Leaderboard
-

Reptoid Overlords
Free Member6Points805Posts -


Av8ferg
Free Member5Points1,538Posts -


siteunseen
Free Member5Points14,904Posts -


dutchzcarguy
Free Member3Points2,614Posts
Popular Content
Showing content with the highest reputation on 03/06/2022 in all areas
-
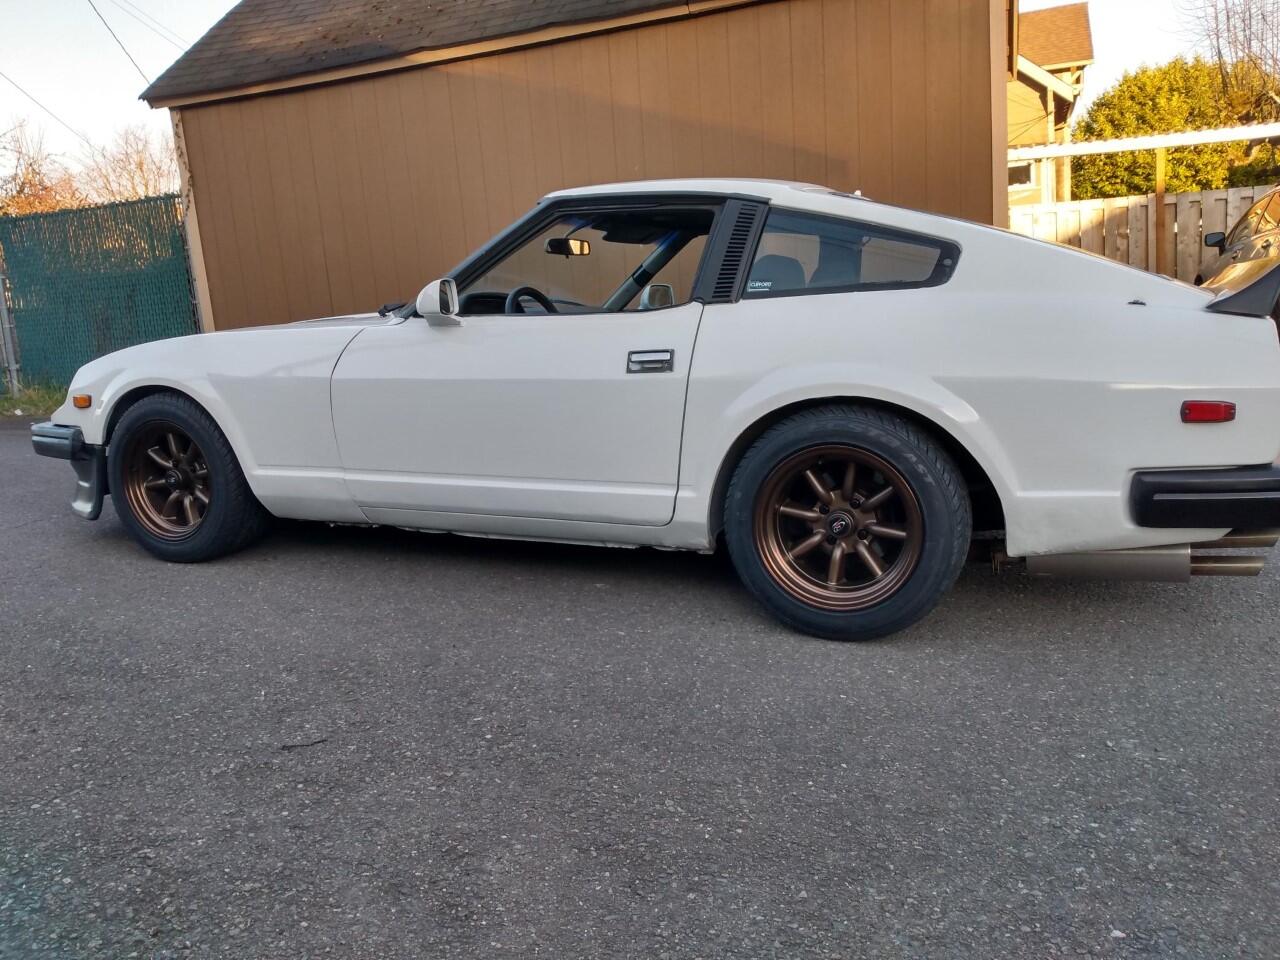
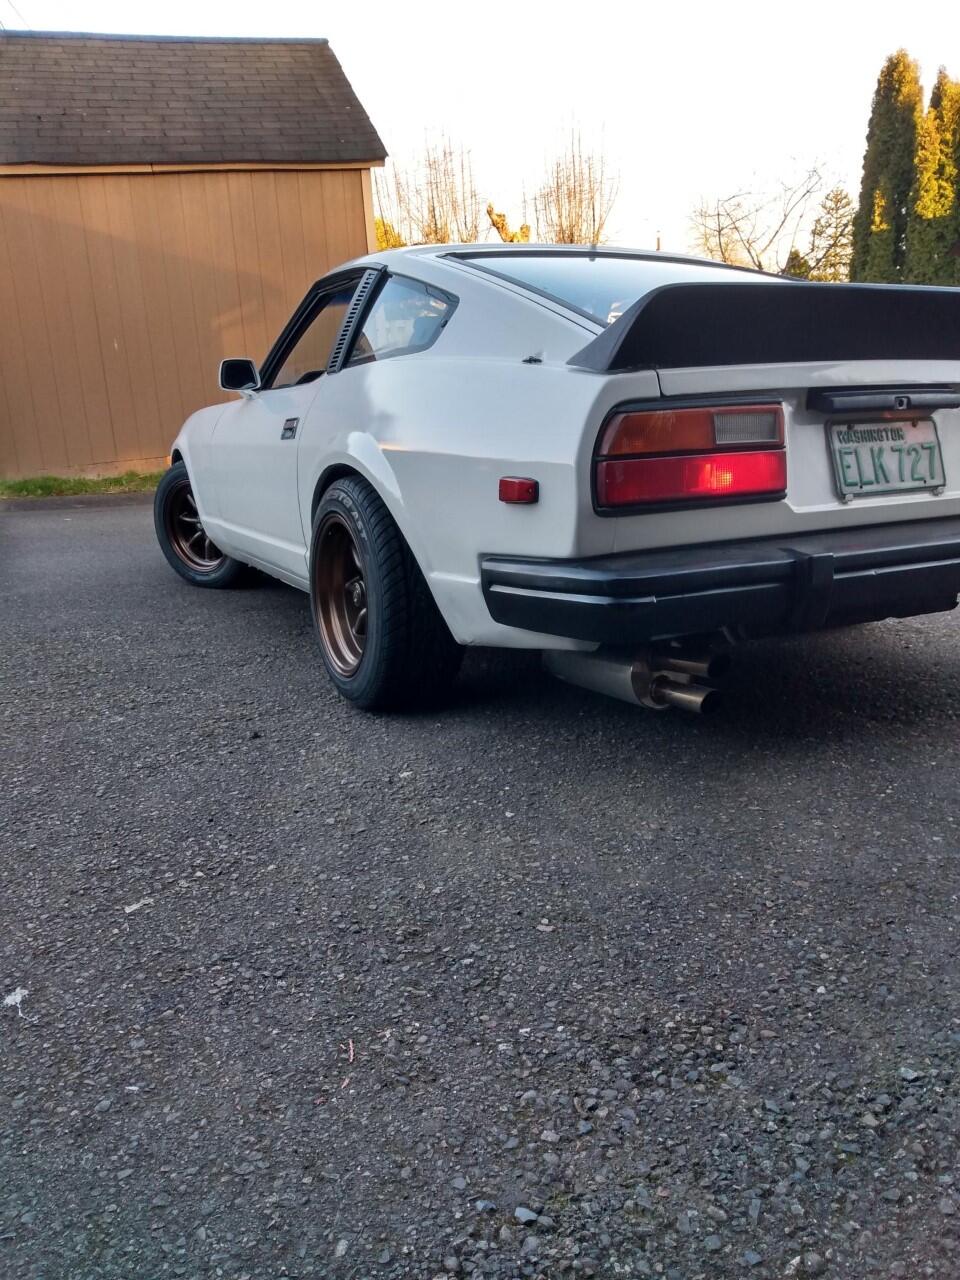
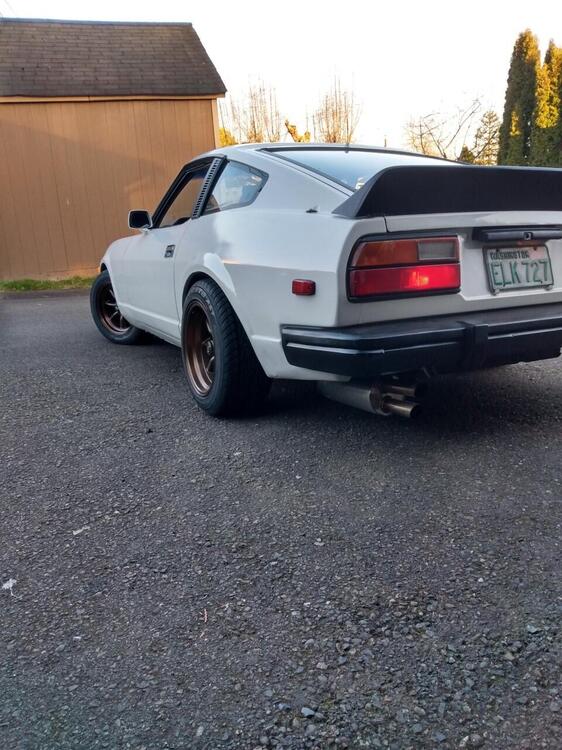
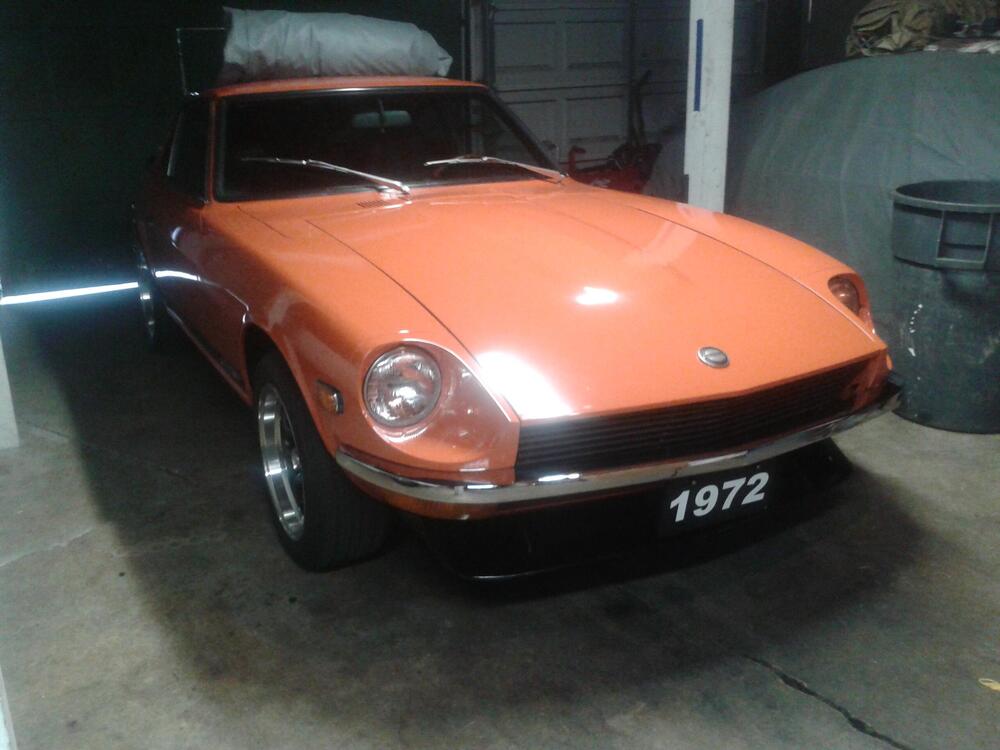
5 pointsAfter an absurd amount of time and a thousand kid car washes later, I finally decided on some Rota RKR's. Money well spent I believe. Now if I'd sort out how to do body work and paint I'd have a nicer car haha.

 5 points
 -
 2 pointsI checked all the things listed above and they are working again, not sure which one it was but it's all good.2 points
 -
 2 pointsThat is foil-backed Mylar. There's also a clear Mylar that has no EMF protectant properties. Used to make transparences. Mylar is a trade name for the base material. It's polyester. https://usa.dupontteijinfilms.com/resources/trademark/2 points
 -
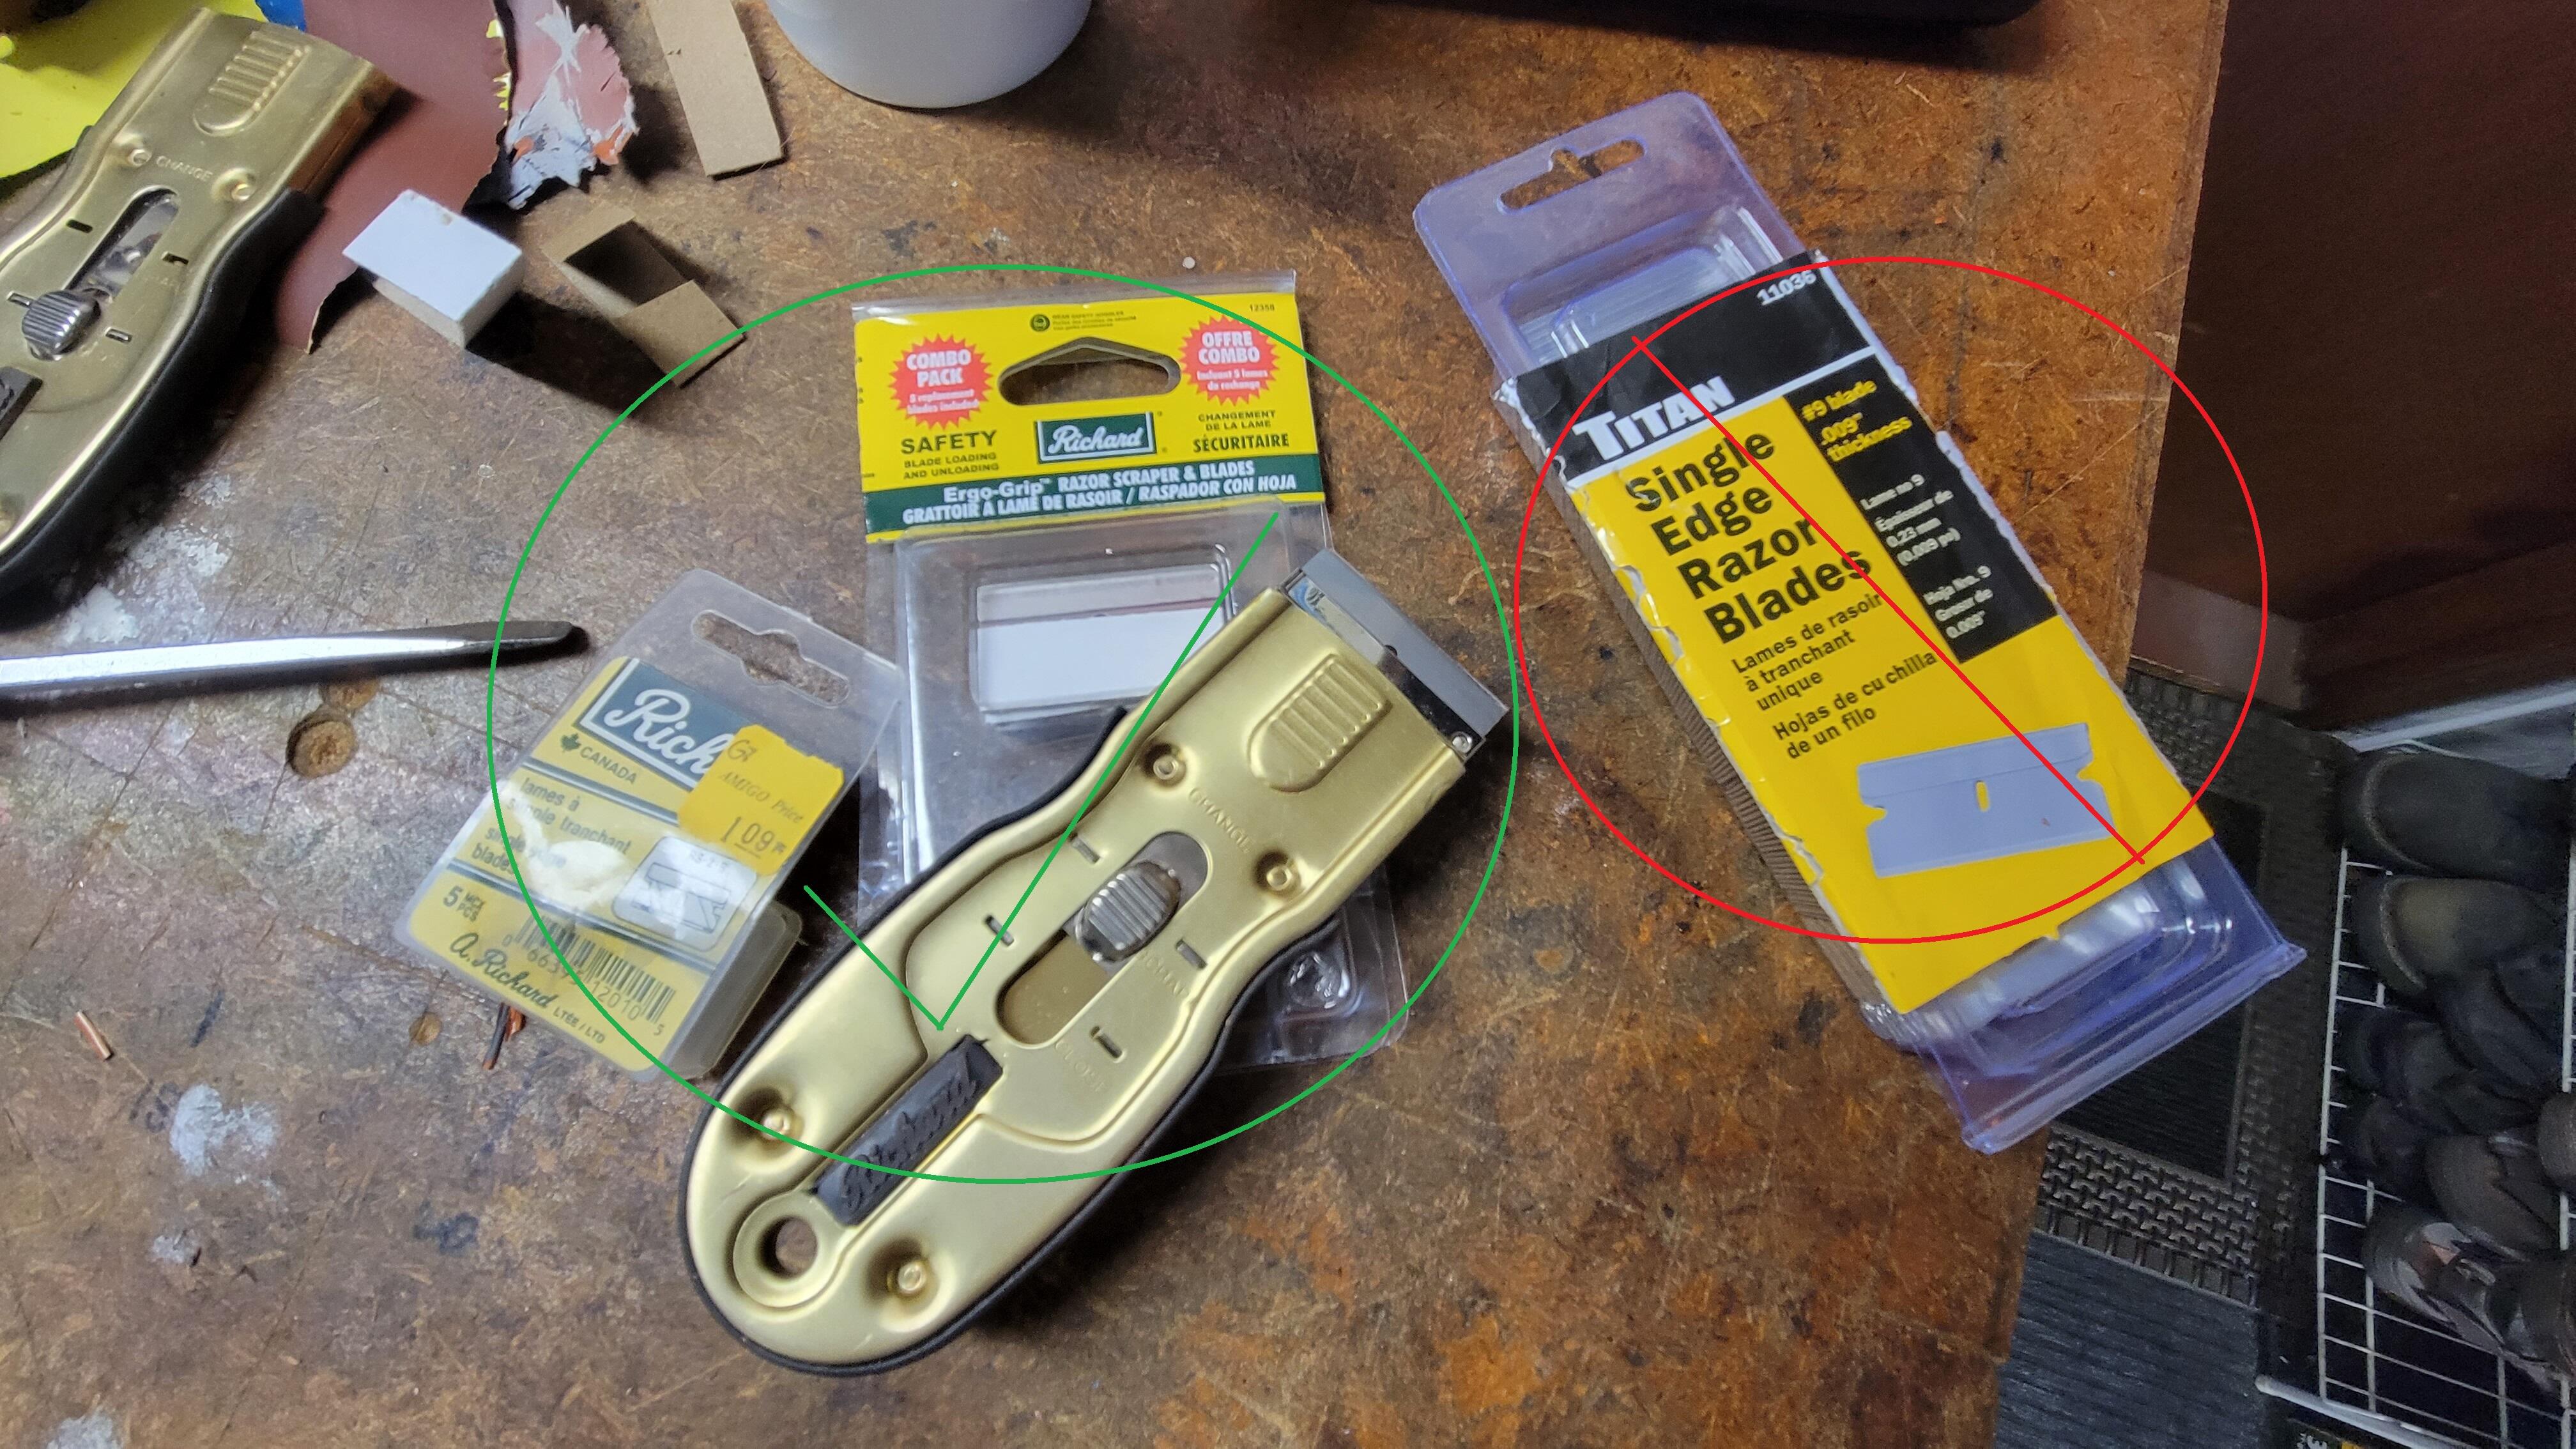
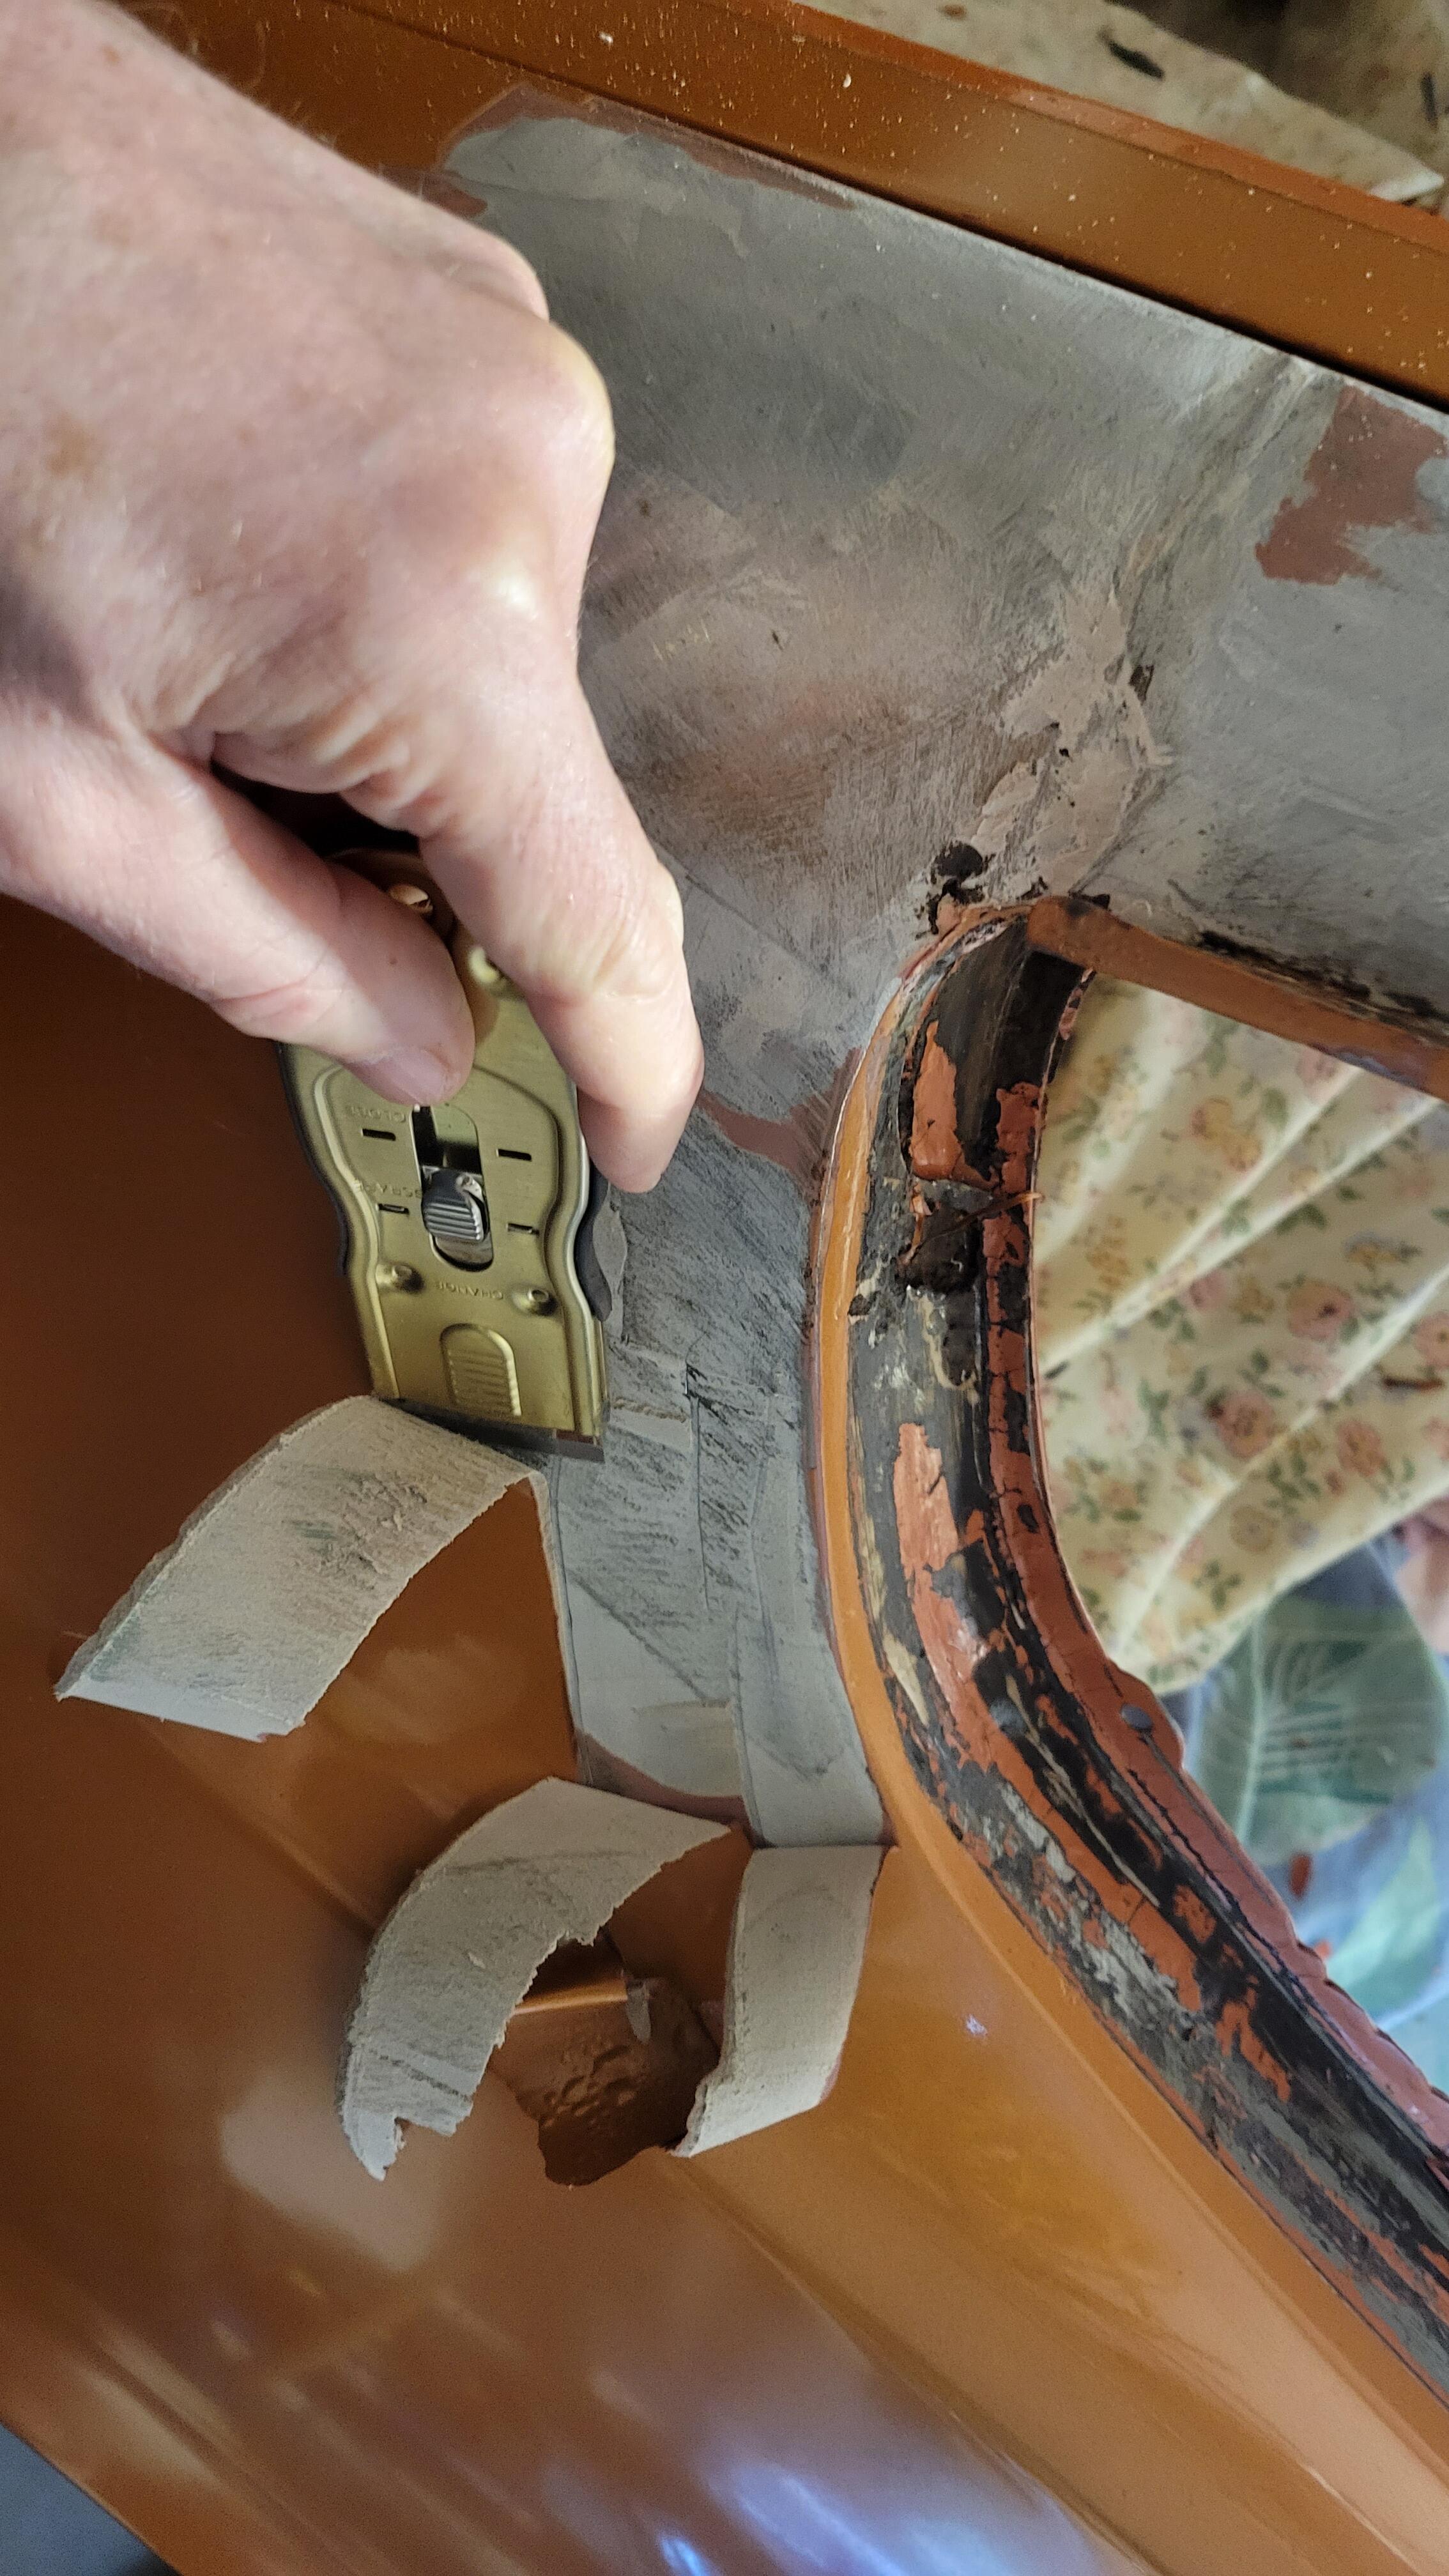
 2 pointsContinuing with the paint removal today. For others who try this method don't cheap out on the razor blades. I started out using Richard brand made in the USA blades, which work very well and stay sharp for quite a while. Then I used some cheap ones I ordered on amazon, Titan brand made in China. First off they were loose in the holder and and they lost the sharp edge quite fast. I'm back to using the Richard blades. Today I've been working on the RH quarter panel. I had the quarters replaced in the early 1980's and even then my local Datsun dealer was not able to get a 70/71 panel, so I had to have my body man weld in a patch to close the vent hole. I found evidence of the repair while doing the paint removal this morning. During the paint removal I found body filler in that area that was up to .10" (2.5mm) thick, but with heat and razor blading the paint and filler came off in one go. Here is another video showing removal of paint and filler (glazing putty?) on the LH quarter.
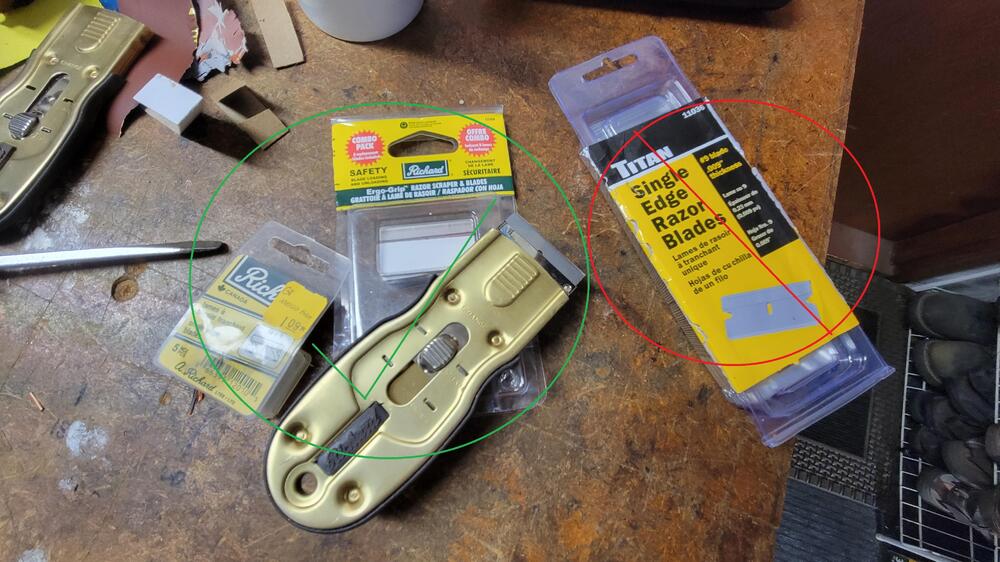

 2 points
 -
2 pointsAlso, I don’t disagree with you except on one point. I have a family and three kids who absolutely depend on me for everything. My job as a father and husband is to always be standing on the wall looking out for threats to their safety and security. In the almost 0% chance of a future dystopian world, if I’m alive I I will do what I can you minimize the impact to them.
 2 points
 -
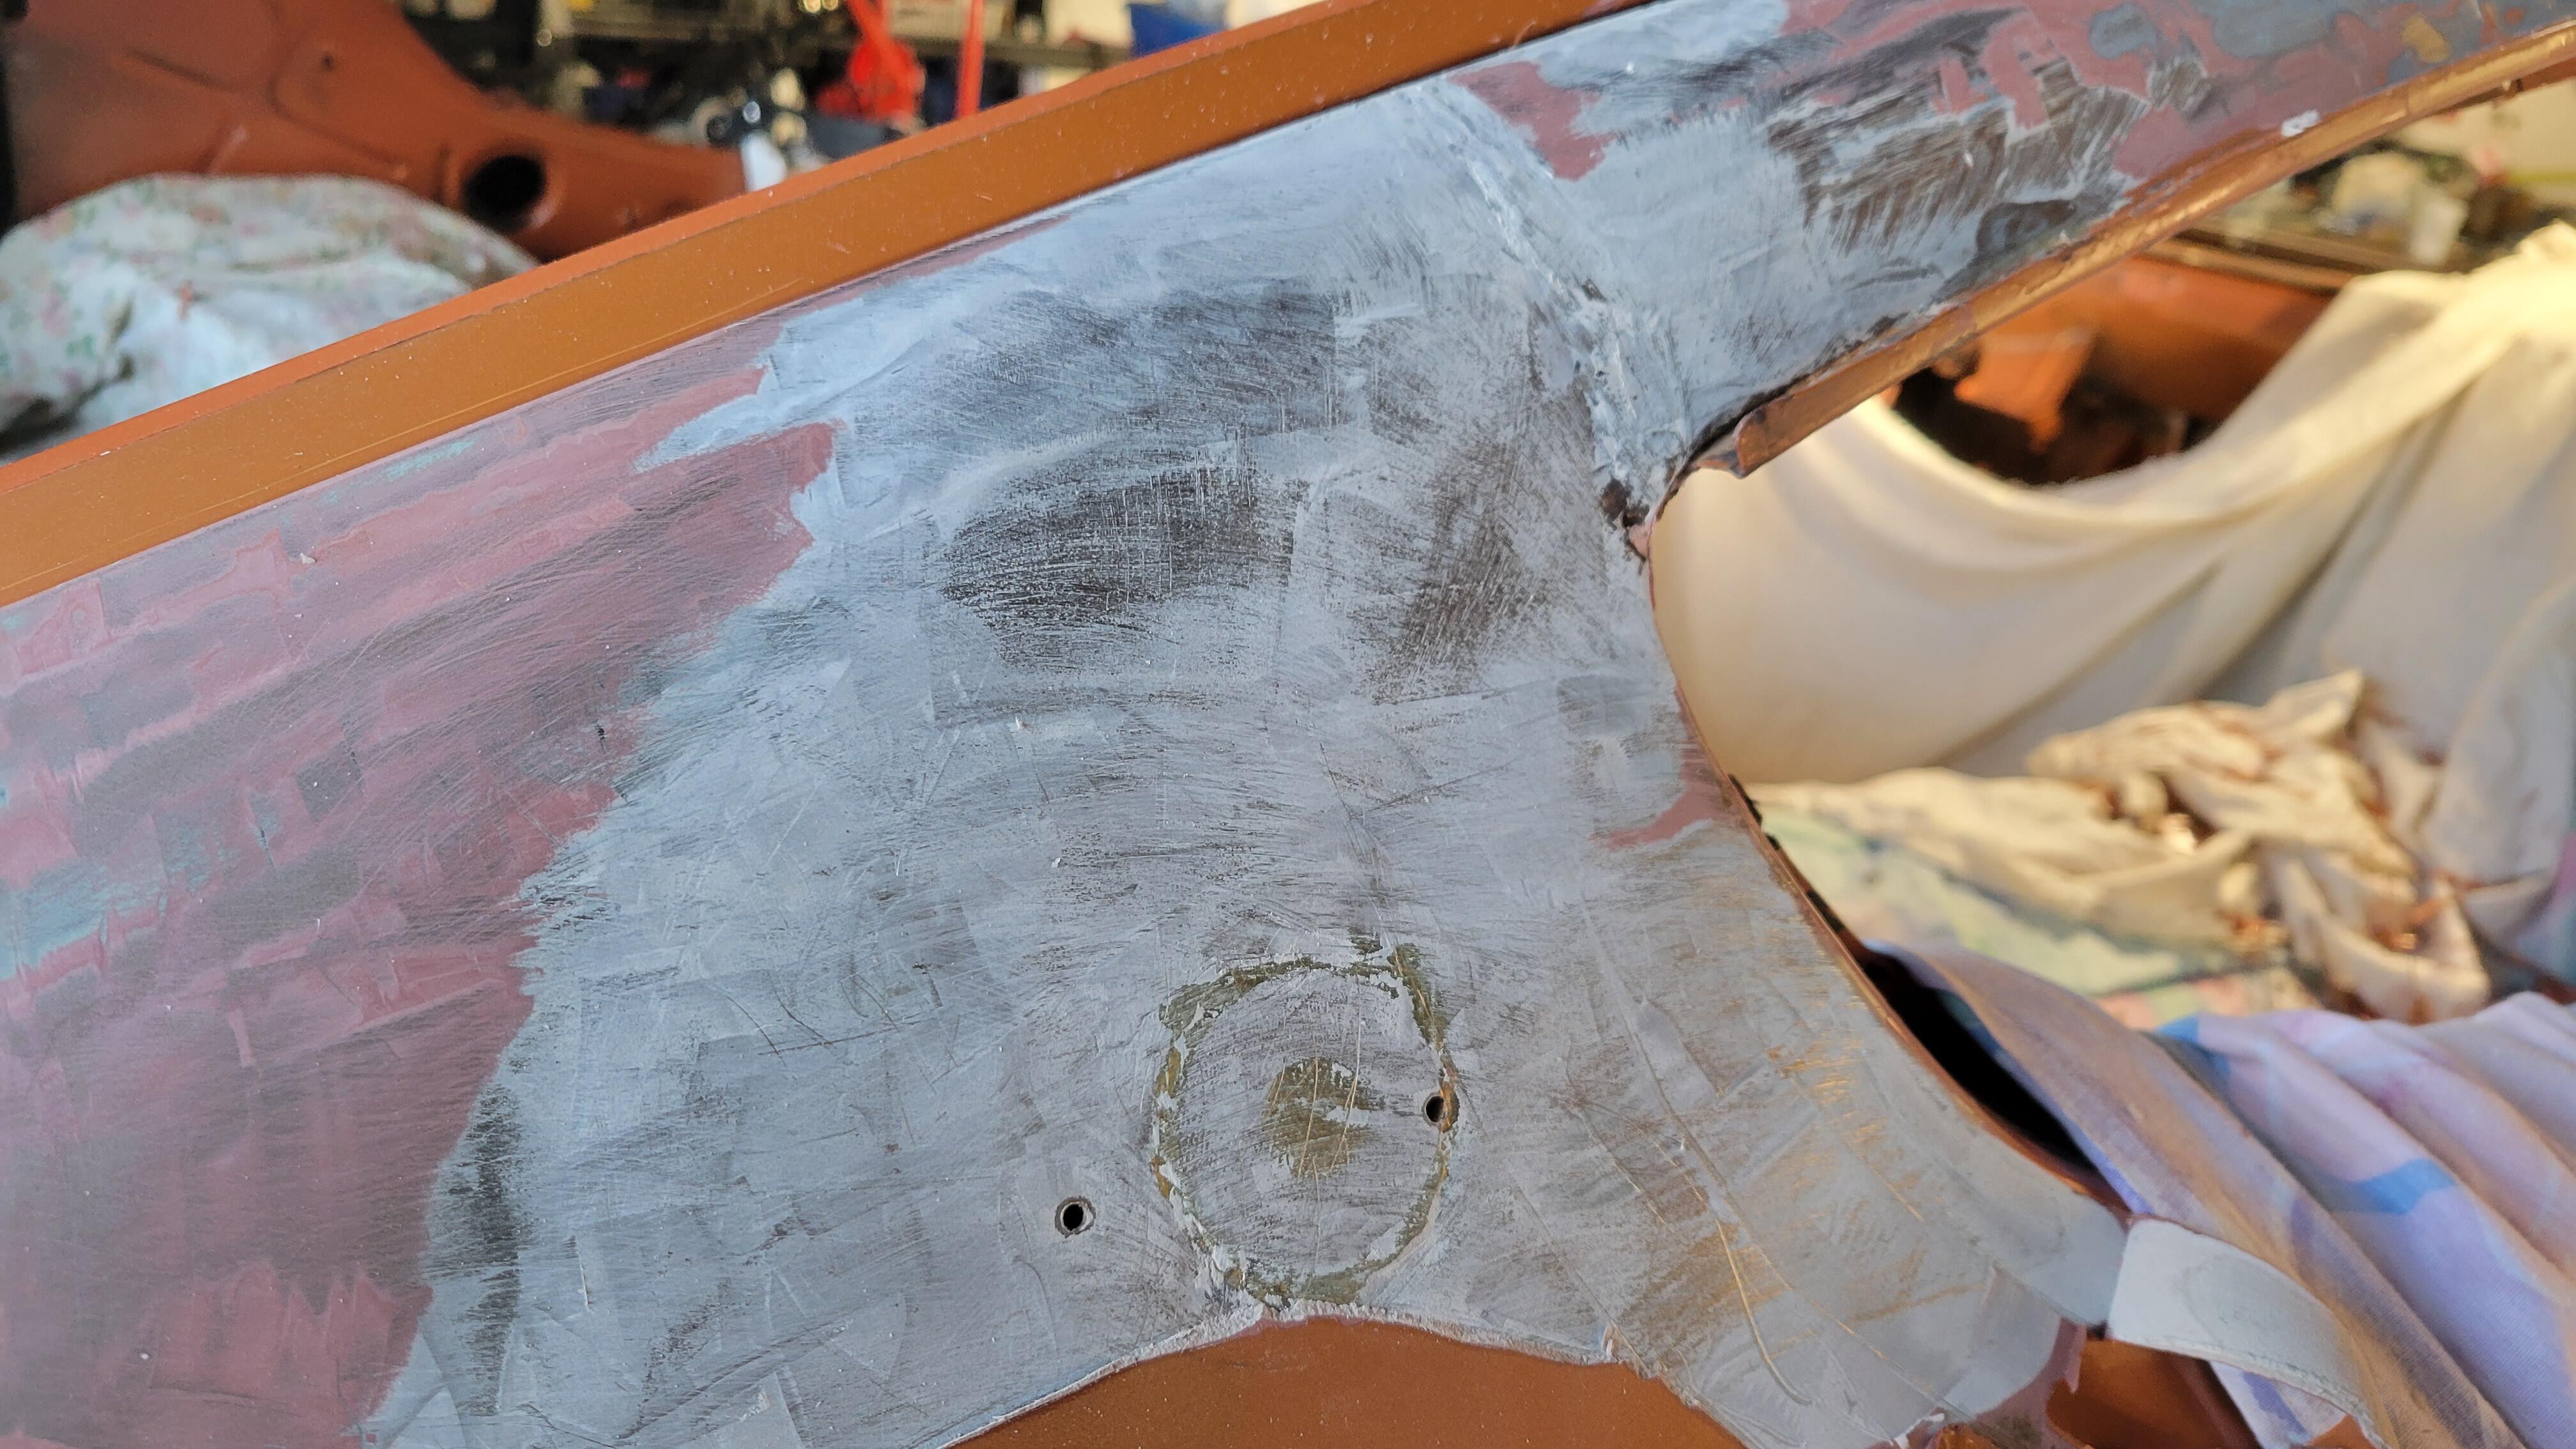
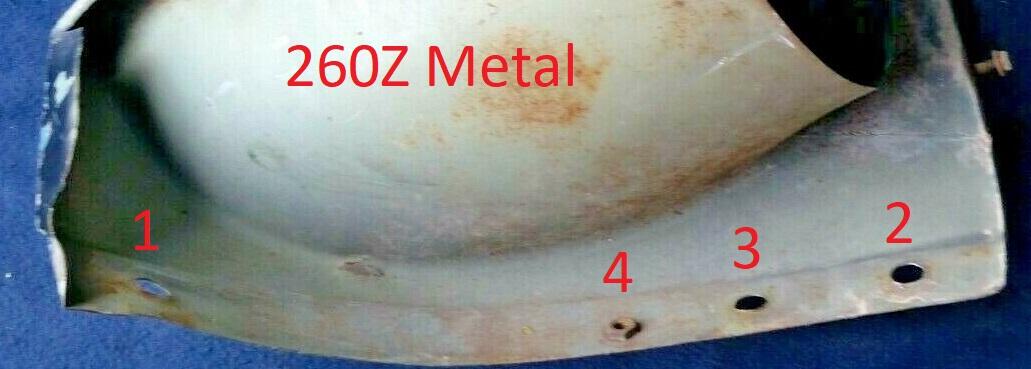
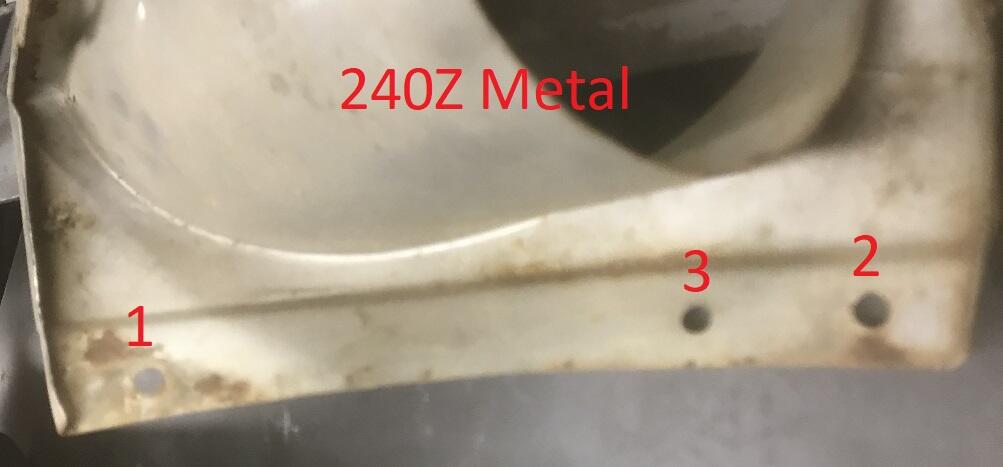
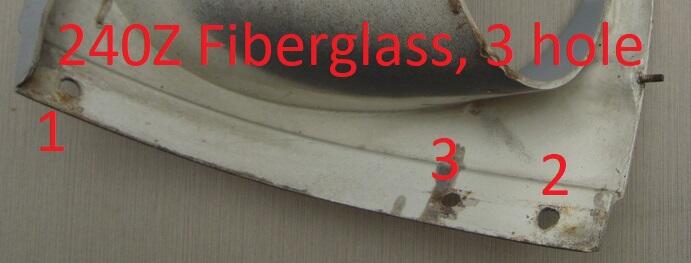
 So during a trial refit of the panels of my May 71 240Z project I had an issue getting the lower lip of the LH headlight bezel ("sugar scoop") to lay flat against the upper lip of the lower corner valance. While researching the issue, I quickly went a rabbit hole and discovered no less that FIVE variations of the S30 bezel, and the differences all seem to be related to the number and type of holes on the lower lip that overlays the top of the lower corner valance. Here is the original fiberglass bucket, with two holes (#1 and #2) that align with the two cages nuts on the valance. These holes are the same on all the variants. But here is a bezel where an additional mystery hole (#3) shows up. I have no idea what it is for, but it does have a matching hole in SOME 240Z valances. (Other 240Z valances do not this this hole.) This mystery hole seems to be continued on all further variants. When they switched over to a metal bezel, they appeared to keep the same hole positions. With the new 260Z bumpers that use a rubber filler between the bumper and the body, this filler has a metal tab that is screwed into yet another, albeit smaller, hole (#4) in the bezel. And this hole has a factory-installed hex (not square) nut resistively welded to the back of the bezel to accept the screw holding the rubber filler. BUT...when this nut showed up on the back of the bezel, a corresponding notch in the top of the corner valance was added so the the valance and bezel lips would still lie flat. (This is what caused me a problem. Some previous owner put a 260Z bezel on my car while keeping a 240Z valance and the nut gapped the panels...no bueno.) When the 280Z grew a even larger bumper, this rubber filler strip was no longer used. While I am just speculating, it appears that they did away with the hex-nut-welding step, but left the #4 hole (no savings to delete it from the tooling). This all is just one man's observations, and I welcome other findings y'all have made.


 1 point
 -
 1 pointGood commentary on the razor blades. Having the brand of a good product always helps. The heat gun/razor blade paint removal process beats the hell out of chemical stripper. Along that line, back in '97 my brother the "expert" body man was helping me with my restoration (that went dormant until last year). So last year when I was cutting out a bunch of crappy work I had done back then I found 1/4" of filler in the rear lower quarters. Darn I said, how did that get there? Can you imagine, a 1/4"? Guess who's not helping this time around? 😁1 point
 -
1 pointOther than on a race engine it's probably just a feel good thing but nothing wrong with that. That is what these cars are all about.1 point
-
1 pointDown here with all our humidity I keep a couple of stereos in my gun safe that has a dehumidifier built in. It's fire and water proof so the dehumidifier is kinda redundant I always thought. I bought a gun safe dehumidifier from walmart that I use in my 240. Doesn't work very well though. It's filled with silica that turns green when it's moist. Plug it in and overnight it heats up changing back to orange.1 point
-
1 pointI live in the south and 800 yards from the Atlantic Ocean. We are in the high 90’s for humidity in the summer. The salt spray doesn’t help either. Sent from my iPhone using Tapatalk1 point
-
 It would be great to cut the post on the front frame rail differences and pictures into a separate frame rail thread to make them easier to find in the future1 point
 -
1 pointWow.. what a job.. i was glad someone else took over that job from me.. cost me a 1000 euro or so.. and someone else took over the wheel housings for 100 euro a housing... i would not do it for 100euro.. a housing.. would you? (There was a thick layer of anti rust, very hard and dry.) Paint is a sort of plastic at the end and can be very sharp edged.. Lead is a soft material, not so sharp..1 point
-
1 pointAre mar bags what i think that they are?? please explain? What does M.A.R. stand for? I for one.. i don't prepare anything in this world.. i don't want to live when those Worlds "leaders" are going to throw with the most feared projectiles.. your better of dead..1 point
-
1 pointThanks. The front are 15x8 zero offset, and the rear are 15x9 -15 offset. I have 1'' wheel spacers on both the front and rear with 225\50\R15 on all 4. Doesn't rub and I didn't have to roll the fenders.1 point
-
 1 point
 -
1 pointThe title threw me too. Here's a good thread if you haven't already seen it.1 point
-
 If you are into power tools, here is a set of JIS (B4633) driver bits: https://www.amazon.com/B4633-Screw-Driver-Bits-Japan/dp/B085TDRBPM/ref=sr_1_30_sspa?crid=3PQP7G6E71DJZ&keywords=ji%2Bscrewdriver%2Bset&qid=1646514867&sprefix=jis%2Bscre%2Caps%2C100&sr=8-30-spons&spLa=ZW5jcnlwdGVkUXVhbGlmaWVyPUEyVkRJMDU3UldNUlcmZW5jcnlwdGVkSWQ9QTA0MDIwNjEyUkZBU0VNVTJPV085JmVuY3J5cHRlZEFkSWQ9QTA5MzY0OTEzTVlYSTZFOUtIU0VMJndpZGdldE5hbWU9c3BfbXRmJmFjdGlvbj1jbGlja1JlZGlyZWN0JmRvTm90TG9nQ2xpY2s9dHJ1ZQ&th=11 point
 -
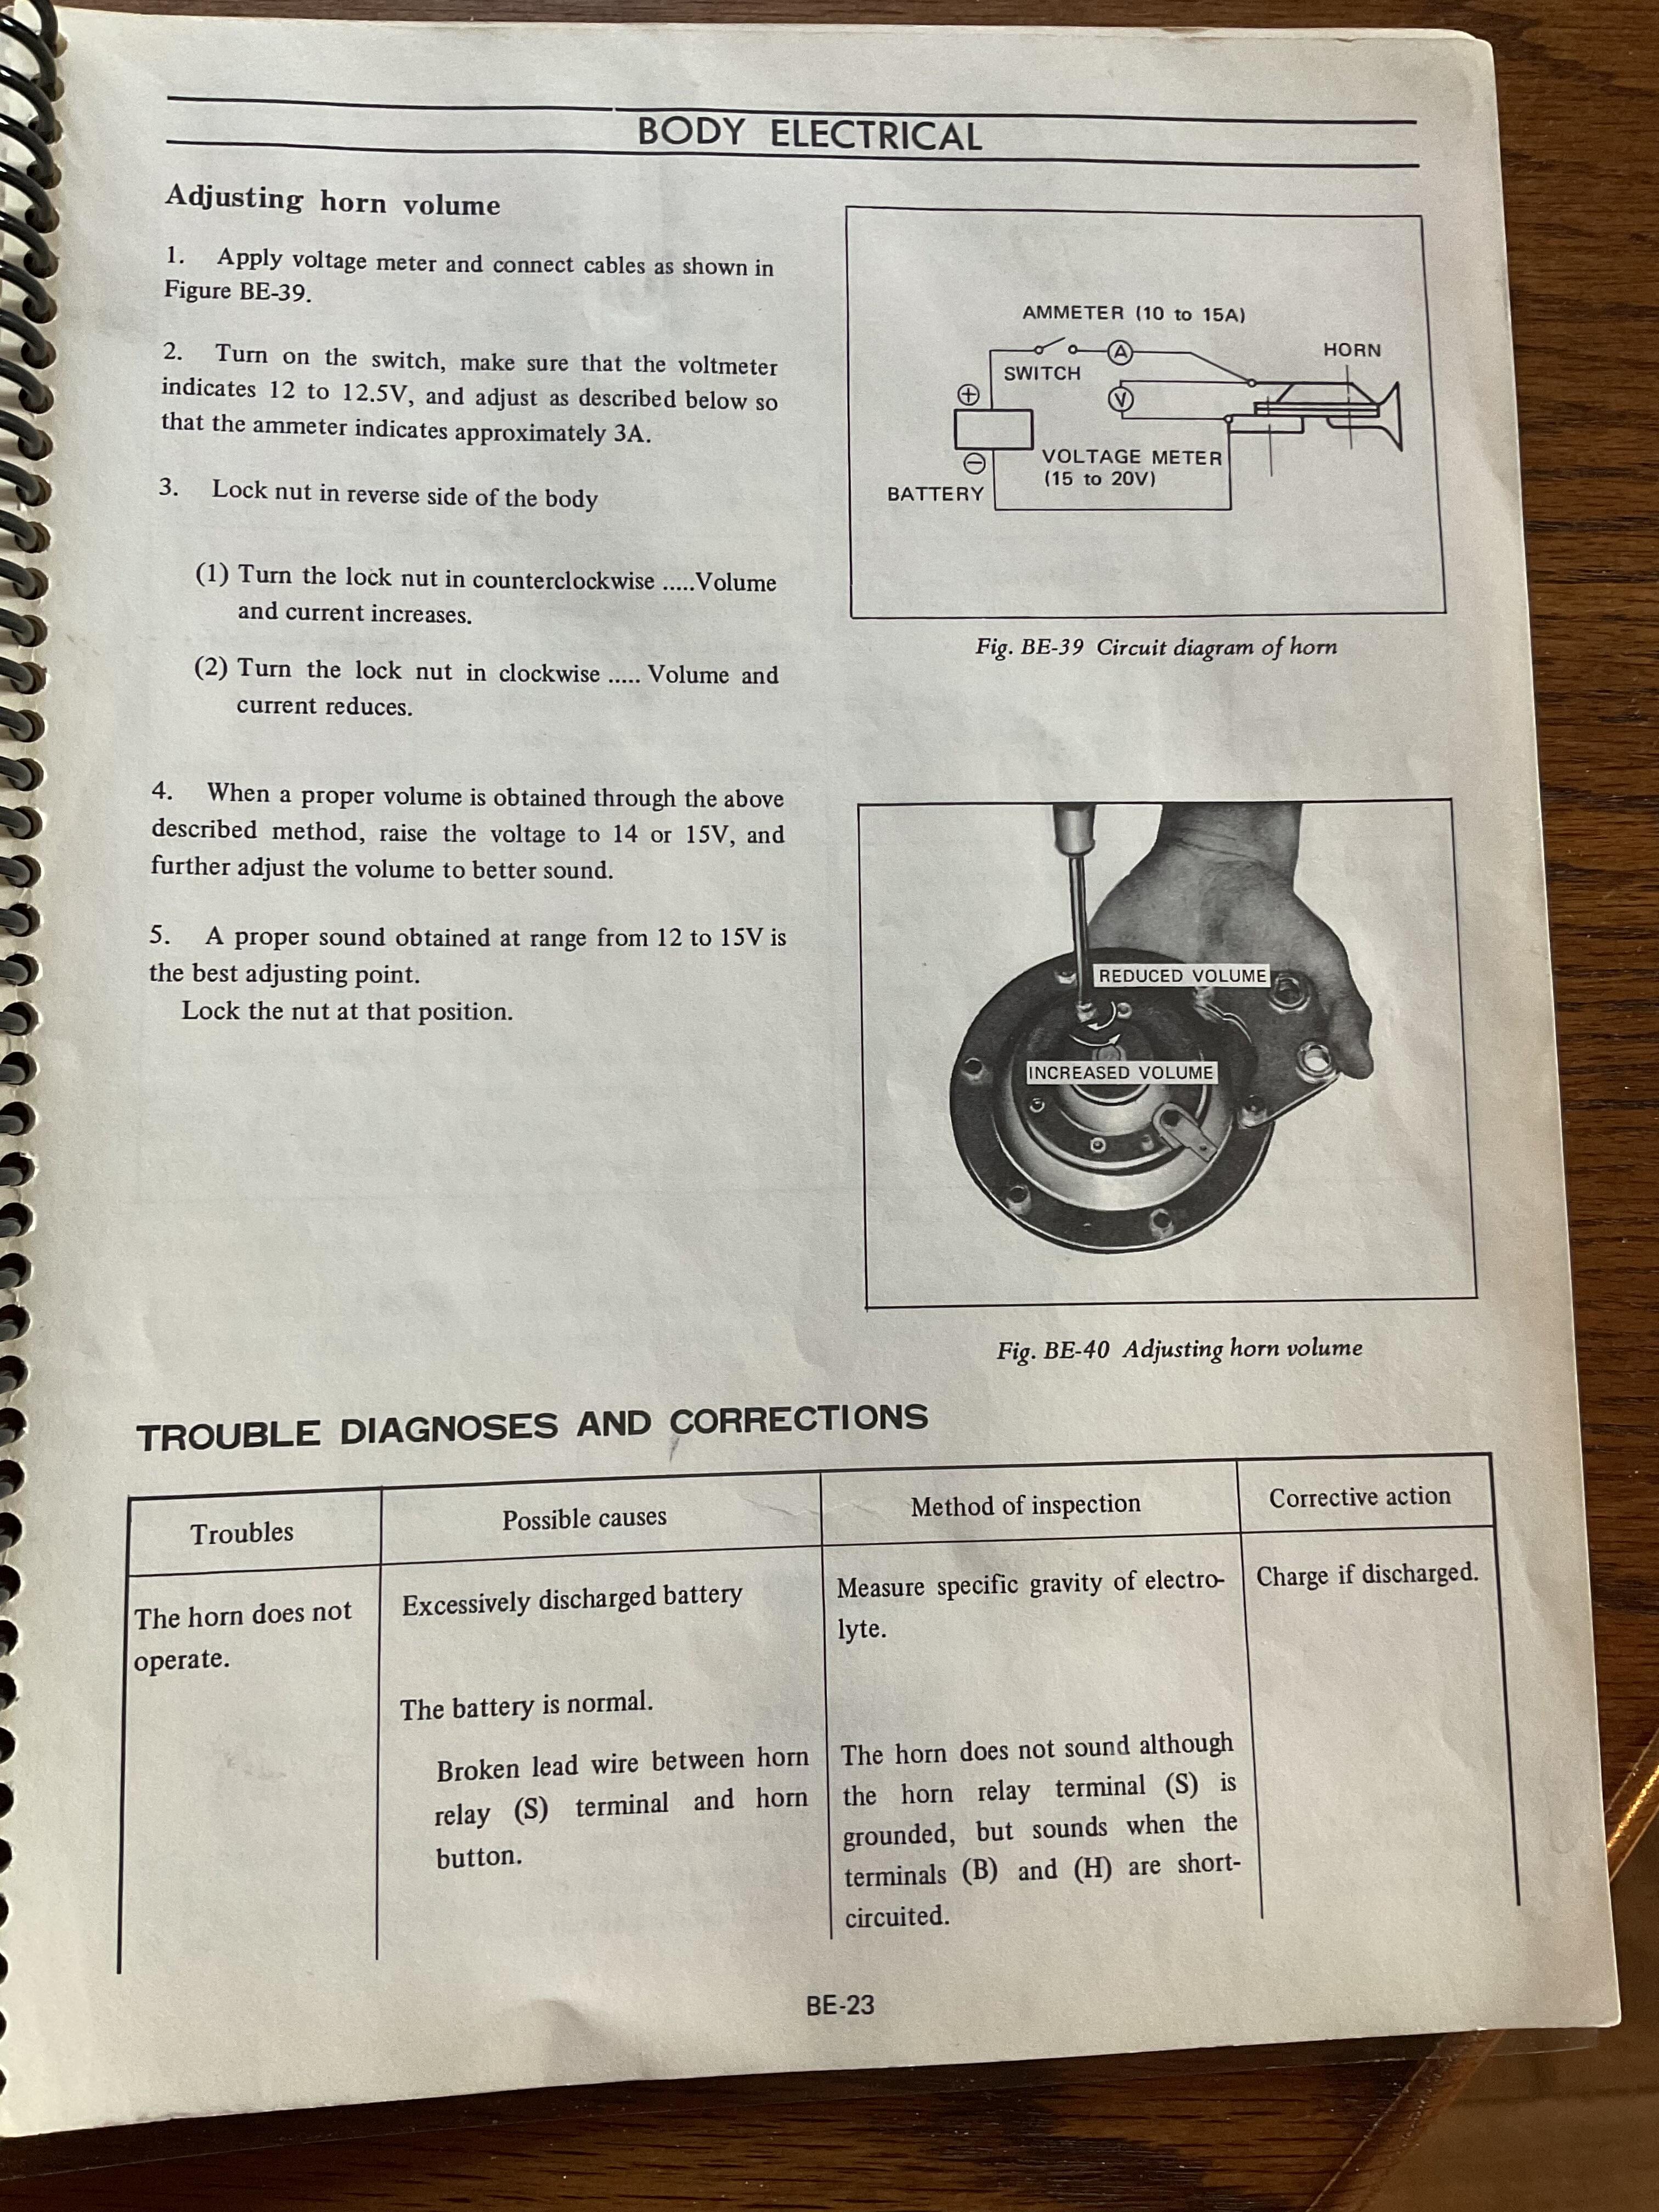
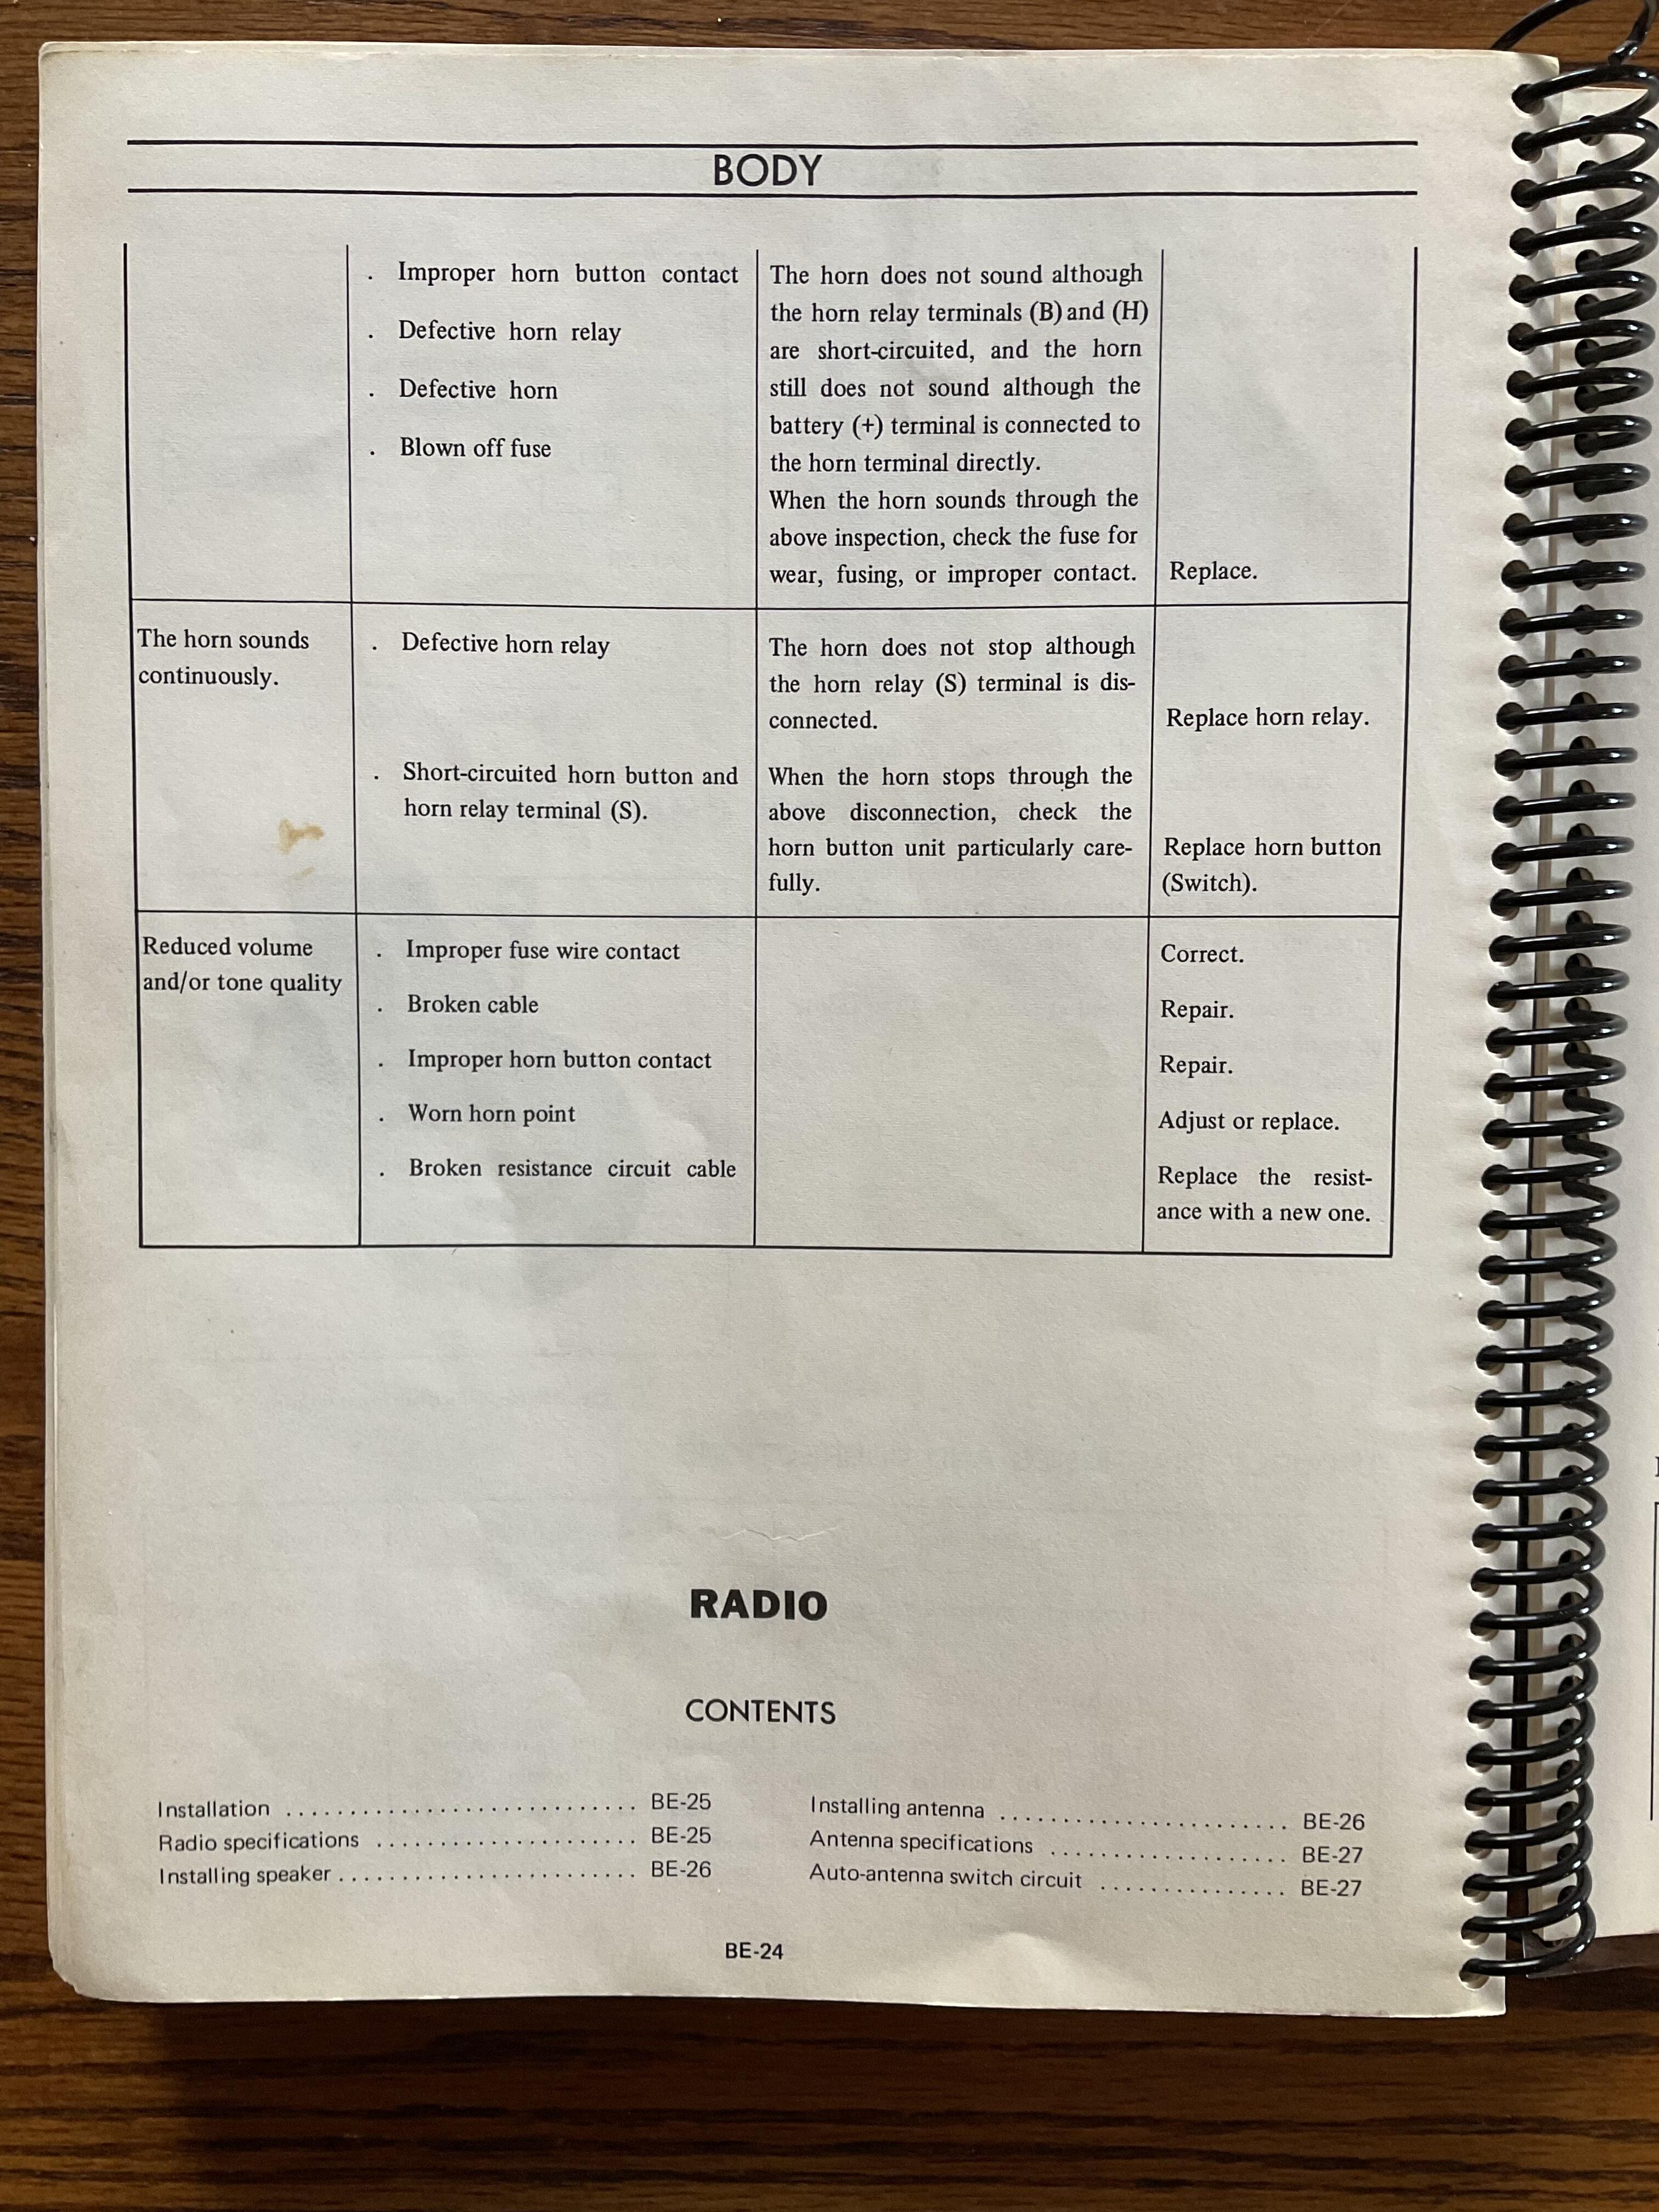
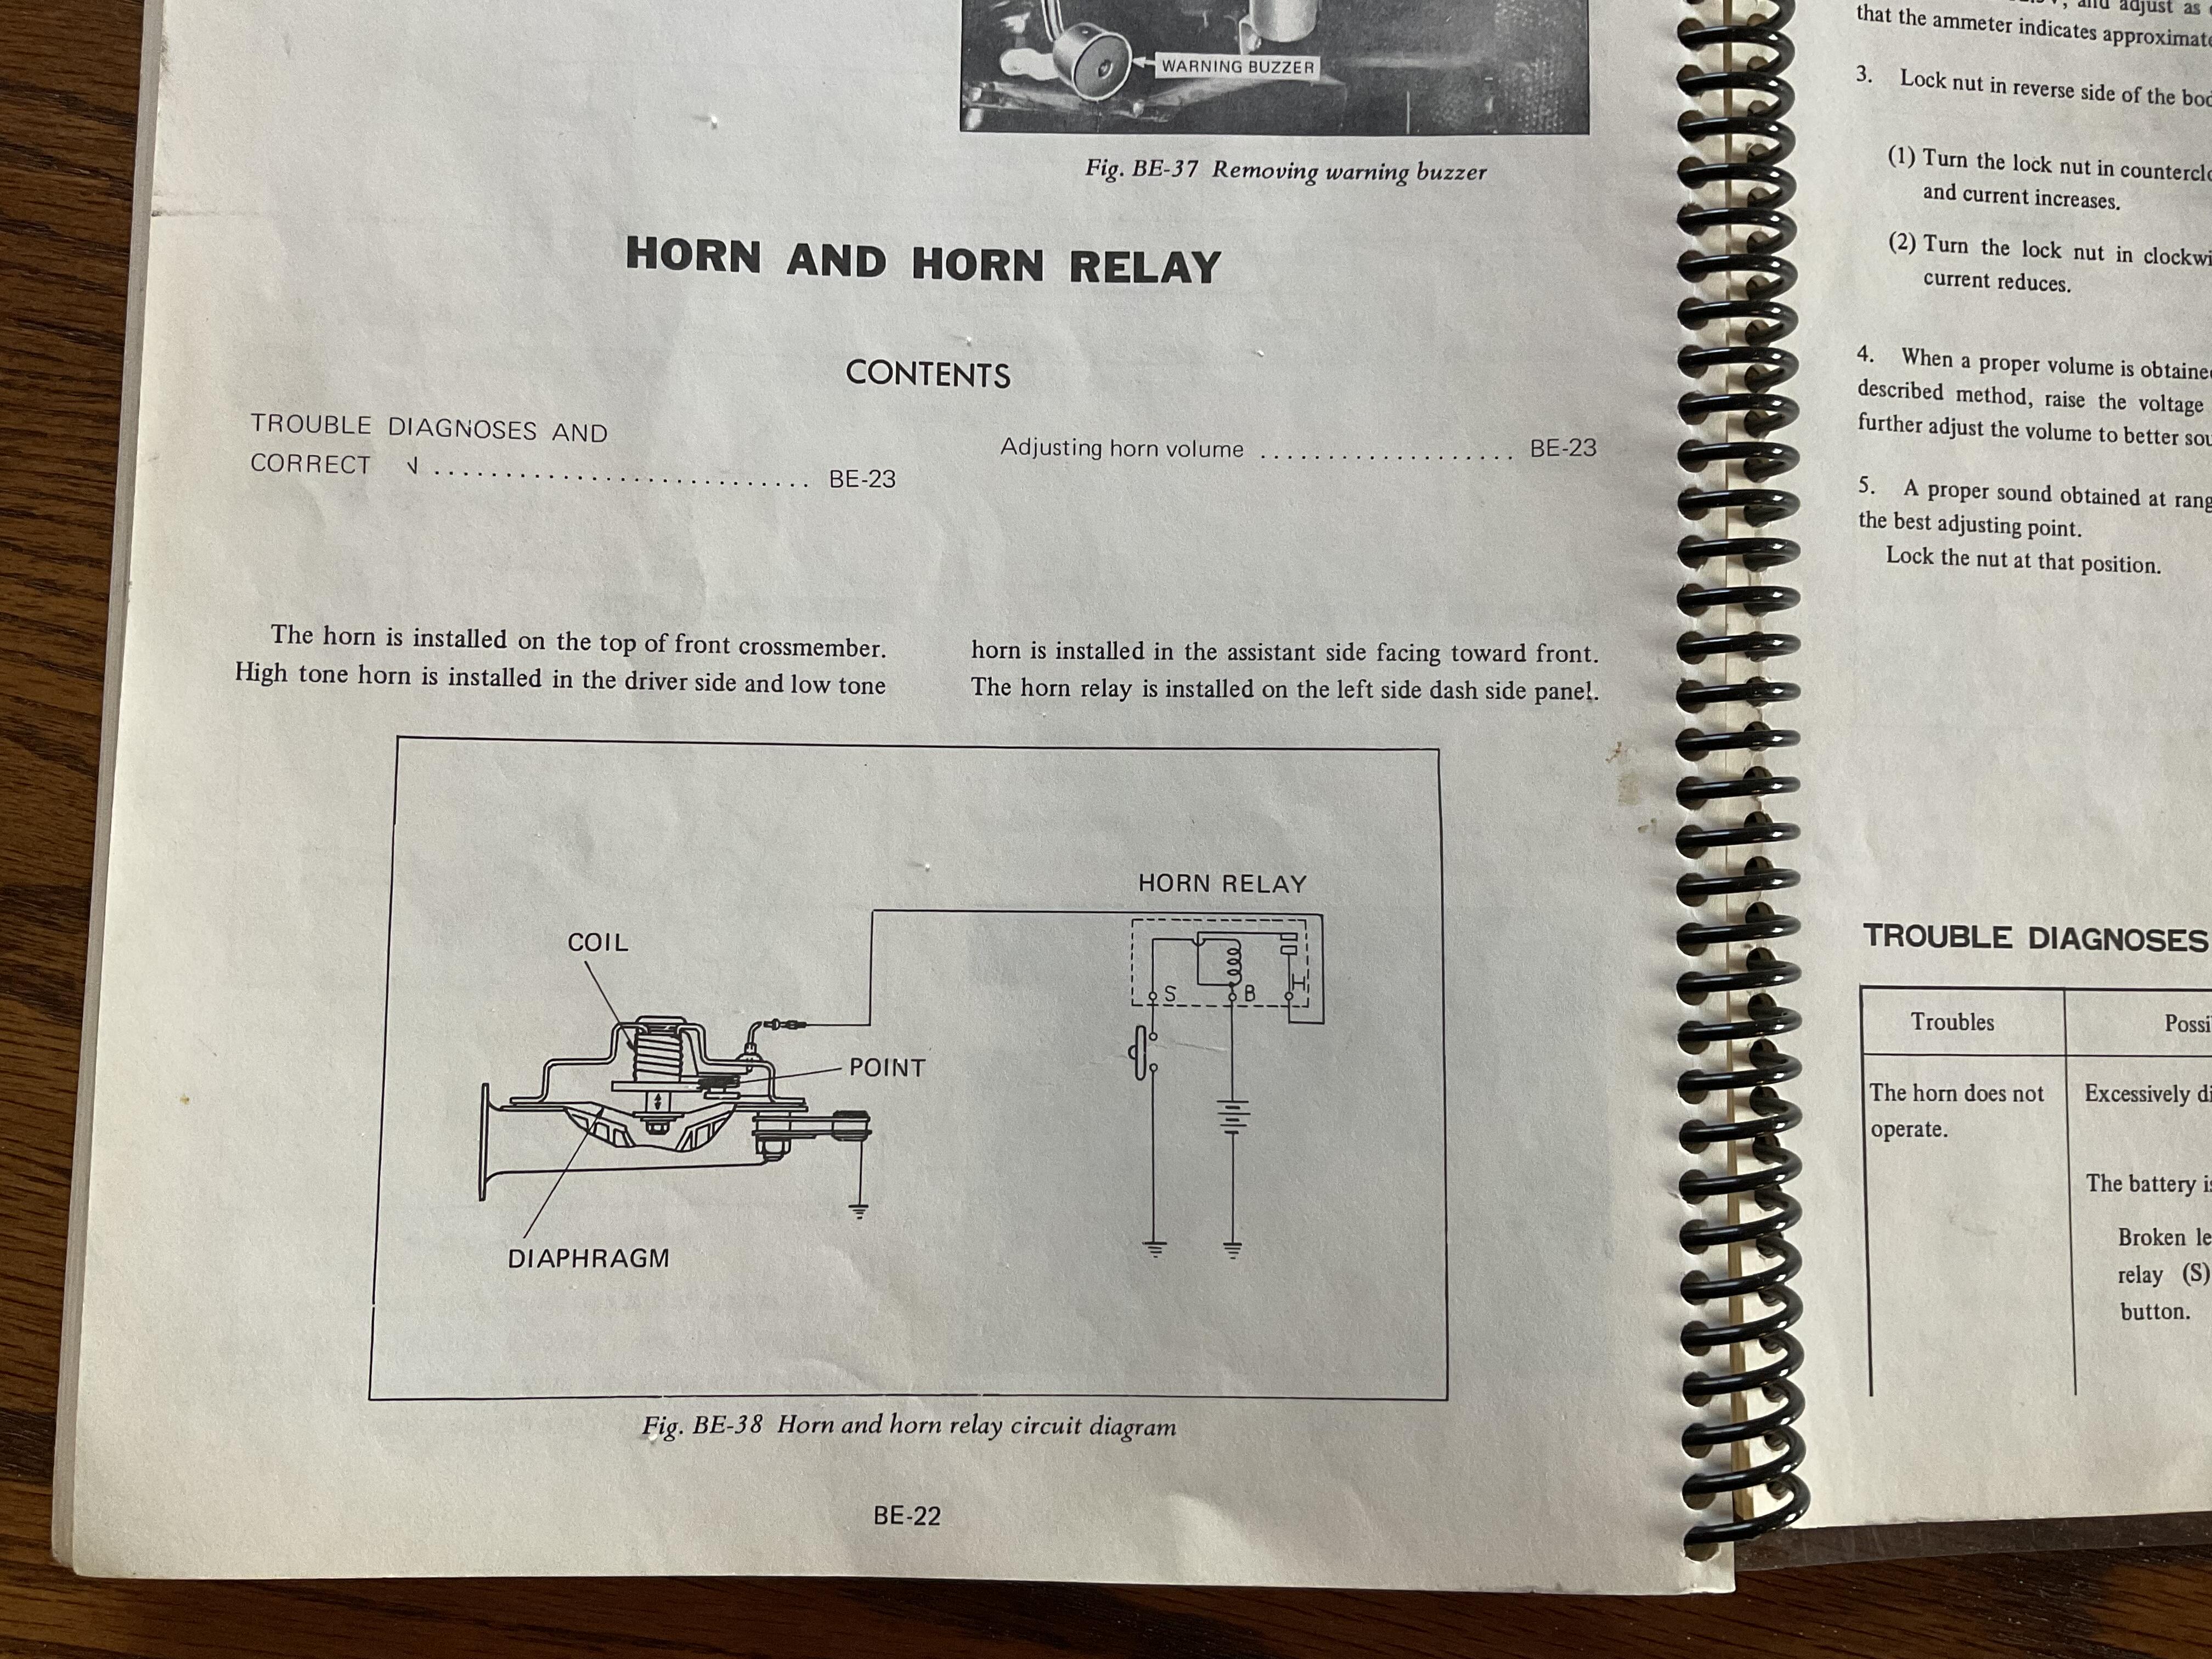
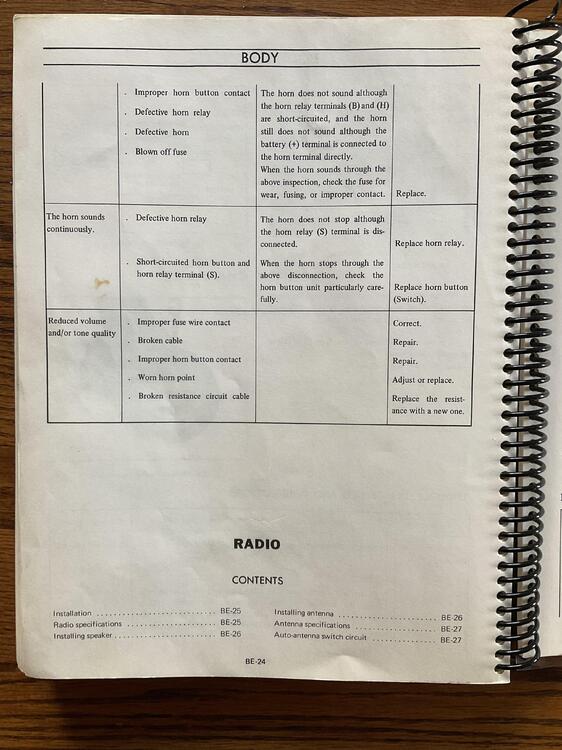
 1 pointTrouble shooting electrics is not my thing, but,I do remember that tiny adjustments on a set screw on the back of the hone housing makes a big difference. You’ve probably already gone there, but this set screw adjusts the gap of horn coil points. Here is the reference in the Service Manual:
 1 point
 -
 1 point
 -
1 pointOf course he did. He’s not an idiot, he’s a calculated killer. Sent from my iPhone using Tapatalk1 point
-
 1 pointYou would have to switch over to a 240z points driven distributor & carbs to harden the car for a EMP John. Maybe add them to your spare parts stash, lol. Zup considers that a feature of his 73 as the as the increasing theft protection of the 4 speed ...1 point
 -
 @Namerow: Since you cought my interest on this, i decided to have a deeper look into this. I have two different sets of NOS frame rails, one is grey and the other one black. one set is already sold, one grey item has already been cut up by my previous bodyshop to fix my chassis: Here you can see the two sets with the partnumbers labelled on it. The main differences are the mounting brackets (see red circles), some "wings" which were added on the grey version (see blue marks), and the extended length of the tension rod mounting "buckets" (sees green circles) Otherwise the two are pretty much the same, aside from some small clamps and brackets which have been added: -E4150 is used up to June 1972 according the european microfiches. and it also seems to match with my late 1971 production chassis i have. -N4150 is not clear. i didn't find it in any of my parts list, it seems weither to be from the 2+2 nor any other model, but because of the part numbering system, i just think it's an July 1972+ item. I didn't measure every single part, but wherever i checked on approx. 5 random spots, it was always 1,5mm thickness of sheet metal: here are some additional photos, see additional cable clamp in the black version, Additional "Wing" is well visible here: extende shape of the inside reinforcment: slightly different shape of the inside mounting bracket / reinforcement (left edge): Here you can see the end "wings" on the grey one, but it seems like the "leftower" piece on t he black ones have just been bent up in the grey version. Small additional bracket on t he grey version (center) Here you can nicely see the different style of mounting brakets: (the center one of the grey one is bent, i t would look similar as the other ones on the grey one. the additional "holes" on the left side are because the bracket on t he inside has been drilled out by the bodyshop, these wouldn't usually be there: Here's a closeup: Here the overall sisize difference of the tension rod mounting bucket is well visible: From what i can see and what i've experienced so far, the KFvintagejdm parts (no advertizing here) come pretty close to the black ones from the picture. The only part missing here is the "bucket" for the tension rod: they currently sell them only in two pieces, but if you look at the photos and drawings in the parts manual exploded view, you can see even the original ones where produced like this and then welded together. so in my opinion this is the best you can get if you can't find OEM ones. It's not well visible in my photos above, but even the "teeth" visible on this one seem to be as on the original ones (the part where the upper and the lower part join). Look closely in the last photo which i posted above, then you can see the "teeth" on the original grey one from a side view):
 1 point
 -
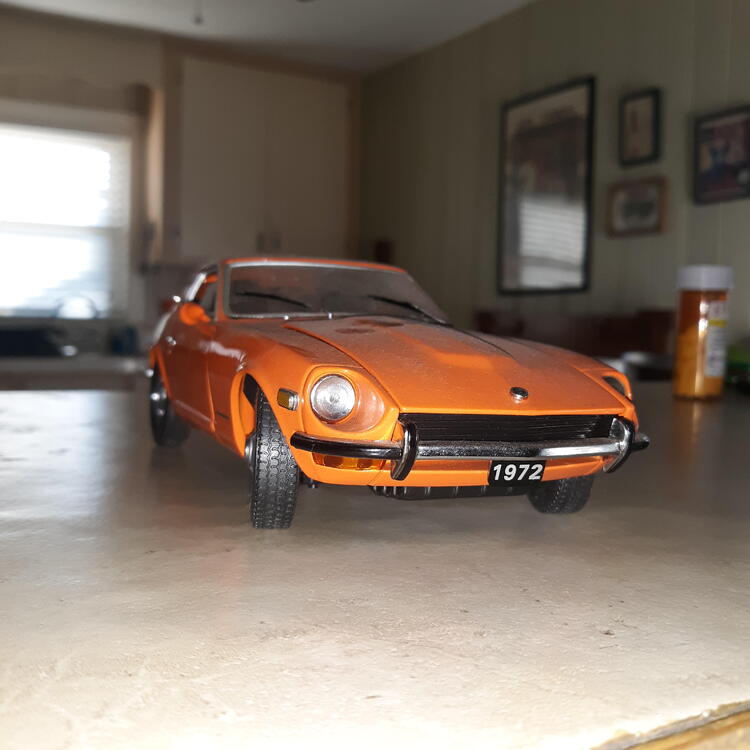
I bought this 25? years ago. Finally got a real one.
 1 point
 -
1 pointYes, they will cut you The older I get, the easier I bleed. Tis merely a flesh wound... 😉1 point
-
1 pointThe secret motivation is to get the car running before the Russians deploy an EMP off the eastern seaboard. The Z might be the only car that drives in my garage. [emoji3166] If we’re gonna be in pre-Armageddon situation might as well look cool in the Z. [emoji1787] All joking aside what’s happening in Ukraine is absolutely horrid. I worked on a NATO staff in Naples, Italy. I was on the team that drafted the NATO maritime operational plan to counter the Russians in the Black Sea and Baltic Sea. War can get out of control very easily. It just takes one mistake and you cannot control every soldier on the battlefield. We need to all hope and pray for good leadership. If anyone has questions about no-fly zones…fire away. A Navy Officer (the guy fired as the Commander of the Theodore Roosevelt Aircraft Carrier during a covid outbreak on his ship 2 years ago) and I designed the no fly zone over Libya. To defend a No-Fly Zone over Ukraine could lead to full on war with NATO. These are dangerous times and we need clear heads making non-political decisions about how to handle this aggression. Sent from my iPhone using Tapatalk1 point
-
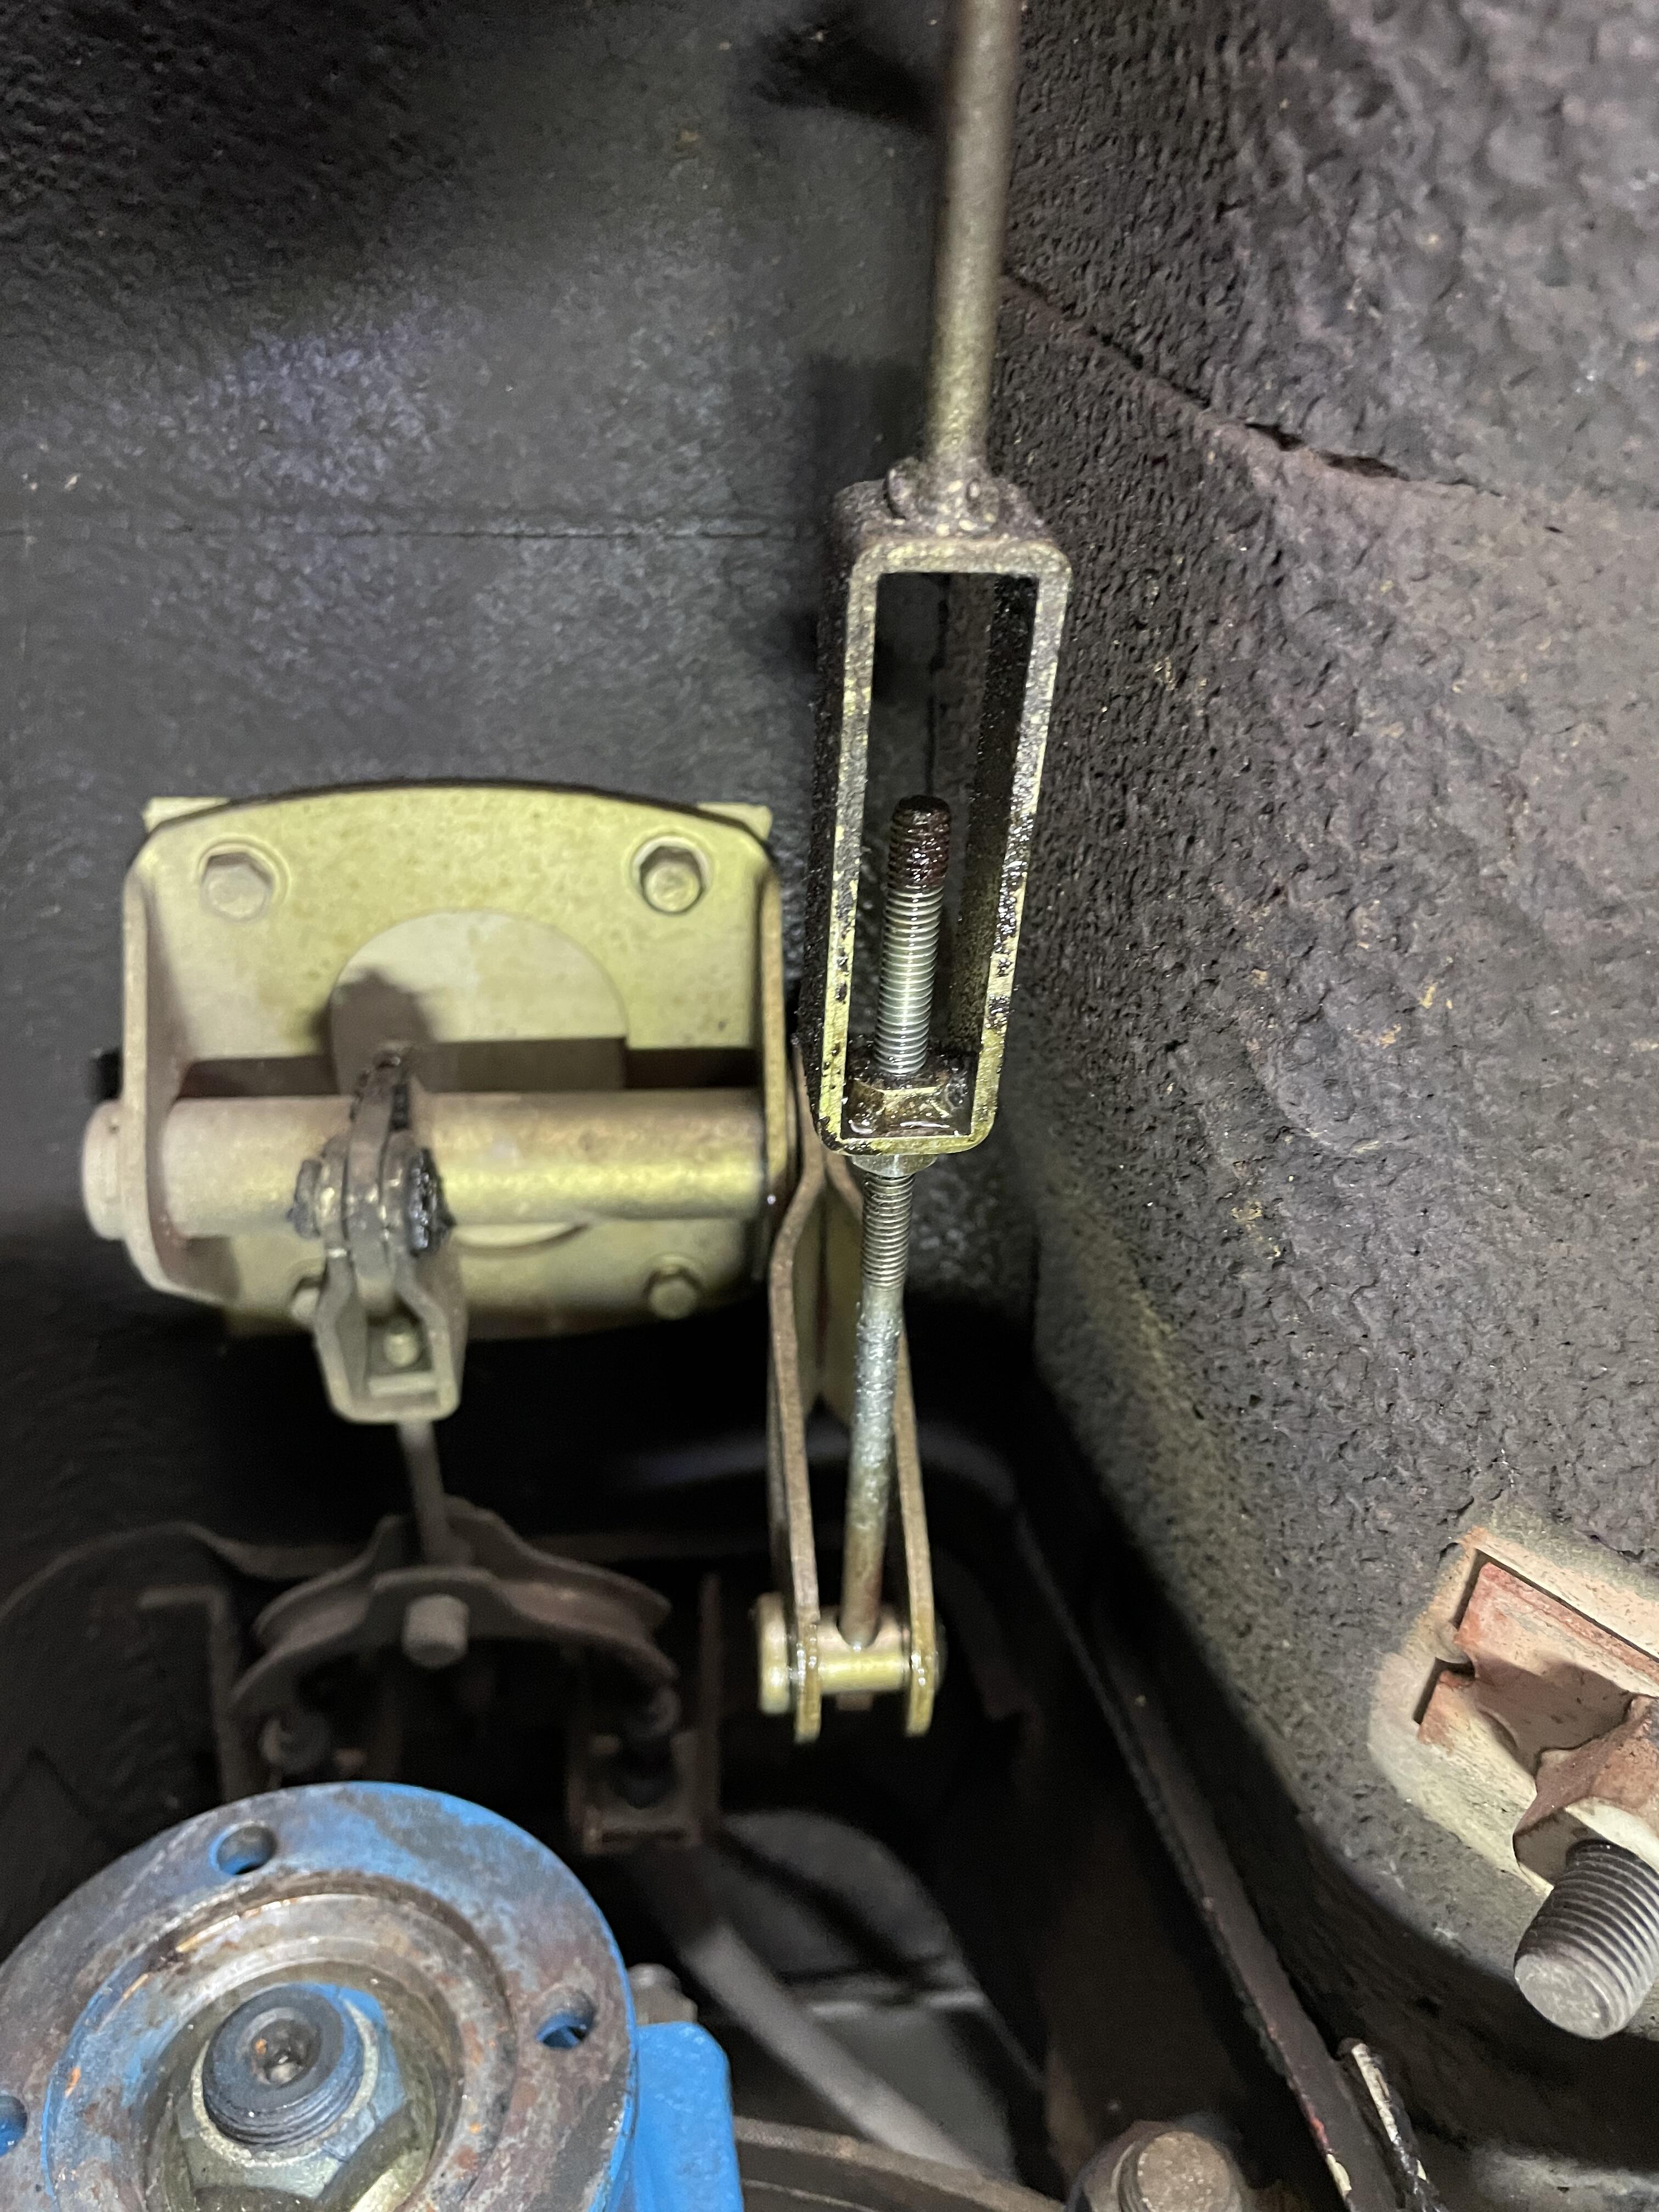
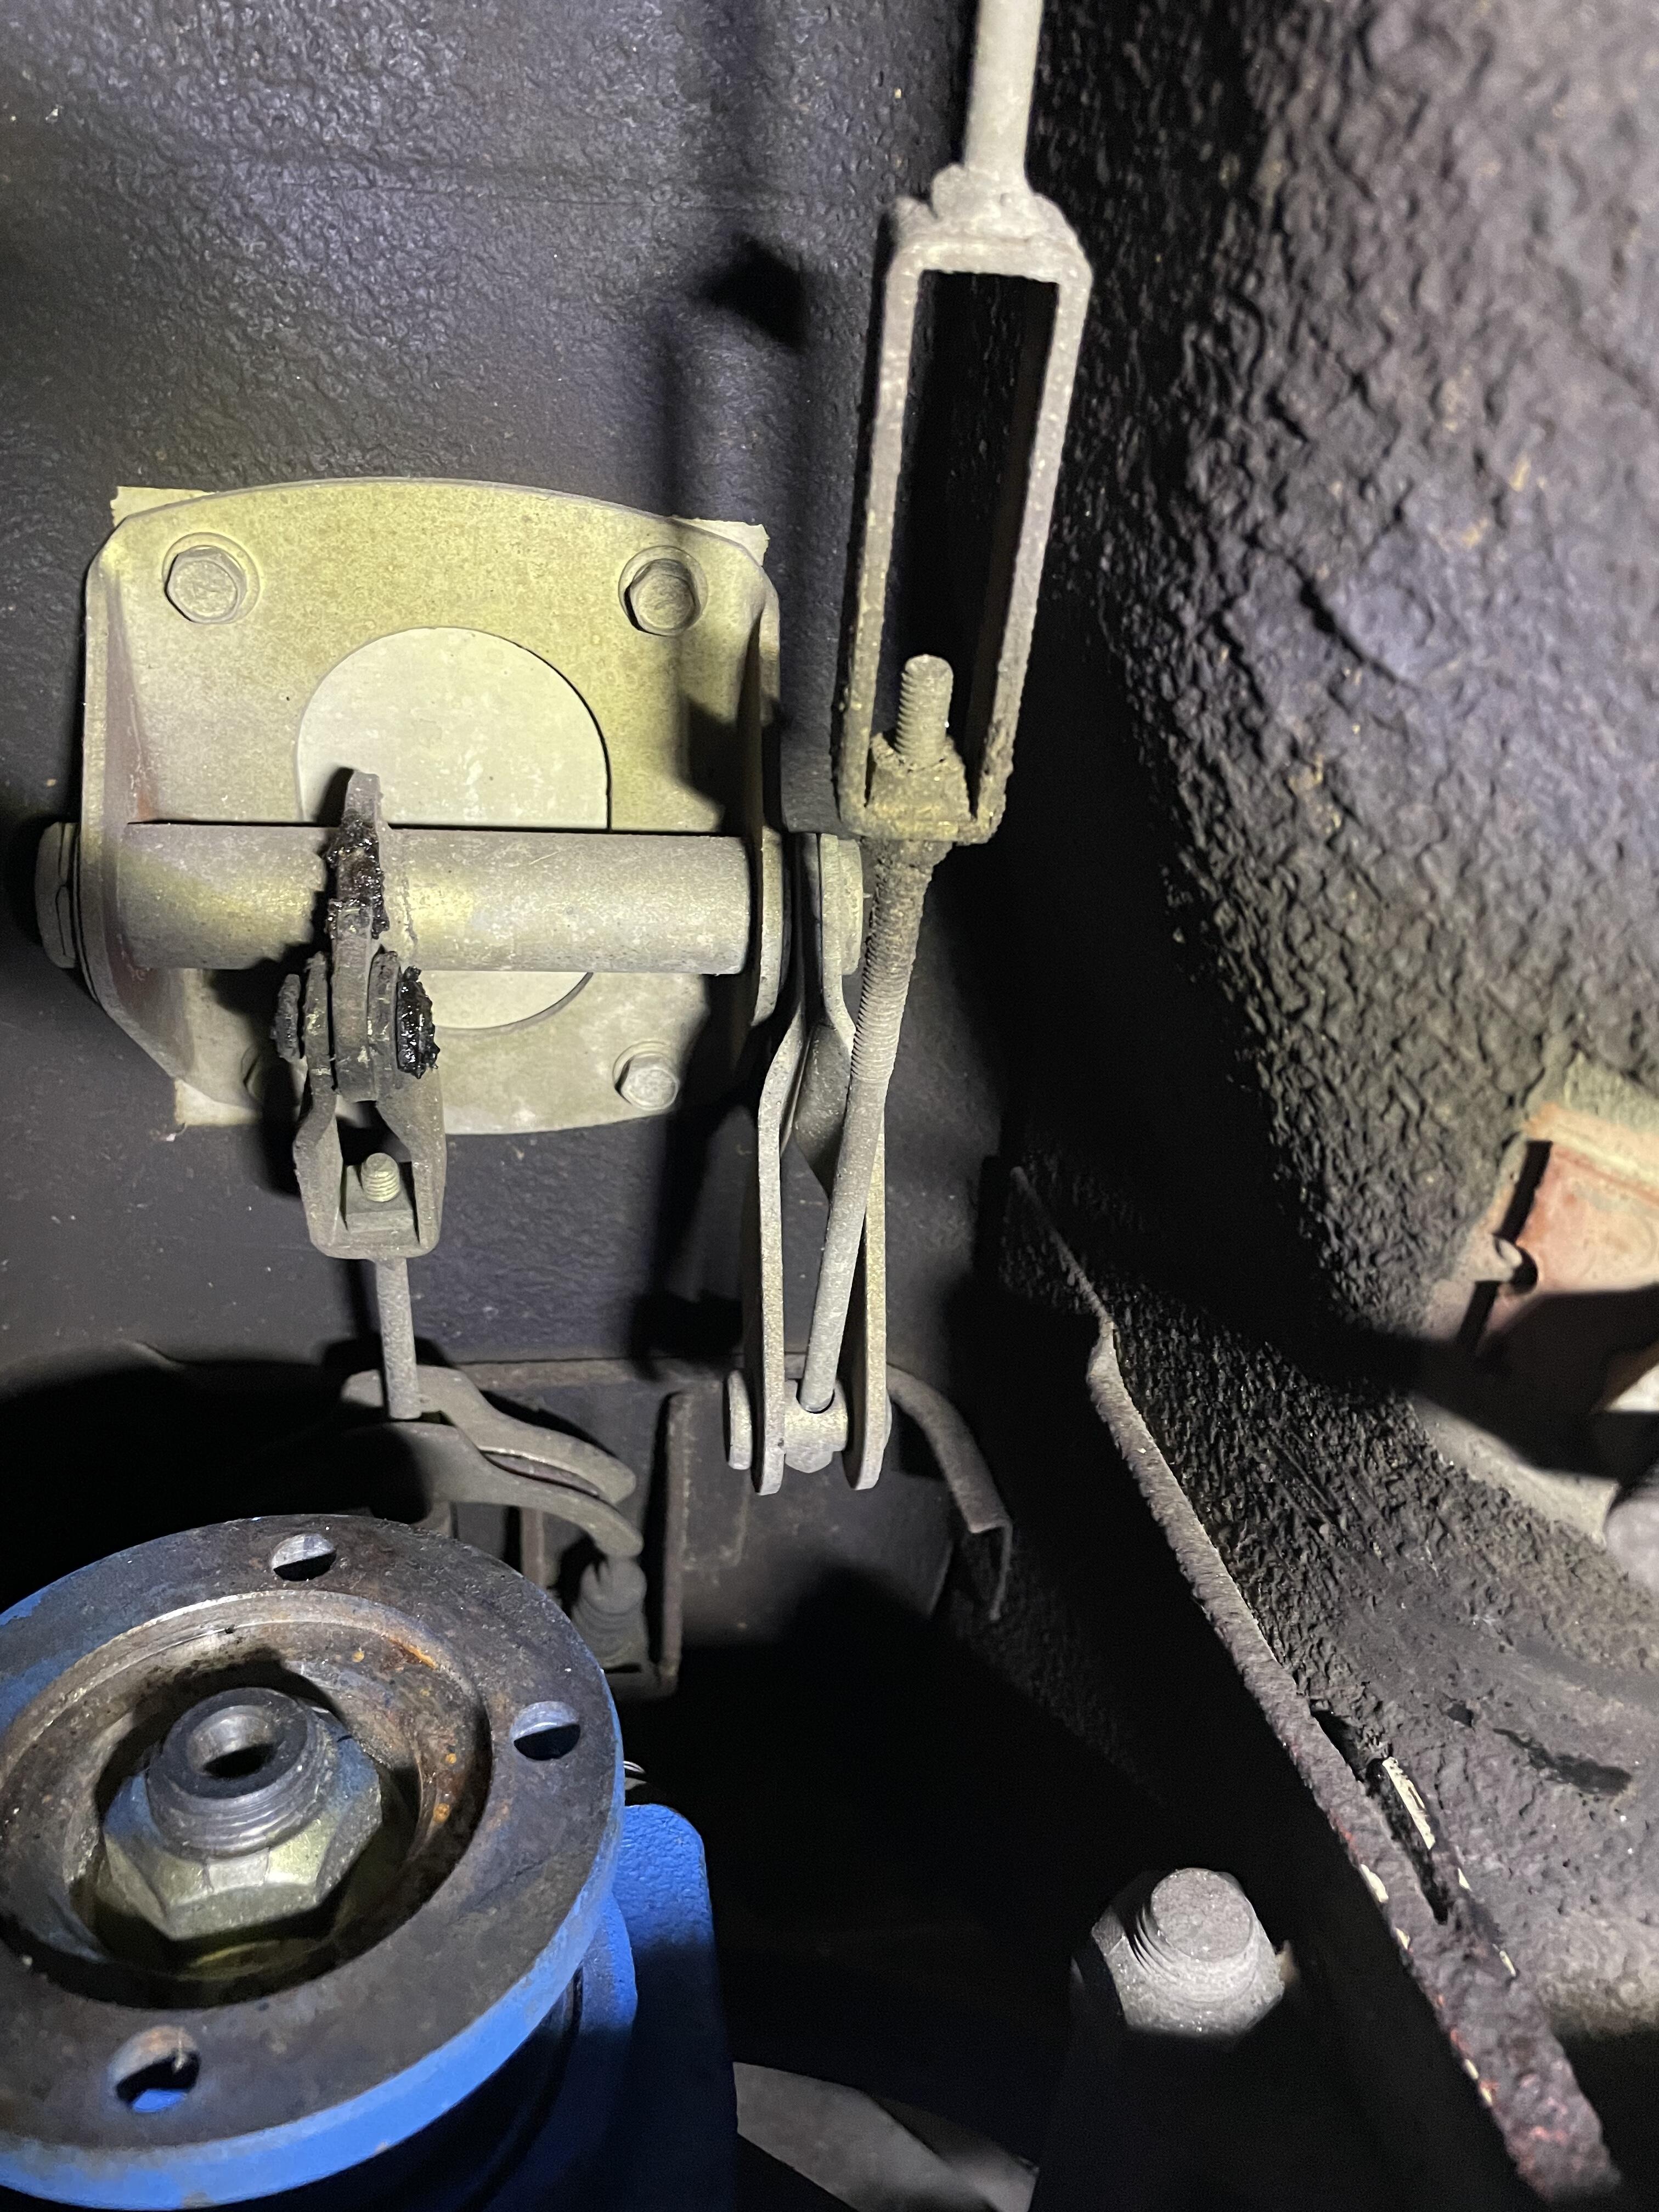
1 pointJacked the car up. Applied penetrating oil to the underside of the E-Brake. Going to let it sit overnight before I hit it in the morning.

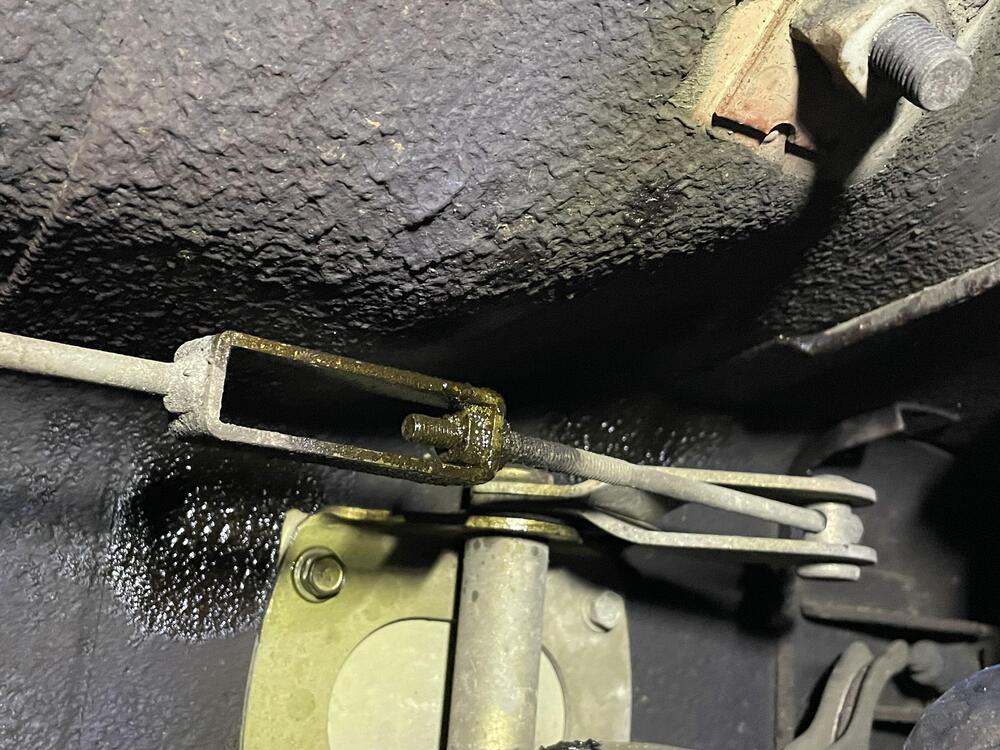 1 point
 -
1 pointIt's the ground for mine. Shine them up and reattach. Good luck. Cliff Ckuld be the horn pad connections too?1 point
-
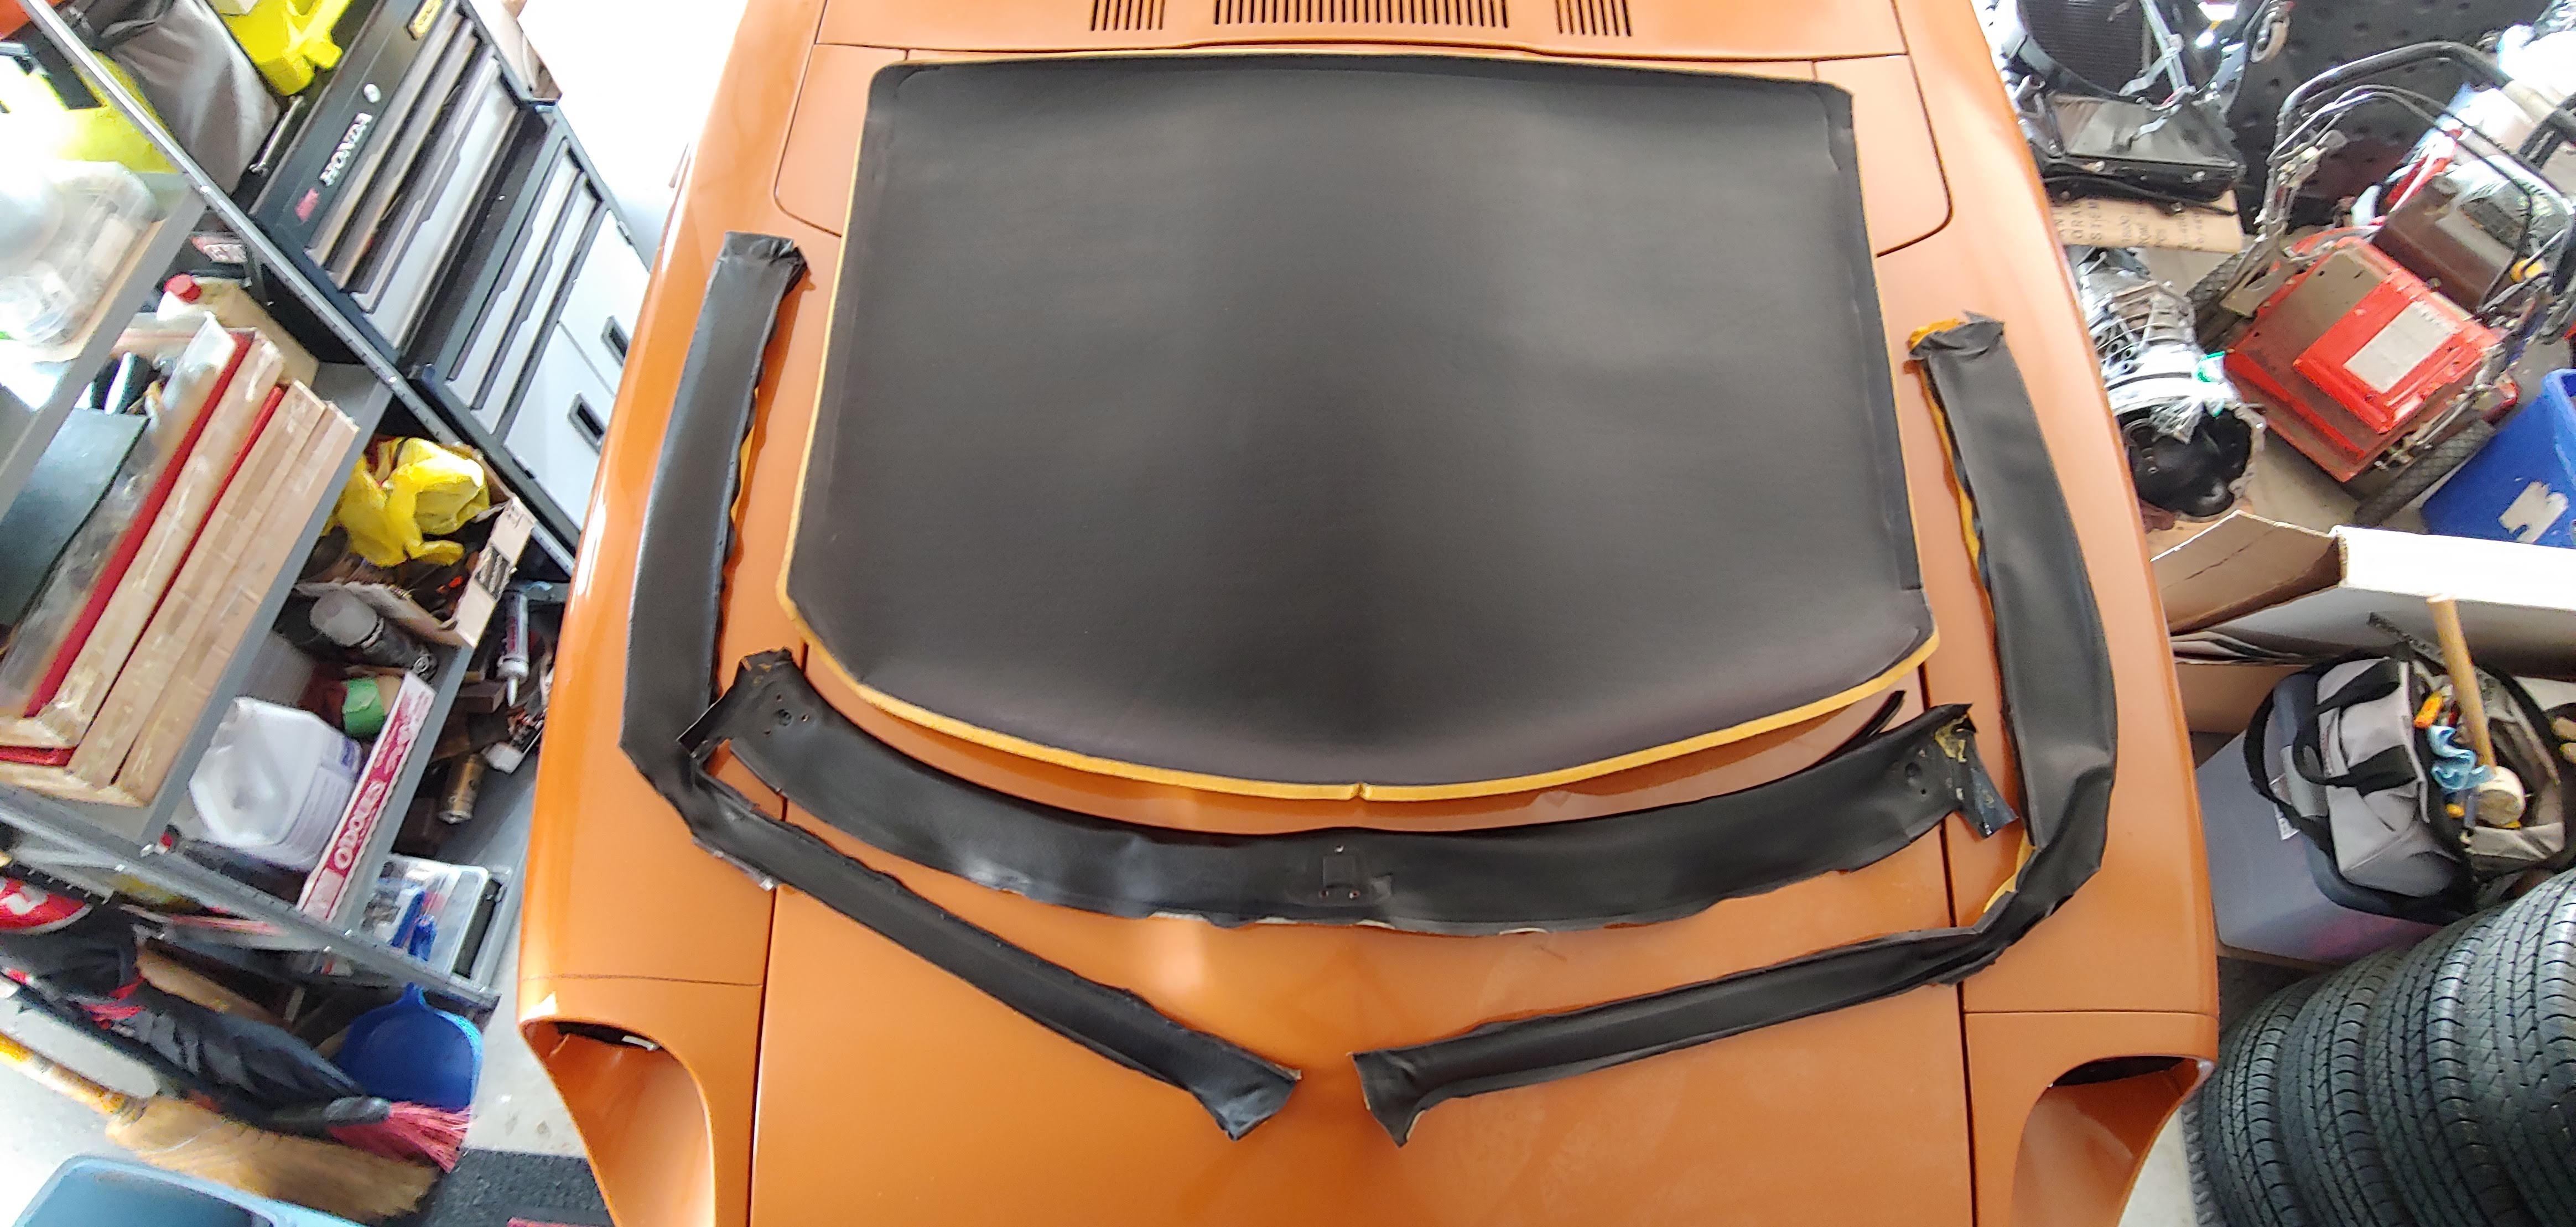
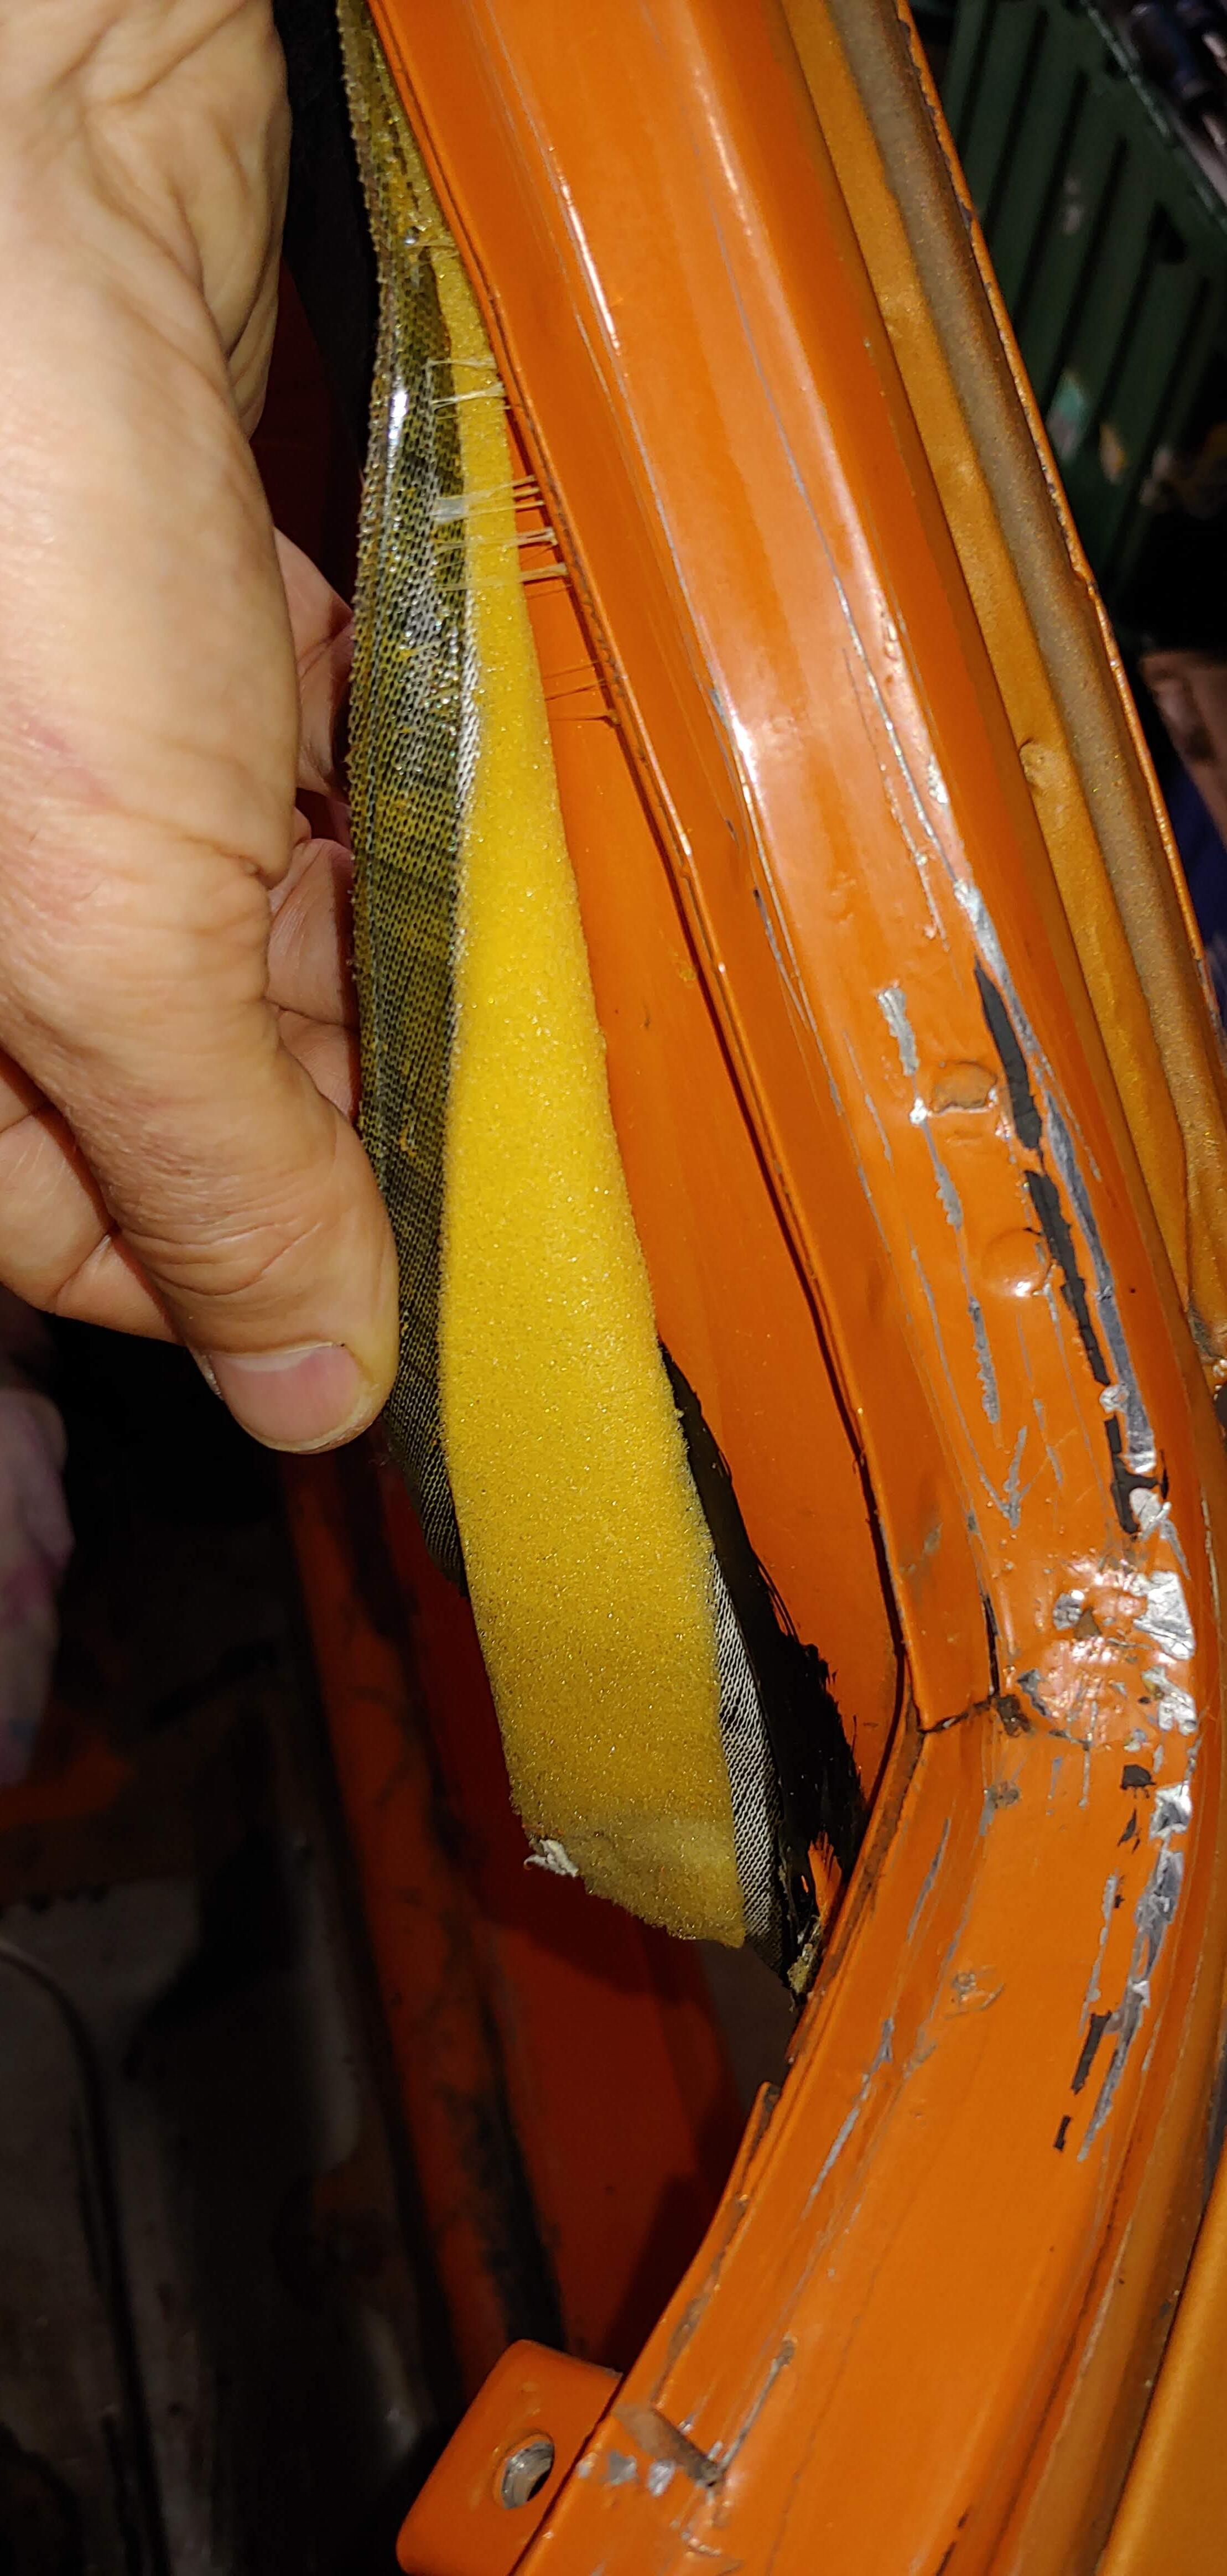
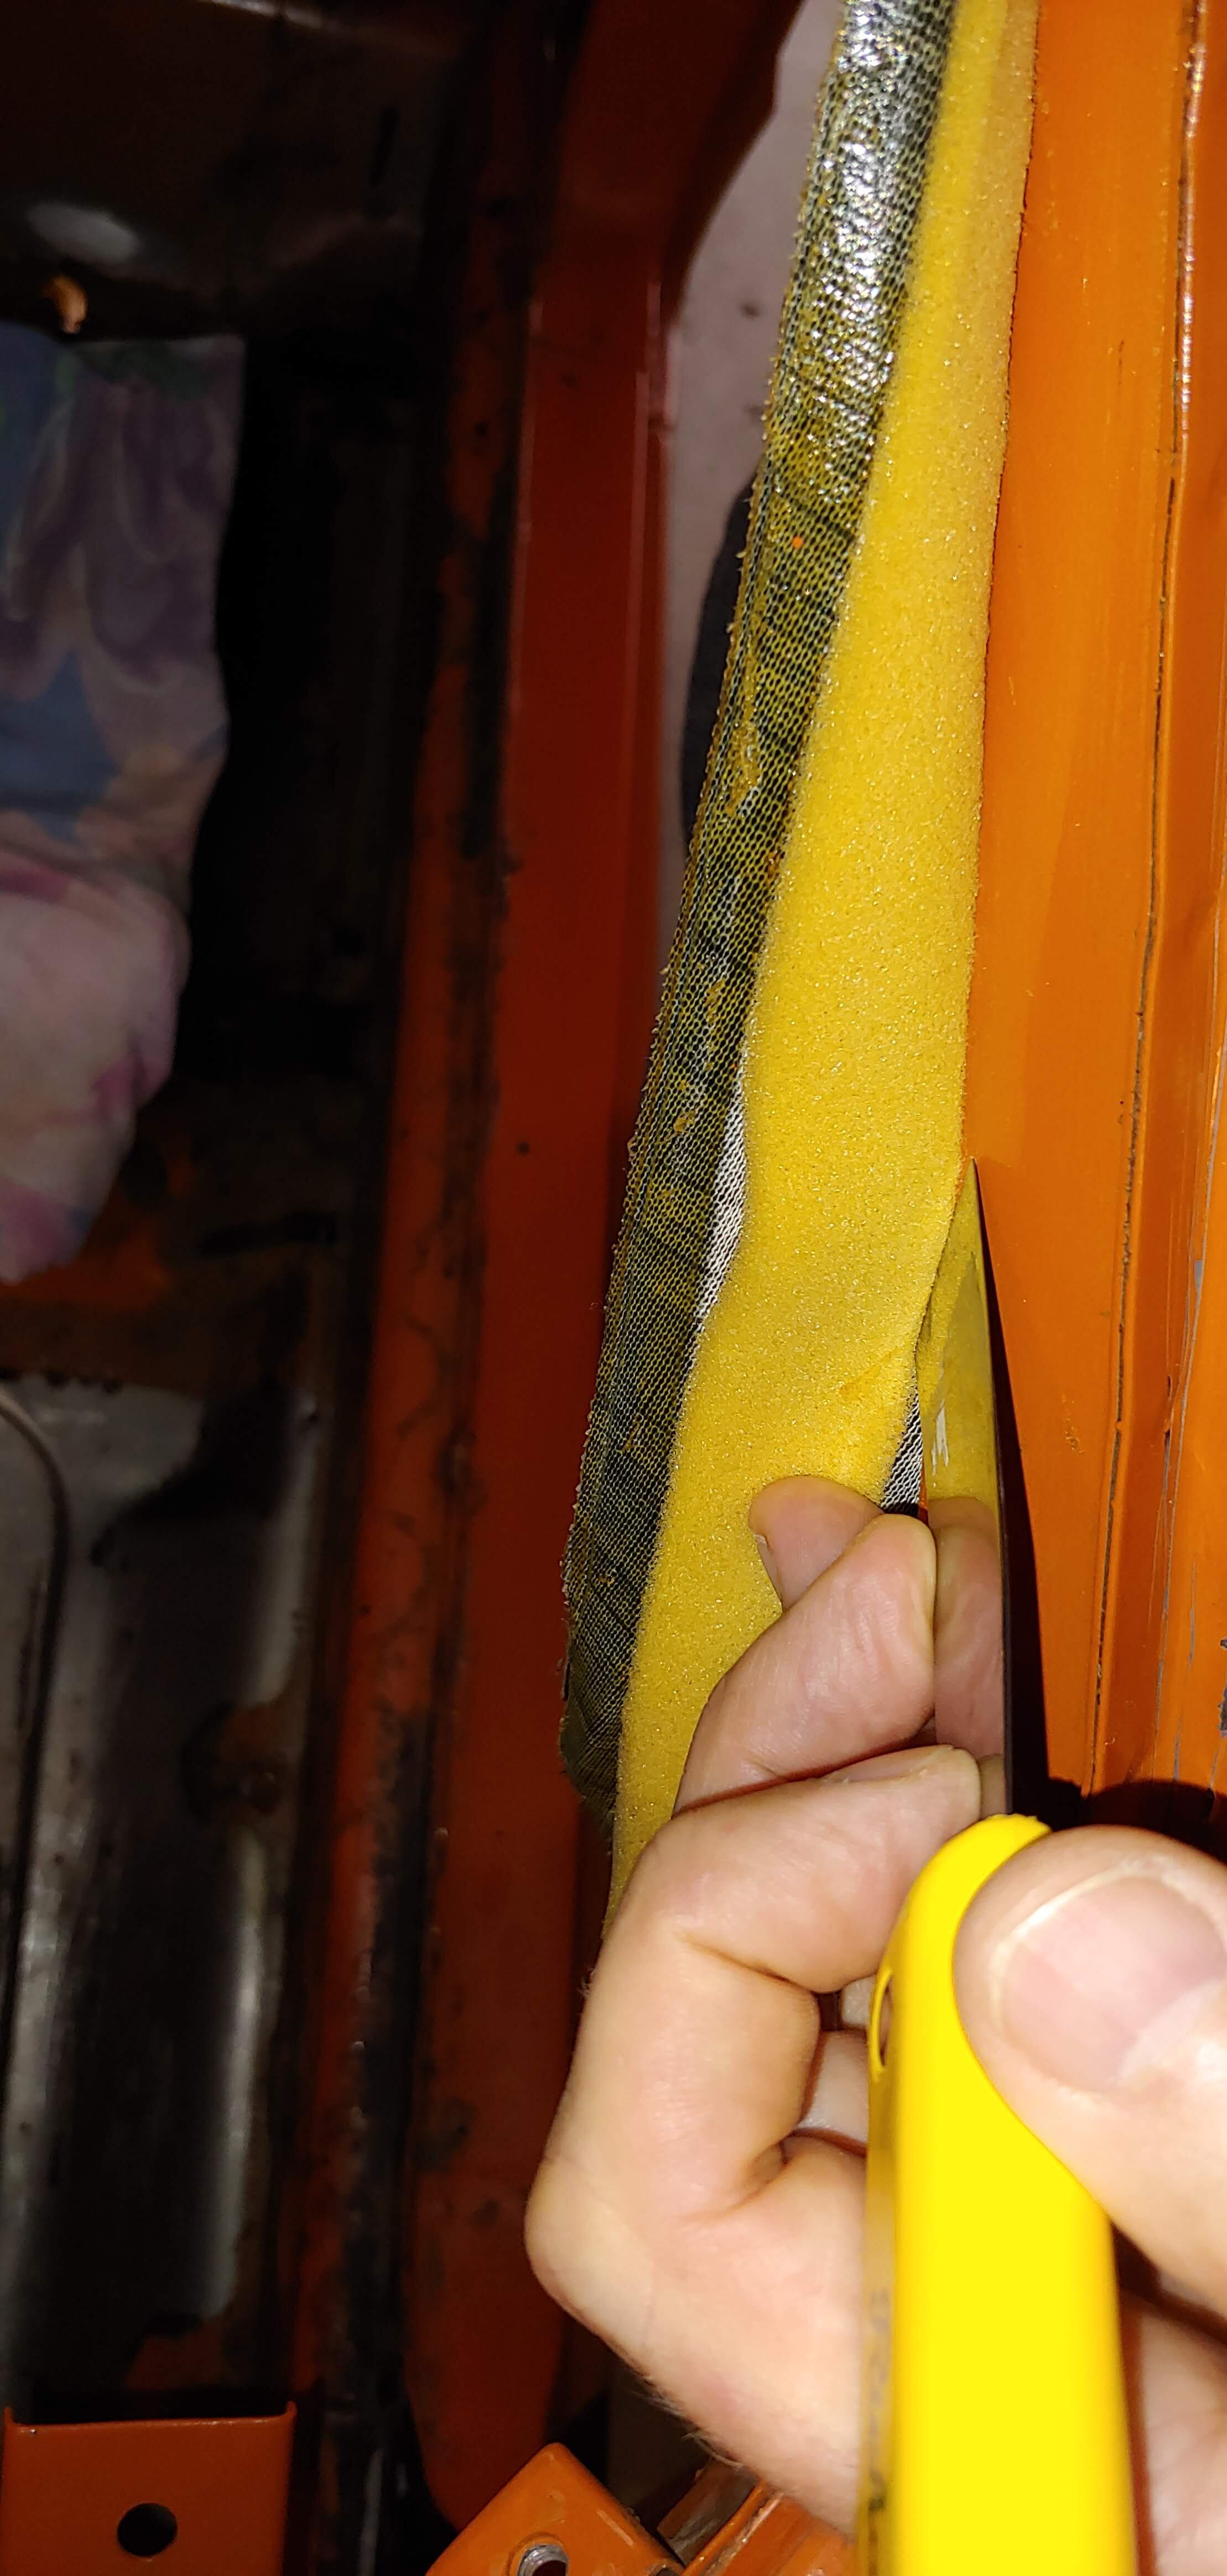
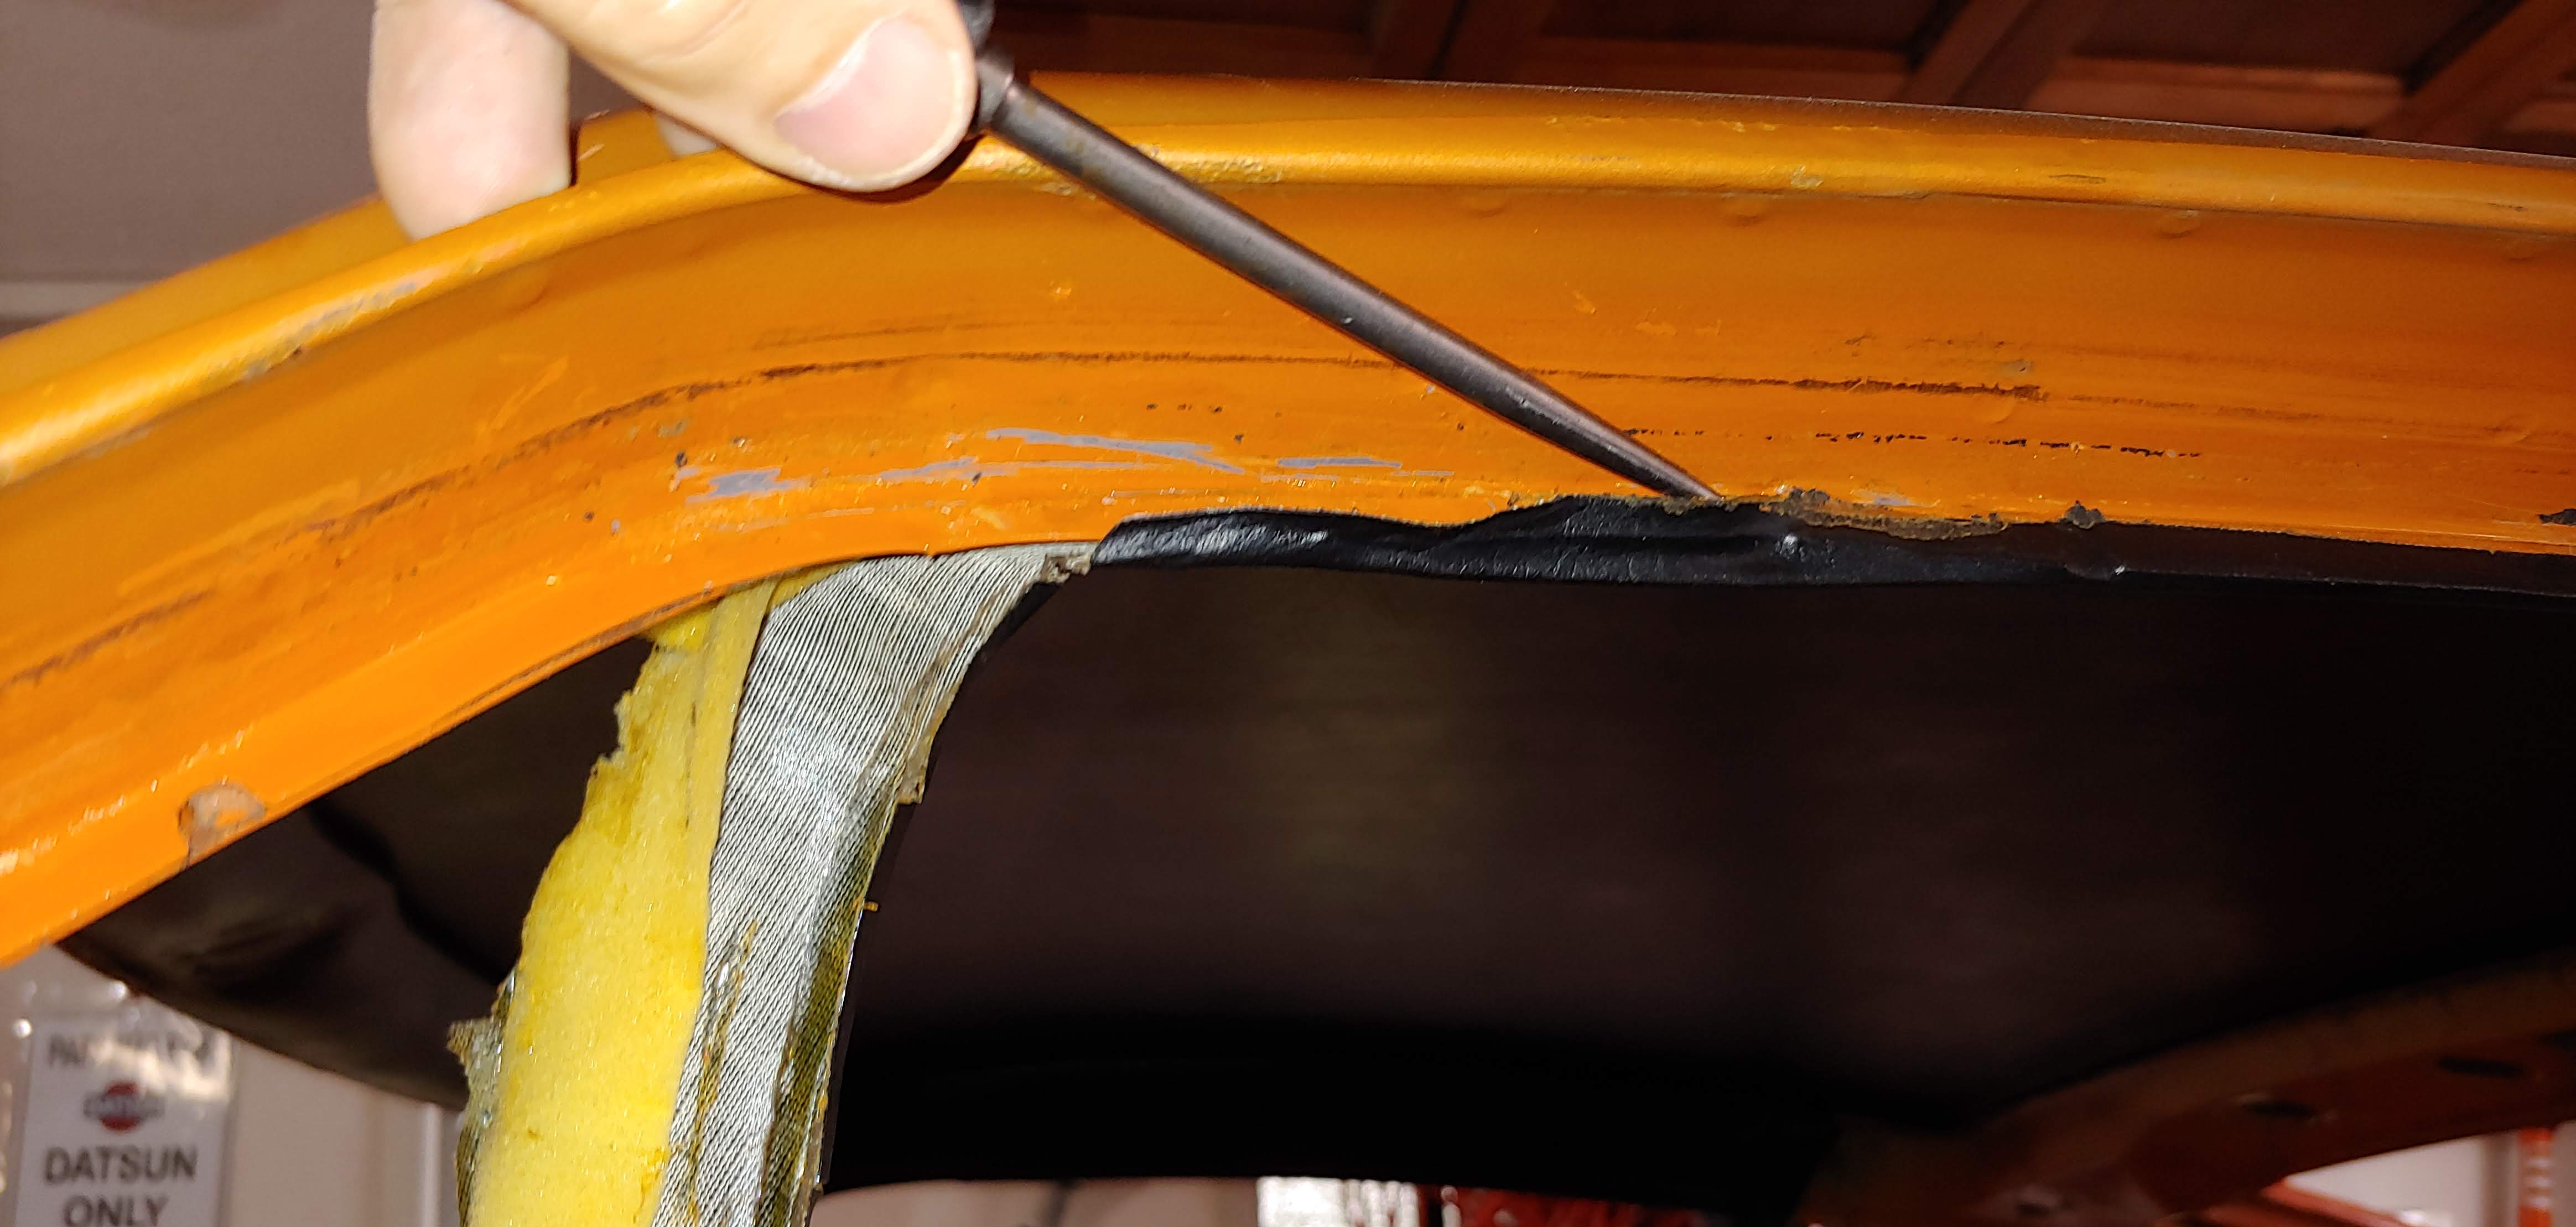
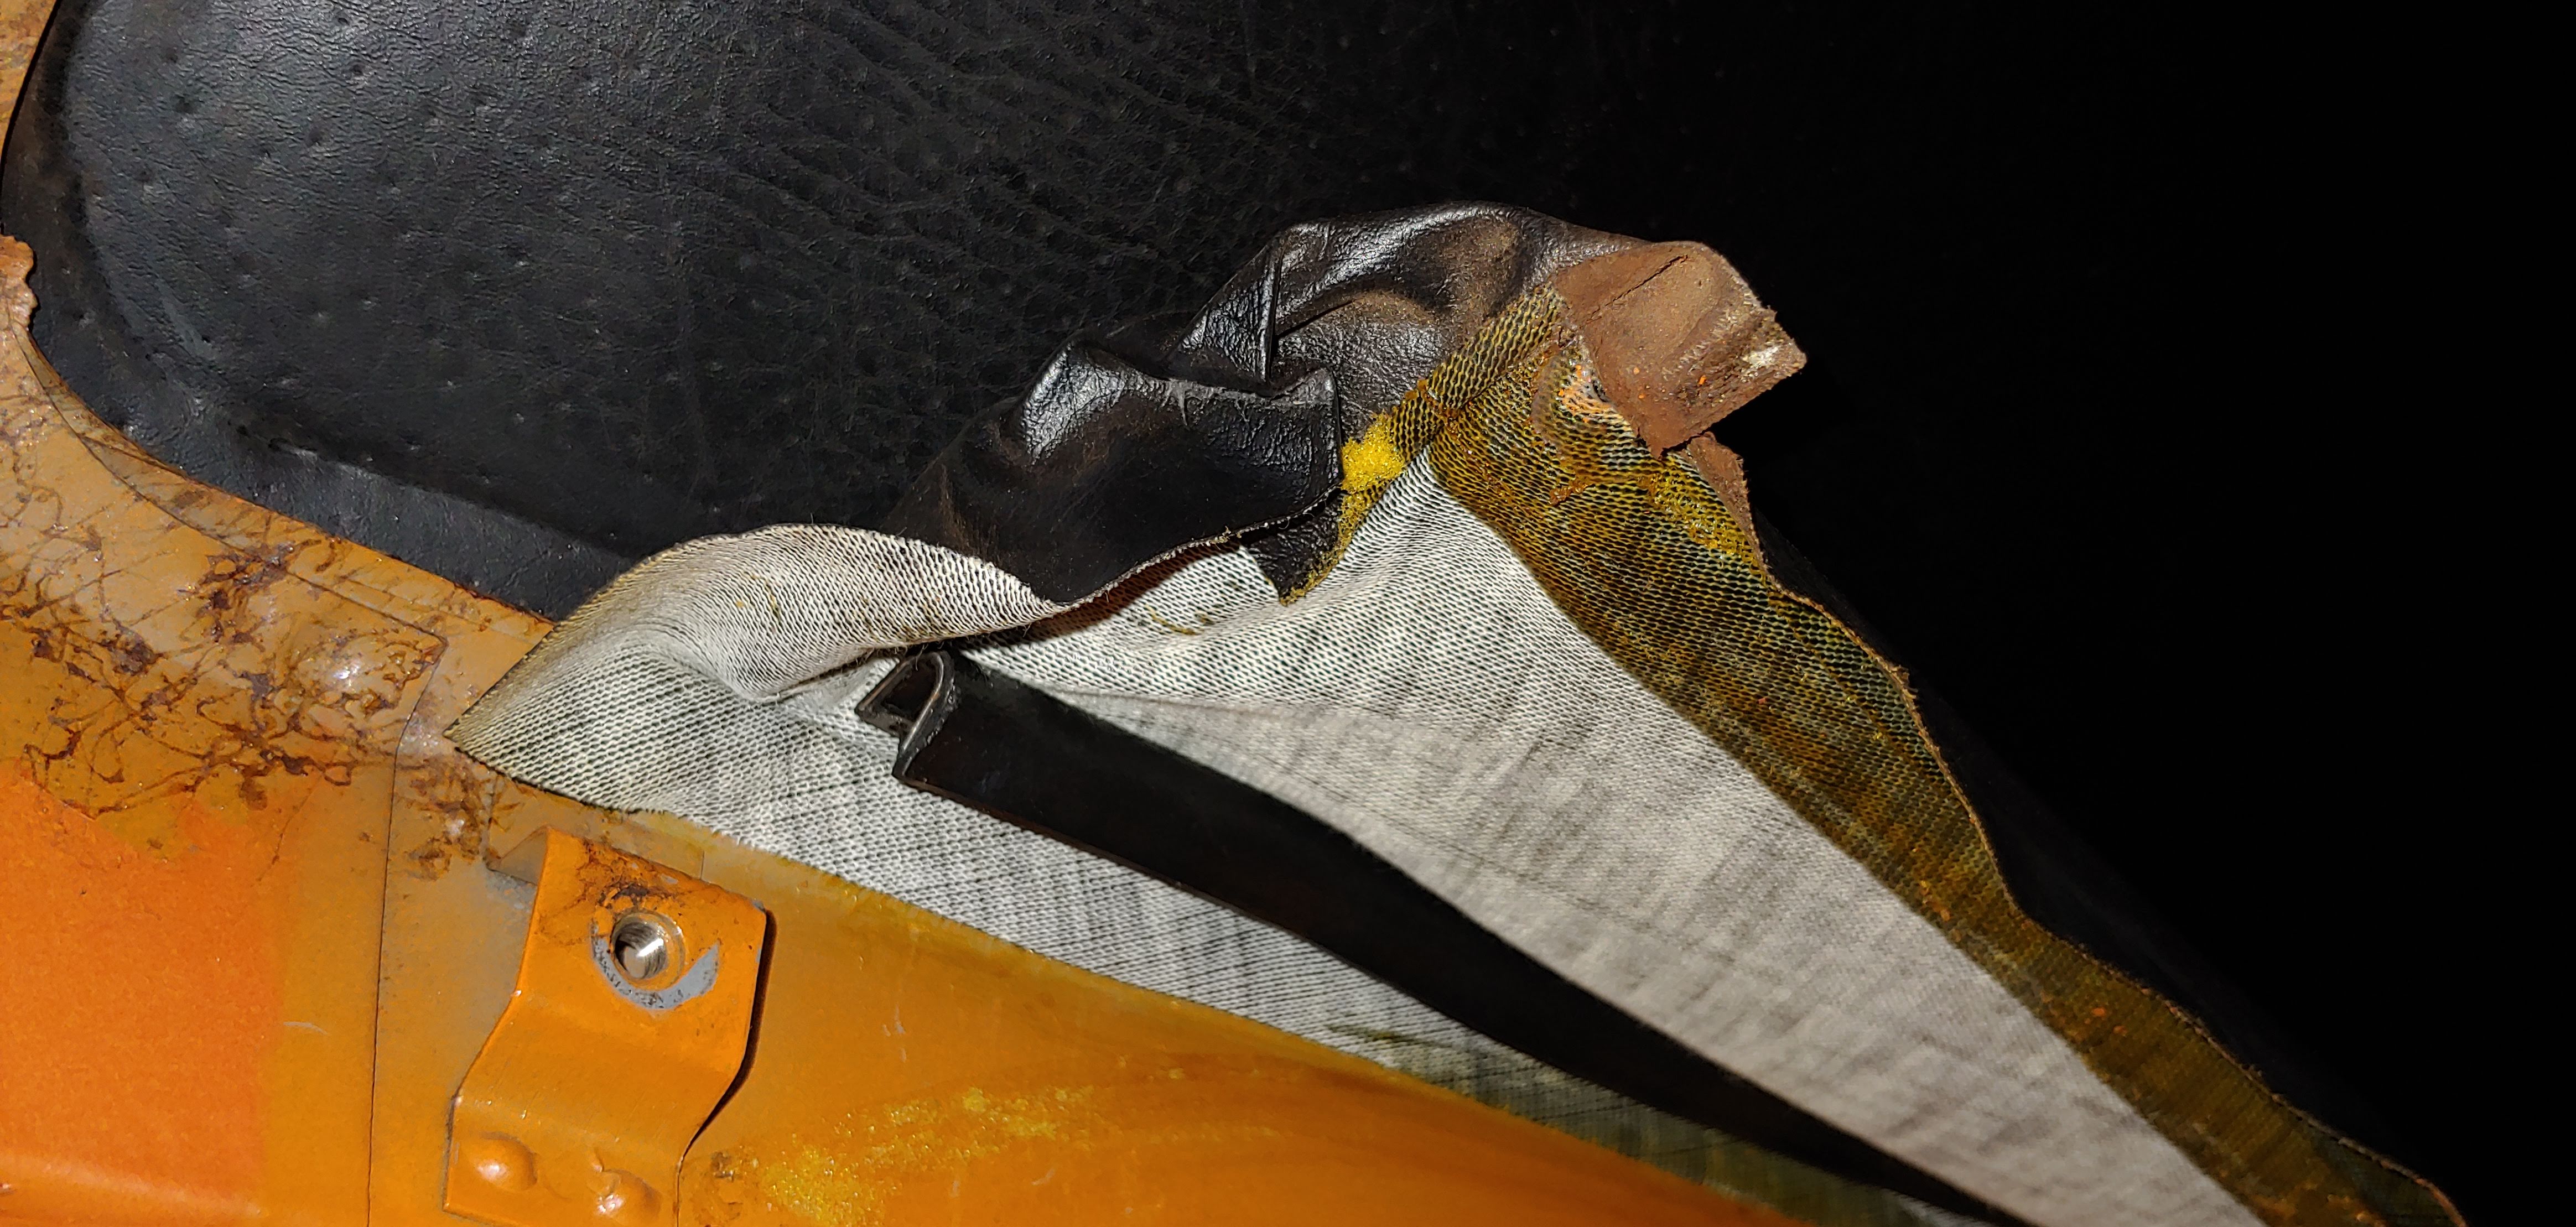
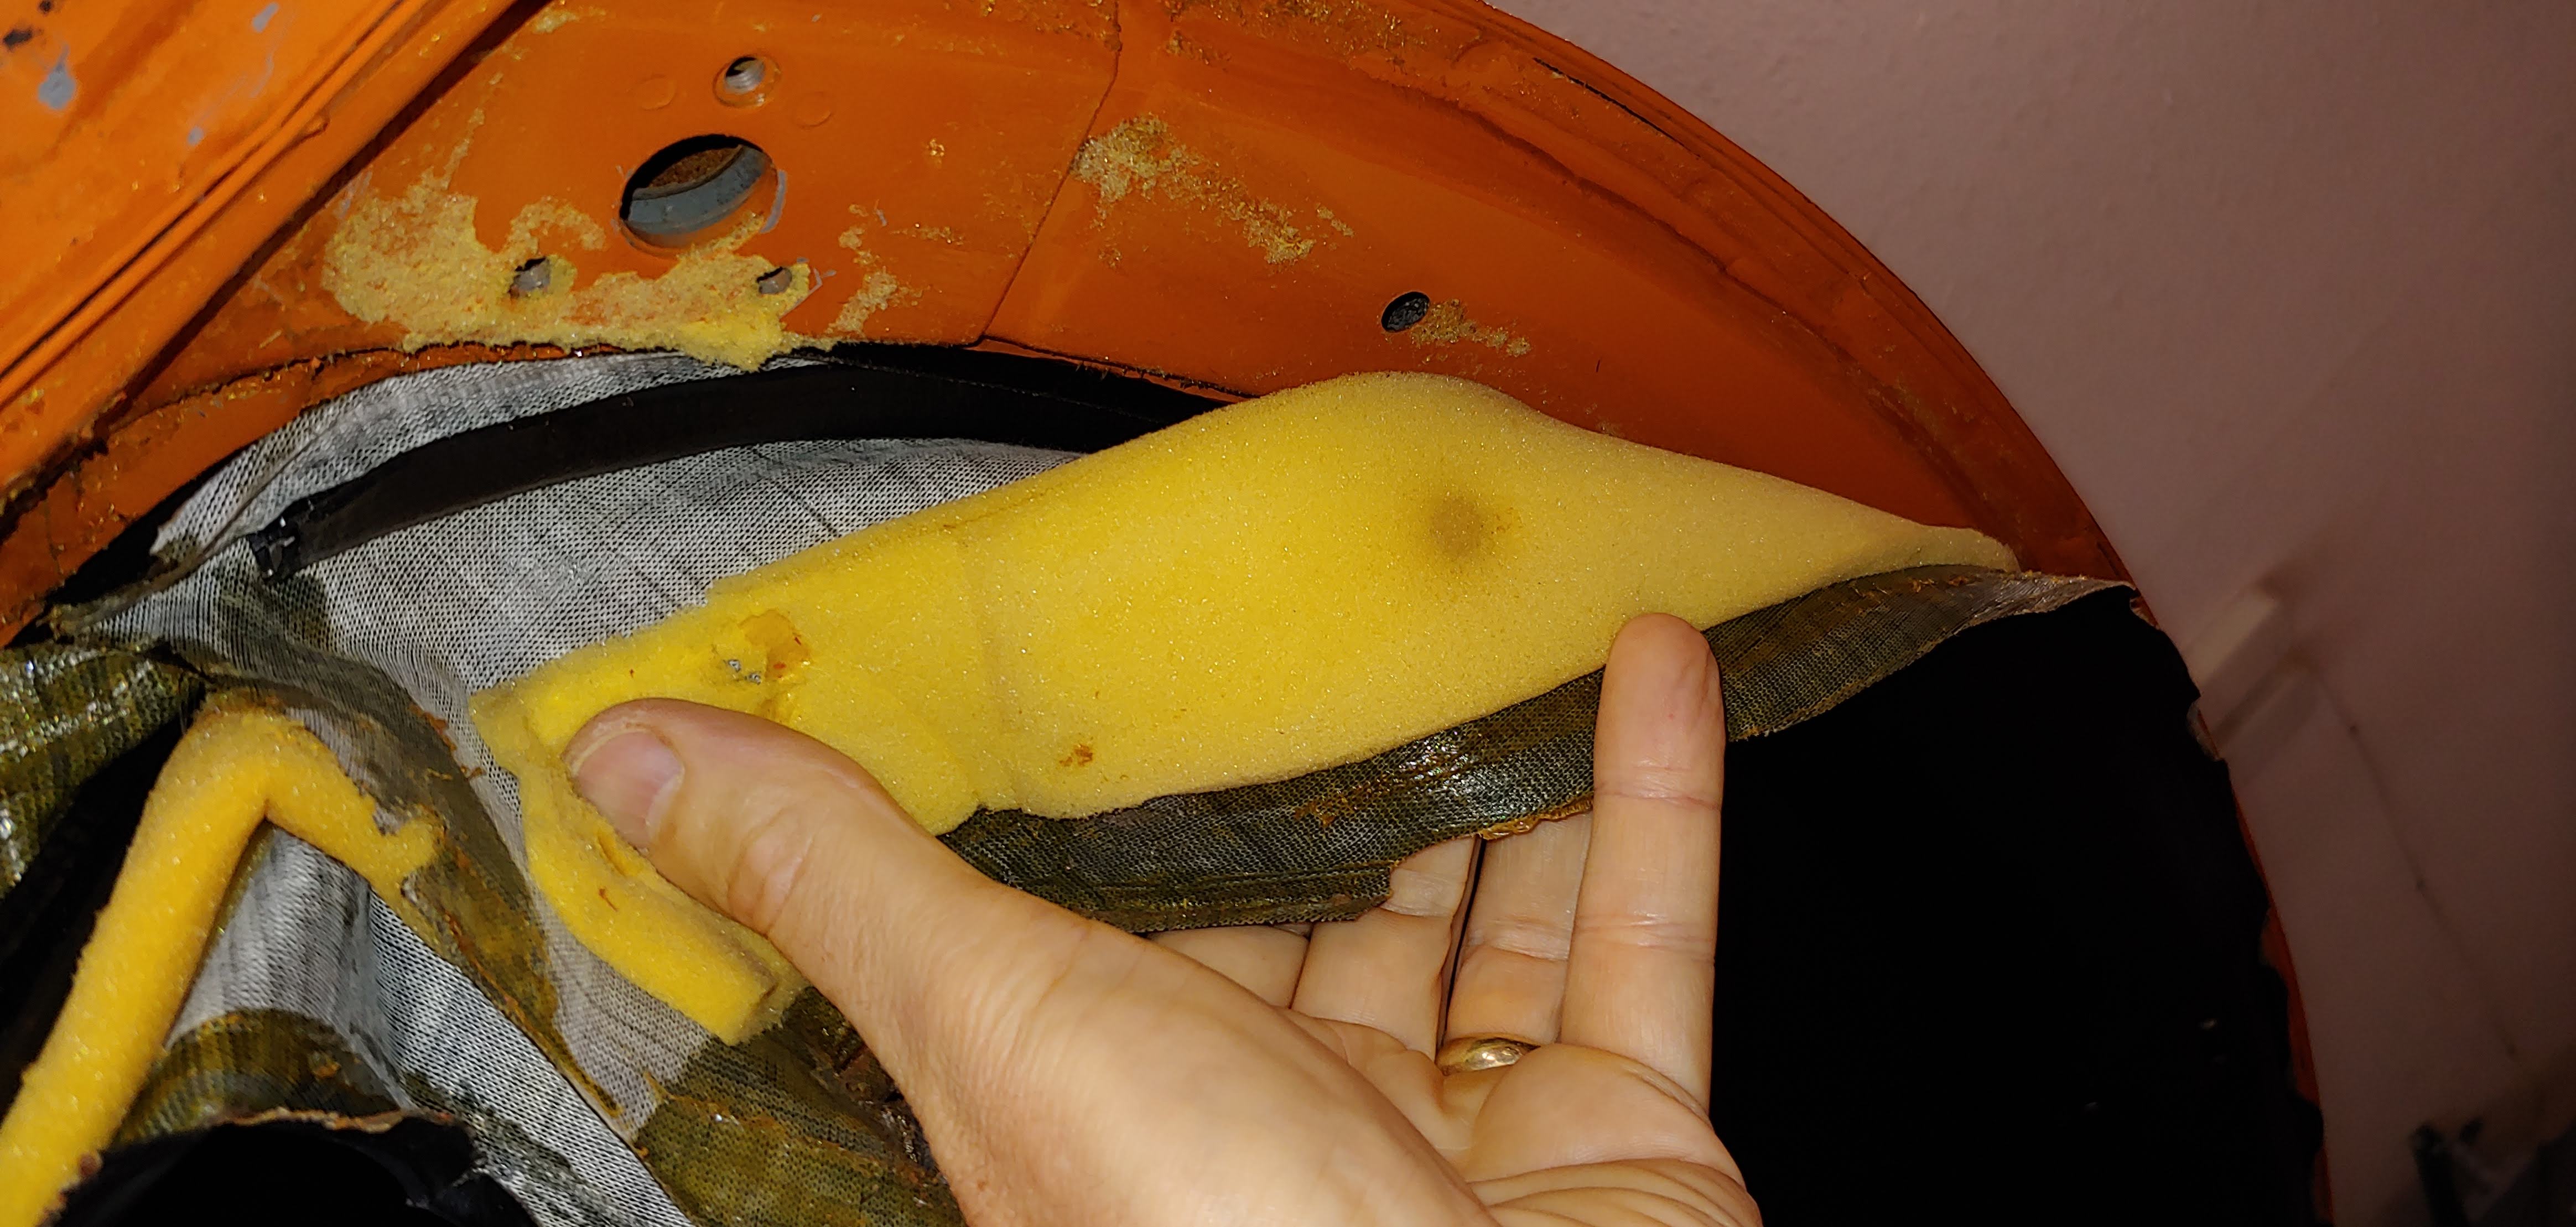
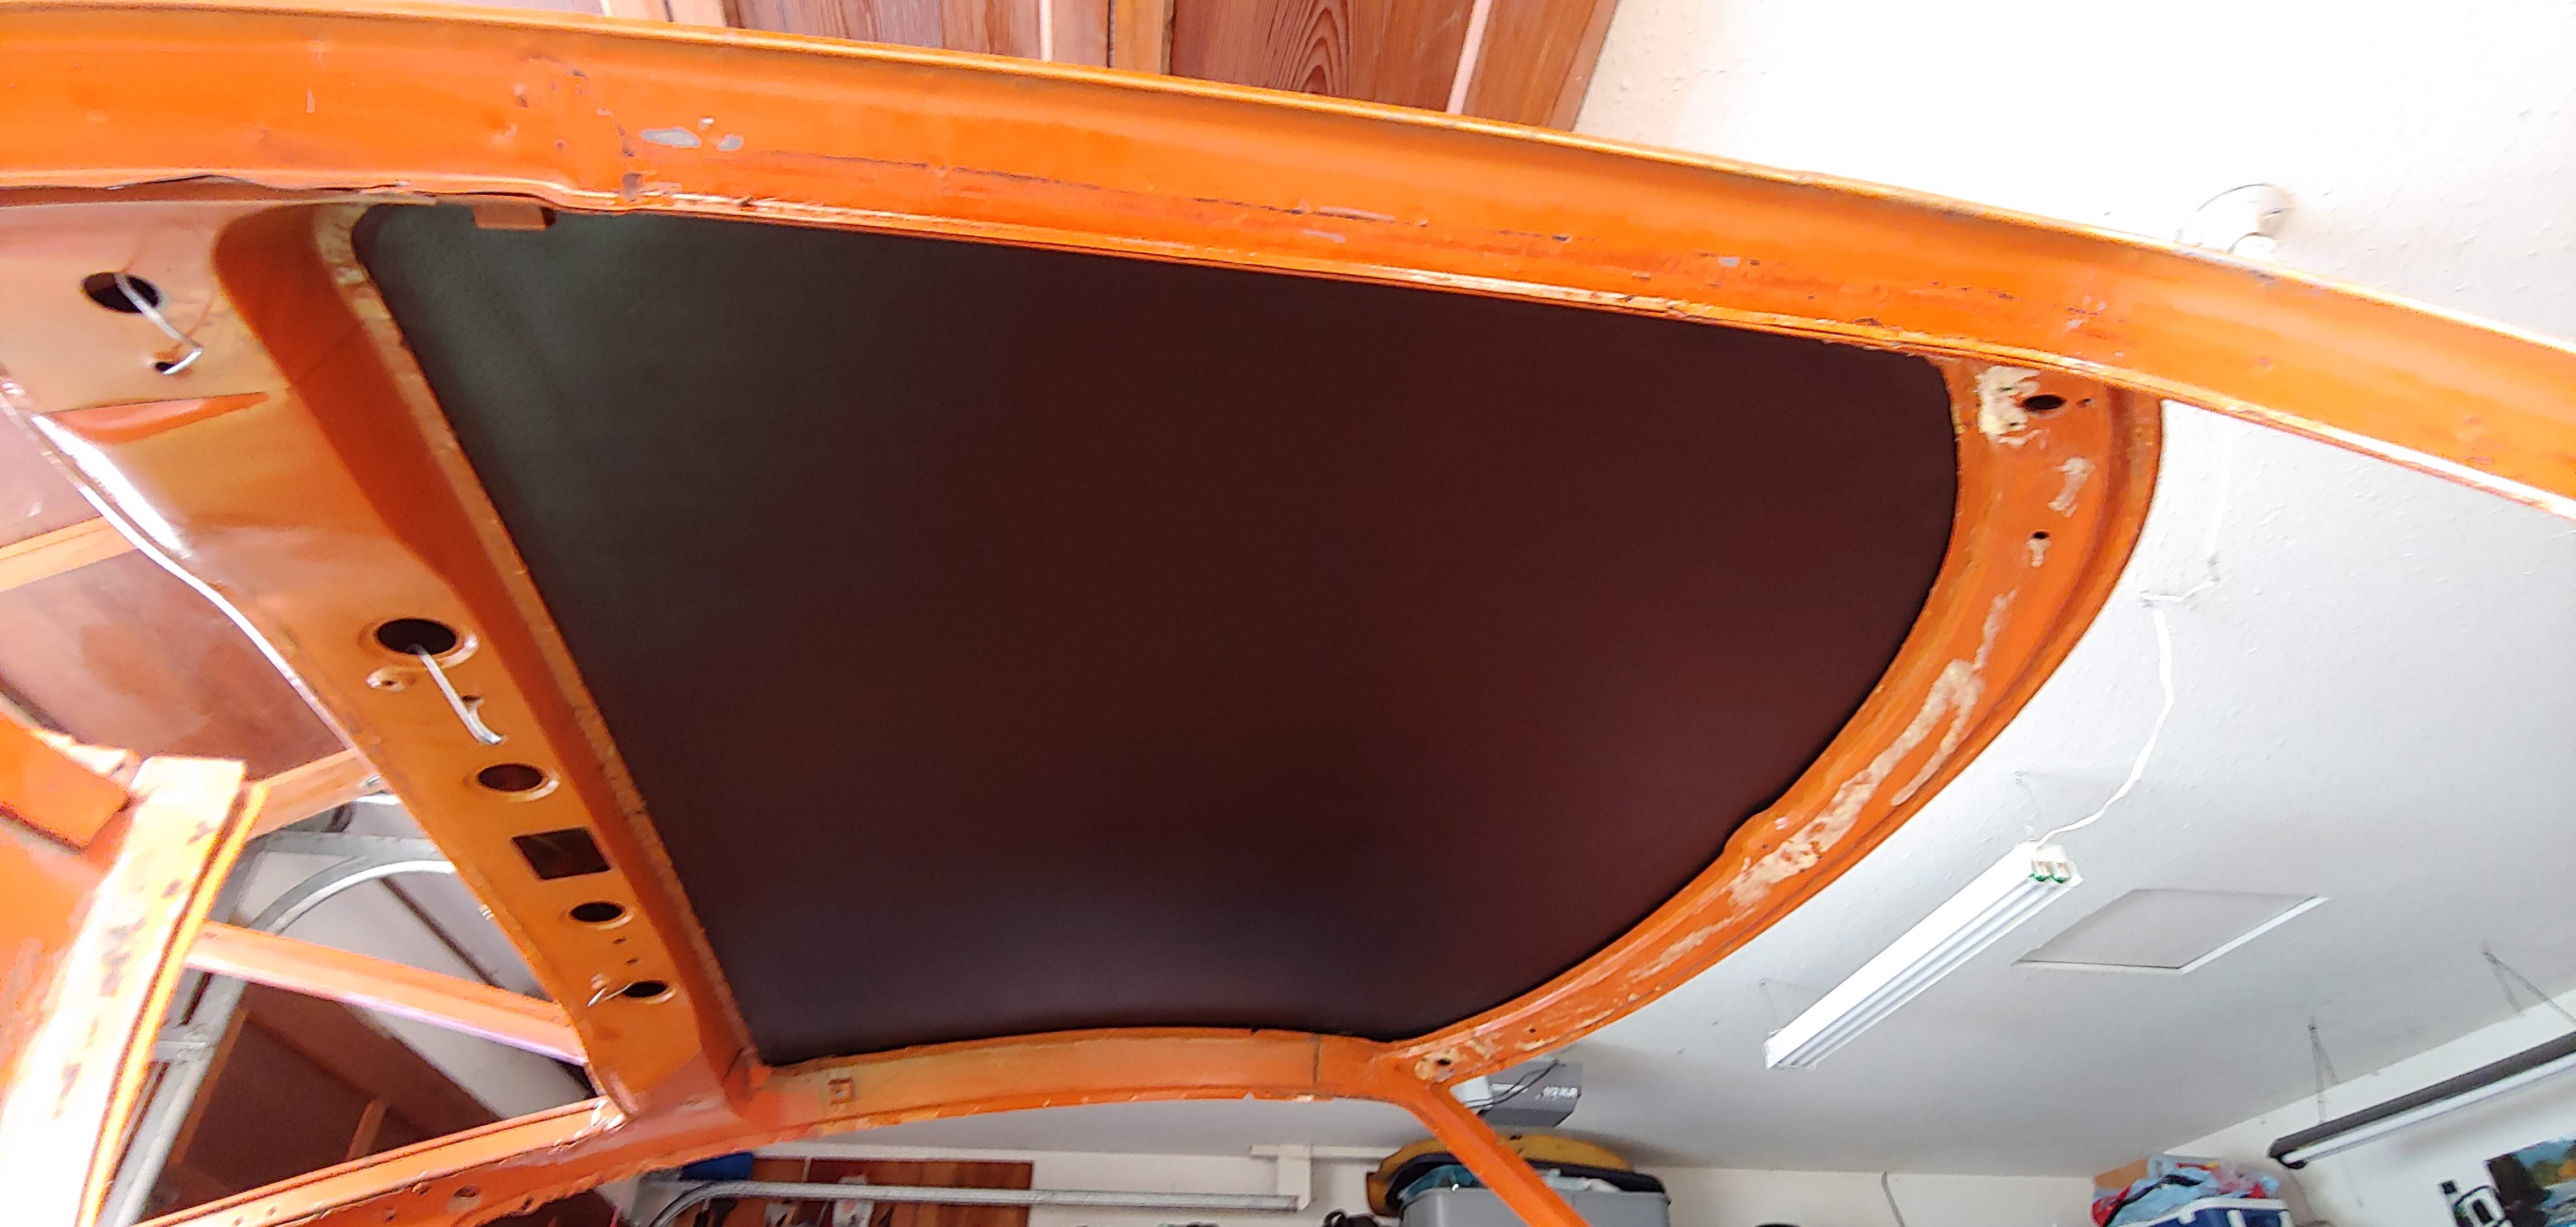
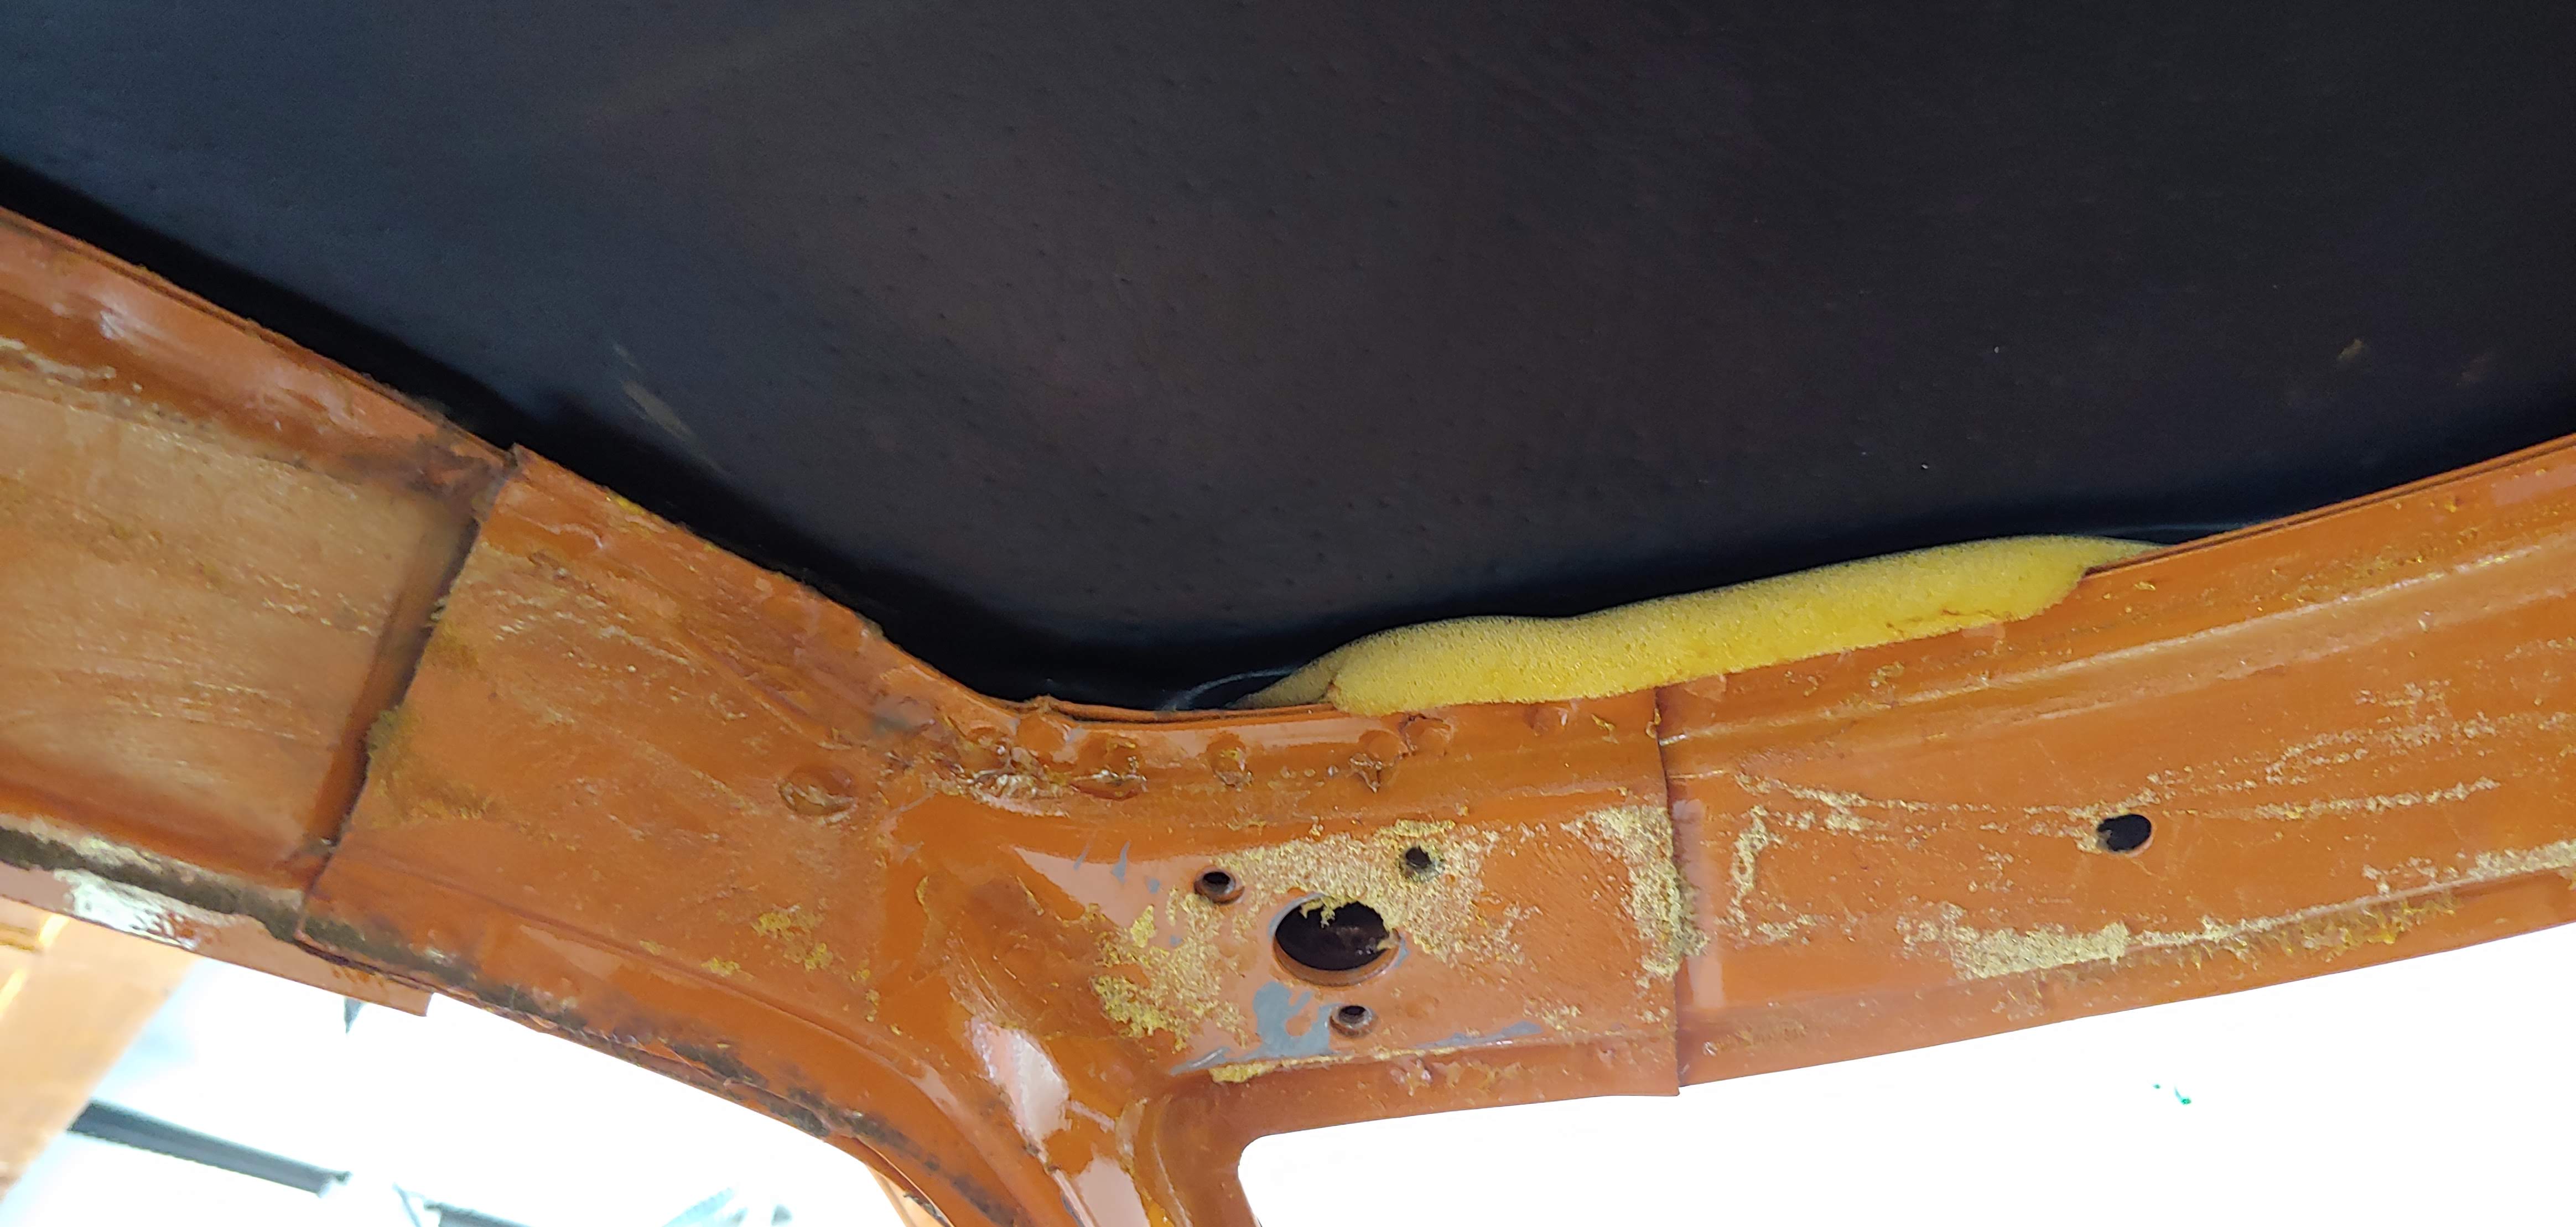
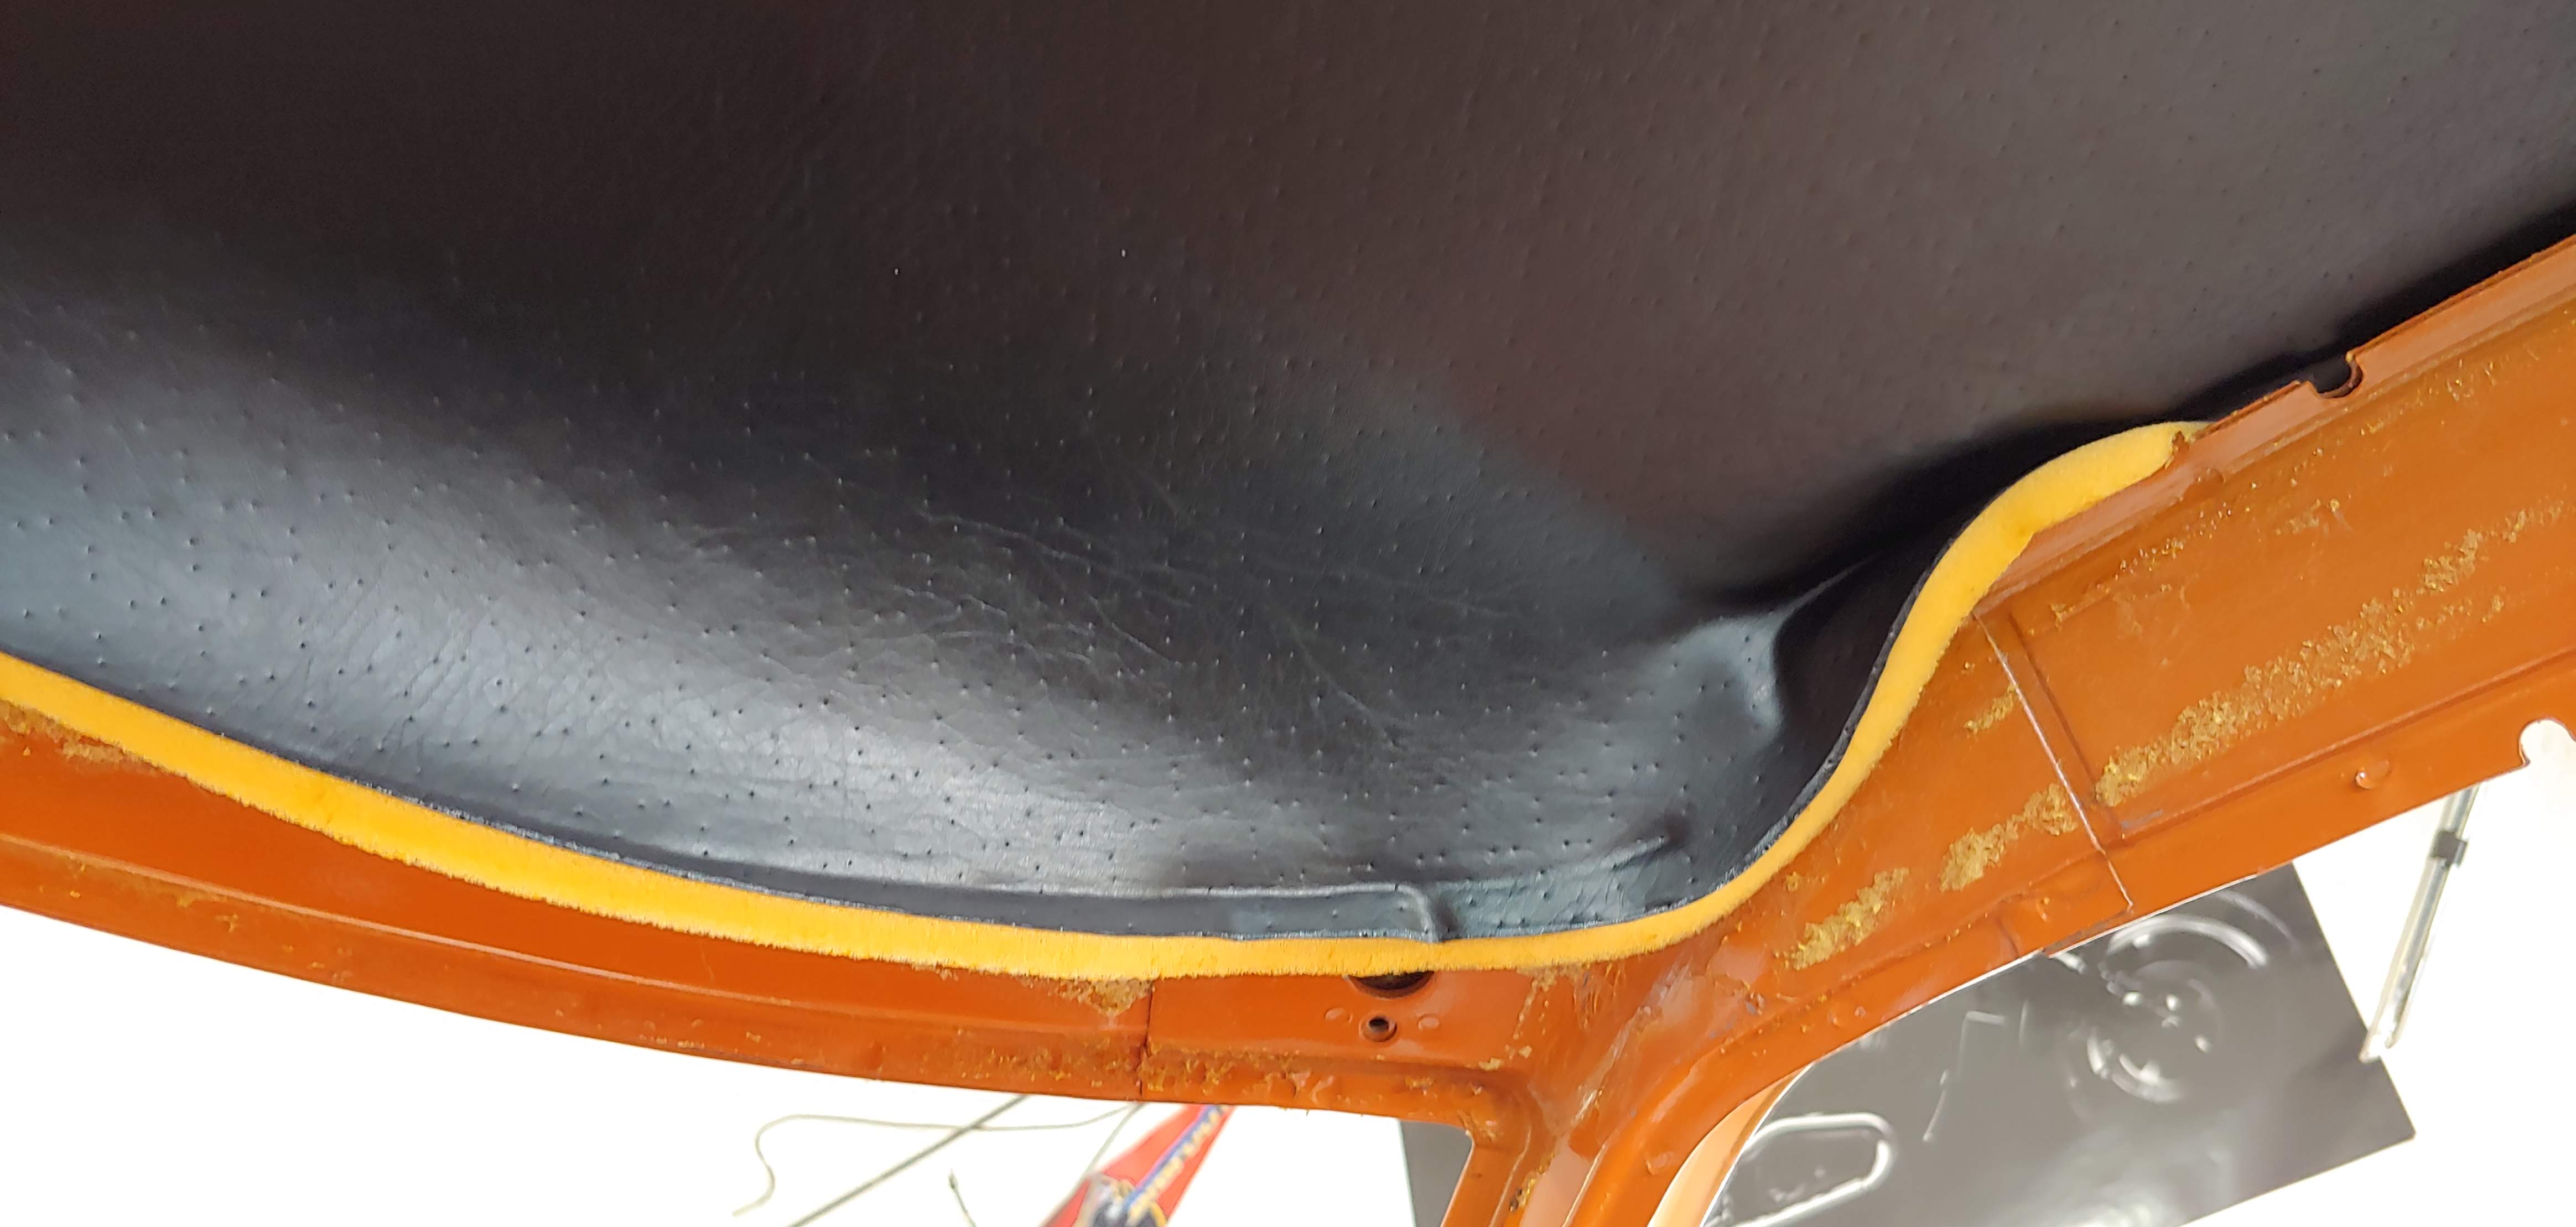
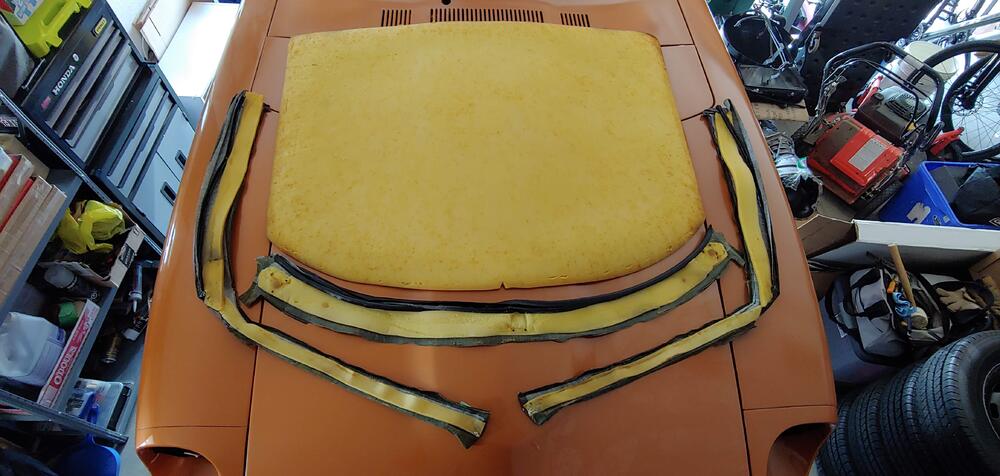
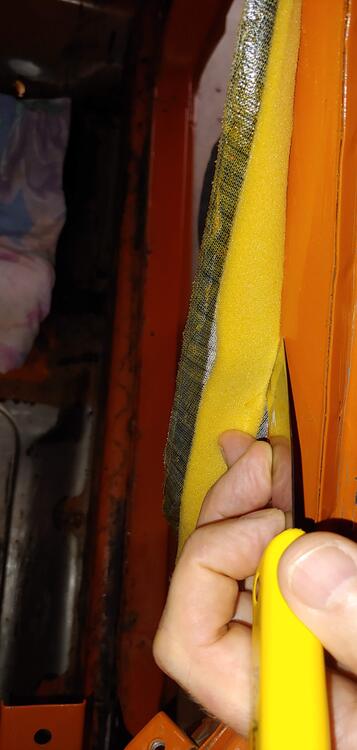
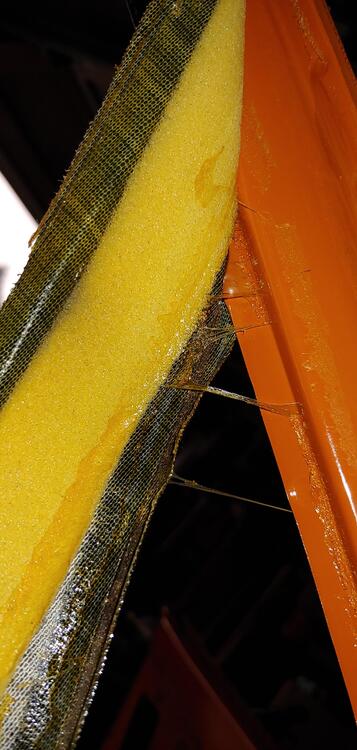
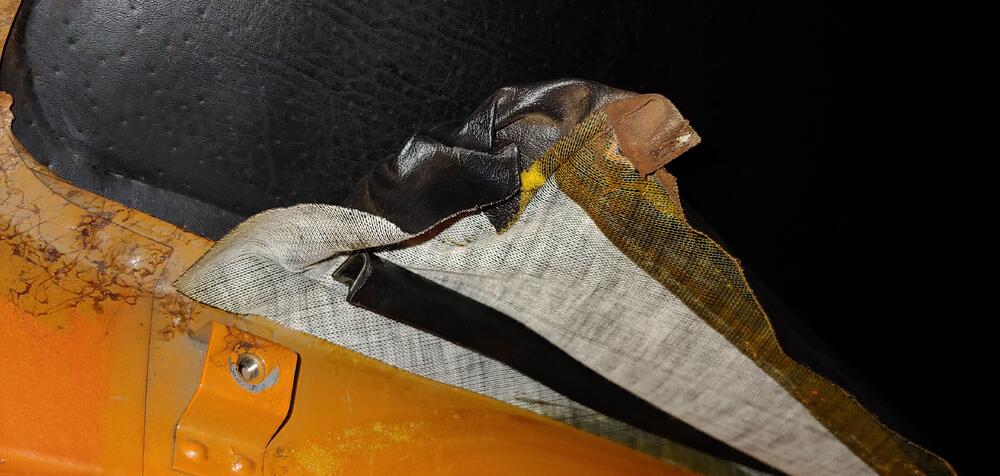
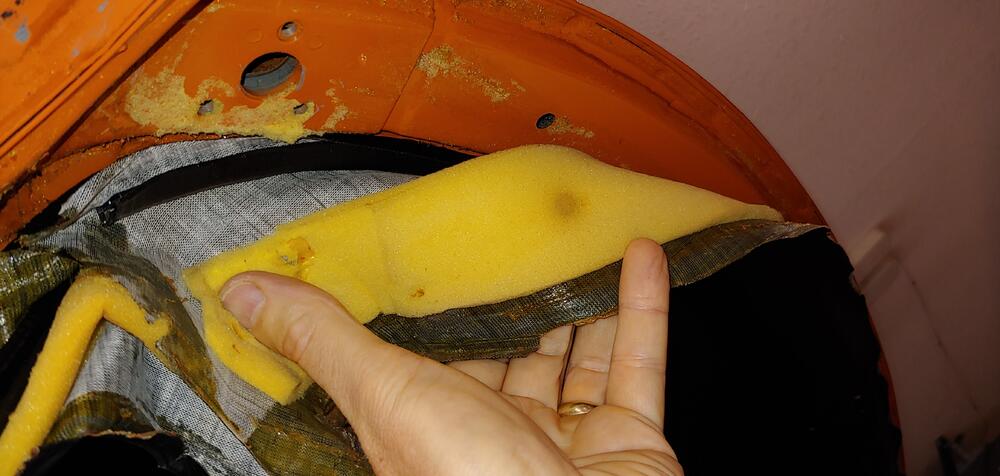
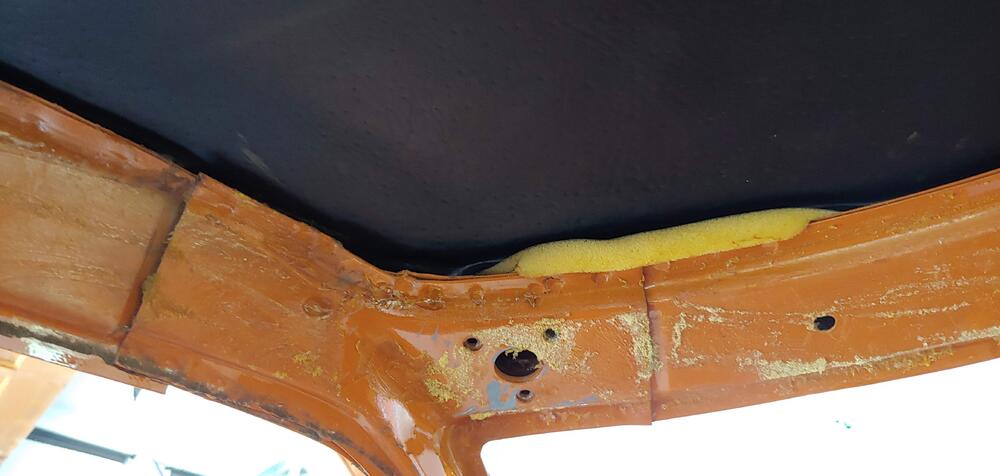
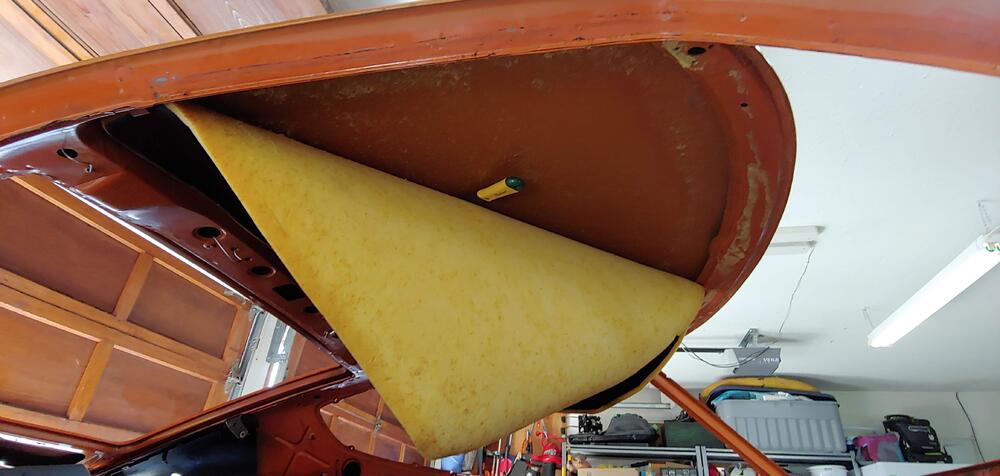
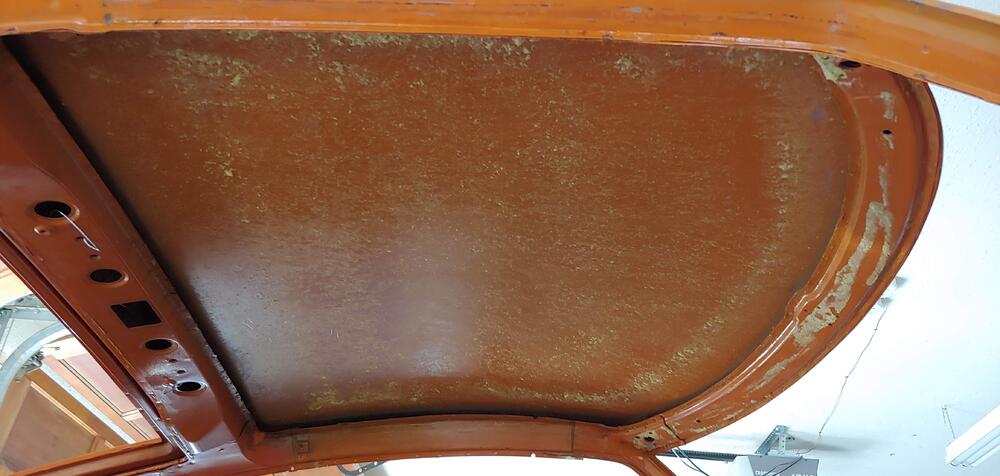
1 pointThis weekend I removed the headliner and surrounding padded vinyl trim and A-pillar trim. I had a little anxiety about doing this as they are are in very good shape. Luckily all came out with no issues and will be reusable, including the foam padding. I took lots of pictures of the joint details to help when I reinstall. Here are some pictures of my process, the only tools I used were a 1.25" paint scraper with corners rounded off and an awl. I started at the lower end of the A-pillars and carefully peeled back the vinyl exposing the foam padding. In some areas I could do this with just my fingers and other areas I had to use the scrapper to break away the adhesive as I pulled. When I got to the vinyl over the door opening I used the awl to break the adhesive as space was limited. For most of the length the foam was glued at the edges to I had to go very slow using the scraper gently while keeping light tension on the foam. There is also U shaped welting that holds the vinyl to the roof frame that had to be pulled away. After removing the A-pillar and over the door opening trim I used the same process for over the windshield opening. For the headliner I found that there was no adhesive where it tucked into the roof frame but there was a very uniform coating of the adhesive on the rest. To get started I poked my little finger in to the hole for the LH visor mounting bracket pushing the unglued edge of the headliner and at the same time gently pushing inward with the fingers of my other hand until I had exposed the edge of the headliner foam. From there I could work the unglued edge out of the frame for the full perimeter. I freed the headliner using the scraper with a short jabbing motion, keeping light pressure on the roof and holding the headliner with light tension with my other hand. I had the scrapper at about a 30 to 45 degree angle to the roof while doing the scrapping. Using this technique very little of the foam was damaged. All in all it when quite smoothly and there was very little foam reside left on the steel. It was definitely worth taking my time to be able to salvage everything.


 1 point