Leaderboard
-

240ZBUILTBYME
Free Member7Points237Posts -


Zed Head
Free Member3Points18,796Posts -

Matthew Abate
Free Member3Points1,189Posts -

26th-Z
Free Member3Points5,239Posts
Popular Content
Showing content with the highest reputation on 05/09/2022 in all areas
-
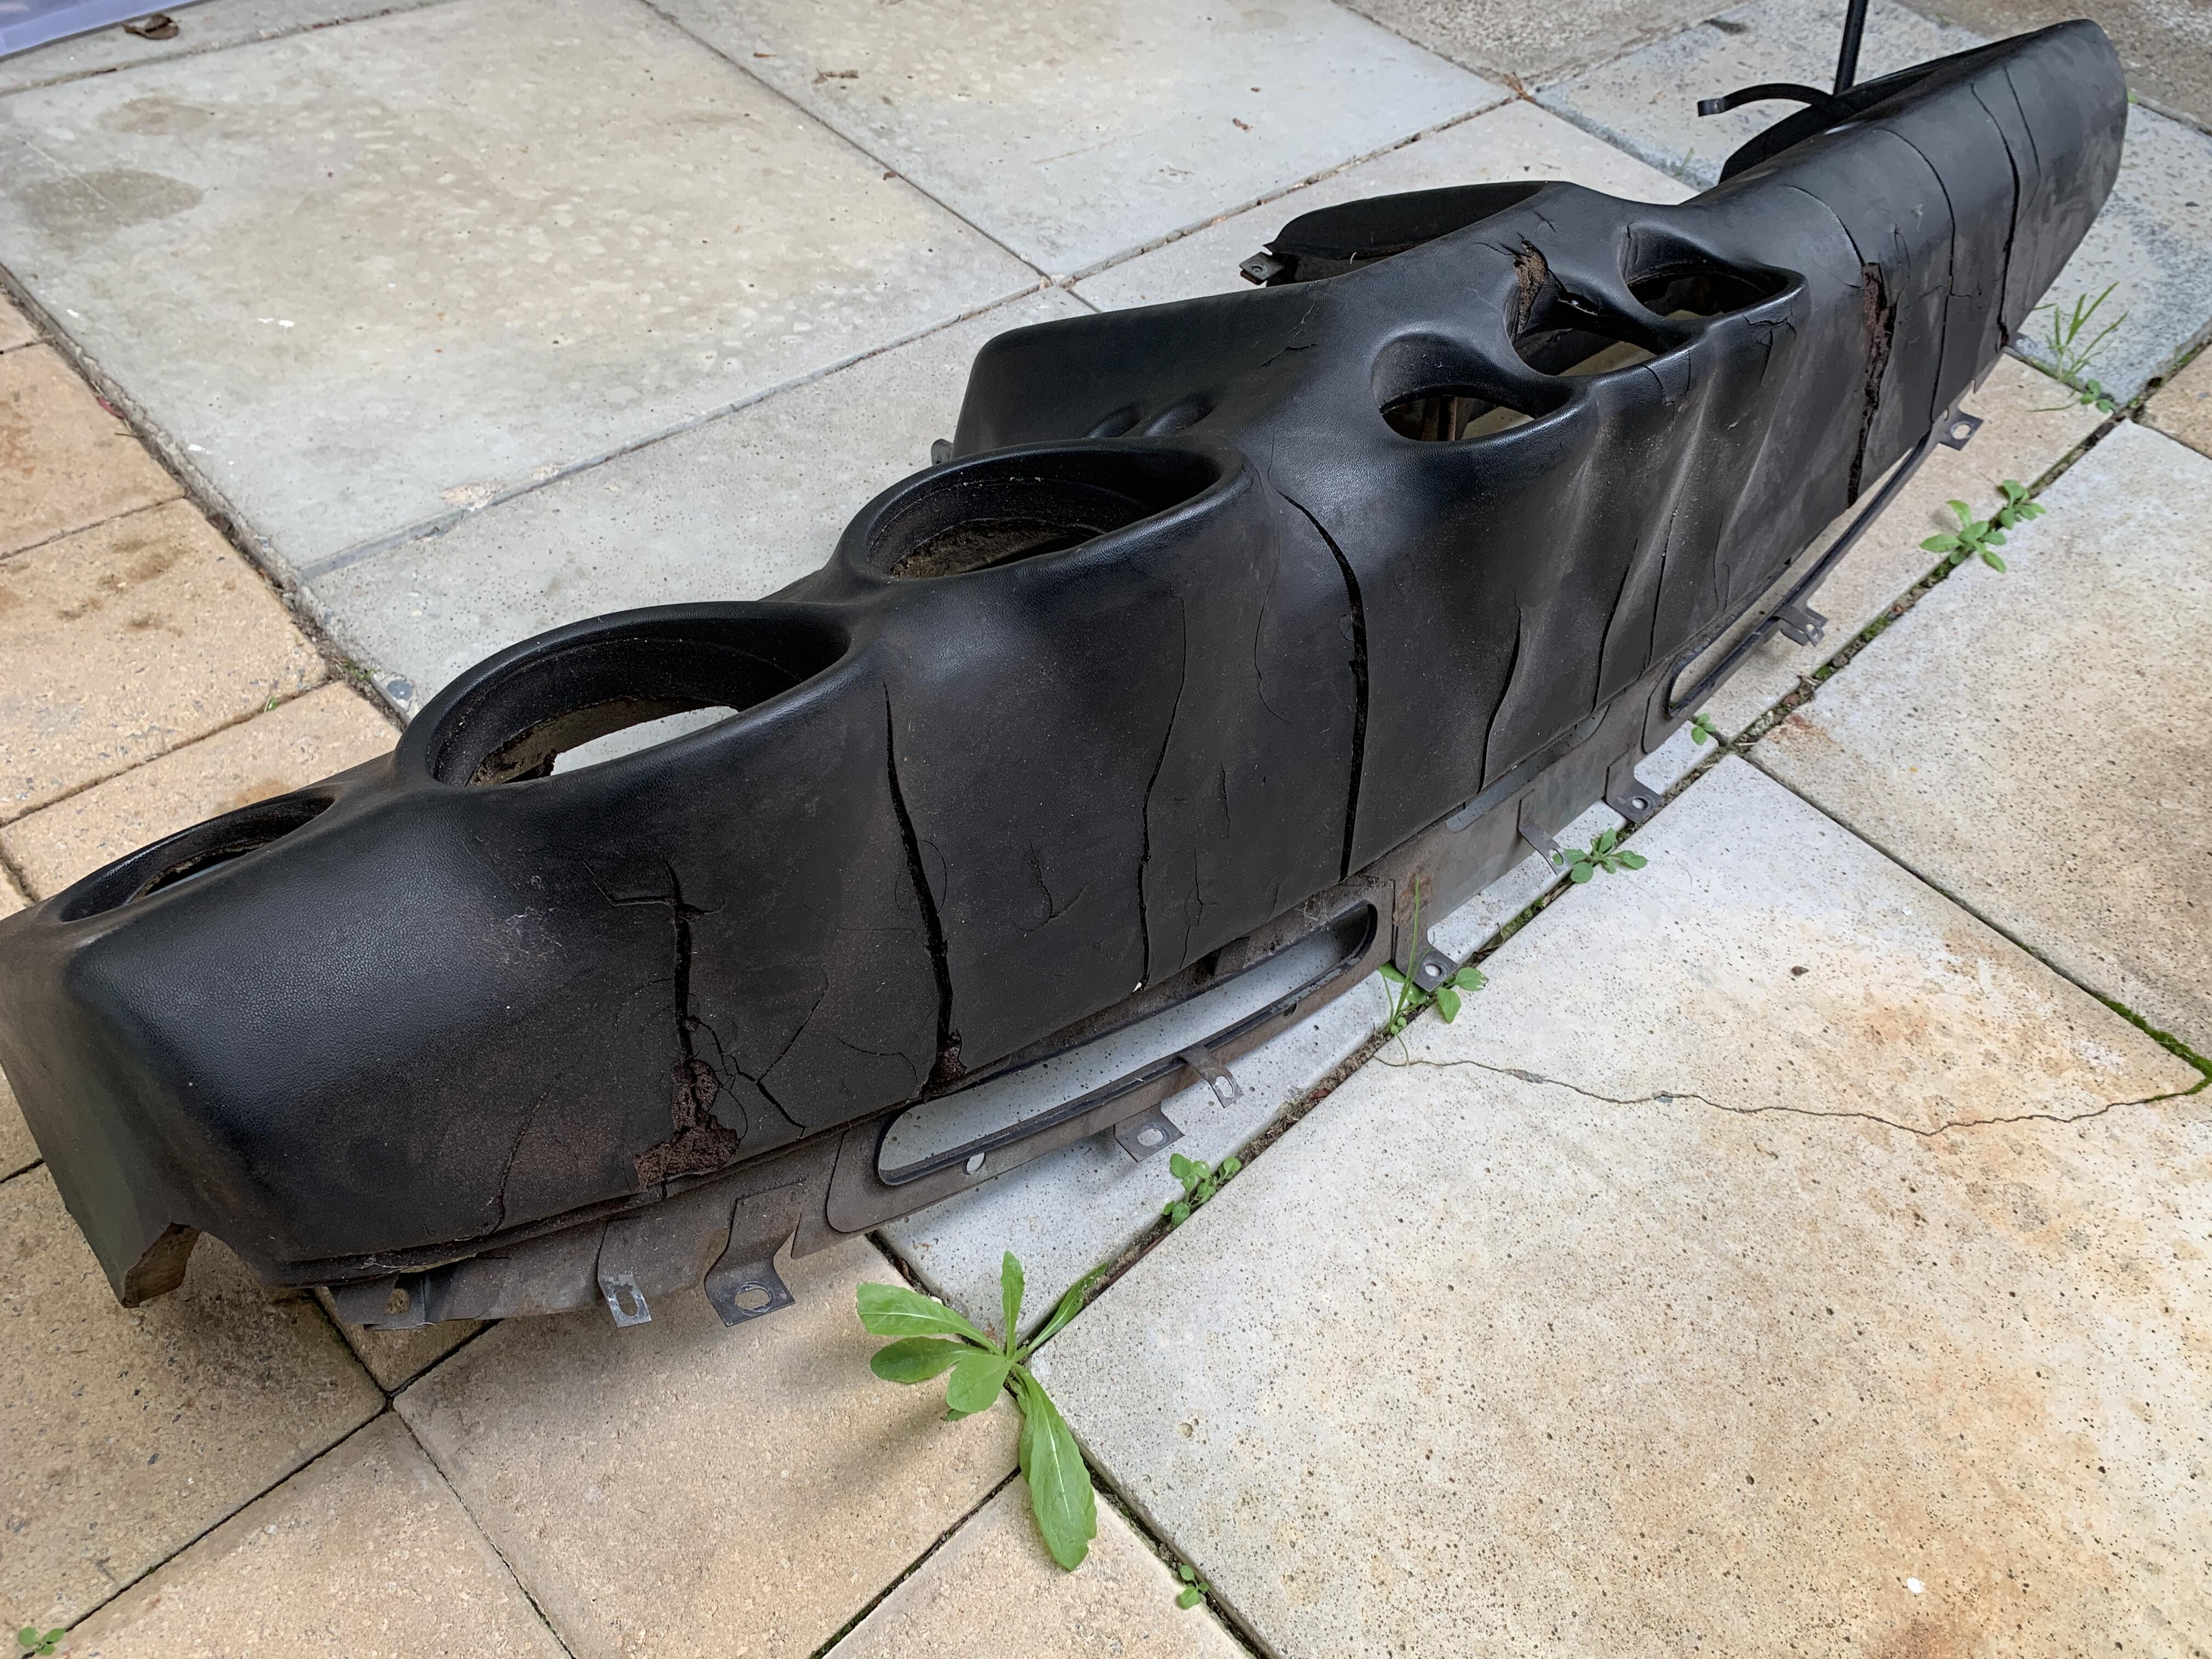
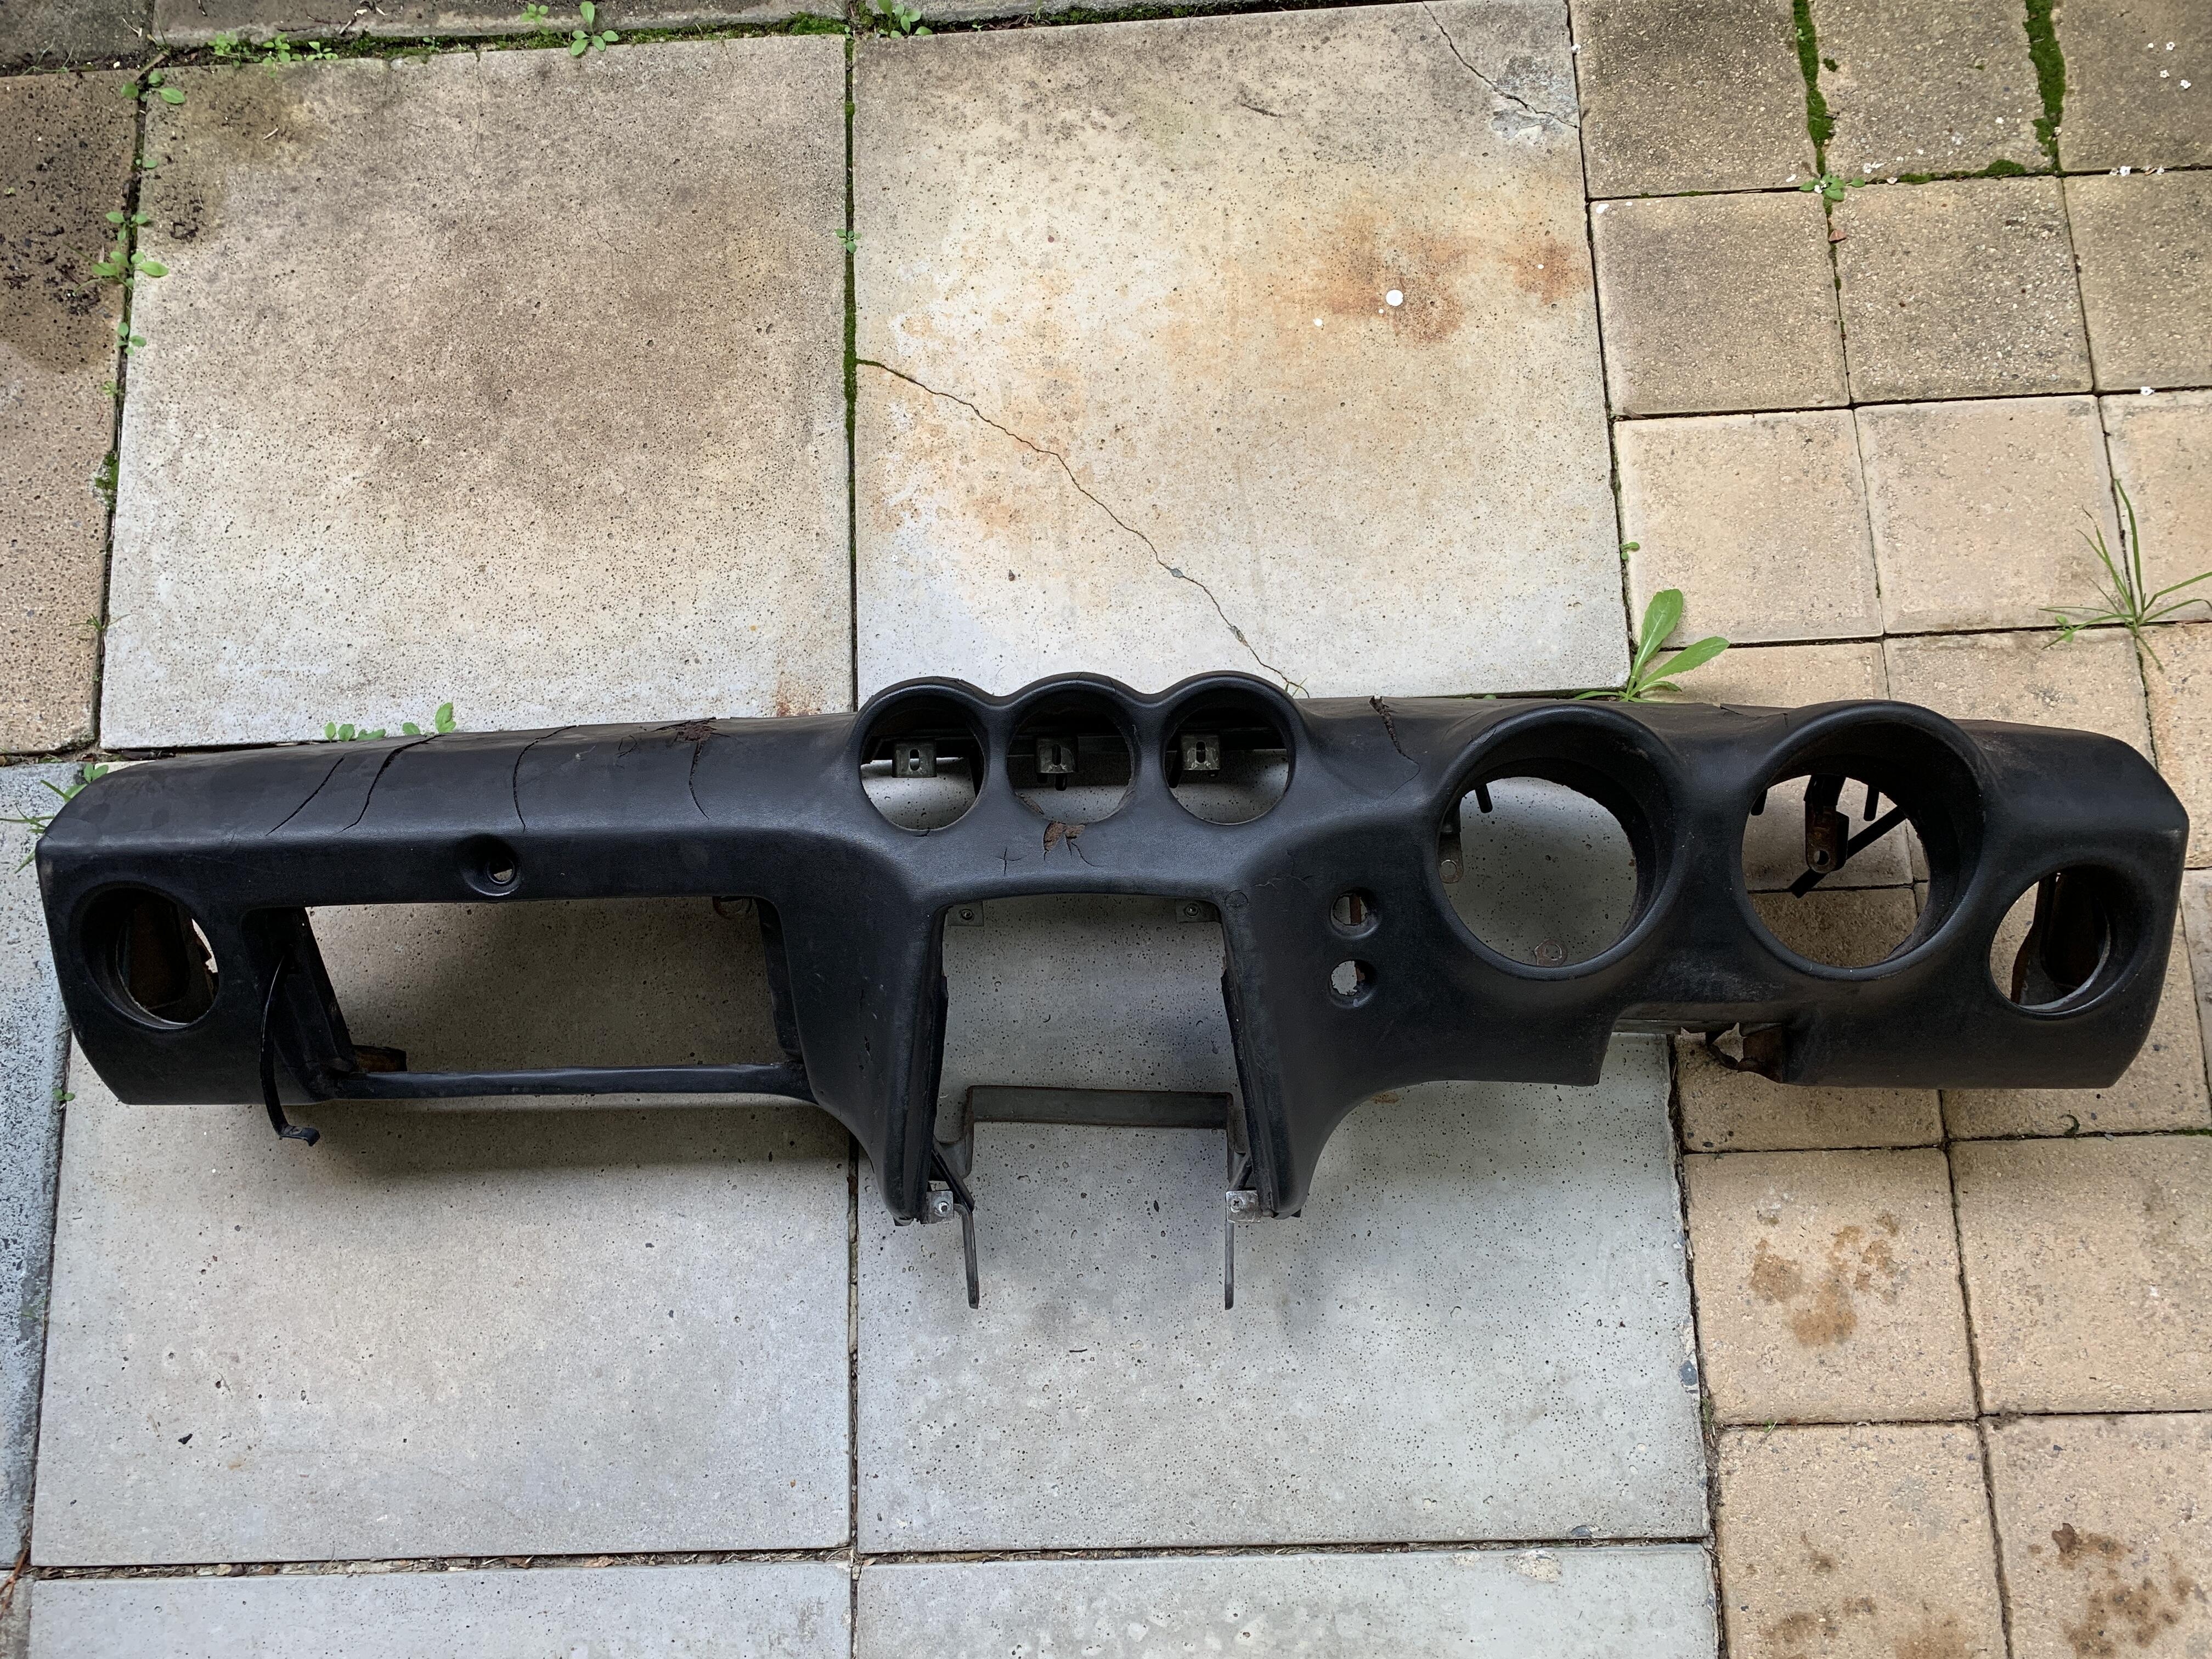
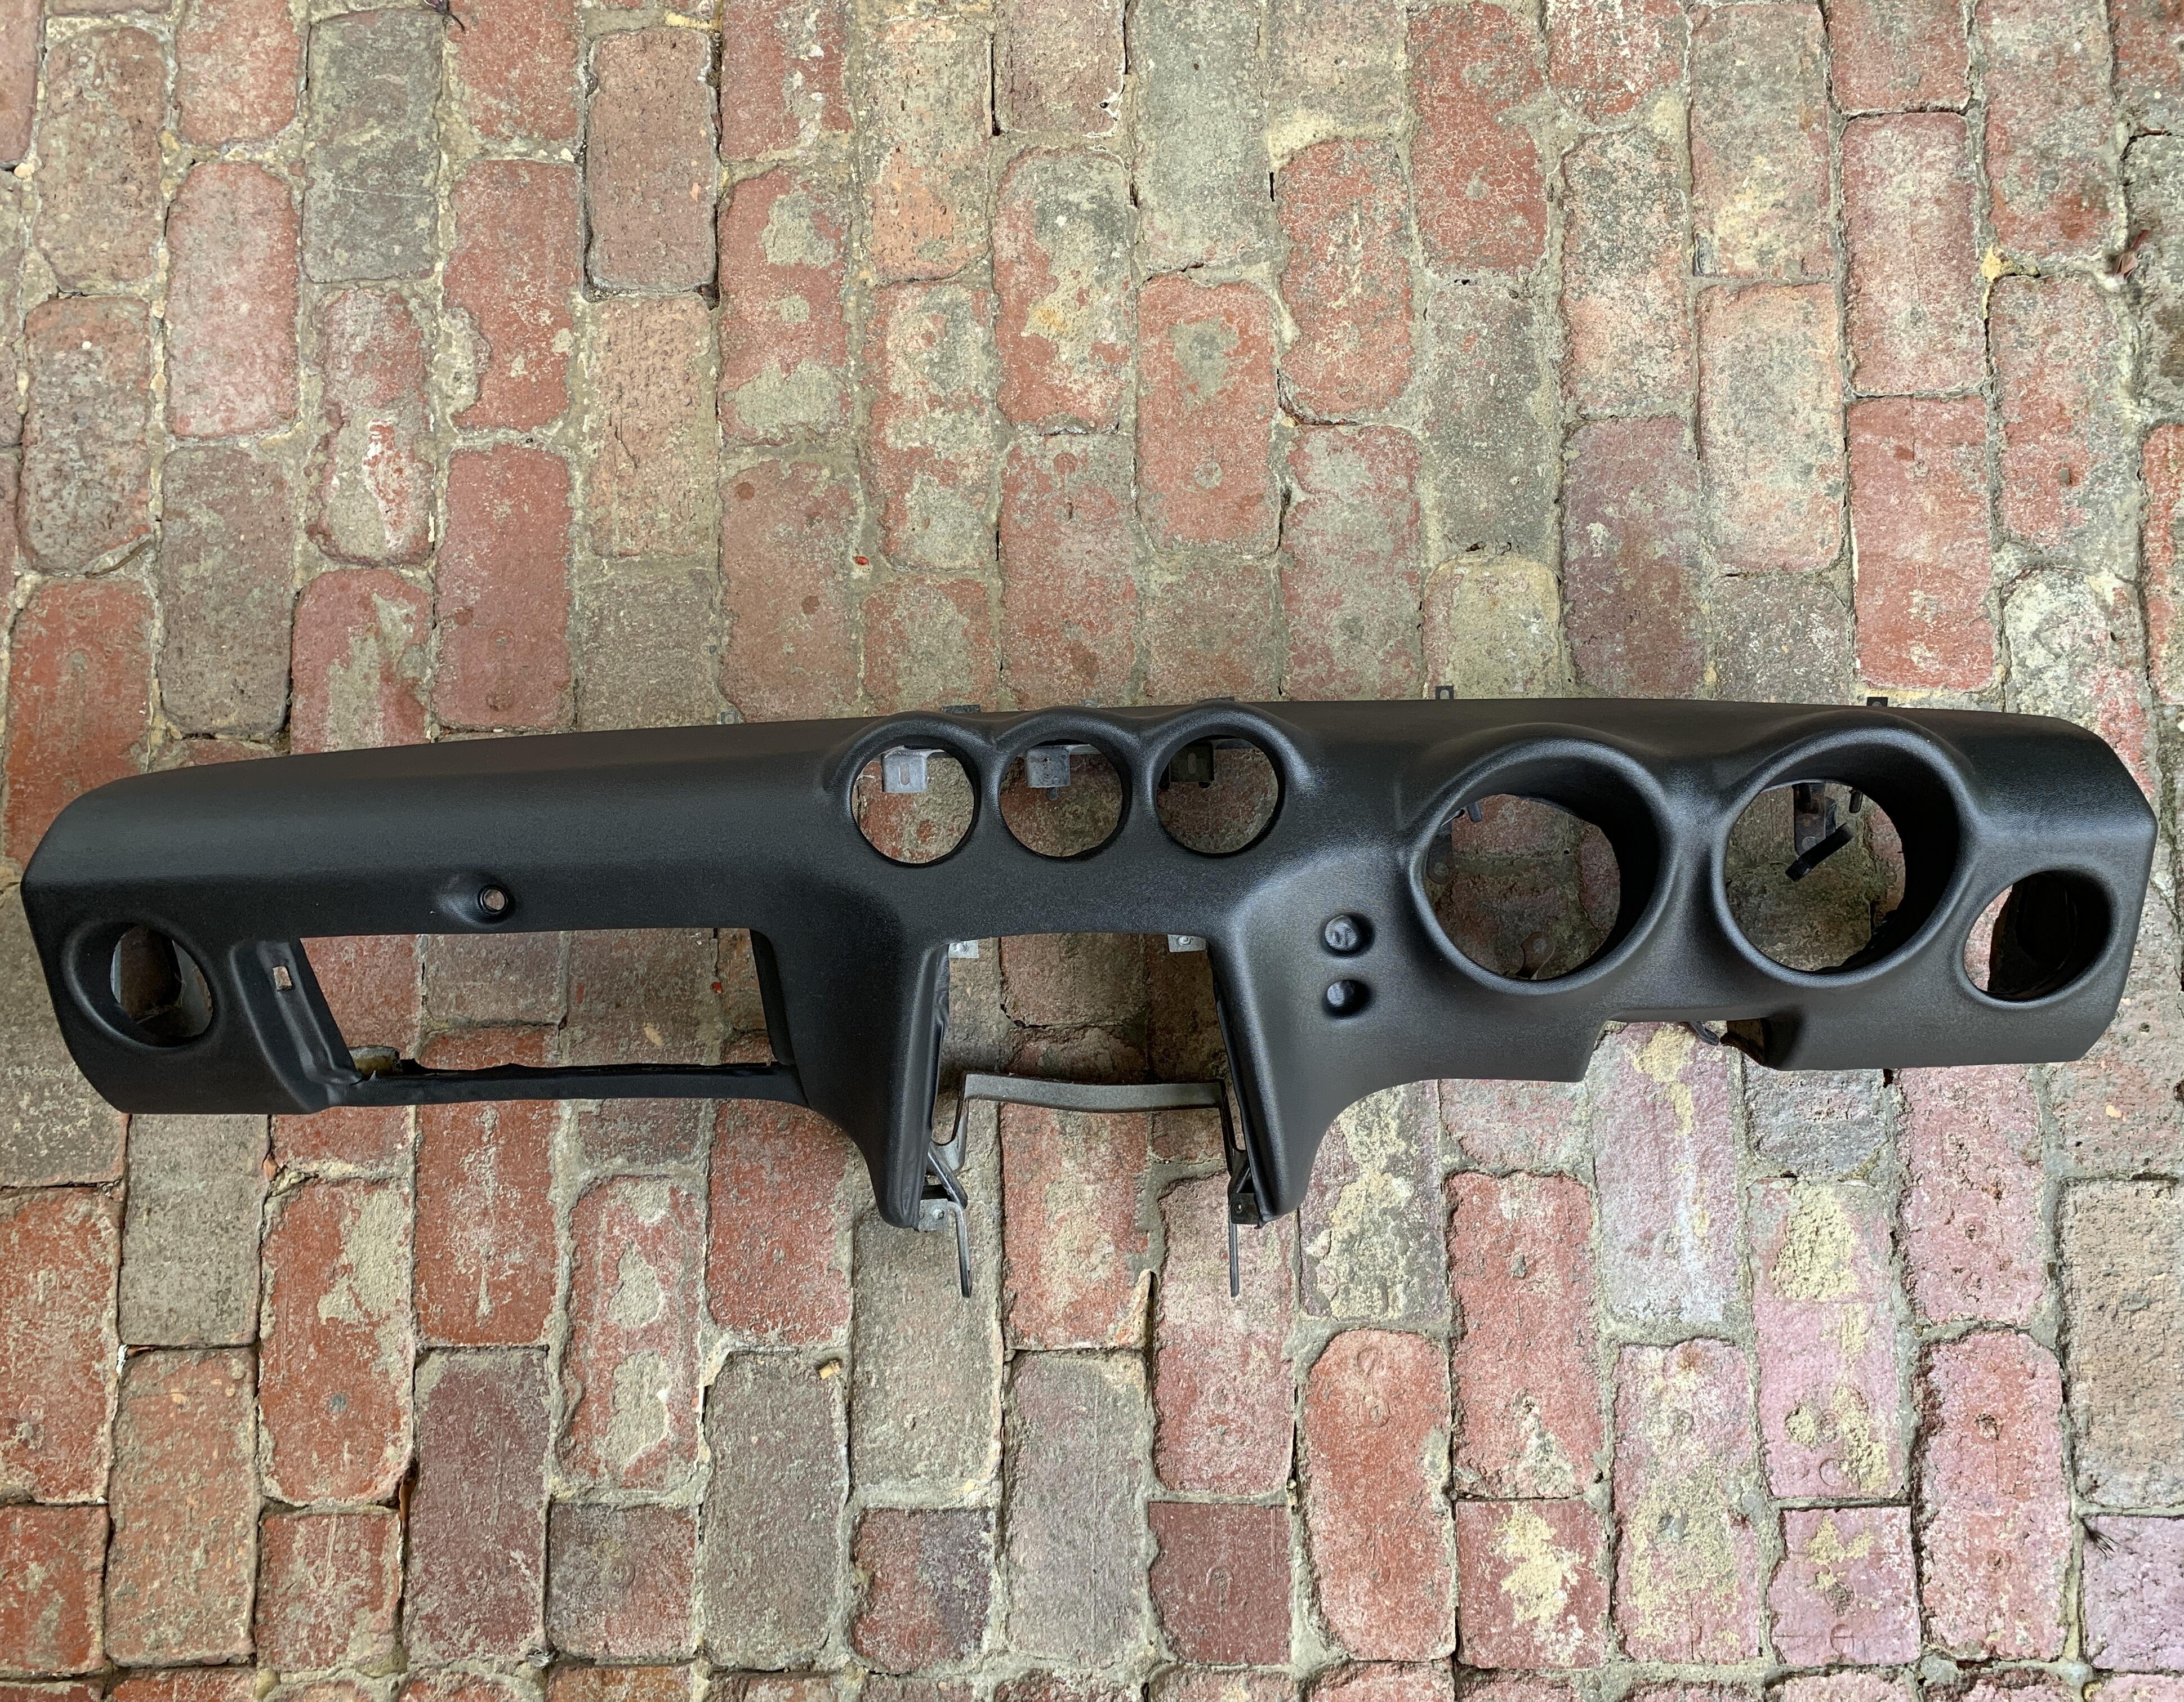
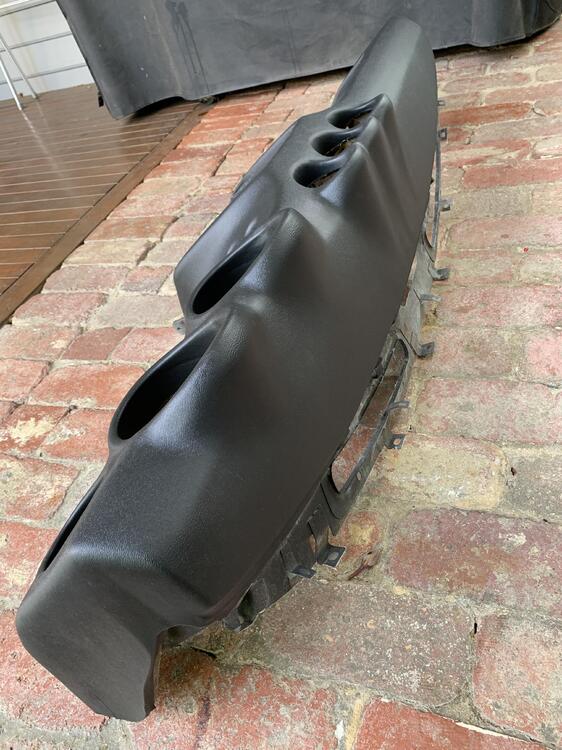
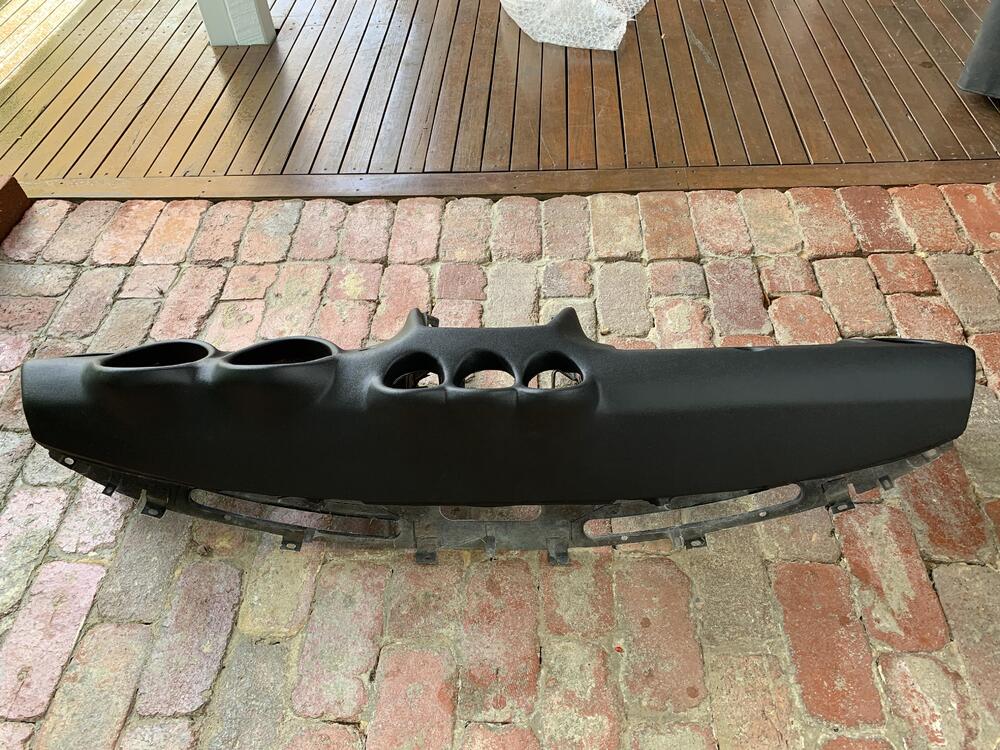
So got the dash back from reskinning, what an awesome job they did! Before: After:


 6 points
 -
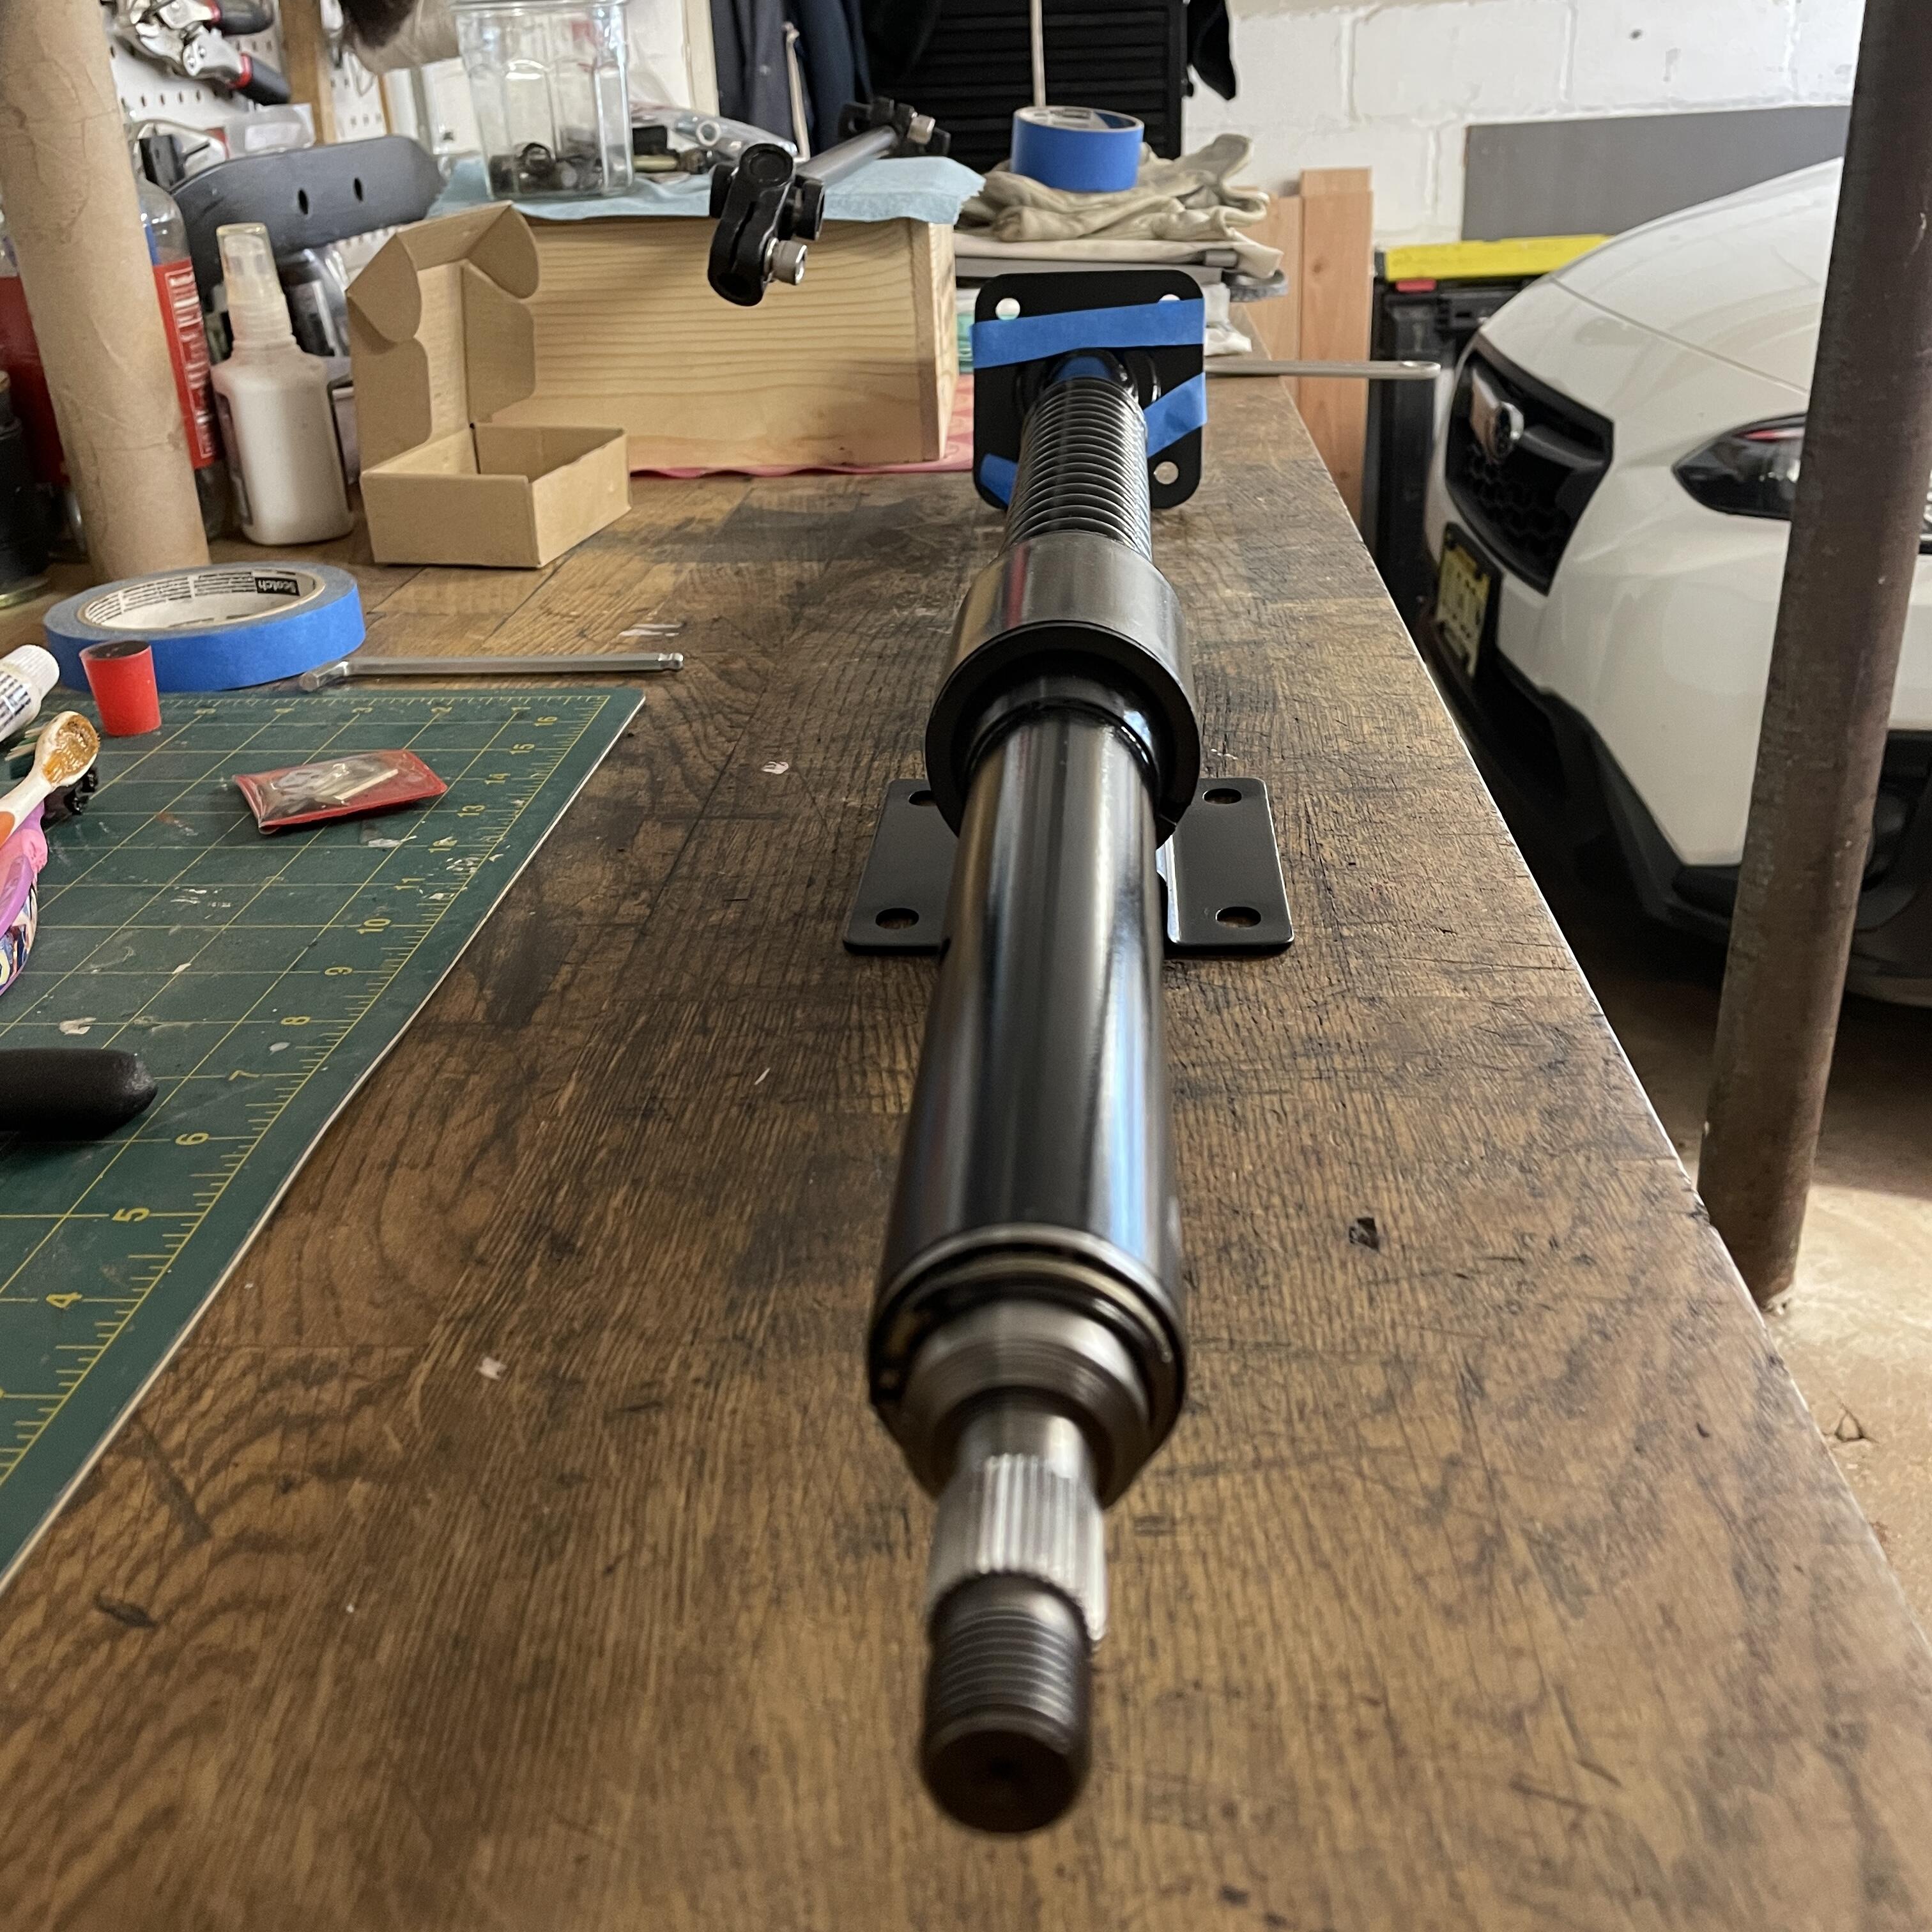
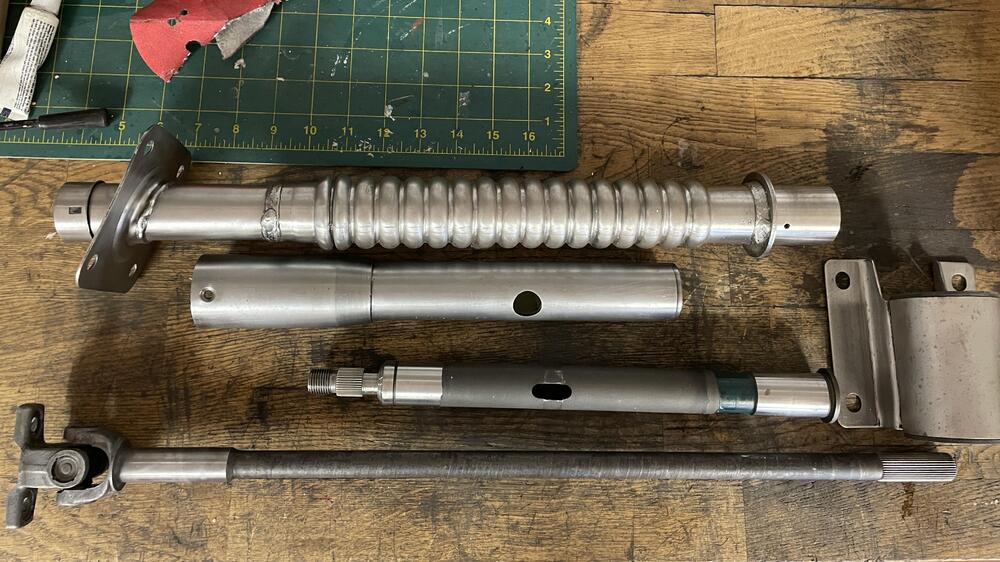
3 pointsBack together: I found this component to be a pretty simple refresh project… if you don’t try to pull the bearings or the plastic bushing out of the column as I’ve seen done in other threads. I used a variety of degreasing sprays, patience, time, and gravity to clear everything out. I think eight rounds and it was flushing out clean. Then repacked the bearings using more patience and a syringe full of grease. It took way too long but it worked. Primer and paint were harder given the poor weather in the north east over the last several weeks. It took a full week for each coat to completely cure. And that’s in the heated garage with a dehumidifier running 24/7. Hence the drawn out timing of this process.

 3 points
 -
 2 pointsAlso, you will have better success with the hose clamps if you use an actual JIS screwdriver!2 points
 -
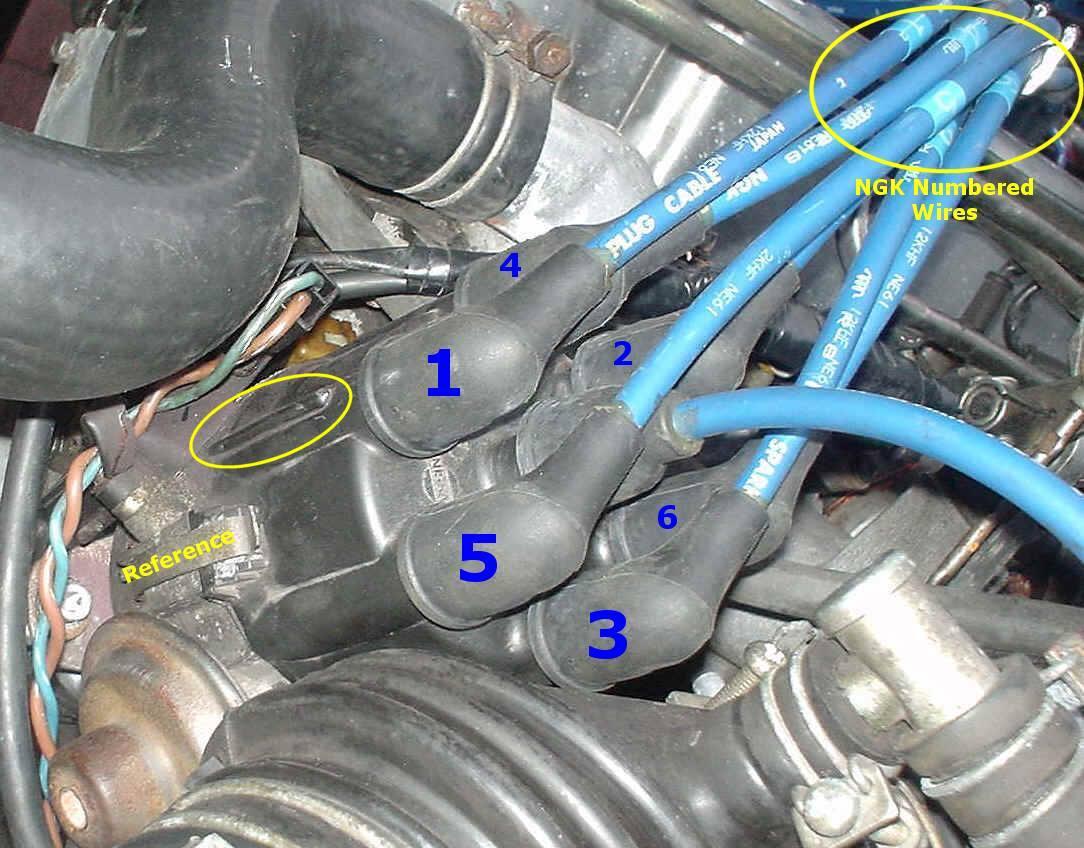
 2 pointsI guess I'm saying once the pump is installed and timed correctly at TDC the tang should be in the position on that pic. There's a fat side and a small side you need to keep in mind. Once the pump is timed correctly your distributor should fit in place with the rotor button on #1 that lines up with the raised line on the outside of the cap just above the front clip.
 2 points
 -
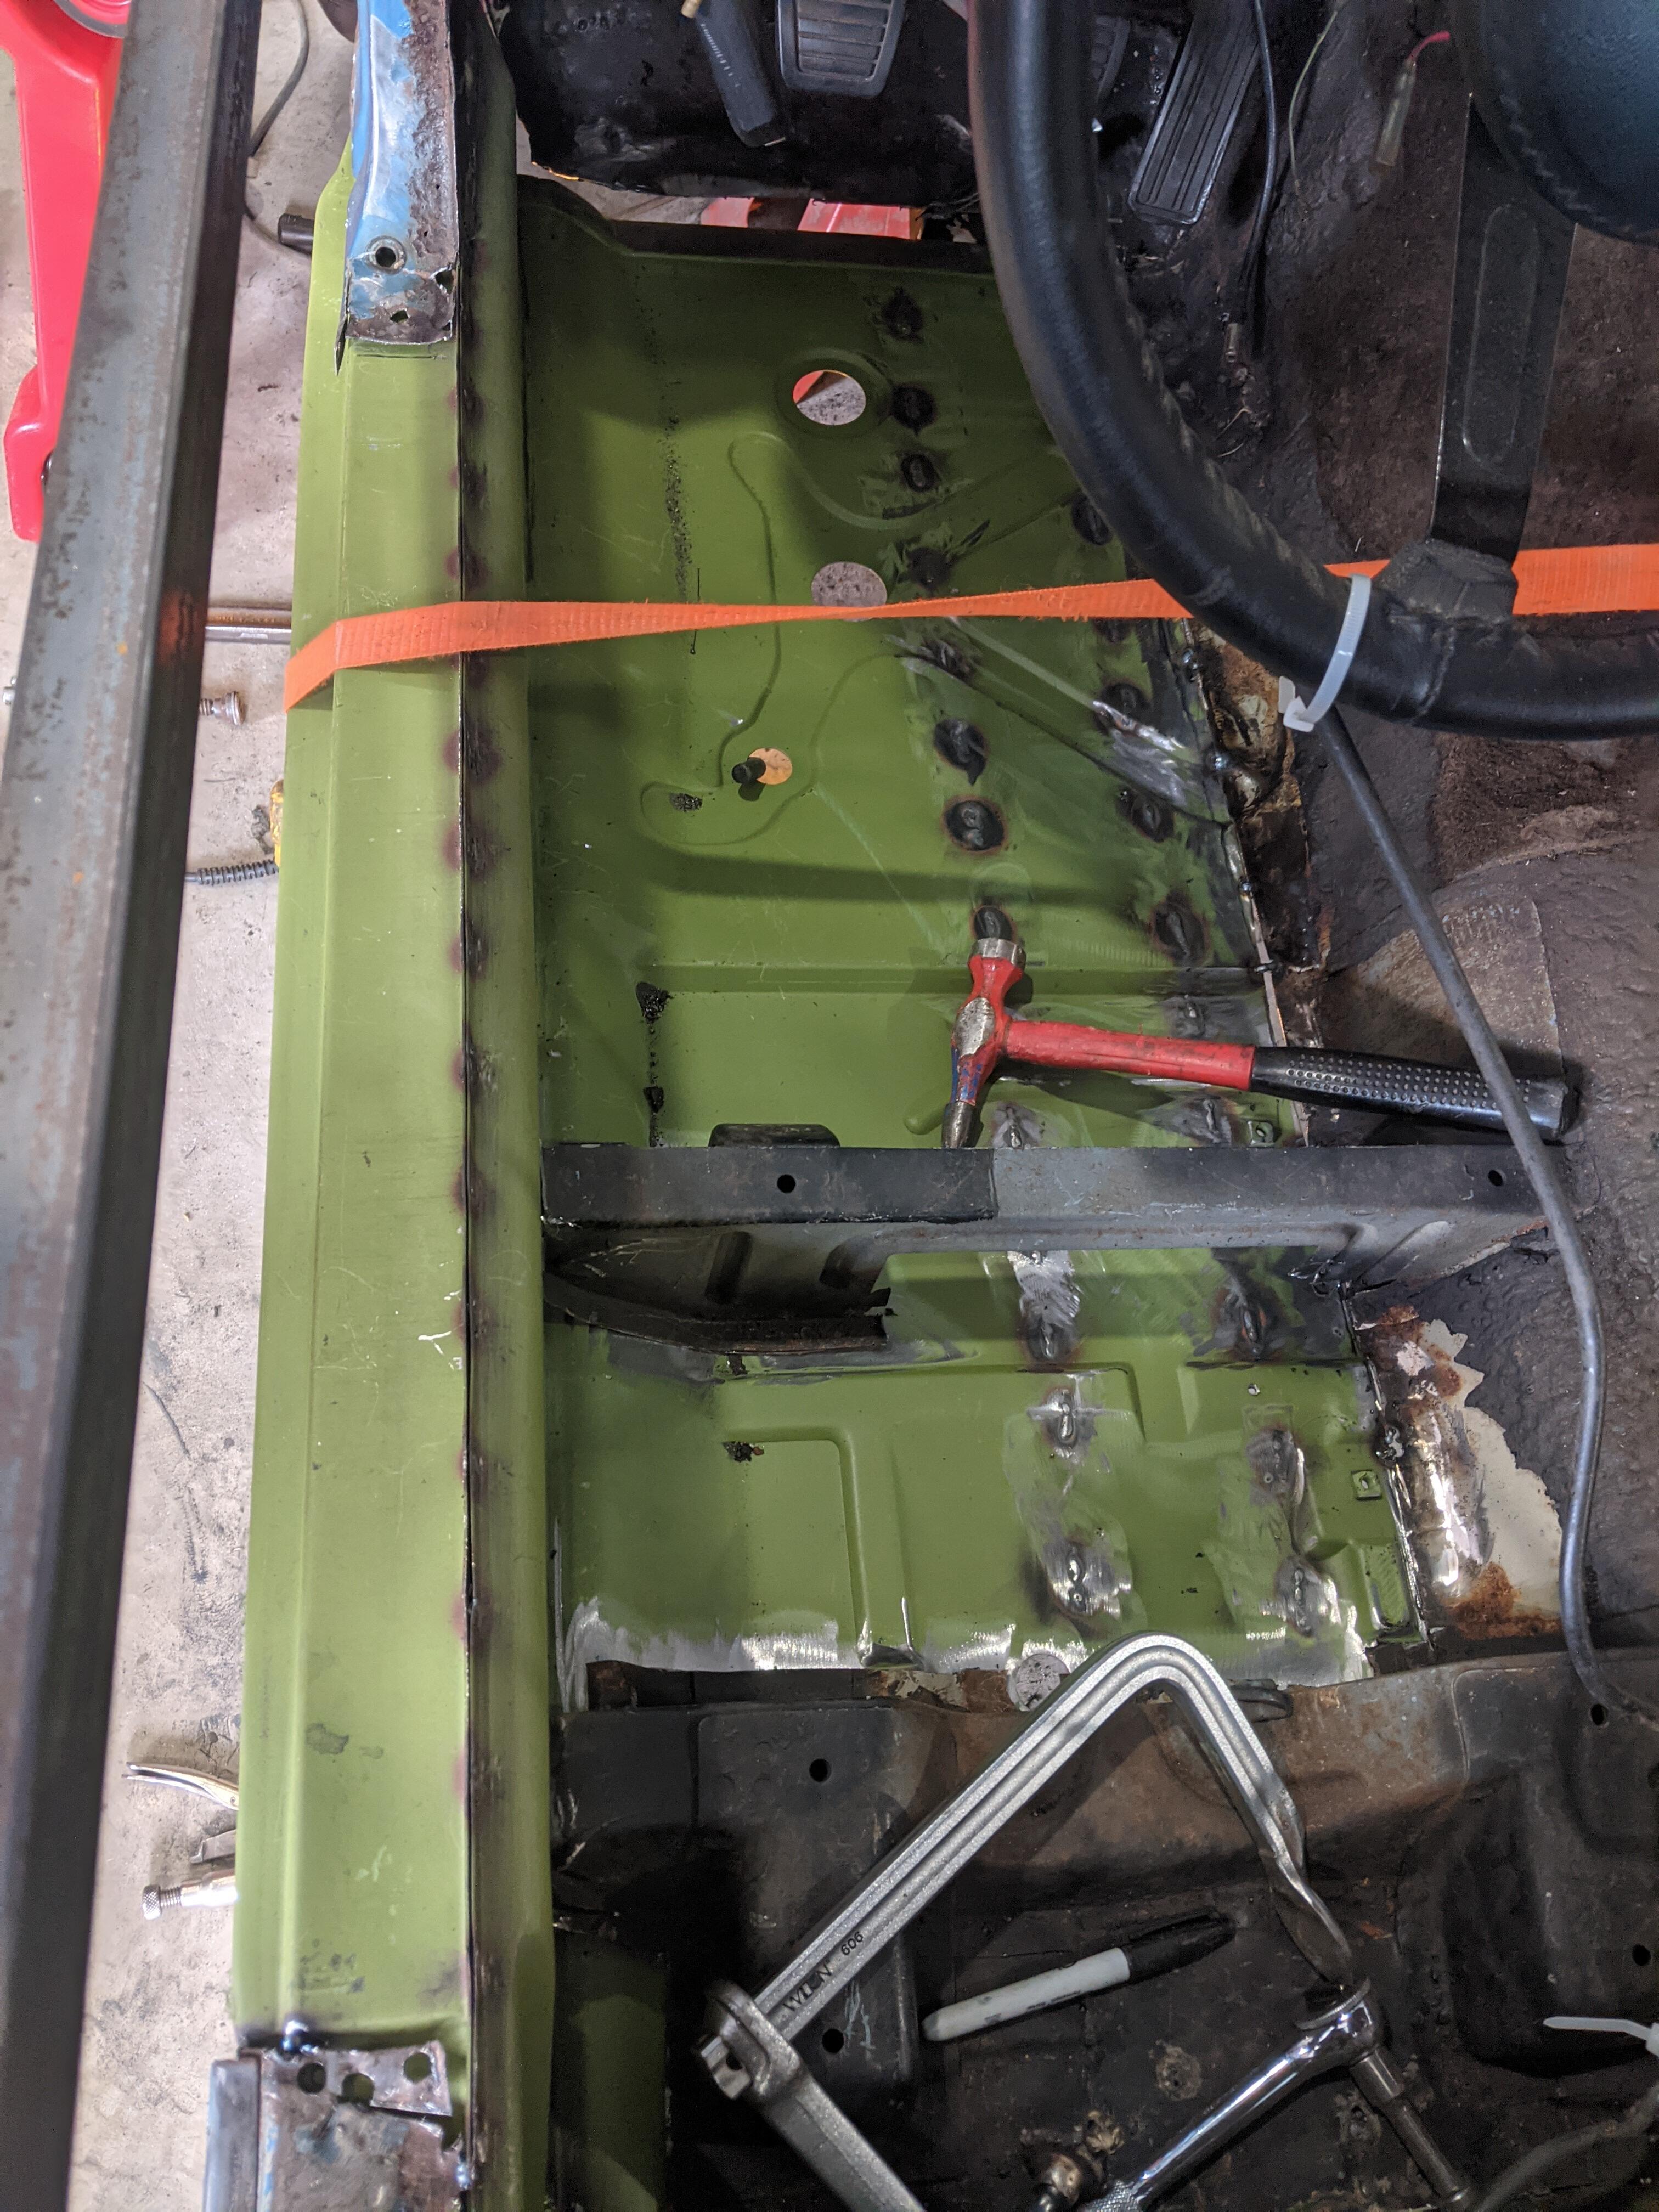
 In the middle of installing floors and rockers in my 280Z; their panels have been a great fit so far. Wish they made more areas on the car!
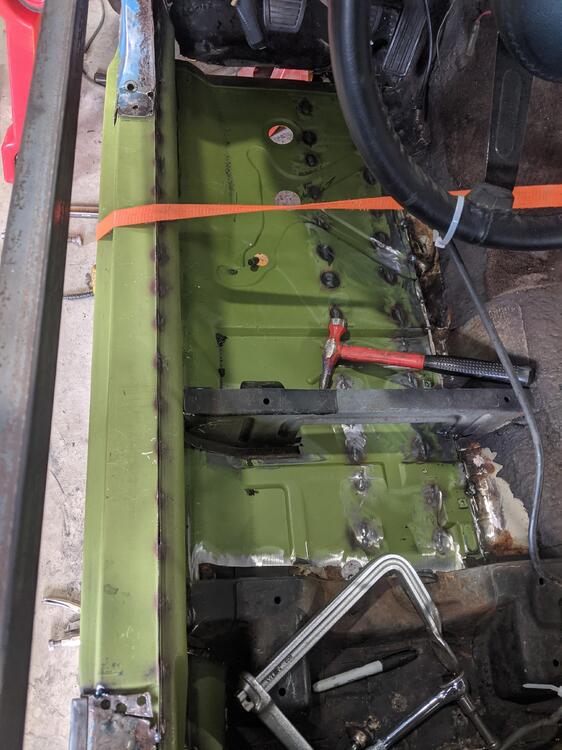 2 points
 -
 2 pointsProbably later. Either when the engine was complete and signed-off as OK, and/or when it was assigned to a destination/batch of cars. Factory replacement/motorsport L24 blocks were supplied machined, but without an engine number. Seems to indicate the above. No real surprise that engine block casting dates/batches didn't match up with assigned engine numbers in a completely linear fashion. Stack up a rack of block castings and they could get mixed fairly thoroughly as they passed through the stages of being cleaned, machined and built up into complete engines. Last on the rack, first off the rack etc. All coming out in the wash over a certain time period. I wouldn't expect very many "Oh! I just found one down the back of the shelf" type scenes. Batch/shift number I should think? Not enough letters seen for them to be days. Too many to be weeks of the month. QC would want a trace line to help isolate any problem batches.
 2 points
 -
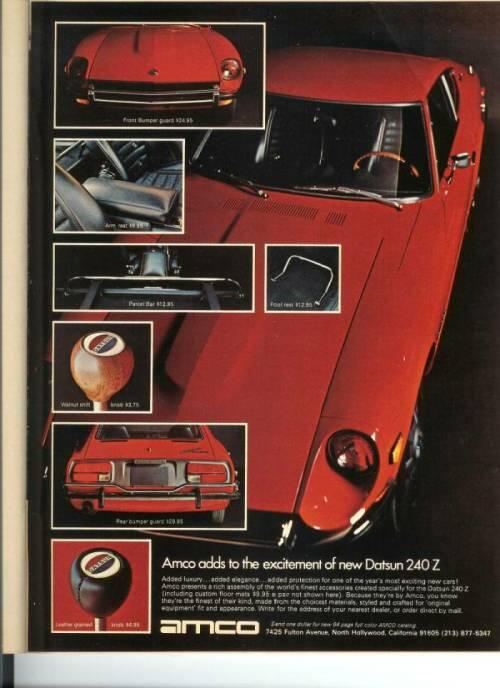
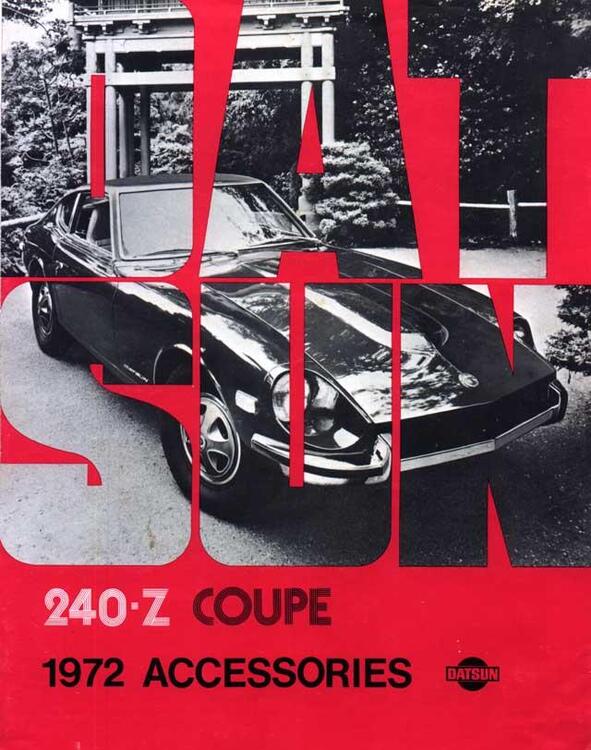
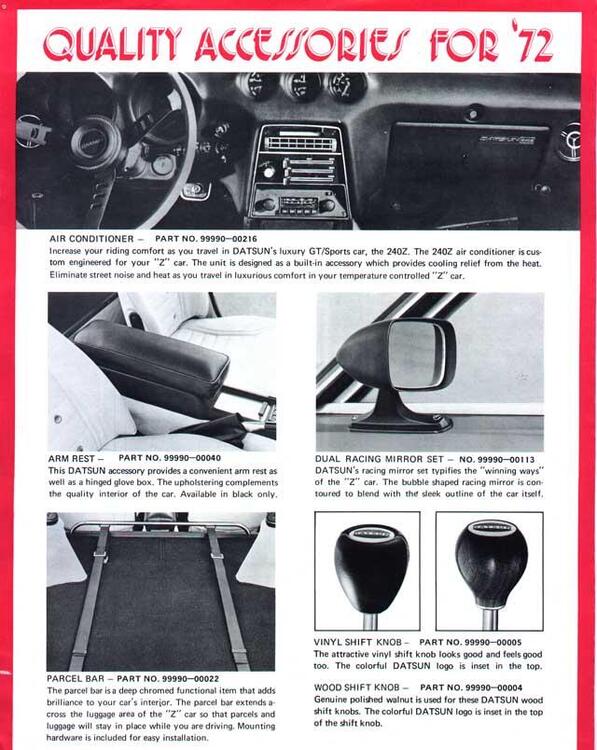
I have the AMCO front and rear bars which I bought used, years ago. At one time, I was thinking of mounting them, but they will go separately with 27th if and when I sell her. I actually have a bunch of AMCO stuff. Attached ad for the Z. I'm also attaching the 1972 Datsun options brochure for comparison. The interior luggage bar is going in 26th. My thoughts about the bumper bars are like those of front spoilers; just another thing out there to get bent. The AMCO bars really don't protect anything and will damage the bumper itself when it gets hit. They DO look great, though, that 'touring luxury' sort of look. Every installation of the front bar that I have seen is over the rubber strip with chromed, slotted cap screws with a nut and washer inside. I guess, that if you use the hole in the upright for the top flange bar mount, you would have to take the screw out of the rubber strip. You're going to have to drill the upright for the lower flange anyhow. Last, but not least, I have a proper hood that I would sell if you're interested.
 1 point
 -
 Some used options.....
 1 point
 -
You might have saved some money then. Do you have a meter or test light and know how to use them? It's pretty hard to get by on a 280Z or even a 240Z without that ability. The parts cannon is not a precise weapon.1 point
-
1 pointActually, per Cliff/siteunseen's response, the answer is "undefined". "Distributor alignment" doesn't mean much. But Cliff's answer has what you need.1 point
-
 Yes, it is some of the benefit from my car being from AZ originally and kept in a garage in CO for 28 years after that which allowed my clips to survive. Some clips are available in the aftermarket - just fyi as options: Ebay auction 6 for $32.95 and free shipping Vintage Rubber $35 for 12 of them if the page will load for you (it was not fully for me) Datsun Garage (or sub-vendor) $6 something each1 point
 -
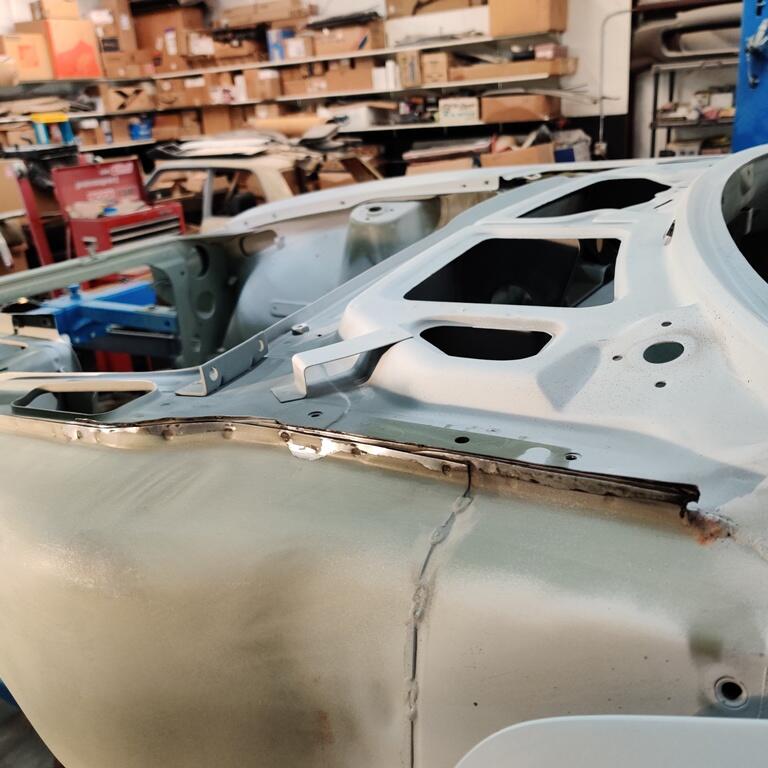
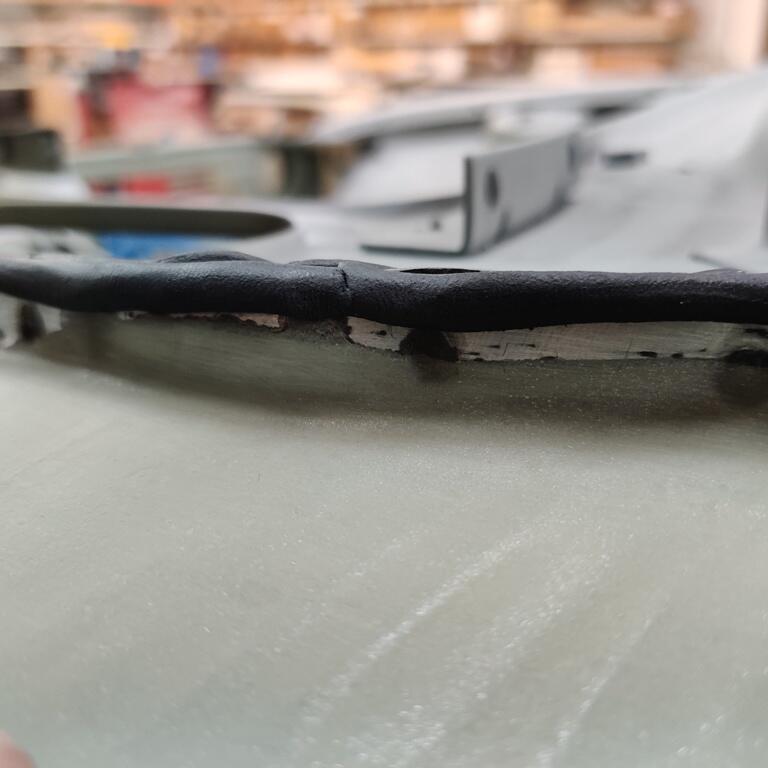
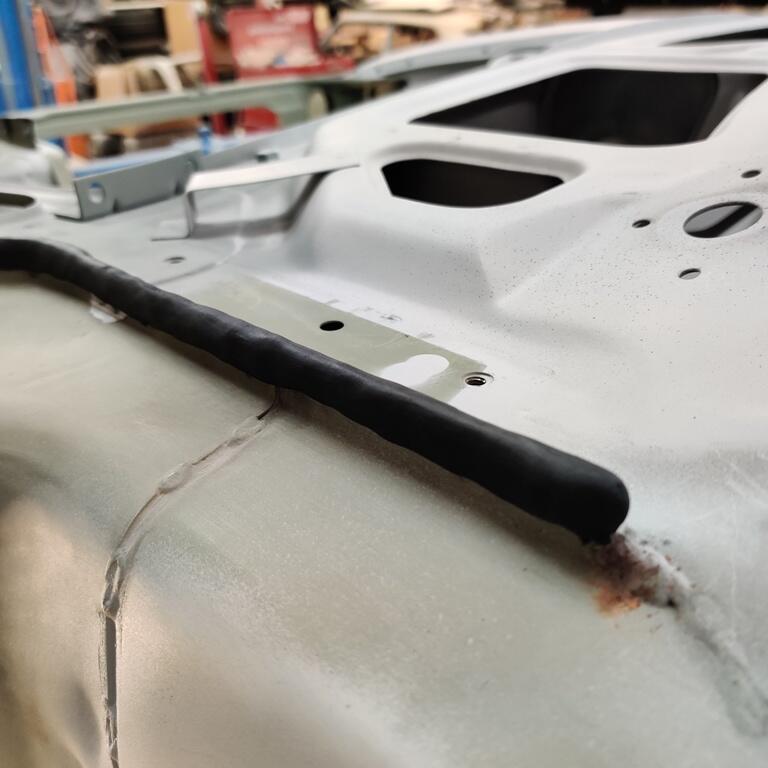
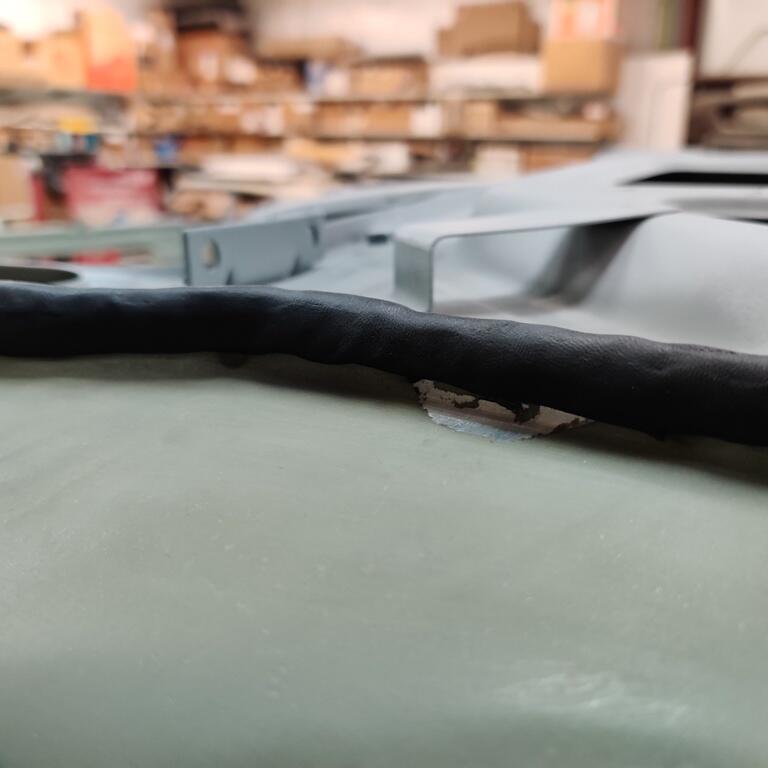
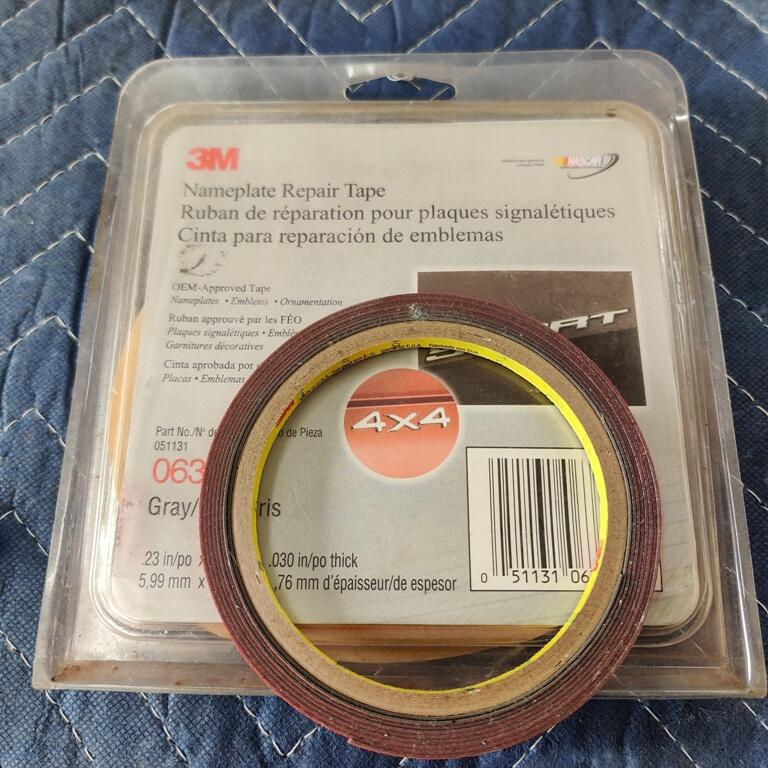
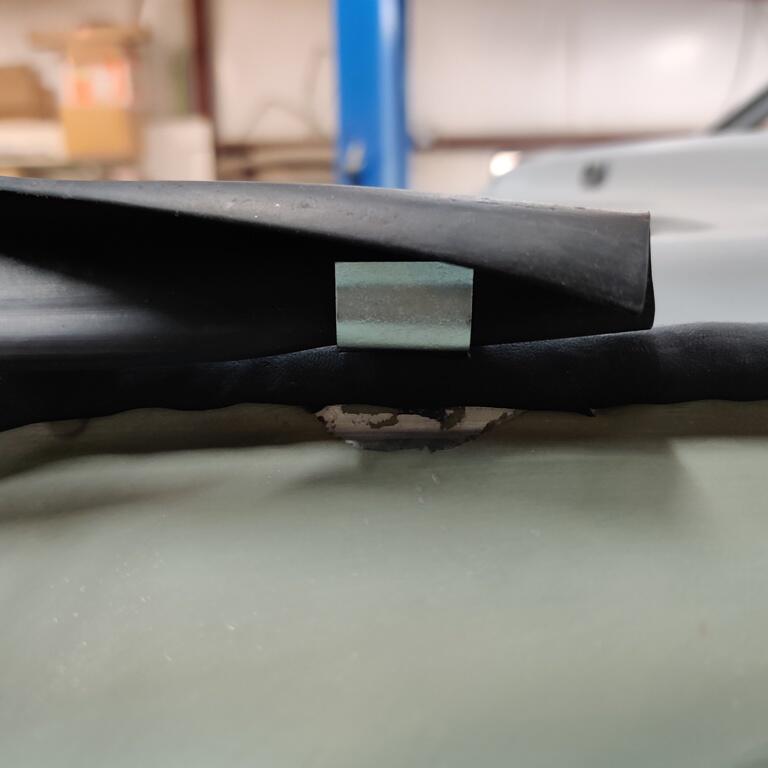
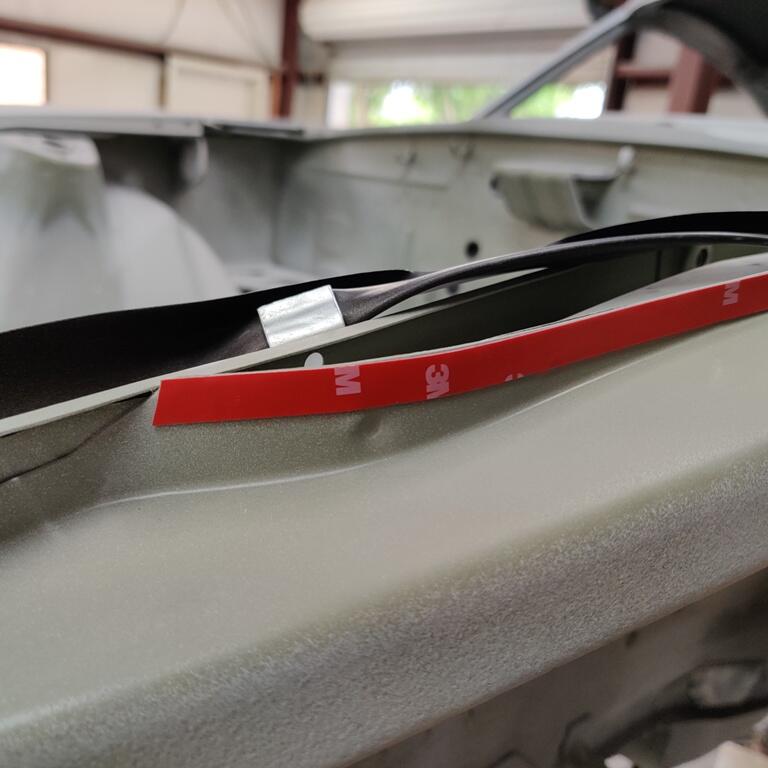
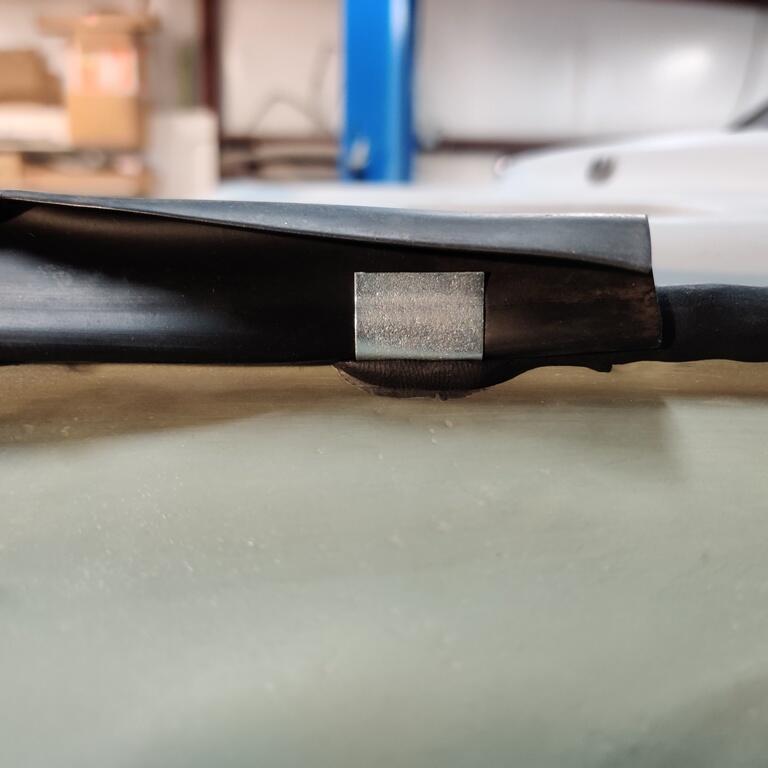
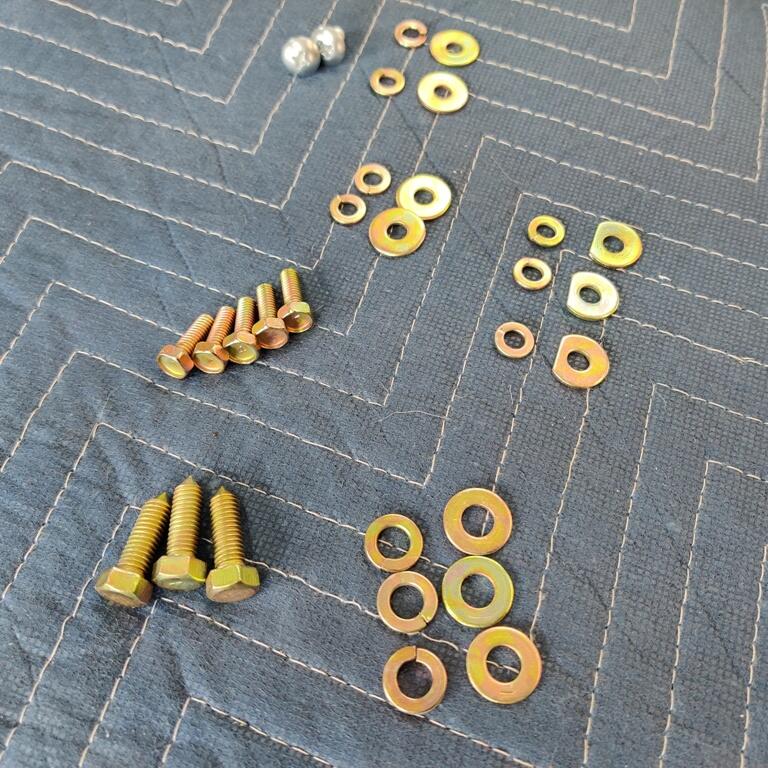
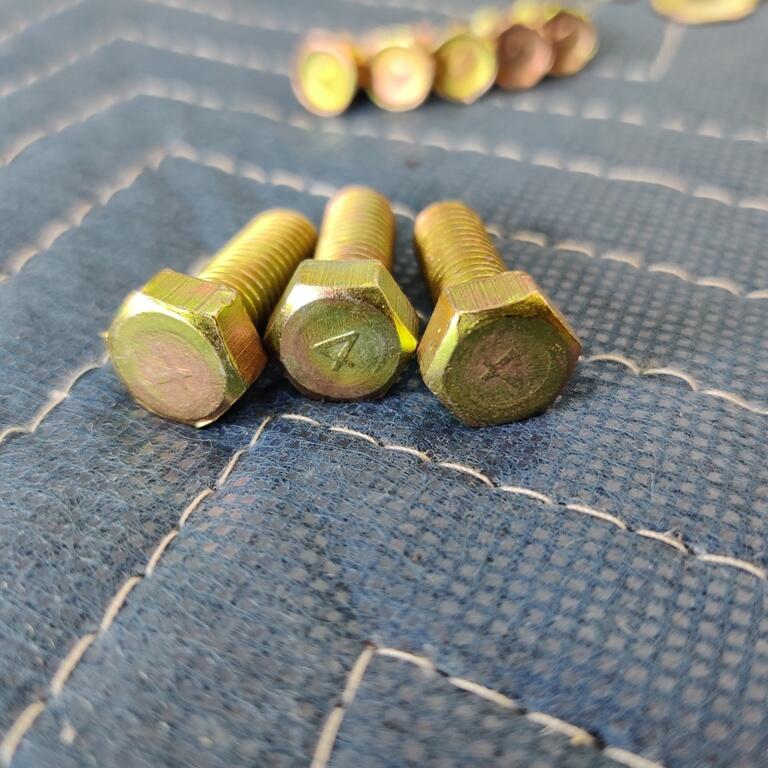
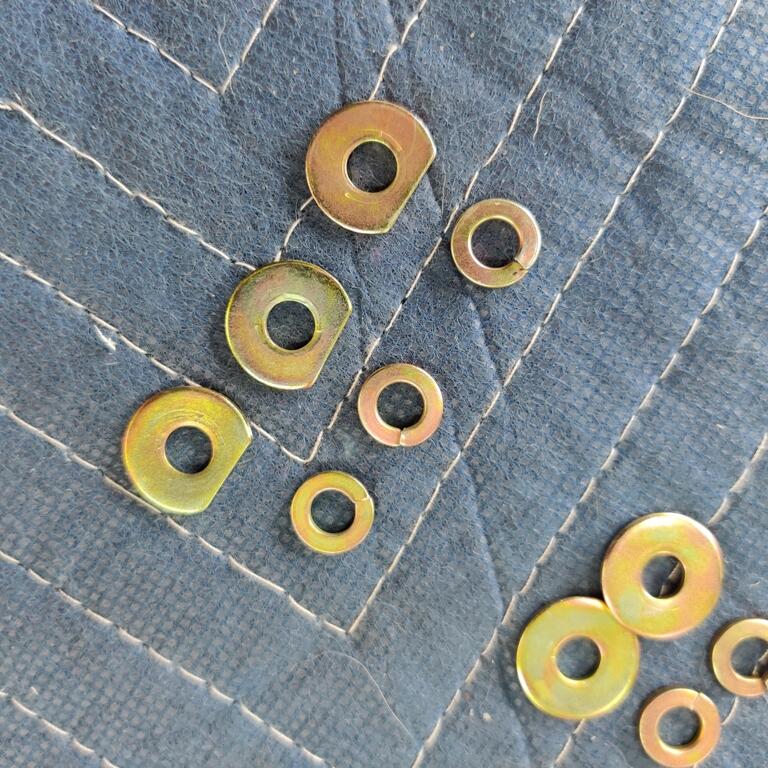
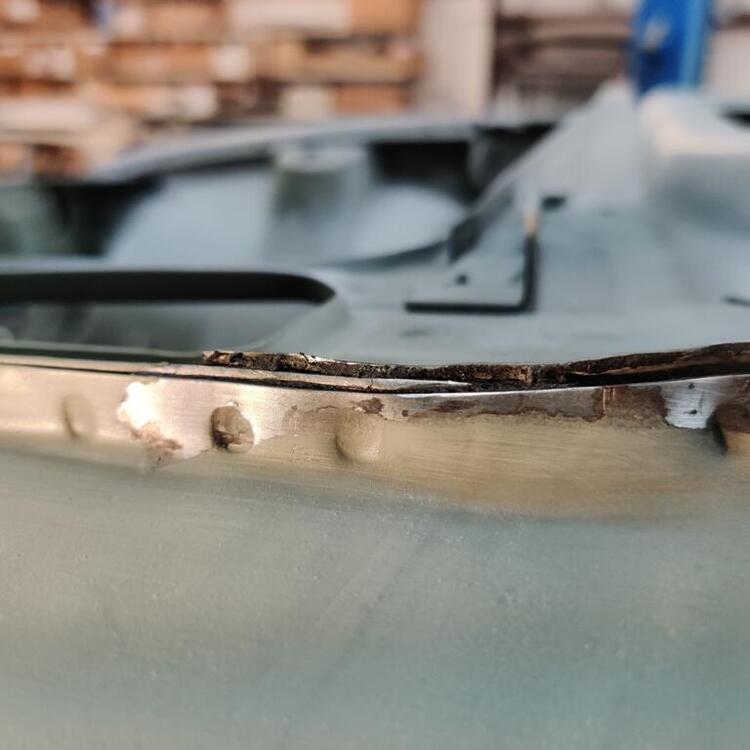
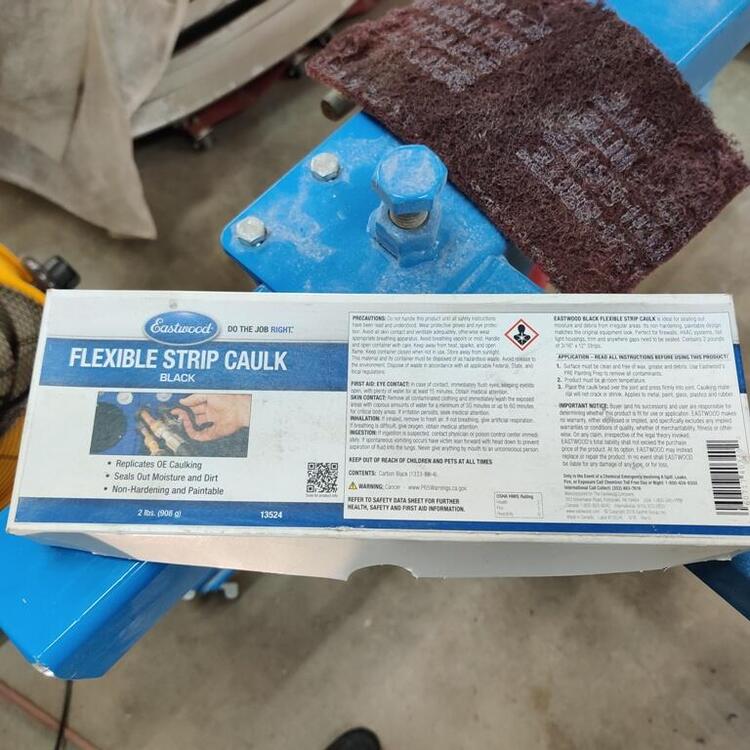
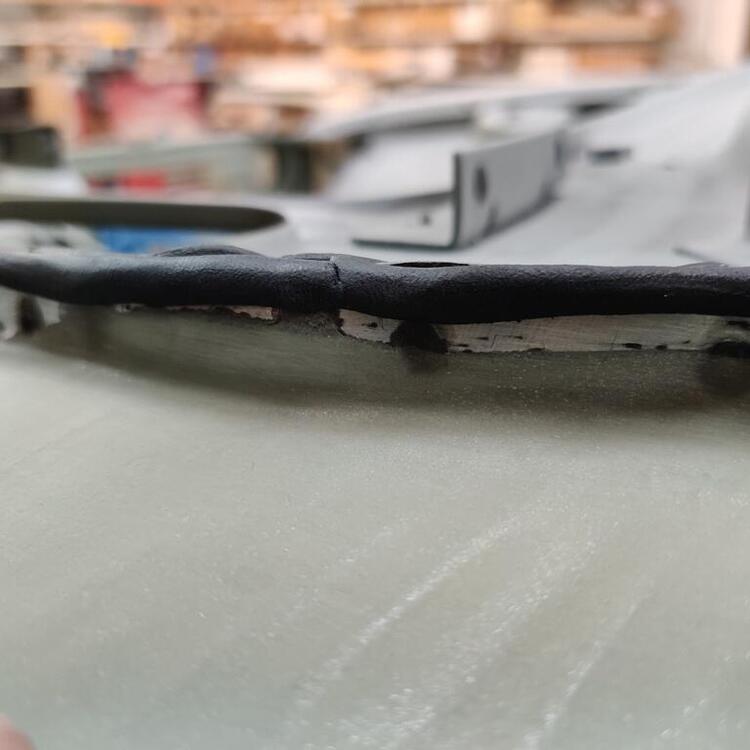
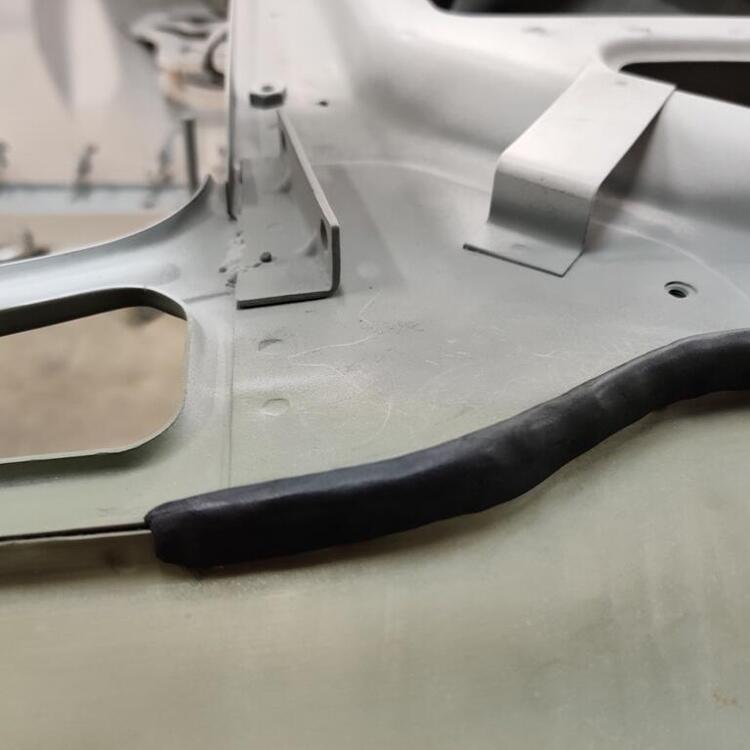
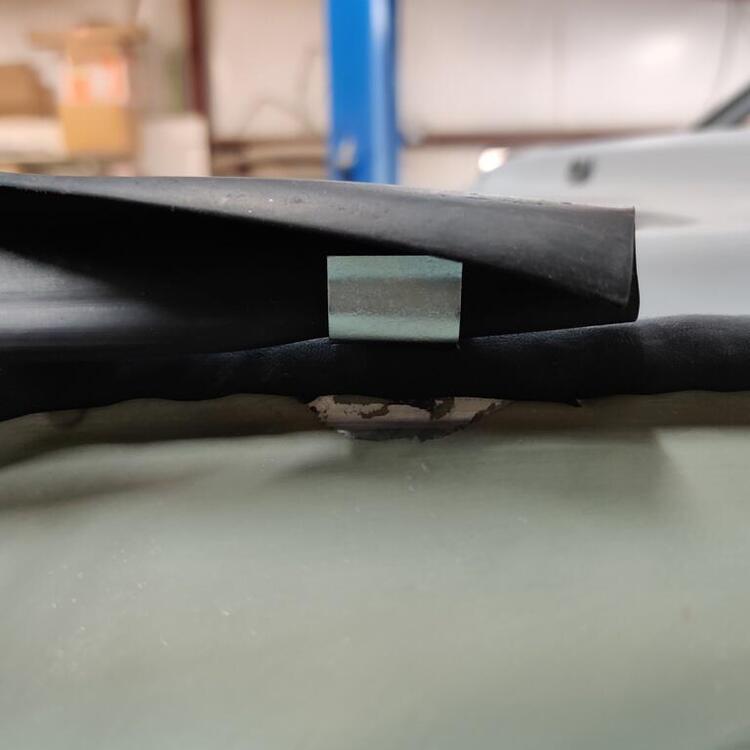
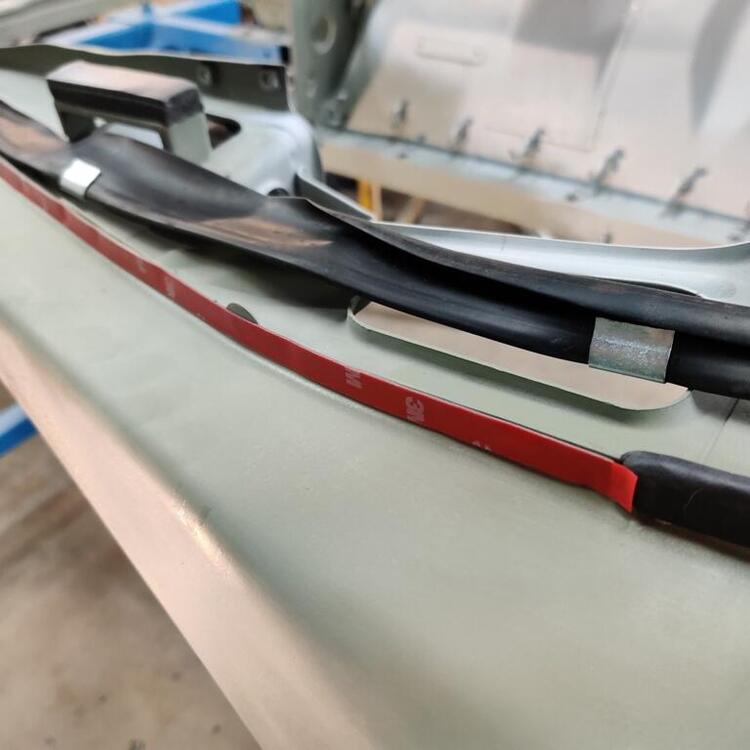
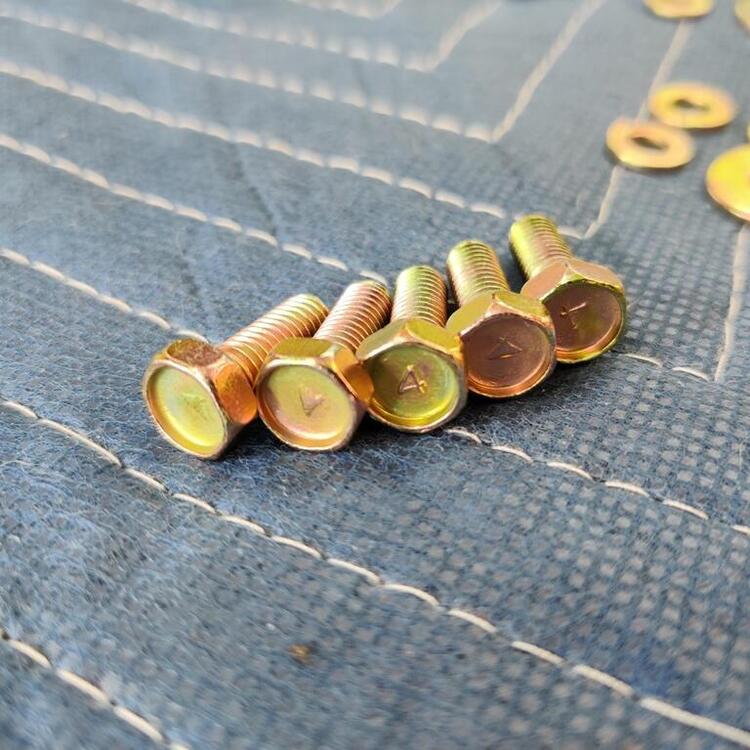
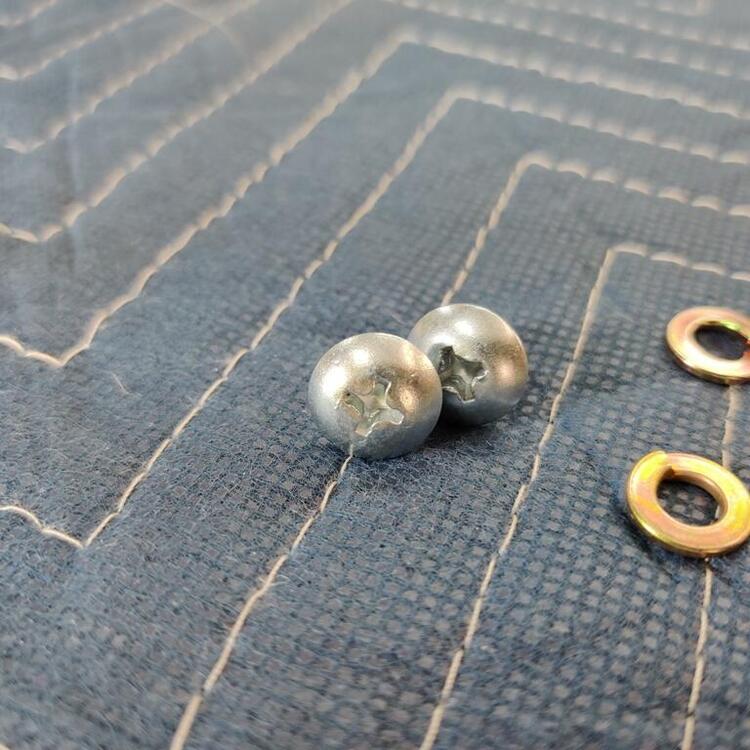
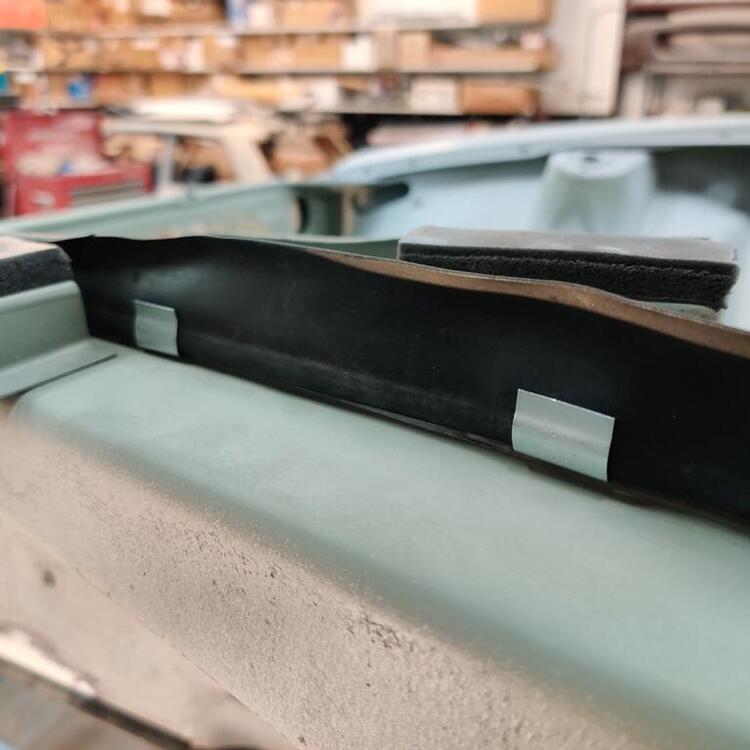
Some actual assembly has occurred. It's been almost four years since I bought the car, and so much of my time has been spent tearing it down, stripping, sanding, etc., but I finally got to put something back on the car! Pics showing the repainted driver side inner fender support, rubber seal to seal against the inside of the fender, along with original clips to hold it in place, and pics of newly plated outer fender hardware: I I'm not sure why the factory put a flexible sealer along the top edge of the pinch weld on the inner fender area, but I replicated it as best I could. It is interesting to note that underneath the old material was bare metal. I scrapped it away and used wax and silicone remover to clean the area. I then used Eastwood Flexible Strip Caulk to replicate the original. I added as many strips as were needed and then hand formed them together in one solid mass to cover up the pinch weld area (third pic is the finished product): Interestingly, you can see that the original material got pushed downward where the clip is located (see third pic here): Something I did that is a bit different than factory - I added some double sided 3m tape so that the rubber seal would be more securely fastened than would be otherwise with just the little "s" clips. In the third pic, you can see the caulk was displaced in a similar way when I pushed the clip "home" into position. The seal doesn't do a particularly good job of sealing the "upper shelf" area from dirt and debris coming from in the wheel well area, but it helps. Maybe with this 3M product the sealing occurring here will be slightly improved. Pic of the product I used, and rubber seal installed.


 1 point
 -
I’m actually in Perth. I used a local classic car parts store who also do dash restoration1 point
-
 1 pointThanks for the suggestions. Of course today, the chirp has disappeared all by itself. I'll continue cautiously.1 point
 -
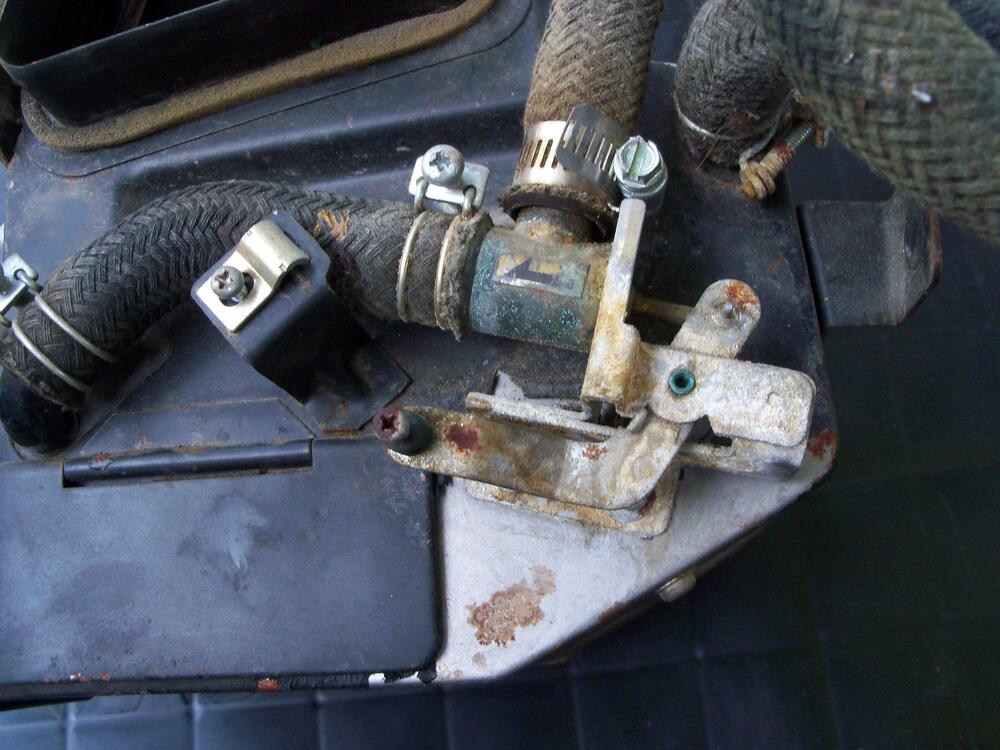
 1 pointThat orange module is the temperature control switch for your A/C compressor. The temp silder lever on the HVAC control panel does one of two things: When you are in non-A/C mode, the temp lever controls the amount of water flowing through the water cokk. But when you are in A/C mode, the system automatically cuts off all water to the heater core using the vacuum controlled valve that lives near the water cokk. So when you're in A/C mode, no water flows through the core regardless of where the lever is. And then in that A/C mode, they instead use the slider lever to control the setpoint for that orange device. That orange cube is a temperature controlled switch with a sensor stuck in the evaporator coil. If the evaporator warms up enough, they turn the compressor on. And if the evaporator cools off enough, they cut off power to the compressor. Basically, they cycle the compressor and the duty cycle is dependent on the position of the temperature slider lever. TMI?1 point
 -
 1 pointOnce upon a time on my old 73 240z I put Michelins on my car after I wore out the factory Toyo's and with them came a steering vibration at about 60+MPH. I tried rotating and rebalancing and nothing would correct the vibration. After putting up with it for a couple of years I replaced the Michelins with BF Goodrich Radial T/A's and low and behold the vibration was gone!1 point
 -
1 pointIn today's lingo, that would be called a ghost block. Makes sense that the alphanumeric digits are casting lots or batches. I could imagine a number of individual blocks being cast at the same time. Perhaps position of the mold in the casting process? But that would assume only one casting process per day. I see what you mean by the engine number assignment. Yea, Ok.1 point
-
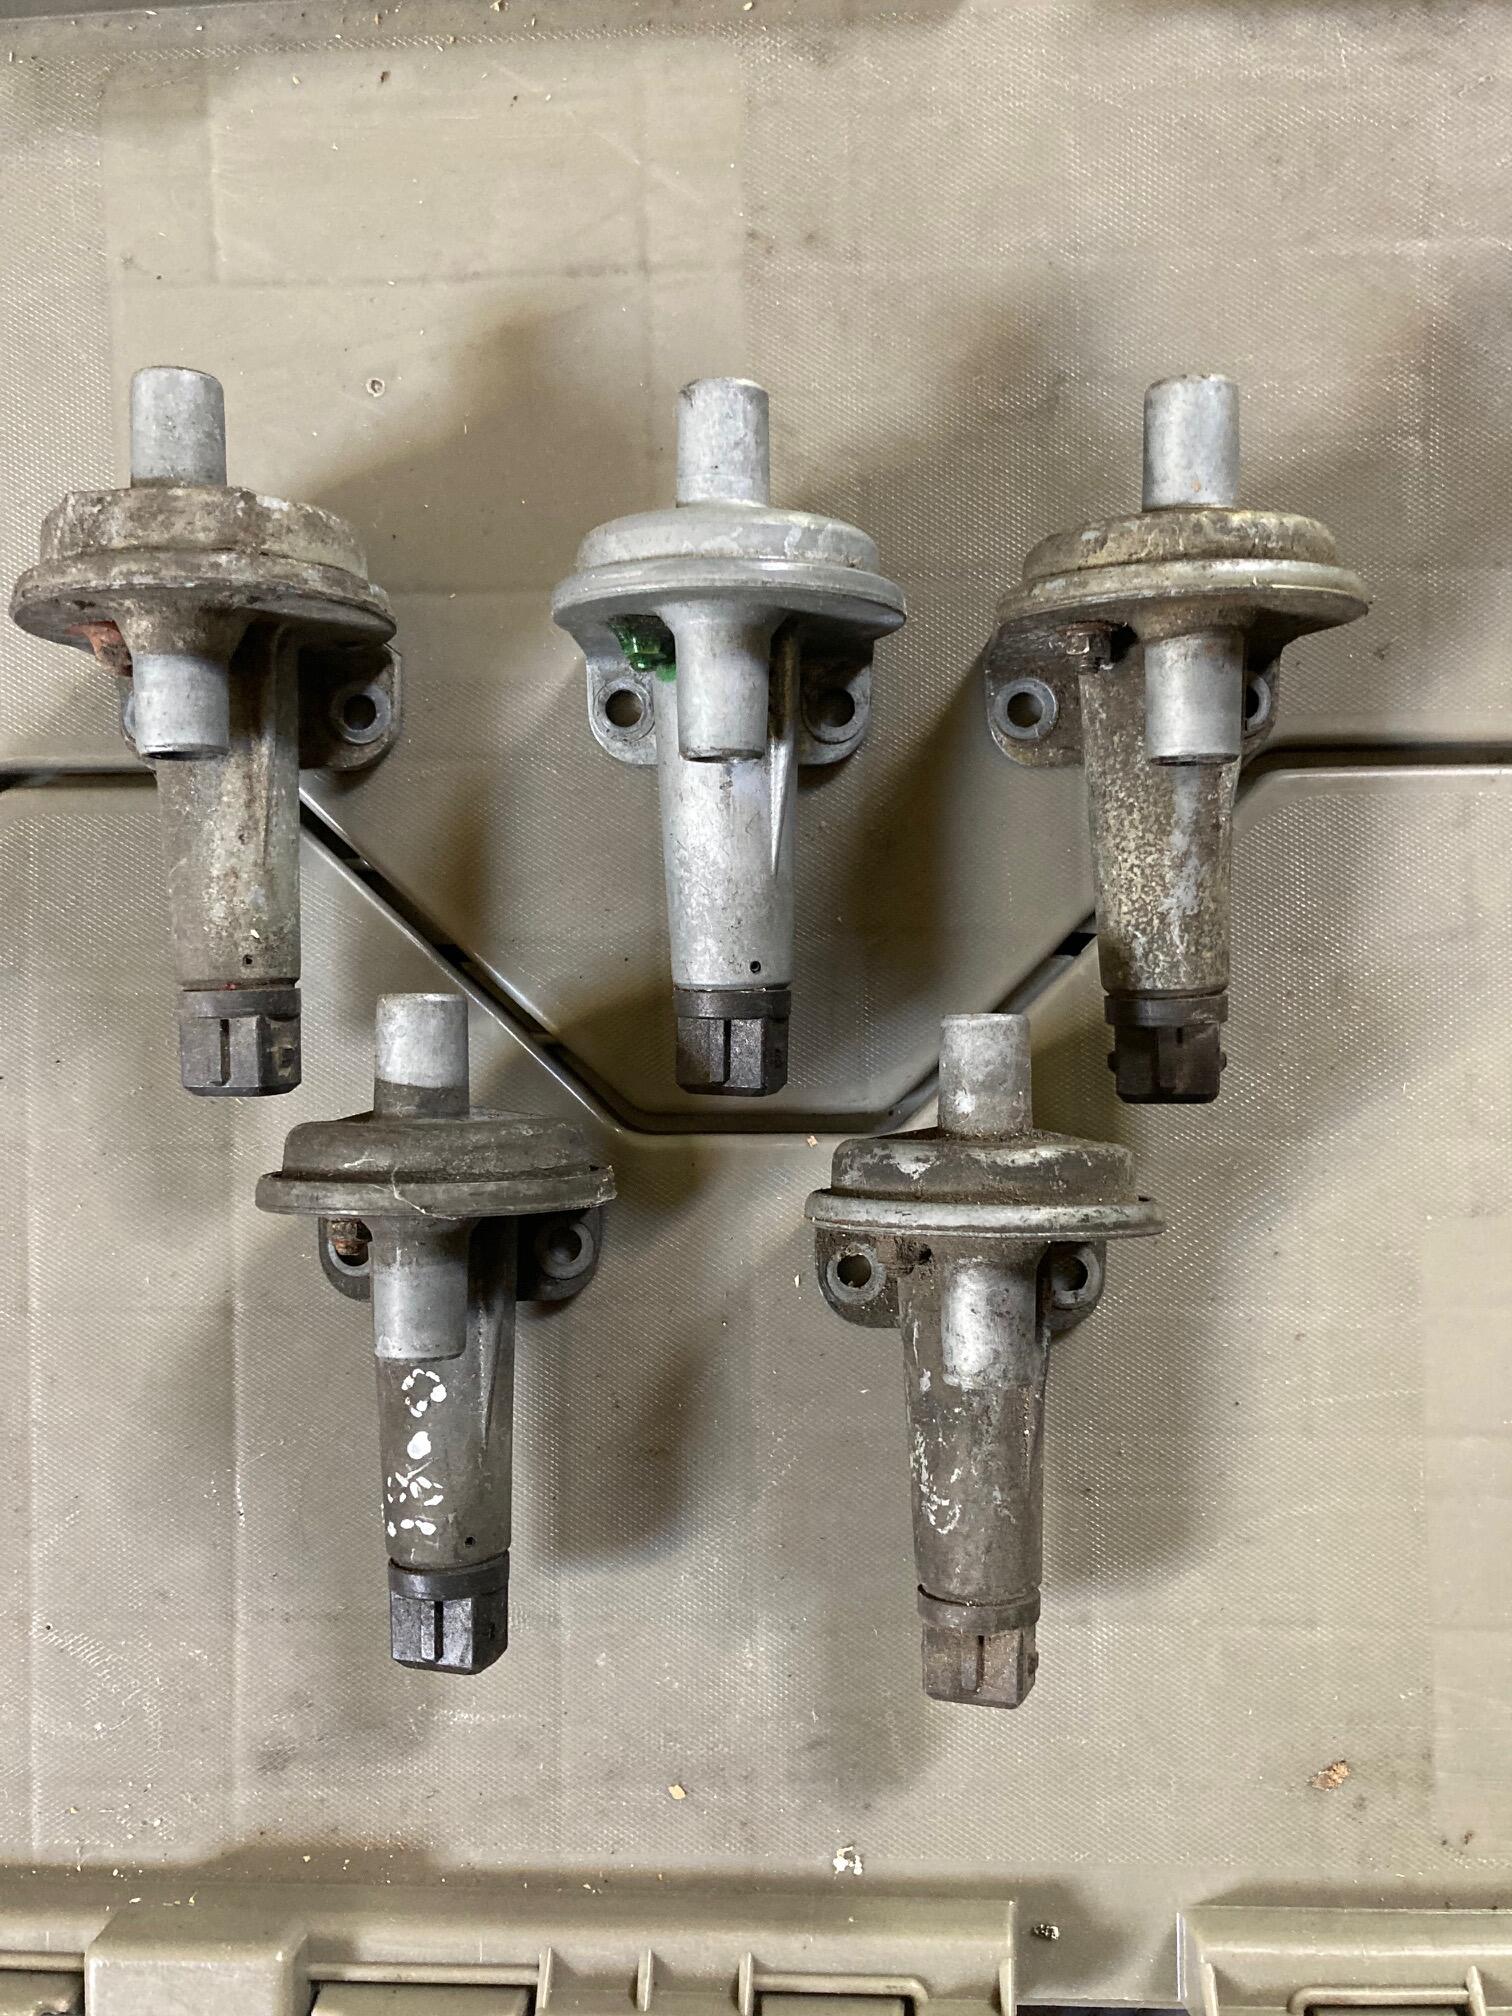
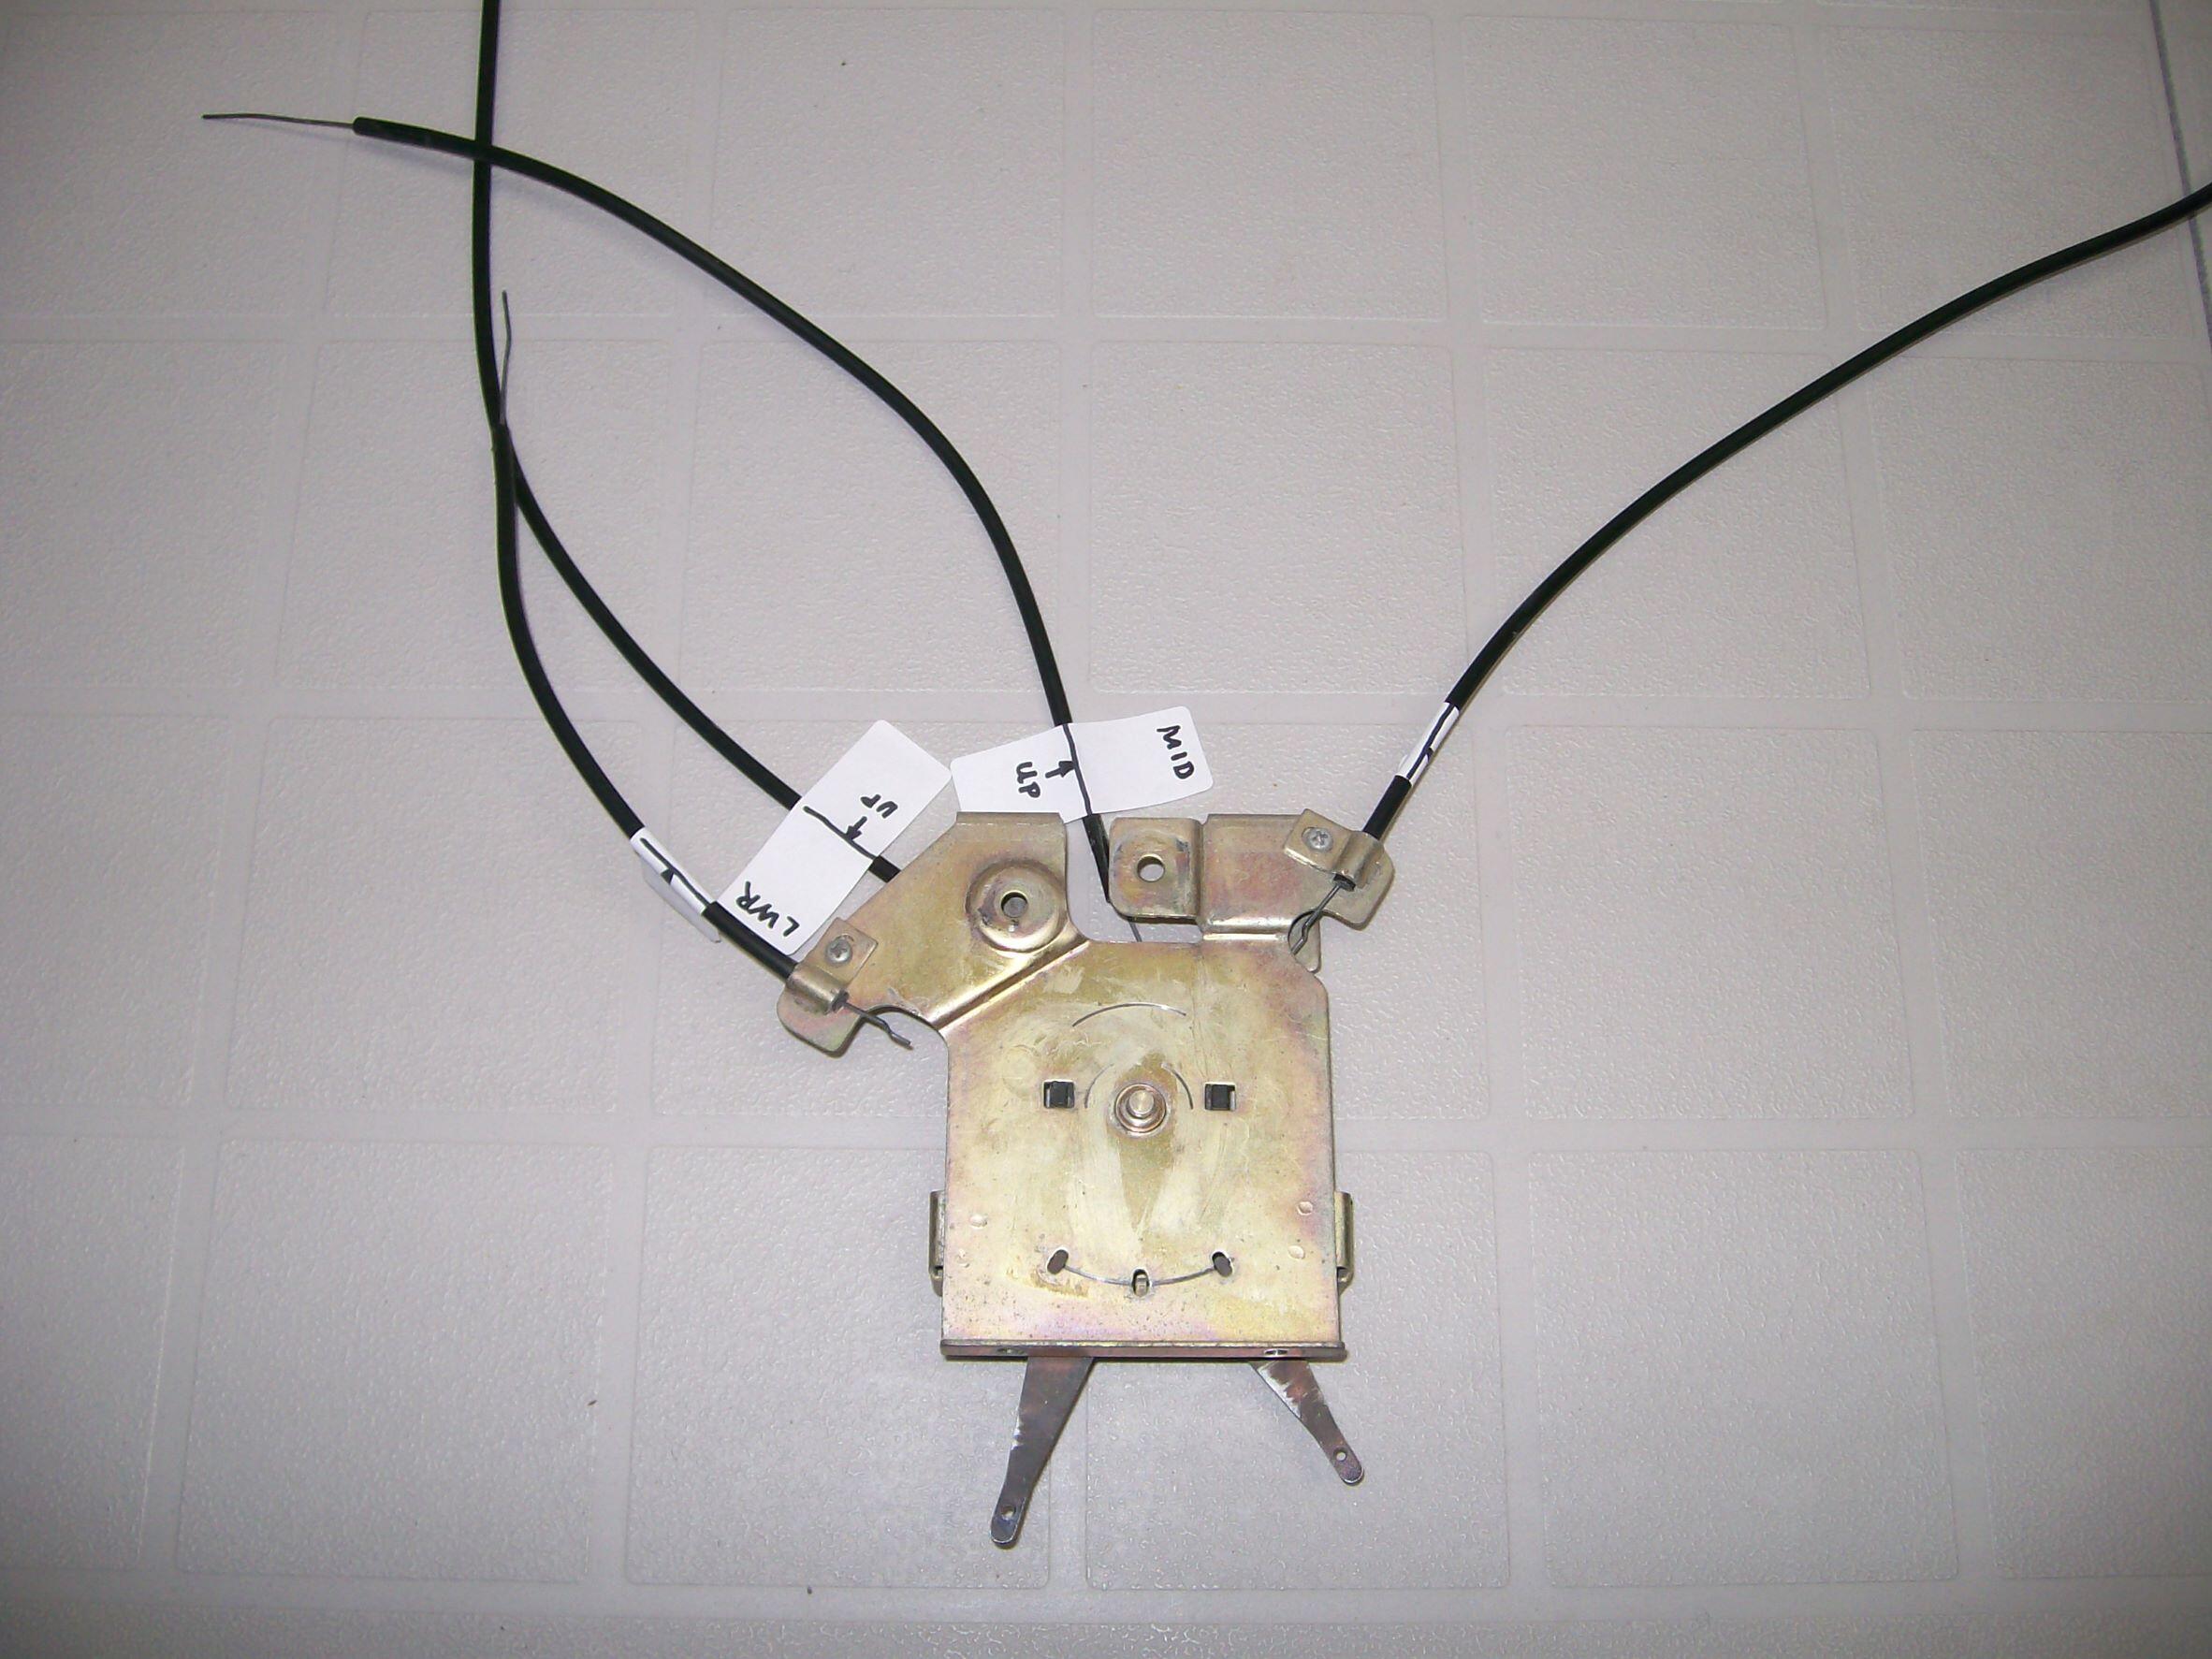
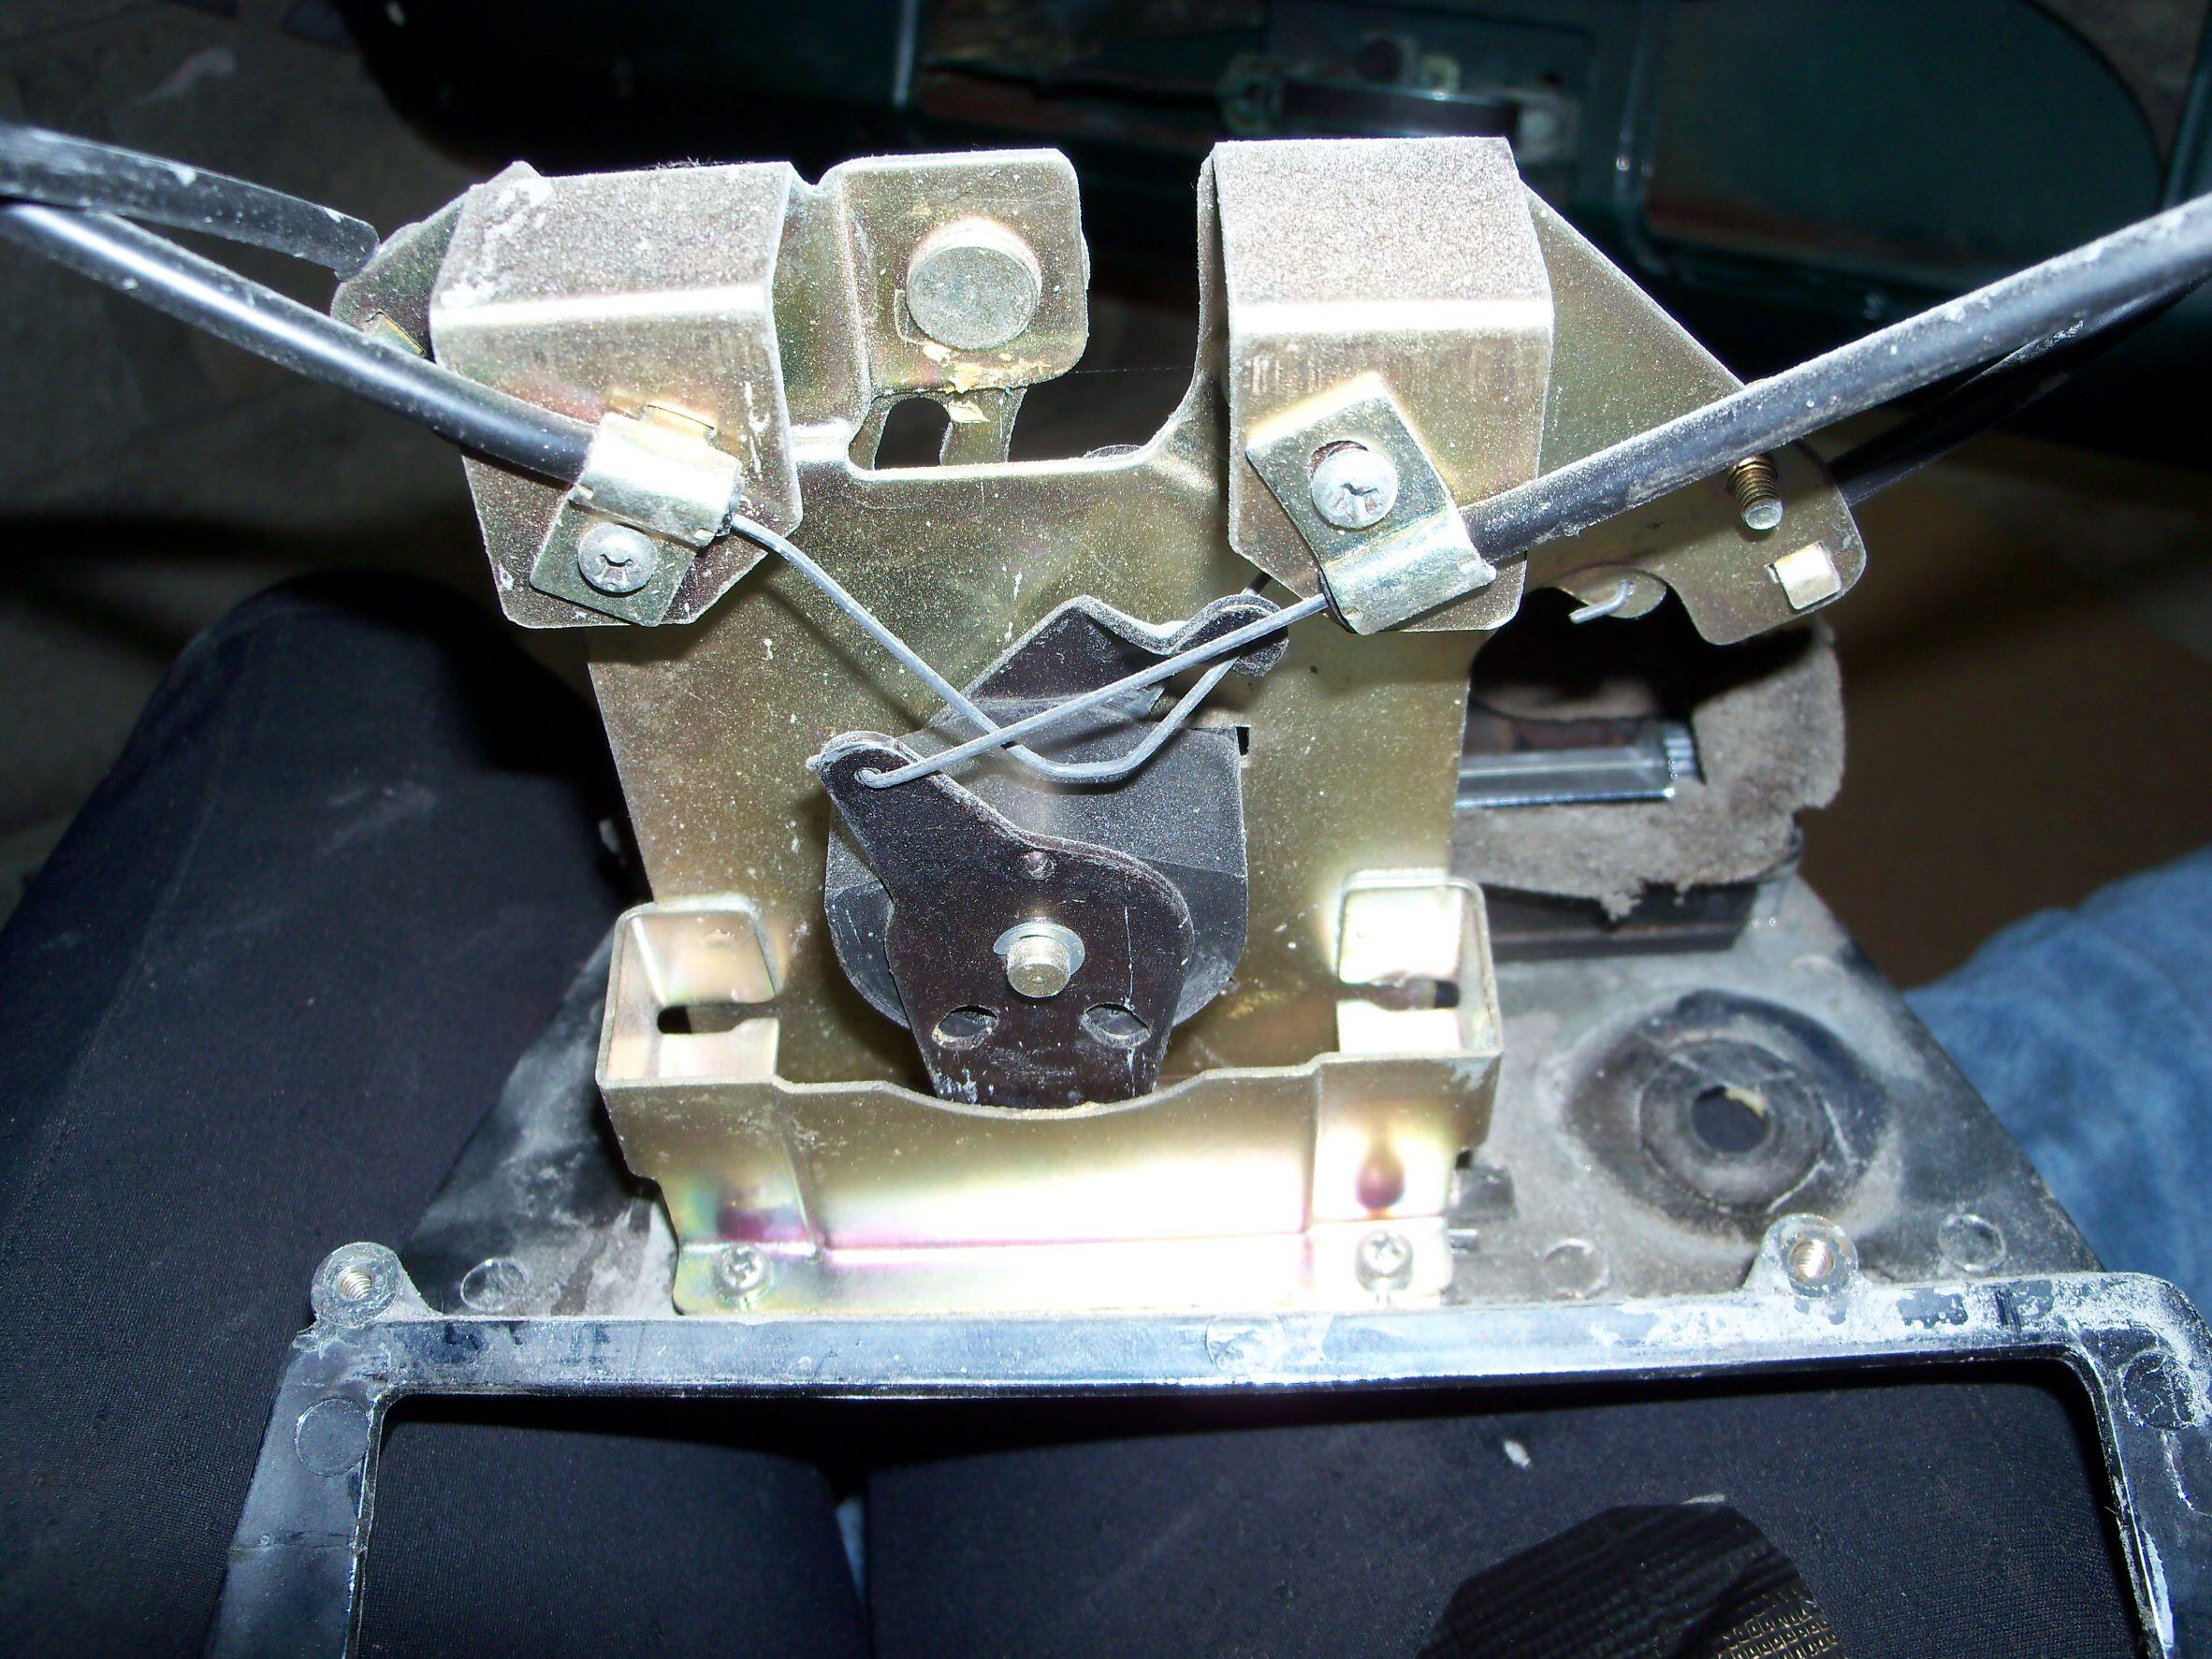
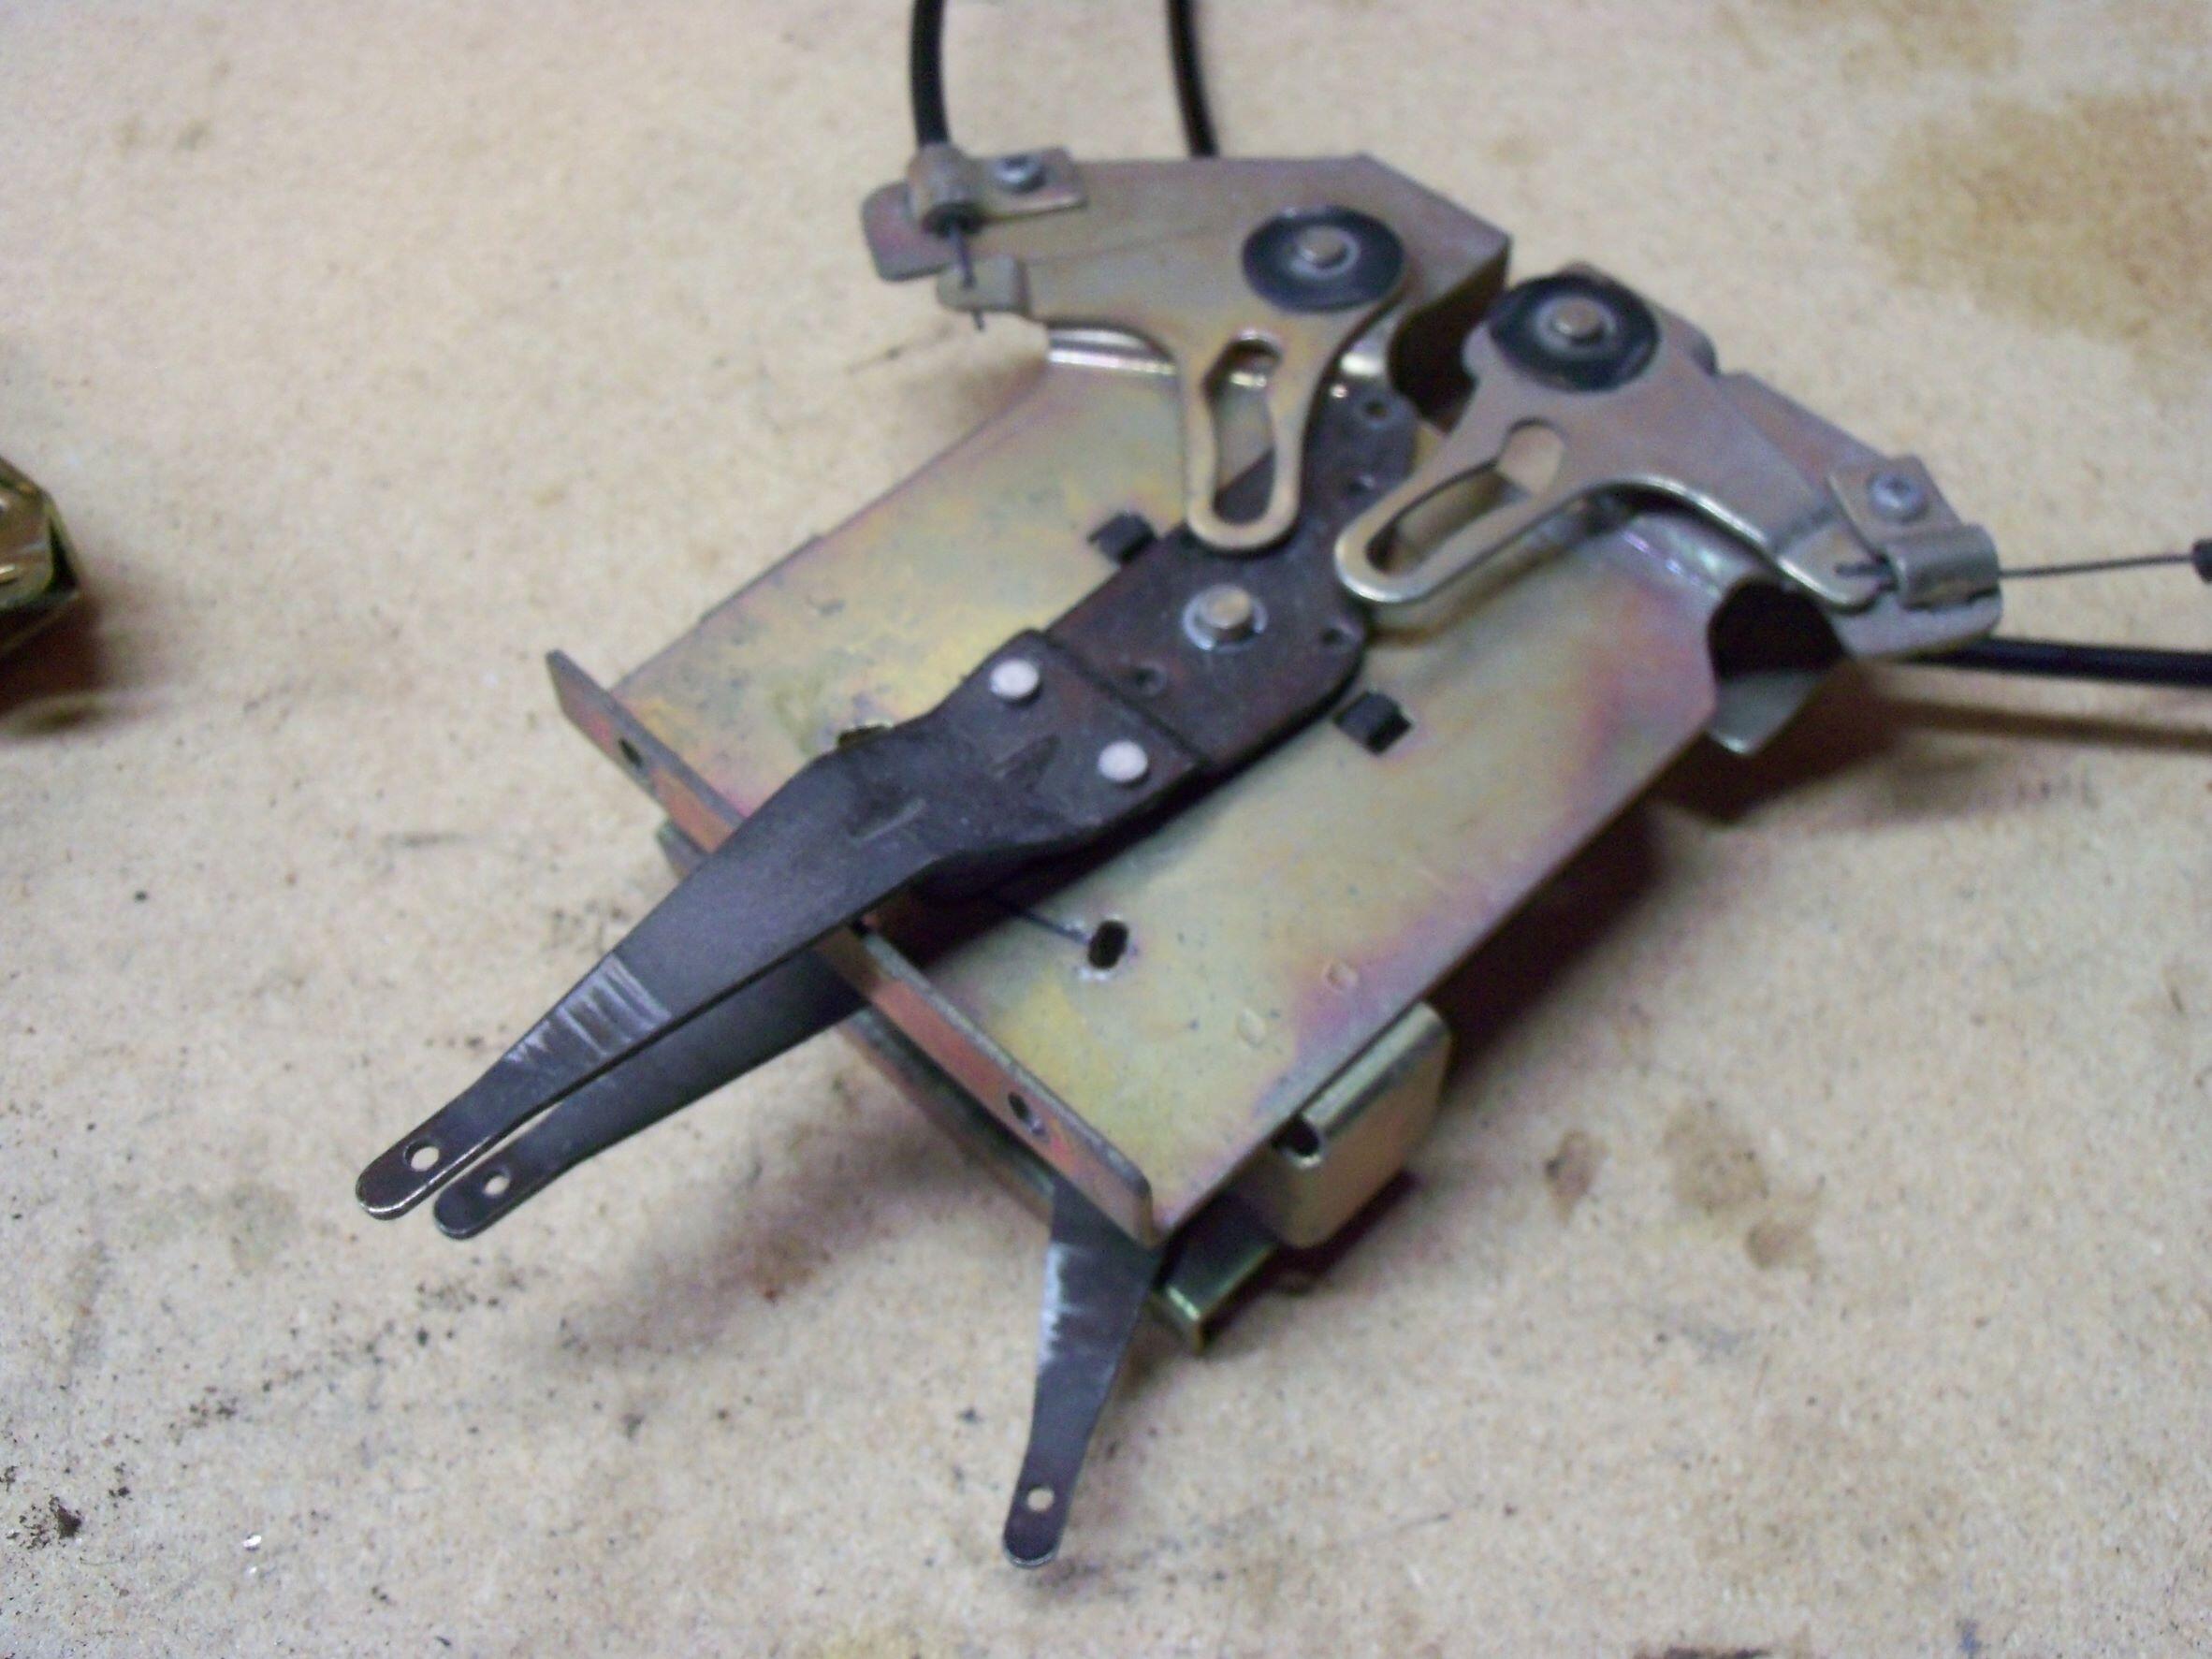
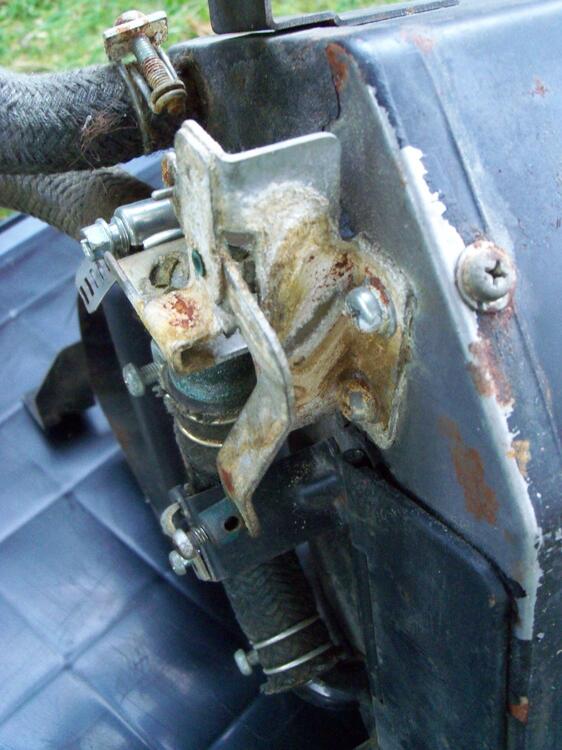
 1 pointJust to clarify what SteveJ, S30Driver and ZedHead have said, you most likely have two issues: 1) your water control valve is seized; 2) with the result that your 'TEMP' control cable wire has bent at the point where it connects to the control lever. If you have an early car ('Series 1'), this is almost certainly what's happened. Some pix and comments follow: The control cable wire for the early Z's ('Series 1') was undersized (1.0mm dia) and therefore prone to bending if anything in the assembly got stuck or balky. In later versions ('Series 2', etc.) the cable diameter was increased to 1.2mm. The cable sheaths were upsized to match. The Series 2 design incorporated numerous other detail changes to the heater control system's mechanicals in an effort to make it more robust: revised lever frame, levers, and finish knobs; revised control cable wire ends (loop-over-peg). Lawn mower control cables can be a good replacement. Alternatively, try tempered-steel 'piano wire'. Otherwise, non-tempered wire from the hardware store will probably be ok, unless something gets stuck again and you try to operate the controls at sub-zero temps. Unfortunately, your water control valve and/or its actuator lever have probably seized. The probable reason is that the valve has a leaky seal. White stains on the outside of the heater plenum box are a clue. NAPA (but not Nissan) used to offer a replacement seal, but it's been NLA for years. So, if your water control valve is leaking you'll need to buy a complete new control valve. If you don't fix this problem, the old valve will leak coolant onto the floor whenever it's left in the 'COLD' position. Also, the actuator lever will probably start to stick again, too. I suspect that problems with the water control valve stem from PO's who run their cooling systems filled with straight tap water. A stuck water control valve responds nicely to an overnight soak in a de-liming product like 'C-L-R'. If the seal is ok, then you may be good to go. However, The older-design water control valves were said to also suffer from internal leakage, leading to a situation where the valve isn't able to fully block coolant flow even when it's set to the 'off' (cold) position. That certainly wouldn't help if you plan to drive a Series 1 car on hot summer days. Make sure you also free up the water control valve's actuator lever. Lubricate its pivot pin and grease the sliding surfaces. These are some pix that I took when rebuilding the Heater system for my Series 1 car: Below: Top side of Lever Assy Note: Control cable on the left side (TEMP) had been removed when this photo was taken) Below: Bottom side of Lever Assy (photo #1 of 2) Note: The bottom control lever (DEF/ROOM) and the associated left and right bellcrank plates had been removed before this photo was taken) Below: Bottom side of Lever Assy (photo #2 of 2) Note: In this photo, the DEF/ROOM control lever, bellcrank plates, and cables are in place. However, the control lever's centre actuating pin had snapped off so the bellcrank plates had nothing to engage with. Below: Water Control Valve, c/w actuator lever assy (actuator cable has been removed) Note: Control valve's actuator rod can be seen here. Actuator lever may need to be freed up and lubricated if it, too, has become frozen because of corrosion. Below: Water Control Valve's actuator lever assy Note stains. Presumably caused by leakage from the Water Control Valve. They look like calcium deposits. If they are, then my car's cooling system must have been filled with straight water at some point (probably during the time when it lived in New Mexico). Below: 'TEMP' actuator cable with bent wire (photo #1 of 2) Note: Here, the cable is fully extended and the bellcrank has been rotated about 45 degrees CW from its centred position. Below: 'TEMP' actuator cable with bent wire (photo #2 of 2) Note: Here, the cable is fully retracted, but the bellcrank has not been rotated CCW any further than its centred position.
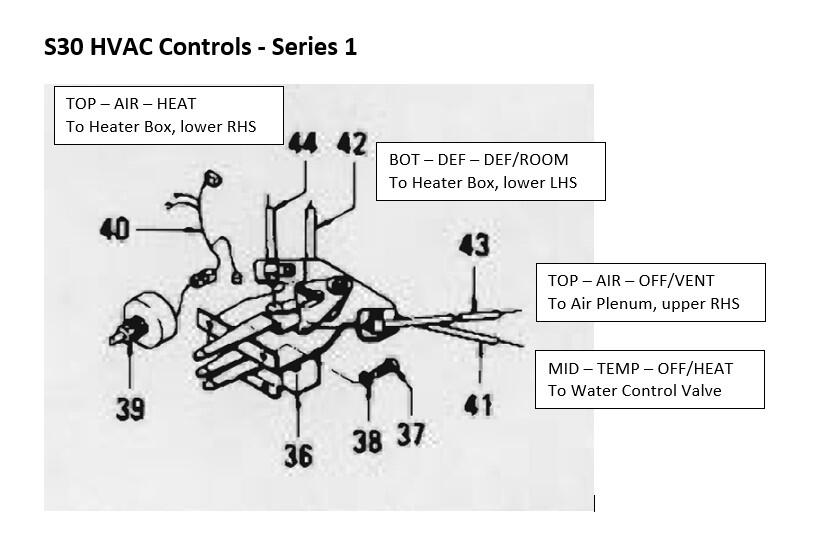


 1 point
 -
1 pointHi Kats, And the same strange situation with the engines: a block cast earlier with a higher machine number than a block cast later (although days later). I would assume that the engine ID number was assigned when the casting was machined? What do the 'A' and 'D' mean?1 point
-
 When tracing wiring go by the colors in the wiring harness. That is what the wiring diagram is based upon. The fact that the switch switched the colors doesn't really matter much as long as you keep the wiring harness colors straight. I don't have the spare time/energy to drive up to Chattanooga, but if you want to drive a couple of hours down to me, I will give you hands on training in using a meter to diagnose using my 73. The connectors are different, but the wire colors of the affected circuit is the same as your 72. Once you get the technique down, it should be easier to find the short.1 point
 -
I was thinking of the power supply wires from the harness. You can check those with a meter or test light with the engine running. Pretty sure the testing methods are described in the two links that CO provided.1 point
-
 1 pointOne more possibility. I chased a bad vibration for over a year until, almost as a last resort, i checked the spacers I was using on the front wheels. They were only 3/8 or a 1/4 thick, but they were SO BADLY MADE (cheap cast pot metal) that their thickness varied SO much that the wheel had enough run out to cause the vibration. Bought some 1/4 aluminum flat plate, drilled the damn holes myself and TOTALLY solved the steering wheel vibration. Bent or out of round rims can also cause the run out too. Just jack the car up at each wheel, rig up a pencil or something to “just touch” the rim near the edge and rotate the tire and watch the clearance to the pencil tip as the tire goes around. Should be dang near no variation, maybe 0.05 at most. A runout gauge is the best thing to use of course but just as a check you can almost hold your finger there and check.1 point
 -
 1 pointYears ago when I worked in a tire shop we static balanced and re-balanced a customer's car because it had a vibration at speed. We finally re-balanced the tire on a machine that could go up to 80mph. That worked. Now I don't know whether or not that can be done today, but it might be worth a try. Your vibration looks like a tire issue. Have you tried switching your tires front to back? However, I had a vibration like yours on my Zed and traced it to a bad wheel bearing. No matter how I tightened and re-tightened it just kept coming back. I finally replaced all the wheel bearings, torqued them to spec, and the problem went away. Hope this helps. Good luck. Cheers, Mike1 point
 -
 1 pointYou've addressed quite a few of the possible vibration issues but you didn't mention how old your tires are. You may have flat spots or out-of-round conditions not detected or cured by balancing, also possible slop in the steering rack. These cars are extremely sensitive to all of these issues. As to the rear end clunk, you likely have a failed differential mount. Get the car on a lift and see if you can move the front of the diffy up and down. Be cautious about getting a replacement solid mount that does not have the rubber insulator.1 point