Leaderboard
-


siteunseen
Free Member4Points14,905Posts -

conedodger
Free Member3Points11,316Posts -
.JPG.cfcada9cf1c1b502df3f5f2f2ca3ff36.JPG)

SteveJ
Free Member3Points9,572Posts -


Zed Head
Free Member2Points18,796Posts
Popular Content
Showing content with the highest reputation on 05/28/2022 in Posts
-
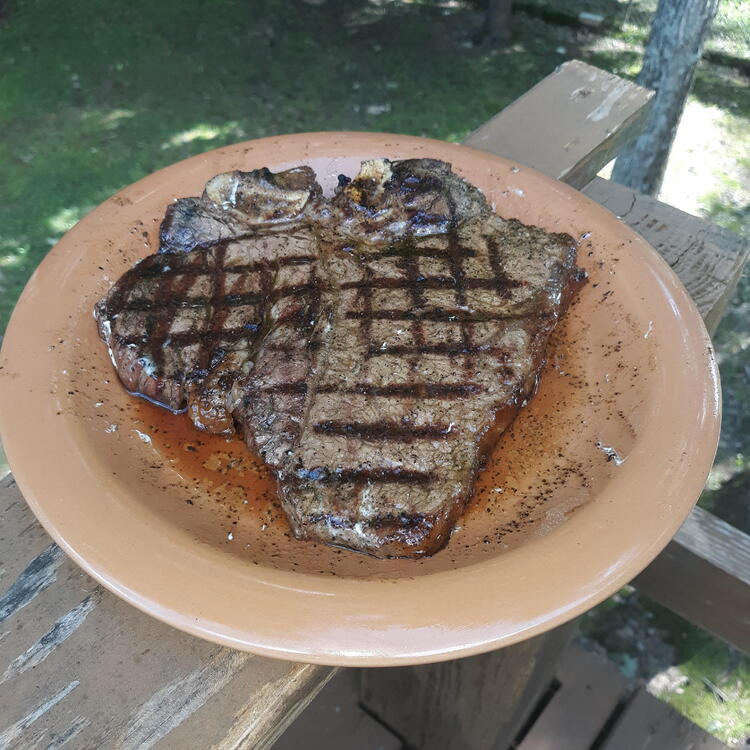
I took my 280 to the local grocery store where I found a Porterhouse for $10.99lb and that's cheap around here. 240 gets it's turn Sunday morning to de glaze the brake pads.
 3 points
 -
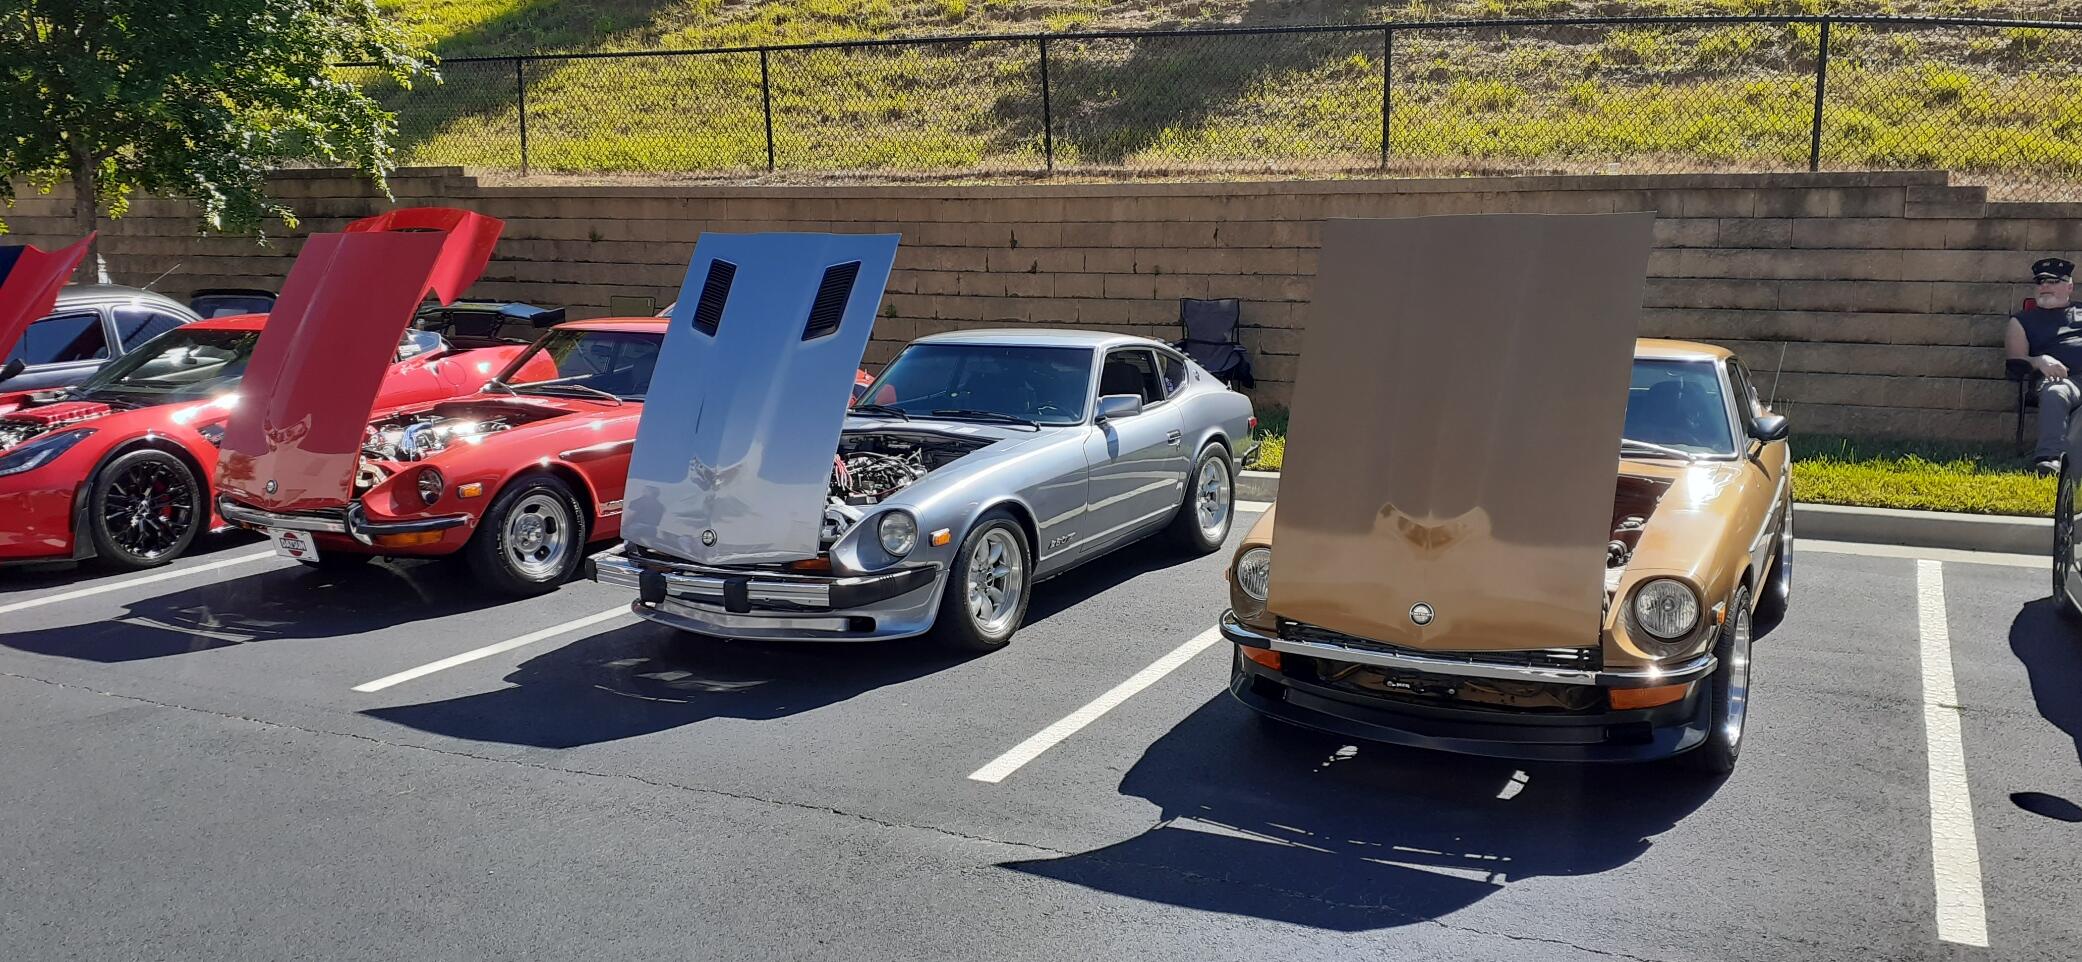
I got new tires for the 260Z in preparation for ZCON. After that, I drove over to meet a couple of friends at Caffeine and Chrome. It's nice when you can get a 240Z, 260Z, and 280Z together at a meet.
 2 points
 -
 2 pointsWith Dallas being fairly close to sea level the boiling point of water is right about 212*F. Based on that you've got about 15*F to play with if you ran straight water. Then mix that with antifreeze which has a boiling point of around 387*F a 50/50 mixture would have a boiling point around 223*F so you would have almost 30*F to play with before you boil. You will have a little more room due to the cooling system being pressurized which will raise the boiling point temp even more. One other little thing is that water typically is the best at heat transfer where the 50/50 water / antifreeze may not be quite as good at transferring heat from the engine. This is kind of just off the top of my head. I'd bet @Captain Obvious or @siteunseen would be able to provide more and probably better enlightenment! My thought is you should be okay at 195*F and I'm sure as soon as you start moving it will come down.2 points
 -
1 pointCO's comment about the reservoir is the most important one to focus on at this point. Apparently, you've been running with a low coolant level for quite a while. That's not good. Get the system back to the way it is designed to be and see what happens. If you lose coolant, there's a leak, as the FSM says. If you determine that you have a leak there are ways to find it. You can also verify a leak by pressurizing the coolant system. And, don't overlook that the coolant system is designed to use a certain type of radiator cap. The cap releases pressure but also holds vacuum. So that the coolant can pass between the radiator and the reservoir as it is designed to do. As far as looking for bubbles, the chemical test was developed and is widespread because the bubble method is not reliable.1 point
-
1 pointMine stays at 173F idiling in it's garage. Good flow at the radiator hole on top when I rev it up. No wind flow other than the stock fan with a full shroud off a ZX pulling air through the radiator. Water boils at 225F way up here in North Alabama where I live and I run 75>25 coolant and distilled water I collect from a dehumidifier running downstairs where the Zs are. 195F doesn't seem that high to me but I've always heard 200 to 225F is not good. Maybe do an IR temp check at the bottom radiator hose where it connects to the radiator and then get a reading at the thermostat housing to what kind of job the radiator's doing. Do the same where the in and out are on the block. That way you'd know if it's the radiator or the block I would think.1 point
-
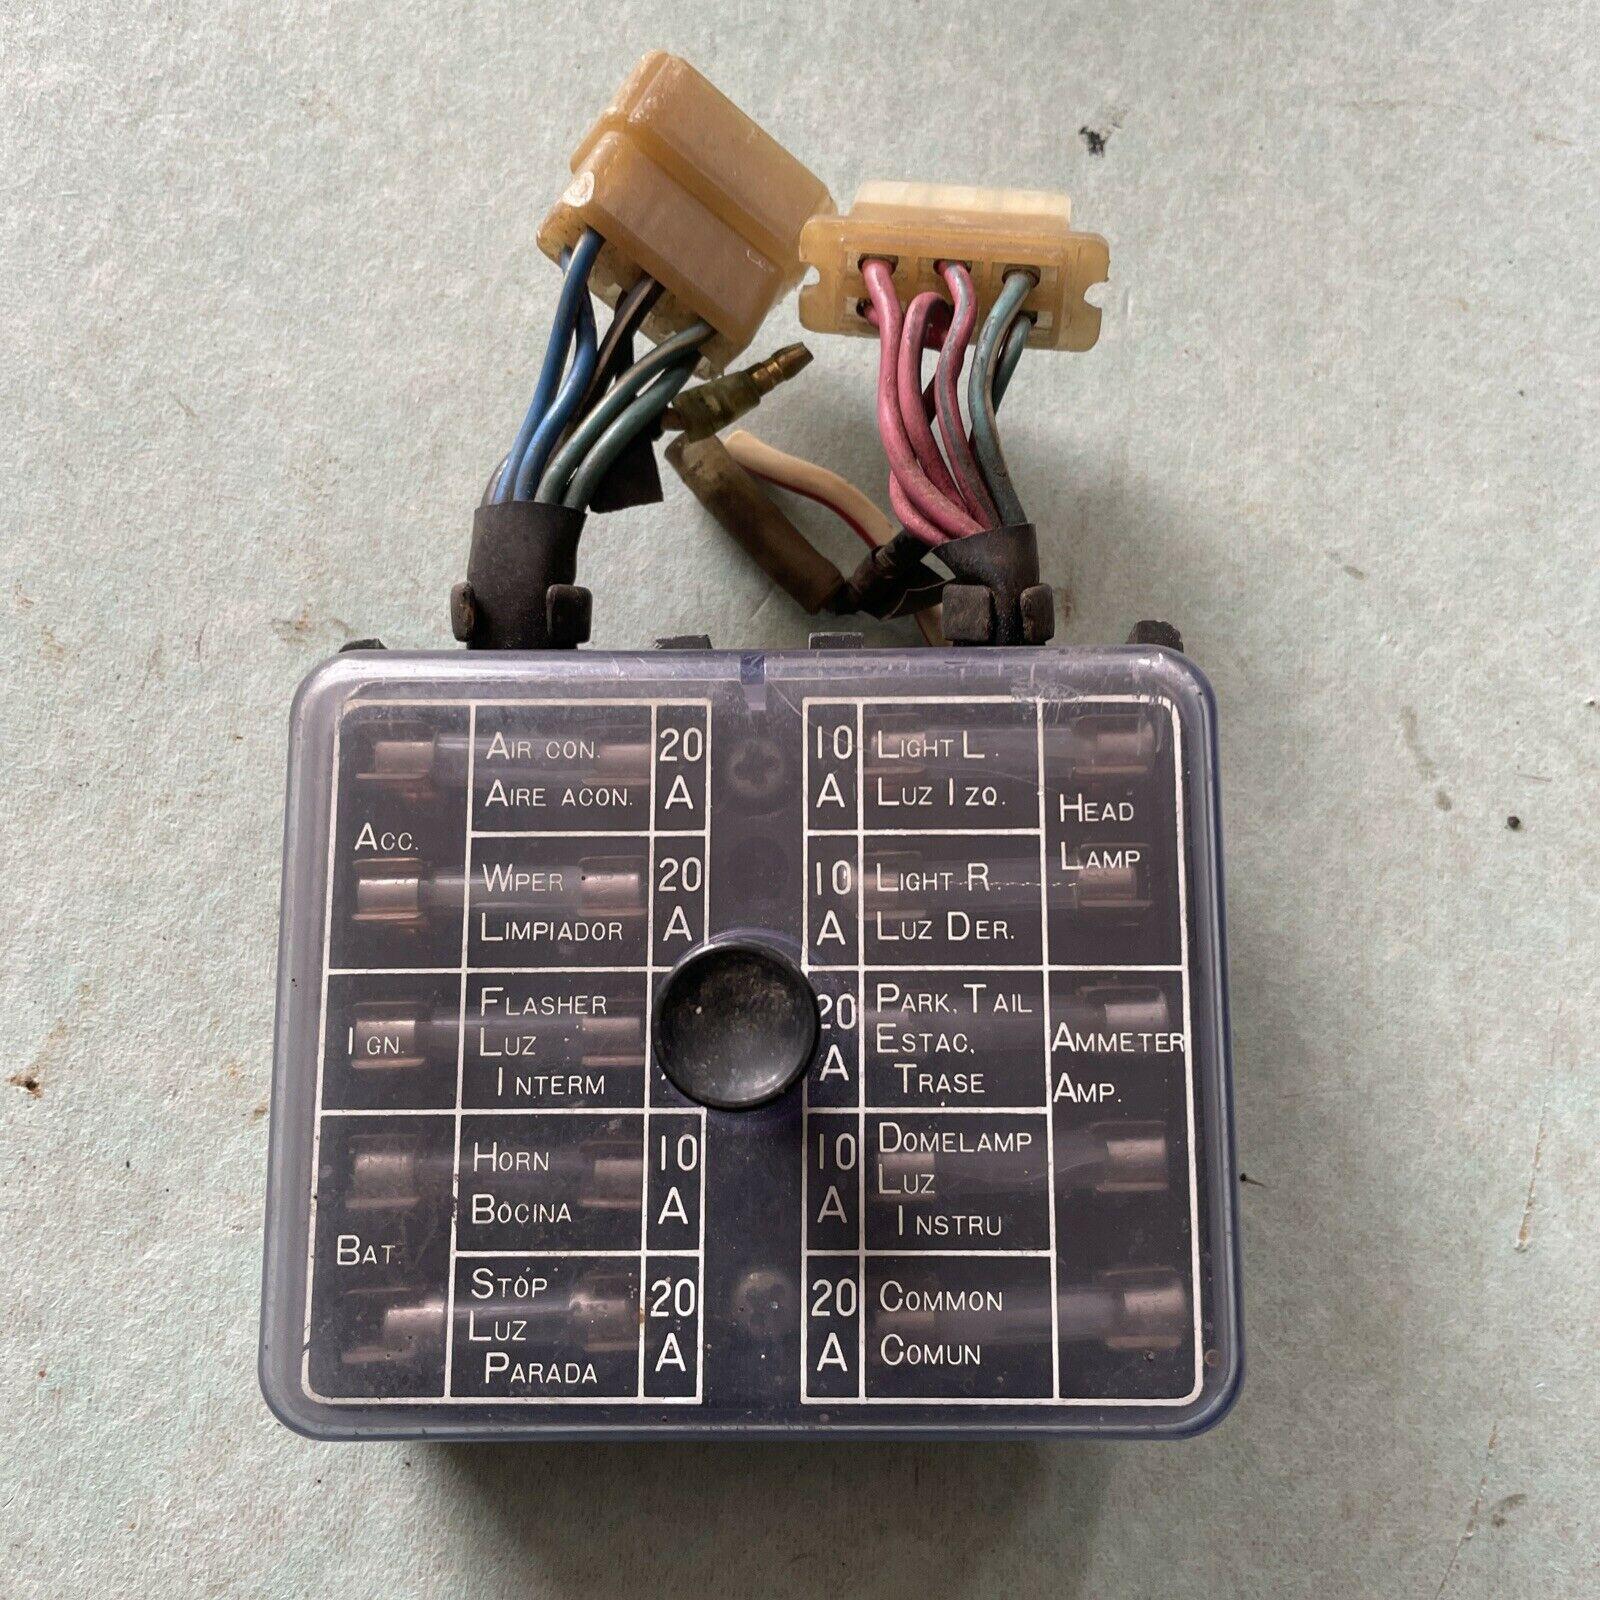
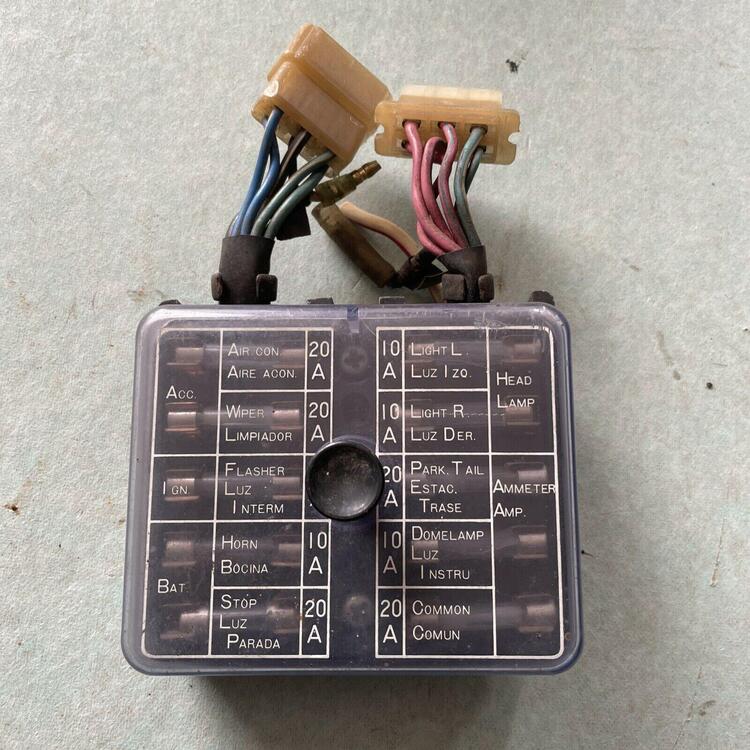
Fuse size depends the gauge of the wire you're protecting. I recommend 10A for 14 AWG, 20A for 10 AWG or 12AWG and 7.5A for 16 AWG or 18 AWG. Don't forget about maxifuses or fusible links for the system as a whole. As I searched for vendors for wires with colored stripes, I found this place was probably about the most economical and flexible: https://www.sherco-auto.com/striped-tracer-wire.html You may be able to adapt this for fusible links: https://www.amazon.com/1J0937617D-Battery-Terminal-Volkswagen-Octavia/dp/B0863XLF6R As for current draw, let the factory fuse box be your guide to start. The fan is the highest draw, especially if you have AC. While the parking/tail light fuse is 20A, you can go to 10A and 14 AWG with LEDs. (IMHO the engineers undersized the wire in this circuit for incandescent bulbs.) The same goes for the flasher. The Common fuse is for the cigarette lighter. That can drop to 10A. I'm not positive about the draw on the wipers, but if you keep it at 20A, I would use 12 AWG instead of 14 AWG. The brake light circuit can also go to 10A with LEDs. Note: the fuse ratings I wrote are very much on the conservative side. However, I have seen enough melted fuse boxes and melted connectors that I prefer a conservative approach. As for wire sizes here is a rule of thumb. The wires for the large connectors should be 14 AWG. Use 16 AWG for the smaller connectors. On the 73 (and on through 76), Nissan started using the 9 pin connector on the headlight switch. That was a bad move. The connectors were undersized for the current of the parking lights, and that connector would melt down. For the large bullets, I would use 10 AWG. Consider trying 8 AWG for the circuits for the ammeter. Are you sticking with the ammeter or are you going to have a voltmeter instead?
 1 point
 -
Might be in here somewhere. Find it and check the part numbers and year ranges. http://www.carpartsmanual.com/datsun/Z-1969-1978/body-260z-280z/2-seater/front-fender-hood http://www.carpartsmanual.com/datsun/Z-1969-19781 point
-
 1 pointIf everything is working as intended, then pushing coolant out into the overflow bottle is not only "not a problem", but it is actually a good thing. There should always be some coolant in the overflow bottle and the level should actually change as the engine heats up and cools back down. When the engine heats up, it pushes coolant out into the bottle, and then when the engine cools back down, it should suck the same amount of coolant back into the engine. I'm actually more concerned that your bottle was ever completely dry. That should not be the case.1 point
 -
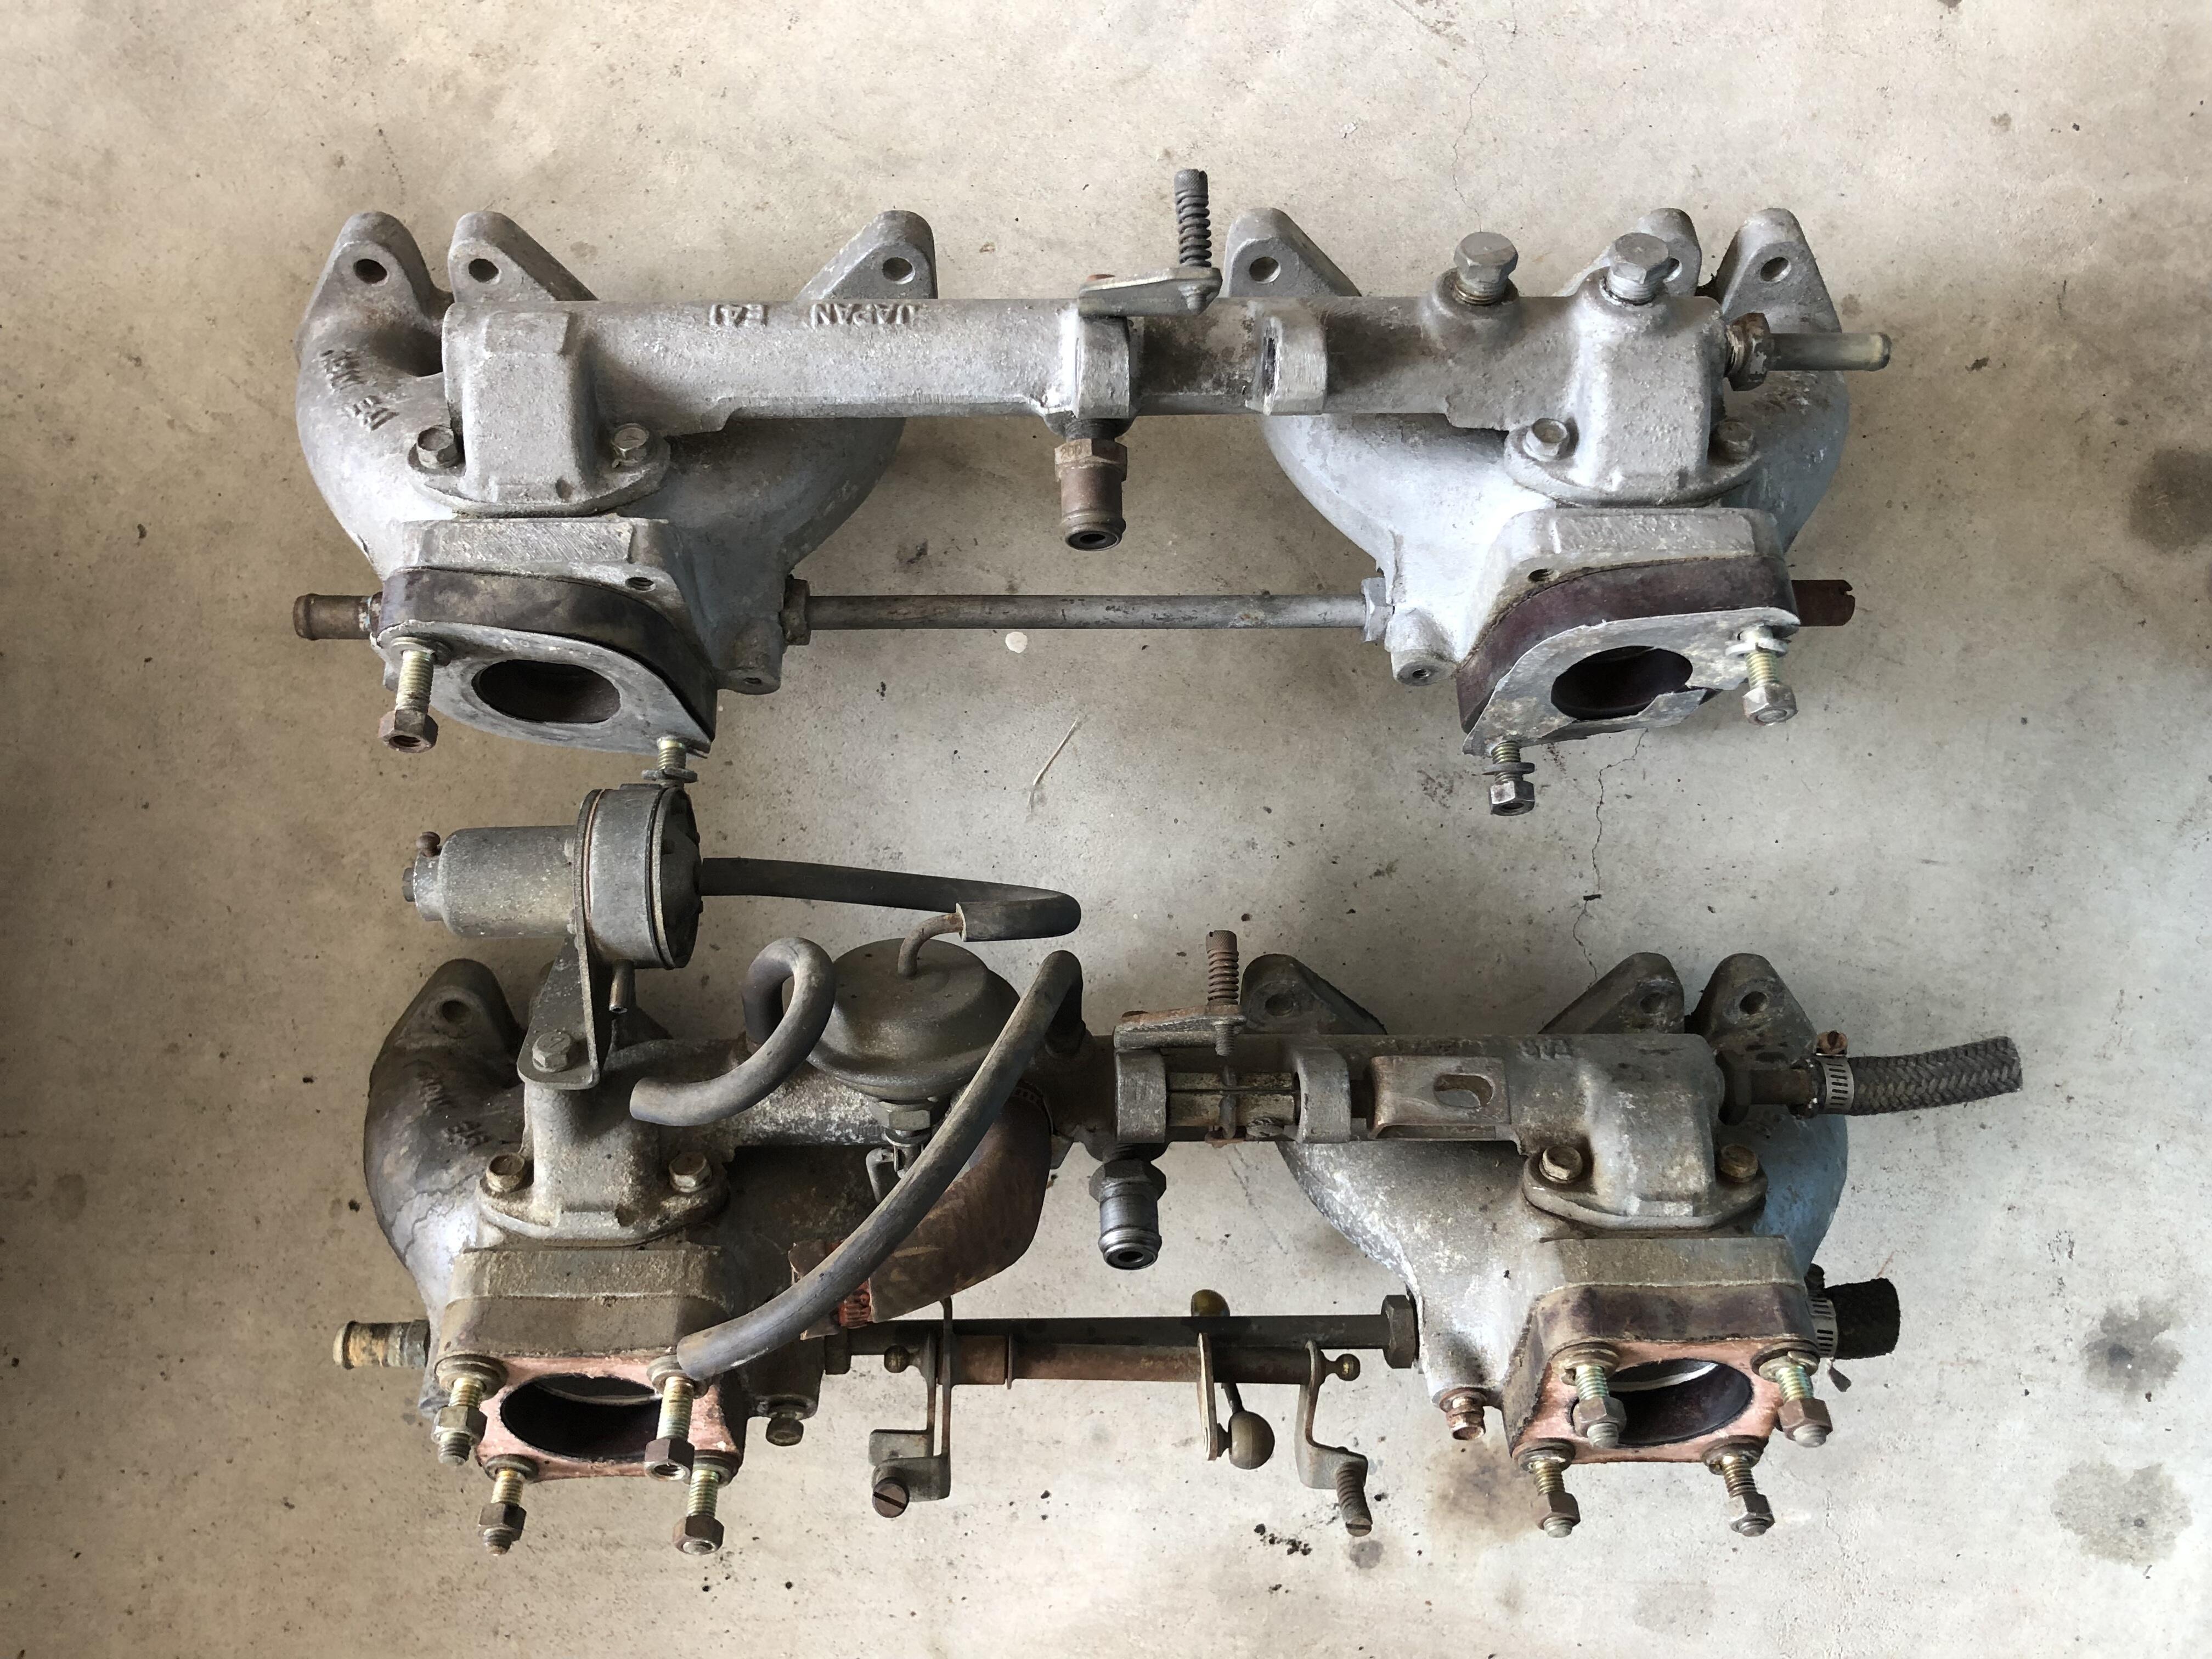
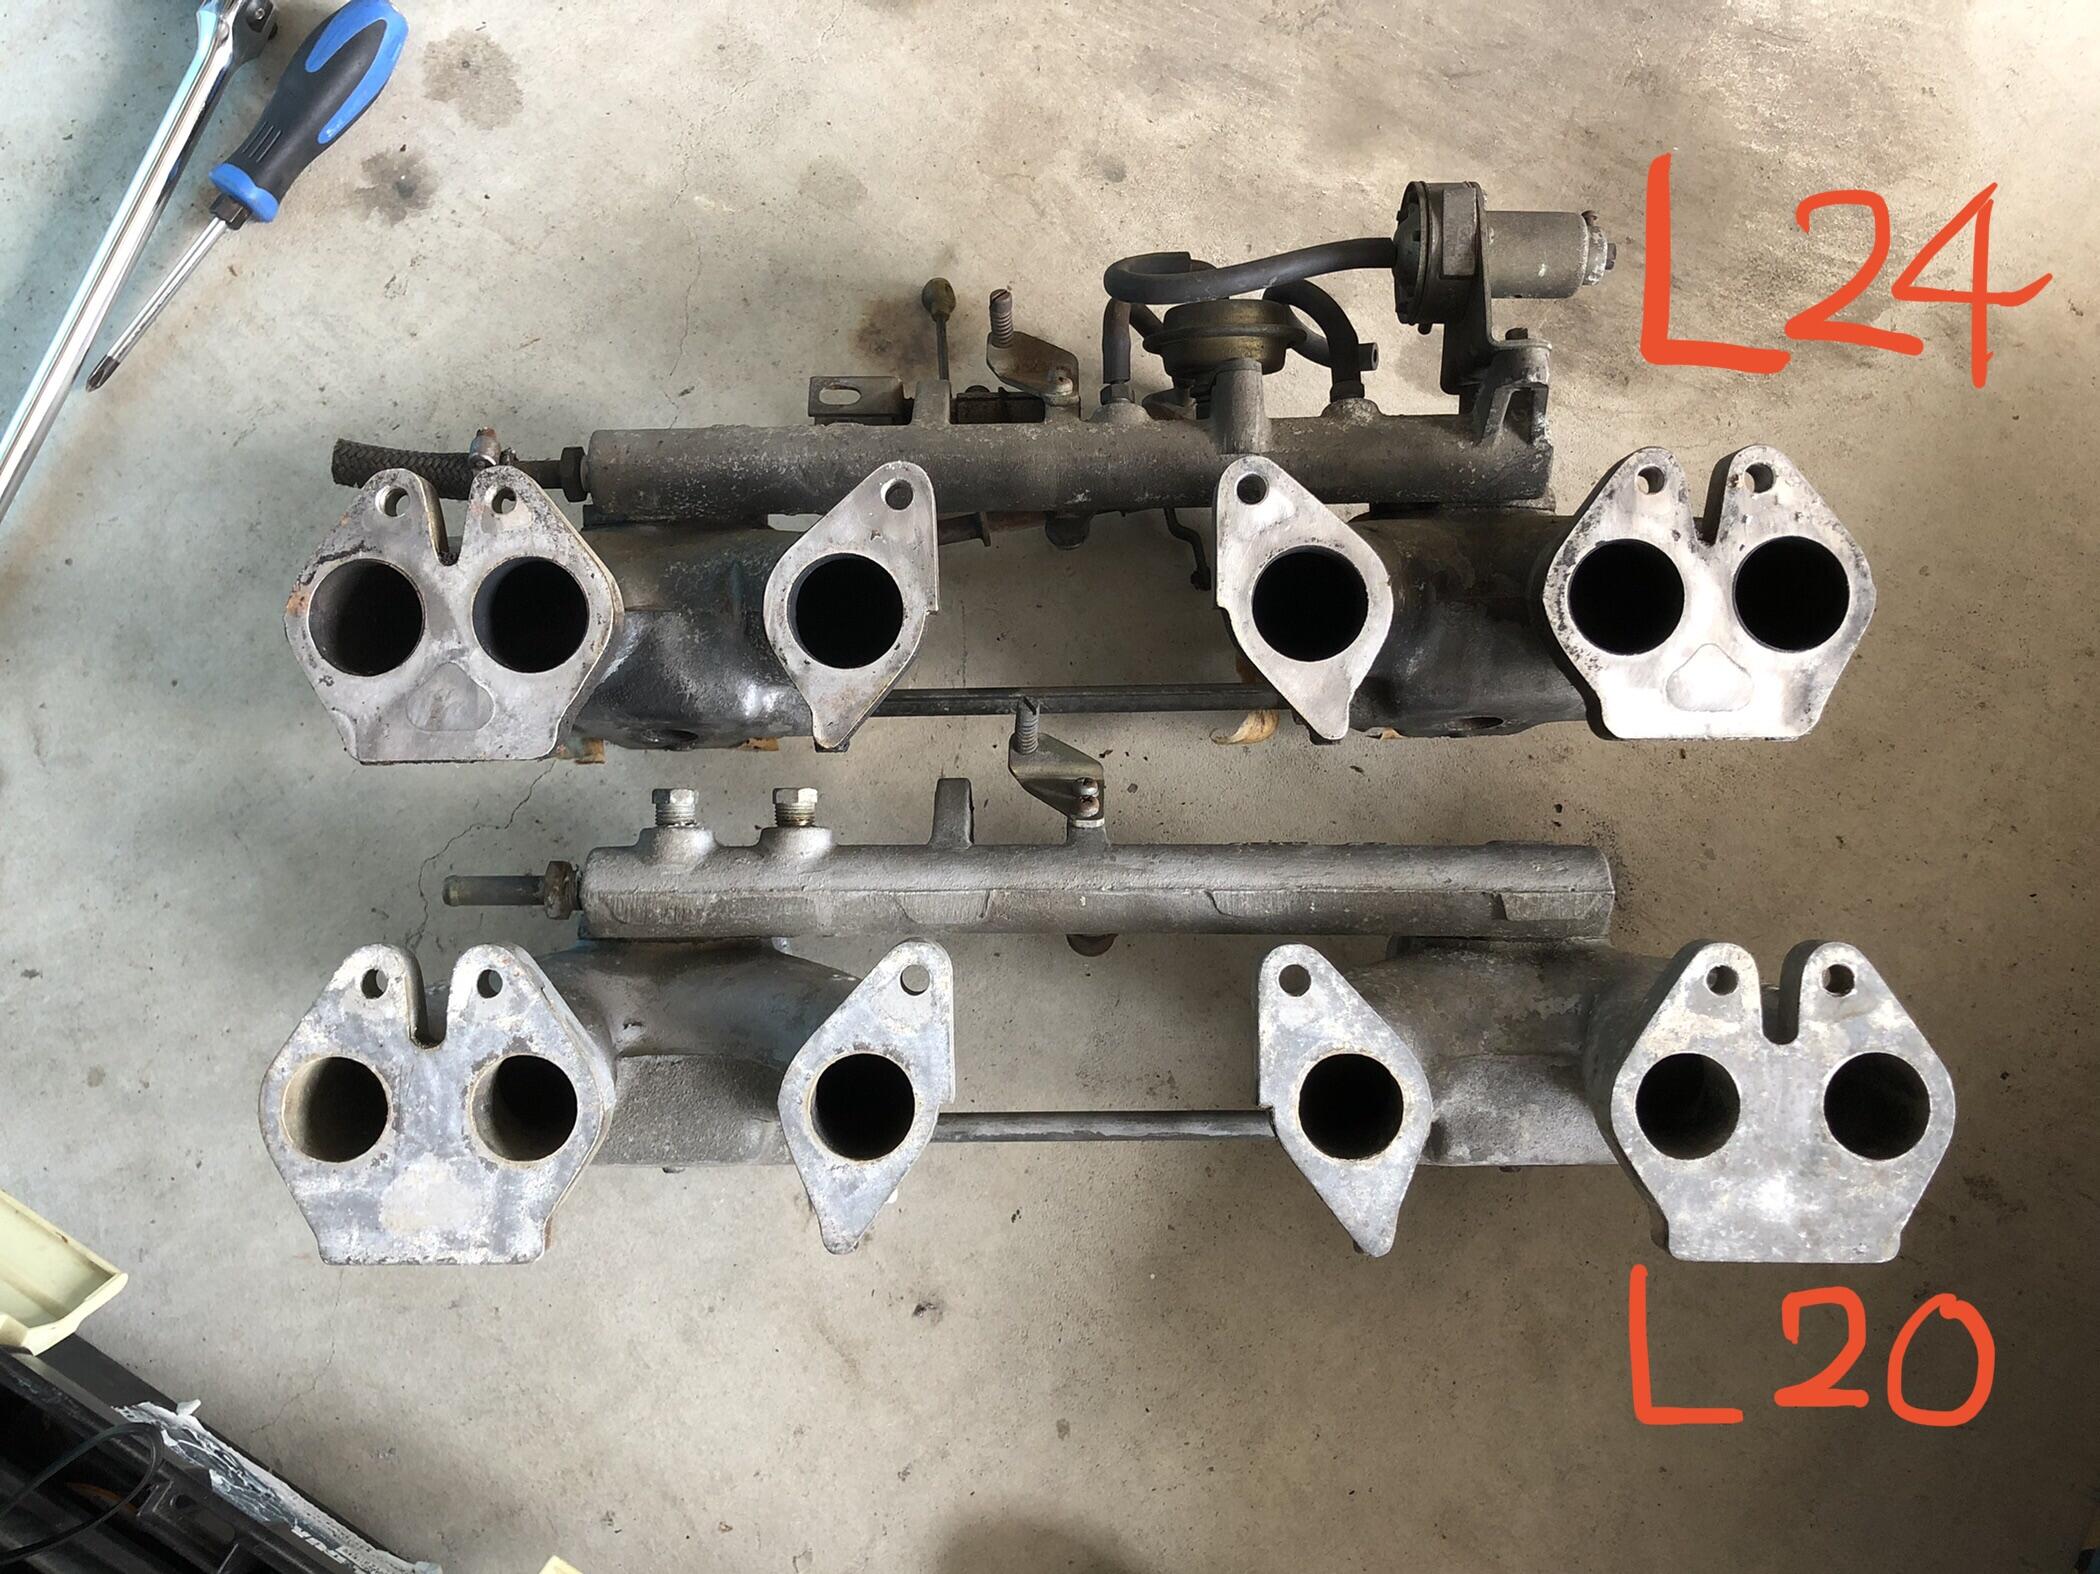
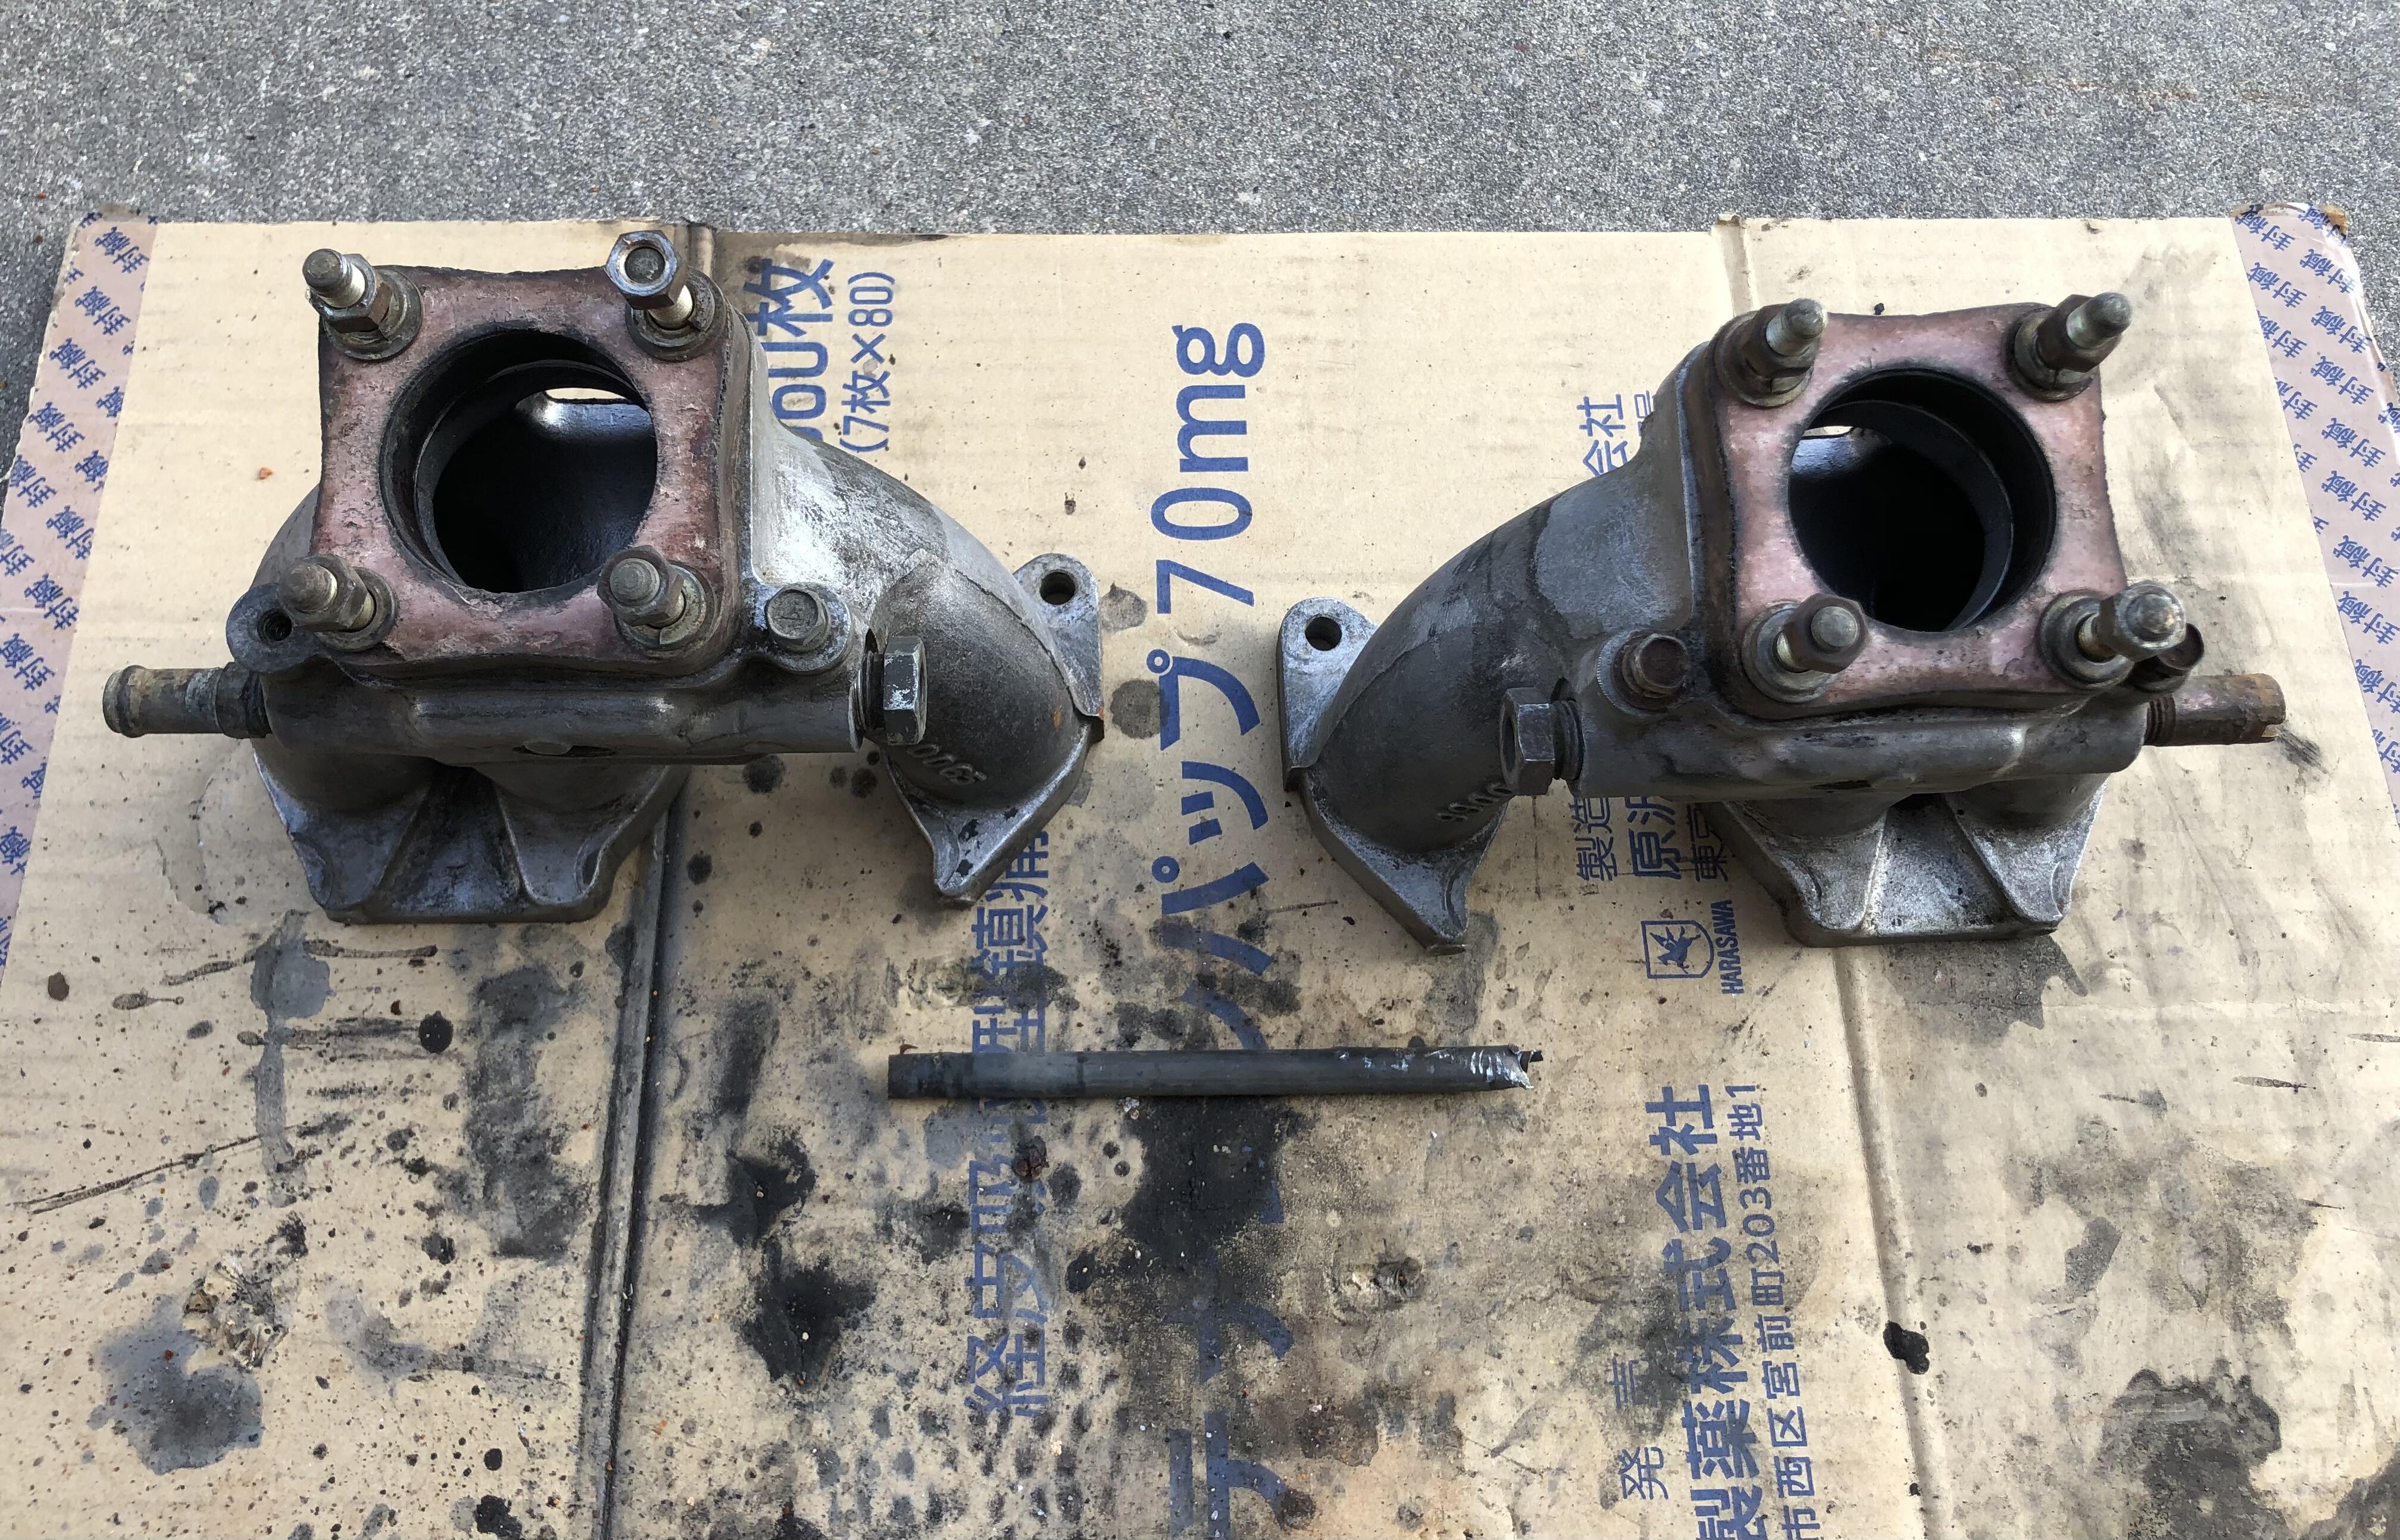
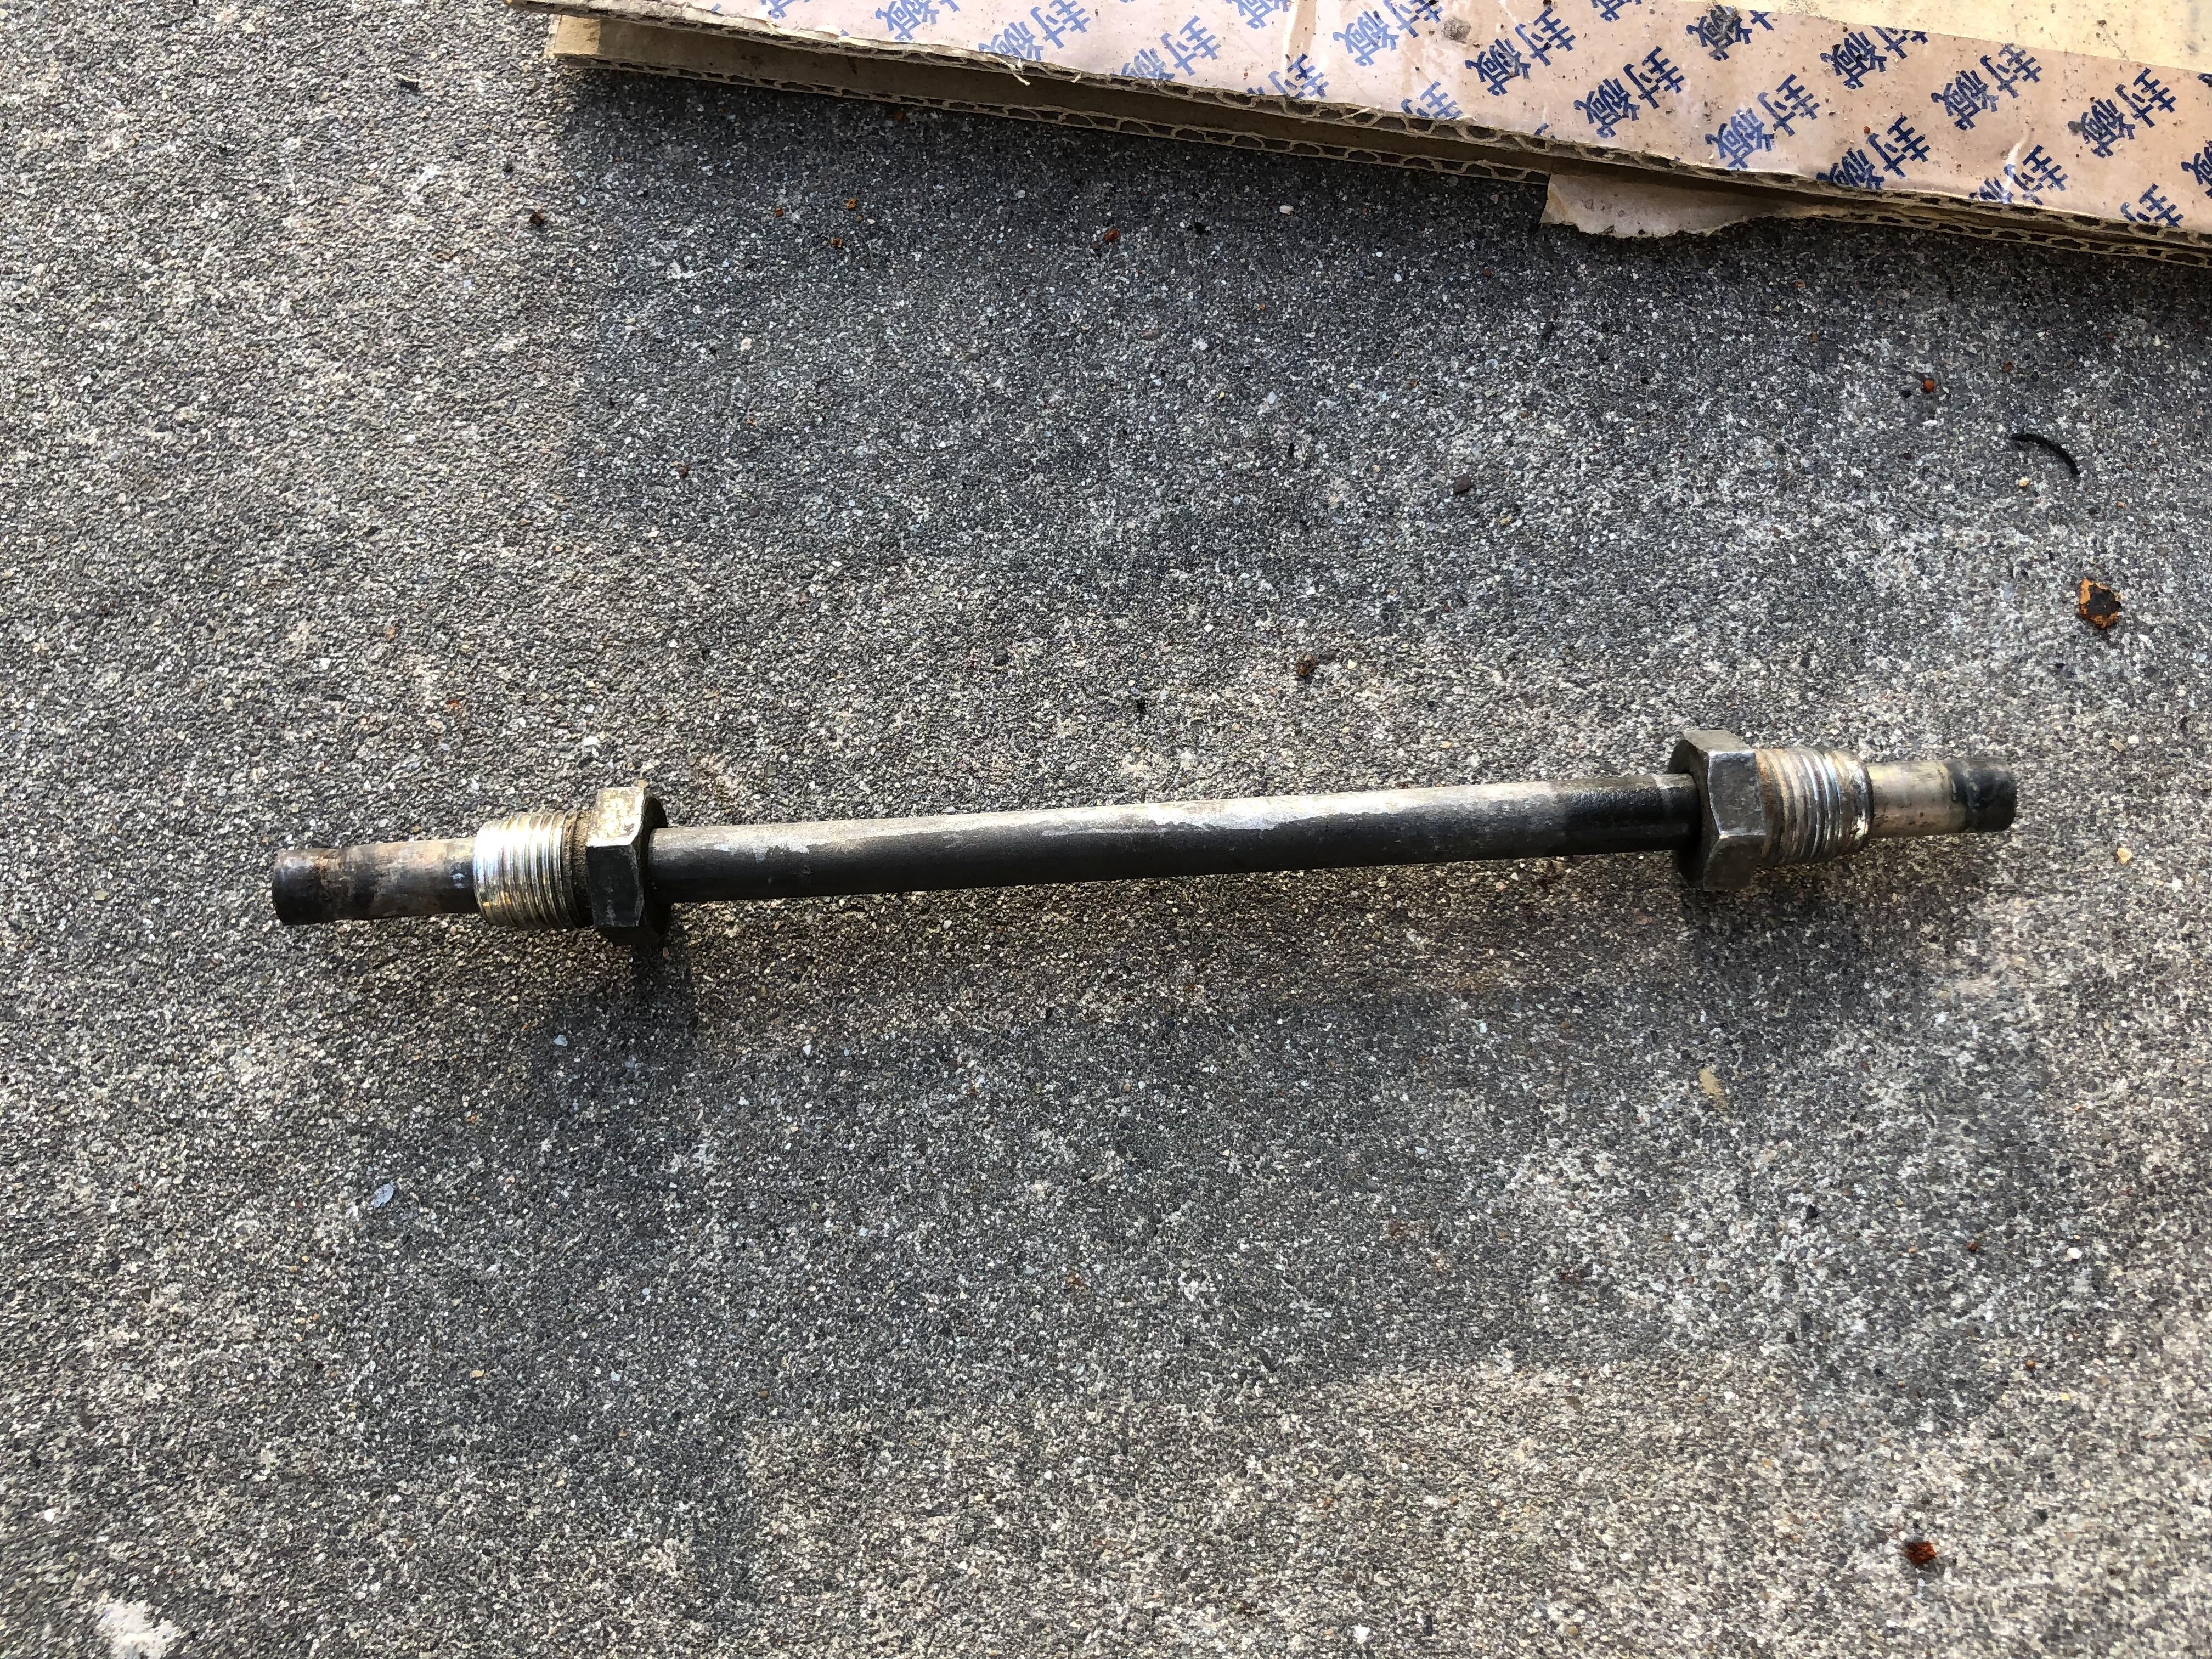
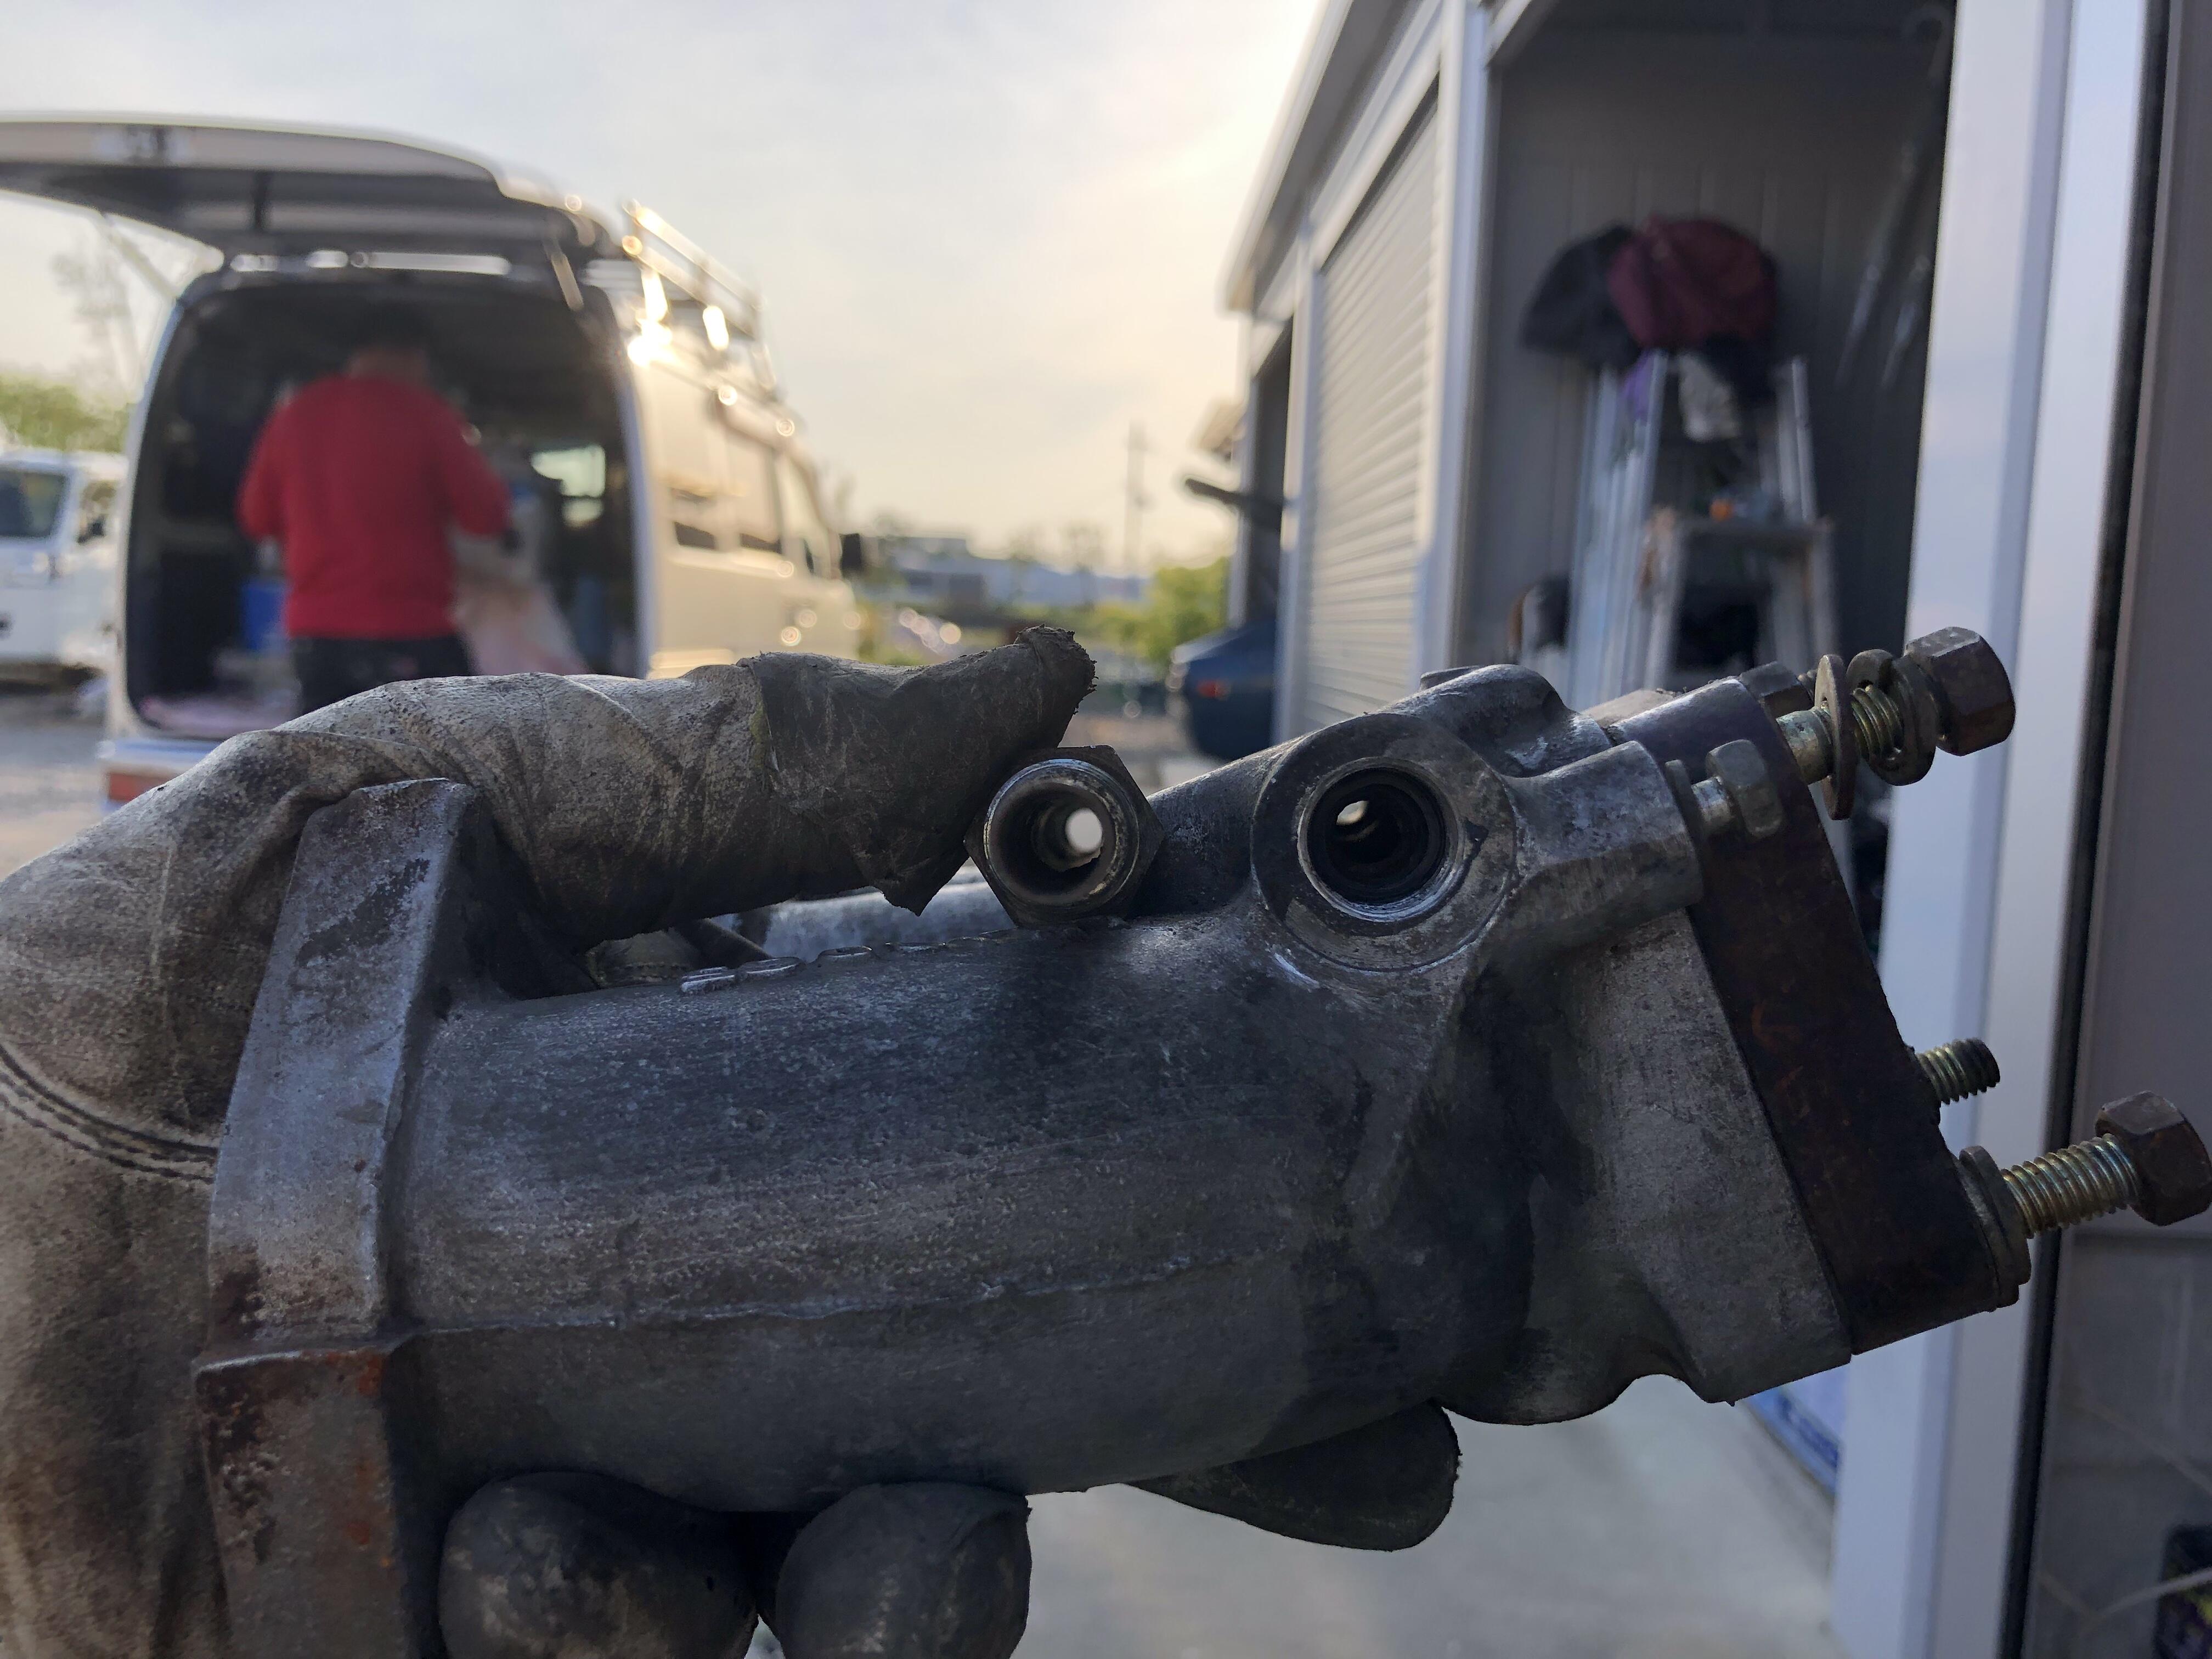
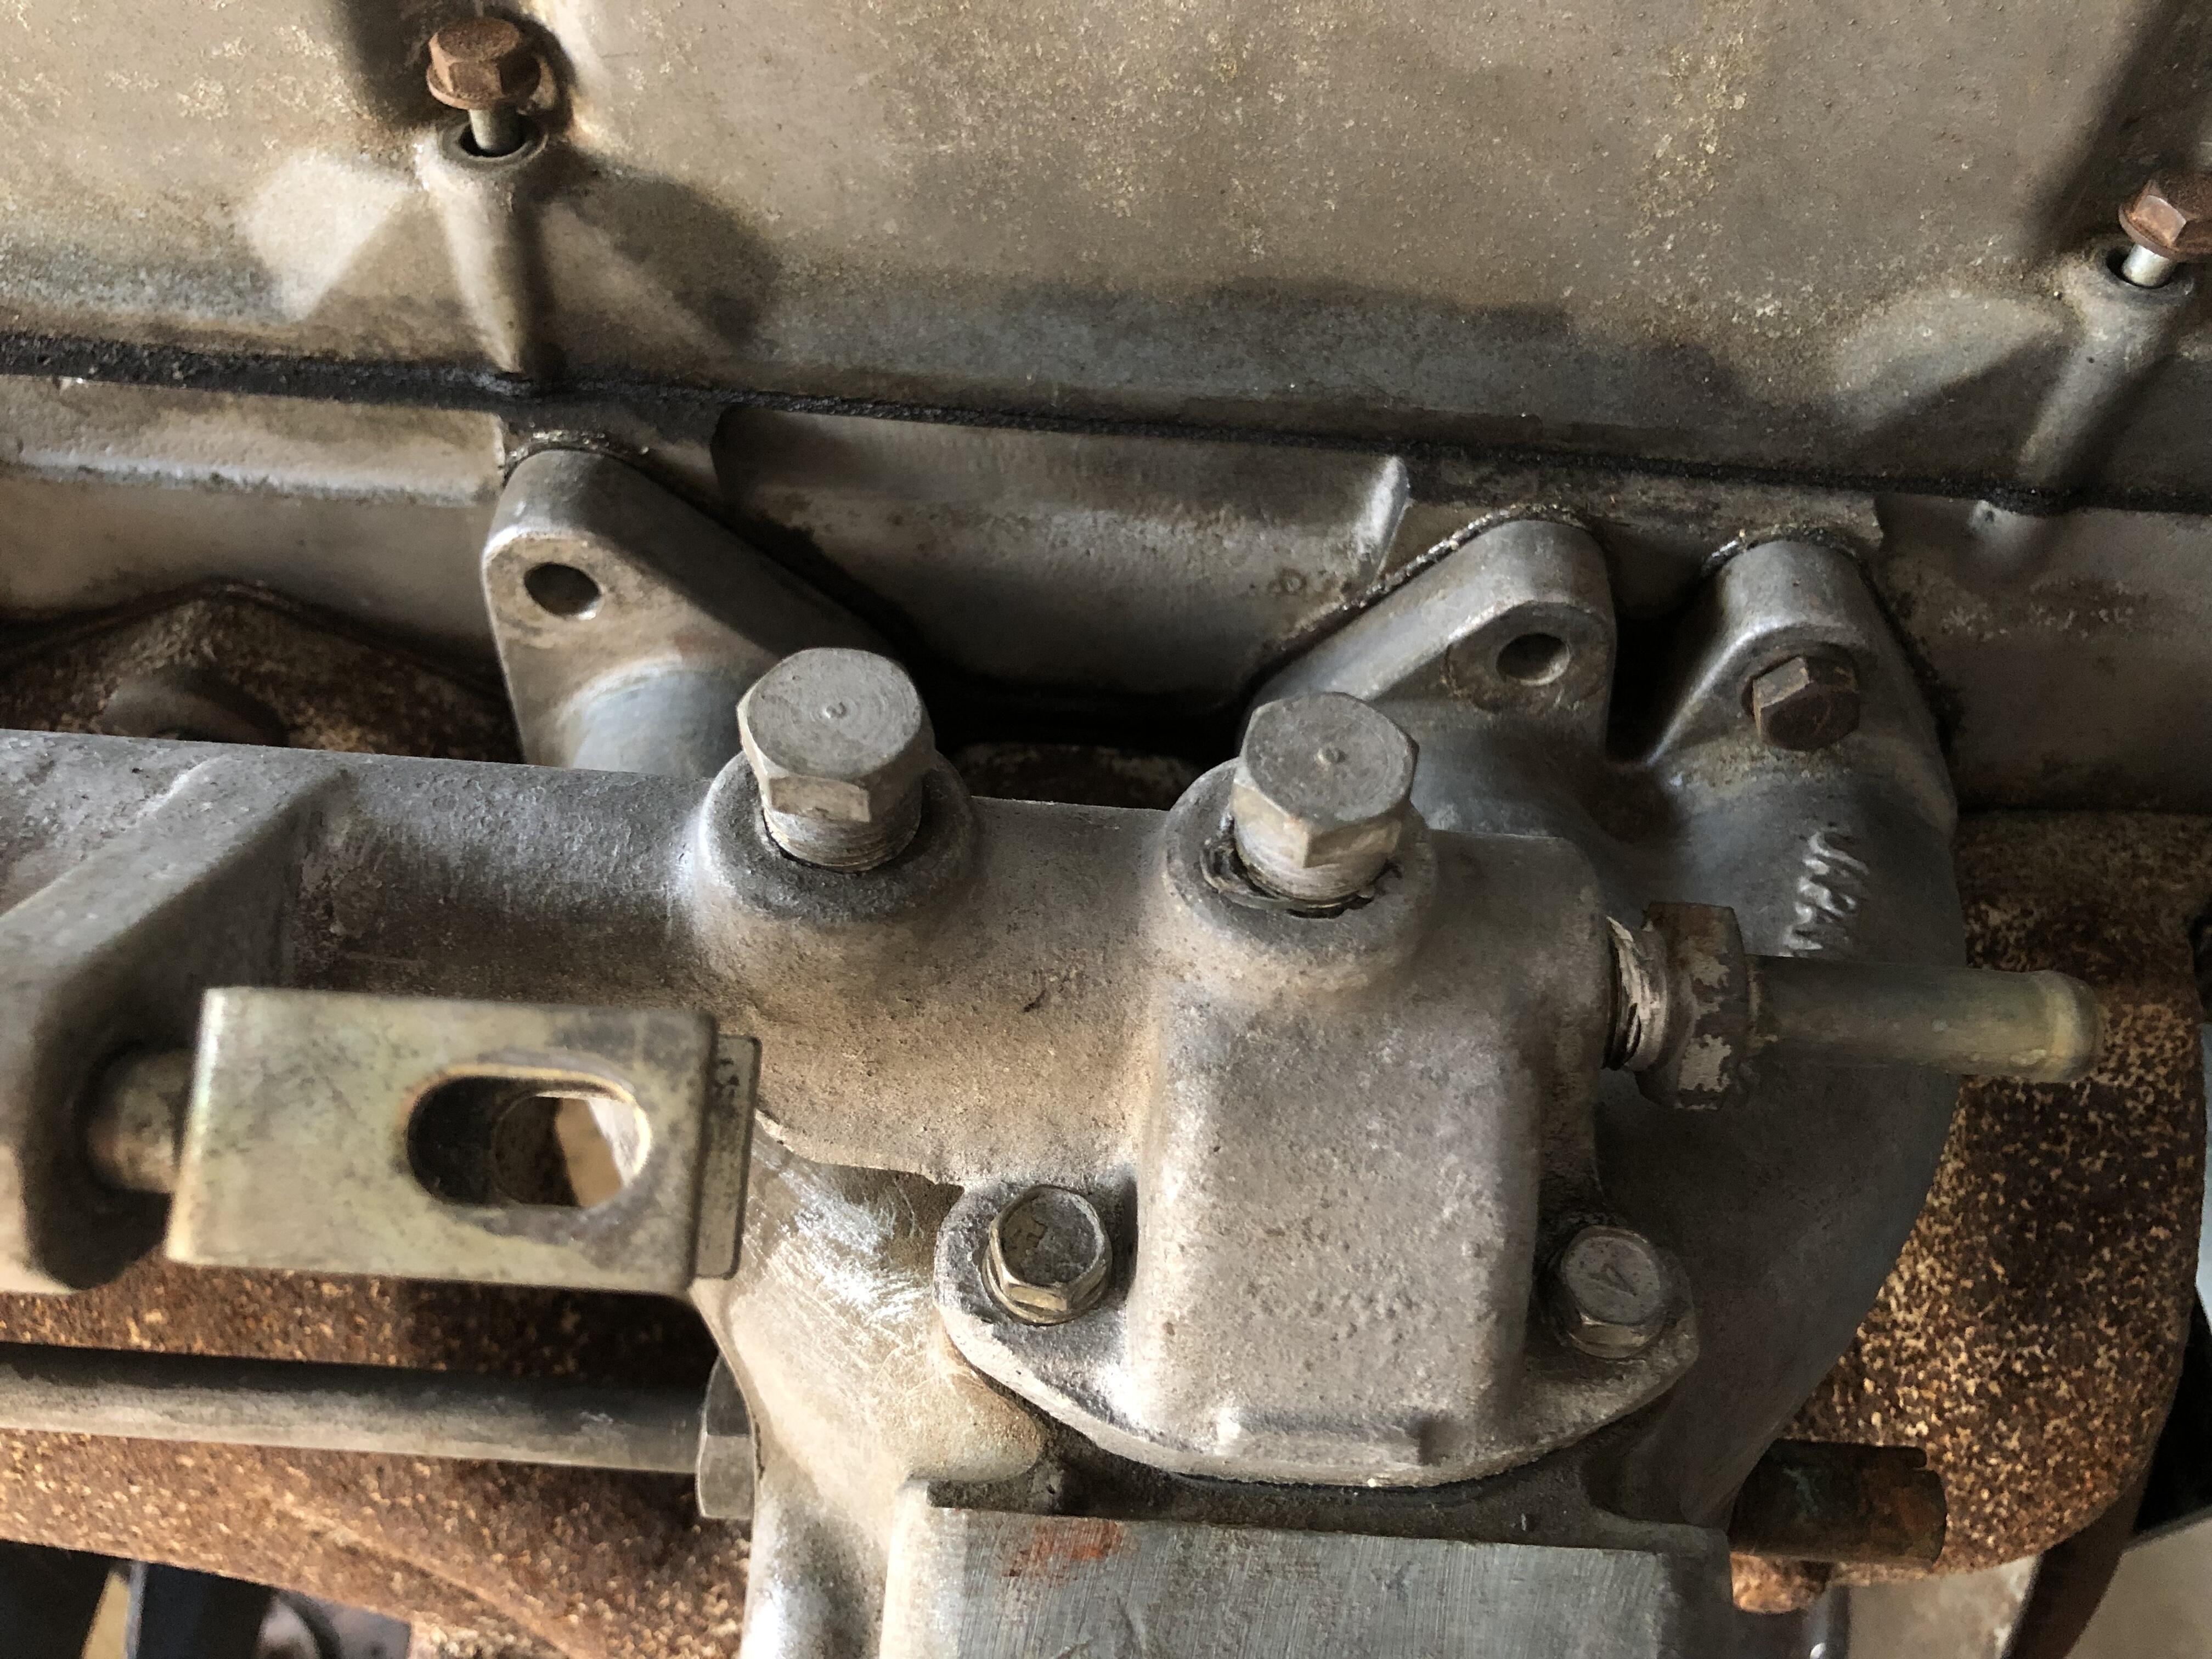
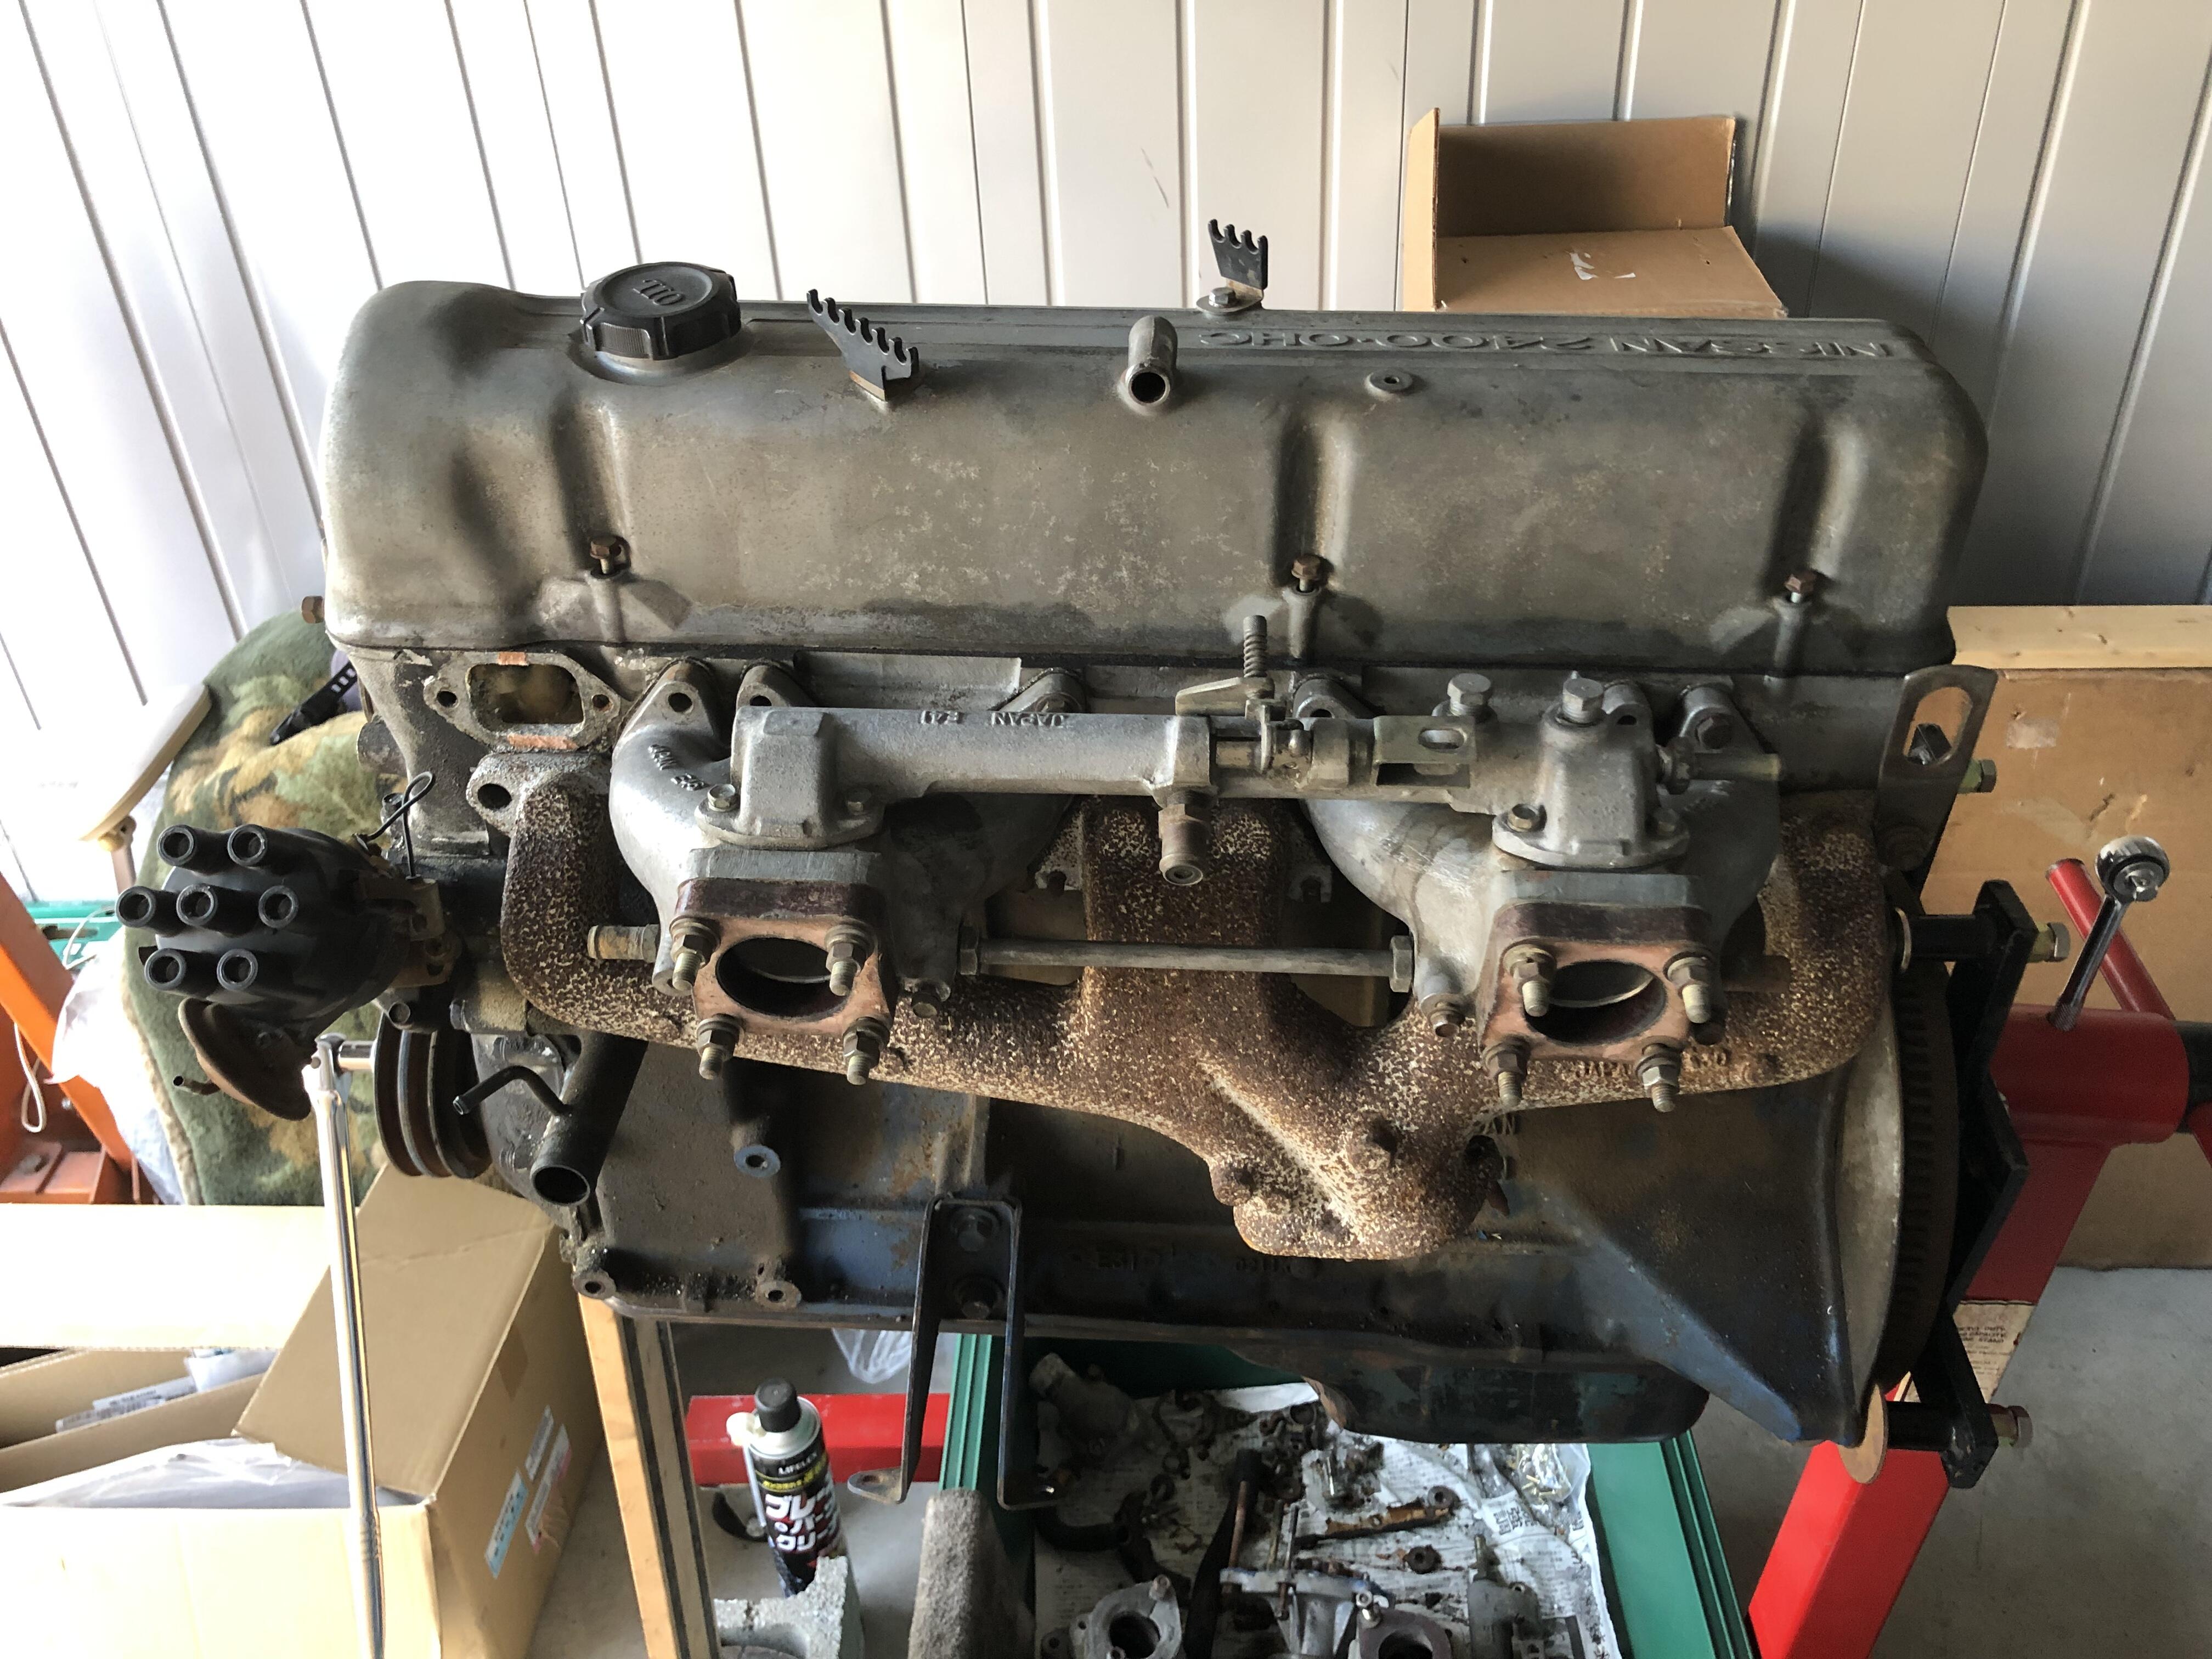
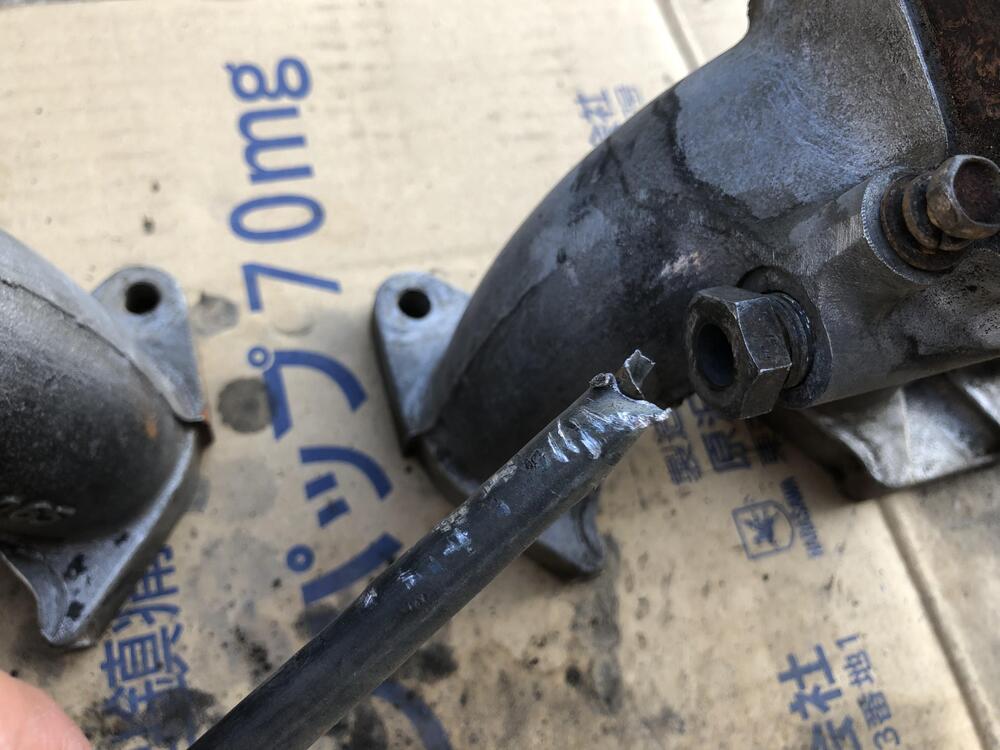
 1 pointTransition to the non-US intake manifold, I have a donor system which was pulled from a 1972 Fairlady Z (L20 engine model) . I was expecting I only need the balance tube but the water tube of between the two manifolds was so rusty. I decided to replace it with the one from the donor. I snapped the rusty tube , I was lucky the donor is very good. Today I have learned that when assembling the intake manifold, I have to wait final tightening the bolts on the balance tube until the two manifolds are secured . Also I tightened the two nuts for the water tube after the balance tube was secured . As some of you are wondering about the two plugs on the balance tube which are not welcome for my 03/1970 car. I am thinking about it to look just like an early L-series balance tube. Kats
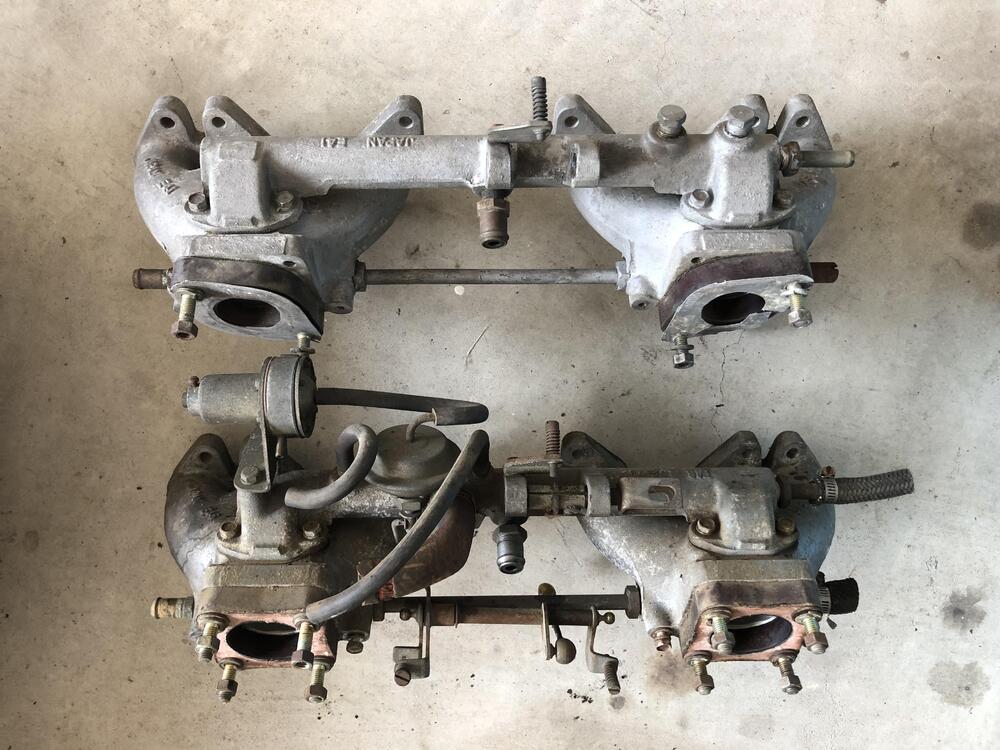


 1 point
 -
 1 point1. It's not easy to test the condition of the bearings and gears with the transmission dismantled like that. It might be a bad bearing causing the hard spots. 2. The shafts tend to wobble around when they are free. The bearings have a clearance specification of C3. You will always see some side ways movement over a shaft more than a foot long and even more with worn bearings. While you dismantle the adapter plate check the bearings are clamped in place by the retainer plate. There should be no end play. 3. The nut should be tight. Loose is not good. To tighten the nut I bought a 38mm tube socket and welded an extra length tube on it and a 1/2" drive socket on it. Worked well.
 1 point
 -
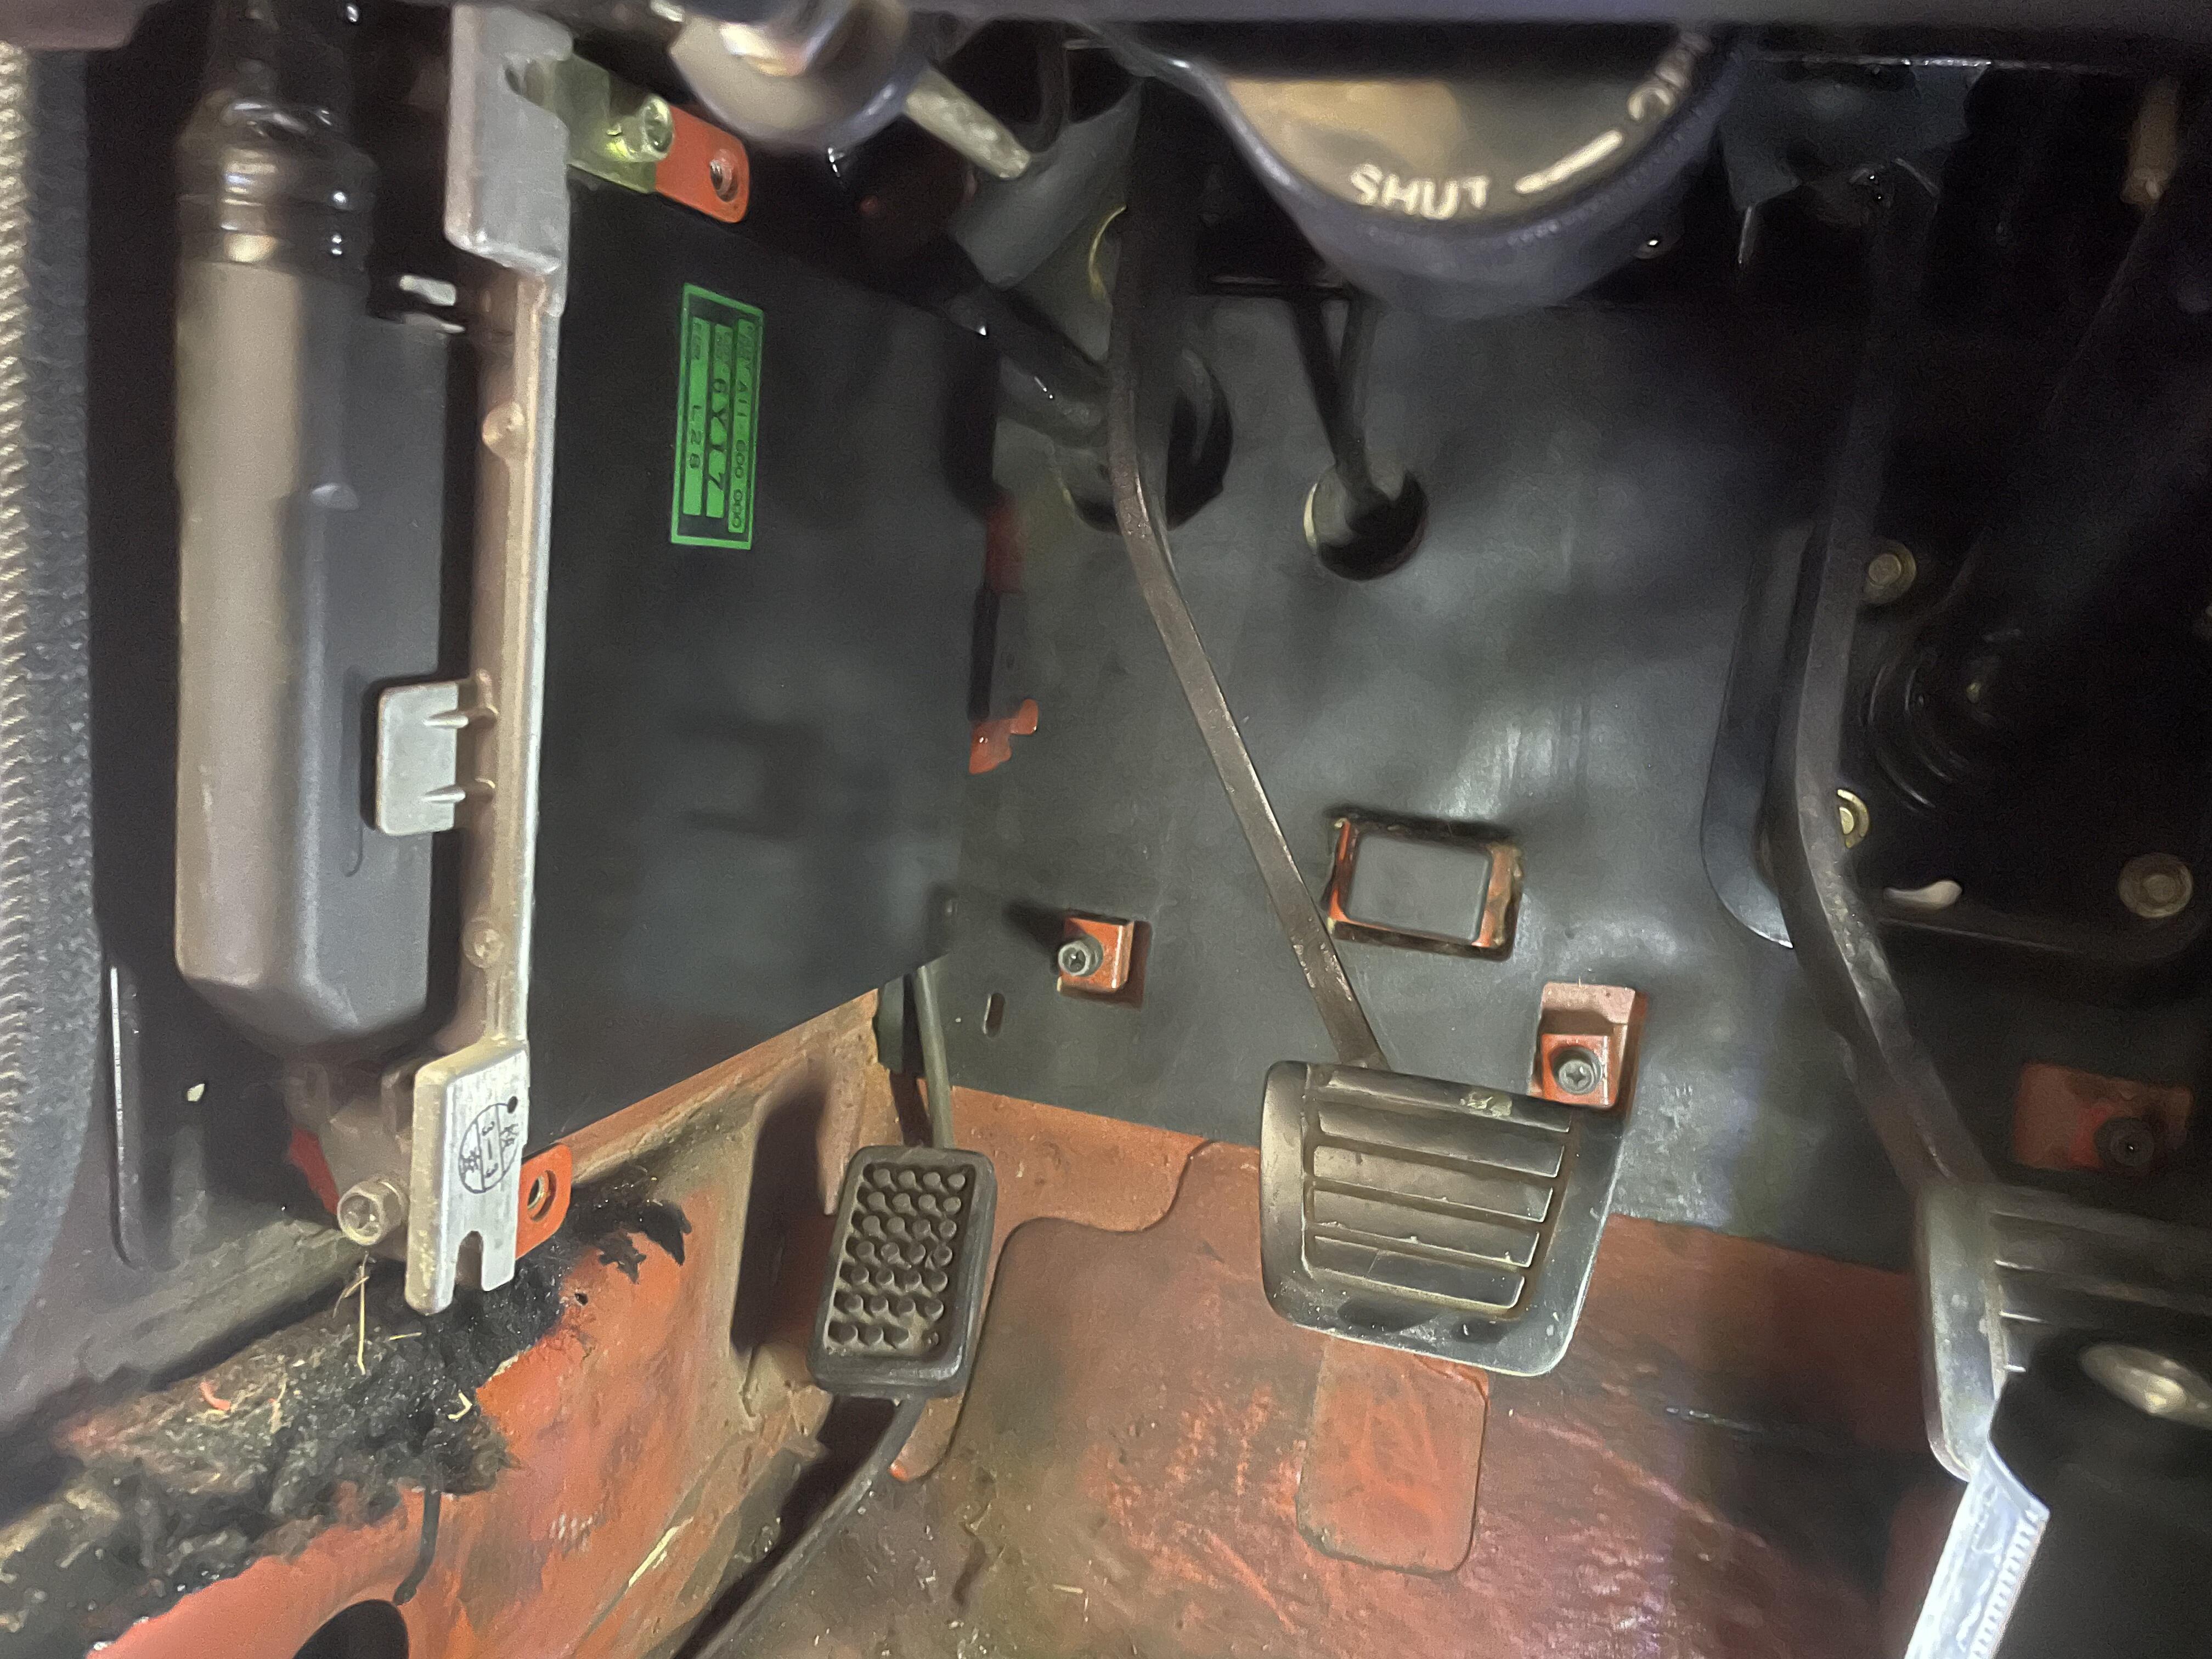
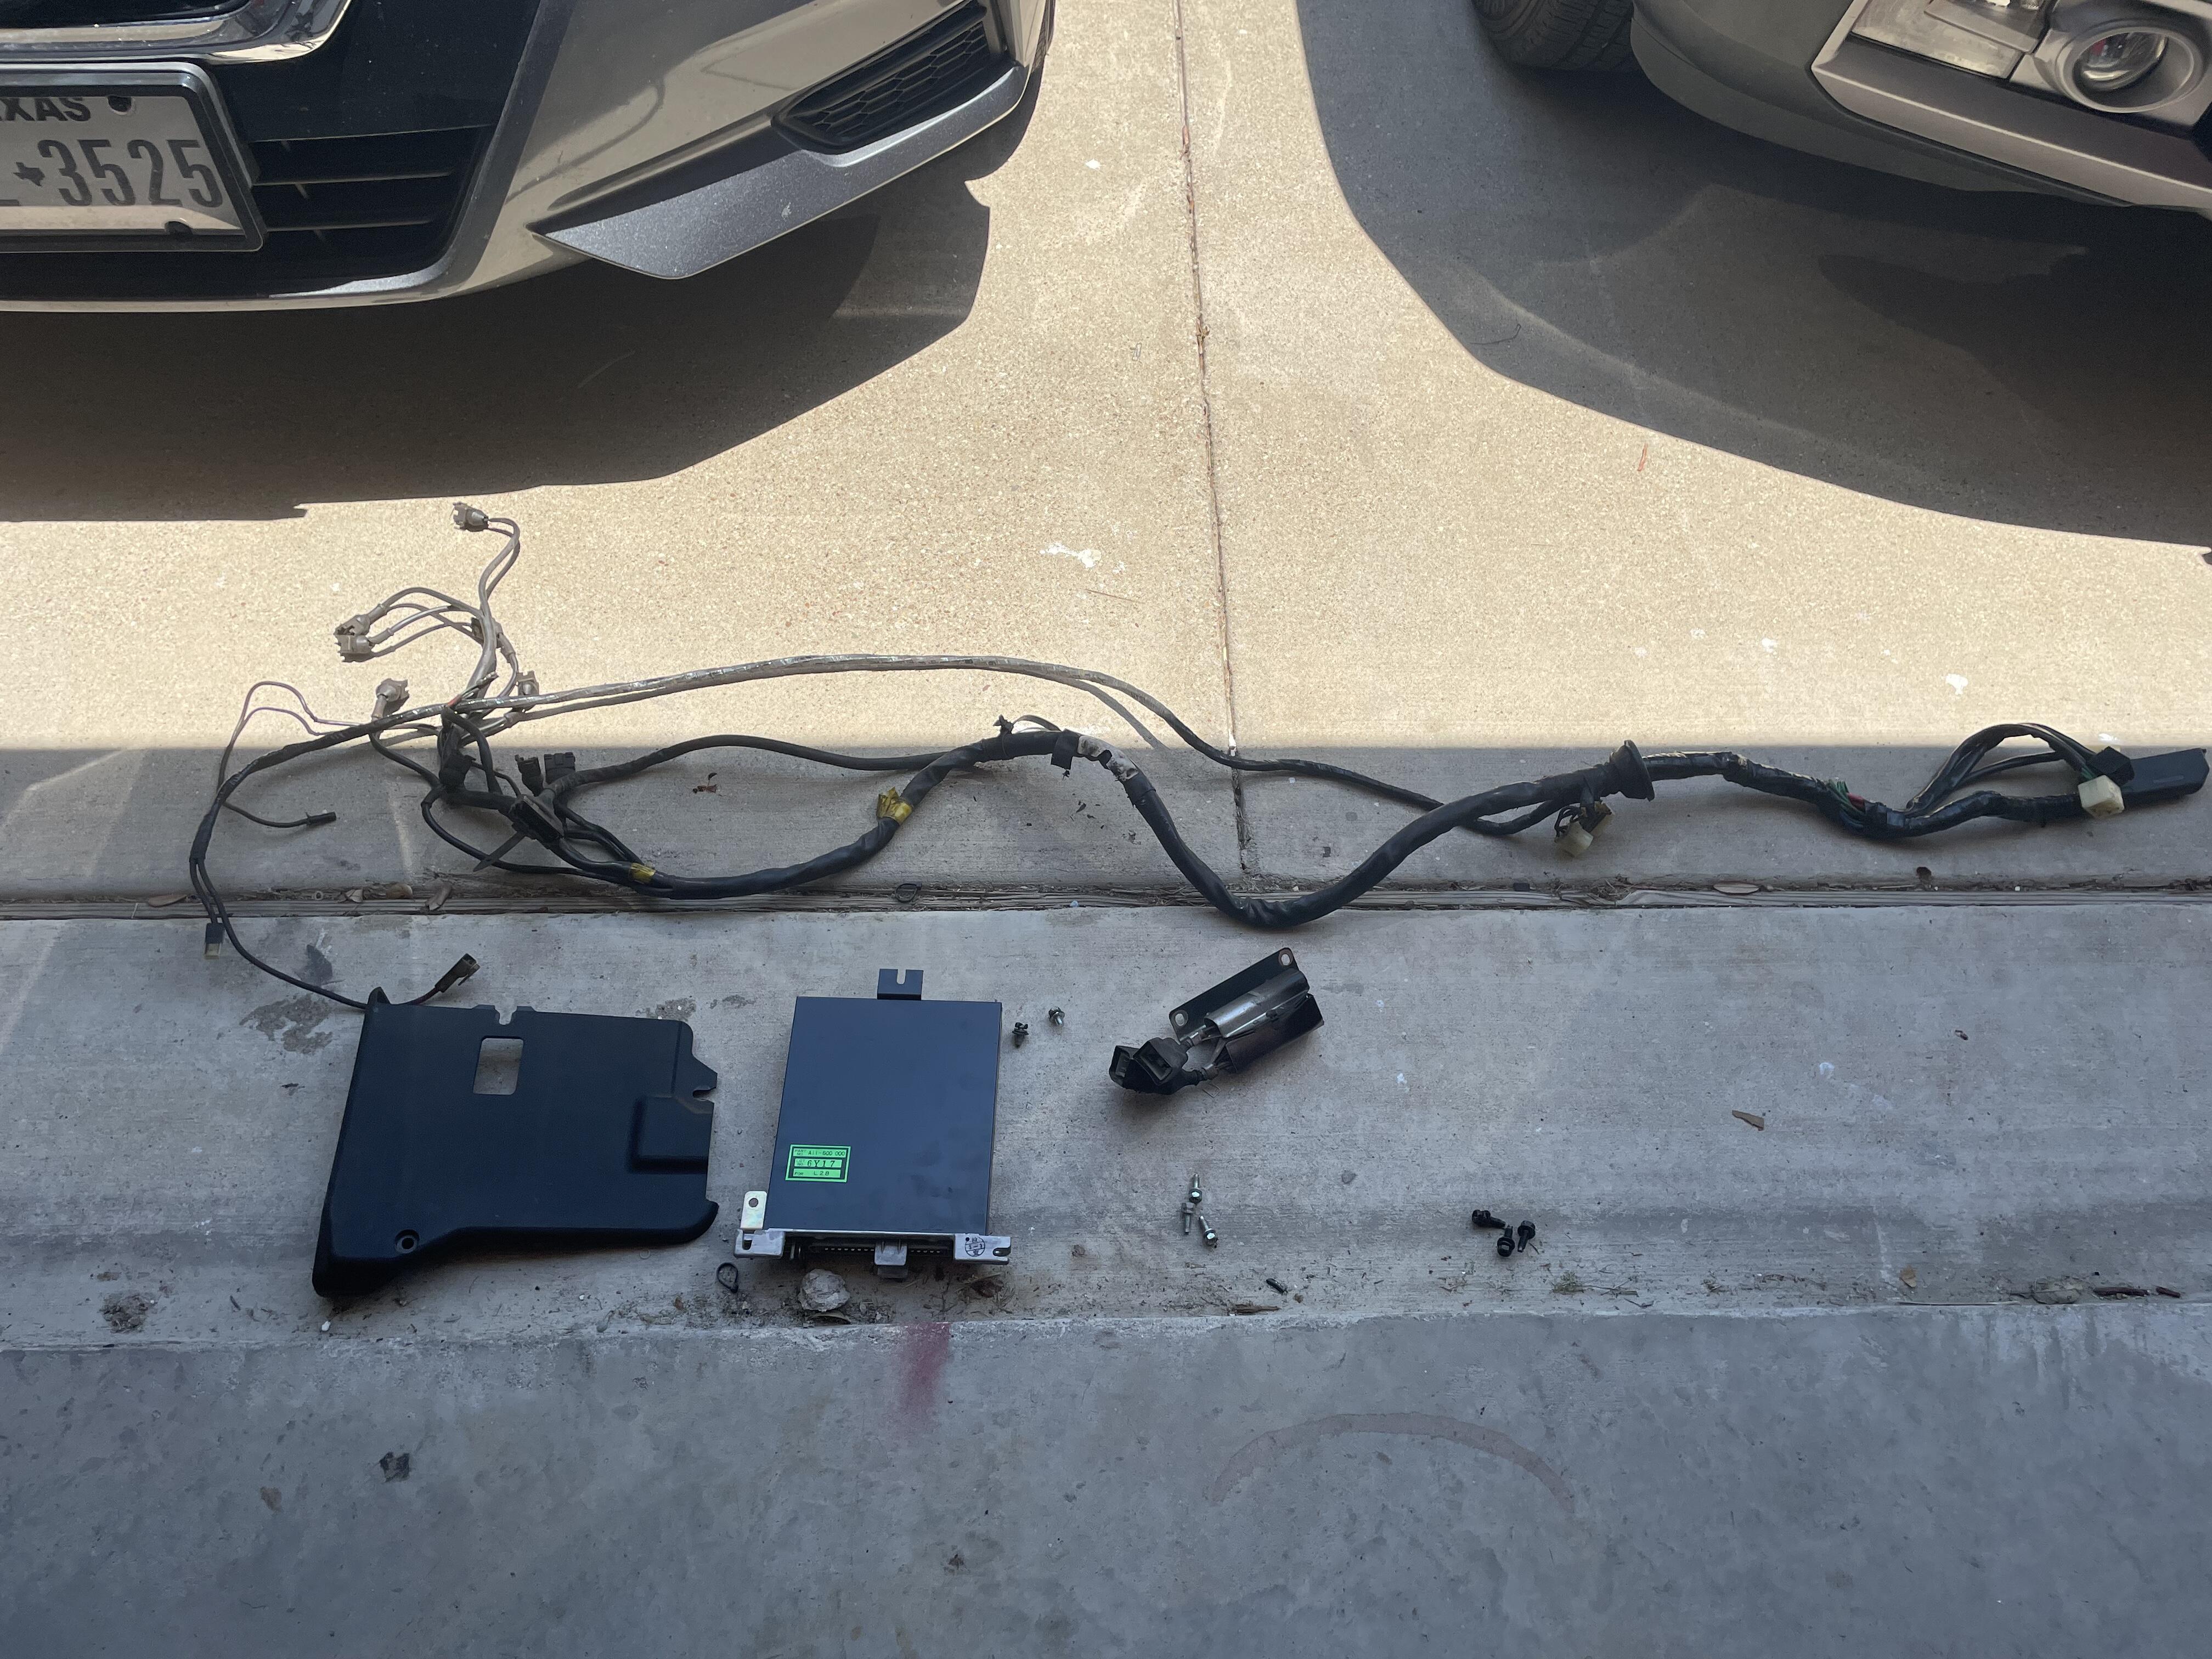
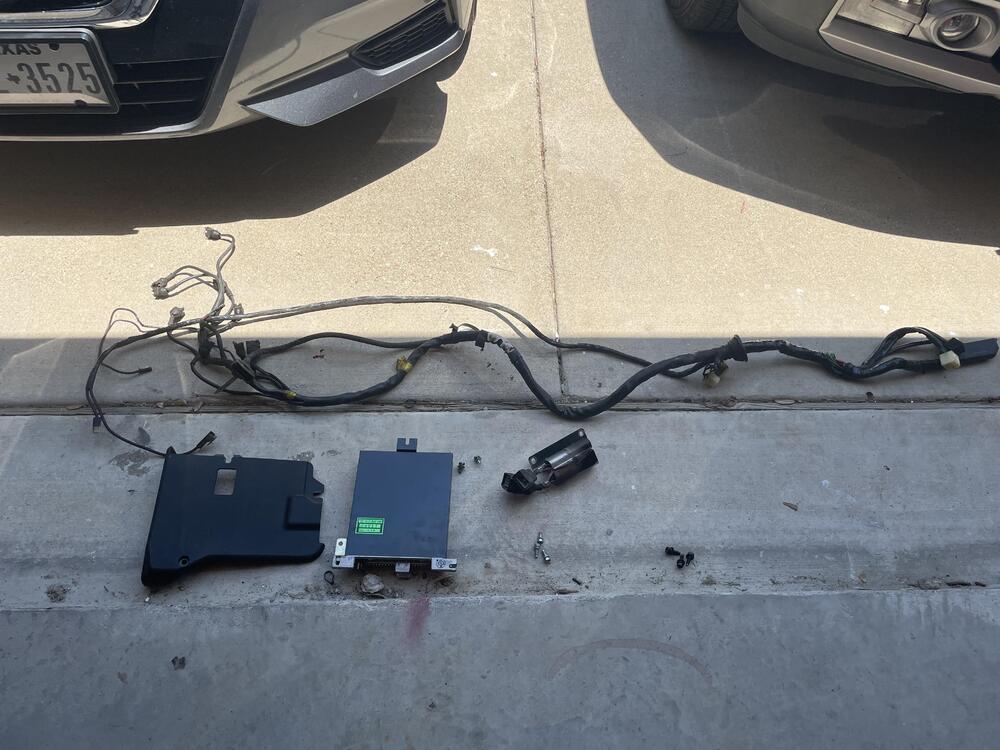
 1 pointThe job gave us a family day today so we can have a 4 day weekend for Memorial Day. Took today removing the EFI cables. relatively easy, I did use a door clip remove to disconnect electric connections and fuses. Made short work of it. EFI is now removed and I’m ready to work on assembling the engine, transmission, and clutch. clutch slave cylinder was installed last weekend.
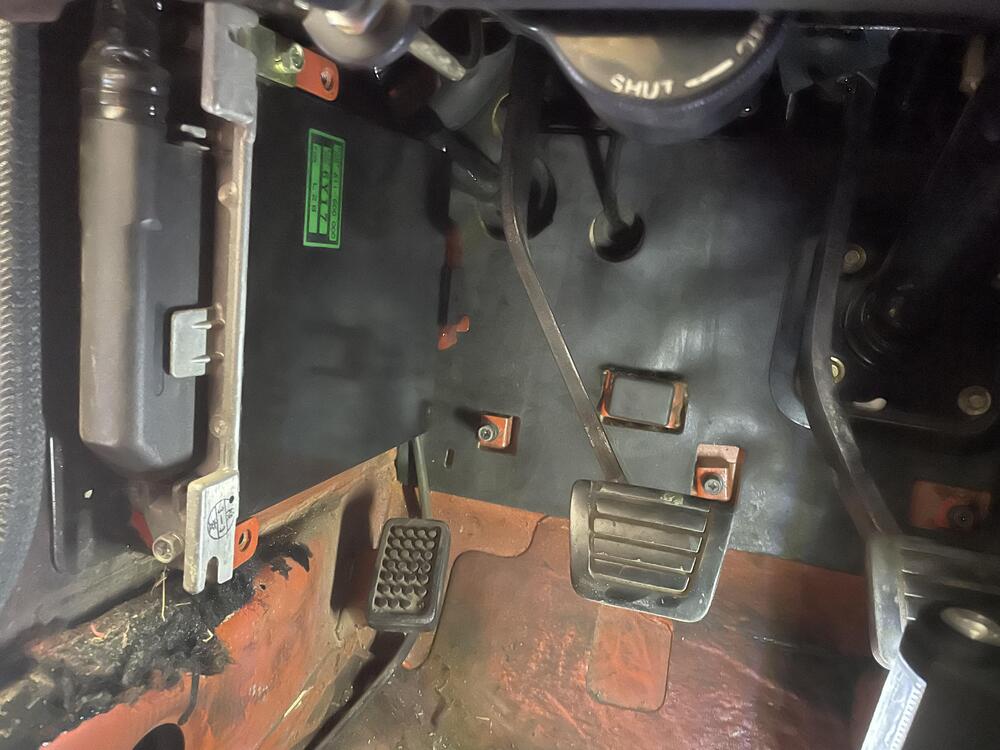


 1 point
 -
 And now the hood, which is very close to being done.1 point
 -
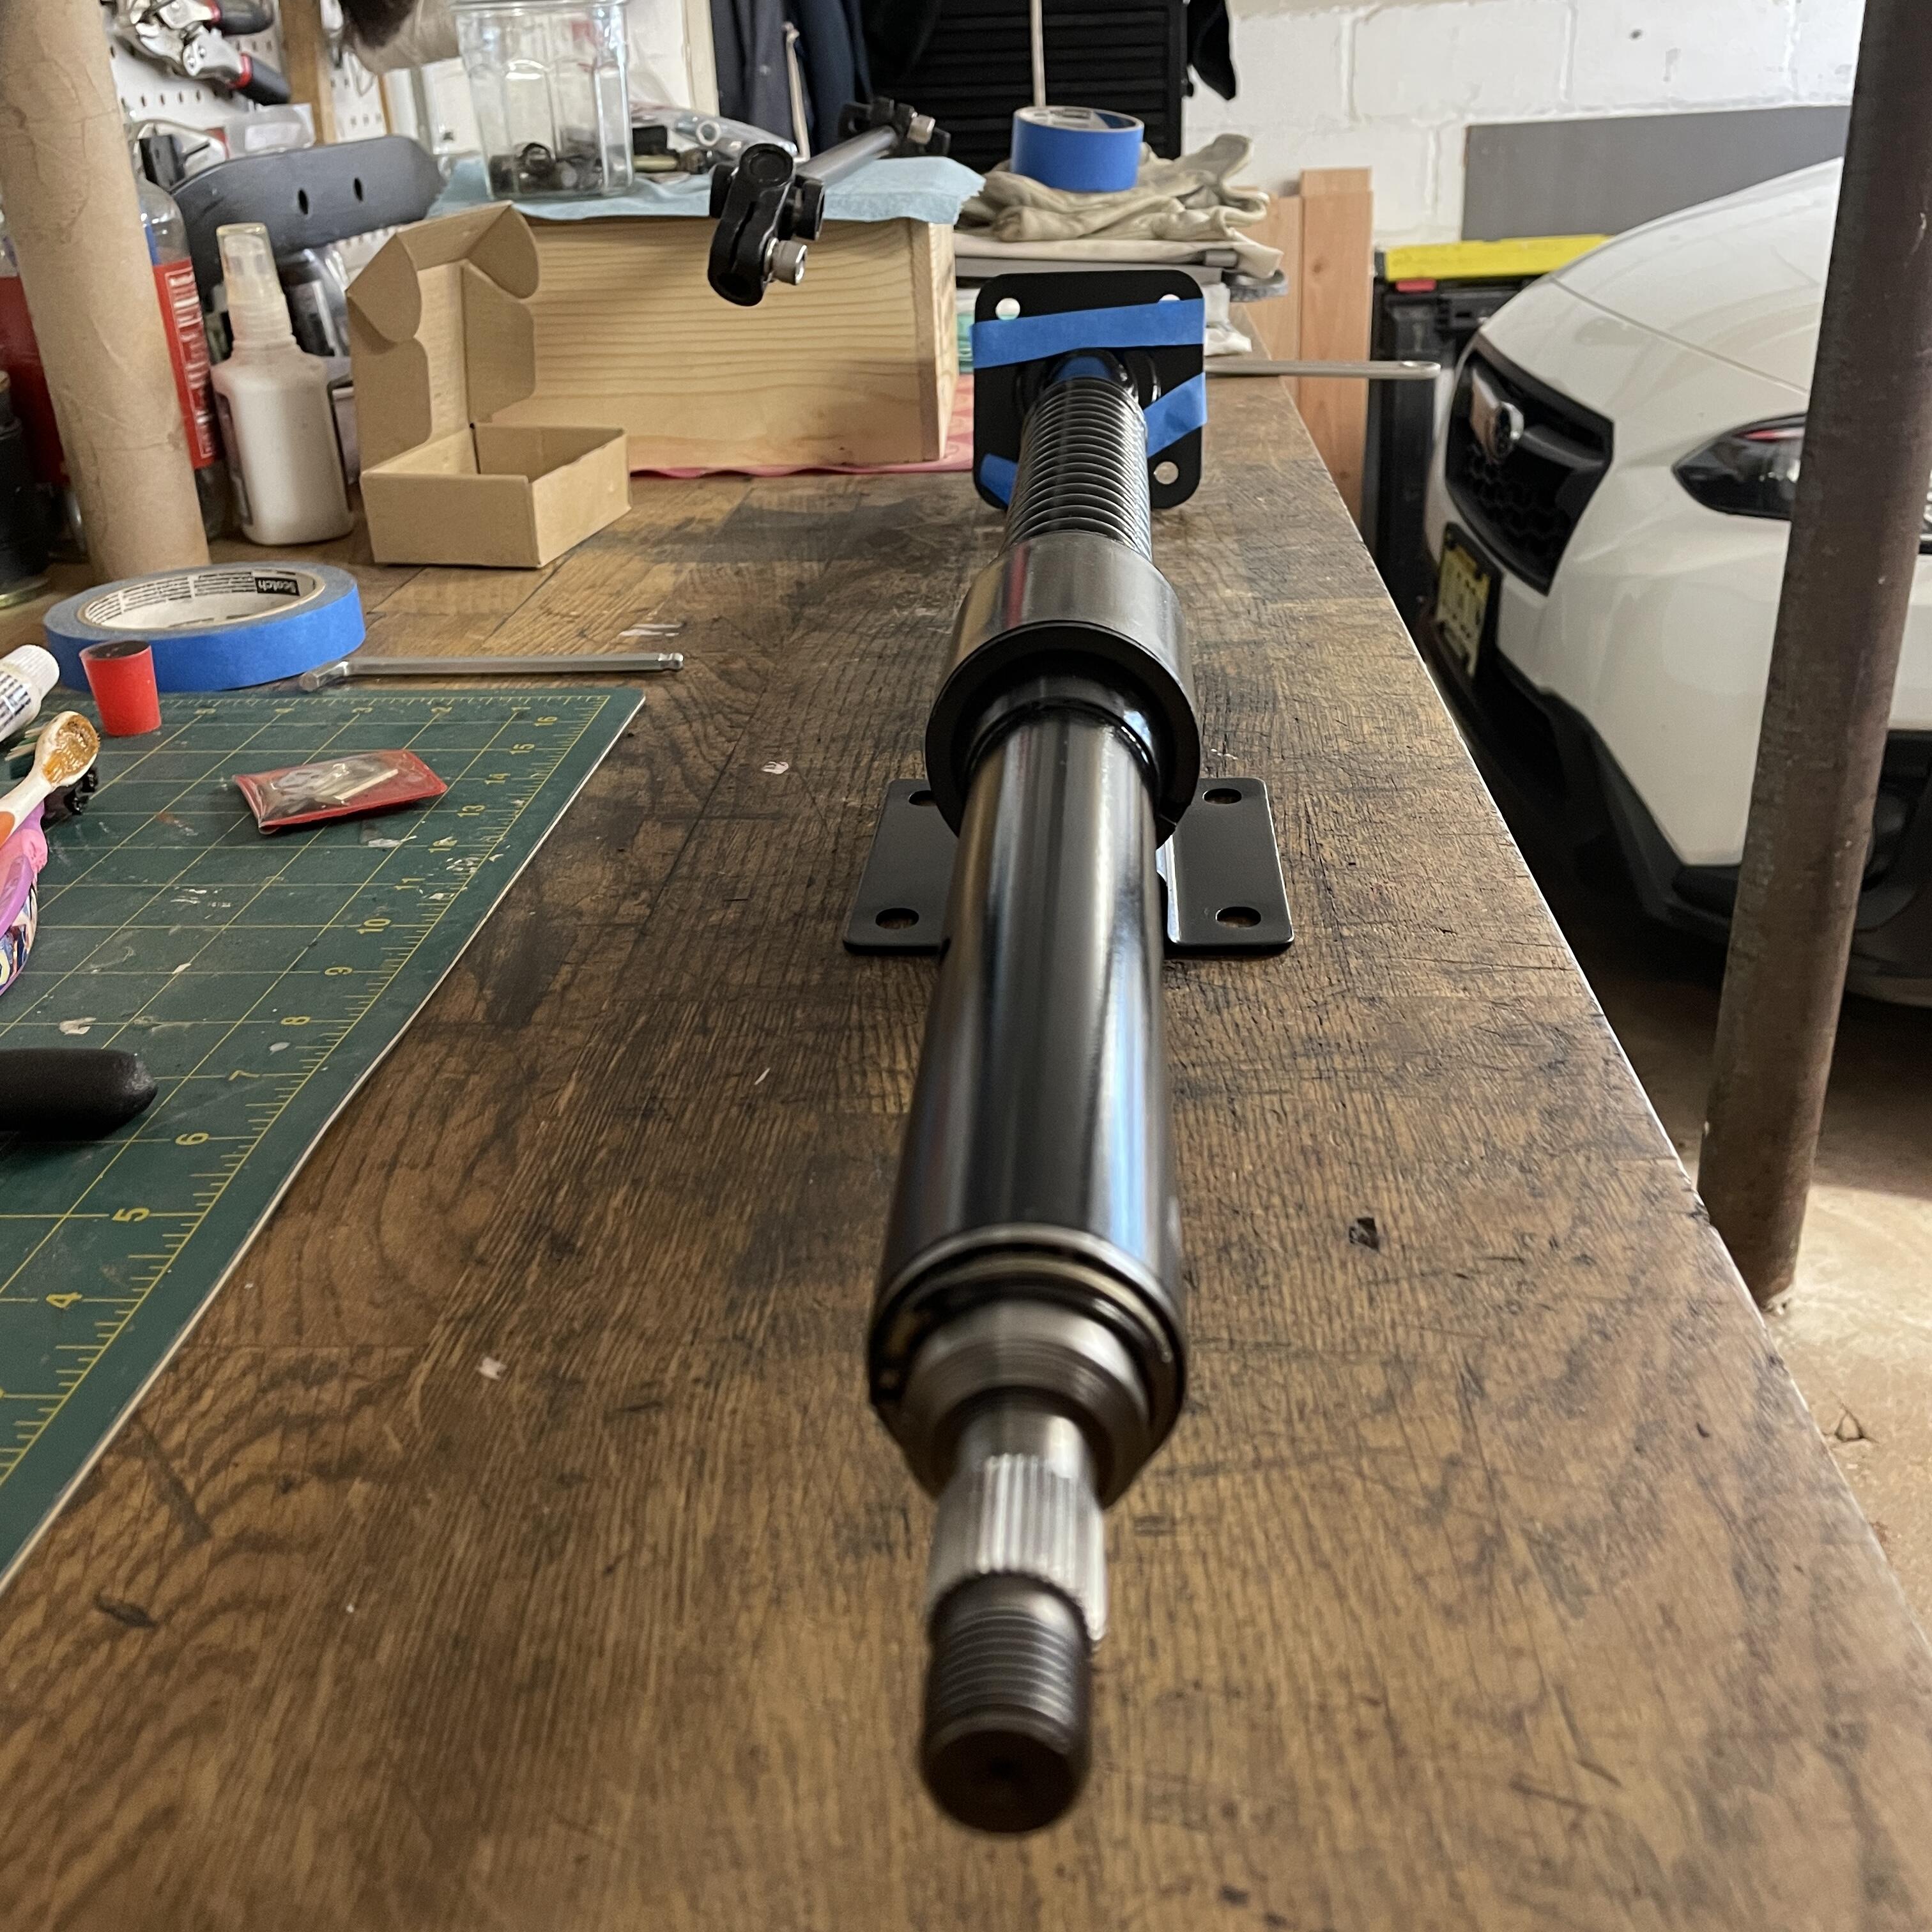
 1 pointBack together: I found this component to be a pretty simple refresh project… if you don’t try to pull the bearings or the plastic bushing out of the column as I’ve seen done in other threads. I used a variety of degreasing sprays, patience, time, and gravity to clear everything out. I think eight rounds and it was flushing out clean. Then repacked the bearings using more patience and a syringe full of grease. It took way too long but it worked. Primer and paint were harder given the poor weather in the north east over the last several weeks. It took a full week for each coat to completely cure. And that’s in the heated garage with a dehumidifier running 24/7. Hence the drawn out timing of this process.

 1 point