Leaderboard
-
Carl Beck
Free Member2Points5,042Posts -
240ZBUILTBYME
Free Member2Points237Posts -
jonathanrussell
Free Member2Points474Posts -
xs10shl
Free Member2Points339Posts


Popular Content
Showing content with the highest reputation on 10/05/2022 in all areas
-
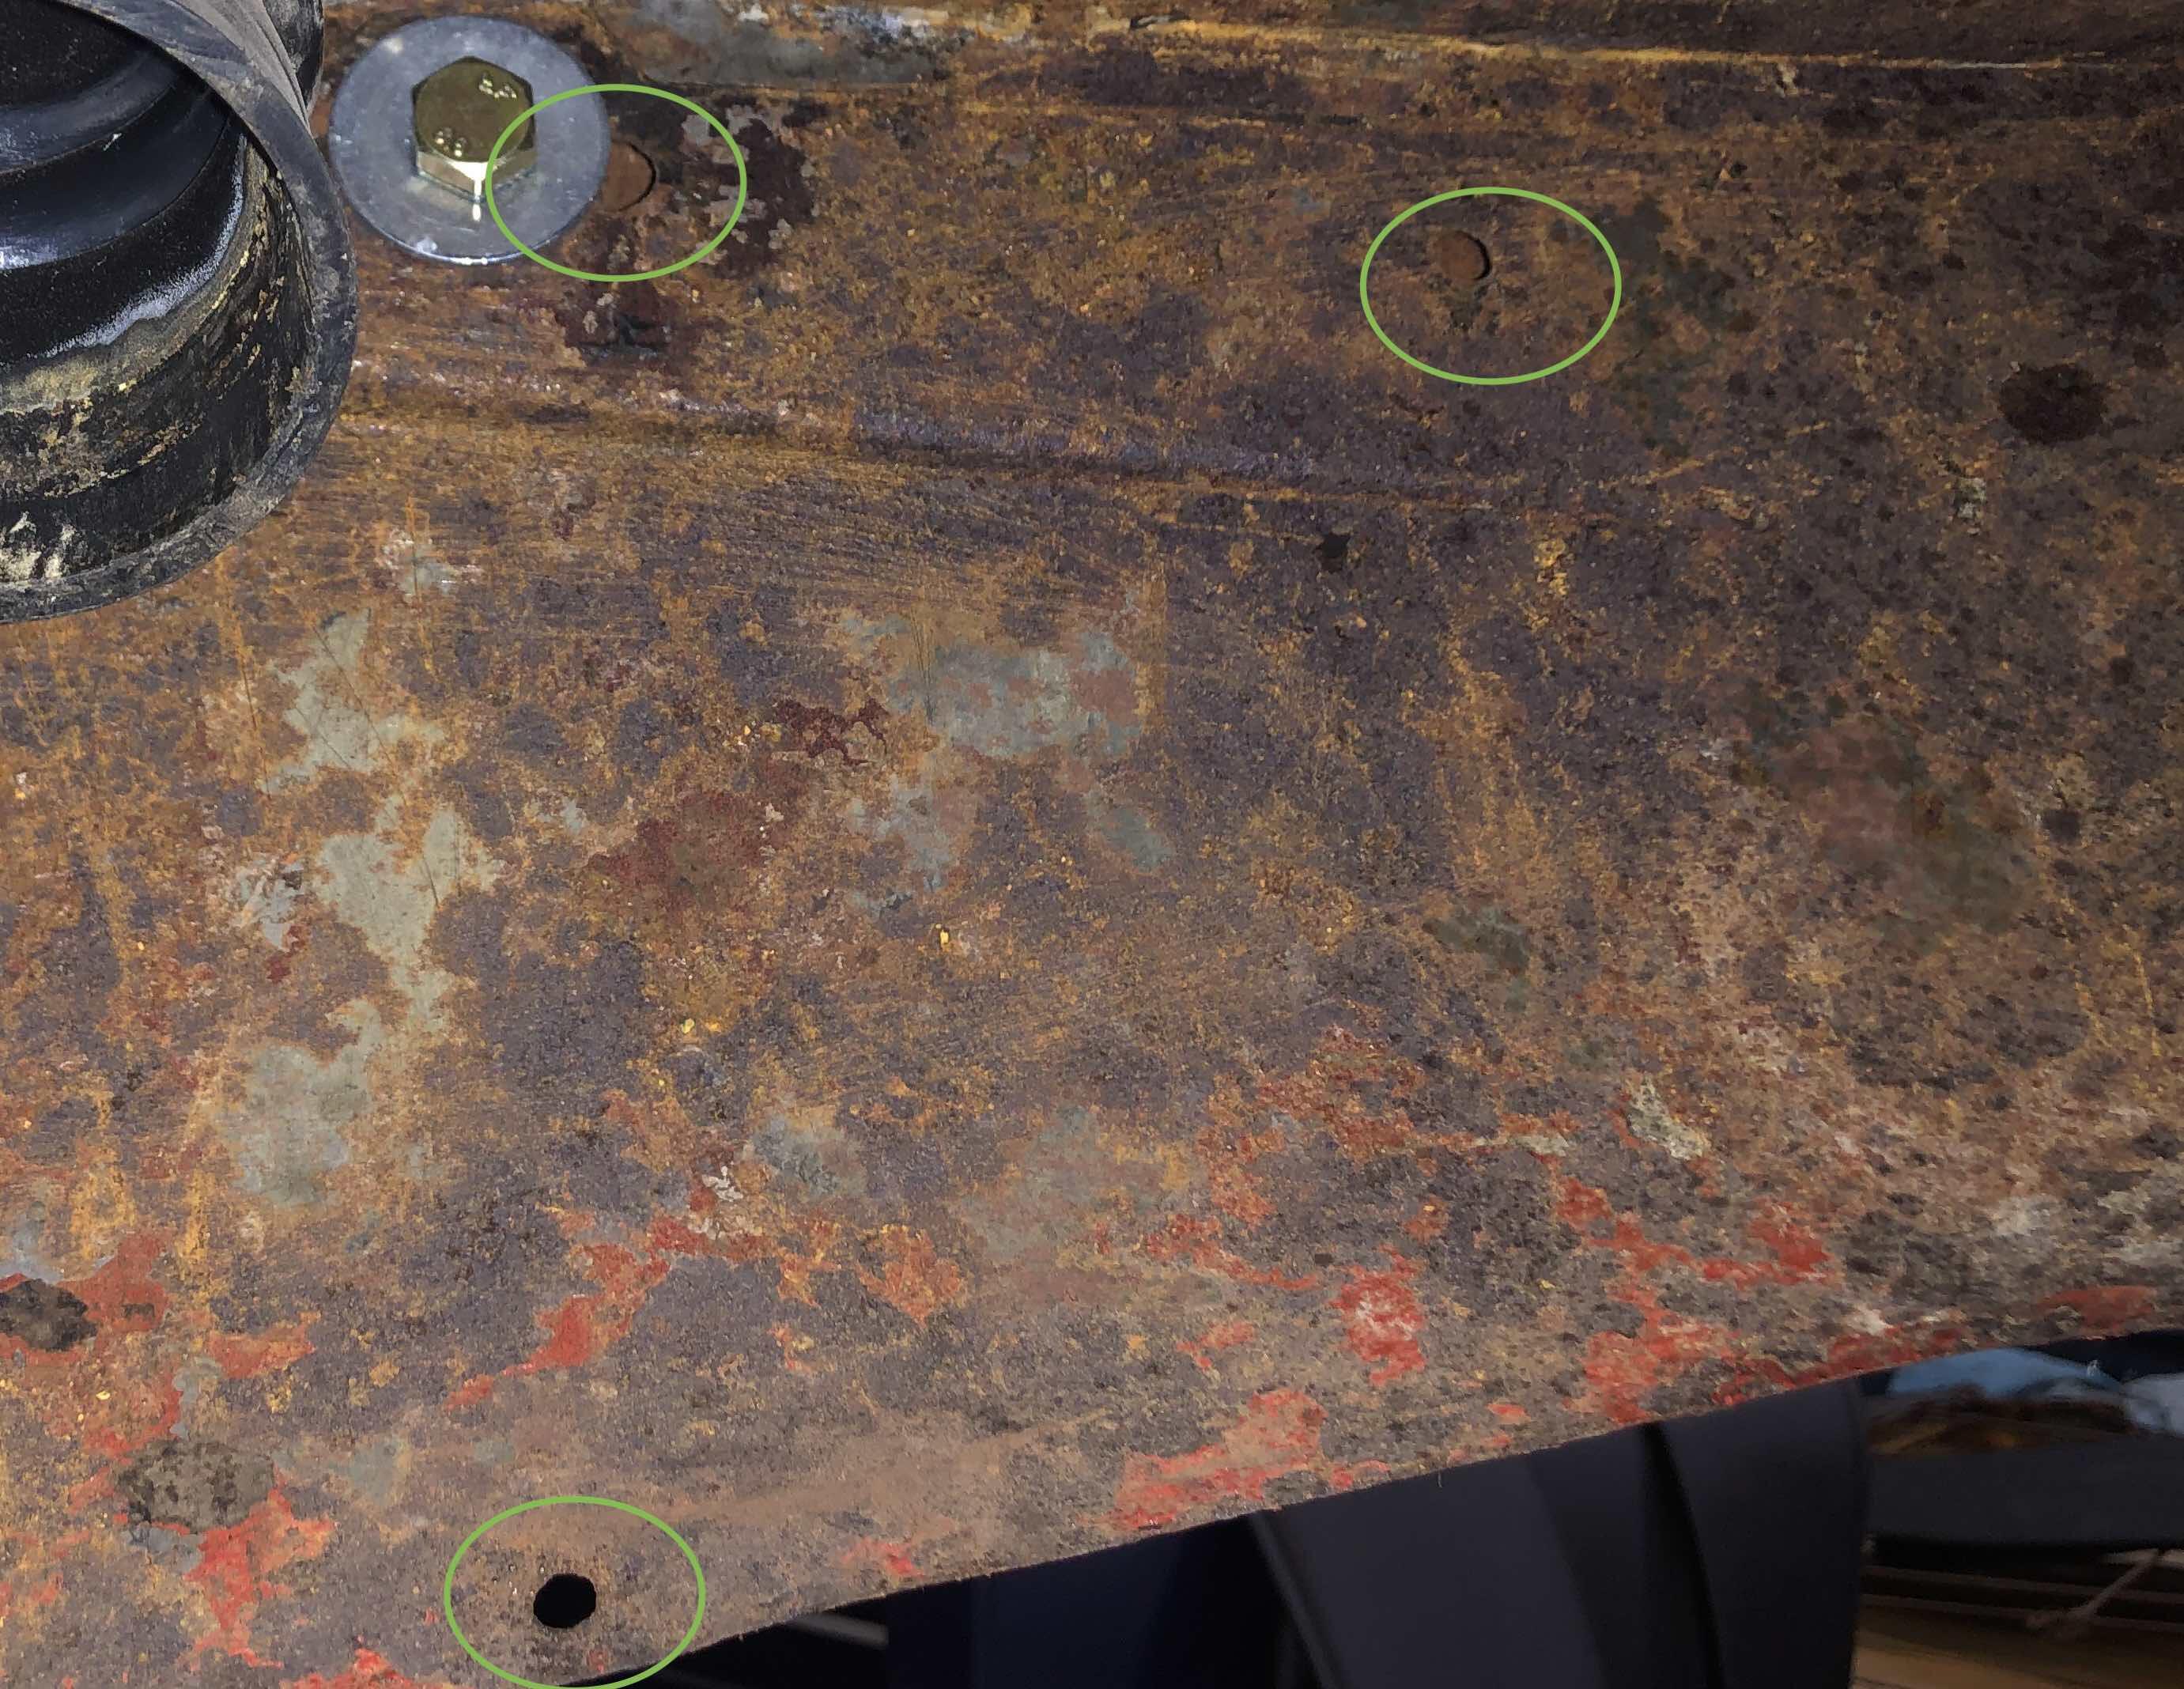
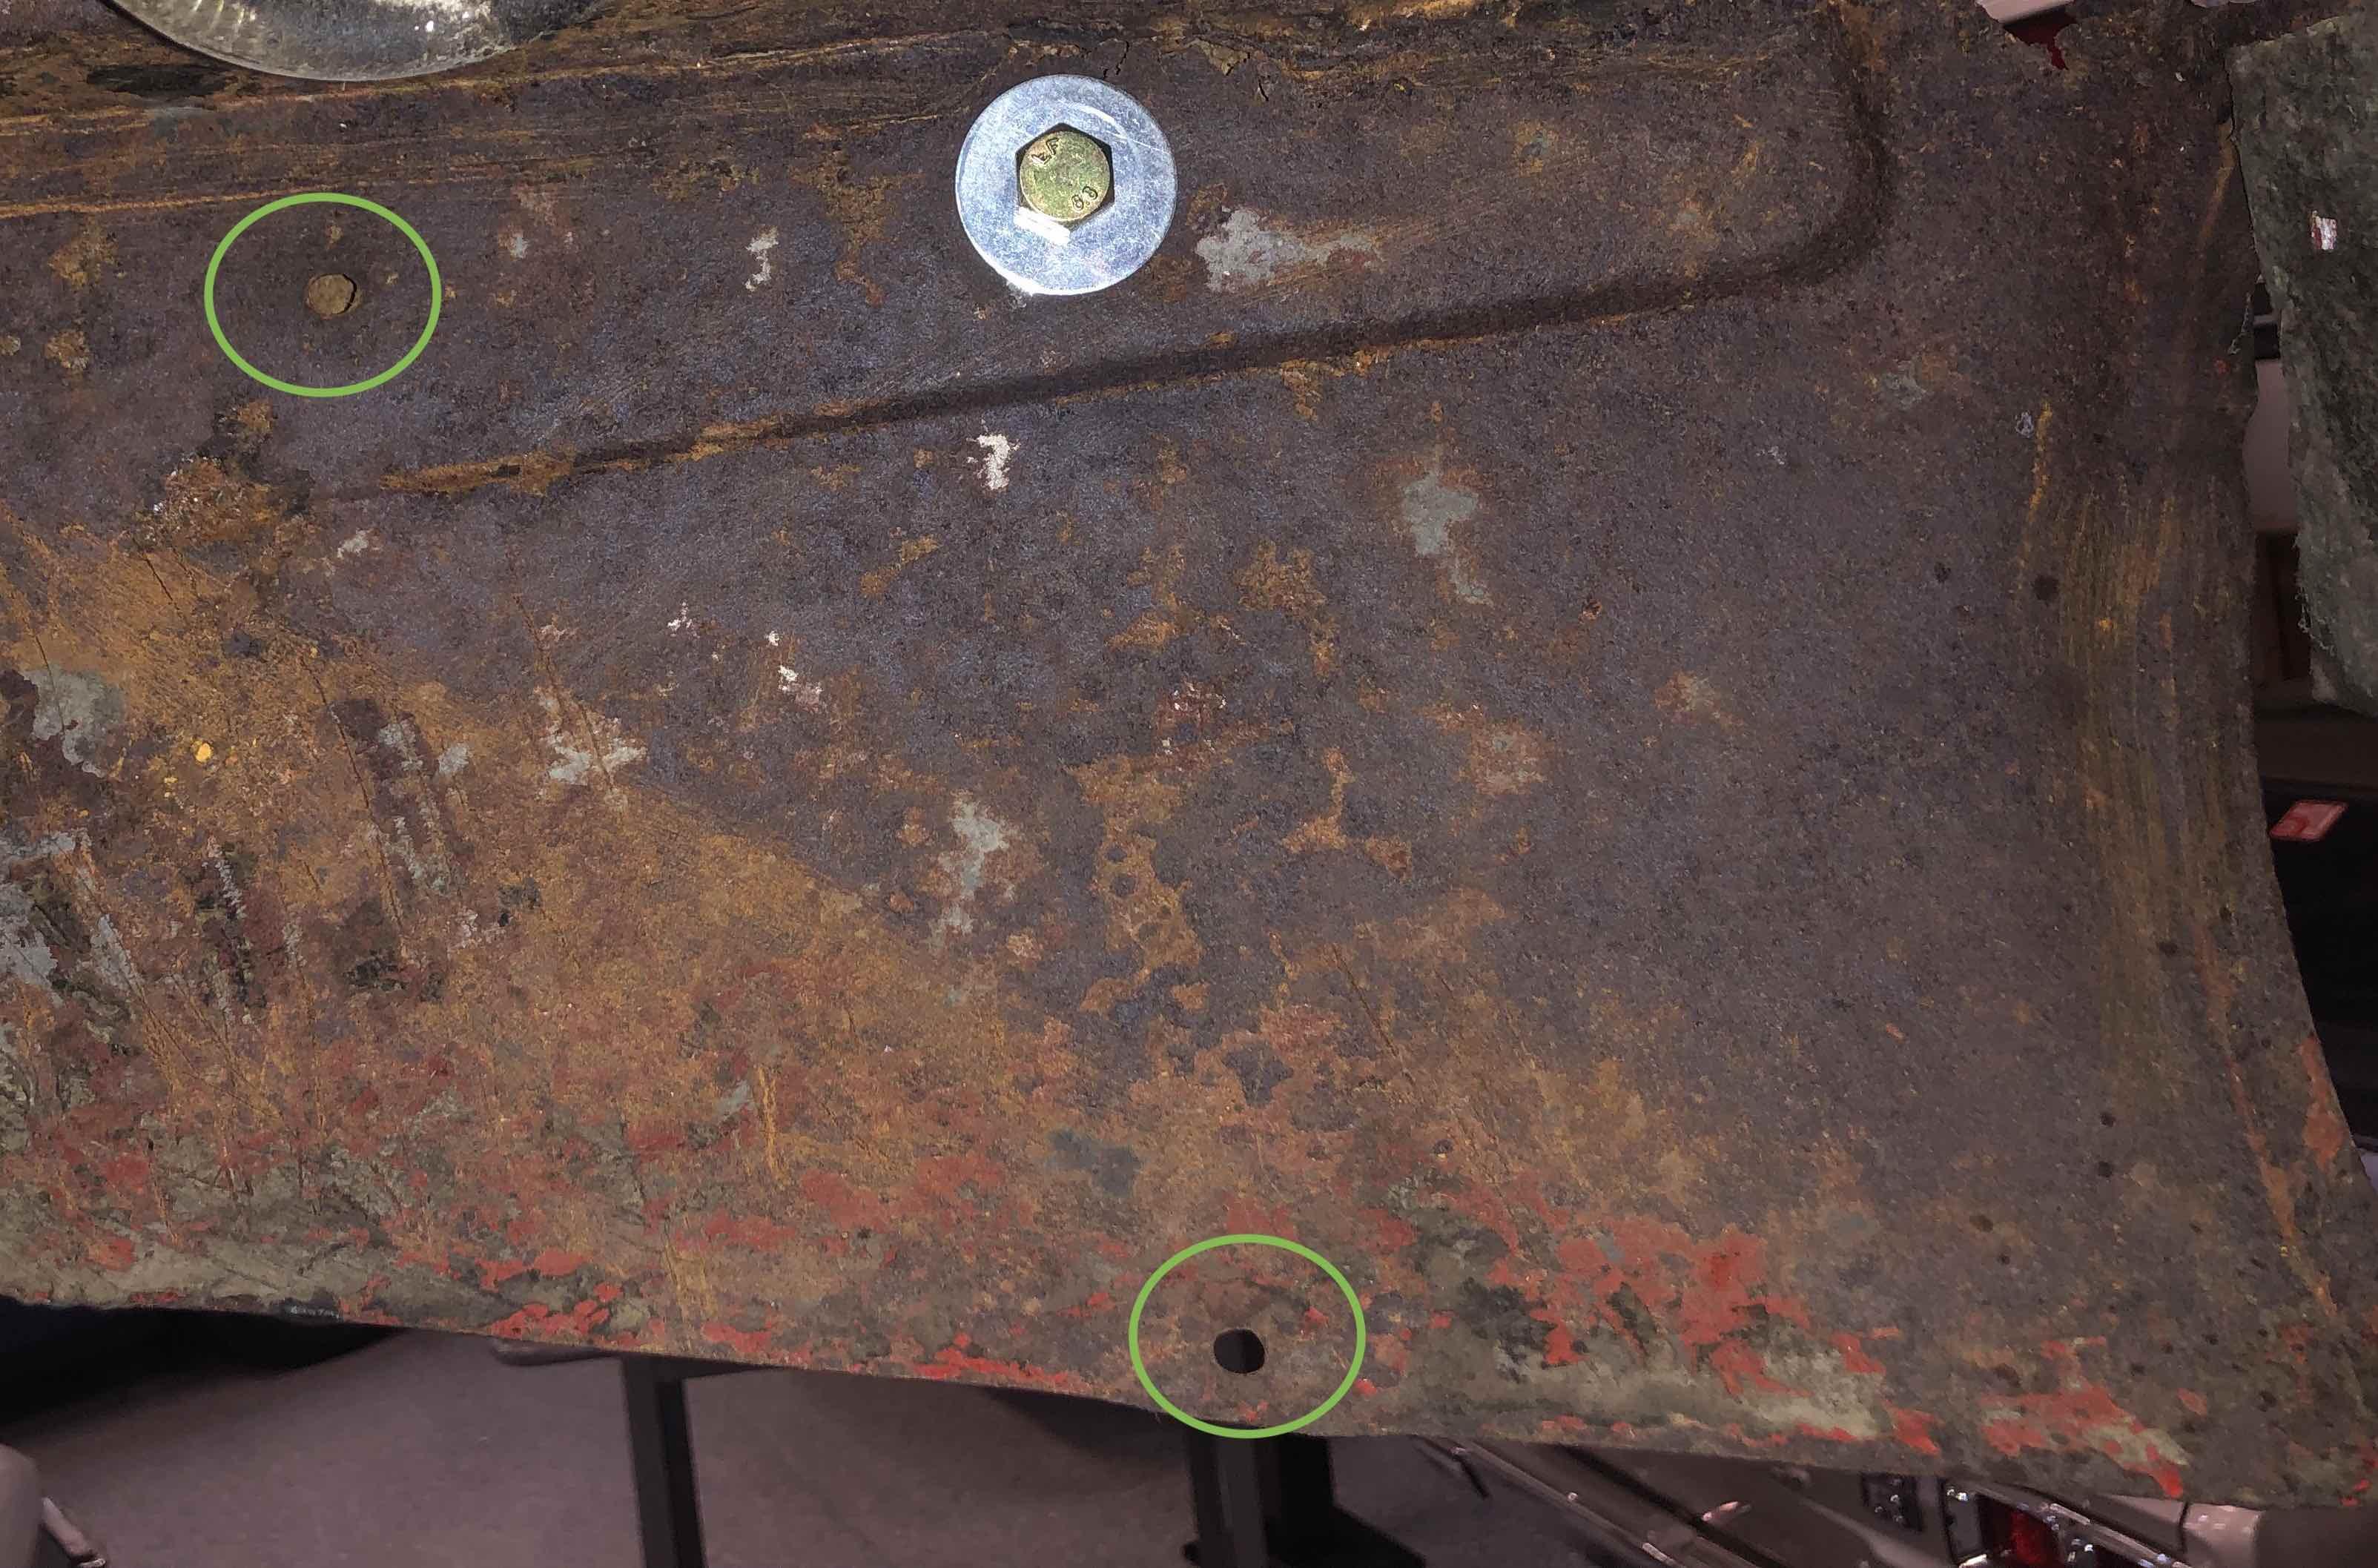
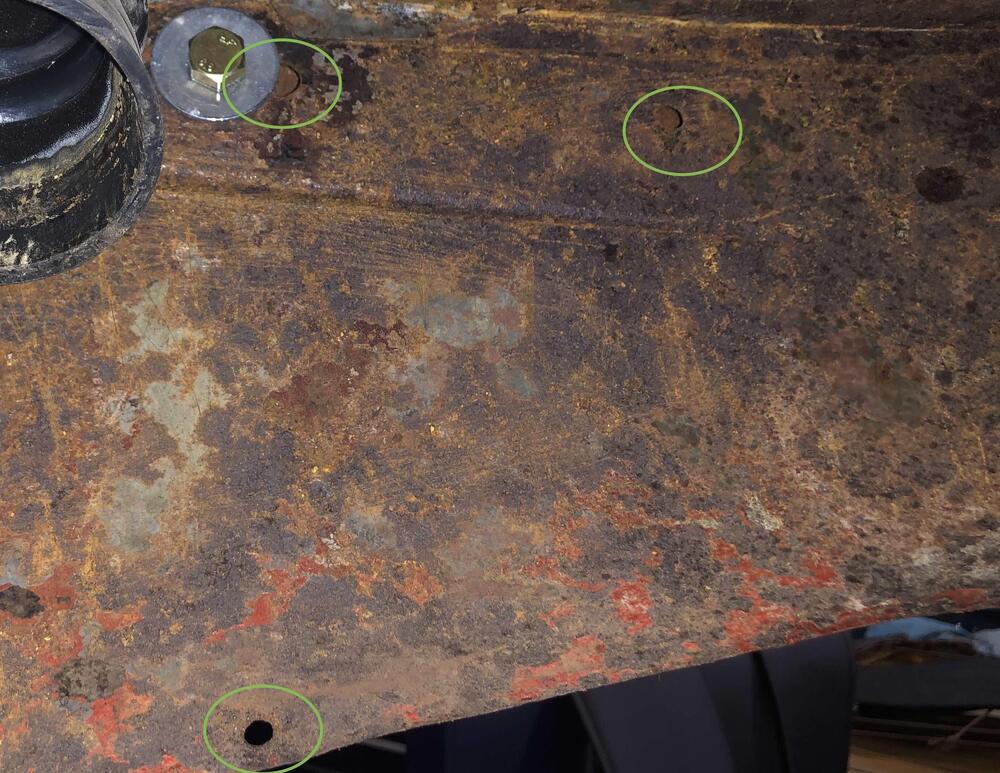
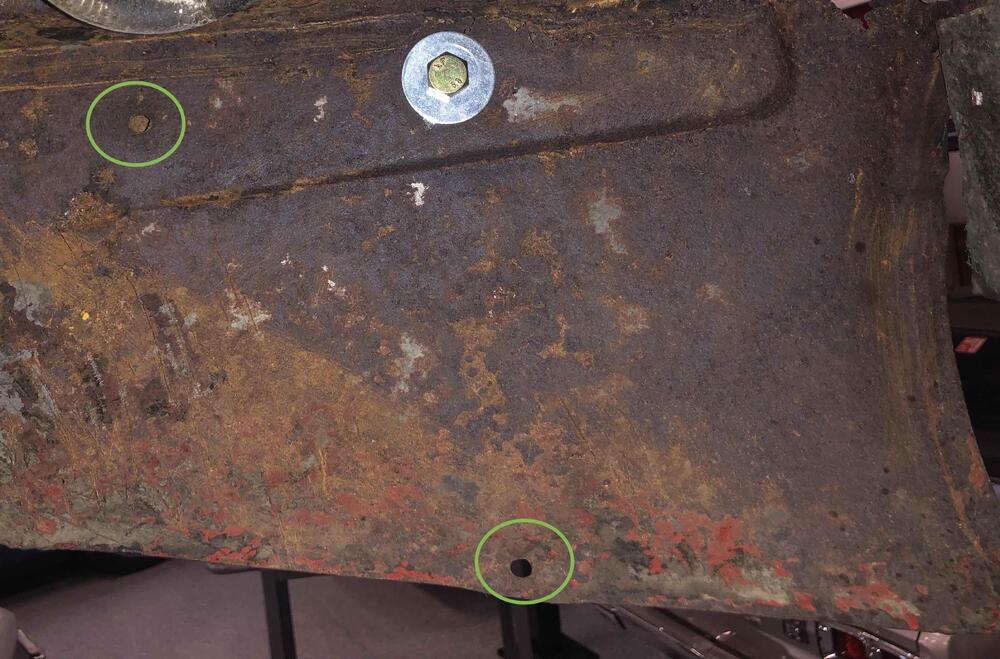
2 pointsyes there's the intake for the blower motor and also the cowl drains you would need to block and not sure if media would get into the side air plenums too. Pretty difficult with the dash still installed, might be able to block from the top. To properly blast, coat and seam seal that whole area you'd need to remove the whole top cowl panel, which is a pretty involved process. anything less would be a band aid treatment, but if theres not too serious rust you could do what you can with wire wheels and then use something that converts the rust and coats at the same time. I think eastwood has a few products2 points
-
1 pointI did this job to my silver 240z a few years ago. Blasting wasn't an option for me so I used a combination of wire wheels, paint stripper, putty knives, and phosphoric acid. I soaked paper shop rags in phosphoric acid and placed them on the metal. This is how I removed most all of the rust. I also cut out the rain cover over the fan blower intake so that I could gain access to areas below it. I reinstalled the rain cover using a silicone sealant rather than welding it. After everything was all clean, I epoxy primed, seam sealed, primed again, and painted. I should also mention that I had the dash out of the car and the interior was totally removed. This made it easier to deal with the fan blower air intake. It was a miserable job. I don't ever want to have to do it again.1 point
-
1 pointReally nice work you are doing. Fyi, if you need to clean up the strut housing gland nut threads, the tap size is M48 1.5 pitch. My powdercoater did the same thing a few years ago when I was refreshing my silver 240z.1 point
-
1 point
-
1 pointOh well.. i think it's the forbidden sweets are the ones one always want... i think it stinks..1 point
-
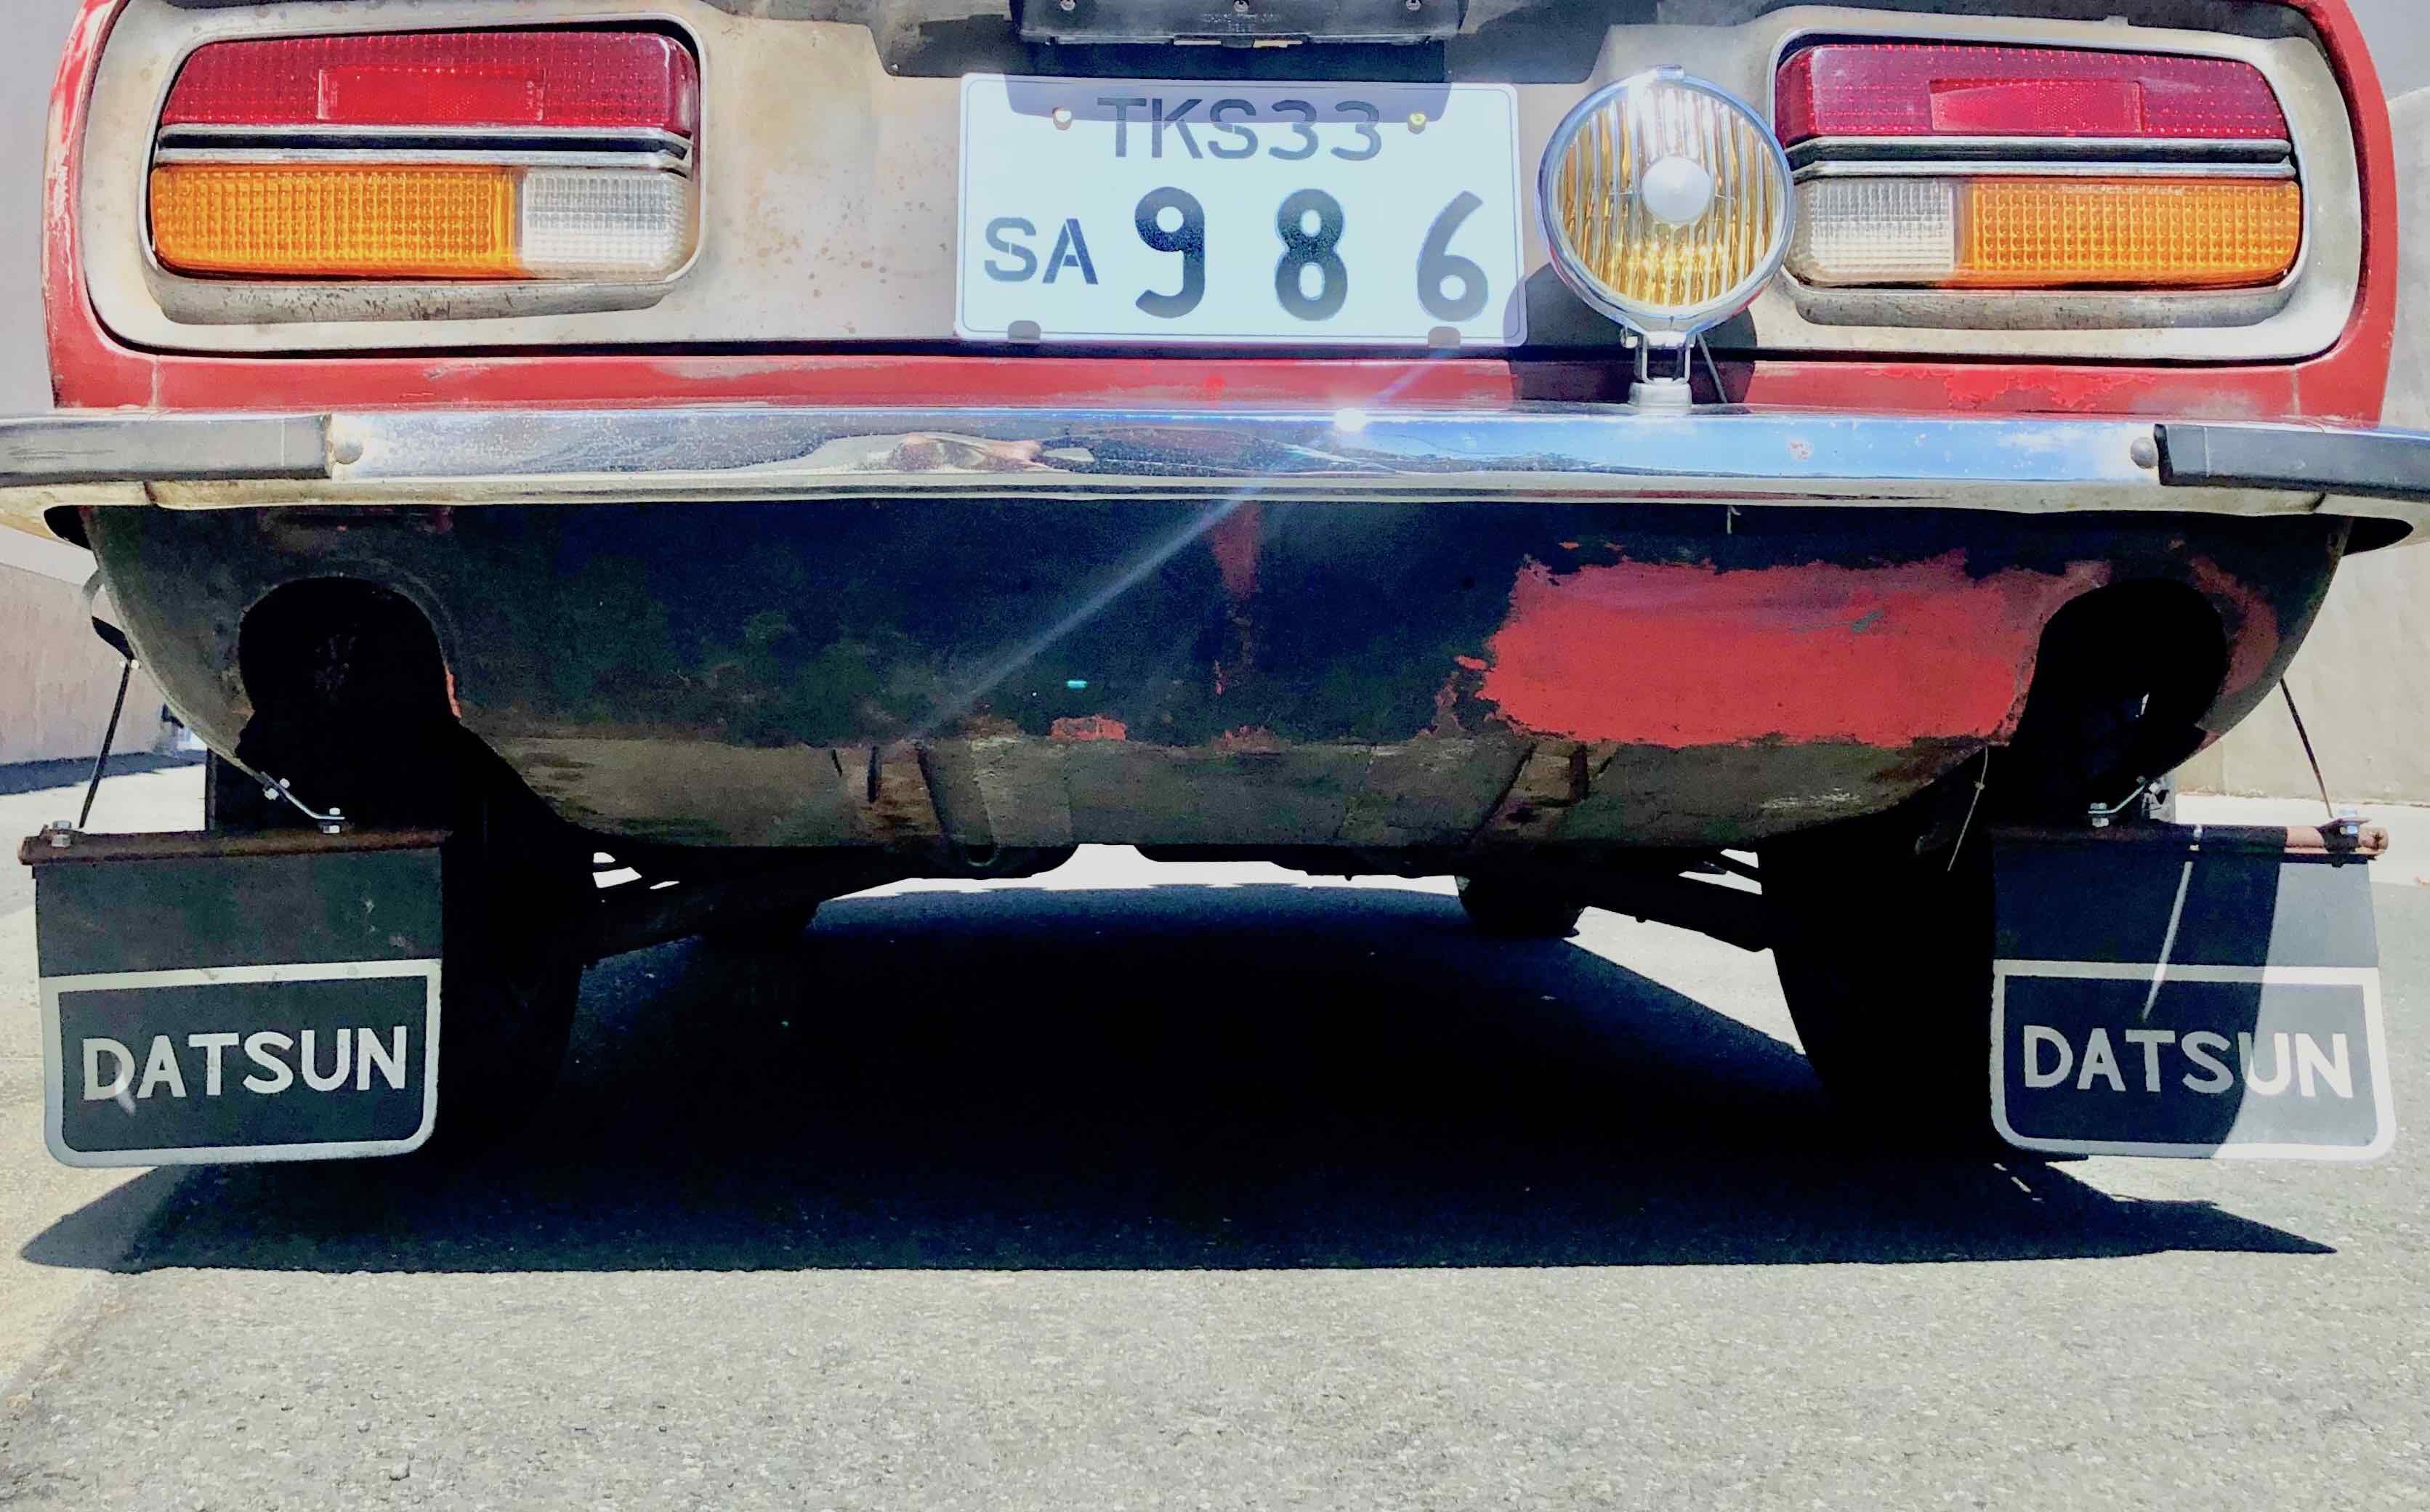
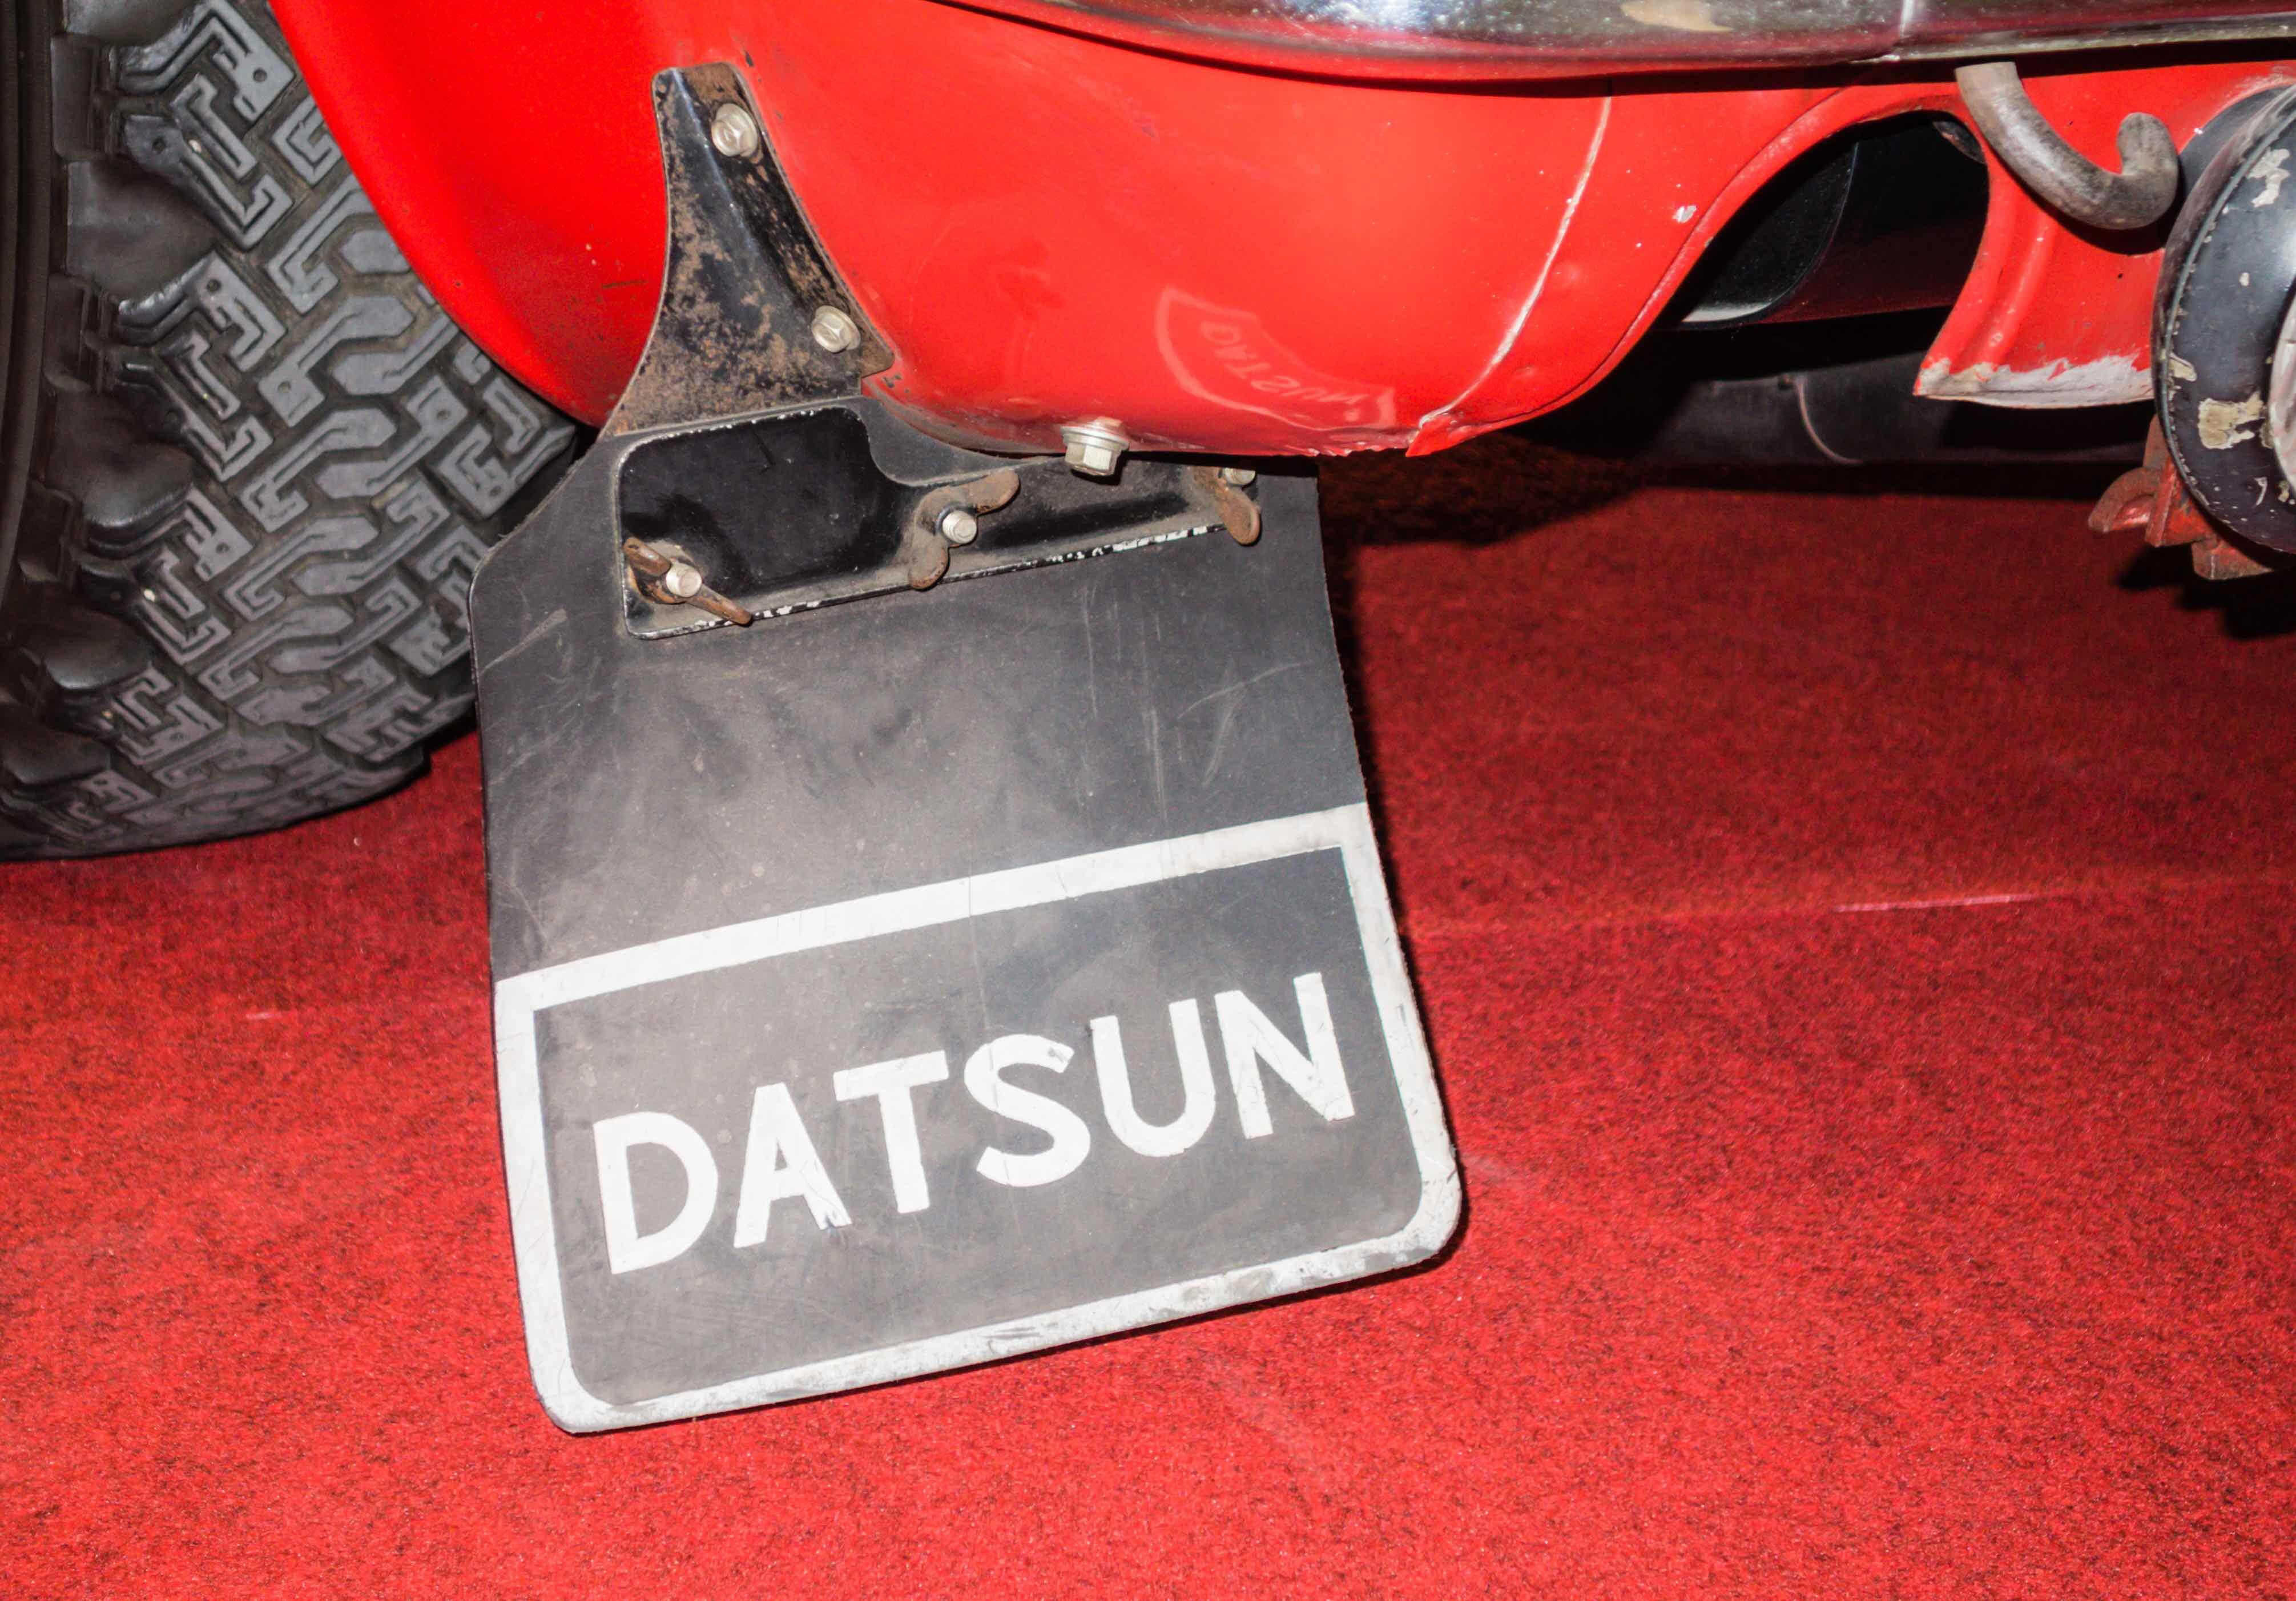
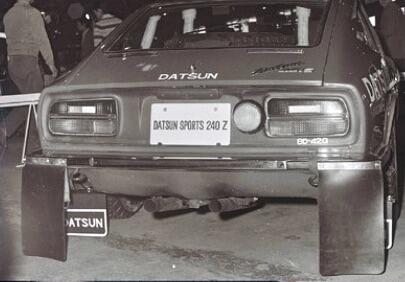
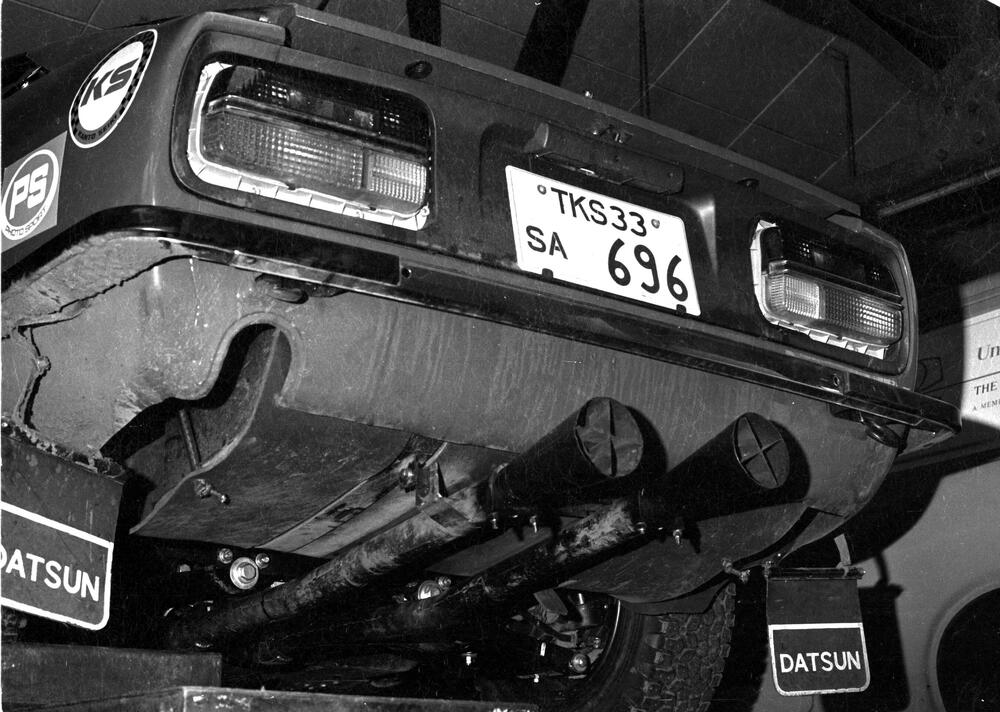
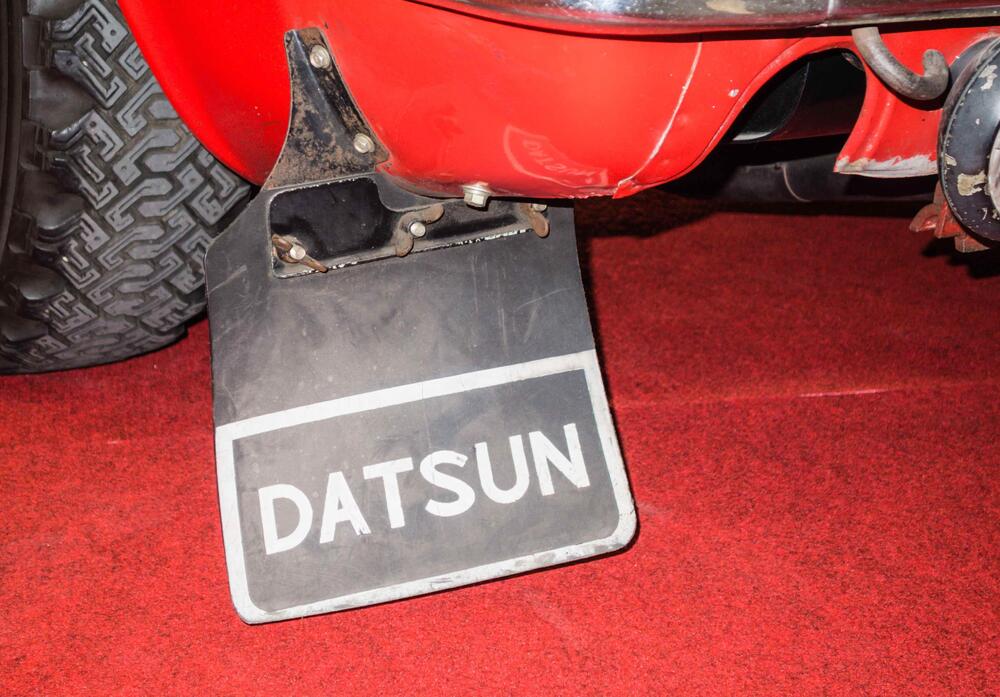
986 used the early-style mud flap system. I received a set of period-correct mud flaps with the car in 2014, but no mounting hardware. So I set about scouring period photos for some details on how they were assembled. The setup I went with was my best guess, given the information at hand. Thankfully, the job was made easier by the simple fact that the mounting holes were clearly visible, making locating the flaps a breeze. I chose 5/8" galvanized strap material for my outer brackets. This strap appeared to be roughly the right thickness - it was wide enough to drill a 7mm hole through, which was a ballpark guess as to the approximate size of hardware used. For the inner bracket, I chose a 1/8" thick steel bracket from Ace Hardware, which I bent into shape, making sure to leave the "Ace" stamp outward, for all to see! These materials were clearly not original, as I'd expect the real brackets to be made out of metric stock, but it served it's purpose for showing the car with the mud flaps in their approximate positions. I'll likely go over the choice of materials again during restoration, as I think I made the rear outer "spring-strap" slightly too short, giving it a "too straight" appearance. Also note that the right-side photo appears to have an extra hole by the bumper mount - my early assessment is that this is potentially just a random bumper mounting hole (or otherwise a hole used for other purposes, given it's size relative to the other bracket holes), as there is no corresponding hole on the left side. So I did not use it to mount the outer bracket. Instead, I hung the outer brackets by drilling a larger diameter hole in the strap, and affixed it between the bumper and body using the existing bumper bolt. I'm not yet 100% certain that this is the correct method, but it was close enough to make the flaps hang properly, so I went with it for the time being.

 1 point
 -
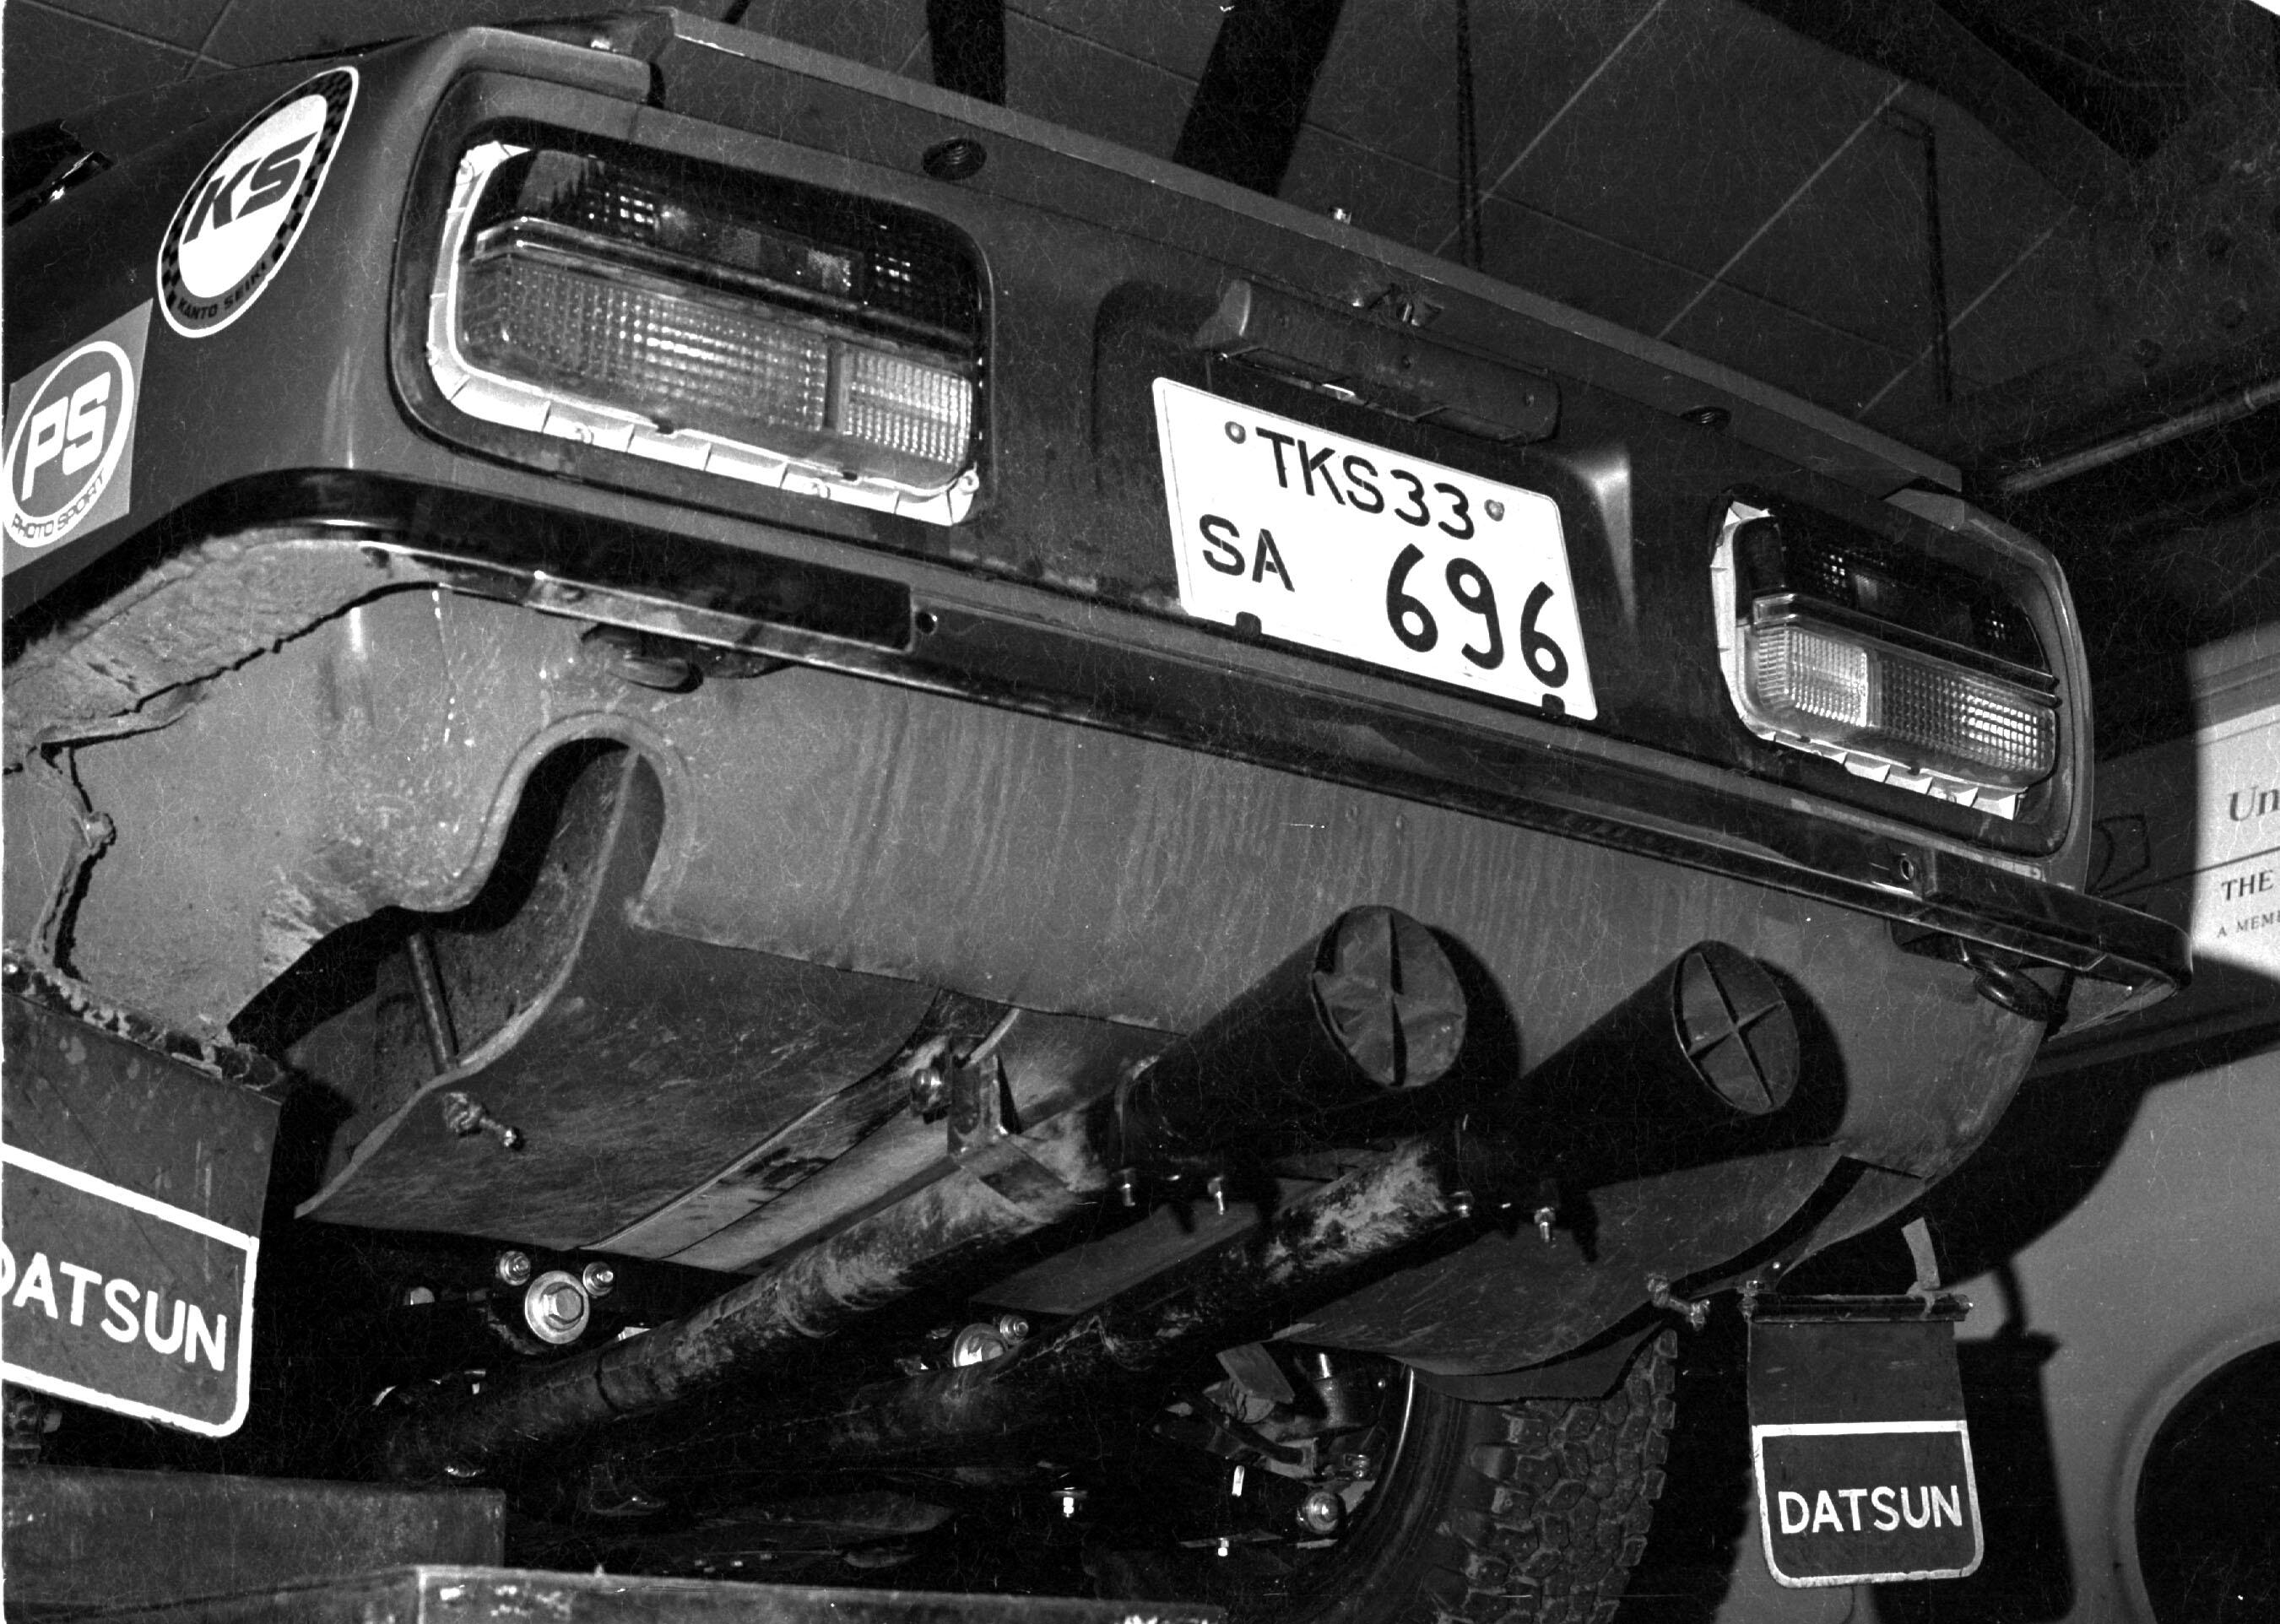
@Tweeds had a question about the mud flaps, so here is a little info on the evolution of the Works mud flaps. I've only included the early configurations that I know a little something about - I'd imagine there are other setups as well I'm not as familiar with. These are also not the greatest pictures, but they'll give some idea about the various styles the early cars employed. The first picture is 8D-420, an early test vehicle. Was this dual setup used in competition? it appears to be designed for serious gravel roads. The second picture is the early setup used through 1970 and 1971, which consisted of two outer metal straps, approximately 5/8" wide, bolted together and thru-bolted onto the car. These were accompanied by an inner, thicker metal bracket, which roughly held the mud flap in place, and could likely carry the weight by itself. I say "roughly", because there are several period photos showing the flaps having been moved backwards from their standard position during a rally stage. My guess is that the Works team were probably concerned about the mud flaps catching on something while driving, so they implemented a kind of outer "spring" system, that would give way, allowing the flap to move rearward, should it become entangled on a branch or rock. The third picture is from the 1972 Monte-Carlo car #5, and represents a later flap system employed for 1972, where the flap was more firmly fixed in place to the lower panel using a bracket.
 1 point
 -
1 point
-
1 point
-
1 pointI'm Dutch.. but was never stoned.. i take a big detour when it comes to drugs.. NO to drugs! Weed is available here and i know the smell ( Horrendously!!) because i was a servce engineer for fire and burglar alarms.. Oh wow... it stinks to hi heaven!1 point
-
Just an FYI, in case you didn’t see them in the Datsun Showroom at the time: That image and another was printed on one half of a Showroom Poster - each image was about 3w’x2h’. So the total size of the Poster was about 3’ wide by 4’ high. The images were printed head to head, or top to top. The Poster was then folded in half - and hung over a support wire that ran wall to wall across the center of the showroom. There were two or maybe three different Posters - that featured the EAS Rally 240Z’s and the Monte Carlo 240Z's.1 point
-
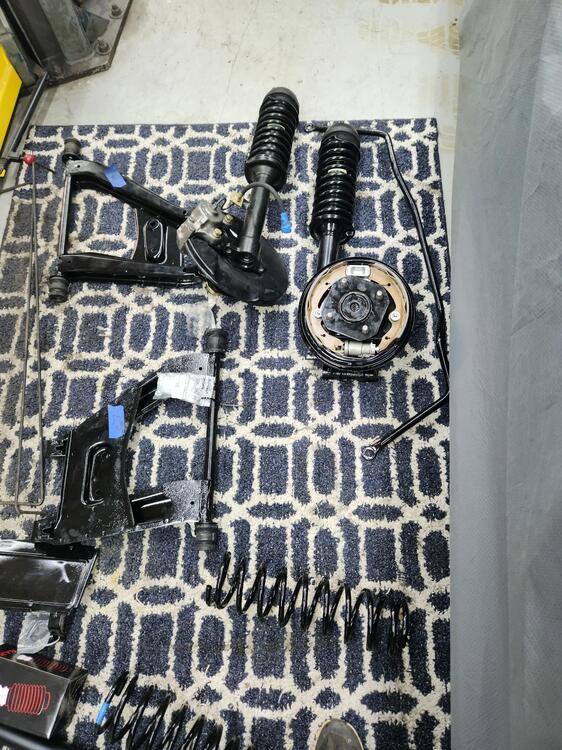
1 pointI got most everything back from powdercoating and started assembling the struts. New bearings, seals, KYB inserts and brake hardware. I ran into two issues. 1. Powdercoater must have dropped one rear strut and dinged the threads for the stut gland nut. Should have left the old gland nuts in the struts. I played with it for a while and a friend was over that was headed to a machine shop to get something done, so I handed it to him to drop off. I hope it can be chased, because I have a lot of time in the rear bearings! 2. On one front strut the caliper was barely scrapping the rotor on the outer edge. I thought that I didnt seat a bearing race completely, so I tore all back apart and races were fine. I tried another caliper, and it is the same, so I am thinking the rotor (Centric) is a little too thick. I noticed the other rotor appears out of round. I may have them turned or try a different brand. It just barely scrapes. Both rotors measure very close to the same dimensions. Weird. I also hooked up with 240 rubber and got some goodies in the mail today. Glad it worked out as his stuff looks nice and only took a couple of weeks once we got the order settled. I saw on BAT where a very nicely restored 73 240 sold for $88,888, so that justifies a few orders for me 🙂.
 1 point
 -
You might be disagreeing about two different situations/cases. In Mr. Uemura’s book he tells us why the Datsun 240Z’s were not undercoated at the factory as regular production began, and that the Dealers were advised to undercoat the 240Z's on Delivery. https://www.lulu.com/search?adult_audience_rating=00&page=1&pageSize=10&q=Datsun+240Z By the 1972 model year (and perhaps some time before) Nissan was using more galvanized sheet metal in the floors, firewalls and hood bracing. So you have to be specific about which model years you are talking about when it comes to undercoatings/paint etc. Big Difference between 70/71 and 72/73. 72/73's were undercoated at the factory. To get primer/paint to stick to galvanized sheetmetal, the sheetmetal had to neutralized (cleaned/cleared of zinc hydroxide) in order to get the primers to adhere to the metal. Nonetheless over longer periods of time the primers/paint would start to peel off as the galvanized metal continued to oxidize under it. If you see a lot of 72/73 240Z’s that haven’t already been repainted etc - you will usually see the paint peeling off - on the firewall and front hood braces. When the original primer peels off the metal, it takes the paint with it. So you see bare usually grayed bare metal. When you see the factory applied undercoating peel or flake off exposing bare metal - it is because the primer/paint under the undercoating is peeling off the galvanized metal - not because the undercoating was applied directly to the metal.1 point
-
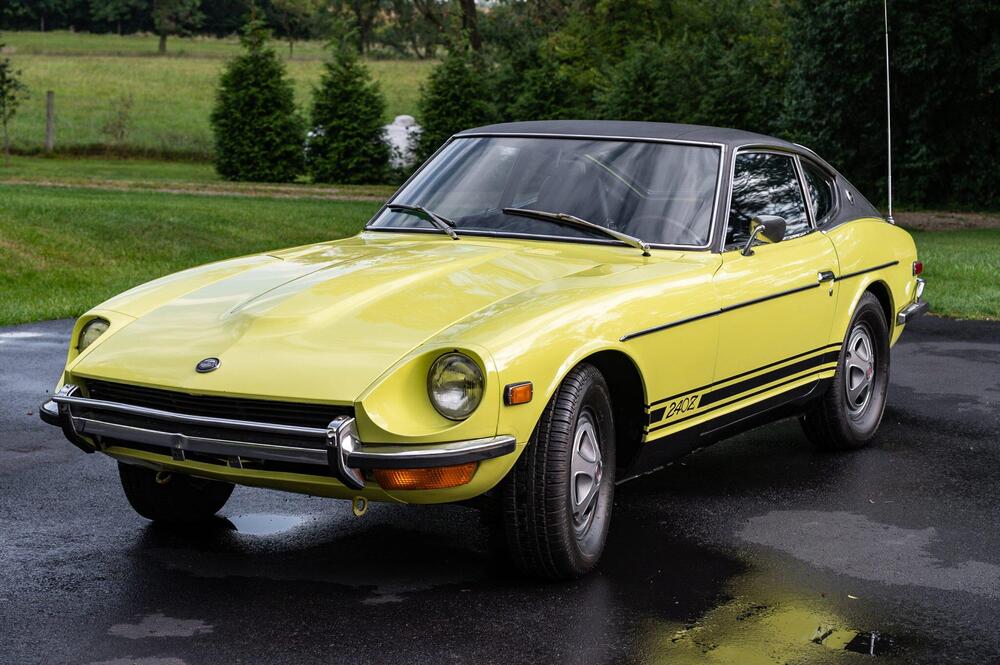
Another 72 on BAT. I have never seen a Z with a vinyl roof. Gotta say, it isn’t for me. Looks like crap. The finish around the hatch and alongside the quarter panels is weird. The termination at the lower end of the windshield pillars is unfinished. https://bringatrailer.com/listing/1972-datsun-240z-242/

 1 point
 -
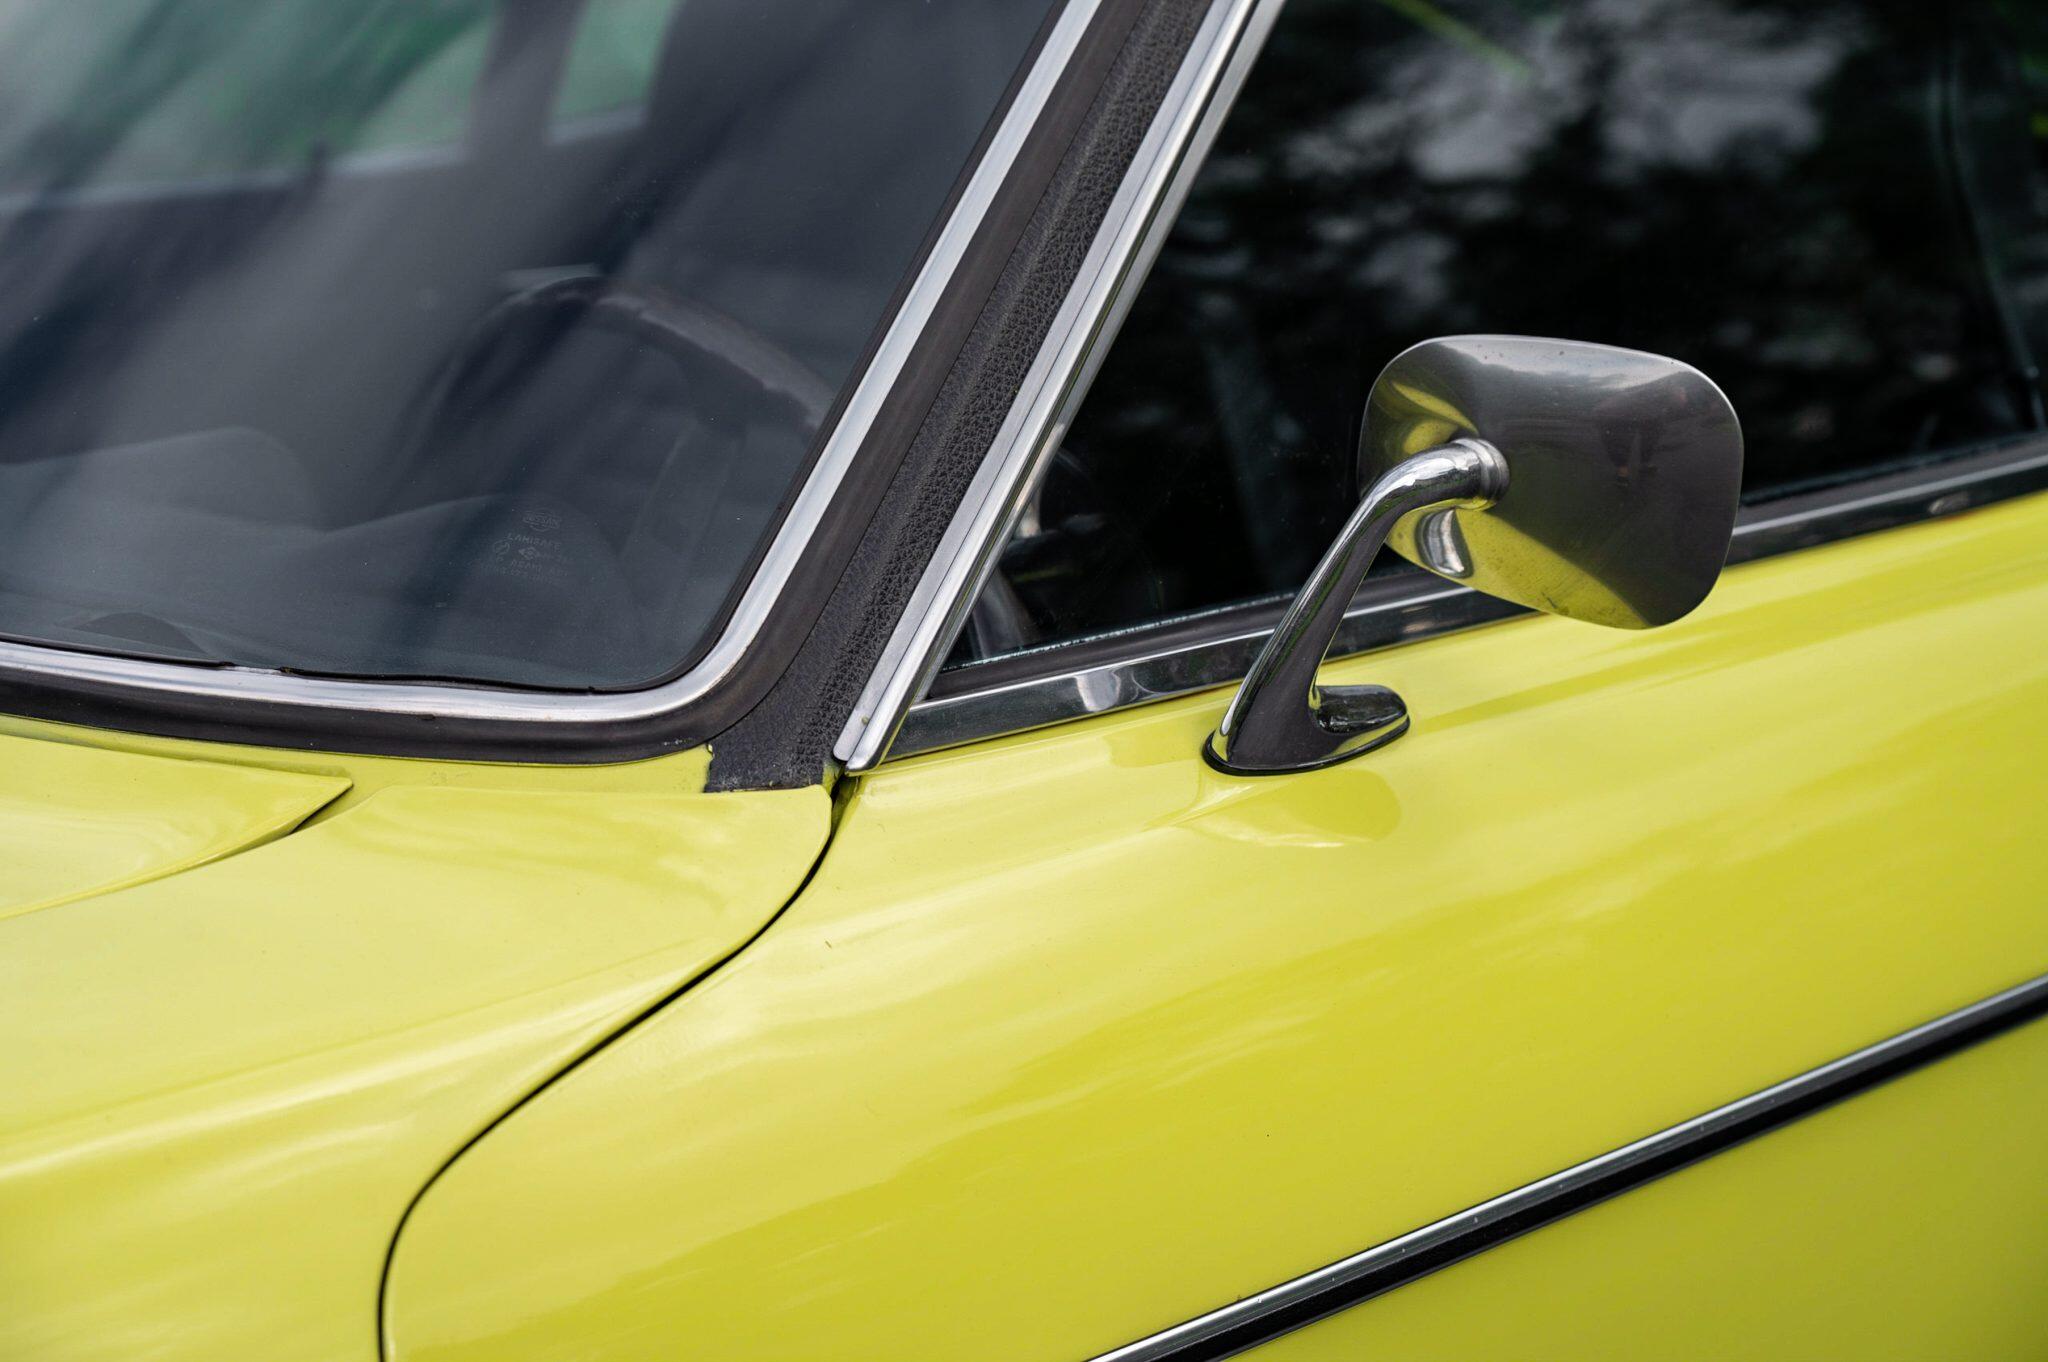
1 pointI remember that post making the rounds and thinking it was a neat look. Different and distinctive without being garish. Thumbs up on taking it out of the turn signal circuit, too.1 point