Leaderboard


Popular Content
Showing content with the highest reputation on 12/05/2022 in Posts
-
 4 pointsFor me, it's usually realizing I didn't put the insulator on the wire before crimping the connector.4 points
 -
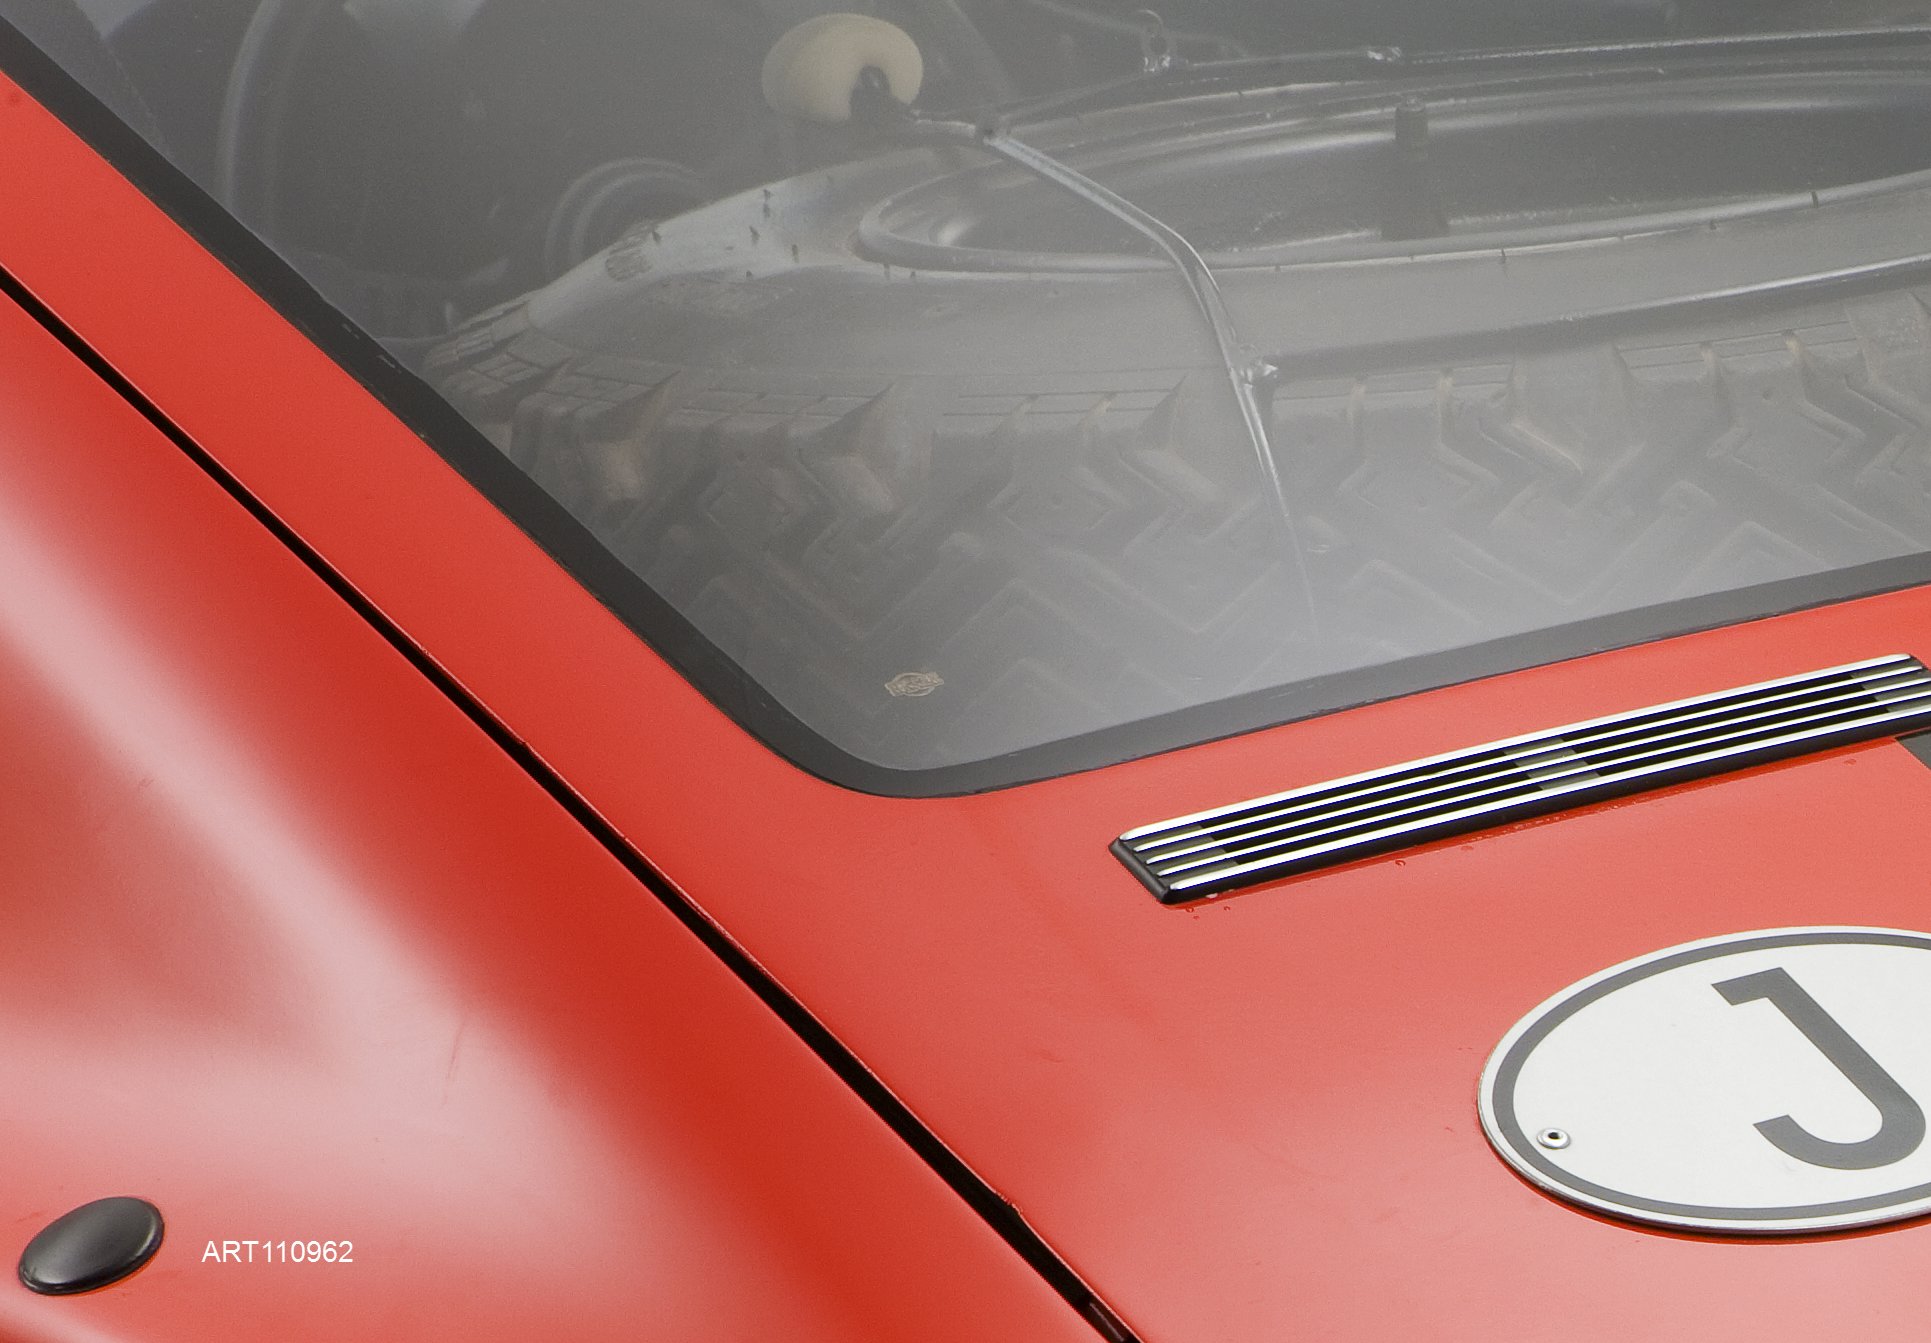
 Kats, we got the dashboard out a few days ago, which gave us access to the duct opening. Attached is a picture showing no brackets. As to the CDI, there appears to be no physical evidence that one was ever installed in this car - no mounting bracket, and no welds where one would expect a bracket to be installed. Crucially, there appear to be no provisions in the wiring harness for a CDI, or even a power point for an igniter. I'm not ruling out that a CDI may have been installed at one point (perhaps using a separate harness currently not on the car). To that point, one might be tempted to argue that the front harness may have been switched out. However, as we were removing the dashboard, we discovered that there was no separate dashboard sub-harness: it was all one giant Works-numbered engine/dashboard harness, reaching from the coil, around the front and right side of the car to the fusebox plugs, and then all the way back across the dashboard to the ignition key. So in order to change just the engine harness, one would need to replace all the dashboard wiring, which IMHO is an extremely unlikely scenario, given how original and unmolested everything appeared to be. Of note, I'm still evaluating how the tach works, so there may be a few more surprises in store there which may revise my opinion about the ease/likelihood of adding a CDI option in-period.
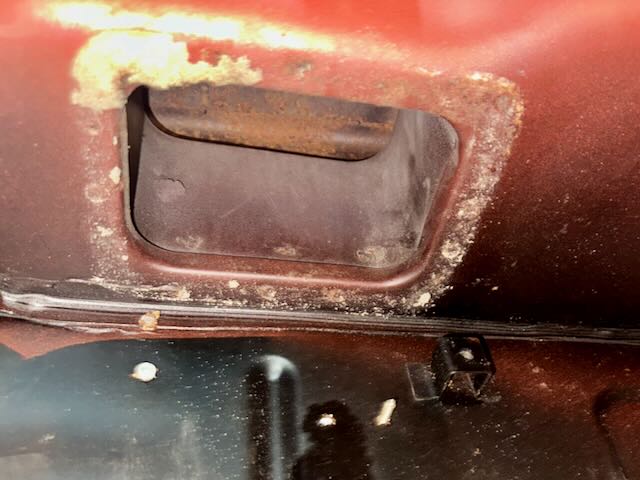 3 points
 -
 2 pointsThe solvent, in this case alcohol, is used to soften the rubber. The wintergreen oil is used to keep the rubber soft after the solvent evaporates. I've heard Go-Kart racers use these chemicals to soften their tires.2 points
 -
 It’s an odd one. Big bore stroked 2.8, running stock fuel injection. Oh, and a racecar without a logbook. That tells me the car hasn’t been raced.2 points
 -
 1 pointNo offense but you seem to be going round and round with "sag" and rake. If you explained what you were trying to do and what you've changed so far you might get better advice. These cars are old and in many cases the springs themselves have "sagged" from when they left the factory. So one person might get rake and another might get sag after replacing parts. The MSA "spacer" is just a way for people to replace their old 280Z insulators with new 240Z insulators. But even the rubber in the insulators has parts that sag. There is actually a small rubber piece inside the insulator that's called a spacer, that compresses over time, causing "sag".. So, another point of confusion. http://www.carpartsmanual.com/datsun/Z-1969-1978/axle/rear-suspension/13
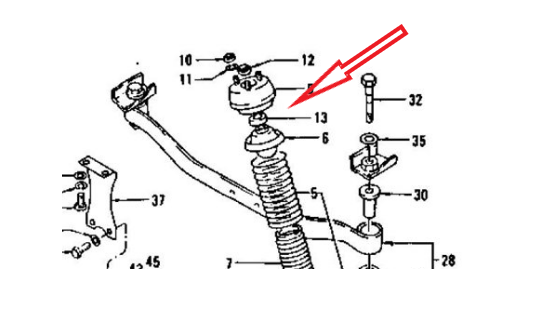 1 point
 -
1 pointWintergreen is an oil made from mint. Have you never had a wintergreen mint? Used to get Canada Mints years ago, not so common these days. Round pink lozenges, delicious!

 1 point
 -
1 pointYes. What number is stamped on the plate attached to the right strut tower in the engine bay? Appears that the engine has been stroked. A different crankshaft and connecting rod combination, and likely pistons with a different pin to top distance.1 point
-
 I think it's overkill.. 1,0 to 1,4 mm steel is more than enough, i had to remove a floor that was made of much to thick steel.. when i took it out some 25 kg of steel fell to the floor.. i replaced it with 1mm steel and the car got a bit faster! Also... never weld steel over some old steel it will always create a mountain of rust!! Always weld head to head.. so: 1 not necassary.. 2 much to heavy (= slower car.) 3 covering is asking for rust.. (Weld some steel IN it not OVER it!) 4 If done on the front, you take out the crumple zone.. you create a even more dangerous car to drive.. I once seen a car that had those fat beams in the front (over the front wheels), It's dangerous to do because if you have an accident the crumple zone is... the place were you are sitting... not a nice thought!1 point
 -
 1 pointWintergreen is an essential oil. What it is essential for, I don't have a clue. I think it's used in homeopathic medicine. Strong smell. Maybe it will keep exhaust smell at bay!1 point
 -
 Looks good, love the " Vredestein " tyres.. Dutch brand The choke knob is not the correct one, Dash looks re-sprayed or something, middle console to, and door panels are not original to, partly refurbished. But it is done nicely. For the rest.. really nicely done early 240Z1 point
 -
 A couple of things I noticed, not to be critical but in the interest of correctness on this early car, can be seen in picture #113. The lower door rubber seal appears to be installed with the seal flange outboard instead of inboard of the door bottom. Also, the door dovetail striker below the latch is the later, universal dovetail with the beefier mounting hole opening. The earlier dovetails had thinner mounting hole openings which tended to crack under use. The earlier dovetails were also side specific, ie., left and right. In picture #115, the inner rocker scuff plates should be mounted with 5 Phillips screws, not the three used on later series cars. A drill will remedy this. And, the door weatherstripping appears to be a replacement tubular seal as opposed to a more accurate reproductions available in the market. this is indeed a beautifully restored car touched by Pierre, the master of Z reincarnations.1 point
 -
 Thank you so much xs10shl ! I imagined how many hours were taken to see only the duct opening, thank you. This fact makes me think of that Works rally car , it needs ventilation system (I mean motorized), so they need to be opened like other public cars. Also I remember Mr. Namba ( general manager of works team) said in the magazine “ for preparation of 1971 Safari , we were making a stronger ventilation system for dry dusty conditions. Works cars were going to be equipped with filtration system - inlet air from cabin to engine. In the end, we didn’t need to do it “. How were they going to do it?? Is there any trace which we can see it today ? I am curious about it. On the other hand Z432-R, they omitted the heater box/blower motor to stay light in weight. I asked about it Ando-san who restored at least 5 road going Z432-Rs but he has never seen an original parts that attached to the brackets. Some Z432-Rs have just added a blower motor and a heater box , some Z432-R just don’t have anything around the opening. Ando-san usually makes a rectangular plate for the duct opening because customers always complain about too much cold in winter driving. It is fun to imagine, if a works Z432-R raced in winter, would mechanics have added a delete panel to prevent excessive cold air coming into cockpit ? How about two inlets each side of foot well ? Does a Z432-R have a duct and flap operated by single cable like public cars ? Sorry this is not related, not proper to ask here.I will continue to search for these. About the mounting bracket for the igniter, thank you so much for checking it. So, we see only S20 cars have them on the cowl top panel. LHD cars have only one cowl top panel(no brackets for igniter and inlet opening) for all variants including works rally car, RHD cars have three types i.e. L- series cars ( no brackets for igniter and inlet opening) , S20 Z432 ( brackets only for igniter), S20 Z432-R (brackets for igniter and inlet opening). As reading your observations, I believe the wiring harnesses are original to your car. Just great ! Thanks always, I really love this topic here. Kats PS I think this picture is your car.
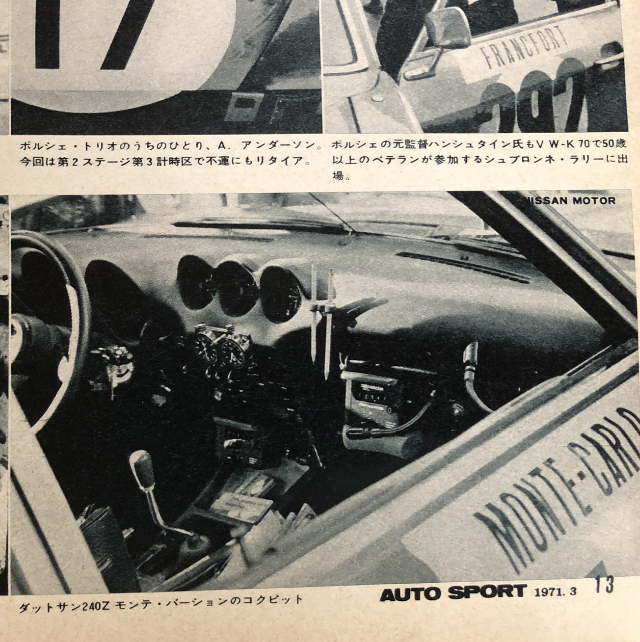 1 point
 -
 1 pointIt sounds like you are assuming that the front ride height is the same for all the years, and I'm pretty sure that is not the case. And you are also making the assumption that the center line of the bumpers was the same for all the years? I'm not sure if this is the case, but I'm not comfortable making that assumption without data. And to make that point... Here's a pic showing how they changed the front spring perch location between the 240 and 260. So in theory, not all the front ends are at the same height from the factory : That pic came from this thread. Some good pics and info: https://www.classiczcars.com/forums/topic/60161-lowering-bottom-spring-perch/ And forget 77 and 78... According to the FSM's the rear bumper was lowered compared to the previous 280's. The front seems to be the same as the rest of the 280's but the rear is different.1 point
 -
It's an improvement in my book. No drawbacks other than it's not an original frame piece.1 point
-
1 pointI just replaced both my lower quarters this weekend with patch panels. One inner was in rough shape and I ended up fabricting a patch. Once you open it up, you understand why they all rusted!1 point
-
1 point
-
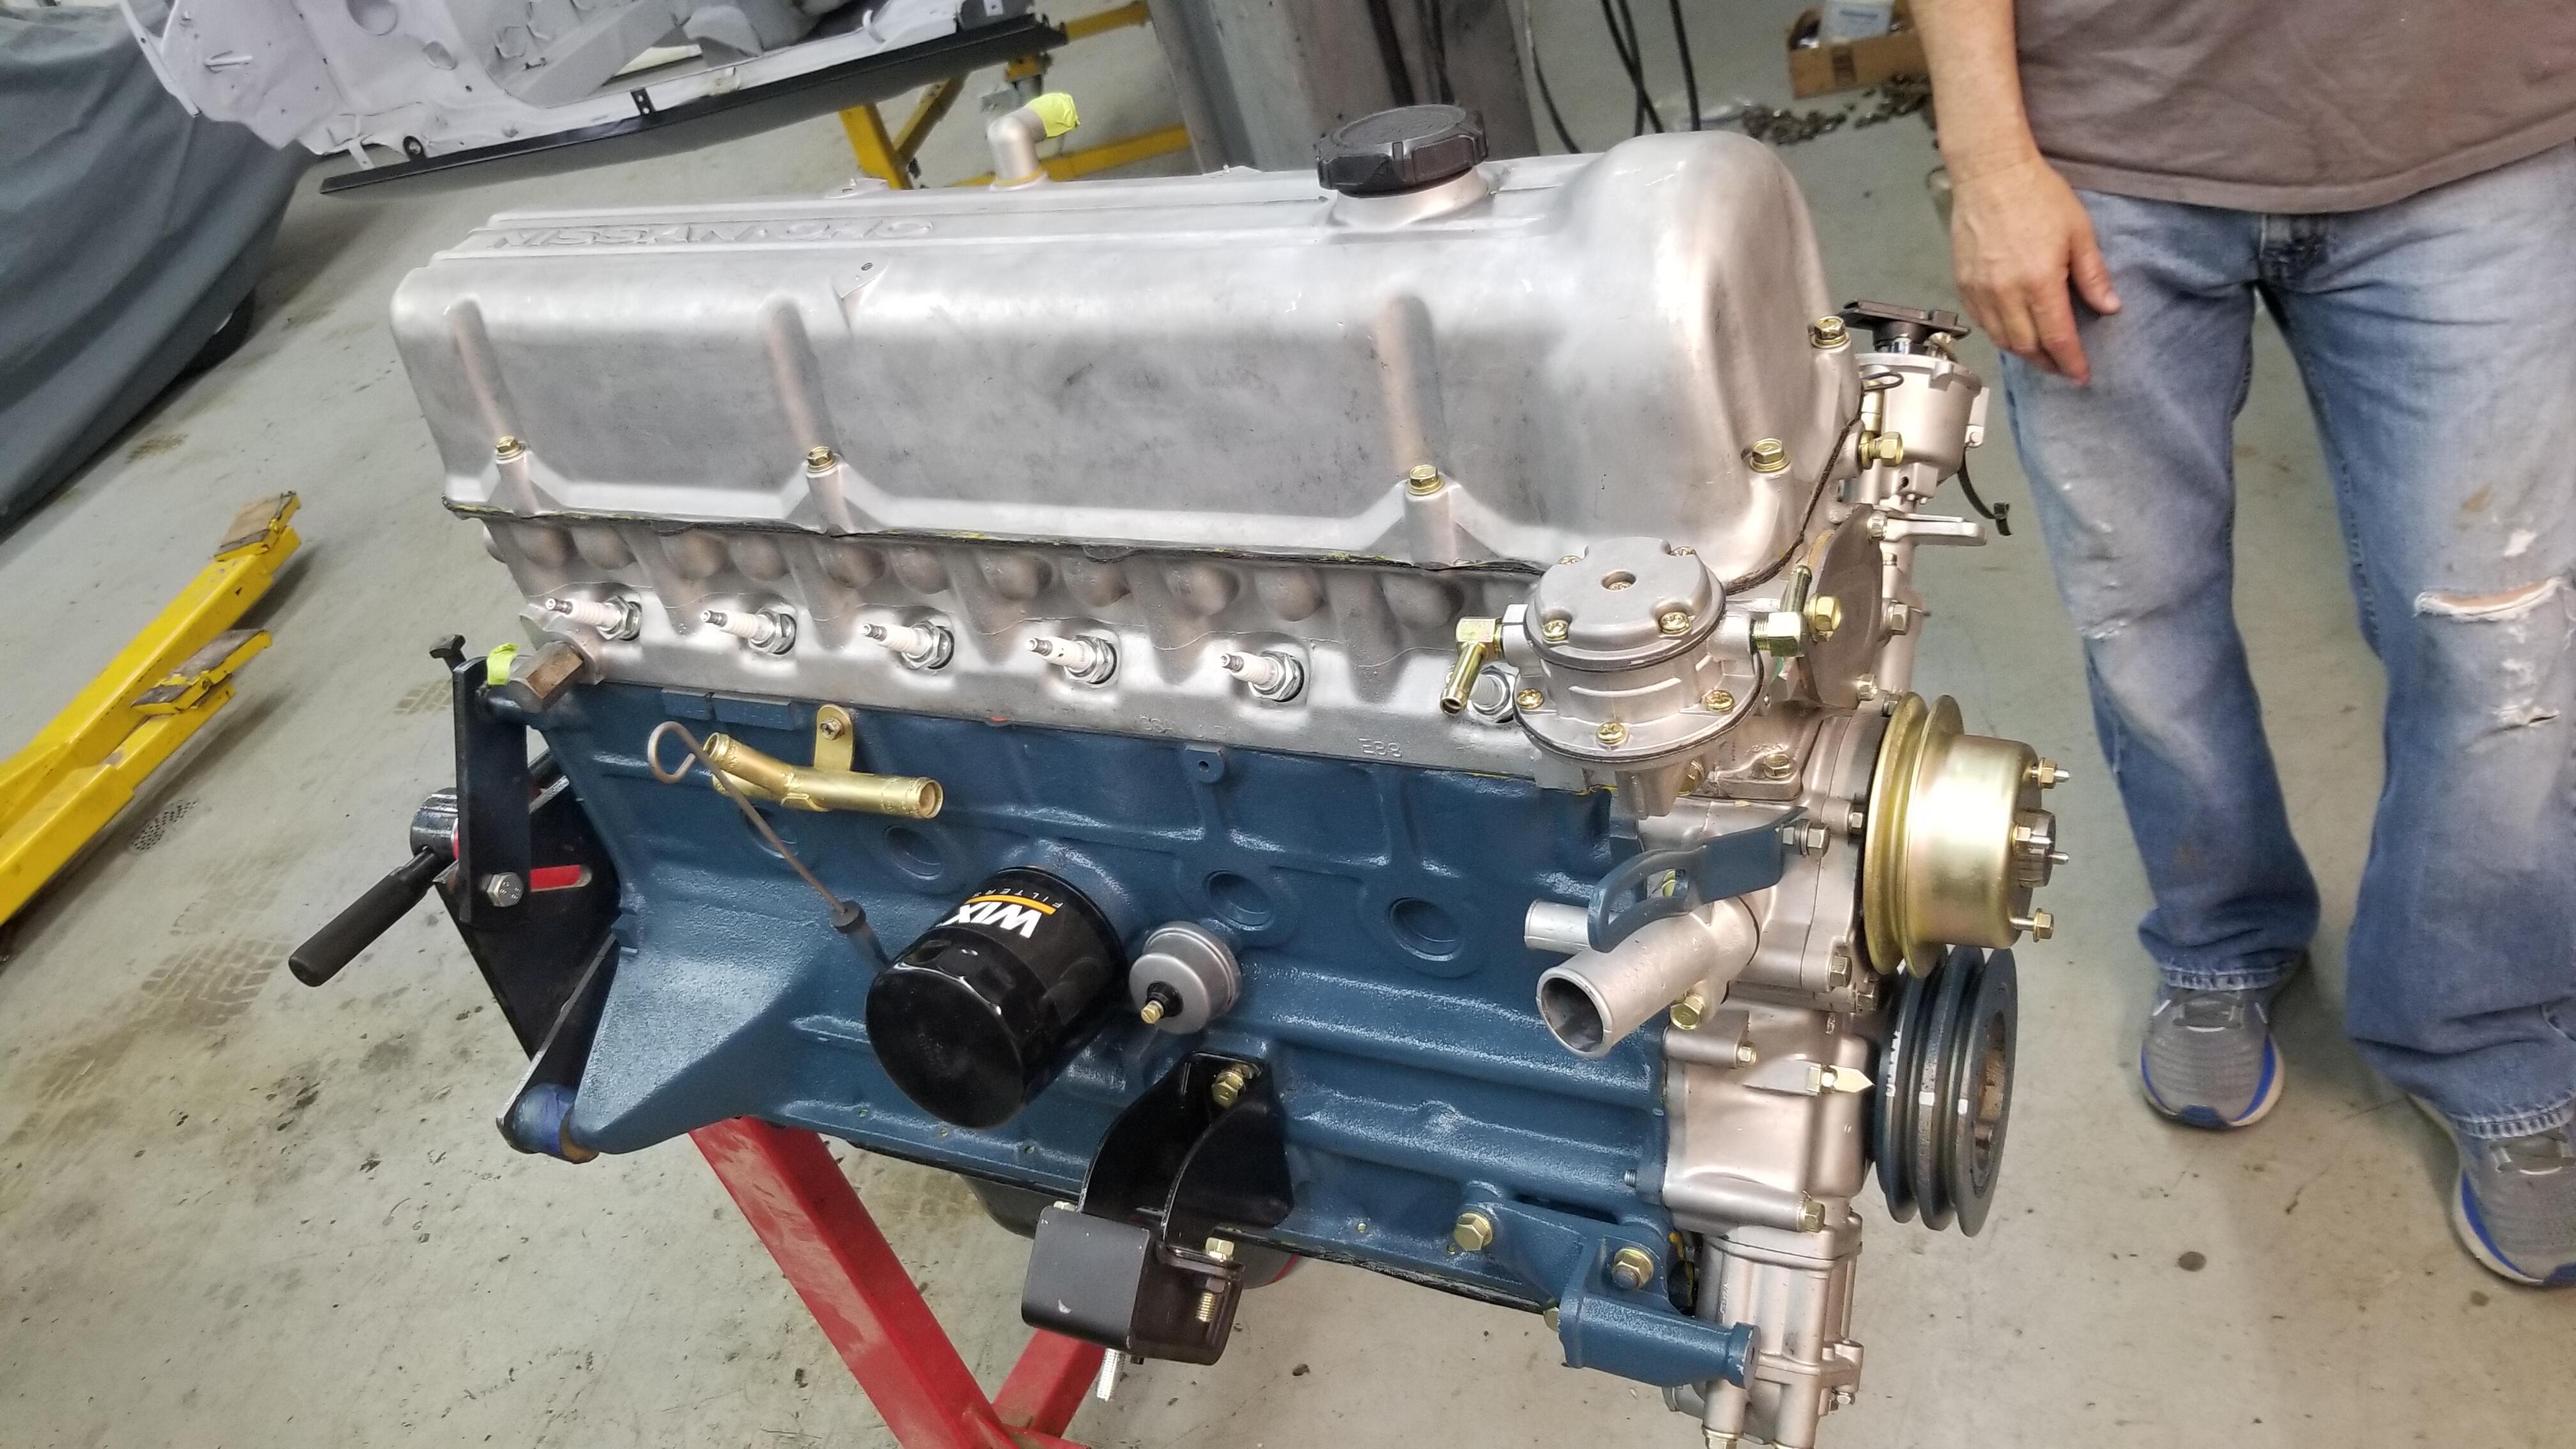
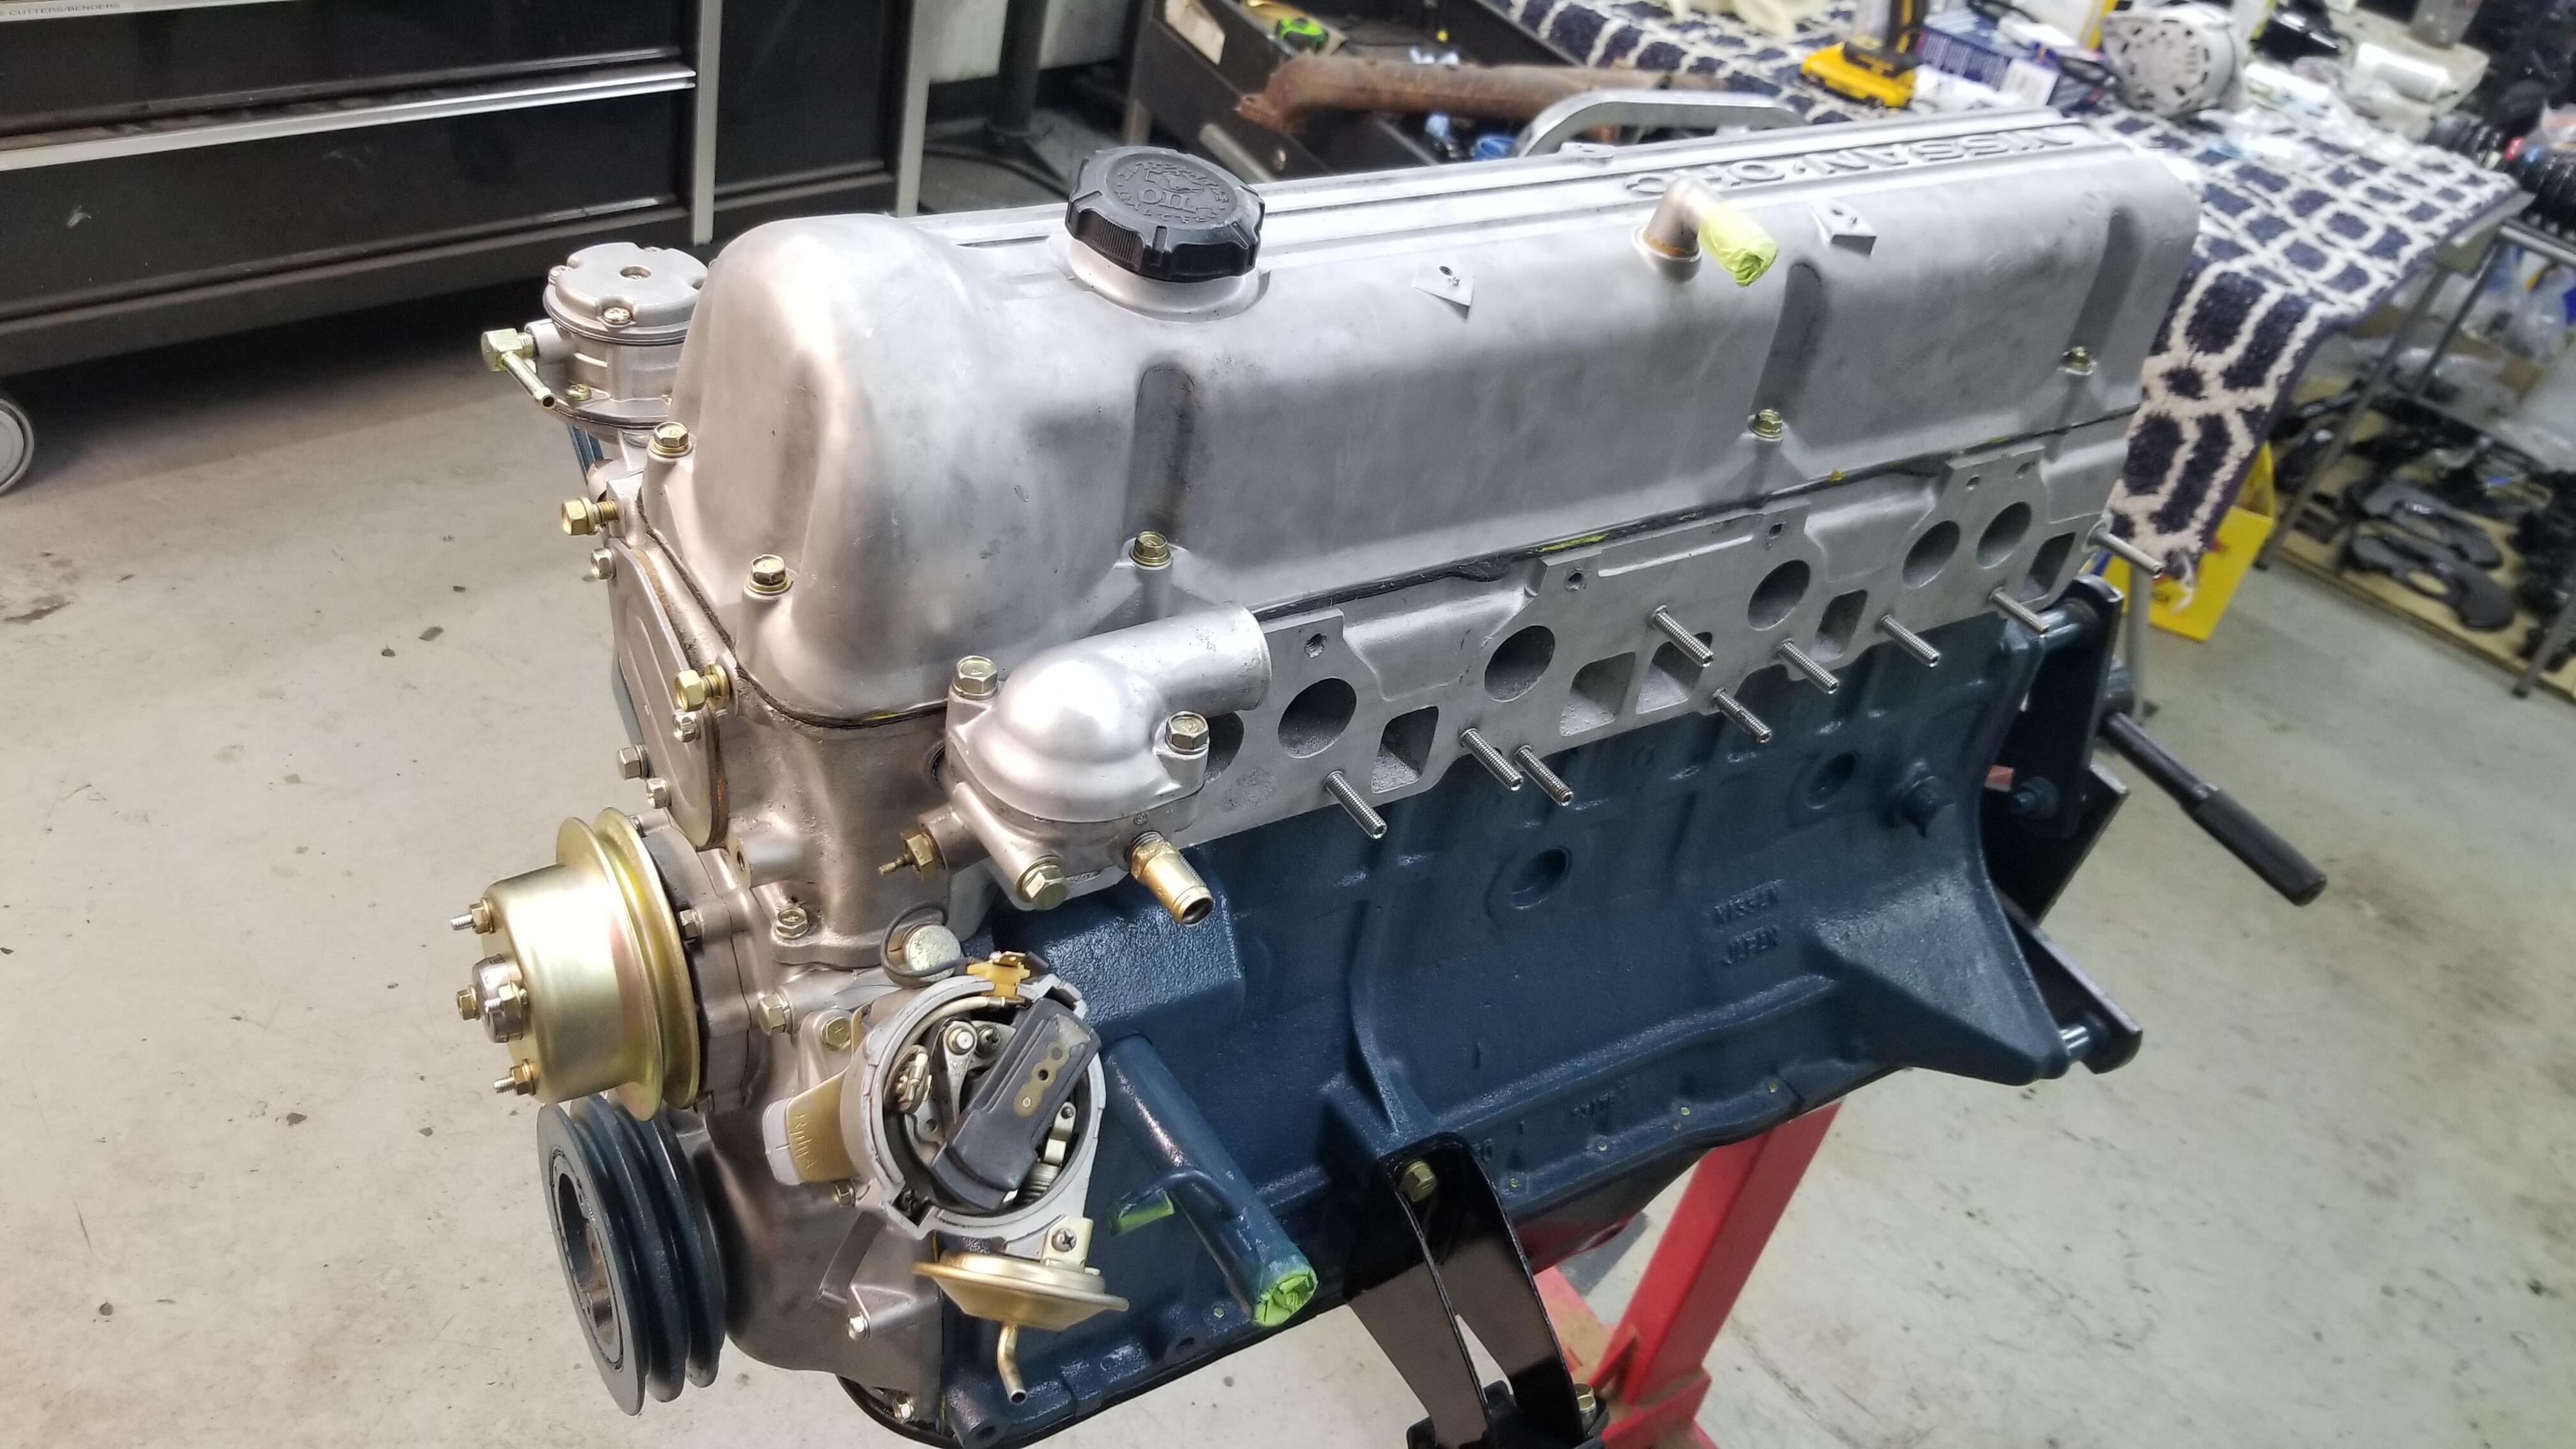
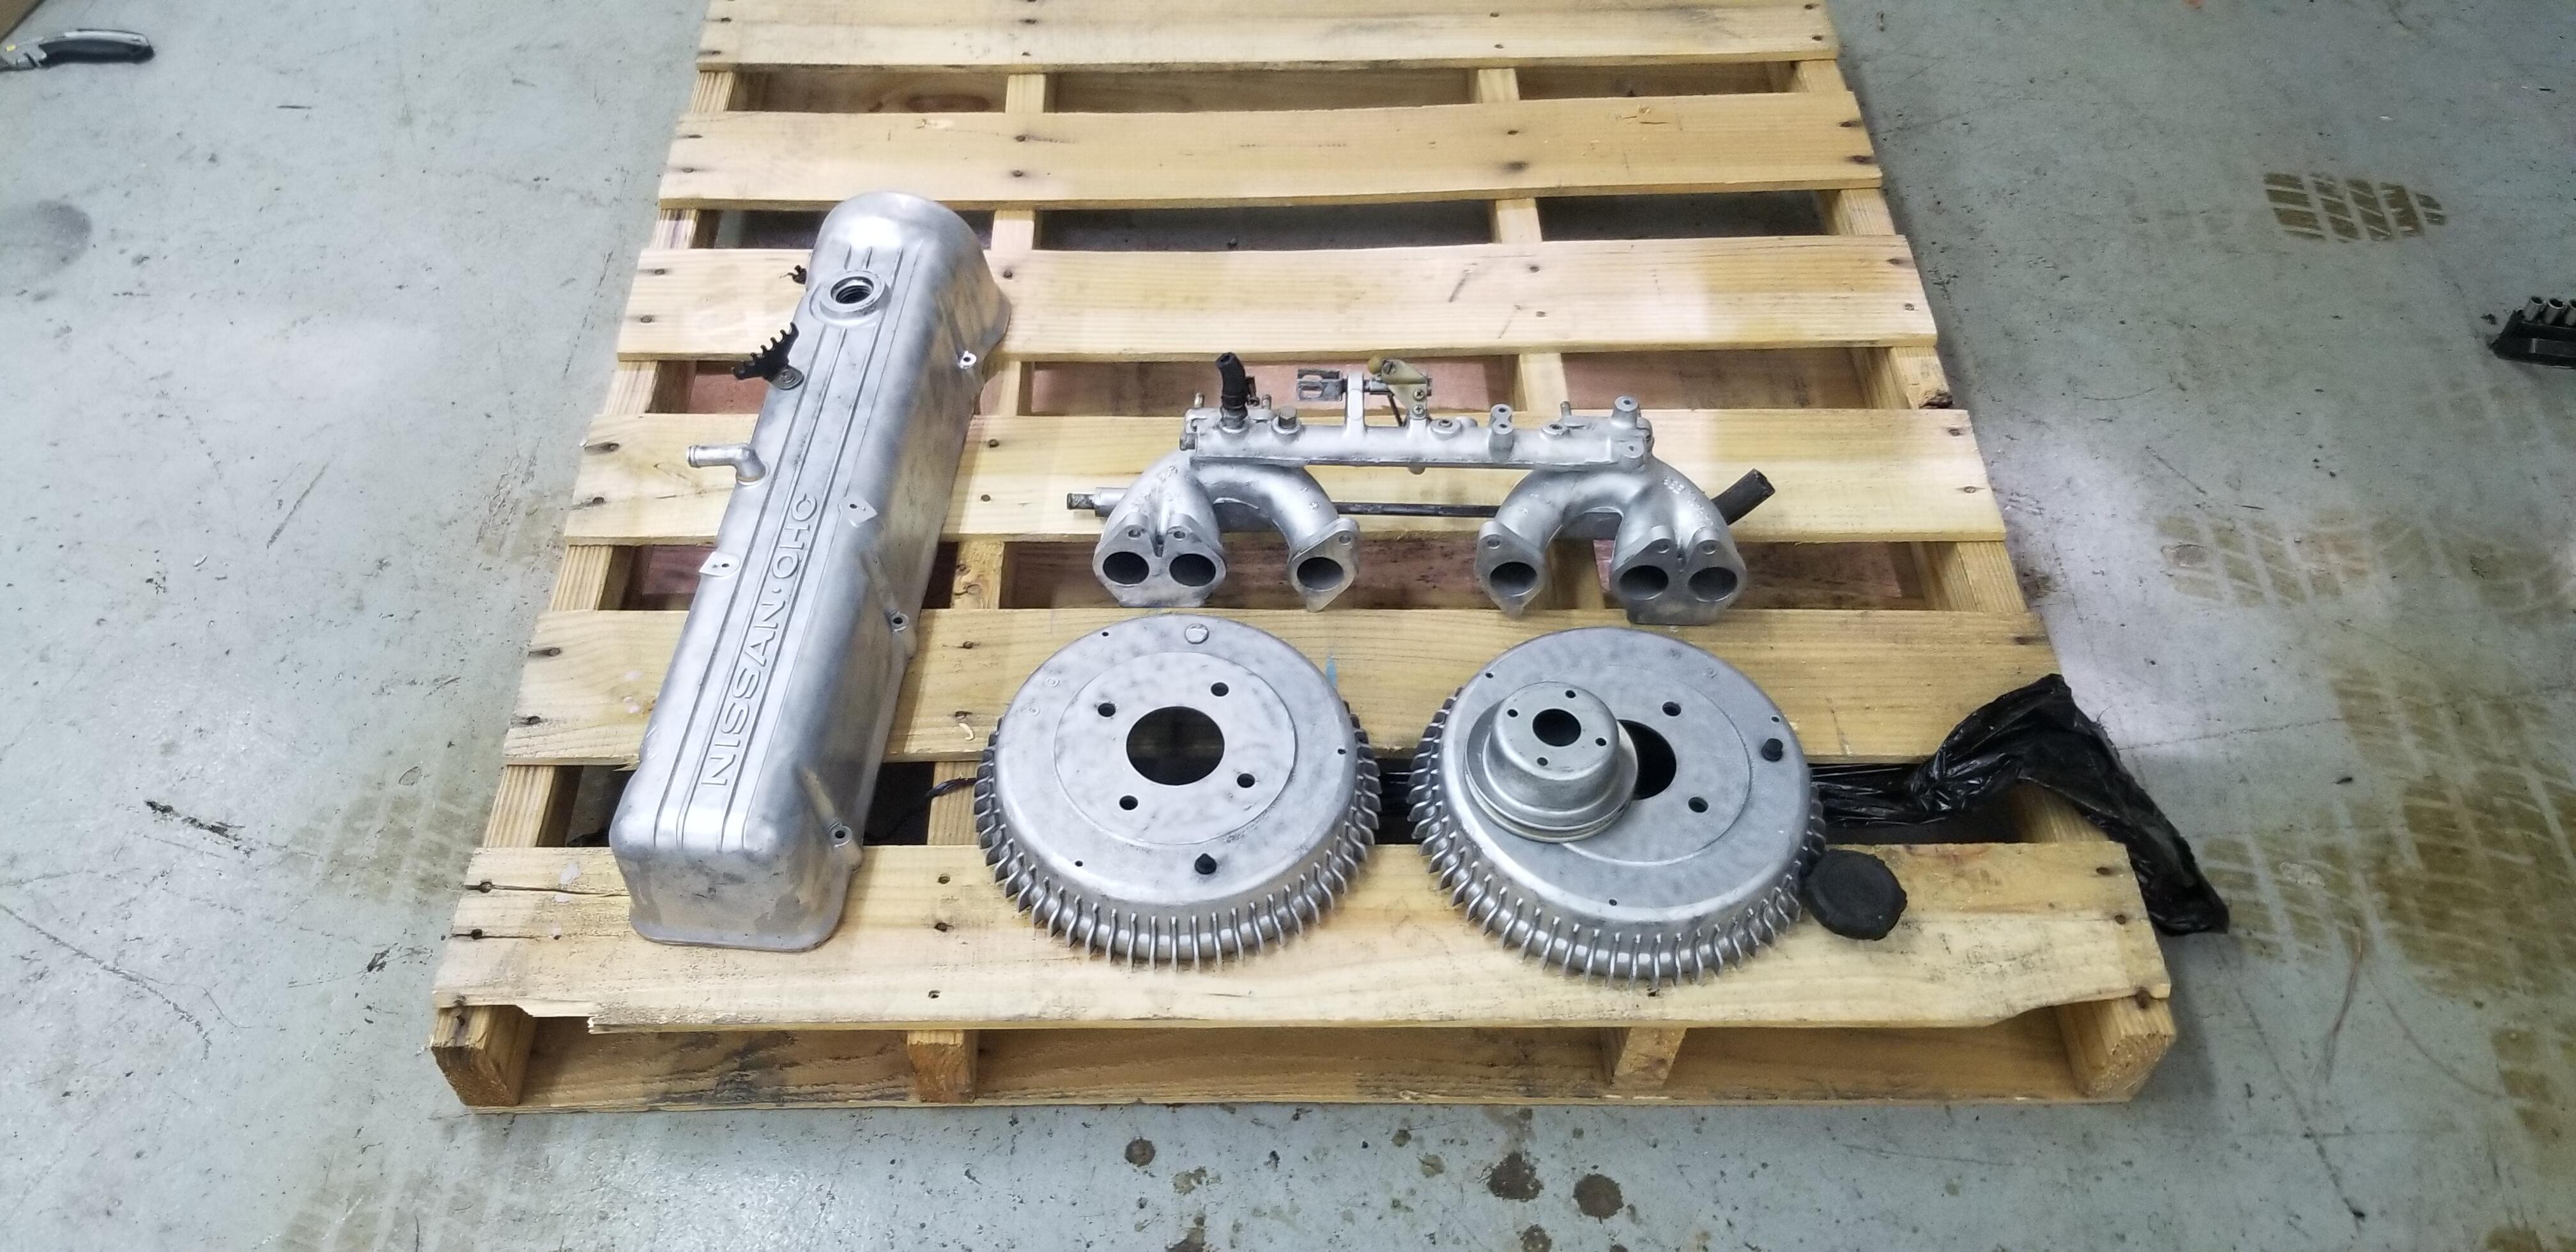
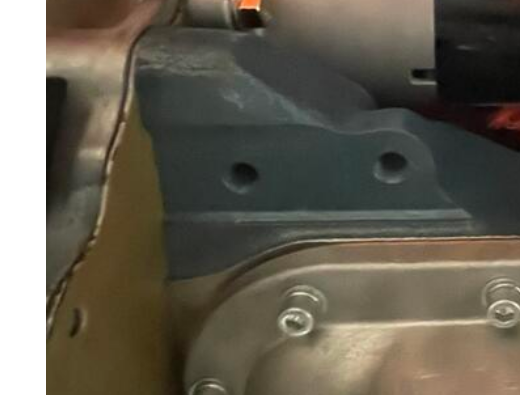
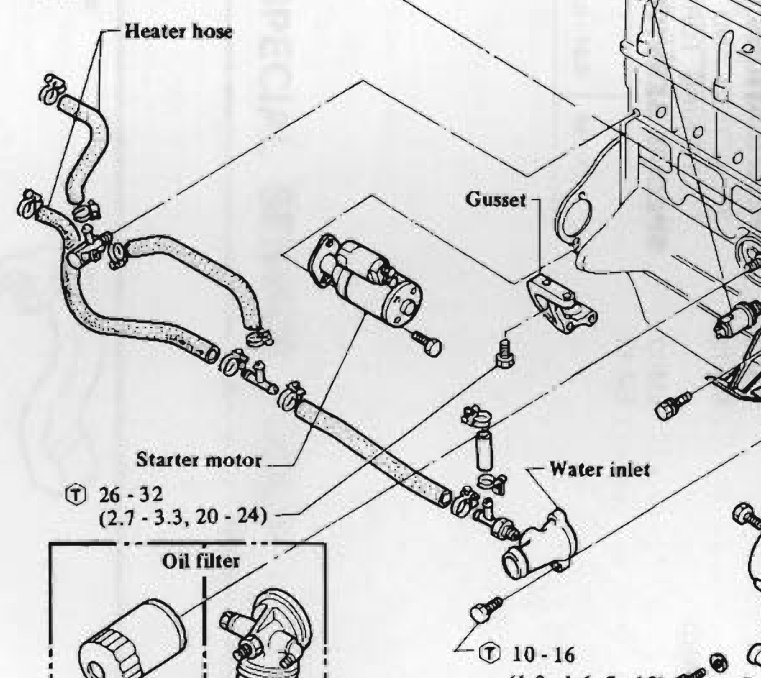
1 pointShiny and clean. Looks like you have an F54 block with the holes for the engine-transmission gusset. Designed to reduce NVH. I can't remember how the holes in the transmission case look though. Might not fit your setup.
 1 point
 -
1 pointI think it was so the bumpers would be at the regulated height. Found an interesting Hagerty article. I've also read somewhere that part of the reason for the big bumpers was for insurance purposes. The insurance companies were paying out too much for minor parking lot bumper bumps. Can't remember where I read it but it stuck in my brain. A congressman was involved. They're called "safety bumpers" but the safety is for the insurance companies. 5 mph. https://www.hagerty.com/media/opinion/the-hack-mechanic/two-years-that-changed-cars-forever-1974-bumpers-and-75-smog/1 point
-
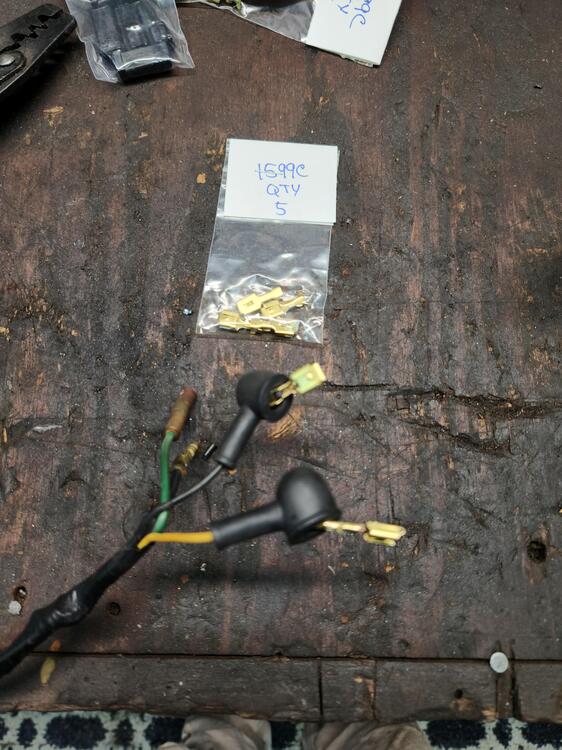
1 pointI tried to source a replacement for the boots on the fuel sender. I found 240rubber has them but I had just placed an order with Steve and figured I would wait until later to add the boots with a final order. Mine were hard as a rock. I decided to give refreshing the rubber a try. I used alcohol and wintergreen 3:1. I heated them up a couple of times with a heat gun and let them soak for about a day and a half. I was shocked at how flexible they got. Added some new connectors and that part of the harness is complete. I bought extra connectors from repair connectors if anyone needs some just shoot me a pm and I will send you some.
 1 point
 -
 Stock (roadgoing) 432-R tailgate was steel, of course. It had the acrylic window and used the stock window rubber (sans stainless trim) to hold it in. Nissan Sports/Race Option tailgate was FRP and had the standard shape lip, so could accept the stock window rubber and either stock glass or acrylic window. That matches what I've seen too. The FRP tailgate used by the early Works rally cars must have been a dedicated moulding because of that different window-mounting lip. It allows the bonded acrylic window to sit pretty much flush with the outer surface of the tailgate. Somewhere I've got photos of a Works lightweight car with a bonded window that has very small screws embedded (covered) in the bonding material for a belt-and-braces solution.
 1 point
 -
Did it have any of the venting/draining gubbins inside it. Other Works FRP tailgates I have seen had the vents blocked off and therefore didn't have any of the usual internals.1 point
-
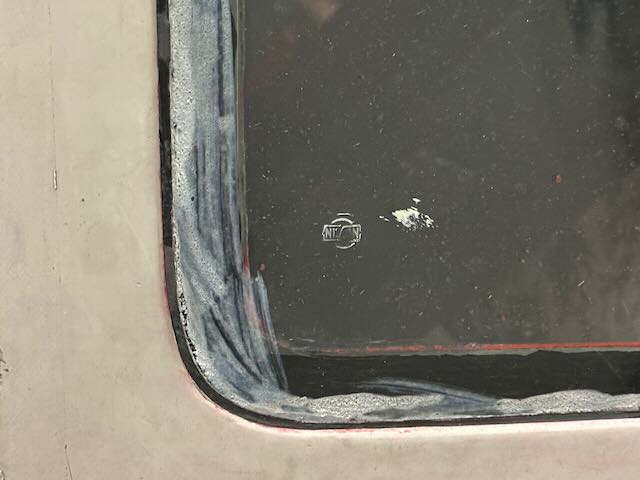
Yes, pictured - not very well stamped, I'm afraid. Tailgate permutations for Z432-Rs over the production life of the S30 are a slight mystery to me, so I'll invite others to chime in with info. From the parts manual, a Z432-R with lightweight decklid would have a fiberglass frame, an acrylic window a little thinner than a stock piece of glass, and a standard rubber gasket to affix it into the frame. The Lightweight Spec Works cars did it differently - they used an even thinner piece of acrylic (perhaps half as thick, by my estimates), bonded directly onto a lip on the decklid frame, without using a gasket (refer to picture)- essentially making the frame/acrylic a single piece. This feature is visible on pretty much all the 1970-71 period photographs I have of the Works cars, so I have come to believe it's the likely procedure the Works team used on all the Lightweight Spec cars. The acrylic is so thin, that there's really no way it would be rigid enough to stay in place using just a gasket. In addition, I'm not sure that this exaggerated mounting lip on the frame was a part of the standard PZR frame - it's possible that this batch of decklid frames were modified specifically to allow for the two pieces to be bonded together. I just don't know the answers yet - more research is required. The above is all a bit geeky, so I apologize for deep-diving into the minutia. Unfortunately, my acrylic was ruined by a former owner, who cut a 6" hole for what appears to be a fresh-air venting system. Thankfully, I have a "very used" standard PZR acrylic window. So, in order to fix my existing decklid, I'm going to have to cut off the old acrylic, and bond on the new, thicker one, or bite the bullet and replicate the existing acrylic piece using thinner material. Right now, I'm leaning towards the latter, for consistency.
 1 point
 -
 You're close to Jackson Pollack big money skills. The Z window chrome would make a good frame.
 1 point
 -
1 point
-
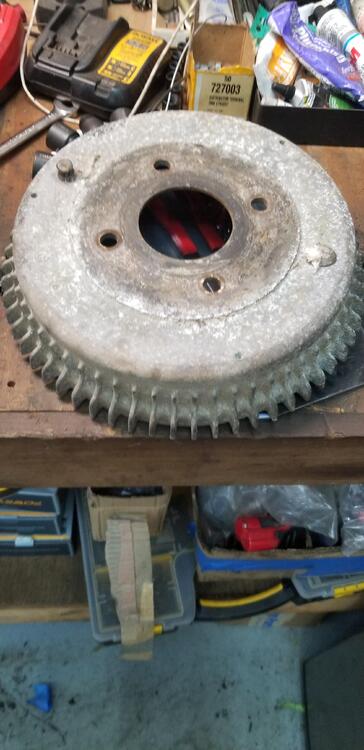
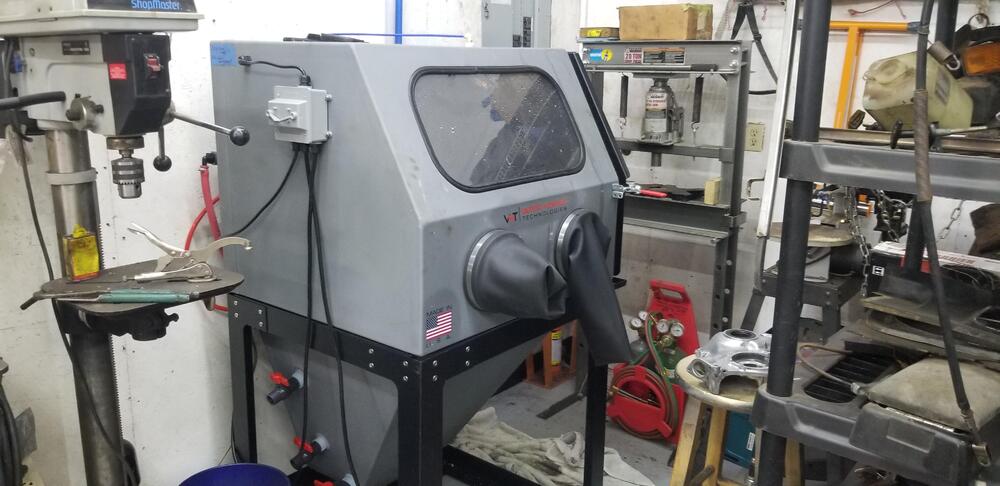
1 pointPicked up my vapor honing blast box today. Had some time to try out a few parts. Not too bad. I think I am going to like it. I have made a good bit of progress over the last few weeks. I will post up some pictures tomorrow.

 1 point
 -
0 pointsNope.. never seen .. smelled.. or tasted.. 😭 Maar wij hebben Venco! (we have Venco) 👍0 points