Leaderboard
-

chaseincats
Free Member7Points1,009Posts -


Zed Head
Free Member4Points18,751Posts -

240ZBUILTBYME
Free Member2Points237Posts -

Captain Obvious
Free Member2Points9,814Posts
Popular Content
Showing content with the highest reputation on 06/02/2023 in all areas
-
5 points
-
2 pointsIt probably won't have a huge effect. My impression has been that it just isn't worth doing. What kind of testing does "Canyon Country" do? Most only do idle and 2500 RPM. Does the car have a catalytic converter? What does "pretty much fell out" mean? Do you still have it? You could probably reattach it, depending on the failure mode.2 points
-
1 pointI've seen that before too. Contact cleaner or Deoxit ia also a good idea. Deoxit is good everywhere actually. https://caig.com/deoxit-d-series/1 point
-
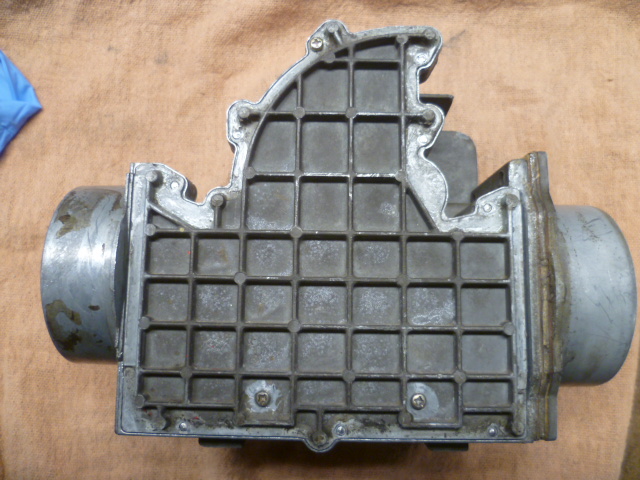
1 pointI can't seem to find the tutorial site, but it might be a good idea for you to scoot the board with the black sweeper track down a bit so that the sweeper arm is going over a fresh/flat/non-ground down track. All you do is loosen those 3 screws that hold the board to the afm housing and push the board down towards the bottom of the housing a tiny bit. Even the tiniest amount will get the contact points out of the carved area.1 point
-
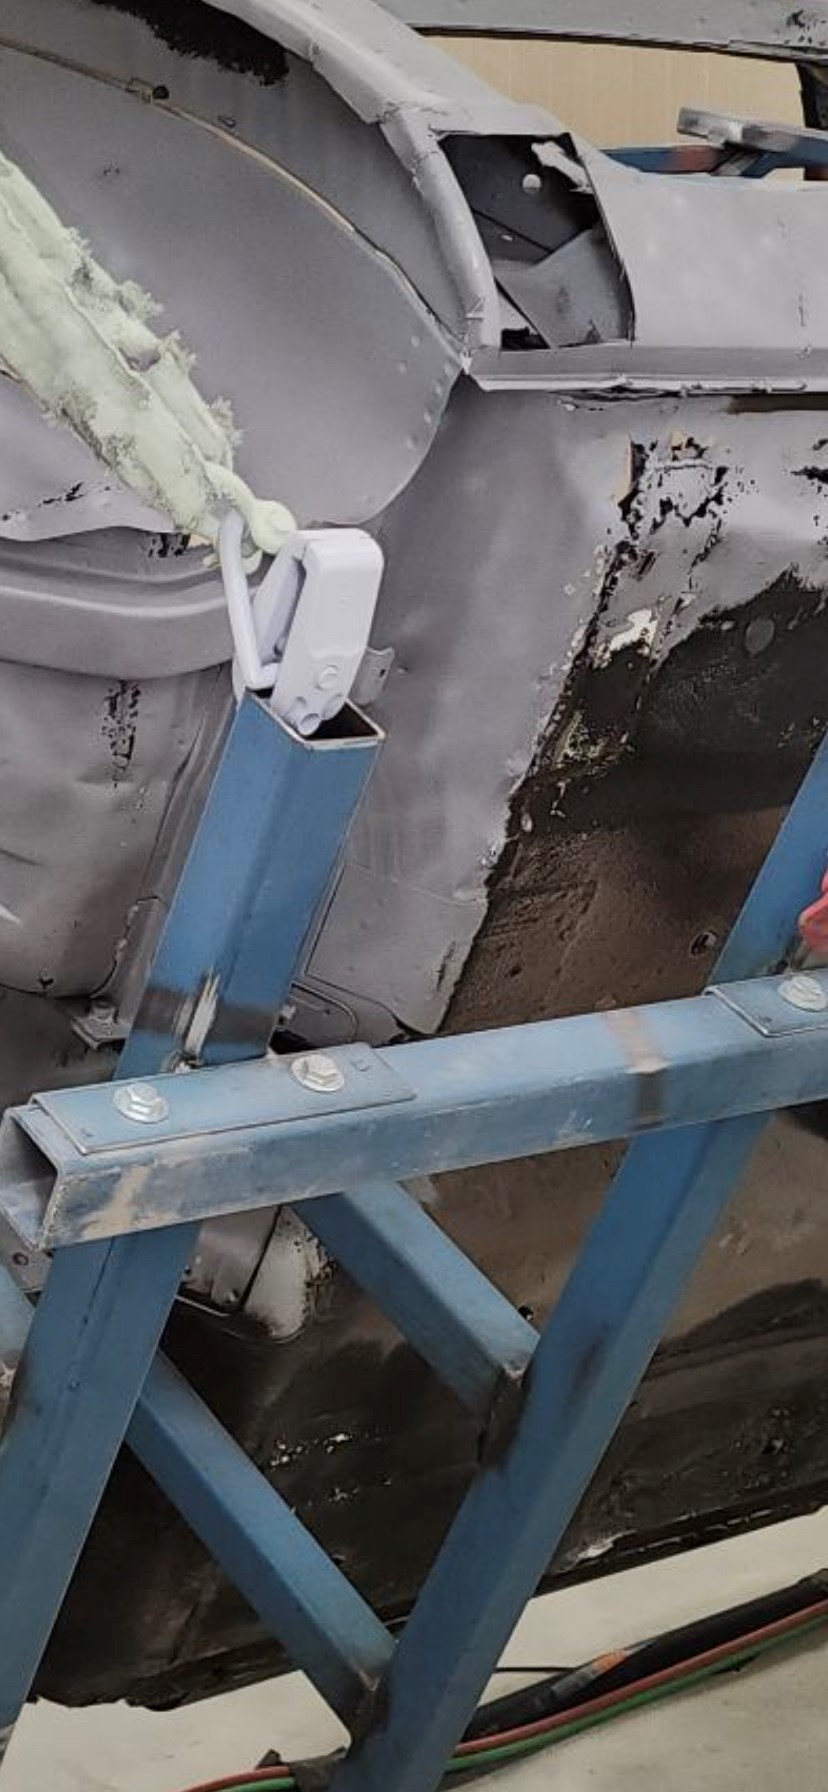
not the best photo but you can see it pretty clearly
 1 point
 -
I'm quite sure this is a stock reinforcement plate, I have them on my car, ill see if i can find a photo1 point
-
1 pointUpdate: I haven't smoked the car yet - that probably won't be for a month+ since my friend owns the machine and has a very demanding job - but I did want to share that if you have a gasoline smell in your car, change out the original-style clamps on the vapor tank's hoses to modern belt clamps and that will put an end to that issue I discovered.1 point
-
 1 pointYou could try that junkyard search engine and see if there's a p79 close by. The n47 is the least desirable head. Mine had a spray bar and an oiler cam, 0 oil pressure. I robbed the valve train components and scrapped the aluminum head.1 point
 -
 1 pointYeah the others seem pretty on there. I know people have ran without them and people have ran with some that are missing, however I haven't heard of anyone confirming if they can't pass smog or if the car runs better or worse with one or all of them gone. I can see the flow being ruined due to the shape of the ports without the liners so a lot of grinding would need to be done I know that much. Yeah, I did as much research as I could before posting but no one that has had them removed and ran their car with one missing or all of them missing have reported if it actually makes a difference to the way the car drives or if it'll effect smog etc... Trying to avoid getting another head as I haven't found any around me at the moment and money is tight.1 point
 -
 Go to page 18 on this link. I discuss all my issues with my 1977 HVAC stuff, including heater core modification (thanks CaptainObvious) and the Heater Control Valve refirb. It was a quick turnaround for this, maybe 7 days. I looked everywhere, you will not find an OEM heater core or control valve anywhere so don't bother, I spent hours looking. This was my only real option. http://www.heatervalves.net1 point
 -
 After a while, you get a feel for how to loose set them so they end up at the proper clearance after tightening the lock nut.1 point
 -
I don't think that material quality was very good back in the early days of fuel injection. Nissan had a team of engineers create a document about changing hoses. So, it was probably a thing back then. Much of the garage lore we all picked up is only based on who the oldest, most authoritative guy (best BS'er) in the garage was at the time. Just saying...I learned a lot of not-quite-right stuff.1 point
-
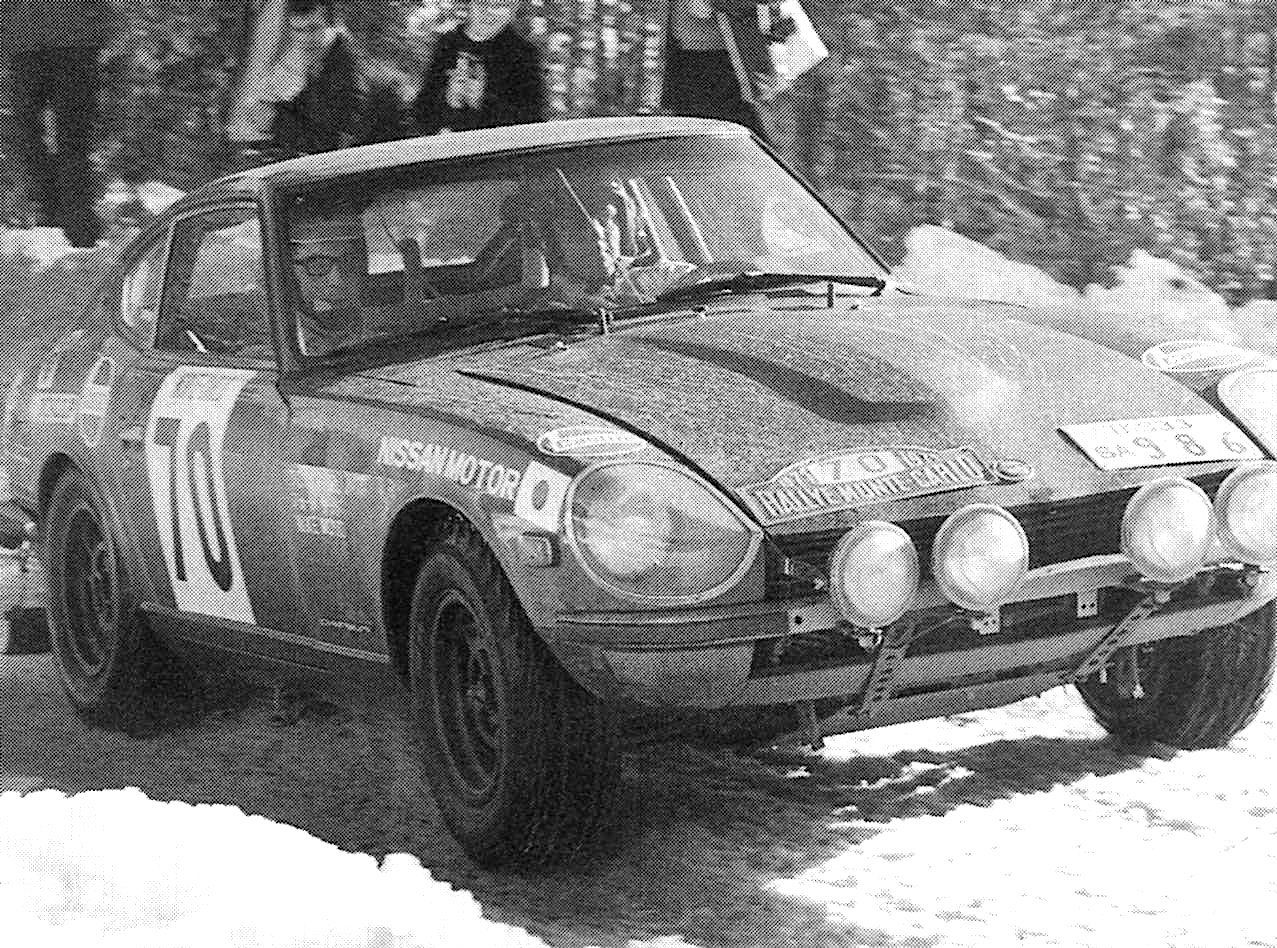
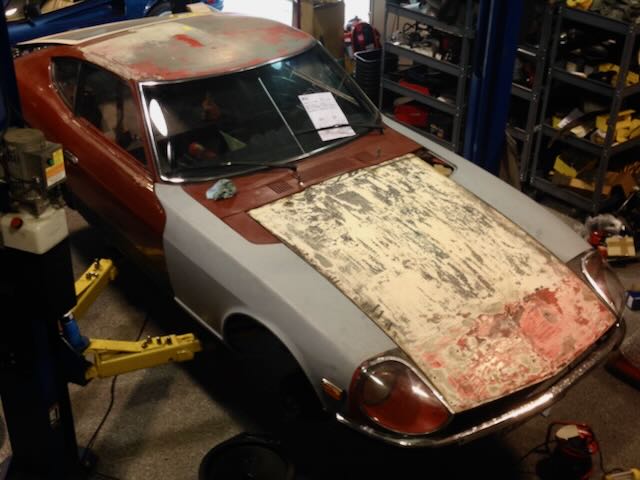
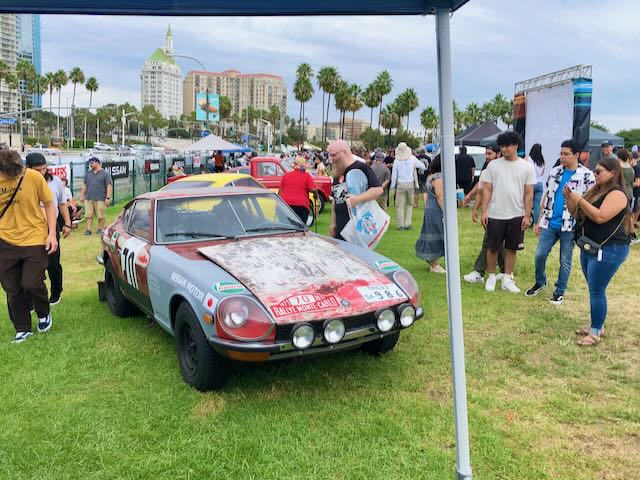
 It’s an interesting question- one that I’ve given quite a bit of thought to over the past few years. here are some long-winded thoughts on the subject: When I previewed the car at JCCS in 2022 (see picture 4), by far the number one comment I got from onlookers was "Leave it as-is, and don't restore it”. I really appreciated these comments, because I myself had considered the very question “Can I leave the car as-found, and do just enough to get it running?” Short answer: I could probably make that work in some fashion, but not really in a way that makes much sense to me from a historical perspective. if I left the car as-is, I really wouldn’t be “preserving” much of any historic rallying patina. To explain: the interior appointments of the car was largely salvageable (and will be preserved, apart from the metal work) but most of the original exterior patina from its rallying days was already long gone, and any originality that was left was unlikely to be usable without a complete overhaul. The rally “patina" that was displayed in 2022 in the form of racing stickers and fog light mock-ups was largely applied by me to give event-goers an idea of what the car looked like in period. The car is REALLY rough (see picture 3, on the lift), and IMHO, beyond the sticker appliqué, there’s really almost no exterior patina that evokes its past as a Works Rally car. The damage on the dogleg and doors raises perhaps a slightly different question, but I personally feel it can also be considered in the same vein. Someone had already repaired this damage to the door and body in Spring 1971. Fast forward to today, we’re really only looking at their “fix”, and not the original hit. So. I pose the question: do I leave the fix as-is, re-damage it so it looks like the hit in the 1971 Monte, or fix it properly? I think if the car had any authentic “Post-Monte” patina, or even “Post-RAC” patina left, it would be much easier to re-create, preserve, or otherwise highlight damage such as this dogleg, and I’d have a much tougher time deciding which condition to restore the car to. However, In this case they’d already applied the fix by April 1971, and rallied it with the fix in-place. Further: apart from retaining its RAC ride height, and a few dents in the floorboards, IMHO the car really has no other external rally patina showing- it’s pretty much all gone. Given all this input, my current plan is to restore it to 1971 Monte Carlo “Pre-Race” condition (picture 1 below, credit unknown), while keeping as many of the original and period pieces as possible, restoring them to their pre-race state as best I can. This restoration target will likely include properly repairing the dogleg, and saving the original “repaired" piece for my wall. But I’m still open to hearing opinions, so I’d love to hear yours if you think differently after hearing my thoughts. Just to note, this restoration target is slightly different from an “As-New” condition, which I’m not really sure is even possible, given that these cars were hand-assembled and field-tested. IMHO “As-New” would probably yield a less interesting and inaccurate result.
 1 point
 -
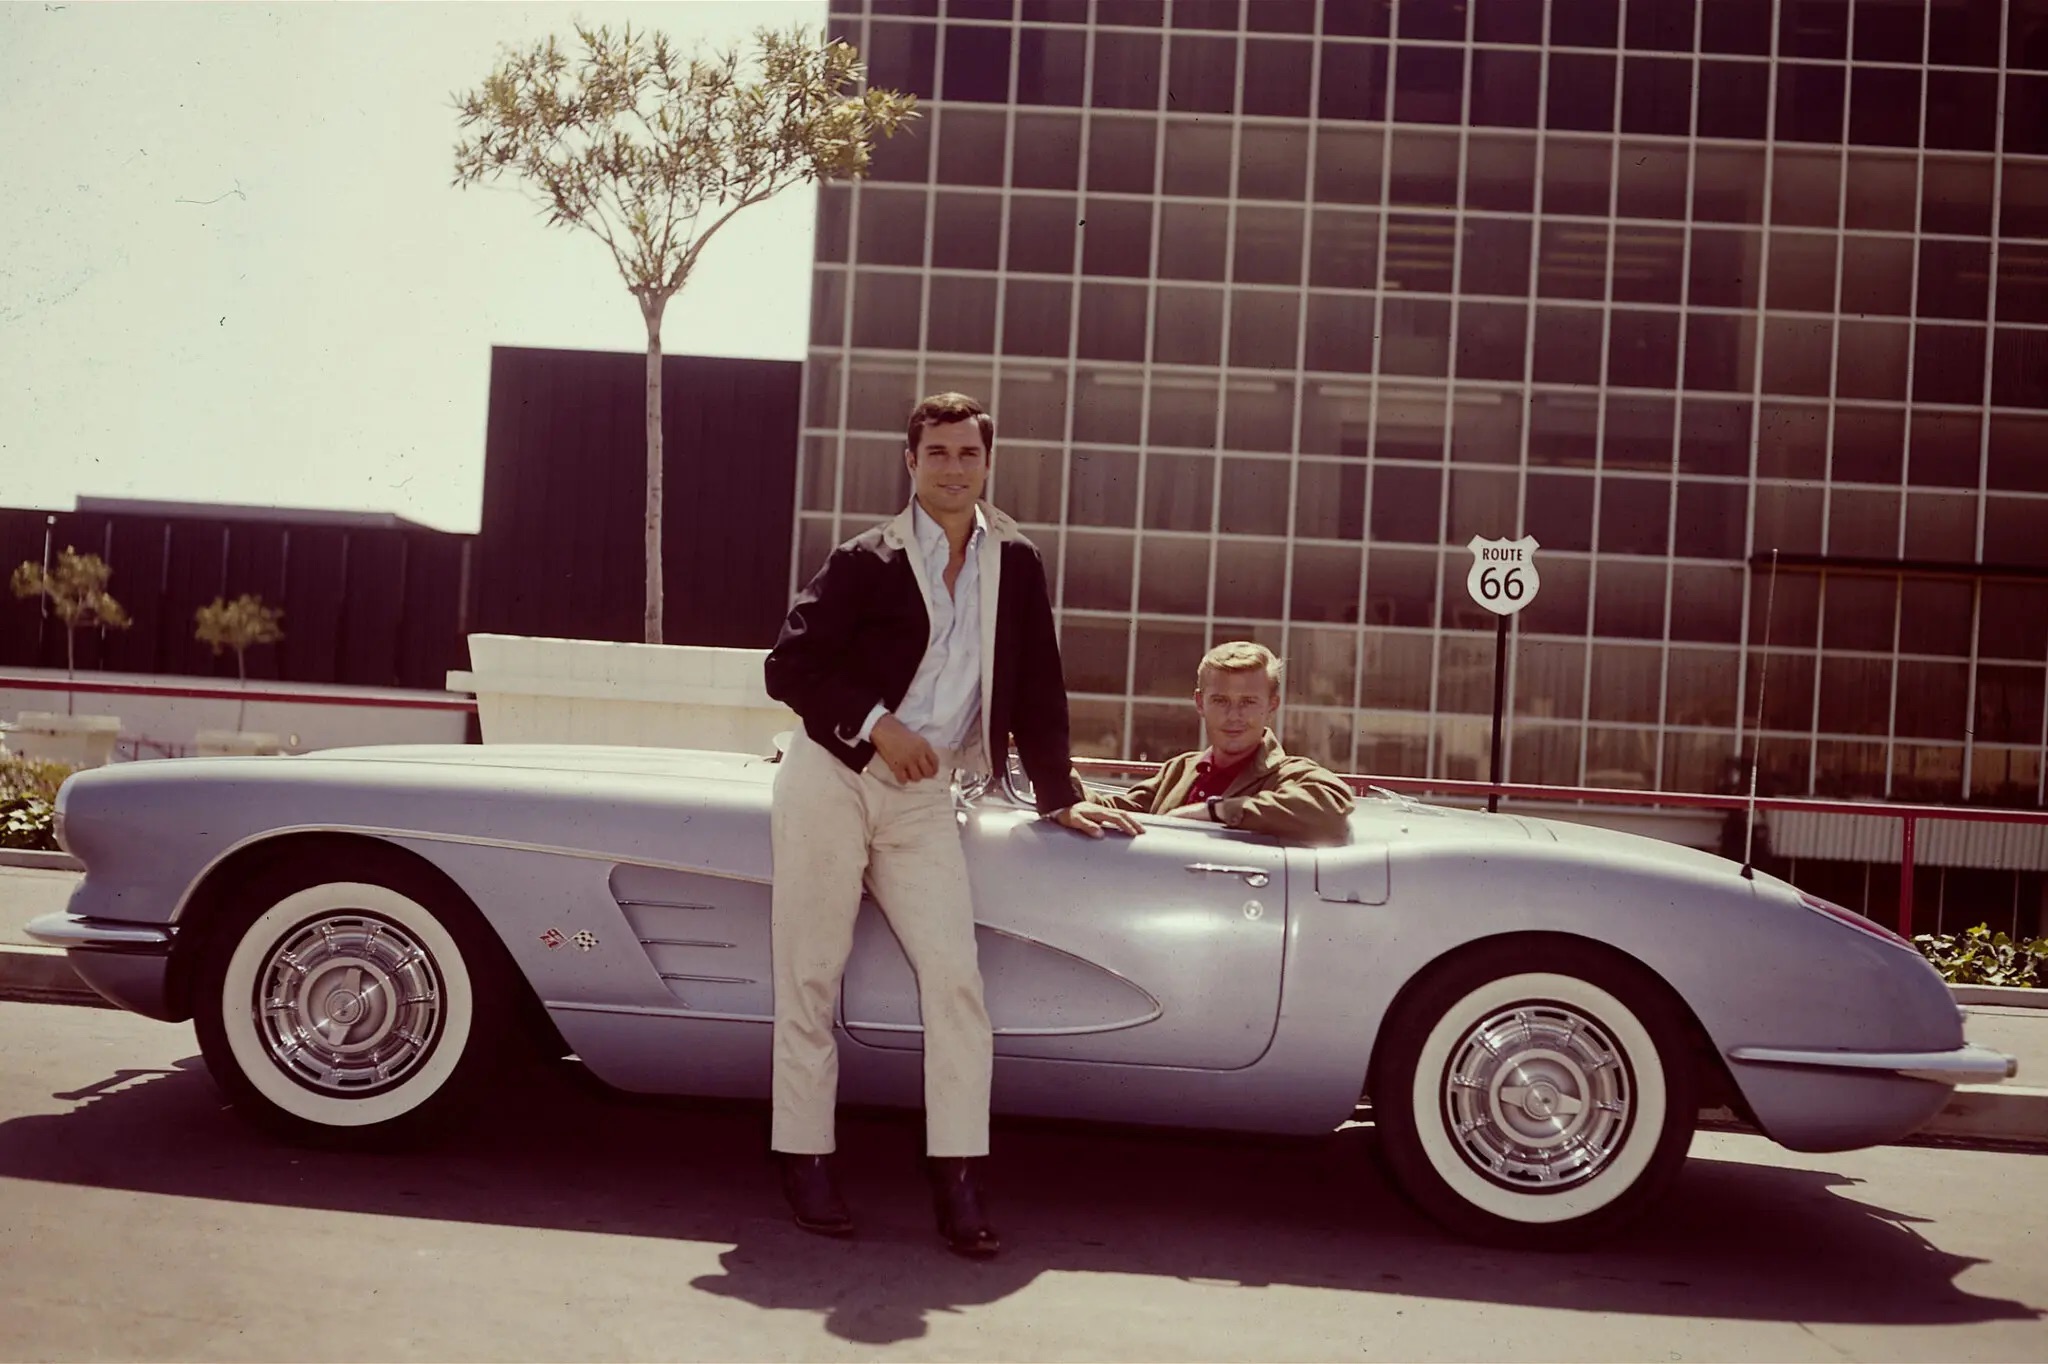
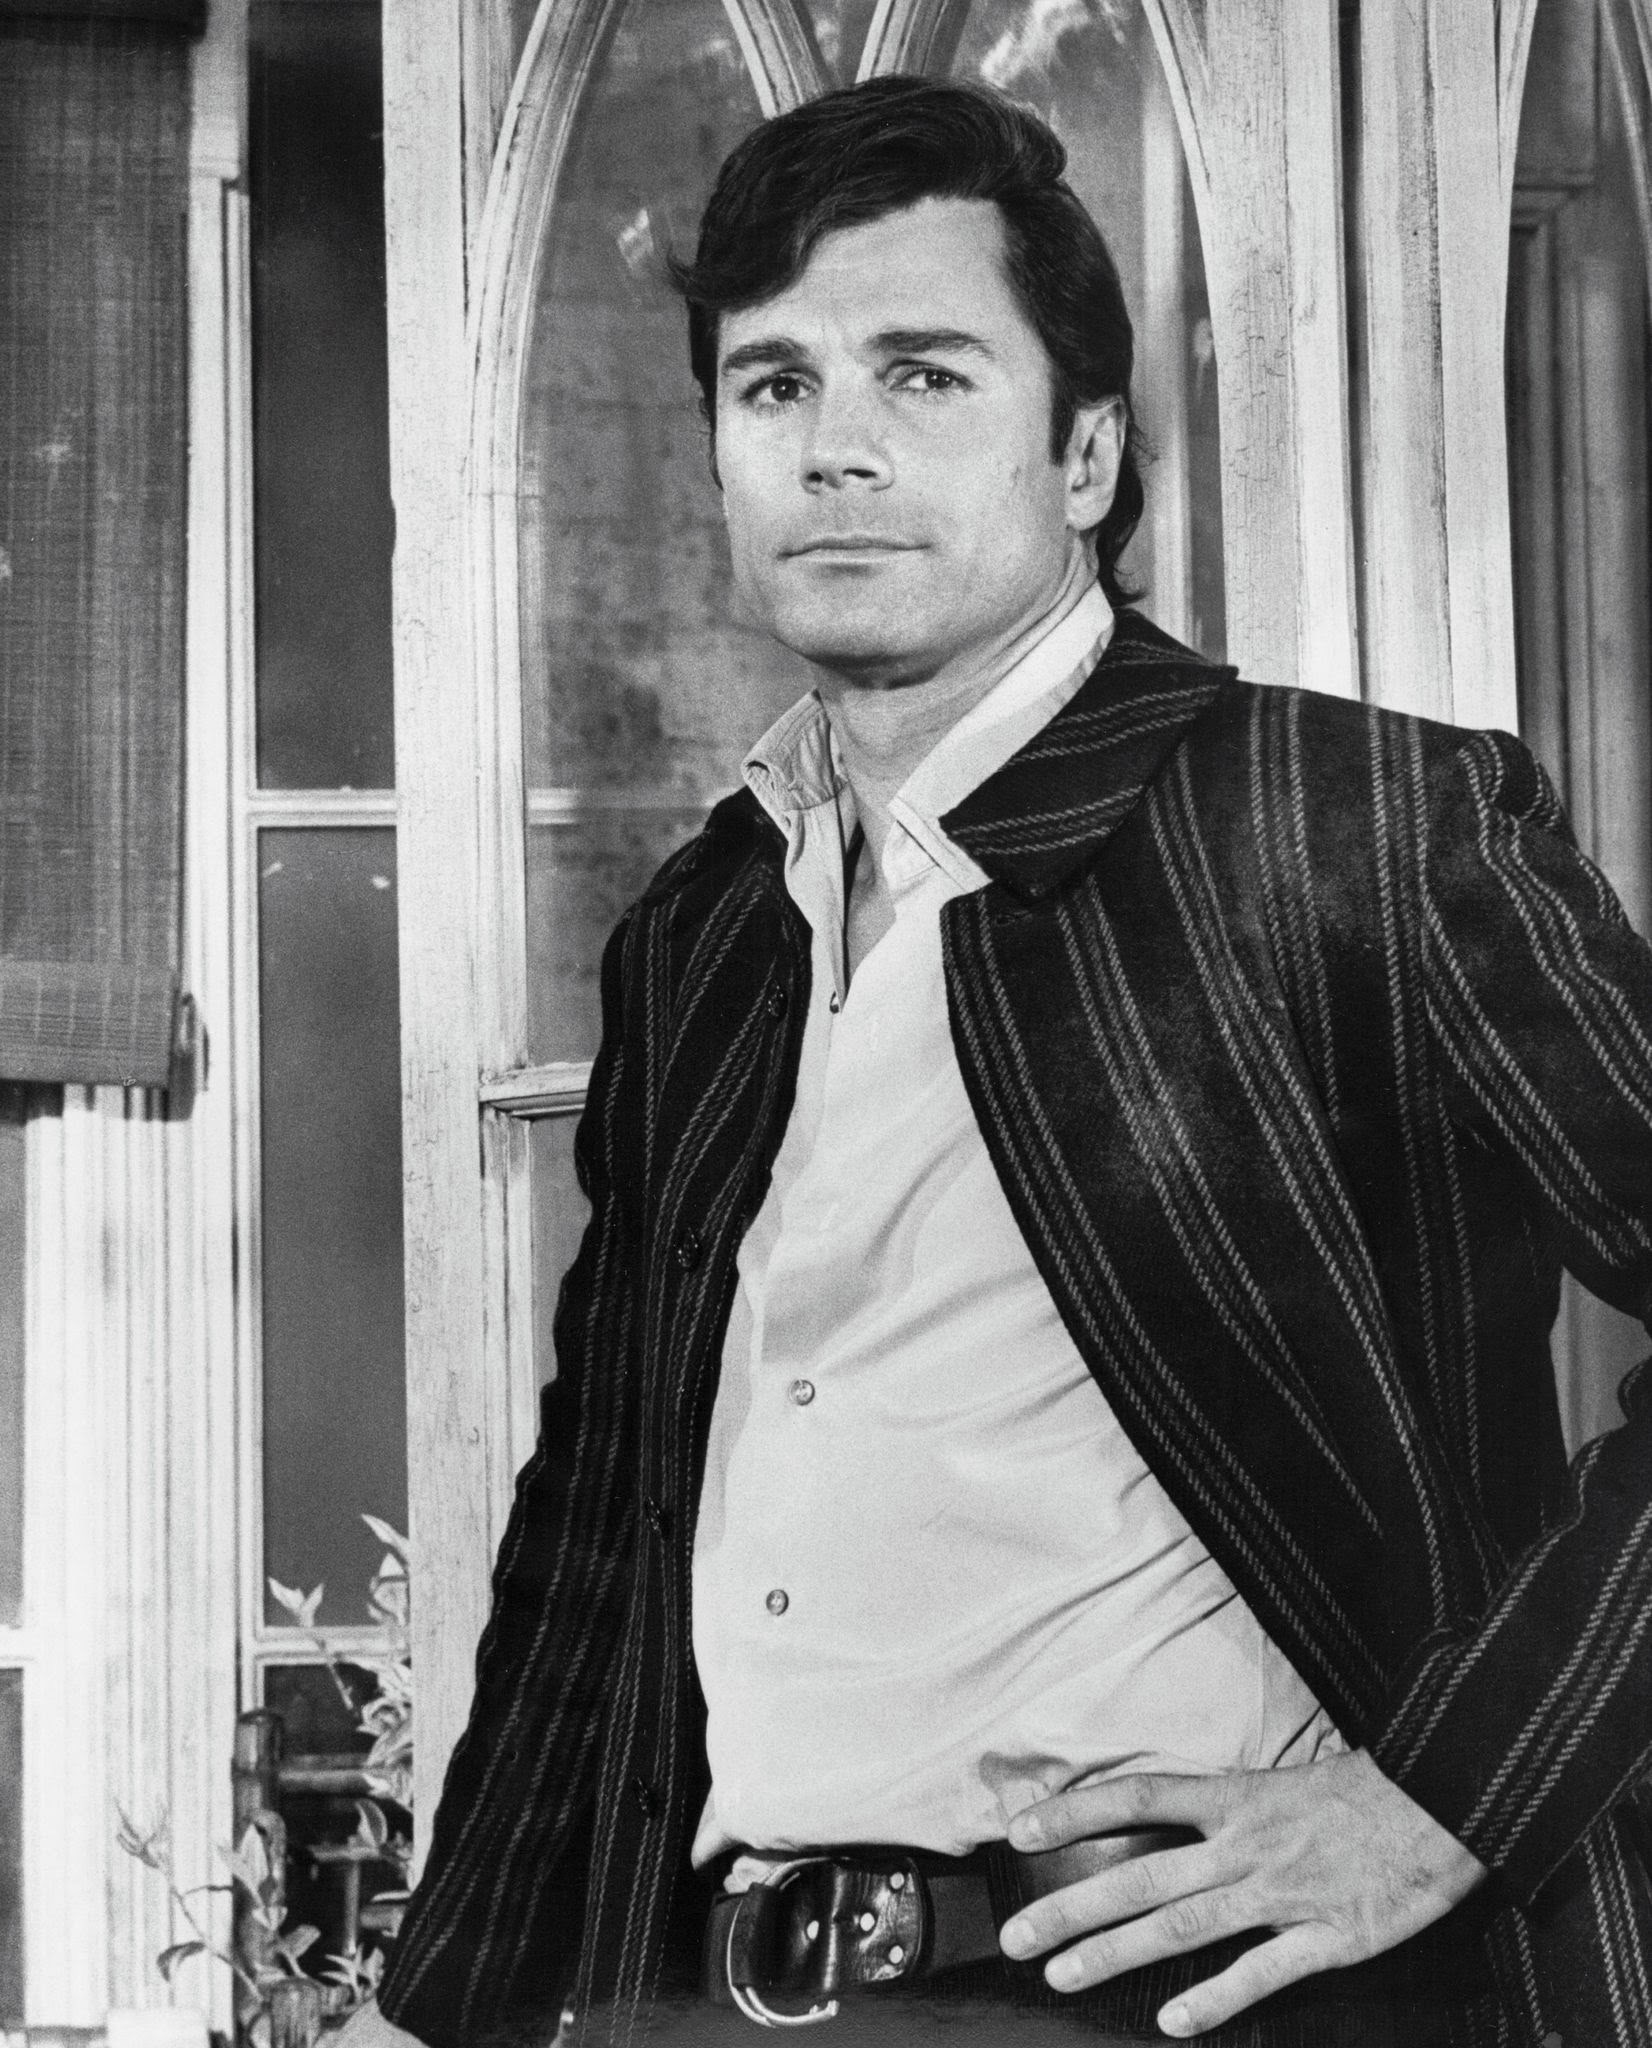
 Not Z related, but this guy got me started loving cars… RIP to George Maharis - 94 died today.
 1 point
 -
 So, i thought i'd pay the bodyshop another visit. i was a bit suprized to see the car looked tmore or less the same than last time on the first glance. But upon closer inspection i realized they have worked on a lot of details. They finished the welding of the front area. added some threads where they were missing on this version of the parts i had (some have minor differences to my original ones, since they might come from a different year version, despite being factory parts). Also the firewall area behind the bedals was completed. The floor pan and seat mounts were removed and the inner side was replaced with the KFV part. Including the additional einforcement plate: Luckily i brought my USB-stick this time so i could get the pictures which the panelbeater made while in progress. he also repaired the lower section of the inner-inner rear wheel arch As well as the tool storage area behind the driver seat: You can also see the lower "Dogleg" area behind the driver, which got replaced. Some small items had to be made by hand, like this rear inner wheel arch lower corner (behind the strut area). Meanwhile the whole section is closed again. On both sides the Mud / Dirt panels got test fitted to see if all bolt holes and stuff lines up. I agreed for a next visit in 1,5 weeks, and i'm hoping for the floor panel area to be done and maybe the outer side skirt (incl seat belt mounting reinforcement, etc..). So far i'm really satisfied with the work they do and also their attention to details which matter at the end. Oh and i need your input. Behind / Outside the LH floorpan, we found some kind of reinforcment plate, which extends to the seat mounts. It looks Very much like factory spot welds from the inside, but i couldn't find anything about this piece in my parts manuals, nor does it make any sense to mee. the area was heavily "repaired" in the past. but this particular piece looks to good to be a repair. No we wonder if we should fabricate something like that and weld it in on the replacement floorpans, or just leave the floor pan as it is? I have a shipment with very rare and cool parts ready to be s hipped out in japan, but since seafreight is quite expensive atm. I guess i'll wait a bit and collect additional stuff before i send it out.1 point
 -
 1 pointI did raptor liner with body color over it. I am really happy with how it turned out. Maybe one day the other side will get paint!
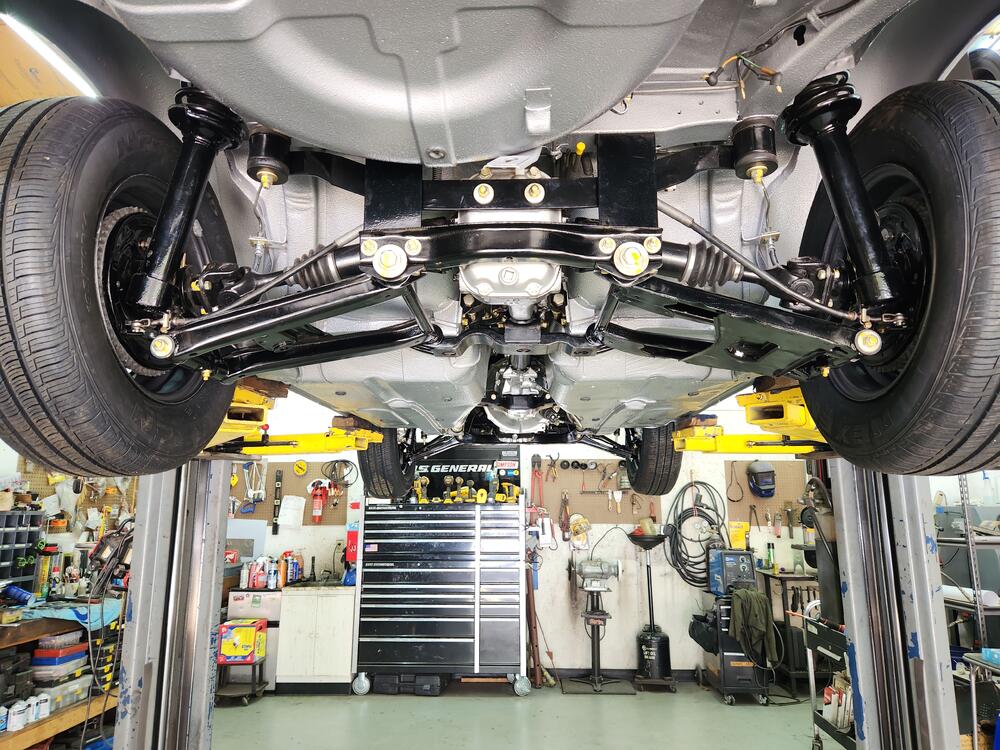 1 point
 -
1 pointI got lucky. When the factory set the proper position, they put a blob of silicone (or something) onto the clamp that holds the gear in position. The lucky part was when the PO moved the gear, it split the silicone blob into two pieces. One part on the clamp, and one part on the gear. I rotated the gear back such that the two halves of the silicone blobs lined up again. I've been inside other AFM's and the blobs are gone completely. Thankfully on this AFM, the split blob was an easy way to tell where the gear belonged.1 point
-
1 pointOK, so the next step in the ordeal was a success. I drilled and tapped one of the places that used to be a rivet. I did one of the positions along the top. Looks like this: So now there are three screws that hold the cover on. One along the top and two near the bottom: This is just a test fit with no sealant, so the next step will be to take the cover off again and put some silicone on the sealing surface and then screw it together "for good". And after that, put it onto the car and see what happens!!


 1 point
 -
So I've been doing a lot of thinking and soul searching in regards to this project. I've contemplated giving up on this car so many times I've lost count, but I just cant bring myself to do it, I'm in too deep at this point and the passion to finish it is still too strong. But I've had to be honest with myself with what I can achieve at this point of my life with my current skillset. I have two beautiful kids that are by far the most important thing in my life. At the moment because of the kids I'm extremely time poor, I think once they are both in fulltime school I'll be able to throw some hours at this car, that is probably 2-3 years away still. So I'm now contemplating having the metalwork done by a professional shop, and maybe me and my dad painting the car once the rust repair is complete, or just bite the bullet and have the shop paint it. I've had some quotes and its an extraordinary sum of money. But at this point of my life I have the money but not the time. I feel like I've been working on this car for ages (cause I have) and feel like I've achieved nothing (cause I haven't). If I continue to stubbornly try and complete the rust repairs on my own I'll still be posting about this project when I'm 50.... So I've put the car on the waiting list of a reputable restoration shop here in Perth, currently their waitlist is over a year, so I think I will still have an opportunity to do some work. It kills me to make this decision as I always wanted to do it myself and I've spent so much buying tools and equipment to do it, but I feel its the only way i can move forward meaningfully at this time I got the car back from the blaster a few months ago but have only just got time to go back and take some photos. I felt nauseous for a few weeks post getting the car back. Here are some pics of the rust that was hiding under the paint....Although the car looks great in all one color there are certainly more holes now.... First the roof, check out the LHS drip rail, yikes RHD rear quarter LHS internal roof structure The bottom of the tool compartment has rust all along the bottom join Not much left of the floor pans I thought my rear hatch was in good nick, crazy what paint can hide.... looks worse in person trust me, all bashed and buckled Knew this LHS chassis rail was bad but it now has 70% more holes now fenders looked really good before but alas I was tricked yet again Bonnet actually came out amazing besides damage to the front corner oh the humanity.... rear section had some nasty suprises cowl and firewall holes got bigger and lastly the cowl cover came out nice despite some small rust holes0 points