Leaderboard
-


CW240Z72
Free Member10Points229Posts -

grannyknot
Free Member5Points5,158Posts -

Captain Obvious
Free Member5Points9,814Posts -


Zed Head
Free Member3Points18,751Posts
Popular Content
Showing content with the highest reputation on 06/27/2023 in all areas
-
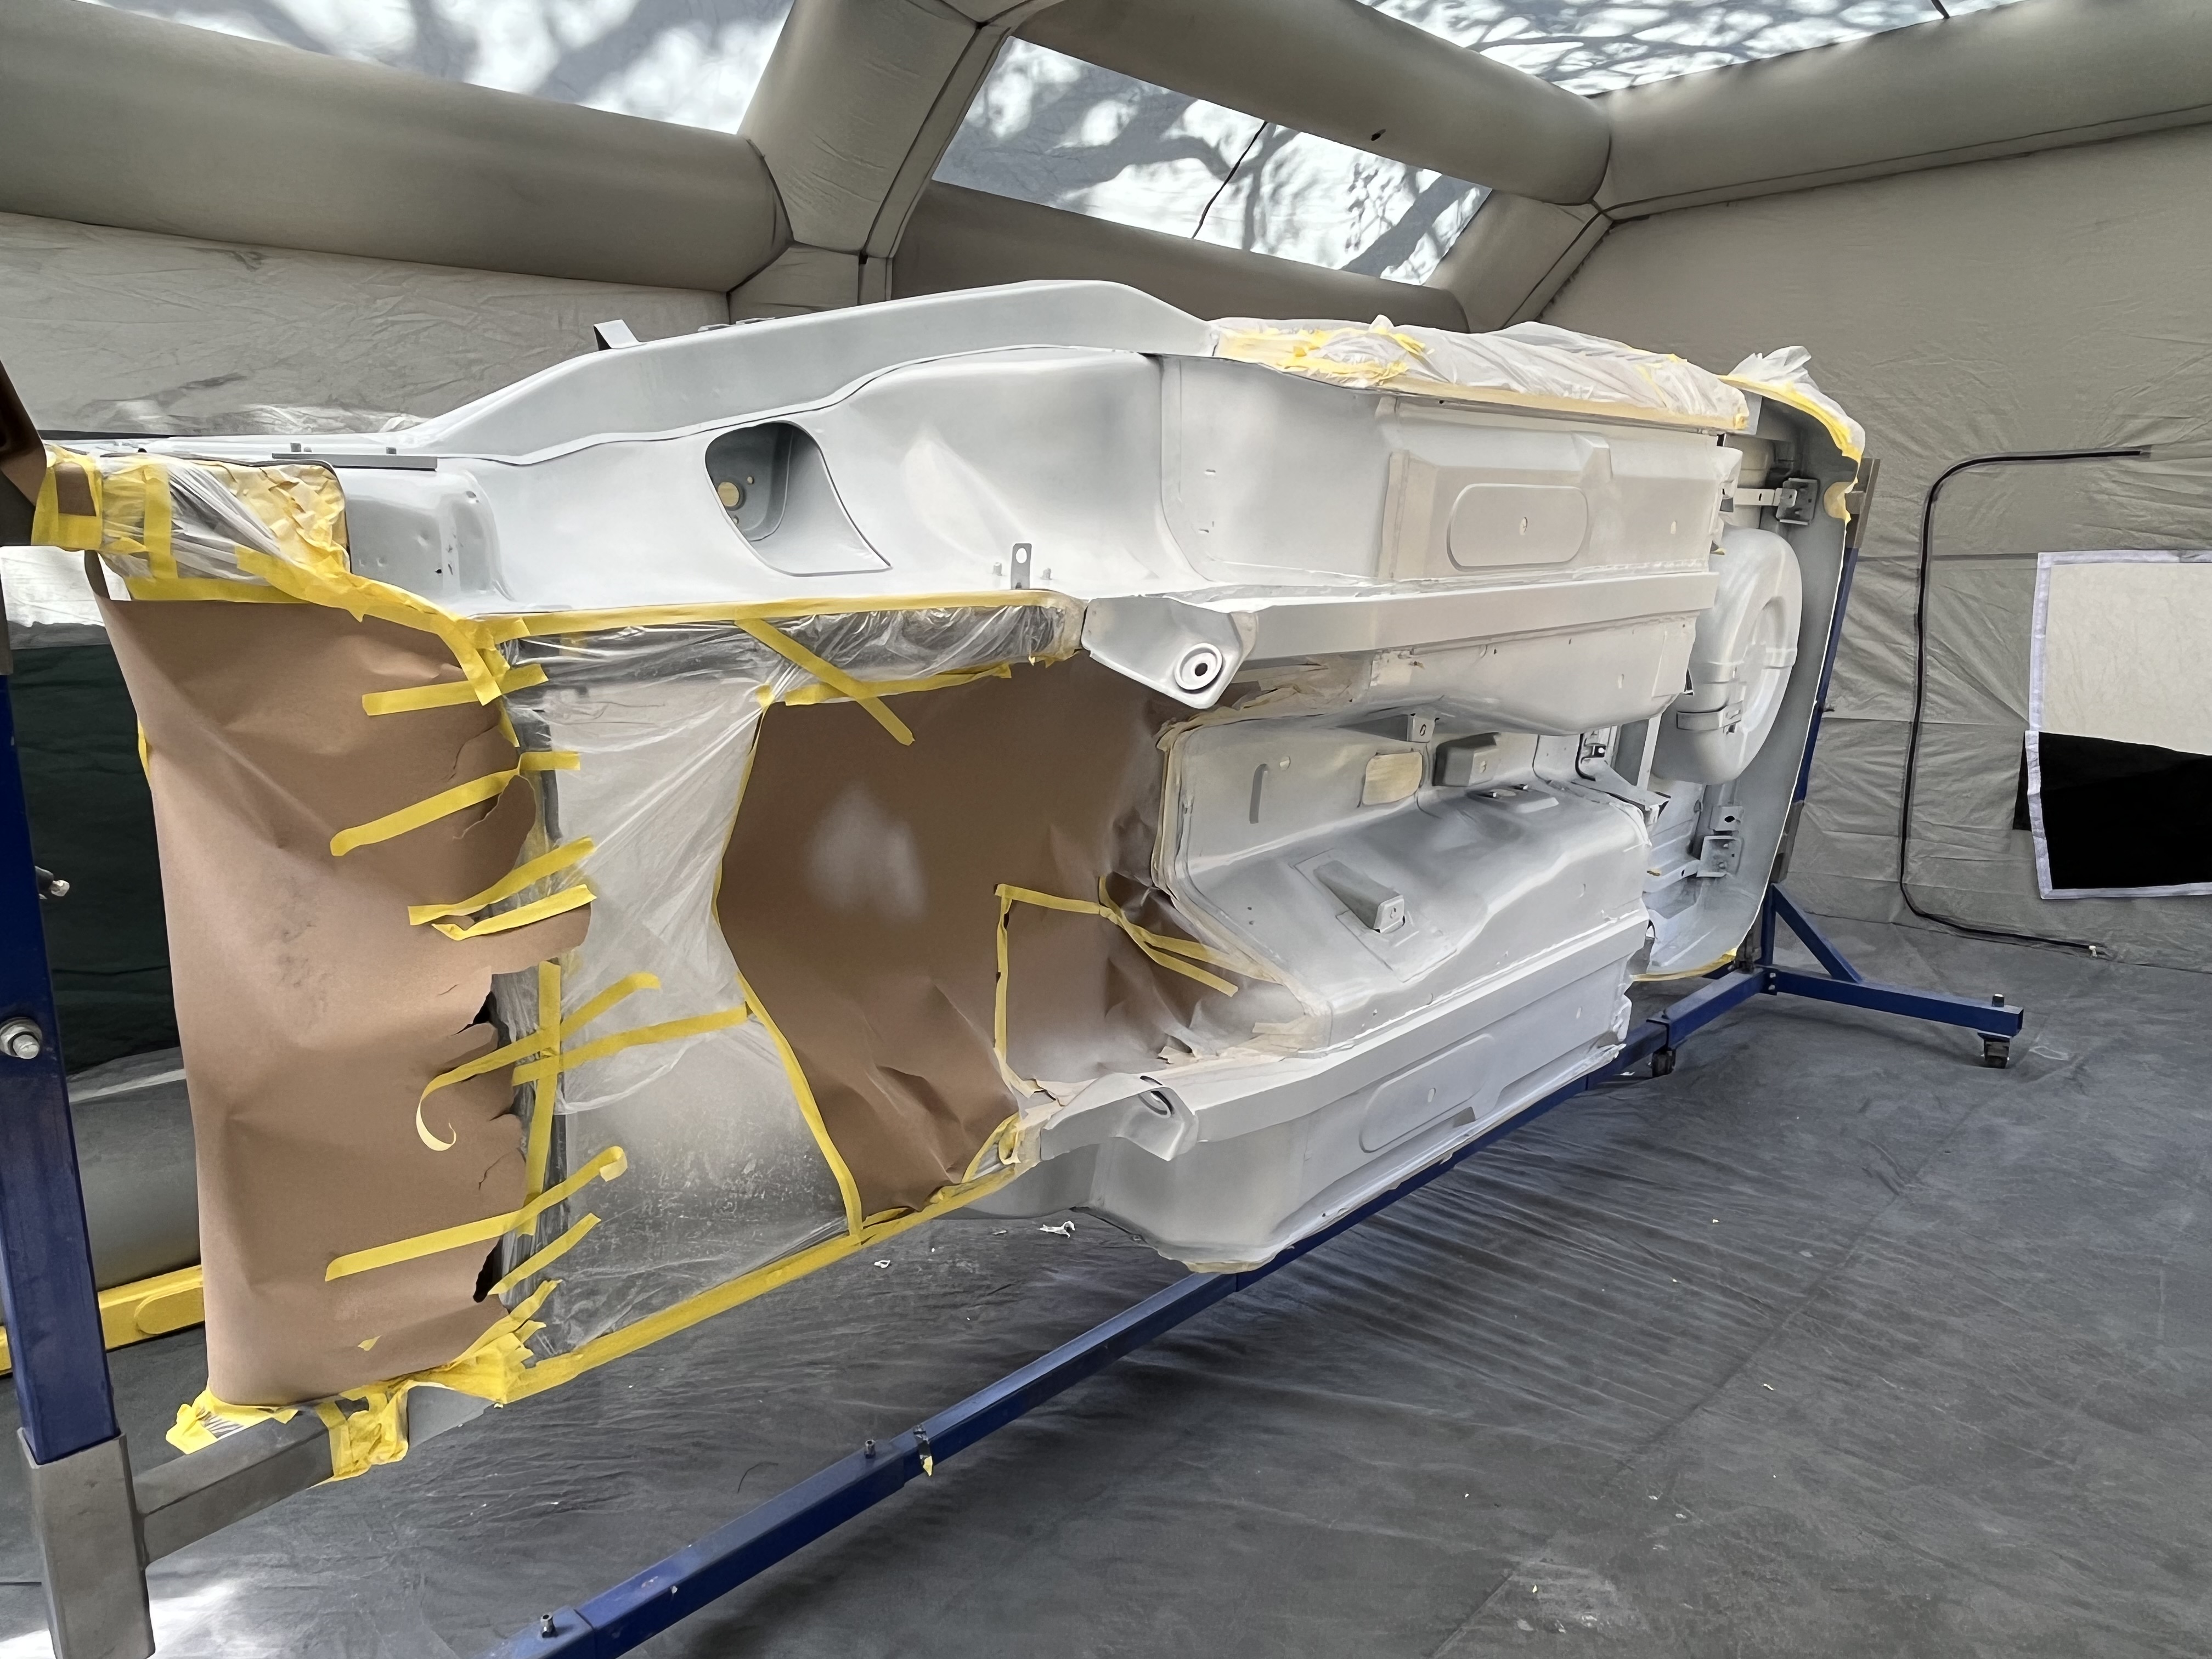
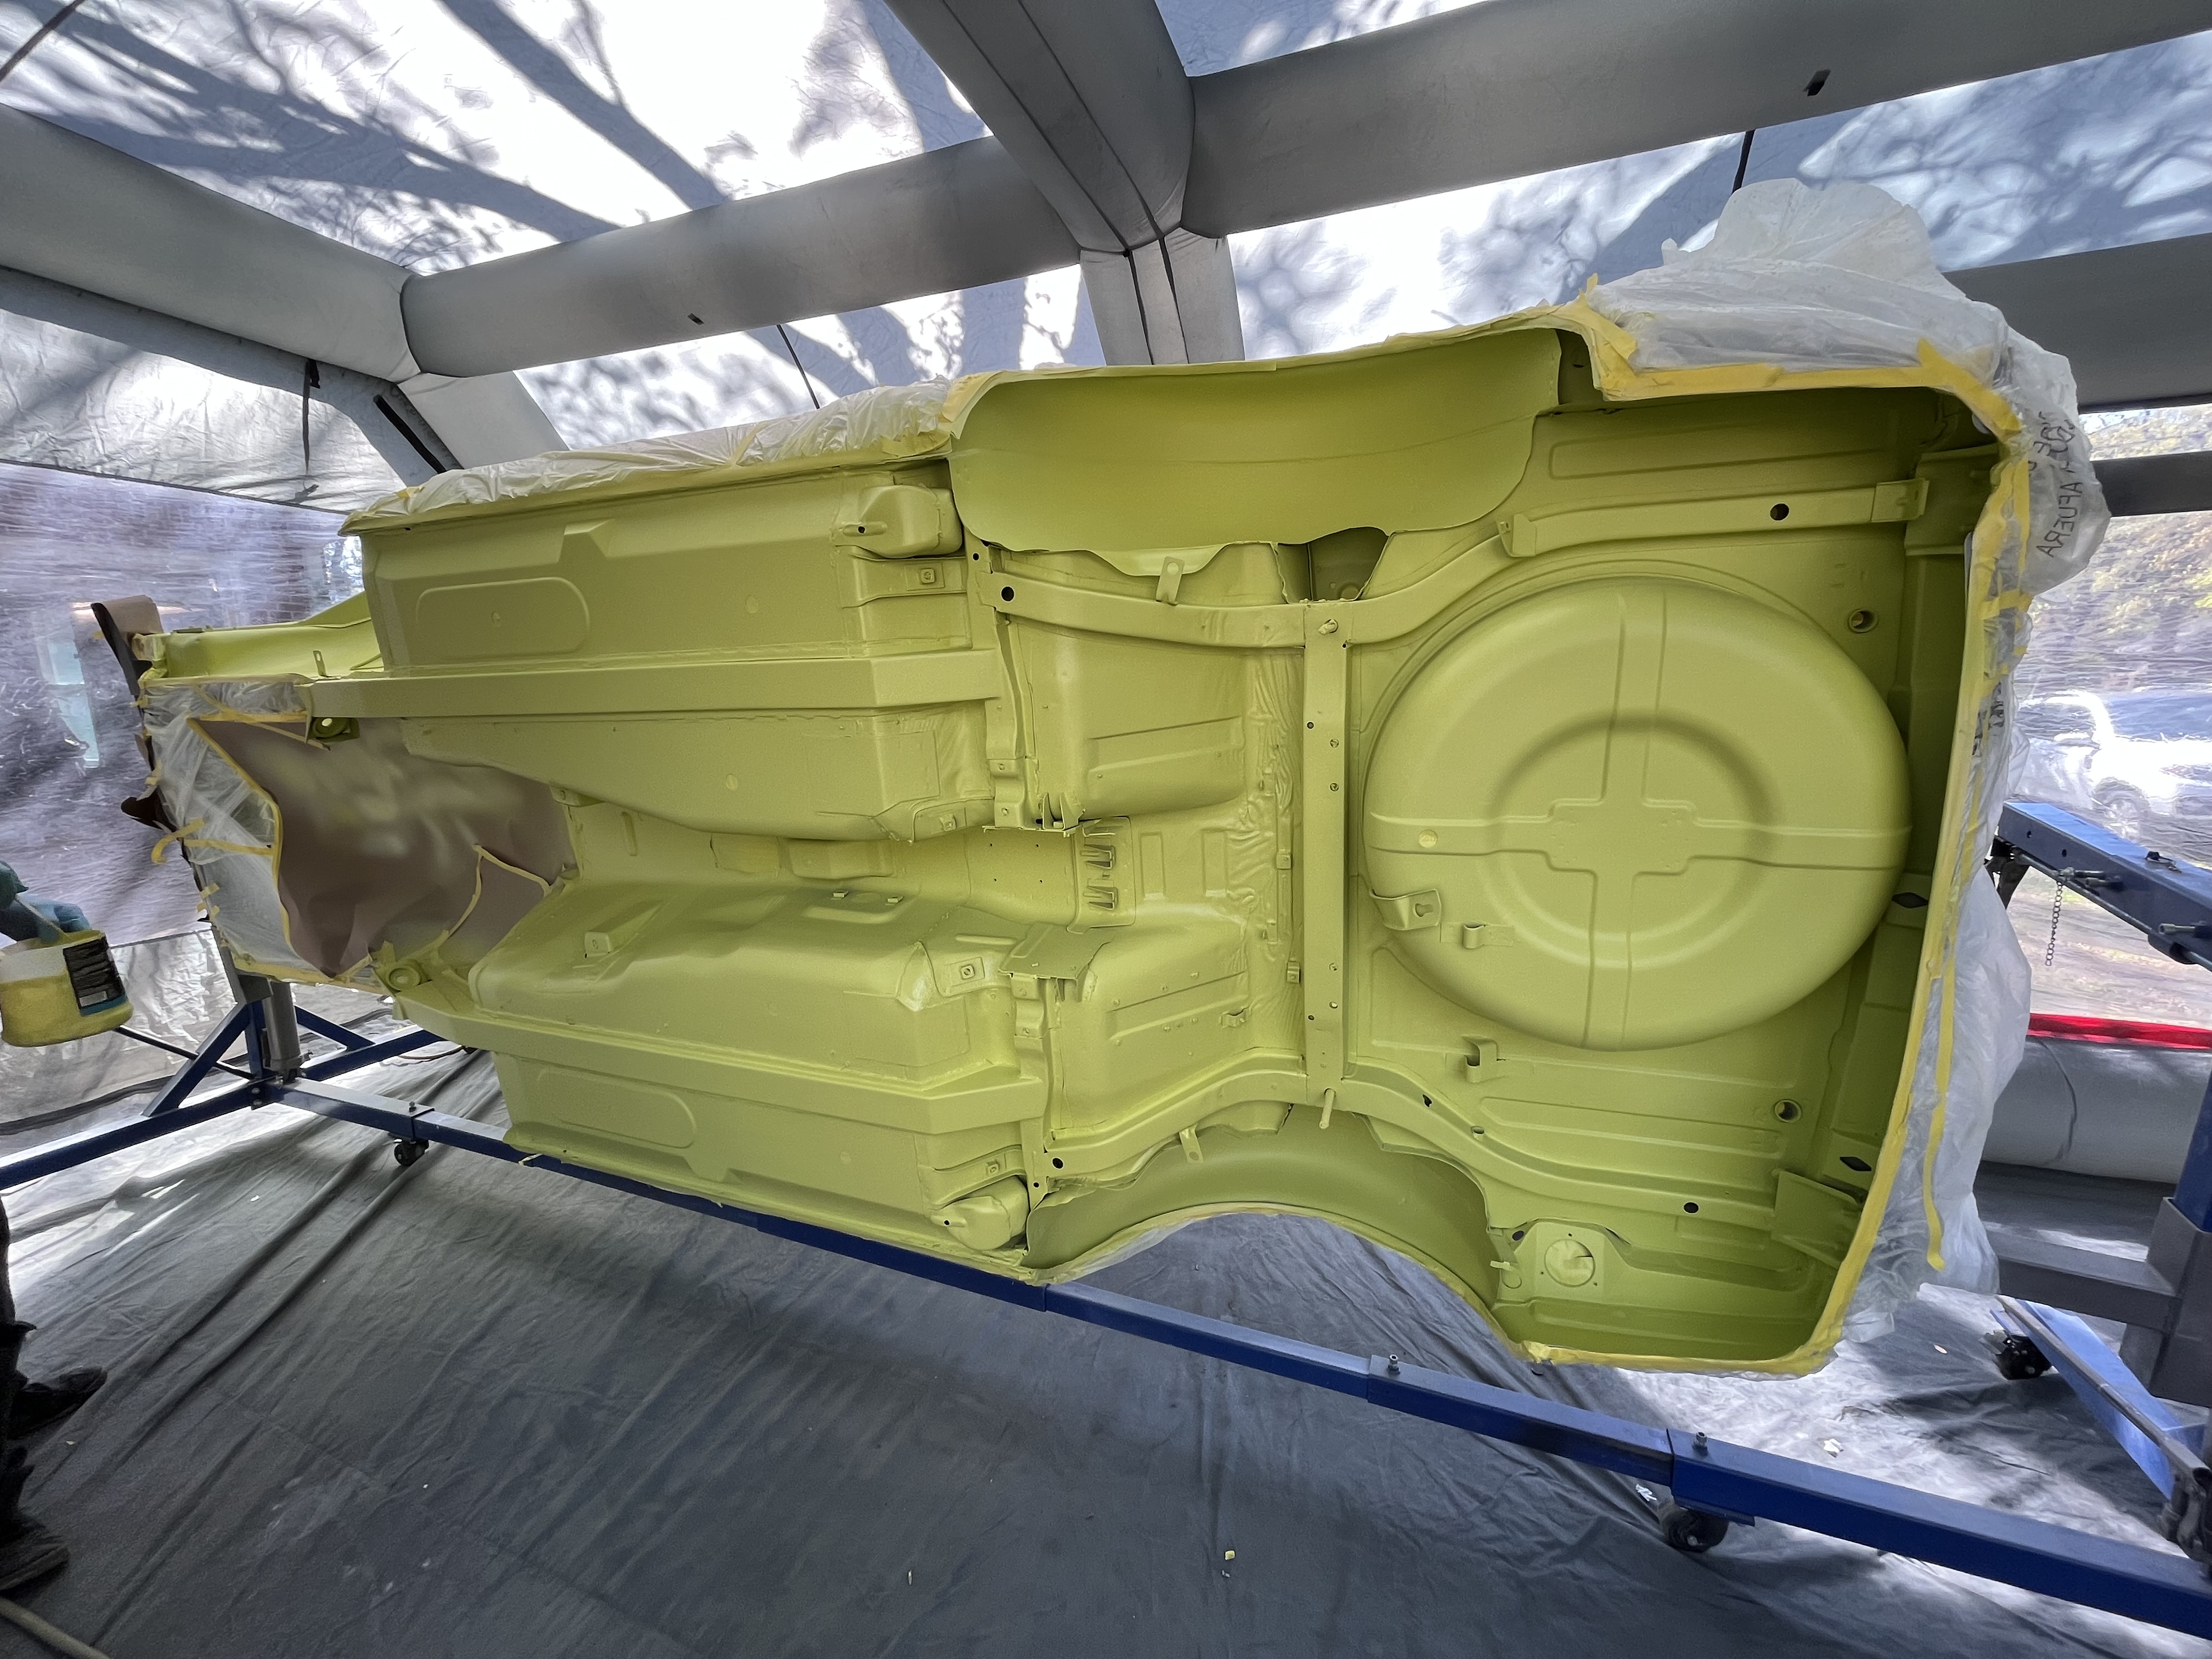
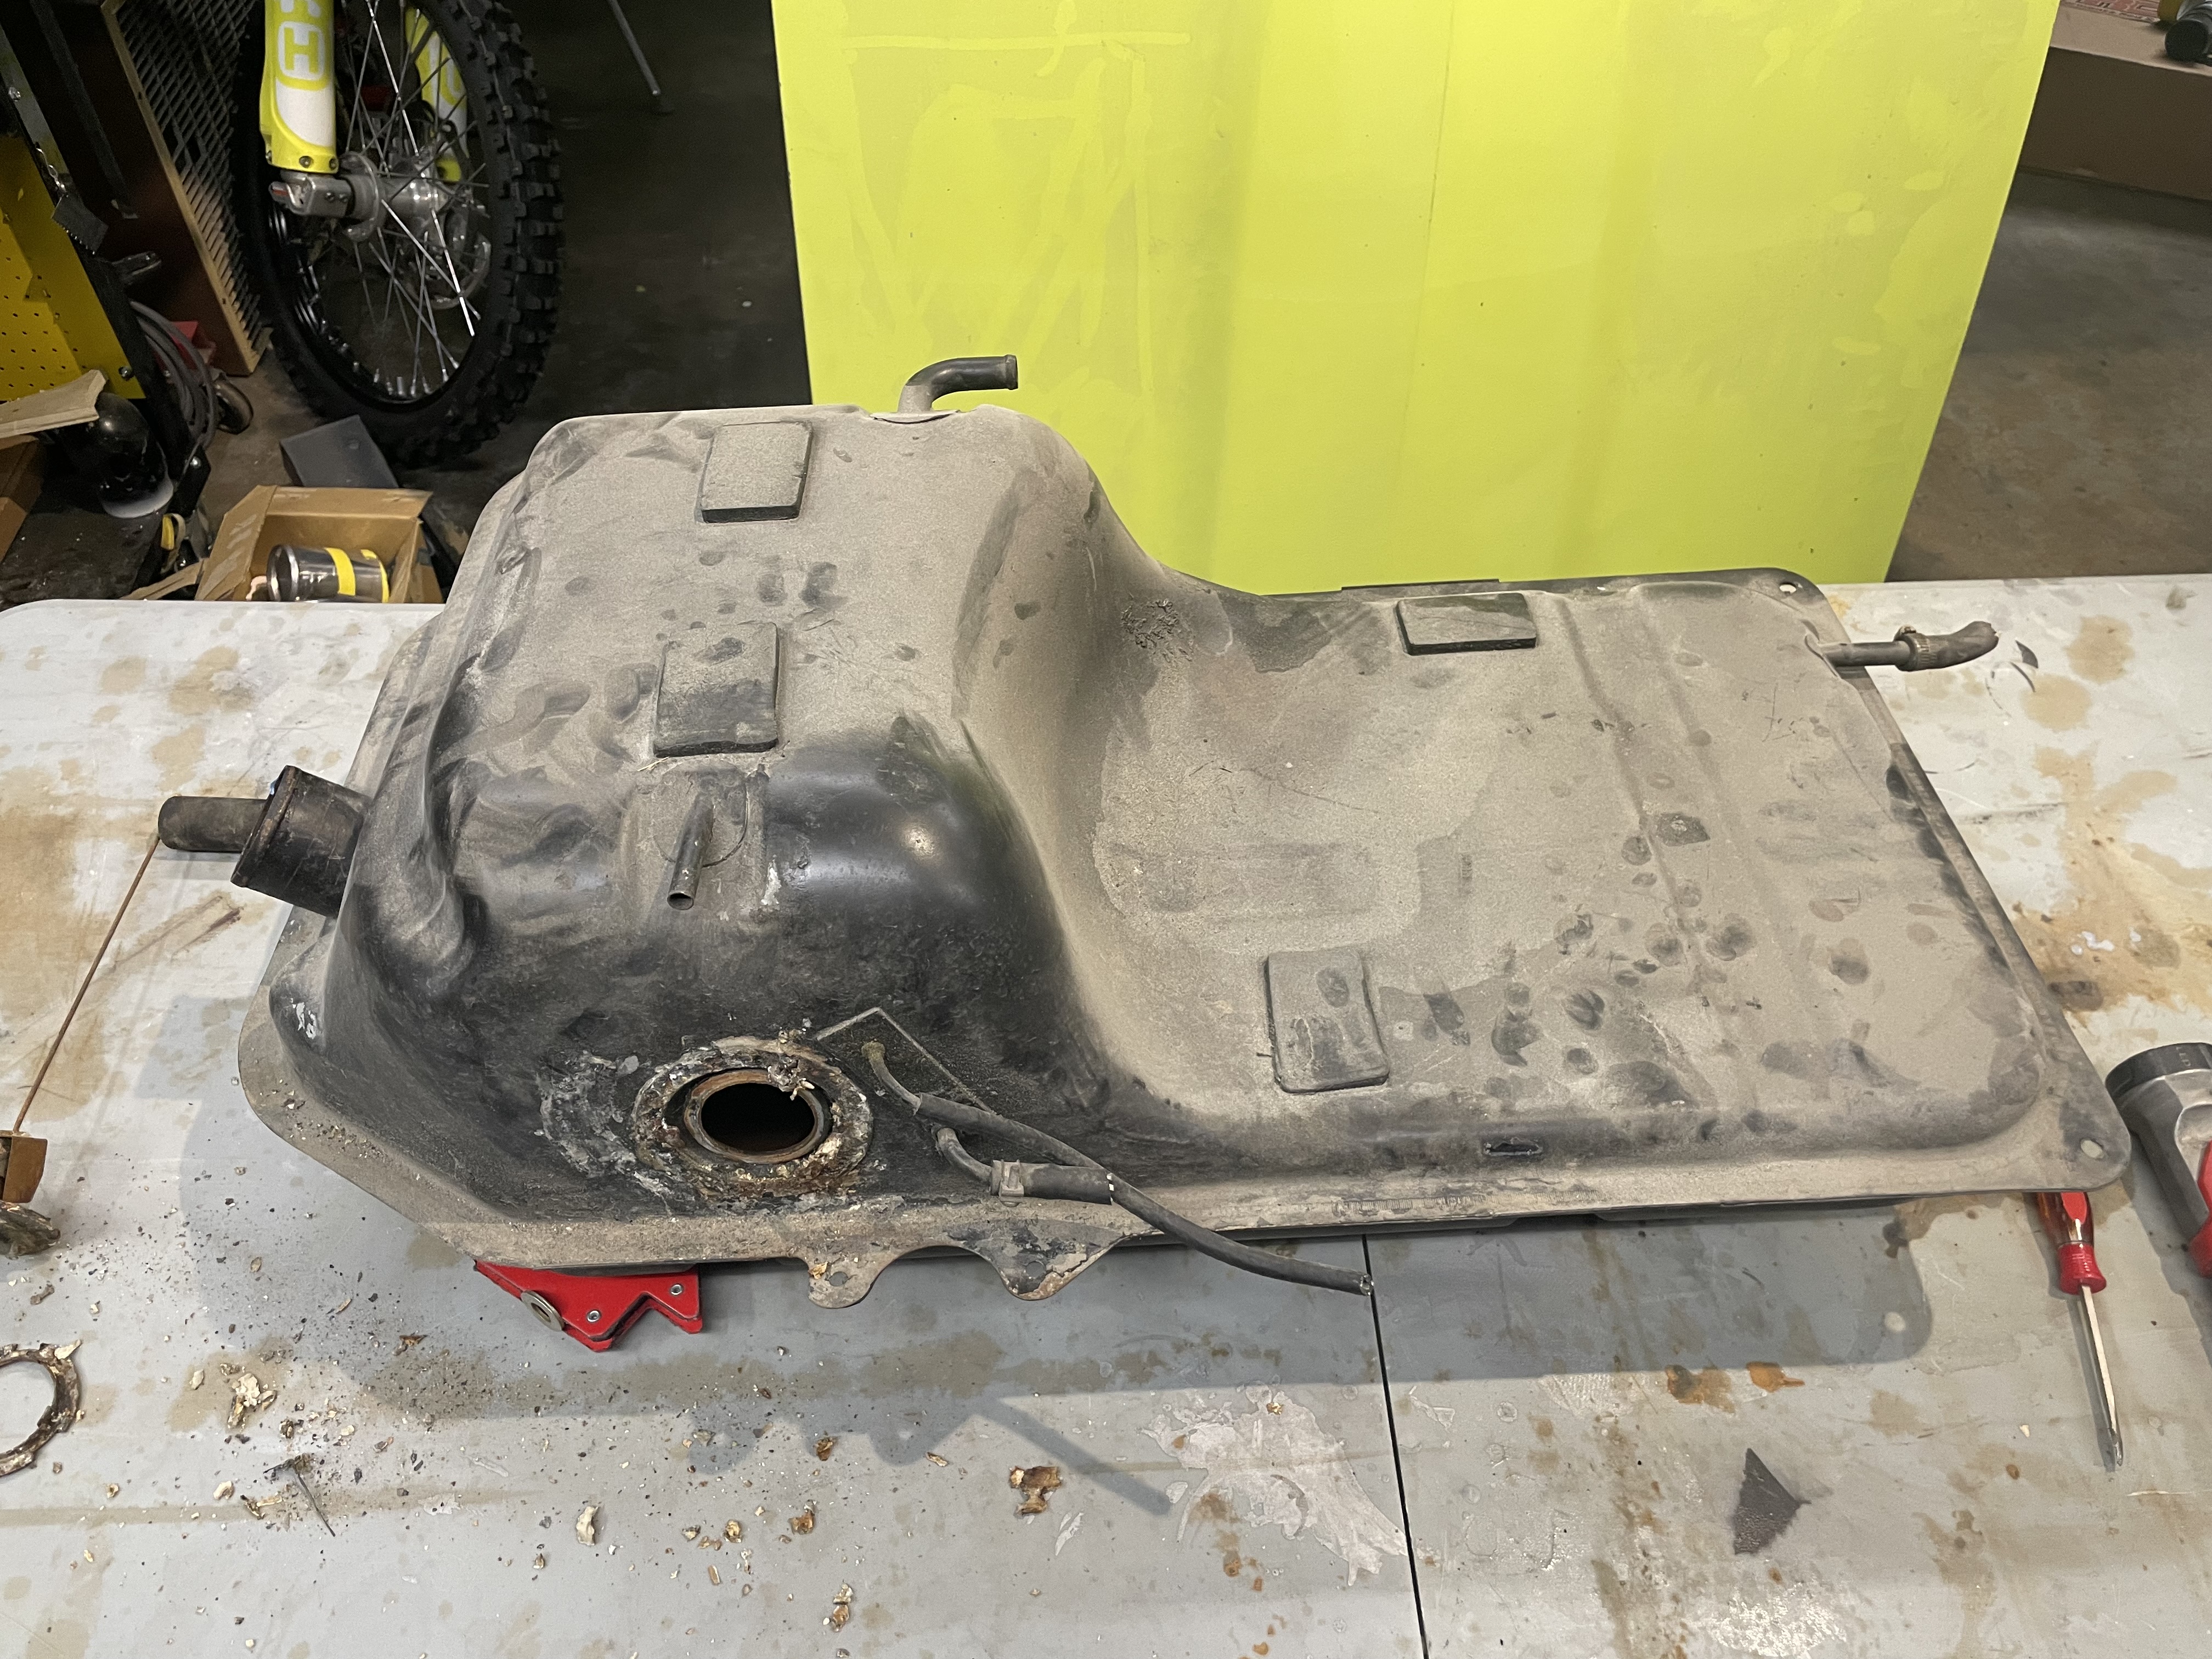
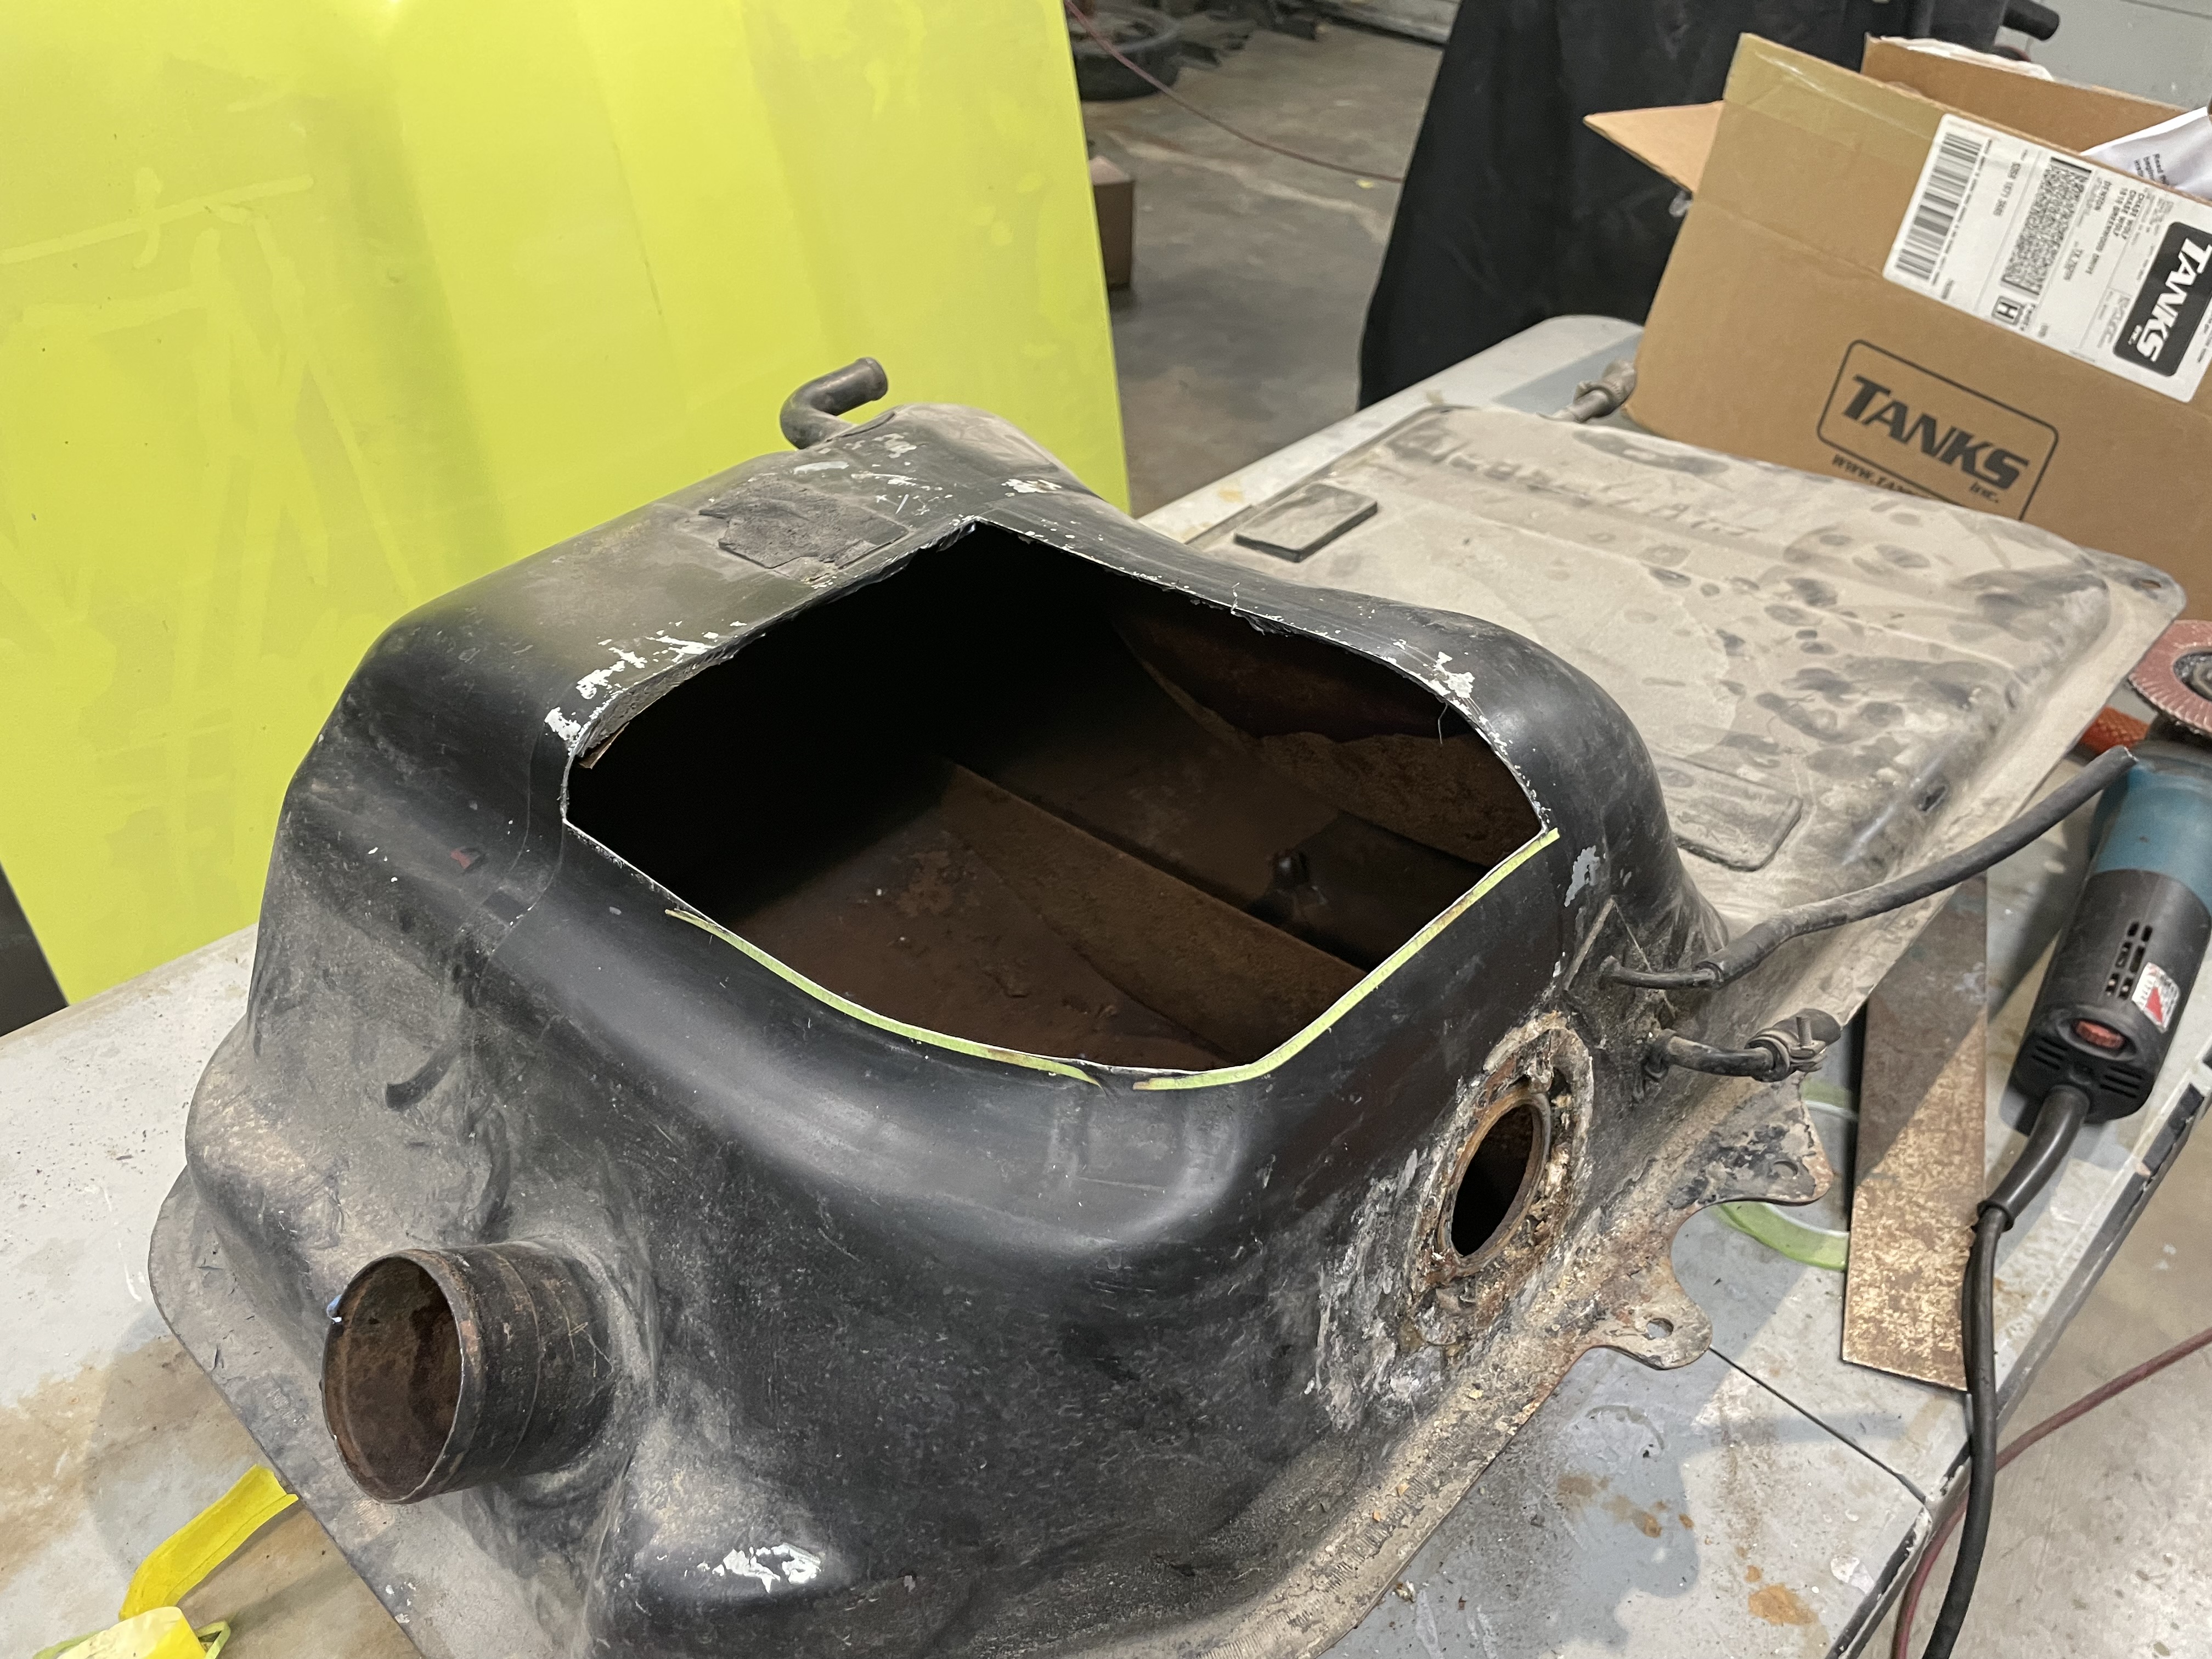
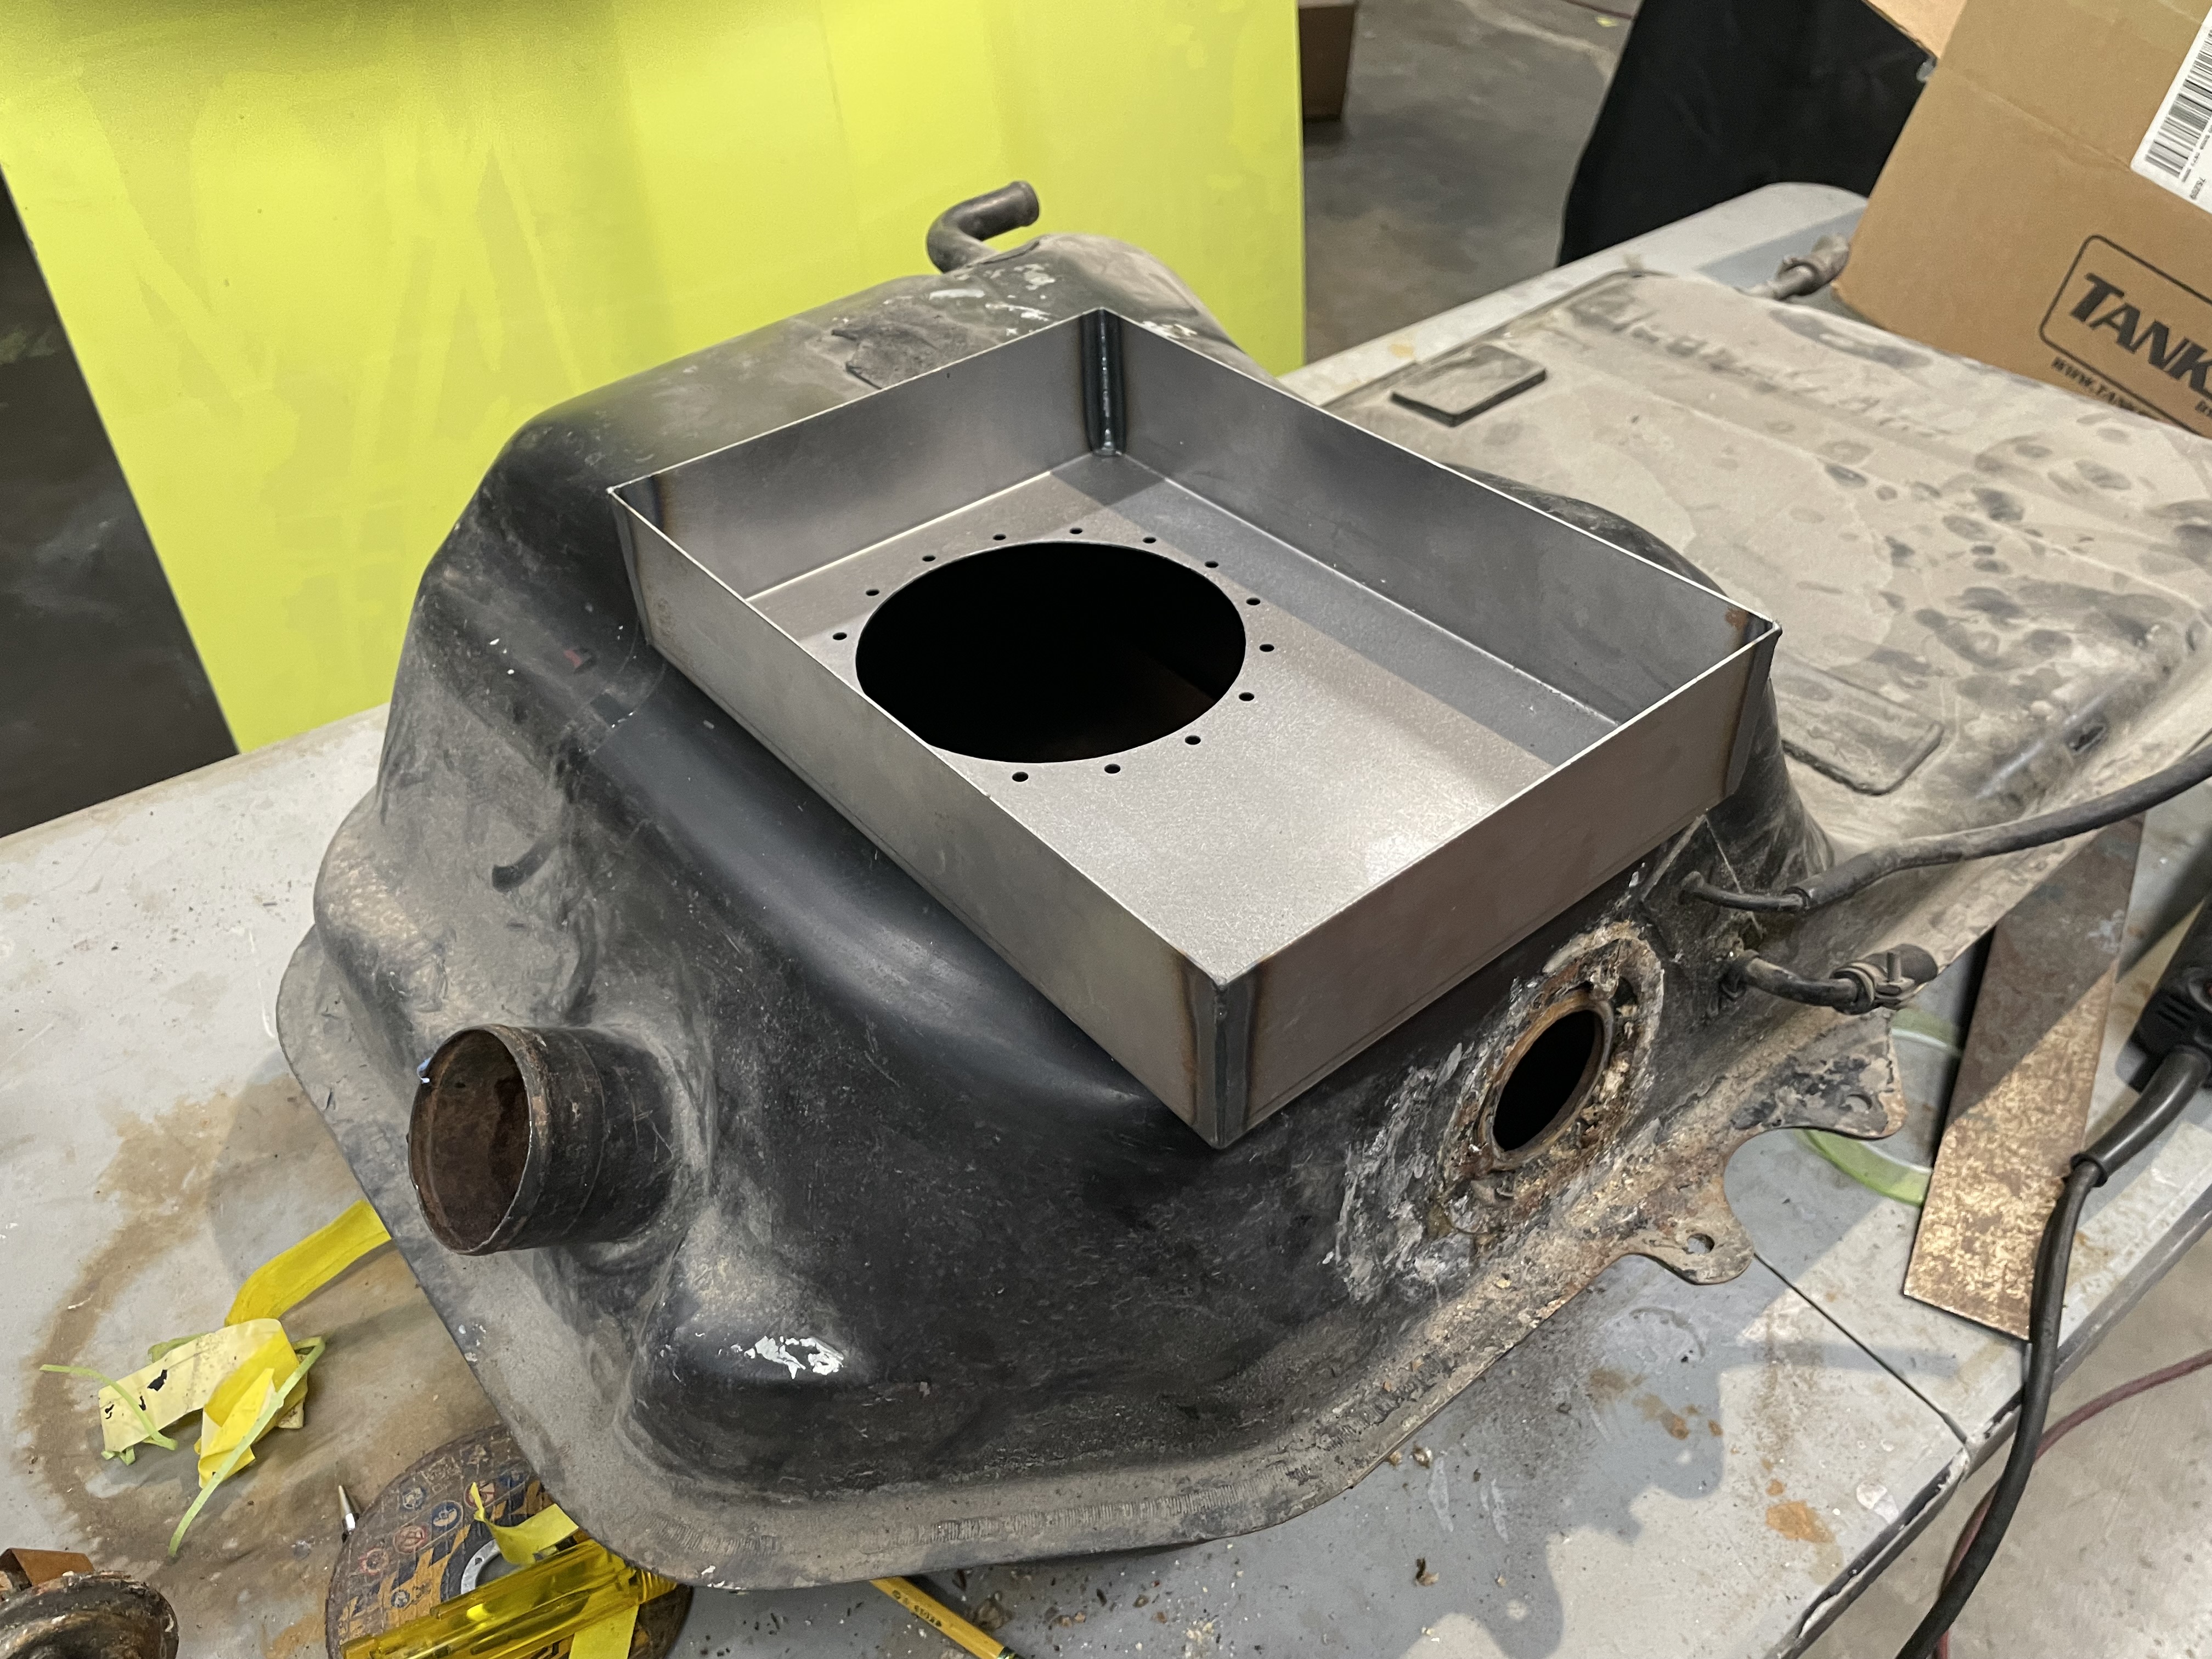
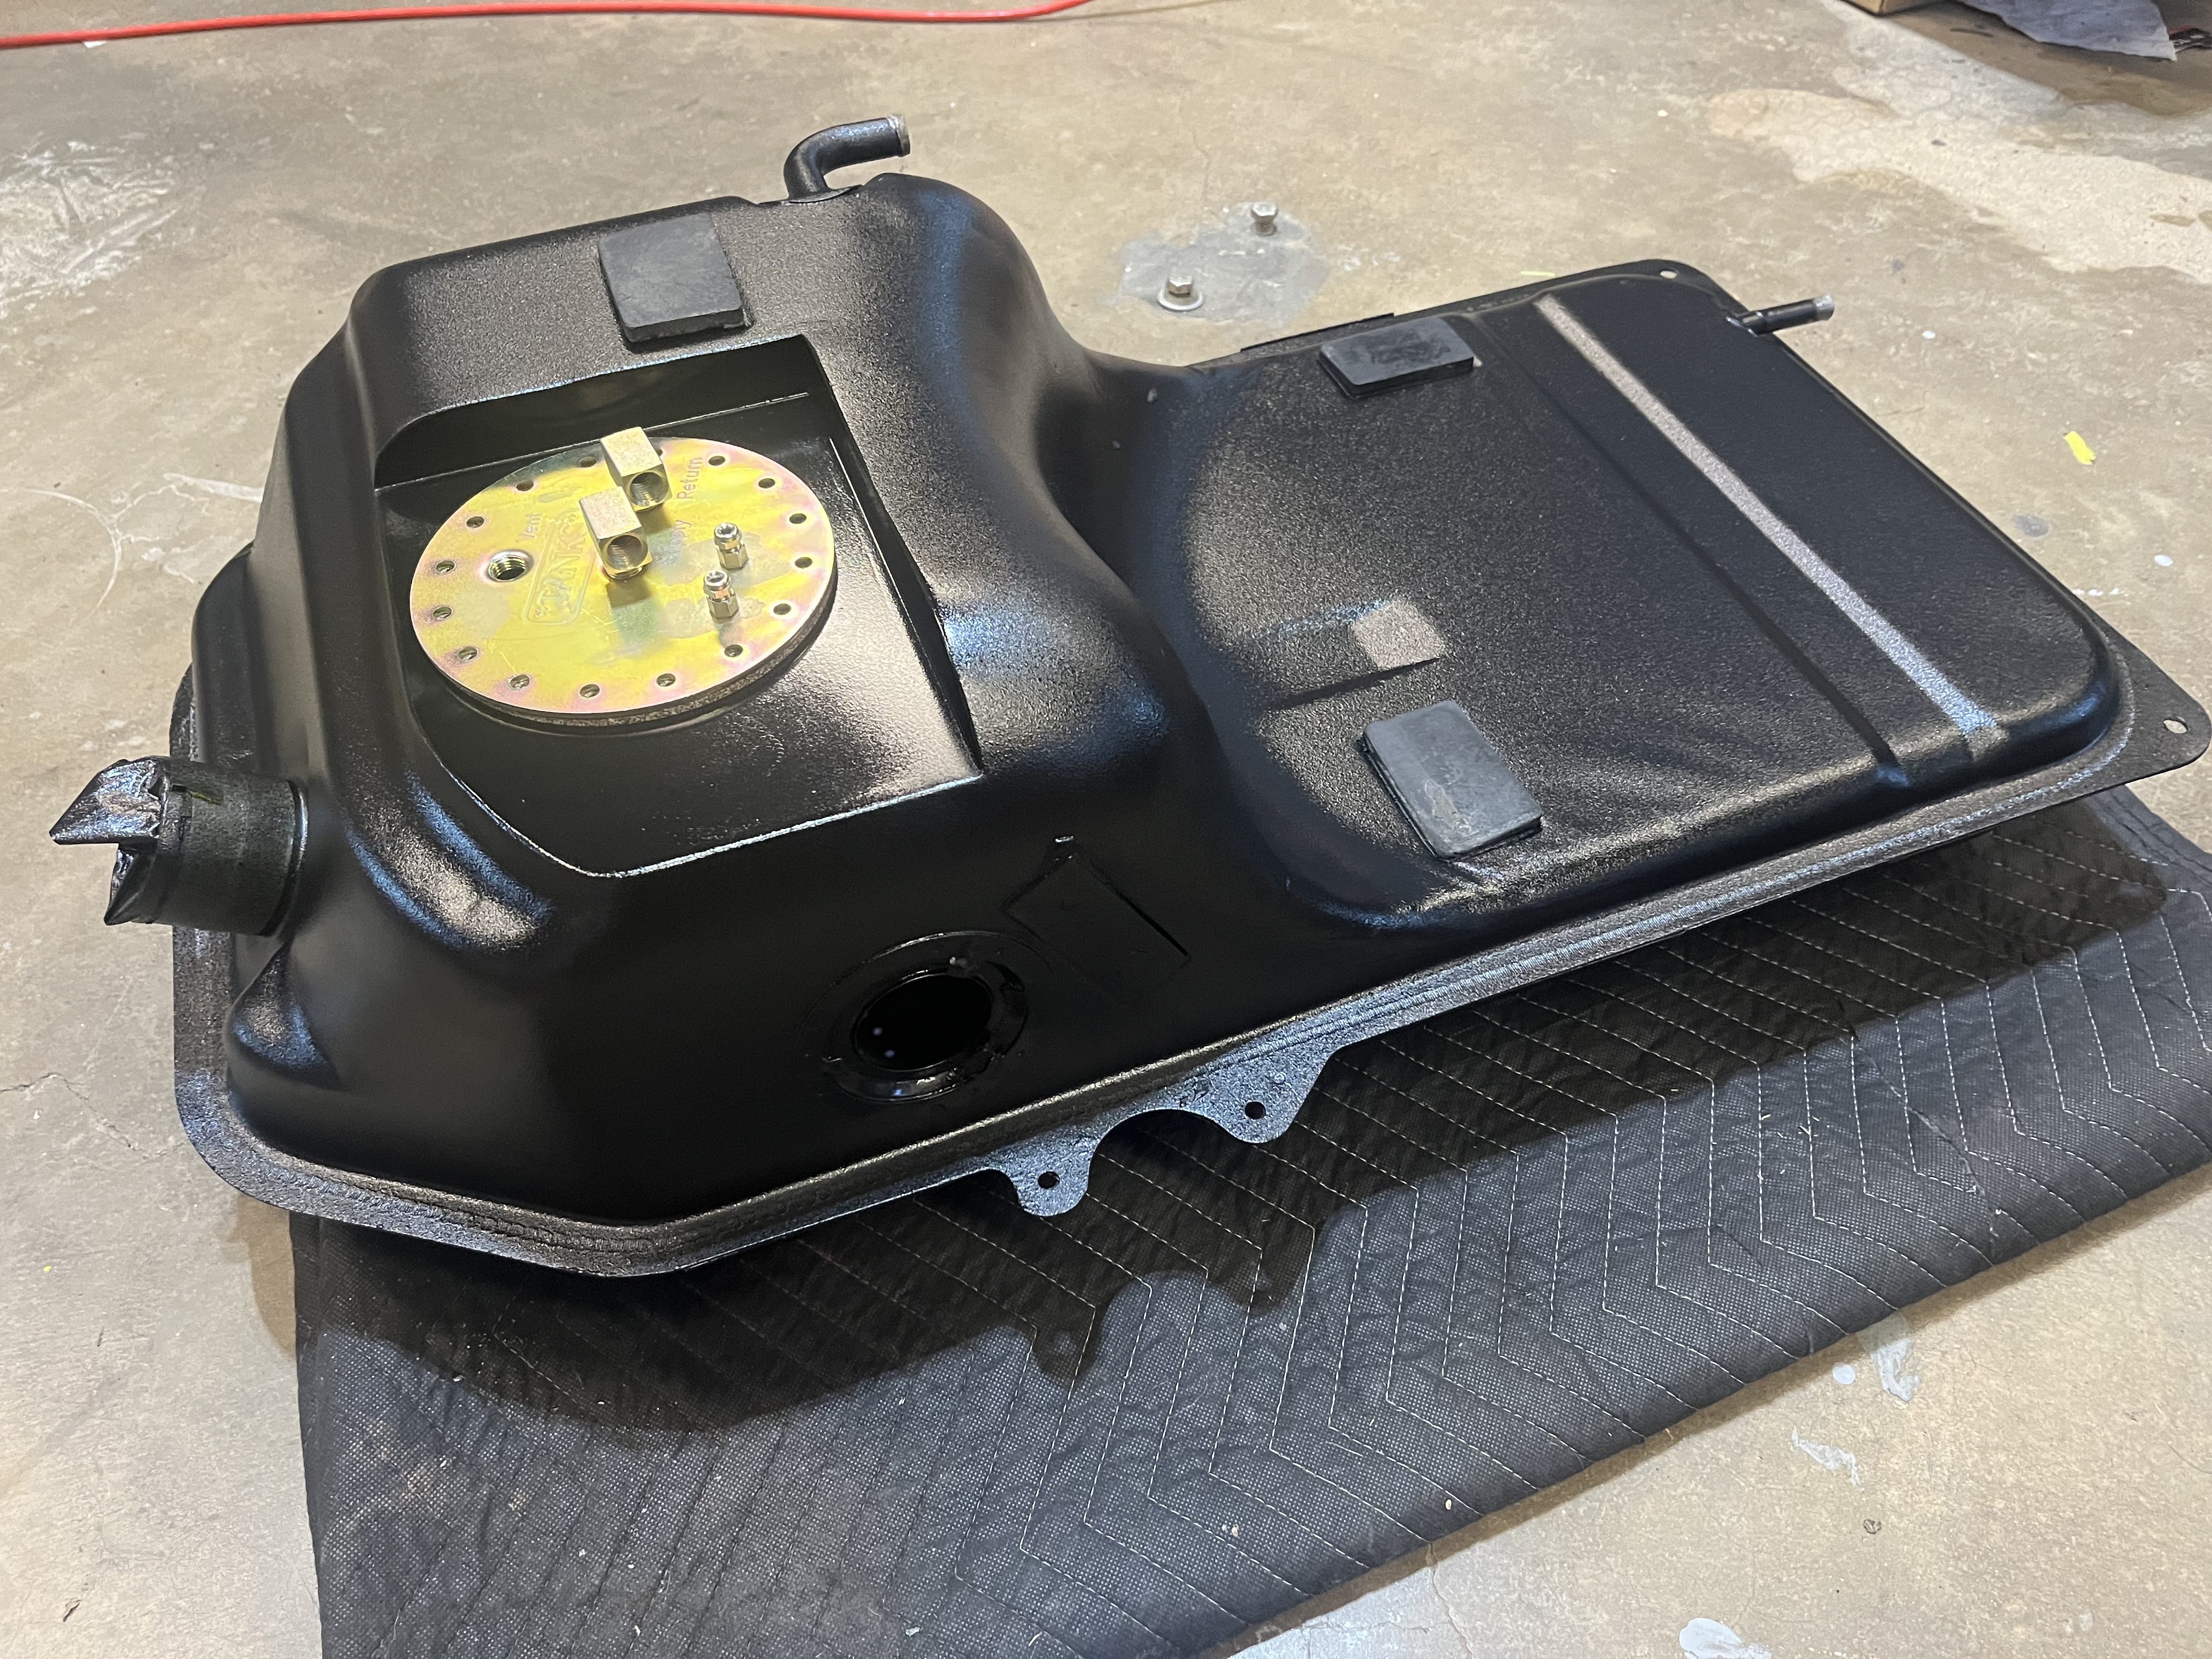
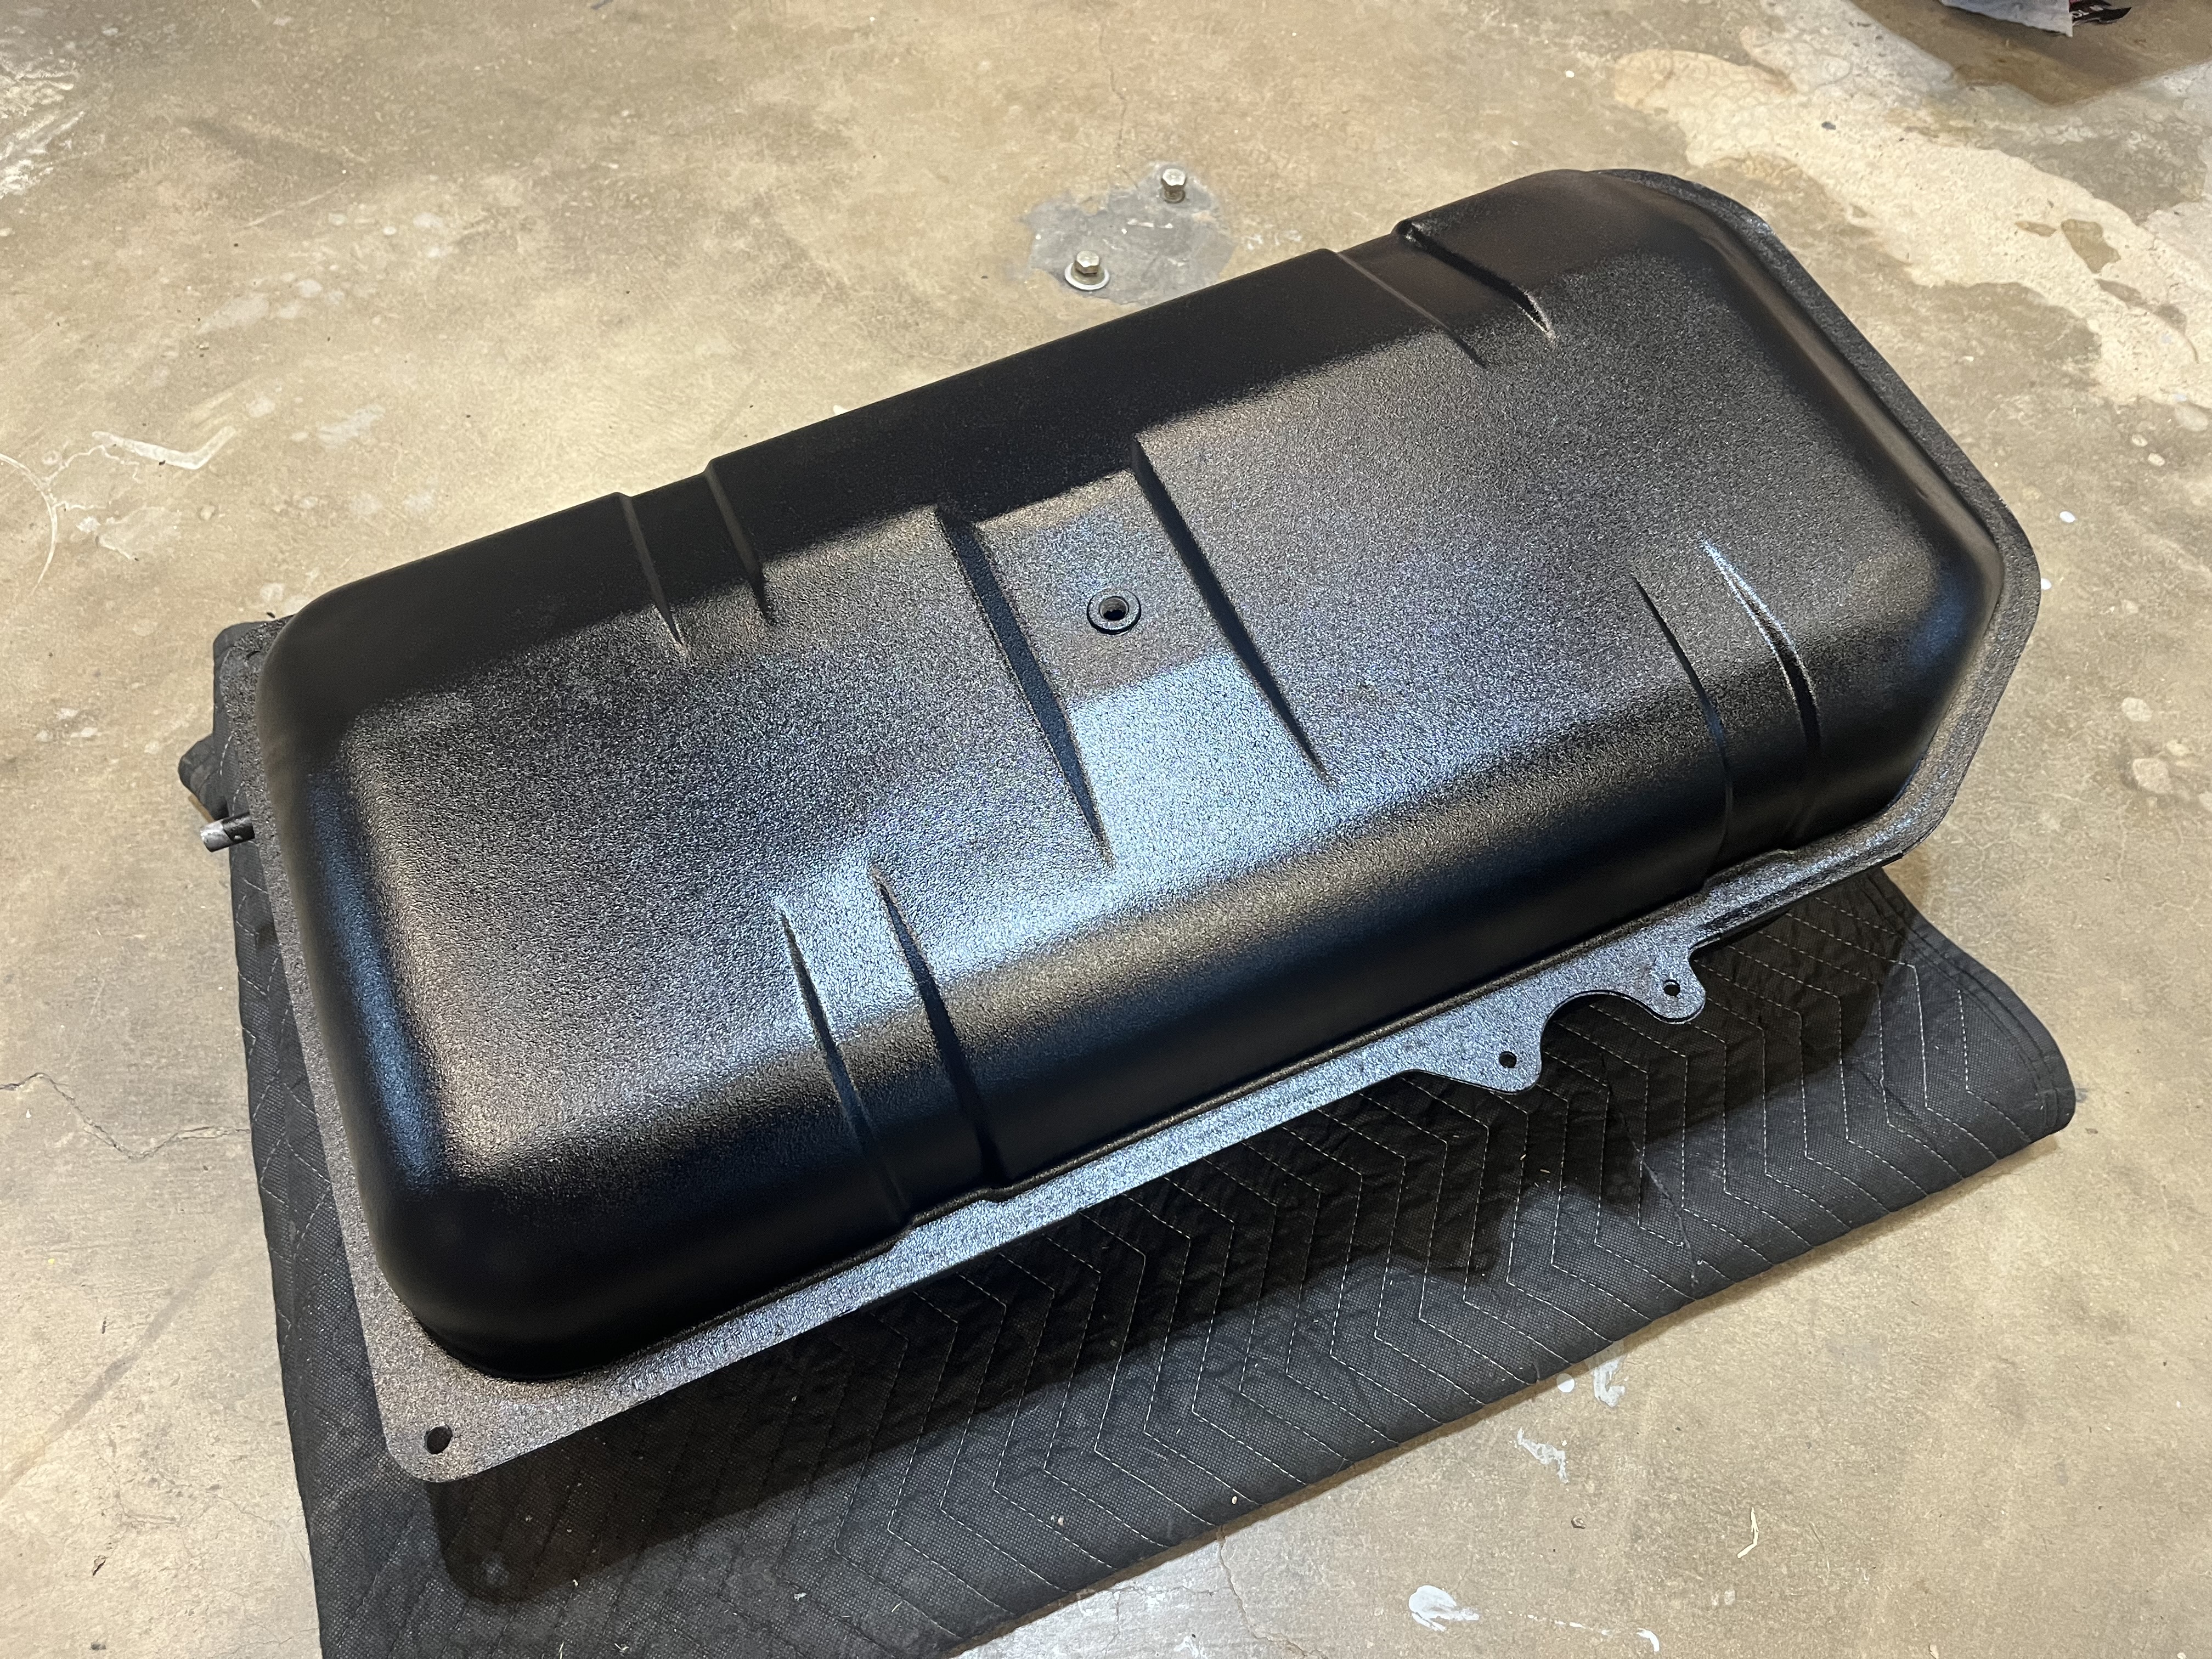
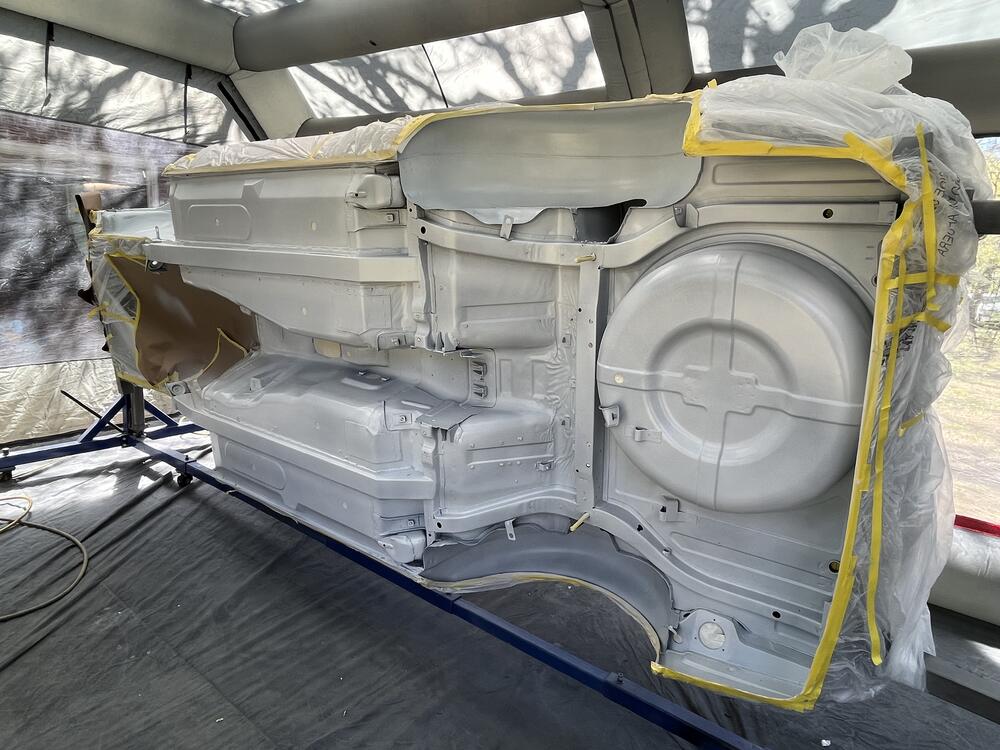
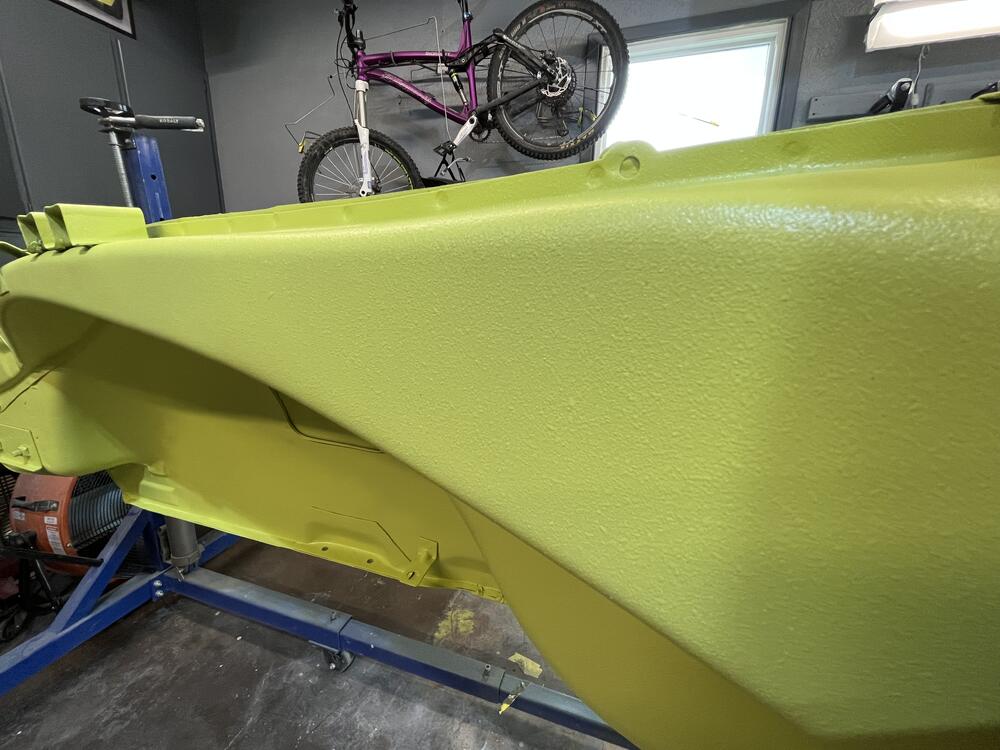
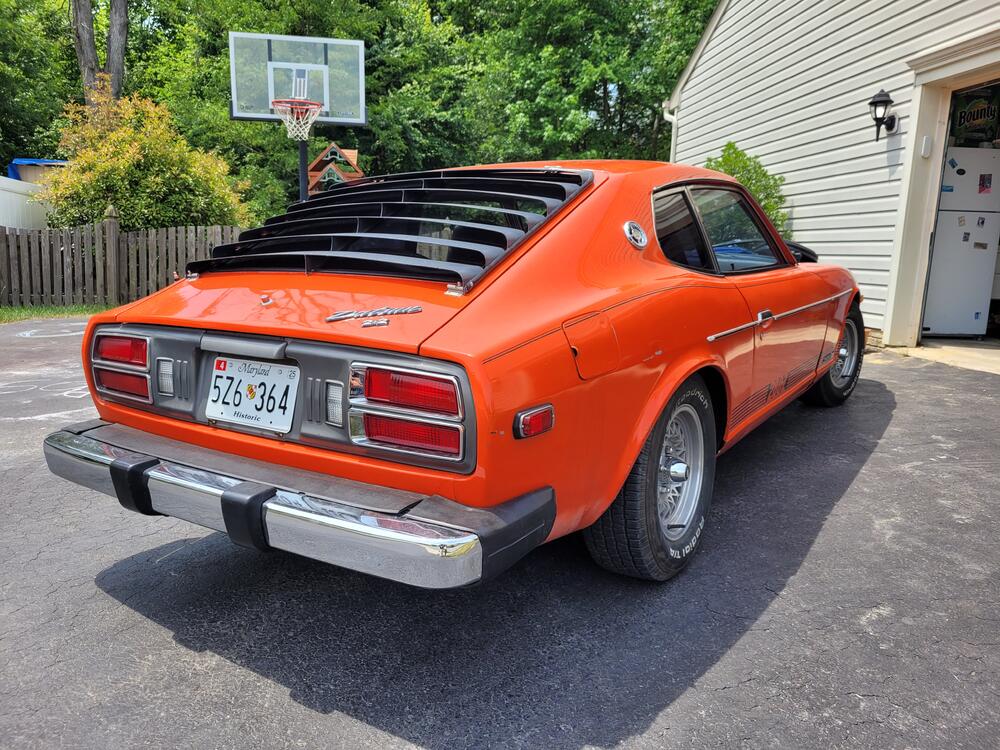
6 pointsGetting color on the body. Previously on the fuel tank we sprayed the top coat with Raptor Liner, reduced enough so you could use a traditional HVLP gun. This gave a very fine texture, similar to what’s on the dash. Really liked the finish so we replicated the same procedure with the underside of the car in the factory color.


 6 points
 -
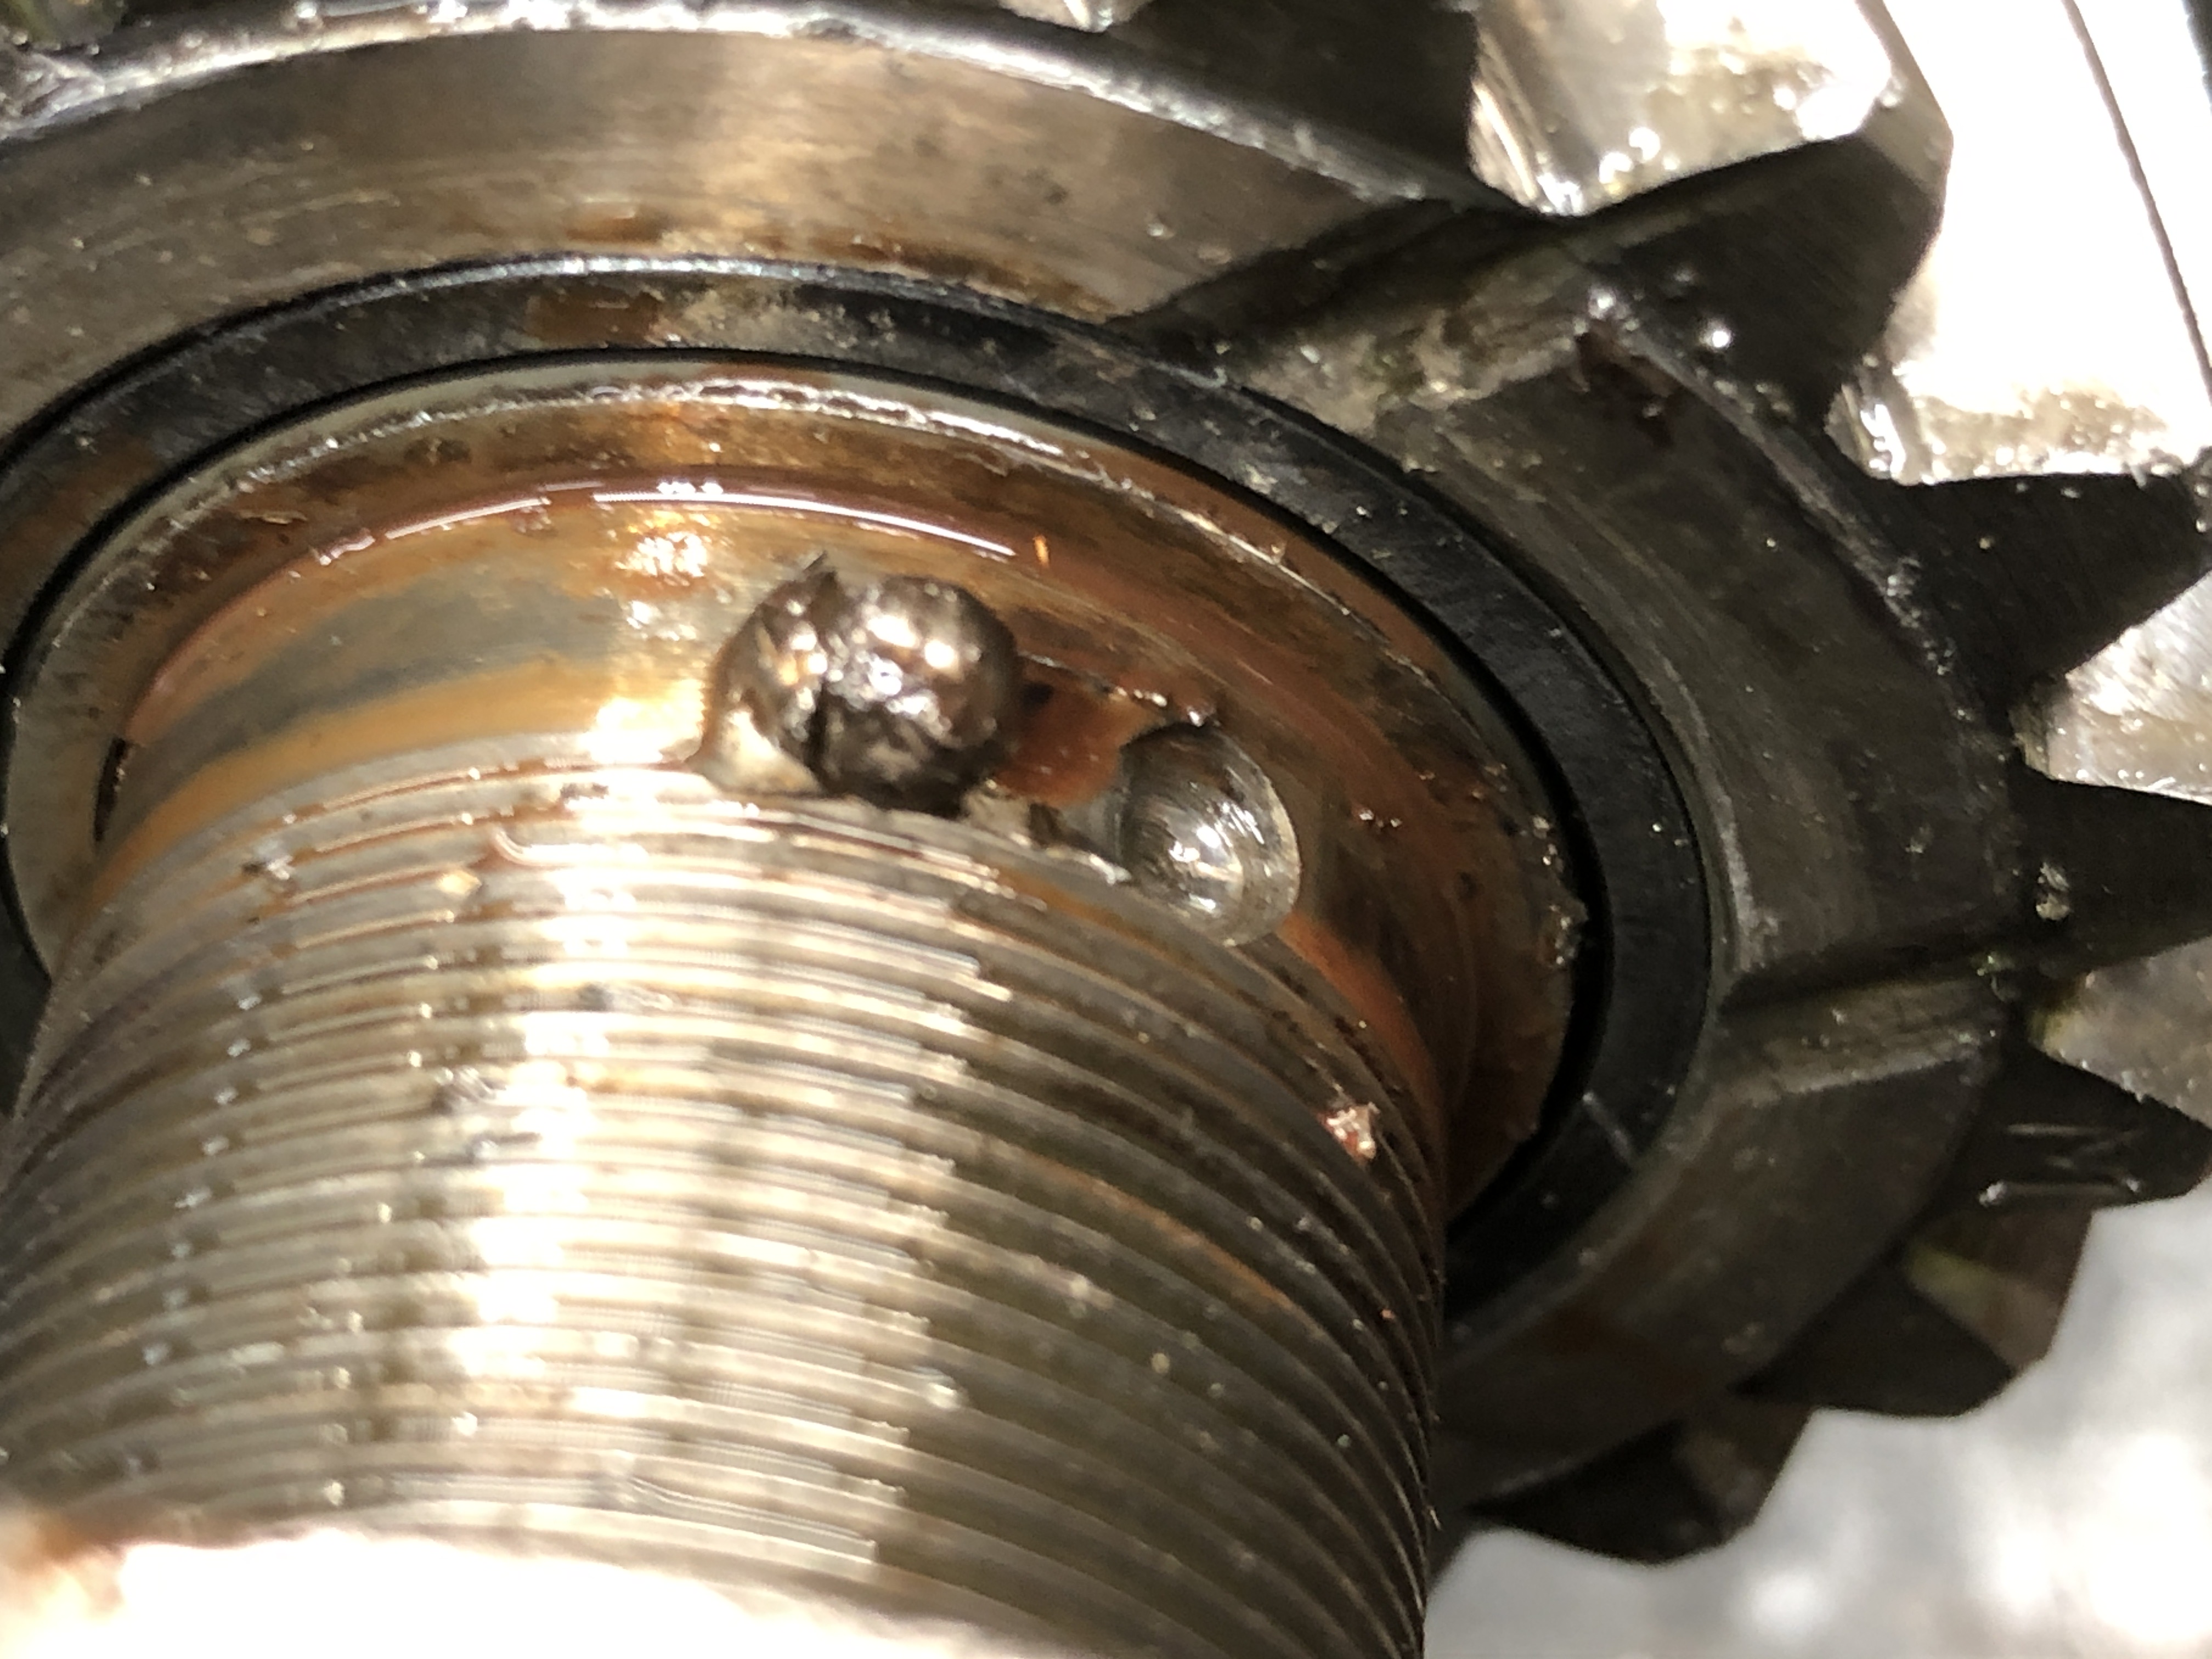
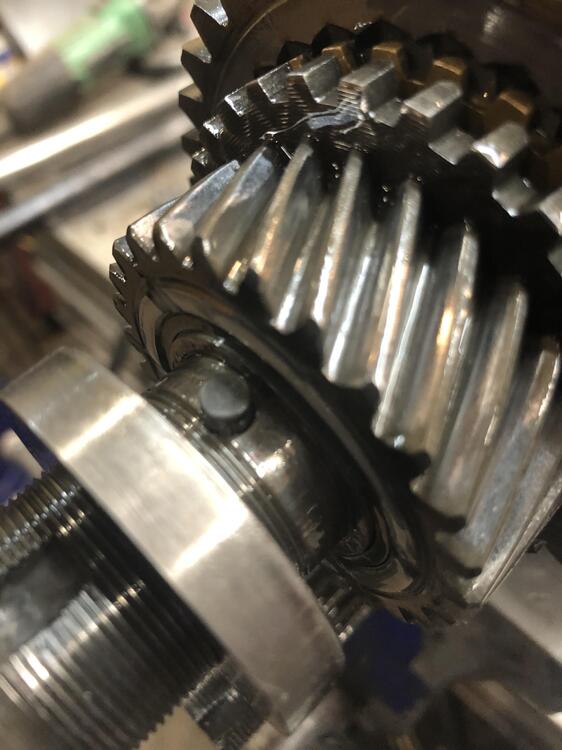
Thinking about it a little mire... I've not been inside a Z transmission, but here's some thoughts: I'm not so sure welding the washer and nut together is a good idea. My read on the way it was designed is that locating feature on the washer (whether it's a ball or a pin like the later design) is that feature exists exactly to isolate the nut from any rotational forces from the gear on the other side. In other words... You've got this gear spinning on one side and a nut that could potentially be loosened (or tightened) on the other side. They wanted something in addition to the peen on the nut to prevent that nut position from ever changing. So they used that locating feature to keep the washer from ever spinning with respect to the nut. If you weld the nut to the washer and completely skip the locating feature, you will allow whatever rotational forces are ever generated to be directly translated to the nut. You would be counting solely and completely on the peen to prevent the nut from changing position and I'm thinking that's not a good idea. In fact, I'm thinking you've got a chicken and the egg thing going on with the failure... Did the nut loosen up and allow the ball to slip out of place? Or did the gear transmit too much torque to the washer somehow (lack of oil, burrs on the surface, debris between the two, something) and start to spin the washer. And then when that washer spun, it ripped the ball out of the hole and started to rotate the nut. So I'm wondering what happened first, did the washer (and ball) slip first which loosened the nut, or did the nut loosen which allowed the washer (and ball) to slip?3 points
-
3 pointsPurely aesthetics. I didn’t want to cross over the fuel lines with it as they’re routed right above the clutch line. I’m getting really good at making simple things harder.3 points
-
 On Friday, I received an email stating that they were ready to paint the car, and the "spray cards" would be on their way today to me in the mail. I've been very busy the last several weekends working on my two rental houses. Both of them became vacant at the end of May, and I decided to take the opportunity to address various things that each property needs. I should be wrapping up that work soon and the car will be painted soon as well. Looking forward to getting it back.3 points
 -
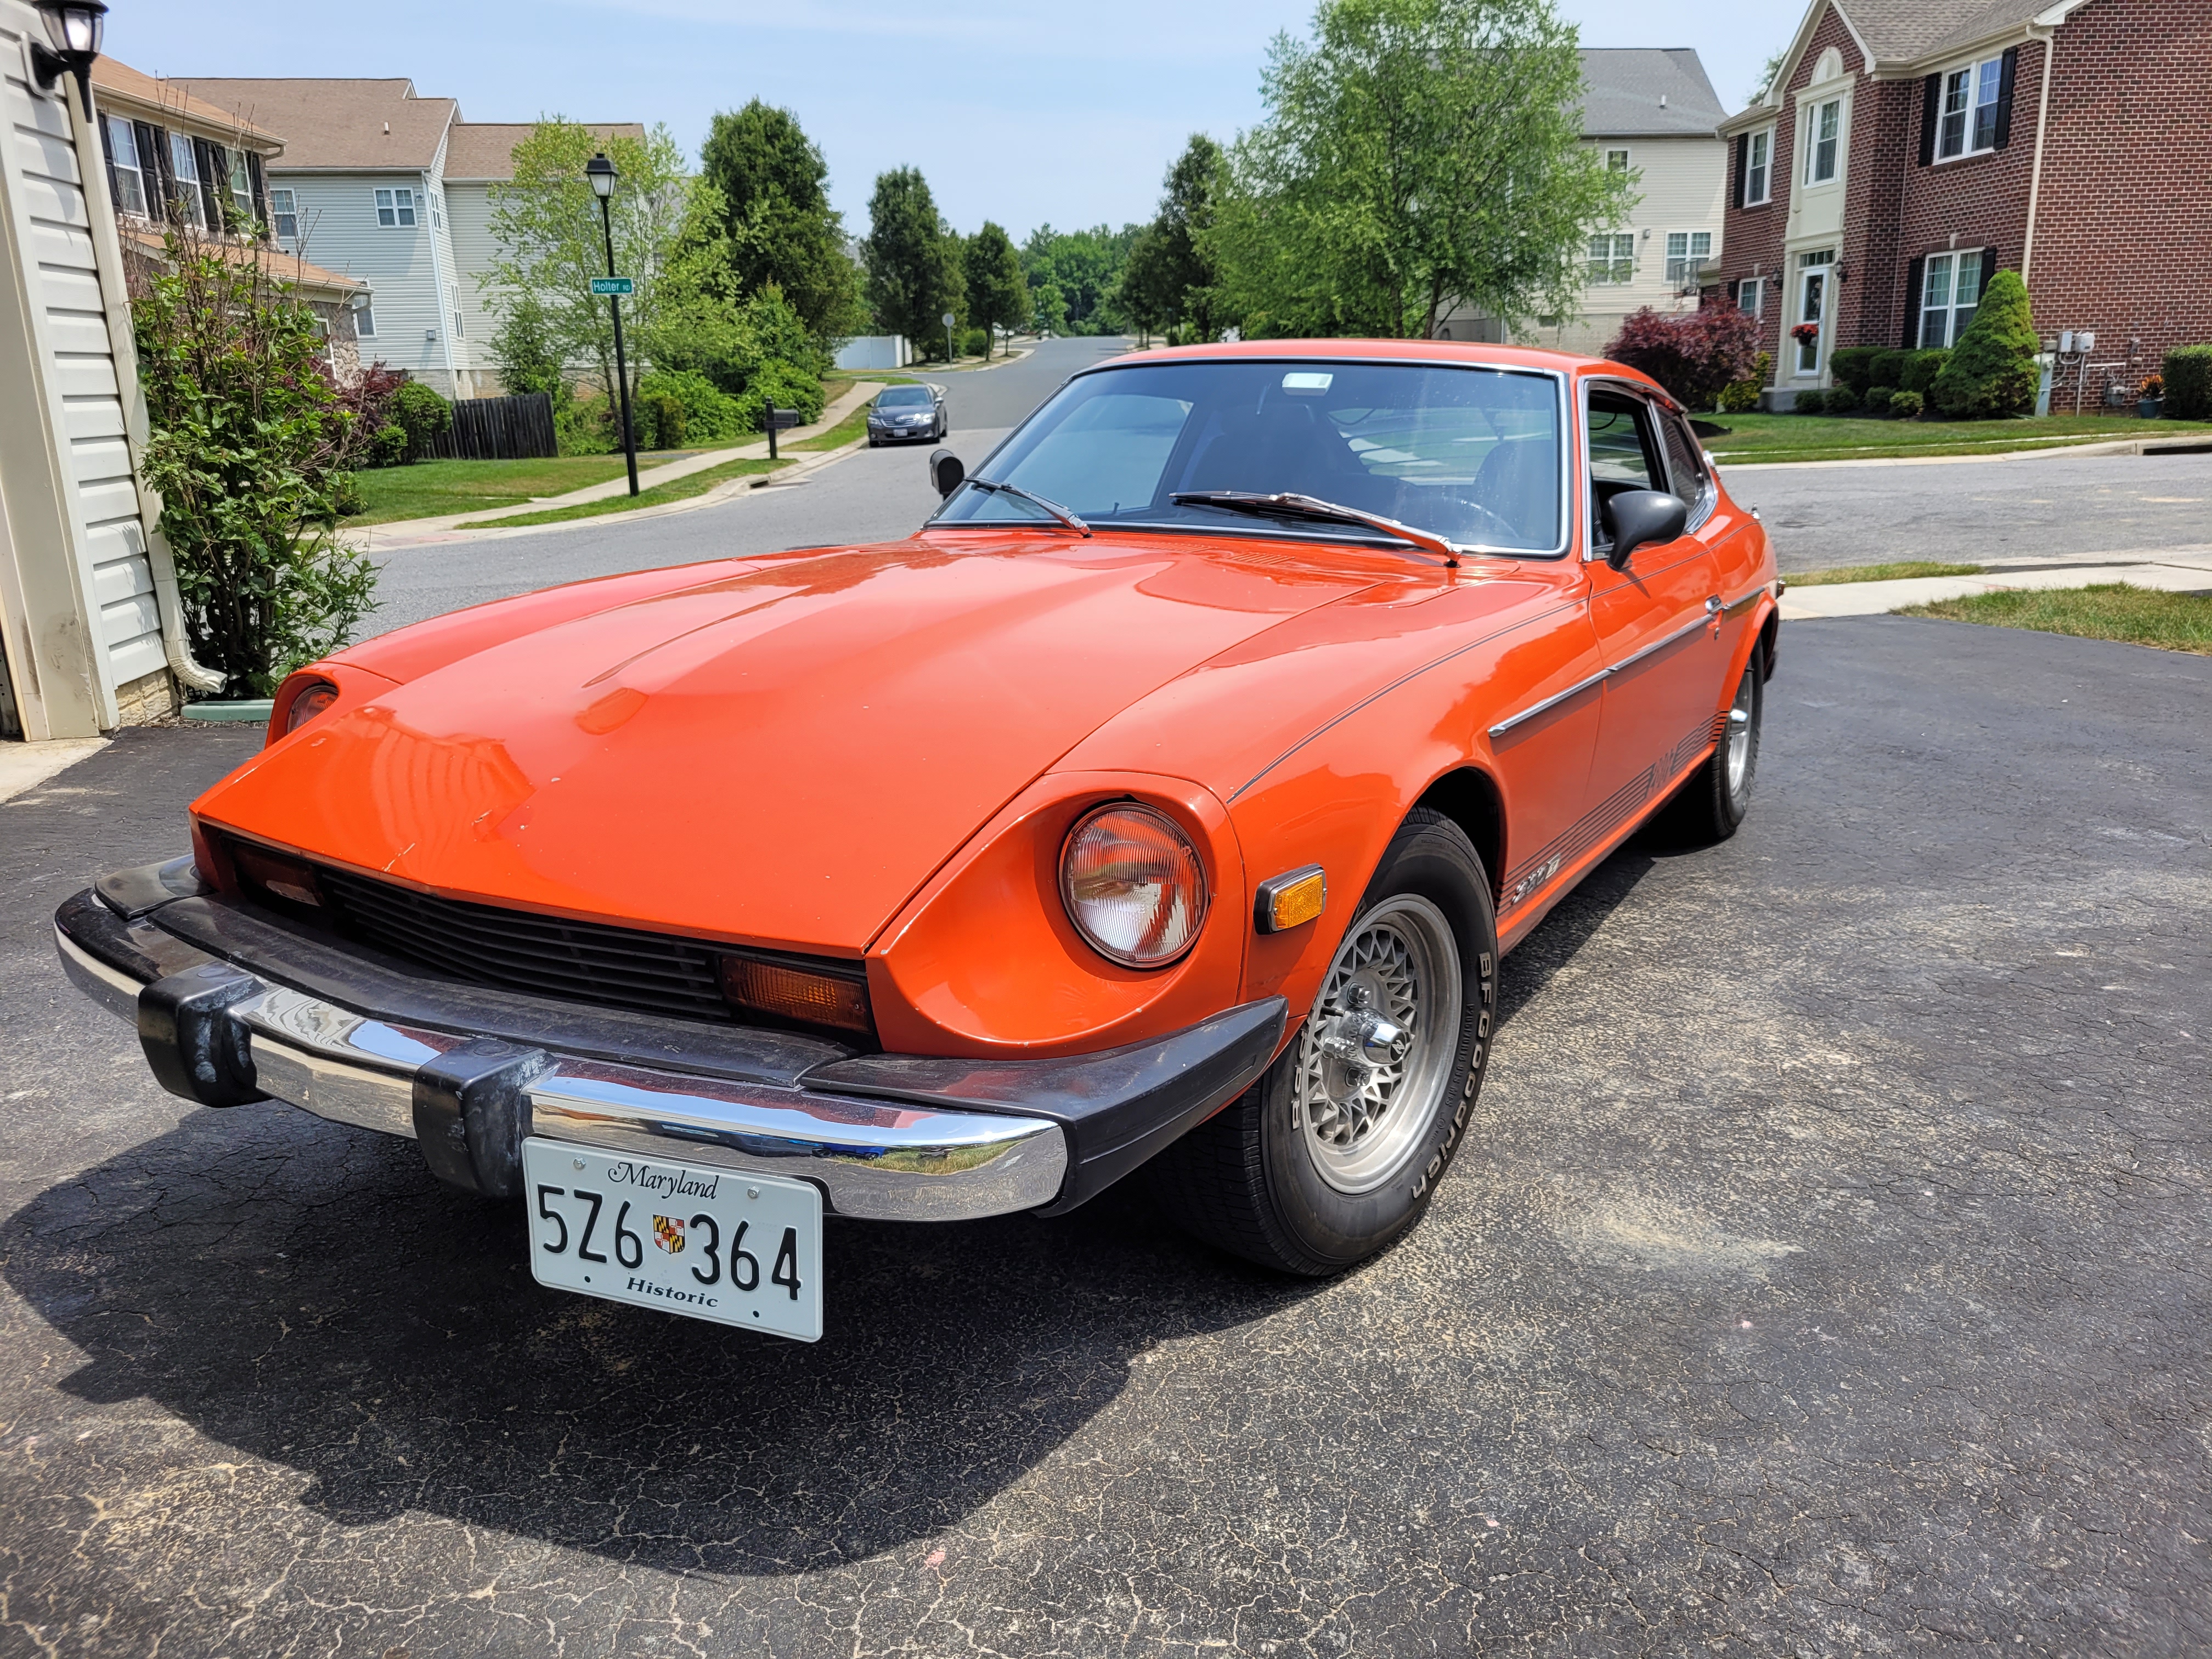
 Greetings from Baltimore County, Maryland! I have been a long-time lurker and reader on this site, and I think I may have talked to a few members in person at car shows or chatted online. After searching for years, a few missed opportunities, lost bids on BAT, passing on a few project cars beyond my comfort zone, I finally found my Z in April 2023. As all cars that are 47 years old, she's far from perfect and will need some TLC that my son and I will eagerly perform and enjoy. I will start a project thread to document the work as it progresses. Looking forward to being an active member of this community! Paul
 2 points
 -
The new owner just sent me this pic from the race track, look at the G's it's pulling.
 2 points
 -
Washers and bushings look good. As Racer X mentioned... That clutch line. Haha!! When you replace it, screw it tight into the slave cylinder first. Then (after it's fully tight into the slave) put the other end into the holder bracket attached to the chassis. That will allow you to get a better routing of the rubber line with less twisting.2 points
-
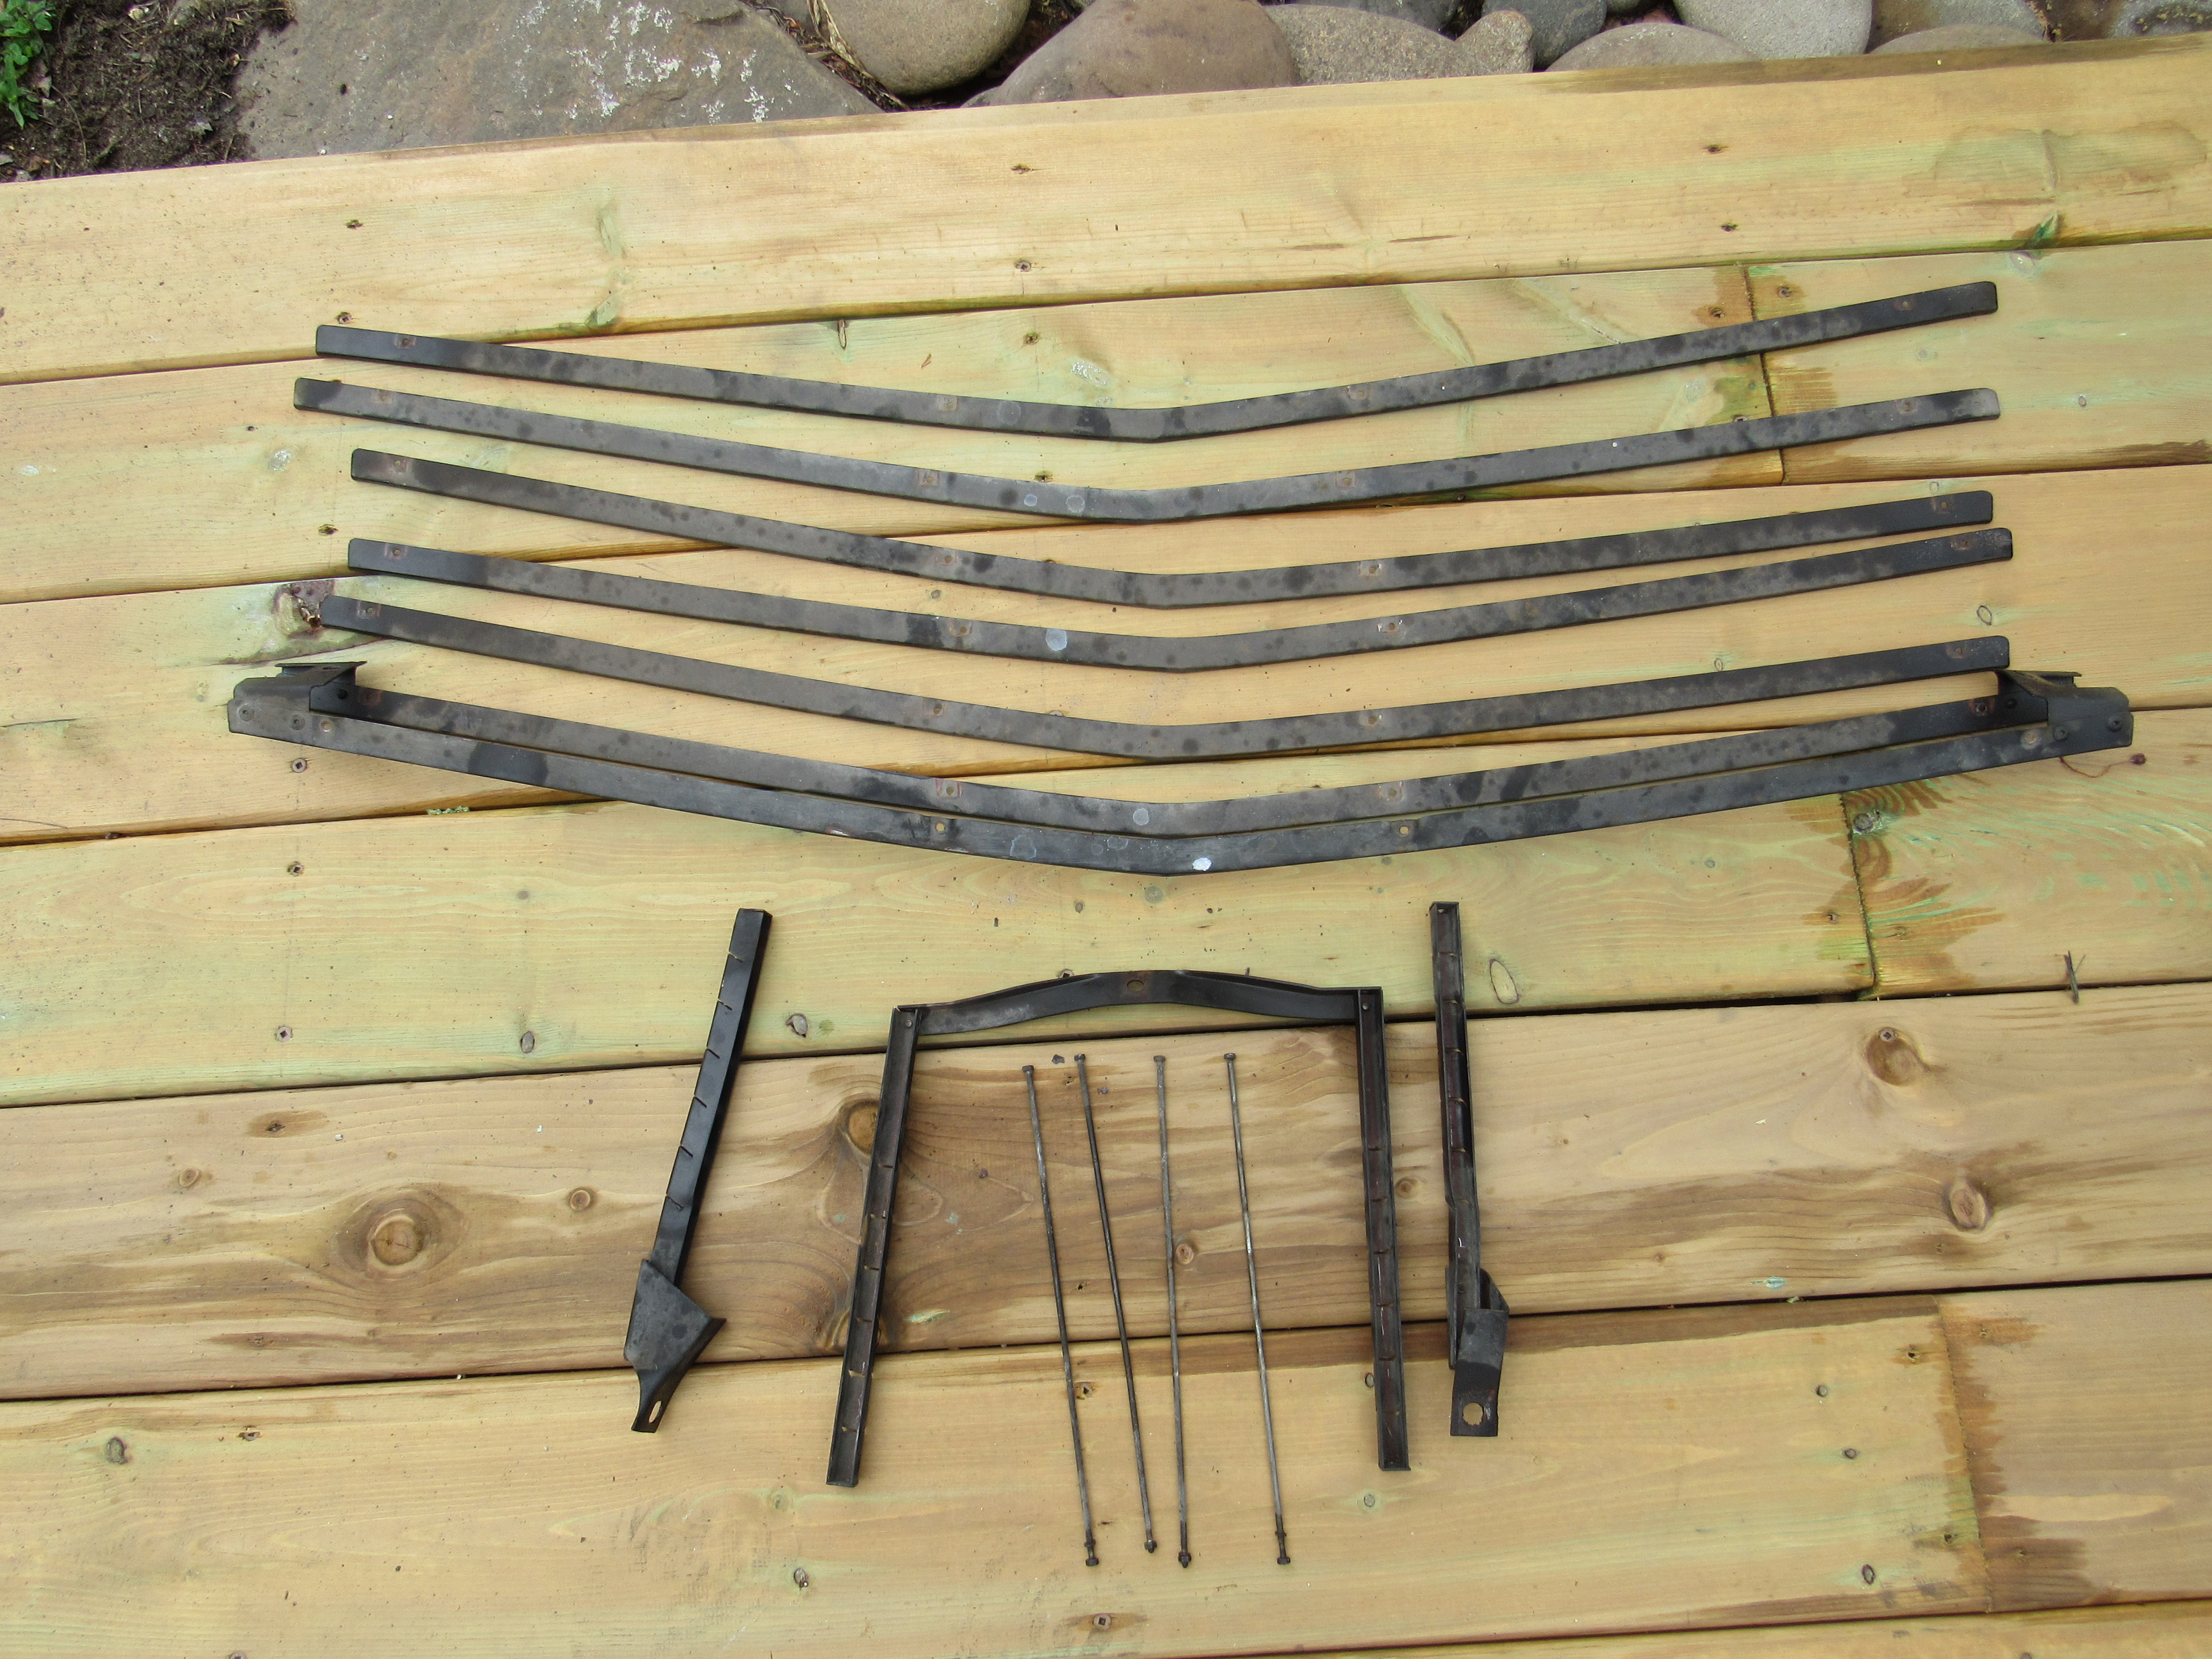
1 pointThis is a very original car, hardly any mods and so far haven't noticed any missing pieces that get lost along the way. Started with some of the fun stuff, the front grill is in perfect condition, just needs to be dismantled, cleaned, sanded and re-coated. The steering wheel is coming out well, need to let the varnish cure a bit more, very humid here right now.


 1 point
 -
Doesn't look familiar. Hope he's not expecting much, that car needs a lot of work.1 point
-
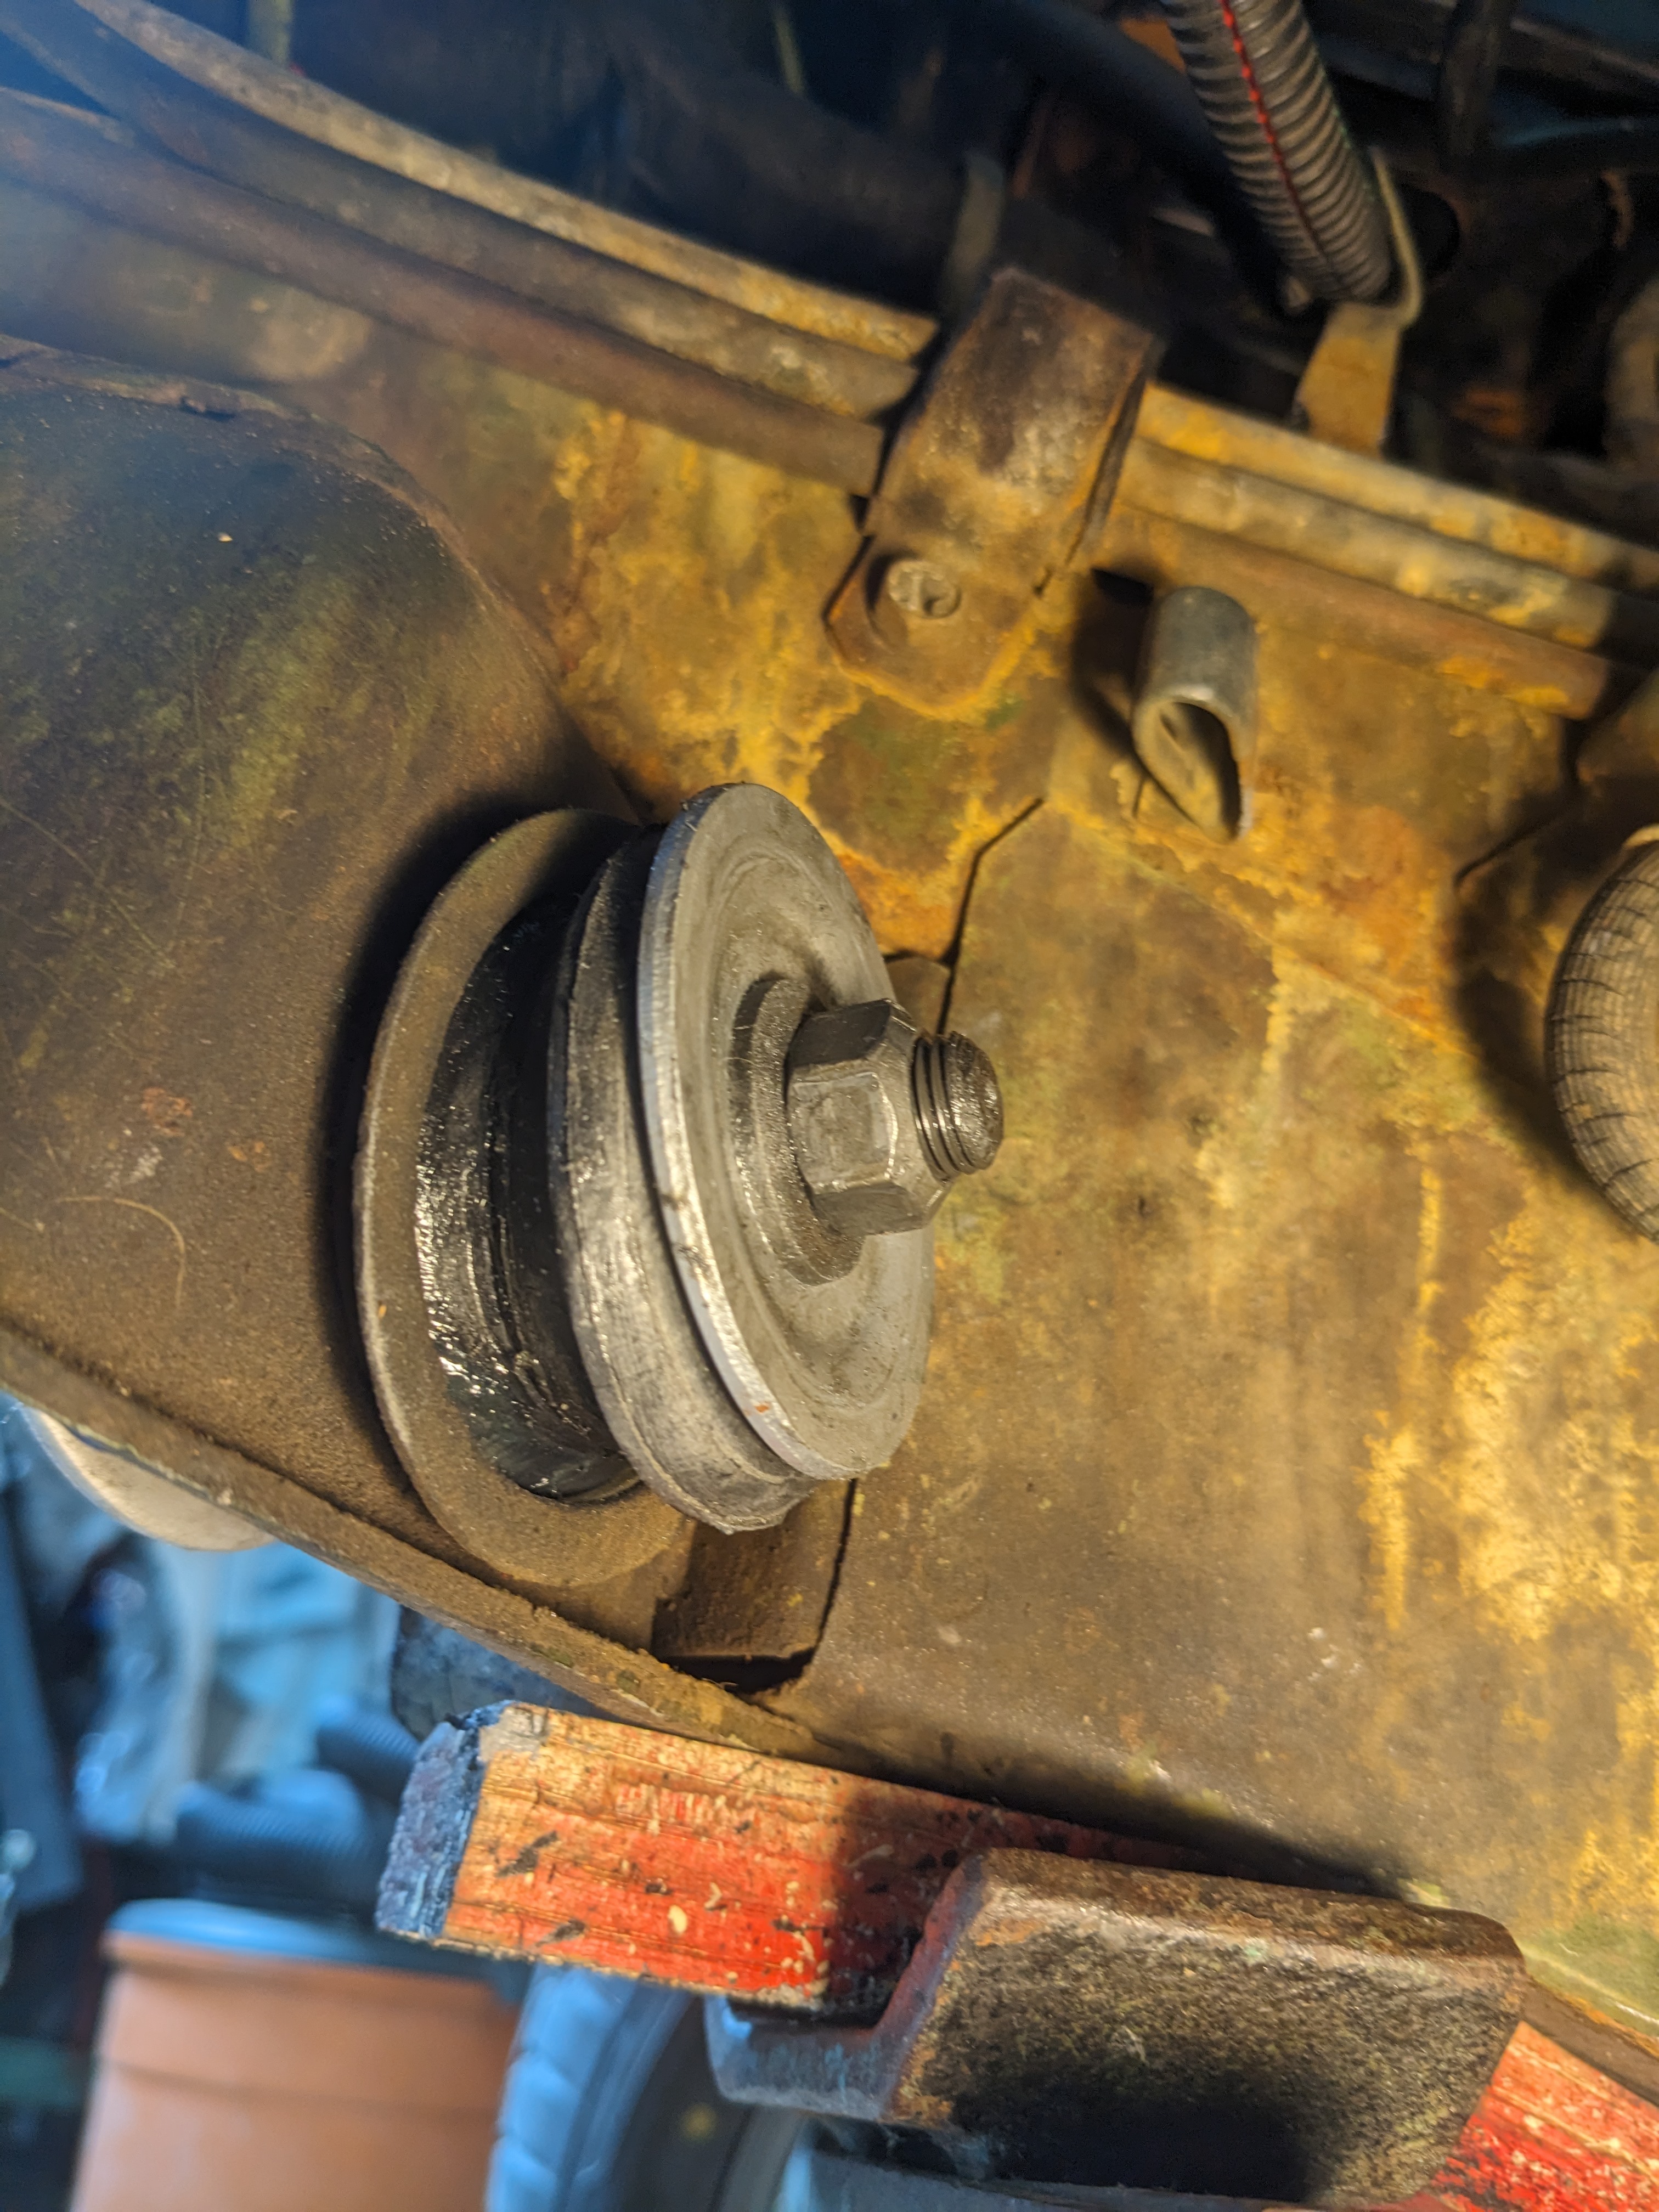
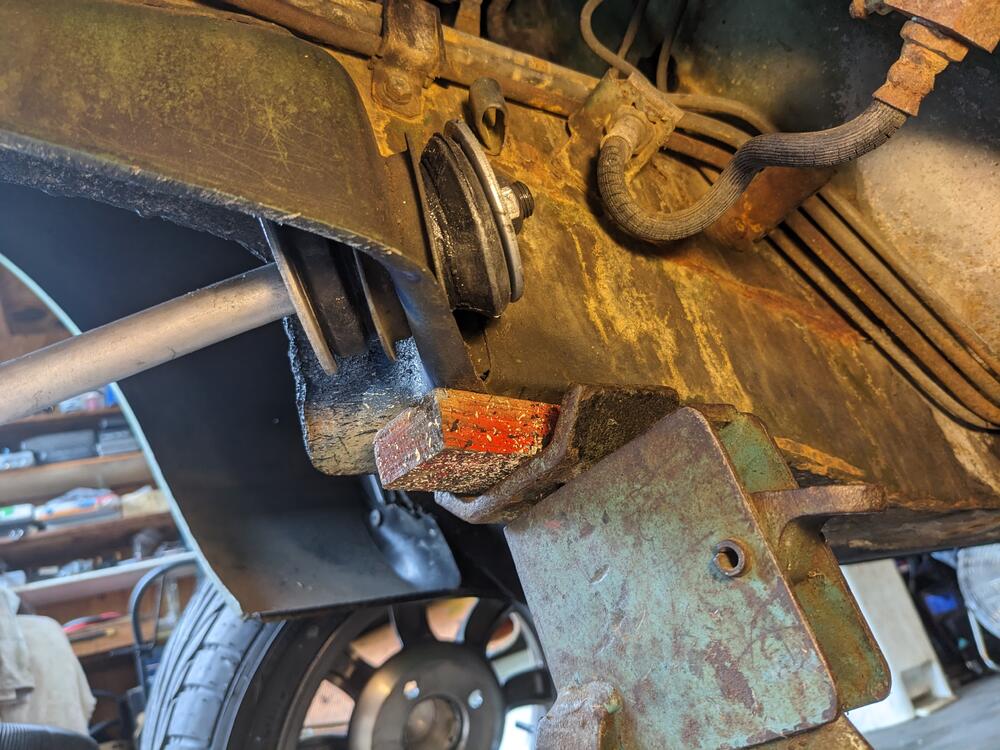
 Not sure where I picked up the 'torsion' rod description, I assumed it was from somewhere in the FSM, however I see they call it a compression rod in the 75 manual I have in my possession. Volvo used a similar design, they called them caster rods. Indeed!! I have the parts, I was going to do it last week, however I couldn't get the clutch master reservoir cap off, and was not about to apply excessive force to that. I'm changing it in part because it was clearly improperly installed. I do understand how to properly install a hydraulic flex hose to ensure the line is not under tension as seen in my pic , but thanks for the concern 🙂1 point
 -
 A 72 up in Canuckistan. https://bringatrailer.com/listing/1972-datsun-240z-279/ Anyone we know?1 point
 -
On the early Z cars, the rods are compression rods, as they are behind the lower control arms, and the forces that act on them are compression forces. On the ‘79 and up Z cars, the rods are in front of the lower control arms, and are tension rods, because the forces acting on them are tension forces. Looks like the clutch hose needs replaced. Also note the twist on it. It has been installed poorly. When you replace it, be sure to not let it get twisted like that.1 point
-
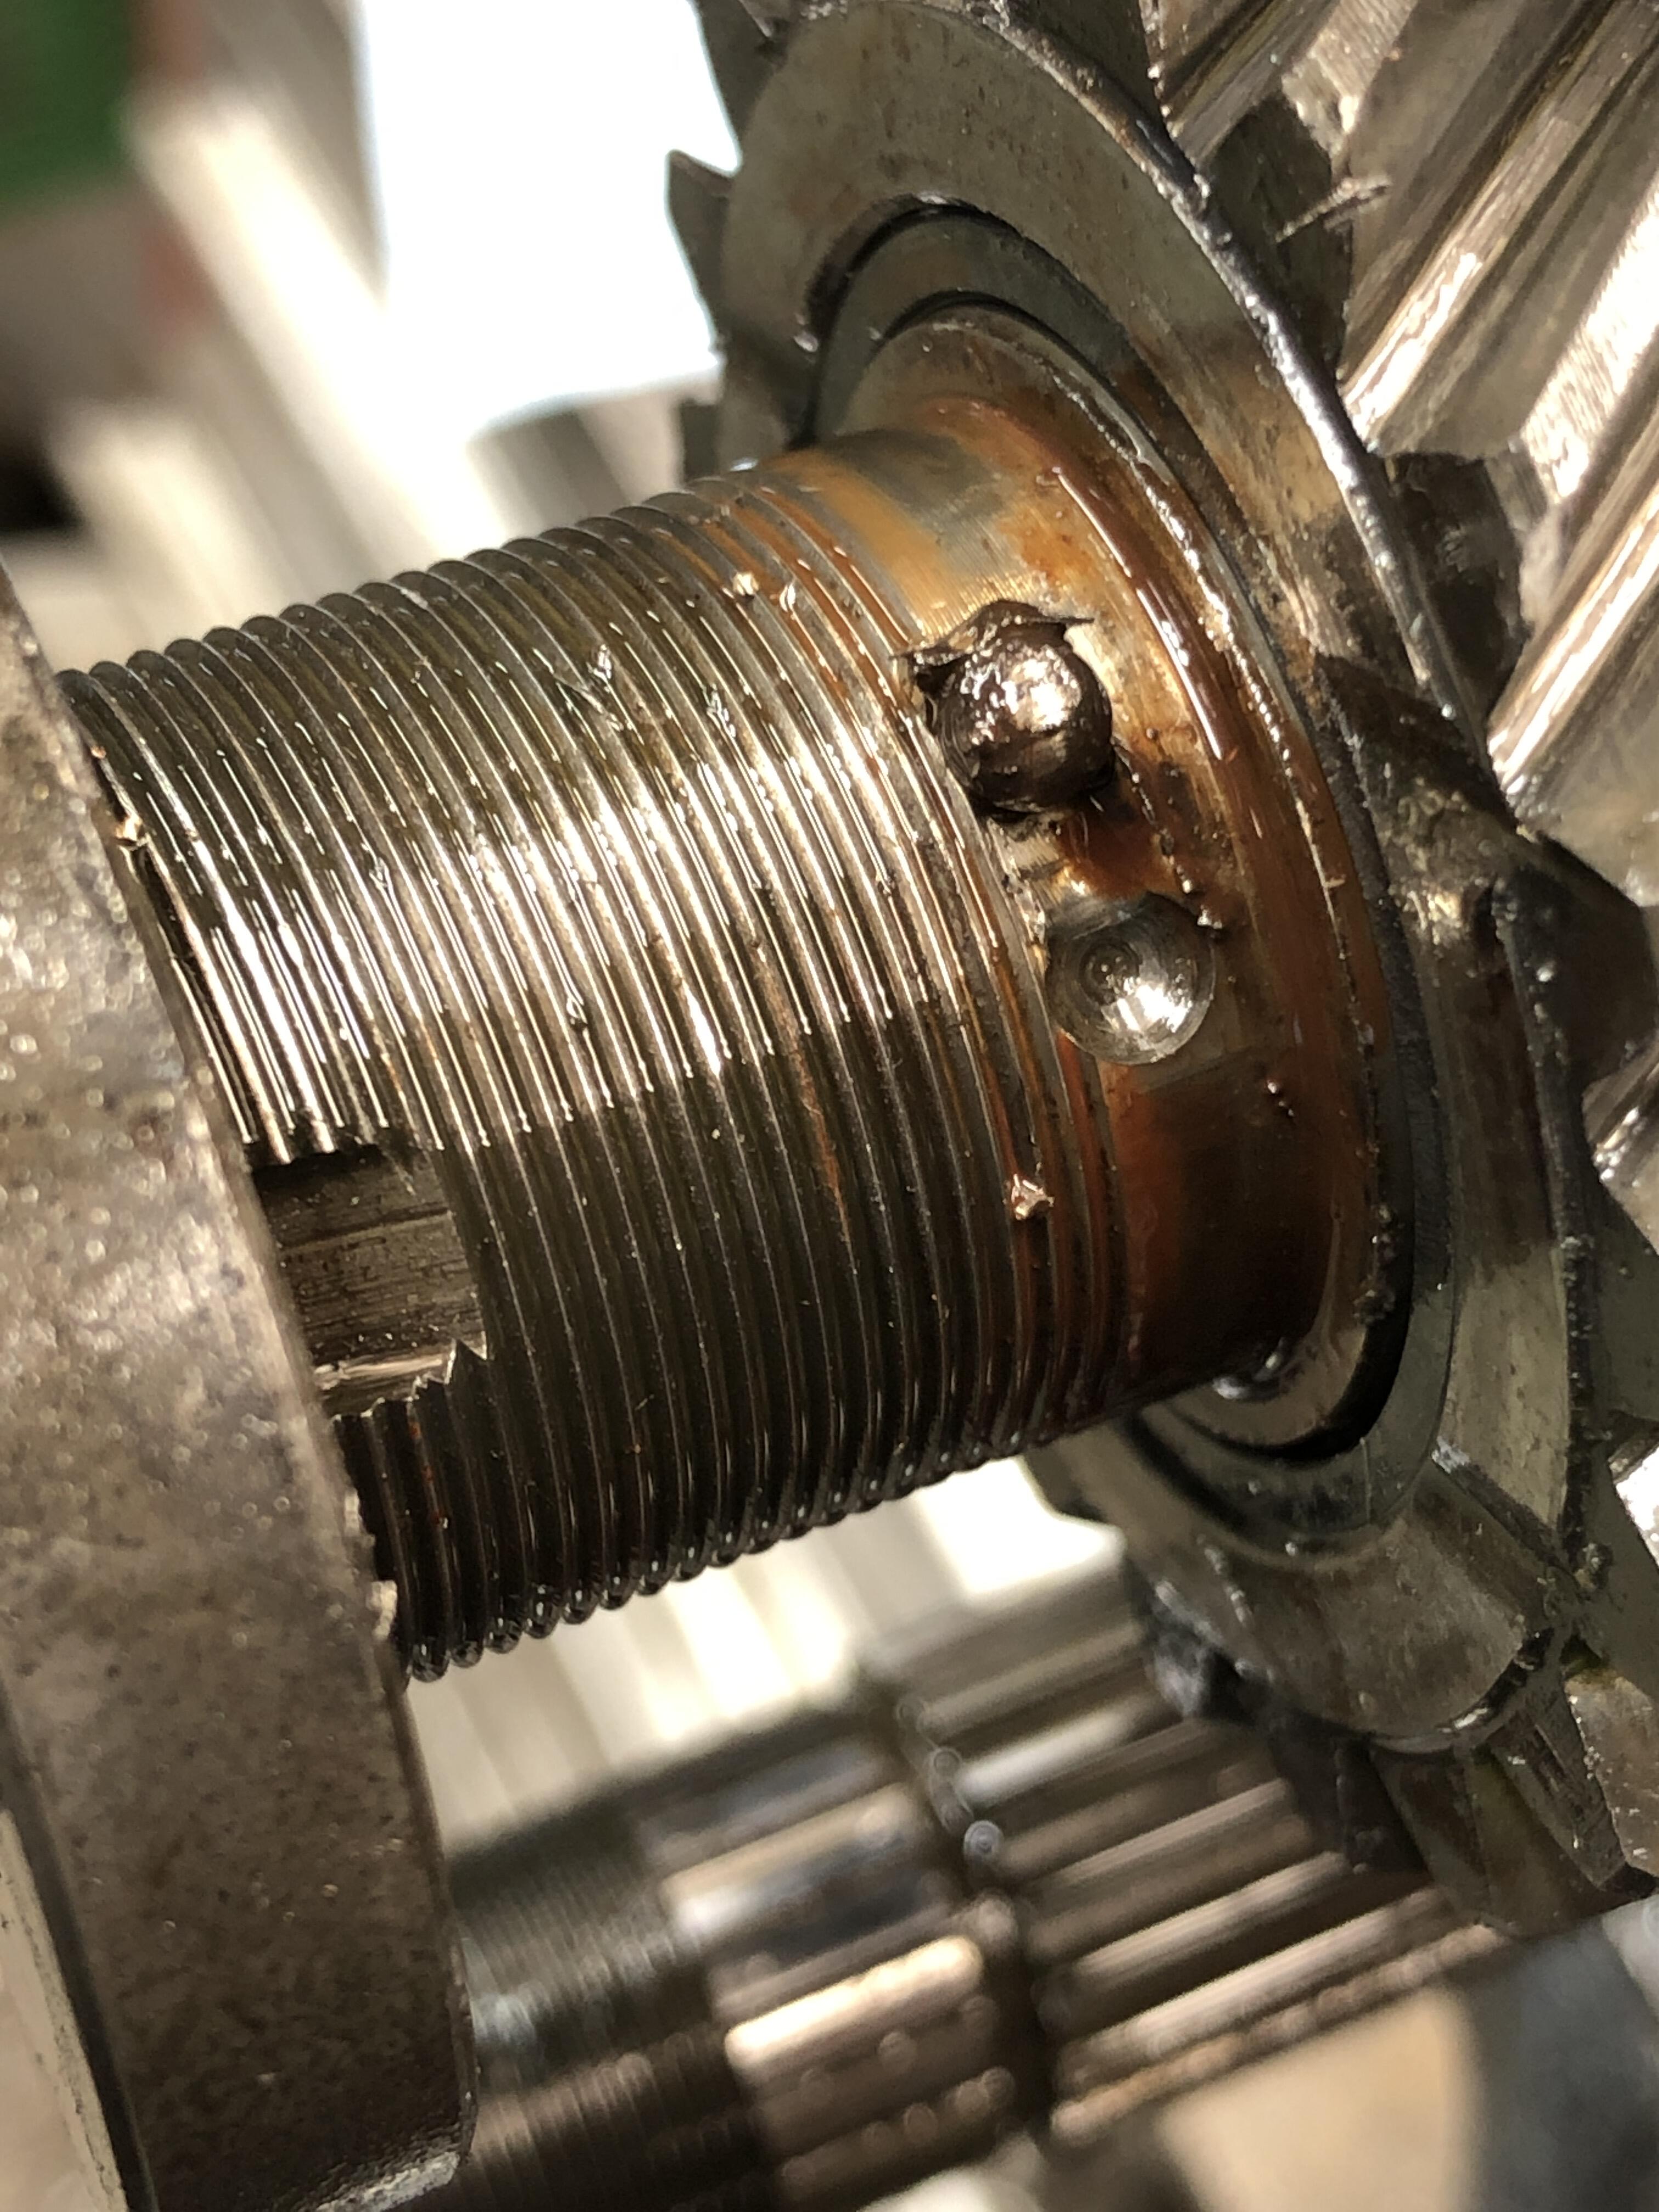
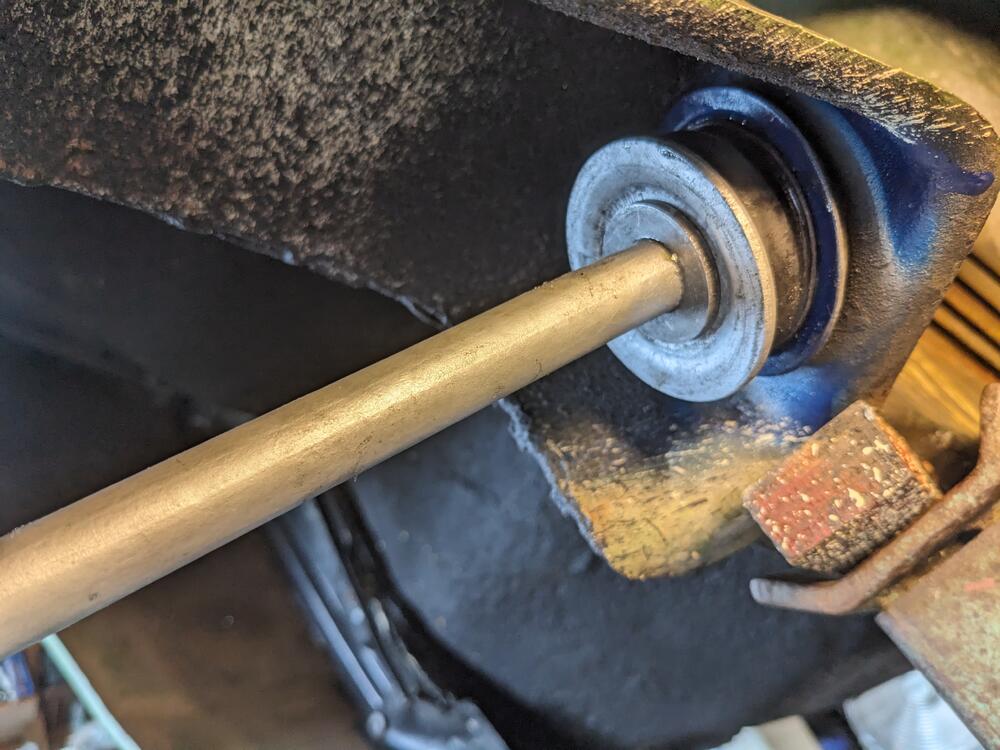
 I plan to spot weld the big nut to the big washer to prevent it from turning, effectively duplicating the function of the ball. Drilling the main shaft for the later 5mm pin upgrade is not possible due to incredible hardness of the main shaft. I had to re-surface both the washer and the face of the gear it touches (sand them flat) in order to get them to turn freely when the nut is torqued. Both were a bit chewed up but there is virtually no clearance when tight. Just enough for an oil film. Can’t let any defects remain that can get the fit in trouble again. Regarding the possibility that a too-small ball was used when I replaced it, well it’s possible. If I lost that ball and replaced it with another, but my replacements are the “same” size within measureable limits. Seems the presence of a bit of rust and slightly loose nut allowed that washer to turn under the tremendous torque of a mighty L series and caused the deformation that turned into a lock up. Only guess I have at the moment.1 point
 -
In 79 they went to the more sensible labelled drawings. Odd thing though, they dropped down to 25 - 36 in 79, then in 80 went back to 44.
 1 point
 -
 1 pointThe fuel tank work looks really clean! Actually all the work looks really clean but I found the fuel tank work to be a very creative solution1 point
 -
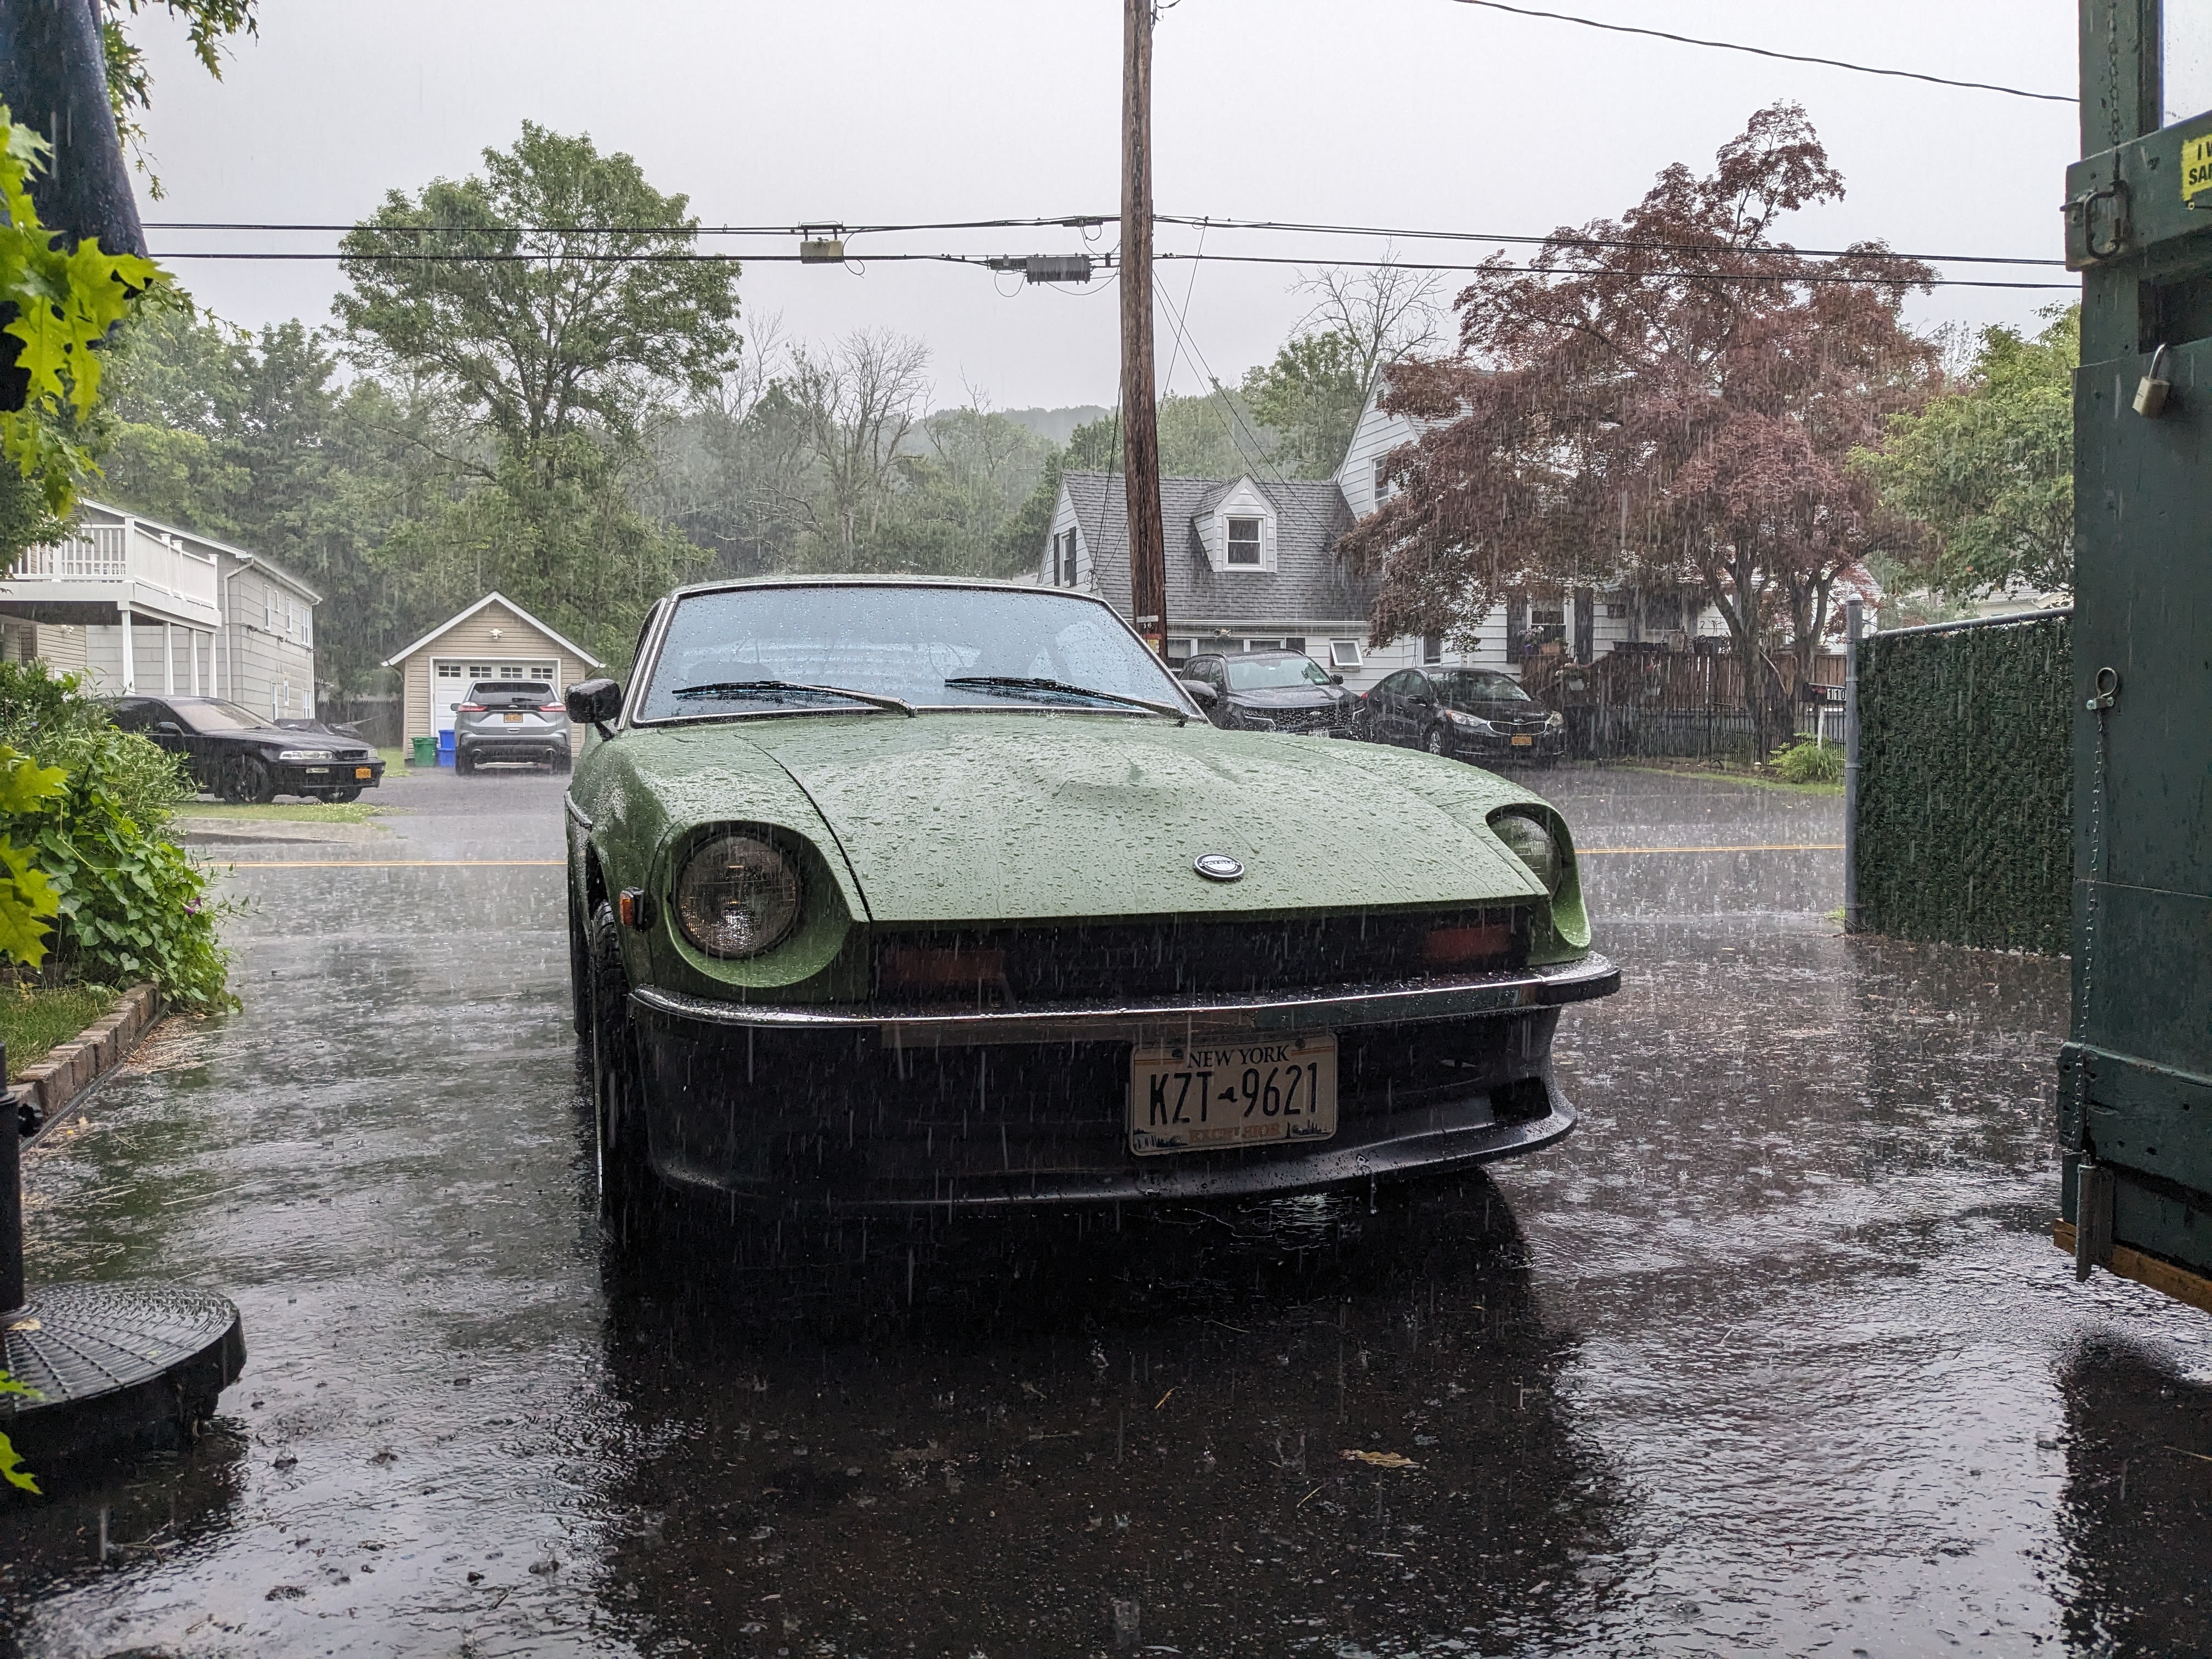
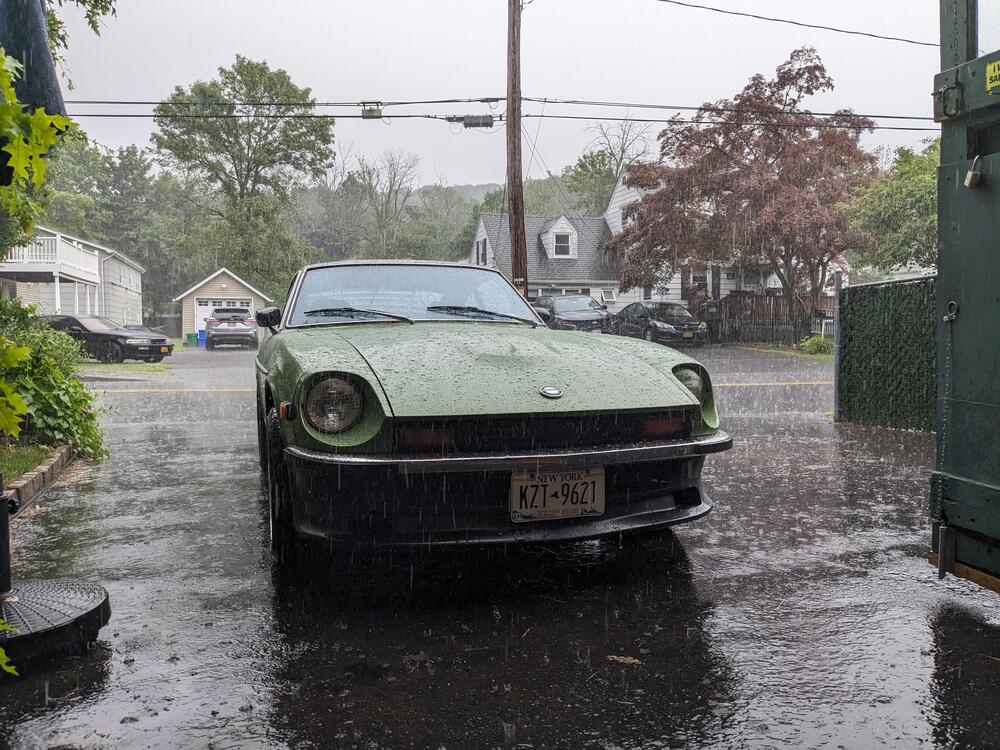
Finally got back to the front end - removed the torsion rods & flipped the cone washers, moved the flat washer to the front side, installed one poly bush on the forward face, added a hardened washer under the nut I used the insert tube from the poly kit, it is slightly longer than the stock version used with only rubber. Torqued to 44ft/lbs. Didn't get to drive it, the rain is coming down too hard. I'll find out if that resolved it

 1 point
 -
 I don't know if the old Yazaki connectors are available anywhere. Even my good friend, Google, is stumped. The Yazaki connectors that are available aren't the same type. https://www.easternbeaver.com/Main/Elec__Products/Connectors/Sealed/YPC/ypc.html This one may work for the 2 pin connector: https://kojaycat.co.uk/epages/950000457.mobile/en_GB/?ObjectPath=/Shops/950000457/Products/2W-YAM-RD125-MAL-CONN https://kojaycat.co.uk/epages/950000457.mobile/en_GB/?ObjectPath=/Shops/950000457/Products/2W-YAM-RD125-FEM-CONN 6 pin: https://kojaycat.co.uk/epages/950000457.mobile/en_GB/?ObjectPath=/Shops/950000457/Products/6W-YAM-ML-CONN 4 pin: https://kojaycat.co.uk/epages/950000457.mobile/en_GB/?ObjectPath=/Shops/950000457/Products/4W-YAM-MAL-RD-YPC https://kojaycat.co.uk/epages/950000457.mobile/en_GB/?ObjectPath=/Shops/950000457/Products/4W-YAM-FEM-RD-YPC It's not easy finding those parts.1 point
 -
Edit - I found them, thought they weren't there. Hard to find, I had to search for the word to get the drawing number then look at the drawing again. One of the 5 speed balls has (1/4) after it, don't know what that means. Glad I'm not rebuilding any transmissions. Edit again - I notice that ball #66 has a different part number. Any chance you put a small ball where a big ball should go? https://www.carpartsmanual.com/datsun/Z-1969-1978/power-train/transmission-gears1 point
-
1 point
-
Now in the next trans revision, this was apparently a known issue because , here is what they did. Big fat pin and much larger slot in the washer.
 1 point
 -
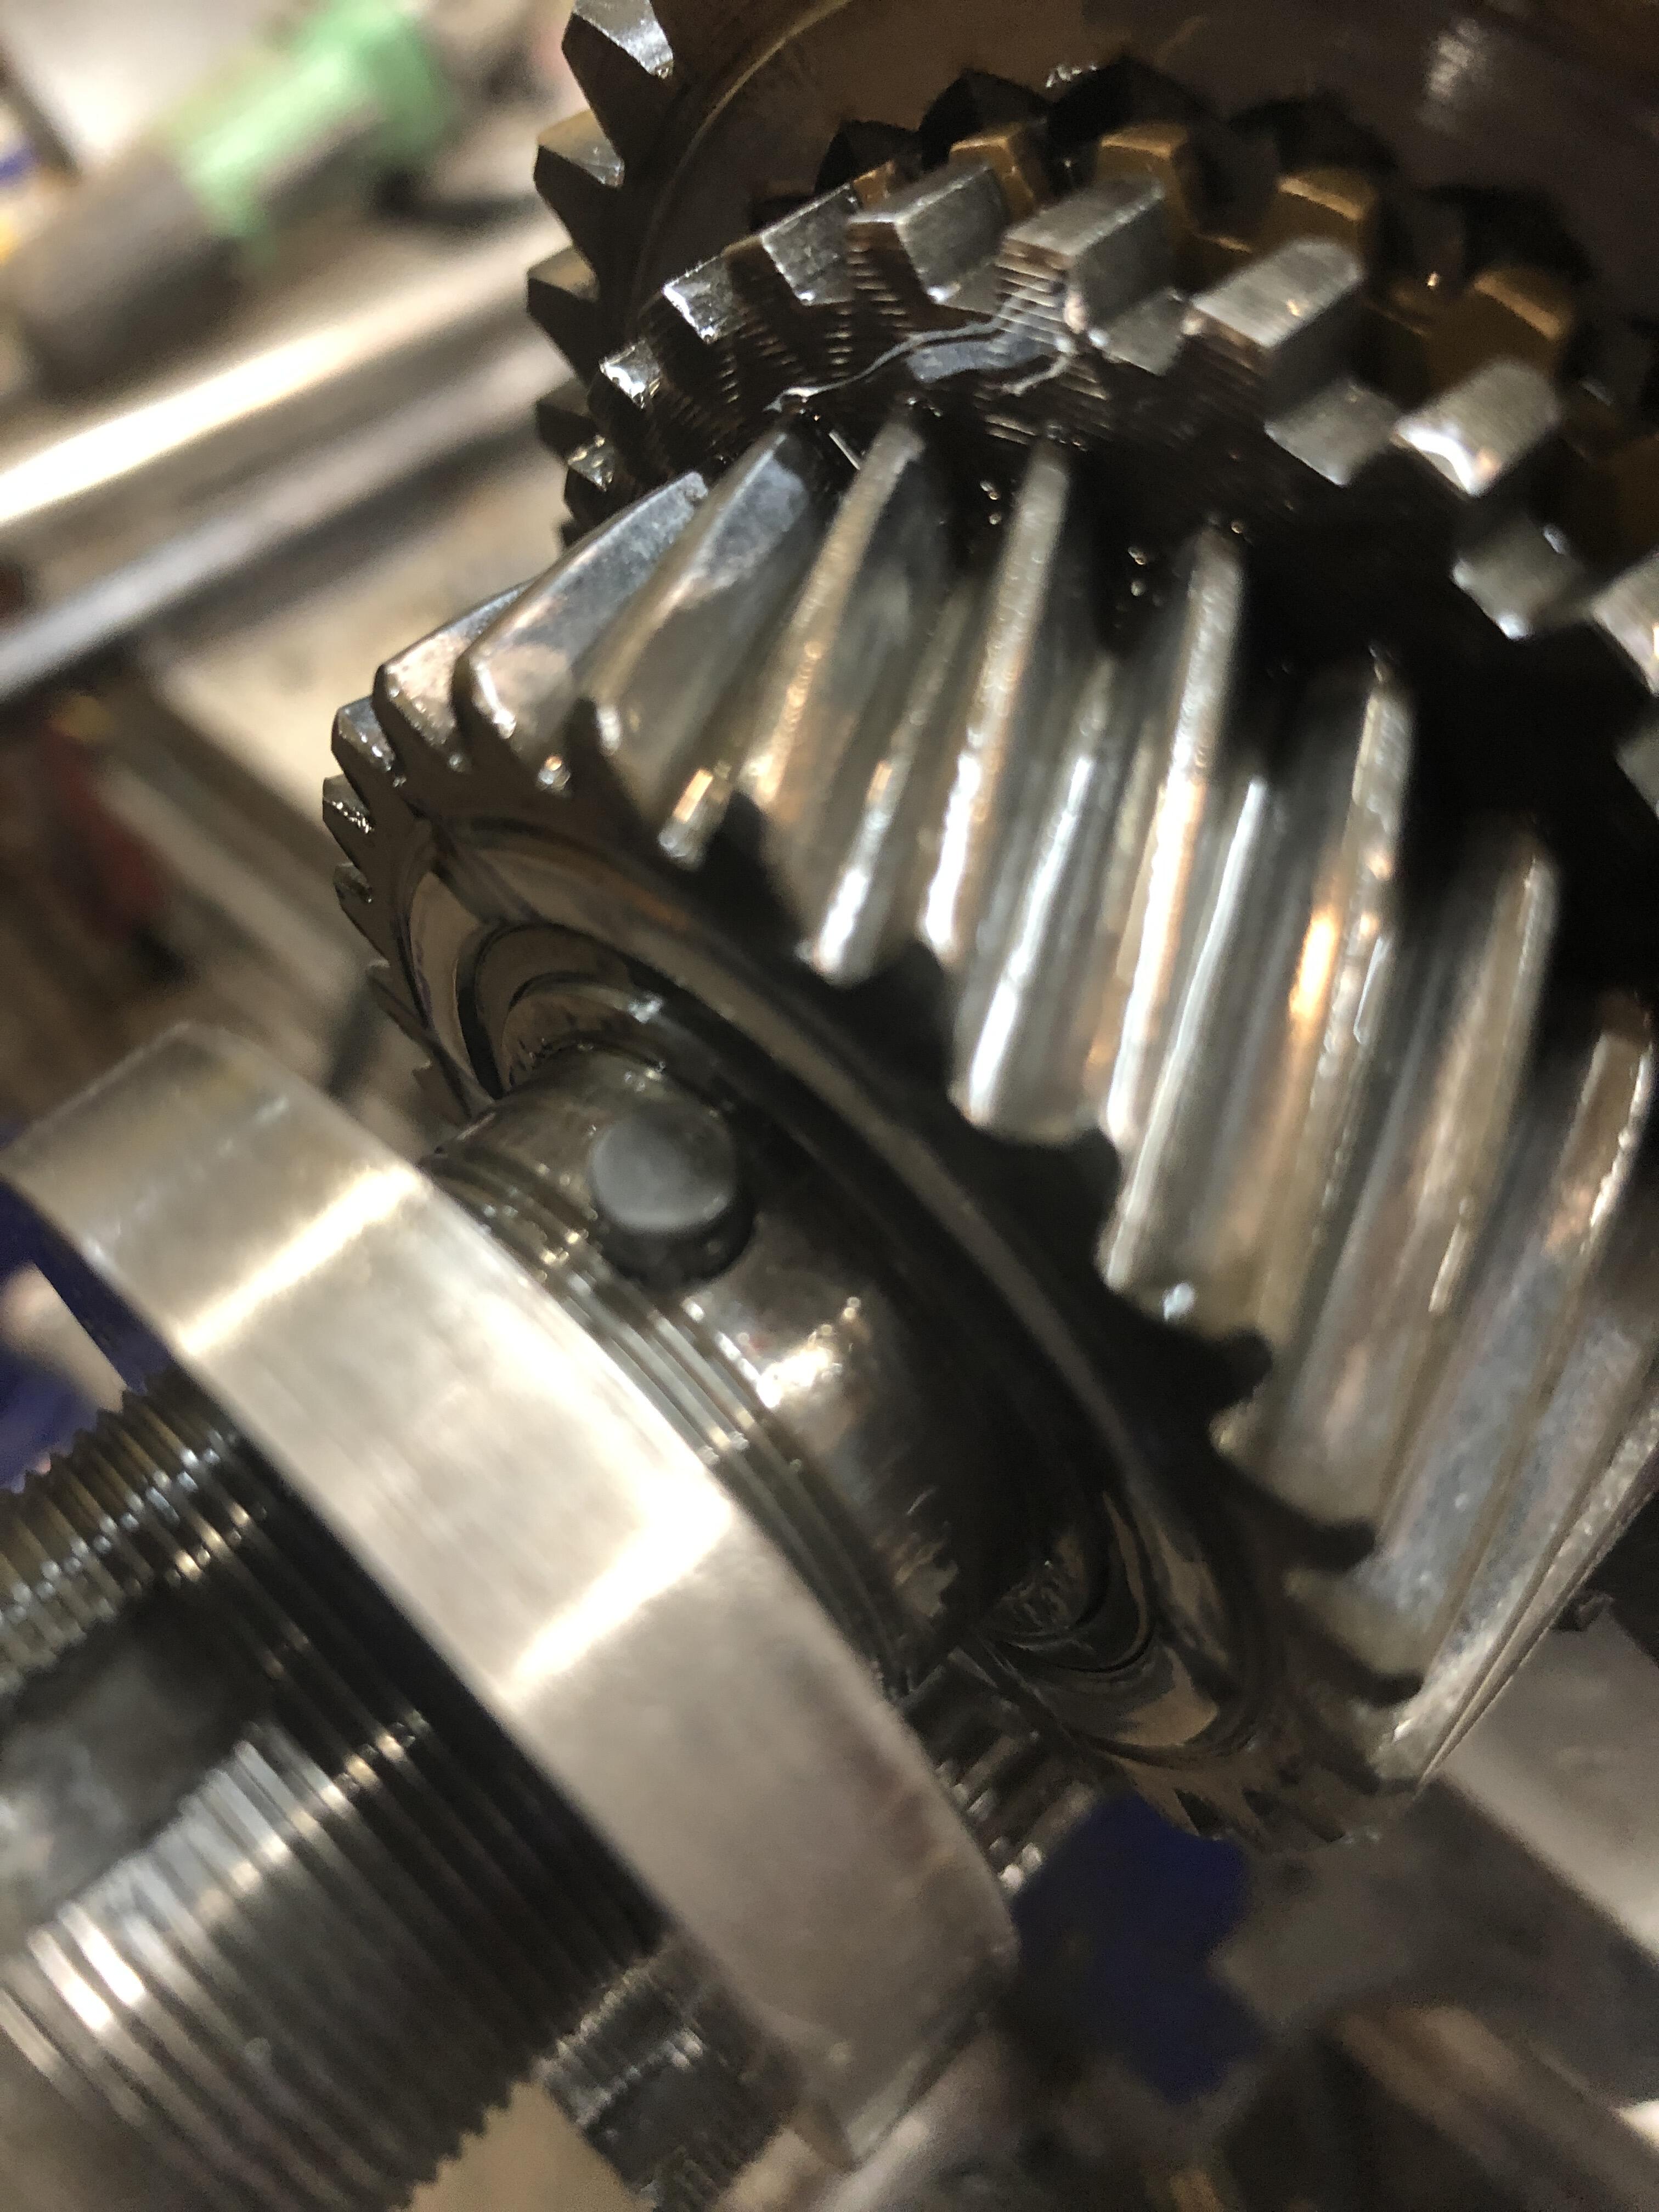
The tranny was indeed locked up. Nothing that you can see on inspection of gears, syncros, shift rods etc. Trans shifts ok into every gear except 5th. My first guess was a loose big main shaft nut. Nope. When in neutral, you turn the input shaft by hand the output shaft turns and is hard connected to the output. Oh oh. Something under one of the gears or synchros has a failed (sleeve bearing?) and is not allowing each idler gear for each speed to spin free in neutral. Hmmmmmm Well, start at the back end and start to take 5th gear apart. Get the big nut off (it was still staked and tight), and then try to slip off the fat washer behind it. No move-y. Get a hammer. No move-y. Get a chisel to get between that washer and 5th gear. Hit it. No move-ness. Nada. This is the one with the little ball and groove that prevents it from moving. Well after using more and more “assistance”, the washer finally comes off. And what should I find? Behold

 1 point
 -
 1 point
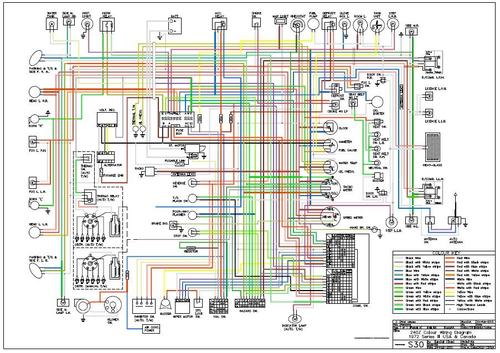 This is a color copy of the 1972 Service manual wiring diagram, Section BE Electrical. (For Manual transmissions)Free1 point
 -
 Yet another welcome to the group! That's a sweet looking car, should be great for a father and son project. Looking forward to your progress updates and we are all here for any help you need along the way.1 point
 -
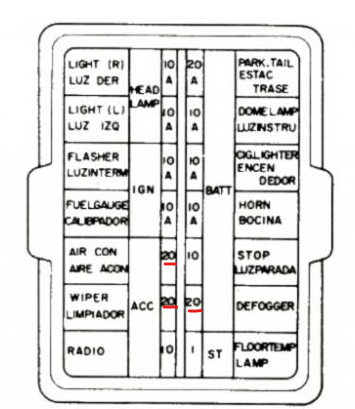
1 pointThe best way to reduce heat in the parking light and headlight circuits is to use LEDs. For the other circuits, look at the ones using 20A fuses. (76 fuse box as an example) If you keep the same placement, note how close those 3 are together.
 1 point
 -
1 point
-
 1 pointI've got a design that covers it, it just didn't print worth a damn (too small length wise, dunno why that happened the model fits).1 point
 -
Thanks SteveJ, Ill try Nissan first and see what turns up. A bit of topic ,but the second site has some nice Stainless steel straps for the rear axle boots. I think ill order them. Thanks again for the link. Cool repair to the fuse box. That would probably work, but the fusable link require a bit of force getting then in. I wonder if it will hold. Nether seen that stuff here. Im still looking at option here. The straps in the "Straps , wire harness" Straps, Wire Harness section look like the ones used along the front section, in front of the radiator. They are all worn and brittle from the radiator heat. Thanks1 point
-
Hard to tell from the tiny picture but there's something here that looks similar - Datsun 280Z Wiring (Engine Room) (From Aug.-'76) Shows up on the Courtesyparts.com site as available. Who knows... CLIP :: Nissan Parts, NISMO and Nissan Accessories - Courtesyparts.com1 point