Leaderboard
-
grannyknot
Community Member4Points5,158Posts -
crayZlair
Community Member4Points143Posts -
Captain Obvious
Community Member4Points10,150Posts -
HusseinHolland
Community Member3Points1,035Posts


Popular Content
Showing content with the highest reputation on 06/29/2023 in all areas
-
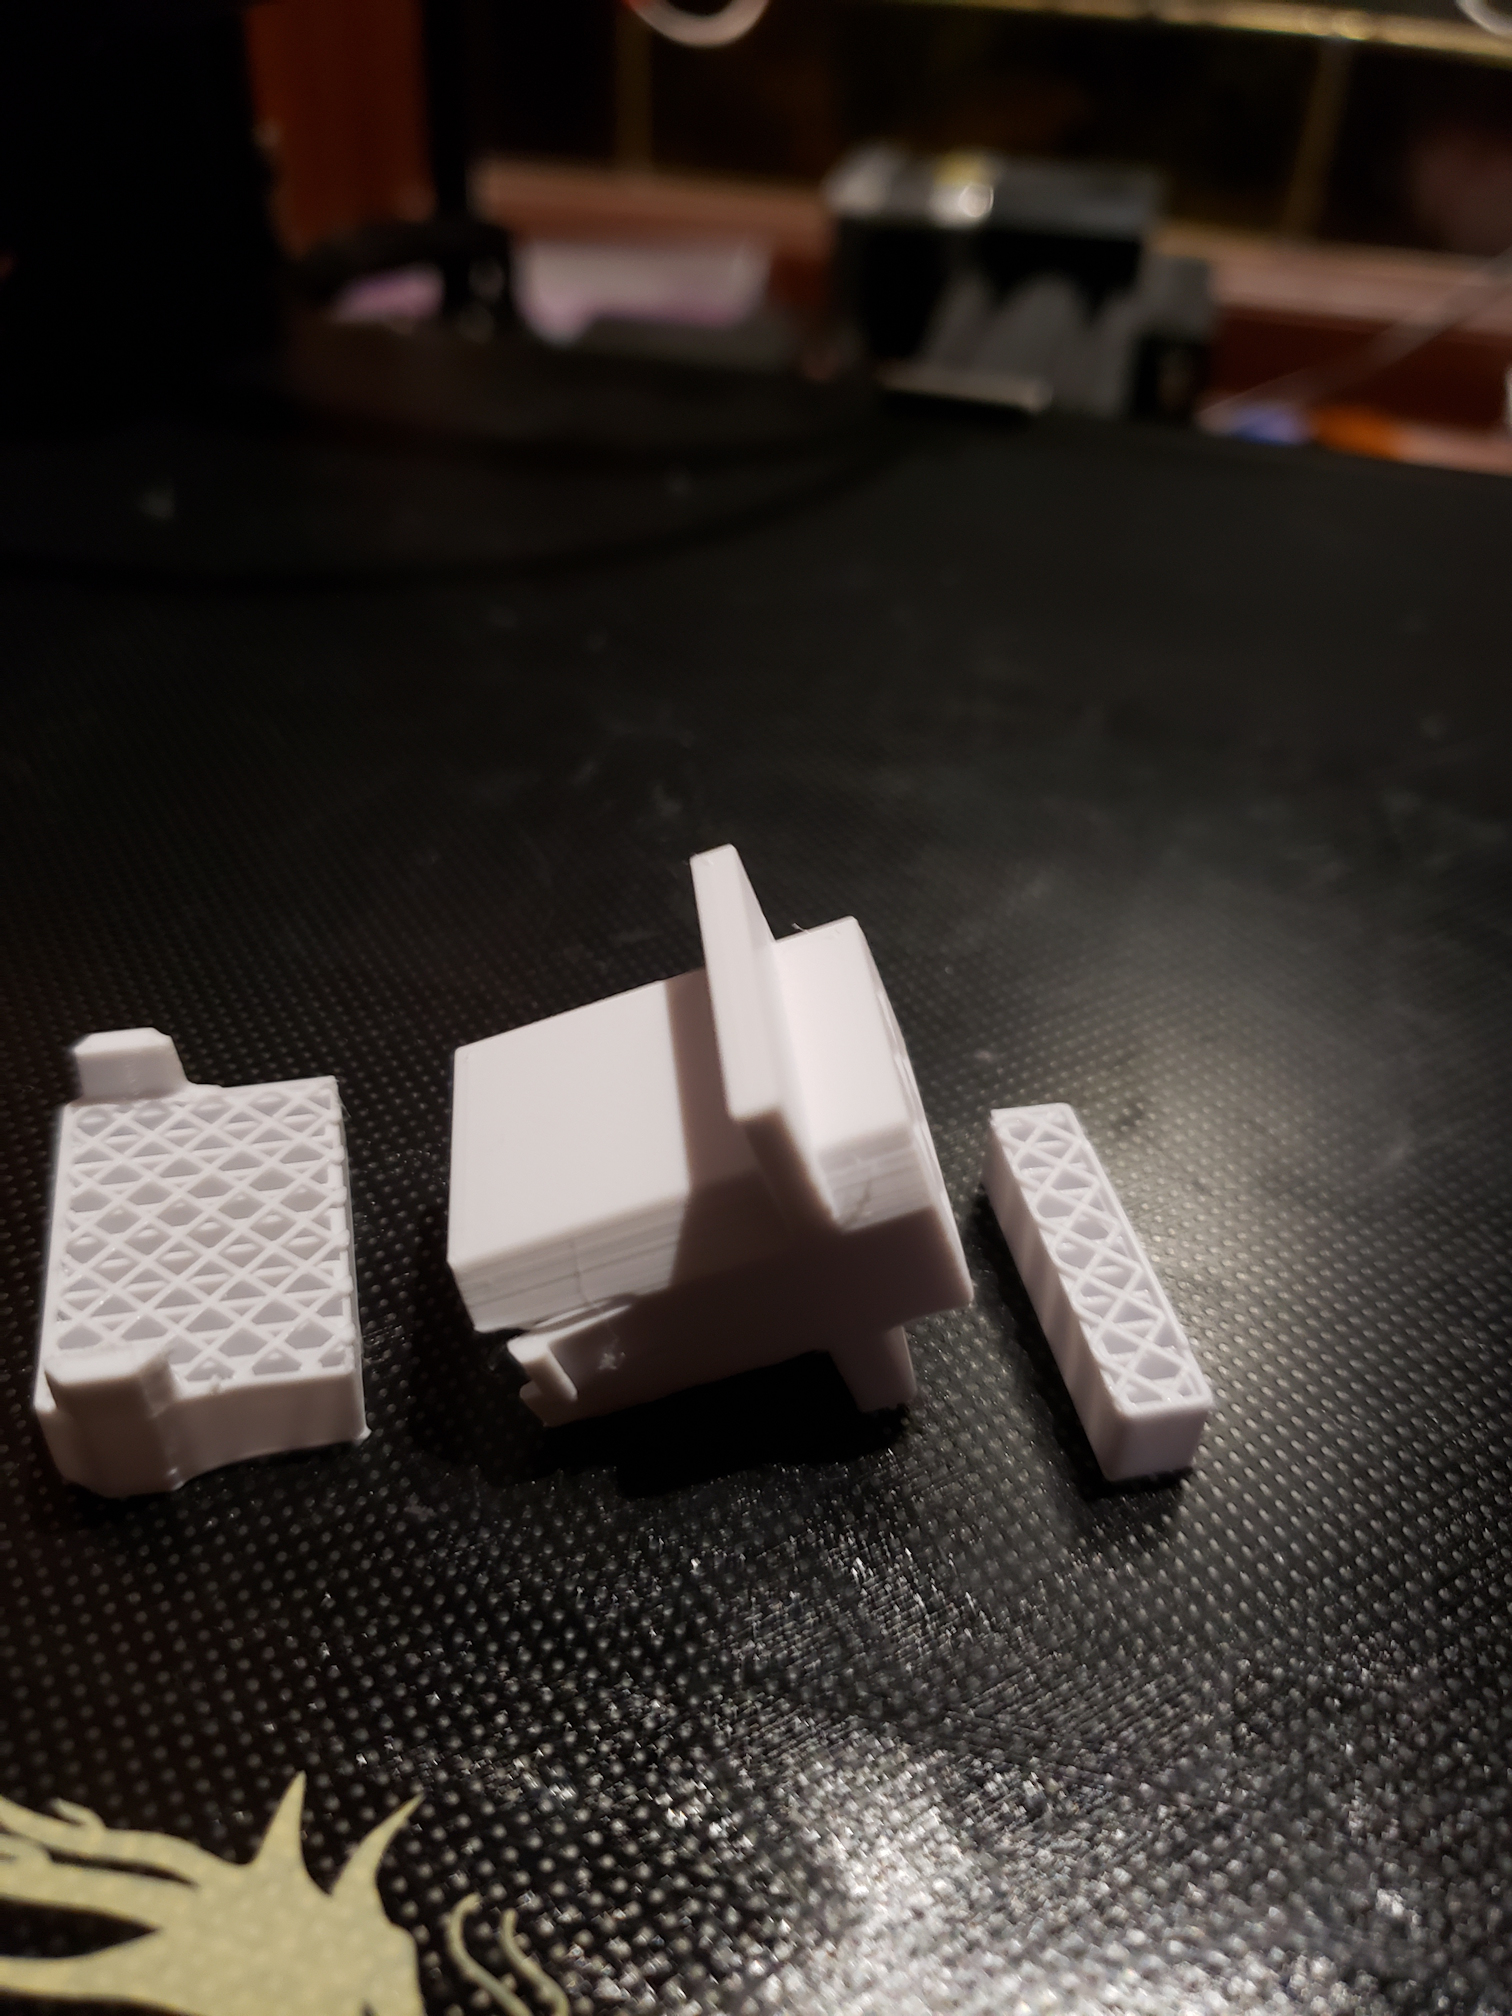
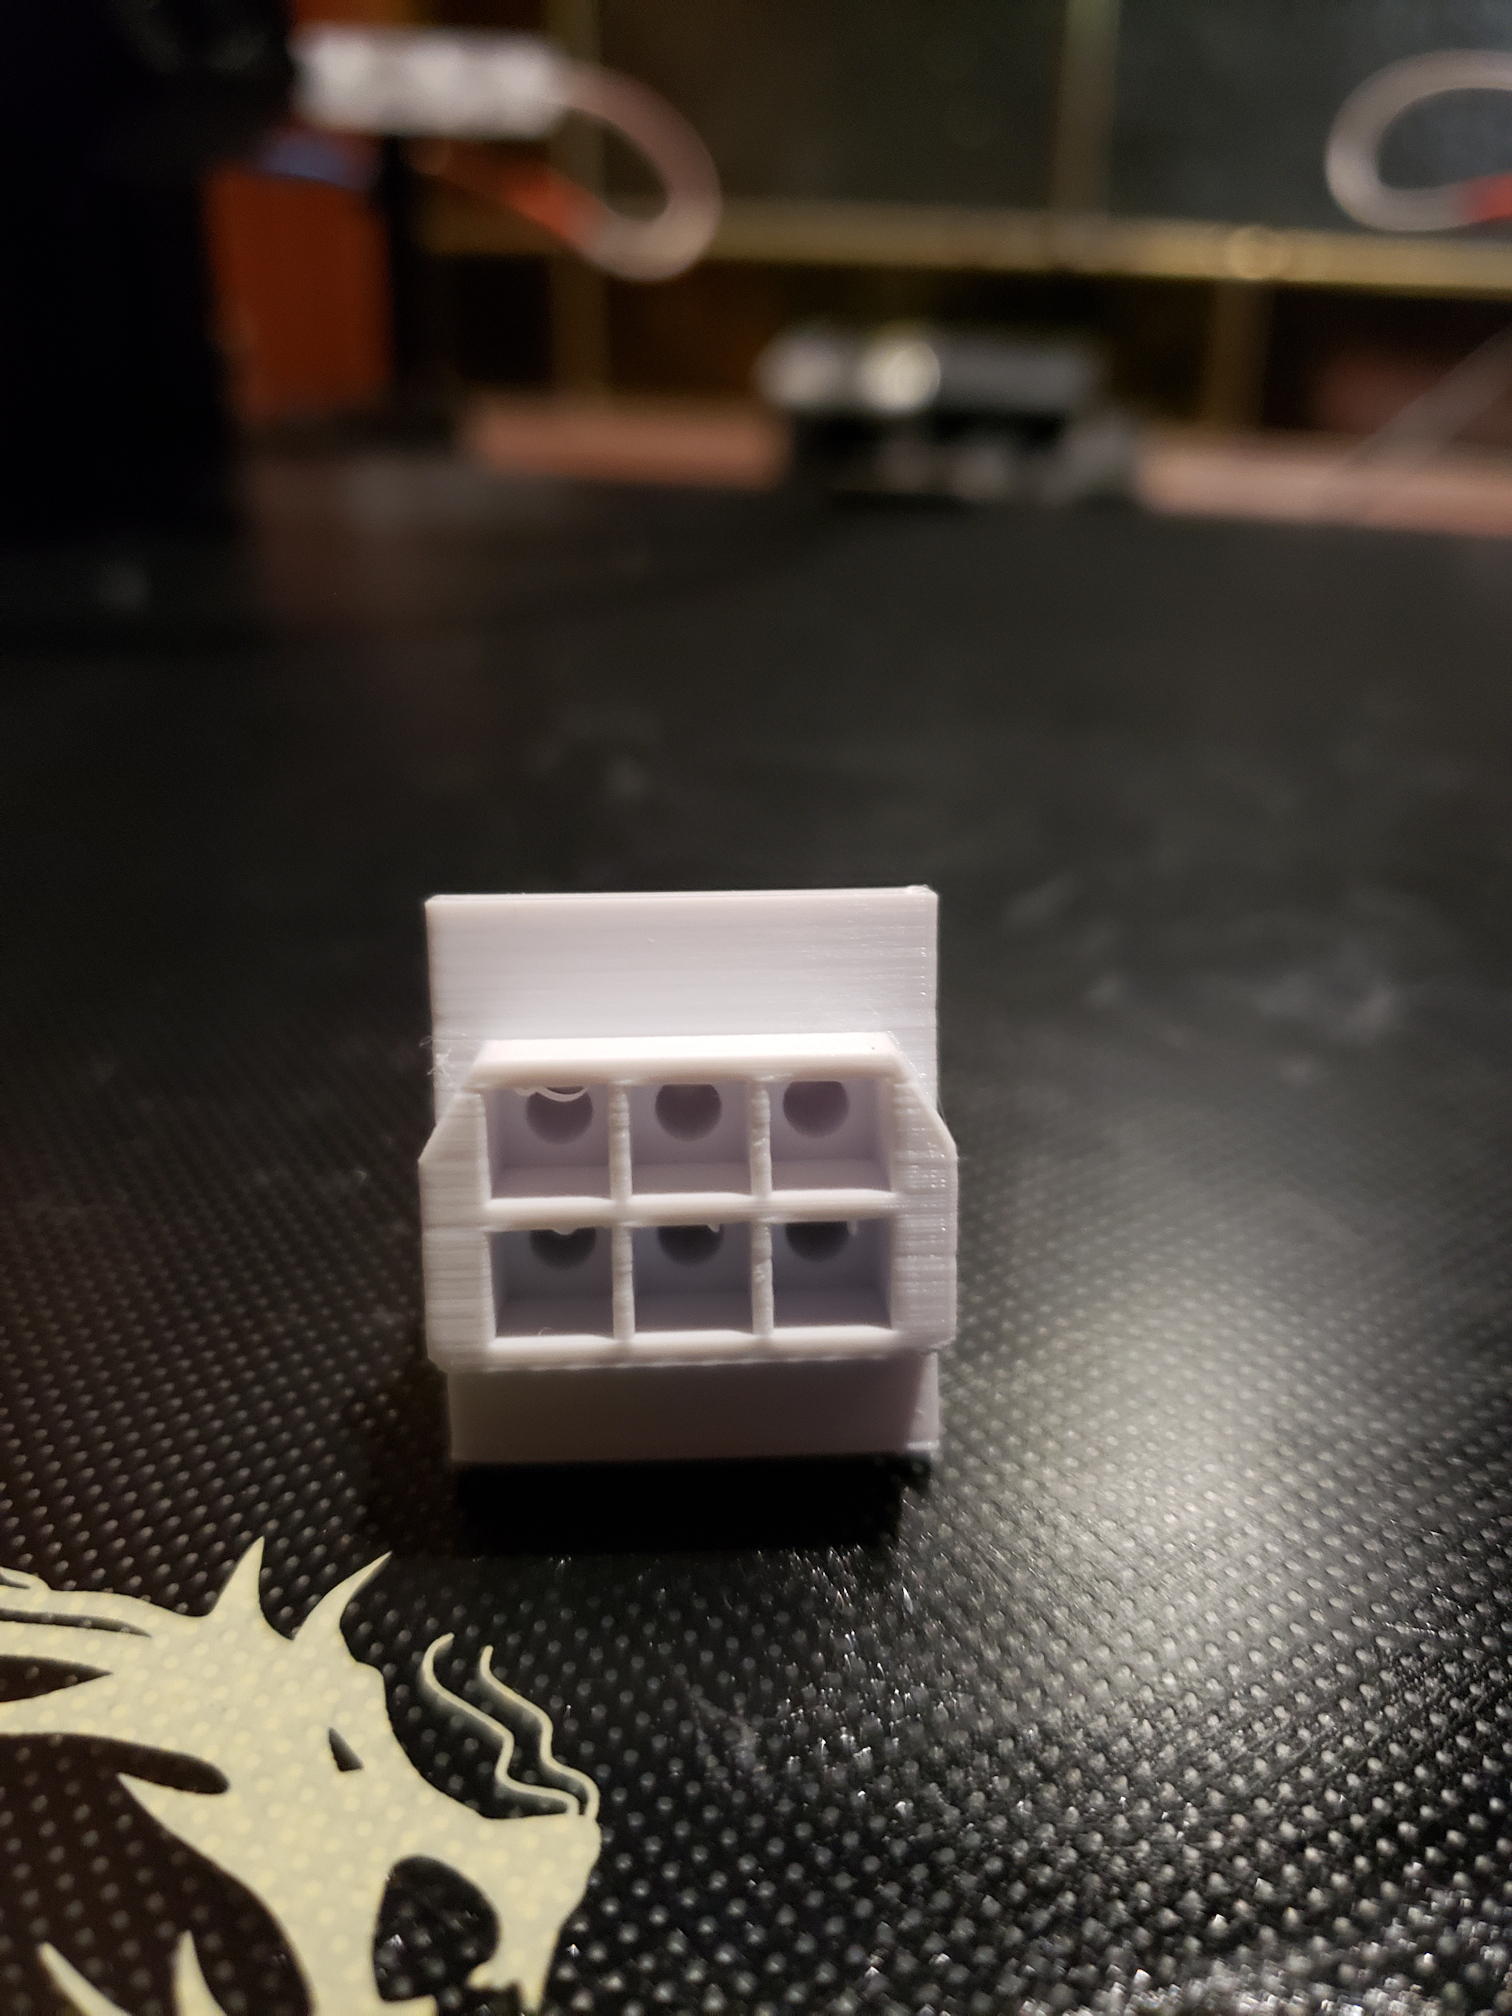
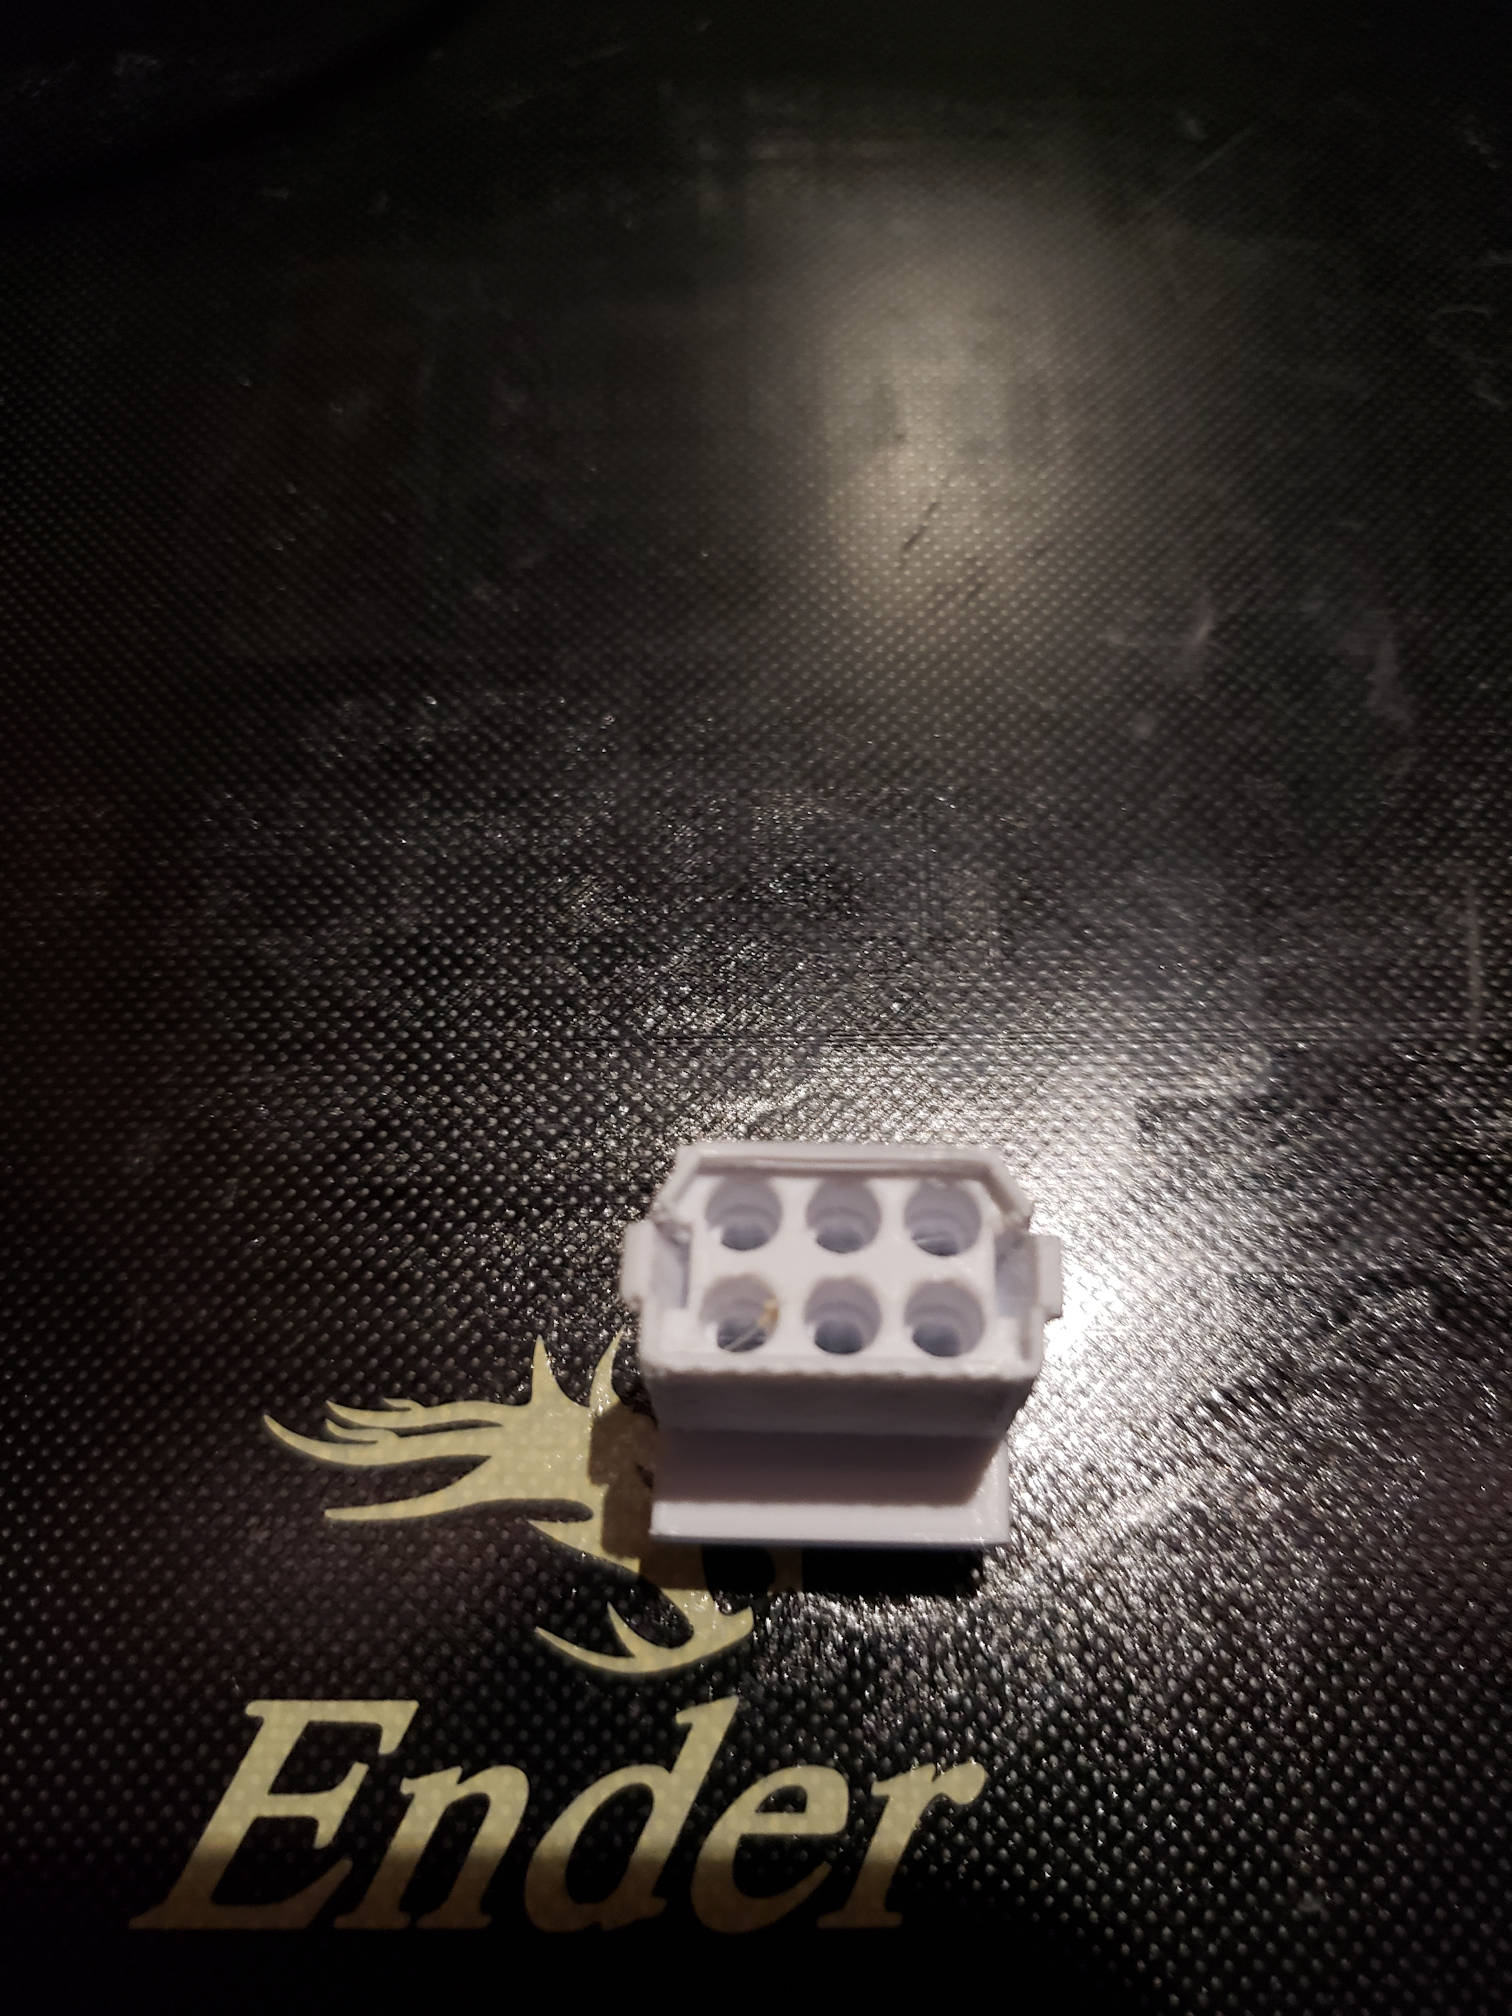
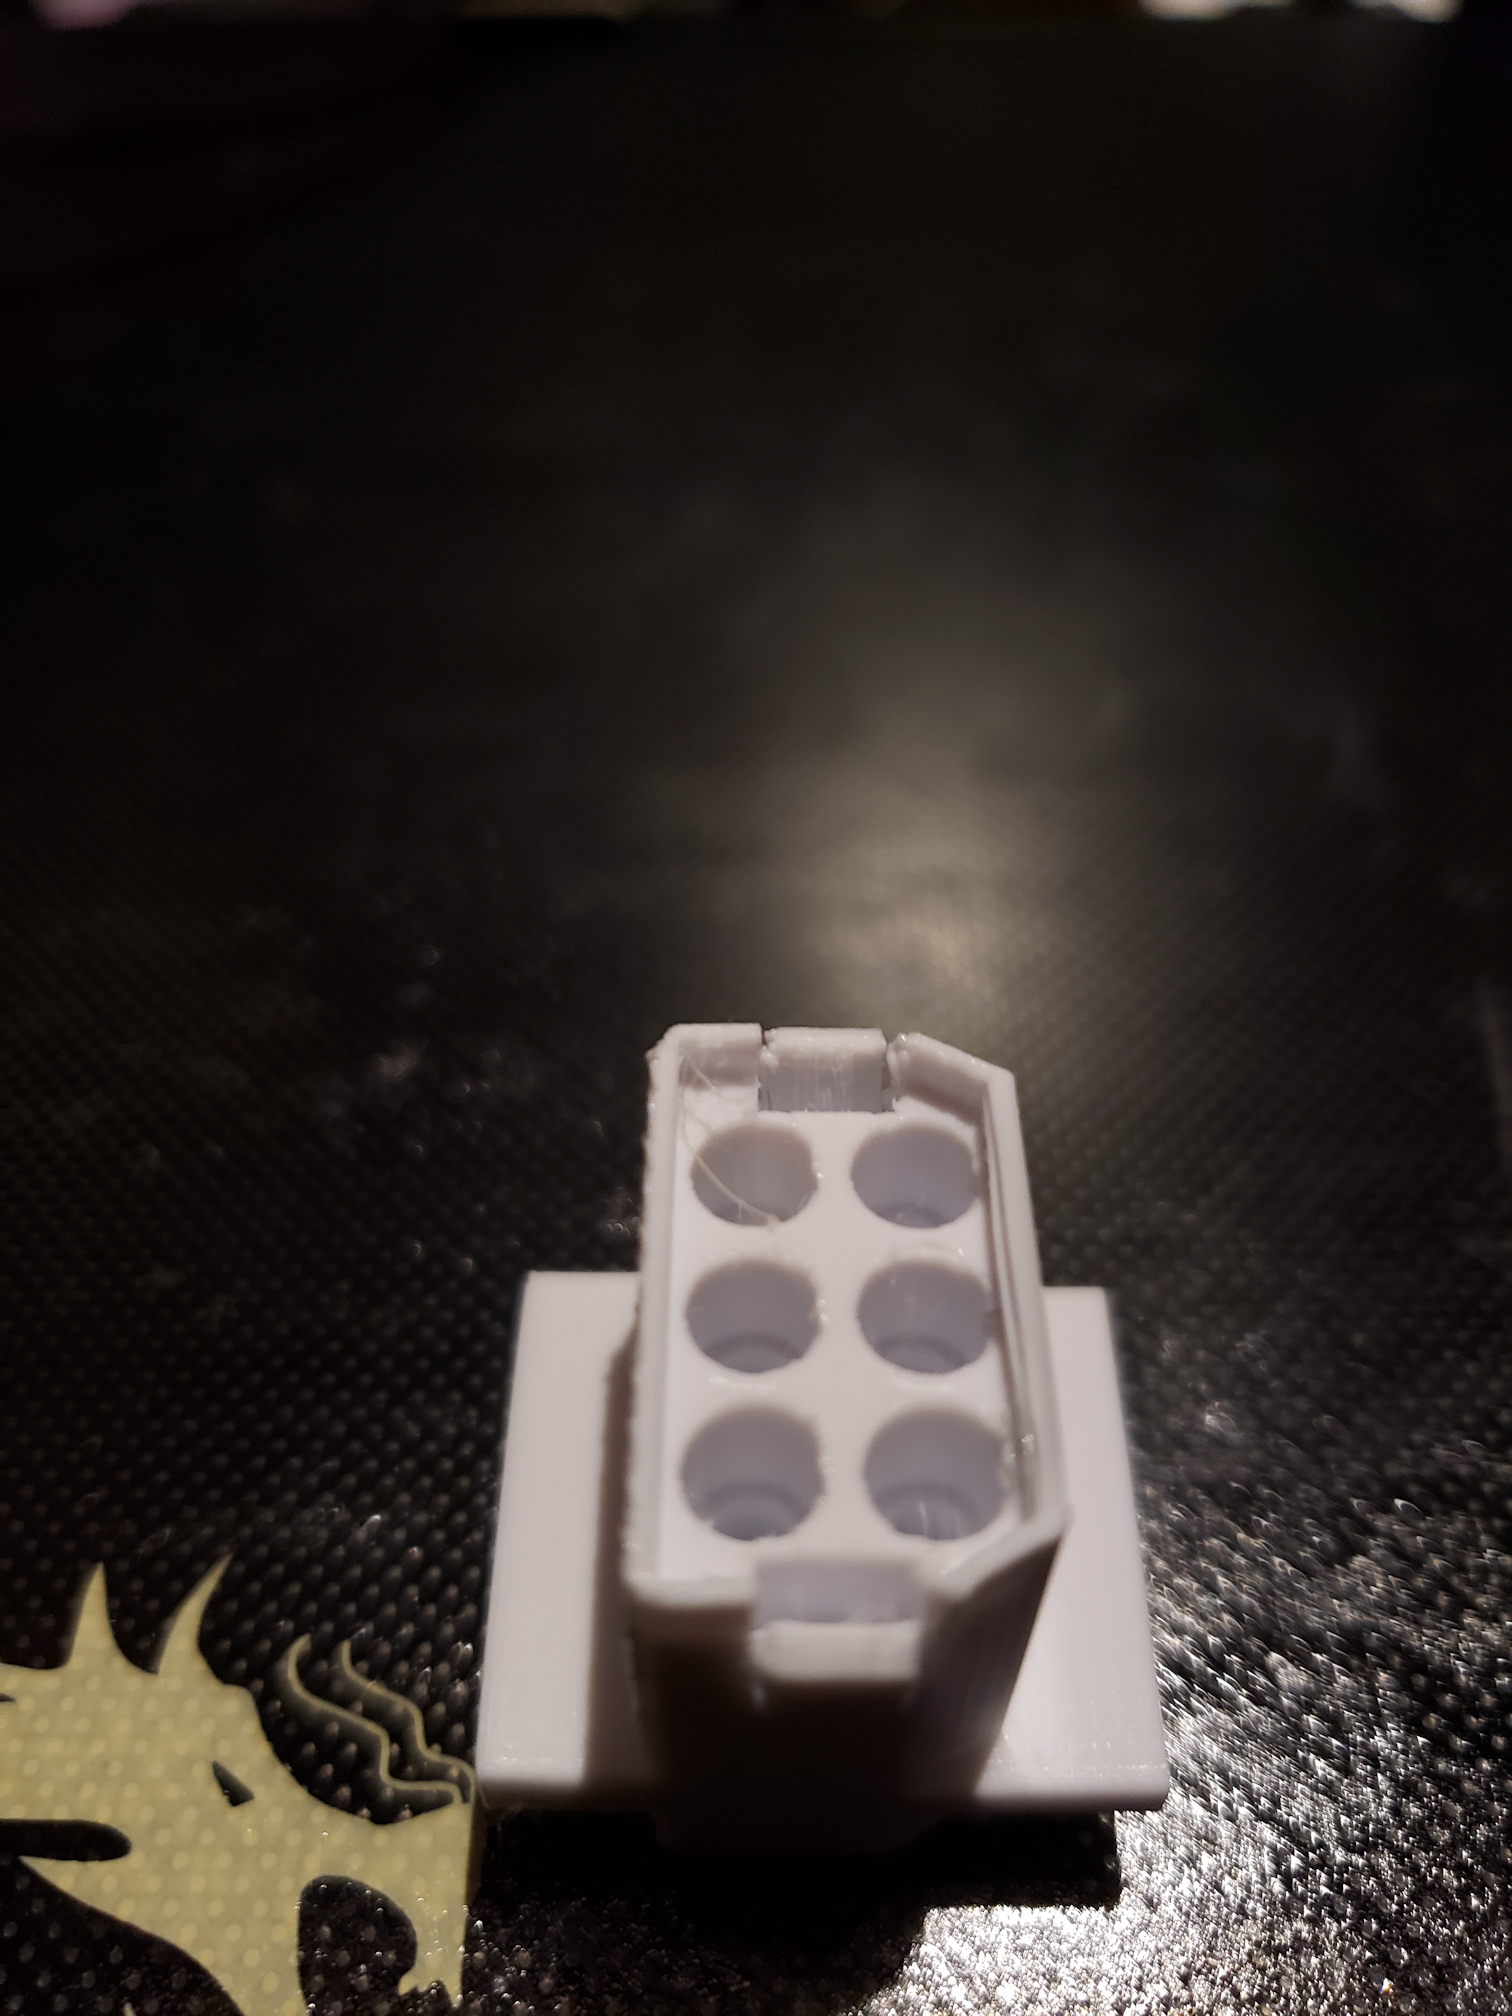
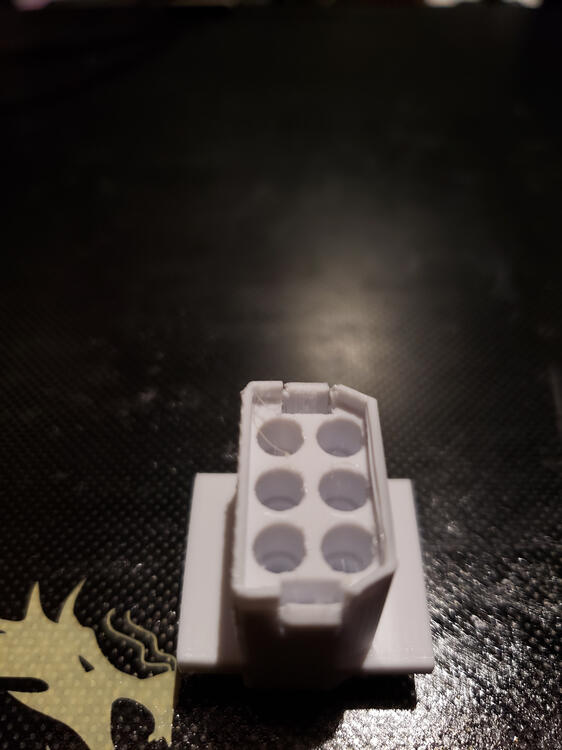
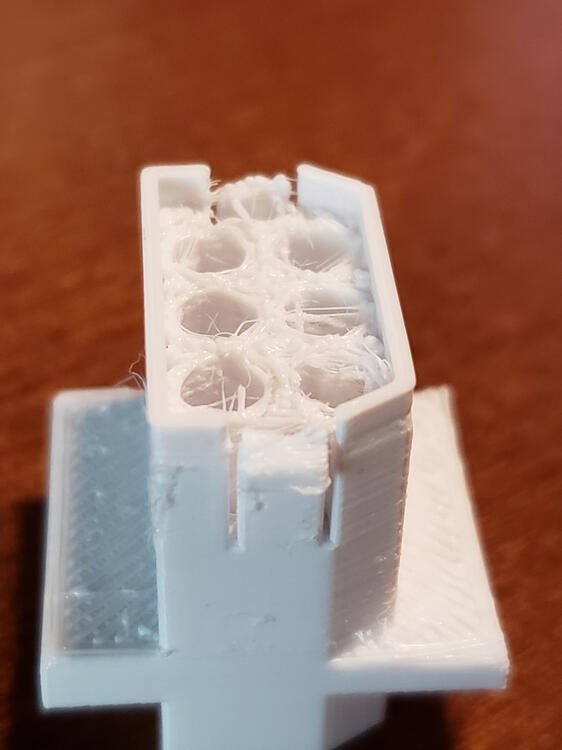
3 pointsSuccess! The orientation along with a general support instead of tree support seemed to do the trick. No Exacto trimming needed. @ckurtz2 message me your mailing address and I will send it to you.


 3 points
 -
Yeah he used a ball hone. He went pretty dang fast if you ask me. I think a lot of it has to do with the camera making it look sharper than it really is because I see what you mean but in person looks different. Based on my eye though and trying to feel for scratches etc you can't feel anything. For now I'm going to take the chance with new rings, bearings etc and see how the car performs. Worst that can happen is I burn oil and have to pull engine again which I'm okay with. $3500-$4000 is a lot compared to $300 and for the price difference I'm willing to sacrifice some time and extra work if need be.2 points
-
2 pointsSure, we have a CAD file section where these would fit perfectly... Mike2 points
-
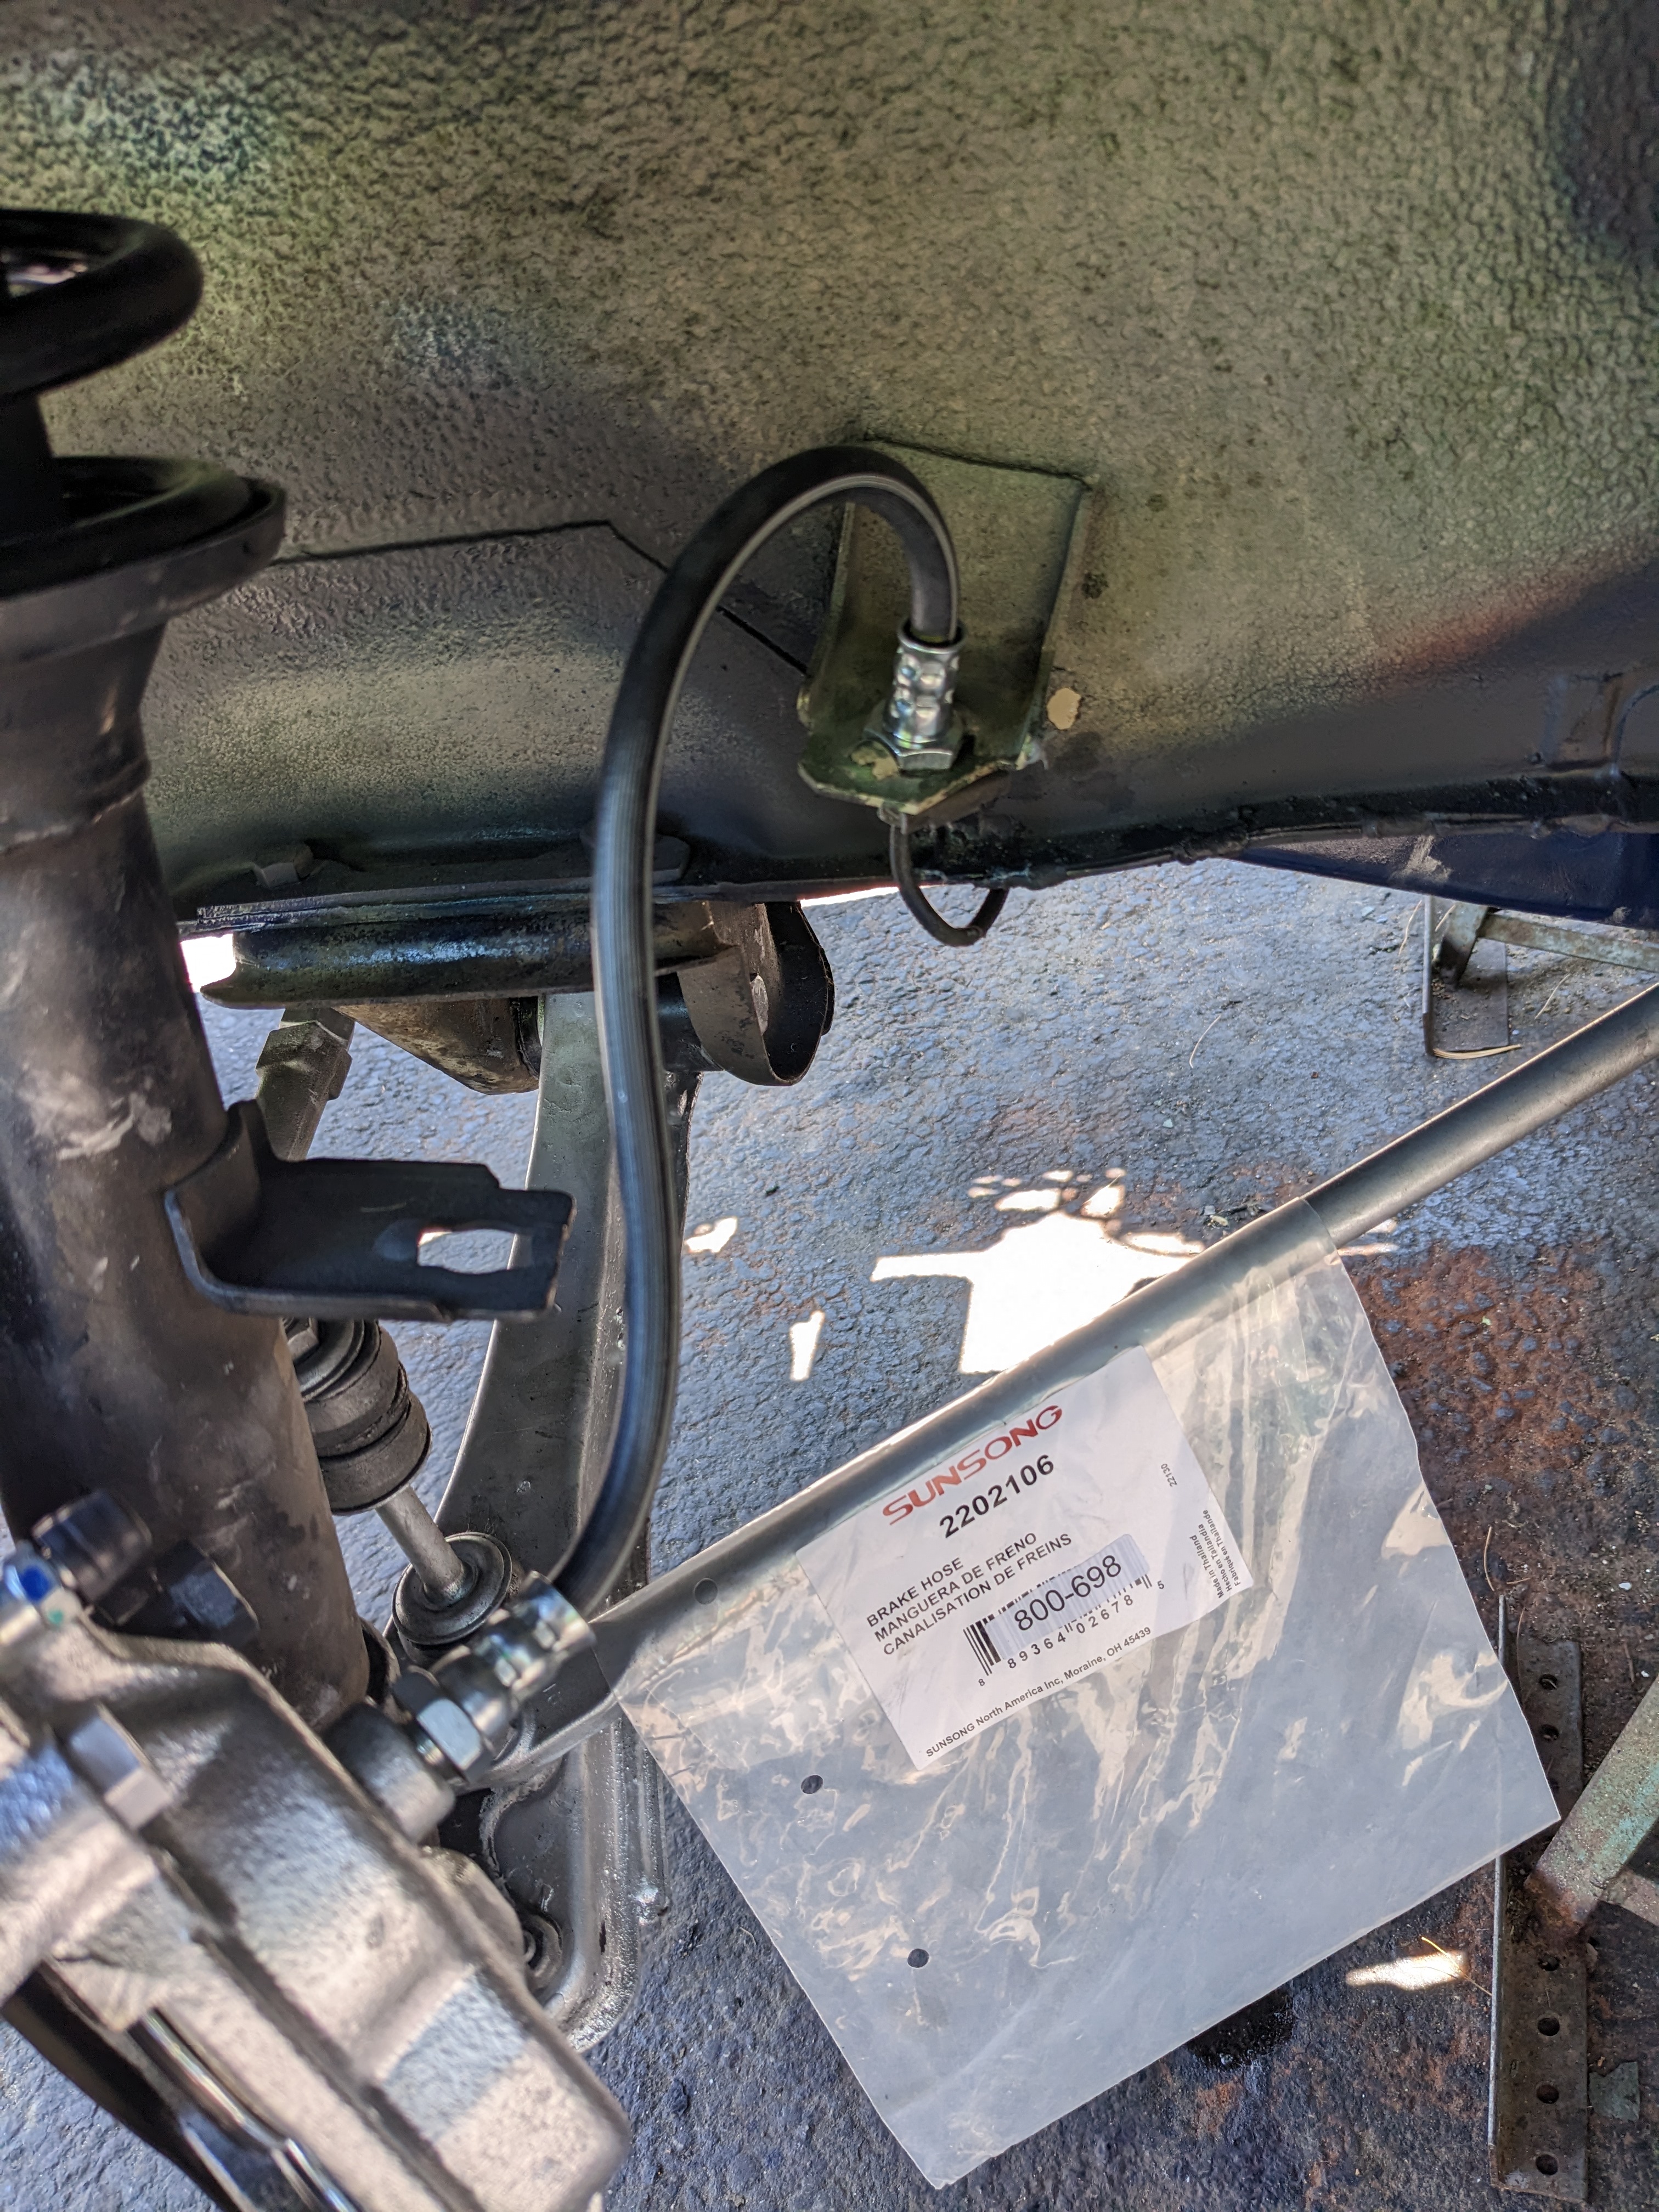
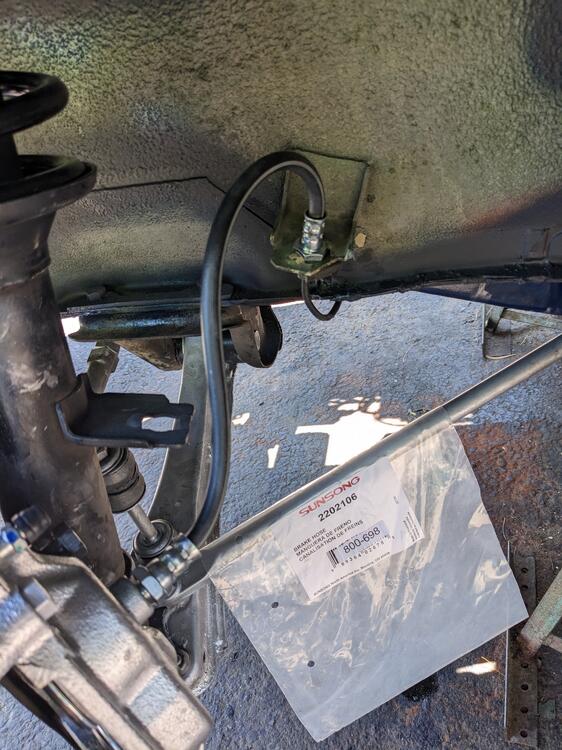
I understand the logic there - and also know from experience how the threads in the fixed fitting may or may not coincide with providing me the proper fitment - I've done exactly the same thing, with brake lines on the Fiat - those rarely come apart without damage, so if it's possible the spin the item off the line rather than undo the fitting, so much the better. I want the hose to end up nice & relaxed as my (one piece) front brake hoses 🙂
 2 points
 -
Hello all, I would like to do a little advertising for this channel here. One of my Z friends is restoring a 240Z and has a very special way of documenting it. I think you will all be very interested and it is super relaxing to watch. In general, this is a very exciting channel!1 point
-
1 pointI think what I'll do at this point is try the car out with some recording temperature sensor I have when I next do Autocross. The suggestions I received are a good starting point. I also found this on the internet which might be of some help: https://www.zhome.com/Care/z_cooling.htm I'm tempted to try that oil cooler as I found a used one for $50. I'll have to read up on them more. I only recently learned that my G35 daily driver had one after it started leaking. I also might consider creating a shroud out of fiberglass based on a method posted by several hotrodders but that will have to wait until next winter when my Z hibernates: https://www.motortrend.com/how-to/1006sr-fan-shroud-fabrication1 point
-
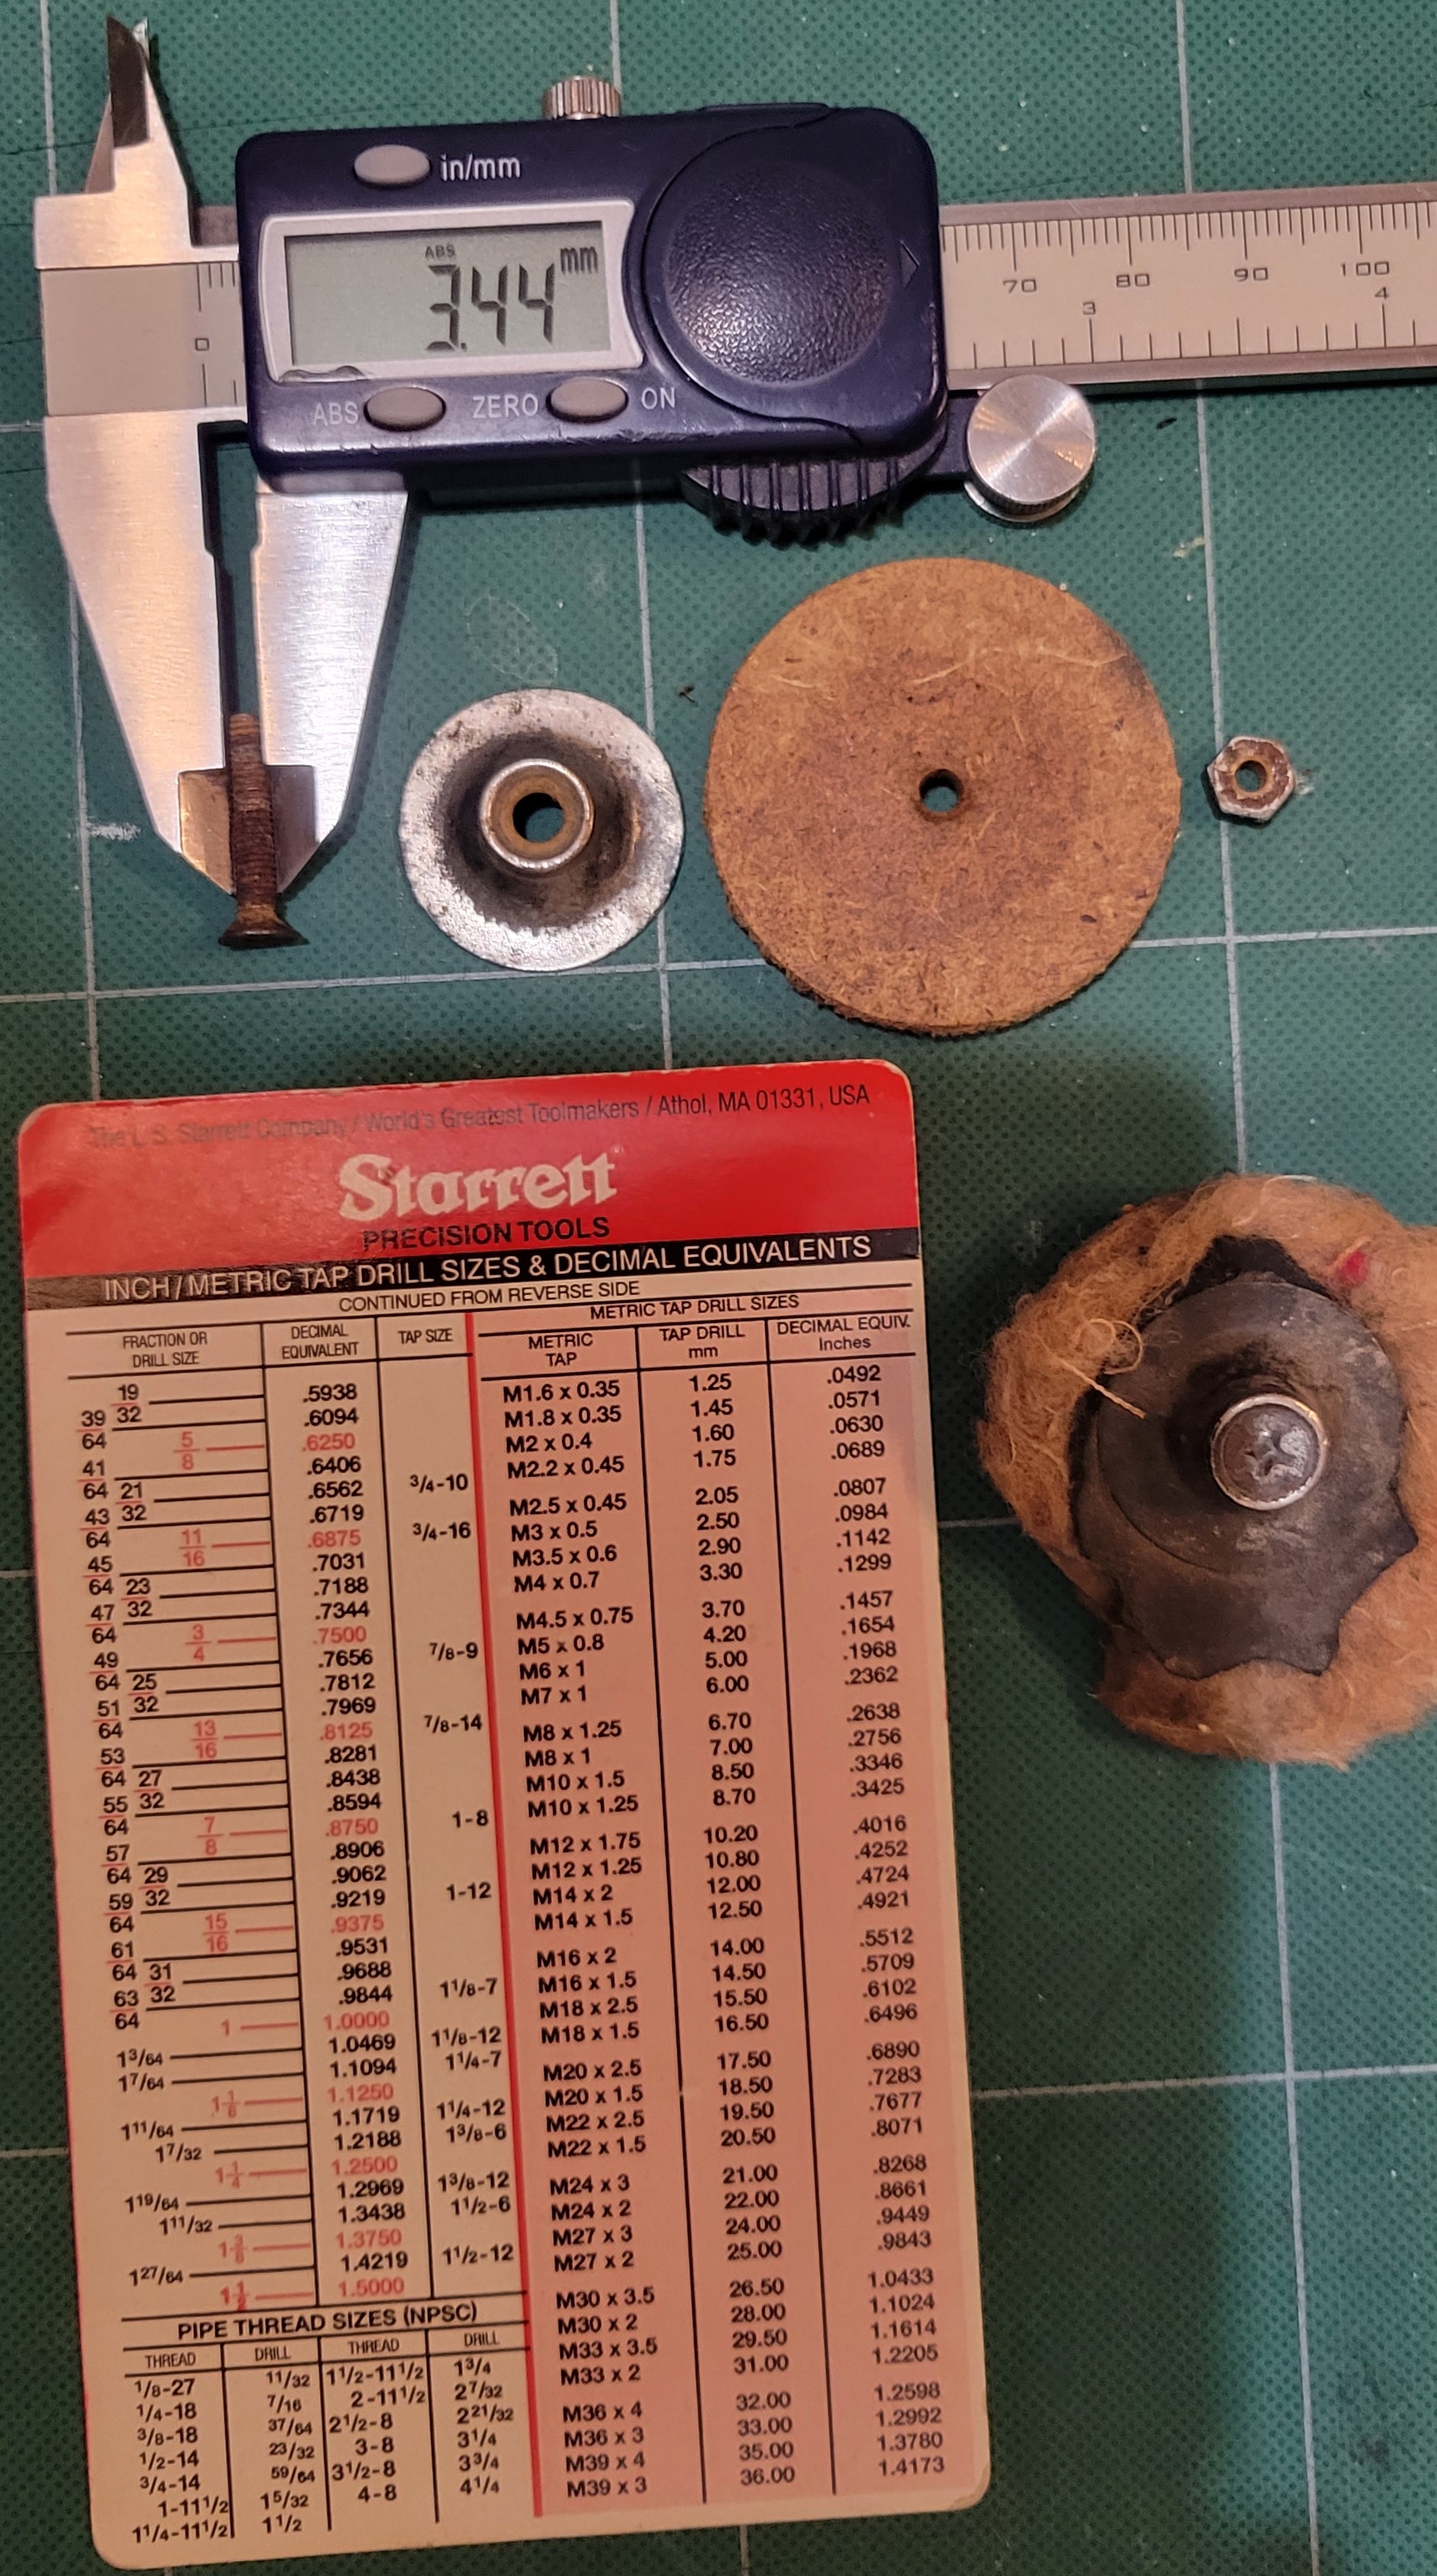
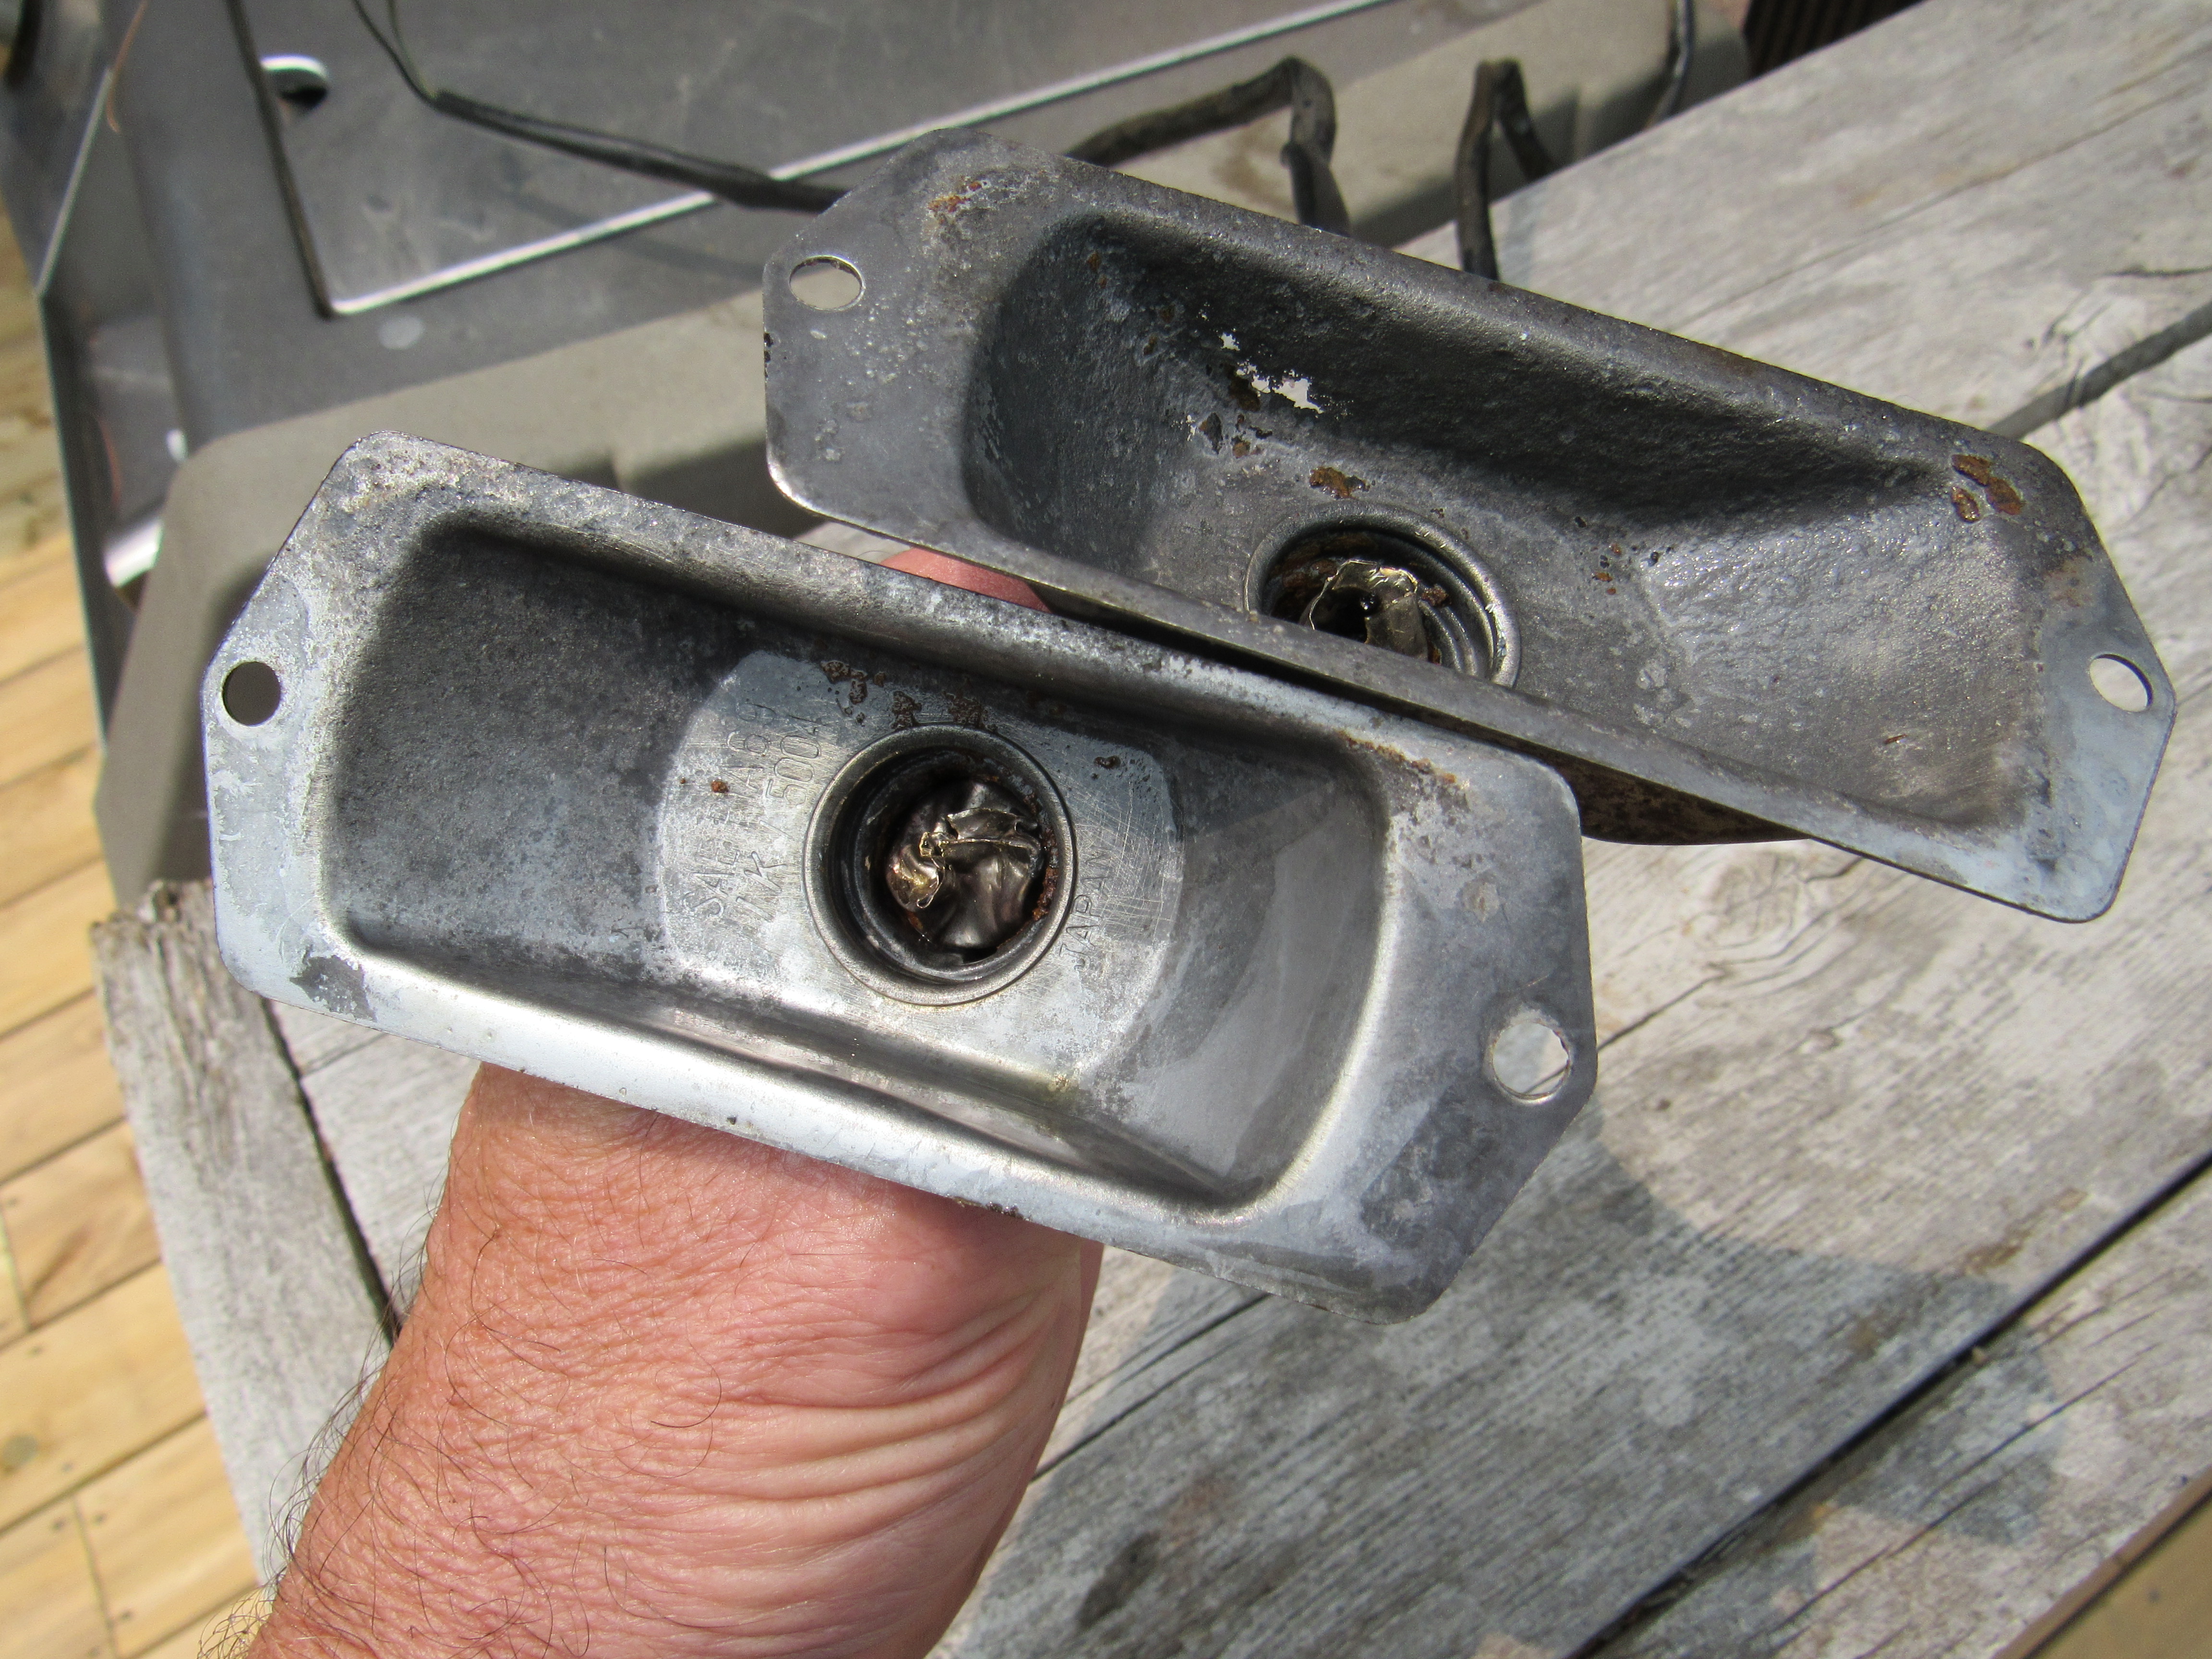
Here is a pic of a couple I saved from a 12/70 parts car. The measurements agree with those posted by @AZ-240z back in 2016, post #6. I was able to determine the flat head screw is a M3.5 x 0.6mm pitch x 20mm long.
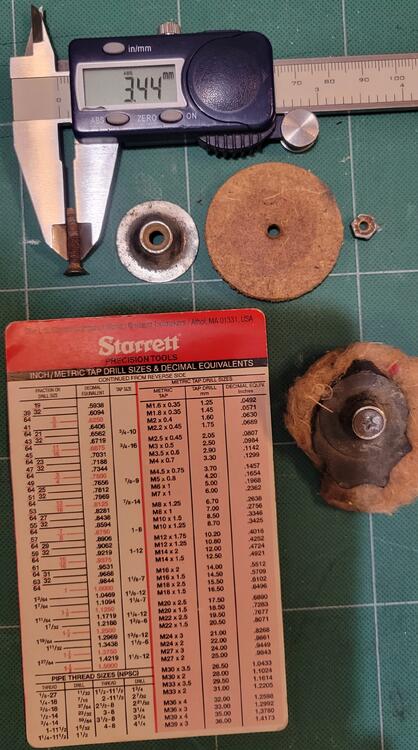 1 point
 -
1 point
-
1 pointA couple of other parts finished, I had the front marker lamps in a citric acid bath for 2.5 days but the metal part of the bulb is rust welded to the housing which means the spring underneath the contact pad is probably disintegrated too.


 1 point
 -
1 point
-
1 point
-
1 point280 belly pans are still available and help keep the air flowing through the radiator then over the motor. I can't afford one for my 240. My 280 pulls air like crazy with a ZX full shroud and the OE pan on the bottom.1 point
-
I got a message from Rockauto about a huge jobber outlet selling off a lot of S30 parts and more ? . . .https://www.rockauto.com/RSS/vehiclefeeds.php?carcode=1209204&m=wc&l=en&html=true1 point
-
Yeah, I probably should have prefaced my post with "In my limited, ancient experience...." Haha! So hope the parts work out and whether they are good enough or not, I find the fact that the people here are willing to jump up and try to help out by making parts i fantastic. One of the reasons this is the best forum!1 point
-
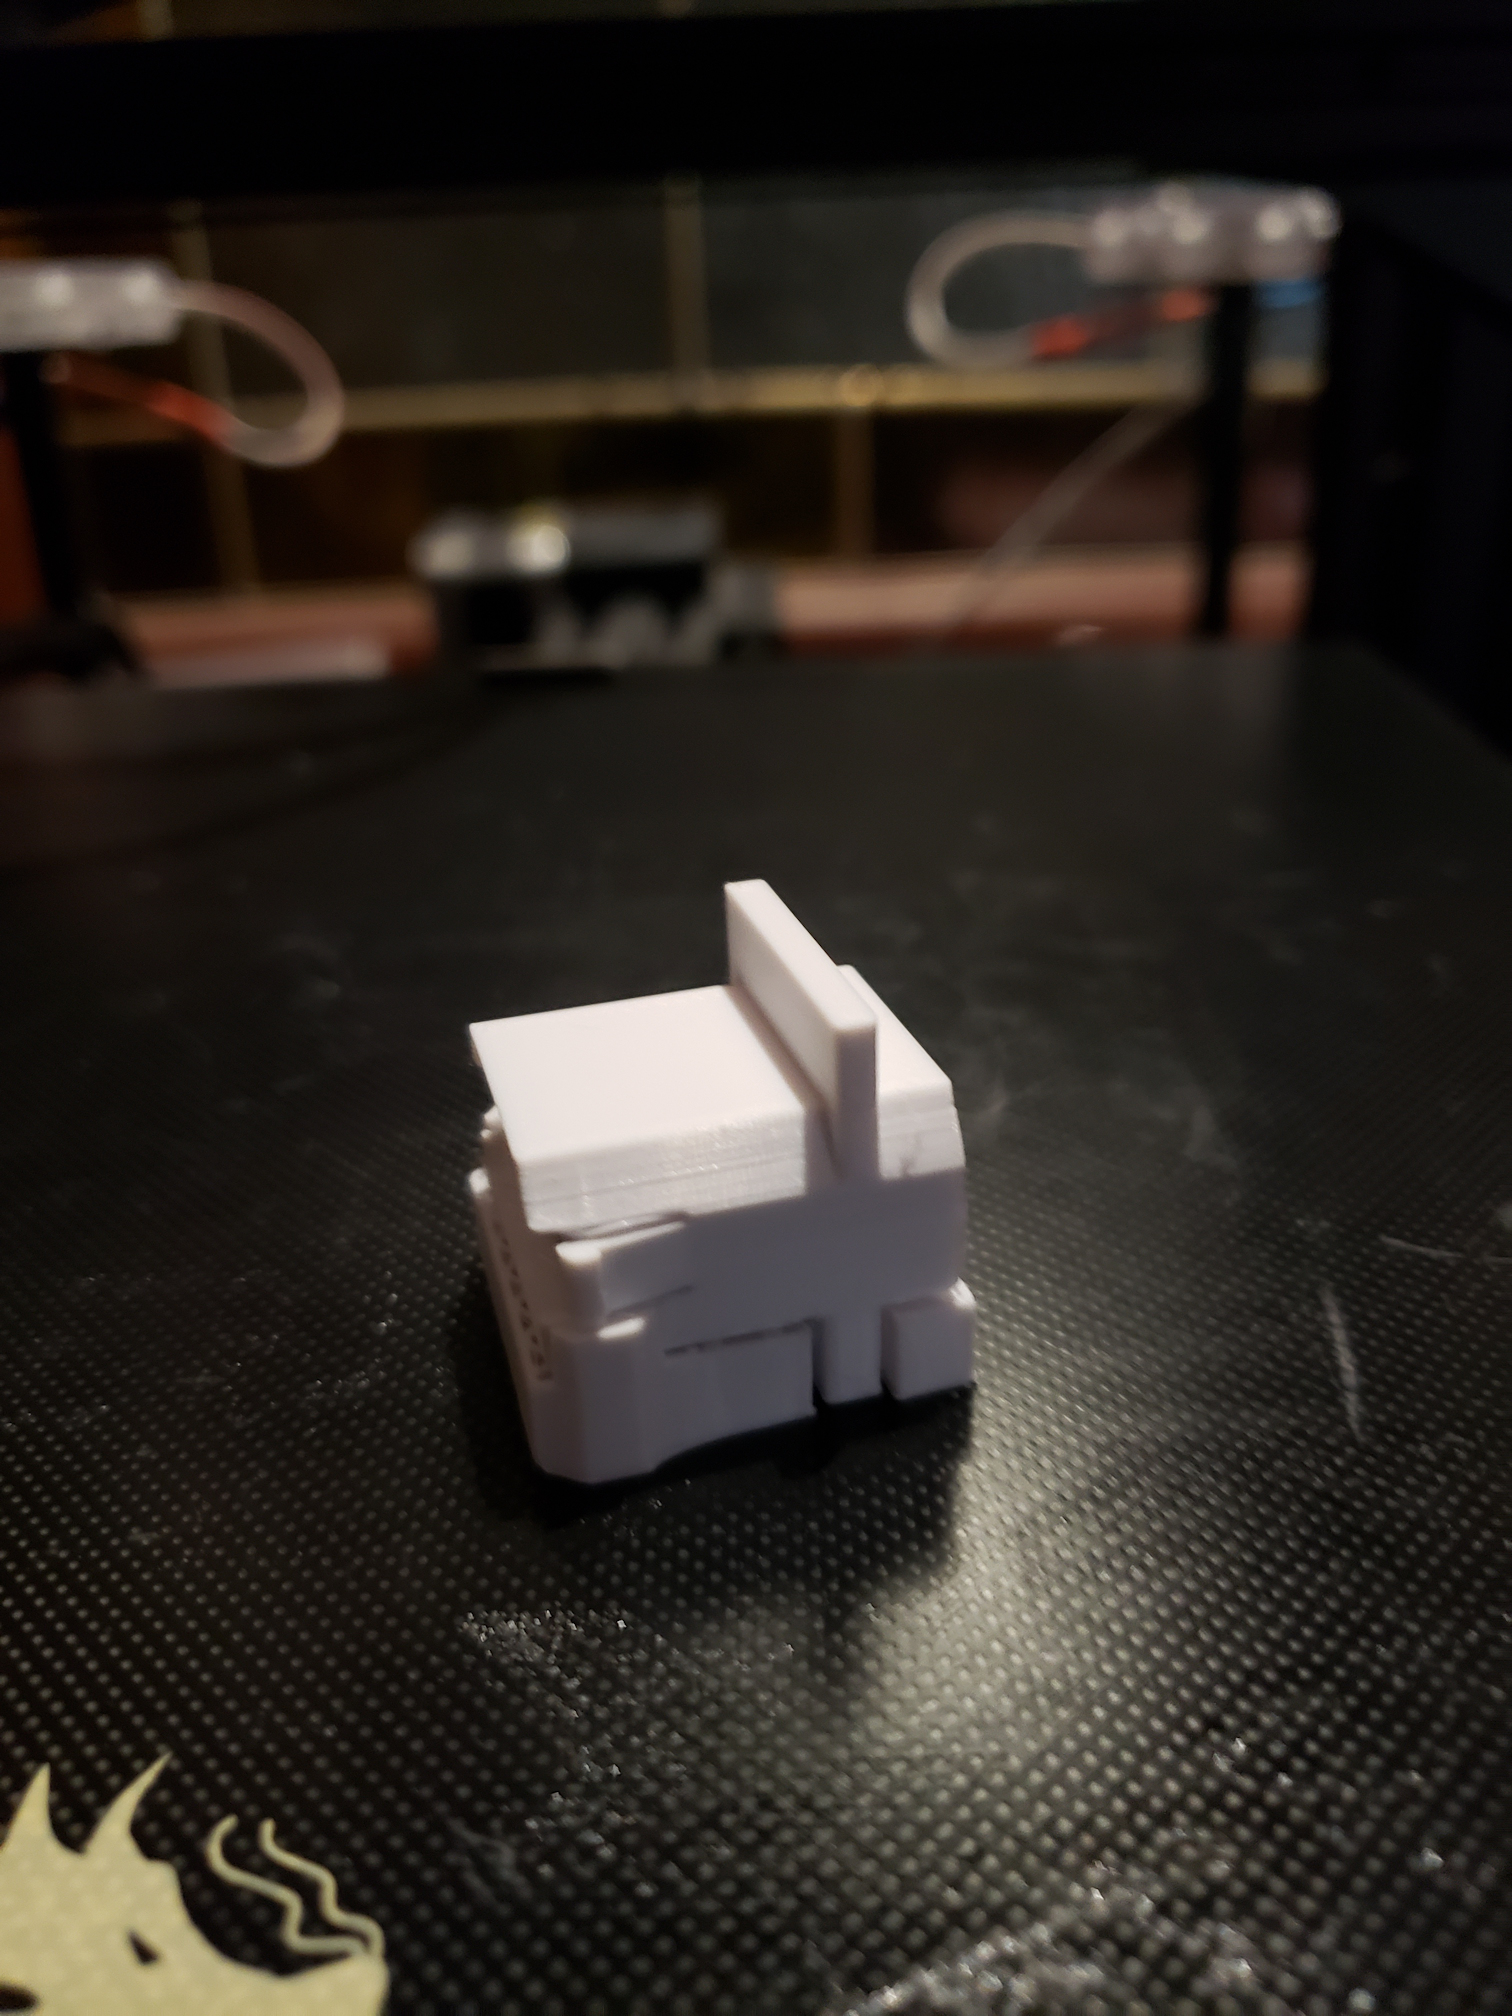
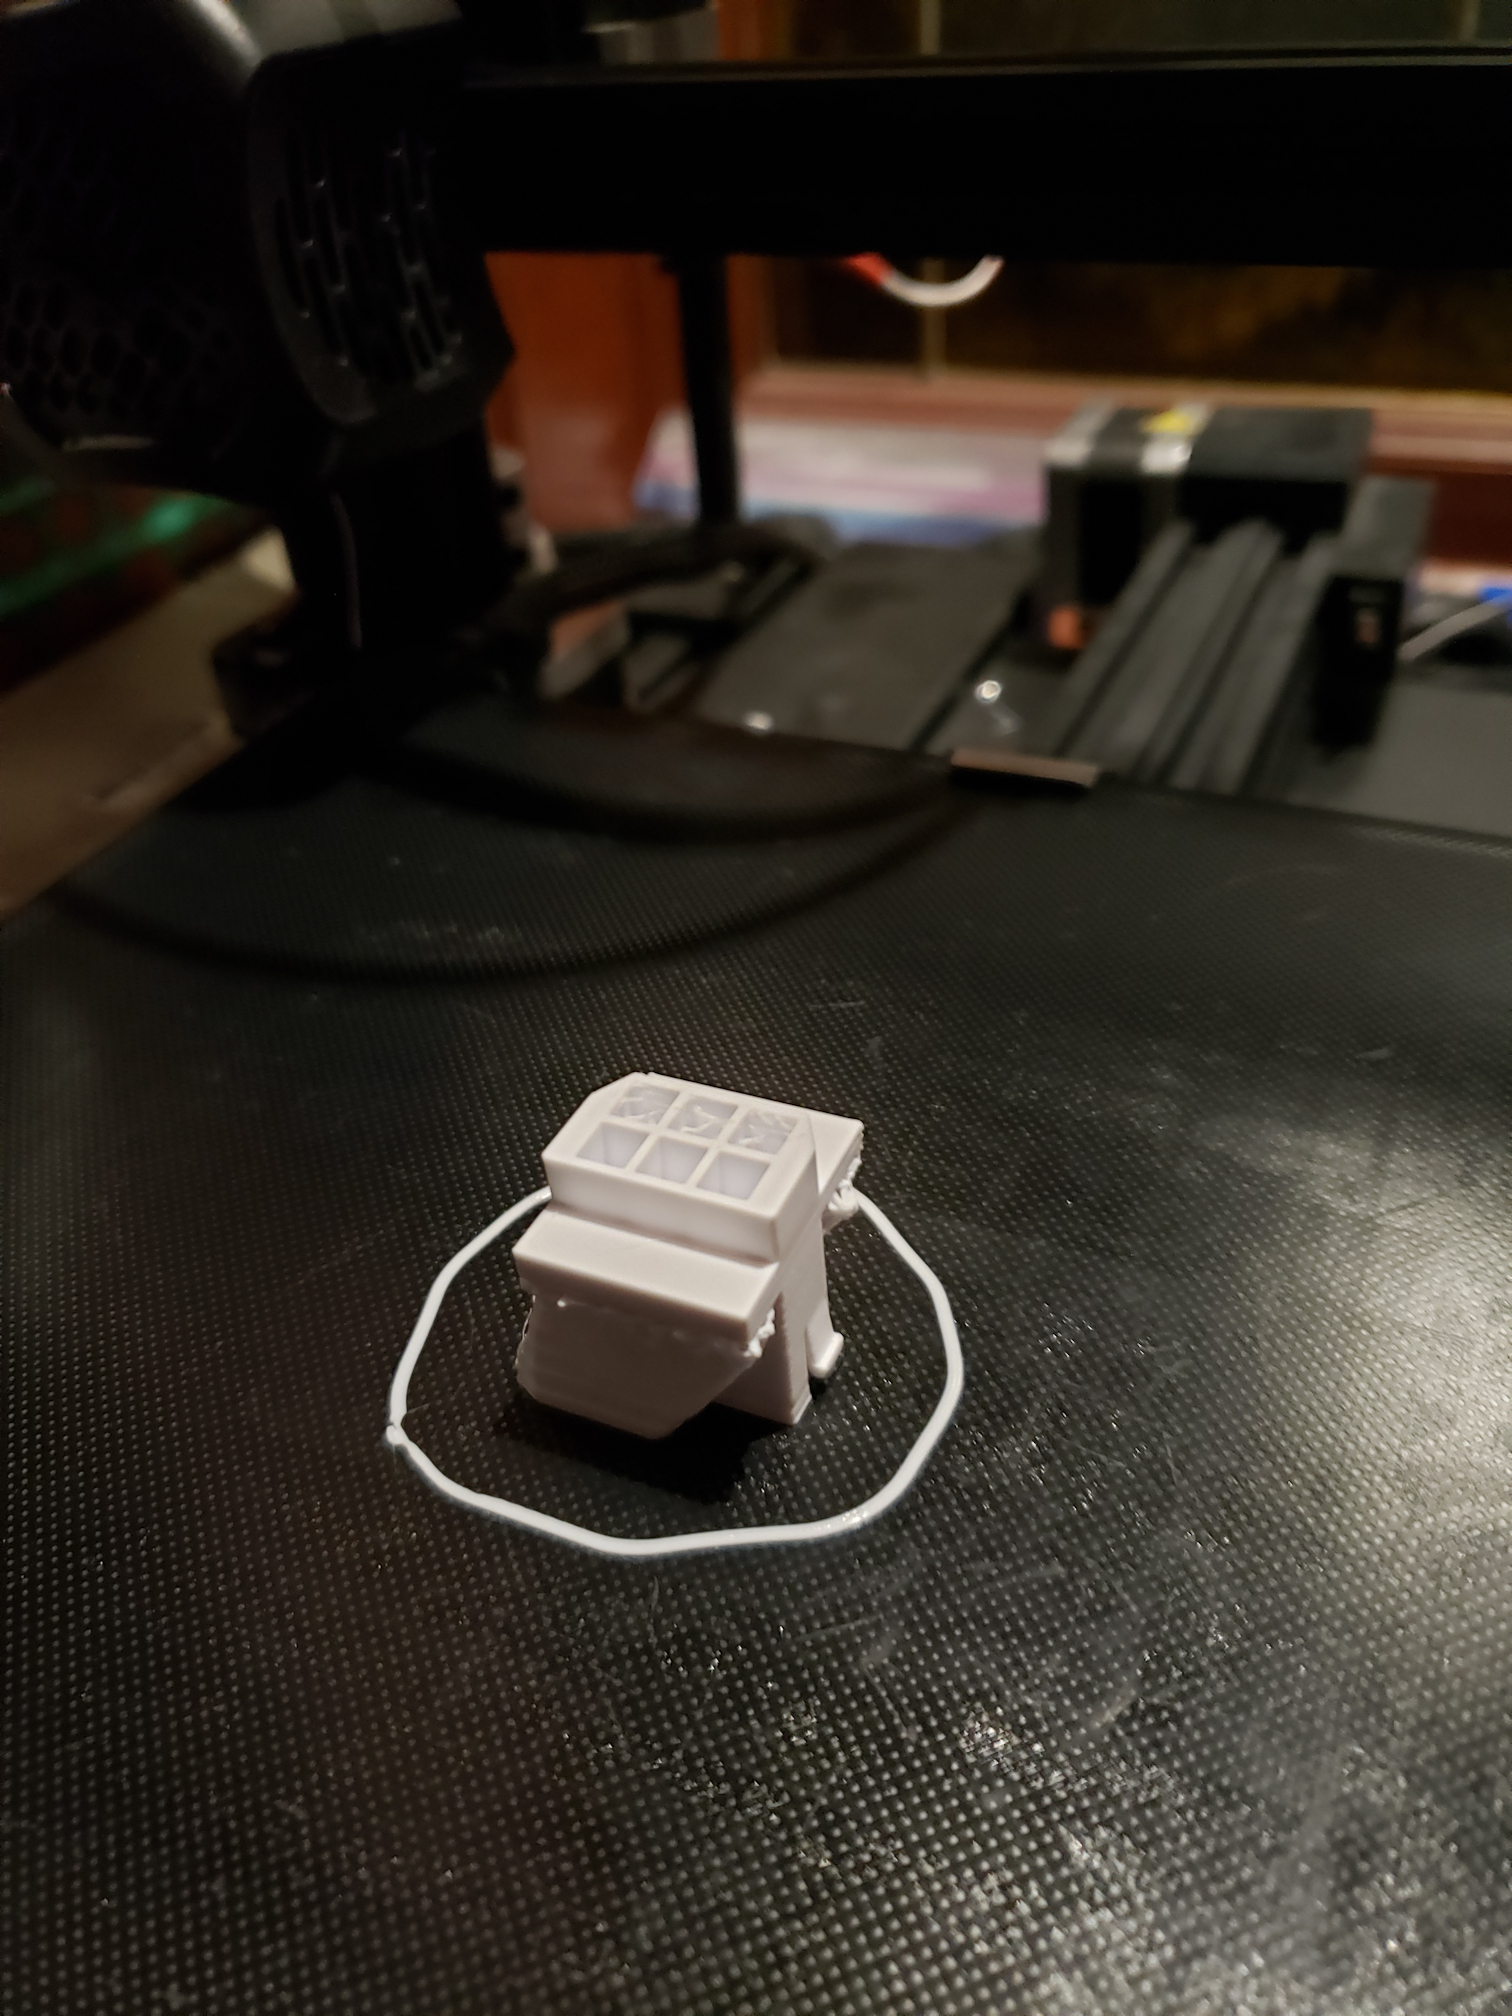
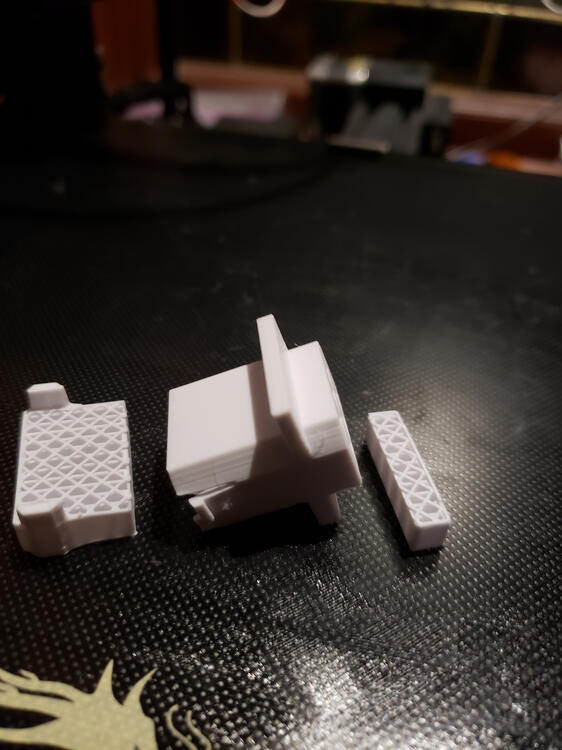
First attempt! A little stringing, but I think that most of it will clean up with a little Exacto knife trimming. I will try to tweak the settings , and print again tonight.

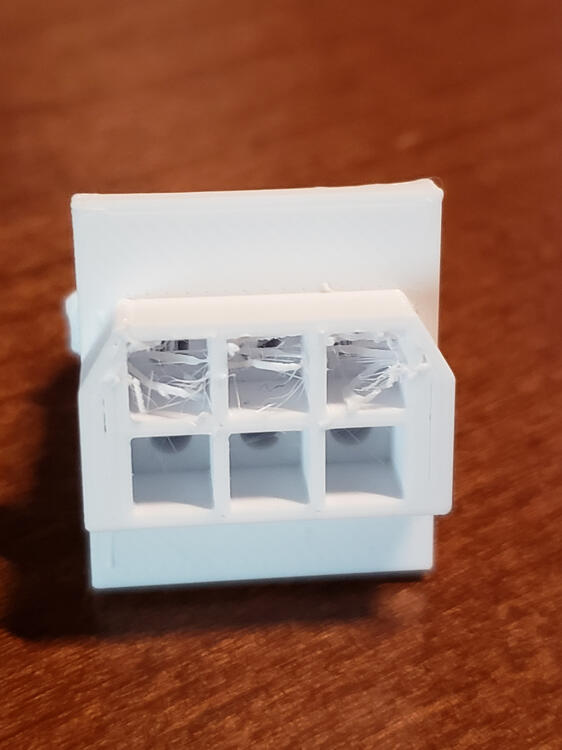

 1 point
 -
Exactly. That will take care of it. Failures like this are really intriguing. When the "impossible" happens. I will have to look at the gear train and flow of power, but I wouldn't have thought that portion of the gear train was even under stress when that failure happened. He was in 1st gear, right? And the wheels locked up and skidded to a stop after the "bang"?1 point
-
Starting in 77 they included a groove along the top of the stainless window trim to accept a piece of rubber stripping. I don't have any pics handy, but can snap one if you want to see it. Just another reason that the 77s are better.1 point
-
Sorry. Not intending to imply that you didn't... Just highlighting the details in the design to save you the potential trouble that I went through once. I once had a leaking slave cylinder that needed attention. Since the rubber hose looked fine, my plan was to unbolt the slave cylinder off the bell housing and unscrew it from the hose and then simply screw the new slave on in it's place. The thought was that while the rubber hose looked great, the mounting tab fitting welded to the body was a little rusty crusty and I didn't want to mess with potentially breaking it off the body. Simple plan, right? So the main portion of the plan worked great. Got the cylinder off the bell housing no problem and the new one went on fine, but the problem was that it was now pointing just about 180 degrees in the wrong direction. The hose screws into the slave and stops where it stops it when it's tight. And if that happens to be in the wrong direction, so be it, You either MUST deal with the rusty crusty other end, or mount it up the way you PO did it. I'm thinking they decided that twisting the hose was better than cracking the other end free. All that said, if you're replacing the hose, you'll have both ends loose so it shouldn't be an issue. Just don't save the cylinder mounting for the very end. Save the double flare fitting for the very end.1 point
-
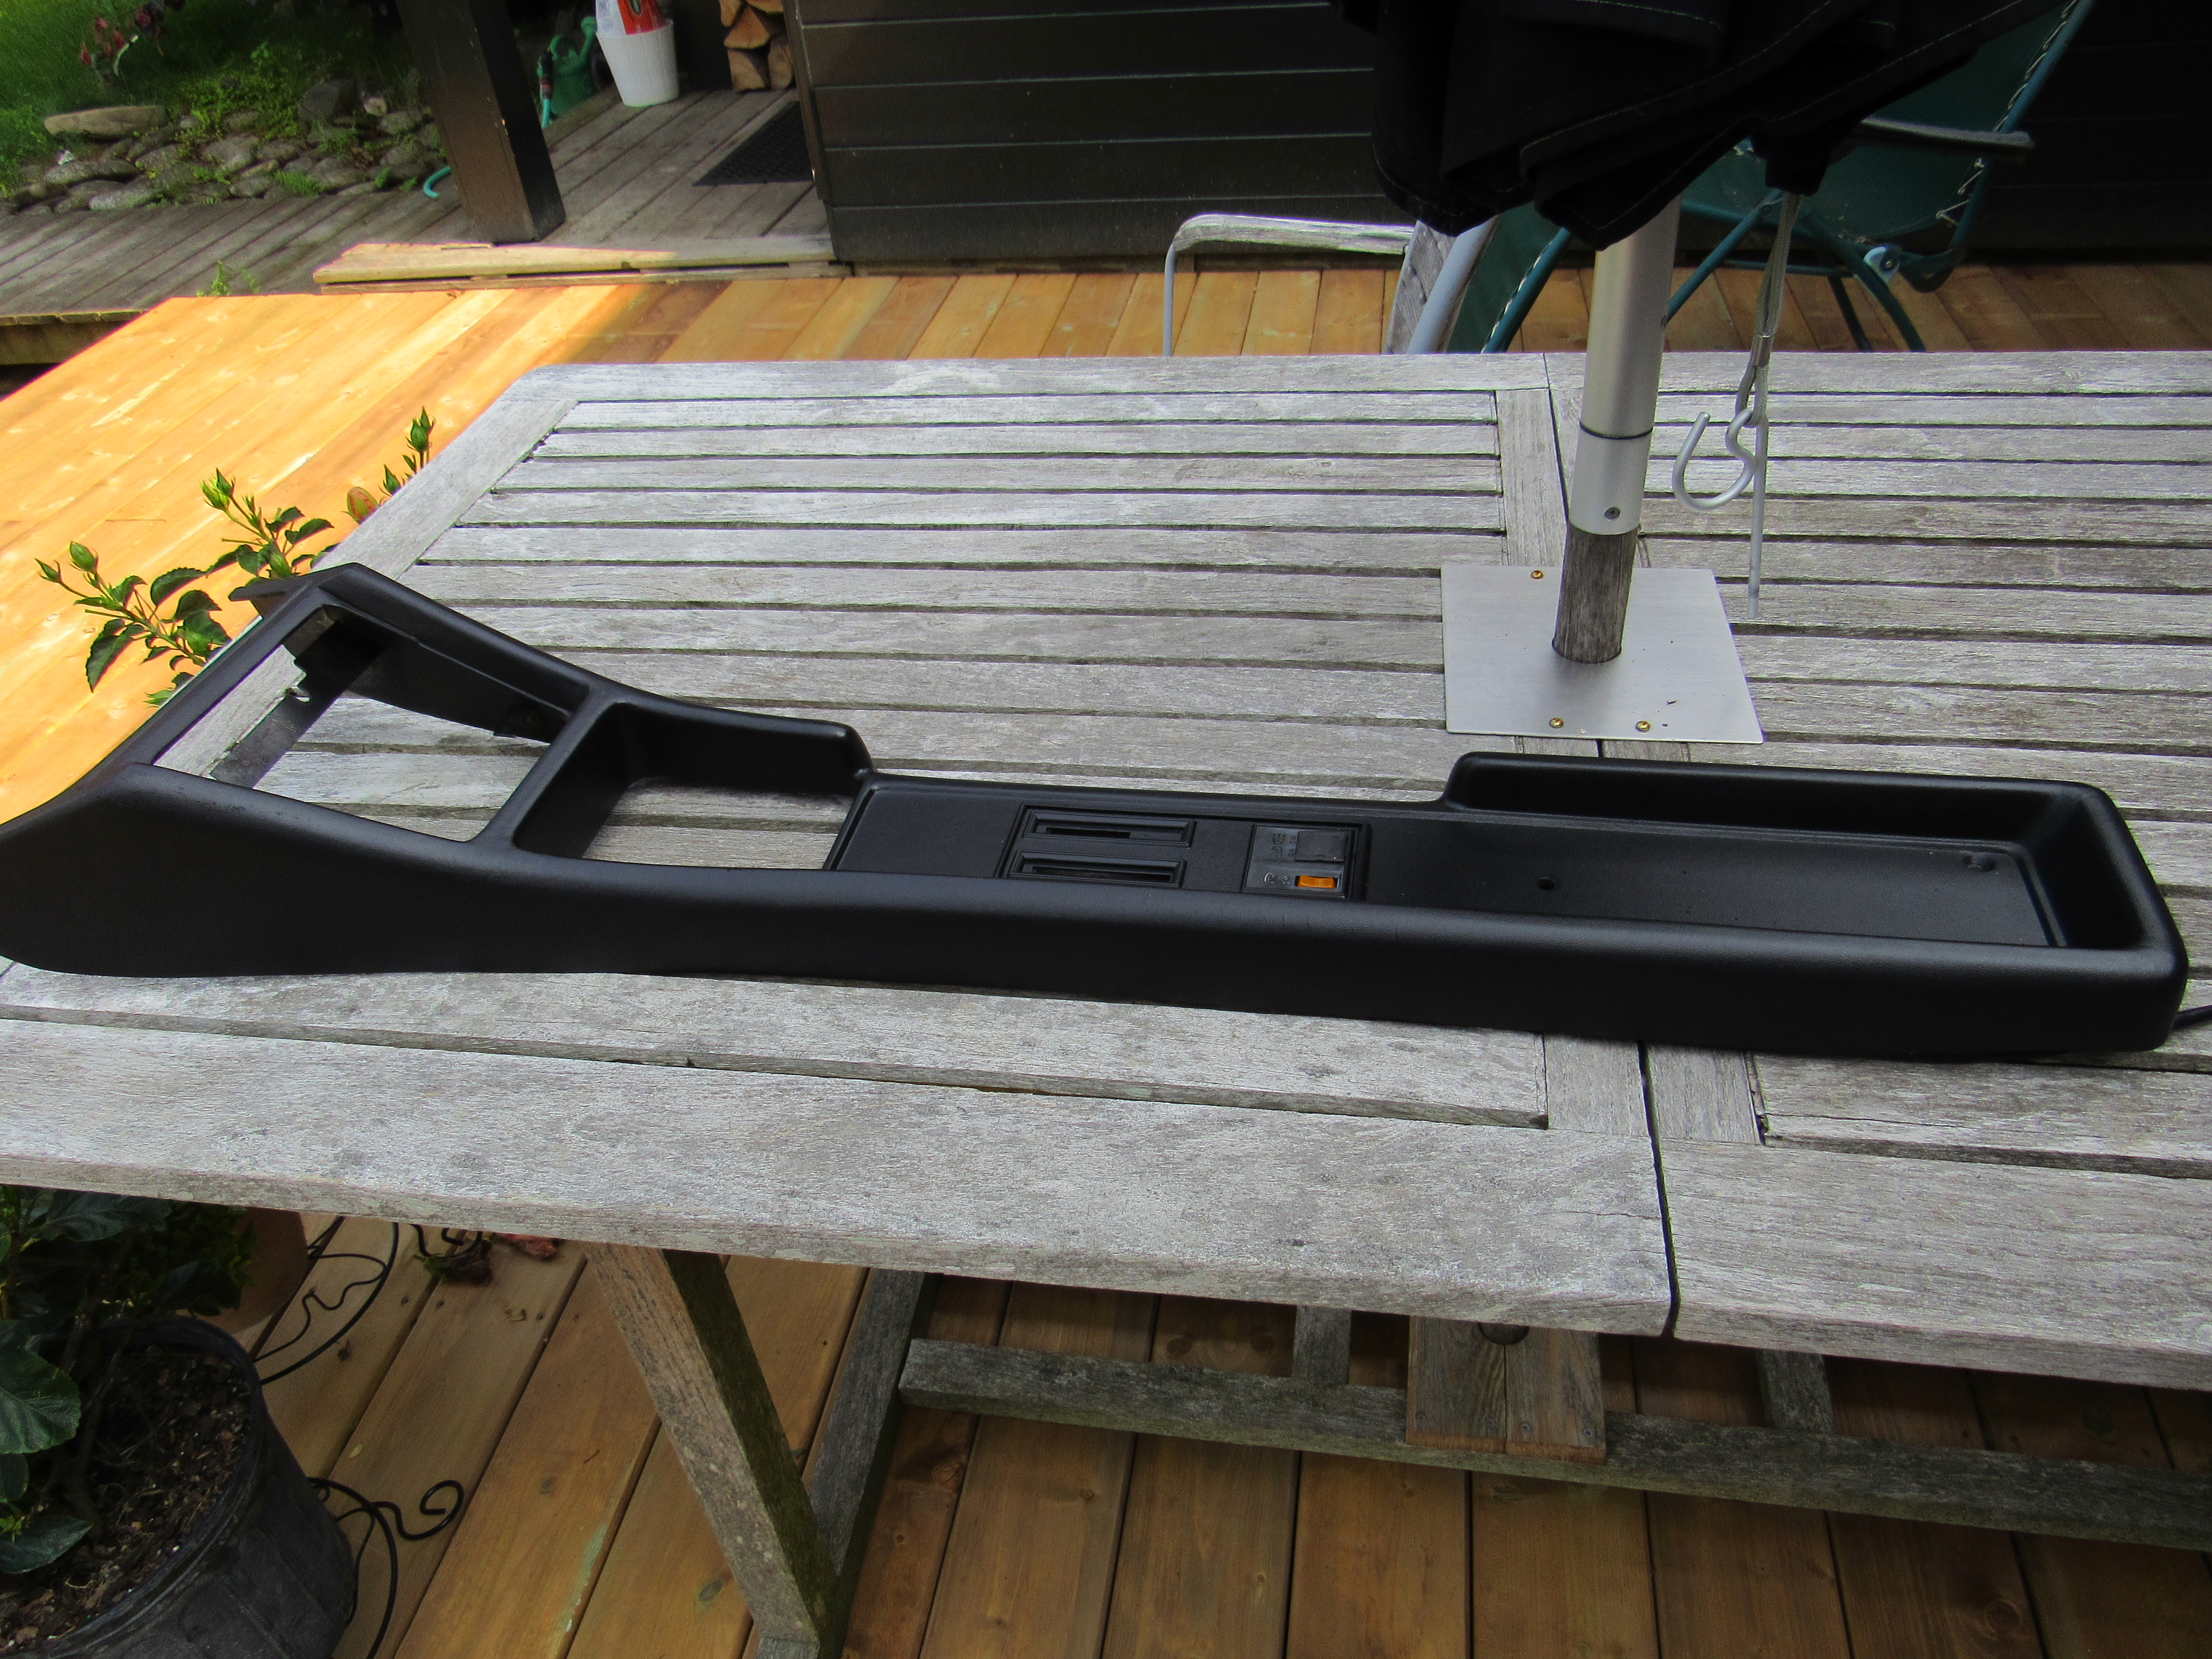
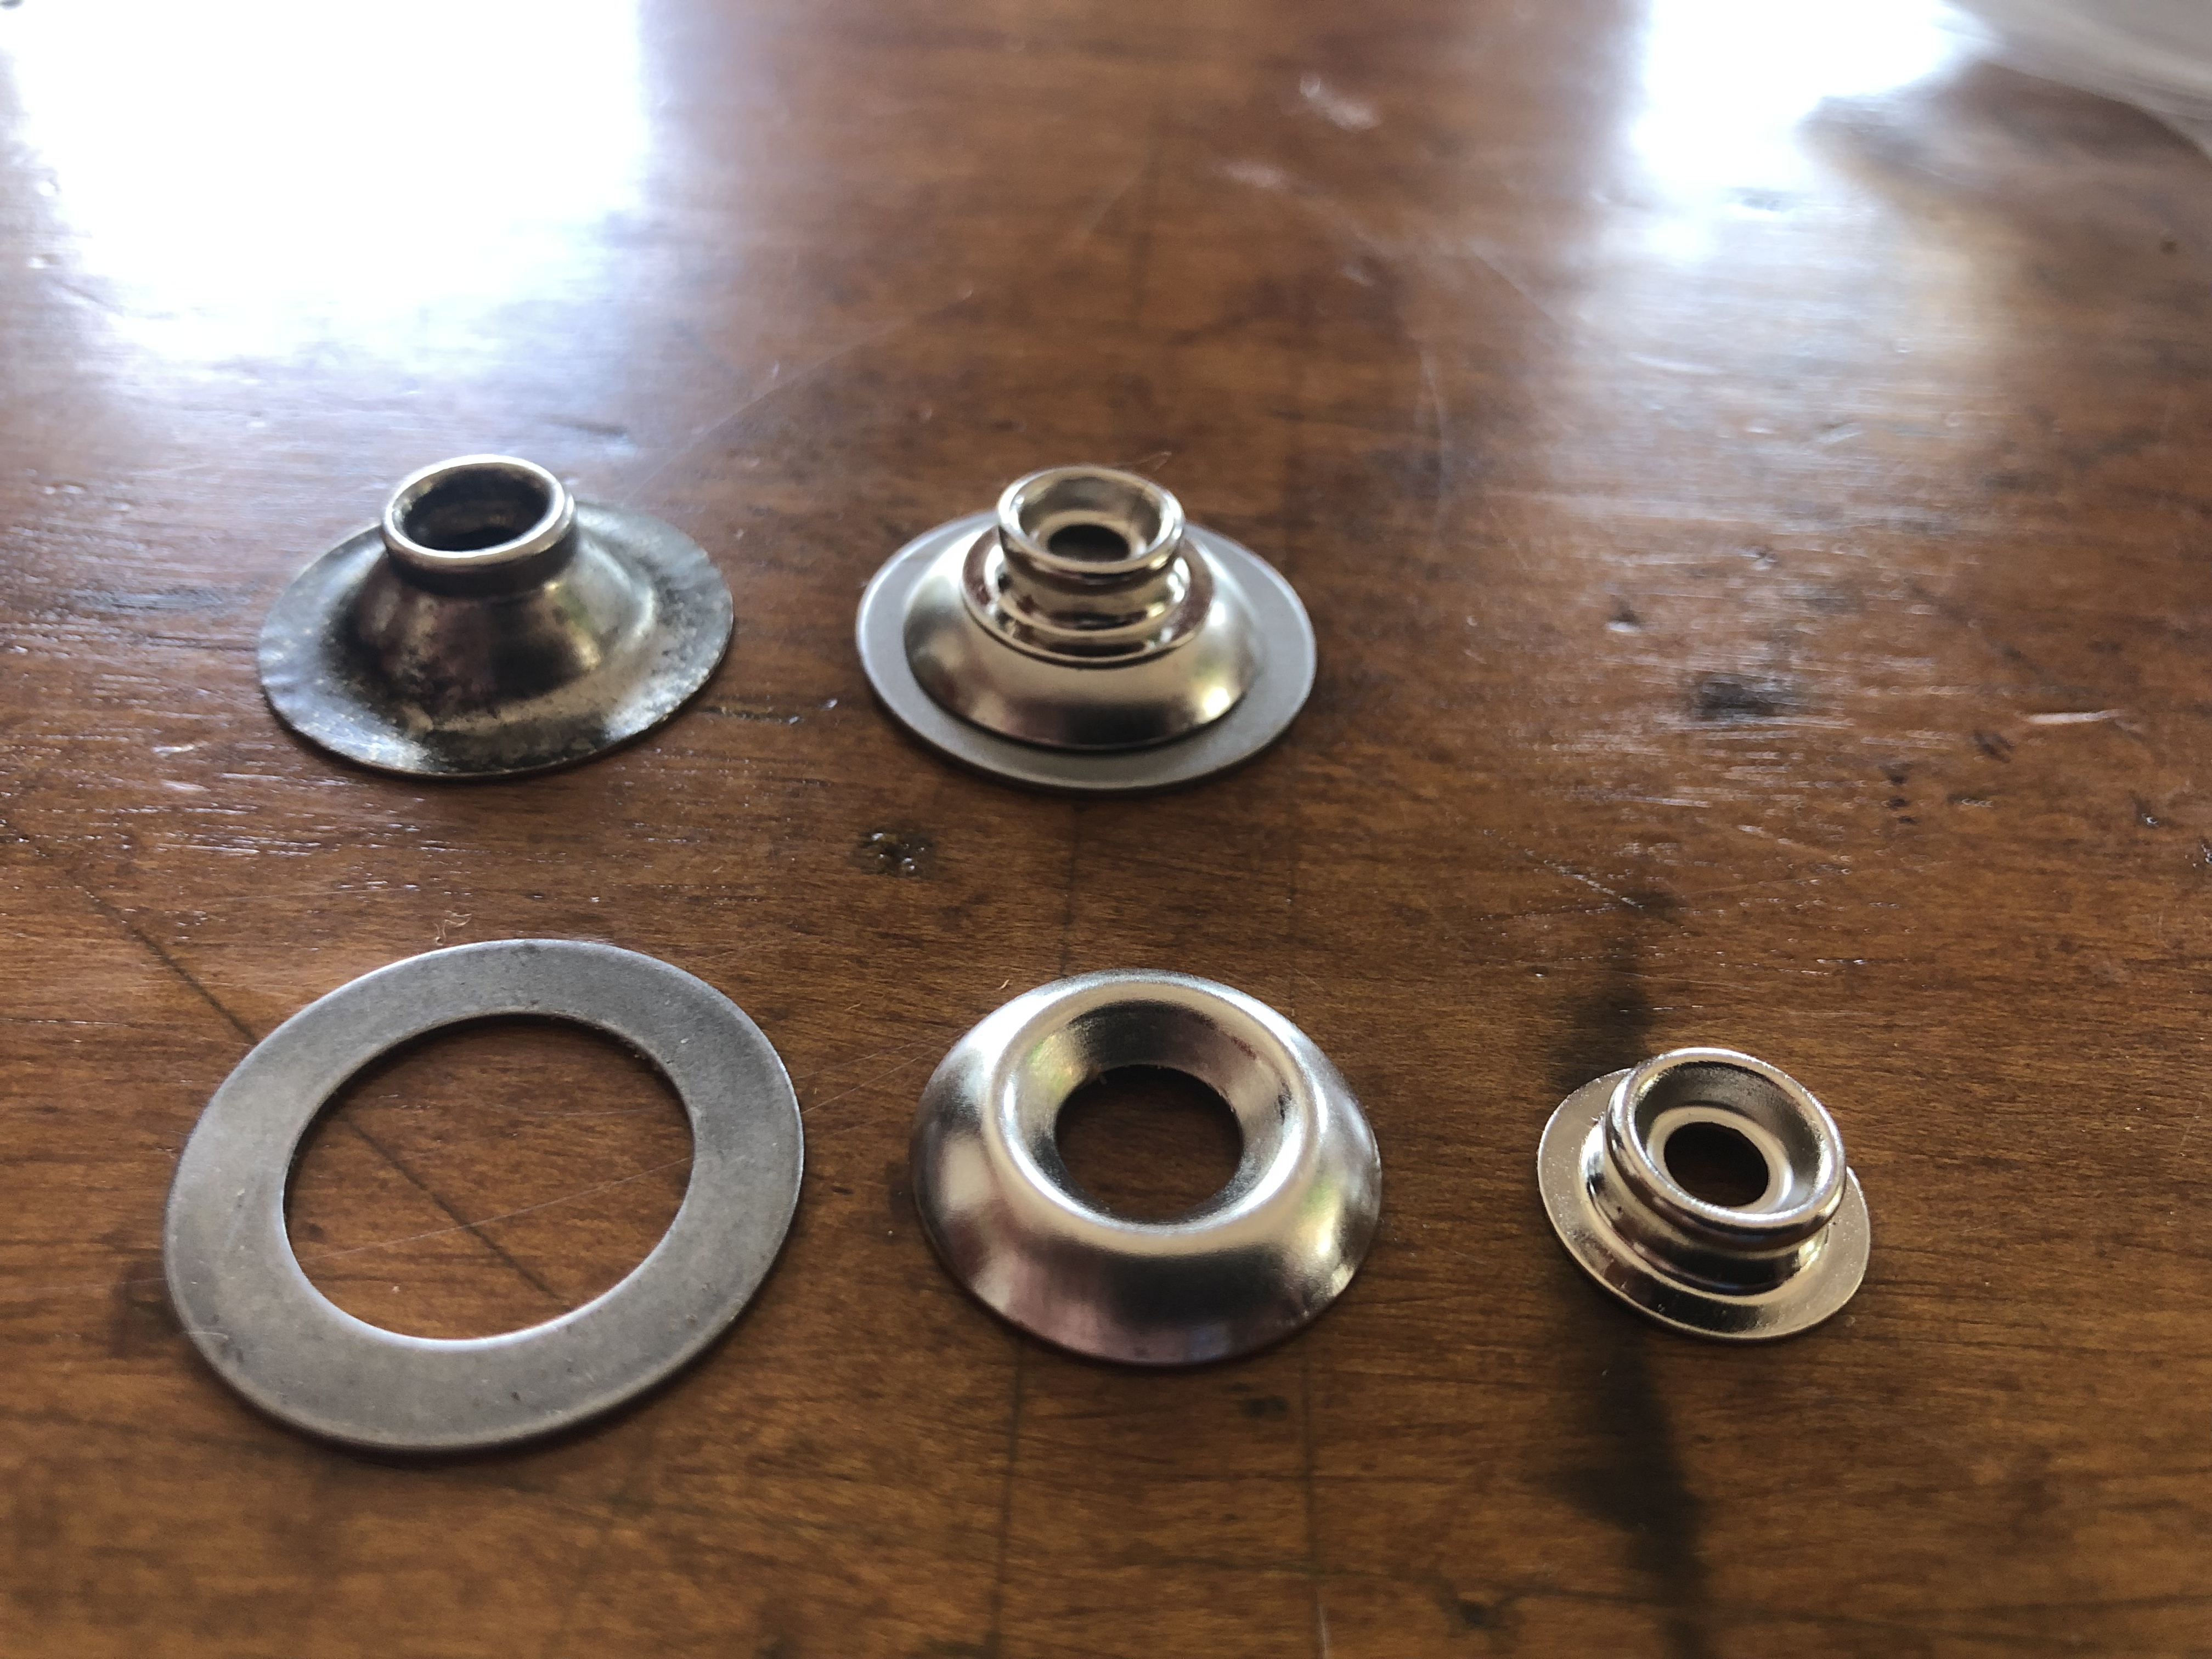
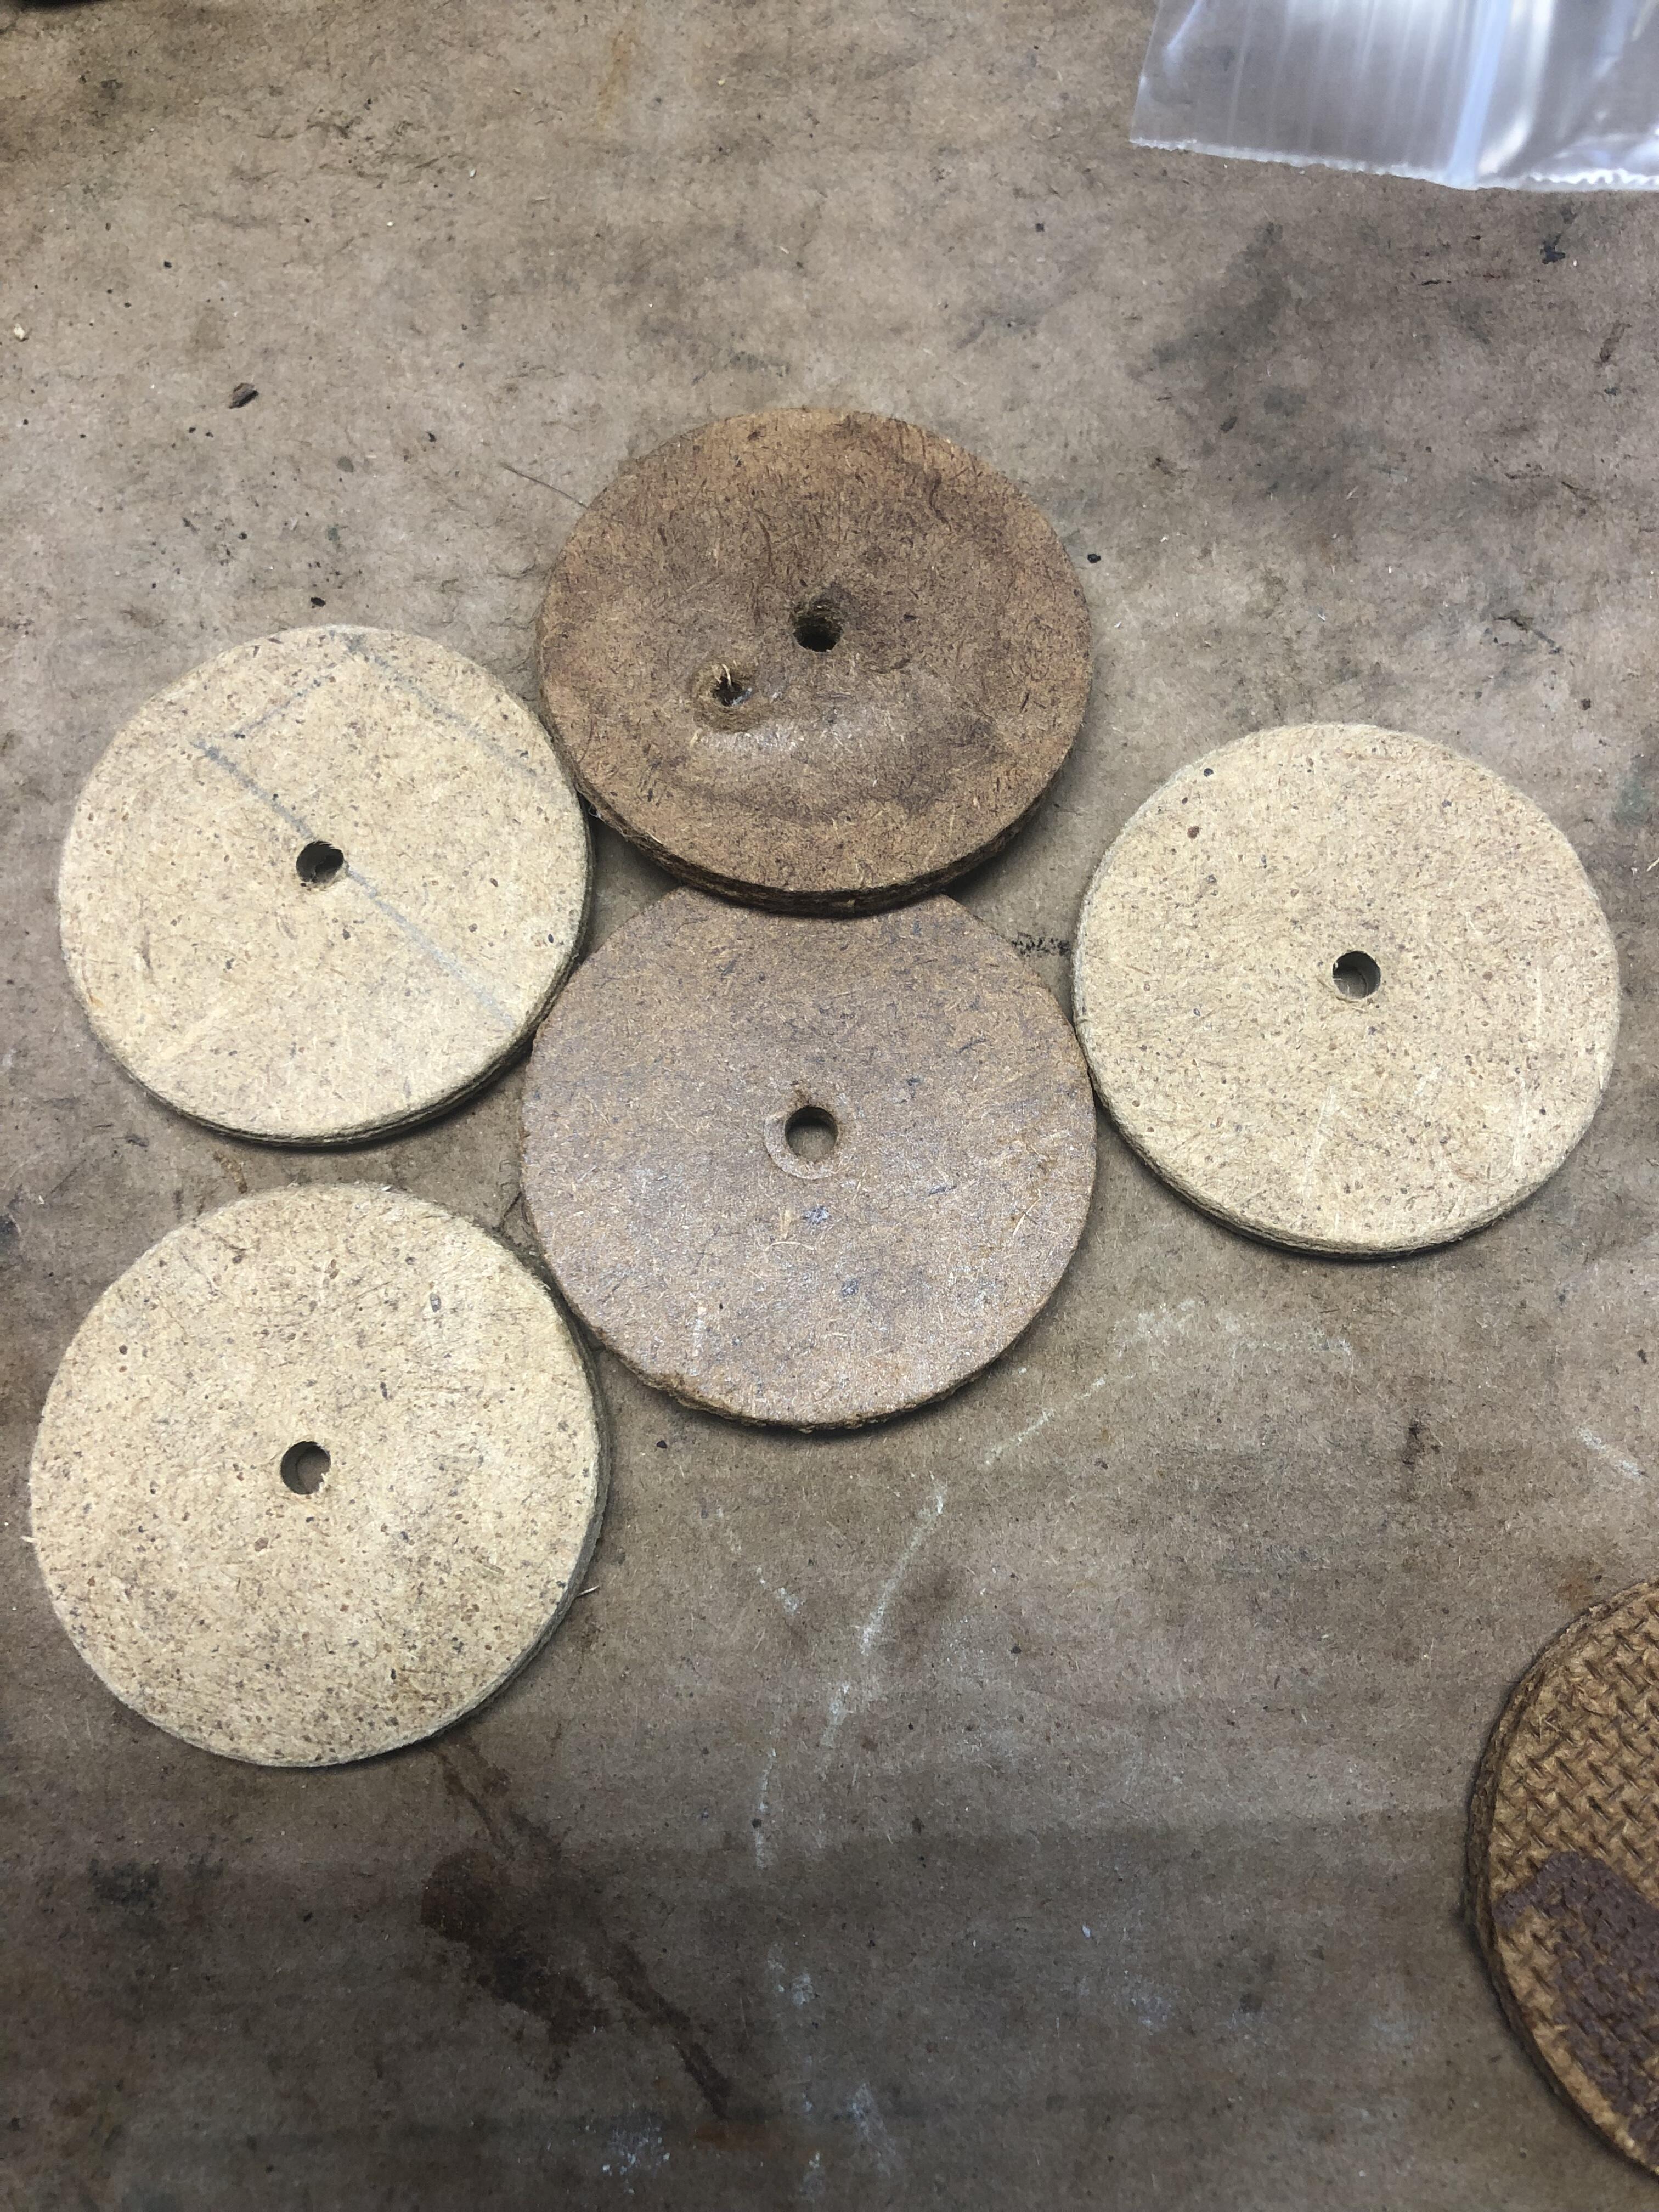
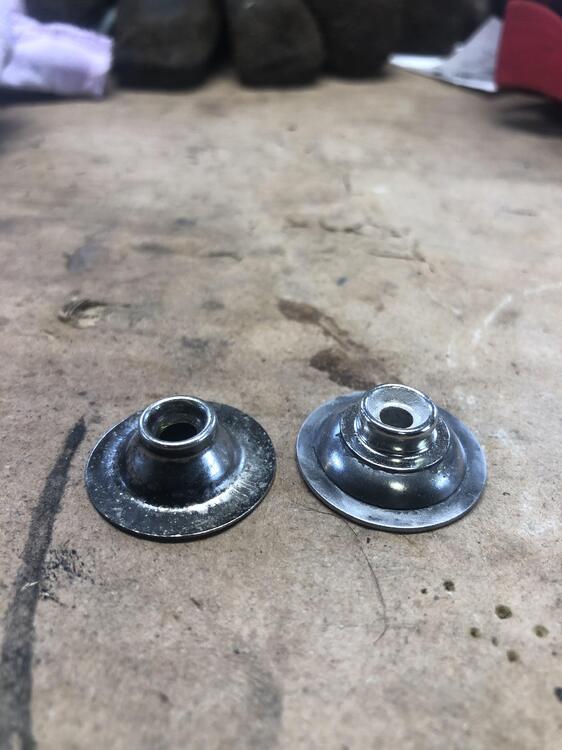
I couldn’t find any of the male snaps either so I made my own from bits and pieces from the Home Depot hardware drawers. Took the 3 pieces shown and stacked them together then glued with epoxy. I also cut out some wood backing washers like the originals. Notice that Datsun put a small piece of tape held the nut onto the backing washer so it didn’t fall off during assembly.


 1 point
 -
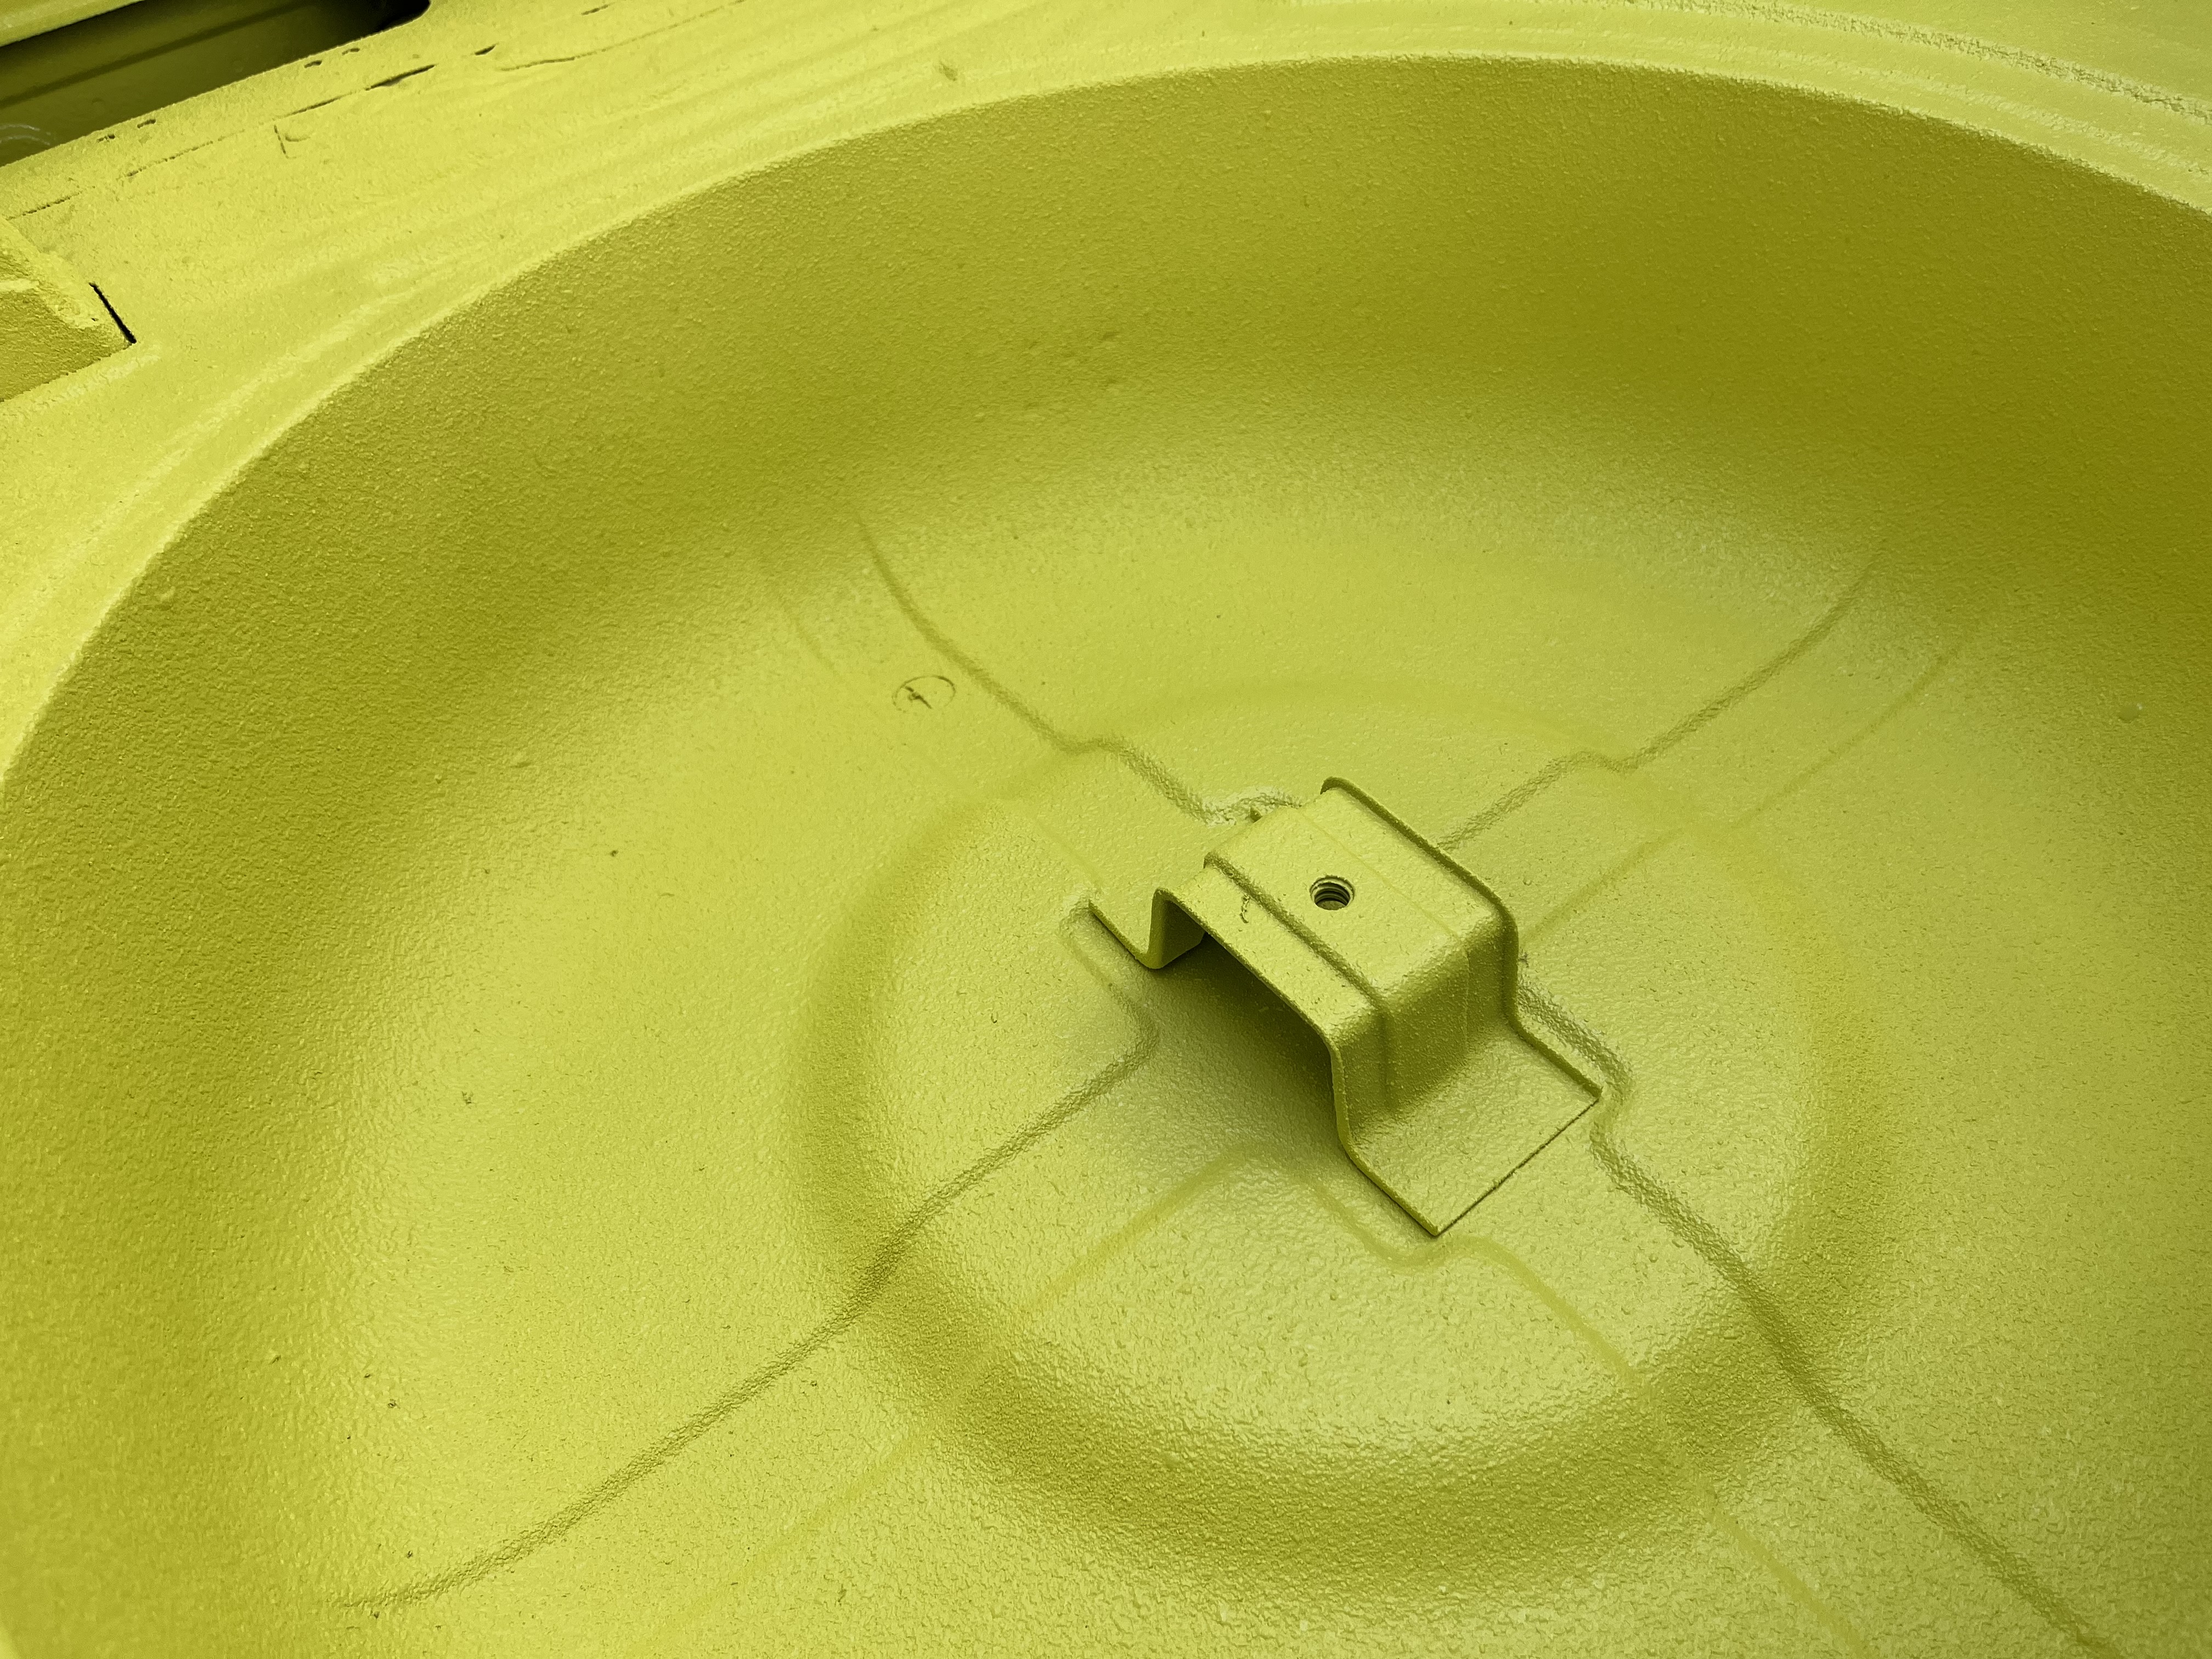
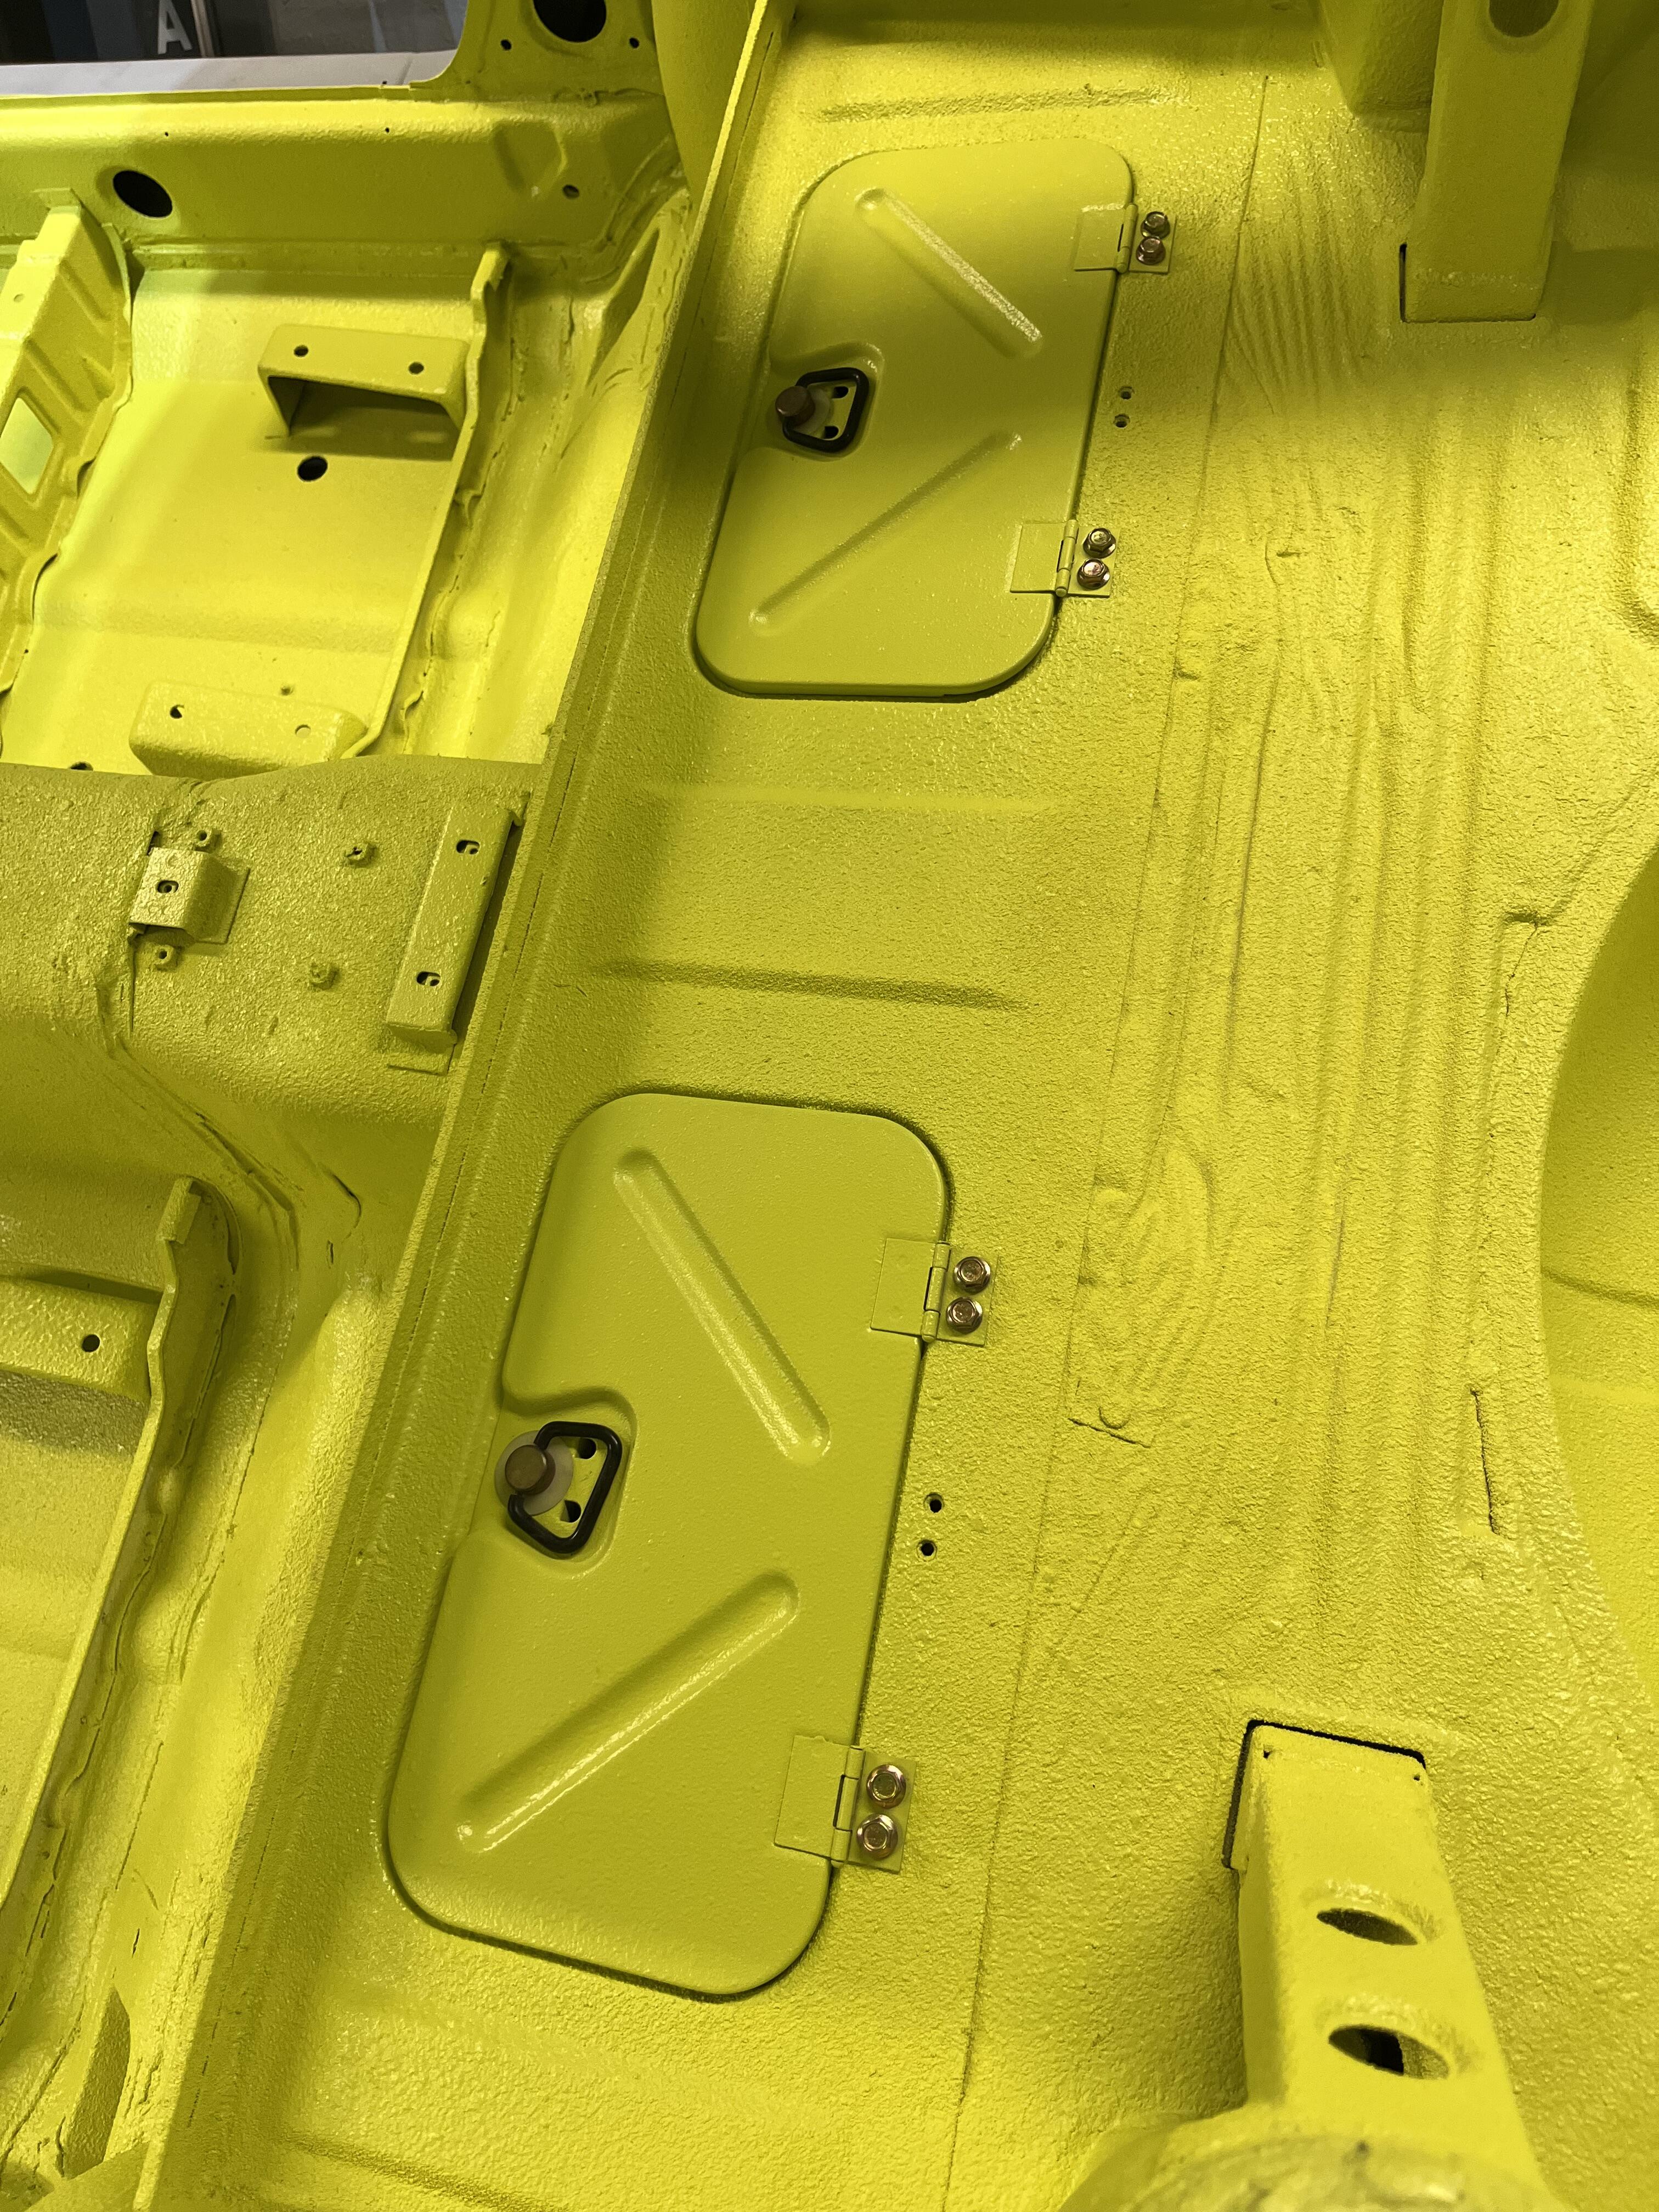
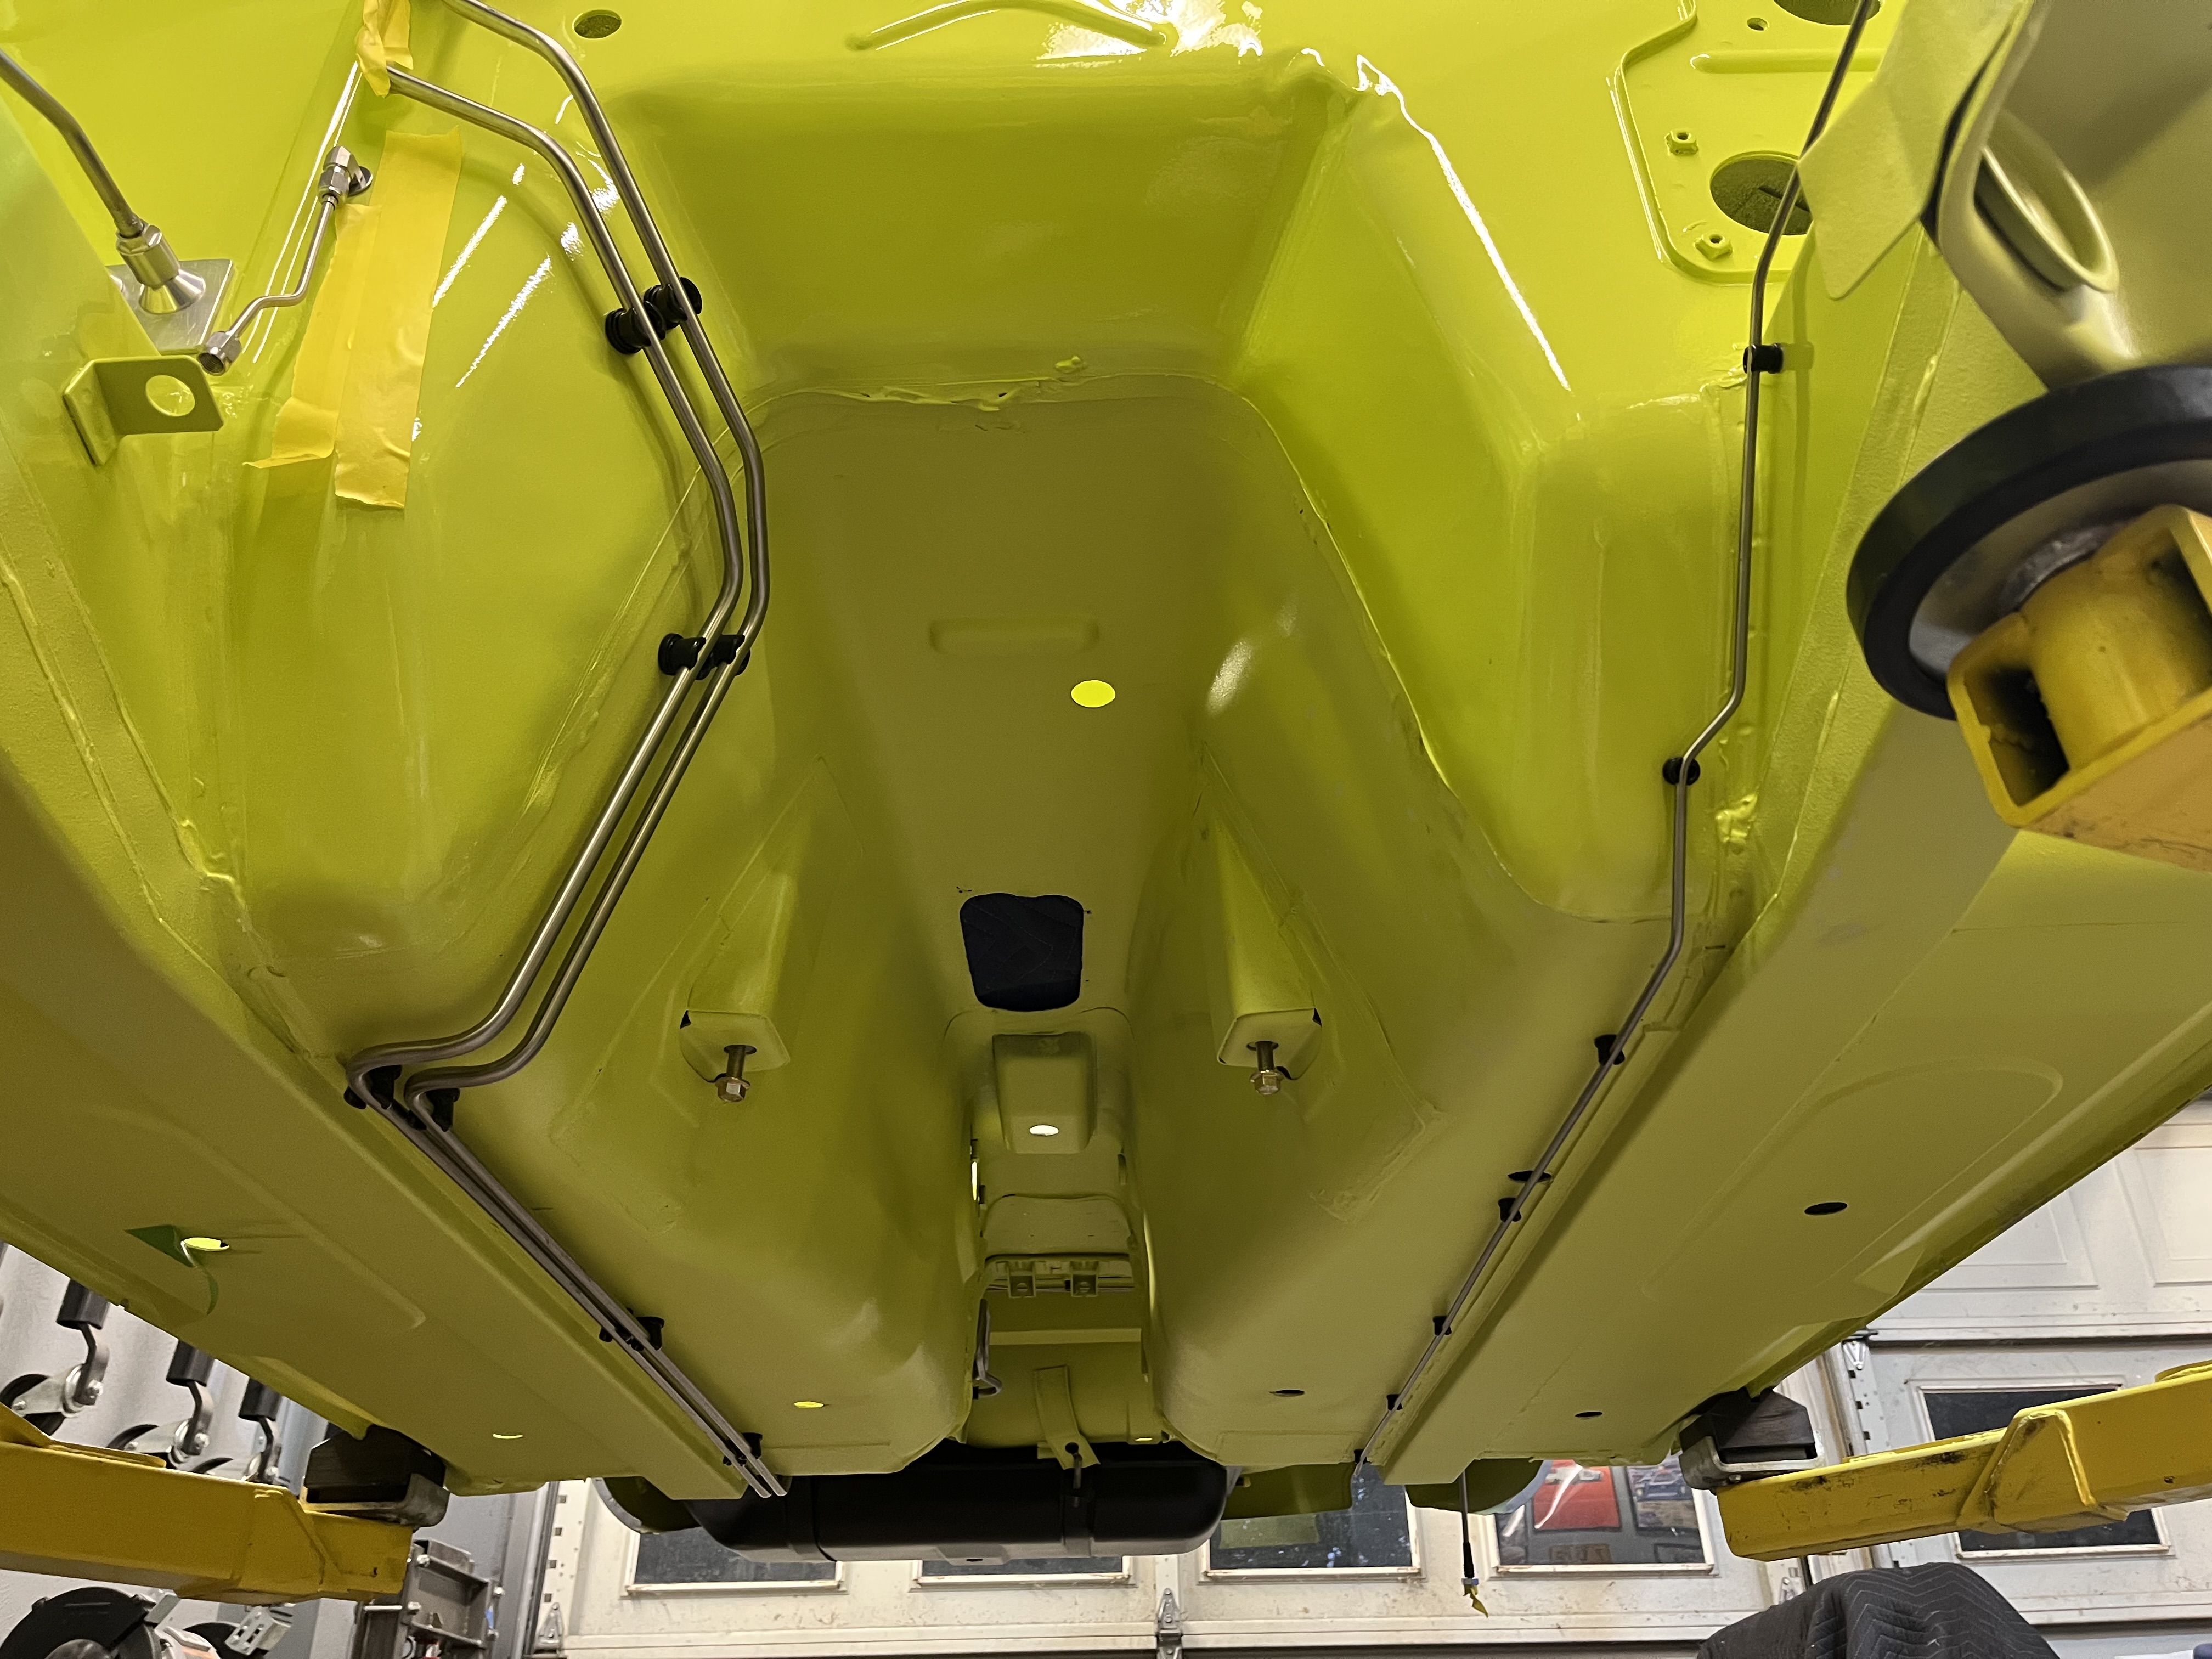
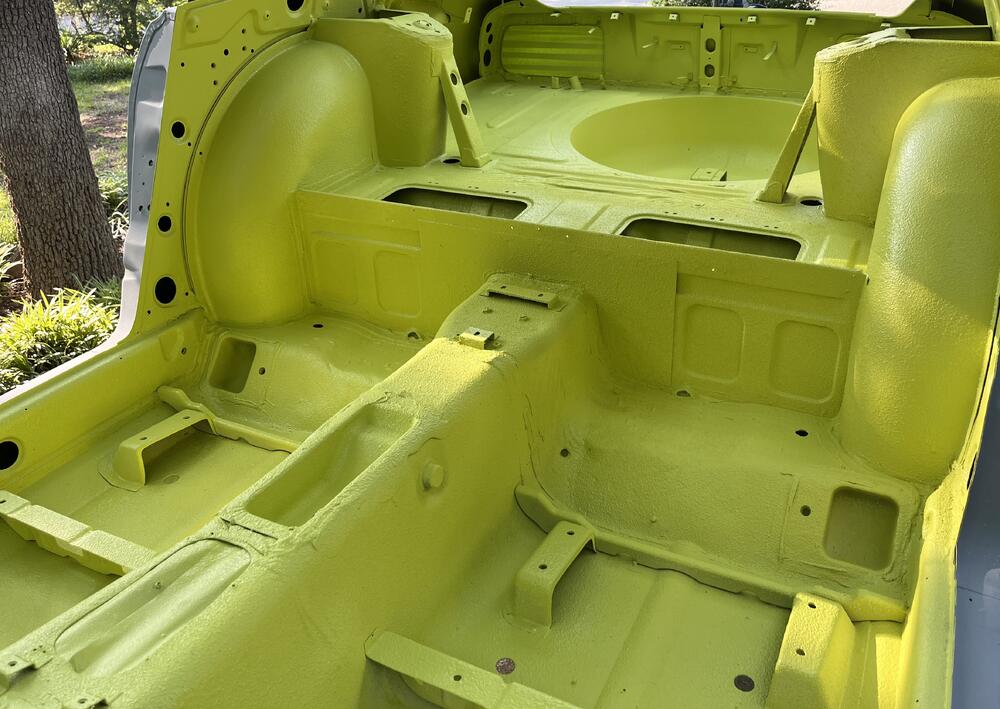
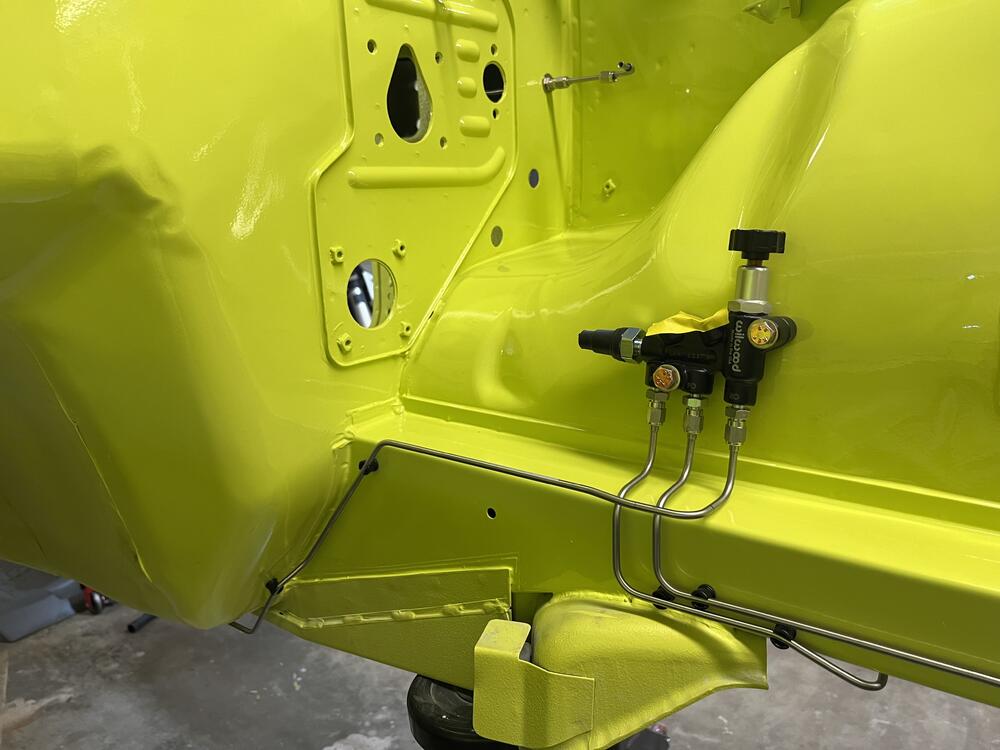
1 pointA bit out of order, but along the way we also finished out the interior. Here we used Lizard Skin ceramic coating as a base, then top coated with Raptor Liner to give a durable finish in yellow.


 1 point
 -
1 pointGood news bad news. BlueZ a 2x6 was the trick for the jack/ramp situation so I got it up safely. i can't believe I didn't think of that, shameful. That was the initial; good news. Bad news tightening didn't do much if anything. There's barely any thread left and it actually feels like it wants to strip or has possibly been cross threaded all this time so I didn't want to push it. That was the bad news. I put it back down, it started sweet and easy and then i let it run for about 5 mins. As predicted the drip slowed due to a probably air-suck but not fully stopped. It's at the point I feel safe driving it (if I can find the seats lol) so in the AM I'm going to call someone whos worked on this for me before with a full lift and everything we would need. While I was under there it really doesnt have as much play as it seems in the photo and i can't really get many tools up there even to cut it out. Gary Cook out of Sacramento had helped me sort a bunch of things when I first got this back in 21. Some of you local guys may know him, he's been racing and building Z's for a while and even had some time on the Shelby team prior. He'll probably have another fuel line he can swap in a jiff. Might take a week or so especially with holiday but the panic has left and I feel ok even if I had to leave it a bit. Thanks to all.1 point
-
Cap’N thanks for the excellent thought process, yes, hard to say what caused what. So plainly I should weld the nut to the main shaft AND them both to the washer, and nothing bad can happen. Right? Anyone want to buy a slightly used 5 speed?1 point
-
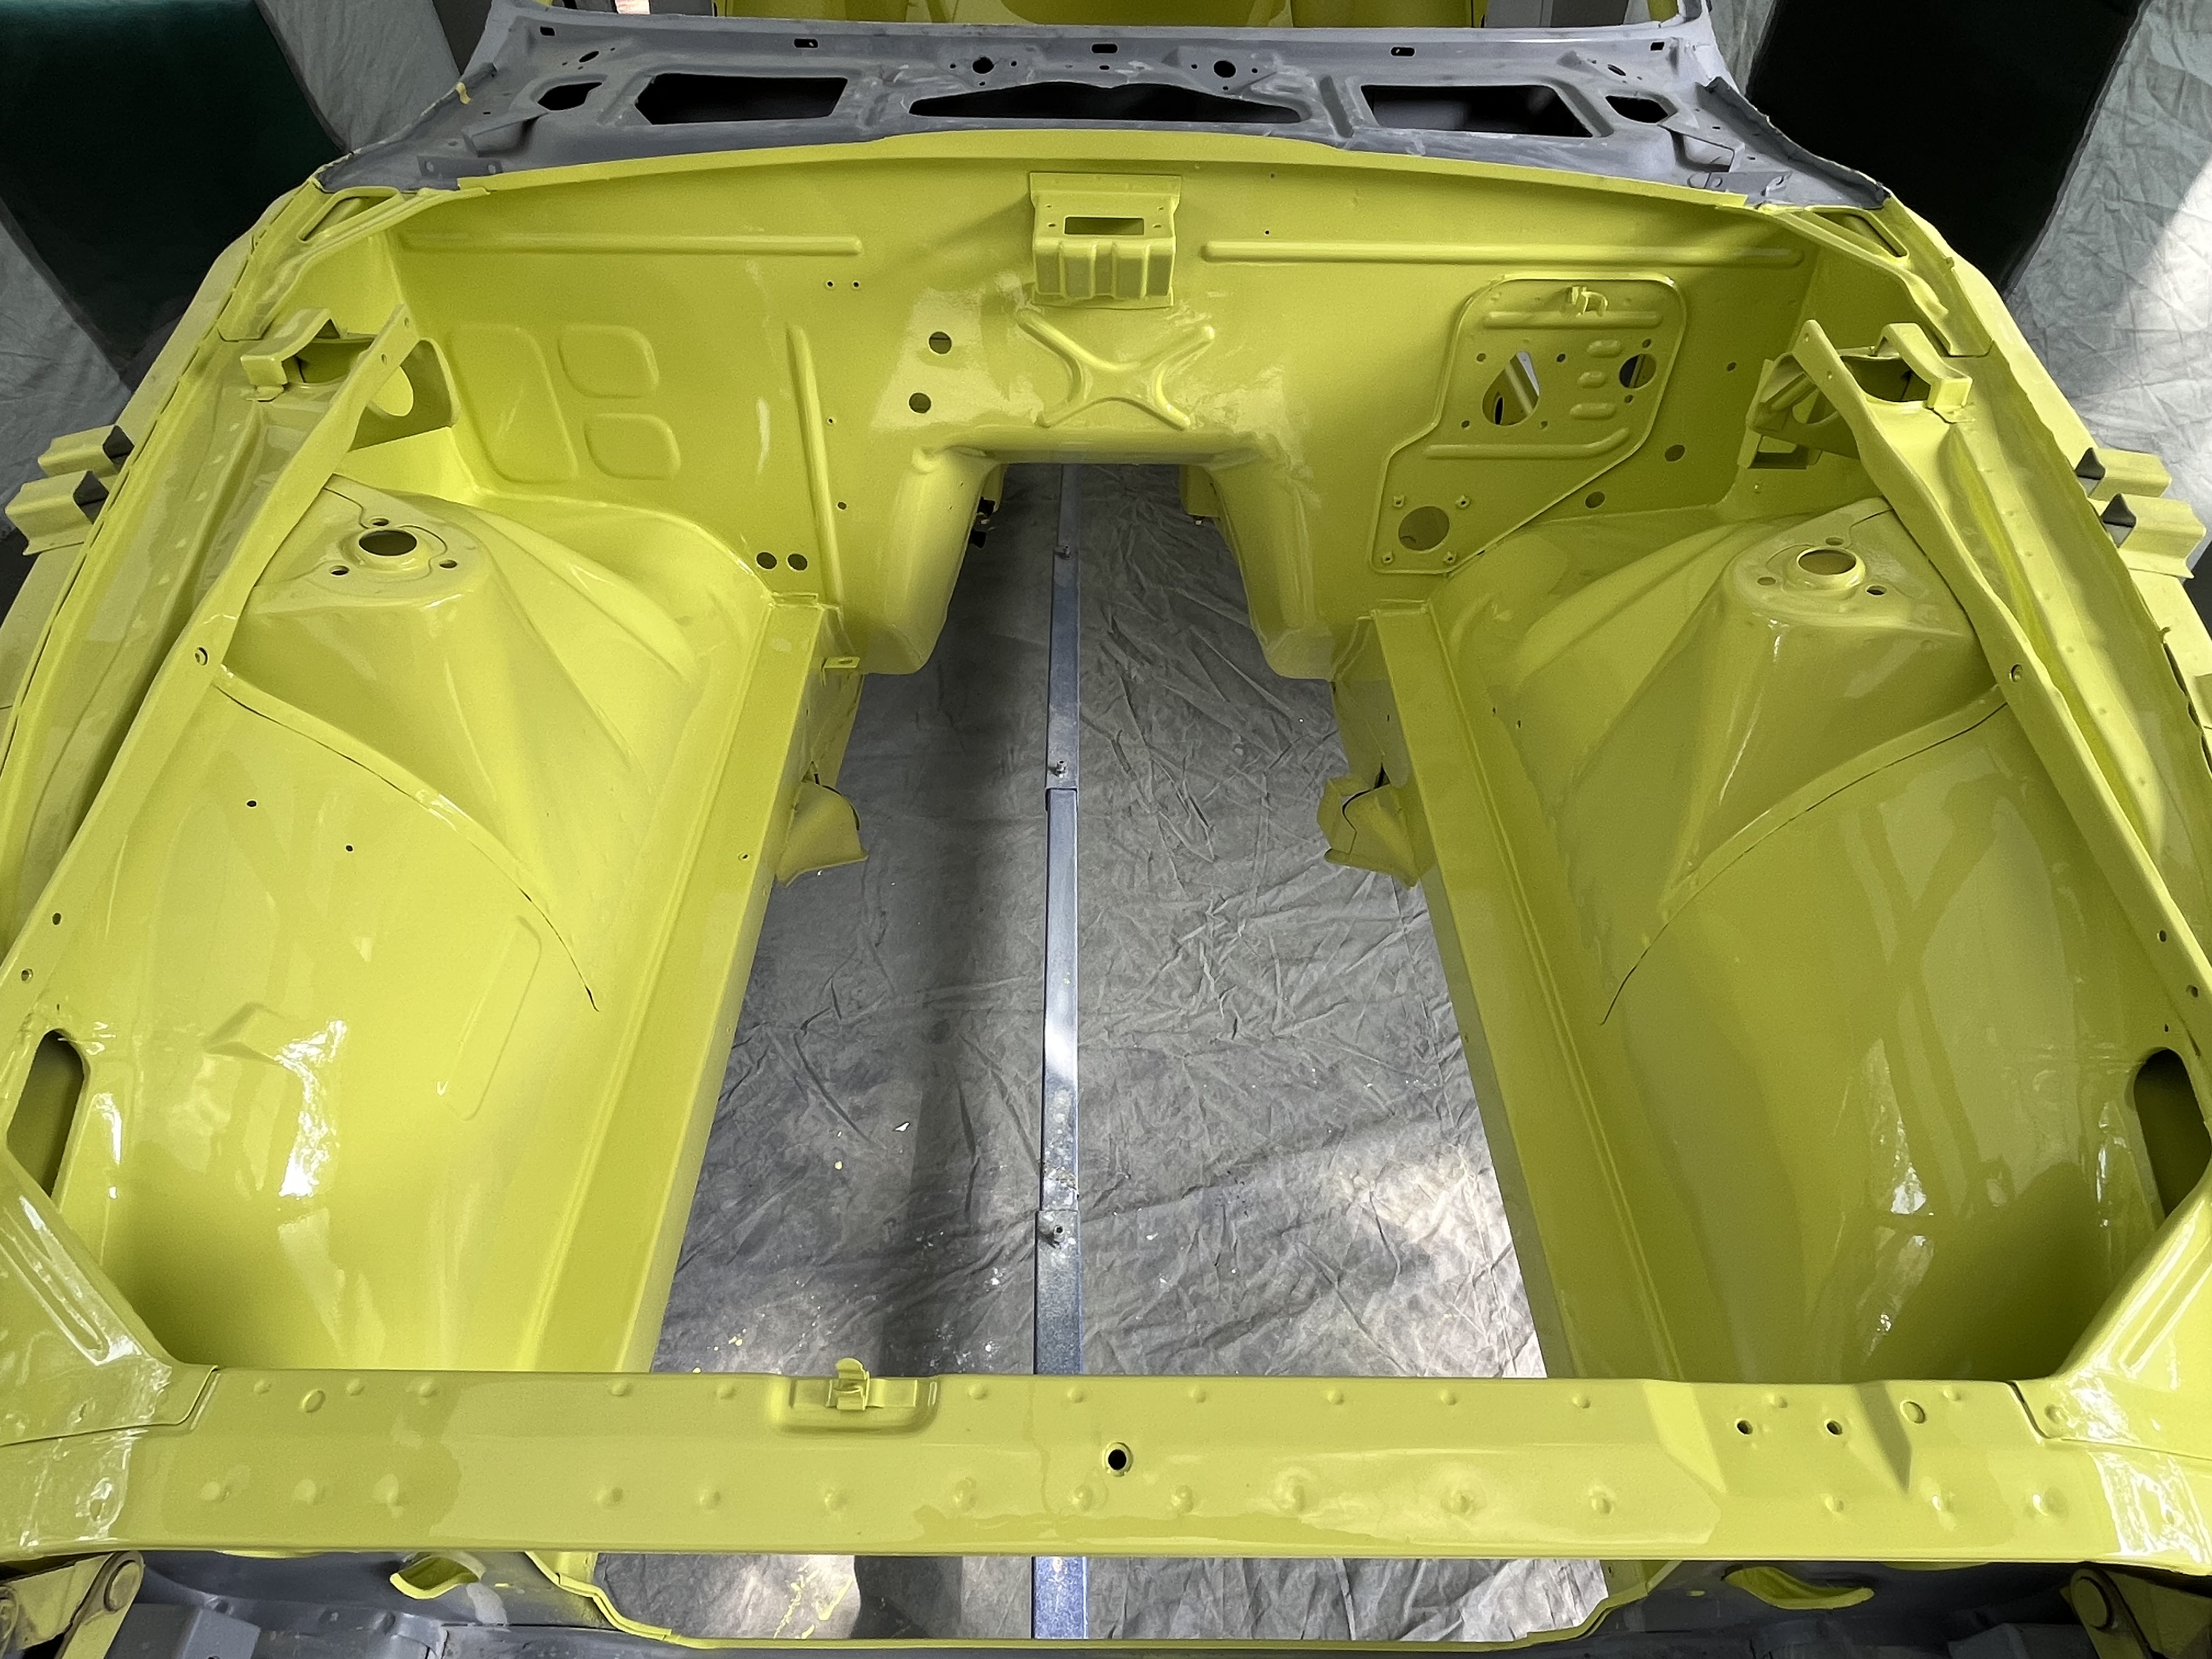
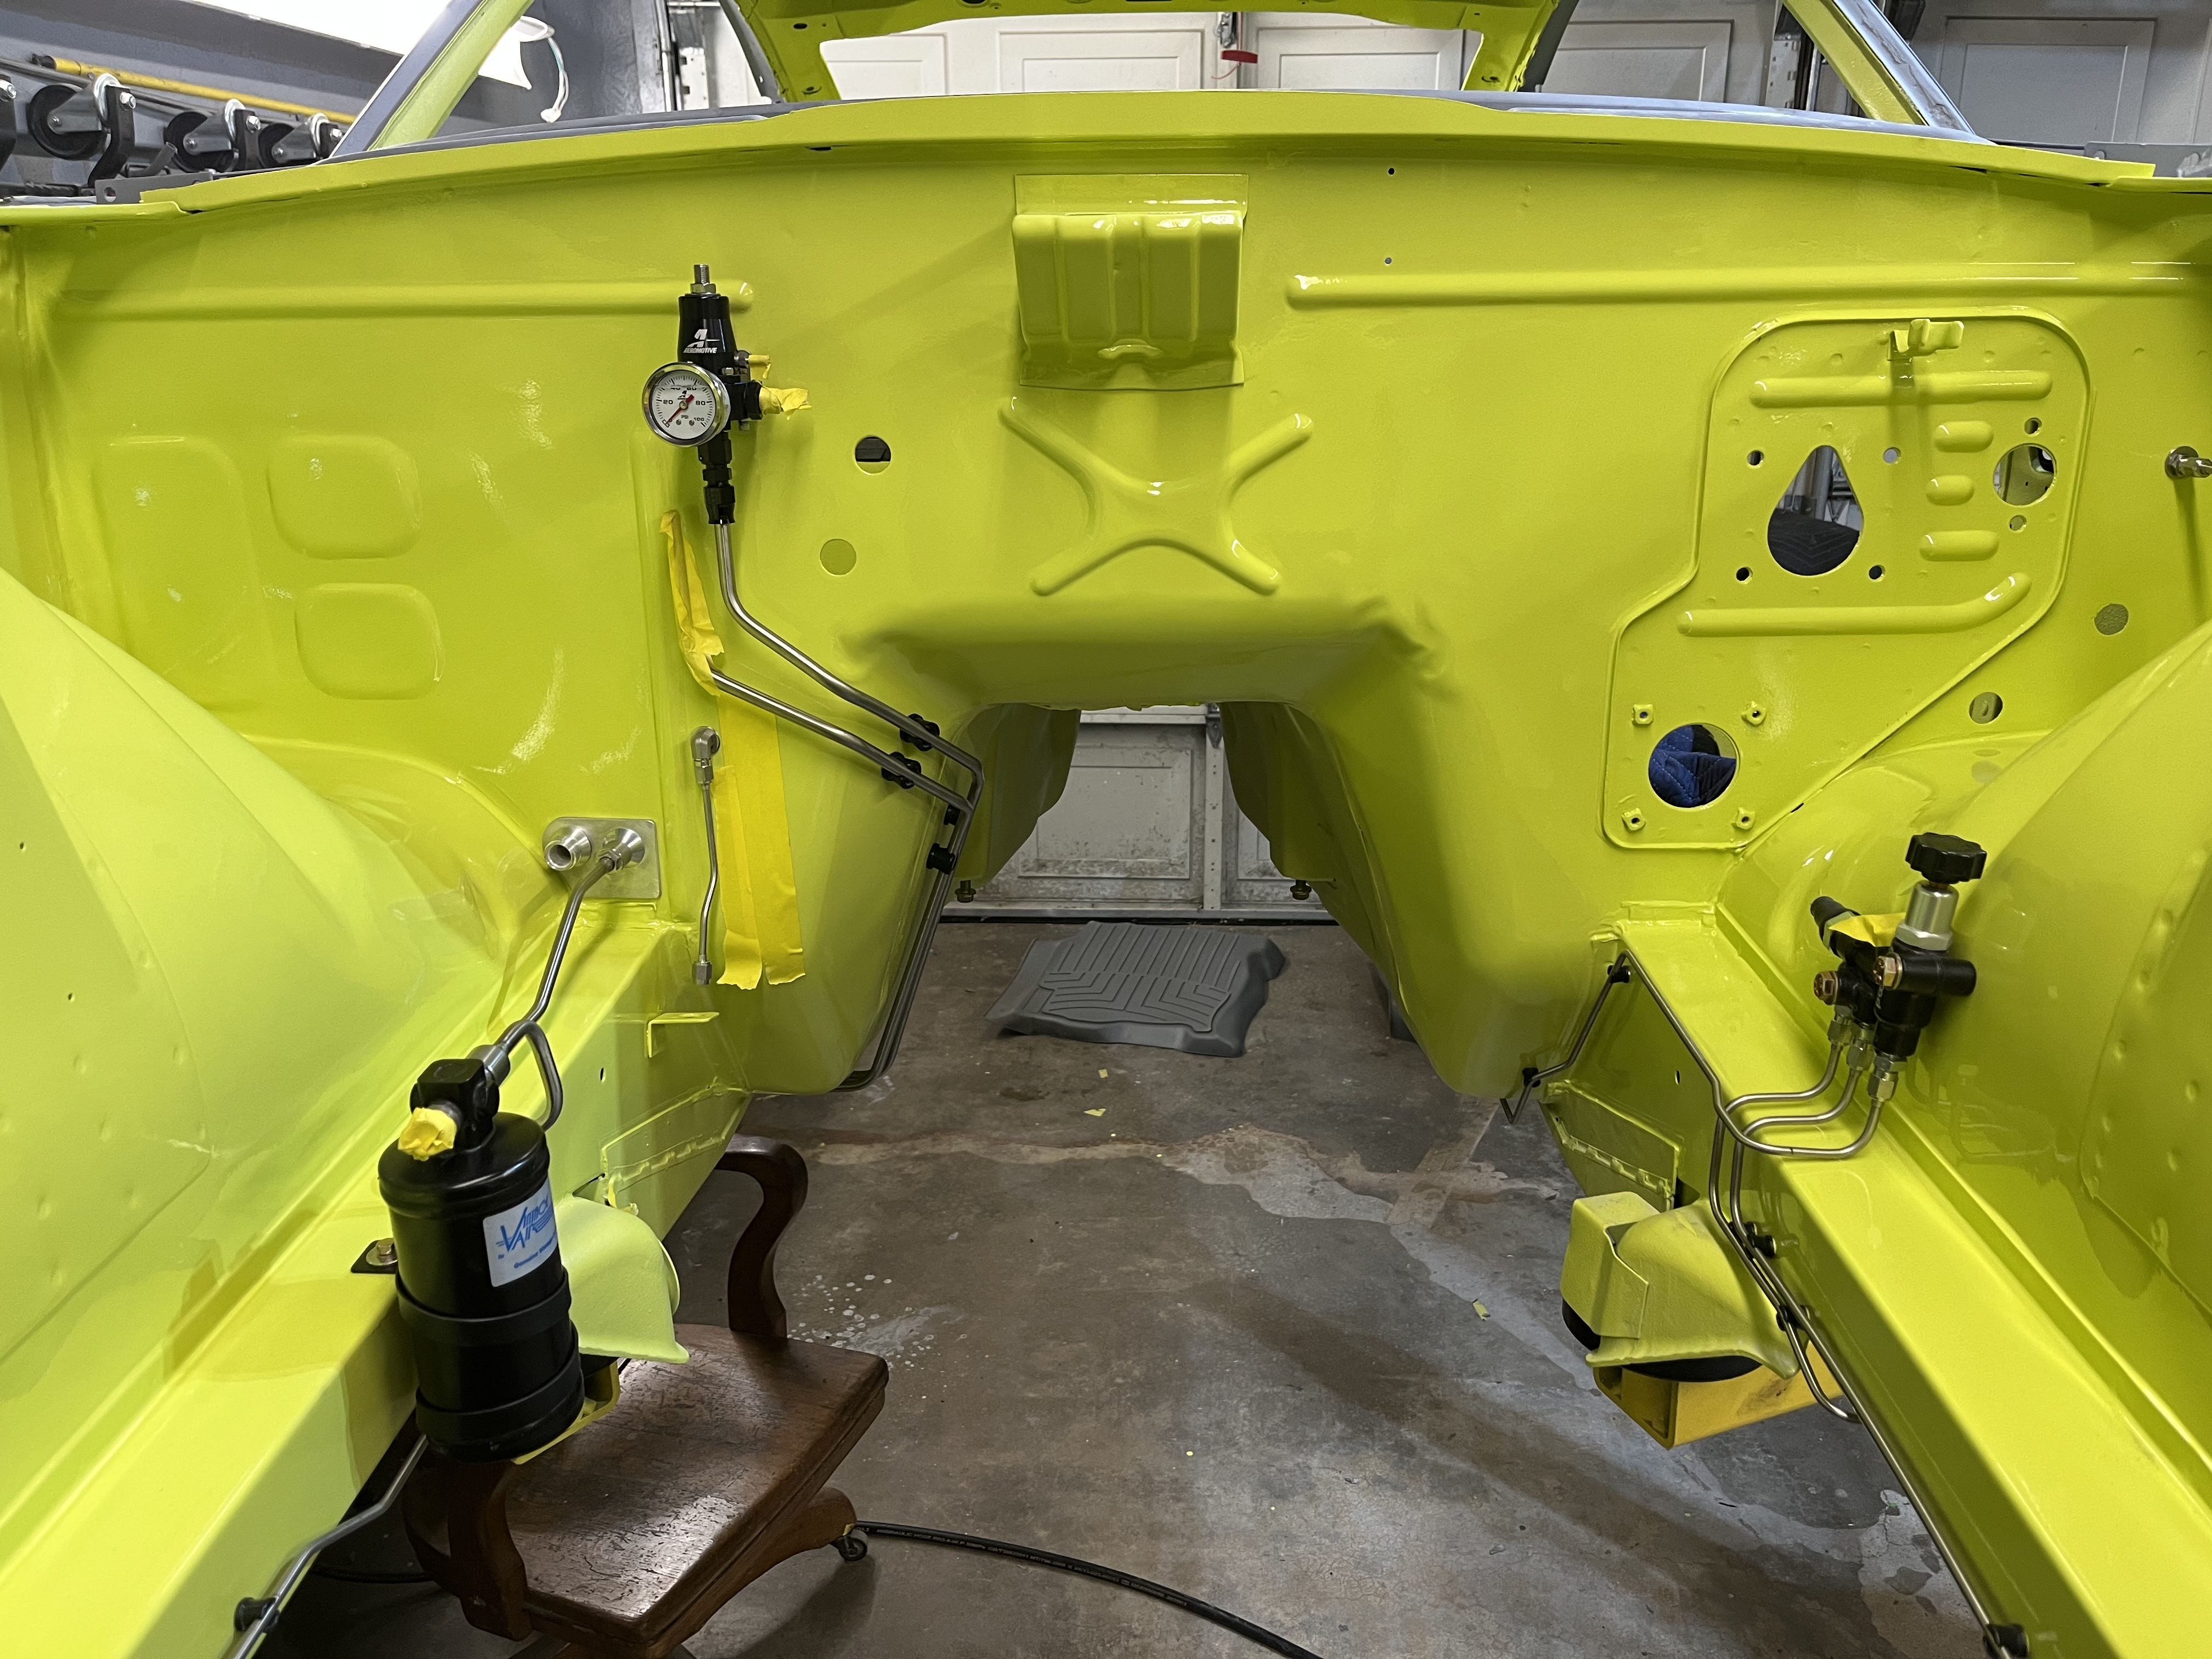
1 pointEngine bay getting some color as well. Finally to the stage of reassembly the car, slowly.


 1 point
 -
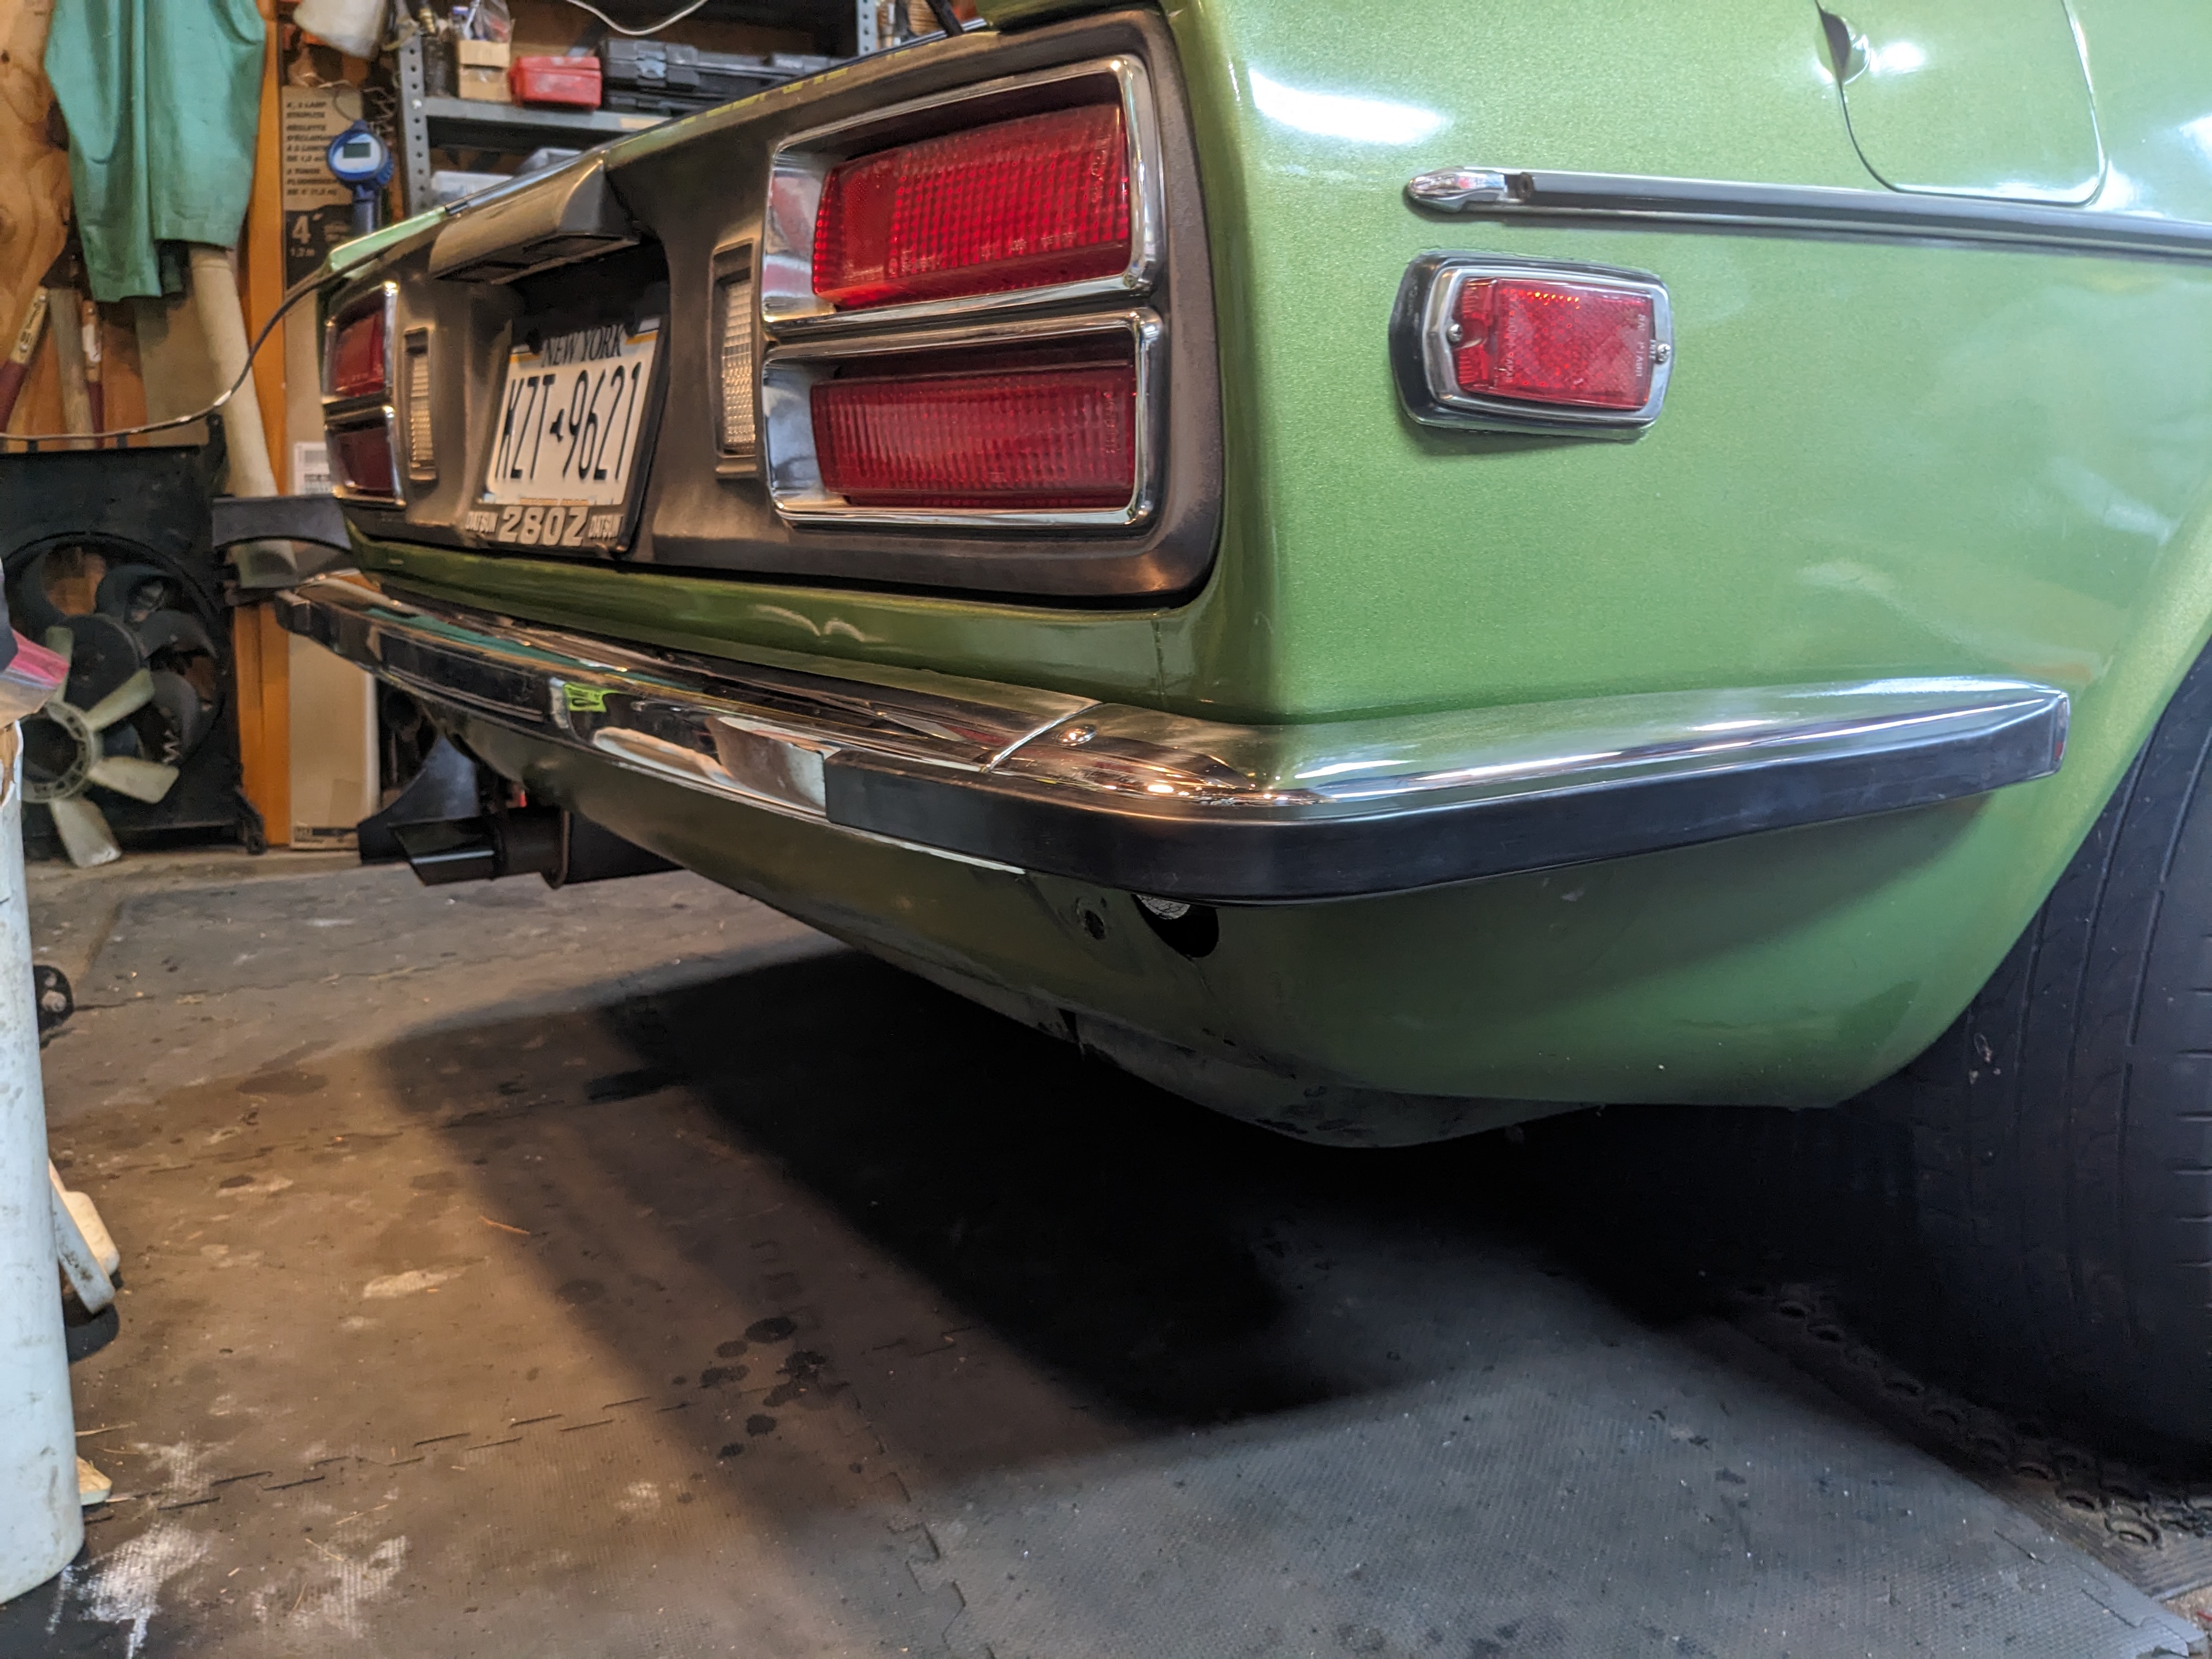
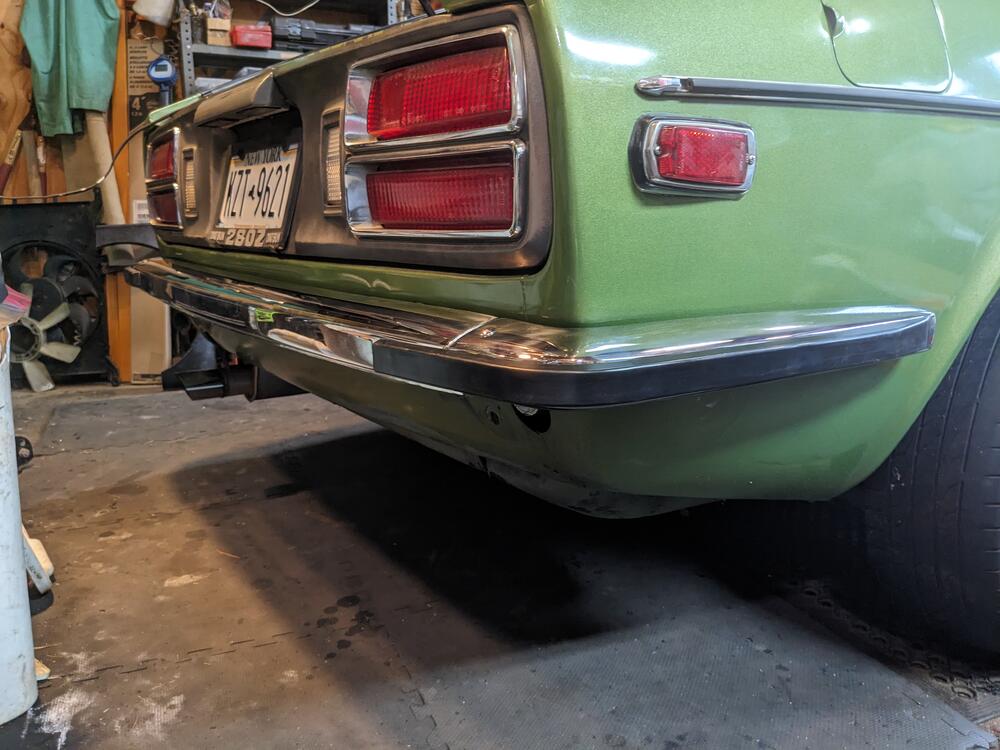
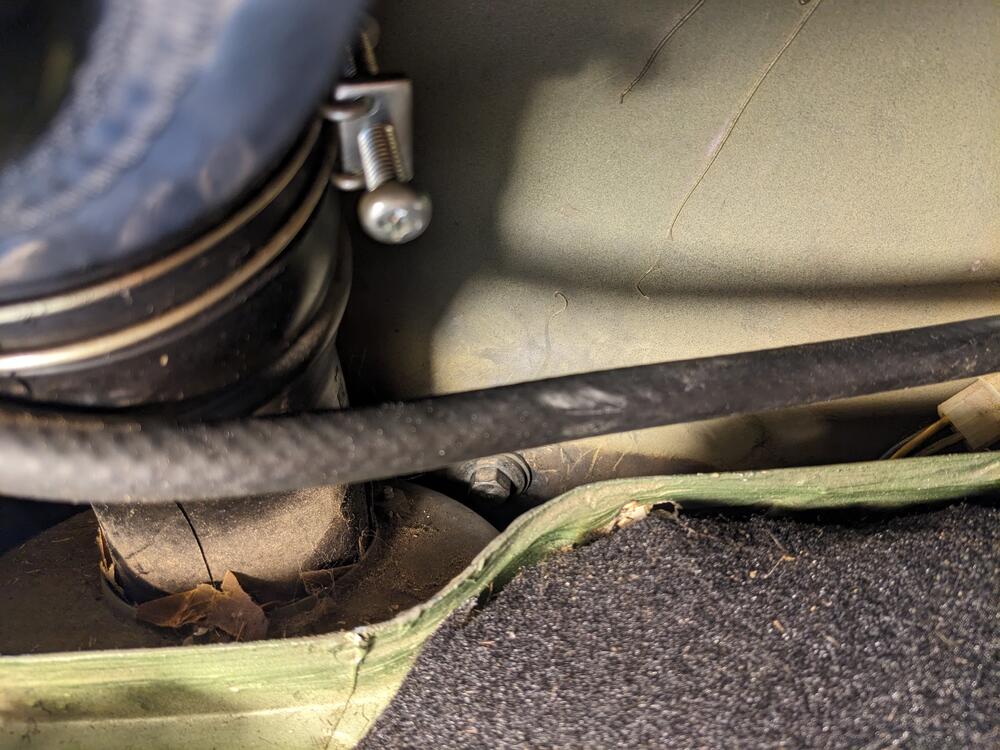
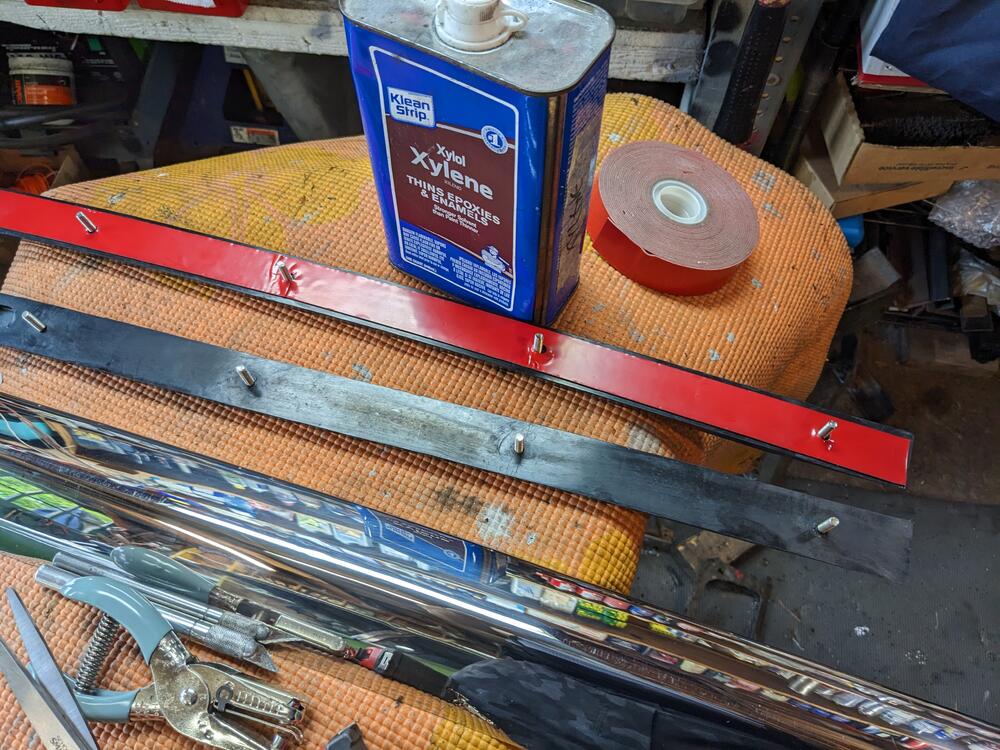
Finally got back to this - assembled & installed the rear bumper today. I test-fitted it yesterday & marked the 2 drill locations for the side attachments. Primed & painted the holes prior to assembly. Had to do it jammed in the garage, it rained all day. I had to retap both the side captive nuts - neither would accept the M12x1.25 bolts. Also had to use 3M VHB tape to secure the rubber strips - otherwise they 'flop' away from the bumper in-between the mount studs. I had removed the fronts & done the same previously. The vendor claims you just have to pull the rubber & then tighten in place. That would work if the bolt holes were elongated, which they are not. The right side I had to shorten the bolt & grind the tip to a point to guide it into the bumper bracket. Not much room given the gas tank proximity Made sure both sides were level - holes were about 9" down from the side molding, and about 5.5" forward of the existing bumper side mount captive nut rubber sleeve over side bracket
 1 point
 -
1 pointWhat year is your Z? Is it a 240? If so, try what worked for me. I struggled for years with vapor lock while racing and NOTHING helped until I removed the heat coming through the brackets that support the fuel rail. In 10 minutes, you can do a trial and it's reversible just as easily. It costs about $10 in hose, a fitting and clamps. Replace the supply hose between the fuel rail and the chassis supply tube with a hose long enough to reach the front carb. Install a T fitting and run one hose off the T to the front carb and another hose to the rear carb. Finally, clamp a small pair of needle nose Vice Grips to the fuel return hose between the fuel rail and the chassis return pipe. Now go run the same route/Auto-X or whatever used to cause the issues. In my case, it was a 100% cure. I had previously tried everything including header wrap, extra heat shields on the header, carb bowls, fuel rail, etc, propping the hood open, electric fuel pump, no fuel return, etc, etc. The dead headed fuel system helped a little as did the electric pump, but overall, they didn't help enough to bother. Even if you have a FI 280Z, the same thing might be causing the heat issues. Unbolt the fuel rail from the head and isolate the rail with ceramic or other non-conductive spacers to keep the heat from transferring to the rail from the head.1 point
-
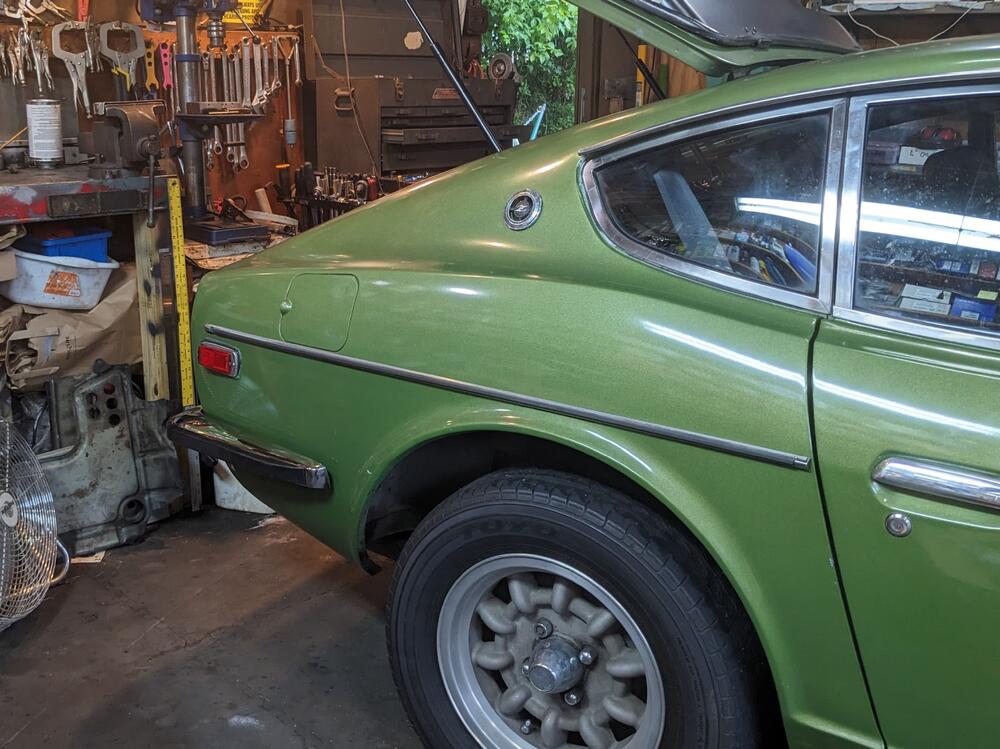
1 pointThis is a very original car, hardly any mods and so far haven't noticed any missing pieces that get lost along the way. Started with some of the fun stuff, the front grill is in perfect condition, just needs to be dismantled, cleaned, sanded and re-coated. The steering wheel is coming out well, need to let the varnish cure a bit more, very humid here right now.


 1 point
 -
Doesn't look familiar. Hope he's not expecting much, that car needs a lot of work.1 point
-
It has been a while since i got something new to read, related to the Z(X) topic. but a few days ago i found not-so-well advertized 280ZX Book for sale. The pictures didn't give a lot of information about the book, but one photograph showed a Rallye 240Z and it was super cheap. That was enough to start my interested and buy it. And this is what i got today: It's an english book about the 280ZX from 1978. A mix of brochure, Catalogue and information about the 280ZX. It shows how it was developed: But also how it is being built, tested and so on: It also doesn't forget about the ancestors of the S130 and shows the S30 in various specification interestingly also covers an Austrailian and european Spec car: It also shows the Z's rallye heritage and success: But only at the end i realized this is a fanbook. but not by 3rd party company, but by Nissan itself. I'm not sure at what occasion it came out, but being the same age as the 280ZX itself, i guess it was some kind of advertizing / marketing material for guys that bought a 280ZX, or guys that were thinking of buying one. Very nice nontheless and a great add on to my collection 🙂1 point
-
My thought is that the Z cars that bring big money on BaT are bone stock. Even though all the mods are tasteful and make the car better, the BaT crowd might not agree. I hope the OP gets what he wants wherever he decides to sell it.1 point