Leaderboard


Popular Content
Showing content with the highest reputation on 07/27/2023 in all areas
-
3 points
-
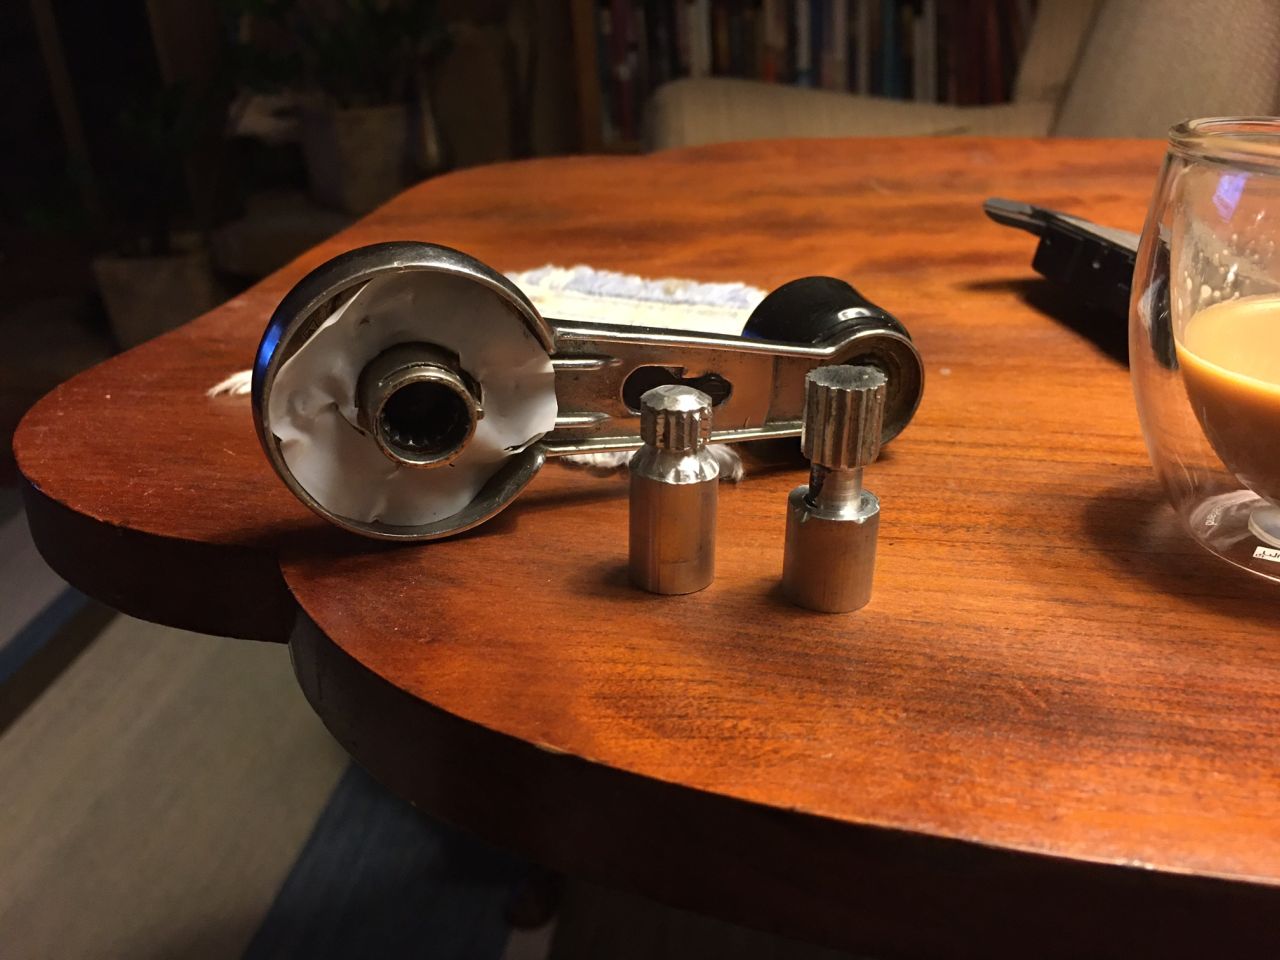
2 pointsThe following information us based on the orientation in the photograph: The one on the right is an early version. I realized the spline could be shorter and the hollow part on the bottom needed to be longer to accommodate two horizontal cuts (not performed yet) to fit a wire crank clip that attaches the adapter to the spline shaft on the door. A second crank clip attaches the window crank to the adapter. I decided that the long neck on the one on the right was not needed and extended the crank handle shaft too far. You are correct my Captain, a non-profitable job but an opportunity to get more proficient at using the lathe and mill along with learning how to use the indexed clamp to cut 16 splines, 22.5 degrees between each.
 2 points
 -
I'll have to see if I have any pics of my 5 minute rubber hose fix. I ran the hose directly over the top of the valve cover, so it wasn't really touching anything. One thing I did have was a factory asbestos(?) insulation sleeve that covered the fuel rail. My guess is that it did the exact opposite thing it was designed to do. If the heat came through the rail mounts, the insulation kept the heat in the rail rather than keeping it away from the fuel. I tried several different heat shields like yours with no success. Keep in mind that mine was an endurance racer, so the underhood temps were sky high. We pitted for fuel every 2 hours and we'd open the hood as soon as the car stopped to keep it from heat soaking. Races were up to 25-1/2 hours long, so you can imagine the heat we had to deal with. When we still ran the iron exhaust manifold, it would glow cherry red during night time pit stops.2 points
-
You don't need to remove the button. The switch contacts are at the other end of the switch. Here's a short video showing the contacts. You'll need to get between the copper arms and tabs to clean those surfaces. There are 3 screws that hold the parts together. Be careful removing the screws on the side because there are small plastic washers that insulate the circuit. Once you have the contacts removed, you can polish them with a dremel w/wire brush, emery paper, or dip them in vinegar for a short time.1 point
-
Not at all likely!!! As you can see on mine, it bolts up metal on metal to one of the hottest part of the head (cyl5/6) and directly transfers heat into that block thing, nicely heating up the fuel on its way to the rear carb ! :( And don’t even get me started on the middle one that unlike the others doesn’t have an insulator of any sort. So not only do you have heat radiated from the manifold below, you also have metal on metal conduction from the head. I don’t wish to upset anyone but I do feel this is a flawed design - probably a common design of the era? I’ve literally spent the afternoon thinking about this and redesigning mine to go round the other side, behind the engine, then come to the carbs behind the heat-shield and be properly isolated from metal on metal contact. I’m sure it won’t solve heat-soak issues but should alleviate many other heat related problems. You could of course re-route from behind the engine if you don’t use the mech pump, but I like having a mech pump in the circuit. And my mech fan and my mech water pump. Analogue man in a digital world and all that. Will definitely share when / if I ever get the time to build an alternative fuel rail. Ordered the parts so no excuses now ;)1 point
-
The common vapor lock issue on the '73 cars doesnt make sense to me. If you swap out the carbs and the tank/fuel lines are open, it is just like all other z cars (excluding fuel pumps). Way off the subject, I often wondered if the fuel rail could be the cause? On the '73, there is a bend at the return. On the earlier cars, there is a square block. Maybe that block helps dissipate heat?1 point
-
Might want to consider ceramic coating your manifold/ header to drop the temp. Fairly inexpensive.1 point
-
Gosh - that really sounds like engine bay hell!!!!! I can only Imagine what all that heat must have done to other rubber hoses / components! Speaking of glowing manifolds - one dark evening I had the car warming up on the choke at around 2k rpm and came back 3-5 mins later to find this …. Which is what makes me think whatever fuel line is used above the primaries is going to suffer with that radiated heat - especially when on full chat for prolonged periods as you experienced. The AFR in the photo was around 12.5 - I checked as my instant thought was “it must be super lean to cause that much visible heat”. I often wonder why the engineers didn’t run the rails on the “cool side” of the engine.1 point
-
Yes, same, it came with the flat top original configuration I inherited from the original owner. I tried to clean it up, but then realized I was probably given myself cancer and had no chance to actually get that gunk off. It didn't line up with the roundtop carbs anyway. I bought the fuel rails in my OP pics from someone on this forum. Back to topic, I should really get more scientific and measure the fuel rail temps at different times. But, not even sure it's a problem now that I fixed some fuel and fuel filter issues (again). I need to reproduce it.1 point
-
Thanks for that detailed reply Jeff - much appreciated. My vapour lock issues were mainly due to idling on hot days or stopping for fuel. I found 90% of all issues was fixed by a home made heat shield that protects the carbs and float bowls. In fact my carbs are fridge cool to touch after a run and often have condensation on the domes. BUT - the super heated fuel rails bother me both from a performance and vapour lock perspective. If going the rubber route, I would suggest running it round the back of the engine and closer to the carbs where the heat-shield protects the rubber from the most extreme temps. Here’s a pic of my homemade heat-shield (those trumpets were experimental at the time and totally rubbish)! I guess the key thing is to find a way to ensure the rubber line isn’t vibrating / fouling against things that vibrate.1 point
-
I've mentioned this in quite a few threads on the topic. Before you do anything, run a simple trial and see if the results work for your car in your weather conditions. The swap takes less than 5 minutes to do and is completely reversible. Swap the rail for rubber as I described above and repeat the conditions that cause heat soak issues. If the issues go away, you know where to start. If they persist, you have a different issue that needs attention either as a fix, or as a step in the right direction.1 point