


Leaderboard
-
florian
Free Member6Points25Posts -
Namerow
Free Member5Points1,554Posts -
zKars
 Subscriber
 3Points3,770Posts
 -

siteunseen
Free Member3Points15,119Posts


Popular Content
Showing content with the highest reputation on 12/22/2023 in all areas
-
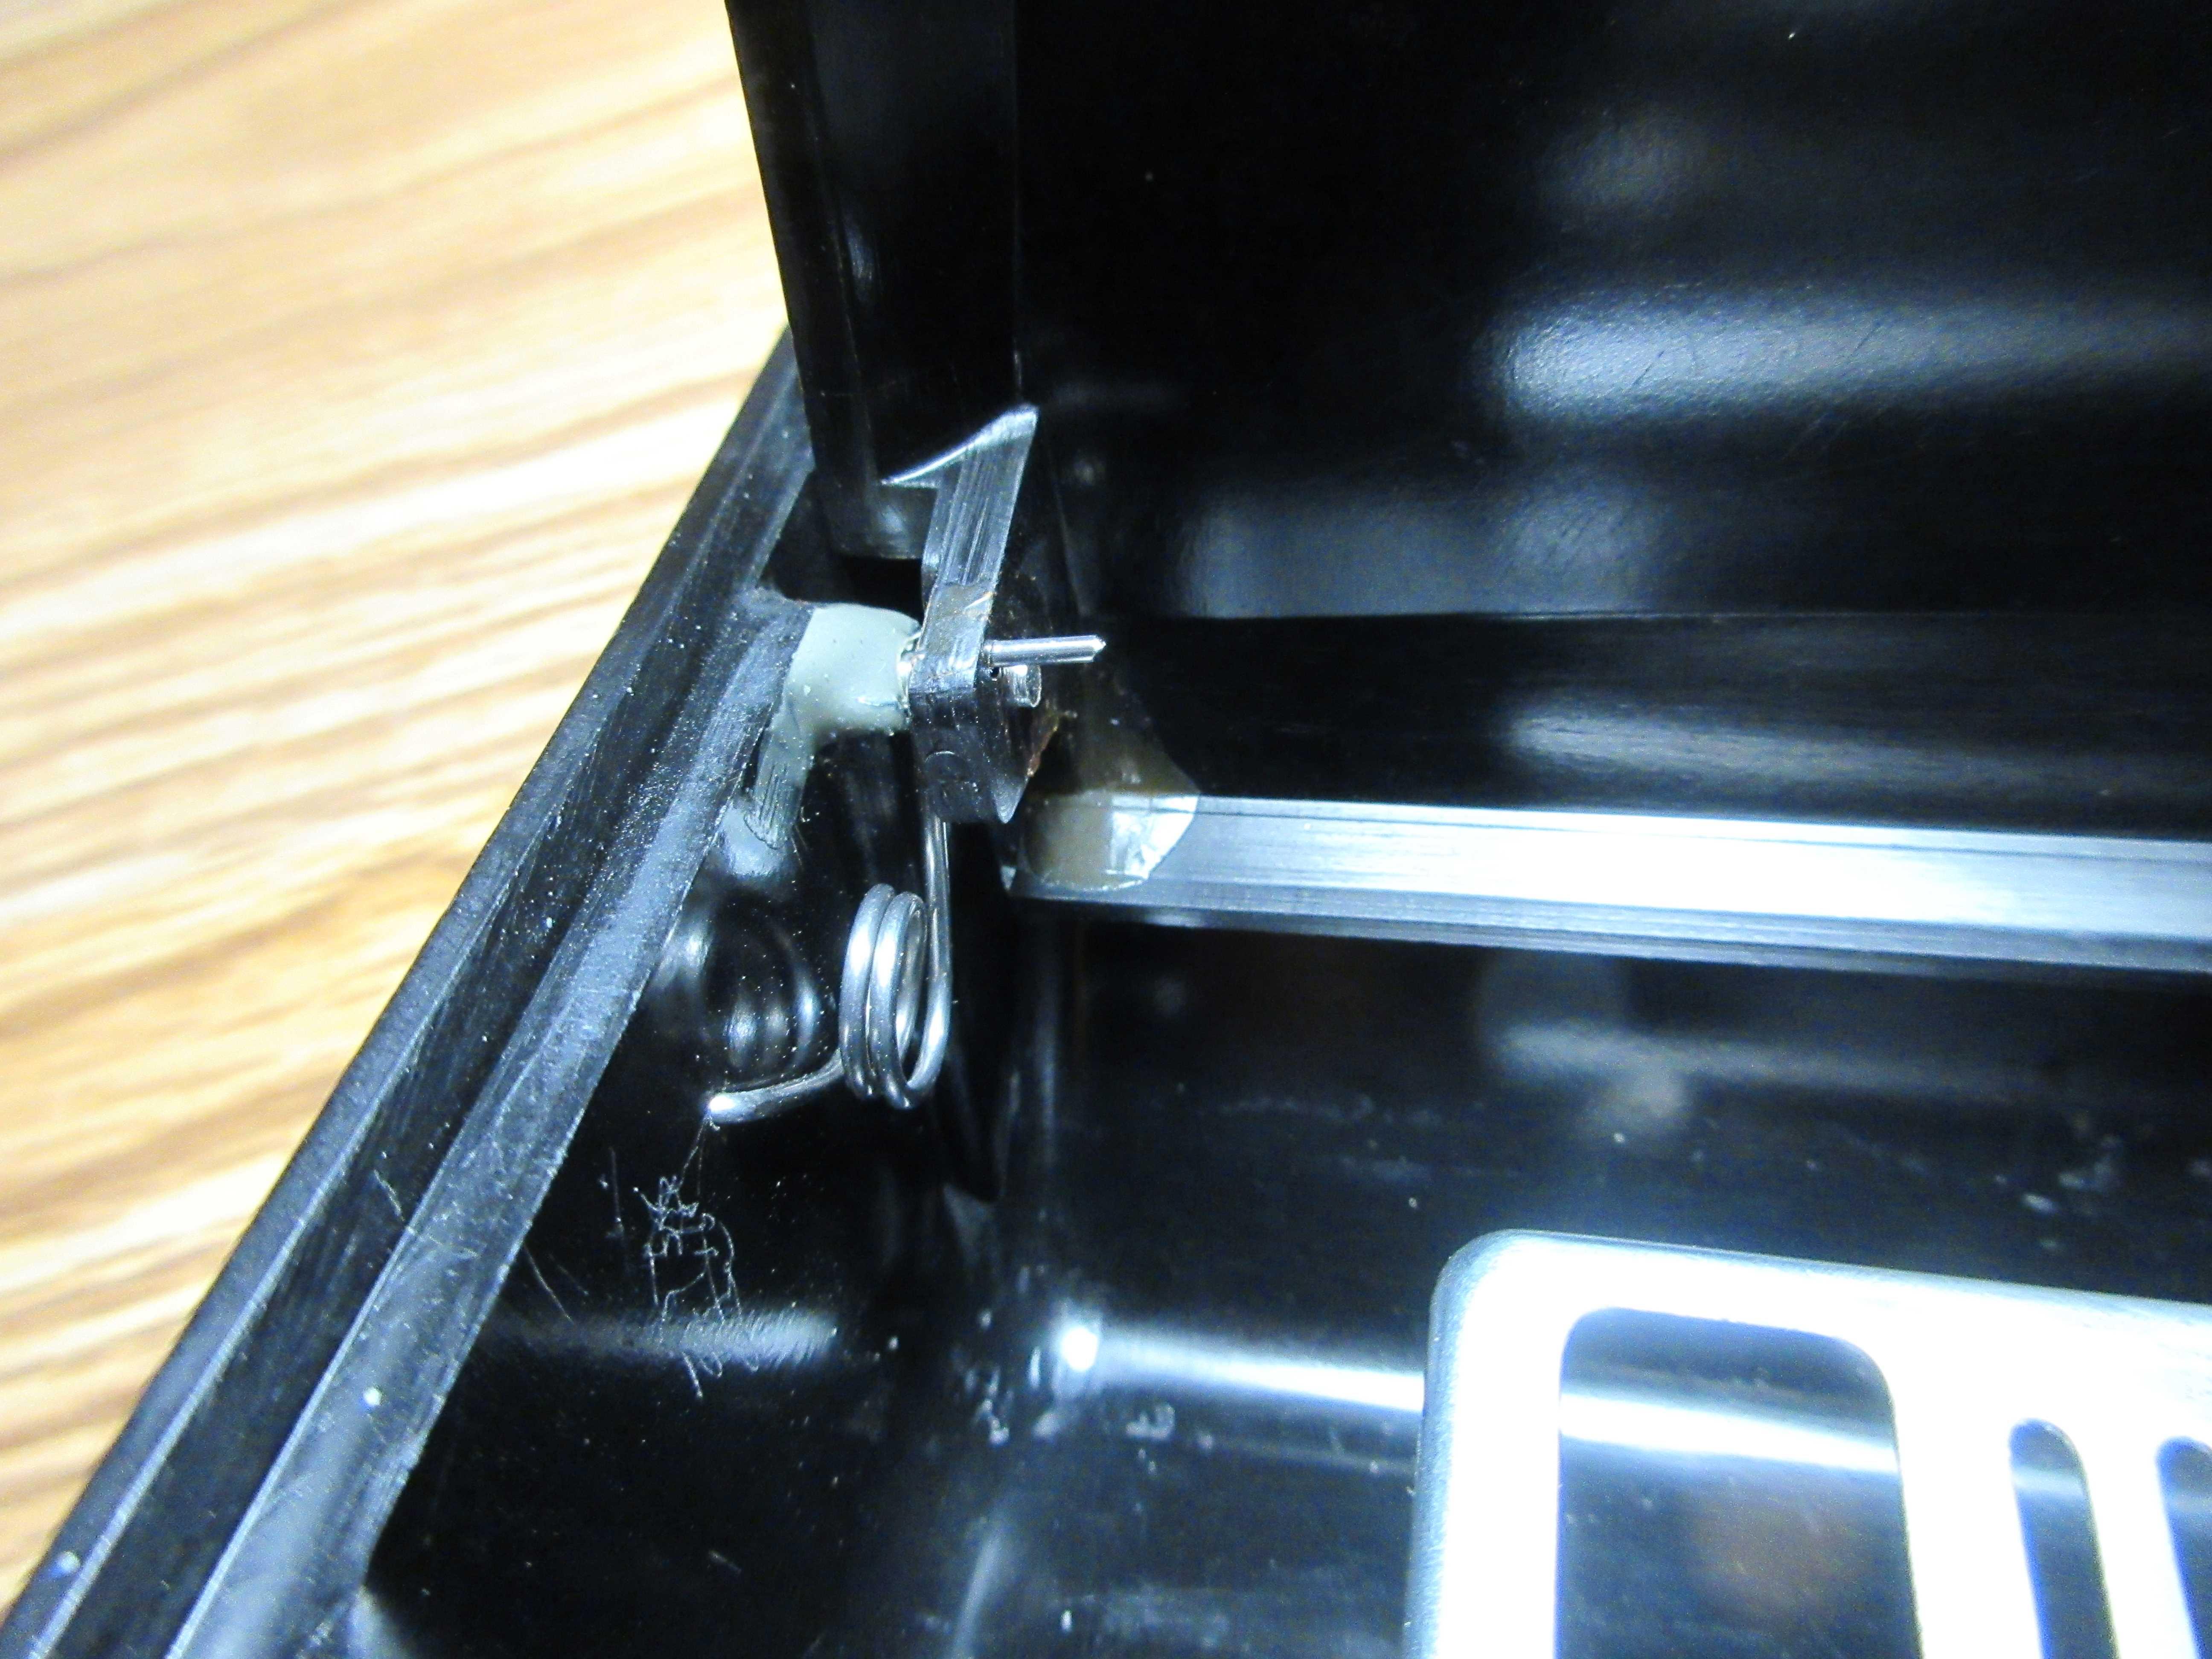
Just ordinary wire. Most mild steels, no matter what form they take (wire, bar, rod, sheet), remain elastic (i.e. they stay springy) unless they're taken past their yield limit. If they go past their yield limit, they 'bend' (i.e. they take on a permanent deformation and don't return to their original shape). In the case of a hairpin spring like this one, you ensure that the wire stays under its yield limit by making it longer... which is done by adding coils. For the Z's ashtray or fuse box lid, two coils seems to be enough to get the job done. I just re-checked my work: I used 0.045" wire. According to my AWG chart, that's 17 gauge.4 points
-
Well I took the first step. I bought a little household Bissell steamer and steamed the heck out of the tank. Put about an hours worth of steam through it. Tank is now fume free. Did it outside on a ~+5C sunny day here. Nice cloud of steam coming out all the ports. Rotated around which hole I stuffed the steam hose into during the hour and rotated the tank around. That steam was immensely smelly but now the tank is odorless and spotless (not that it had much in the way of spots to start with). I happily silver soldered up the stock fuel outlet tube that was rotating freely(and leaking) with nice MAP torch with no fear. And yes I even stuffed the open flame in the filler tube just to prove it was fume free. Granted I’m abandoning the stock feed and return fittings, should really just solder them shut. Guess I could use the return as a vent. We’ll see.
 3 points
 -
I am very pleased that the video has been so well received here. He hasn't been known in the Z scene before and doesn't want people to know who he is. I'm therefore taking on a bit of the task of sharing his videos everywhere. I also have to say that all of his documentaries (and there are many more!) help the Z scene a lot. If you want to see more, as a Patreon you get to see a video of the work done every day. When you watch it like this, you can only marvel at how much work goes into the small details.3 points
-
2 points
-
Hello all, I would like to do a little advertising for this channel here. One of my Z friends is restoring a 240Z and has a very special way of documenting it. I think you will all be very interested and it is super relaxing to watch. In general, this is a very exciting channel!1 point
-
1 pointYa-know? I don't have and problem inconnectly speeling without the crutch of computer intelligence. This is because of my superb education. You guys are whining.1 point
-
This guy, incredible. Not too many know how to lead anymore, I love the faux spotweld dimples he recreated on the rear wheel well lip.1 point
-
I just gotta say - I have a lot of respect for this guy. Completely unrelated; prior to, I had been watching his videos where he restored random stuff like coffee grinders or whatever and I thought he was doing something cool. My YouTube (of course) recommends z related stuff. I started watching this guy's z restoration, quickly became enamored. He's handmaking so many of these parts, tastefully documenting his journey along the way with his recordings. This is commendable in its own right -as @Richie G said, it's "mesmerizing". At some point he hammers the front apron flush, end to end - a little unseen seam that even the original z engineers overlooked because, well, who cares, nobody's gonna see it!? Anyways, I randomly get into this z restoration, and, turns out, this is THE SAME GUY who had been entertaining me months prior with his well done and beautifully presented restorations of random kitchenware and various archaic hand tools. Now, this isn't even to mention all the bs random nonsense he's had to deal with off camera - stuff that we, the audience, will never see. Random things breaking or irreversibly bending, bolts flying off into oblivion... you name it. And, how about all the rust he's found hidden beneath a layer of already rusted metal? We're talking past the doglegs; beneath the corroding metal one sees along the the back window. Of course we, fellow z owners, feel his pain (I'll be damned if I don't break at least one bolt in any endeavor or have to overcome some small, small detail in what should be a boiler plate operation), but that just adds to the level of detail, dedication, and craftsmanship this guy achieves! He has a keen eye in general and set his sights upon our beloved z car. This guy is getting it done son, and I love it!1 point
-
Nice job! As this is part 3... there are gonna be some 10-15 parts i guess? Very nice recordings of the work. The "leading" you (he) uses is this soldering tin like 40/60? made of lead and tin? i always wanted to know what is what? 40% lead and 60% tin? or the other way around so, 60% lead and 40% tin? Who can tell me this? Or is it pure lead, i don't think so because that's to soft.. I have seen restorers use the leading technic and it's a very good way to finish sheetmetall like that hoodedge. Well Done!!1 point
-
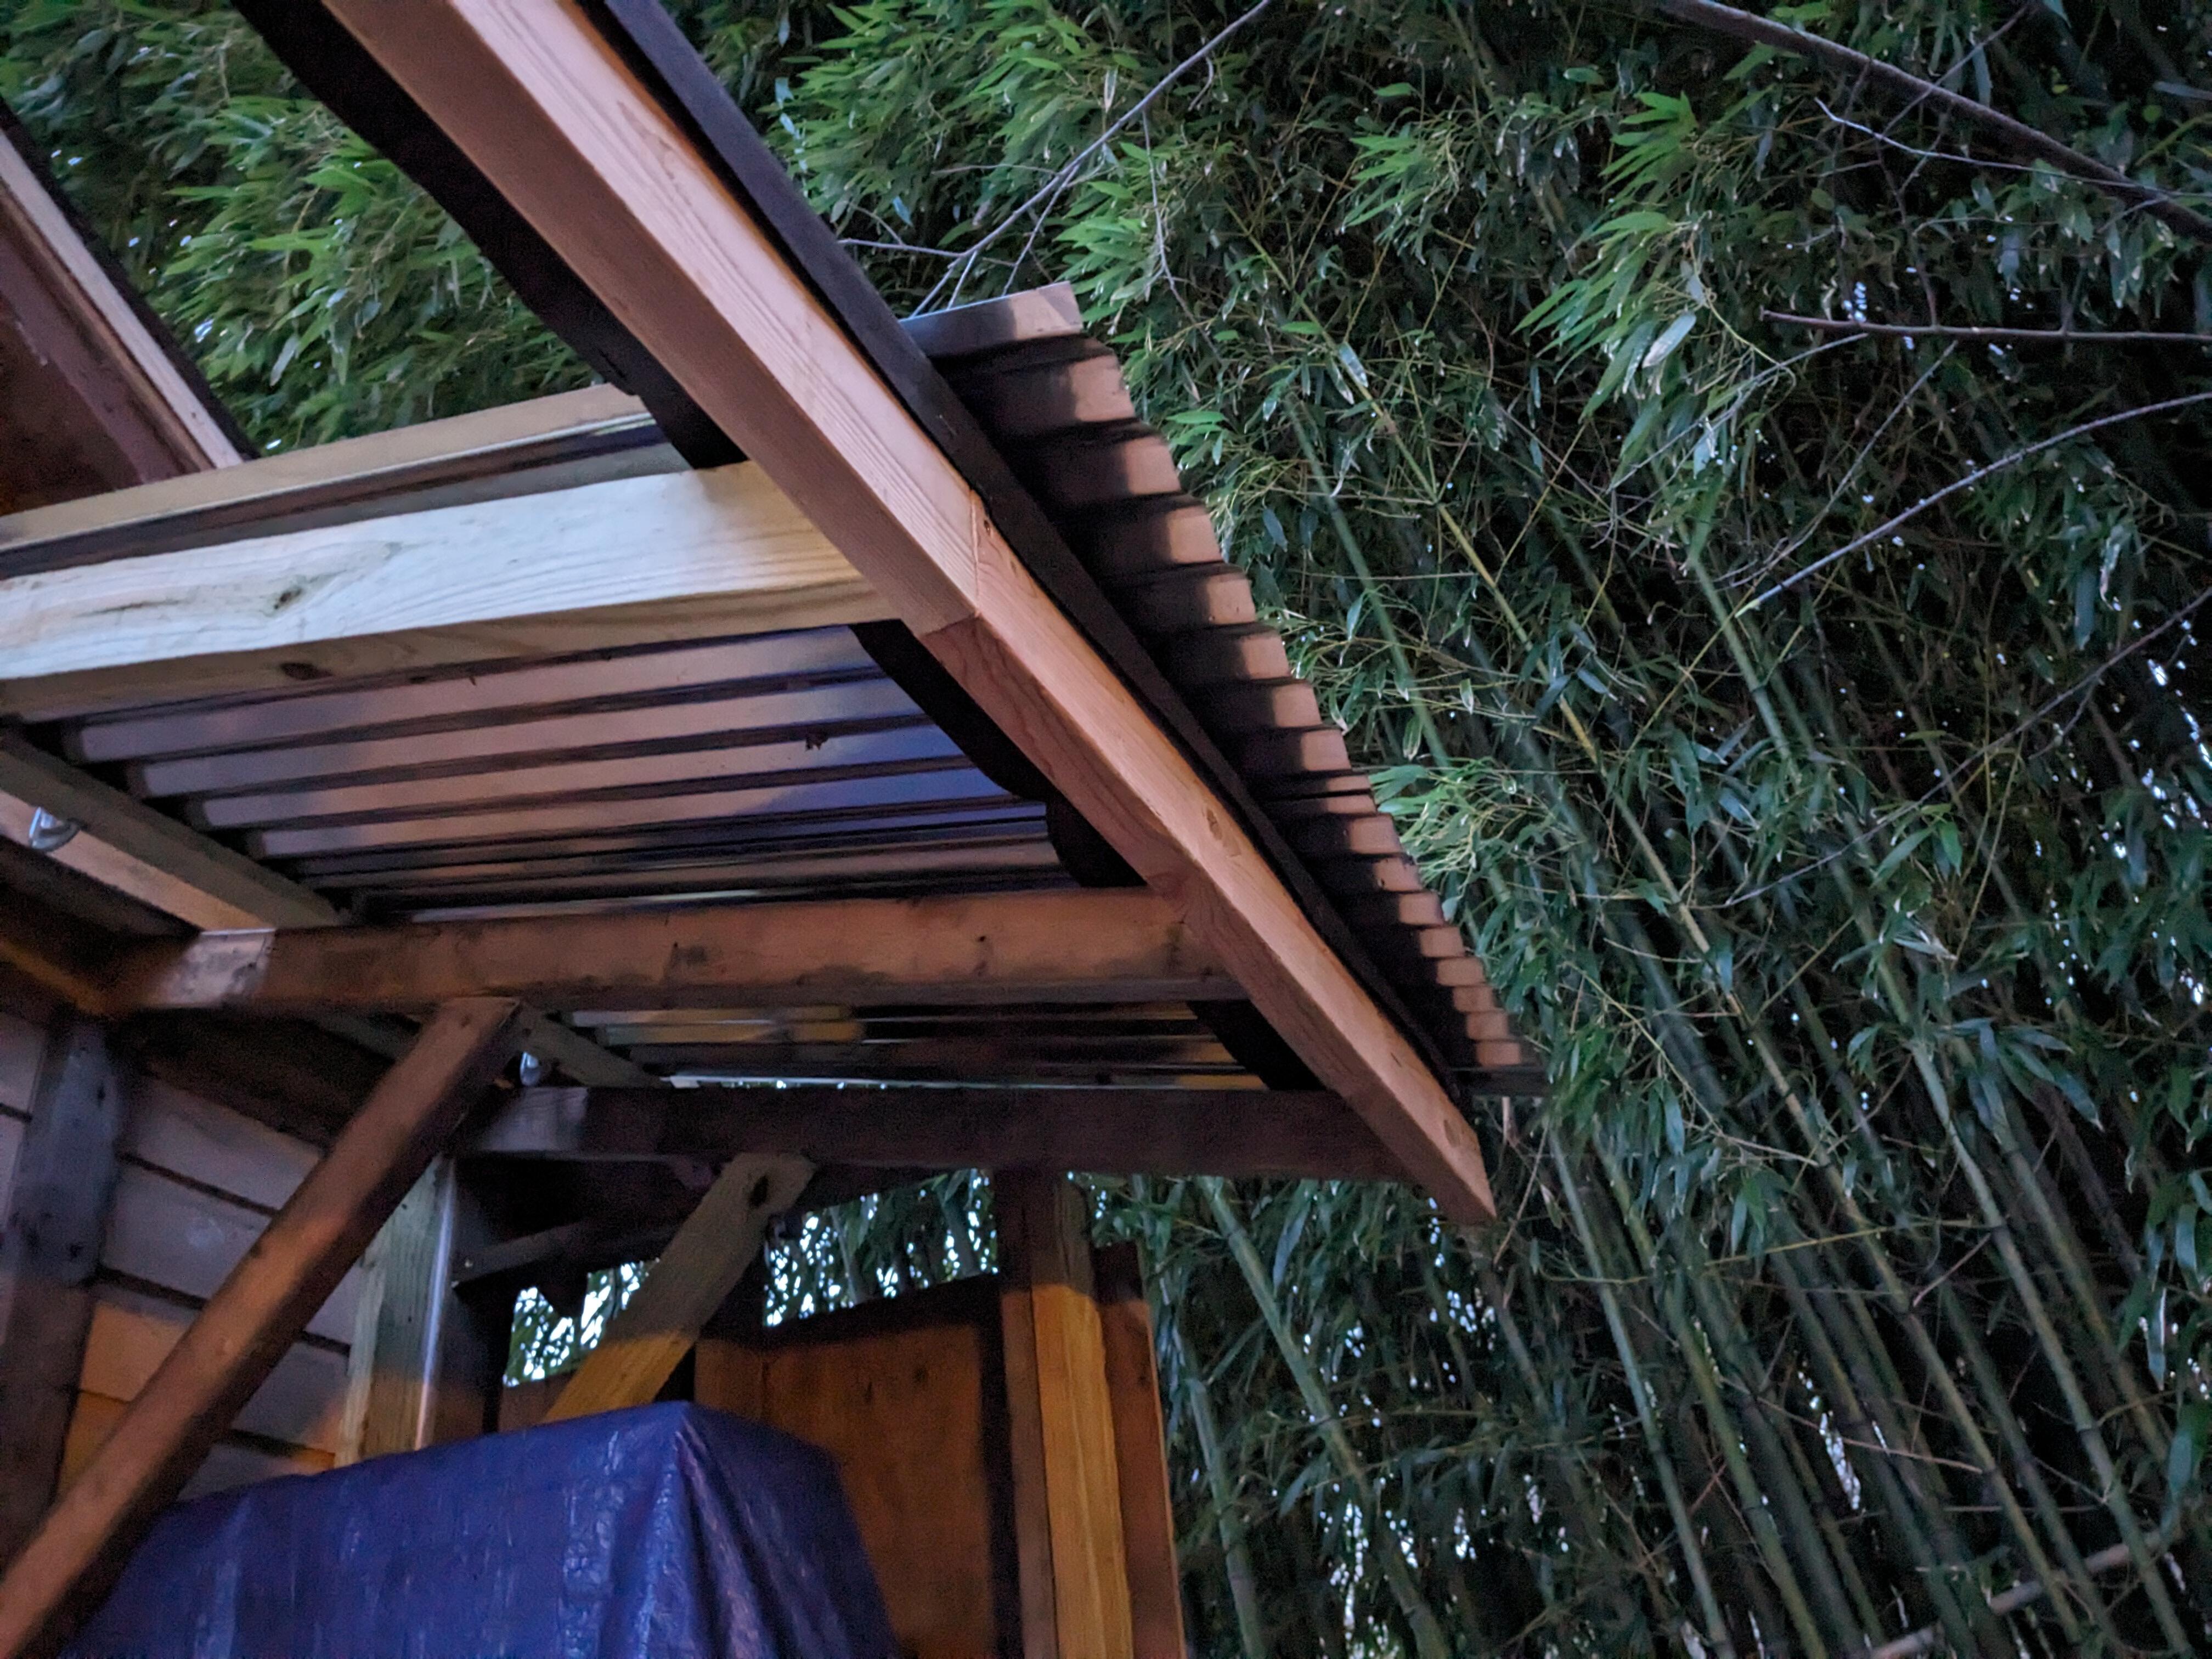
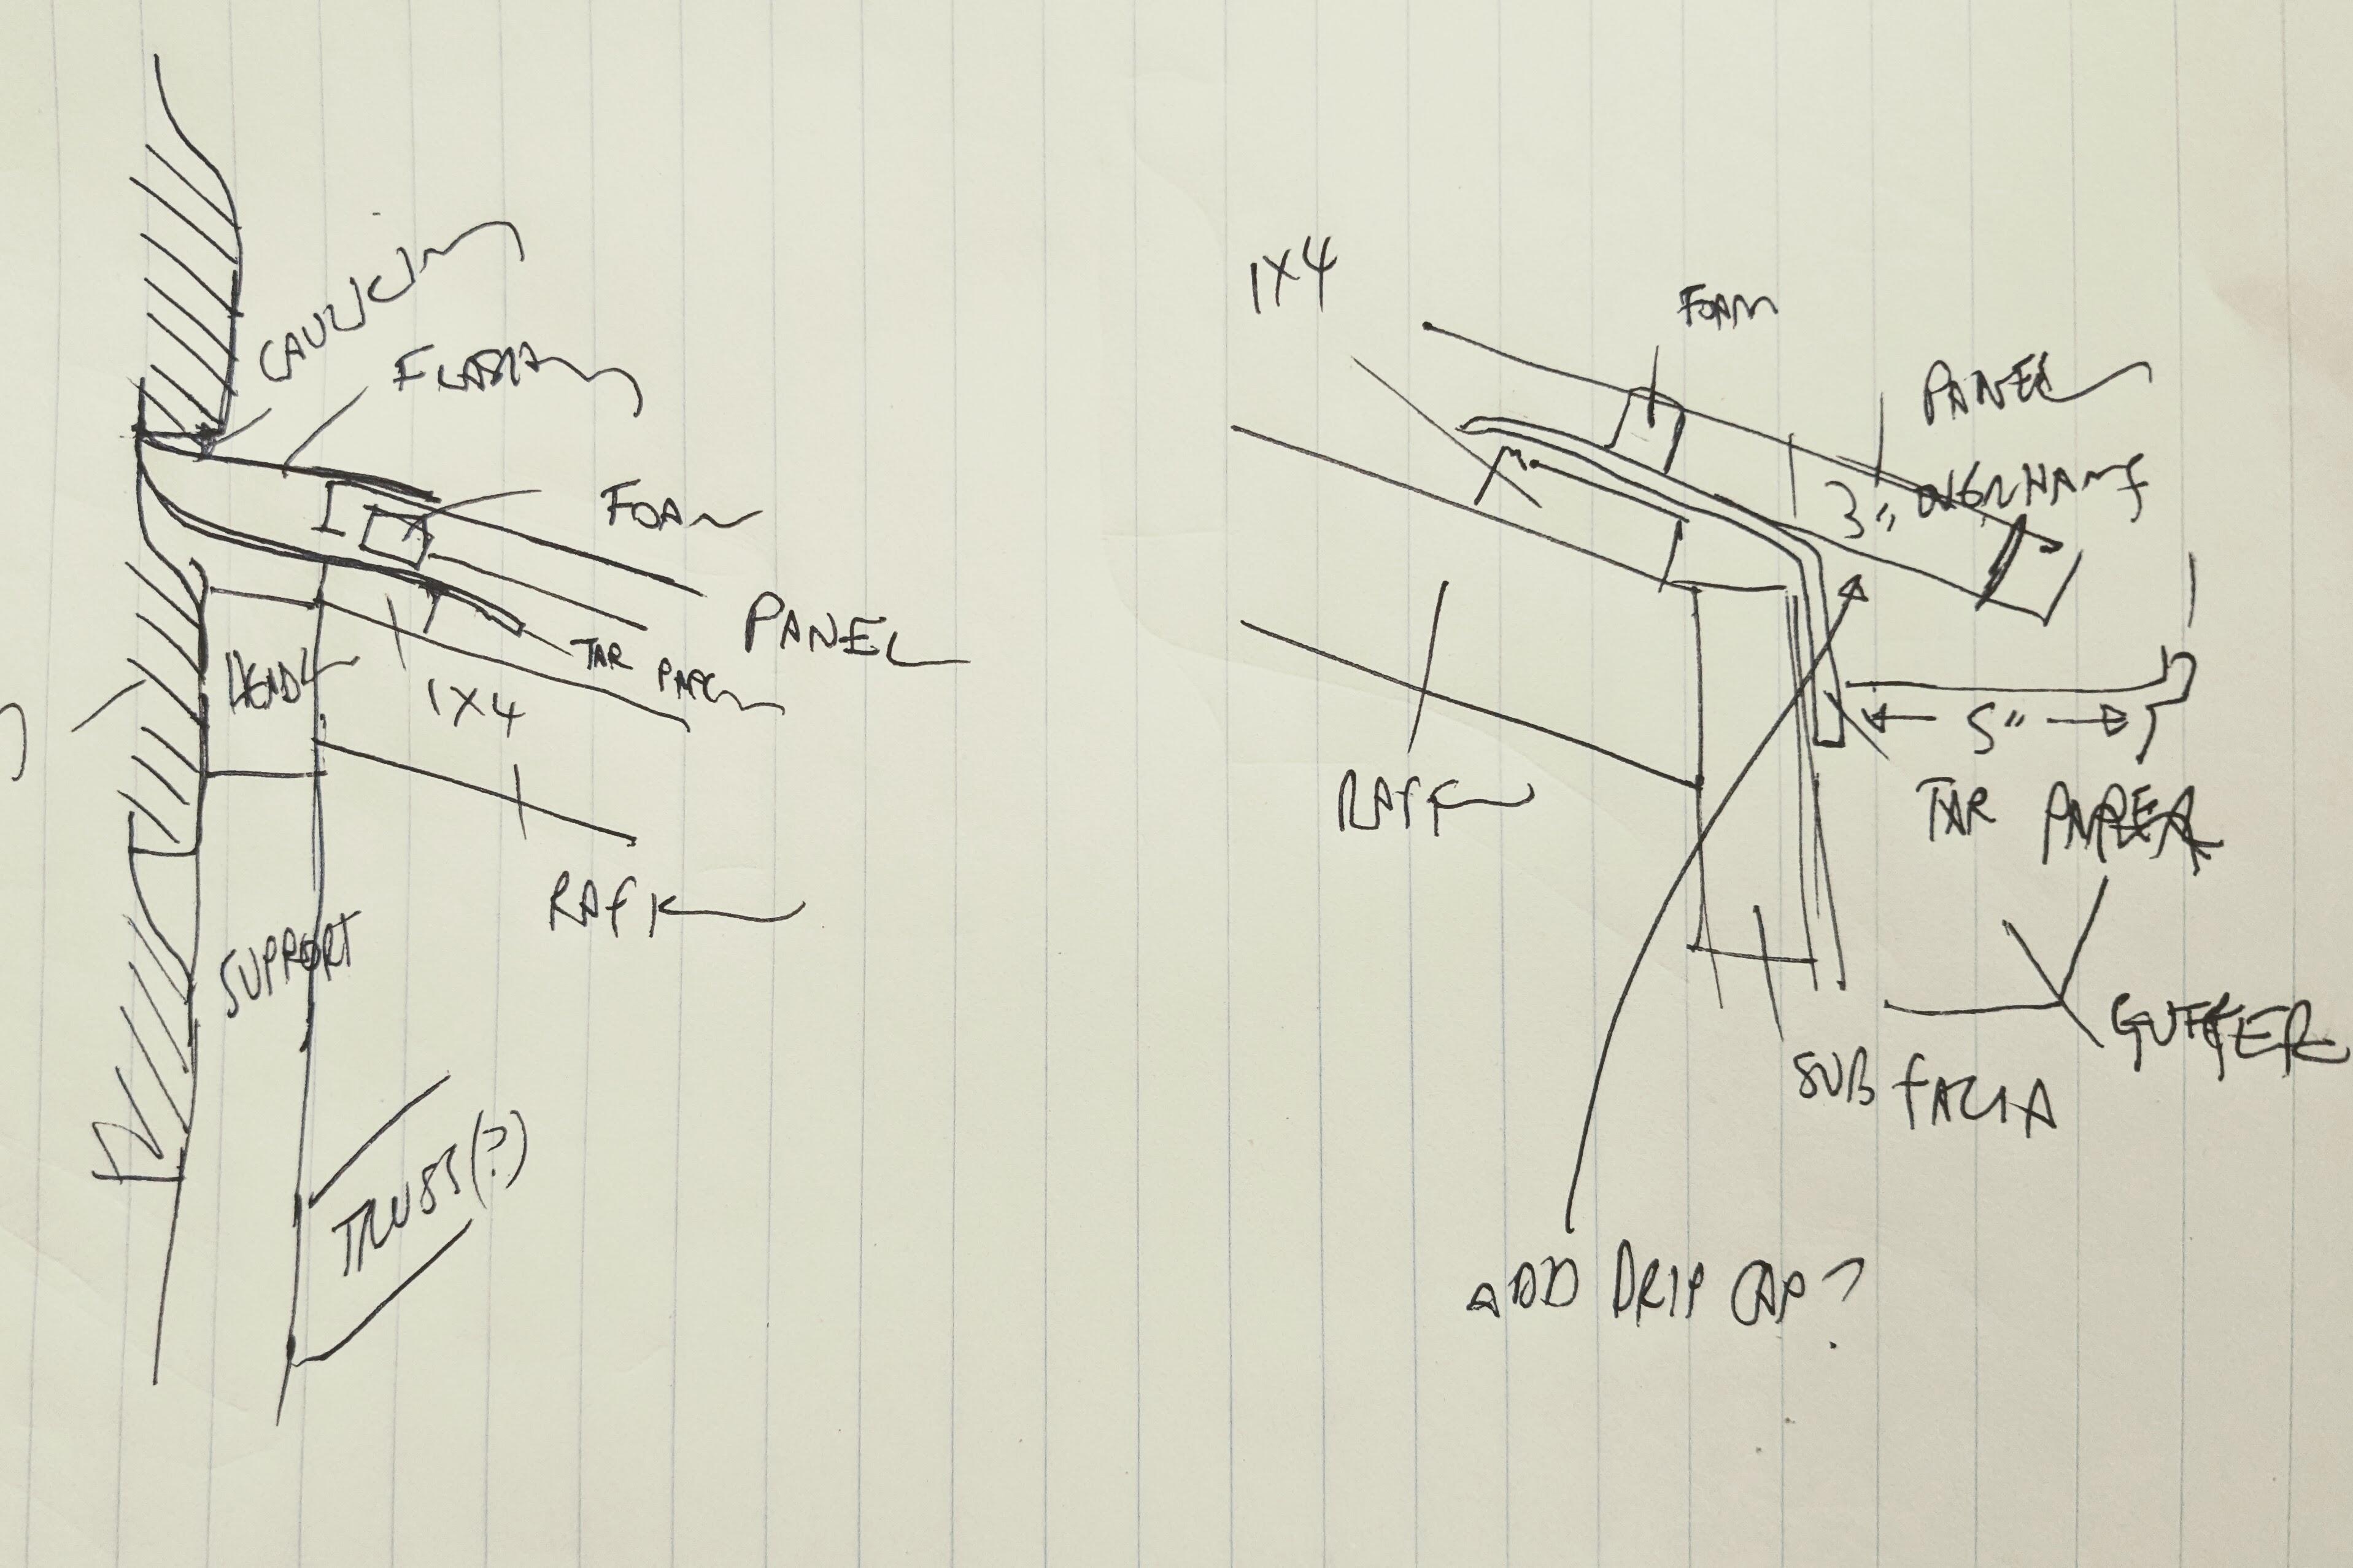
Thank you again. I will scrap the J channel idea. I can't find flashing that is corrugated for steel panels, or foam 'wave' closure that conforms to the panel contour, which was the main reason I was considering the J channel. I did find a 1" foam tape that is meant for metal panels, so I'll get that to use under the flashing, over the panel at the siiding, and at the facia end . Finding angle flashing besides drip edge seems to be problematic. I'll have to see what I can find. I got 1x4's along the top & outer edge of the rafters, along with another strip when the upper & lower roof panels will need to overlap. I still need to add another length of 1x4 in the middle of the span. I put tar paper along the outer 1x4 overlapping the sub facia. I will see if I can pry up the siding to tuck flashing under. I wedged tar paper up under the siding ridge as it stands, I can seal flashing up against that if not under. Test fitting the lower section of the roofing, with 3" overhang. I found that the 4th rafter from the right is not 24" OC, so I need to add a sister(?) rafter at 24" OC. Still have to buy the gutter. I had bought 1x6 to use as facia, not sure I need to bother with that now I have the 2x6. I could add drip edge, but I don't know if that's a requirement with a guttered awning.


 1 point
 -
1 pointGoogle has gone to crap recently. All the ads and pop-ups they used to block aren't blocked on my end anymore. I may try Fire Fox soon. The internet has gotten worse for me. I have better user end through my smartphone. Sad days, unfortunately for EVERYTHING. The Unabomber was right.1 point
-
1 point1 point1 pointThis is for Phillip, @240260280. I think about him every time I hear this song.1 pointHere are a couple of photos of the spring that I made for the ashtray in my 70Z. It was made from plain hardware-store wire (16 gauge?). IIRC, I just clamped a Philips screwdriver in my bench vise and then wound the wire around the metal shaft. The 90-degree bends at the ends were formed afterwards over the jaws of the vise. The key, of course, is deciding how many winds you need in order to get the right tension in both open and closed positions. The spring needs to be lightly compressed when the lid is open. Also visible here is the epoxy repair that I did to restore the mounting boss for the lid's pivot pin (the original boss had cracked and splintered).

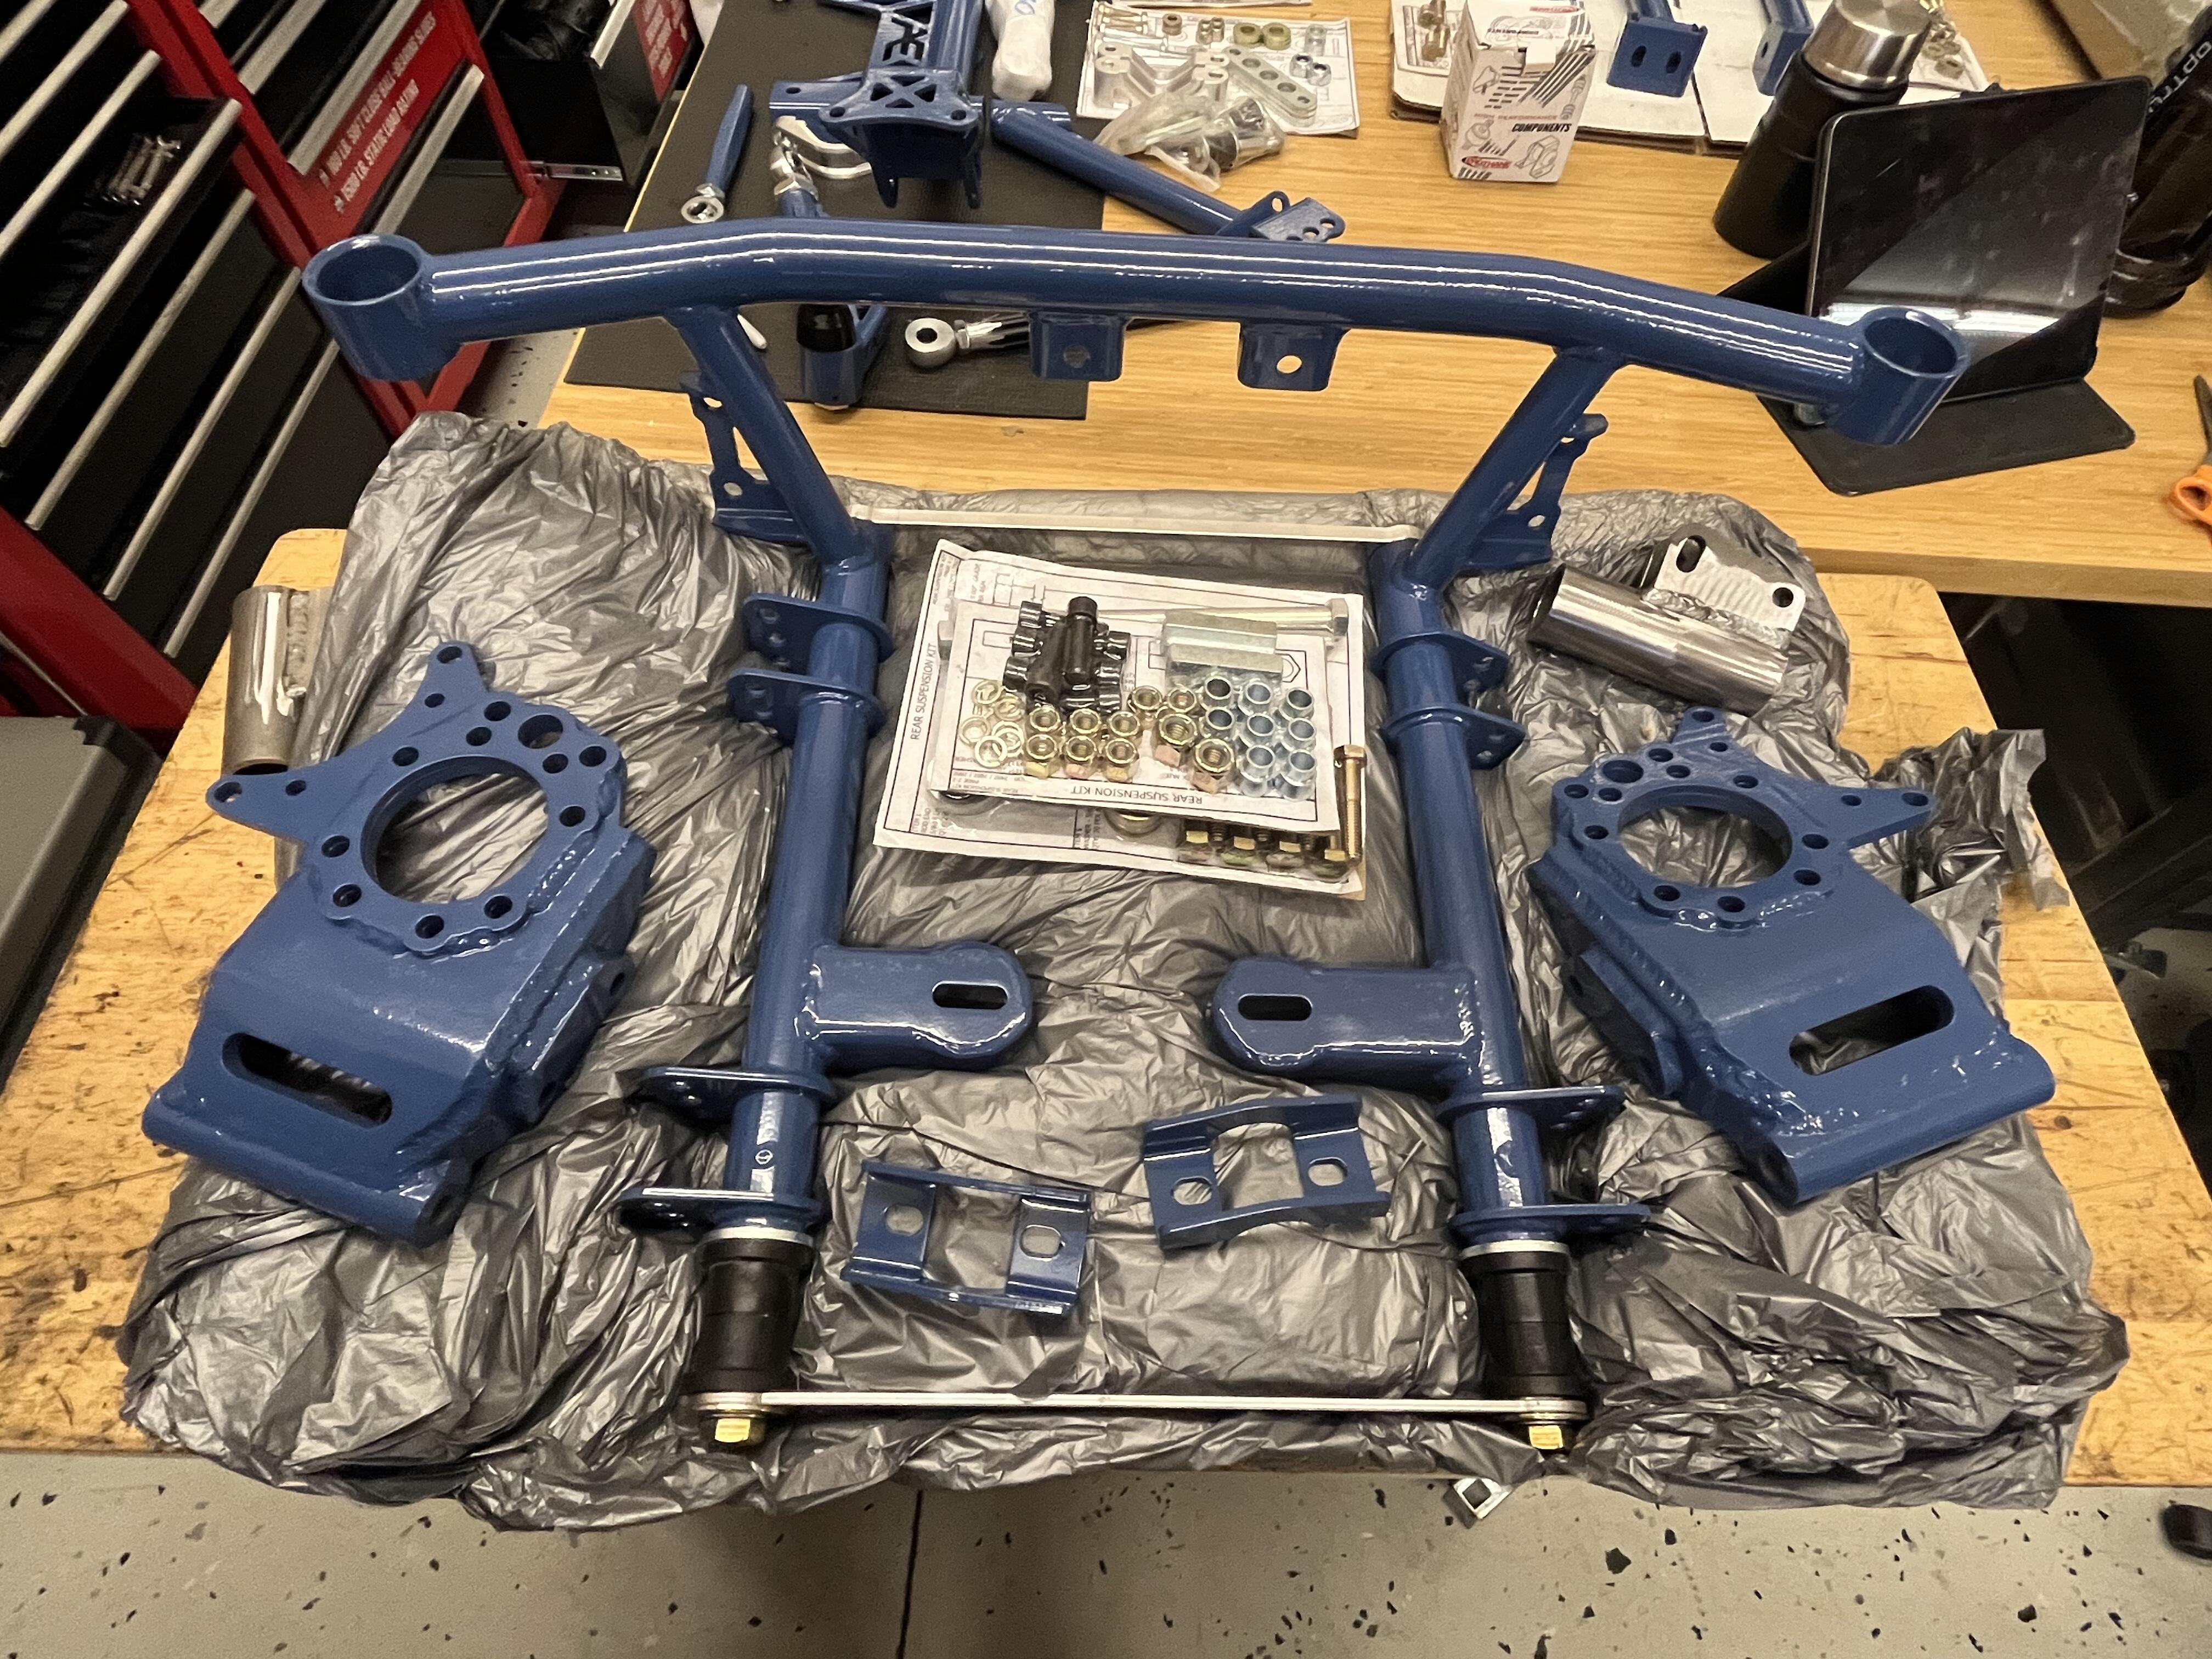
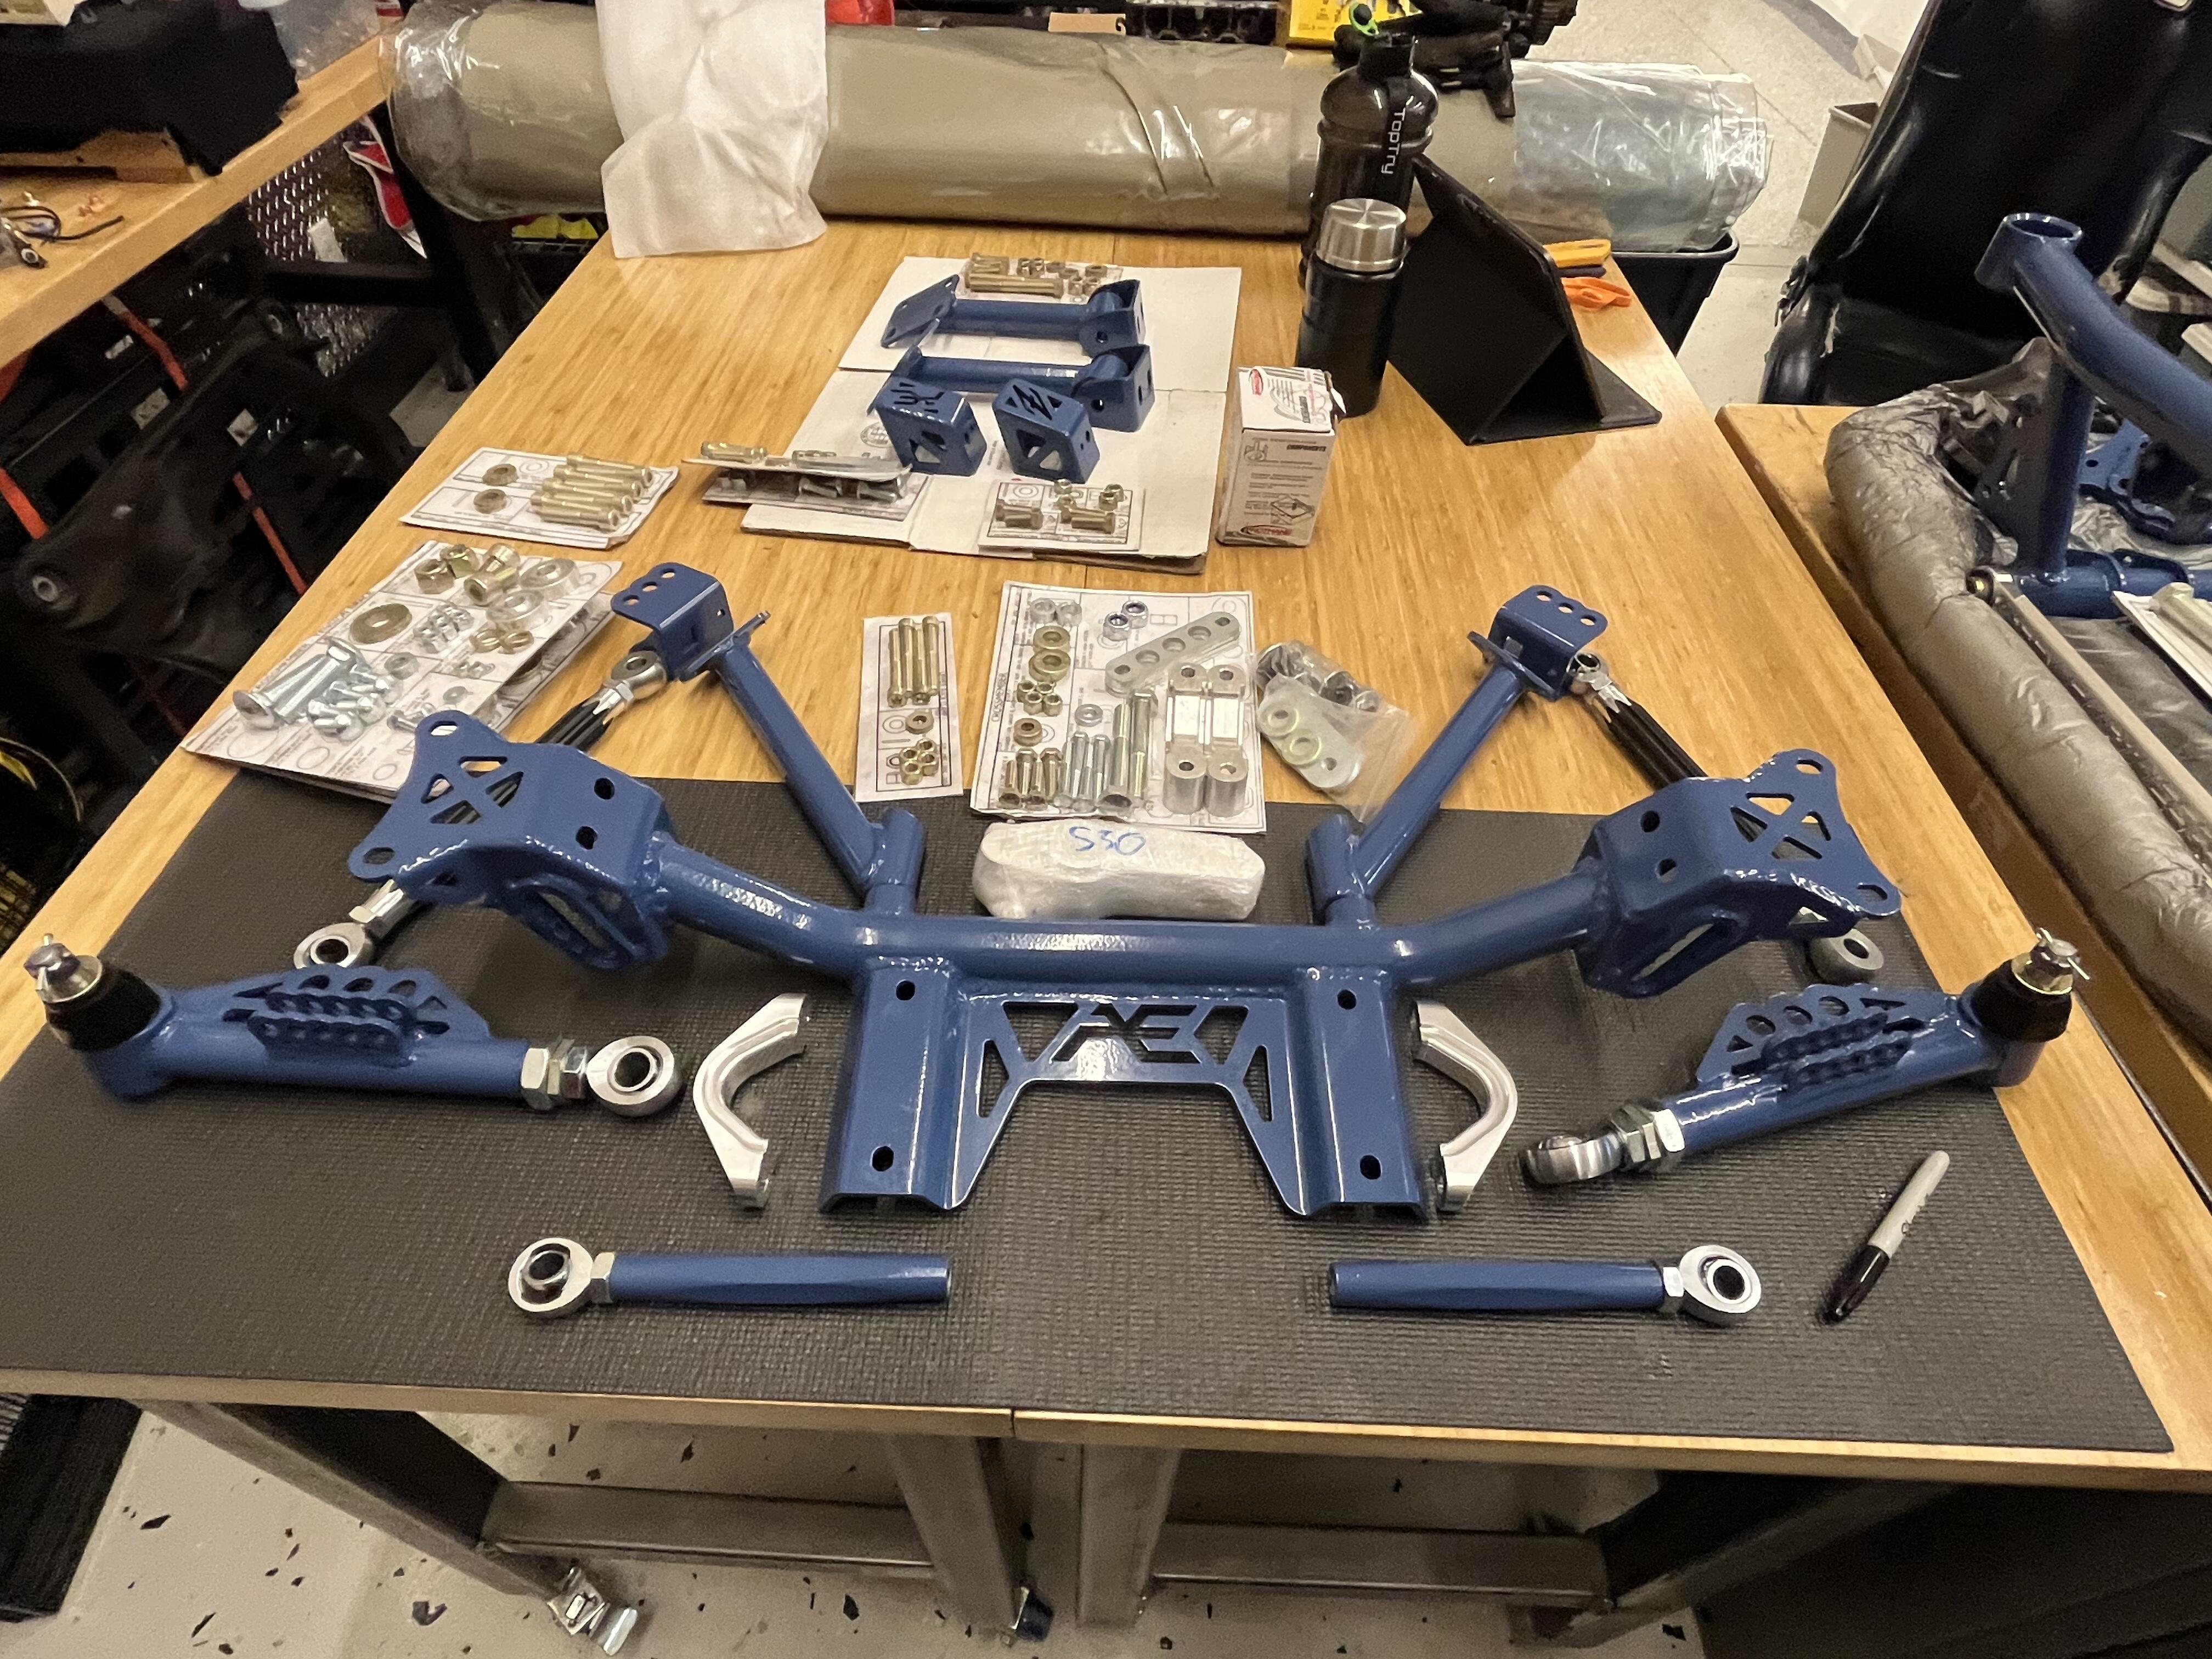
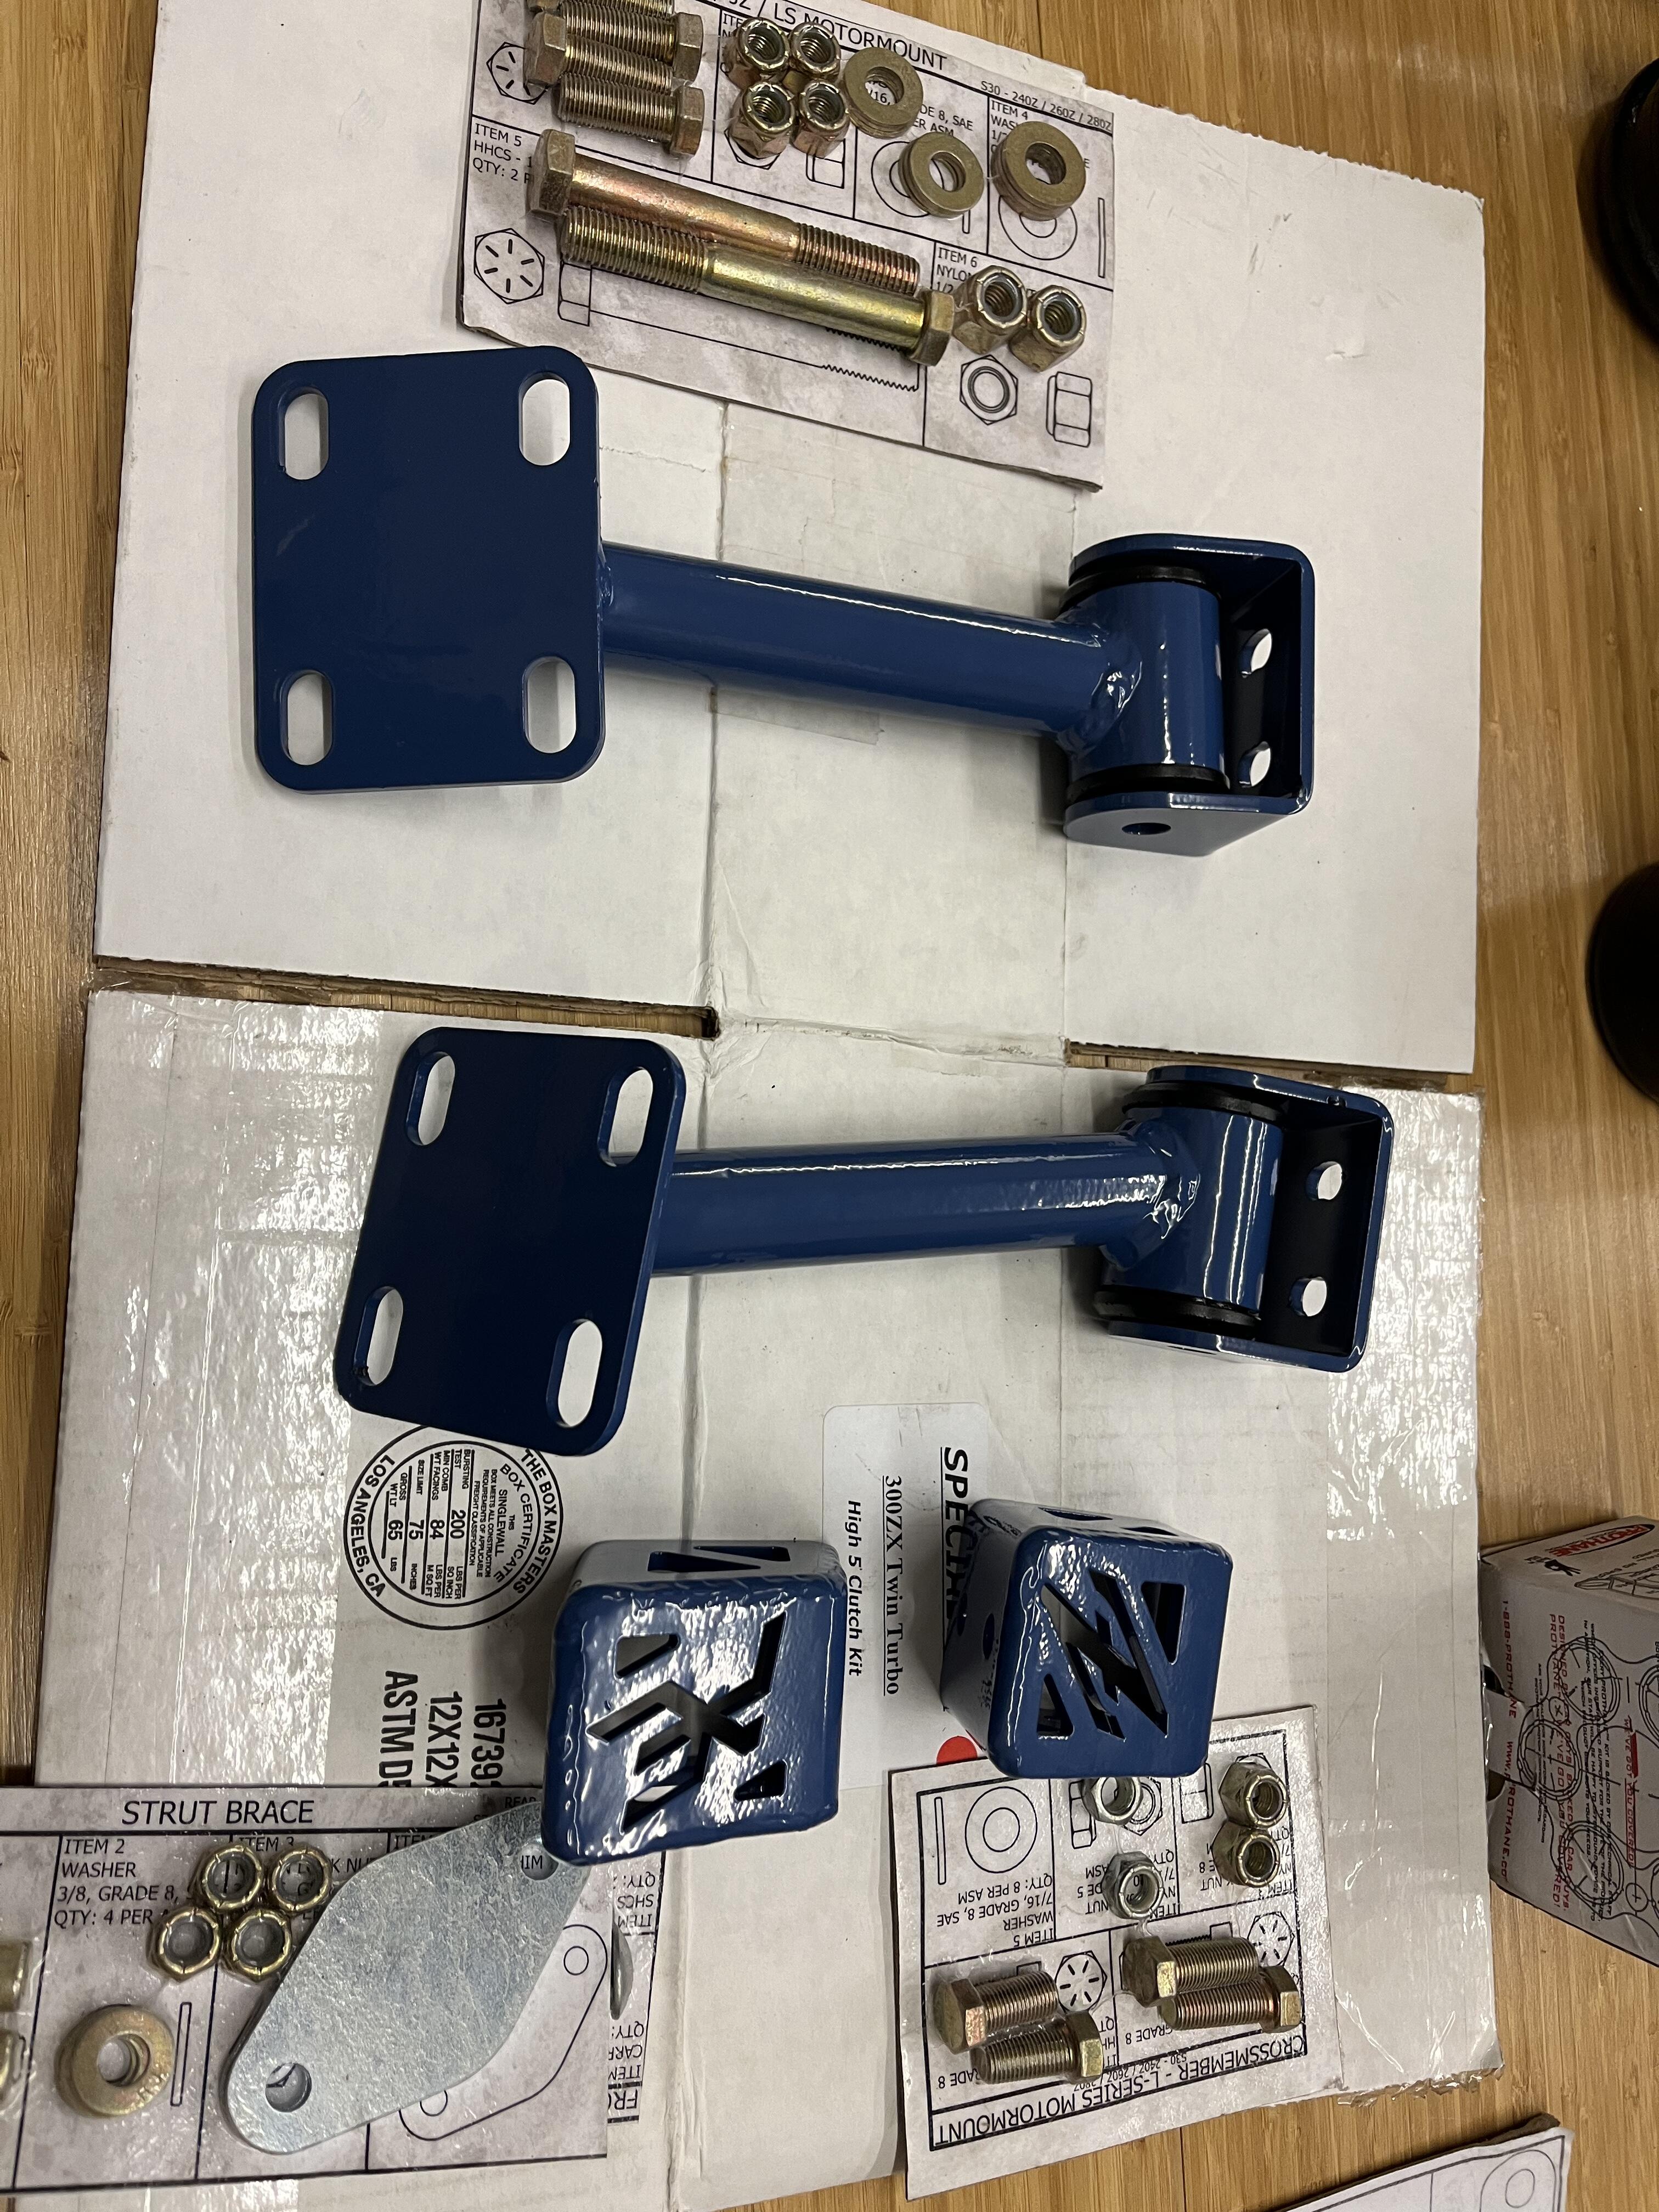
 1 pointHe is strapping the top of the 2x4s w 1x's so that will tie them all together. Hangers wont hurt anything. Im not totally sure they're necessary but they're fairly cheap in the overall scheme. The most susceptible location is actually the top of the rafters that have kickers. The portion of the rafter that hangs out past the kicker will want to pivot down when loaded. The kicker will act as a hinge point putting a lot of load on the top connection At the wall to roof transition, no j channel. Your flashing needs to preferably go under the siding and must turn out on top of the roofing. If not it will funnel water under the roof. They should offer a rubber weatherstripping for sealing the corrugation. You could use that under the counter flashing at the top if it needs closing up. If you cant get under the siding with the counter flashing You could seal it to the siding with some good sealant. Maybe a urethane with some 3d or 4d nails to hold it down1 pointthese videos are mesmerizing, so well done and for sure informative. will be bookmarking parts i need to refer to in the future work i have planned.1 point1 pointAbout 75% of the APEX kit showed up today ... thanks Black Friday!

 1 point


Important Information
By using this site, you agree to our Privacy Policy and Guidelines. We have placed cookies on your device to help make this website better. You can adjust your cookie settings, otherwise we'll assume you're okay to continue.