Leaderboard
-

HusseinHolland
Free Member4Points1,023Posts -

Yarb
 Subscriber
 4Points1,690Posts
 -


dutchzcarguy
Free Member2Points2,605Posts -

Namerow
Free Member2Points1,484Posts
Popular Content
Showing content with the highest reputation on 06/28/2024 in all areas
-
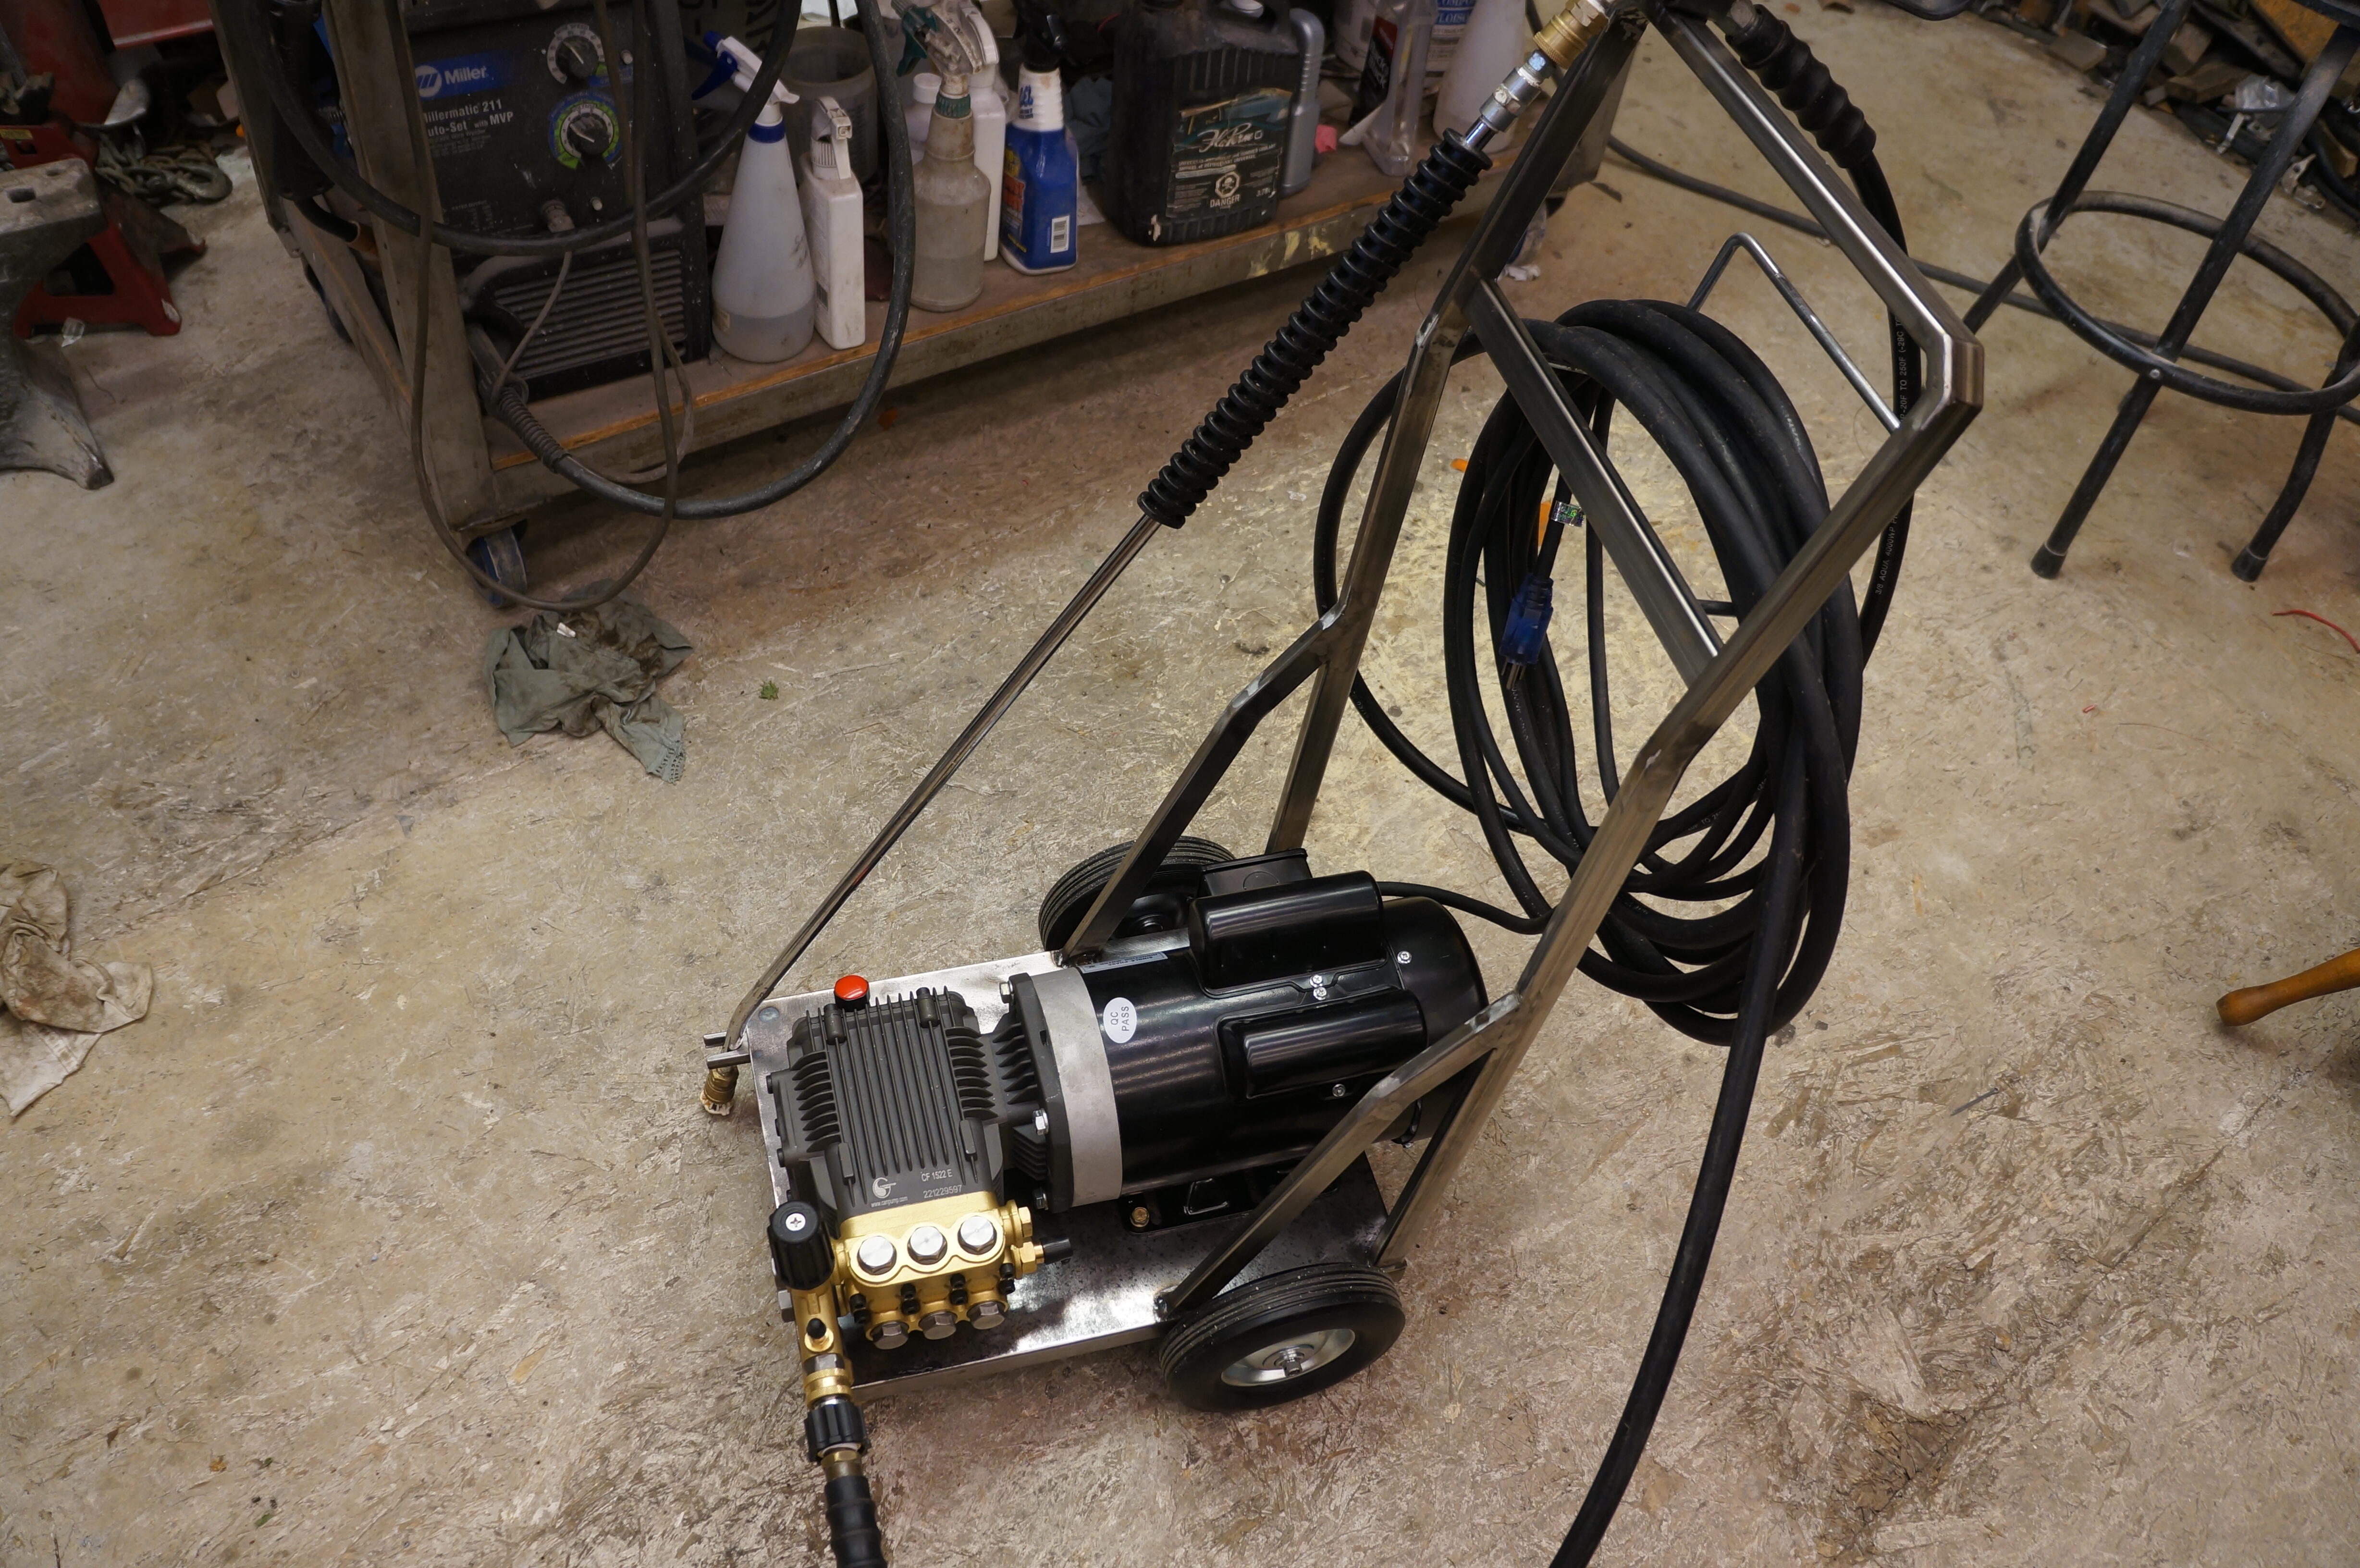
 I have a gas powered pressure washer and it's great, but it's loud. I like to wash the cars early in the morning on weekends but my neighbors aren't too happy about it, so I started looking around for an electric PW. Man there's a lot of junky units out there, most of the consumer grade PW's have axial pumps and the build quality looks like they won't make it through the summer. Kranzel has good reputation but the prices were too much for this old cheapskate. So I started looking around at commercial products and found if you are willing to do some leg work and assembly you can put together a good quality system that will last many years and not empty the wallet, too much. I started with this Triplex pump, 1500psi, 2.5 gpm https://www.amazon.ca/dp/B07V2BG92C?...osi&th=1&psc=1 for $310 cnd (cheaper for you guys in the states) 1500psi is fine for car washing, patios and decks so I should get a lot of use out of it. Paired it with this 2 hp compressor motor, https://www.ebay.ca/itm/165599464830...1&isGTR=1#shId I have a good quality hose and wand from the gas powered unit that I can use and welded up a cart from scrap metal I had in stock. I had the cart powered coated for $40, so in all, I spent about $600 cnd.


 2 points
 -
Lol - my co-workers were singing that to me - emphasis on "Schools Out Forever" 😁2 points
-
2 points175 on a 5 inch wheel fits perfect. btw i drive vredestein and at first i was not a fan of vredestein but they make good tires.. (i could get a set for little money new and they drive very well) Pirelli... pff.. i would never fit a Pirelli to any of my cars, Italian hey.. it looks cool but drives like sh*t in a few years as they harden fast.. I drove Bridgestones of 15+ years old and they also got hard and slippery but after 15 years.. As i'm driving about 2000 km a year i don't wear 'em out.. they need to be replaced because the rubber gets hard .. It is FUN though.. making powerslides all the time Haha.. but it's not very safe.. 🙂2 points
-
Second that. Not an easy job: 1/3 educator, 1/3 keeper-of-order, 1/3 entertainer. Made all the more challenging in this modern era of cell phone and texting distractions.2 points
-
 2 points
 -
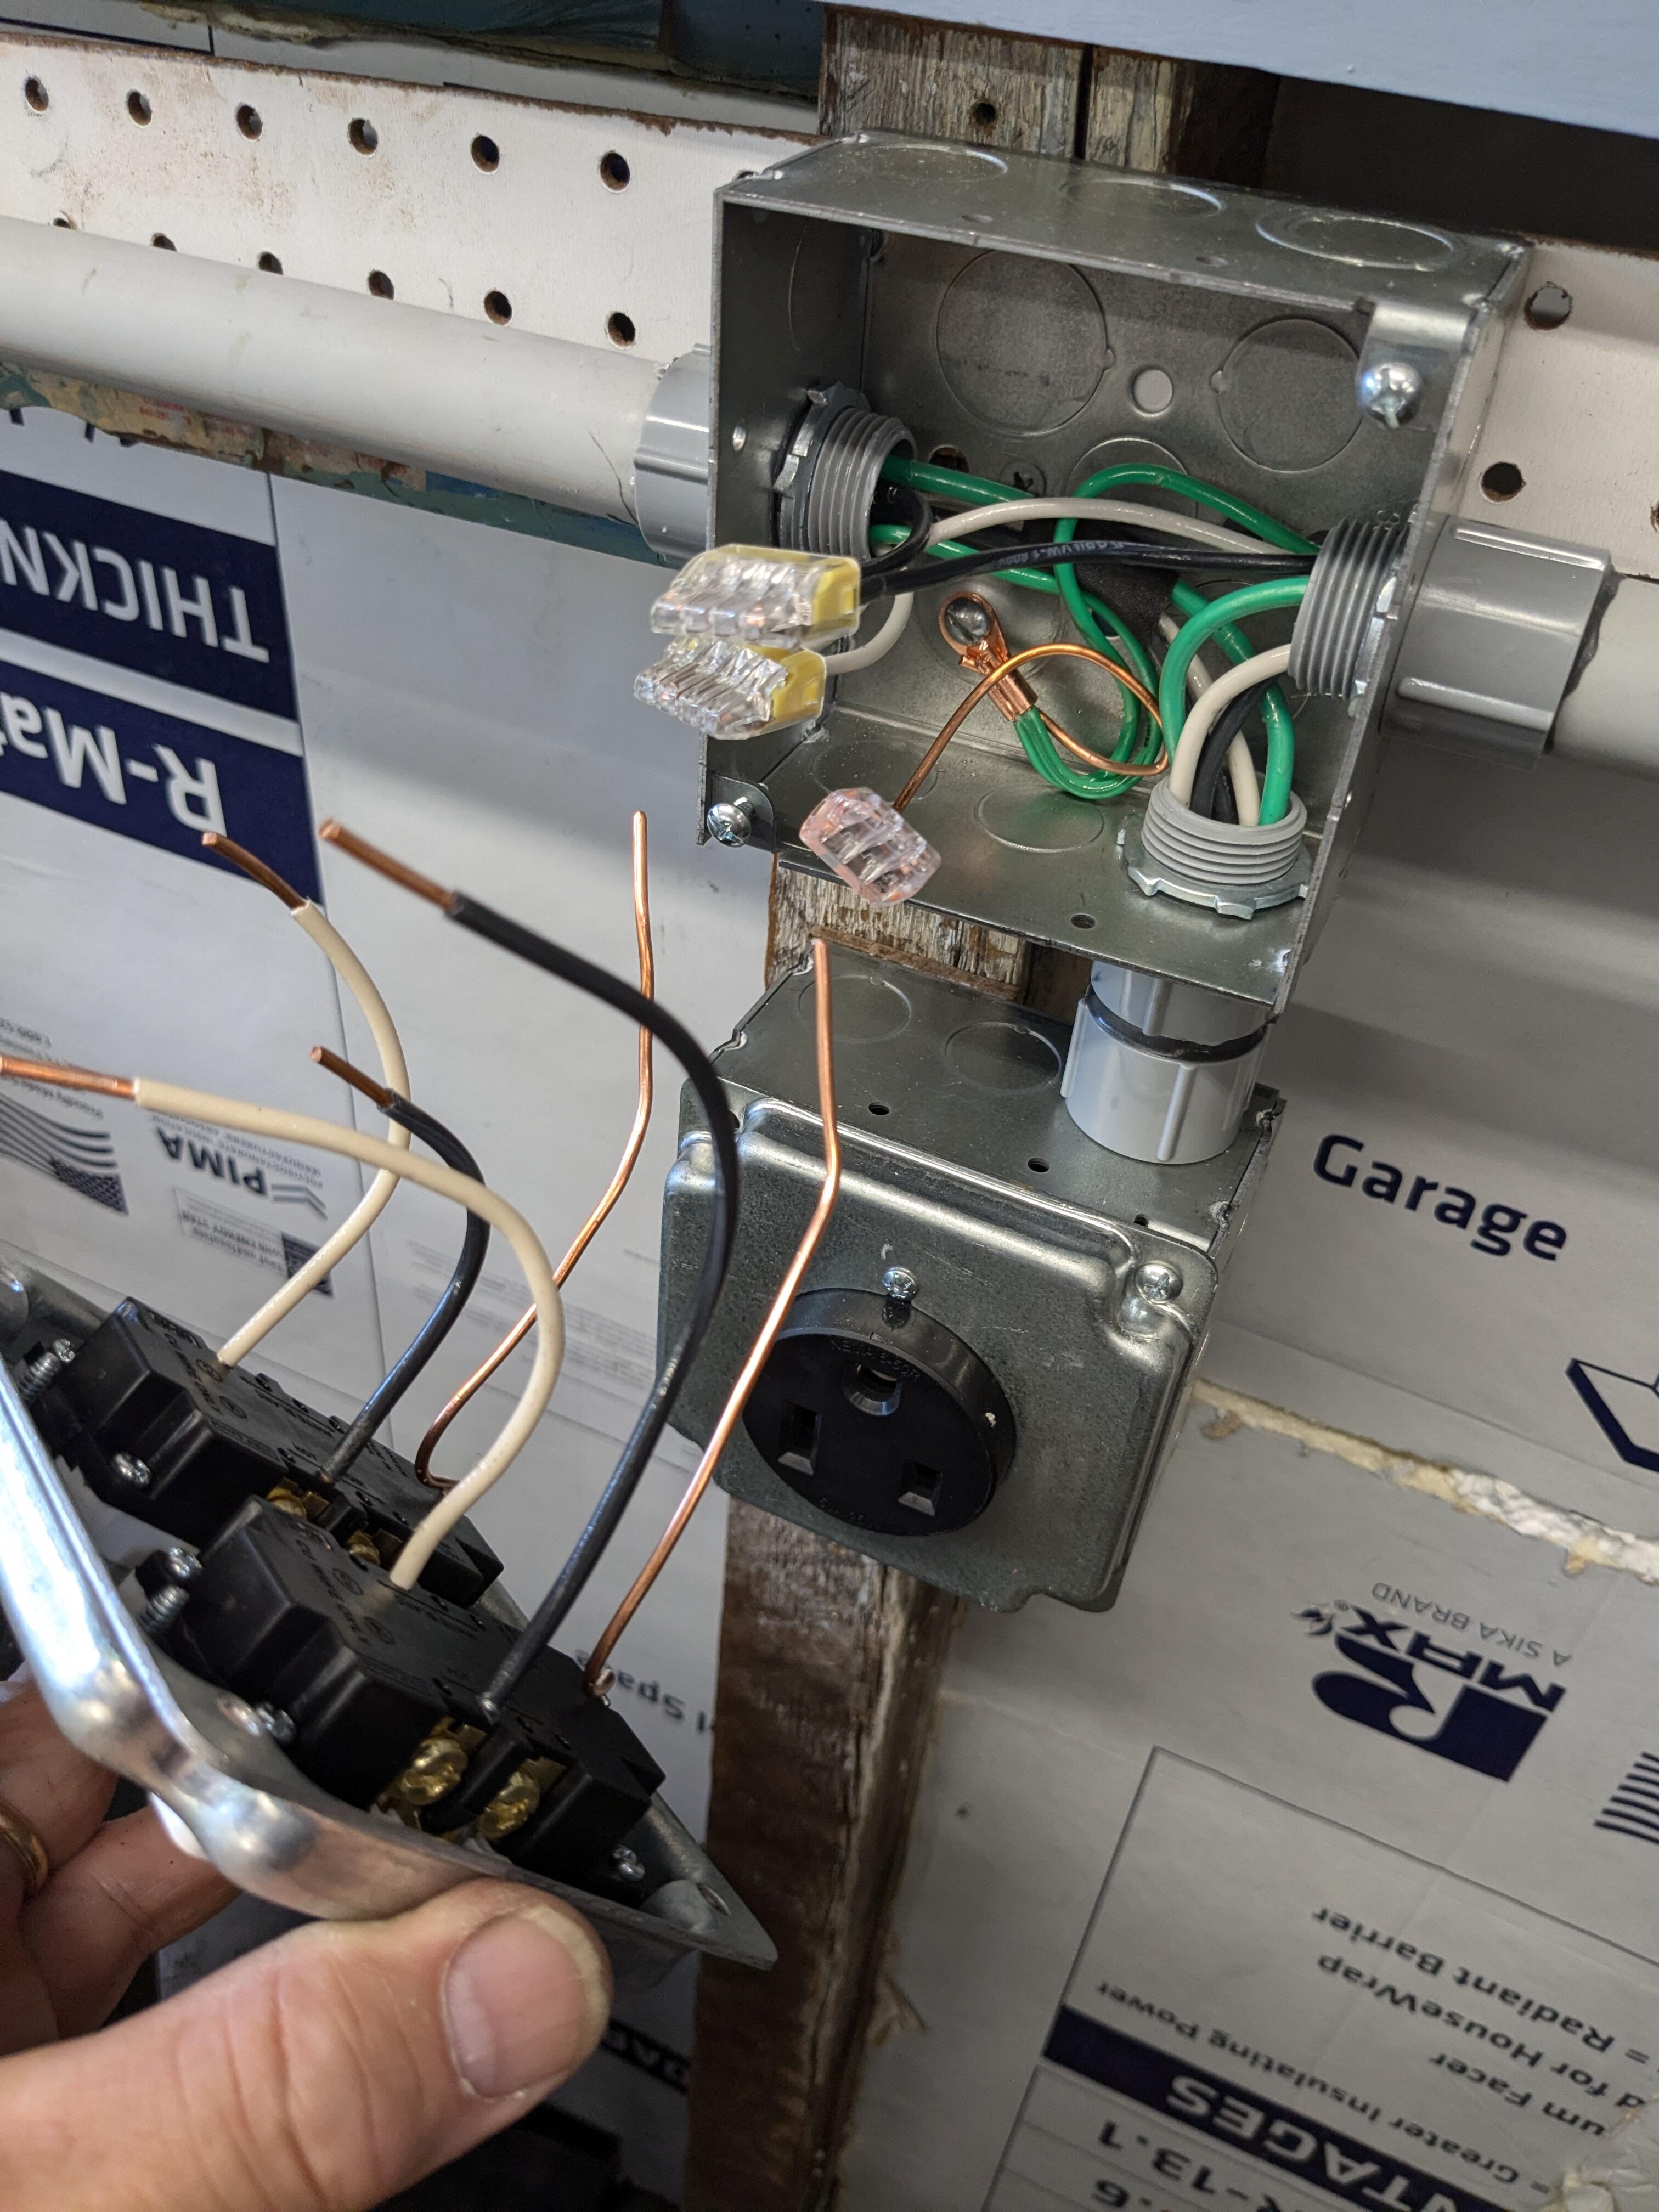
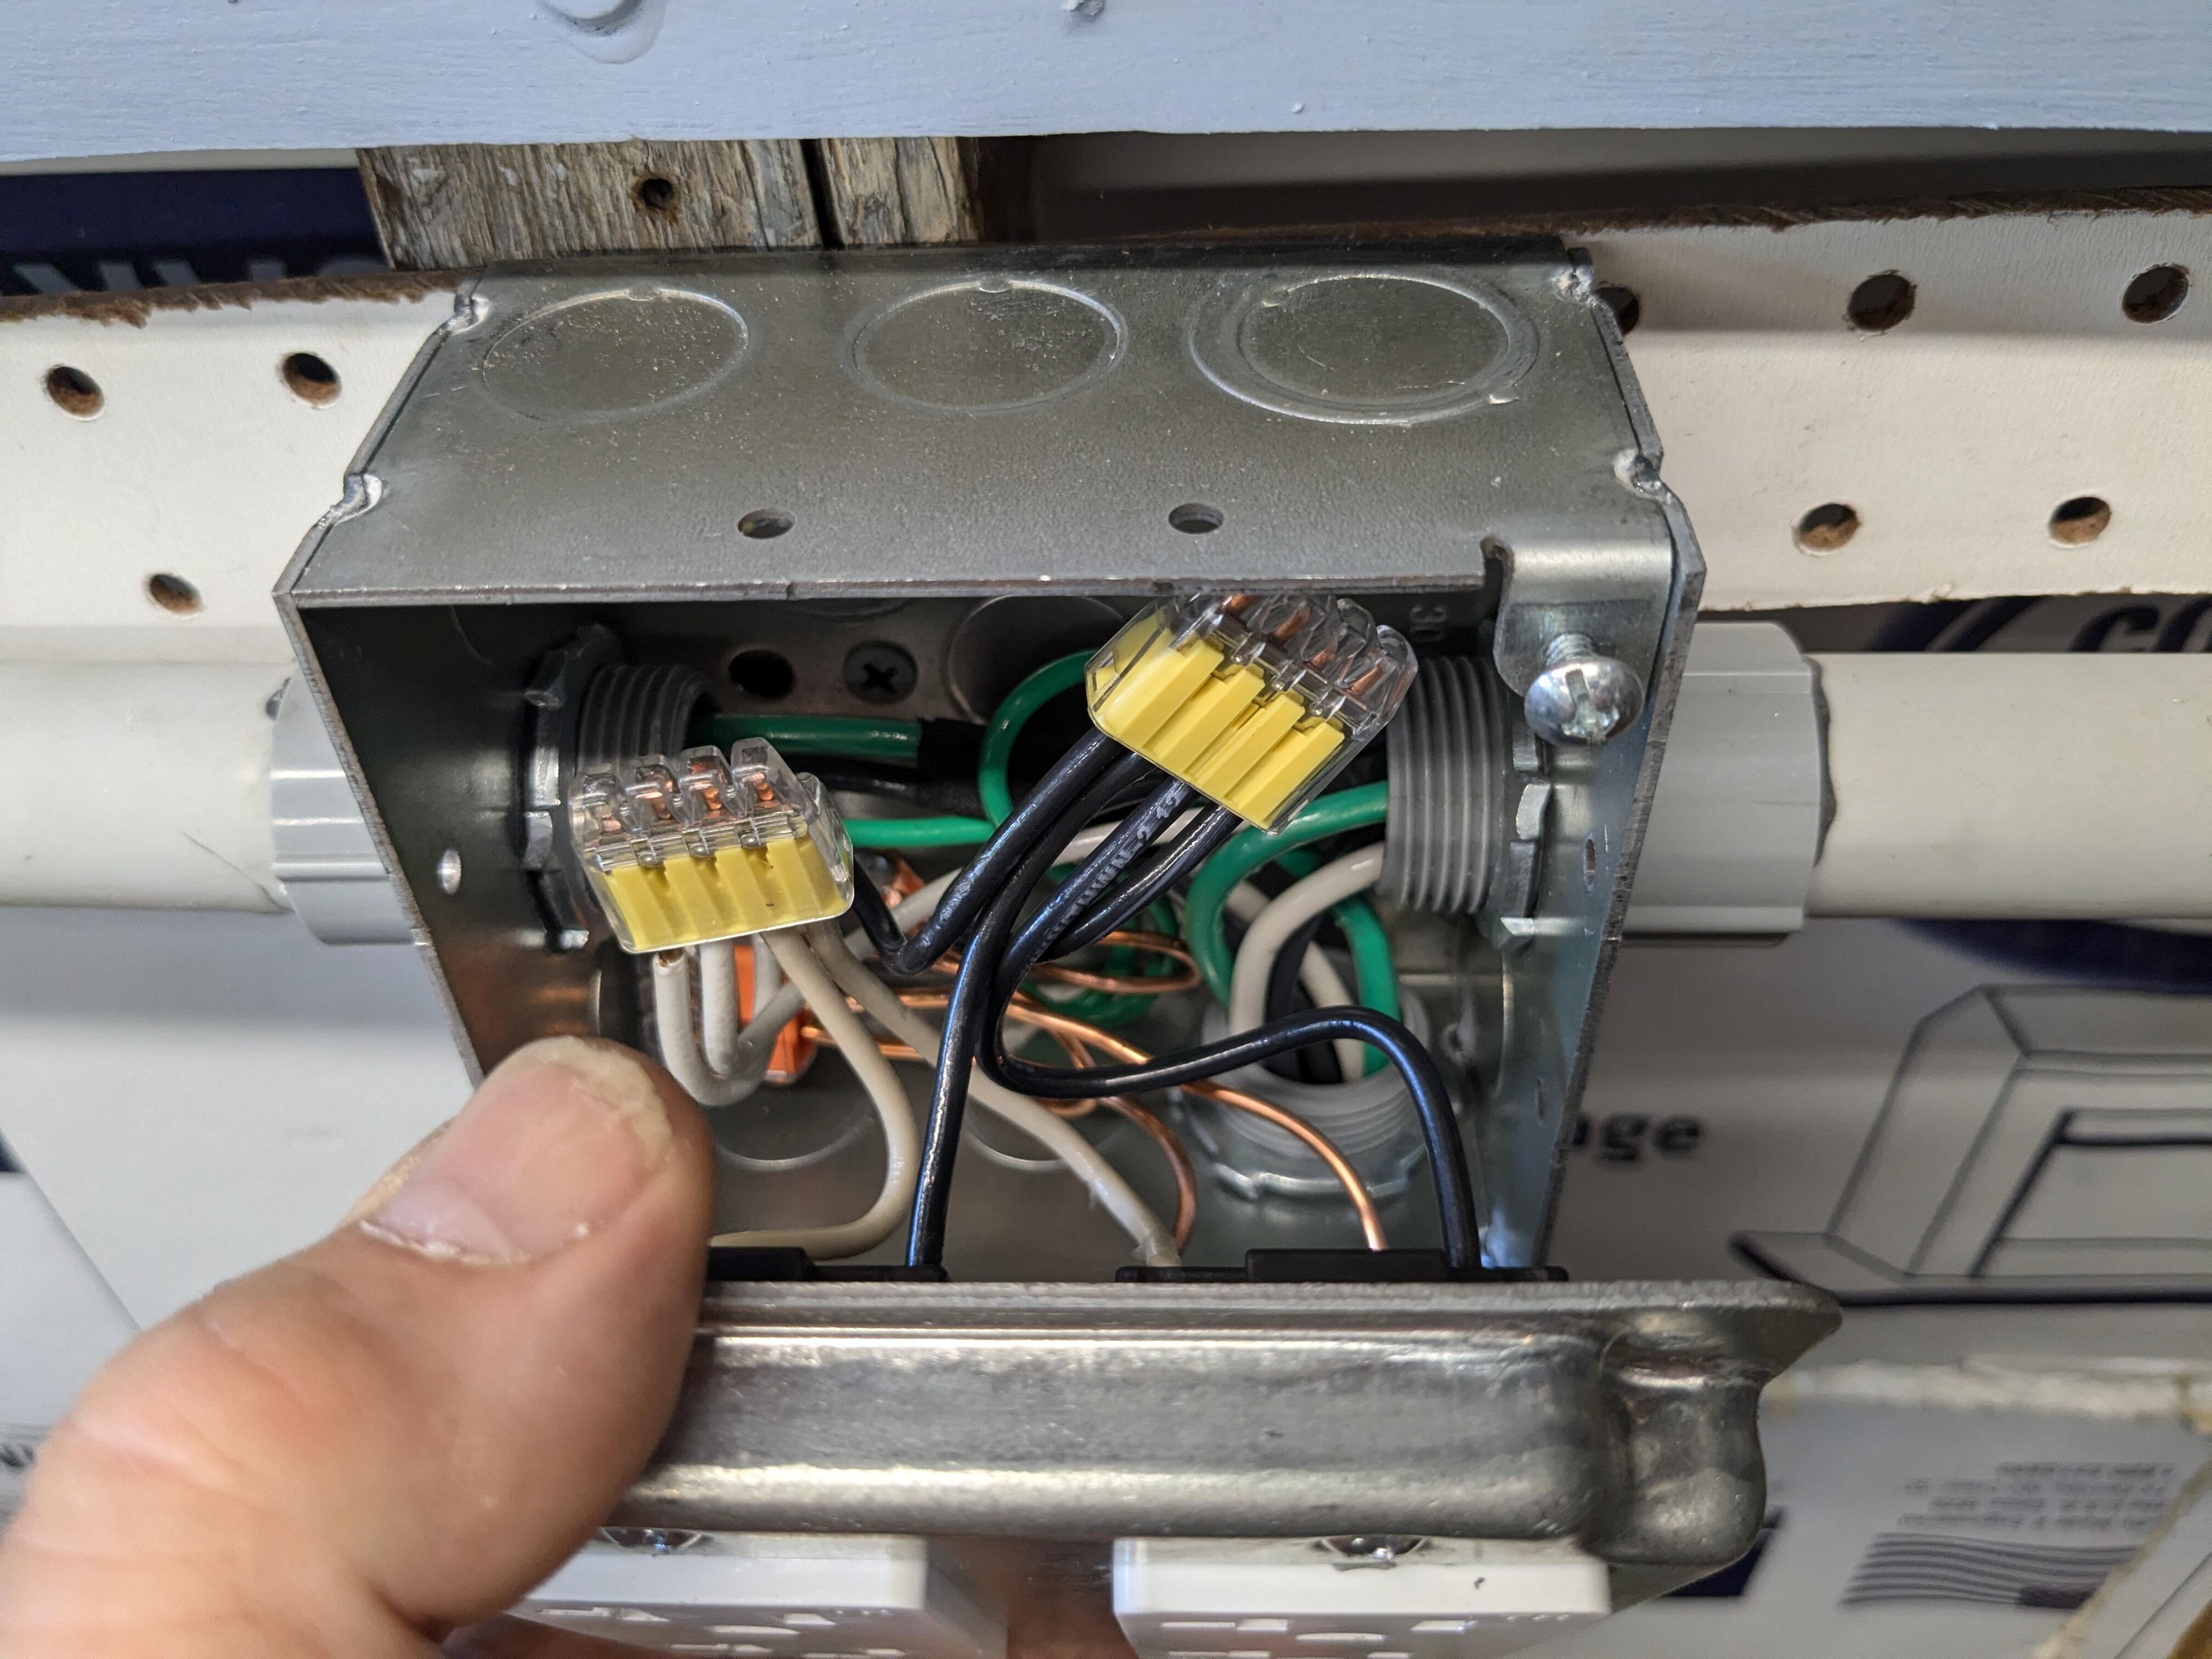
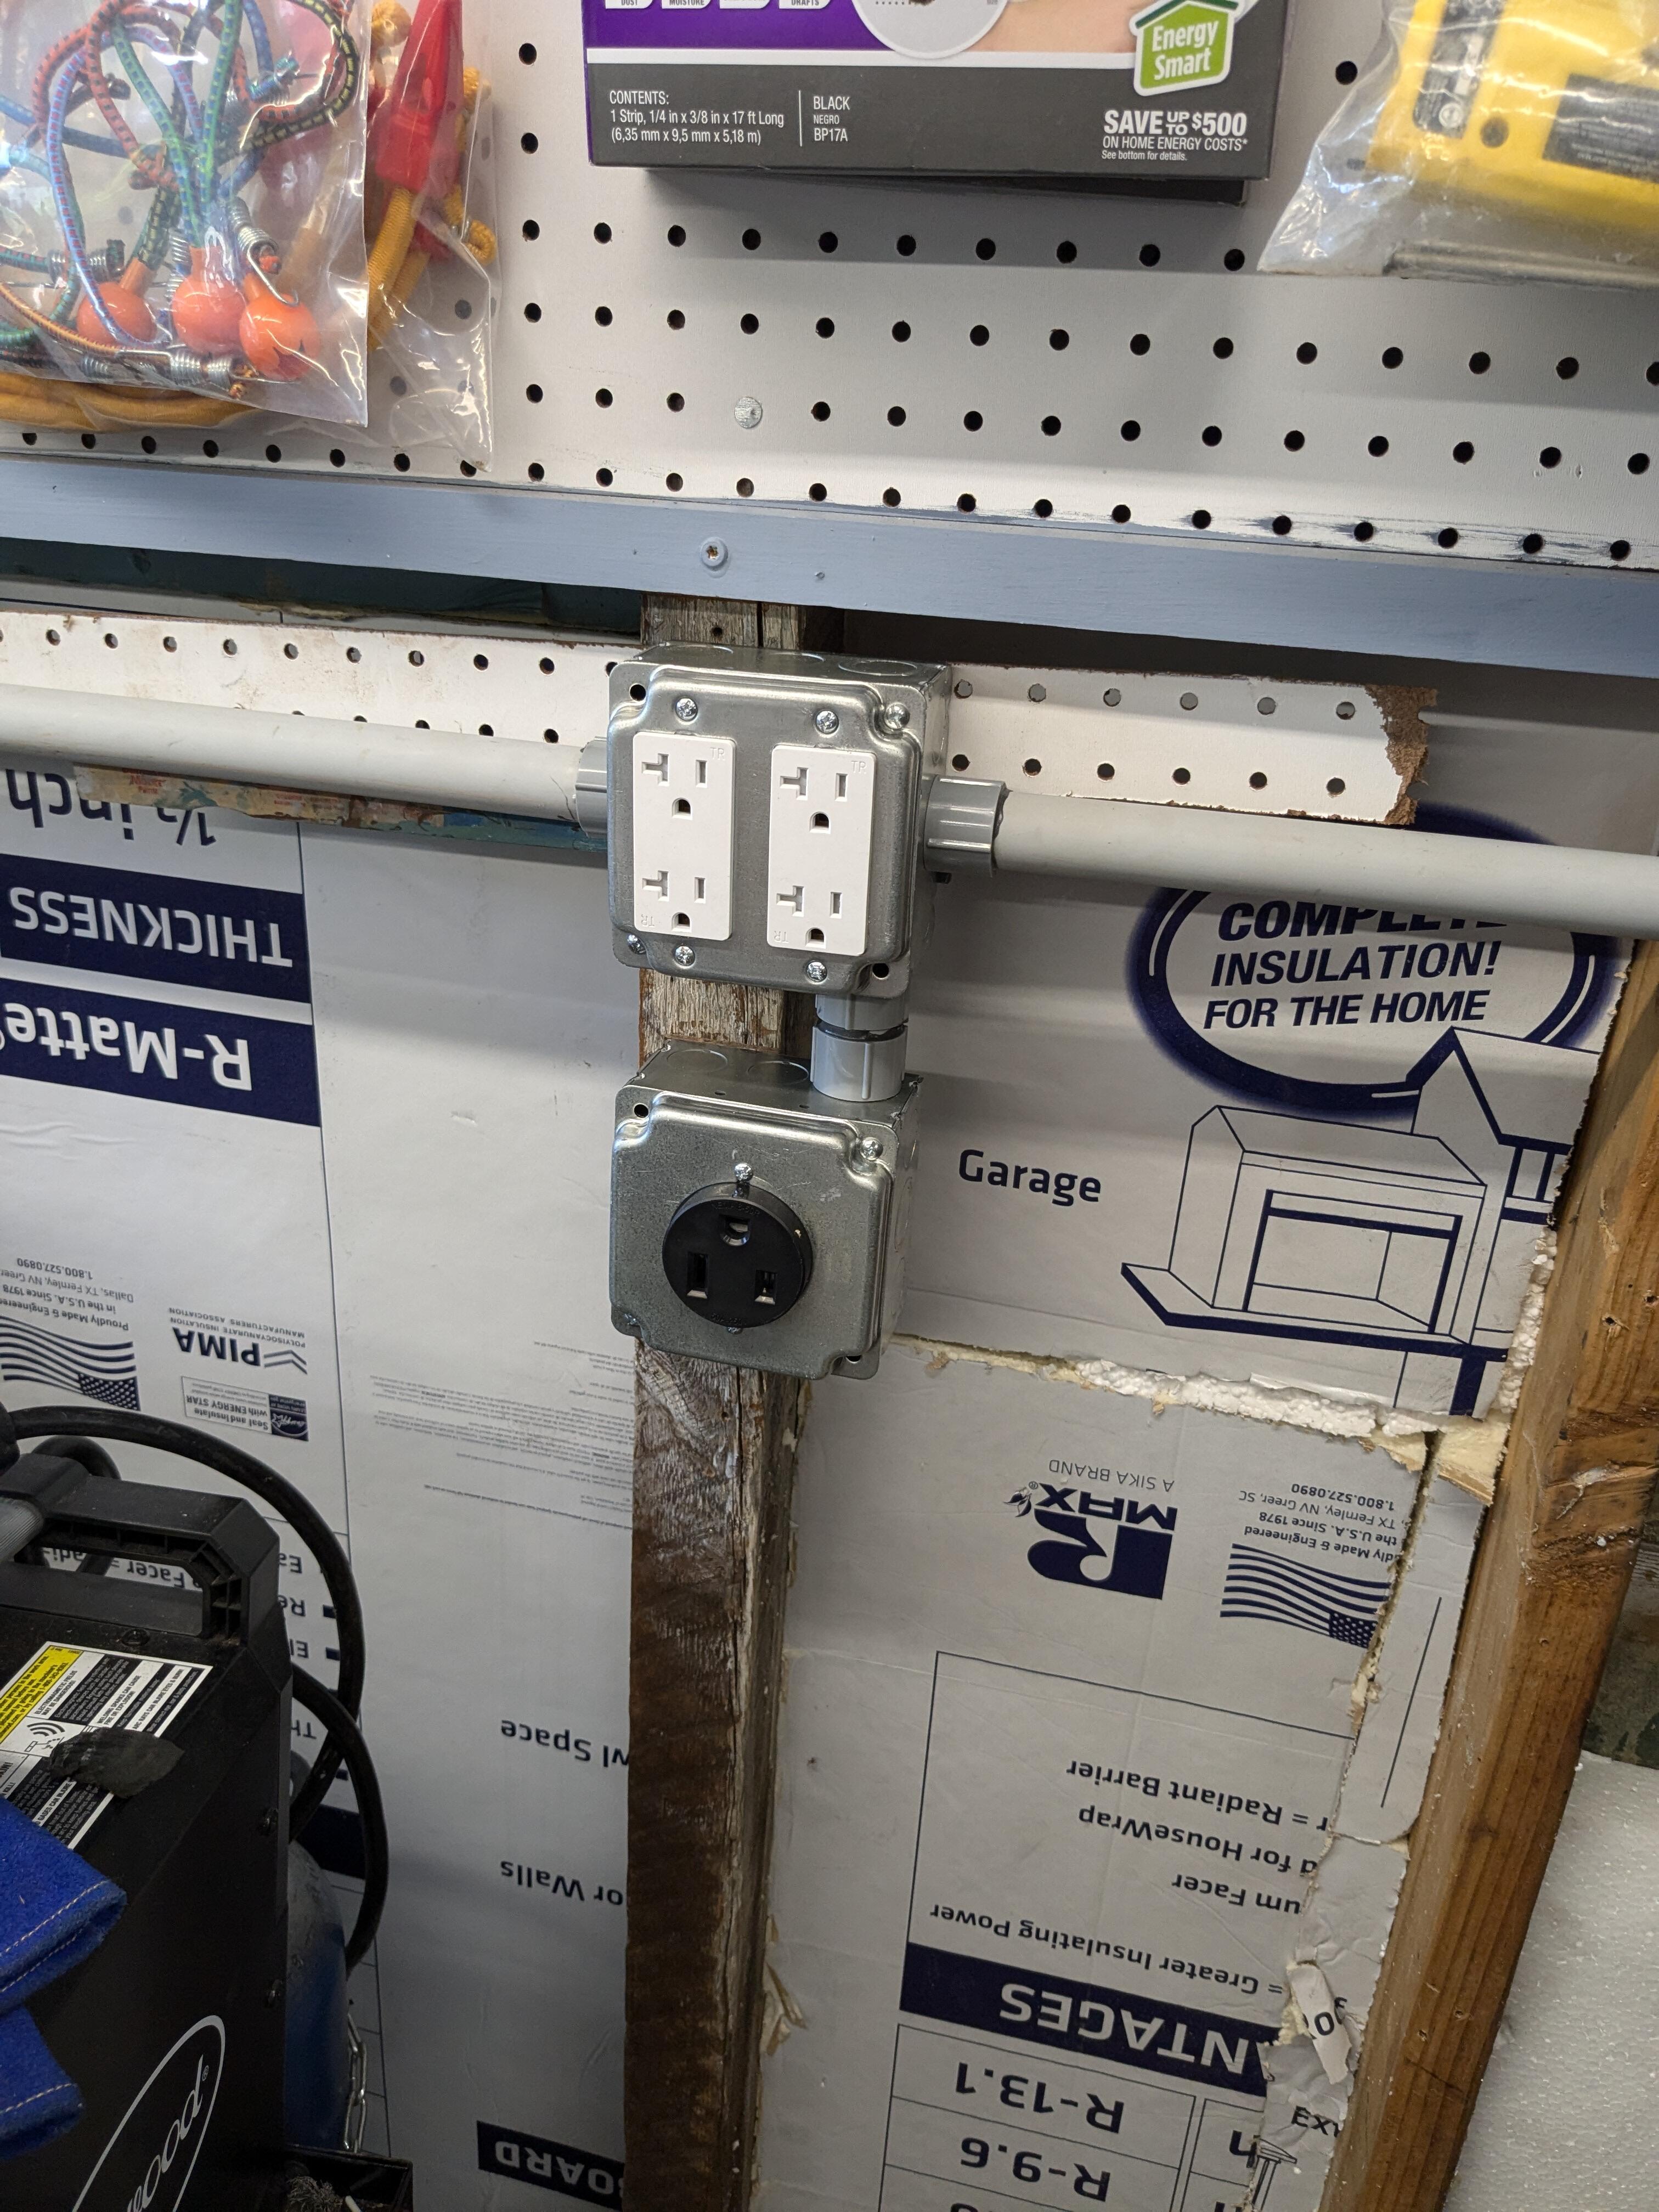
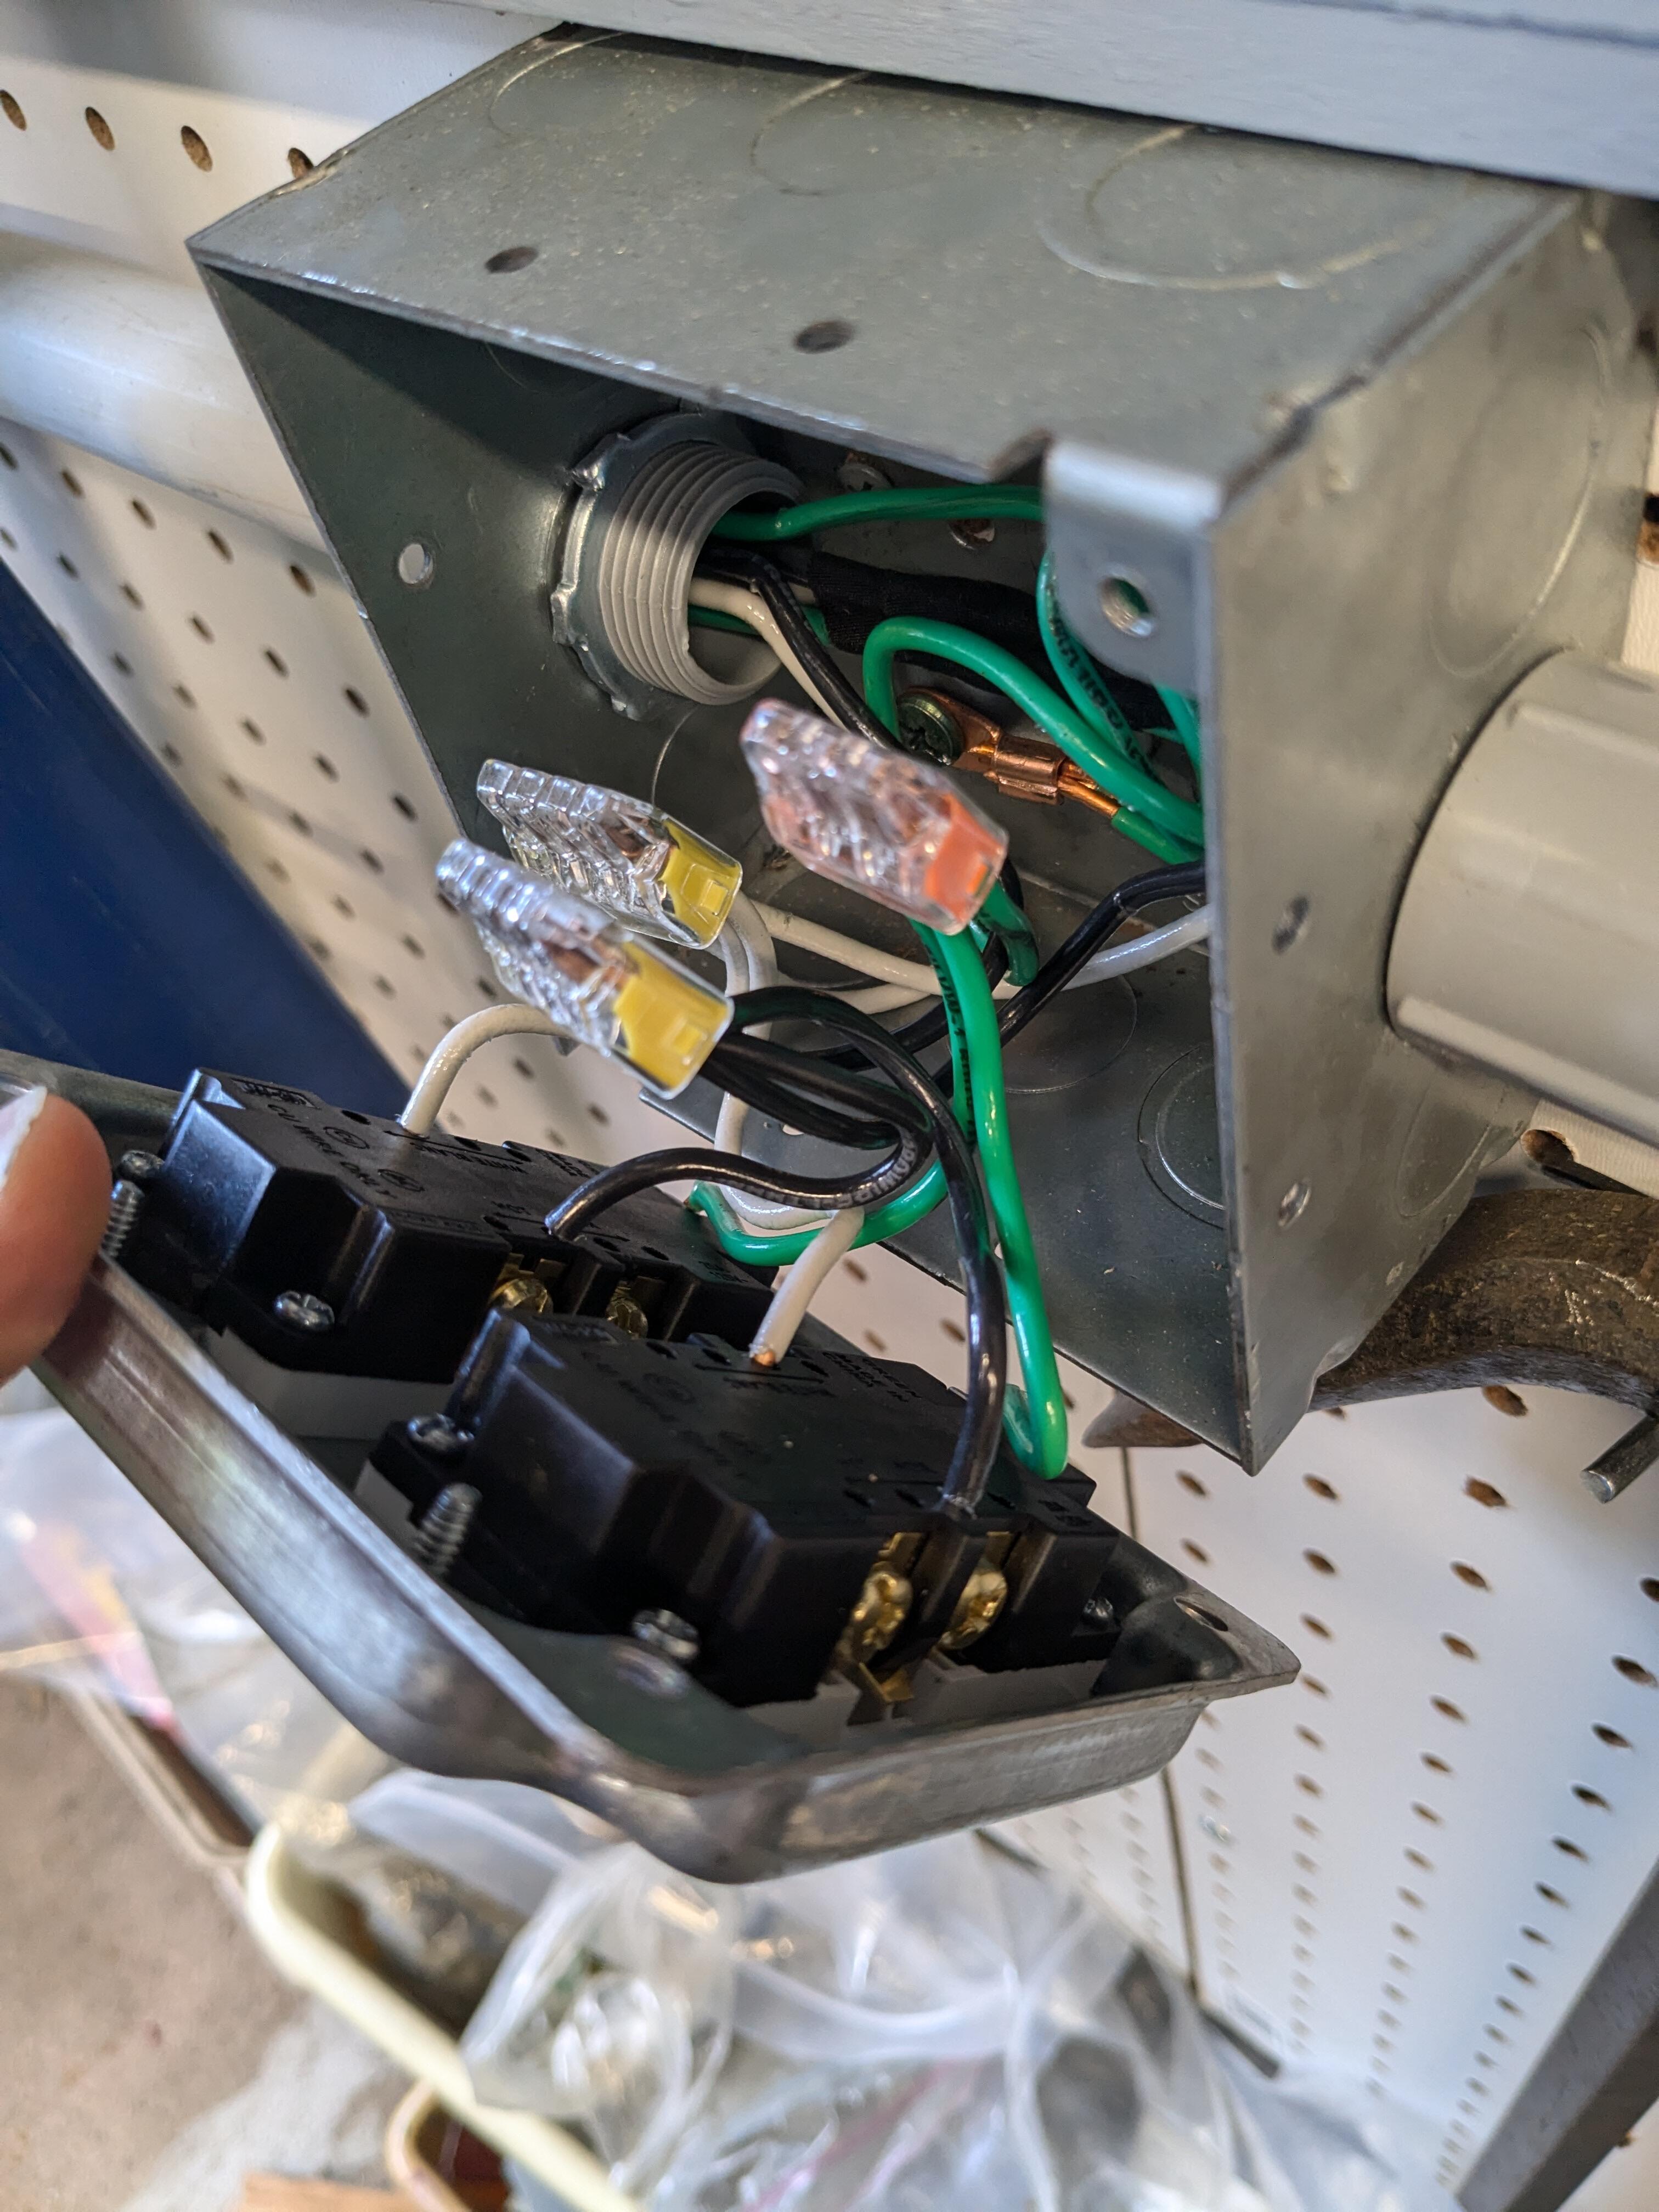
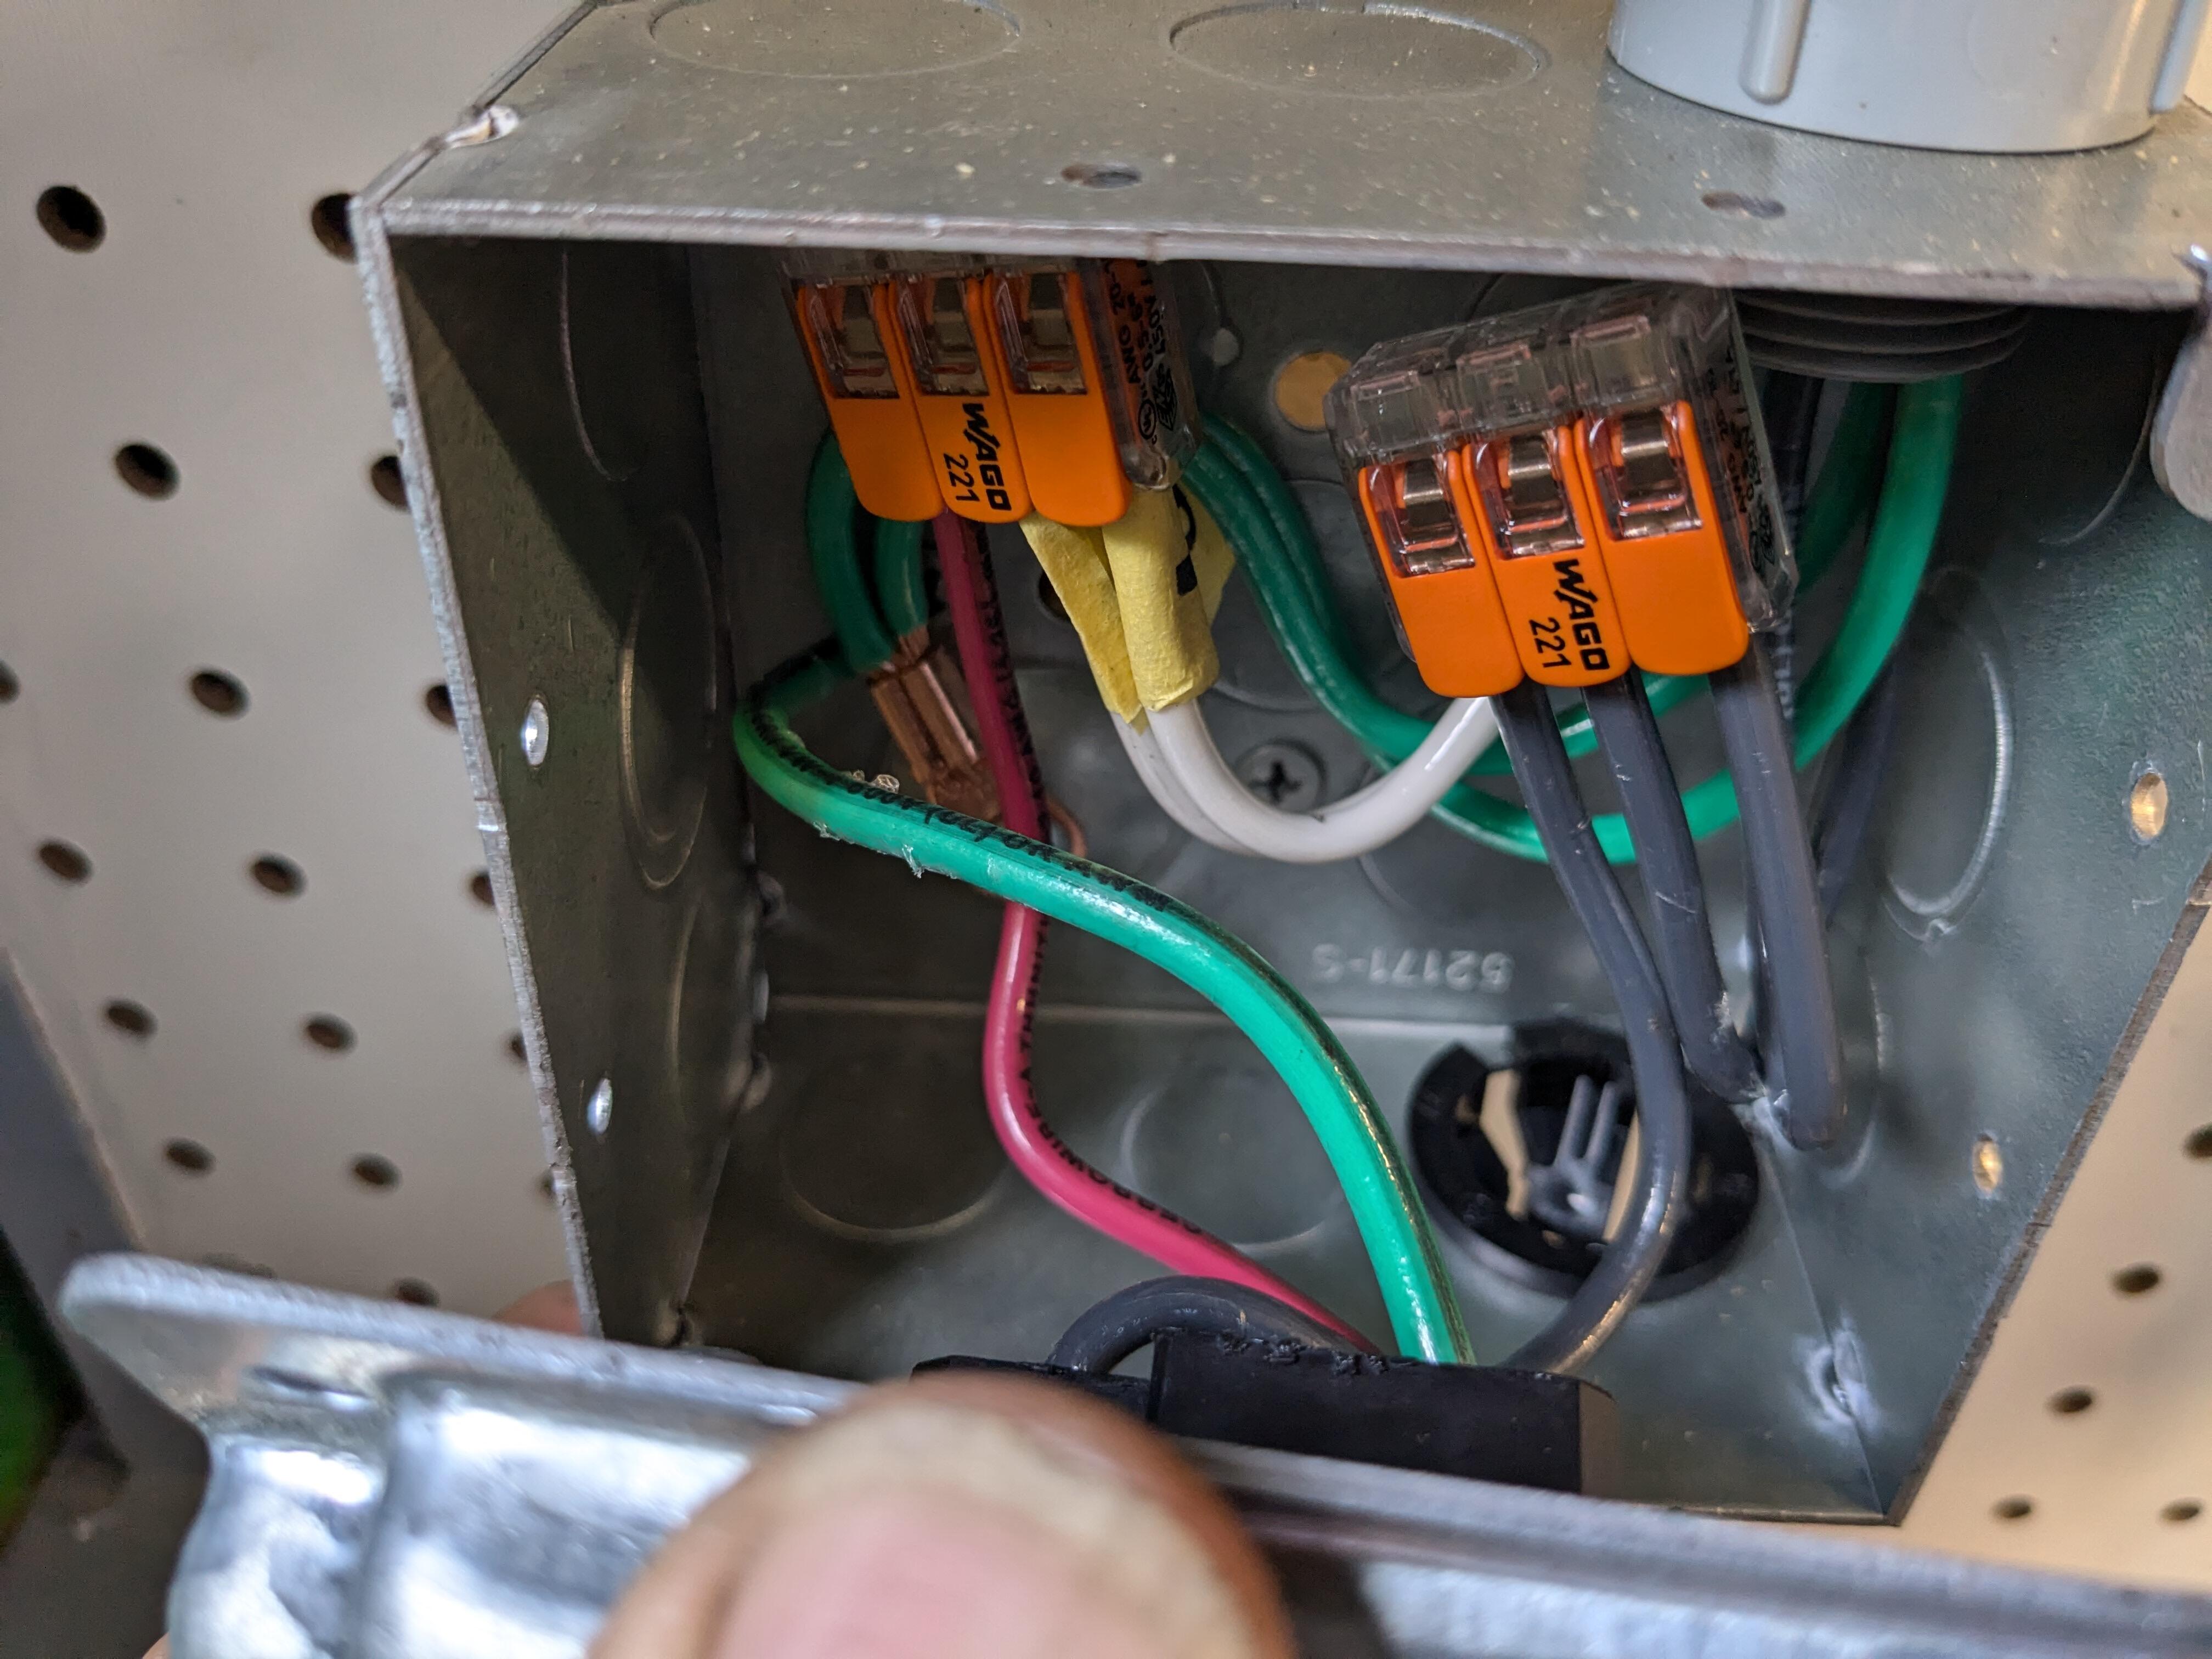
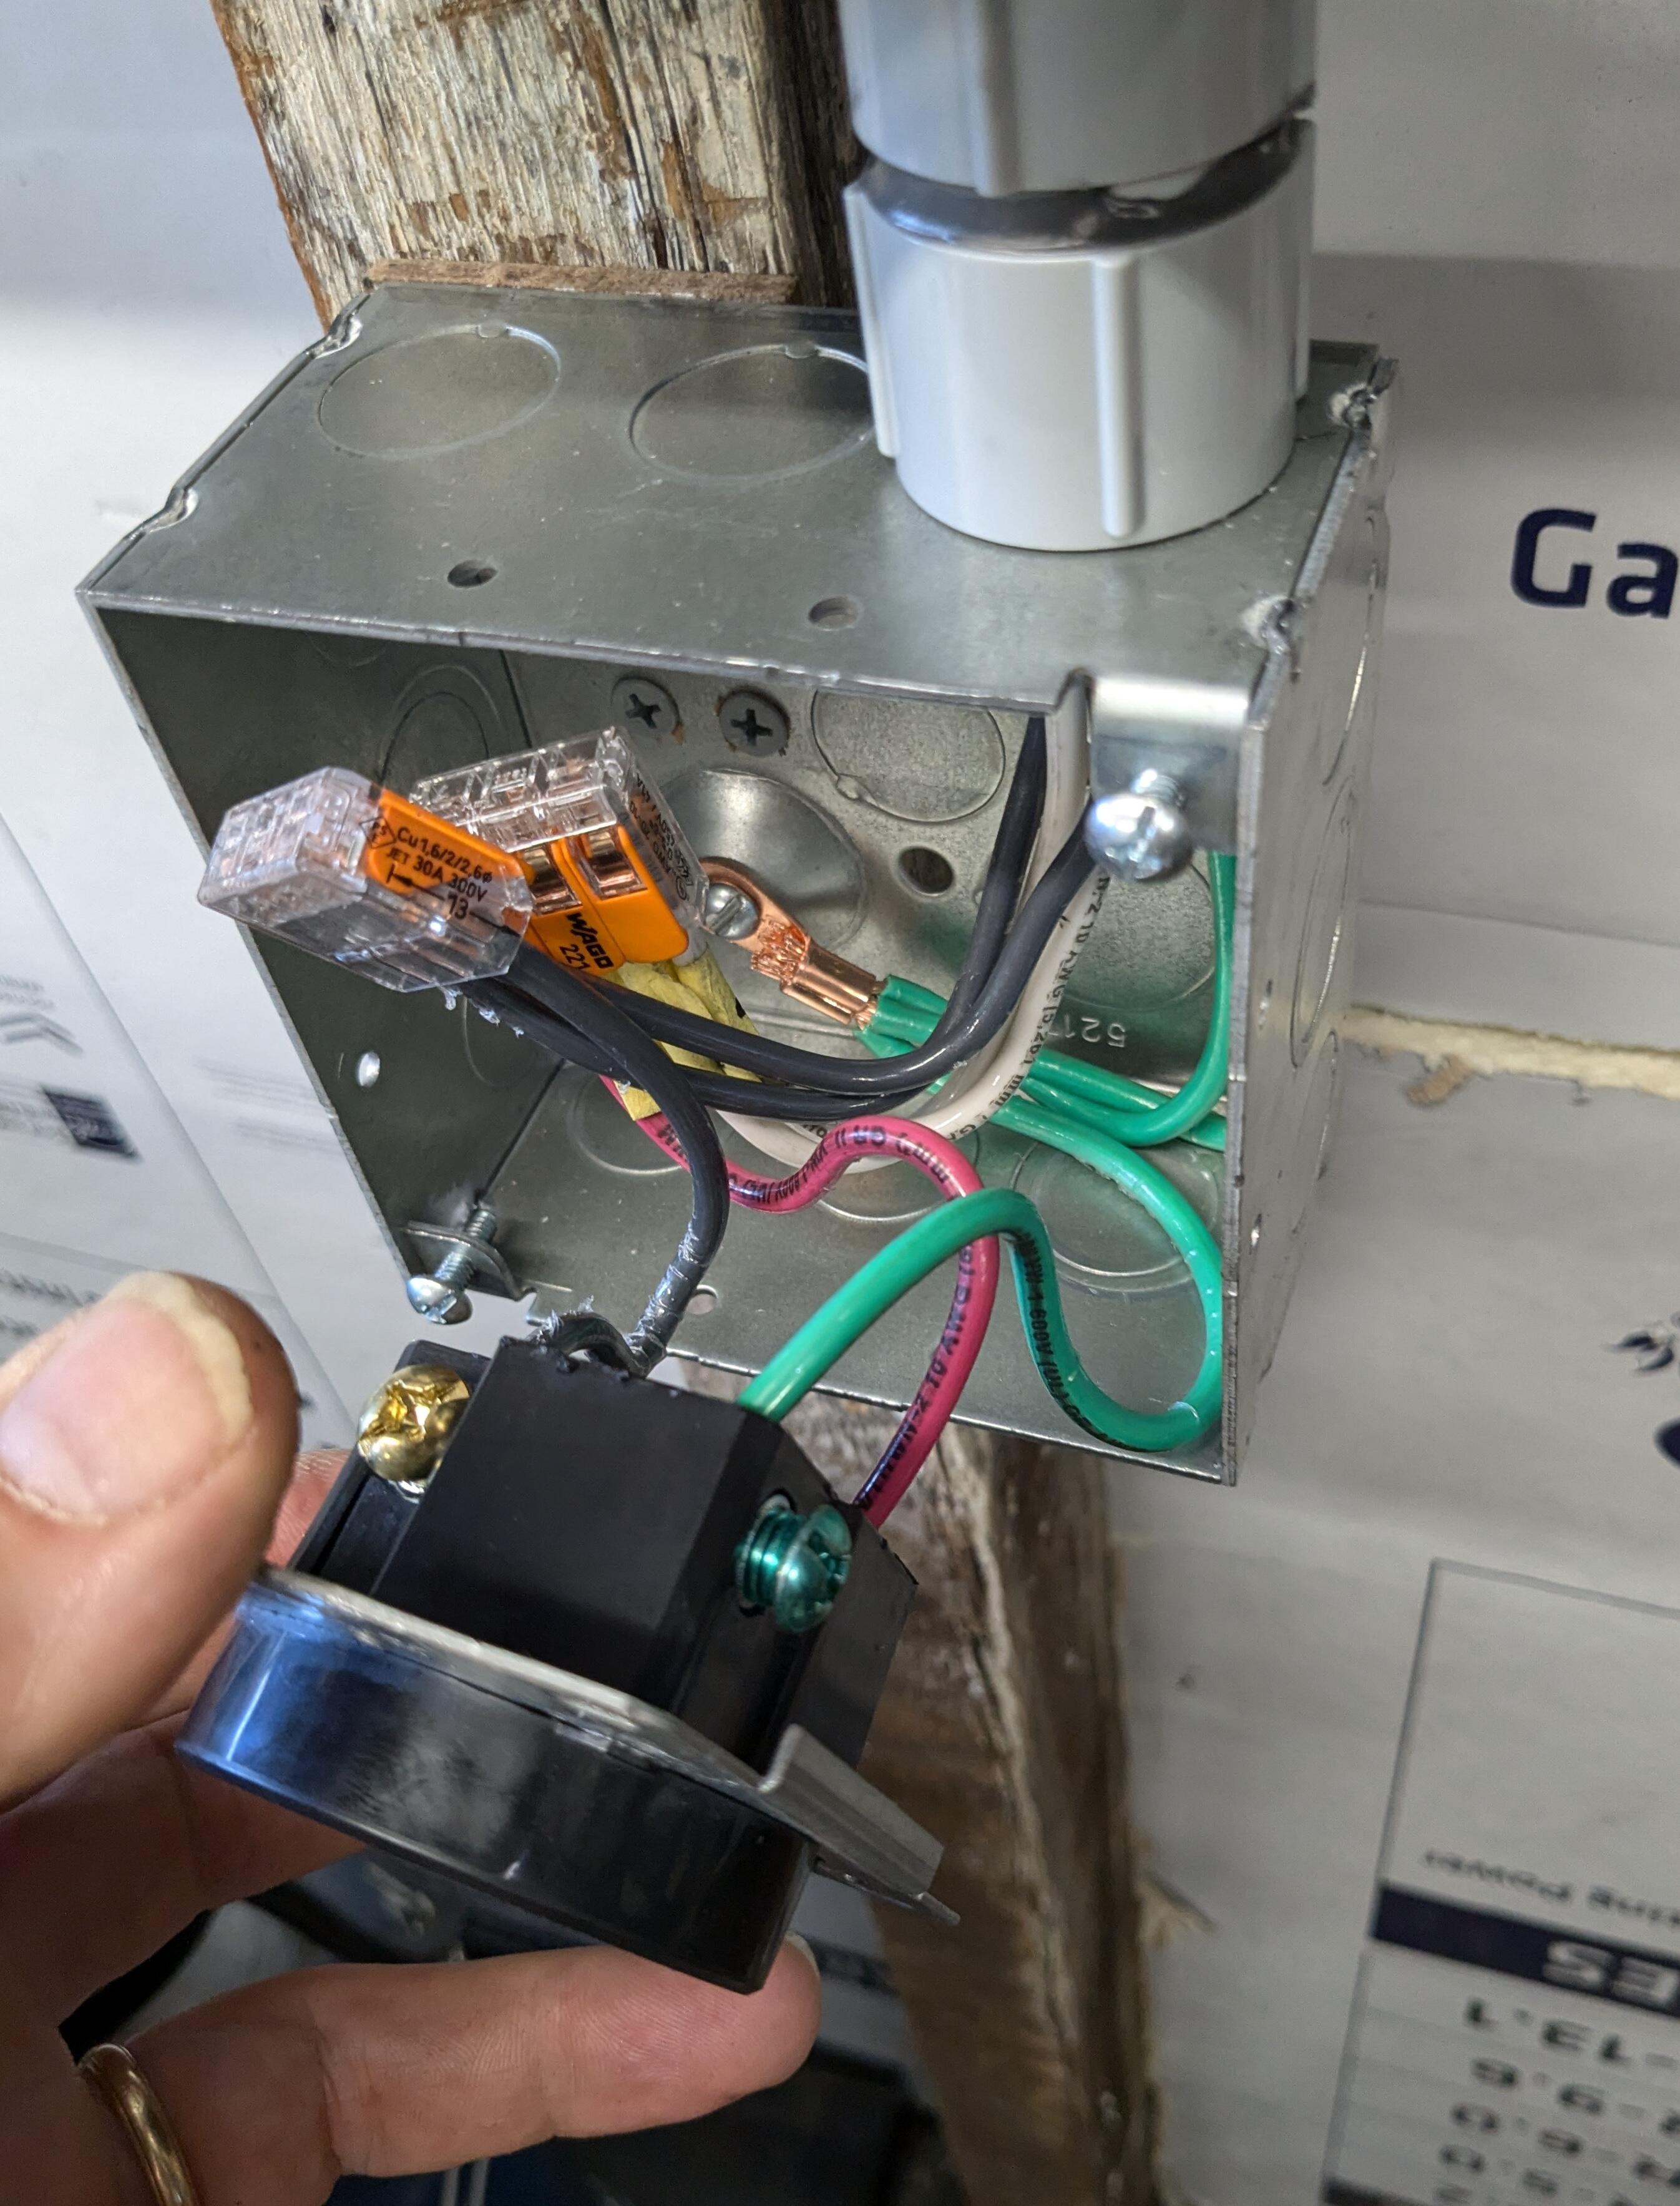
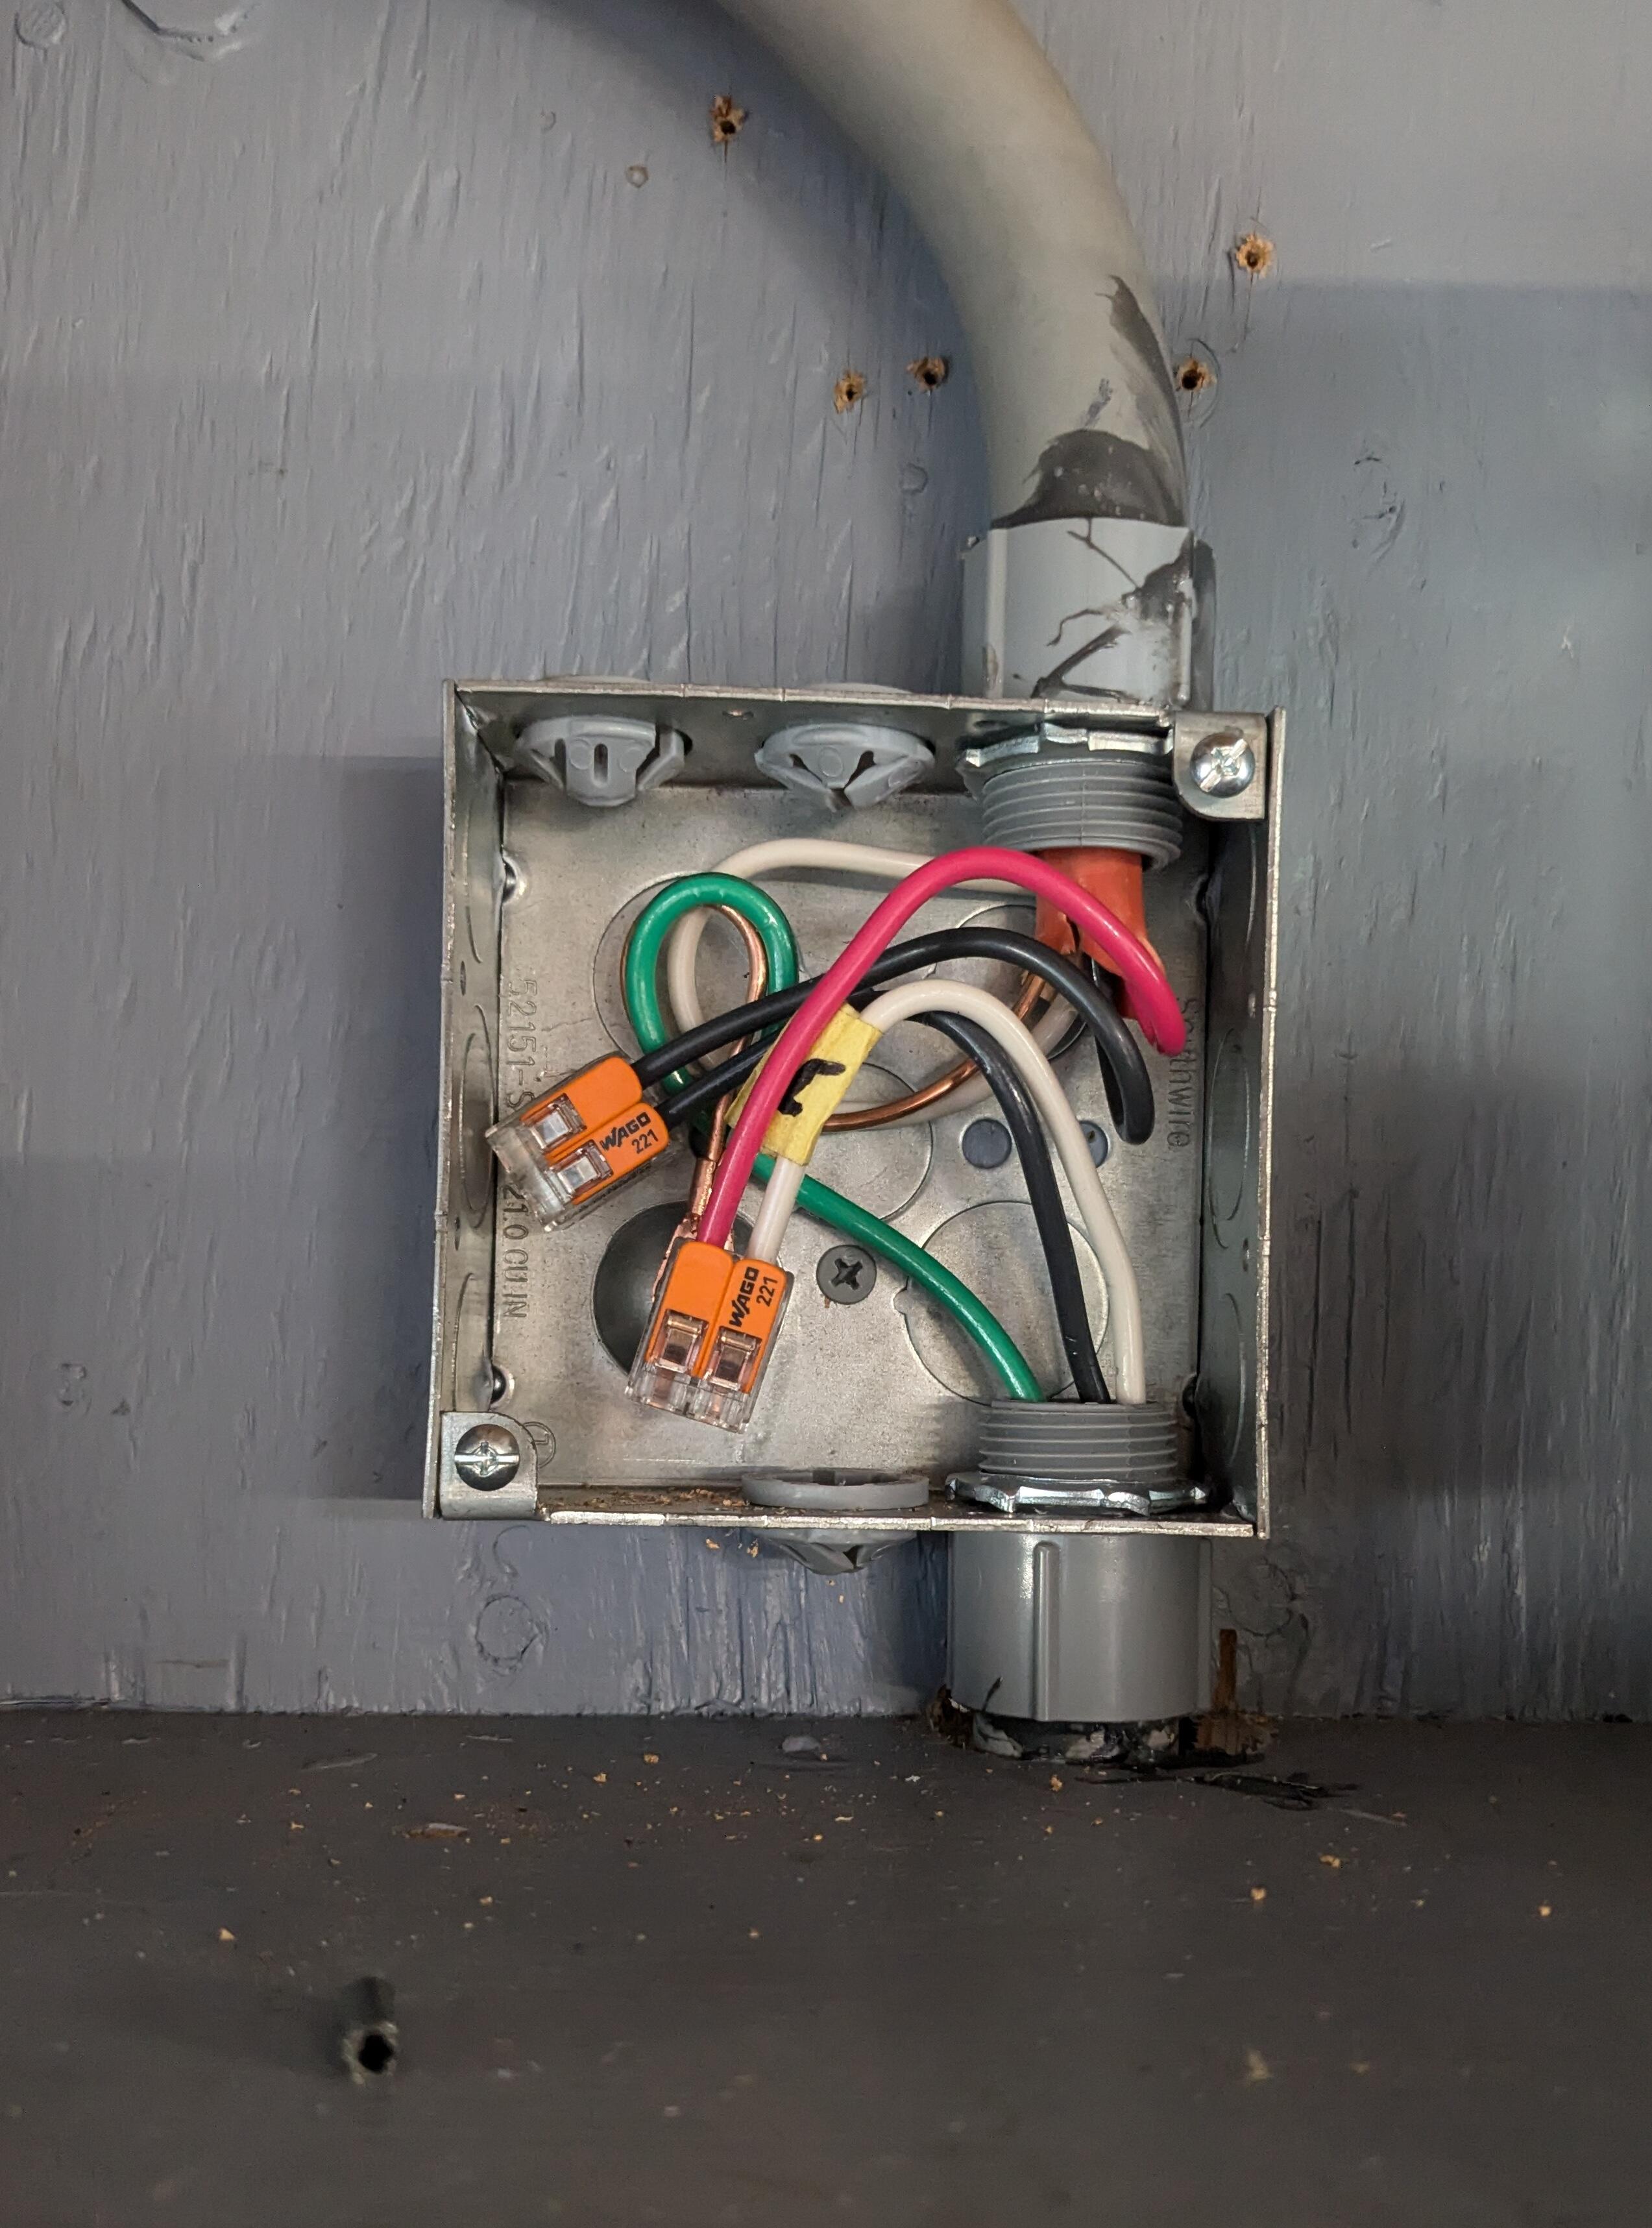
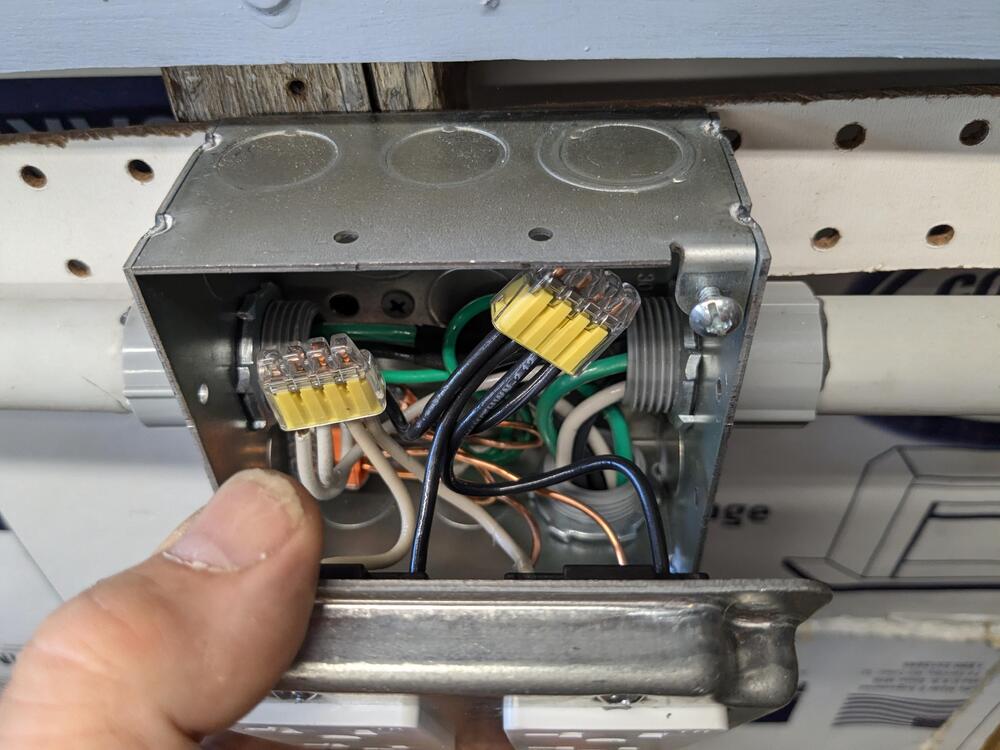
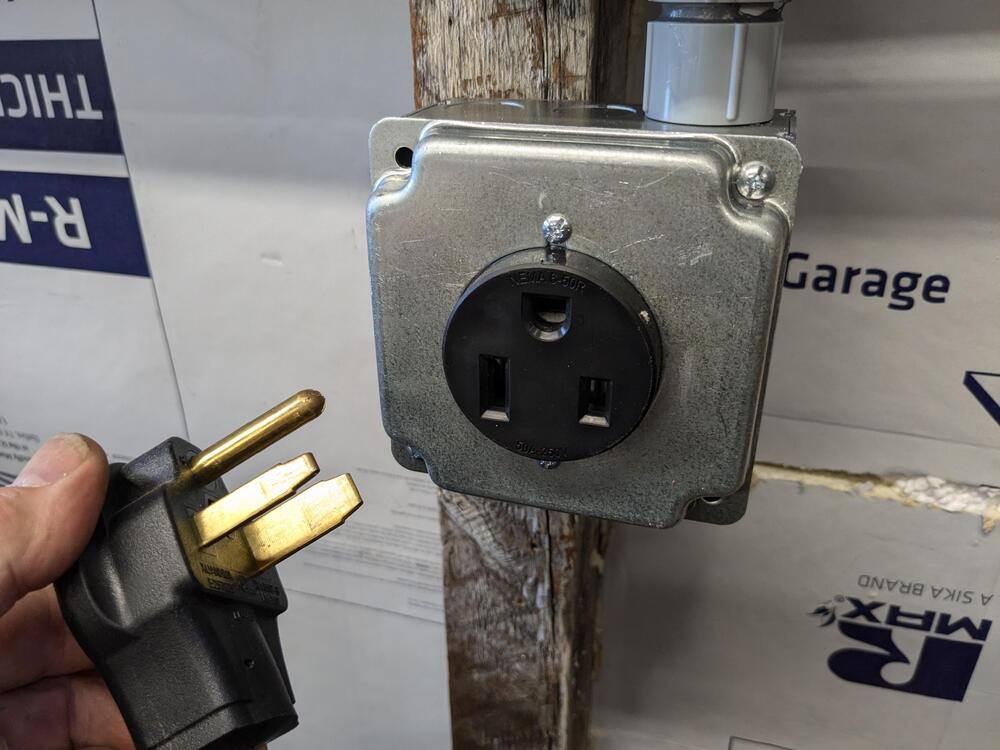
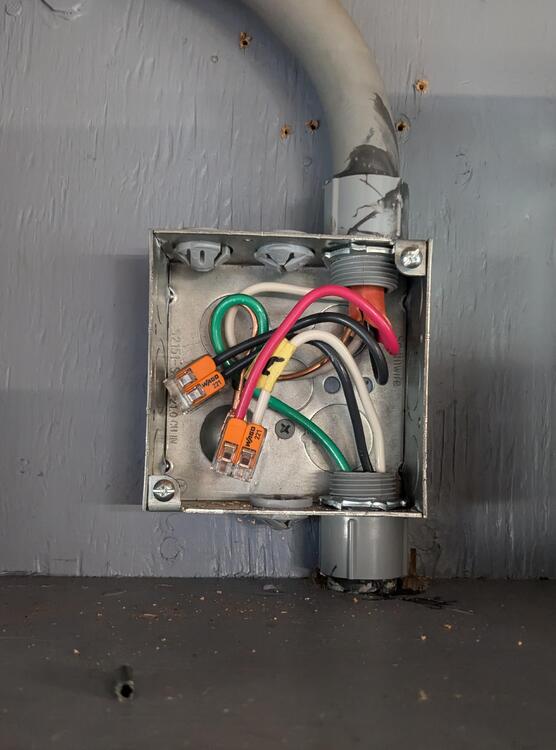
Today was the last day of my teaching career. I'm officially retired 🤪 Got a little wiring on the south wall - finished up the wiring of the 240 & 120 receptacles Used crimp eyelets for the grounds wired each receptacle separately rather than bridging them 12AWG for the 20A receptacles Made sure they were the right version 240V outlet this time 10AWG for the 240V 10WGA Junction that feeds the East center post receptacle


 2 points
 -
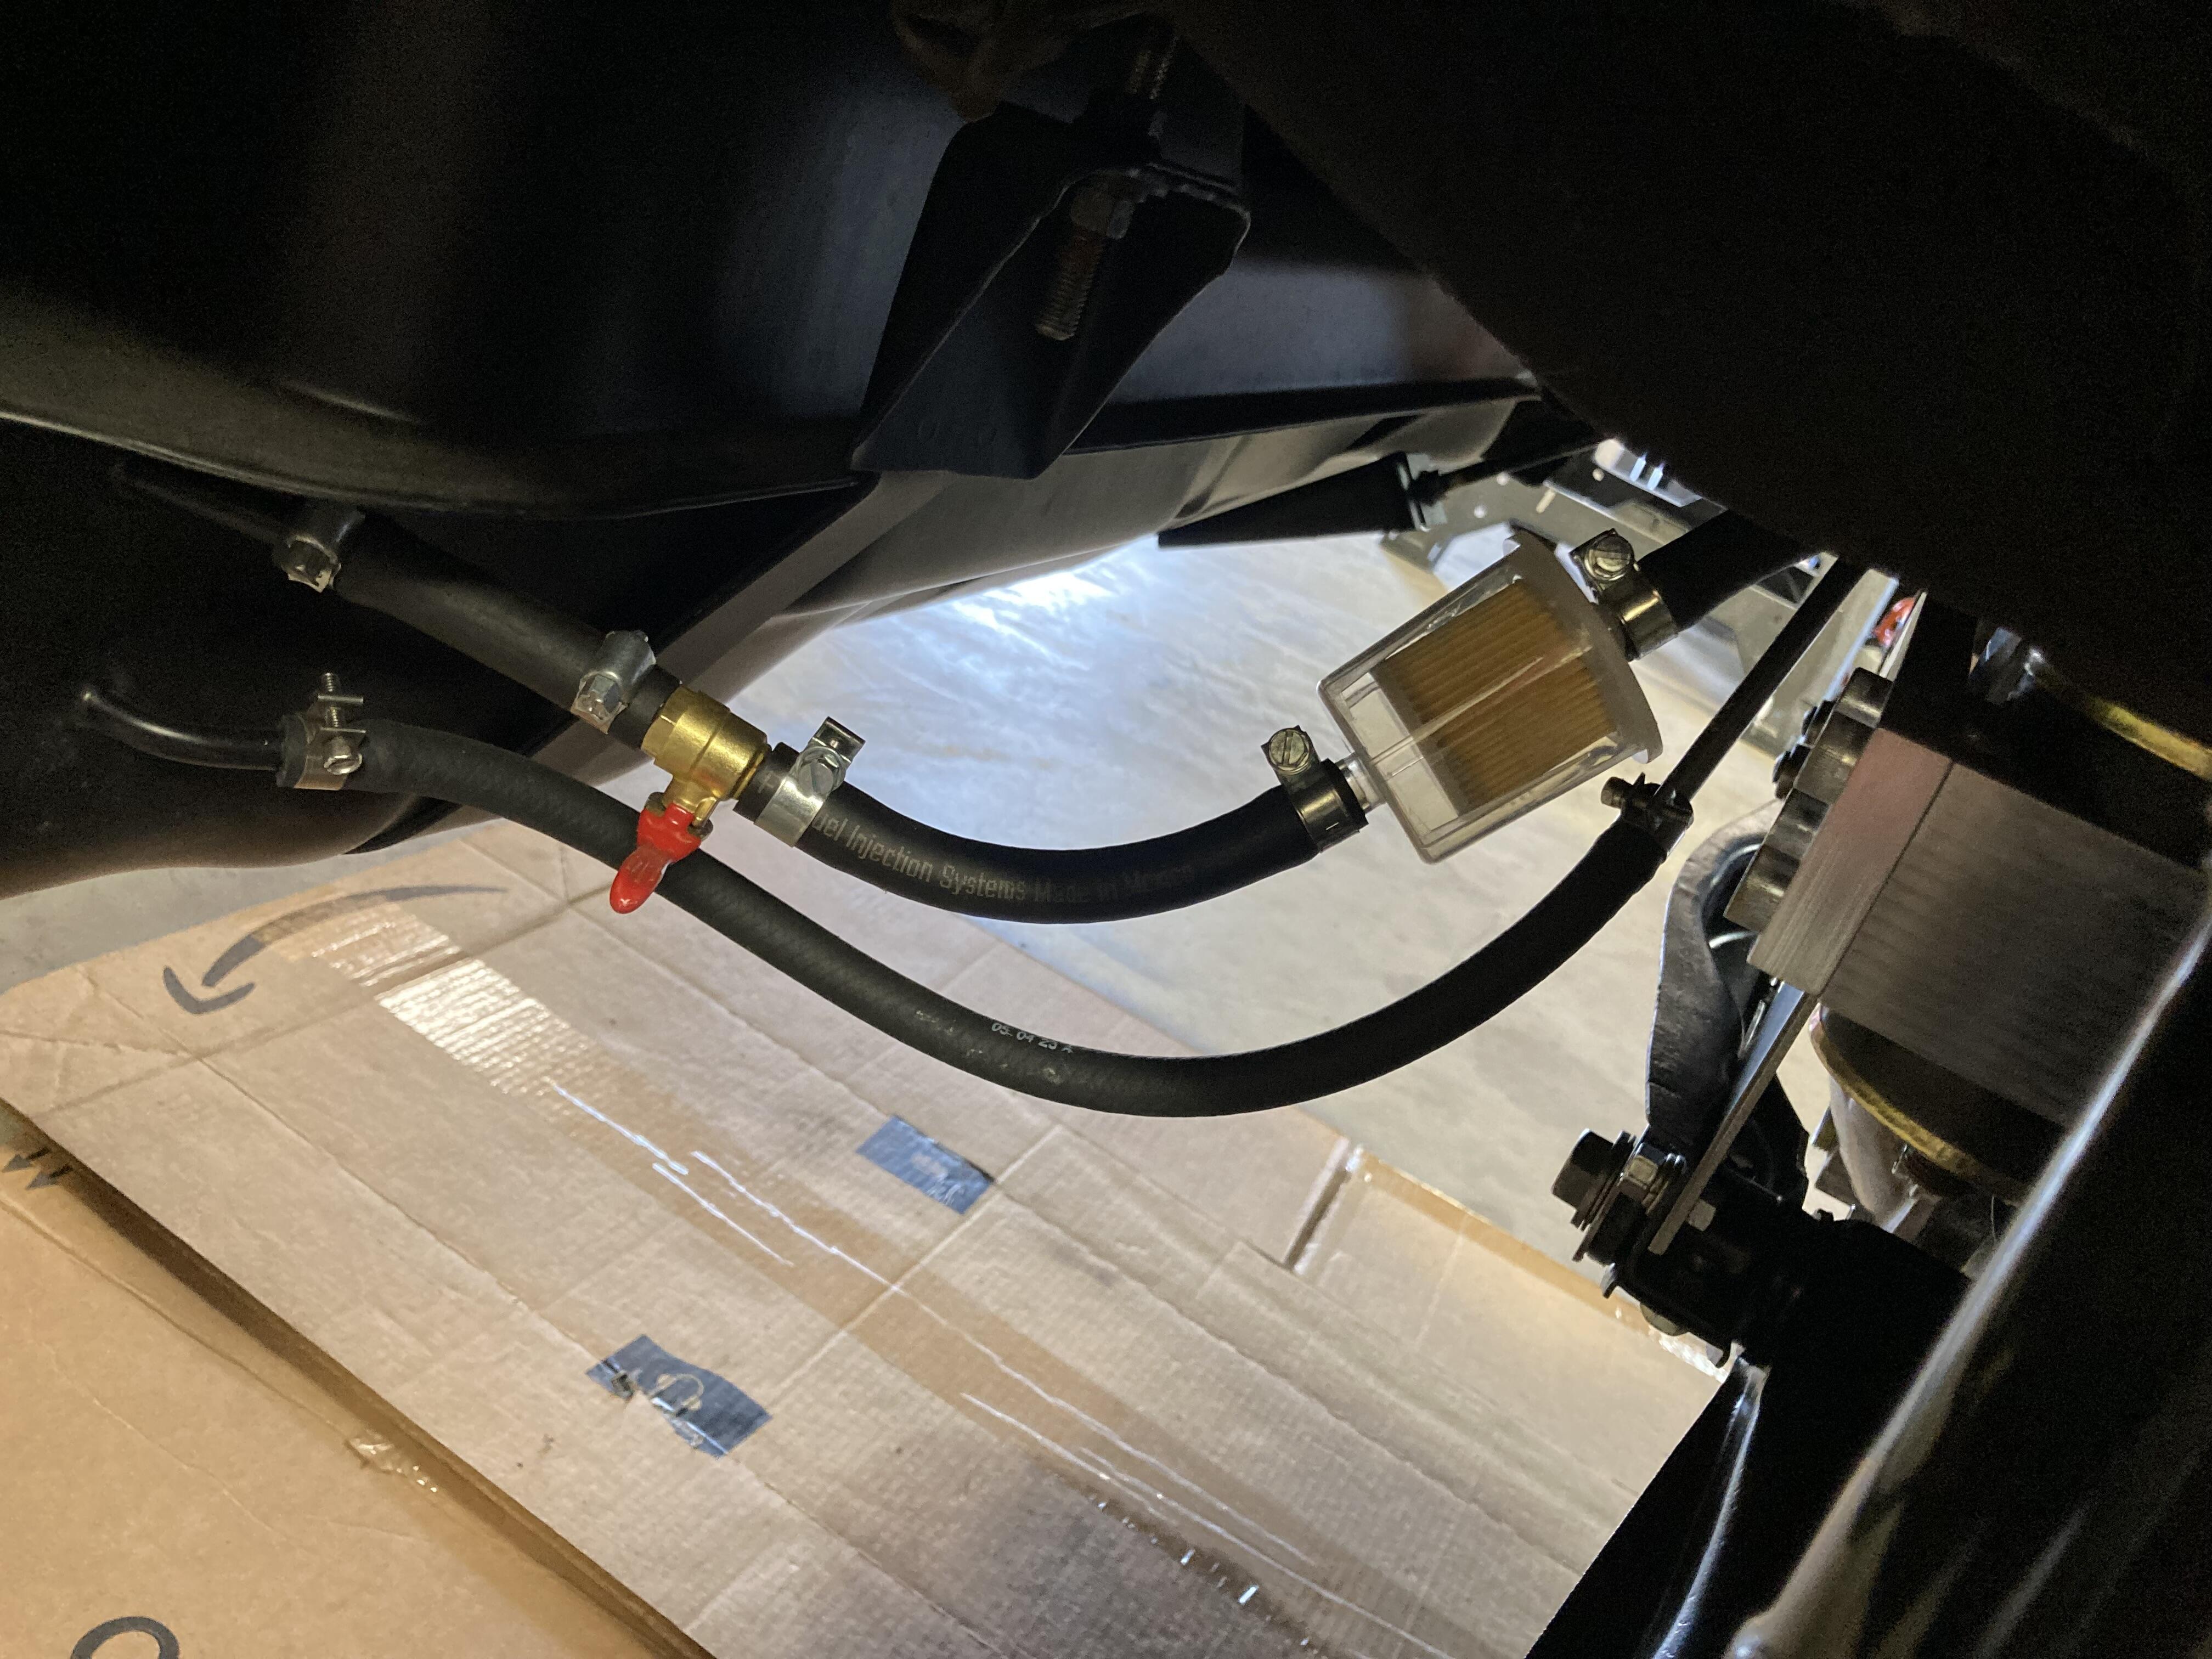
@Av8ferg actually came up with the idea and I was able to enhance the theory of installing an in line shut off valve about 6 inches away from the supply line coming off the tank itself. From there we ran about another 4” of line into the tank pre-filter.” Wix 3003” from what I’ve found is the only filter that’s still clear and IMO is a better filter. From there straight to the pump inlet. This will allow shutting the supply off while doing routine maintenance on the fuel supply system. I will attach pics of what I have installed and is duplicated on ferg’s car. I believe the hiccup he ran into was buying a less expensive/quality valve that ended up leaking and permitted all the way to the 3rd floor. The wife was not amused! Sorry John had to add that tidbit!
 2 points
 -
 I certainly had a Guardian Angel watching over me that night. Not that it makes it any better, but there was about 5 gallons of gas in the tank at the time of the incident.1 point
 -
 1 point
 -
I chose the Trophy because that’s what you deserve for being an educator friend. Congratulations Sir!1 point
-
Here’s the link to the valve. https://www.amazon.com/gp/product/B08KVZT7P5/ref=ppx_yo_dt_b_search_asin_title?ie=UTF8&th=11 point
-
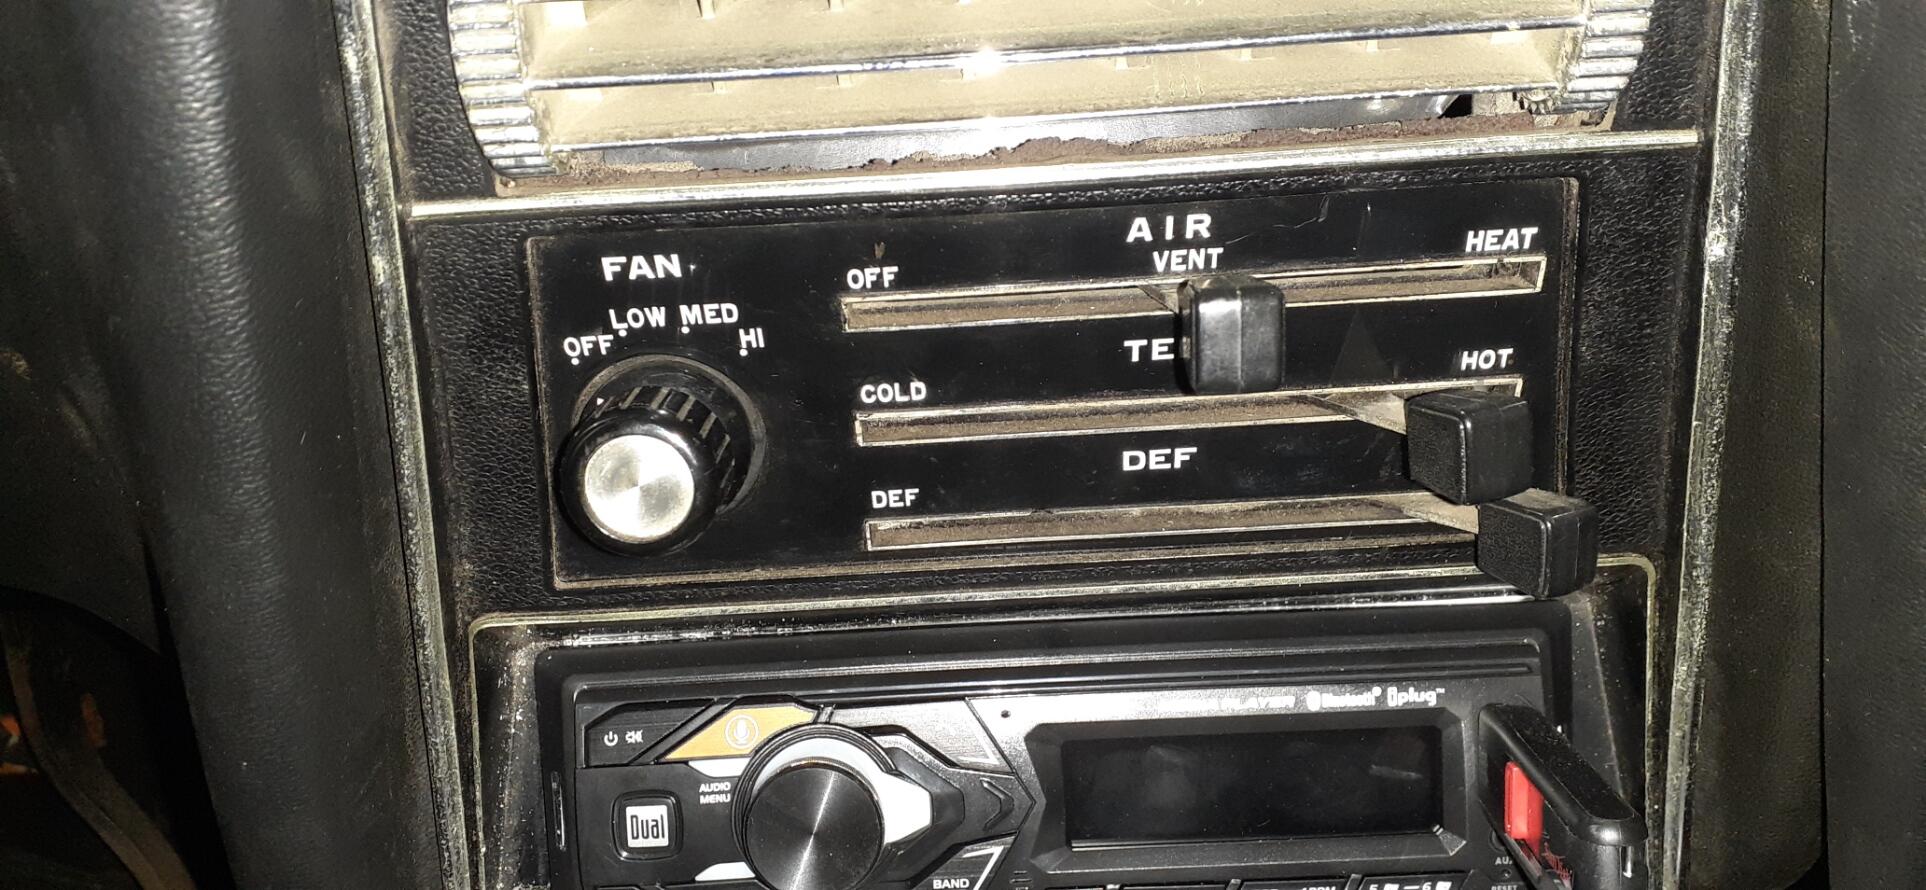
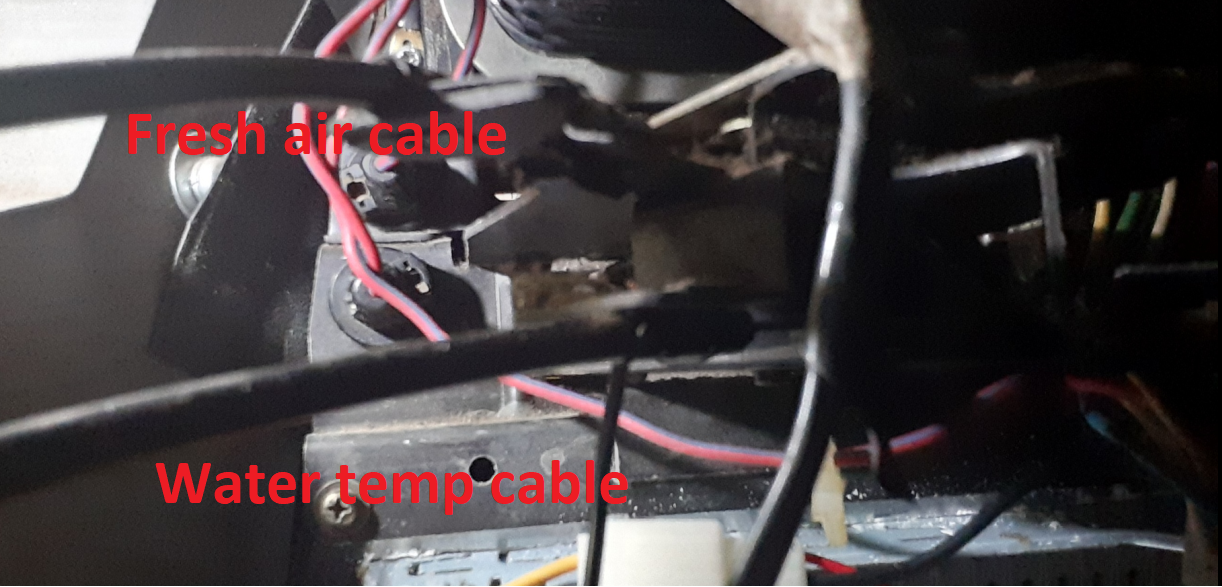
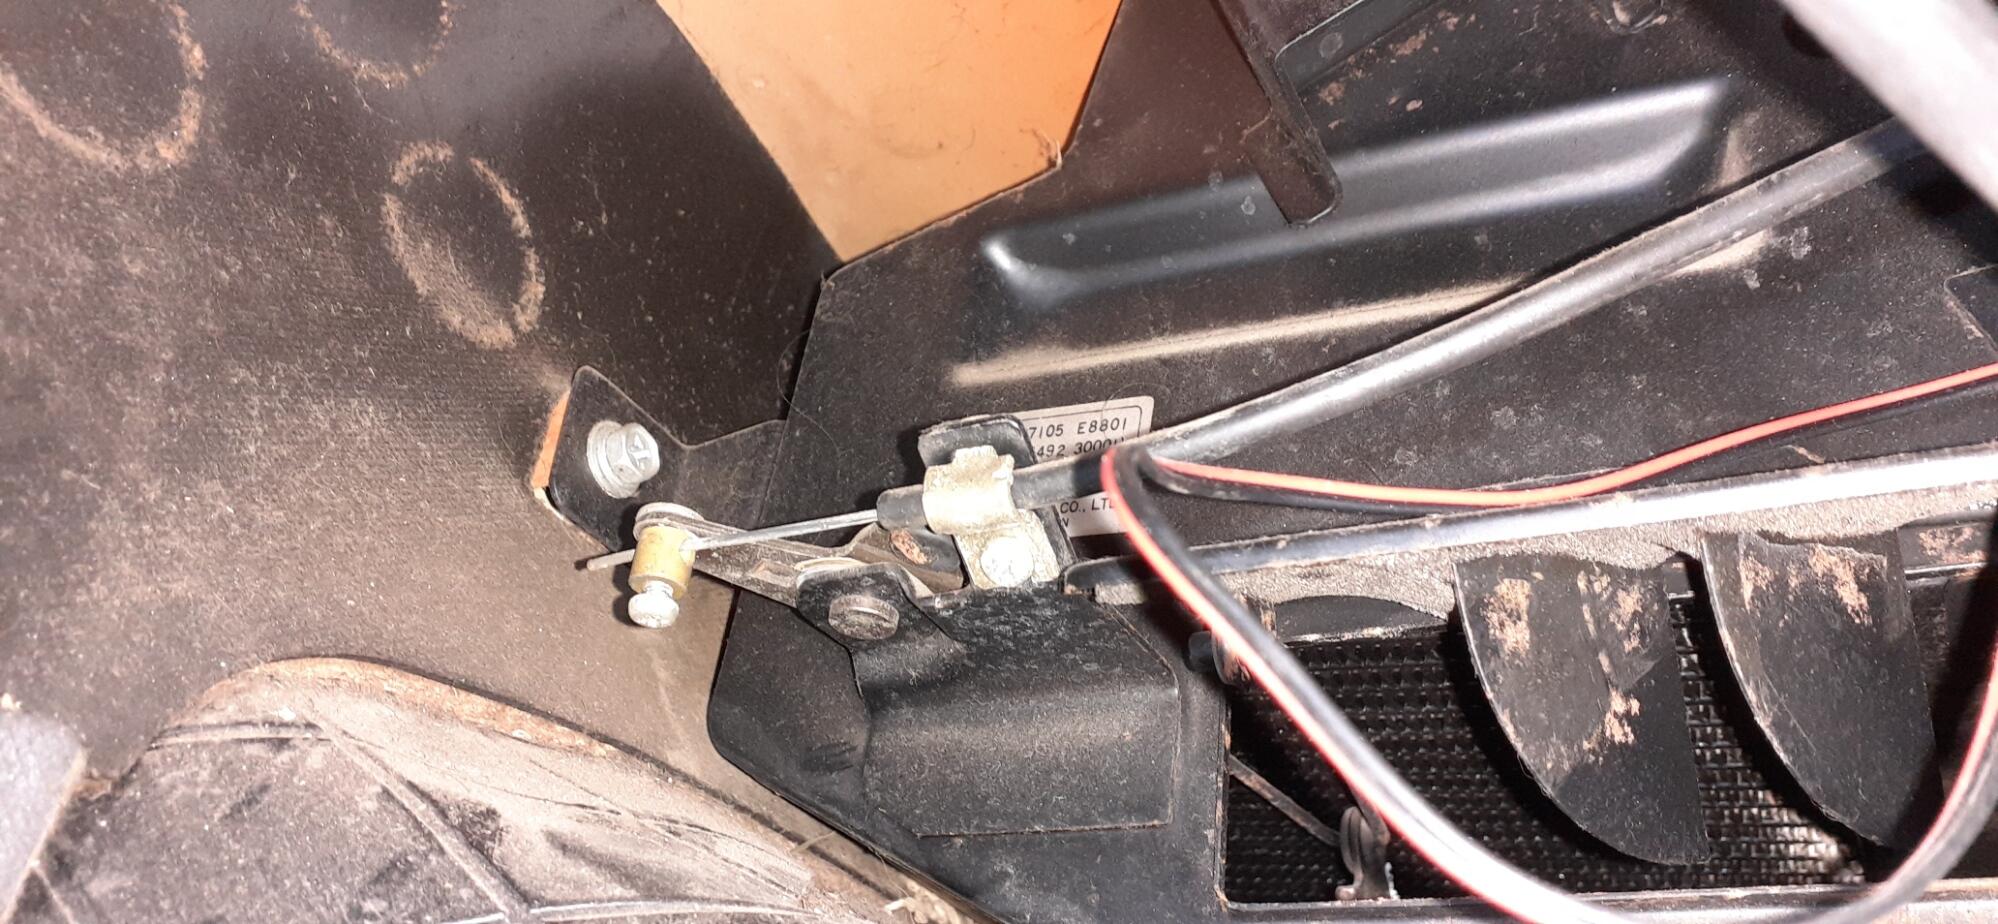
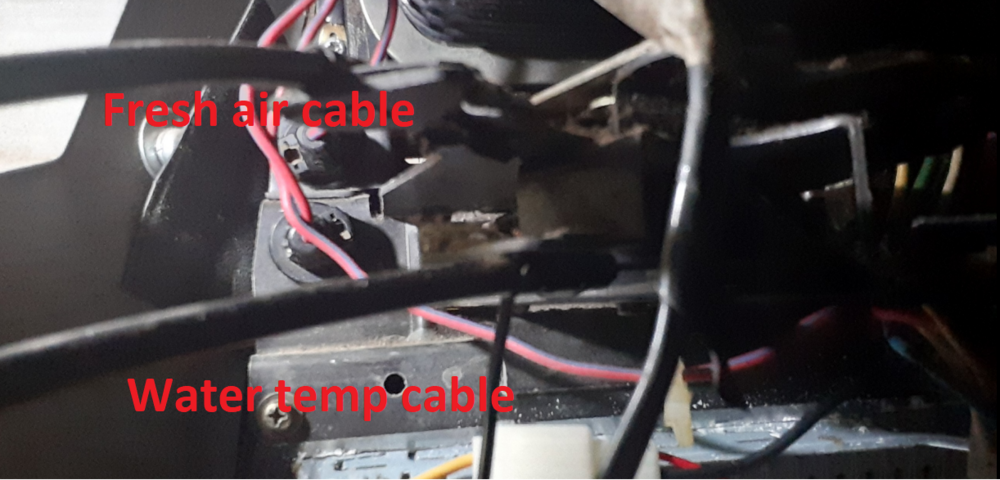
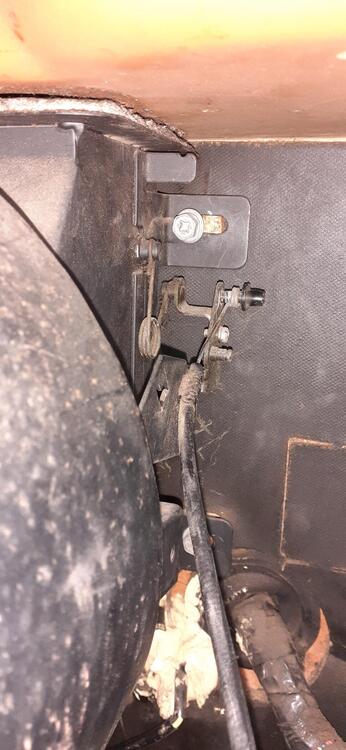
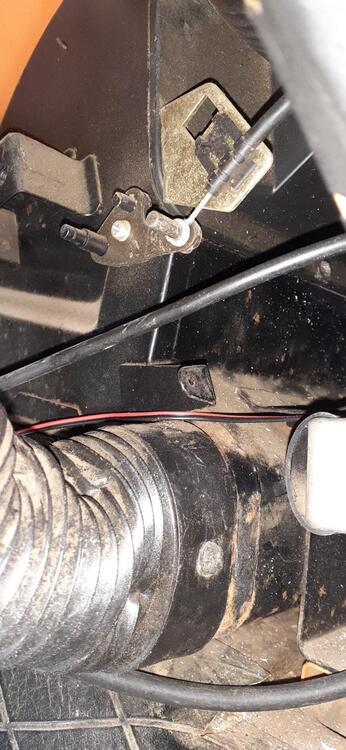
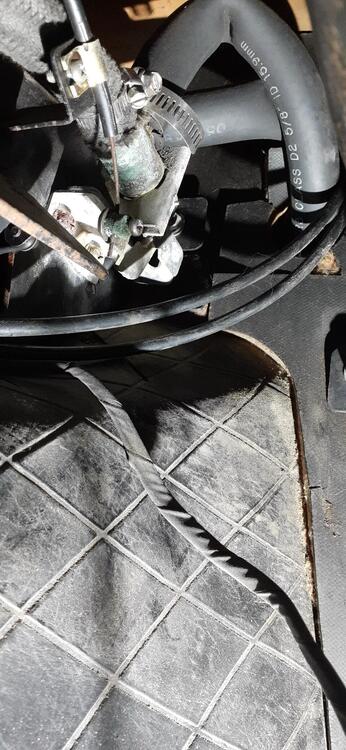
 1 pointSo there are 3 control levers with 4 control cables. The top lever has two cables. One of the cables goes off to the right. It moves when moving the top lever between Off and Vent. The other cable goes off to the left and moves when moving the lever between Vent and Heat. The middle lever for the temperature control goes to the right and connects at the watercock at the heater core. The bottom lever goes over to the left and connects near the door that covers the footwell vent. It moves when you move the lever from Def to Heat. Here's a backside view of the control panel. Sorry I couldn't get a better photo. At least you can see a couple of the cables. Here is the fresh air (Off to Vent) connection. It's up near the firewall in back of the fan box and is probably obscured by the glove box. (I removed the glove box recently.) Here is the Vent to Heat actuator. It is on the drivers side above the hose that goes to the side vent. Here is the cable connection at the watercock. It is on the passenger side near where the heater hoses come through the fire wall. Finally, here is the cable connection for the Def to Heat lever. It is on the driver's side near the firewall where the door for the heated air vent is. Does this give you what you were looking for?
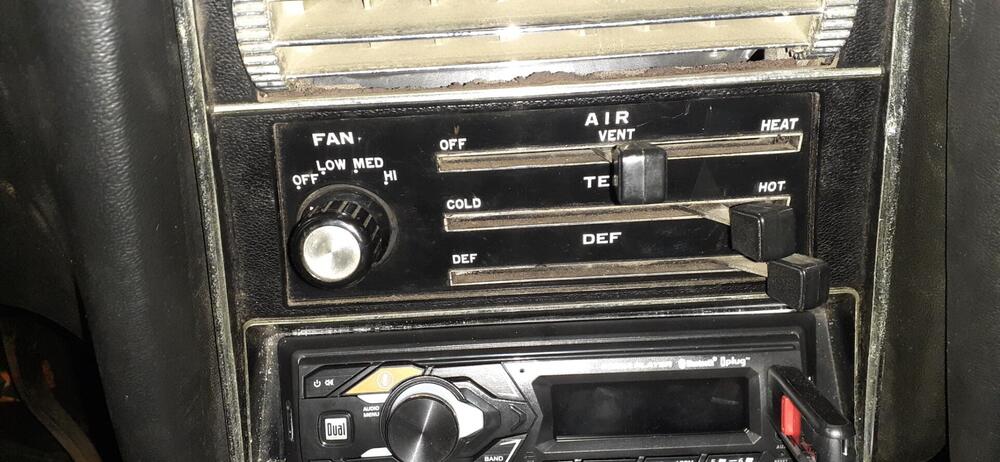
 1 point