Leaderboard
-

Matthew Abate
Free Member7Points1,187Posts -

conedodger
Free Member3Points11,316Posts -


Zed Head
Free Member3Points18,751Posts -

grannyknot
Free Member3Points5,158Posts
Popular Content
Showing content with the highest reputation on 09/07/2024 in all areas
-
3 points
-
2 pointsI worked on the firewall a bit yesterday and today. The dash can now go in once it’s ready (unless I forgot something as usual). I wrapped the -10 ac pipe at the evaporator end, but the insulation isn’t long enough to go all the way to the firewall, so I may need to address that. I also need to figure out where I want the AC drip hose to exit. There are still a handful of insulation pieces to put on the hump and the kick panels. I’m holding off because I am missing some plugs and I still need to test fit the ventilation and relay stuff. Once those are on I will tape all the joints and put a sheet over it until I order the carpet.
 2 points
 -
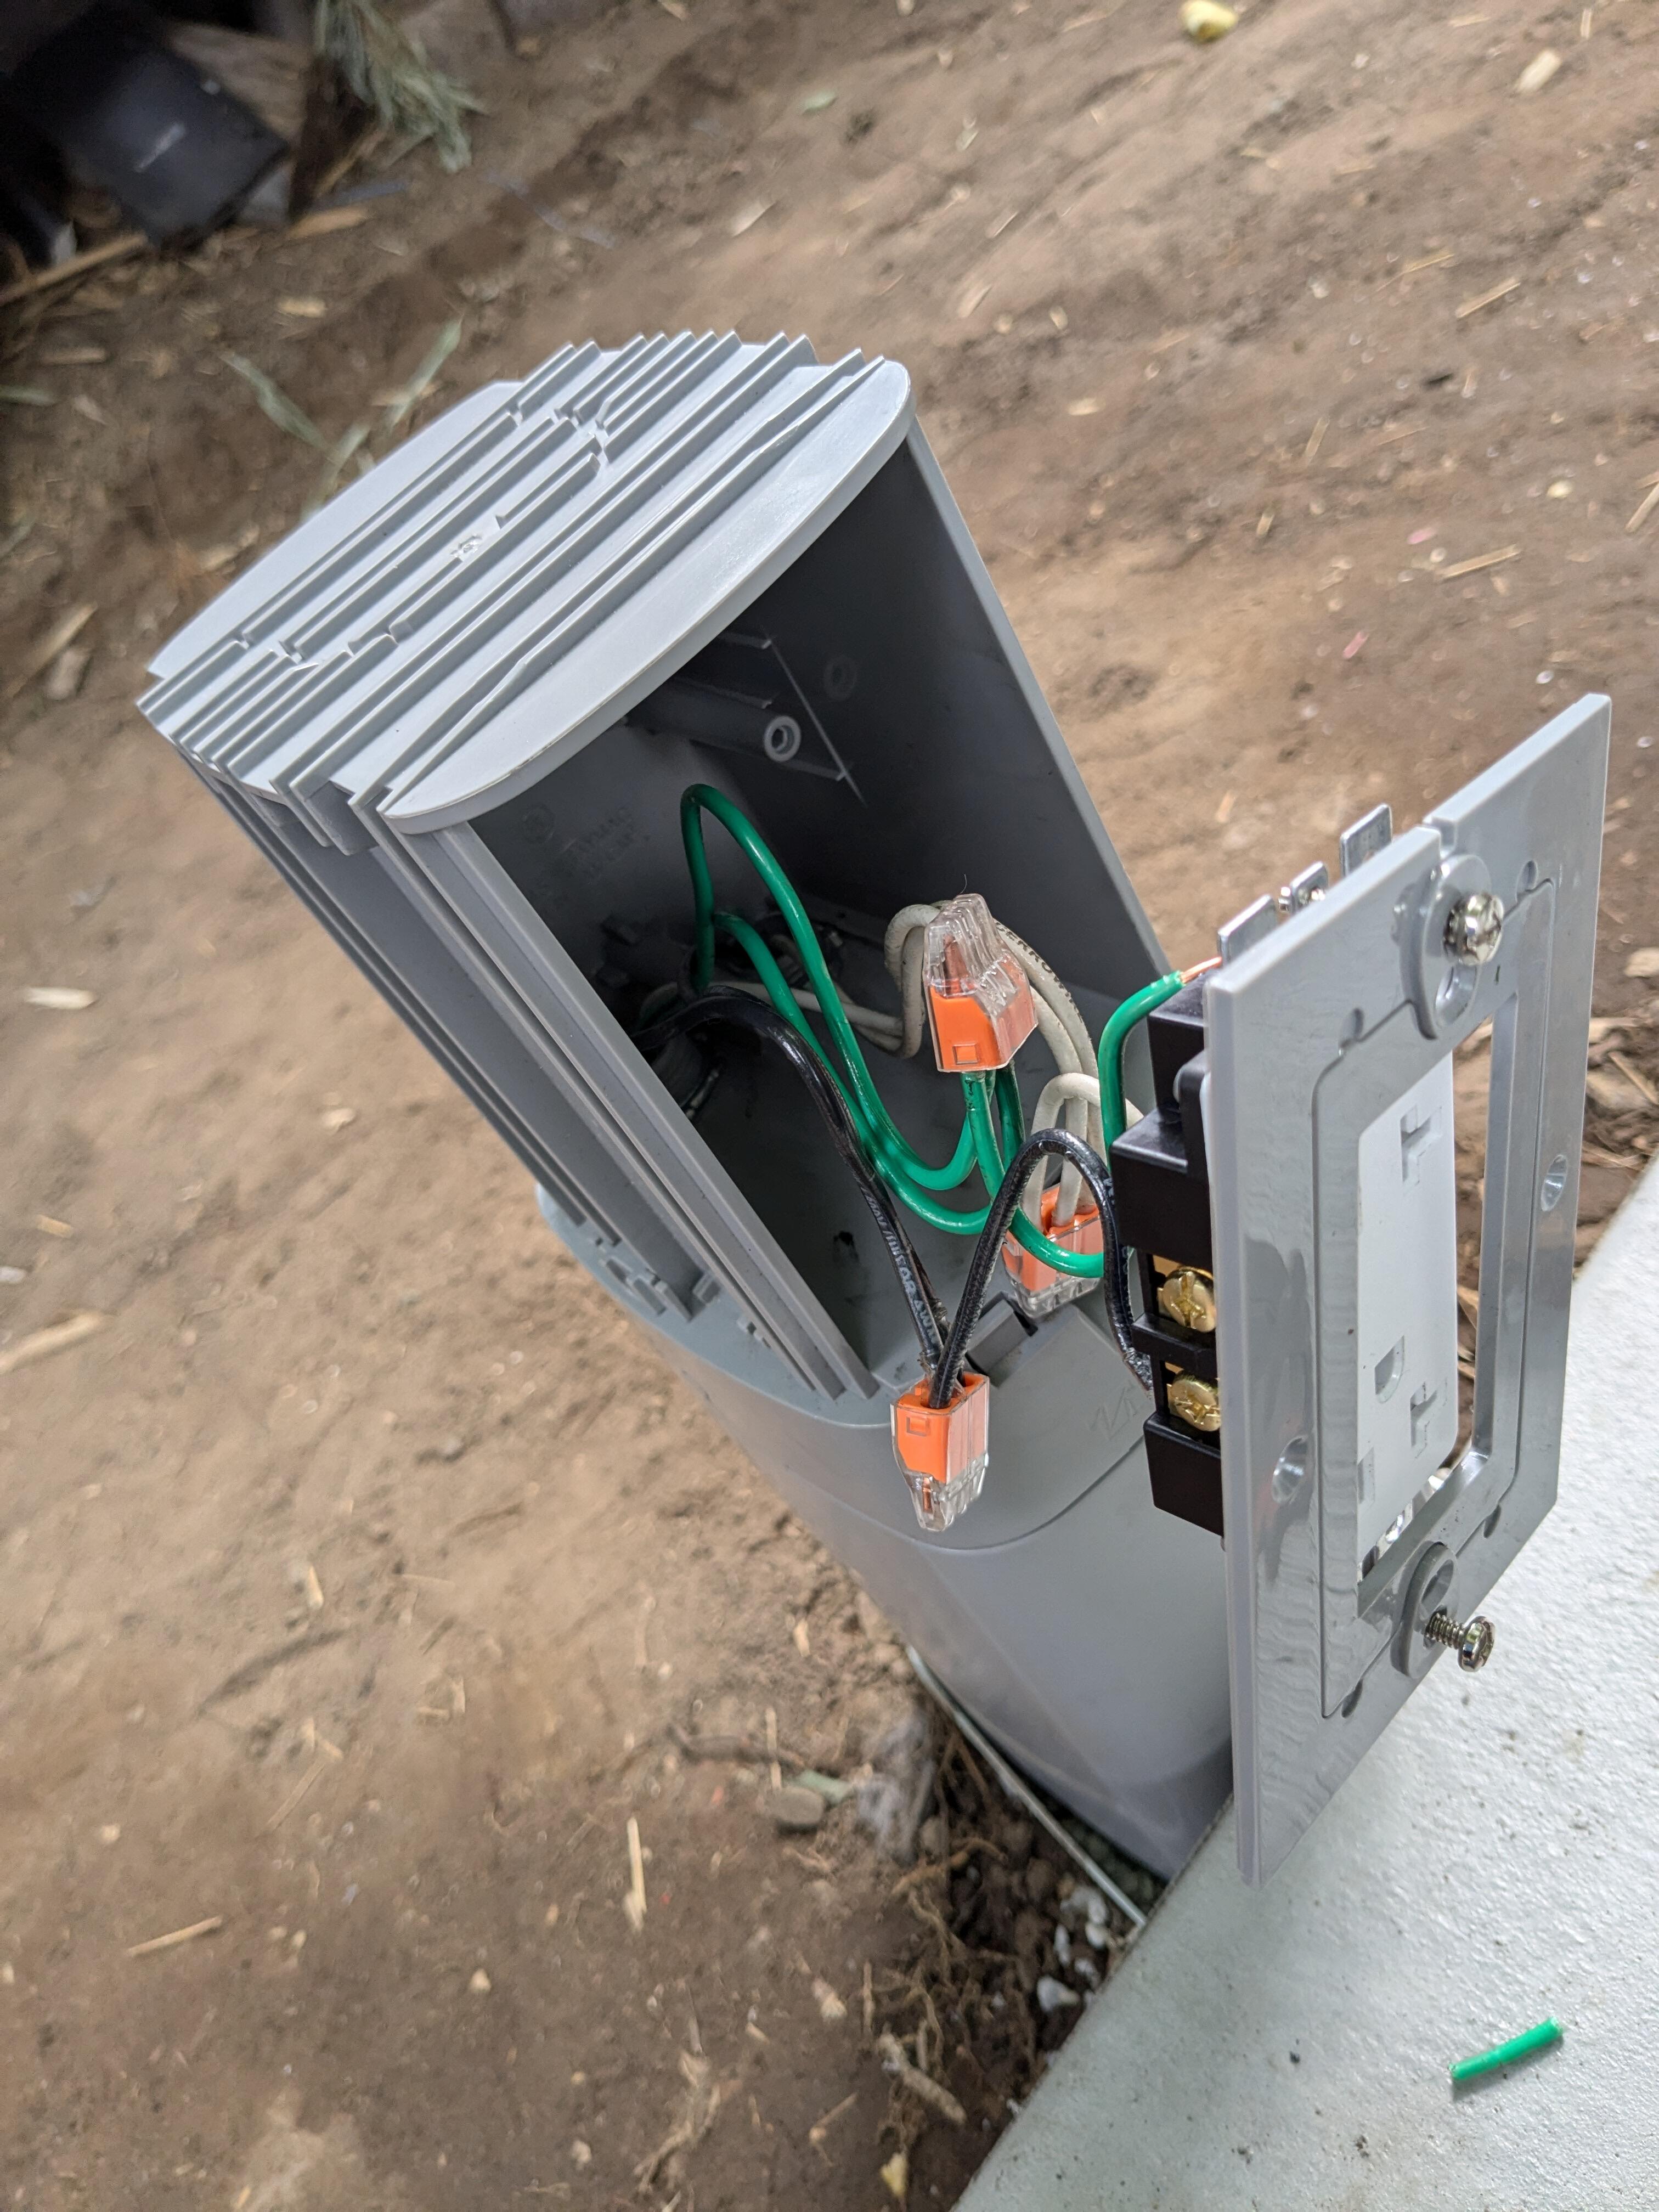
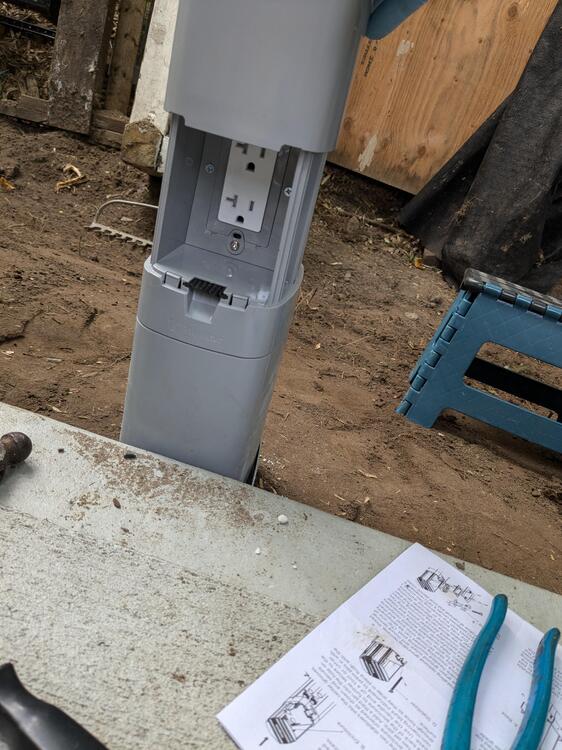
 Filled the trench & graded the ground. Wired the receptacles today West side (end of run) South side With sliding cover down.
 2 points
 -
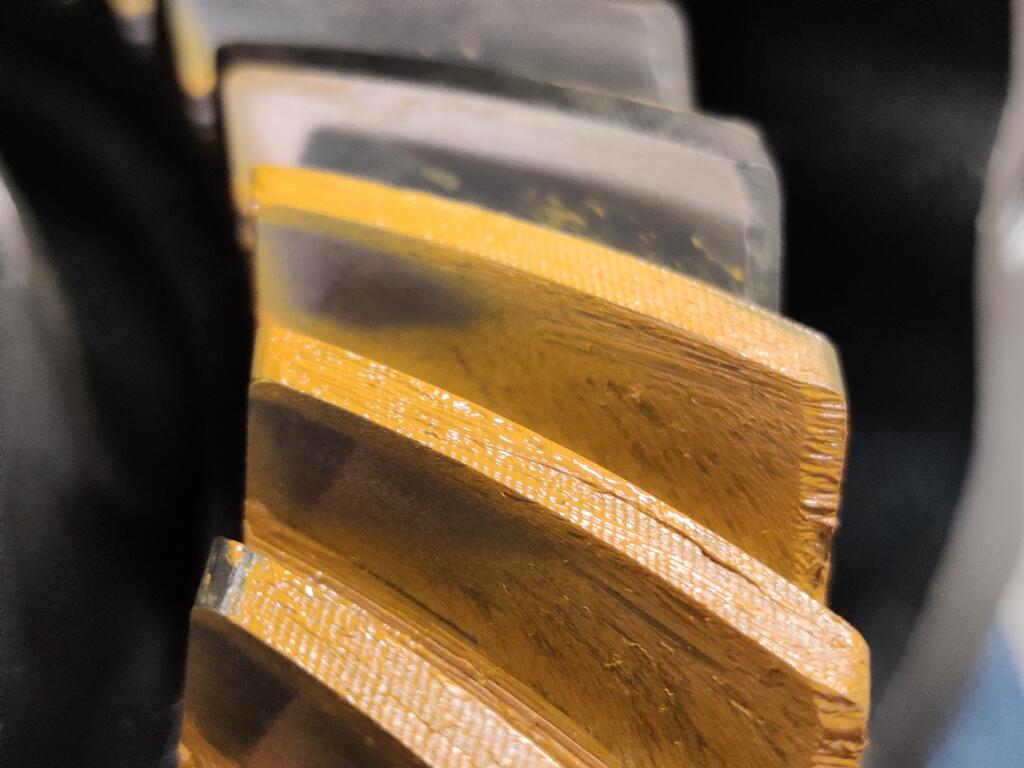
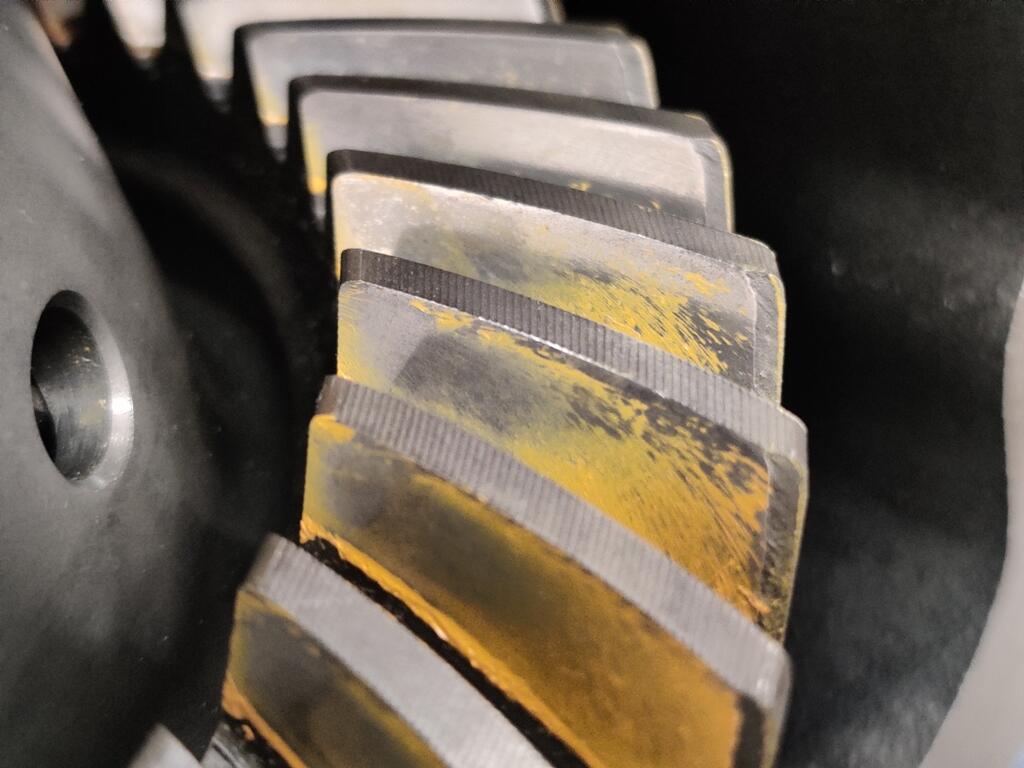
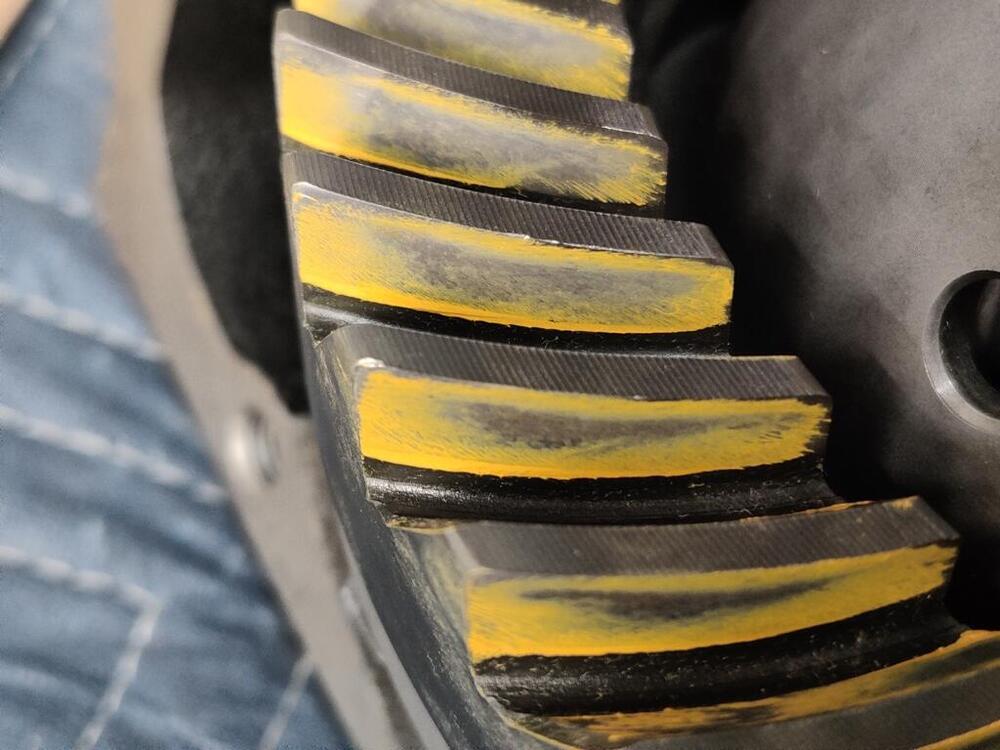
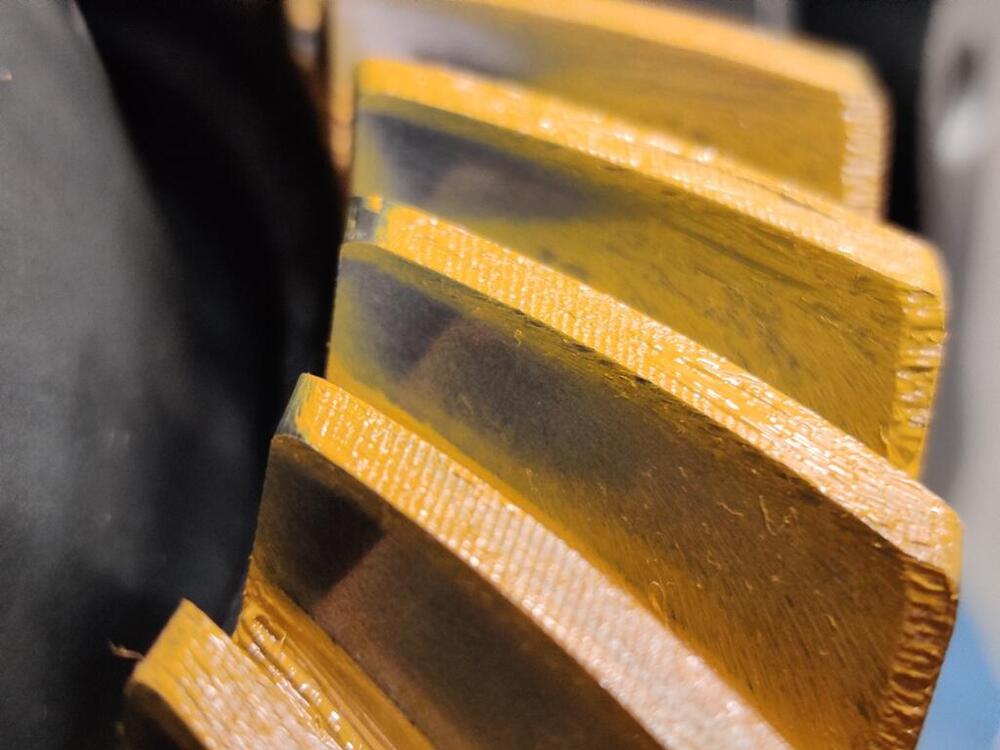
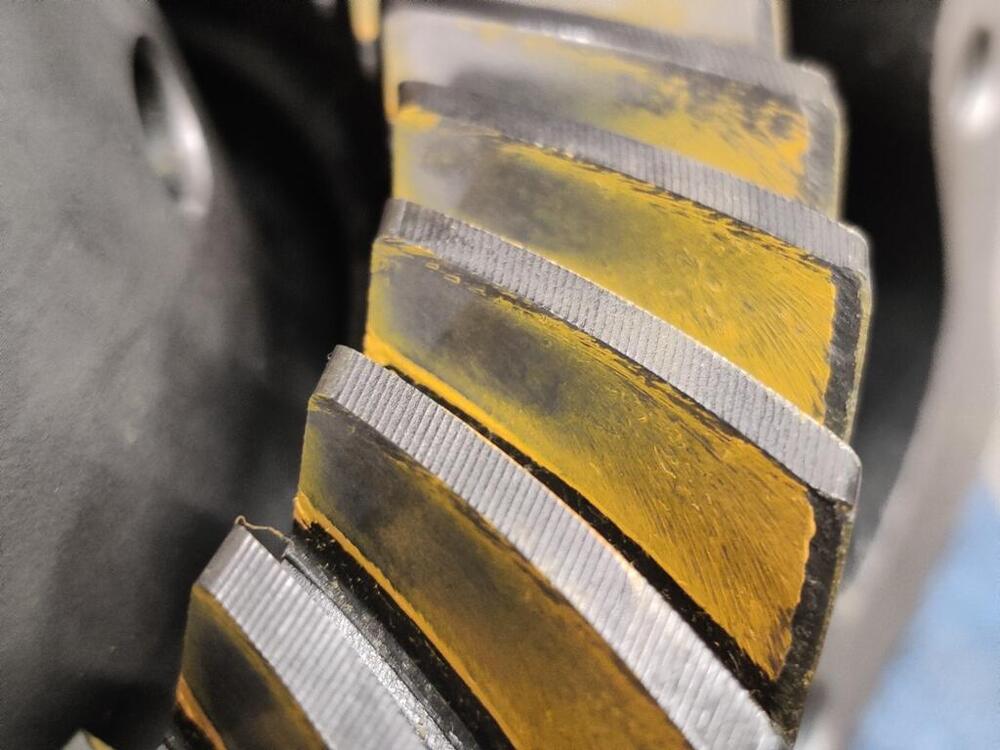
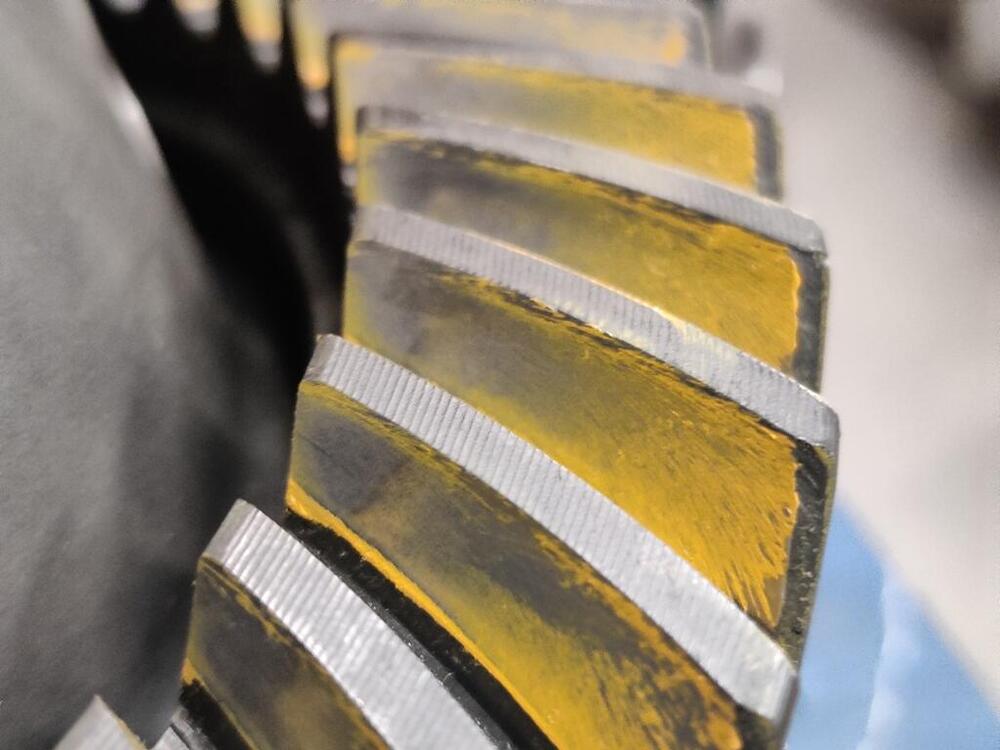
 I was measuring runout incorrectly. I was measuring on the outside, angled edge of the crown gear. When I measured the backside of the gear, I got less than the .0031" factory specification. So, here are the wipe pattern pics: Drive side - first pic is directly painted teeth, second pic is the paint transfer to clean teeth. What I see here is that the contact area is nearly centered both from a top and bottom of the tooth and toe and heel of the tooth. The total surface area of the exposed metal (exposed by paint displacement) is much greater than my prior efforts where I was changing the pinion shim thickness. Paint is still present on the tooth surface above and below the exposed metal... and on the toe and heel of the tooth as well. This looks very good to me. Shifting now to the coast side of the gear: This is not as ideal. The exposed metal is mostly on the toe side of the tooth. It almost runs off the toe edge. However, I see a little bit of paint on the toe edge. And the surface area of exposed metal is quite wide and centered top to bottom on the tooth. I'd like to see the exposed metal area shifted more toward the center (with reference to the toe and heel) of the tooth. Looking now at teeth that were not painted: The pics above show paint that was transferred from the pinion gear to "clean" teeth. In these pictures it looks like the contact area is a bit more extensive. The width of the contact from top to bottom of the tooth is quite large. And the exposed area of contact appears to cover about 1/2" of the tooth between the toe and heel, mostly on the toe side. I am happy with the results I have achieved here. So, I will proceed with installing the oil seals and installing it in the car. It will be interesting to see how much noise this differential makes. From when I had it installed previously, I recall it made a low but noticeable amount of noise on deceleration, but it was quiet when under load. I had a 3.9 in the same car for a bit and it was incredibly quiet. I sold that one some time ago though as it wasn't the ratio that I needed. Net/net (summarizing this thread), I have installed the Quaife LSD carrier. I have replaced all of the bearings in the differential. I have reused the existing pinion shim and pinion spacer. In order to get the backlash within specification, I had to get the left side bearing retainer turned in a lathe to remove .5 mm of material, so that the retainer could recess that amount more inside the left side of the differential (when differential is viewed from the back). The .5 mm (about .020") which was removed was "replaced" with shims. I added back a .3 mm (.1181") shim to the left side bearing retainer, and put a .2 mm (.00787") on the right side bearing retainer with the rest of the shim stack there. It would seem that replacing bearings on the pinion with new ones was actually "no big deal" with regard to changes to the pinion and ring gear meshing. Swapping in the Quaife carrier caused the ring gear to move away from the pinion gear vs. the stock carrier. Also, replacing the side bearings in the side retainers did not appear to change the relationship of the carrier to the case either. I am confident in this because I checked the bearing preload on the side bearings at one point - the pinion gear was not installed, and I installed the carrier and checked rotation of the carrier. My check wasn't measured with tools, but by hand; however, the preload "felt" noticeable, but not "heavy". Anyway, I think I landed in a good place. I will be able to test that out now when I install the differential.


 2 points
 -
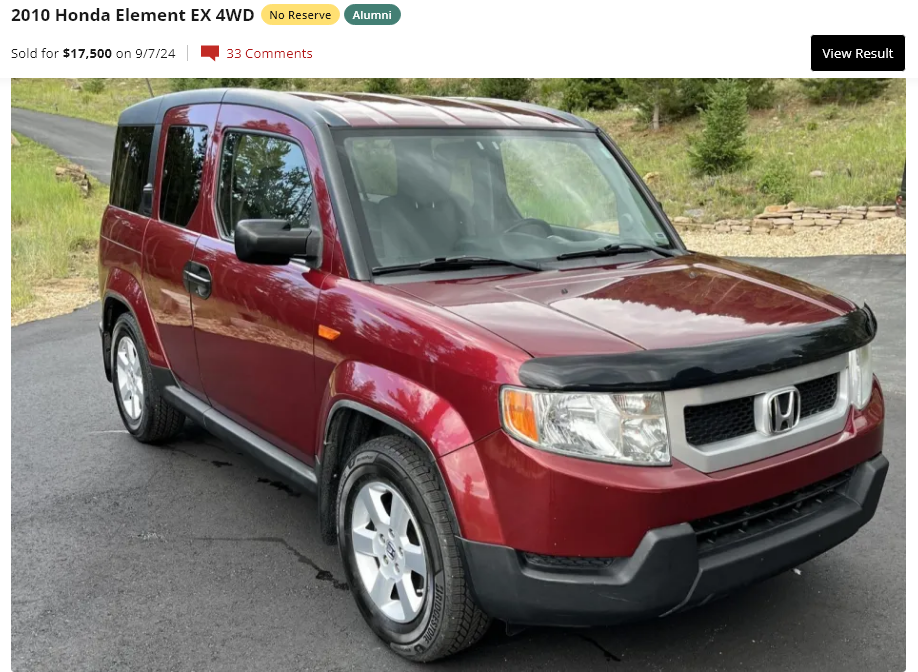
The collector/investor car market is a strange place. https://bringatrailer.com/listing/2010-honda-element-22/
 1 point
 -
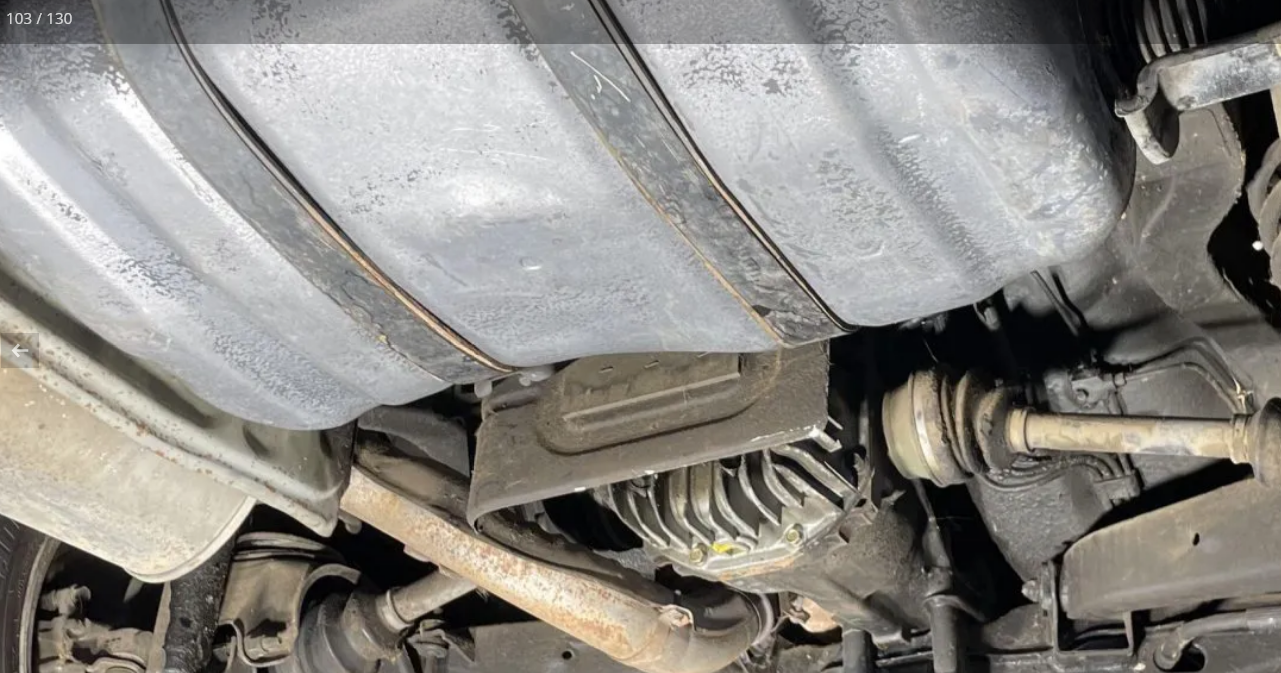
In the States they just stuck on the finned cover and called it good. The 300ZX's got them with the LSD diffs, CLSD for sure and I think the 88 Shiro VLSD. Only 87-89 I believe. The FSM shows maintenance procedures on the CLSD's but no pictures of the cover. It's one of those things to look for for those trying to get limited slip for their early Z's. Like finding gold in the wrecking yard. Here's a typical finned cover. https://bringatrailer.com/listing/1988-nissan-300zx-43/ But this one looks like it might have the plumbing for fluid cooling. Different cover. First time I've seen it. Interesting. https://bringatrailer.com/listing/1989-nissan-fairlady-z-2/

 1 point
 -
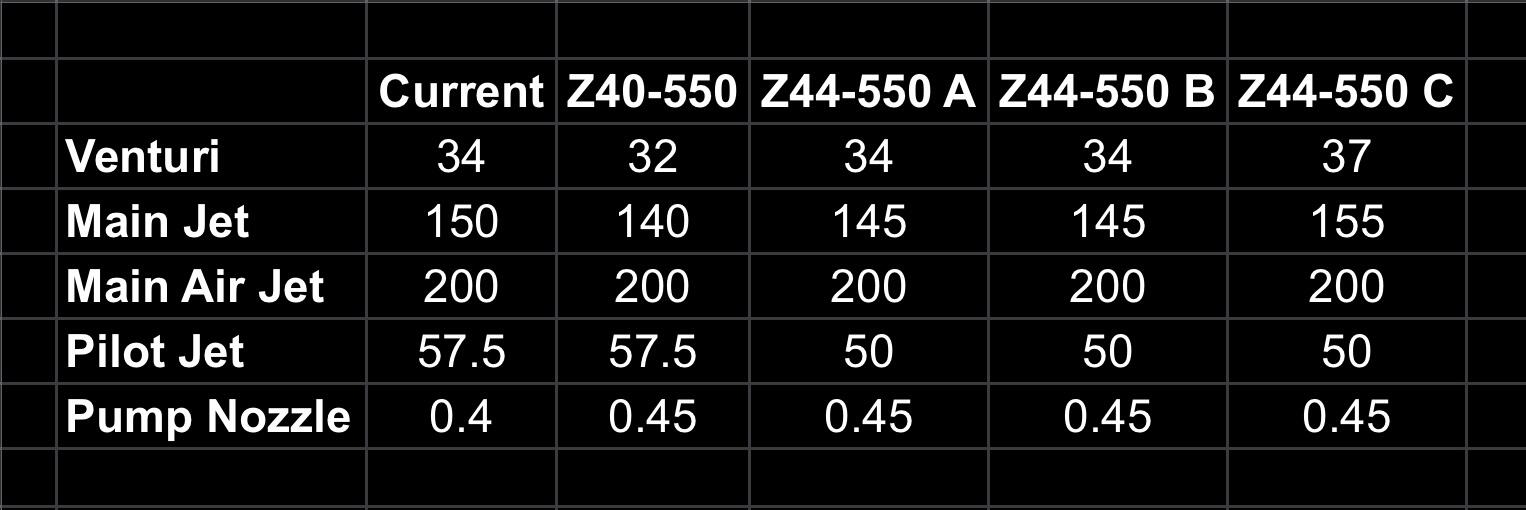
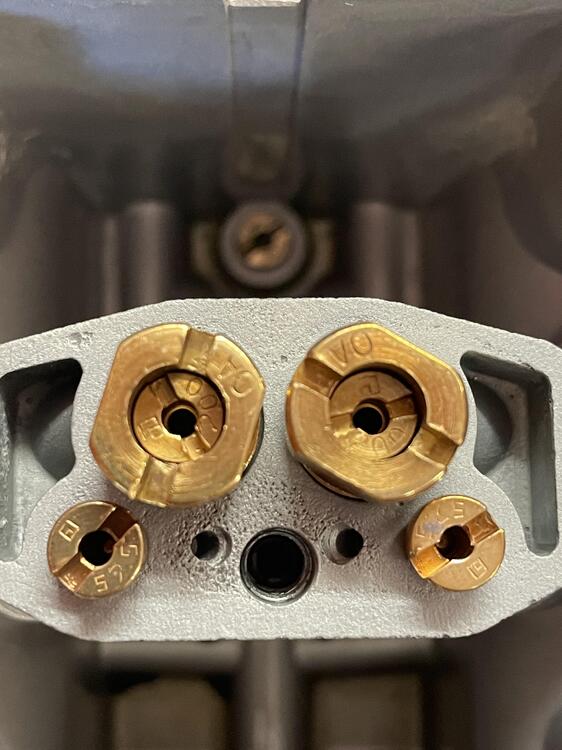
1 pointThe engine is running much better! I was struggling to get the timing below 40° advanced, so last weekend I reinstalled my oil pump shaft and played around with different distributor bases and plates. Today I adjusted my valves and checked the torque on the head bolts. It’s still idling way too high (1,130 rpm) and running way too rich, but today it is much smoother. I have a jetting kit in the mail from Upgrade Motoring so I can bring it down to manufacturer’s specs. Hopefully next week I’ll be able to get it to where I can sync the carburetors. But first I need to relieve the fuel pressure by putting the fuel return lines back on. It’s currently over 5psi so it’s swamping the carbs. While I fix that I’m looking into changing my jetting: Im not sure about Mikuni’s recommended pilot jet, but I will definitely bring the nozzle up to 0.45. Depending on what happens with that and adding the regulator I might be fine with 150 main jets. We will see.
 1 point
 -
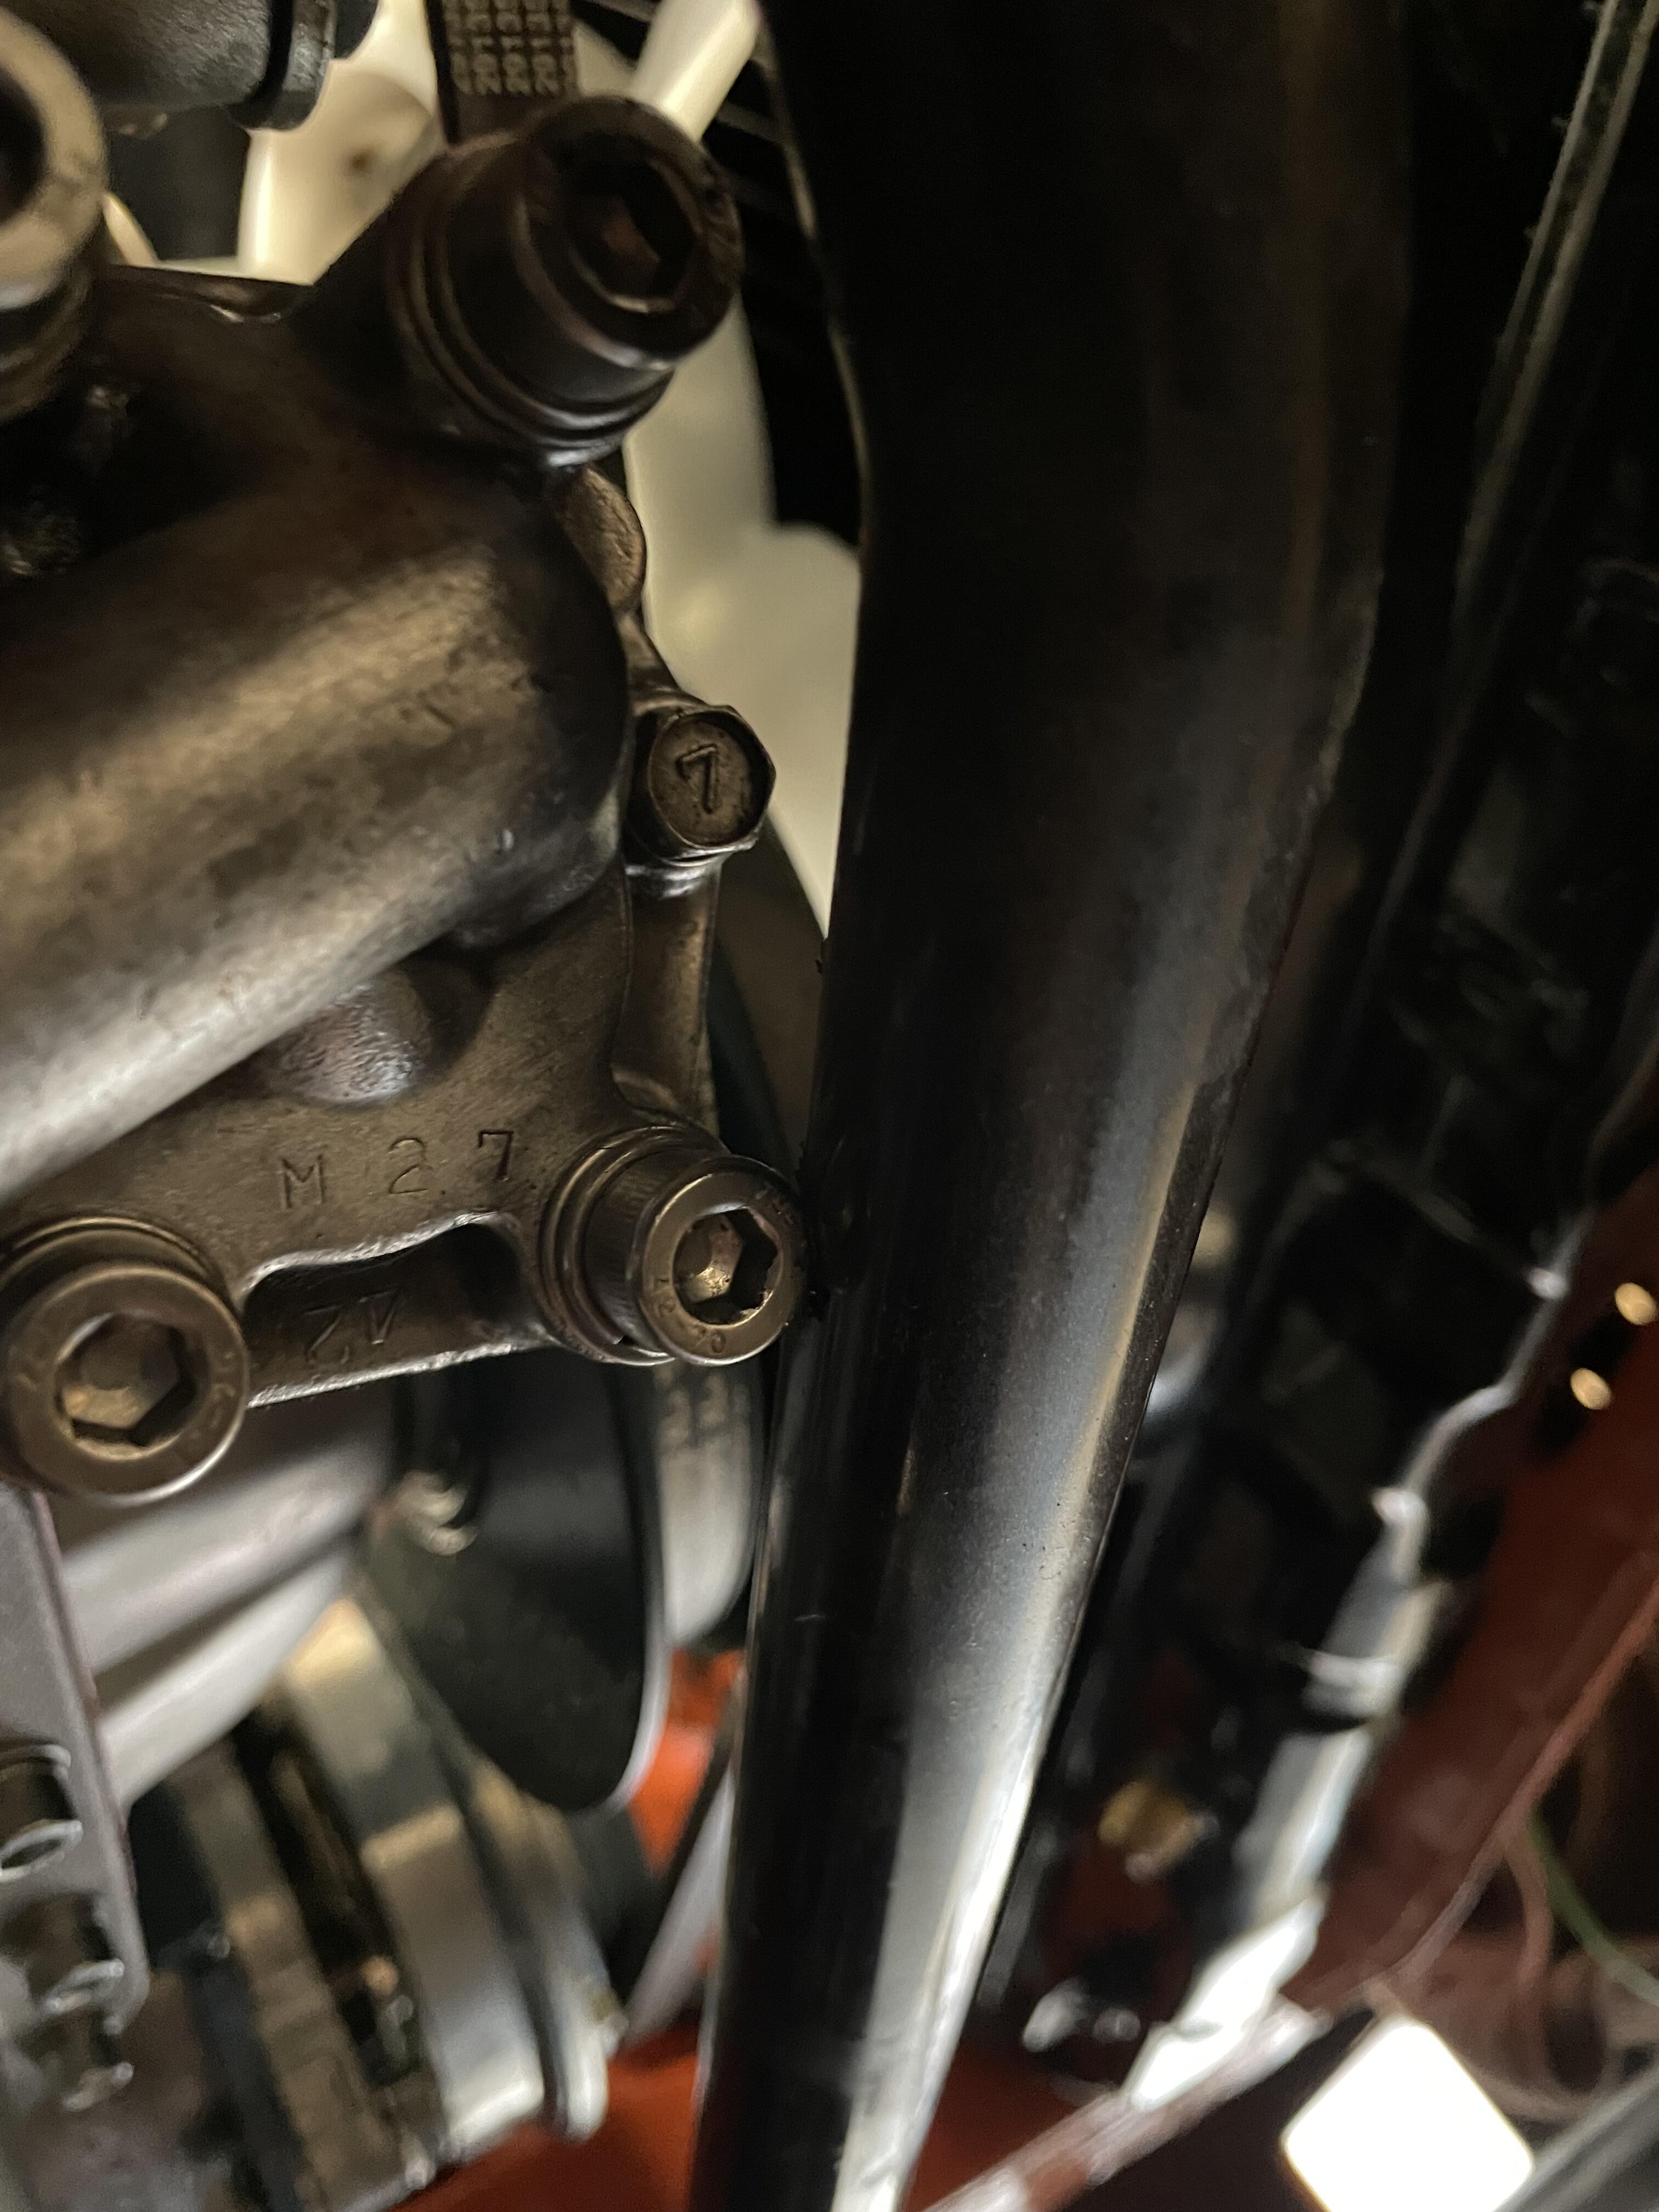
1 pointI’ve identified four issues that need to be addressed before I can start the car again: The timing being 40° advanced is due to the oil pump shaft being off by one tooth. To fix it I’m going to have pull the pump off, and to do that I’m going to have to pull the front sway bar because it’s hitting the pump bolts. I’ll be changing that hardware. Once I get the timing right I can address my insanely rich mixture (last picture), but before that I need to check my head bolt torque because I have a leak (not pictured). It could be the valve cover, but I want to check the rocker arm adjustment, so I’ll do it all in one shot.

 1 point
 -
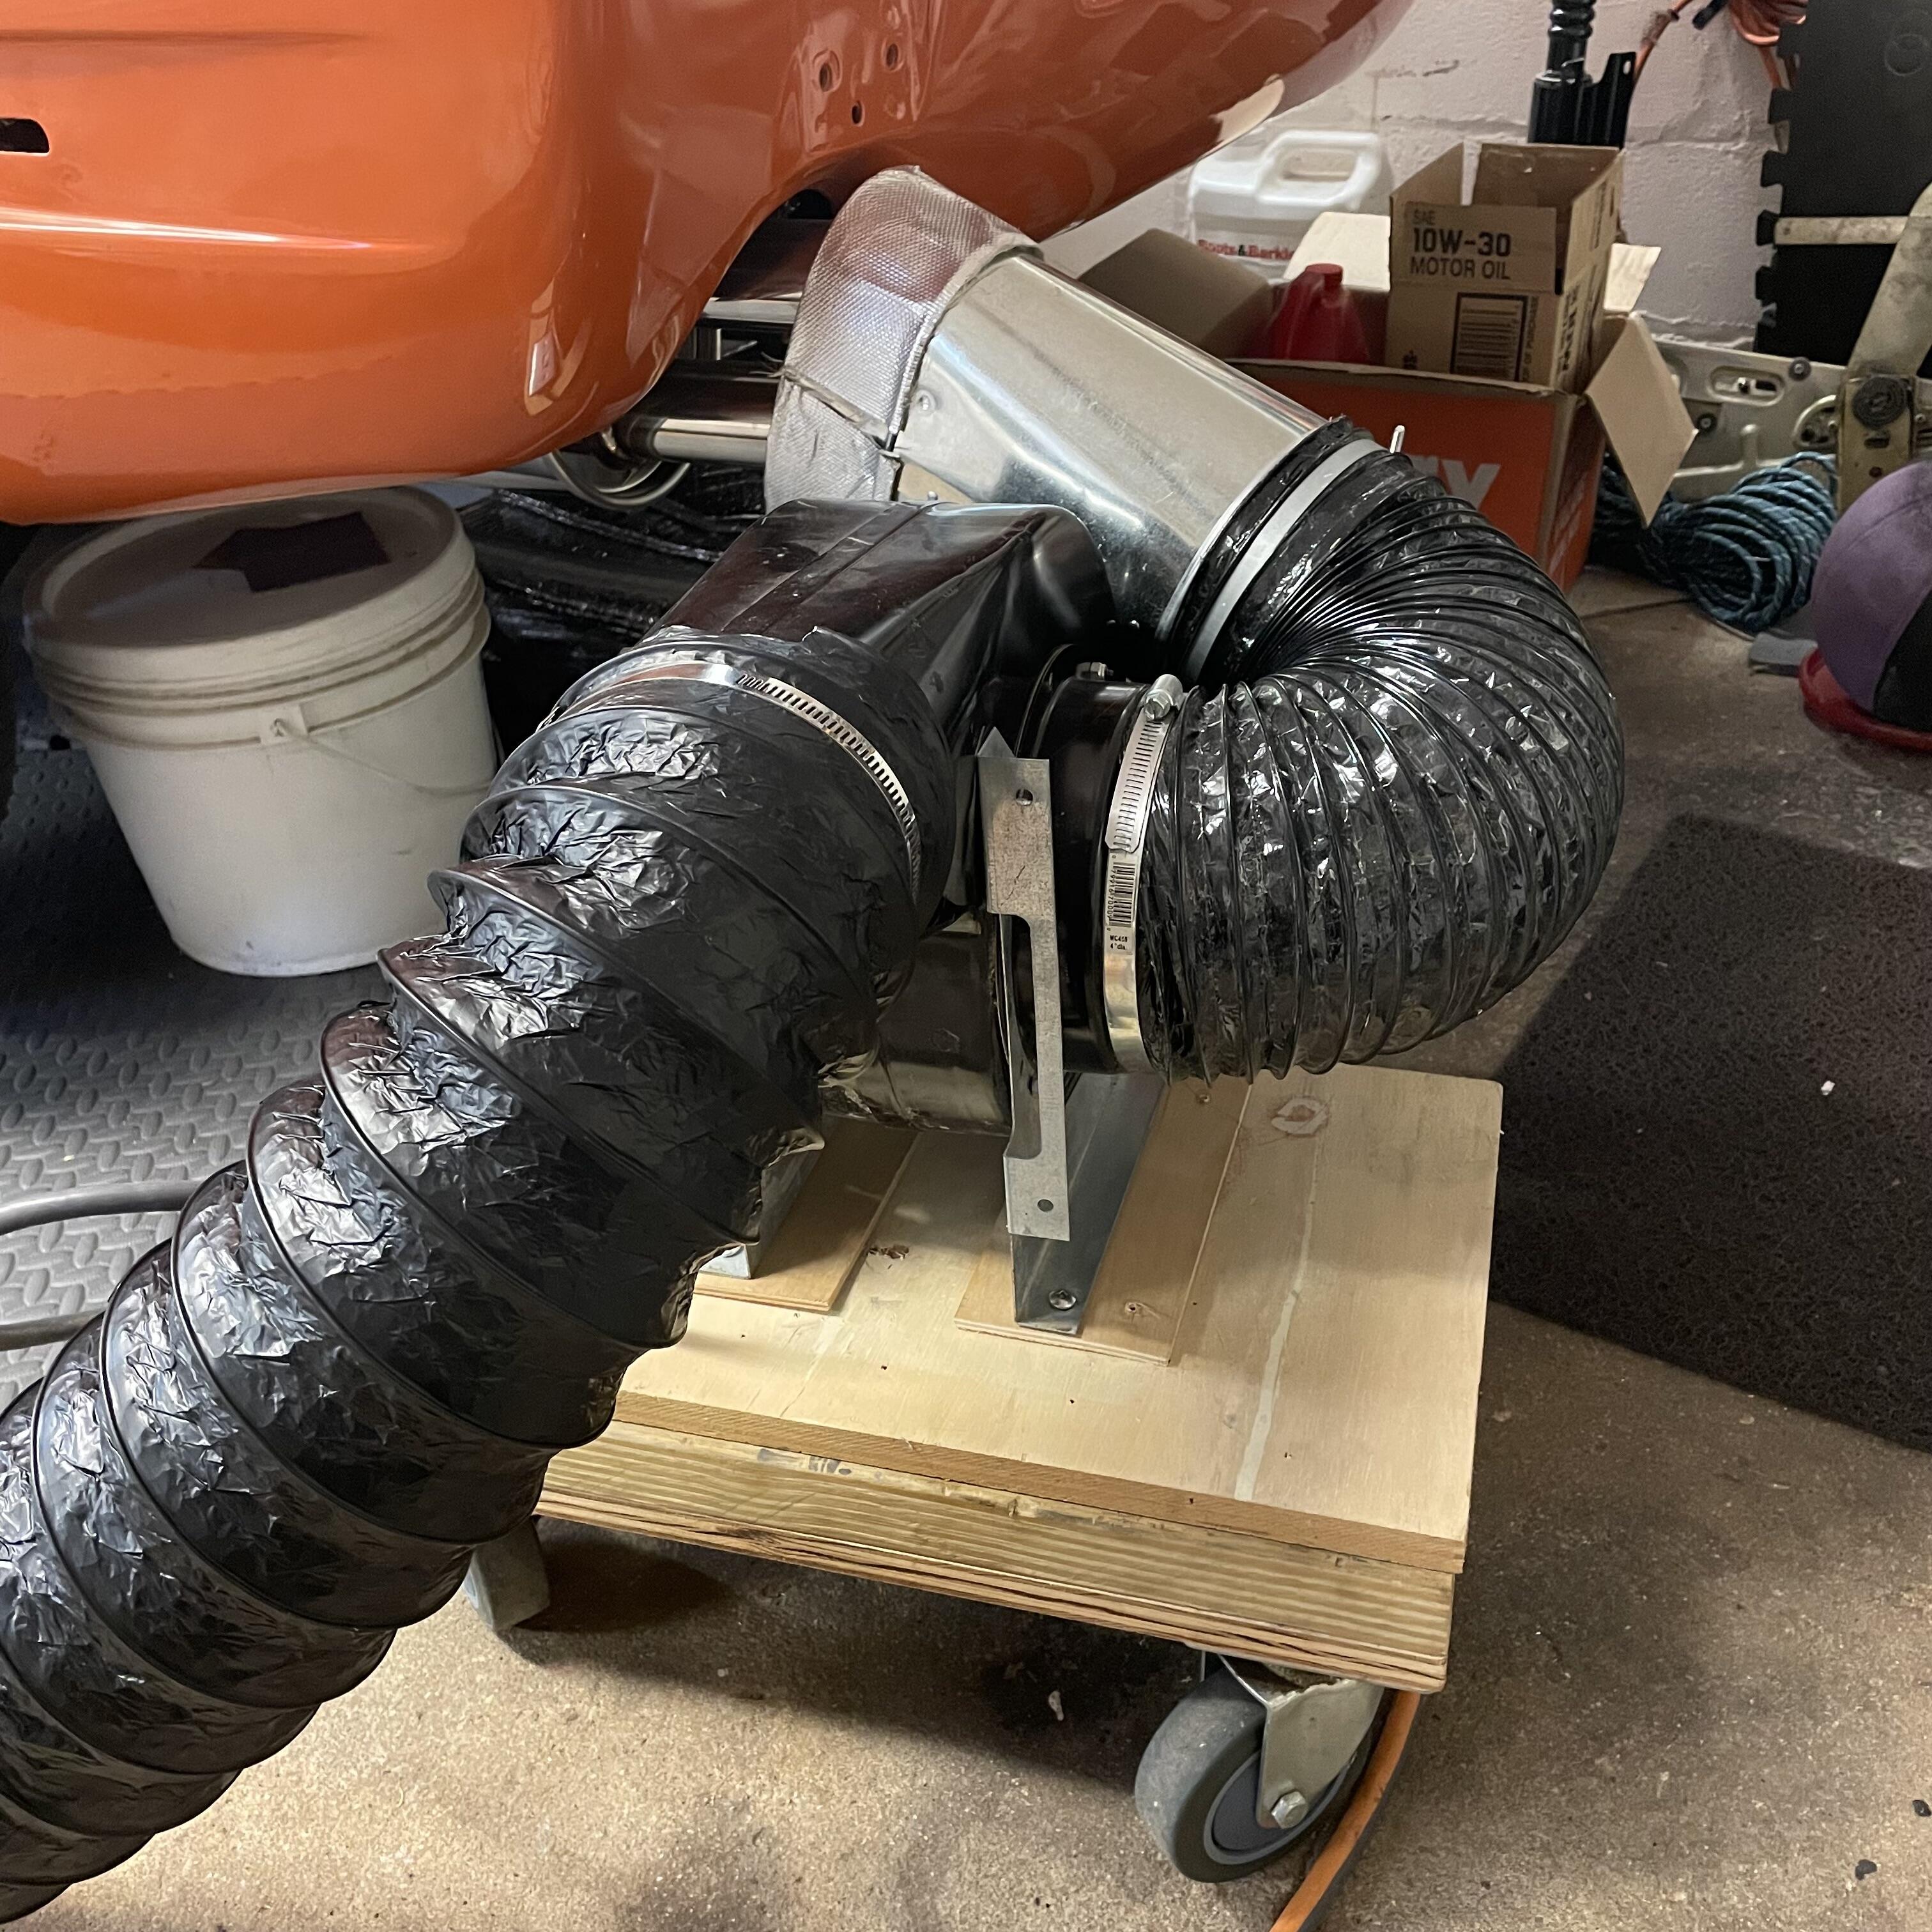
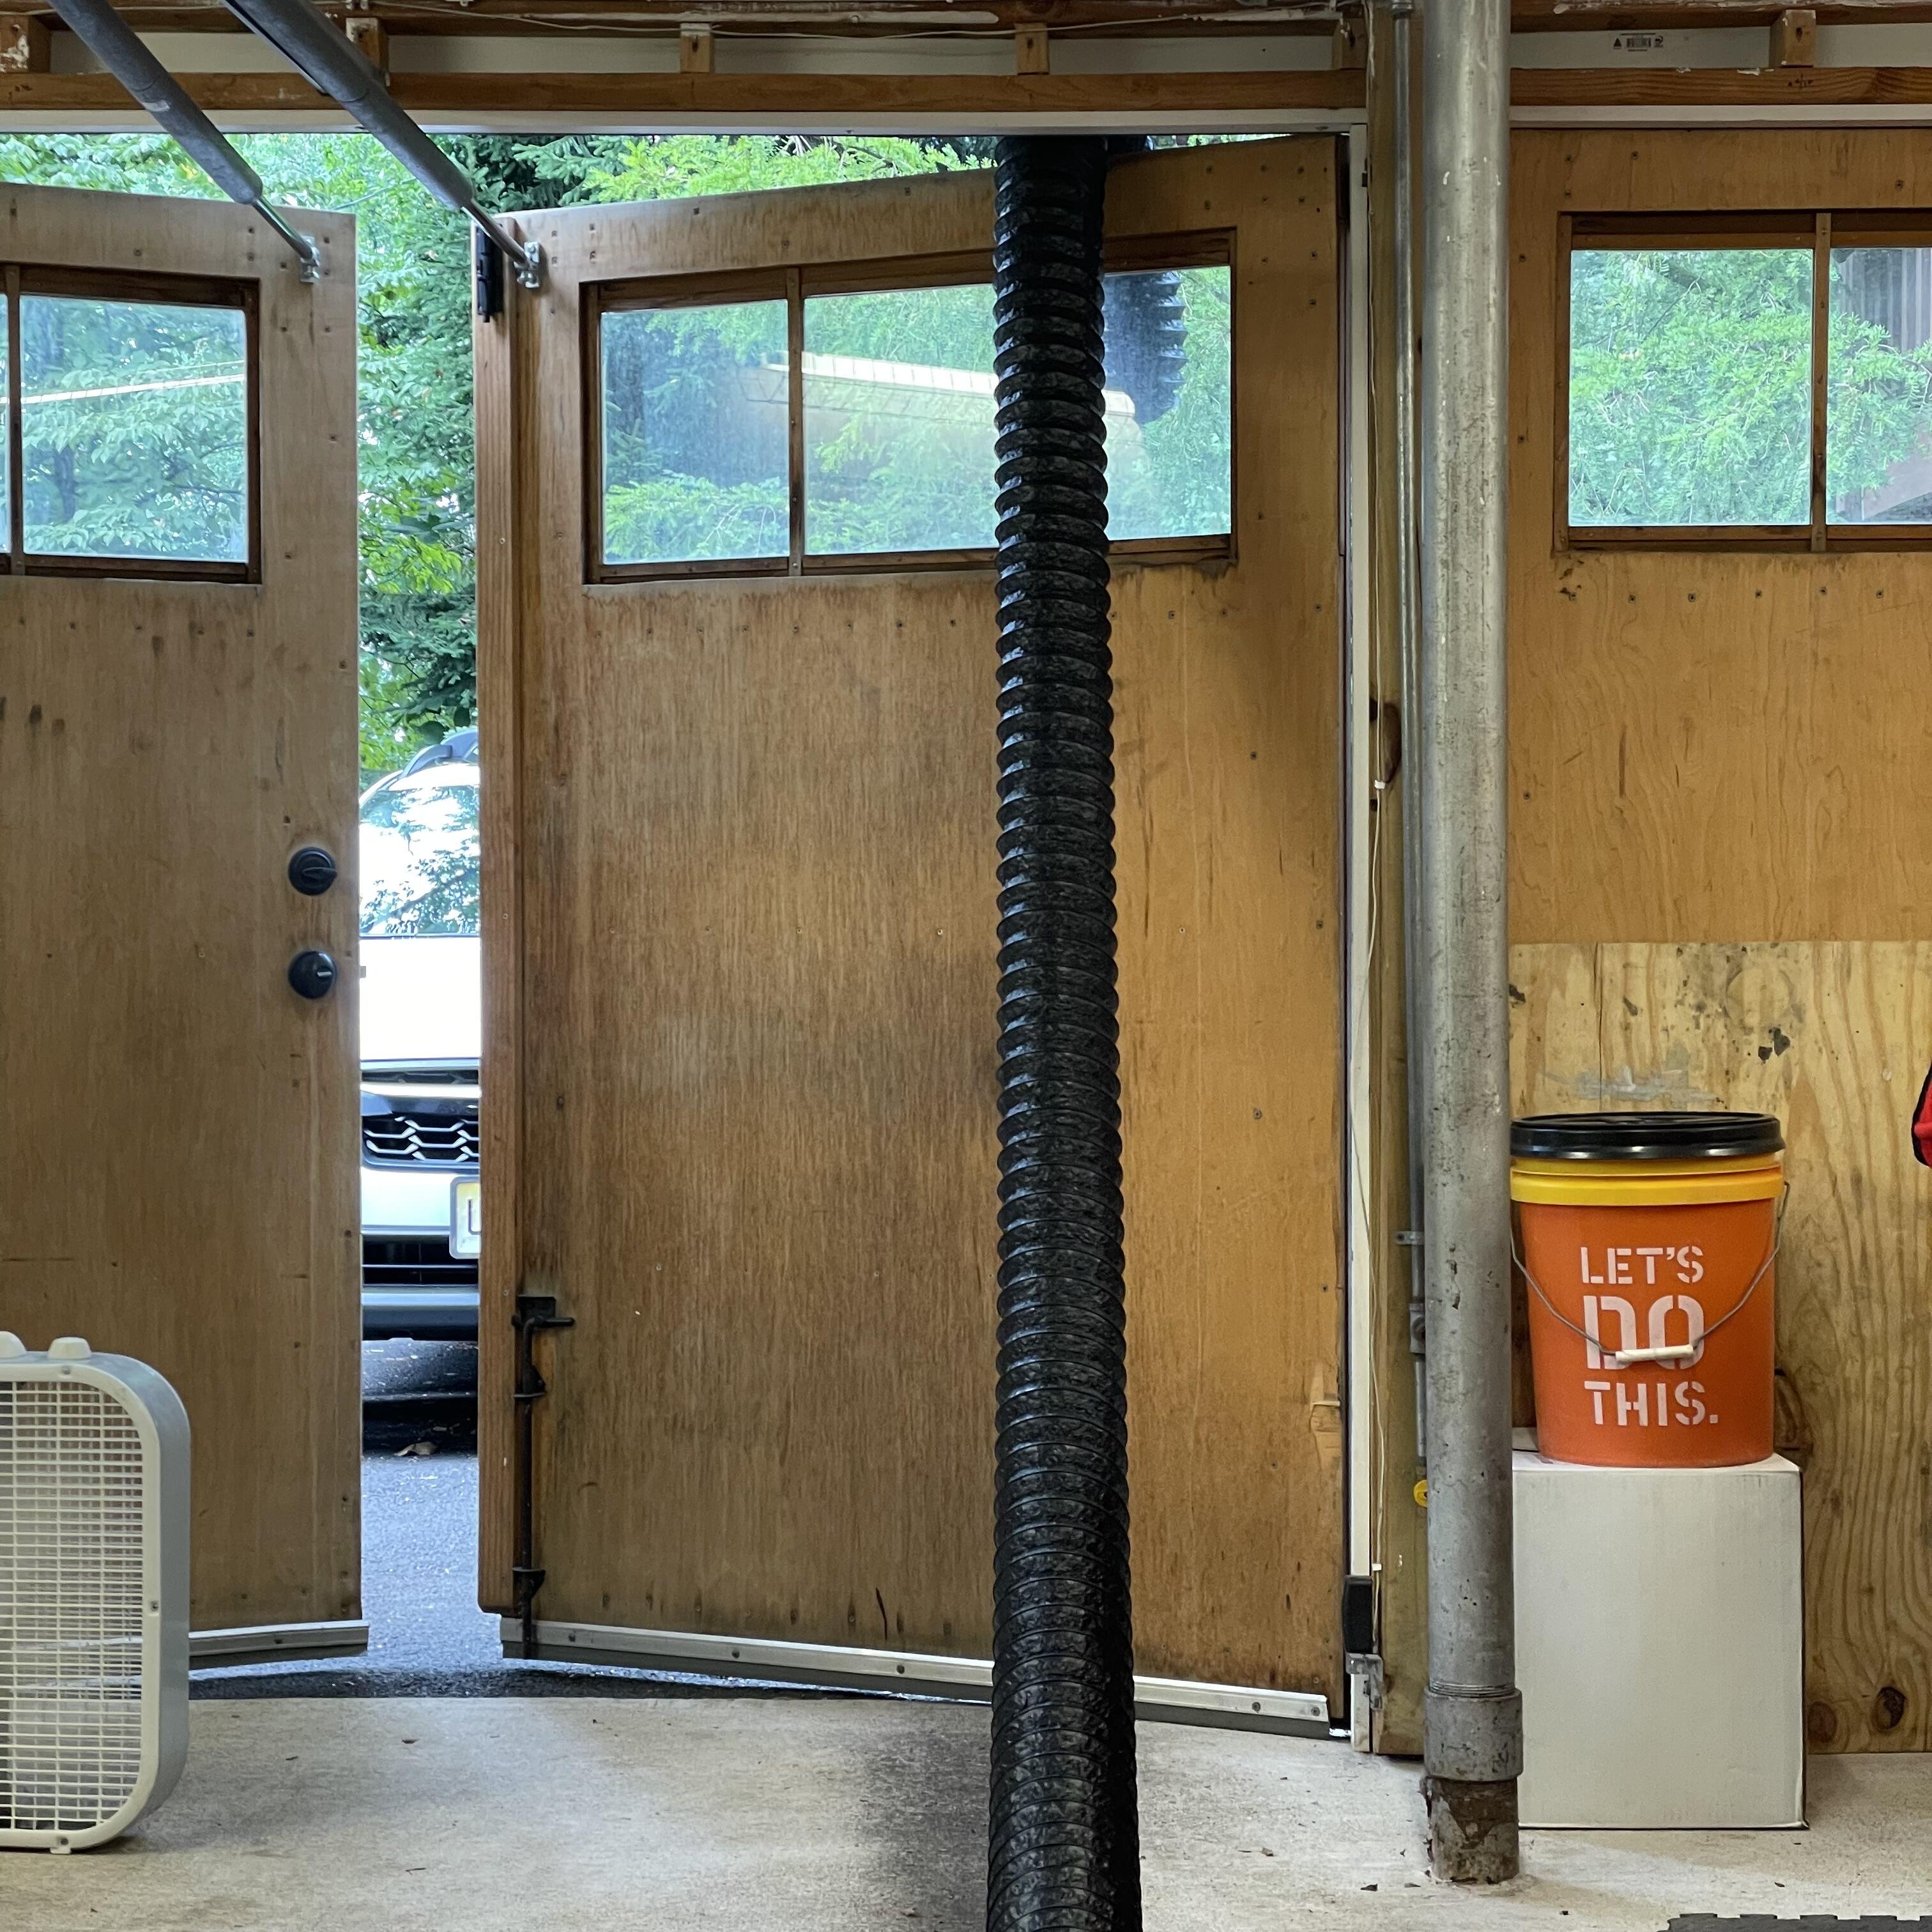
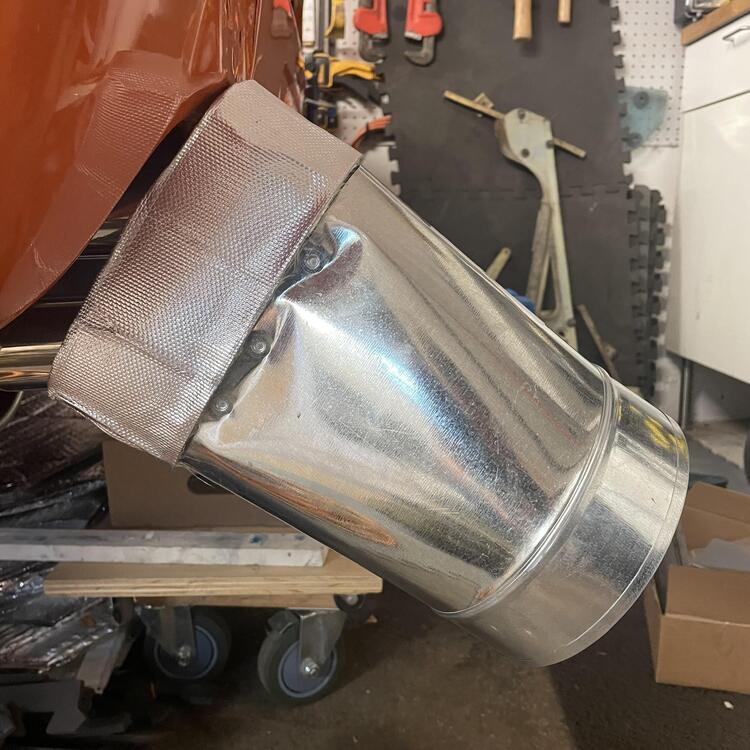
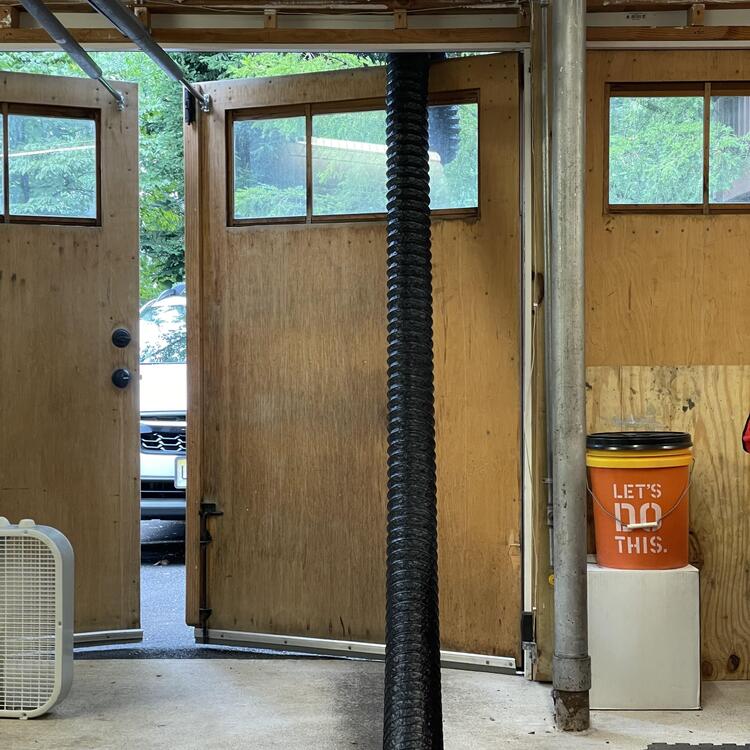
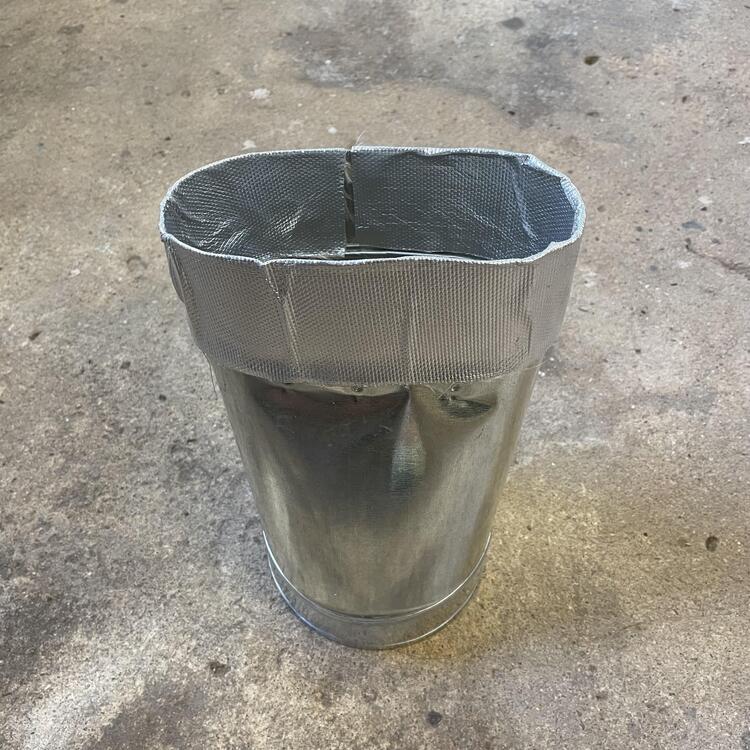
1 pointI made myself a little exhaust evacuation system so I can keep the car backed into the garage without gassing up my whole house. My in-laws recently refurbished their oven so they had a blower from an oven hood laying around. A piece of HVAC ducting with some scrap heat shield and some hose did the job. I do wish the fan in this thing was stronger, but if it’s not doing enough I’ll supplement it with a Vornado house fan under the back of the car blowing toward the front. 🤞🏻


 1 point
 -
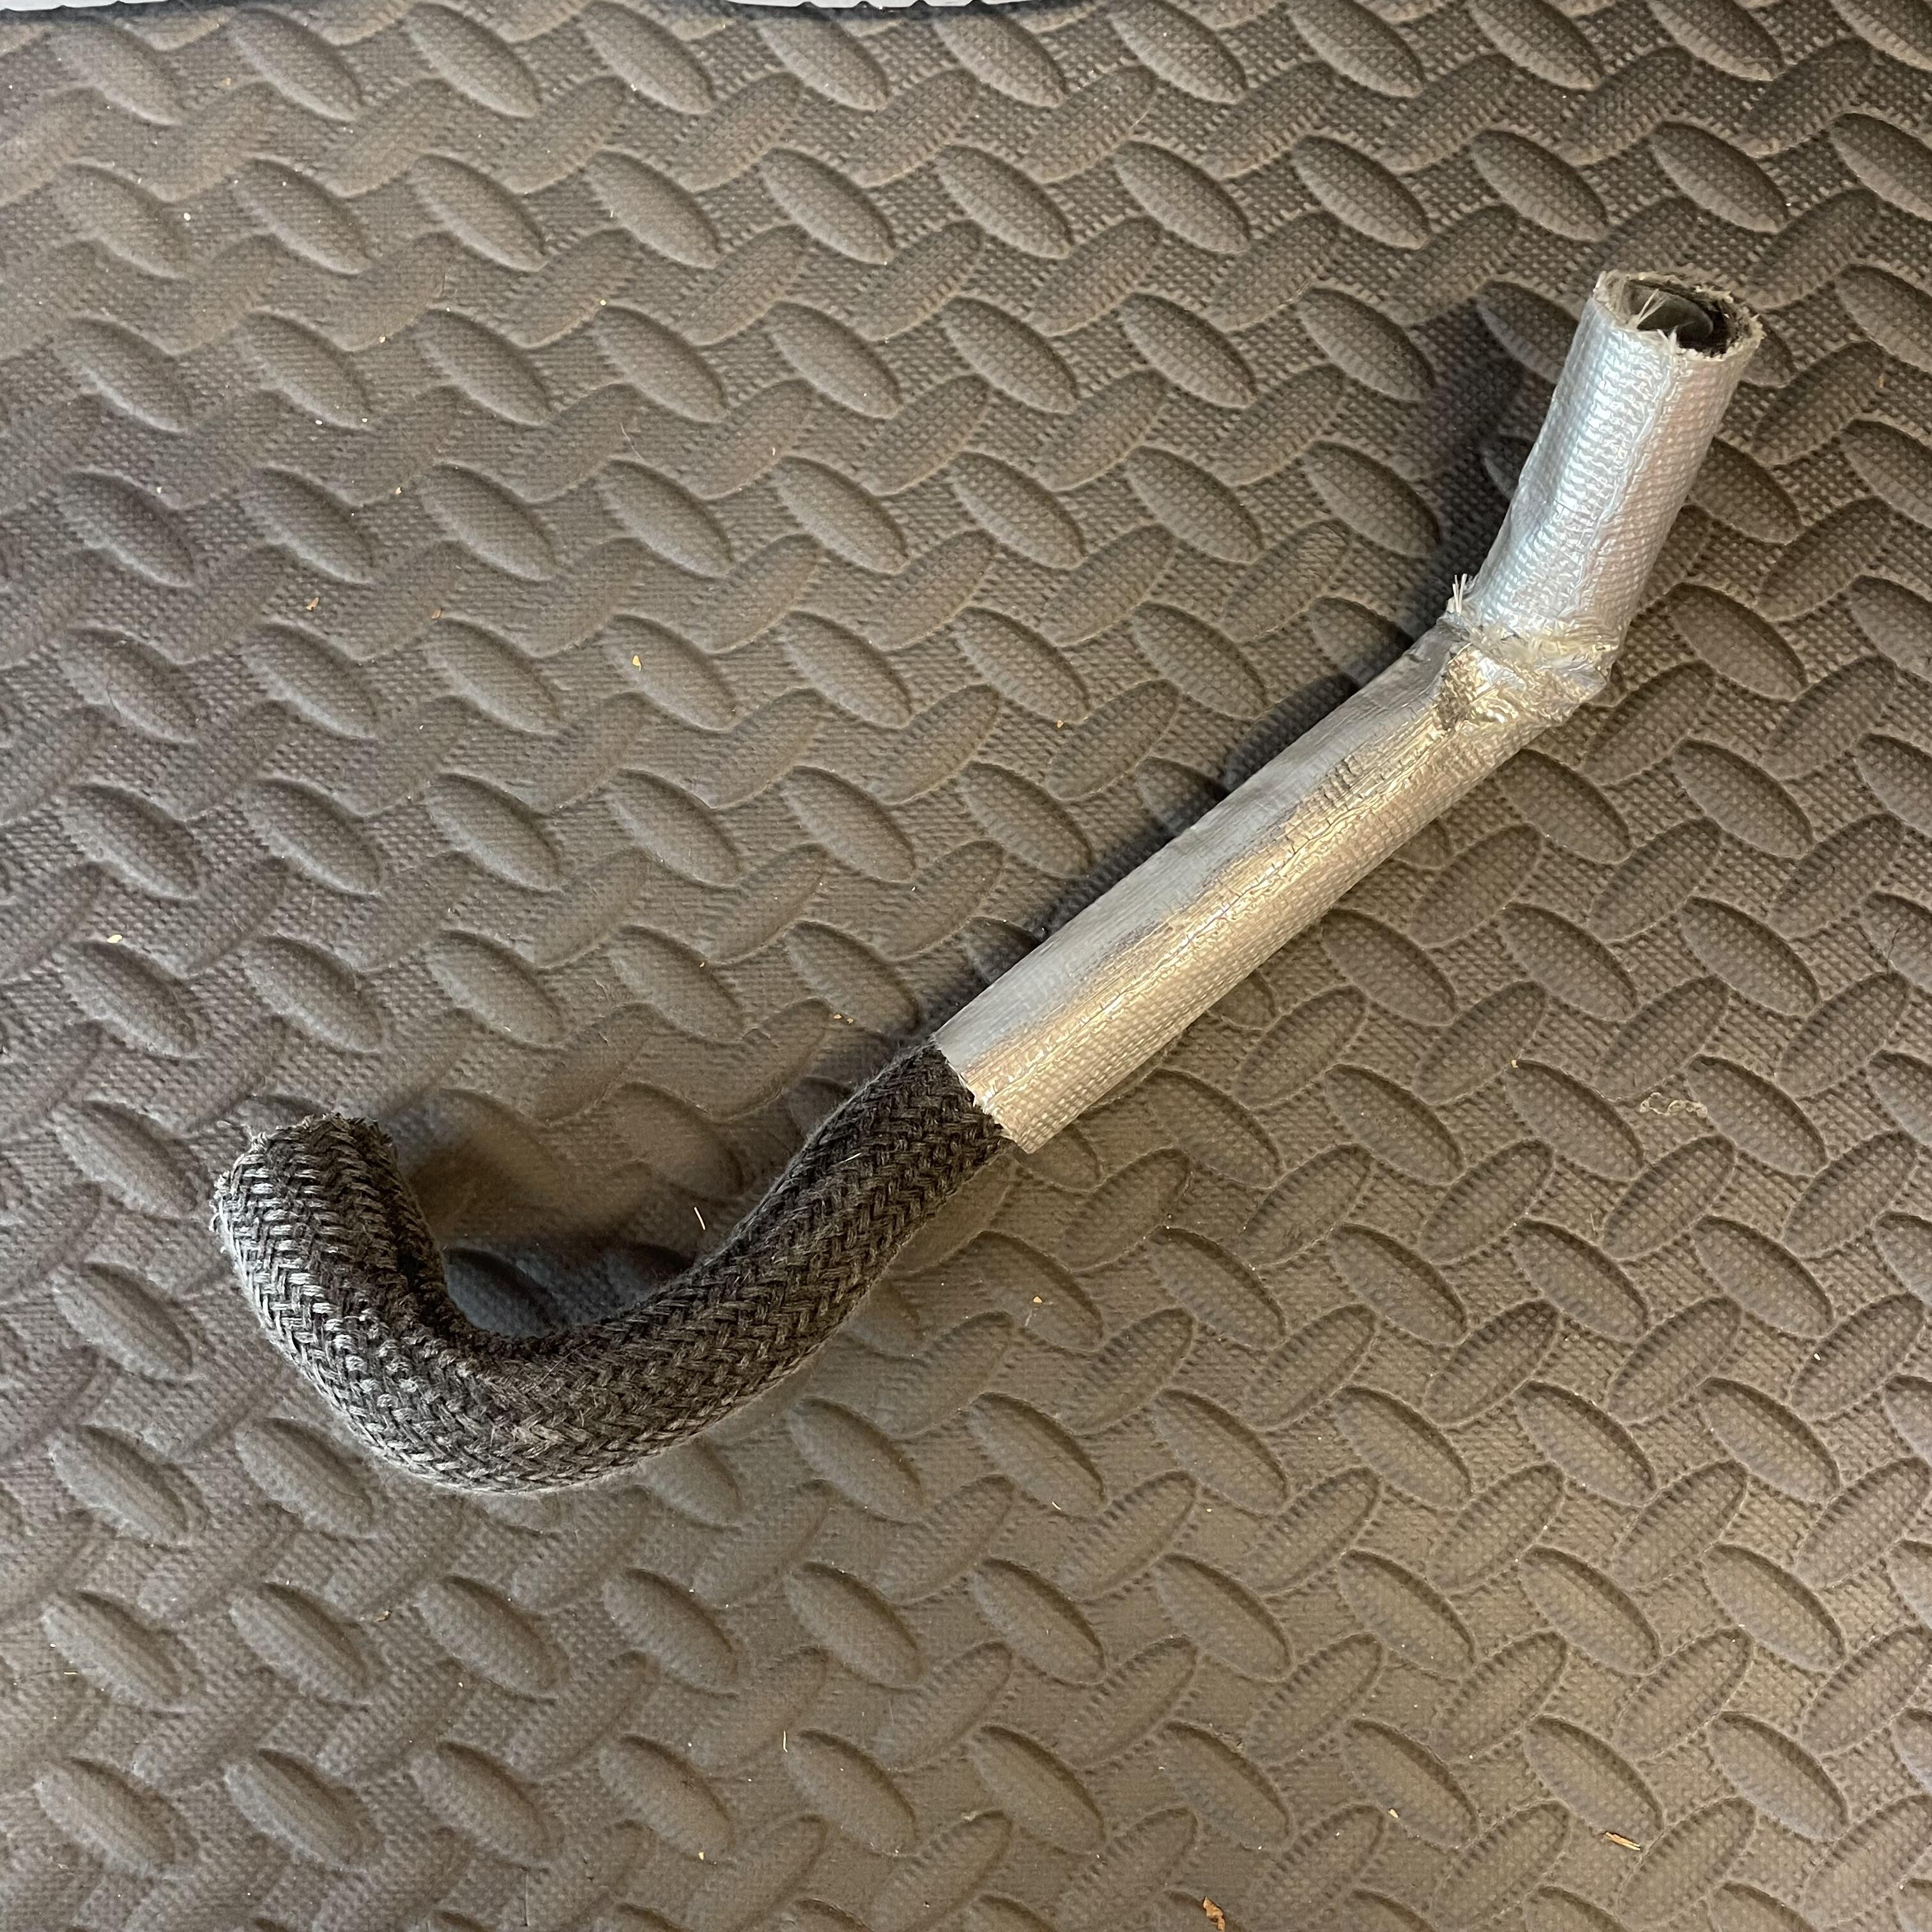
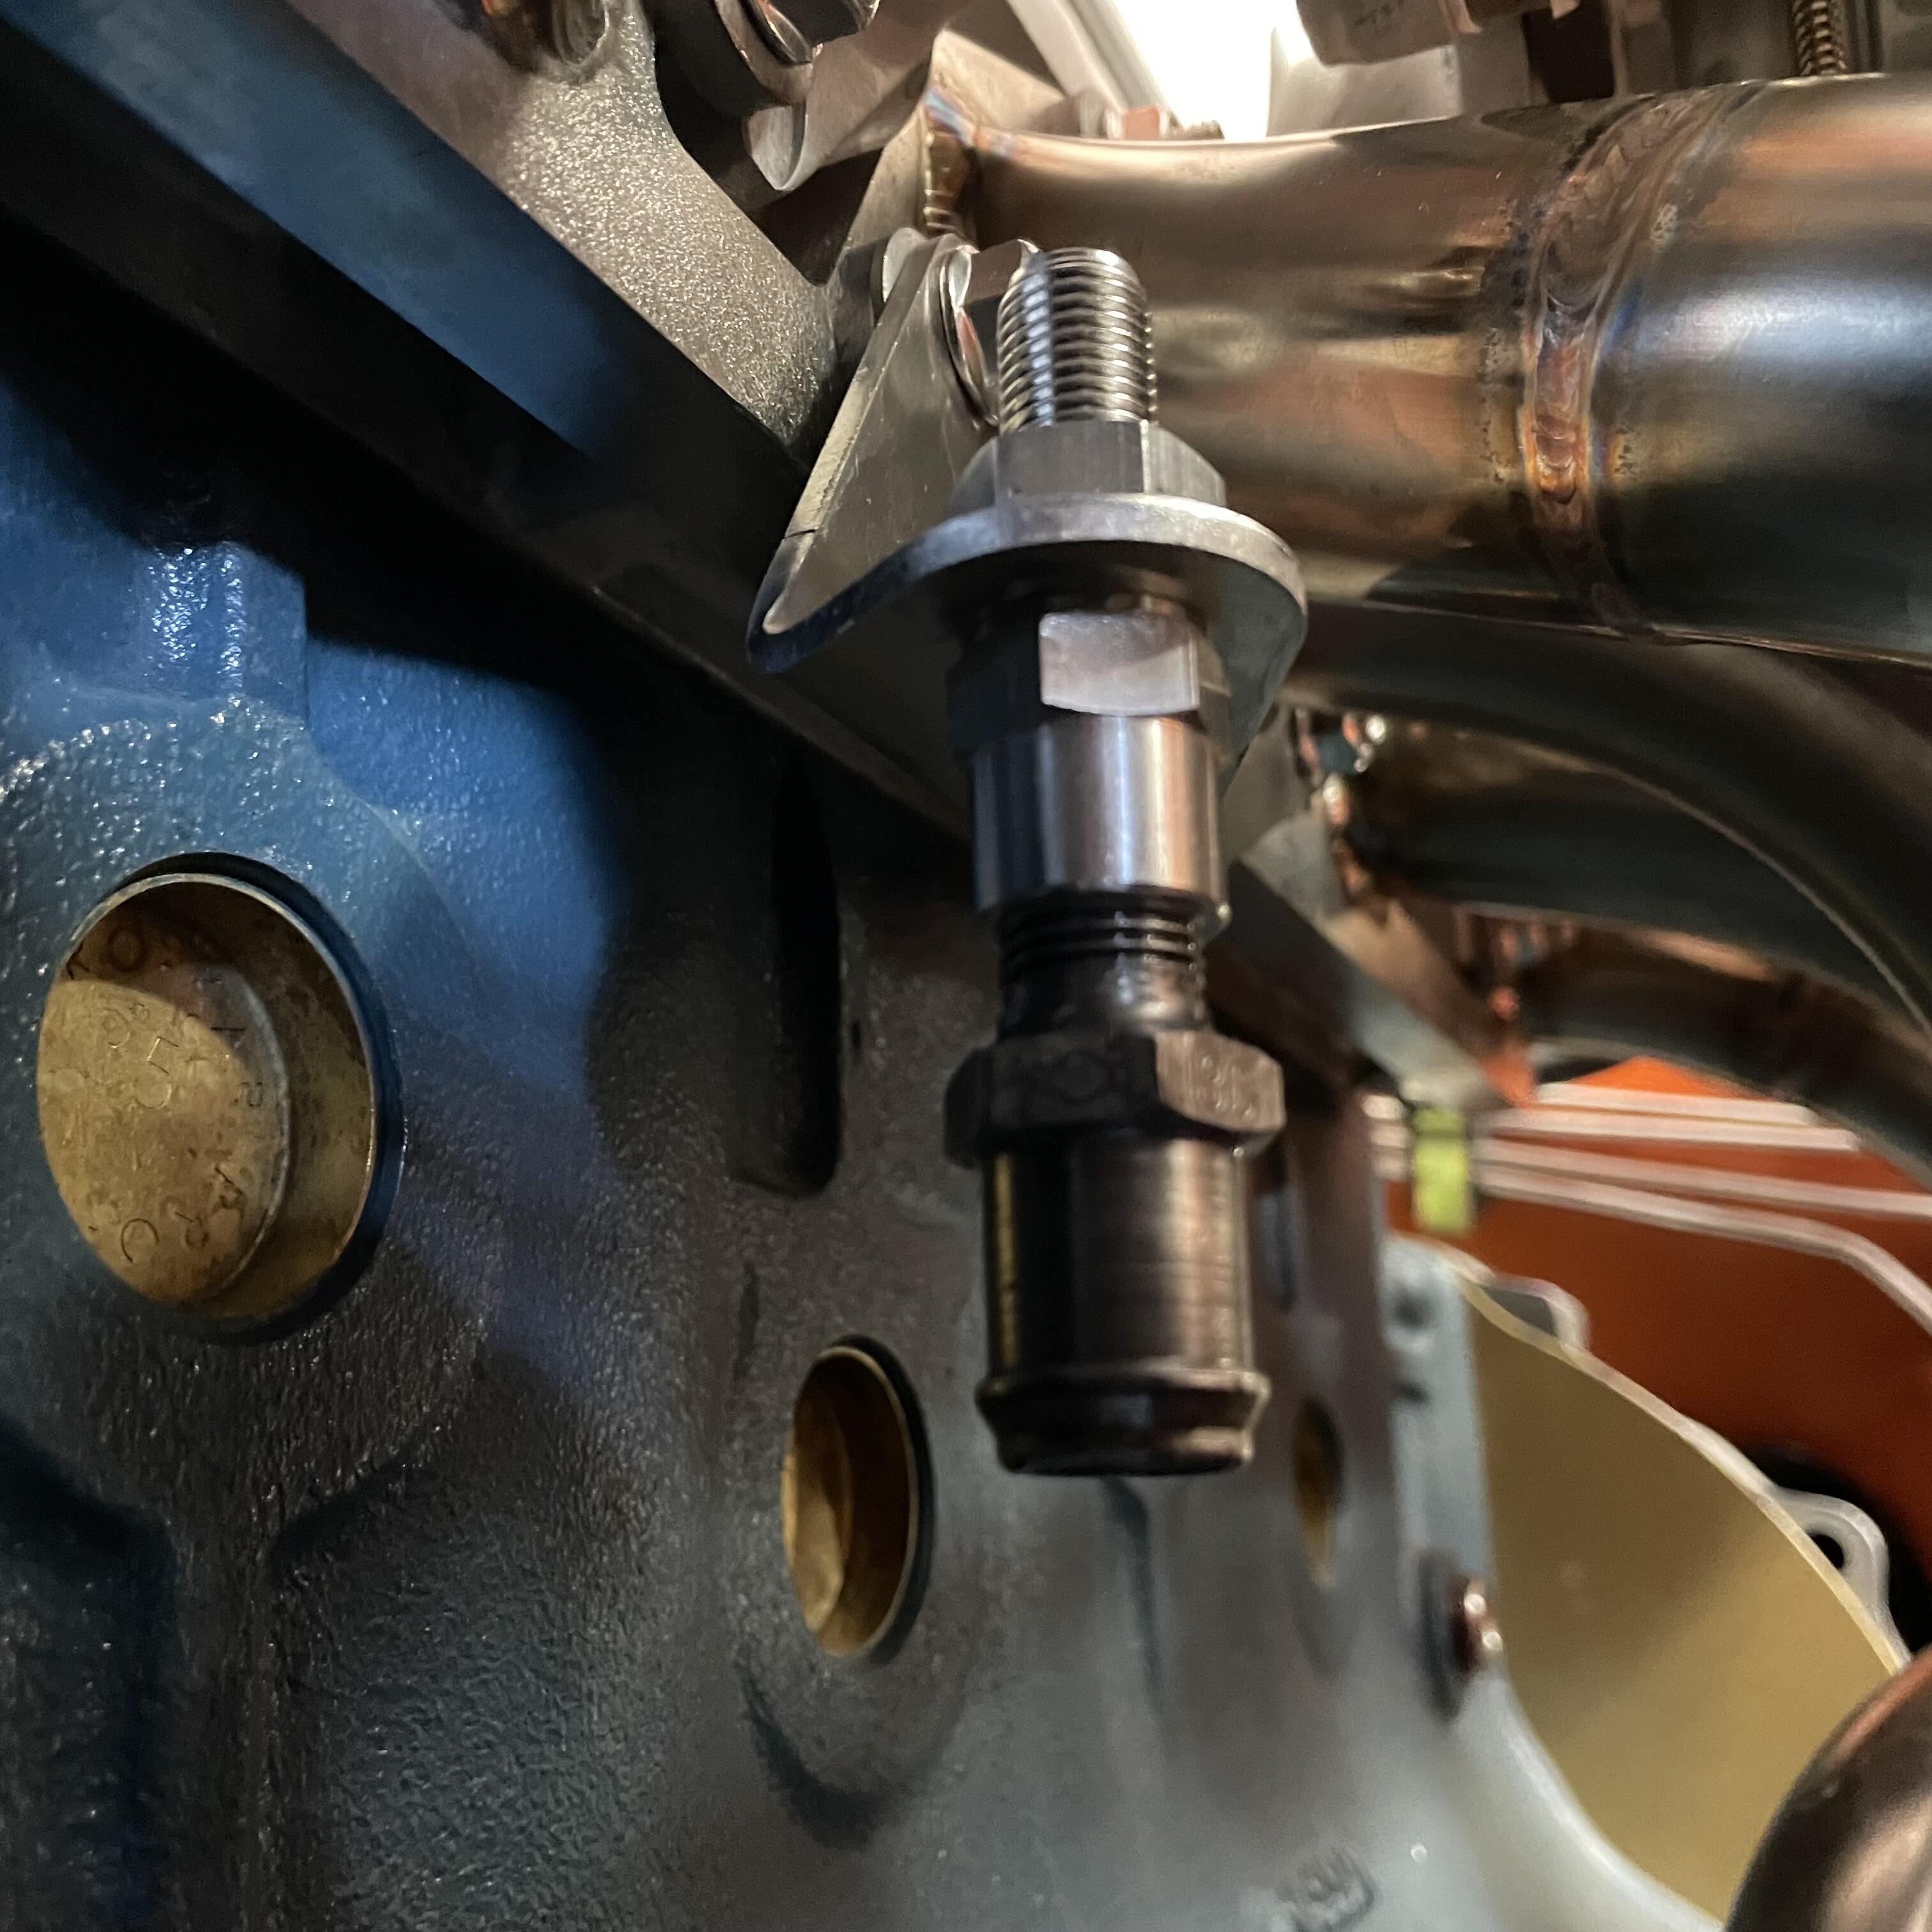
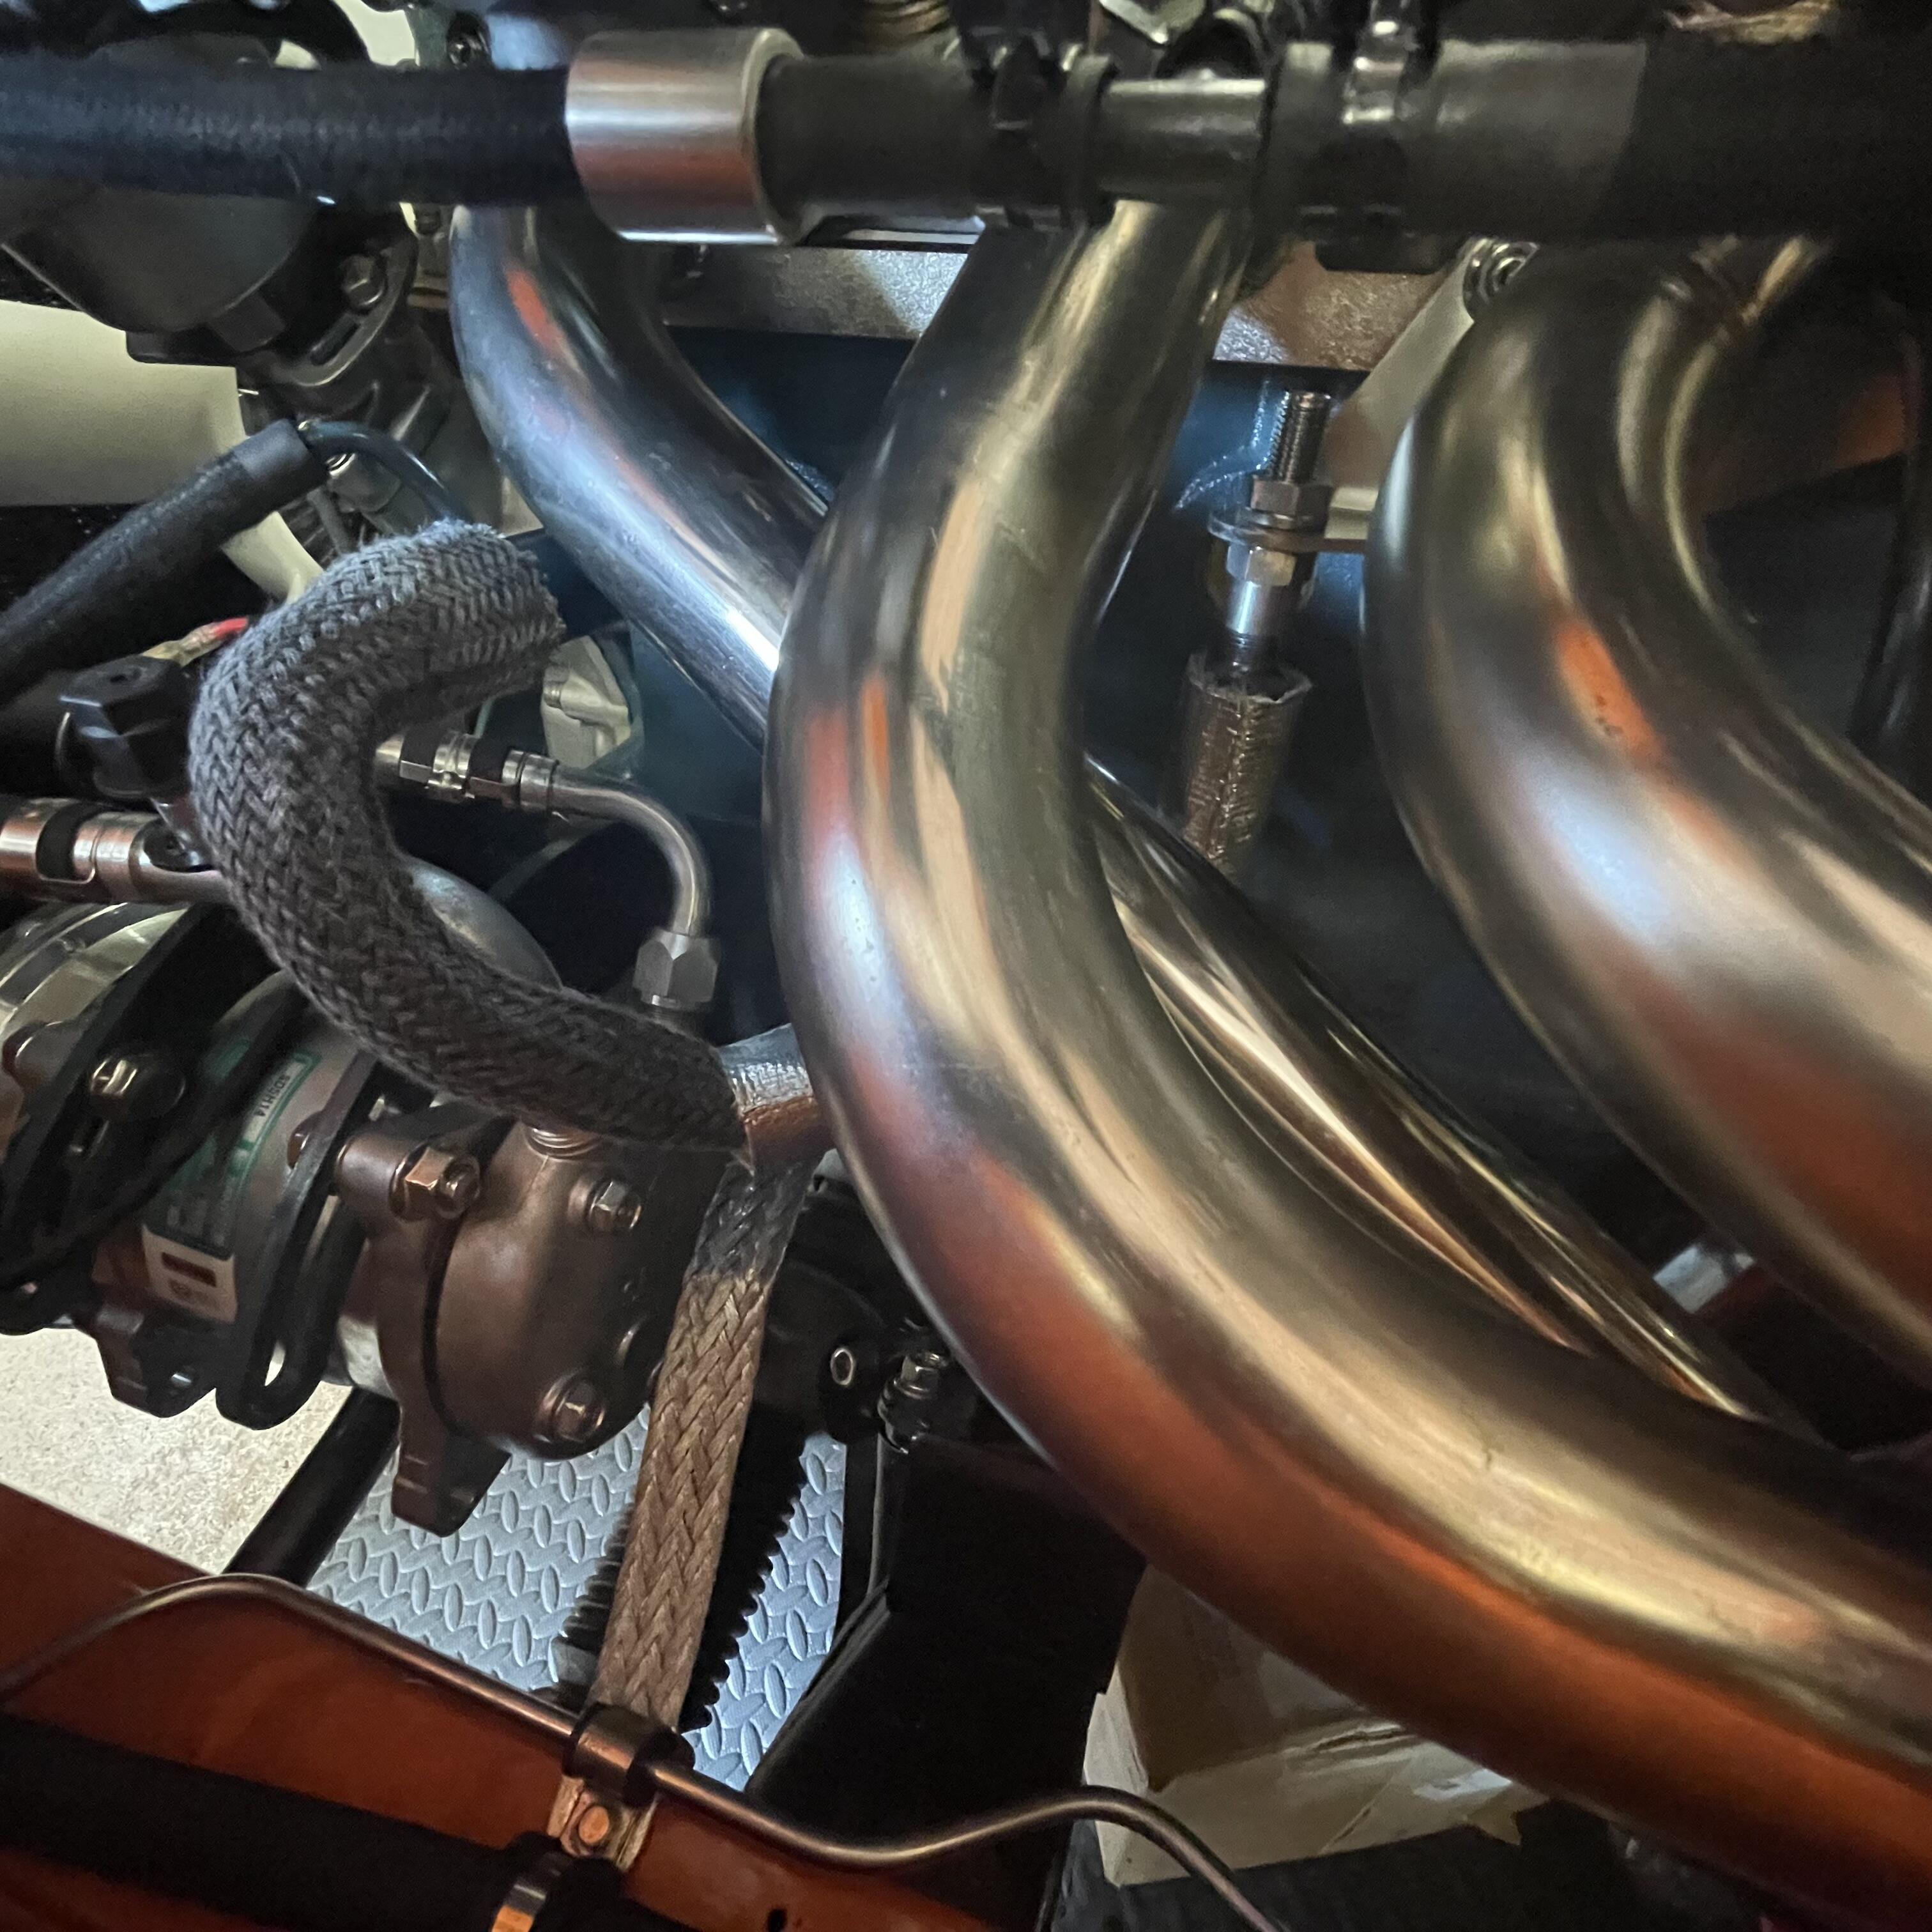
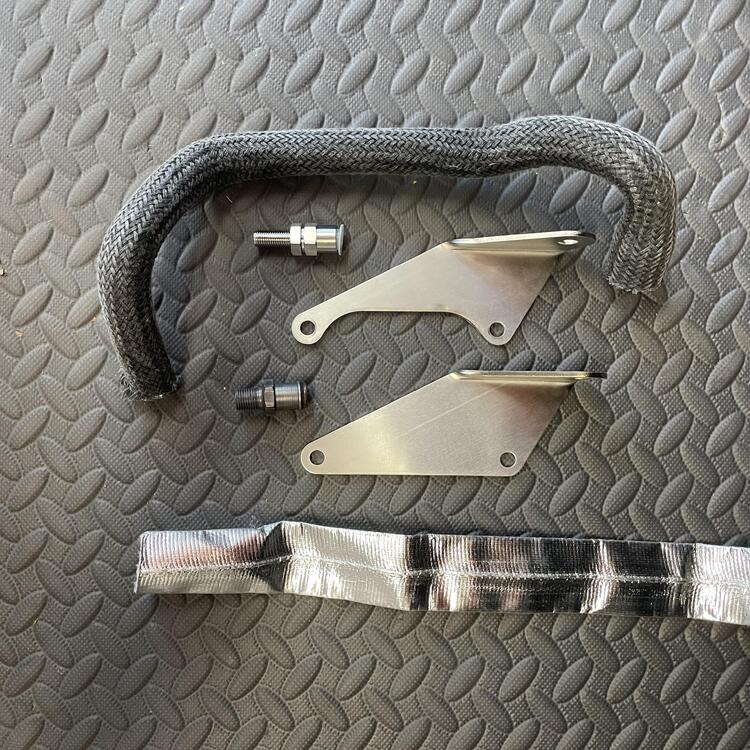
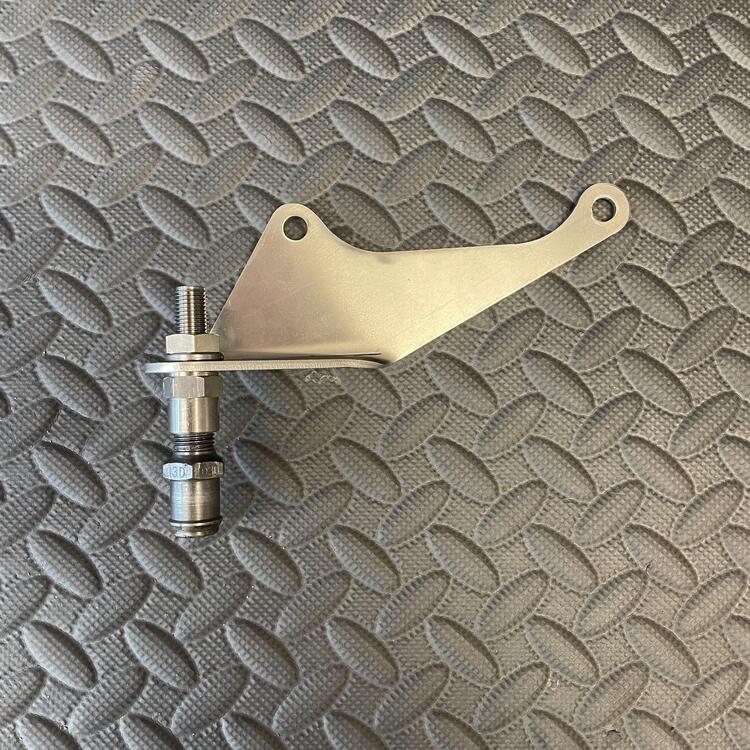
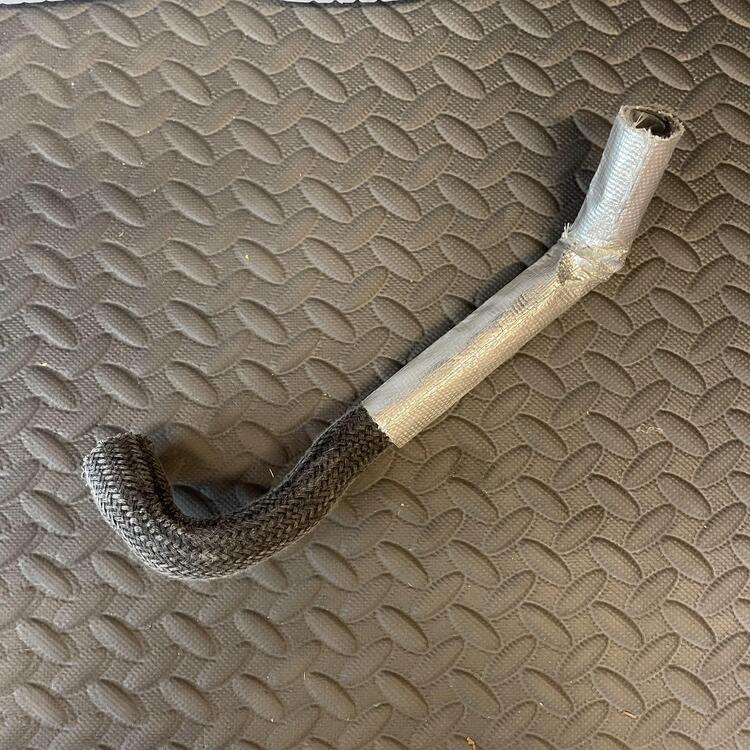
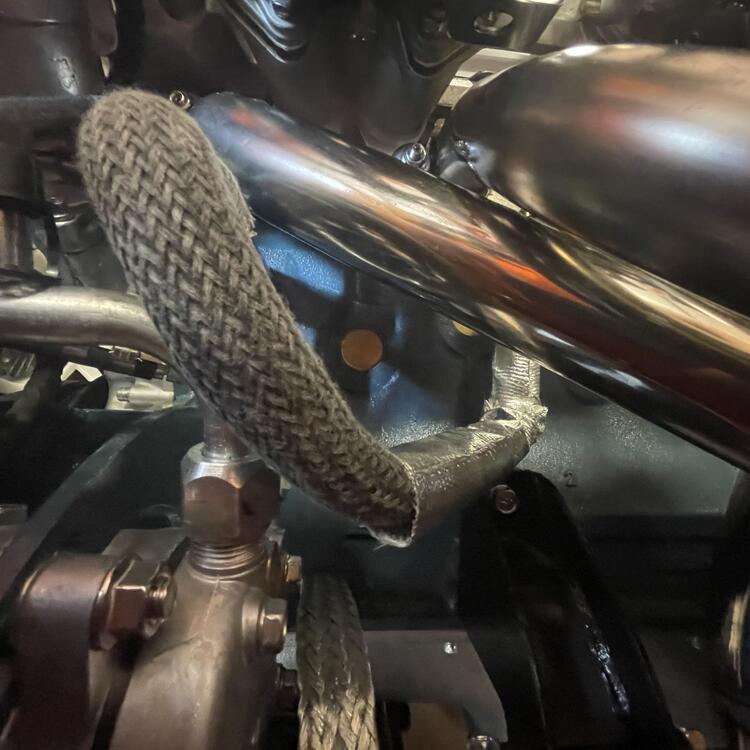
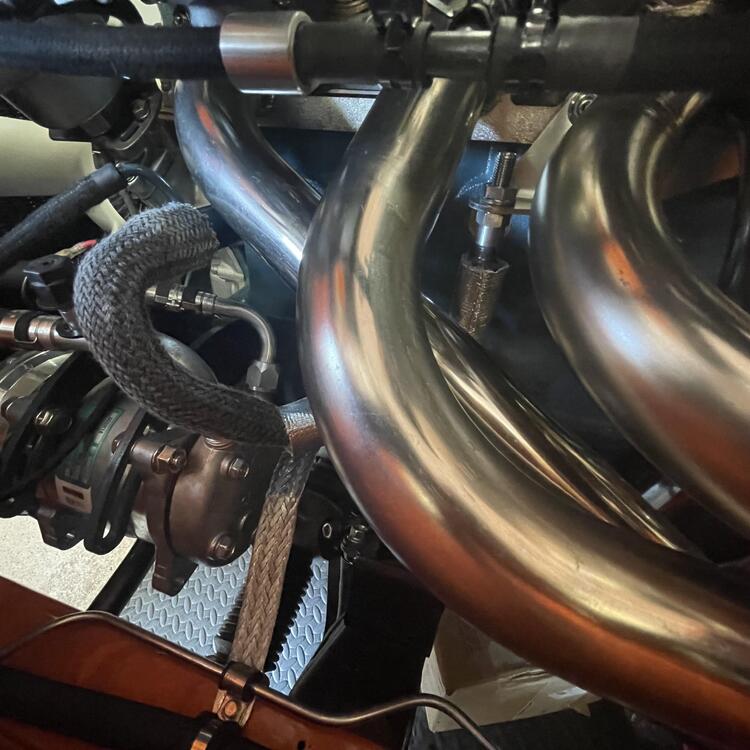
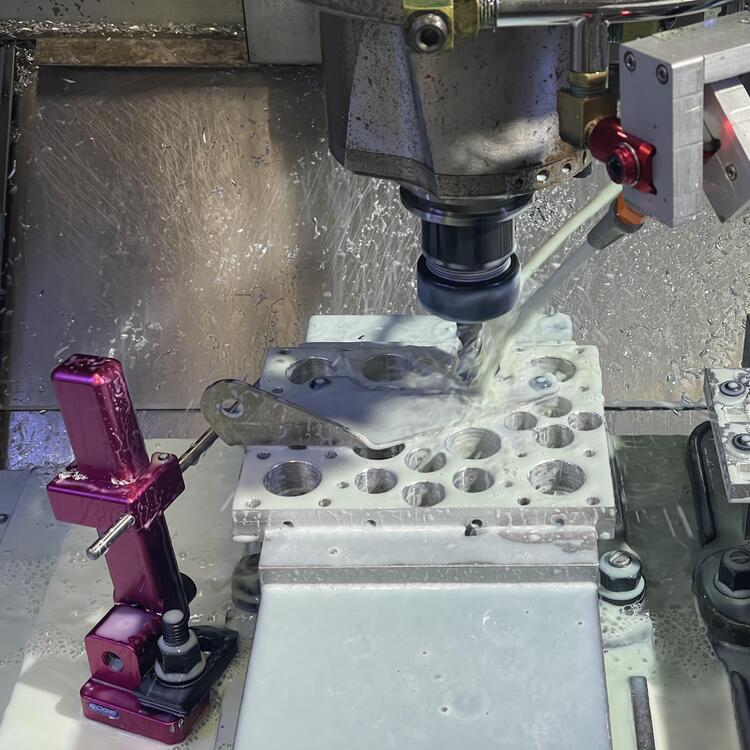
1 pointMore harebrained schemes! With the change from SUs to PHH 44s I lost the balance tube from the Nissan manifold, which is where the PCV valve went. I’m not content to throw my hands up and say “Oh well” on all of the compromises these carburetors usually cause, so I made a bracket. Or rather, SendCutSend made me a bracket. It came out great, but I forgot to provide clearance for the 3 and 4 cylinder exhaust pipes on the manifold, so a friend graciously did a little CNC work on it for me. I’m reasonably confident this will be a good relocation point for the valve. The tricky part from here is going to be plumbing it into the intake manifold. The fitting the valve is screwed into is a Fuji 1/4” BPST to 1/4” OD compression bulkhead union. I was only able to find one place who would sell me just one, but @misumiusa was quick with it. I’m planning to run a stainless steel pipe to a vacuum manifold that will then route to the intake manifold.

 1 point
 -
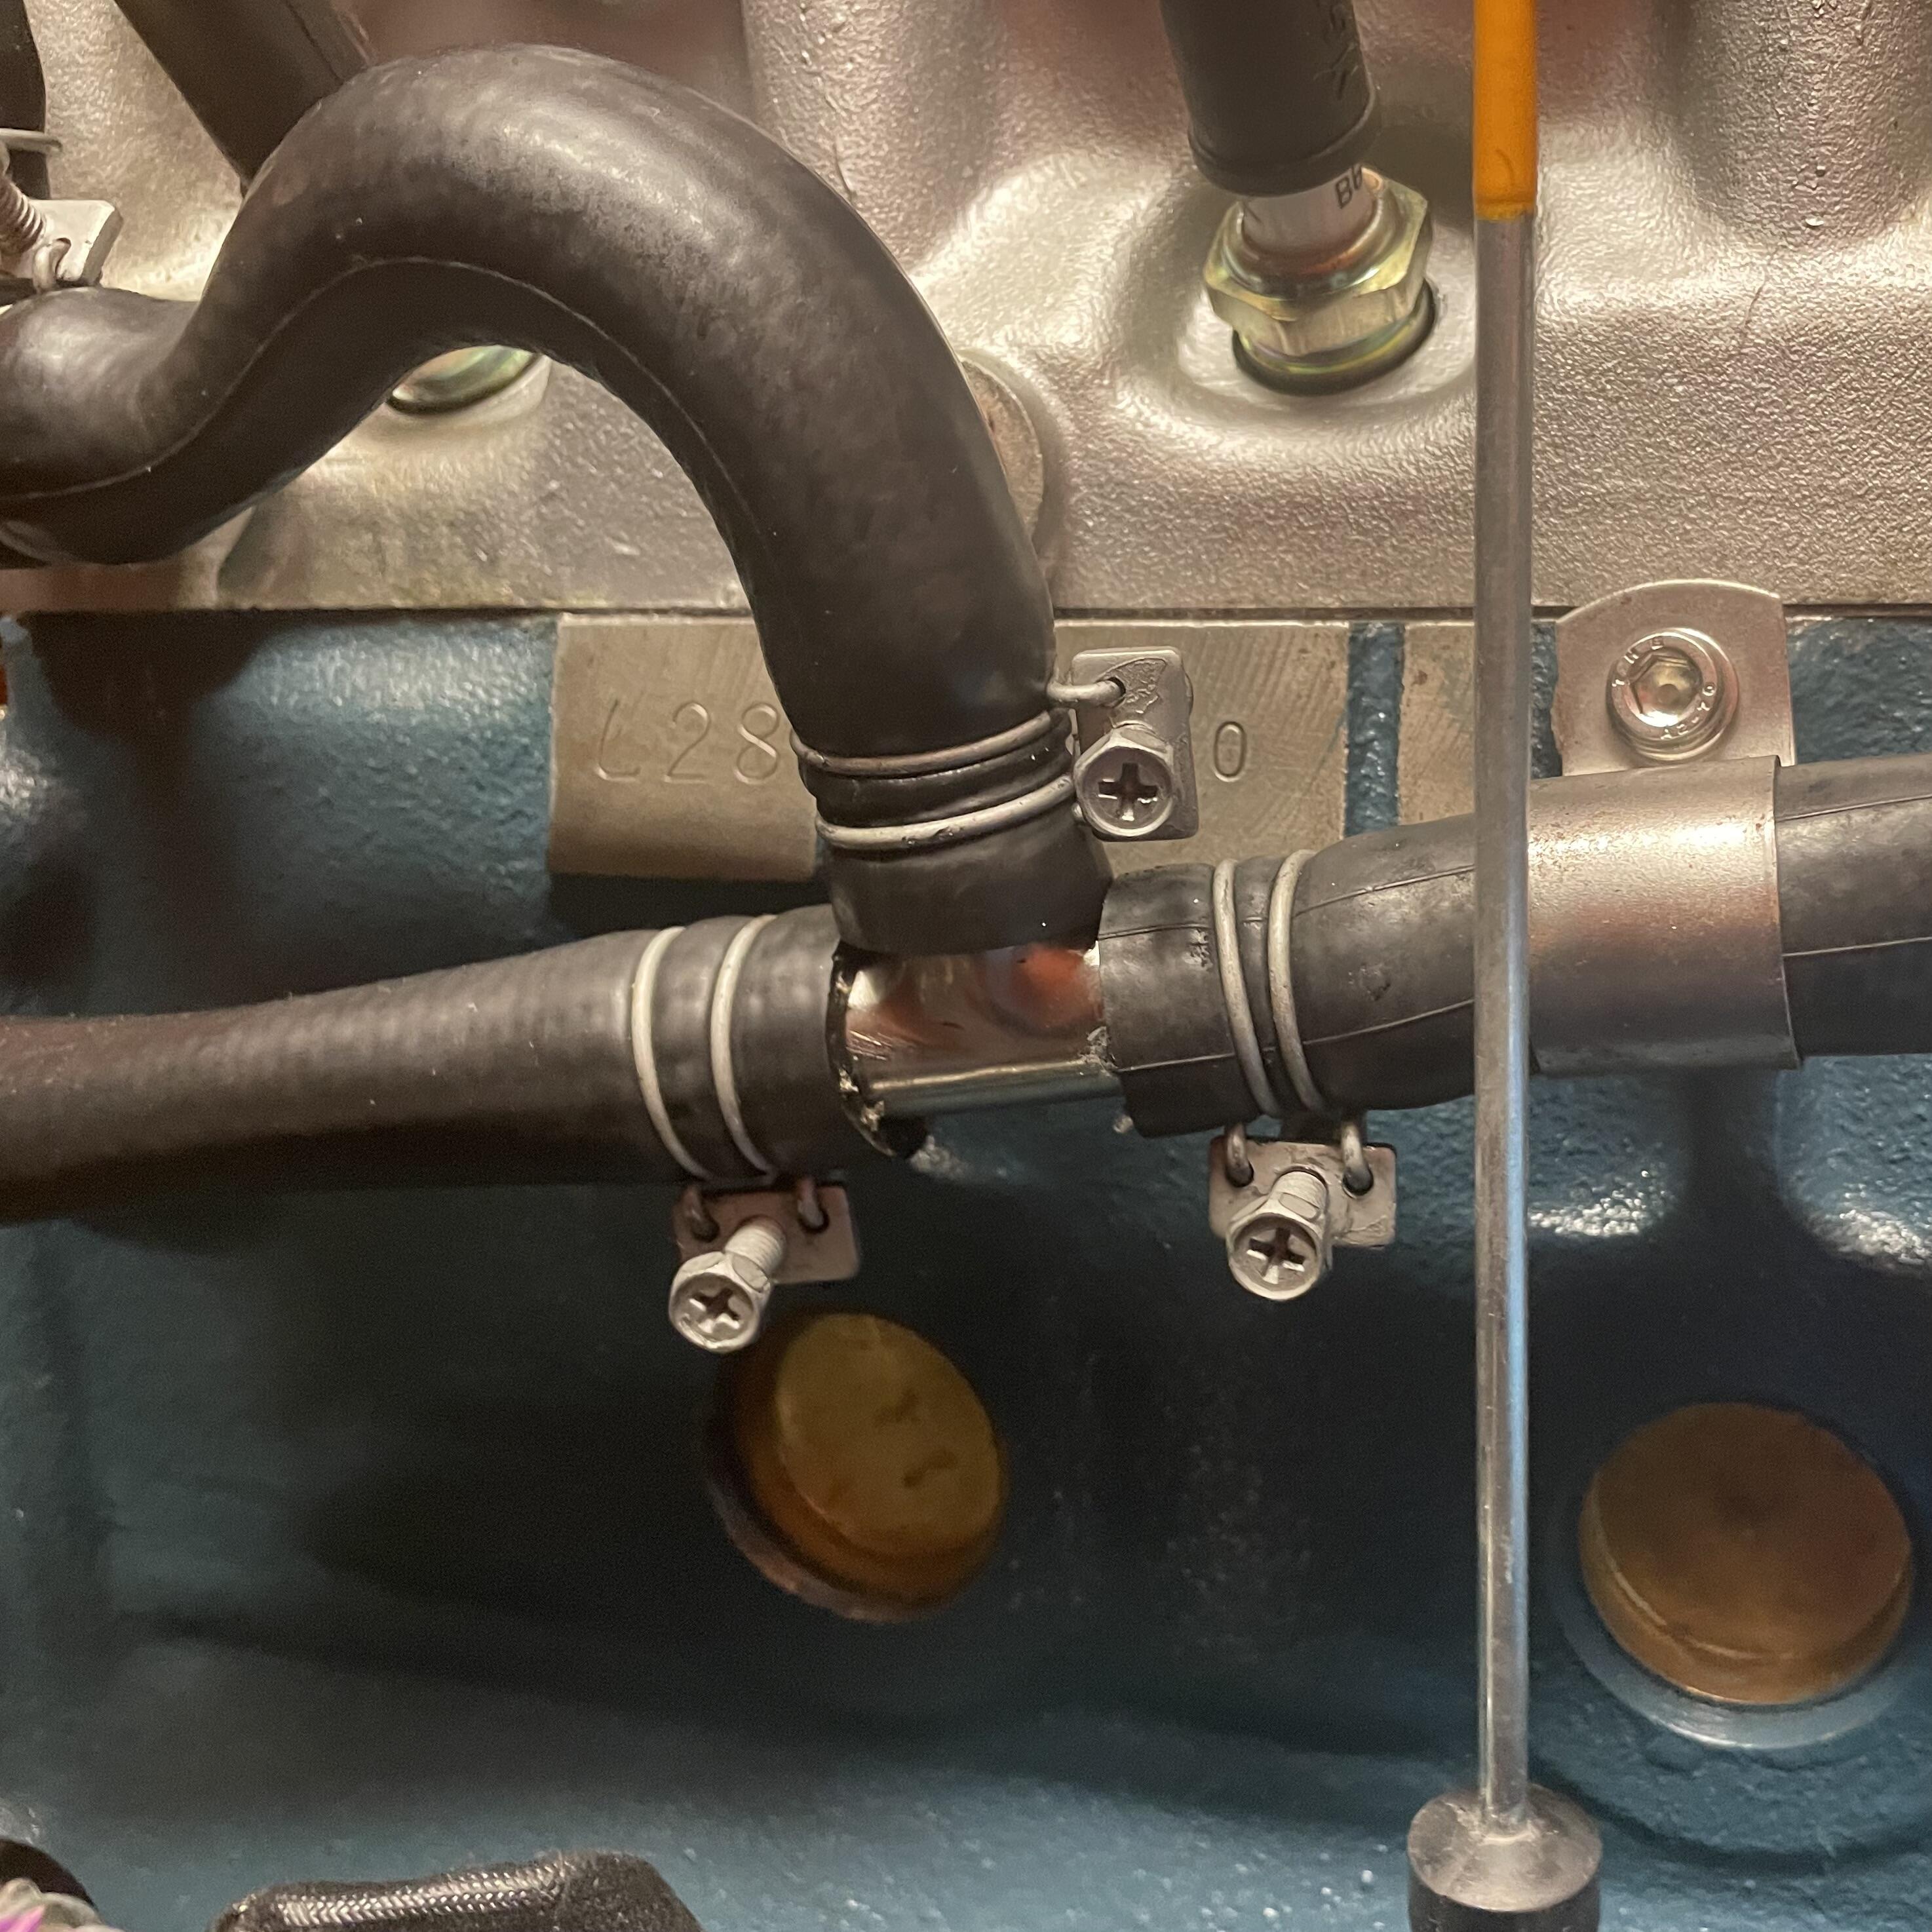
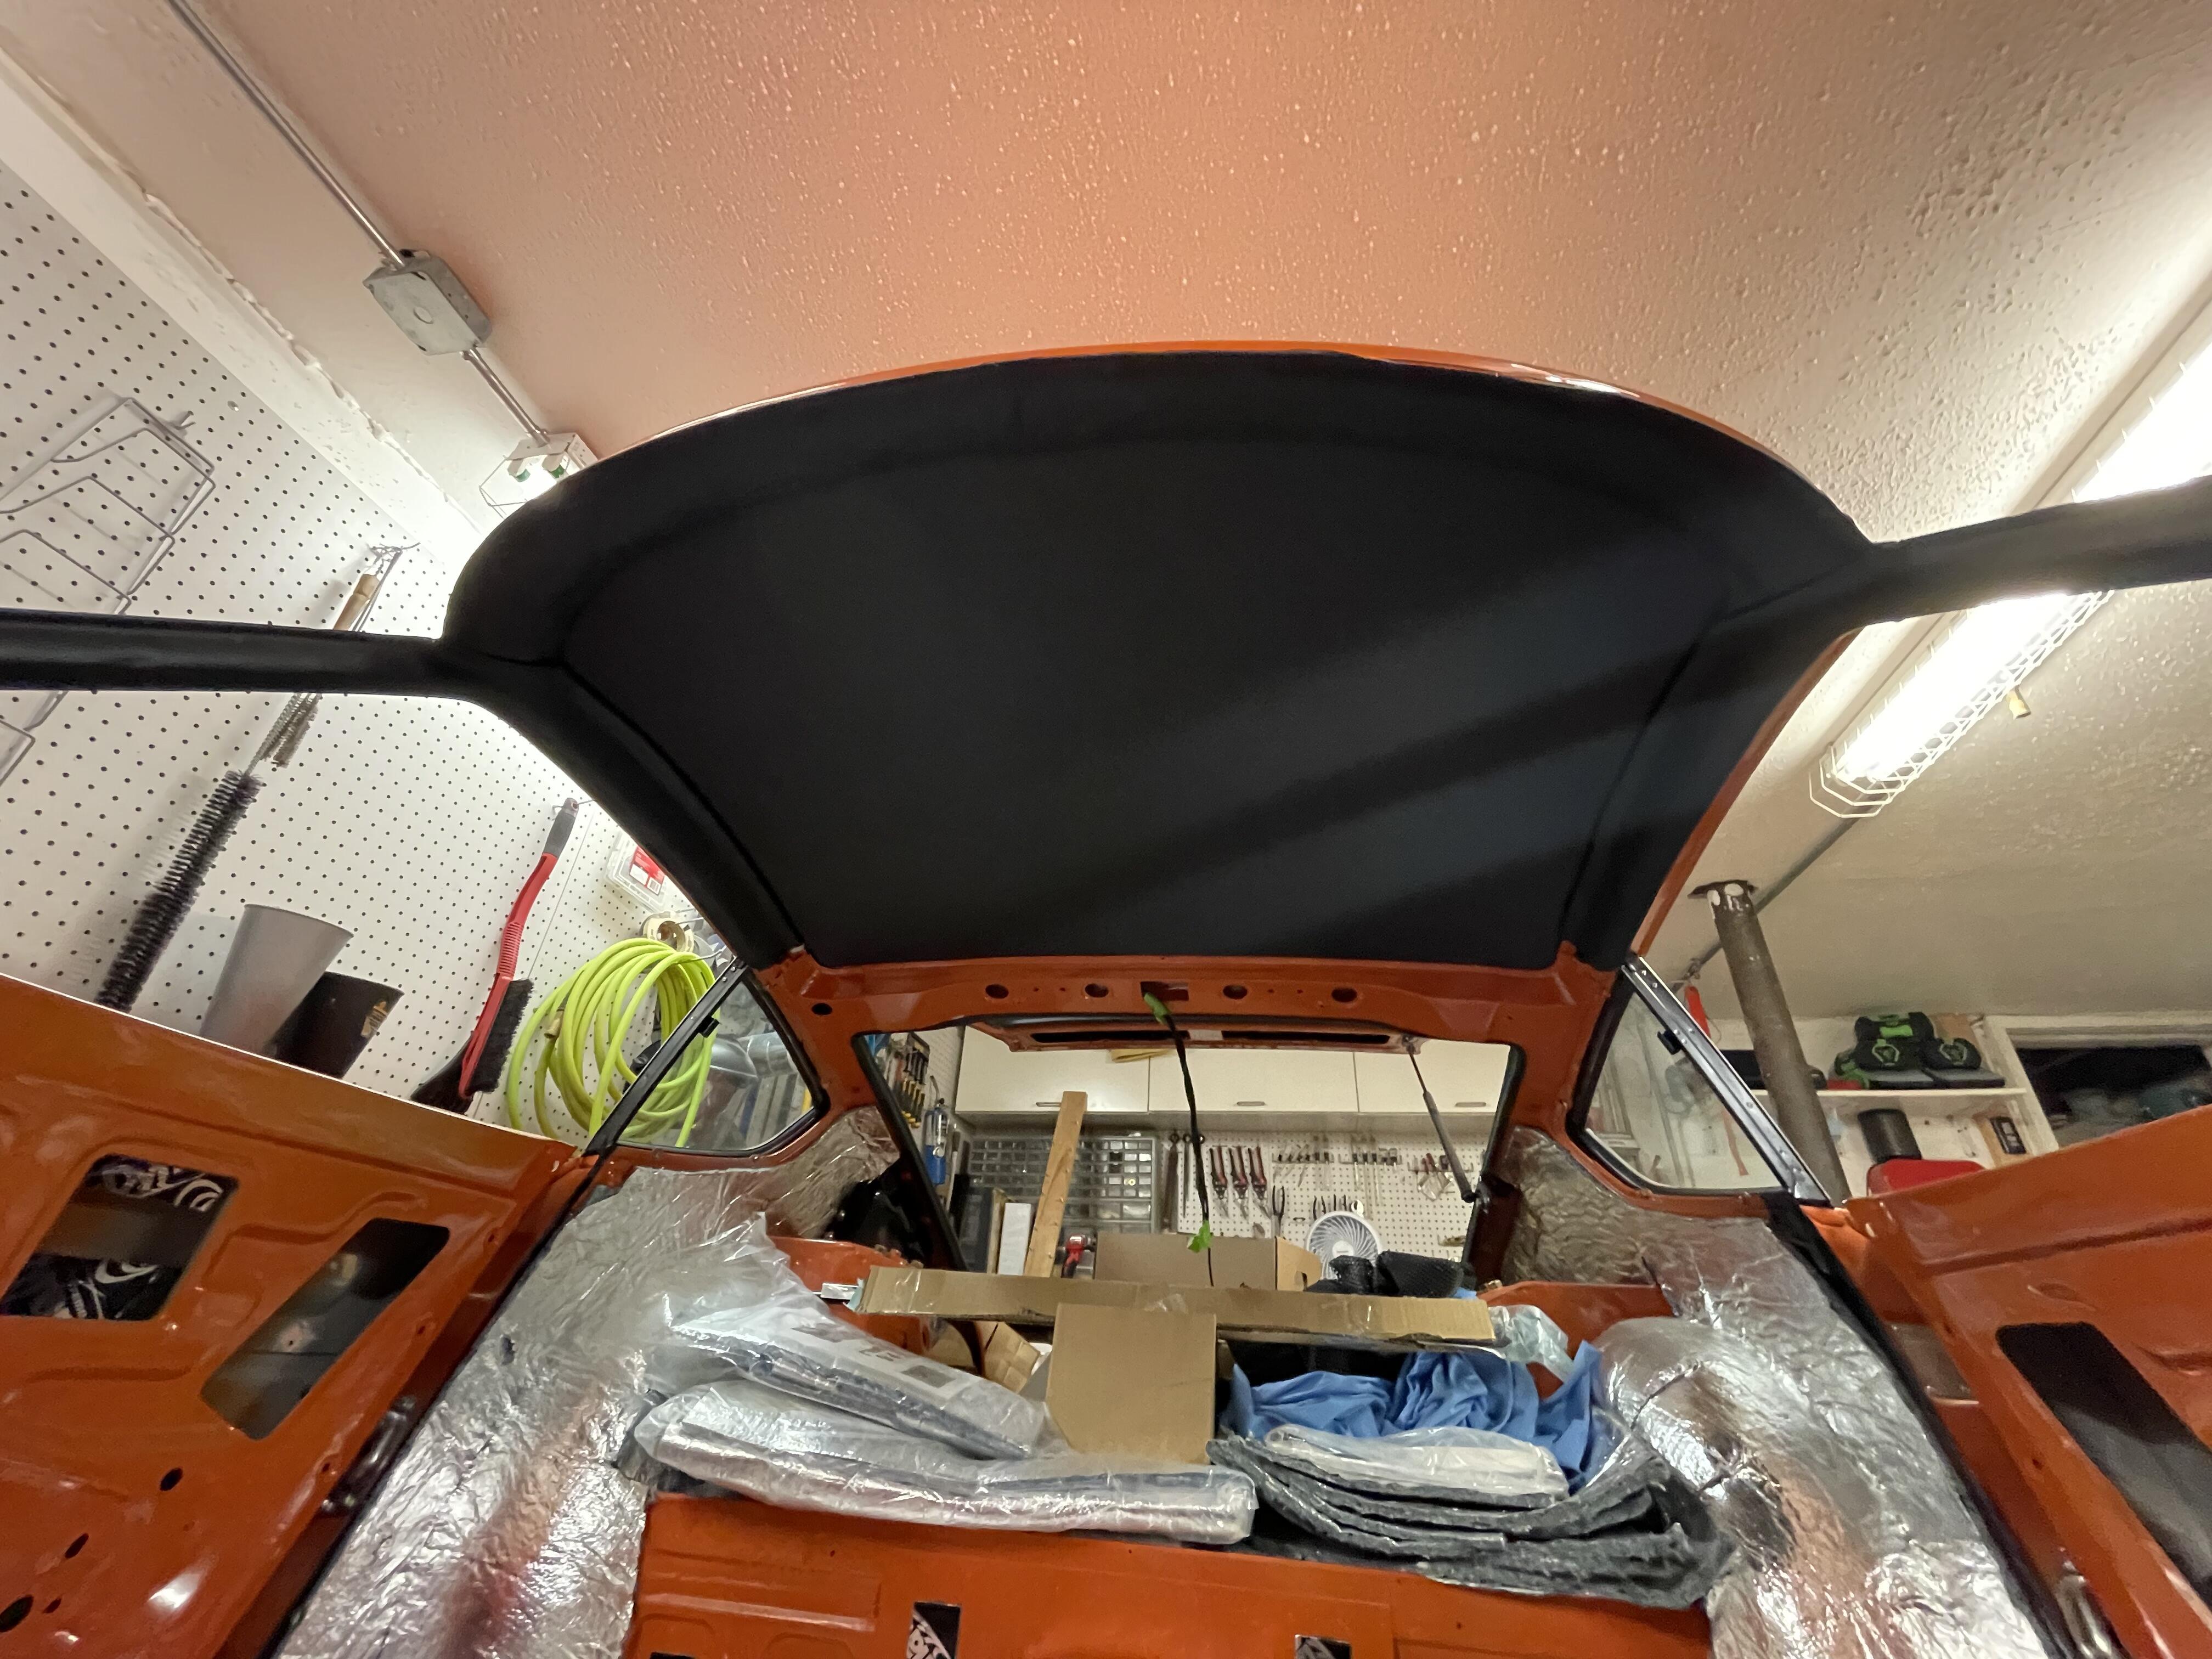
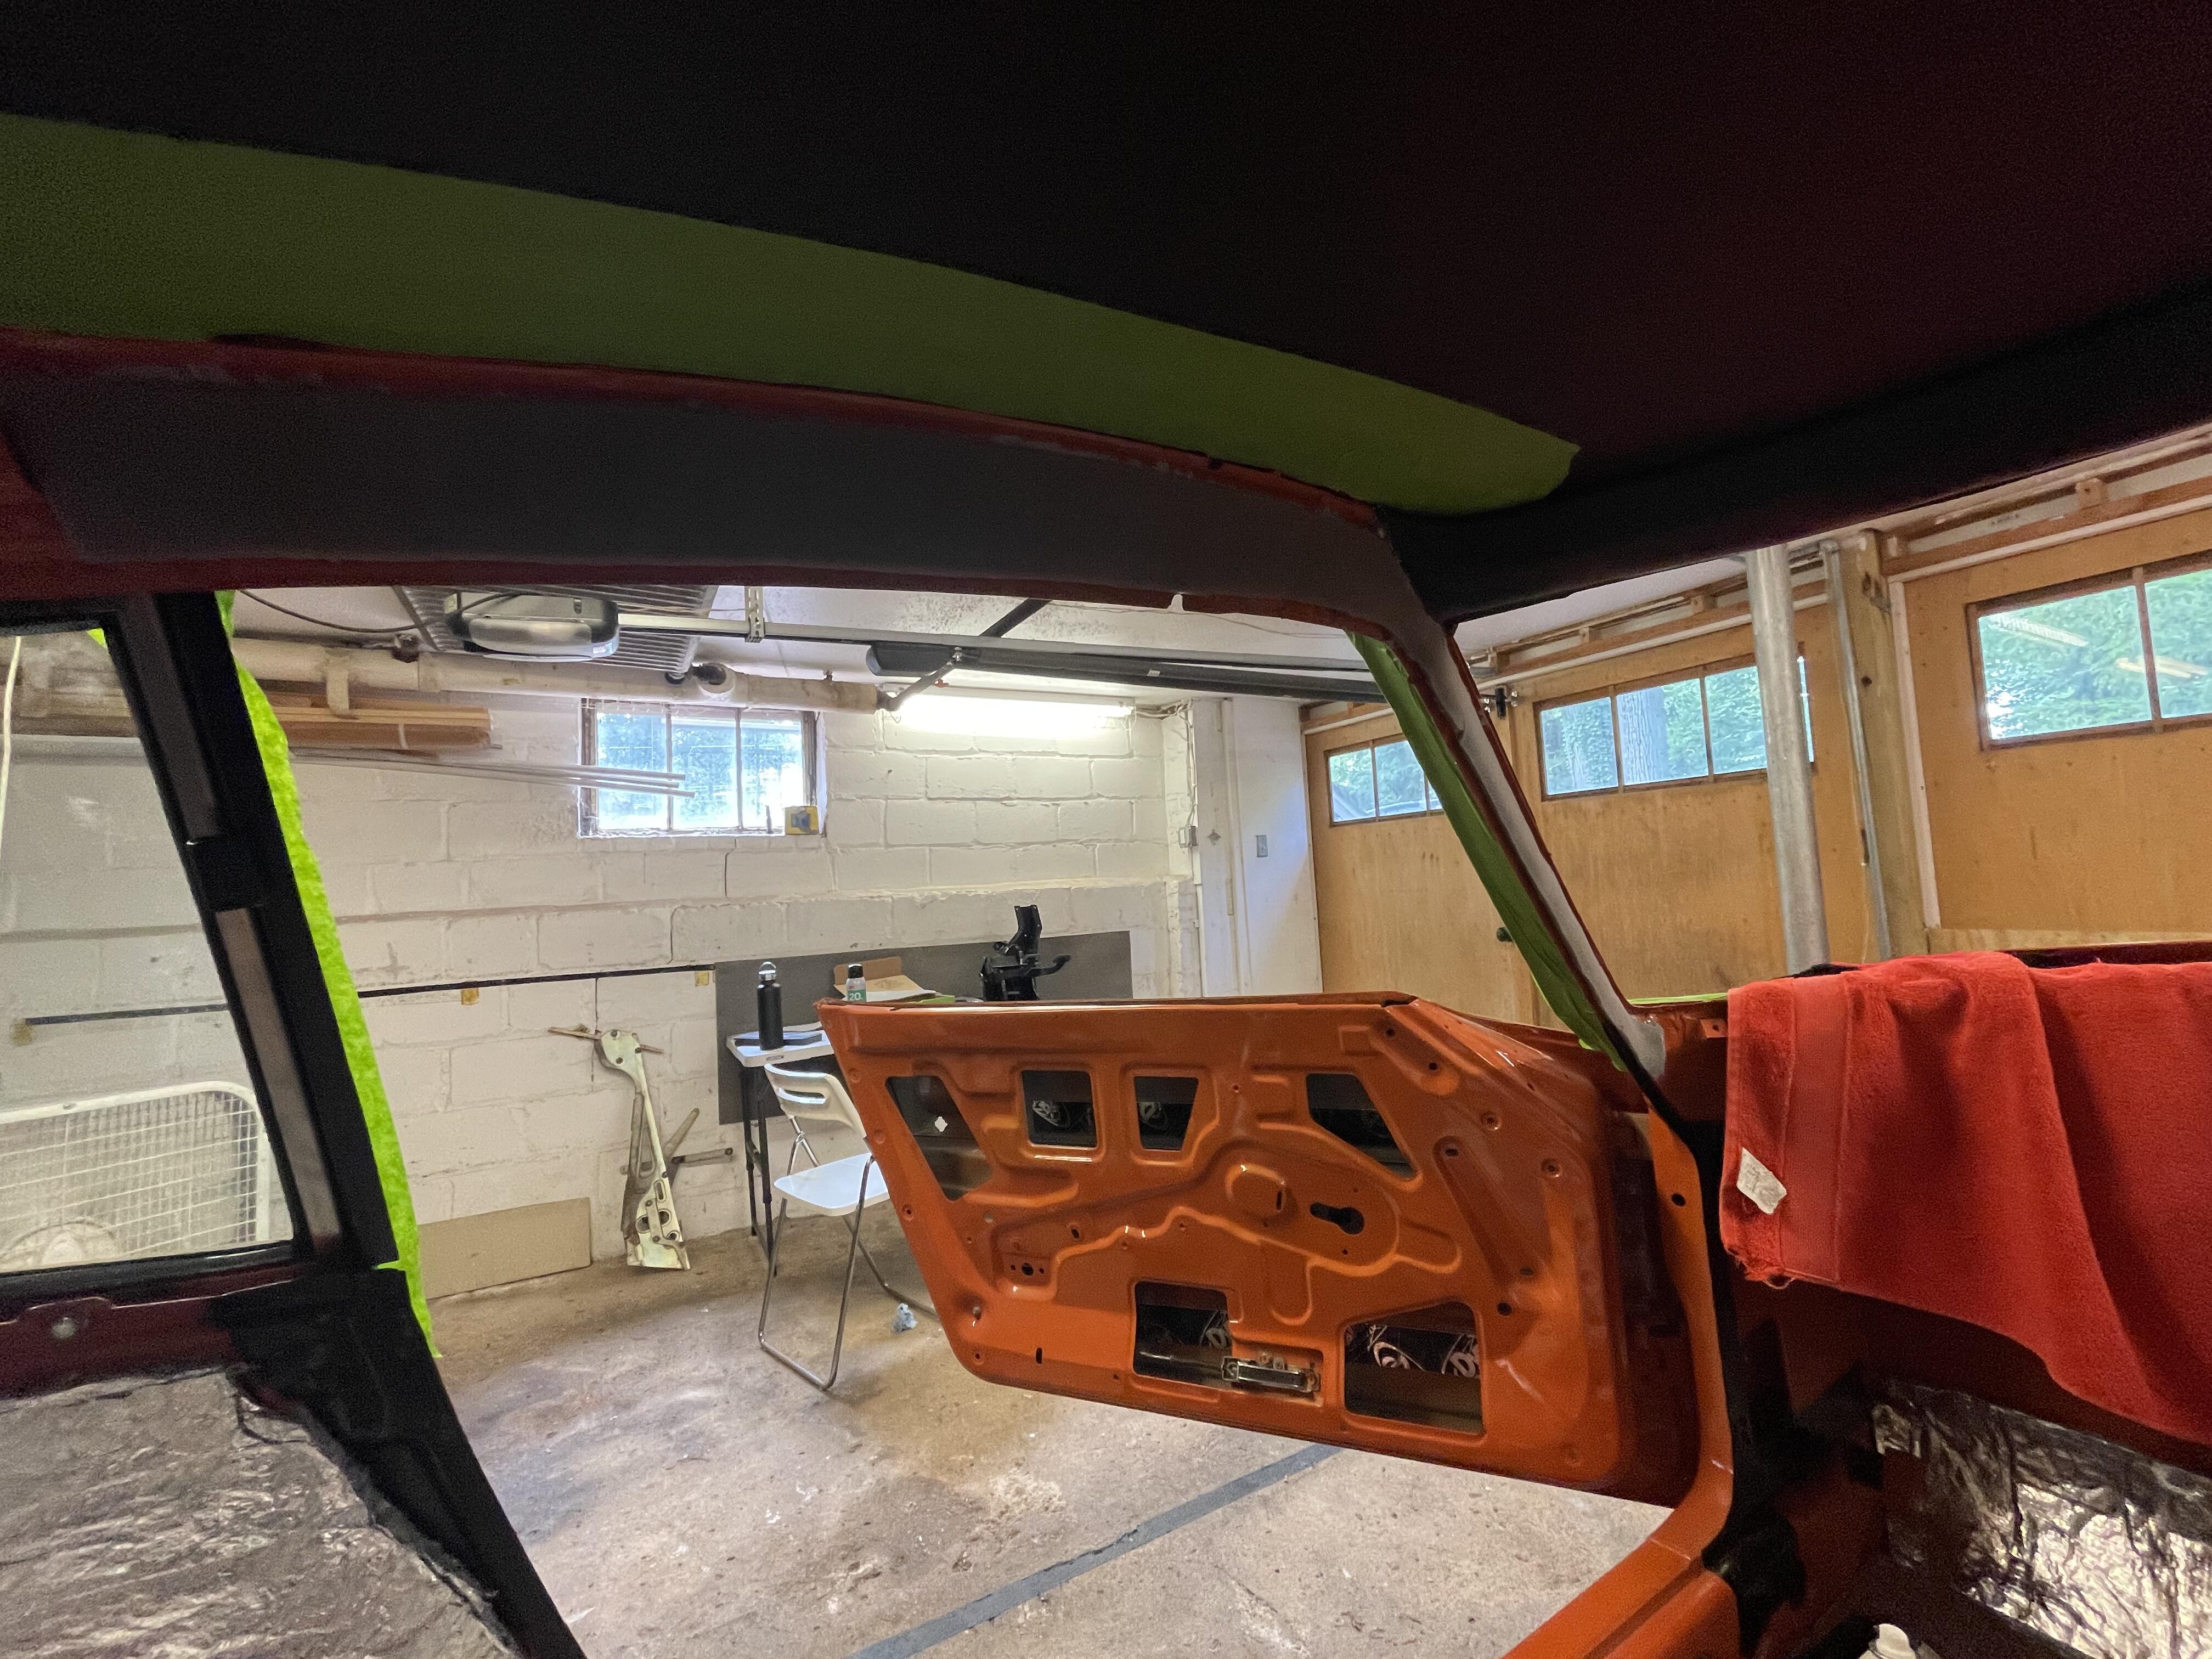
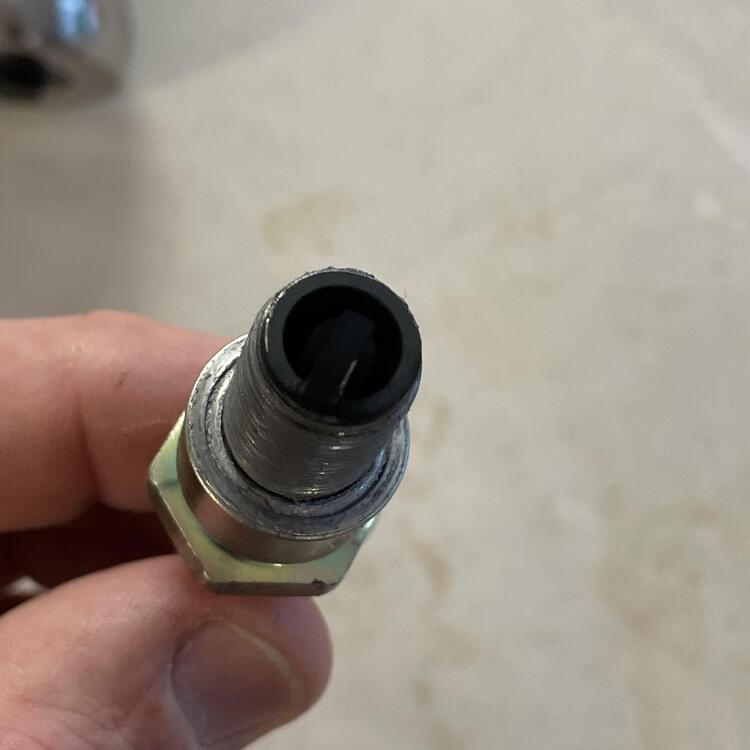
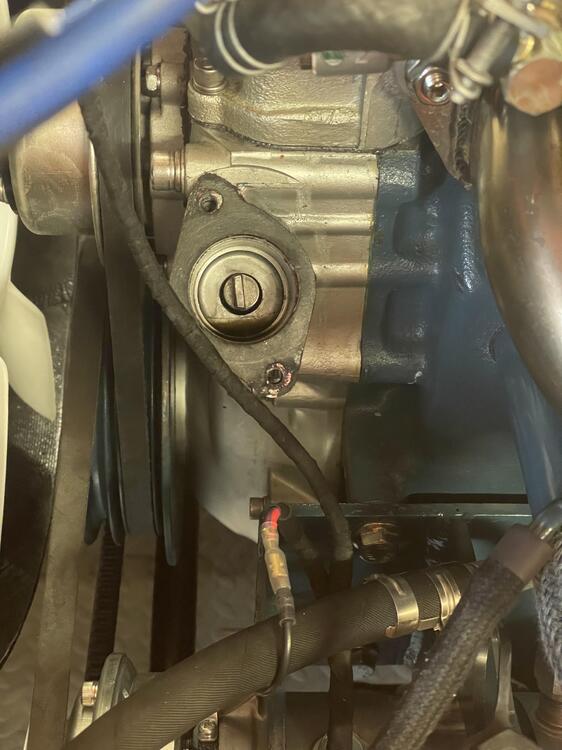
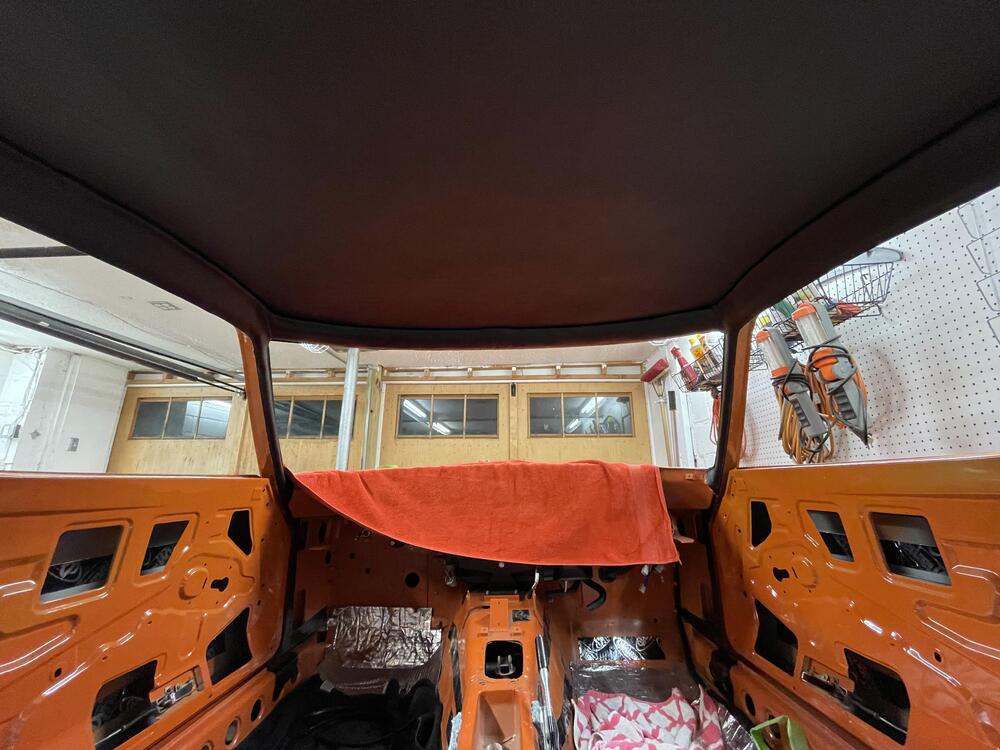
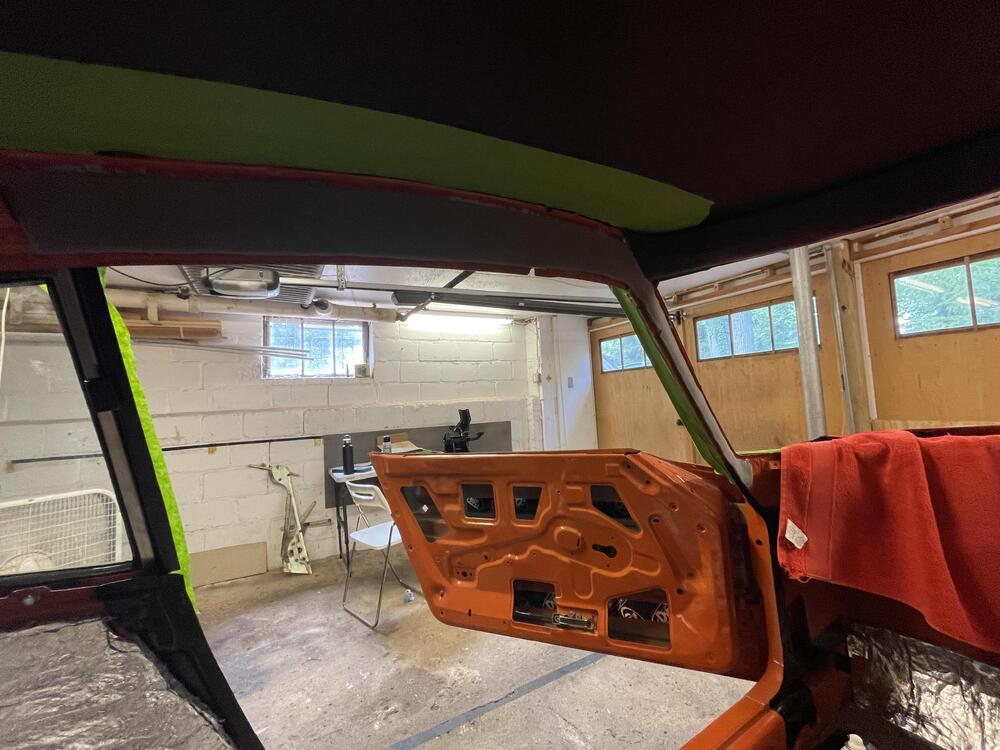
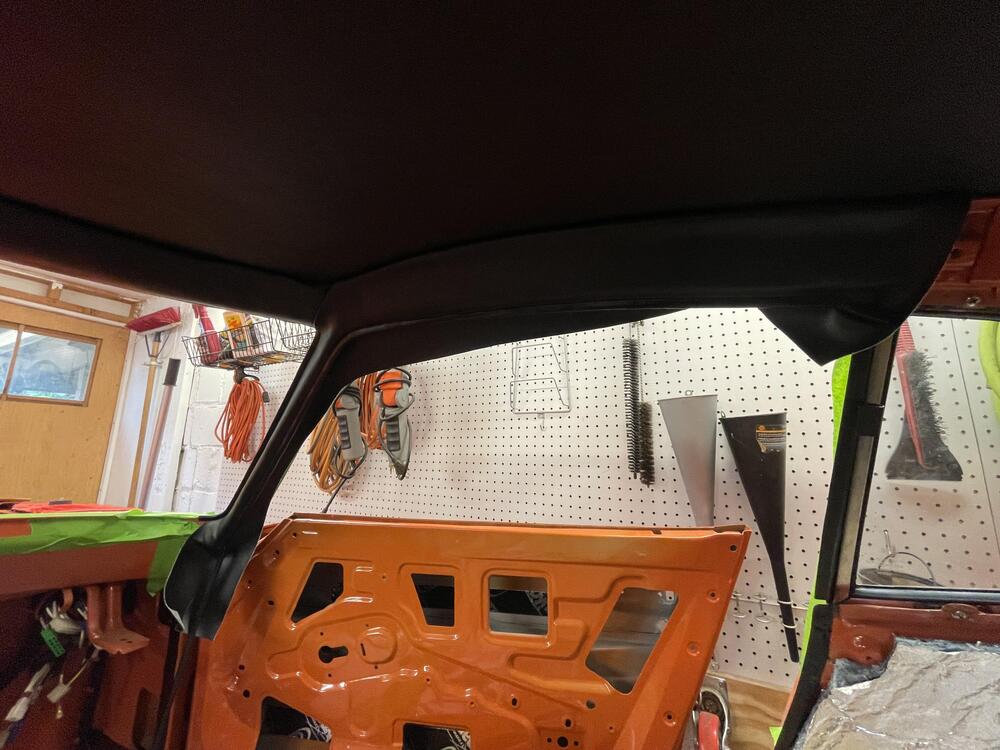
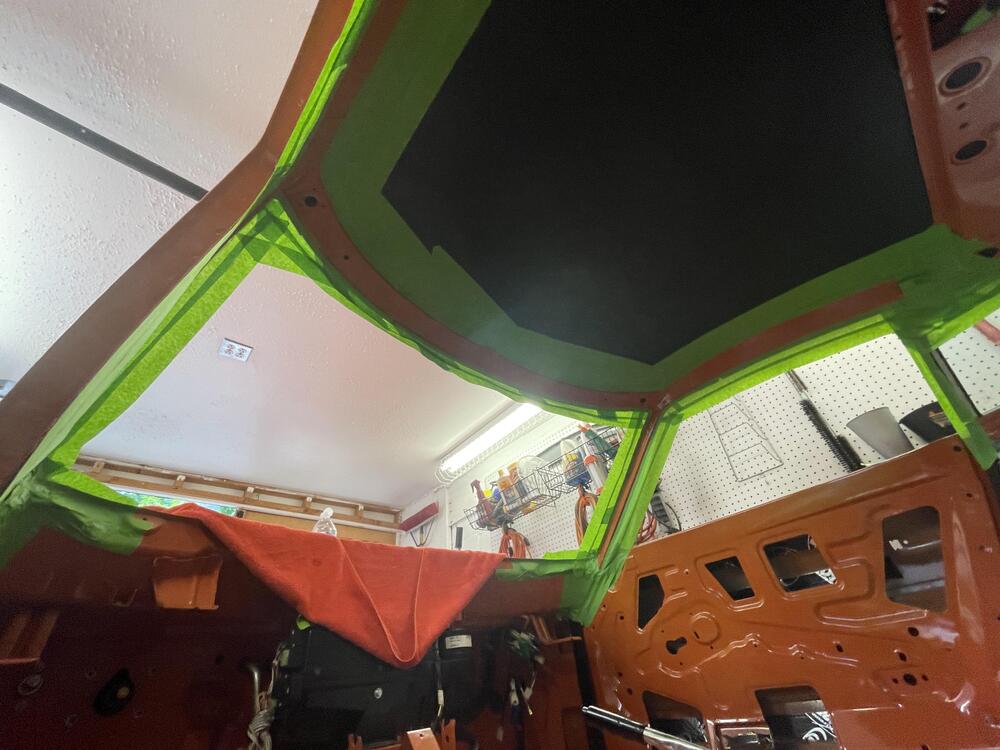
1 pointI’ve been neglecting this thread so I’m going to make a series of updates in quick succession… After much messing about I was able to close my coolant circuit. It was not easy. I had to order an entire set of clamps because I had the wrong size in eight (!) places. Luckily a friend of mine has a vacuum system for checking this and I got it sorted. She held vacuum for an hour so I’m confident it will be good. Despite being reassured by the seller that it had been tested, it turns out my coolant regulator leaks, so I swapped it for an open T fitting until I can repair it. Yeah, I know there’s a source for NOS ones, but I’m not paying his prices. ••• Vibe change. This vinyl pillar trim really changed how the inside of the car feels. Now I feel some urgency to get the windows in to keep the dust out. I’m 90% happy with how this came out. There is some unevenness I am hoping will come out as the vinyl settles in the same way it did in the head liner. I would try the heat gun on it but I’m too paranoid, plus my garage is hot enough I don’t really need to. If anything I’m nervous the glue will fail because of the heat. It’s an easy kit, but I made a critical error and used the wrong piece for the front, so I have to make the pieces work, which required some extra persuasion (see last photo for the pucker at the rearview mirror that should be hidden by the bracket). I’m sure if I had my mind right and took my time it would have been a cinch.


 1 point
 -
 1 pointI think that rubbery stuff was common on this side of the world maybe 20 or so years ago. My car was repainted in the early 1980's and that chip guard coating was used behind the rear wheels. My son and I have wrapped two cars. Wraps have a finite life of perhaps 3-5 years depending on the quality of the wrap and how much exposure to the sun it experiences. Wrap can chip get scratched, pealed, etc. Wrapping the headlight buckets is difficult to say the least. Wrapping a portion of a car with clear is common and effective but It too degrades with age. My son's '05 Lotus had to have its clear protective coating pealed off in small pieces and it left marks behind.1 point
 -
That's pretty "cool"! Can you take a picture of the page and post it? I assume that it's in English?1 point
-
0 points