Leaderboard
-

conedodger
Free Member9Points11,316Posts -

Patcon
 Subscriber
 2Points10,919Posts
 -


Paulytunes
Subscriber2Points98Posts -


Zed Head
Free Member2Points18,786Posts
Popular Content
Showing content with the highest reputation on 11/17/2024 in Posts
-
2 points
-
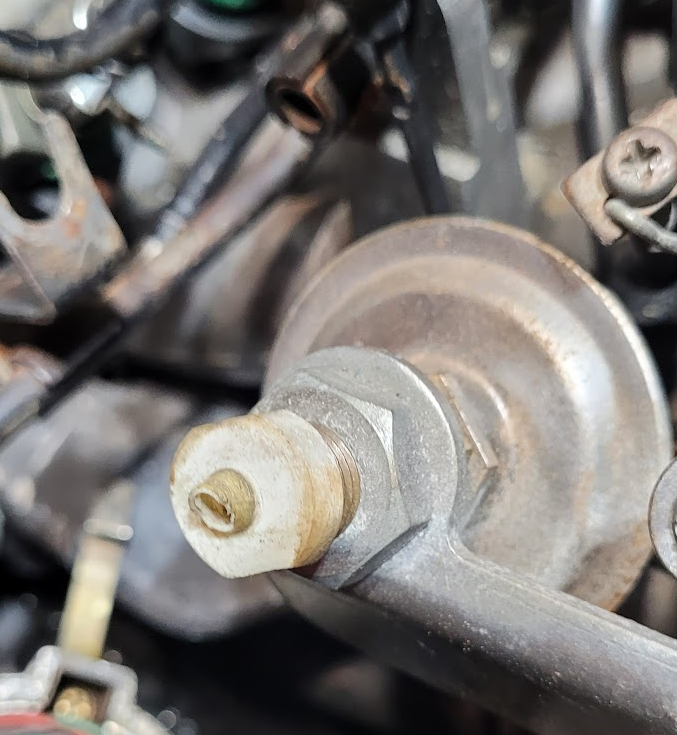
So after much trial, error, troubleshooting, and going through the Fuel Injection Bible and FSM, I was able to get my 280Z running again. The issues I have now: I stupidly broke the plastic nipple on the stall dashpot while connecting the thermostat sensors and wiring: Idling is pretty high, around 2000rpm at cold start. Occasionally, it will adjust down to 700 to 800 rpm and will sometimes stall. Other times it will stay at 2000 rpm, unless I drive it and can force the RPMs lower with the gearing. When I take it out of gear, it shoots right back up to 2000 rpm. May be due to the temps here, which were between 55 and 60 degrees F today. I was able to temporarily fix the dashpot and reconnect the vacuum hose to it using a smaller diameter tube to insert into the part of the intact plastic and the vacuum hose until I can source a new dashpot assembly. I'll continue to diagnose the high idling and see if this is due to something I am overlooking or a symptom of my rebuilt ECU not performing up to OEM standards.
 2 points
 -
The three way T should go to the ported vacuum on the TB, the charcoal canister, and the distributor vacuum advance mechanism. Here's a good place to browse pictures. https://bringatrailer.com/search/?s=1976+280z https://bringatrailer.com/listing/1976-datsun-280z-88/
 1 point
 -
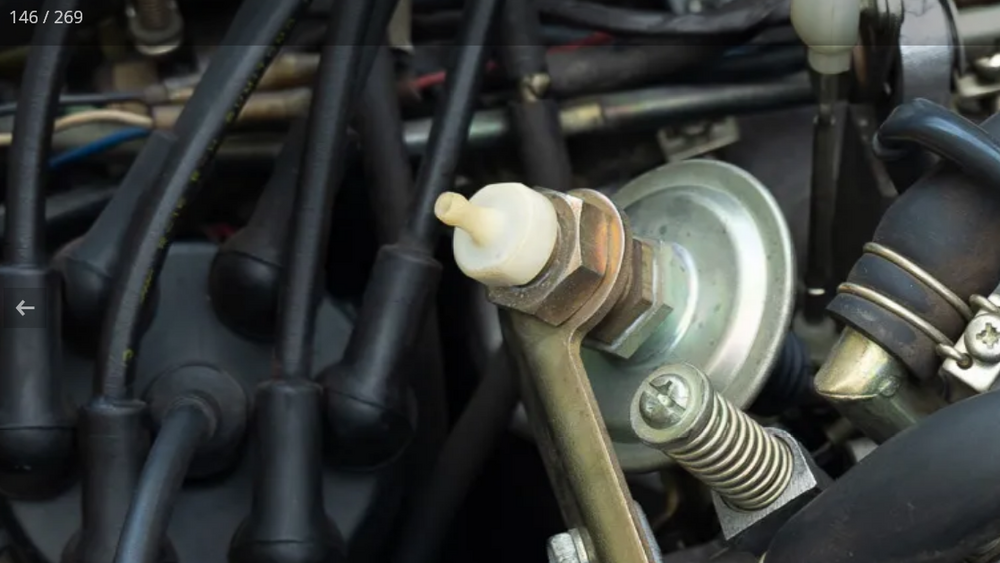
That nipple shouldn't have a vacuum source connected to it, it should be open to the air. It's a common mistake. Don't know why Nissan designed it that way. A common problem with the pre-77 throttle bodies is that the blade gets gummed up and sticks open. You might check that. Next time it hangs at 2000 pull up on the throttle pedal with your toe or open the hood and press the linkage closed. Another possibility is that the return spring rusted and broke. It's hidden away, low and behind the TB. Can't remember if you already addressed that possibility. Finally, the other "hanging high" problem is caused by the BCDD. Here's a drawing of the dashpot with no hose connected.
 1 point
 -
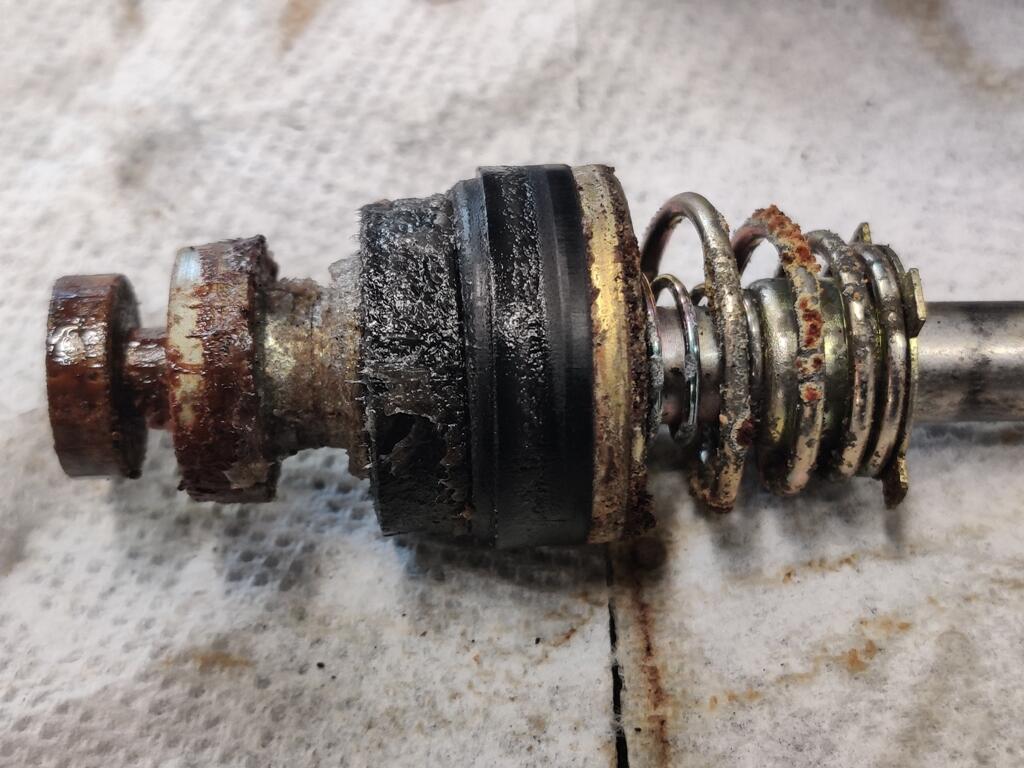
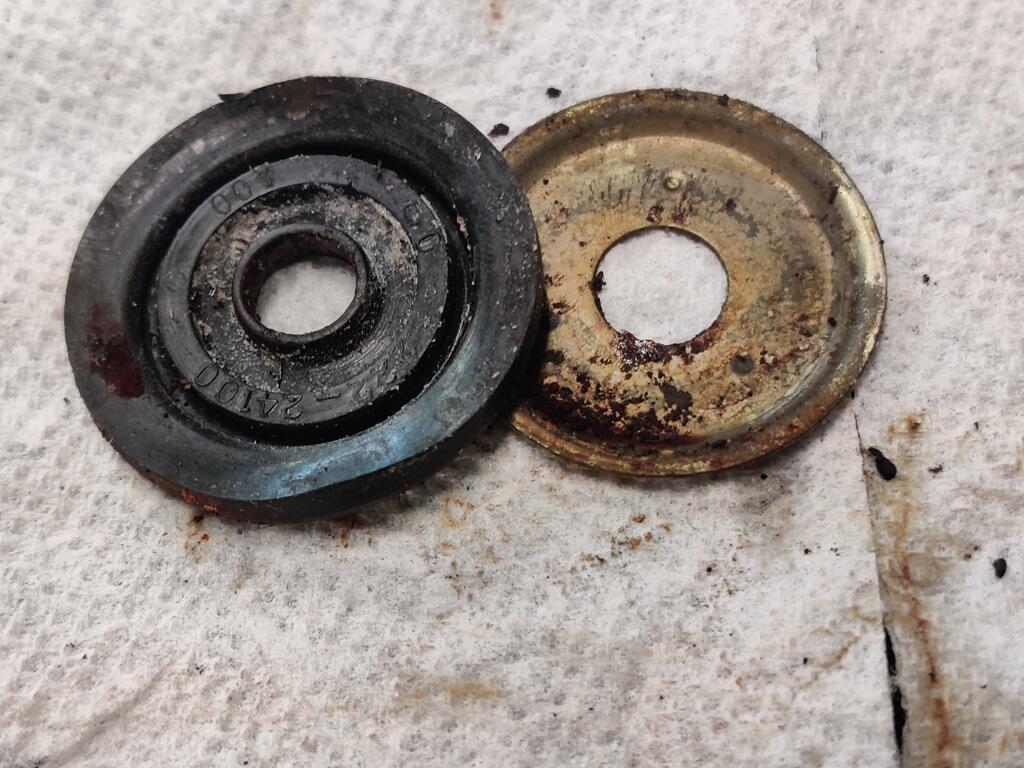
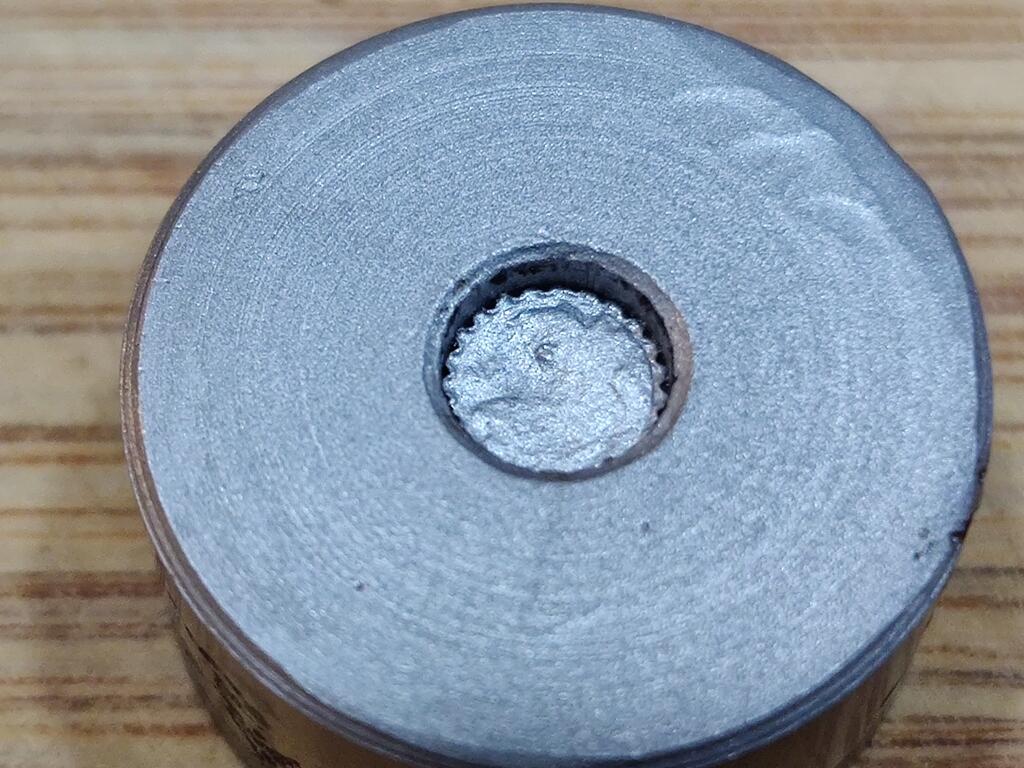
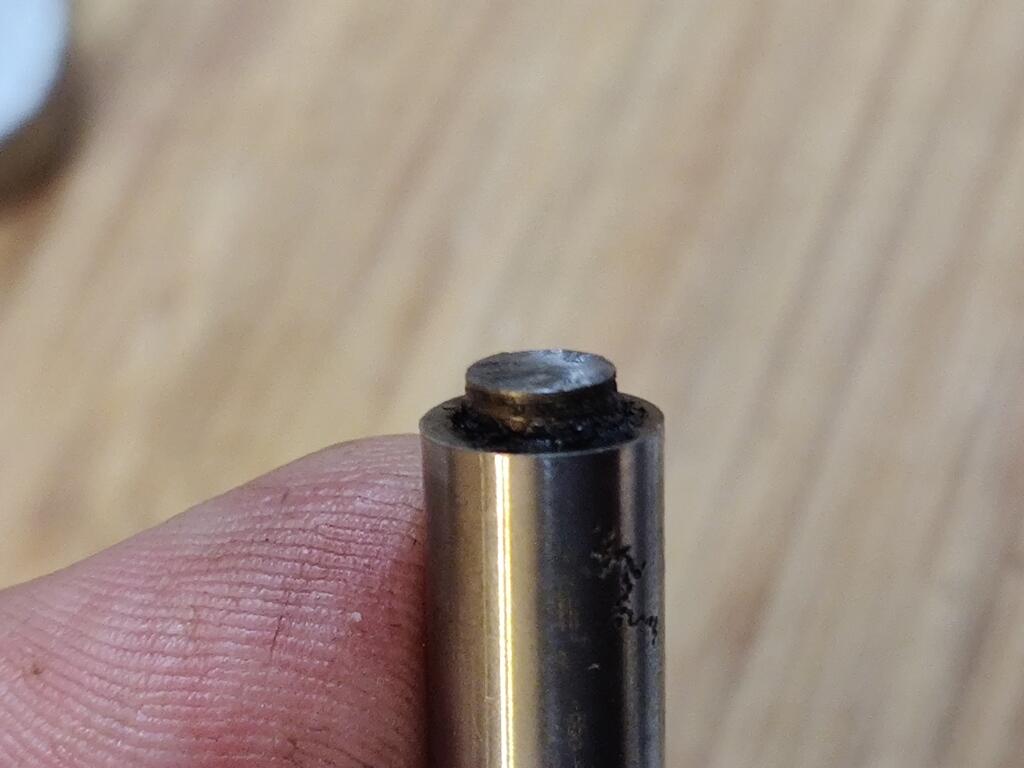
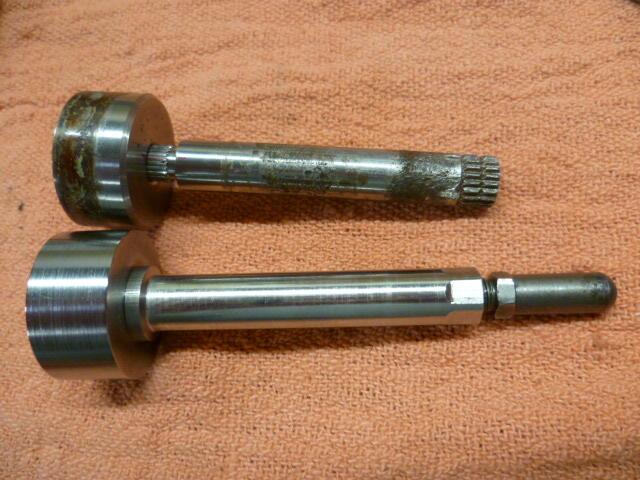
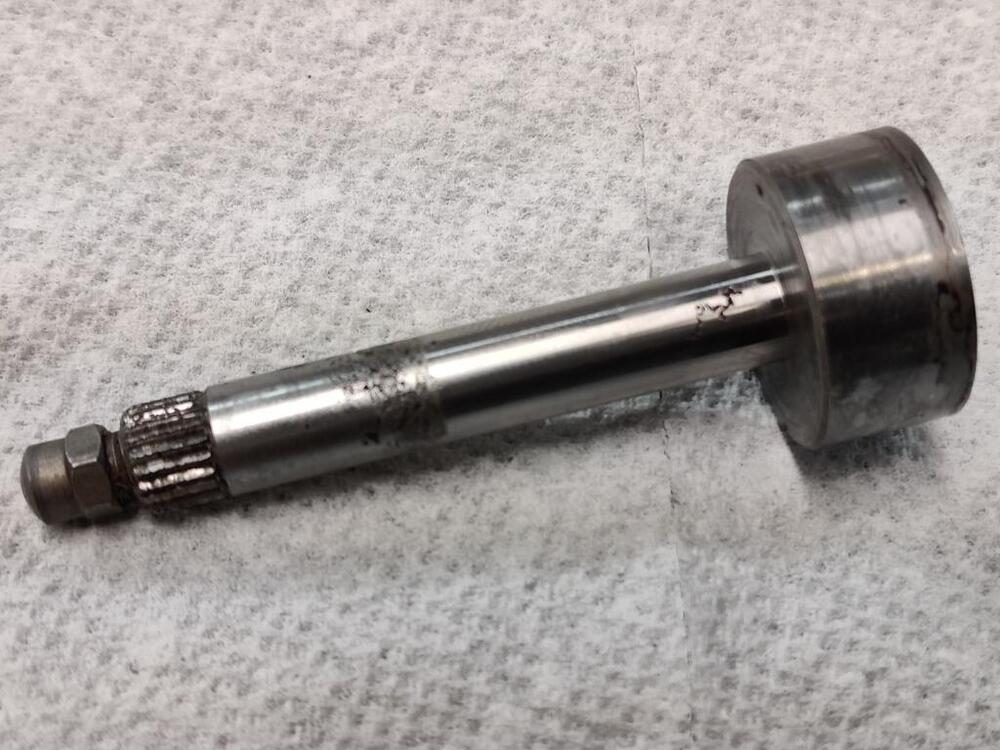
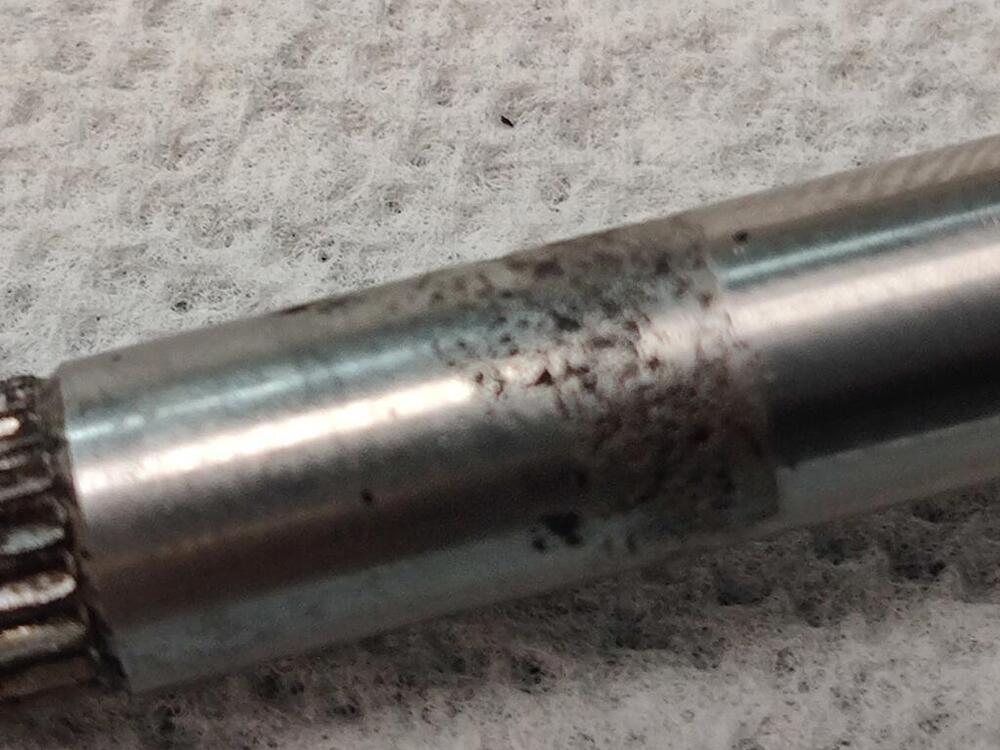
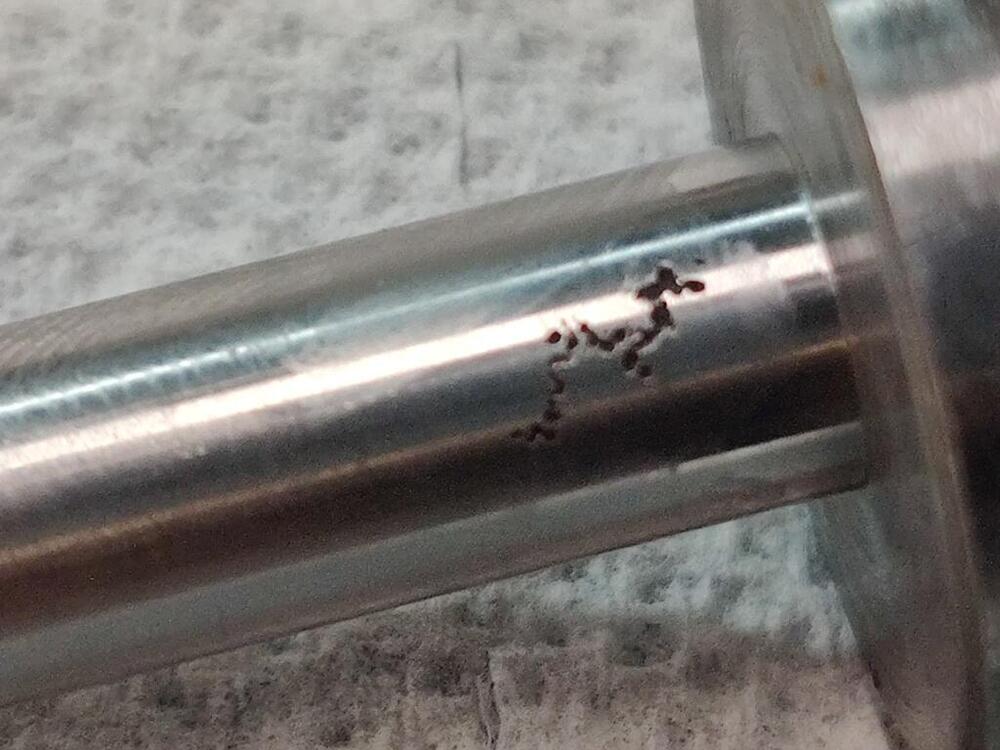
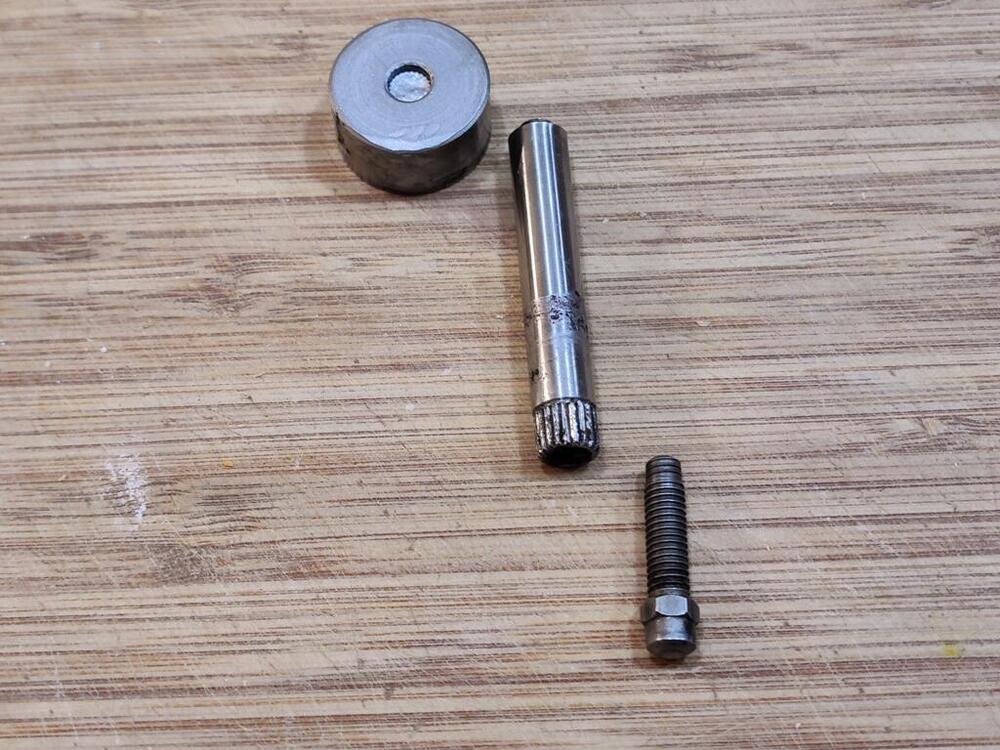
 Day late, but... Yes, it is splined and pressed in. I made a new one that threads in instead of pressed in with splines. Made it out of stainless so it wouldn't rust next time Here's old and new: And save the rounded tip piece. It's special because it's hardened. Or if you do have a new tip made, make sure you have it heat treated to a similar hardness.
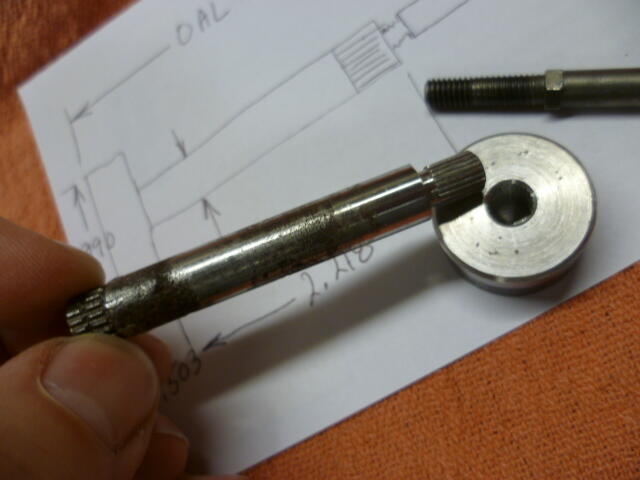
 1 point
 -
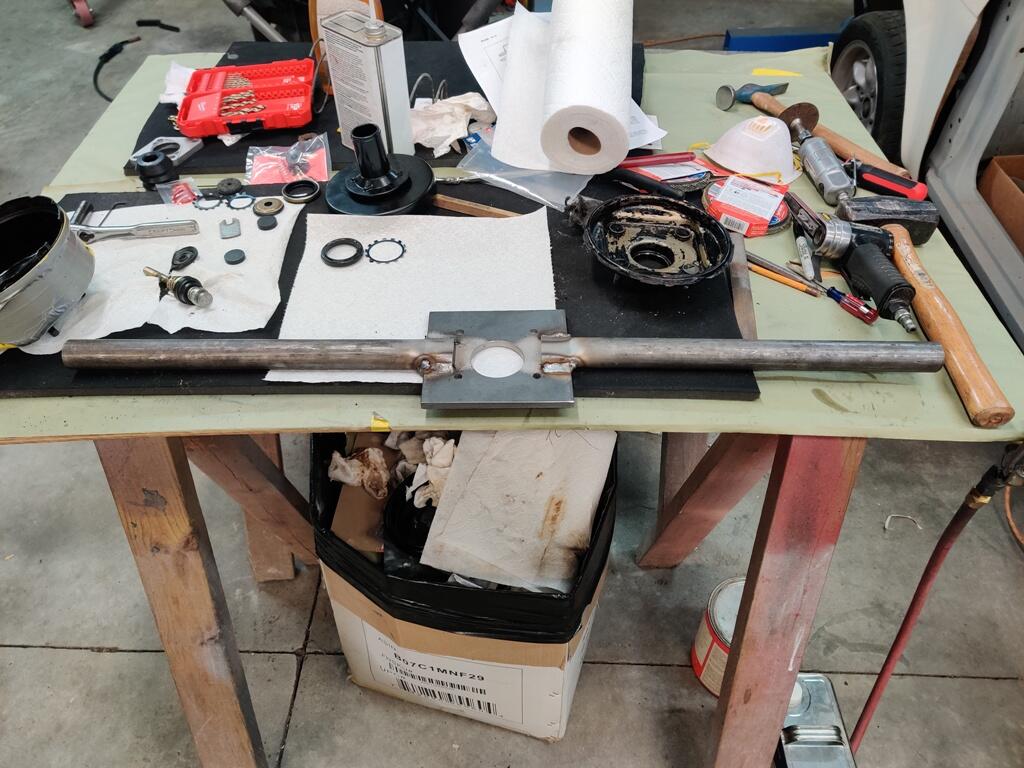
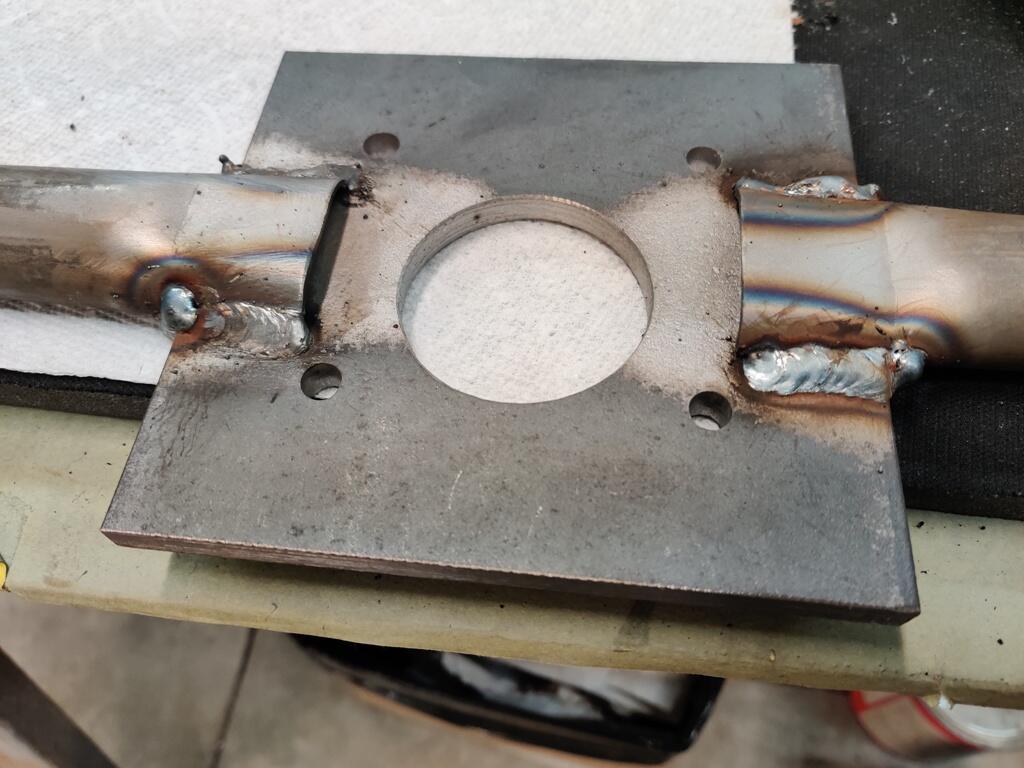
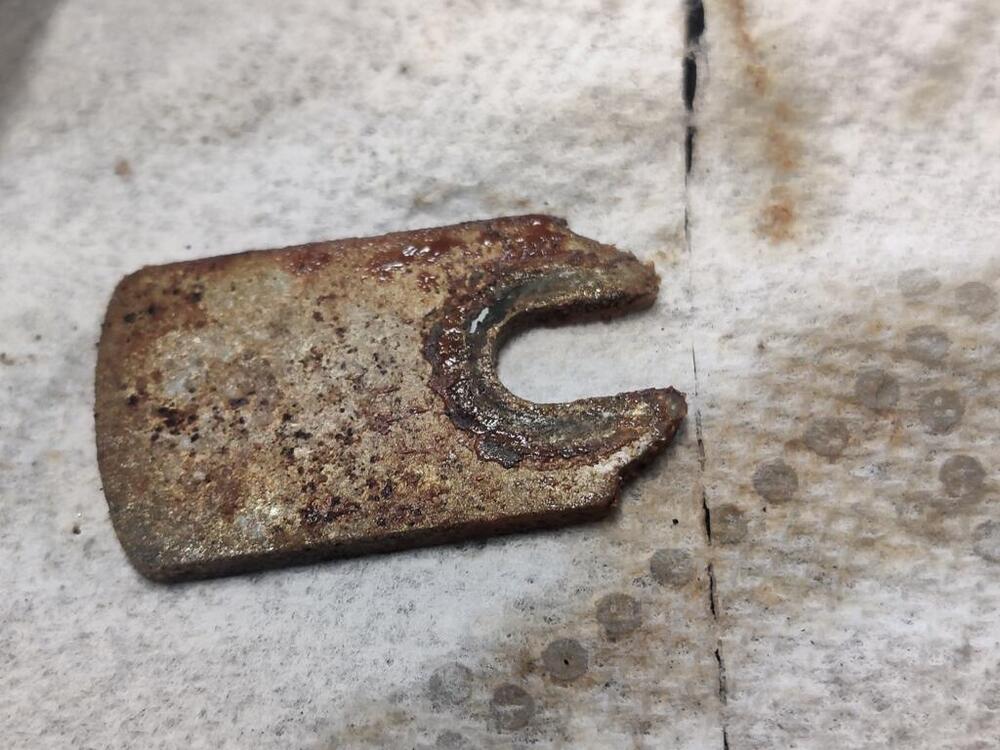
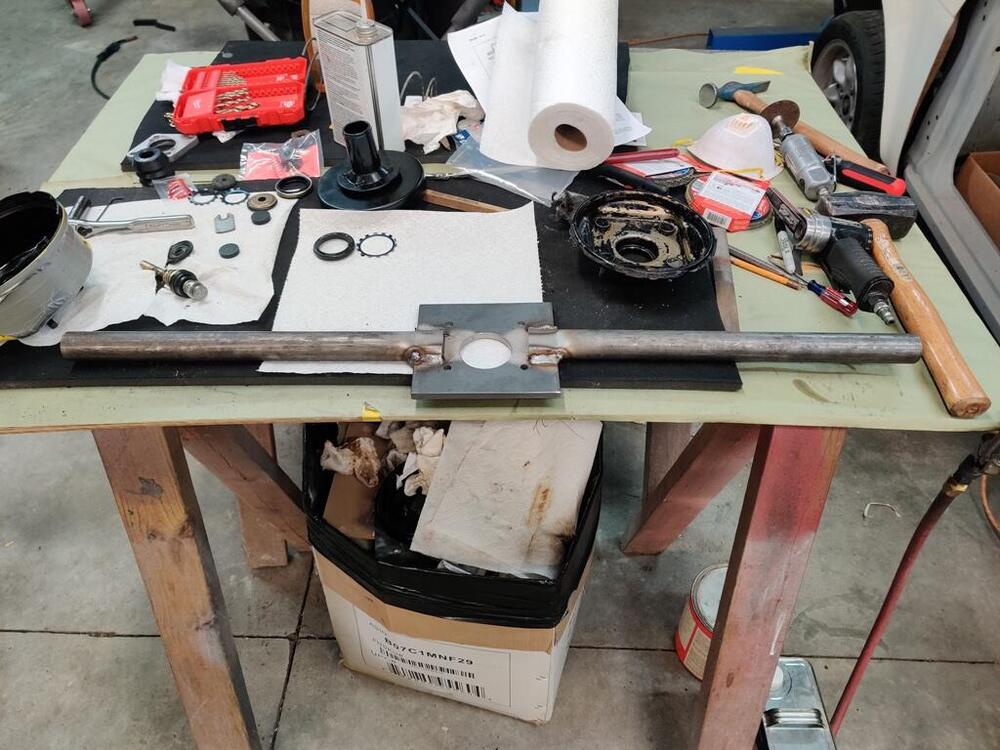
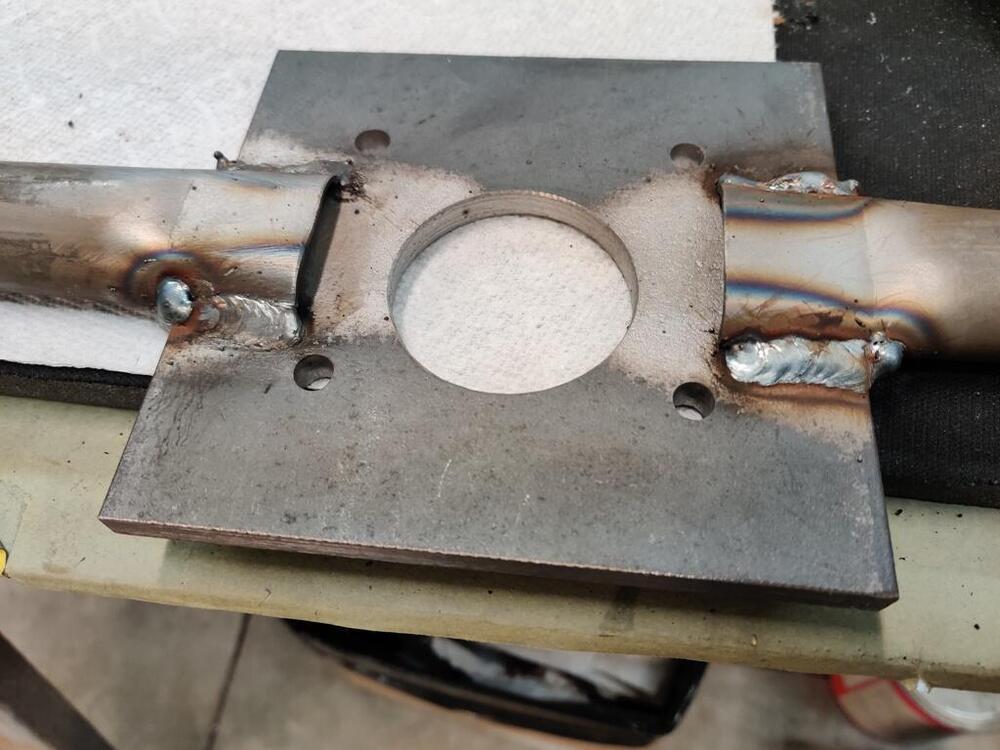
 Making the tool went well today. It took me a few hours. The plate I found in the "drops" area of my close-by metals store was quite thick, so it took a while to drill through it with drill bits and a hole saw. My re-sharpened titanium coated drill bit wasn't working well. Instead, I made a trip to Home Depot and picked up a new set - this time "cobalt" drill bits. The set has two each of many of the common sizes, which I like. I made the tool a bit differently than the factory one. The handle portion overlaps the plate only on the top side. The bottom side of the plate is totally flat. I squeezed the handles in my hydraulic press to squash the ends that are welded to the plate. On the underside of the handles, I cut a way a the part that would overlap like the top does and just butt welded to the side of the plate. Inspection when I got it apart revealed a large tear in the diaphragm. I was pleased that the stop key came out easily. And I was surprised to see a large amount of grease on most parts. This part doesn't look good however: This part looks to be chrome plated. And rust got to it and caused some bad pitting. I don't see this part in the parts catalog, not that it would be available anymore. But, I don't want to put this one back in. Perhaps I will have to get one made. The booster had some old brake fluid sloshing around inside. So, I plan to refinish the inside of the cover and probably both sides of the back plate. So far, so good.
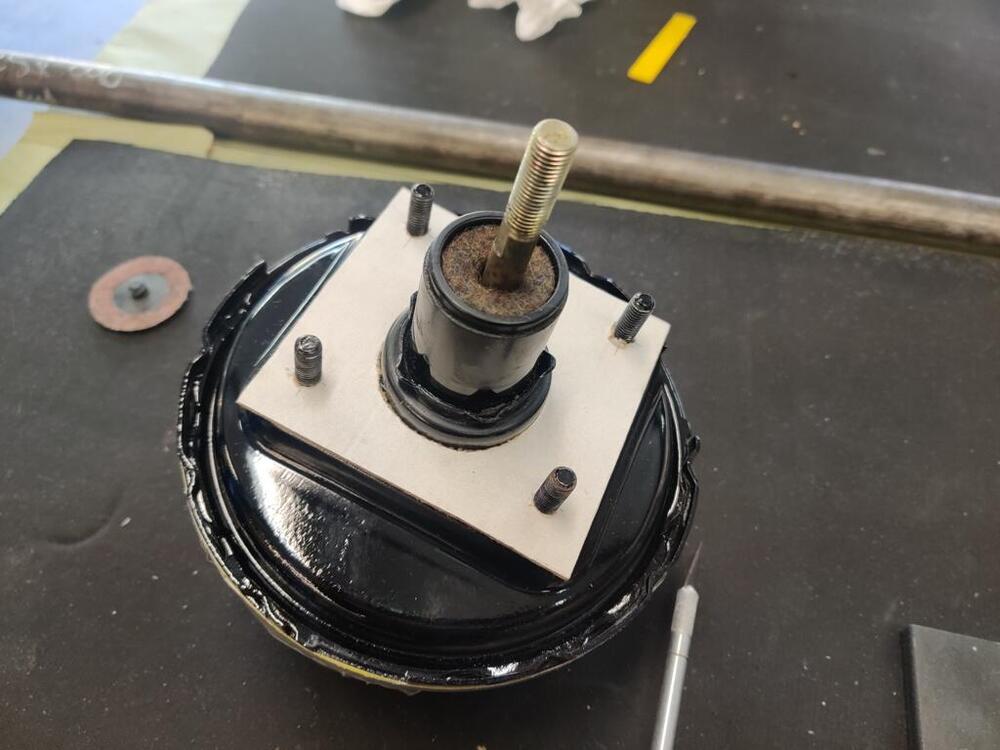


 1 point
 -
 1 pointNice website, www.s30.world (so.. not .nl or .com or whatever!) just s30.world !!1 point
 -
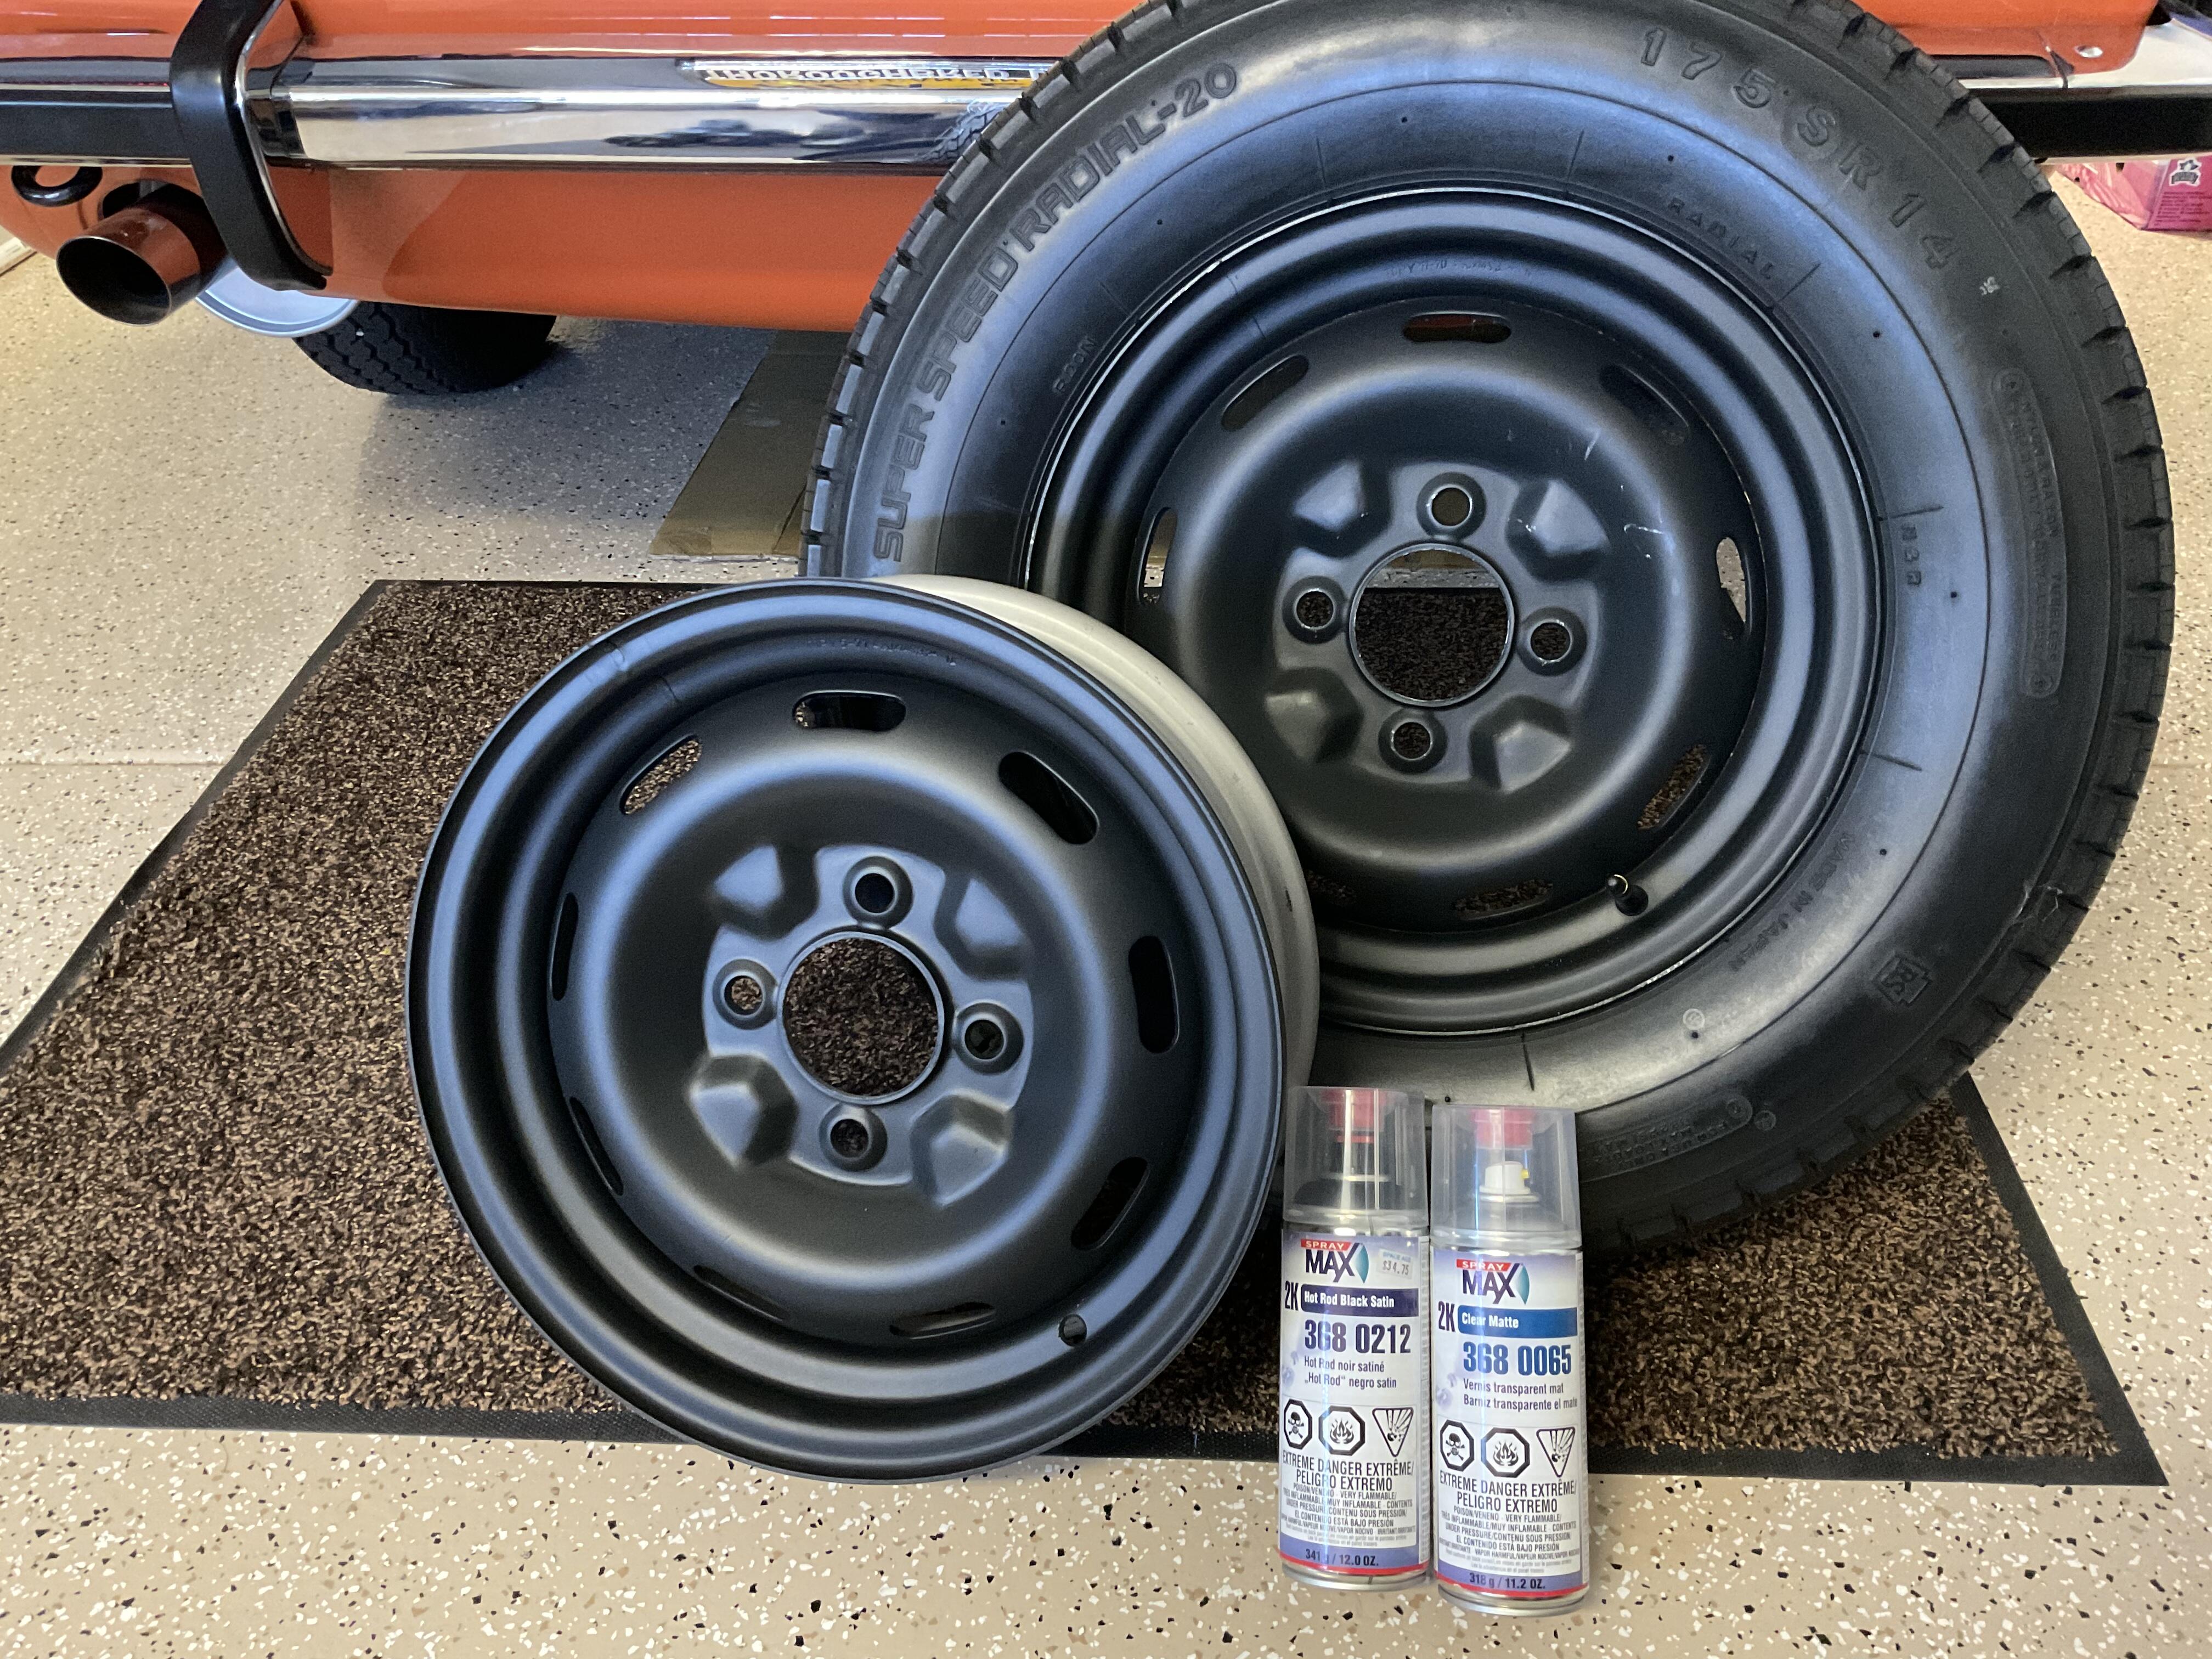
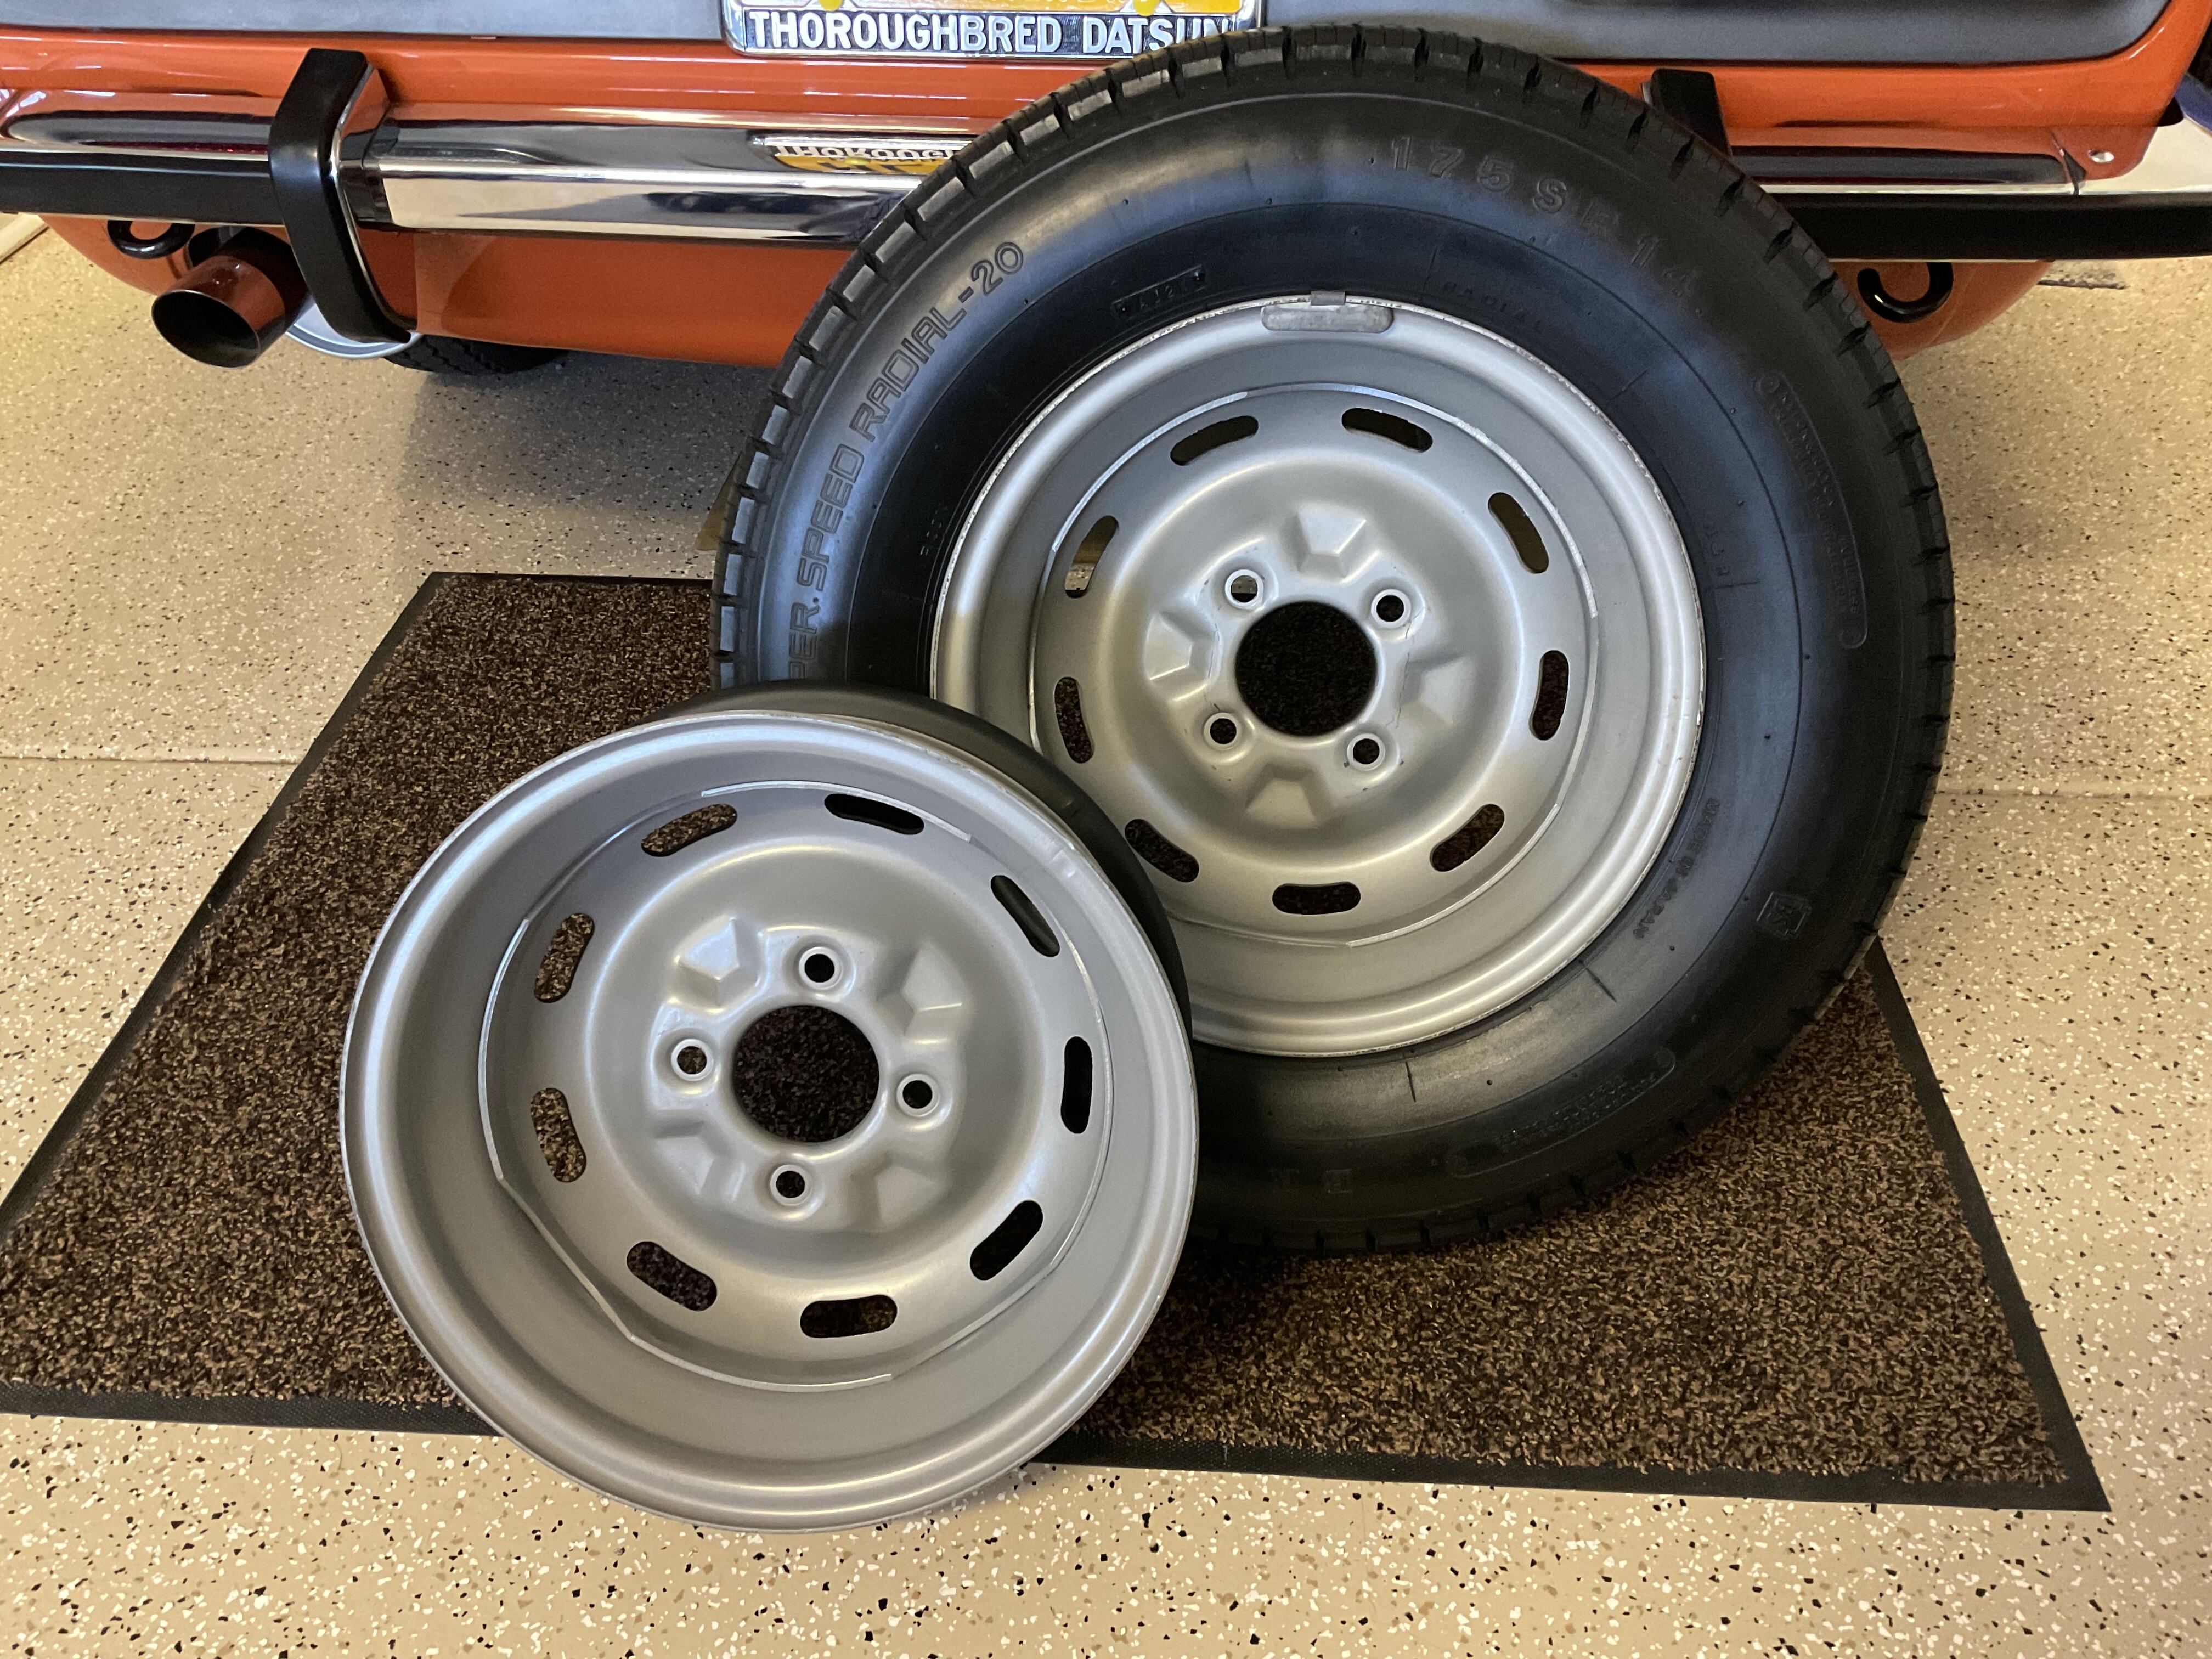
 1 pointI have this early steel wheel and needed a spare tire to replace my NOS original Superspeed Radial-20 in the spare well for daily driving. So, knowing “matte Black” is the correct shade, and for those burdened with the need for originality, I wanted to share my results compared with my NOS original spare. I used two coats each of the black and clear products as shown. Love the 2K catalyzed paint, which yields a professional, easy to use, finish.
 1 point
 -
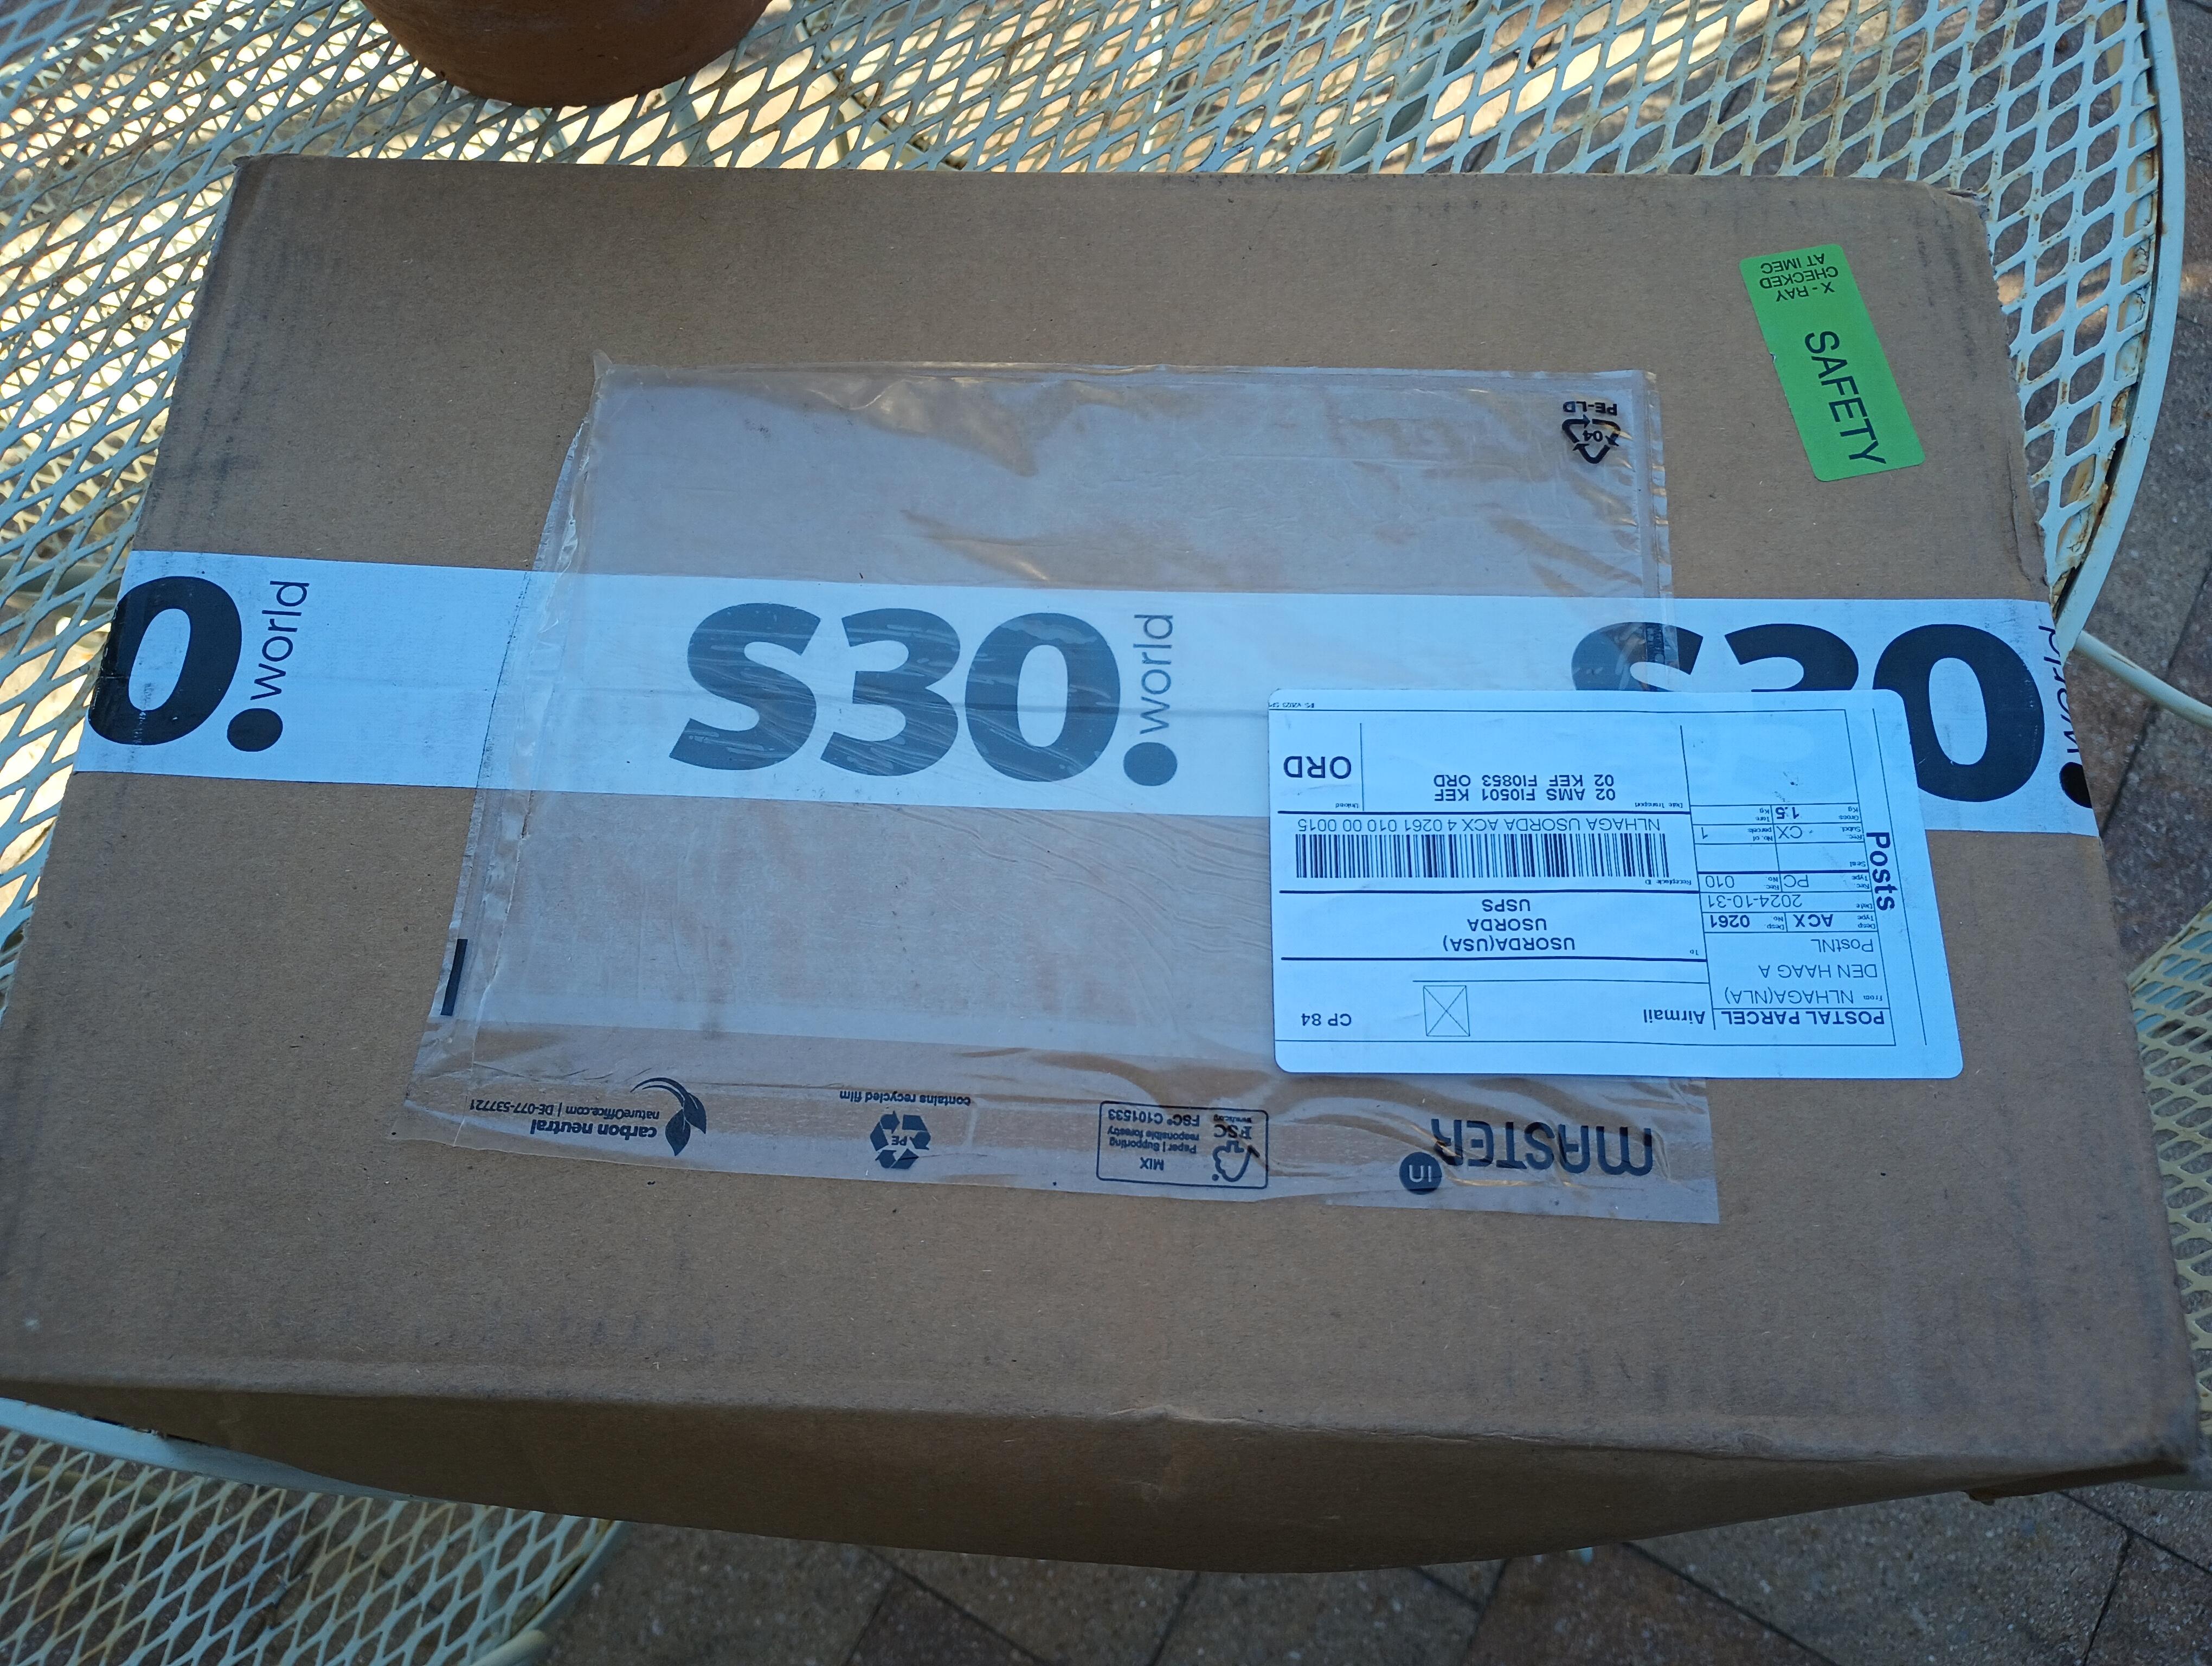
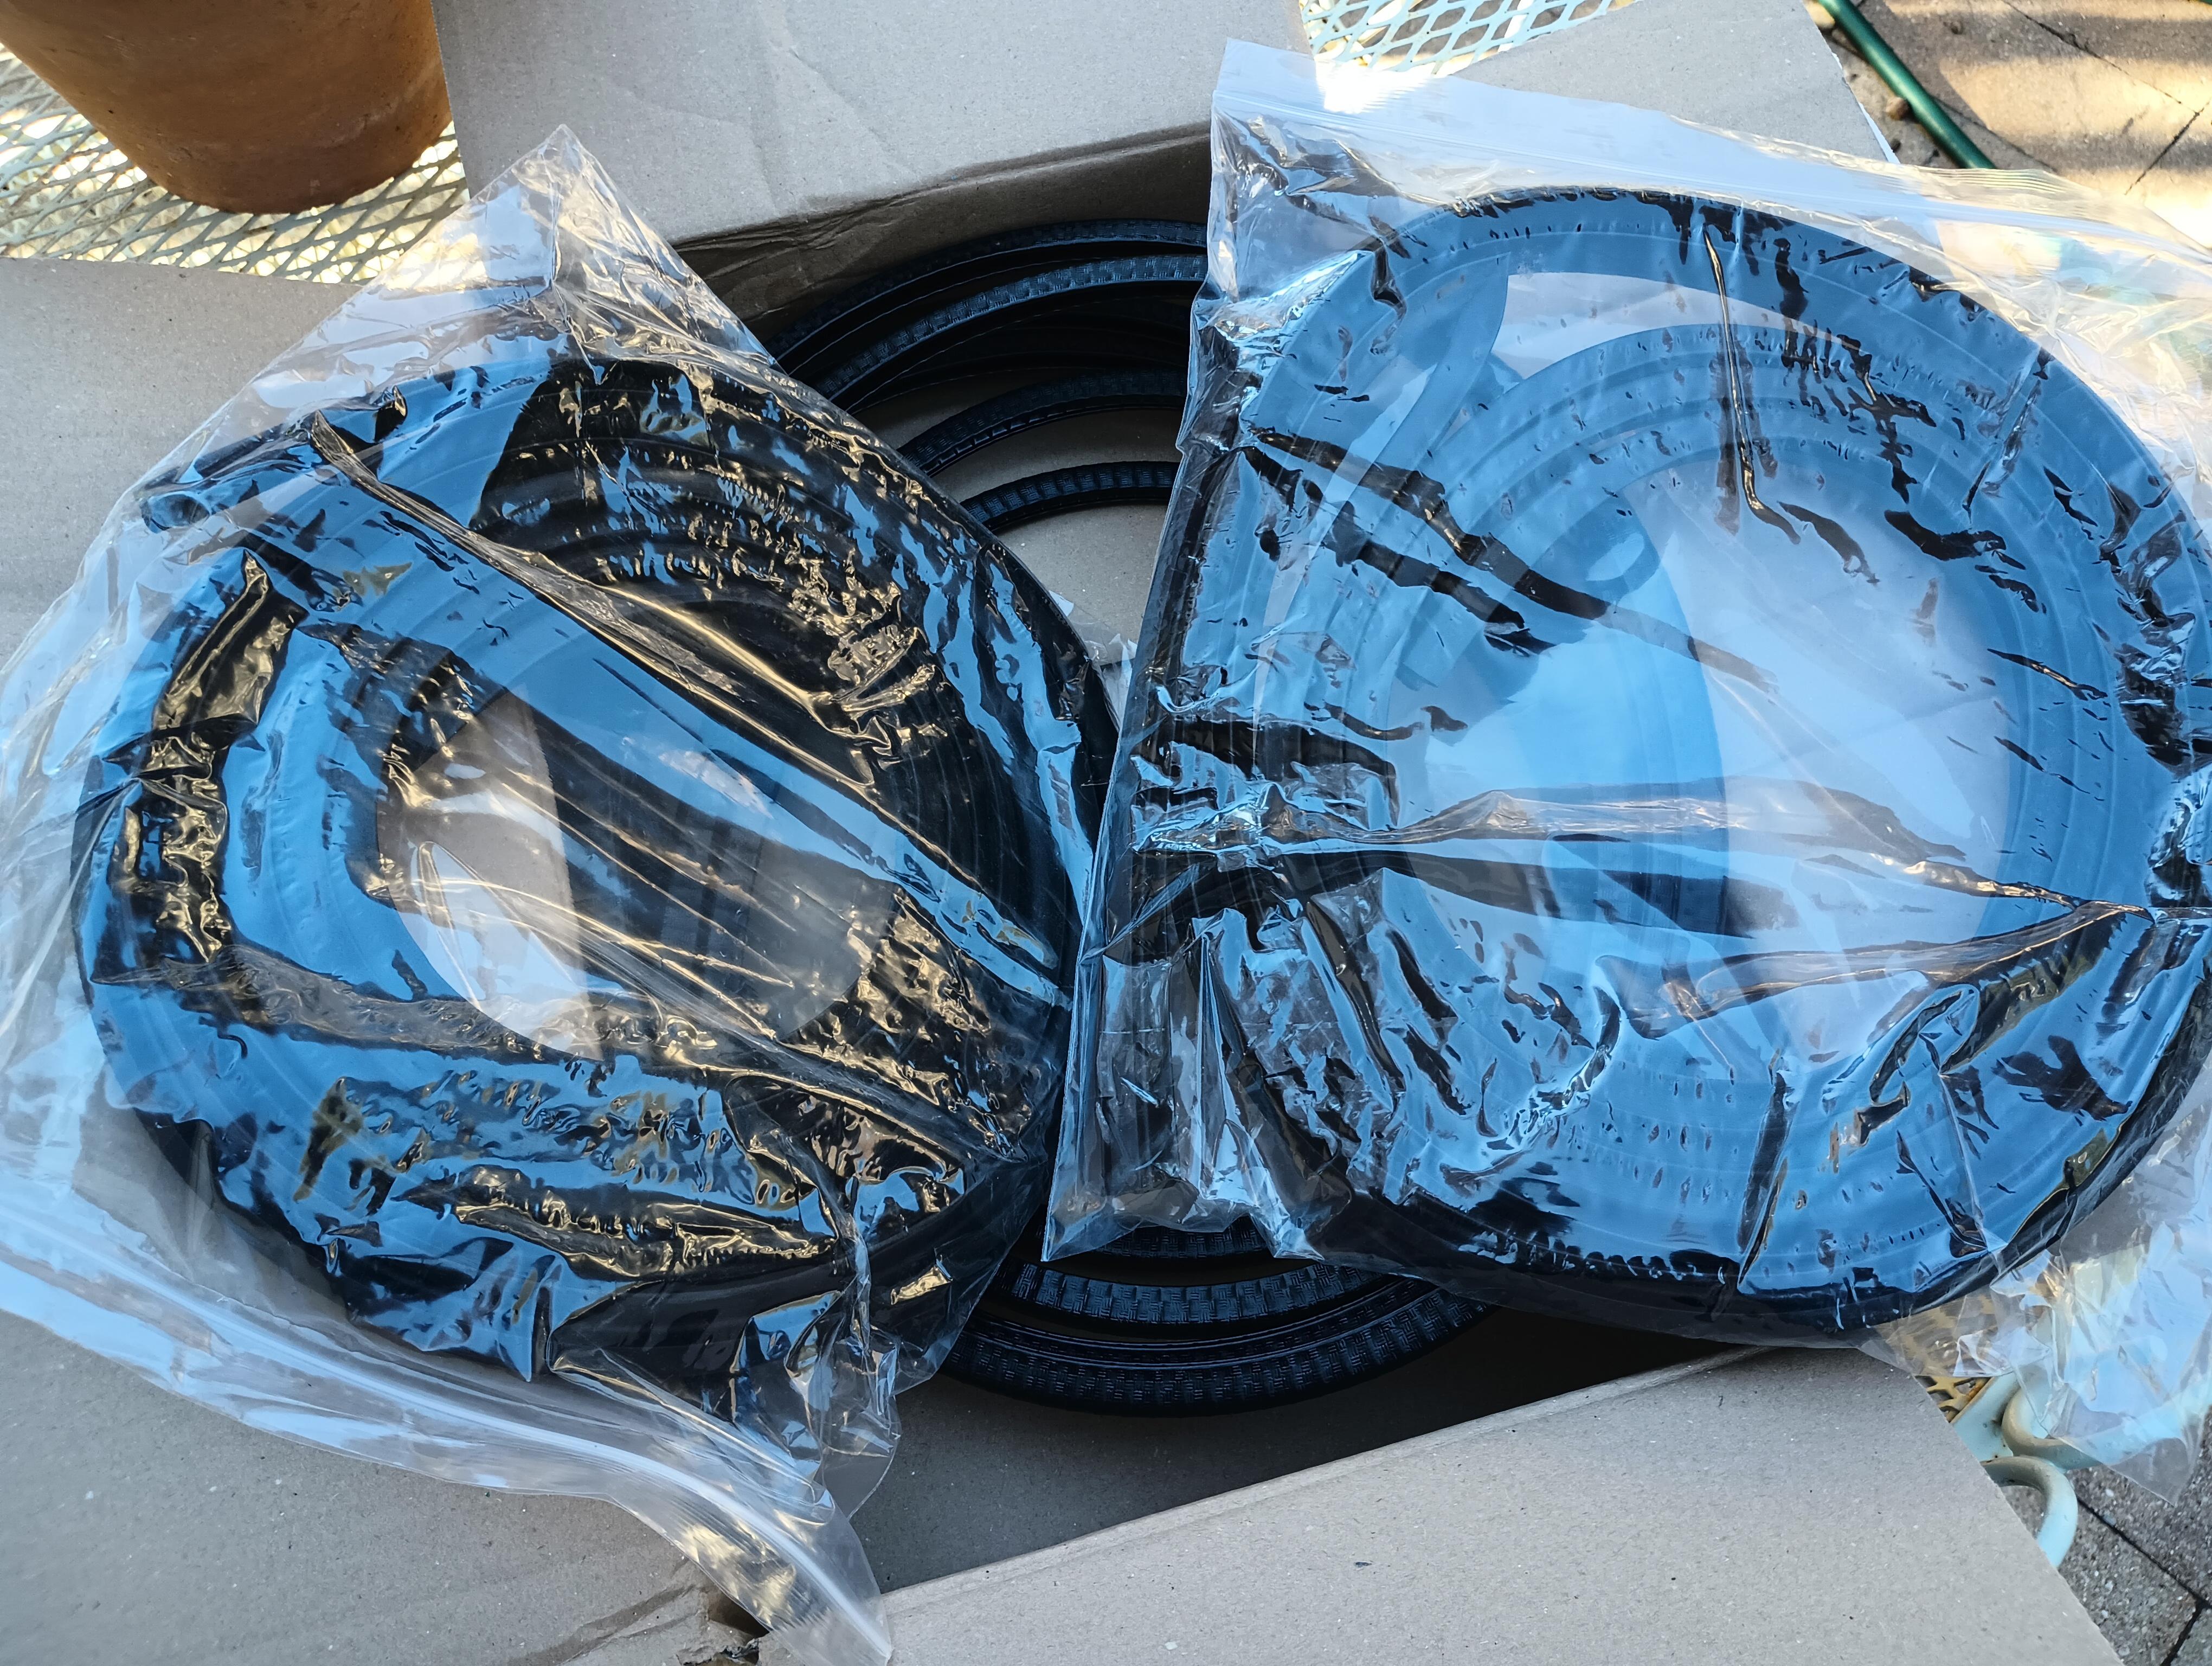
 1 pointProduct arrival from the Netherlands yesterday, new seals and welting as anticipated. Next up is to watch the install video on their website. Wheeee!!! 😁
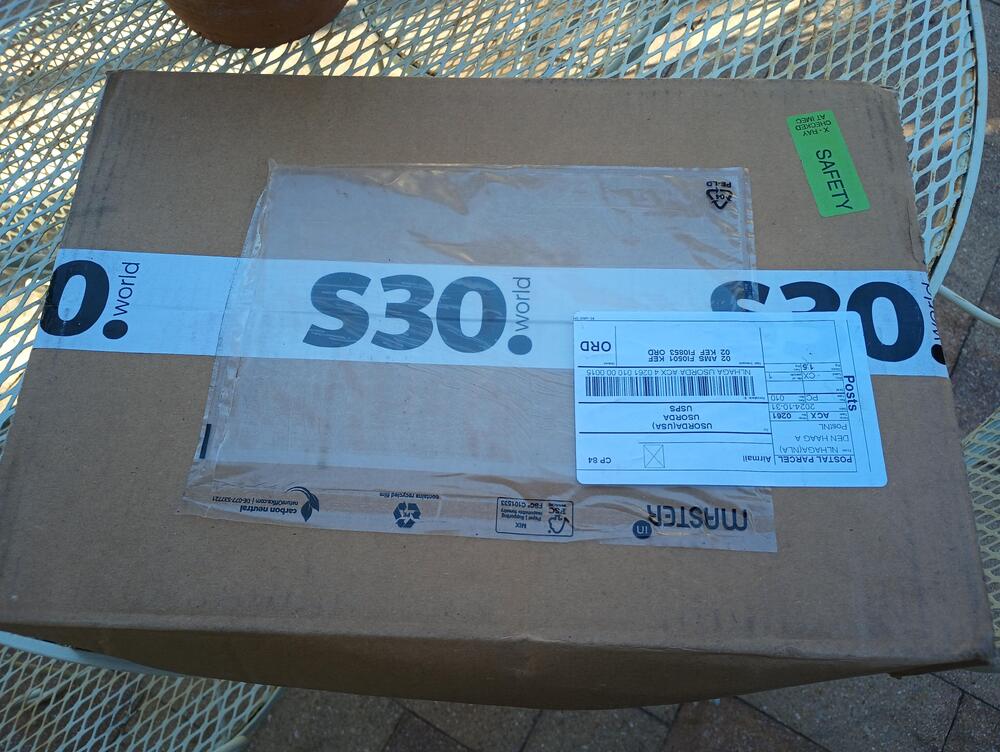
 1 point
 -
 1 pointThe original E41 design WAS a two-part system. Just look in the factory parts manuals. The spongey rubber part was the 'Weatherstrip' and the U-shaped 'Welt' clipped over one side of it, sandwiching it onto the body seam. Most people don't notice because they can weld themselves together fairly well over time. The two component parts are also on different pages in the factory literature. Many think that the 76801-E4100 RH and 76802-E4100 LH show a one-piece system, but they are missing that the 76920-E4101 Welt A and 76921-E4101 Welt B parts are shown in a separate diagram for the body side. With all of the proprietary off-the-shelf/universal seals the main problem in my experience is that the Weatherstrip part is the wrong shape and/or made from a material which does not compress anywhere near as easily as the original. In my experience this is worst at the front vertical edge of the door where the seal is being asked to compress more than anywhere else, and with nowhere to go. The original Weatherstrip is also a 'flap' cross-section rather than a 'bulb'. The new S30 World versions are the closest to the originals I have seen.1 point
 -
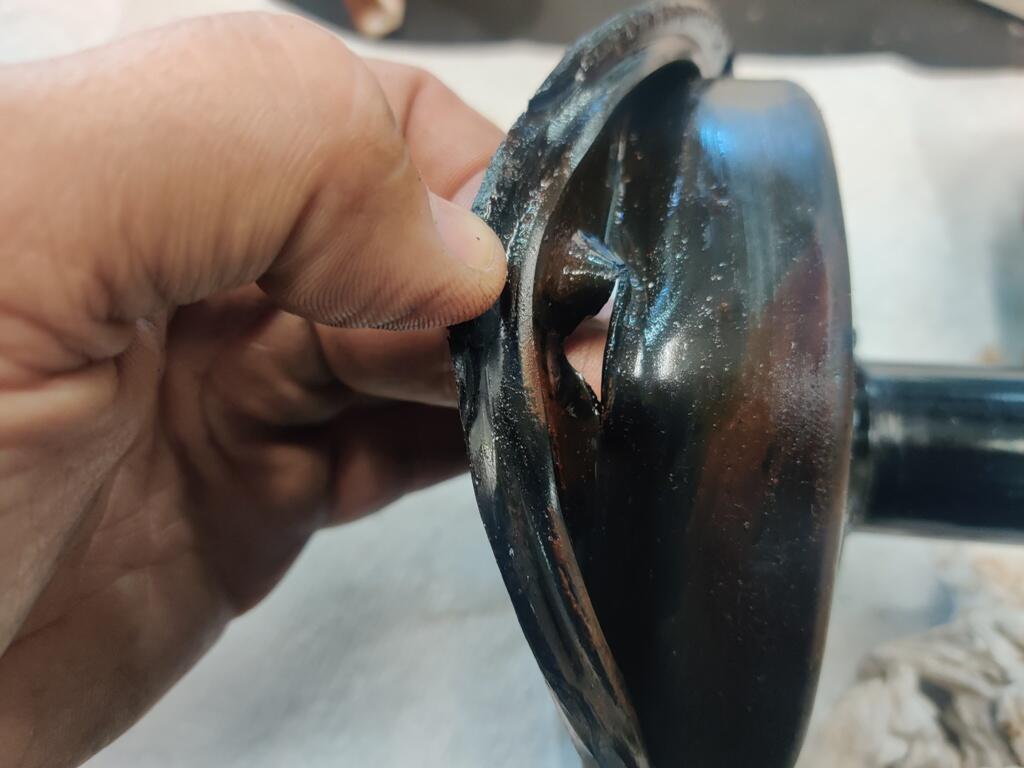
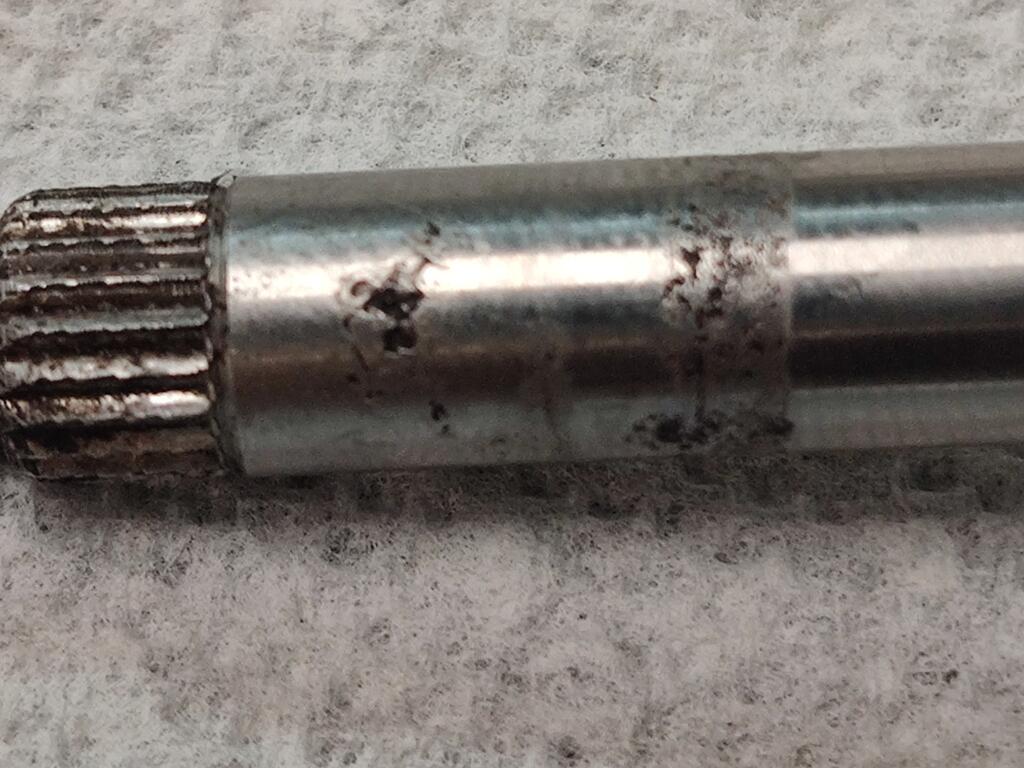
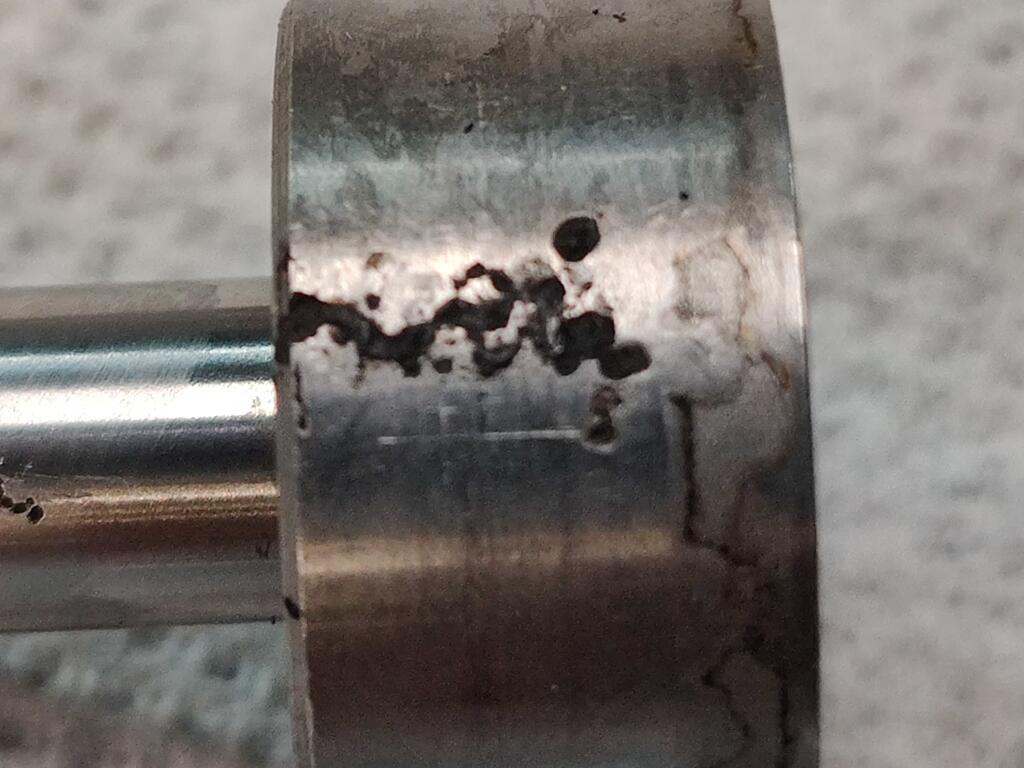
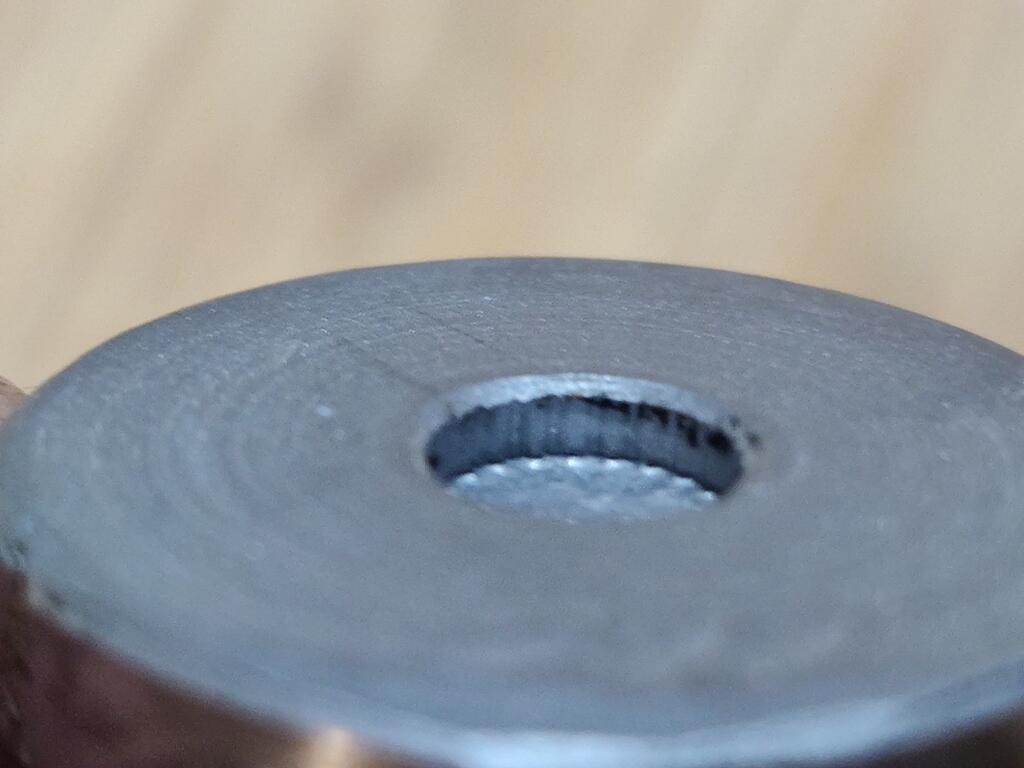
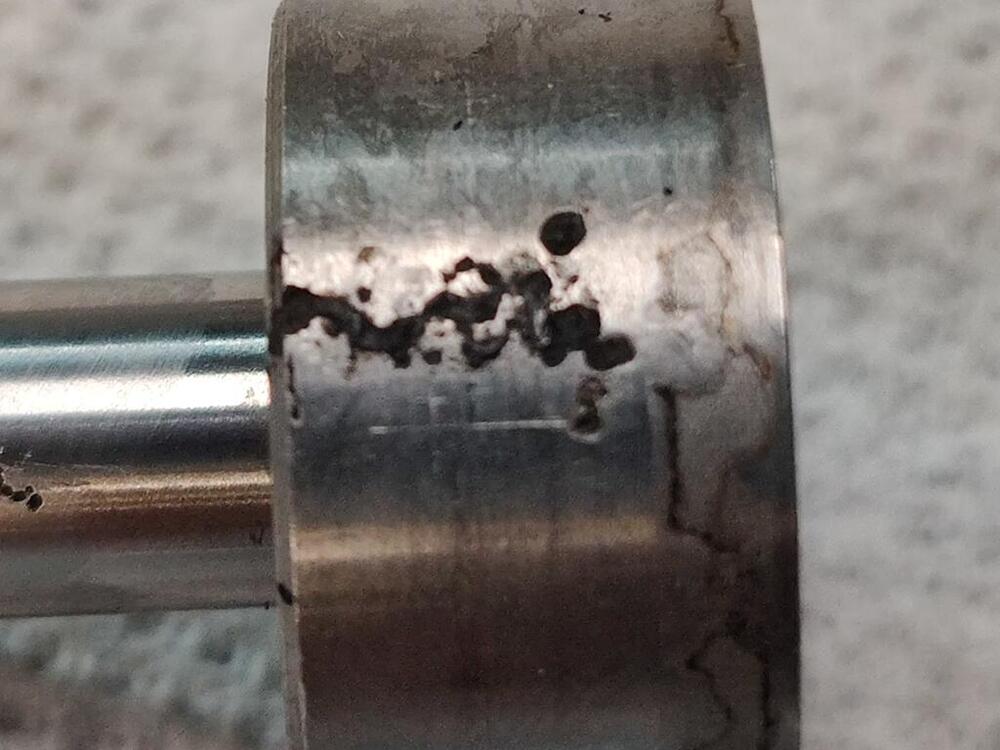
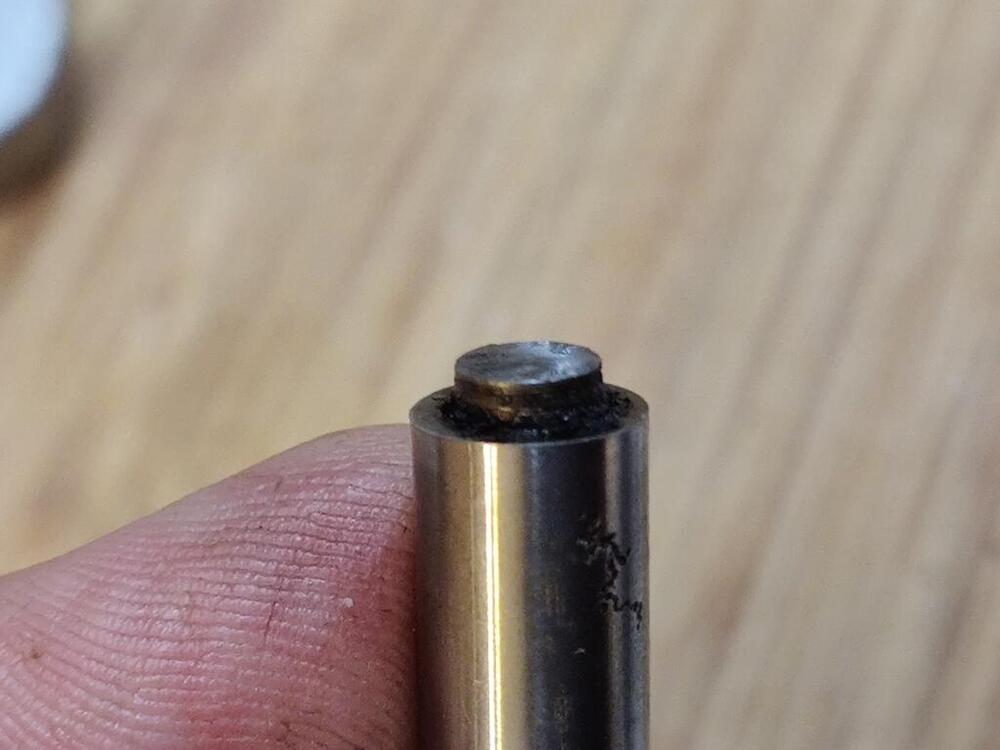
Well... I did some deconstruction on it just now. I couldn't get the big end off. Couldn't figure out how it was on. I could see lathe turning marking on both sides of the big round and the shaft was highly polished. So, I figured it was a press fit. I heated the big end and some fluid boiled out of the joint. With some confidence, I clamped the shaft in the vise and started hammering on the big round end. Even with lots of heat and lots of force, it barely moved. So, I thought, "gosh - could it be threaded on? And I took some large vise grips and clamped on the big end and wrenched it. It broke of course. So, the shaft is splined and pressed into the big end. And, it is splined on the other end as well. I was able to get the tip unthreaded without mangling it. Now... I need to have one made.


 0 points