Leaderboard
-
Yarb
 Subscriber
 6Points1,897Posts
 -

siteunseen
Free Member6Points15,068Posts -
Patcon
Subscriber5Points11,059Posts -

Zed Head
Free Member5Points19,093Posts


Popular Content
Showing content with the highest reputation on 03/01/2025 in all areas
-
4 points
-
2 pointsIt goes to the bottle I've never paid attention to. Paying attention is like having bullets in a gun. I missed that one though. Damned if I'm not getting old.
 2 points
 -
I don't think it will matter if the OD and ID are correct1 point
-
1 point
-
1 point
-
I spent some hours in the Garage again and got some tasks checked off my to-do list. First, I started to test-fit the taillight panels: So I was able to get the installation holes back into the replacement rear panel: Where the plastic rivets go. Luckily, I have a few for reference: It took me a while, but in the end, all worked out. I have to say, after studying a bunch of original, unrestored cars, those Panels are quite poorly aligned from the factory, and with a few adjustments to the rear hatch lock panel, they could have made this much more appealing, but at the end I wanted to have it looking OEM. After that, I installed the taillights too, just to see if it all lines up. Which, luckily, it does. Note that the panels are not properly locked into the brackets here, why it all looks "wobbly": While at it, I decided to also install the hatch locking mechanism, so that the hatch has the correct height. I own a set of NOS locks. But decided for testing the old ones will do. As usual, bolts / nuts are only temporary and might be the wrong ones, so please ignore those. The lower one was a bit tricky. I realized the space in the aftermarket panel is not big enough for the lock to fit through it. After a bit of hammering, though, it fits now. Still needs a bit of adjustment, though, as it seems the punches are not lined up properly with the bracket: While working in that area, I realized that this corner is also not straight. So I got that straight too. (Picture shows "before" state): In the end, I'm quite satisfied with how things fit. It's still all just temporary and needs a bit of adjustment and proper fitting here and there, but for the first mock-up, things at least fit, without discovering major issues: You might have noticed that the "chrome" (I think it's stainless steel?) taillight panel trim is missing. I had them removed before paint strip dipping, because the previous owner painted them black. Luckily, the paint could easily be chipped off with a carpet knife: And then I gave it a bit of polish with my "Metarex" metal polish wool: It still needs a bit of work here and there, but the first results after a few minutes of manual work are promising: Then I had to test-fit the door steps (or whatever you call those) back, as the replacement panels came without the holes to install them: So I had them test-fitted: And then got the holes and screws back in. Note it might look crooked, but that's just the reflection of the protective plastic i left there to avoid scratches on the new panels: I hope I can keep up the current pace. It's really nice to see things coming back together, even if it's only temporary.1 point
-
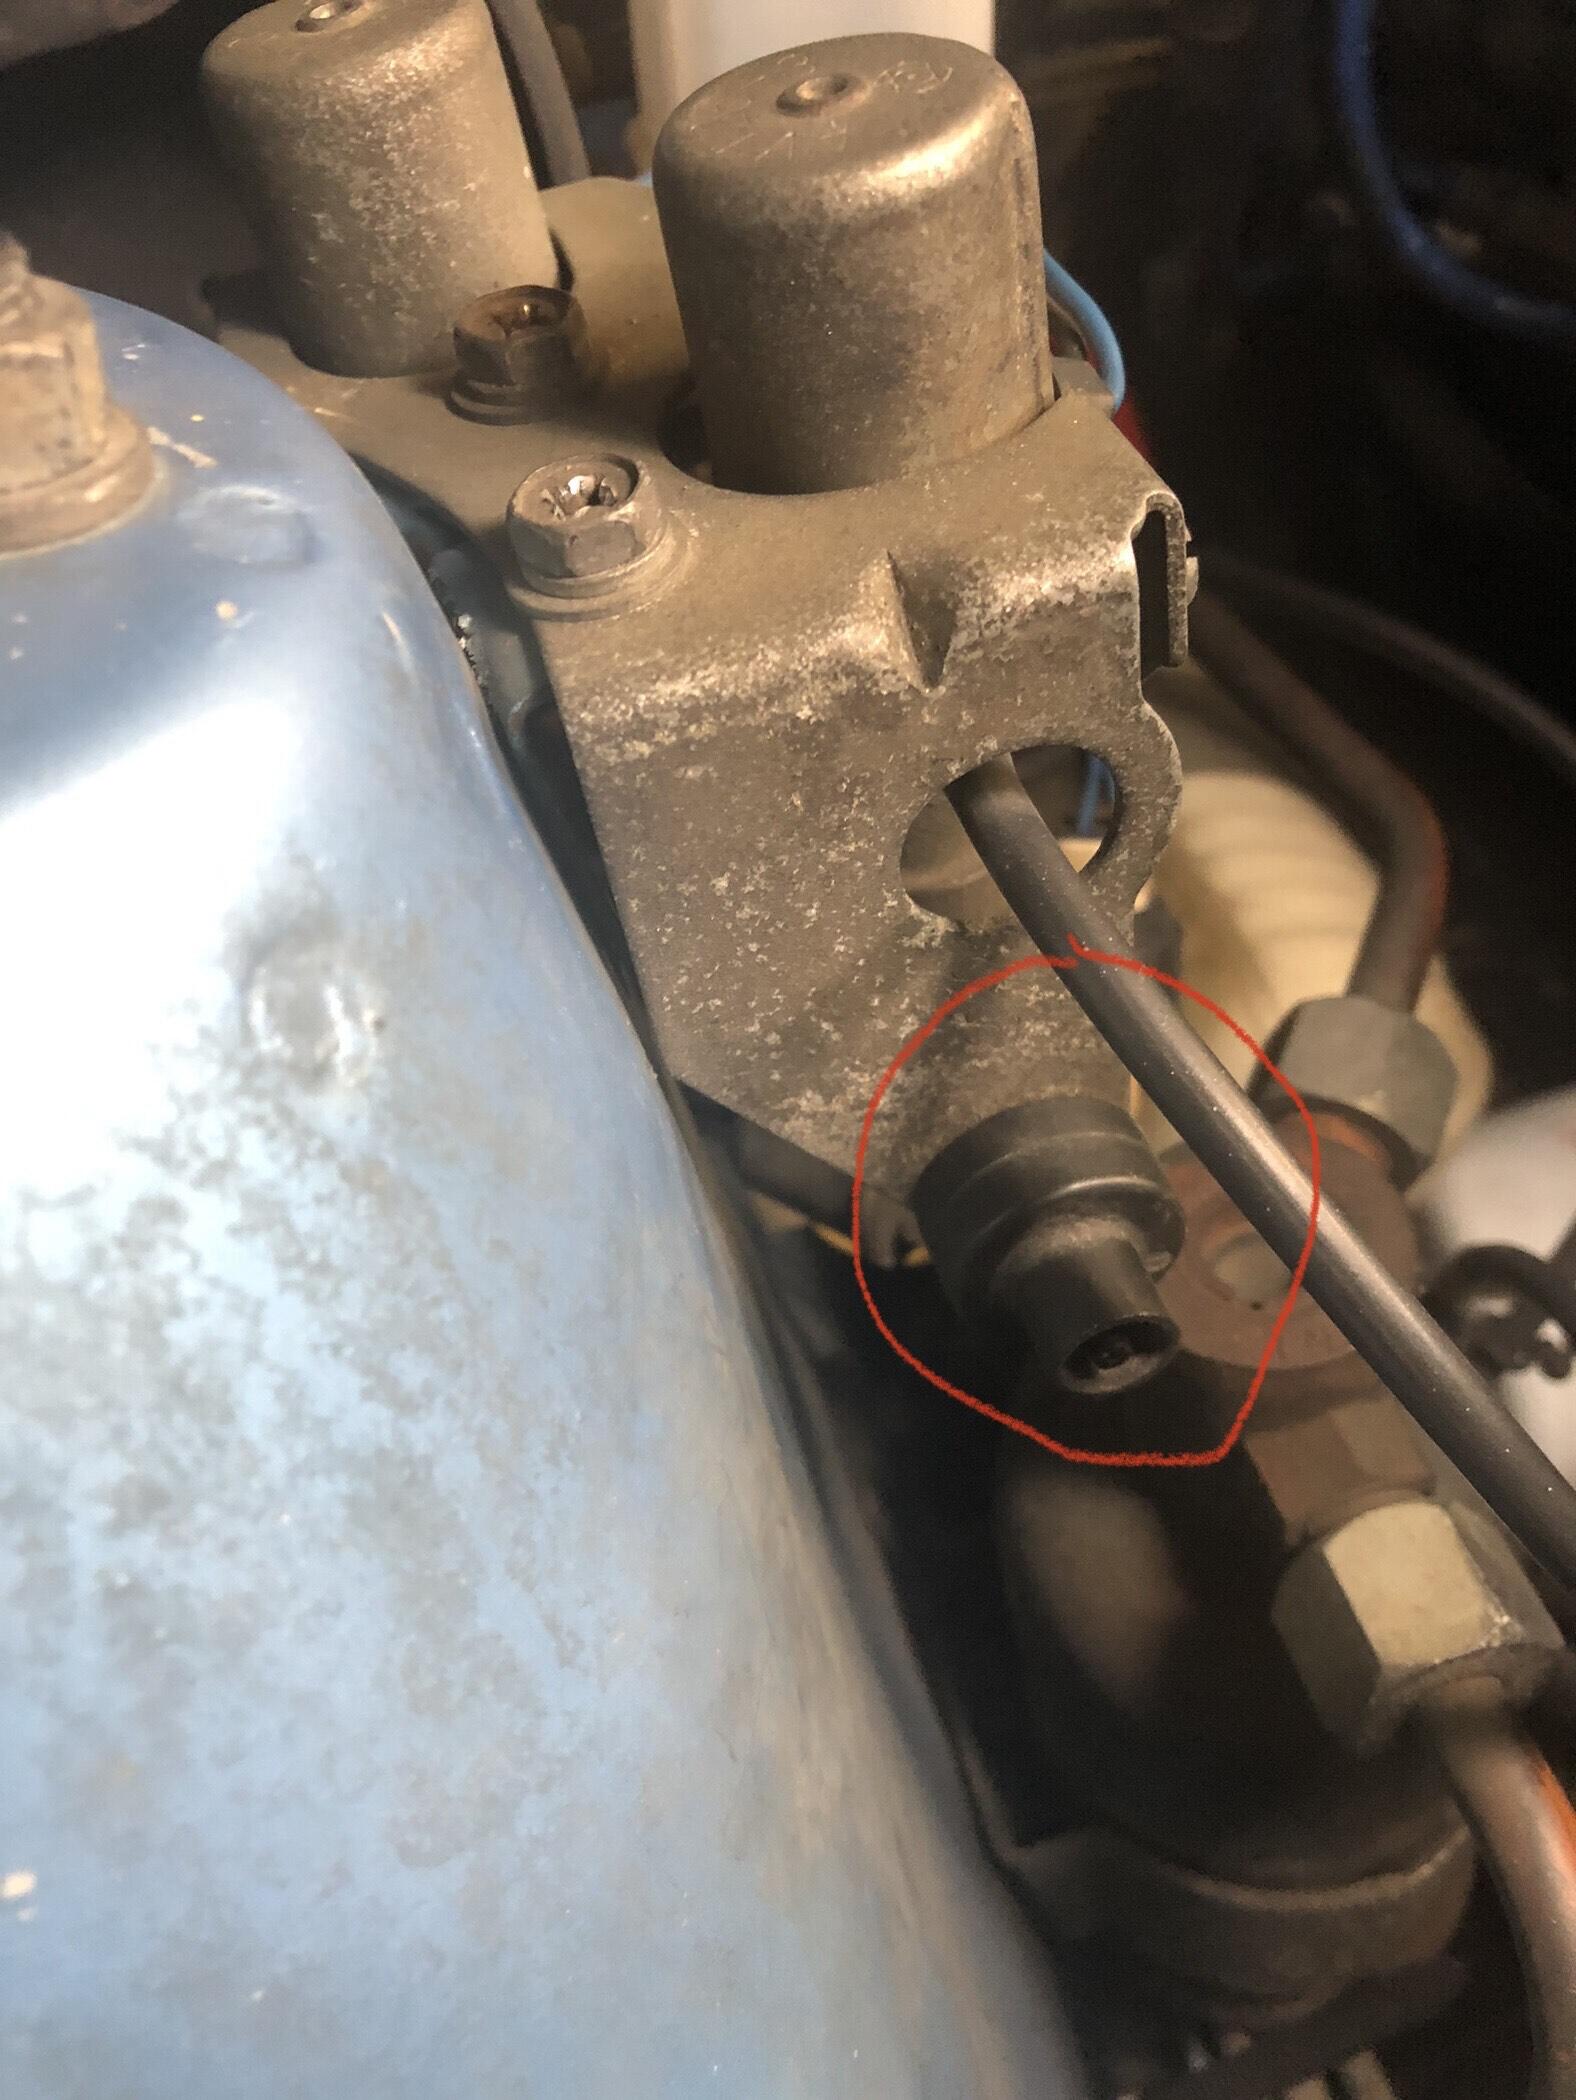
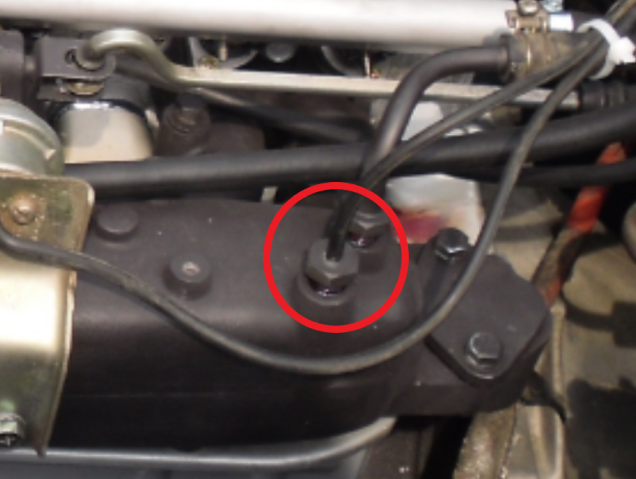
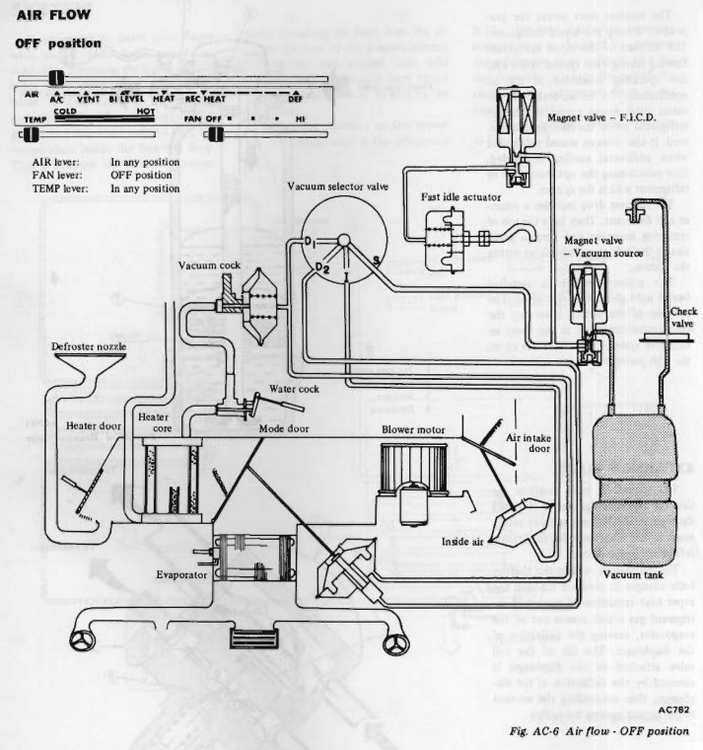
1 pointFrom manifold it goes to the check value (mounted under the two magnetic valves) and from there to the bottle.
 1 point
 -
1 pointIf it wont hold air pressure, a spray bottle with soapy water might help You only need about 15#s of pressure for testing1 point
-
1 pointInteresting. Where does this hose go to? That's the one that would go to the bottle.
 1 point
 -
1 pointYes, it's strikethrough. Couldn't remember the name. It's here in the first box, but not the Edit box. Weird. I had one on my 76 but maybe it's an AC system only thing. I had AC.1 point
-
1 pointThe check valve is designed to let air pass out of the bottle and in to the intake manifold, (darn it, I knew I'd do that), but not from the manifold to the bottle. The hose with the check valve is the one that loops around to the tiny nipple on the top of the manifold. Suck on the valve to determine which end points toward the manifold.
 1 point
 -
1 pointJust try it and see. You are not going to damage anything. You have gotten good advice so far. Analyze what you have and give it a try.1 point
-
1 pointWhen running, the intake manifold is a vacuum source but depending on the engine load the amount of vacuum can vary wildly. The check valve prevents the intake manifold (engine) from sucking the vacuum BACK OUT of the bottle when the engine load is high and/or the intake manifold vacuum is reduced. It's important that the vacuum bottle keeps enough vacuum to run all the vacuum solenoids. The check valve is a huge part of that.1 point
-
WOW, and mention of Cybersanford (eBay seller) too...I've not see that name in many years.1 point
-
1 pointShould work fine. If there's no leak you don't really need to add coolant. The ability to hold pressure will tell you. But if it doesn't hold pressure then you'll need to add coolant to see where it's leaking from. Unless you have good ears and can hear the air hissing out. I'm going to guess though that you might have problems getting the cap to fit correctly. Just the odds, the right size and fit might not be in the kit. You might get lucky though.1 point
-
1 point