


Leaderboard
-


Mike
Administrator4Points23,018Posts -

Blaxdragon
Free Member2Points1Posts -

Scarab#157
Free Member1Points5Posts -

Mikes Z car
Free Member1Points1,240Posts
Popular Content
Showing content with the highest reputation since 10/25/2006 in Blog Entries
-
2 pointsWe’re rolling out some changes to make things better for everyone. Here’s what’s happening: 📢 Updated Process🔹 Classifieds – Our classifieds have officially moved to the forum! You can find all existing listings in the Classifieds section, and new ads can now be posted there. ⏳ Features Coming Soon (Awaiting Code Updates)🚗 Garages – A space for members to showcase their cars with photos and details. Stay tuned! 🆔 Profile Block – This will display your member number and a quick profile summary. 🌐 External Links – This feature, which provides links to external websites, is under review and may be phased out. 📅 Event Calendar – The calendar is in place but needs a few updates before it’s fully functional again. Hang tight! 📌 Retired Features❌ Ignore Posts – This option has been removed. 🗺️ Community Map – This feature has been discontinued. We appreciate your patience and support as we continue improving the platform! Let us know if you have any questions or feedback. 🚀😊2 points
-
2 pointsWell hello and welcome back. As foretold in the previous updates I plan on starting up the second year of the Datsun rebuild. Looking at where I left off I’m starting to think I bit off more than I can chew with the build expecting to take three years with just the winters being the active time on the project. I know I said I would poke here and there on the Datsun in the summer, fortunately and unfortunately I did not do anything with the Z except for take parts from on location and place them in another location no cleaning of parts nor wrenches on the vehicle were accomplished during the spring summer months of 2015. Where I left off with the Datsun was the dash removal. That went relatively well all one piece and no did not take instruments out like I thought I would this summer. With the dash out the next step of my plan is to continue removing all interior pieces . What’s remaining? The duct work , heater box/AC, interior vinyl coverings, pedals, steering column, gas tank odds and ends, wiring/conduit, and glass. Sounds like a lot looks like a lot less than that. After that then the next phase is body work. What this should initial, should be the purchasing of all replacement panels and materials for the cars welding and patching needs. The end goal for this stage is to have the car cleaned up inside and out , rust removed and stopped, patchwork welded and muddled, primer sprayed and ready for paint come spring 2016. Wow right, I am bugging out a little because I don’t want to include the drive-train and suspension in this phase but I have to remove it to be able to clean and clear the under-body of the Z. Comments would be helpful with this but either I am too cheap to get a paid blog or you folks who have subscribed don’t care to give advice, In either case comments and advise are welcomed good or bad. My thought is to go ahead with the suspension and drive-train removal but, when it comes to replacing parts keep that at minimum. The only reason this is any concern is due to the need to have a way to get the body to the paint shop, I don’t have a frame dolly with wheels to bring it on a flat bed. Although I could make one, but then I would be forcing work during the summer which may not agree with my family? I could maybe bust arse a little and try and get both drive-train and suspension done after getting the car ready for paint then putting the car for paint as soon as I am done, maybe get what is necessary completed on the drive-train with the knowledge that I will have to take off some of the parts again to add exchange or repair. For example I don’t need to mess with the brakes, but I plan on doing the Toyota forerunner conversion to the rear wheels to upgrade to disc brakes so everything on the spindle would have to go, also I am going to swap for a 200LSD vs. the current 180LSD but that doesn’t have to come off too roll the car into a paint booth. In any case this will give me something to rant about next update on the blog. The body in paint will free up room for prep for the last phase, the rebuild with new engine. If the body is in paint then I will have a open stall for a donor car with the engine or a engine and transmission separate. Then when the painted car is complete I can store it outside covered over a make shift outdoor covering or at another location for a short time to get the donor car emptied or move it back if I just have the engine and transmission to deal with I will be working on building a Car rotisserie for the Z in hopes to have it on the stand in November. I will need to modify the two stands with a piece of square stock steel and weld into place. I intend on continue to strip the interior and catalog the parts and remove the suspensions both front and rear in preparation for the rotisserie. A lot has to be done so wish me luck. After countless hours of looking at multiples setups and years of dreaming , watching and reading manga cartoons about racing and JDM cars, I have decided on a plan or direction for the Z. I am looking to slowly build the car in stages with the ultimate stage having very similar things as the devil Z with a 3.1 liter displacement and twin turbo, should be able to claim at least 600hp in a car that ways less than 2300lbs is pretty sick. That's the idea for the performance aspect. Since I don't foresee a Ferrari in my future, I plan on capitalizing on the Italian design cues the 240Z has already captured. I ma not going to go overboard with it, I feel that would make the car tacky. I do however am going to attempt to do this tastefully and efficiently as possible. My next update will be in a months time with pictures of the remaining deconstruction and current status, till then thanks for reading.2 points
-
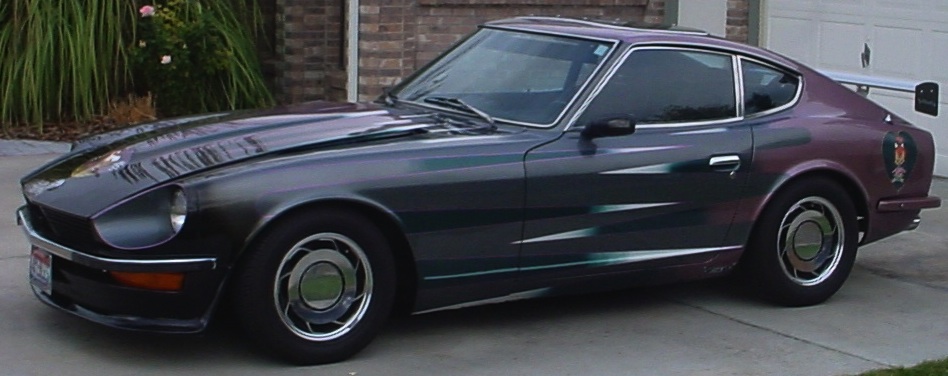
Wasn't sure if I added this somewhere on the site already. So, I'm adding this to my CZCC personal blog. Mike Gholson of the Classic Zcar Club knows wheel fitment is key to getting the look that makes his car stand out. Mike came to VTO Wheels because he knew our fitment and customer service is the best in the industry. The VTO Classic 8 GTR 16"x7" wheels gives Mike's Z car a stylish finish, while the deeper lip gives a much more desirable and understated aggressive look. This yellow beauty is sitting on stock struts with Tokico springs that lower the car 1 inch. The VTO's are 0mm offset and wrapped in 205/55-16 BFG G-Force Sport 2 sticky rubber. No rubbing issues are reported, and the ride is said to be smooth and free of vibration. Thank you for your support, and please let VTO help you find the perfect fit for your next project, whatever the year, make, or model may be. Don't know what offset or bolt pattern to run? With us fitment doesn't have to be a guess! We will send you a wheel to test your fitment so you know that when you place an order, the fit will be perfect. Shop VTO Wheels1 point
-
1 pointJust wanted to share some photos of my Z over the years... This photo is just after I bought and rebuilt the engine. I drove it around through college. At the time, I purchased the car from a family friend who was storing the car in his garage. Purchased for $500 with a frozen engine block, bad head gasket, and seized brakes. After a few years, and the first split with my ex, I decided to 'man-up' and start taking the car apart. I spent the next several years sand blasting, with a gravity feed blaster, and disassembled the entire car. I then took her to a body shop of a guy in Corvallis, Oregon. he did the unibody work and painted the inside. The drive-train and brakes were installed so I could push it around in the garage. Soon thereafter, I re-united with my ex and we moved to a place in Albany, Oregon where I managed to get some more work done and the car painted. My Z then sat in this state for 4-5 years, neglected in the garage while I went through some even more challenging "life" situations (new house, final divorce, etc, etc) At one point, I ran into Steve Epperly from Ztherapy at a club outing. After hearing my story, he brought about 6 guys to my house and proceeded to take my car to his shop for restoration. This process took about a year. Until finally one day, he called me over and said, "Your car is running, do you want to see it?" We fumbled around with the car for another few months until Steve went to the Portland Roadster show and showed off the project for all to see. I then took delivery of my baby and drove her around to various different events and functions. I must say, without the support and encouragement of the Z community, this project never would have happened. Our cars may follow us through a lifetime, but, its always rewarding to sit back and appreciate the accomplishments. Sometimes I just go sit in my Z and stare at all the wonderful parts surrounding me. Thank you to everyone for all the support over the years, I wouldn't be here without you. Mike1 point
-
1 pointHi All! this is my first post on classiczcars.com and i'm super excited to let you all know that 3 days ago i found and rescued original Scarab #157! I put a link below to a short youtube video of the car when we got it back to the shop. If the the link does not work just do a youtube search of scarab #157 and it should pop right up.Within the next 24 hours I'm going to post a ton of pics of the car and lots and lots of documentation. This is a 2 owner car from California that was moved to the Midwest in1990. The car has not been driven for almost 5 years. We are planning a full 100% restoration on the car. If there is enough interest, once we strip the car down, i can find out what the process would be to make molds of the body kit and whale tail. The originals are fiberglass. I think carbon fiber would be the way to go if we redid the body kit. What do you guys think? http://youtu.be/8RAXw0EGFCk1 point
-
Here are pictures of the firewall insulation of a 1/1972 240Z on a "fabric board" with lines 1 inch apart going both ways to allow duplication if for some reason someone wanted to. Note that the top edge of all three pieces of the insulation are lined up with a blue line on the fabric board. Pictures were taken in full sun and have shadows. To clarify where the black insulation poster board ends and the shadow begins white dashed lines have been drawn. This could be printed out and the blue fabric board lines drawn as white lines with a ruler to extend what is on the fabric board across the black insulation to make duplication easier. Or start with a fabric board (cheap, can get in fabric shops) drawing what you see here on the cardboard fabric board as a pattern. The insulation pieces are from a 1972 January MFR date 240Z they didn't come from the car shown in my signature. Driver's firewall insulation: Passenger's firewall insulation: In car- driver and middle sections: In car- passenger side:1 point