Leaderboard
-
conedodger
Community Member82Points13,006Posts -
Captain Obvious
Community Member25Points10,150Posts -
Patcon
Supporting Member16Points11,279Posts -

Zed Head
Community Member15Points19,554Posts


Popular Content
Showing content with the highest reputation since 02/25/2026 in all areas
-
As you all saw, the auction result for Safari Gold HLS30-11699 is now in the books. The current global climate likely played a role, but auctions always reflect a specific moment in time. When you invest this much time, research, and craftsmanship into a car, you naturally hope the result reflects that. Still, what matters most to me is what we achieved. We were able to show the world what we believe is an exceptionally beautiful early Z restored with deep respect for how these cars originally left the factory and once again learned a lot in the process. Even though I have always had a deep love for the design of the S30 and for the way we approach our restorations, seeing the car through Adam’s presentation made me fall in love with it all over again. This is only a first step for us. We will keep refining, learning, and pushing ourselves further. We’re also working on many new things beyond the Masterpieces project, which makes me genuinely excited about what lies ahead. Thank you for your feedback and please don’t hesitate to reach out if you feel you can contribute to our shared passion for the Z. (chris@s30.world)9 points
-
7 pointsCadmium Or ZINC? It is Pi Day - so I wanted to get this Posted today. The Cad/Zinc question has been ongoing for a long time. With today’s technology for environmental testing very broadly available - I wanted to find out what the answer to that question actually is. I sent 22 assorted nuts, bolts, fasteners and small parts to an environmental lab for testing. Now we know, and I can’t argue with that. More details for each part analysis are on the Z Car Home Page; https://zhome.com/ZCMnL/tech/CAD:ZINC/Plating.htm

 7 points
 -
6 points
-
6 pointsGrande is the name of the game…… of course these always remind me of Mad Magazine Spy versus Spy episodes…😄😄

 6 points
 -
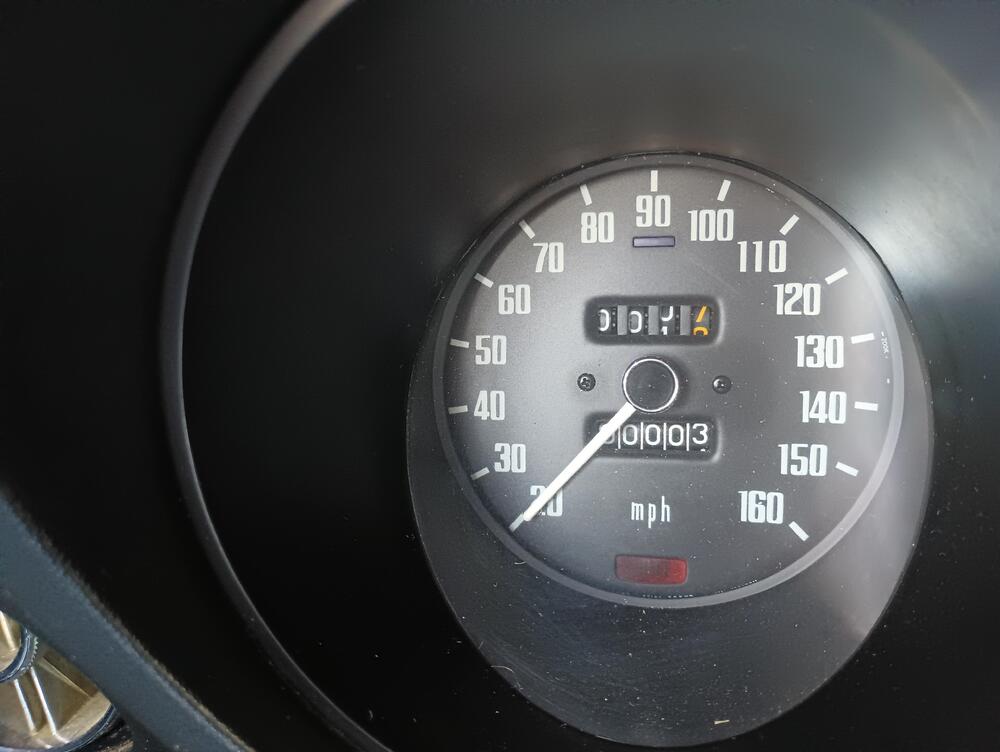
6 pointsWe hit the big 100k miles yesterday. I was able to get before and after pics but I was on a busy tollway headed to a club meet-up at the time of the rollover so I could not capture the all 9's or all 0's. I know, poor planning on my part! One more month and we celebrate our 55th anniversary together.

 6 points
 -
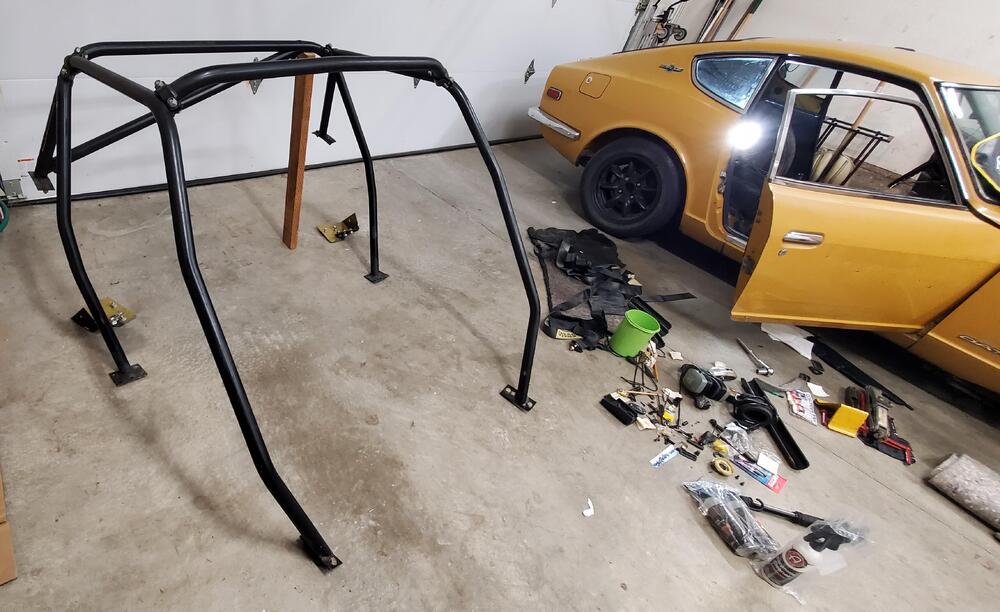
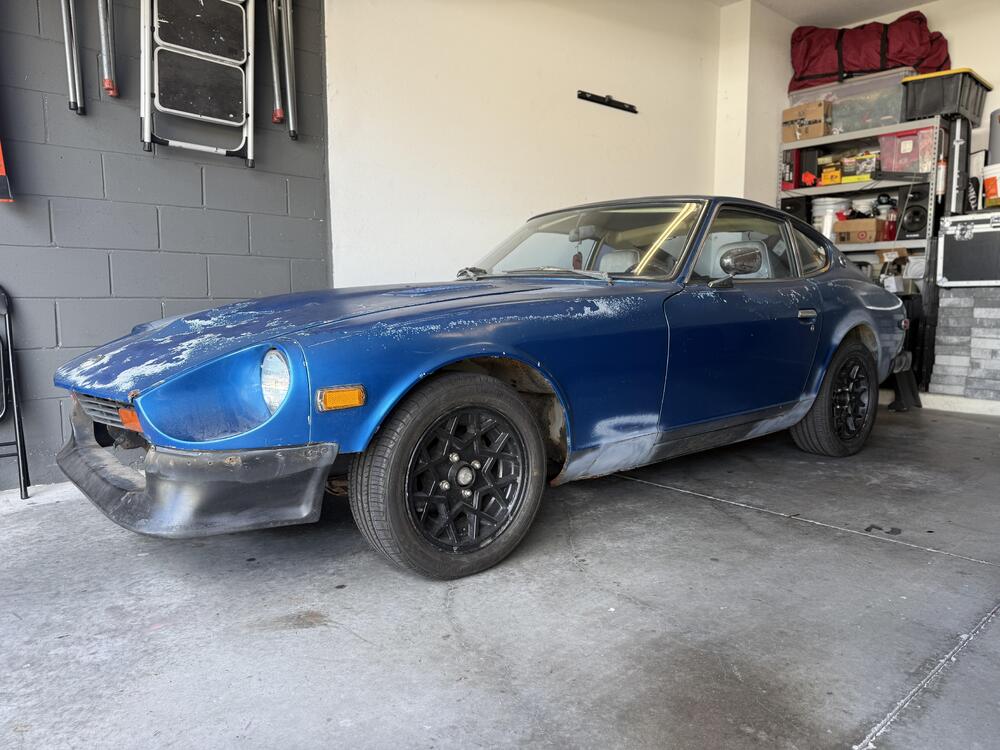
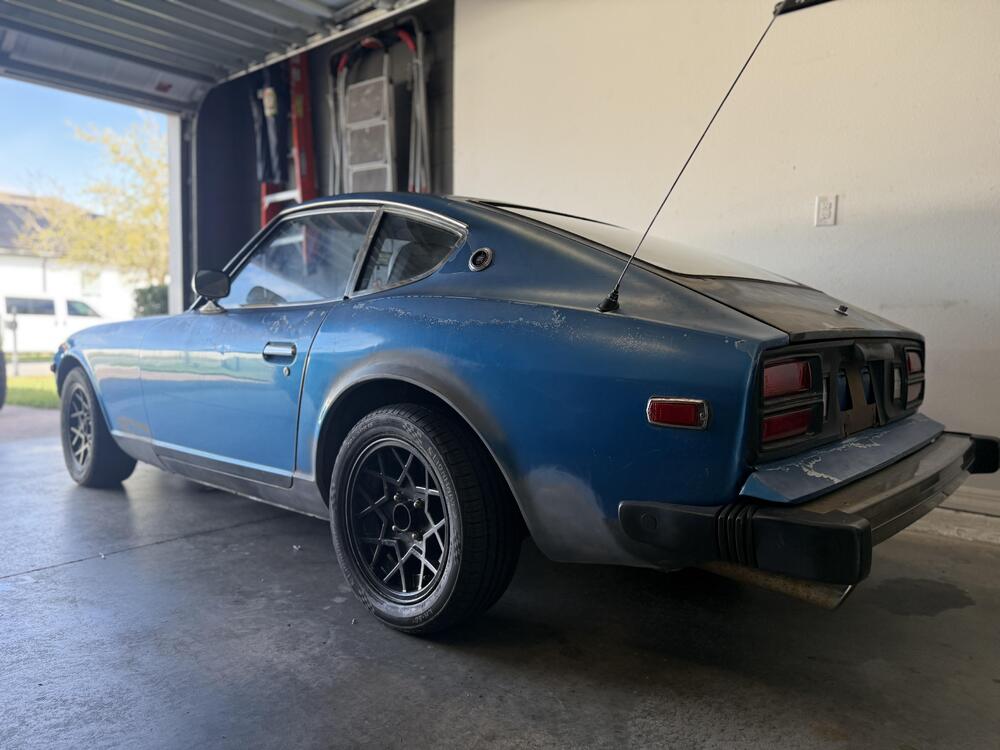
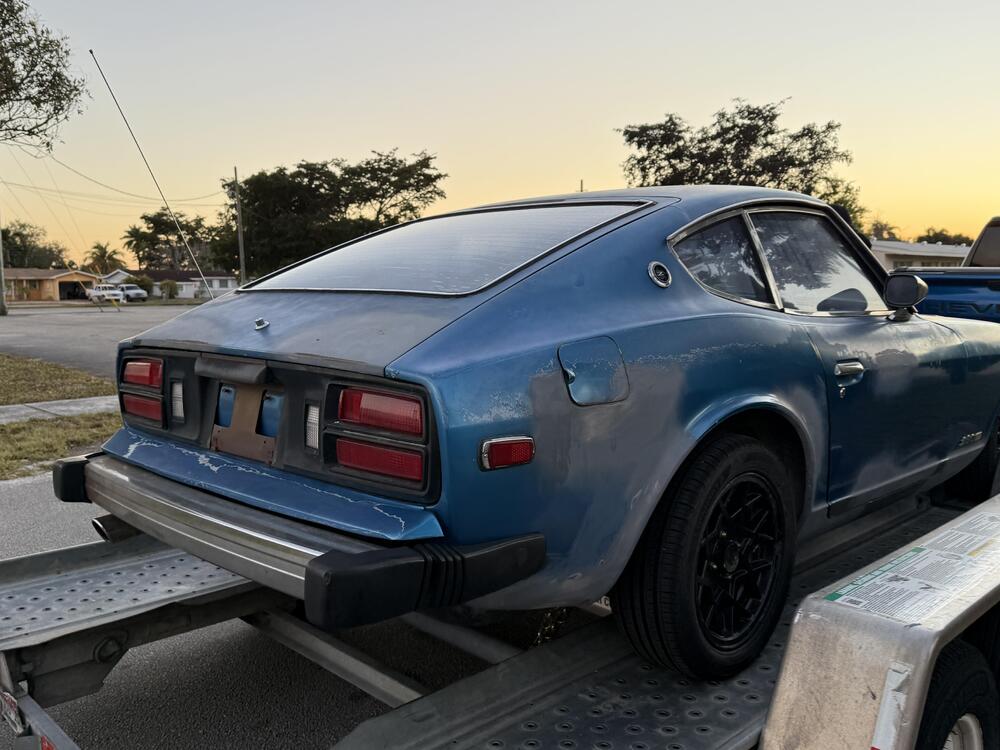
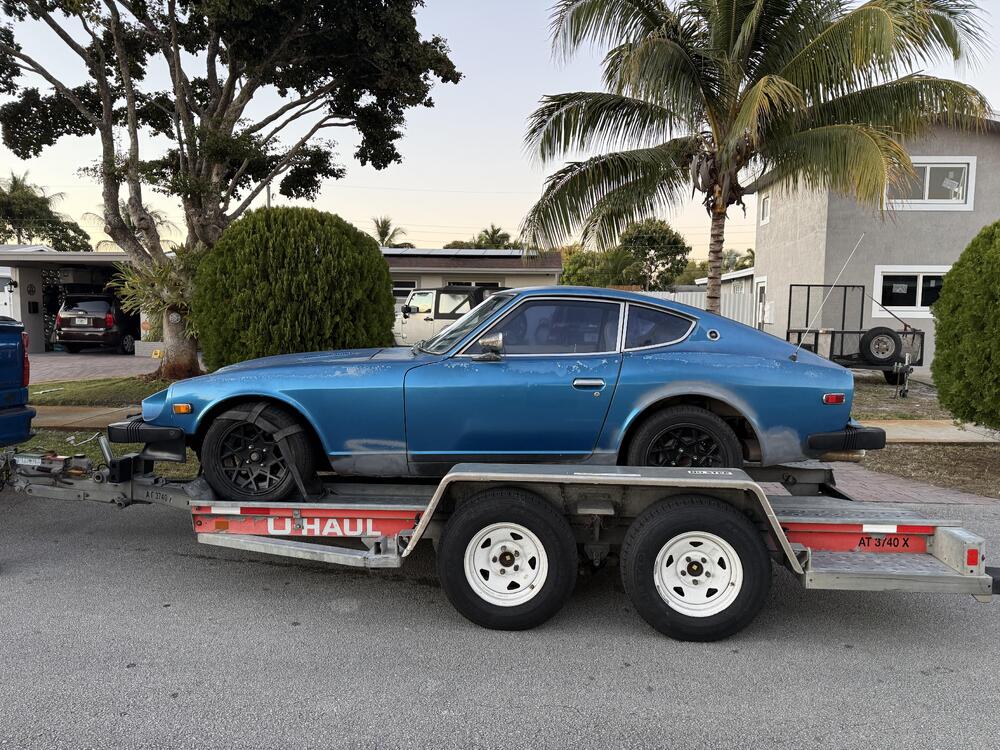
5 pointsHello everyone. I thought I would make the first post here. I am back in a 240z, again. This is actually the car I learned to drive in 36 years ago. My father bought it new after Vietnam and it was a garaged daily for decades. For a time by brother used it after crashing his 72 but abandoned it for 15 years when he moved out of country. I saved it from being discarded and started to bring it back to what I remember 3 and a half decades ago. Here is a picture with the roll cage out (So I fit) Cheers everyone.
 5 points
 -
5 pointsThank you so much for the kind words. We are happy to help anyway we can. Our crew are all car guys so they are very passionate and particular. We have been talking about doing some events for our customers. I will see what we come up with.5 points
-
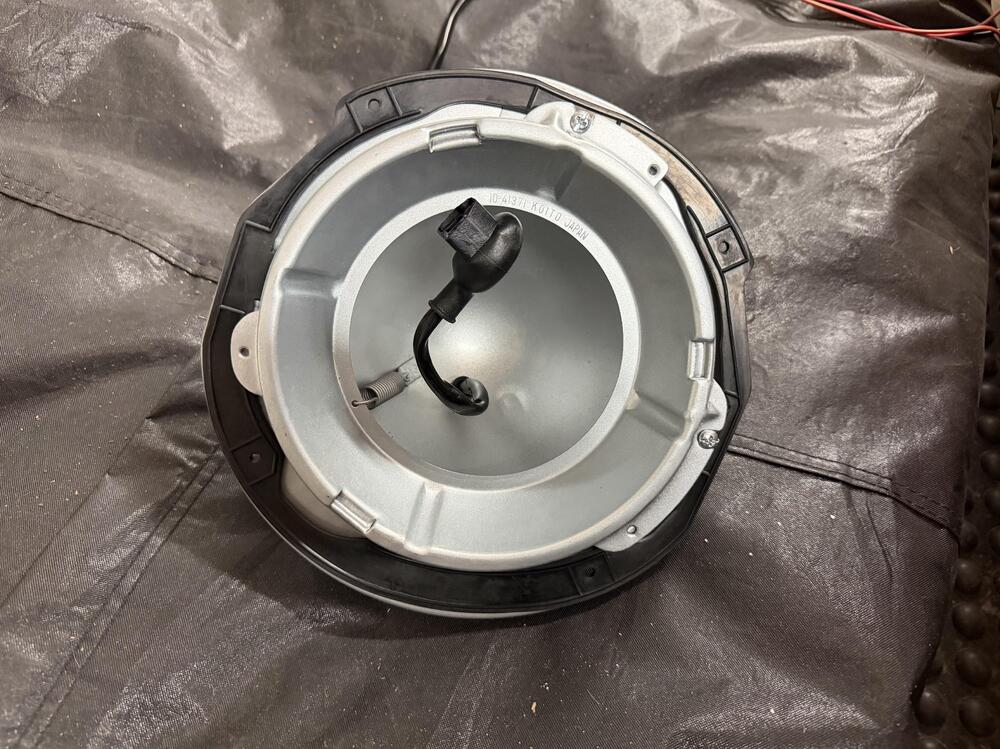
5 points77 280z Combo headlight repair with new spring cap aka nibs. Shawn @The Unobtainium , I received the spring caps today. Installed them this evening, everything fit nicely and worked great! Now I have lights with the switch working perfectly. Thank you to Shawn and the folks at The Unobtainium for creating these. https://www.theunobtainium.net5 points
-
5 points
-
Recently, I got a very nice Clay model of the HS30-H Fairlady Z-G blunt nose. But this story started 7 years ago, in May 2019, when an Australian JDM-parts-dealer shared this on his facebook page. I was immediately hooked. Could it be an actual clay model from the design-phase of the G-Nose? I started to go through my archive, and discovered that Nissan Indeed used 1:1 scale clay-models for styling and "rapid prototyping" by the standards of the 60ies. In 1965, they switched to 1:4-scale clay models: They were used for flow testing in Wind-tunnels, water-channels and also for designing the exterieur. I contacted the seller, but he told me it was already sold. Little did I know back then that the item was not actually sold. Neither by him, nor by the original seller. Probably it didn't get any bids, so it remained with the seller. A few years later, I found a magazine article about a Japanese guy who owns some very special S30Z cars. and i noticed that exact same clay model in one of his shelves. the details made clear that it was the same car. Fast-forward to 2025, where I met the Actual owner and his car at the S30.World Japan excoursin Meeting. And fast-forward some more months and now I'm the proud owner of that car. The car is made out of modelling clay, with an underlaying wood structure. Some details like the windows are painted on and the overfenders (partially missing) seem to be made out of some styrofoam or something similar. The details are quite accurate, if you ask me. So somebody must have spent a lot of time to get it right. I was trying to find some marks or any hints that this car was originally used by Nissan, but there are no marks at all. Some body gaps are made by using something like a foam-tape, which, unfortunately has lost its stickiness. The length (without the G-nose) is about 80cm. Considering that the original car is about 4.14m sans g-nose. This is about an 1:5 scale model. So considering that there are no marks (I would somehow expect that from Nissan), and that styling prototypes probably never left the factory, Plus the fact that a model with such a construction doesn't make a lot for usage in a wind tunnel, if you ask me - make me believe that this is something else. Either it was a hobby project of somebody, or something else. Either way it's a cool piece of history and I love it.5 points
-
About year ago, I managed to find a complete set of somewhat rare Nissan height-adjustable competition suspension. Back then, I discovered that one of the rear springs was shorter than the other one, which was a bit strange. The catalogue however clearly mentions 205,5mm's free length, for both sides, on the rear springs 55020-E4621: The difference might have occurred due to wear under racing use, or long-term storage in compressed state or whatever, but yeah it was a bit strange. My thinking was that I probably would not sense a big difference once they are installed in a compressed state, so it didn't really bother me. But then, I came across these for sale: A NOS set of 55020-E4621 springs. It's probably not often you will see a set of unused springs for a competition adjustable suspension, still new in its original box, with all the stickers still on it. So I HAD to get them: Once unpacked, you can clearly see that the two old ones on the left side had been repainted at some point with a flat black (vs glossy black on the new ones) and that indeed one spring was shorter: That means, that my adjustable competition suspensions is pretty much complete now and ready to be overhauled. Excellent. And a bit unexpected, but I'm more than happy. But that's not it. While going through the boxes to put together the suspension for the Photos, I opened a box of spare parts that came with some of the suspension parts. I remember it had some unknown springs and strut inserts inside. Back then I removed one of them from the packing and could only read "KYB" (= Kayaba Brand) and a part number. I quickly googled the numbers back then to find out what it was, but couldn't find any information, so I just put them back in the box as "random aftermarket" parts that came with some other stuff. Well today I was about to through them in the bin, since I had no use for them, but inspected them a bit closer before scrapping them. And...? I just found out it's actually a set of NISMO dampers in still quite good shape: 56110-RRE72 and 56210-RRE72. The springs have no markings on them, so not sure if these are NISMO too, or any other aftermarket or OEM springs. I tried to find the part numbers in my various old NISMO / Nissan Motorsports / Competition catalogues, but wasn't able to find them. A quick google search pointed my towards my own suspension post on this very website, where I showed a similar set with the same part numbers that was Sold on Yahoo auctions years ago specifically for the S30. I'mm still trying to find out more. The NISMO logo tells me that it must have been in the 80ies / early 90ies that this set was sold. But I'd like to find out what specification it has, and for what specific type of racing it was designed. If you have any input on this specific dampers and the springs that came with it. Please let me know. So at the End of the day, I have a full adjustable suspension with some extra spare parts AND a set of NISMO dampers. The day could be worse :-)4 points
-
4 points
-
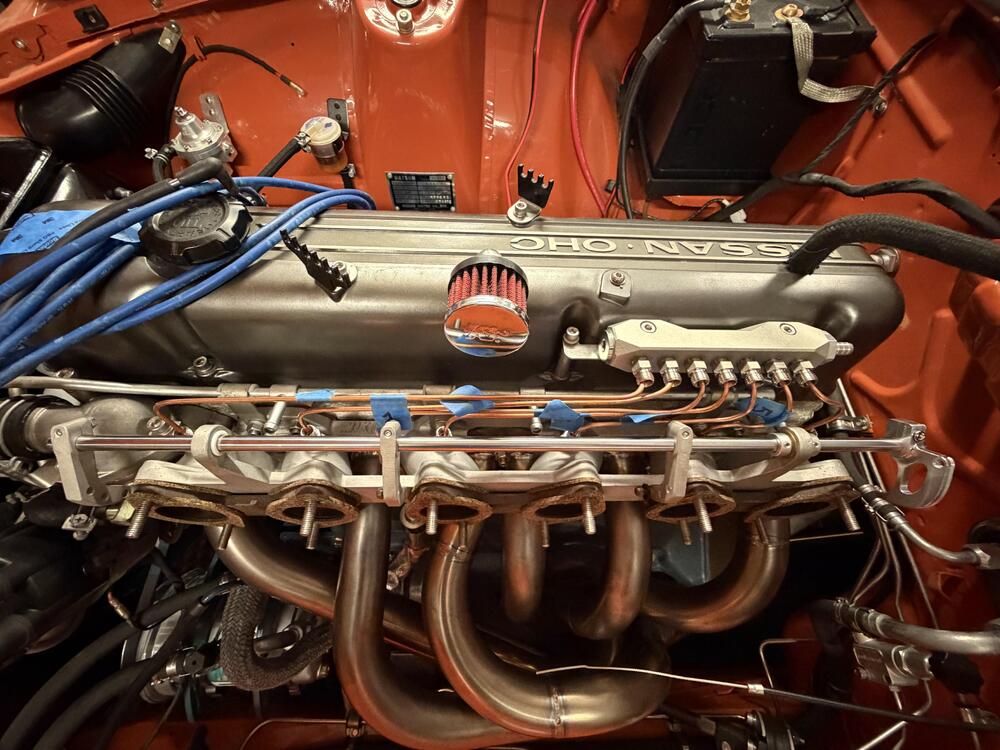
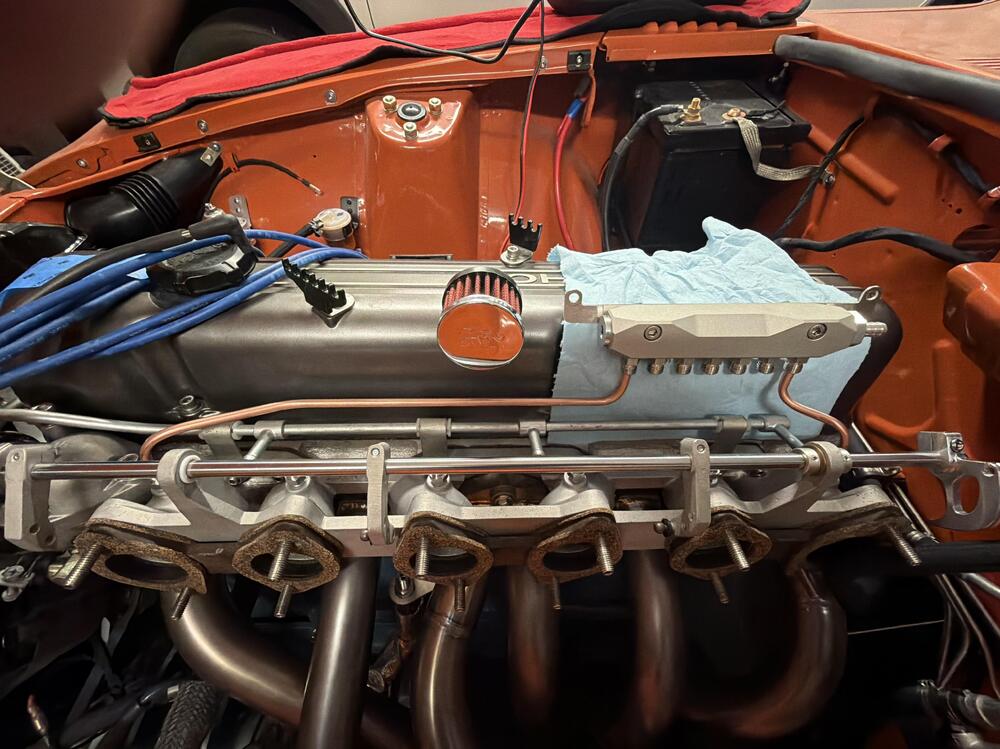
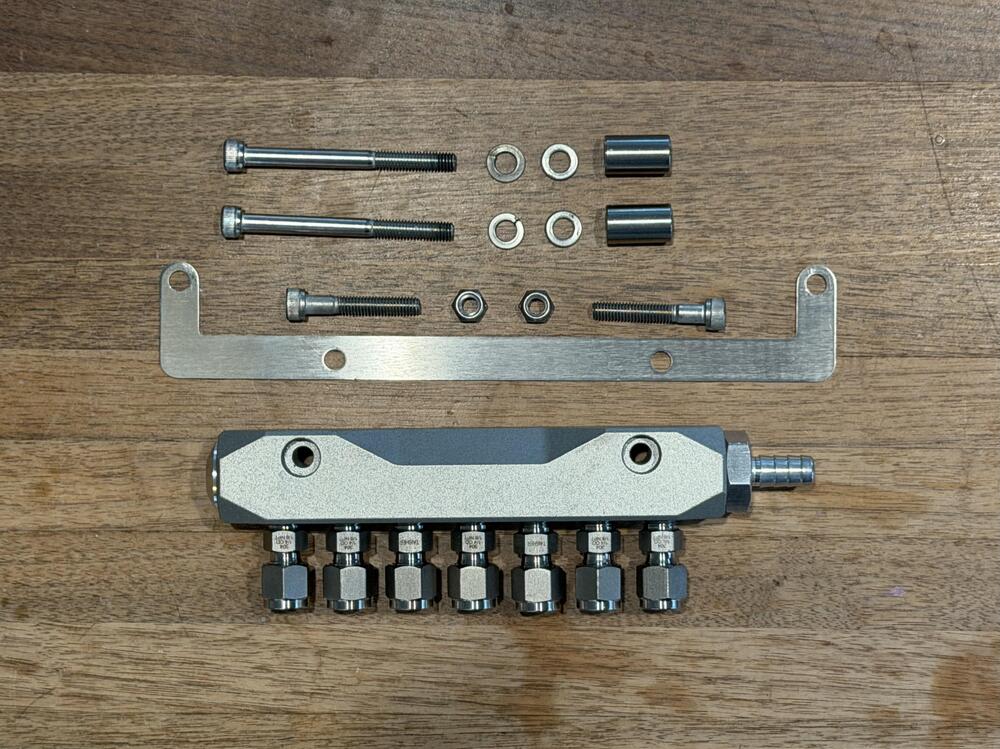
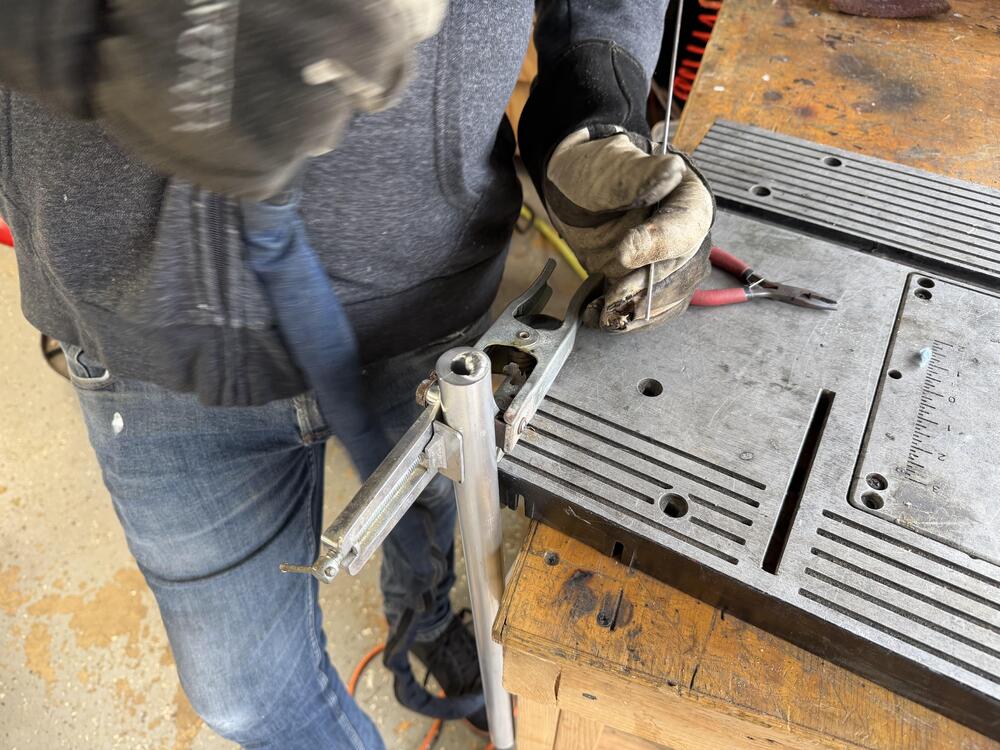
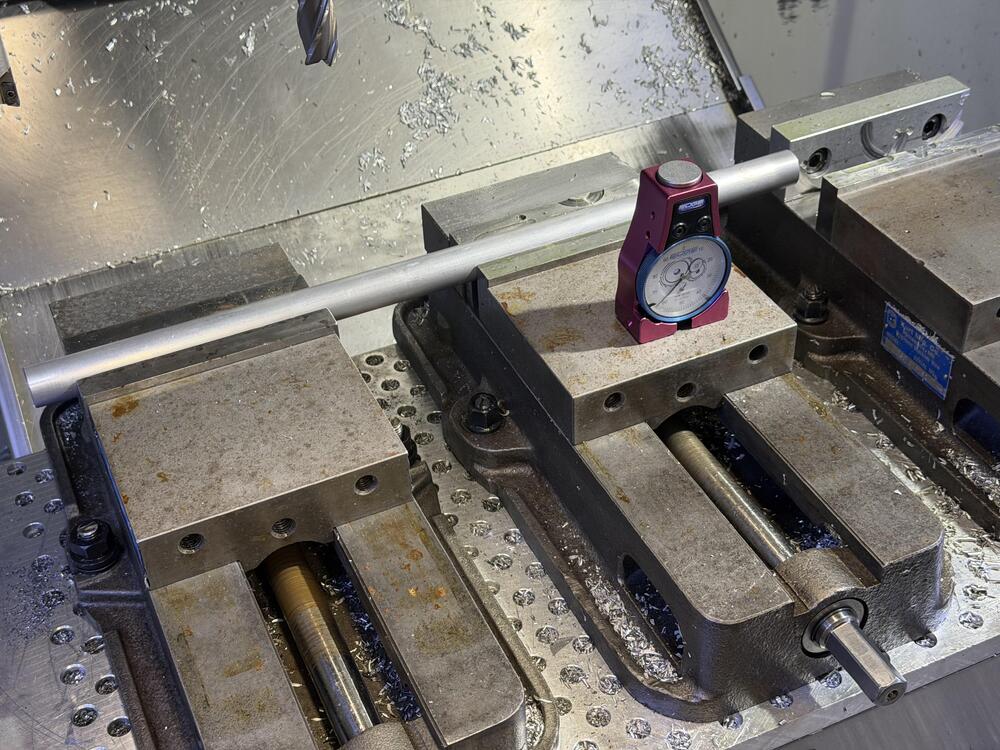
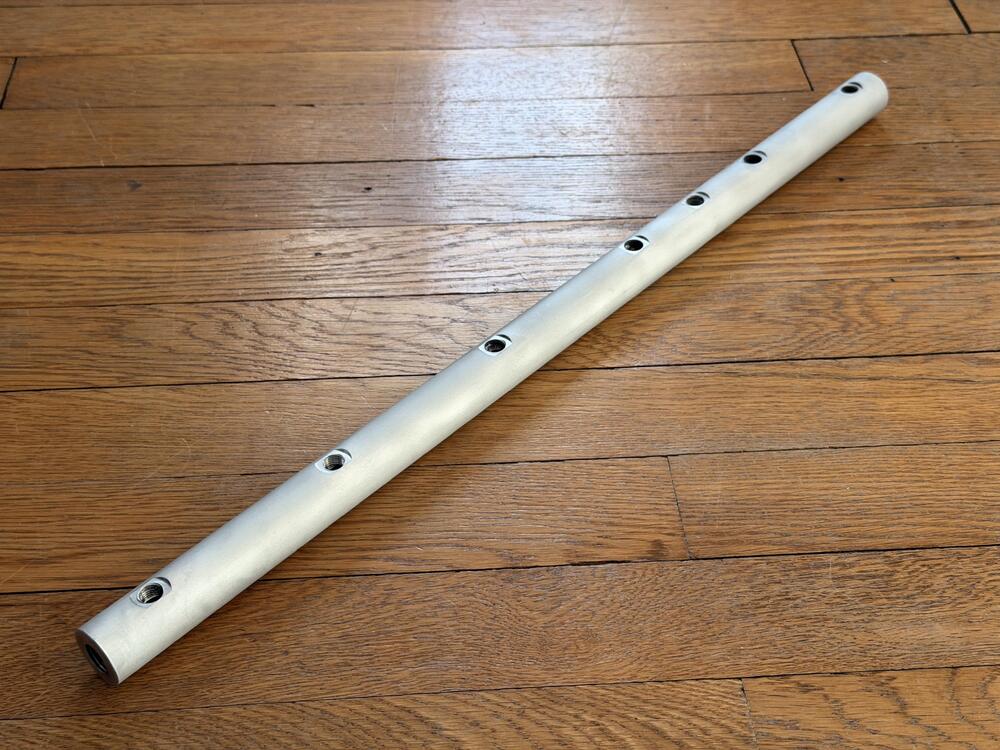
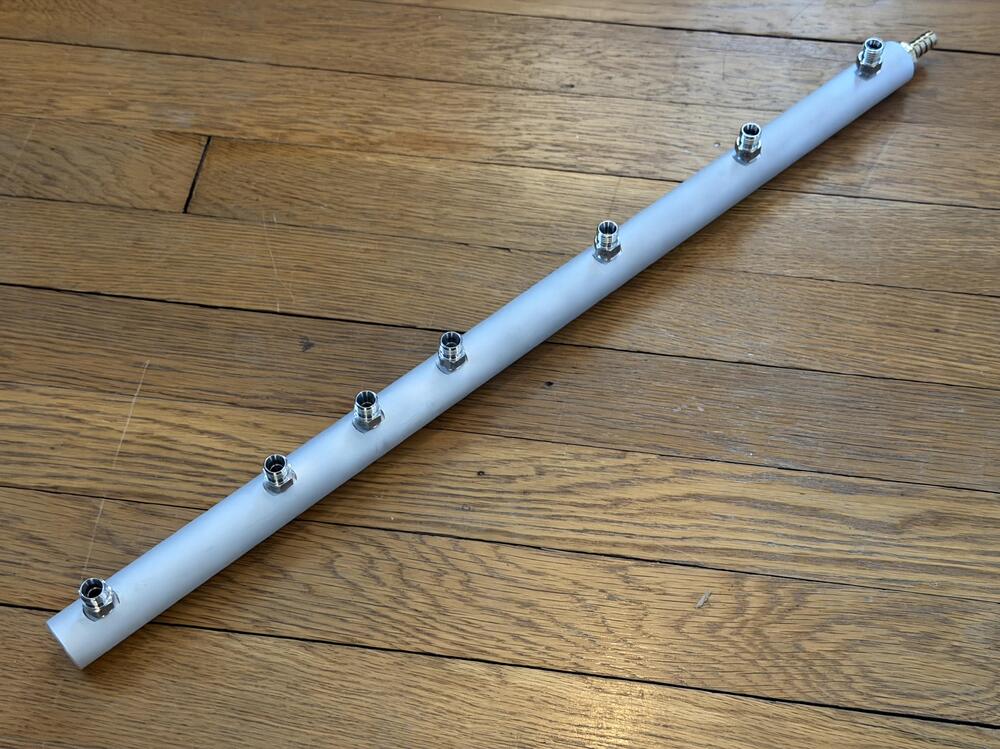
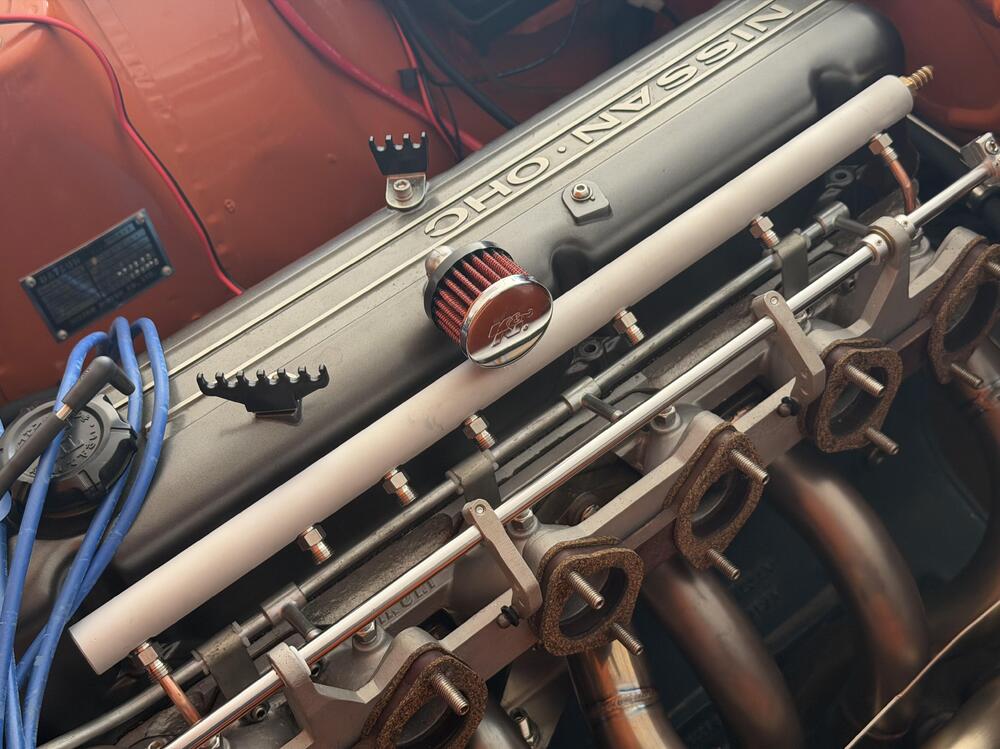
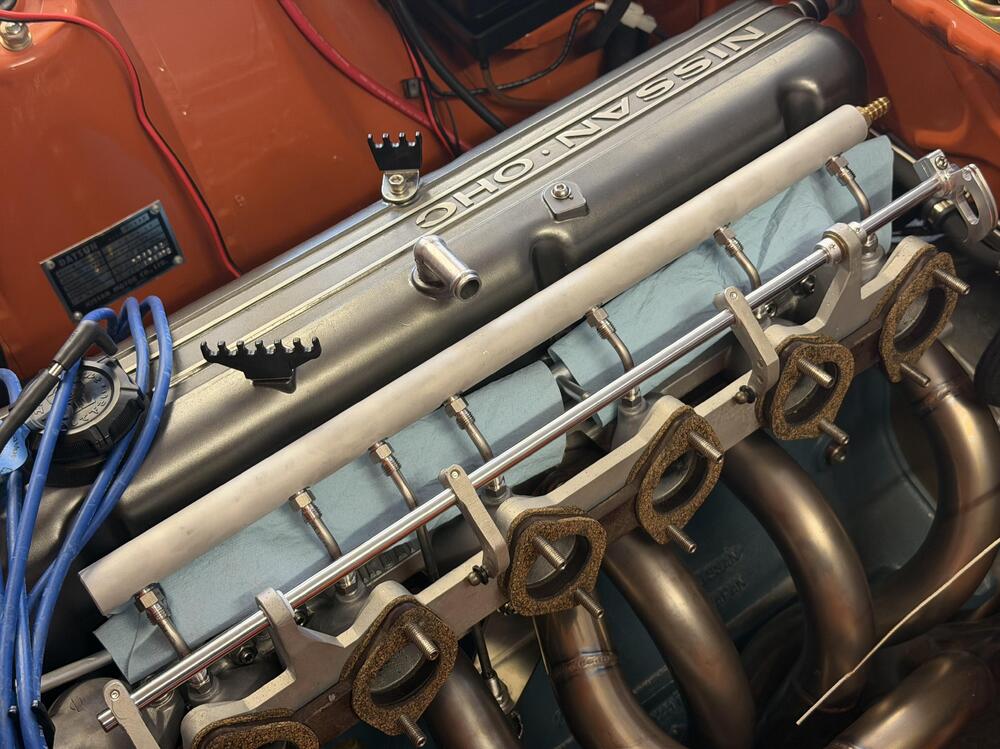
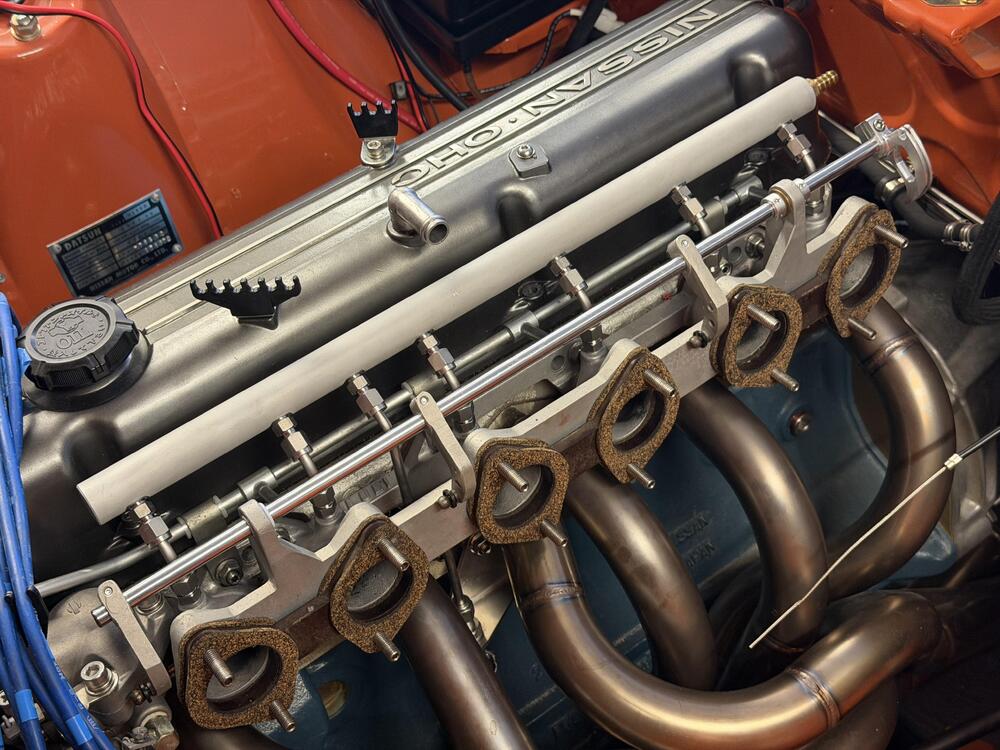
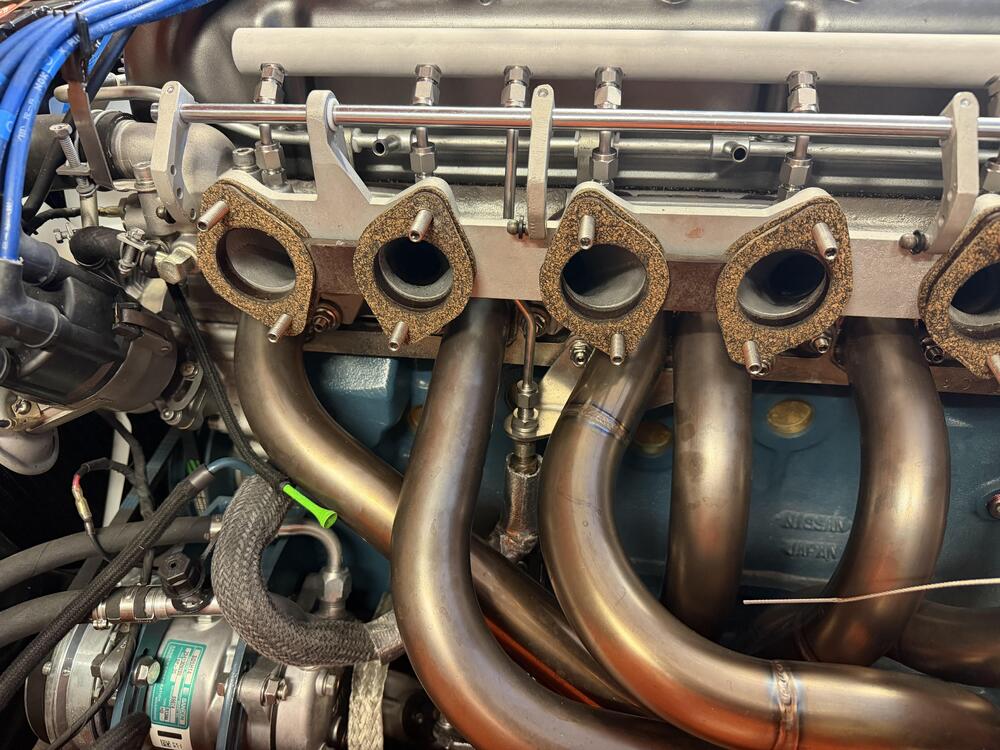
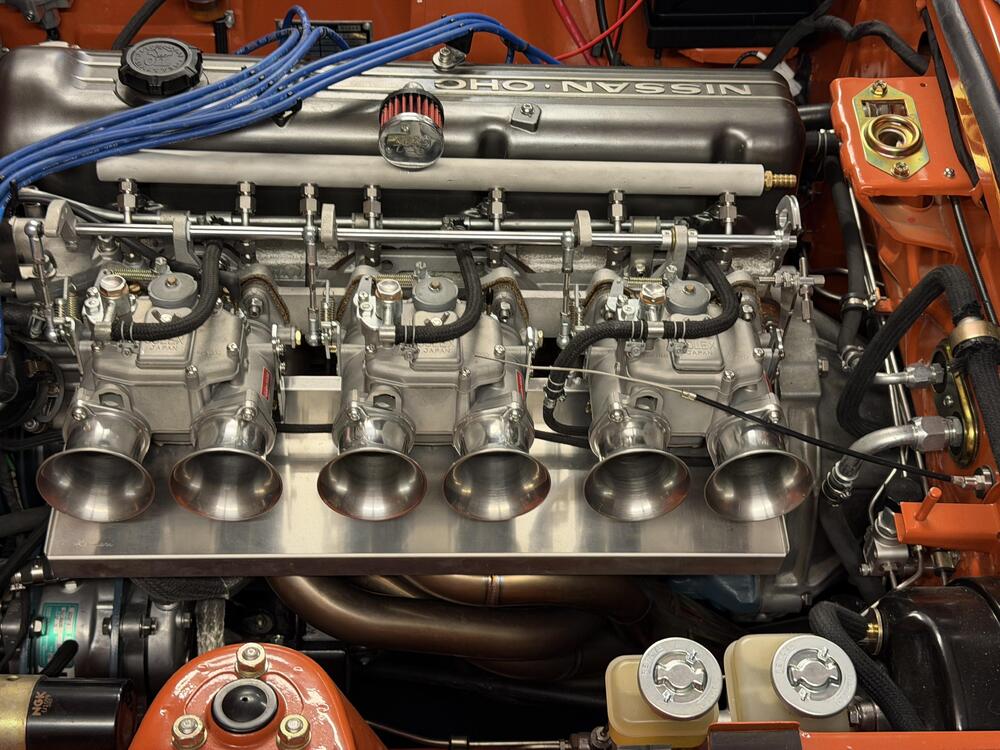
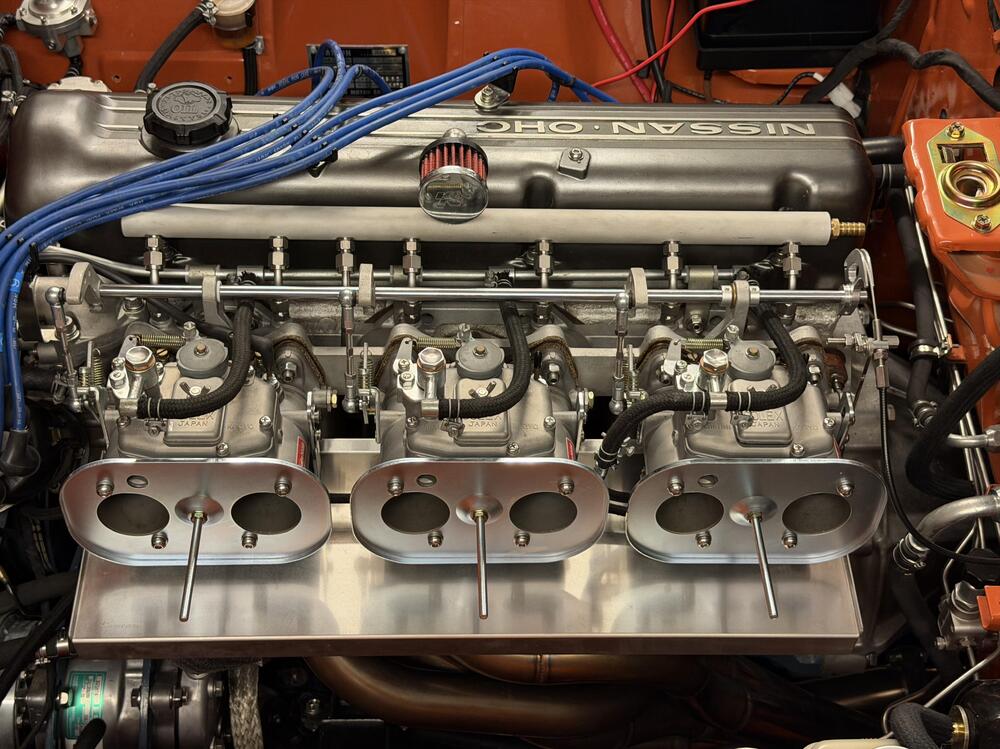
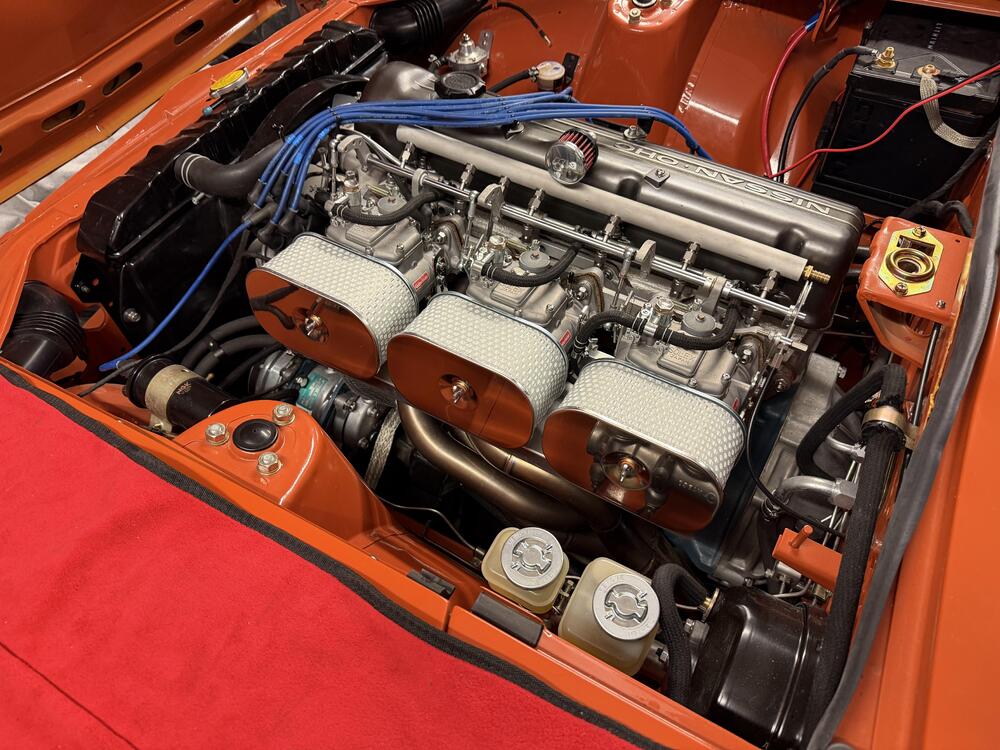
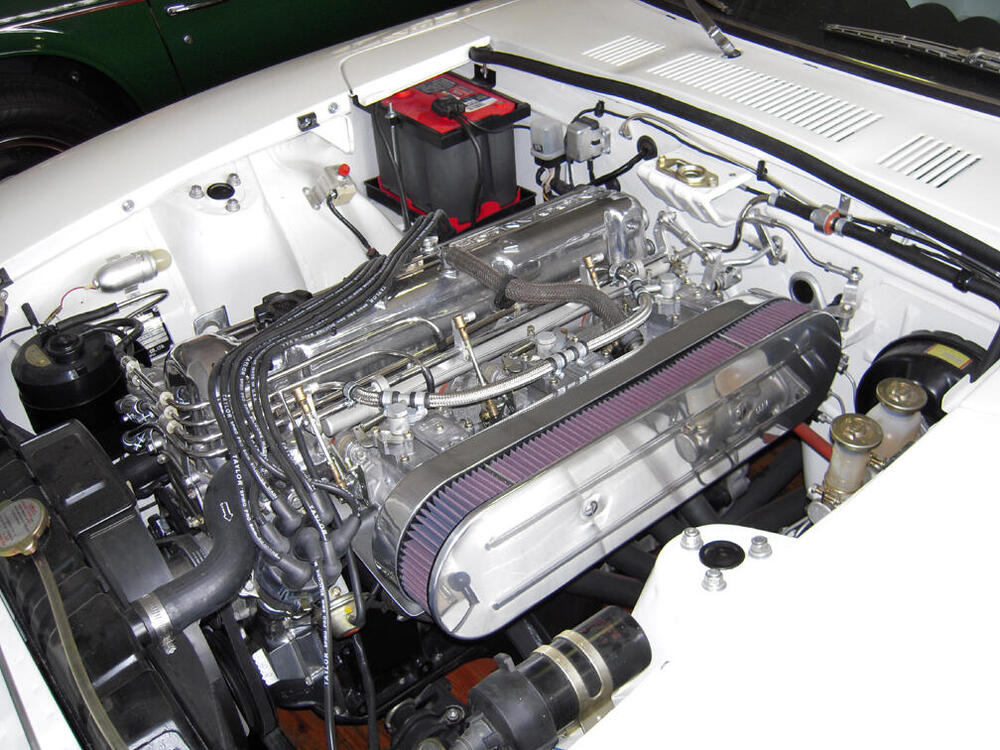
4 pointsCatch-Up Digest, Continued. After this I’m up to date. ••• March 9, 2026 They said it couldn’t be done.* If you have been following this project long enough (good job 👍🏻) you know this engine had SUs when I installed it. Lots of drama later I put triple Mikunis on it, and I’m glad I did. One thing my euro-spec SU balance tube has that my short Mikuni manifold is missing (other than clearance) is a PCV valve. Around the time I got the triples working I installed a bracket to hold one with a plan to figure out how to connect it later. Well, later is here. Several years ago I saw a Z at the east coast import show in PA sporting a custom air filter housing for a Lamborghini Countach air filter. The owners is here but I can’t find the name. We ALSO discussed its balance tube on the manifold. My plan was to do something like that, but add a port for the PCV valve. (Nismo put one with a PCV valve on the l型6気筒 TLX manifold, so please hold the snark). I would have liked to figure out a way to mount the valve right on mine, but routing the hose was getting too difficult. This cleans up the visible plumbing better. Hopefully it with function as intended. My vacuum manifold also uses the port on the #6 runner meant for the brake booster, so I move that fitting for to the back end, as well. Eight ports in all. It’s made from a 22.5 inch piece of aluminum pipe (1” OD, 0.25” wall for tapping, which is technically not enough but works). A buddy of mine was MVP on this for welding up the ends, getting my specs into his CNC machine to bore all the holes, and letting me use his lathe and mill to start the guide taps. A quick media blasting with aluminum oxide and it was pretty simple to install. The hardest part was getting 1/4” stainless tubes bent to the right angles to accommodate the irregular angles of the six manifold ports, which are so irregular they must have been drilled and tapped by hand. Lest I create the impression this was a complete breeze, know I finished a prototype meant to be final using a vacuum manifold, but bailed on it after the tubes started to look like a mess of spaghetti. Pro tip: if you’re doing something like this, get some copper tubing at a hardware store and mock it up with that before you start bending stainless. I’m pretty happy with this. The only thing I would change is to use thinner walled stainless capillary tubing. This stuff is unnecessarily robust, so it’s hard to bend and a smaller inner diameter than it could have been. *I don’t know how the balance tube will change how the engine runs. The assumption is slightly smoother, with the brake vacuum building faster at 6 times the frequency. ••• March 11, 2026 Nearly done in here. I picked up these Kameari stainless air filters on a whim from JDM Car Parts a while ago, and I’m glad I did. They look really nice paired with the heat shield (also from Kameari). I was nervous the shield wouldn’t fit with the cooling blocks installed, and it is tight, but it isn’t touching them or the header so I think I’m good there. The braided cooling block lines look nice over that shiny stainless steel. I’m still debating whether to get some short velocity stacks that will fit inside these filters. I do have a plenum for a cold air intake, and I think the old stacks are short enough to work in that, but I think it’s going to be a while before I get to that. Everything is back where it belongs now, except for the throttle cable and the booster hose. I remade the cable bracket out of thicker gauge stainless to get rid of the flexing problem with the previous version. As such I need to make some adjustments to the cam (and replace the barrel nut I lost). The hoses I need to reroute and trim to connect to the vacuum manifold I just installed. Otherwise I just have the windshield wipers and water tank to put in here and I’ll be pretty much done inside the engine bay.


 4 points
 -
4 pointsGood Morning Gentlemen, Our guys looked at the part and determined it was an ABS material. That makes sense for the durability of the part. We reproduced it in ABS to assure the same properties as the OEM Part. We are all car guys over here so we know the importance of doing things right the first time. We are always here to help anyway we can.4 points
-
I've got a basketful of used distributors in my storage garage. Let me see if I can find a reasonable D606-52 amongst them for you. Might take a few days until I get down there, so stay tuned.4 points
-
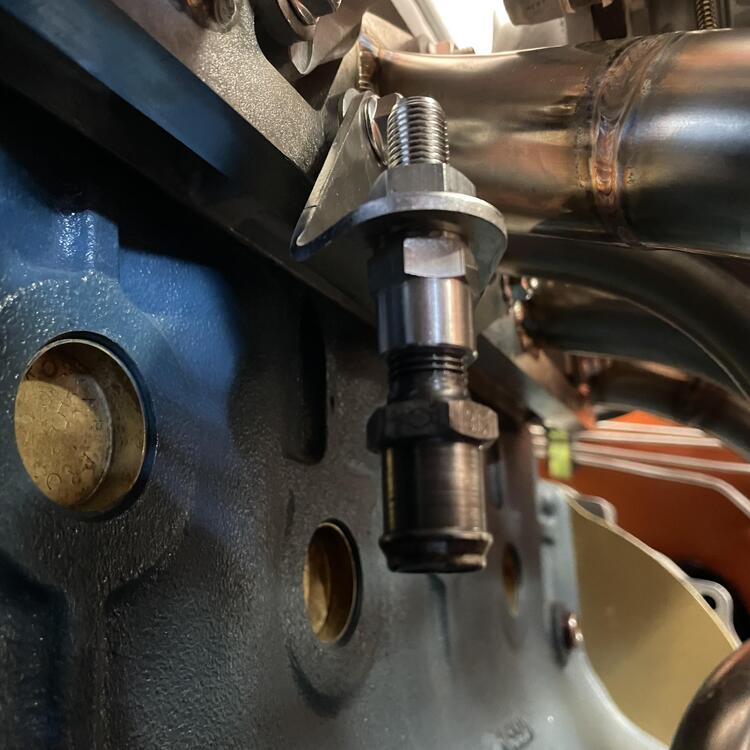
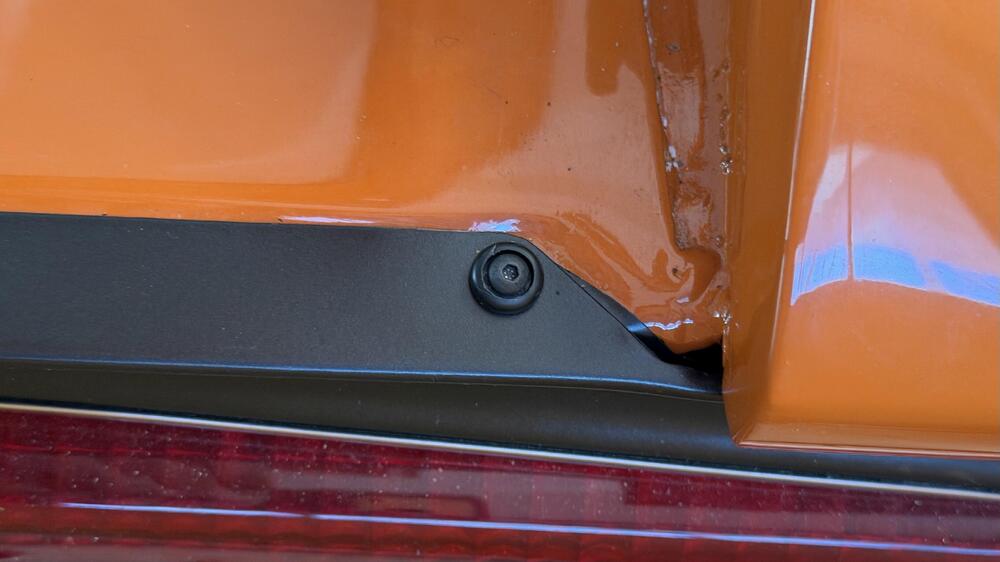
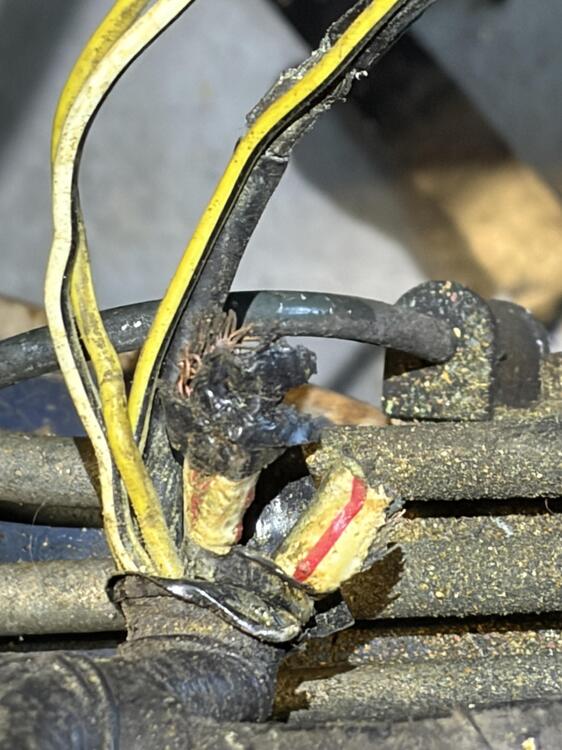
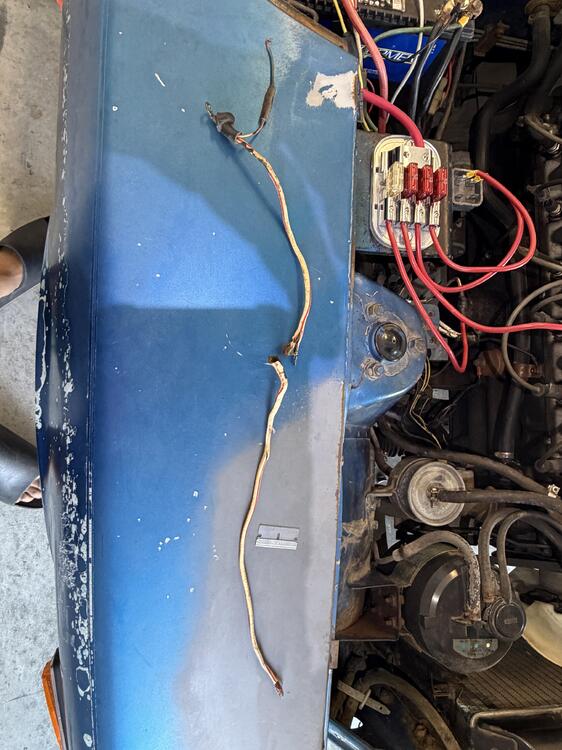
4 pointsI believe that piece of plastic is known as a "strain relief". The purpose is to help prevent damage to the softer delicate fusible link wire when you are pulling on the harness. In other words, if you pull on the wiring, that plastic strip is supposed to protect the link wire. But yours, like so many others is broken and not doing anything.4 points
-
4 pointsHi! A photo book featuring my Z432 will be on sale soon, a lot of pictures taken by a photographer Mr. Yatsui Isao. https://mm-style.jp/smartphone/detail.html?id=000000005300 He did the same back in 2015 when my Z432 was a top cover of Nostalgic Hero. Enjoy! Kats


 4 points
 -
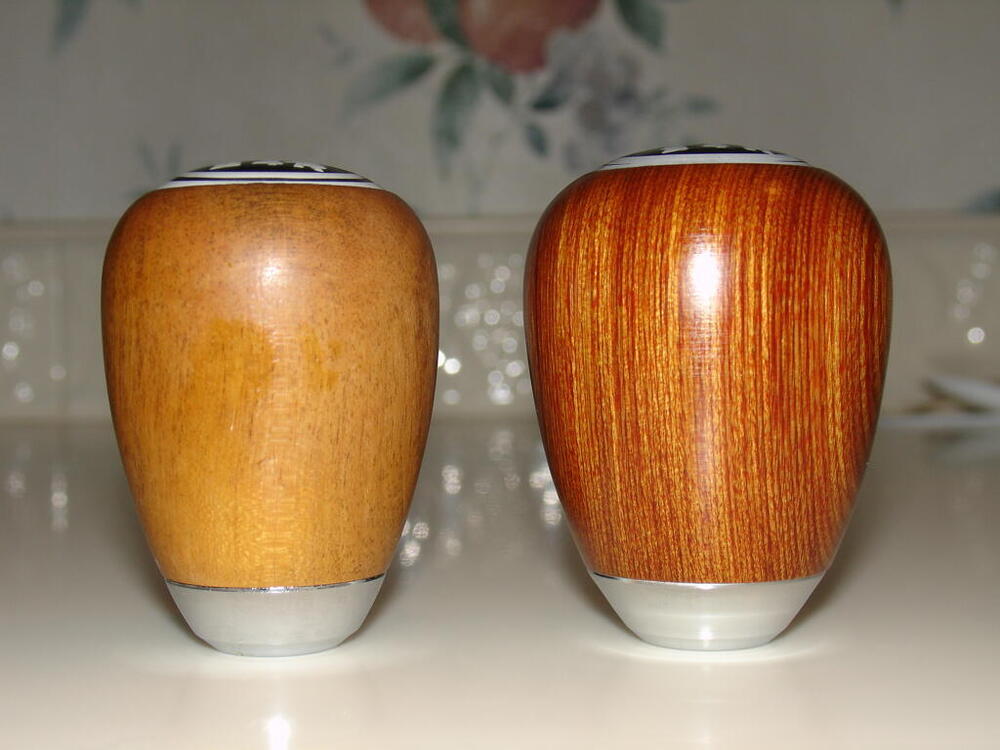
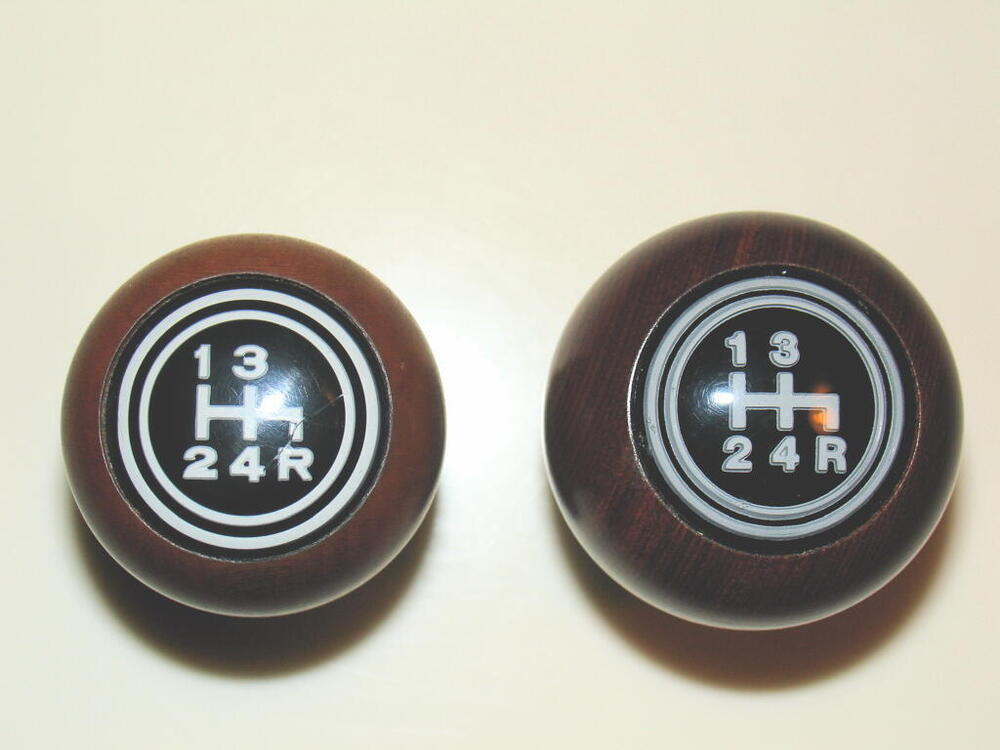
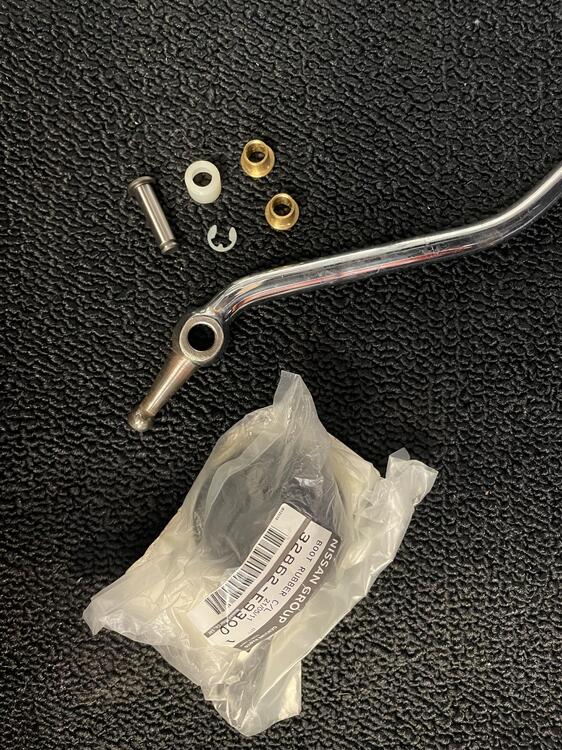
Yes, from what I've seen, Nissan changed the size of the shift knobs somewhere along the years. The knobs originally supplied on the Zs are smaller than what was supplied as a replacement some years later. Here's a pic showing an older original Z car shift knob and a genuine OEM replacement that could be purchased some years later. Both are genuine OEM, but the newer version is larger than the older original. Original 240 knob on left, newer Nissan replacement on right: So yes... For your car, NOS isn't good enough. You want an "ONOS" (Old New Old Stock). 🙂 I thought I had pics of the ONOS knobs I have here, but I can't put my finger on them. I'll have to take some fresh pics when I get the chance.
 4 points
 -
3 pointsI respect Carl greatly for the post! It's a shame his humility couldn't be reciprocated3 points
-
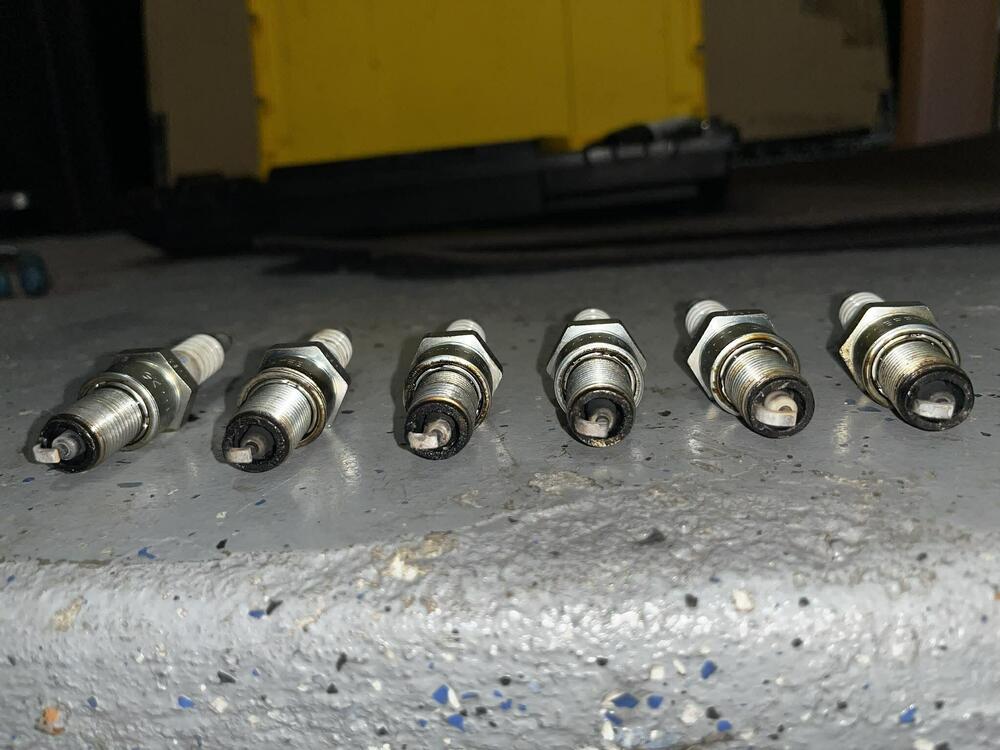
3 pointsUpdate for you: After driving the car quite a bit, it now starts smoothly which is great but was running quite lean. I pulled the plugs and they were very white - you can see that plug #3 looks very burned which makes sense since that was the cylinder that had the injector that wasn't fully working at start-ups. I put a fuel pressure gauge on it today and here are the numbers: Idle: 32 psi w/15 on air fuel gauge (very lean) - Cruise: 36 psi w/15 on air fuel gauge (lean) - WOT: 40 psi w/13.2 on air fuel gauge (slightly lean for WOT but acceptable) I then noticed the TPS's idle enrichment arm contact was dirty, so I grabbed some sand paper and gave it a good cleaning - the sandpaper came out black to my surprise. After that, I opened the AFM that we went through in the "tuning with an air fuel gauge" thread and moved the gear back and forth. I noticed for the first time that when turning the gear there is a very quiet click with each tooth when turned - I believe the position I had it in was in between one of these clicks. I richened it one click and the air fuel numbers are perfect now: idle - 13.8, cruise 14.5, WOT 12.8 and the car drives awesome. Just for completions sake, I pulled out the fuel injection bible and went through all of the multimeter checks it provides, and everything came out normal. I'll post another update in the coming weeks as it continues to wake itself out of hibernation. I will be checking the plug gap on all of these in the coming days too.
 3 points
 -
Have you tried reaching out to these guys in South Australia? They’ve been around since the ’90s. A workmate of mine used to buy Bluebird parts from them years ago. Even if it’s not listed on their website, there’s a good chance they might still have some old stock tucked away out the back. Datsport510/1600 Early Outer Dash Air Duct Hoses (Pair) | Hailes...Early style outer dash air duct hose pair for Datsun 510/1600 (up to Sept 1969). 3D printed flexible TPU replacements for cracked originals.3 points
-
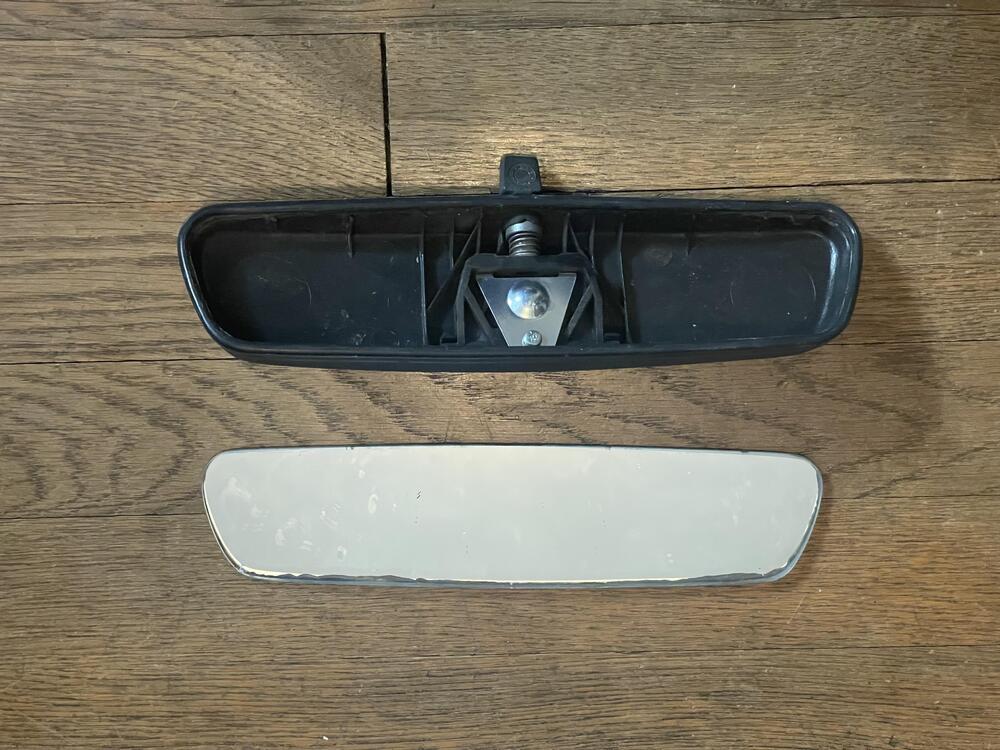
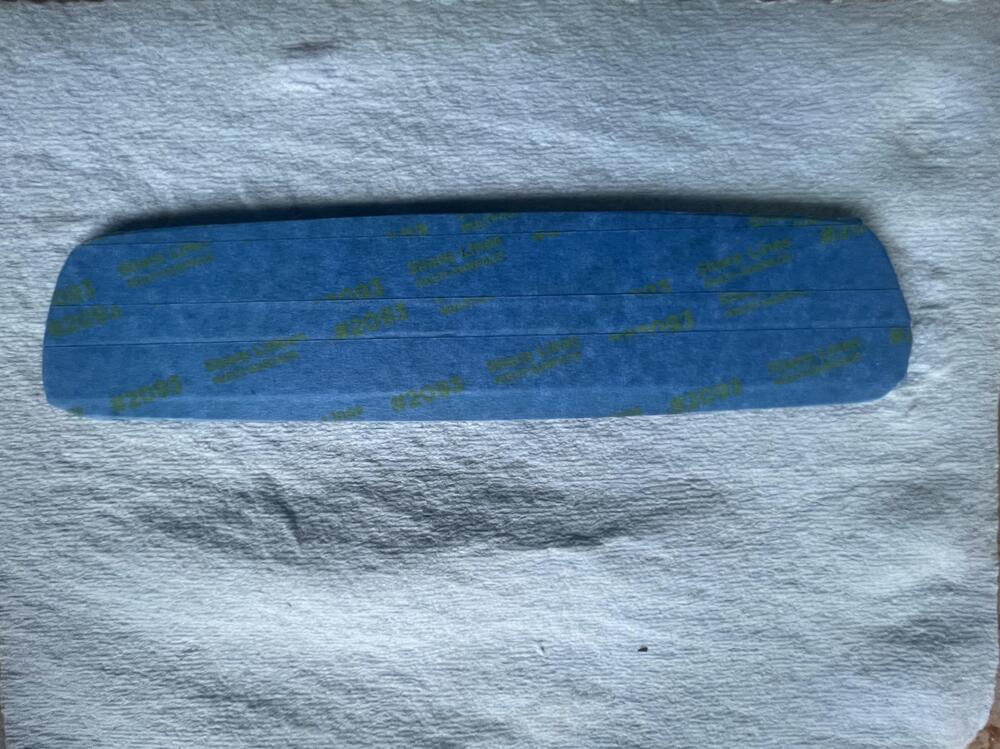
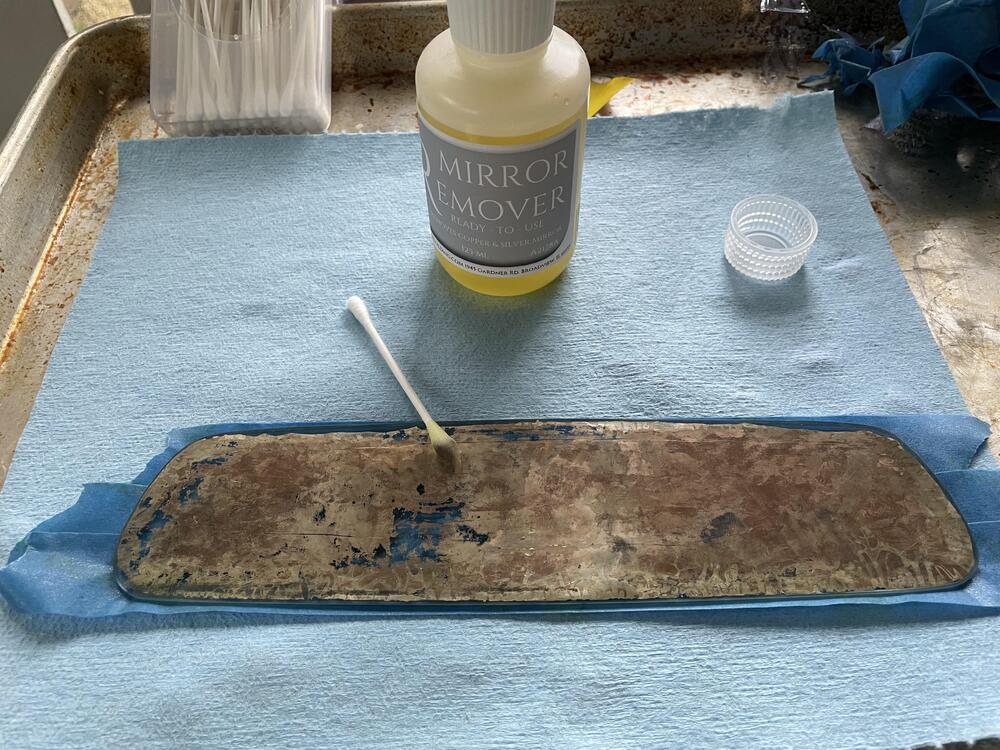
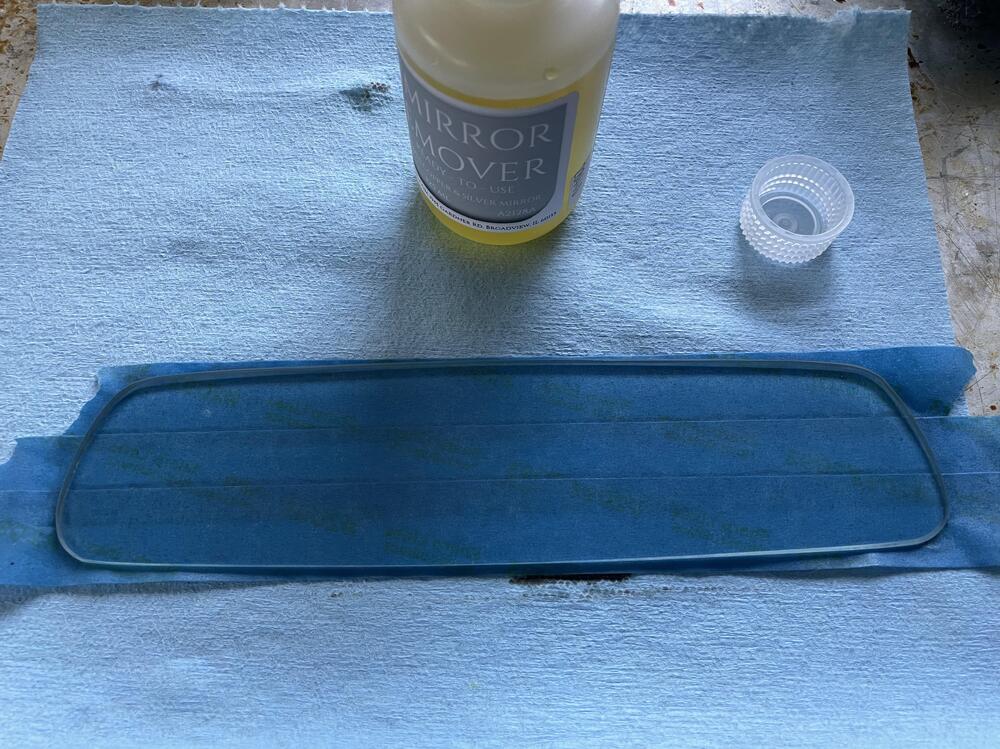
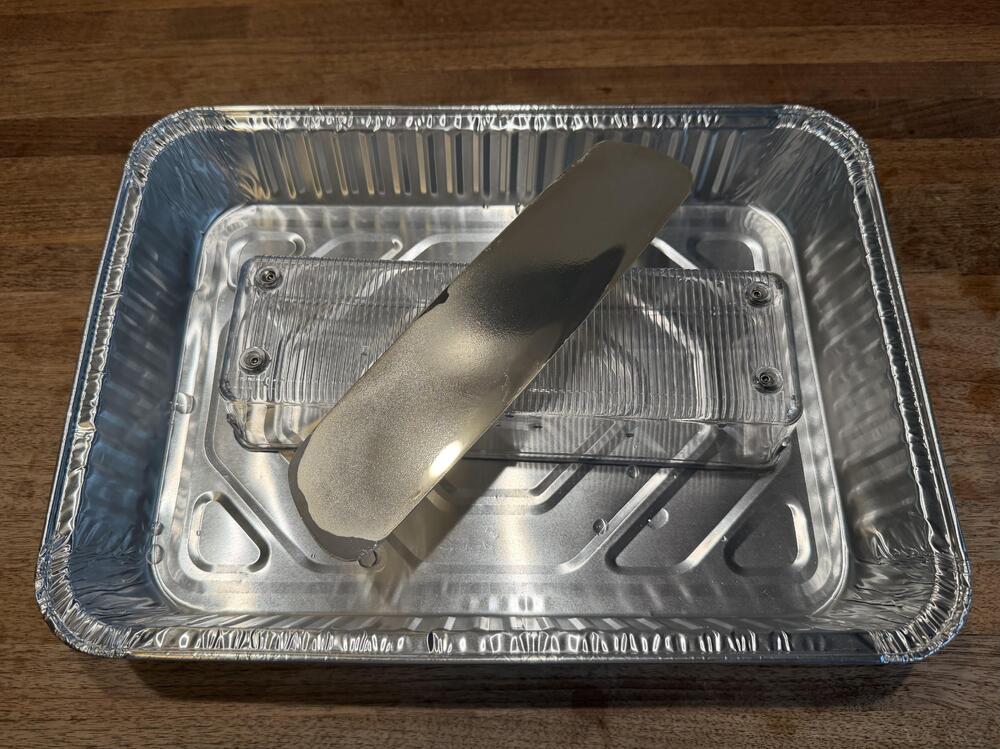
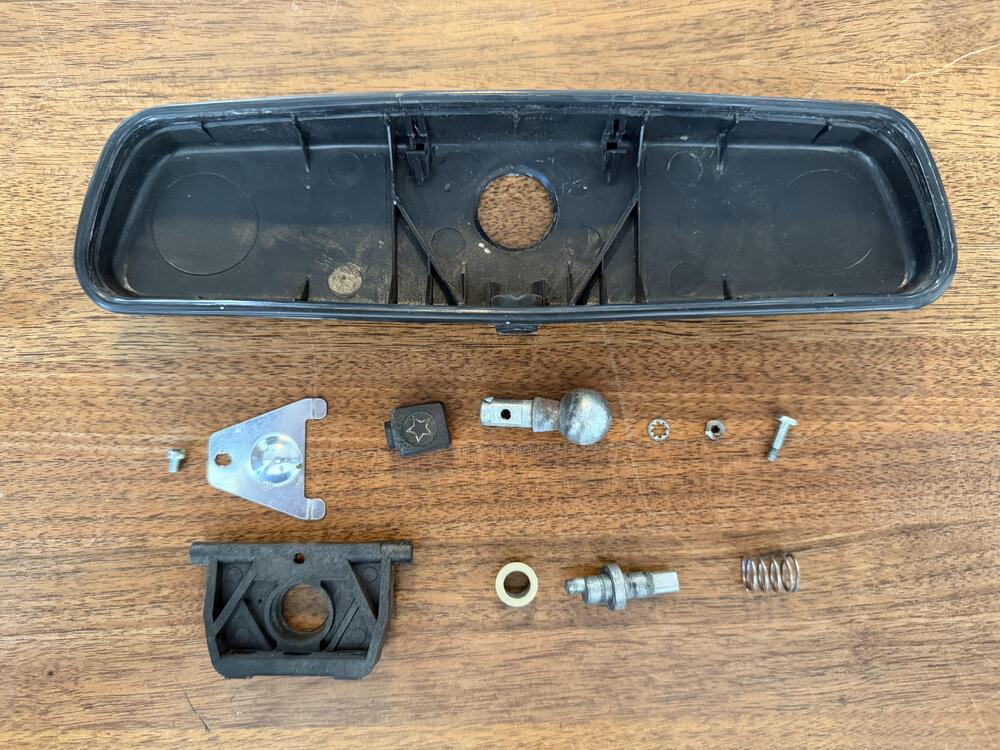
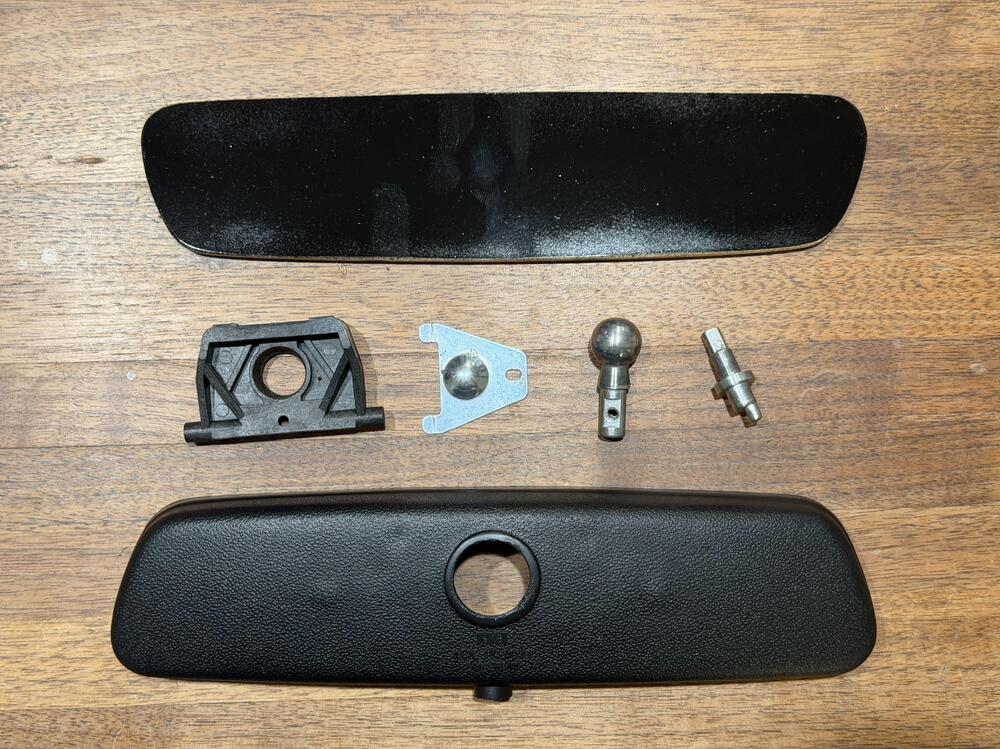
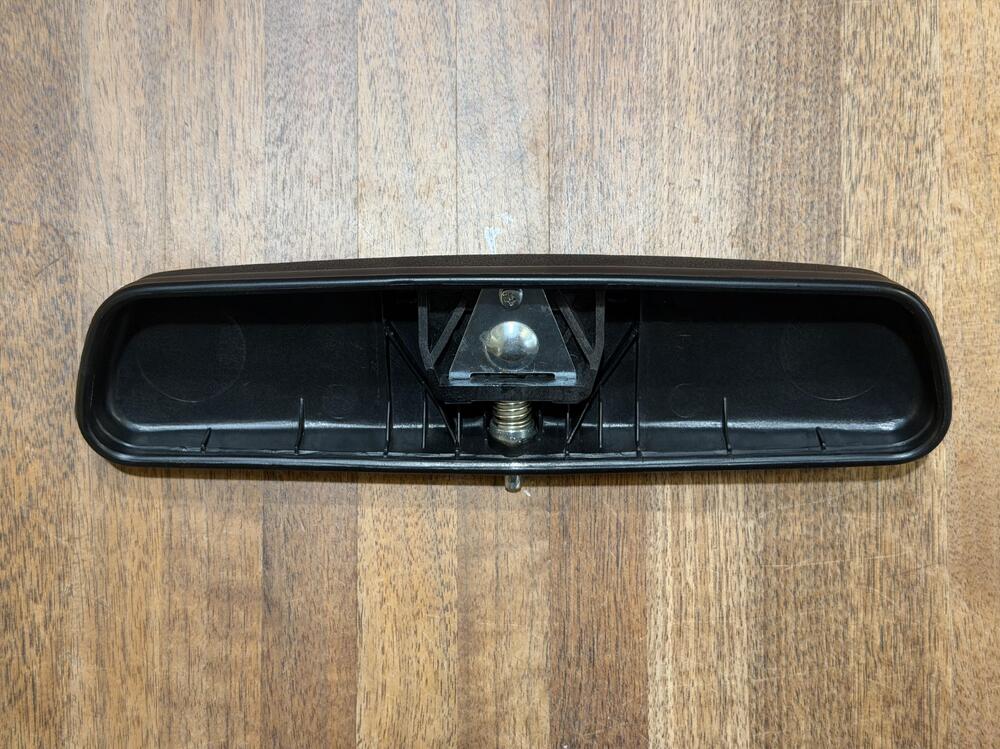
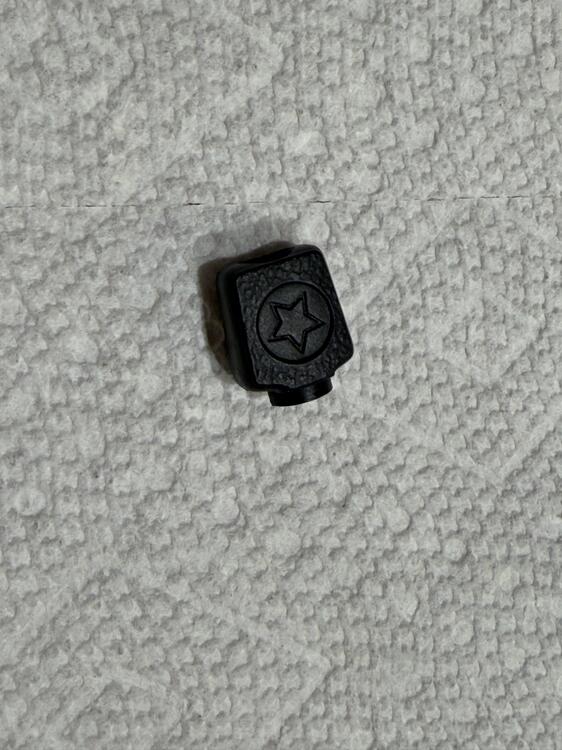
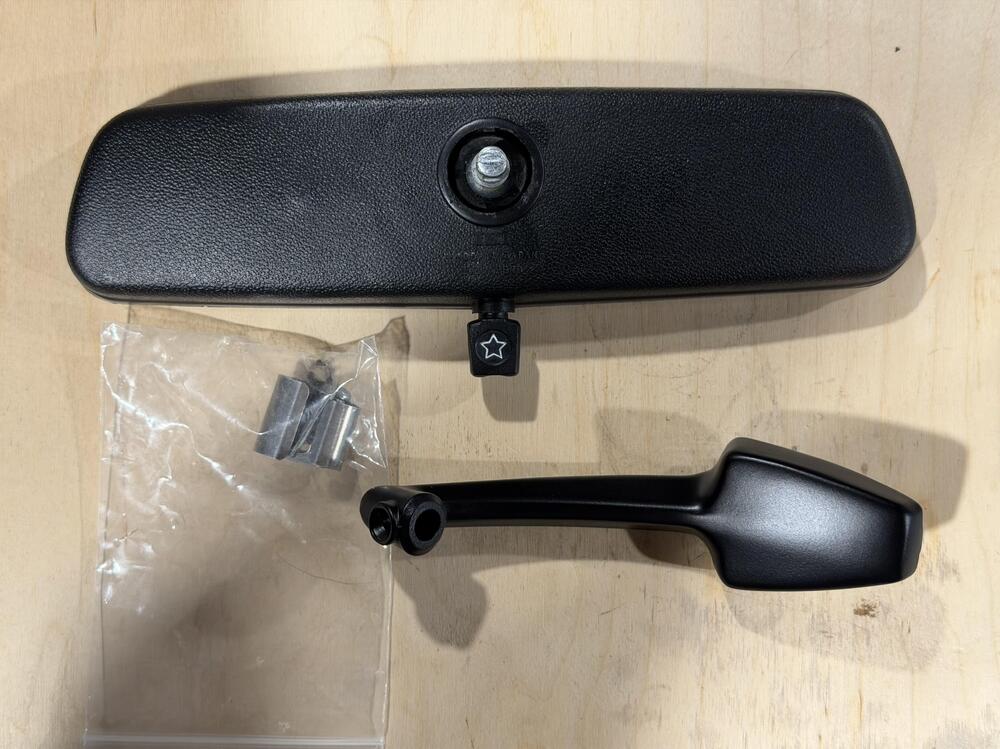
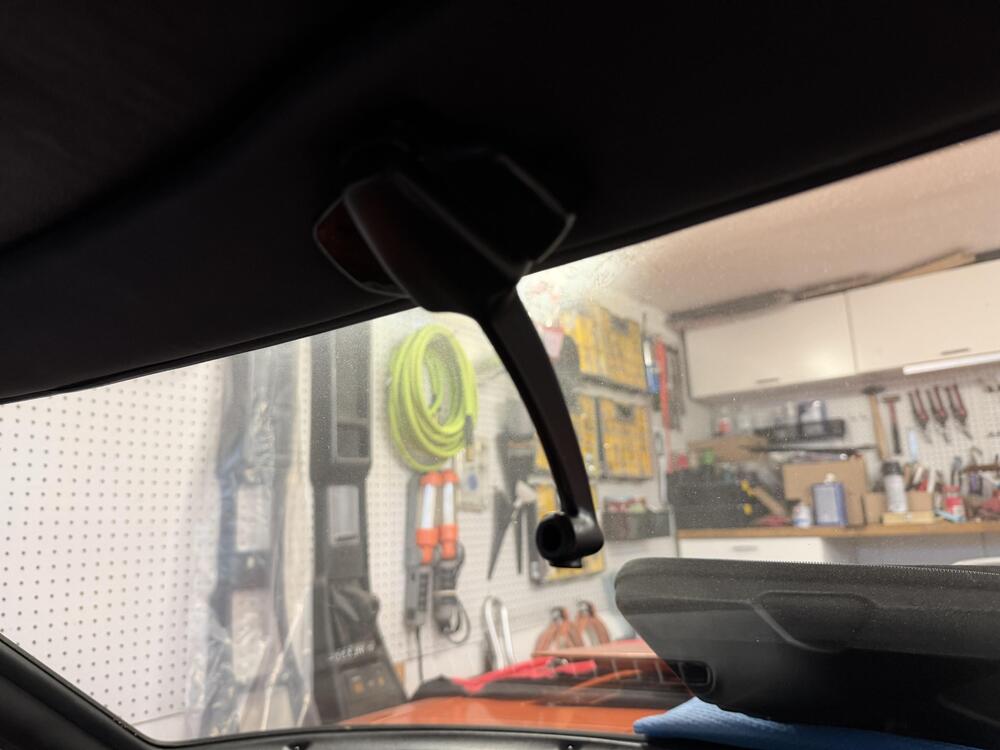
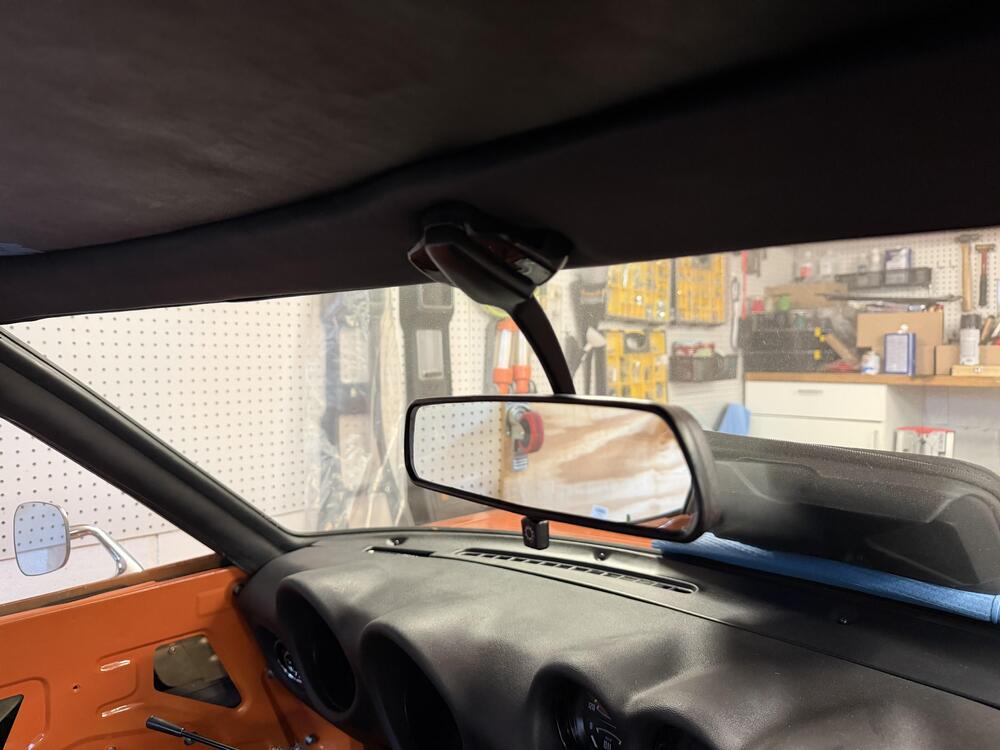
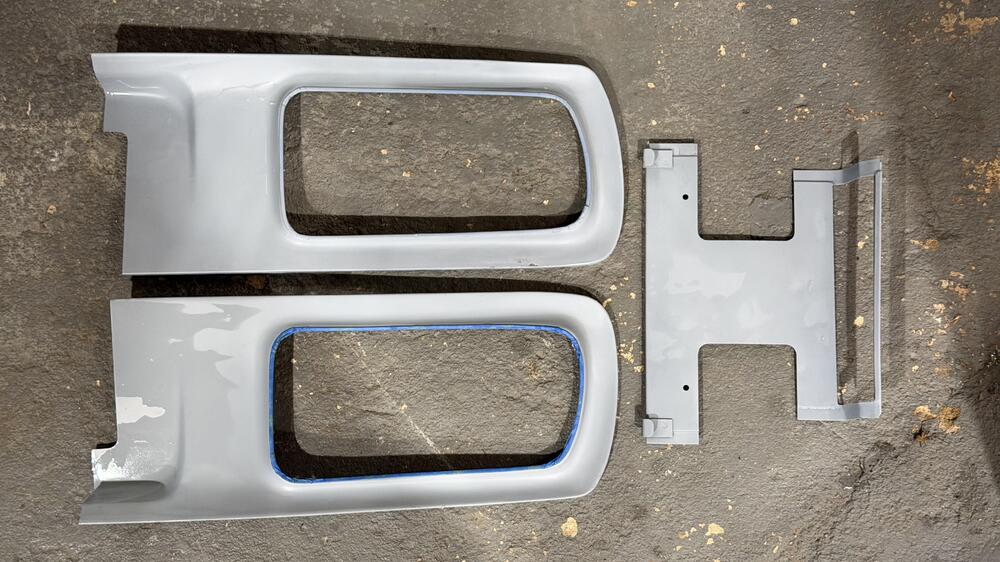
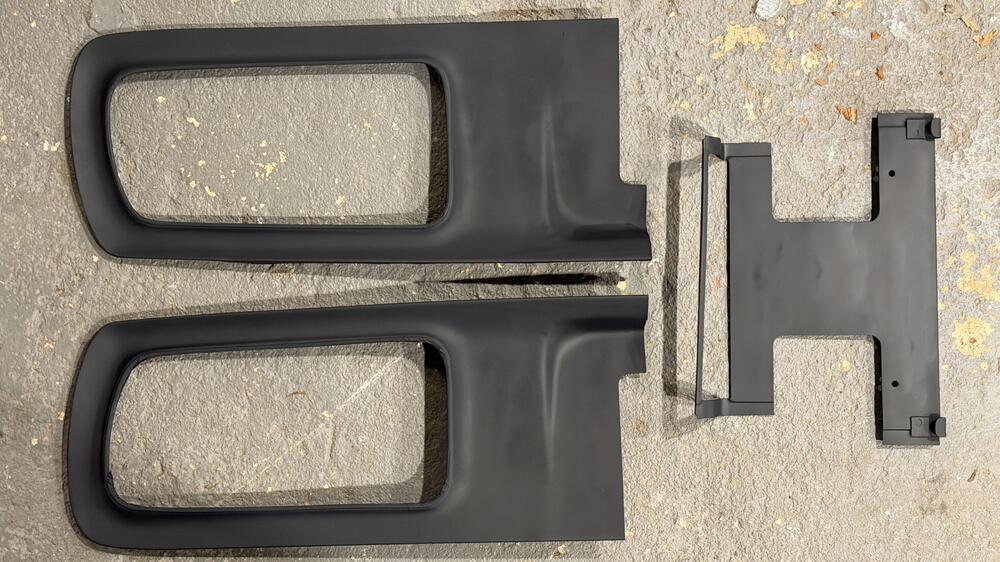
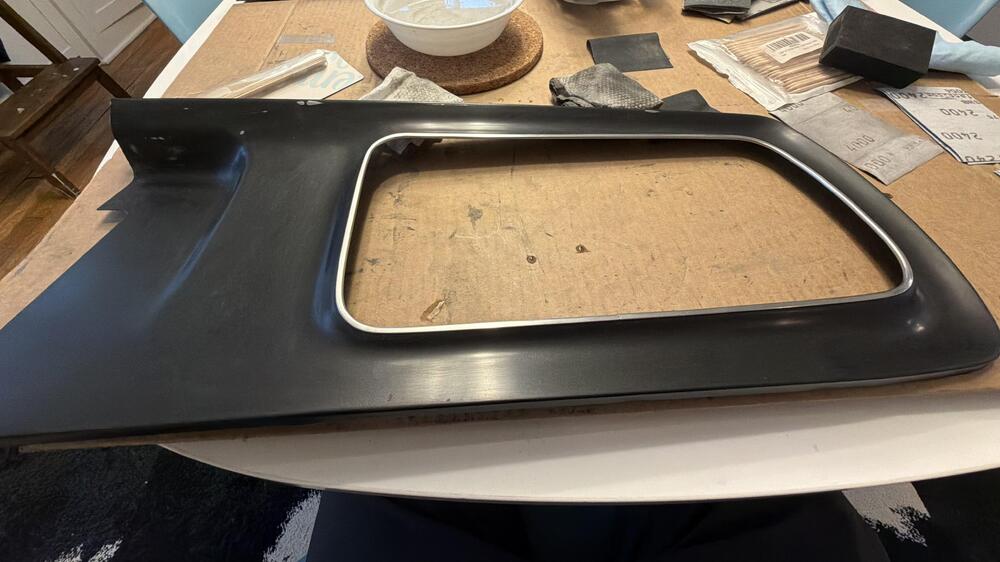
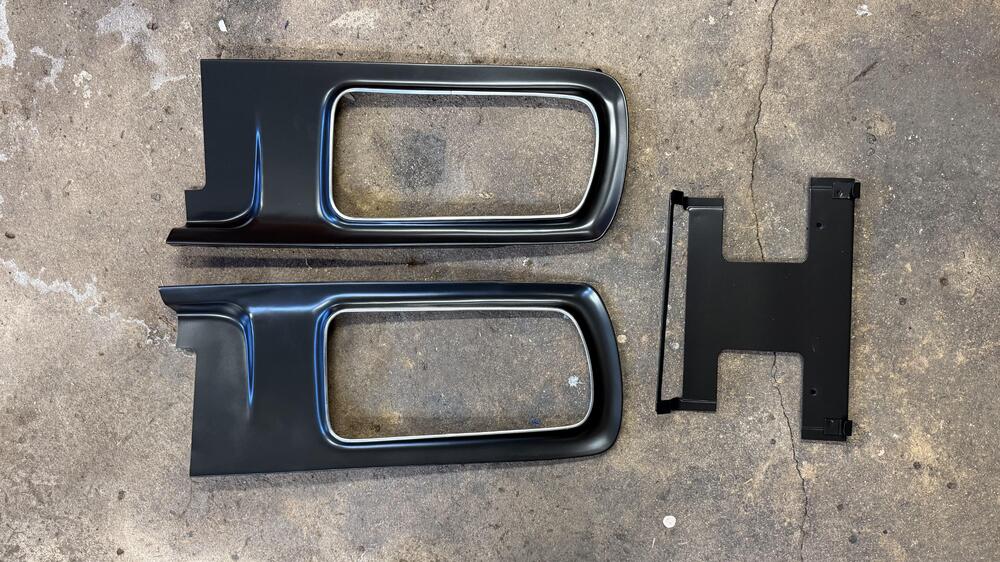
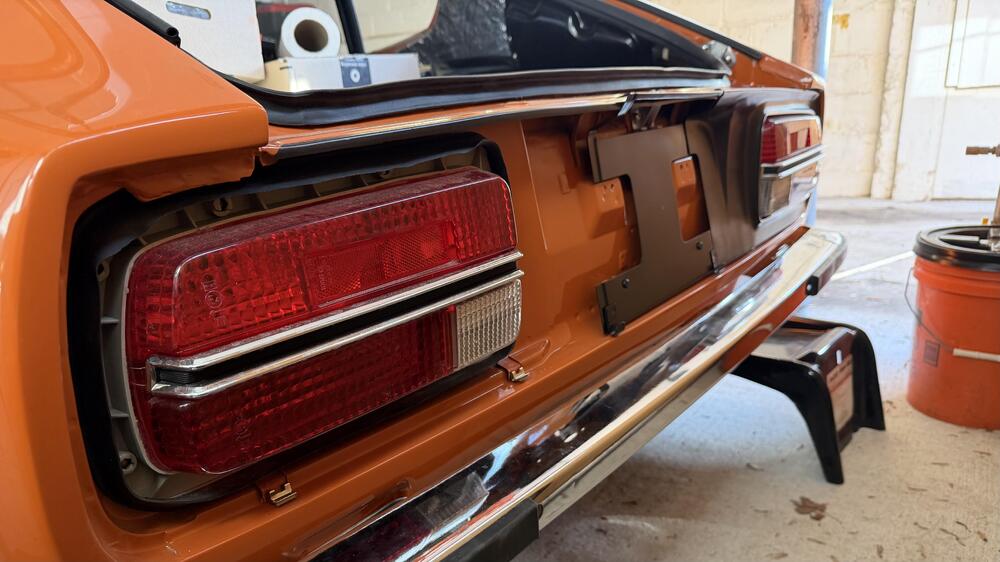
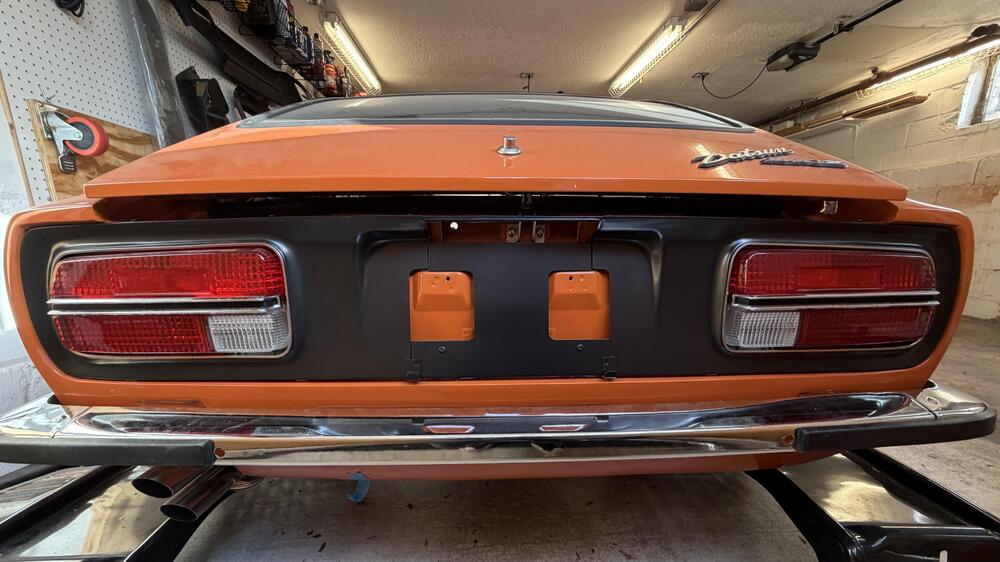
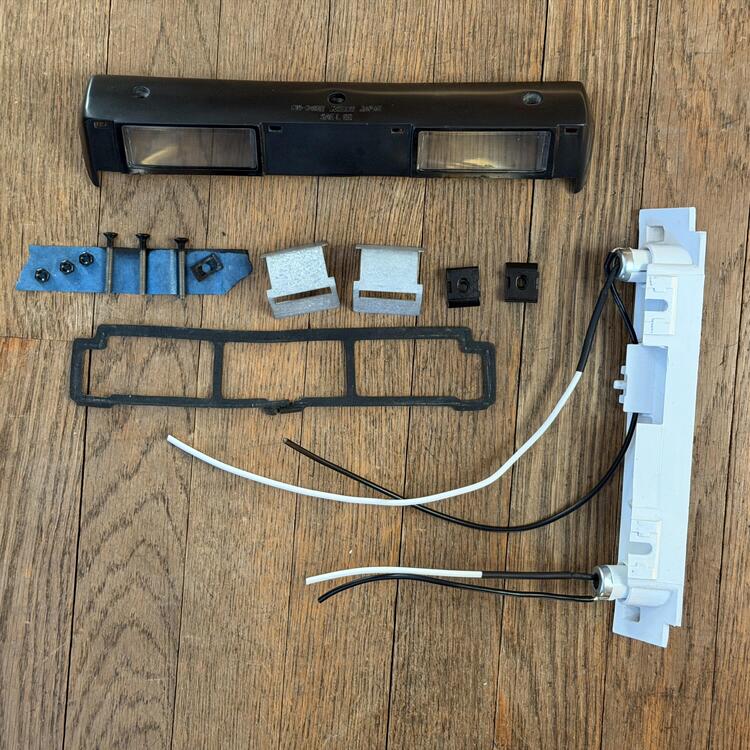
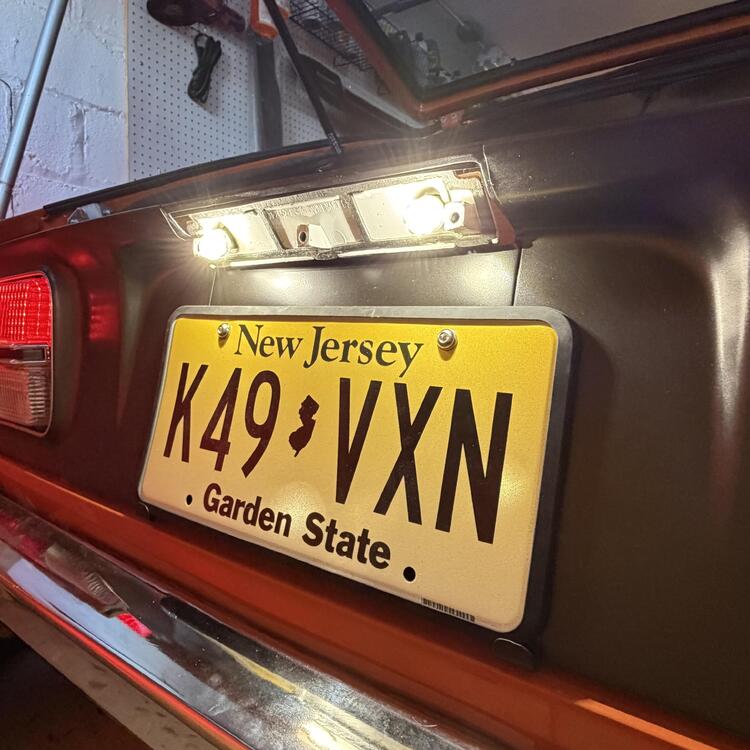
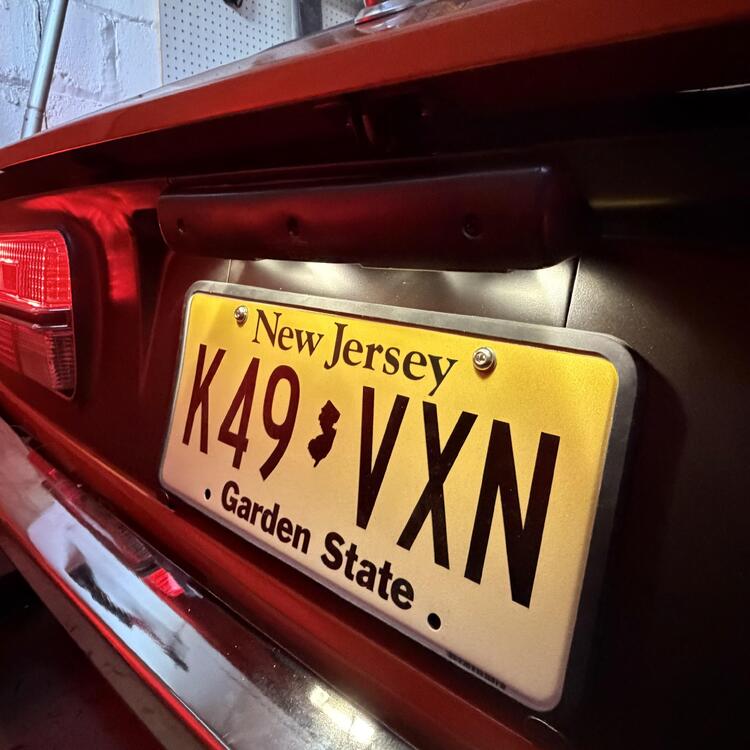
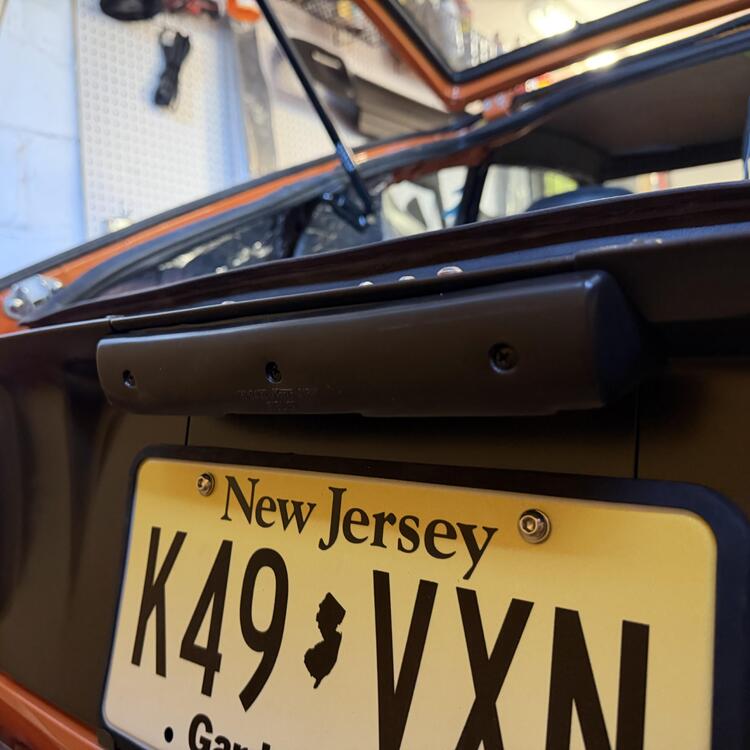
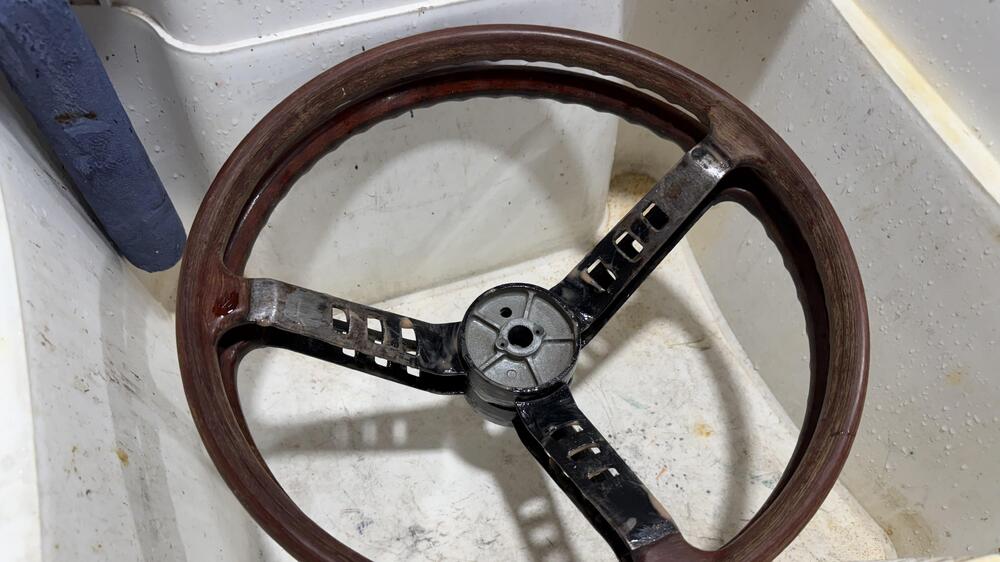
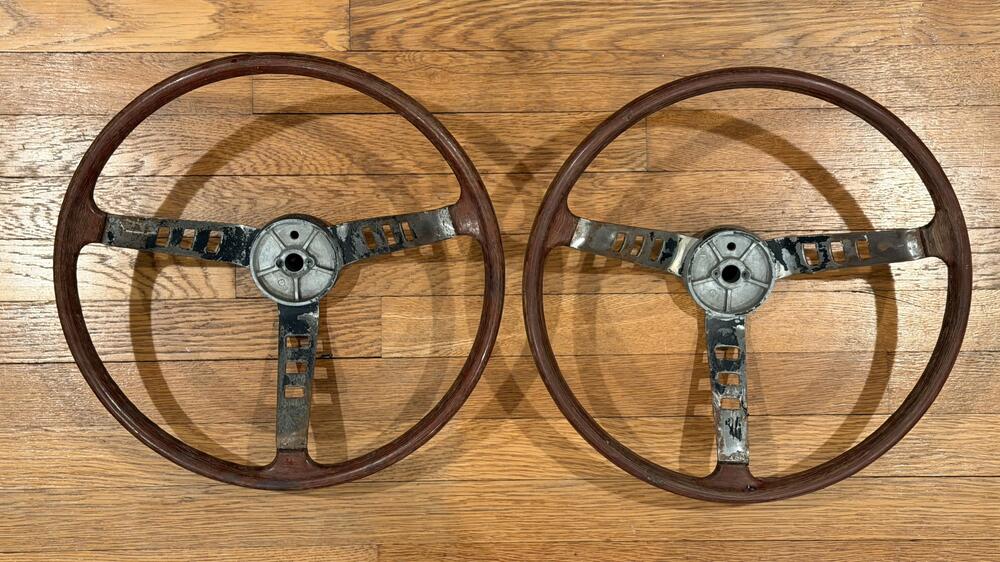
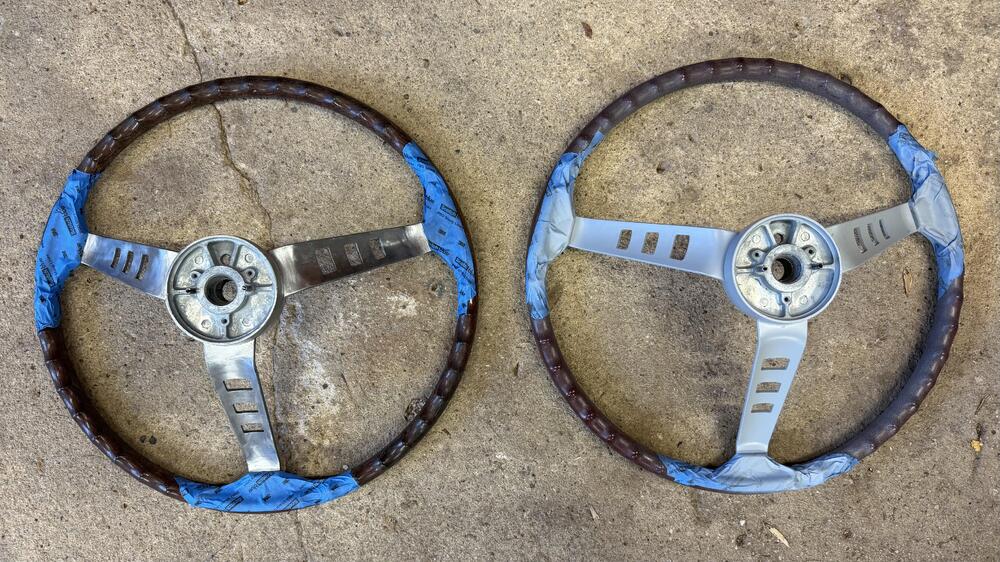
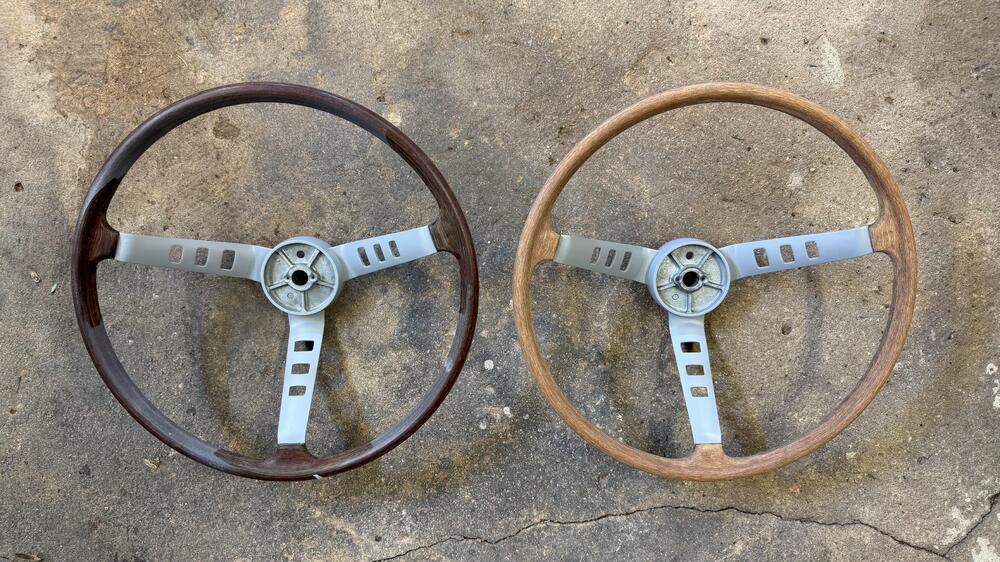
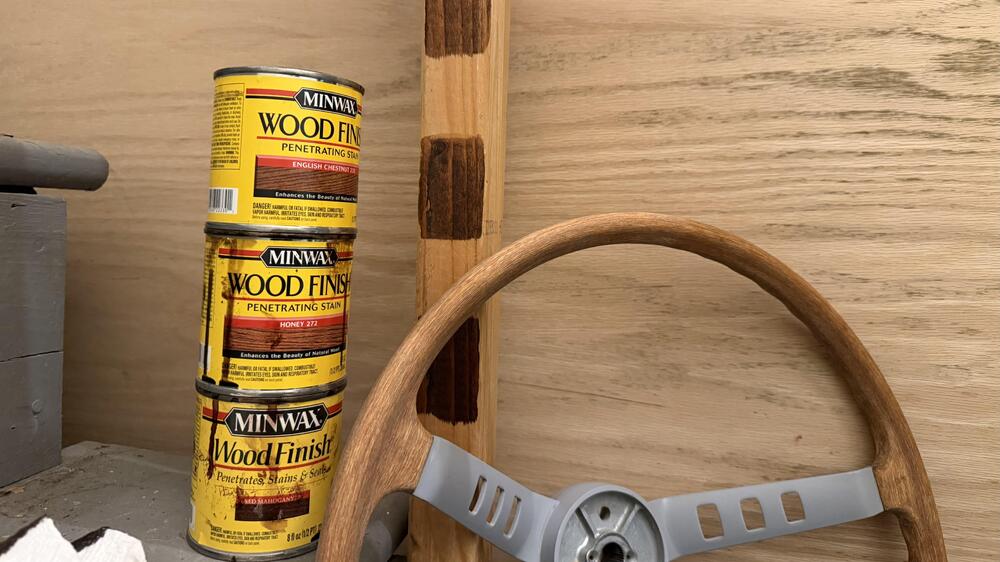
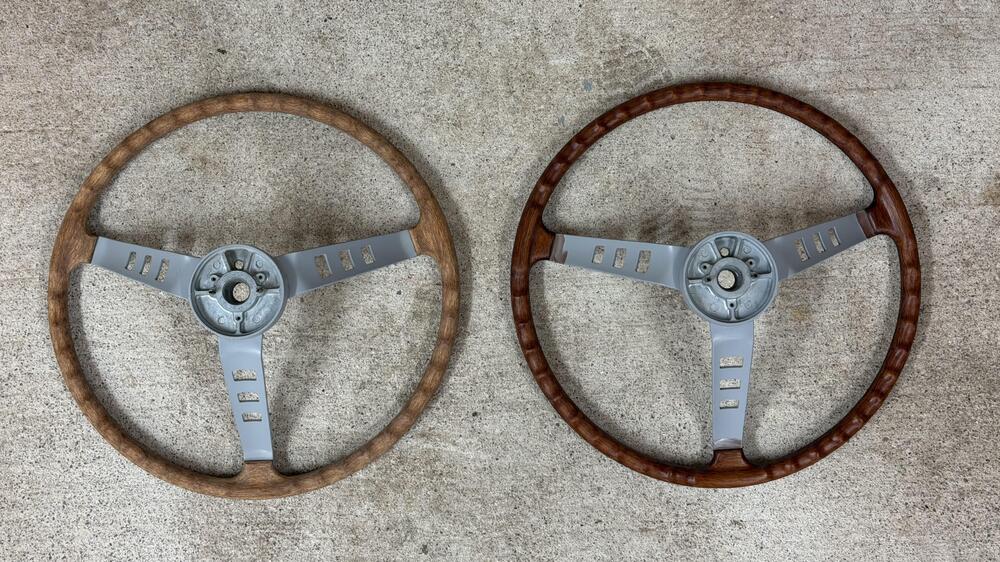
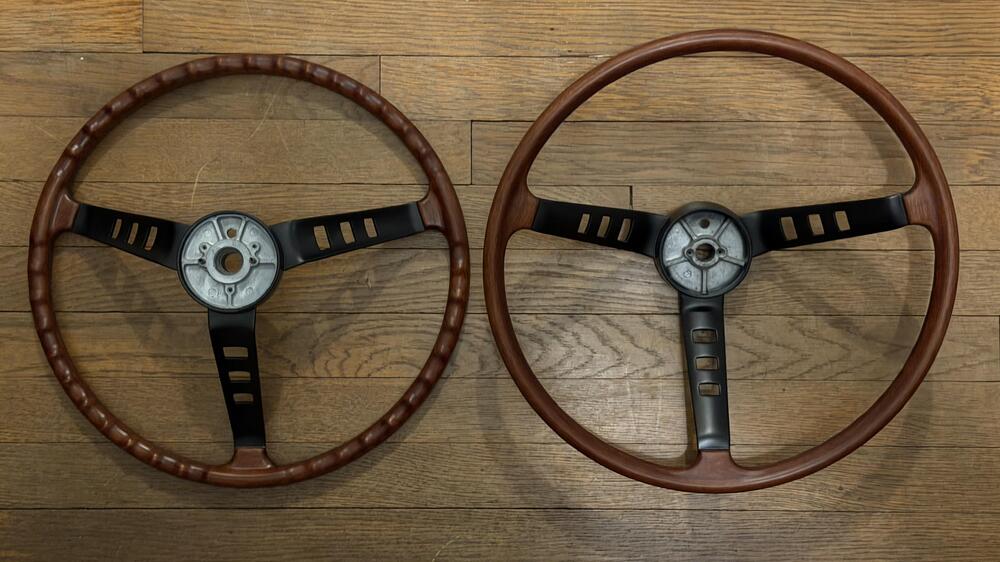
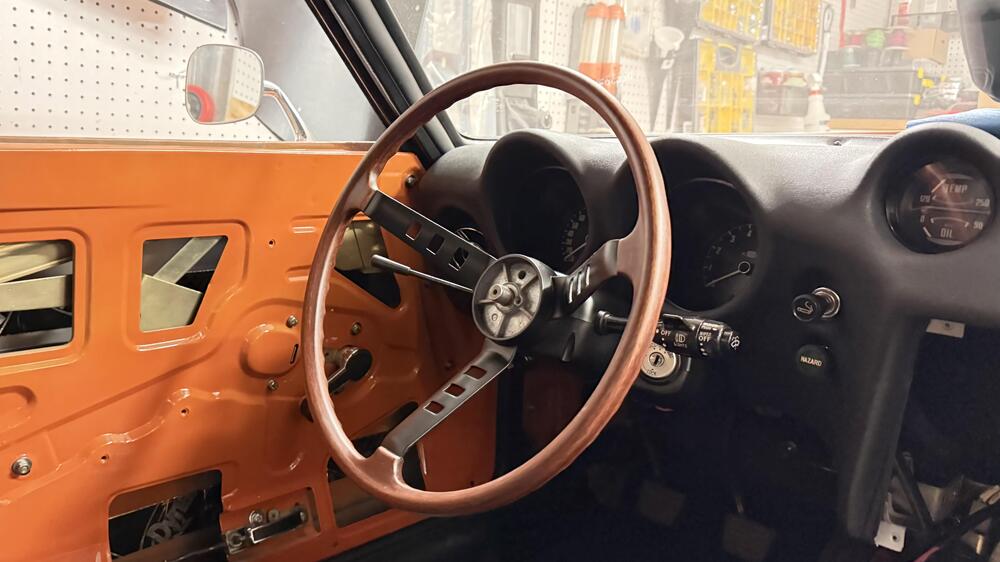
3 pointsCatch-Up Digest, Continued ••• December 19, 2025 This took me forever but I finally got the finish the way I wanted it after a million coats of paint. I kept getting a chemical reaction between the metal and the paint, despite using metal prep, self etching primer, and the same brand and formulation of paints. Resilvering the glass took a few times but I got it on the third try. I still have a couple of small flaws, but I’m fine with it. It keeps it looking vintage. Kintsugi, right? The kit was from Angel Gilding of you want to give it a shot. Watch their YouTube instructions a few times first. The plastic is refinished in SEM’s Laundau Black, like the rest of my interior, and the stem is just the satin black I’m using on all the metal inside. The housing has some lumps and distortion from heat and age but you can’t really see them through the windshield. The day/night knob emblems were filled with thinned down white nail polish applied with a 0000 brush in five or six layers. The visor clip is NOS and the rest of the bits were in good enough shape to clean and reuse. ••• December 31, 2025 Nearly finished with the exterior. I just need to do the license plate light, gas cover, grille, and front bumper. I know this photo is not the best, but you can see the tail light panels are in. Painting this was a little tricky due to the cold weather, but after sanding out the orange peel and giving it one super light coat to know back the shine it’s done. They were sanded bare, masked, etch primed, and primed again in black lacquer to prevent bad chemistry. The color is SEM Trim Black Charcoal Metallic (39033), which is an acrylic lacquer and the closest thing to OEM that our resident nerds who want to look at this stuff under microscopes could find, but it has been discontinued since I bought these cans. I’m not sure how I’m going to get the grille done now because I used almost all of what I had. I just placed an order for some on a long shot the place actually has them. 🤞🏻 Update: California Datsun has something for this. I don’t know how close it is to what I used here, but I’ll report back once I use it. One thing that I changed was the fasteners. Z Car Depot has the correct ones from Nissan, but I opted for some that are easy to remove just in case. The holes on my car aren’t in great shape so I needed something I could test and tweak. I used metal screws instead of the plastic ones they came with to make them a bit more robust and reusable. I also put black electrical tape on the sill under the panels to keep things from rubbing through the paint while I worked and eventually rusting. Overkill, but whatever. It was a bit of a pain to get together because the body shop didn’t check the figment of these panels when they were cleaning up the left rear fender, which had been hit and pushed in at some point. Plus I replaced the clips that hold the bottom edges of the panels, which took hours and should have been done before paint. There was much finagling involved here. ••• February 4, 2026 Here’s the third project that was held up by the weather. Again, it’s been way too cold to spray the paint, so I’ve been having to put down more layers and sand them out way more than normal. Luckily the previous owner of this car left me two license plate light fixtures. Both of them were broken, but between the two I had enough repairable pieces to make one that works. I’m going to use the other one to experiment with. To rehabilitate this I had to rebuild the areas on the cover where the three black screws hold it onto the housing. I used ABS cement in stages to fuse the cracks and fill in the gaps that had chipped away. Once I had that done I filed and sanded it back down as close to the original shape as I could manage. After that I sanded it in stages from 600 to 8000 grit wet/dry sand paper. Then hit it with the same SEM Trim Black Charcoal Metallic paint I used on the rear light surround panels. The inner housing was less straight forward. The rings that hold the bulb sockets in place were cracked and the plastic was very brittle. I started by submerging it in very hot water for fifteen minutes to get it a little soft. Then I applied super thin CA glue in the cracks and squeezed the rings together with hose clamps. The sockets were still a little loose, so I ended up wrapping them in one layer of electrical tape to snug them up. The housing got a layer of gloss white paint, more to brighten it up and help the reflecting light than to make it look nice. The electrical was straight forward. I just bought new sockets and wired them up as stock, the same way I did the tail lights and blinkers. From there it was just a matter of refinishing the hardware, reassembling it, and putting it on. One thing I learned is while you can remove the face place with the light installed, you’ll want to loosen or remove the screws holding it to the car to put the faceplate back on so it seats correctly. Otherwise it will crack. ••• February 7, 2026 And, finally, 4 of 4. I went through so much paint on these. Between lifting, dust, poor mixes and spatter from the cold, accidentally sanding through clear, accidentally sanding through the base coat, and the masking tape pulling off the clear, I’ve been working on these since Thanksgiving weekend. I don’t know why I have two ‘73 USDM steering wheels, but fine. They were both pretty trashed, and one had some issues with the rim material that I had to put some research into. Once I had them stripped and sanded they looked a lot better. The process was straight forward: strip, remove rust, sand metal with 250, mask, etching primer, black primer, gloss black, satin black, satin clear, mask again, fix and fill rim issues, sand with 600, stain, clear gloss spar urethane clear, clear satin spar urethane. Stripped on the left, etch primed on the right: I did some tests on some aged pine that was a close match to the raw rim to my make sure I had the right stain color (English Chestnut, Honey, Mahogany). I’m not convinced mahogany is correct, but it looks good and that’s what most people use. I still think some of them had blond rims like this: We all know the rim is not wood, but it is also not injection-molded plastic. I’ve read it’s a resin-like material with wood fibers, sort of like fiberglass but wood instead of glass mesh. I used a very small amount of clear epoxy mixed with a small amount of wood filler to fix and fill some crack that formed around the centerline of the rim, then sanded everything down to the base material. The metal was just like anything else. Each coat of paint dried for three days, followed by a knock down with 400 up to the gloss layer. Then wet/dry sanding from 800 to 4000 to fix any weird imperfections (see above). The satin black was sprayed very lightly, with satin clear over it while it was still wet. Three days to dry, then two more light coats of satin clear. The finish looks pretty close to my OEM 10th Anniversary Datsun Competition wheel. The photos don’t capture it. I still need to get all the overspray out of the center before I choose one to install. Given how heavy steering is with my 195mm front tires I’m going to need the leverage. The Competition wheel will go on my office wall and the spare ‘73 USDM wheel will go on eBay some day. It looks awesome but the steering is just too heavy with these 195mm tires. And my legs are too long.


 3 points
 -
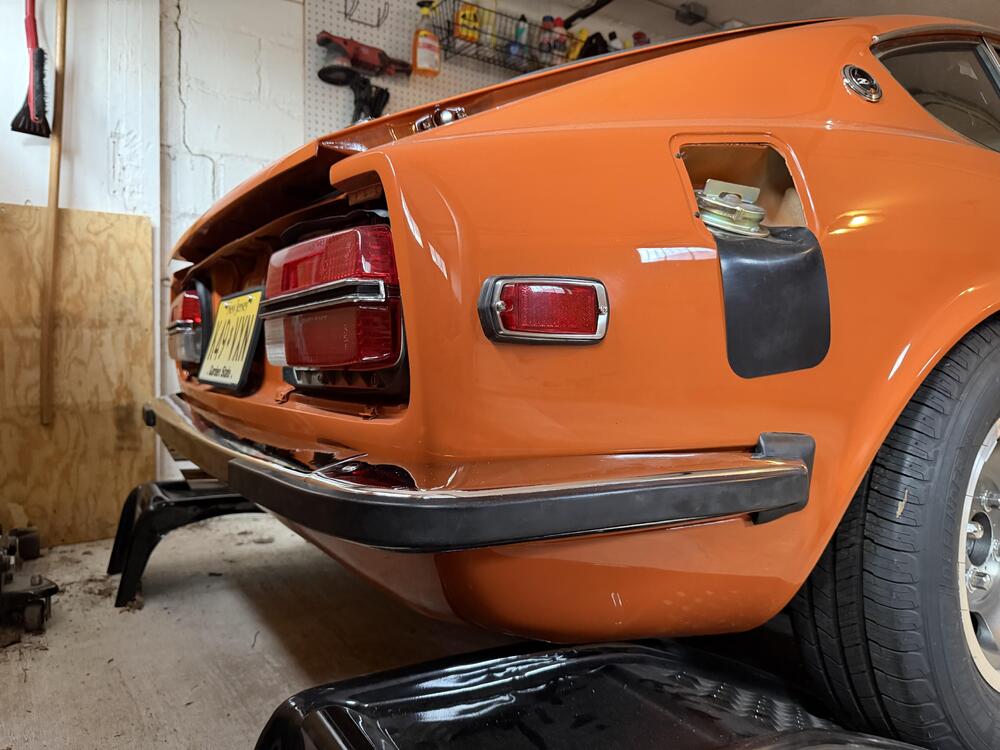
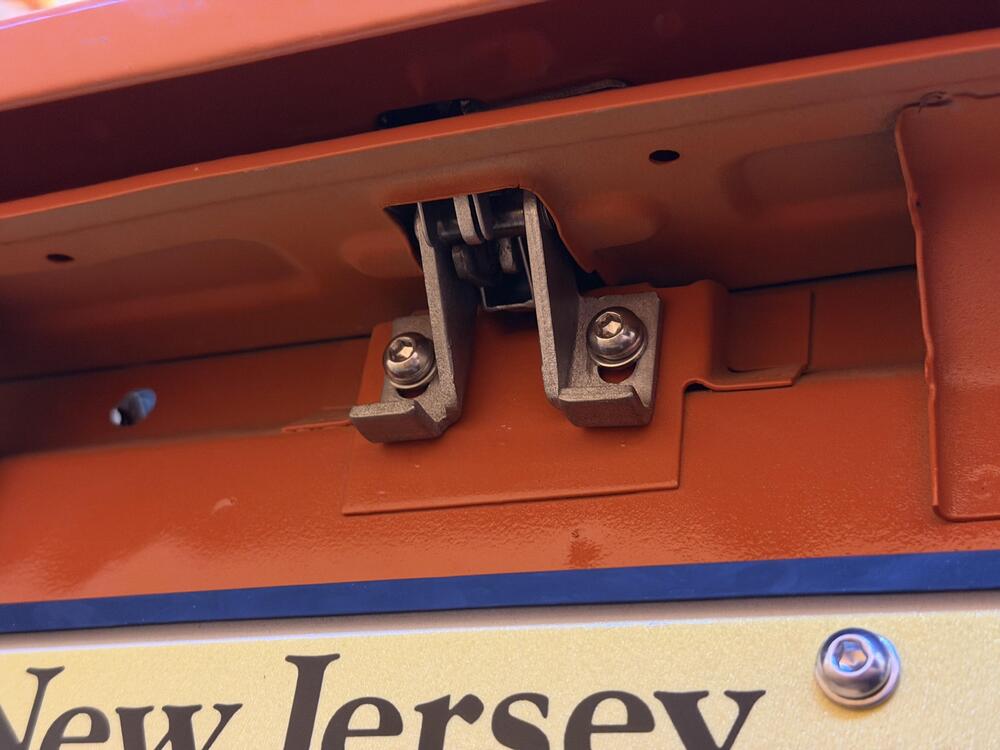
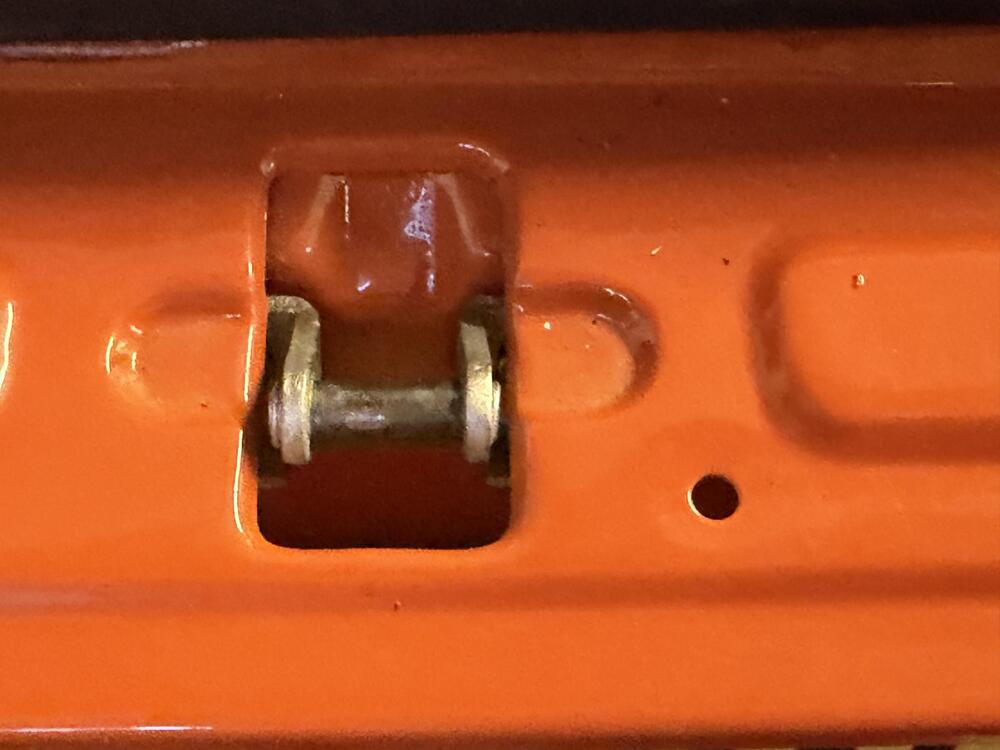
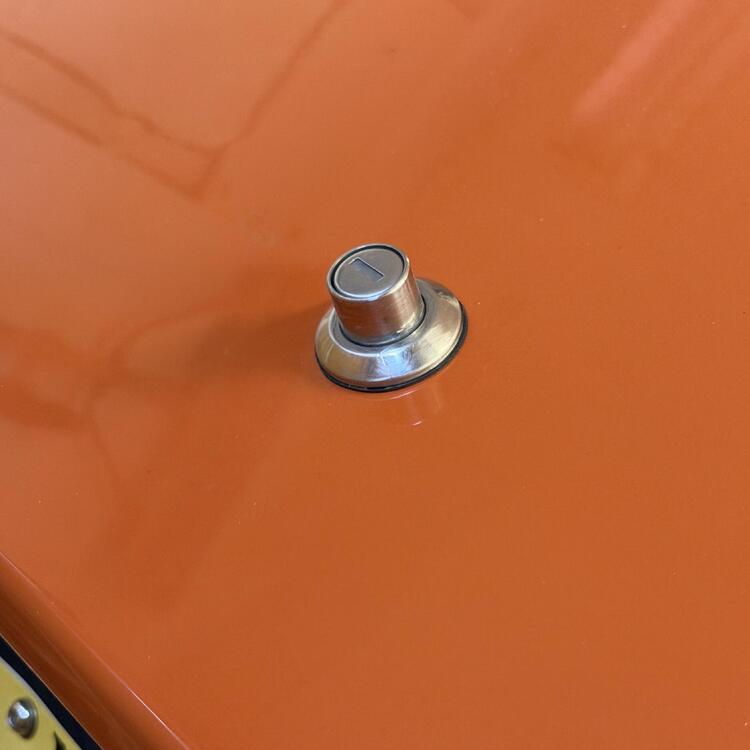
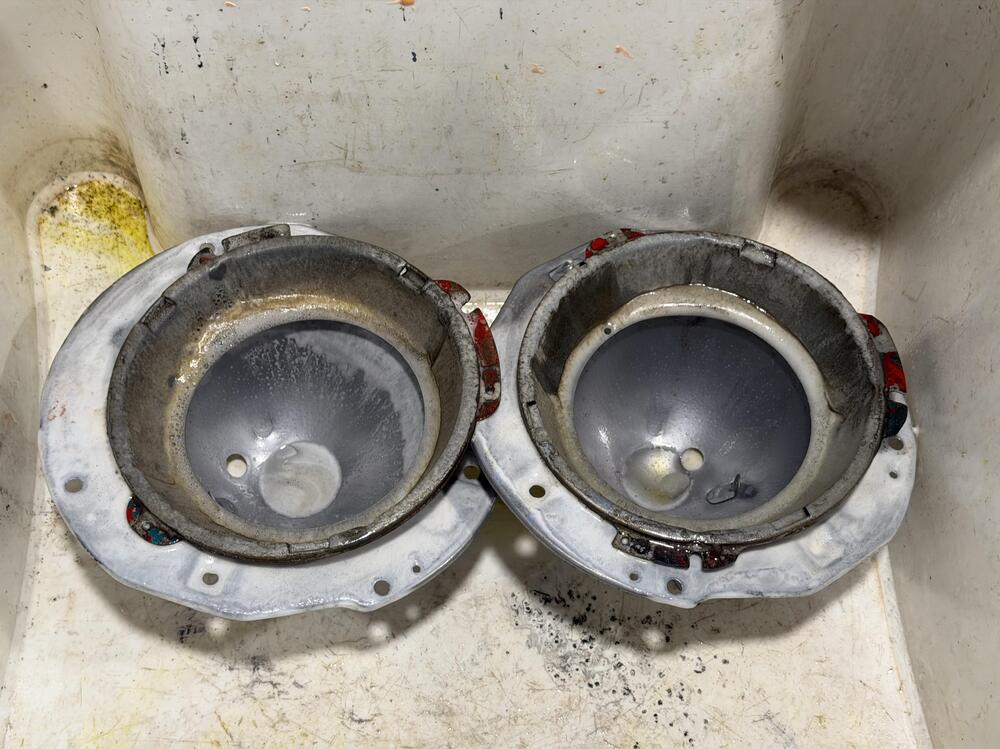
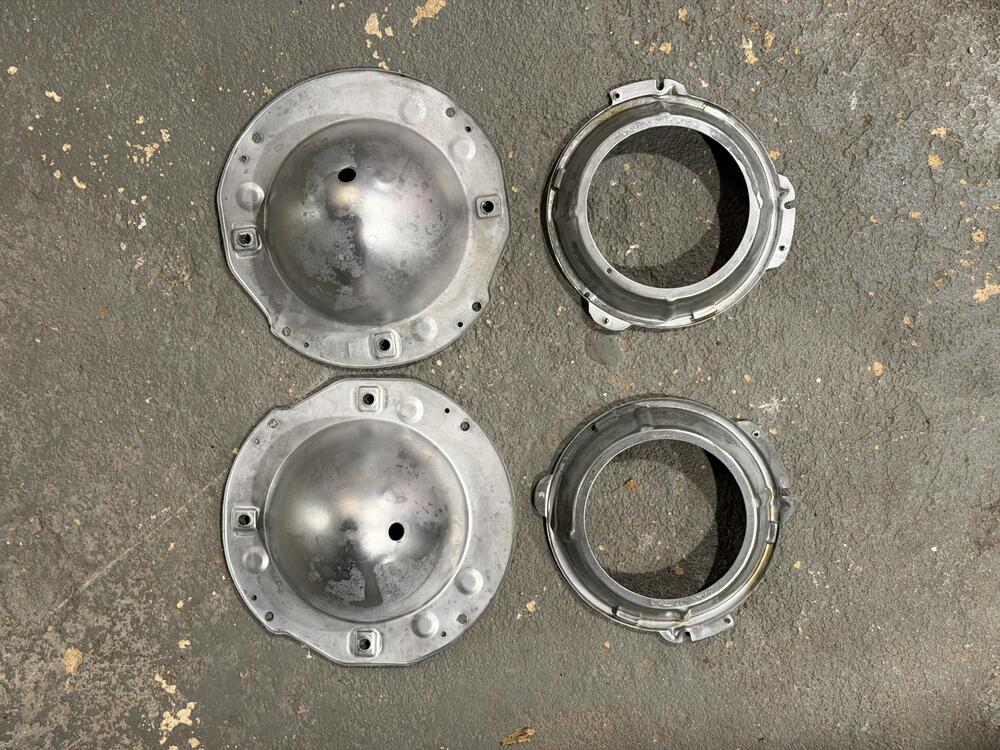
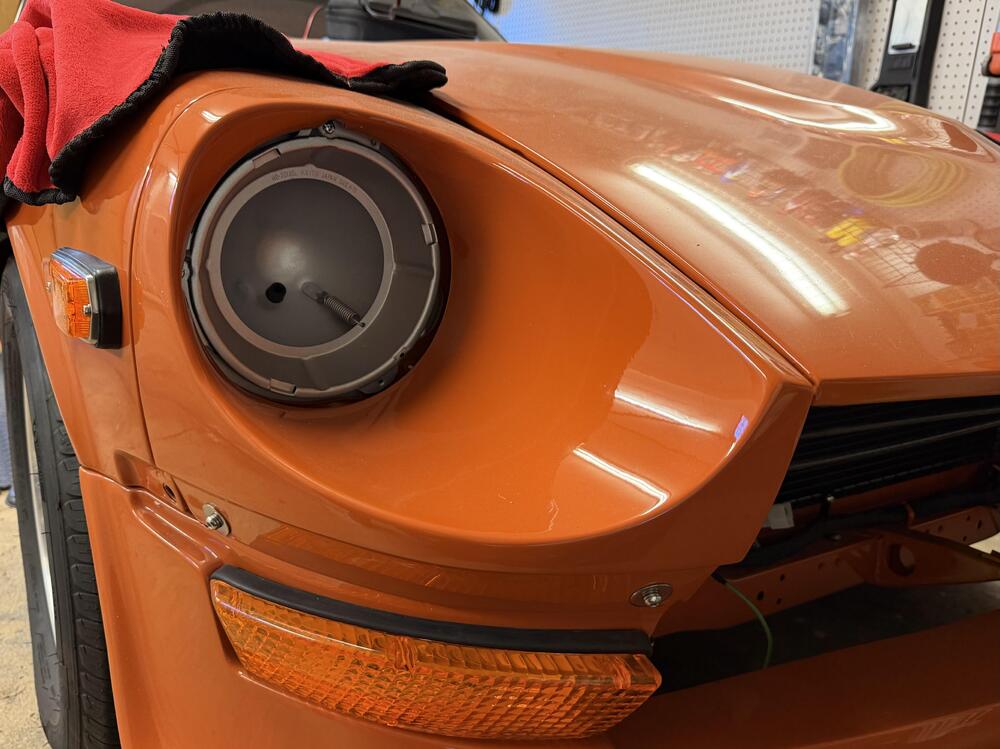
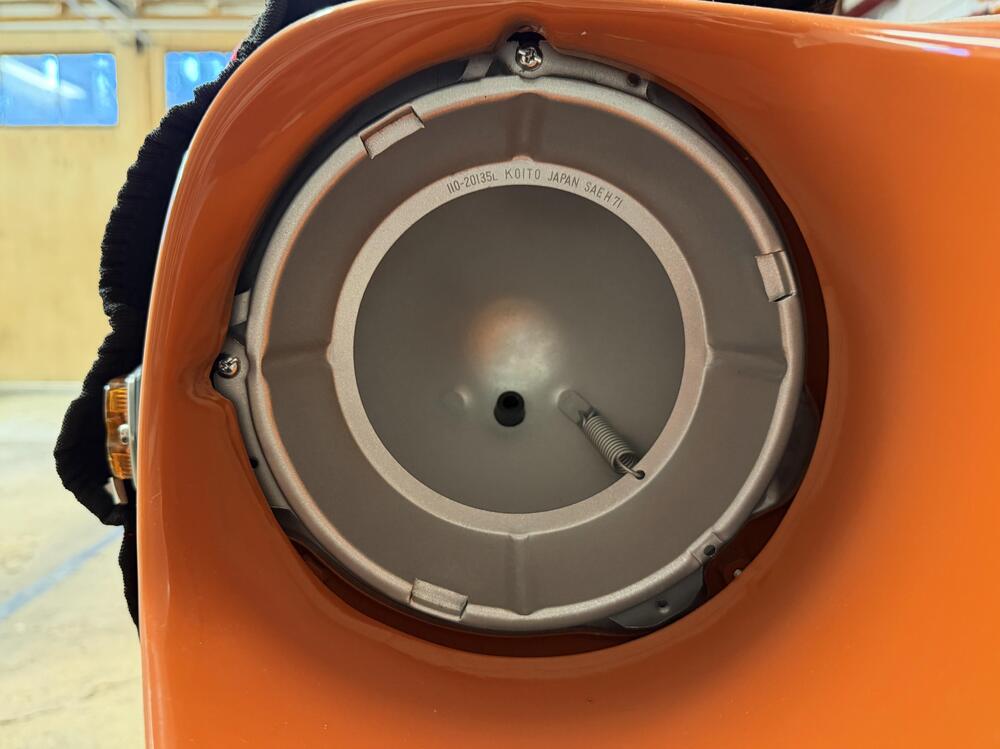
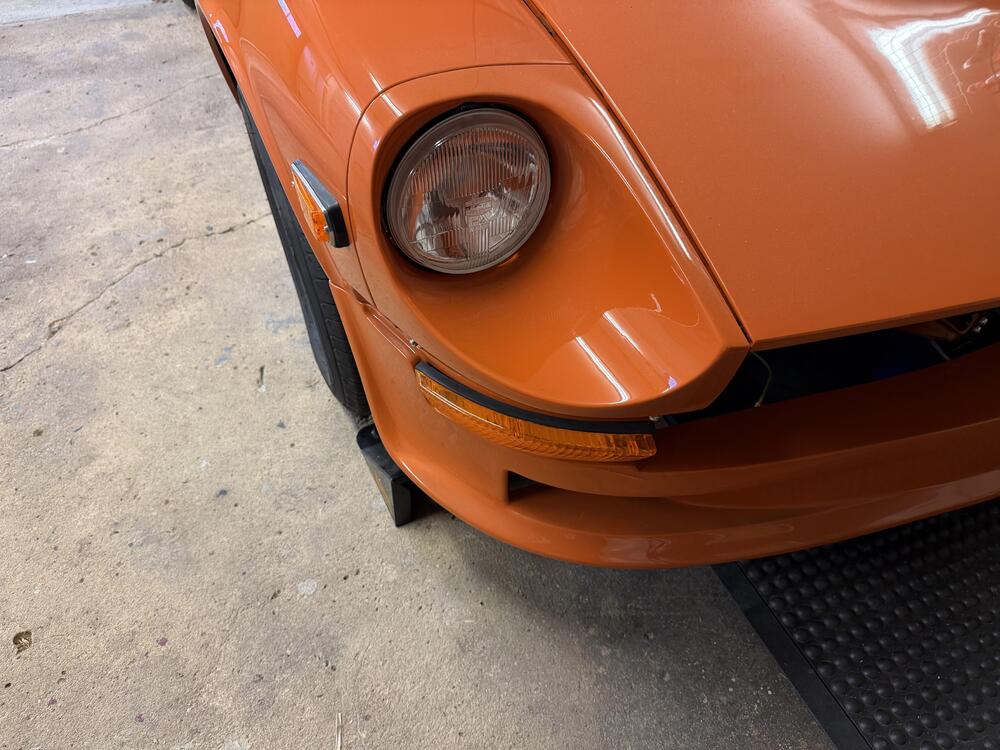
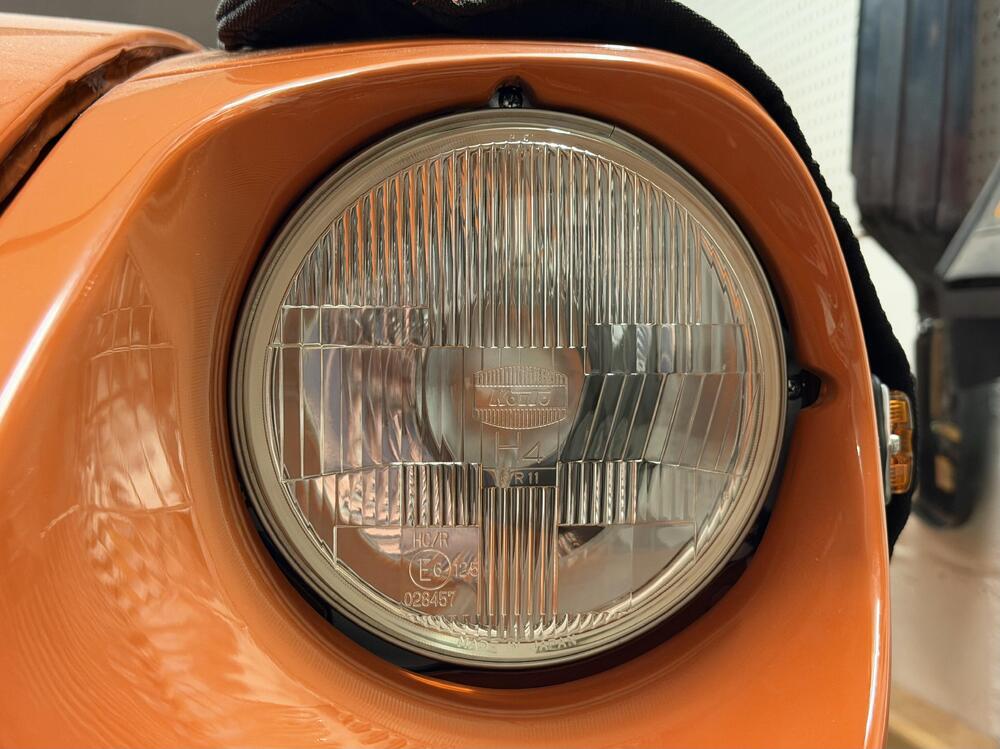
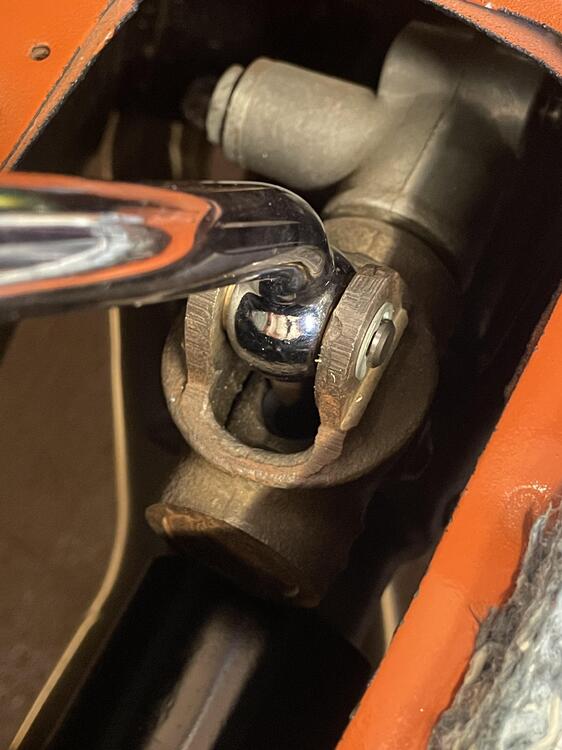
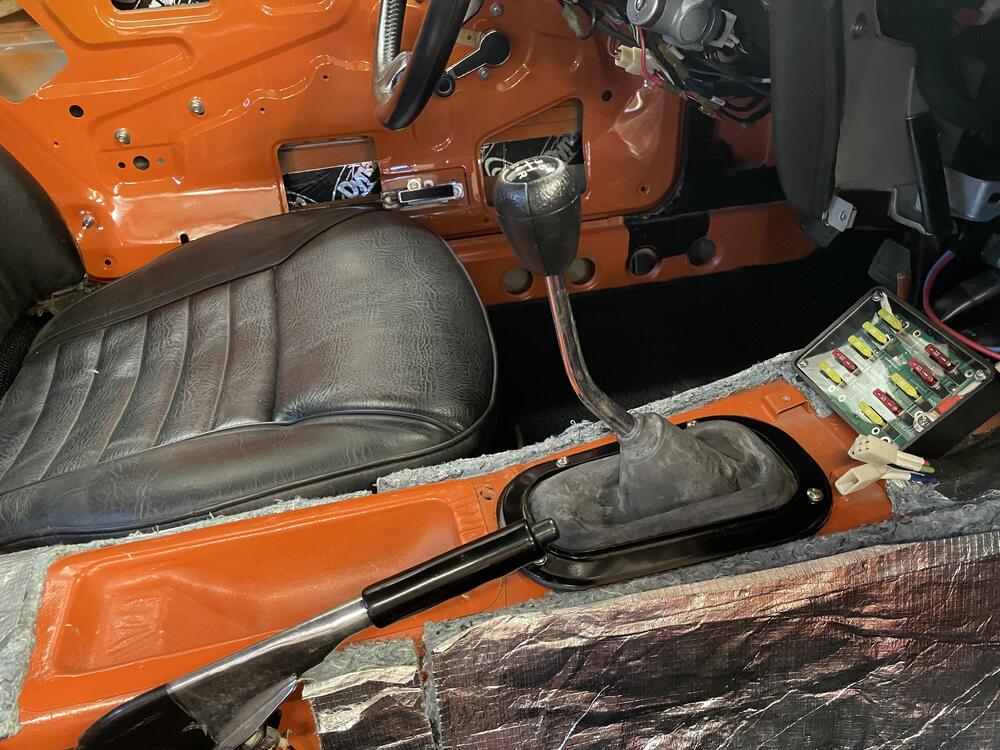
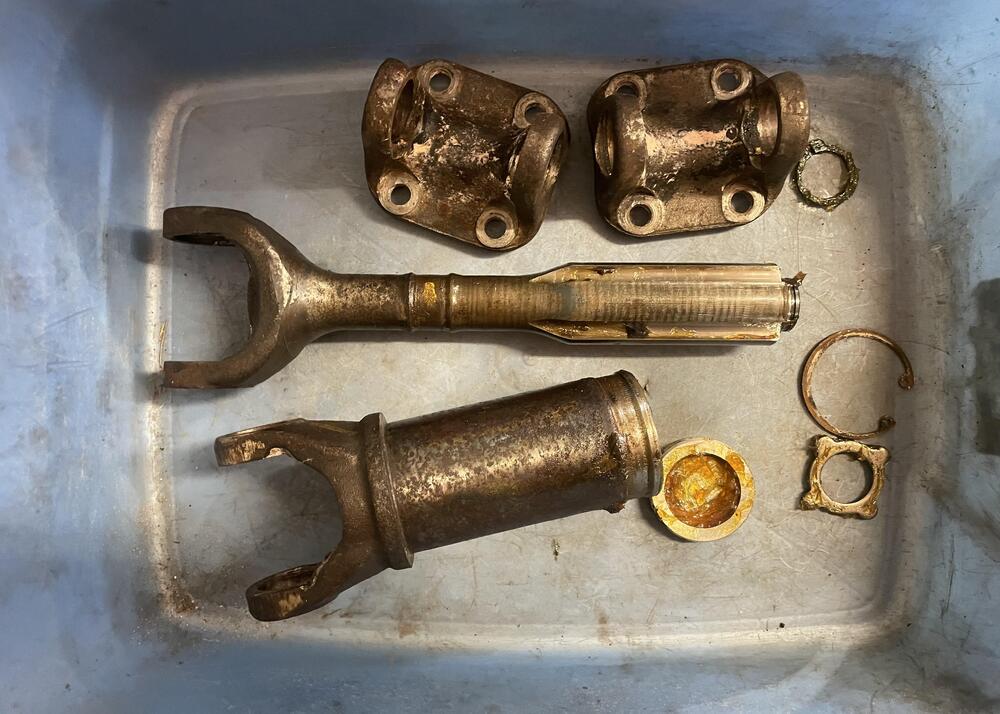
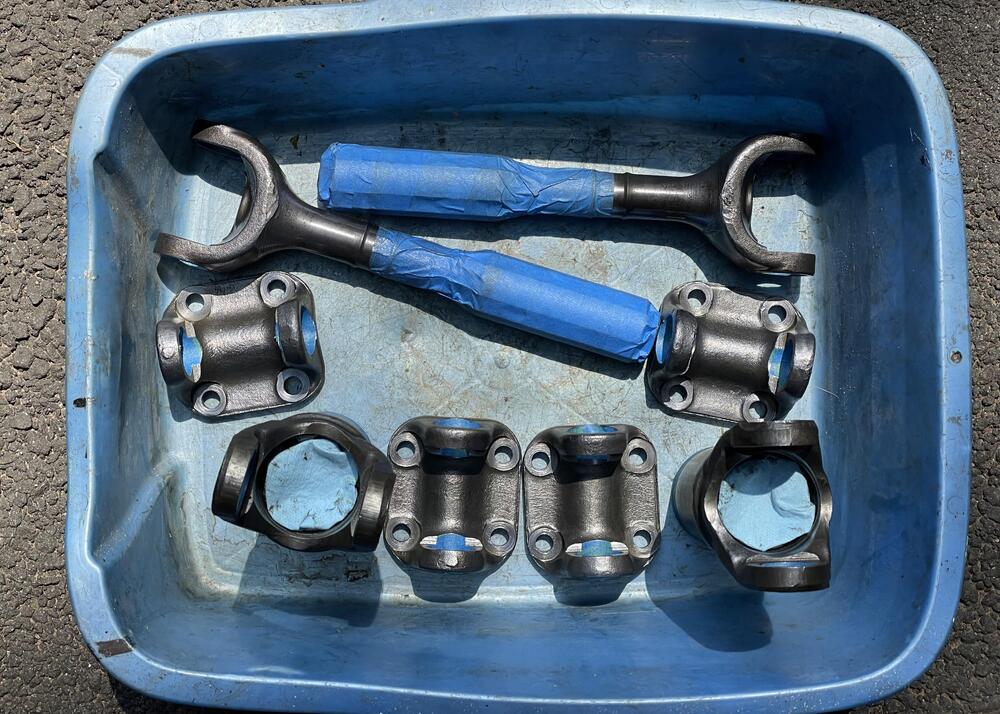
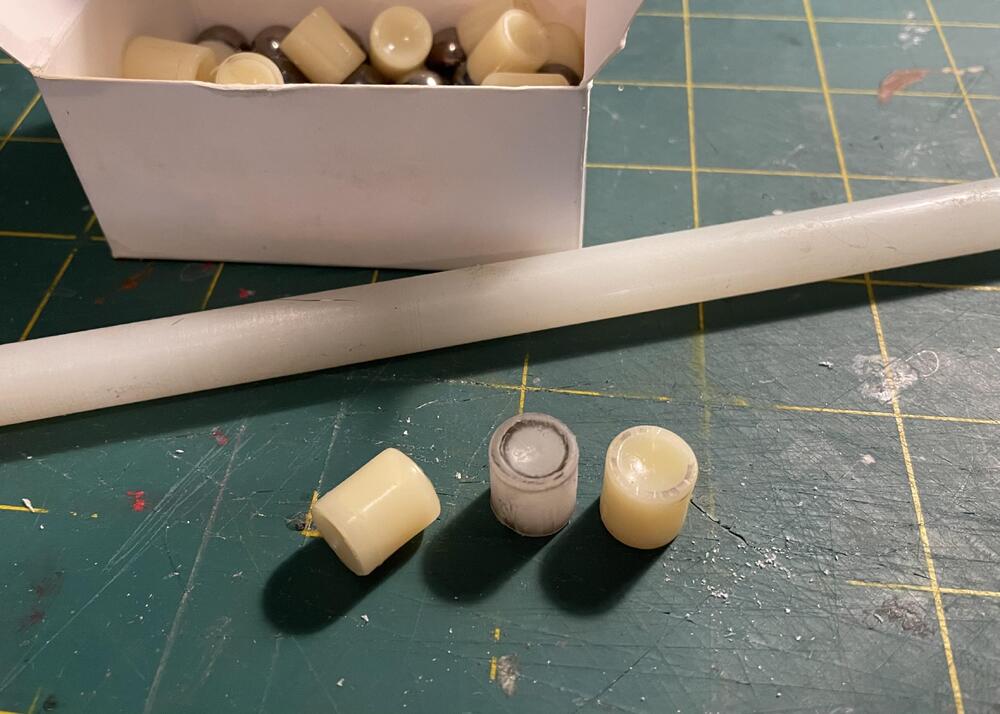
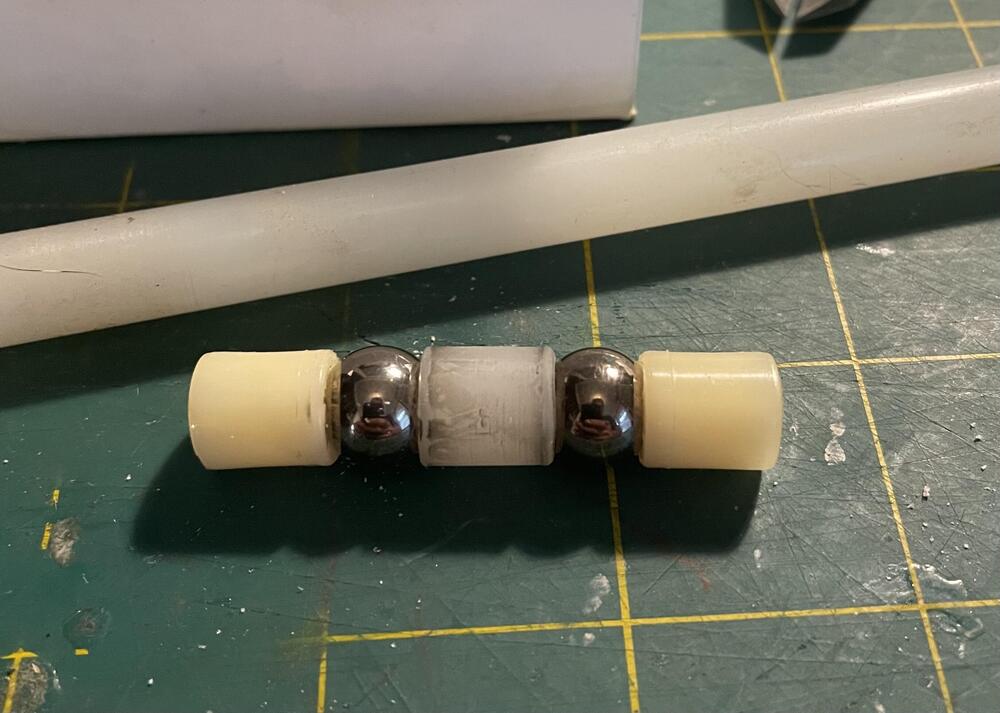
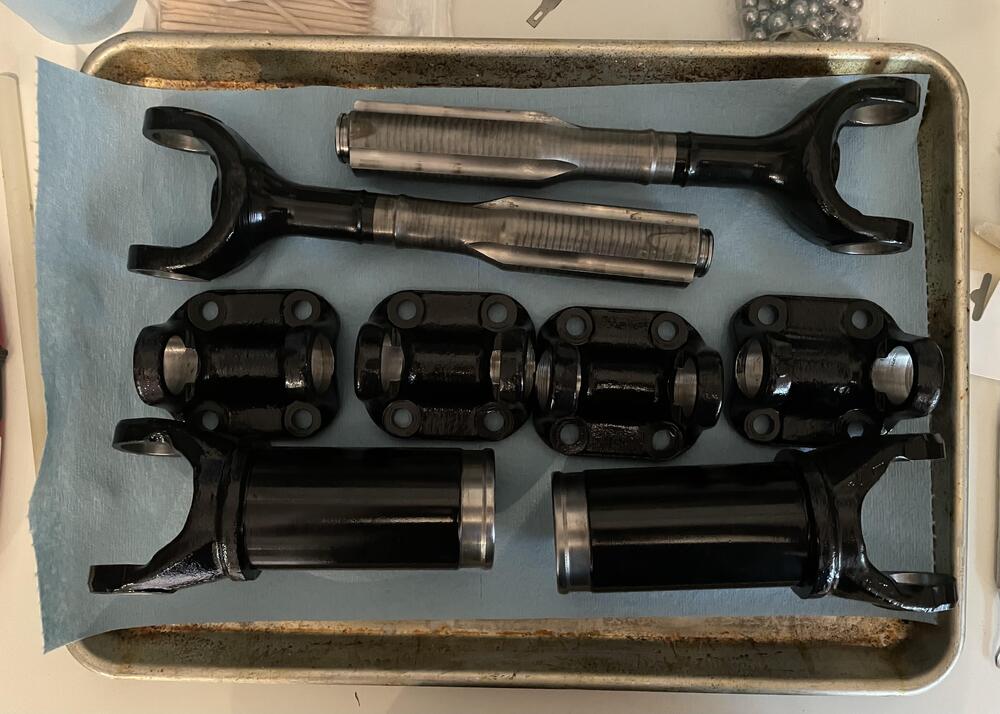
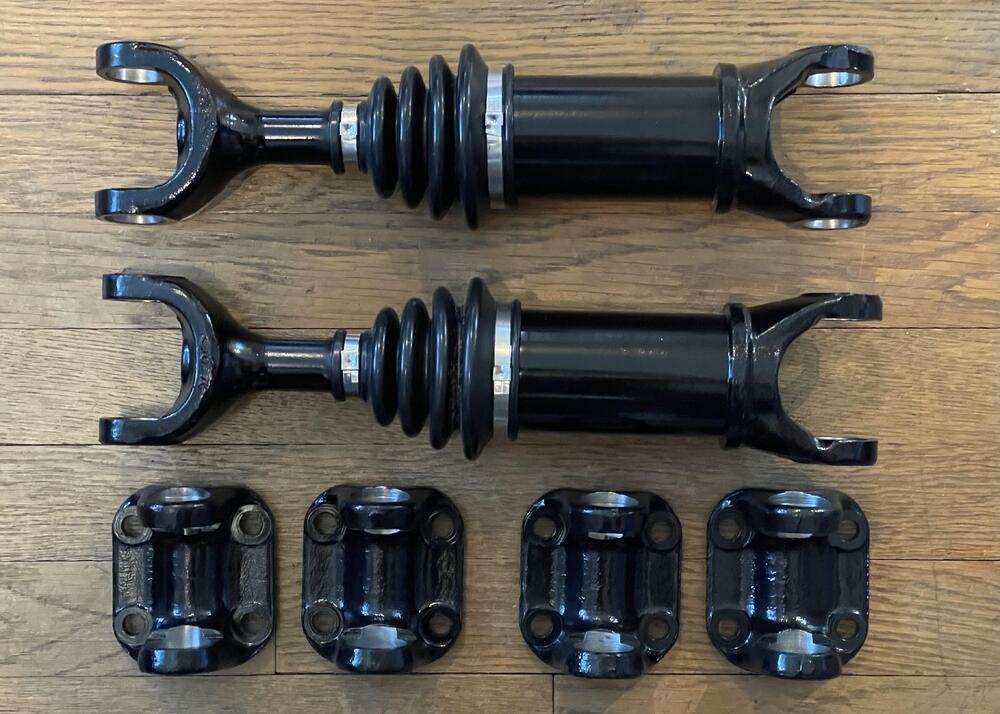
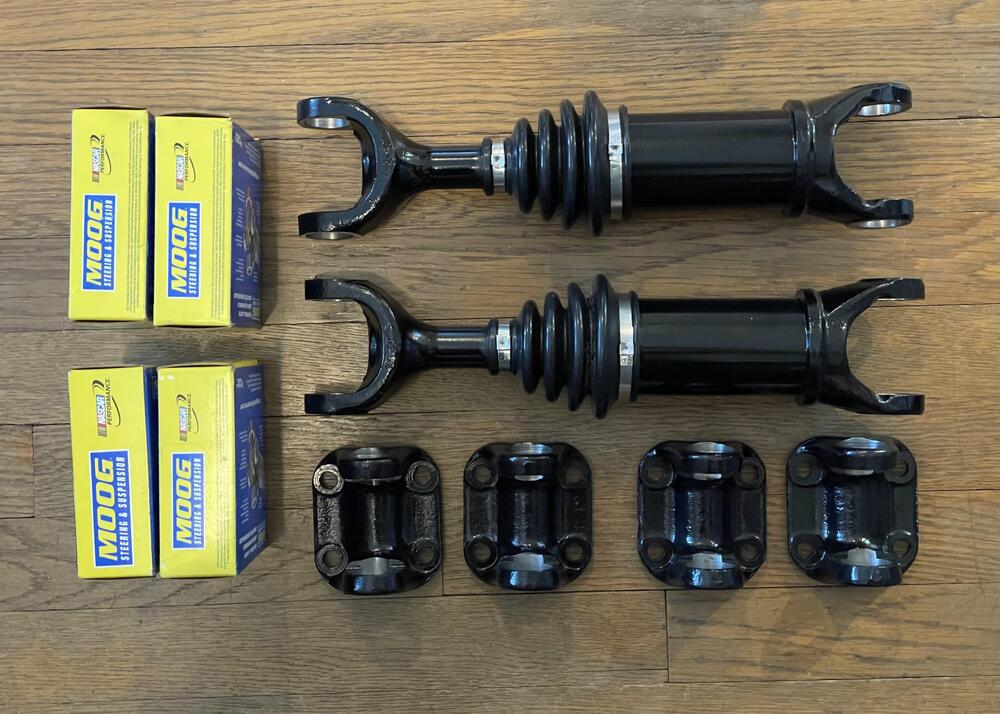
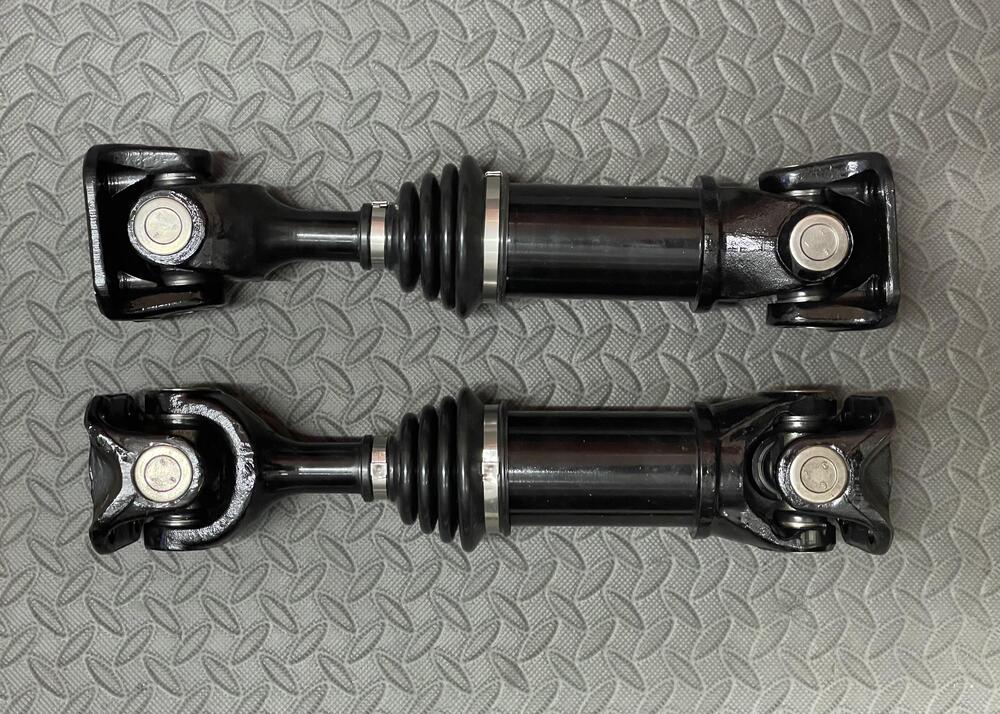
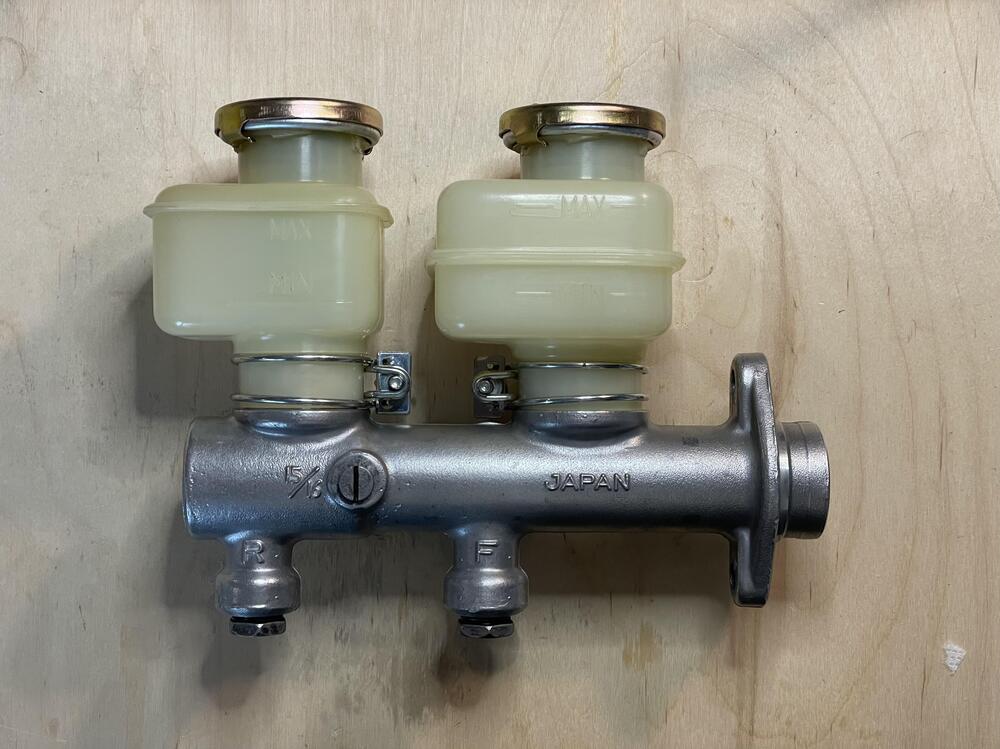
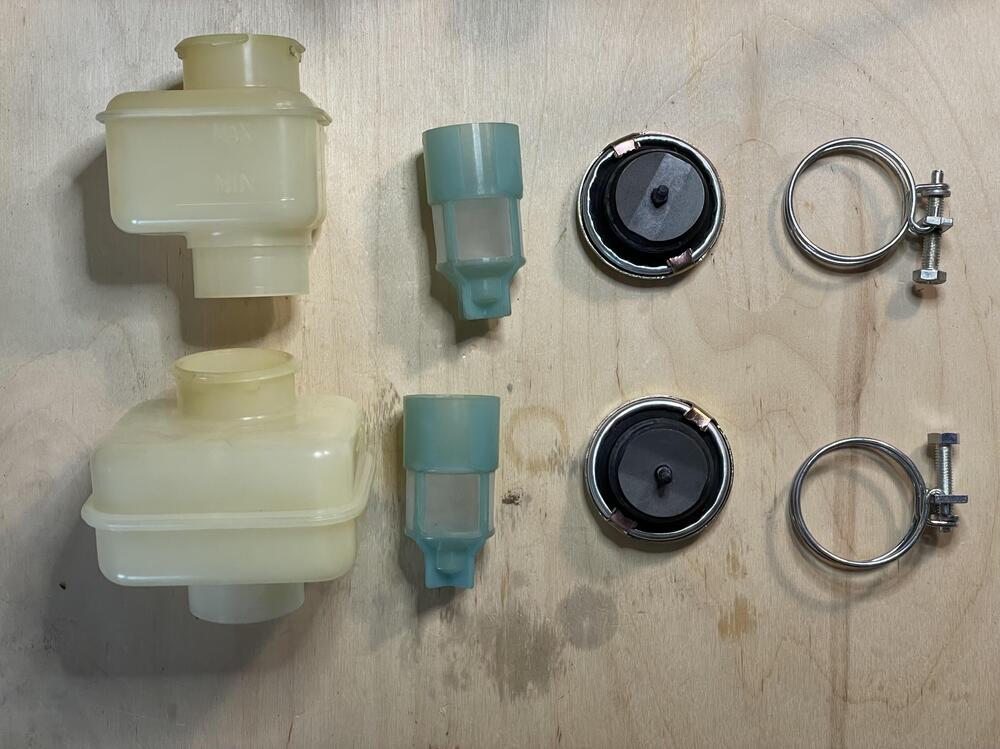
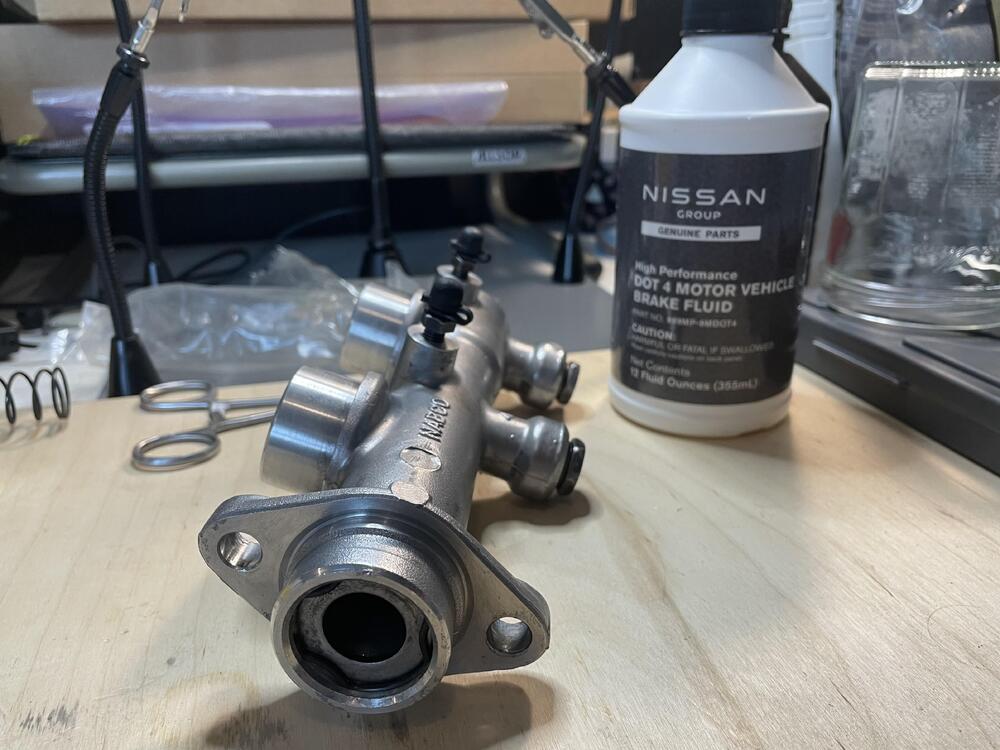
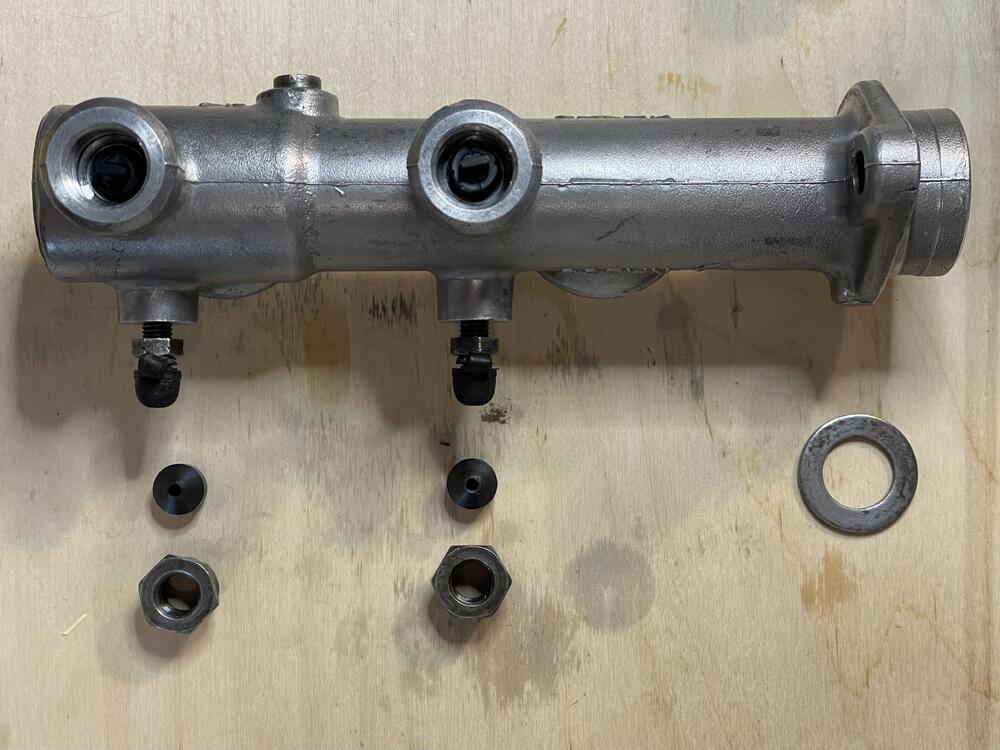
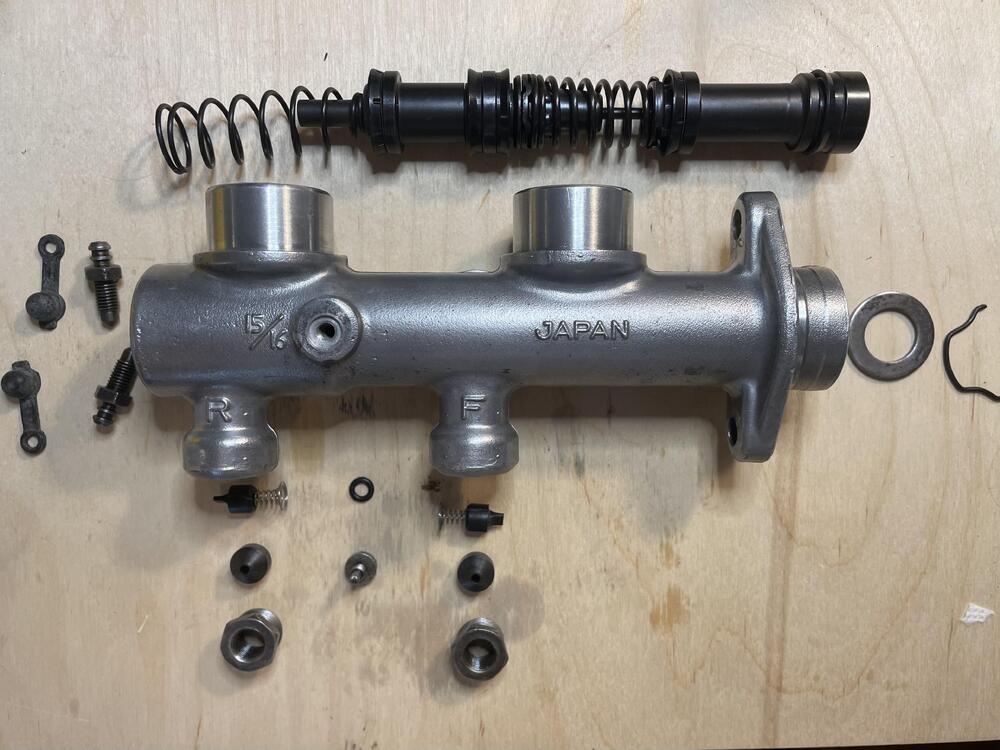
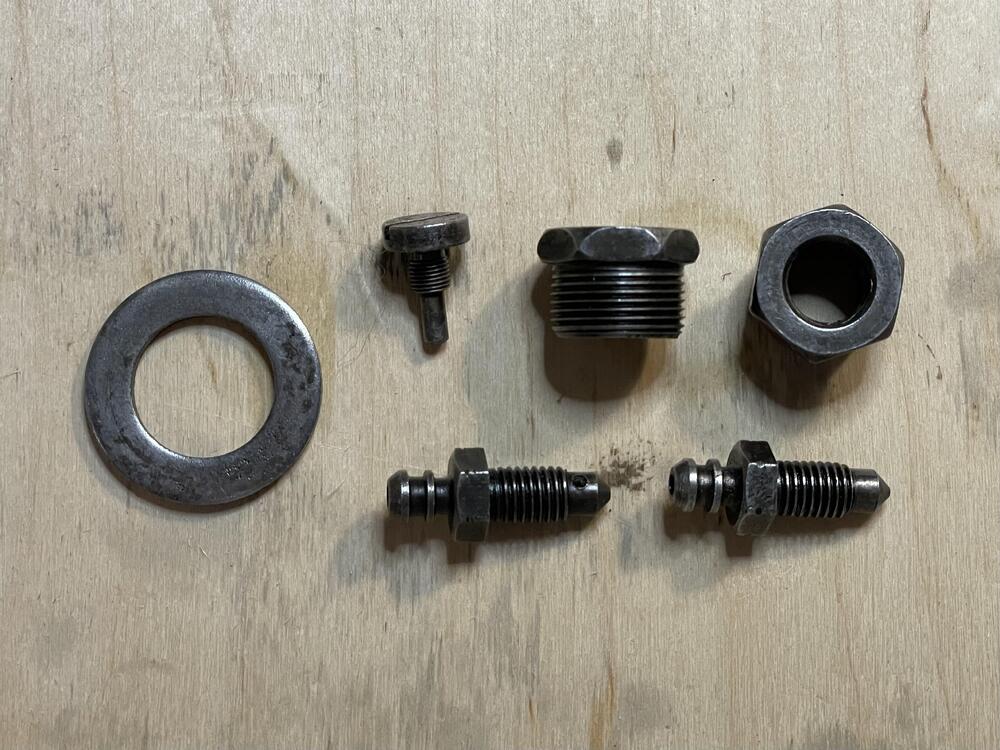
3 pointsI’ve been negligent in keeping this up to date, but I have been posting regularly on Instagram, so I’ll spend the next few days copying those updates over to here to catch you all up on my progress. ••• June 26, 2025 280ZX Brake MC is ready to go! I tore this apart several years ago thinking it would be a short project, but the rebuild kit I had turned out to be for the one made by Tokico (large perforated disc residual valves) and this one is made by Nabco (small rubber duckbill residual valves). I messed around with rejuvenating the reservoirs. I read using a mix of oxy clean and hydrogen peroxide gel under UV light for 24 hours would take the yellow out. It lightened them, but they’re still clearly yellow. Super clean, though. I also did some chemistry on the hardware. The bleeders and reducers for this thing are not common sizes (the reducers are m16x1.0 to m10x1.0) and after two weeks of searching for replacements I gave up and decided to try chemically treating them. I didn’t want to do the hardcore hot bluing or zinc methods because, so I used the rust bluing method. Basically, you soak them in white vinegar to strip off the rust and zinc. Then you paint them with a paracetic acid / salt solution (8 parts hydrogen peroxide:1 part white vinegar + as much salt as it will dissolve). Dry it with a heat gun and throw it into a double boiler. You’ll see the rust turn black as it changes into iron oxide. Buff it with steel wool and repeat until satisfied, then soak for 24 hours in motor oil. They came out okay. I was hoping they would look more like the pistons, but this is after four rounds, so it’s good enough. Fingers crossed that they don’t immediately corrode. You could also do the phosphoric acid version (cold bluing), but this makes a harder coating. Then I just had to hone the cylinder, flush it with 91% alcohol, wipe it out, and reassemble. I kept the Tokico 240Z reservoir caps since I didn’t wire the car for the ZX caps with the fluid level sensors , plus I don’t have the metal or plastic Nabco caps. Maybe later if I can find a set for less than €53.40. It looks pretty good after test fitting it. I’m waiting for a dust cover and O-ring in the mail, then I can install it and bleed the brakes. ••• August 7, 2025 This is not hard… … if all the parts are there. I took these axles apart and found one of them had been rebuilt previously, and whoever did that lost one of the bearings and spacers. So what should have been three days of work, including paint drying time, turned into three weeks of figuring out how to replace them. I ended up buying a bag of 11mm chrome steel bearings that were close enough to the same (0.09mm difference) and some 10mm wear-resistant nylon rod to fabricate a replacement spacer. Even though I have tons of new bearings now, I only replaced the missing one just in case that difference matters. All in all the spacer came out well; not perfect, but close enough. The rebuild process is pretty straight forward. Search the Classic Z Cars forums for instructions if you need them. Getting the boot on the inner shaft is the hardest part. I recommend finding some plastic tube that fits over the shaft, pushing it into the boot, and sliding it on that way. Make sure you use the prescribed amount of grease, which is 10g (about 3/4 Tbsp) at the top of each bearing channel. Once I had everything nice and clean (citristrip, a wire wheel on the bench grinder, rust inhibitor) I sprayed them and got them back together. Another jam I got into was two of my u-joints had the wrong part in the right boxes, so I had to order new ones and wait for shipping on those. But an evening on my home made press and they were done. Next step is installation. ••• August 20, 2025 Well that changes things. I realized about six months ago that this car started life as an automatic. With this last step that crime has been rectified. Brass bushings. Artificial leather 5-speed knob. New seals and trim. ••• September 1, 2025 Initial systems tests (clutch, brakes, transmission) and… IMG_8948.mov It moves! I had some friends over to help me test the systems that makes this an actual car rather than a very expensive 1:1 scale model. Everything seems to be working correctly. We didn’t get too far, though, because my fuel return and carburetor cooling system is leaking directly onto the header. So, test cut short, but massive fire averted. My wife was thoughtful and made a quick video of the car’s first roll under its own power, complete with my dog barking at everyone. ••• November 7, 2025 Well, I had planned to be wrapping up something else, but I’m having some issues with the paint, so here’s something else I did on the side instead: hatch latch & lock plus the rear bumper with OEM rubber trim. I forgot to take any before photos of the latch parts, but suffice to say they were rough. Lots of rust and primer. Very little zinc. So I stripped and buffed them and hit them with some stainless-blast from Seymour paint. Looks decent. Better than the CAD yellow experiment I did on the window regulators. The button is the one that came with the car after some vigorous attention from some steel wool. It was rekeyed to match all of the other locks and installed with a gasket from JDM Car Parts (not OEM but fine) and a brand spanking new clip from Zedd Saver because I lost the old one. The bumper is the chrome version from @resurrectedclassics. I’d say it’s 4/5 stars. Great fit but the gauge of the steel is a little thin so the mounting tabs flex more than I would like when installing, and the chrome finish is not as smooth/nice as I expected. There are occasionally streaks (kind of like brush strokes) where the chrome built up or the steel wasn’t smooth before it was applied. If I had it to do over I would go with the stainless version. ••• November 16, 2025 Steps 1 through 5 of getting my Koito H4 headlight kit installed. These frames were covered in paint (three different primers, metallic blue, orange, and red) and one of them is from a different year. I’m 99% sure the right front fender was hit as some point and they just replaced the entire corner. Acid bath for the rust. Steel wool. Eastwood Clear Zinc as a base coat, then dusted with Silver Cad to knock back the blue and give it a more metallic look. Then satin clear coat to keep it from rusting. Almost indistinguishable from the zinc coating on the springs. All new hardware from Z Car Depot except the covers for the adjustment screws, which I cleaned up and reused. Tip: to get the various plastic parts on, drop them in a bowl of almost boiling water for one minute, then press in. ••• November 27, 2025 Parts 6 through… whatever, 27?, of putting the headlights in. I was able to wire up my Koito H4 kit this week. It took a while to get to because I had to find the right size flag terminals for the bulb connectors. I could have gone with straight connectors, but the kit comes with a wiring harness that has nice 90° connectors with really snug boots. Unfortunately I couldn’t just use the harness as is because I wired the car to have the headlight relay in the cabin. So I scavenged what I could. The right side went together in a snap. I had some vinyl tubing left over from making the harness that just barely fits through the grommet on the back of the headlight can. It took a while to squeeze the wires though, but once done I had a fully waterproof setup (at least from the back/outside. The cans can still get water in them from the gap around the light, but hopefully that will be minimal and drain out. I’ll try to remember to blow it out with canned air when it does happen. One small problem I’m having is the light switch doesn’t want to work 100% of the time. There’s a contact that isn’t working consistently so I’m going to have to pull it out and re-rebuild it. I haven’t tried them at night, but I assume these are comparable to my Crosstrek H4s, which are adequate. All these people with LED headlights in cars not meant to have them are pissing me off on a daily basis, so I’m not going to be one of them. If I have to go with LeDs it will be complete lights, not just replacing the H4 bulbs.


 3 points
 -
3 pointsCan we just be thankful folks out there are trying to keep these S30’s alive . It’s going to come to a point where parts are dwindling far more than they already have. Personally speaking for myself I am thrilled that innovative ideas arrive and we can move forward. Once they do or do not fail we all learn from it and continue to improve. My 2 cents.3 points
-
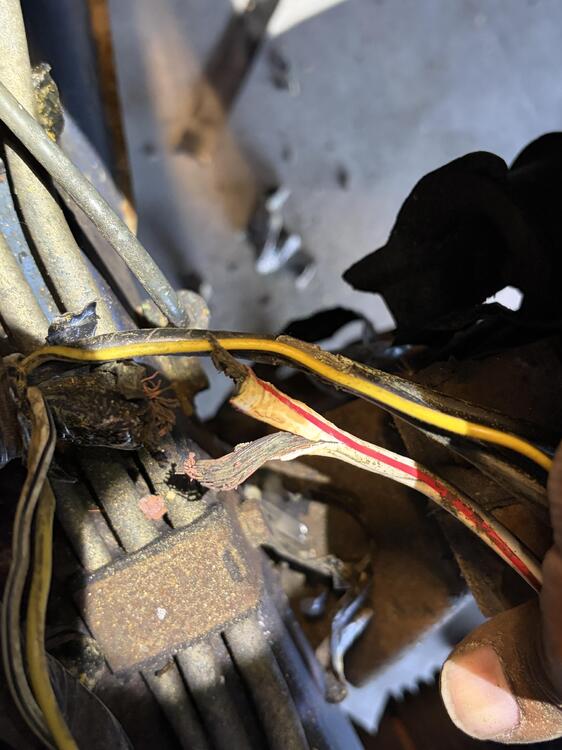
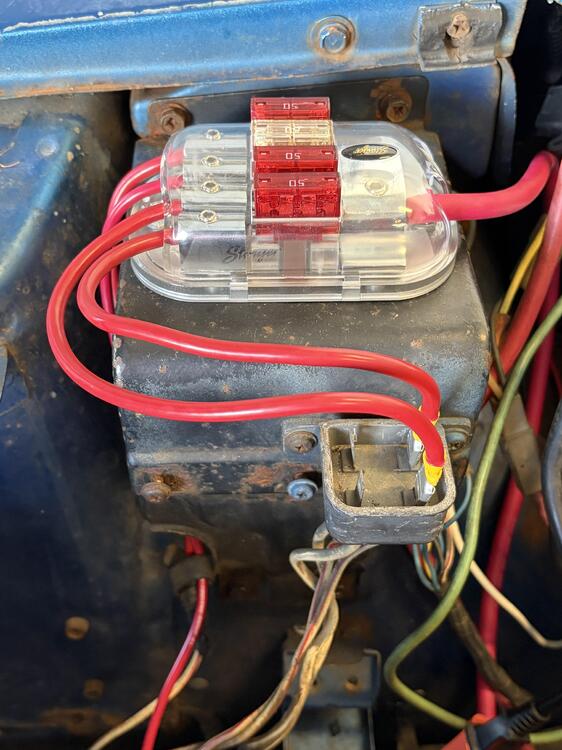
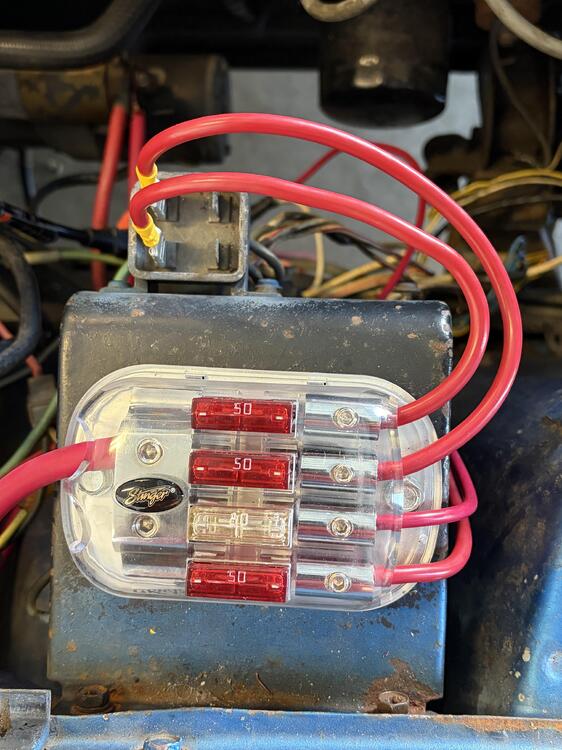
3 pointsUPDATE: I ended up finding the issue in the main power wiring between the alternator, starter, and fusible link area. I had upgraded to a maxi fuse setup to replace the fusible links, but it didn’t change anything electrically. While troubleshooting I noticed there was no continuity on the main white B+ wire or the two white/red wires that run back to the fusible link area, so I started unwrapping the harness to investigate. Inside the harness between the alternator and starter I found the main white wire from the starter to the alternator partially burned, along with two white/red wires that feed back to the fusible link block. The fusible links had been removed by a previous owner and the wires had been tied together with wire nuts. Those three wires were damaged and preventing battery power from reaching the battery-side fuse box, and also interrupting the alternator charging circuit. I cut out the burned sections of the wires and respliced them properly, restoring the connection between the starter, alternator, and fusible link wiring. After fixing that the alternator started charging and the car powered up normally. I’m now seeing about 12.6v engine off and 13.3–14.0v running. At this point everything works except the turn signals, hazards, and dash illumination, so that’s the next thing I’ll be tracing.
 3 points
 -
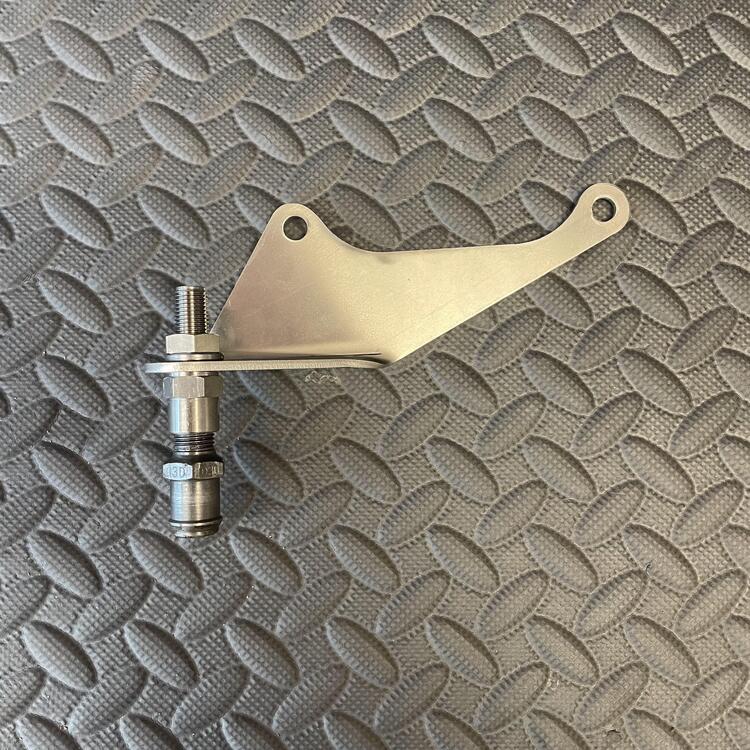
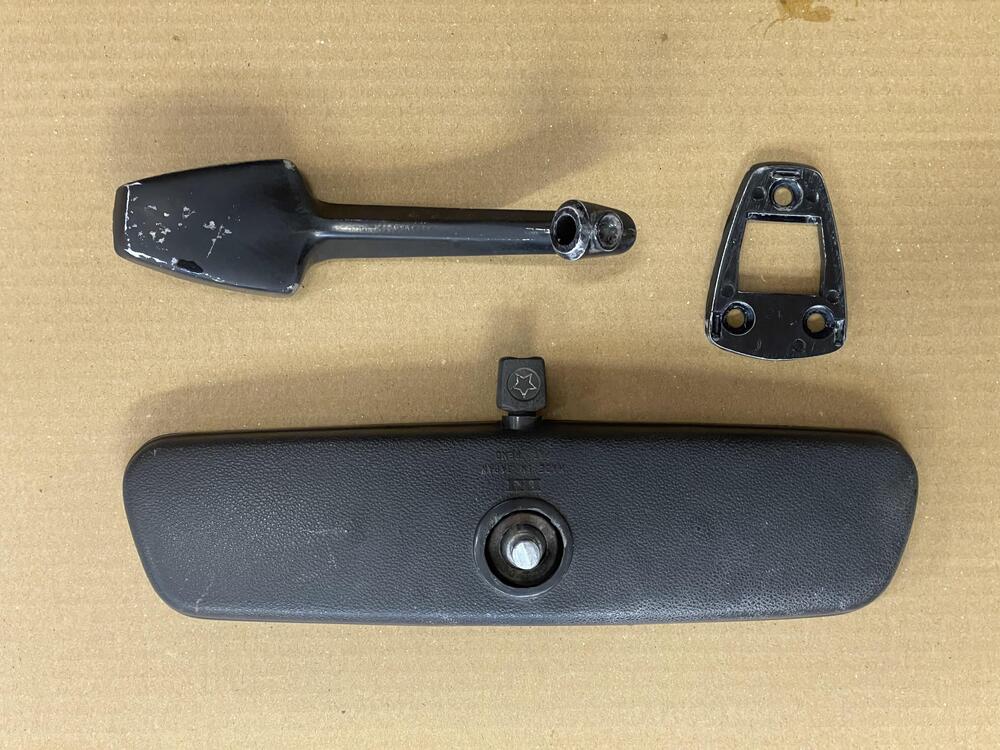
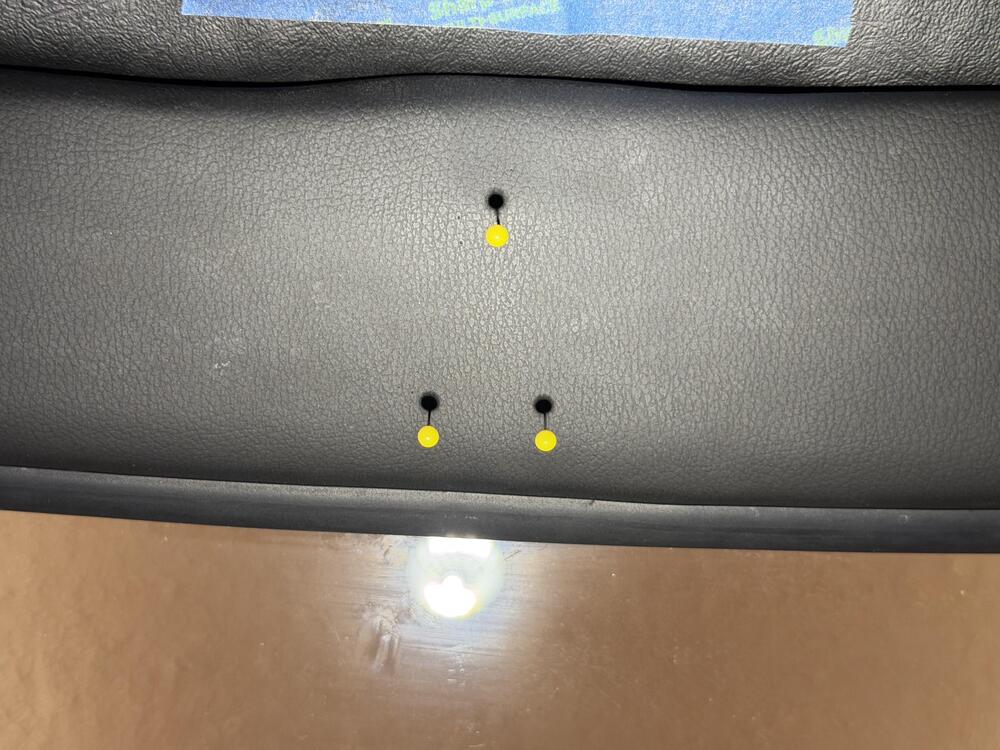
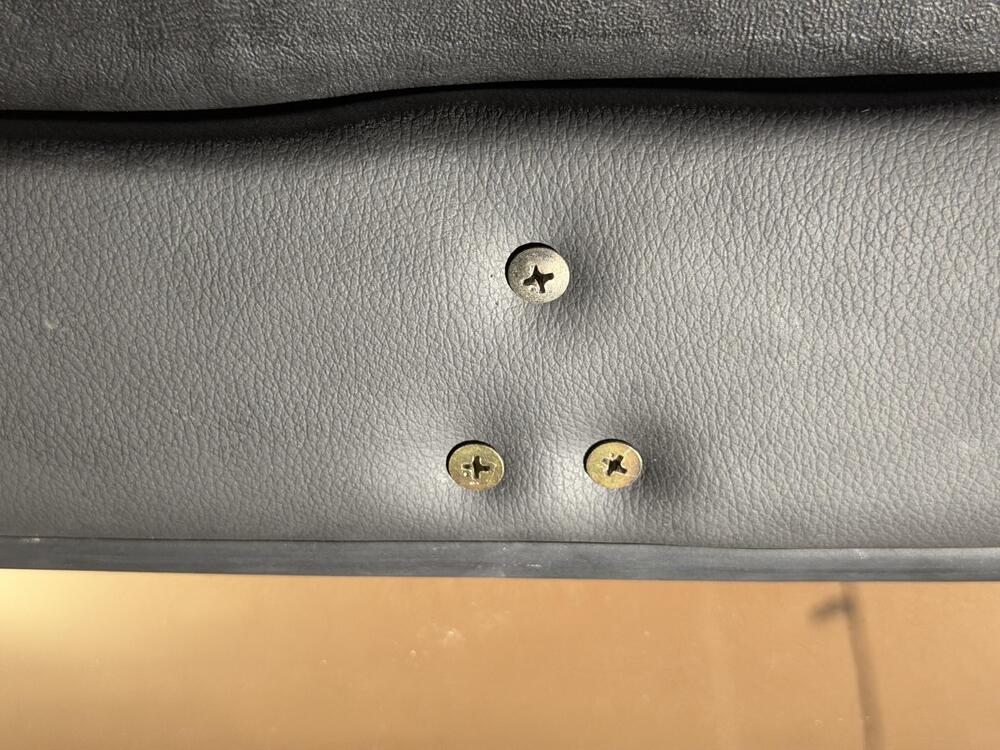
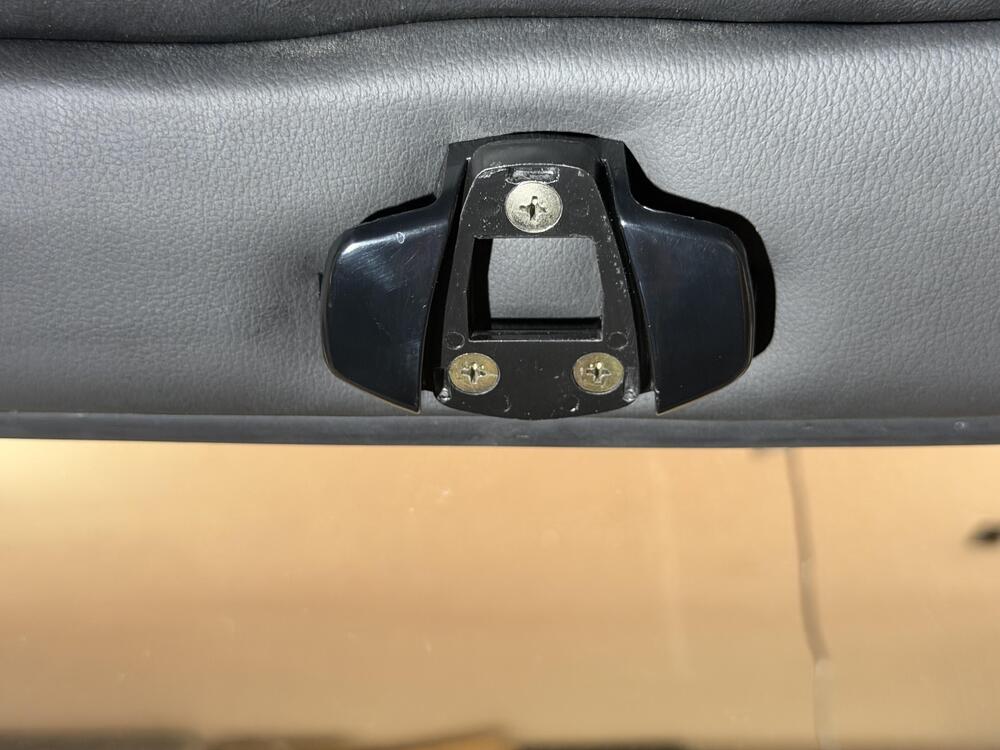
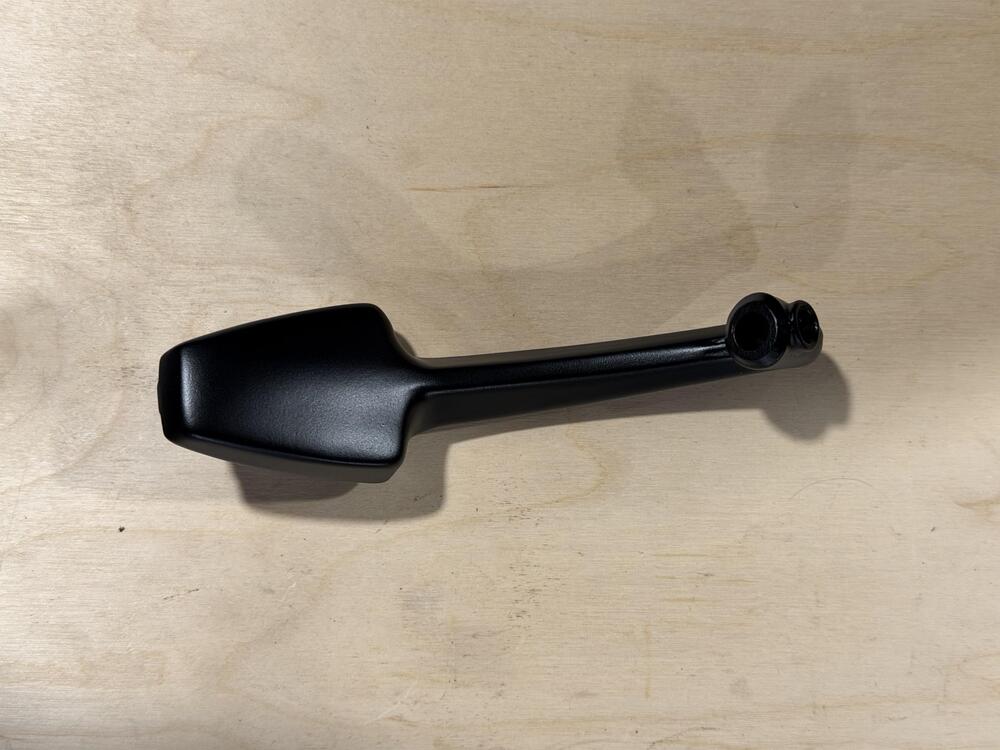
3 pointsThe middle one looks like a tool used to release the circlip on the window mechanism handle.3 points
-
3 pointsThe original vapor barrier is very thin, transparent plastic. I bought a roll from Home Depot ages ago, something like this: https://www.homedepot.com/p/Husky-10-ft-x-100-ft-Clear-2-mil-Plastic-Sheeting-RS210-100C/202184044 For sticking it to the door, I really like this stuff: The plastic sticks to it, and it to the door, really well even in the heat of summer. If you have to open it up to get inside the door, you will have to make a new plastic sheet, as it will not pull away from this product without damaging the plastic. It is an easy job, so no big deal.
 3 points
 -
3 pointsHi everyone, We’ve introduced an updated user group hierarchy here at The Classic Zcar Club. This change helps us: Keep the forum safe from spam and scams Protect our technical downloads and resources Recognize the members who actively contribute to the community Below is a quick breakdown of how the new system works. 👀 GuestVisitors who are browsing the forum without creating an account. Permissions • Read-only access to public areas • Cannot post, message, or download files These are typically casual visitors, search engine traffic, or the occasional internet bot wandering through the garage. 🆕 New MemberMembers who have recently joined and completed email verification. New Members can participate in the forum normally, but a few temporary limits are in place until they reach 10 posts in public forums. Temporary Restrictions • Private messaging disabled • Downloads limited to 1 per day • Minor account limits in certain areas These safeguards help us prevent private message scams, spam accounts, and automated downloading of community resources. Once a member reaches 10 posts, they automatically move up to the next level. 🧰 Community MemberMembers who have made 10 or more posts and are actively participating in the club. At this stage, all normal forum features are unlocked, including: • Private messaging • Full download access • Normal forum participation across the site This level represents members who are actively engaging with the Classic Z community. ⭐ Supporting MemberSupporting Members are Community Members who have chosen to support the club through a subscription. These members help keep the forum running and receive: • Highlighted username recognition • Access to potential extra perks and benefits • The appreciation of the entire community for supporting the site You can learn more in the Subscriptions section of the forum. 🙏 Thank YouThe Classic Zcar Club has always been about sharing knowledge, helping each other, and keeping these amazing cars on the road. Thank you to everyone who contributes, supports the club, and keeps the community thriving. Spring driving season is almost here… time to get those Z’s out of the garage. See you on the forums! — Mike 🚗3 points
-
Chris, thank you for listing on BAT with such incredible detailed pictures. These should be a must for most all restorers to reference in the future. It is incredibly bad luck to have a war break out during listing with the associated doubt in all our minds during this period. Zspert said above lower values with the lack of “free” money floating around for last 2 years. The passion exhibited by your company is contagious and will be rewarded with the satisfaction of accomplishment and respect we all for your endeavors of restoring our great z!!!3 points
-
3 pointsHello everyone, my name is Daniel. I’m a longtime car enthusiast with a particular appreciation for classic Datsuns. About 15 years ago I owned a 1969 Datsun 510 project. It was already fully disassembled when I bought it, and after discovering extensive body filler and juggling life with two young kids at the time, it became more than I could realistically take on. I ended up parting it out, but always intended to return to a Datsun someday. Recently I picked up a 1977 Datsun 280Z, 4-speed, complete and running. The car is largely stock and in decent shape, but it does have a few issues I’ll be working through — mainly electrical cleanup, fusible link replacement/upgrades, EFI power questions, rust prevention, and general reliability items. I joined ClassicZCars to learn from the experience here and to approach the car the right way, with an emphasis on preserving what makes these cars special while improving reliability where it makes sense. My goal is a clean, dependable driver rather than a rushed or heavily modified build. I’m looking forward to learning, contributing where I can, and sharing progress as I go. Thanks in advance for the knowledge and guidance.


 3 points
 -
Had a note in my files - Clint Duncan on FaceBook was looking for his Dad's Z - HLS30 01515. Left him a message on FB.. no response so far.3 points
-
3 pointsThis is certainly a milestone event. If you have never seen this original owner 240Z, either at the ZCON where it won or at a local DFW show, you are missing a true winner. What makes this combination of owner and car extra special is that Jim is so very supportive of the Z community, both on this forum and in person. People have strived to duplicate the care that Jim bestows on his Z. No amount of money and time can duplicate this original owner’s joy of a Z. Jim, thanks for your continued support of The Z Club of Texas. Showing up at an event with my 920 and seeing you and your Z always reminds me that a Z is more than just a car. Keith3 points
-
3 points
-
3 points
-
I'm always amused to see discussions of component paint finishes defined as 'matt', 'satin' and 'gloss', as though there's nothing in-between. Some of the first restoration-linked discussions I ever had with like-minded enthusiasts about these cars were on the bewilderingly diverse range of finishes observable on the various parts of the cars. But we should not be surprised. The components of these cars were made in many different factories and facilities by many different companies, both within the Nissan fold and without. So the black paint used on the spokes of the steering wheel when Izumi made it is not necessarily going to be an exact match to that of the seat mounts (which - by all accounts - was applied by a Nissan Shatai line worker armed with a pot of paint and a brush...), and the black paint on the suspension legs made by Atsugi is not necessarily going to match that of the diff casing made by Fuji Heavy Industries. Hair-splitters (guilty as charged) might also imagine differences depending on who was wielding the spray equipment/paint brush, what day/time (Monday morning vs Friday afternoon?!) and even what month of the year. Not stirred thoroughly enough? A little too much thinner? Getting near to clocking out time? If you've ever worked in a manufacturing environment some of this might be familiar to you. The production line at Nissan Shatai was a busy place from late 1969 and through 1970, when the car in question here was being made. Like a good garden, A Little Bit Of Chaos would always have been involved... Not forgetting that we are now unable to source/use many of the formulations of paints originally used on these cars 55+ years ago. We have to use modern - safer, more environmentally friendly - formulas which cannot be expected to be an exact match to what was used in period. So a fair amount of pragmatism is required both by the restorer, and by the observer/judging panel.3 points
-
What an amazing restoration! I only wish I had this much reference material available when I redid my car 15 years ago (not that I could have approached this level of quality). I see what appears to be light reflected on the spokes of the steering wheel, suggesting the finsh is a semi-gloss or gloss. The original finish on the spokes and hub was a non-reflective satin black.3 points
-
So, I collected and got gifted a lot of cool stuff again over the recent weeks, and I have more updates coming in the next days ... First, I finally got a set of good reproduction Carb insulators for the Mikuni 44 PHH's thanks to my man Glenn who helped me with those! He was also kind enough to put a few nice freebies, like the 2026 JCCS calendar and a BRE fan into the box. Thanks mate! I also got an original admission ticket from the 1969 Tokyo Motor show, where the S30 was shown first. This will go nicely into a frame next to the S30.world museum opening ticket: From my man @RIP260Z , I got a very nice Kobe Sieko sticker reproduction, based on an original Sticker design. Thanks a lot, buddy - I love it! I recently got laid off and my former employees were kind enough to give me a few thoughtful gifts for goodbye, including a Rally car die-cast, a Datsun flag and this beautiful card which one of my former team-members drew. From my man Stefan, I got some cool NOS bits in exchange for some other items: a few relays, gaskets, steering coupler and drum brake parts: This also included a set of Mystery relays which have a Su-I-Su (= Suisse = Switzerland) Stamp on it. We're both very keen to figure out what it is for. Most probably not S30 related but cool nonetheless! Now to the stuff from Japan: I Sourced some cool vintage stickers, magnets and a Checkman horn button: And a bit of a special Clay model, which I've been tracking and hunting since 2019. I will post about this tomorrow in a separate story. And the probably rarest item: an original, NOS Group 4 racing overfender: The former owner in Japan was a trustworthy source and the price was more than fair, so I had to get it. @HS30-H confirmed that the Fabric and Part-number writing look correct for a factory part, so it seems to be a legit item. I had to put it on my car just for fun's sake: You might have realized that I've put it the wrong way around and on the wrong side of the car, as it first didn't make a lot of sense to me the other way around, but the FIA Homologation clearly showed me that I was wrong, and that cutout was for the G-nose front bumper. The quality of this item is clearly a factory item. It's quite heavy, thick and stiff and the surface very smooth. Lucky me :-) Here you can see how it's installed correctly on a car with the full bodykit. Picture taken from our visit to the NISMO HQ last year. Stay tuned for more updates on parts and the car itself in the coming days!2 points
-
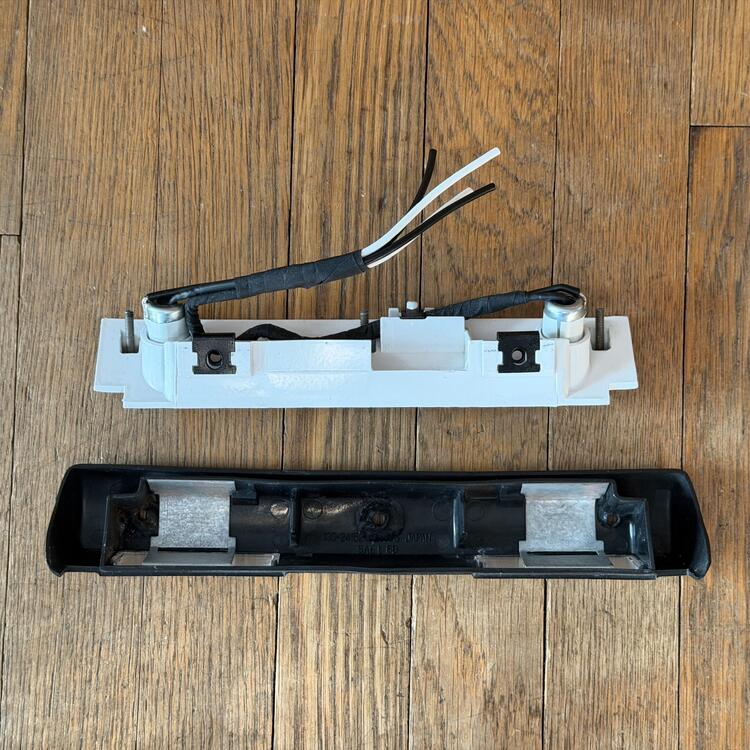
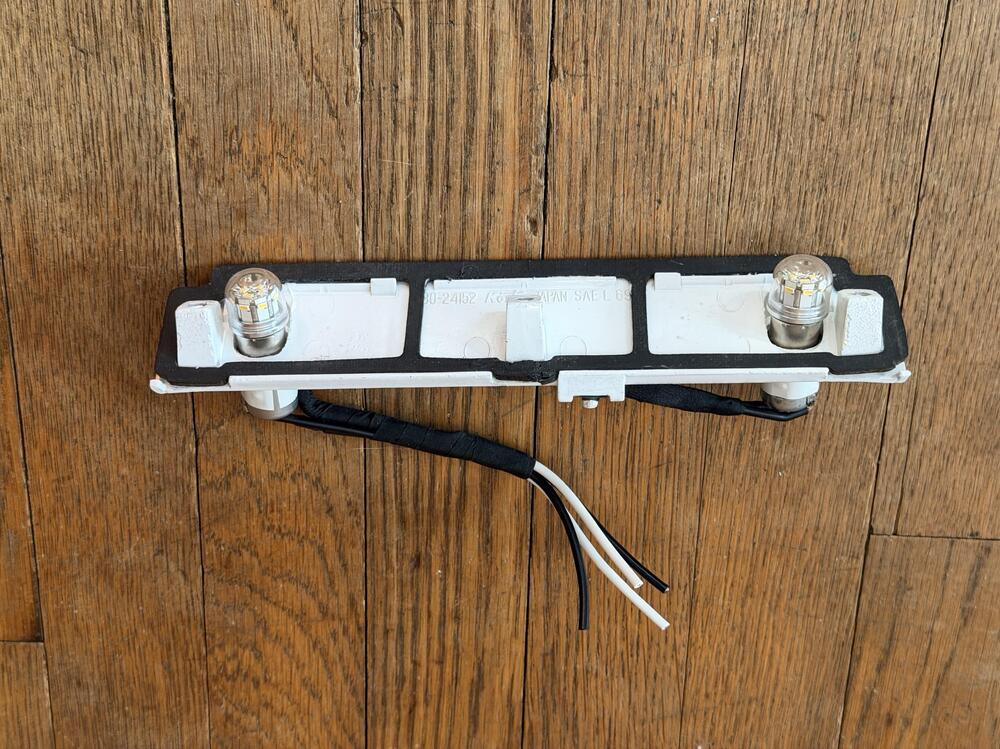
2 pointsHere are some pics of a OE license light. Compare yours and how it is assembled to see if there is anything different. The OE light has a rubber gasket between the two pieces, light should only be visible thru the two lenses that face down towards the license plate. Hope this helps.


 2 points
 -
2 pointsI was just about to say the same. On the 280Z's the relay is in a leak zone. Not good!
 2 points
 -
2 pointsMany circuits in the fuse box get power from the ignition relay. Are you sure that relay is functional? It is found on the passenger kick panel. Since it is mounted upside down, it is prone to water infiltration/corrosion over the years. The fuses in the red box only have power with the key in ON and ignition relay functioning. The fuses in the green box only have power with the key in ACC or ON and the ignition relay functioning.

 2 points
 -
2 points
-
2 points
-
Thankyou for confirming my suspicions! I missed purchasing that A-16-100 Kit last week on eBay. Someone else picked it up! I’m pretty sure the A-16–105 kit has the correct ignition tumblers in it also. I did manage to pick up a set of Curtis key punches though and a code book. Looking forward to having this capability to match lock sets.2 points
-
That method will not work for the Z because the Z ignition lock uses a solid pin for retention, not a roll pin. I mean, I guess you could drill directly into the pin and then thread it and use a puller to yank it, but the geometry is all just so small. Last time I removed a pin, I drilled into side of the lock cylinder (figuring that I didn't care if there was a hole in it since I was replacing it anyway). Something like this:


 2 points
 -
2 points@dtejada Congrats and welcome! I think you'll find this forum to be pretty awesome and to be a great resource. I joined a long time ago (when my wife gave the okay to start looking for a project car), and I bought my 280Z about 3 years ago. I have learned a tremendous amount in that period of time. Whatever you run into, there's a good chance someone here has had that or a similar experience. I'm a little behind on documenting things as life, kids, etc. tend to help push things to the right on the schedule. If you have not already, get an FSM and a wiring diagram for your model year, those documents have been life savers for me, as well as posting here when I get stumped or hit a snag.2 points
-
2 points
-
2 points
-
2 points
-
2 pointsI suggest using a marine type maxi fuse holder. Littelfuse makes a line that I believe would work well. It's the Maxi 152 series. https://www.littelfuse.com/products/fuses-overcurrent-protection/fuse-holders-fuse-blocks-accessories/fuse-holders/in-line-fuse-holders/maxi-152 I am thinking it would be a part number like 01520005Z. I attached the cutsheet from Littelfuse. Littelfuse-MAXI-152-Series-Datasheet.pdf To crimp the terminals properly, you would need a set of crimpers like this: https://www.amazon.com/dp/B0978S514B Are you sure the voltage regulator has been jumpered out? You can verify with a multimeter. Measure voltage to ground on the yellow wire at the T plug on the back of the alternator. If it has voltage, the regulator has been jumpered out. However, if that's the case, it would cause problems when the car is running, like human sacrifice, dogs and cats living together... MASS HYSTERIA! Okay, maybe not that bad, but you get the picture.2 points
-
2 points