Leaderboard
-

siteunseen
Community Member6,478Points15,183Posts -
conedodger
Community Member5,427Points13,006Posts -
Captain Obvious
Community Member4,982Points10,150Posts -

Zed Head
Community Member4,710Points19,554Posts


Popular Content
Showing content with the highest reputation since 10/25/2006 in all areas
-
19 pointsI've worked for 2 people, self centered narcissistic micro managers what's in it for me type for 35 years. I made a life improving decision to go to the corporate workforce and after two weeks I love it! When I leave I LEAVE. Nothing but family matters when I clock out now. They don't even know my phone number. I took a small pay cut but the nonexistent stress evens it out by way far. My beer and stress eating make up the difference plus some. Money is time don't jive anymore. How I spend my time is #1 now. So now my time is worth more than money to me as it should be to everyone else too. Smell the roses my friends.19 points
-
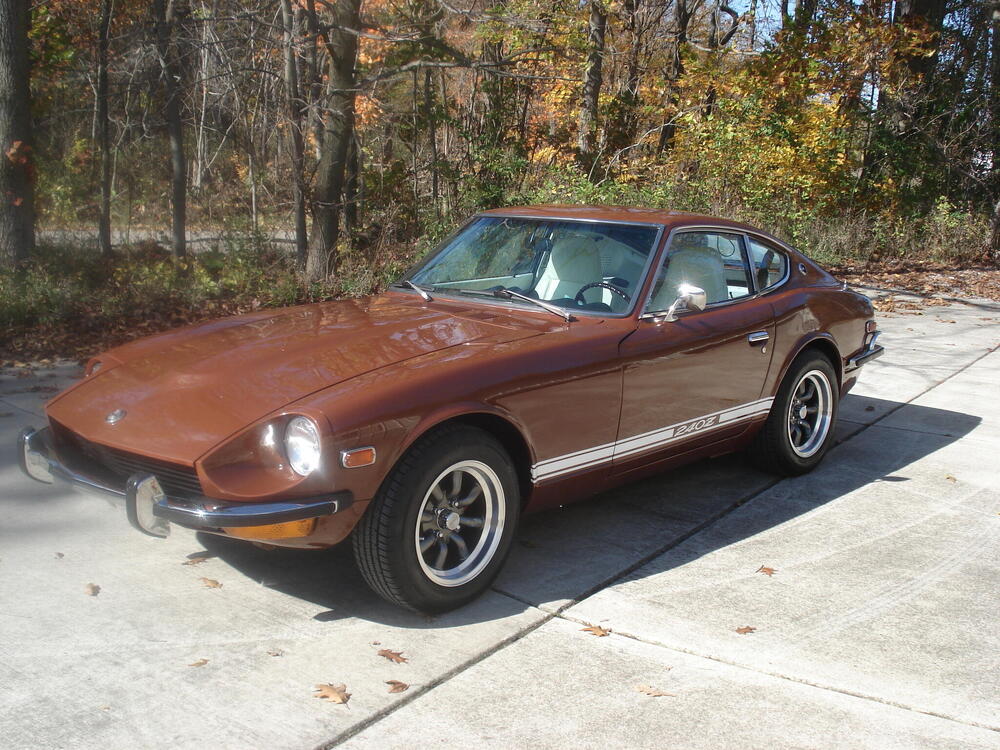
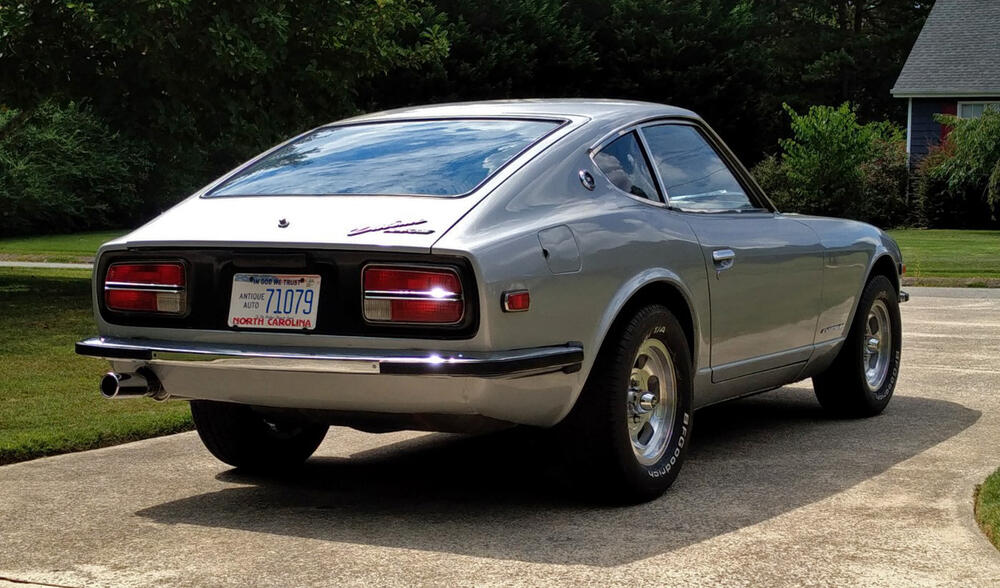
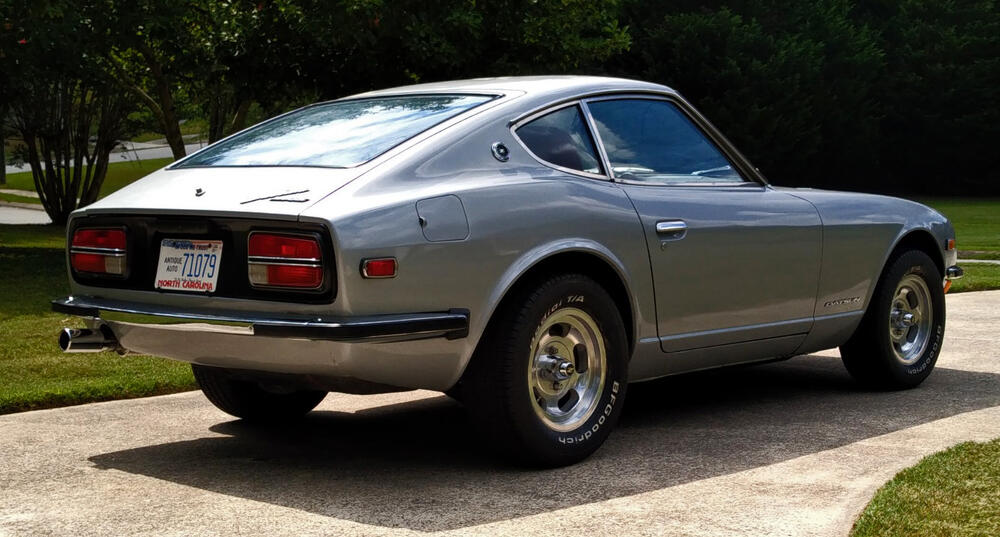
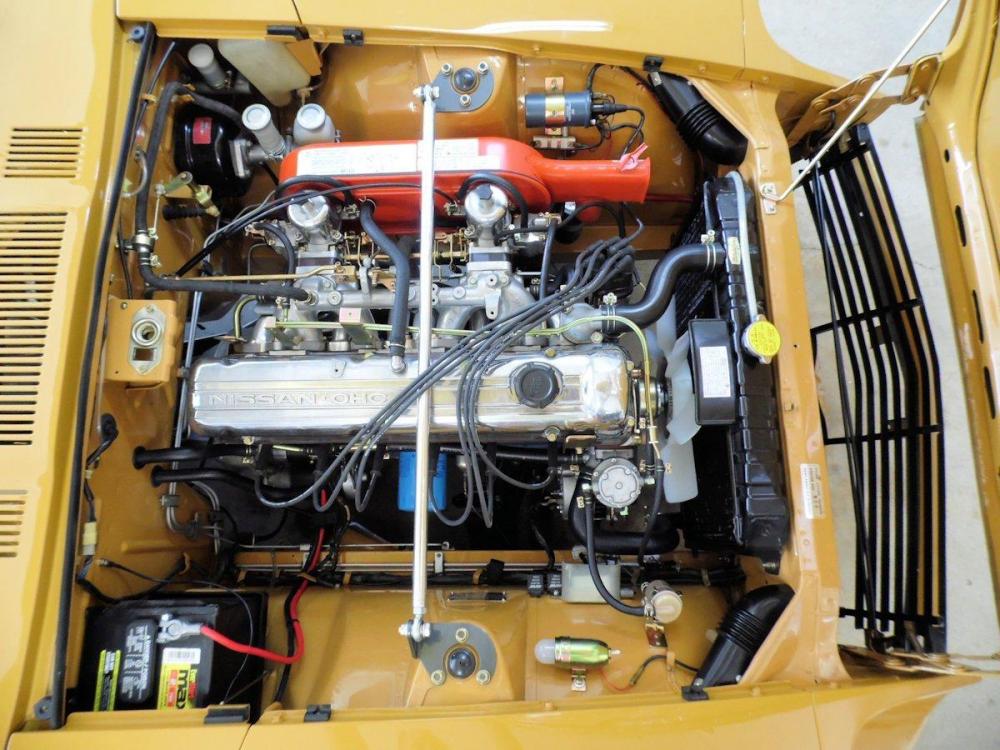
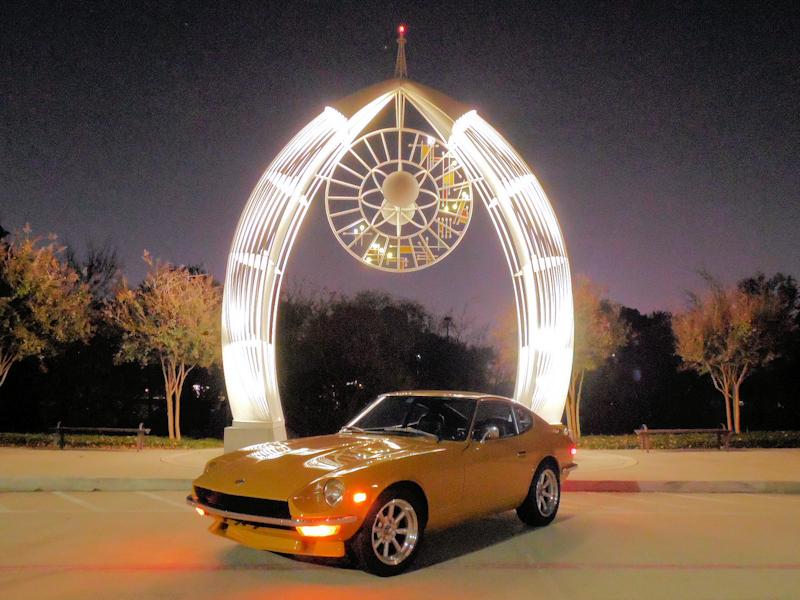
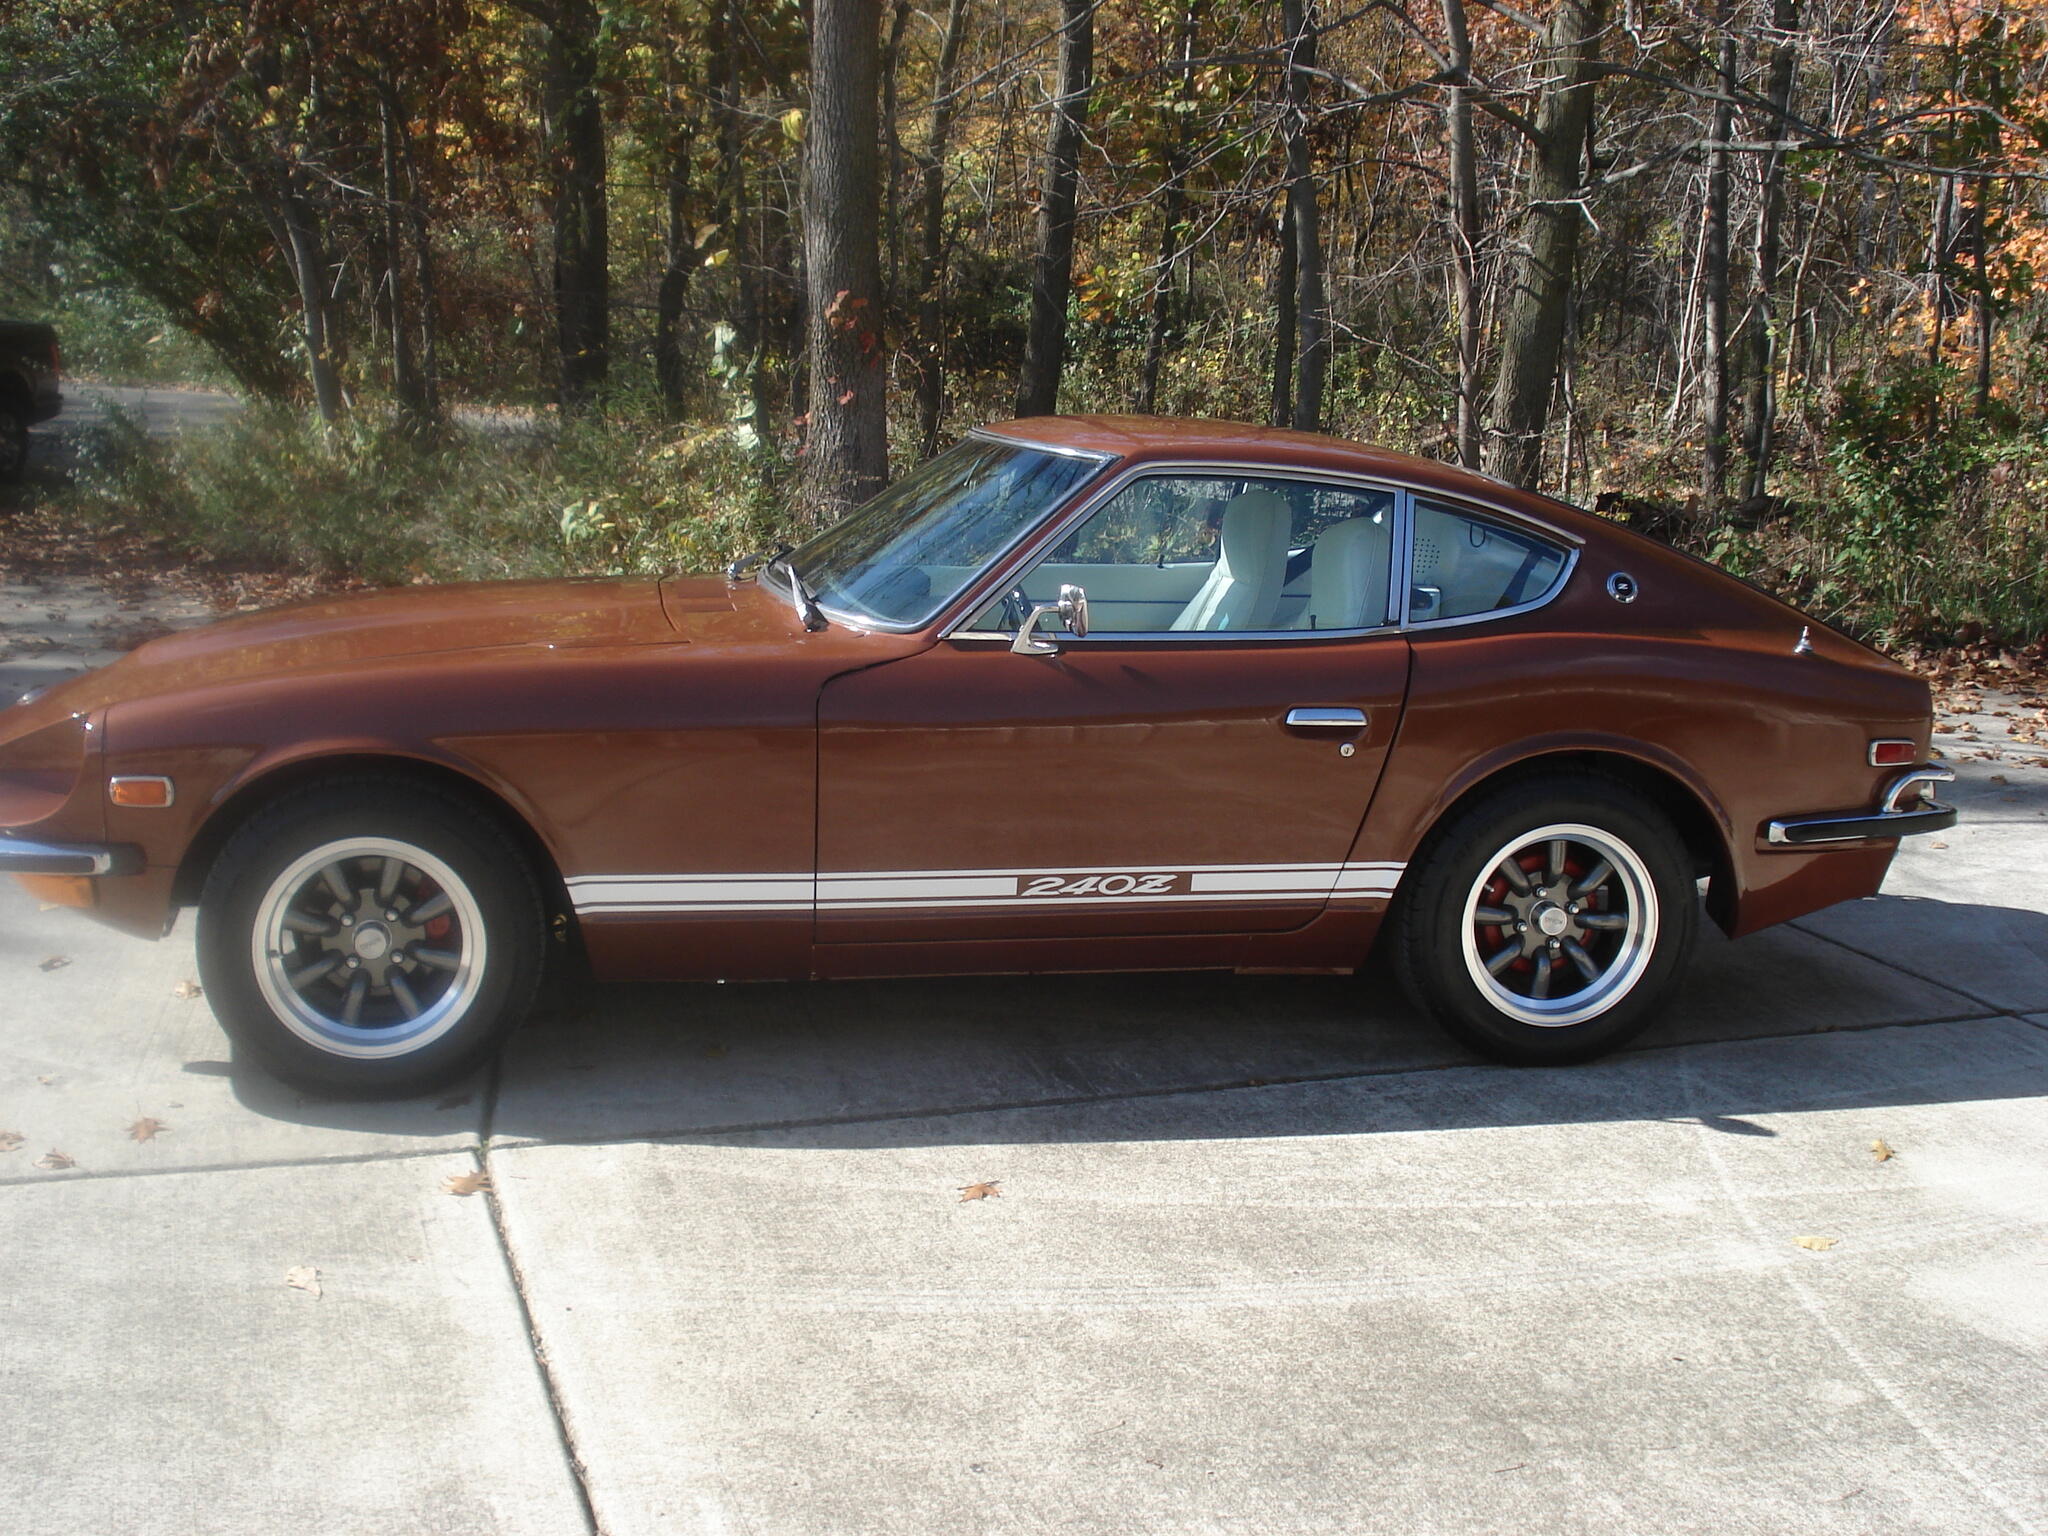
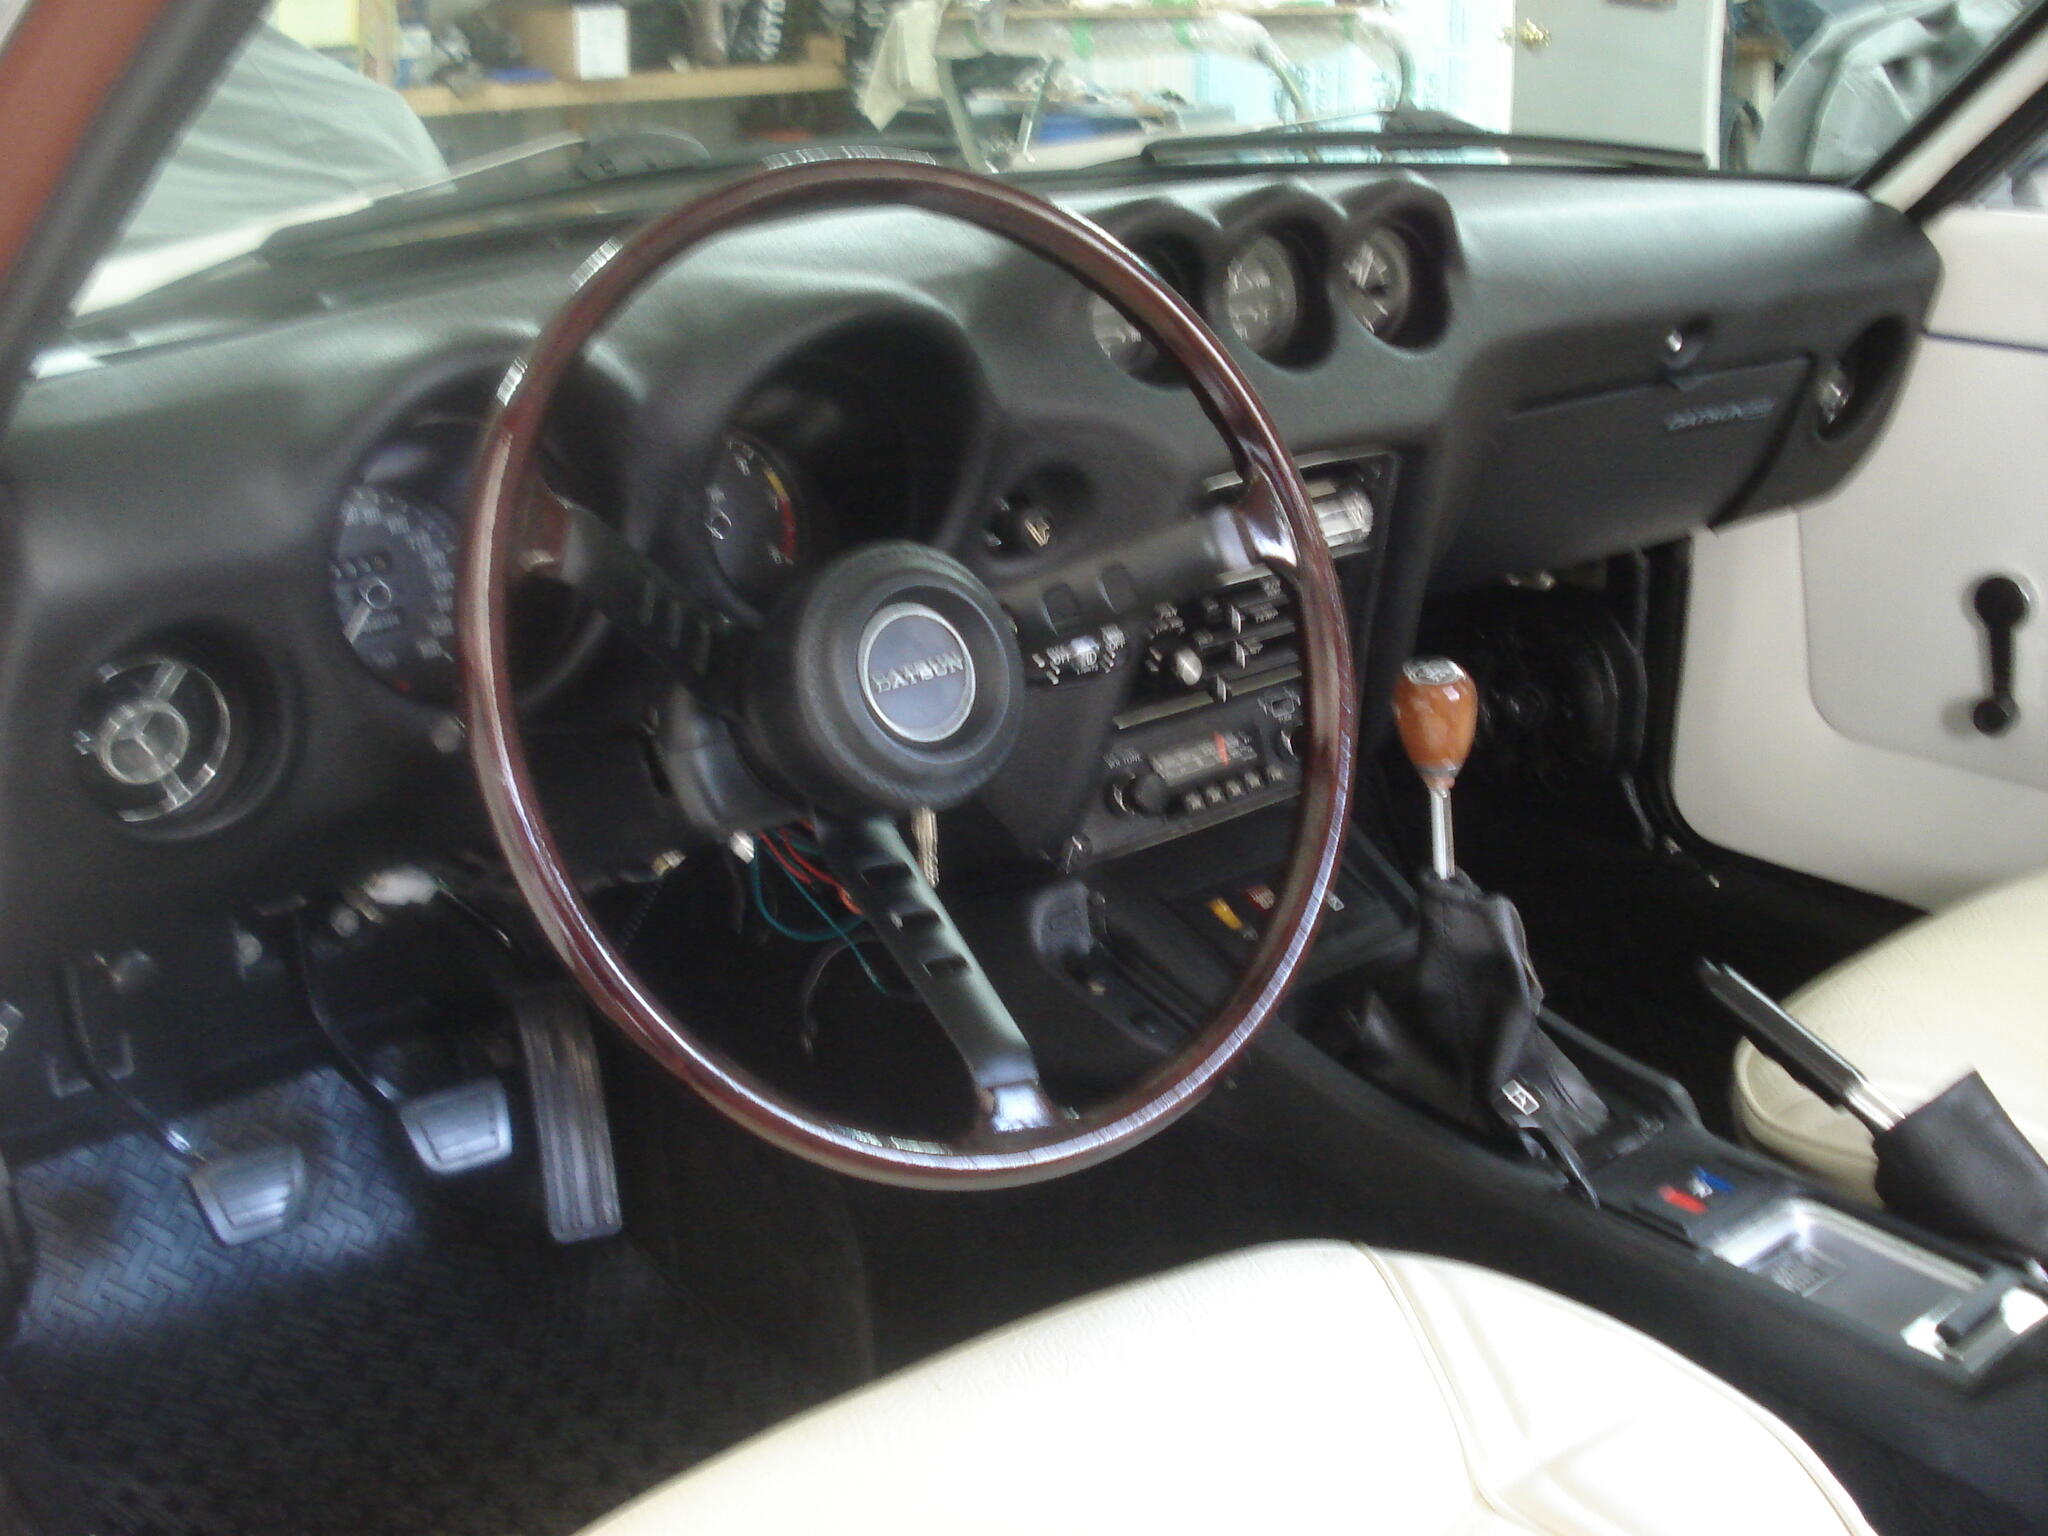
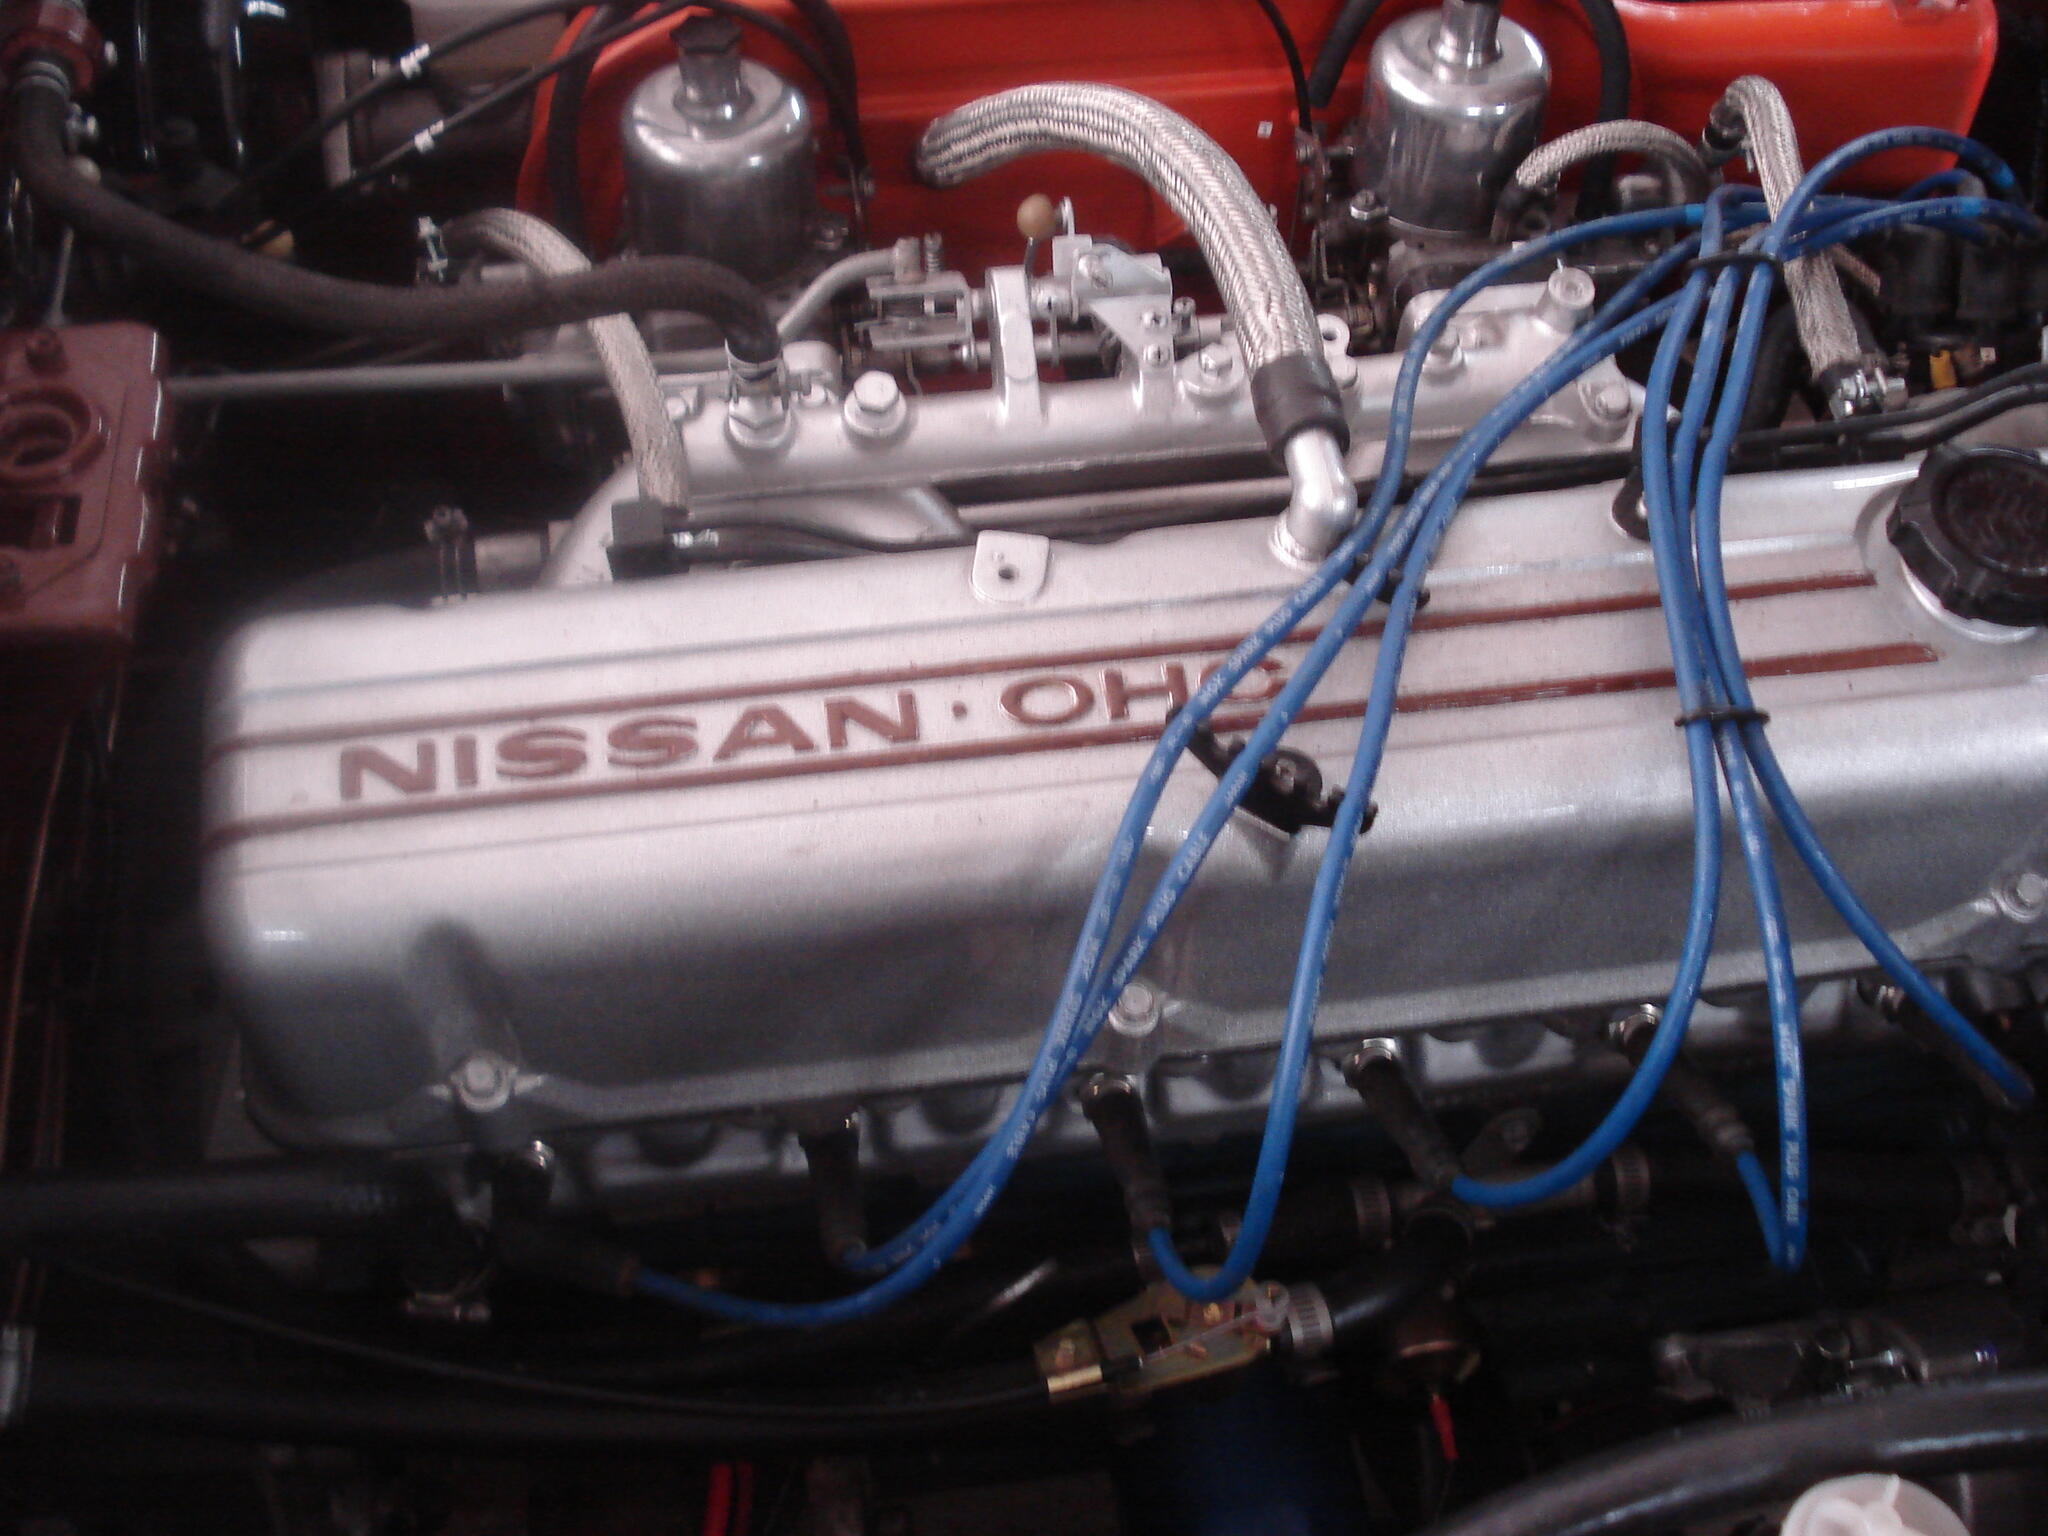
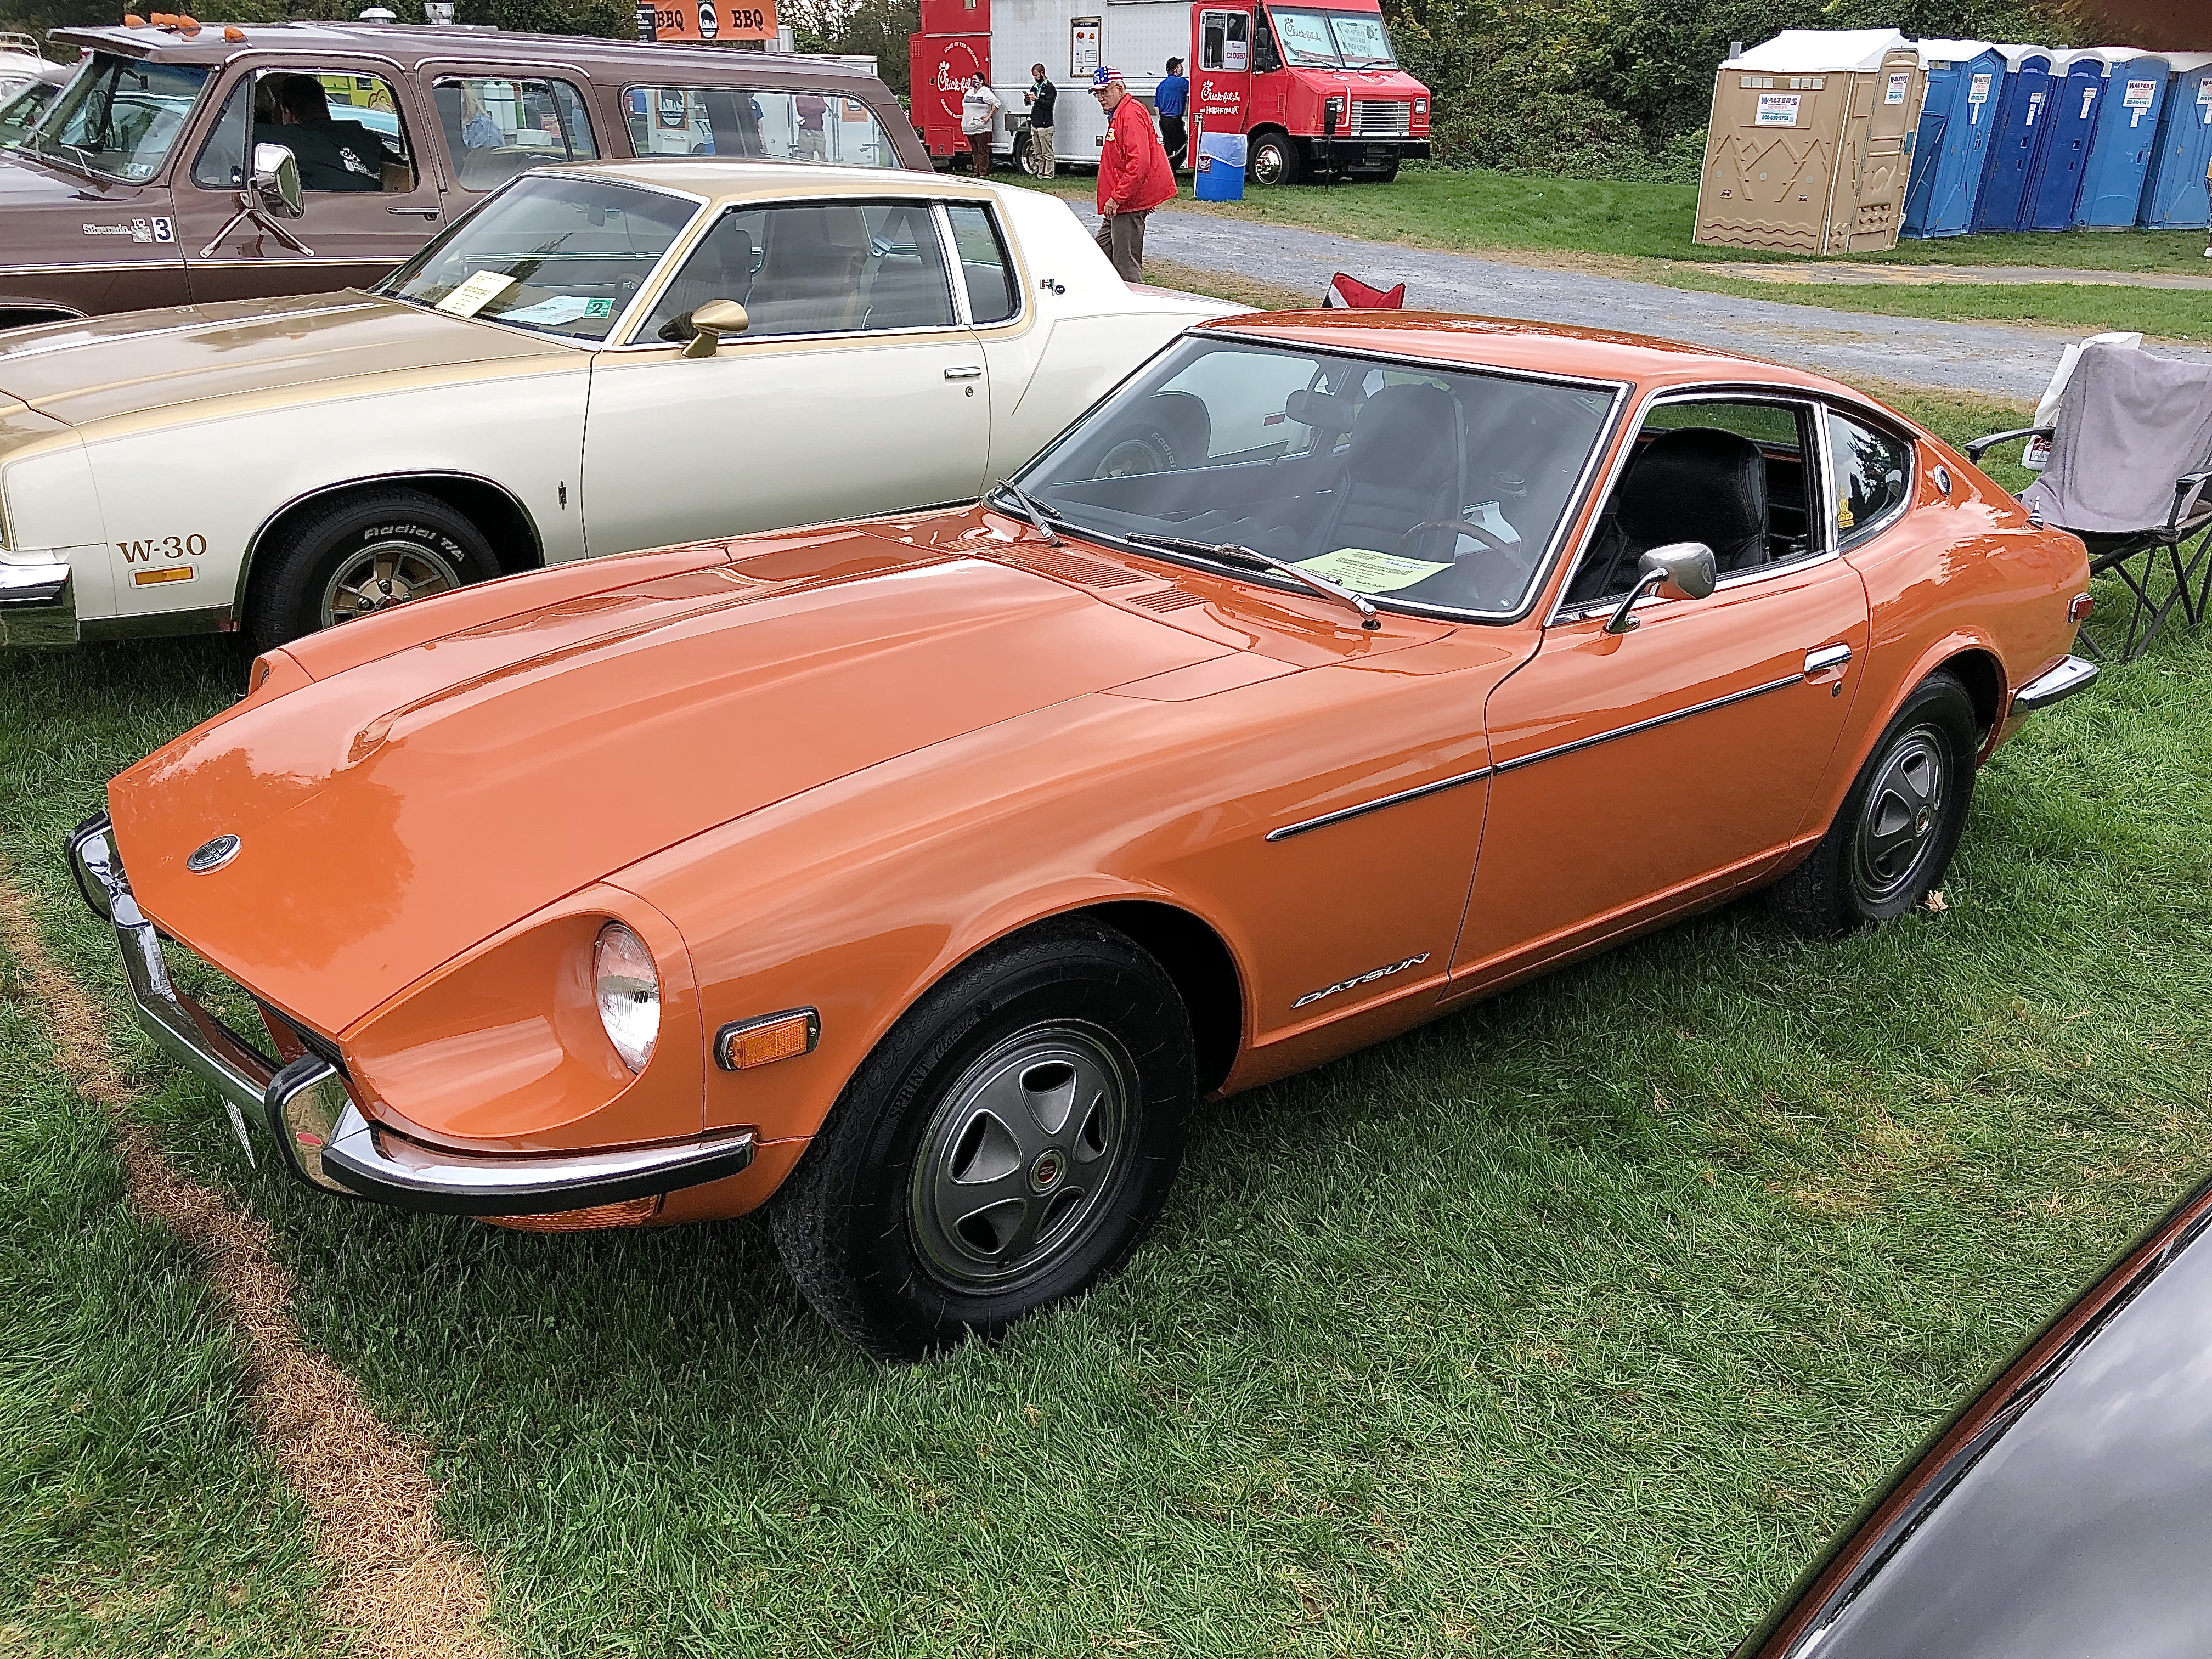
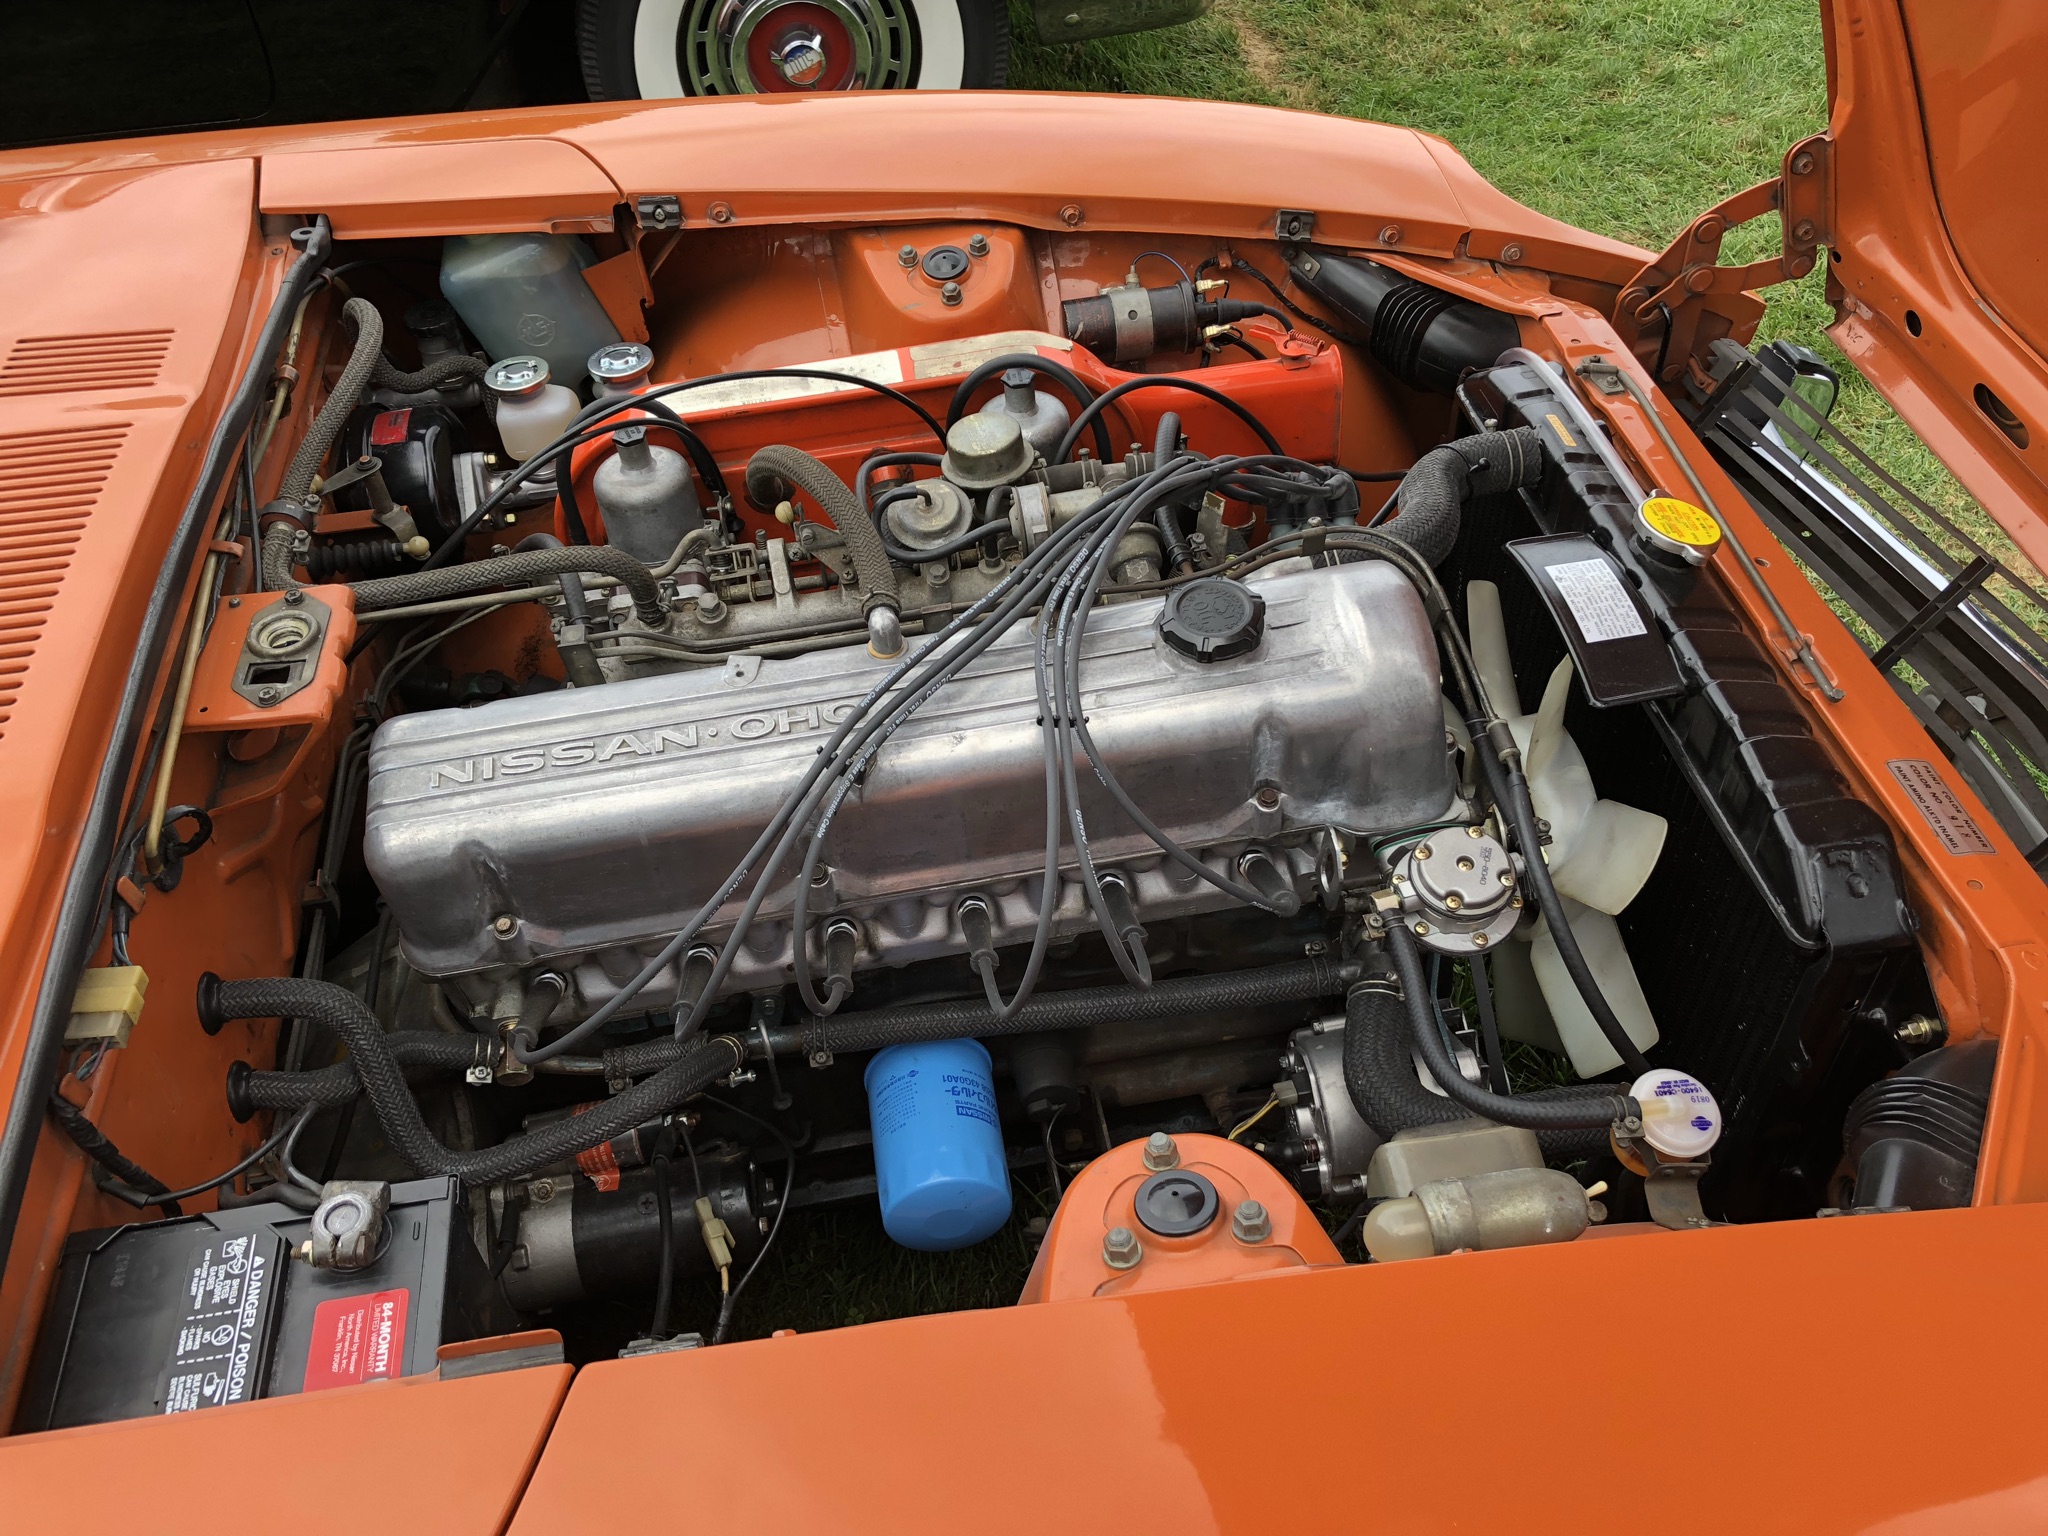
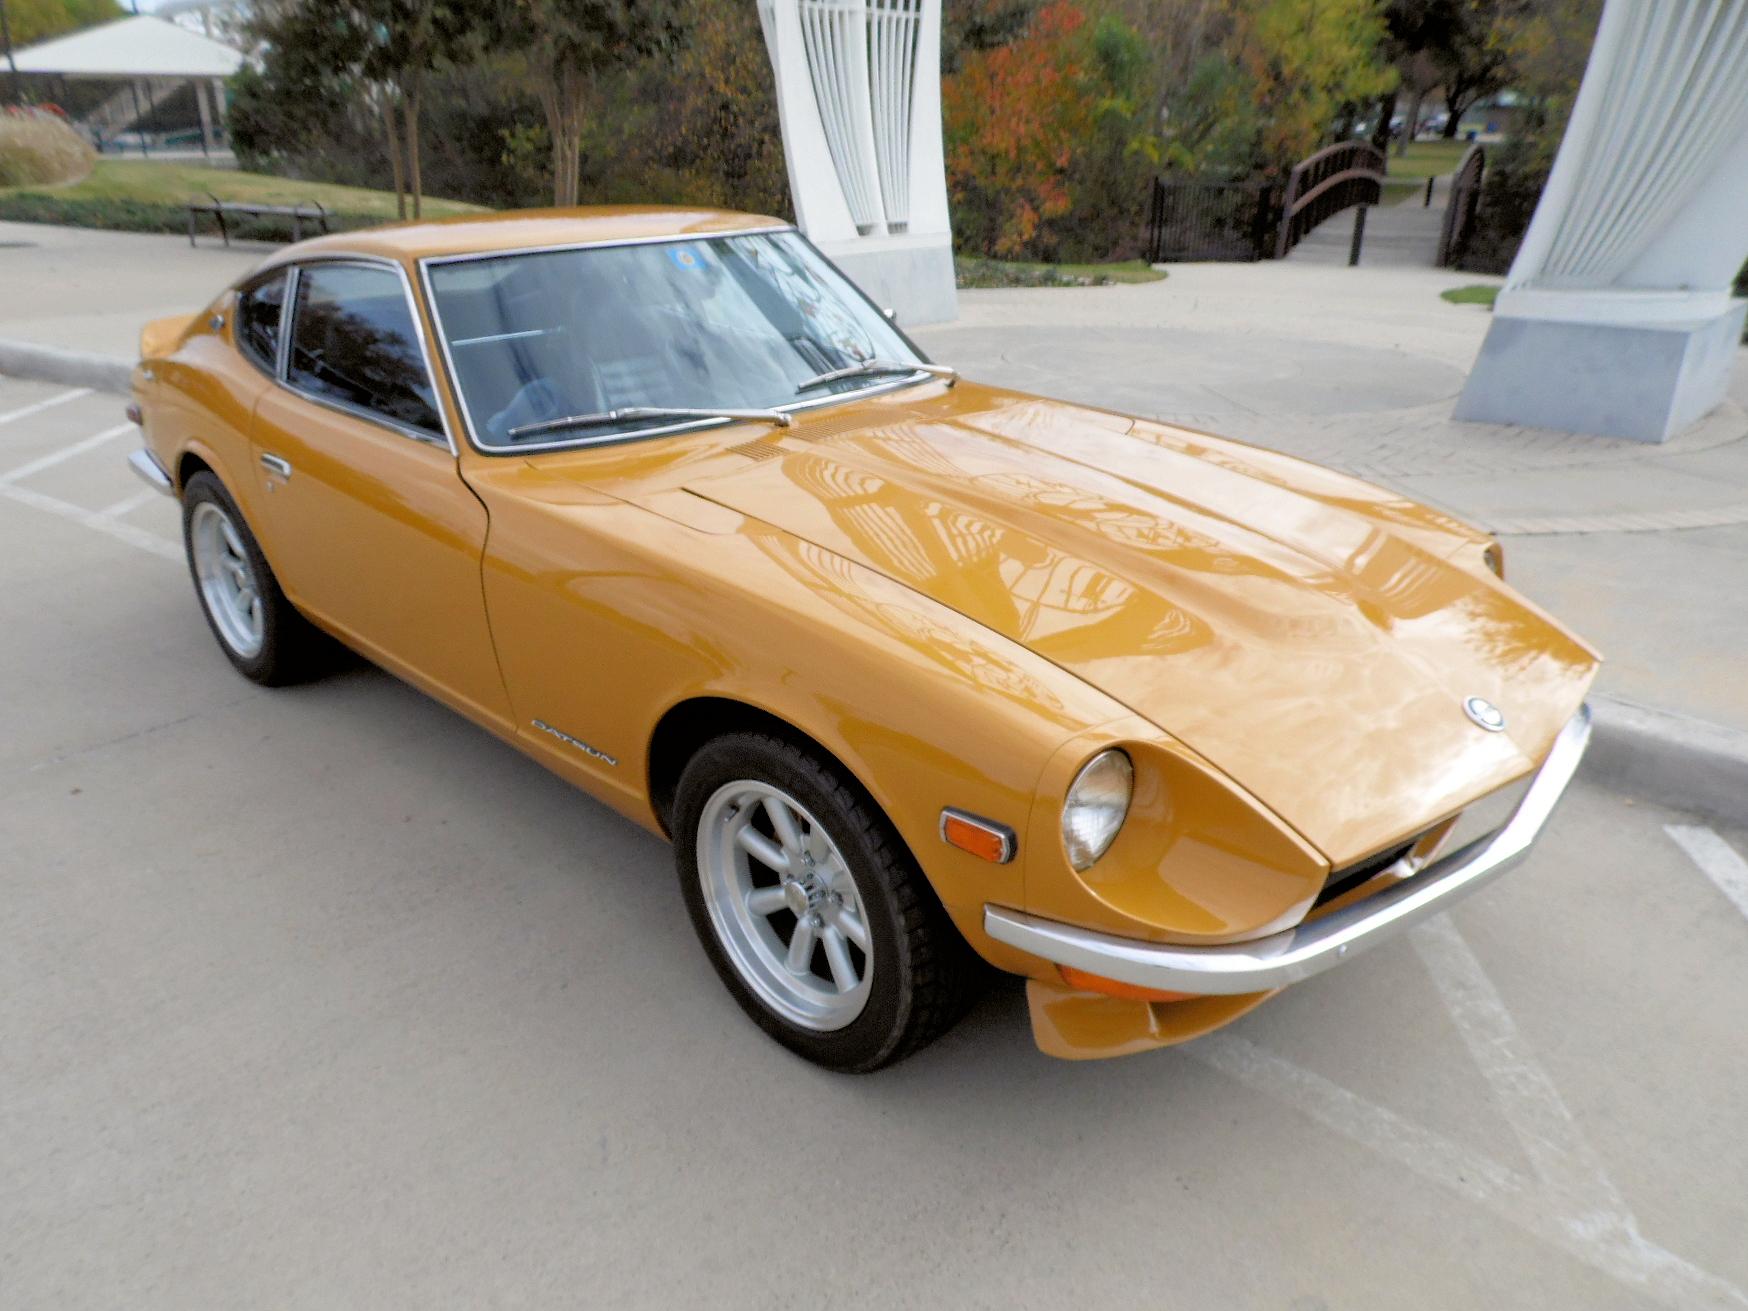
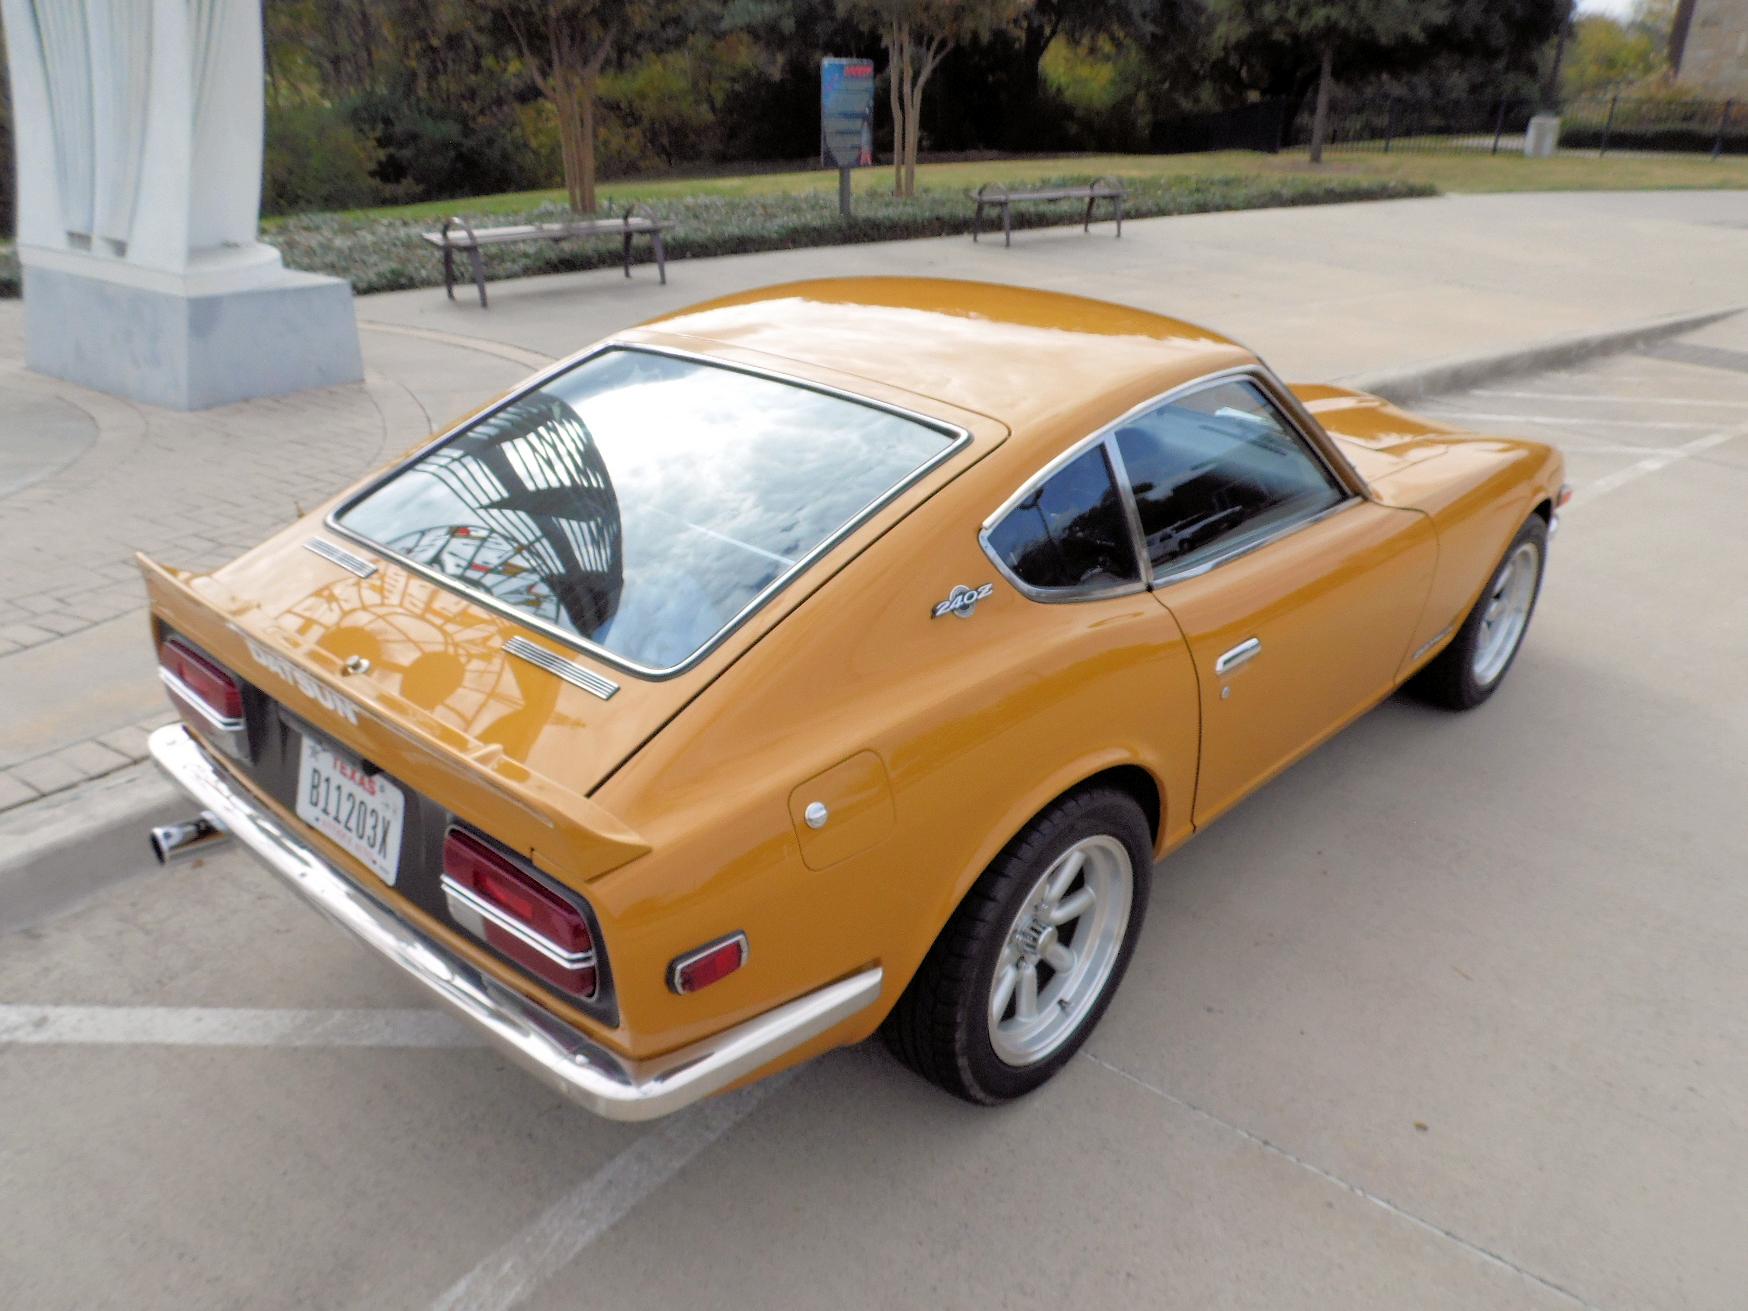
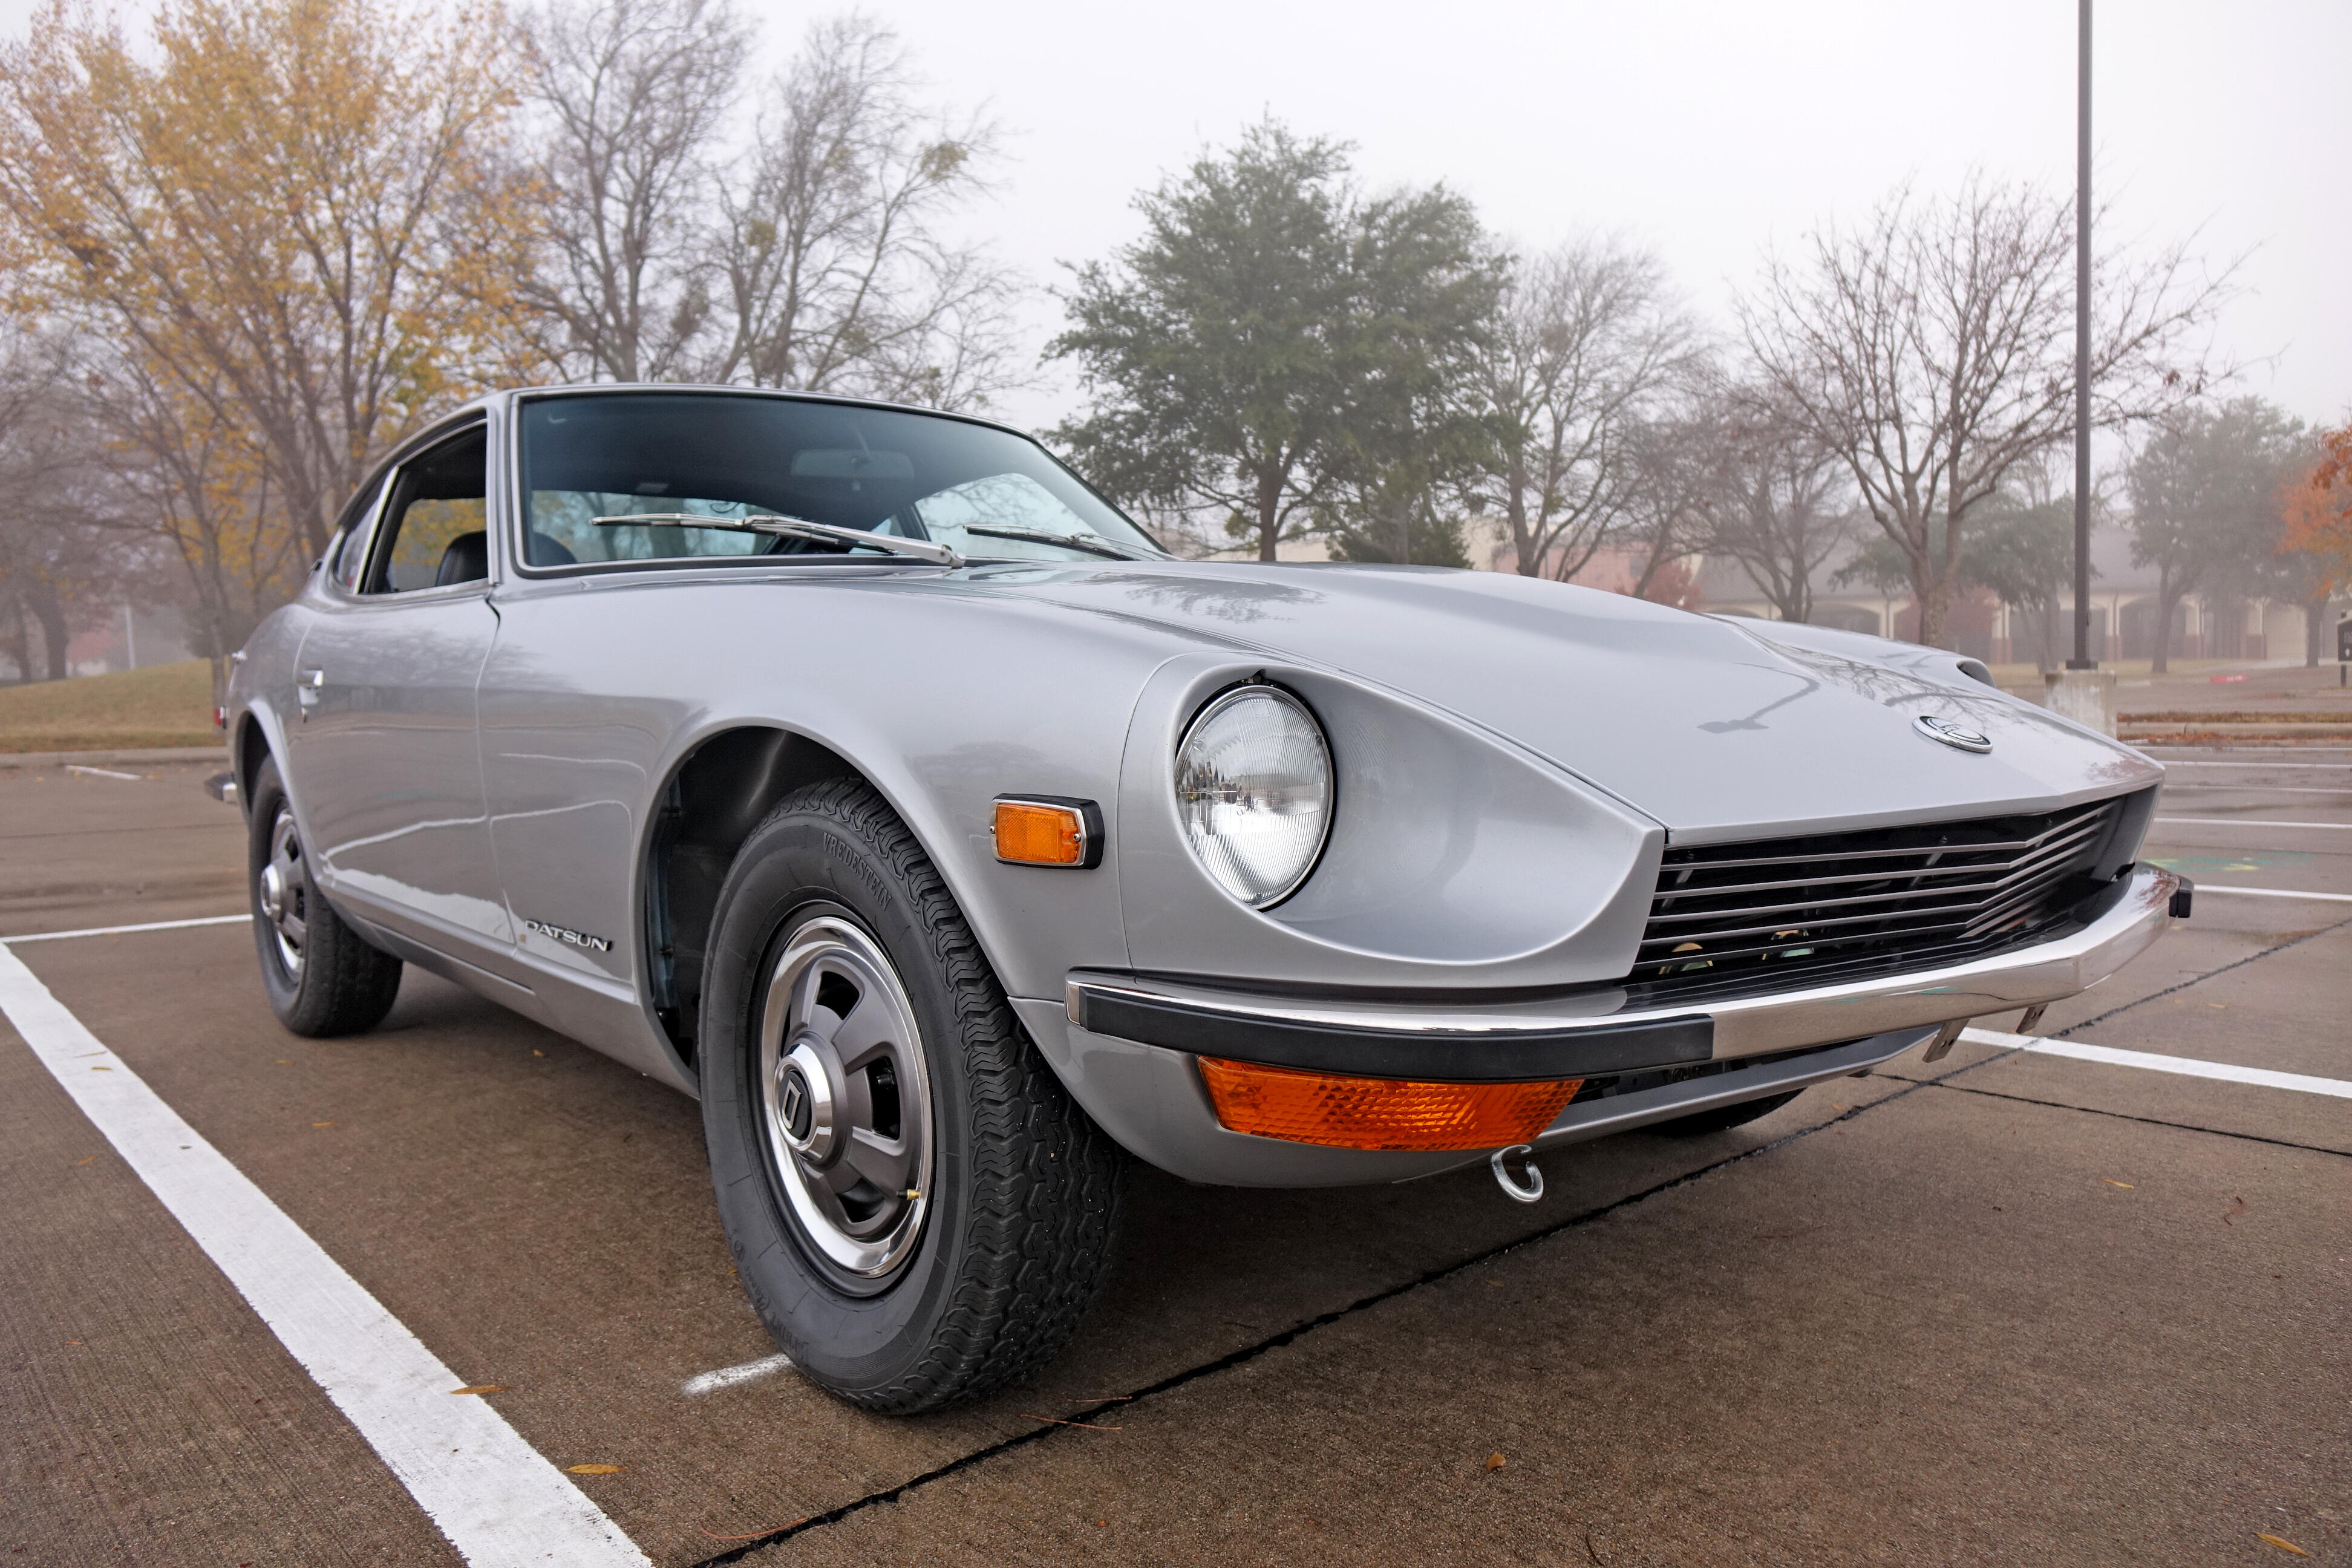
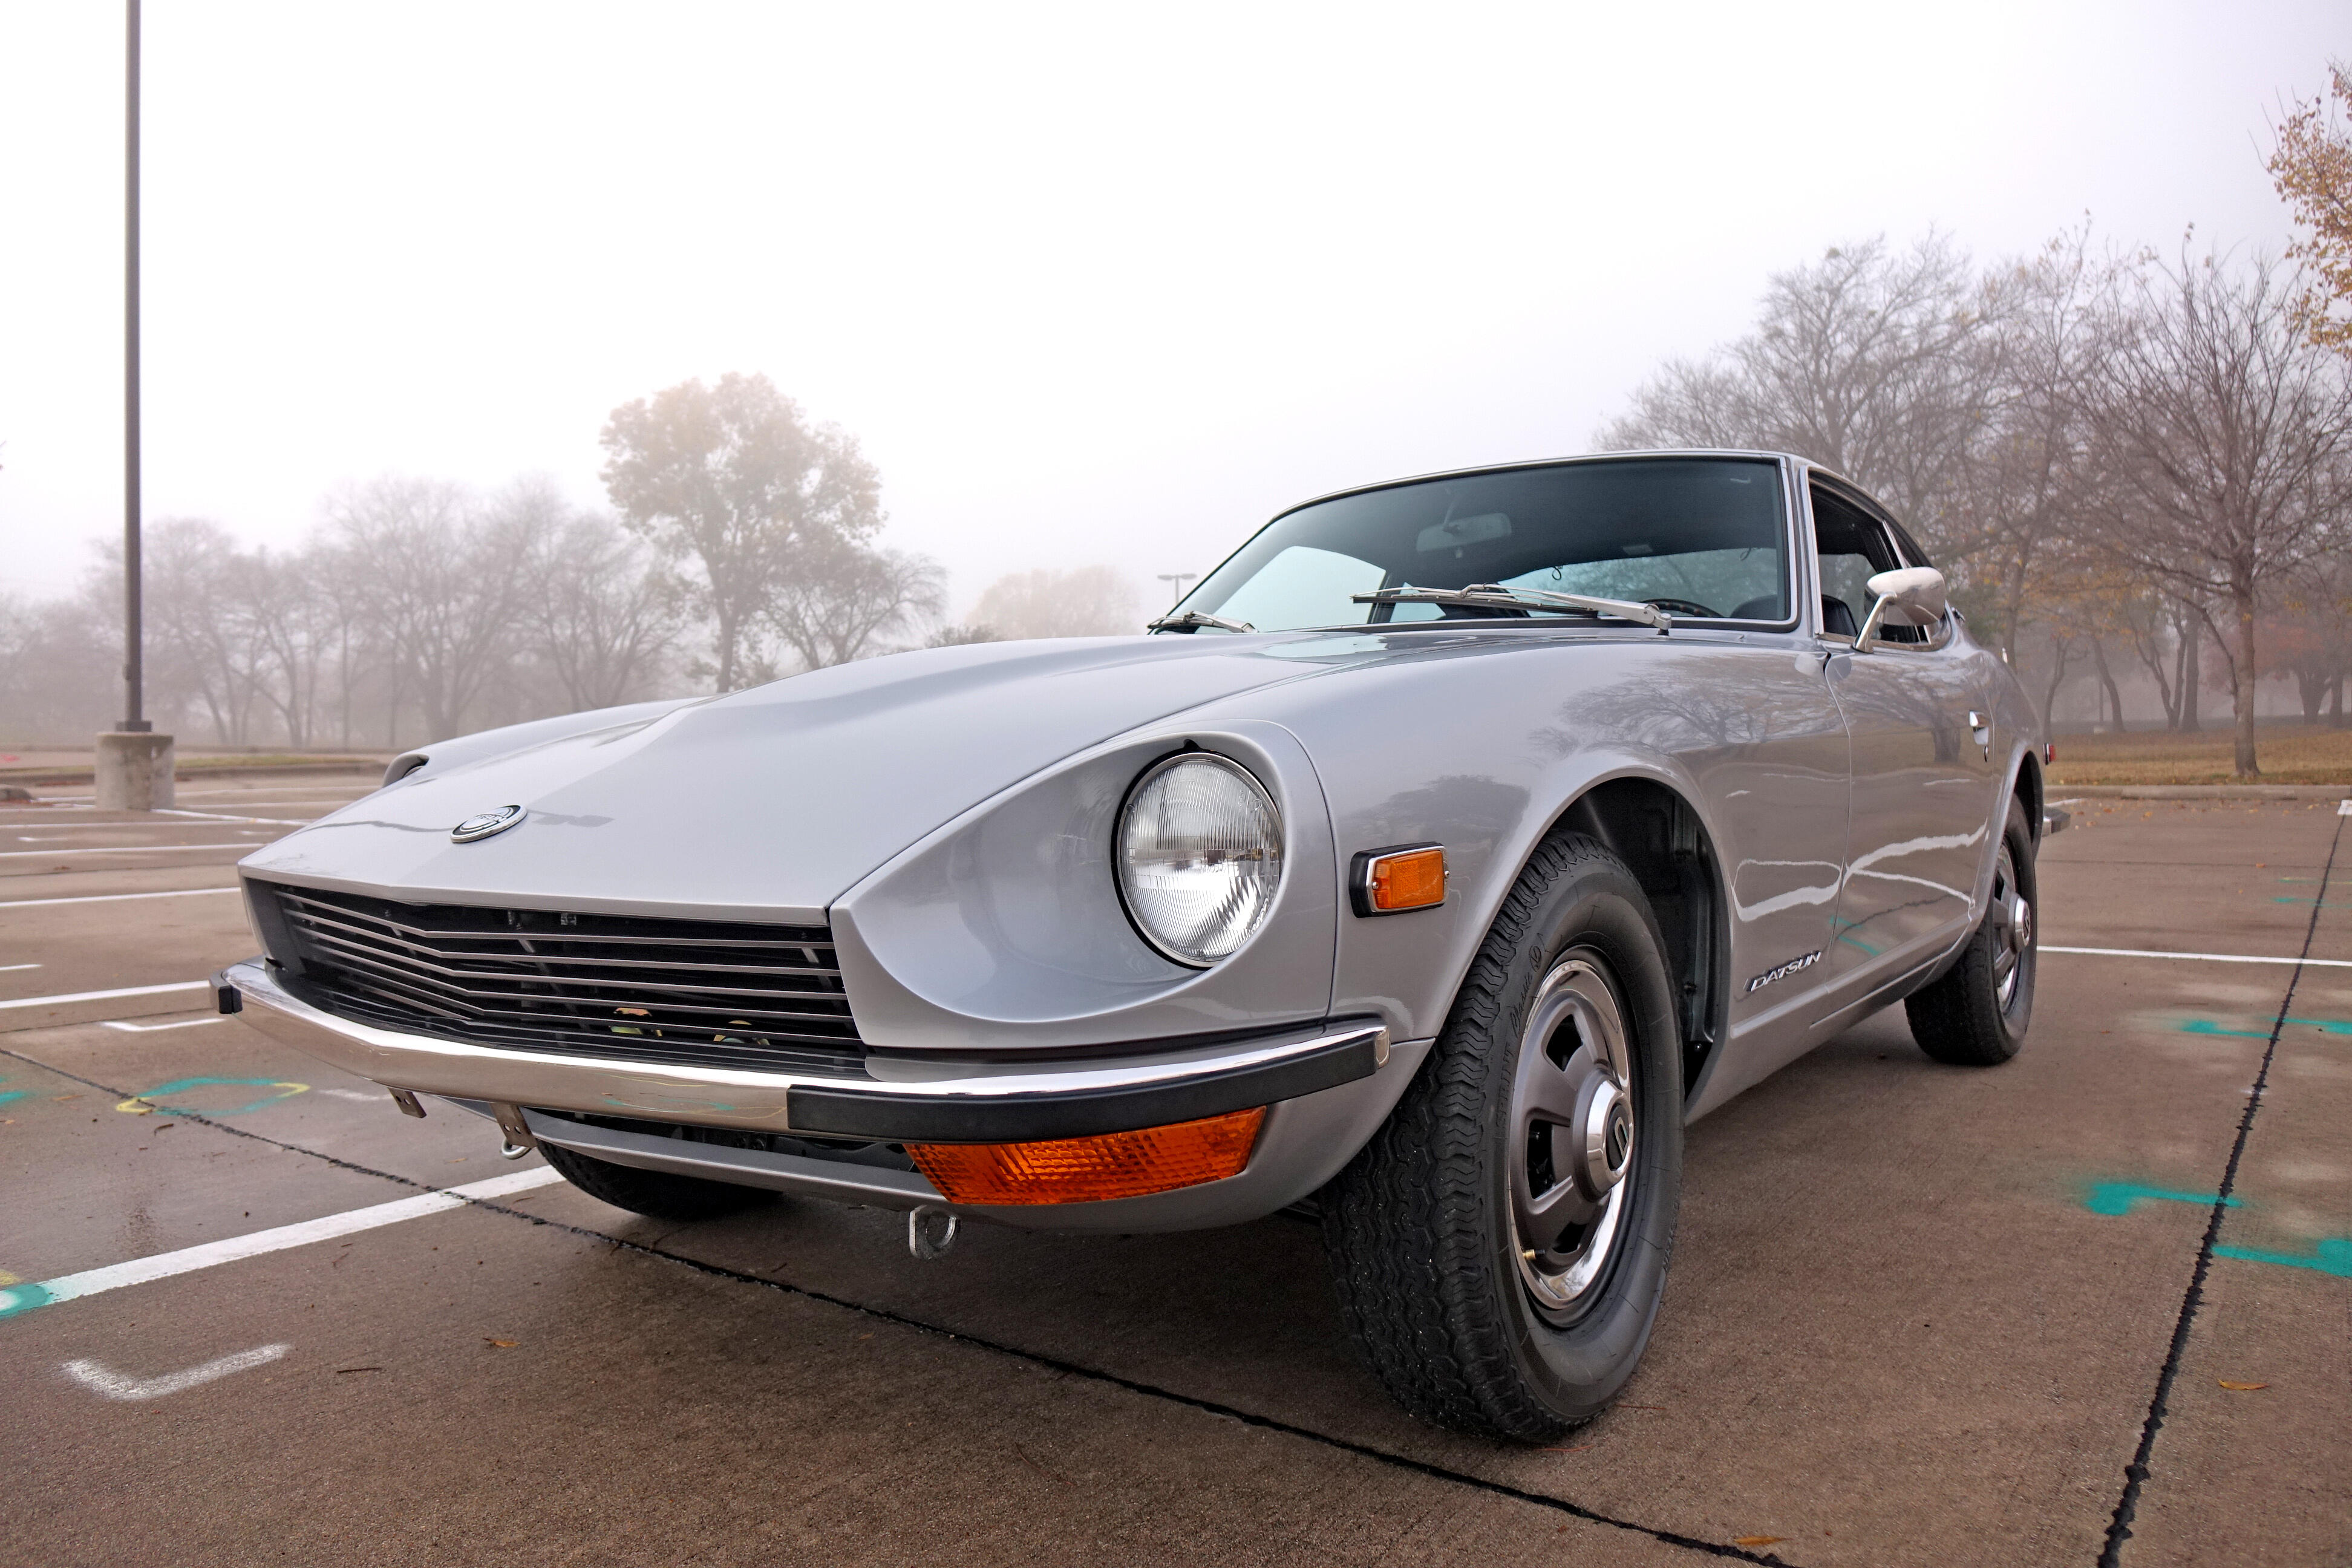
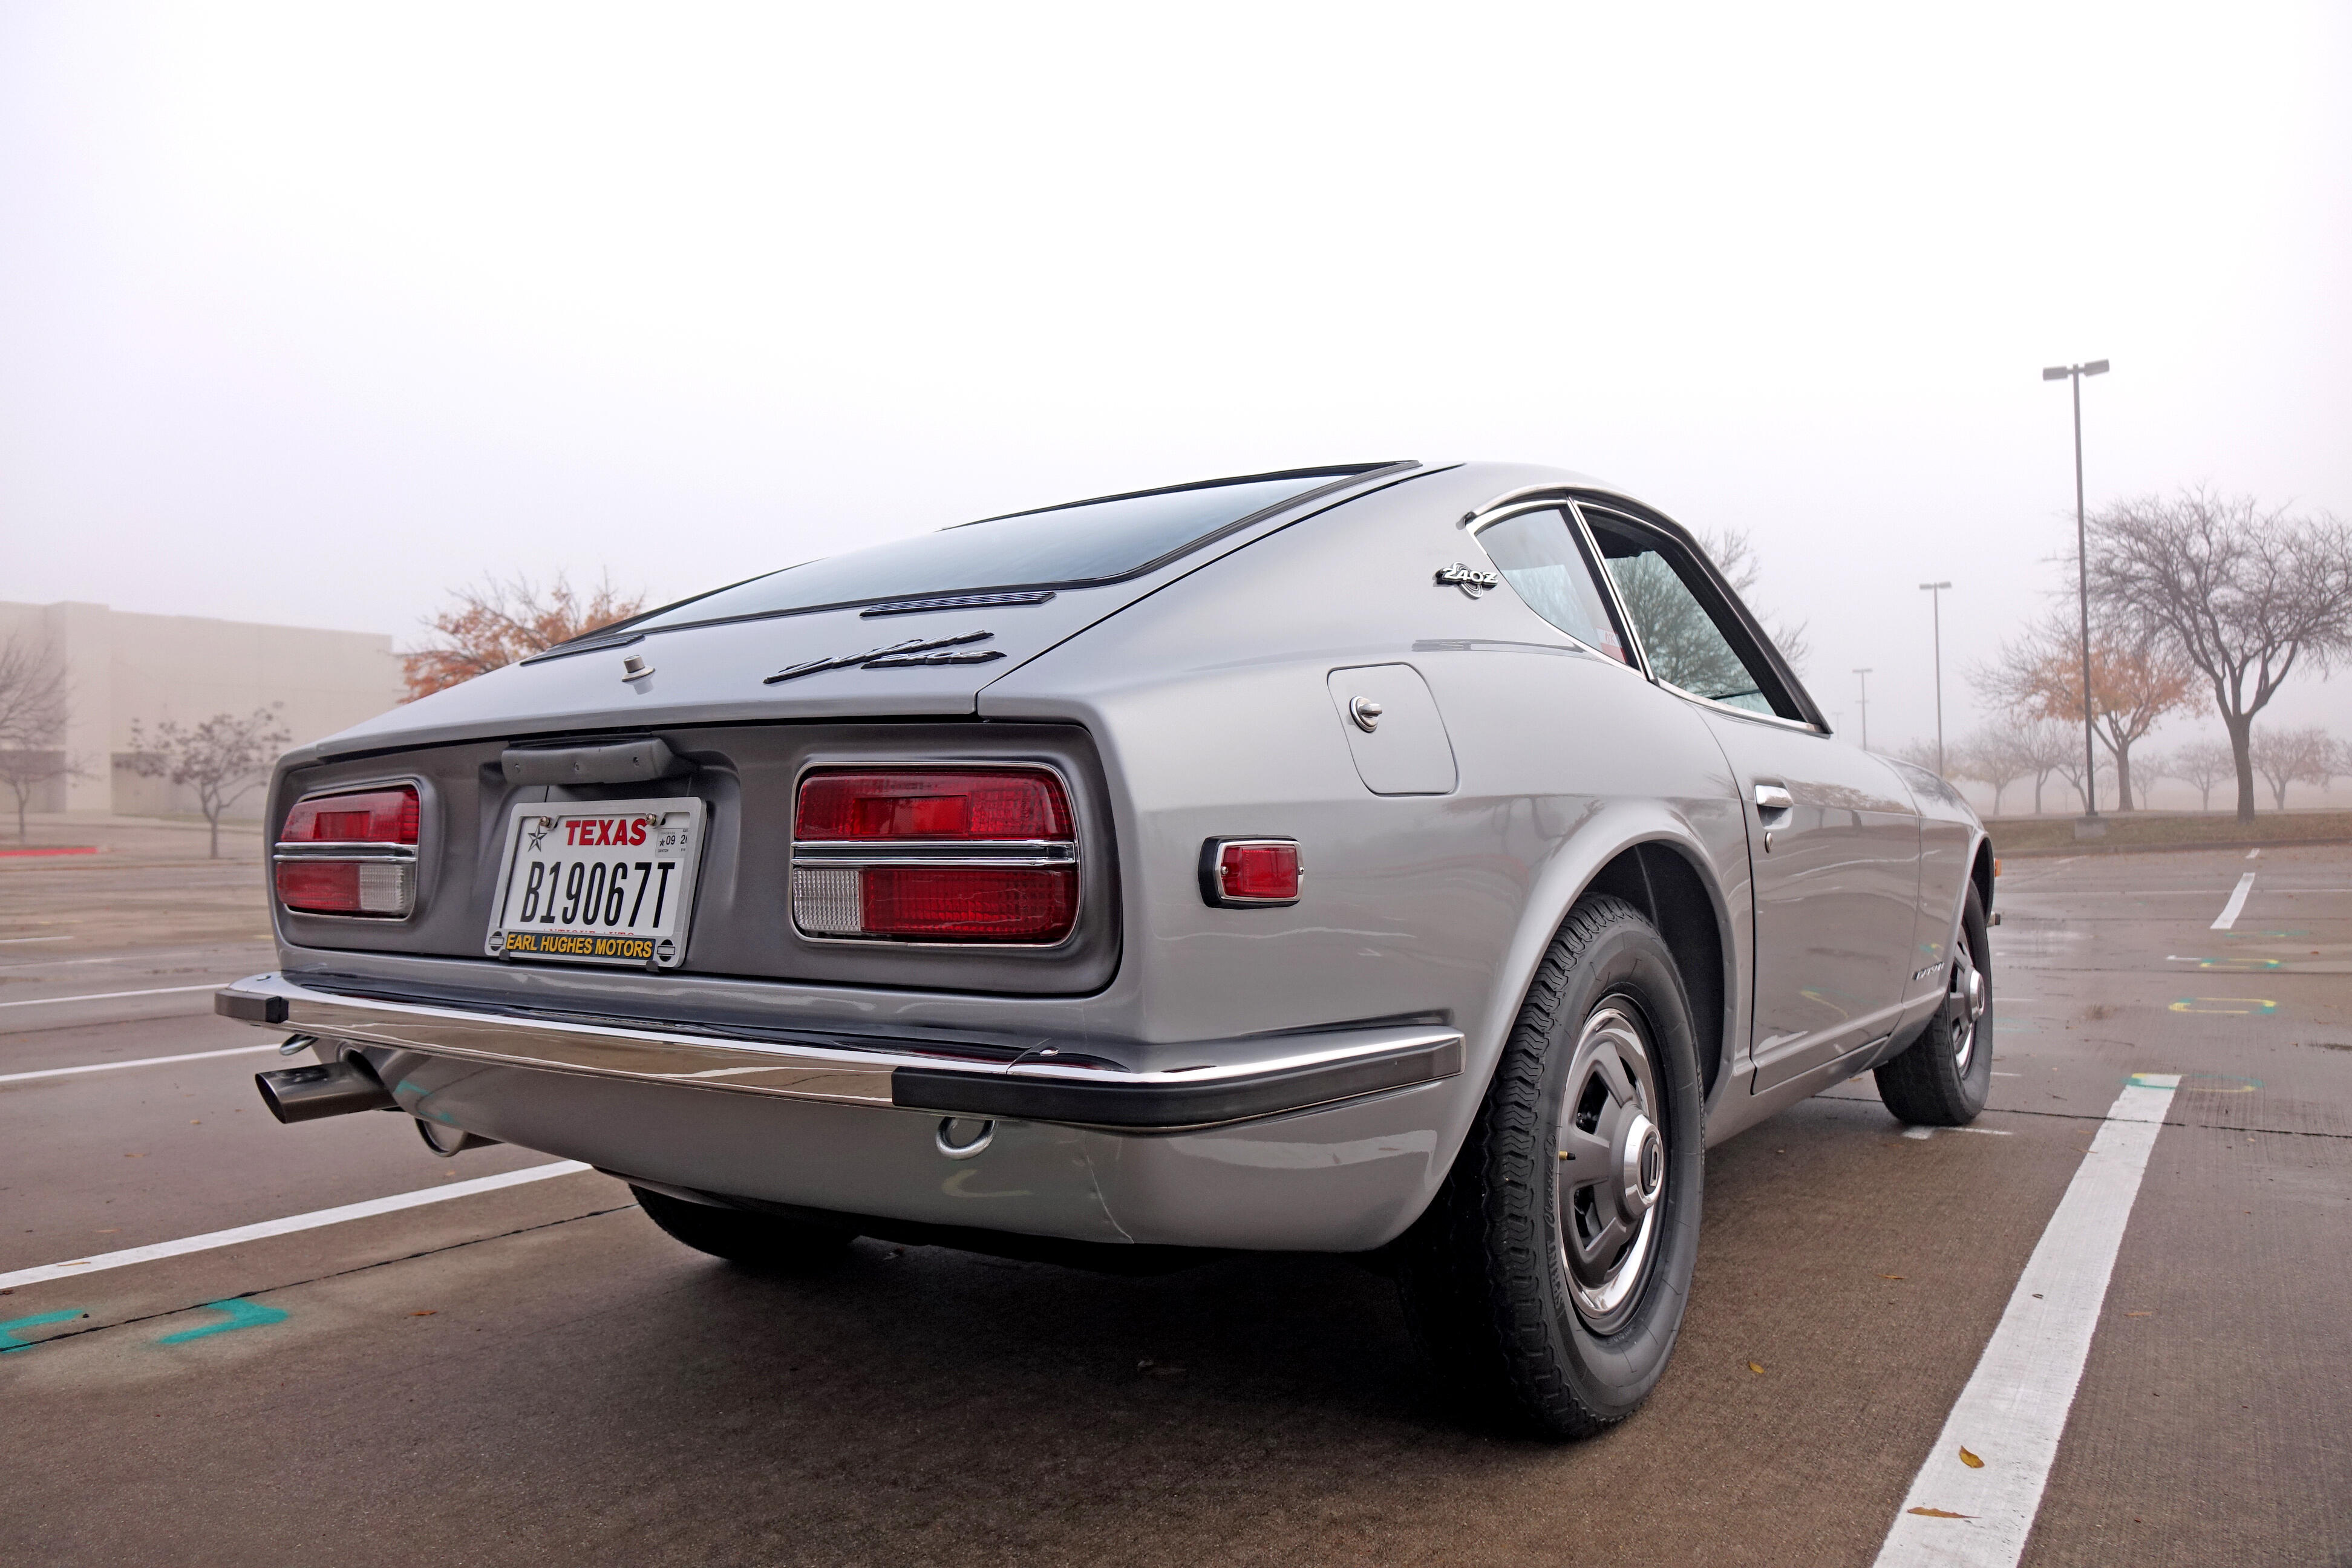
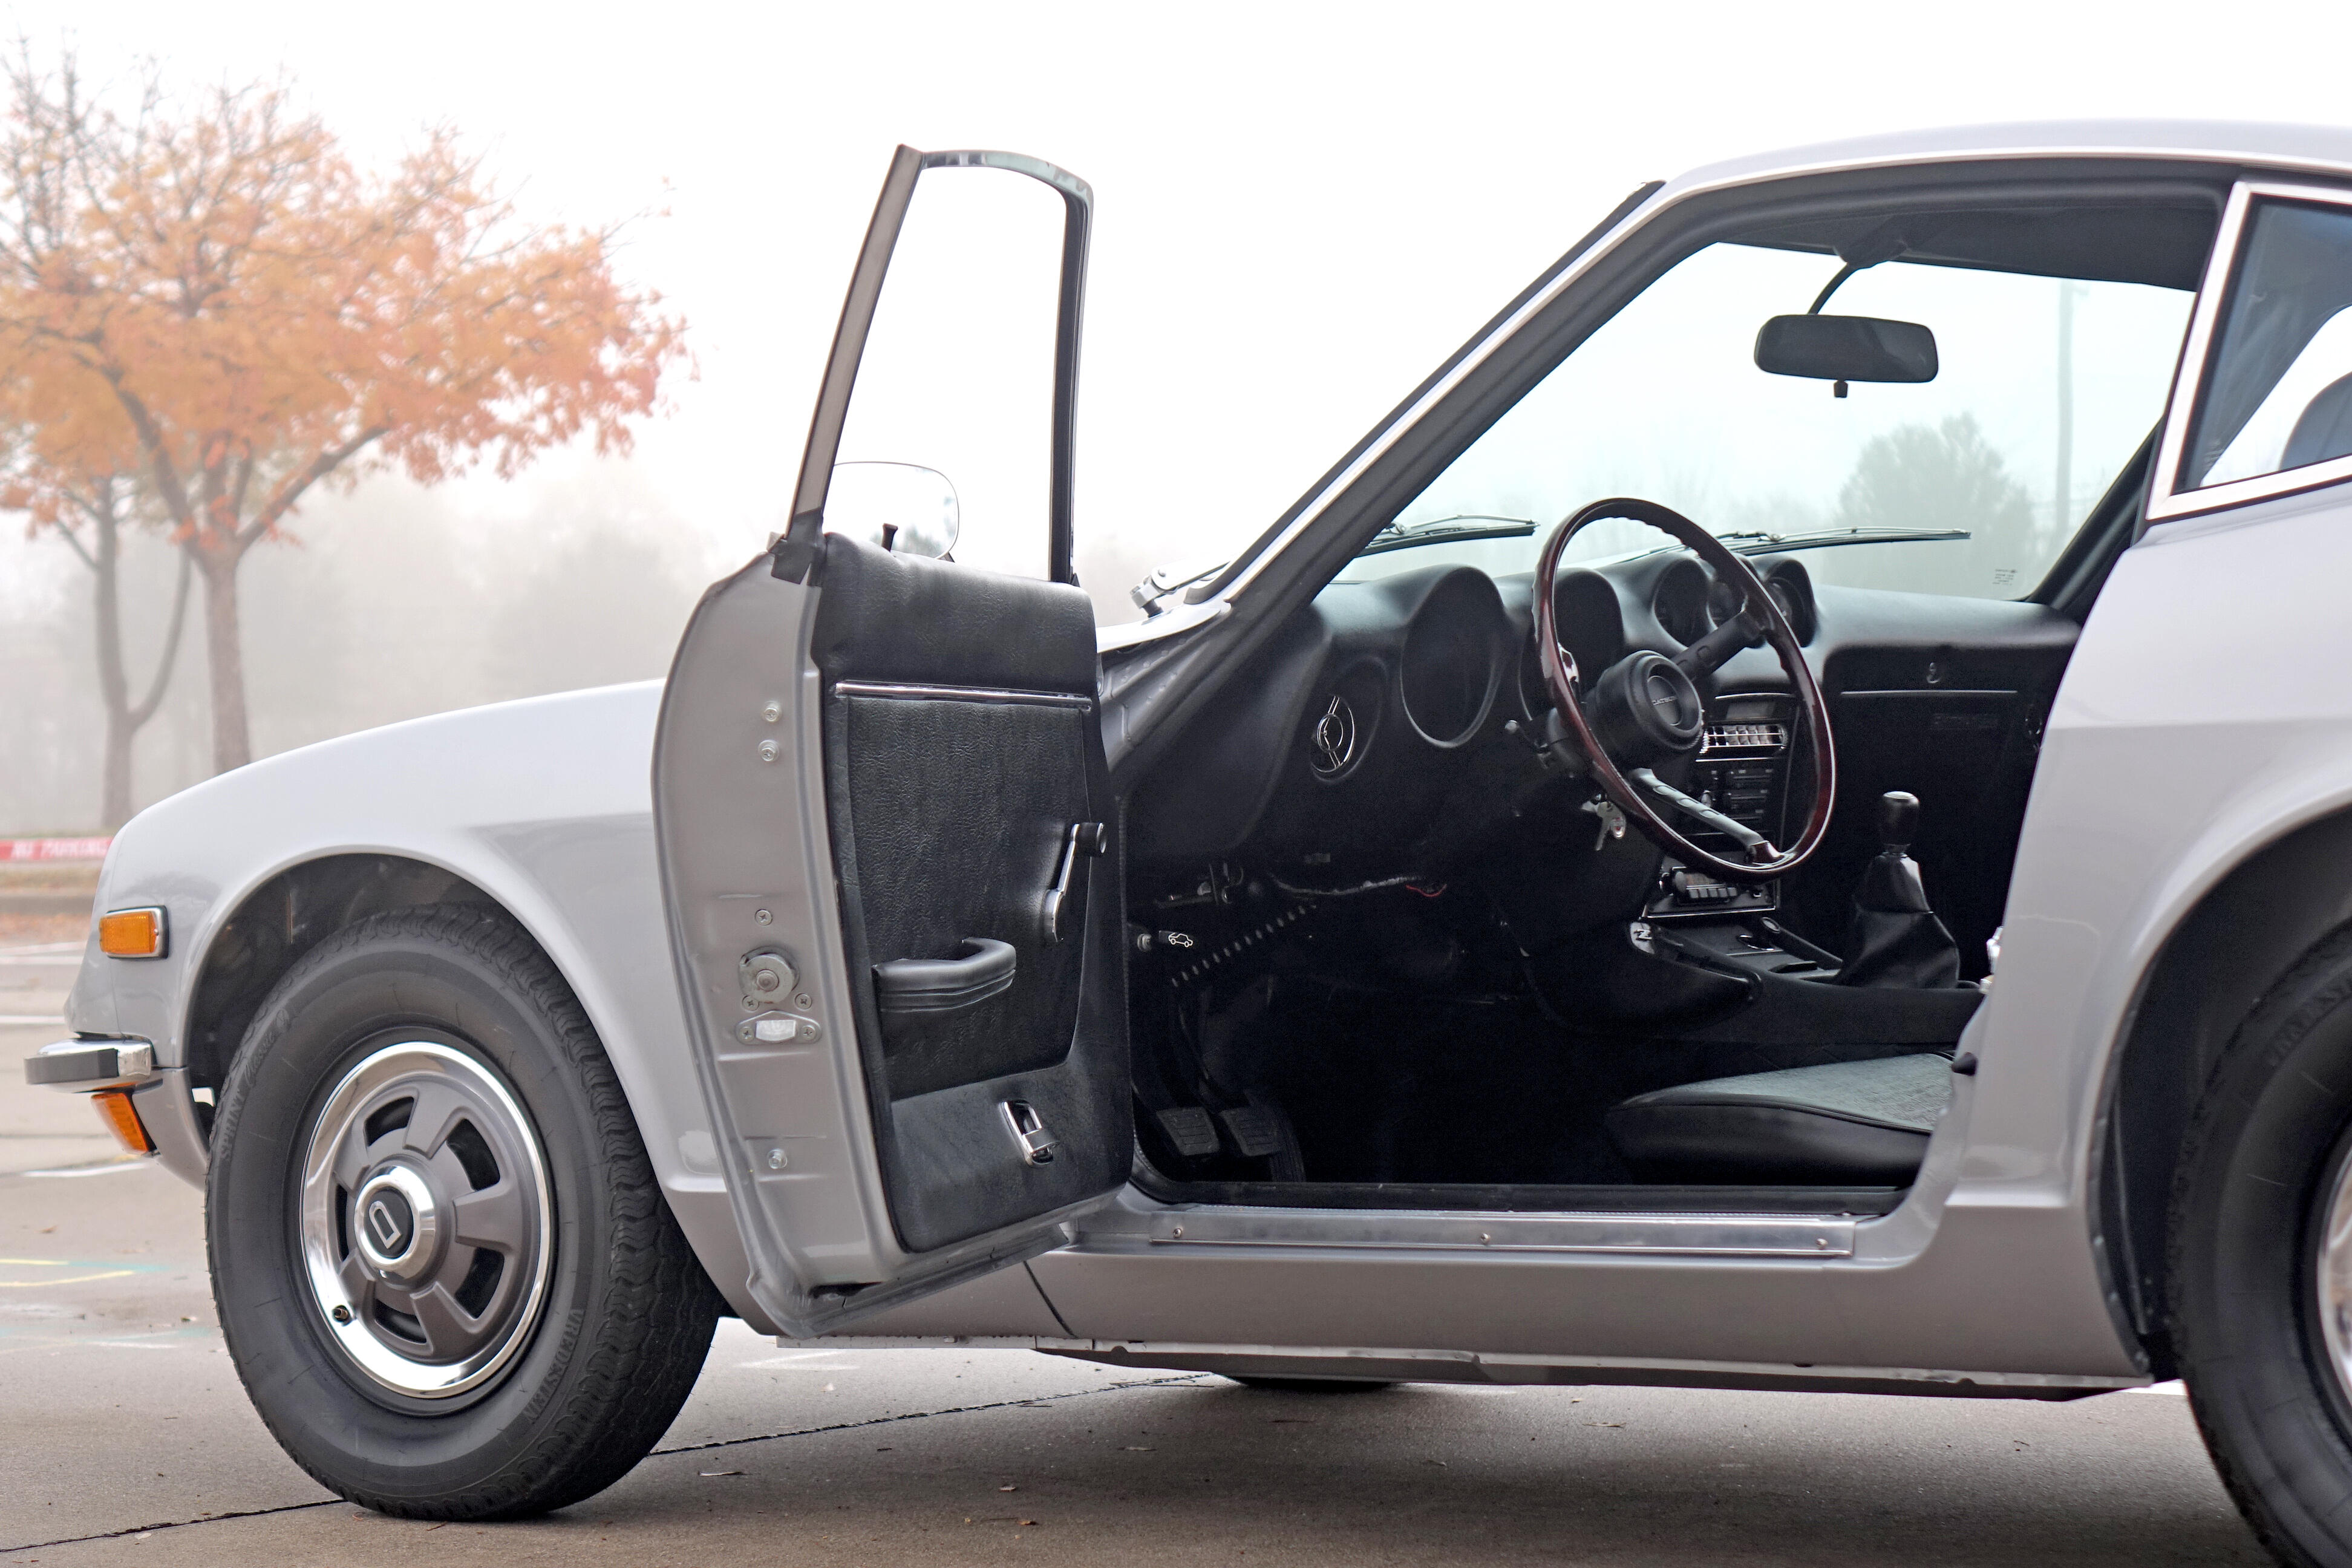
17 pointsAfter several years, a lot of $, work and help from many of you guys, I now have a 2023 1973 240Z. Here are a few pics. Thanks again to all of you. It's hard to tell from the photos but when I painted it, I incorporated gold micro sequence metal flake in an intercoat layer of paint. When it sits in the sun, it sort of twinkles.


 17 points
 -
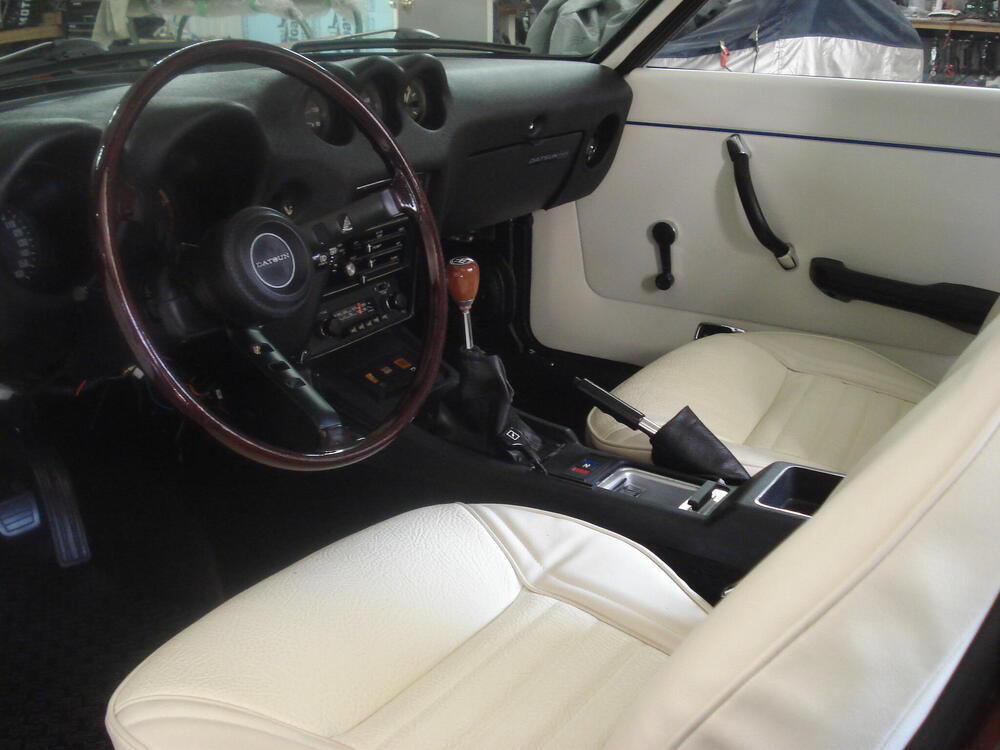
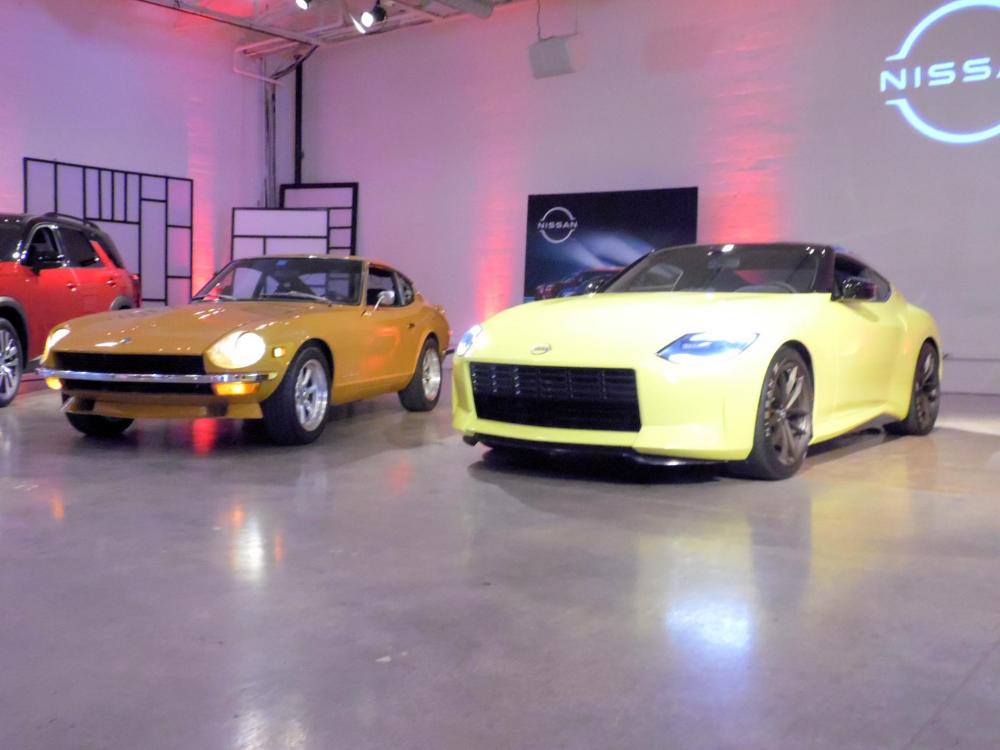
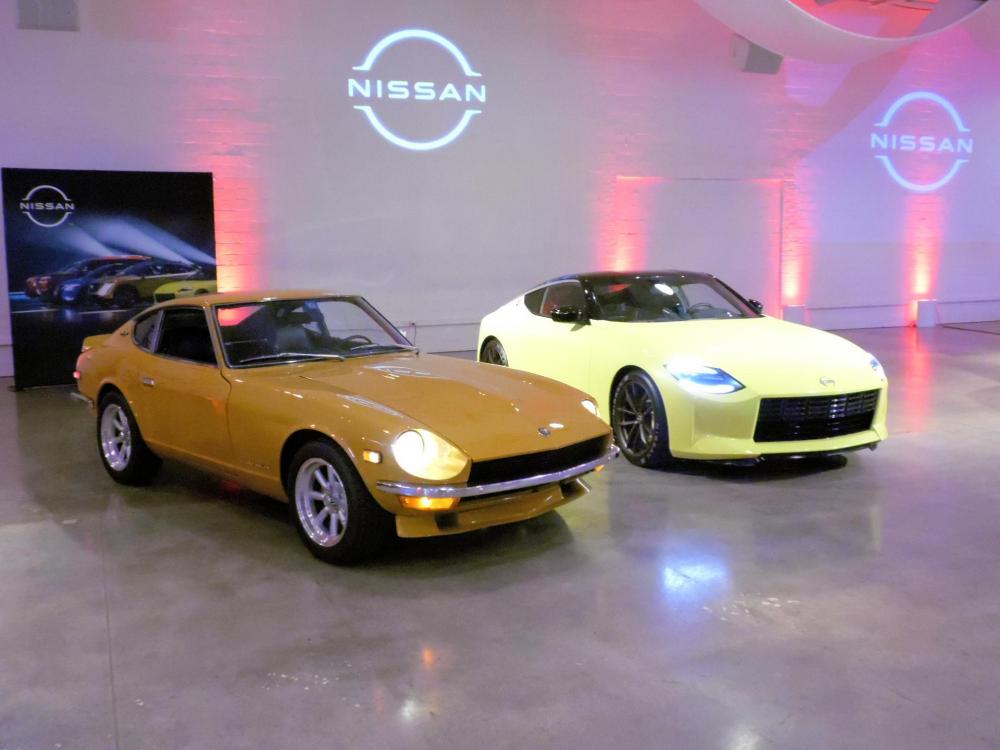
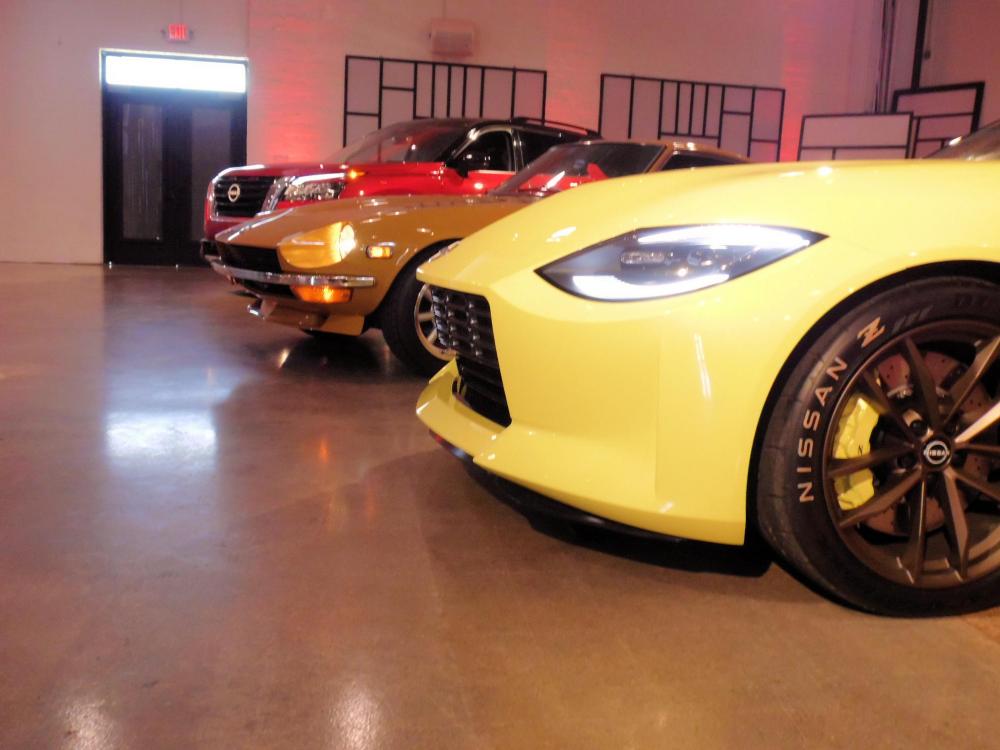
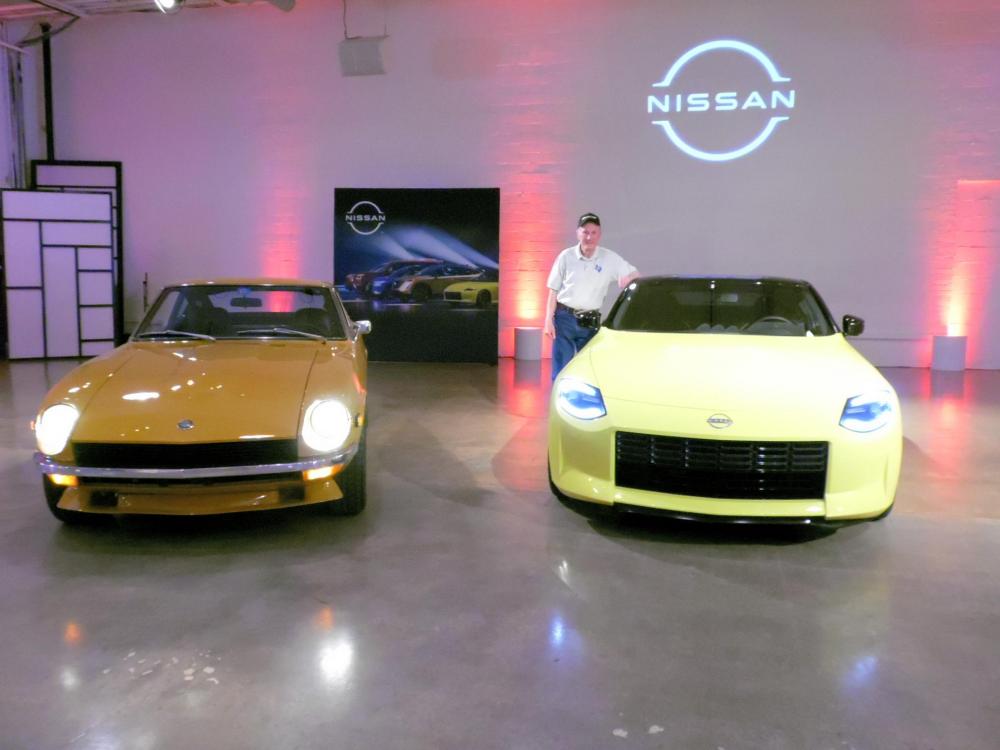
16 pointsThe Z Proto wrapped up a three-day visit in Dallas today. I had recently posted on the Nissan USA Facebook page about our 50th anniversary and they reached out to me with an invite to see the Z Proto. What followed was an unexpected photo and interview session where they posed my car next to the new Z. The new Z is a sleek and stylish car with none of the faux vents, overwrought bulges and creases, or chrome embellishments; the interior is exceptionally comfortable and well done. The Nissan team was very welcoming and showed a genuine interest in my car. I expect to get copies of the photos taken by the pros in the coming weeks.
 16 points
 -
16 pointsI wanted to give a compliment to the caliber and quality of people that are regular contributors to this forum. Seems like many other car forum just don’t have the magic this one has. I have a 20 yr old Dodge Viper that was given to me by my father before he passed away a few years ago. It sat for at least 5 years in his barn so once I got it here it needed some TLC but ran great. This week I took it out to get inspected and then went and ran it pretty hard. As I pulled in the driveway I got a Check Engine light. My OBD2 reader flagged a #2 misfire. Well, I went and posted on one of the Viper forums expecting a similar group of folks as we have here on CZCC and wow what a disappointment. Some of the folks on there are pricks, providing snarky comments that just turned me off. Won’t ever post on there again. This is why some other forum die. They don’t welcome new members and provide marginal help with excess useless comments. So, this forum is great because we have great people here and like many of you I appreciate that and glad to be part of it. Happy New Years by the way! Sent from my iPhone using Tapatalk16 points
-
15 pointsGents, I wanted to get on here and let you all know briefly why I’ve been gone and that I’m back. I’ll keep it brief and if you want to more details send me a message. About 8-9 months ago I had a medical incident that was a wake up call for me. It ended up with my in the ER with a doctor standing over me with cardiac paddles telling me they’re going to have to smock me. My job is 100% contingent on my health. Shortly after I notified the company I was placed on medical hold, and have been in this status until recently. This medical event was a watershed moment for me and I spent some time reflecting on my lifestyle and then came up with a game plan. I determined it was time to “Reset my life”. I had to reevaluate all my actions that impact me and make changes. This medical event opened up a host of other boxes with the FAA drilling down into every medical aspect of me. I had many doctors visits, saw specialists and found I had some blood work items out of normal ranges too. I had to do a couple sleep studies and so on. It was painful! It didn’t help I ran into incompetent people along the way which made me realize how broken our medial system is. I can dive into that later but because of incompetence and financial incentives by secondary medical providers who were calling themselves “experts” I was going to have to do treatment I didn’t need or want, So I had to become my own advocate and spent countless hours researching and educating myself. I read several book by “real” experts and had great advice from friends who are physicians. I became a pseudo expert is some medical areas and with the actions I implemented I turned everything around, I’d go see my doctor and we’d discuss items that he really knew nothing about. I was shocked at how our medical system works and how it is incentivized. So what did I do to reset my life. I changed everything; my Diet, Exercise, Nutrition , Sleep, and Stress; it all had to be changed. Because I didn’t have time to figure out exactly what I needed to do I used the “cast a wide net approach”. Do it all and hopefully i fix these issues. This ultimately worked, it wasn’t easy. I had to be disciplined and methodical and I was. In this time, I’ve lost 24 pounds, ( I wasn’t really heavy to begin with), I exercise for 60-90 mins 5 days a week (running 15-20 miles a week), taking multiple vitamins and supplements, track my sleep and O2 saturation every night, and removed all stressful activities I can. I stopped drinking alcohol, removed all sugar from my diet, The second order effects are many. First I feel better than I did 10 years ago, I’m never tired, I have more mental clarity, I dropped my LDL cholesterol 70 pts without medication, blood work is now normal, I sleep great. I stopped working on my car during this time for the most part. I did a little here and there but it hasn’t had anything really done to it. I do drive it now and then. I had to refocus my life and that meant 100% commitment to the things I determined were more important after evaluating everything. The tenants were: Family, Faith, Friendships, Spiritual and Mental Heath and overall personal Wellness. Everything else was placed on hold. The bottoms line is this long post is I’m back, I’m better, I’m going back to work in 2 weeks. This event was a blessing in disguise. That’s my story!15 points
-
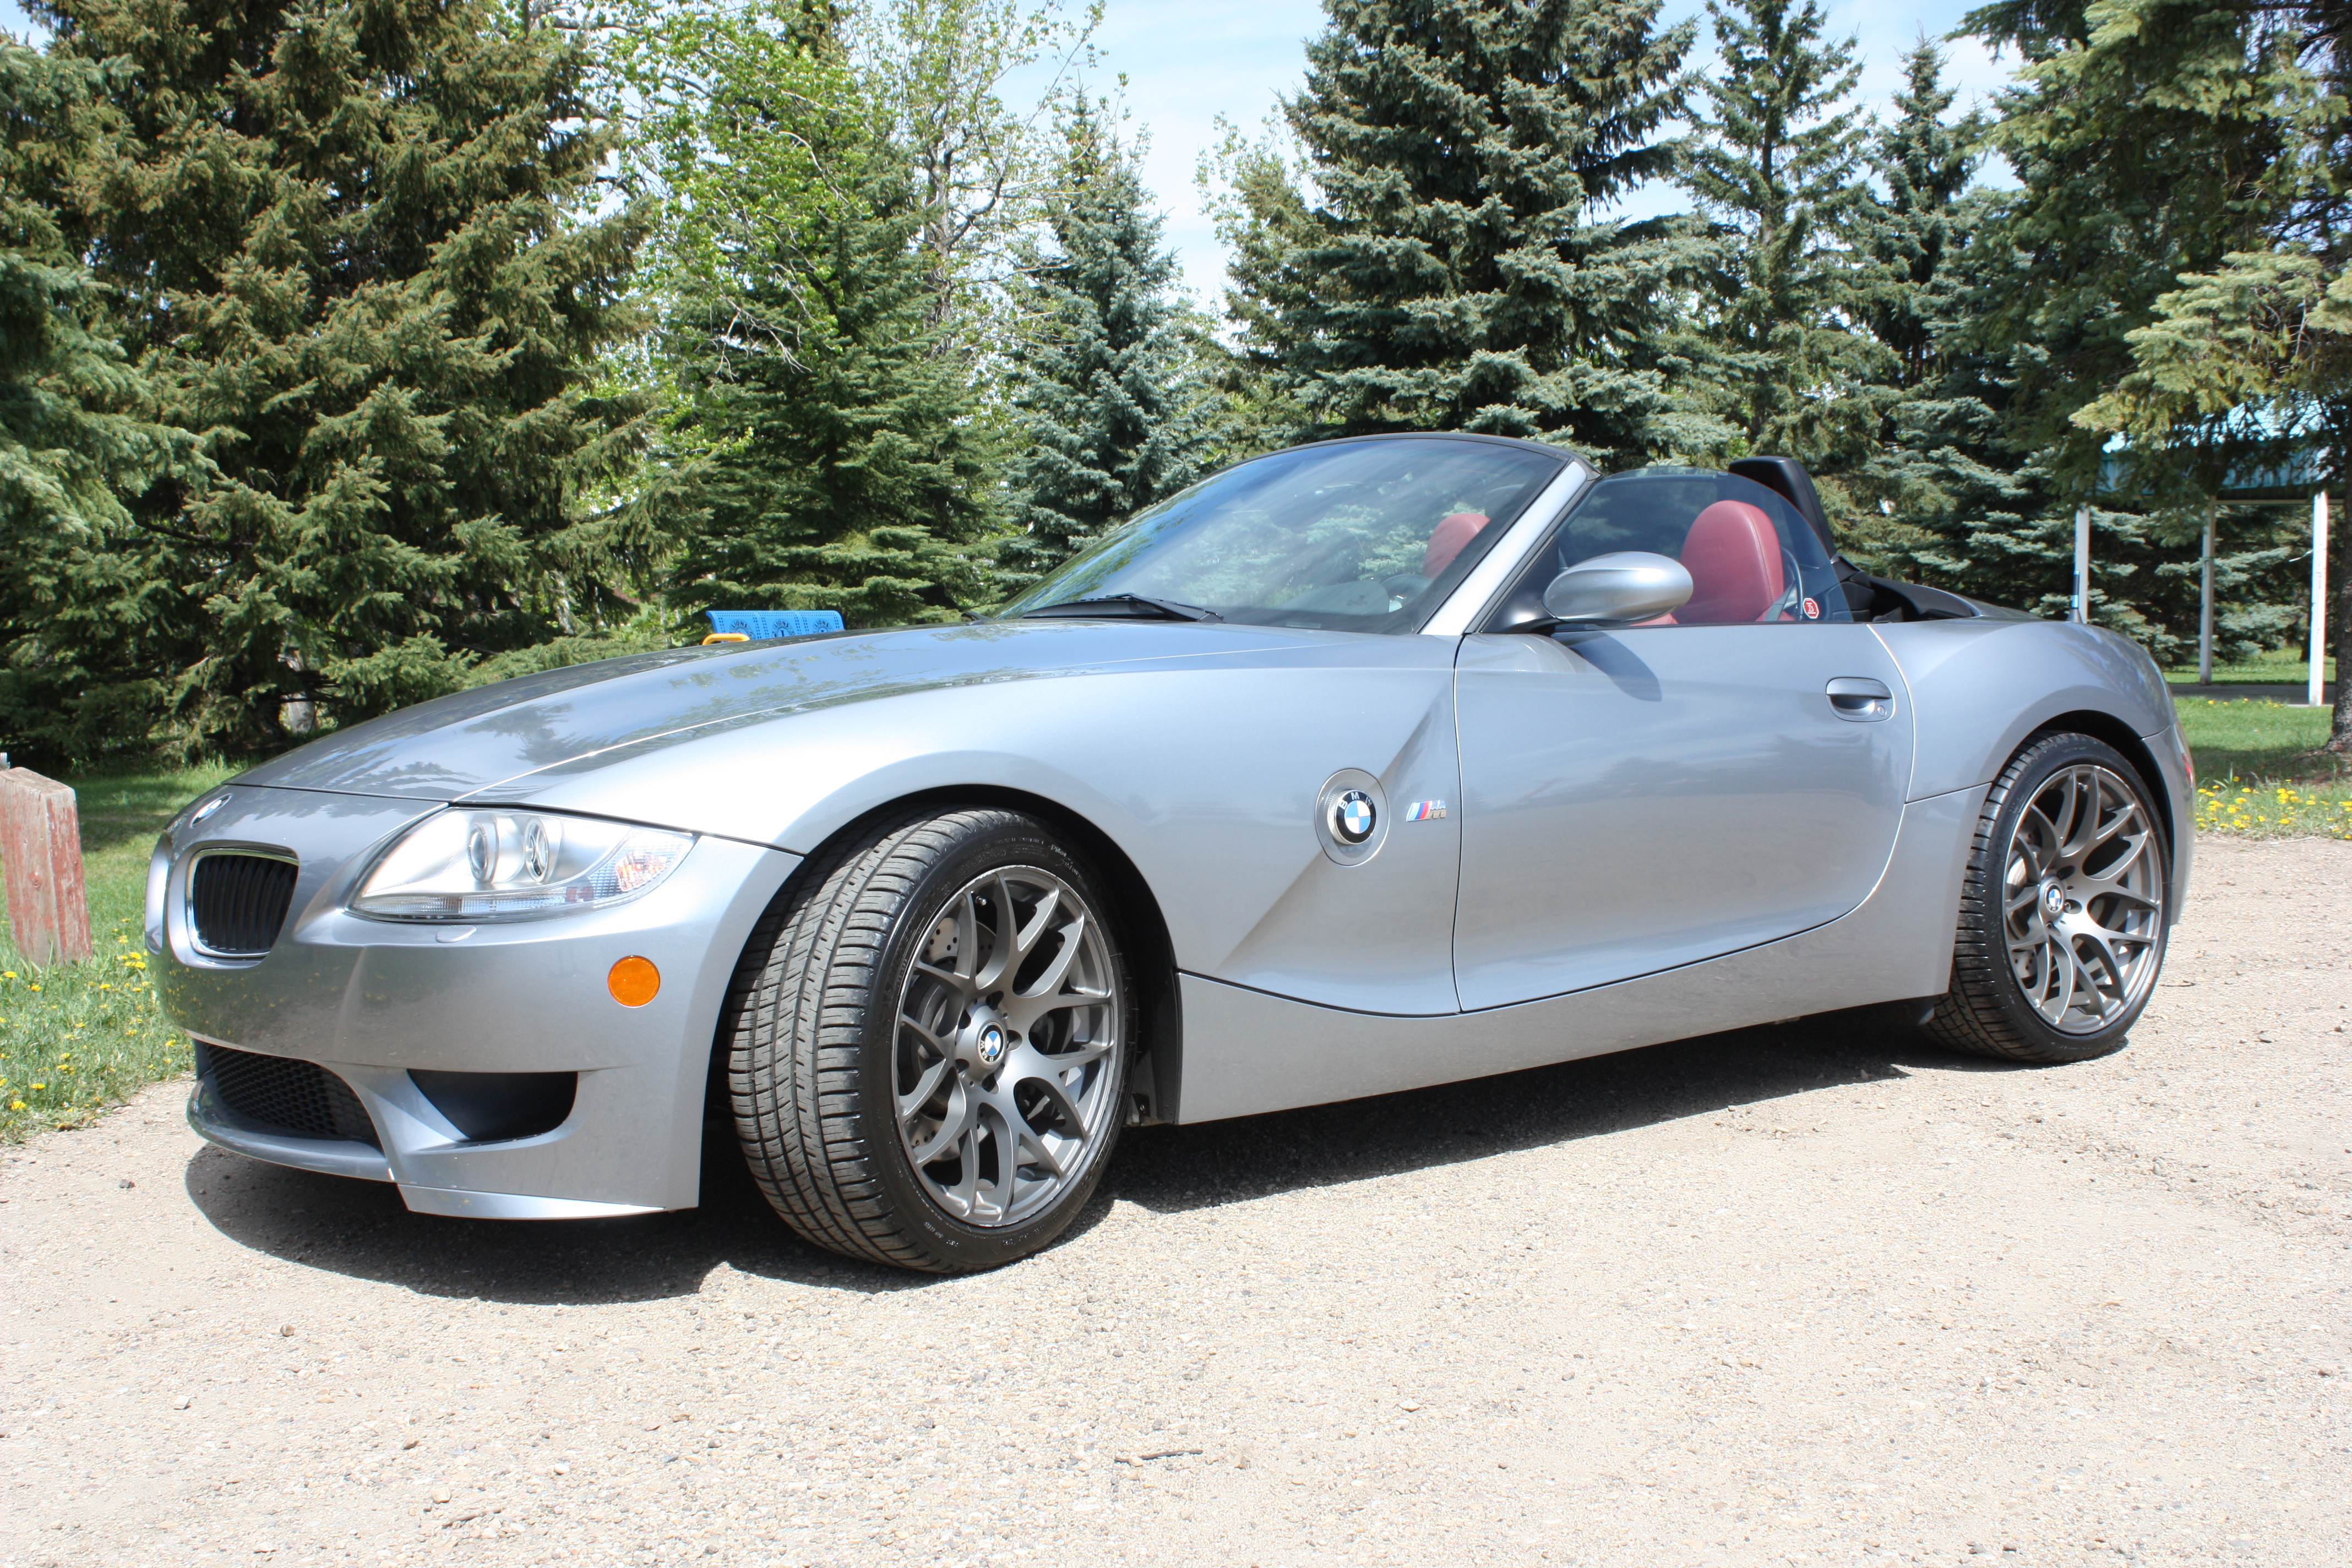
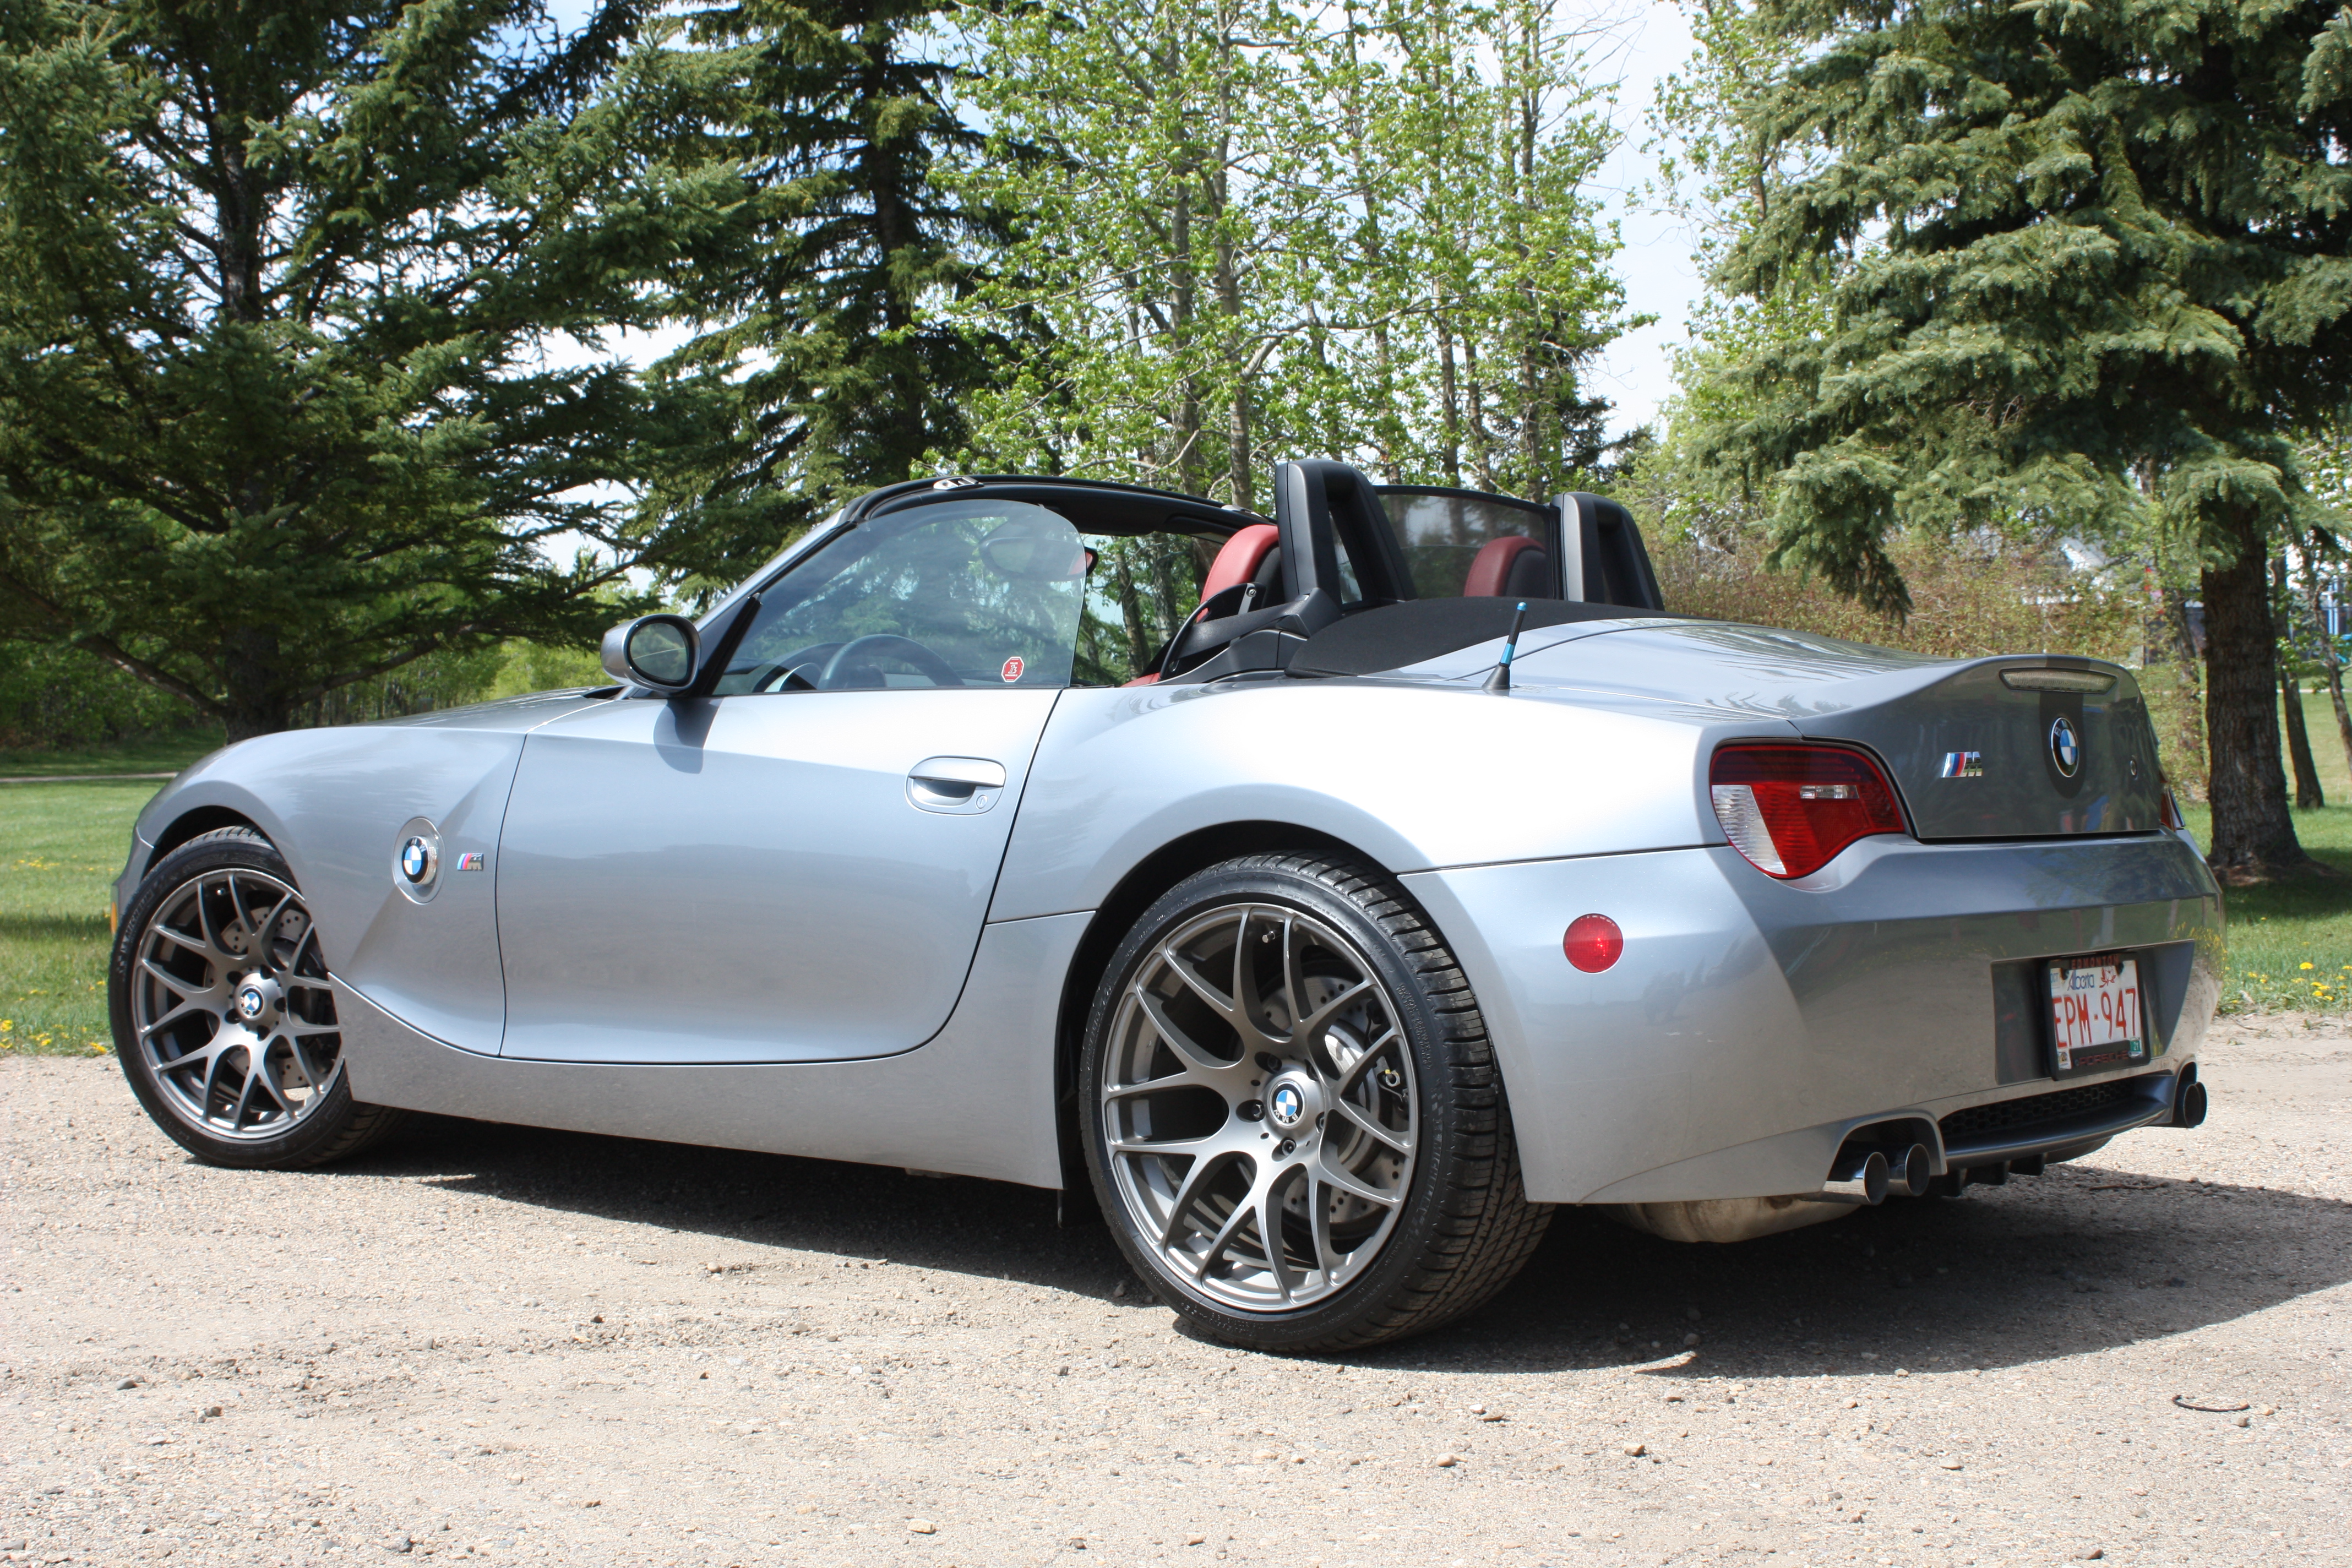
14 pointsJust thought I'd pop in to say I finally found an affordable alternative to my Zed! After test driving some BMW m3's and M2 Competitions, and considering a 911, I just didn't want to spend north of 50,000 dollars for a toy! Then I found this car advertised in Edmonton, and negotiated a good deal for the same money I got for the Datsun. A 2006 BMW Z4 M! I am loving the convertible driving experience, and it actually feels reminiscent of the Datsun, two seater, long, sexy hood loads of power from the beautiful sounding straight six! And, the wife now wants to go on road trips! It is admittedly much more comfortable for longer distances. The car seems to have been well cared for, 56,000 kms over 3 previous owners, it has a few scratches on the rear bumper, and the wheels have some curb rash and will be refurbished at the end of the driving season. No owners manual or service records though, I will track them down hopefully, car has been in Alberta all it's life. Fully vaccinated and heading to Jasper for a road trip this week!


 14 points
 -
14 points
-
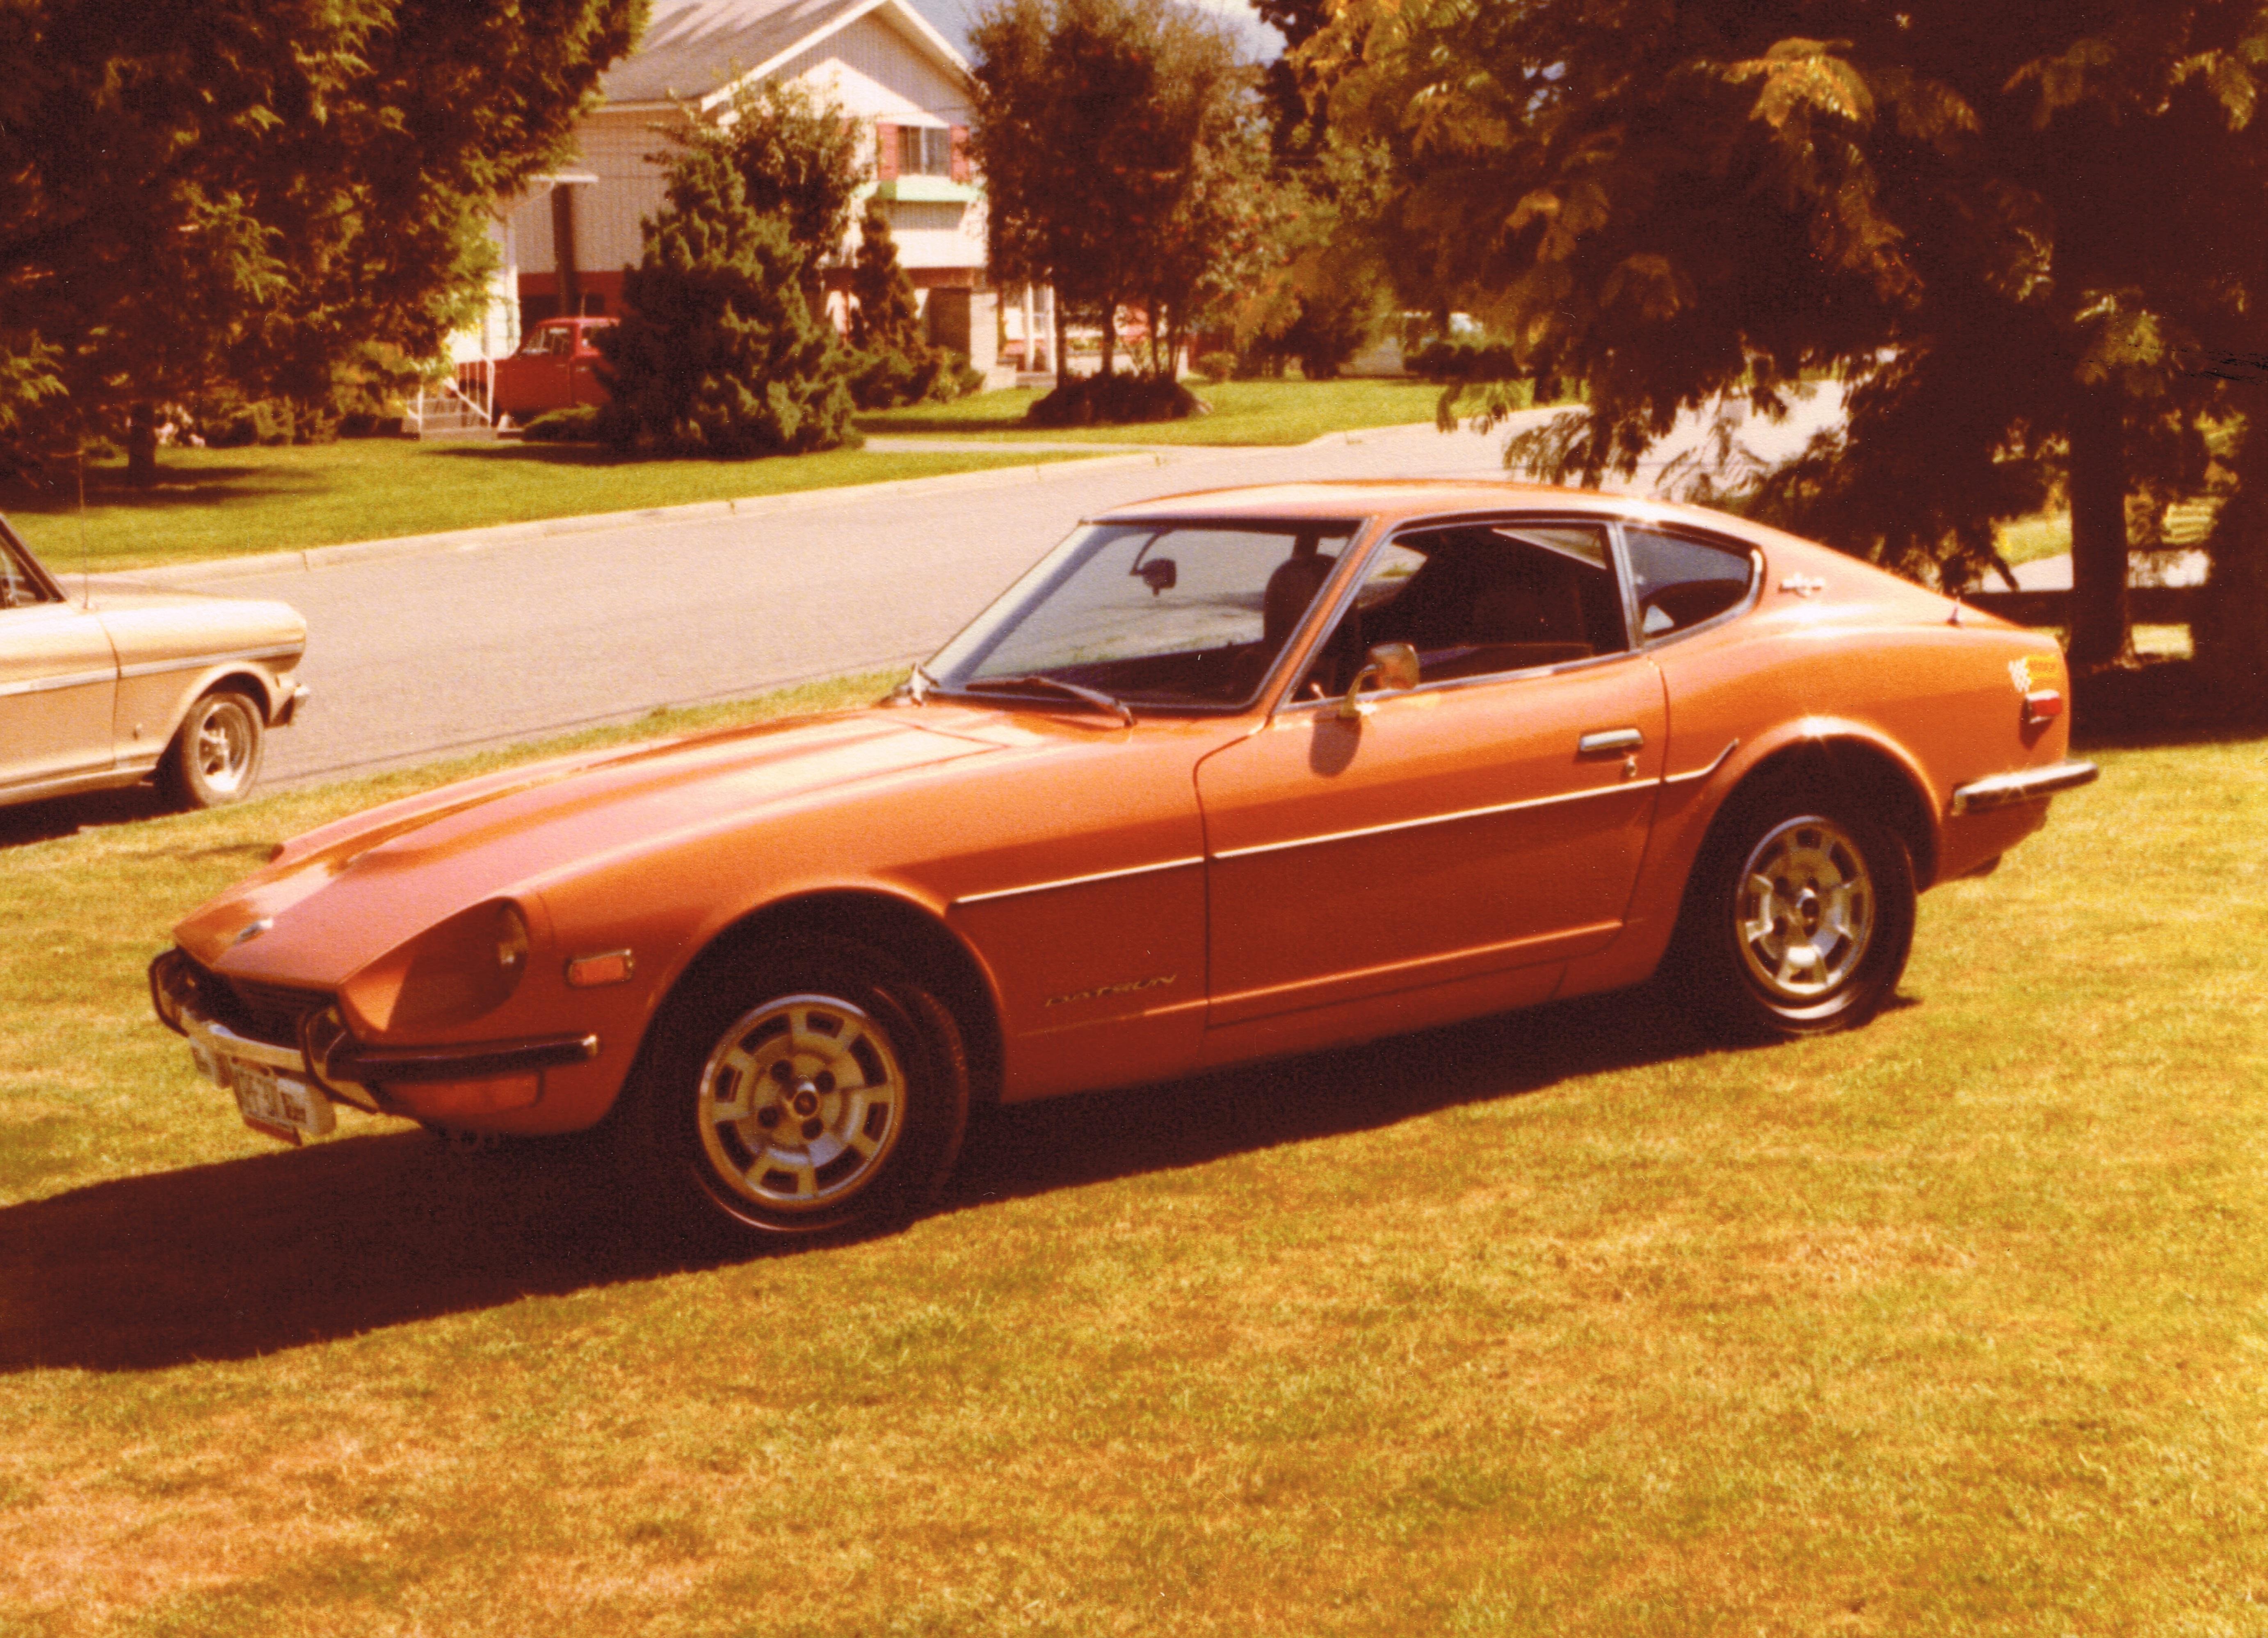
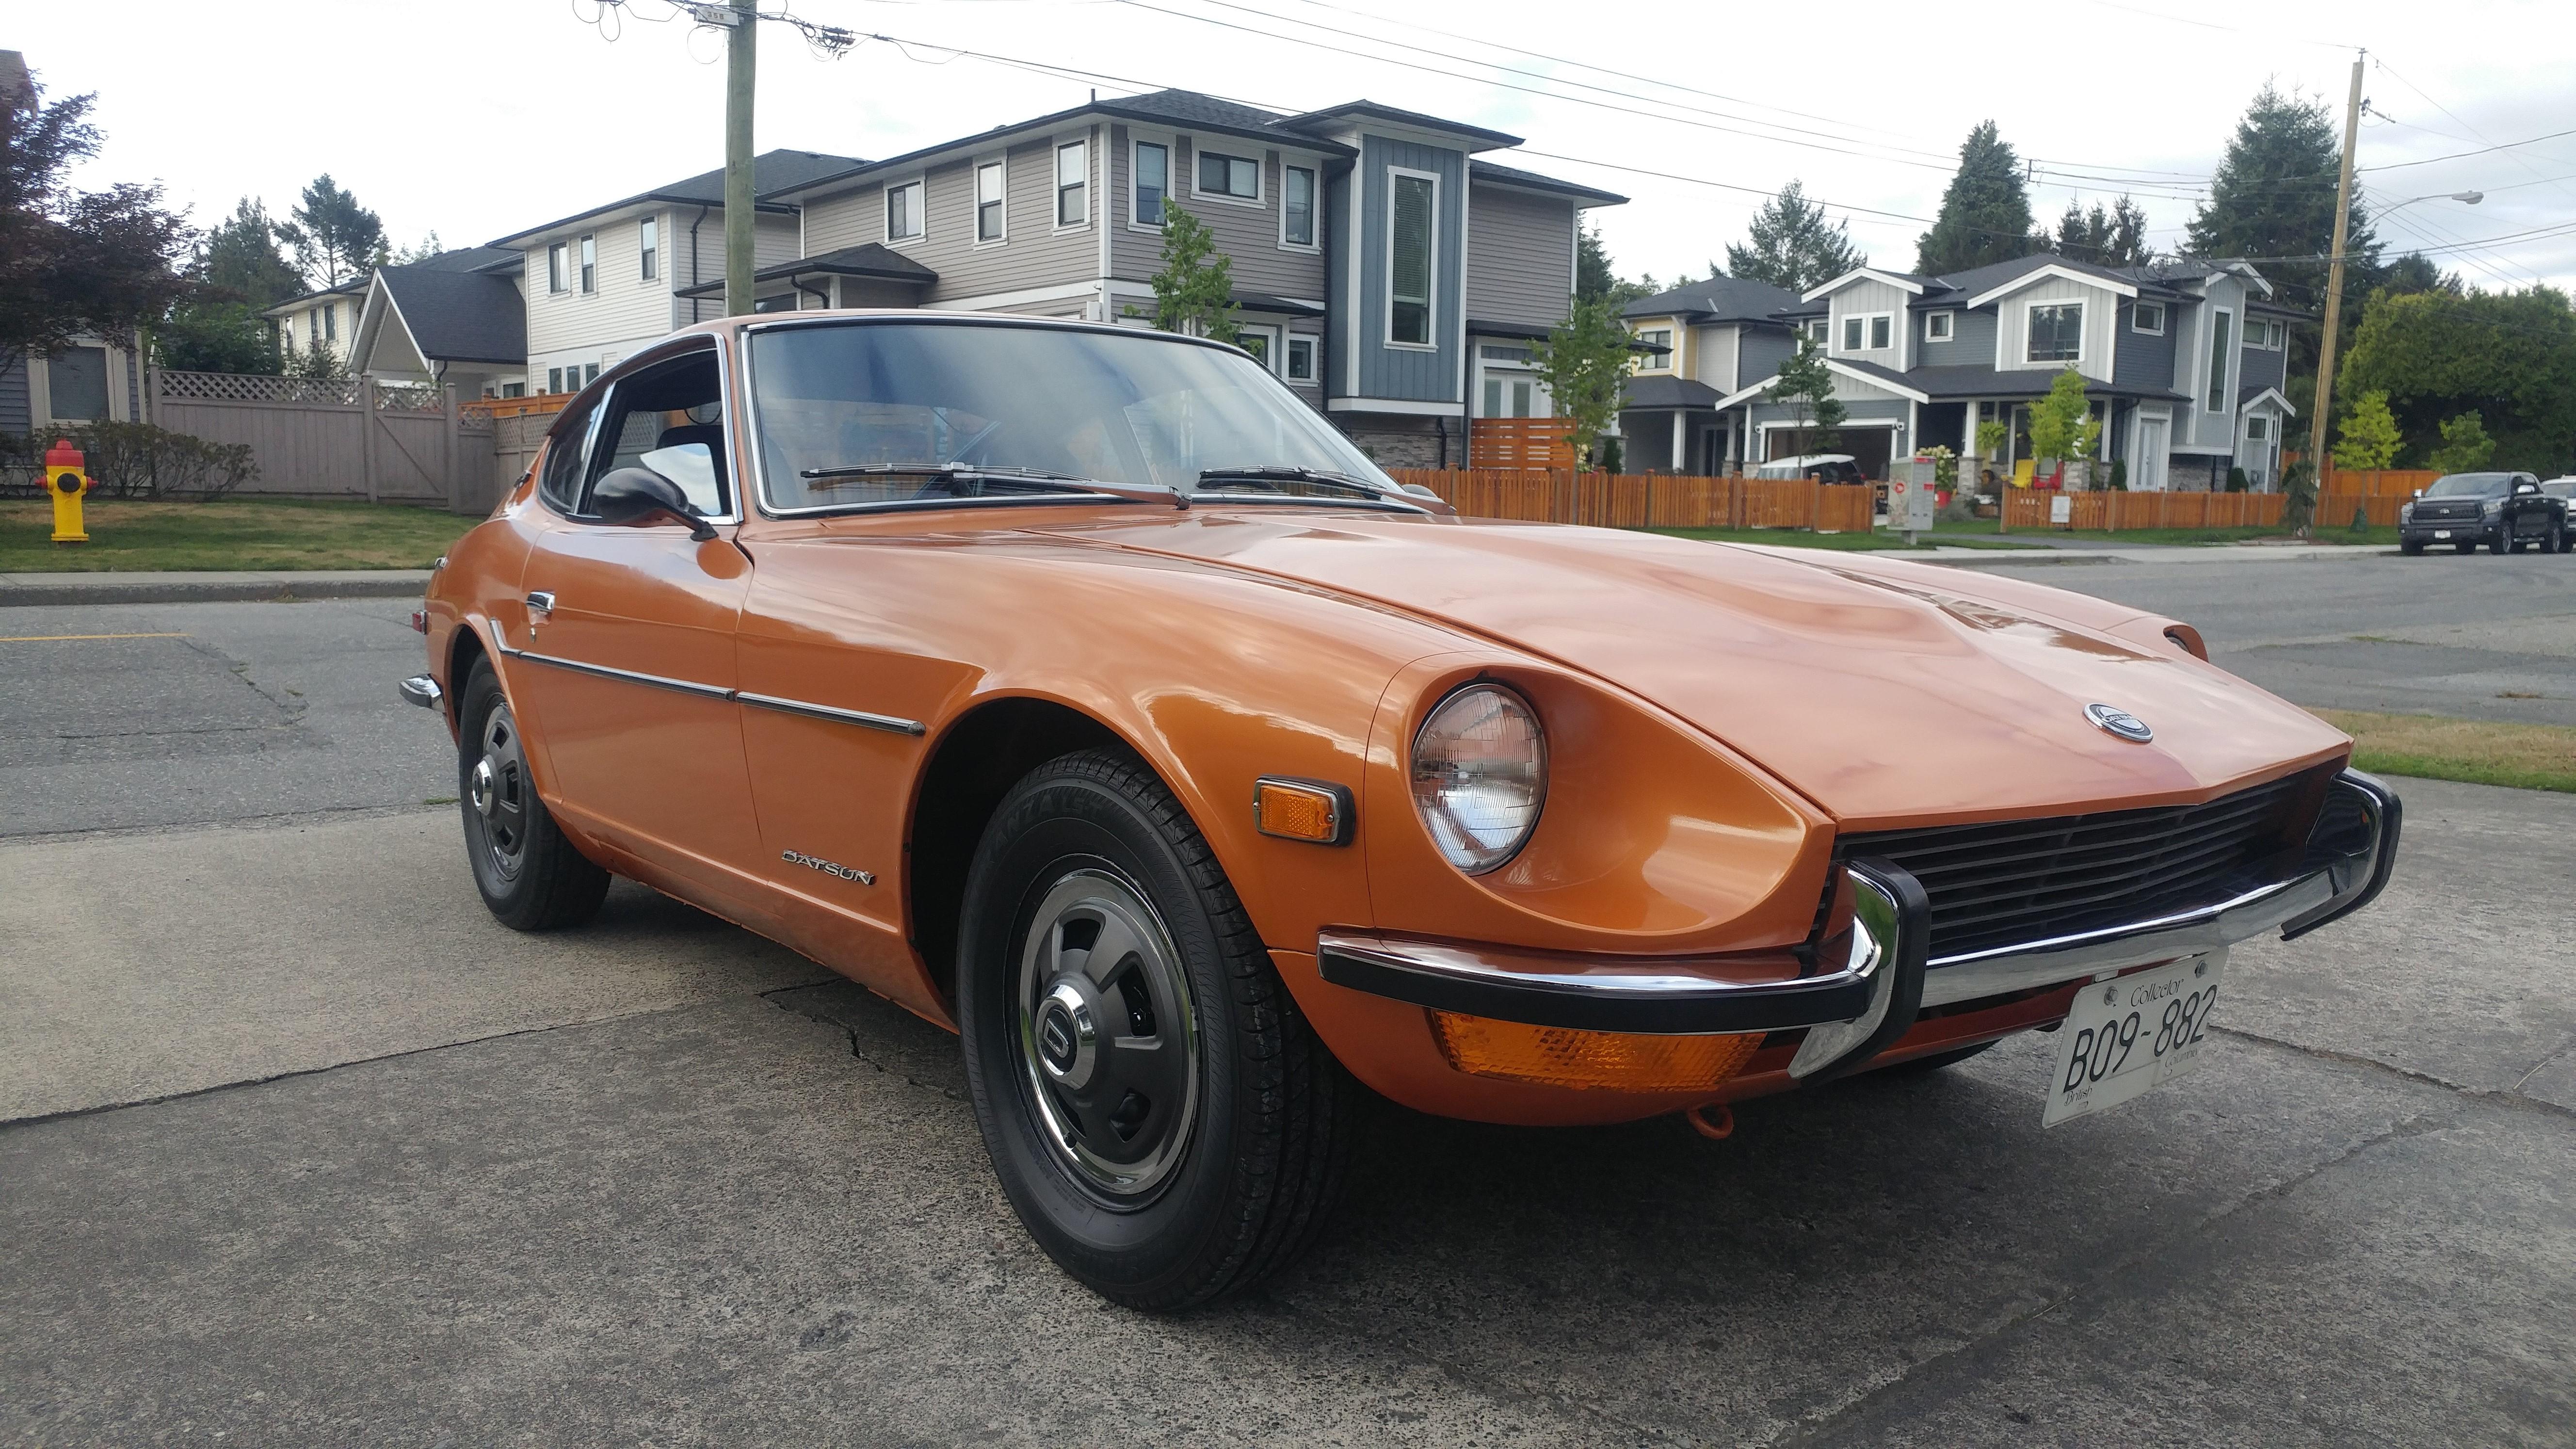
13 pointsWell after forty years of ownership I'm finally starting a second go around at restoring my 1970 240Z. I purchased the car well used in 1978 with 90,000 plus miles from the local Datsun Dealership in Chilliwack, BC Canada. Here is a picture from July '78: Here is what it looks like today. Looks reasonable but the paint is showing its age and there are some other issues lurking that need to be fixed properly. Full disclosure will come later. Restoration number one was done in 1982 and I only did what I could afford at the time. I actually think this first attempt of was really "Canadian maintenance", my poor Zed was at a do or die point. Here are a few pics from 1982: I went to the parts department at my local Datsun dealership and made, what I learned later was, the largest order of body parts that anyone had ever placed with them to that point. By the time my body man and painter were finished and with the cost of the car, I could have bought a brand new 1978 280Z instead, but hey I was 18 at the time and I have never regretted doing it. In future installments I will list my restoration goals add a time line of my 40 years of ownership, after I sort and scan more of my old pictures. Anyway I plan to document my adventure with my re-restoration here, and I'm sure I will be looking for advice, also comments and tips will be very welcomed. Cheers, Mike


 13 points
 -
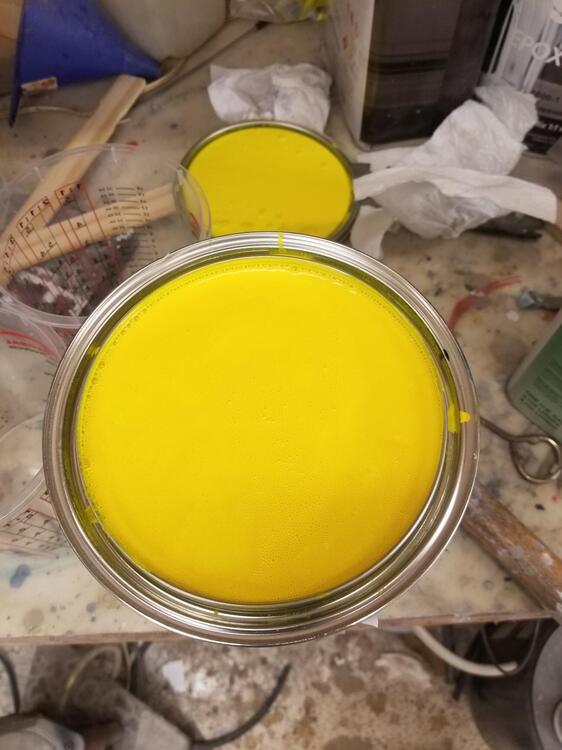
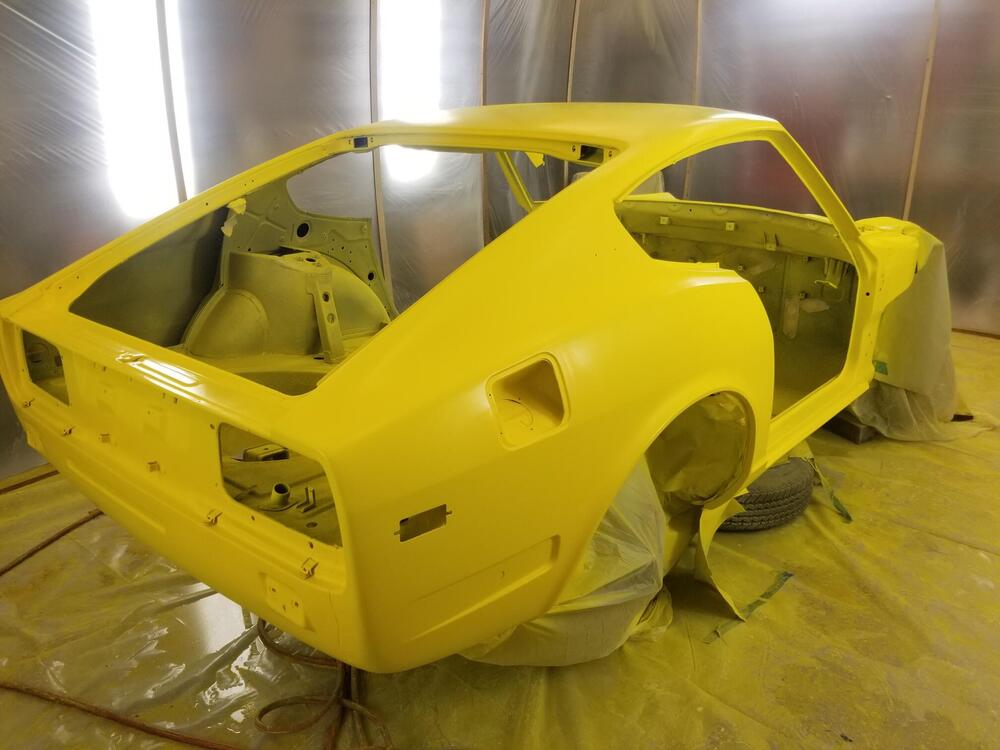
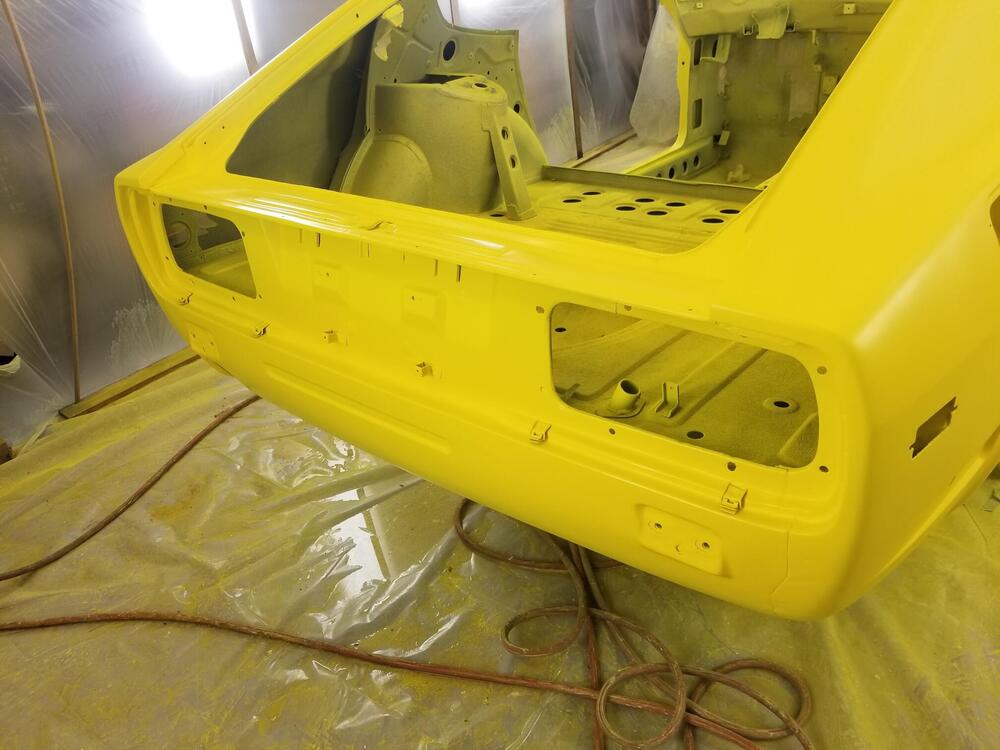
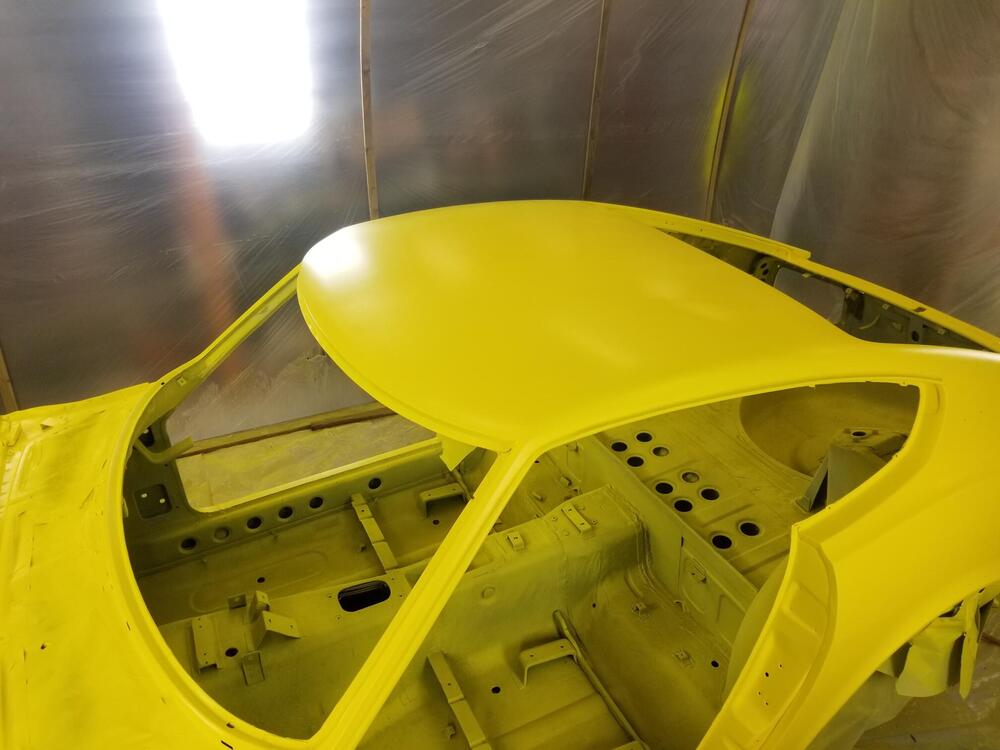
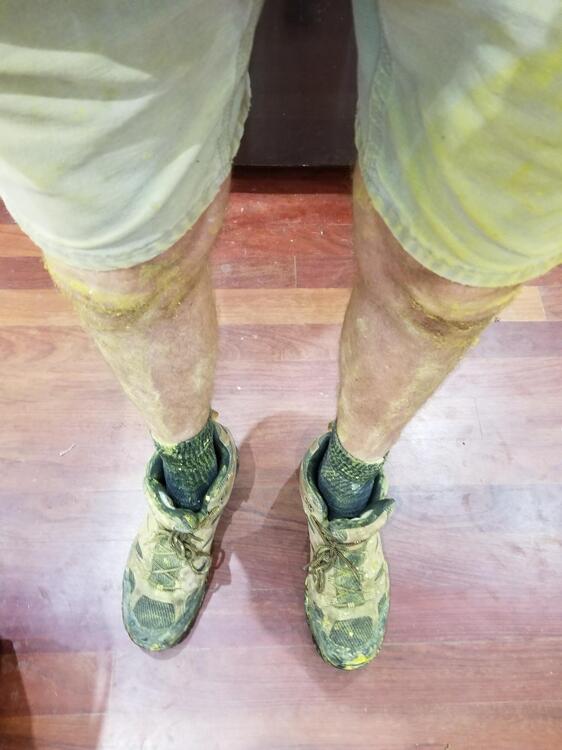
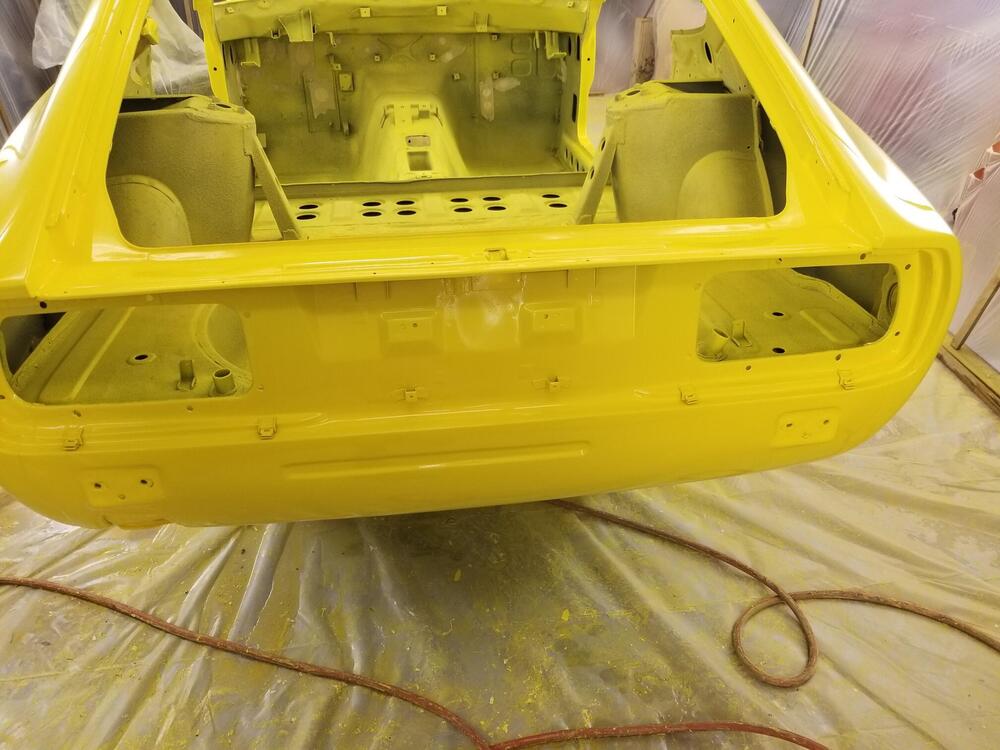
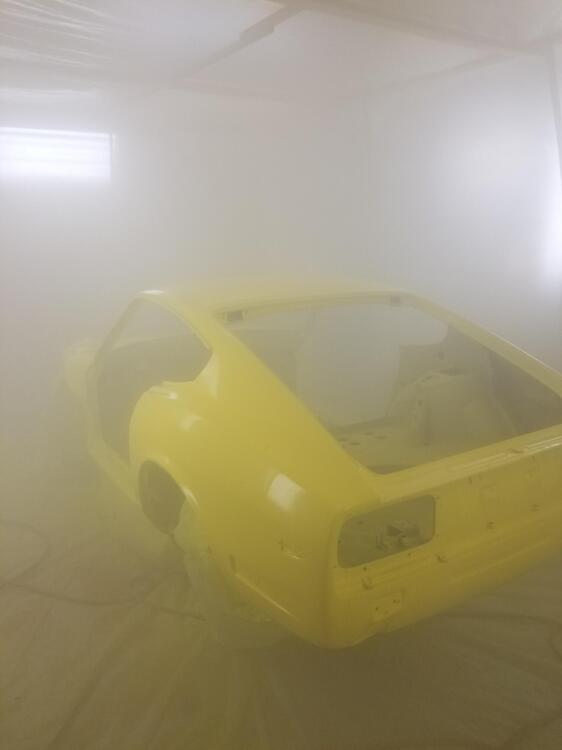
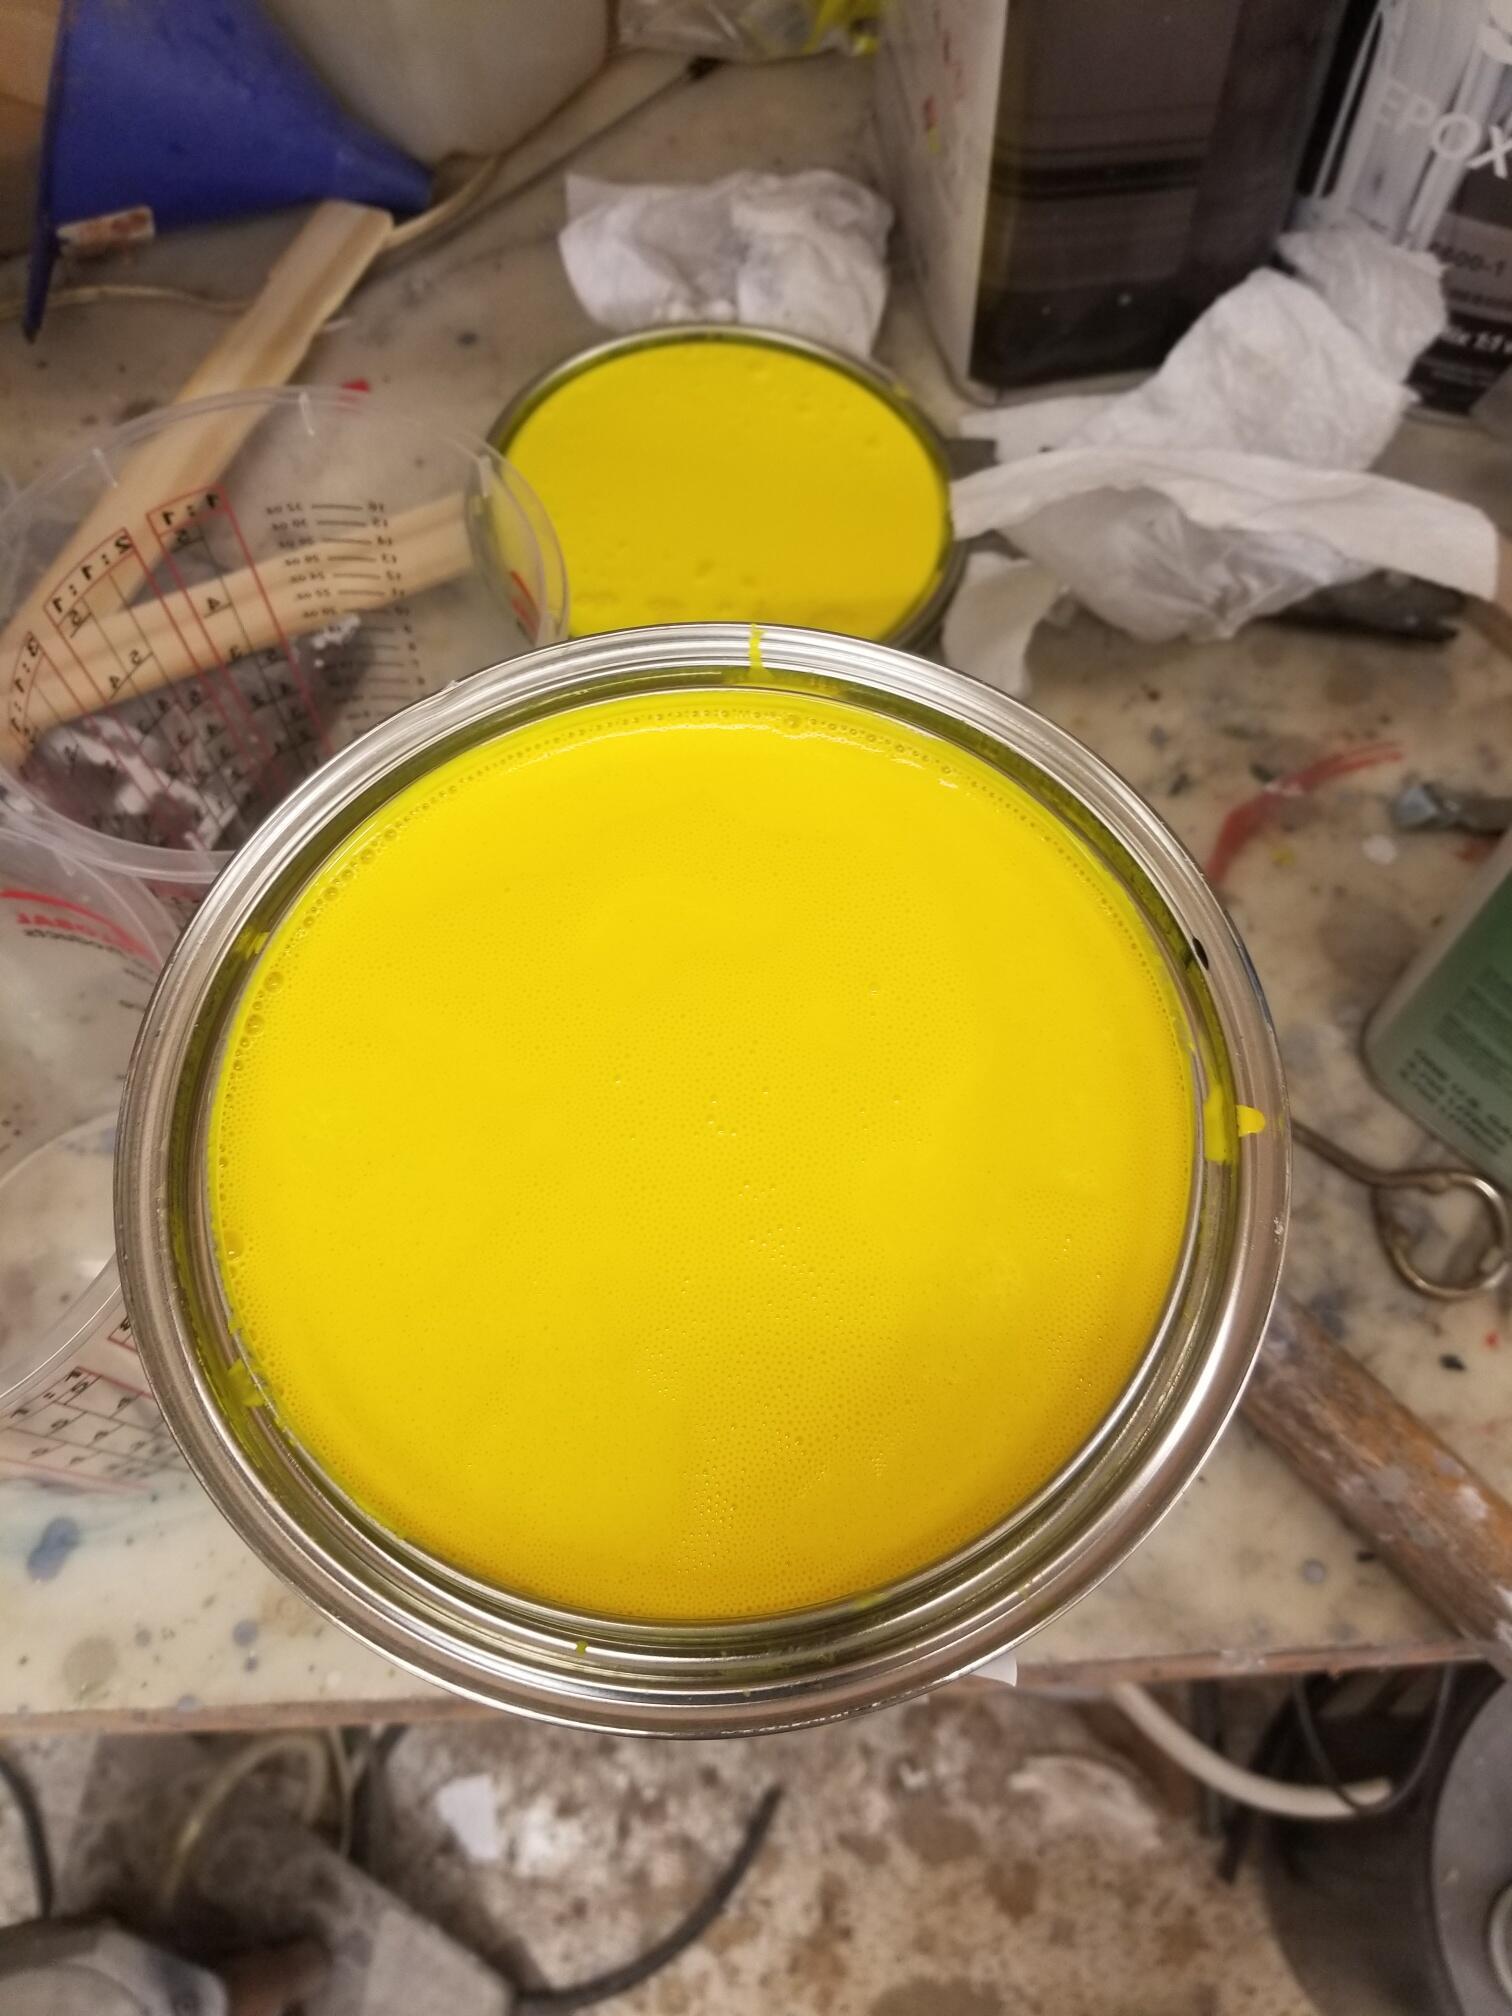
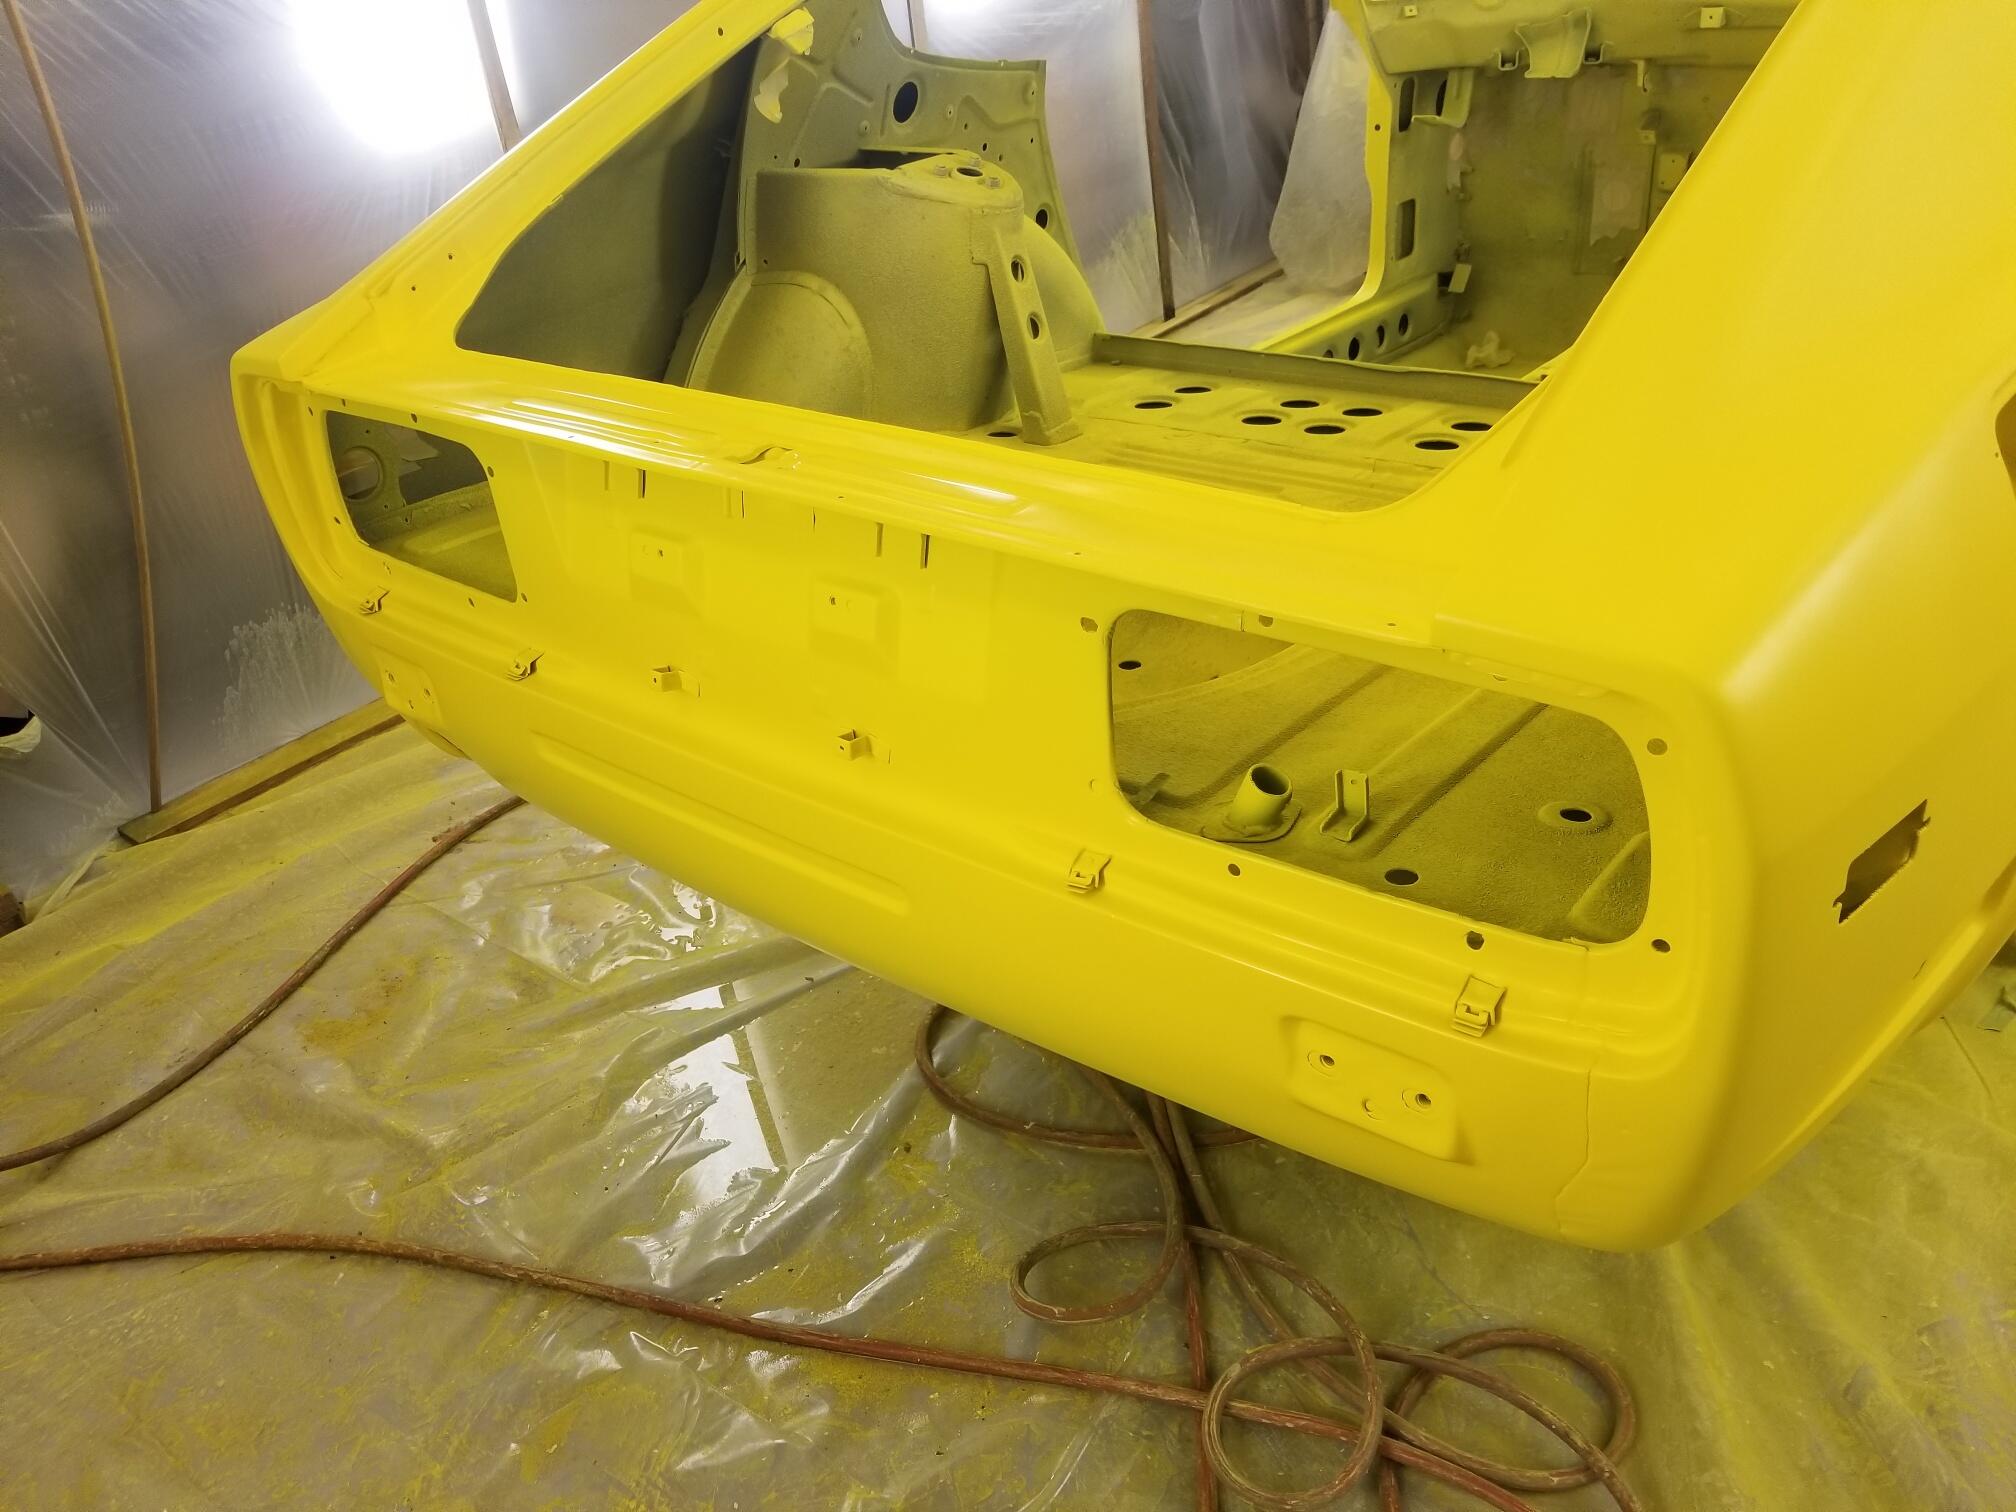
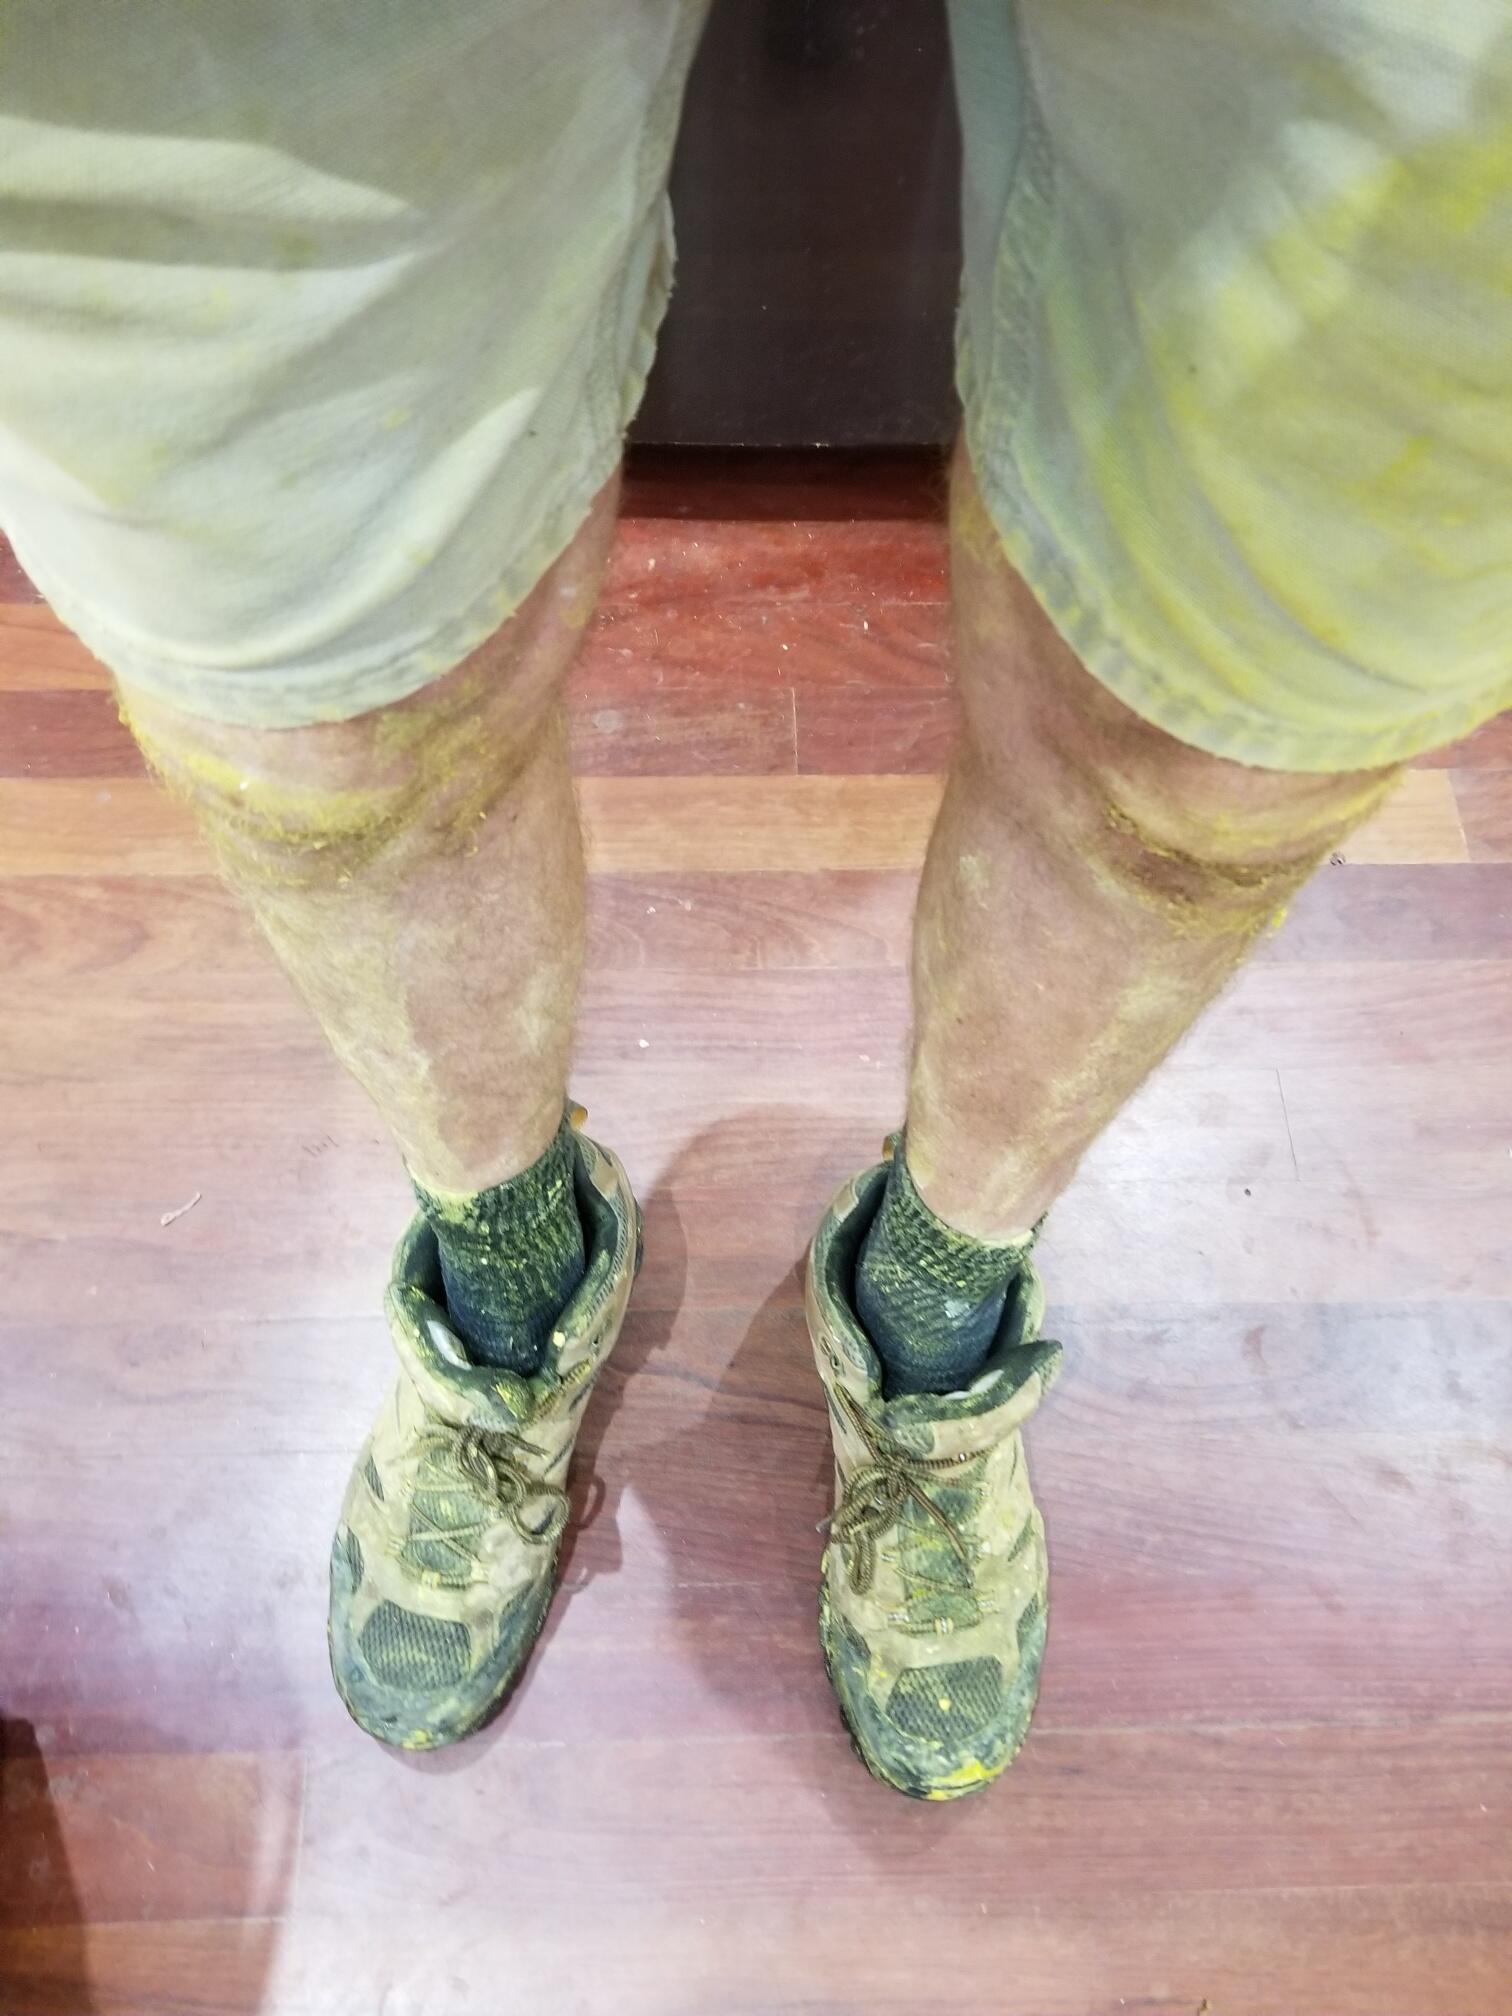
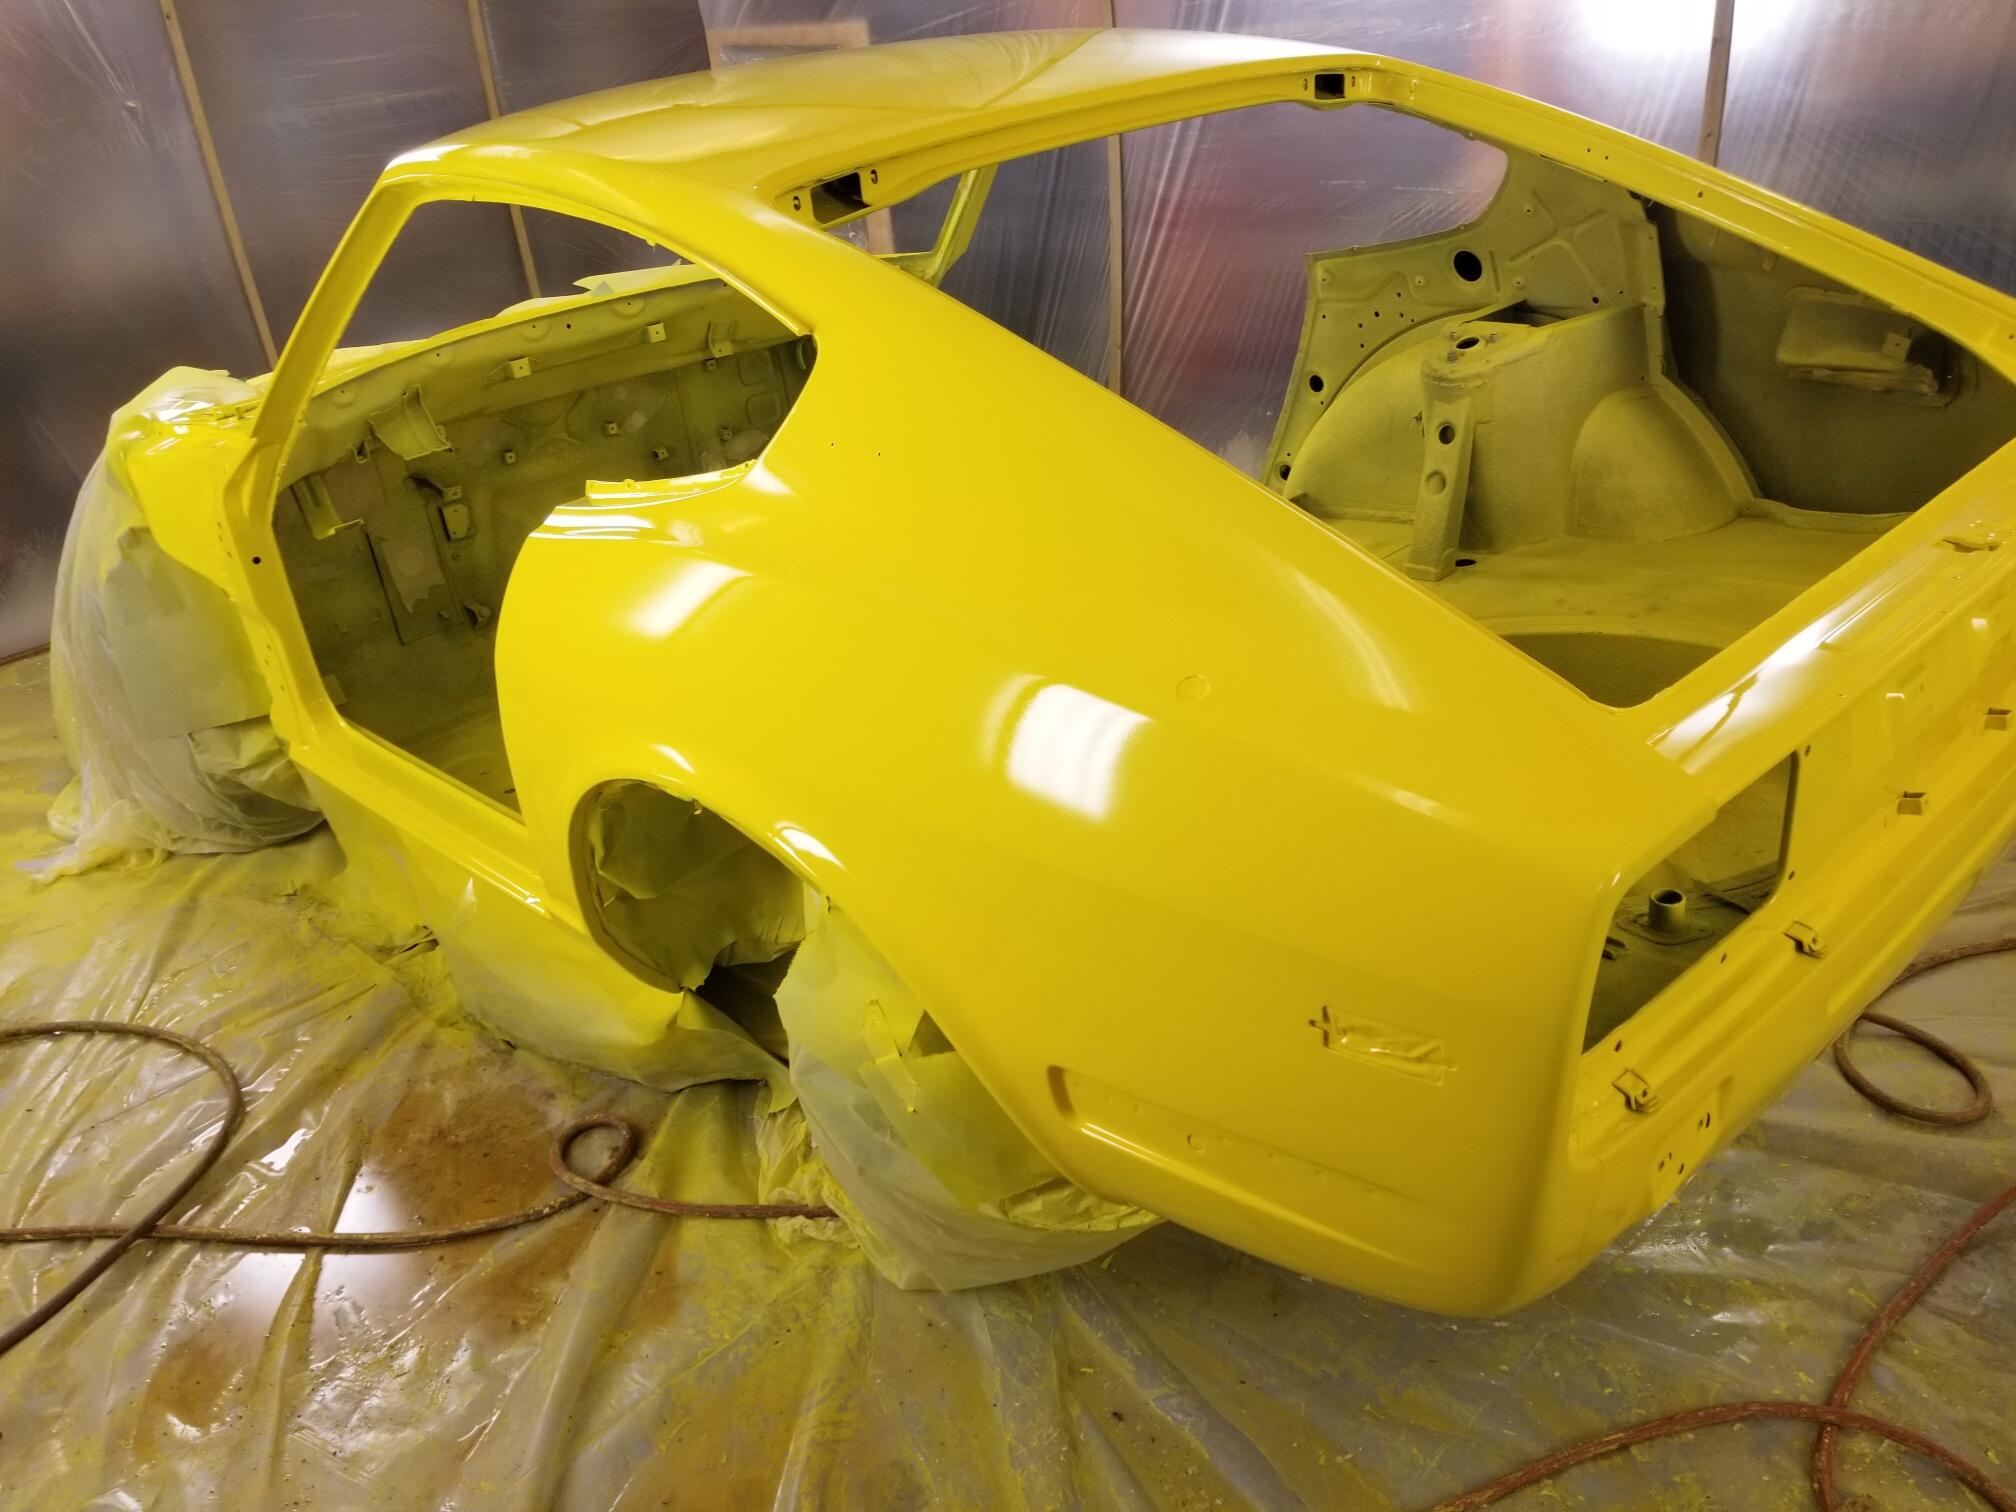
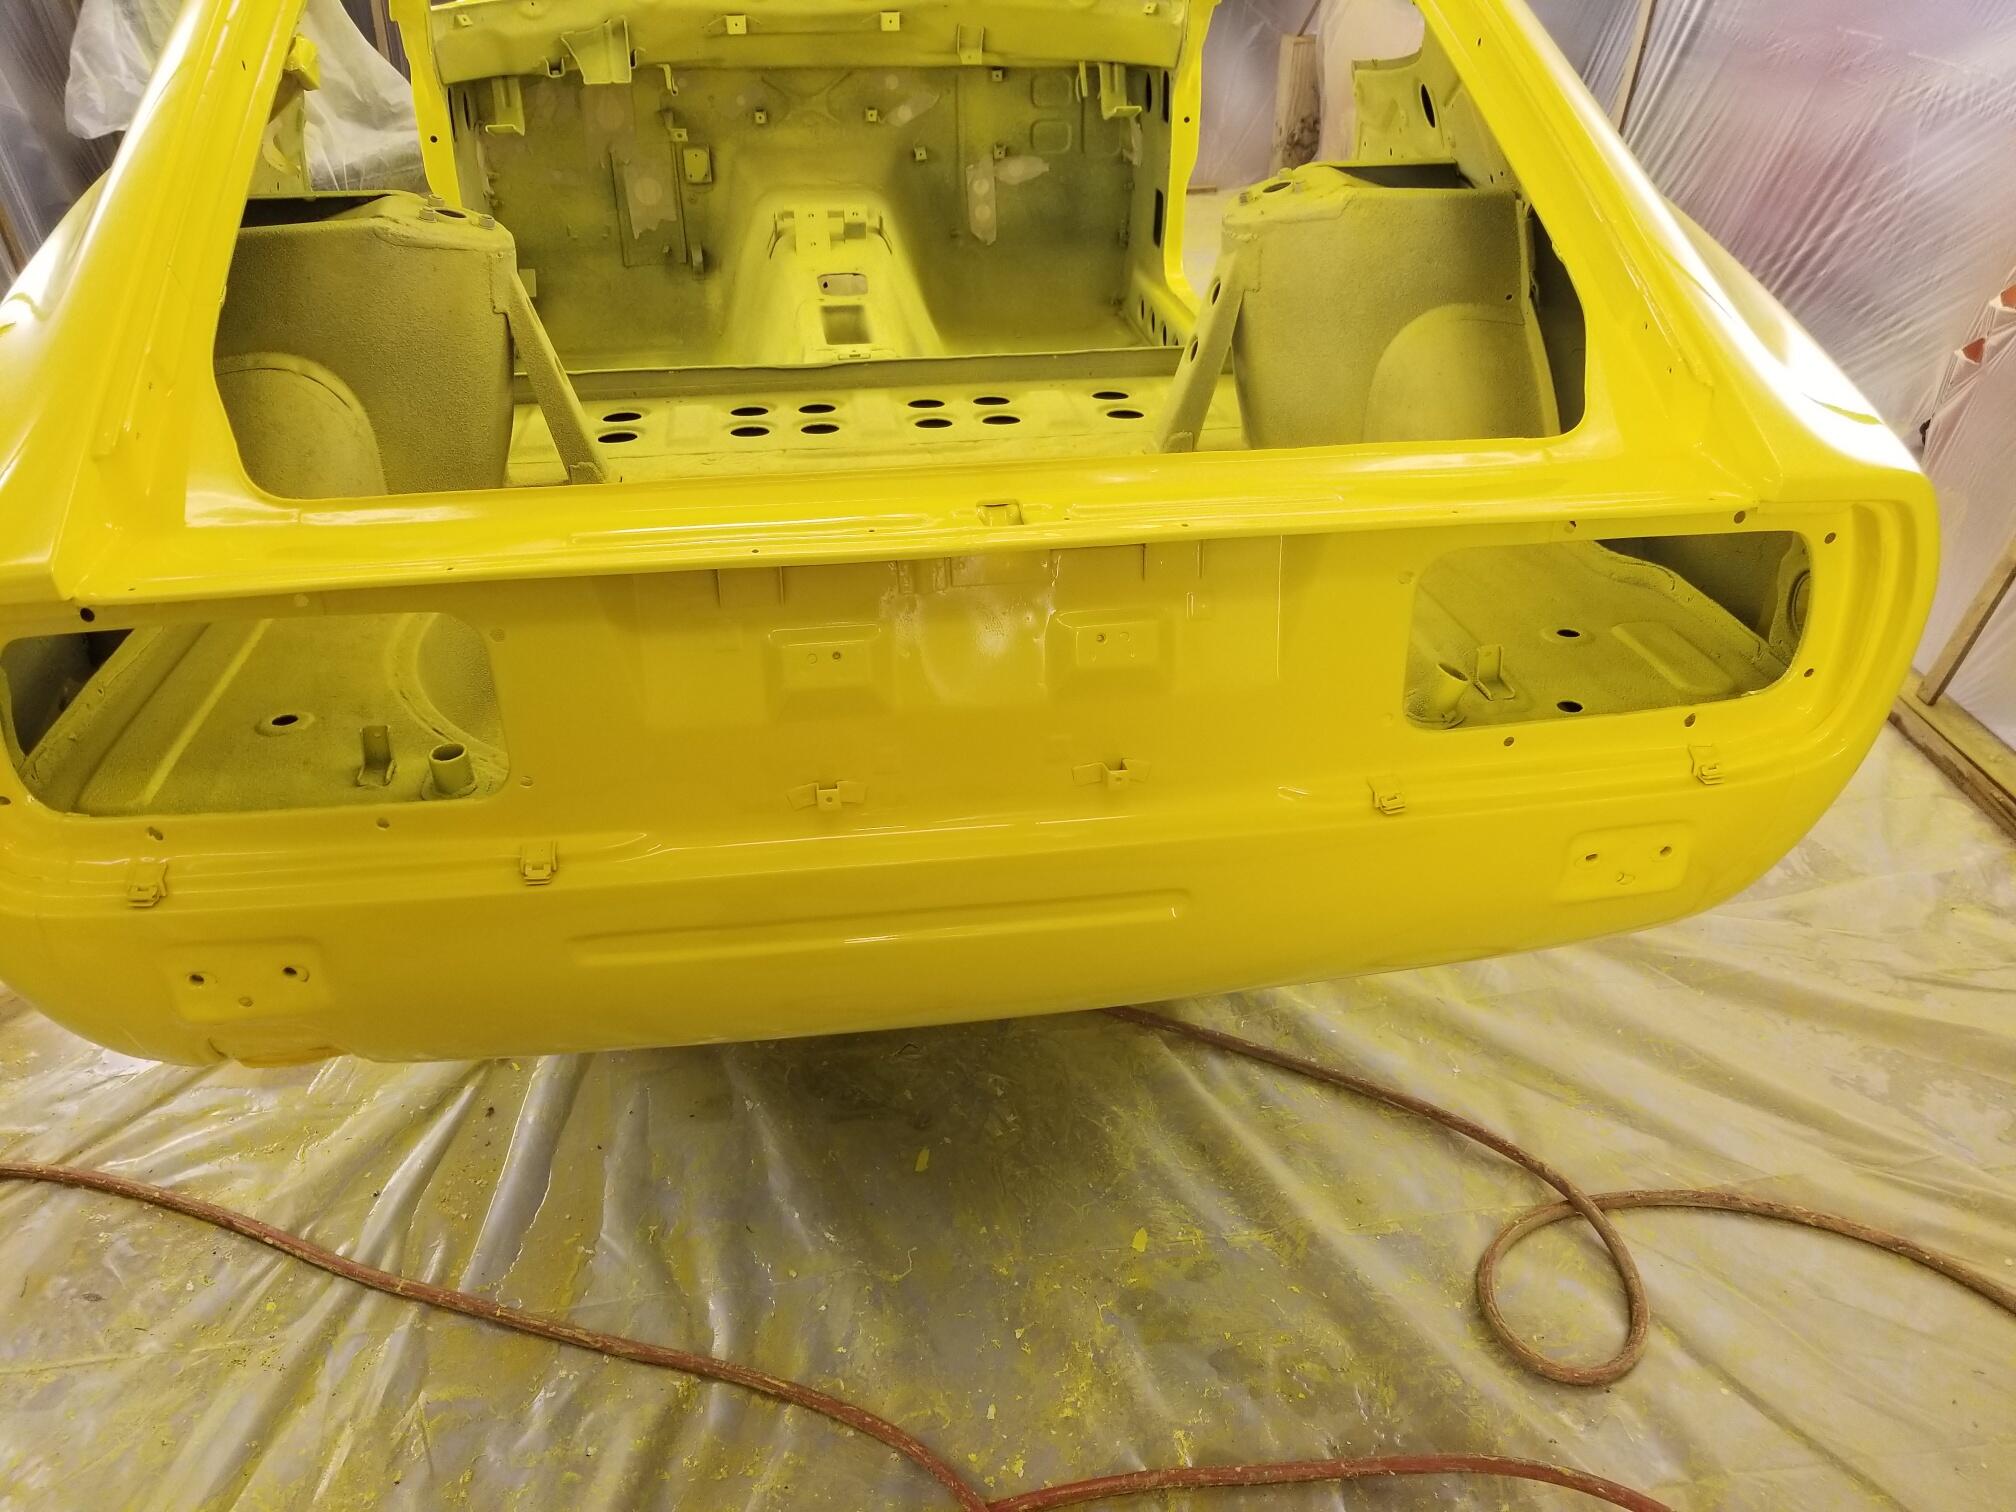
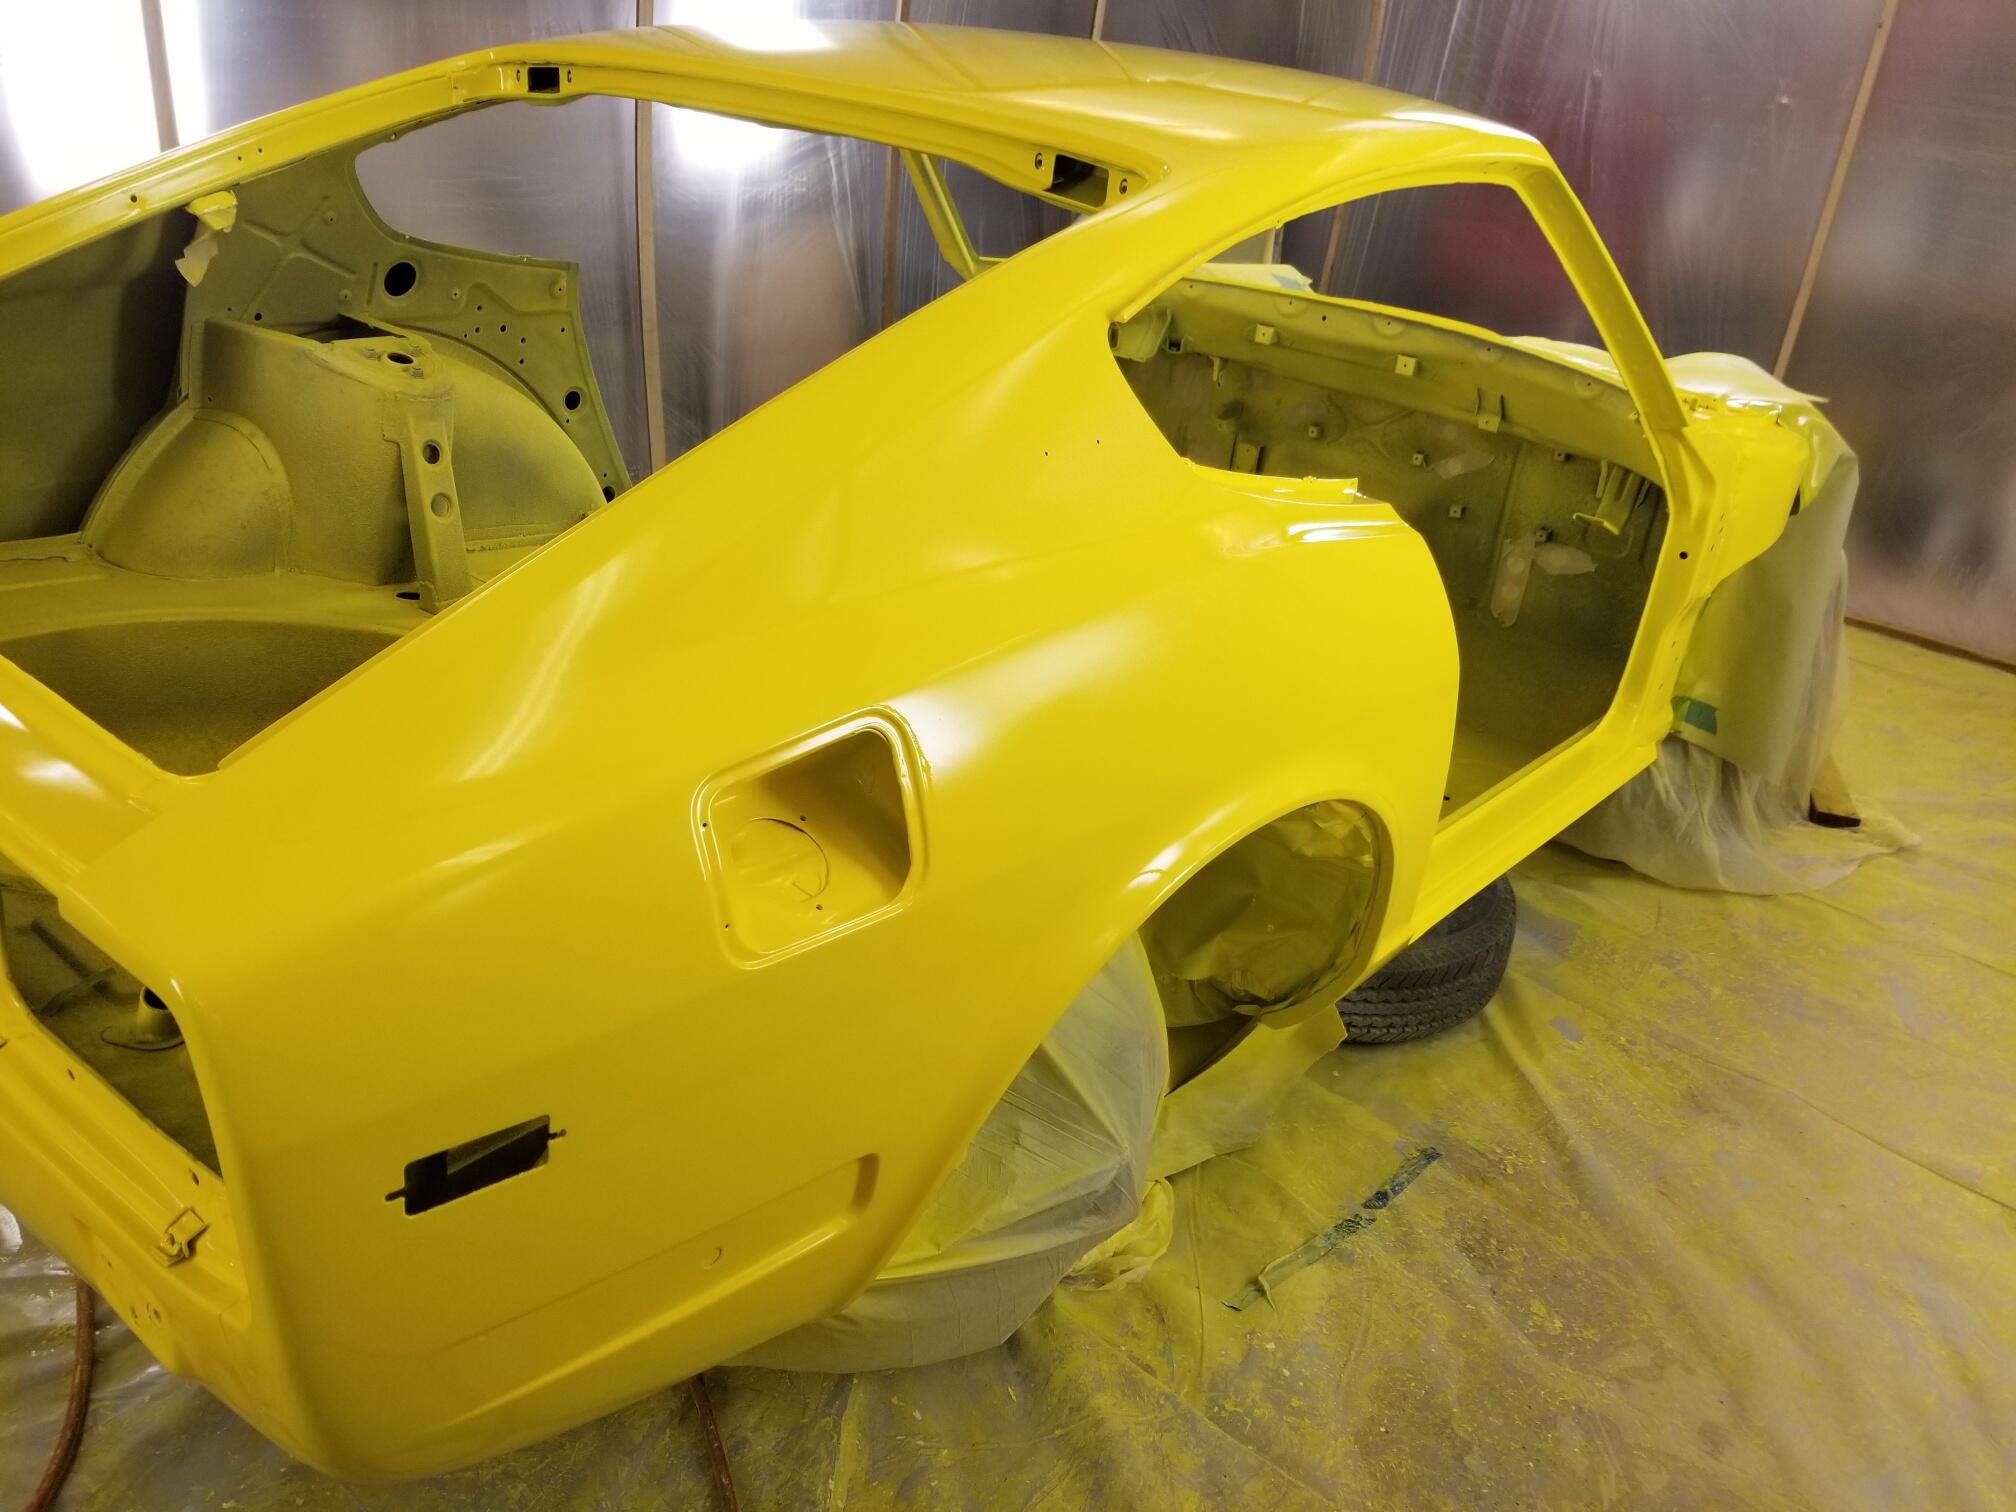
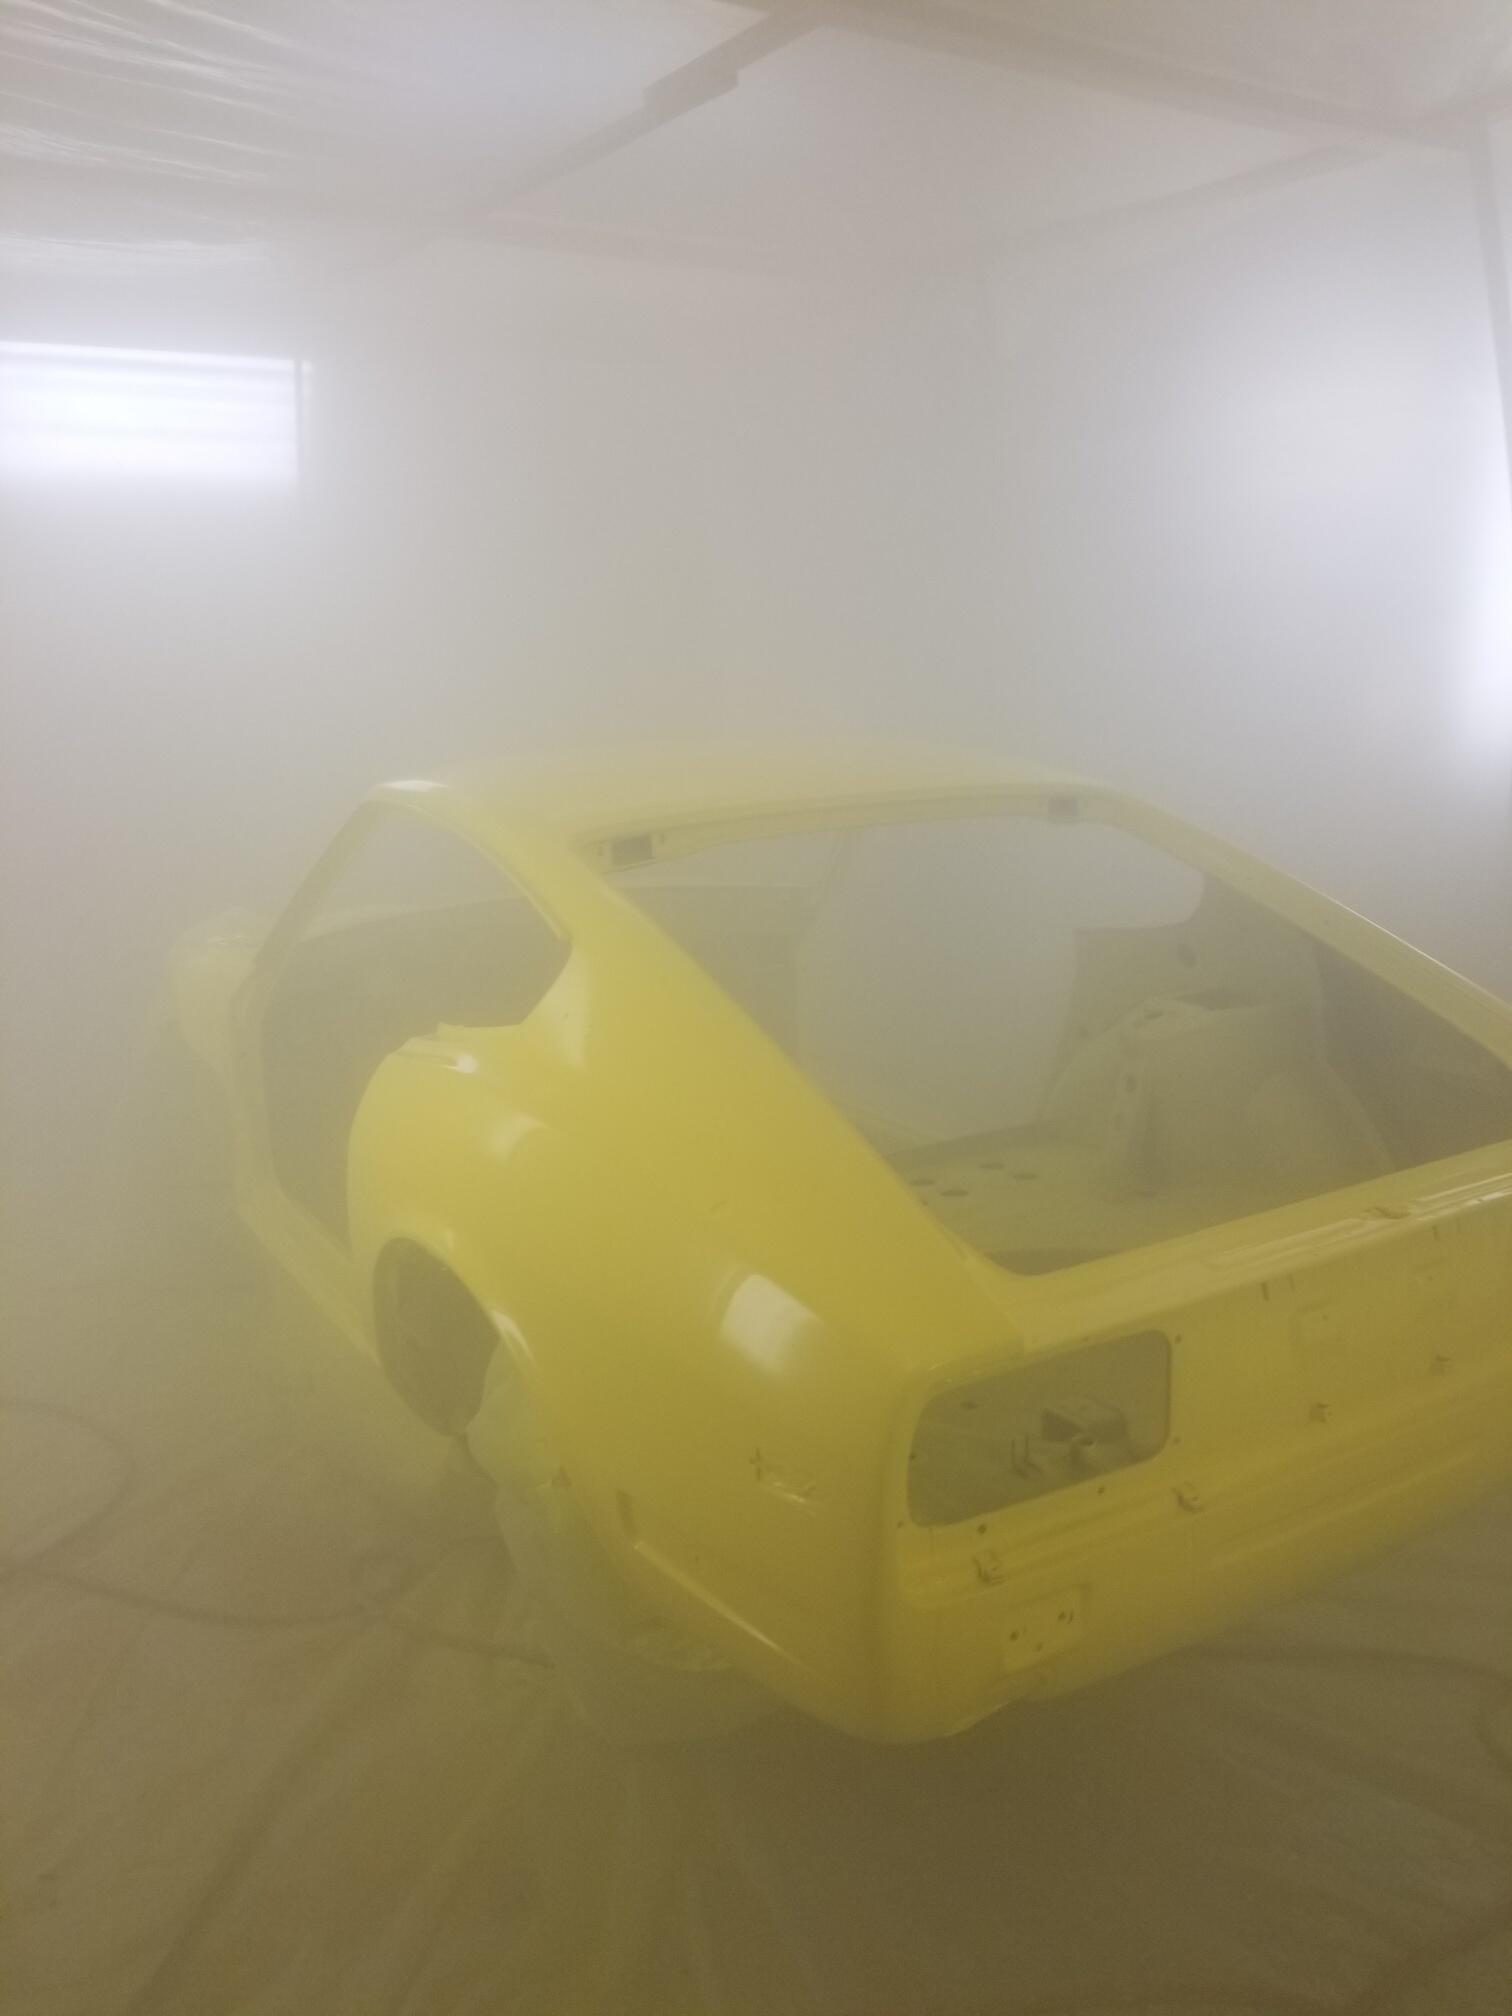
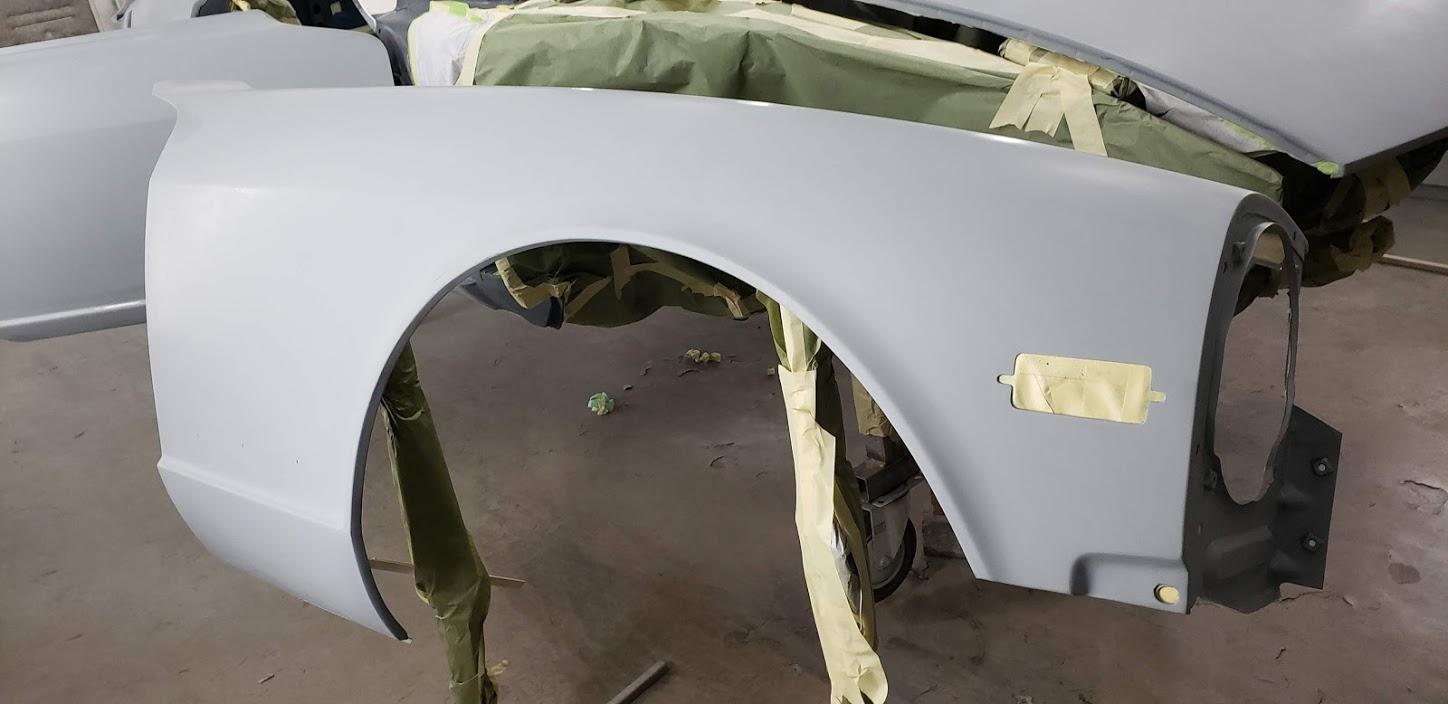
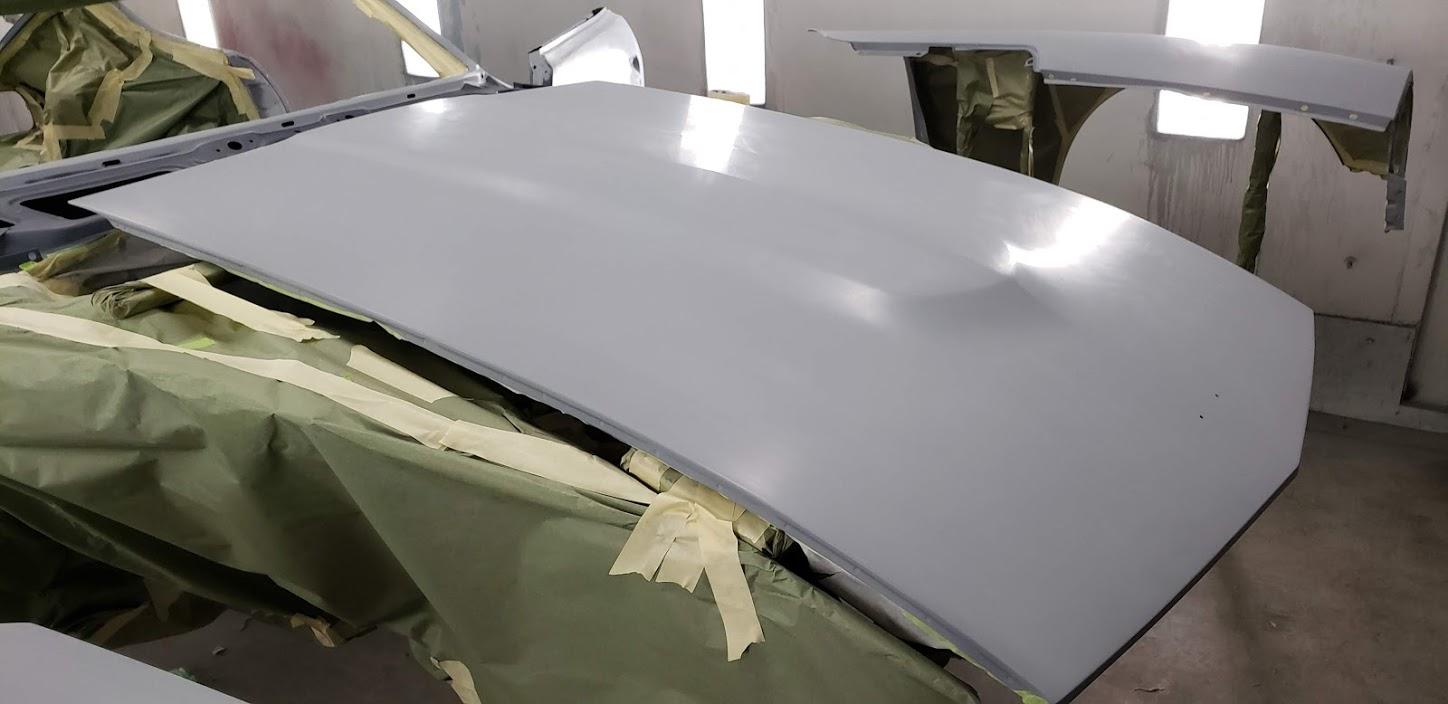
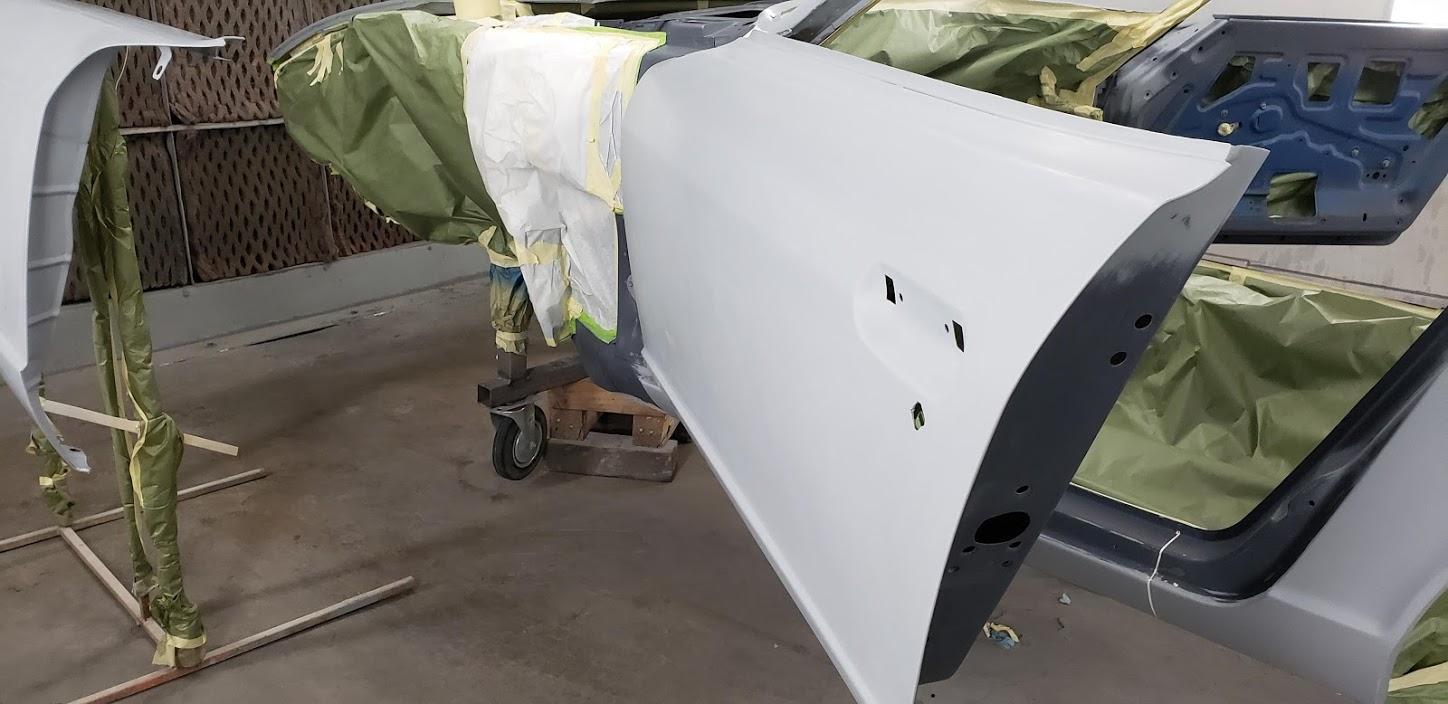
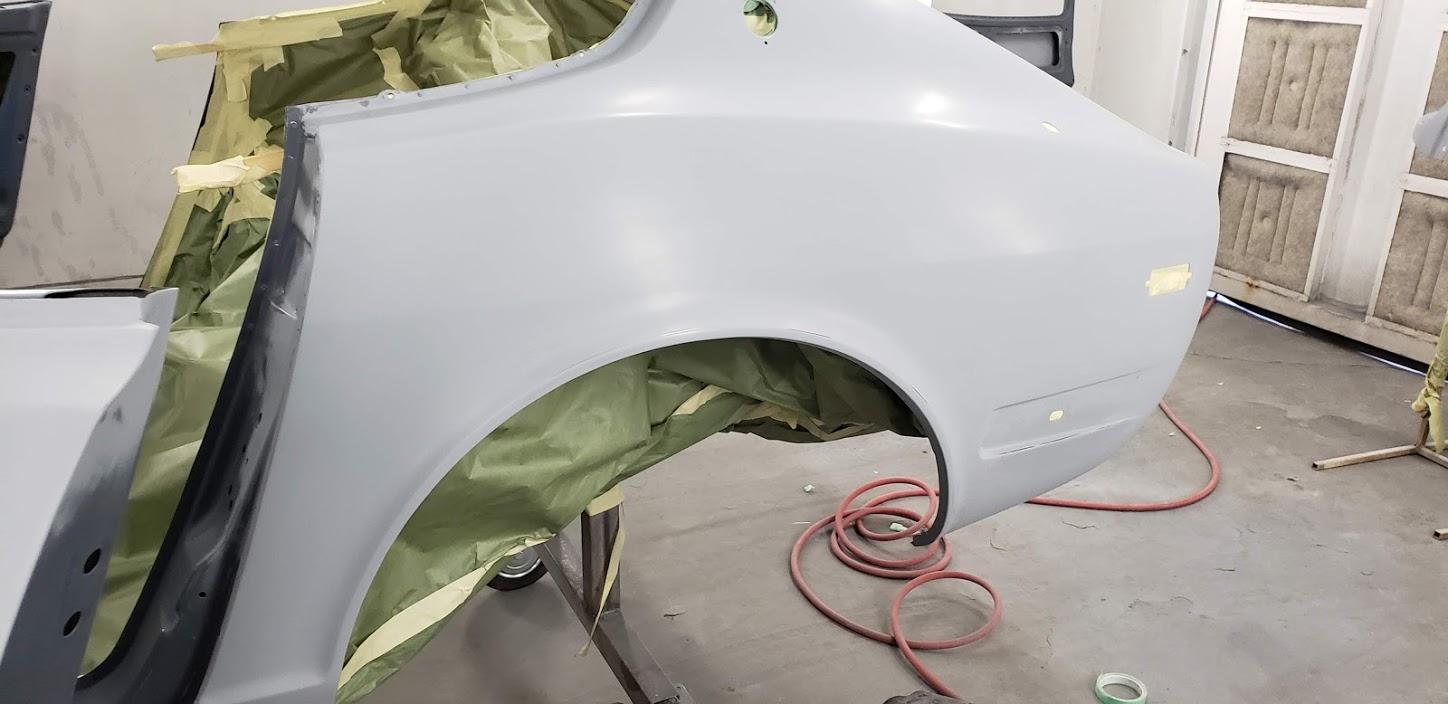
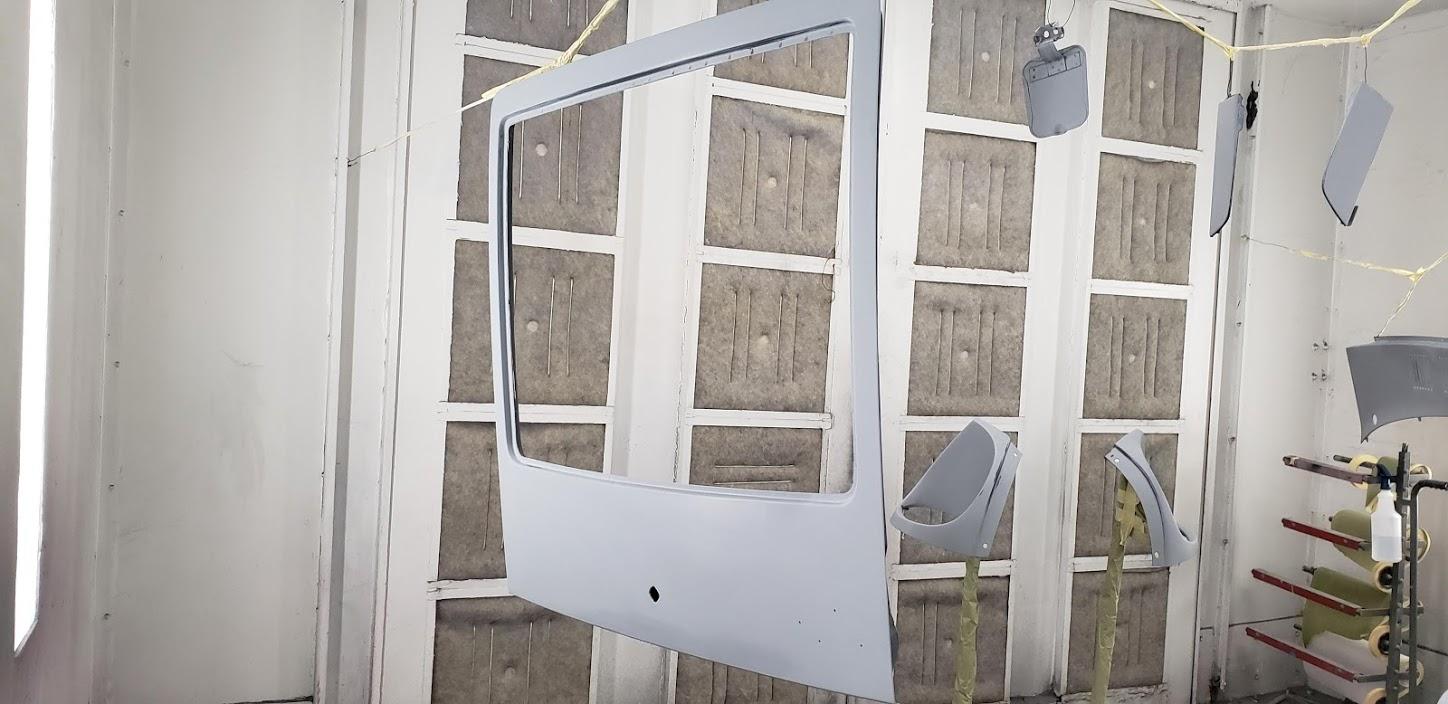
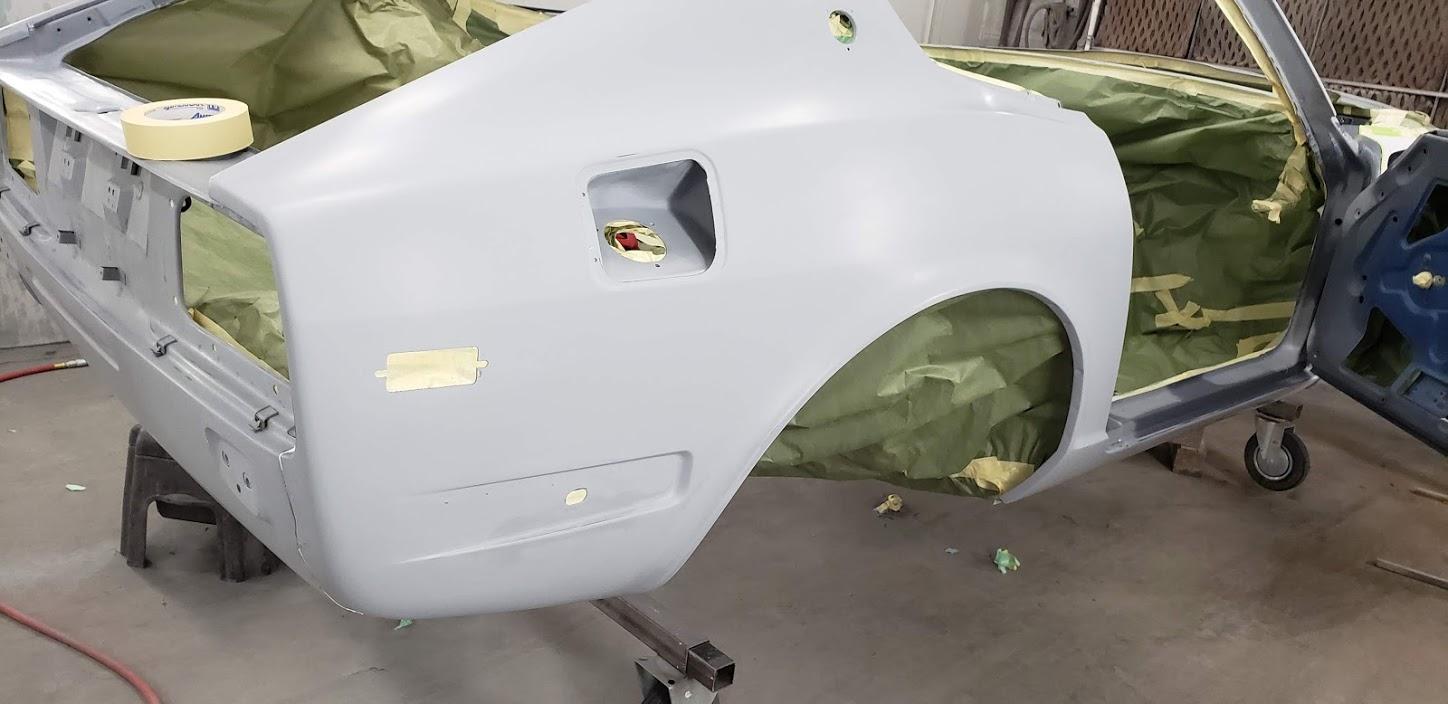
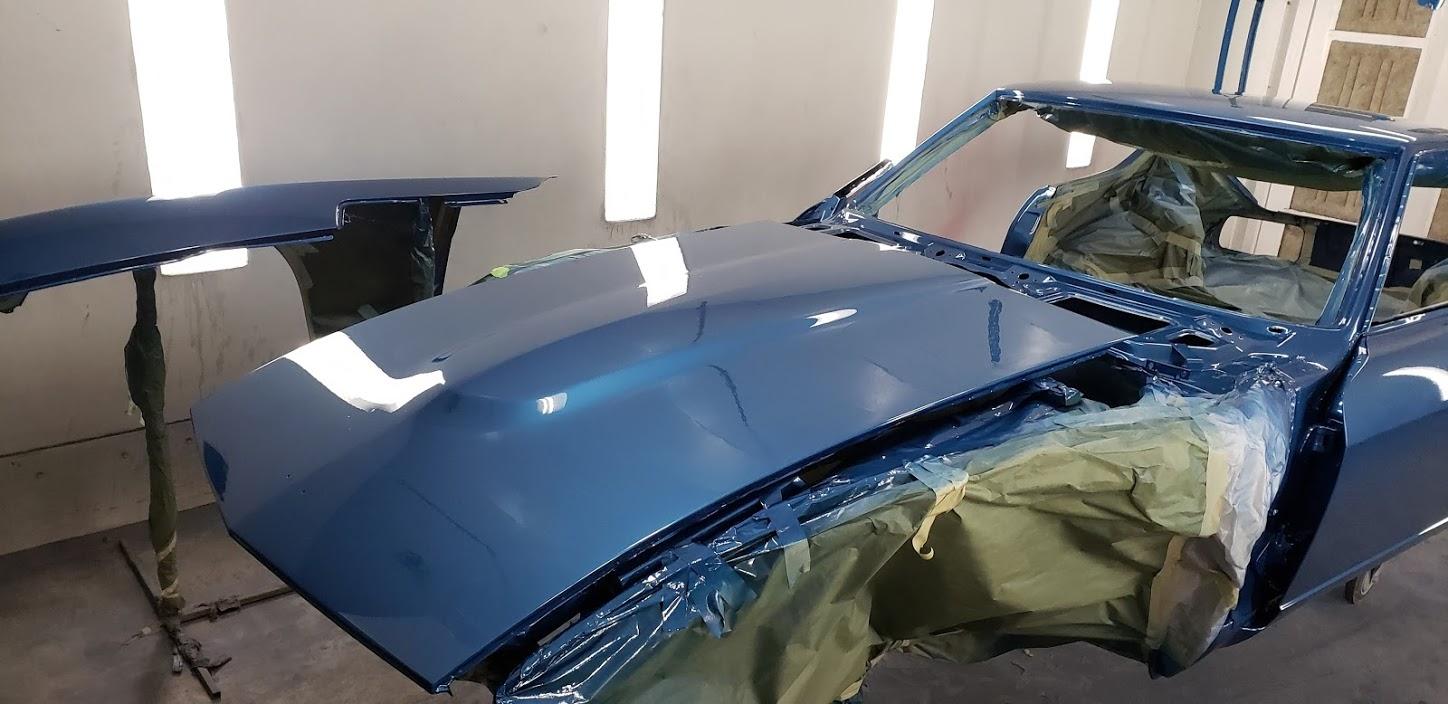
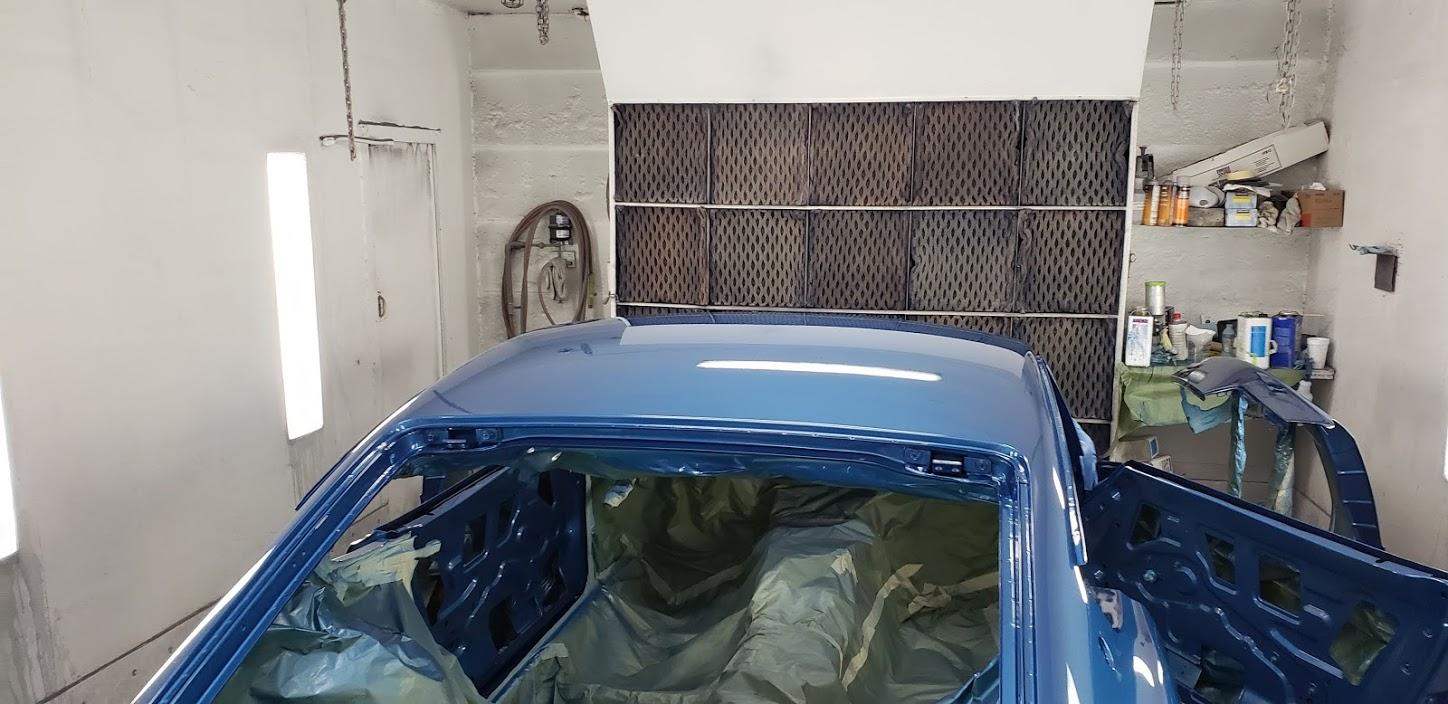
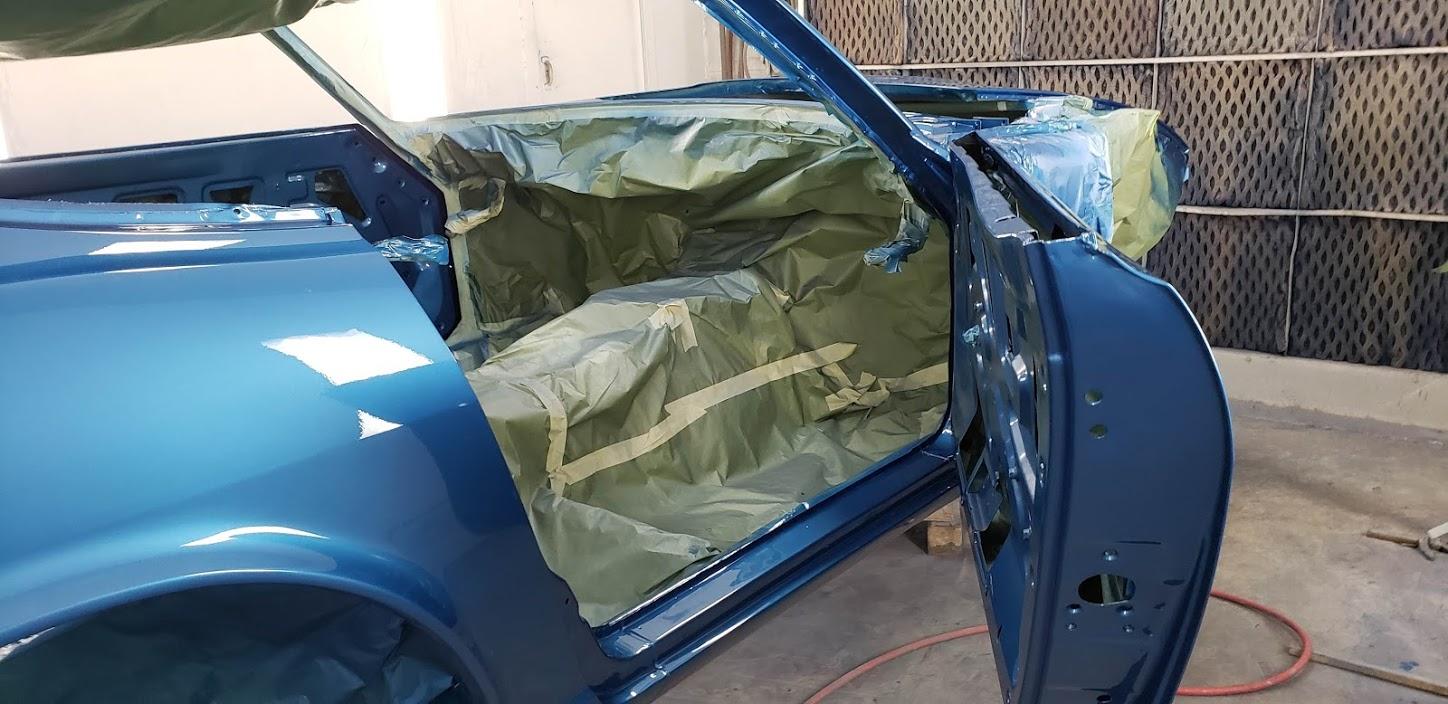
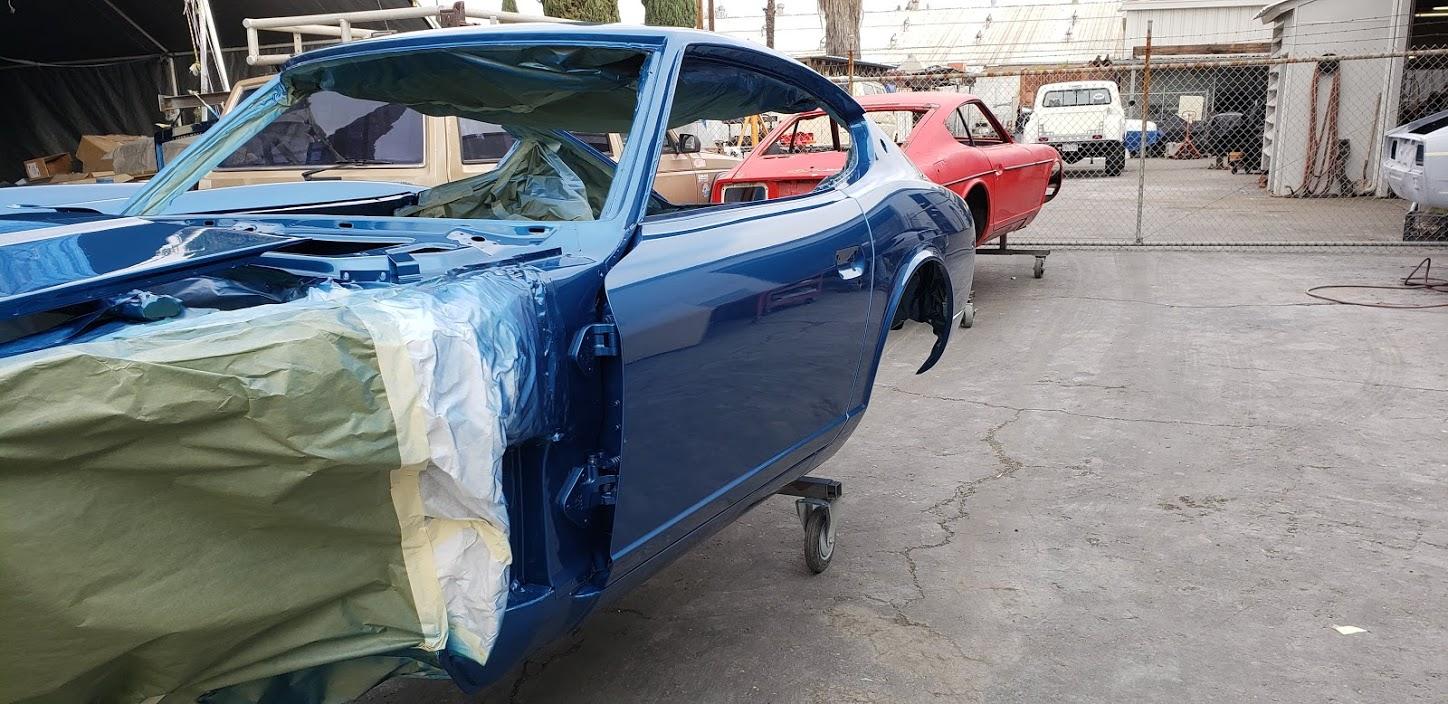
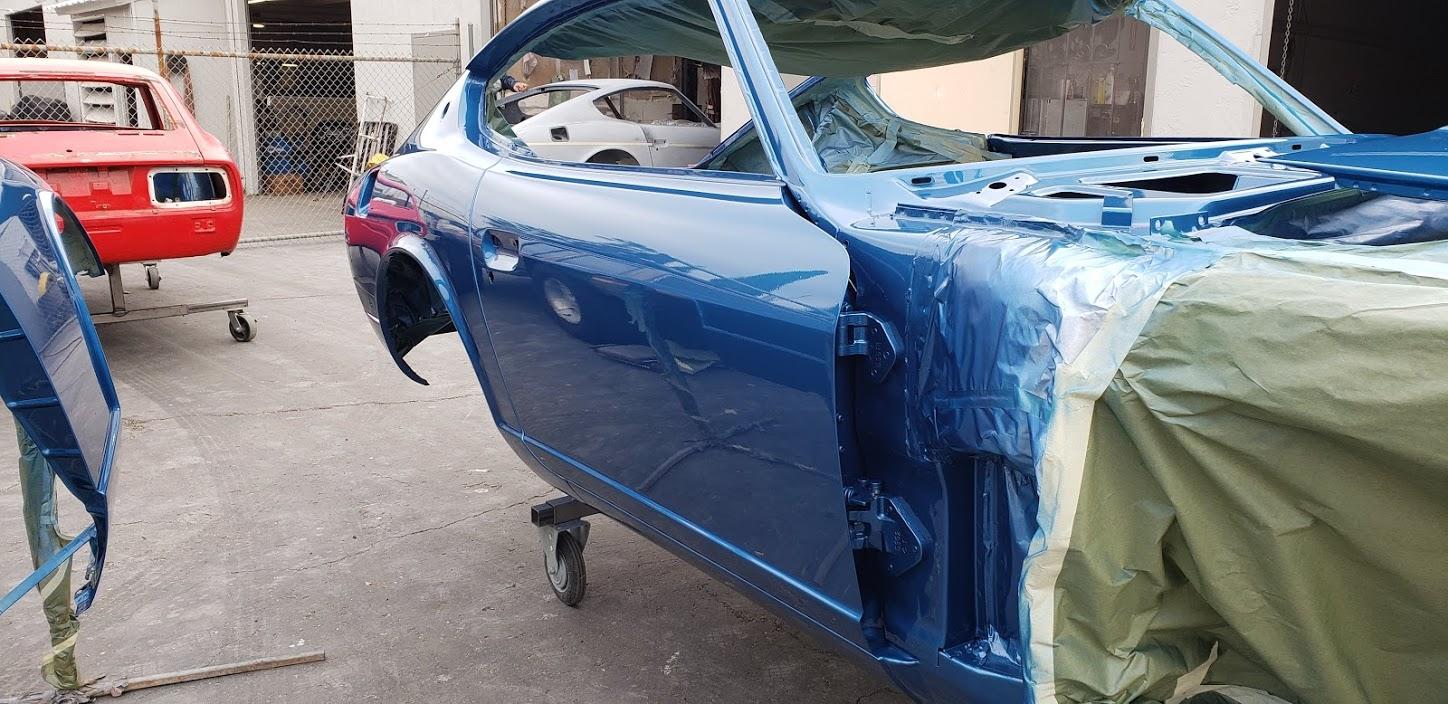
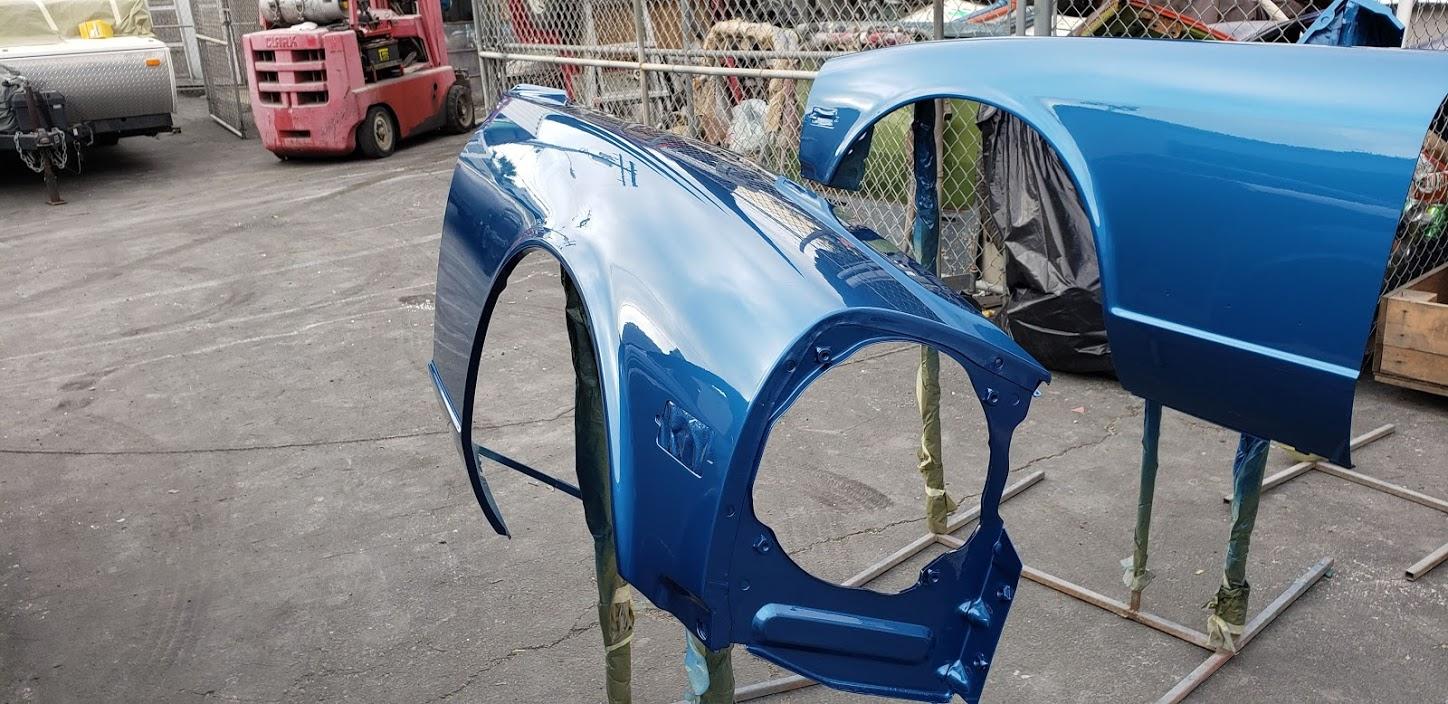
13 pointsToday A bright gallon Here is the yellow basecoat I think that was 3 coats of base. There were some areas that had a little gray show through and they were super hard to get covered with the yellow. It's just so transparent! 3 coats of clear. Overall, not too bad but one of my cans of clear had a little rust on it and it ended up in the mixing cup. the paint screens didn't get it all. So there are a few brown specs in the clear. I will have to cut them out. Hopefully I won't have to reclear. It's progress though. My booth didn't totally work the way I wanted. My intake fan filter ended up clogging with exhaust paint overspray coming back in another door of the shop. At the end the booth was pretty foggy! Don't light a match!! I probably should have worn my Tyveck suit but it was already hot in the booth... Colour!!!!


 13 points
 -
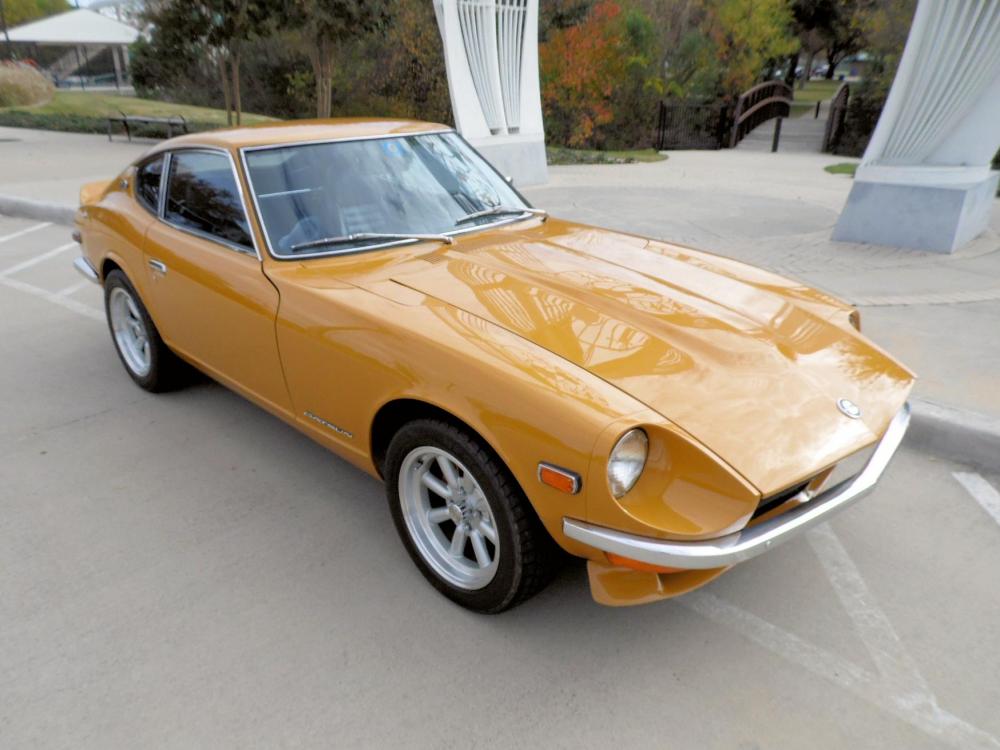
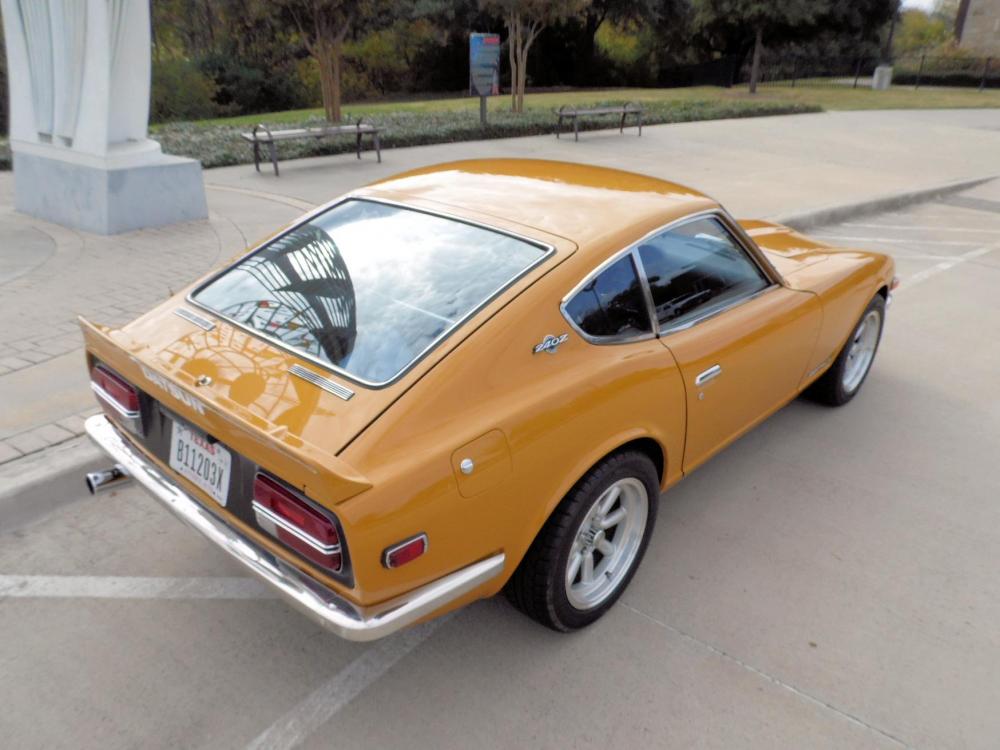
13 pointsBeen working hard to improve my photography skills so I shot my dad's orange Z this morning. These are my favorites. Shot with a Canon 6D.13 points
-
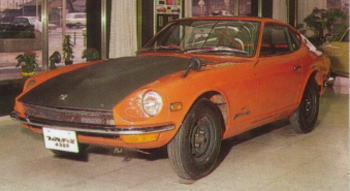
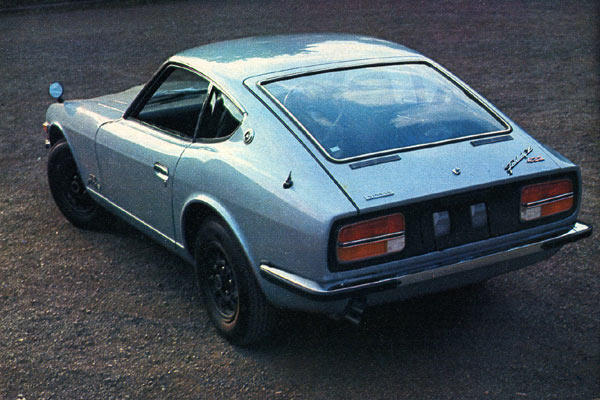
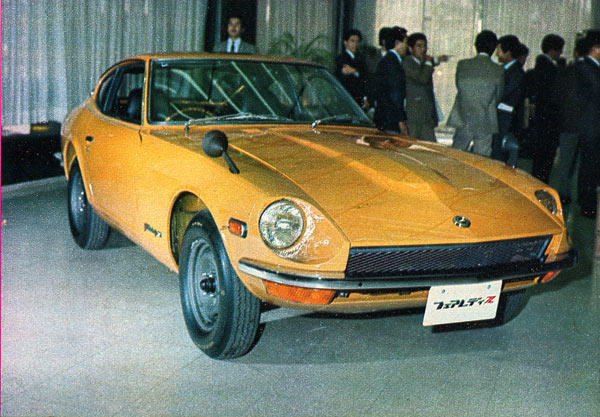
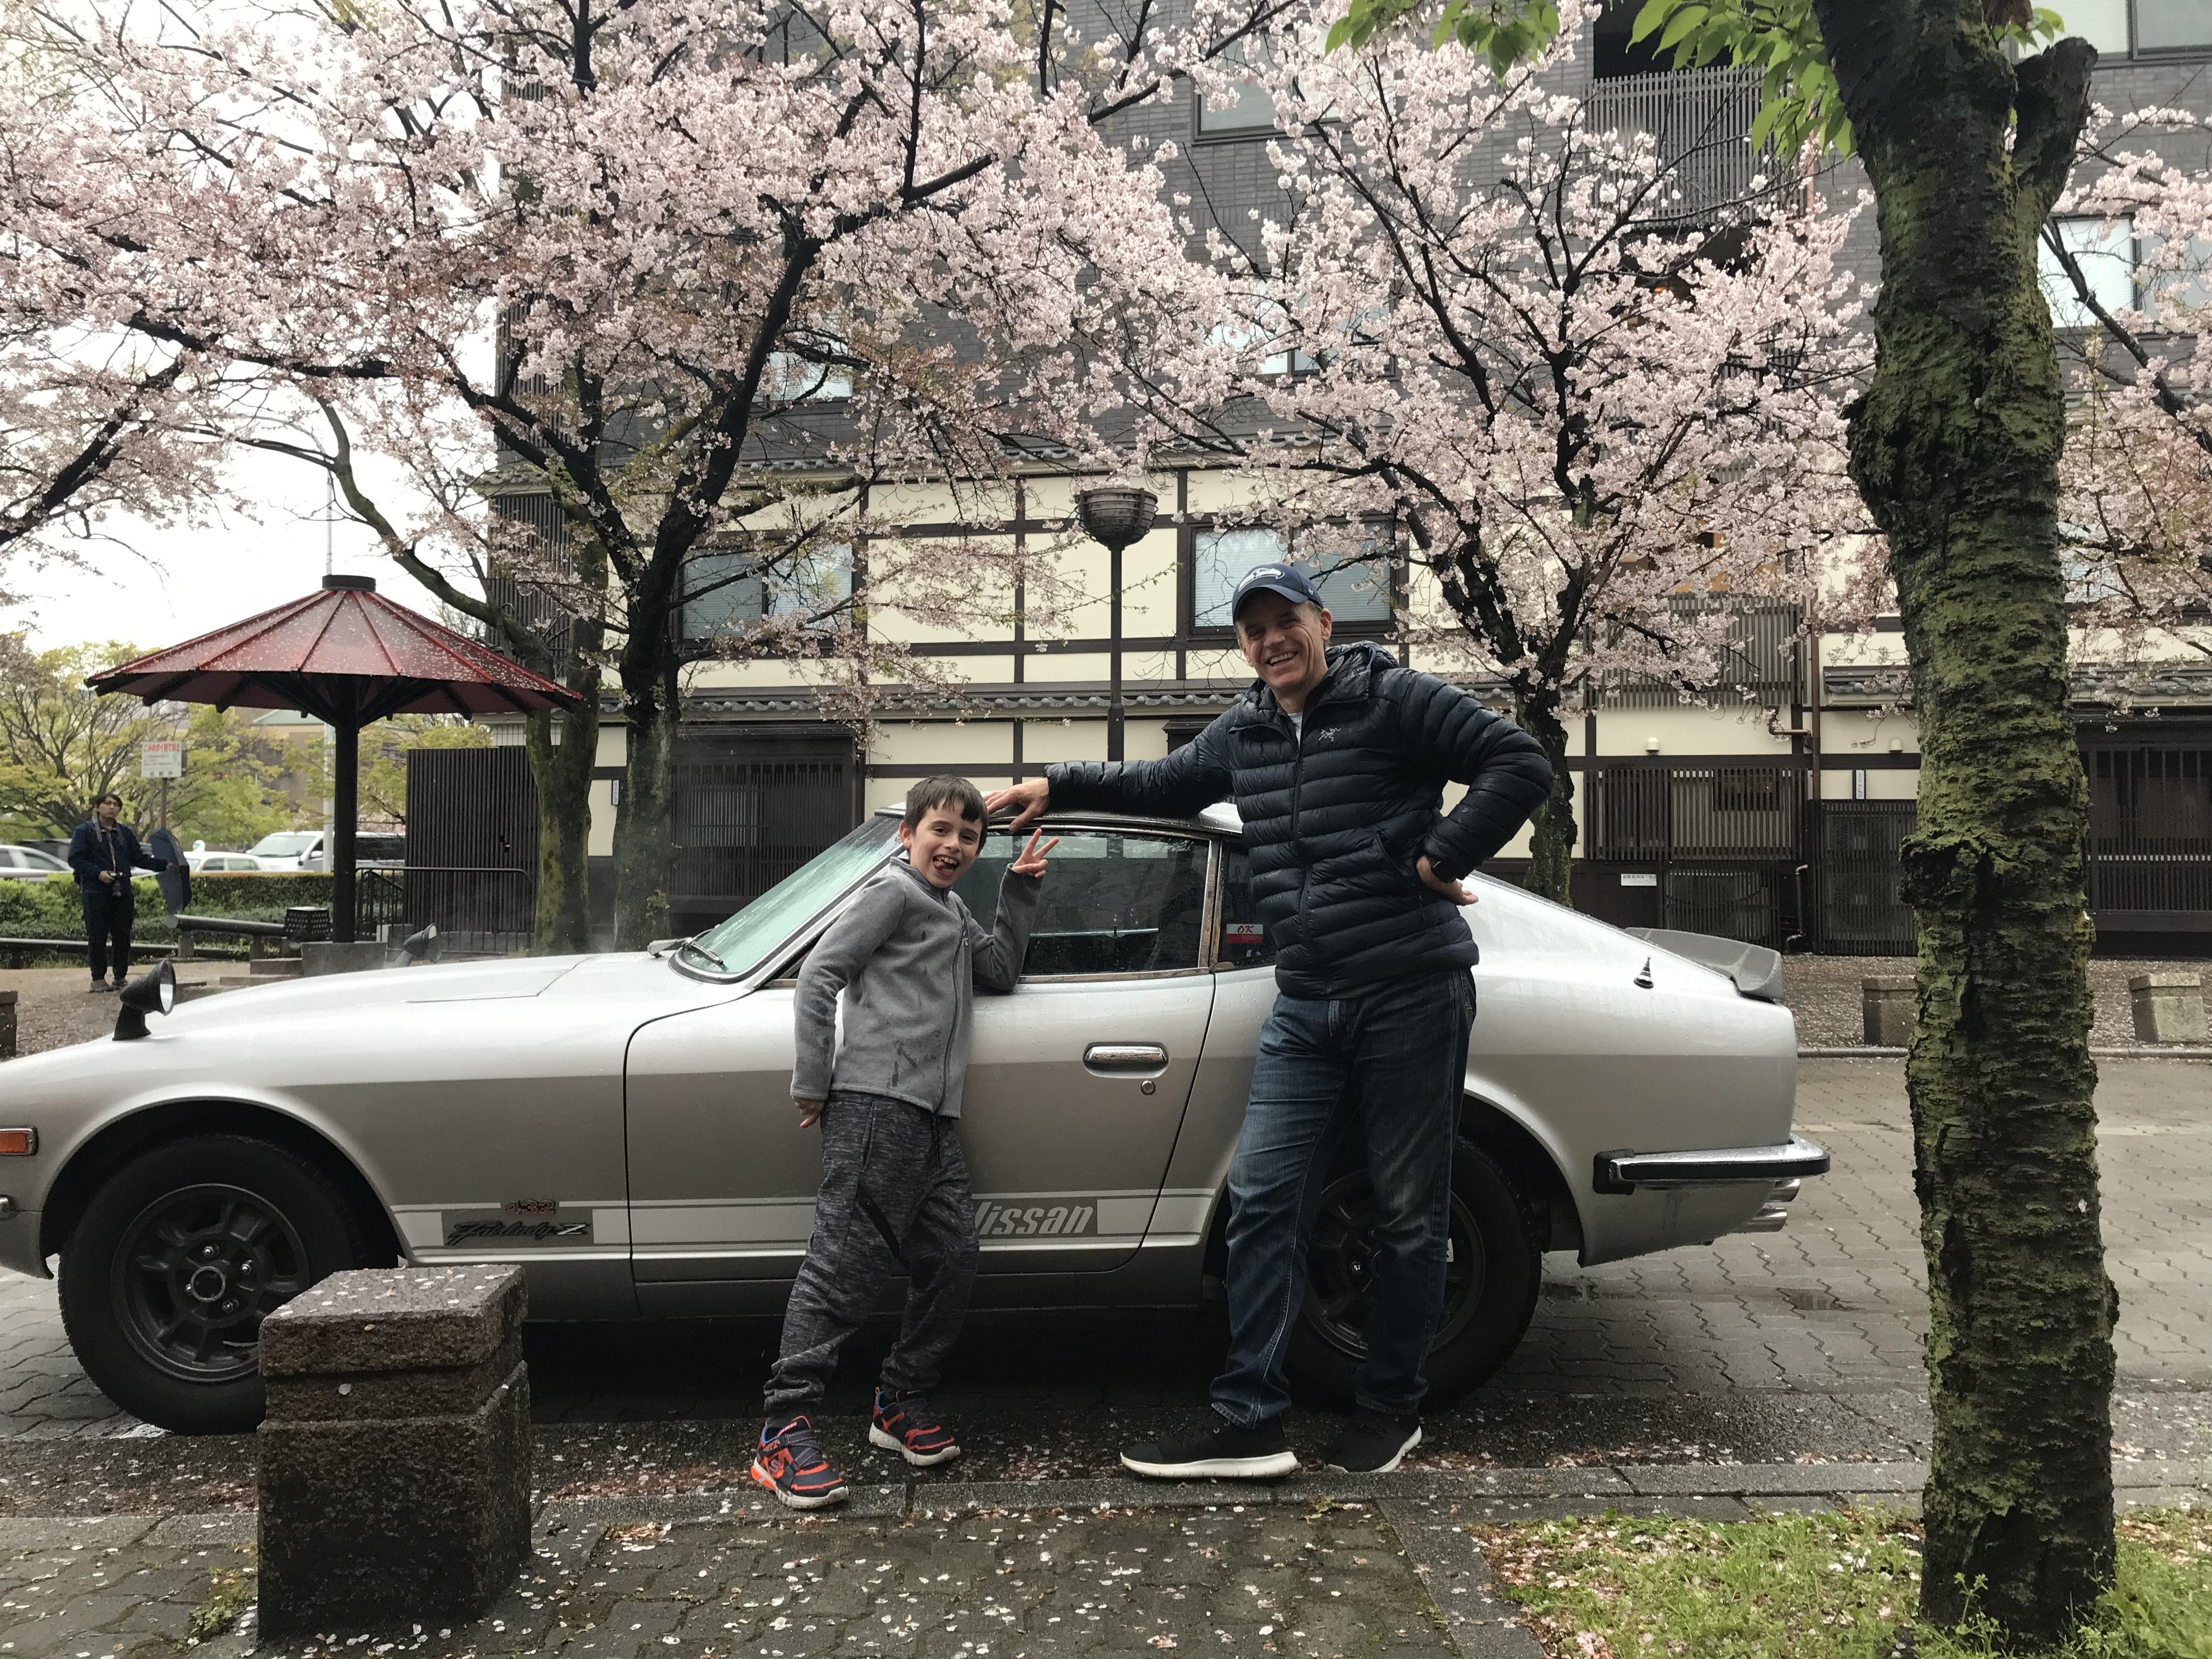
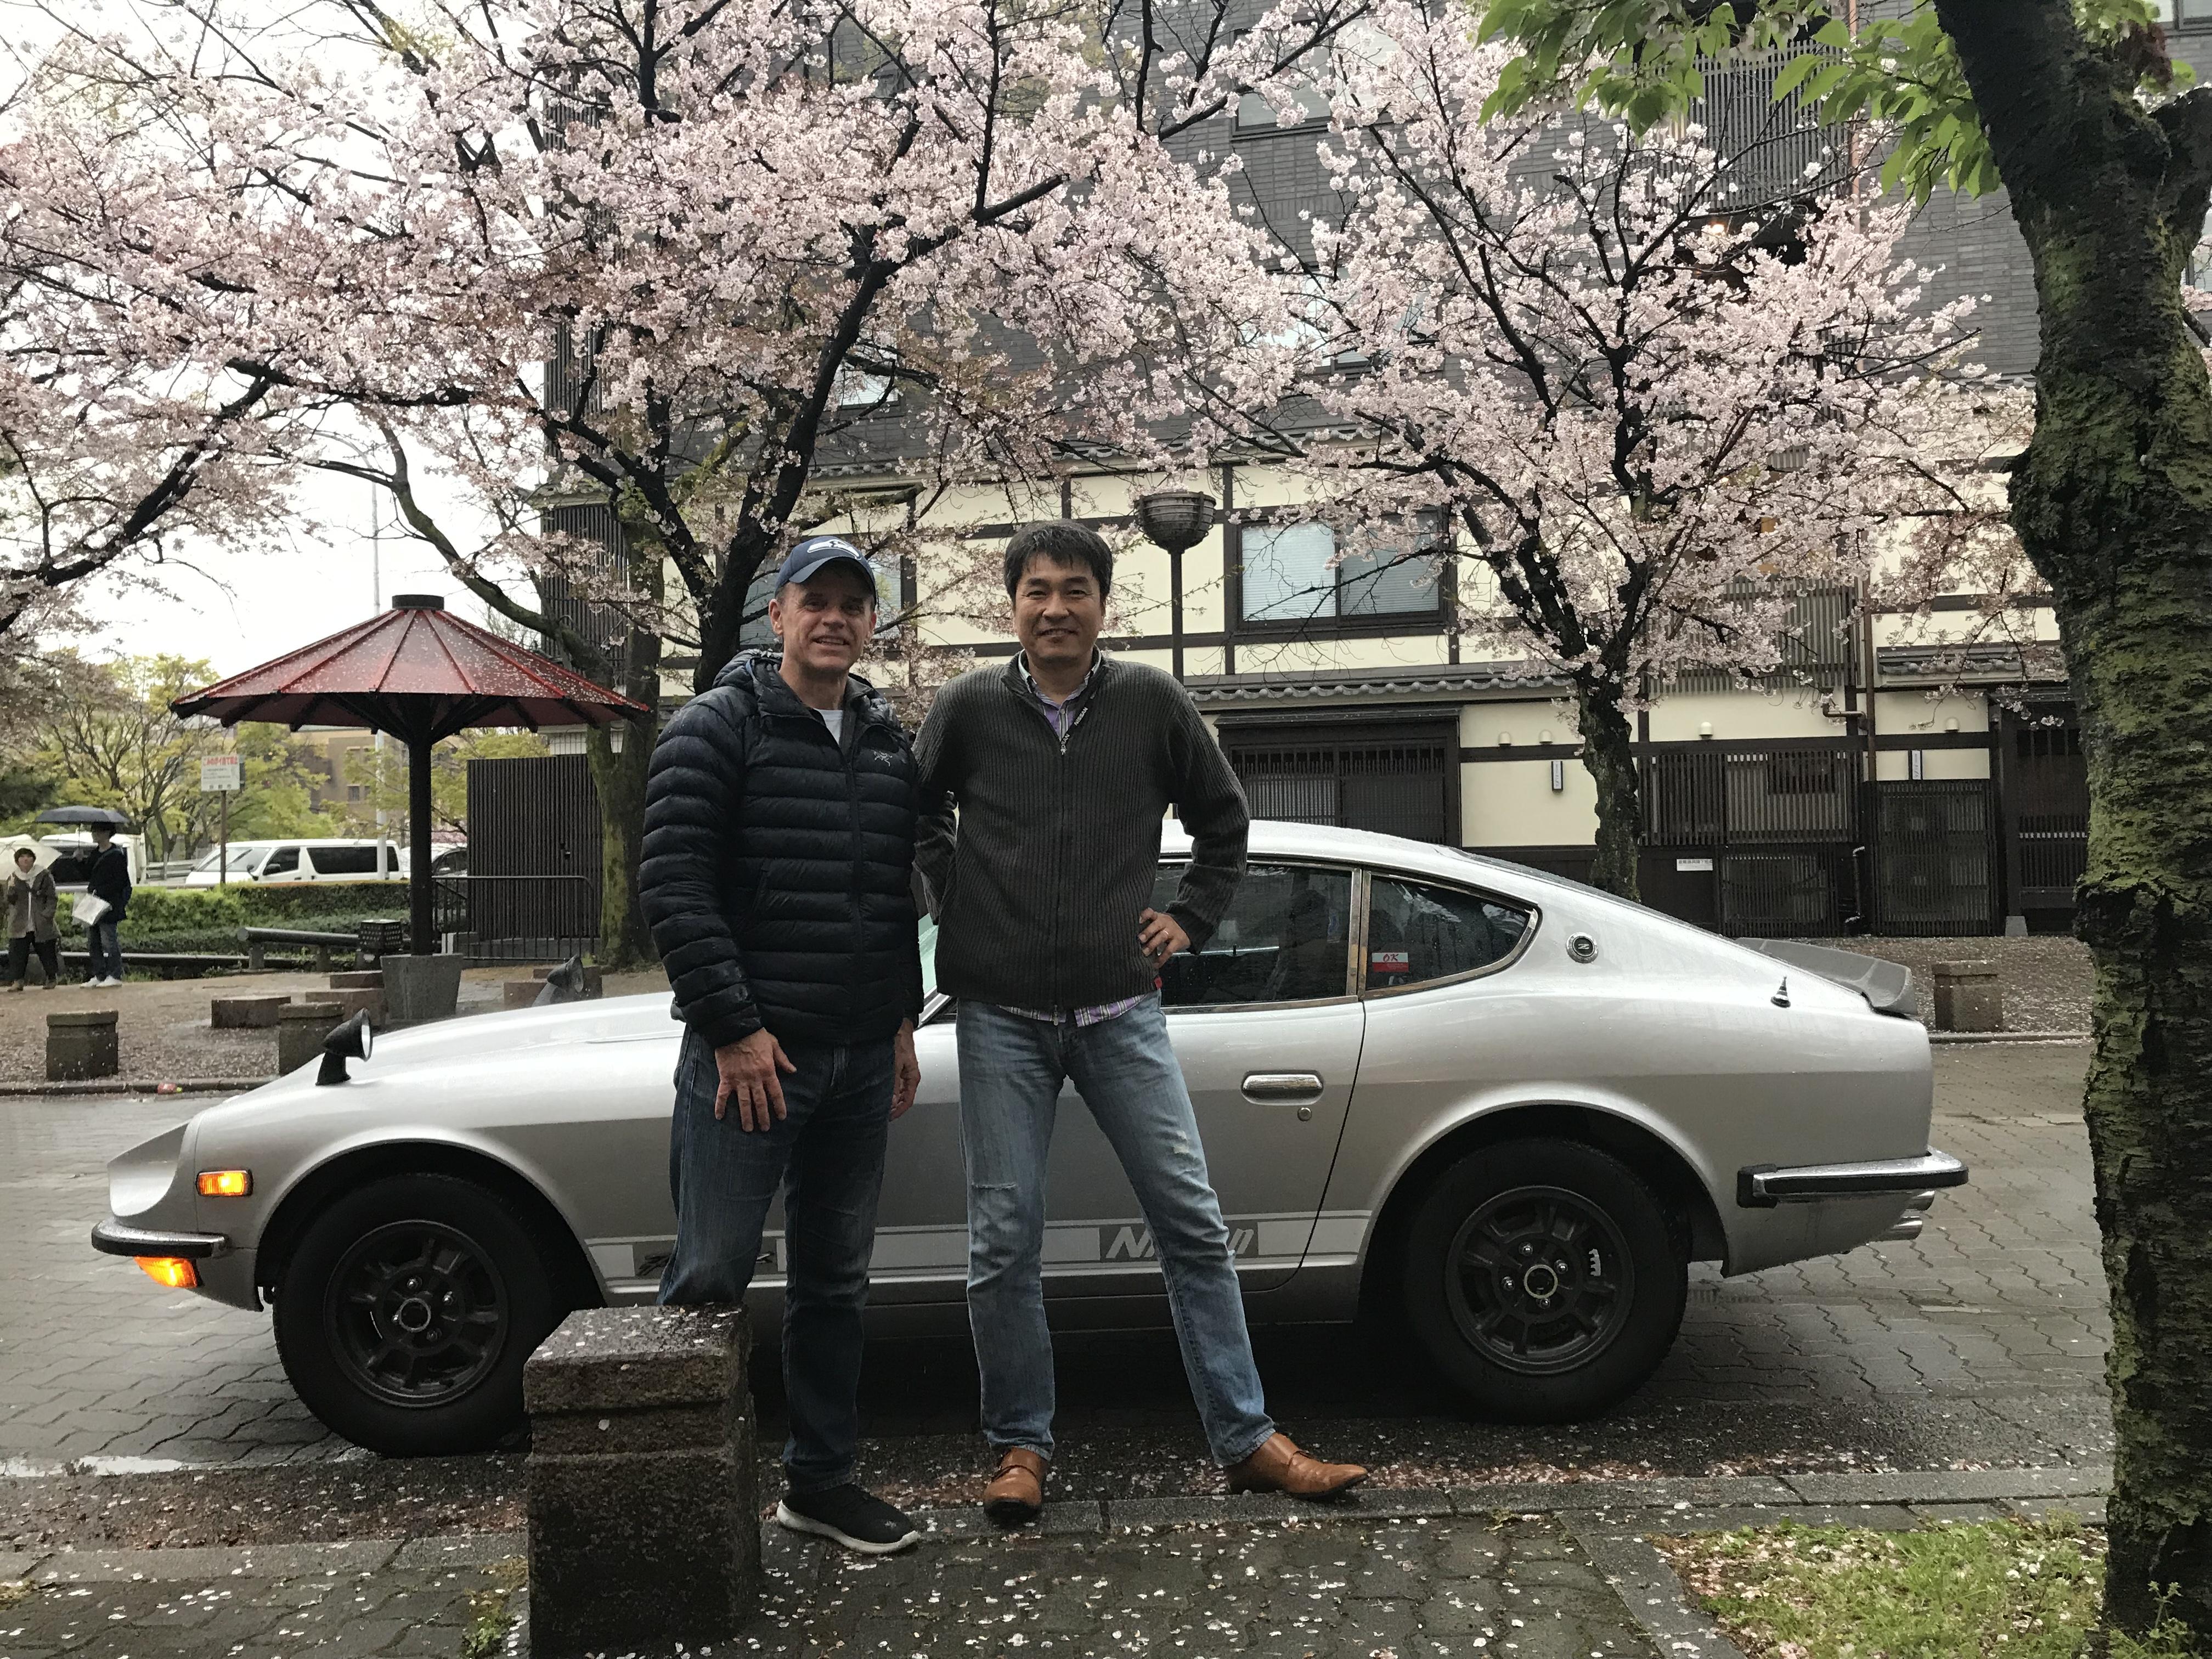
13 pointsHi all, just wanted to post some status of my trip to Japan. I was able to meet @kats and we took a drive in his Fairlady Z432. Man what a great car! It’s in great shape and Kats knows how to take car of his cars. We met in Kyoto as I arrived, with my family, to our hotel. Kats lives about 30 minutes away from Kyoto and drove the car up just to visit with me. He has 4 Z’s and asked me which one I wanted to see (and drive). Since I’ve never seen a Z432, it was an obvious choice. We spent about 20-30 minutes ogling the car before he let me drive it around the block. I don’t have an international drivers license, so he took the controls and we went for an extended drive around the city. I’ll post more about my observations when I am able to sit down at a computer, but I wanted to share a few pics. What a great time, and I wanted to personally thank Kats for taking time out of his busy schedule to meet with me. As you can see, it’s springtime in japan and the cherry blossoms are in full effect!

 13 points
 -
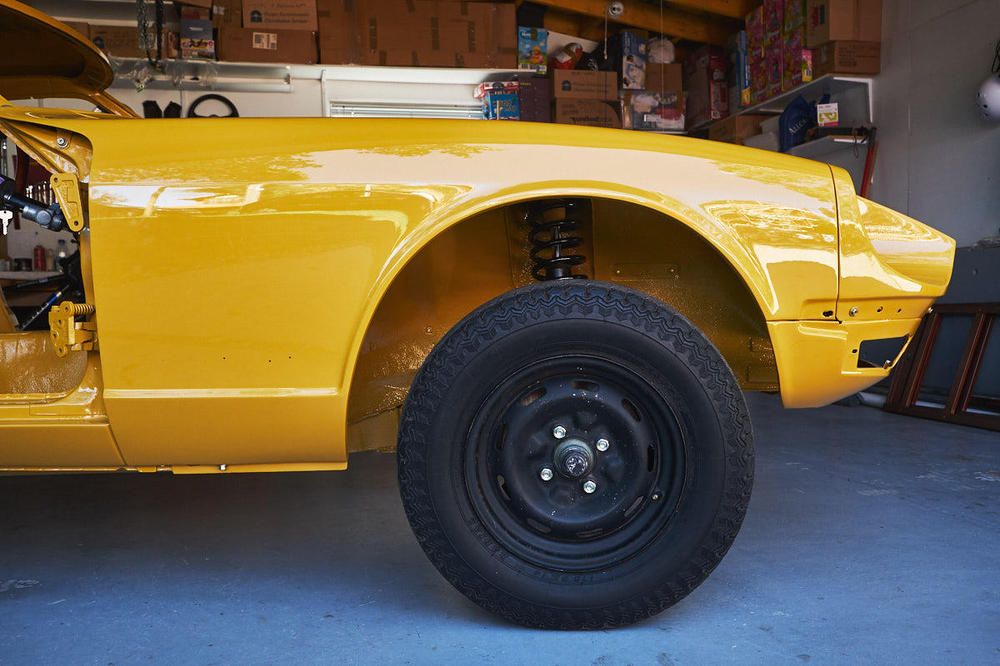
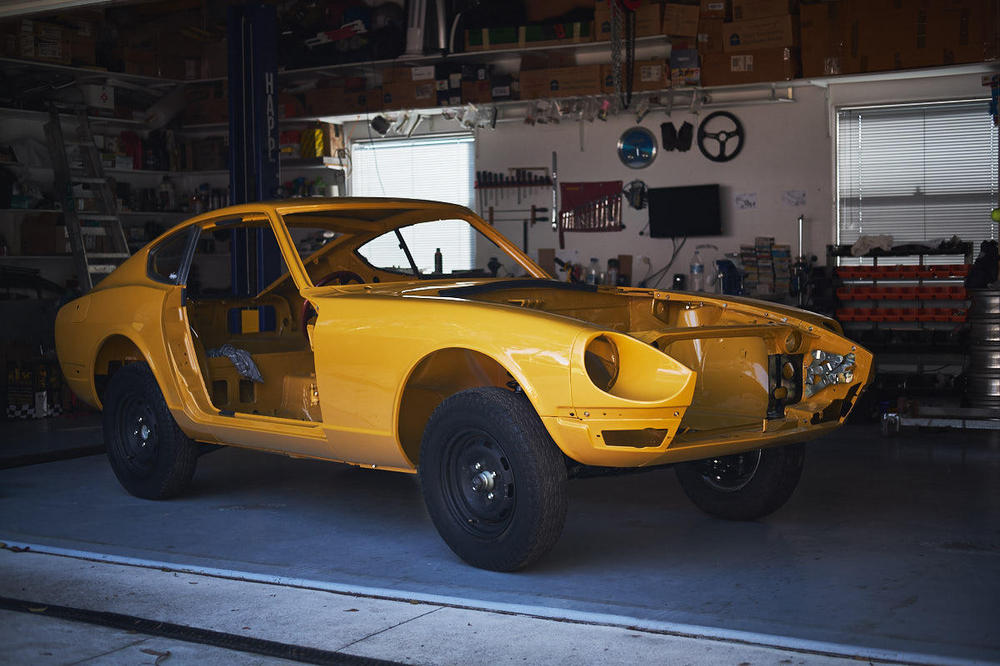
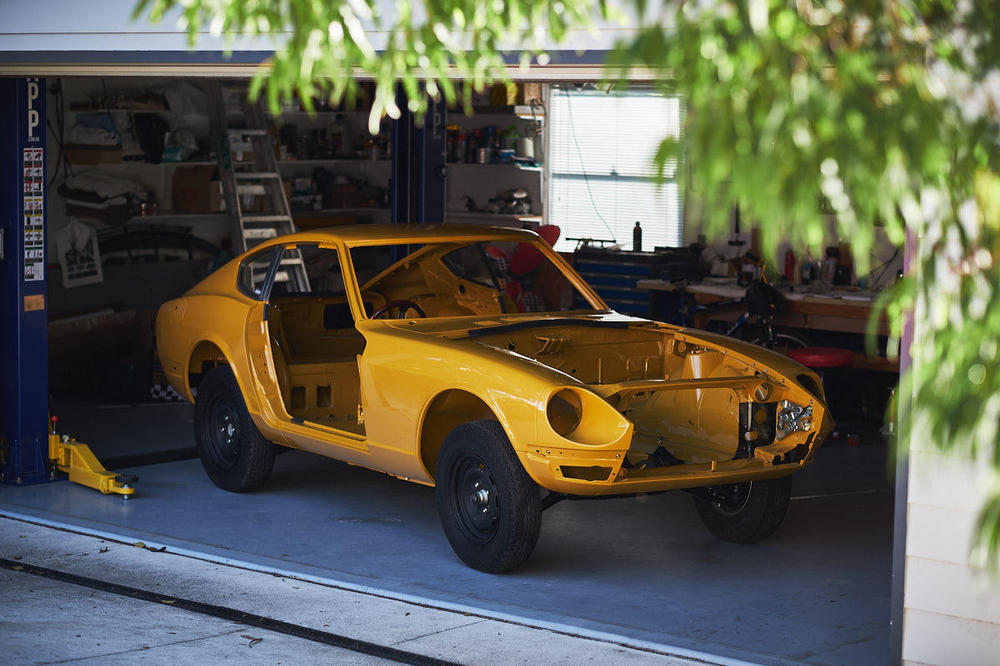
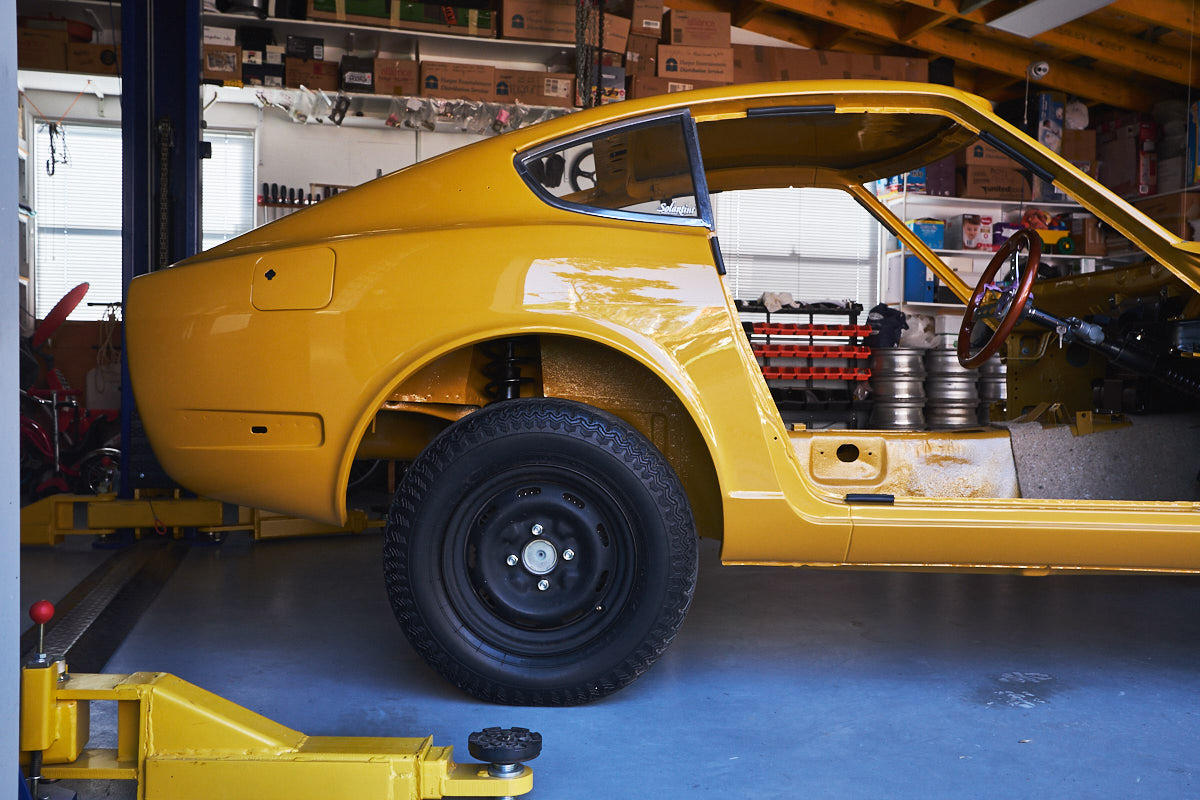
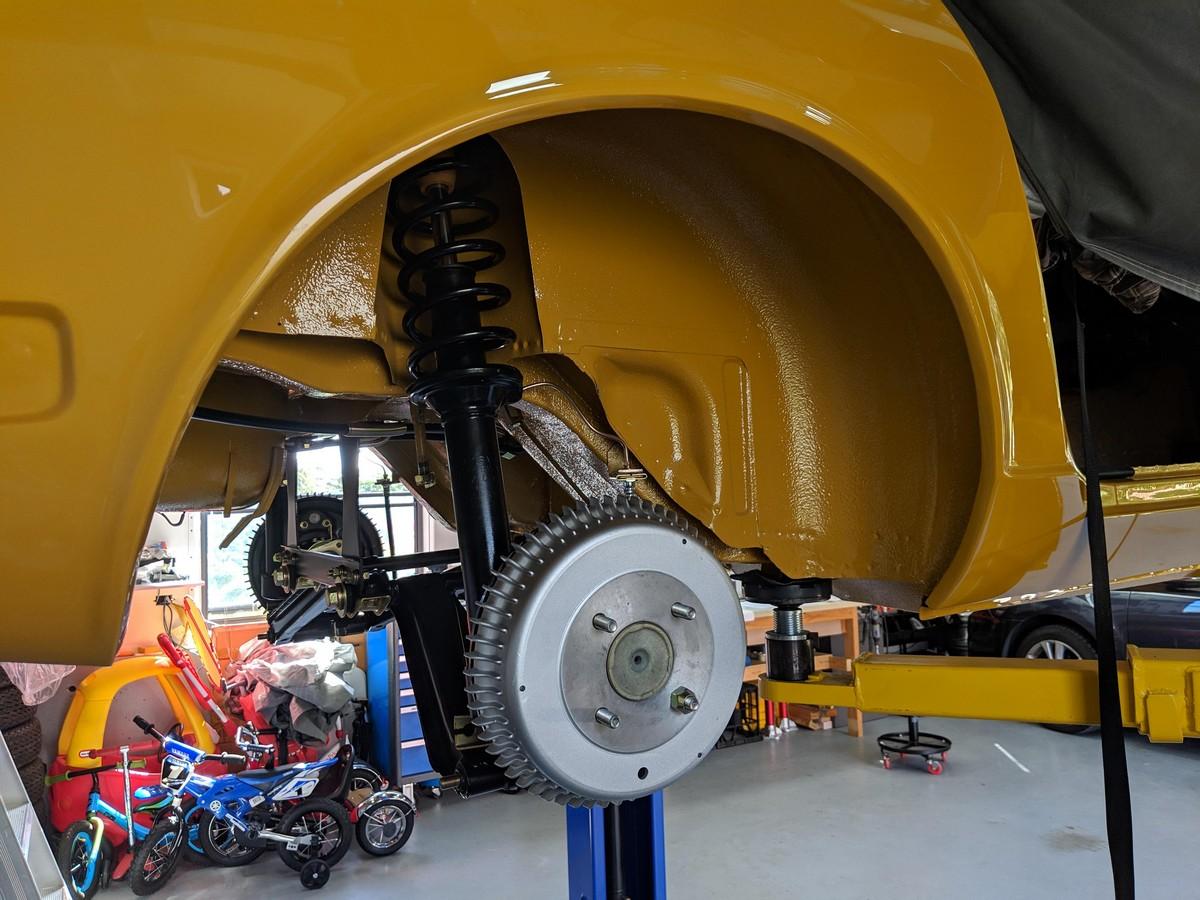
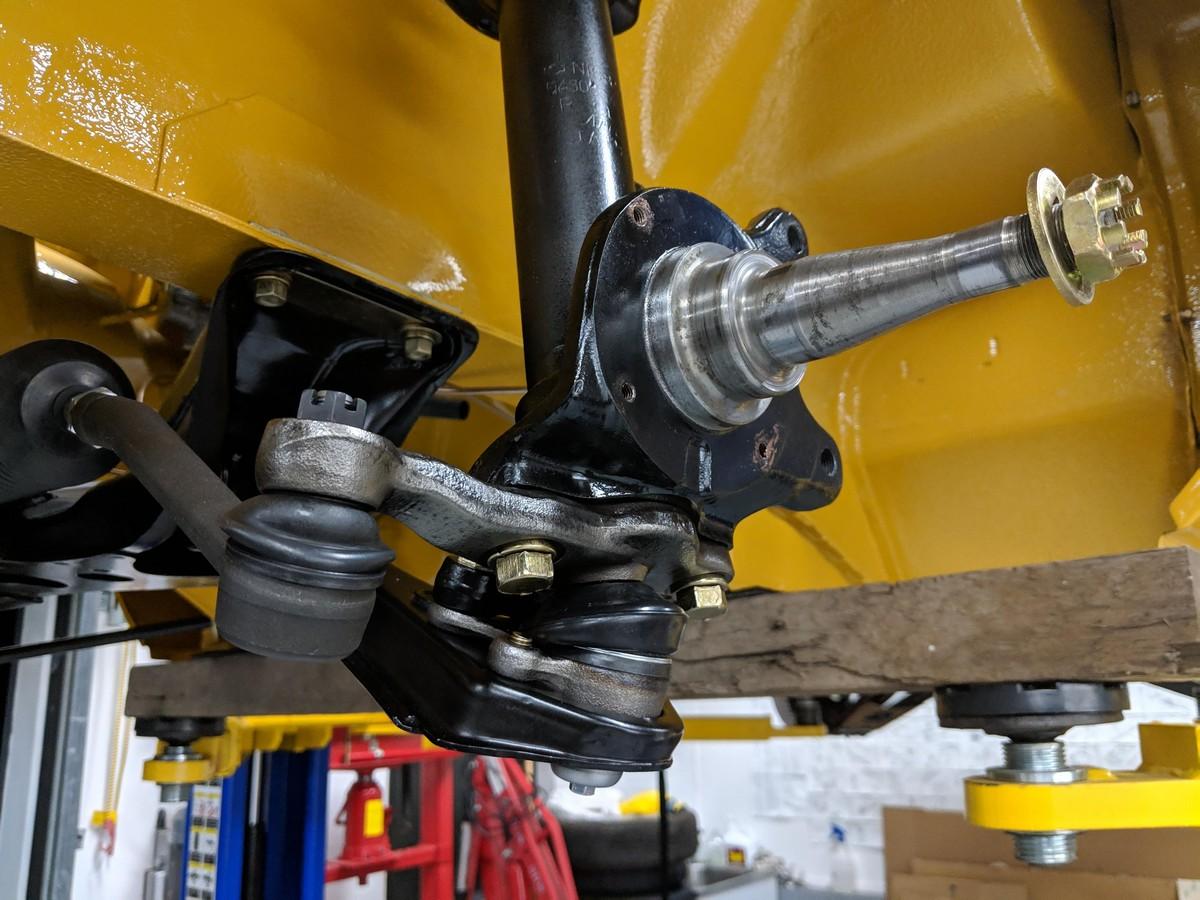
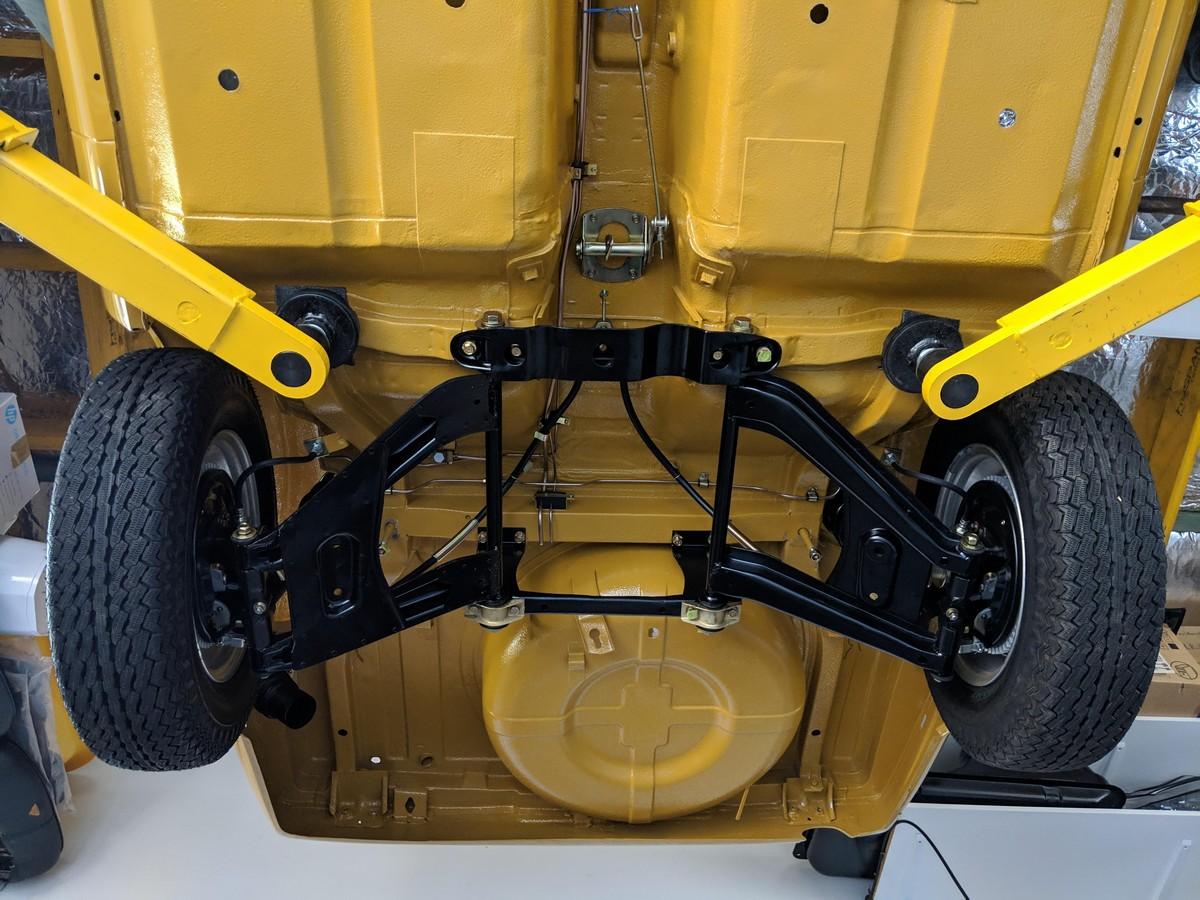
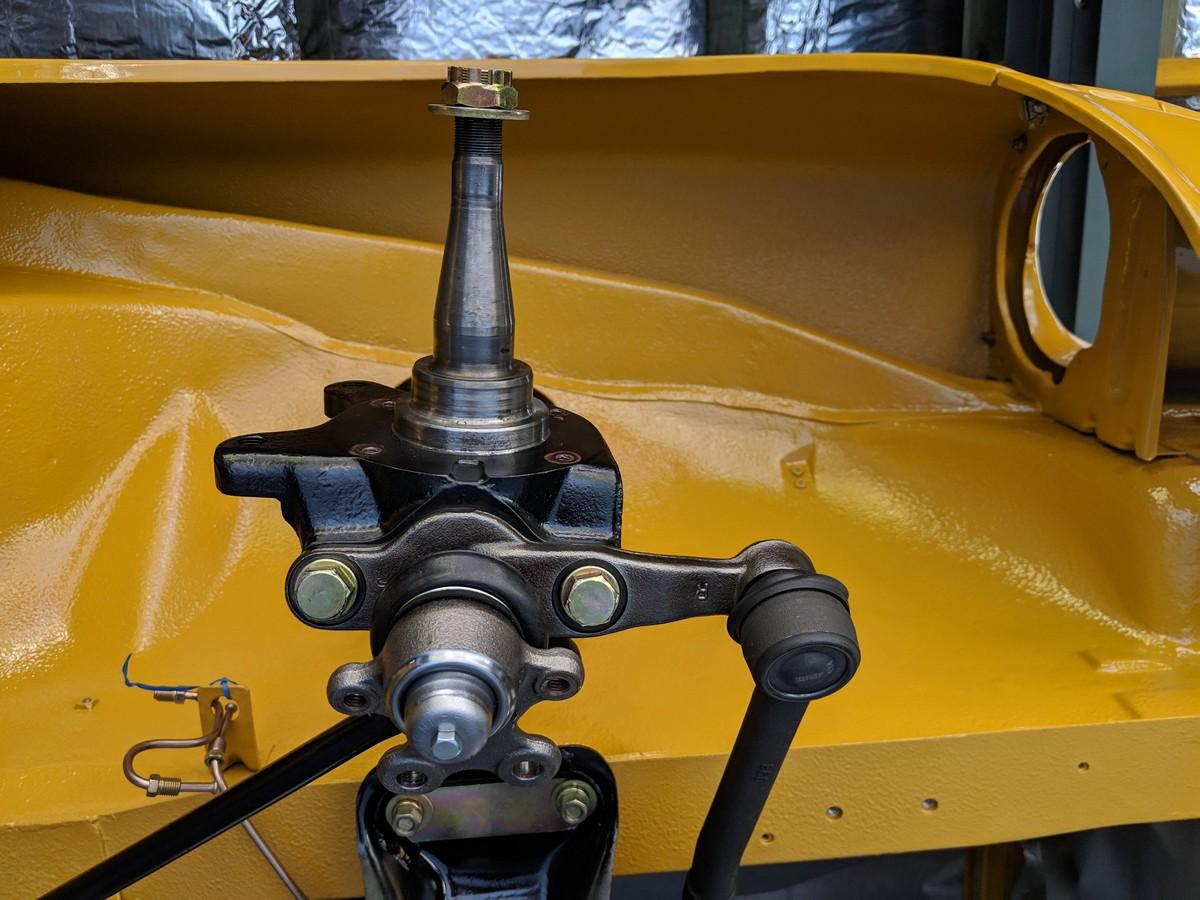
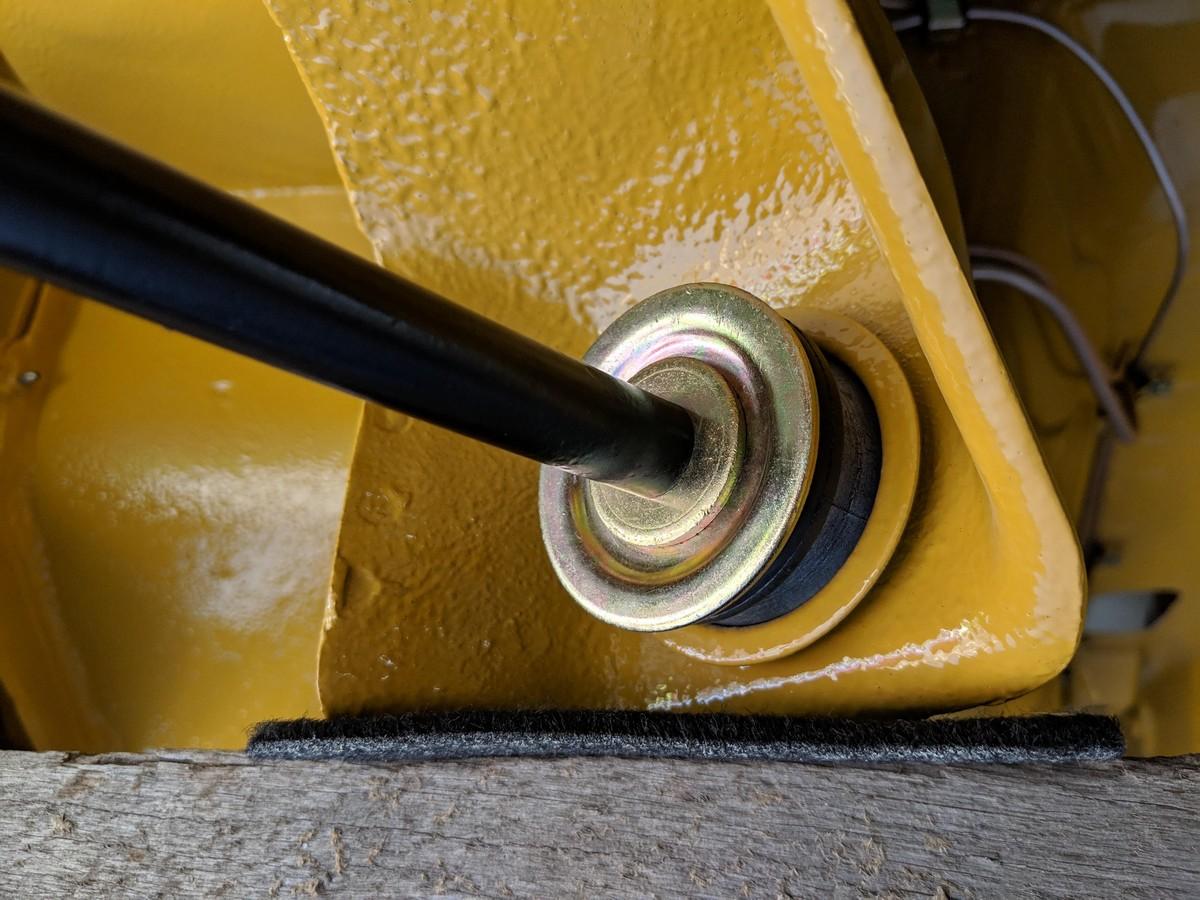
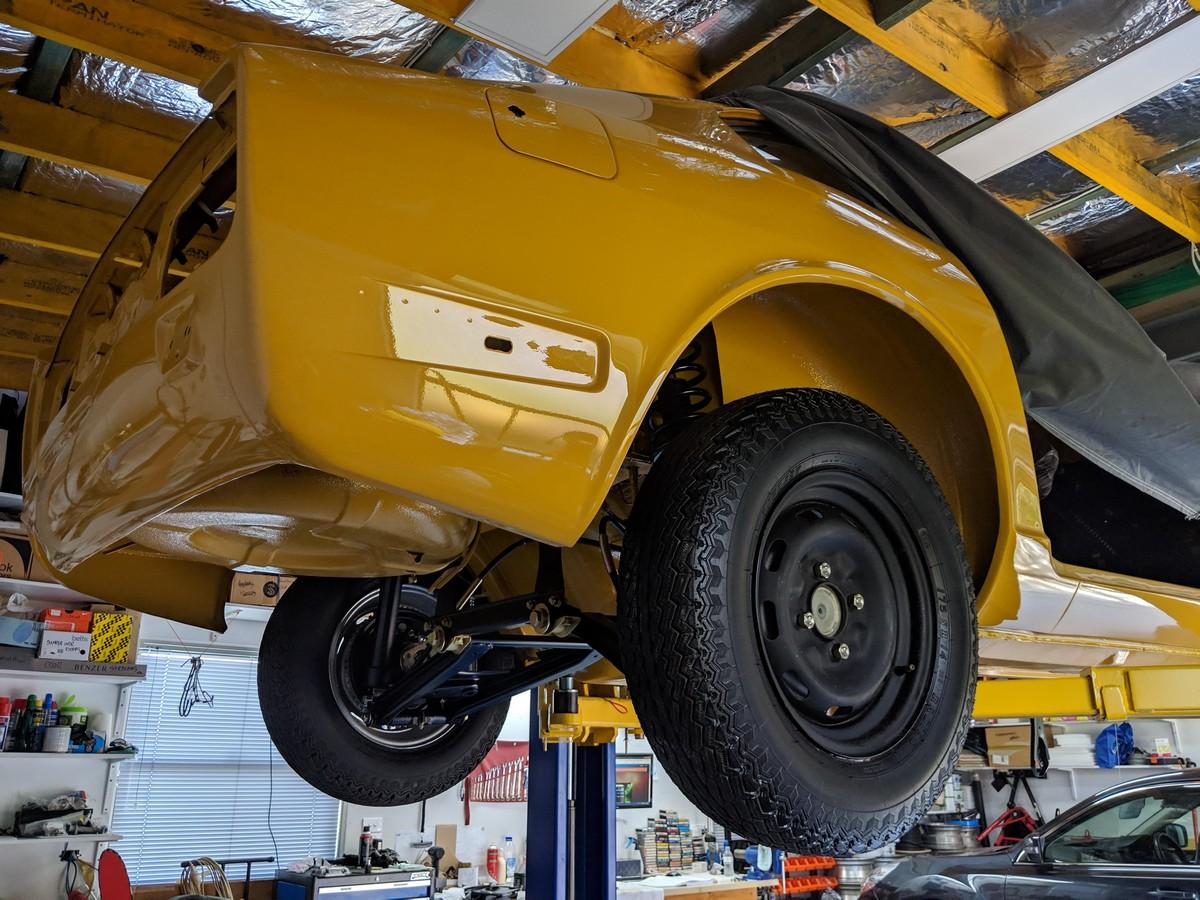
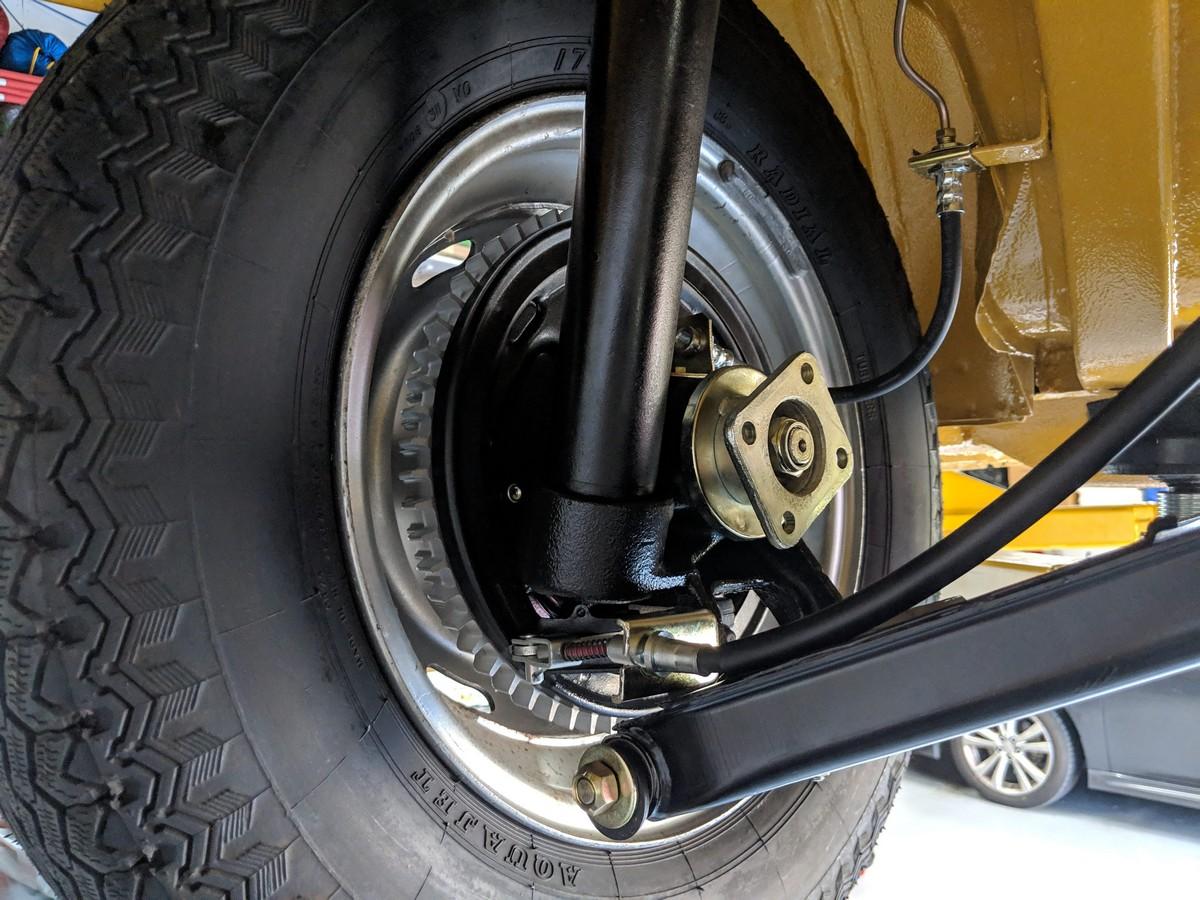
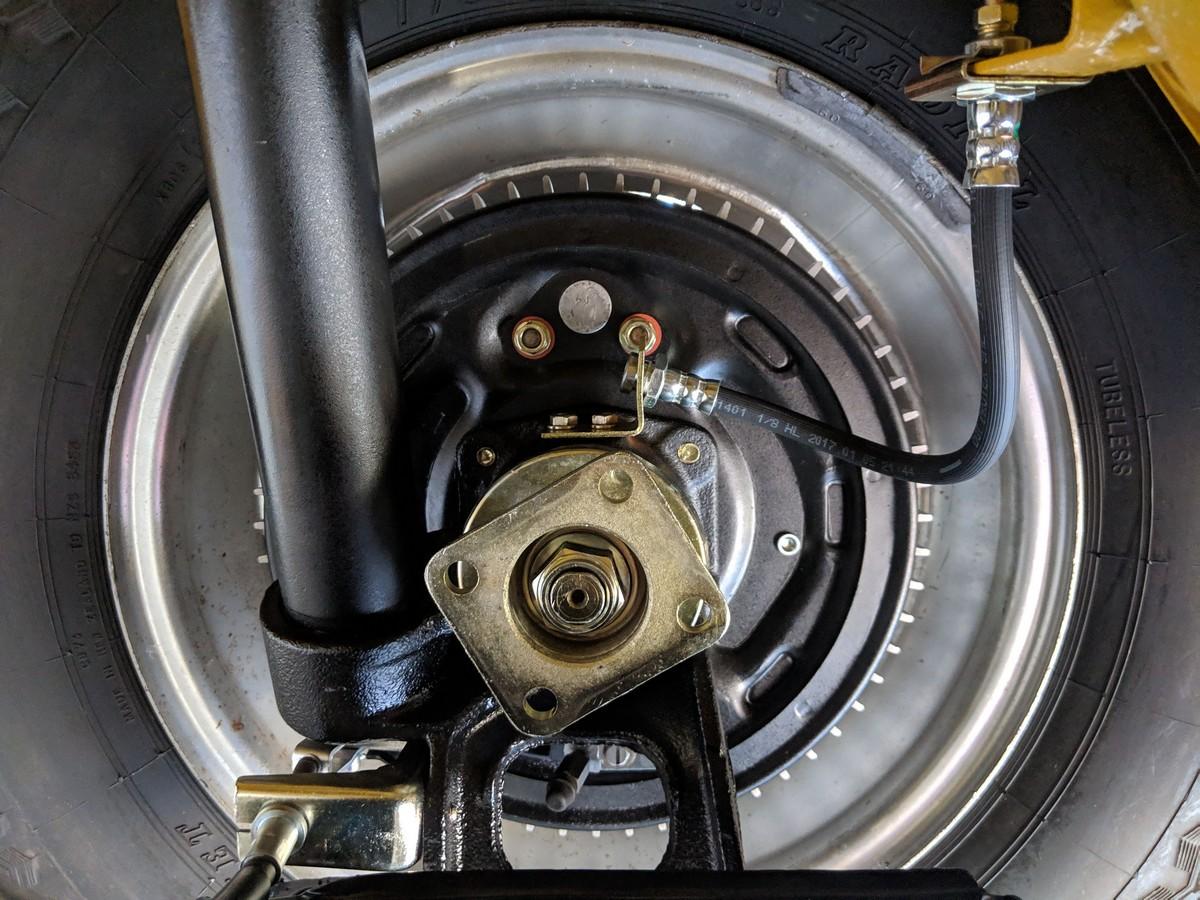
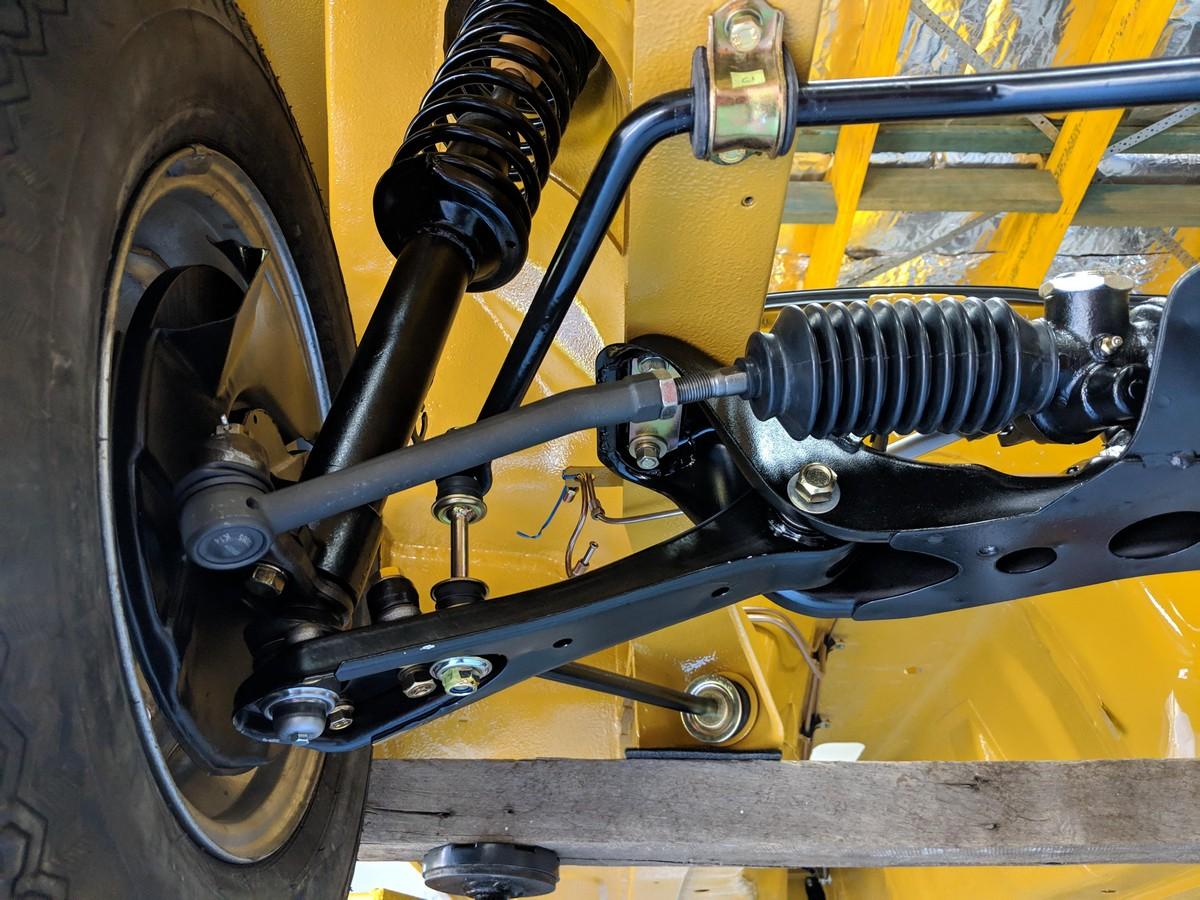
13 pointsBig milestone last week. Car is back on wheels 5 years after I stripped it down.


 13 points
 -
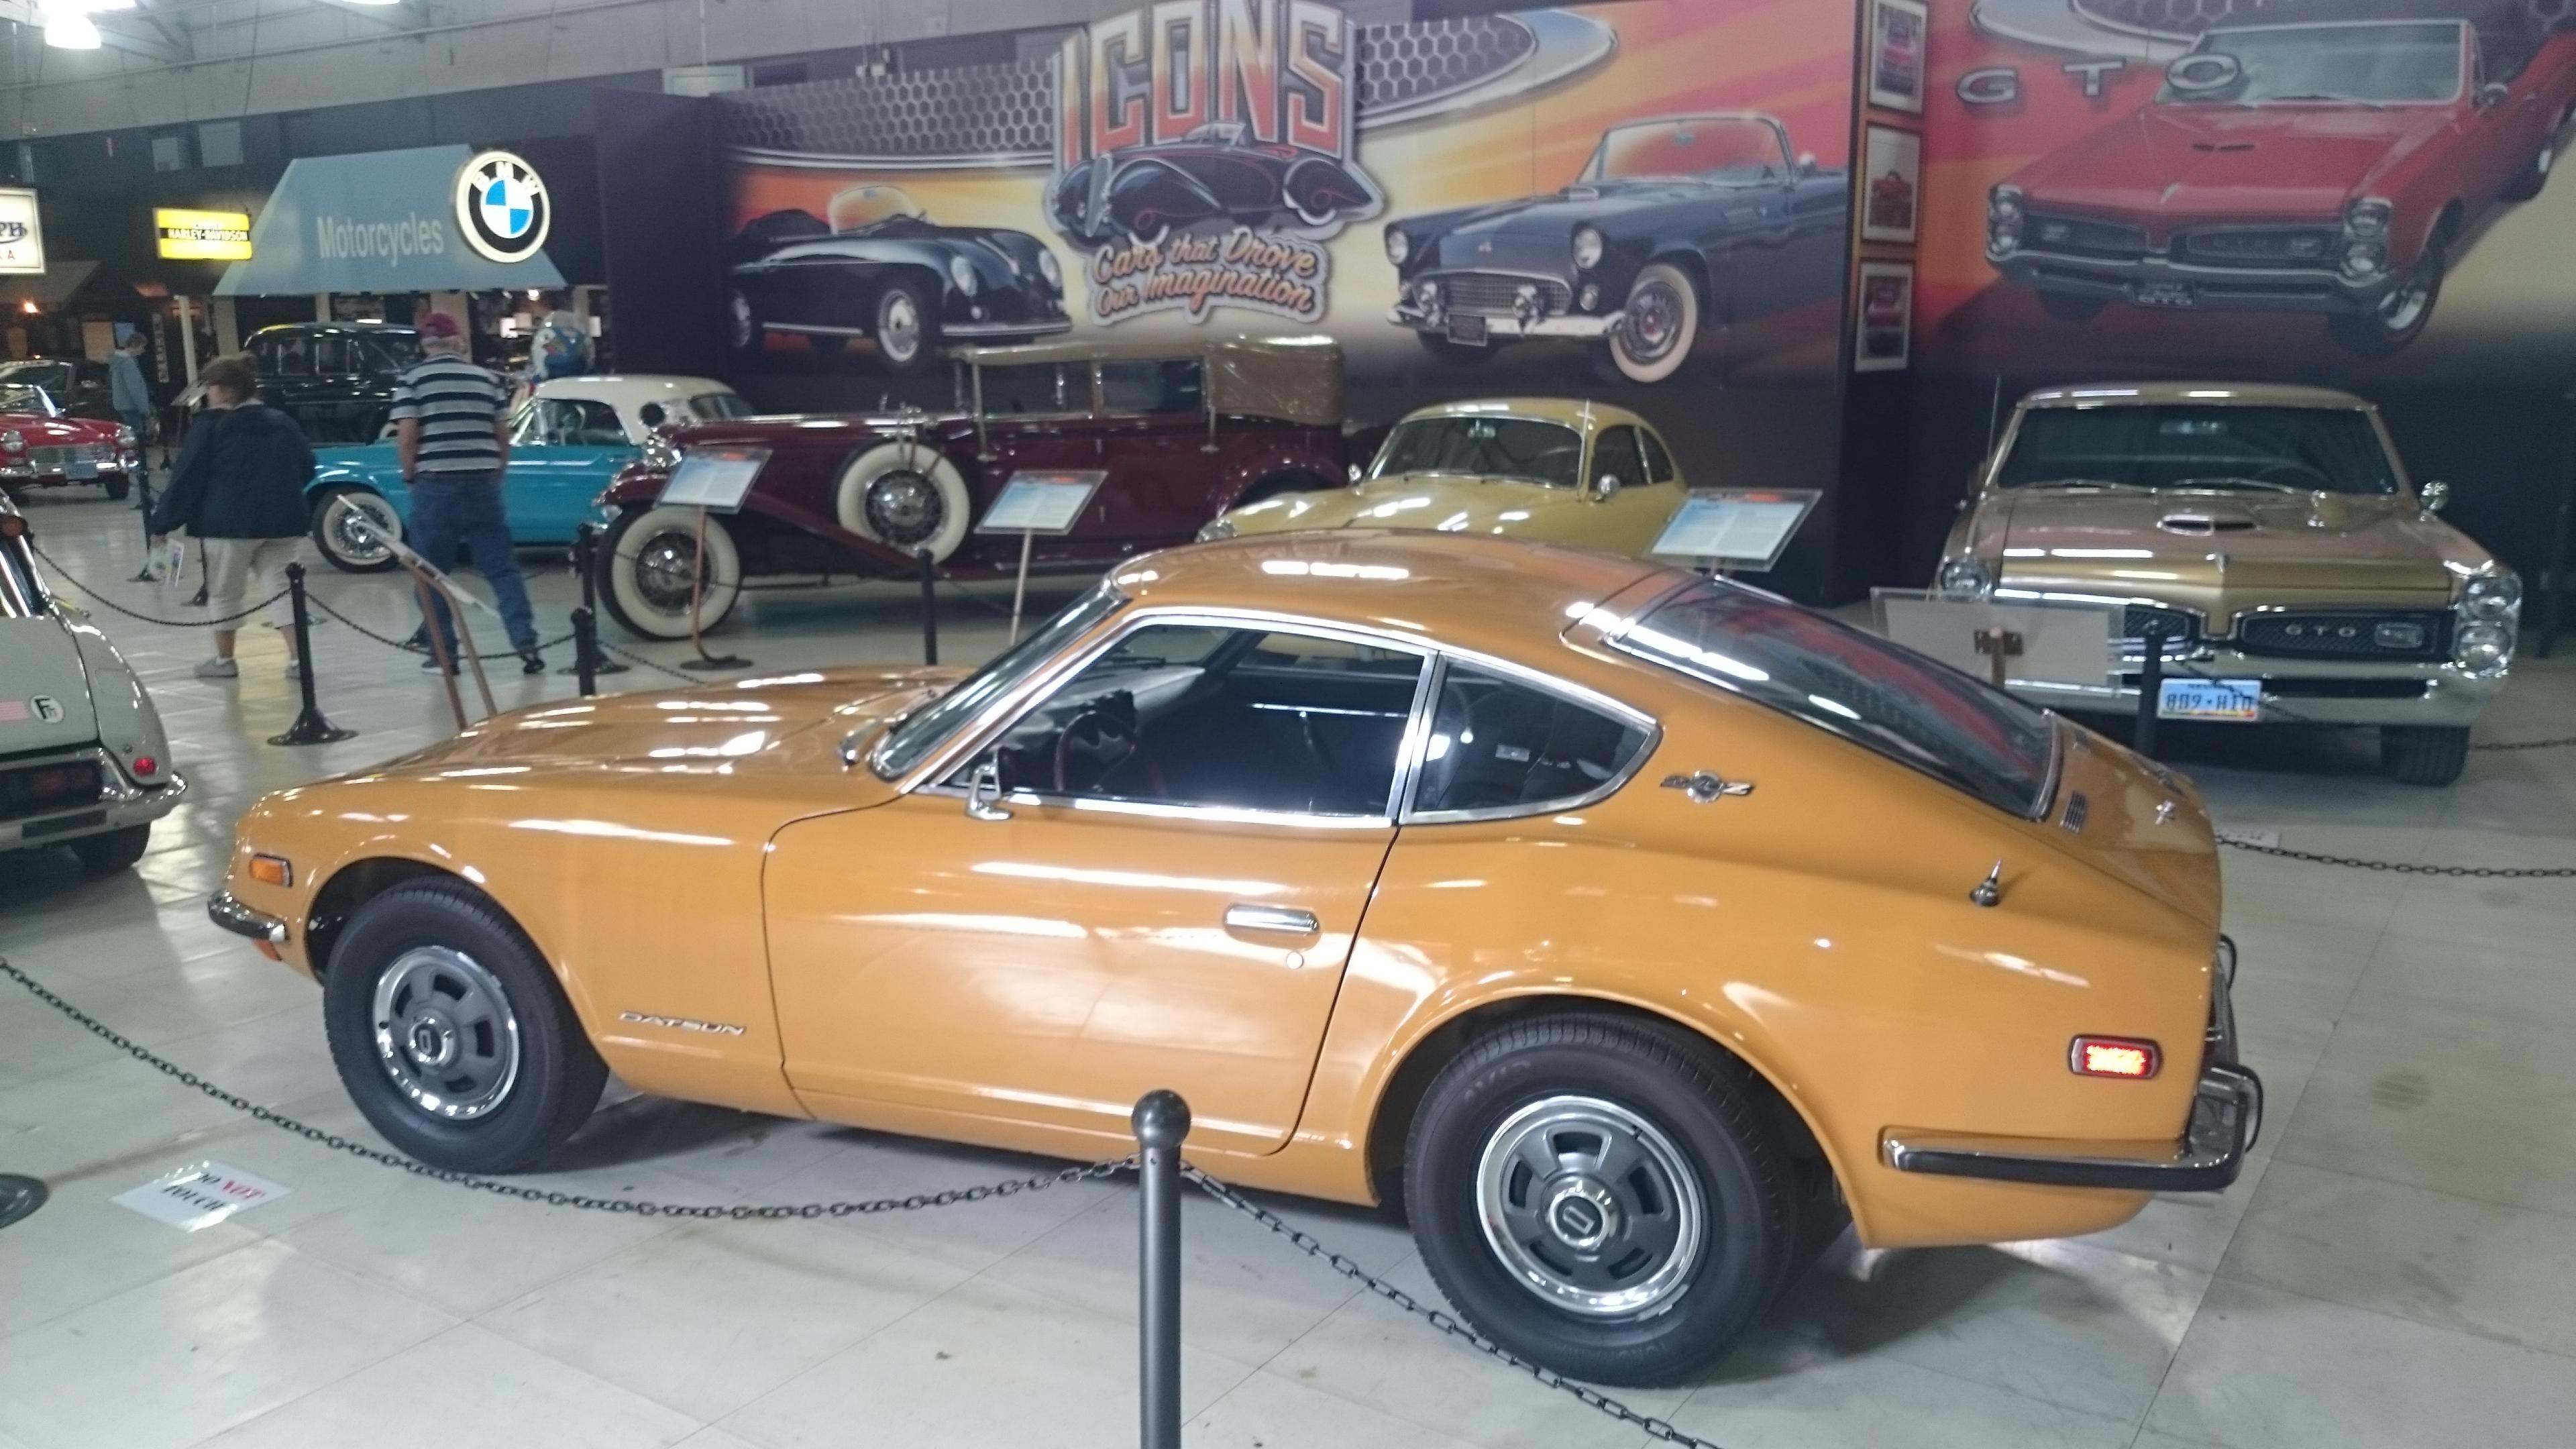
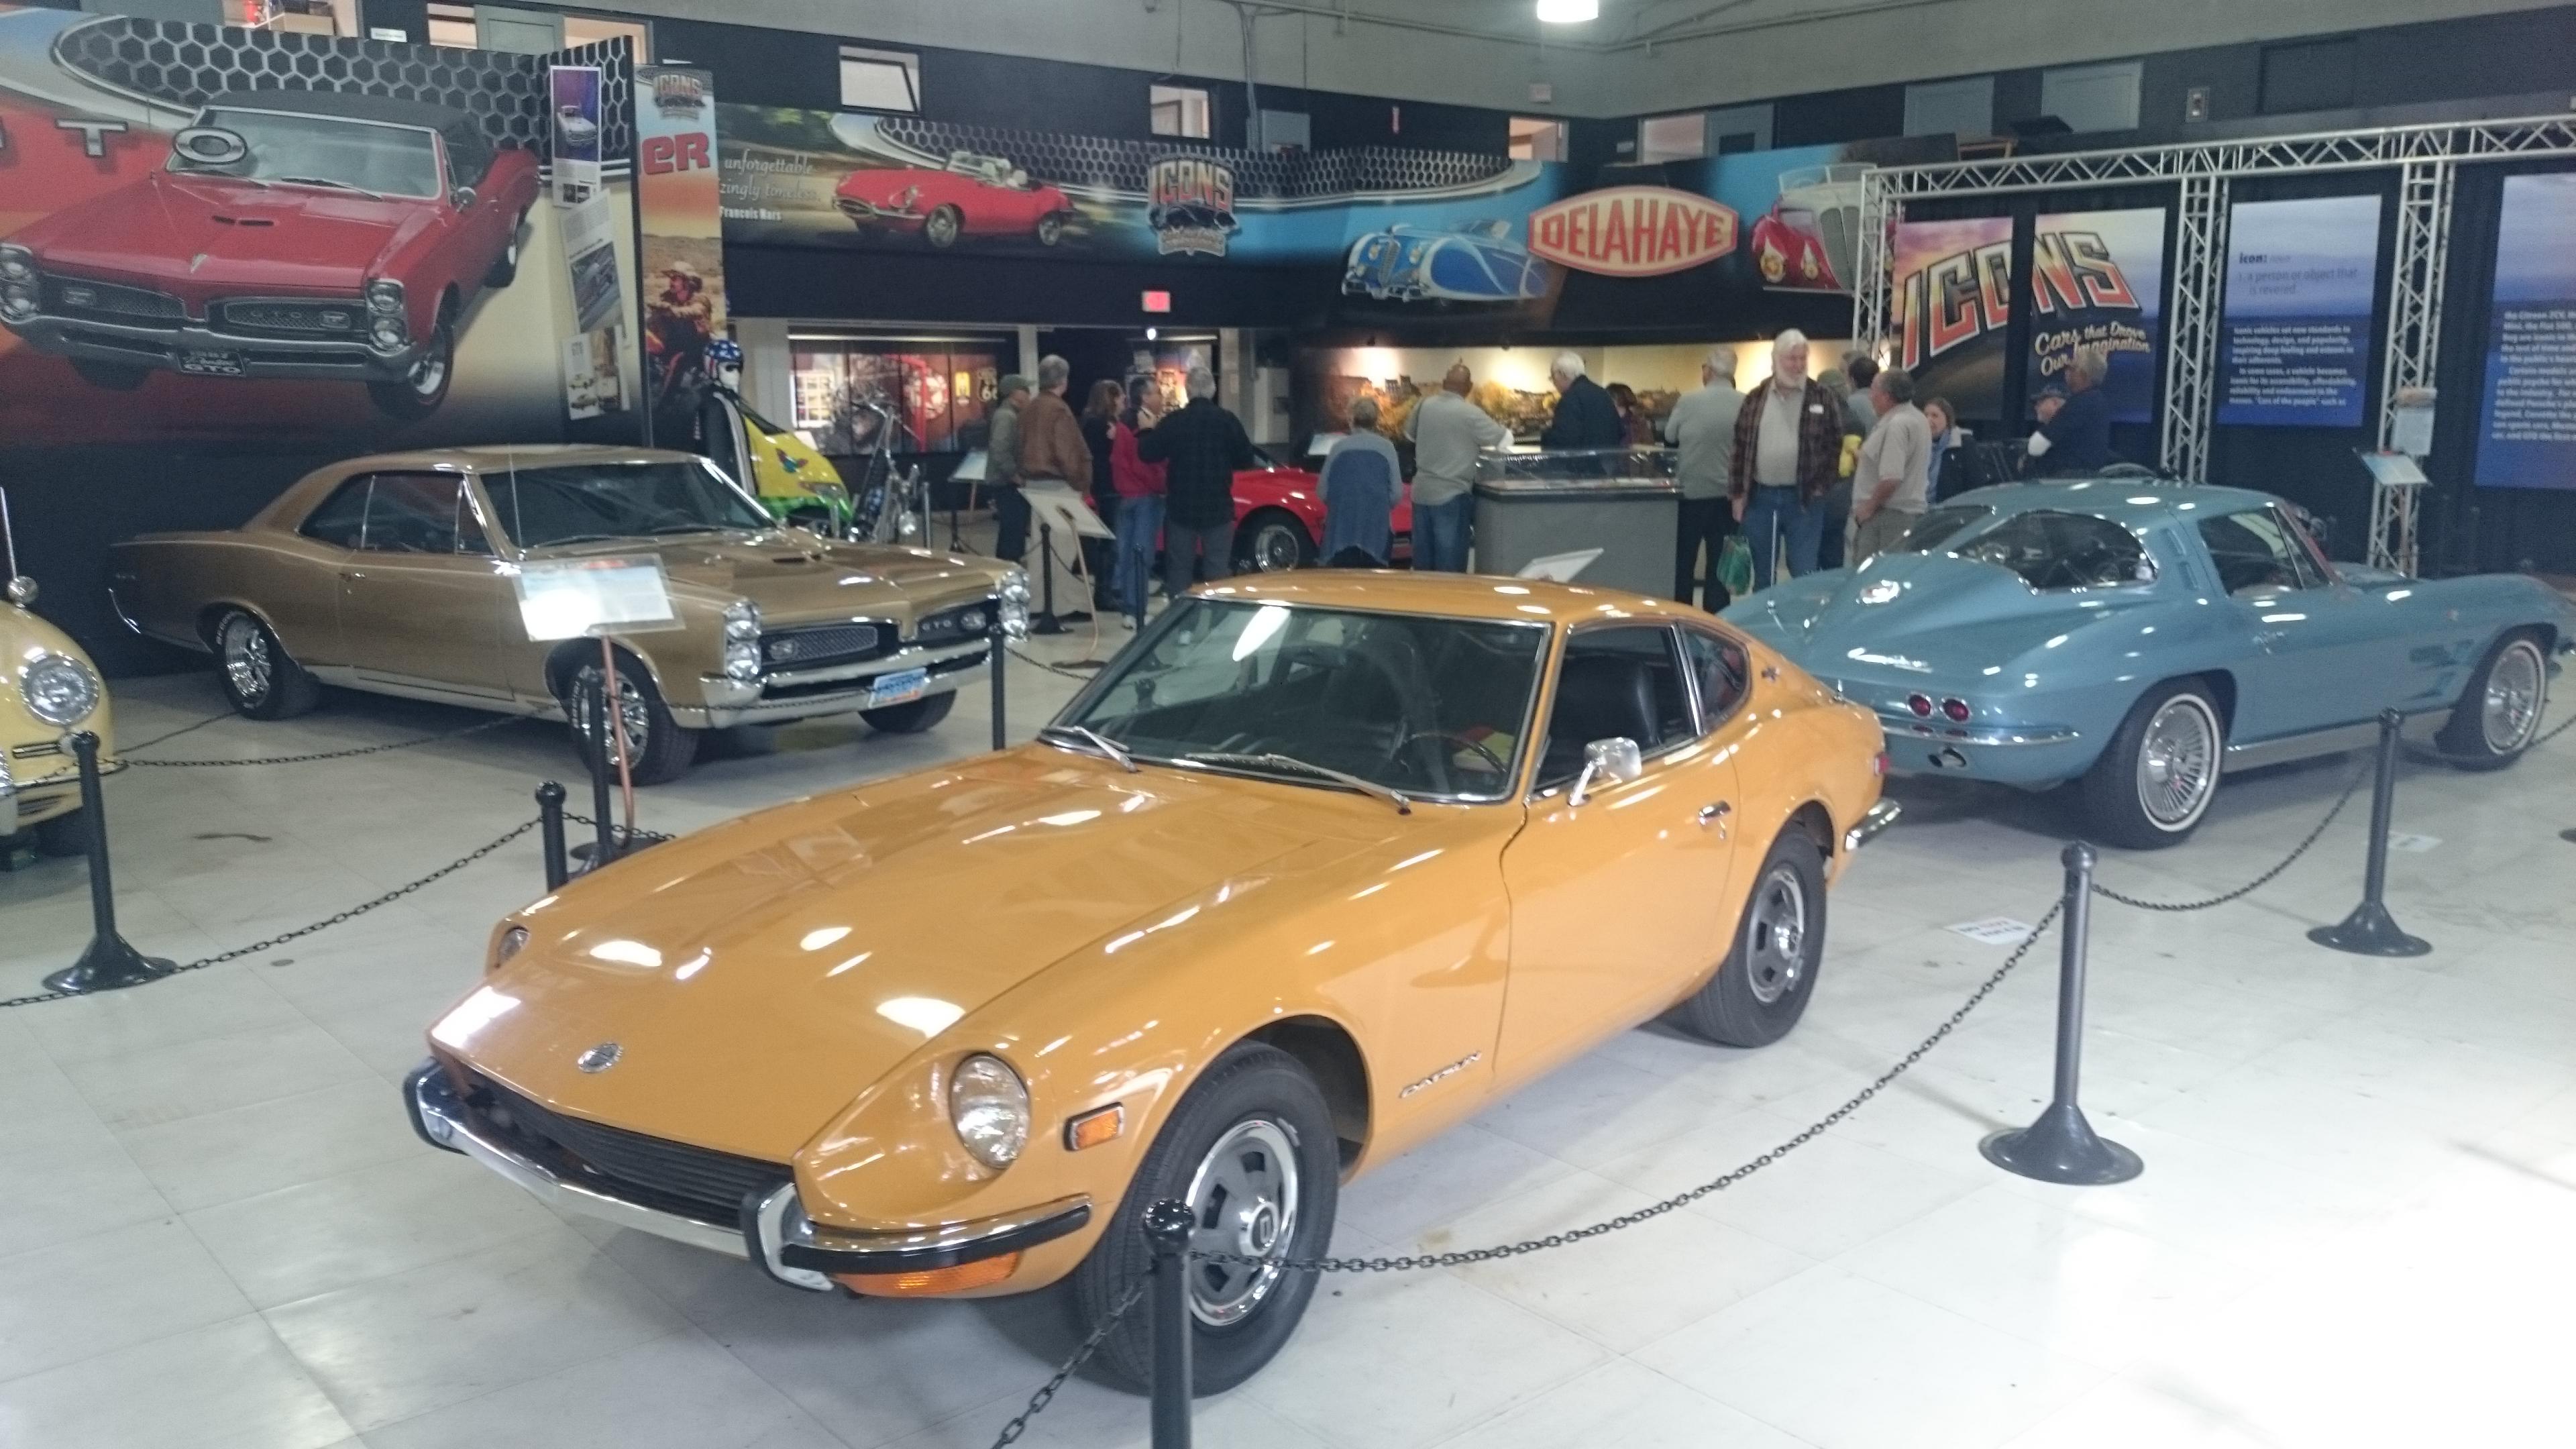
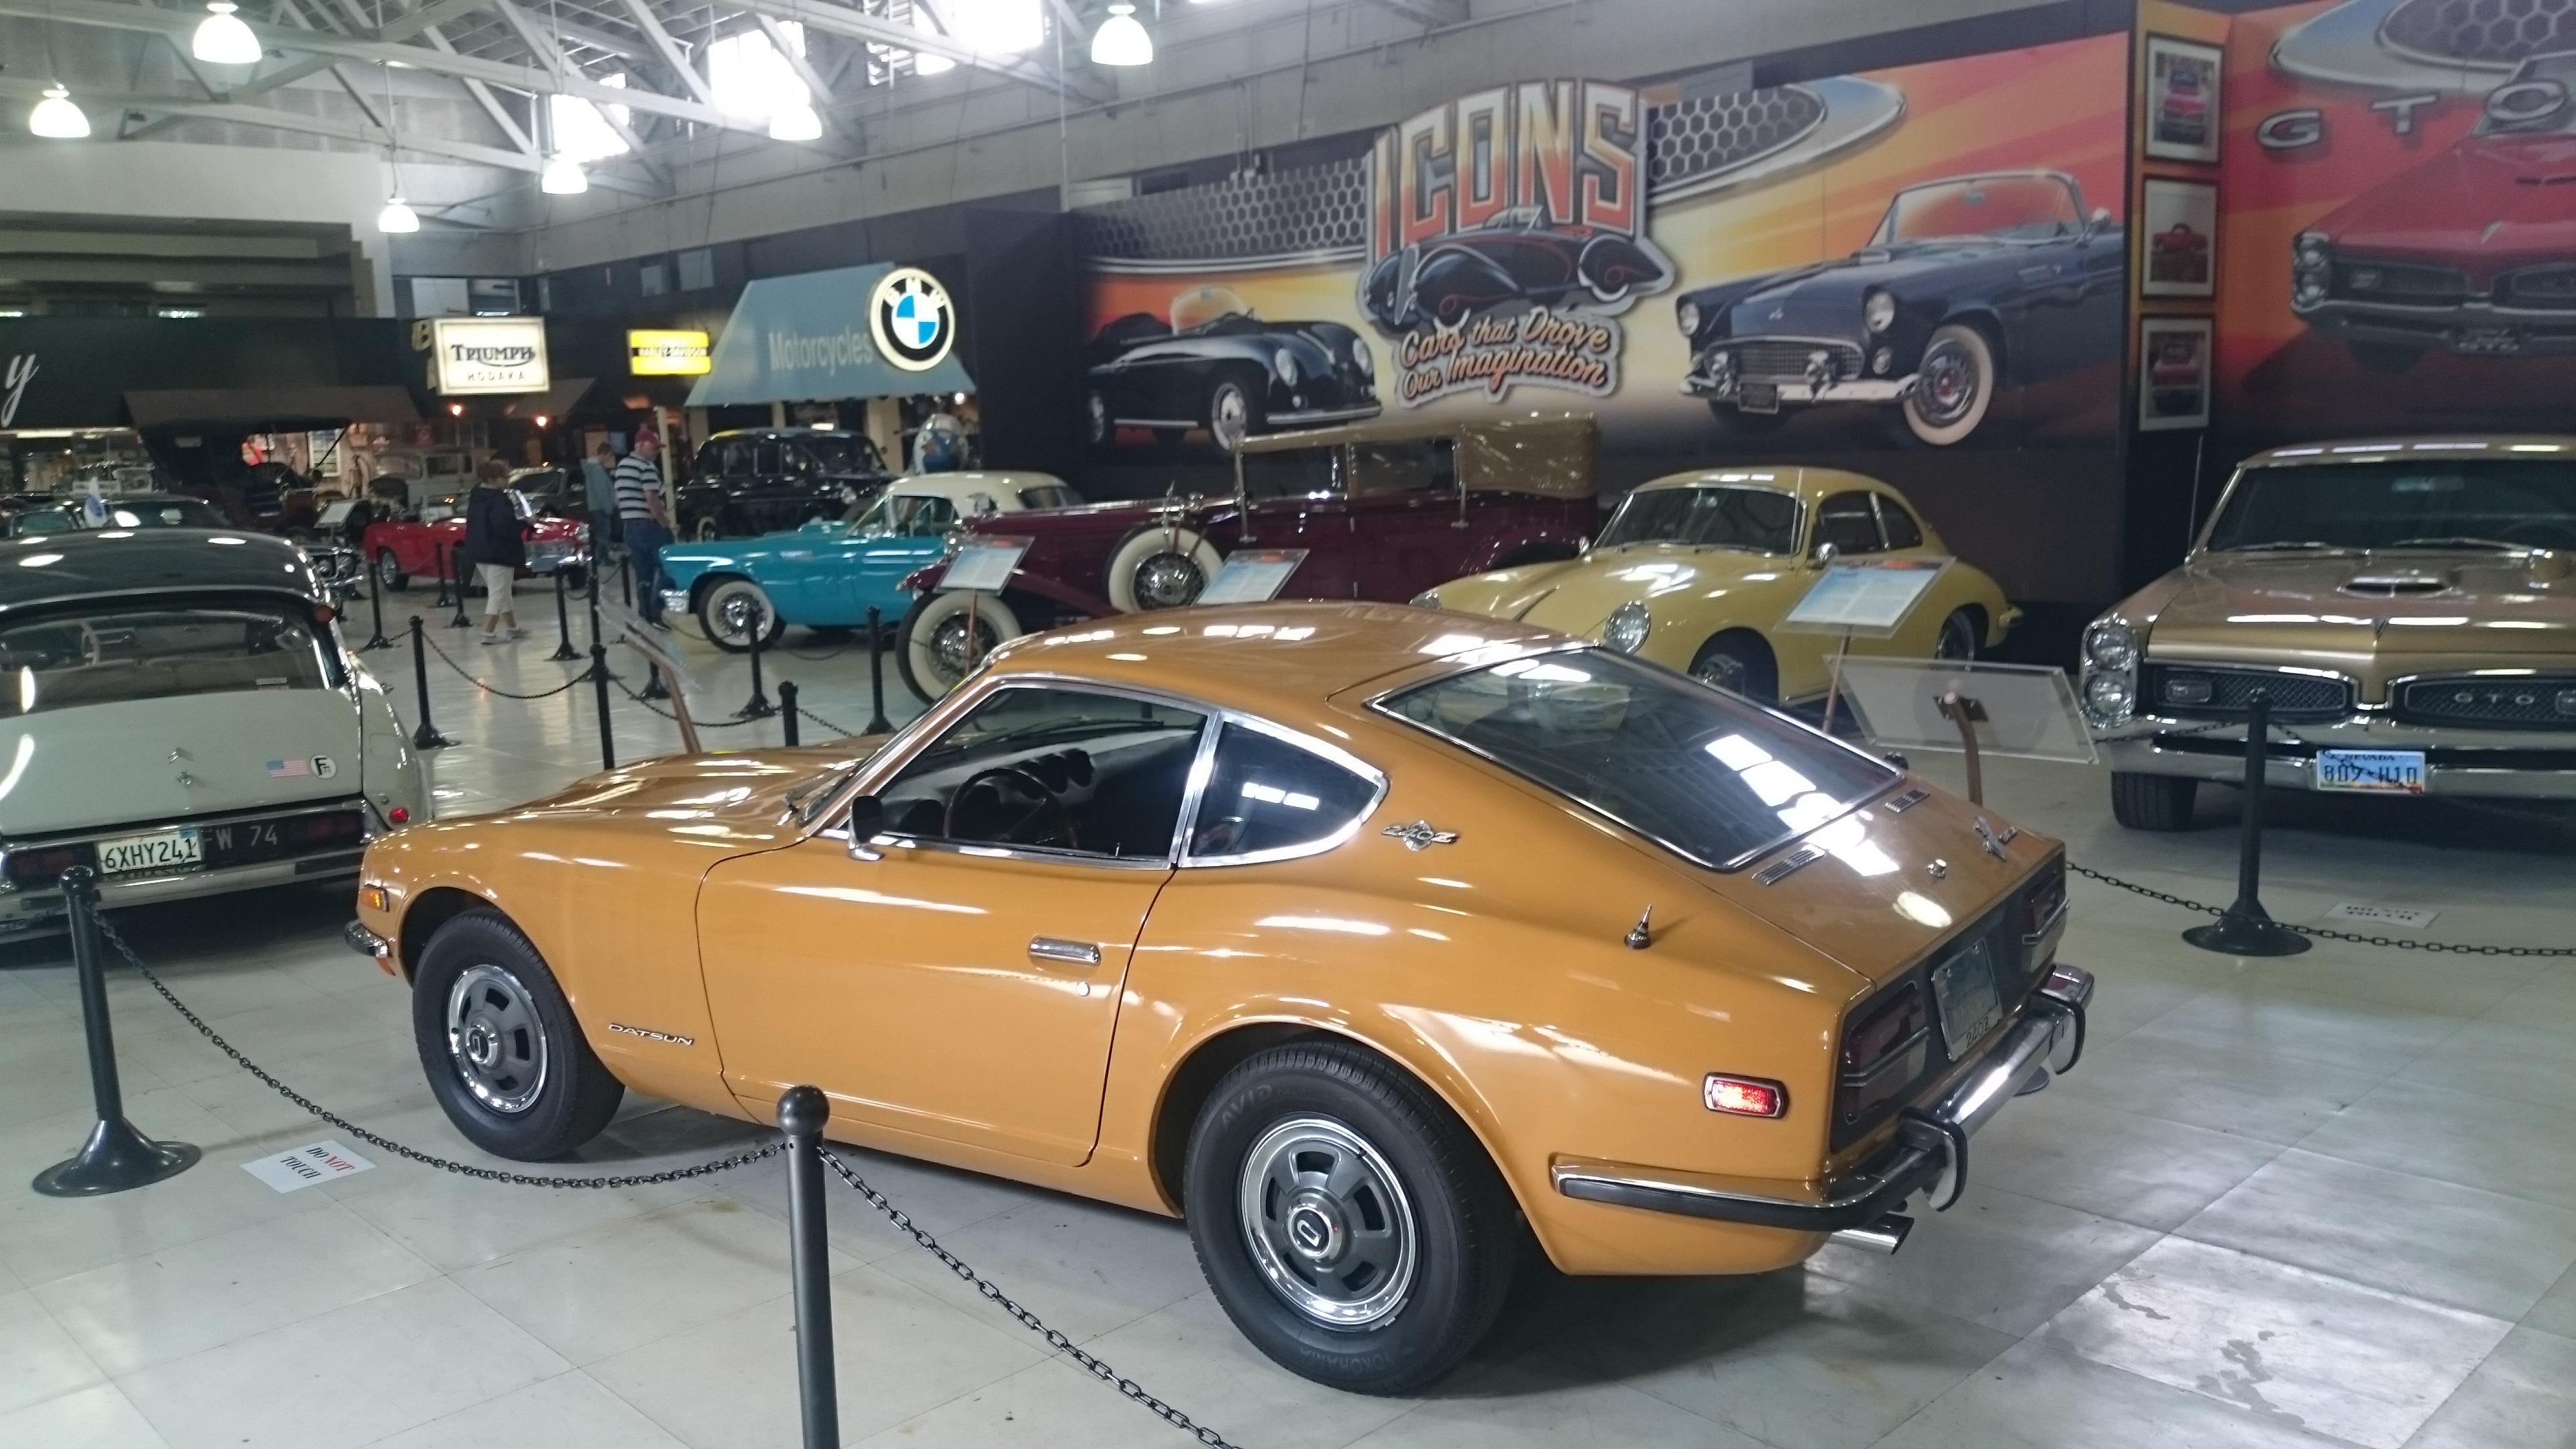
13 pointsI should update the title of this thread to 'Z cars at the Concours and Museums'. My '70 is now on display at the San Diego Auto Museum. They have an exhibit that started Feb 2, 2019 called "Icons, Cars that Drove our Imagination" : https://sdautomuseum.org/exhibit/icons The Roadster is at the Petersen Museum: https://www.petersen.org/1969-datsun-1600-roadster/ Love that free storage!


 13 points
 -
12 pointsDear all, My name is Chris Visscher and I am the owner of S30.world. For the past 10 years, I have focused a significant part of my life on increasing the appreciation of the Datsun 240Z/Nissan Fairlady Z, which we all cherish. With my partner Gustav combined we did about a total of 60 restorations to date. I would like to thank everyone here for their feedback. We are removing the white 240Z with VIN HLS30-15662 from the masterpiece program. You are right, the underside of the car has been completely repainted, and that should not be the case. The press release states that it is factory correct. You are right, it should say: as close as possible to when they left the factory. I am the last person to admit that a complete factory-correct restoration is impossible. All I can say is that we did our very best and made special rubber mats (for the 1969 cars), special air ducts(for the 1969 cars), a fuel tank for each of the different years, the insulation mats under the paint on the bottom, behind the dashboard , etc.etc etc I myself have dismantled many cars that were produced from October 1969 to the end of 1970 and compared all the parts with other project cars. So I have done everything to gain experience. In addition, we have different first paint cars starting with #2xxx and #19xxx that we have used as examples. We will certainly have made mistakes, but I can tell you that we have done everything we can to do it as well as possible. I am proud of the result and I hope you are too! I'm also very proud about the team we put together from all over the world. JAPAN, USA, UK, SWISS, GERMANY, AUSTRALIA, HUNGARY. They are all giving there free time to get appriciation for the S30 to another level. S30.world - The platform . Please read about it. If you want to help us and the community and have further feedback on the cars or the website, please email it to chris@s30.world, I appriciate it very much! Thank you in advance for your help.12 points
-
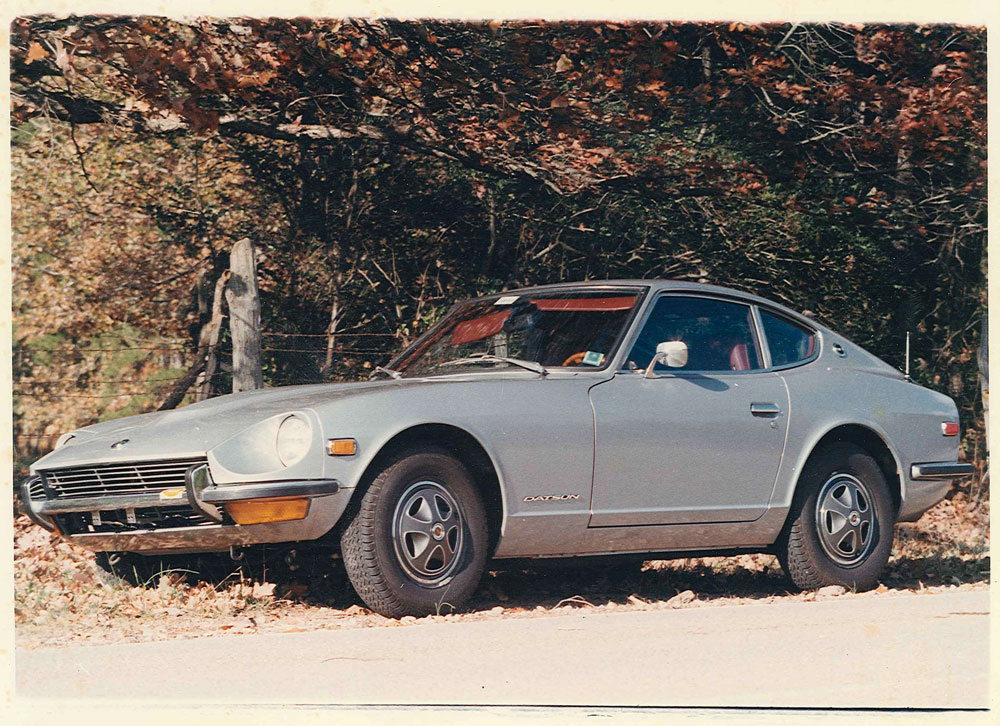
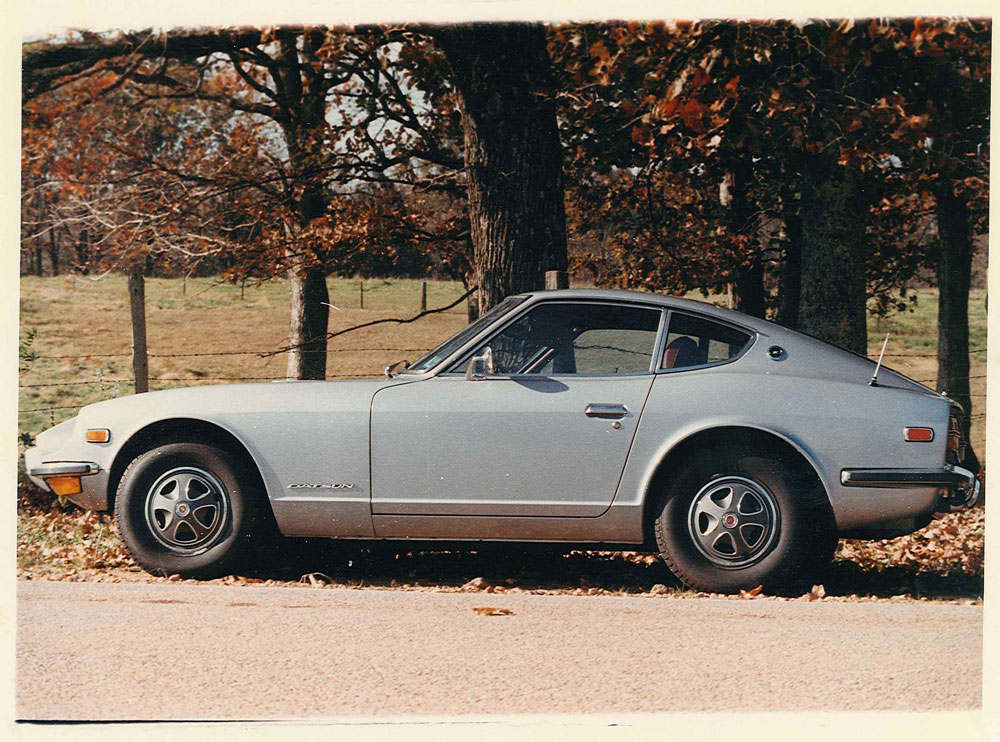
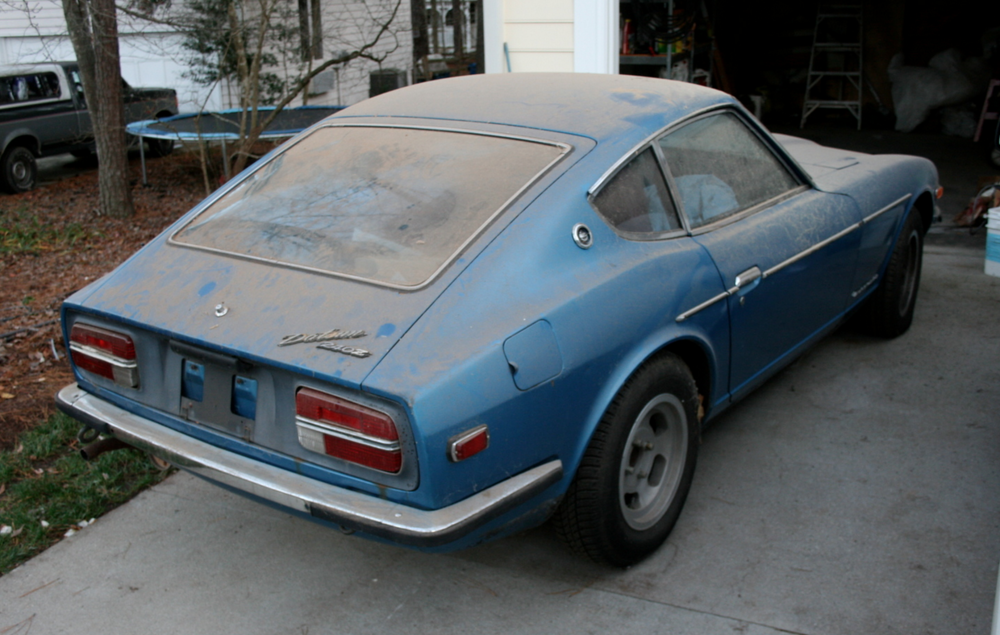
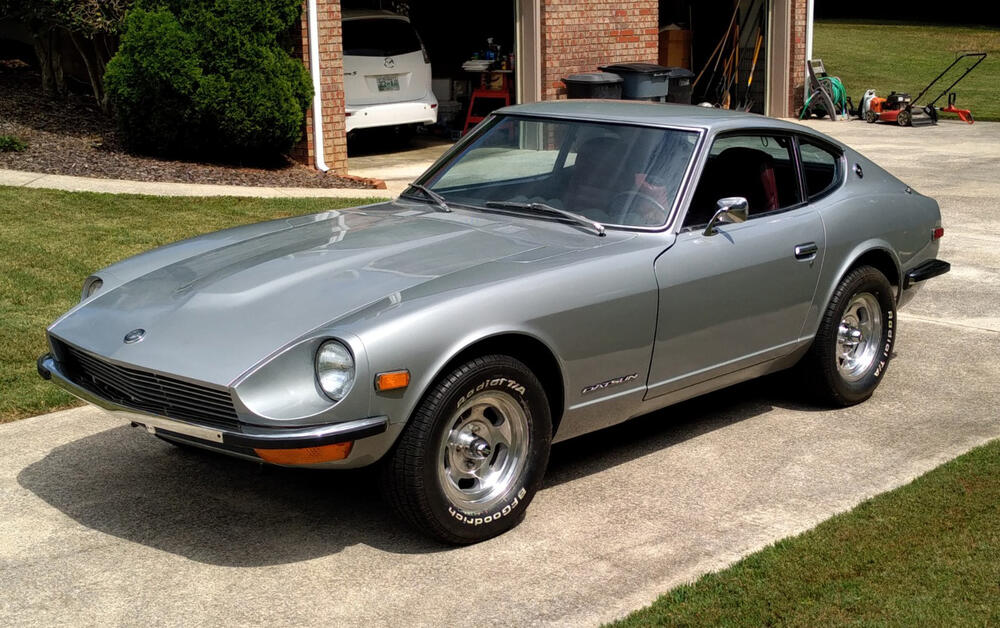
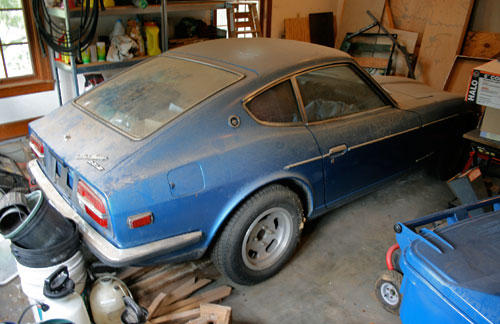
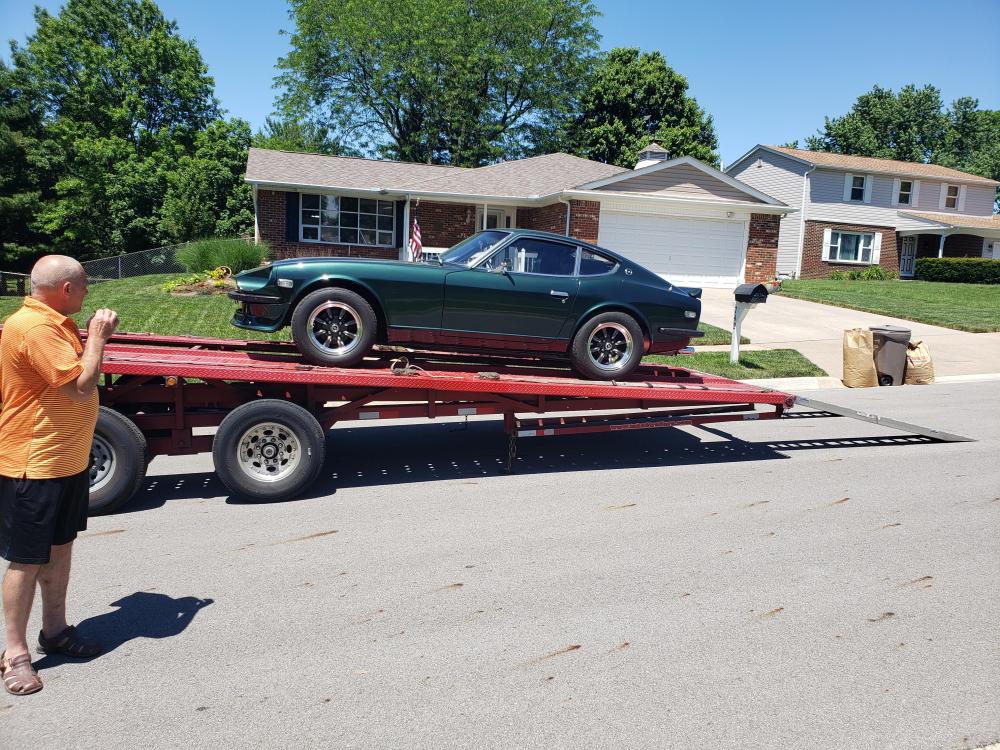
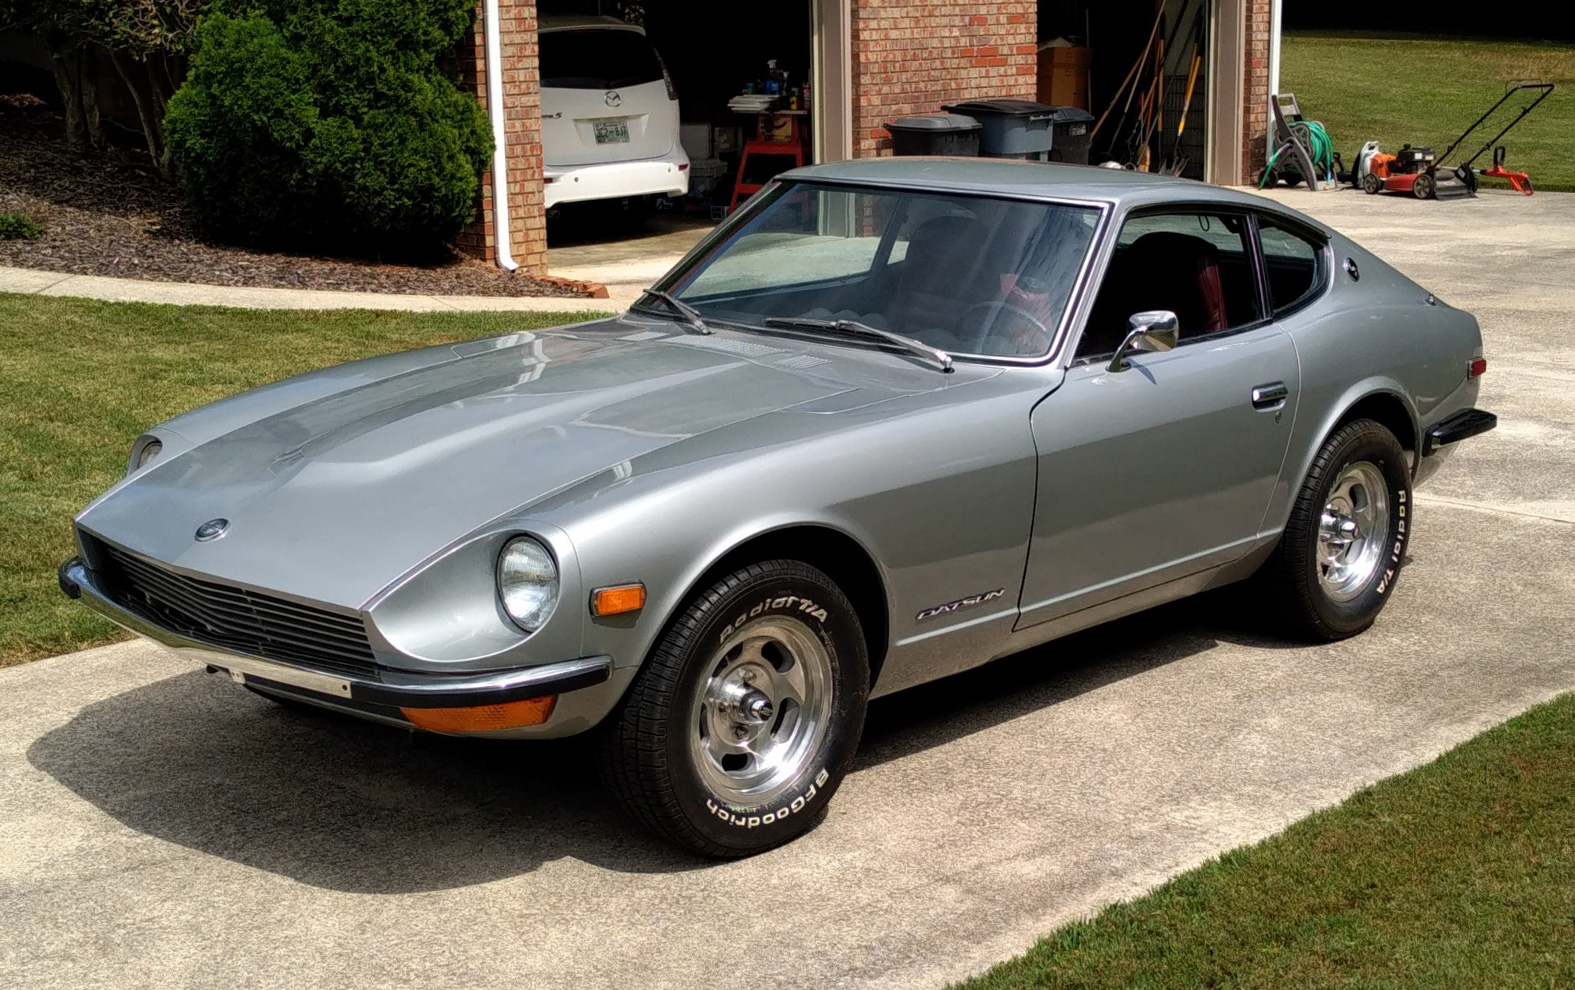
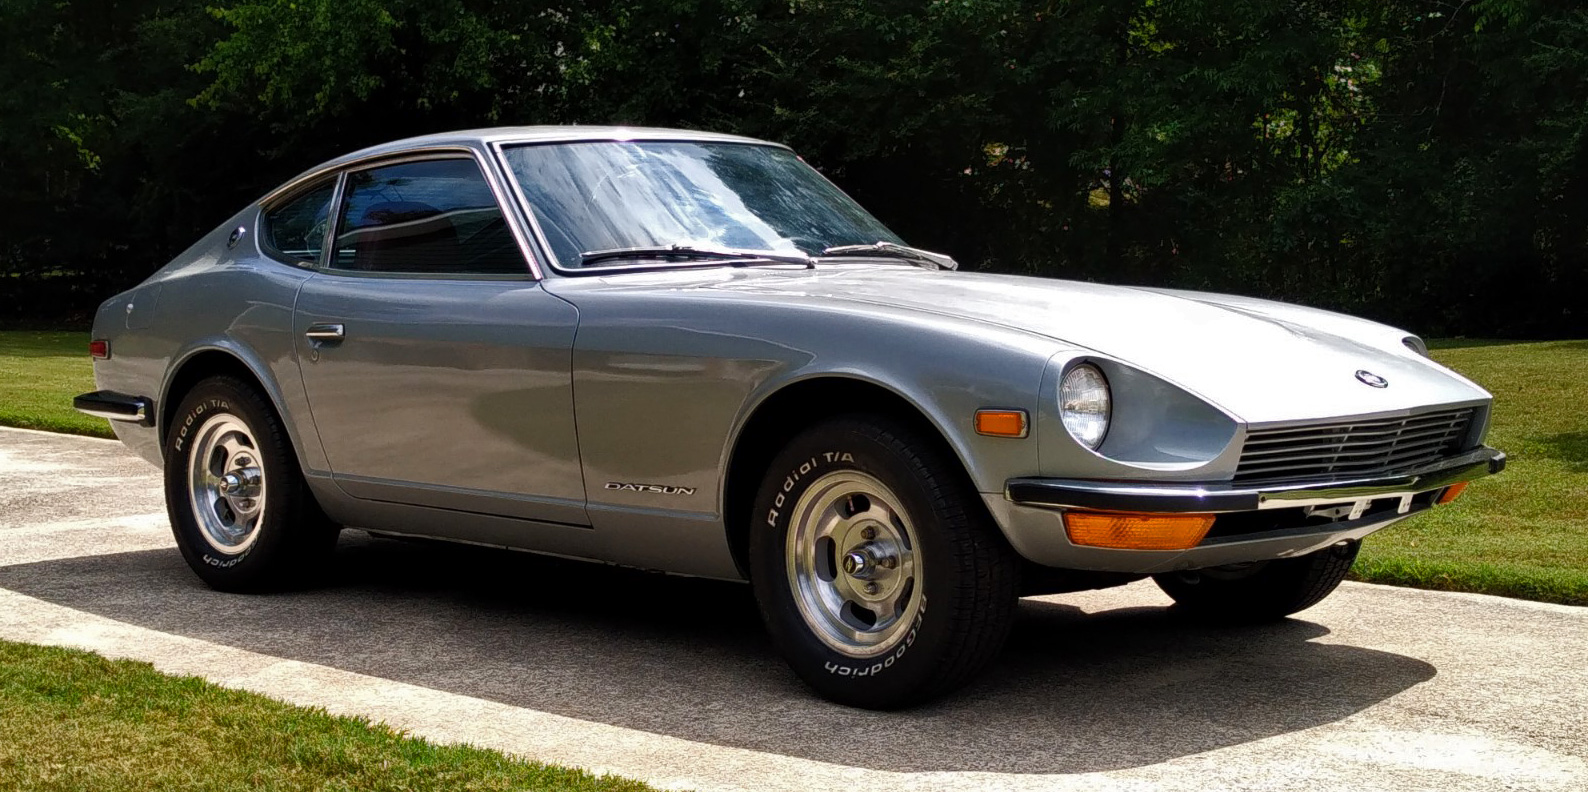
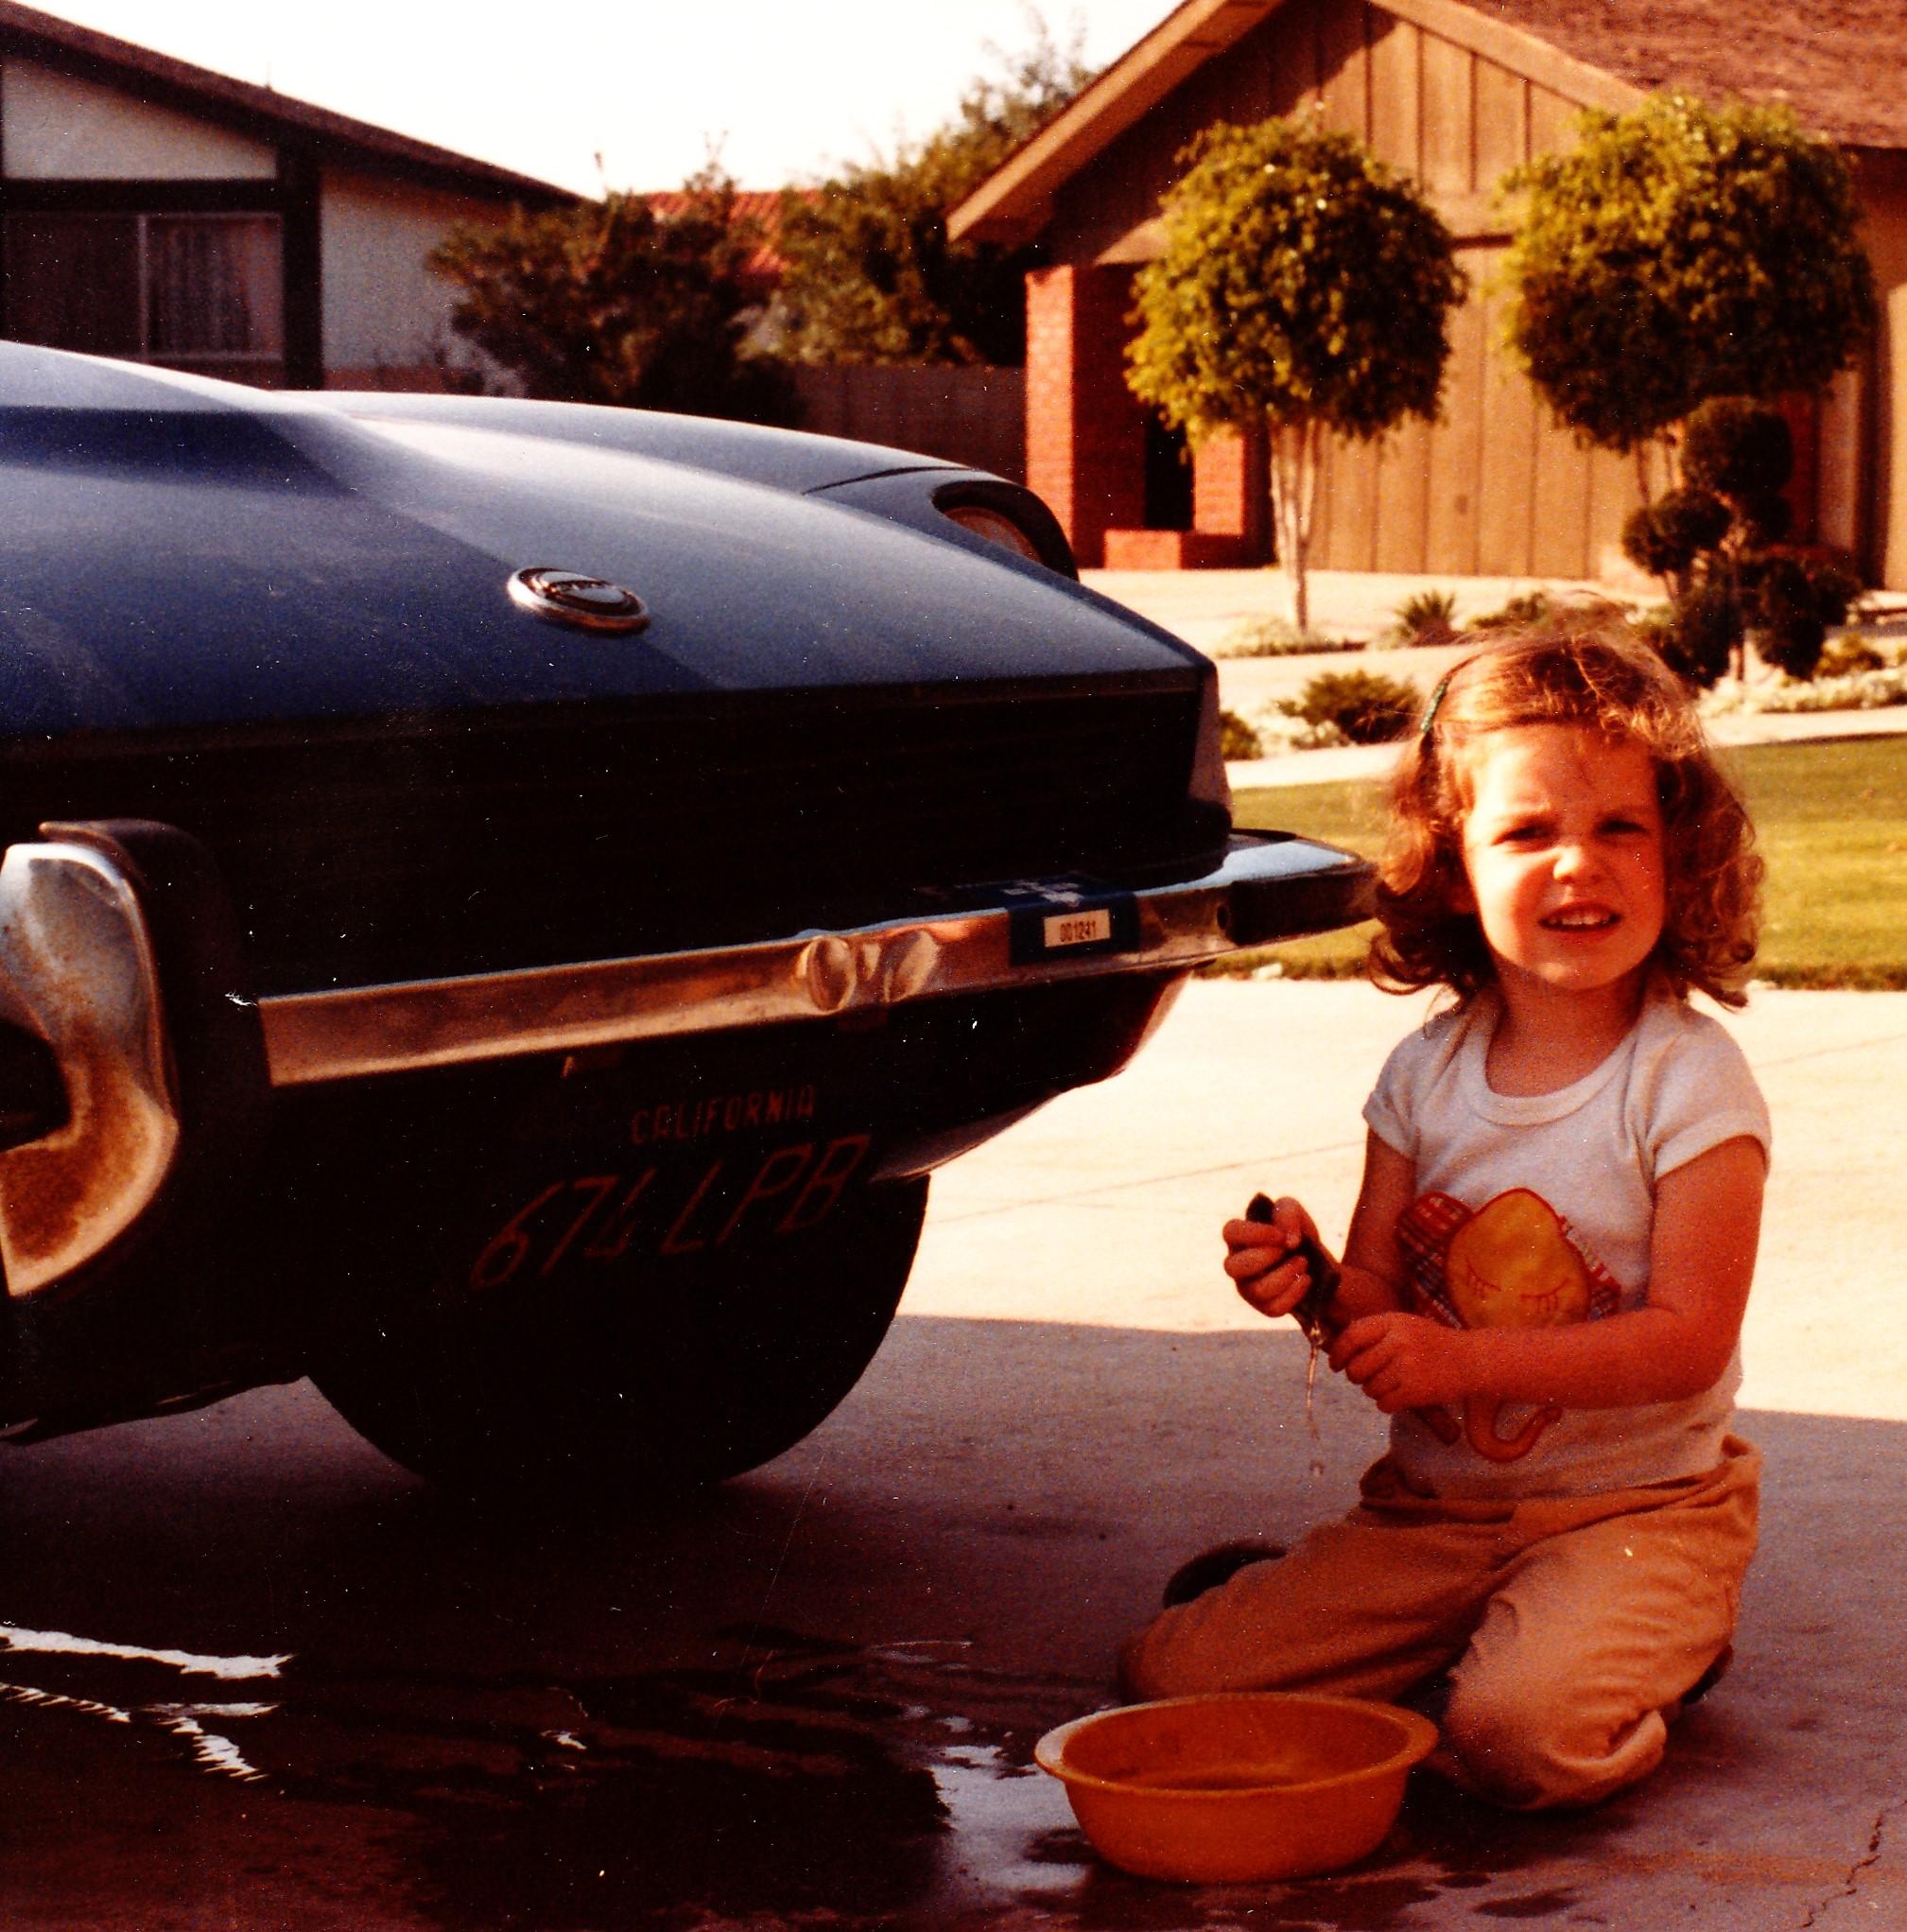
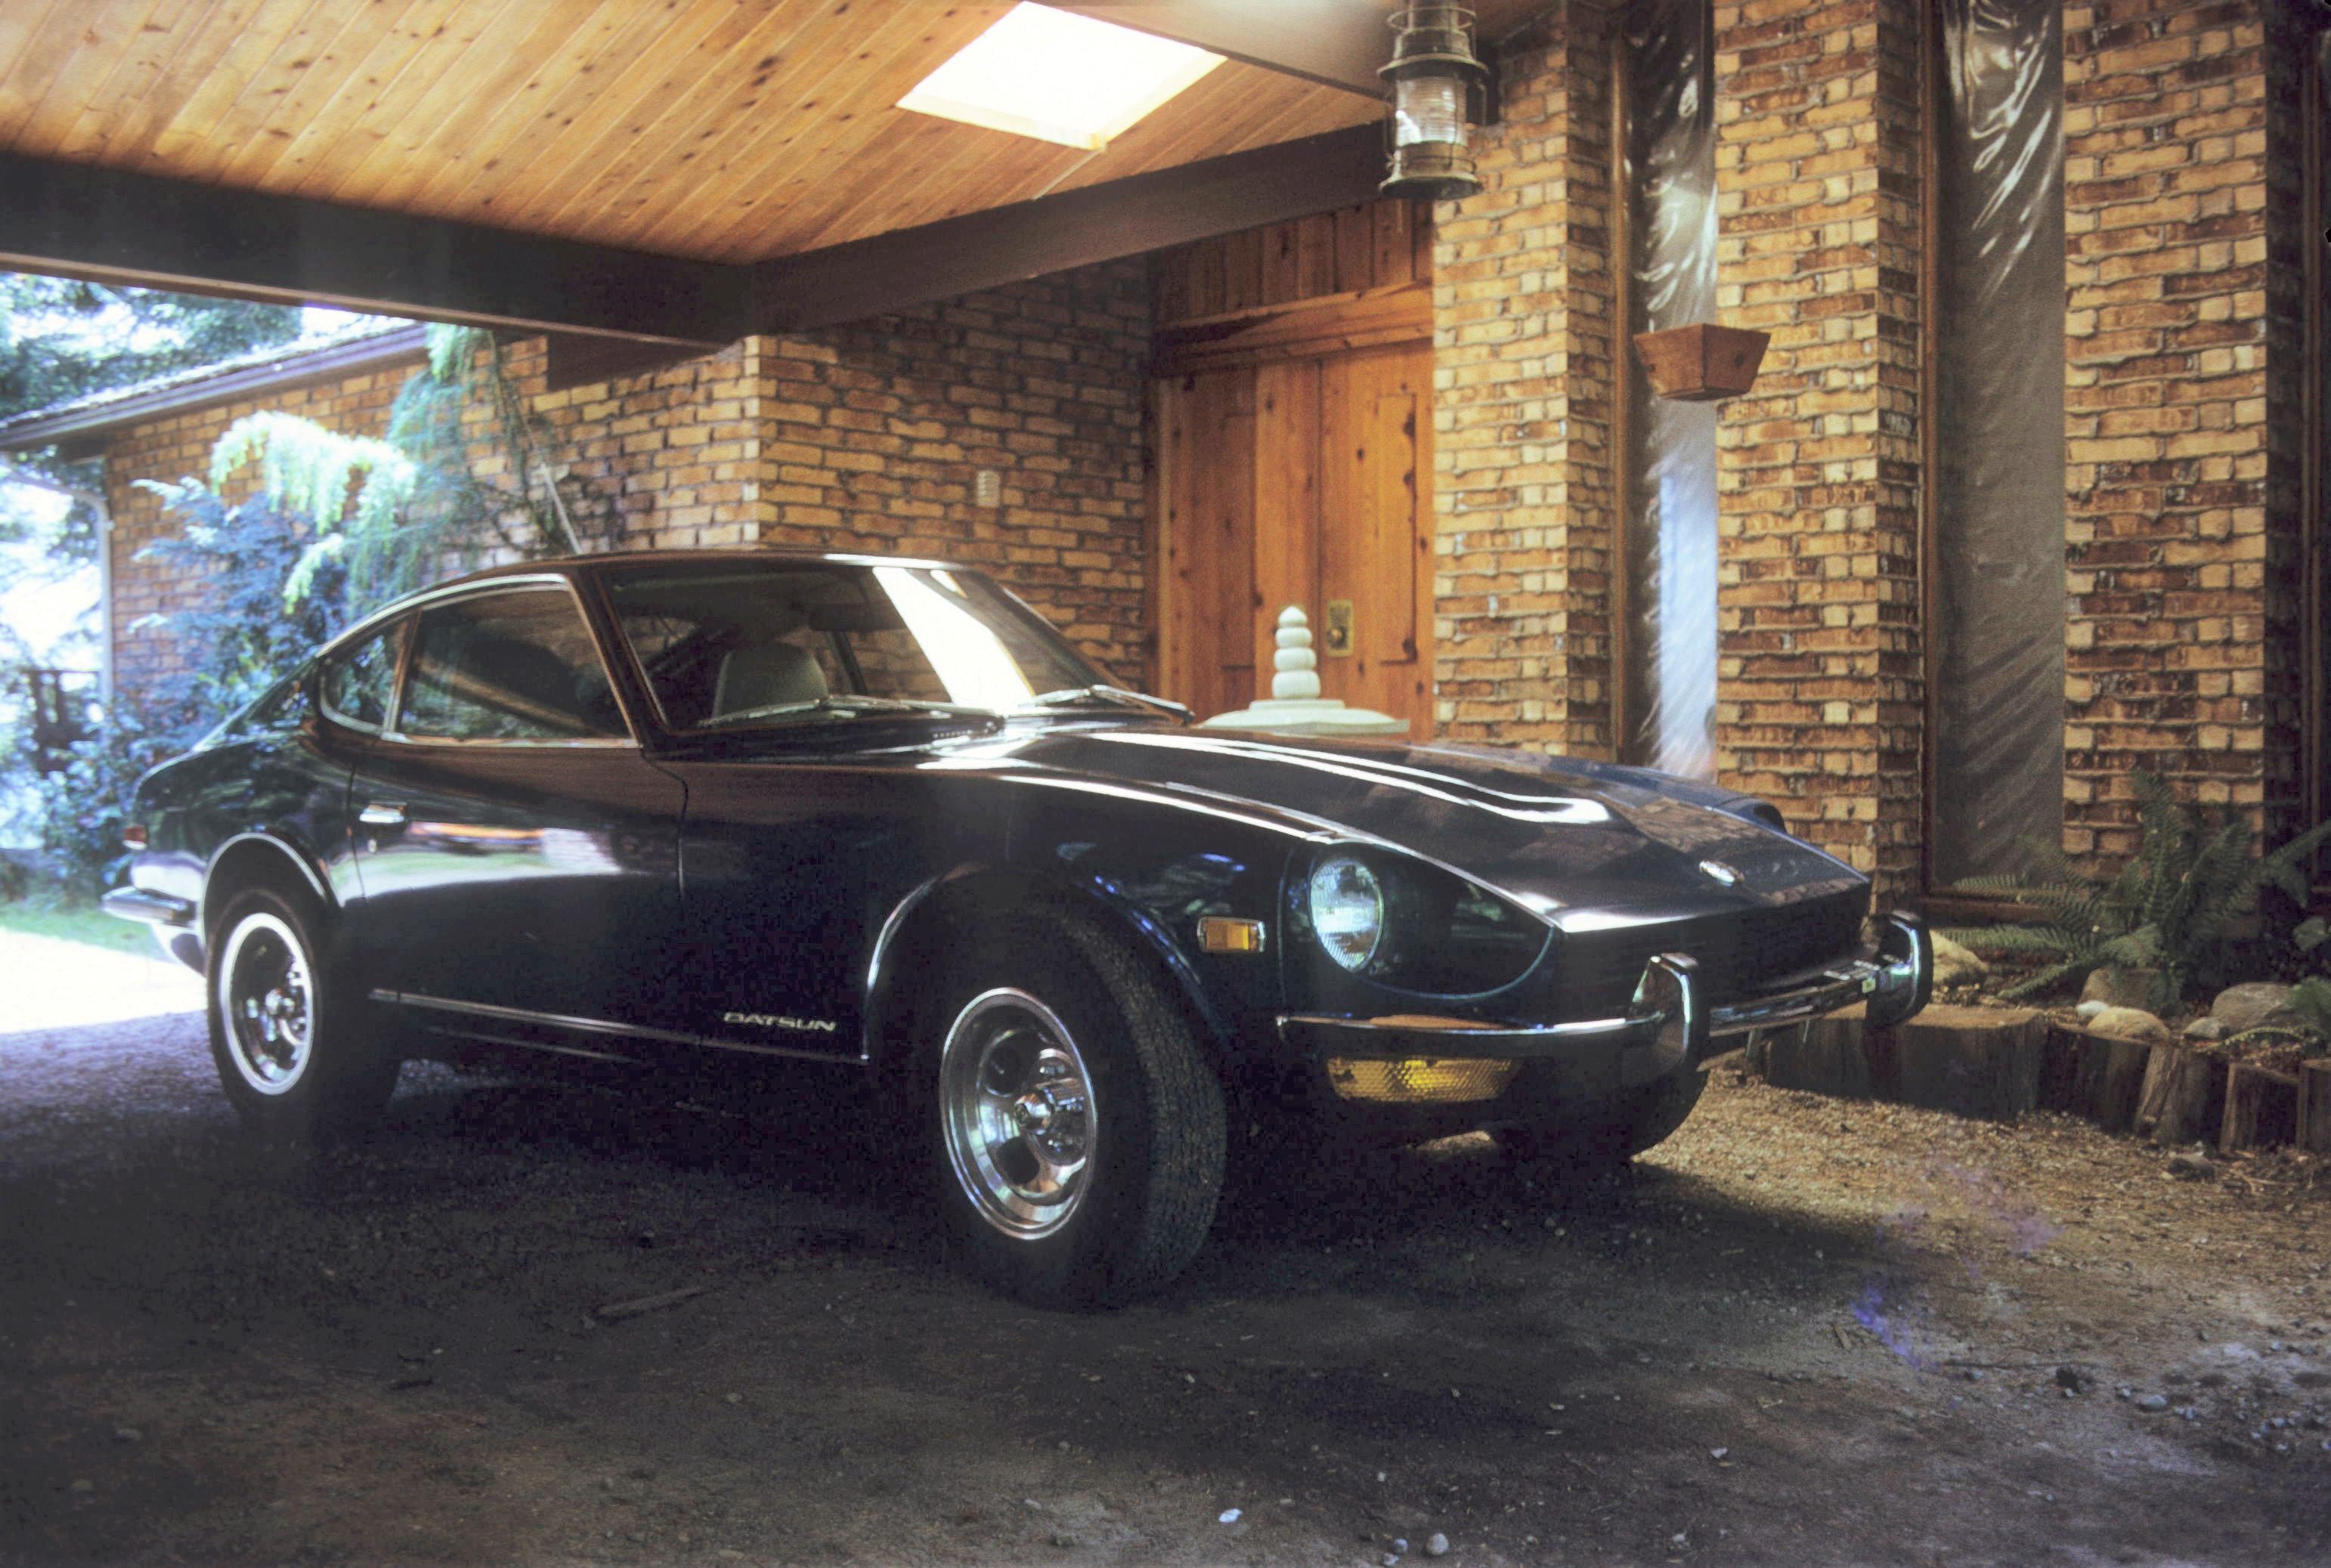
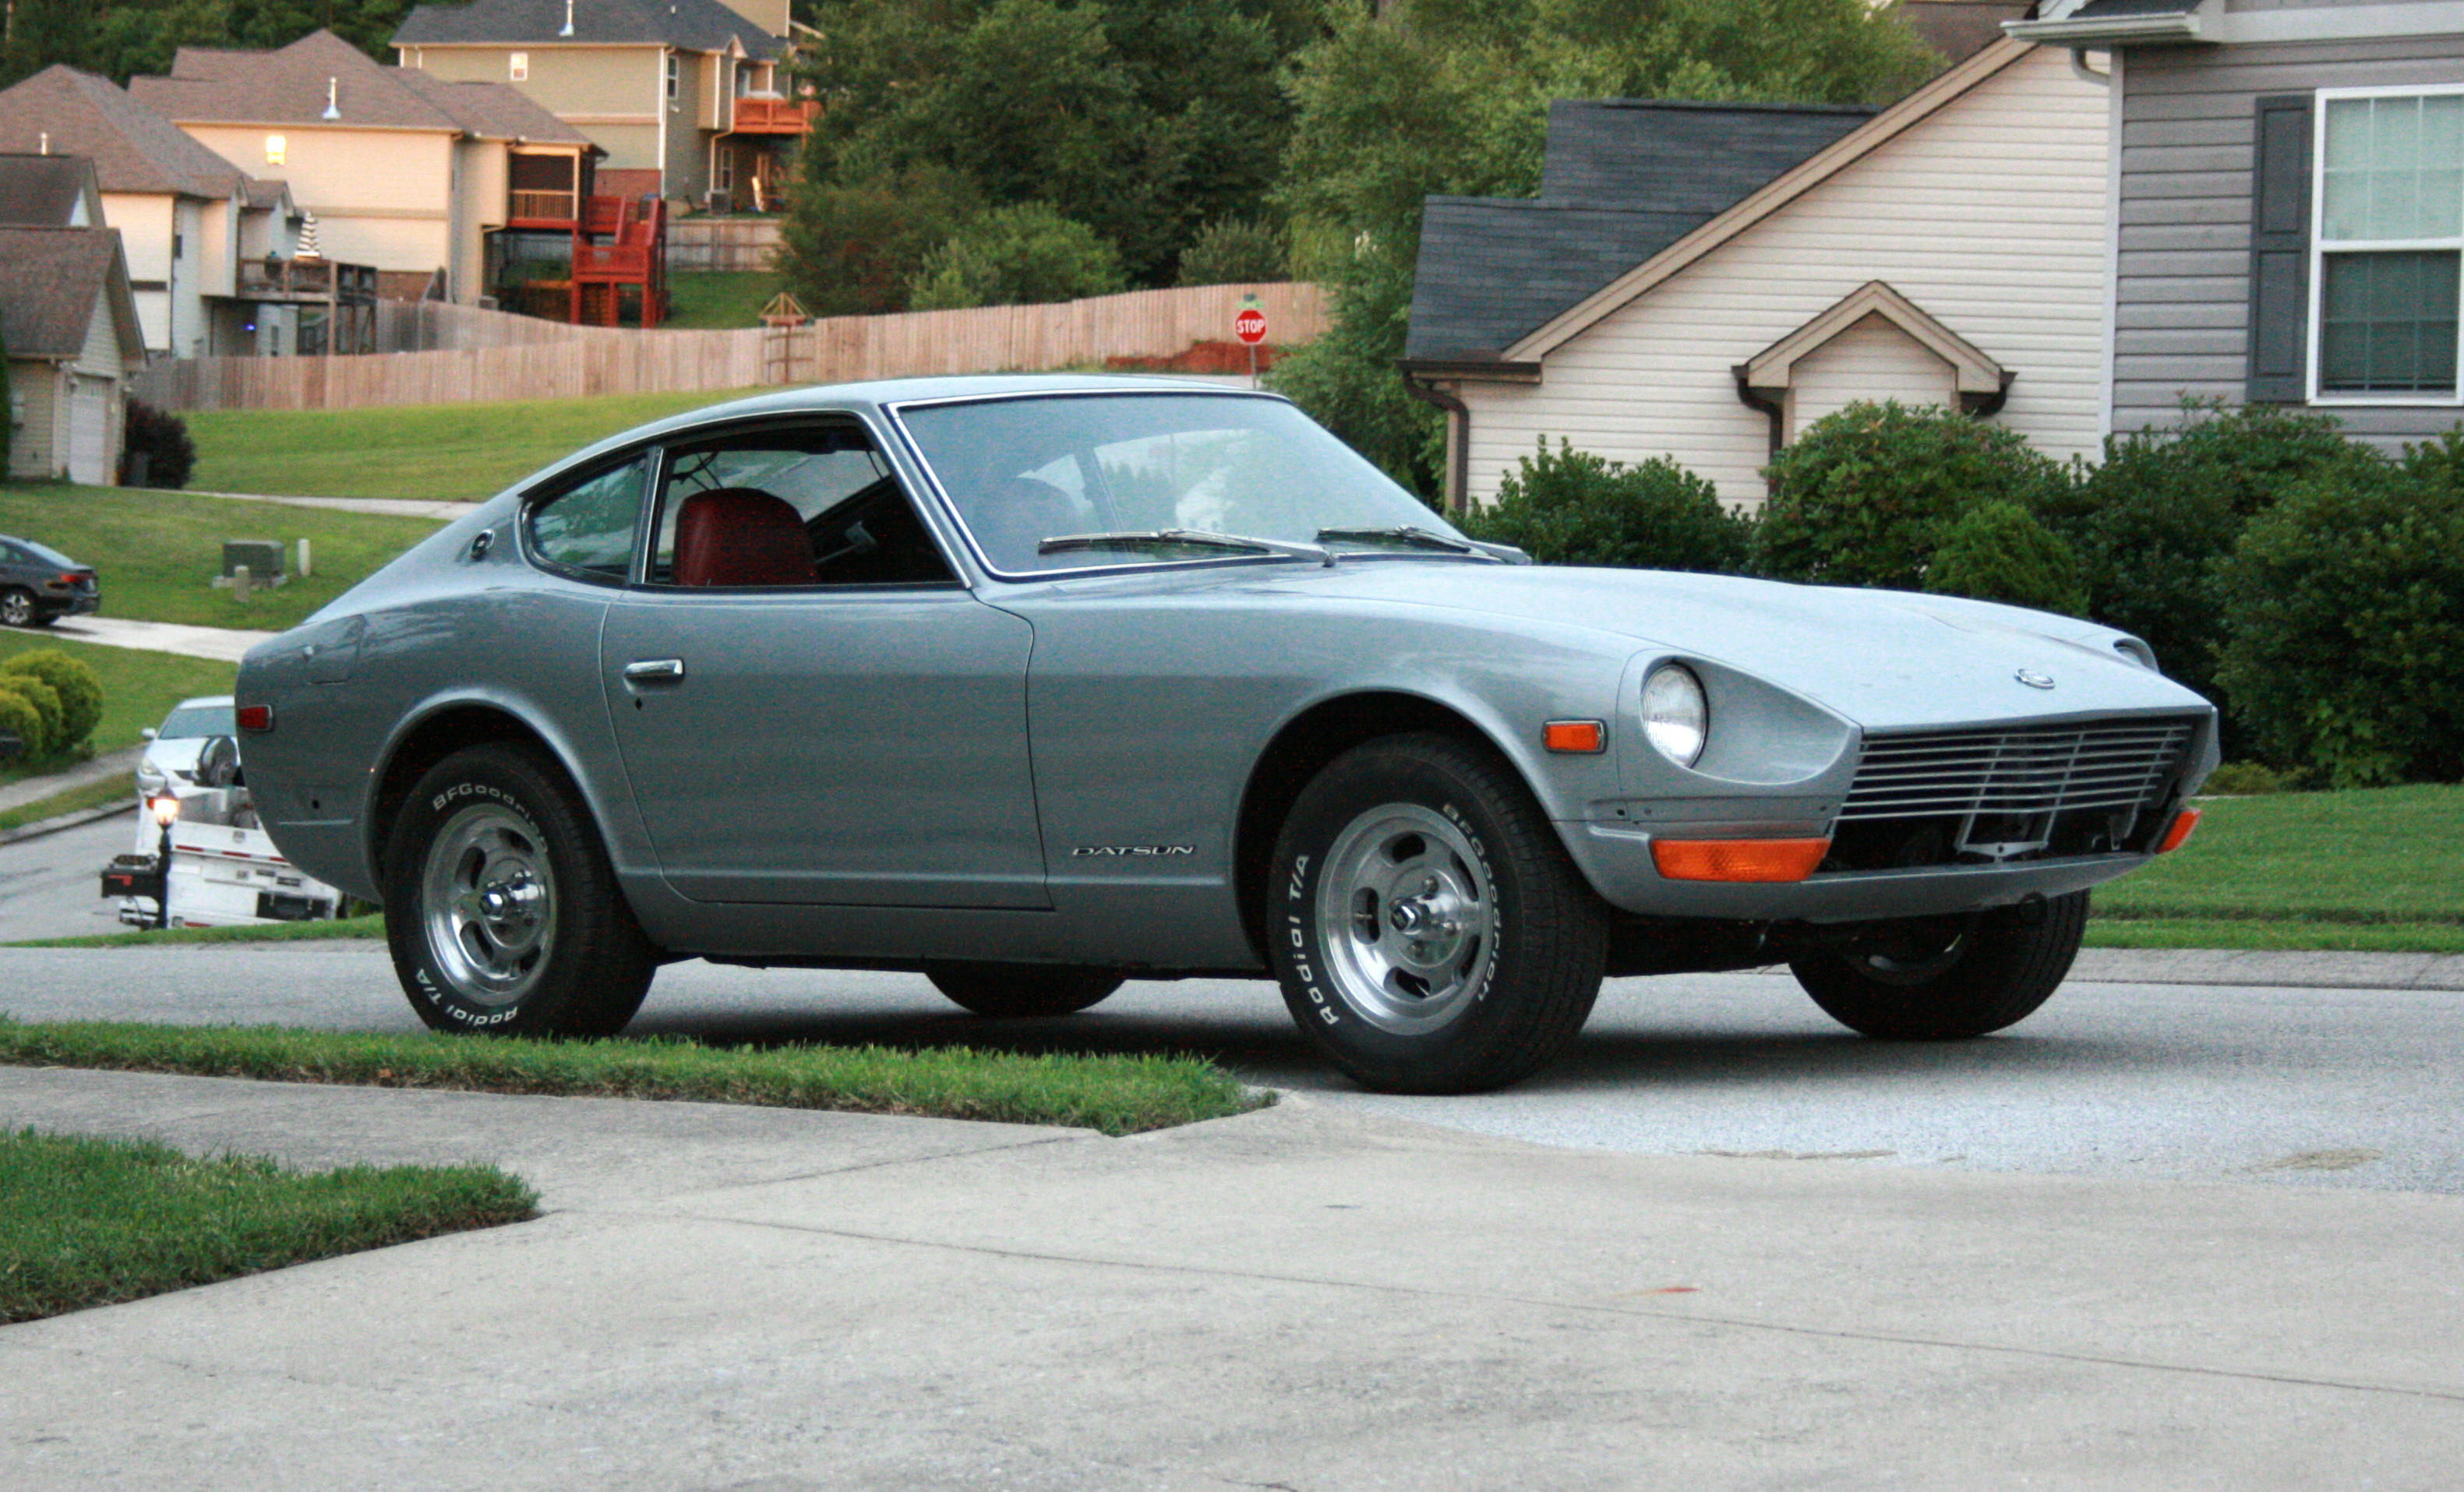
Hi guys. I figured I should start a build thread in here. The actual restoration is very close to being complete, but this seems like a good place to document a few things and perhaps ask little questions so I don't clutter up the main subforums with little inquiries when I can't find the answer. Anyway, this is about 93069, which my dad bought new in October of 1972 from Cardinal Motors in Jacksonville, NC. He was 21 years old at the time and just starting his senior year at NC State. The car's block number is 118555 and it has a built date of 07/72 (right around the brake system crossover). Original color: 901 Silver over red vinyl, dealer-installed factory air. Here are a couple of pictures my dad took in November of 1972, one month after he bought it: My dad had it repainted blue in the late '70s. My mom has always liked blue cars, so it's possible she had a hand in choosing the color. It seems rub strips were installed at that time also. I obviously remember the car all growing up. It was my dad's daily driver, and my brothers and I crammed into the back of it on more than one occasion, legs dangling behind the front seats, lying on our backs in under the hatch glass, watching the trees flick by overhead. Very unsafe, but it was a different time. The car deteriorated over the years. Battery acid ate a hole in the inner fender well and firewall, water seeped down and rusted out the passenger side floor pan. Rust started to pop up other places also, like the rocker panels and the trunk sill. My dad had the engine rebuilt in the '90s, and the carbs refurbished by the original owner of ZTherapy around the same time. I still have his "Just SU Carbs" and "240Z Tuneup" videos on VHS. Pretty nice viewing. I've always been into cars, but was never wild about the Z, which always felt weird because everyone I talked to said it was an incredibly cool car. Maybe familiarity just breeds contempt (or indifference in this case)? Who knows. Regardless, I got into wrenching about 20 years ago and have had a long succession of project cars (FB RX-7s, mk3 Supra, Type 85 Audi, various BMWs, etc), but found it hard to muster the motivation to start restoring the Z. Finally, about 10 years ago, I was at a point in my life where I had a place of my own with a 2-car garage and wanted to start bringing the Z back into focus. This was its state then: Pretty much a "barn find" in my parents' own garage. Dusty, rusty, mismatched tires, etc. I had chucked the bumper overriders years ago and managed to talk my dad into buying a set of slotted mags since he kept losing hubcaps. It hadn't run in 6+ years at that point. Back in 2005, I was driving it and the battery wasn't properly secured. It slipped off the its pedestal and impacted the oil filter, creating a nice gash (and minor fire, which I beat out). I was young and stupid and continued driving, trying to make it to the nearest auto parts store for a filter in spite of the fact that I likely had marginal oil pressure. The moment the engine started acting funny I parked it and walked the remaining 1/2 mile to CarQuest for an oil filter. I put it on and drove it home, but was scared that I had permanently damaged something, so I just let it sit. Fast forward to 2011, Stage 1 of the restoration was determining if it would run properly or if the engine needed a rebuild. I replaced all the consumables on the engine, had the carbs rebuilt (again) by ZTherapy and drained and resealed the fuel tank. Got everything hooked back up and after a few hiccups...it started and ran just fine. That was a relief. Stage 2 had to wait a few more years. I moved for work about 6 hours further away from my parents (they had been 1.5 hours away before), and took the Z with me. In early 2014, I partially disassembled the car, removing the engine and some other key bits. The next spurt of motivation came in 2016, when I finally got my garage organized and finished stripping the car down. In 2017, my dad came with a trailer and took the car back to his house to have the body restored. He took it to a local body shop to have the rust repaired and the car repainted its original 901 Silver. The body shop did an OK job. I wish I had been local in order to supervise the work more closely, since they cut a few corners, especially in the engine bay. Long story short, the car returned back to me for reassembly on Labor Day 2019. I was initially pretty intimidated by the task at hand, but started chipping away at it and it started coming together. I finally got it started again a little over a year ago so it could move under its own power to our new (local) home. Since then, reassembly has continued in fits and starts, but this is where it stands now: Still quite a lot to do, especially as regards the interior, but I've been pleased with the progress so far. Thanks for reading and stay tuned. -Matt


 12 points
 -
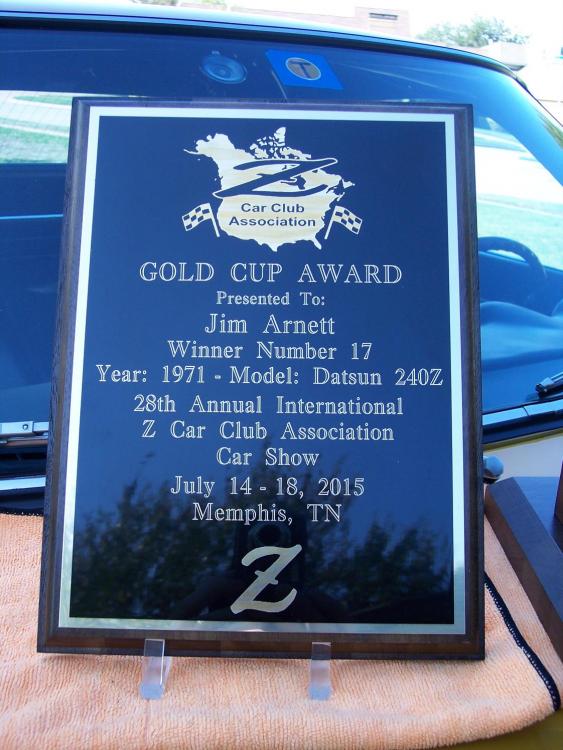
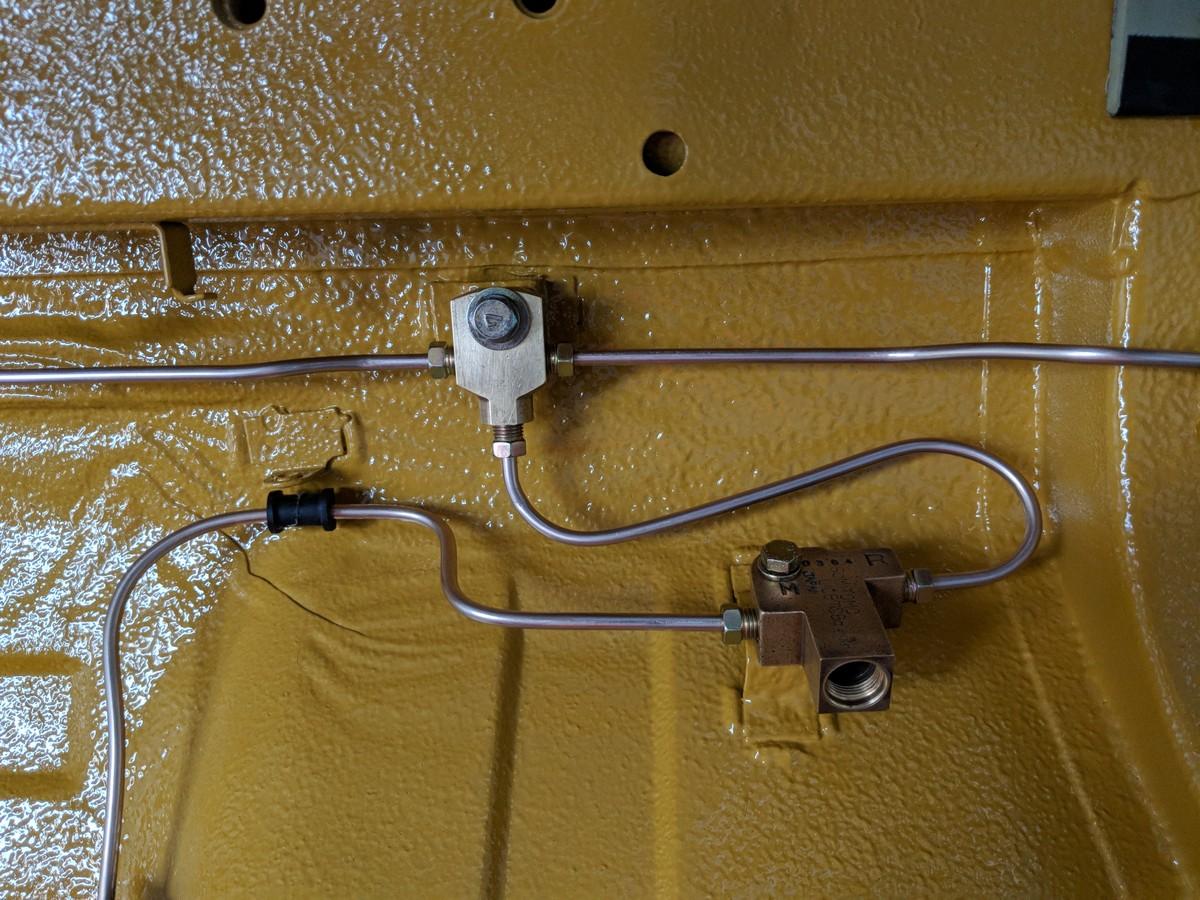
12 pointsHello i am just back from the AACA Eastern Fall Meet at Hershey, PA. I entered my Z in the Historical Preservation Original Features class. In that class you are judged against a standard of originality. Anything restored or incorrect aftermarket gets a deduction. Used, NOS and OEM replacement parts are allowed. Owners are asked to disclose anything they know has been restored or modified. You are allowed up to seven deductions. Under that and you qualify for a HPOF award. My car is pretty much original but has had two minor body repairs/paint and the fuel line in not totally correct (correct routing but a new piece near the filter has been replaced using a Union. Not sure what the judges found (they do not tell you on the field.) I did not attend the awards ceremony that evening but I heard My car did get an HPOF award. it was a huge event…at least 500 cars on the showfield. From what I could see, Mine was the only Z, so it got lots of attention. Jim

 12 points
 -
As I was thinking about this a bunch of memories passed through my head in voice over type thoughts. "Is this one exhaust or this one?" Do they just alternate from here? Exhaust - intake - exhaust - intake... No? Crap. The engine's tilted. Up is not Up". Is this still hot? Should I start over? It was perfect before I tightened the lock nut, now it's too tight. Does it matter if it's hard to get the feeler gauge in? Am I scratching the cam lobe with the feeler gauge? Where's my small sledge, I don't want to bleed anymore. #1 is a B___h! I should have wiped that oil off the edge before it dripped down the side of the engine. Wow, I really wacked something when the nut came loose. Hope nothing got bent. I could have just taken my time setting them cold, then rechecked them when they're hot. And that's just in the first hour.12 points
-
12 pointsTo duplicate a post I made earlier on the UK site, I’ve been having a bit of fun doing back to back tests and learning about making YouTube videos - my kids want their own Minecraft channels, so I’m trying to learn with my version, I call it Zcraft! 😄 Ever wondered what an exhaust system would sound like on your car with different mufflers? I personally found that the internet was full small clips but very little in the way of back to back comparisons on the same car. Well, purely for your benefit, I sacrificed myself!!!! I will splice parts of these together one day when I get more time, so that the same bit is played back to back on one video. 1. Thrush / Dynamax 17715 Turbo Muffler (I had some SERIOUS hay-fever that day so forgive my lifeless voice). 2. Zstory Classic Muffler (forgive the jibe at you left-hookers) [ 3. Zstory JDM Muffler (forgive my boyish squeaking) 4. Zstory Street Muffler (forgive the camera mount that broke halfway through the clip). Let me know what you think and I hope it's helpful / fun. (To be very clear, I have no affiliation with Zstory nor is this commercial in anyway - it's just me having a bit of fun and sharing it with fellow enthusiasts!)12 points
-
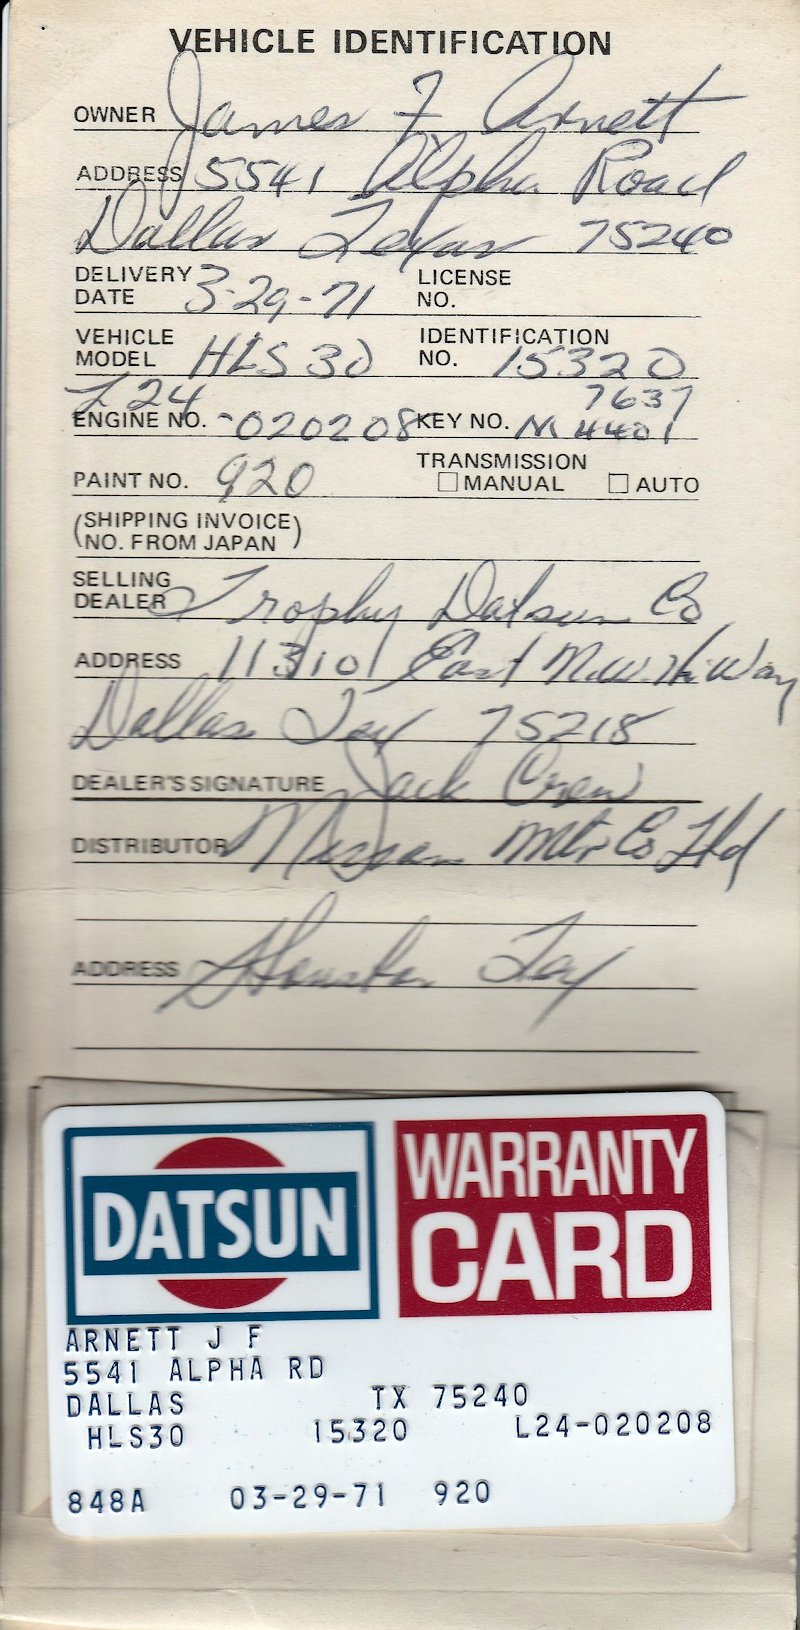
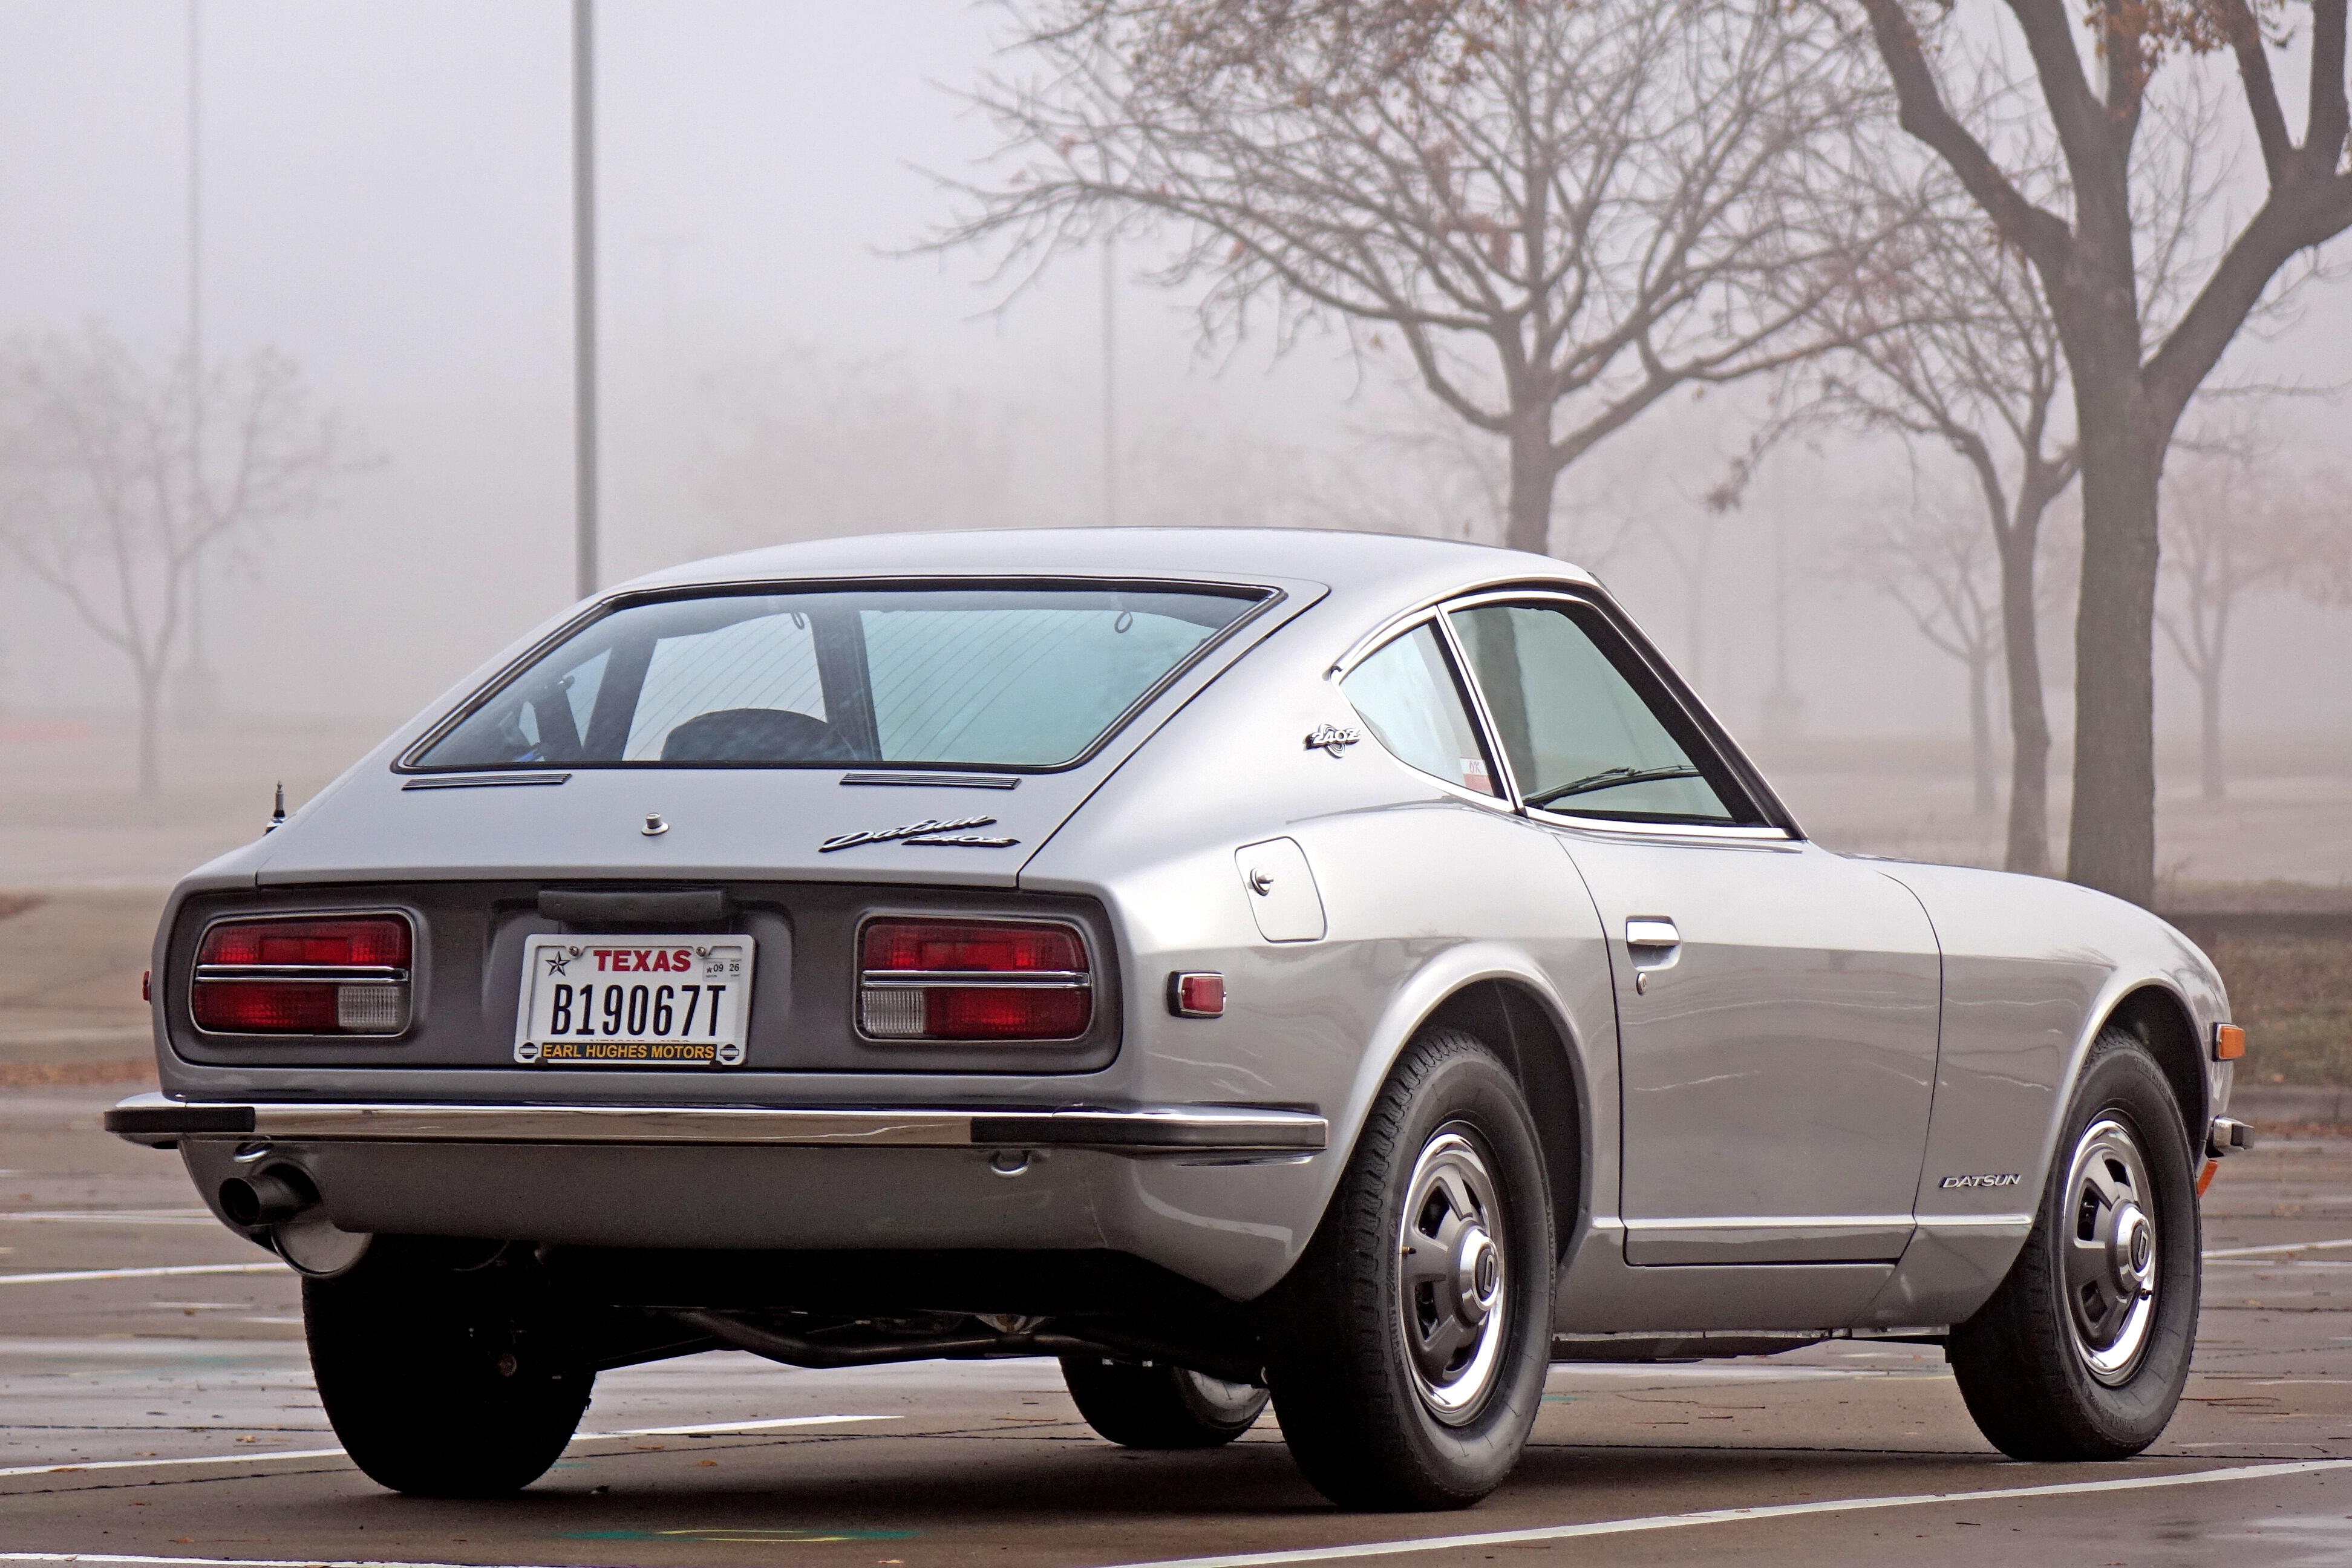
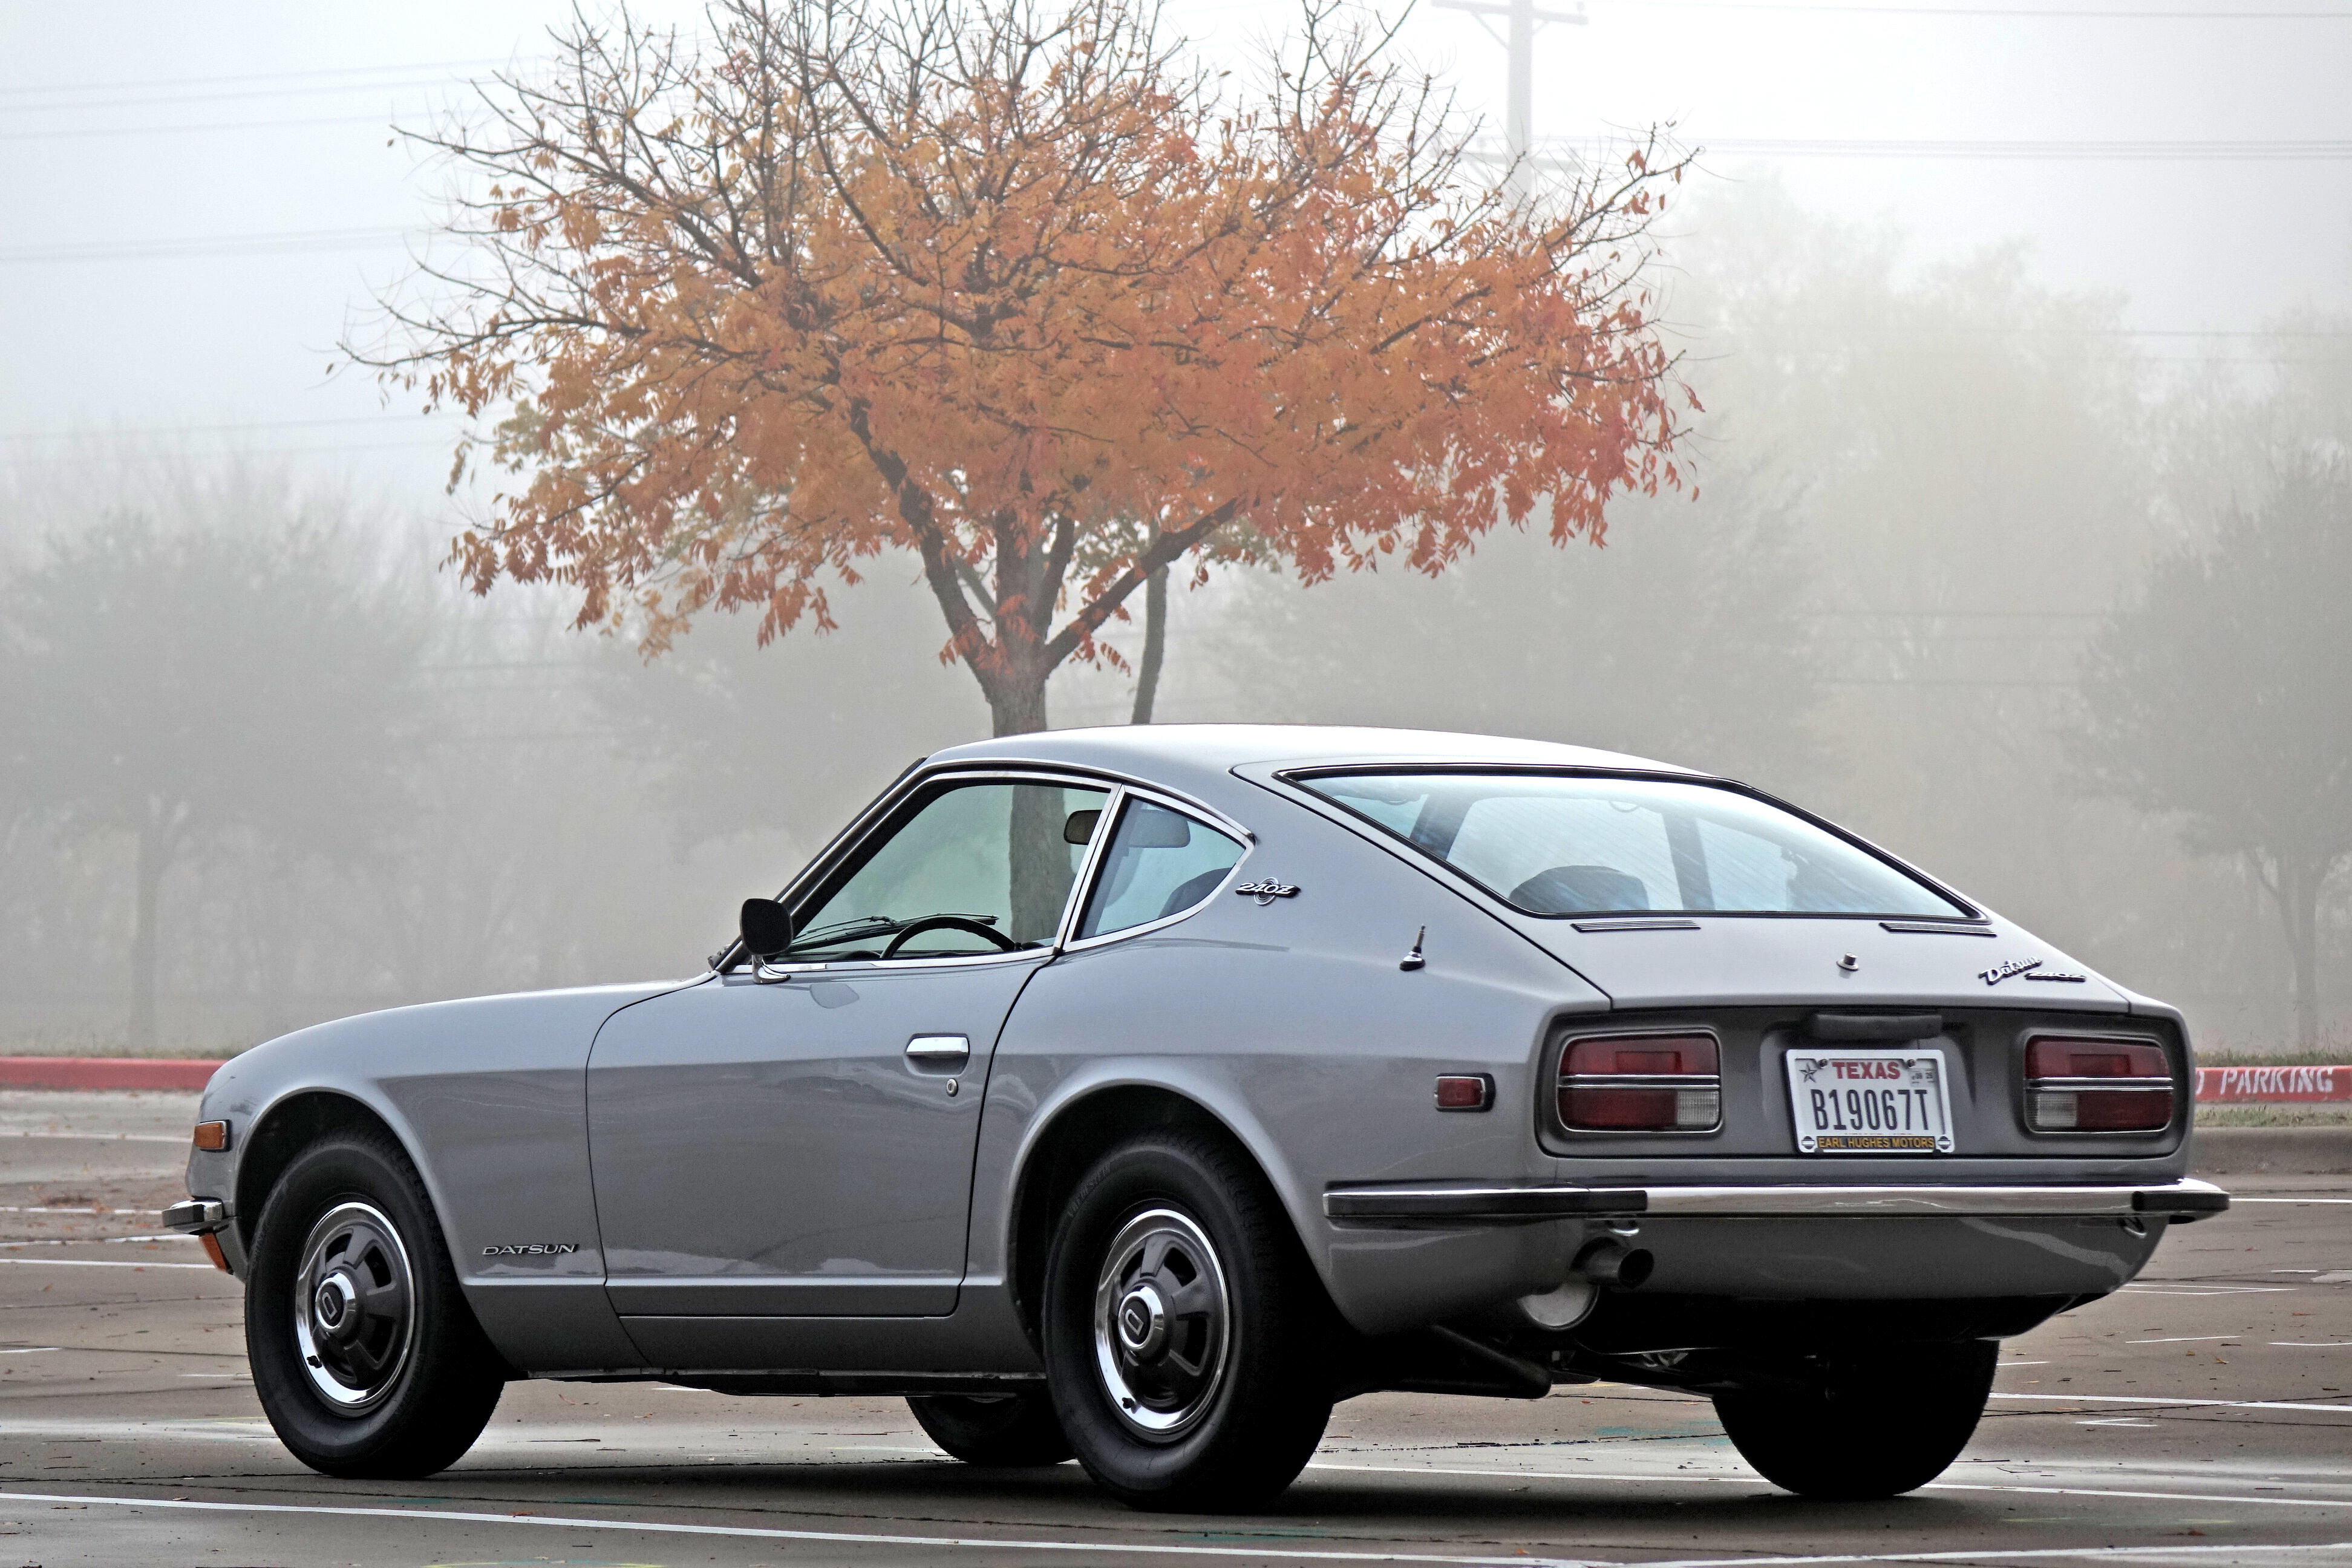
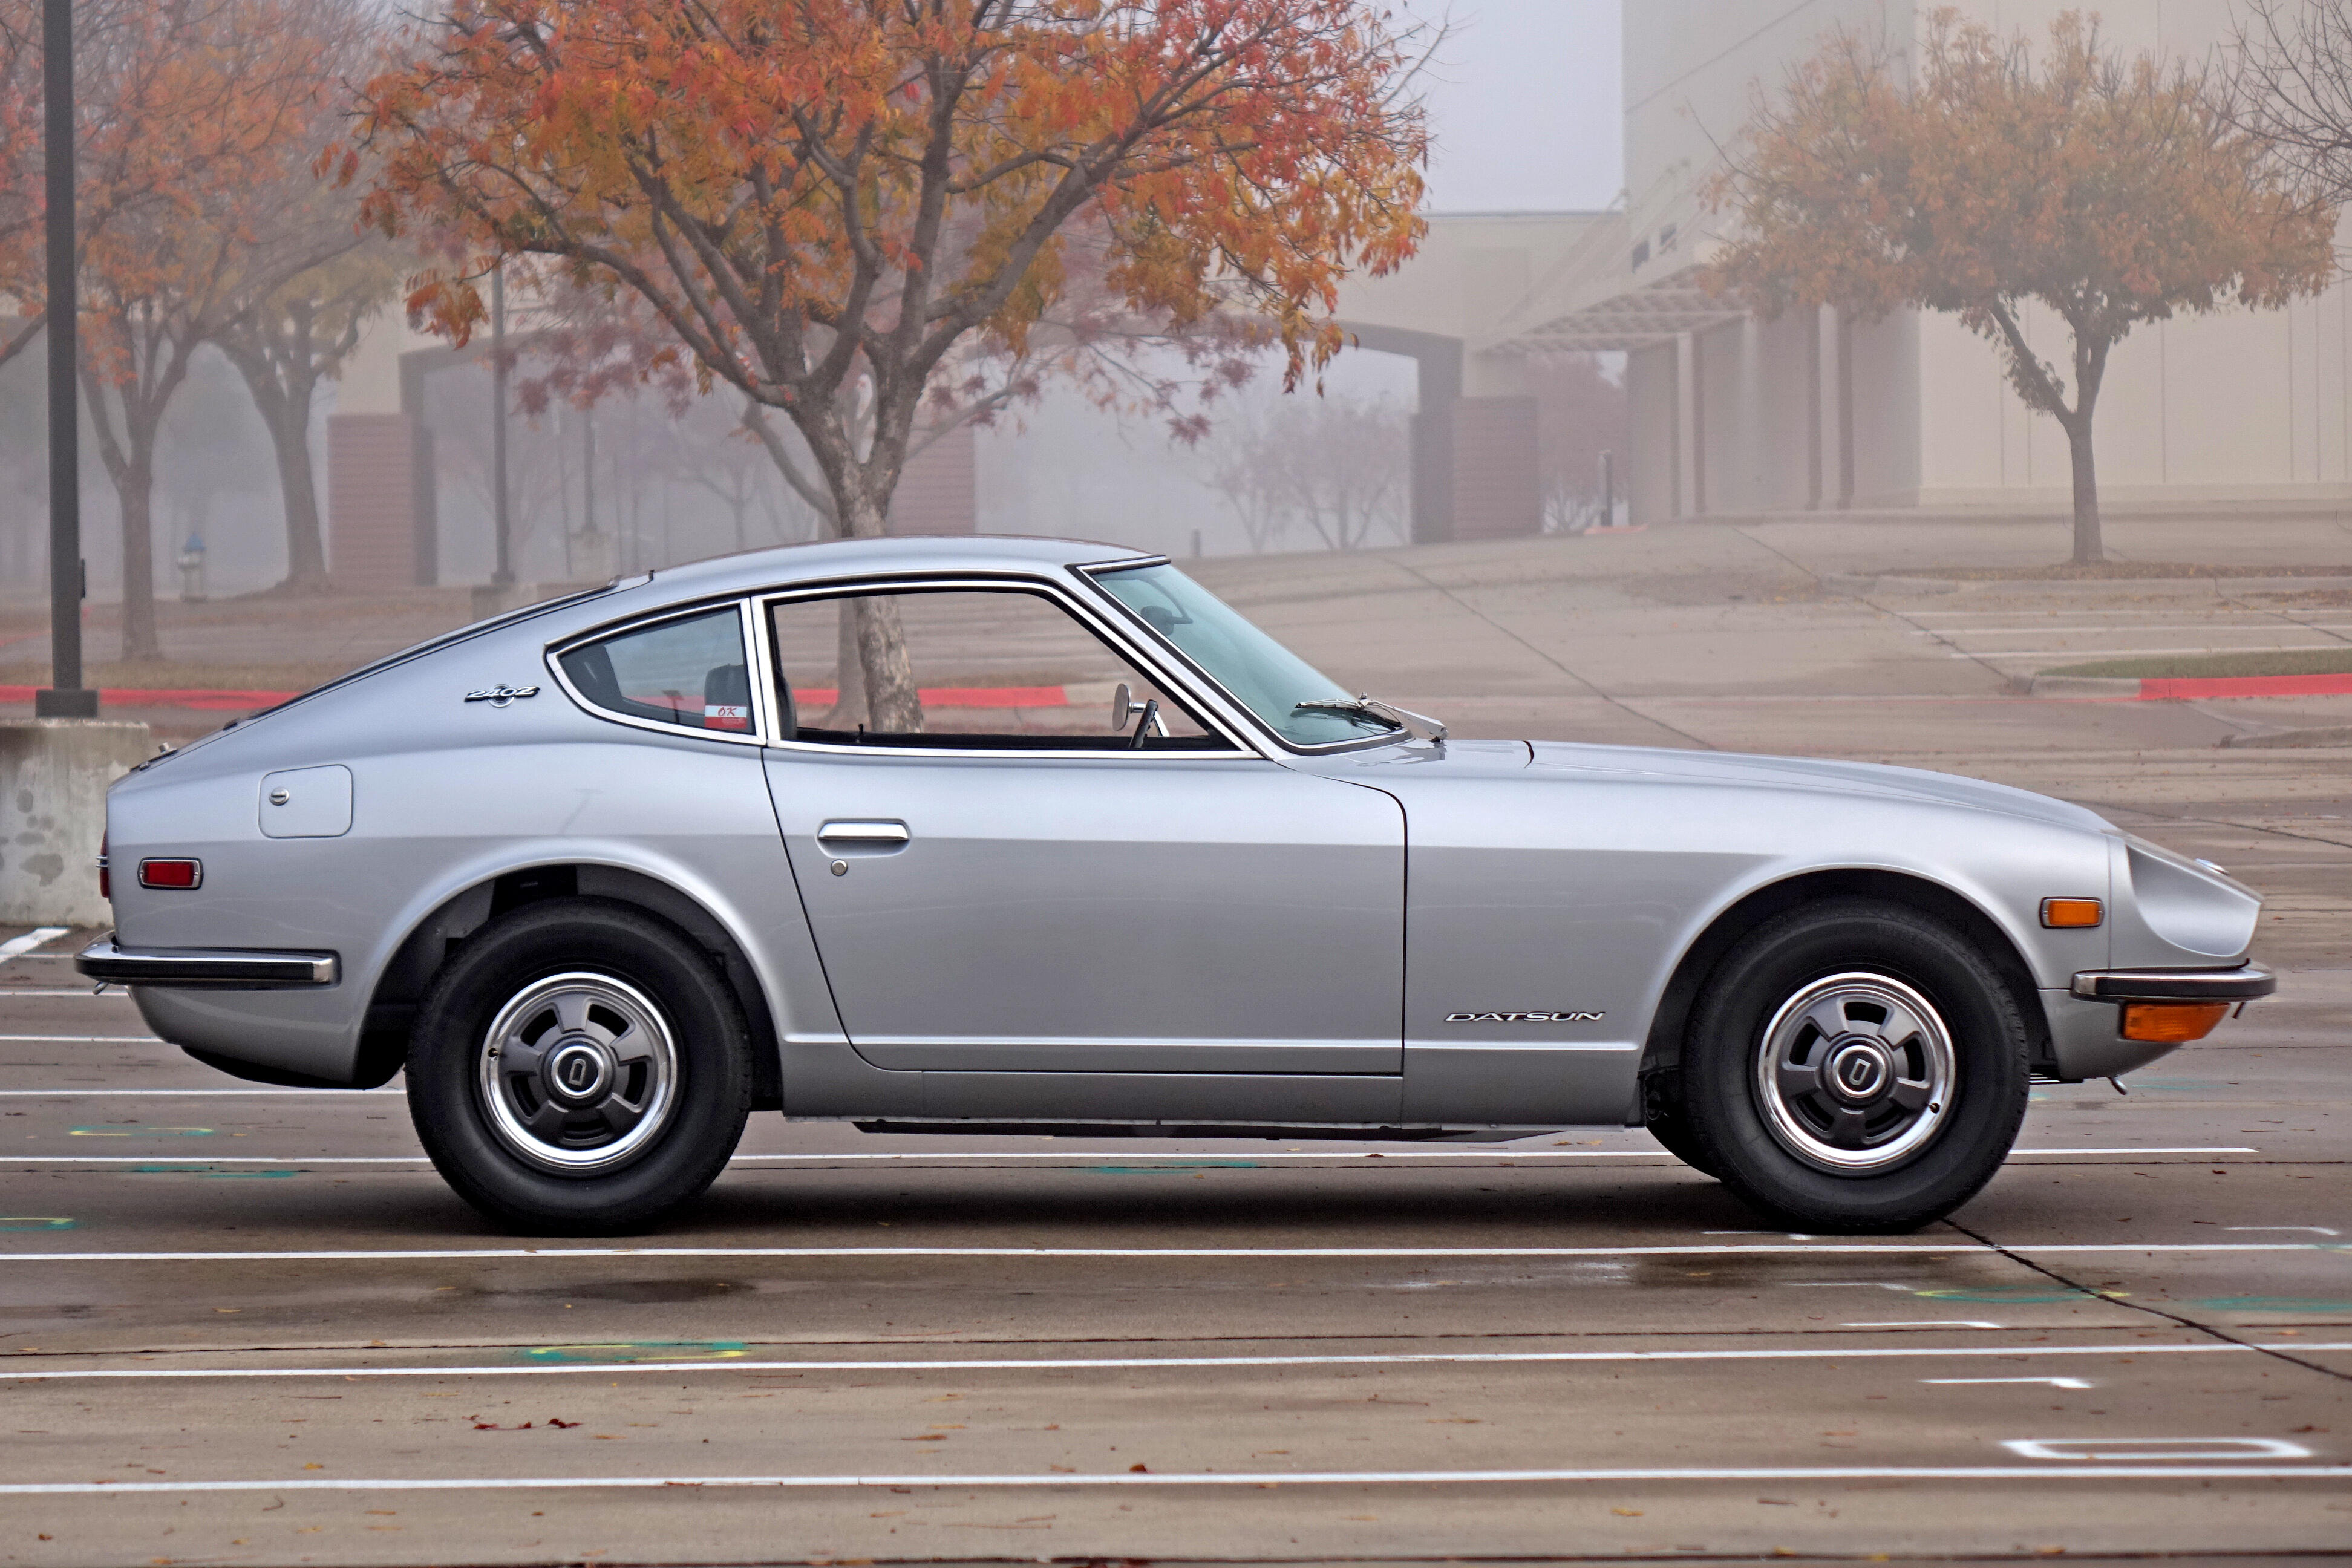
12 pointsToday marks the 50th anniversary of closing the deal on my 240Z. It did not start out as a "forever car" but thoughts of a '66 Mustang Fastback I let go of to quickly always tickled the back of my brain, telling me to never make a quick decision on this one. Glad those tickles kept me honest! 1999 - Getting the car out of the garage after 16 years of storage and a bath before starting the teardown for the restore. 92k miles at the time and other than the first two years when I was in an apartment, always garaged. Recent pics celebrating the car's 50th birthday. ZCON 2015 - Our first trip to the big dance worked out pretty good. Unfortunately there are no cool, curvy, country roads near my urban residence so I had to make do with a run on a nearby toll road to get a fix of the Symphony In Straight Six. Enjoy! 50th Anniversary Clip.mp4


 12 points
 -
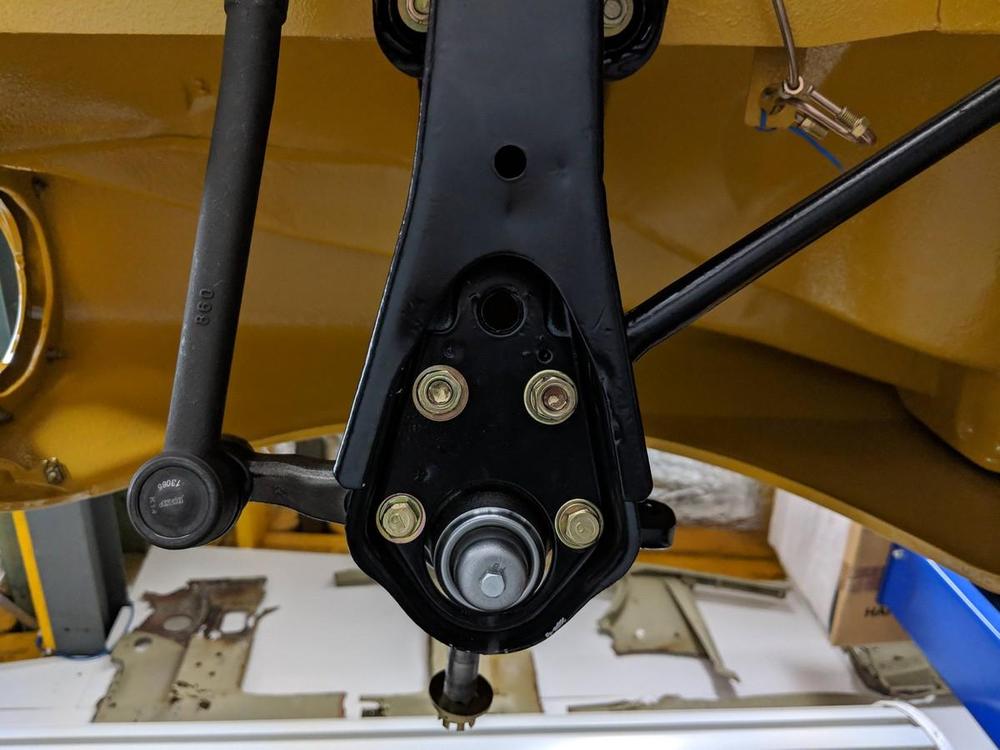
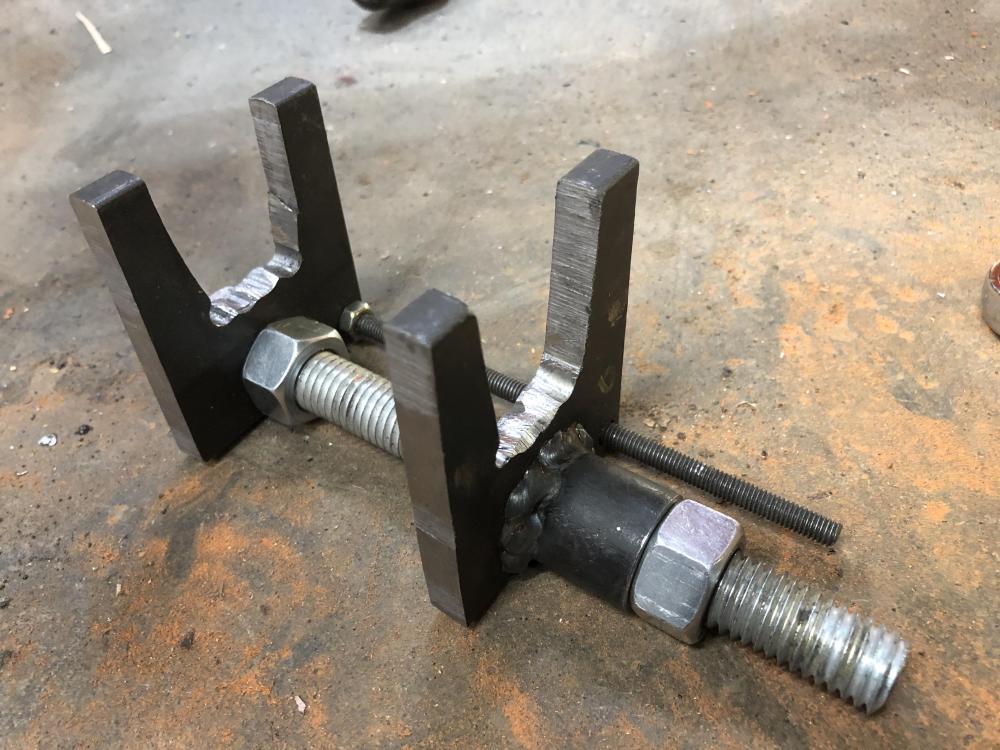
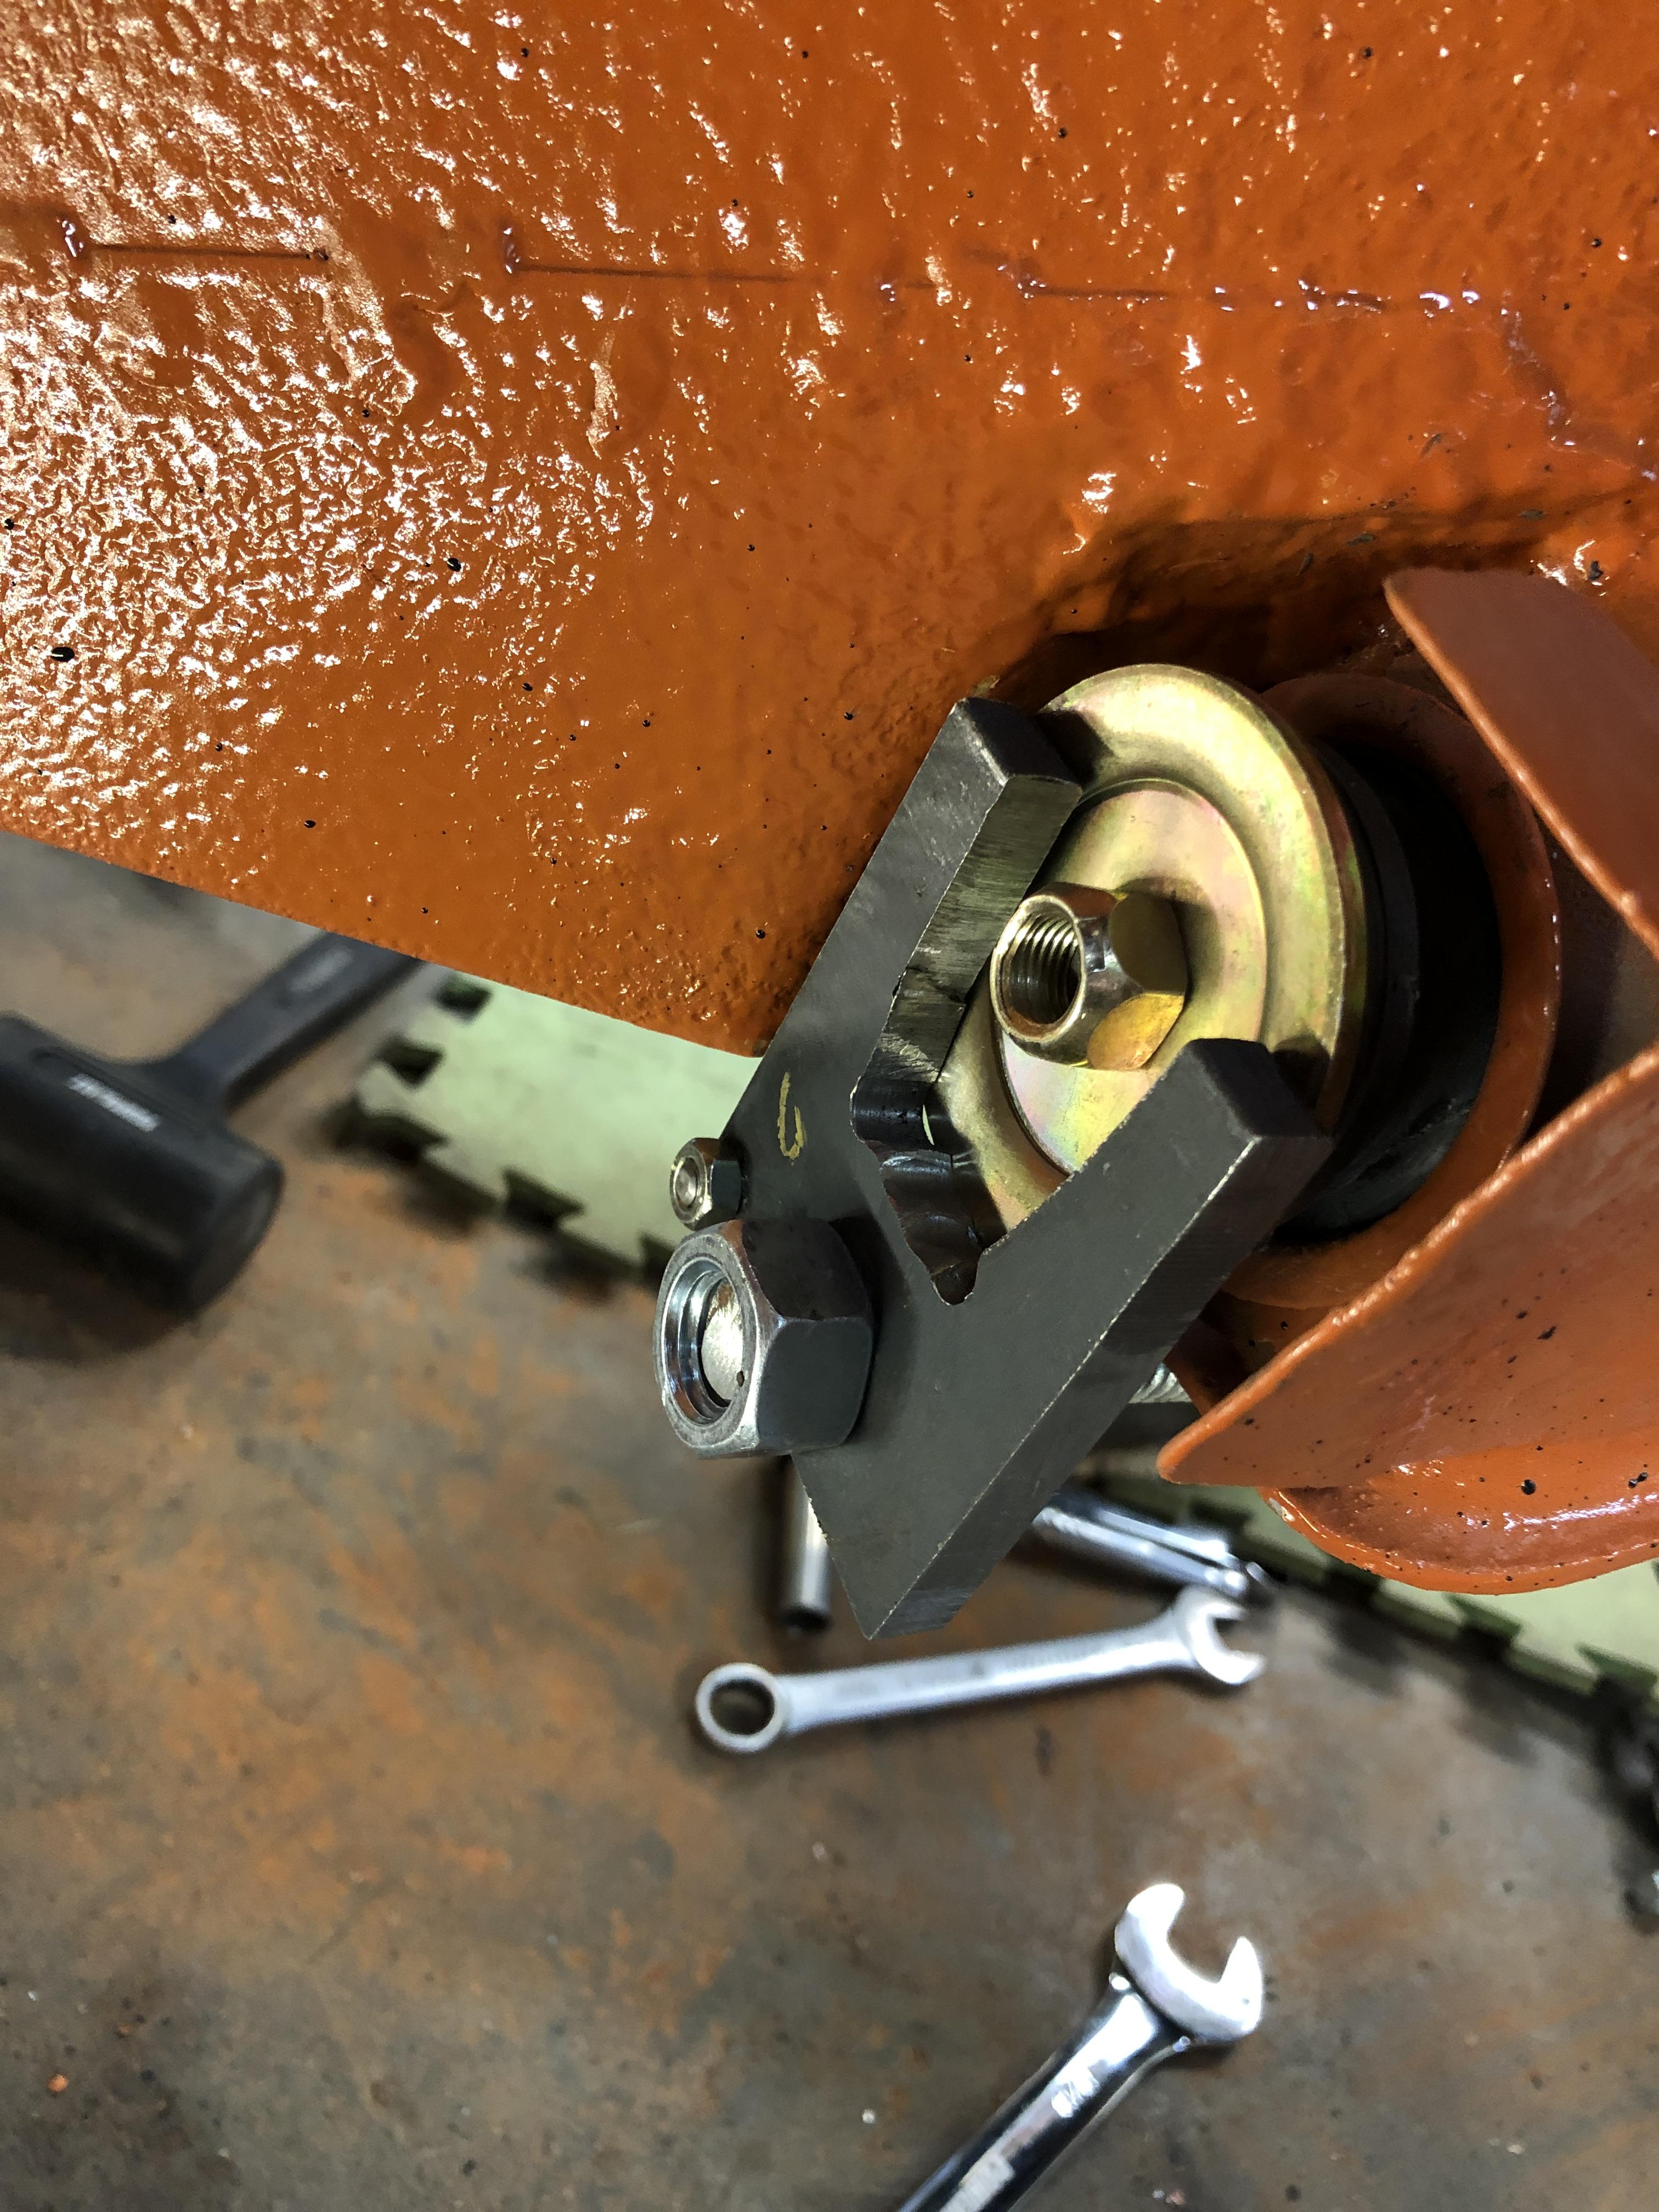
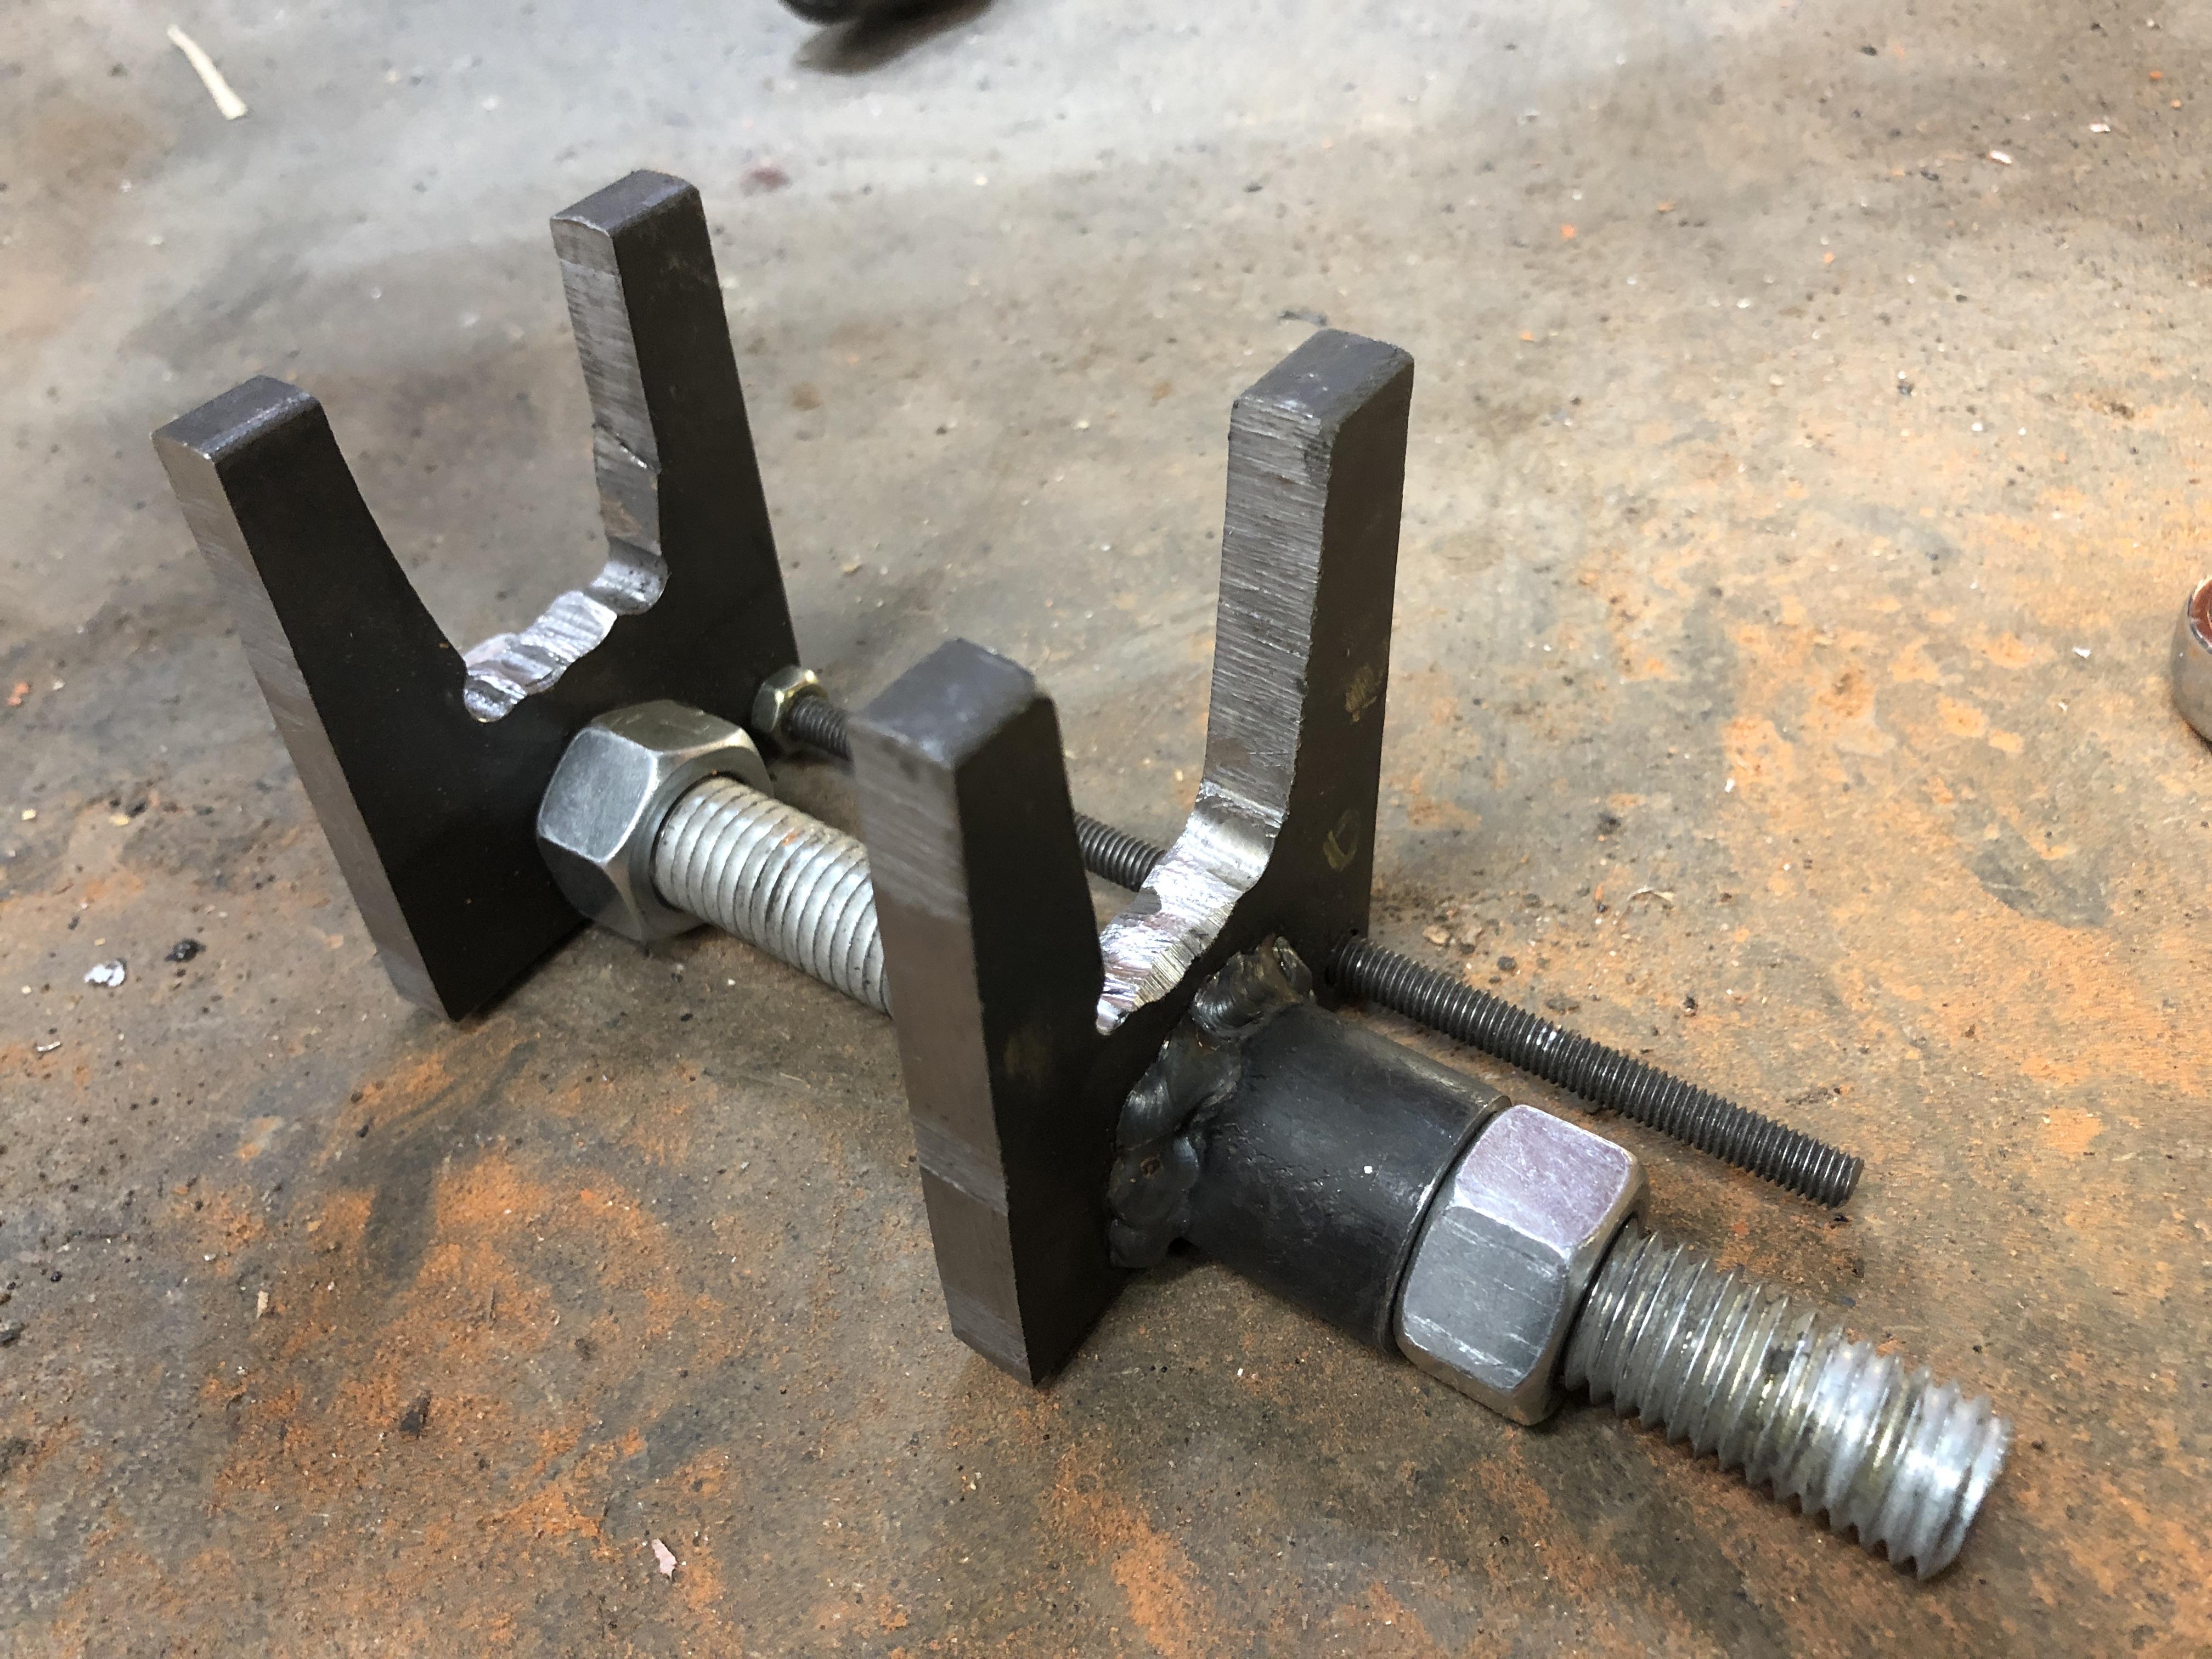
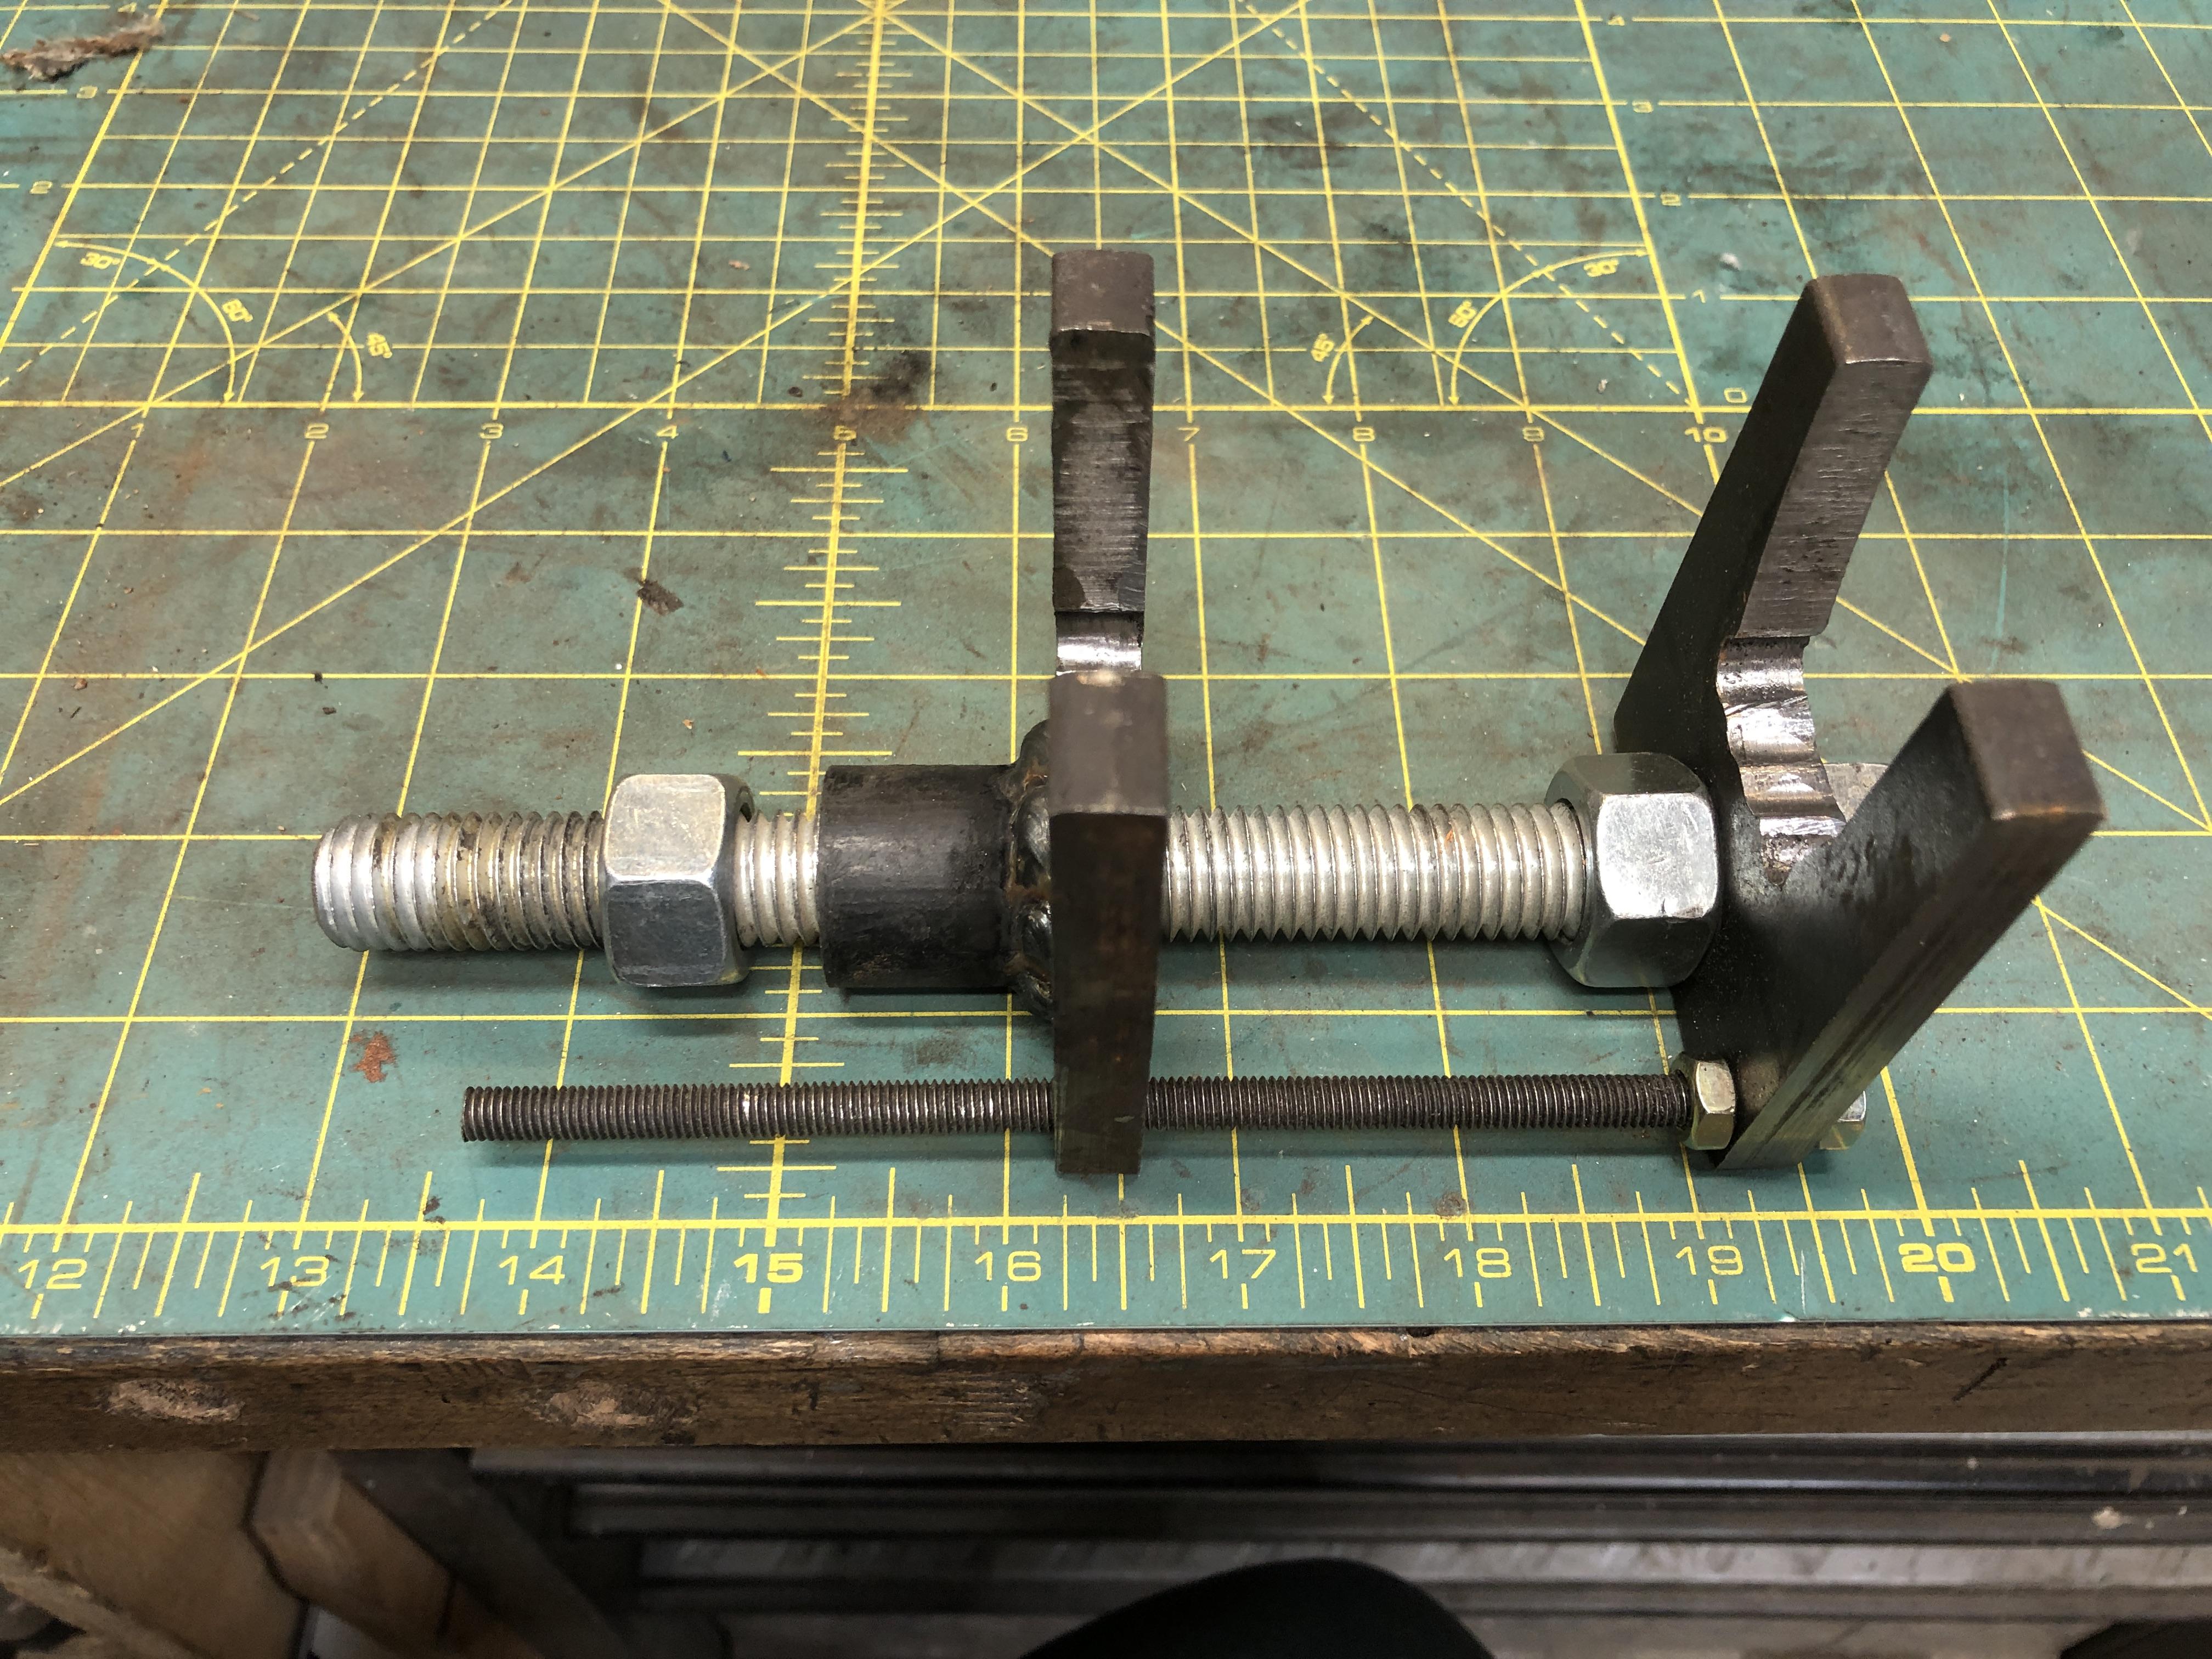
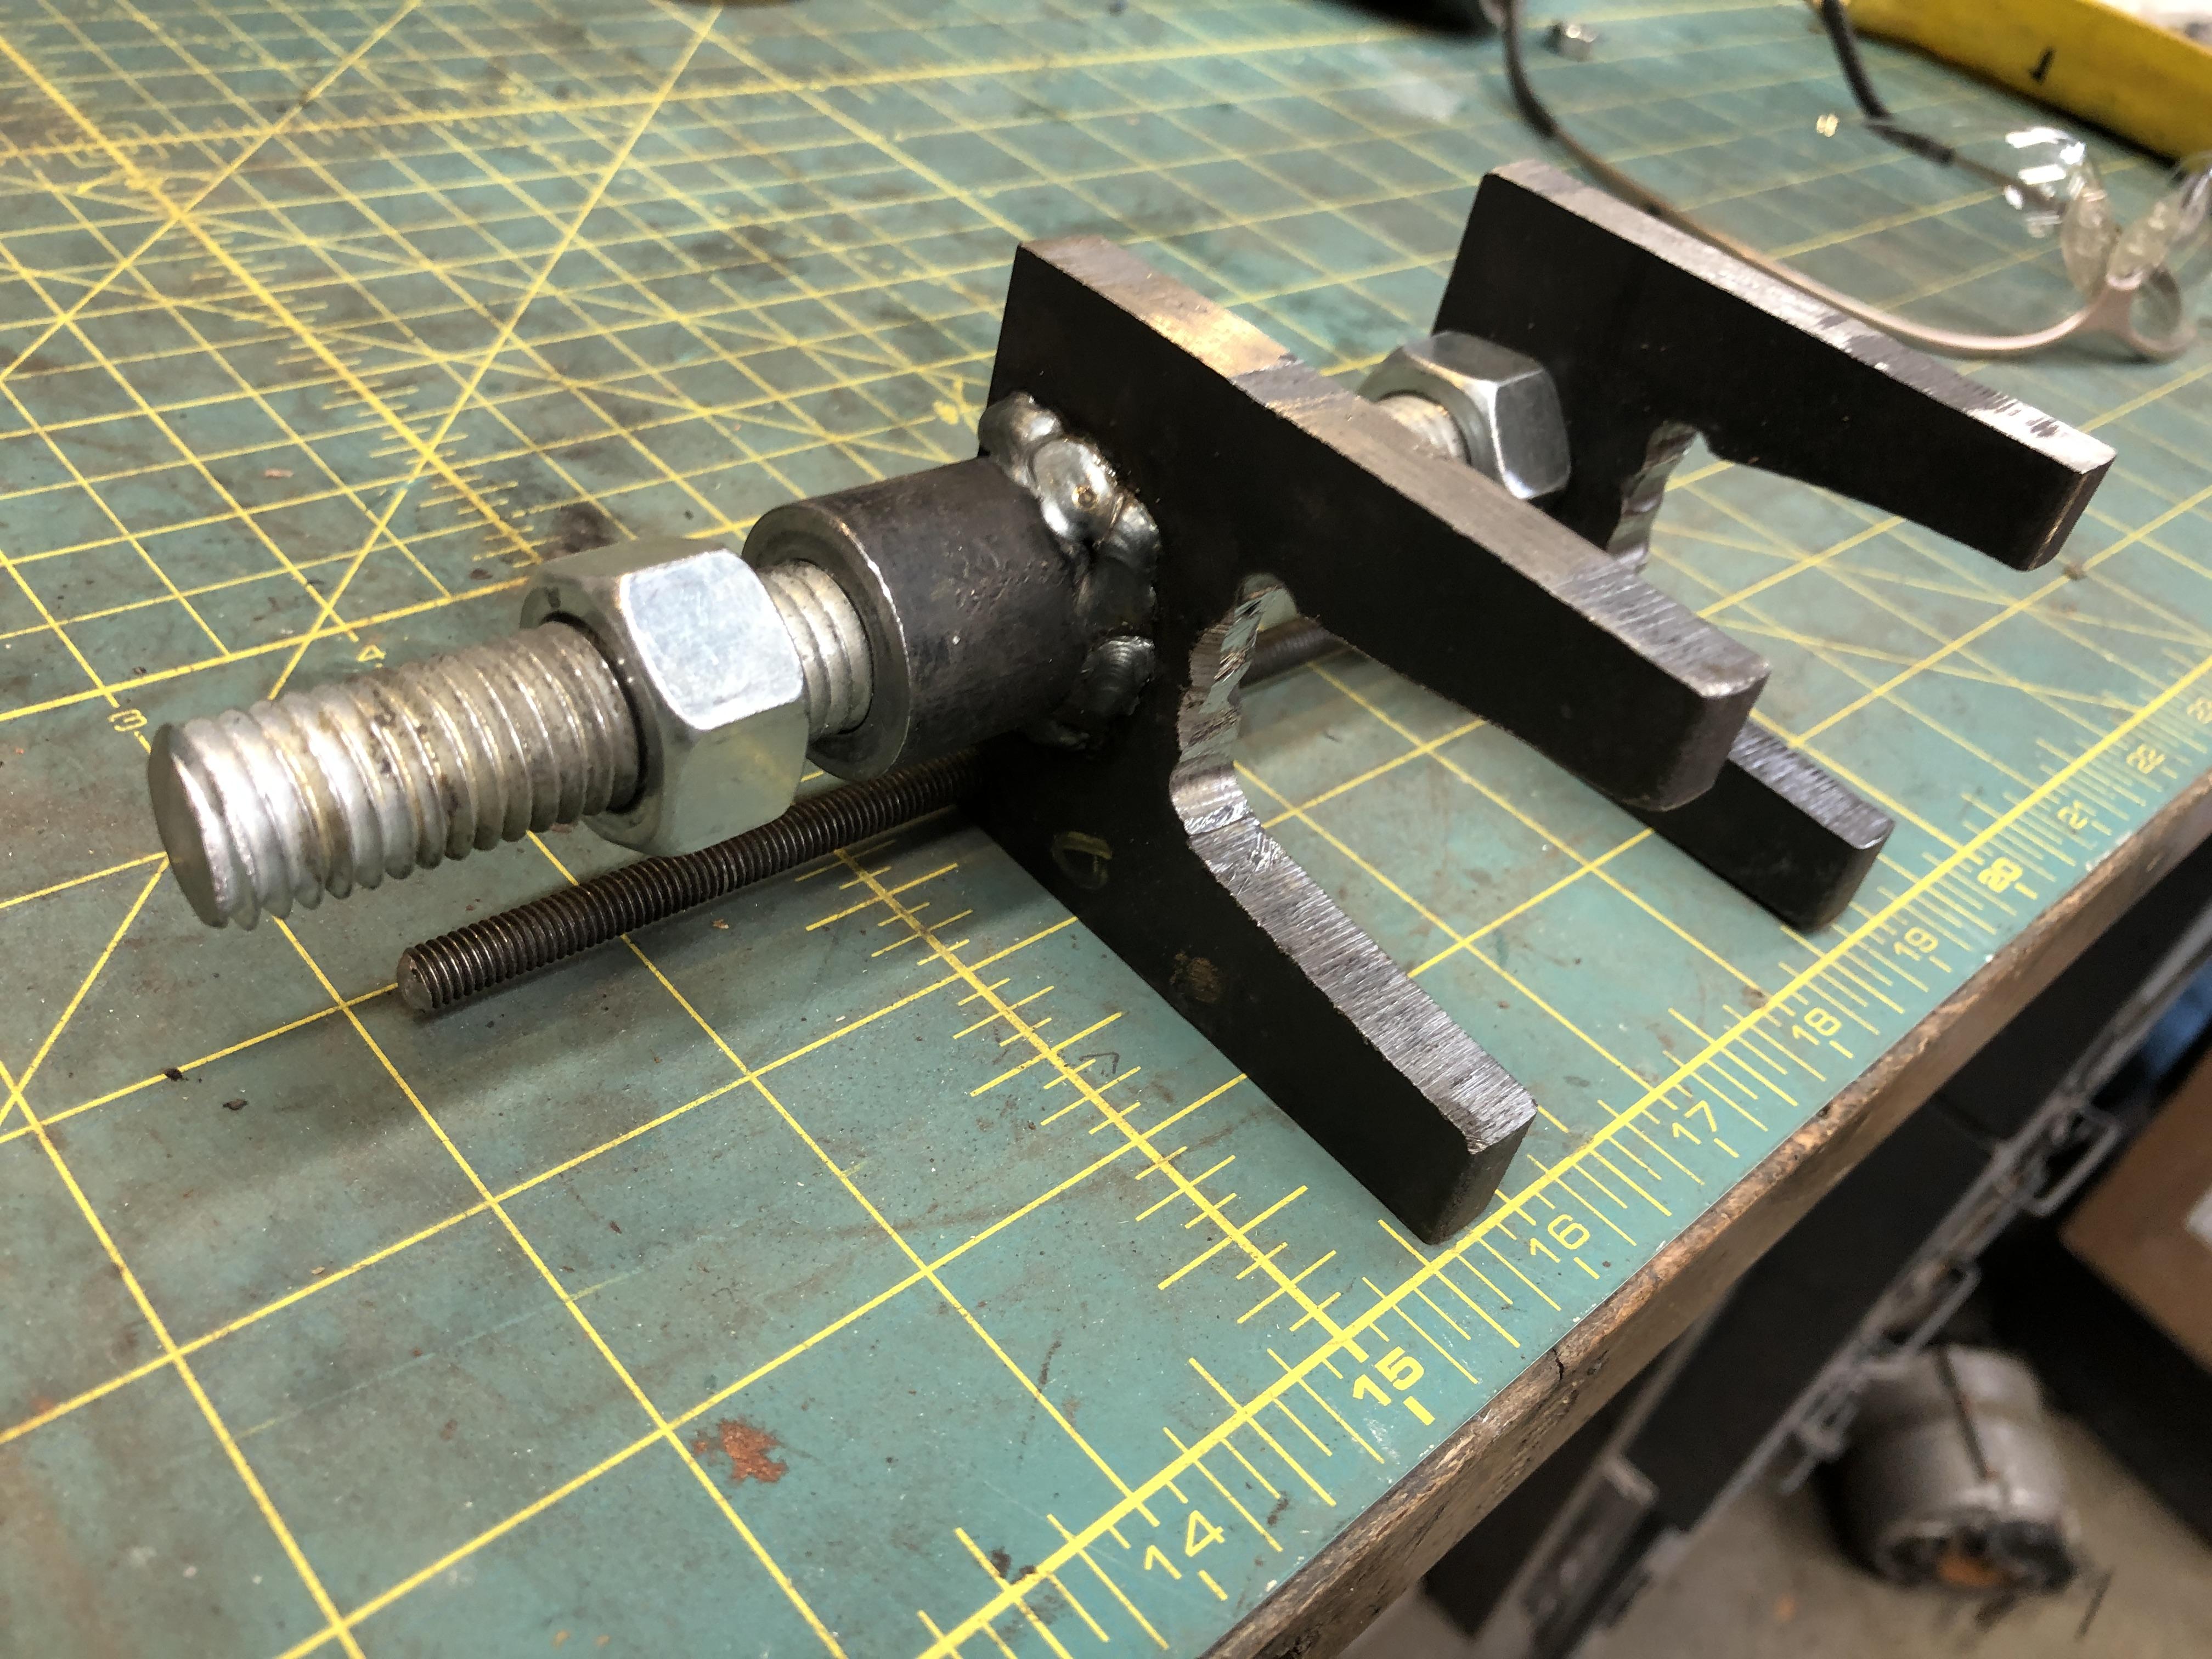
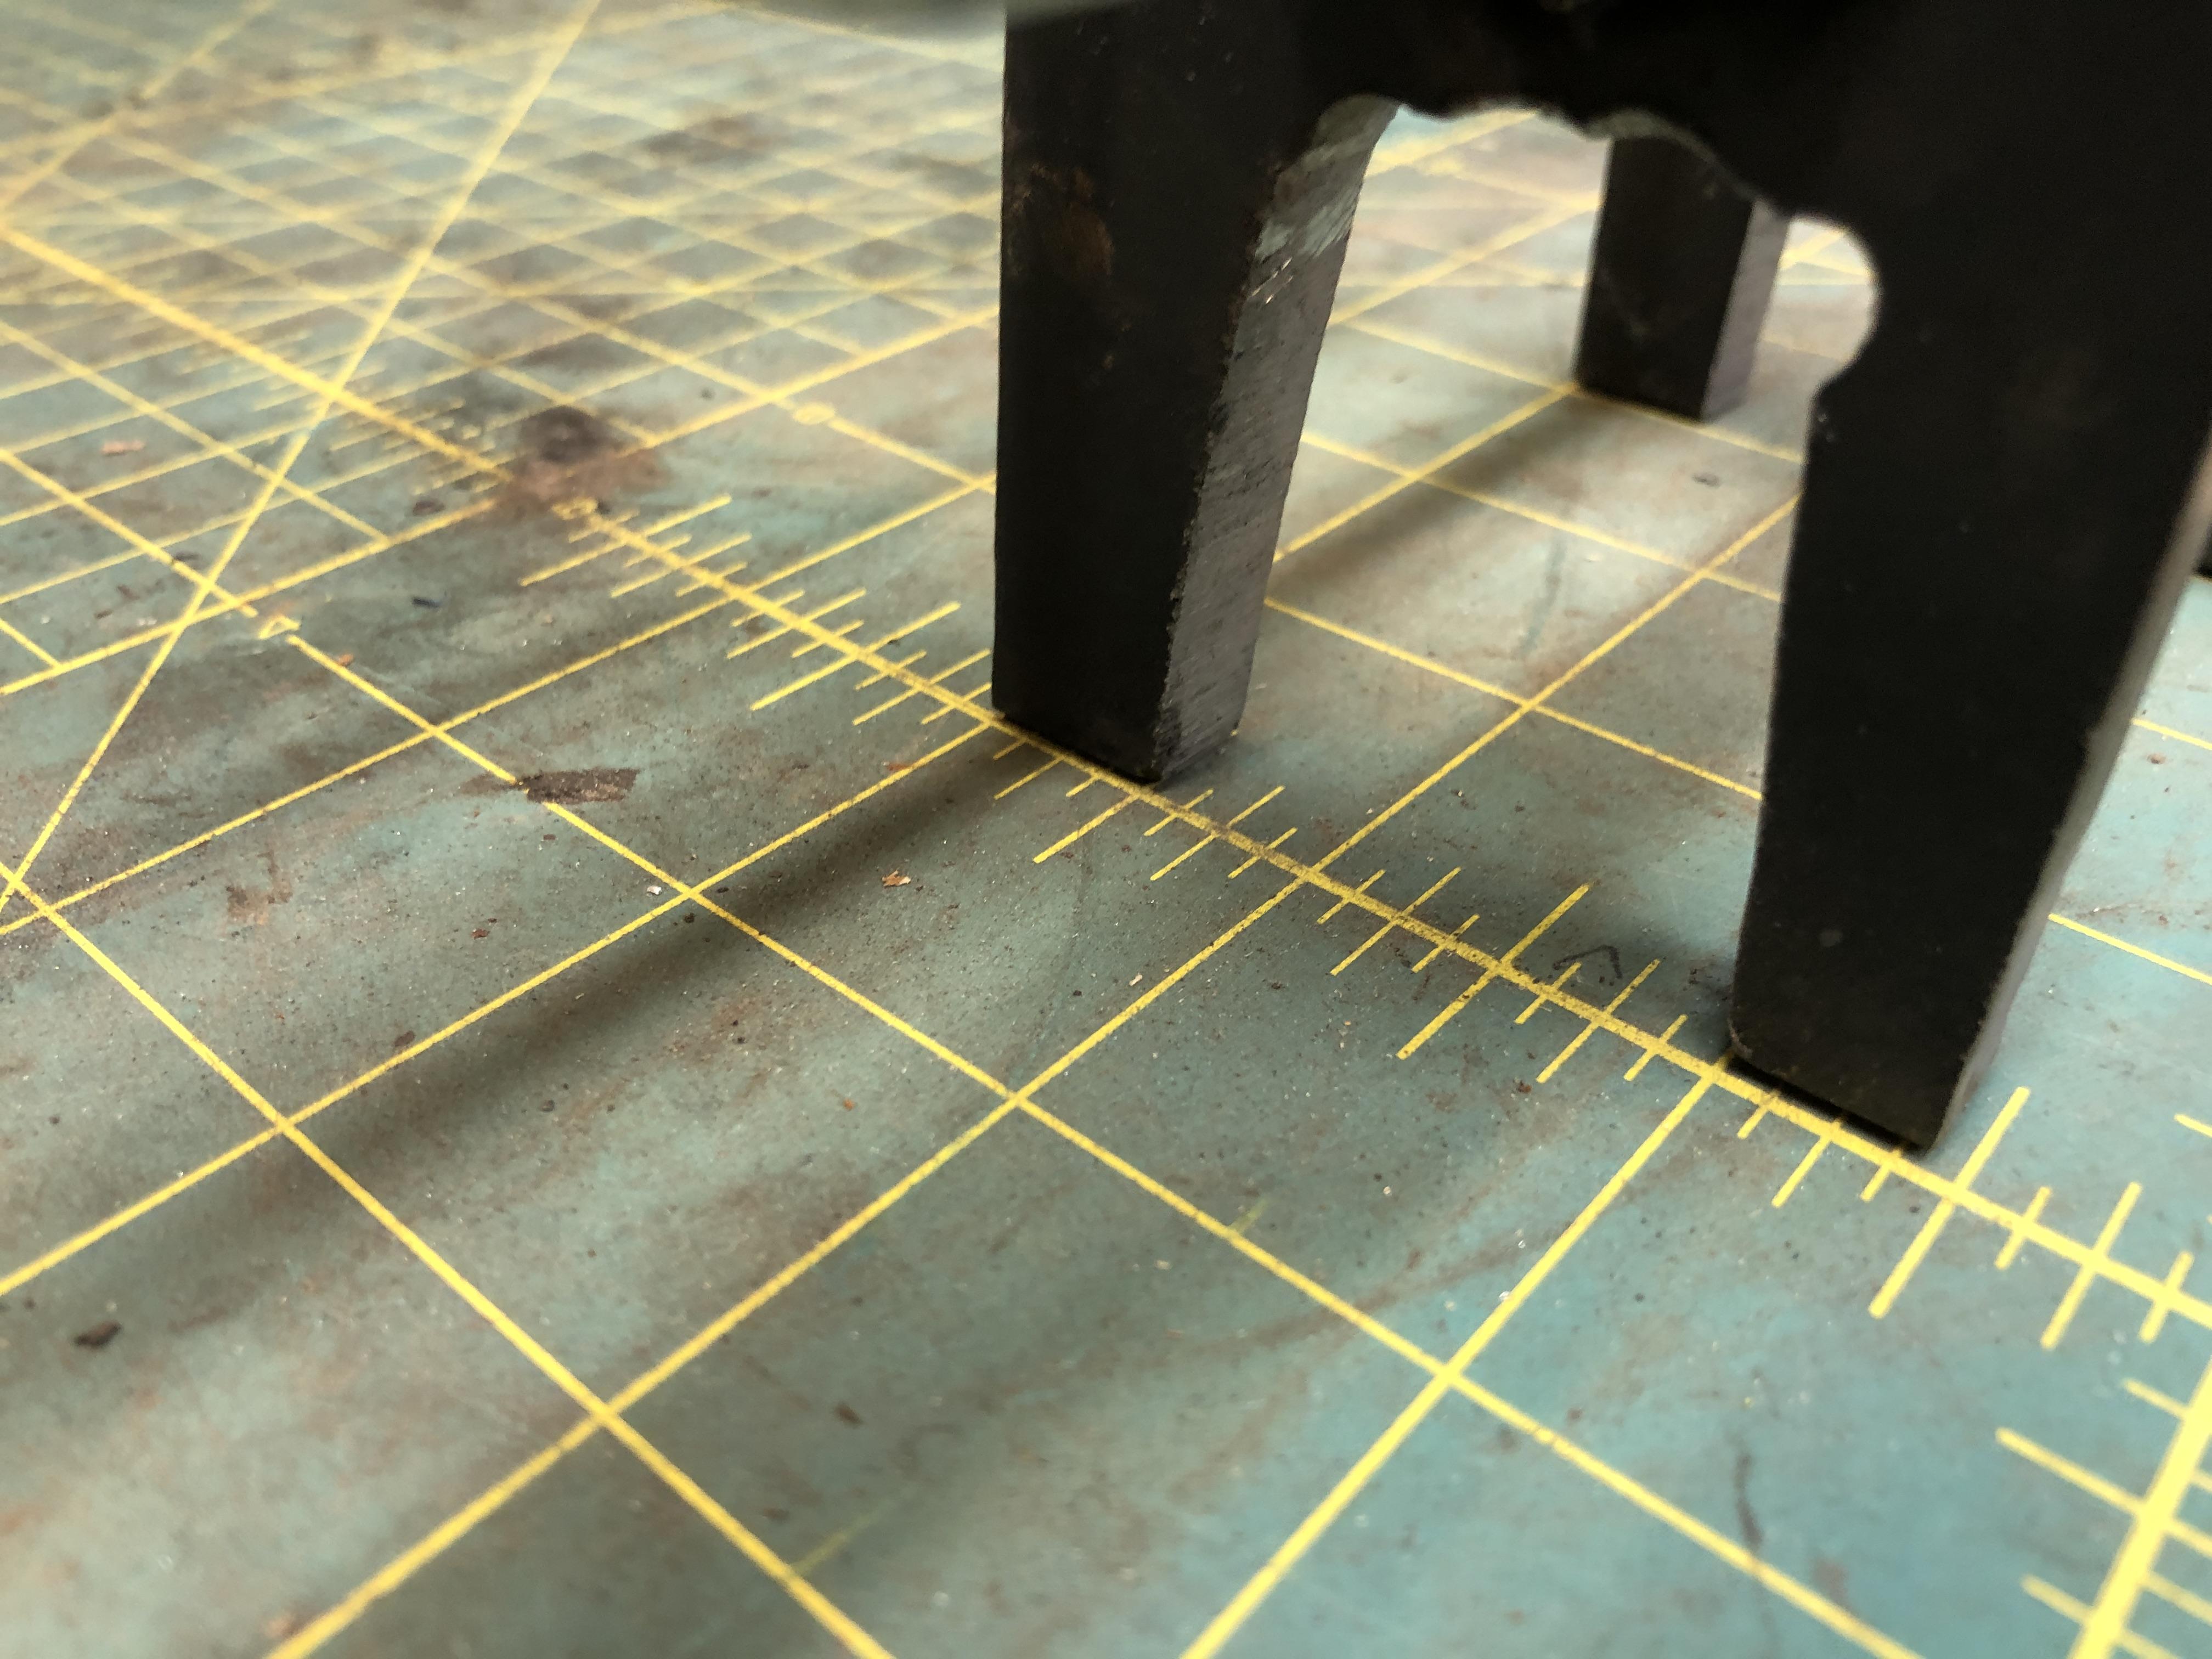
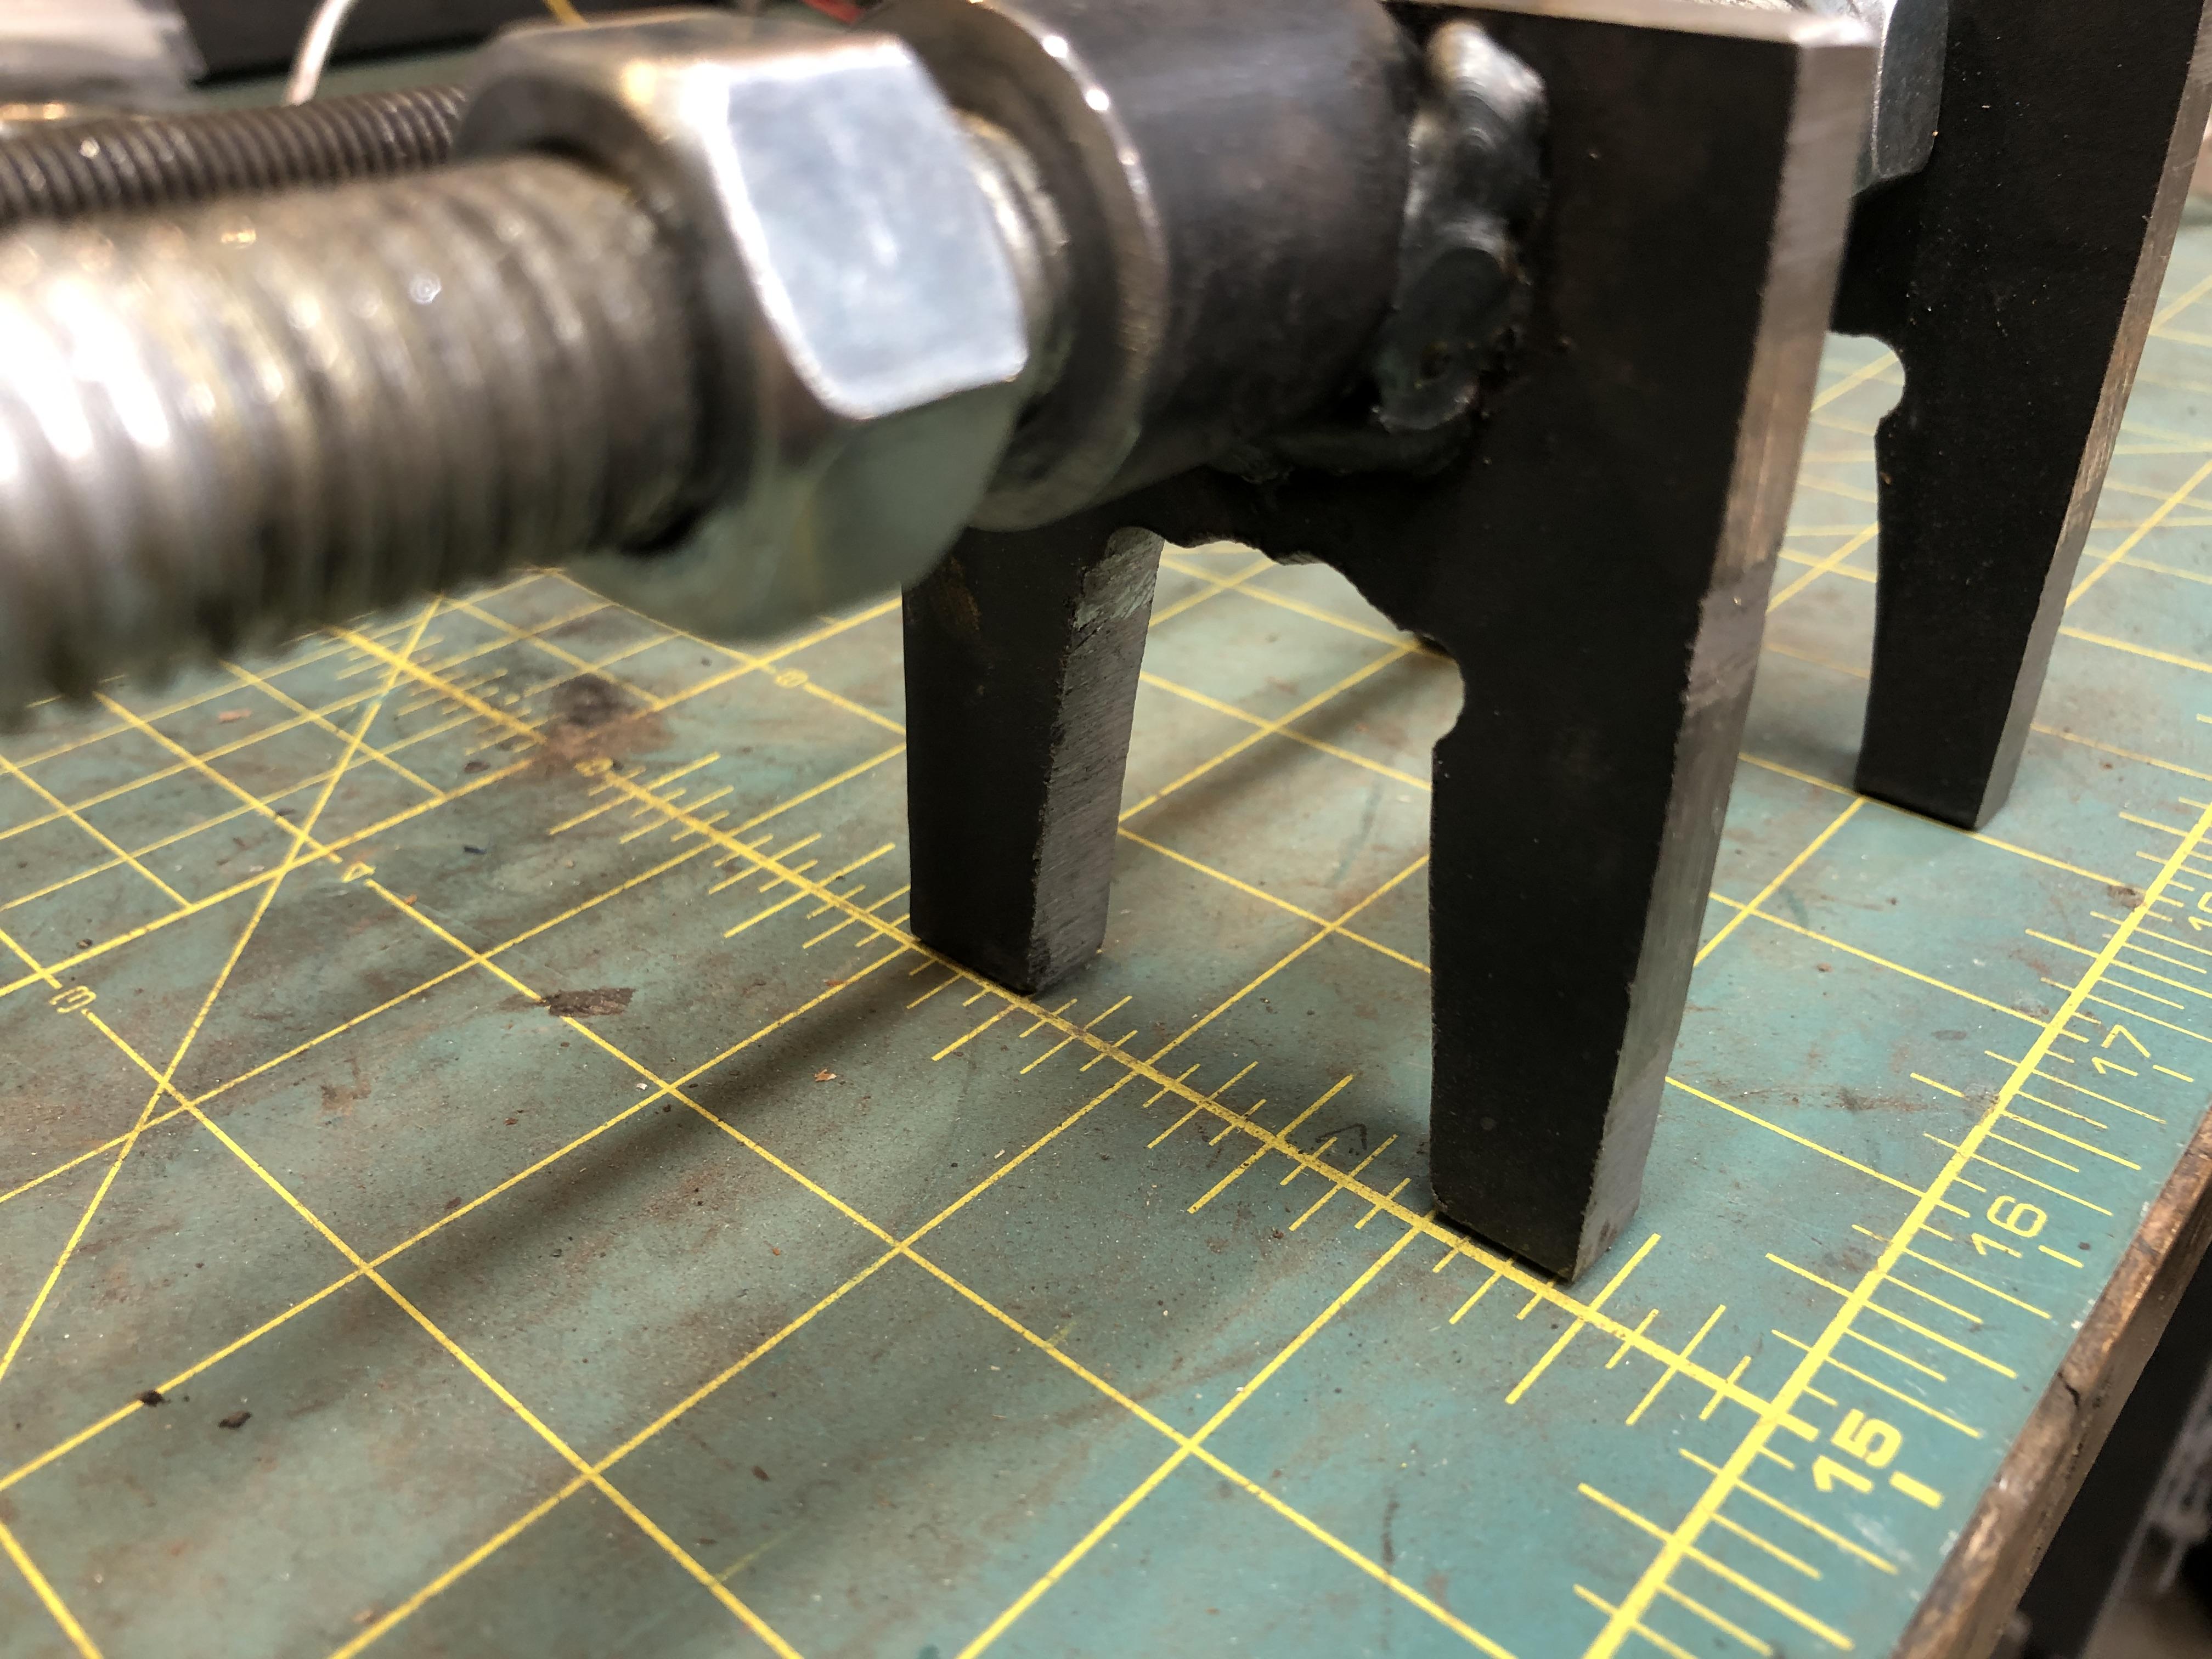
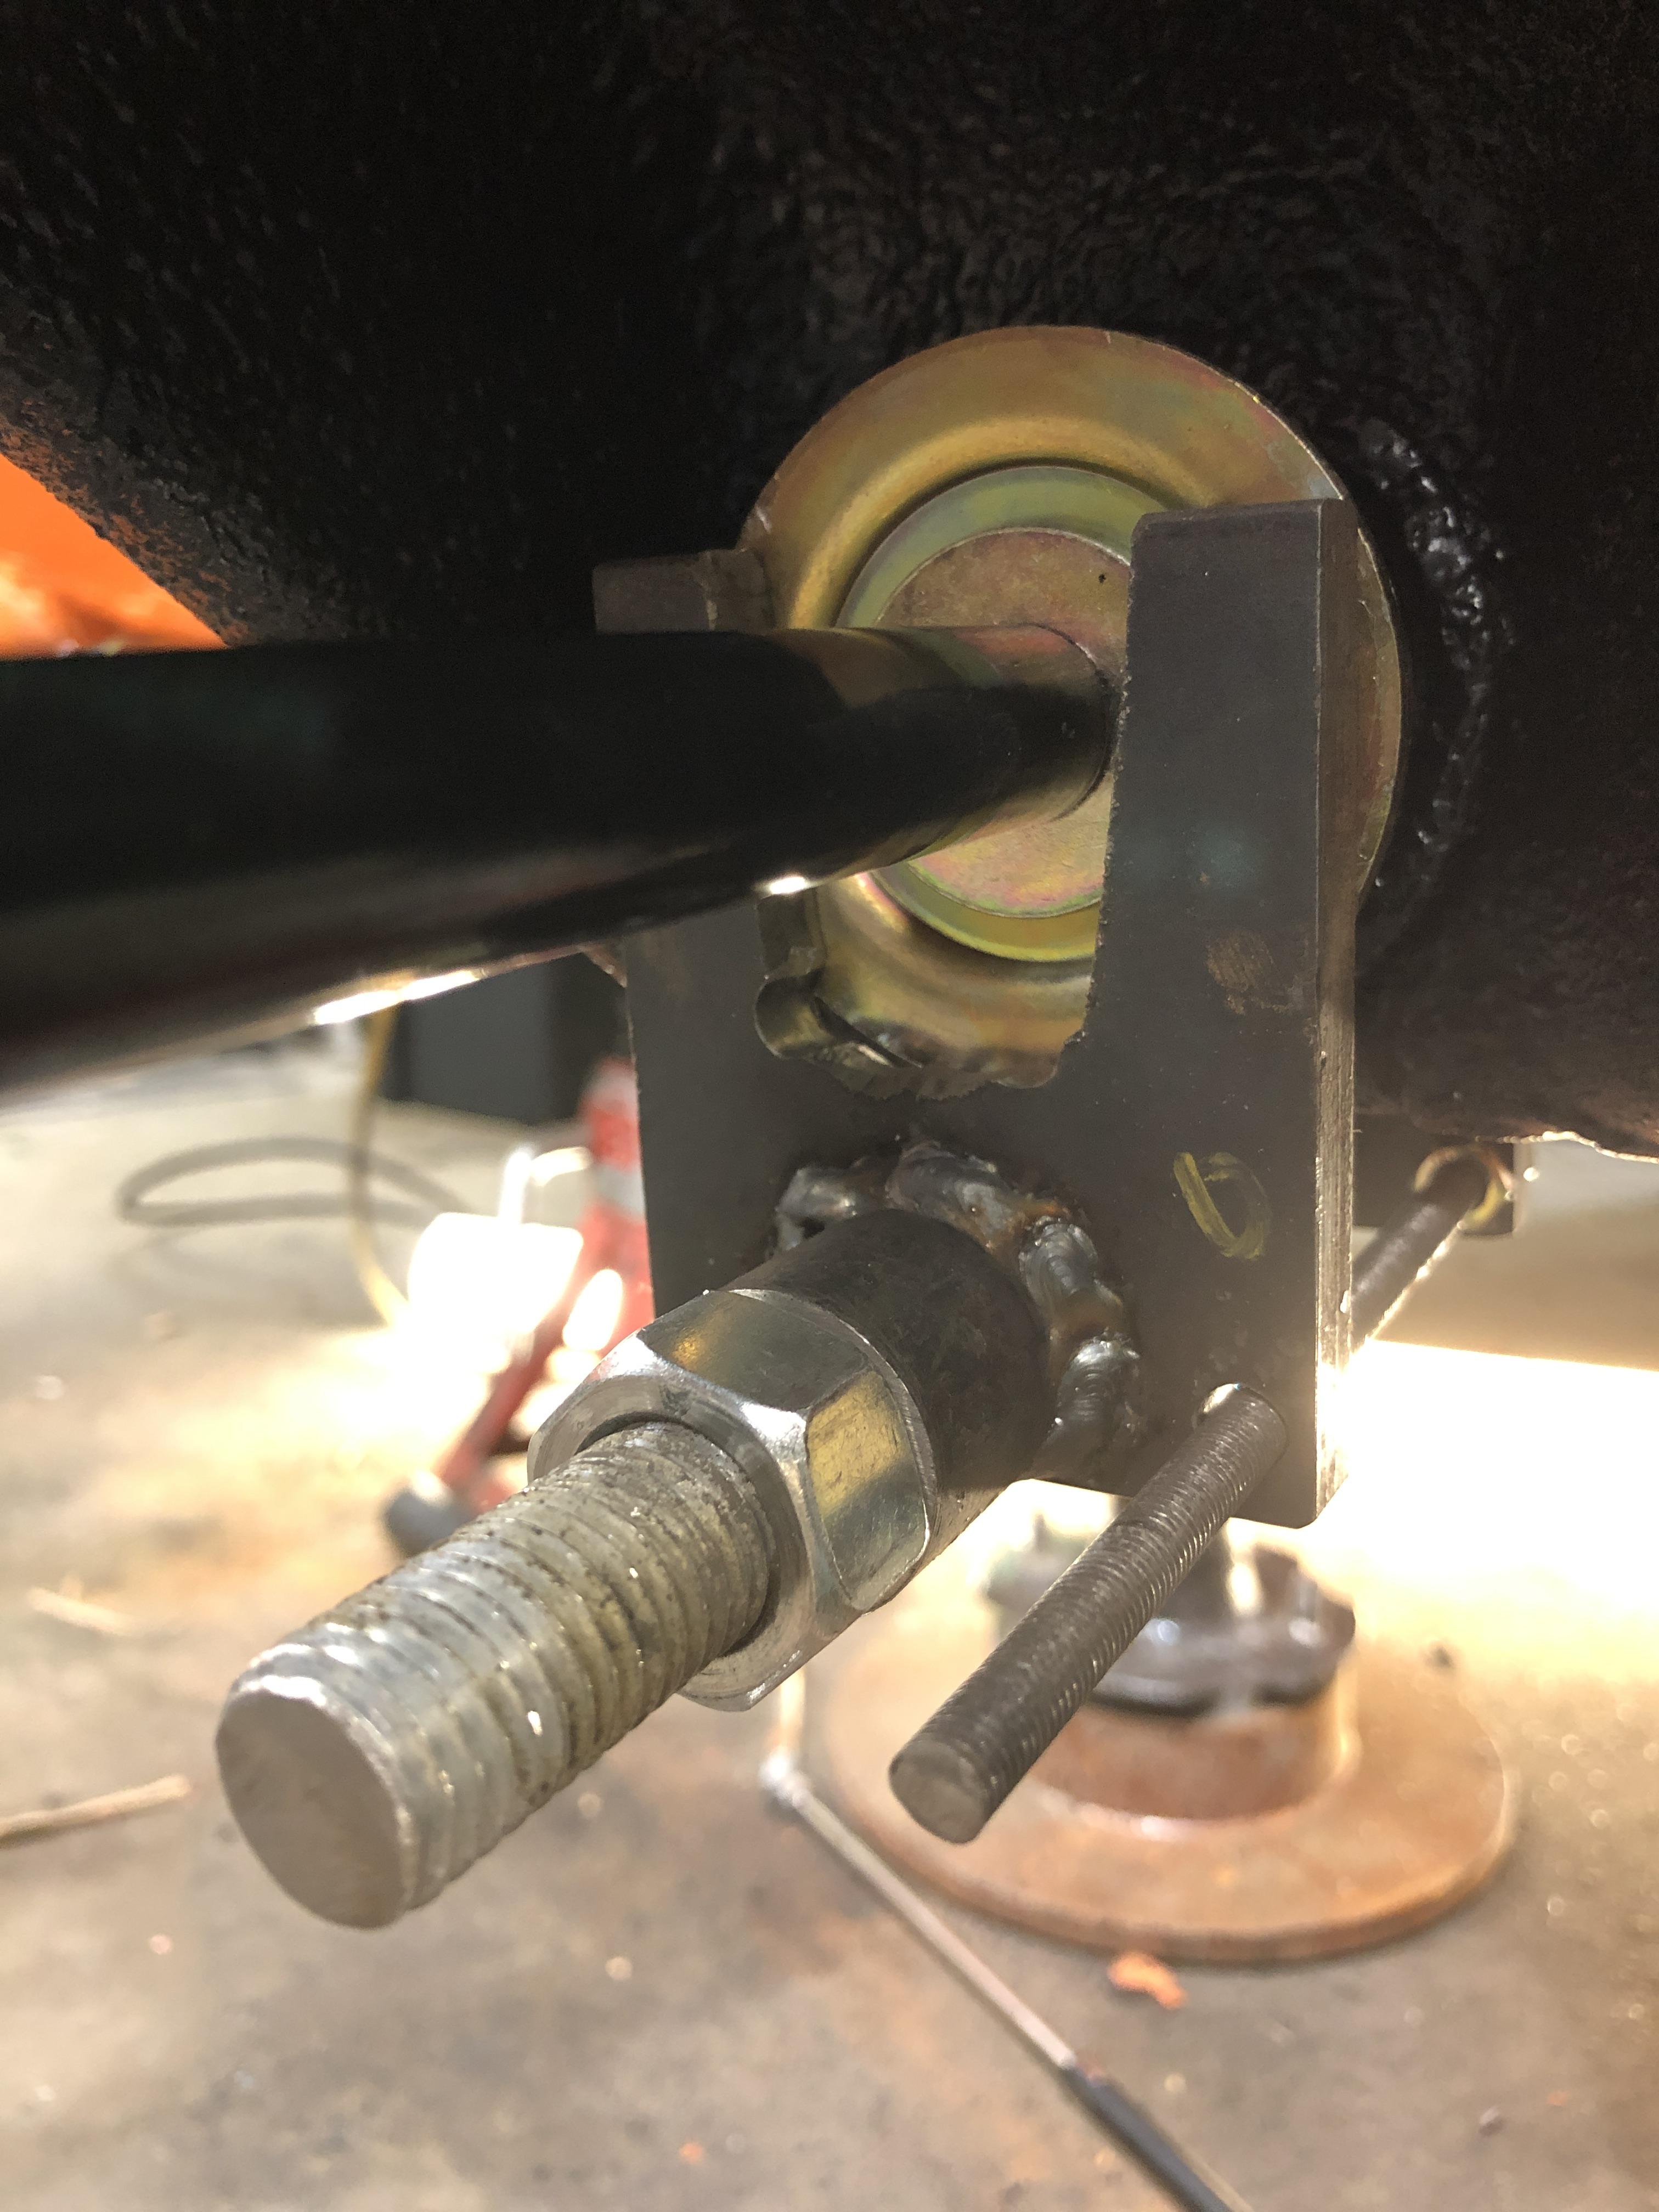
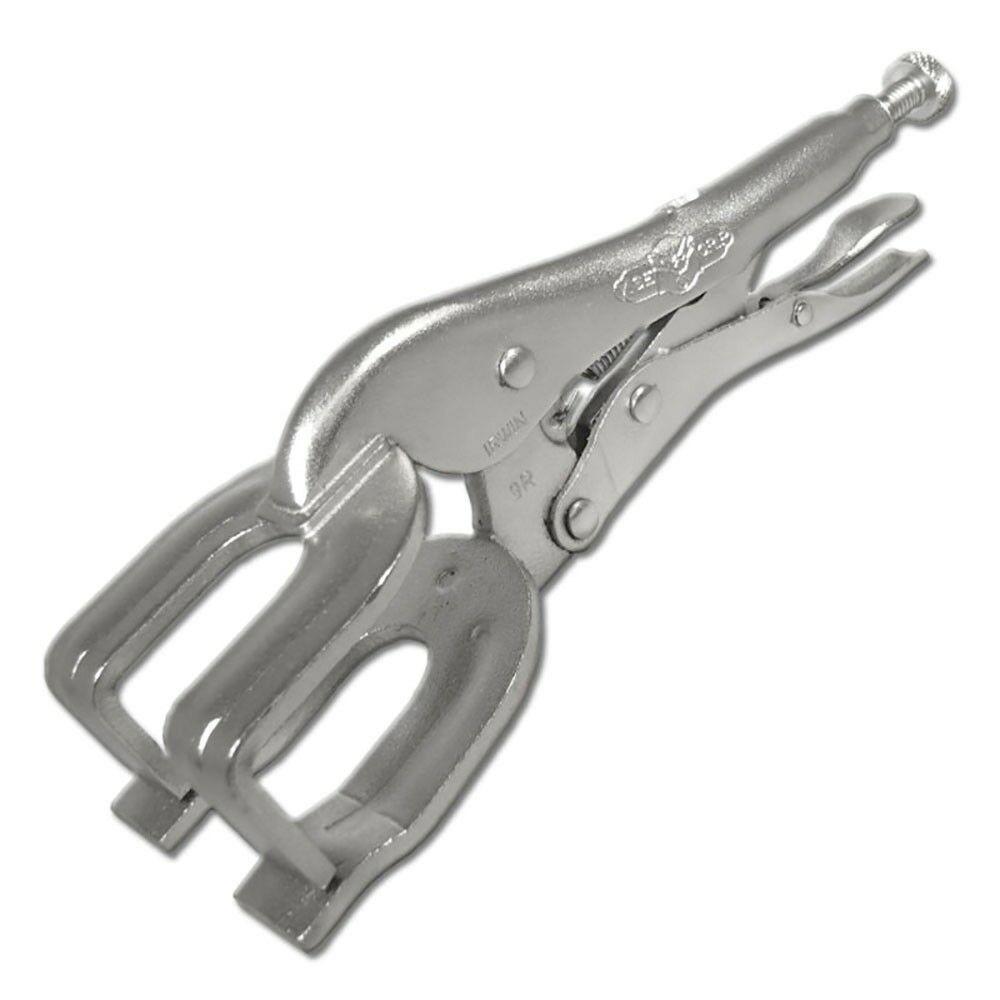
12 pointsI have a drawer full of jigs and things I’ve made over the years to make things “better” but I made one today that I’ve been wanting to build for some time. When installing new stock T/C bushings, you have to compress the rubber quite a bit to get the end of the rod threads to stick out far enough to allow you start the nut. I had previously modified a special welding vice grip, but it was a struggle at best. It is now in the metal recycle bin. Here is what I built. Some 5/8 threaded rod, few nuts, some 1/4 plate steel, piece of 5/8 ID pipe (garage door spring tubing). M6 threaded rod to keep the two halves aligned. Added that after using it to do the first one. This is the vice grip tool I modified before. The jaws are always in a V shape, never parallel.


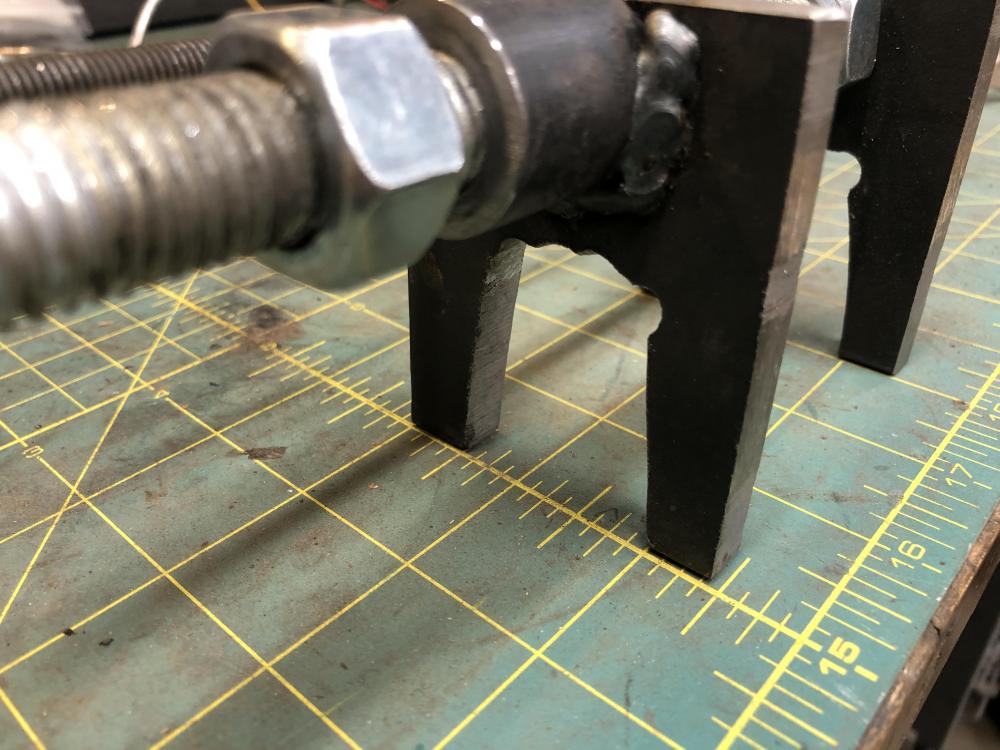

 12 points
 -
12 points
-
Here's another great S30.world article, this time focusing on the development of the 'Euro' spec Datsun 240Z, exploring the circumstances which necessitated its creation and the people behind it. It includes some - precious! - original hand-written development note documents which we are privileged to have access to after all this time, thanks to our fellow member @kats Very nicely put together and written up by another of our fellow members here Nils @JDMjunkies.ch Tip of the hat to Florian at S30.world too. This is a topic not often acknowledged let alone discussed, and yet it is a fascinating window into a significant part of the S30-series Z's family tree. Recommended reading: https://s30.world/articles/european-spec-datsun-240z11 points
-
11 points
-
11 pointsI've been replacing all of my 11 year old fuel hoses with braided cover hoses and decided to do the flow guide valve vapor hoses for a consistent appearance. My valve cover breather hose was already a OE braided unit but I gave it quick inspection. Uh Oh - big crack at one end, time to replace it as well. A visit to MSA showed me a repro unit for (choke!) $90! 😲 So it was back to Belmetric for possible options. The valve cover fitting is 16mm in diameter but Belmetric only has 14mm and 17mm hoses. The breather hose is about 14" so I ordered two feet of the 17mm hose at the most attractive price of $7.15/ft. (today it is $8.01). At 1mm oversize, obviously it is an easy fit but the OE circular spring clamps hold it securely in place on the valve cover and air filter box. All of the hoses at Belmetric are from Germany and are typically marked so on the hose. If you don't want the word Germany on your Japanese car, the markings can easily be removed with a vigorous rubbing with mineral spirits. I really like the feel of $75 still in my pocket! 😁 https://belmetric.com/m17x21-braided-continental-hose-rh17-n203701/
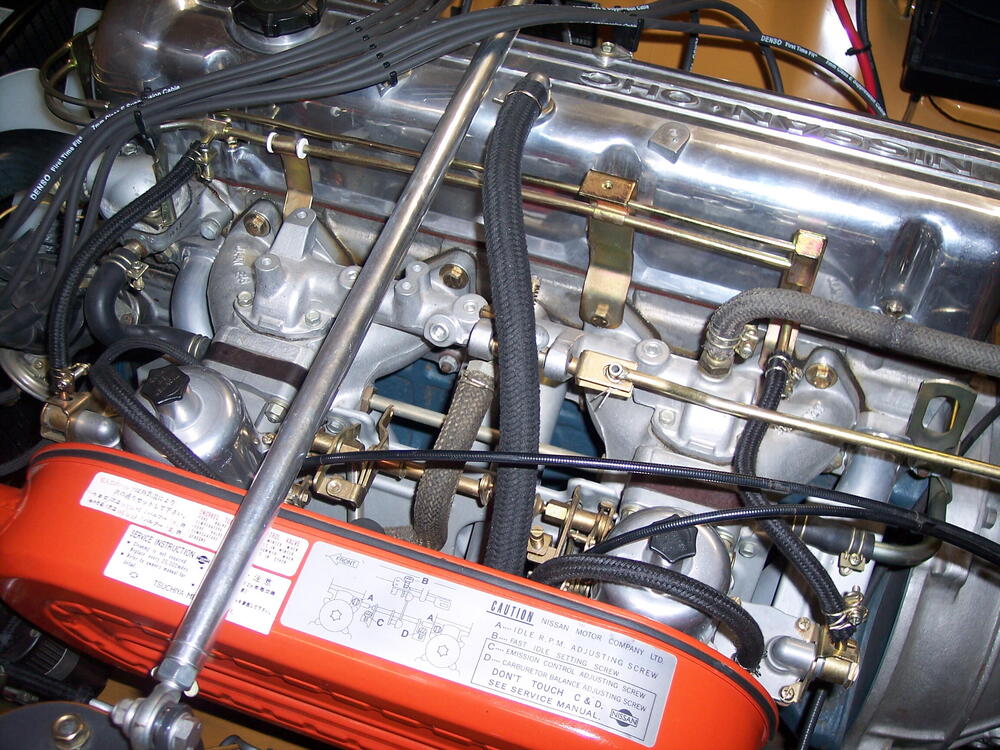 11 points
 -
11 pointsNothing brings out the scammers like posting an ad in in the "parts wanted" section of the forum. I posted an ad a few days ago looking for a left front fender for my 73 Z project. Within hours I started getting bombarded with replies stating they had one in excellent condition. Just a few clues to be aware of so you don't get burned. See how long they've been a member. One reply I got the person had been a member for 4 hours, another one was a member for 6 days....red flag! Another clue is the stated condition is always excellent...we all know that if you can find one of these it's not going to be in perfect condition. Look at where the message is sent from...it's usually from some oddball source like tap a talk . Some offer to send pictures, but the pictures are usually ones copied from some other source. I had one that sent me pictures from a legitimate ad where I had spoke to the seller who informed me the part had been sold. If you call the number and connect with a real live person who speaks broken English it's more than likely a scam. I replied to one that left an email address. I replied a few days after I got his message...guess what? It came back as an invalid email address. Another red flag is the price is usually very reasonable and includes shipping. The last fender I bought, the shipping was more than the cost of the part. One way to help determine if its a scam (but not perfect) is to ask for specific pictures of the part. I usually ask for a close ups of the front and back of the area where the headlight bucket attaches. It's a shame we have to deal with these low life's. Too bad there's not a way we could screen them out. Maybe we can help each other out by posting detailed info any time we encounter a scammer. Remember the old saying, "if it sounds too good to be true, it probably is". Paul11 points
-
Congrats to @Mike on another year of a big bunch of Z Crazies still posting on this site. Another year of @siteunseen with a new computer.....kind of like giving a loaded .357 to a two year old, @Patcon with 2 projects that may never end......EVER, and @Jeff G 78 adjusting to the Arizona climate, and posting pics of a race car that needs to be eating oats with Secretariat!@Zed Headwill answer all of your questions and 85% will be correct. If you want to solve any electrical problems, the only person to contact is @SteveJhands down. @Captain Obviouswill still swear that flat tops are great......3000 1973 Z owners that switched are wrong lol. @HS30-Hwill poke at you till you finally admit that he is probably the most knowledgeable member ever! @Zupwill once again be the nicest member and @motorman7will continue to rub your nose in a before and after pic of every part of the Z anatomy until you feel like a total failure lol! @EuroDat, @grannyknot,will show up from time to time with some decent stuff and the rest is history. Sorry for all I missed......you all are awesome and Happy New Year to “What did you do to your Z today 2022!” Guy11 points
-
11 points
-
11 pointsYou're in that weird area of talking like your "informed" but asking uninformed questions. Basically, your comment says "not really excited about doing things the way the Nissan engineers designed them and used for the full lifetime of the Z. I don't want to use the factory installed removal hardware that Nissan installs on every single engine that leaves the factory. " Think about that for a while. (TATFAW)11 points
-
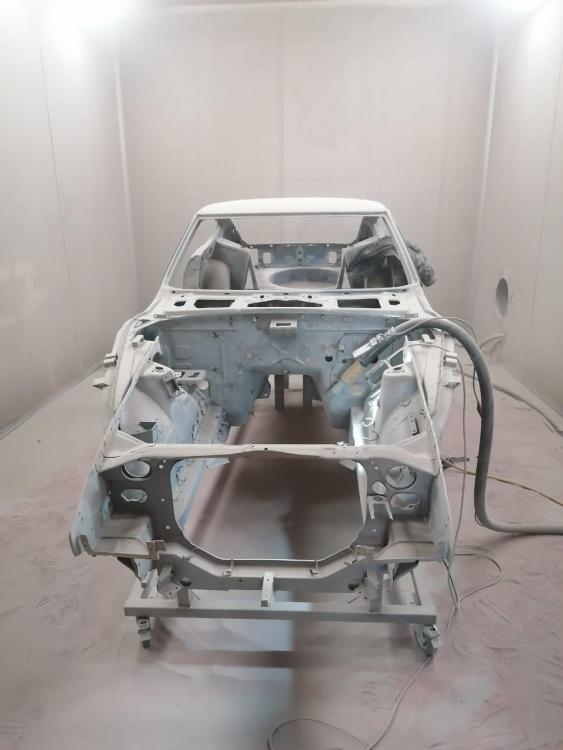
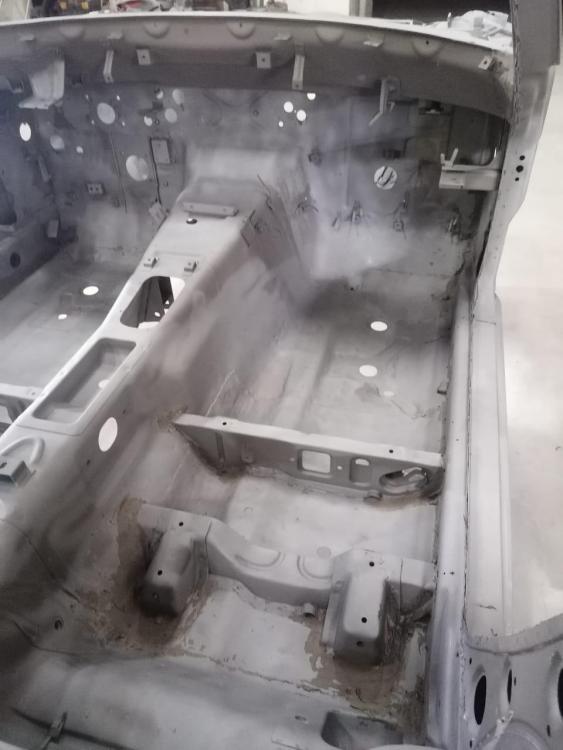
11 pointsGreat progress today on engine bay prep. Here’s the drivers side frame rail before...in between...and after. I used Eastwood’s 2k epoxy primer (thanks for the tip Jim) Sent from my iPhone using Tapatalk11 points
-
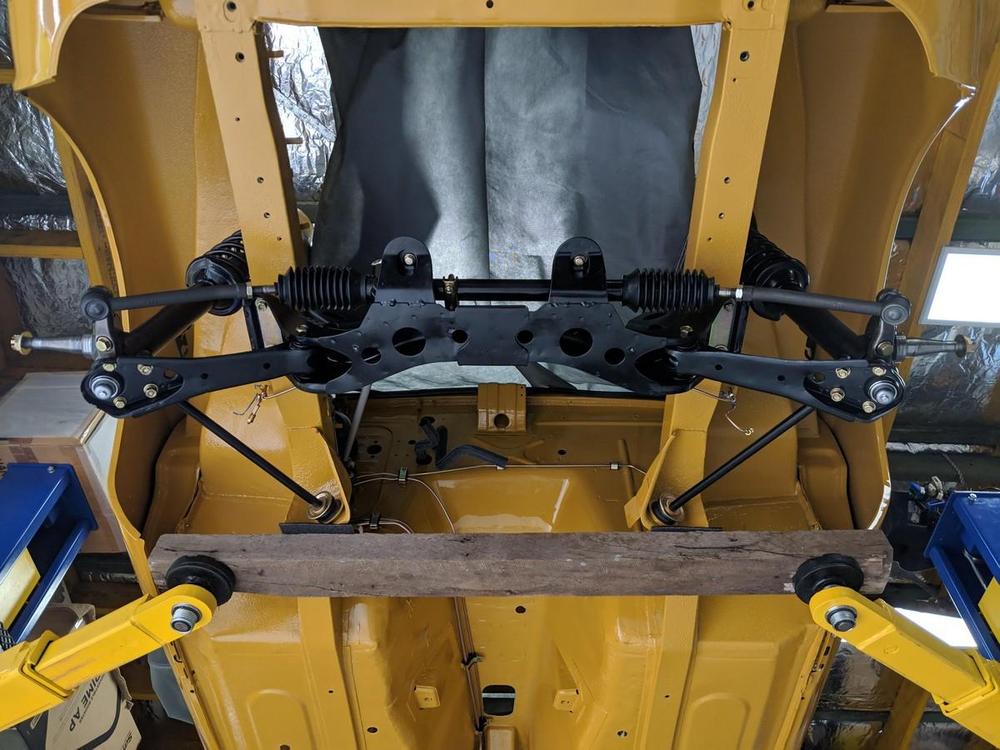
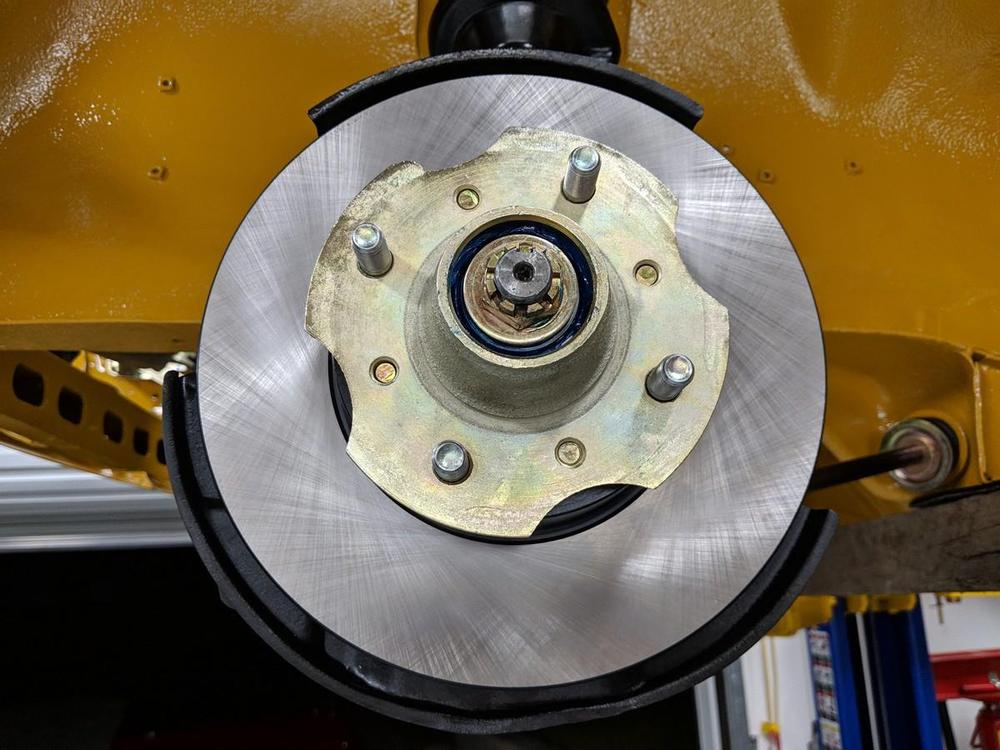
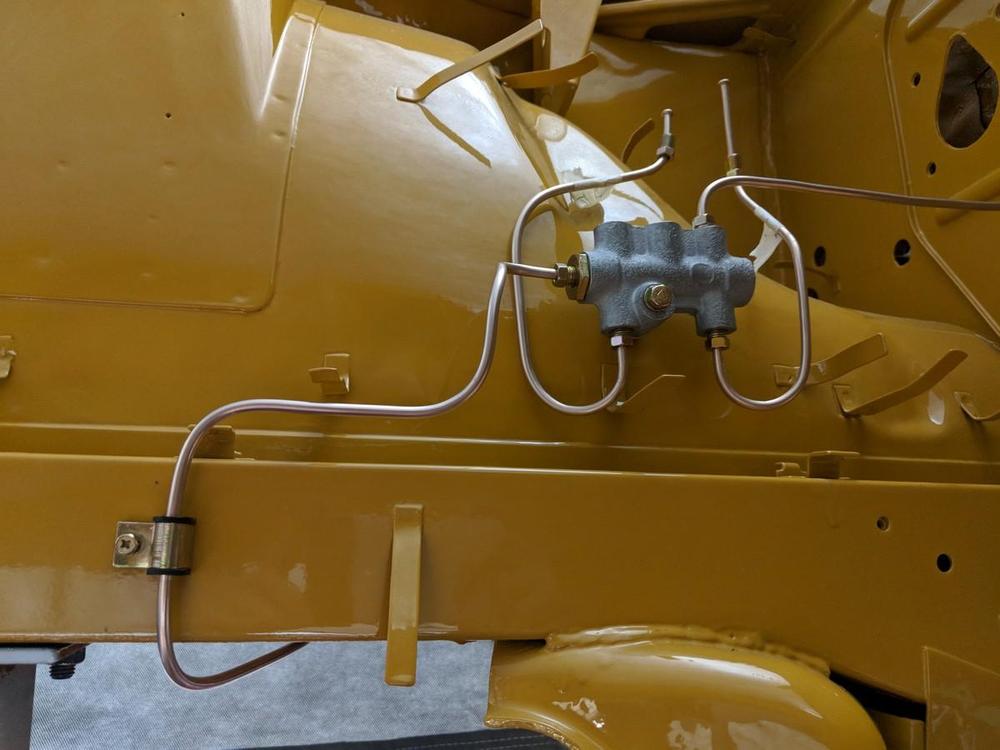
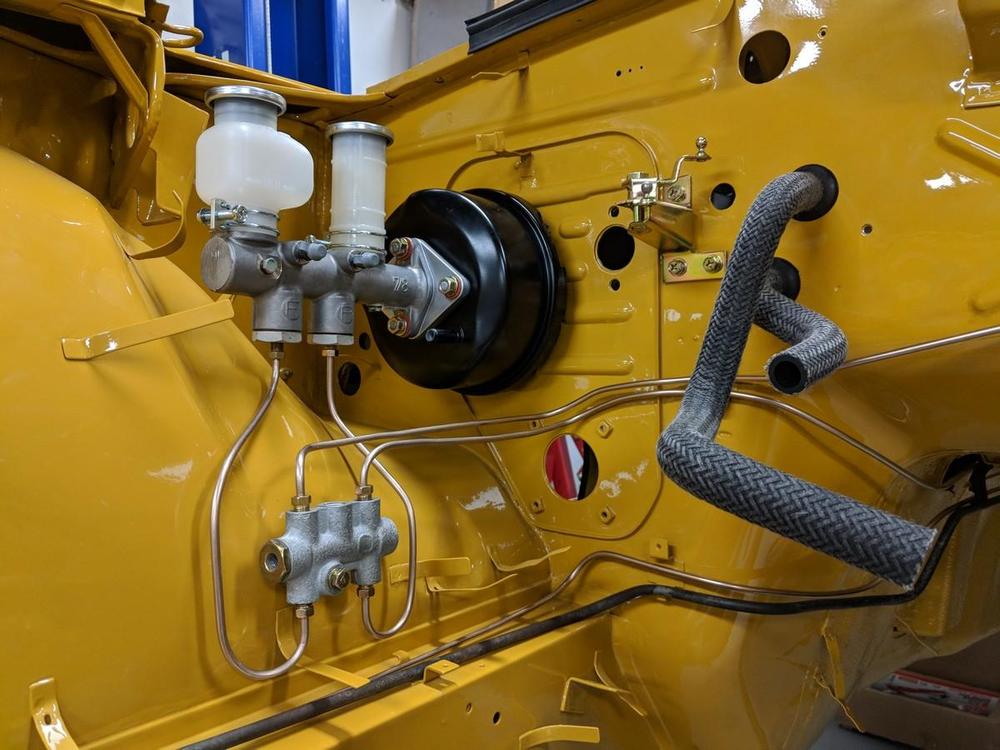
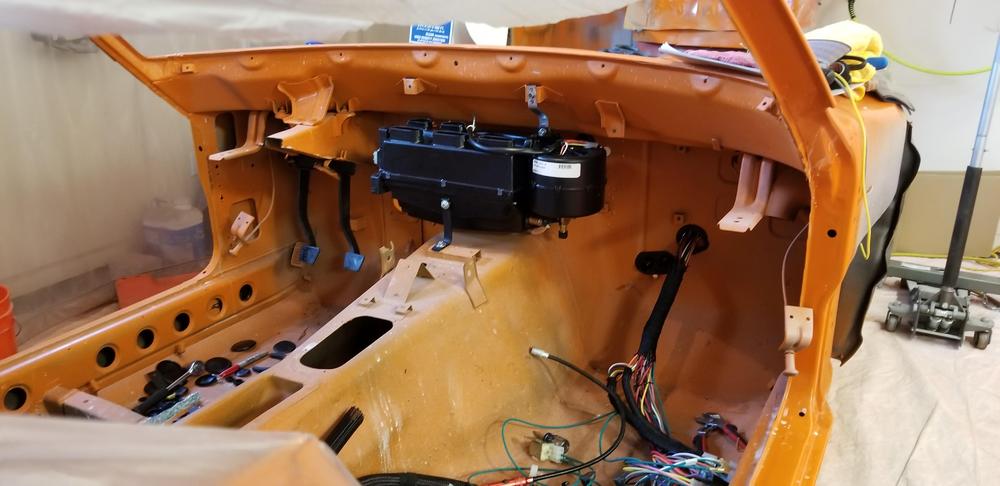
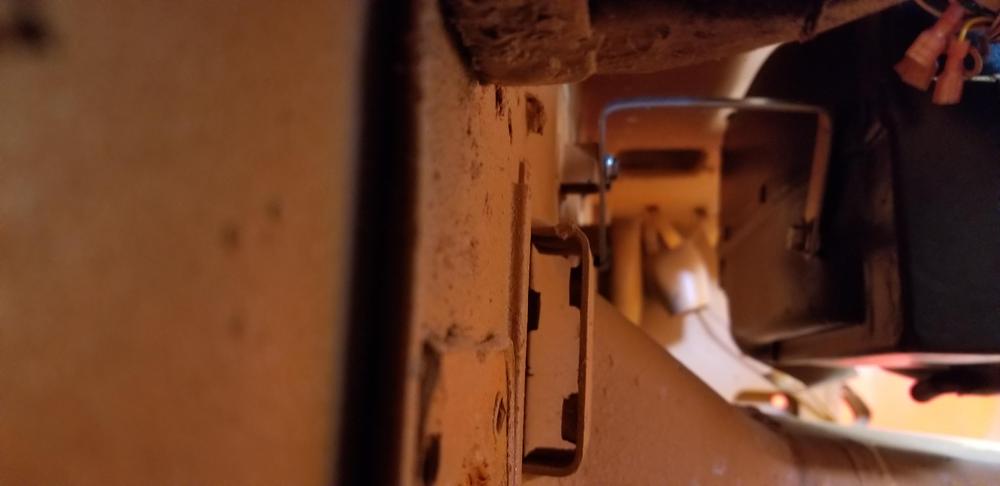
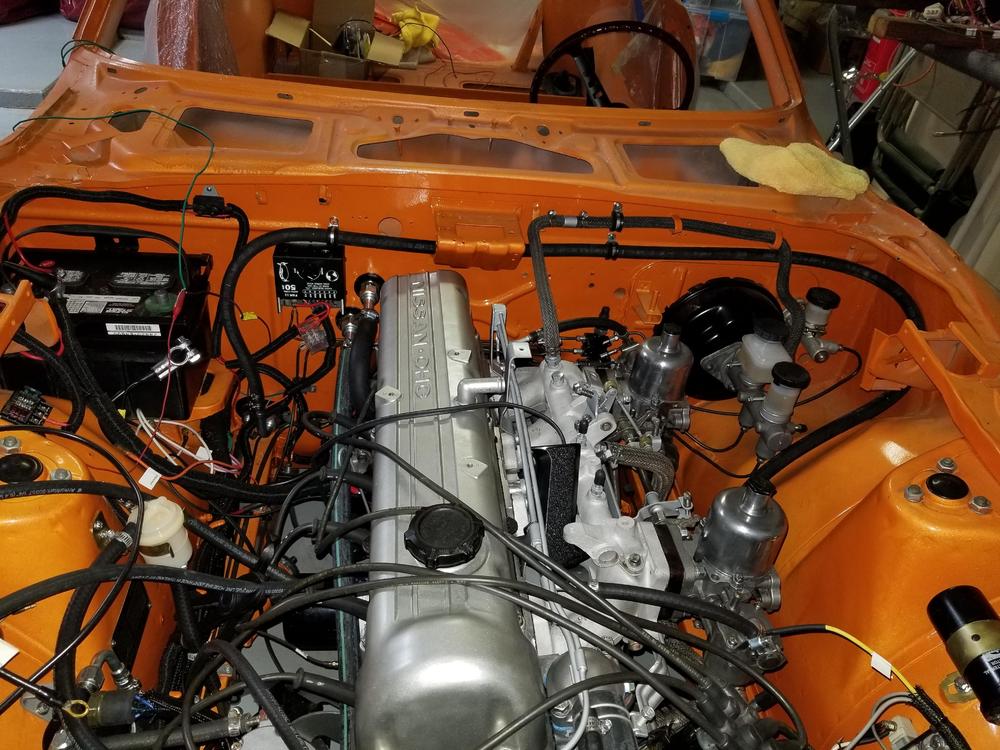
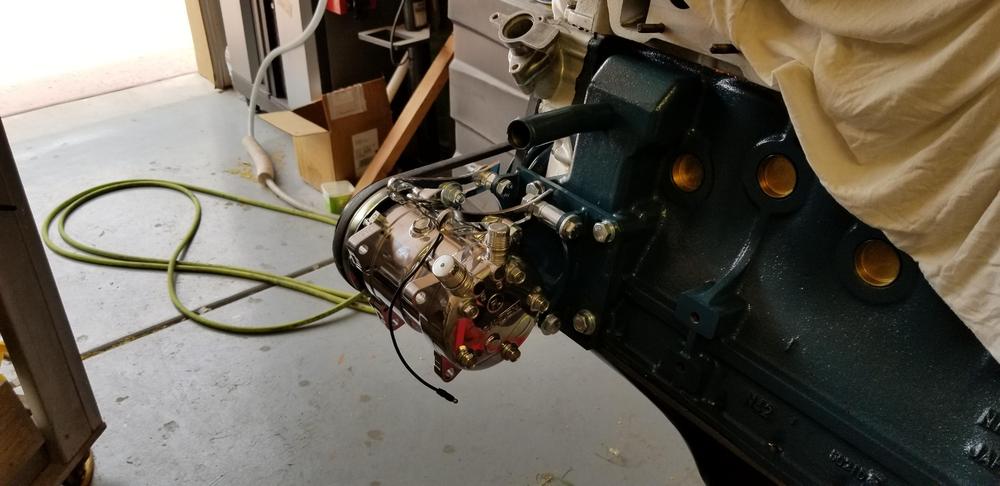
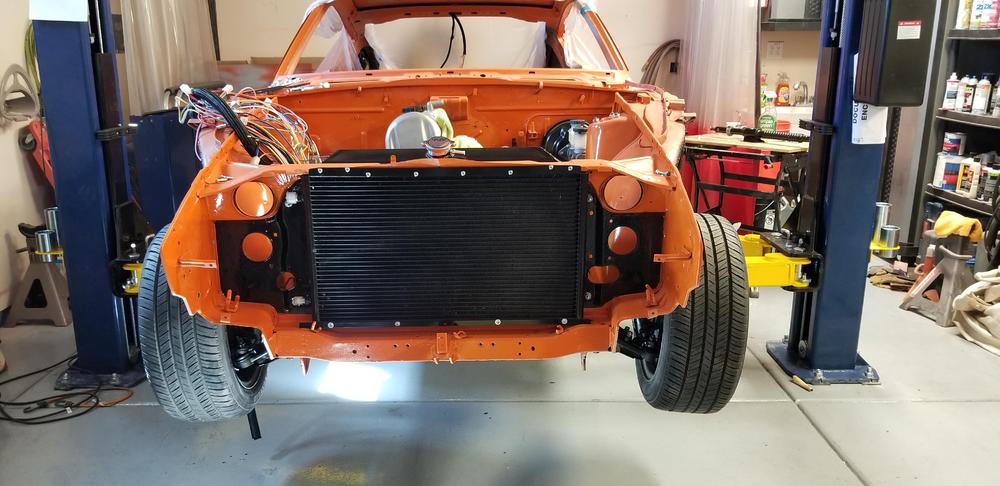
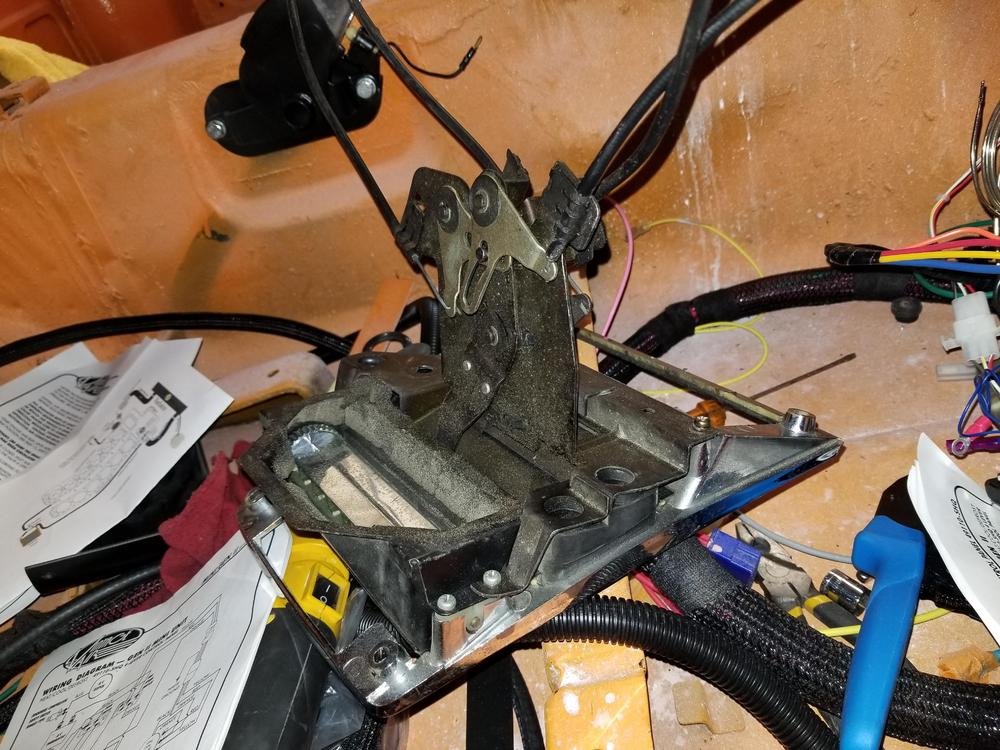
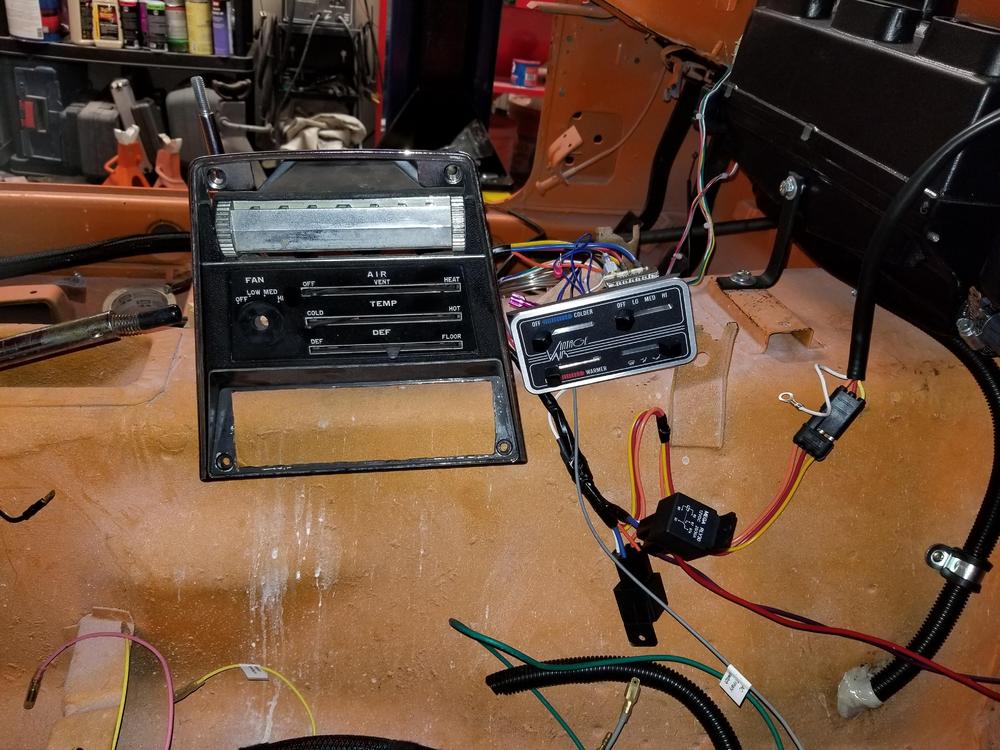
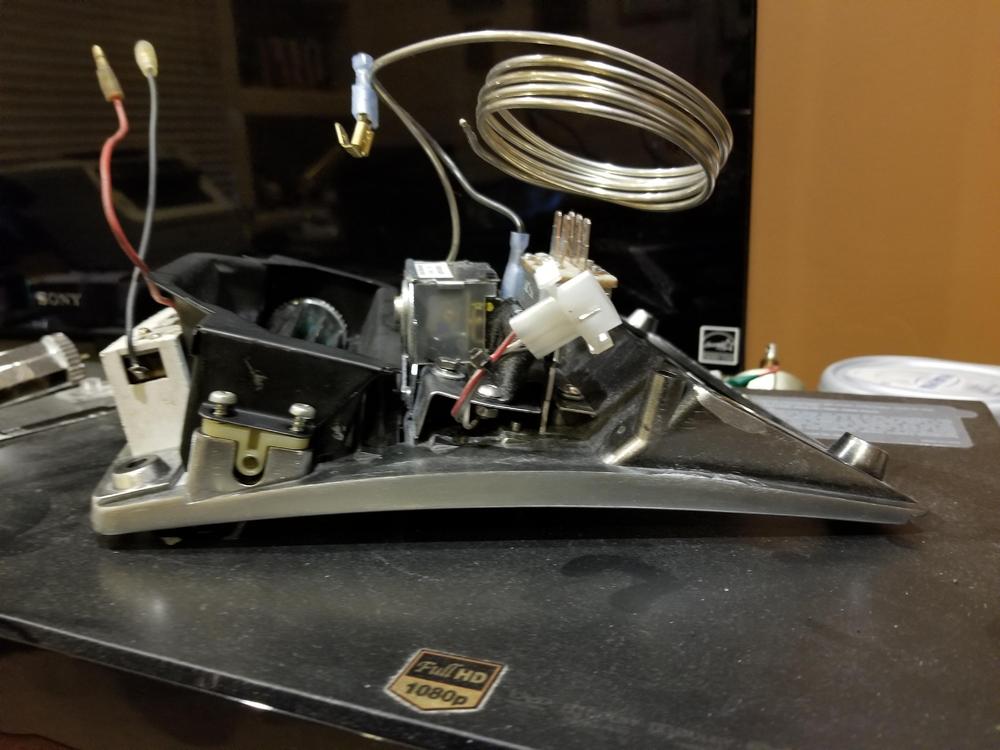
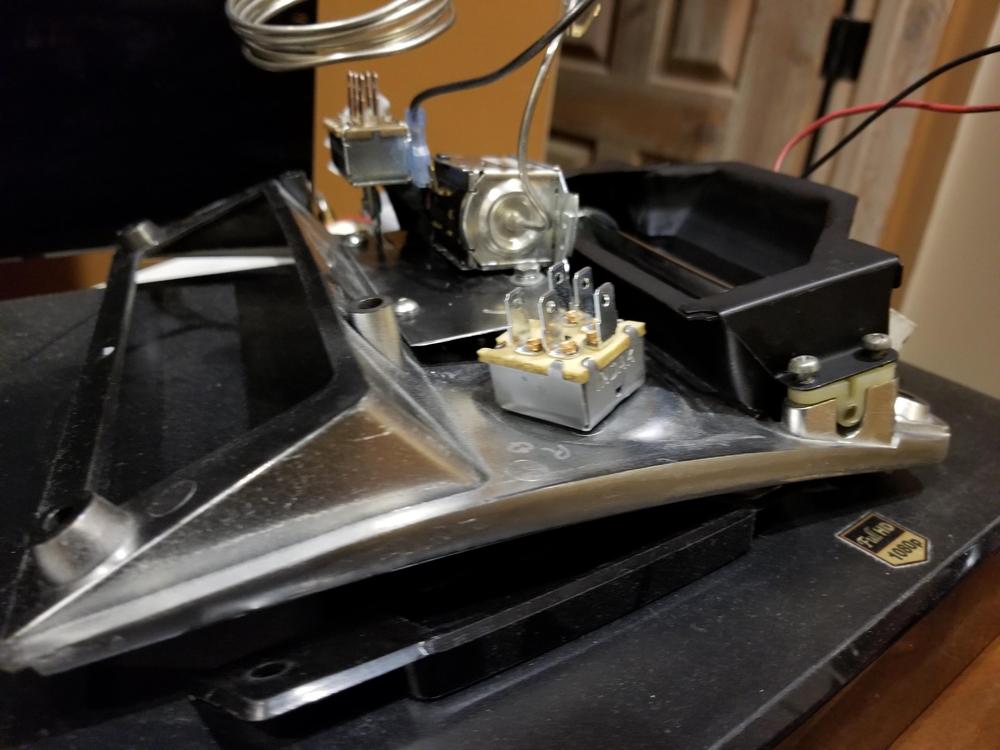
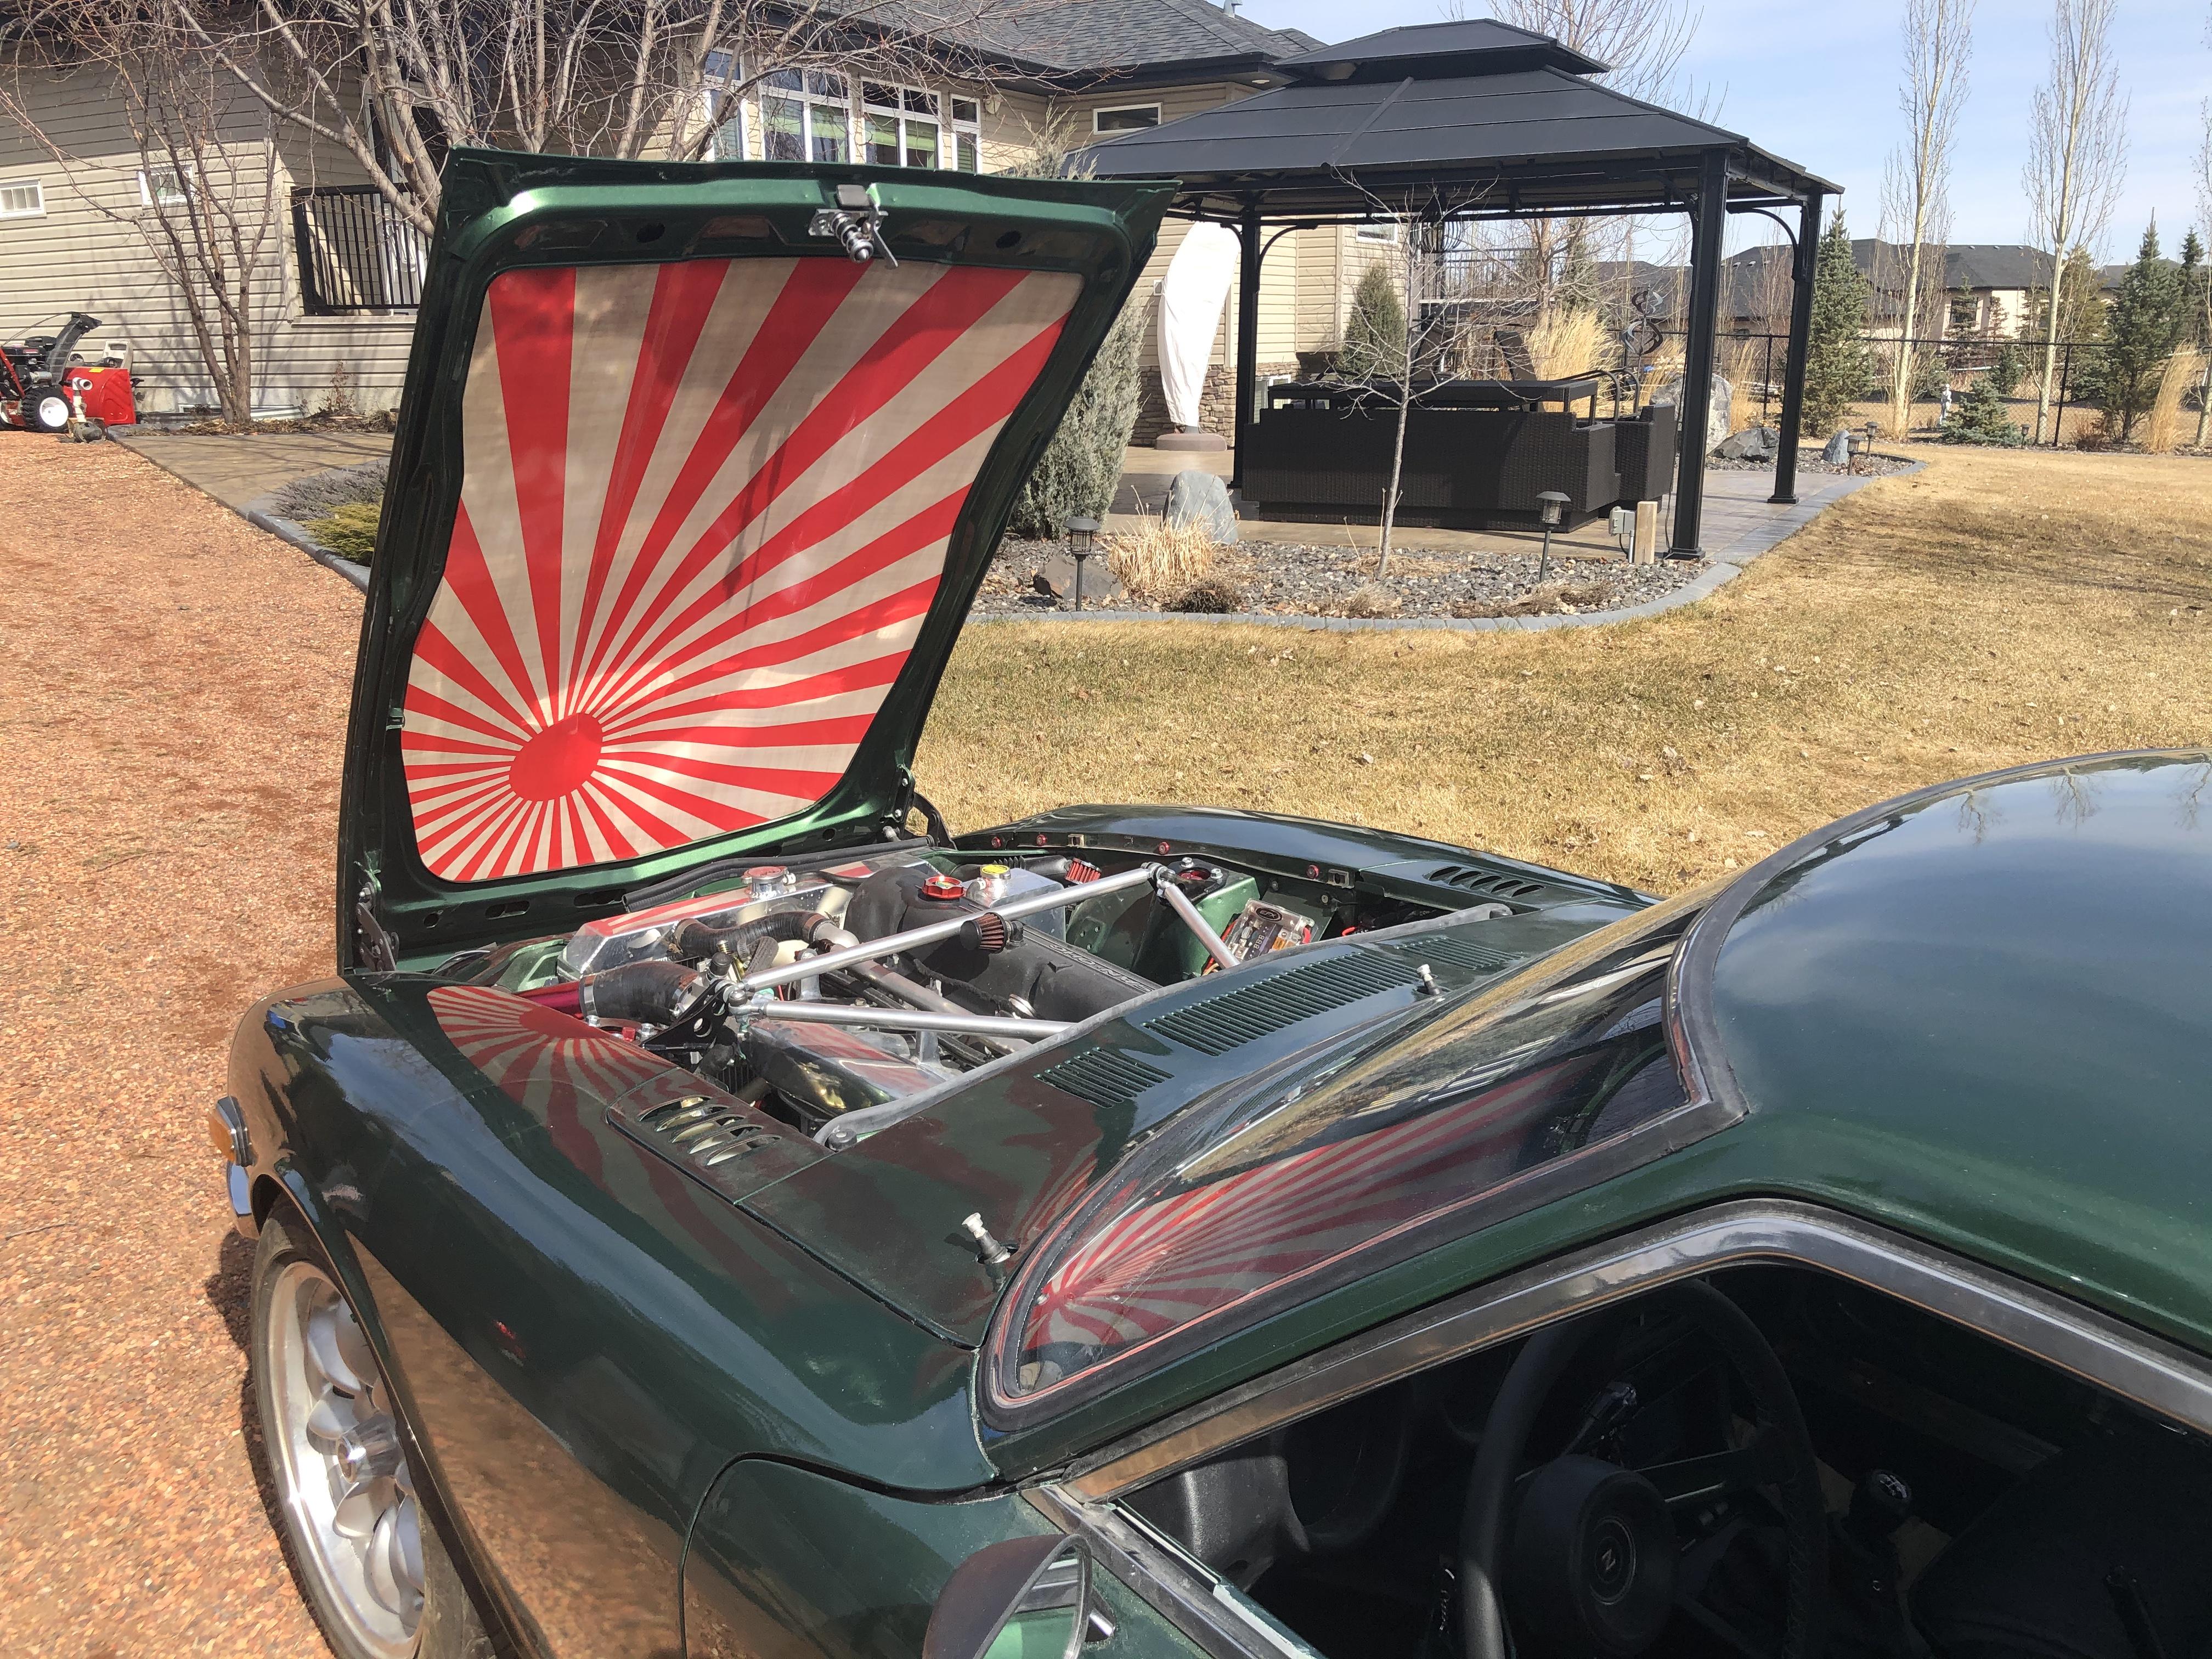
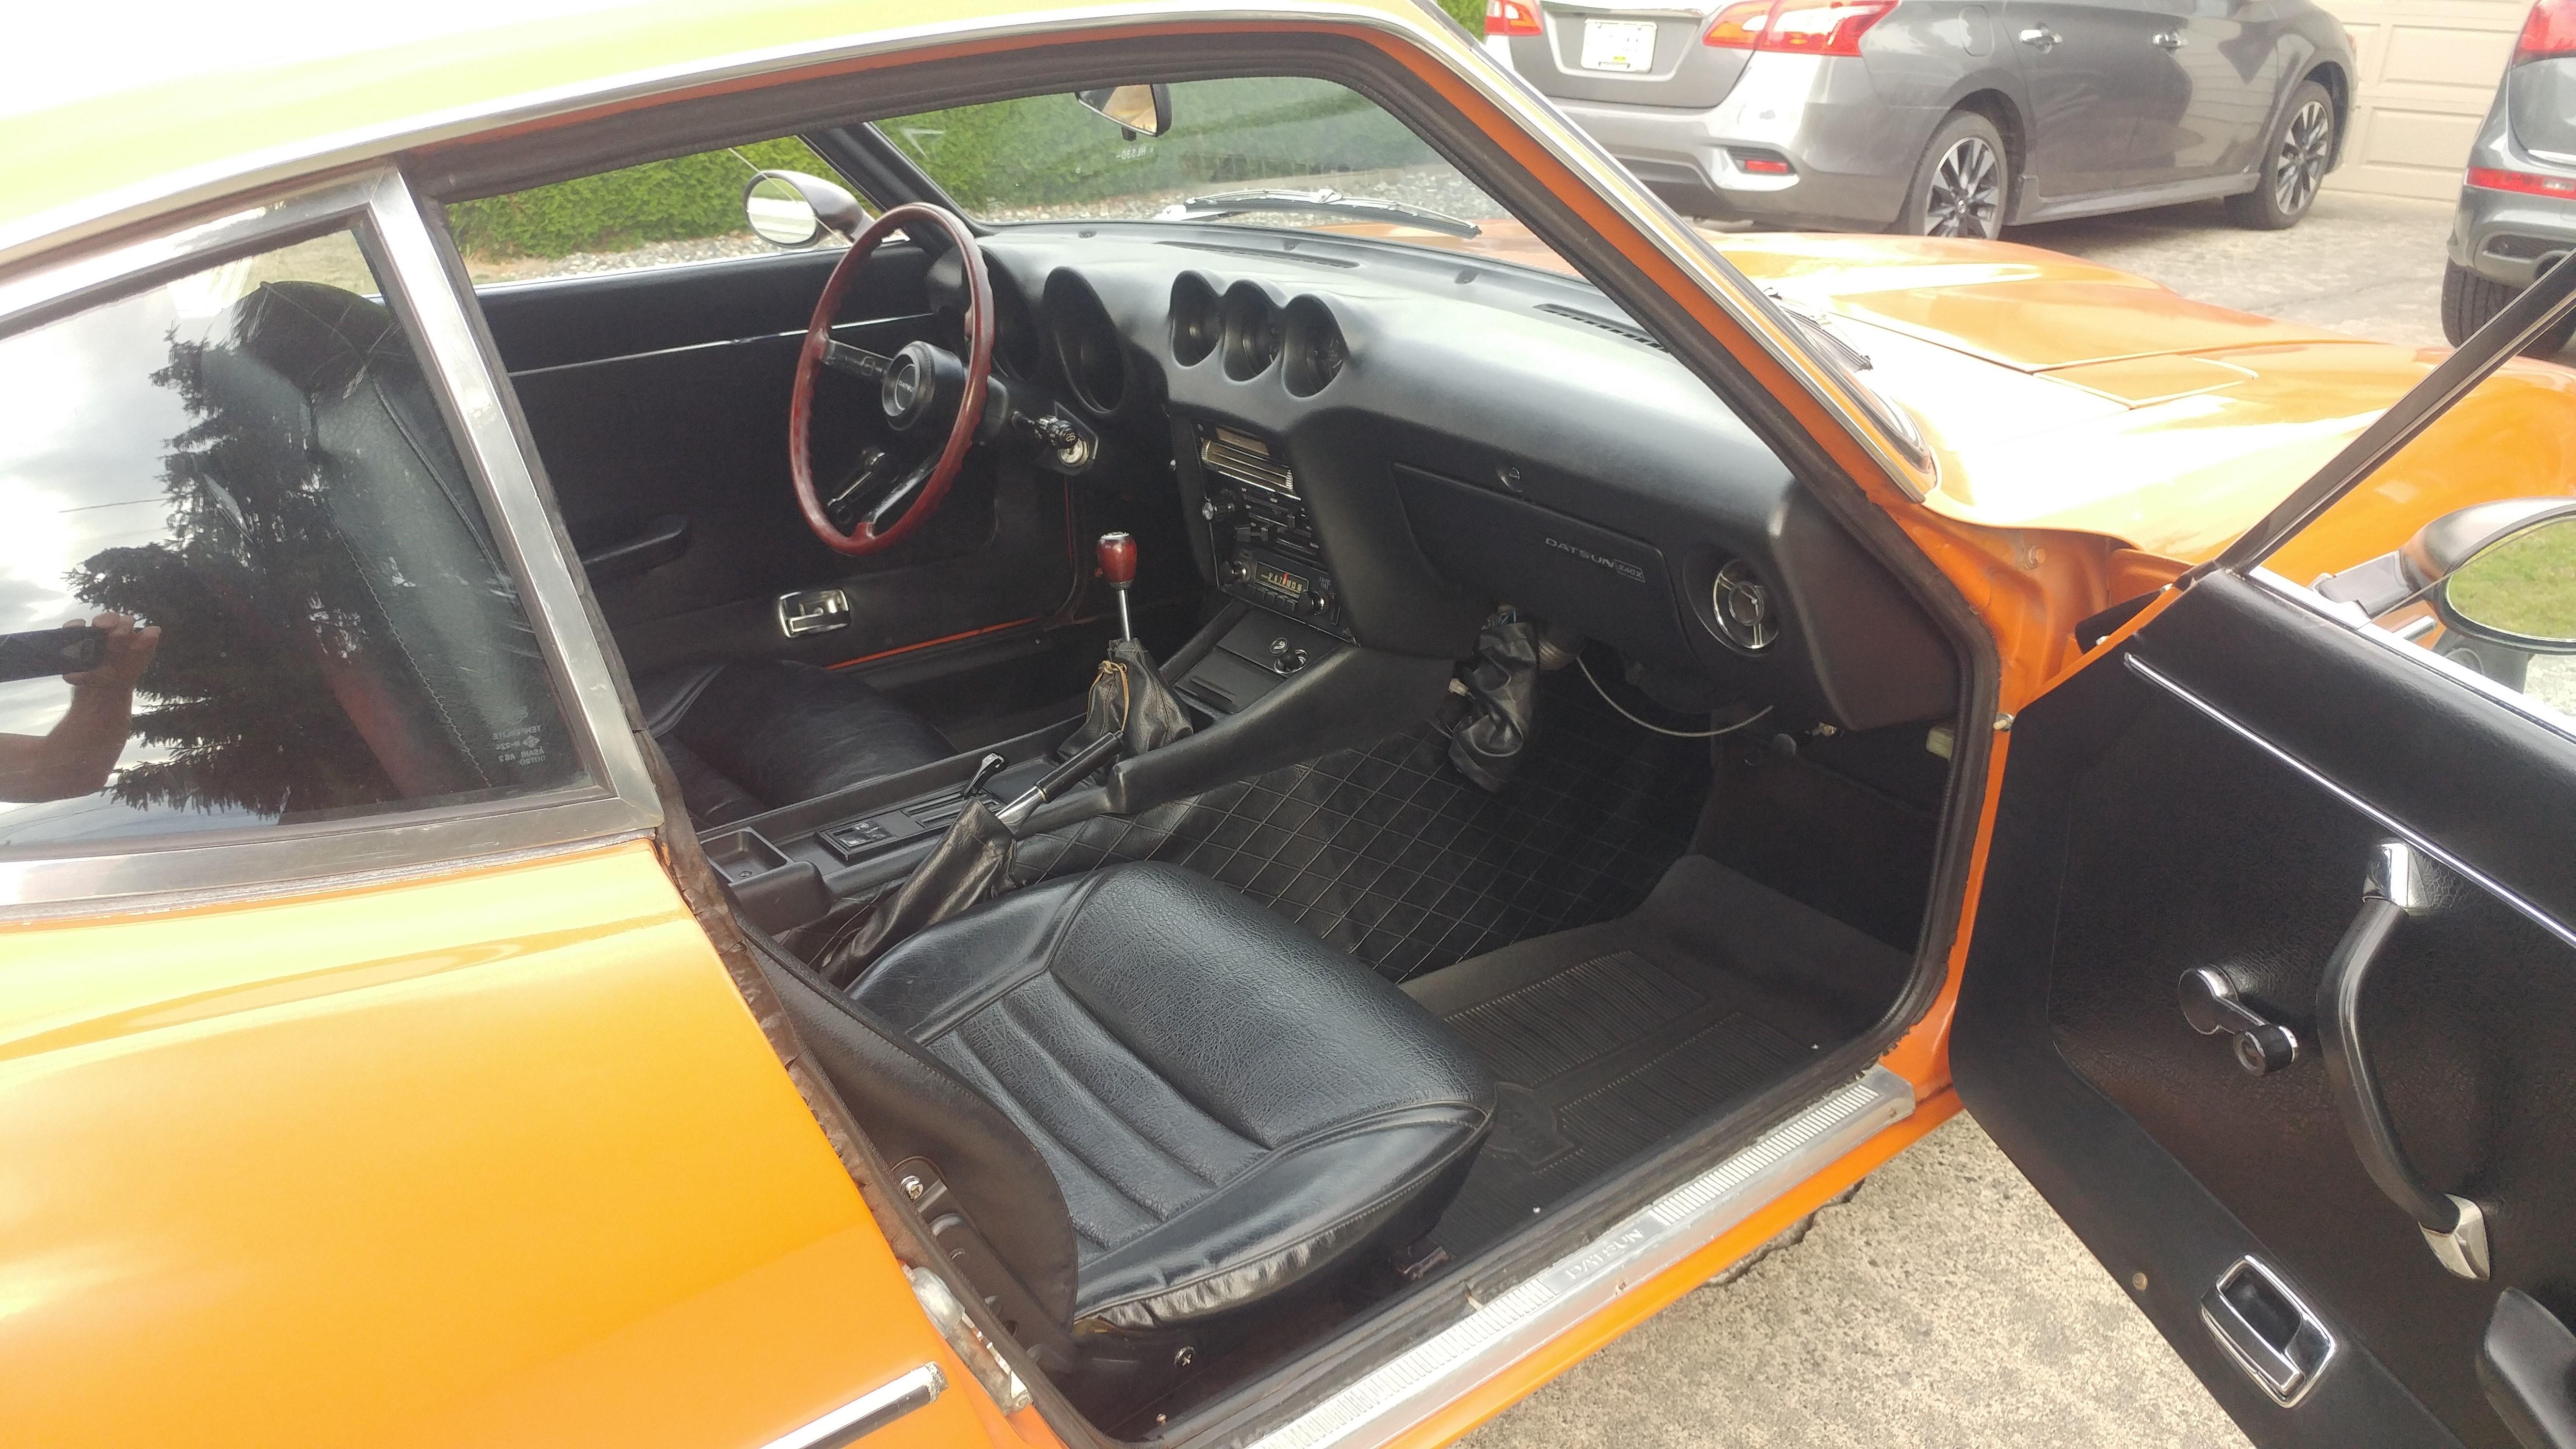
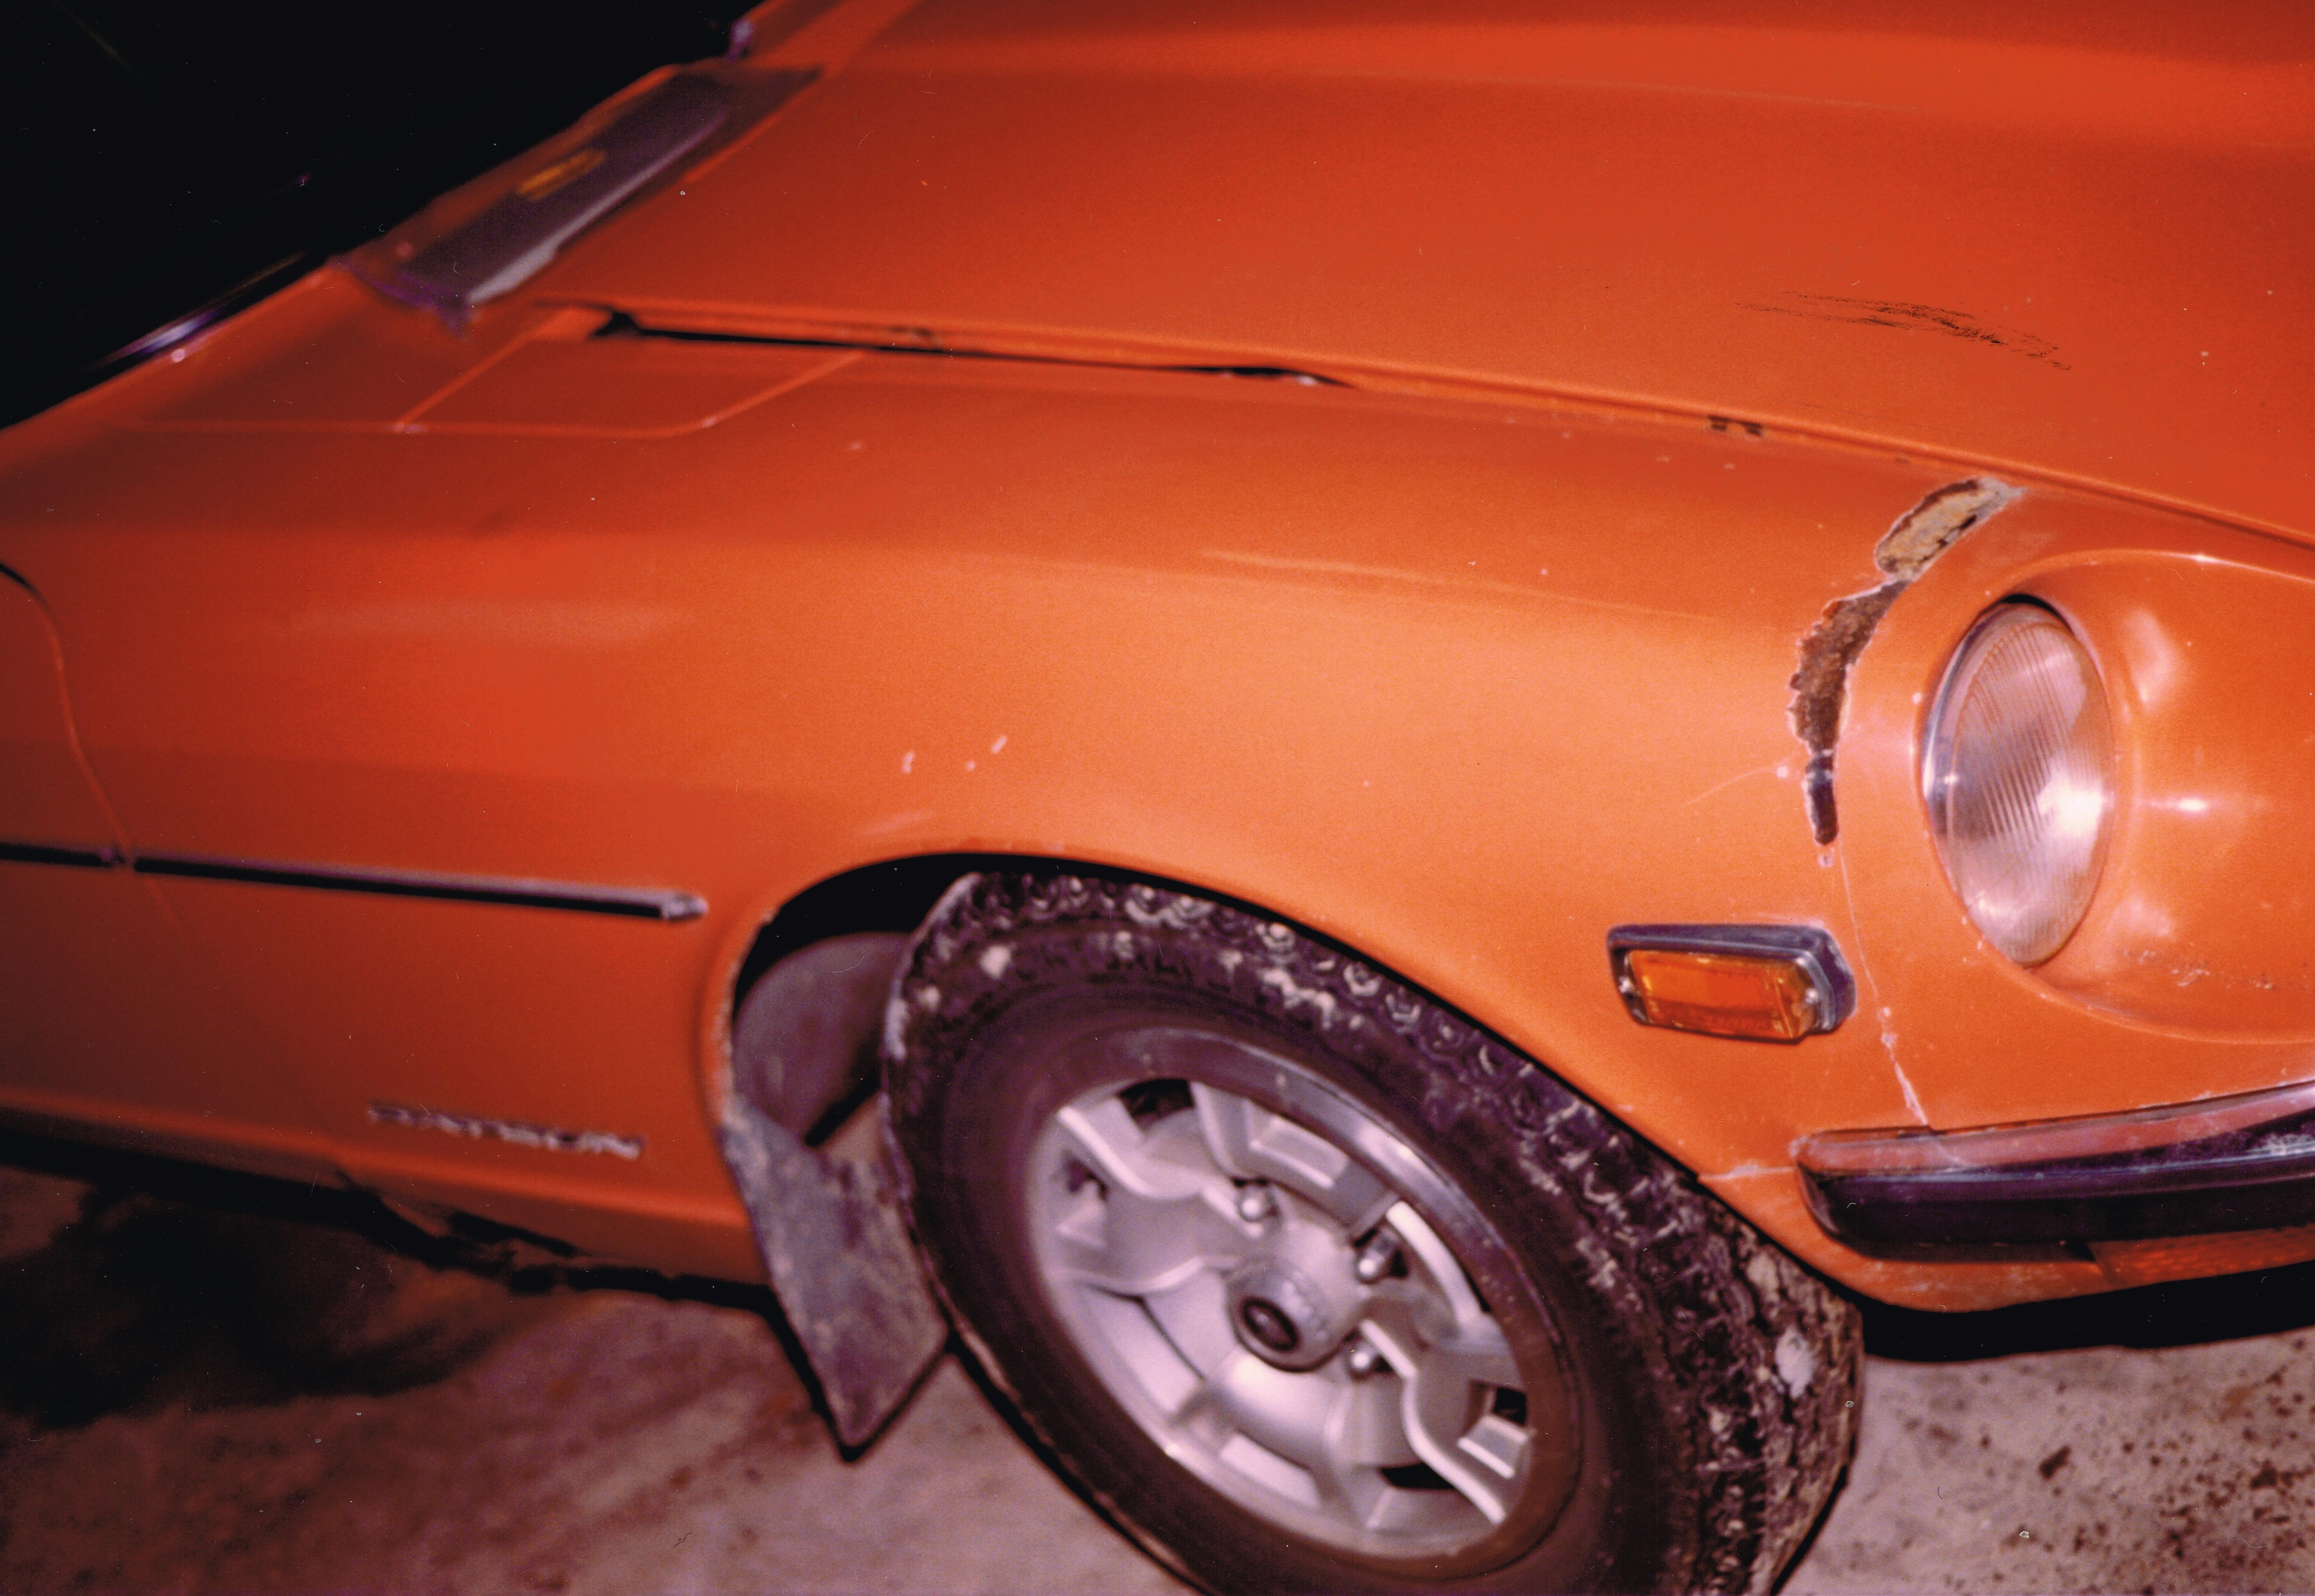
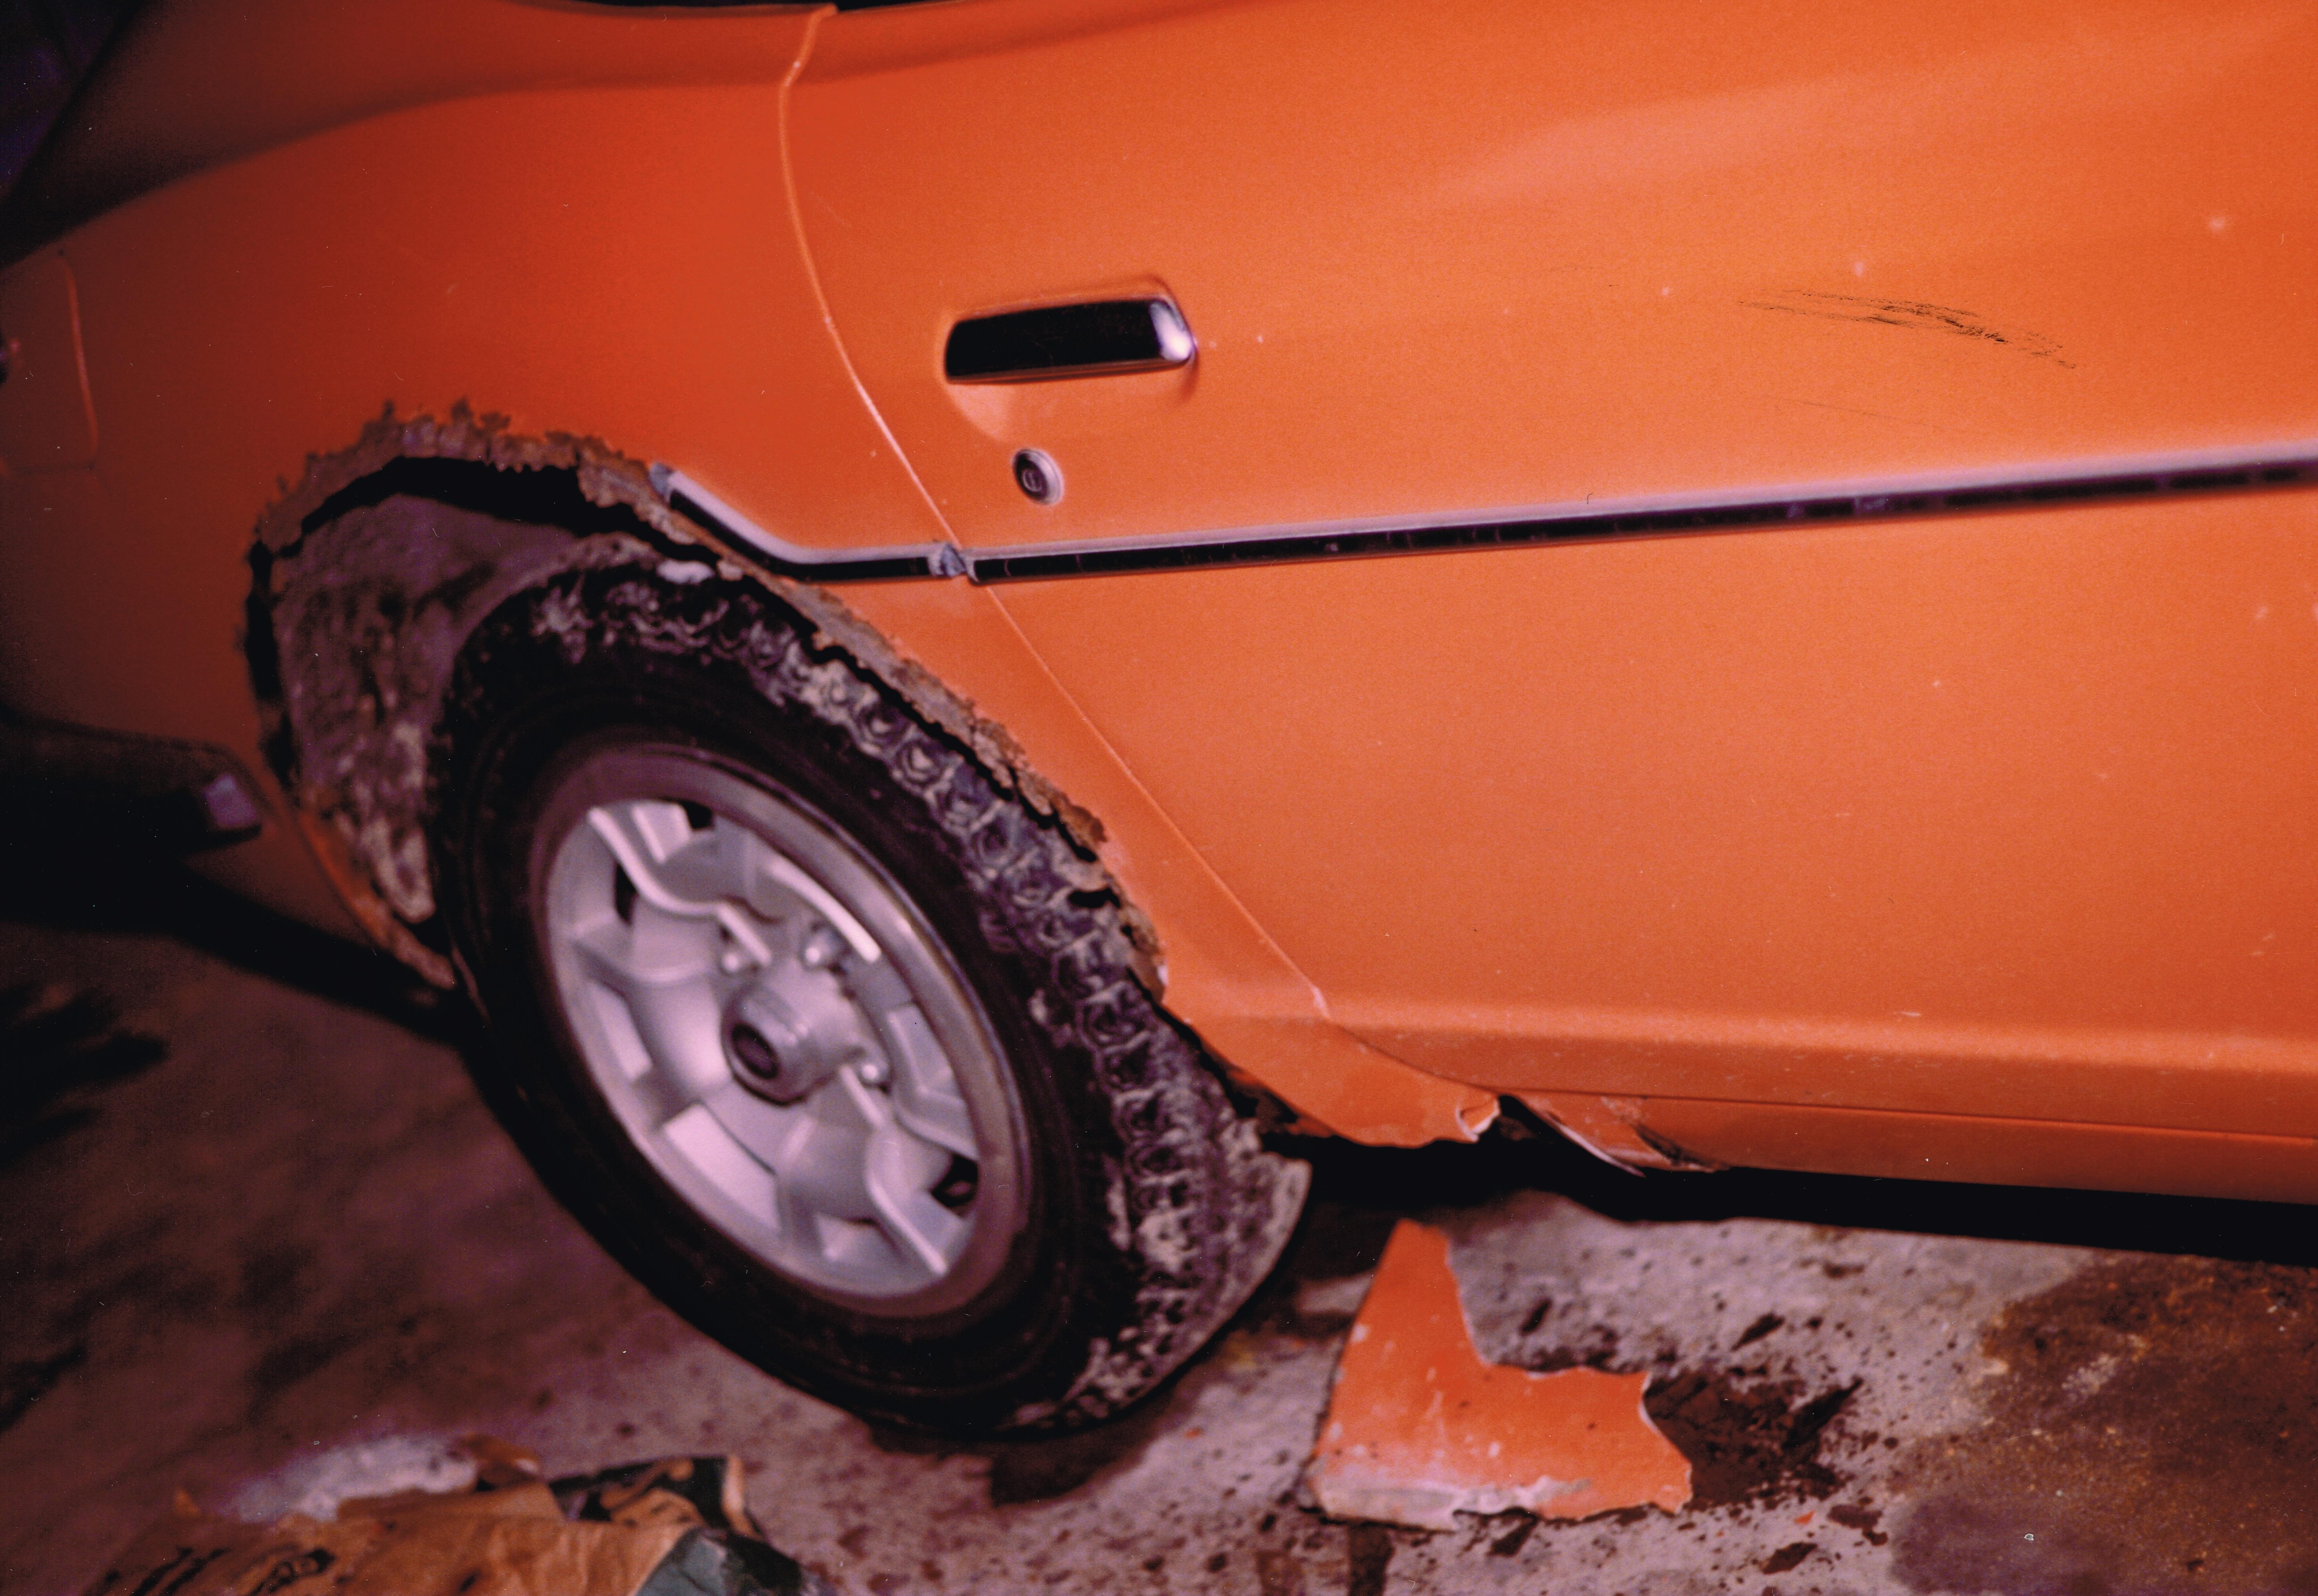
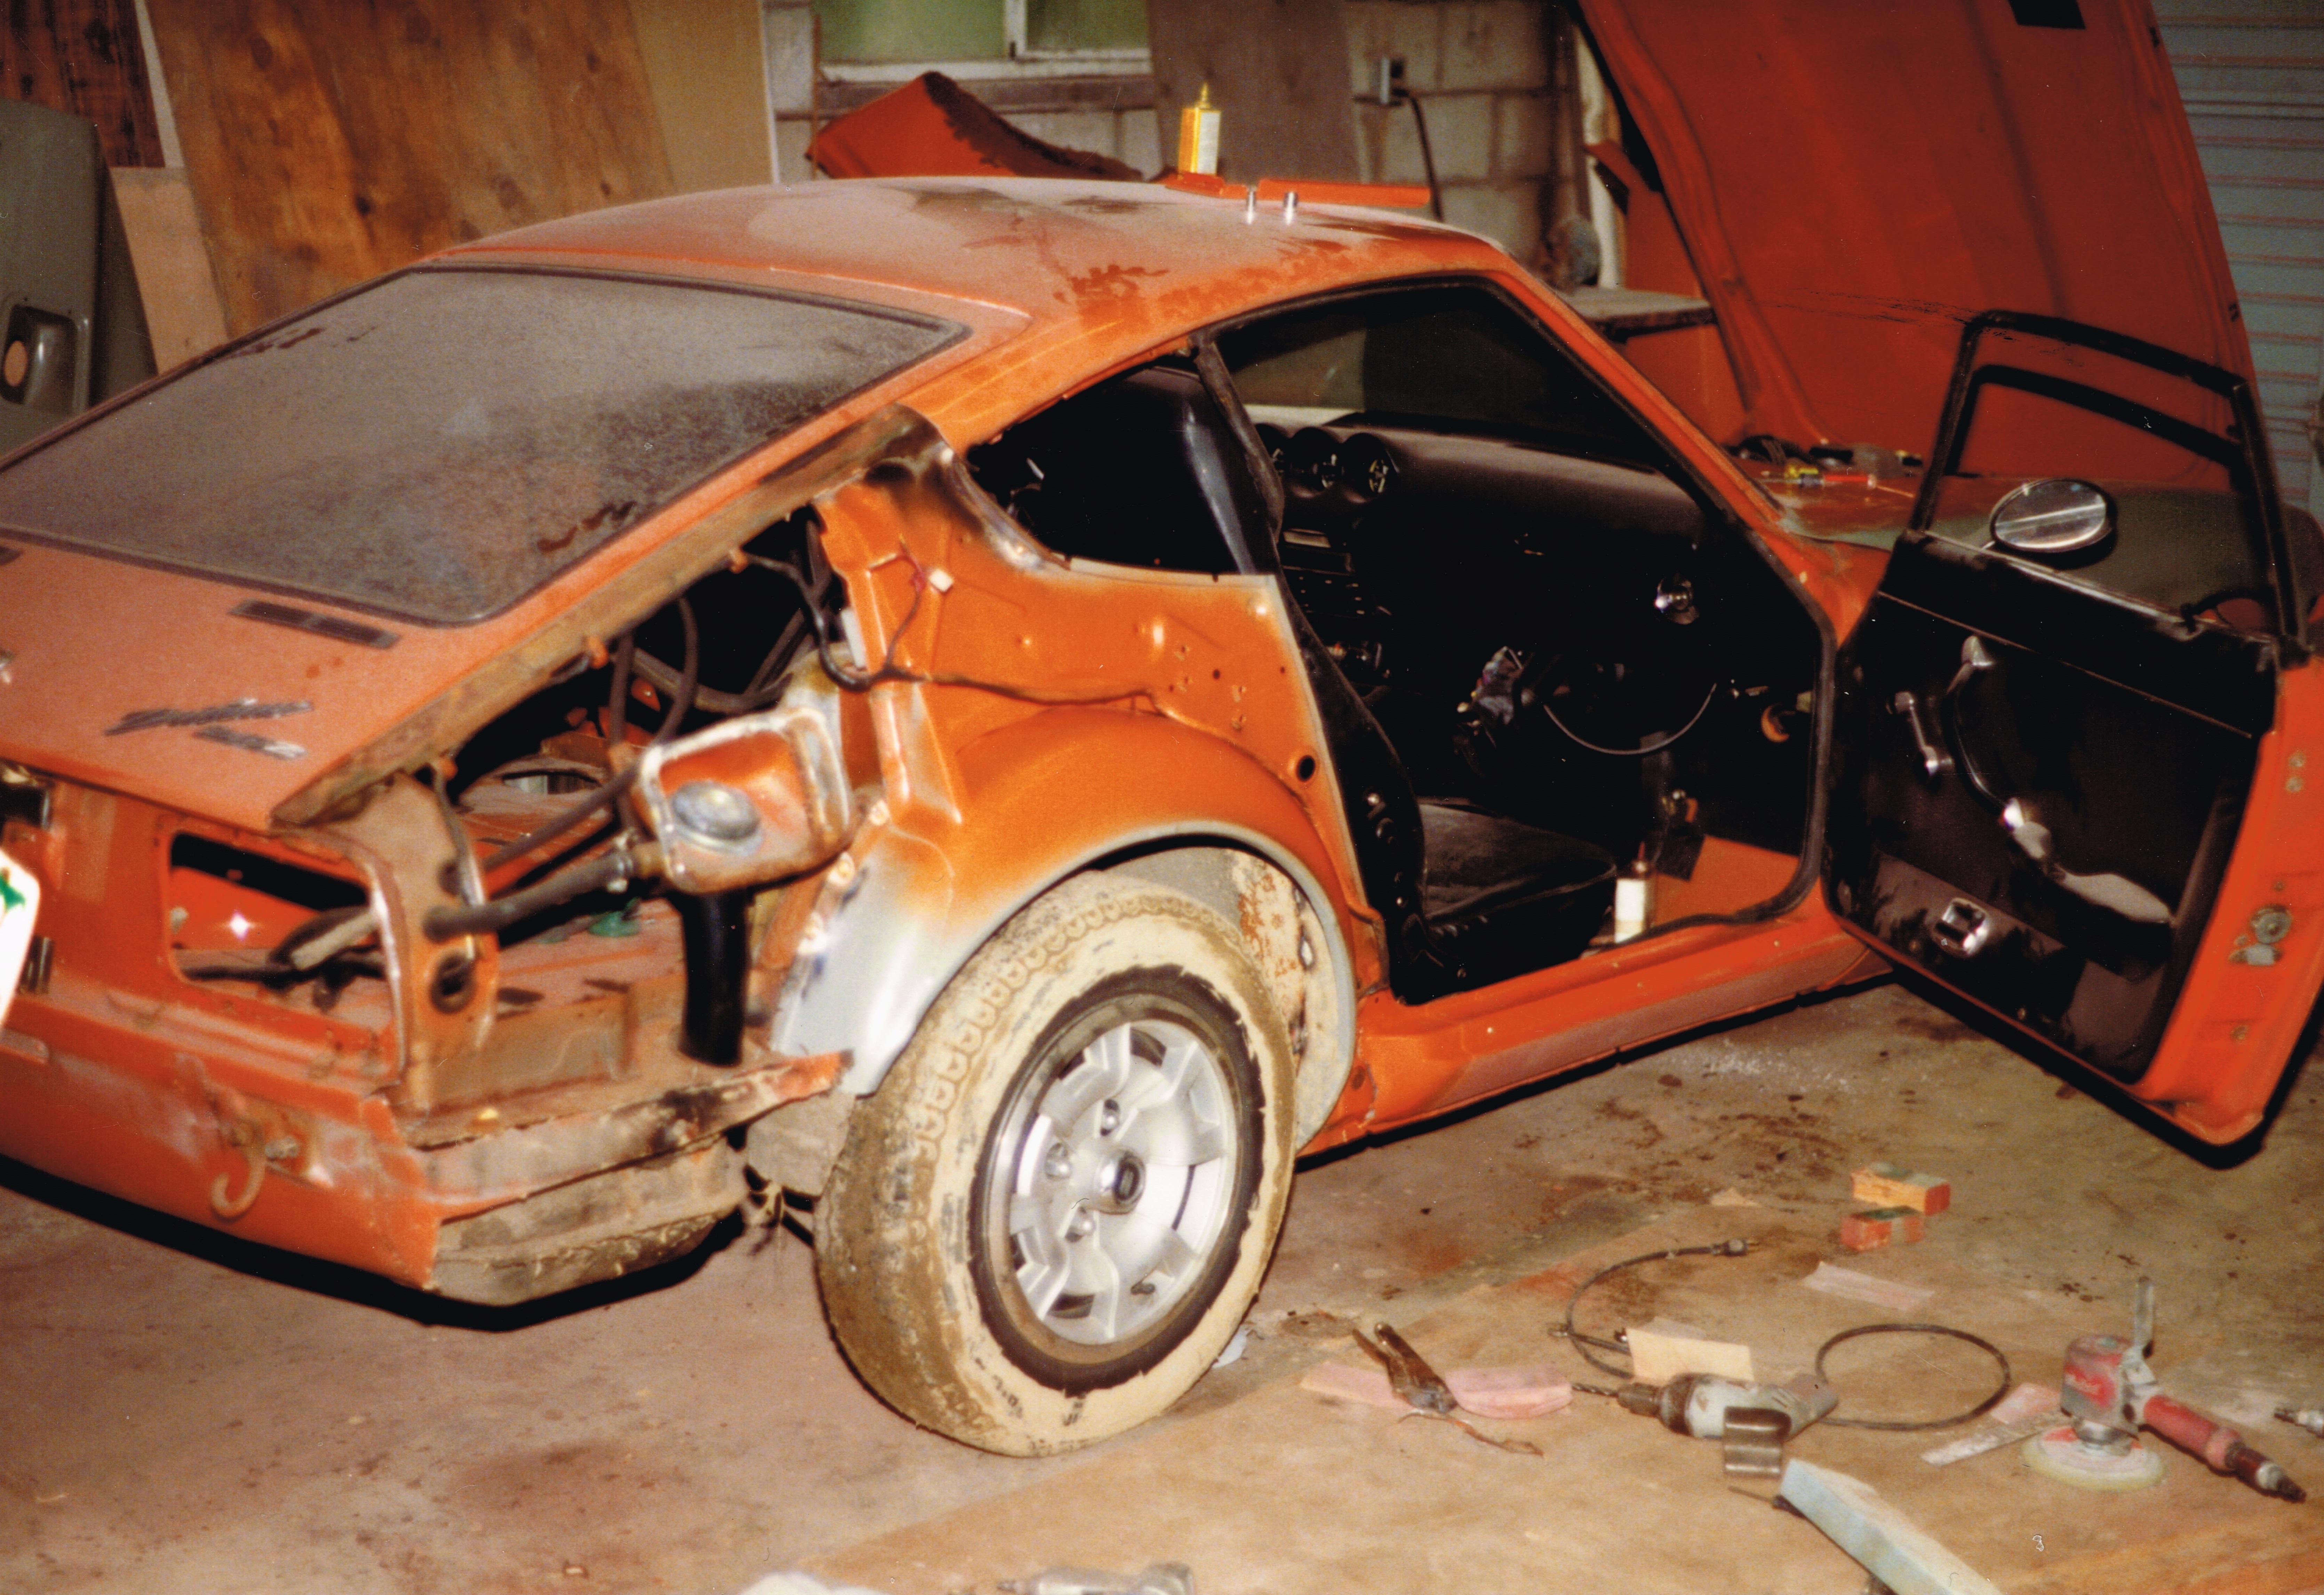
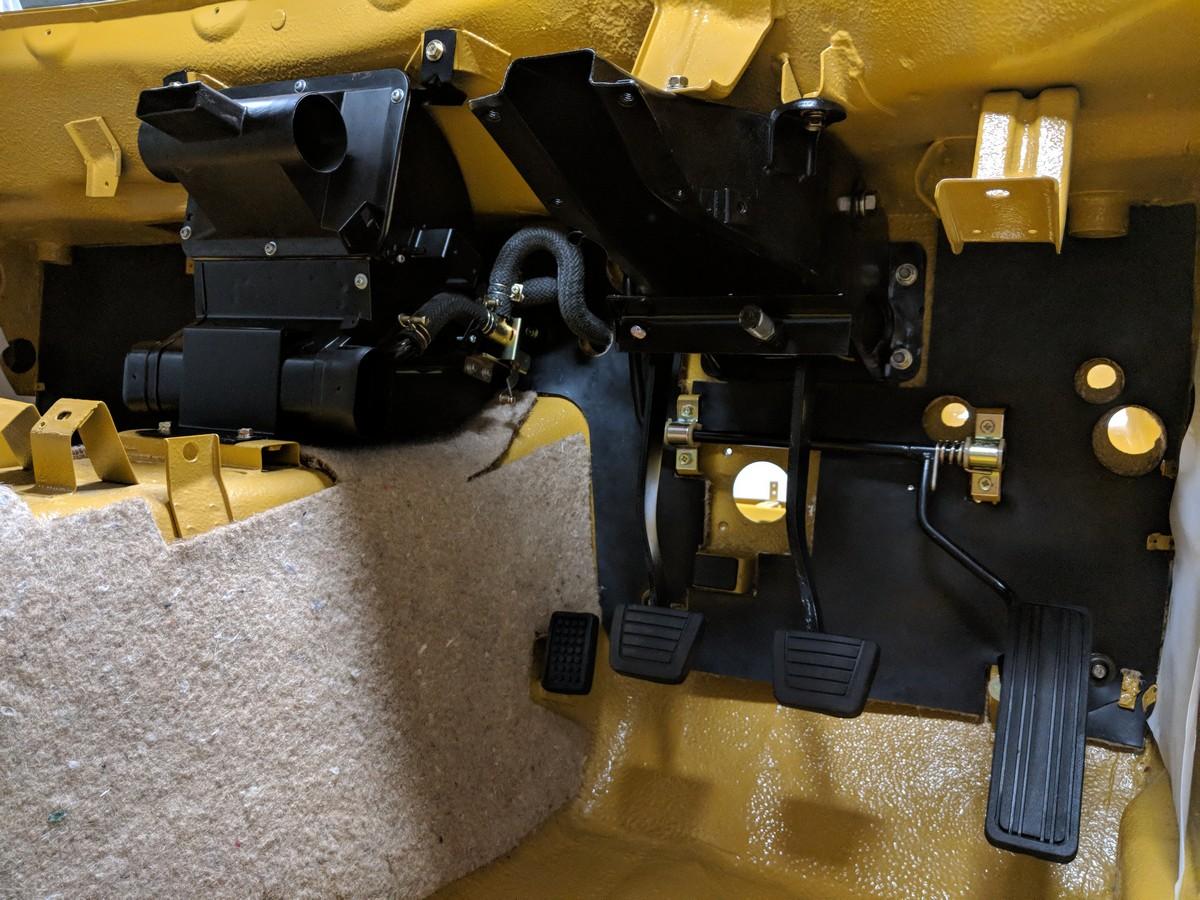
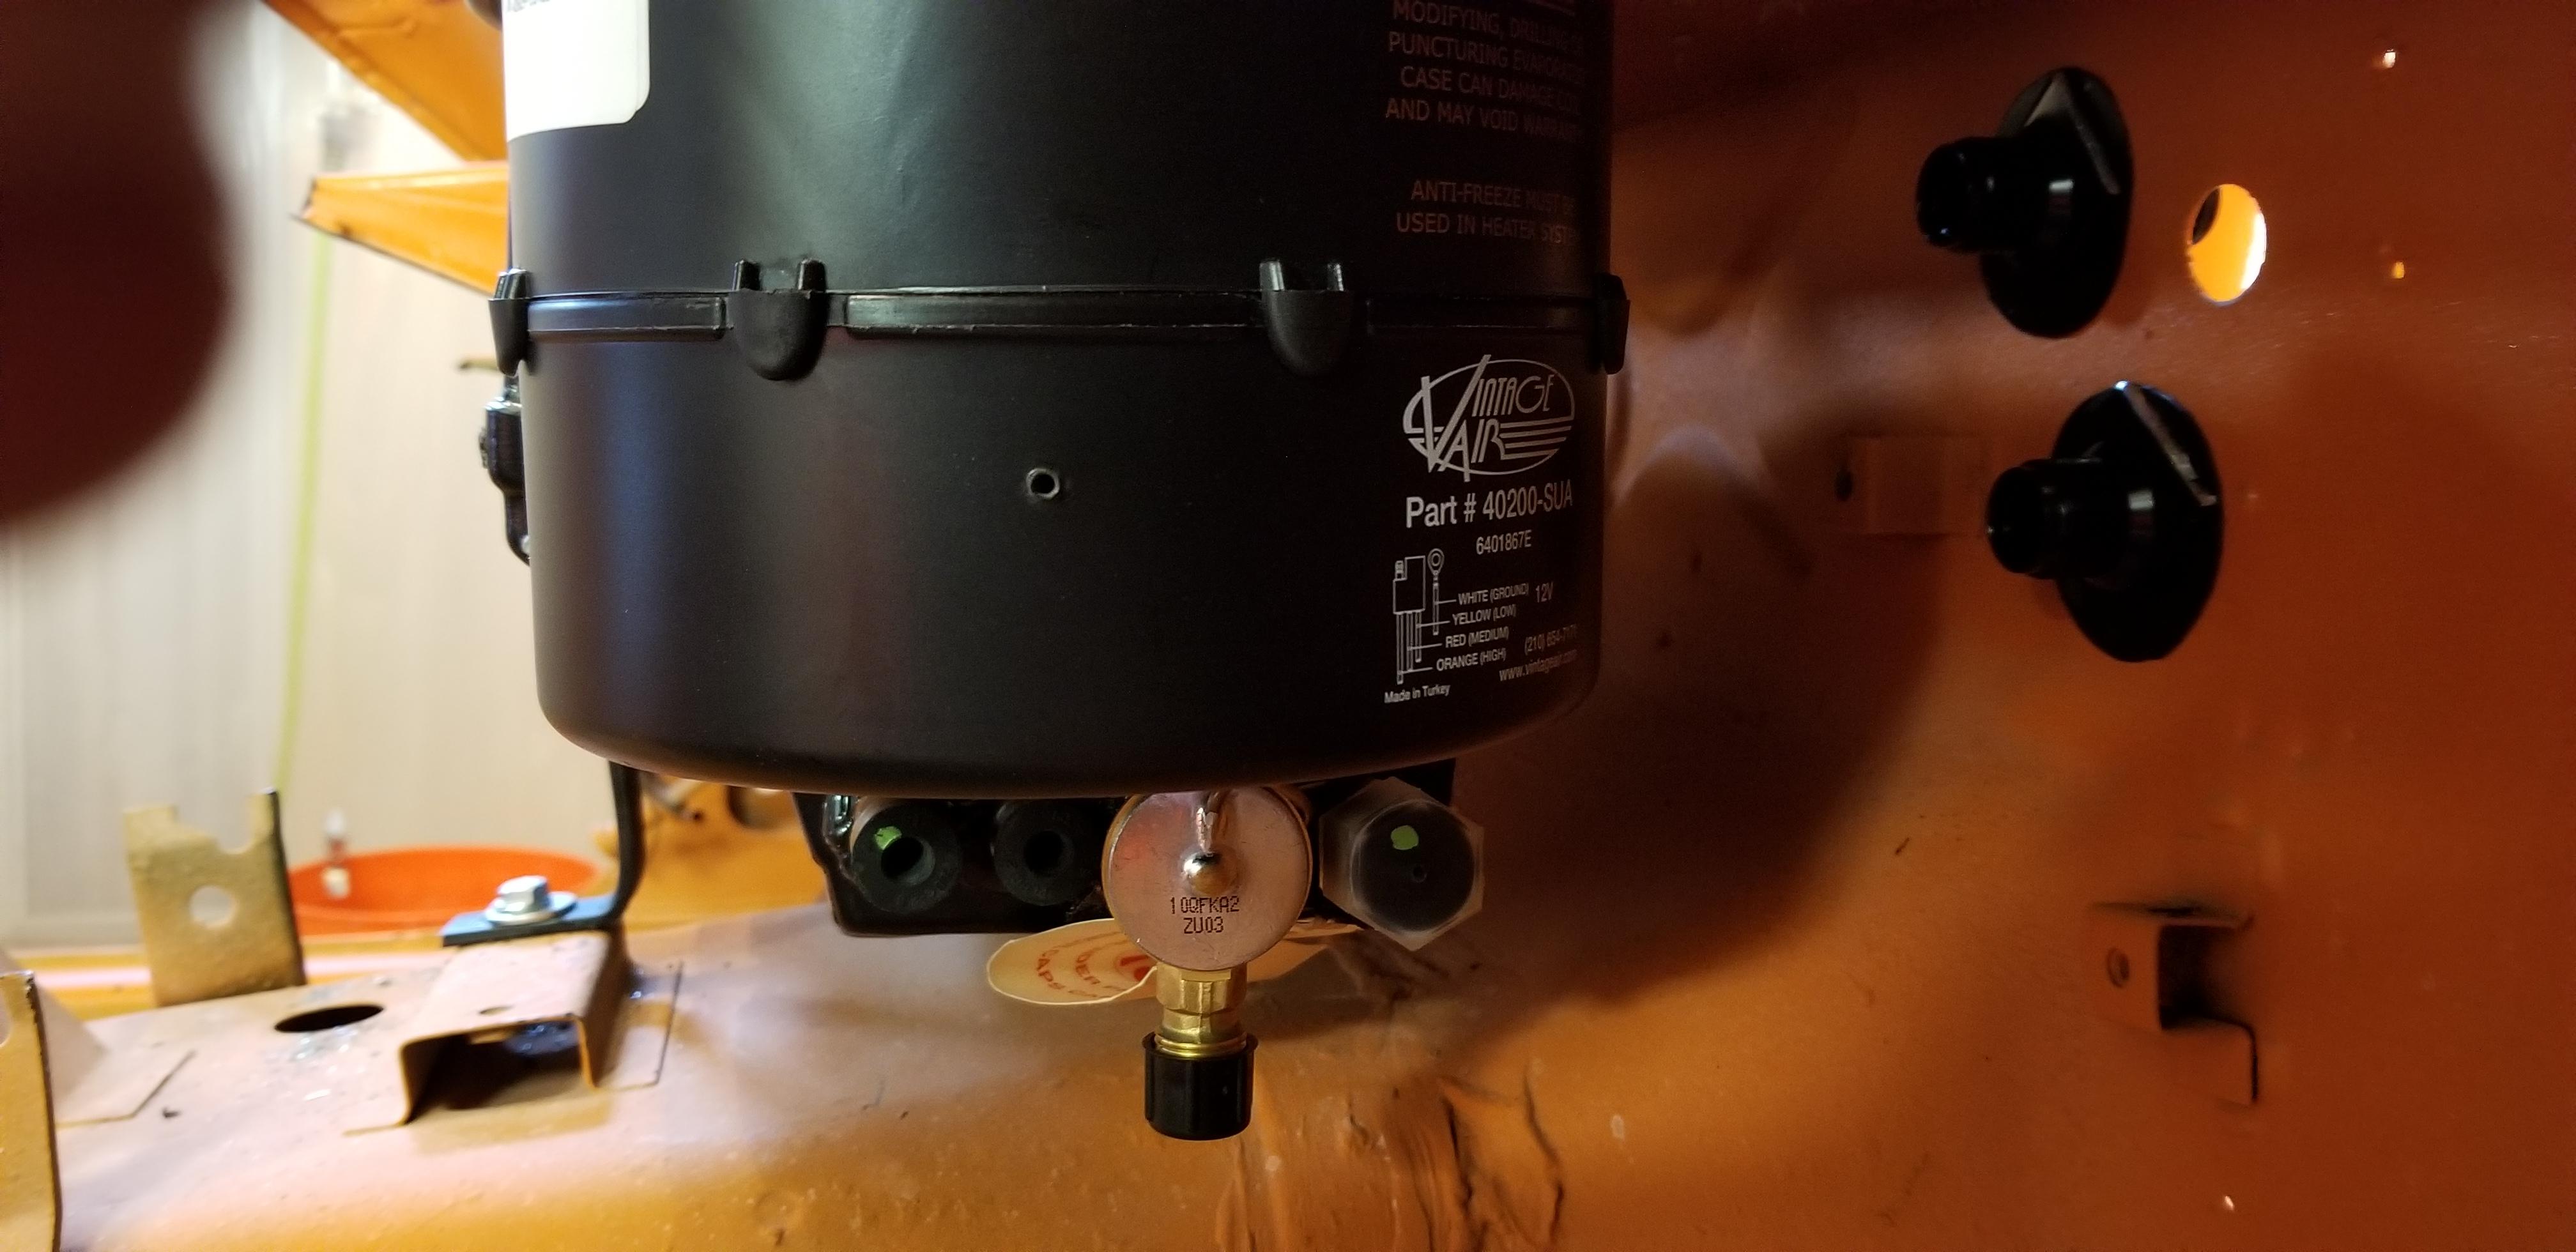
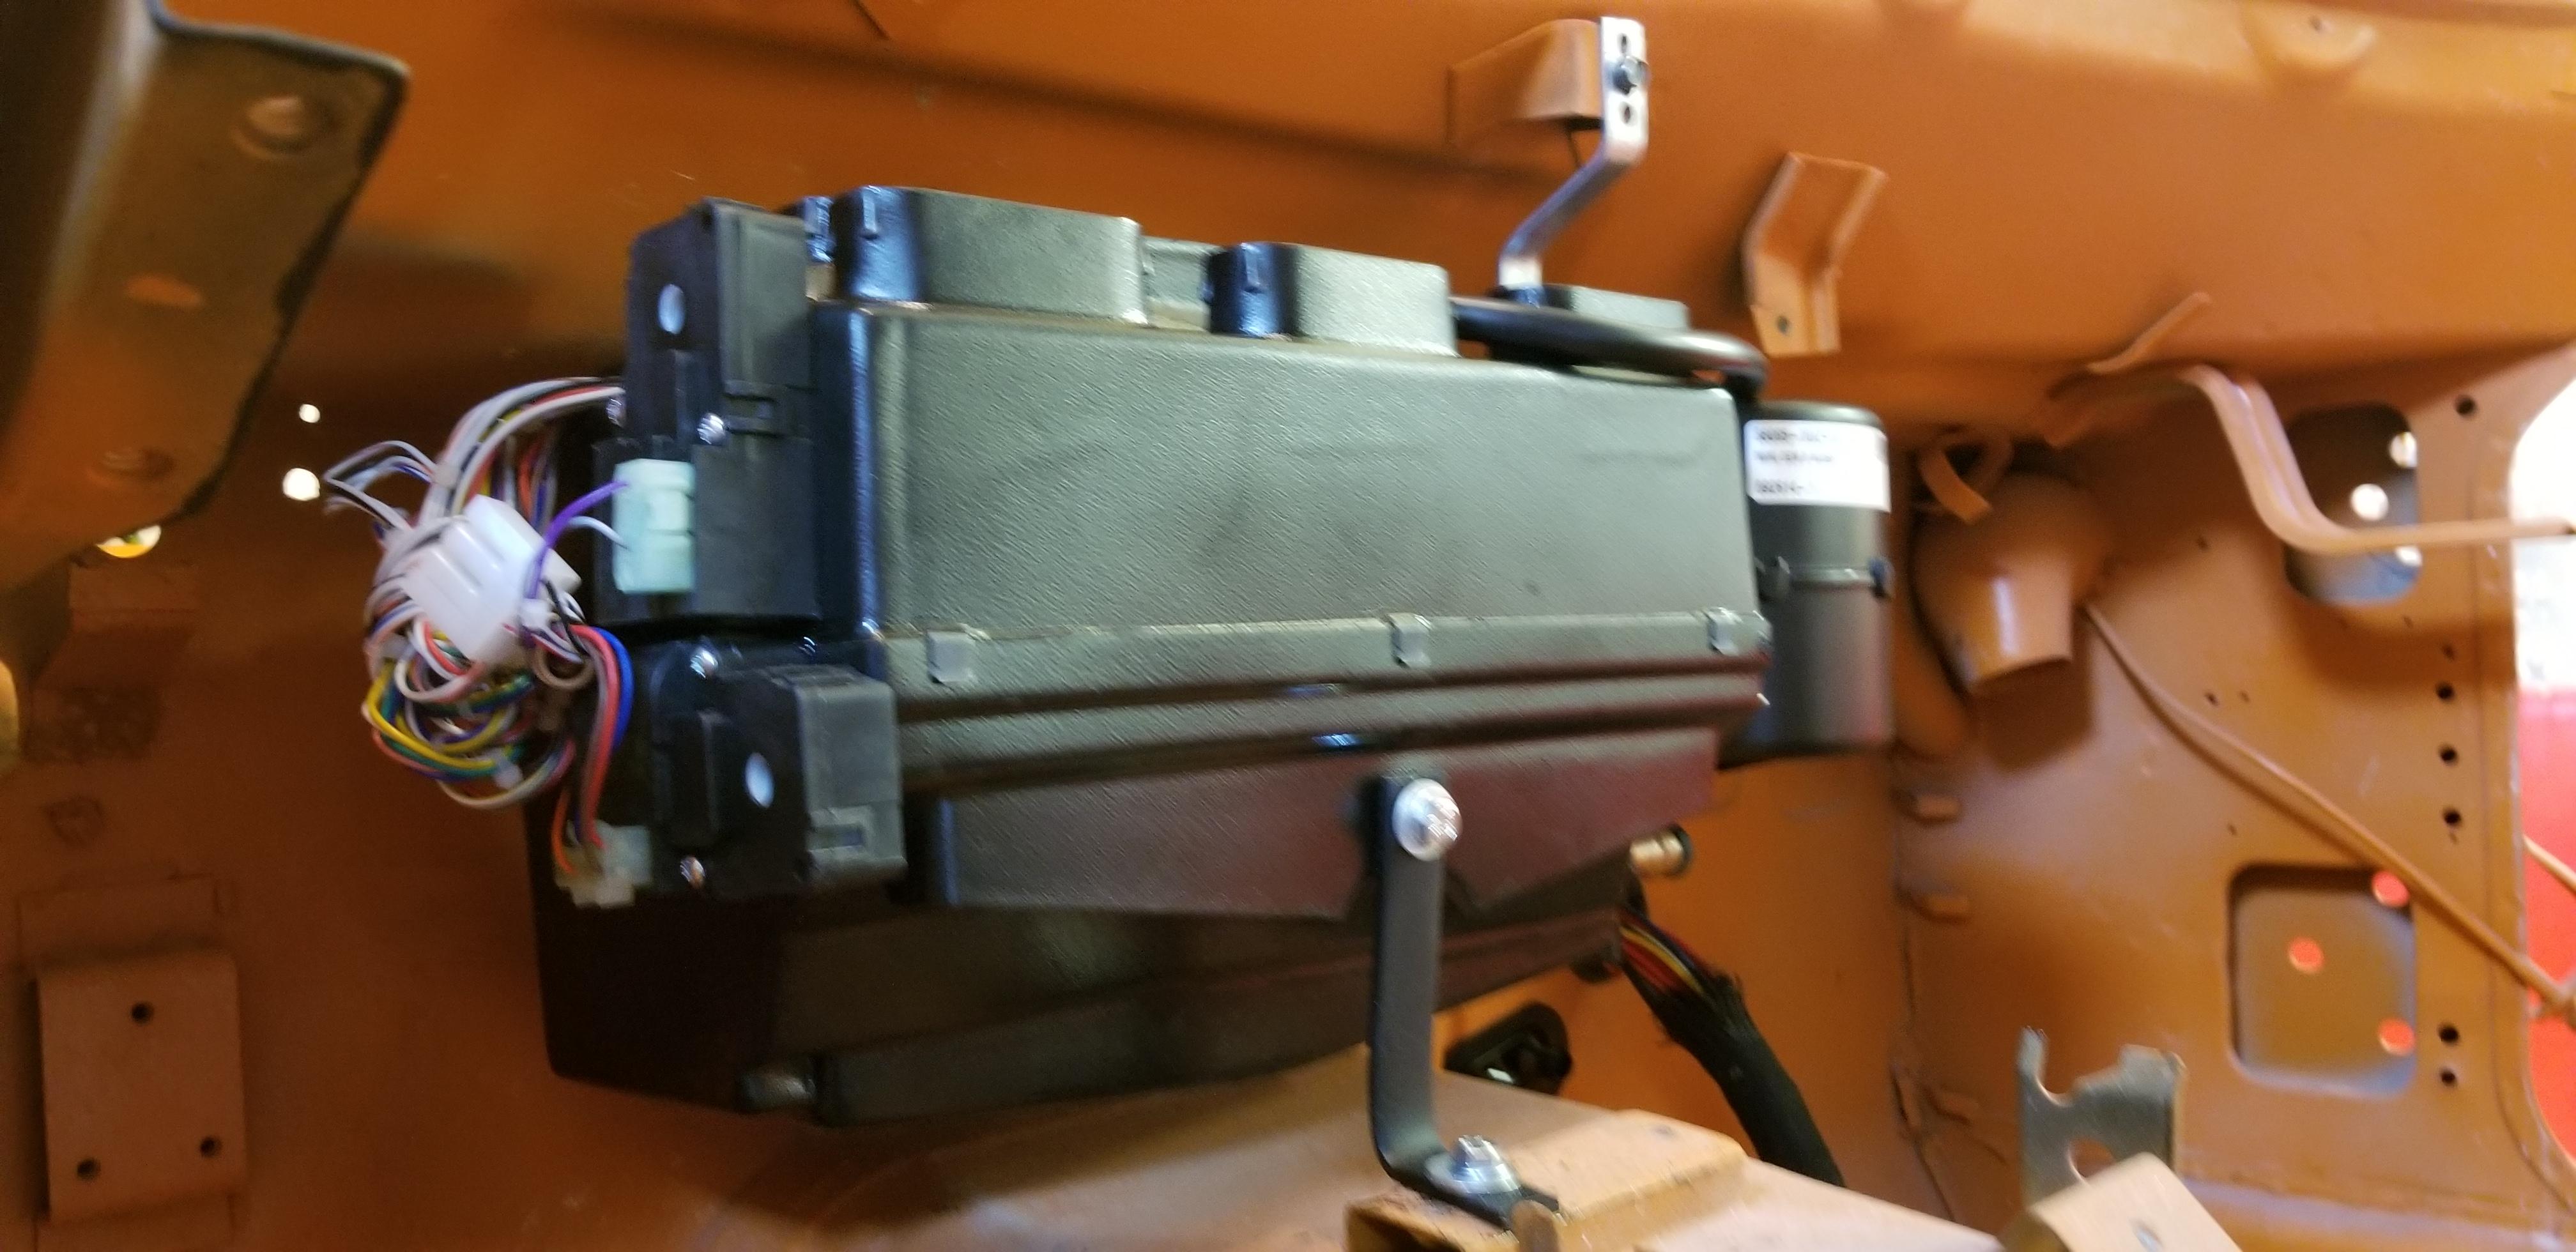
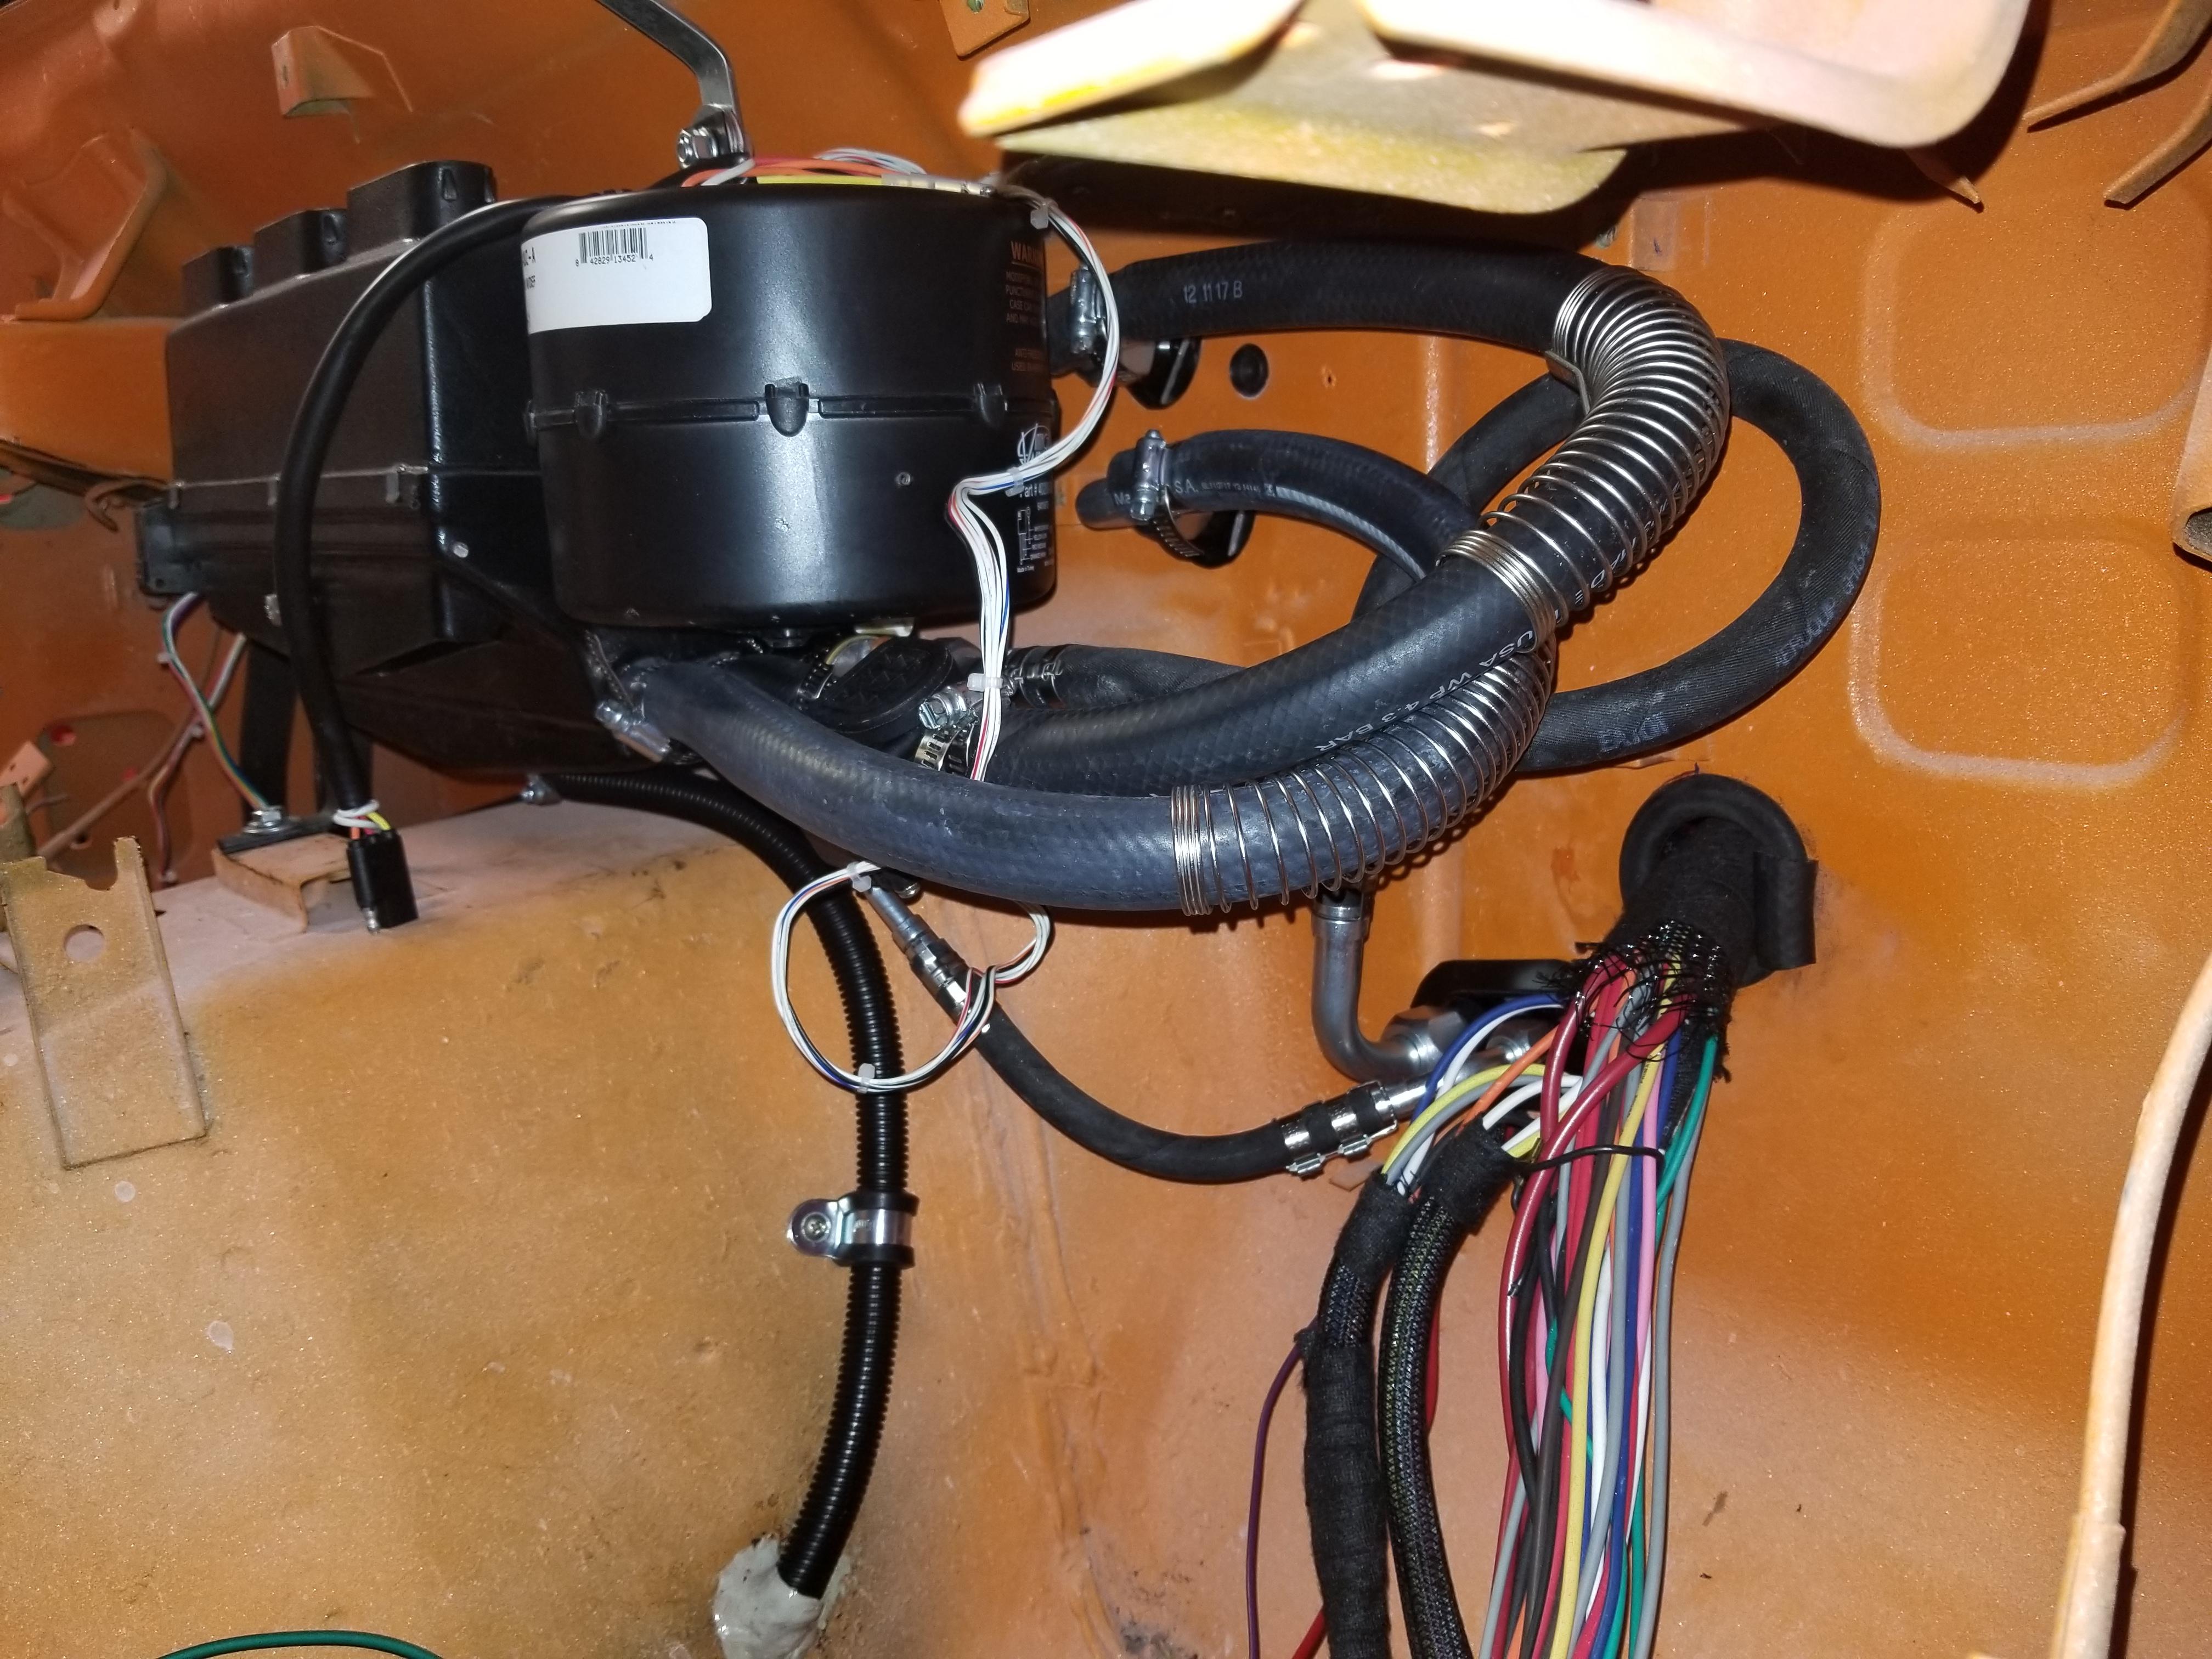
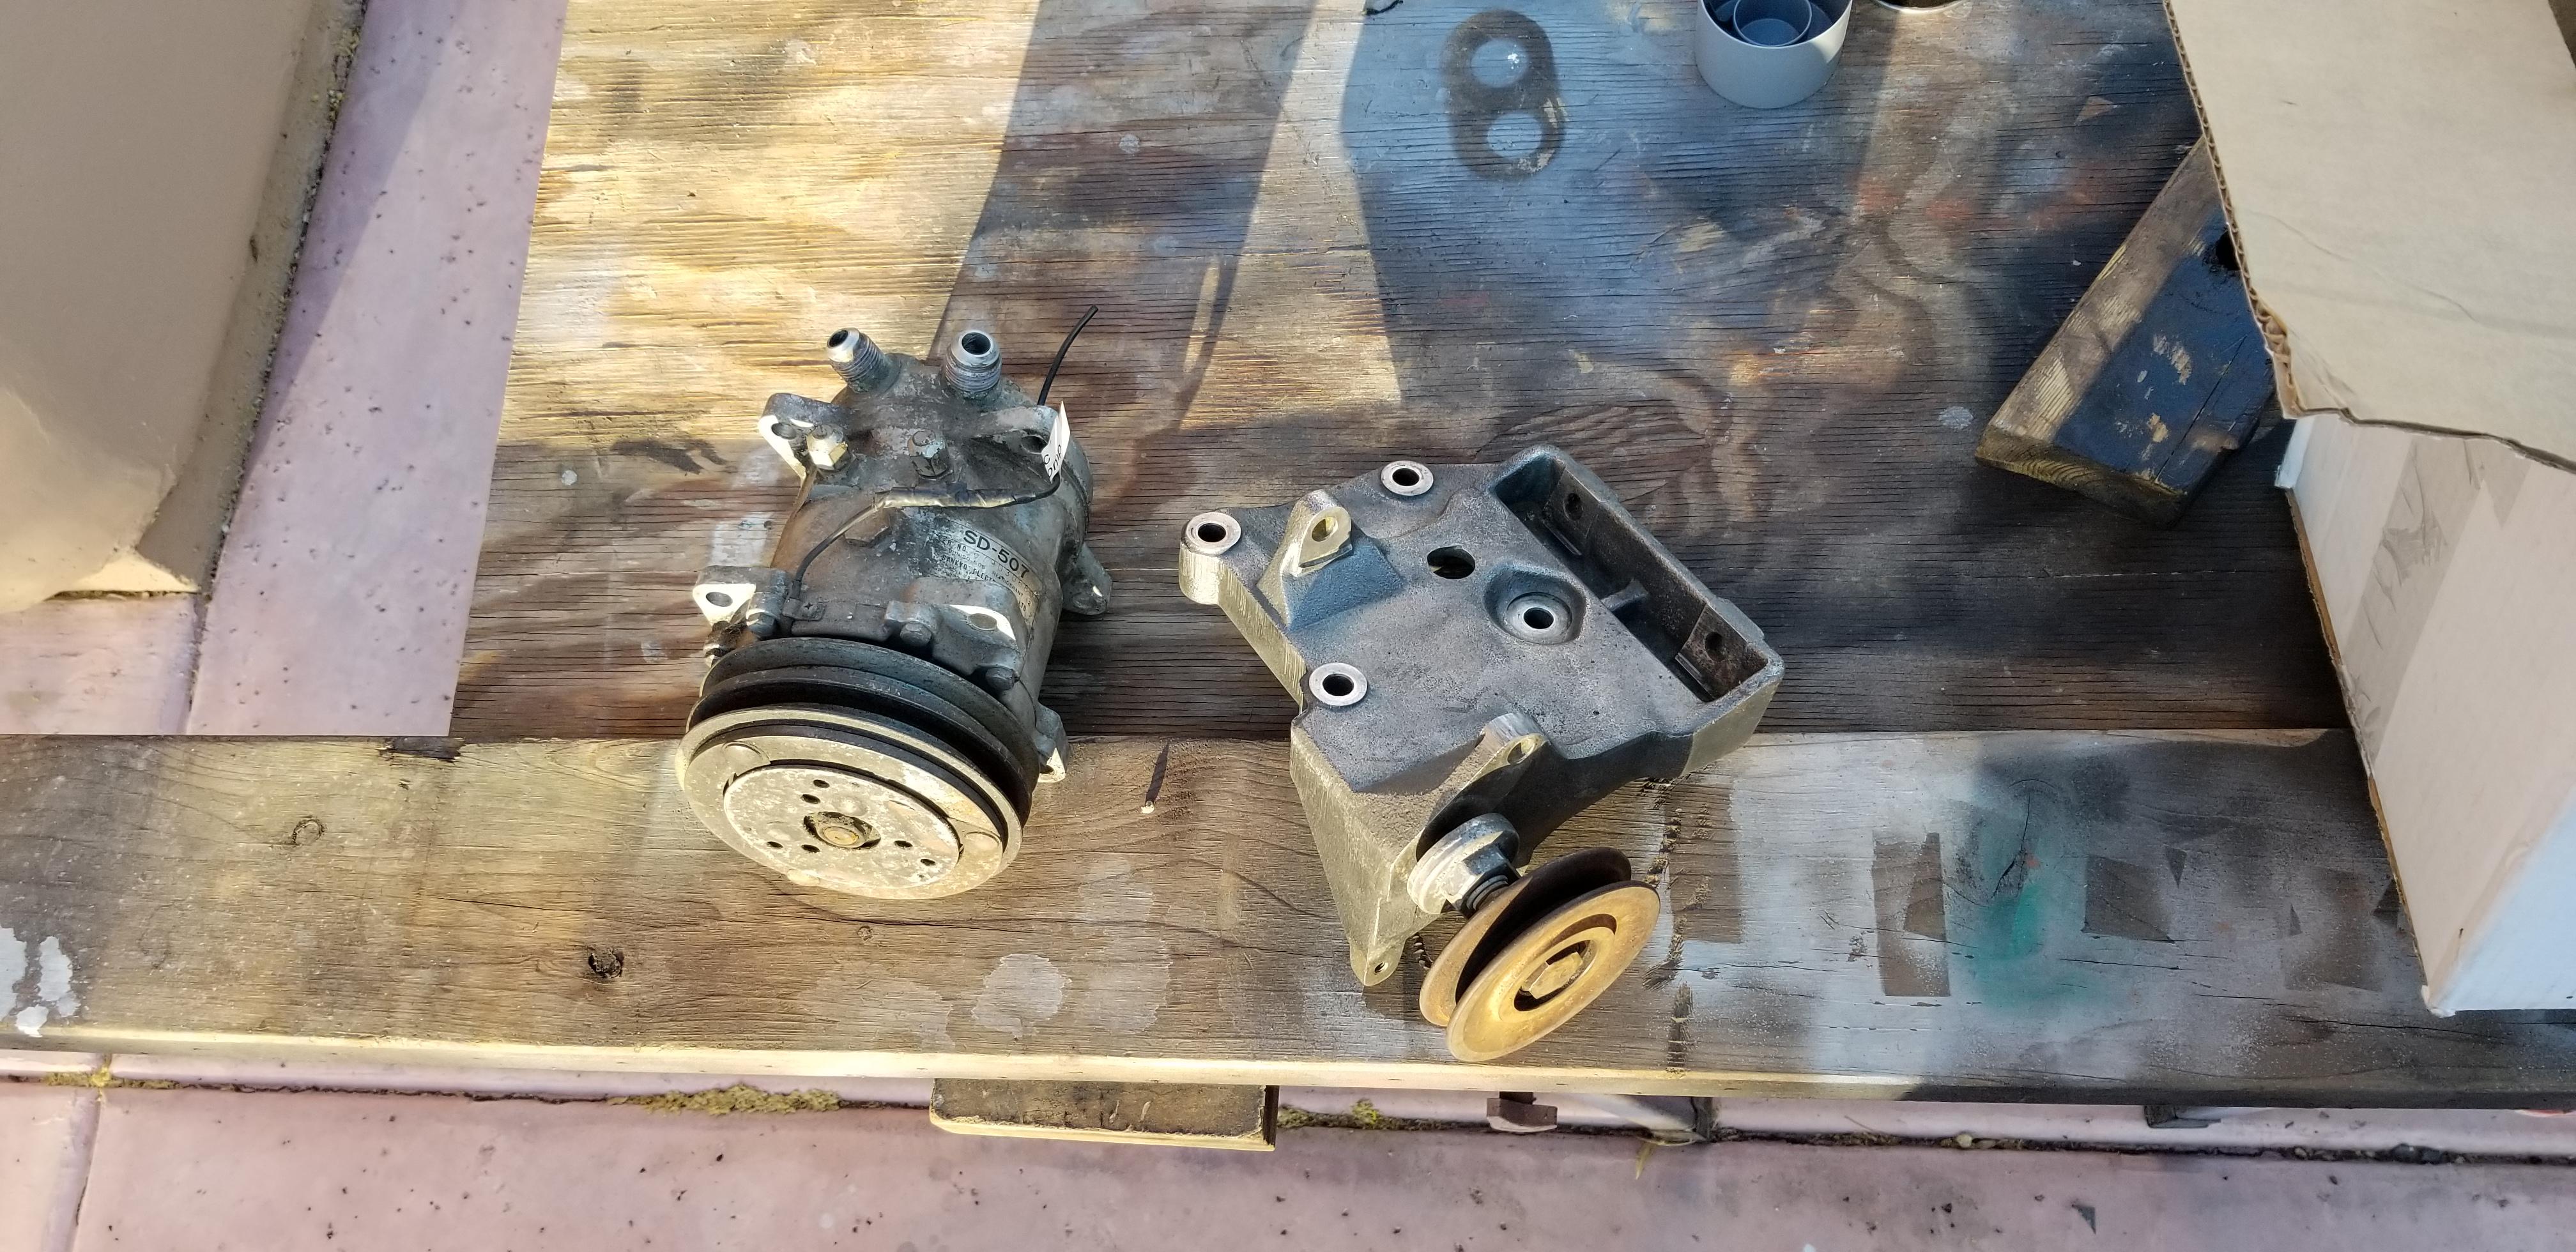
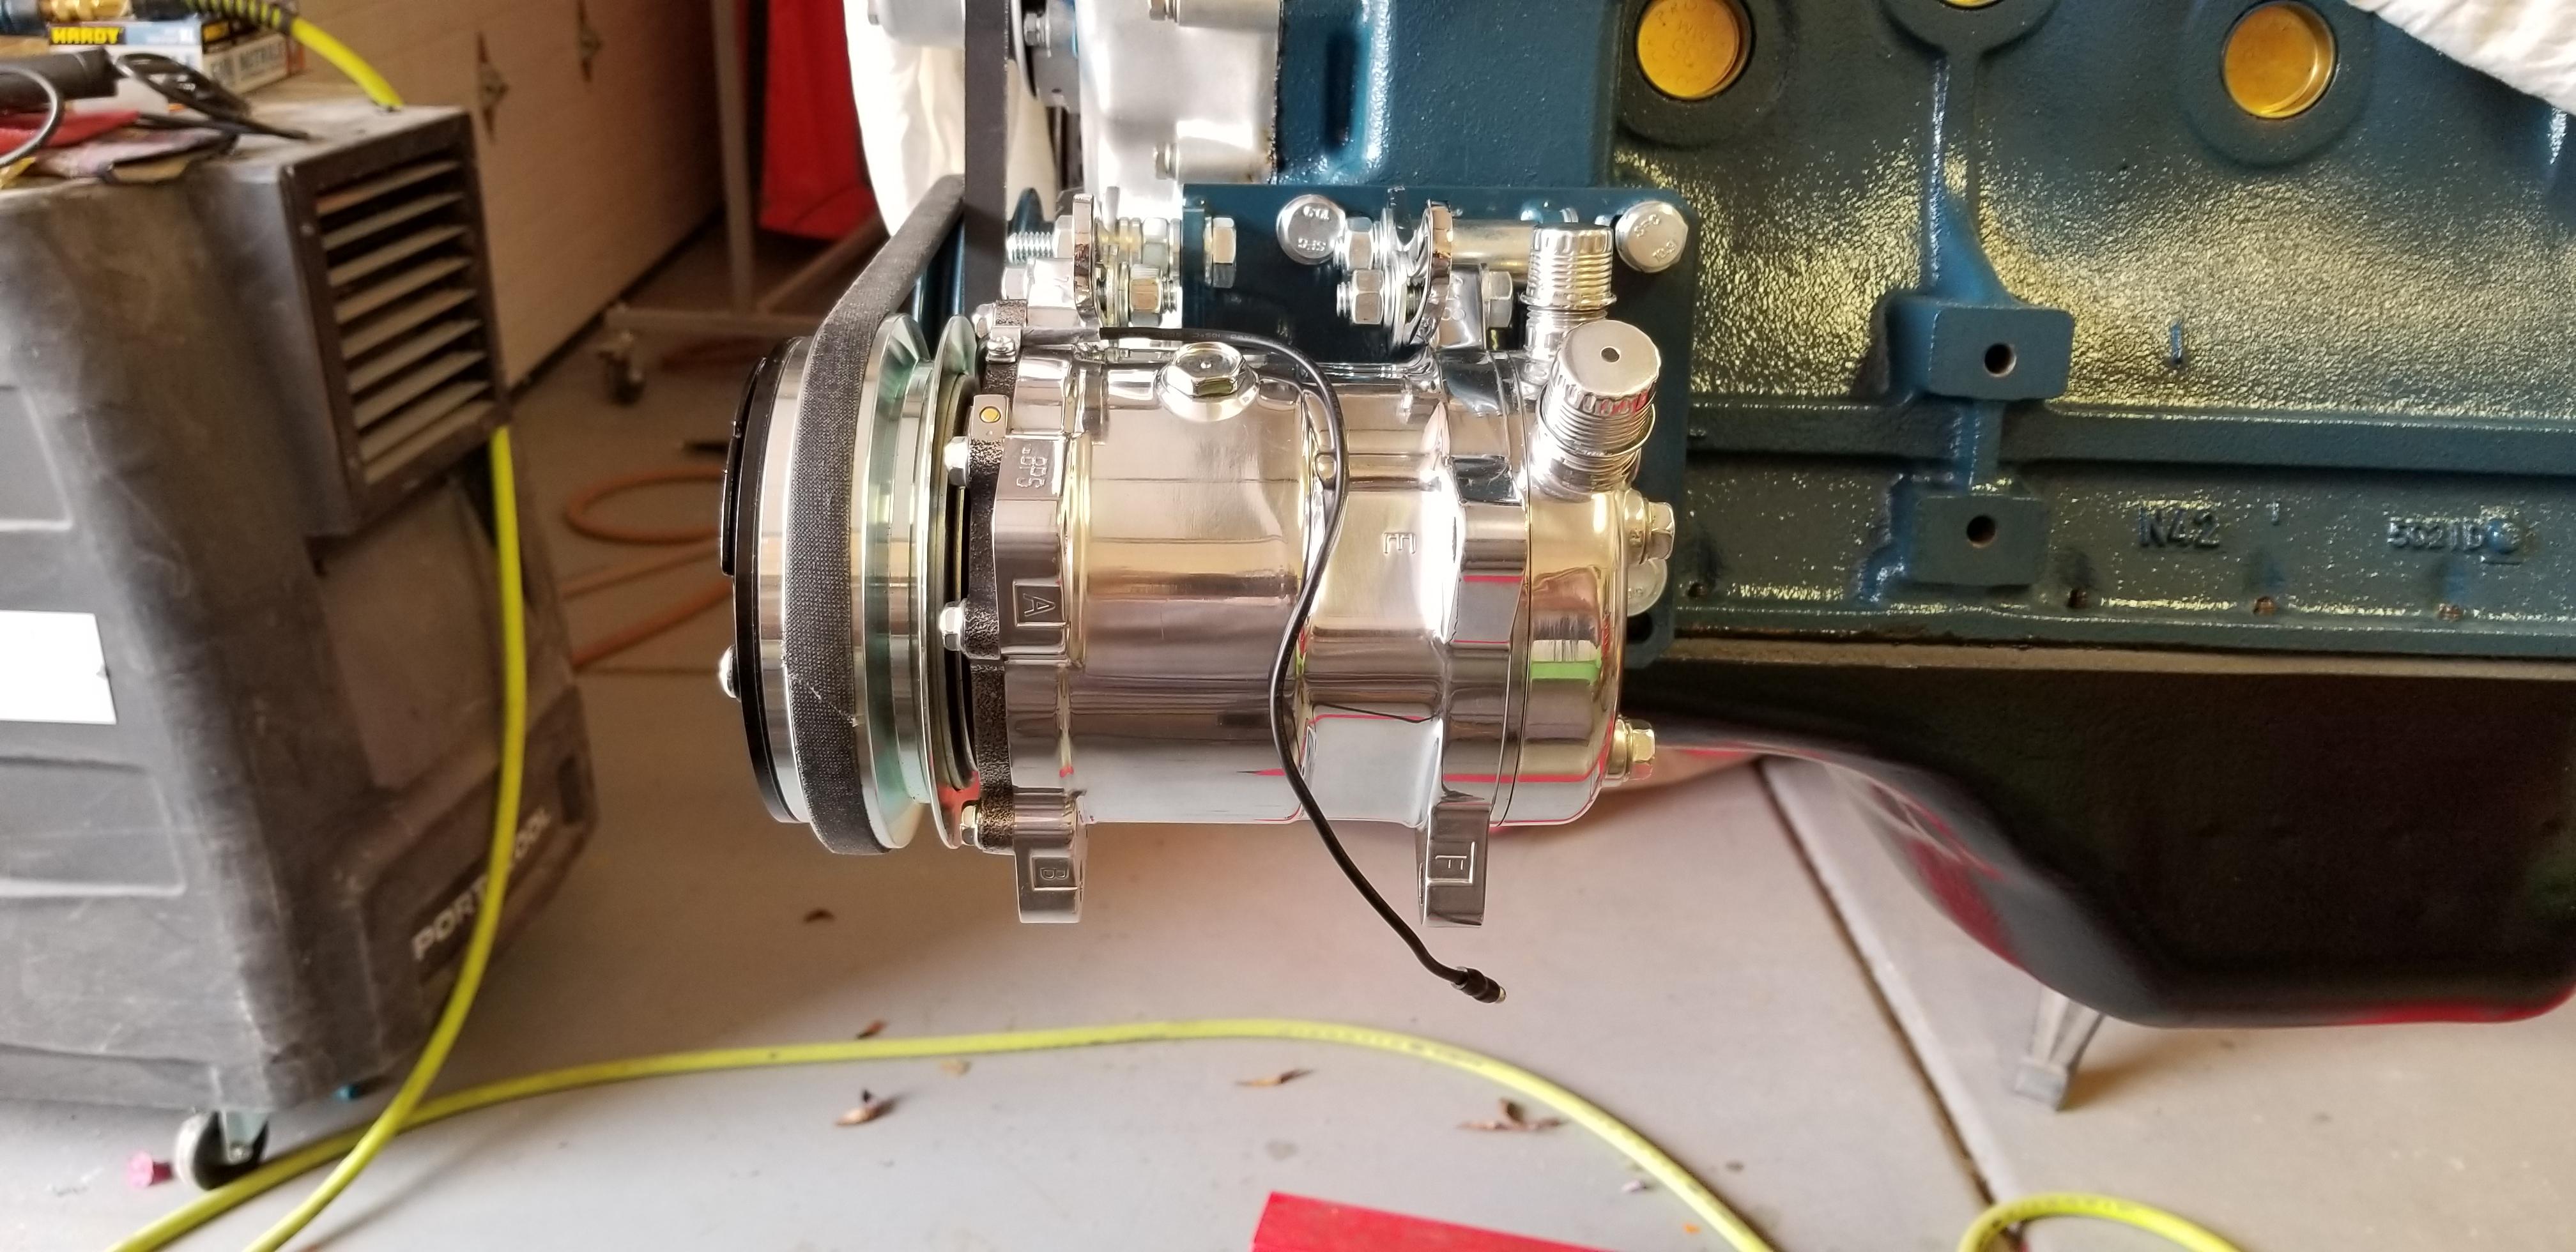
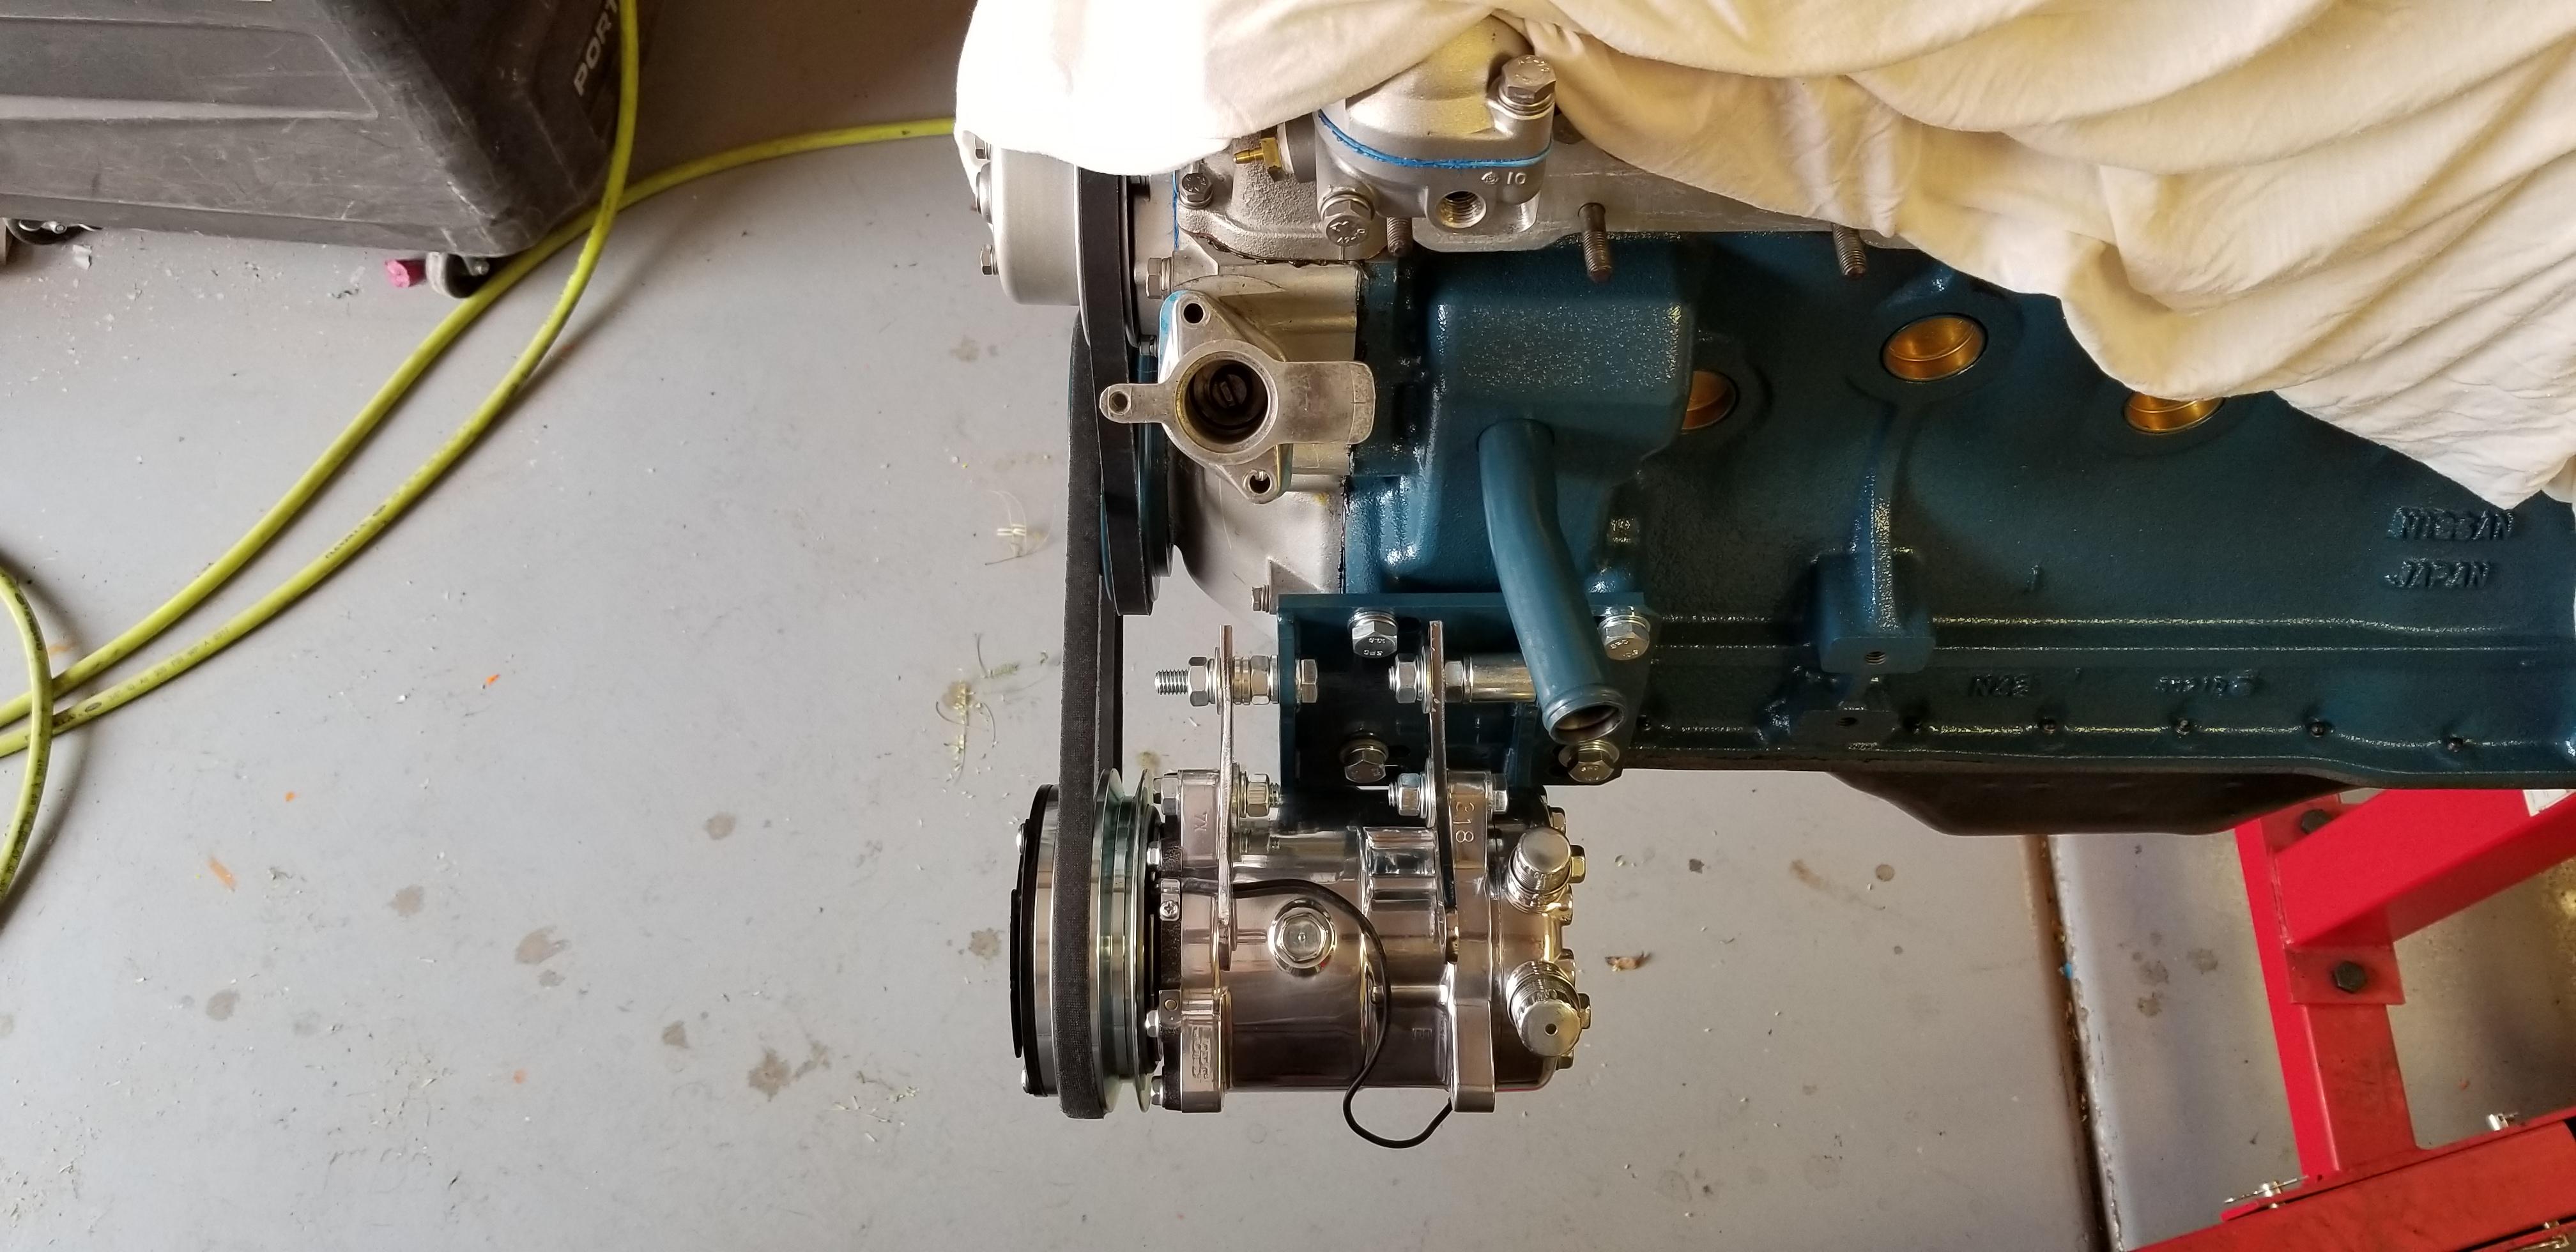
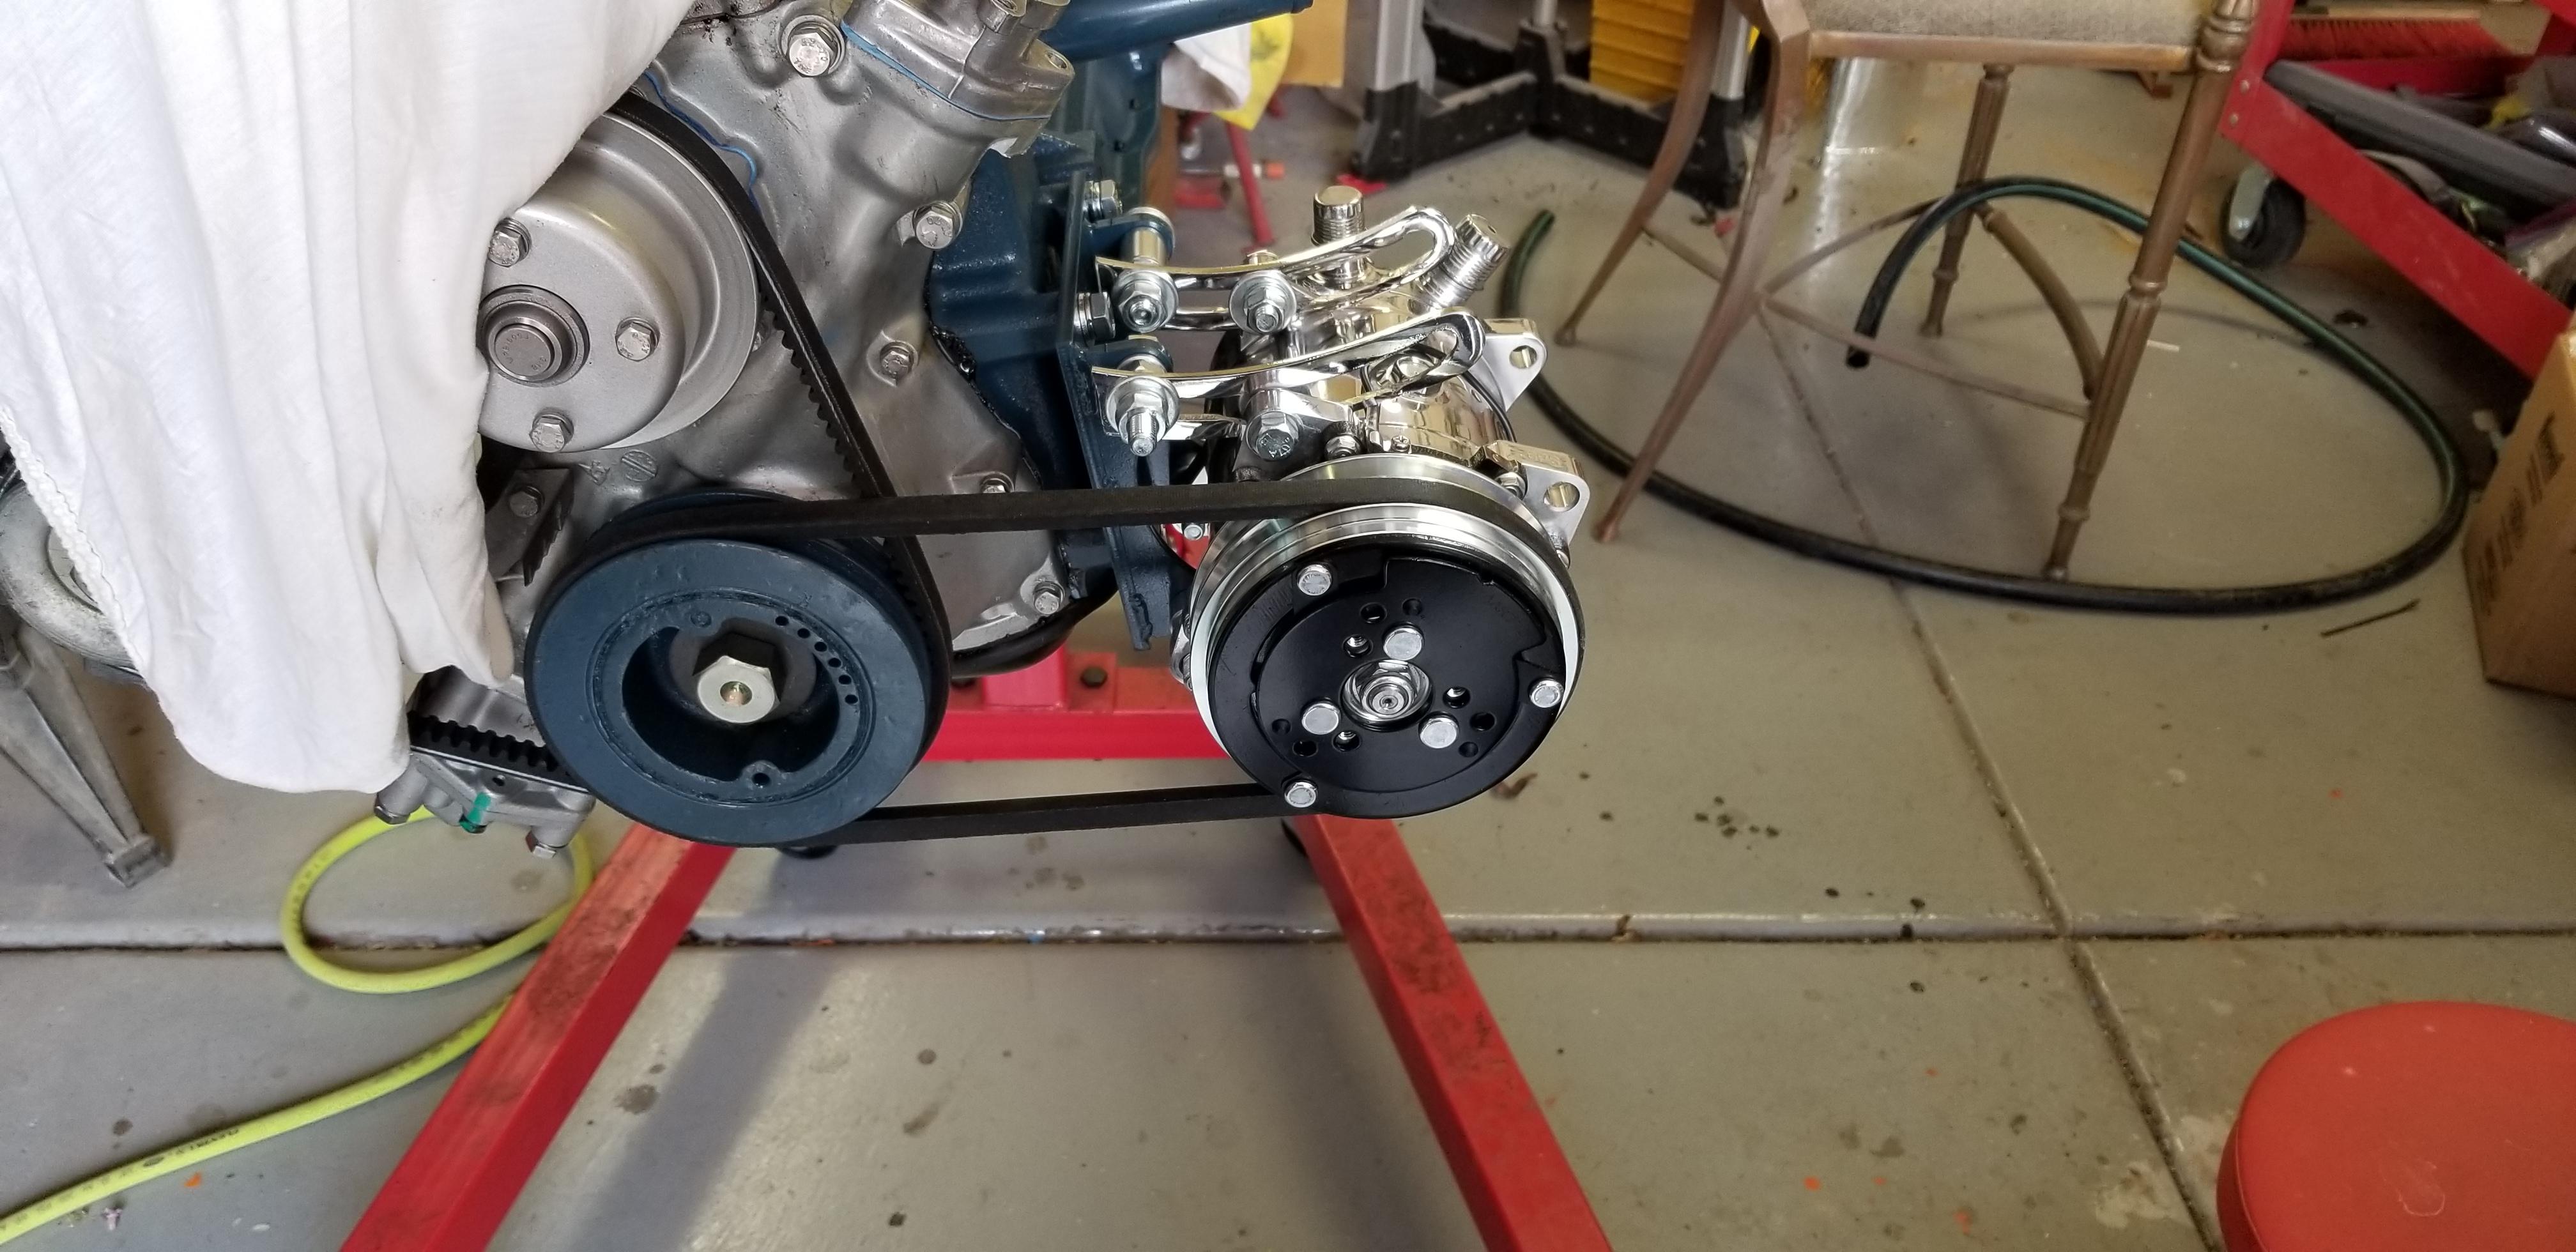
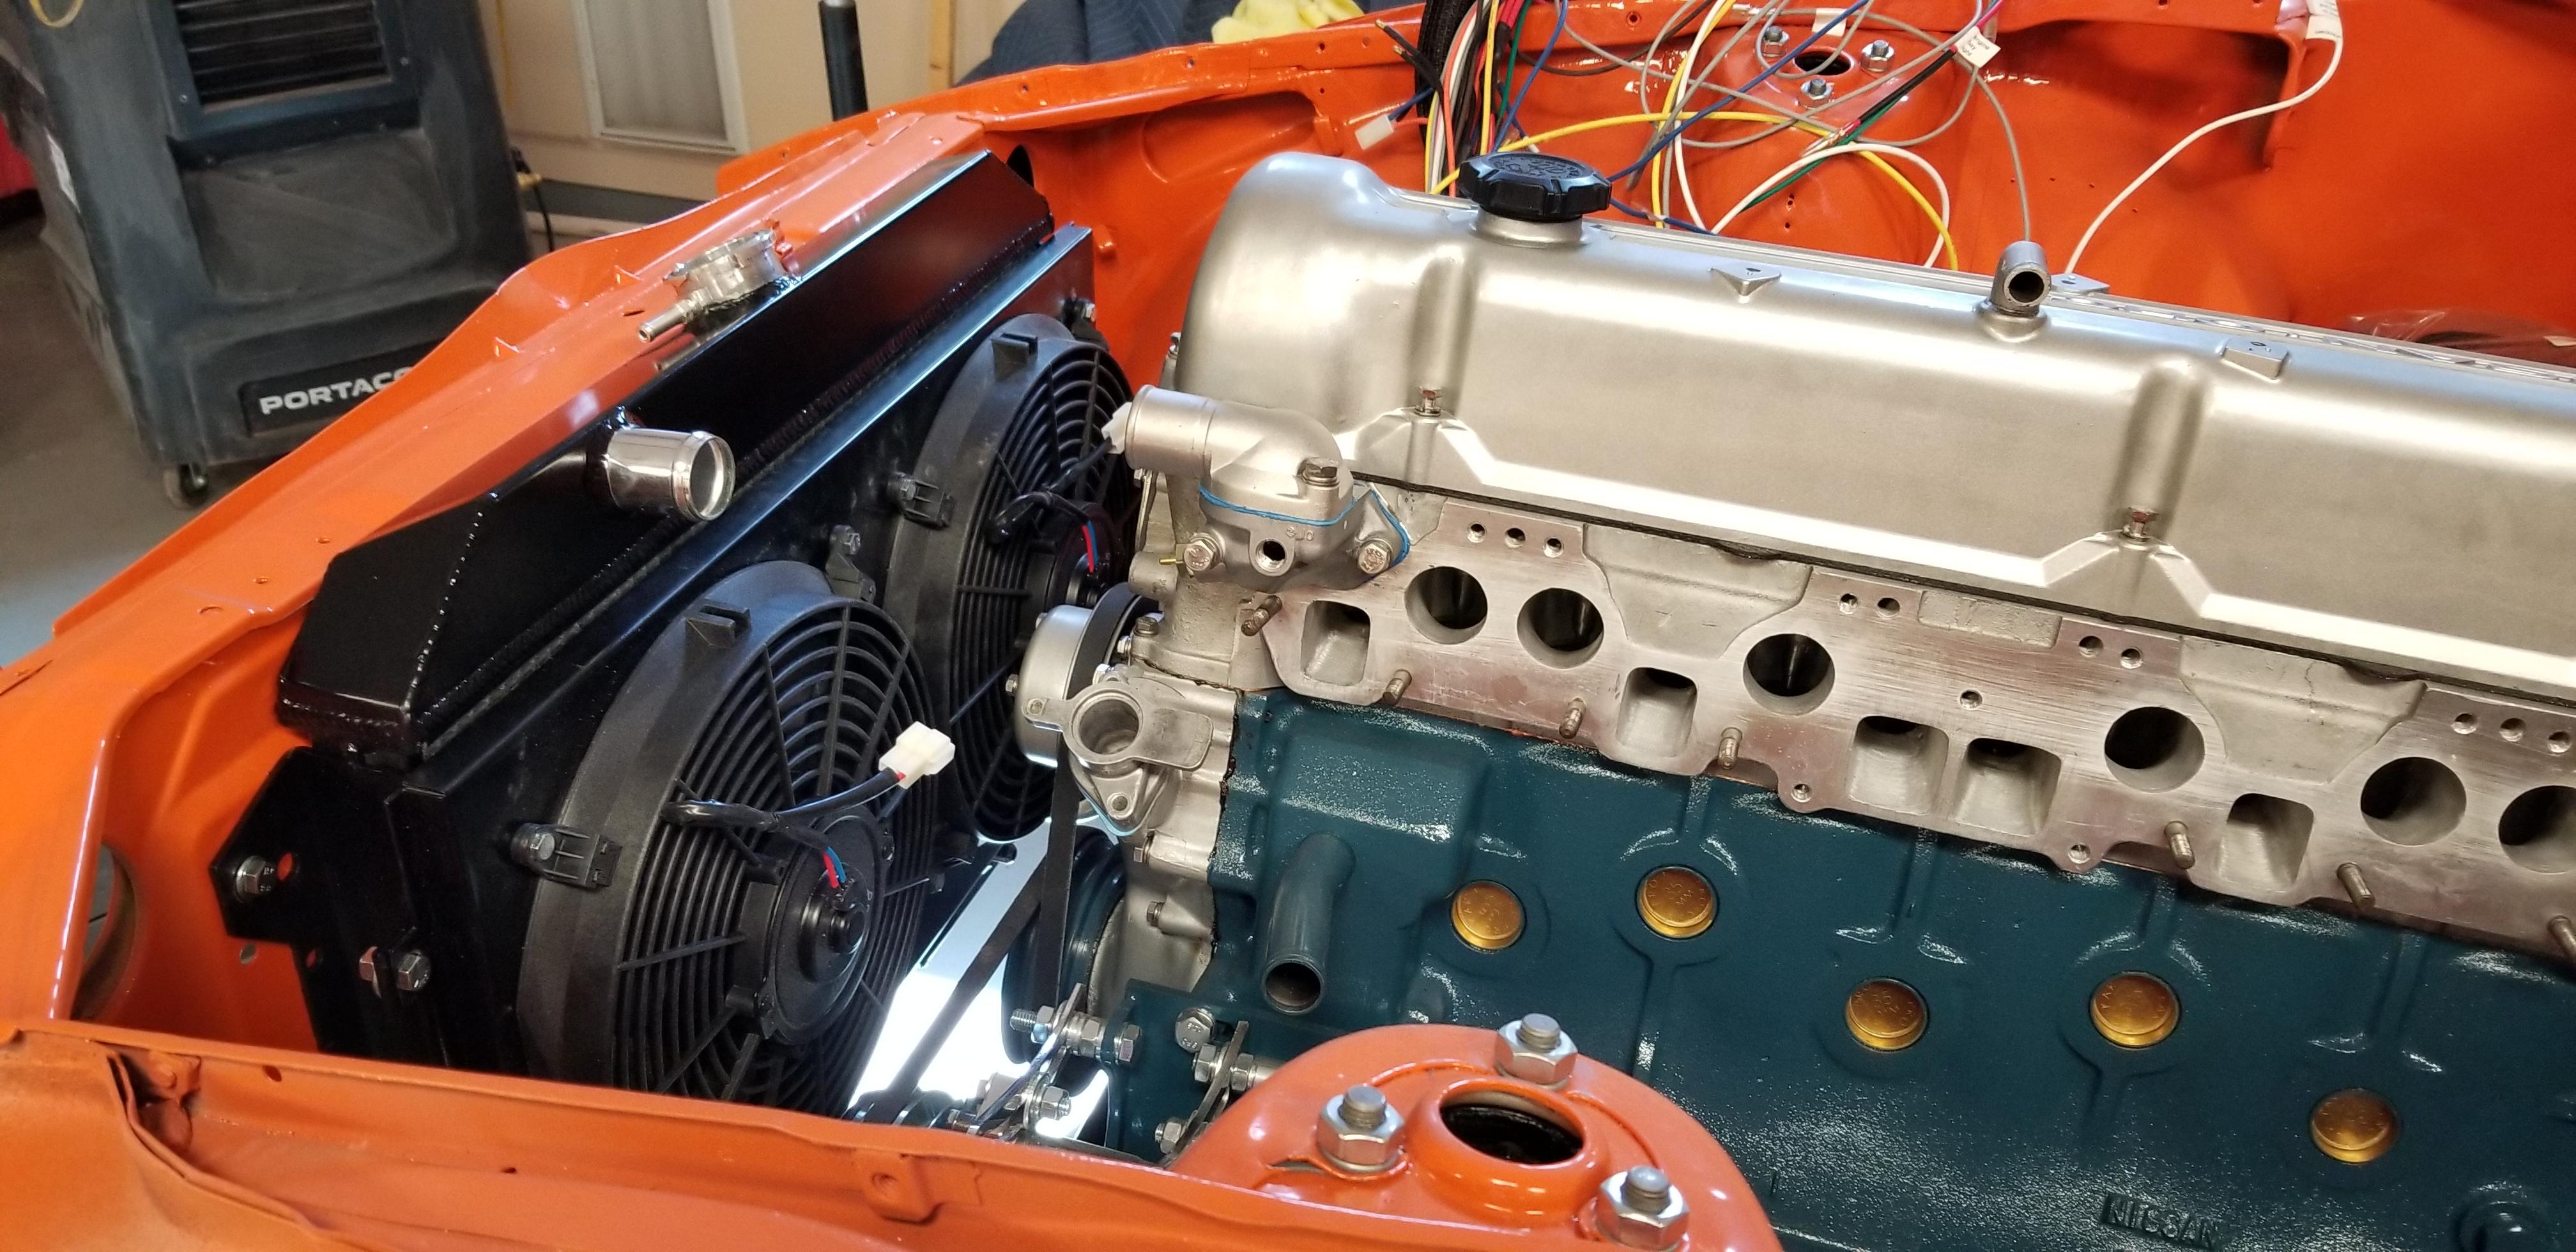
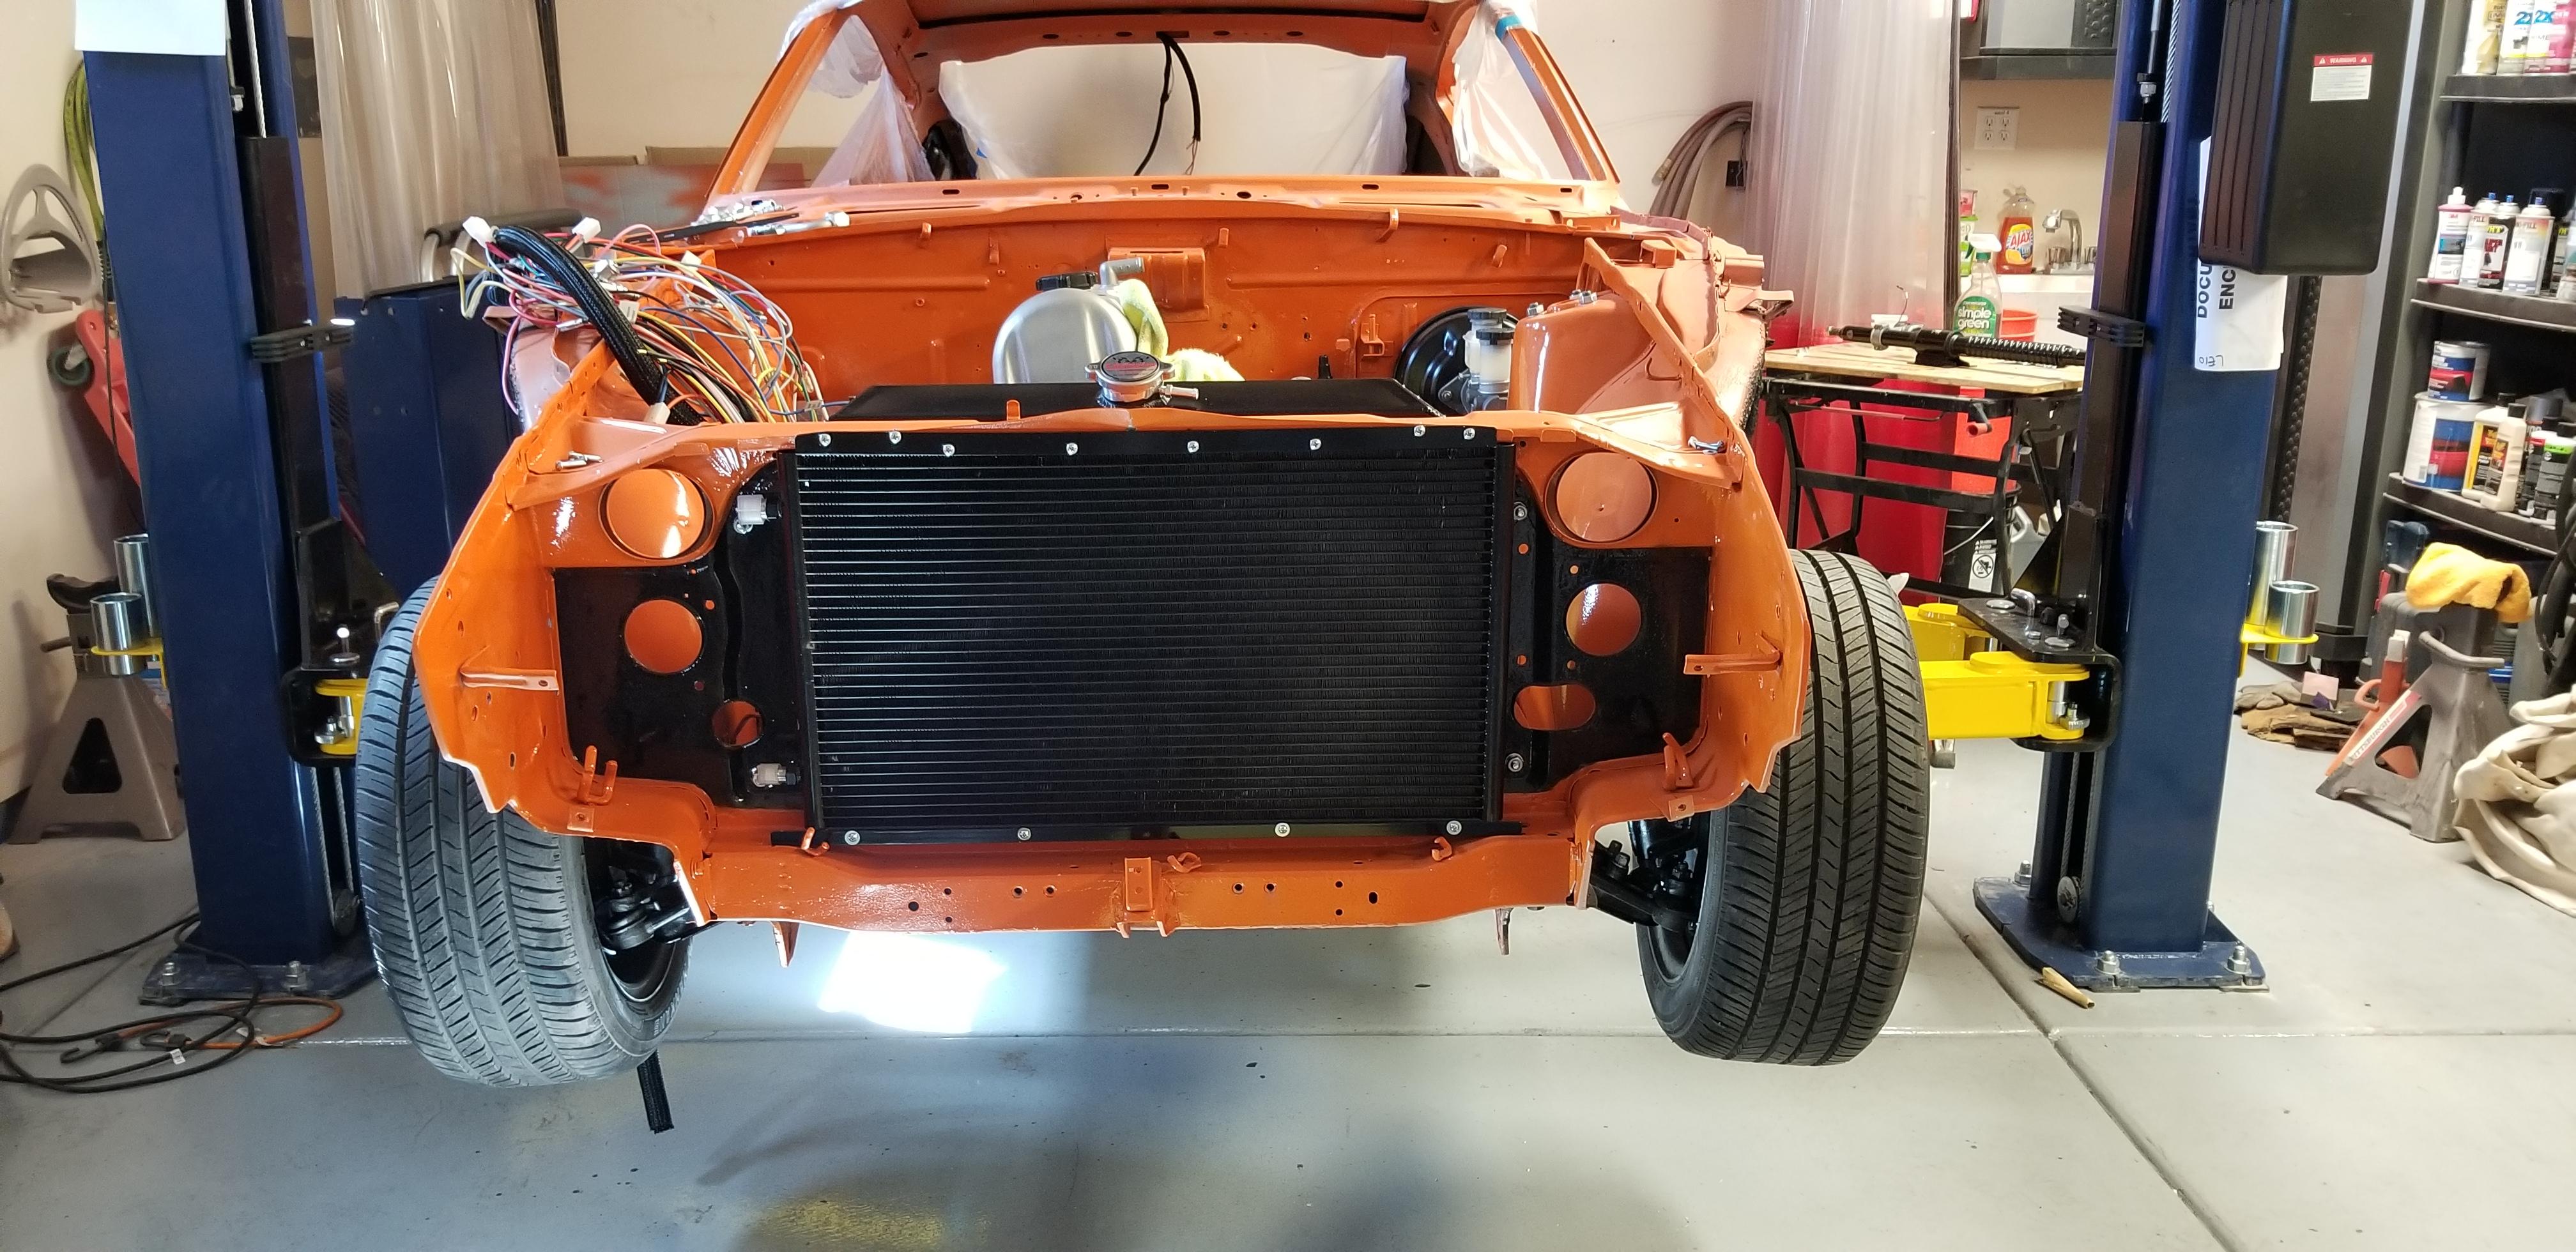
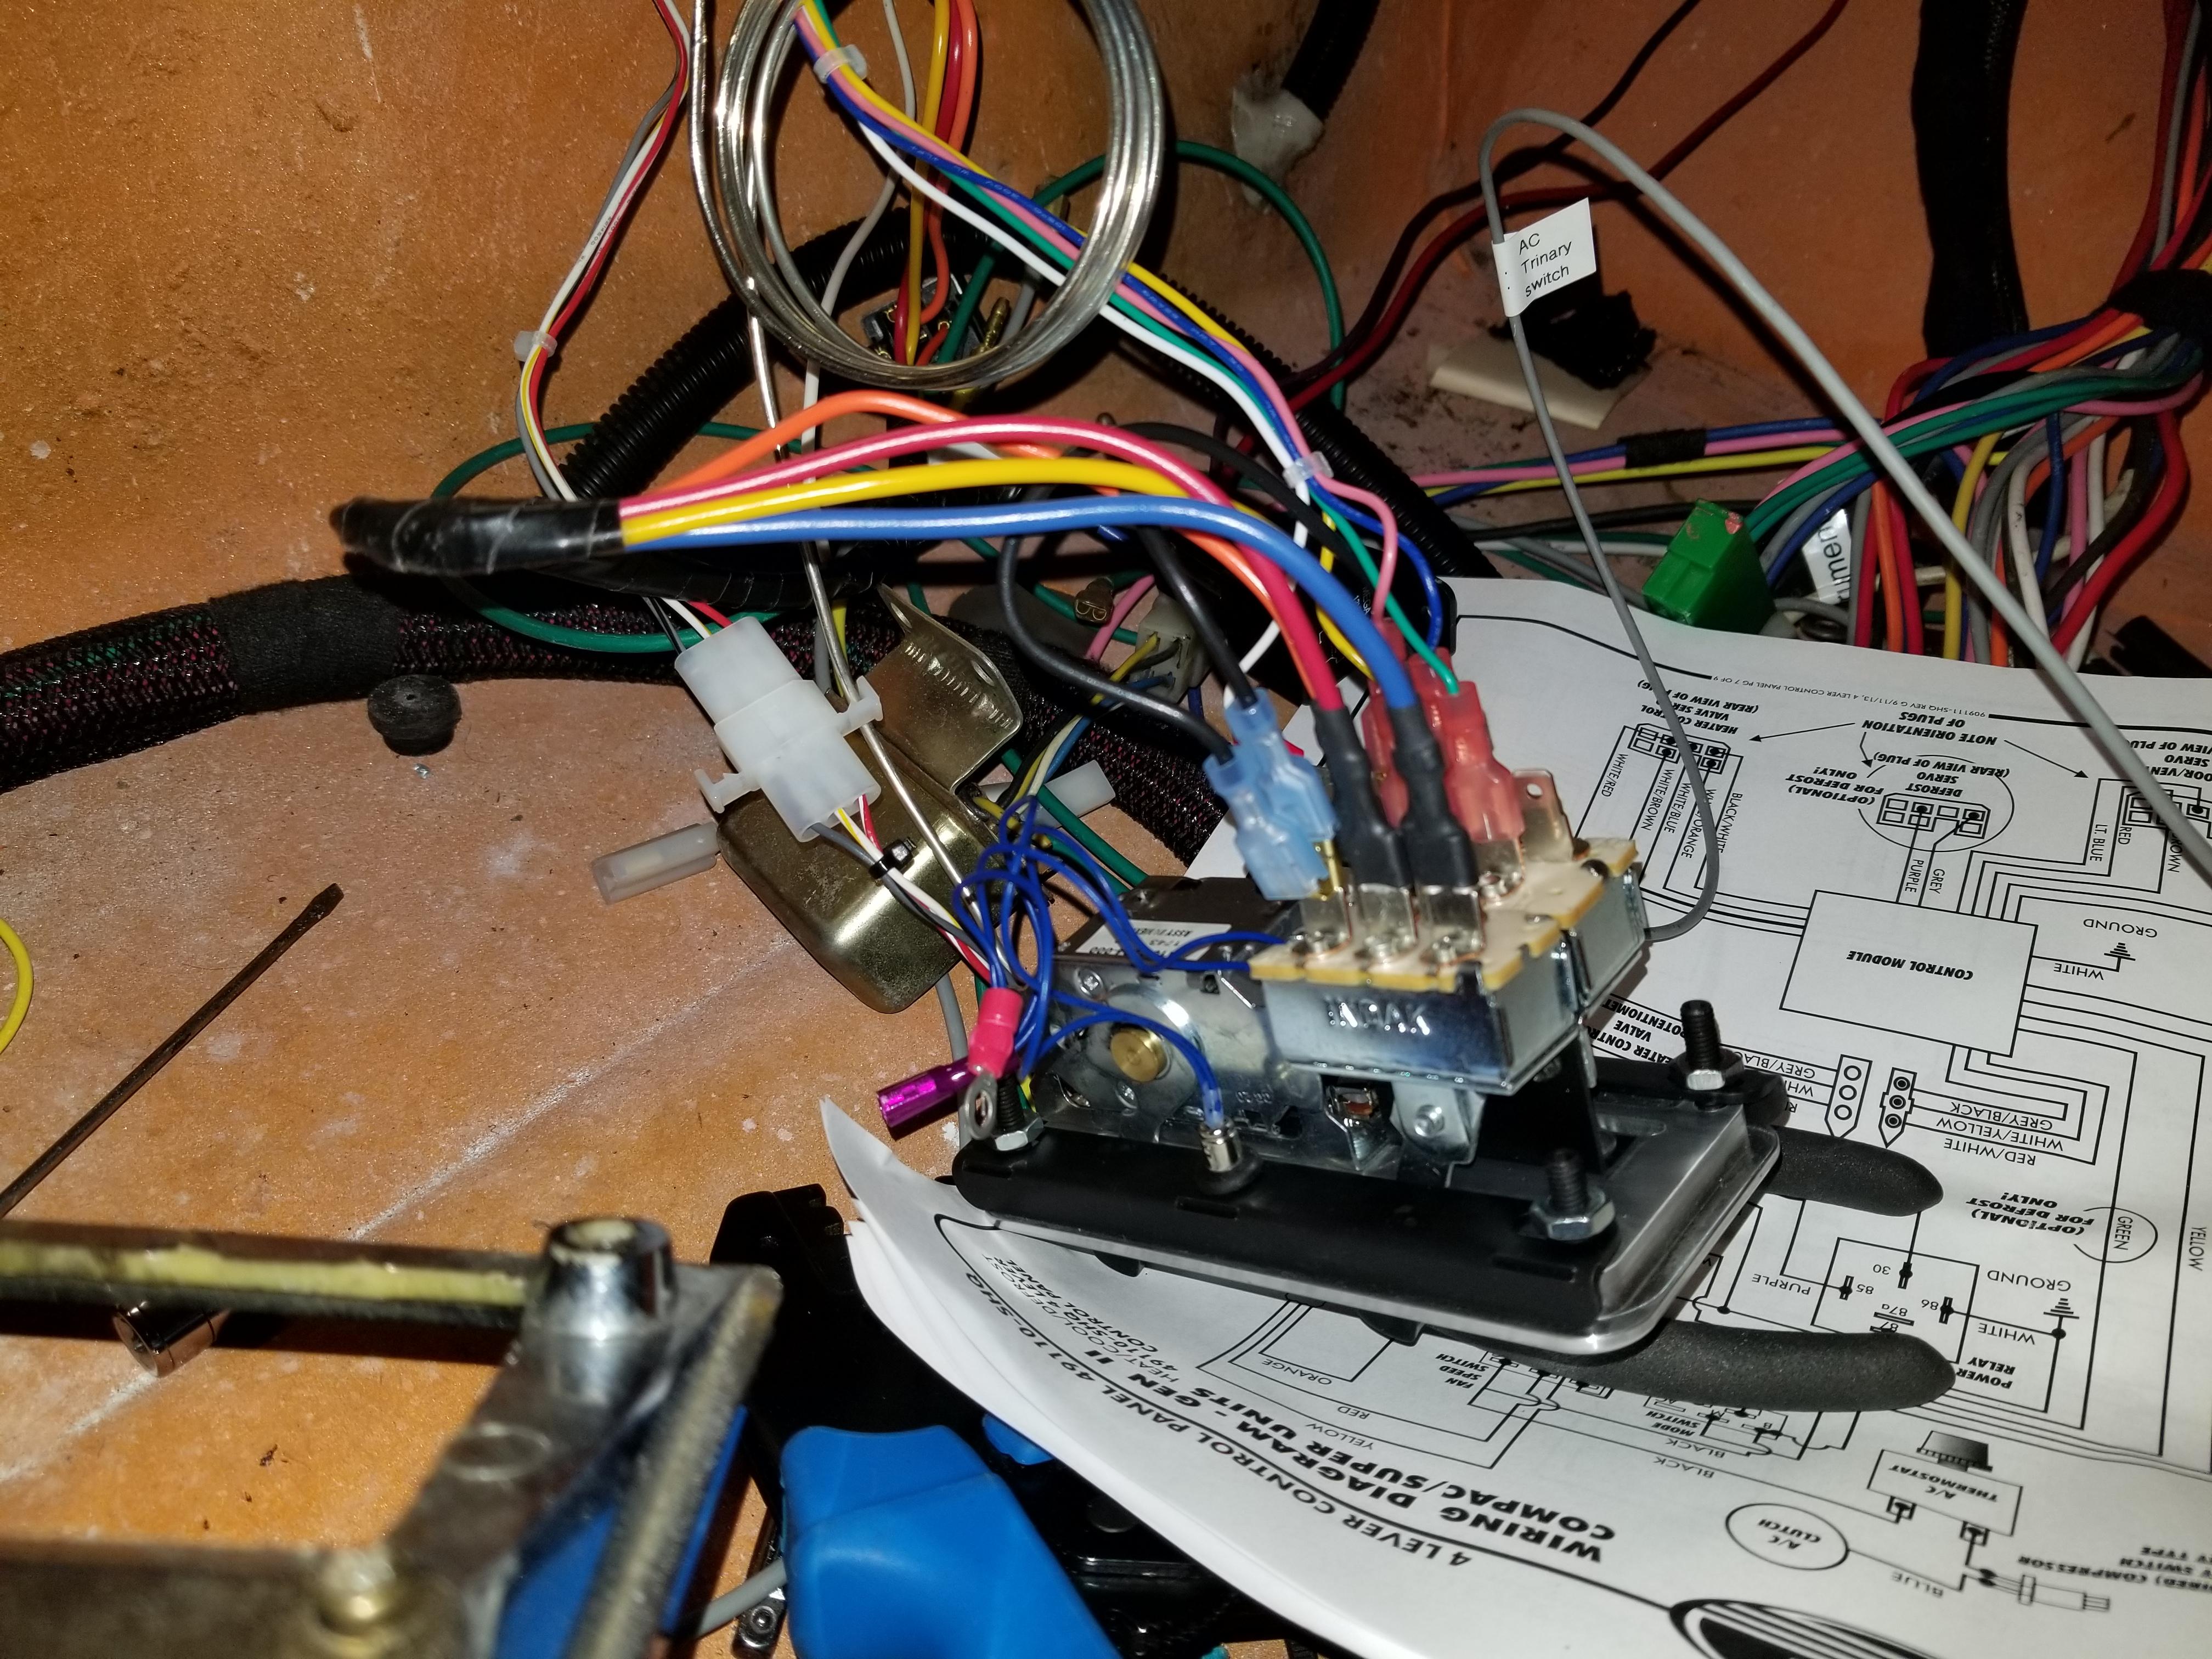
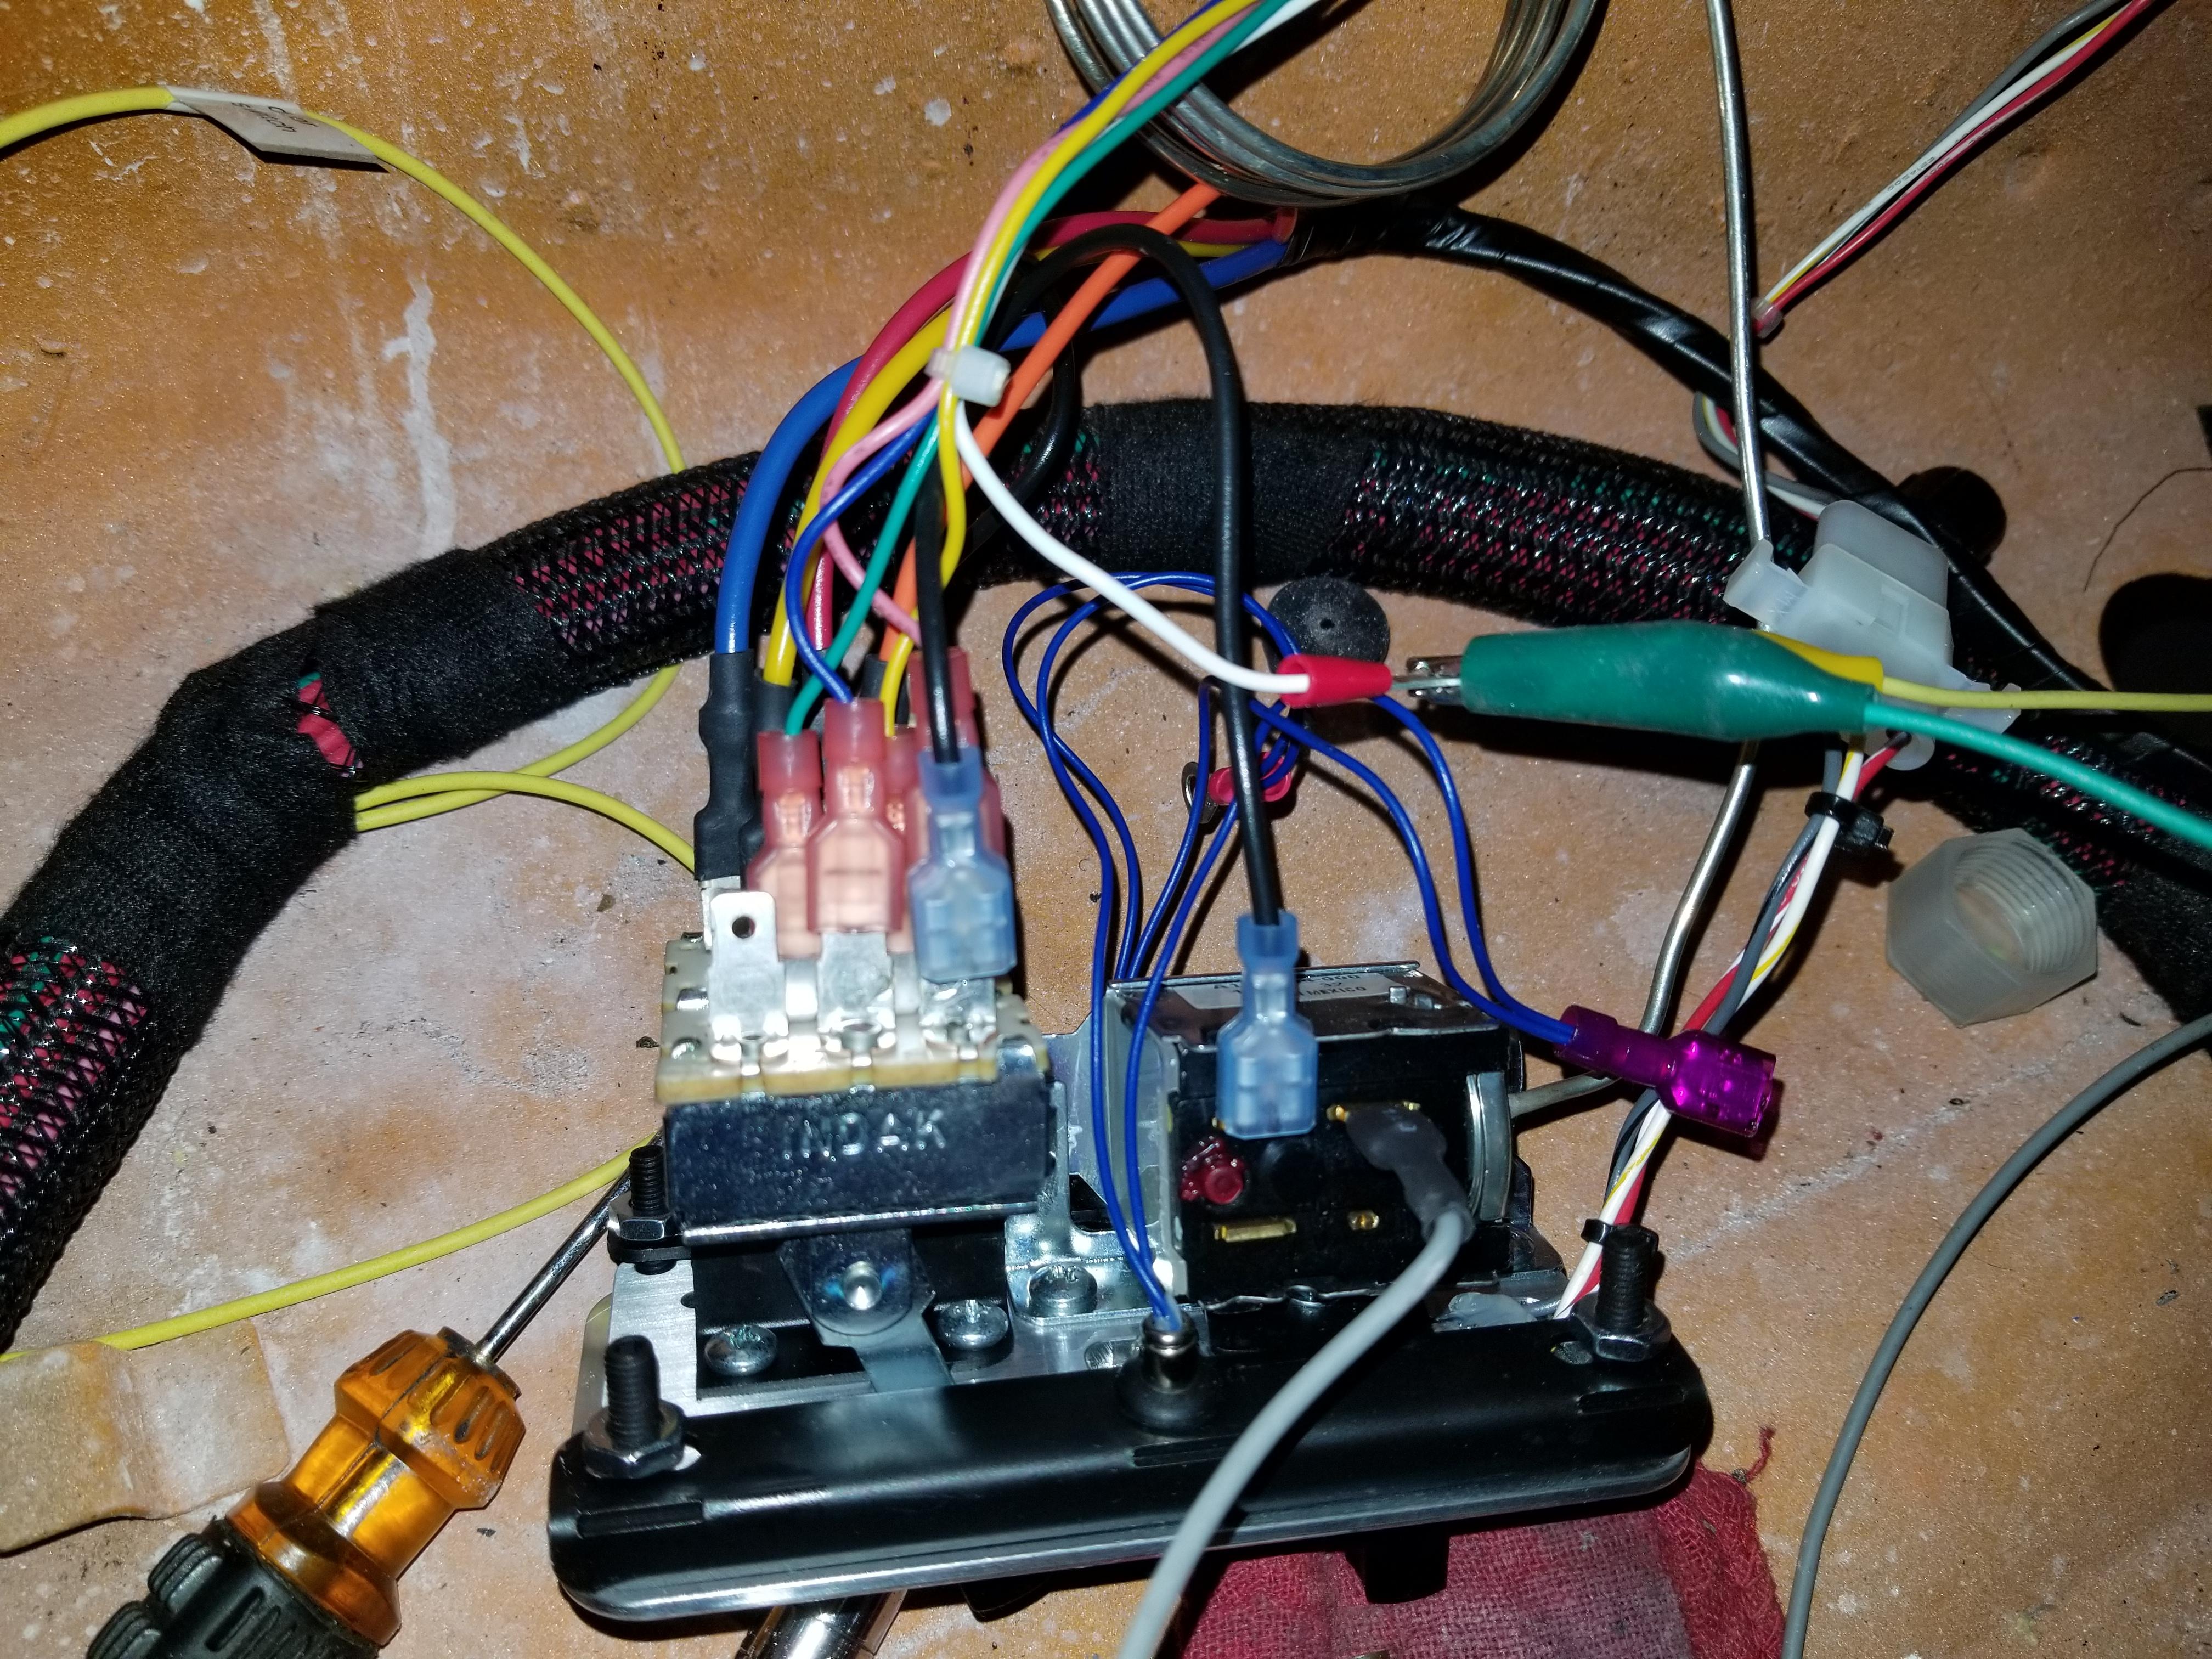
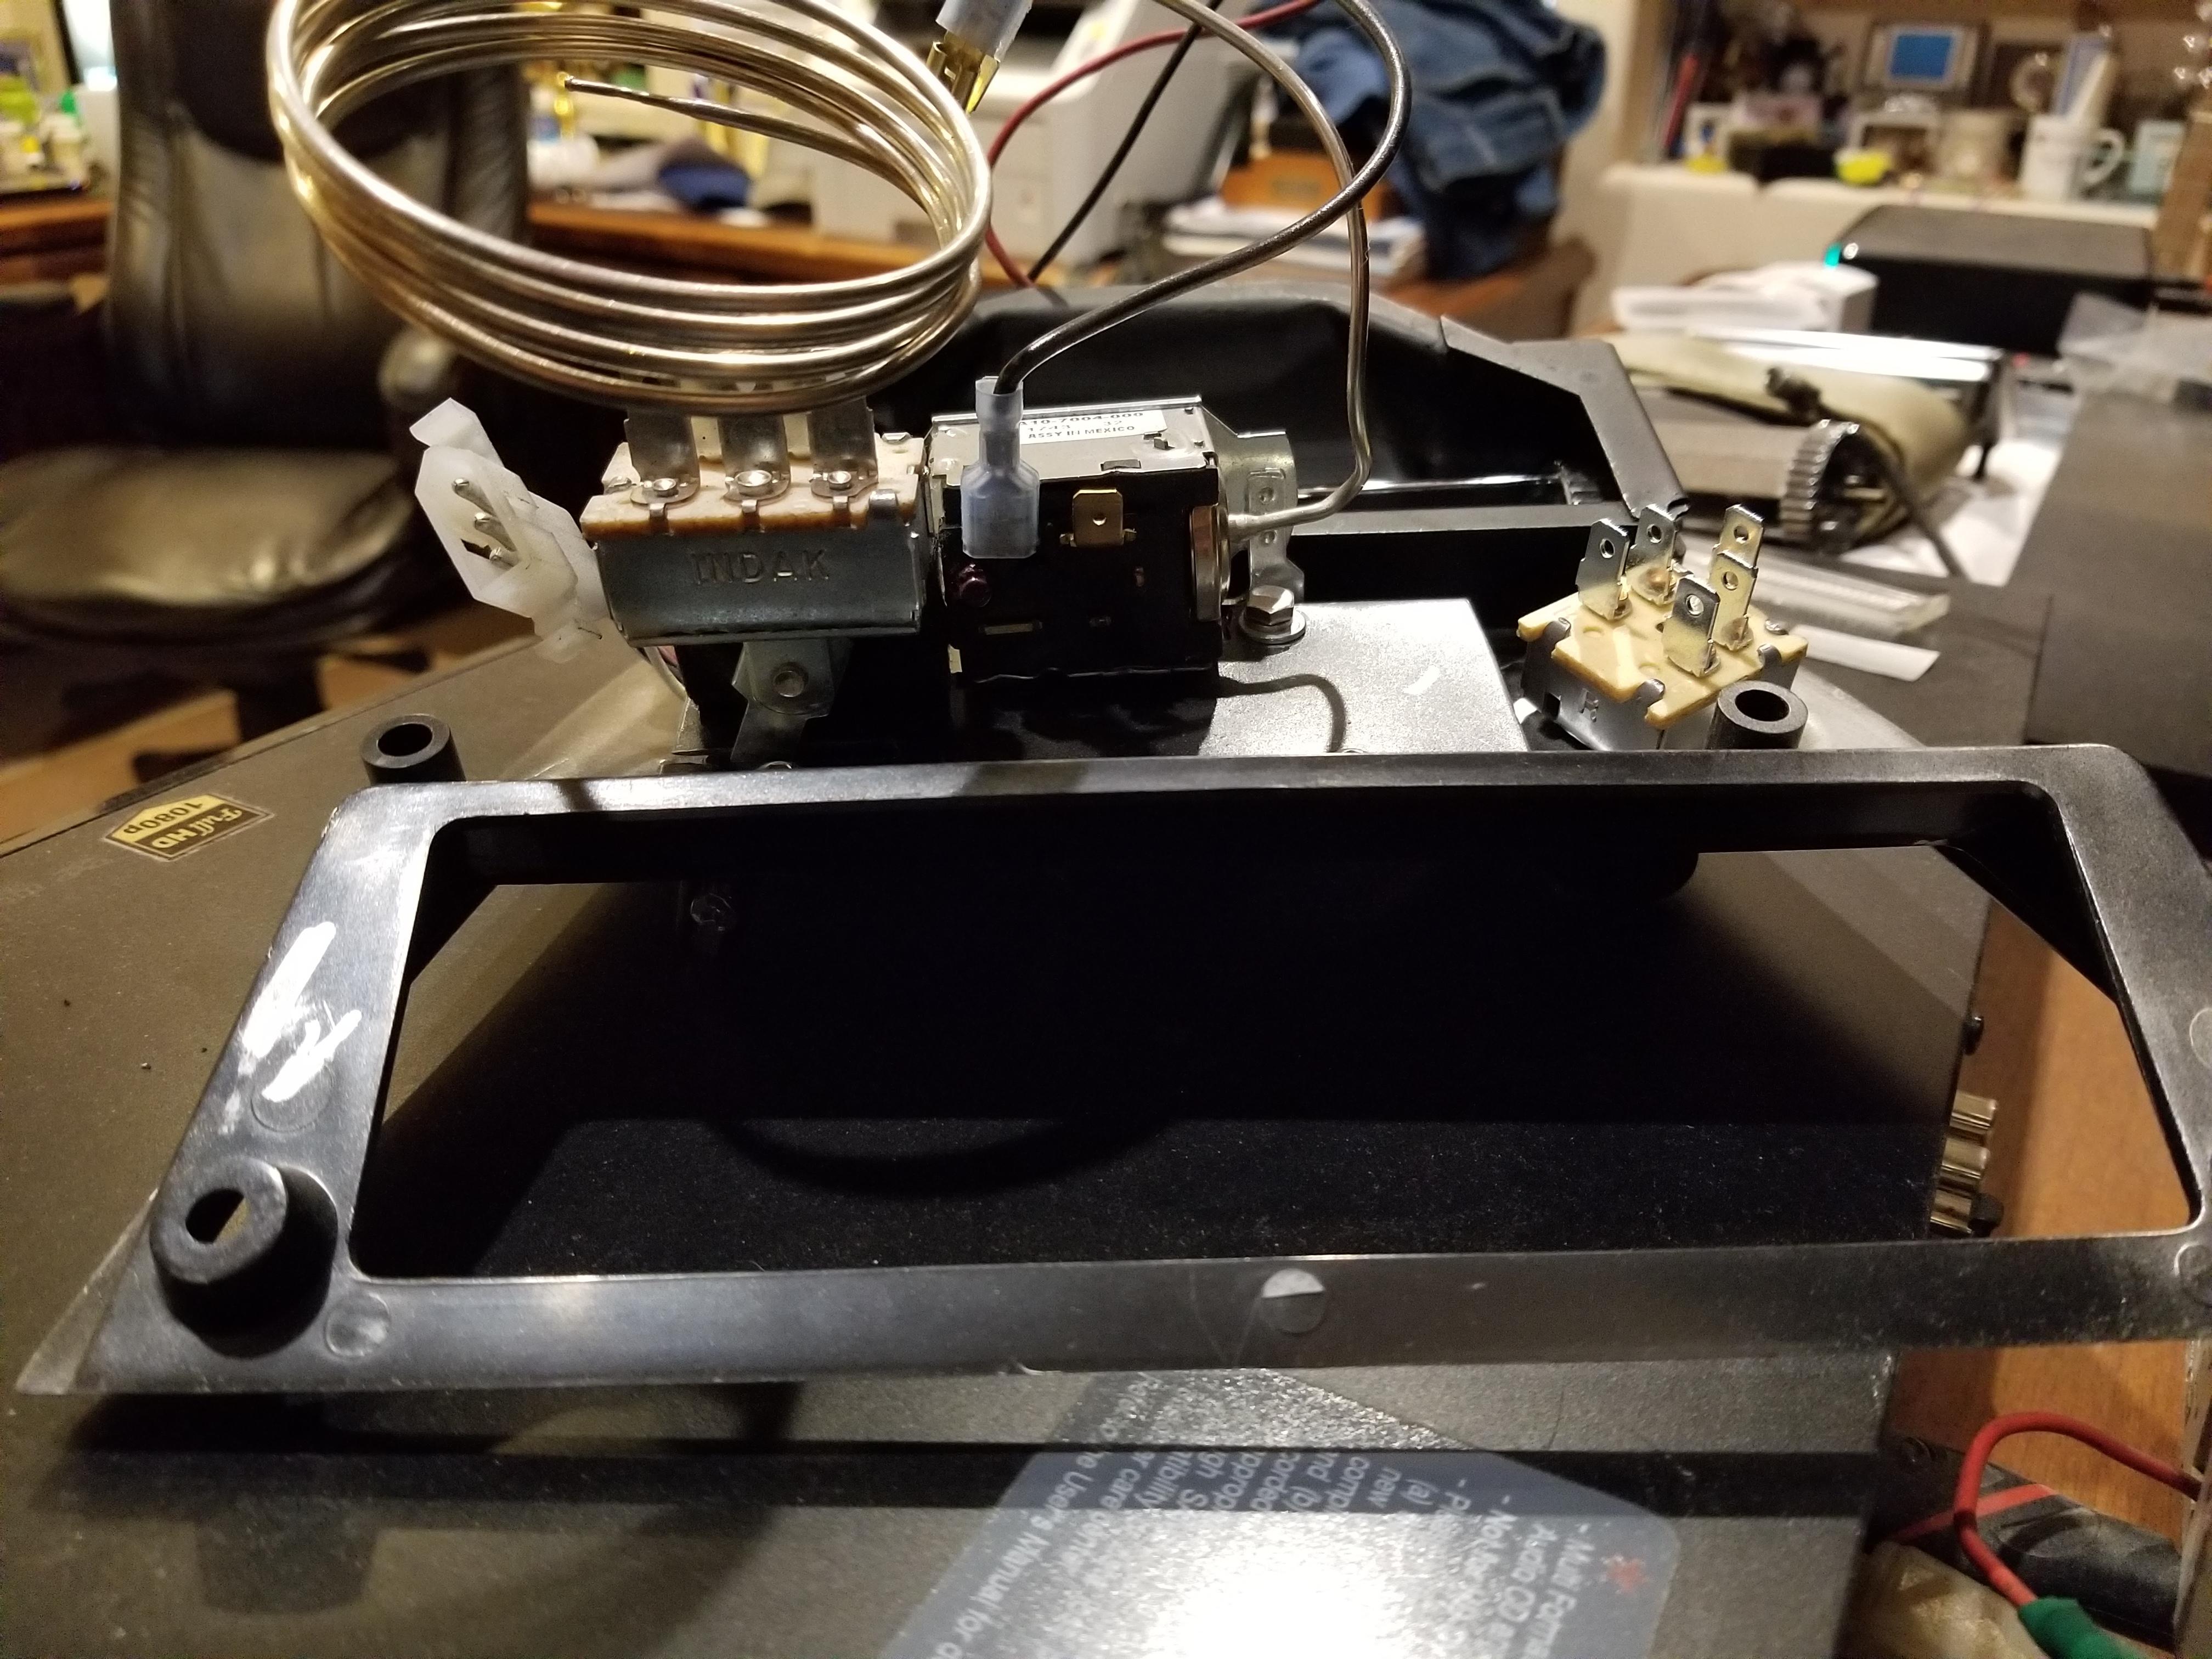
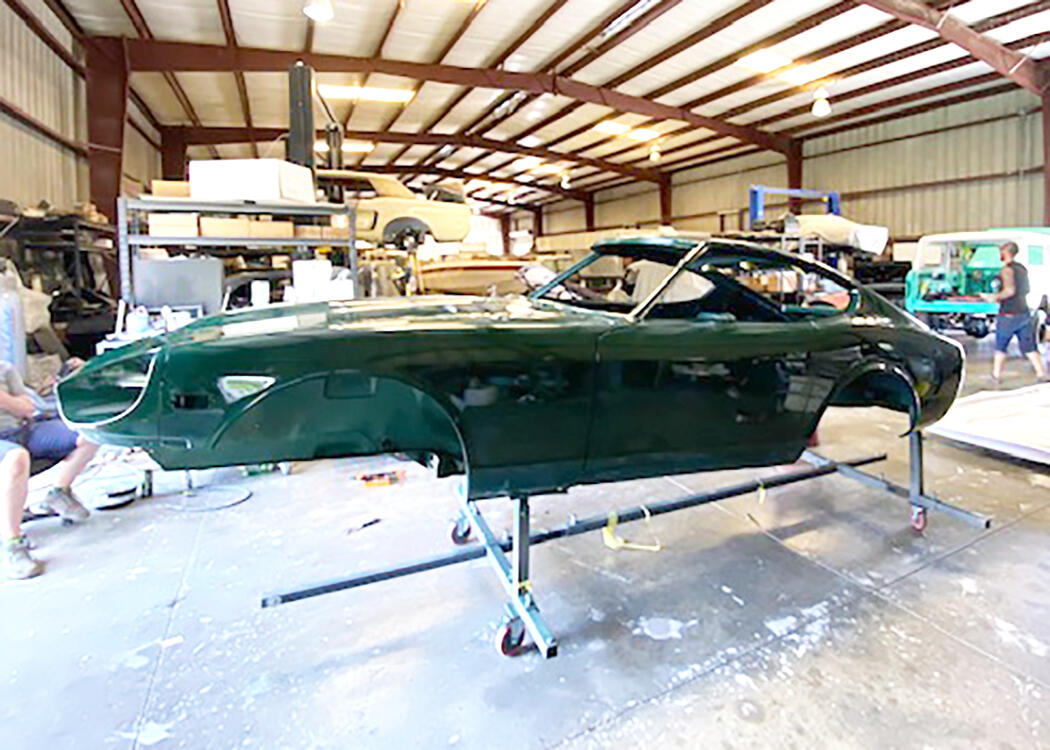
11 pointsThis forum has been very helpful to me. As a means of documenting some of what we have done and to help others avoid some of my mistakes I thought I would post the installation of a vintage gen II mini AC system. Background: My son and I are restoring a 1973 240z. We call it the bucket, as there was a significant amount of rust that had to be dealt with and our other choice – Money Pit was already taken. We are changing the color from 113 avocado green to mango orange, it has an L-28 engine and a 5 speed gear box. At this point: the car was taken to bare metal, metal replaced where required and any rust has been eliminated the rear clip is painted, front and rear suspension has been restored/upgraded and installed brake system has been restored/upgraded and installed half axles, differential, driveshaft, transmission, engine have been restored/upgraded and installed fuel system has been restored and is installed cooling system has been restored/upgraded and installed electrical harness has been restored/upgraded and the cockpit harness is installed When we purchased the car, it did have a non-working aftermarket AC system, probably installed at the dealership. We decided to replace the AC, defrost, and heater with an integrated system from Vintage Air. Vintage Air recommended a Gen II Mini The Gen II is a replacement for the original heater core, air box, and under-dash AC evap. As you can imagine the gen ii is quite a bit smaller than the original components, but it is a universal system and therefore it needs to be shoe horned into a space under the original dash. Because I removed so much original material, I thought that I would be able to fit the combination evaporator/heater and air box above the transmission tunnel and behind the instrument panel. This gets it away from the passenger footwell and centers the defrost and climate openings. I found someone that had done something similar so I was fairly confident that I would not have a fitment issue with the dash. Brackets are provided with the Gen II but I did not find them to be particularly useful. Mounting is fairly straightforward, but if you are like me sometimes it takes a few proto-types to get something that satisfies you. Mounting the Evaporator Once the evaporator is in place you can decide where hoses need to enter/exit the firewall. It is always nice to use the original holes, but you need to consider the radius of the bends for the hoses as they do not like to make sharp turns. I decided to install bulkheads for both the AC hoses and the heater hoses. I like this luxury because if the engine has to come out or if anything goes wrong with the evaporator/heater then disassembly stops at the firewall. Also if any of the hoses fail you don’t have to disconnect at the evaporator to replace an engine bay hose and vice versa. Working these stiff hoses and close connections under the dash is not the most comfortable task, The only downside that I can think of regarding bulkhead connections is that there are additional breaks in the hoses that now require some sort of mechanical connection and this is yet another opportunity for a leak. I did not have to cut any additional holes in the firewall but I would recommend that you buy individual bulkhead connectors as opposed to 2-way or 4-way bulkheads. This probably makes it easier to use the original holes. Bulkhead Connections water connections are behind the evap, compressor connections are near the main harness entry. Those are EZ-coils fitted on the hoses to help keep them from collapsing due to a sharp radius you can see the water connections on the passenger side of the engine just below the level of the valve cover. Compressor lines enter the bay just above the passenger frame rail. I would have preferred to do all of the hose routing with the engine out of the way, but I was concerned that I could not visualize every aspect. The AC compressor is a bit of a chore to mount so I will do that while the engine is on a stand. Here is what is being replaced – a Nissan bracket, and a sanden compressor. The original compressor is much lighter than most that were used in the day like York, but the original combination still weighs 24 lbs. Original Bracket and Compressor I tried to use the original bracket. Even though it is heavy and bulky it is clearly better because the compressor can be mounted so that it does not have to move to install a v-belt. There is an integral idler pulley that is adjustable. I spent valuable time cleaning the bracket and the pulley in preparation for painting, but alas I could not figure out a good way to modify it to accept the new compressor and properly align it with the engine pulley. The bracket that I purchased from Vintage is simple (no idler pulley) but it is made to convert a York bracket. Unfortunately, it does not line up with the bucket’s pulley. So my choices were to somehow modify the simple bracket or build a new bracket. I decided to attempt a mechanical solution as opposed to modifying the bracket by welding a piece on. The problem really has two pieces: the compressor must align with the engine pulley and because there is no Idler pulley it must rotate to install and adjust the v-belt. Here is what I came up with. It is 9lbs lighter. I will continue to look for a more elegant solution with an idler pulley, but I need to get the engine back in the car. NEW AC Bracket and Compressor With the engine and radiator in place it is an easy task to route the Compressor hoses to the bulkhead. Vintage offers a connect system called “easy clip”. I have not used this before but it allows me to construct all of the hoses myself without the usual expense of a crimping tool. This will make start-up of the AC system much simpler, because I will be able to go to a shop and only require evacuation, drying and filling to get the system working. This should take about an hour as opposed to waiting for someone to construct the crimp hoses and depend on someone else to route the hoses to my satisfaction. Hopefully, the easy clip system works well and does not leak. Condenser The condenser and drier were both part of the gen II kit. Bracketing the condenser was fairly easy. You need to take into account the holes in the radiator support as the hose that sources the drier must go through the support. It would have been nice to mount the drier ahead of the support where the air is coolest but it was more convenient for me to put it on the engine side. I converted to an aluminum radiator with an electric fan so I installed a trinary switch on the drier. So, the routing of the hoses is: Evap to Comp, Comp to condenser, condenser to drier and drier back to the evap. The route that I took was evap across the firewall to the comp mounted driver side low, from the compressor thru the radiator support across the condenser to a connection on the passenger side of the condenser from the condenser thru the radiator support to the drier, from the drier along the passenger frame rail to the firewall to the evap. That is a 2 row aluminum radiator painted black with a dual electric fan setup. I still think that it is strange to use a 2 row, but based on what I read I convinced myself that 2 rows were actually better than 3 or 4 for the same overall length and width. The condenser is visible here - in front of the radiator Climate Control Panel The last piece of the puzzle – mounting the controls. When this project began, I had no idea what I was going to do with regard to the climate control panel. Trust me this restoration has had enough challenges, but I wanted the controls to look they were part of the car. Originally, I envisioned the new panel hidden behind the original panel with mechanical linkages to control the system. I ordered a panel from vintage air, their least expensive. It allows for 4 slide type controls: AC compressor on/off combined with AC temperature control, Heater temperature control, Fan speed control, and Mode (defrost, feet, body, body+feet) control. Now that I have good handle on the mounting of the evaporator and know that the dash will fit without interfering with the evap I can consider using the original Datsun climate control panel which had the original mechanical controls for the vent, heater and defroster. The bucket had an aftermarket AC system, but it did not have anything integrated so the compressor control and the AC temperature control were all hung external to the dash. The Datsun climate control panel accommodates three slide controls: outside air, heater temperature, mode (defrost, feet, body, body+feet) control; and a rotary fan speed control. The controls for the original AC system were appended to the dash and did not compliment the look and feel of the car. The original climate control panel and the vintage air panel I decided that I was going to attempt to integrate the vintage air controls into the 240z panel. My control panel was not in very good shape so I decided to use it to trial fit everything. I opted for the luxury of replacing my panel with a new one. MSA does make one – it’s approximately $130. Its plastic, well built, but nothing special. They have a slightly more expensive version with chrome accents – I was not smart enough to order that version, so I spent more to have the fun of trying to do chrome accents myself. The first obvious difference between the original and the vintage controls is the fan control. I ordered a rotary fan switch from vintage air to replace the slider that I originally purchased. The hole in the 240z panel must be opened a bit to accommodate the vintage air control. If you go this route, remember to be careful as you are working with plastic, so cracking is a real possibility. Next, I removed each of the slide switches from the vintage air panel. In my opinion the best/easiest way to integrate them into the 240z panel was to create an intermediate metal panel to house the vintage air controls and then mount the intermediate panel onto the 240z plastic panel. The metal panel should help distribute the forces of the sliders and will allow me to more easily position the sliders where I need them. It’s not as easy as it sounds. The travel of the vintage air sliders is quite a bit smaller than the original 240z controls. I considered mounting the sliders a few inches back from the 240z panel which would make the slider travel more similar to the original but it complicated everything else so I rejected the idea. The length of the vintage air slider mechanisms is also different than the original 240z controls. The vintage air heater temperature control is a bit hooky in my opinion. It is mounted to the vintage air panel by being squeezed by their bracket. There is no provision to screw it to a panel. It’s quite small. I used thin aluminum sheet stock to build trial configurations. It’s easy to bend and easy to cut and you can expose a lot of issues very quickly by using a proto-typing process. The AC control is relatively large. I decided to fit it into the top slot of the plastic panel labeled “AIR”. In my opinion - this is where it fits best. You can mount it without a lot of difficulty with one exception – the length of the slide control is too short. If you choose to go this route don’t purchase the vintage air panel (it’s a waste of money), and when you order the controls make sure that they provide full length sliders. When they build a kit with their panel, they cut the sliders to fit their panel and it is too short for the Datsun panel. I very carefully bent the L shaped bracket flat. I then removed enough material from the bracket to allow the slider to protrude through the plastic panel enough so that I could attach a plastic knob to it. I wanted to use the original 240z knobs to help disguise the vintage air system. One of my knobs was cracked and so I searched for a replacement. I found some new ones at Banzai Motor Works that were reasonable. The heater temperature control will fit just below the AC control. I built a small aluminum bracket that pinches the heater control and attaches to the climate control panel. Lateral movement of the heater control is prevented by the aluminum bracket and vertical movement is prohibited because the heater control is held in place by the ac control above it. The mode control will fit in the climate control panel’s third (lowest) slot. Here is an image of the original control panel with all of the controls mounted to it. Also, you need to seal off the cowl vent because there is no provision for the vintage air system to utilize that vent. The only fresh air vent system that you will have will come from the vents on the driver and passenger side which are controlled by individual mechanical cables. These vents actually get their air thru the ducts to the opening in the radiator support. The bottom line is that the original 240Z panel will remain in-tact and the new system will seamlessly fit behind it. You will not be able to tell that the entire climate system has been upgraded. vintage air controls Integrated Panel CONCLUSION If you choose to upgrade your AC system and you opt to integrate the controls into the original climate control panel you can benefit from my mistakes. Do not order the panel/control kit. Instead order the individual switches with full length sliders. Make sure that you order the rotary fan control and not the slide fan control switch. In the spirit of full disclosure I have not fired-up the AC system yet. Having said that, based on previous experience I believe that Vintage Air has done a great job providing a terrific system with more than adequate documentation. I especially like the reduction in physical size and weight. I also like the electronic controls as opposed to mechanical – cable stretch and loose cable connections are a thing of the past. I appreciated being able to make my own compressor hoses (hope they are solid and do not leak). I do wish that they would come up with a universal compressor mount with an idler pulley. All in all, it is a great system. It takes a fair amount of time and effort to install, but I believe you will be happy with the result. I will try to answer any questions that you might have. Good Luck.


 11 points
 -
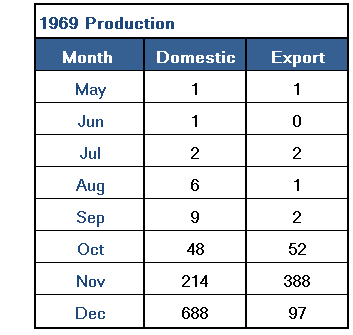
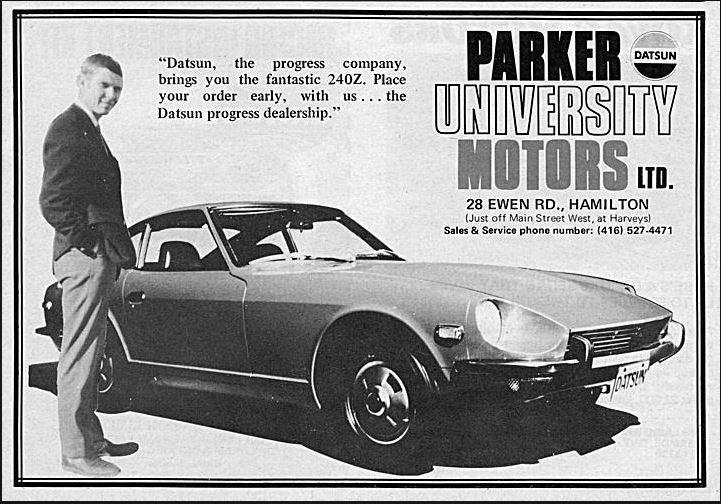
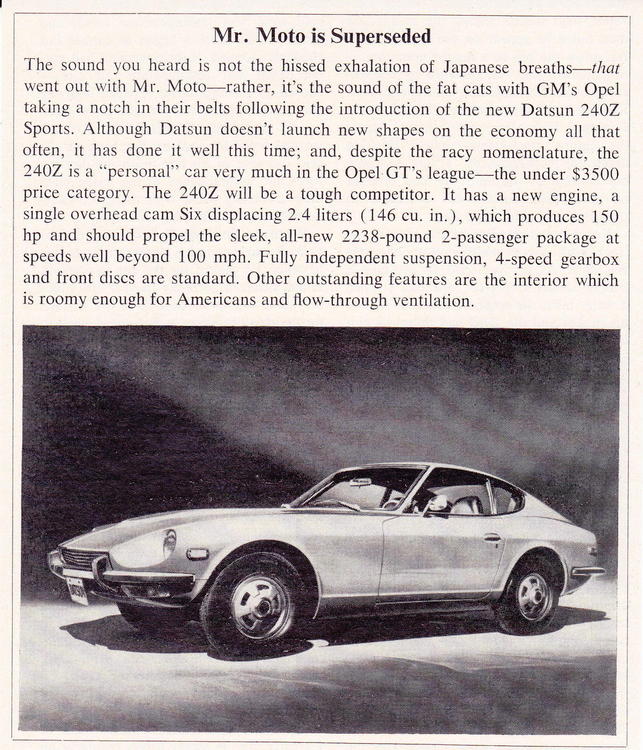
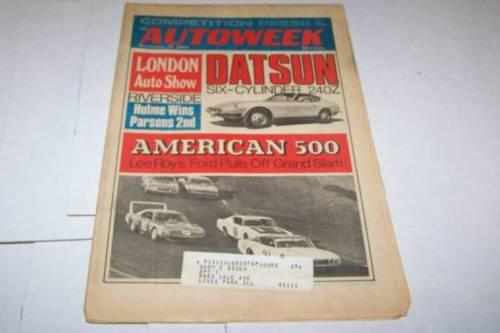
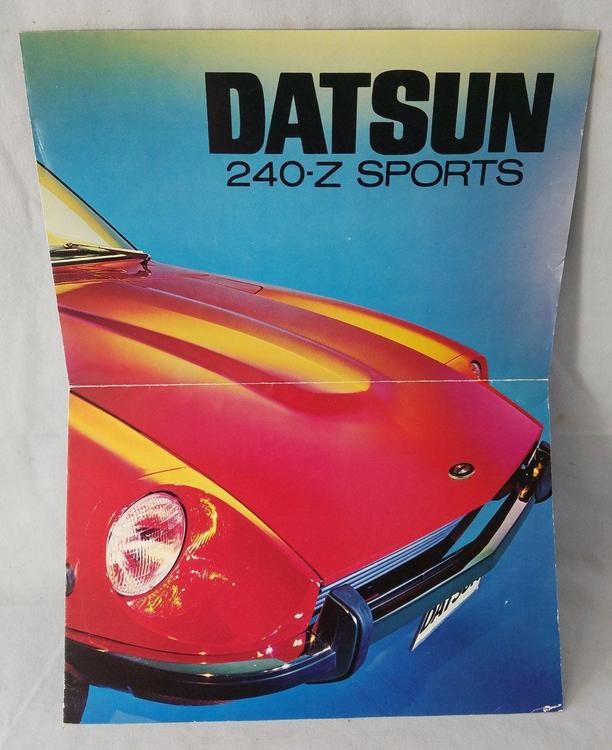
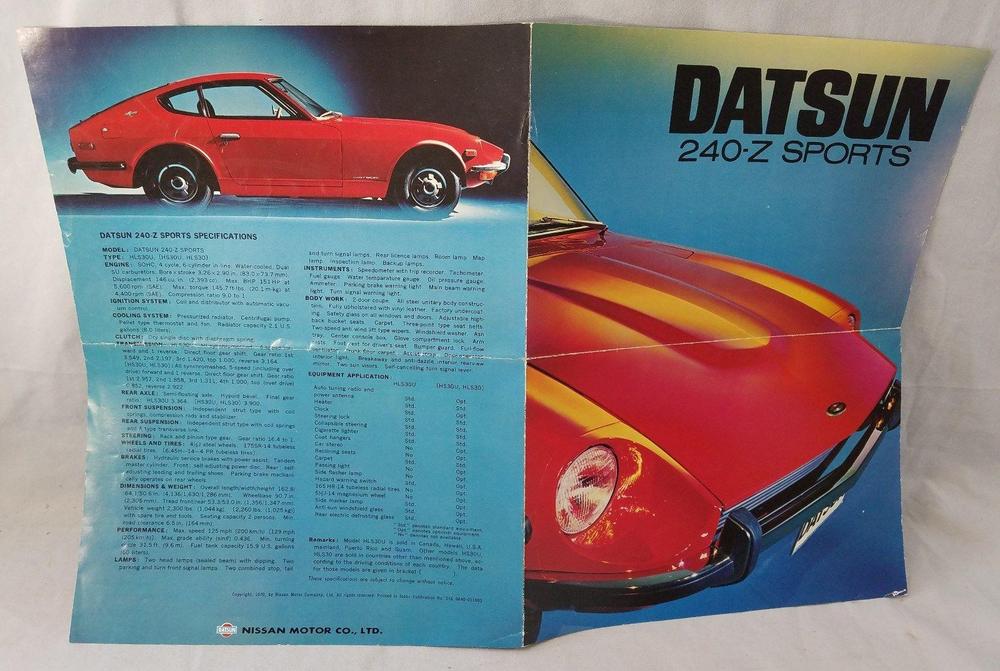
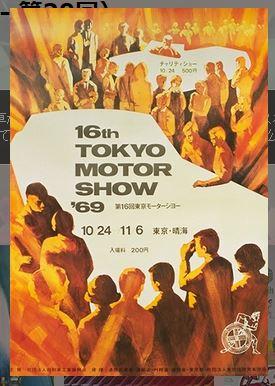
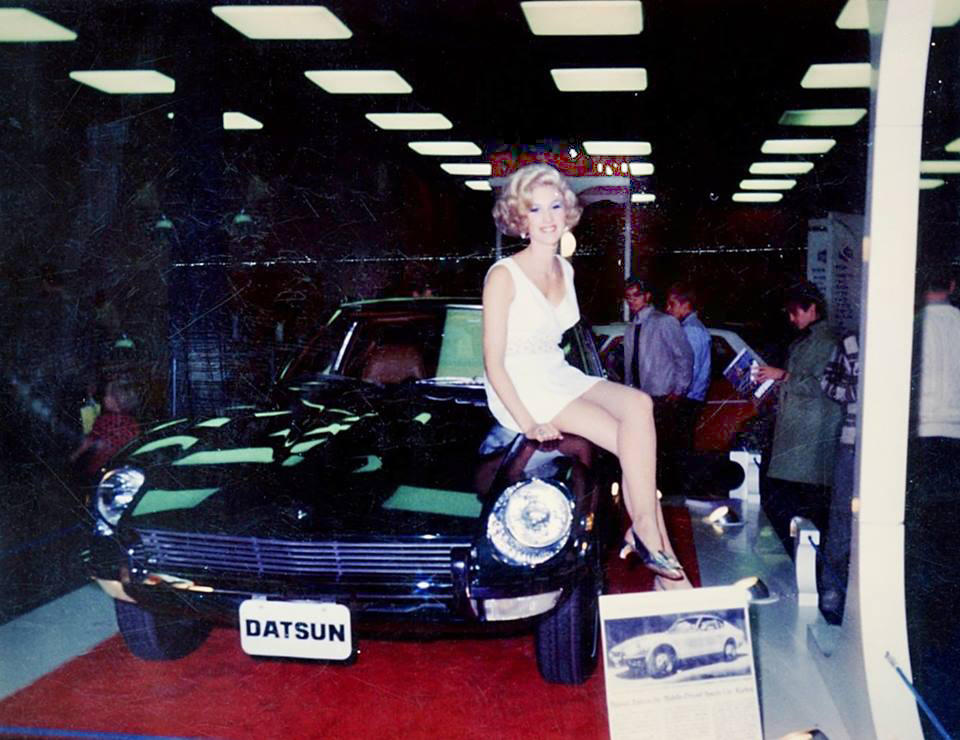
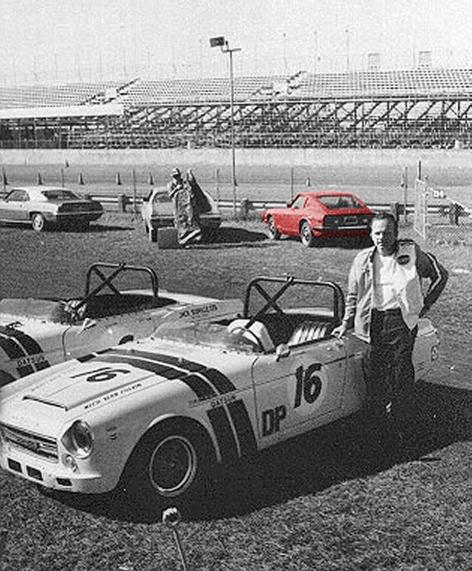
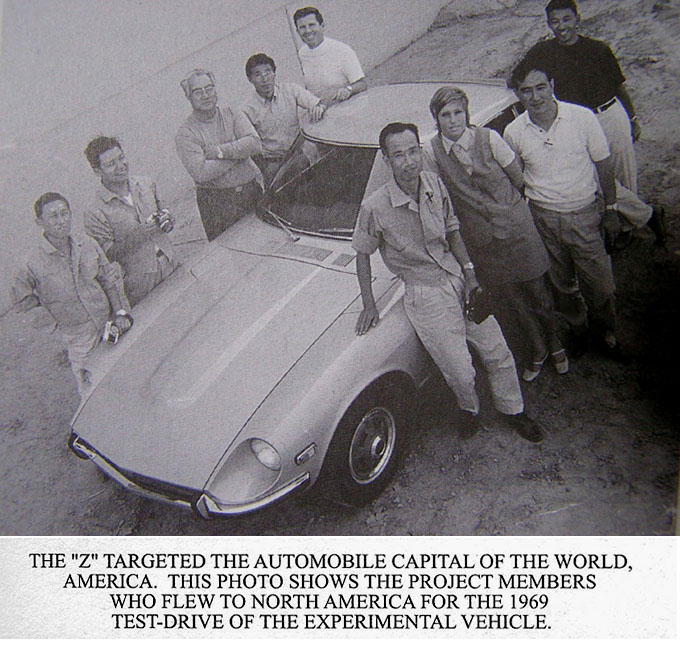
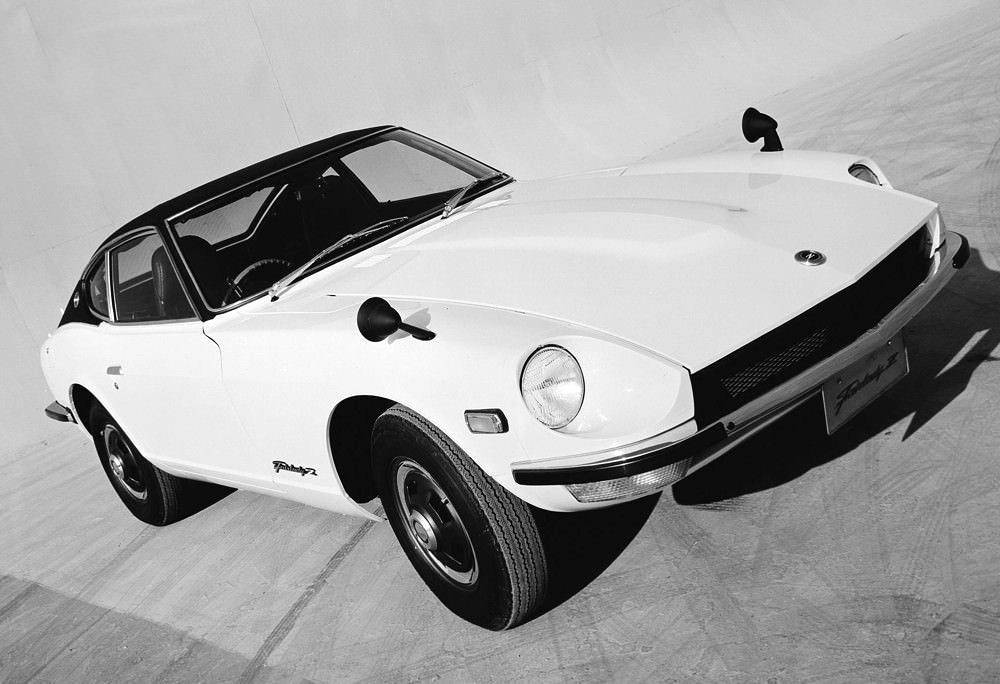
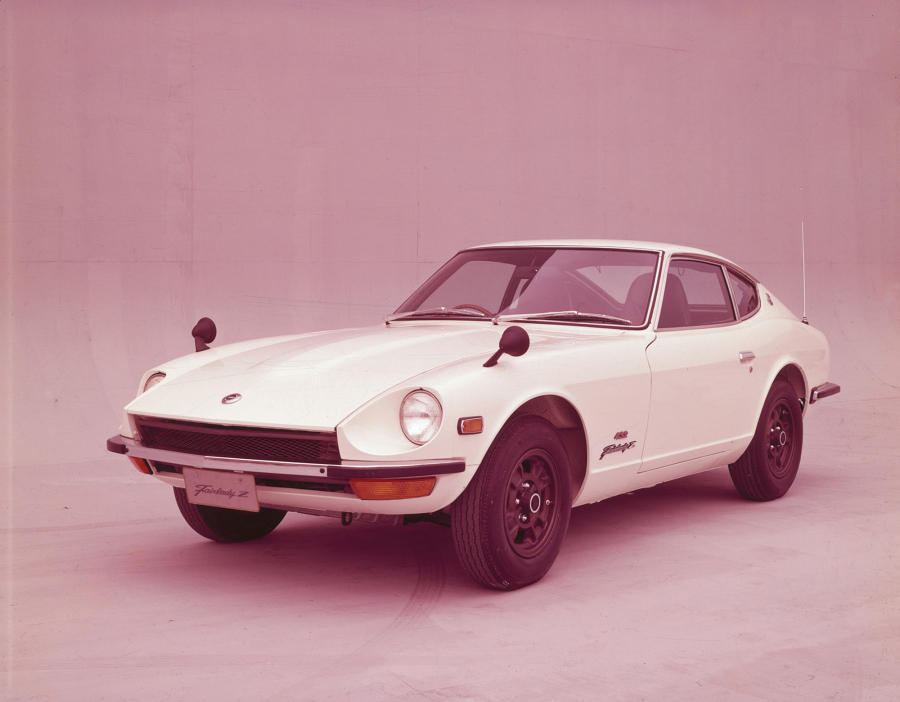
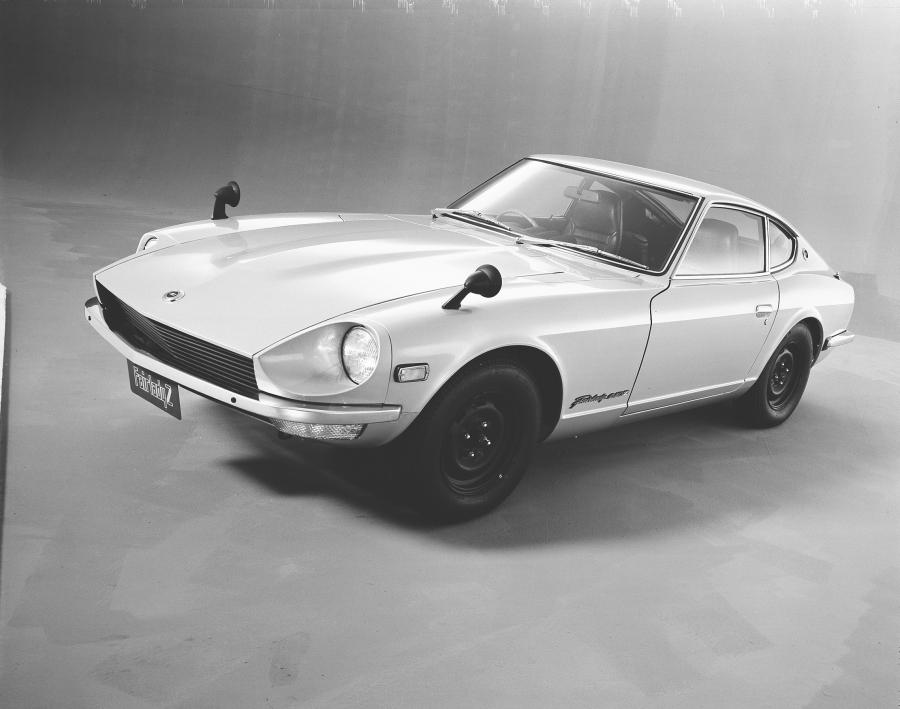
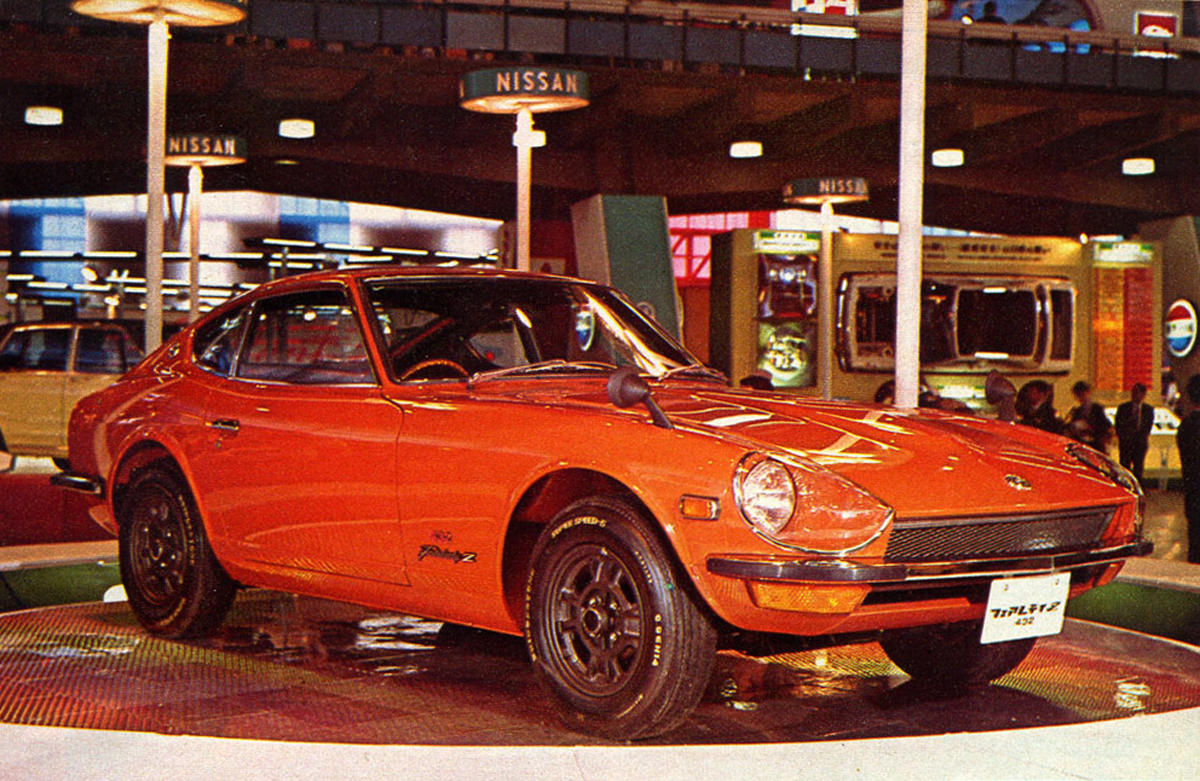
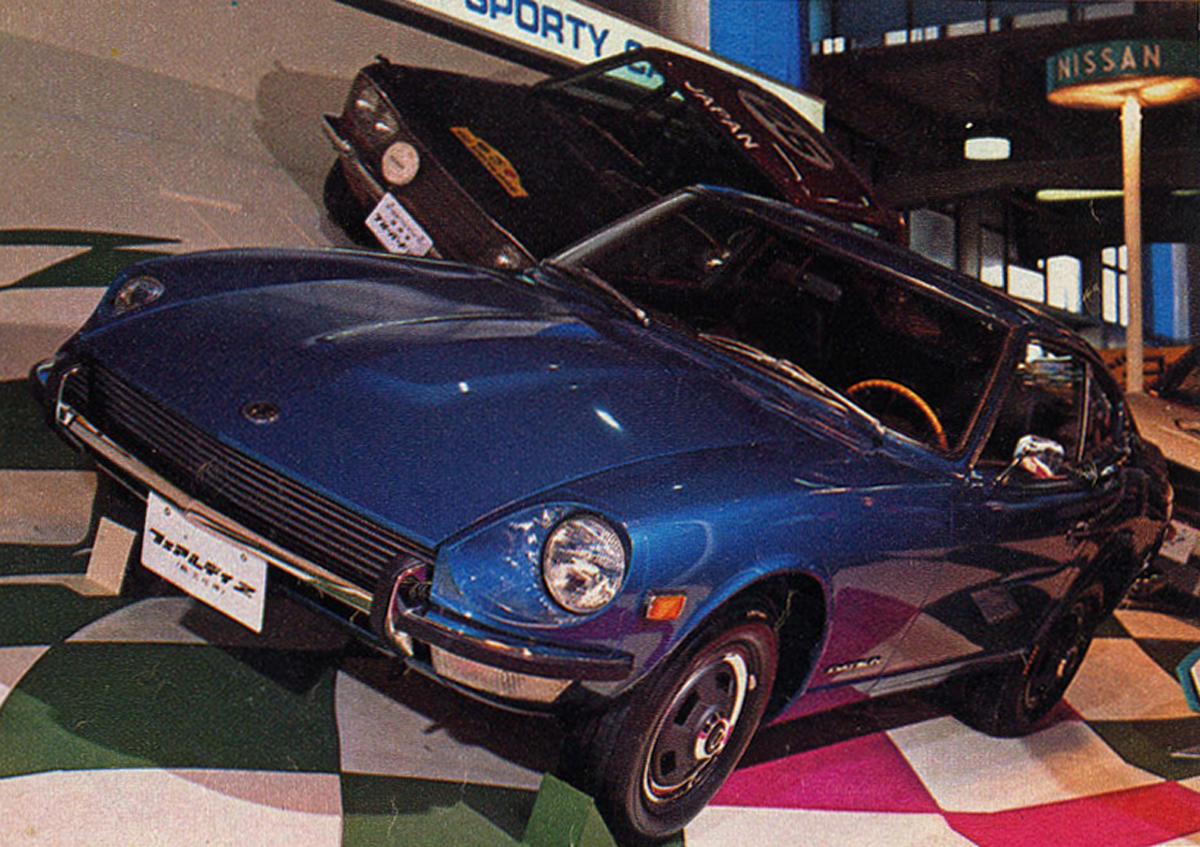
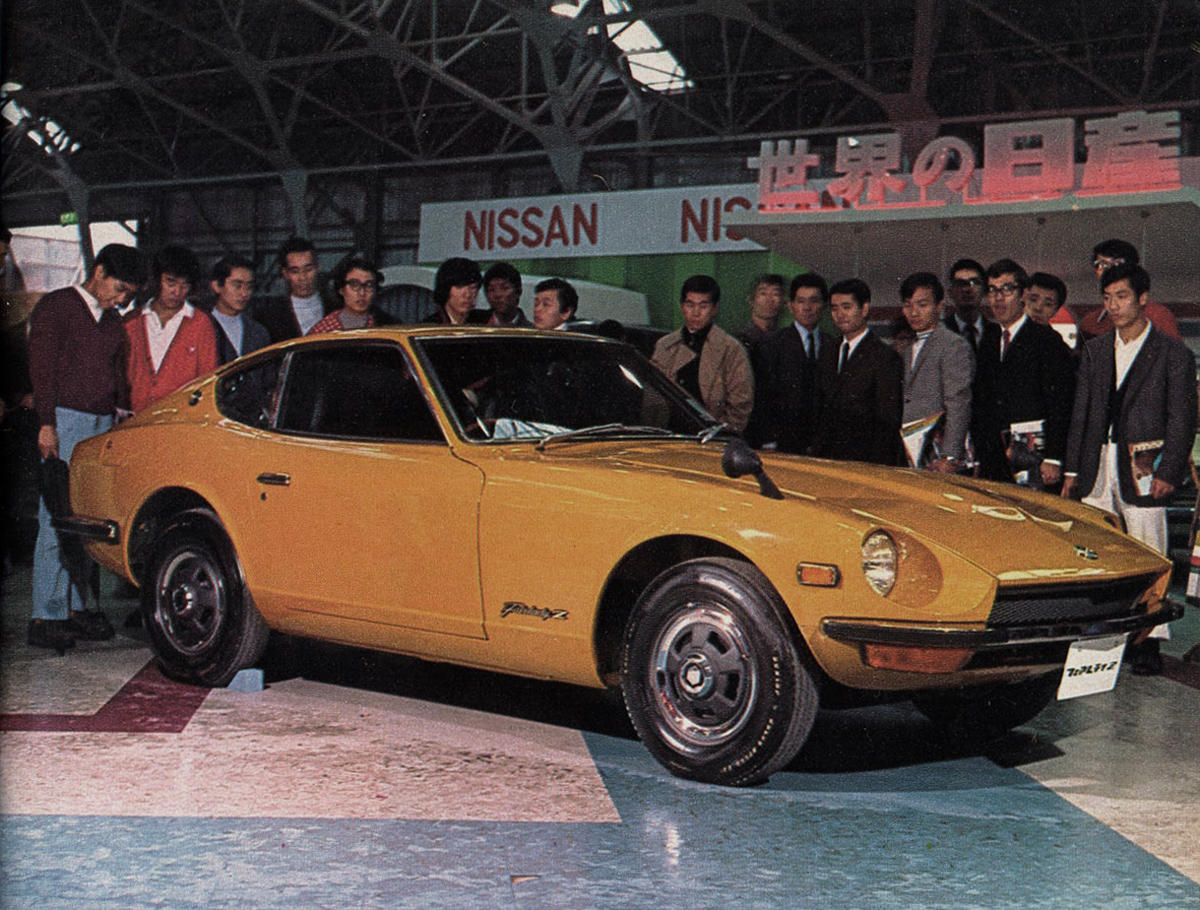
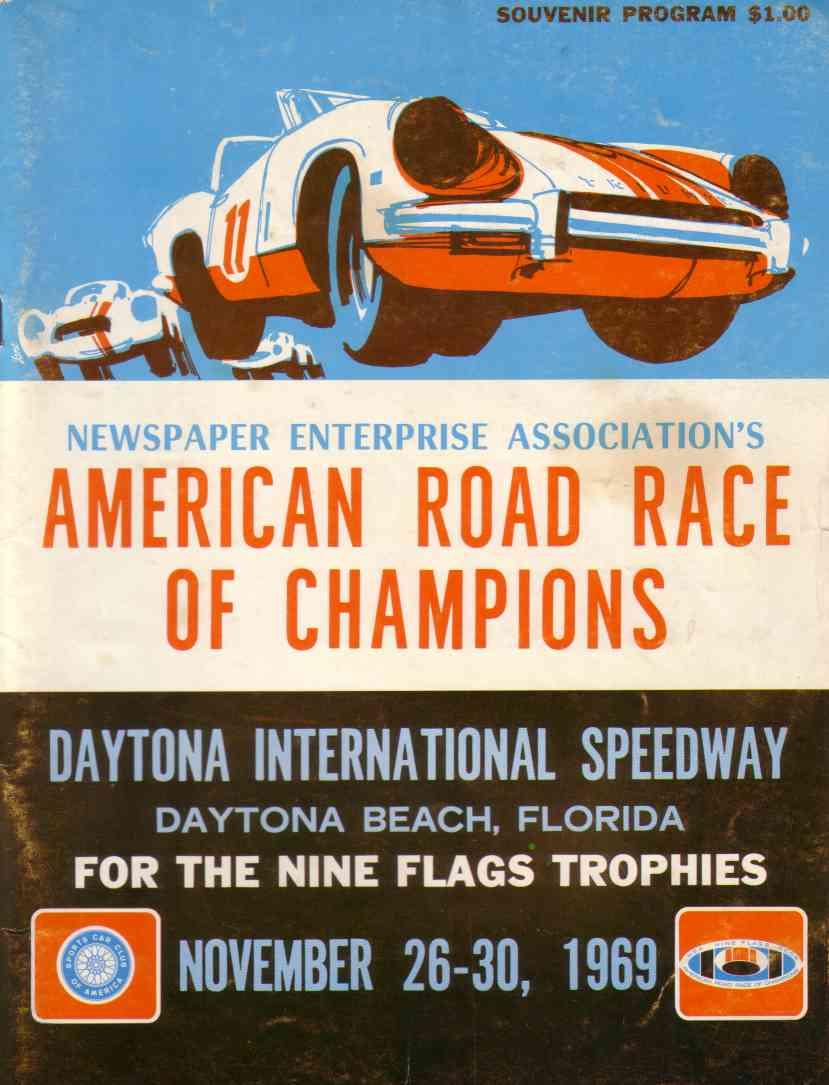
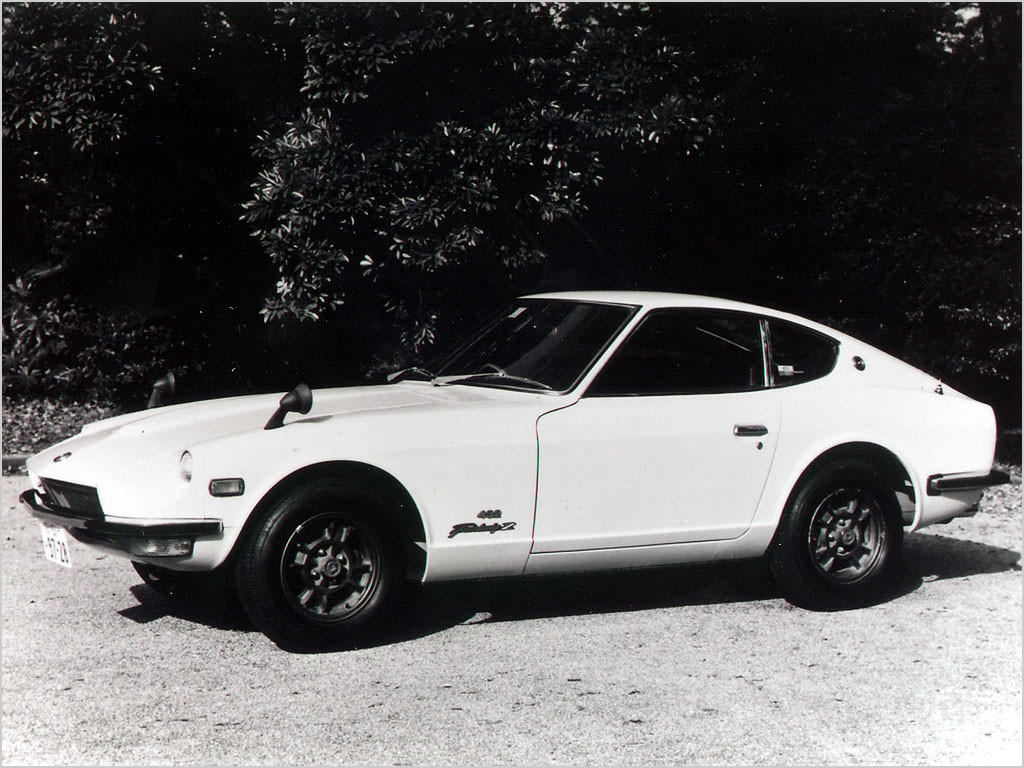
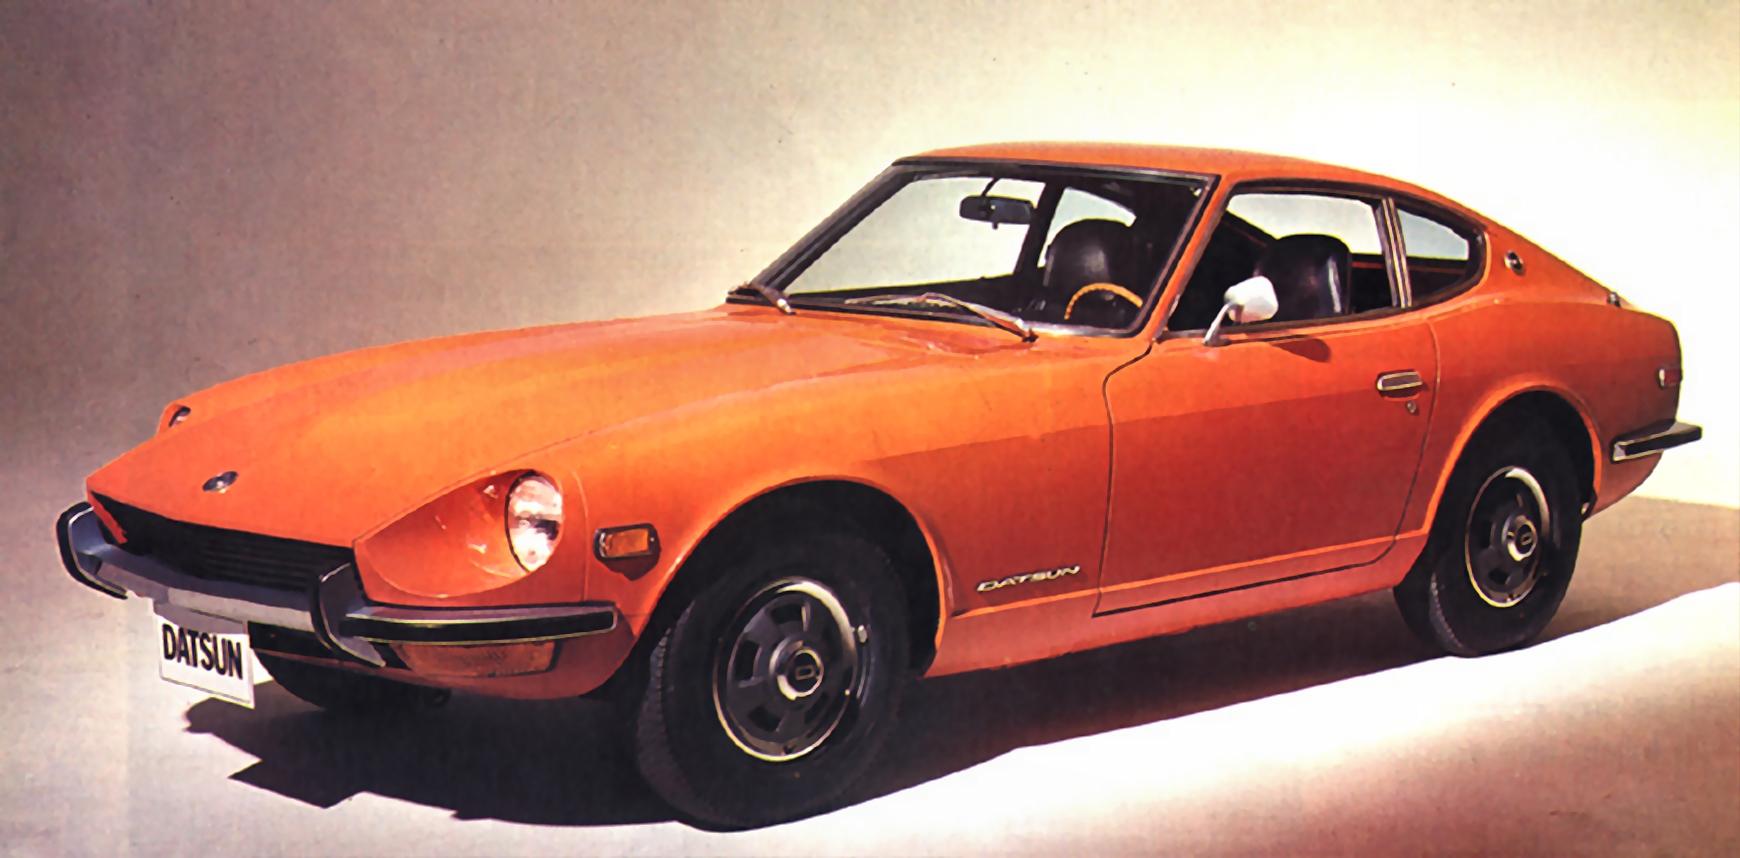
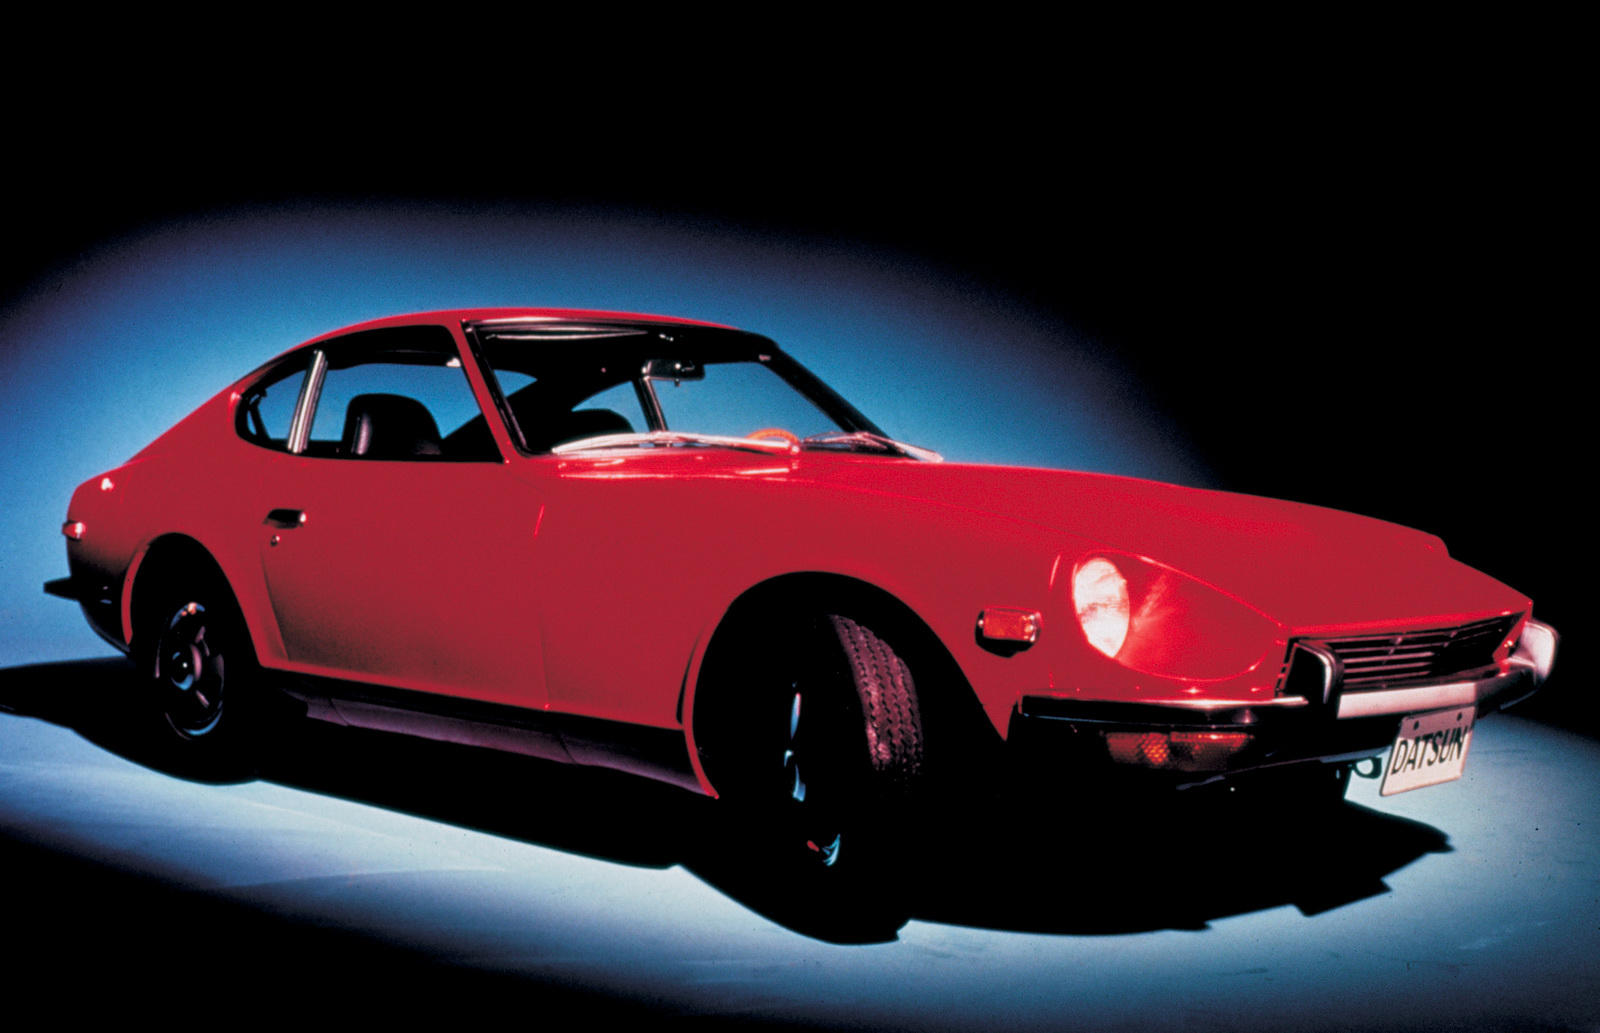
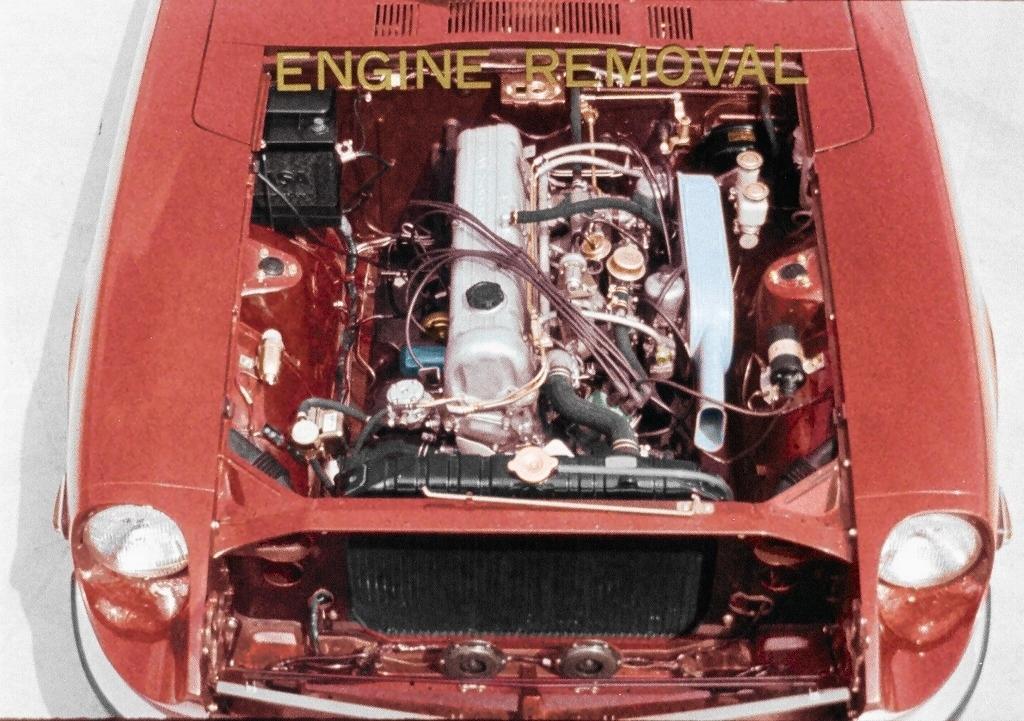
Some interesting ones below thanks to data and images from @kats @HS30-H @Mike B @Carl Beck & @26th-Z and anyone I missed (BIG THANKS!) May 1969 - total 2 cars - one domestic, one export: 1 = S30-00001 (Factory prototype 1) 2 = HLS30-00001 (Factory prototype 2) June 1969 - total 1 car - domestic: 3 = PS30-00001 (Factory prototype 3) July 1969 - total 4 cars - two domestic, two export: 4 = HLS30-00002 (Primary Production prototype 1) 5 = S30-00002 (Primary Production prototype 2) 6 = PS30-00002 (Primary Production prototype 3) 7 = HS30-00001 (Primary Production prototype 4) August 1969 - total 7 cars: 8 = S30-00003 (Primary Production prototype 5) 9 = S30-00004 (Primary Production prototype 6) 10 = S30-00005 (Primary Production prototype 7) 11 = PS30-00003 (Primary Production prototype ? 12 = HLS30-00003 (Primary Production prototype 9) 13 = S30-00006 (Primary Production prototype 10) 14 = PS30-00004 (Primary Production prototype 11) October 10 Two 240z test cars and parts arrive in North America in crates - HLS30-00004 (Silver Manual Mfg:09-69) Seisan Shisaku: #14 - HLS30-00005 (Silver Automatic Mfg:09-69) Seisan Shisaku: #15 < October 22 Three 240z demo/photo/show cars arrive in North America - HLS30-00006 (Green) - HLS30-00007 (Silver) - HLS30-00008 (Red) Oct 17 Press Presentation Ginza HQ, Tokyo Oct 20 First Ad in Japanese Paper (432) Oct 22 NYC International Preview Pierre Hotel (and press kit release HLS30-00006 Green) Oct 24 16th Tokyo Motor Show Oct 24 Wilshire Motor Show Preview LA Oct 27 Calif Competition Press and Autoweek Article on the new 240z with photo of Test car Oct 30 Boston Motor Show Oct ?? HLS30-00013 & HS30-00003 produced Nov ?? 432 Race Track Testing Suzuka Circuit Nov 25 Japan Test Drive for Journalists near Mt. Fuji Nov 25 ARRC Daytona Speedway 240z (red HLS30-00007) Dec 20 Refined Z's Shipped by plane to North America (following Seisan Shisaku road testing feedback and export production slow down to resolve) Early Z Production car Early Z Photos Early Z Advertising and Promotion Early Z Brochure Press Show in Japan Tokyo Motor Show Boston Car Show ARRC with Early Promo Z in Public Press Test Drive in Japan Early Z Coverage in Magazines Manufacturing Testing in North America


 11 points
 -
11 pointsSome old and new photos of my '73 240Z. (I am the original owner) My 240Z in 1973 1982, Daily Driver loved by our daughter . 2019: after restoration - loved by the next generation

 11 points
 -
11 pointsJust wanted to chime in and let everybody know that the houston floods spared both the Datsuns and the Z and roadster will be seeing the beauty that is texas fall soon. Hope everybody is well, and driving as much as possible. I have been away for too long from this great community and will make an effort to be more present as I miss you guys. SD11 points
-
11 pointsOMG, I'm drooling. This will be one sweet ride. Can't wait to start assembly.


 11 points
 -
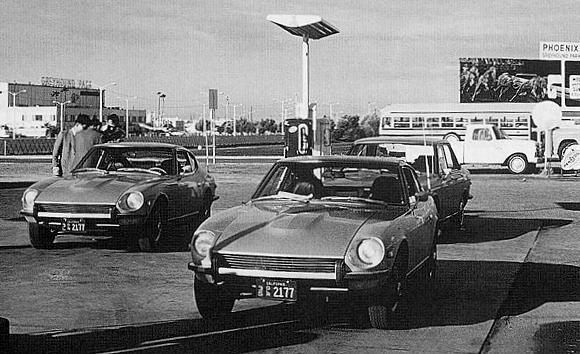
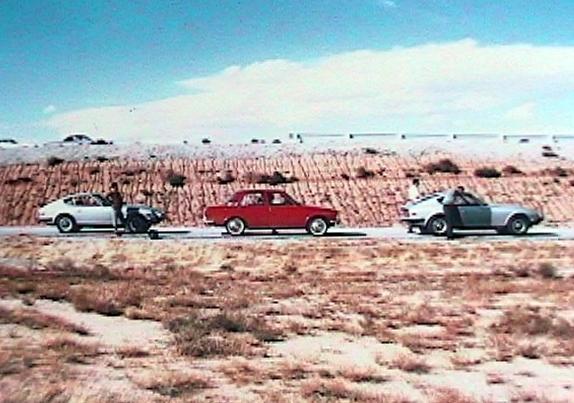
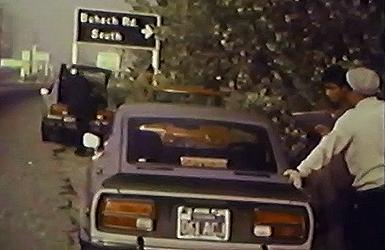
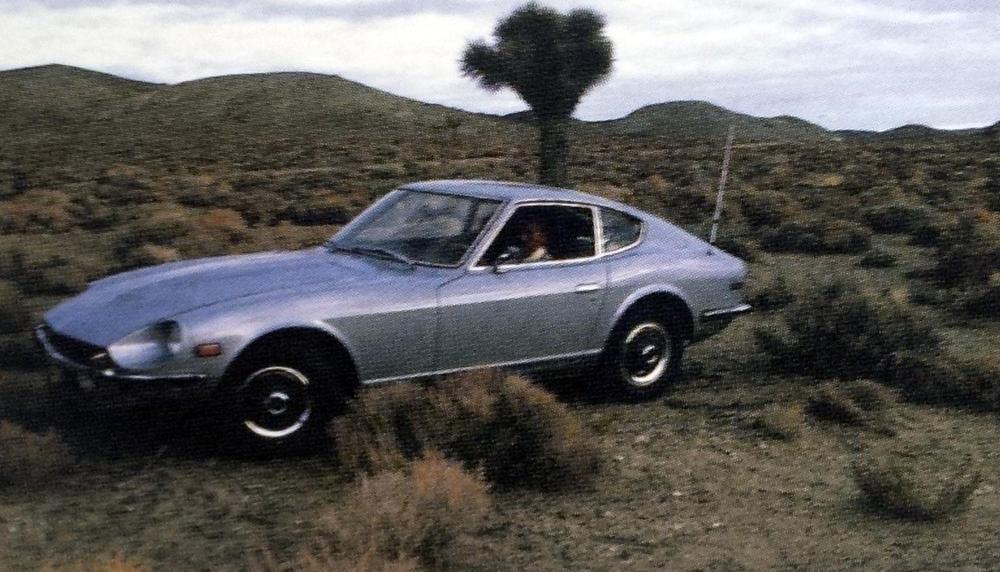
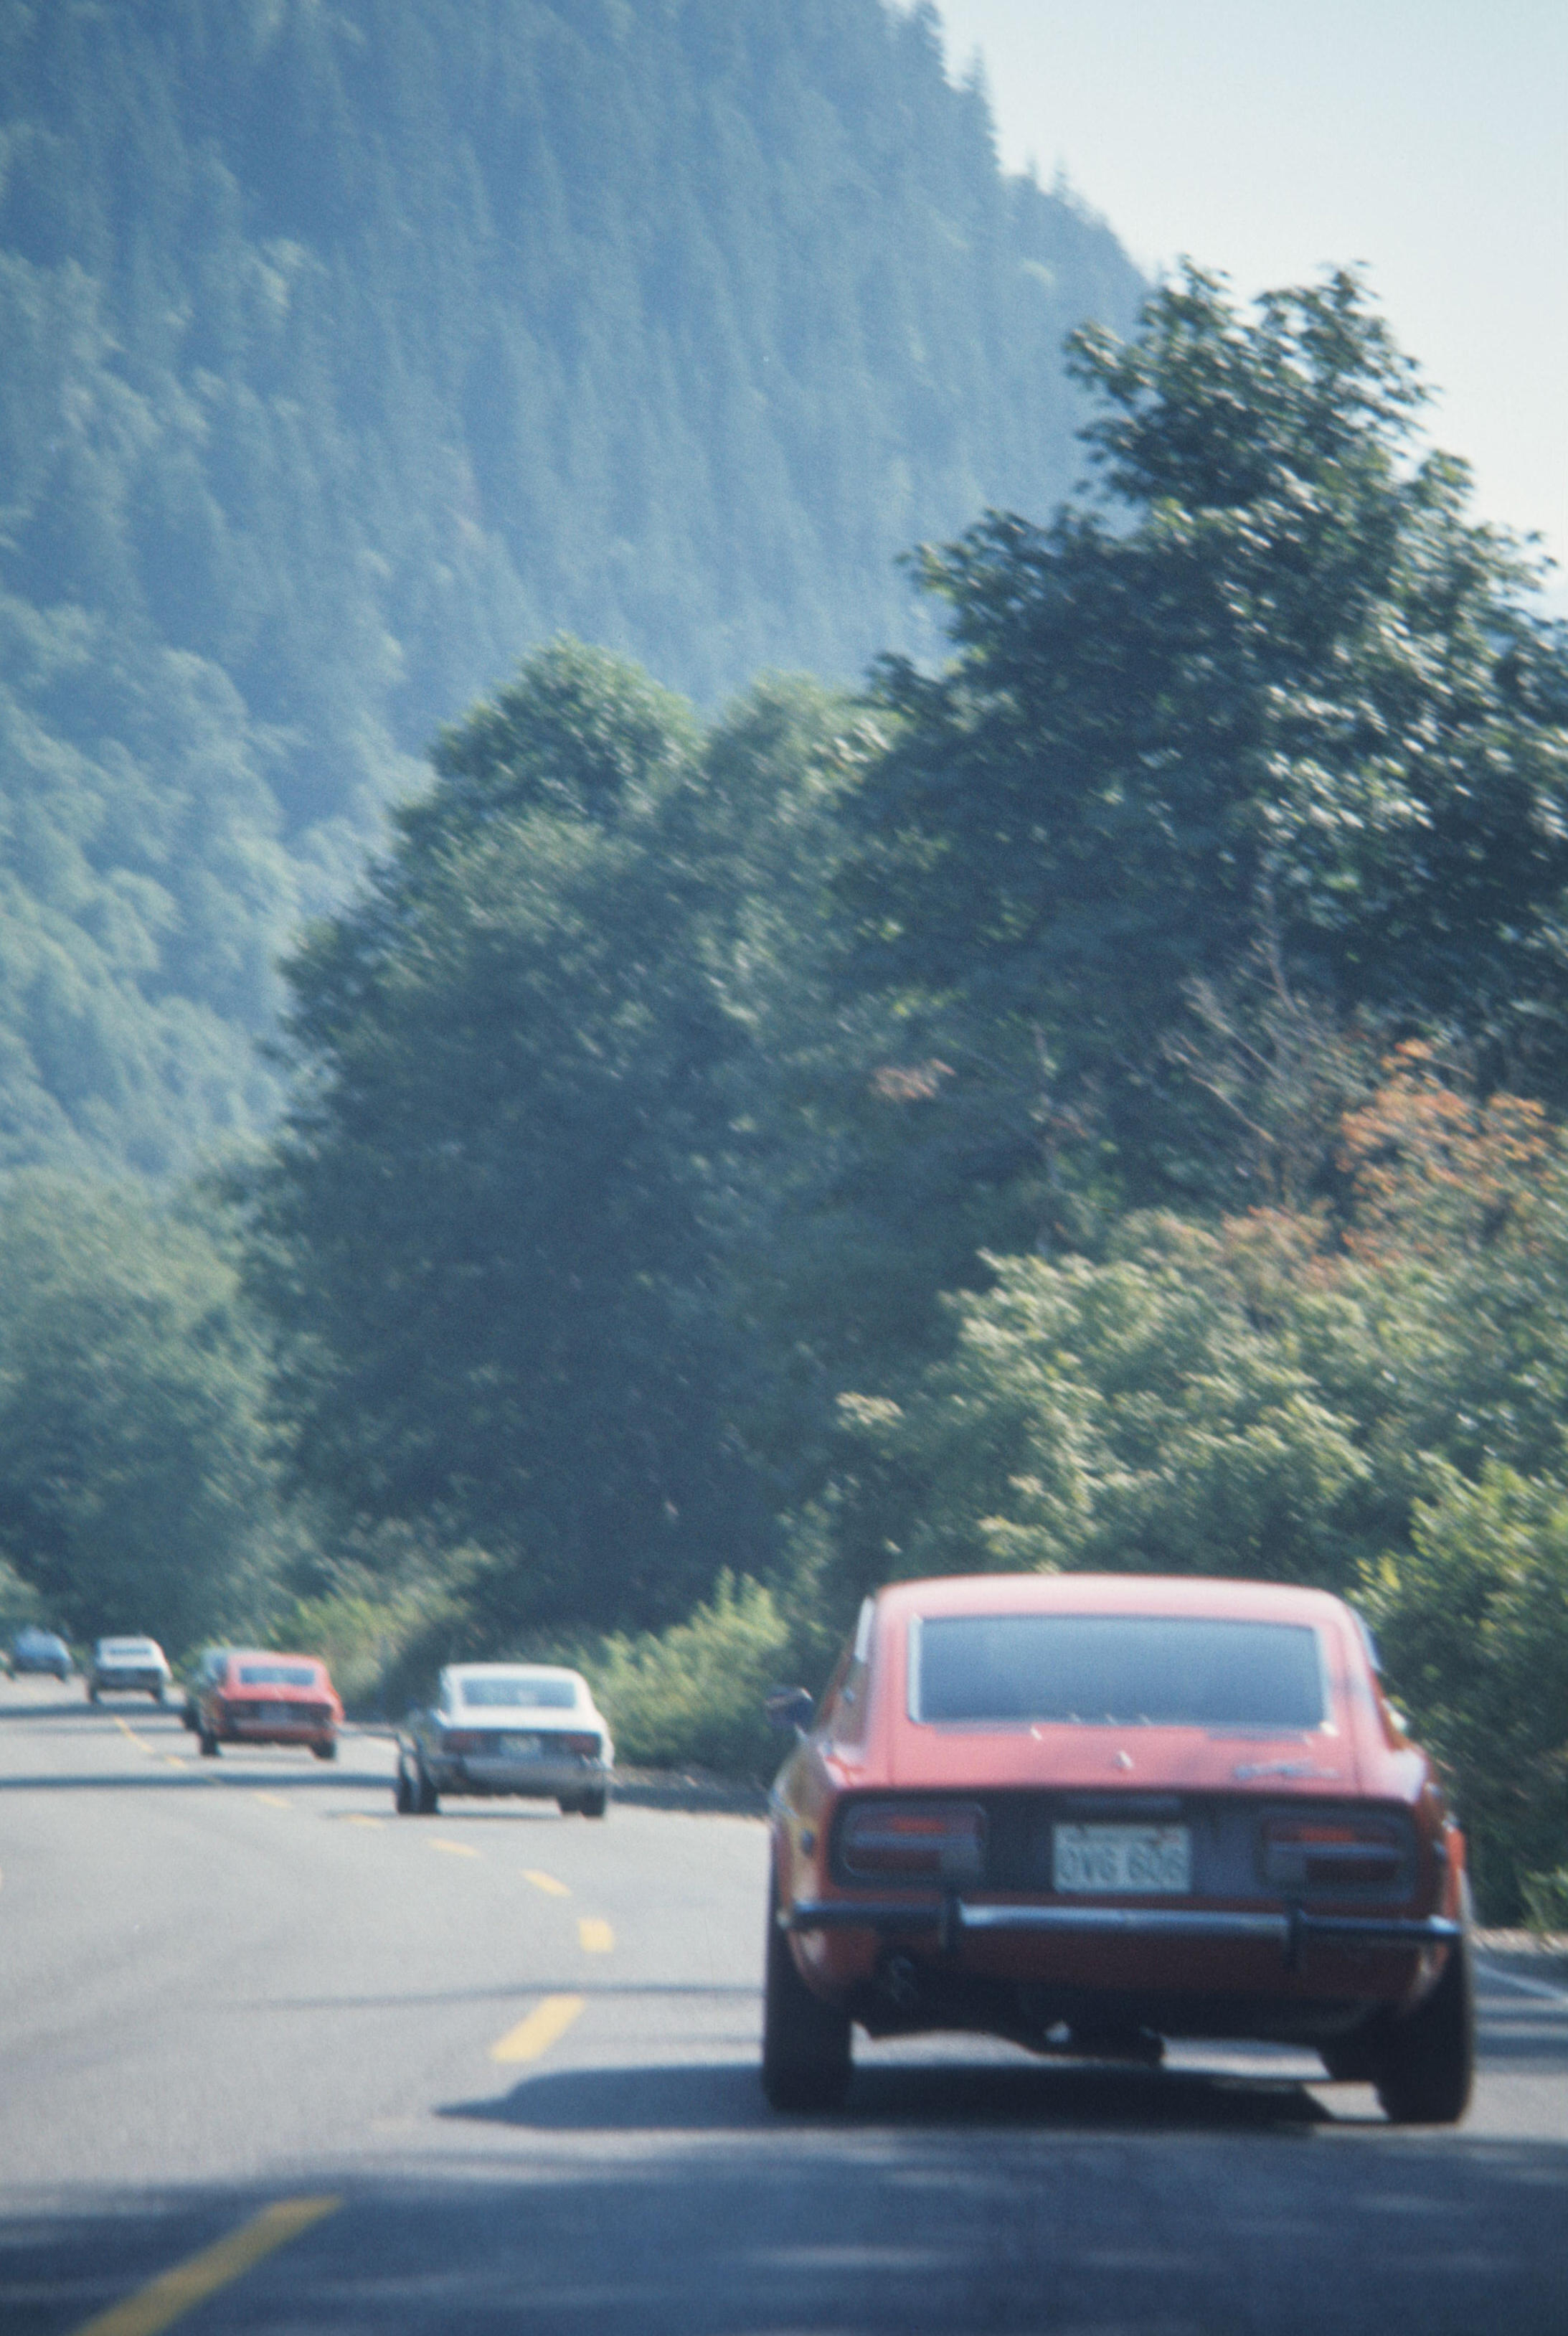
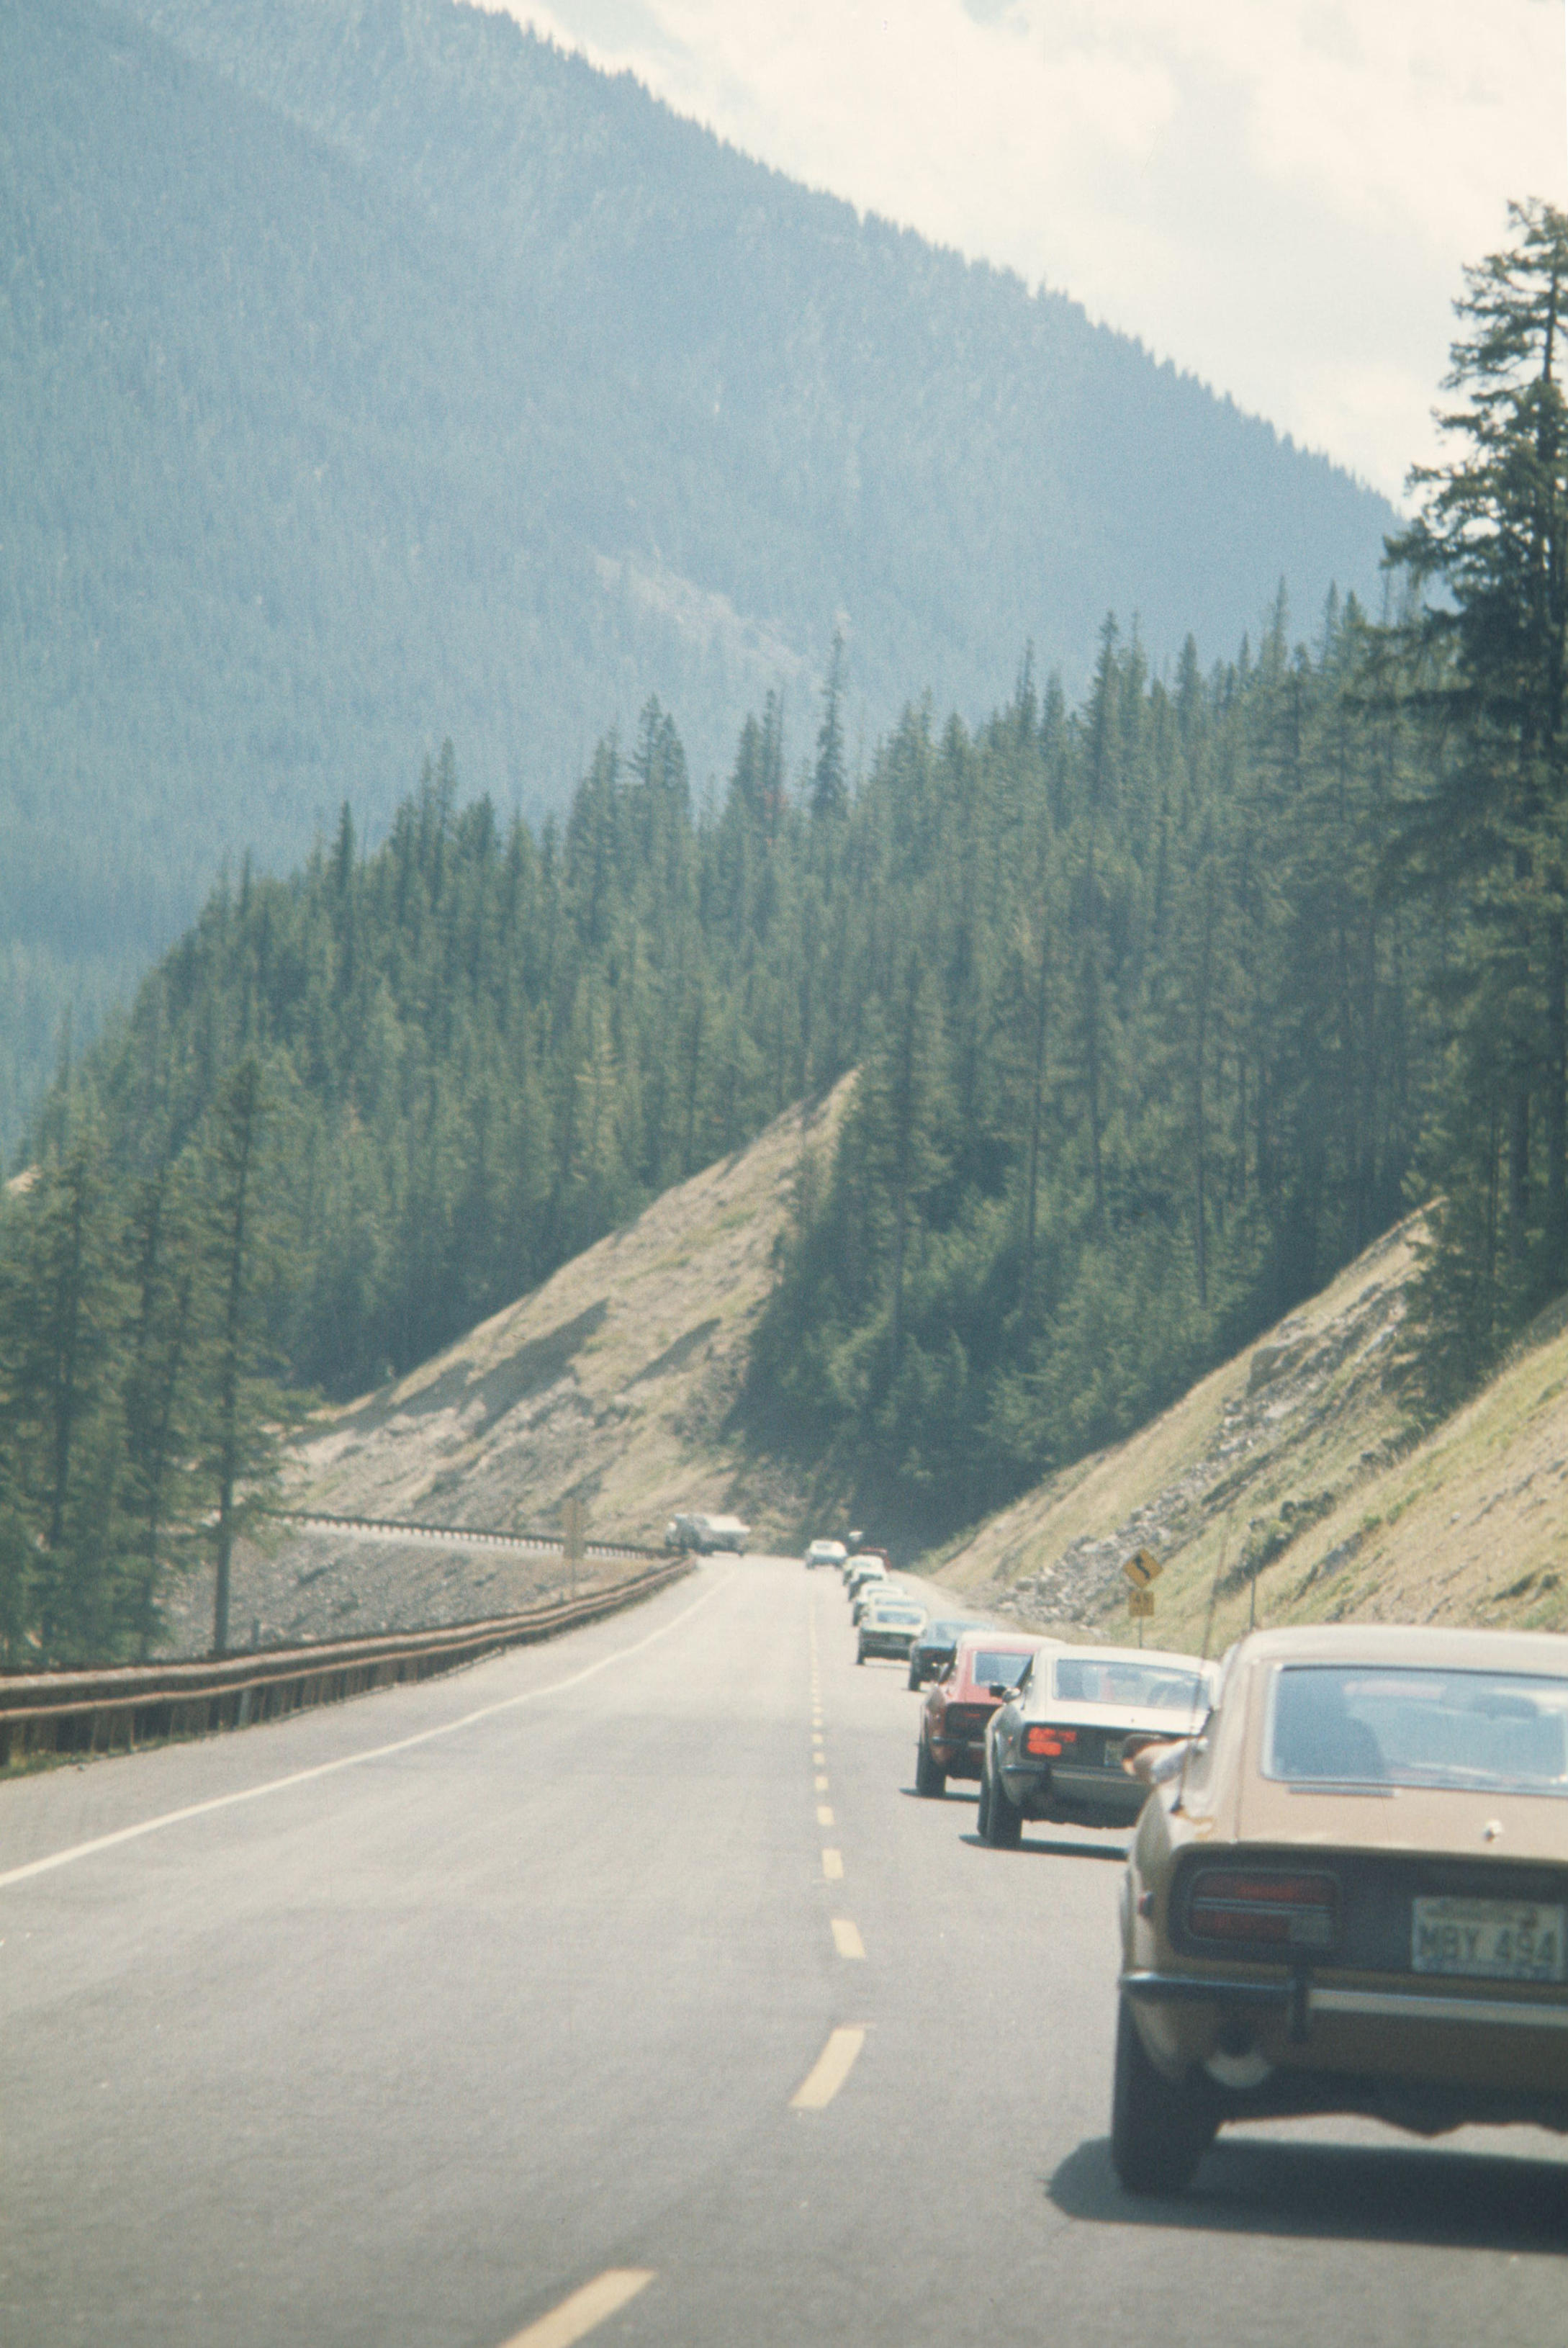
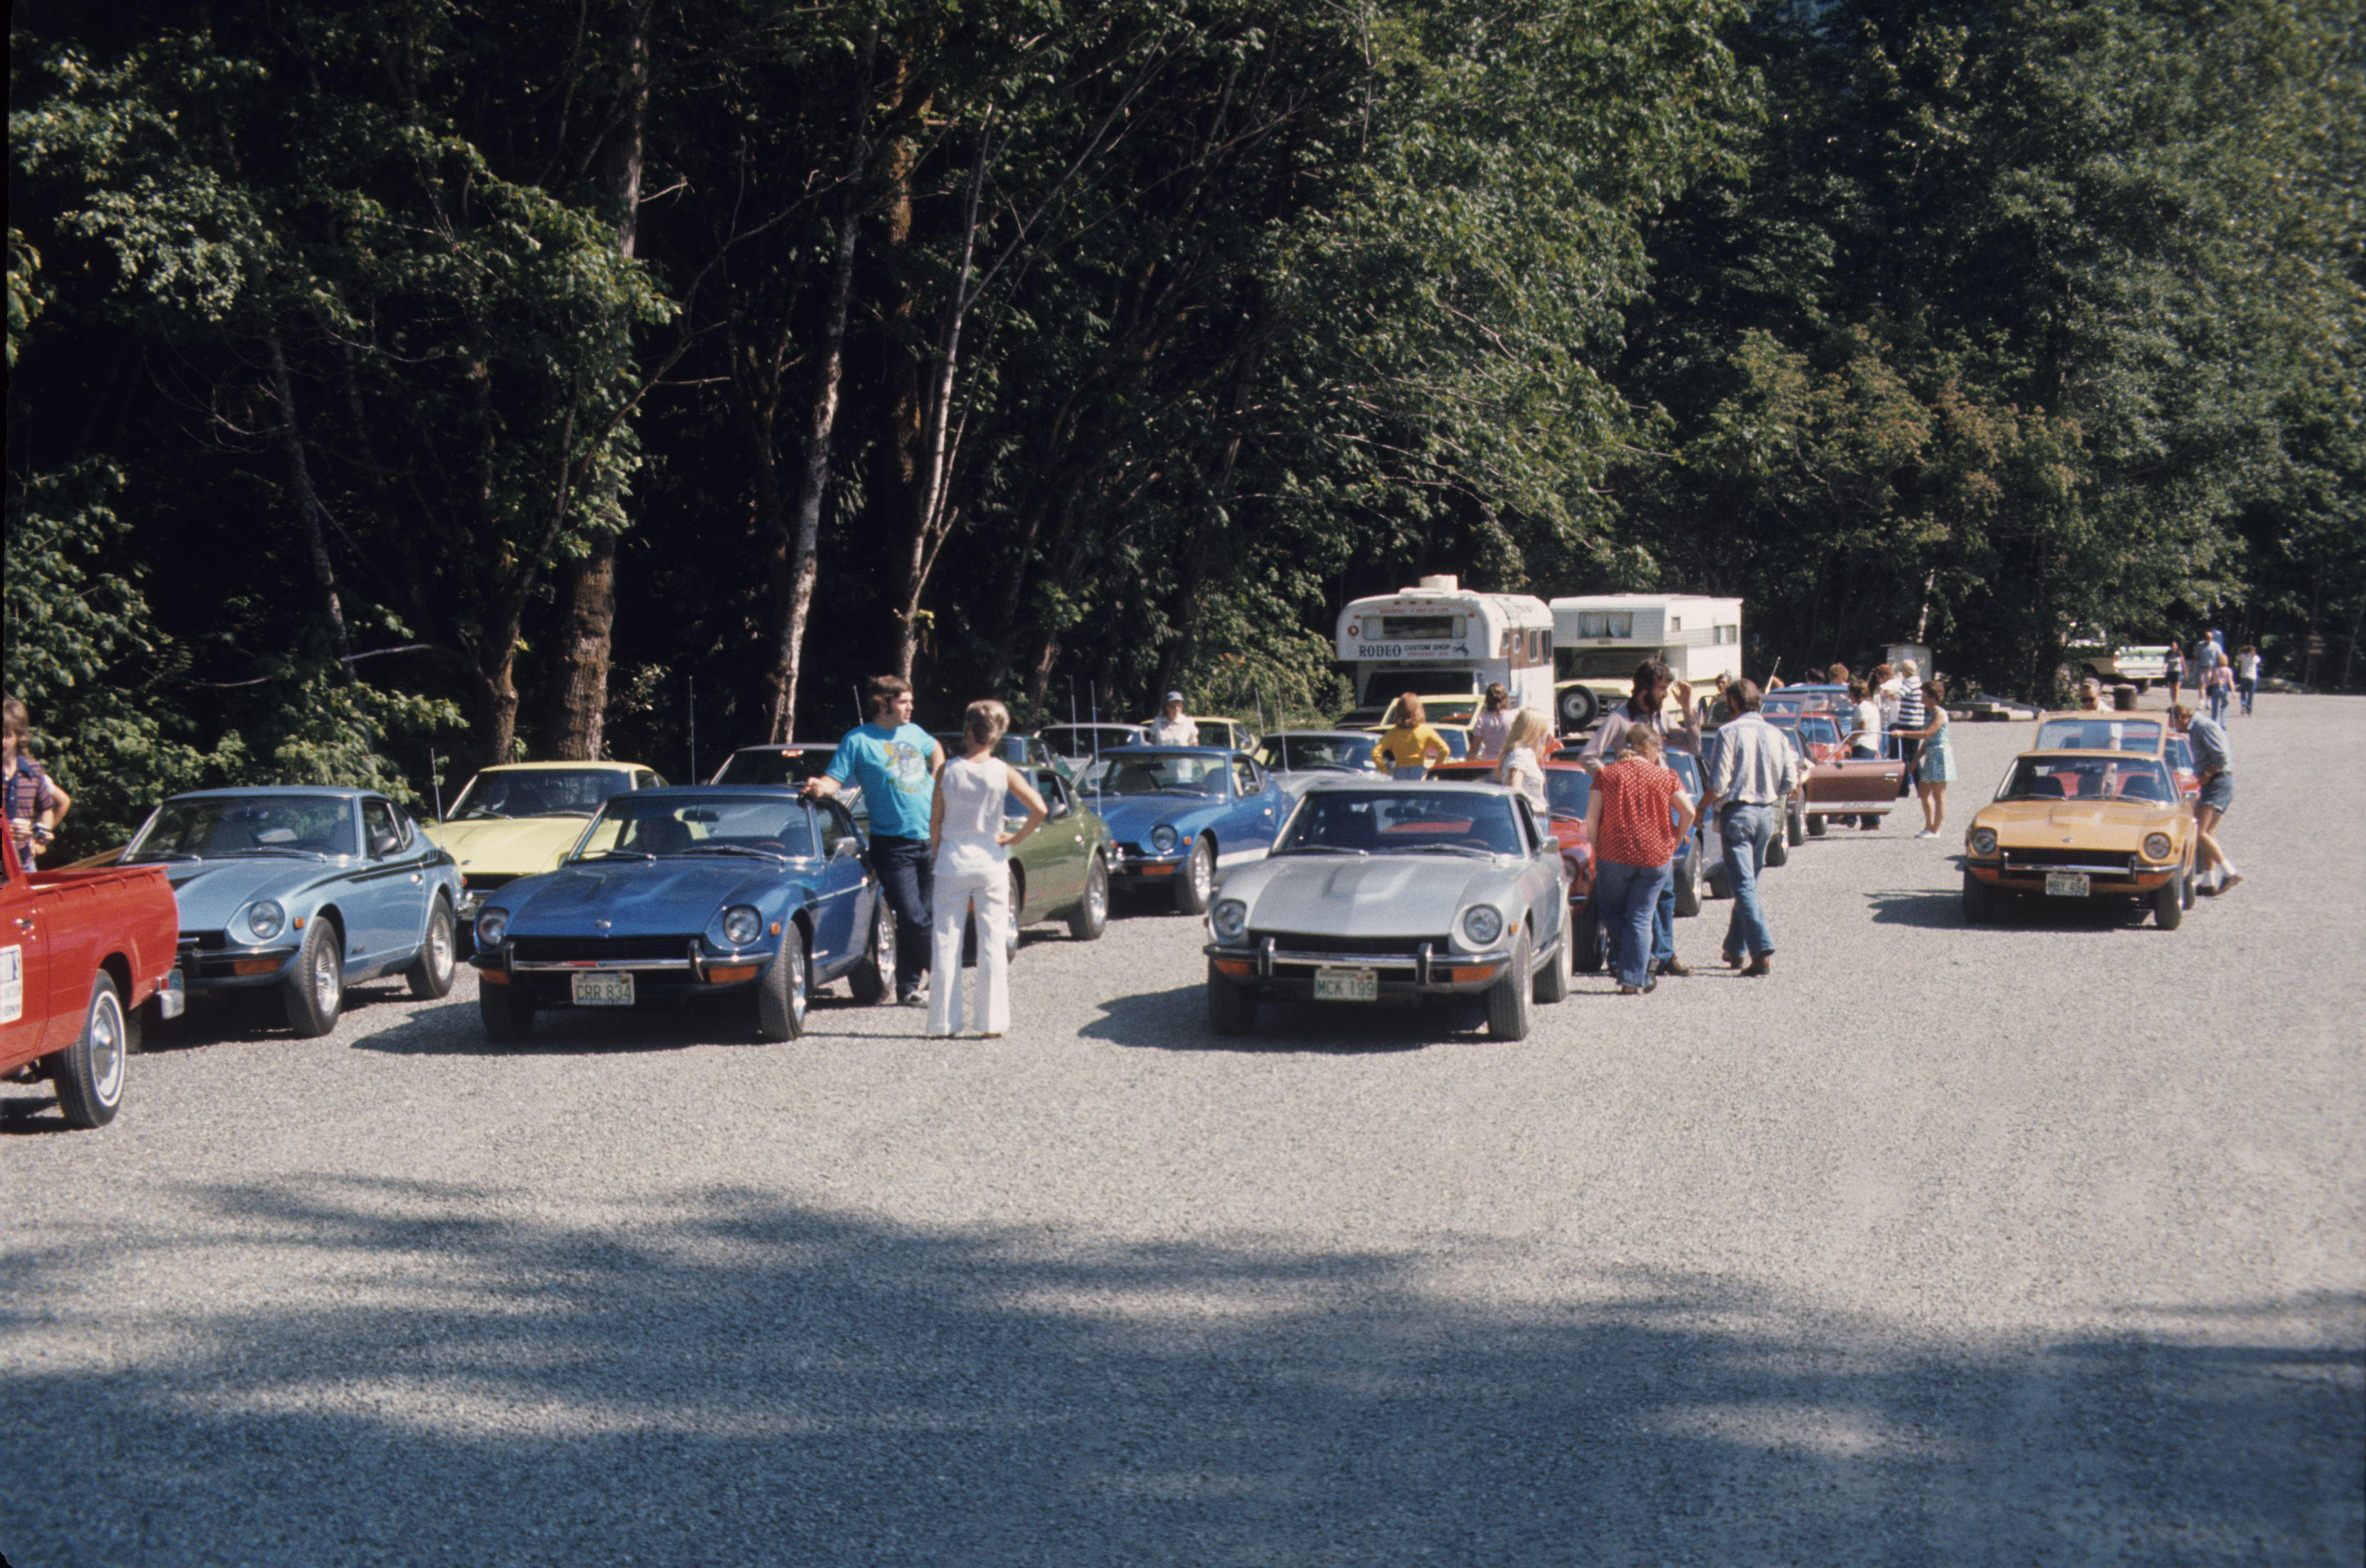
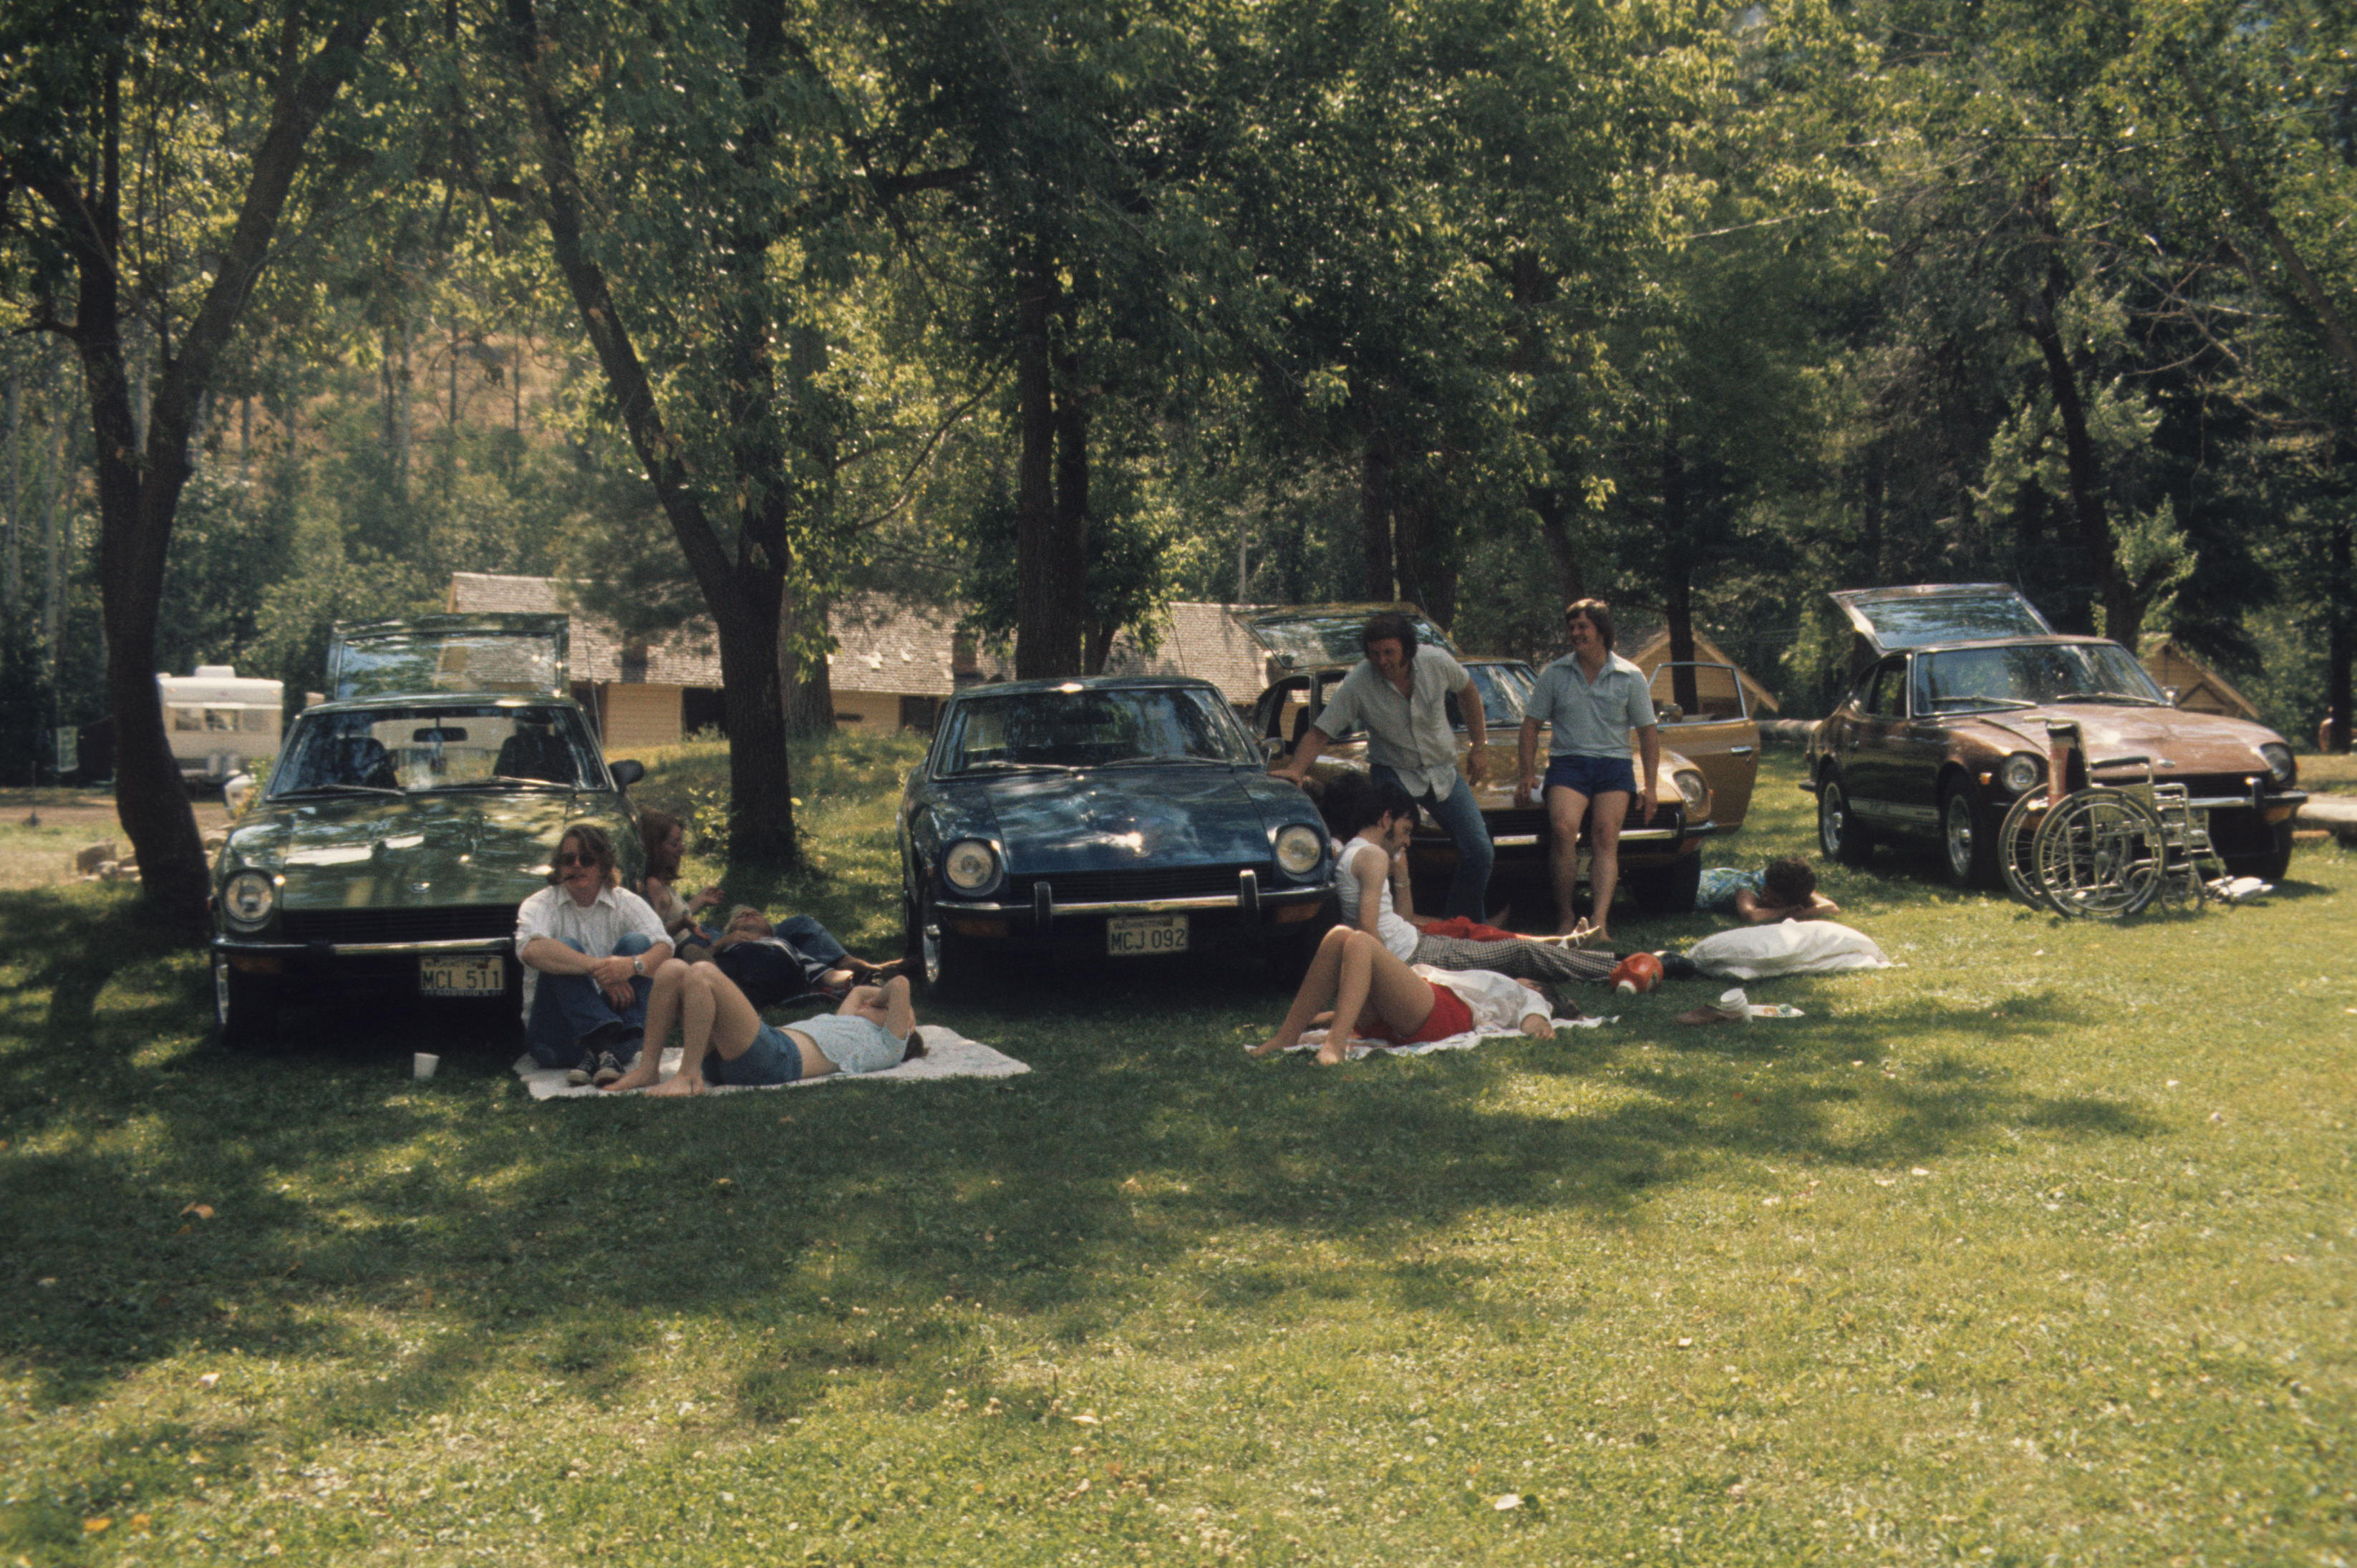
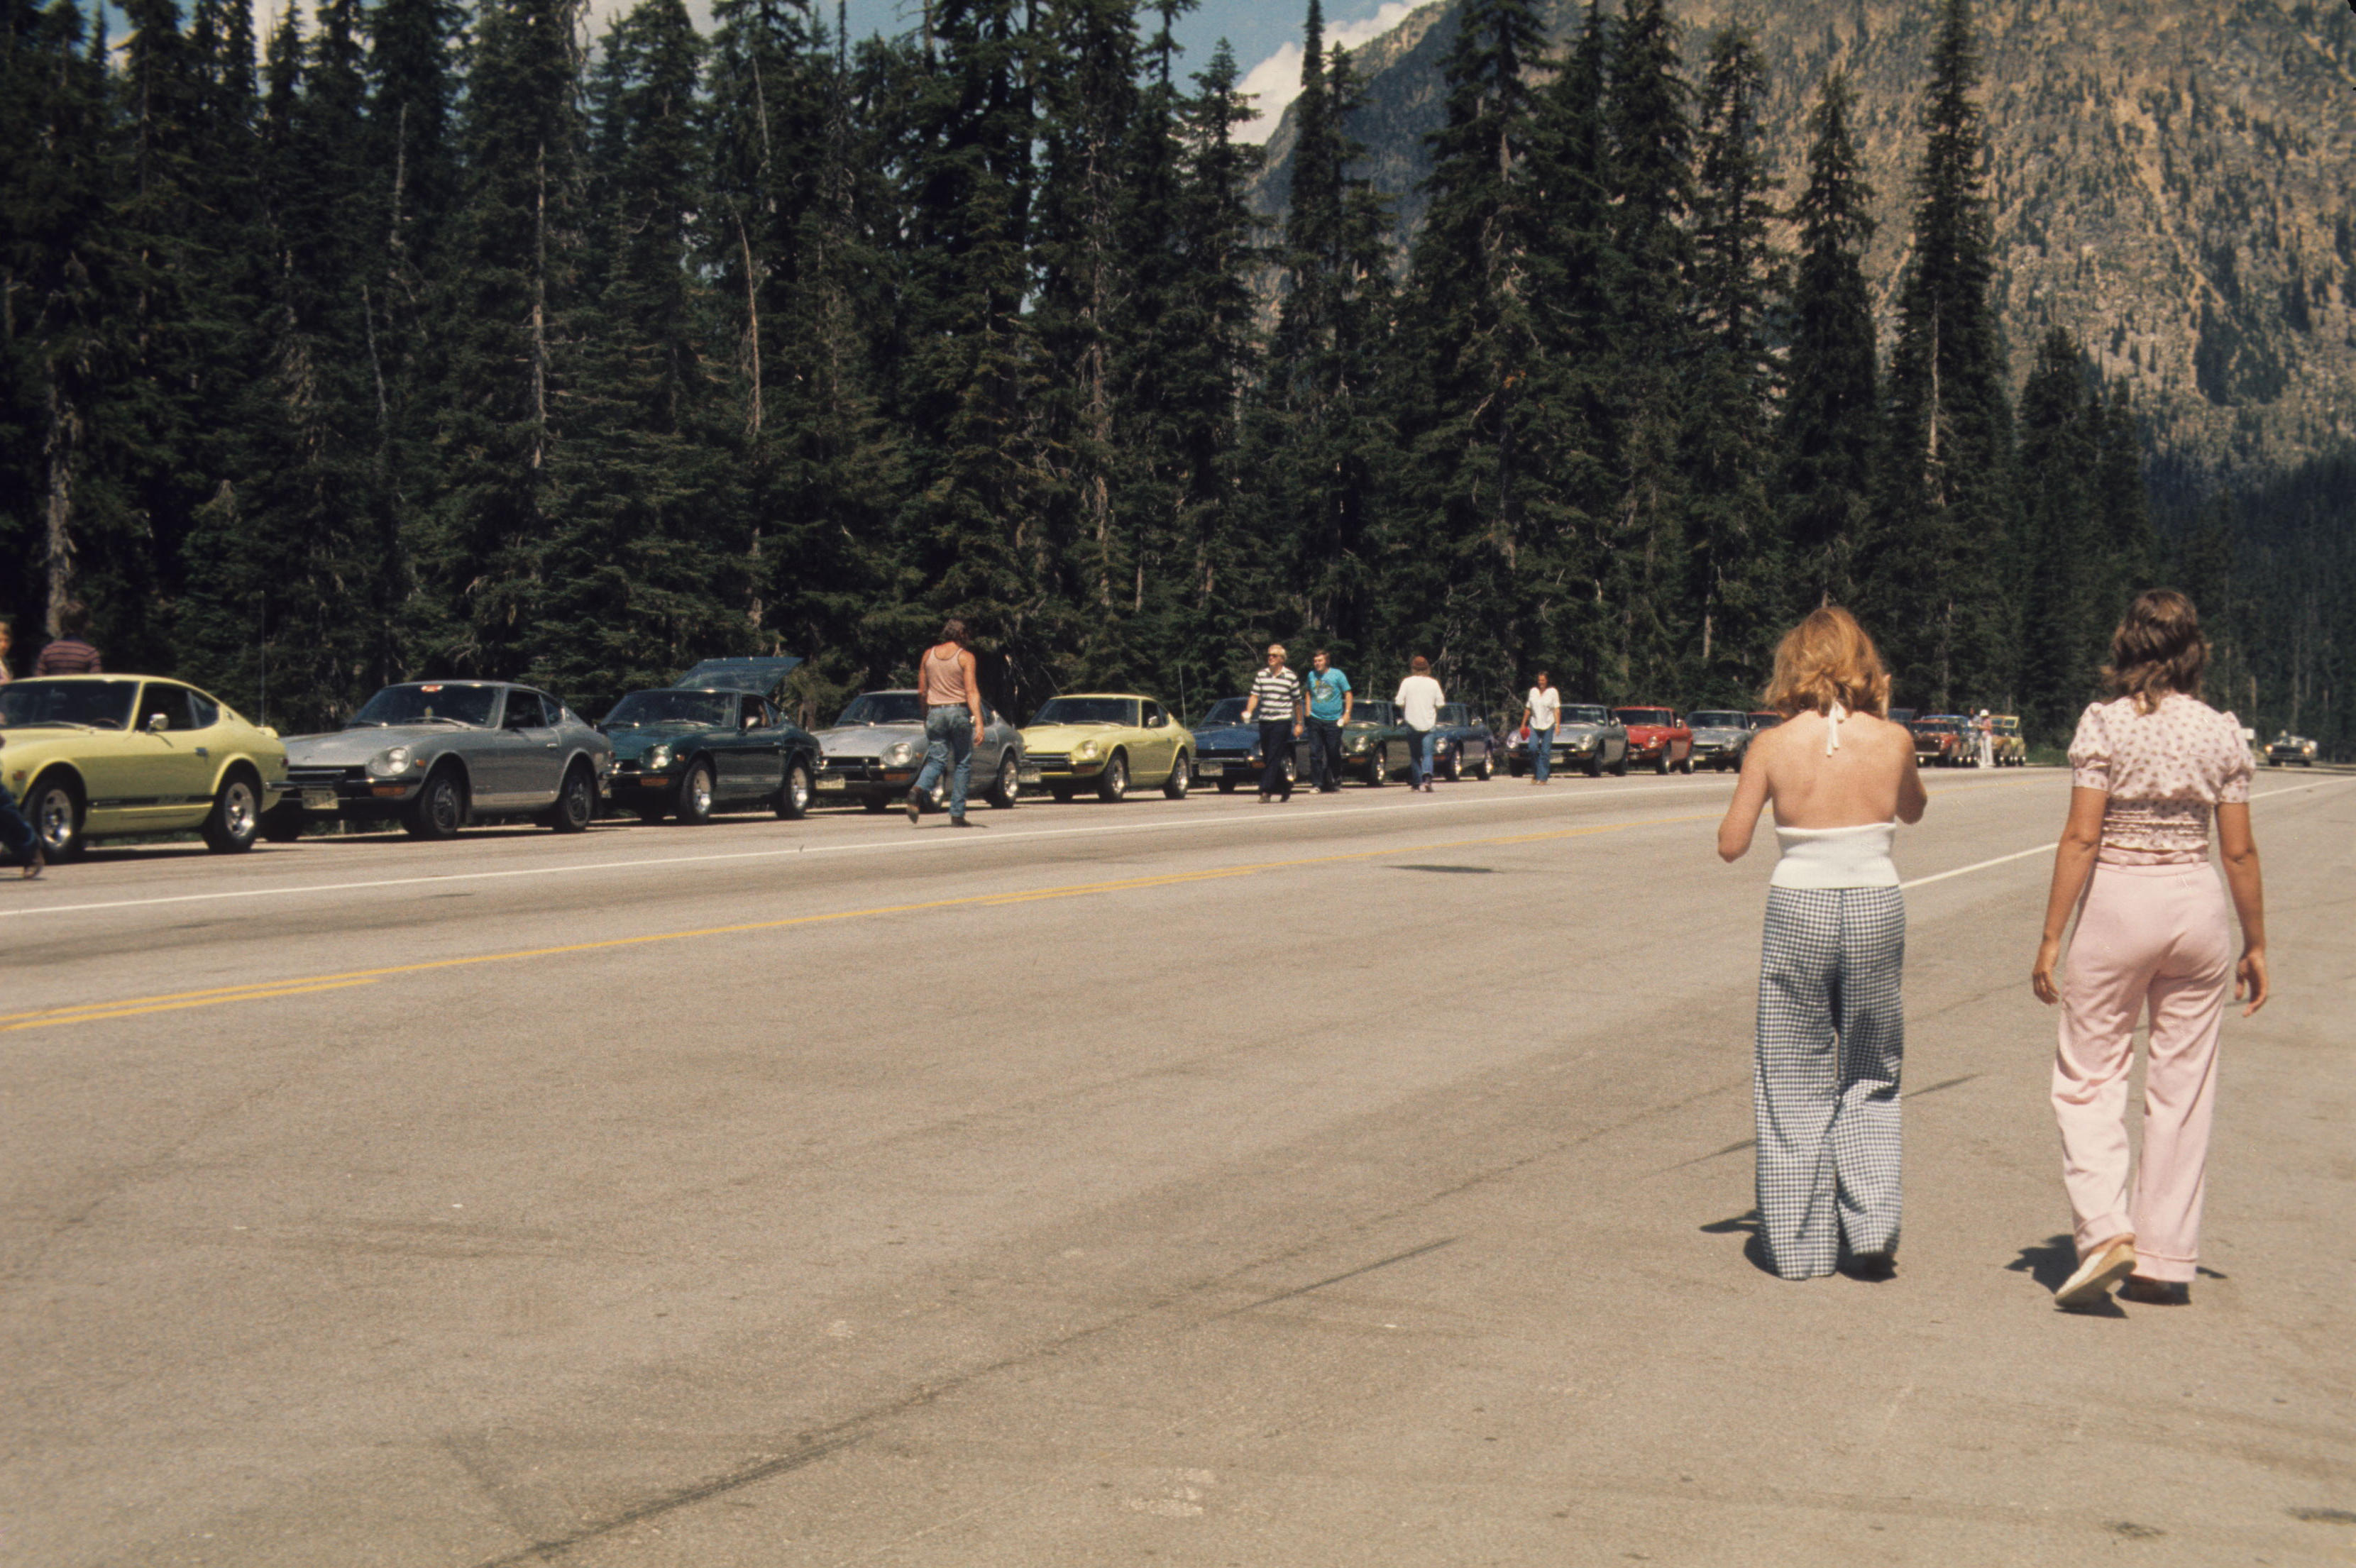
11 pointsWhile Motorman7 is restoring my '73 240Z, (thread titled: We're bringing back the flat tops!) I've started digitizing the slides I took of the car I've kept since I bought it new in 1973. I came across the pictures I took of a "fun run" in 1974 sponsored by Jack Gubrud, the owner of Gubrud's Valley Datsun in Mt. Vernon, Washingon. That was where I bought my car in April, 1973 after returning from a 10+ month deployment to Vietnam aboard the aircraft carrier Kitty Hawk. This was on Sunday, August 4th, 1974 from Mt. Vernon WA (north of Seattle) over the North Cascade Highway through the Cascade mountains to the town of Winthrop, WA. I believe almost all of the Zs in these photos were purchased at Gubrud's Valley Datsun. Lots of S30s! As I recall, Jack Gubrud paid for a BBQ picnic lunch for everyone. And we had a presentation by a Datsun engineer about the new Hitachi carbs. Wish I had paid more attention!
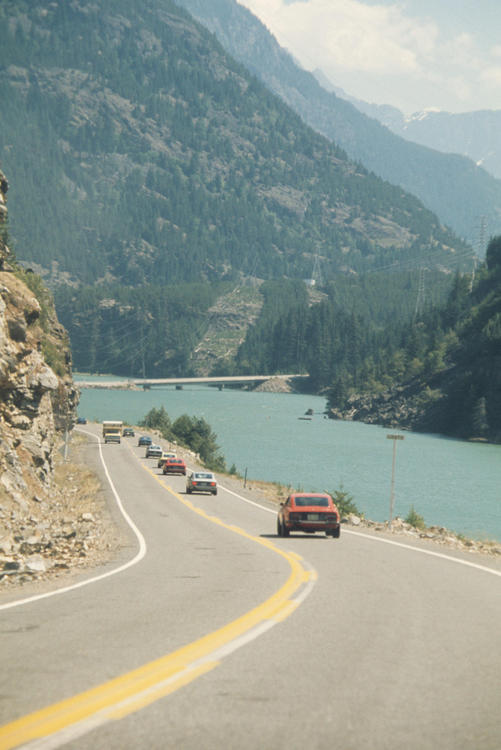

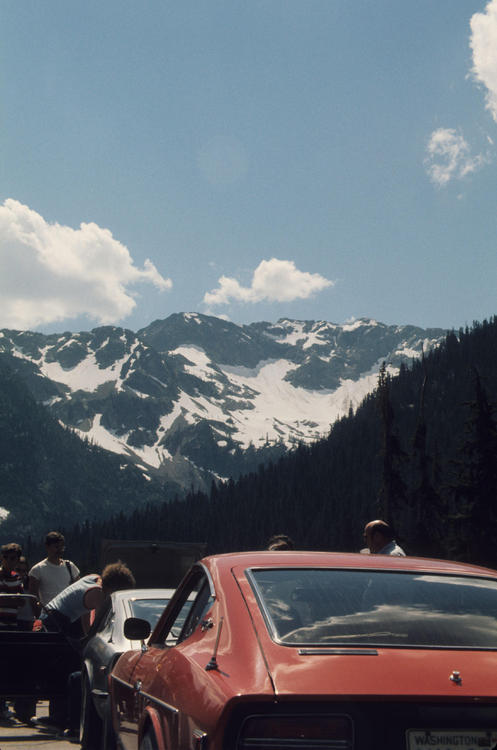
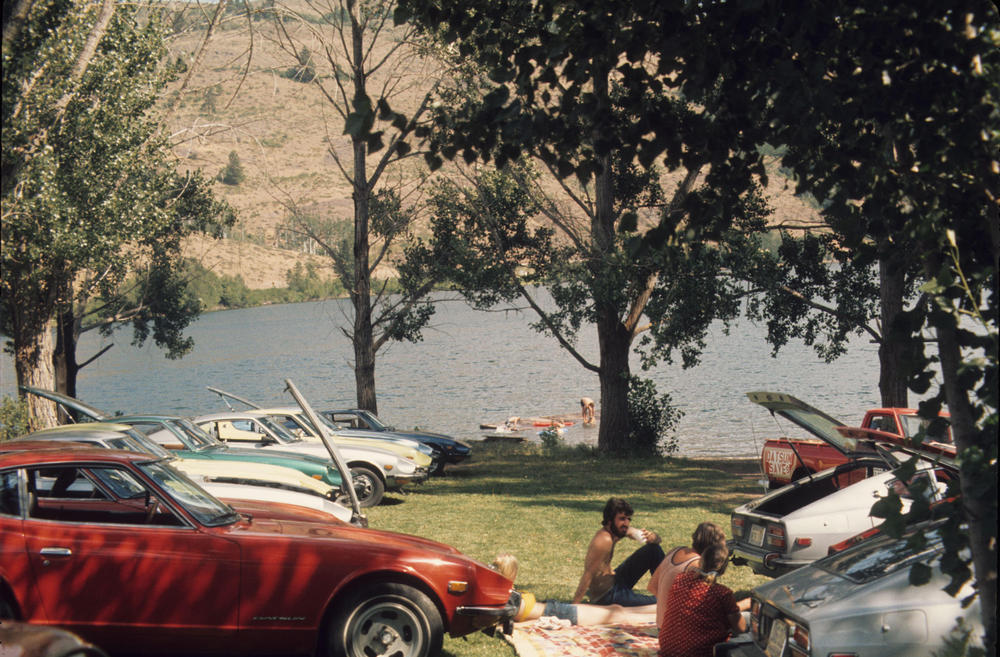


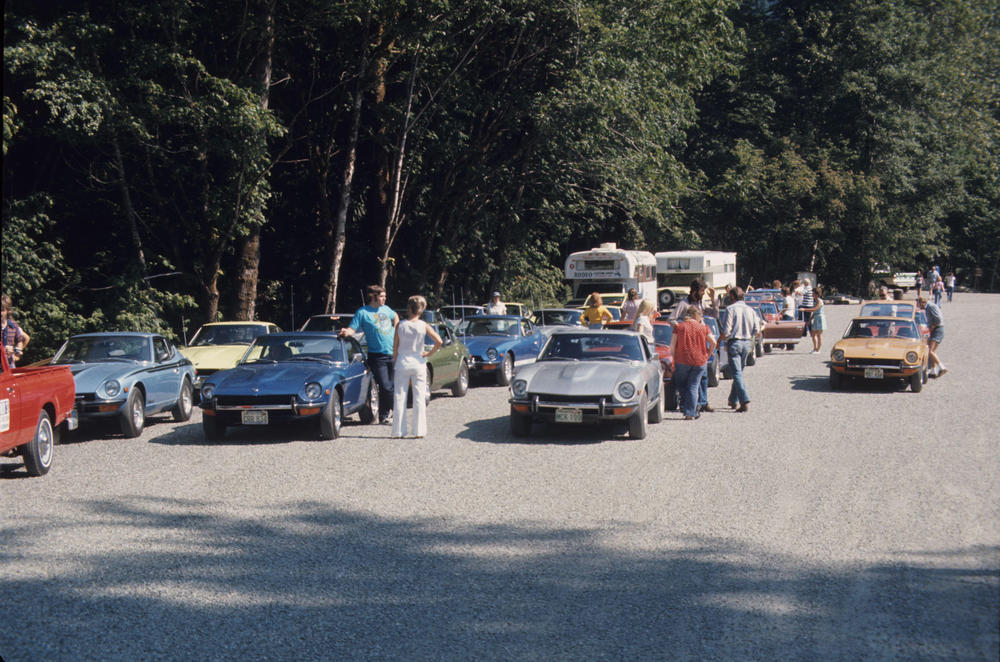

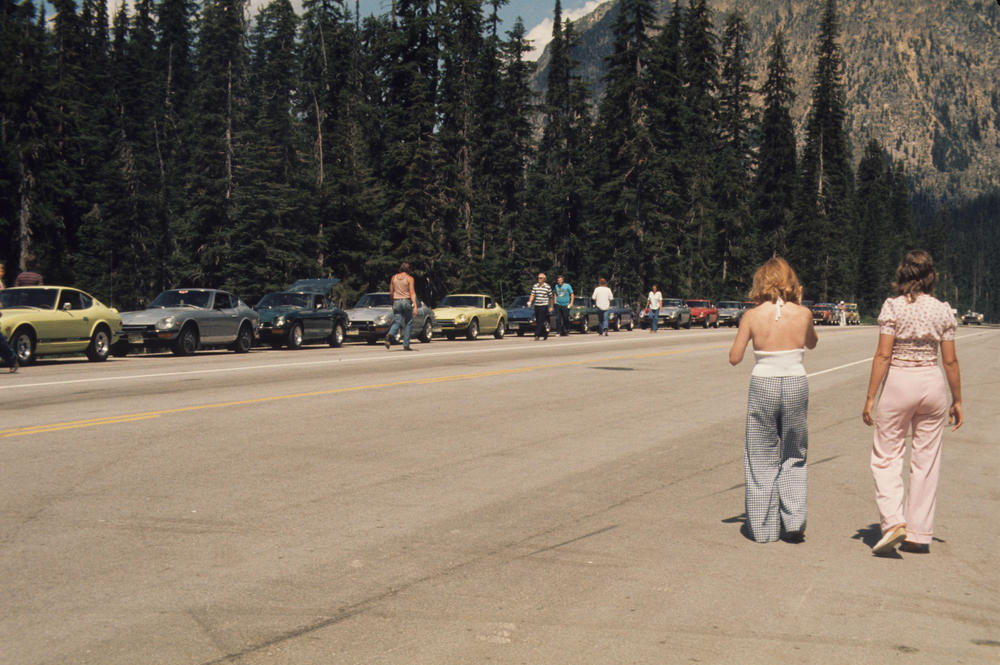 11 points
 -
11 pointsToday, September 13, 2017, is the 45th anniversary of my ownership of my Z-Car. If someone told me when I first bought the car that I would have it for 45 years I would have said “you’re nuts”! Most of what follows is copied from the similar thread that I started on the 40th anniversary ( http://www.classiczcars.com/topic/44418-me-my-z-40th-anniversary/?tab=comments#comment-402126 ) and updated to cover the past 5 years. This is the story of the car… I read the road test of the 240Z in the April 1970 issue of Road&Track magazine and recognized the car as a great value. Then, in 1971 I visited my brother down in Miami and he pulls up in a blue 1970 Z - so that was my first ride. Between the article and that ride, I said to myself: I should get one of these someday... Bought my Z new in 1972 while in the Marines, using a re-enlistment bonus to pay cash for the car. Had a BRE/Interpart header, spook, and rear spoiler installed by the dealer at delivery. After I had the car for a while, drove up to the BRE/Interpart shop in El Segundo, CA and bought the Mulholland suspension package. In ’73, put in a hotter cam. Also in ’73 I put in the Interpart TC kit. In ’74, bought a new WR OD 5-speed, driveshaft, and R-190 LSD w/4.44 gears from Datsun Comp ($575 through a mechanic friend at a dealer). The car scooted pretty good with that gearing. Car was up on blocks for a year while I was stationed in Japan in late ’74 into ’75. By 1977, I wanted more power, so skipped the triple carb scene and went with a 331ci SB Chevy – 11:1 forged, cam, Edelbrock Tarantula manifold, 650 Holley double-pump carb, headers. Had to pull the R-190/4.44 out and put a R-180/3.36 in for the V-8 (the R-180 lasted while the V-8 was in). In 1978, I had the Acra-Trac front suspension mod installed (who remembers Acra-Trac?). Sometime during this period, I had the short steering knuckles put in. After 5 years with the V-8, I got married, needed a better transportation car, and was getting caught up with smog/legal issues with the swap, so in 1982, put in an L-28 with just a slightly hotter cam, and another Datsun Comp 5-speed. In 1983, the R-180 pinion gear finally failed while I was doing a spirited 1-2 shift (must have been something to do with the V-8 service!) so put in an R-200/3.54. Also in 1983 I made the +1 upgrade to 15” wheels. In ‘86/’87, did a moderate refresh of the car – went through the mechanicals, had it repainted original color (901 silver). Then, didn’t do much but drive and enjoy it for nearly 20 years. In late 2005, I started a mechanical refresh again (mostly suspension). In December 2005 (unfortunately) the head cracked and I had an oil pan full of coolant – so, an unplanned engine rebuild. As long as the engine was apart, went with flat-top pistons and a hotter cam. In January ’06, decided to go to the MSA show, so I worked on the cosmetics a bit and finally refreshed the interior. In 2007 I installed Z-Therapy carbs with SM needles. After those refreshes and rebuilds, I figured the car would be ready for another 20 years of trouble-free driving. In 2008, I moved from Southern California to rural Tennessee. I had planned to drive the Z across but couldn’t make that work with the household move so it was shipped to TN. Since the move, the car is used mostly to get me to my local fishing lakes, but occasionally I take it for a spin down a deserted country lane and blow it out with a couple of fast runs. Over all this time, the car has only been out of service (not counting the year on blocks while I was in Japan) for about 6-7 weeks due to engine swaps/rebuilds, paint, etc. It was a daily driver for the first 17 years, about a “twice a week” driver for the next 17, and has been about a “once a week” driver for the past 11 years. It’s been a long, but fun, 45 years of ownership. Future plans? Five years ago on the 40th anniversary I reported that perhaps I would reverse some of the mods I made to the car over 40-45 years ago (mostly non-stock instrumentation and other interior mods). That at some point in the future, with upper body strength diminishing, I’d have to consider pulling out the quick steering knuckles and putting stock ones back in, along with perhaps a larger diameter steering wheel, to reduce the steering effort. I haven’t done any of that. I’m 65 now and can still turn the wheel (although parking is a bear) so no changes to the car yet. I just keep driving it and “enjoy the ride”… A problem that will continue to get worse over the future years may be finding appropriate performance tires for 15” wheels (of course, as I age, perhaps I shouldn’t be exploring the capabilities of performance rubber!). Otherwise, the car is mostly good to go – let’s see how much longer we stay together…!
 11 points
 -
11 pointsWell, third time's a charm, it seems. After two lengthy and unsuccessful adventures with a DIY electrolyte set-up, I finally spent the money and bought the Caswell chemicals. It took me almost full day to create a new set-up... I created all-new baths (distilled water, muriatic acid, MEK solvent, Caswell electrolyte, Caswell blue chromate & Caswell yellow chromate). Every container was wiped down with alcohol before use, to make sure and manufacturing residue, fingerprints, etc. were gone. I also replaced my wire wheel (brass) with a new one, just in case the old one had acquired any kind of contamination. The acid bath was mixed at 1 part acid to 4 parts distilled water Electrolye and chromate baths were created according to the directions on the Caswell packaging (I didn't buy their manual).and added new ones for the electrolyte and the two phosphates) I used a fresh, single hoop of Moss-Boss zinc foil I added 1/2 teaspoon of Caswell's brightener liquid before getting started No heating used for the acid bath, nor for the two chromate dips My detergent bath consisted of a 4-qt crock pot full of distilled water, to which I added 400ml of liquid ammonia and a shot of dish detergent. I kept this at about 100 degrees F. Parts were scrubbed with a toothbrush, then rinsed off in a distilled water bath. The electrolyte bath was kept heated at between 100 - 110 degrees F during plating, with constant agitation using an aquarium bubbler. I pre-heat the solution with a hot water tank heating element, then remove the heater before I start plating. I started at 110 degrees. The temp dropped to about 100 degrees over the plating period. Plating current was set based on 140mA per sq.in. of part surface. I ran the part for 20 minutes, turning it 90 degrees at the 10-minute mark. I wasn't actually ready to get started with my first part (a brake line clip from the engine compartment) until about 3:00 Sunday afternoon. The part looked good coming out of the zinc plating step -- full coverage, dull light grey, no burning, no visible edge or corner effects. It got a quick swish in a distilled water bath, then into the blue chromate for a 60 s. dip. After that, it went directly (no rinse) into the yellow chromate dip for a 15s dip. Then a quick rinse with tap water. Then a 1 min. blast with a blow drier (running on HI heat). I can't tell you what a relief it was to see the part emerge like this... I'll post some pictures of my set-up later, along with some additional comments about settings and running multiple parts. I haven't tried any large items yet, so that remains an unknown.
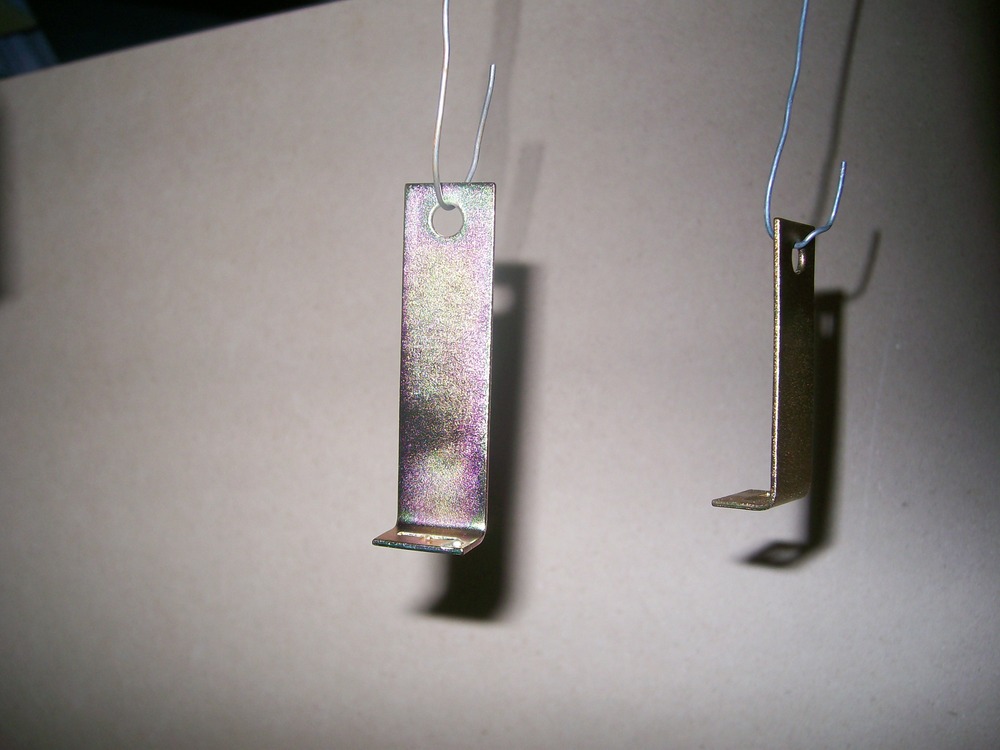
 11 points
 -
10 pointsGood morning and greetings from Germany/Europe. After reading along here for a long time, I am now introducing myself as the ‘marketing guy’ from S30.world. Even if this might be a mistake, because I'm speaking up as a "newbie" and will surely get 40 knives rammed into my back. But I'm willing to take that risk. So please forgive me if my language isn't perfect and I don't know most of the people here in the forum. I think the community here has been connected for a very long time and it's difficult to let someone outside the USA into the "inner circle". But let me at least try, and I hope that a certain amount of friendliness in all directions will certainly do everyone good. As Chris already wrote, we are busy every day doing our best and put a lot of effort into understanding and paying attention to every detail as best we can. Of course, the fact that our team is located all over the world also plays a major role in this. We are in the Netherlands, Hungary, Switzerland, Australia, England, Japan, the USA... This is very important because the S30 series was not developed solely for Japan, nor solely for the USA, nor solely for Europe. The entire S30 family is a globally designed car. And every export market is different (even though, as we know, the USA makes up a large proportion of exported cars). But not many people know that European cars are significantly different from those in the USA. The fact that cars in Portugal are also VERY different from cars in the rest of Europe is also an interesting story. But why is that? What impact do laws in Australia have on cars in the USA, for example? What do changes to cars in Japan have to do with cars in Europe? Why are there still 260Zs and no 280Zs in Europe and other export countries in the years 76-78, while in the USA it is the other way around? These are all questions whose answers are connected like a tight net. So you should never look at just one export market. That would not be the whole story. We, as a group of people spread across the globe, gather our knowledge and try to answer questions. (For example: who knew that between 1969 and 1978 there were 10 different factory hubcaps for the Zs?) We are simply passionate nerds who not only restore cars, run a museum and reproduce parts, but are also on the hunt for all these undiscovered mysteries. I think it matters less which words in our press release are "allowed" from this forum – because surely it is also our goal to appeal to people who haven't owned a Z for 50 years, but are new to the topic. Above all, it's about sharing all our experience (people are already laughing about the fact that I was born in a Datsun. My family has been driving Datsuns since the early 1970s, and the first car I ever sat in was a 1973 Cherry E10, a model that wasn't even available in the USA) and to create a place that inspires all Z fans worldwide. I therefore invite all sceptics to visit our museum in the Netherlands and take a look at the cars. It's certainly exciting to see how they are built. Incidentally, we are very grateful if anyone on location notices that, for example, a screw is the wrong colour or a hose does not have the correct number. But please don't judge something like that just because you see photos on a computer screen. Come and visit, you are invited, and I am sure that we are all nice people who share the same hobby.10 points
-
10 points
-
10 pointsA few weeks ago I traded in my 2015 Pathfinder for a Frontier Pro-4X Crew Cab. There was a poster on the wall and I said "doesn't that go with my new truck?". They took down the poster and gave it to me.
 10 points
 -
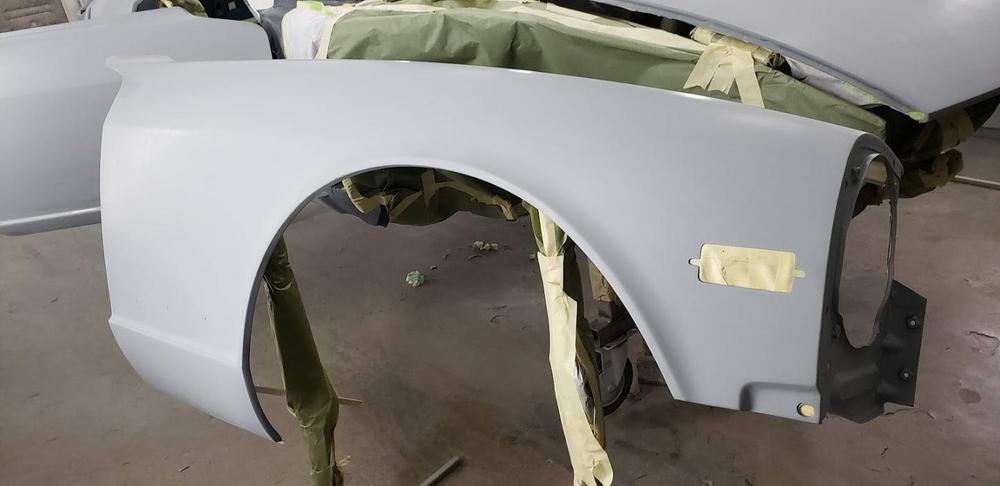
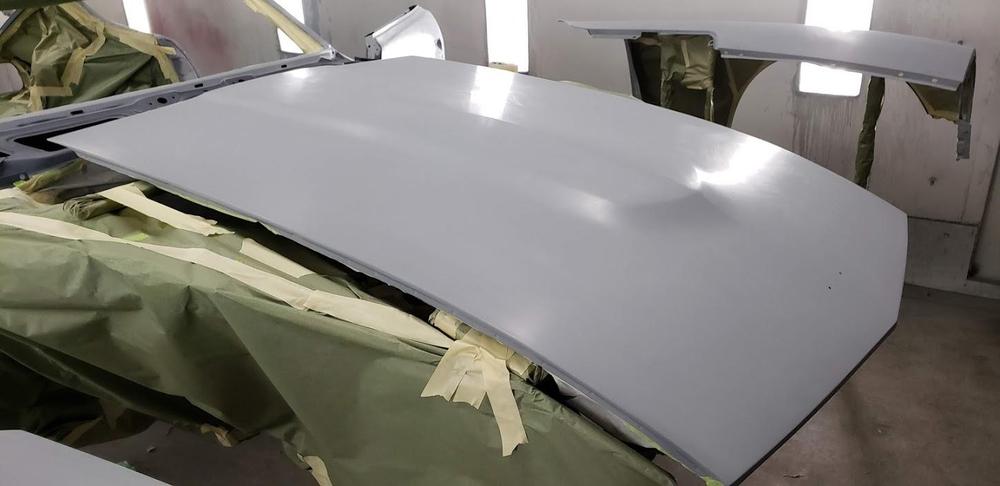
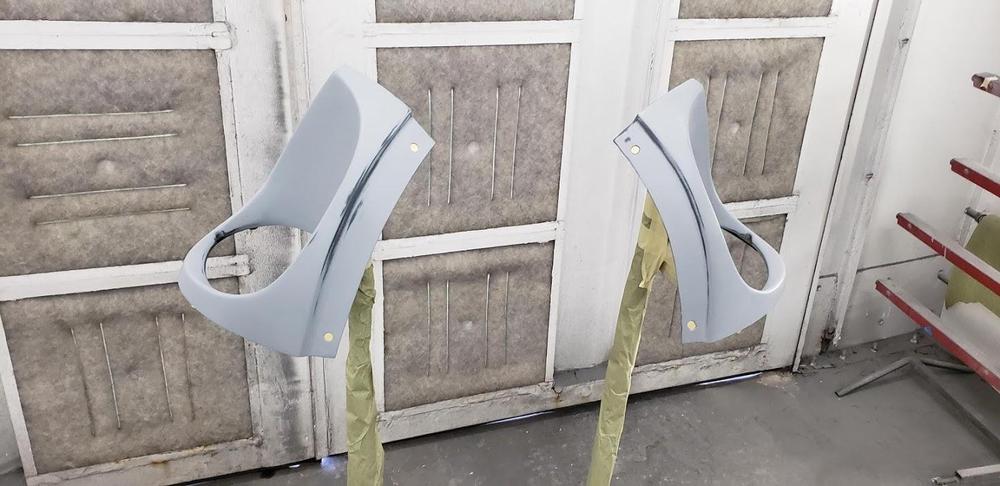
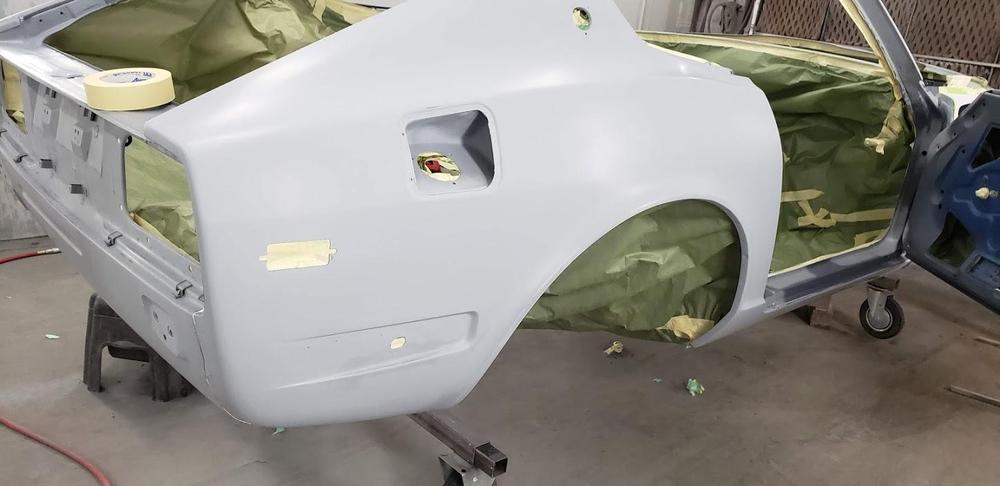
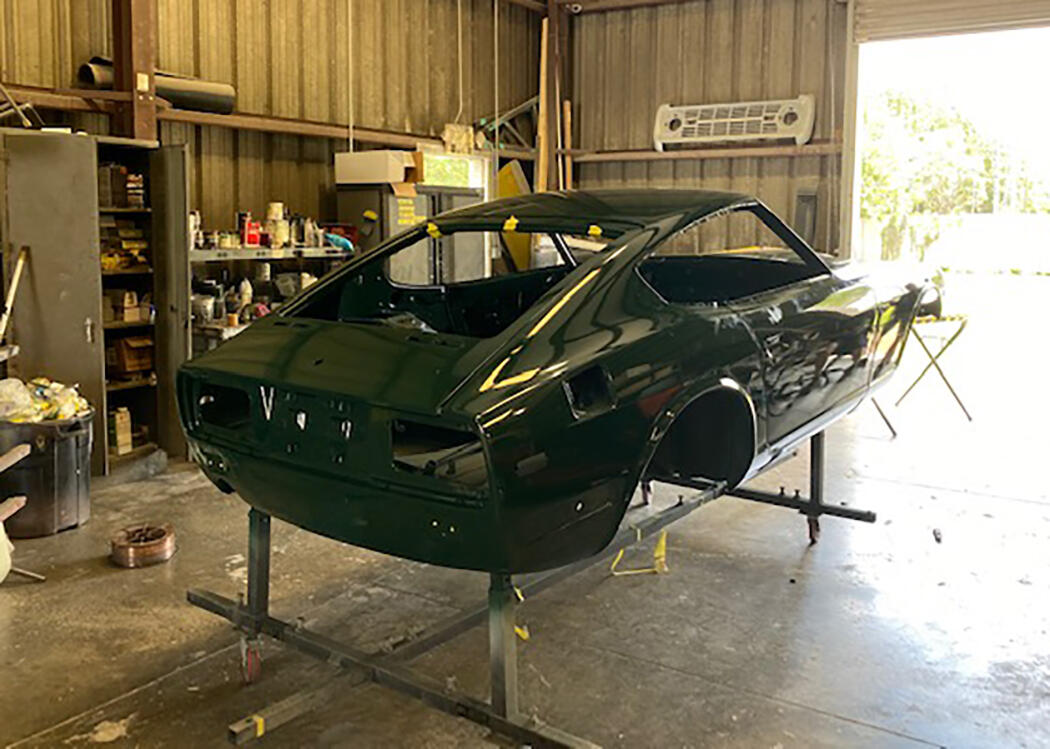
10 pointsThis restoration shop is a full service business. Classic Car Restorations in Bradenton, Florida. Complete services from paint and body work to interior work to full reassembly. Many thanks to Brian and his crew for excellent work and specific attention to detail. They fixed some poor welding work and fixed some other metal that had been covered over in Bondo. Once I get the car rolling and running, she will go back for the interior installation - butterscotch. For 26th, I chose a two stage acrylic with a clear coat. The underside is textured in a colorised product called Raptor. I decided to texture the wheel wells and inner fenders. The interior finish is just the base coat which is why it looks a little dull


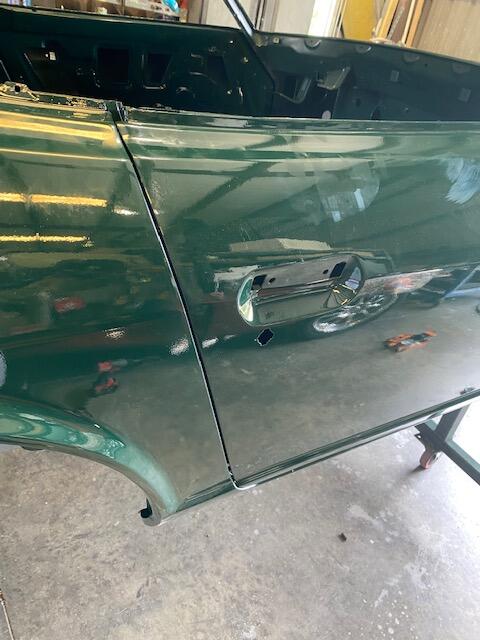 10 points
 -
10 pointsIt has been one long journey. Three different body shops, years of storage, but she will be coming home next week to begin the reassembly process. Finally!


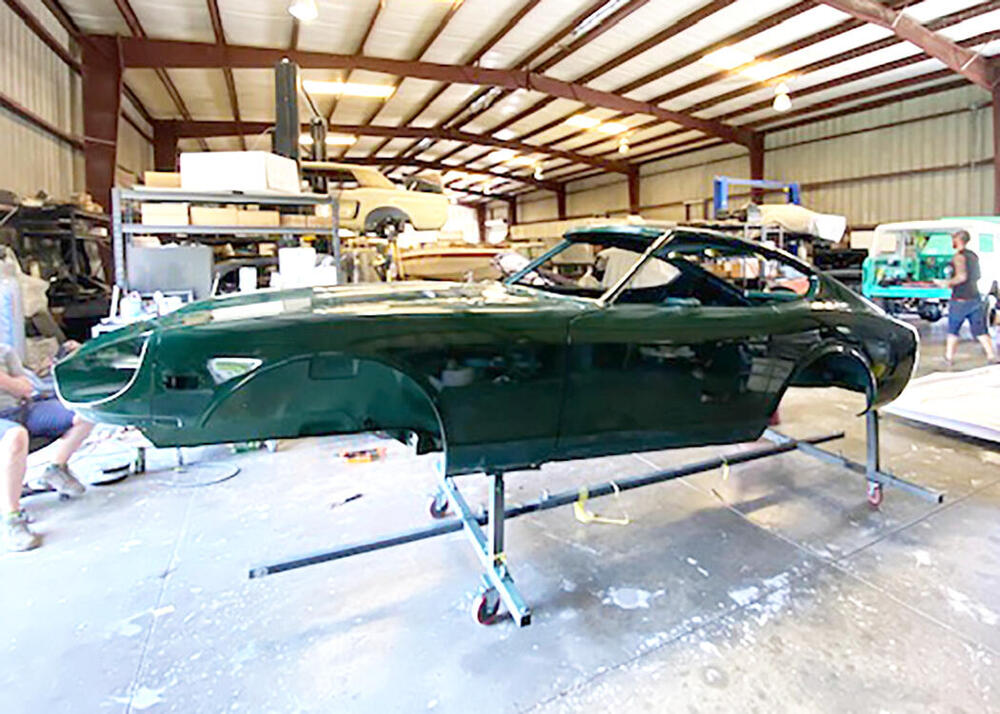
 10 points
 -
10 pointsToday marks 15 years since I joined this forum. When I bought my brand new 1971 240Z 51 years ago I could not have imagined that I would still own it in 2022 and rely on maintenance advice and encouragement from a global community of Z owners. I would like to thank everyone who has helped and entertained me for the last 15 years, especially Cliff and Charles. Of all the car forums I follow, this one is the most friendly and helpful. I always feel that I leave with more than I bring. Thanks, Dennis10 points
-
10 points
-
10 pointsGood evening All, All these years of working to turn three dilapidated 240s into one good cruiser has come with a lot of expense I'm sure that everyone on this forum knows what I'm talking about. But this evening I'm delighted to share with you that I have taken the first step towards recovering my investment. I had in my garage two trash-grade seats. The idea was to take them apart so the seat cushions and backrests would fit into my garbage bin. On two of them, I made a profit. Jammed between the seat cushion and the metal arm linking it to the backrest, I found money! A 1974 nickel and a 1981 dime are now safely in my possession! Finally, a return on my investment! I shared this news with Momma, but for whatever reason she did not share my jubilation. Cheers,10 points
-
10 pointsStill needs a tune and bumpers and a myriad of other things, but I started it for the first time in 6.5 years (and since the body was restored) yesterday: Before the restoration, way back in 2011: Totally rusted out pass. floor pan and rockers, mismatched tires, faded non-original color paint, etc etc. I've done everything except the actual body restoration (welding, paint, etc). All the disassembly, reconditioning of parts, reassembly, etc. It's been a LOT of work, and it's not over yet, but... I just wanted to take a short victory lap. Thanks for all the support and great advice.

 10 points
 -
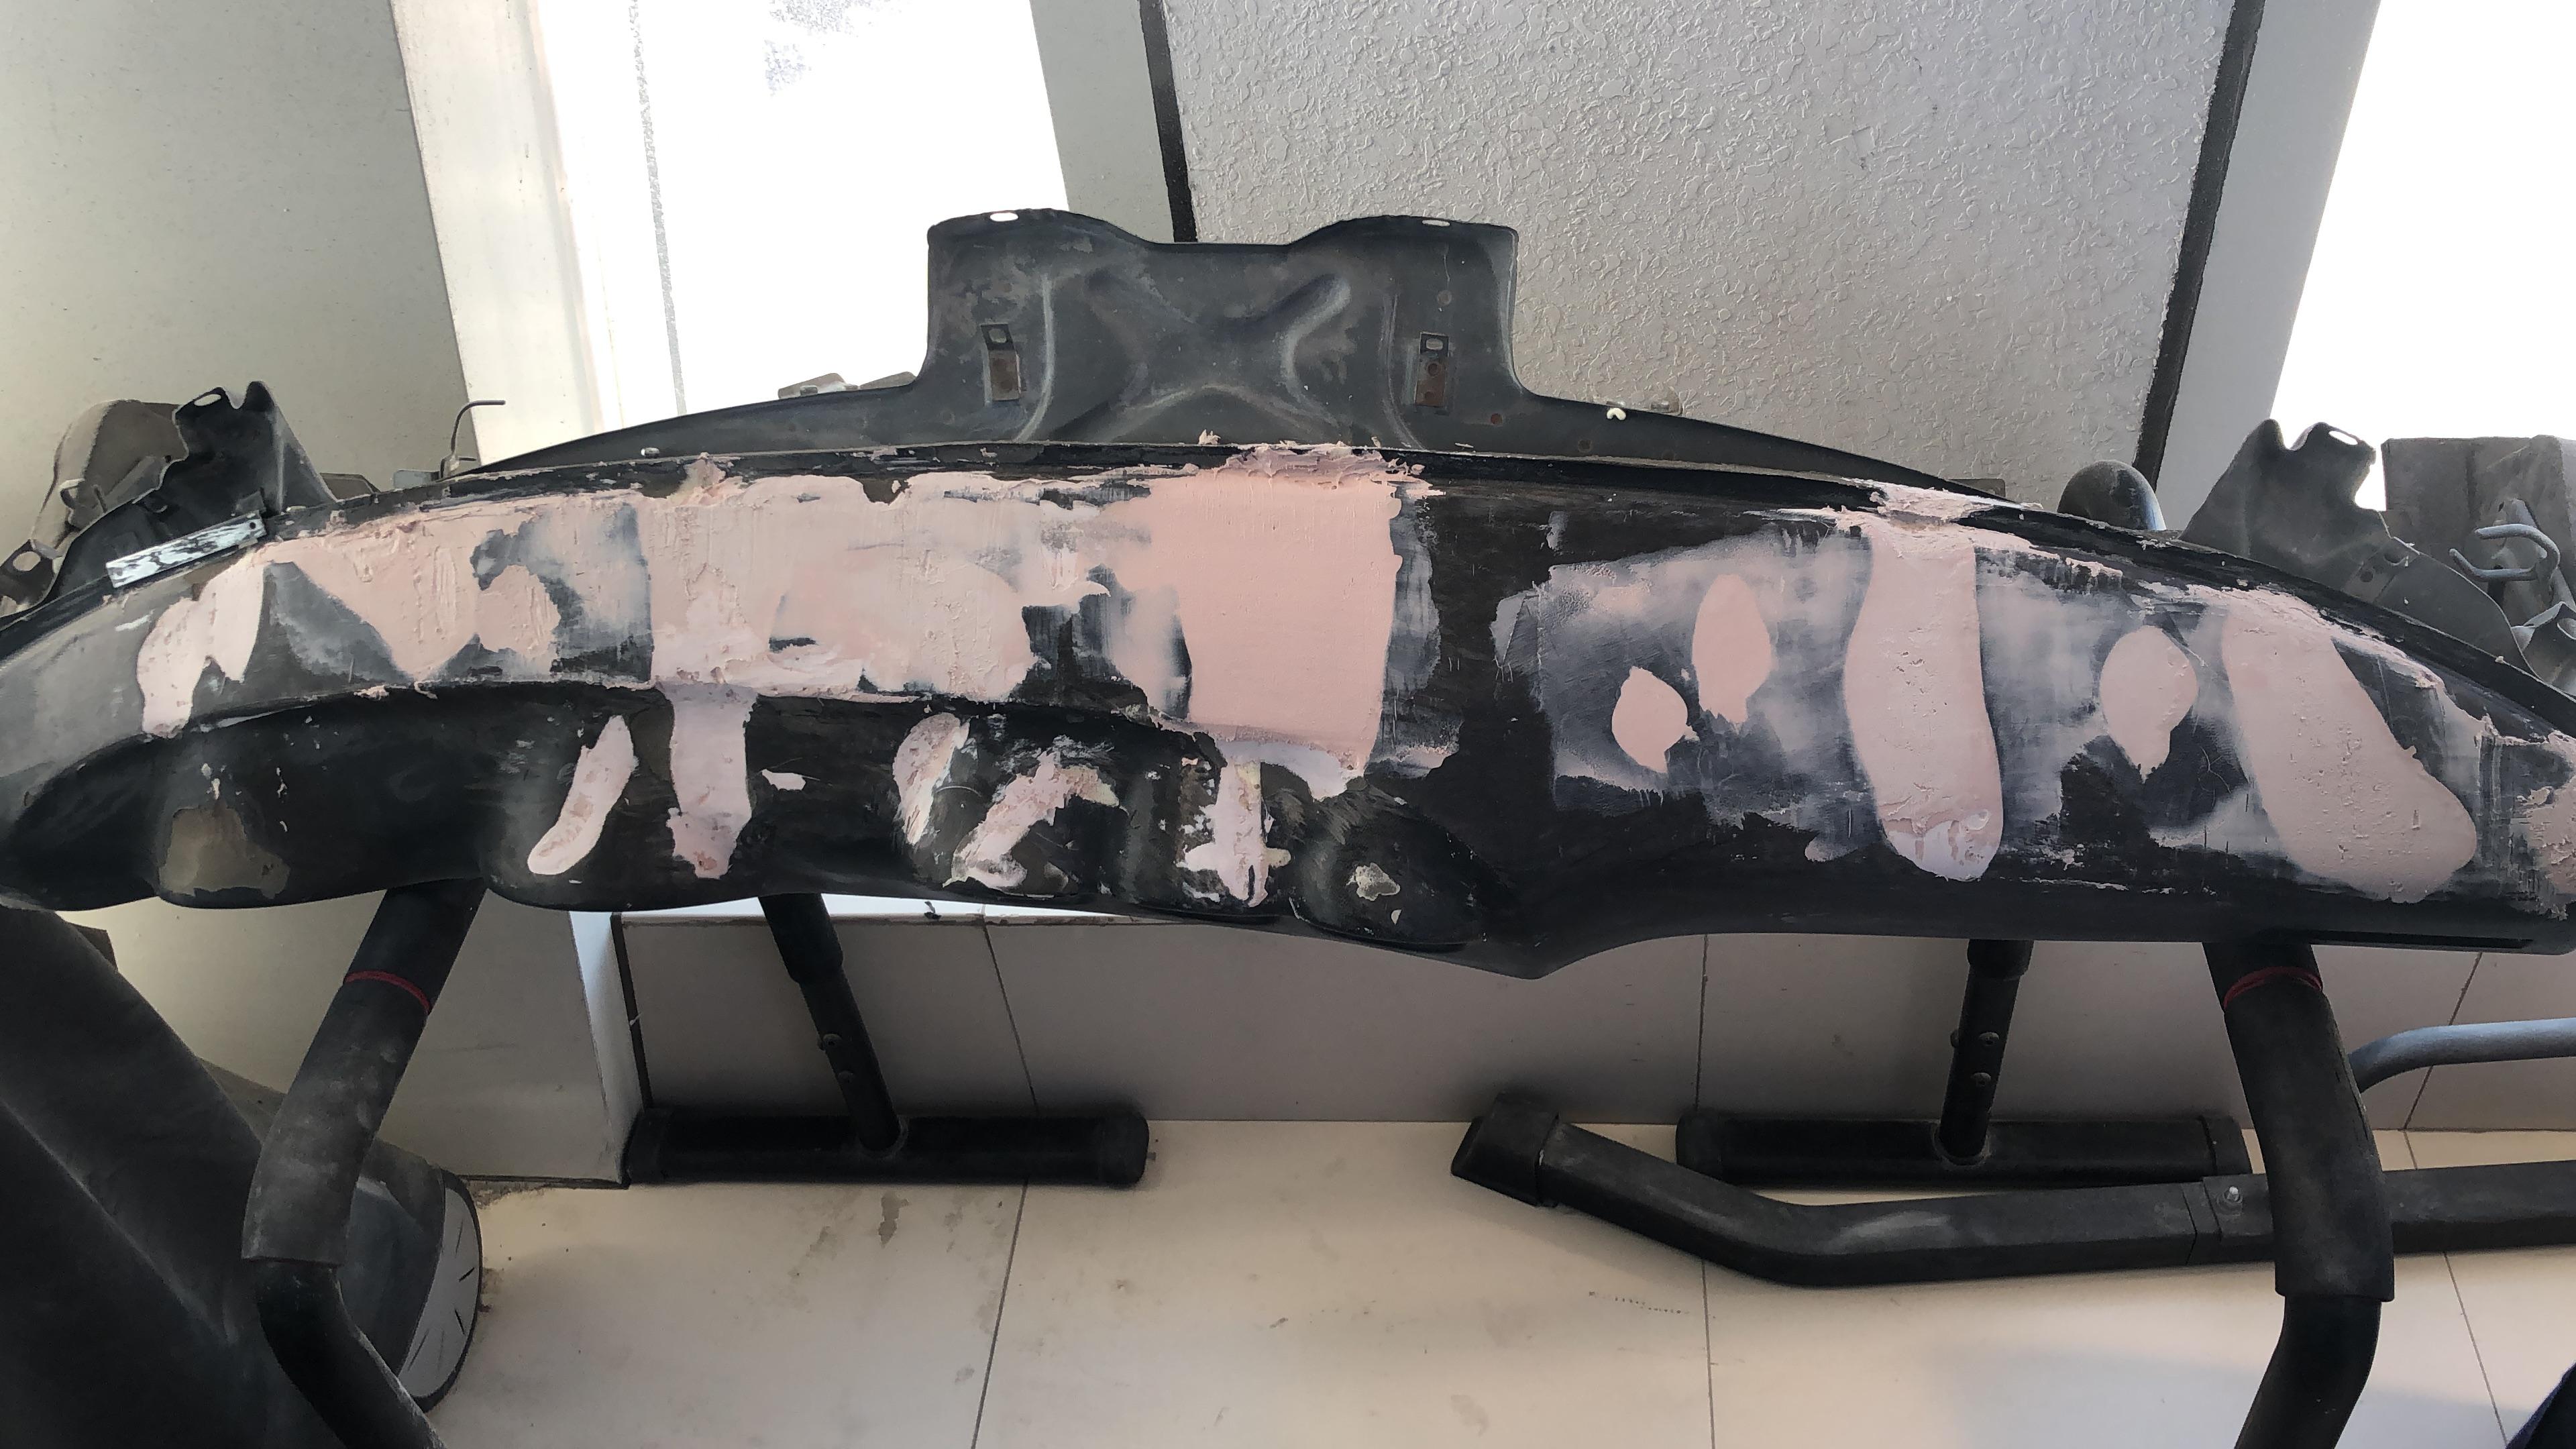
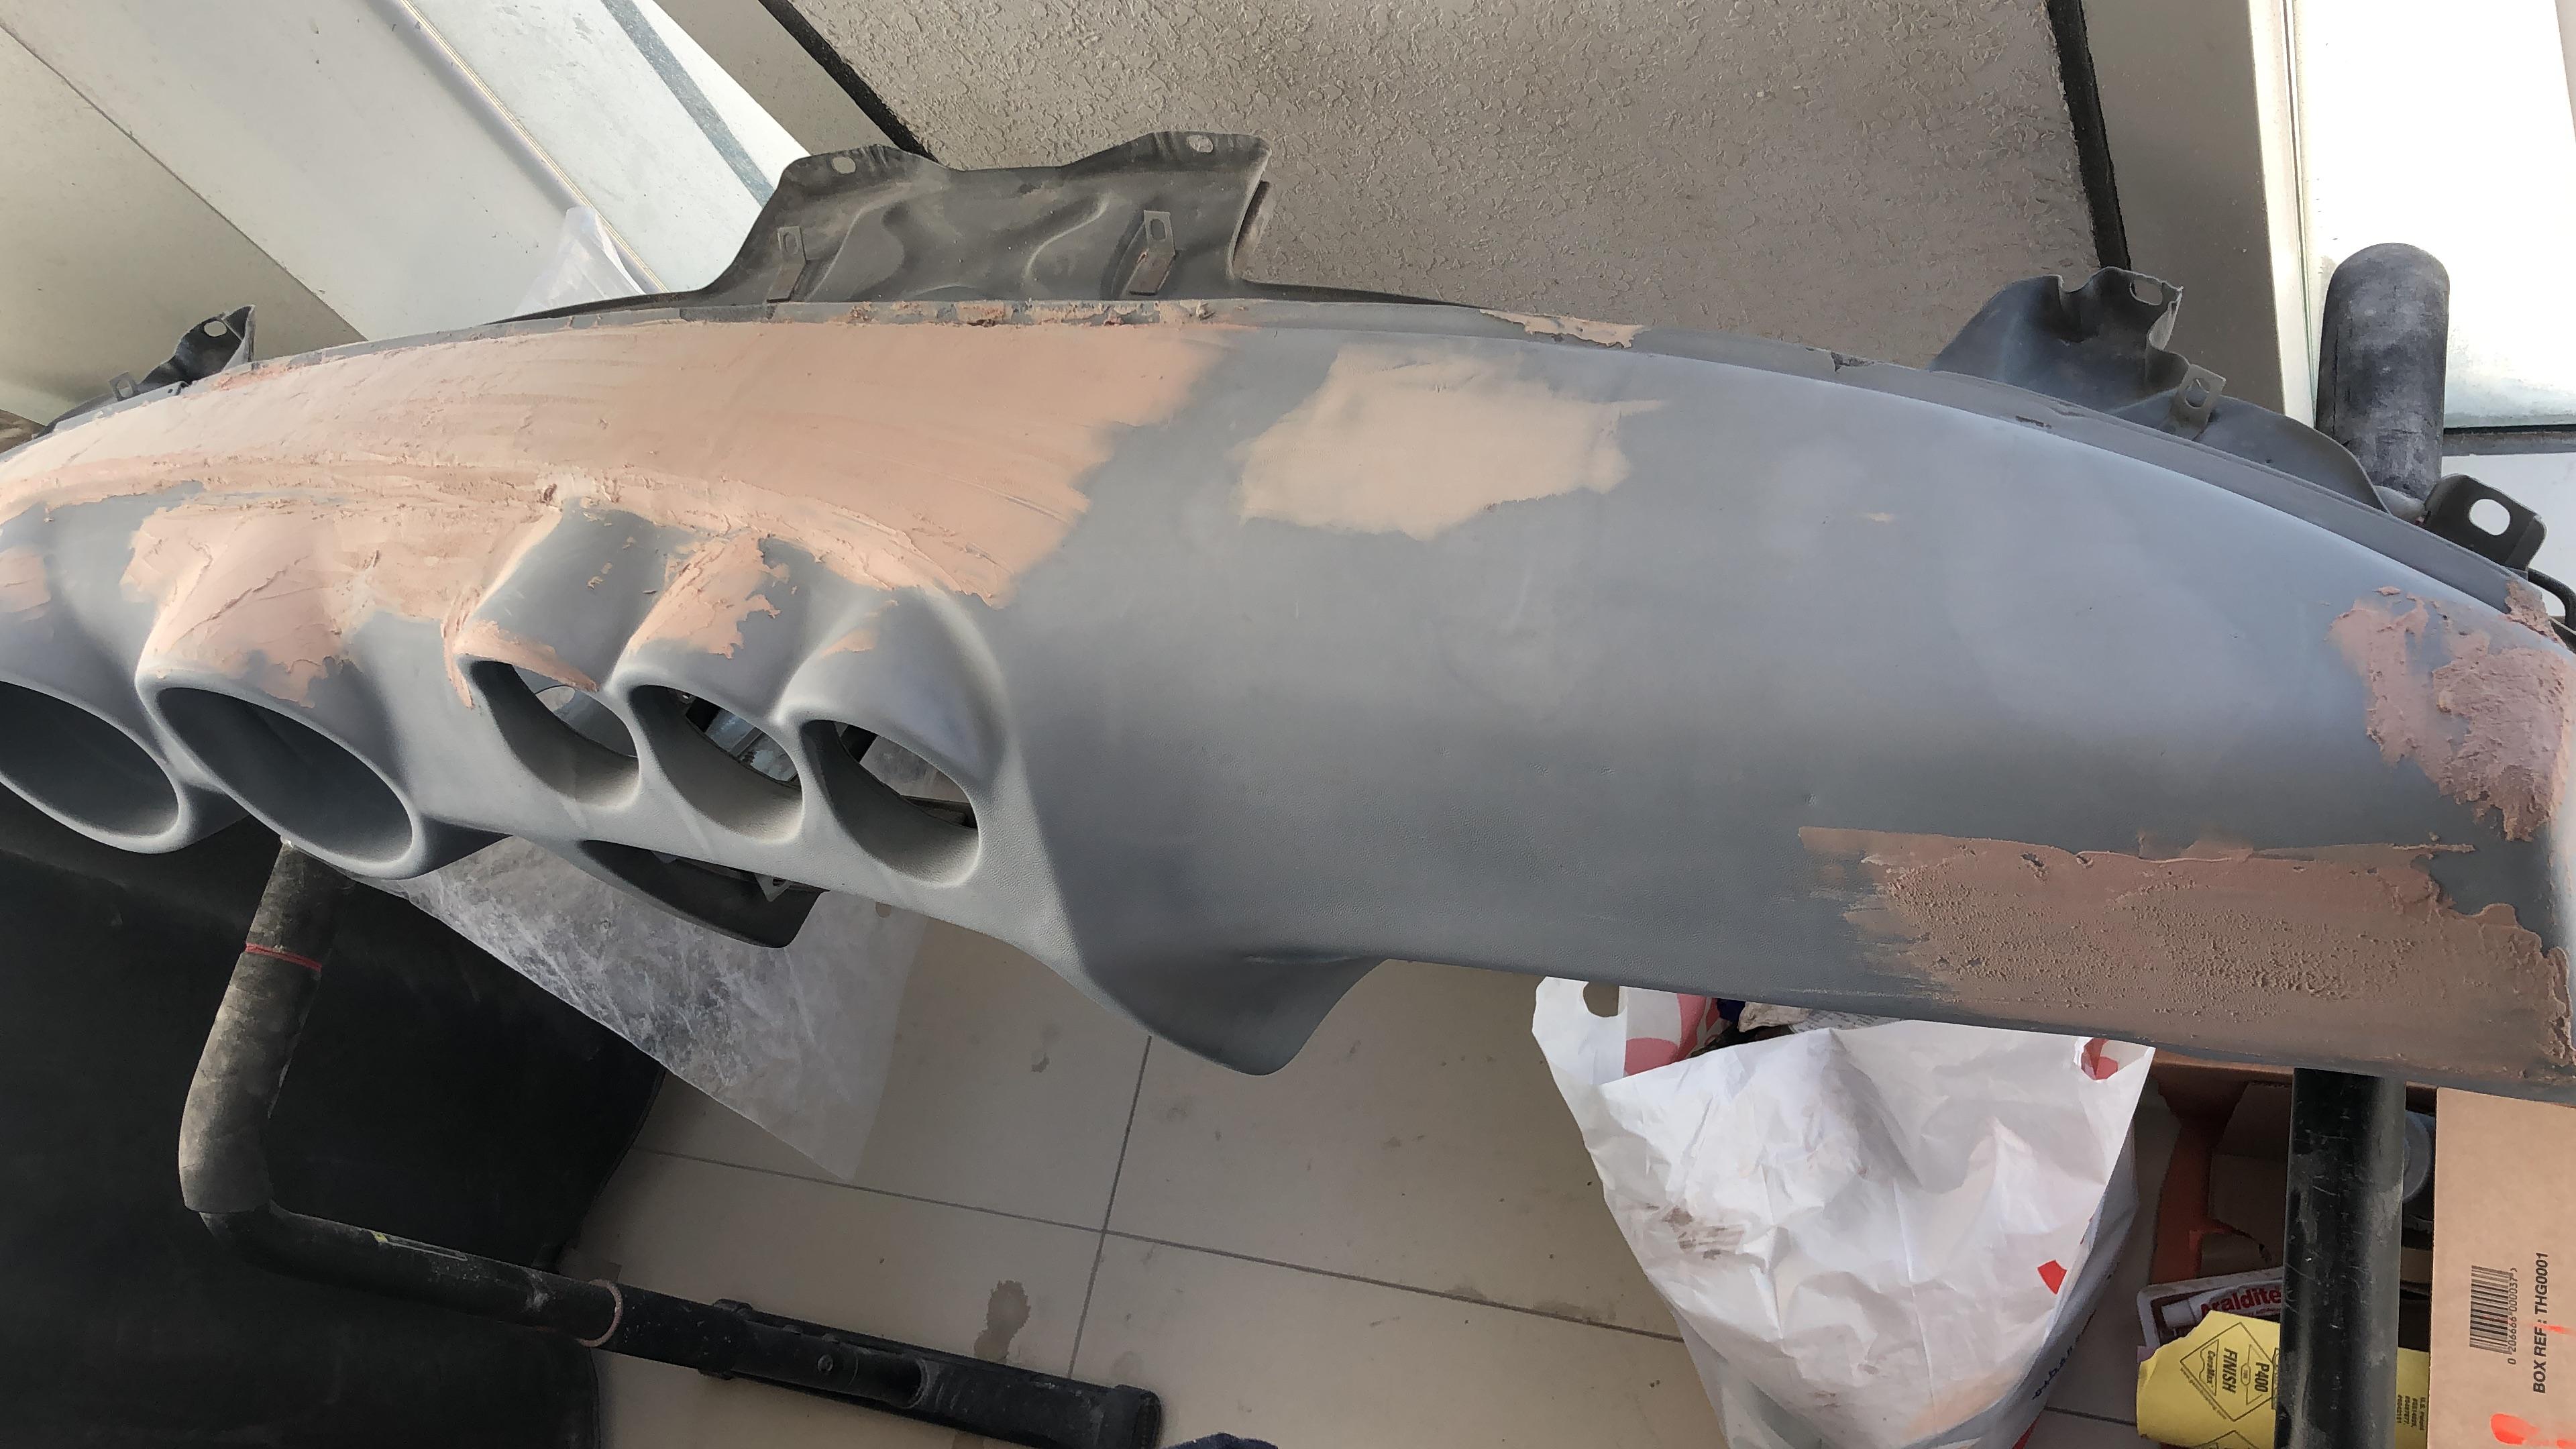
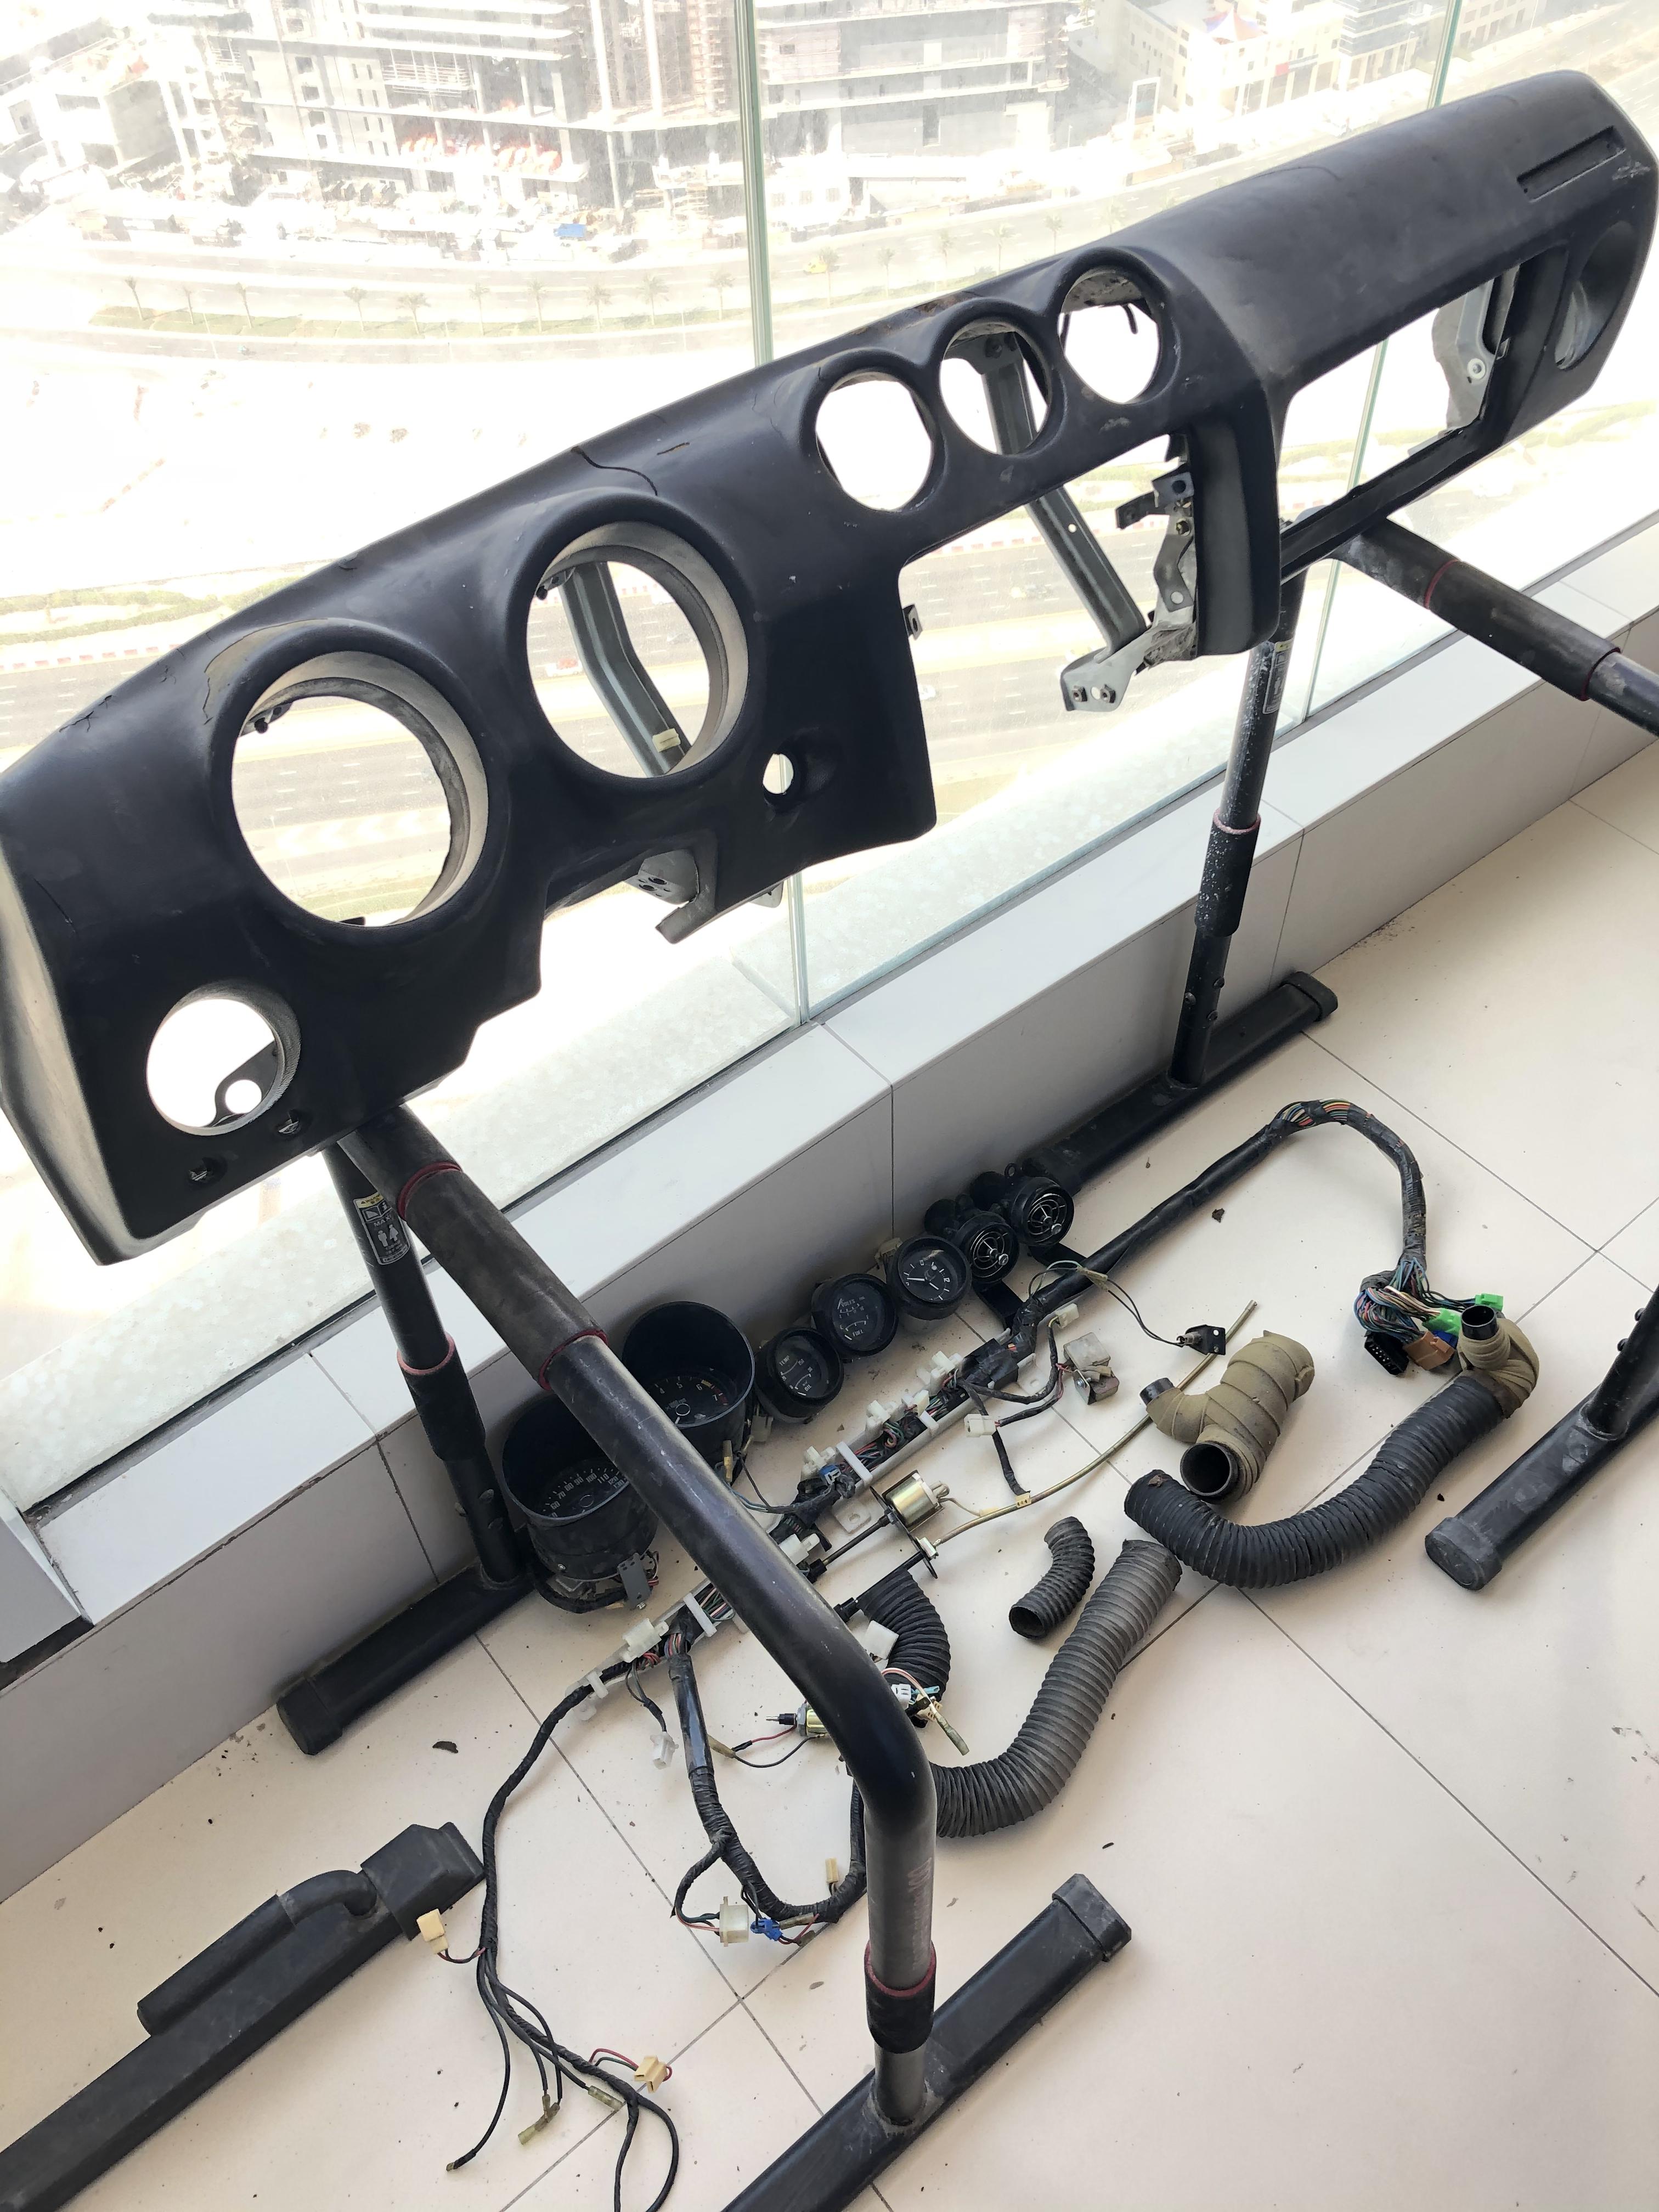
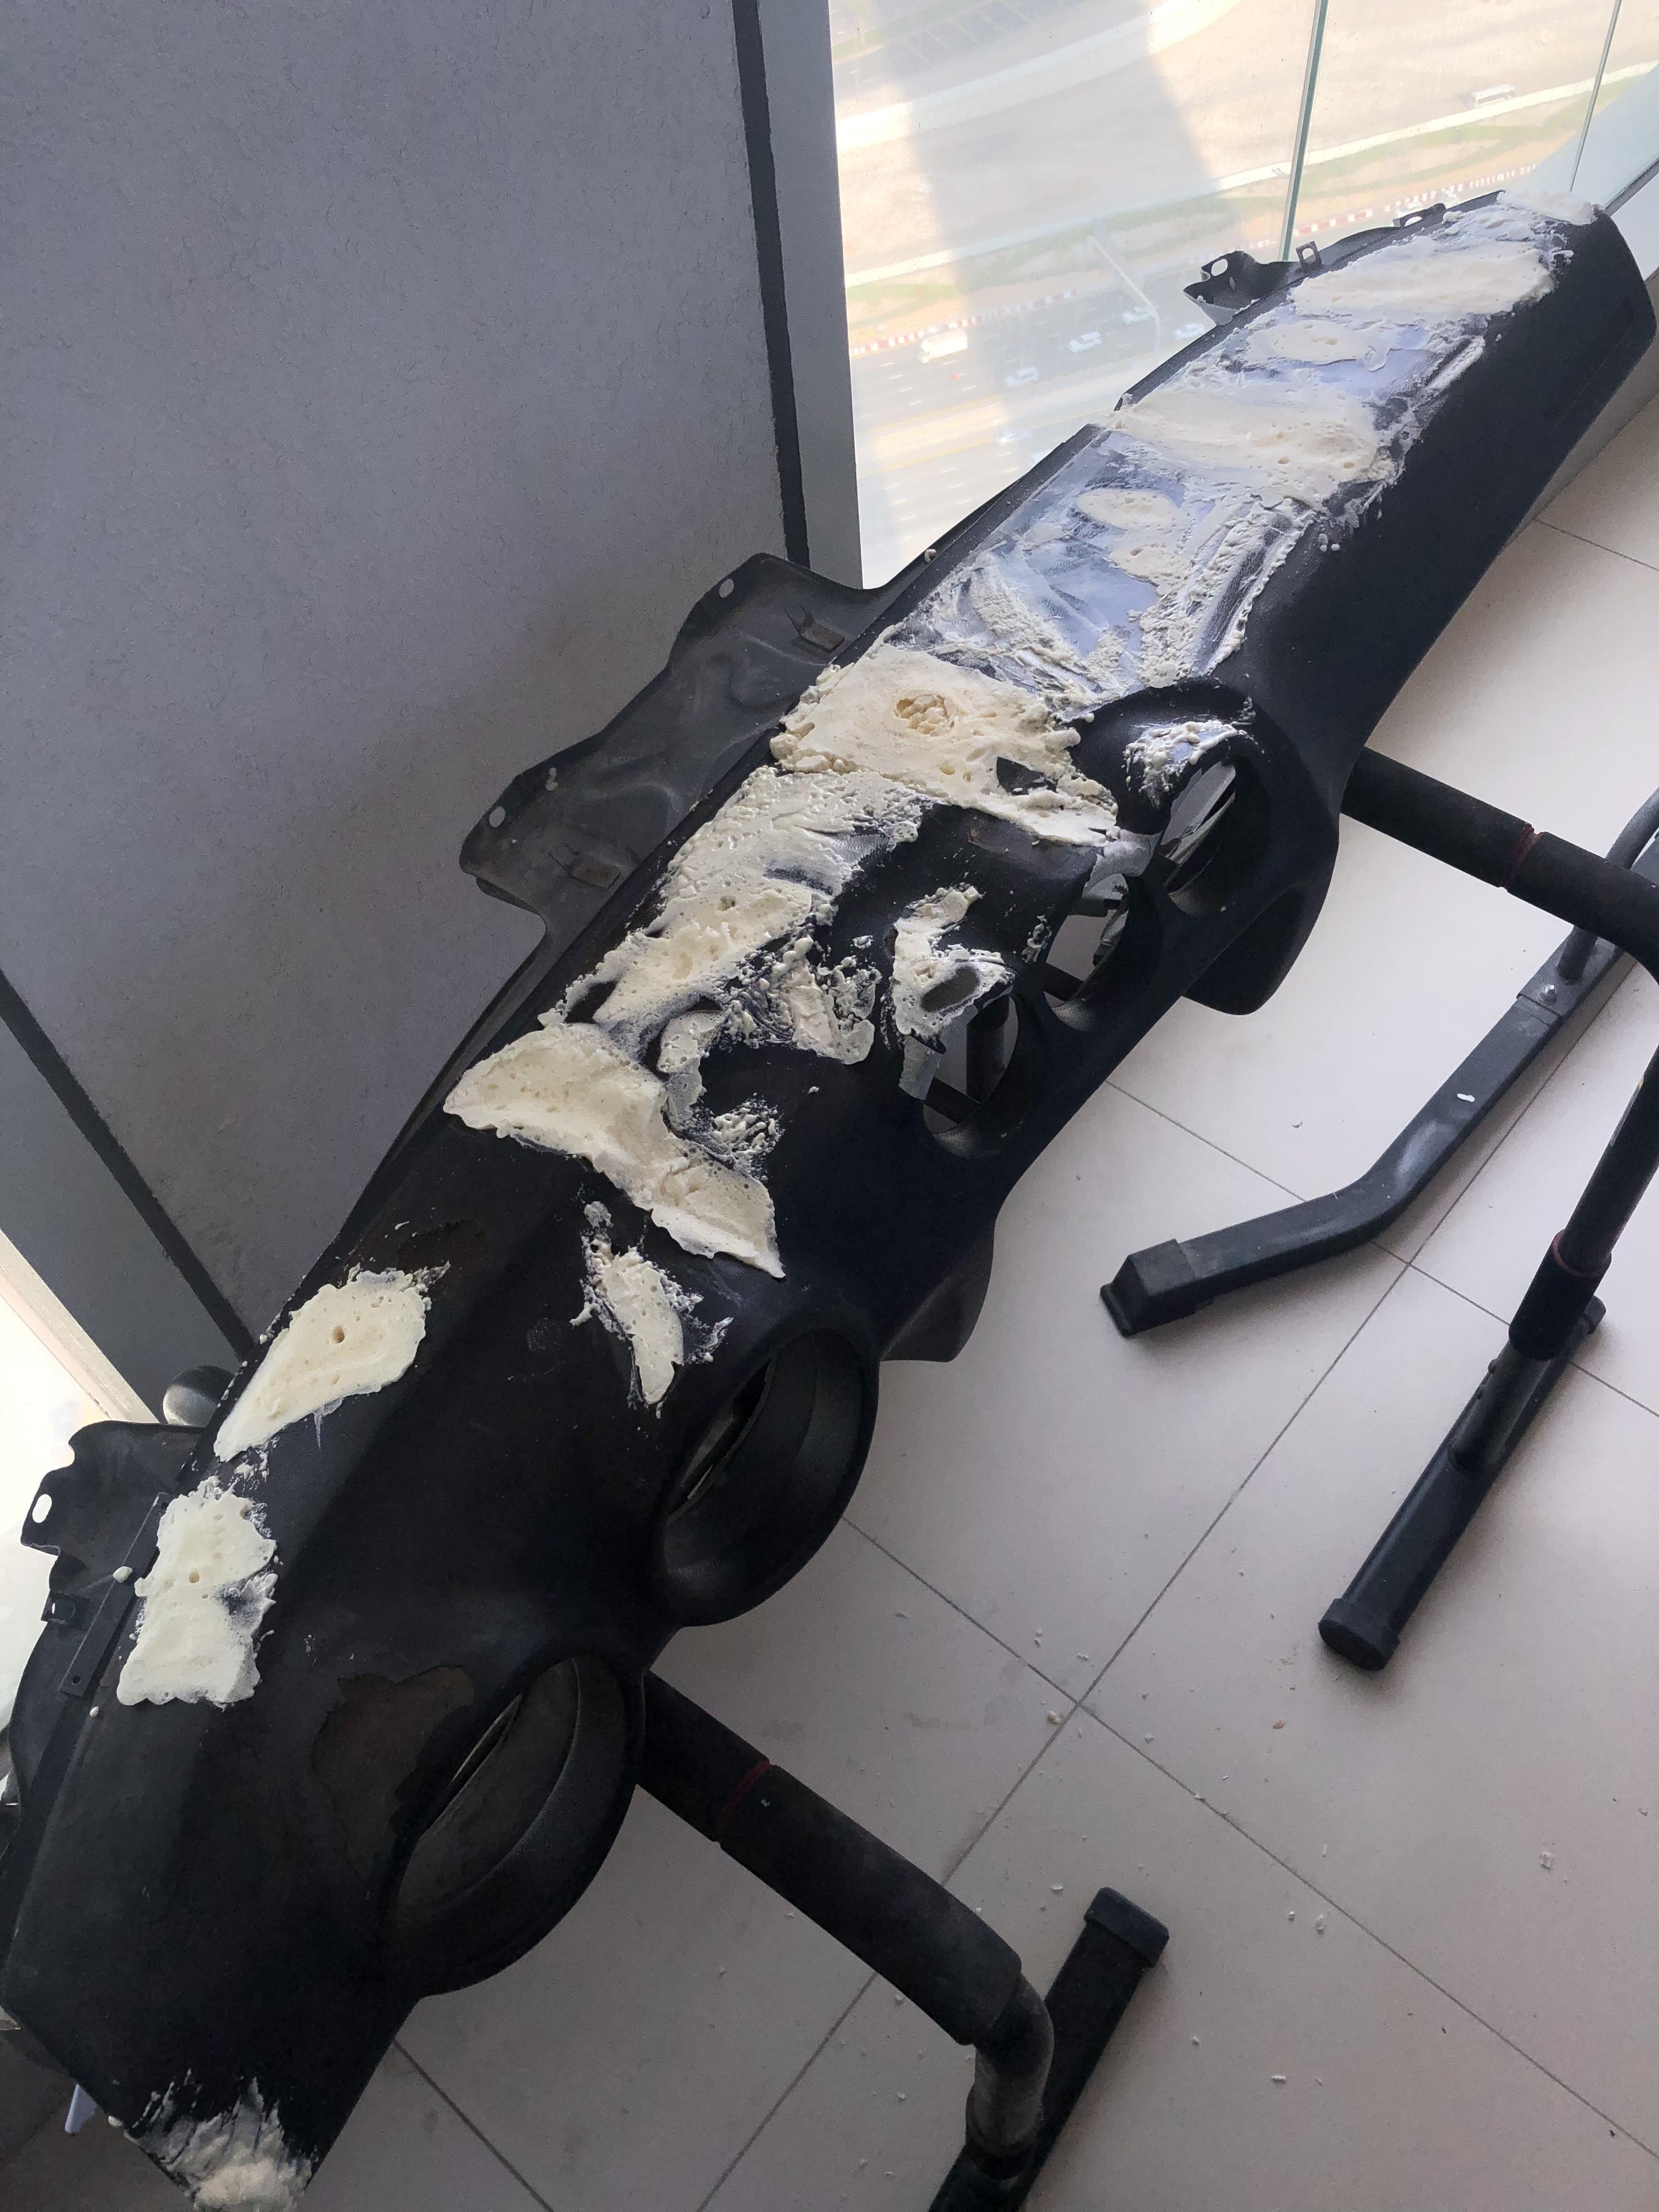
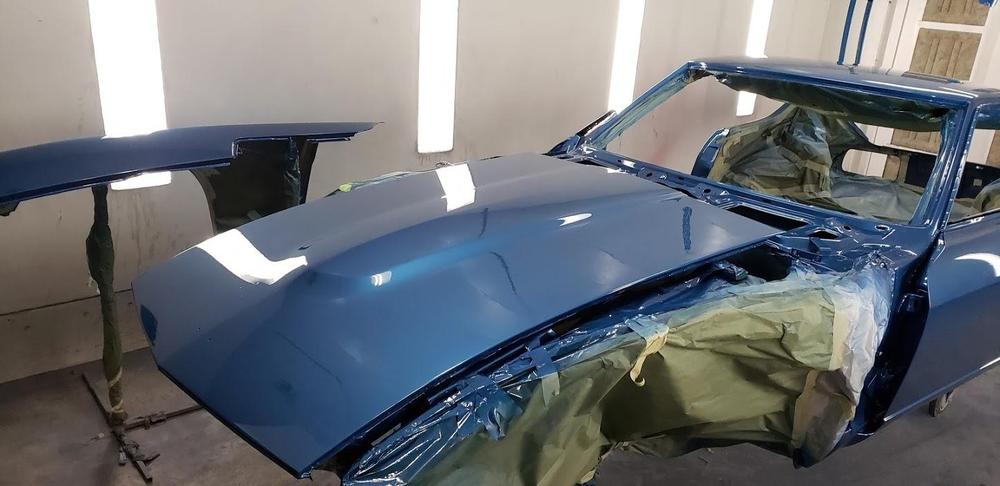
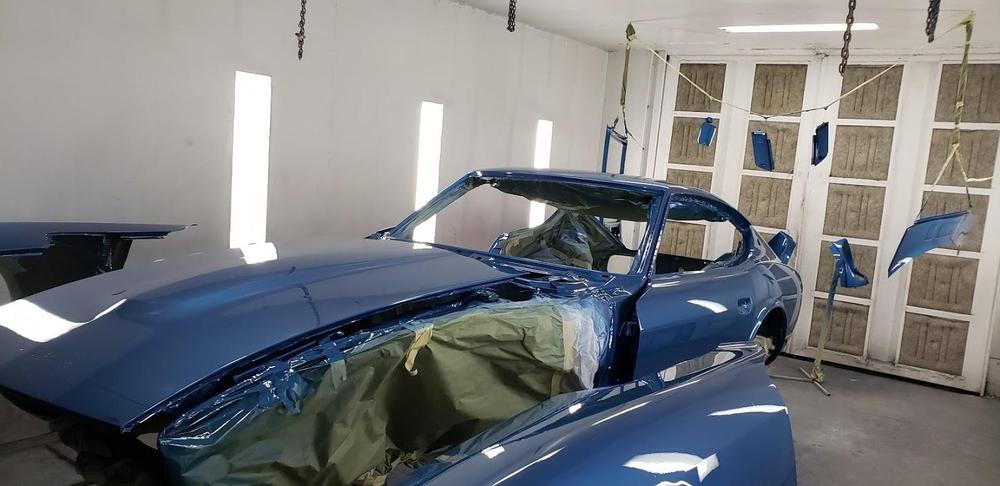
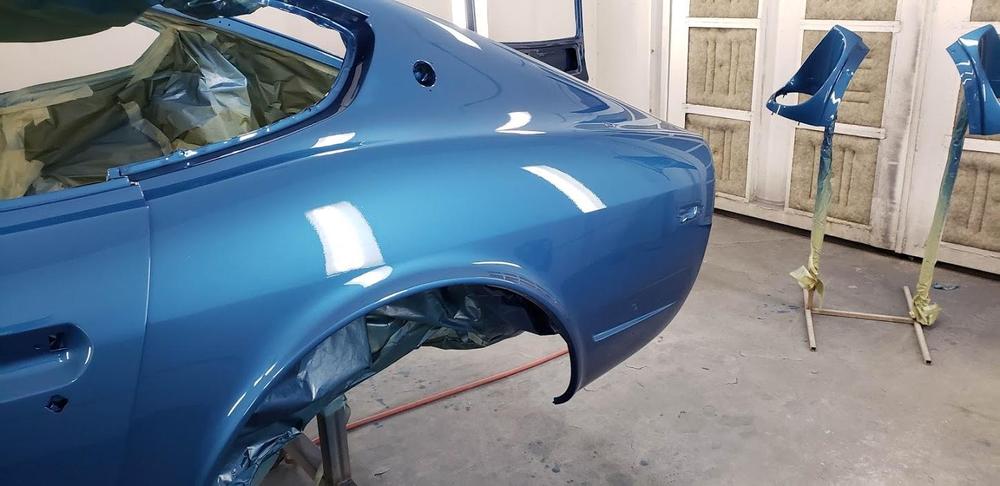
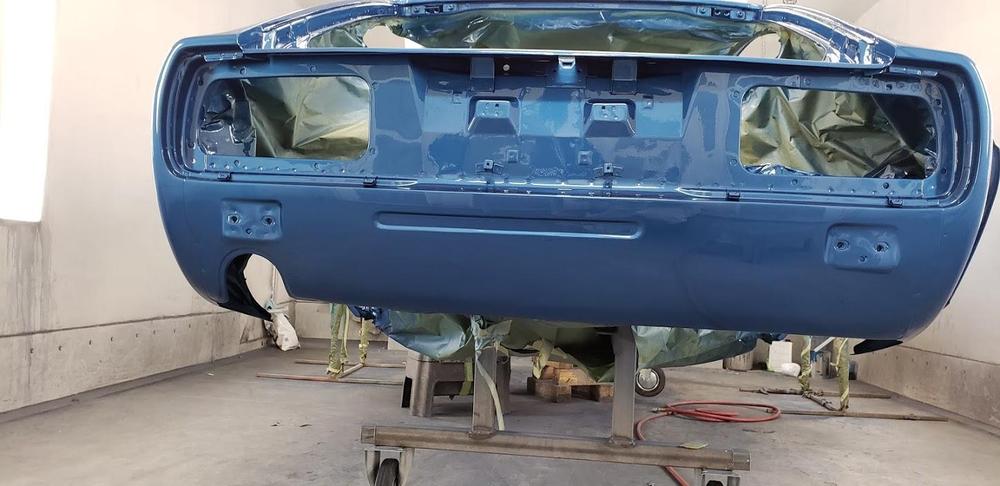
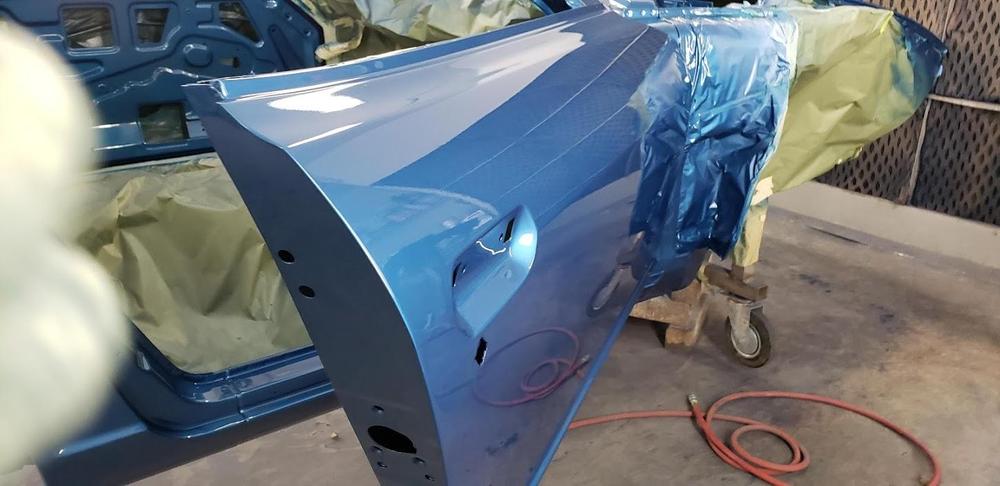
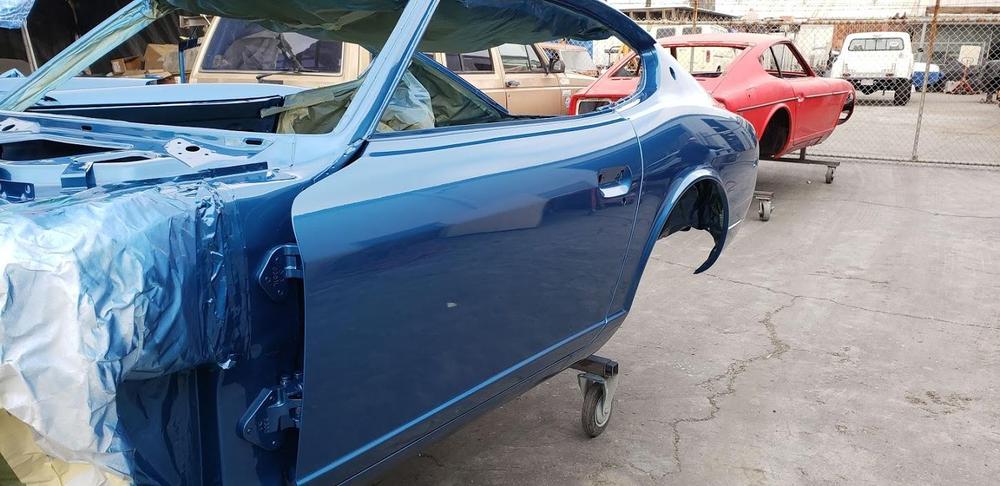
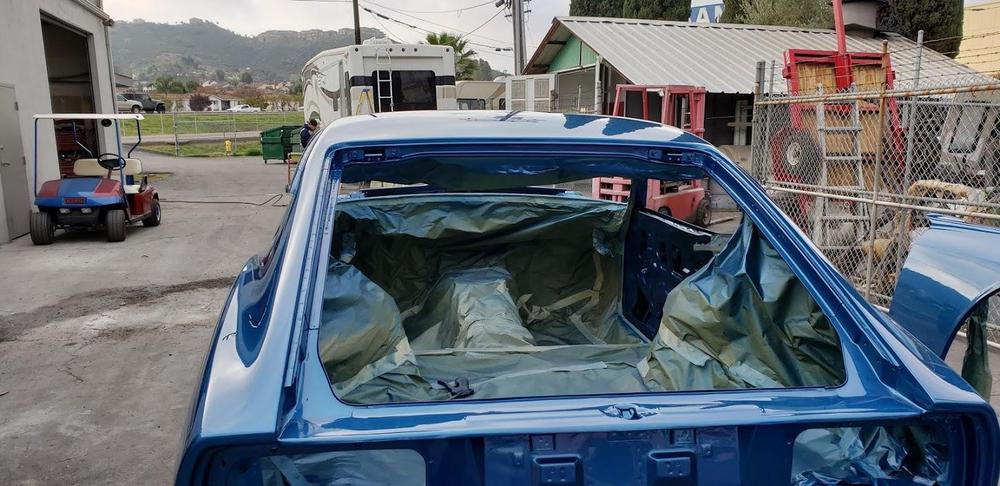
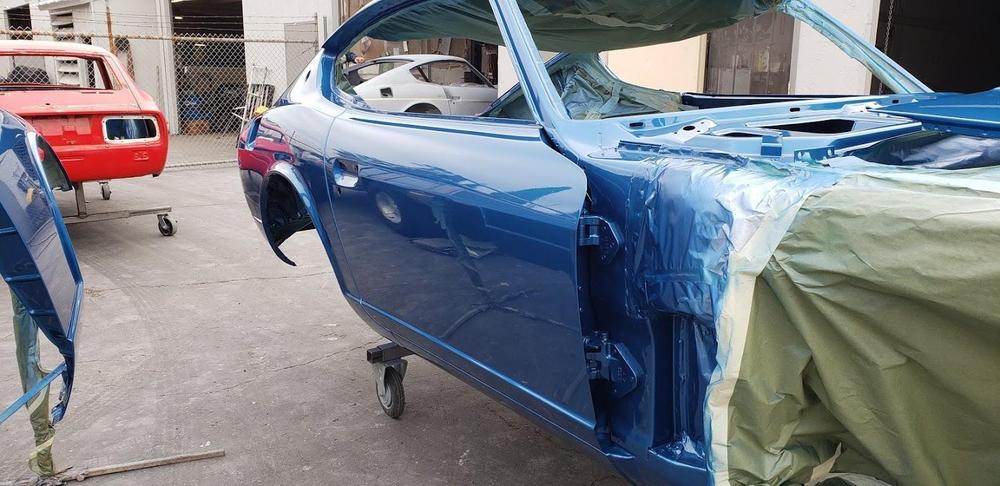
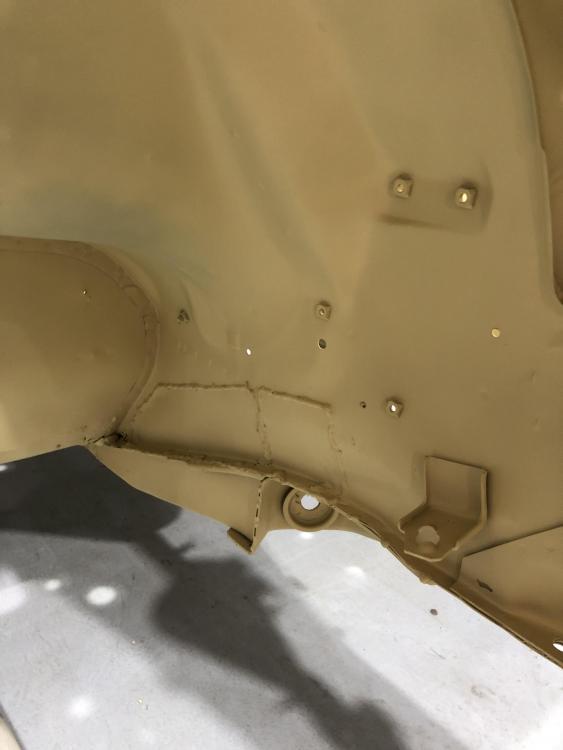
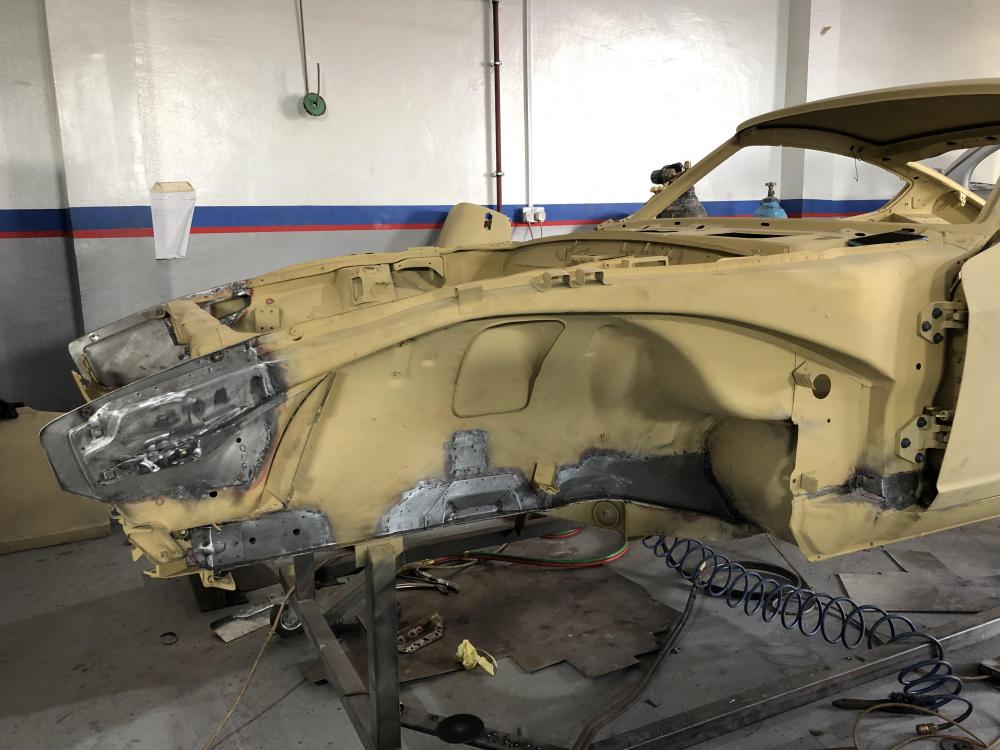
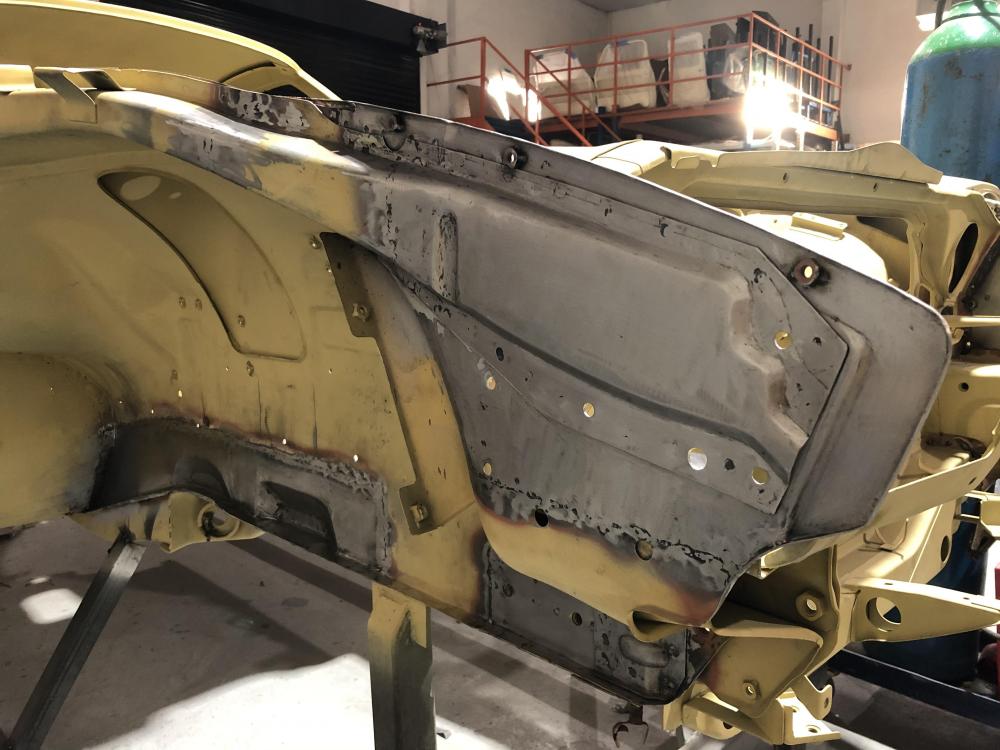
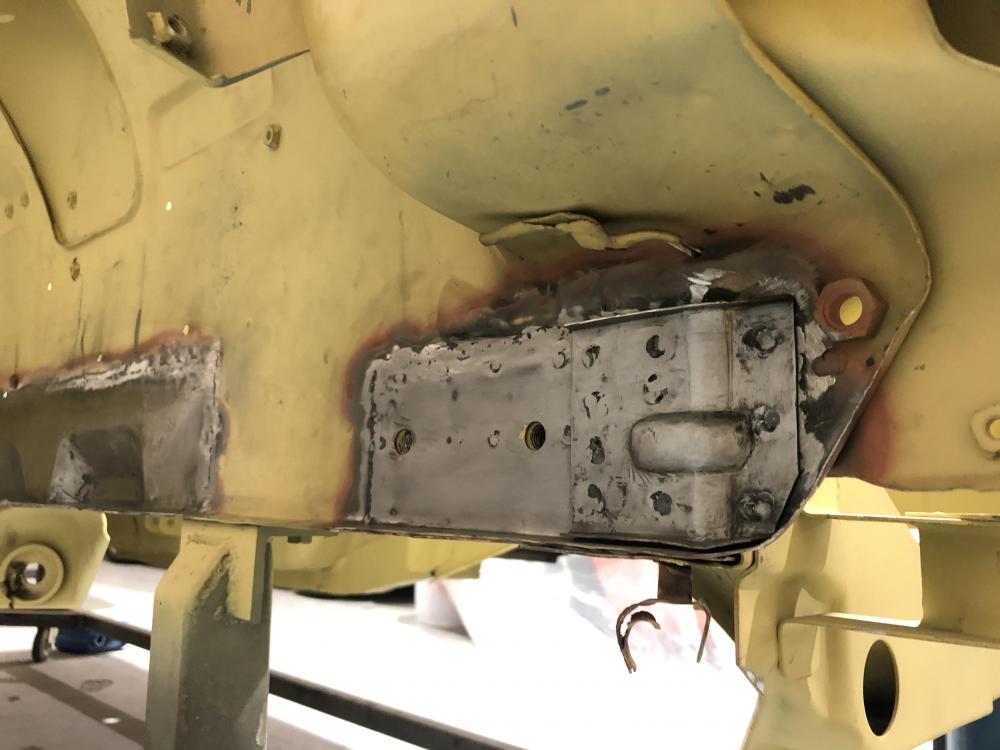
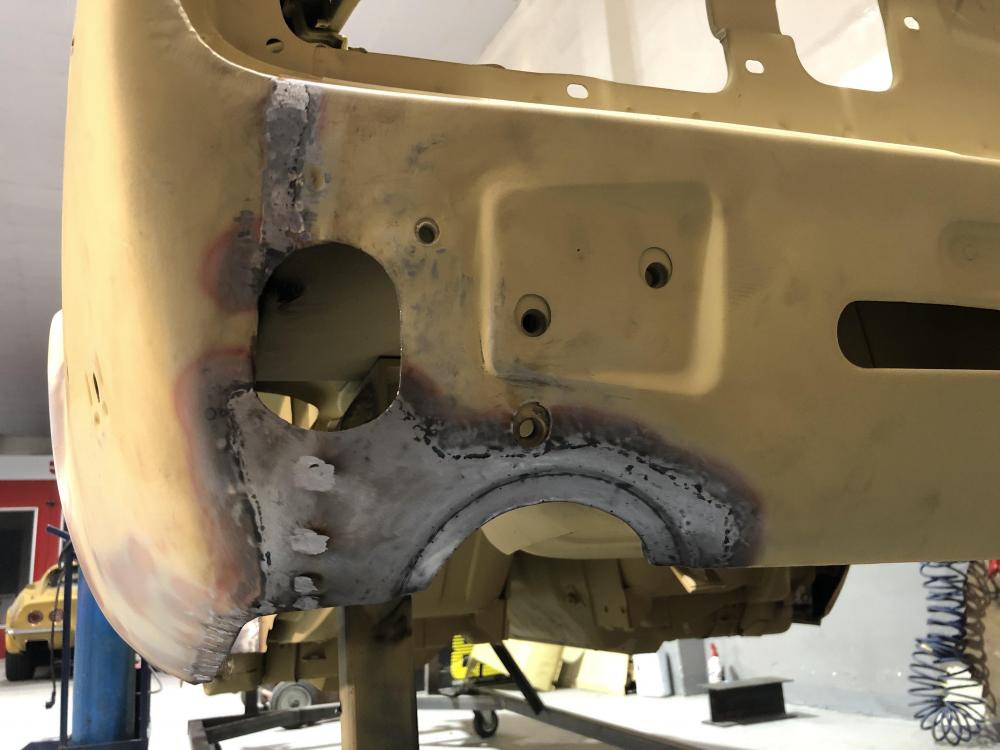
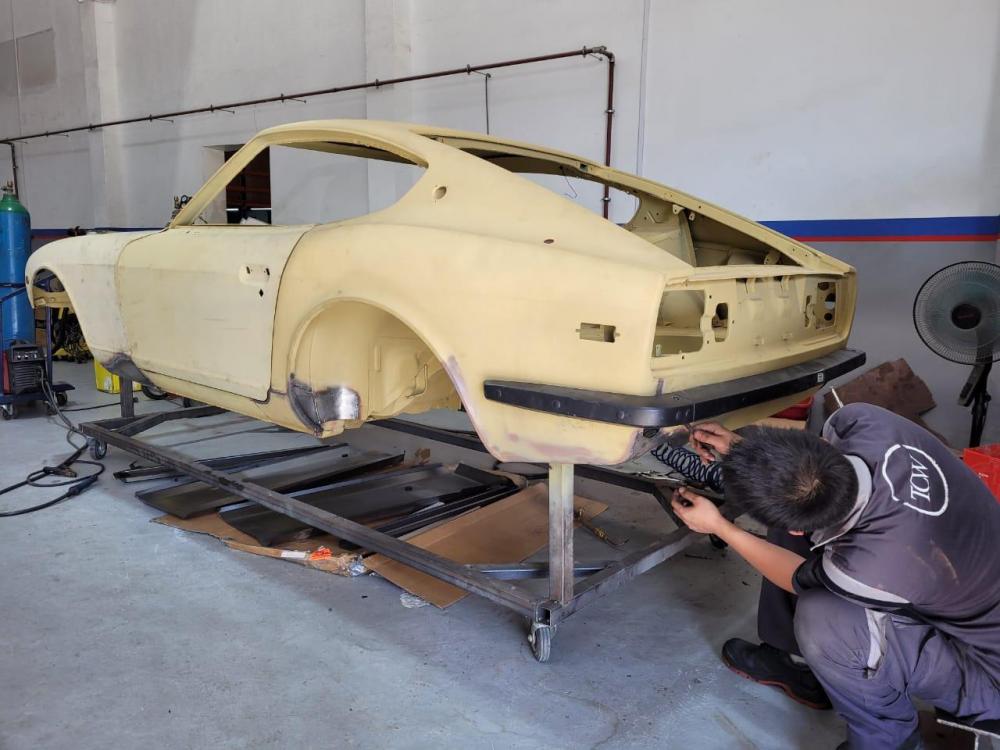
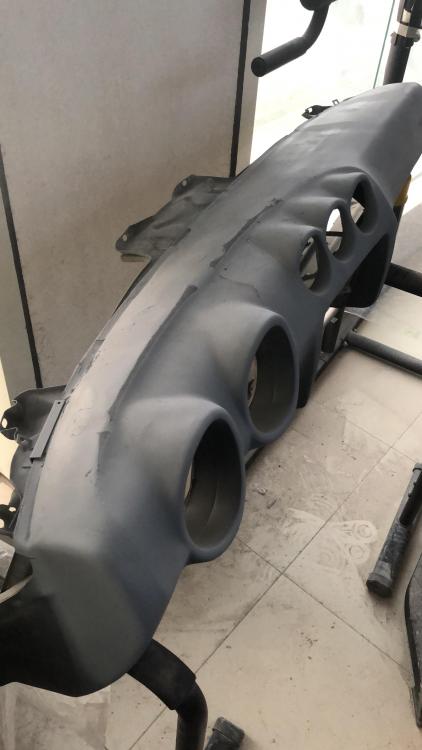
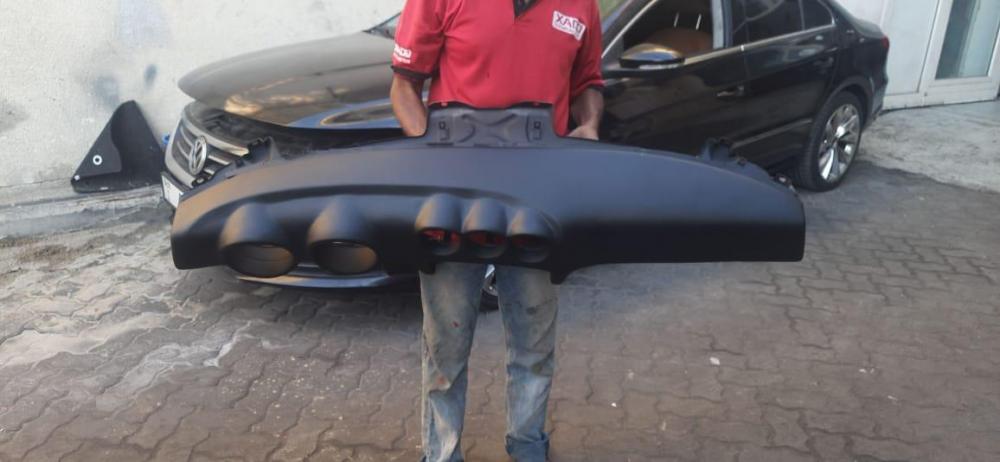
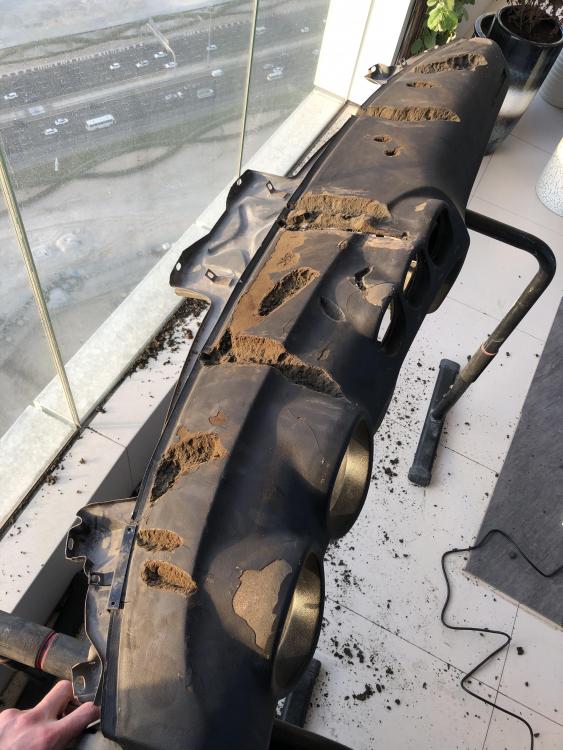
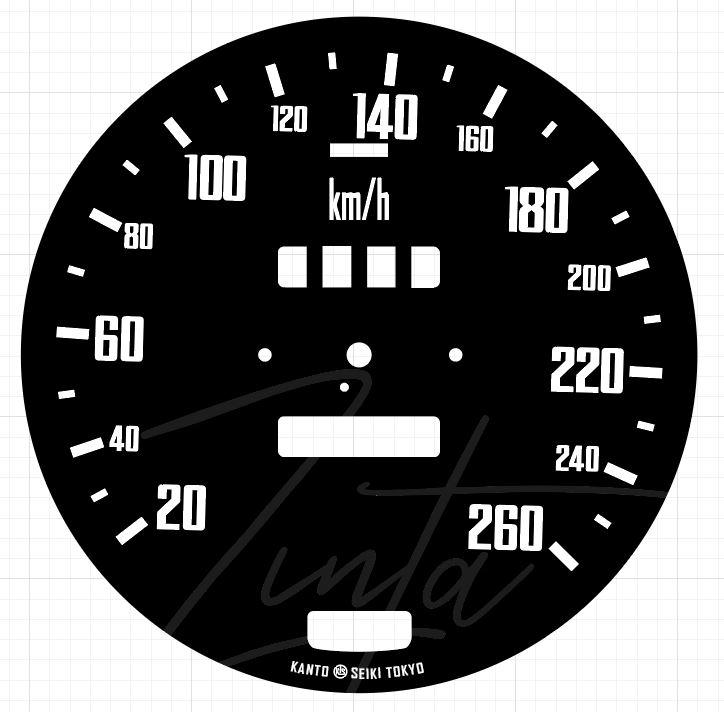
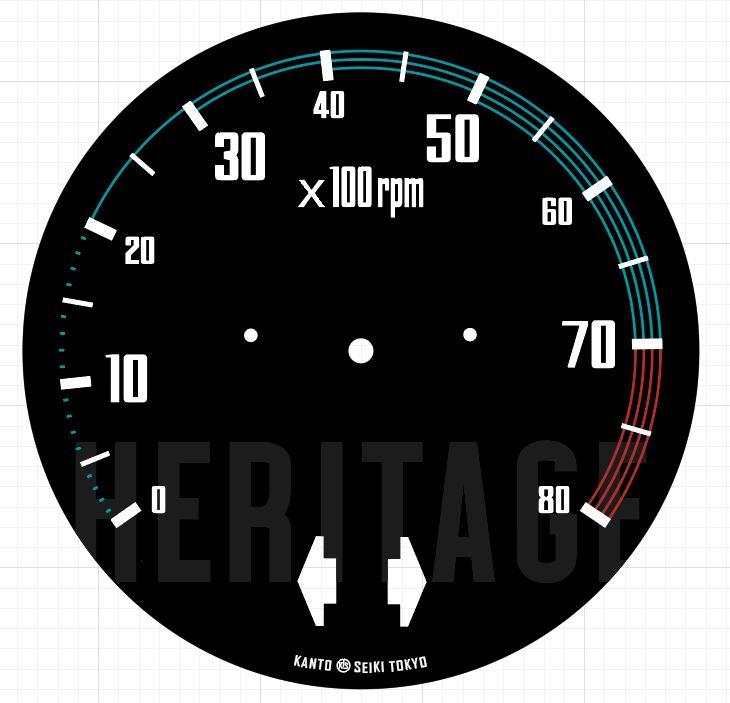
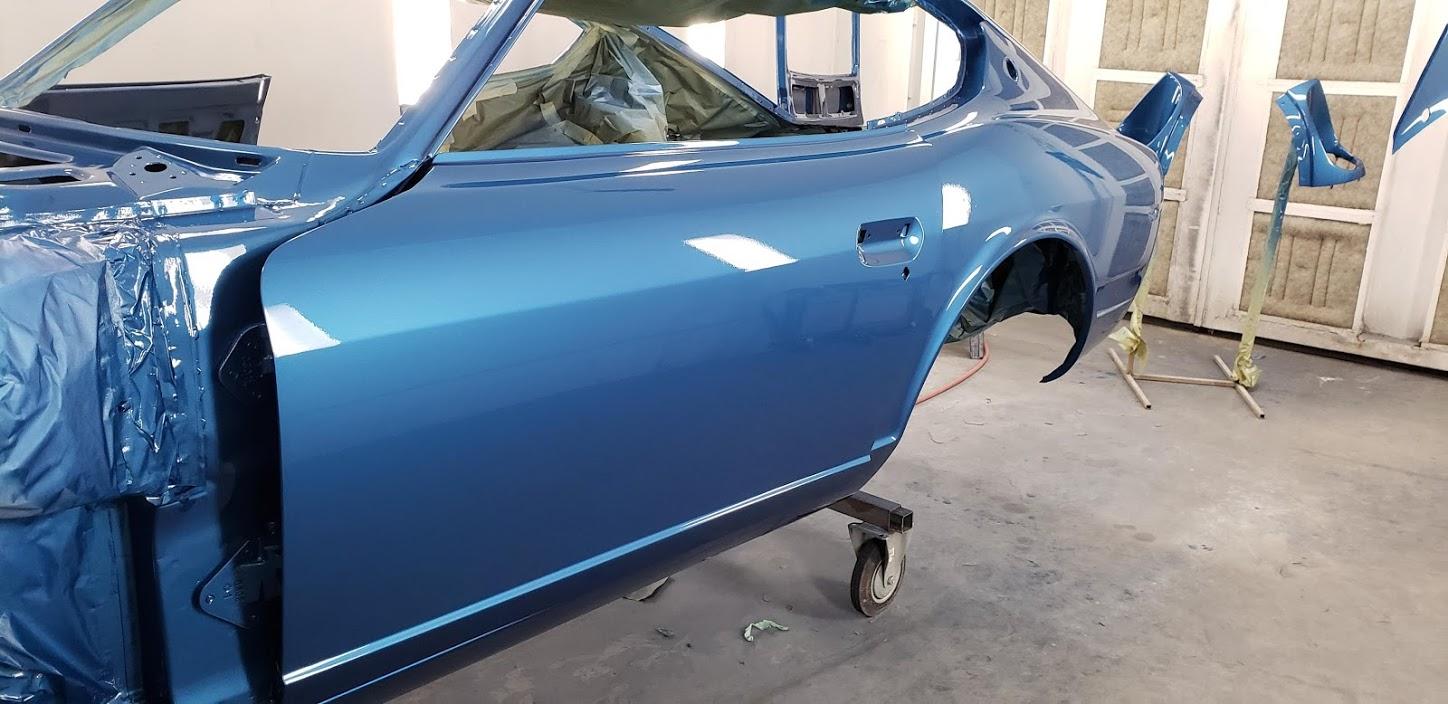
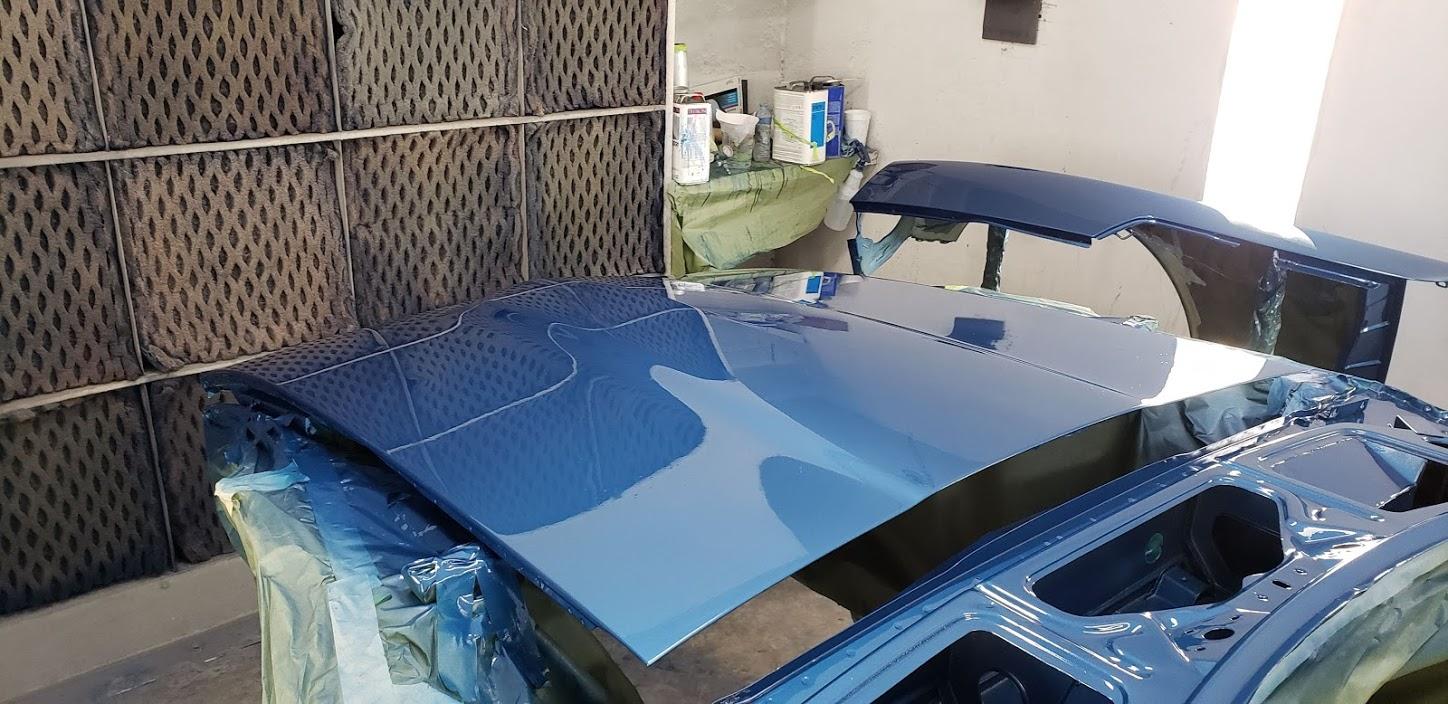
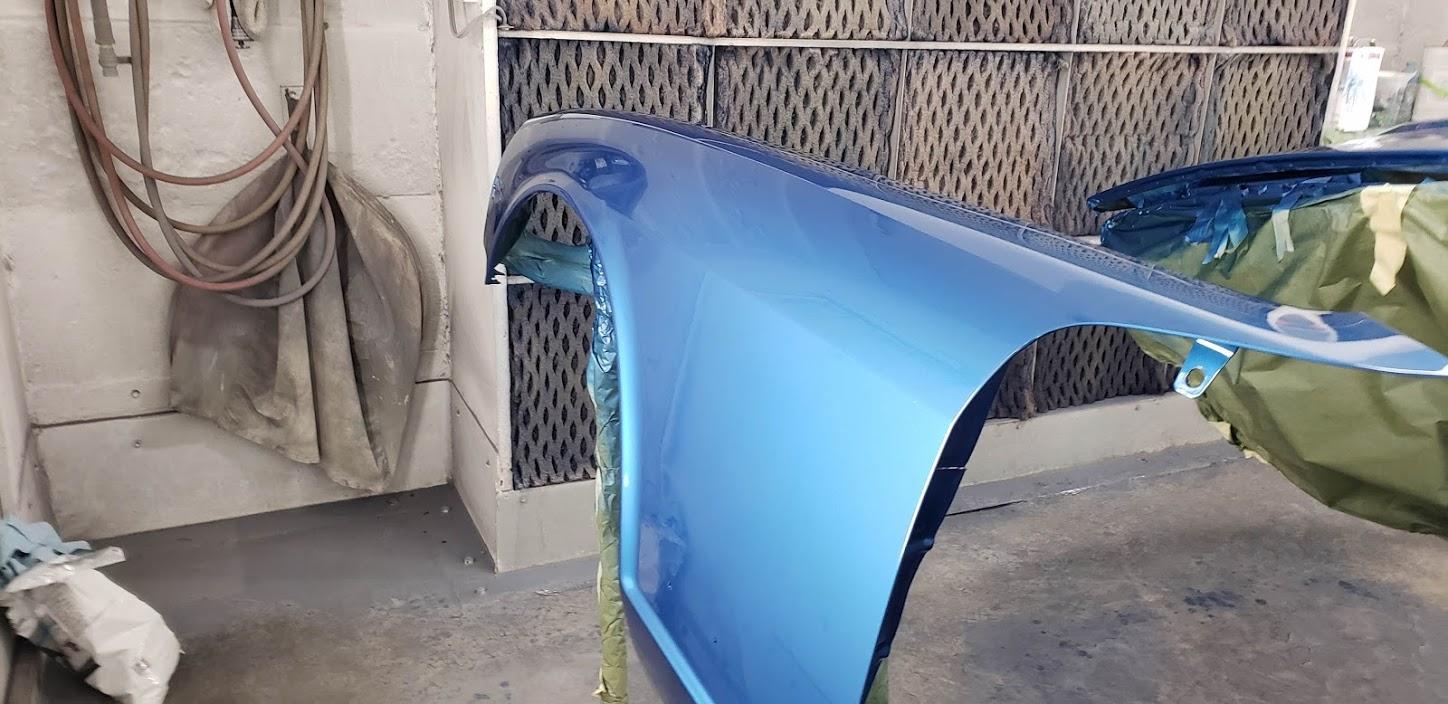
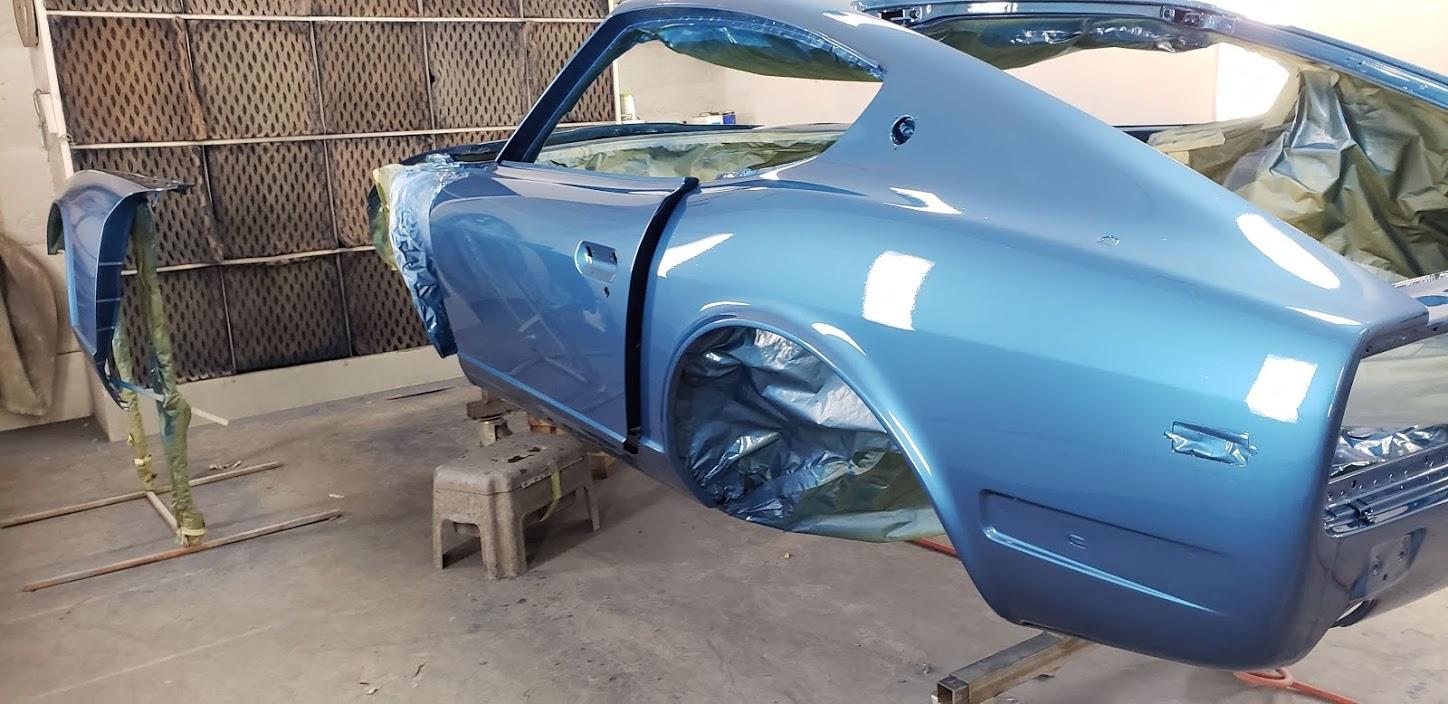
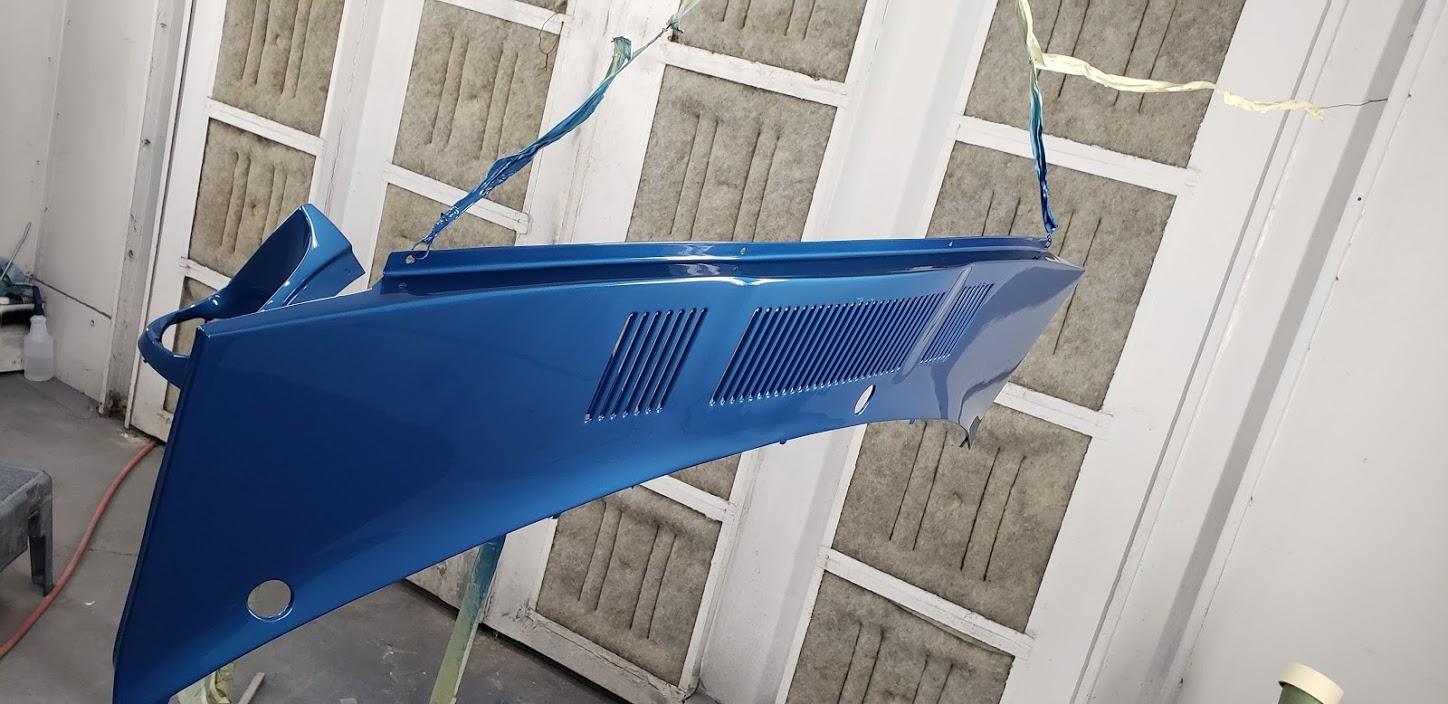
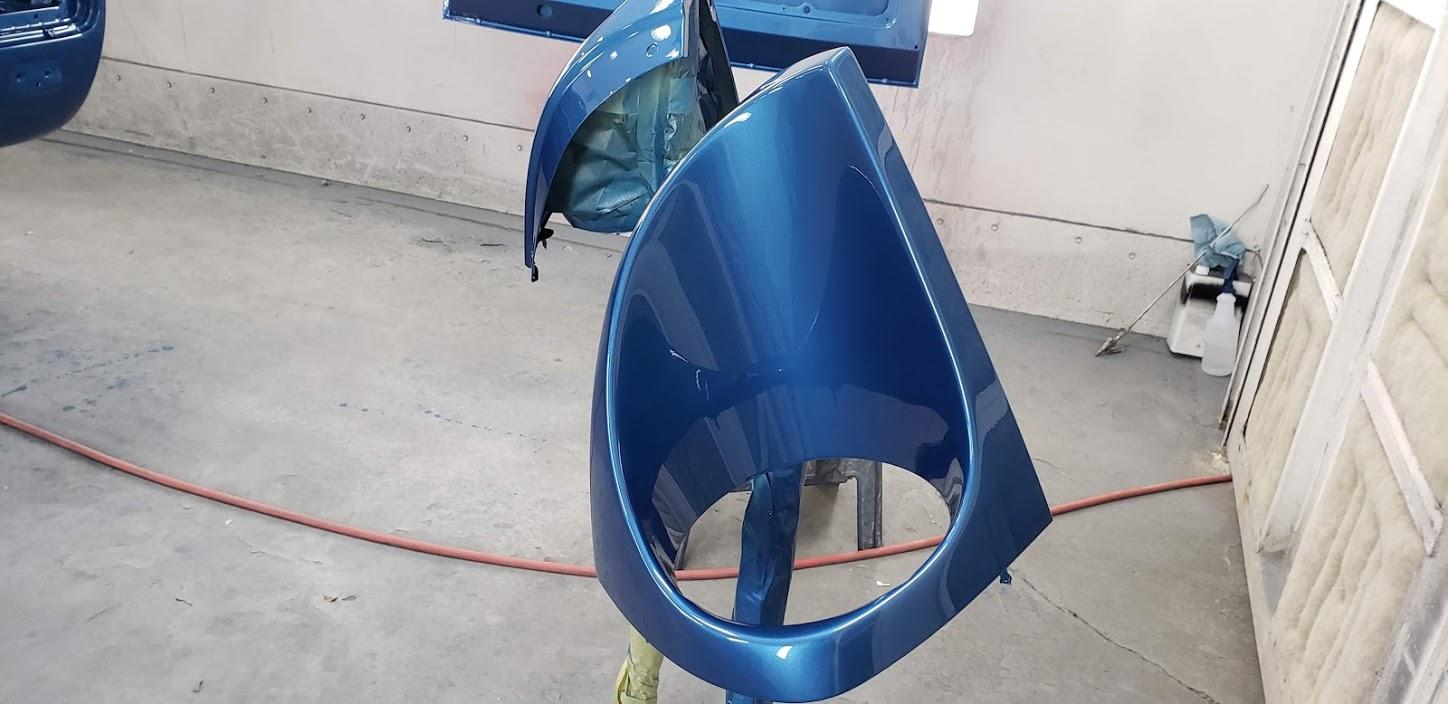
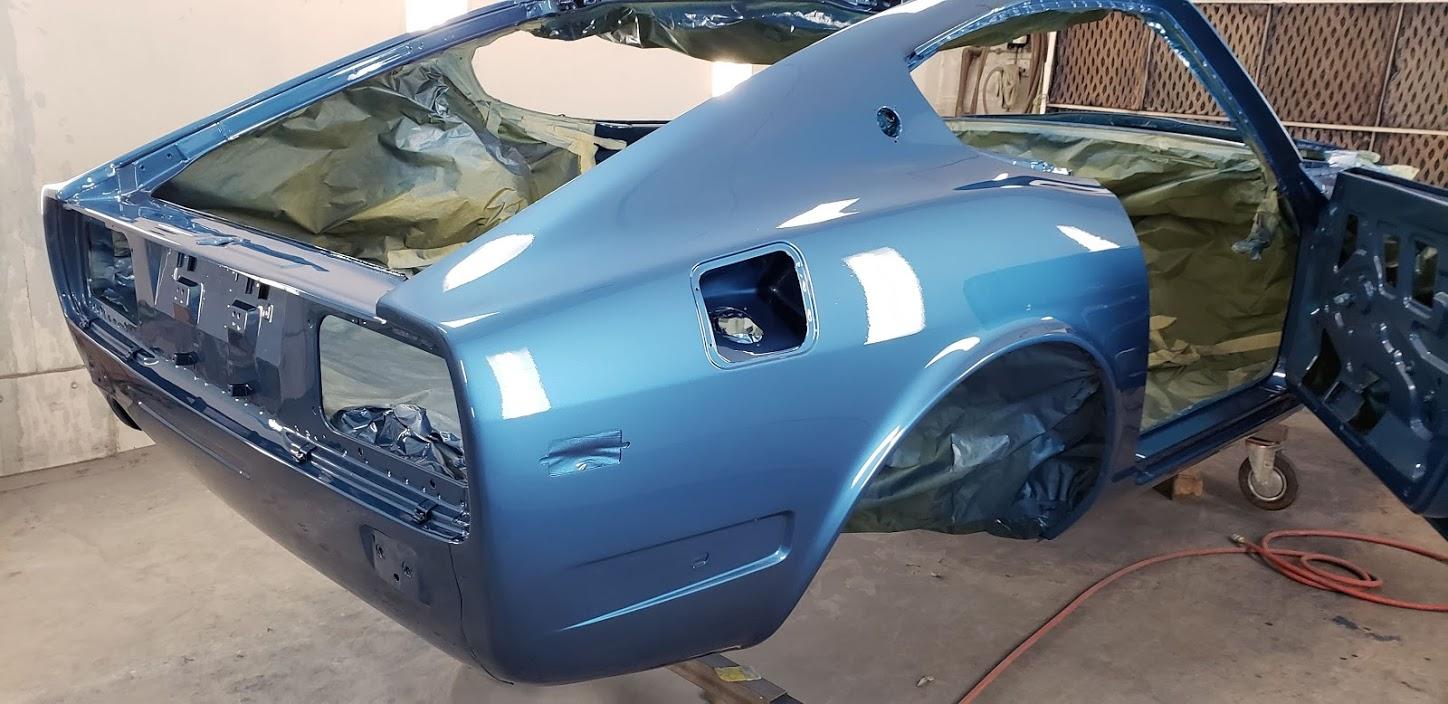
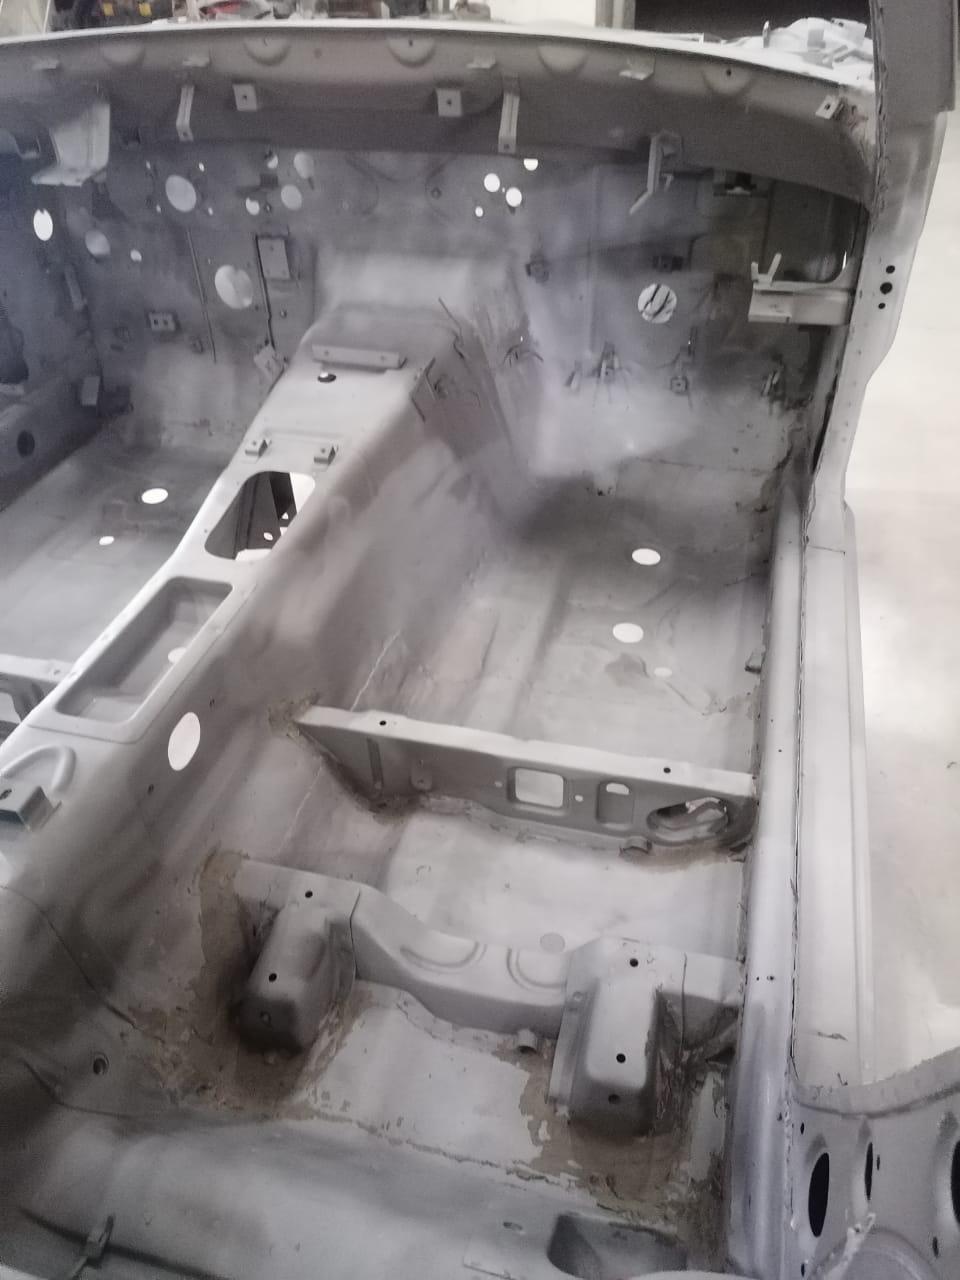
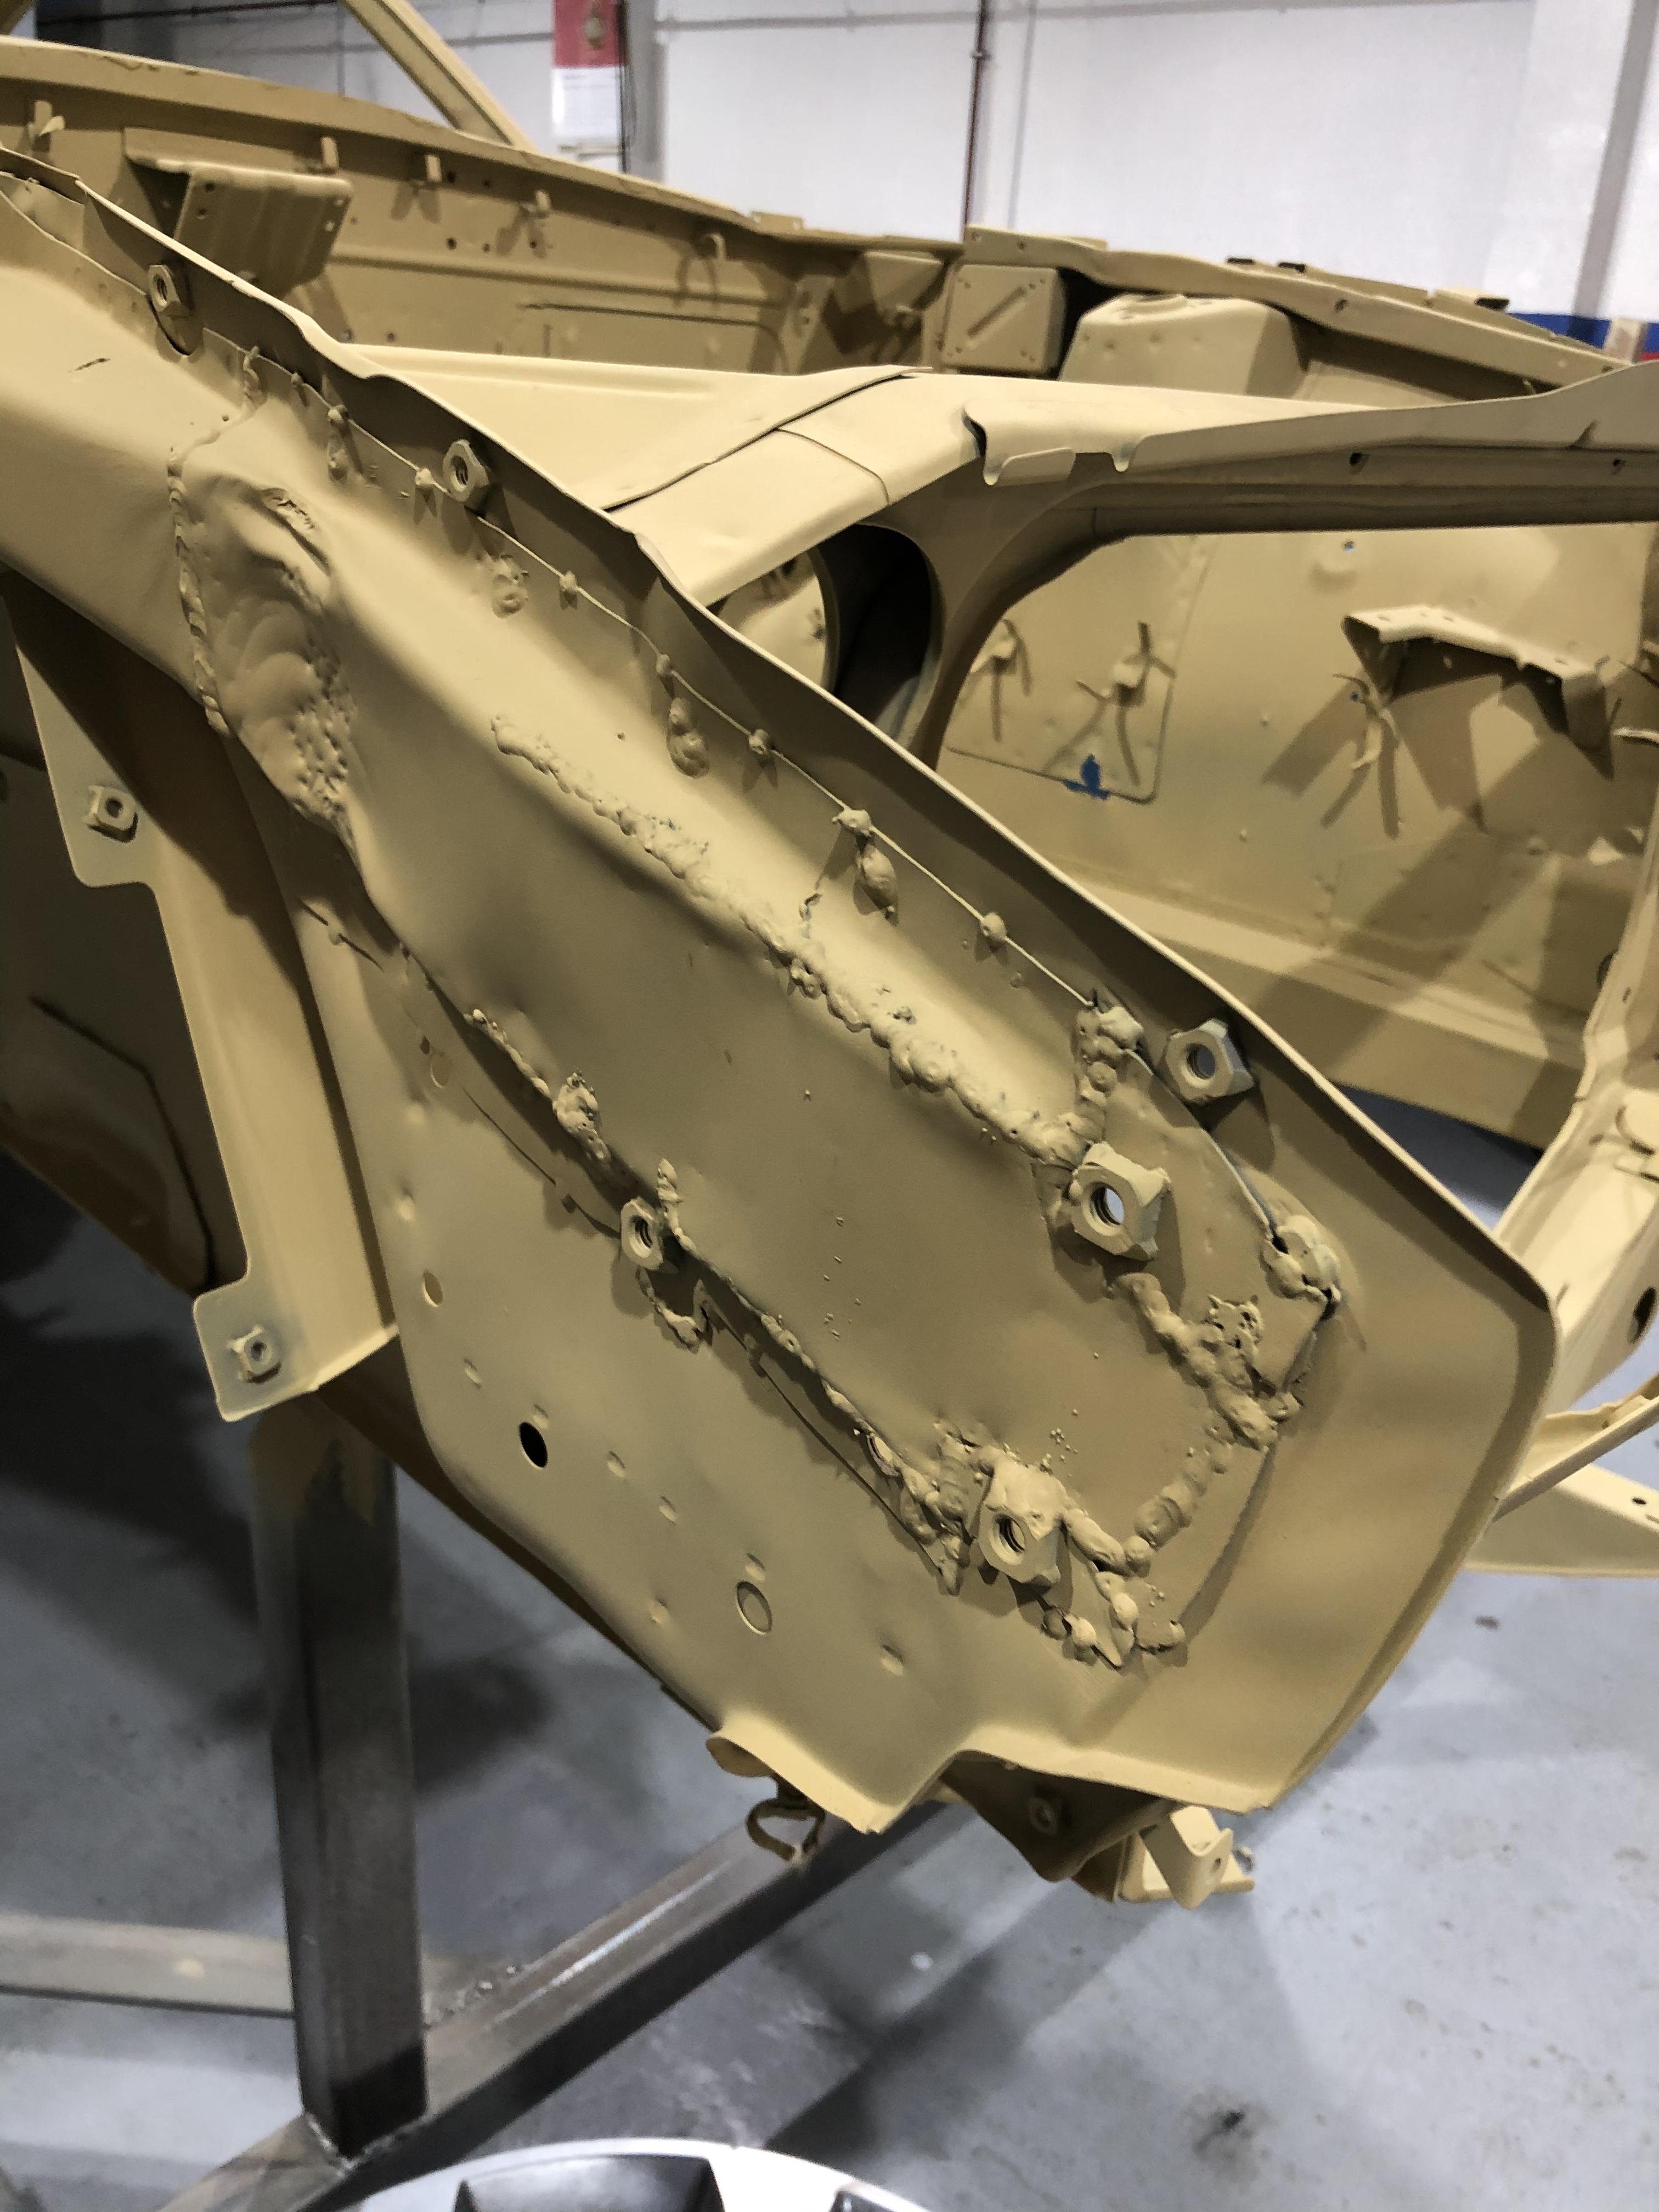
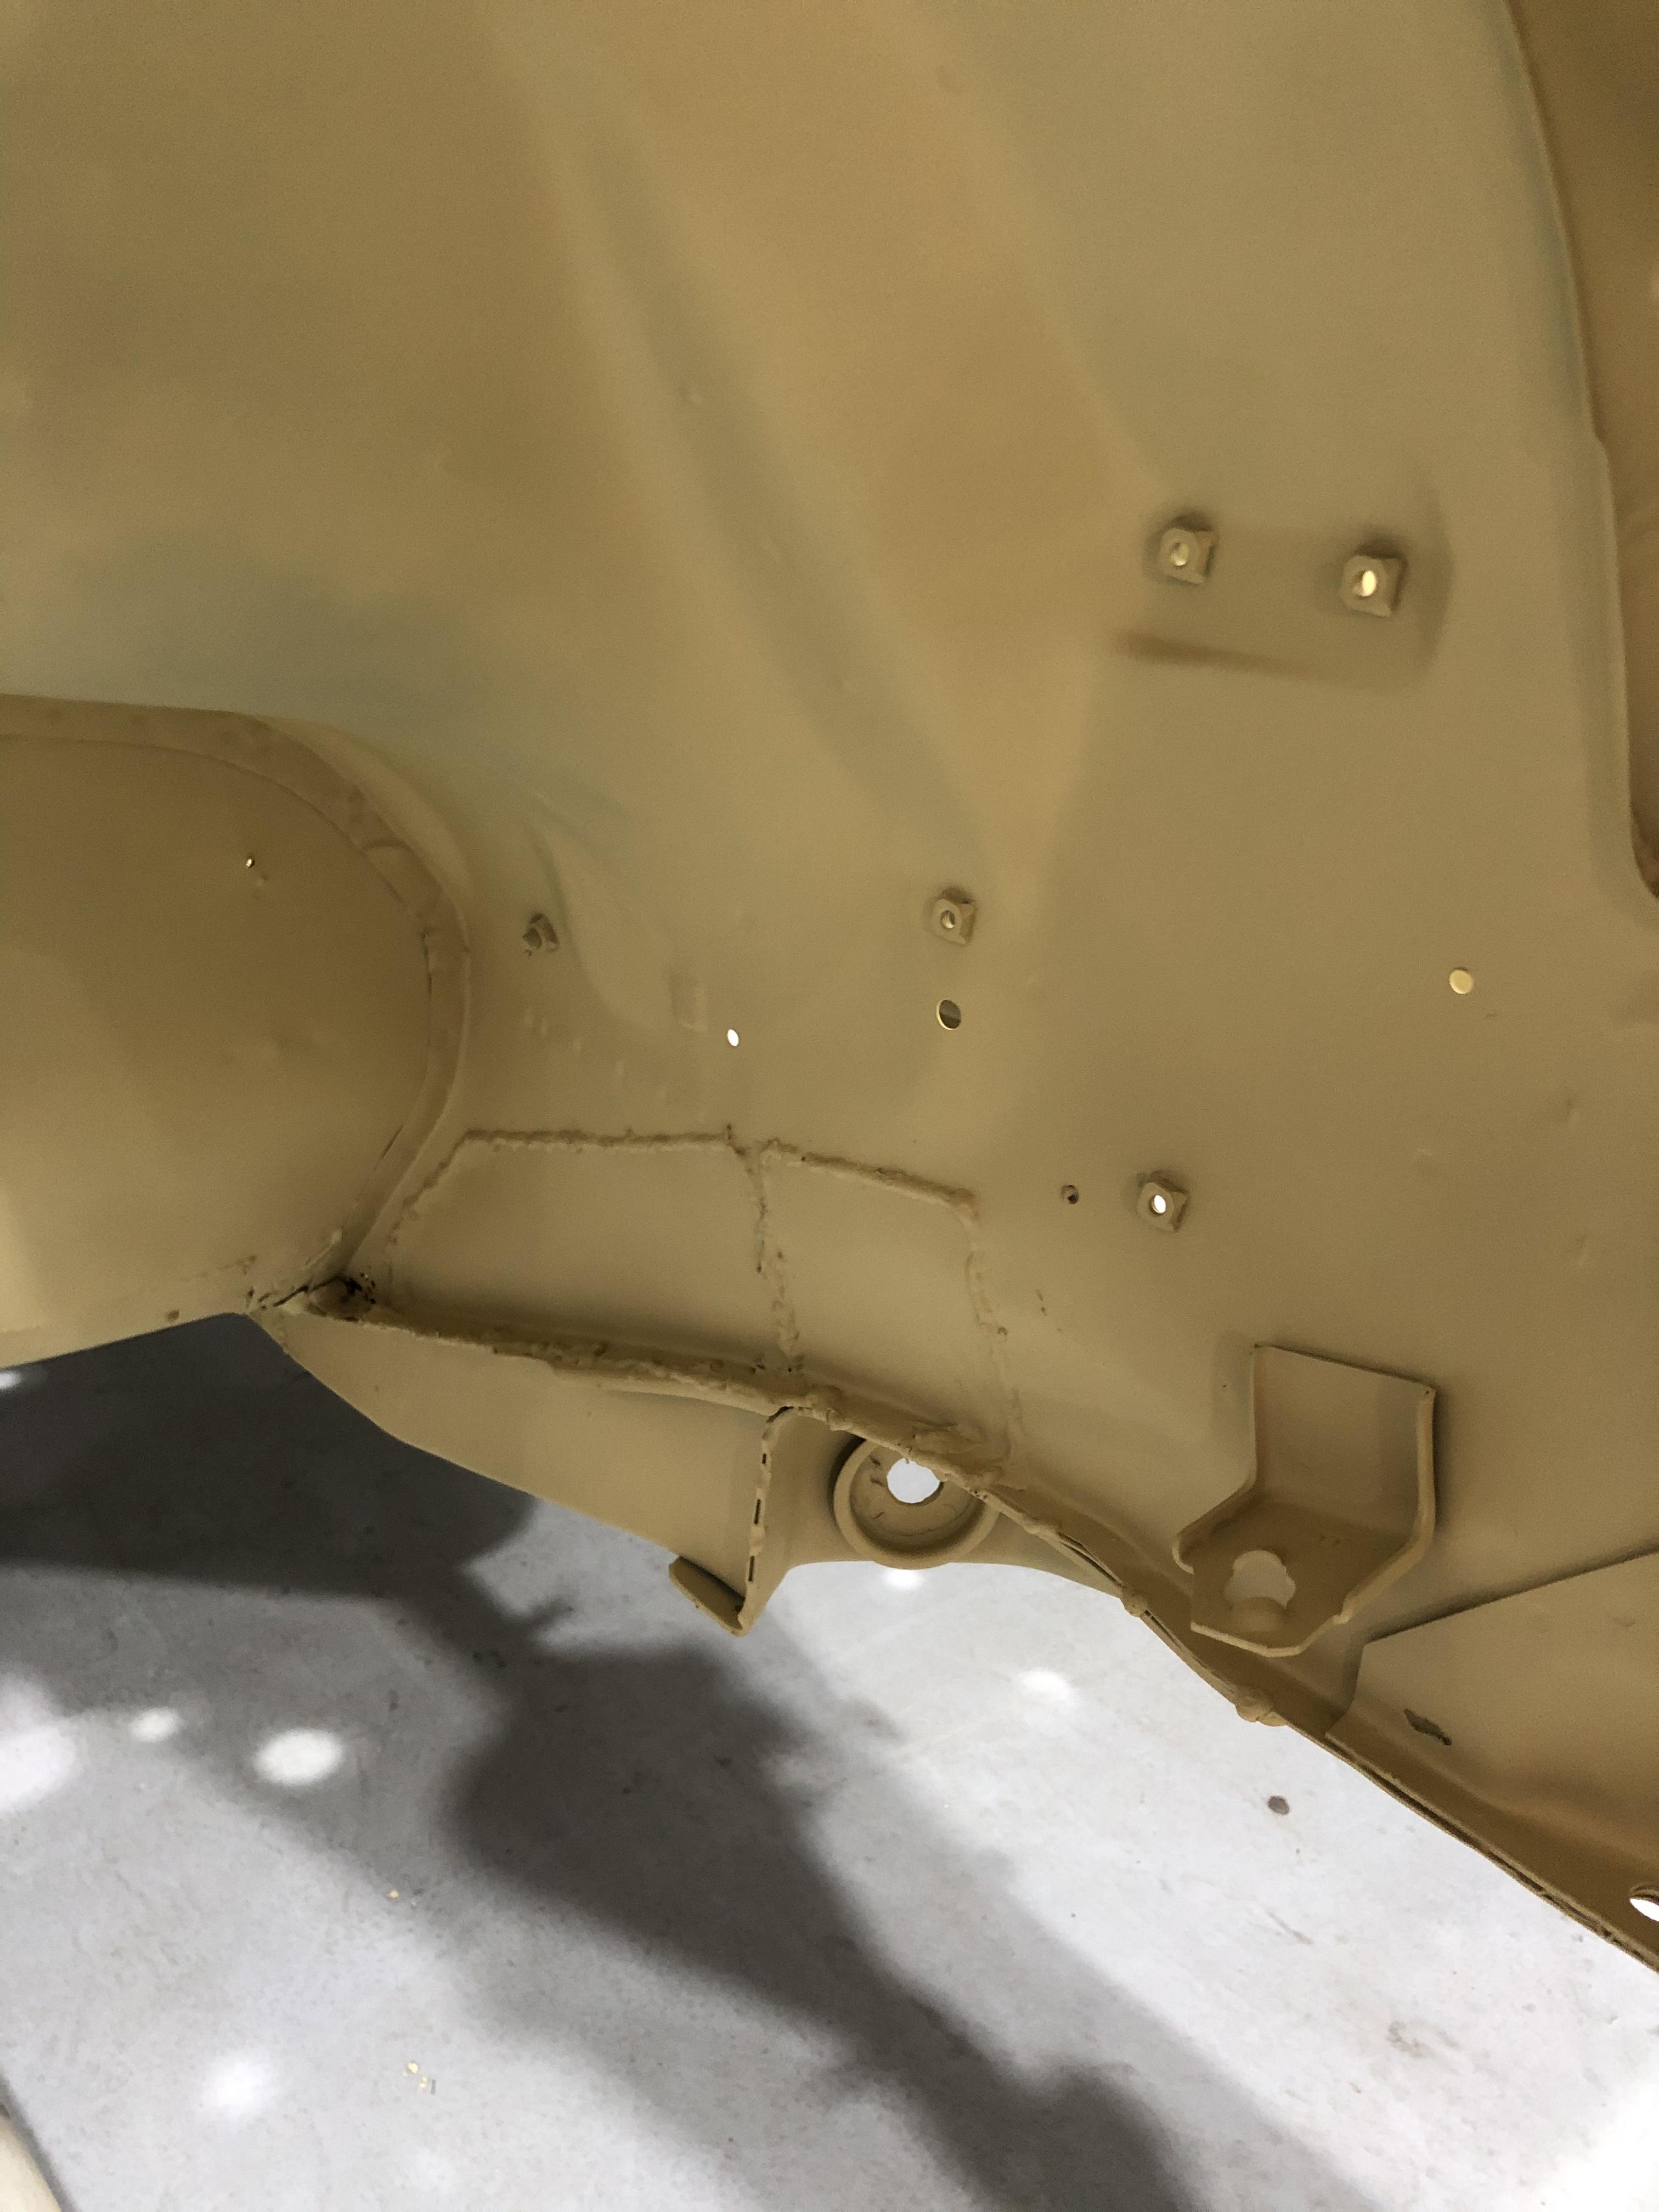
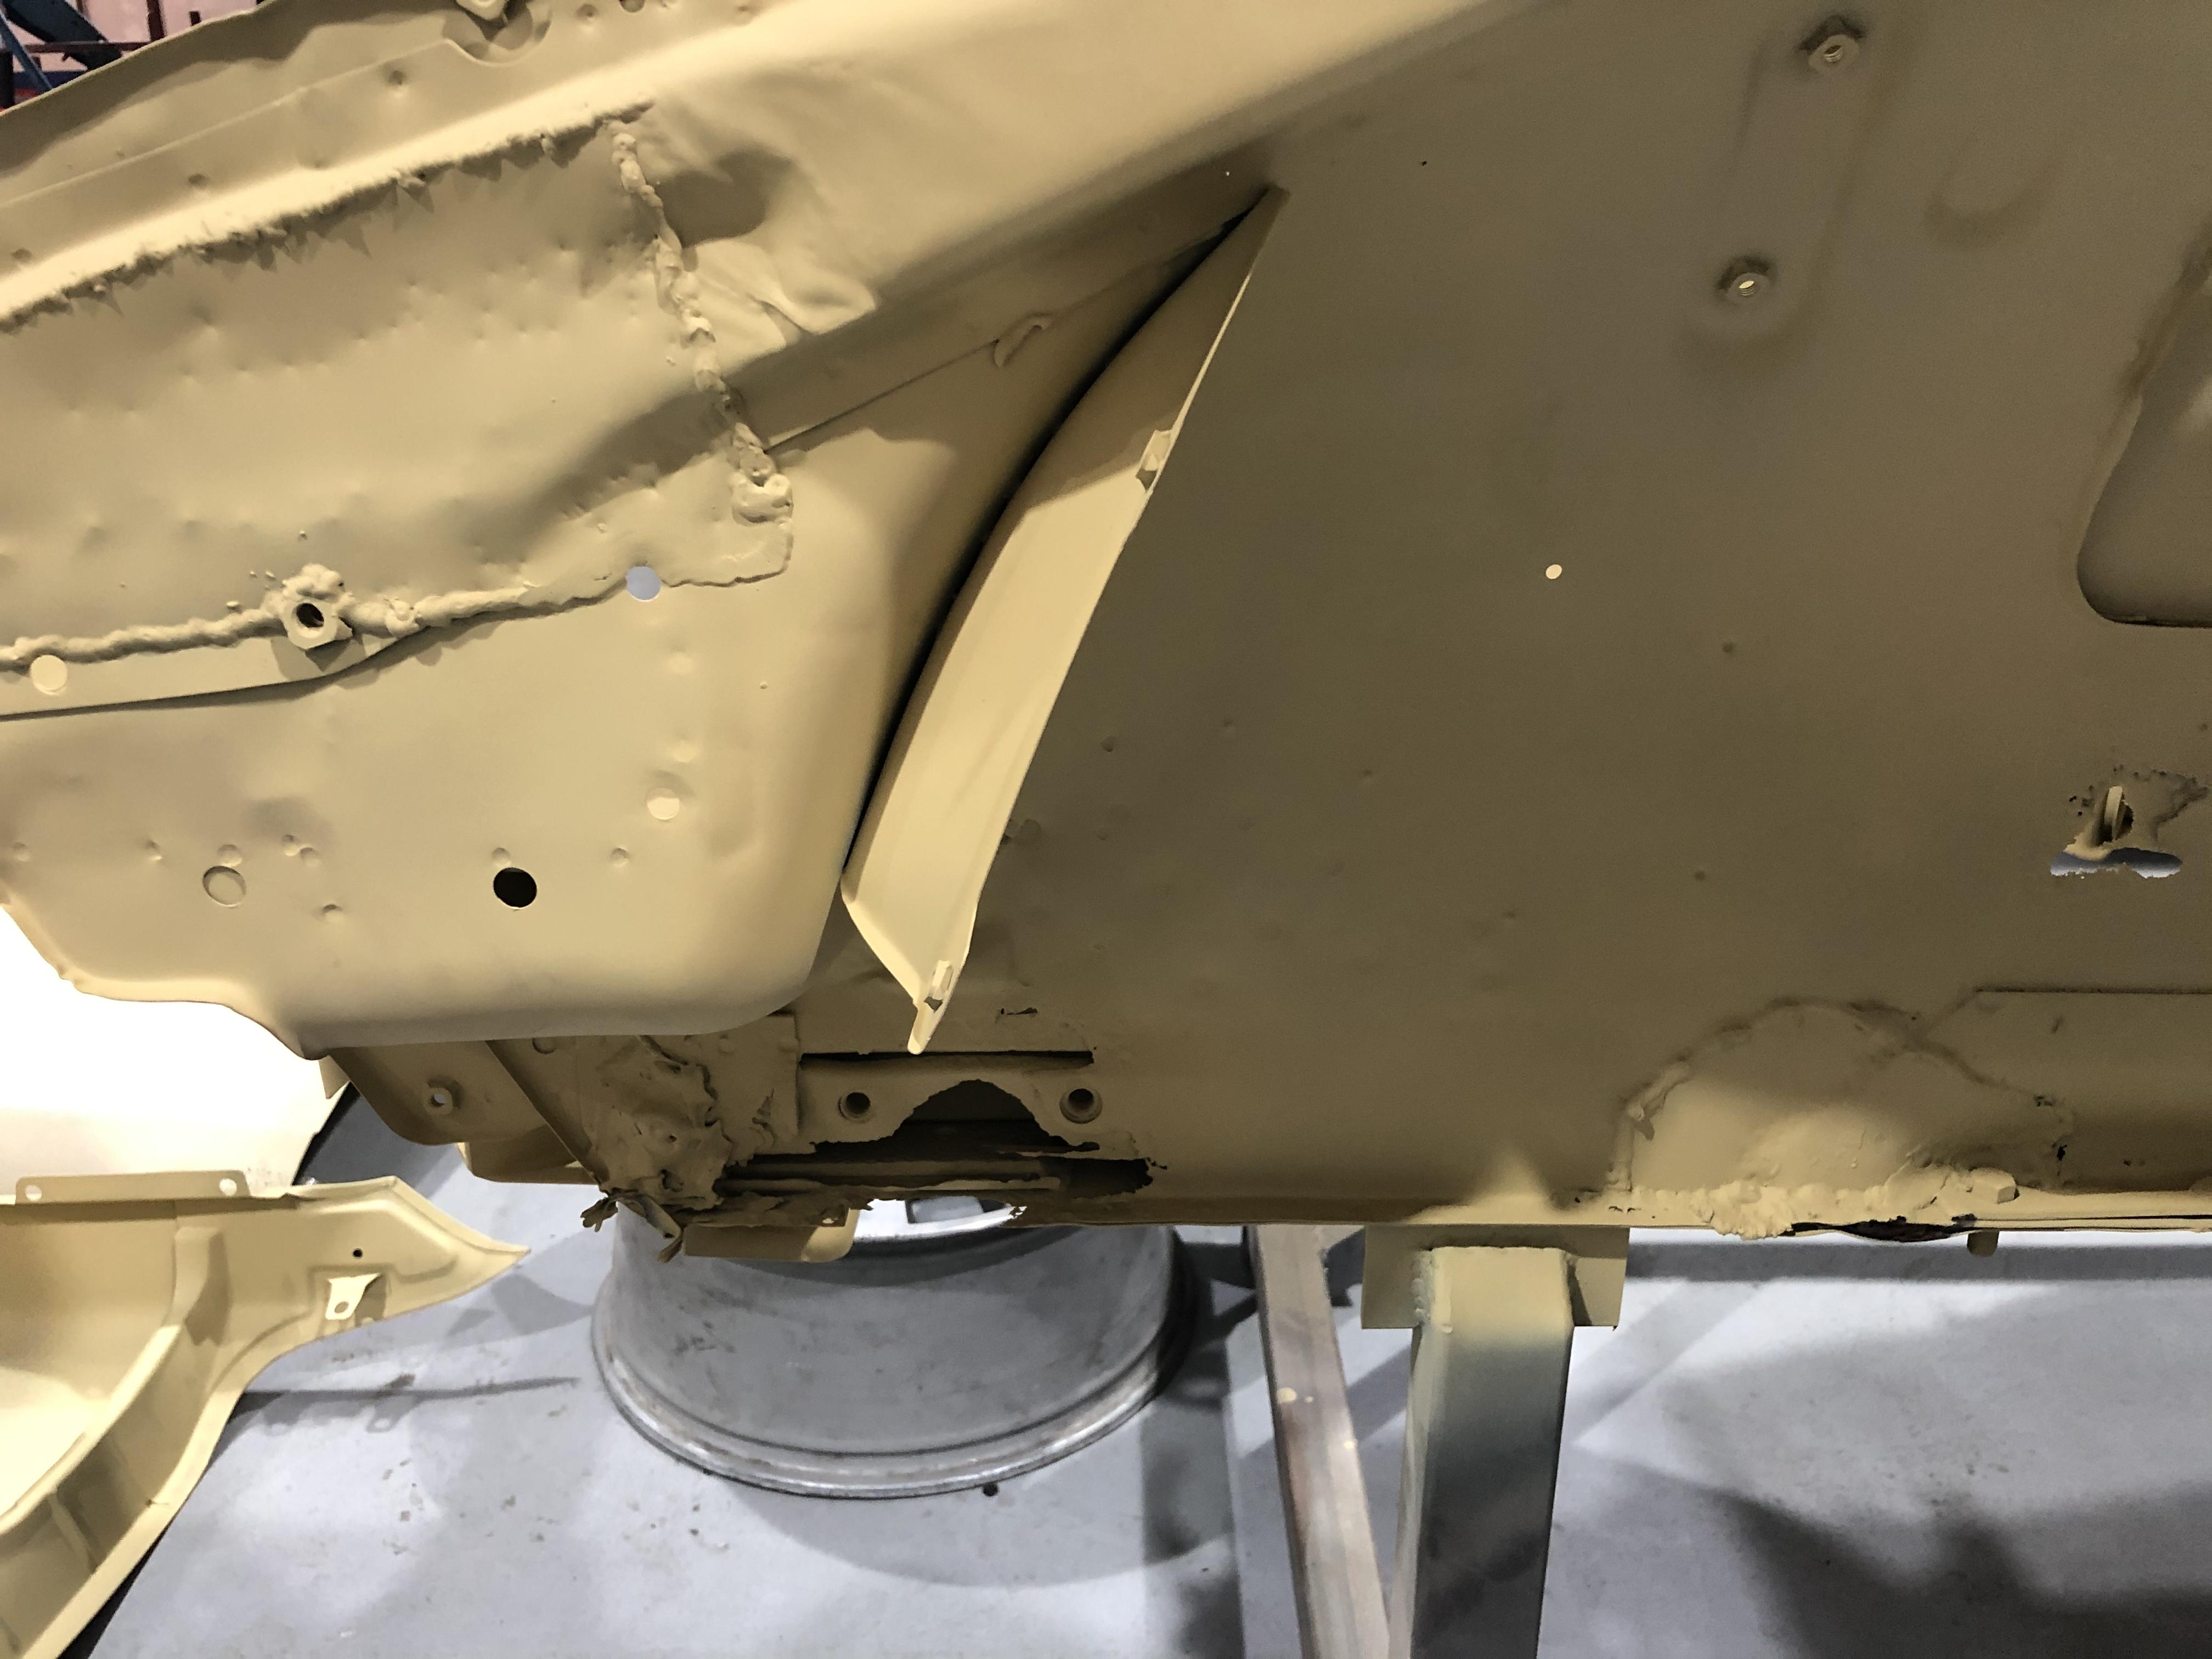
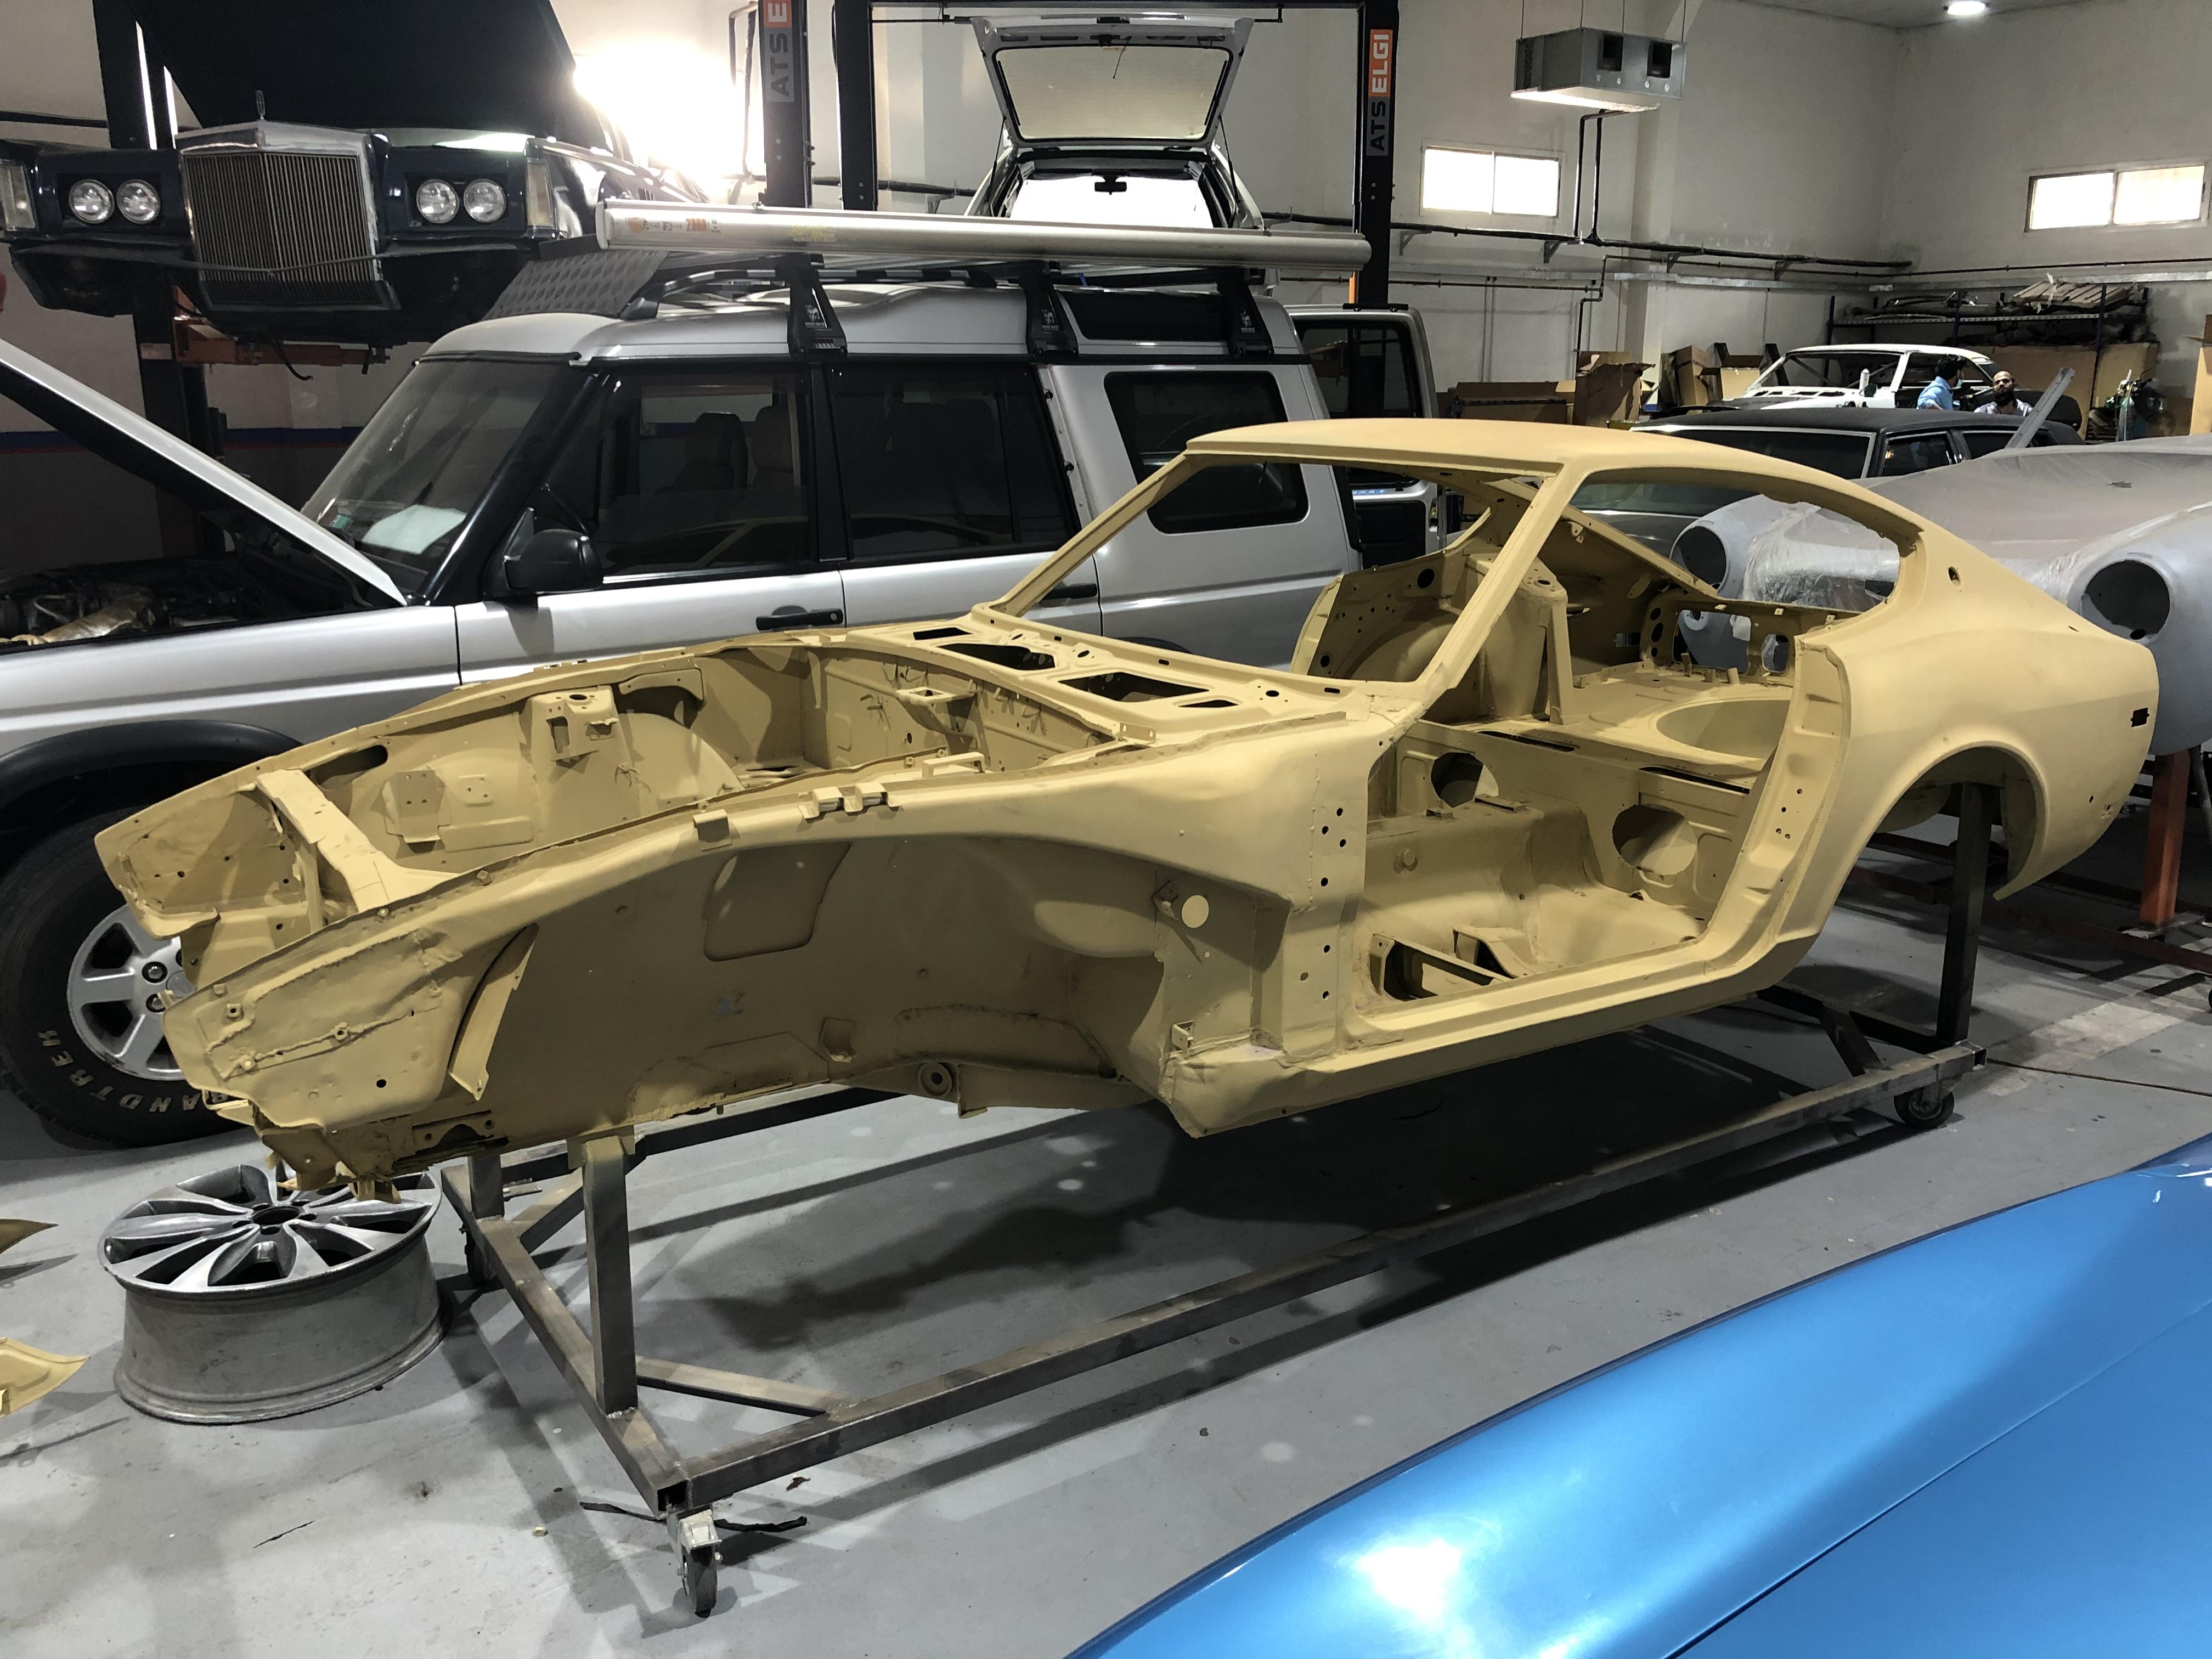
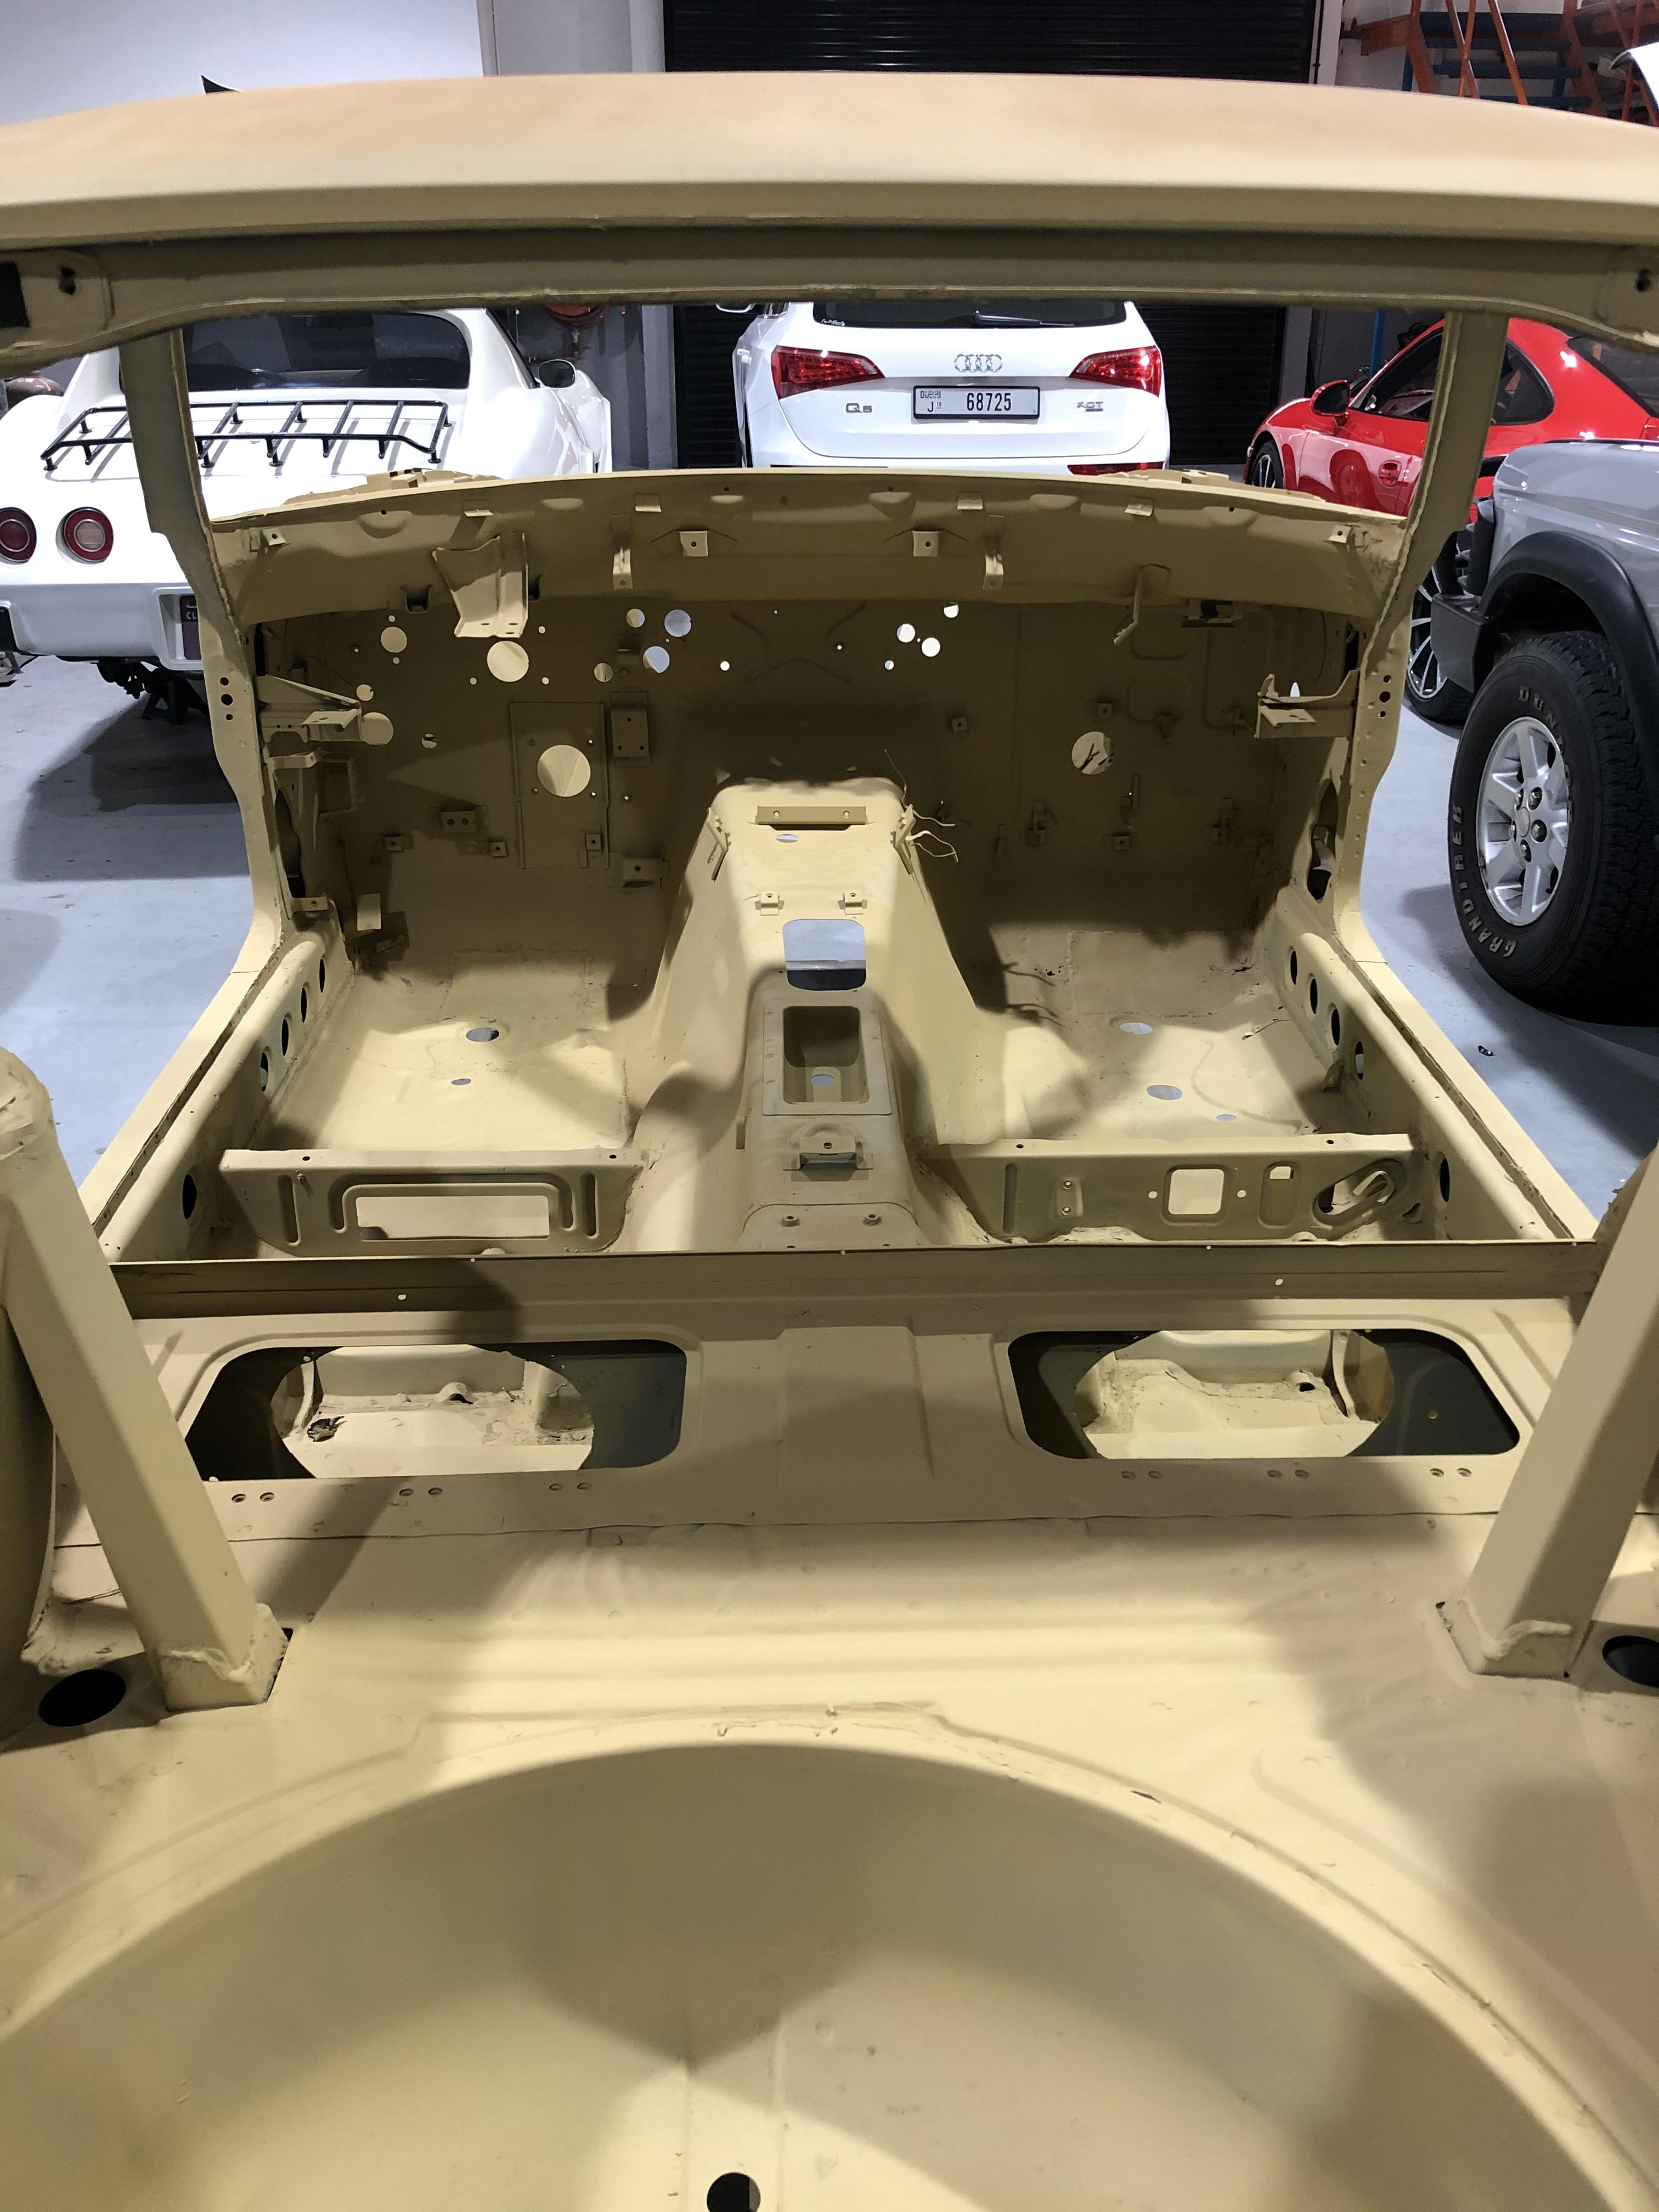
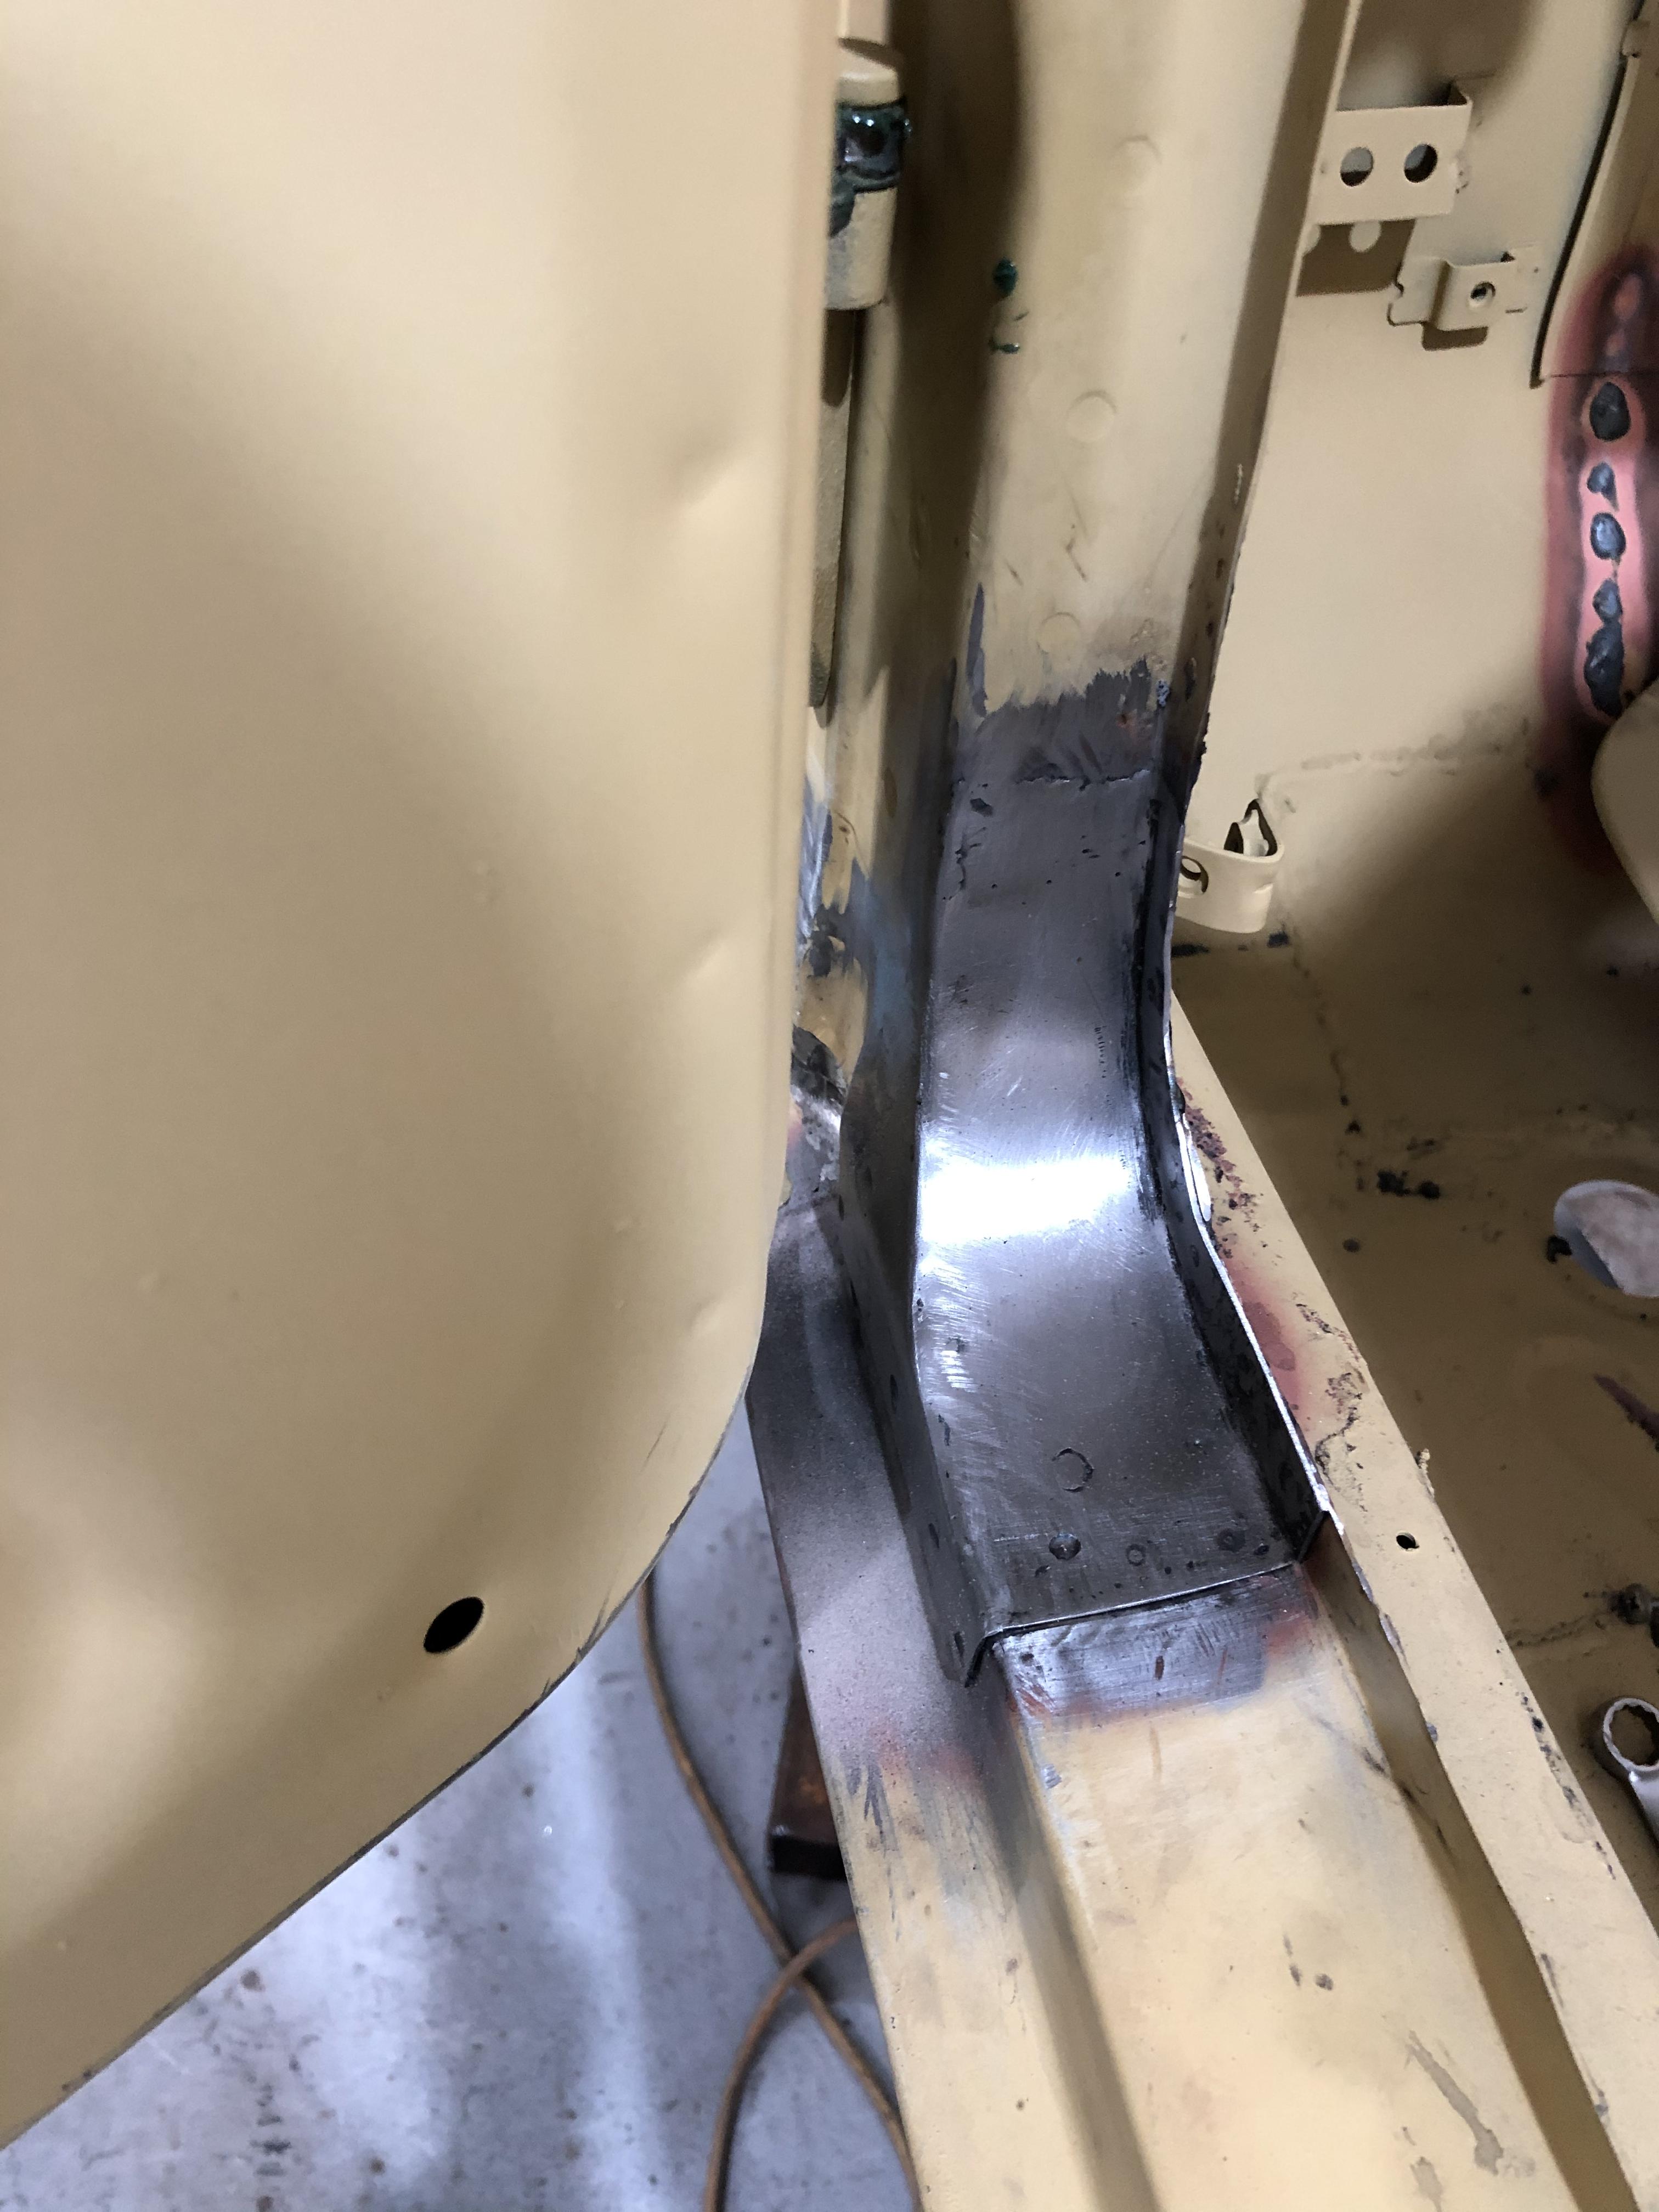
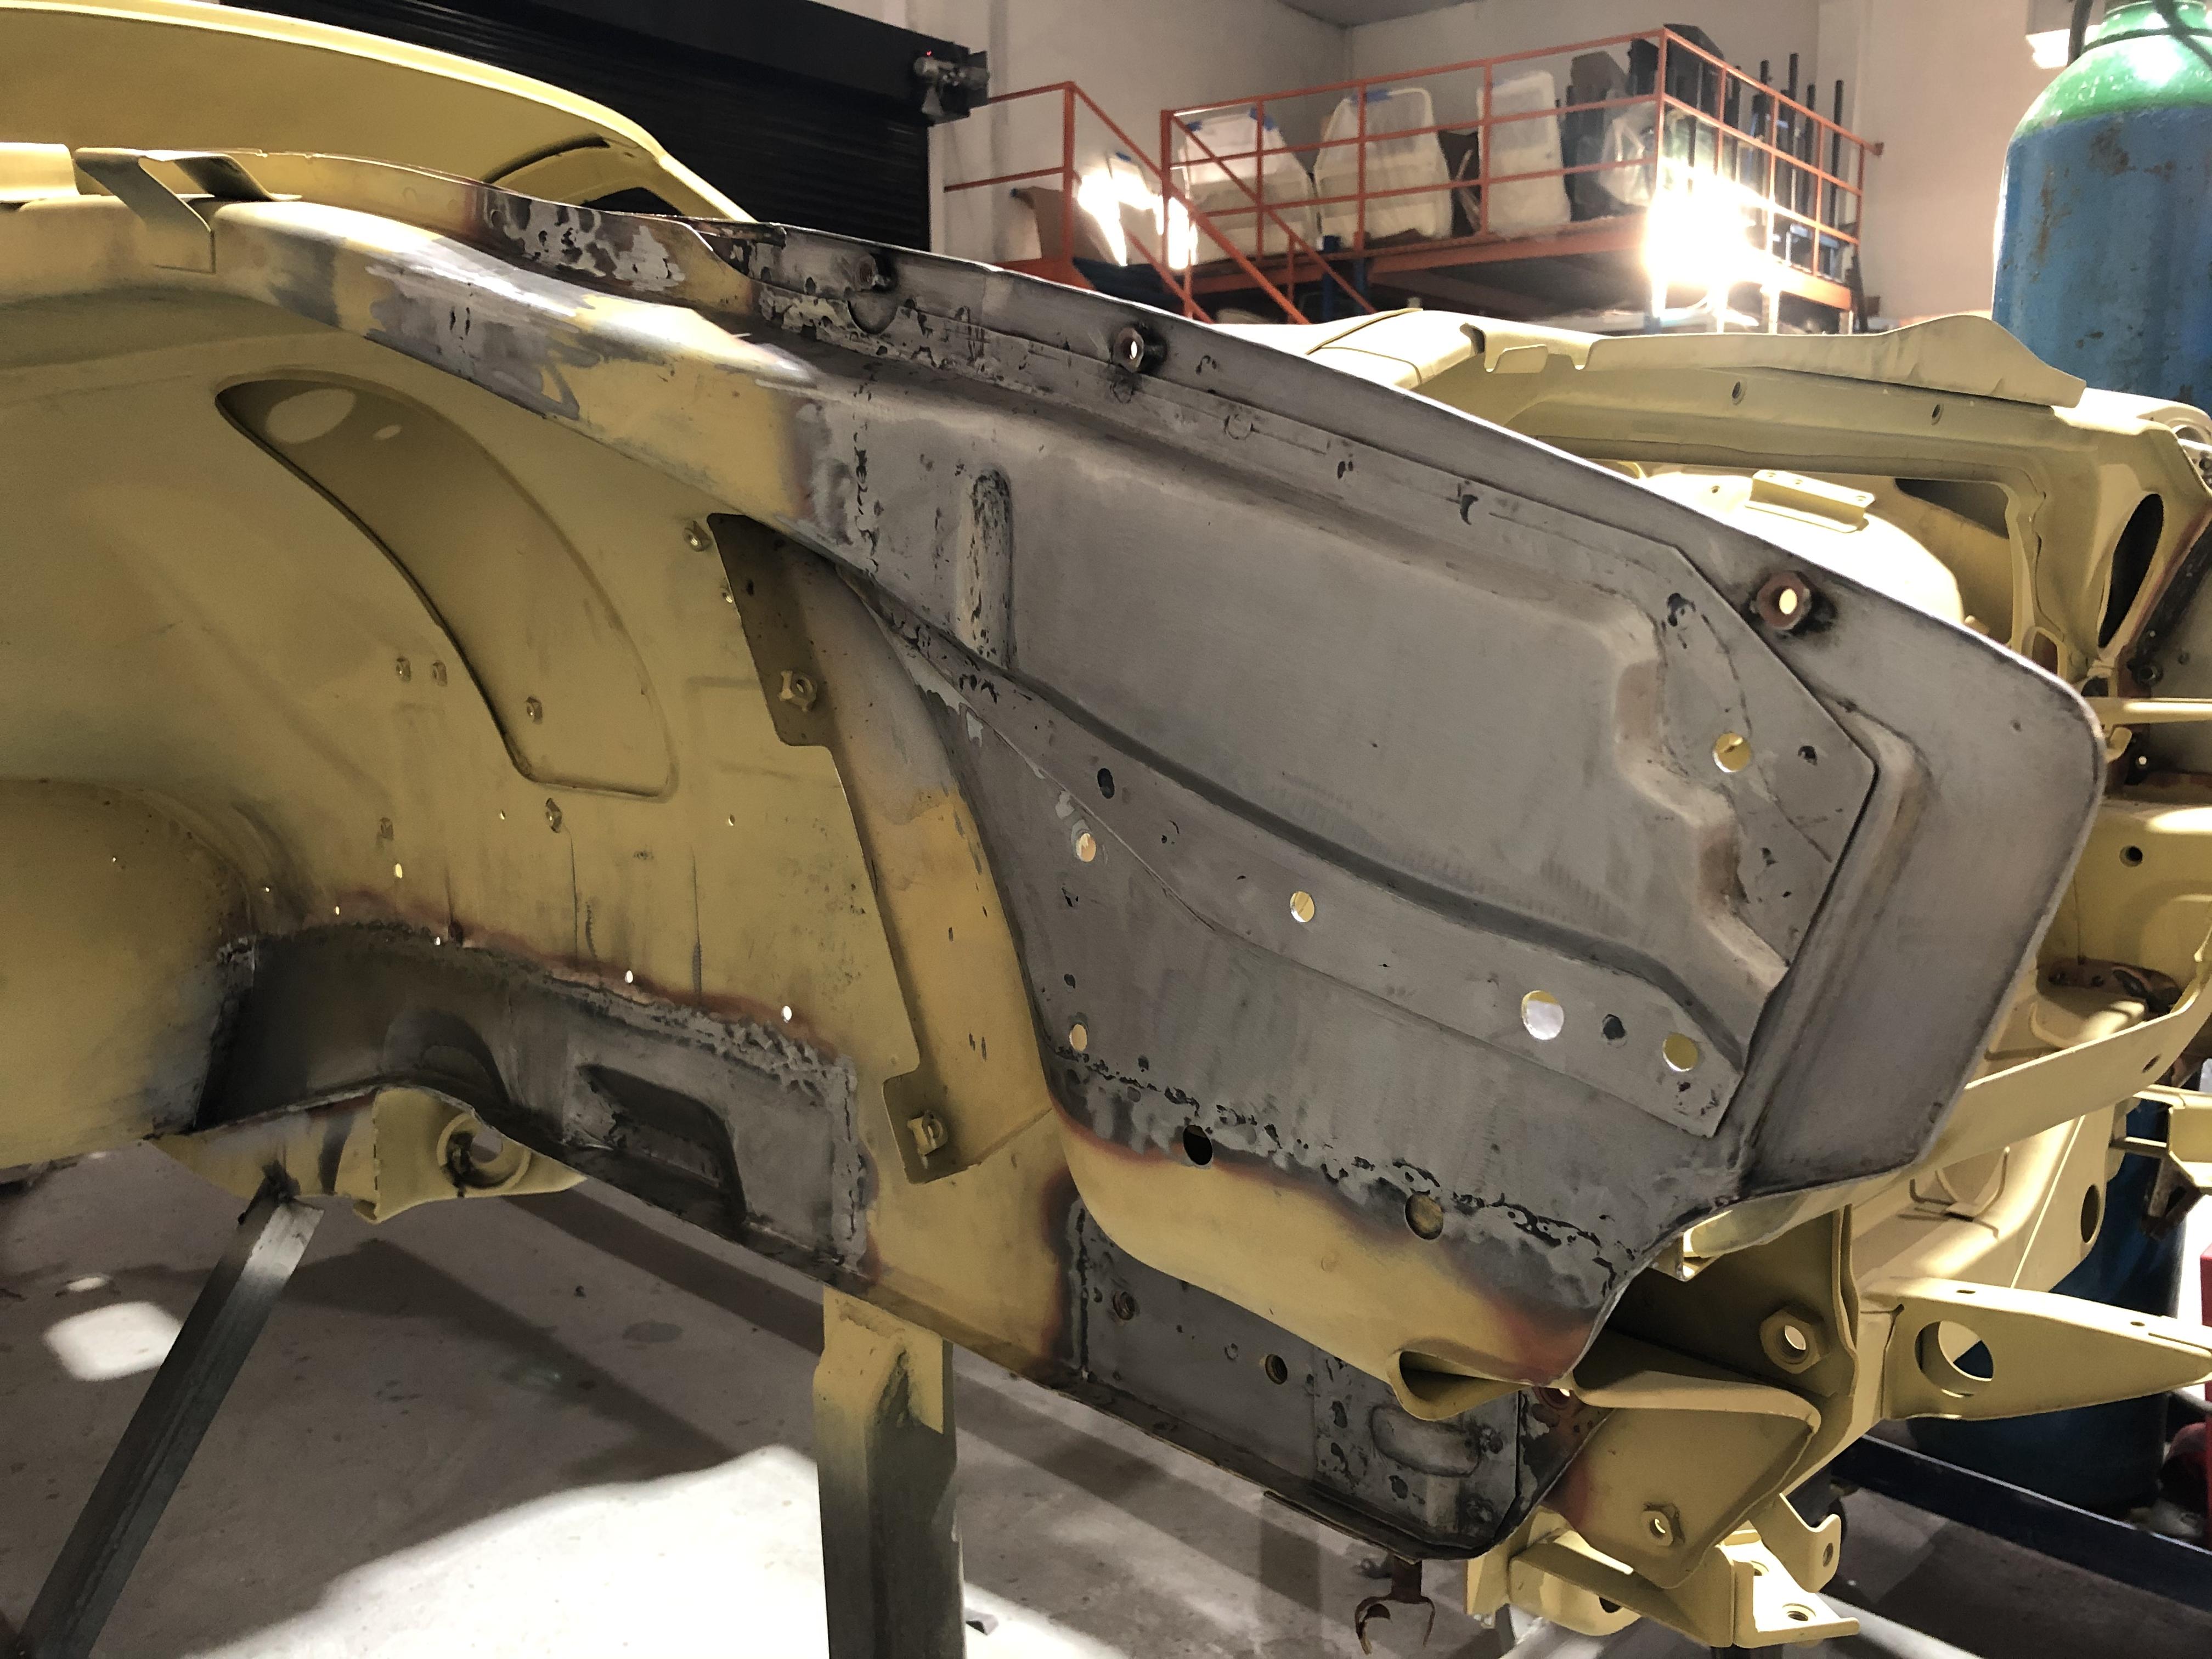
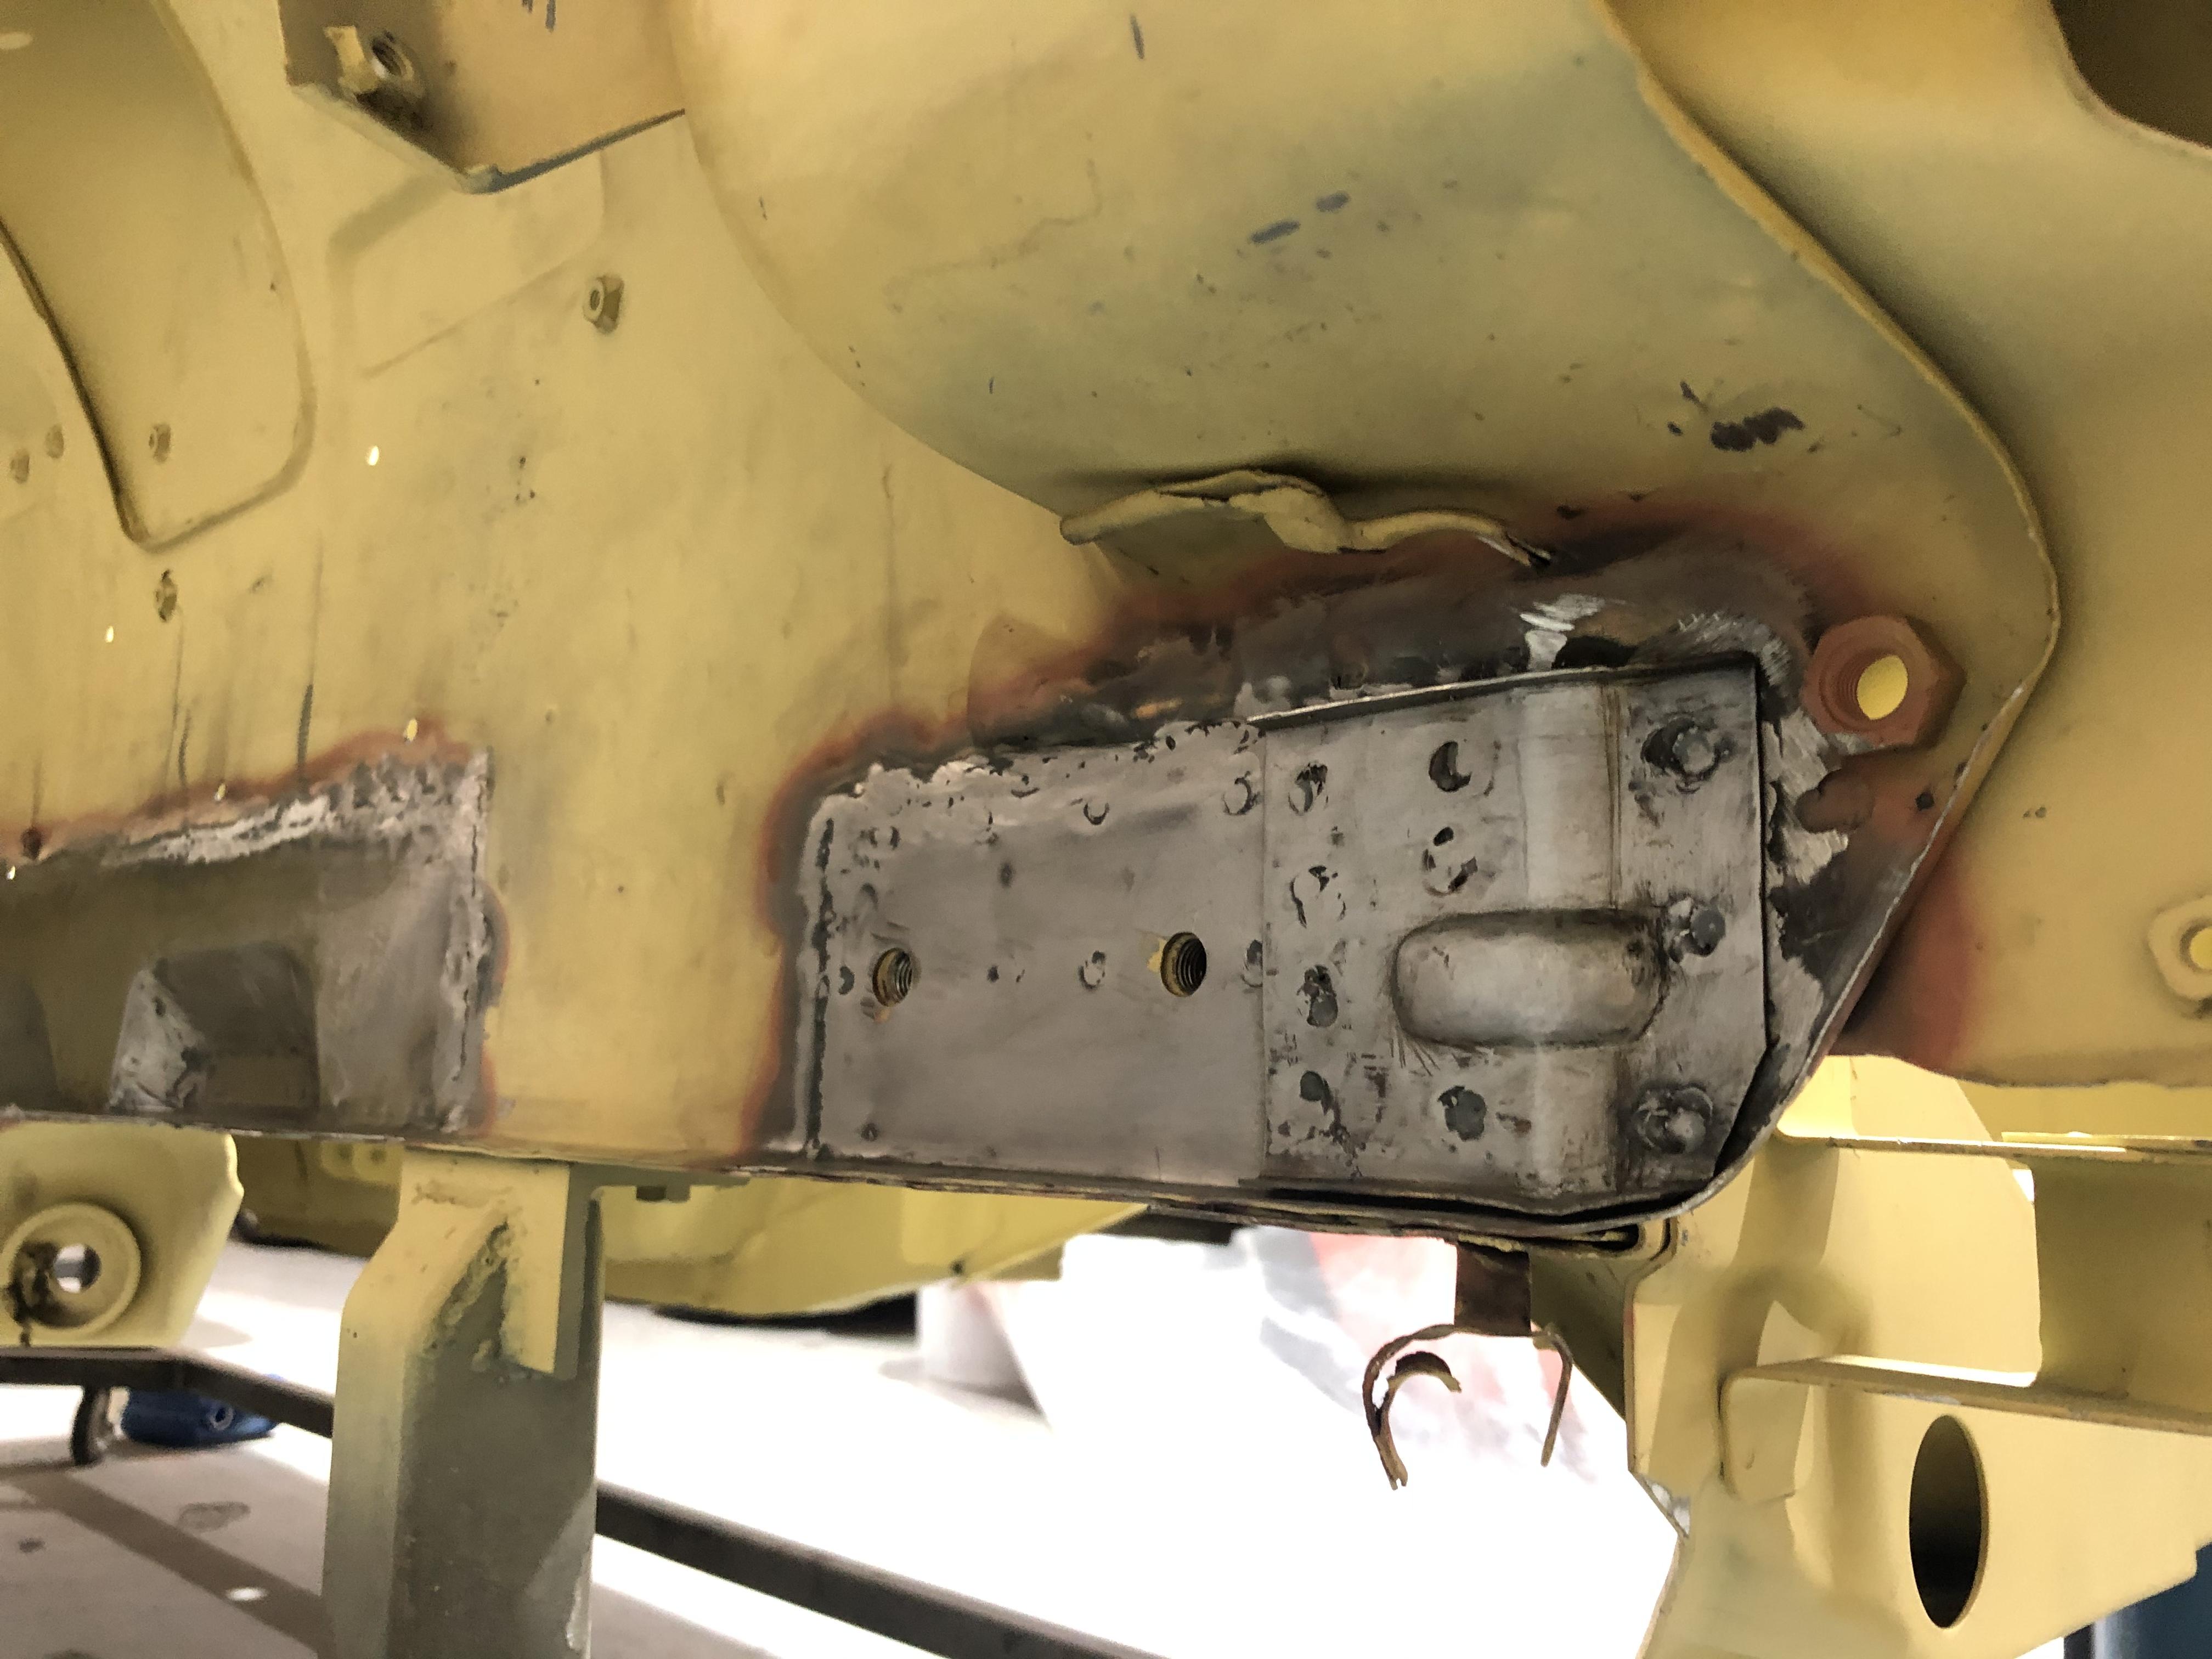
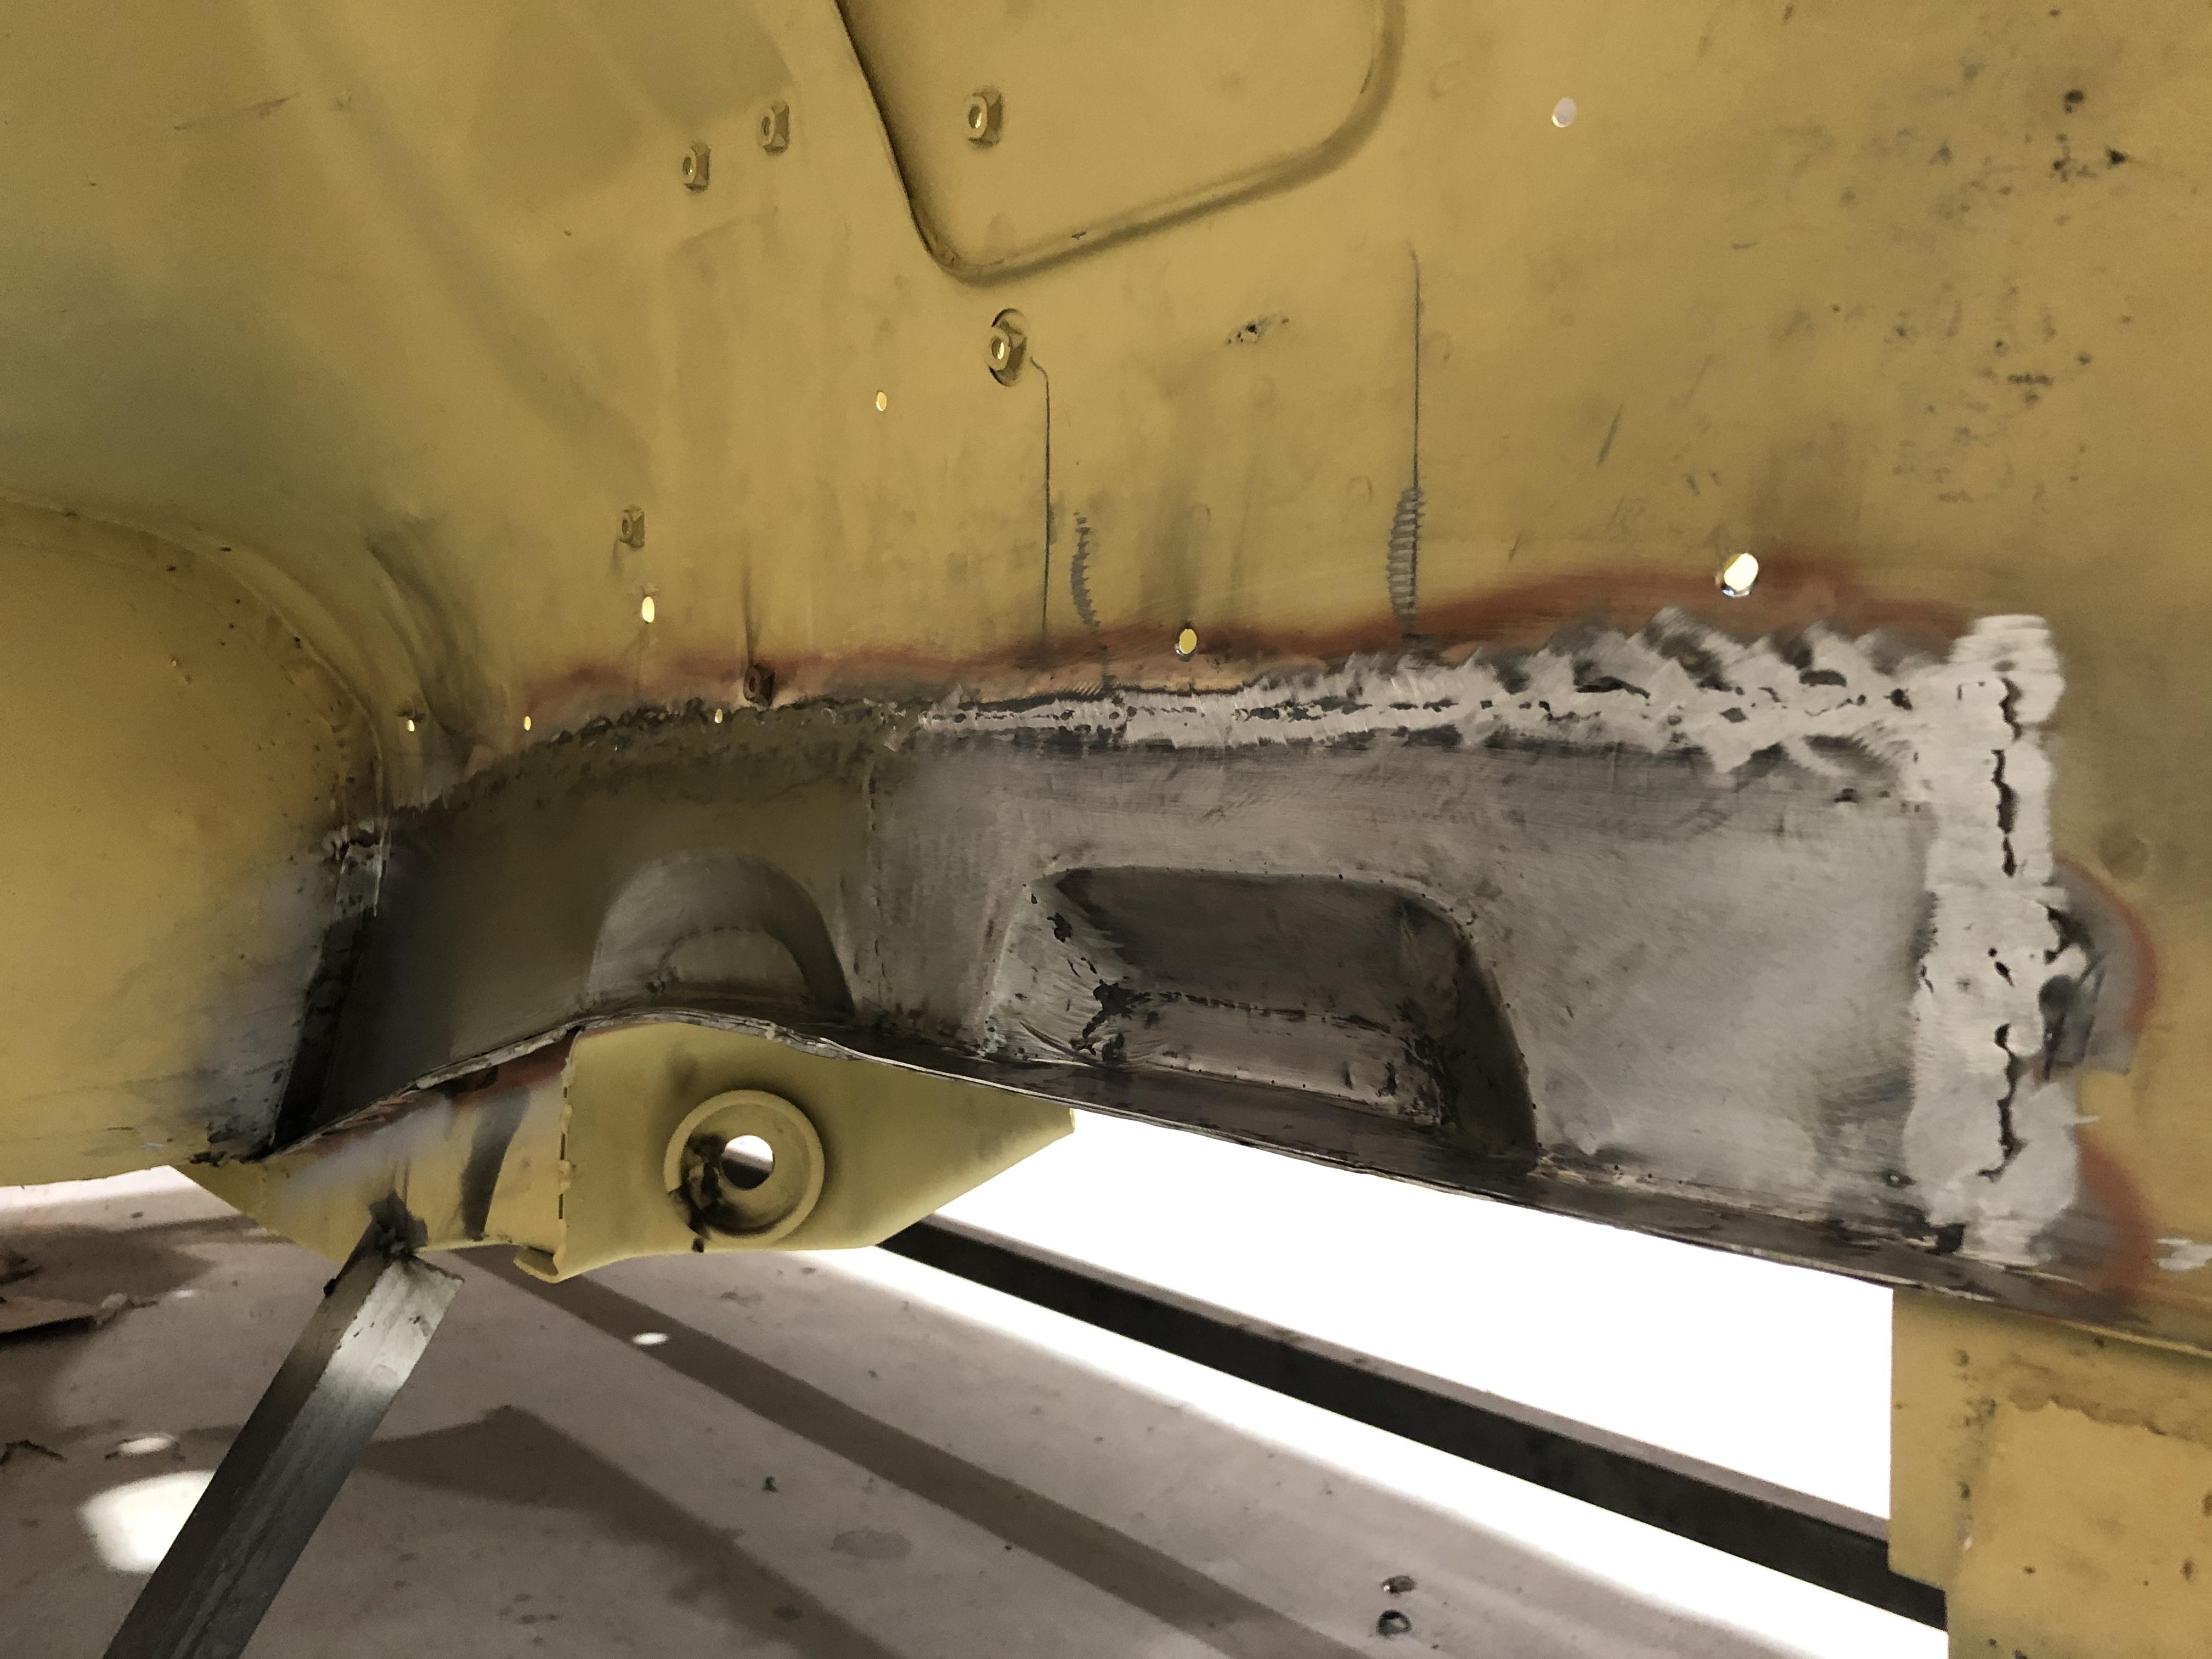
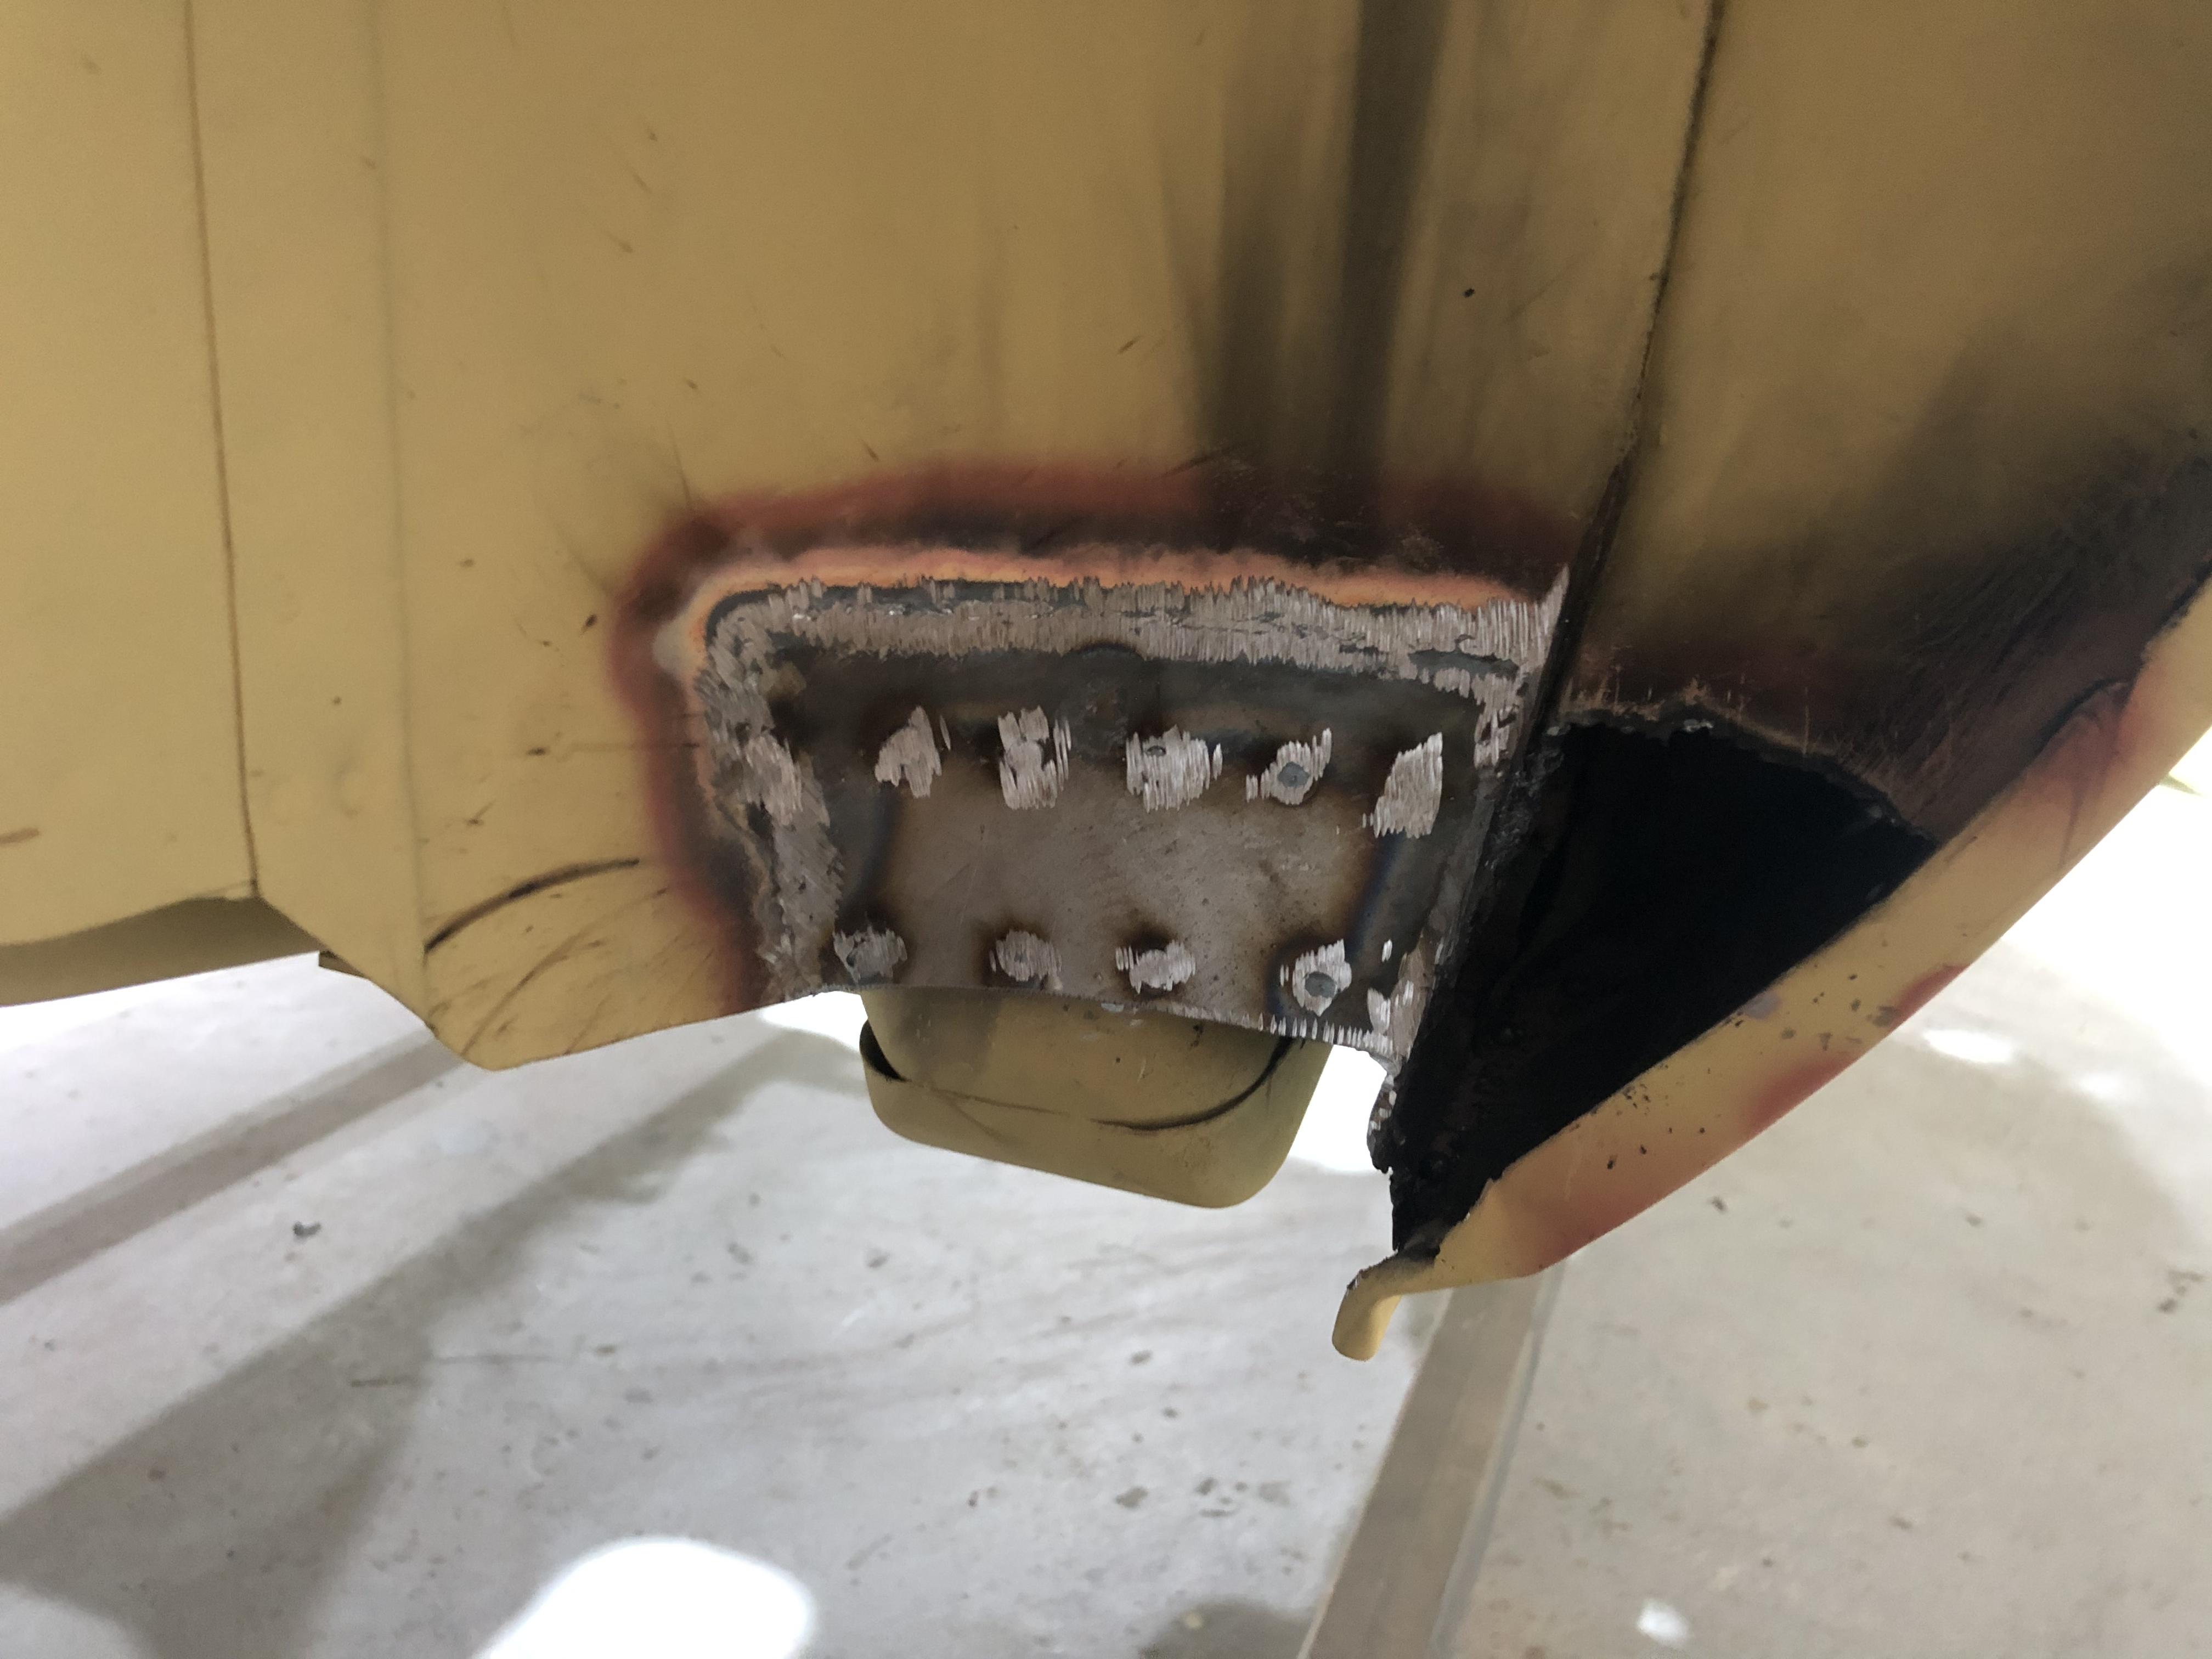
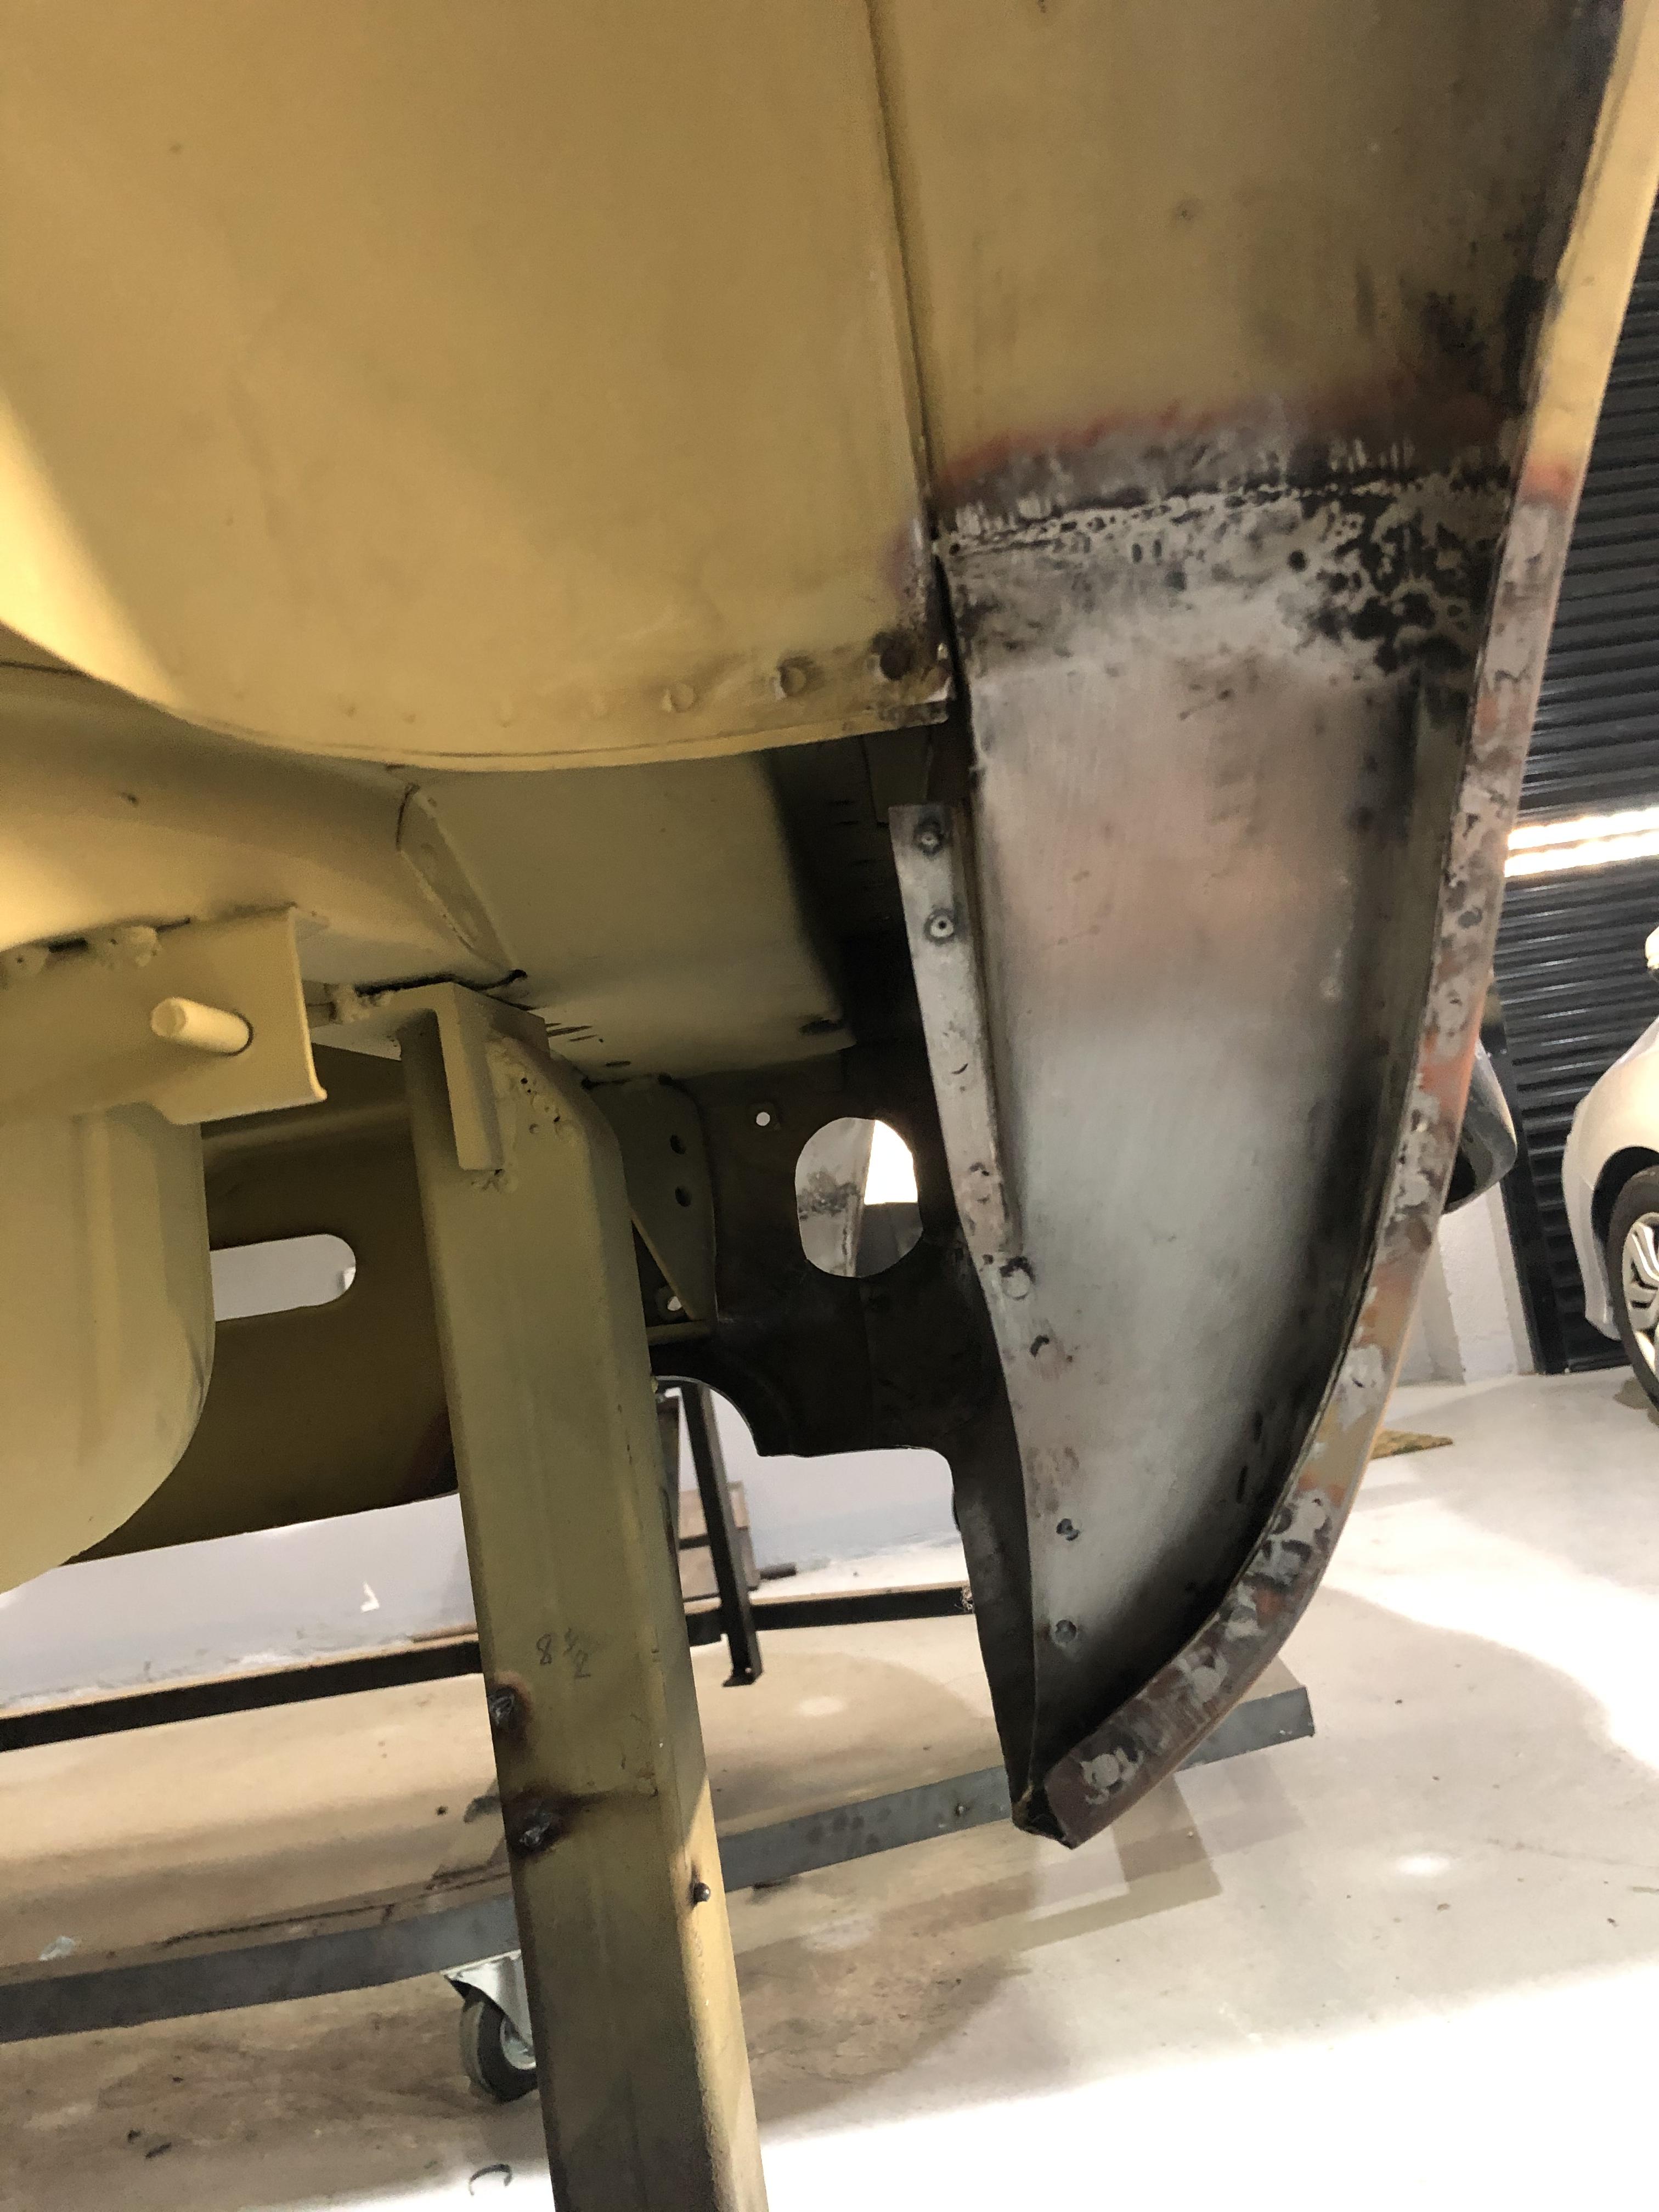
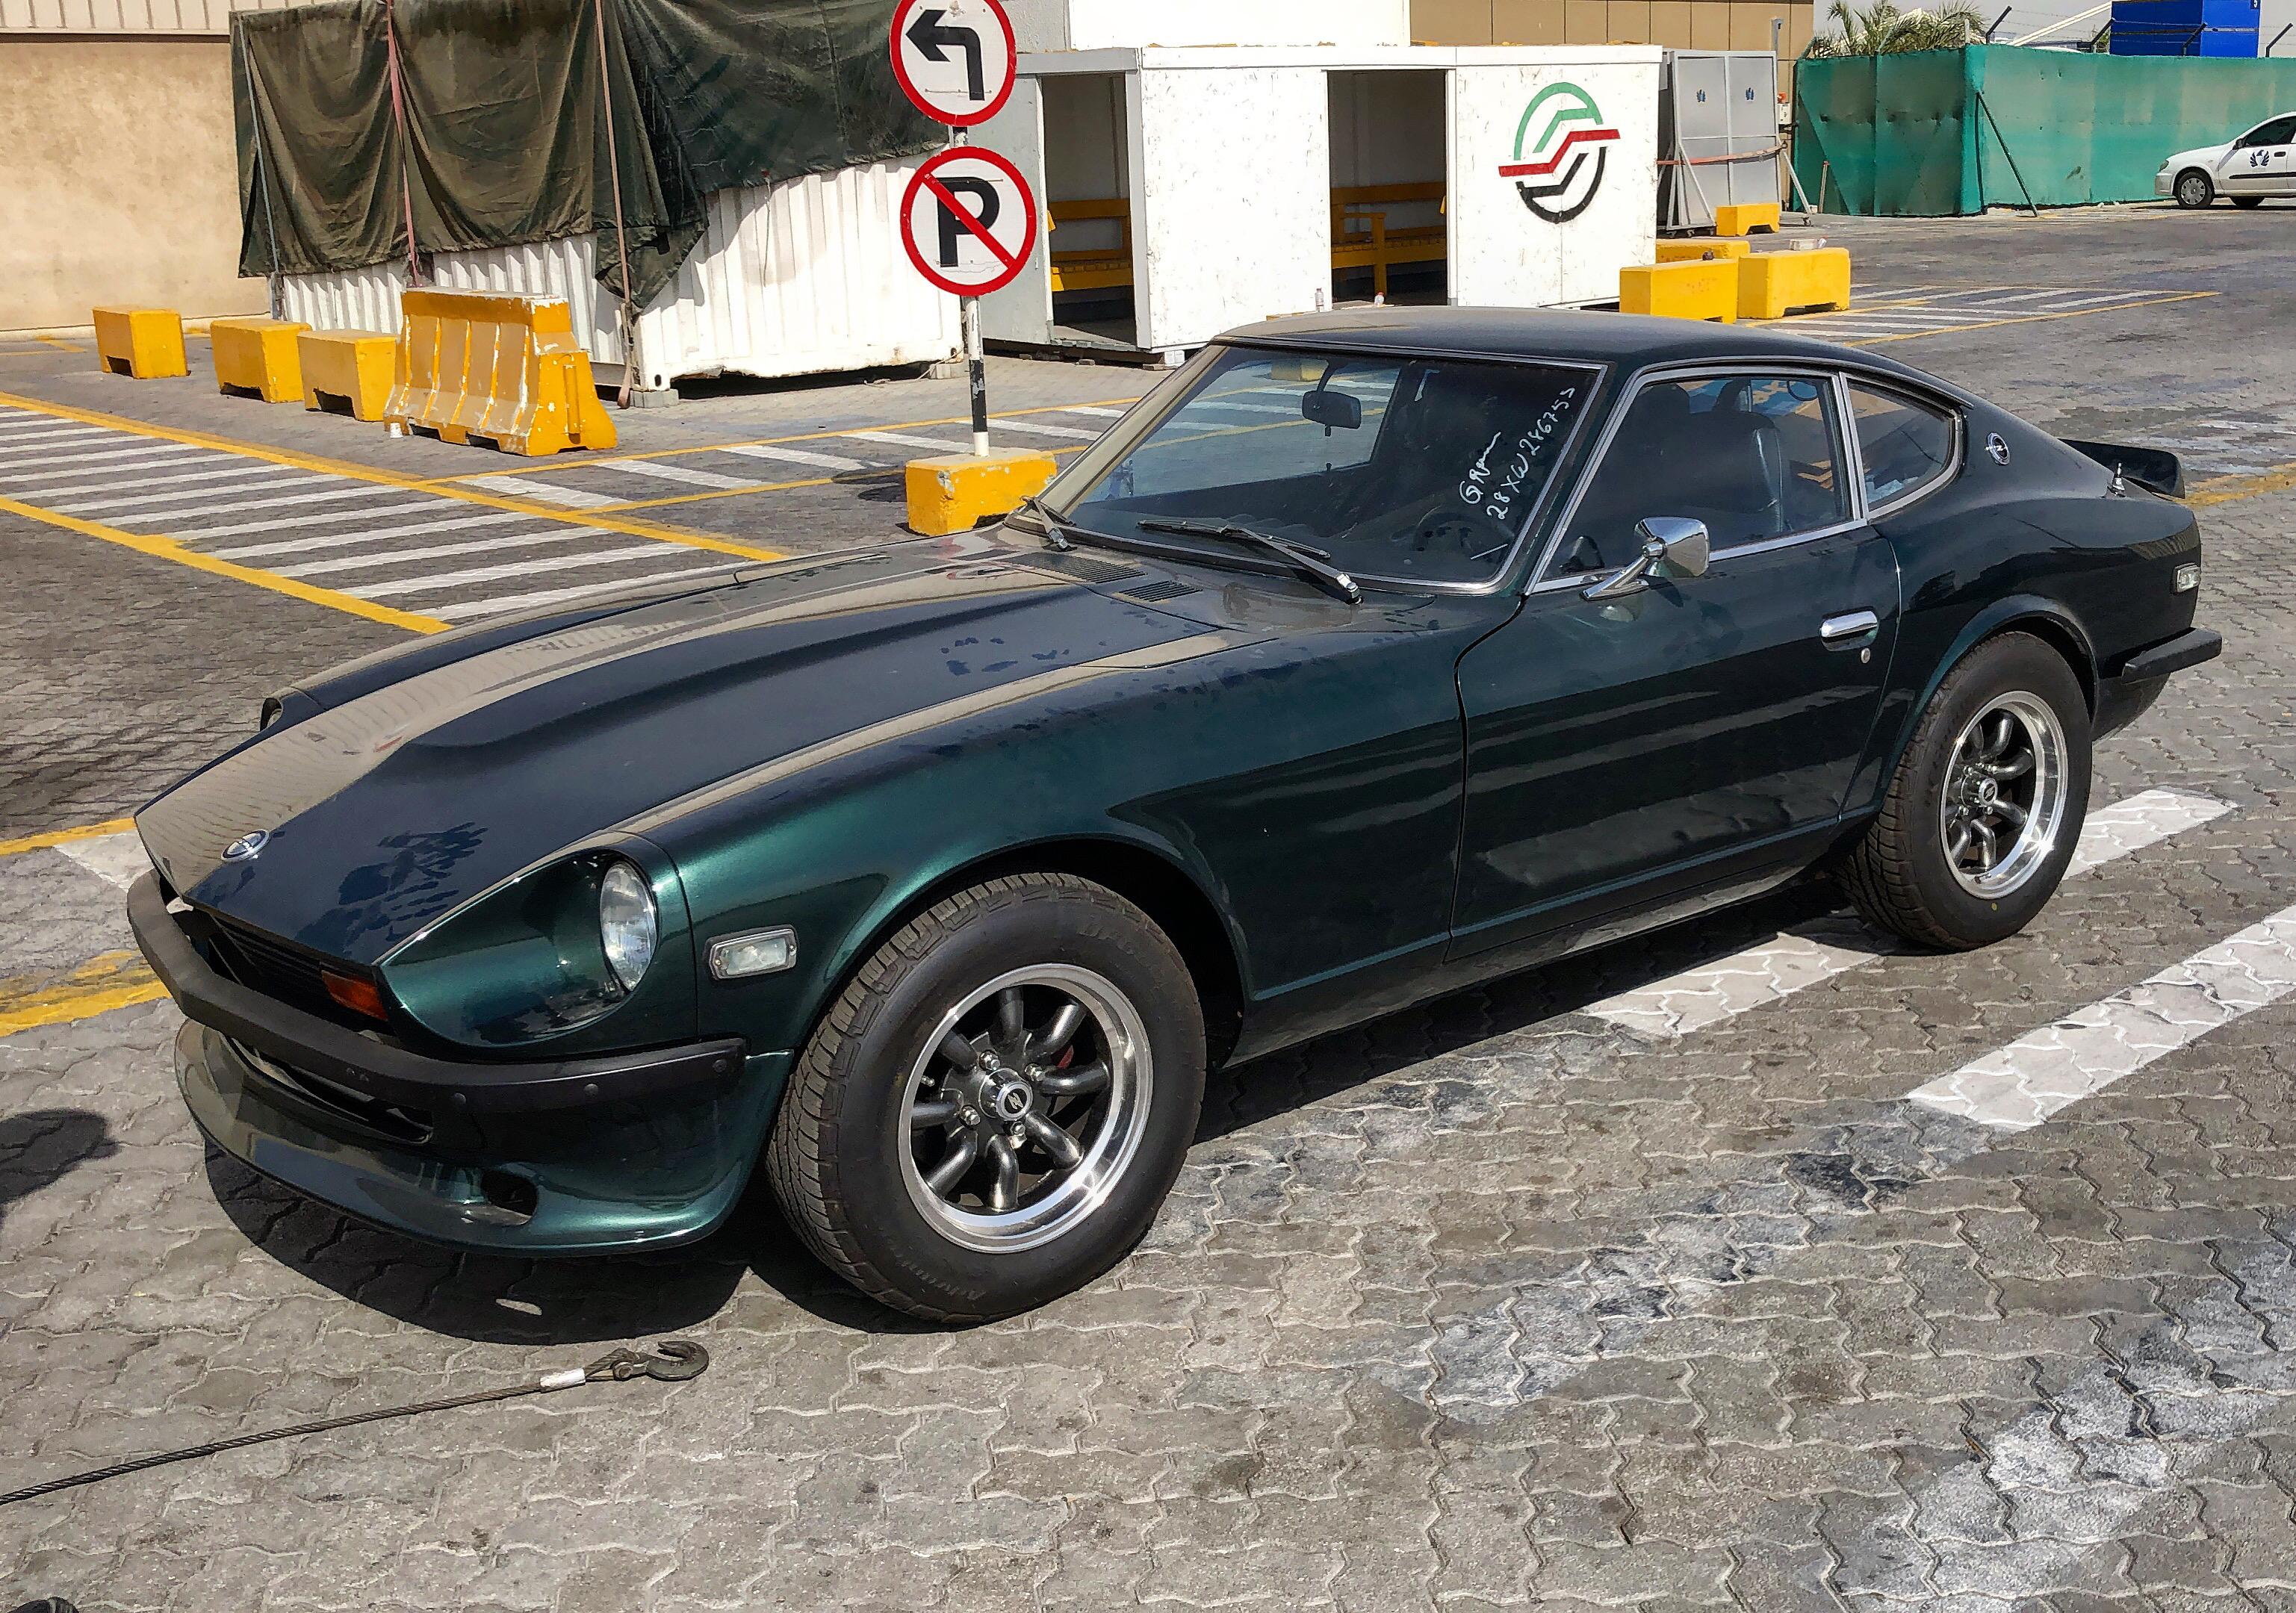
10 pointsHi Guys, First of all, I'd like to wish everyone a Happy New Year and the very best health ! I am new here but can already appreciate the overall dynamic and supportive mindset of the neighborhood ! End of May 2020, insomnia hitting, I somehow ended up on BaT at 2am and got my hands on a beautiful 280 Z from April 1976 with its original matching number engine + 1981 280zx 5-speed gearbox (the original 4-speed also came in a box). The car is originally from Nebraska I believe, but transferred to Ohio in 2016. Obviously with COVID-19 and loads of excuses from the transporter (CFR Rinkens - DO NOT recommend), the car reached Dubai (UAE) mid September 2020. From the previous owner in Ohio: To Dubai, fresh out of the container, 4 months later. The plan from the beginning was very simple, as the car had already been through some body work and was repainted at least once in 1998 from its original Pacific blue (DAT 307), I wanted to give it backs it's factory glory and color, but with a personal restomod touch under the name Zinta Heritage (Zinta meaning: From early in life, you have asserted your individuality, learning through your own experiences, relying upon your ingenuity and practical creativity to accomplish your objectives with independence and determination). I decided to have it fully dismantled and sandblasted (we can see the dated Pacific Blue remains in the engine bay). This is when surprises knock on the door, a lot of body "repair" badly done, plenty of patches, poor quality welding and so on, especially on both front ends and the floor. Some rust holes showed up as well, but can we blame a 44 yo car from Northern states ? Nop... Then, following my original vision to make her "as new" the work started, removing patches, cutting, hammering, welding... As of now, the body work is 70% completed, the floor kit arrived from Zedd Findings (Big up to Charlie Osborne for his support) and will be replacing the old one. Some other area to be finalized in the next few weeks, cleaning the engine bay from the "useless" pieces, deleting the side markers (front/rear), deleting the unused rear bumper holes, closing the ugly speaker holes made in the toolkit hatch and some overall rear panels hammering for perfect alignment with doors (as they were probably replaced in 1998 as well). I also managed to get some parts in prevision of the rebuilding process: - Jenvey ITBs kit with 480cc injectors, MS3 Pro Evo ECU, DG508 ignition coils, OneSixIndustries CAS, complete engine seals/gaskets kit, timing chain kit, water pump, T3 front/rear strut brace, T3 weld-on coilovedr kit (car came with unmounted KYB Excel G), Prothane bushing kit, full weatherstrip kit. In the meantime I was also keeping myself busy restoring the dashboard and gauges (obviously cracked and hidden under a plastic cover). It will be eventually wrapped in dark black alcantara, but I didn't want to wrap a piece of garbage... Regarding the gauges, I got my hands on some LED rings and bulbs in order to get some decent lighting, and decided to redesign the speedometer (originally imperial and I need metric) and tachometer and have them screen printed), as well as giving a neon orange touch to the needles. The painting should be happening within 2 or 3 weeks, and then the reassembling process will start. Happy New Year to you all !
.thumb.jpeg.2e34b768d387dc20168a9564cdc750bf.jpeg)
.thumb.jpeg.84a2cf7bc39d07b895ad7895bd586355.jpeg)


.thumb.jpg.eadcbf9ccf3d97e8788e267c3581241e.jpg)


 10 points
 -
10 pointsTo all our American friends I just want to extend (edit) my best wishes, here's hoping the next 4 yrs in politics are pleasantly boring and average. Life, Liberty and the pursuit of Happiness to each and every one of you.10 points
-
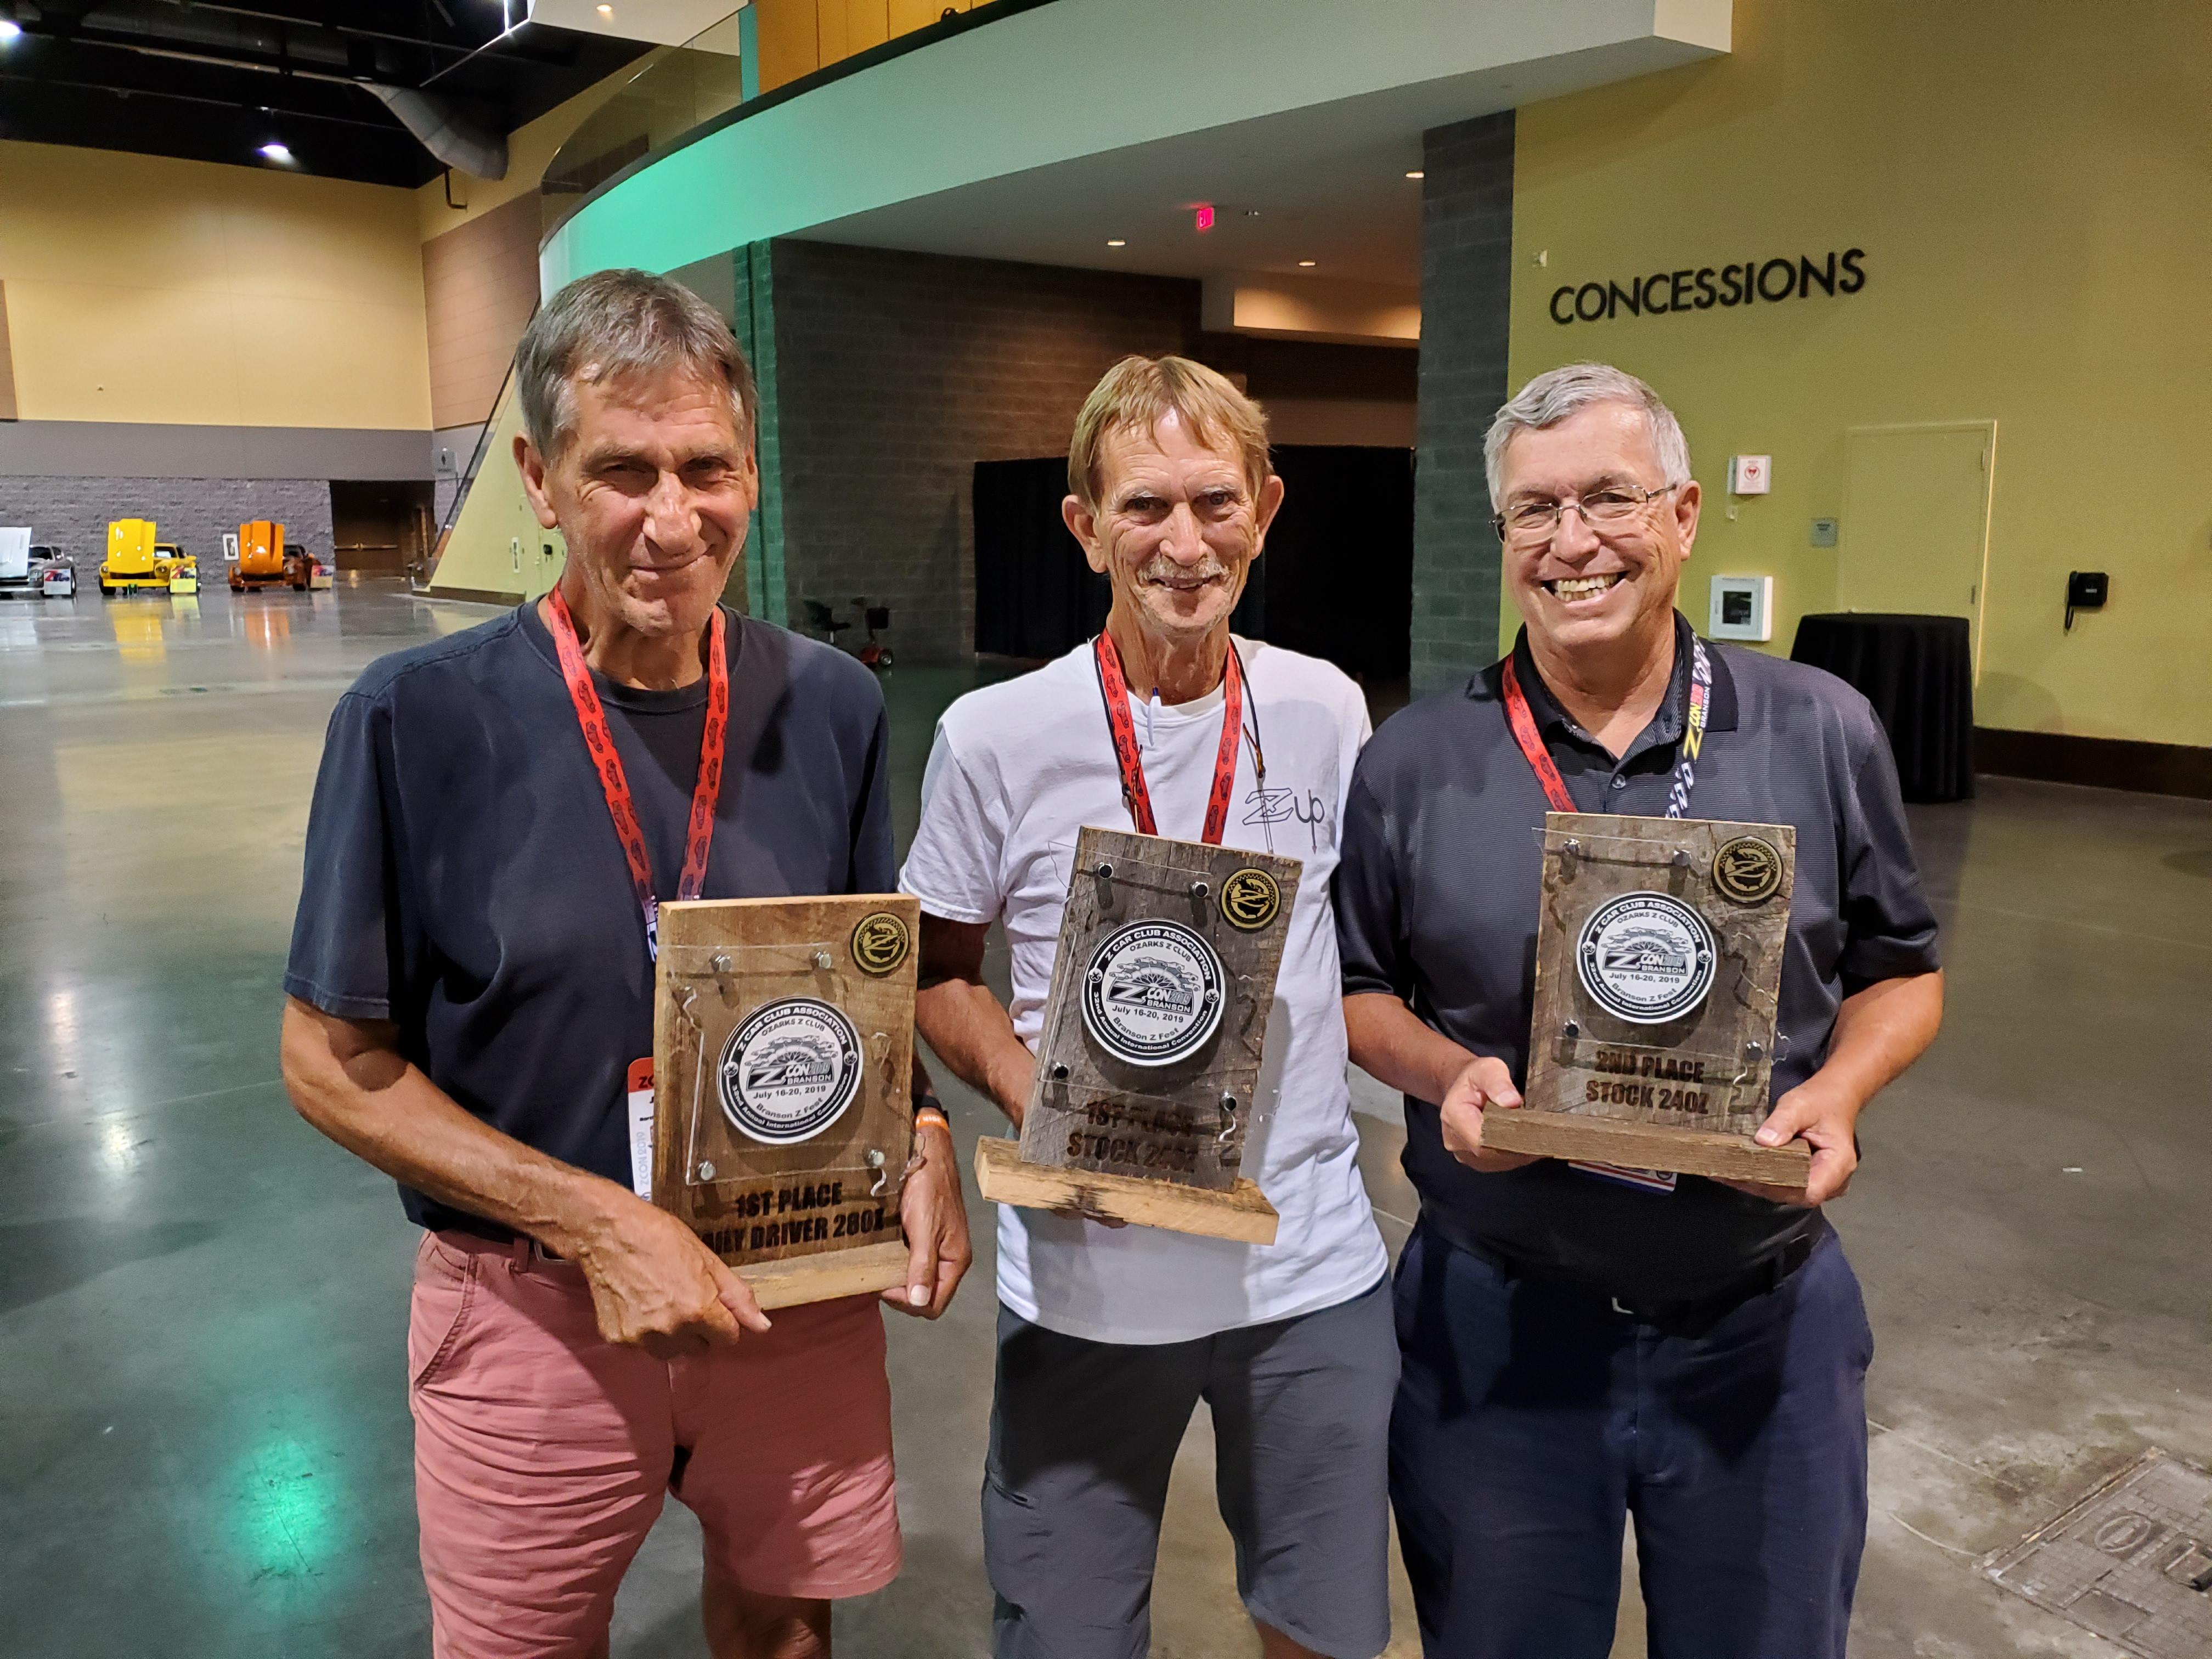
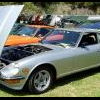
10 pointsThe flat top contingent takes the top two spots placing 1st and 2nd in the stock 240Z category. The outclassed round tops just can't compete.
 10 points
 -
I'm just hoping to be able to stick around to celebrate my own 50 year anniversary in a couple of years.
 10 points


.jpeg.540f9ca8405ca558da246767c7557893.jpeg)
.jpeg.6bf4fc5b5a2dd5fd3e235330005cb607.jpeg)


.jpg.4ed28e550d63f3fc301742dad7bbf9a6.jpg)