


Leaderboard
-

conedodger
Free Member1,829Points11,316Posts -

Patcon
 Subscriber
 449Points10,923Posts
 -

Captain Obvious
Free Member398Points9,849Posts -

inline6
Subscriber303Points1,237Posts
Popular Content
Showing content with the highest reputation since 04/27/2024 in all areas
-
 Some of you have dealt with this little annoyance, and I have found a perfect solution. When doing a full restoration, or at least the full interior, you often have to replace the head liner and the A pillar vinyl, as well as the vinyl trim that goes across the top of the windshield where the sun visors and rear view mirror mount. While I won’t discuss the pain of installing these items, what I have found is even more of a pain, is finding the nine M5 threaded holes to put the visor and mirror mount back in. All that fresh painfully installed lovely vinyl, and 9 secret little holes you have to find to poke holes through. Get out the pokey thingy of your choice and start poking until you find them. If you put some kind of thin foam behind the vinyl like you’re supposed to, those damn holes are just a nightmare to sleuth out. Not any more! I put some nice long M5 grub screws in the nine threaded holes, THEN do the upholstery. Then finding the tips of them sticking out is easy! Make little “X” slits to expose them, grab your M3 hex key, back them out and screw in the visor and mirror mounts. Five minutes each! Easy peasy.
 10 points
 -
10 pointsCody worked on the brake booster some. I found a longer clevis. It also has a larger diameter pin which fits better in the pedal This brought the pedal height up and against the brake switch We messed with quarter windows last weekend. It was frustrating. Probably one of the tougher jobs to do, especially by yourself and get them right. We did get them installed last weekend. I wrapped a string around them to make it easier to get the lip turned out properly. But at the back of the drivers side window, it got really tight to the body and the seal ripped instead of turning out. On the passenger side, I wrapped the seal too tight to the glass and it didn't seal at the back corner of the glass Fortunately for some odd reason I had an extra set of quarter window seals. So this week in the evenings I redid the quarter window seals. We put them back in yesterday They both pretty much seal but they're still not quite right. The passenger side gap closed up but the seal turns in a little at the back becuase it doesn't have enough pressure on it to make it flair evenly. The drivers side does the same thing but in a different location. I visited Inline6 this week and saw his immaculate car. He said he used a slice of a bondo spreader to work the lips out from the inside of the car. It is flexible to put it down between the glass frame and the body to push from the inside. Tips for quarter windows. Grannyknots pick idea works really good to help manipulate the frames. Also just get the screws all started then work on getting the lips all turned out. The windows will still move a little until they're all the way tightened down. Also if the doors are off you can use the door jamb up by the door hinges to help push with your foot to get enough force to push the window back in place I finished the inner weatherstrip on the hatch yesterday and got the hatch back on. It sits a good bit proud of the body because it's so new. Hopefully it will relax over time I also used some silicone grease on the weatherstrip at the hood hinges to keep the hinge screws from nipping the weatherstrip. Seems to be working


 10 points
 -
 9 points9 points
 Today i got something very special, which i found in the USA: A box with "Maintenance of the Datsun 240Z Sports" Service slide films. Let me explain: The Box contains 7 small, numbered plastic cans. Each can has a dia film of colour photos (aka "Slides"). The booklet was Printed in November 1969. So it is from the very beginning of the 240Z. Additionally, there is a booklet which is called "Slide narration" the booklet contains the text to each slide. My understanding is that this was used to train workshop employees. Whoever trained them got a bunch of coloured slides which show how to maintain the 240Z in a workshop, and a book which shows what to mention for each slide. The purpose of the whole kit is also mentioned in the foreword on the first page of the booklet: I have never seen such a box before and think it's quite cool. It's basically a Service manual in colour photos. Some photos appear to be actually the same as in the black-and-white printed Factory Service manual. There are some awesome photos of Nissan works employees working on the cars. I still have to read it all and look through the photos. There are also many graphics and drawings shown, which I have never seen before, and most probably were made specifically for training purposes. I'm already looking for a dia scanner to digitalize them all and if I find time, I will share some of them with you. More updates in the coming days. I have planned some work and there is a sea-freight crate from Japan waiting for me to be picked up.8 points
 8 pointsHey fellow Z heads. It's been a long time since I logged in here much less made any posts. I thought I would check in to see who is still here from the old crew of 10+ years, actually it's been almost 20 since I first posted on this site come to think of it......and say hello to those who are new since I was last active here. SInce then I've gotten married, have 2 grandchildren, moved from Santa Cruz, CA to Auburn, CA and switched companies and focus. I haven't lost the bug but life, family and career had to take priority for a while, however I'm planning to dedicate more time to the hobby and hope to start reassembling the Z and get it back on the road in the coming months. Actually. I have both the Z and a 1967 Camaro RS/SS 396 to get back on the road and both need some electrical and mechanical work. Wish me luck and more importantly the time and dedication to get it done. I hope you're all doing well and spending plenty of quality time with your Z (and your families 😉).8 points
 8 pointsI figured I would let the cat out of the bag. From September 2020 at the unveiling, I thought that Nissan finally designed a Z I would want to buy new. I was too young to buy an S30 or S310 new. I was young and broke when the Z31 and Z32 came out, and I never was really taken by the Z33 or Z34. Yes, the RZ34 is a Z34 with a new wrapper, but I really liked the heritage touches. To me it looks more like a GT car and less boy racer. When I talked to a couple of Nissan people during the pre-sales road shows, they confirmed New Sight Orange would be coming. The first Z I remember was a 260Z in New Sight Orange. It was owned by a former NASA test pilot, and I lived down the street from him. A friend's father bought the car and got it back on the road. My friend got to enjoy it for a few years before the car was hit by an uninsured motorist. My first Z, a 73 was originally New Sight Orange, though someone with questionable taste had it repainted a color similar to Metallic Gold, though it looked worse than a MAACO paint job. I still have that car and hope to return it to New Sight Orange some day. I was excited to hear that Nissan was holding to its word that orange was coming back, but my excitement diminished when I learned it was on the Heritage Edition only with a sticker of $62K (plus whatever the dealers think they can charge for a special edition). So I set about looking for an alternative. I noticed that dealers were finally coming off sticker price for the Z. On the other hand most of those Zs were Gun Metallic. While I don't worry too much about color, I didn't really want grey. No blue Zs with manuals were popping up nearby, but finally a Z in Sport trim showed up at one of the closest dealers sporting Ikazuchi Yellow Pearl paint. I took it for a test drive, and the wife loved it. It felt right for my new daily driver, so a couple of hours later I drove it home. The new Z has very good acceleration as one would expect with 400HP on tap. The steering feels extremely light at low speeds, but the feel improves as speed increased. With no limited slip, it's easy to spin the tire a little getting into traffic. The seats are comfortable, and the shifter is in easy reach. The clutch engages higher than I think it should, but I am just going to live with that. The blind spots are huge, but the blind spot warning system seems to work well. The view out the rear window is small, too. I have an Android phone, so one of the USB slots is taken by the phone if I want to use navigation. If you want more creature comforts, or if you are planning on tracking the car, go for the Performance trim. The yellow pearl paint stands out, but it doesn't look like a taxi, even with the black roof. I have experienced one problem with the car so far. Yesterday, the TPMS monitoring system lost communications with all 4 tires. I drove the car around for a while, and the system found the left front, though that didn't last. I guess I'll see how good the local service department is.
 8 points
7 points
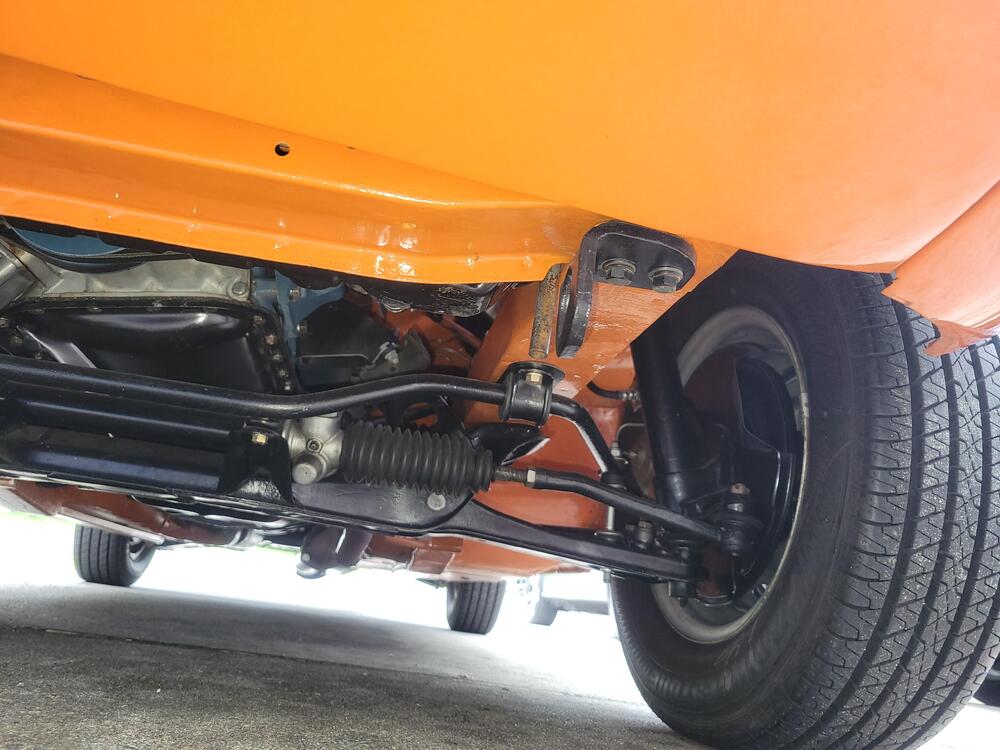
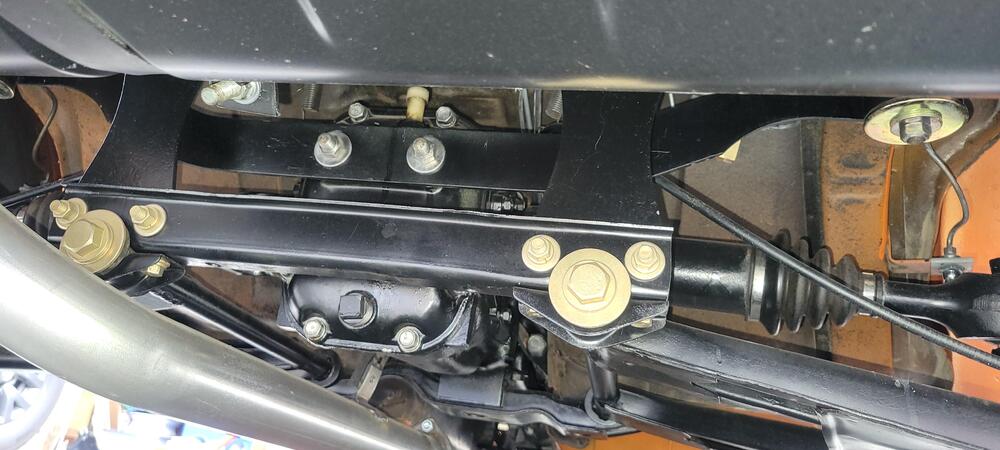
Today I was able to pick up the long-awaited sea-freight shipment from Japan with some parts I bought as long ago as June last year. I almost forgot what I bought back then, so I was excited to see what i got. The shipment originally included parts which were not for myself, so when the shipment was ready to be loaded on the boat, and then these items popped up for a good price, i just bought them blindly to use the opportunity of almost free shipping. This set is what i think an original Nissan factory adjustable suspension. I still have to check the numbers and all the details. But ut looks like it could be an original nissan set. The other (rear suspension) set looks like a reworked original strut. It has some Nissan stamps on it and obviously got repainted at some point, but it was quite cheap and looked close to factory (not like these modern designs), and it came with multiple boxes of what appears to be original Nissan suspension parts, so I added it to my delivery. The third item was a real win. a set of genuine Mikuni JP PHH44 Carbs. The price was very low, because it looks really rough. But if you studied the details thoroughly, you would see the inside is in pretty damn good shape. All the original parts are included, and the plating is still nice on most parts. And it came with an old school heat shield (not sure if original Nissan) plus a set of two modern style heat shields. Both still unused. The price was a real bargain for what you pay for those these days. And it seems to my untrained eye, that all it needs is cleanup and set of fresh gaskets. but we'll see.. Not from Japan but also delivered today was this used DiaFilm scanner which I bought online recently. So I gave it a try to scan those first original Nissan Maintenance training slides, which I bought recently I still need to figure out that colour correction and other stuff, but the first results are promising. and those slides are really, really cool! My goal is to digitalize them all.7 points
8 points
8 points
7 points
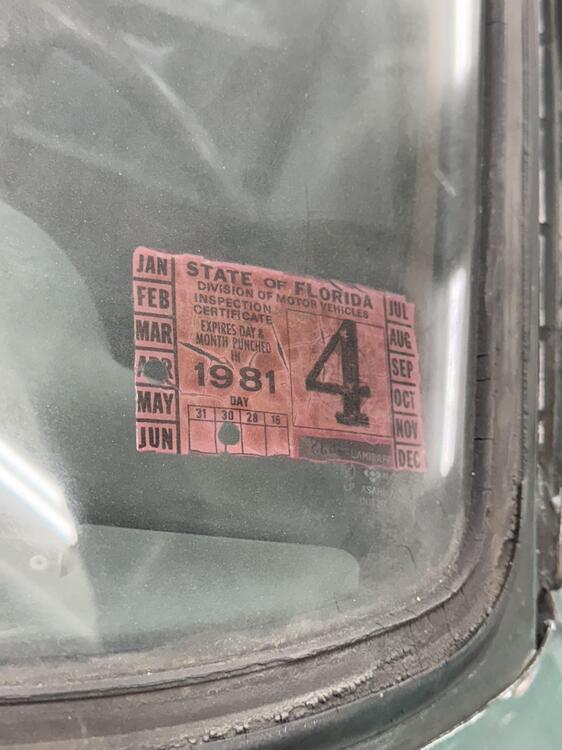
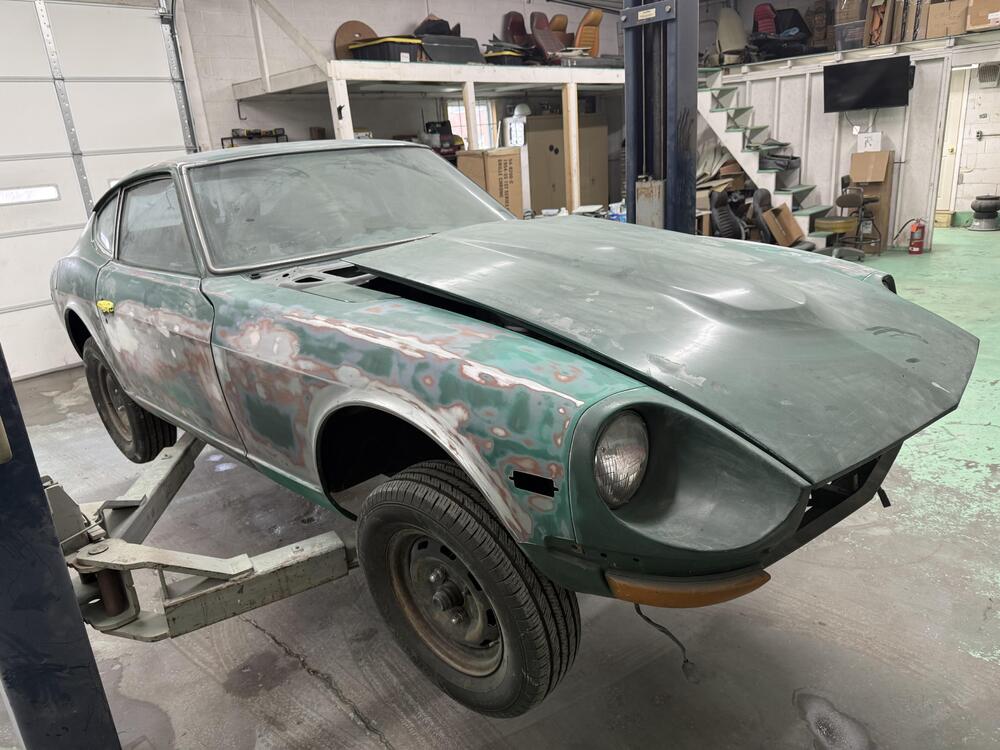
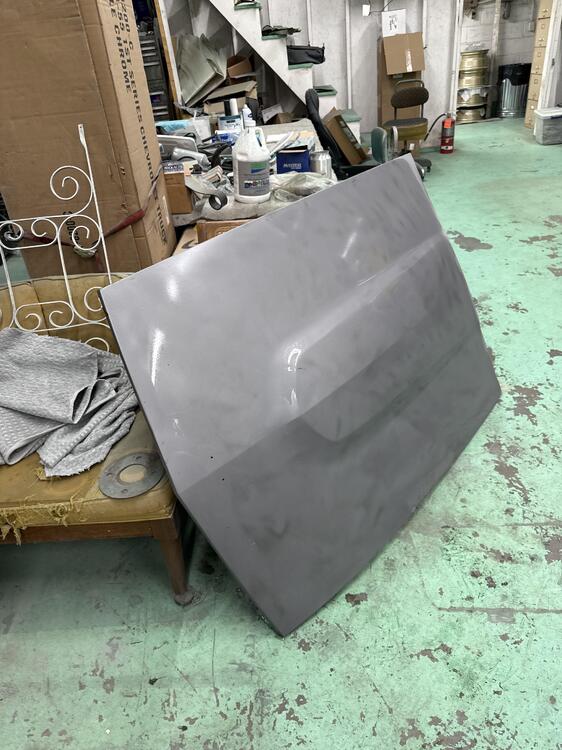
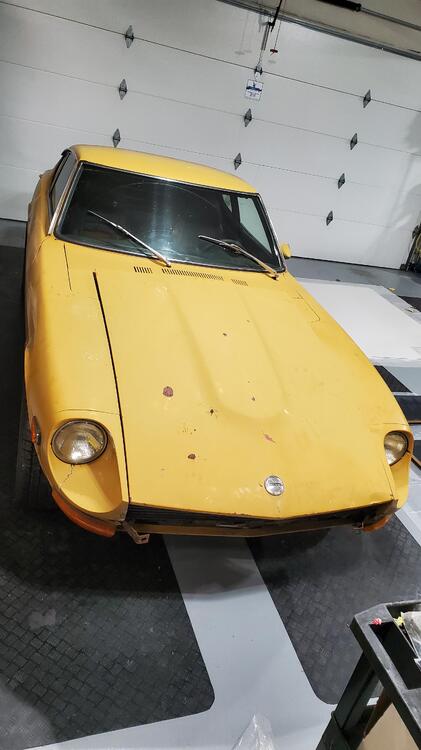
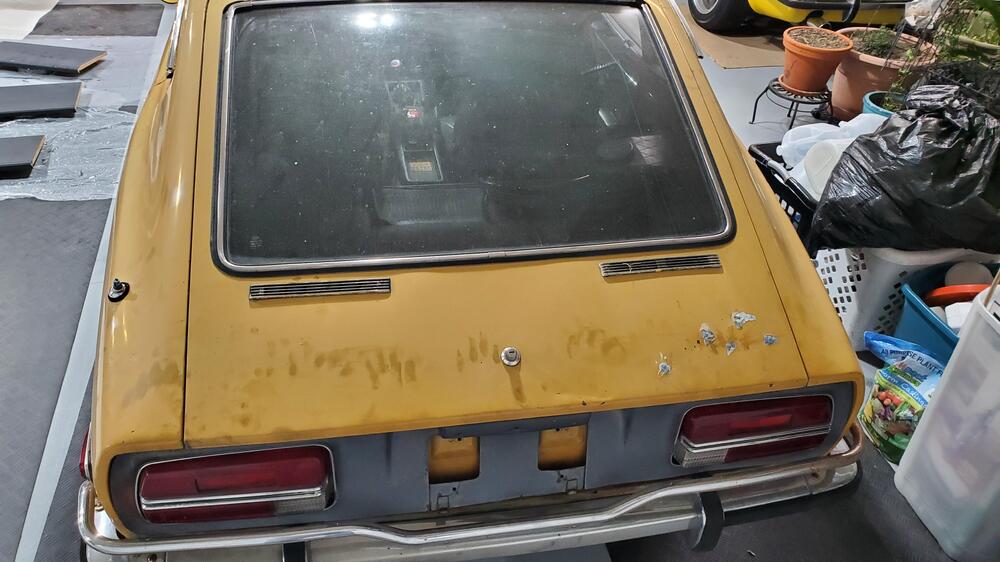
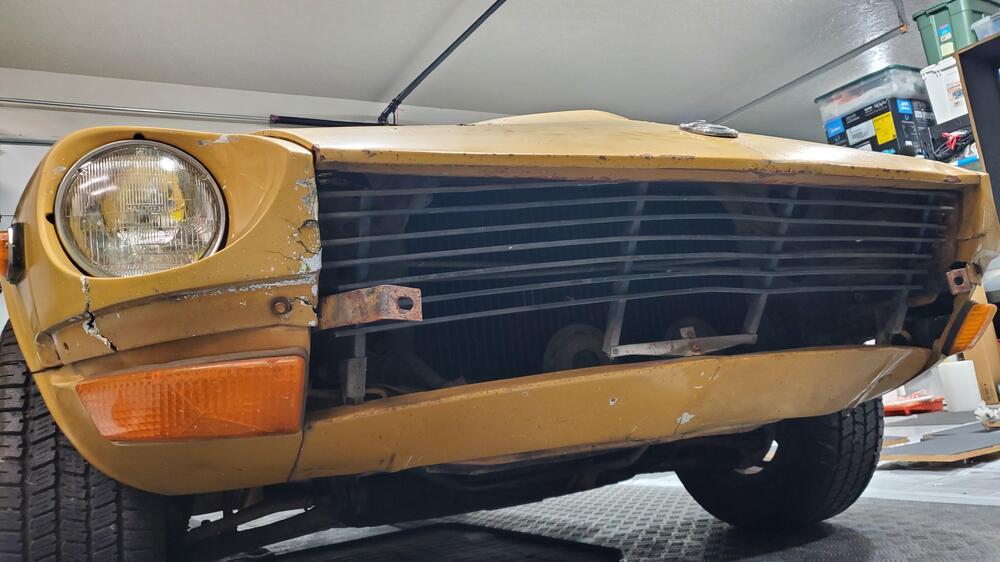
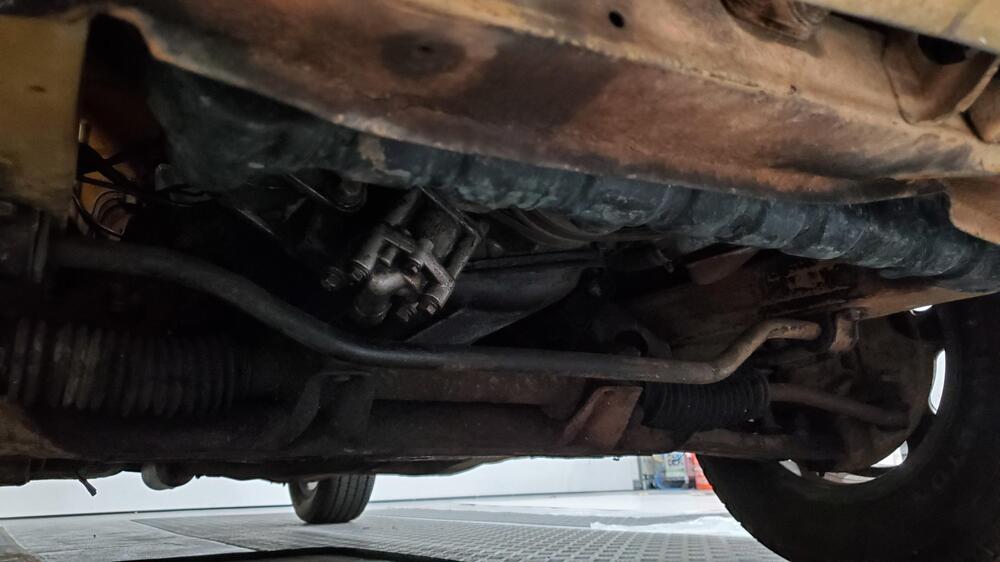
Today I was able to pick up the long-awaited sea-freight shipment from Japan with some parts I bought as long ago as June last year. I almost forgot what I bought back then, so I was excited to see what i got. The shipment originally included parts which were not for myself, so when the shipment was ready to be loaded on the boat, and then these items popped up for a good price, i just bought them blindly to use the opportunity of almost free shipping. This set is what i think an original Nissan factory adjustable suspension. I still have to check the numbers and all the details. But ut looks like it could be an original nissan set. The other (rear suspension) set looks like a reworked original strut. It has some Nissan stamps on it and obviously got repainted at some point, but it was quite cheap and looked close to factory (not like these modern designs), and it came with multiple boxes of what appears to be original Nissan suspension parts, so I added it to my delivery. The third item was a real win. a set of genuine Mikuni JP PHH44 Carbs. The price was very low, because it looks really rough. But if you studied the details thoroughly, you would see the inside is in pretty damn good shape. All the original parts are included, and the plating is still nice on most parts. And it came with an old school heat shield (not sure if original Nissan) plus a set of two modern style heat shields. Both still unused. The price was a real bargain for what you pay for those these days. And it seems to my untrained eye, that all it needs is cleanup and set of fresh gaskets. but we'll see.. Not from Japan but also delivered today was this used DiaFilm scanner which I bought online recently. So I gave it a try to scan those first original Nissan Maintenance training slides, which I bought recently I still need to figure out that colour correction and other stuff, but the first results are promising. and those slides are really, really cool! My goal is to digitalize them all.7 points 7 pointsPulled out this car after a long slumber. I purchased over 20 years ago in Orlando area from original purchaser family. Windshield shows last inspection in April 1981… Original windshield, 4 side windows dated 12/69. Hatch glass 3/70. Interior all there. Hoping to do a light refresh/clean of interior,drop the suspension, clean and paint. Engine needs to be rebuilt….”matching numbers”. Dog legs being replaced small rust area under drivers seat between alignment “flap” from rear body and floor 2”x2”. Green Tan…. My favorite combo… Wet blasting hood revealed surprisingly…. A virtually perfect hood..!!!!
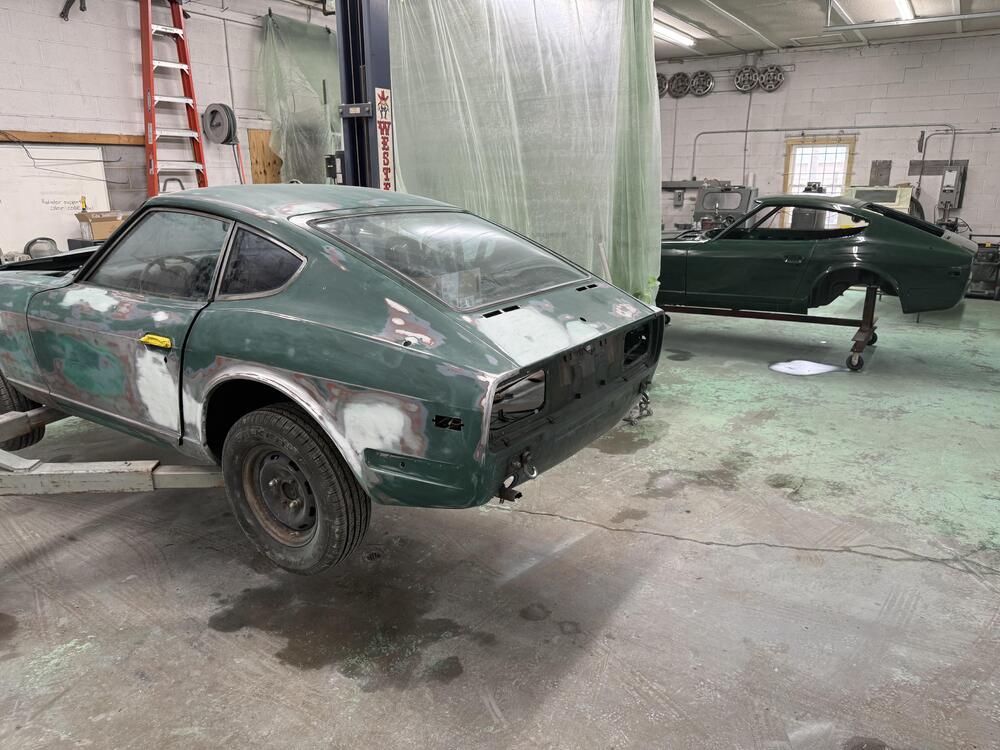


 7 points
 5 weeks since surgery and it's still pretty sore. Really depends on what I do. Therapy one day, rest the next and then back for more. I'm doing a lot at home with a recumbent bike and weight bench with a leg lift I bought years ago to hang clothes on. Now they're my nemeses just like the upstairs garage apartment I've loved for so many years. The doctors say I'm halfway, 12 weeks is their recommendation for release but say it could take up to a year to feel like it never happened. Haven't taken a pain pill in 2 weeks, not saying I wouldn't take one the size of a Frisbee right this minute but the OTC Aleve plus herb(s) are working great. Happy New Year Mark and Kathy!7 points
7 pointsI just wanted to let my friends know that I've been under the "weather" for over a year now with my clutch leg (LHD). I had a knee replacement 10 days ago and walked on my own after 1 week. I didn't get the robotic arm installation just the old fashioned human arm job. Very happy with the prospect of being young enough and pain free to maybe work on another Z sometime in the future. I'm keeping them cranked up and fluids flowing monthly but unable to drive. Soon enough my doctor says.7 points
5 weeks since surgery and it's still pretty sore. Really depends on what I do. Therapy one day, rest the next and then back for more. I'm doing a lot at home with a recumbent bike and weight bench with a leg lift I bought years ago to hang clothes on. Now they're my nemeses just like the upstairs garage apartment I've loved for so many years. The doctors say I'm halfway, 12 weeks is their recommendation for release but say it could take up to a year to feel like it never happened. Haven't taken a pain pill in 2 weeks, not saying I wouldn't take one the size of a Frisbee right this minute but the OTC Aleve plus herb(s) are working great. Happy New Year Mark and Kathy!7 points
7 pointsI just wanted to let my friends know that I've been under the "weather" for over a year now with my clutch leg (LHD). I had a knee replacement 10 days ago and walked on my own after 1 week. I didn't get the robotic arm installation just the old fashioned human arm job. Very happy with the prospect of being young enough and pain free to maybe work on another Z sometime in the future. I'm keeping them cranked up and fluids flowing monthly but unable to drive. Soon enough my doctor says.7 points 7 pointsOkay, time to come clean. I found this car for sale on Vancouver Island and couldn't resist buying it. My Canadian girl, number 6521 now has an American cousin, Number 957, a 1/70 car. When I finish restoring 6521 they will be twins. HLS30-00957 was owned by a member here, @M3333hp. sadly he passed away in 2020, mid way through the restoration. Rest in peace Pete. Pete's son completed (except for a few small details) the restoration with great attention to originality in 2022, exactly as his dad would have wanted. Pete would be proud. He recently decided it was time to let the car go to another enthusiast. I was very happy to be that guy, and yes I still do plan to complete the resto of 6521. Not that haven't already, I will be taking my time on the current resto, leaving the final work to enjoy when I retire in a few years. I have really missed having a Zed to drive and for club cruises and shows, etc., number 957 will definitely take care of that. Here are of few more pics of 957. I will be starting a new thread soon to document the number 957, and the short list of items on my new todo list.
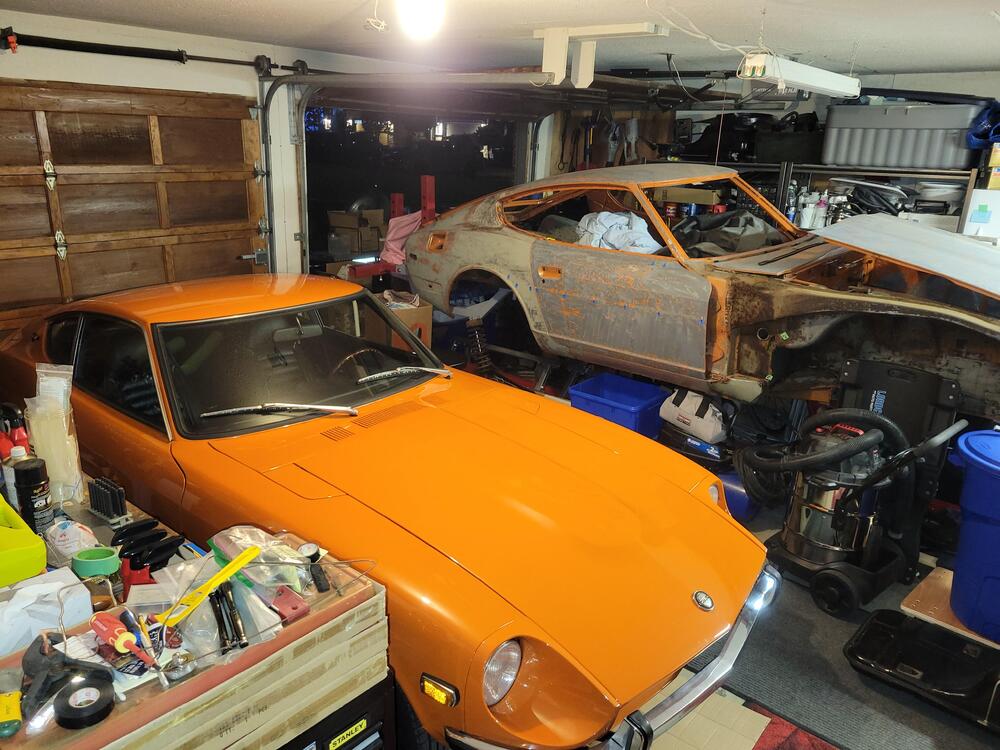


 7 points
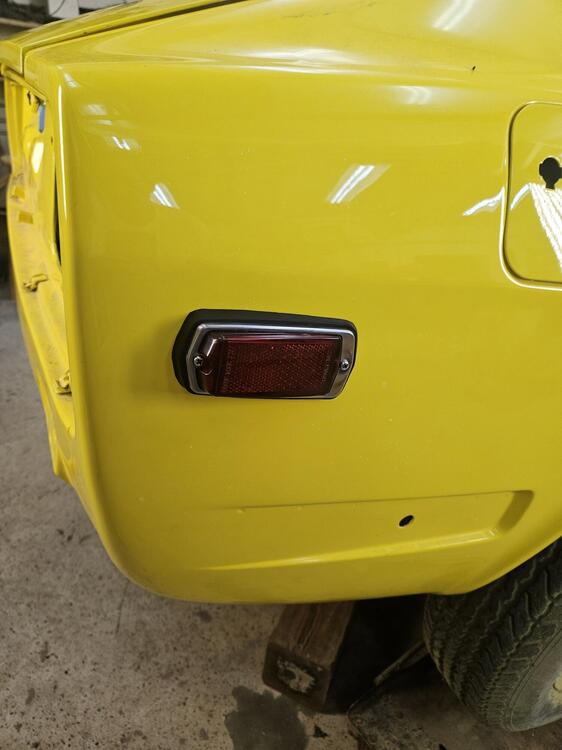
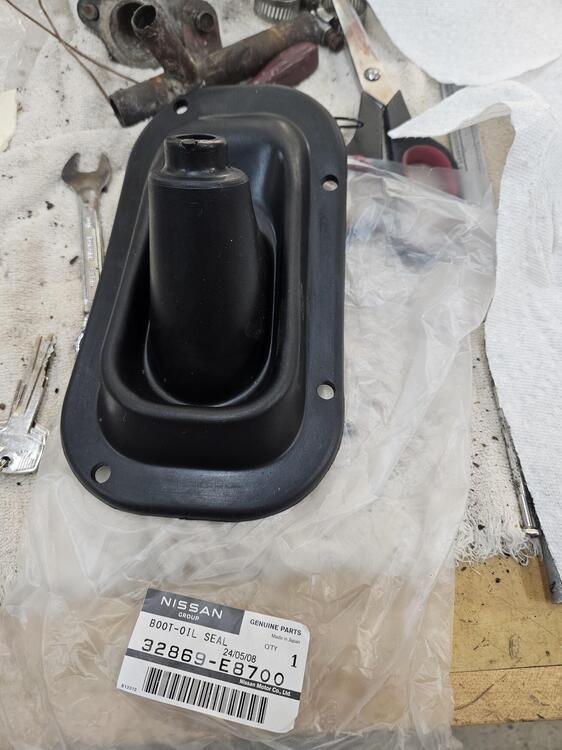
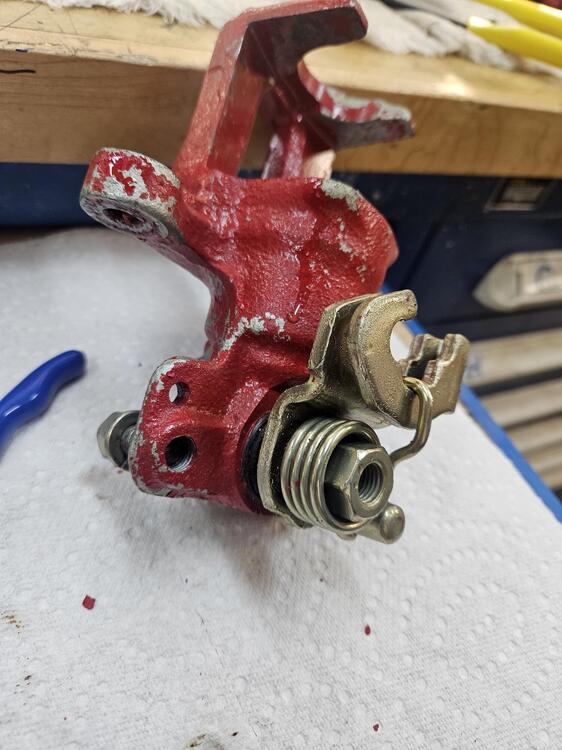
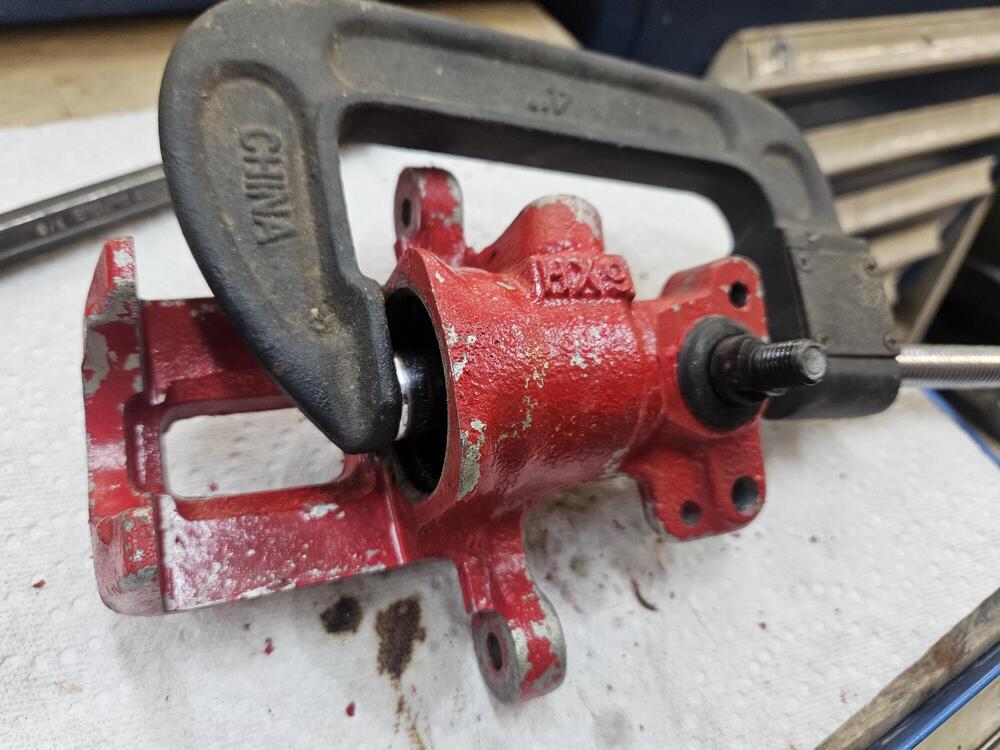
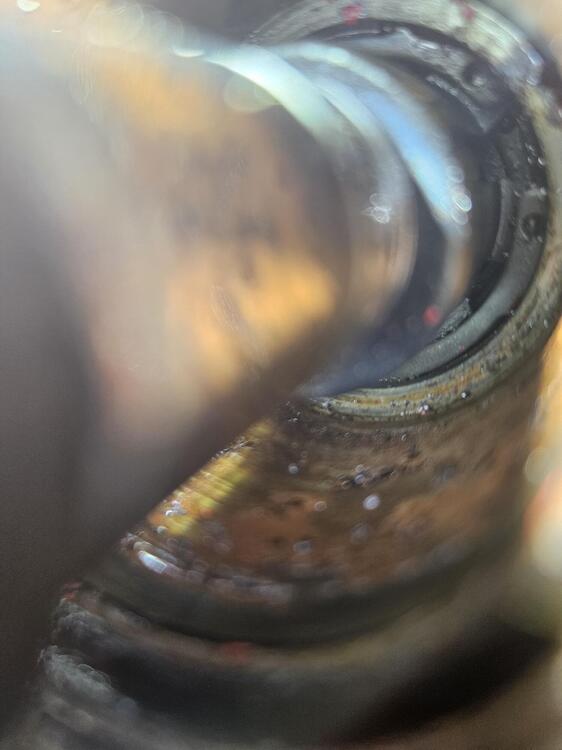
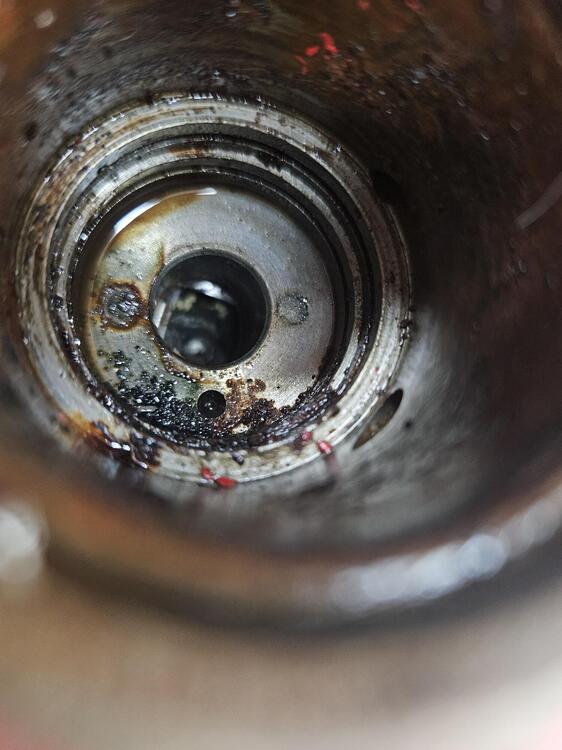
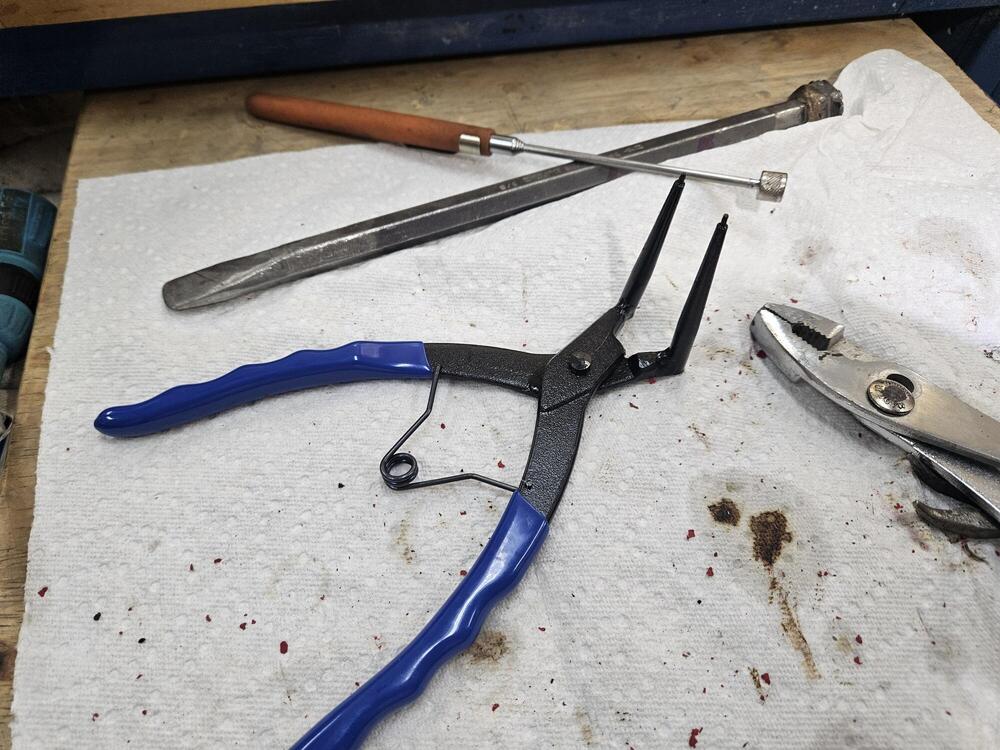
So I finally got back into the shop this weekend. A while back I was working on reworking some marker lights. Jim Arnett watched me struggle along with that for a while before he said "I have a nice set of running lights all redone if you're interested?" So yes, I'm interested! Jim does nice work and I got them in a week or so ago. I put the rears on yesterday and a engine room light that also came from him. I also got a new shift boot and rubber boot for the end of the transmission I also figured out how to get the maxima calipers apart There is a clip way down inside you need to get out I bought these snap right pliers. They work really good Needs some clean up Rebuild kits come in on Monday
7 points
7 pointsSo I finally got back into the shop this weekend. A while back I was working on reworking some marker lights. Jim Arnett watched me struggle along with that for a while before he said "I have a nice set of running lights all redone if you're interested?" So yes, I'm interested! Jim does nice work and I got them in a week or so ago. I put the rears on yesterday and a engine room light that also came from him. I also got a new shift boot and rubber boot for the end of the transmission I also figured out how to get the maxima calipers apart There is a clip way down inside you need to get out I bought these snap right pliers. They work really good Needs some clean up Rebuild kits come in on Monday


 7 points
 I own a 1/71 car "Series 1", and I had someone approach the car and start pointing at all the incorrect things on my car. The fun part is , my car is all original and unrestored. I just said thank you.7 points
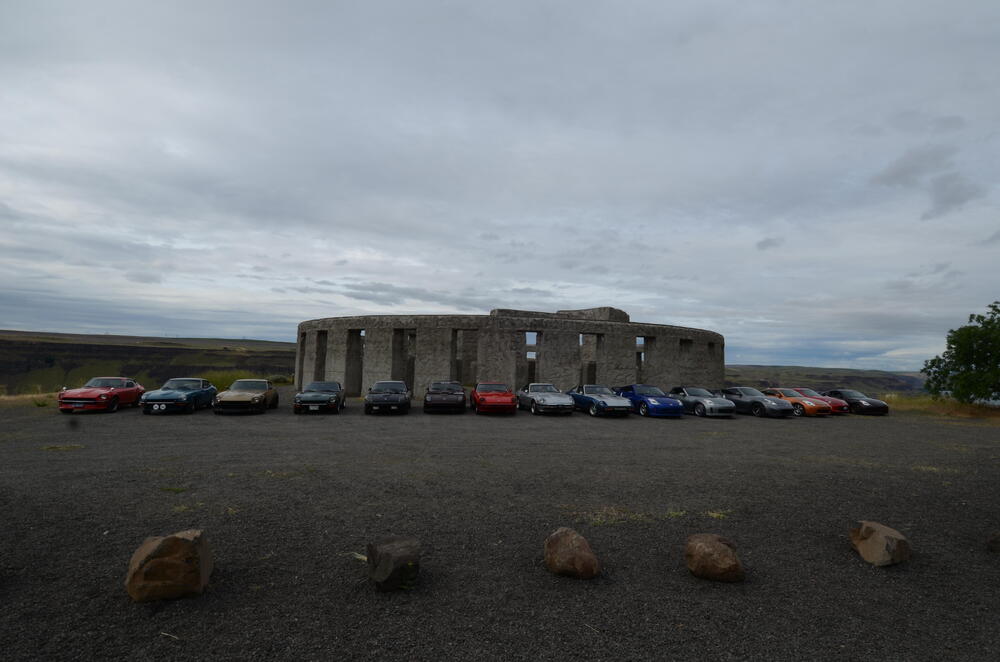
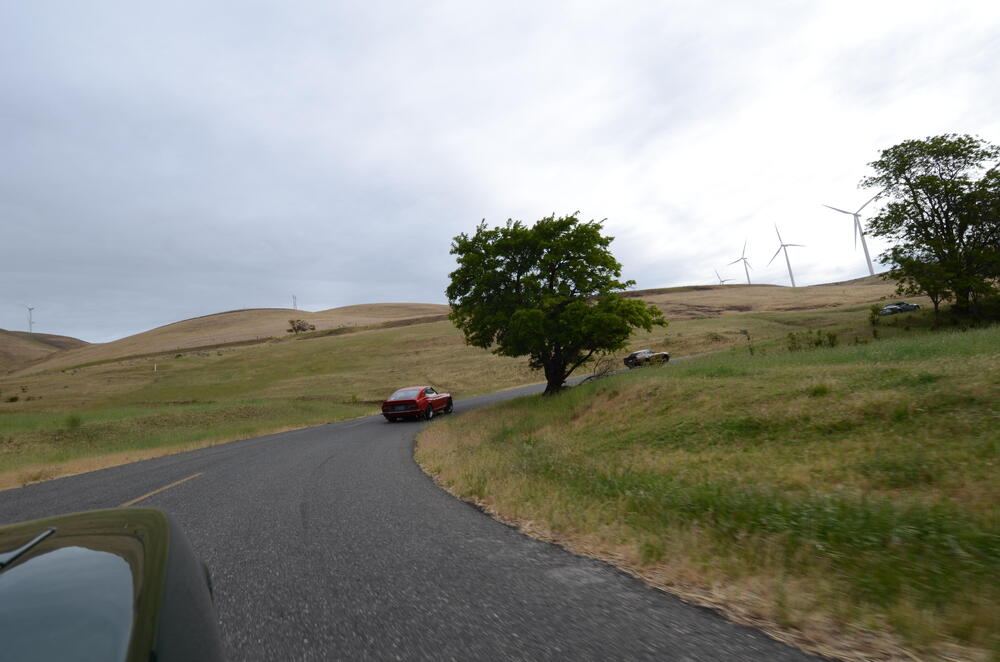
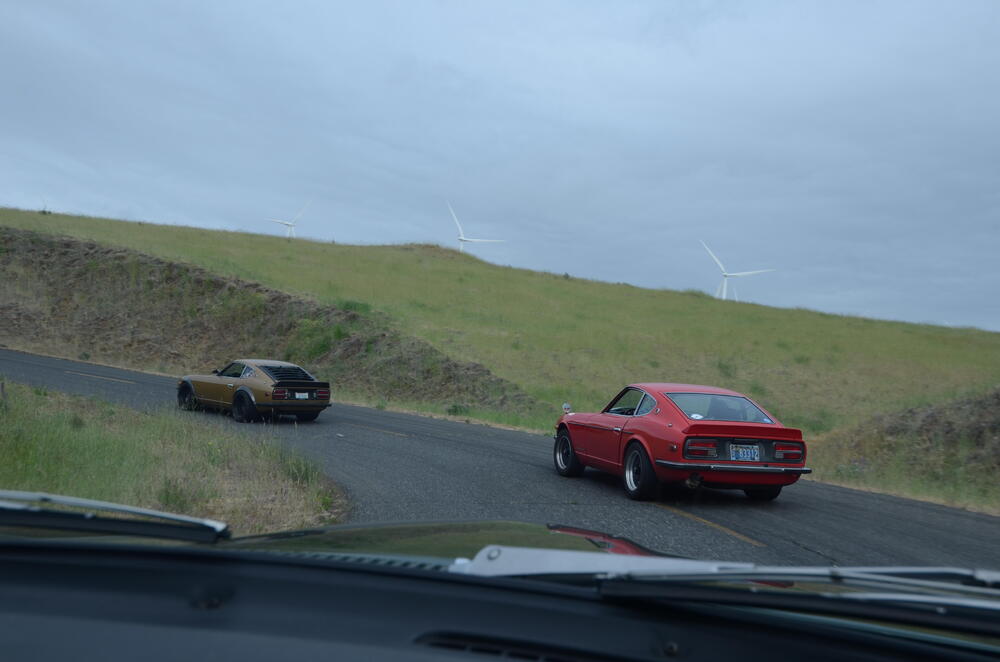
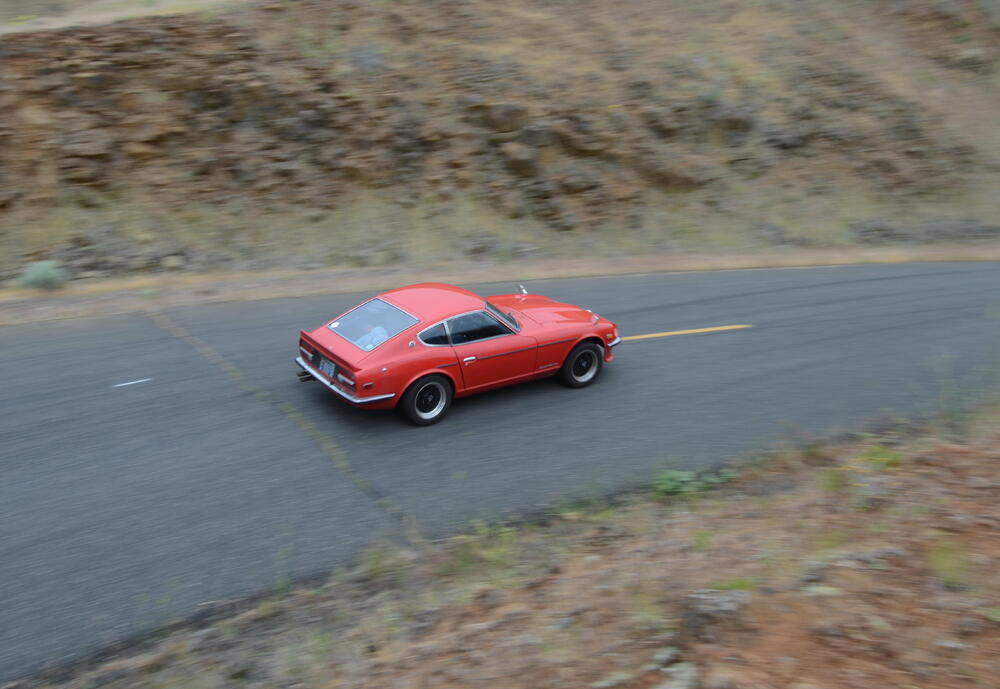
 7 pointsI don't see to many "drive" posts on the forum, it seems to be more technical. I thought I might add a post from a recent ZCCW drive. We rent out Maryhill Loops Rd. and drive up and down all day with no worries of cars coming the other way or the like. A fun weekend for sure. https://www.maryhillmuseum.org/outside/historic-maryhill-loops-road Skate boarder's fly down and cars fly up. Interesting story about the origin it in the post above. Here are a few pic's and one video from the weekend. Out there having a blast in my 6/70 driver. We normally only have one car at time, but I talked the officers into letting me follow the other early (71) S30 up the road for a video shot. Reuel and I going up.mov
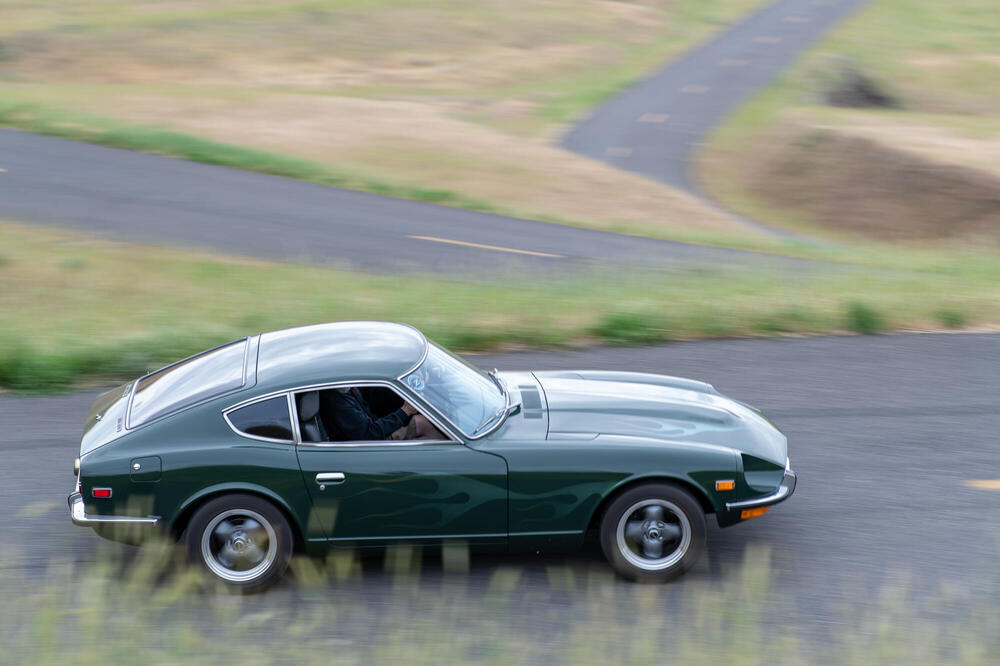


 7 points
 7 pointsI just did that, waiting to hear back, will see how long I can string him along😄7 points
 Here's another great S30.world article, this time focusing on the development of the 'Euro' spec Datsun 240Z, exploring the circumstances which necessitated its creation and the people behind it. It includes some - precious! - original hand-written development note documents which we are privileged to have access to after all this time, thanks to our fellow member @kats Very nicely put together and written up by another of our fellow members here Nils @JDMjunkies.ch Tip of the hat to Florian at S30.world too. This is a topic not often acknowledged let alone discussed, and yet it is a fascinating window into a significant part of the S30-series Z's family tree. Recommended reading: https://s30.world/articles/european-spec-datsun-240z6 points
 6 pointsHLS30-00042 arrived this afternoon for a complete restoration. Boy, this an early one, complete with the original clear rear window. It's a little beat up, but most of the parts are there. I own HLS30-02614 in the same color, so by the time I am finished they should be looking like twins. The motor runs, which is great, but it will undergo a complete rebuild. Amazingly, the head still has the overspray on the lower portion, which is pretty rare to see. I will see if the machine shop can leave that intact. There are still a few wire clamps in there and the owner has a metal fan (and a number of other key parts), so we should be able to get the engine bay looking like the original. Looks like the hood has been replaced by a later series that was orange. The drivers side door may have been replaced as well, as there appears to be blue paint under the Safari Gold re-spray. Also, the rear panel under the rear bumper is pretty beat up and front bumper is missing. We will need to get one of those. Rear bumper looks to be in pretty good shape. Both headlight buckets are fiberglass and cracked. Both fenders are pretty rusted out in the standard places. Rear hatch panel is also rusted out (as usual) and will need to be replaced by the body shop. The interior will need to be completely restored as most items are severely cracked or worn. The original dash has just one crack in the middle unfortunately. Not sure if that is repairable, I will have to look into that as the single crack is about 2 inches long. The seats have the original vinyl material which is cool, but not usable obviously (from the pics). So the plan here is to completely strip the car over the next two weeks and get the body to the body shop ASAP as that is typically the long pole in the process. I am estimating about 6 months for the body shop to complete all its work. While the body is out, I will send the block and head to the machine shop to get that all in order for me to re-build. All the undercarriage parts will be sent to the powder coater, and all of the nuts and bolts will go out for re-plating. I will re-upholster the seats, clean up the wiring harnesses and replace the connector housings, and then start re-assembling items as they return from the shops so that once the body arrives, everything will be ready to assemble. I will post progress on here and pics as things move along. As always, feel free to comment.
.thumb.jpg.ec8a5efa93ff12430f99926668938dac.jpg)


.thumb.jpg.f70075449a254e1f05b51897c14e5f0e.jpg)


 6 points
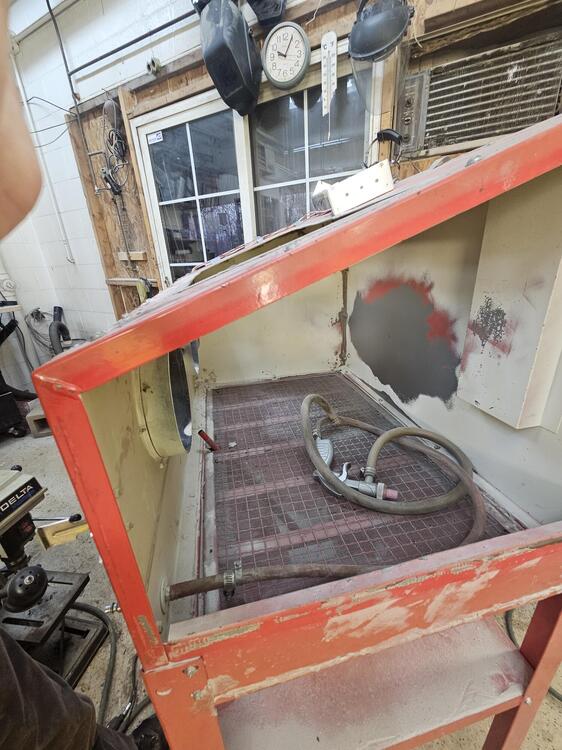
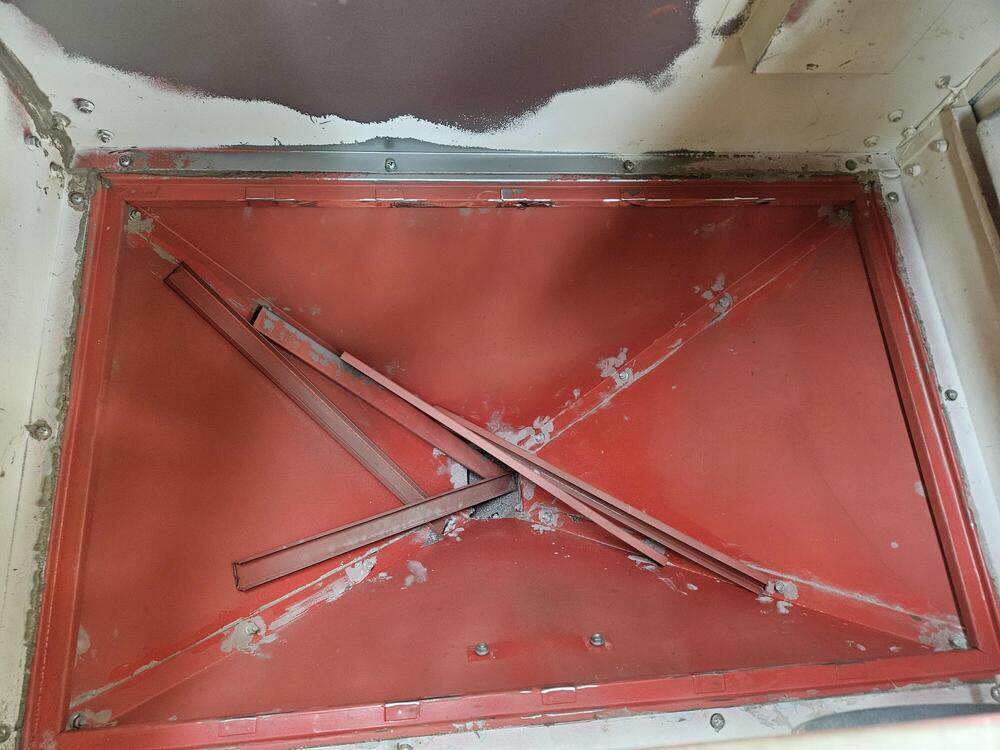
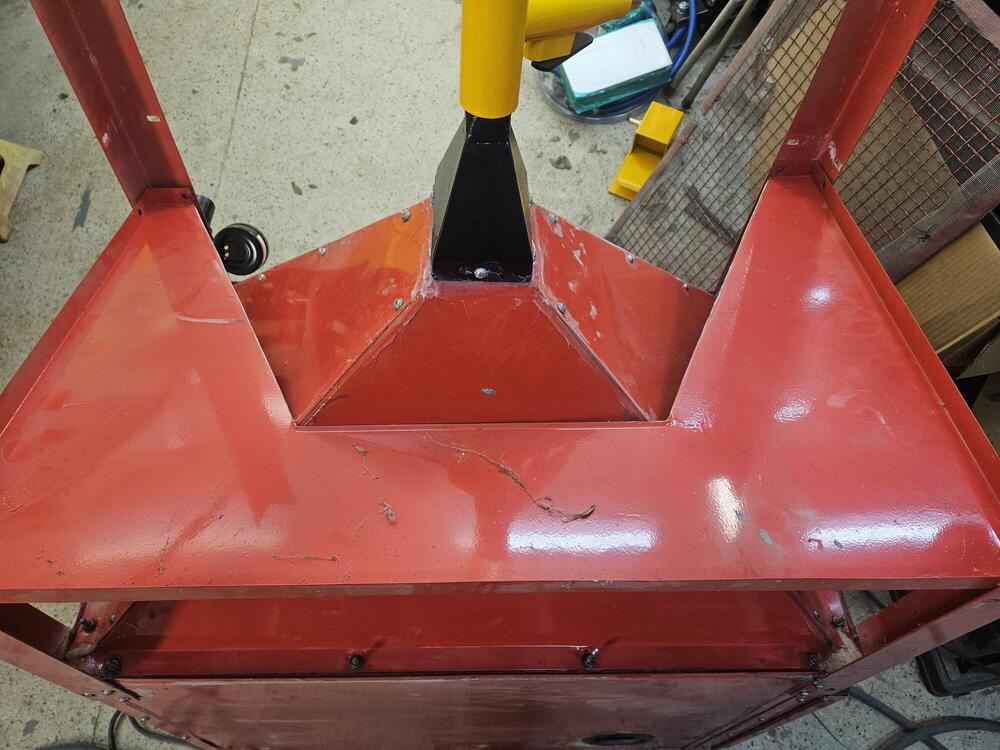
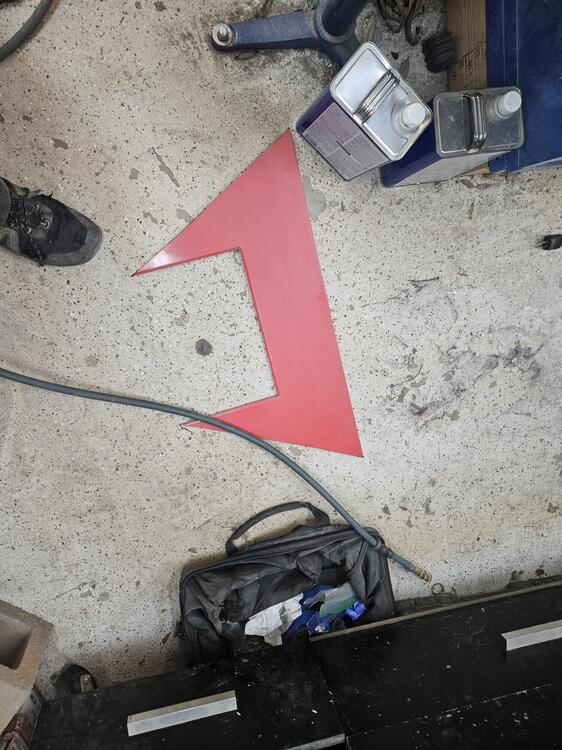
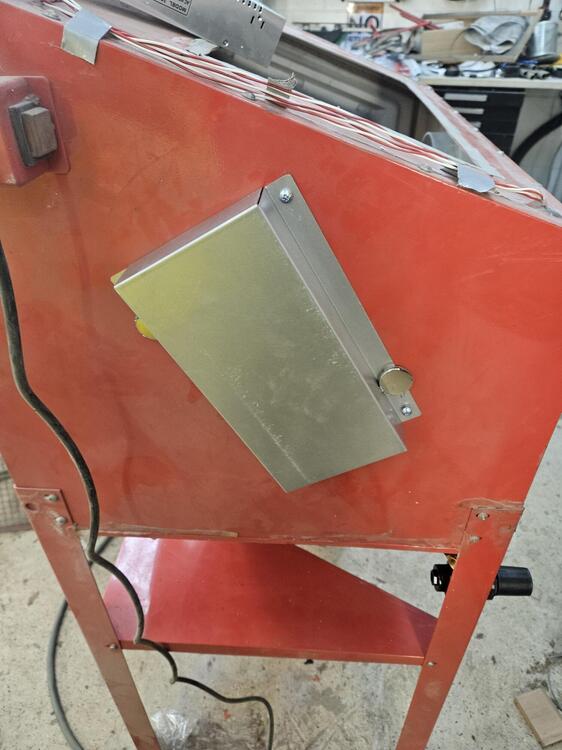
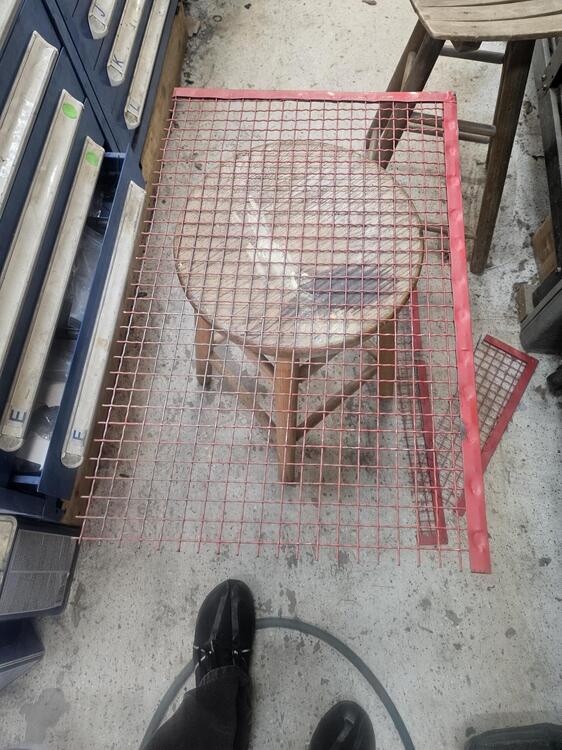
So I have a Harbor Freight blast cabinet. It is probably 15 years old or older. I have wanted to do the Tacoma Company upgrades to it for years but I've never pulled the trigger because the timing was always bad. I finally bought the pieces last month. https://www.tacomacompany.com/ The original cabinet Cut the bars out from under the frame New funnel adapter on bottom of the cabinet Drilled a hole in the left leg for a new air regulator Two new holes for the air and media for the gun Regulator Cut the lower shelf back New box that covers the air intake on the left side of the cabinet Air flow is reversed in this new setup I had to silicone the screws at the glove cuffs because the static from the cabinet would shock the fool out of you Cut the spring steel screen down and wrapped it with metal screening to prevent little parts falling down in the cabinet Added a foot pedal for the cabinet versus a hand trigger New gloves inside and a fresh piece of glass I have a switch on top that cuts the LED's on in the cabinet and start a vacuum that sits outside the shop door I finally got the air all hooked up today. It's a totally different cabinet now!! I can see and it cuts really quickly. I have some new Bufferfly screws for a quick change glass setup
6 points
6 pointsSo I have a Harbor Freight blast cabinet. It is probably 15 years old or older. I have wanted to do the Tacoma Company upgrades to it for years but I've never pulled the trigger because the timing was always bad. I finally bought the pieces last month. https://www.tacomacompany.com/ The original cabinet Cut the bars out from under the frame New funnel adapter on bottom of the cabinet Drilled a hole in the left leg for a new air regulator Two new holes for the air and media for the gun Regulator Cut the lower shelf back New box that covers the air intake on the left side of the cabinet Air flow is reversed in this new setup I had to silicone the screws at the glove cuffs because the static from the cabinet would shock the fool out of you Cut the spring steel screen down and wrapped it with metal screening to prevent little parts falling down in the cabinet Added a foot pedal for the cabinet versus a hand trigger New gloves inside and a fresh piece of glass I have a switch on top that cuts the LED's on in the cabinet and start a vacuum that sits outside the shop door I finally got the air all hooked up today. It's a totally different cabinet now!! I can see and it cuts really quickly. I have some new Bufferfly screws for a quick change glass setup


 6 points
We bought an uncoated header for the 510 from Troy Ermish a while back. We added two O2 bungs so we can check the carbs separately and added a Vband fitting at the exhaust end. I sent it off to JetHot over Christmas and got it back this last week. It looks nice!
6 points
6 pointsWe bought an uncoated header for the 510 from Troy Ermish a while back. We added two O2 bungs so we can check the carbs separately and added a Vband fitting at the exhaust end. I sent it off to JetHot over Christmas and got it back this last week. It looks nice!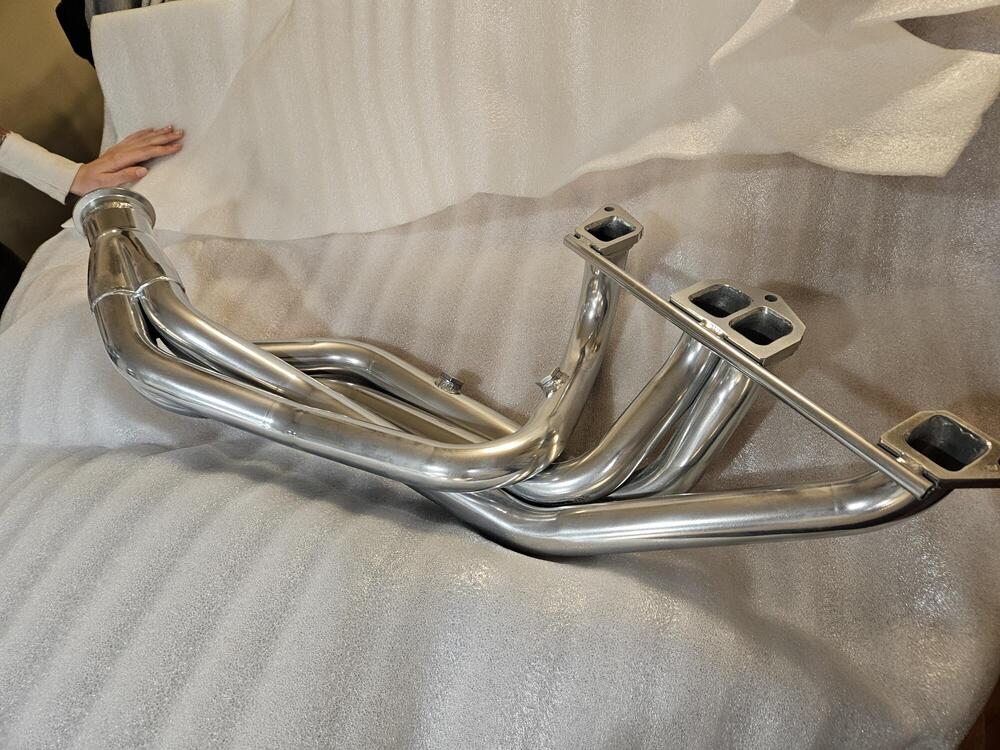

 6 points
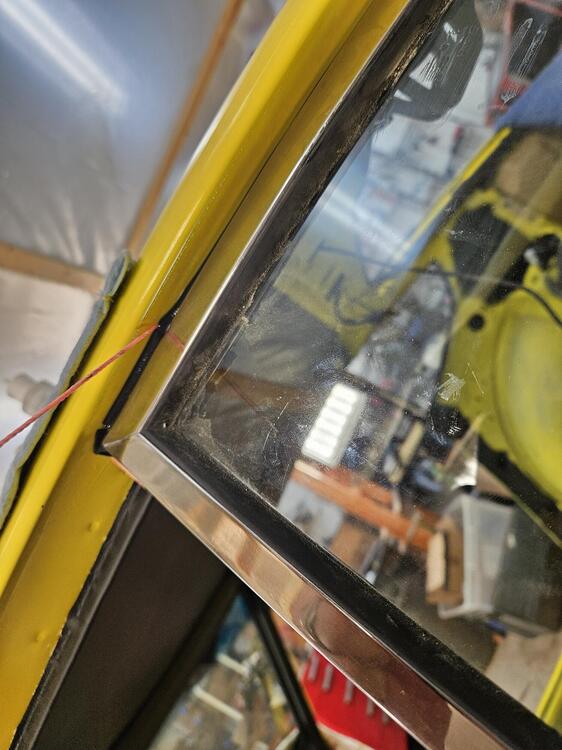
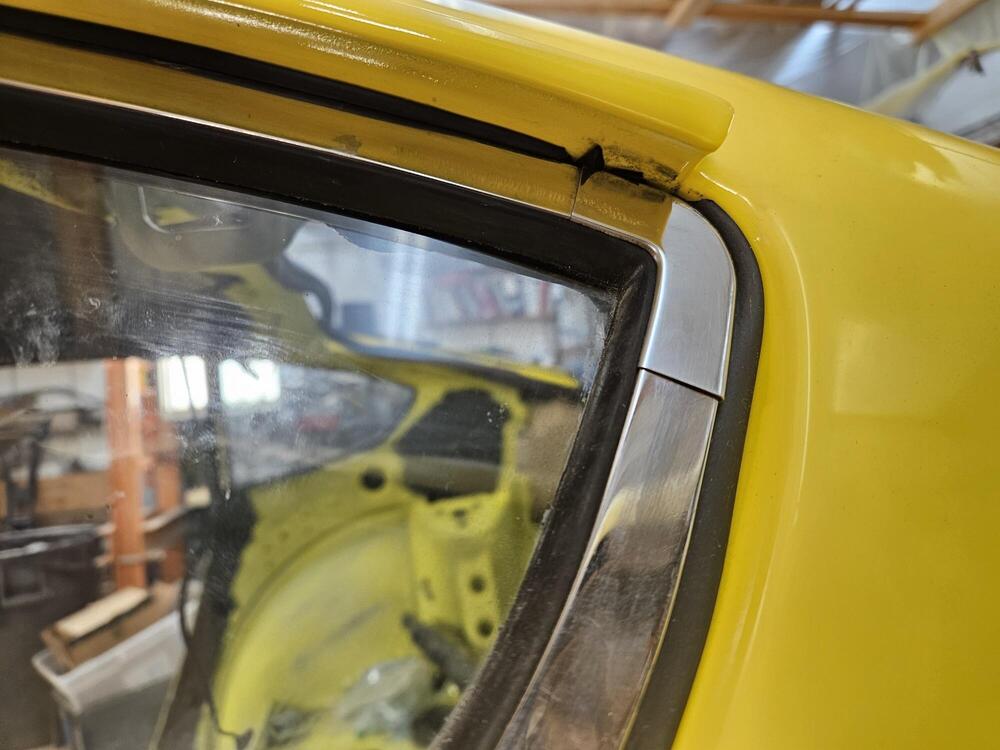
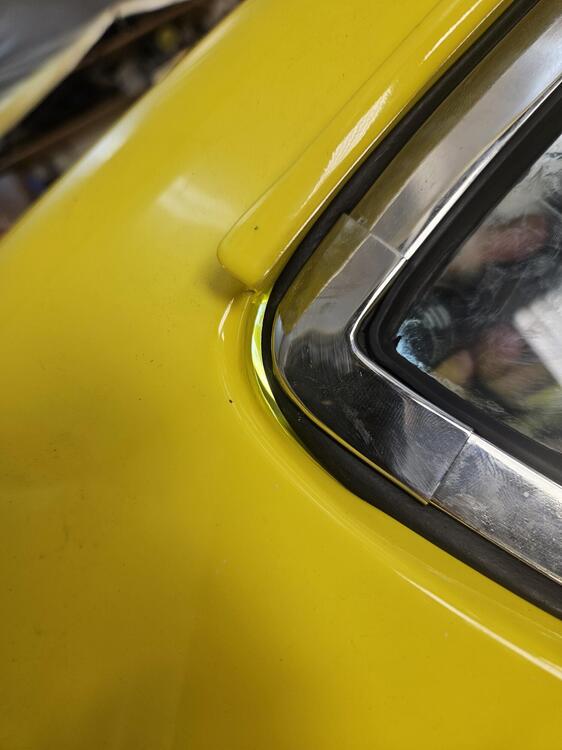
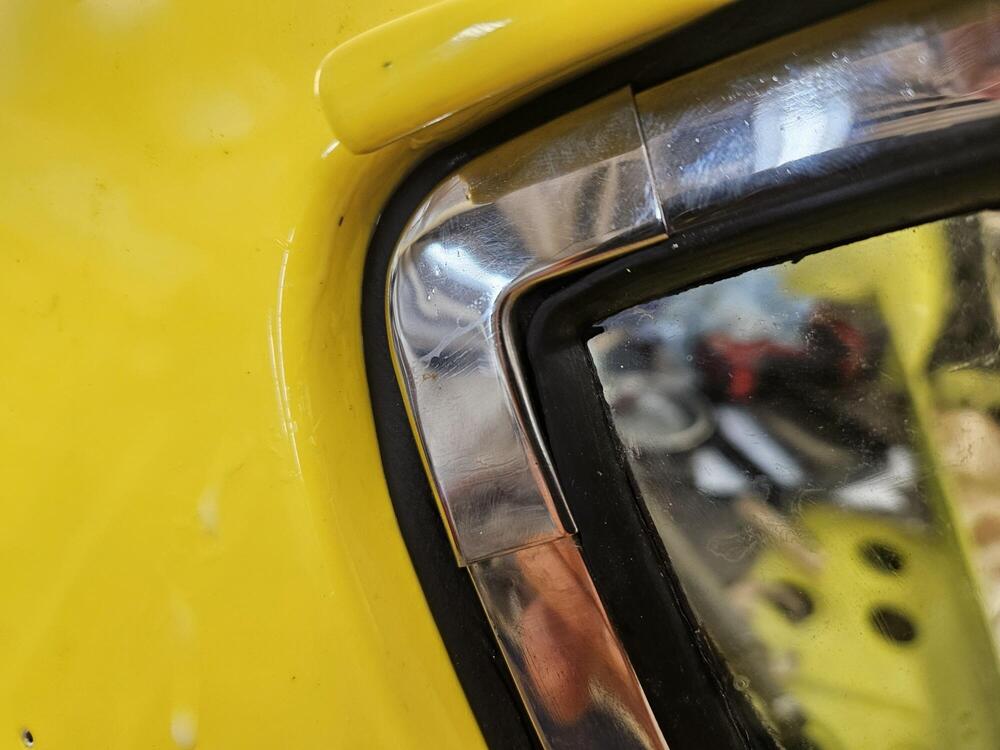
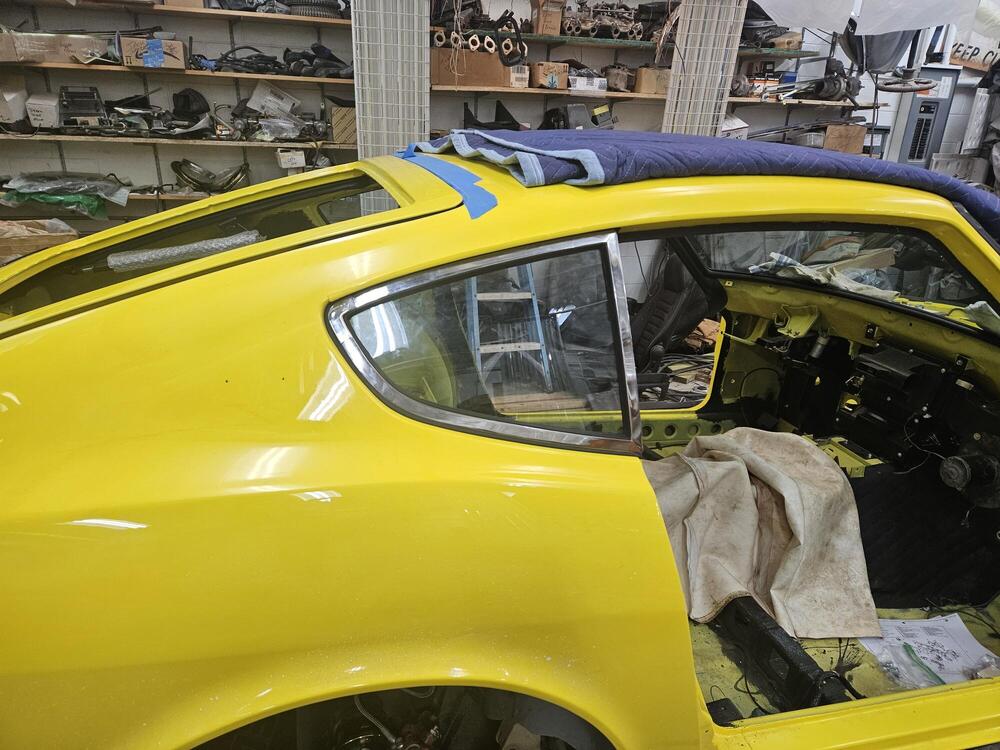
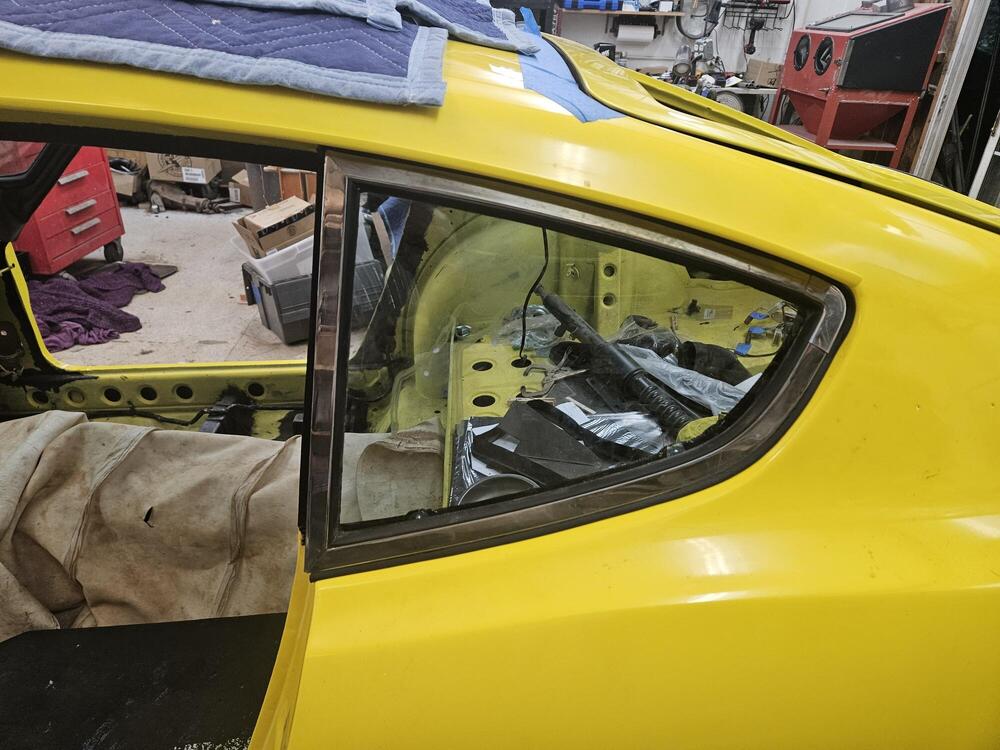
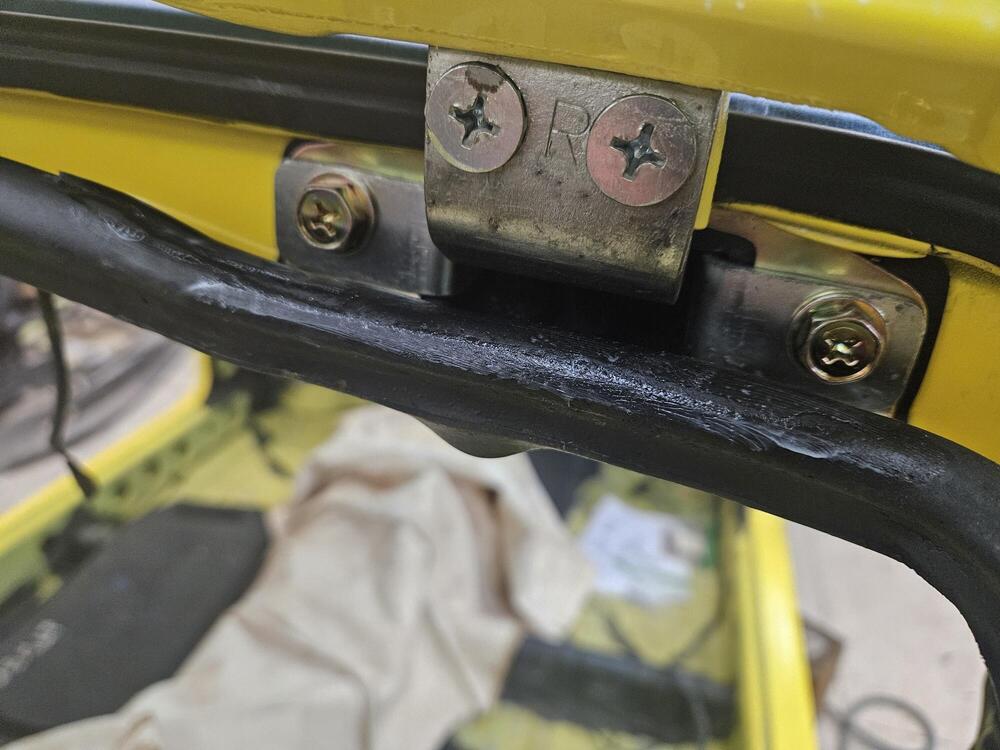
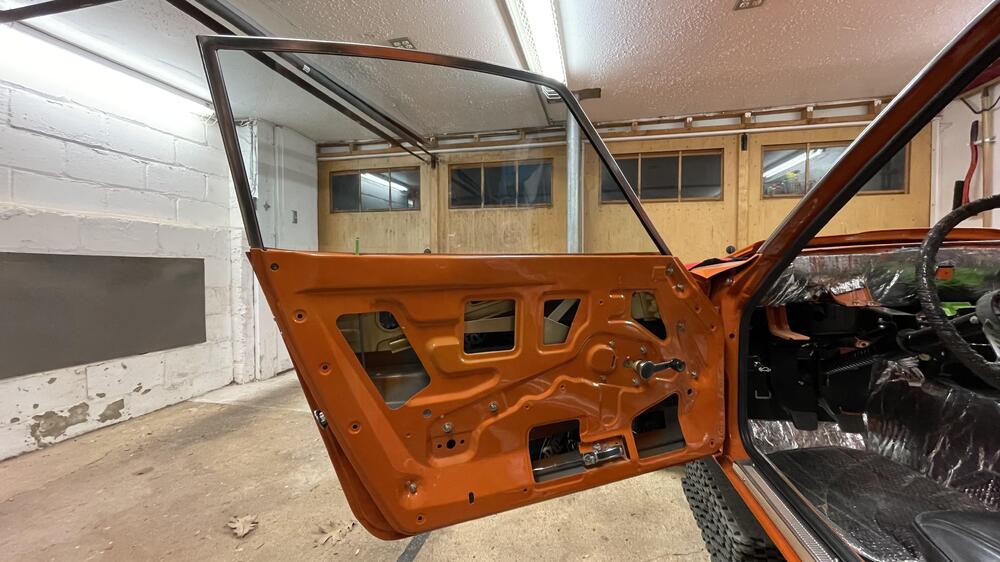
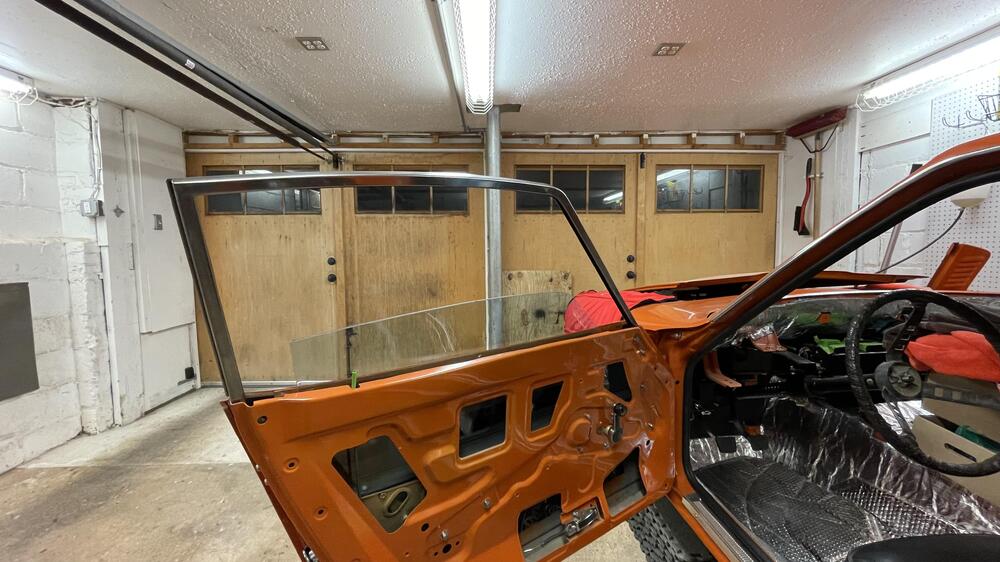
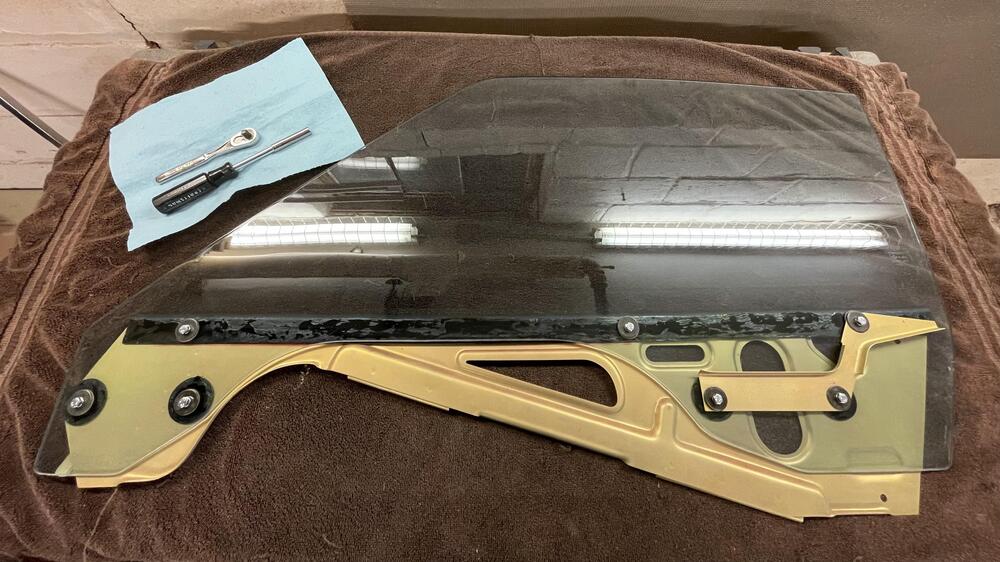
 6 pointsI am very tired and sore. What I thought was going to be a three day job ended up being two weeks… because I am a perfectionist. 😕 The installation of the left door window was no big deal, but I wanted the glass to be as clear as I could get it, so I spent six (!) days working the scratches out of what was a B+ window when I pulled it out of a wrecked car a year ago. I used a combination of diamond polishing pads and cerium oxide, which works well, but there is a learning curve. The right side should only take a day now that I know what I’m doing. It’s now a solid A grade, but I came a little too close to the Nissan etching, so that’s less crisp than it should be. All told there are two 1/4” scratches and some light swirls that I couldn’t get out without risking distorting the glass. Not bad. Acceptable I guess. Installation was not hard, although I should have brought a second set of hands. I have some alignment issues with the rear corner sticking out and not sliding back enough without help from outside, but I don’t feel like dealing with that right now. New seals, new hardware, and tons of grease.
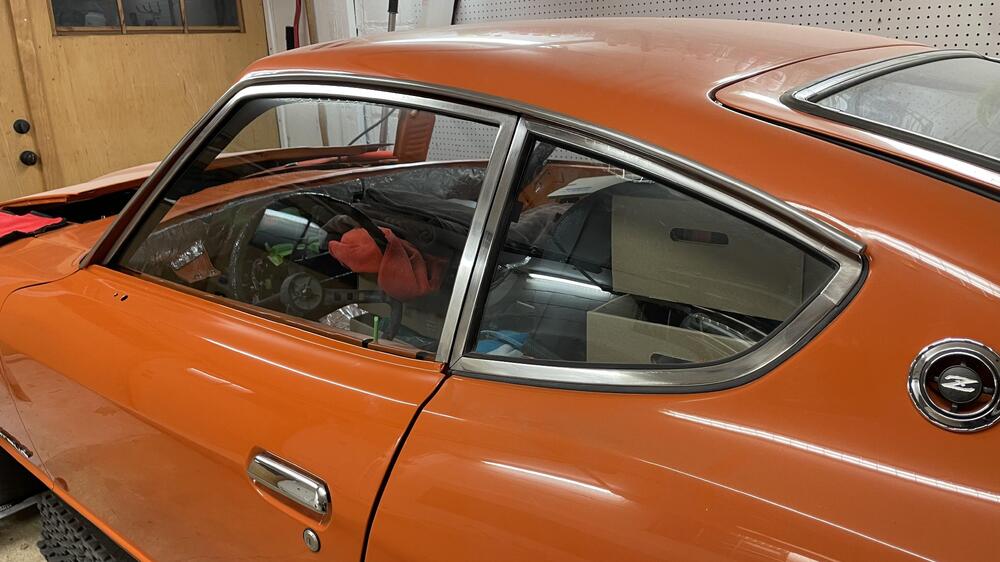

 6 points
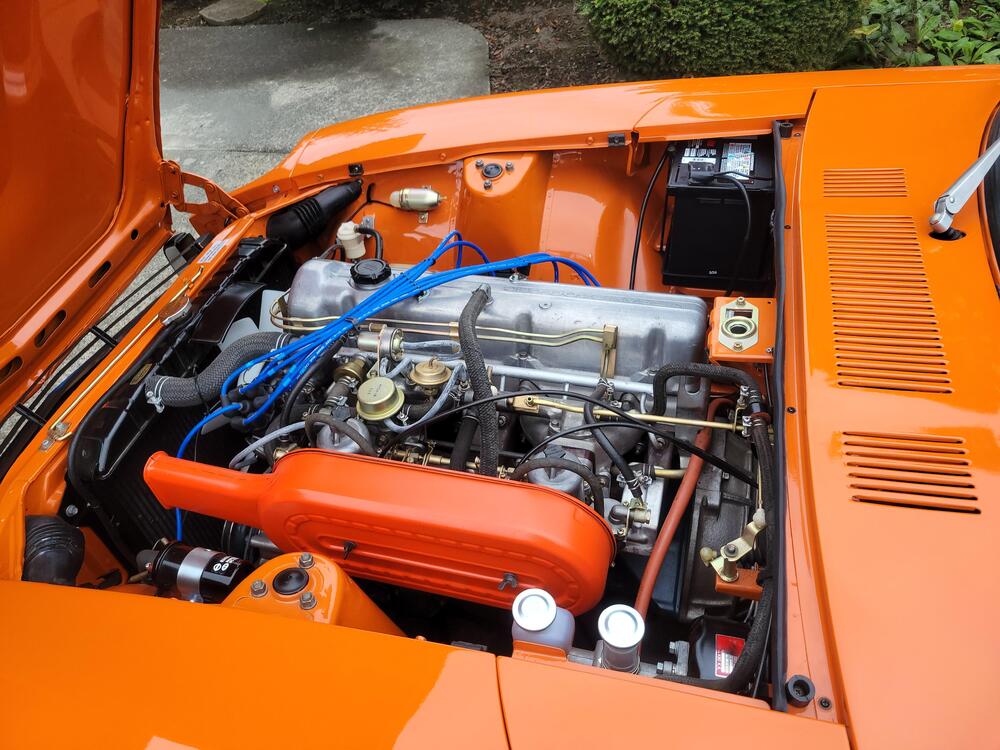
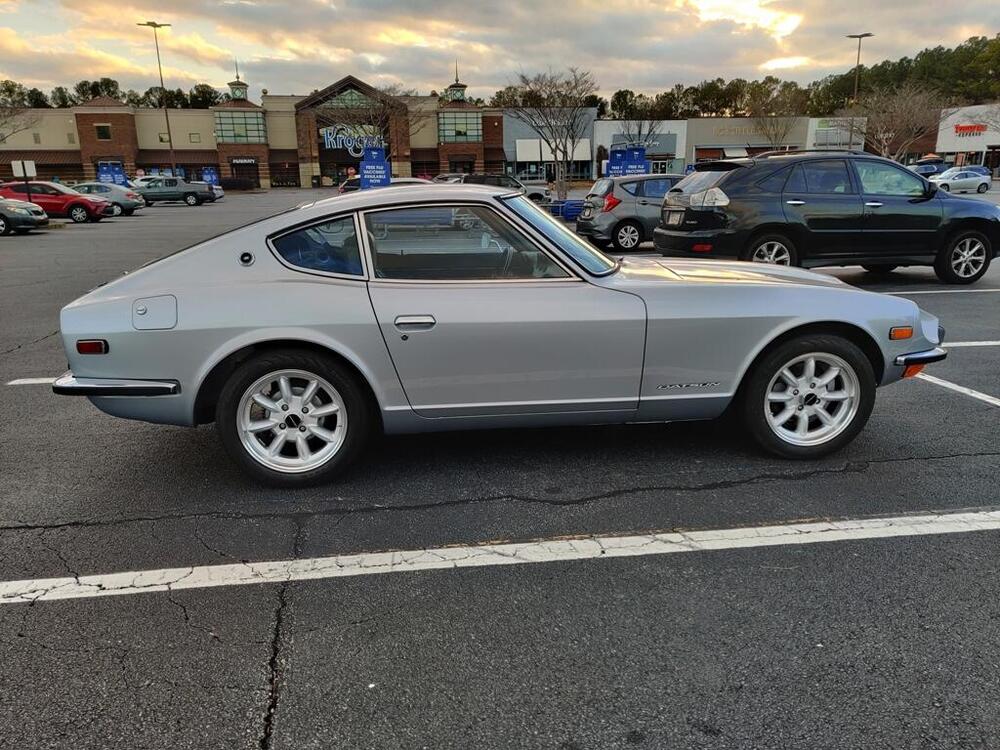
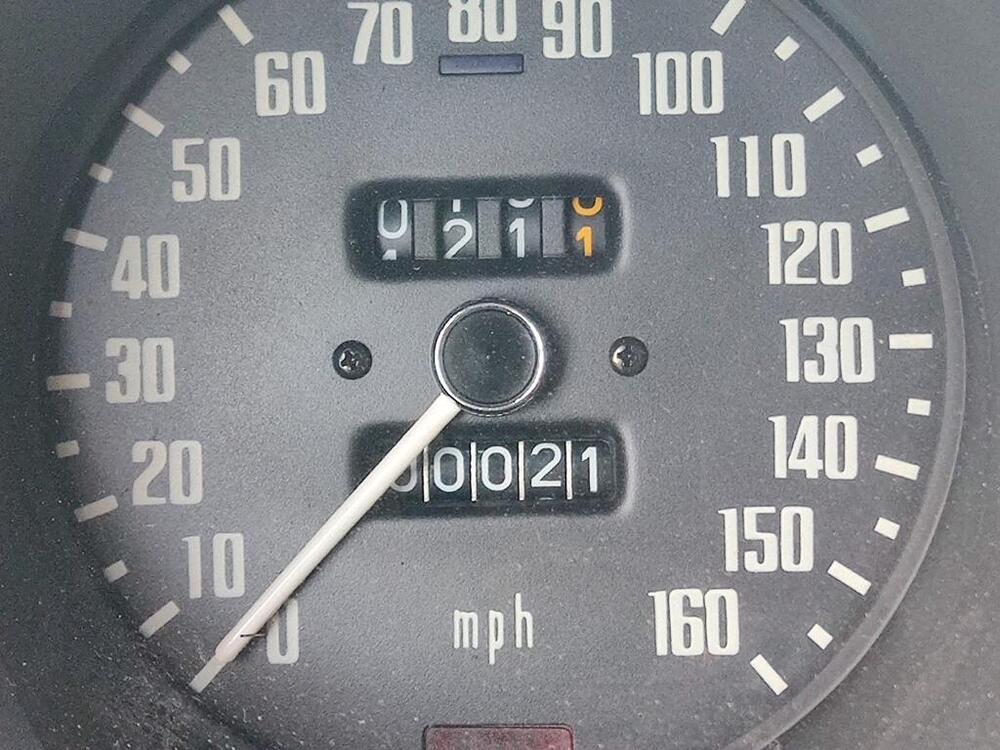
The "grocery getter today": Walking towards the car with my grocery haul, I laughed out loud as I gazed at the car. Though not quite as small as a Miata, the size of these things is quite laughable. Pictures of it by itself (purposely parked far away from others) don't reveal its compact size. But, put it next to nearly any modern vehicle and the small size becomes very apparent. My tire diameter is a little smaller than stock. So, even though I have a "red gear" speedometer drive to match the 4.11 rear end ratio, the speedometer appears to be off on the high side. I will check it vs. actual speed with my phone/GPS soon. For now, I am just trying to keep from being freaked out while I drive it around. For the first 15 or so miles, I have been pretty anxious, thinking of all the things that could go wrong. On the way back from the grocery store, I started to feel "at home again". The exhaust note is quite aggressive, and loud... and that is a good thing. 🙂 It has been 9 years since I have driven a 240Z, albeit the last one was my more "track focused" 240Z, which is an entirely different beast. I still have many things to finish up, some of which include: figuring out what to do about putting a speaker in the stock (rear, left) location. This is holding up putting the left side interior trim panels in place. decide whether to put the factory radio in the dash, or install a blue tooth compatible "Retrosound" unit. troubleshoot why interior fan is not functional install glove box door spray paint and install tail light finisher panels and rear license plate light spray paint and install front grill install steering wheel horn hub/garnish install luggage straps cut jute for the front floors install front right kick panel (I am still evaluating right door fit/alignment) Install storage compartment liners - glue to body Place jack and tire stops in storage compartment
6 points
The "grocery getter today": Walking towards the car with my grocery haul, I laughed out loud as I gazed at the car. Though not quite as small as a Miata, the size of these things is quite laughable. Pictures of it by itself (purposely parked far away from others) don't reveal its compact size. But, put it next to nearly any modern vehicle and the small size becomes very apparent. My tire diameter is a little smaller than stock. So, even though I have a "red gear" speedometer drive to match the 4.11 rear end ratio, the speedometer appears to be off on the high side. I will check it vs. actual speed with my phone/GPS soon. For now, I am just trying to keep from being freaked out while I drive it around. For the first 15 or so miles, I have been pretty anxious, thinking of all the things that could go wrong. On the way back from the grocery store, I started to feel "at home again". The exhaust note is quite aggressive, and loud... and that is a good thing. 🙂 It has been 9 years since I have driven a 240Z, albeit the last one was my more "track focused" 240Z, which is an entirely different beast. I still have many things to finish up, some of which include: figuring out what to do about putting a speaker in the stock (rear, left) location. This is holding up putting the left side interior trim panels in place. decide whether to put the factory radio in the dash, or install a blue tooth compatible "Retrosound" unit. troubleshoot why interior fan is not functional install glove box door spray paint and install tail light finisher panels and rear license plate light spray paint and install front grill install steering wheel horn hub/garnish install luggage straps cut jute for the front floors install front right kick panel (I am still evaluating right door fit/alignment) Install storage compartment liners - glue to body Place jack and tire stops in storage compartment
 6 points
I have installed the windshield - this time with the stainless trim! It's not fully in place as it should be - it sits about an 1/8 of an inch more toward the passenger side. However, that will auto correct when it sits in the hot sun for a bit. This third windshield seal was very flexible which made a big difference when installing the stainless trim pieces. And so far, this second windshield has not delaminated in the corners like the first one did. The other part I was waiting for was a replacement brake booster push rod. With its arrival last week, I was able to complete the rebuild of the brake booster and to get that installed in the car. Using a vacuum tool like this one - I was able to build vacuum to 500 mm Hg by connecting it to the hose from the booster and waiting the 15 seconds specified in the factory workshop manual to confirm it was within specification (did not lose 25 mm Hg or more in 15 seconds). With these two things completed (brake booster installed and windshield installed), I was ready to take the car for a brief test drive. The car now has 15 miles on it 😉 During that brief drive, I noted that the brakes are not 100% yet, and the exhaust was vibrating against the rear apron at idle. When I got back, I put the car back on the lift. I found a bit of brake fluid on the front right caliper, so I quickly cleaned that off and went around to all of the brake line fittings and ensured they were all tight. I will need to bleed the brakes again to ensure all air is out of the system. For the exhaust, I simply loosened the band clamp that holds the muffler to the tail pipe and moved the muffler forward 3/4". One of the things I was worried about was the differential. After all the trial and error with shimming and the custom work to rebuild it, I was worried I still didn't have the gears meshed properly and it would make a lot of noise. I am happy to report that I don't hear any noise coming from it. It is super quiet even. I am glad to have these two things that were holding me up out of the way!
6 points
I have installed the windshield - this time with the stainless trim! It's not fully in place as it should be - it sits about an 1/8 of an inch more toward the passenger side. However, that will auto correct when it sits in the hot sun for a bit. This third windshield seal was very flexible which made a big difference when installing the stainless trim pieces. And so far, this second windshield has not delaminated in the corners like the first one did. The other part I was waiting for was a replacement brake booster push rod. With its arrival last week, I was able to complete the rebuild of the brake booster and to get that installed in the car. Using a vacuum tool like this one - I was able to build vacuum to 500 mm Hg by connecting it to the hose from the booster and waiting the 15 seconds specified in the factory workshop manual to confirm it was within specification (did not lose 25 mm Hg or more in 15 seconds). With these two things completed (brake booster installed and windshield installed), I was ready to take the car for a brief test drive. The car now has 15 miles on it 😉 During that brief drive, I noted that the brakes are not 100% yet, and the exhaust was vibrating against the rear apron at idle. When I got back, I put the car back on the lift. I found a bit of brake fluid on the front right caliper, so I quickly cleaned that off and went around to all of the brake line fittings and ensured they were all tight. I will need to bleed the brakes again to ensure all air is out of the system. For the exhaust, I simply loosened the band clamp that holds the muffler to the tail pipe and moved the muffler forward 3/4". One of the things I was worried about was the differential. After all the trial and error with shimming and the custom work to rebuild it, I was worried I still didn't have the gears meshed properly and it would make a lot of noise. I am happy to report that I don't hear any noise coming from it. It is super quiet even. I am glad to have these two things that were holding me up out of the way!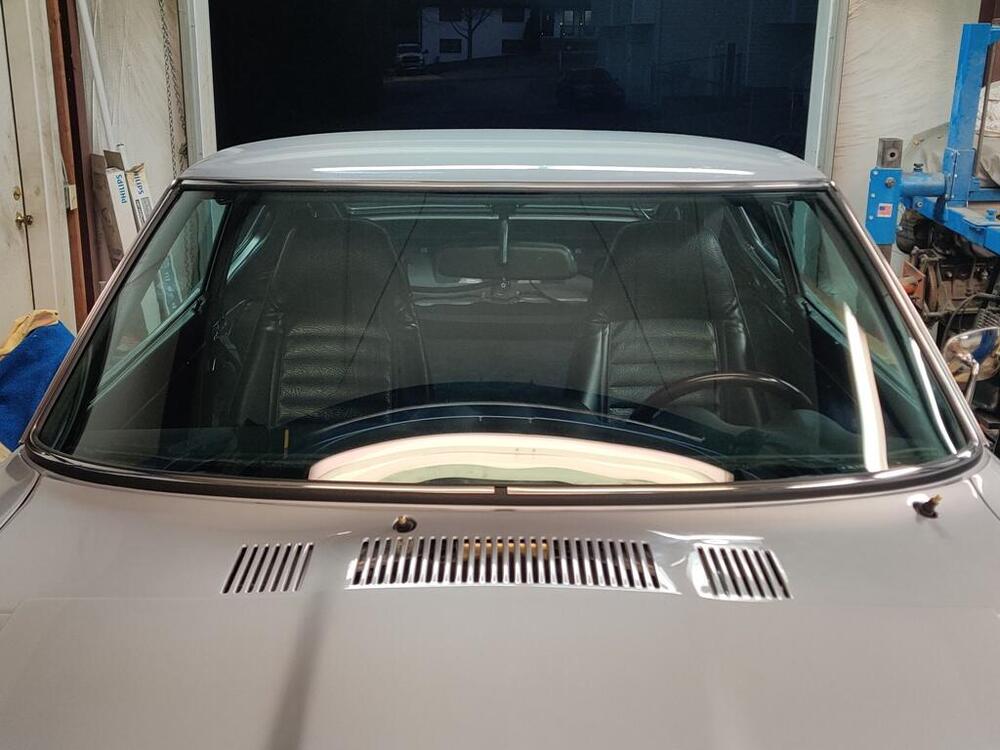
 6 points
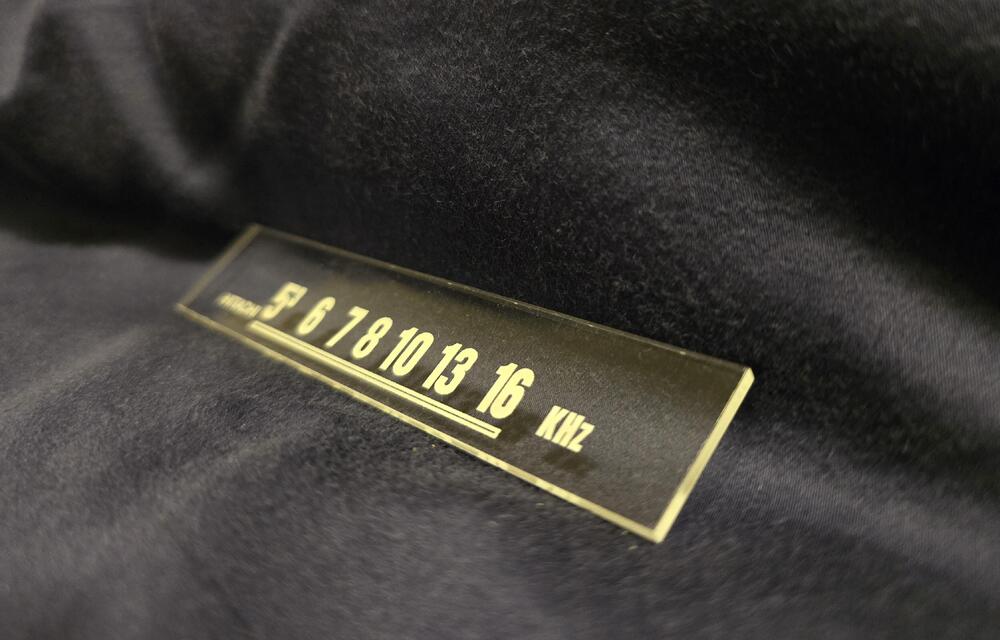
 I've recreated the frequency panel for the 240z radio panel- From what I can tell its as close as I can get it- what do you think?
 6 points
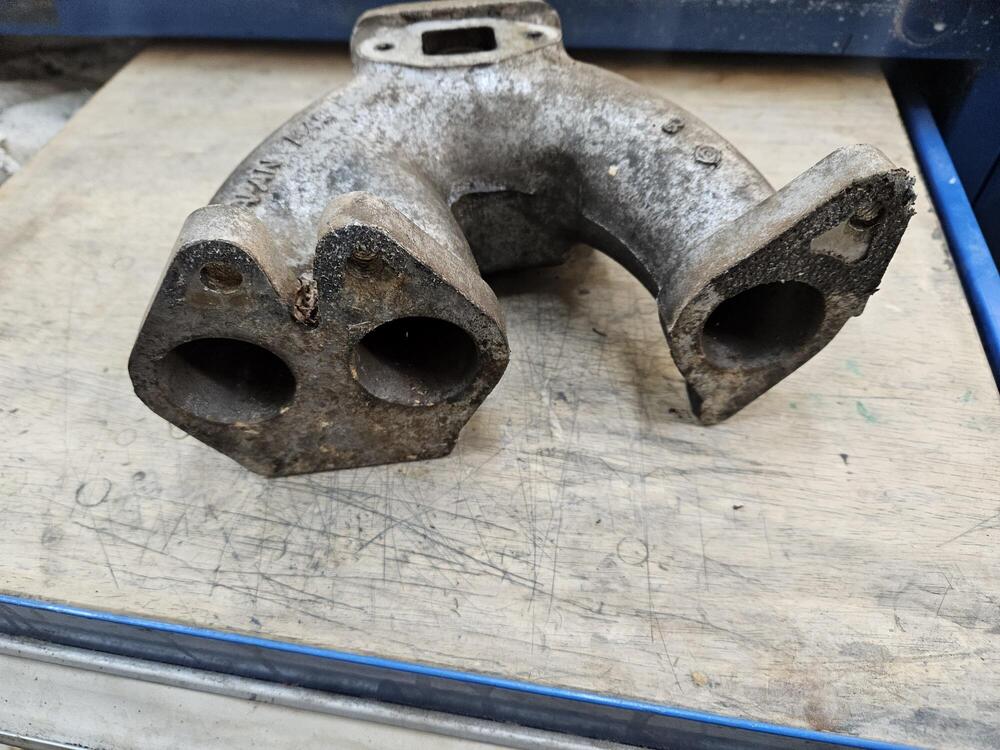
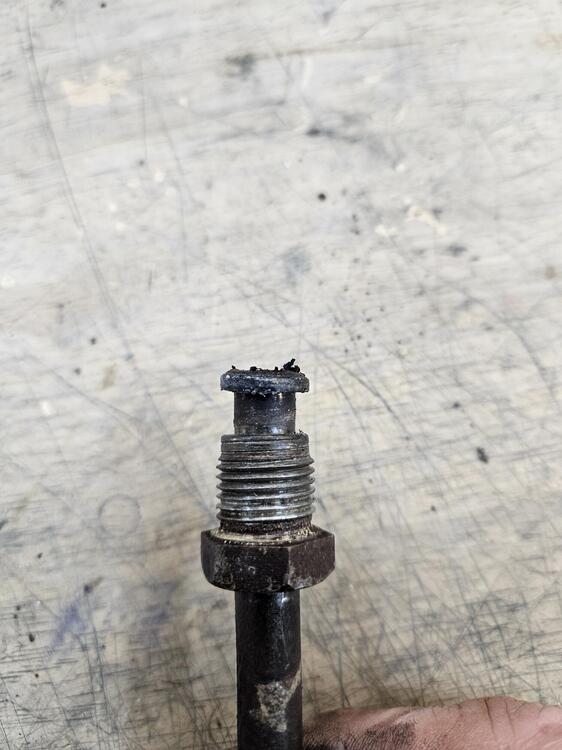
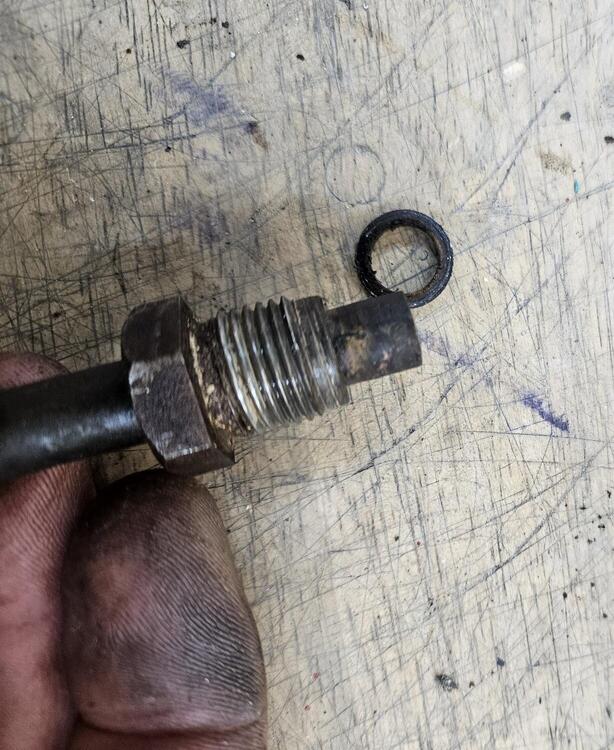
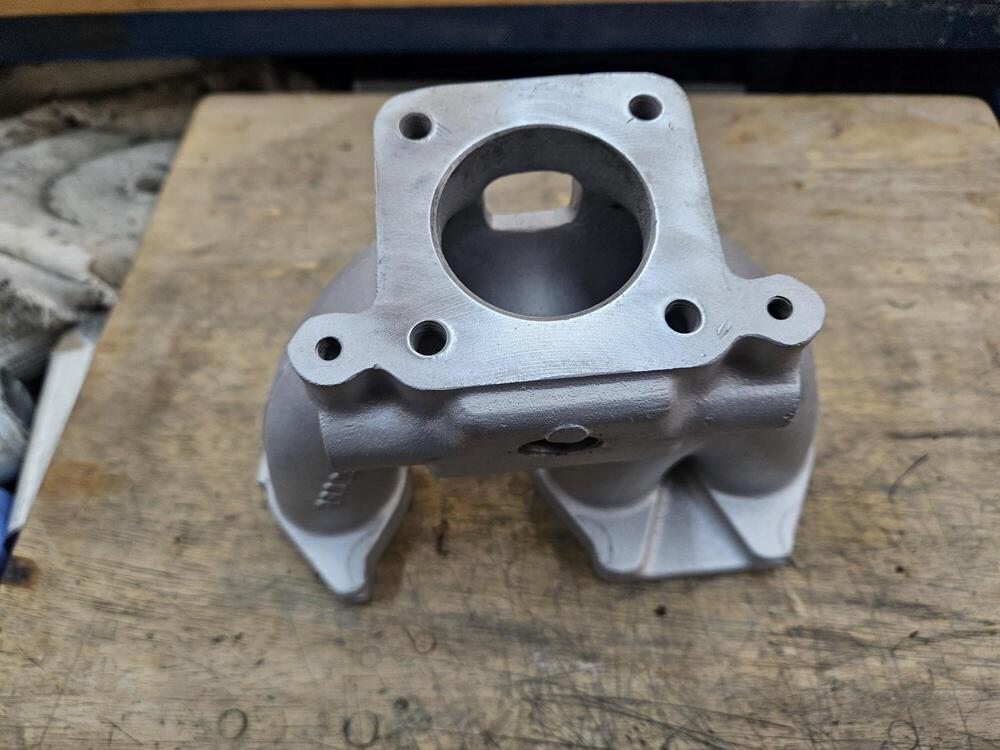
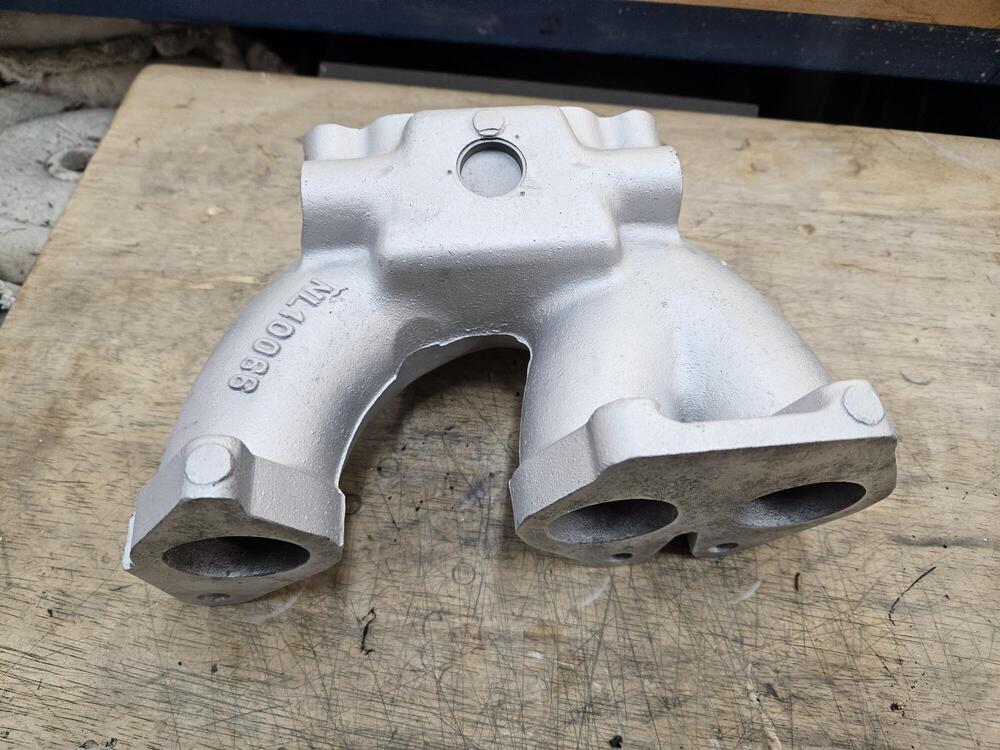
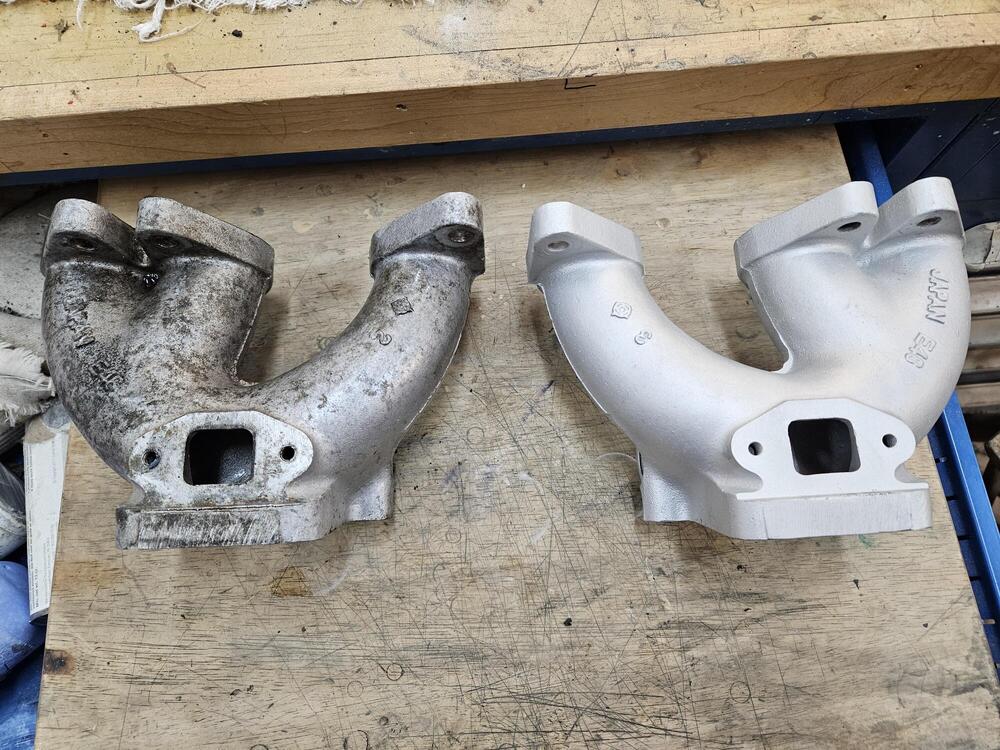
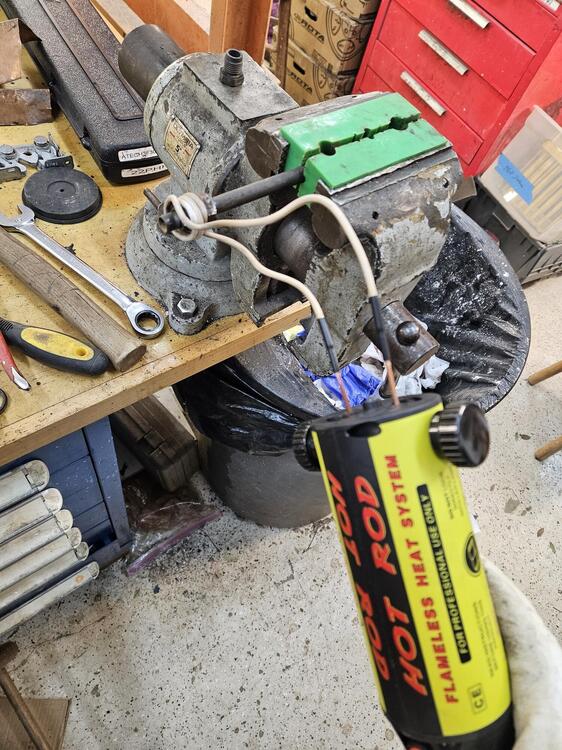
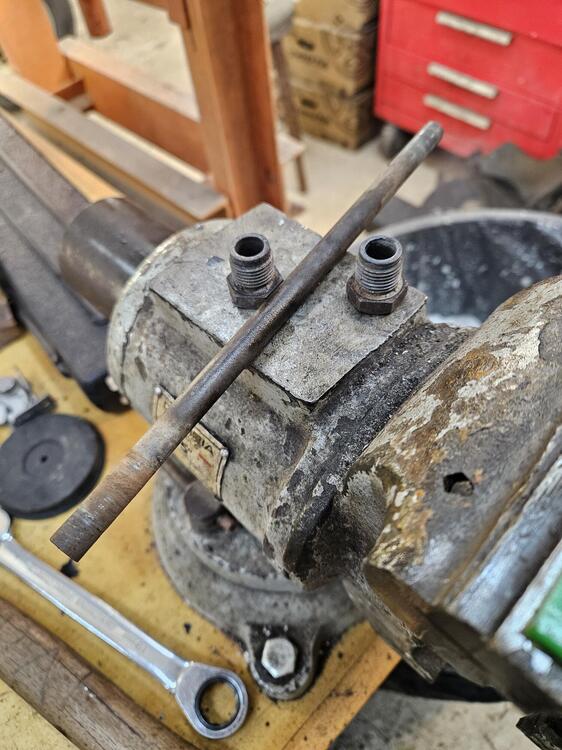
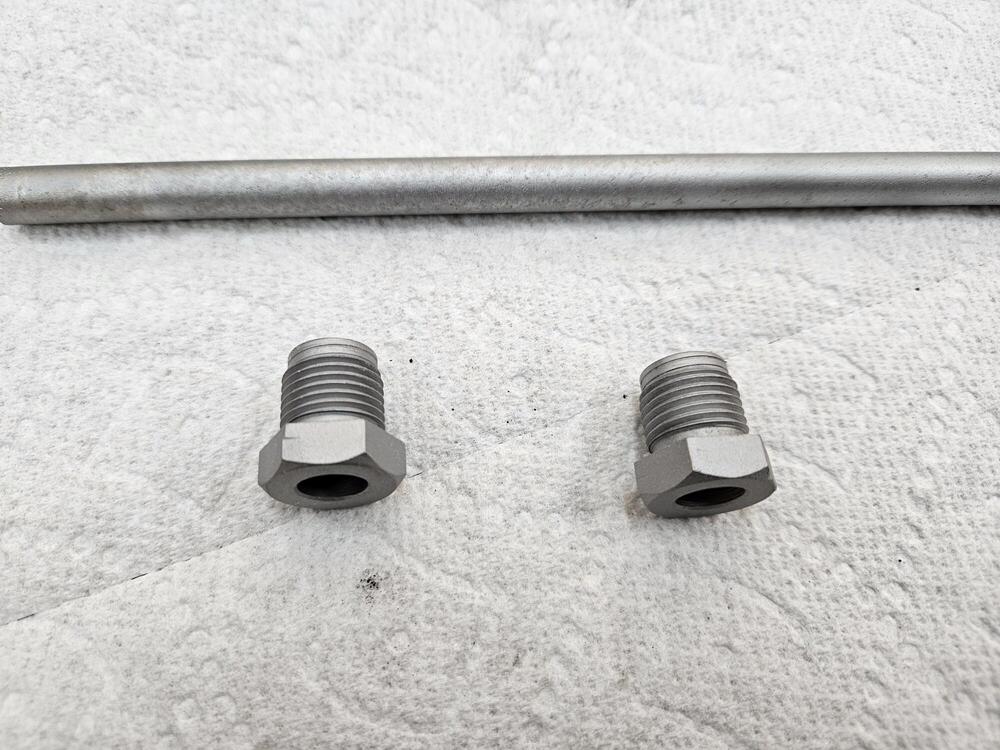
So I debated trying this or not. I'm glad I did though So the water tubes in the intake manifolds have been there for 50 years; steel in aluminum. They are 19mm (3/4") I don't have a flare nut wrench that large. But I took the propane torch to it and they came out! This is the end of the water tube. There is a rubber o ring that goes against a conical seat at the bottom of the hole. Then I used the induction heater to try to get the nuts off the pipe They came off which was great! That tool is really impressive in what you can get apart. Then I bead blasted these parts I'm glad that I did because the tube has a pin hole. I believe this would leak because the seal is a the bottom of the nut at the seat. This pinhole would be inside the nut. So I found a piece of tubing. I couldn't find anything on Amazon but I found some 10mm OD 8mm ID tubing on Ebay. So I have 20" of that coming. I will try to replate all of this in the next few weeks I pulled the studs out of the manifolds too. And this is what I had I degreased then and put them into the bead blasting cabinet. After the first pass, I turned the air pressure down to about 60psi and blasted them again. This is how they came out. I'm really pleased they look this good! Then I treated them with Sharkhide. Before and after
6 points
6 pointsSo I debated trying this or not. I'm glad I did though So the water tubes in the intake manifolds have been there for 50 years; steel in aluminum. They are 19mm (3/4") I don't have a flare nut wrench that large. But I took the propane torch to it and they came out! This is the end of the water tube. There is a rubber o ring that goes against a conical seat at the bottom of the hole. Then I used the induction heater to try to get the nuts off the pipe They came off which was great! That tool is really impressive in what you can get apart. Then I bead blasted these parts I'm glad that I did because the tube has a pin hole. I believe this would leak because the seal is a the bottom of the nut at the seat. This pinhole would be inside the nut. So I found a piece of tubing. I couldn't find anything on Amazon but I found some 10mm OD 8mm ID tubing on Ebay. So I have 20" of that coming. I will try to replate all of this in the next few weeks I pulled the studs out of the manifolds too. And this is what I had I degreased then and put them into the bead blasting cabinet. After the first pass, I turned the air pressure down to about 60psi and blasted them again. This is how they came out. I'm really pleased they look this good! Then I treated them with Sharkhide. Before and after


 6 points
 6 pointsProduct arrival from the Netherlands yesterday, new seals and welting as anticipated. Next up is to watch the install video on their website. Wheeee!!! 😁
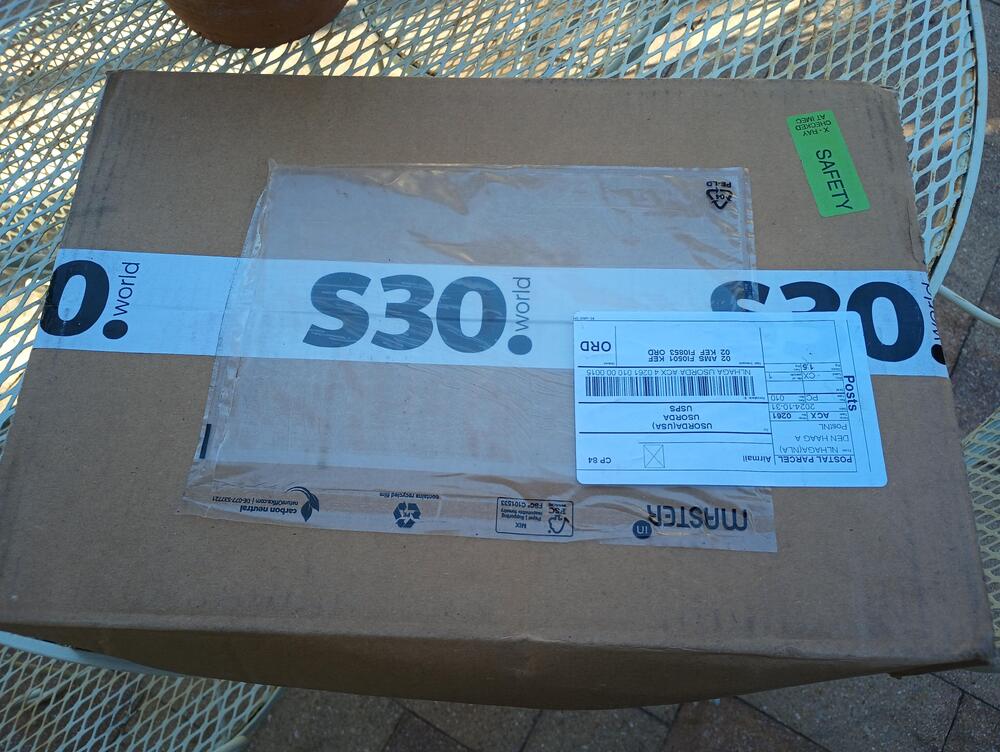
 6 points
From 1969 up, Japan. The basic design of the lamp unit incorporates the two bulb holders. Japanese market models used the second bulb holder for the parking lamp system and the designated sub harness hooked it up. . Slightly later, Australian market cars got a two bulb system with a divided half amber and half clear lens and an internal partition.
6 points
6 pointsFrom 1969 up, Japan. The basic design of the lamp unit incorporates the two bulb holders. Japanese market models used the second bulb holder for the parking lamp system and the designated sub harness hooked it up. . Slightly later, Australian market cars got a two bulb system with a divided half amber and half clear lens and an internal partition. 6 points
 6 pointsFun day with the Driven Edmonton show. A little overcast and turnout was still good with around 300 cars. SASSZ was one of two cars picked for Judges Choice award!
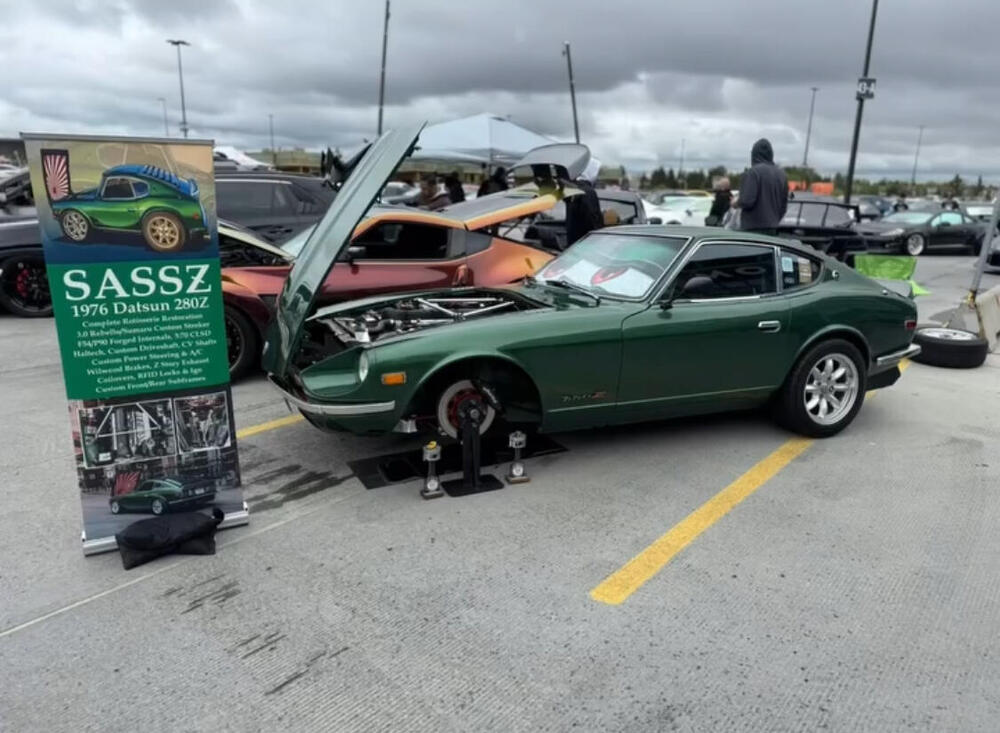


 6 points
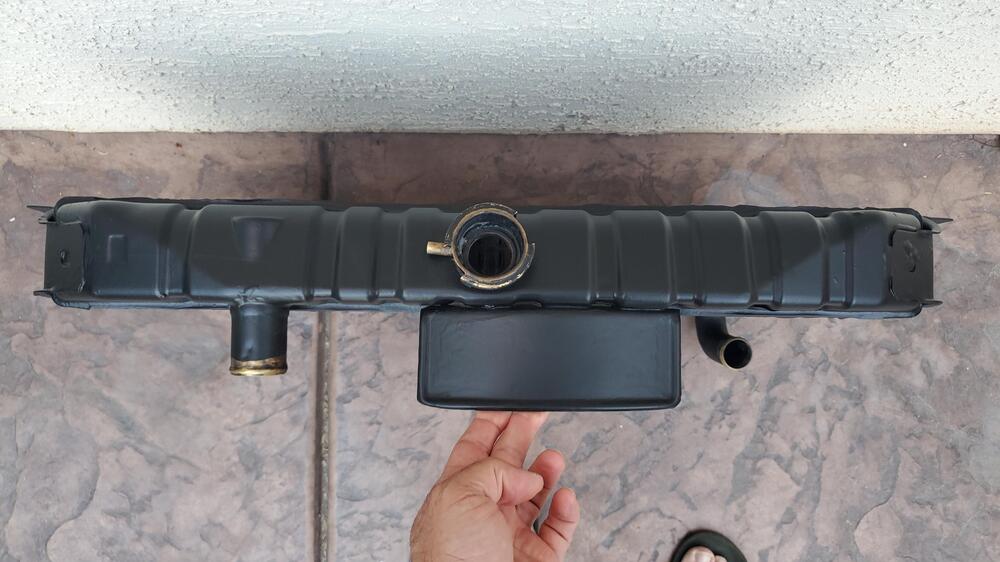
 6 pointsI'm working on the glove box lid, had to repair the hinge, repaint the hardware, etc. So like a dope I left some cleaner on the lid too long and it discolored it 😞 I knew better but got distracted with something, lost track of time, and came back to a faded grey for the color of the outside lid. At this point I was open to trying to paint it and since I have a bunch of the SEM stuff for the panels I'll be doing next month I figured I'd give it a try. Then I had another idea. I recently restored the radiator and used this to paint it when done. It came out beautiful BTW I had also used it for the inner door sil kickplates and those came out great too So I figured lets give it a try on the lid. Well, it came out nearly perfect match to the dash lol. This rad paint sprays on so thin since its made for radiator fins and dries so fast it was really easy and i didn't need to go through all the SEM prep and sandless and all that. Pictures don't do it justice but here goes When I'm ready to do all the panels I'll give this a try to see how it holds up and report back. Maybe an easier alternative for some.
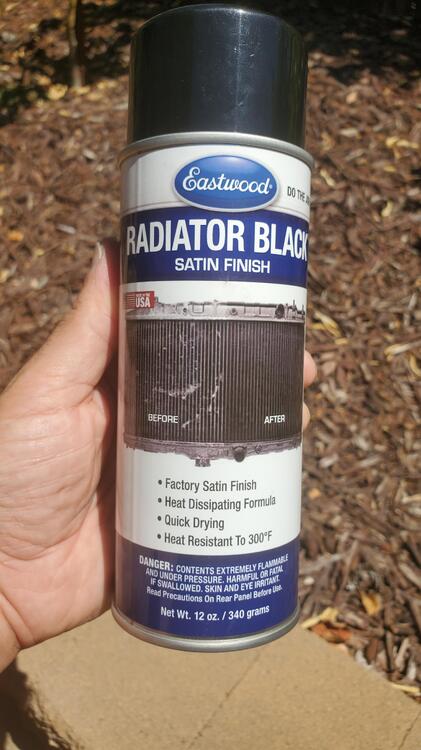
 6 points
 6 pointsBrigham City, Utah, Sept. 7, 2024 - 1,070 cars. I found I had relatives/in-laws with Z's, we were the only Z's except for a 370Z that was with the tuner cars. The ZX is an original turbo car and the 280Z has a LS under the hood. Different generations, we had a blast and I'm old enough to be their grampa. Funny, one kid about 12-13 walks by and says "look, Jaguars".
 6 points
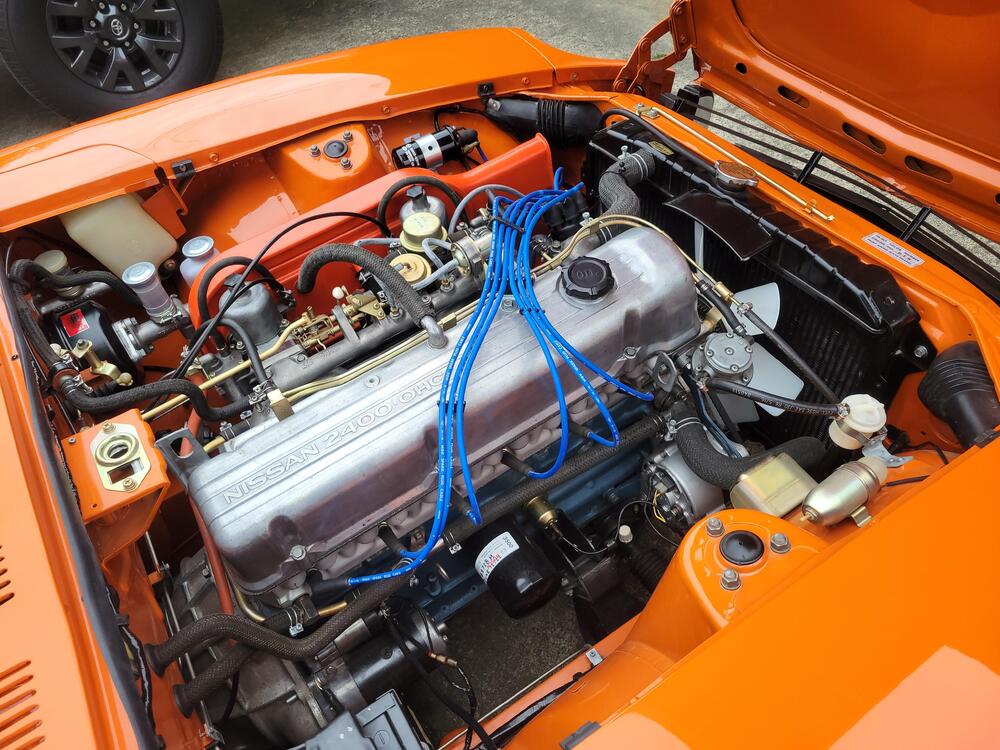
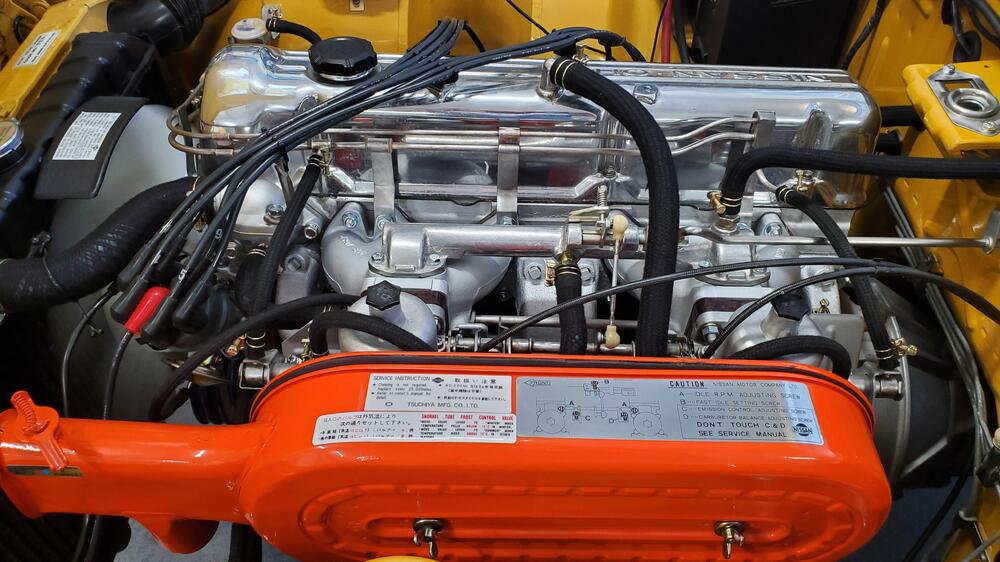
Well, everything is back and Ive attempted to balance the carbs. I think i did it right from all the reading Ive done. i madse sure to balance the airflow in each carb, then tested the mixture by slightly lifting the piston in each. Idle was pretty much un changed after I got them where It felty ok. i didnt have an impedence trype rpm reader was relying on the gauge and the sound of the engine. It feels around 850 from what i can tell. I'll have a friend come by and double check my work lol. One thing i did was go back and find the "before" pic and compare it to my new after. I'm pretty proud of theprogress Ive made as a newbie and 1st time owner. My work is probably not perfect but I continue to advance it little by little. Before, first pic from buying it after with all the changes / eliminations I really want to thank everyone for all the help these past two years. I couldn't have gotten this far without the community. Next up is getting the seats redone and back in so i can test drive it.
6 points
6 pointsWell, everything is back and Ive attempted to balance the carbs. I think i did it right from all the reading Ive done. i madse sure to balance the airflow in each carb, then tested the mixture by slightly lifting the piston in each. Idle was pretty much un changed after I got them where It felty ok. i didnt have an impedence trype rpm reader was relying on the gauge and the sound of the engine. It feels around 850 from what i can tell. I'll have a friend come by and double check my work lol. One thing i did was go back and find the "before" pic and compare it to my new after. I'm pretty proud of theprogress Ive made as a newbie and 1st time owner. My work is probably not perfect but I continue to advance it little by little. Before, first pic from buying it after with all the changes / eliminations I really want to thank everyone for all the help these past two years. I couldn't have gotten this far without the community. Next up is getting the seats redone and back in so i can test drive it.
 6 points
 6 pointsI finally figured it out. The white plastic adjustment screw for the outer door handle rod was screwed too far out. I screwed it in further and it works. Whew.
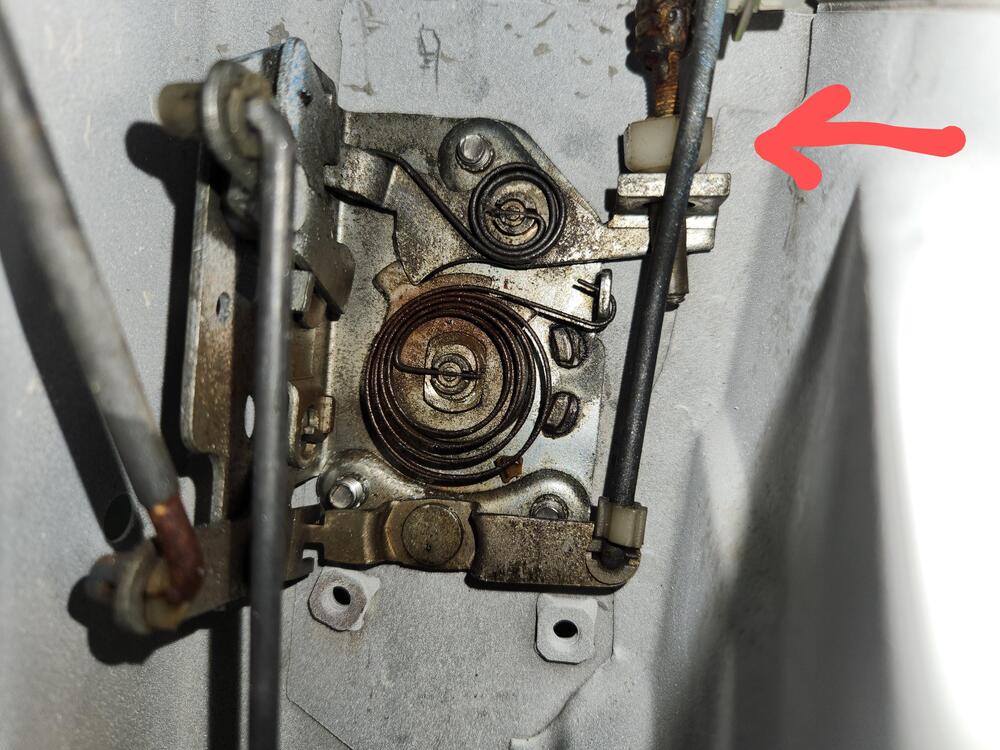 6 points
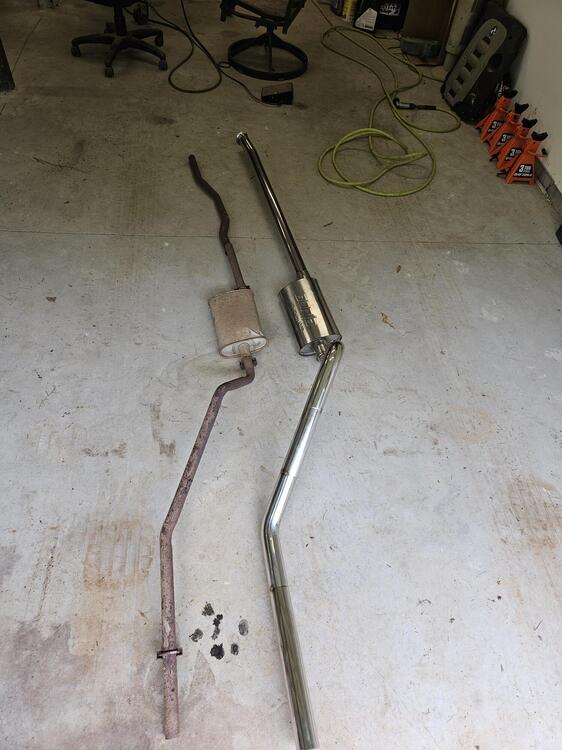
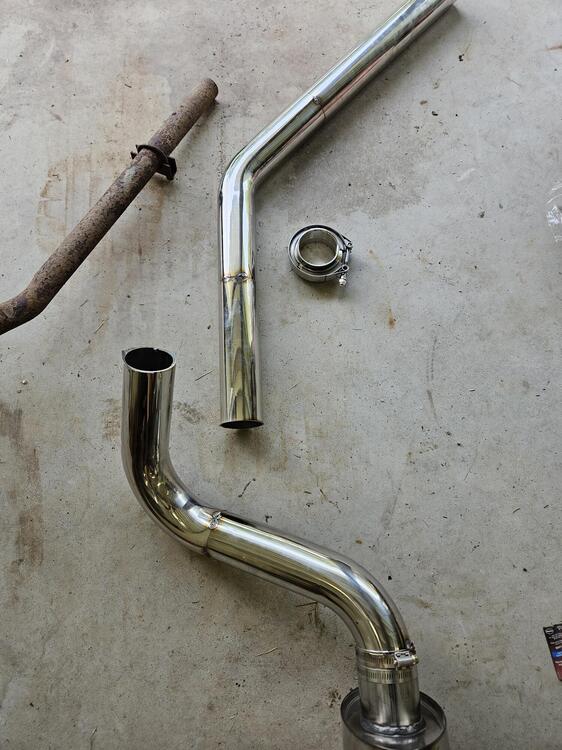
So more exhaust work last weekend I can't load all the images I want to. I get an unknown server error -200 @Mike Here are the one's that did load Old next to new We couldn't get the exhaust back under the car once it was tacked up. So we cut it here and will add another Vband. It pretty much all tacked up up. Once we verify that, we will ship off the header for jet coating. The cross section on the new exhaust is 315% bigger then the stock exhaust (1.25" vs 2.5"). It'll probably be rowdy but Cody will like that
6 points
6 pointsSo more exhaust work last weekend I can't load all the images I want to. I get an unknown server error -200 @Mike Here are the one's that did load Old next to new We couldn't get the exhaust back under the car once it was tacked up. So we cut it here and will add another Vband. It pretty much all tacked up up. Once we verify that, we will ship off the header for jet coating. The cross section on the new exhaust is 315% bigger then the stock exhaust (1.25" vs 2.5"). It'll probably be rowdy but Cody will like that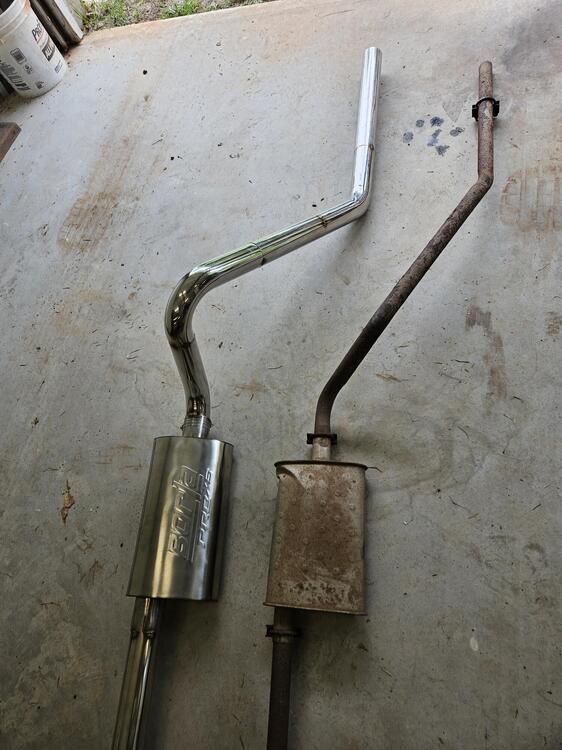
 6 points
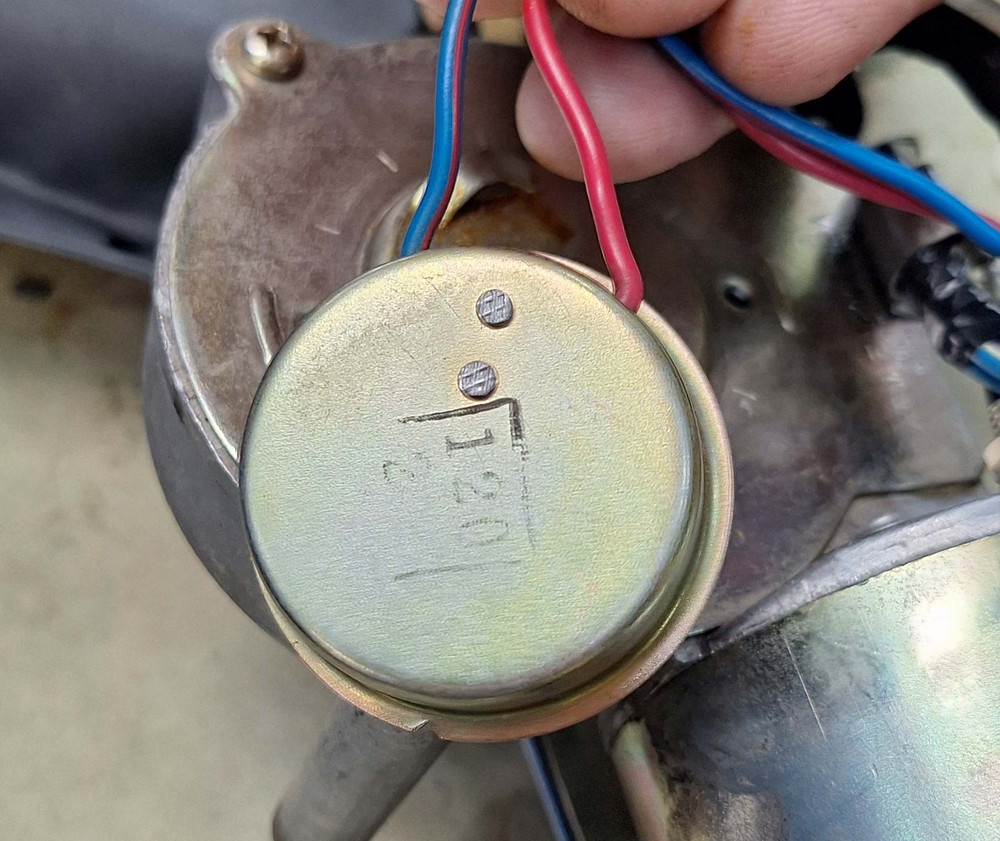
I recently visited with @inline6 to see if I could help him with an issue with his wiper motor. Though we thought we fixed it, my meter readings said we still had a problem. It turned out to be a self-inflicted issue that @Captain Obvious helped me to understand. Thanks to @inline6 finding an old thread (linked below) and @Captain Obvious getting me to focus on the diagram in the FSM, I was able to develop a better understanding of how the wiper circuit works. I hope I can convey it clearly in this thread. Anyway, here is the thread @inline6 found: Page BE-17 of the 72 FSM shows the wiper circuit, but it is confusing because it is a challenge to relate the diagram to the physical layout of the components. It also shows how the circuit is when the wipers are parked. The motor is not in the first photo, but the relay clamps to the motor, and the gearbox attaches to the motor. The relay is a 3-pole, double throw (3PDT) relay. In it's de-energized state, the contacts connect the motor to run in reverse for parking. The cap on the gearbox has a blue/red wire and red wire. The picture above is for a 73, but it was the clearest picture I could find. If you look carefully, you can see two rivets on the cap. On the other side of the cap, there is a set of contacts. These contacts allow the gearbox to break contact between the armature and ground when the wipers are parking. The gearbox has a wheel on the back with a raised area to push on the contacts. When the switch is turned on, the relay is energized. The blue arrows in the diagram below show going from the positive of the battery to the motor. The green lines show the contacts closed. The return path from the motor to ground depends upon the position of the wiper switch. If the switch is in low, follow the brown arrows. If the switch is in high, follow the red arrows. When you turn the switch off, the relay is de-energized. The contacts in the relay go back to the normally closed position. This reverses the power flow through the wiper motor. The motor keeps going until the wheel in the gearbox comes into contact with the contacts in the cap. At that point, the current return path for the motor armature is opened up. (Actually, both sides of the motor see the positive wire. This isn't an easy circuit to understand, especially if you've never taken a wiper motor apart.
6 points
6 pointsI recently visited with @inline6 to see if I could help him with an issue with his wiper motor. Though we thought we fixed it, my meter readings said we still had a problem. It turned out to be a self-inflicted issue that @Captain Obvious helped me to understand. Thanks to @inline6 finding an old thread (linked below) and @Captain Obvious getting me to focus on the diagram in the FSM, I was able to develop a better understanding of how the wiper circuit works. I hope I can convey it clearly in this thread. Anyway, here is the thread @inline6 found: Page BE-17 of the 72 FSM shows the wiper circuit, but it is confusing because it is a challenge to relate the diagram to the physical layout of the components. It also shows how the circuit is when the wipers are parked. The motor is not in the first photo, but the relay clamps to the motor, and the gearbox attaches to the motor. The relay is a 3-pole, double throw (3PDT) relay. In it's de-energized state, the contacts connect the motor to run in reverse for parking. The cap on the gearbox has a blue/red wire and red wire. The picture above is for a 73, but it was the clearest picture I could find. If you look carefully, you can see two rivets on the cap. On the other side of the cap, there is a set of contacts. These contacts allow the gearbox to break contact between the armature and ground when the wipers are parking. The gearbox has a wheel on the back with a raised area to push on the contacts. When the switch is turned on, the relay is energized. The blue arrows in the diagram below show going from the positive of the battery to the motor. The green lines show the contacts closed. The return path from the motor to ground depends upon the position of the wiper switch. If the switch is in low, follow the brown arrows. If the switch is in high, follow the red arrows. When you turn the switch off, the relay is de-energized. The contacts in the relay go back to the normally closed position. This reverses the power flow through the wiper motor. The motor keeps going until the wheel in the gearbox comes into contact with the contacts in the cap. At that point, the current return path for the motor armature is opened up. (Actually, both sides of the motor see the positive wire. This isn't an easy circuit to understand, especially if you've never taken a wiper motor apart.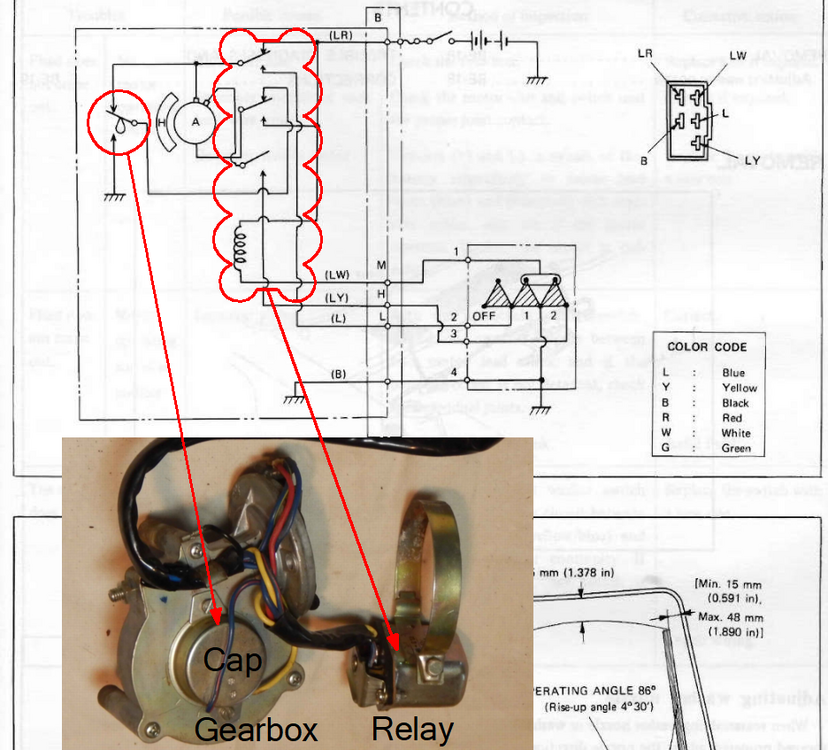


 6 points
 6 pointsHey guys, I've got some replacement parts for the transmission, like a new shift fork boot and throwout bearing (now installed on the sleeve). I wanted to get all new bolts to reattach the transmission to the engine so I ordered them from ZCar Depot. I just want to give these guys a big public shout out. I got this E-mail: I think it was really cool that they checked it with me. I don't mind of course. Not like the bolts will be visible once it's all back together anyhow, but I know it might be an issue for some folks so it made sense for them to contact me to check. I just wanted to give them some recognition. Never had a bad experience with these folks yet.6 points
Looks like a fantastic money pit, would love to get my hand on it.6 points
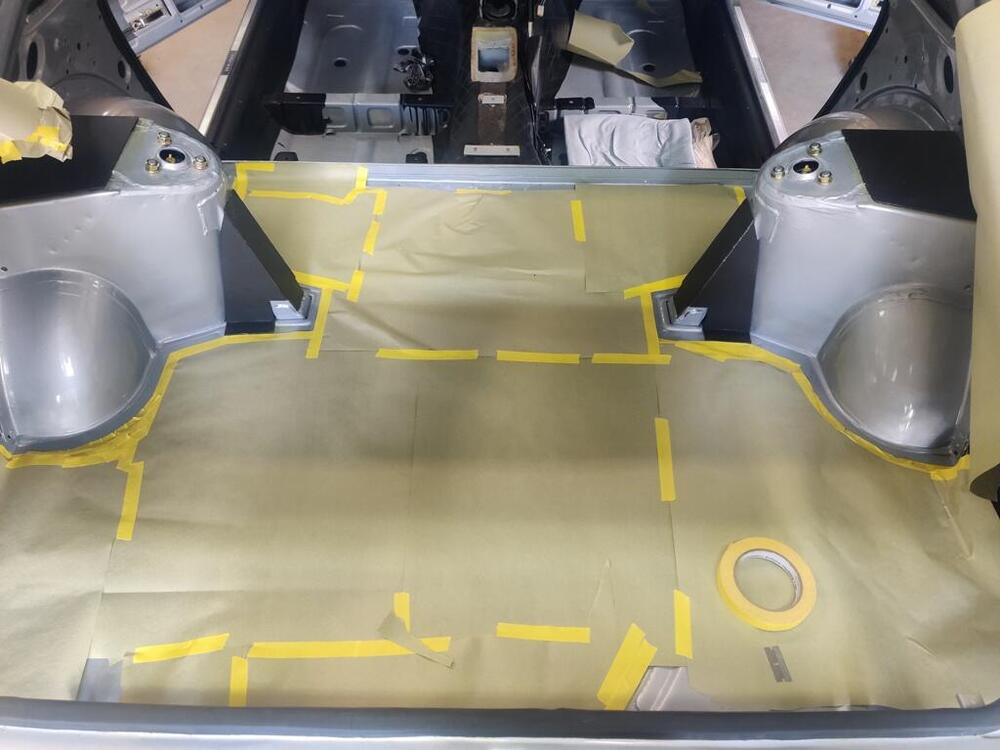
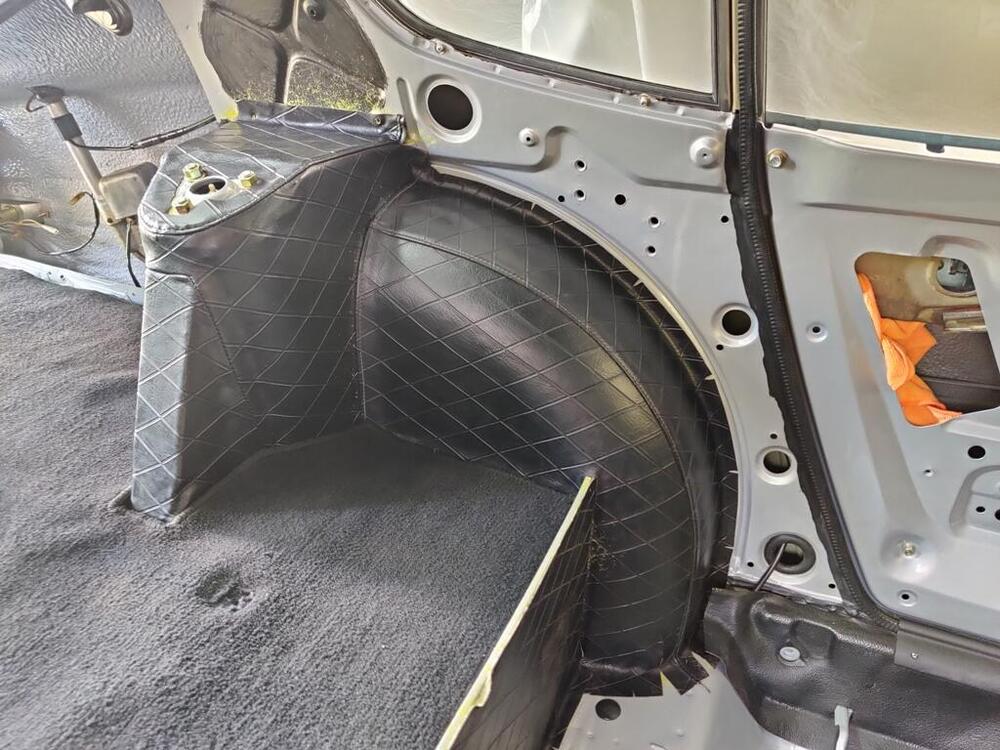
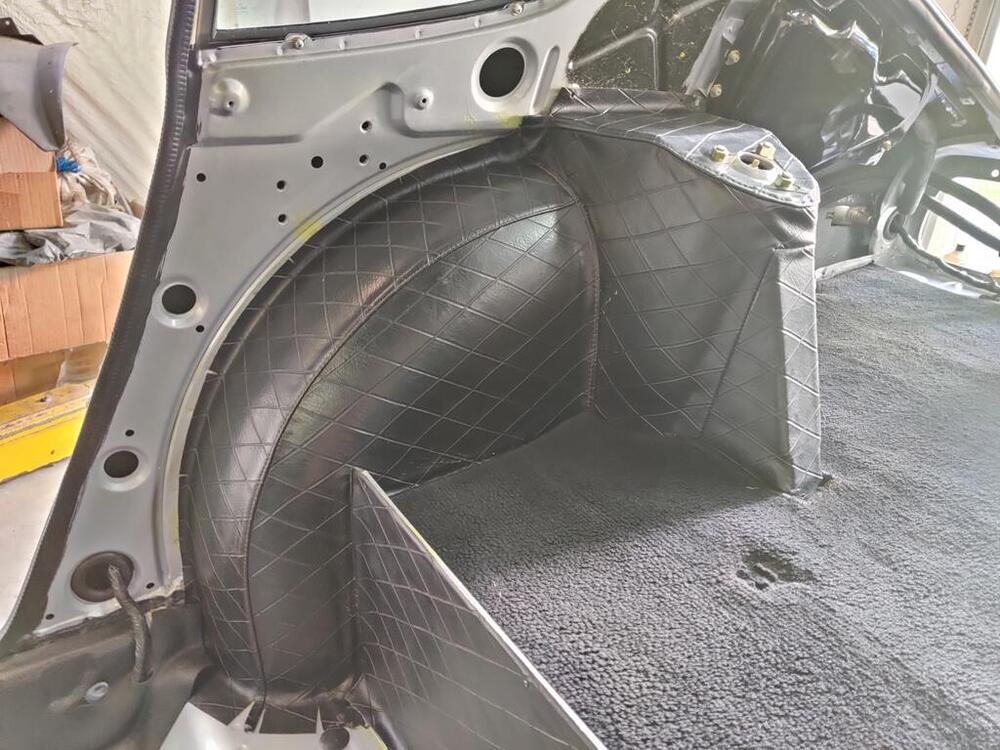
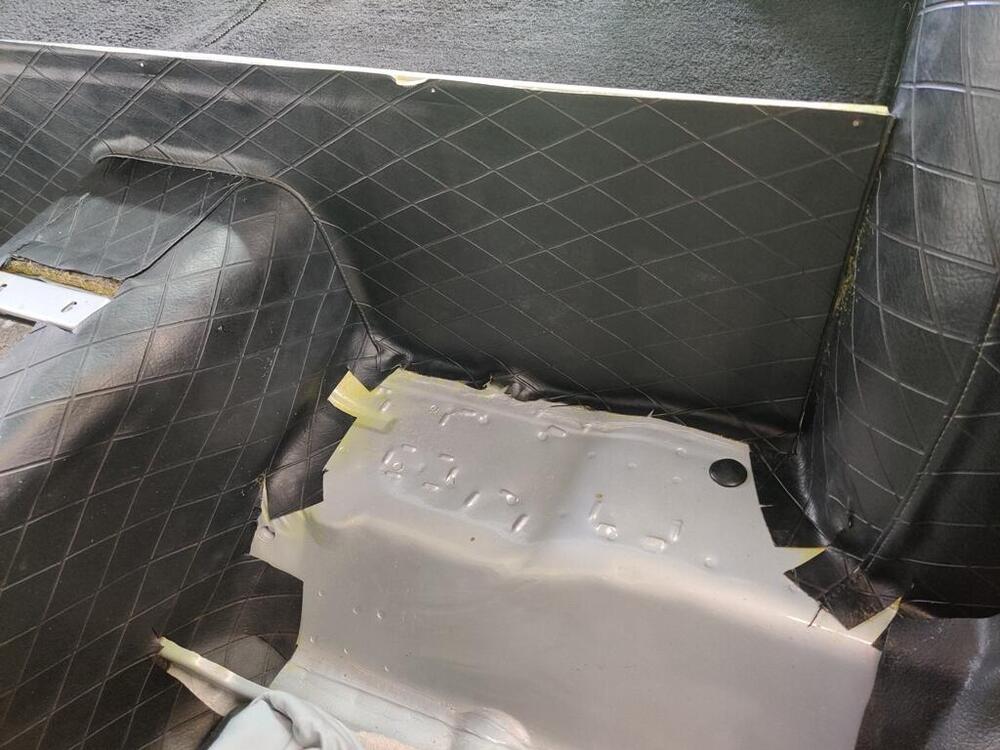
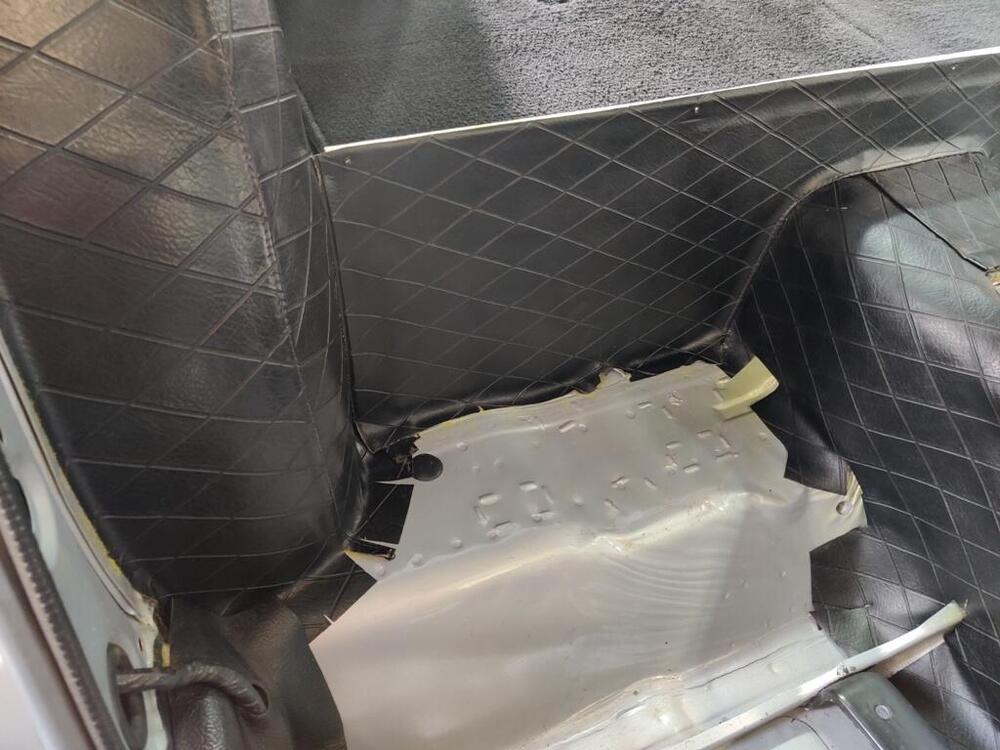
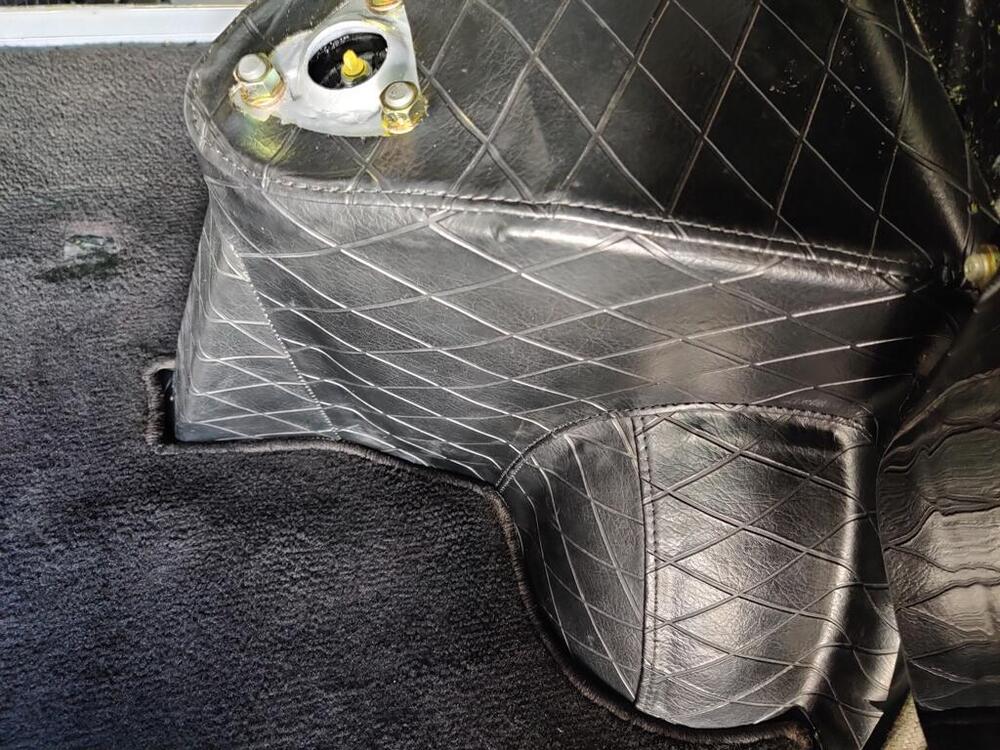
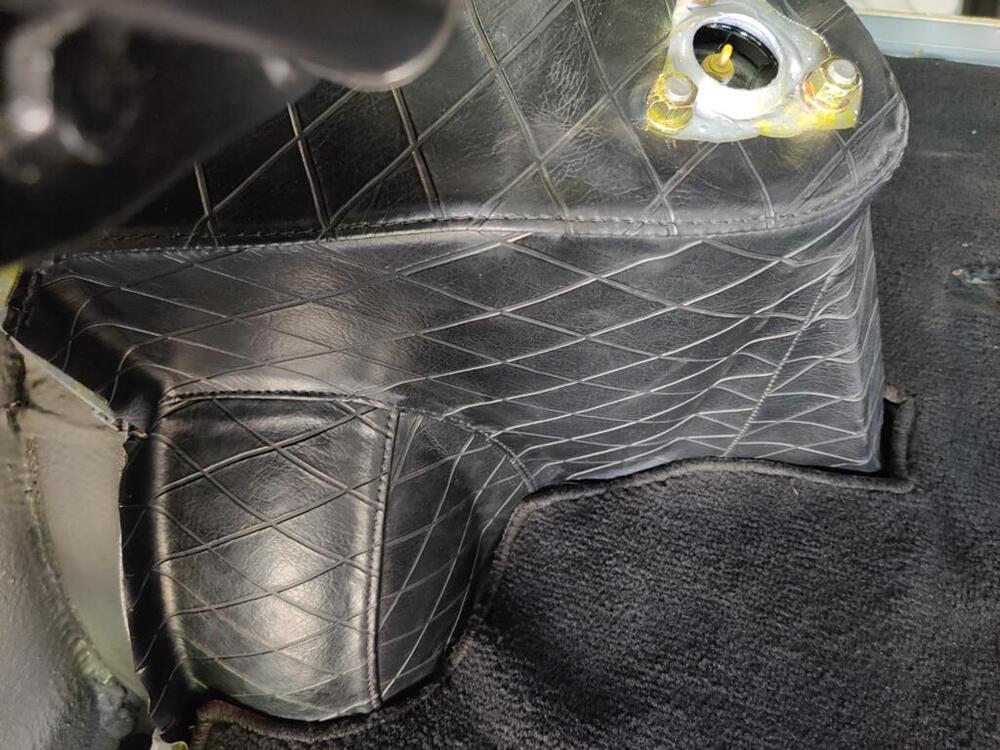
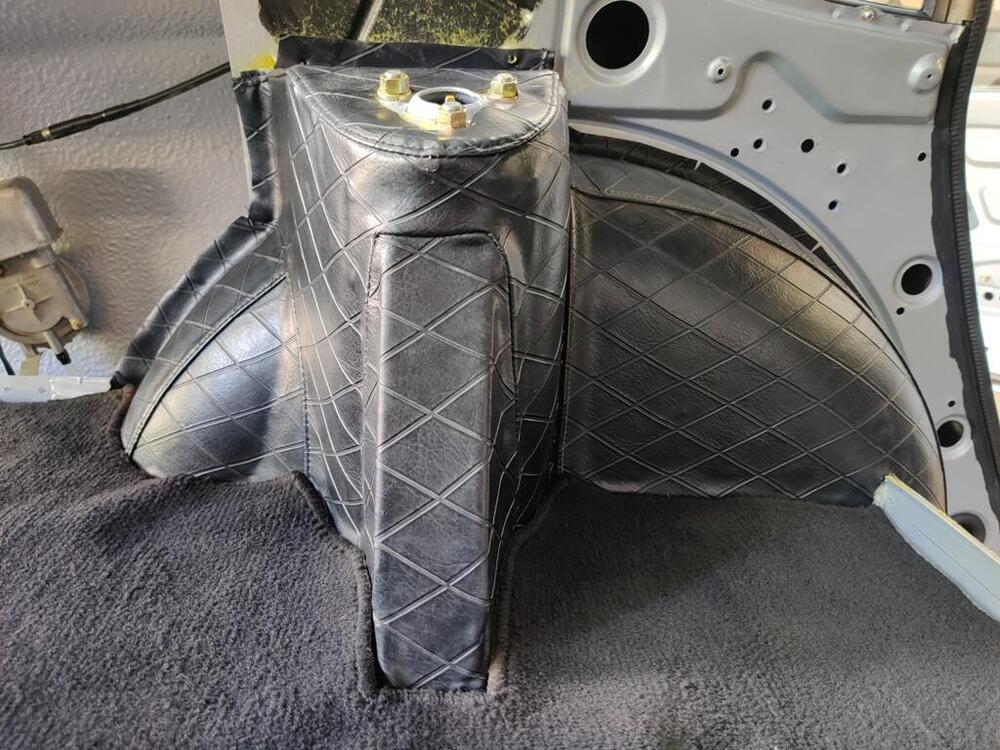
The time has come for me to install the rear tower and wheel well interior trim. The reproduction pieces have a "shallower" diamond imprint. I prefer the original. These pieces are often damaged, I think from putting in and retrieving things out of the rear hatch area, Objects nick and slice the vinyl, especially on the inner most portions that protrude. For the rear strut tower pieces, I took three complete pairs which I had accumulated over the past few years to a local auto upholstery shop. There, we determined the best sections for use. I left them with instructions to pull them apart as necessary and to re-stitch one complete pair using the best sections from the lot. Another "issue" I have noticed looking at 240z's over the years is that the vinyl covering the rear strut towers, if removed, often looks terrible when it is put back in. Whether, the wrong adhesive is used, or the installer lacks the necessary skills, or something else, the result often falls short vs. the other restoration work done on the car. So, as I started yesterday with my plan, one that included having all of the remaining diamond vinyl glued into place on the car before the end of the day, I knew I was in for some long, and stressful hours. First, I used Wesley's Bleche-White (an ancient bottle) to clean the backsides of the vinyl trim. Over the years, the white (I assume cotton) backing wicks up water and collects dirt with it. Wesley's Bleche-White that you can buy today appears to be a different chemical composition (based on a few minutes only) of searching online. The one I have appears to be the original stuff. I was amazed at how much dirt came out of the backside of the vinyl. I rinsed them thoroughly and then hung them outside in the GA heat to dry. While they were drying, I taped up parts of the back hatch area to protect from glue overspray. I once again used the Landau contact cement. When it is 90+ degrees, this stuff dries a bit quicker. That, and the very odd shape of the strut vinyl trim parts makes installation very challenging. On the first one, I struggled a bit because I didn't get the alignment right and it kept sticking to itself. With each passing second, the glue got drier and drier and more sticky. I screamed some obscenities and tried helplessly to reposition it without pulling it back off completely. Within two minutes, I realized I had failed, so I pulled it off completely. One important thing to note about contact adhesive is that it can be reactivated by applying more. So, before it dried even more, I grabbed the gun and went with a bit of a different plan. Instead of lightly coating the entire inside of the vinyl as I did before, I only sprayed the top (horizontal) section. I resprayed the corresponding top of the strut tower. Then, I positioned the top section so that the triangular cut out for the upper strut mount bolts was in the right location. From there, I put my attention at the portion of the top surface of vinyl that presses up against the inner quarter panel. I aligned the holes (those that accept the black plastic trim clips) that were in the vinyl to the holes in the inner quarter panel. I pushed the part contacting the inner quarter panel against it firmly. When I was sure those holes lined up, I lifted up on the triangle cut out area and pulled the vinyl taut as I repositioned the top (horizontal) section. You have a bit of work time, but you have to move quickly. At that point, I had only the top section in place, but the alignment looked good. From there, I lifted the other sections up so that I could spray glue onto the backside of the vinyl and onto the metal strut support structure. I applied more glue in areas where the factory workers had. Flat expanses got less, areas of transition from one surface to another, got more. From there, it was less challenging. I focused on getting the backmost section located properly against the inner quarter panel, making sure to put some tension on it as I pressed in into place. This is necessary to keep wrinkles from forming. I did have to lift back up some and reposition, but not a lot. Anyway, for the second one, I copied my successful second effort on the first. It went well. I still have some glue overspray, and the white haze that you see on the black vinyl to clean off. I think the white haze came from the Westley's Bleche-White, but it comes off. These pic were catching a lot of afternoon sun as well, so the black looks like it is washed out a bit, but it isn't. I think it will look nice when all cleaned up.
6 pointsHey guys, I've got some replacement parts for the transmission, like a new shift fork boot and throwout bearing (now installed on the sleeve). I wanted to get all new bolts to reattach the transmission to the engine so I ordered them from ZCar Depot. I just want to give these guys a big public shout out. I got this E-mail: I think it was really cool that they checked it with me. I don't mind of course. Not like the bolts will be visible once it's all back together anyhow, but I know it might be an issue for some folks so it made sense for them to contact me to check. I just wanted to give them some recognition. Never had a bad experience with these folks yet.6 points
Looks like a fantastic money pit, would love to get my hand on it.6 points
The time has come for me to install the rear tower and wheel well interior trim. The reproduction pieces have a "shallower" diamond imprint. I prefer the original. These pieces are often damaged, I think from putting in and retrieving things out of the rear hatch area, Objects nick and slice the vinyl, especially on the inner most portions that protrude. For the rear strut tower pieces, I took three complete pairs which I had accumulated over the past few years to a local auto upholstery shop. There, we determined the best sections for use. I left them with instructions to pull them apart as necessary and to re-stitch one complete pair using the best sections from the lot. Another "issue" I have noticed looking at 240z's over the years is that the vinyl covering the rear strut towers, if removed, often looks terrible when it is put back in. Whether, the wrong adhesive is used, or the installer lacks the necessary skills, or something else, the result often falls short vs. the other restoration work done on the car. So, as I started yesterday with my plan, one that included having all of the remaining diamond vinyl glued into place on the car before the end of the day, I knew I was in for some long, and stressful hours. First, I used Wesley's Bleche-White (an ancient bottle) to clean the backsides of the vinyl trim. Over the years, the white (I assume cotton) backing wicks up water and collects dirt with it. Wesley's Bleche-White that you can buy today appears to be a different chemical composition (based on a few minutes only) of searching online. The one I have appears to be the original stuff. I was amazed at how much dirt came out of the backside of the vinyl. I rinsed them thoroughly and then hung them outside in the GA heat to dry. While they were drying, I taped up parts of the back hatch area to protect from glue overspray. I once again used the Landau contact cement. When it is 90+ degrees, this stuff dries a bit quicker. That, and the very odd shape of the strut vinyl trim parts makes installation very challenging. On the first one, I struggled a bit because I didn't get the alignment right and it kept sticking to itself. With each passing second, the glue got drier and drier and more sticky. I screamed some obscenities and tried helplessly to reposition it without pulling it back off completely. Within two minutes, I realized I had failed, so I pulled it off completely. One important thing to note about contact adhesive is that it can be reactivated by applying more. So, before it dried even more, I grabbed the gun and went with a bit of a different plan. Instead of lightly coating the entire inside of the vinyl as I did before, I only sprayed the top (horizontal) section. I resprayed the corresponding top of the strut tower. Then, I positioned the top section so that the triangular cut out for the upper strut mount bolts was in the right location. From there, I put my attention at the portion of the top surface of vinyl that presses up against the inner quarter panel. I aligned the holes (those that accept the black plastic trim clips) that were in the vinyl to the holes in the inner quarter panel. I pushed the part contacting the inner quarter panel against it firmly. When I was sure those holes lined up, I lifted up on the triangle cut out area and pulled the vinyl taut as I repositioned the top (horizontal) section. You have a bit of work time, but you have to move quickly. At that point, I had only the top section in place, but the alignment looked good. From there, I lifted the other sections up so that I could spray glue onto the backside of the vinyl and onto the metal strut support structure. I applied more glue in areas where the factory workers had. Flat expanses got less, areas of transition from one surface to another, got more. From there, it was less challenging. I focused on getting the backmost section located properly against the inner quarter panel, making sure to put some tension on it as I pressed in into place. This is necessary to keep wrinkles from forming. I did have to lift back up some and reposition, but not a lot. Anyway, for the second one, I copied my successful second effort on the first. It went well. I still have some glue overspray, and the white haze that you see on the black vinyl to clean off. I think the white haze came from the Westley's Bleche-White, but it comes off. These pic were catching a lot of afternoon sun as well, so the black looks like it is washed out a bit, but it isn't. I think it will look nice when all cleaned up.


 6 points
Got the doors on tonight. Not totally lined up but pretty close
6 points
6 pointsGot the doors on tonight. Not totally lined up but pretty close 6 points
My two cents as a relative newbie to all this. i have a 6/71 build HLS3036219 and am not the original owner so i don't know what was original or not. By date and VIN it should be a pure series 2. the PO did a terrible job of restoring and took so many shortcuts its shameful. trying my best to correct all that I can. As i'm doing this I realize that the most important thing is to make your car what you want with it. I had to address seat mechanism issues and took the ebay route. Well what I did was get a 72 pair of seats which isn't correct for the car but its correct for me since I like the idea of the better reclining function. I also had to replace the fan, the original metal one was a mess well I decided to get the 72 plastic one to save wear and tear on the water pump, and the list could go on. So enjoy your cars, build and tinker to suit your needs. We wont be here forever so enjoy it.6 points
I don't find the Series 1 / 2 terminology offensive. I look at it as a general description that gives some idea of the traits the car could have. It's not normally used as a hard and fast rule or an absolute. I find the terminology very helpful and always have. If I want exactness I use production dates but it's very rare I care that much.6 points
6 points
My two cents as a relative newbie to all this. i have a 6/71 build HLS3036219 and am not the original owner so i don't know what was original or not. By date and VIN it should be a pure series 2. the PO did a terrible job of restoring and took so many shortcuts its shameful. trying my best to correct all that I can. As i'm doing this I realize that the most important thing is to make your car what you want with it. I had to address seat mechanism issues and took the ebay route. Well what I did was get a 72 pair of seats which isn't correct for the car but its correct for me since I like the idea of the better reclining function. I also had to replace the fan, the original metal one was a mess well I decided to get the 72 plastic one to save wear and tear on the water pump, and the list could go on. So enjoy your cars, build and tinker to suit your needs. We wont be here forever so enjoy it.6 points
I don't find the Series 1 / 2 terminology offensive. I look at it as a general description that gives some idea of the traits the car could have. It's not normally used as a hard and fast rule or an absolute. I find the terminology very helpful and always have. If I want exactness I use production dates but it's very rare I care that much.6 points 6 points
Ok, a few minutes for an update to what’s going on technology wise on the 510 project First, an update on the speedo cable drive. I couldn’t get the Dakota DIgital box to read the VSS out of my ECU for reasons I have not resolved, so I went the lazy route and bought the one from Speed hut that uses GPS as an input. It has been operating flawlessly, EVEN on a recent trip through the mountains (unlike my satellite radio….). While it can be calibrated to any speedo, somehow this work of art managed to read PERFECTLY out of the box on my Metric KPH marked 69 510 sweep style 50+ year speedometer. Maybe the RPM/MPH thing is pretty standard across speedometers….. https://speedhut.com/supershops/speedbox-without-mechanical-cable-gps-vss-to-mechanical-drive-speed-converter/
6 points
Ok, a few minutes for an update to what’s going on technology wise on the 510 project First, an update on the speedo cable drive. I couldn’t get the Dakota DIgital box to read the VSS out of my ECU for reasons I have not resolved, so I went the lazy route and bought the one from Speed hut that uses GPS as an input. It has been operating flawlessly, EVEN on a recent trip through the mountains (unlike my satellite radio….). While it can be calibrated to any speedo, somehow this work of art managed to read PERFECTLY out of the box on my Metric KPH marked 69 510 sweep style 50+ year speedometer. Maybe the RPM/MPH thing is pretty standard across speedometers….. https://speedhut.com/supershops/speedbox-without-mechanical-cable-gps-vss-to-mechanical-drive-speed-converter/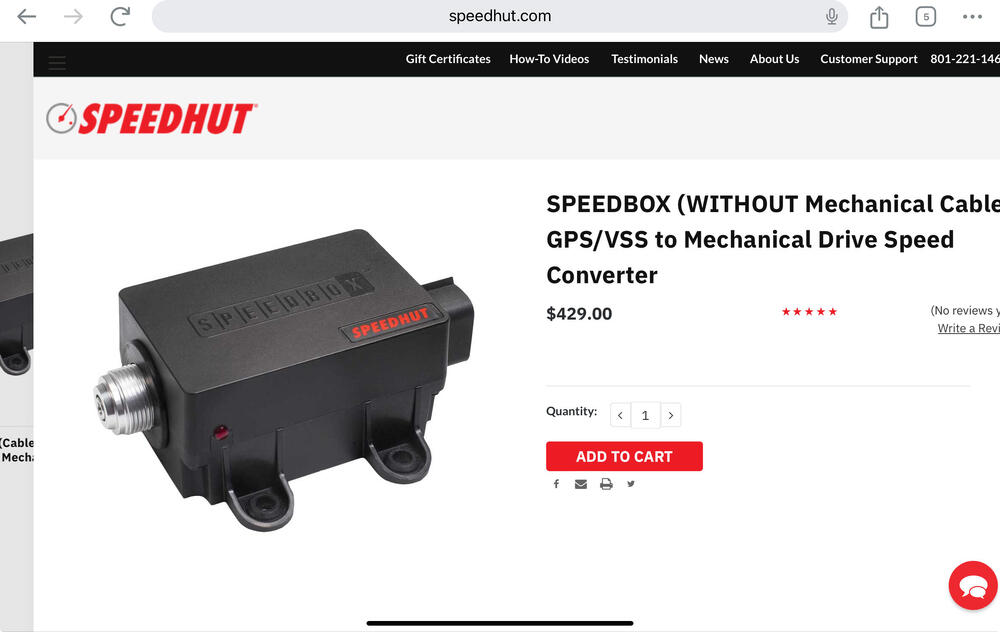 6 points
 6 pointsPainting the block, masking is always fun to do. I couldn’t stop my self to paint the bolt fixing the engine mount bracket. If I had extra genuine marked ‘7’ bolts I would have re-plated it. The outcome is so so, I sprayed fluorescence green over metallic yellow. Finally I put just a little bit of metallic purple. Please see the engine mount bracket, it has over spray of blue, is is original? And the date shown on the center muffler and the rear muffler ‘72 07’ they make the car so proud as a survivor. In Japan so many people wanted to replace it with a dual exhaust pipes. I think it looks odd to see some very bright parts in the non restored engine bay. Kats

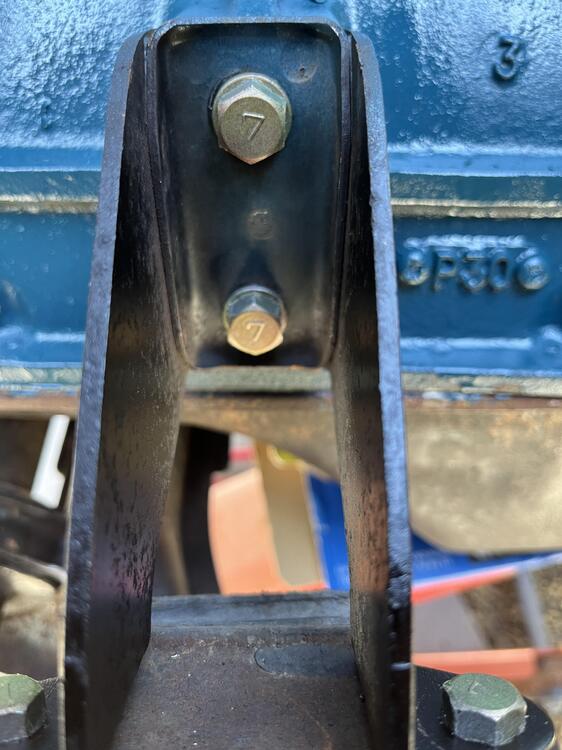


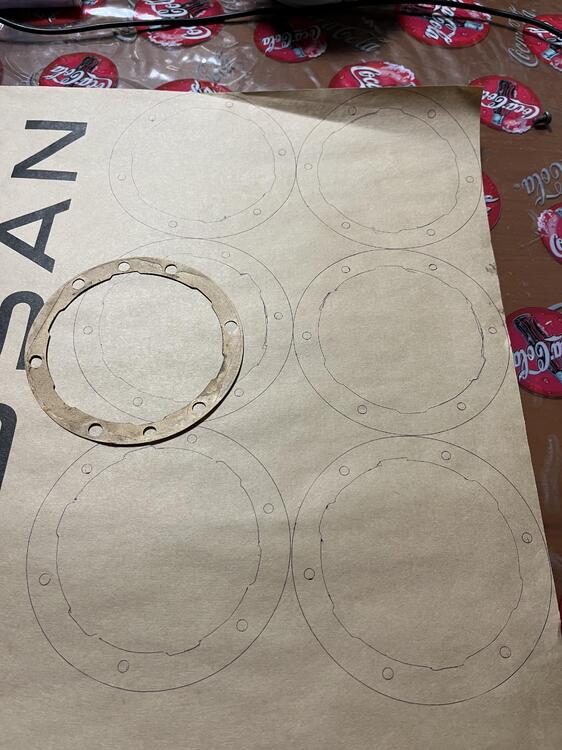
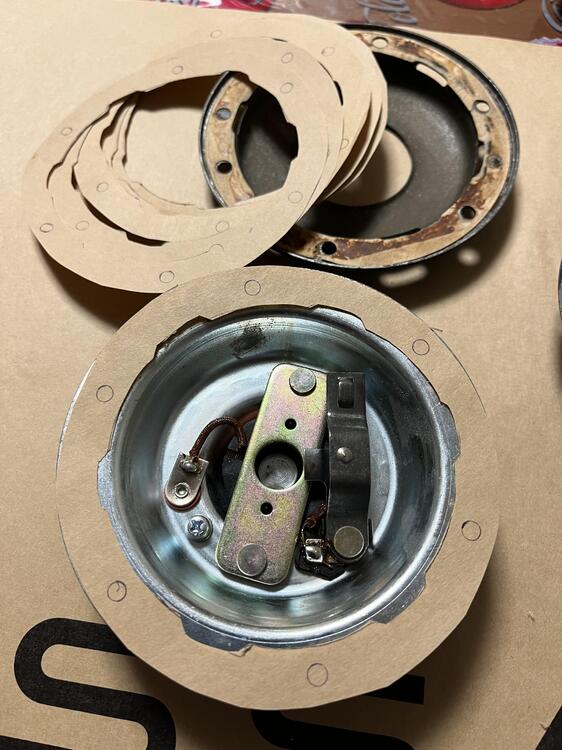
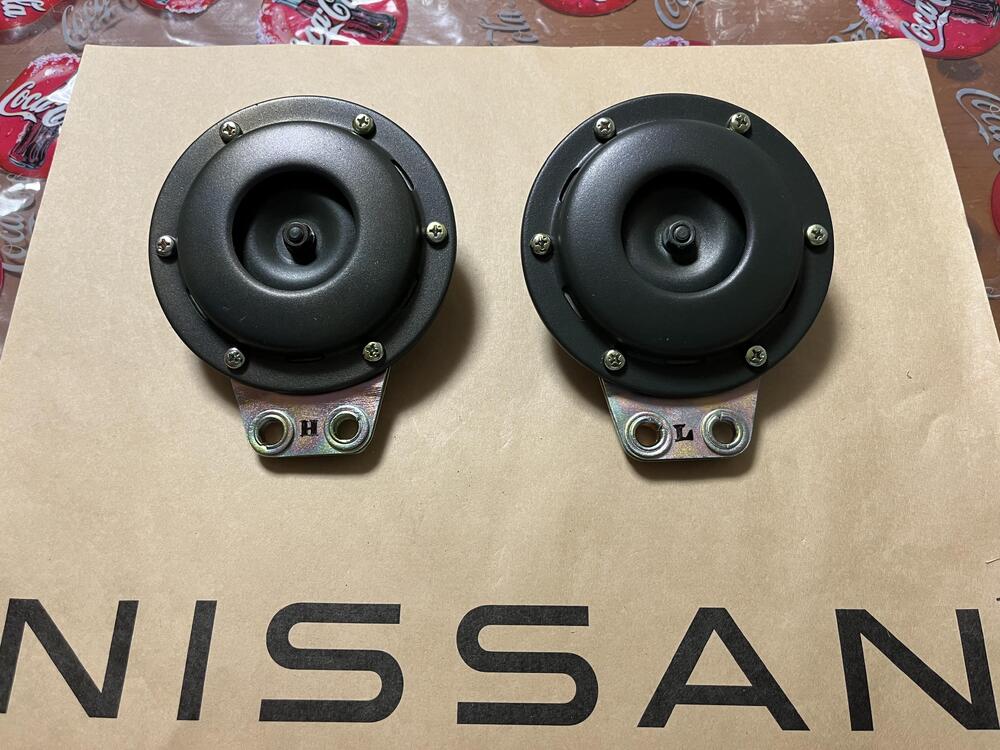
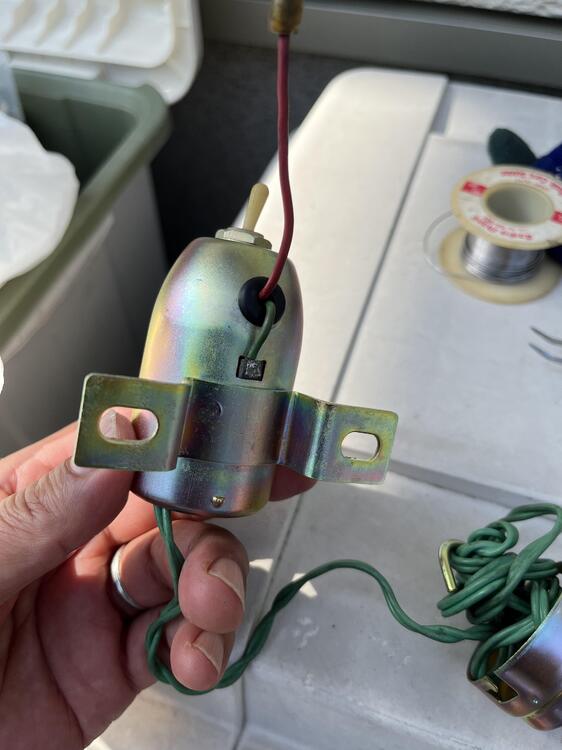
 6 points
 Pulled the Old Gal out of the garage to sweep out the dust bunnies underneath. Bonus...no fluid puddles on the concrete 👍
 6 points
 6 pointsI brought the z to a car detailer who polished it..it was full of swirls etc. Paint is 8 years old but wel maintained. Looks like new again he did a great job.
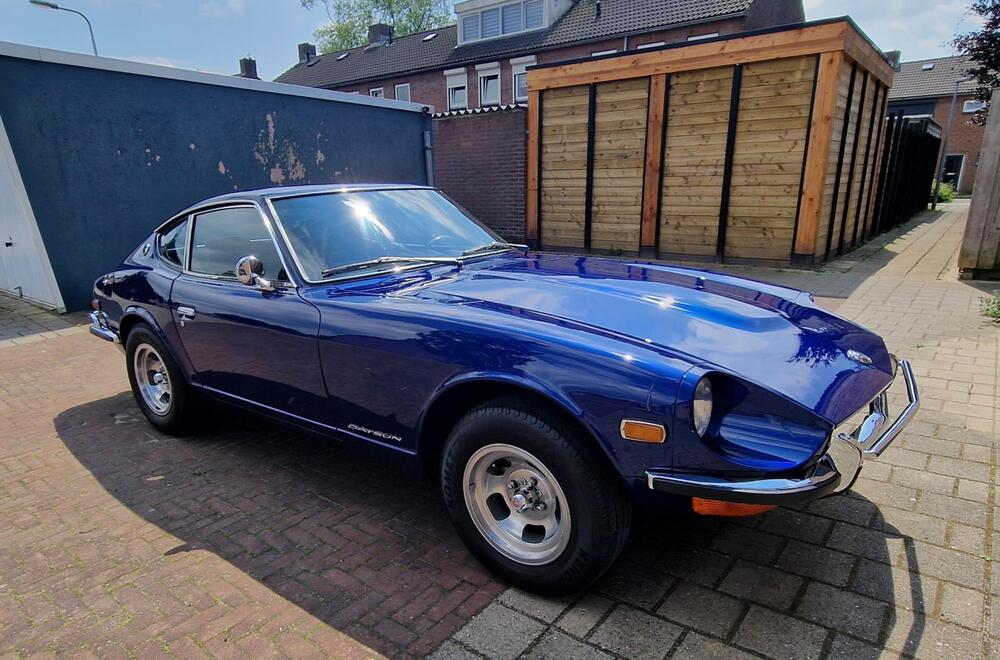 6 points
 I finally got around to doing something with this. I dropped by my local Z mechanic last week to see what pro tips he may have and it was well worth the stop. Super simple fix using something everyone has in their garage (I was obviously over complicating it by seeking a pipe expander). He took a socket that was just barely too big and hammered it in the end to expand it ever so slightly, this also had the added benefit or making the tube perfectly round again (not sure if it was already or not). Super simple fix!! I installed it today and the install was just as I would have expected, a nice tight compression fit...tapped it in gently with a hammer. All is good. 🙂 Hope that this helps someone else in the future.6 points
6 points
5 points
I finally got around to doing something with this. I dropped by my local Z mechanic last week to see what pro tips he may have and it was well worth the stop. Super simple fix using something everyone has in their garage (I was obviously over complicating it by seeking a pipe expander). He took a socket that was just barely too big and hammered it in the end to expand it ever so slightly, this also had the added benefit or making the tube perfectly round again (not sure if it was already or not). Super simple fix!! I installed it today and the install was just as I would have expected, a nice tight compression fit...tapped it in gently with a hammer. All is good. 🙂 Hope that this helps someone else in the future.6 points
6 points
5 points

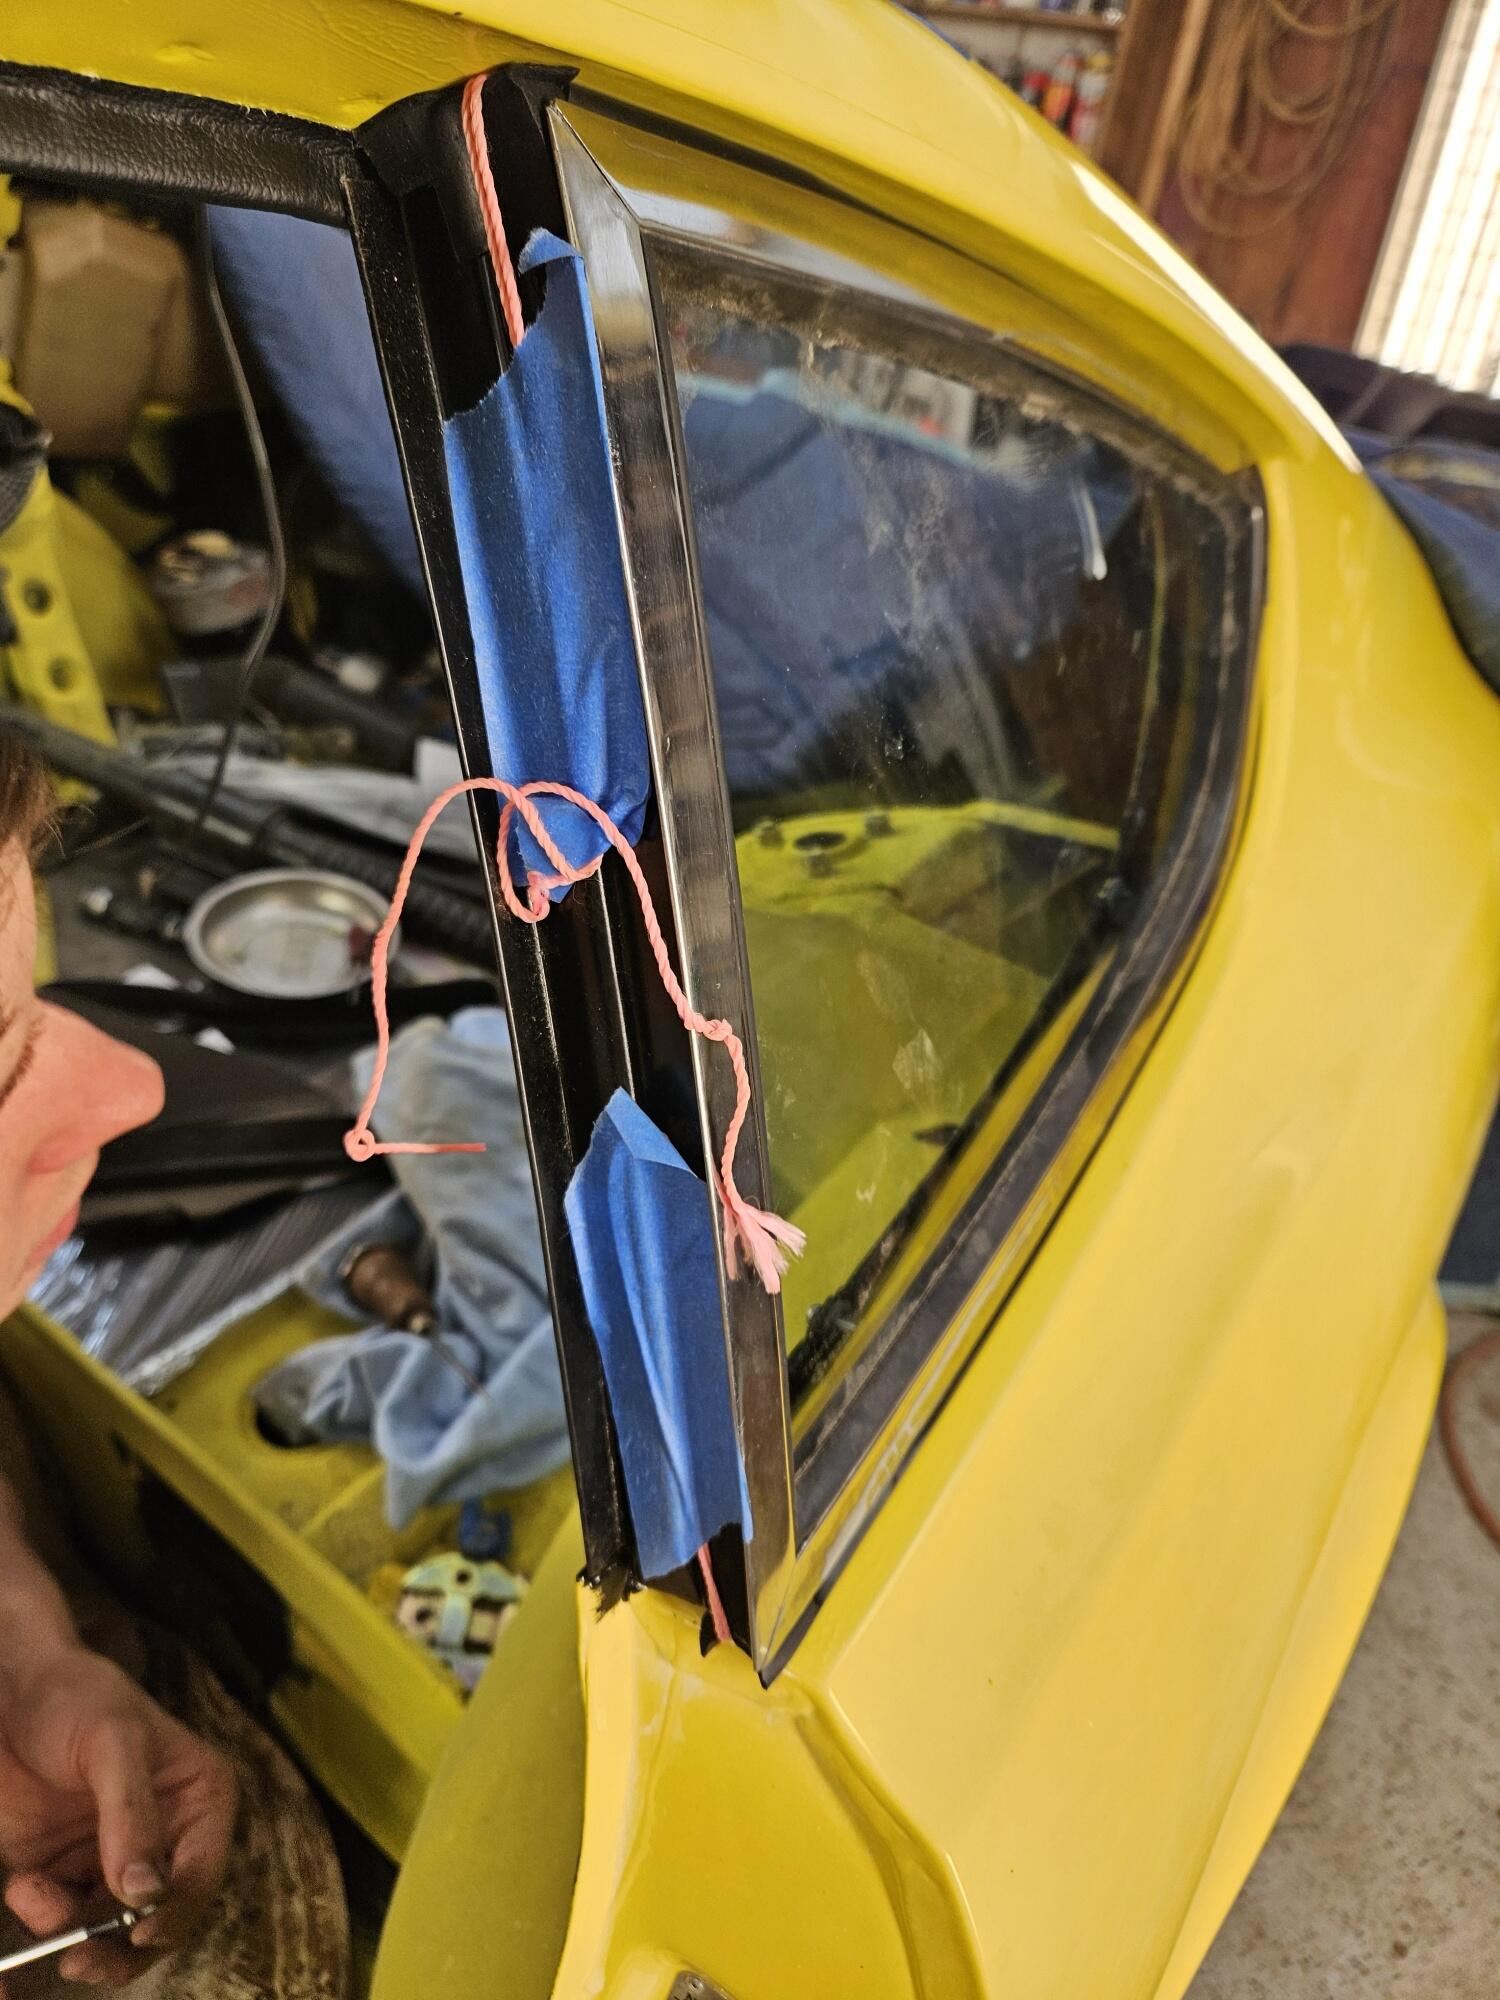


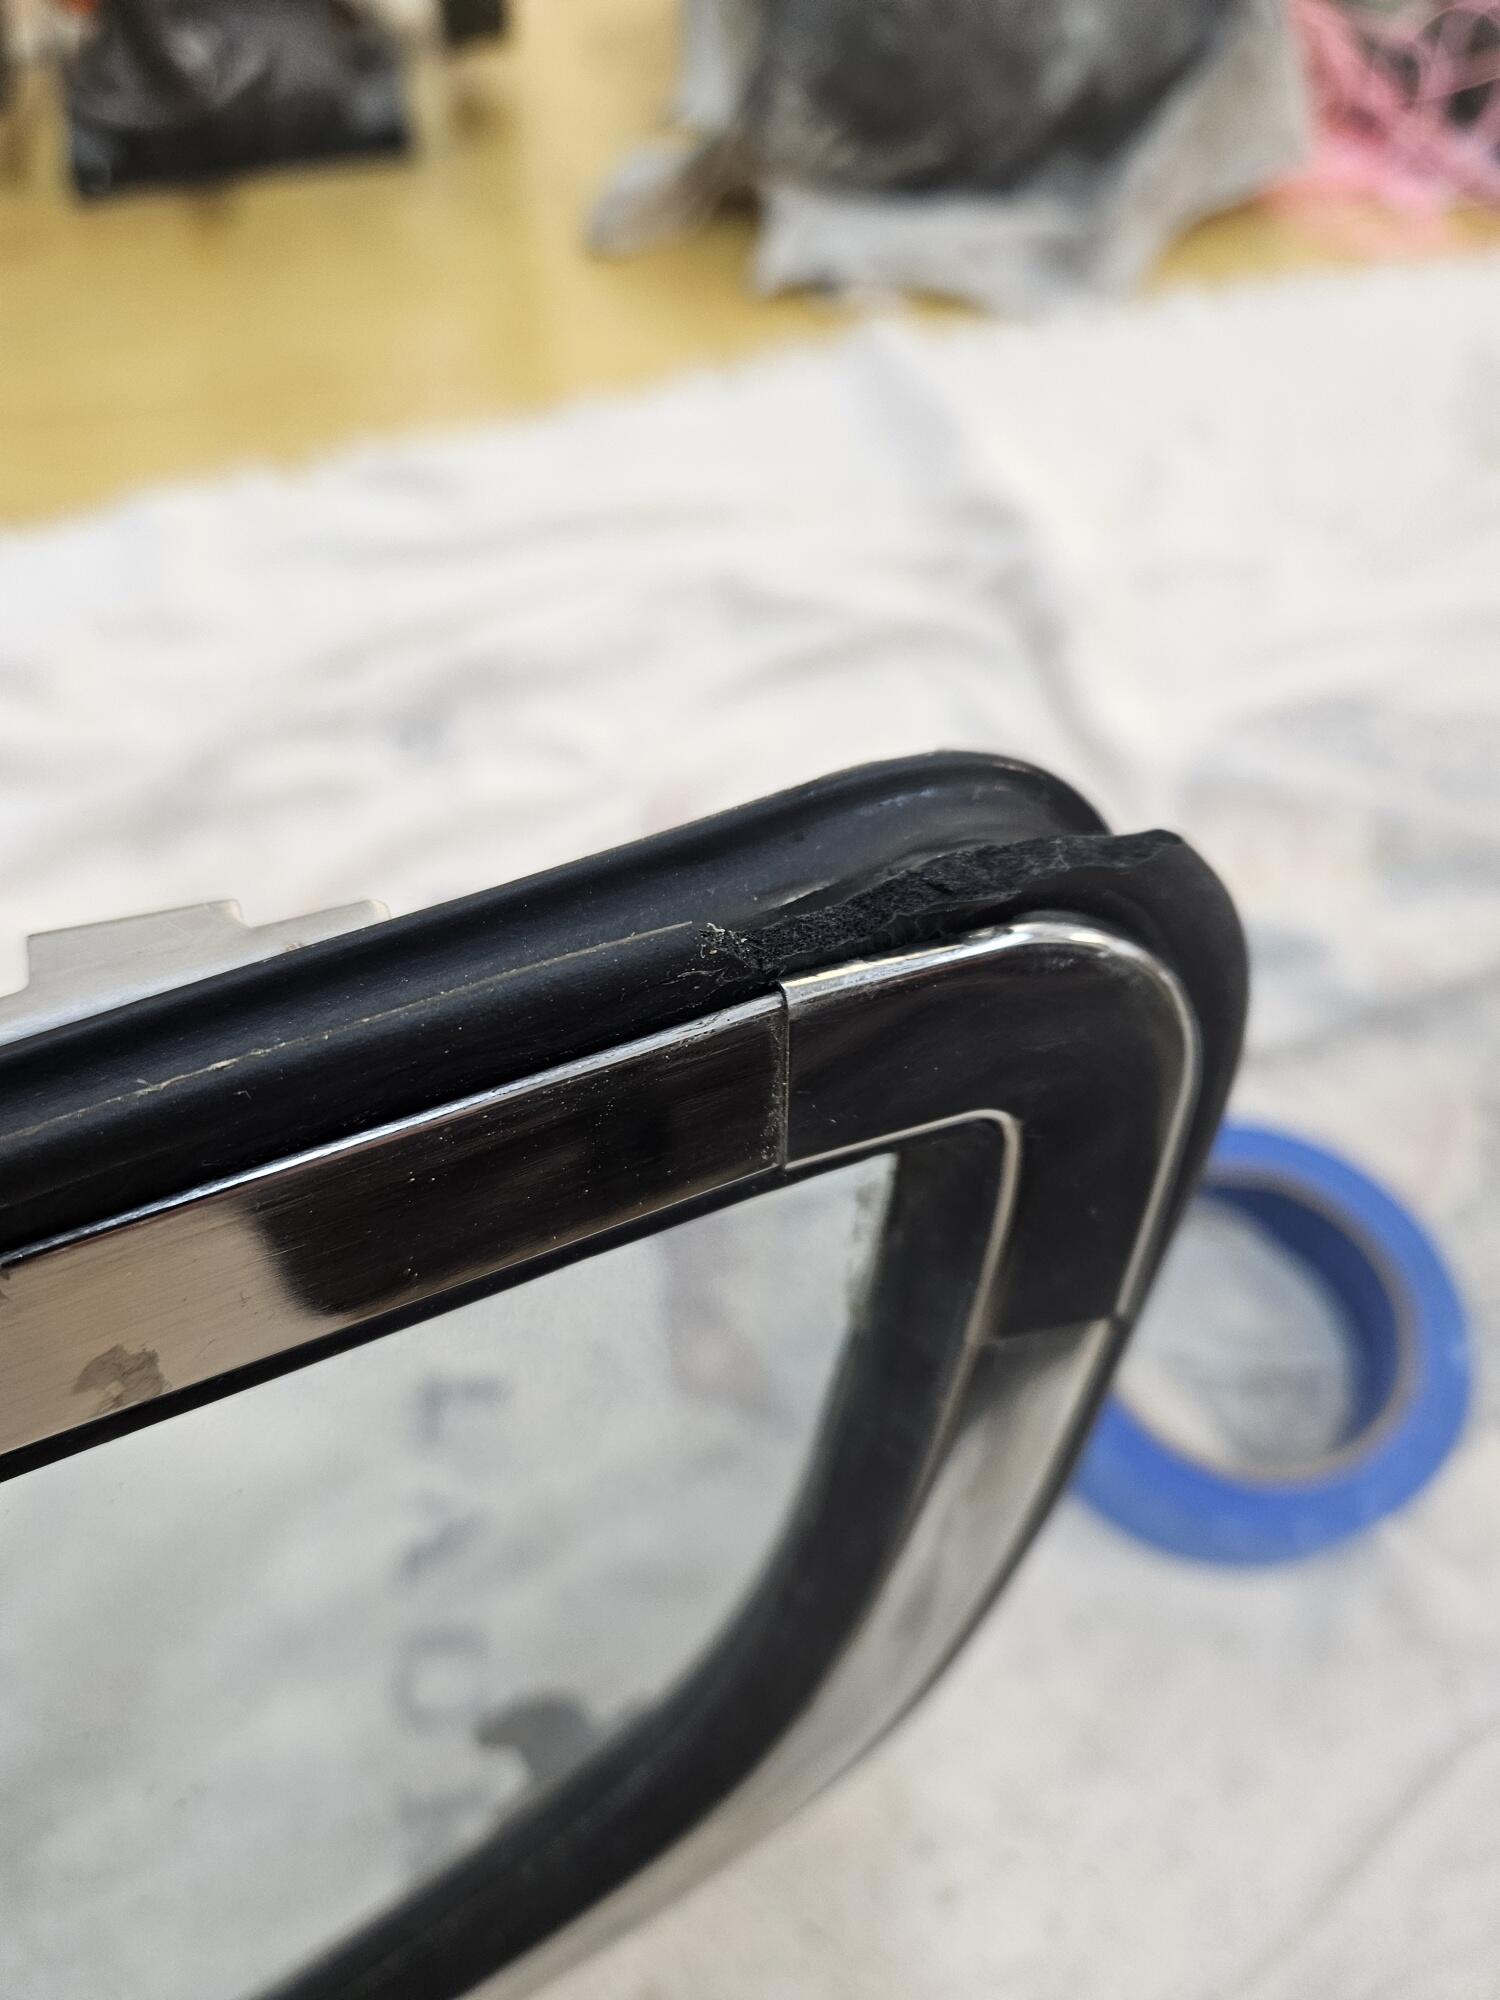
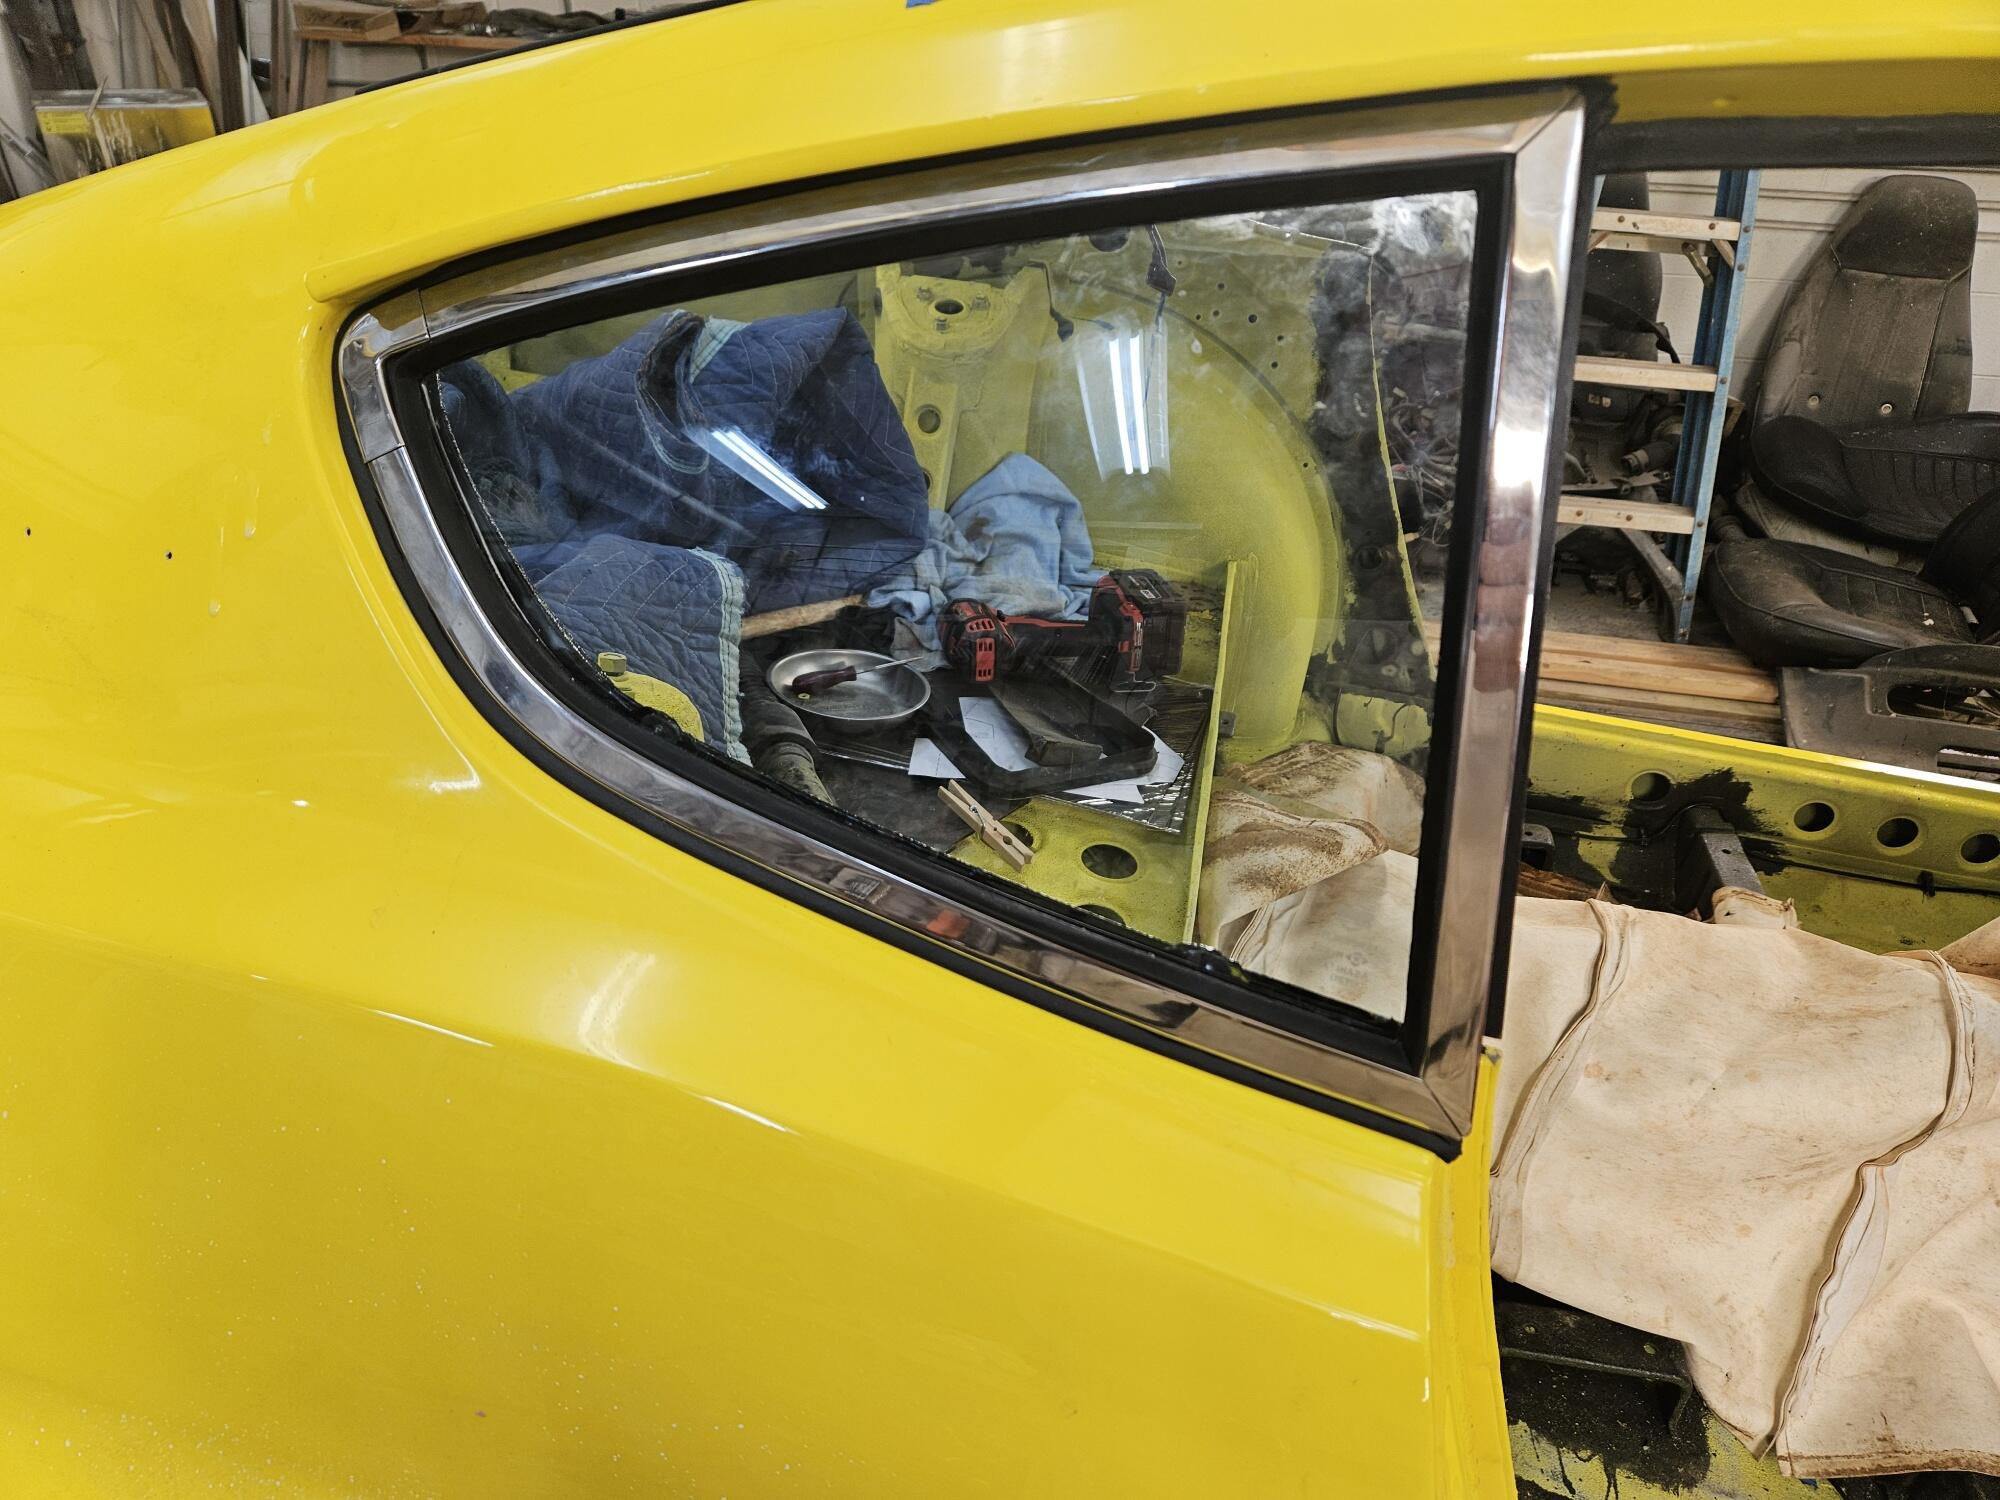

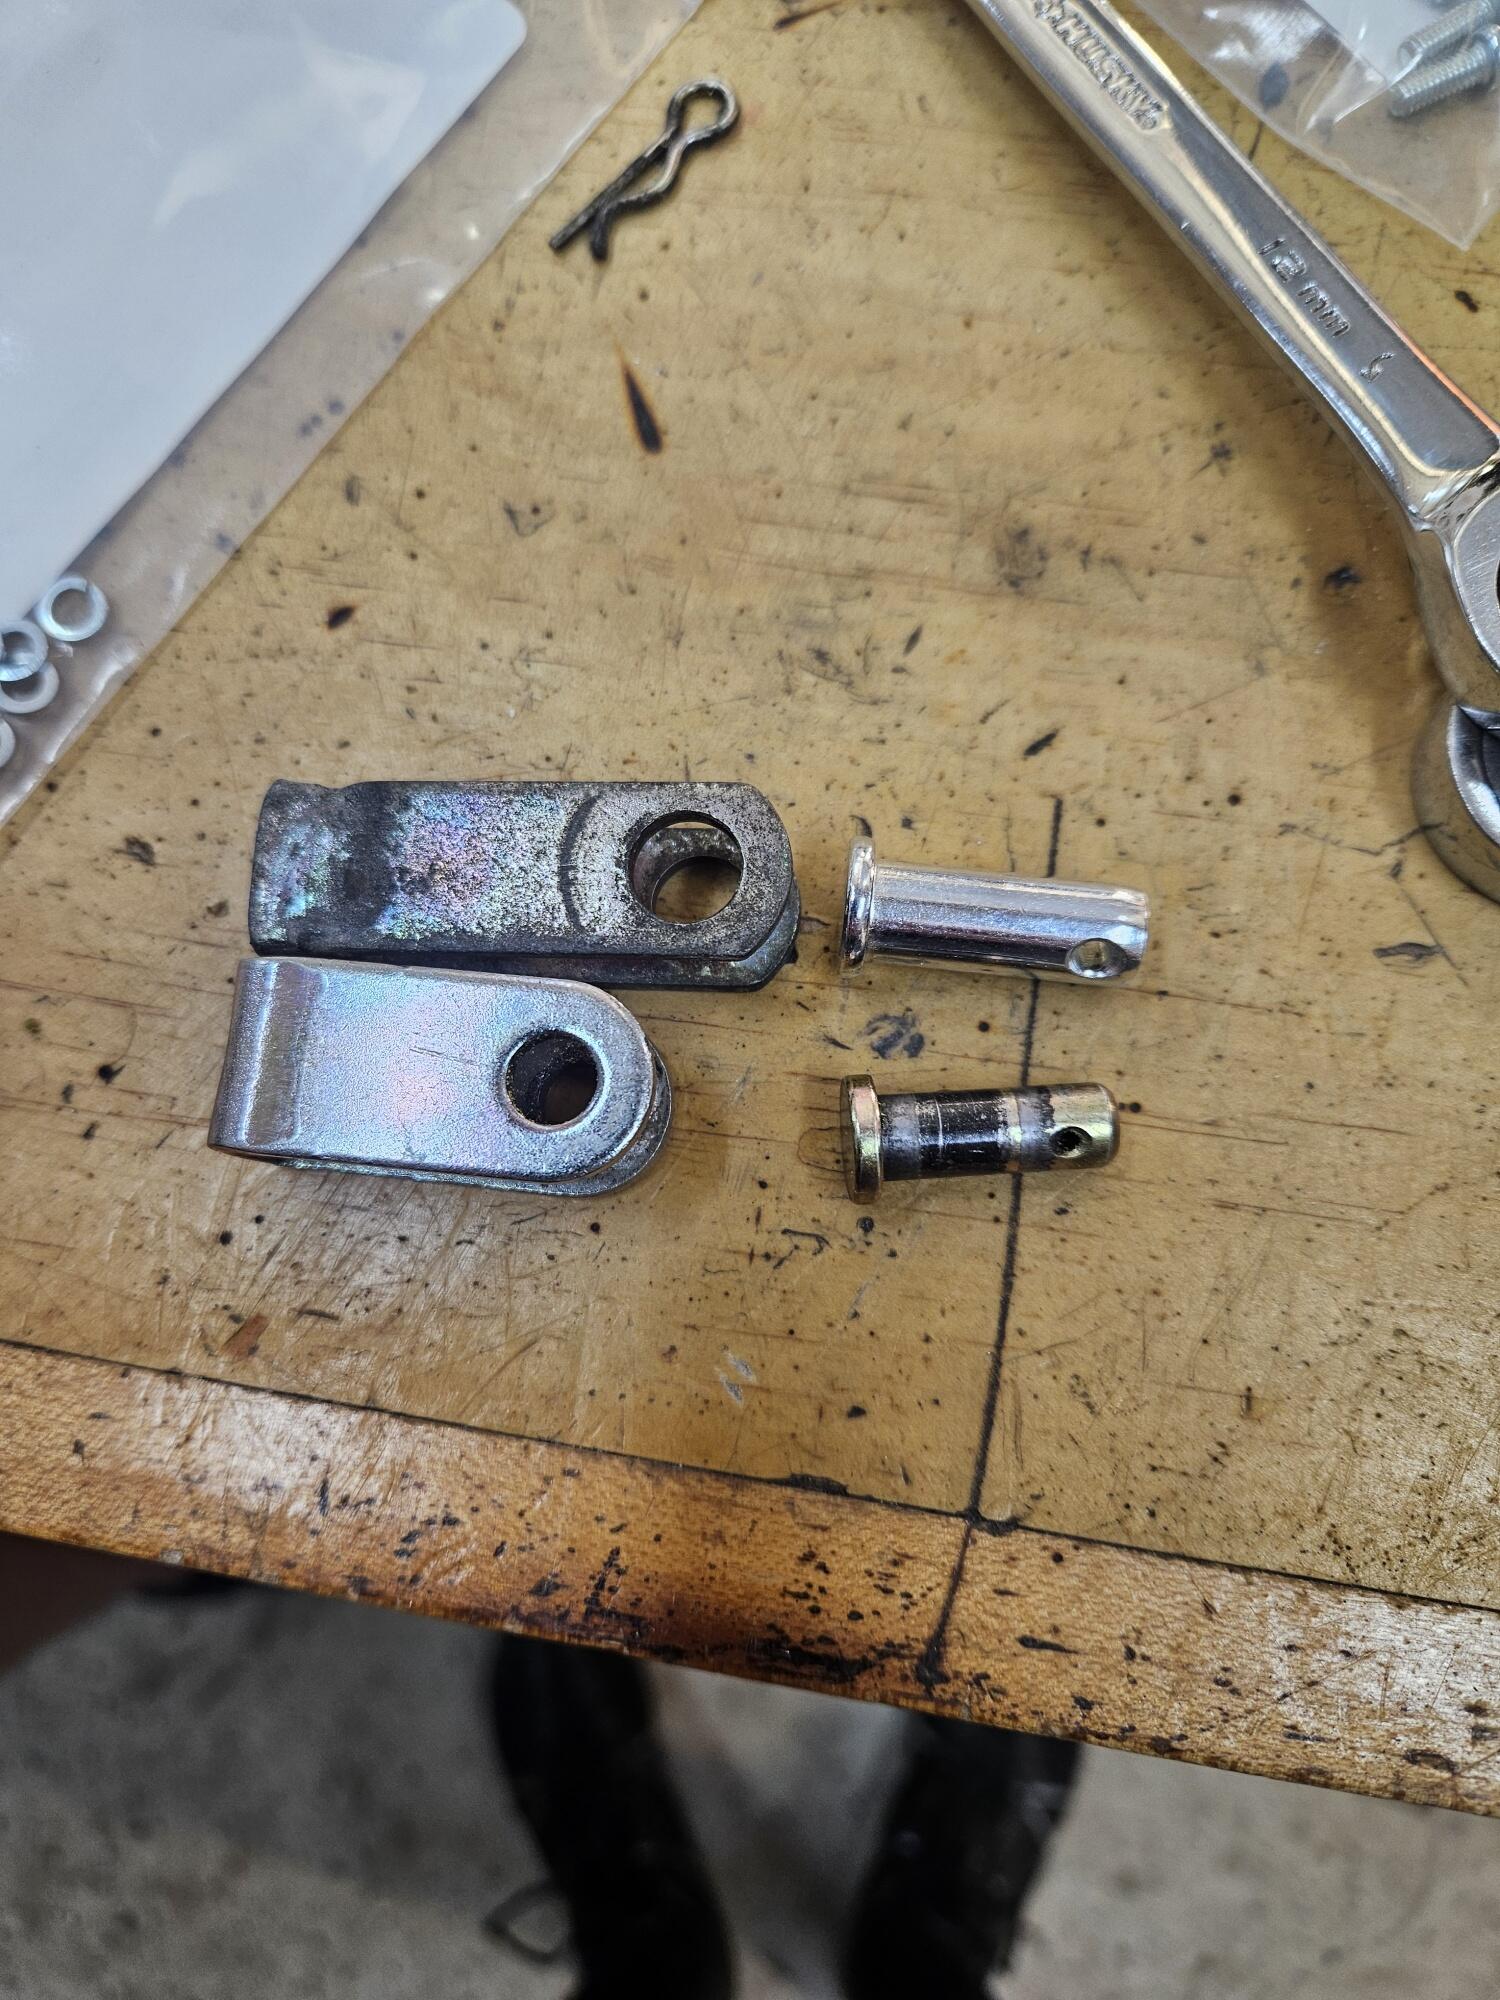

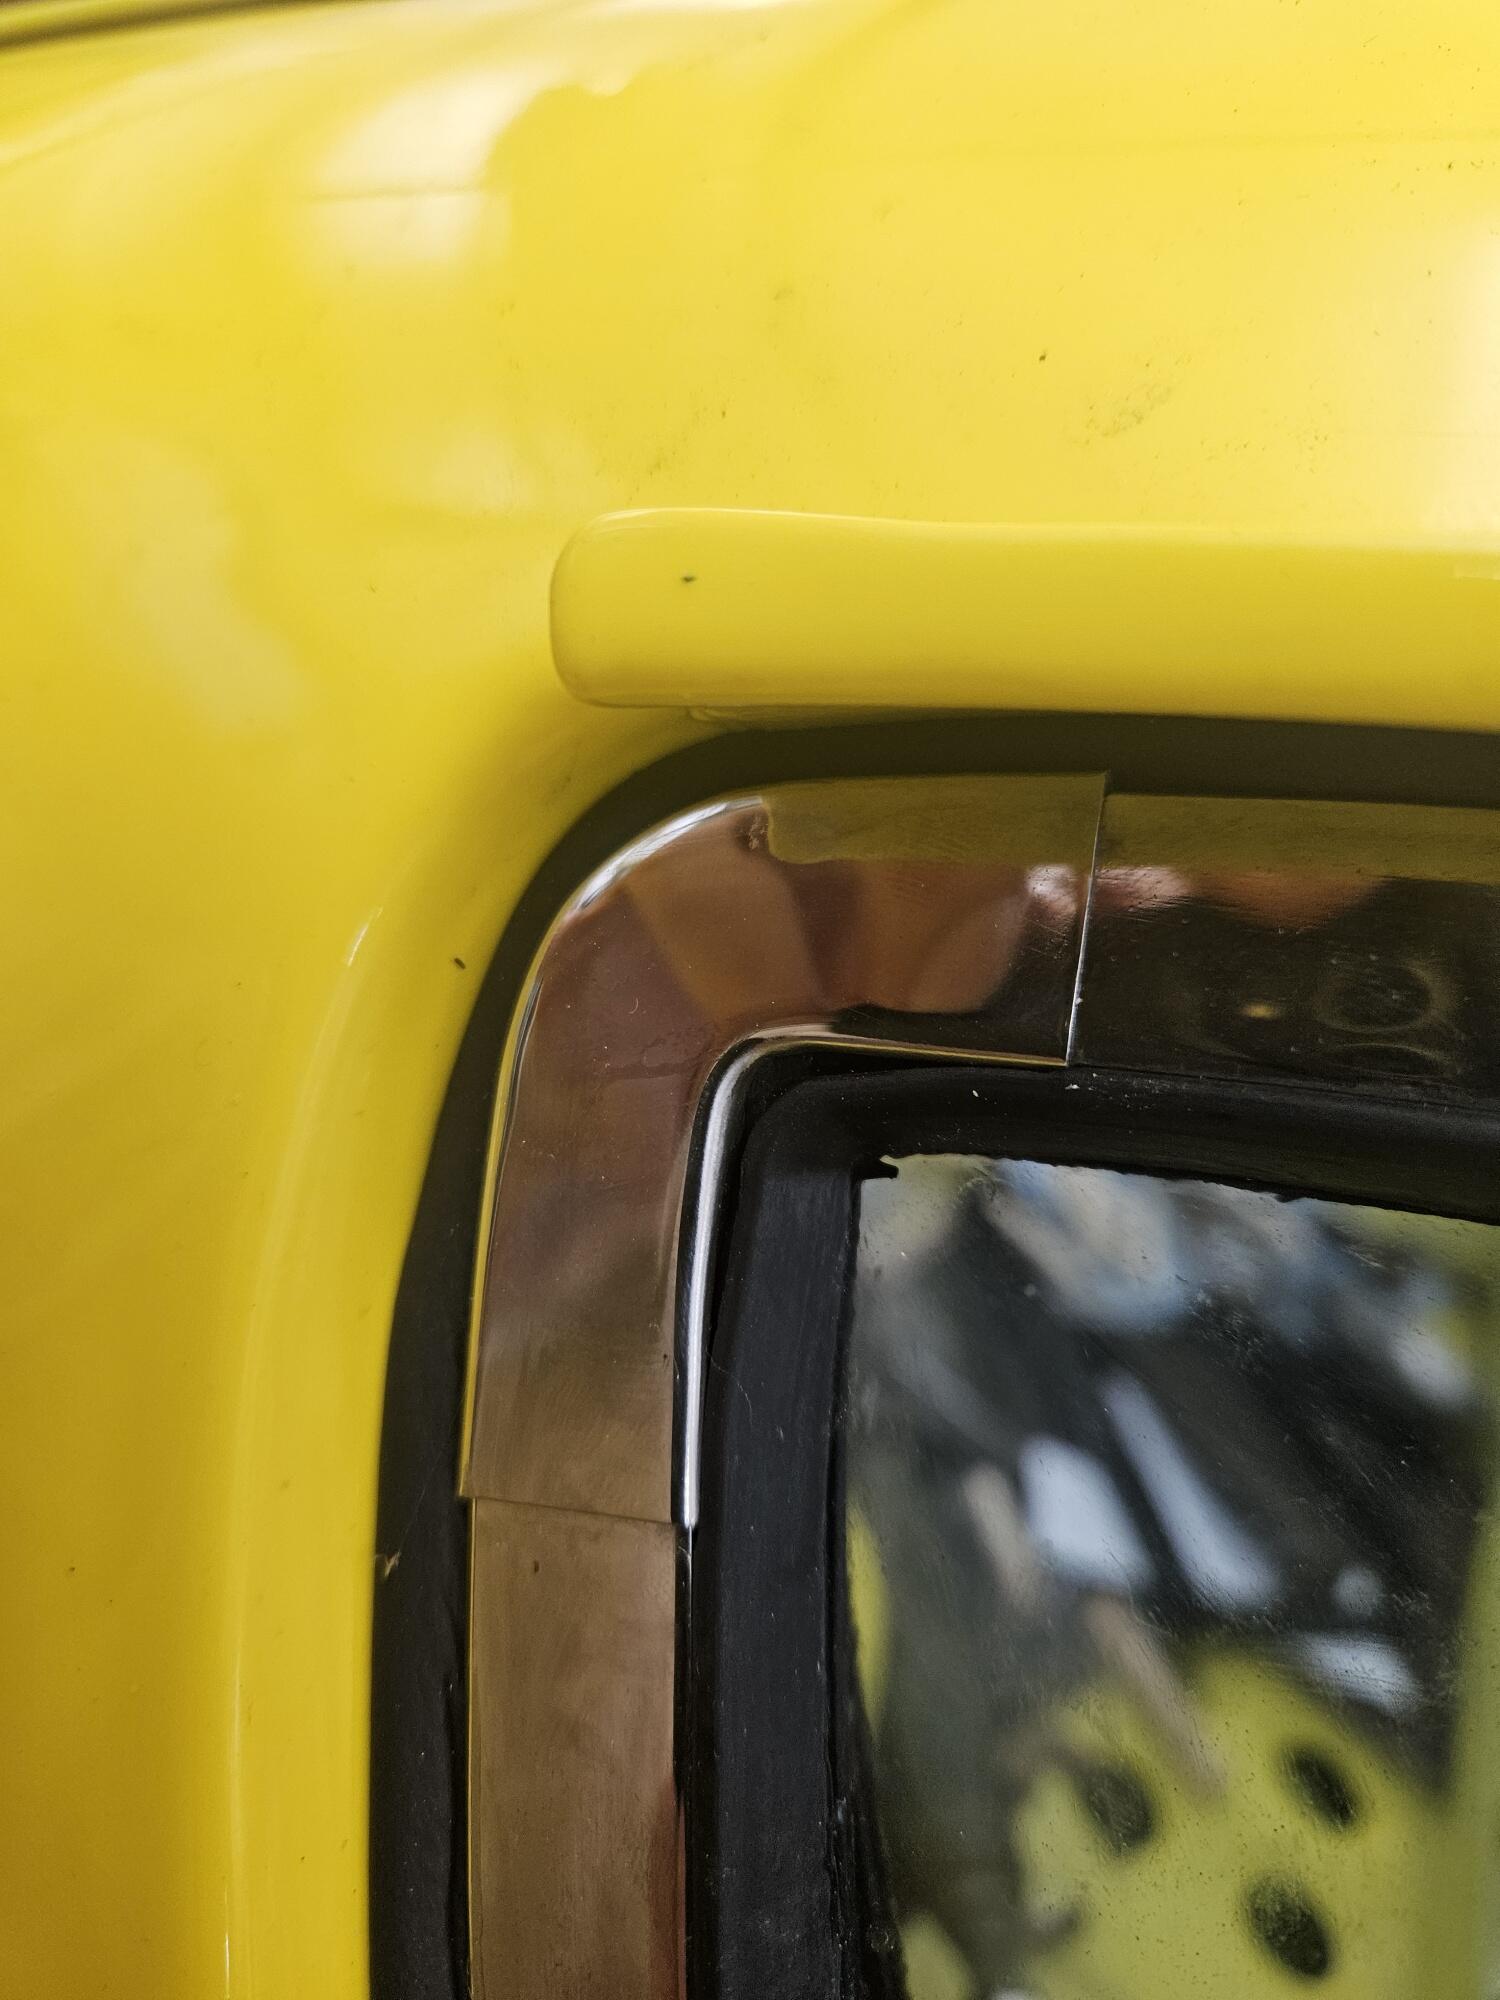
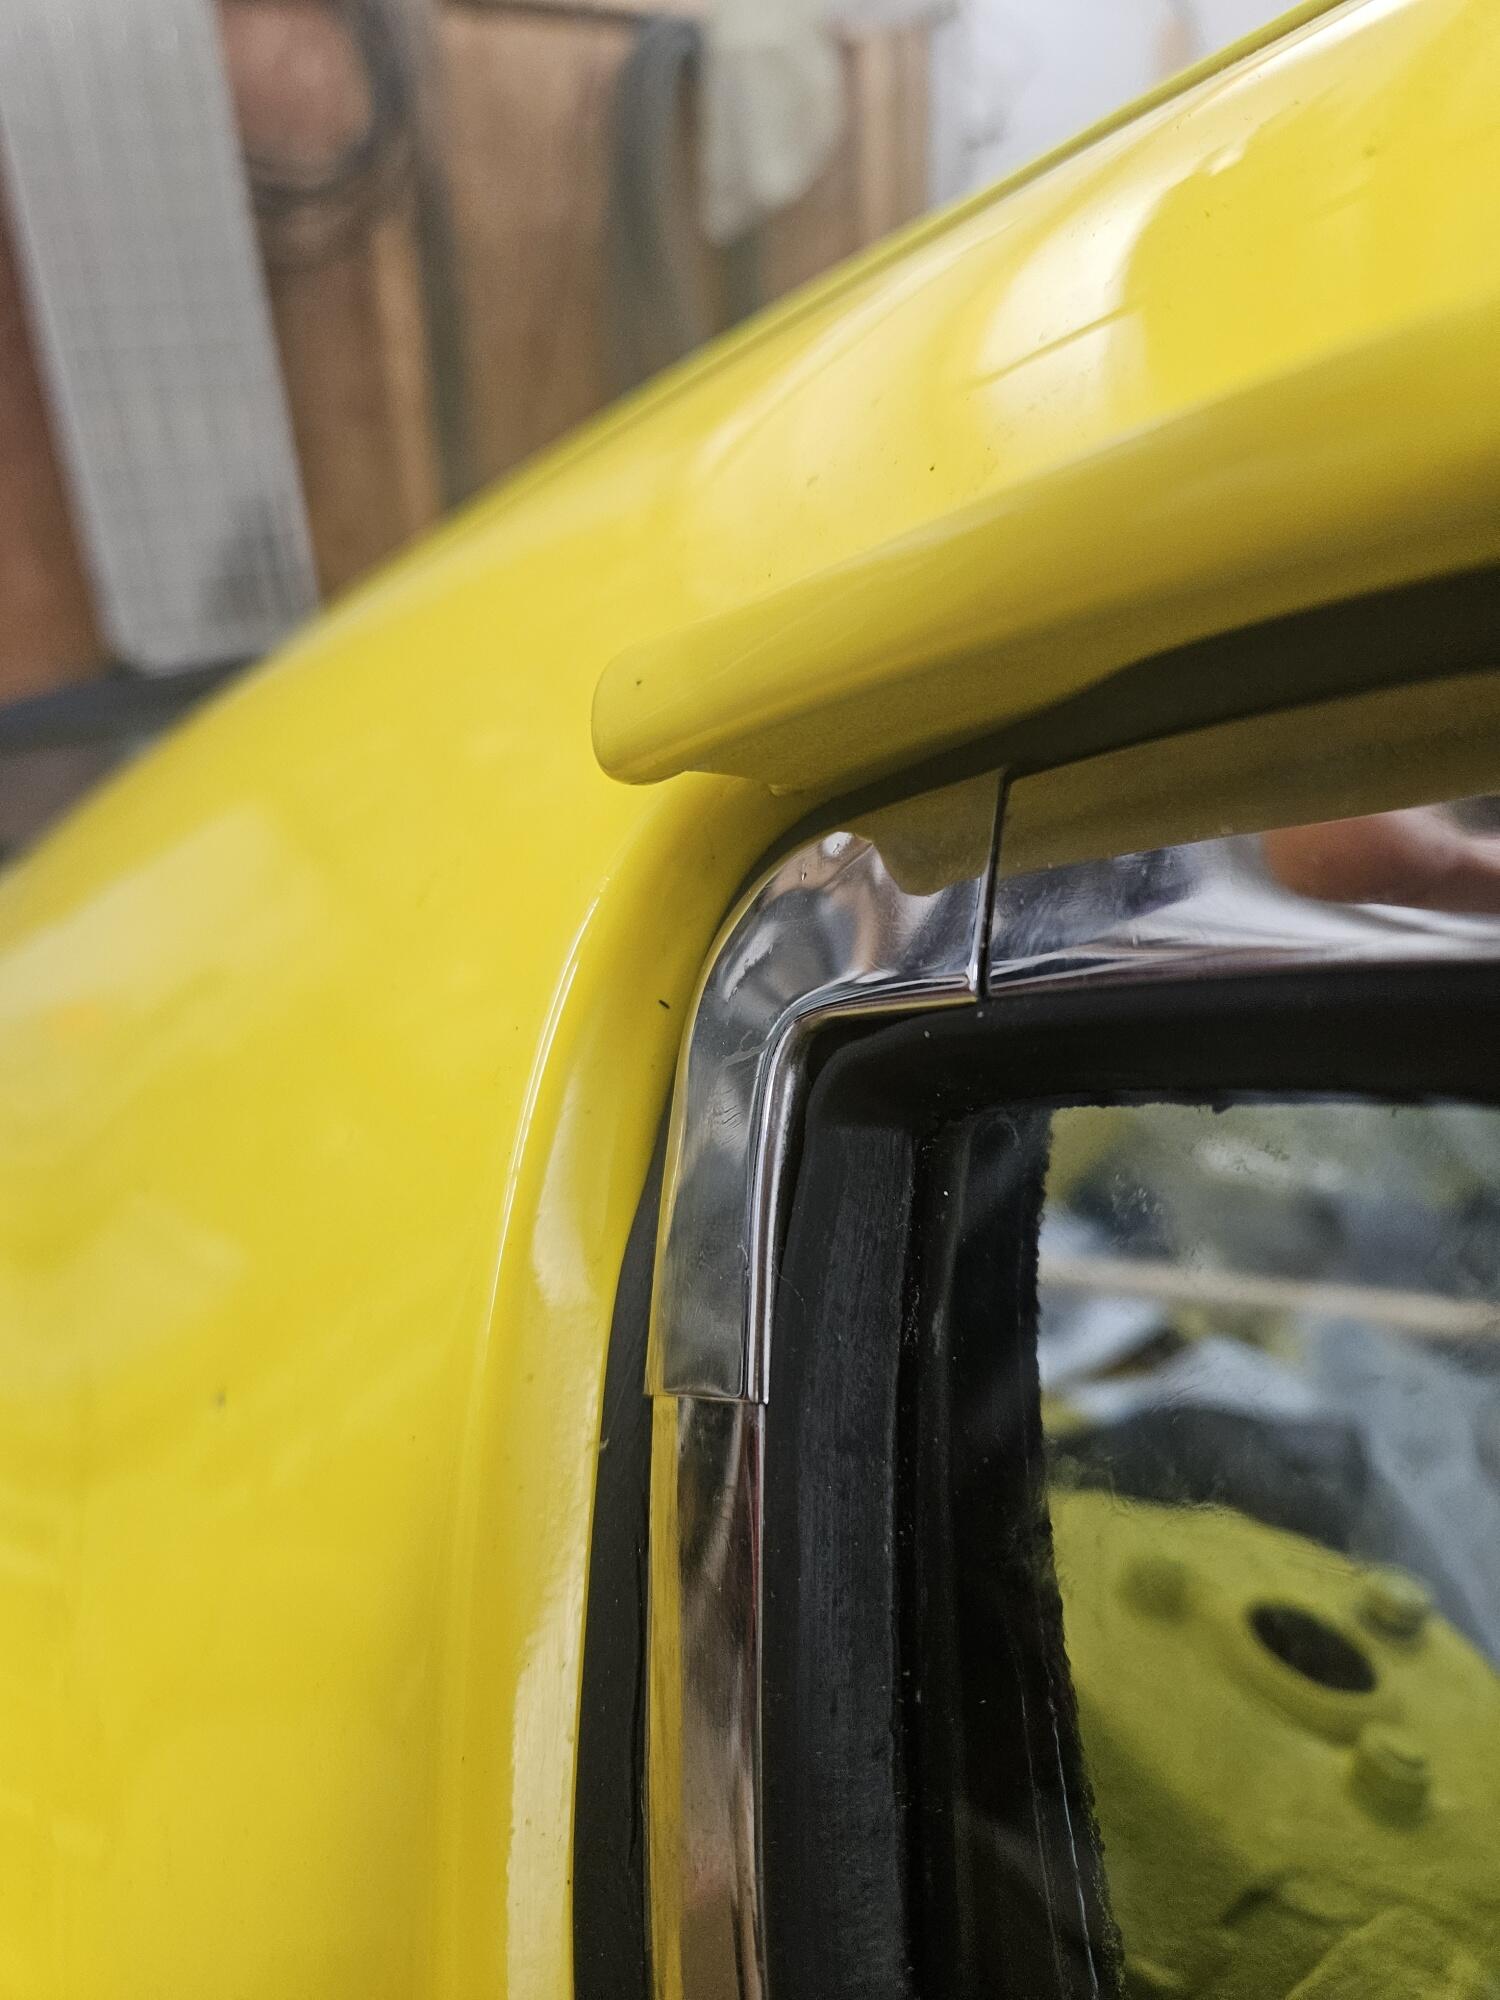

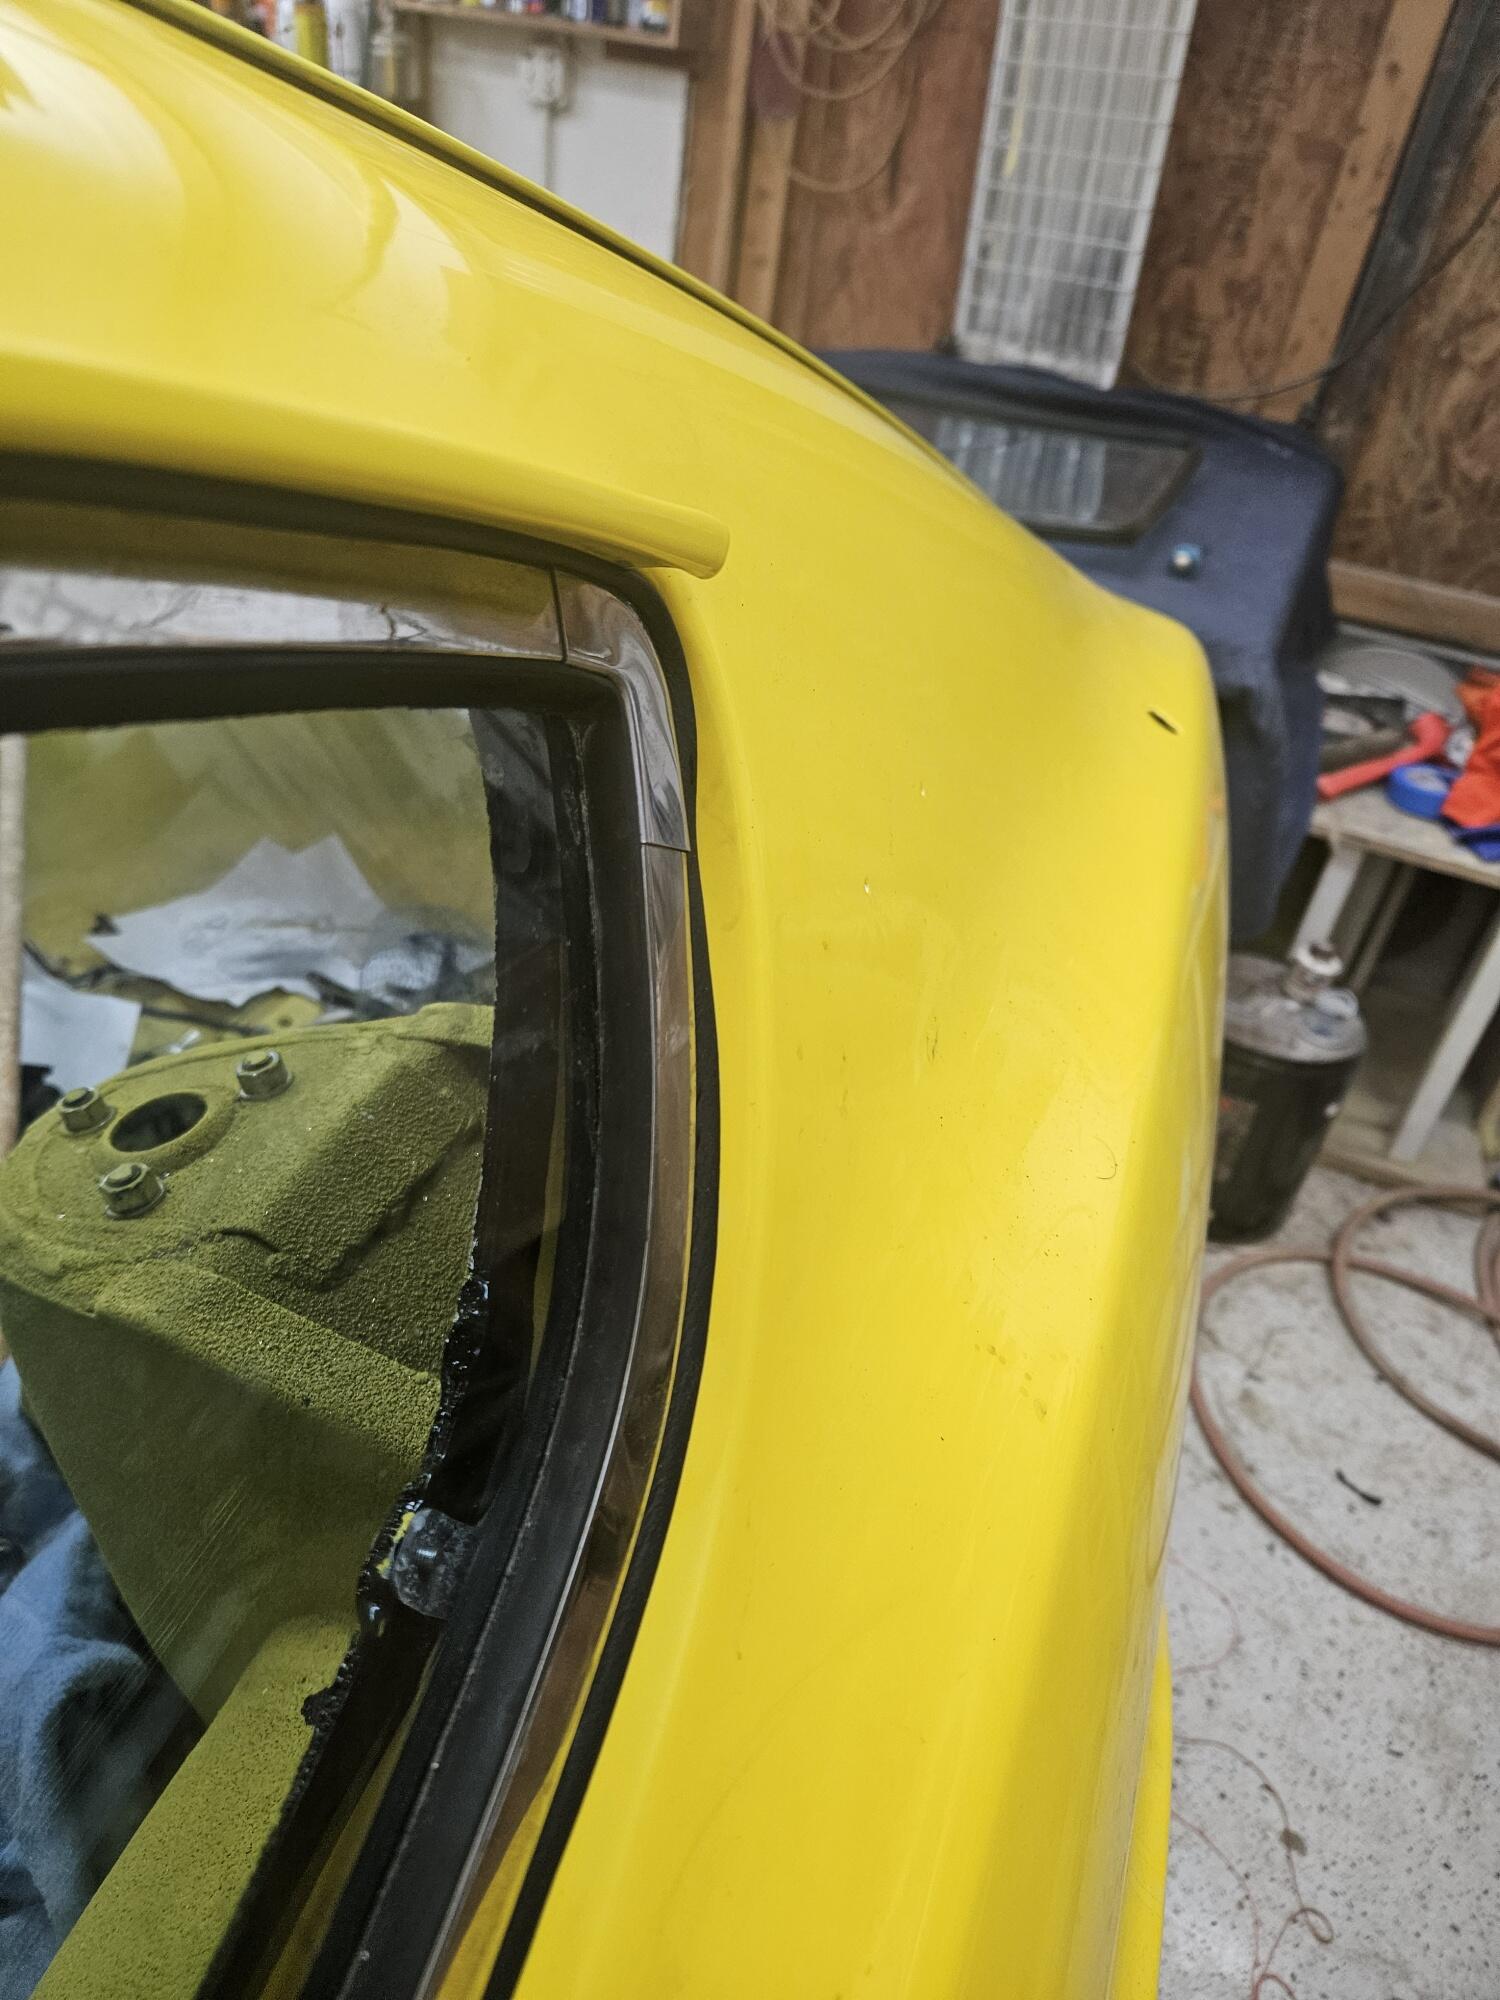
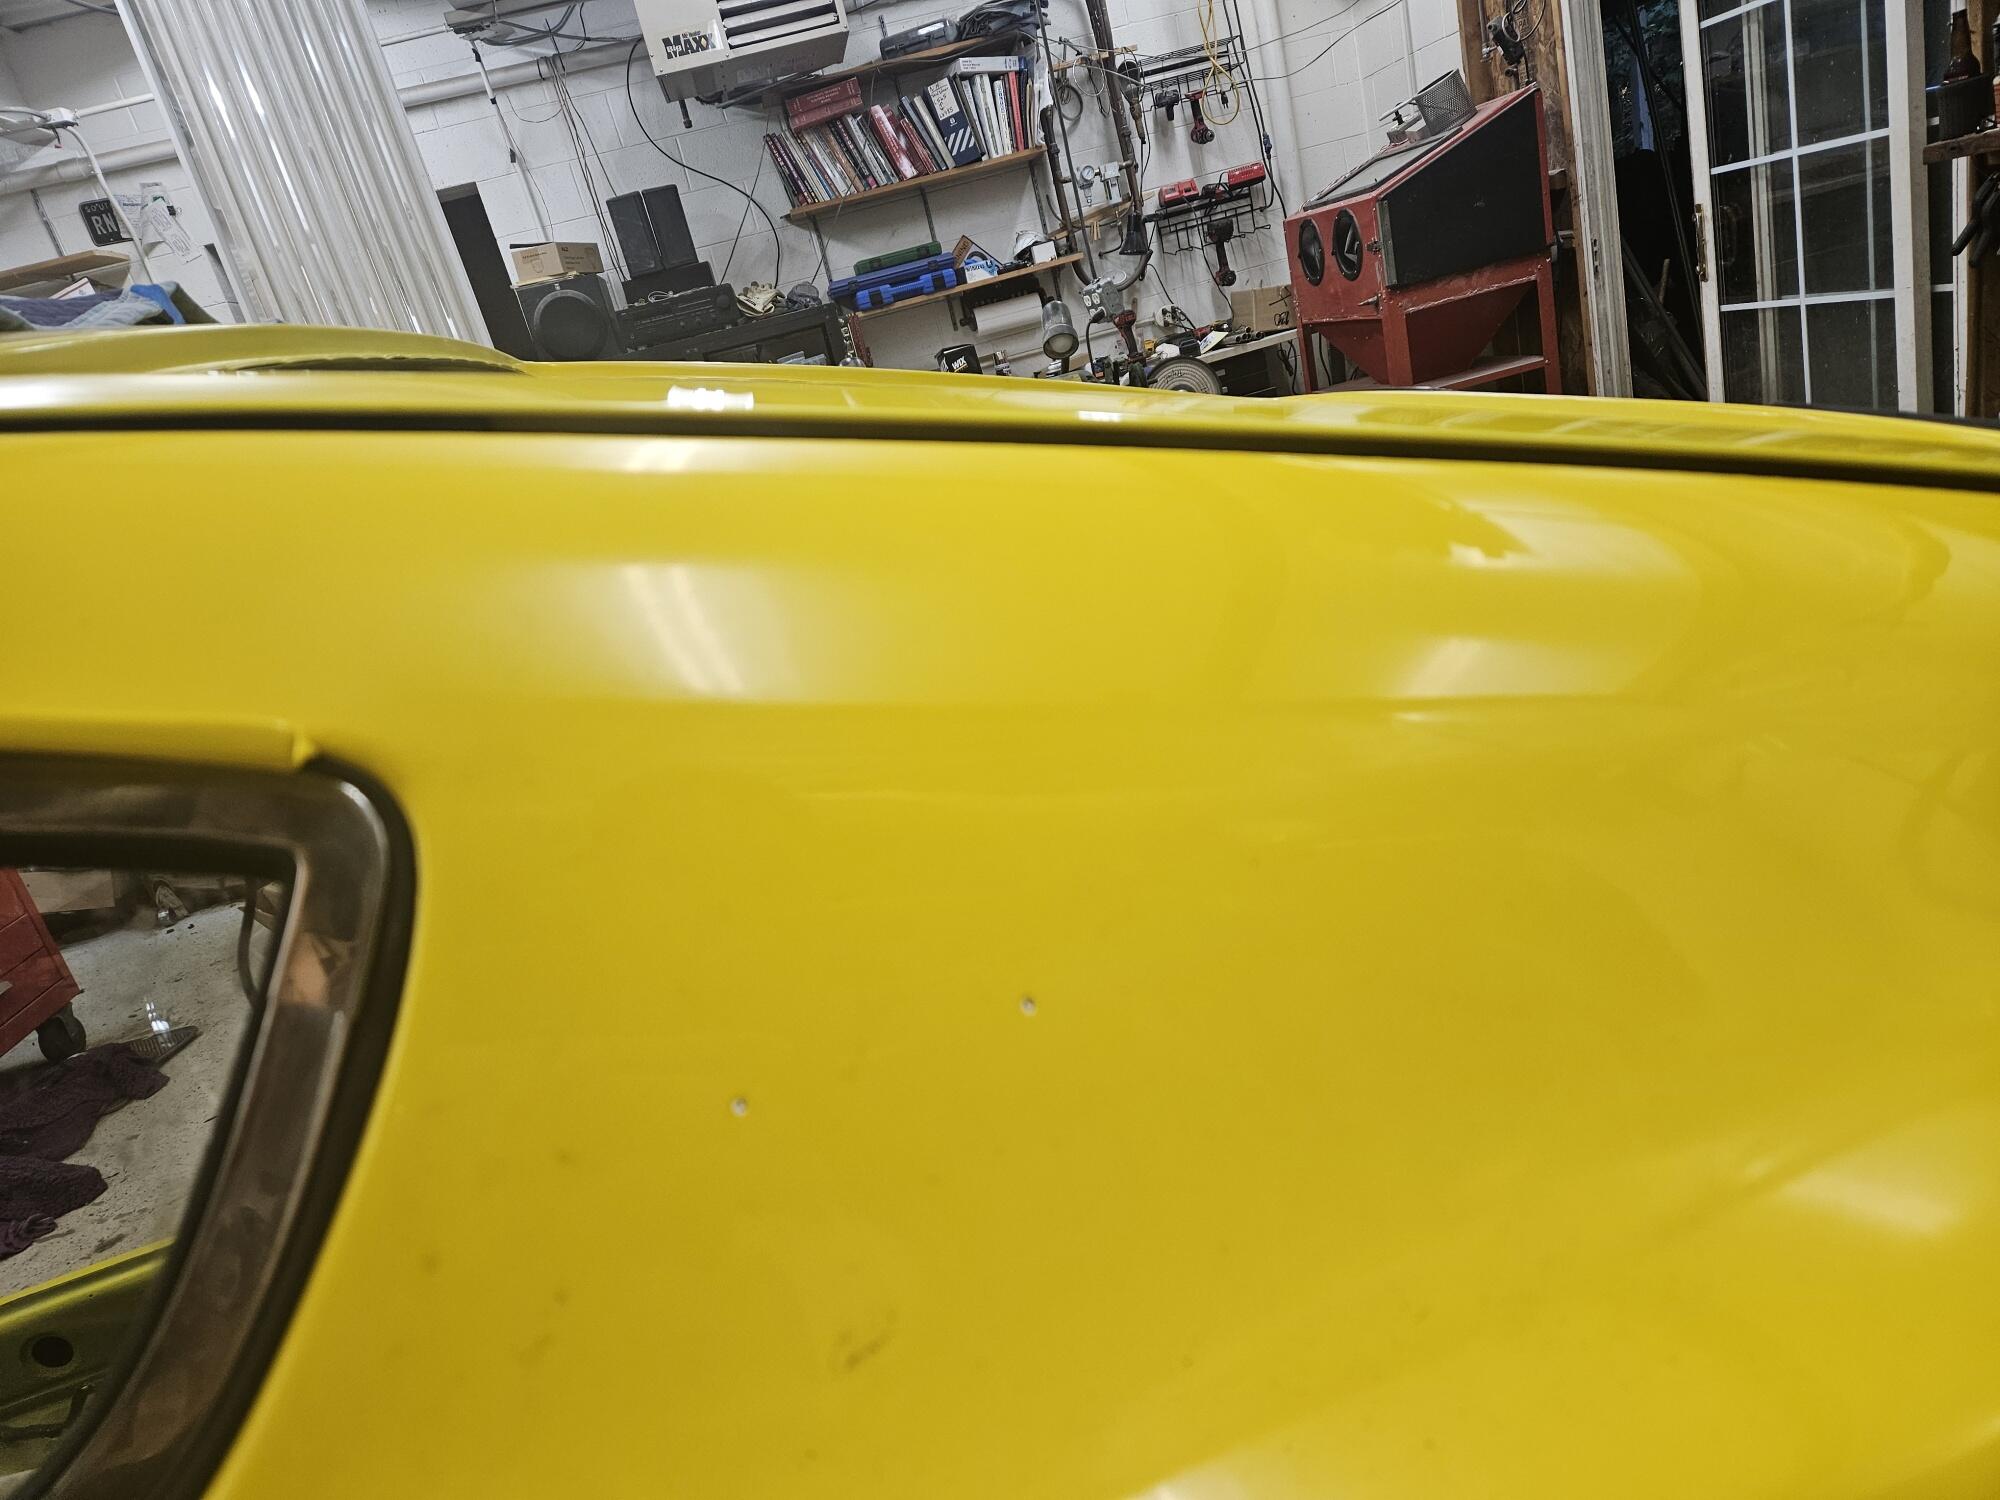
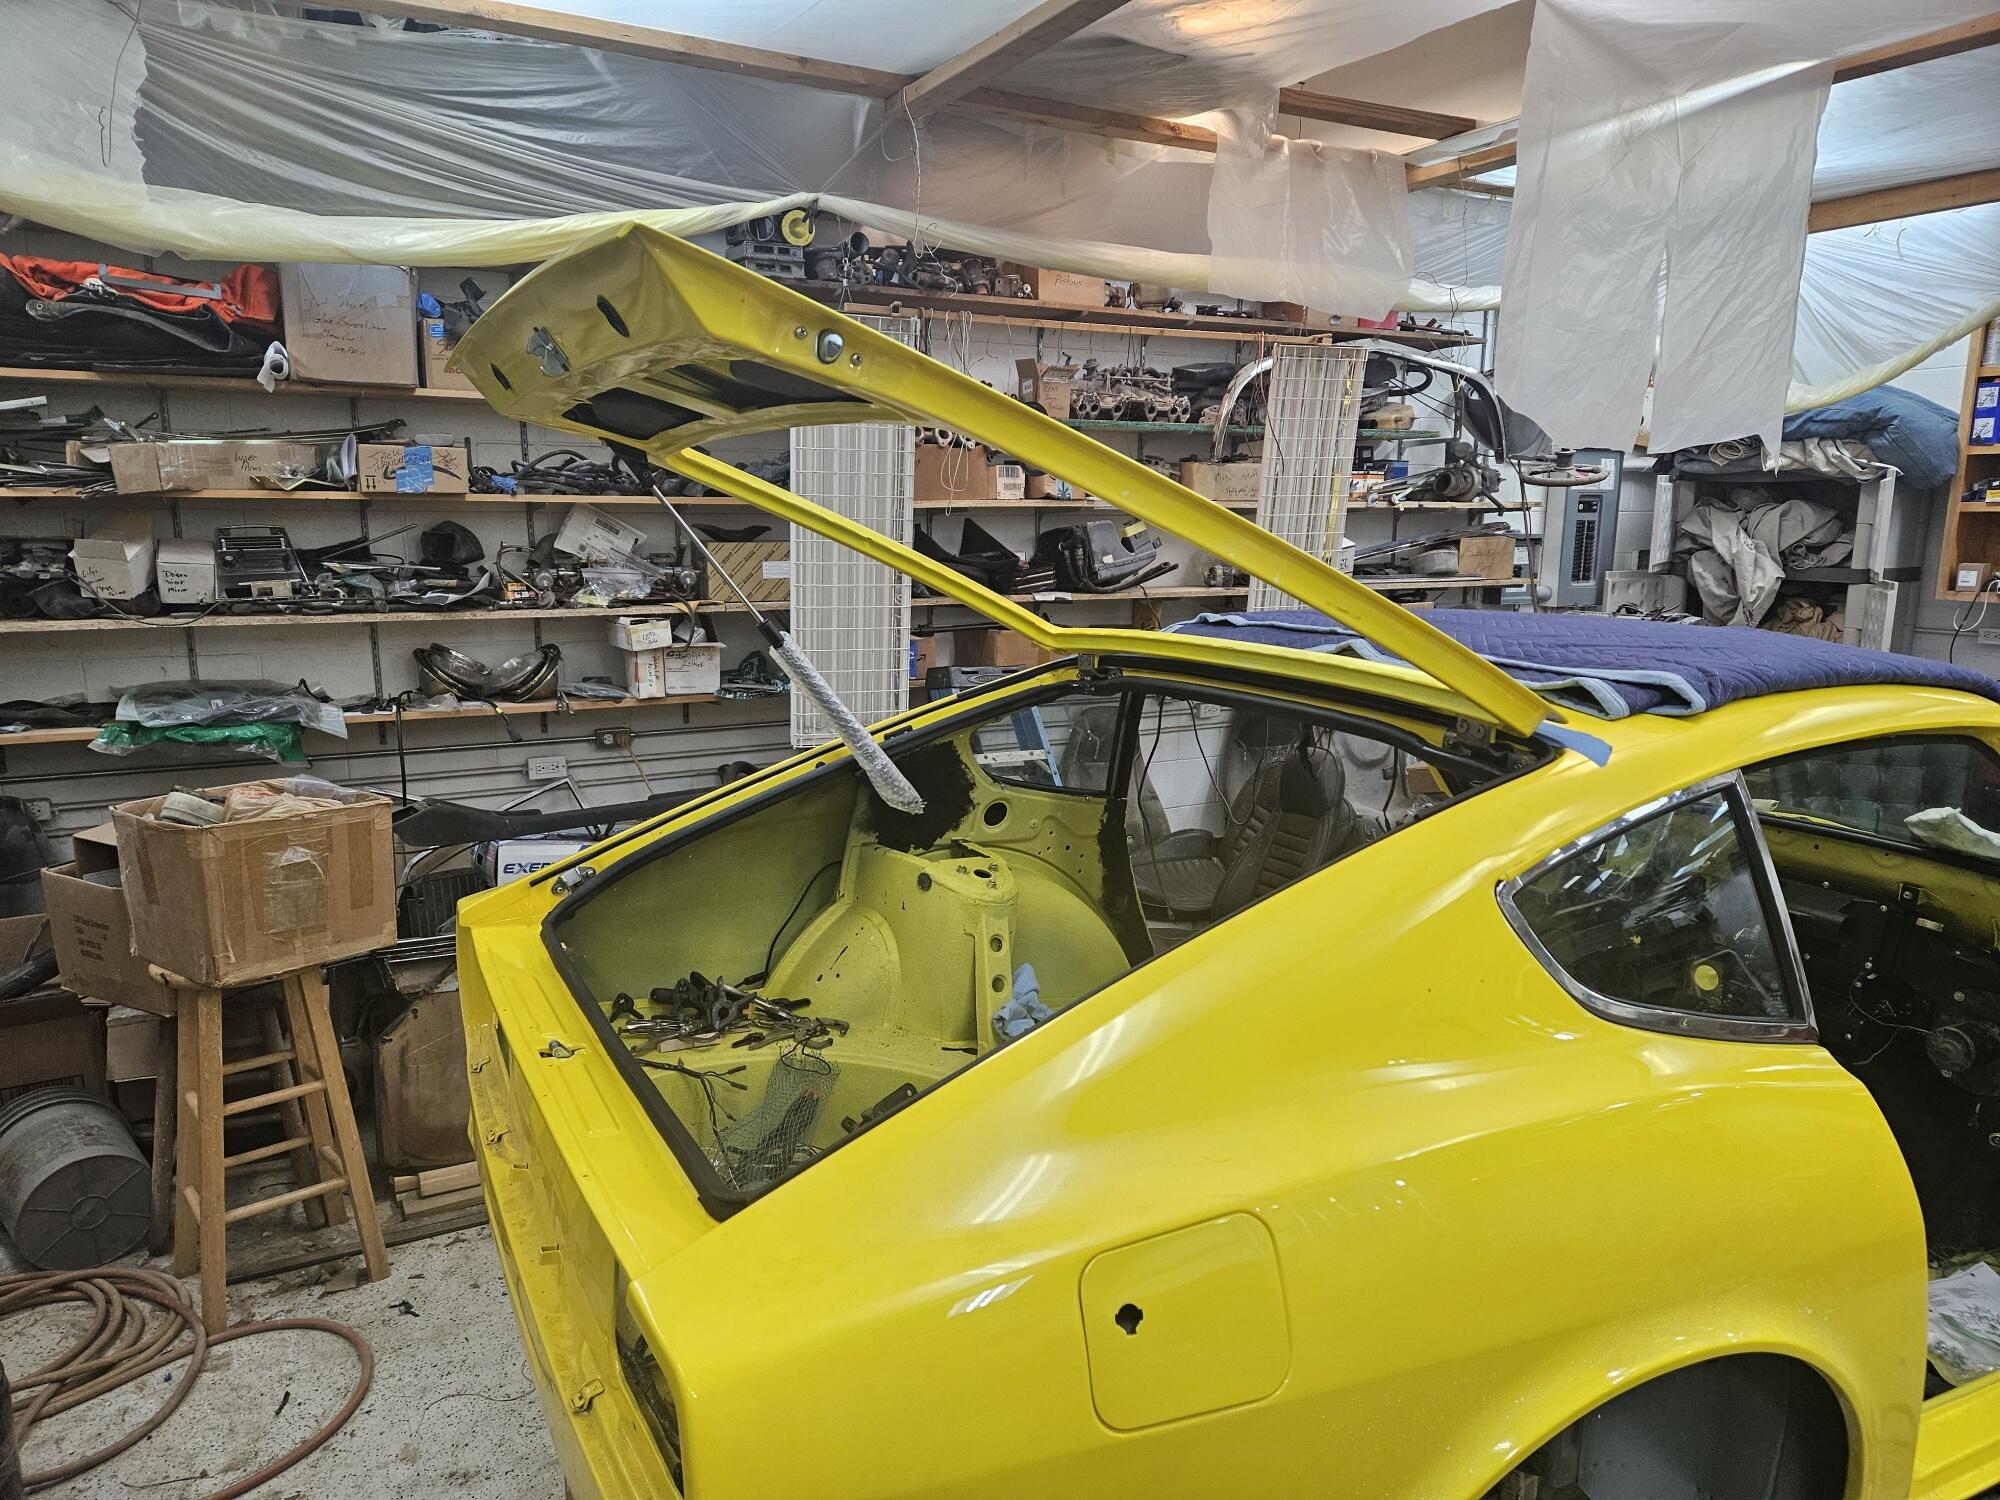

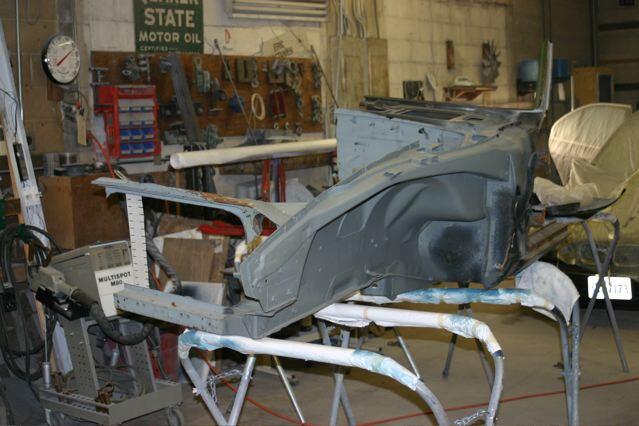
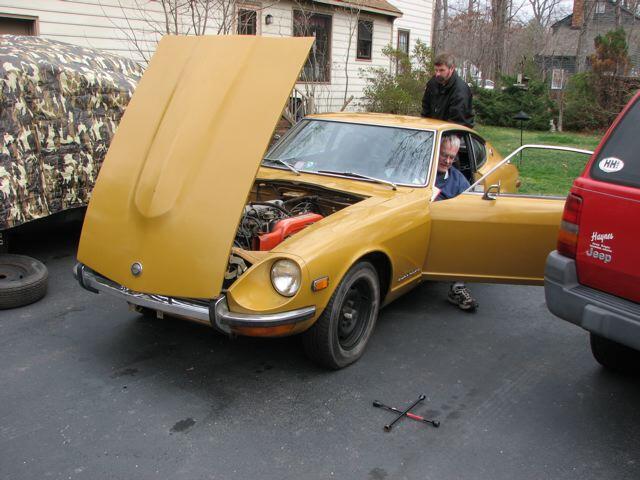

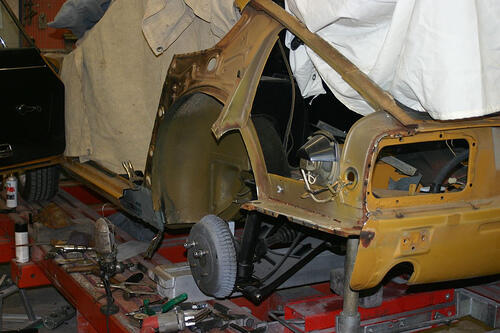

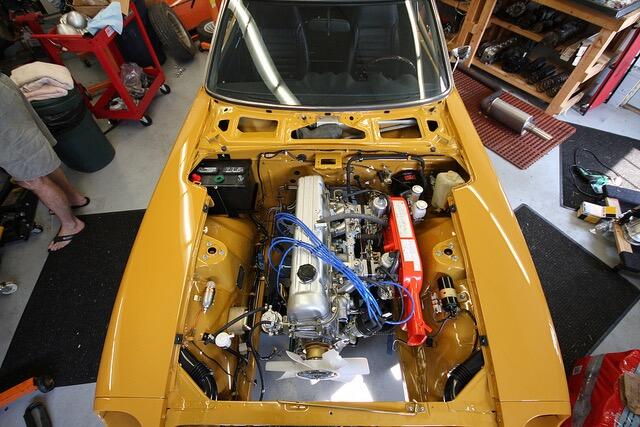
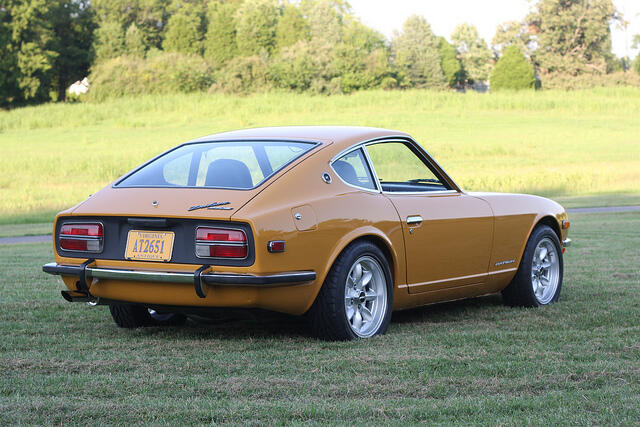
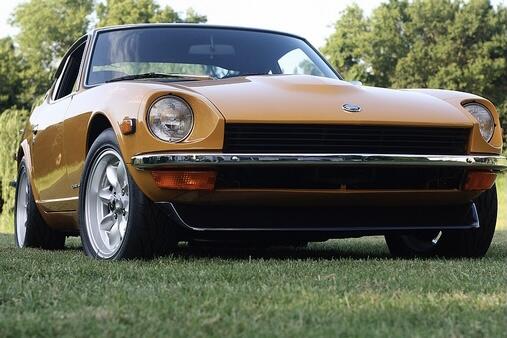
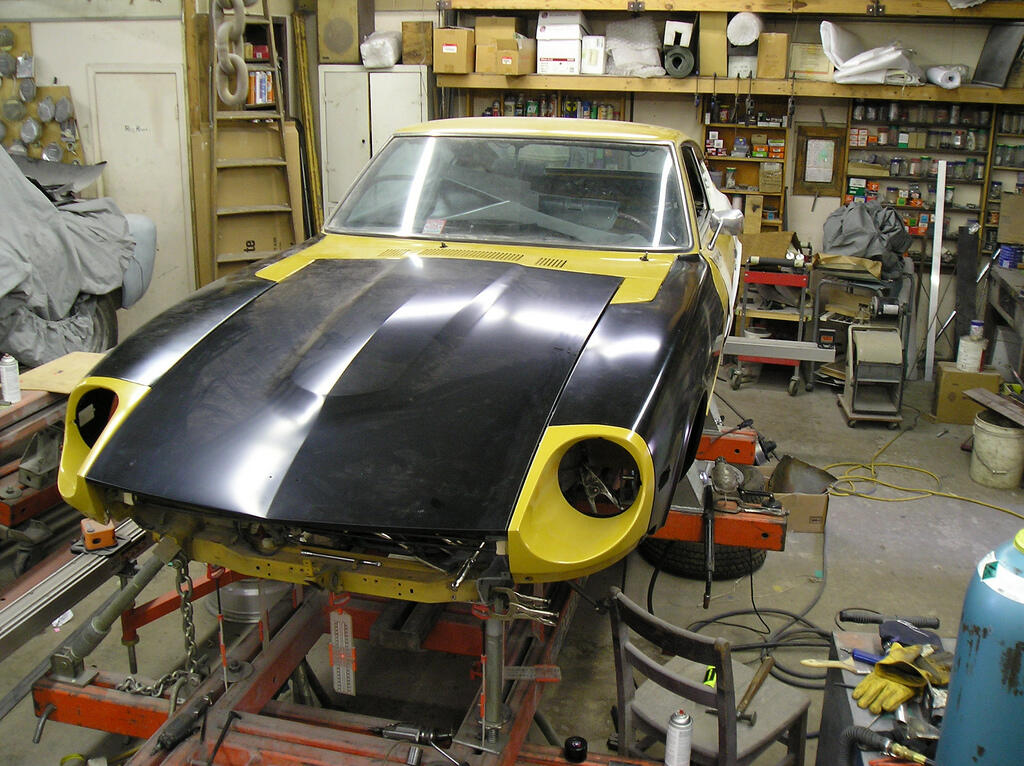
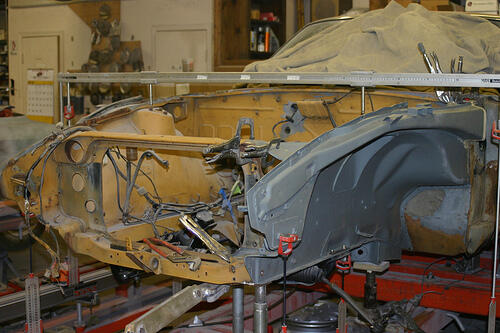

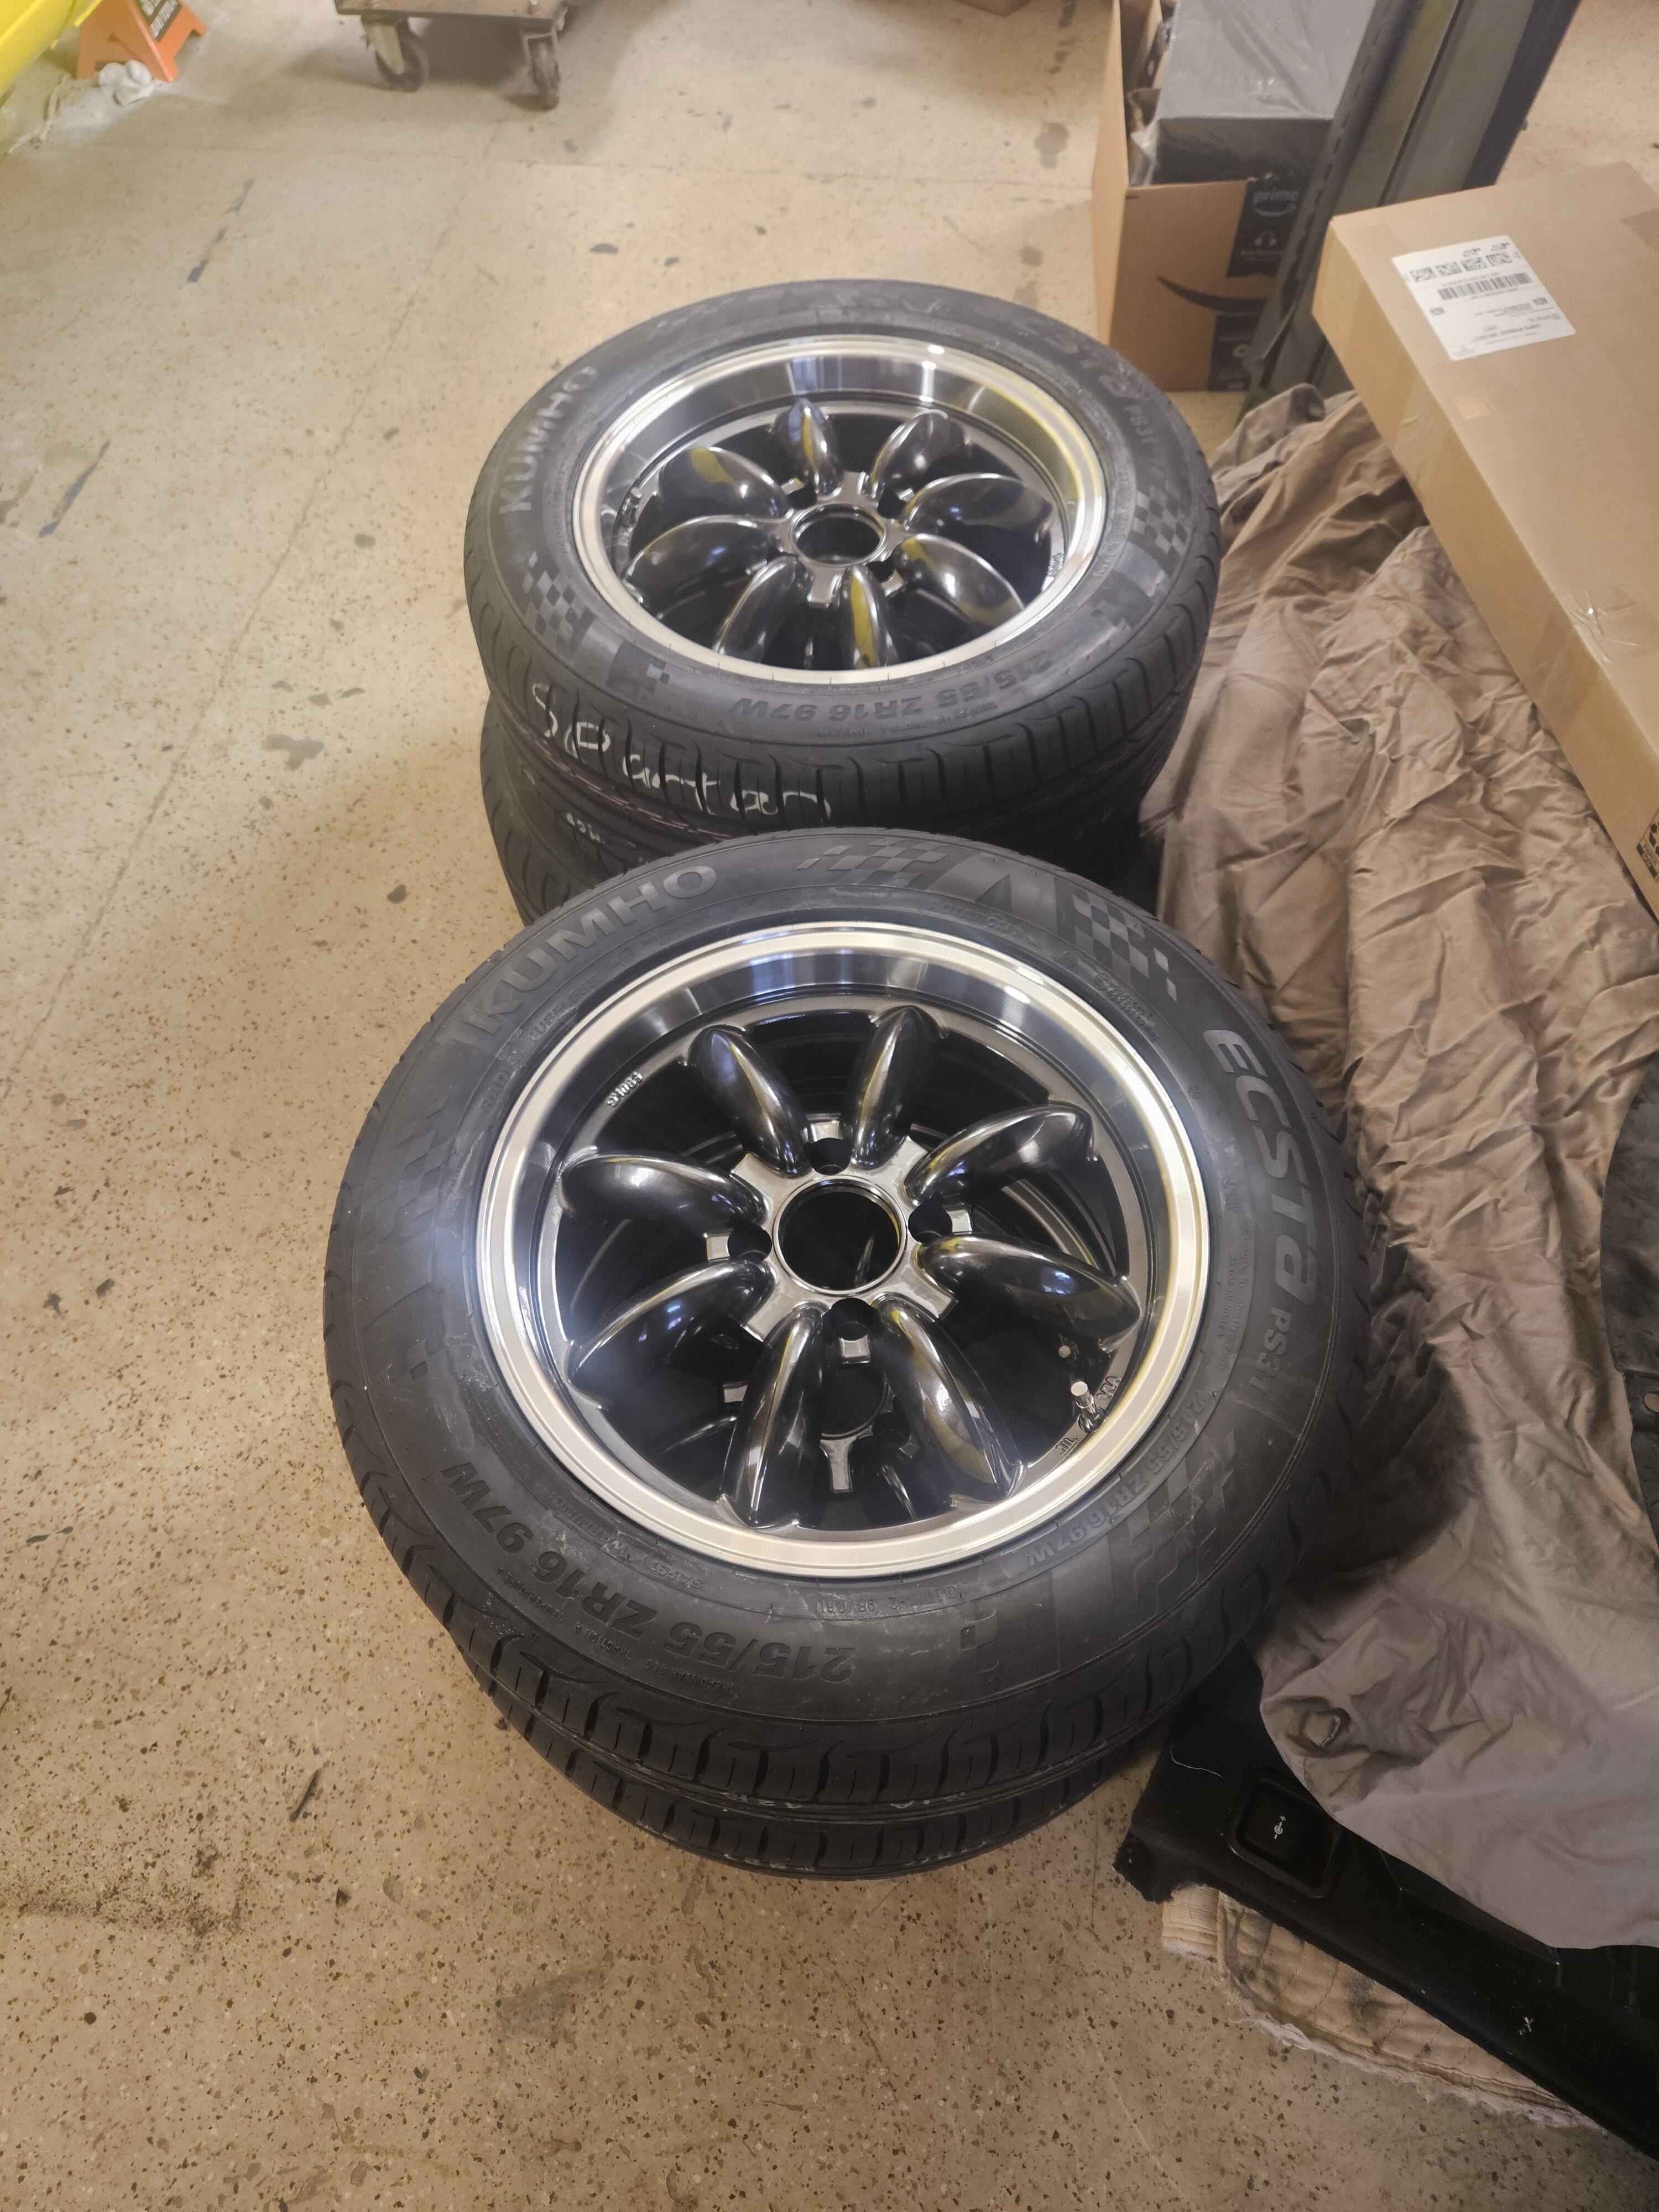
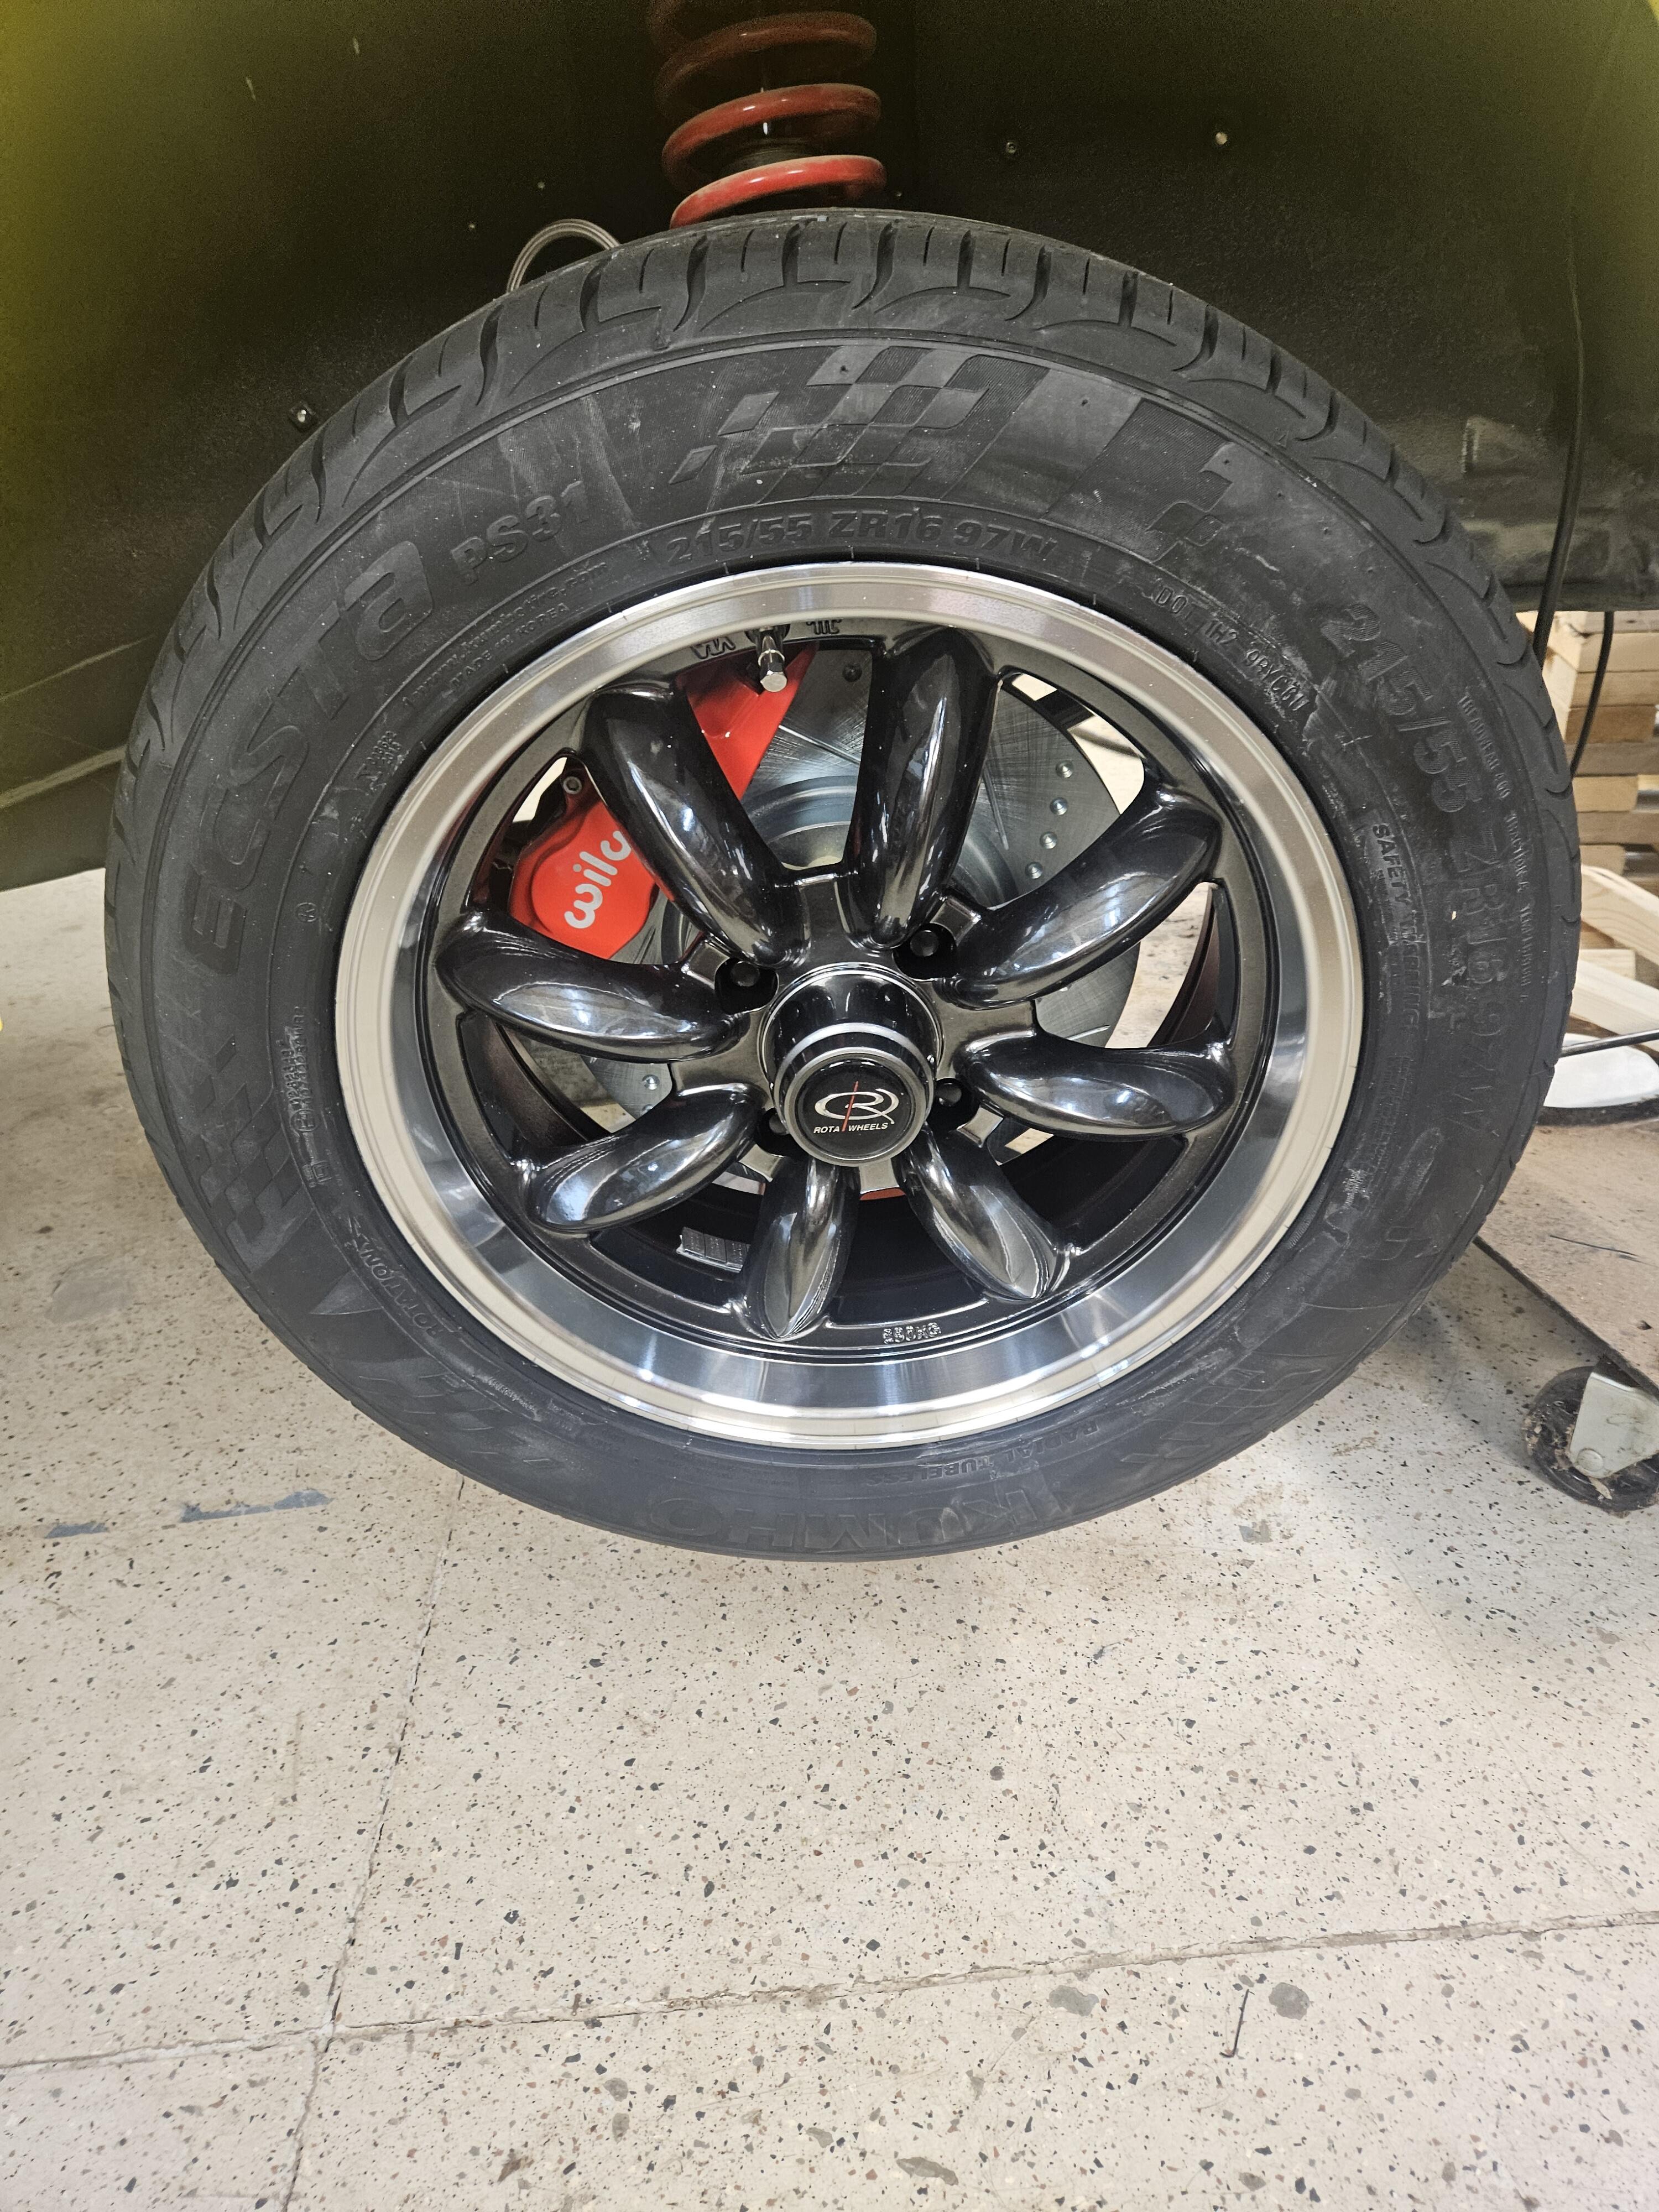
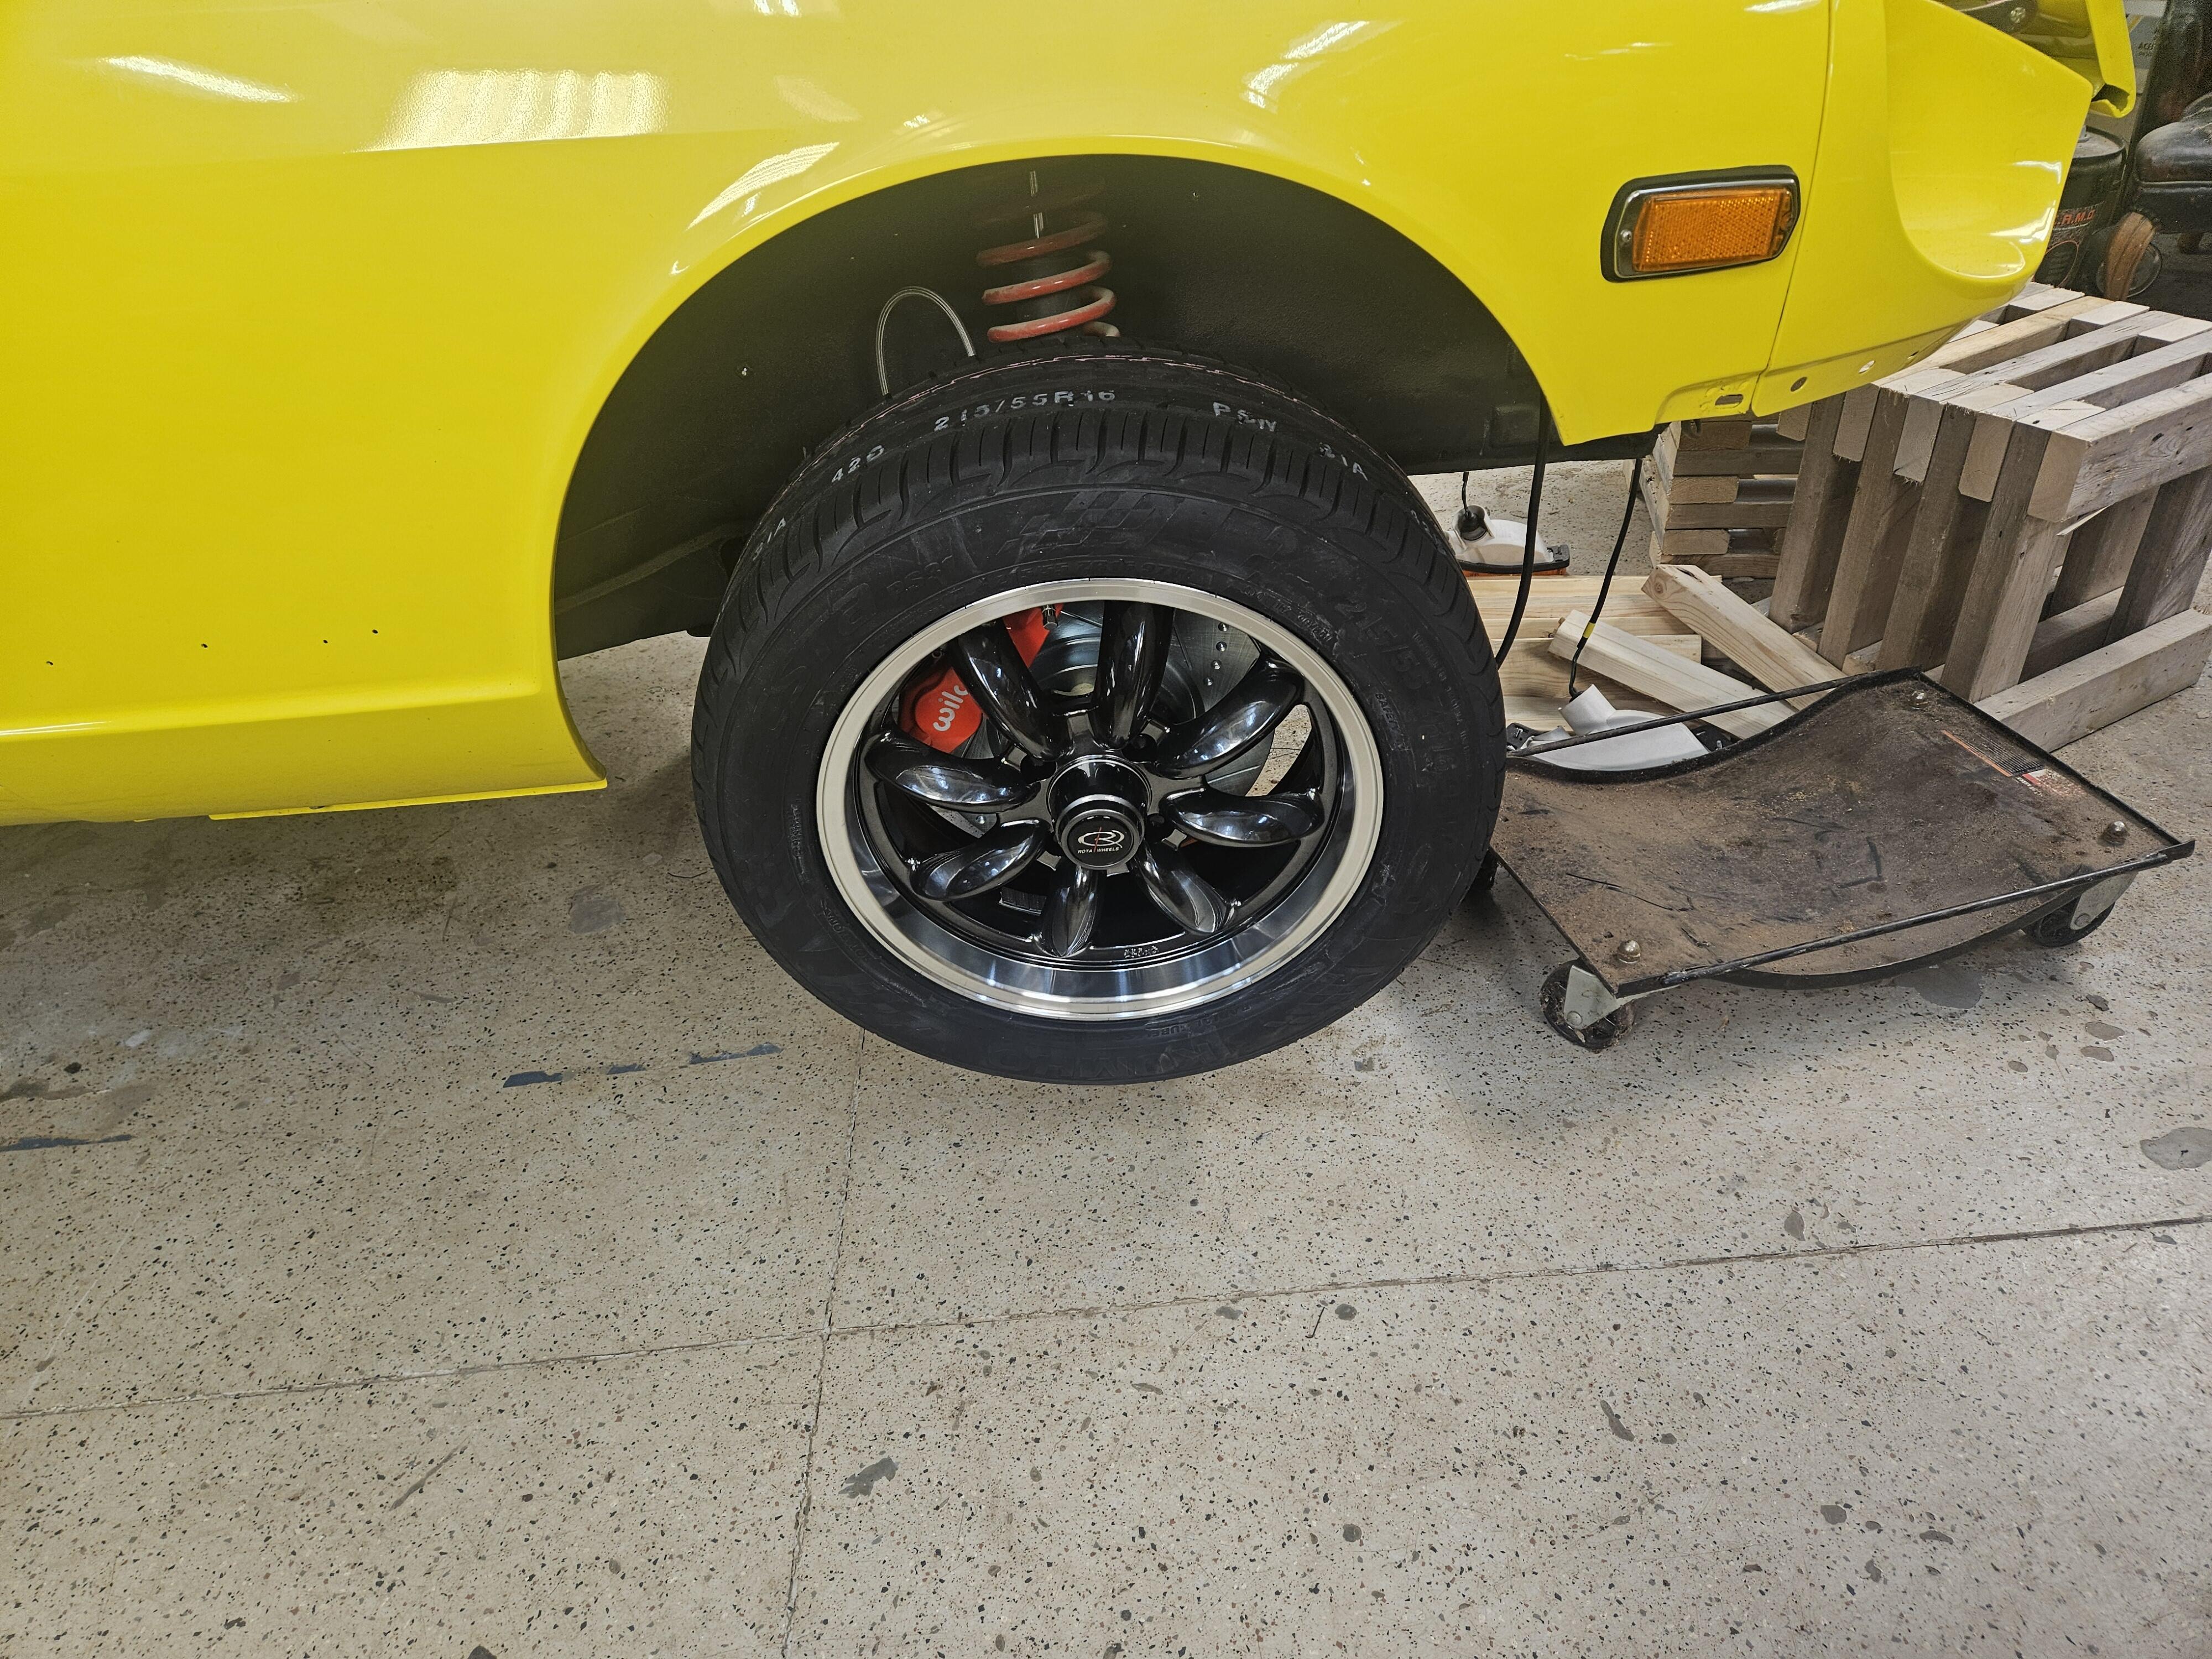


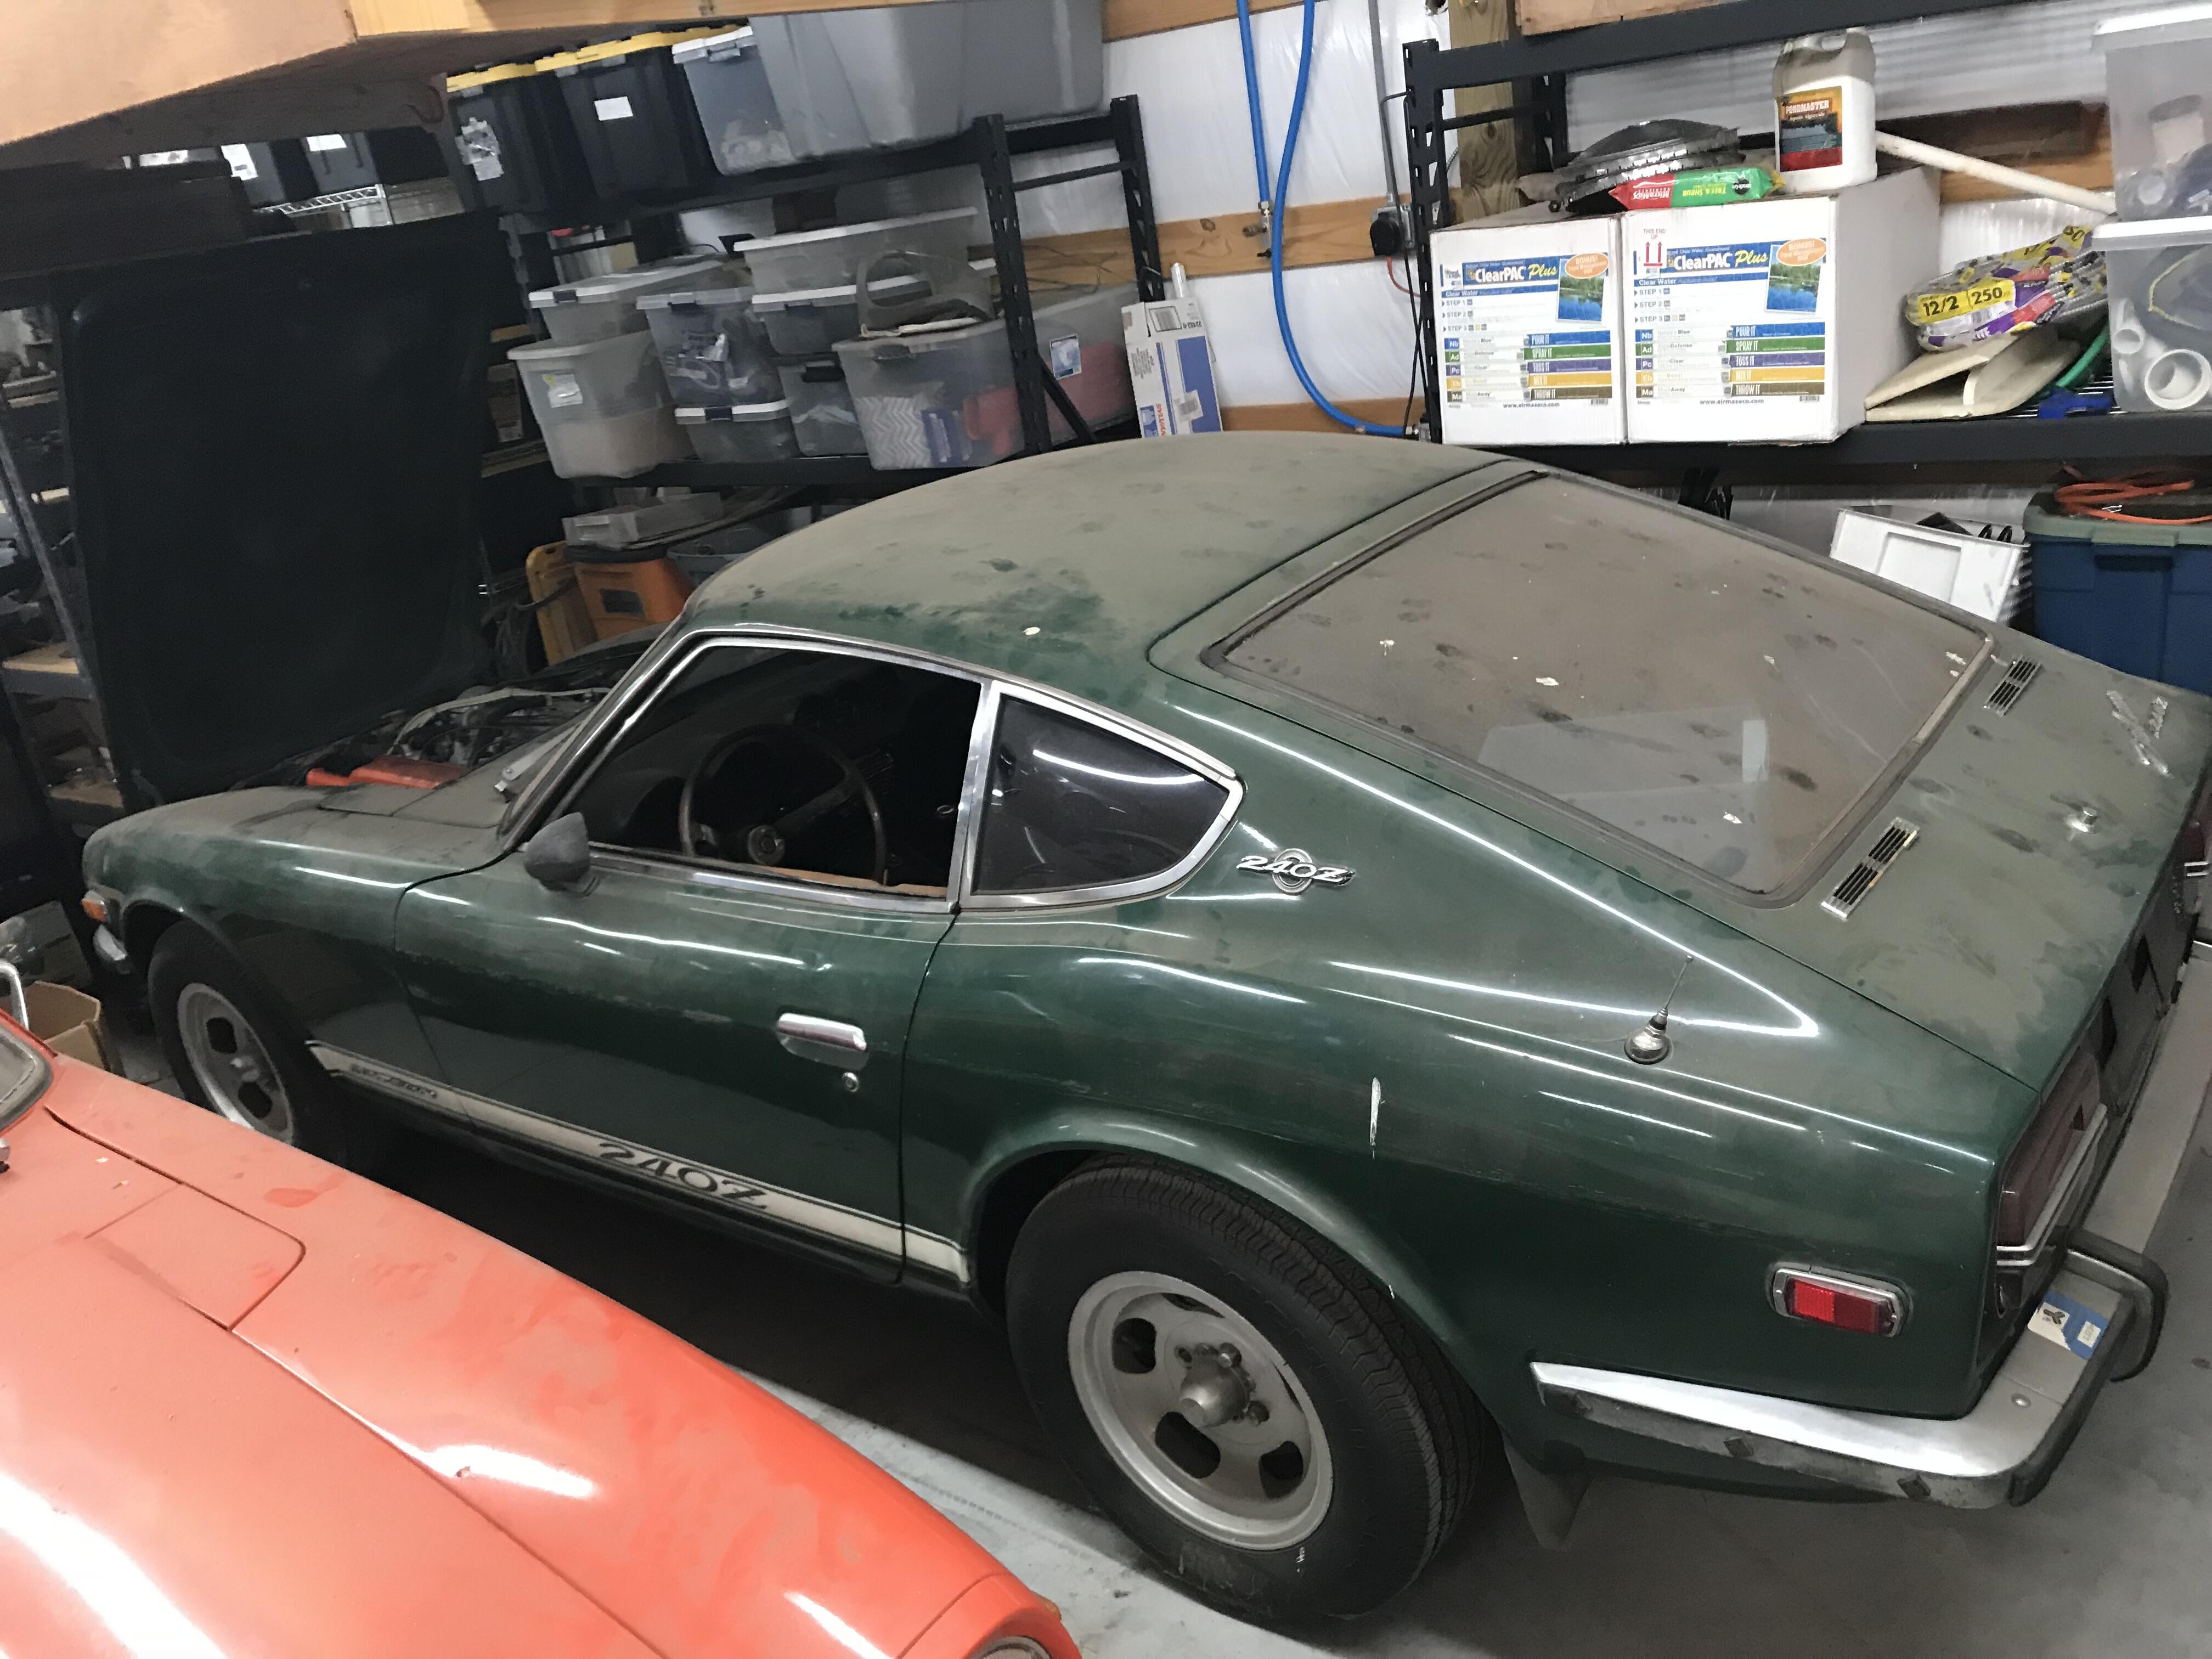

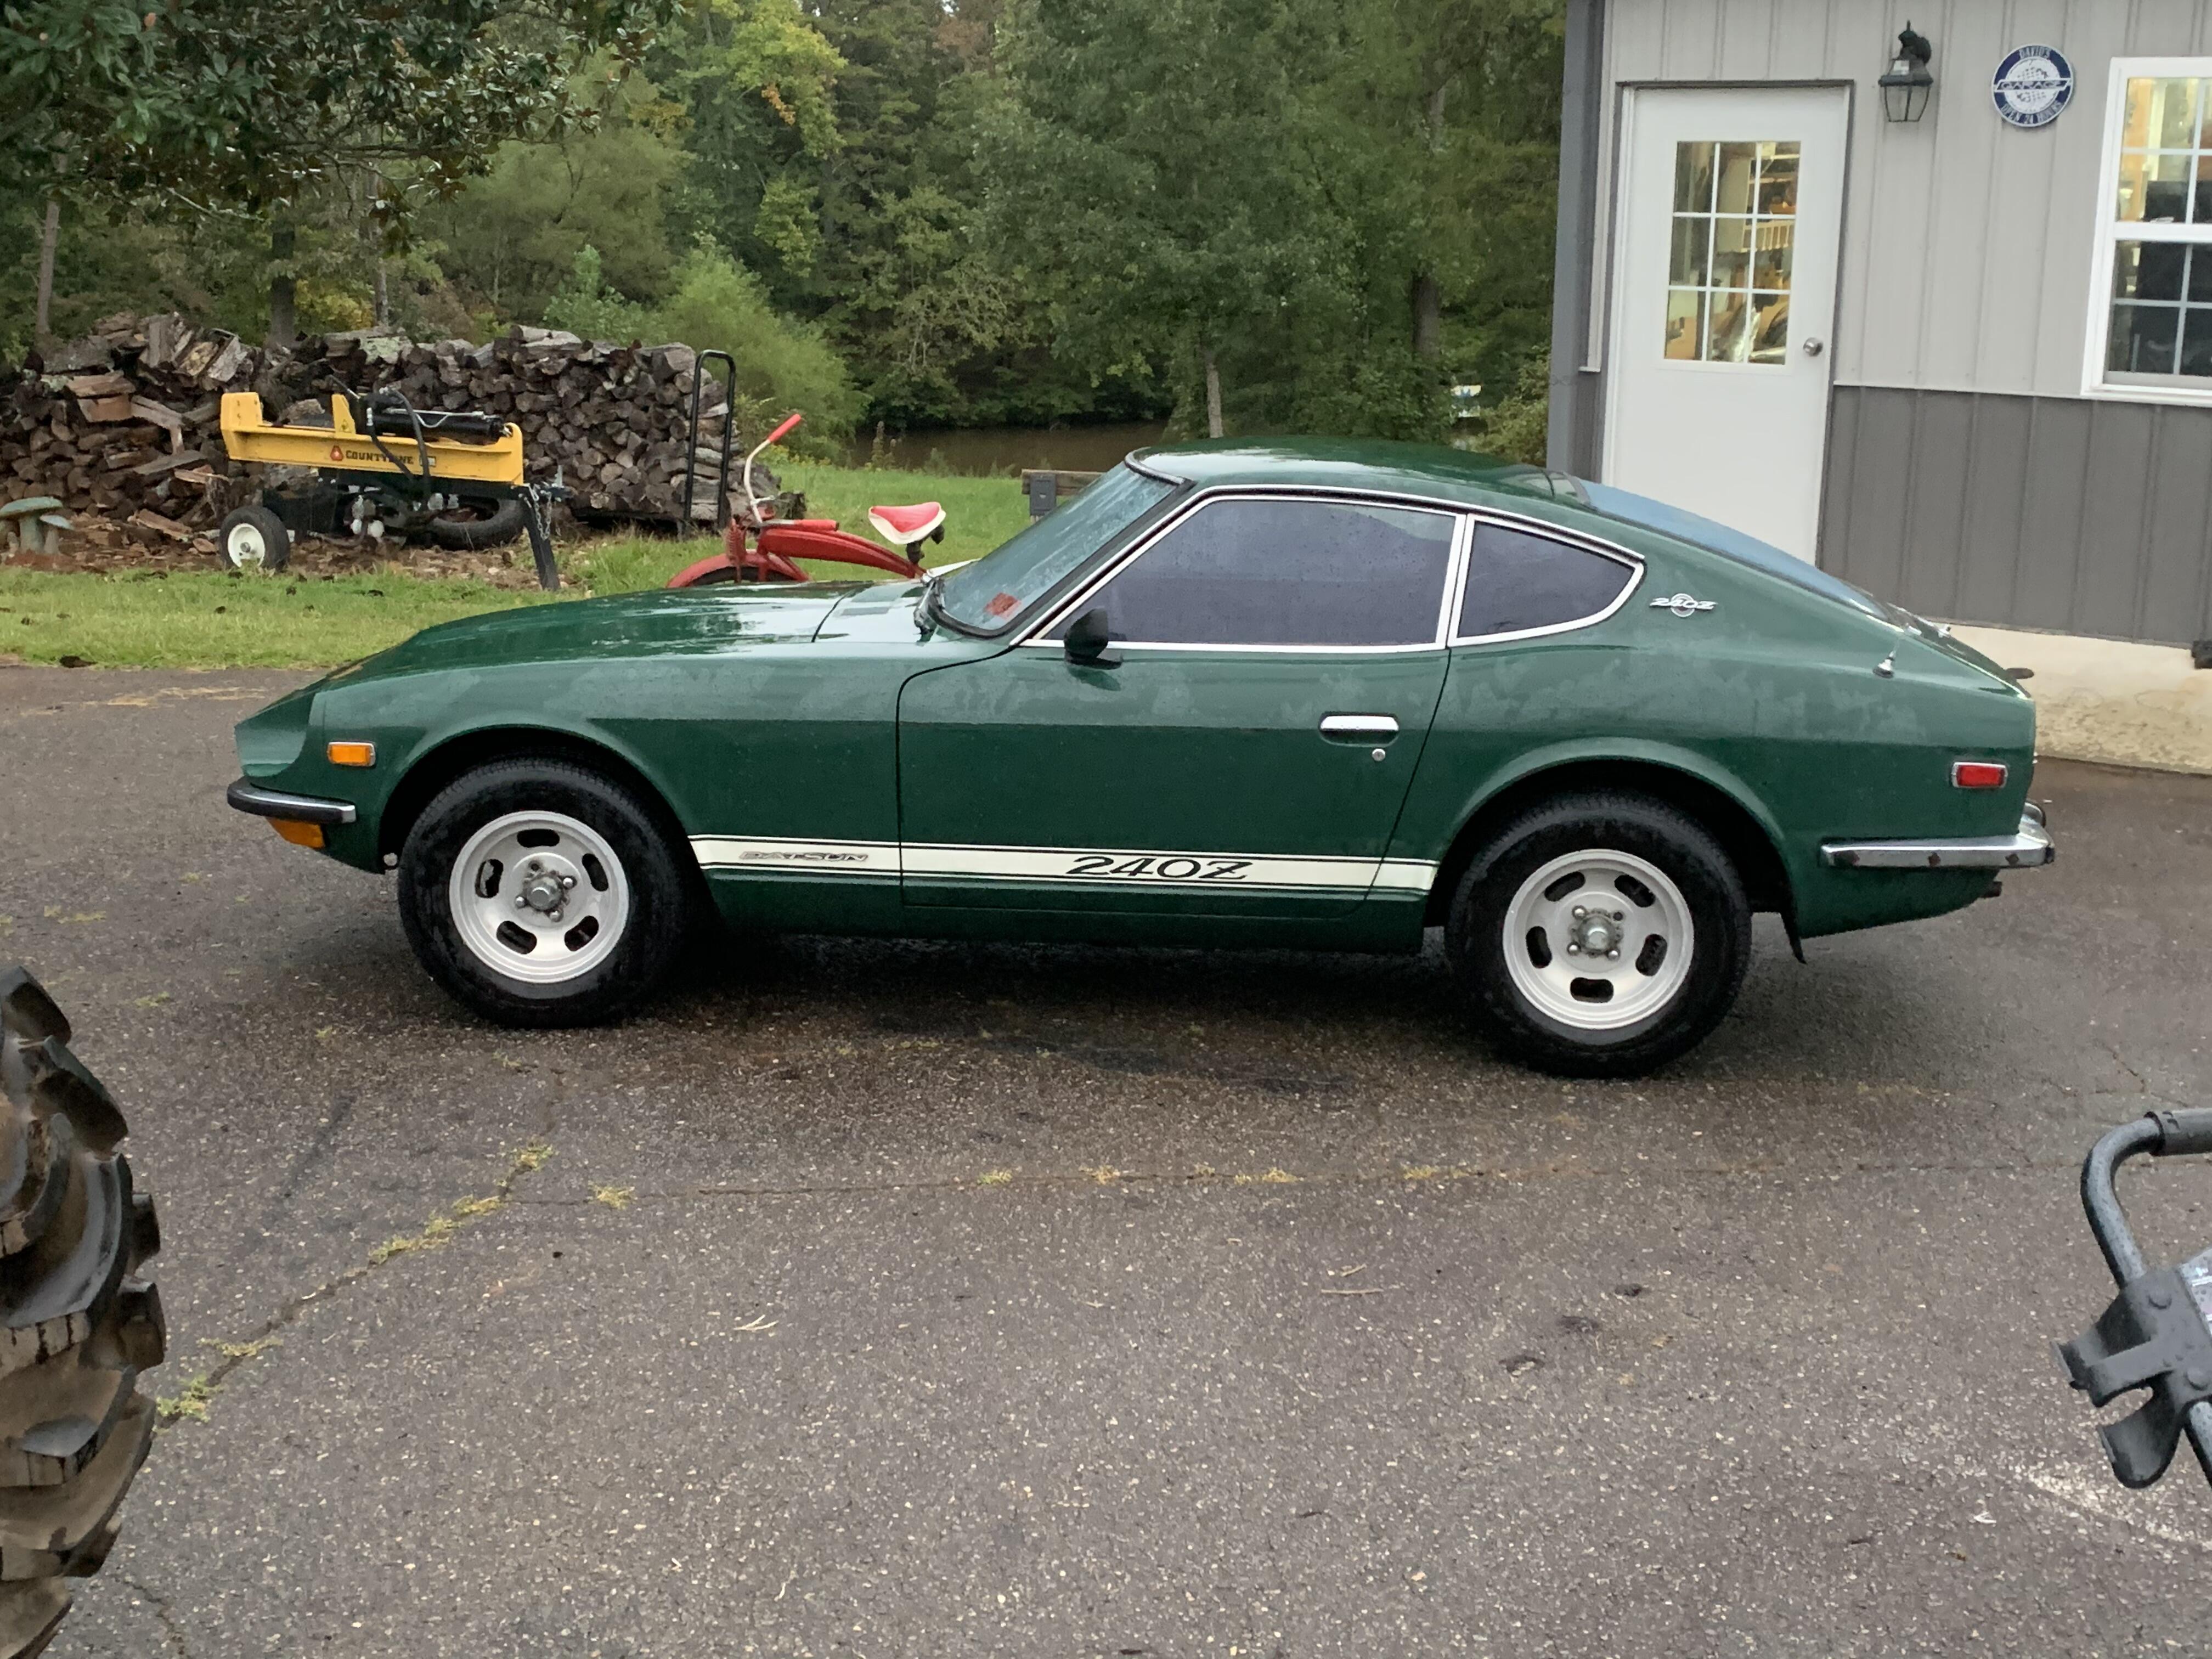

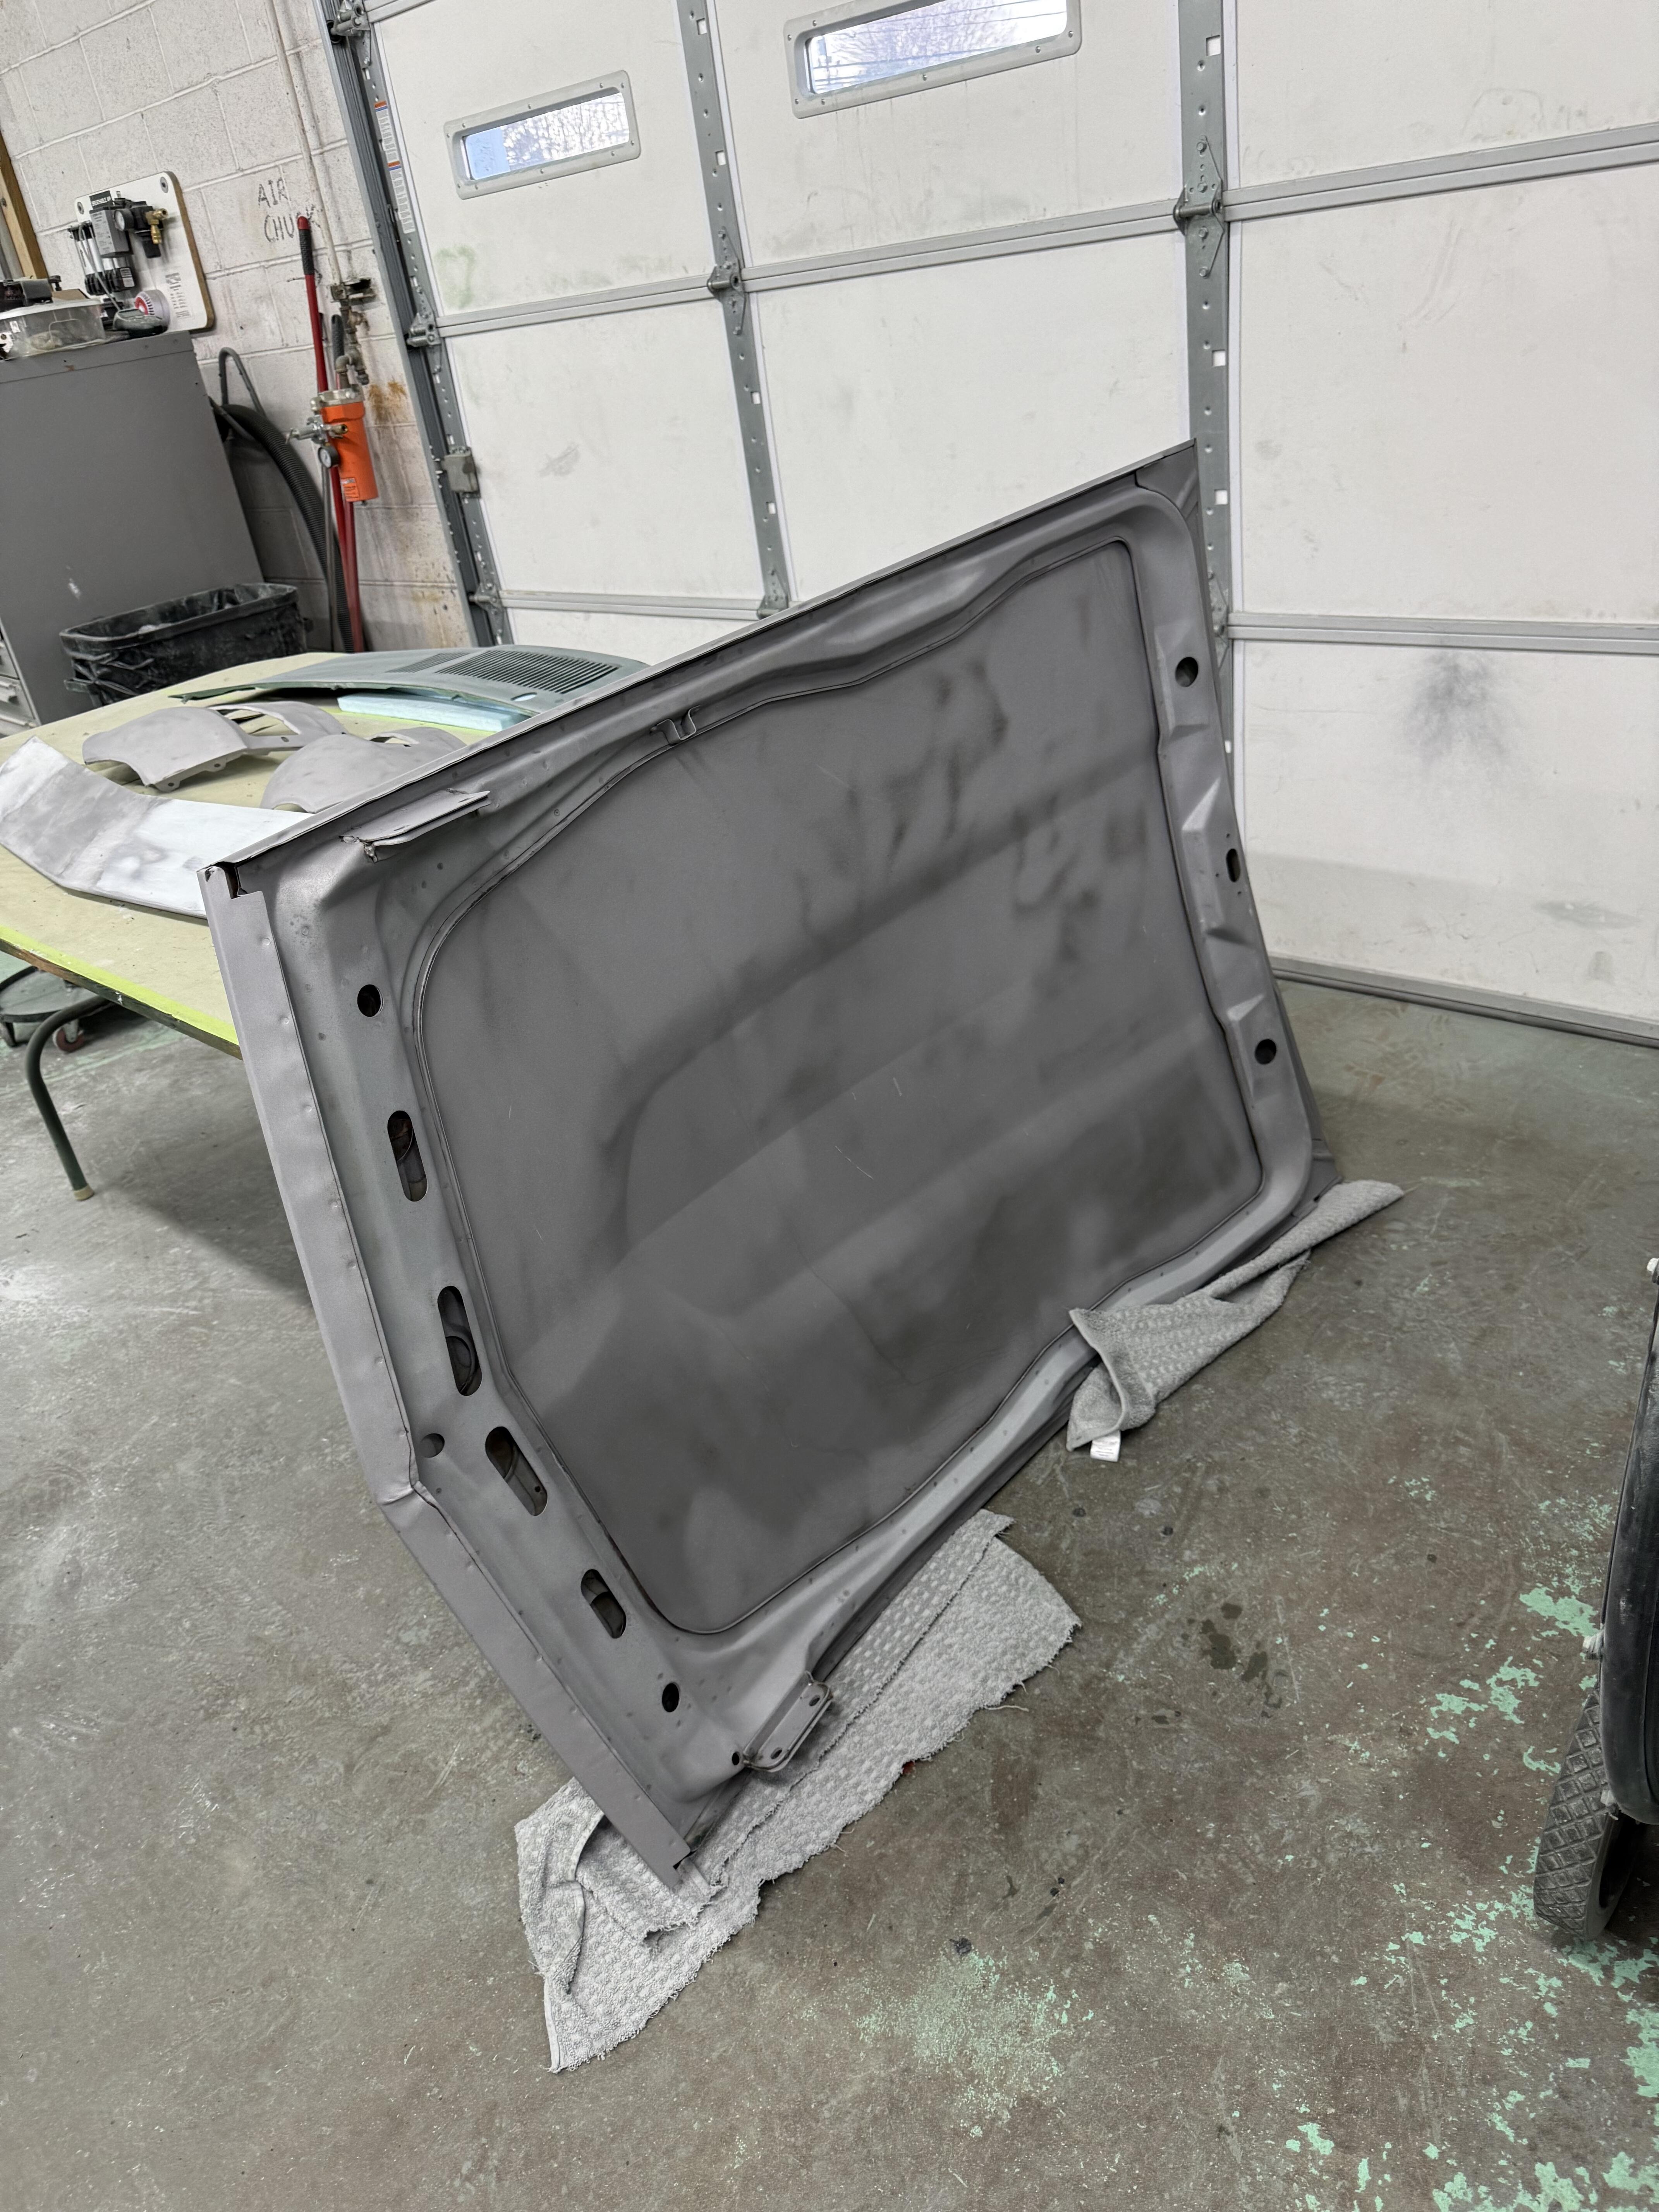


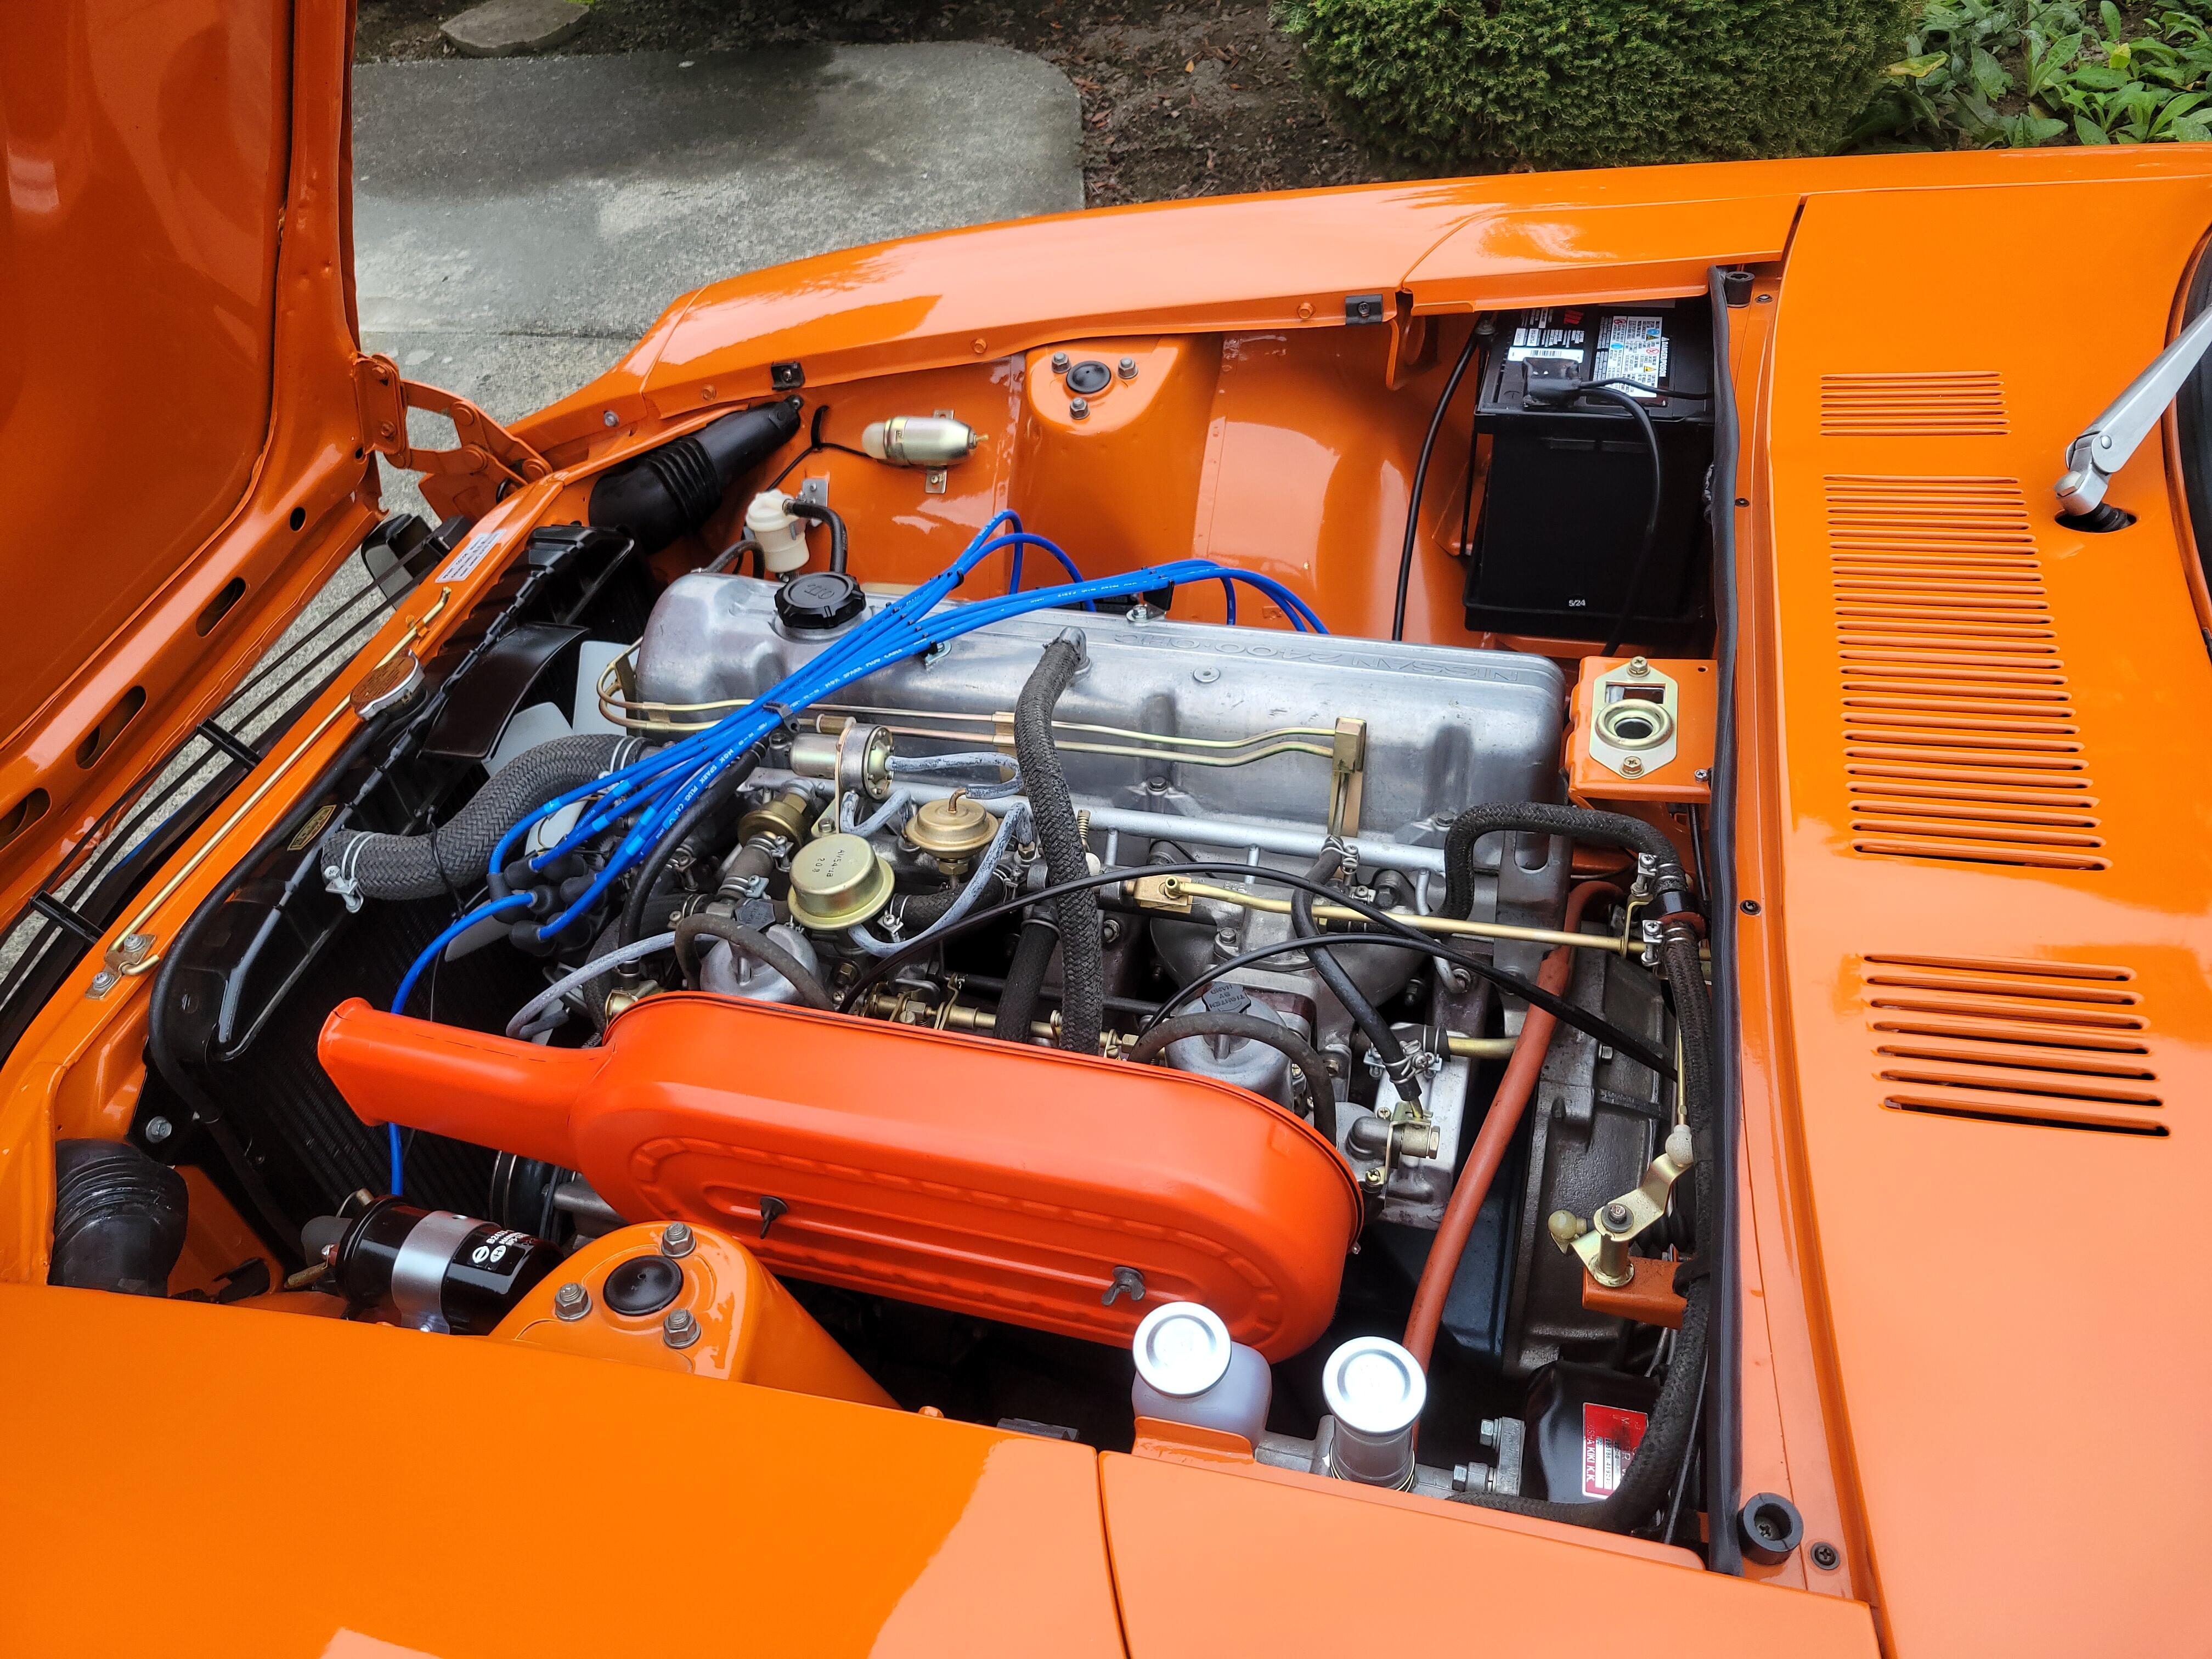
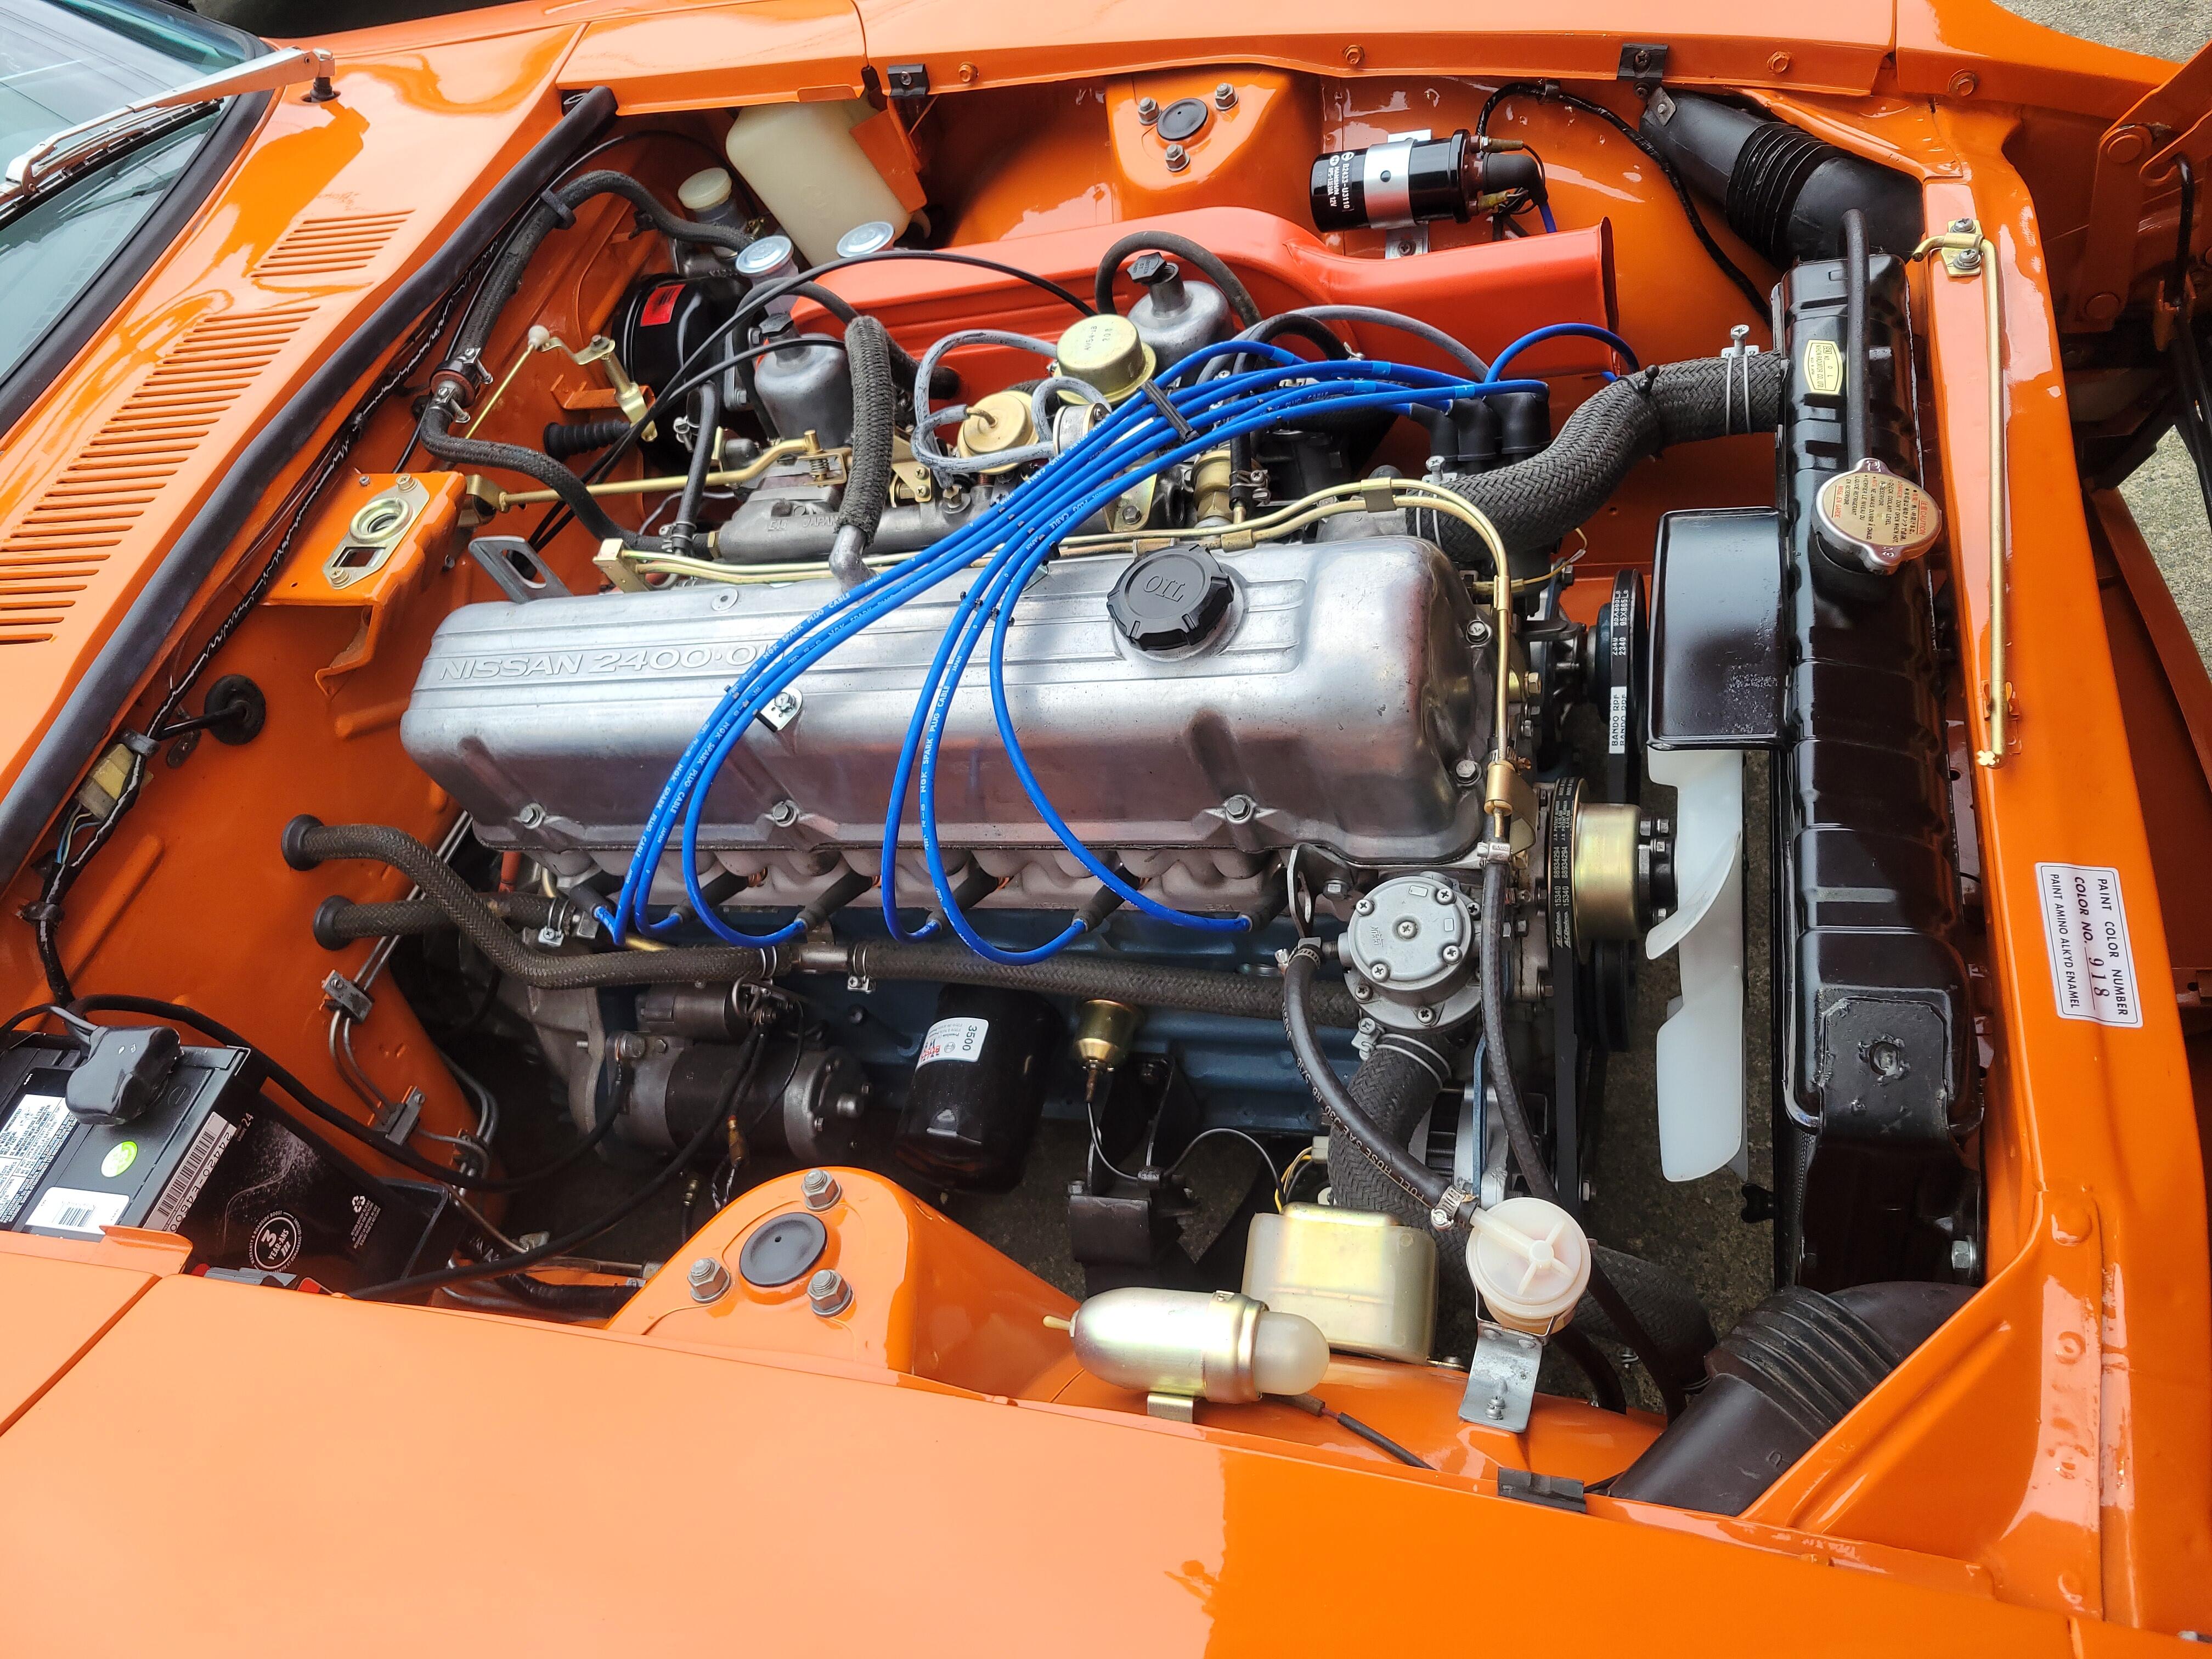

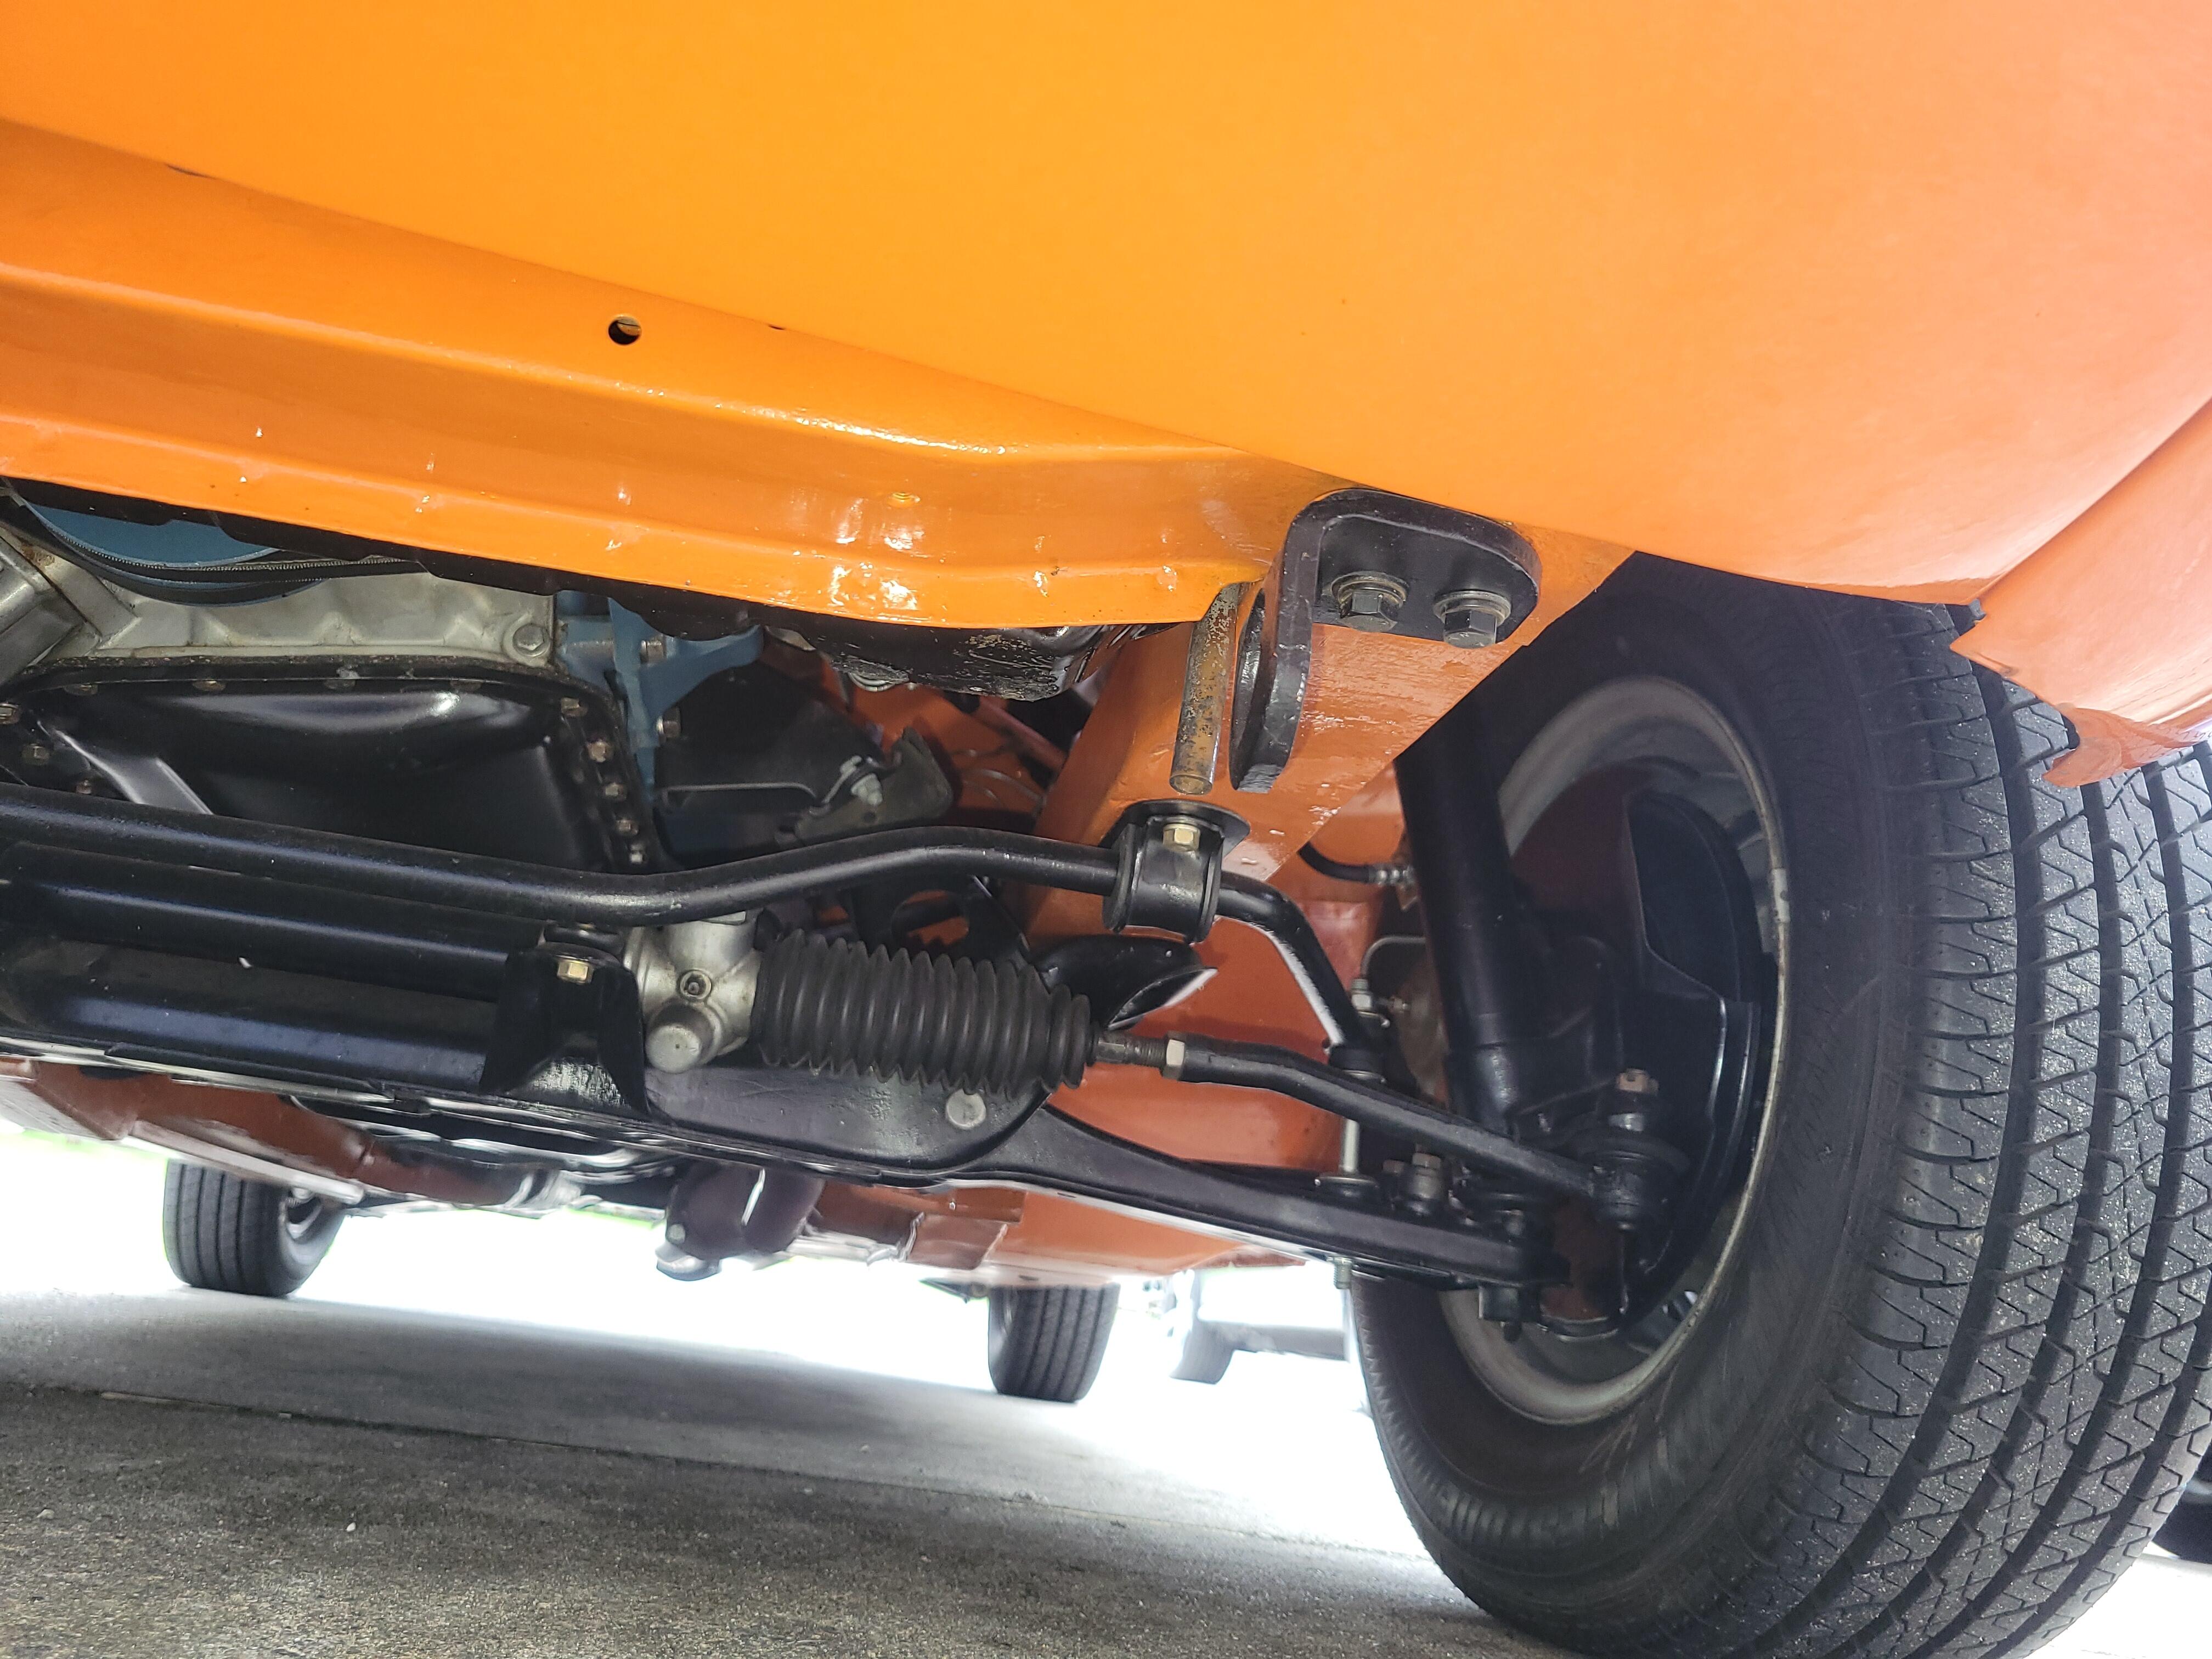
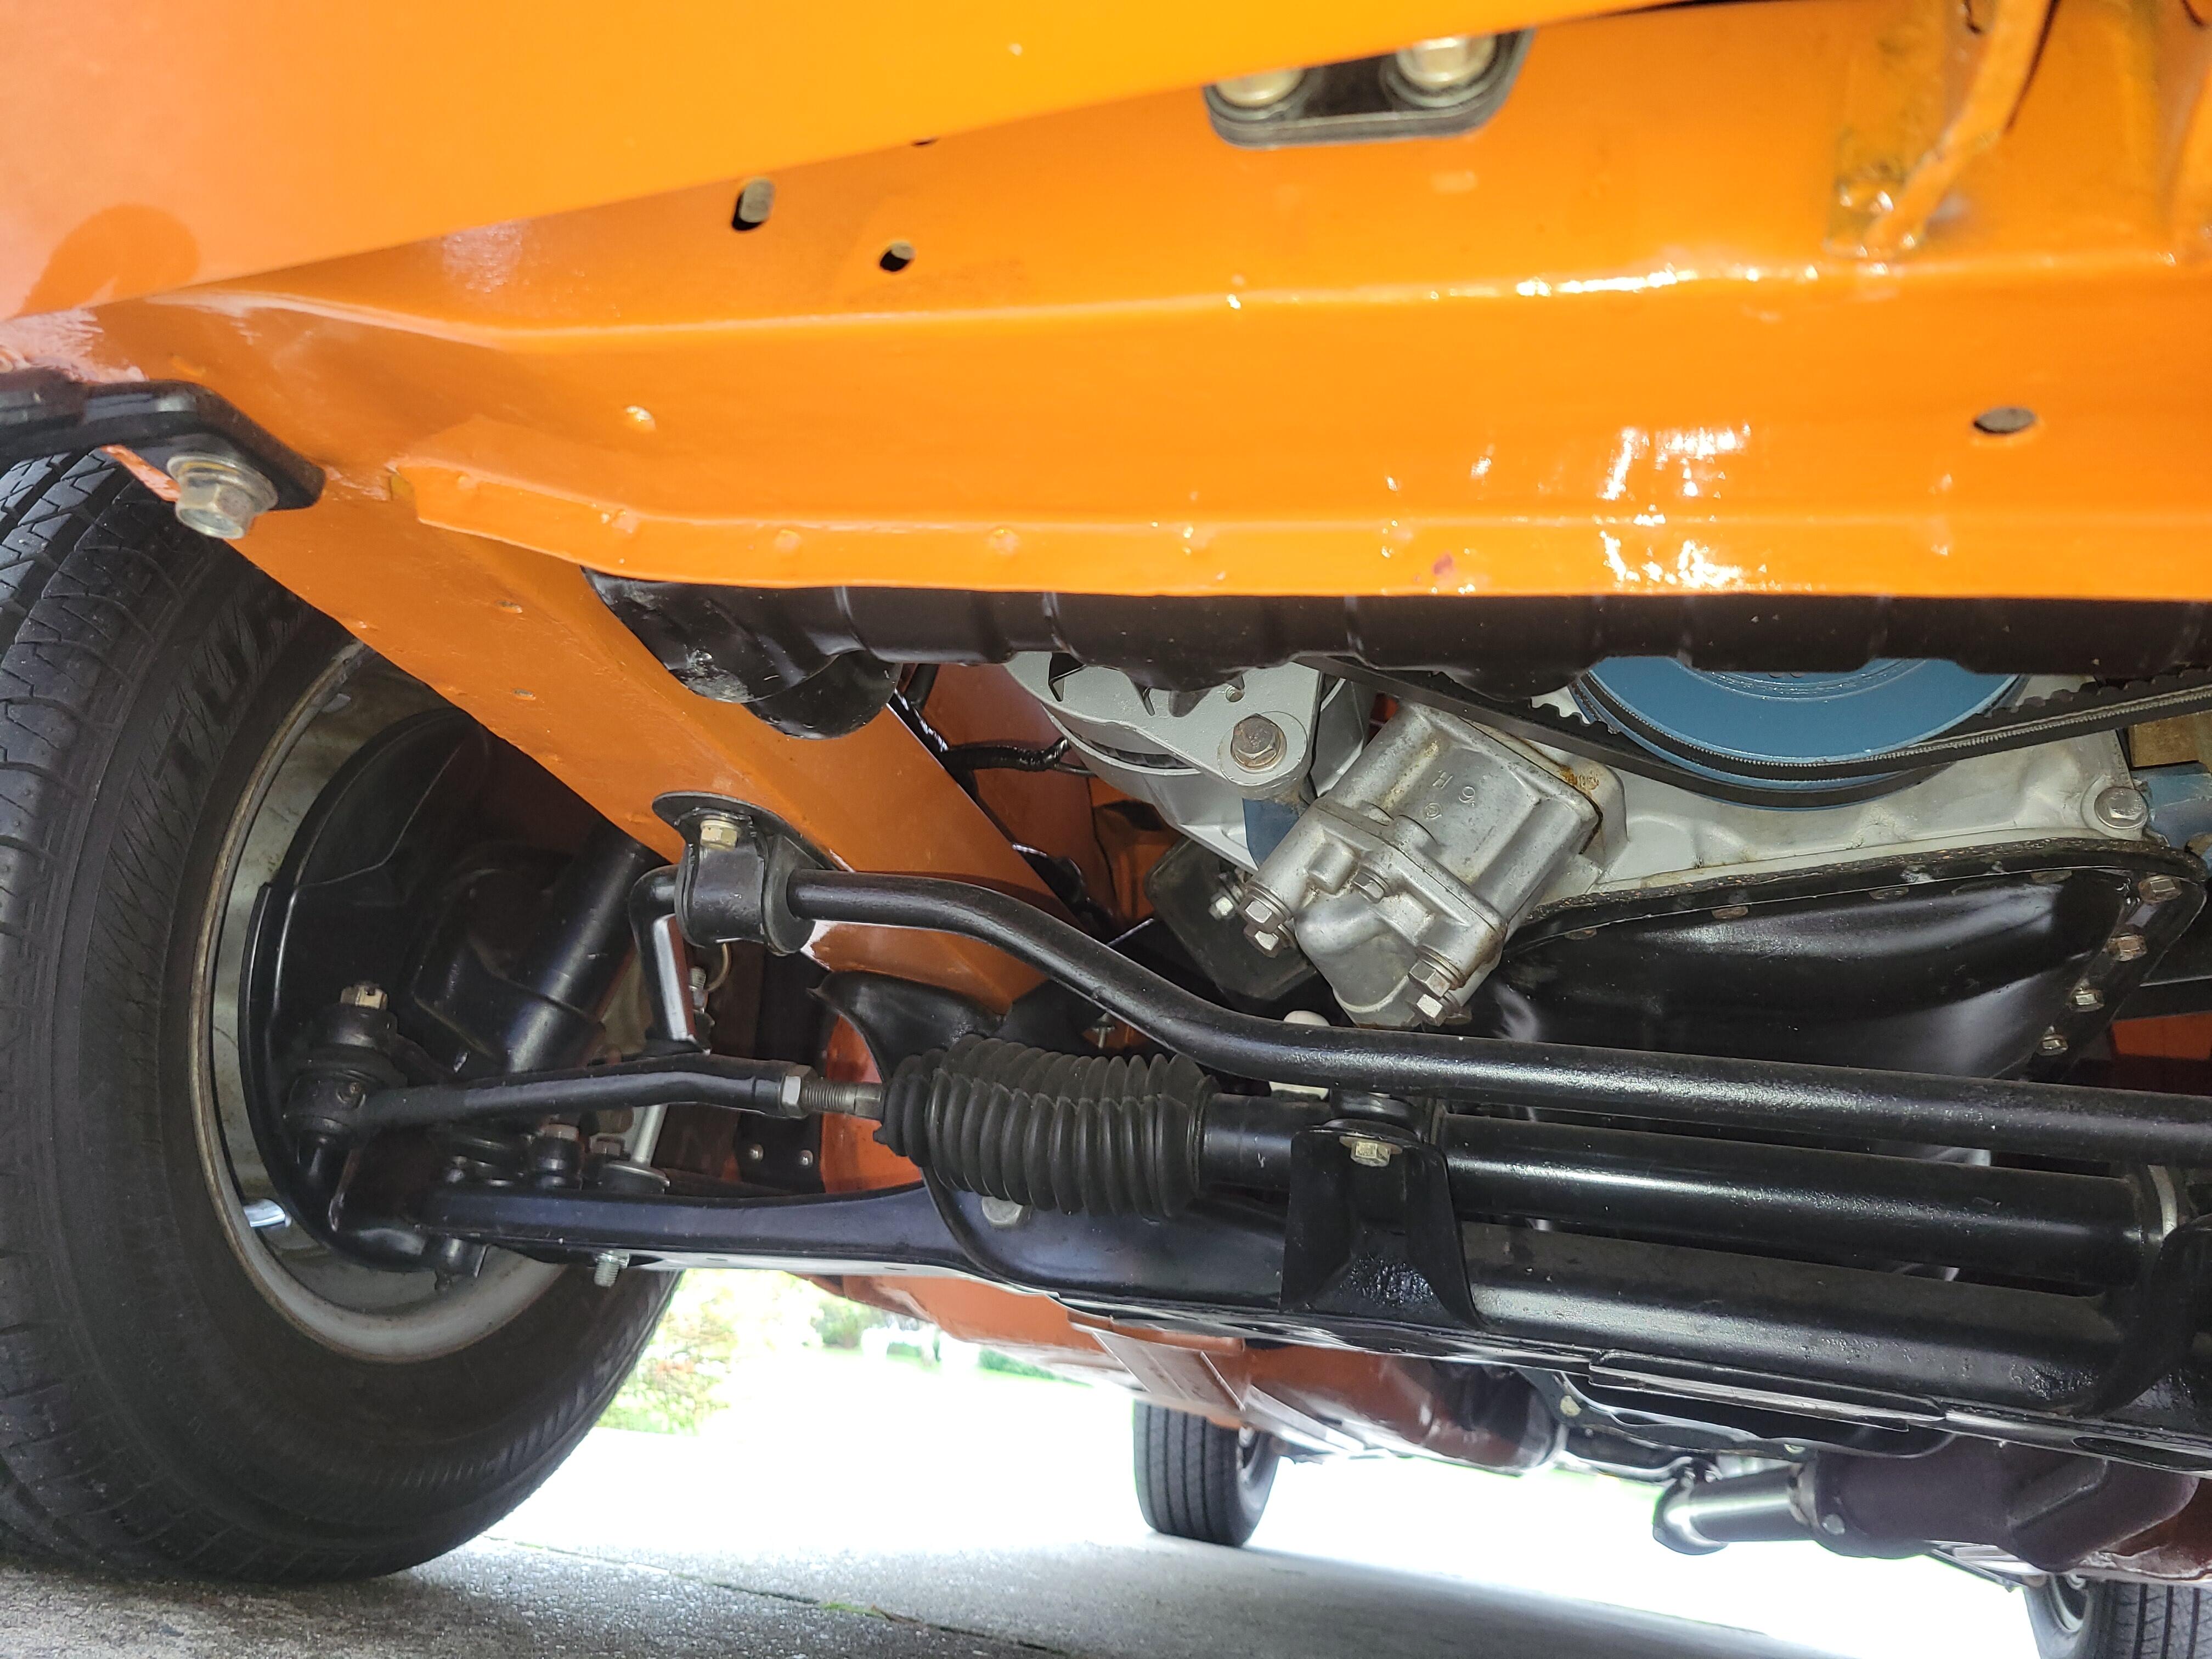
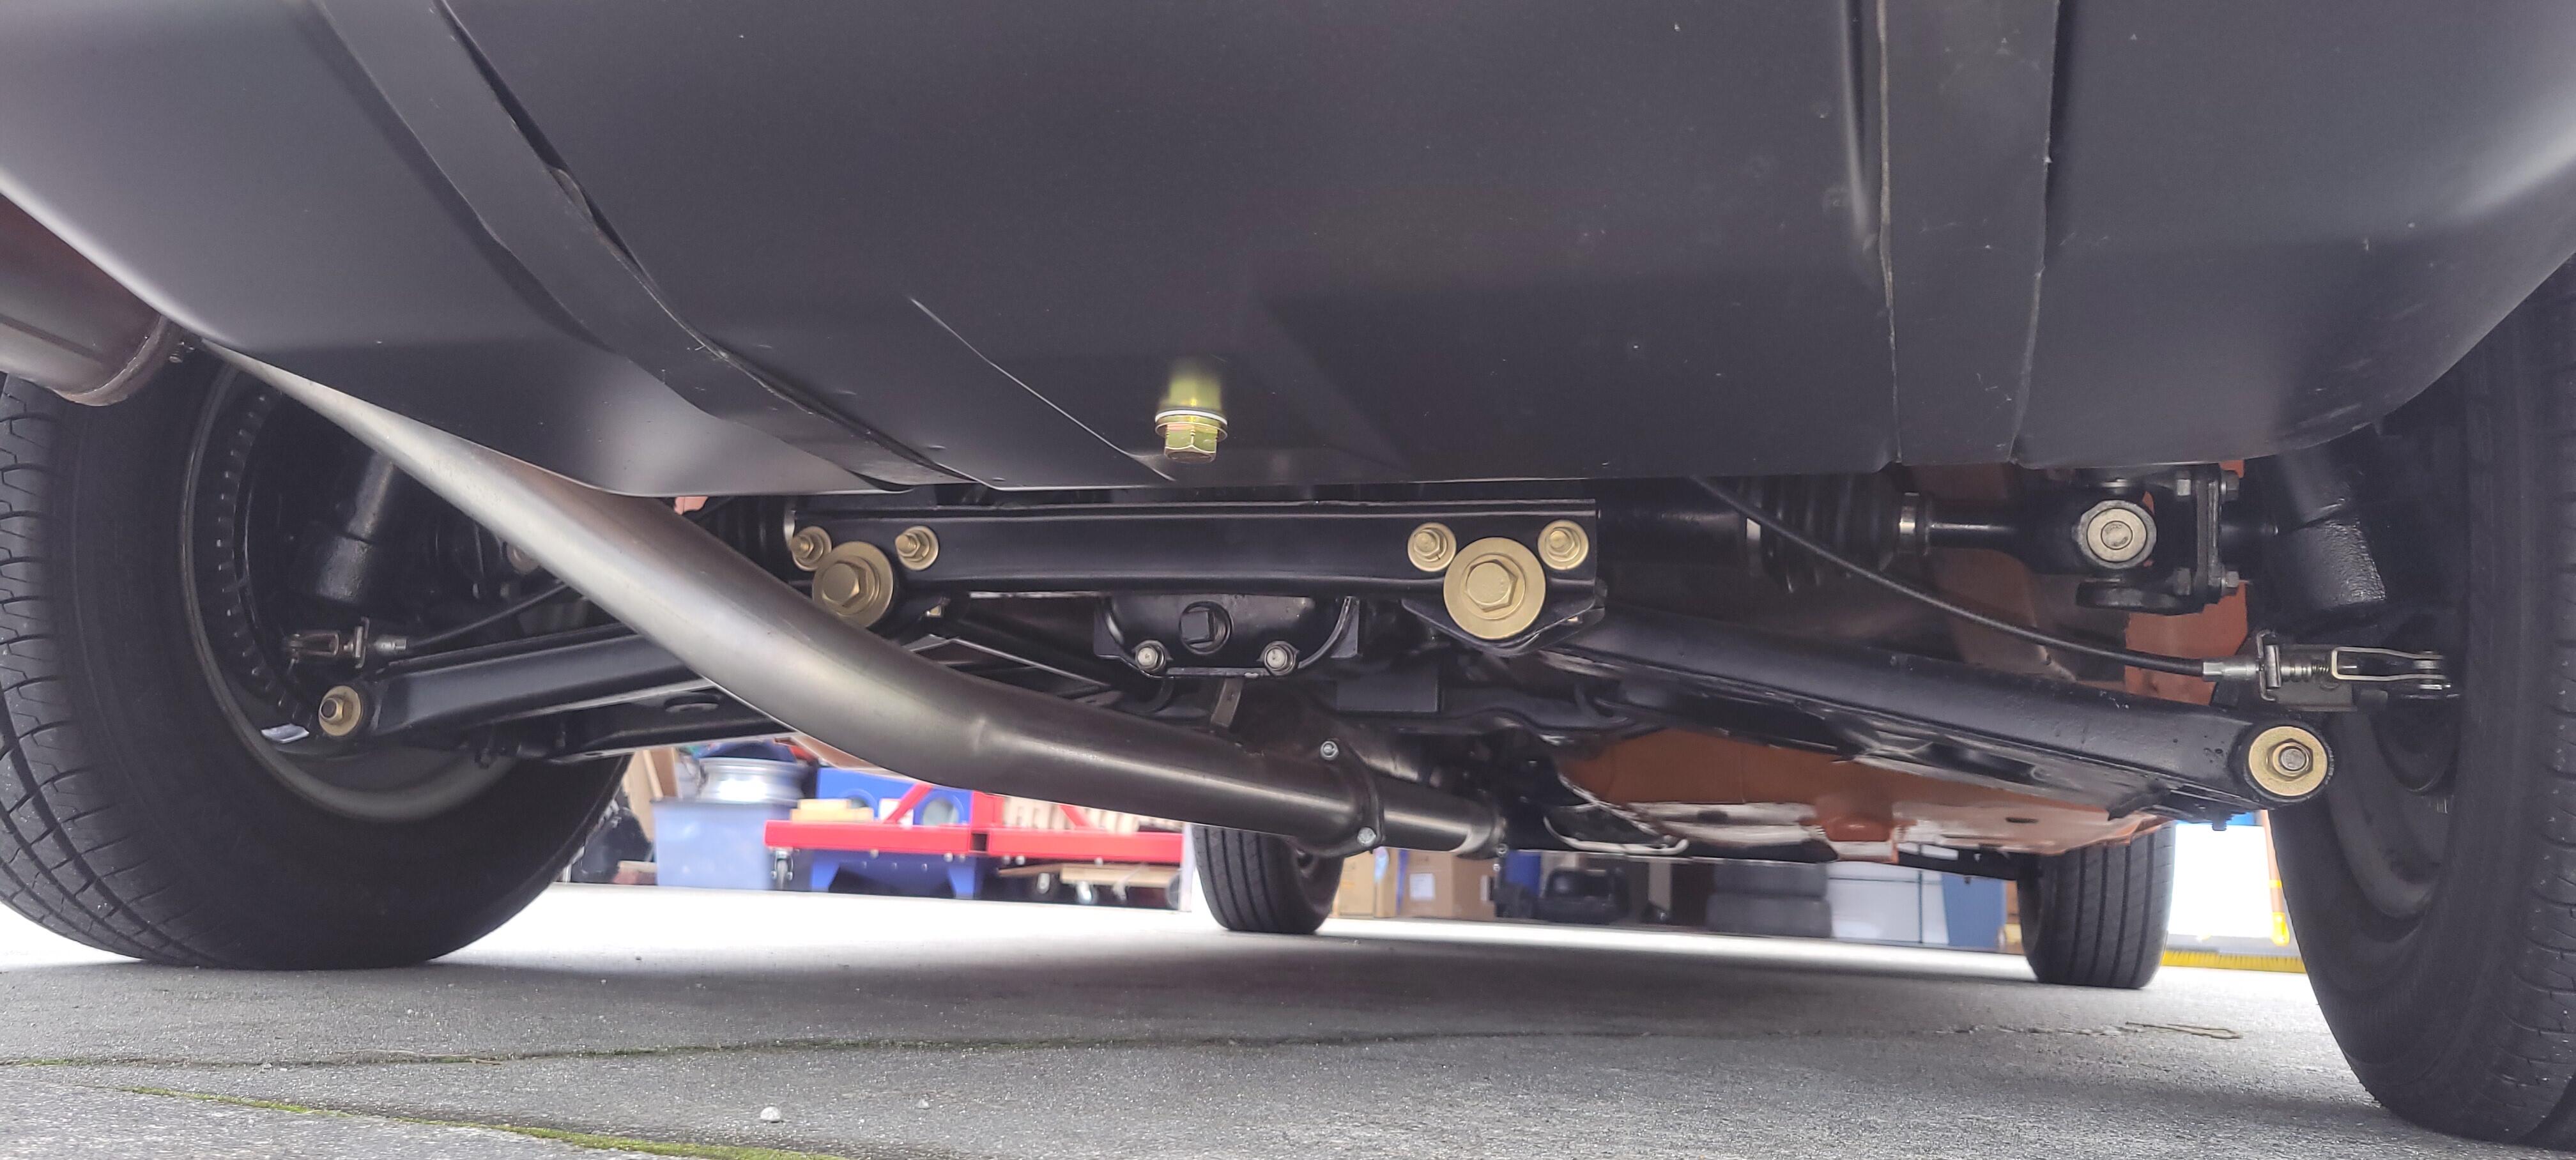

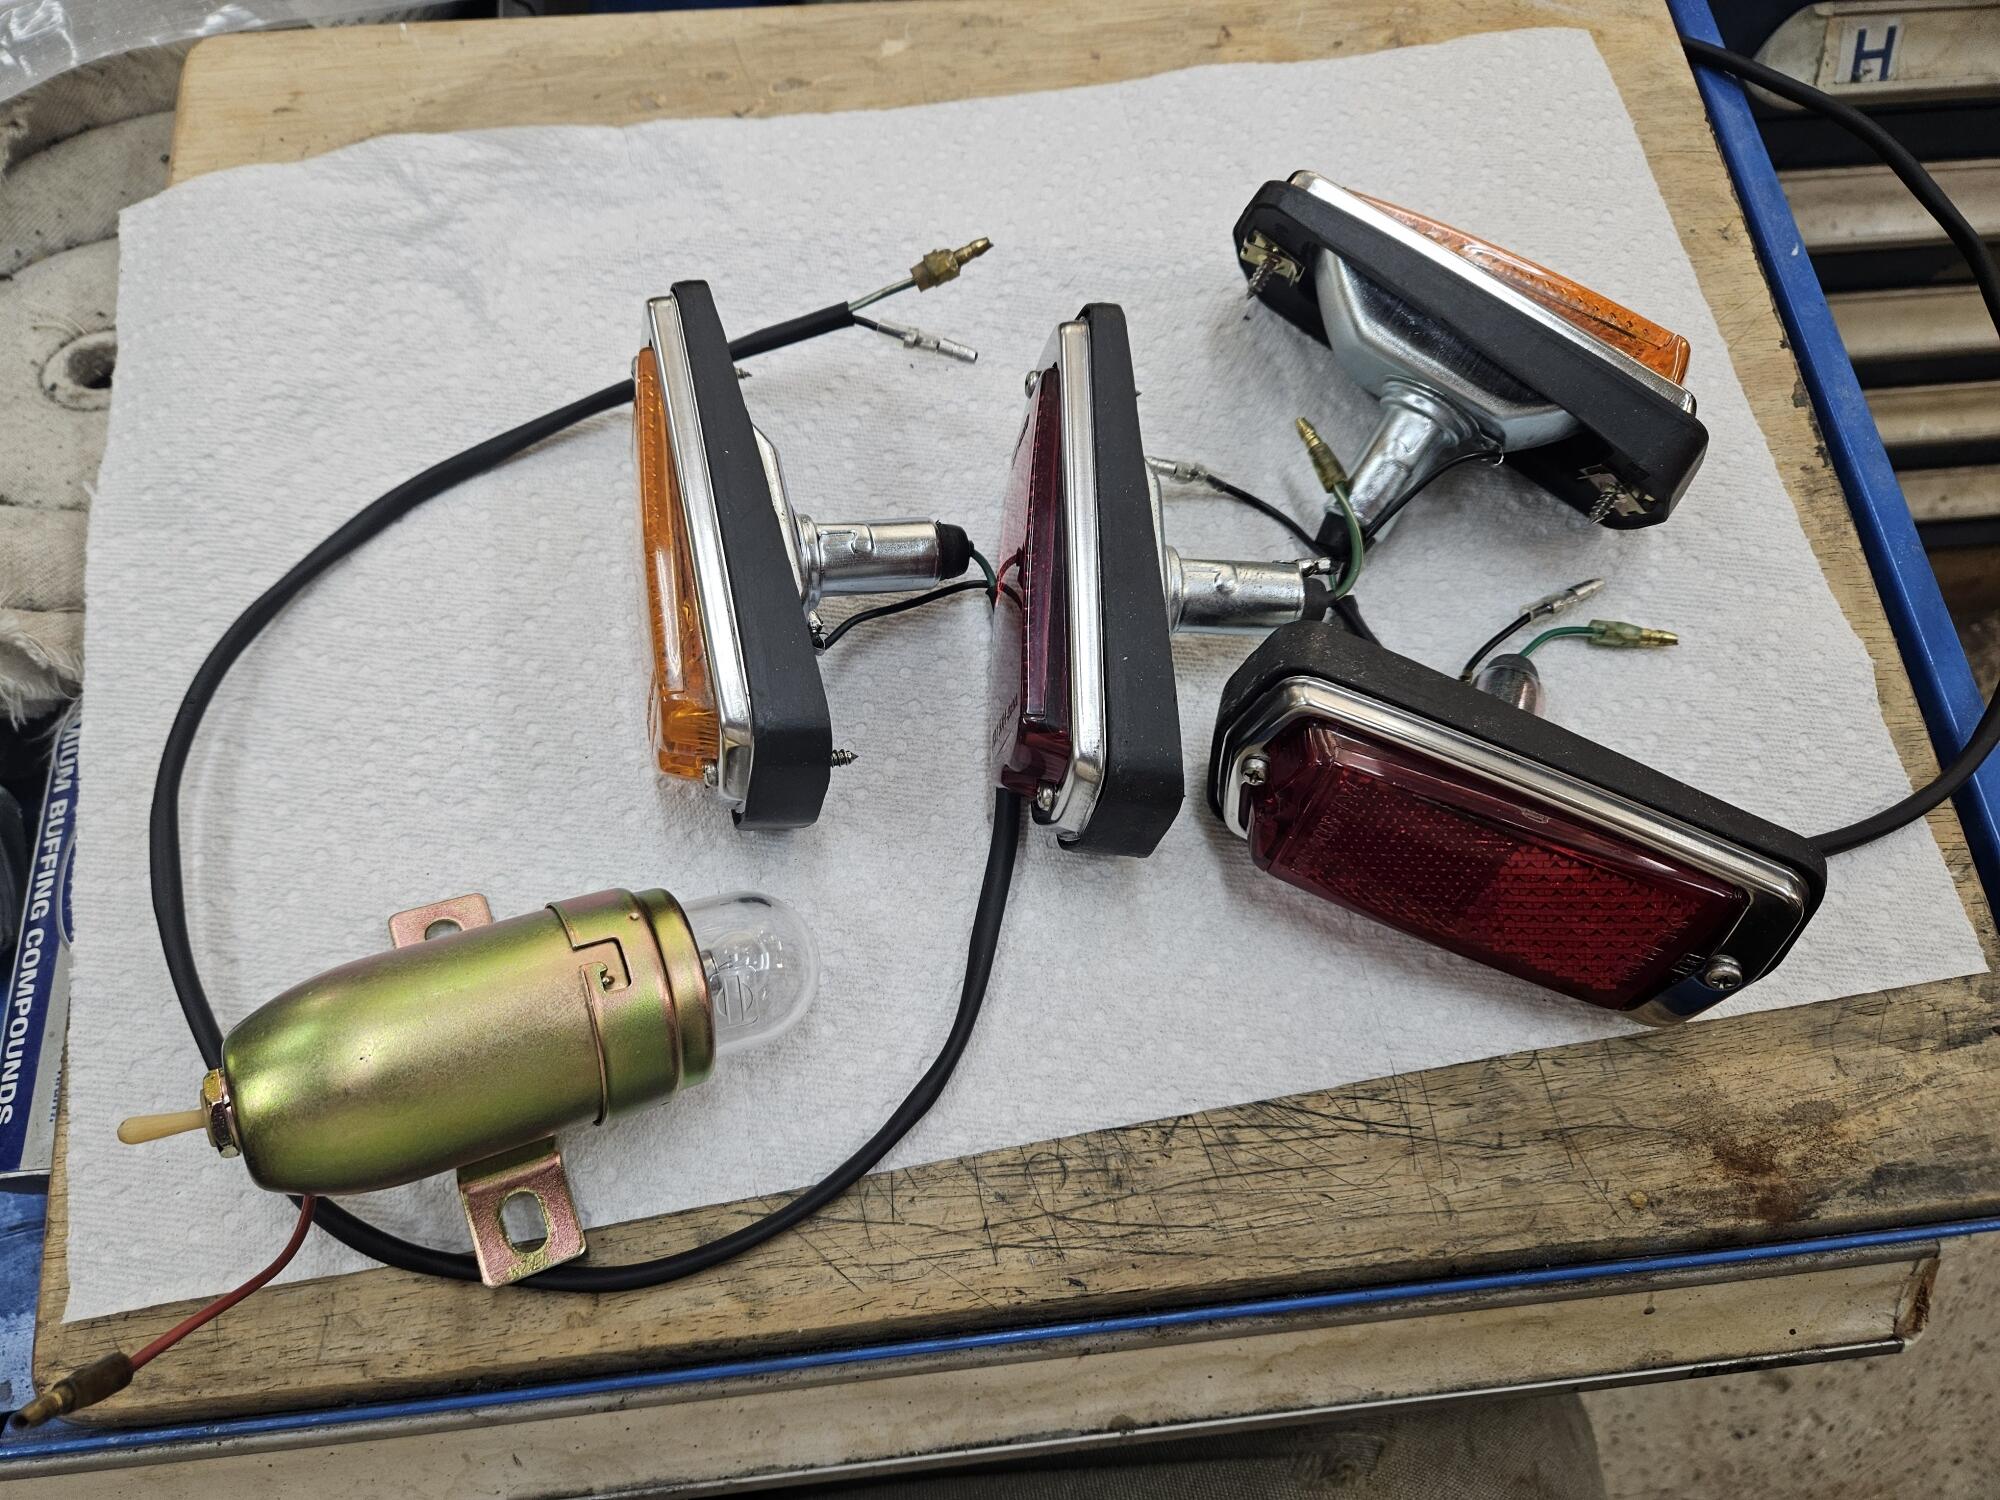

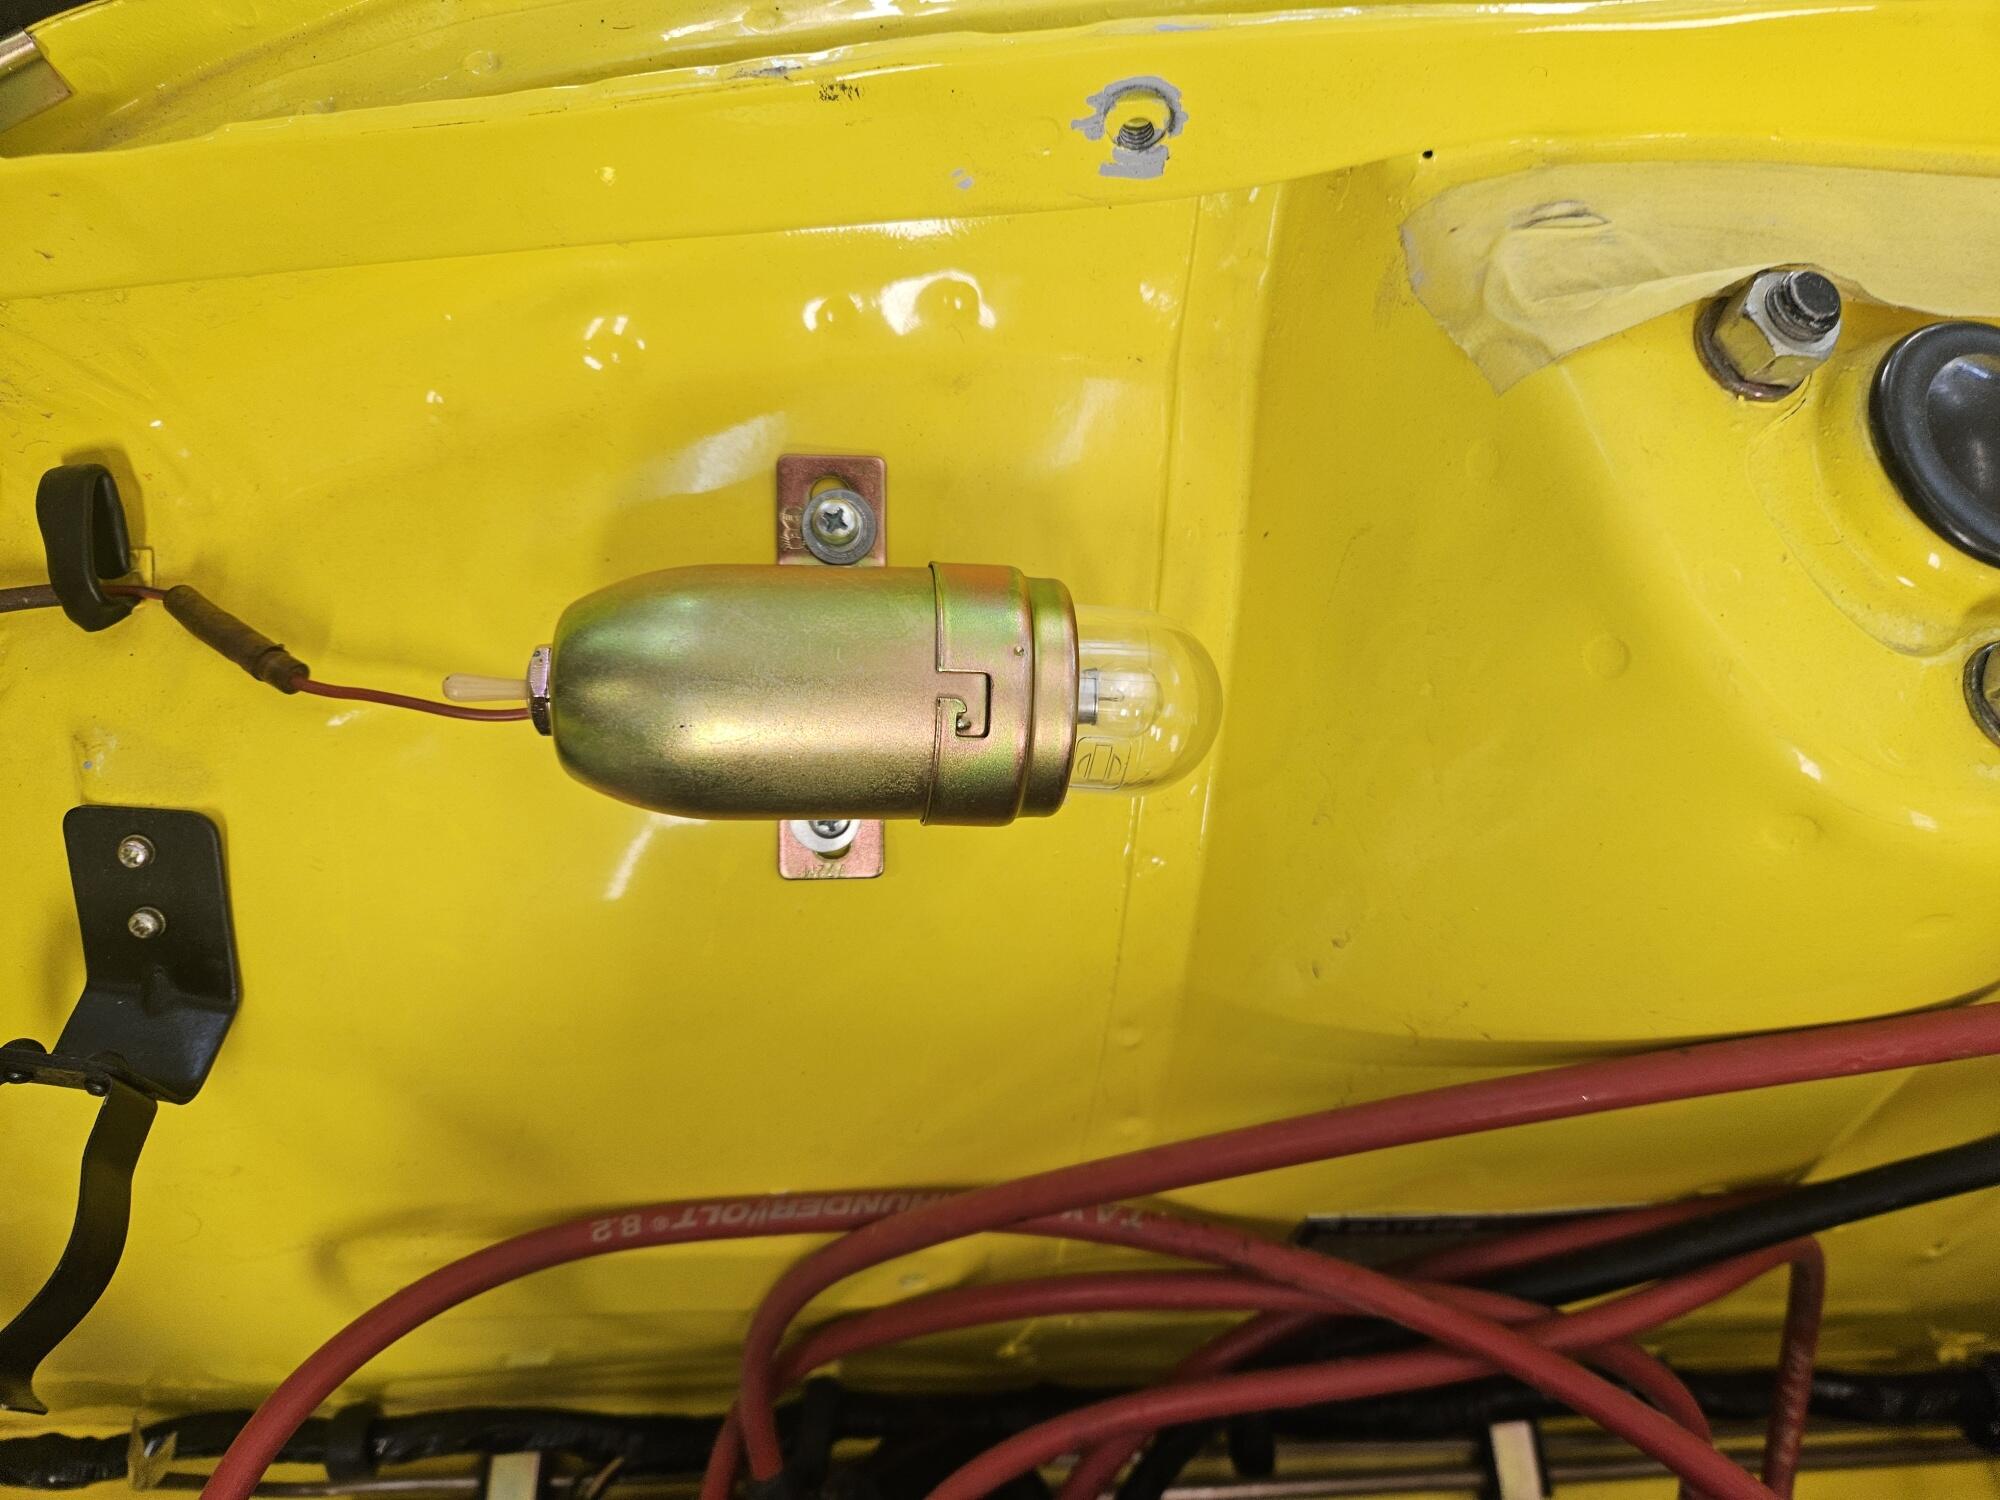


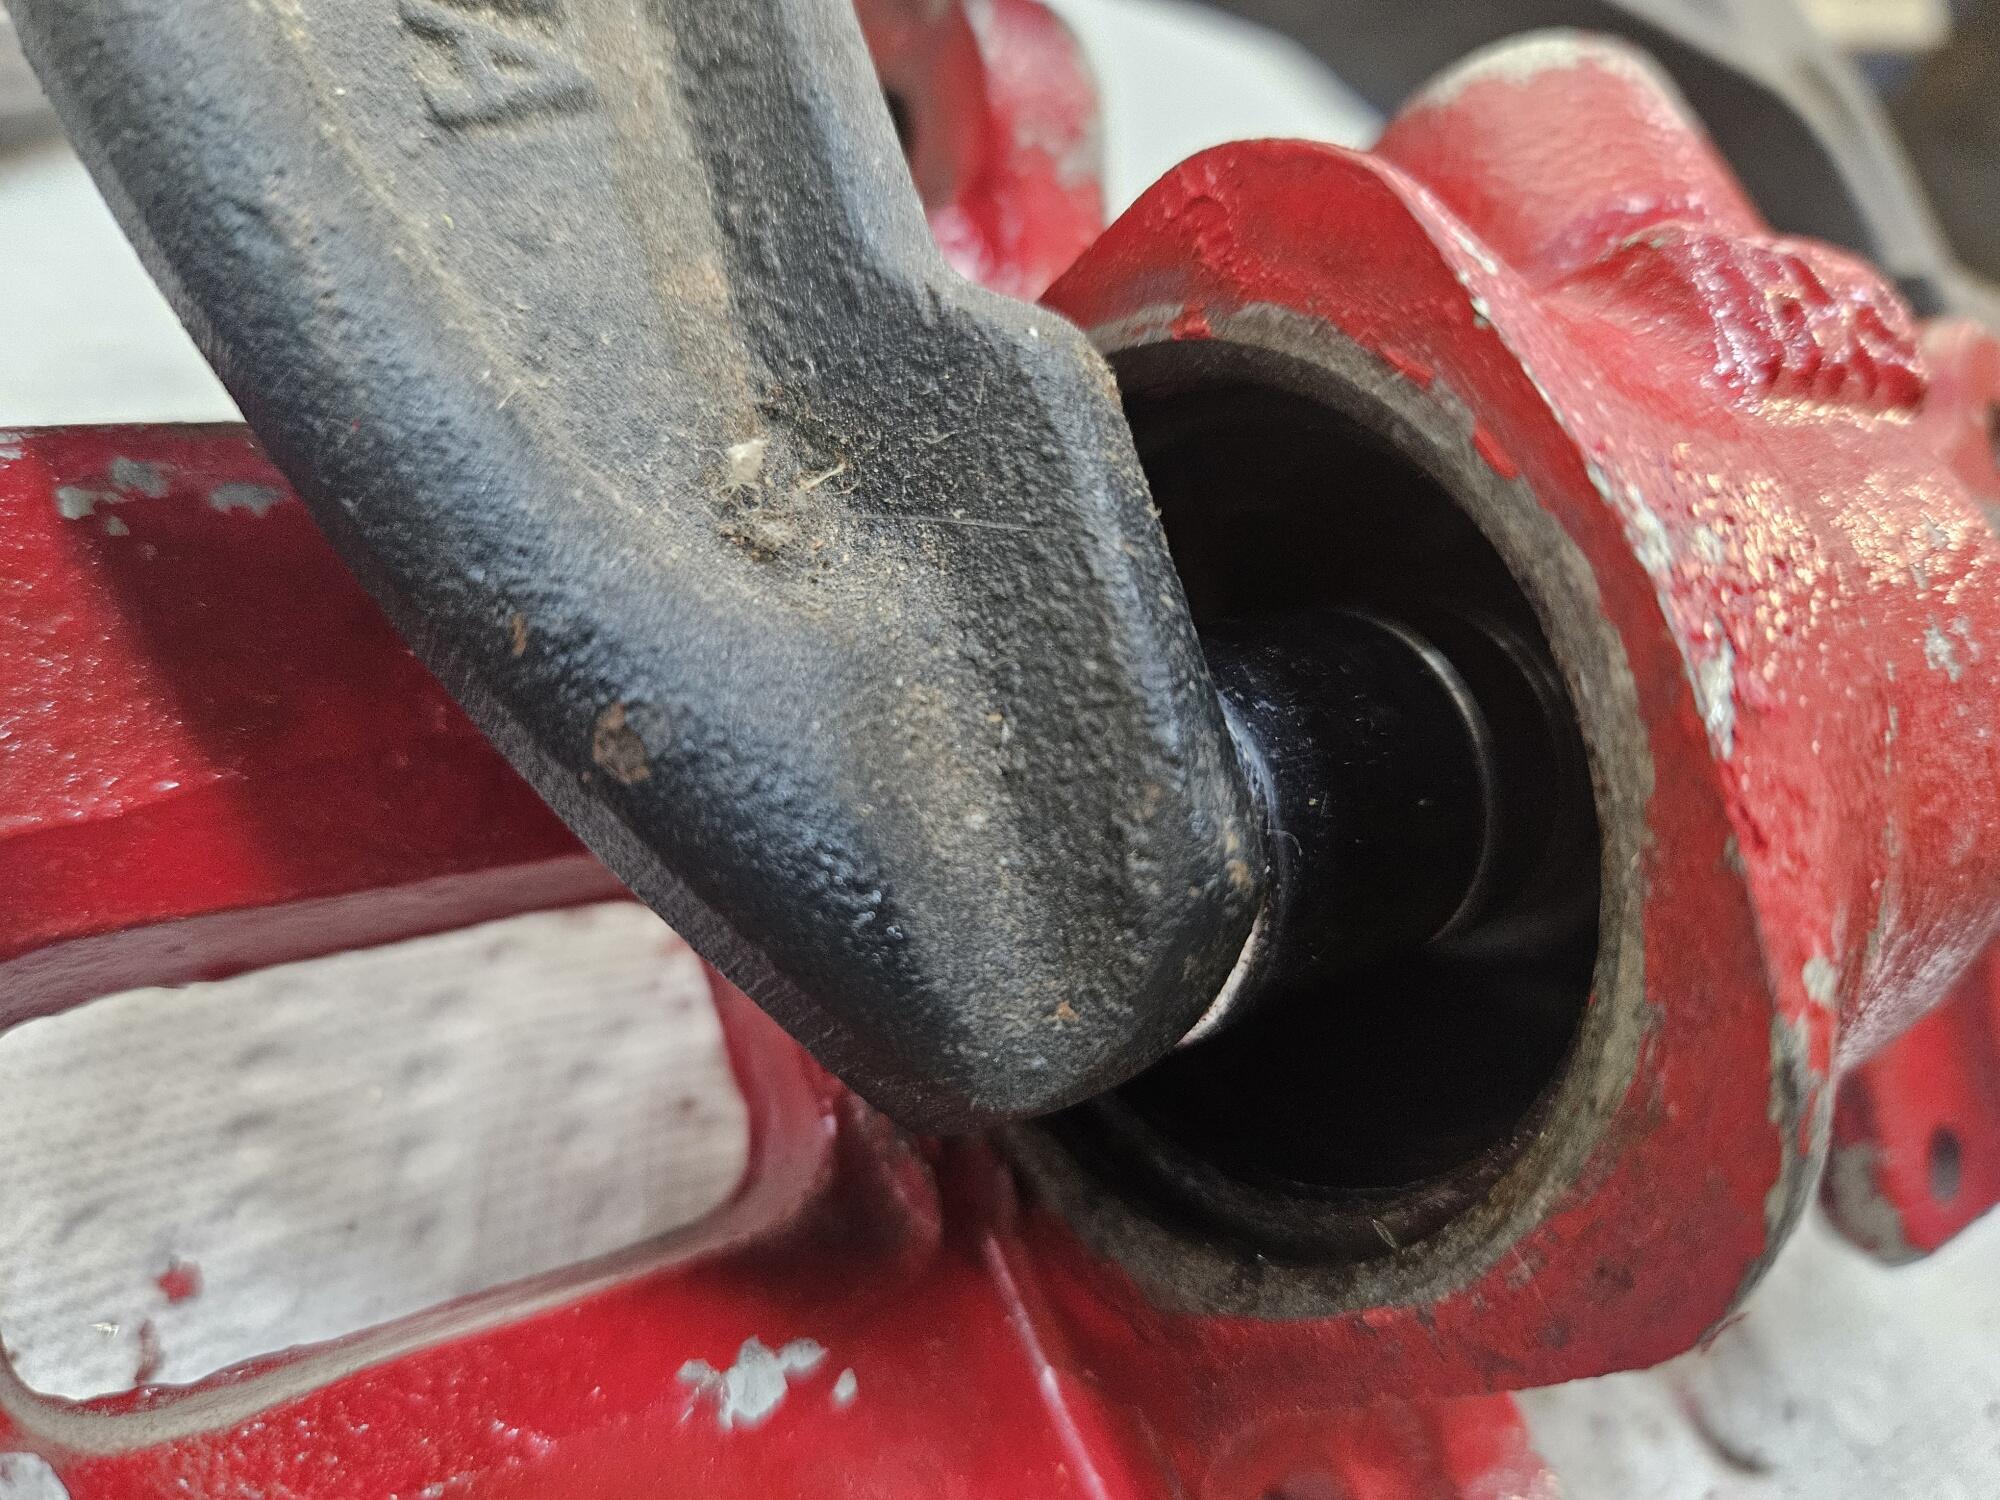


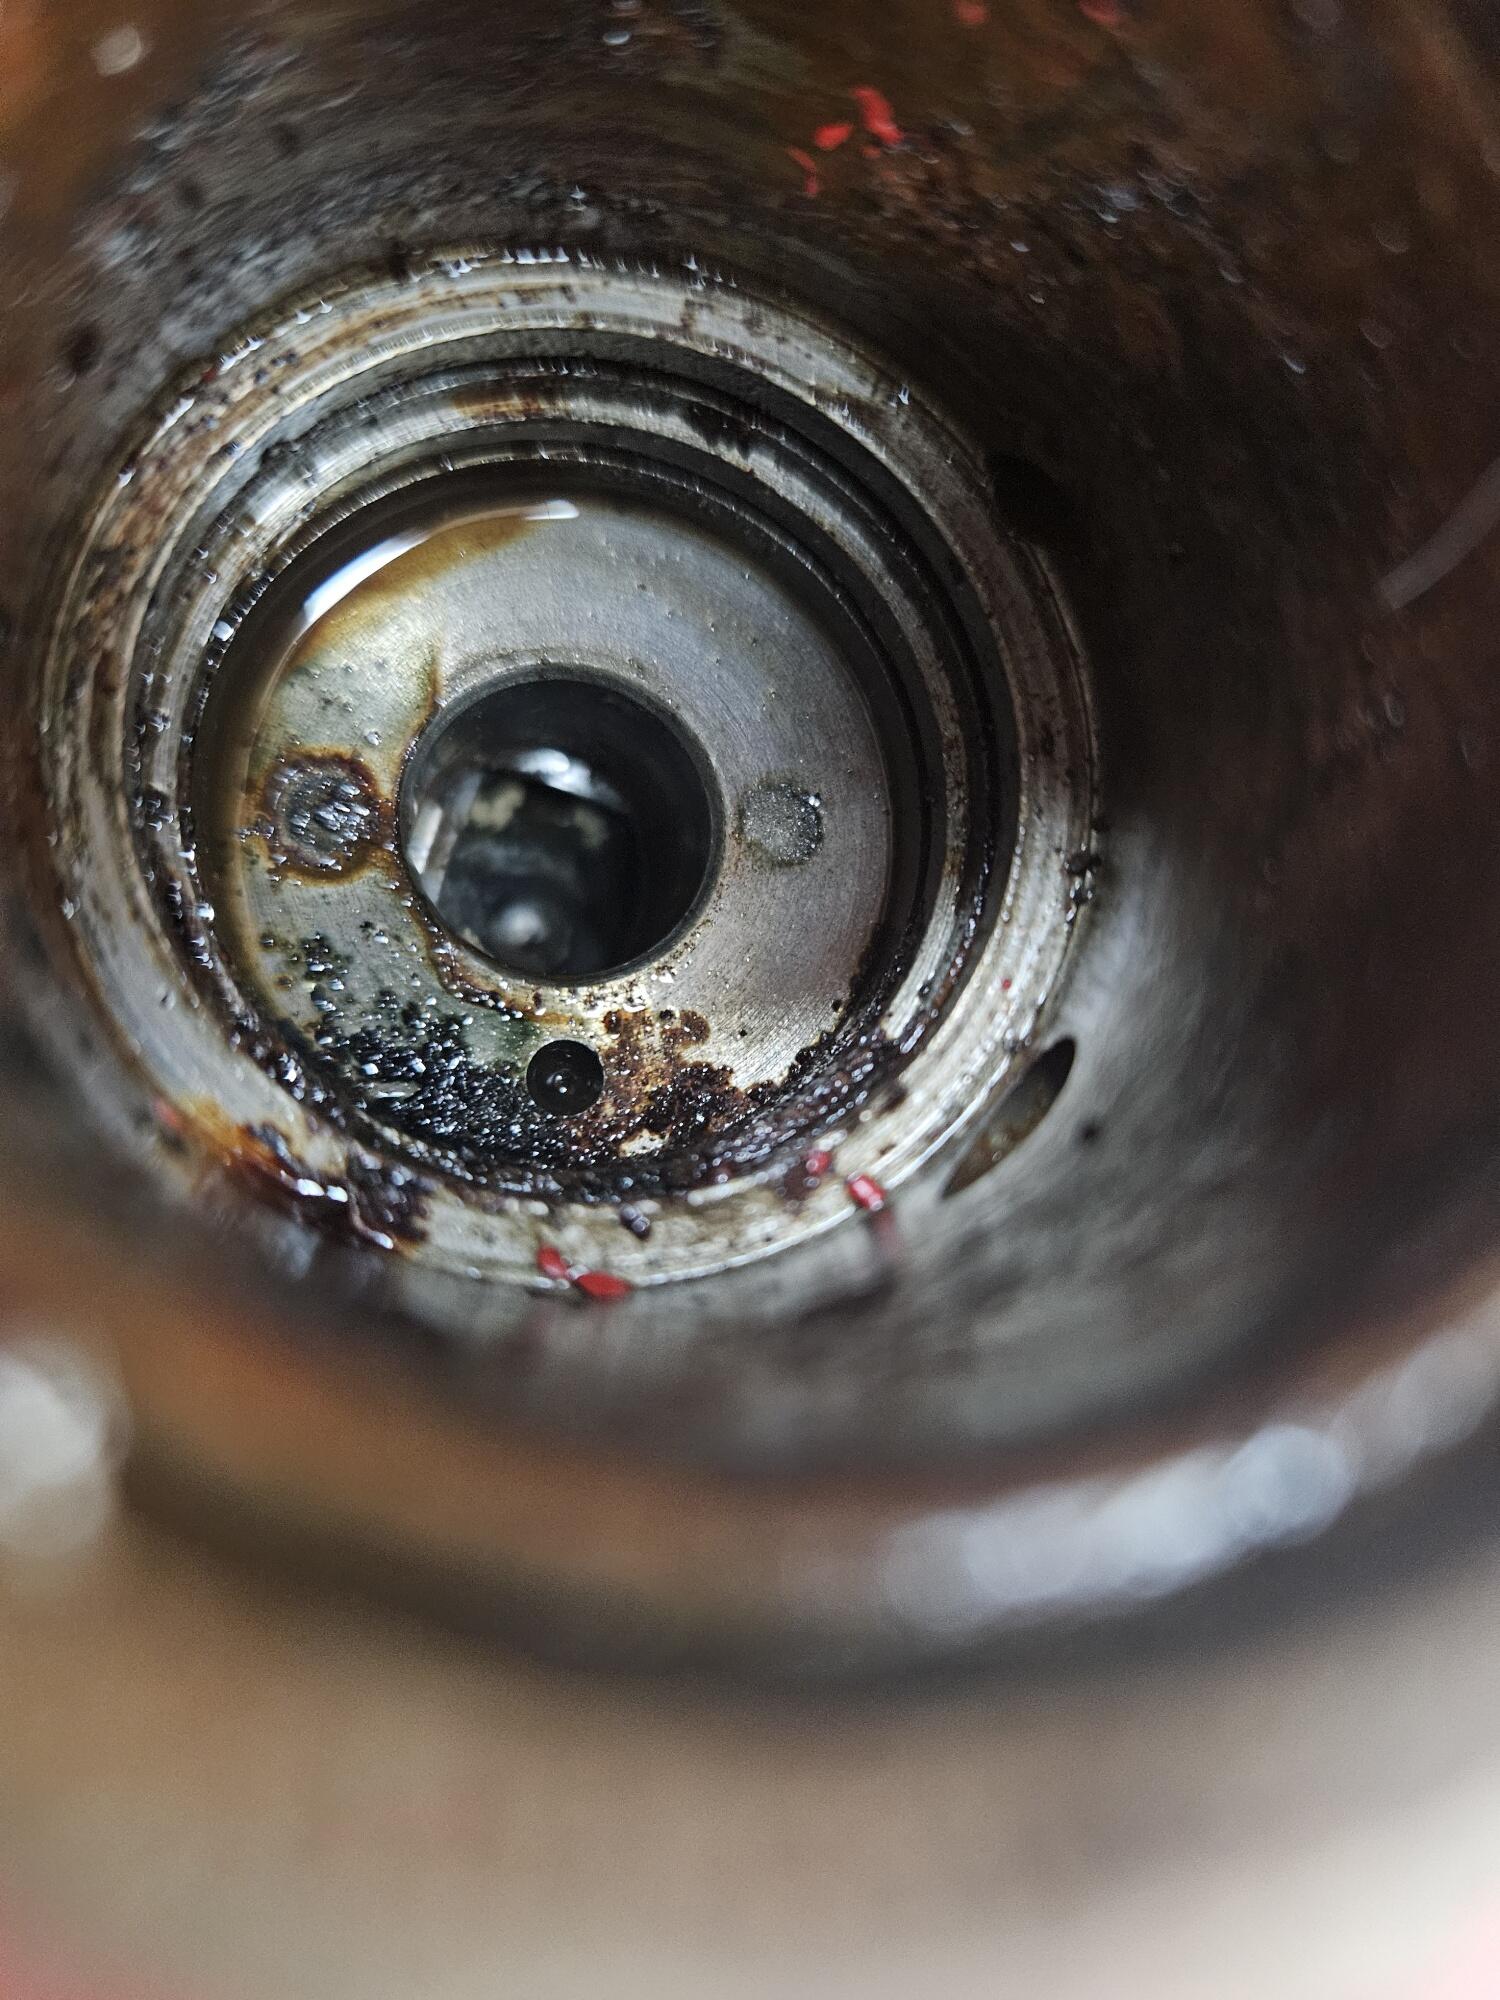
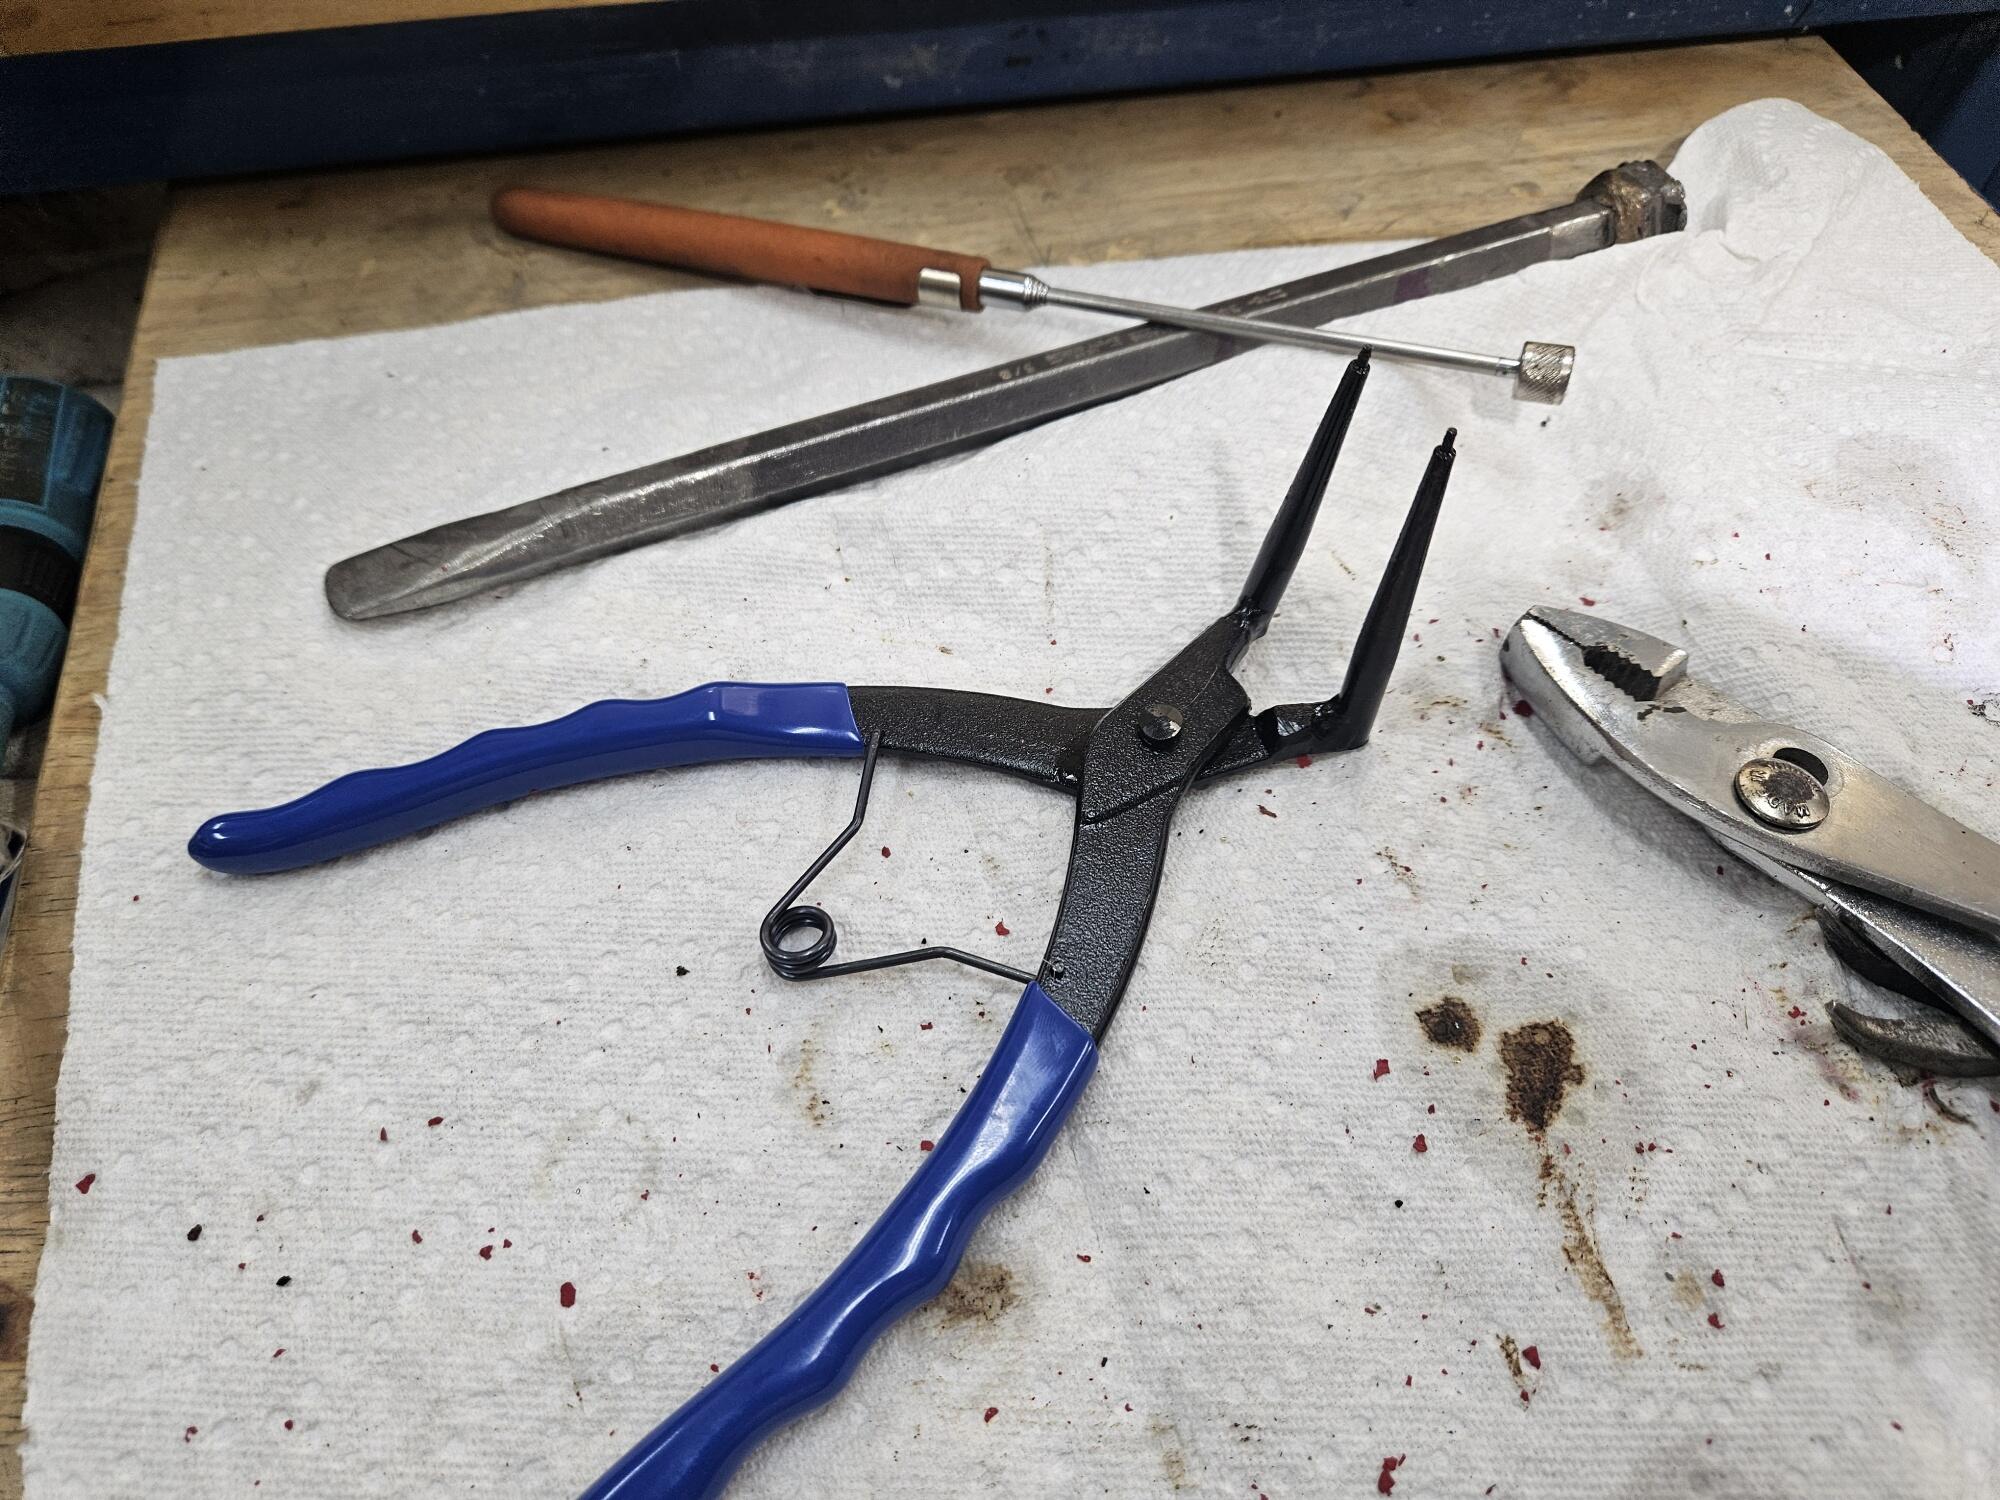

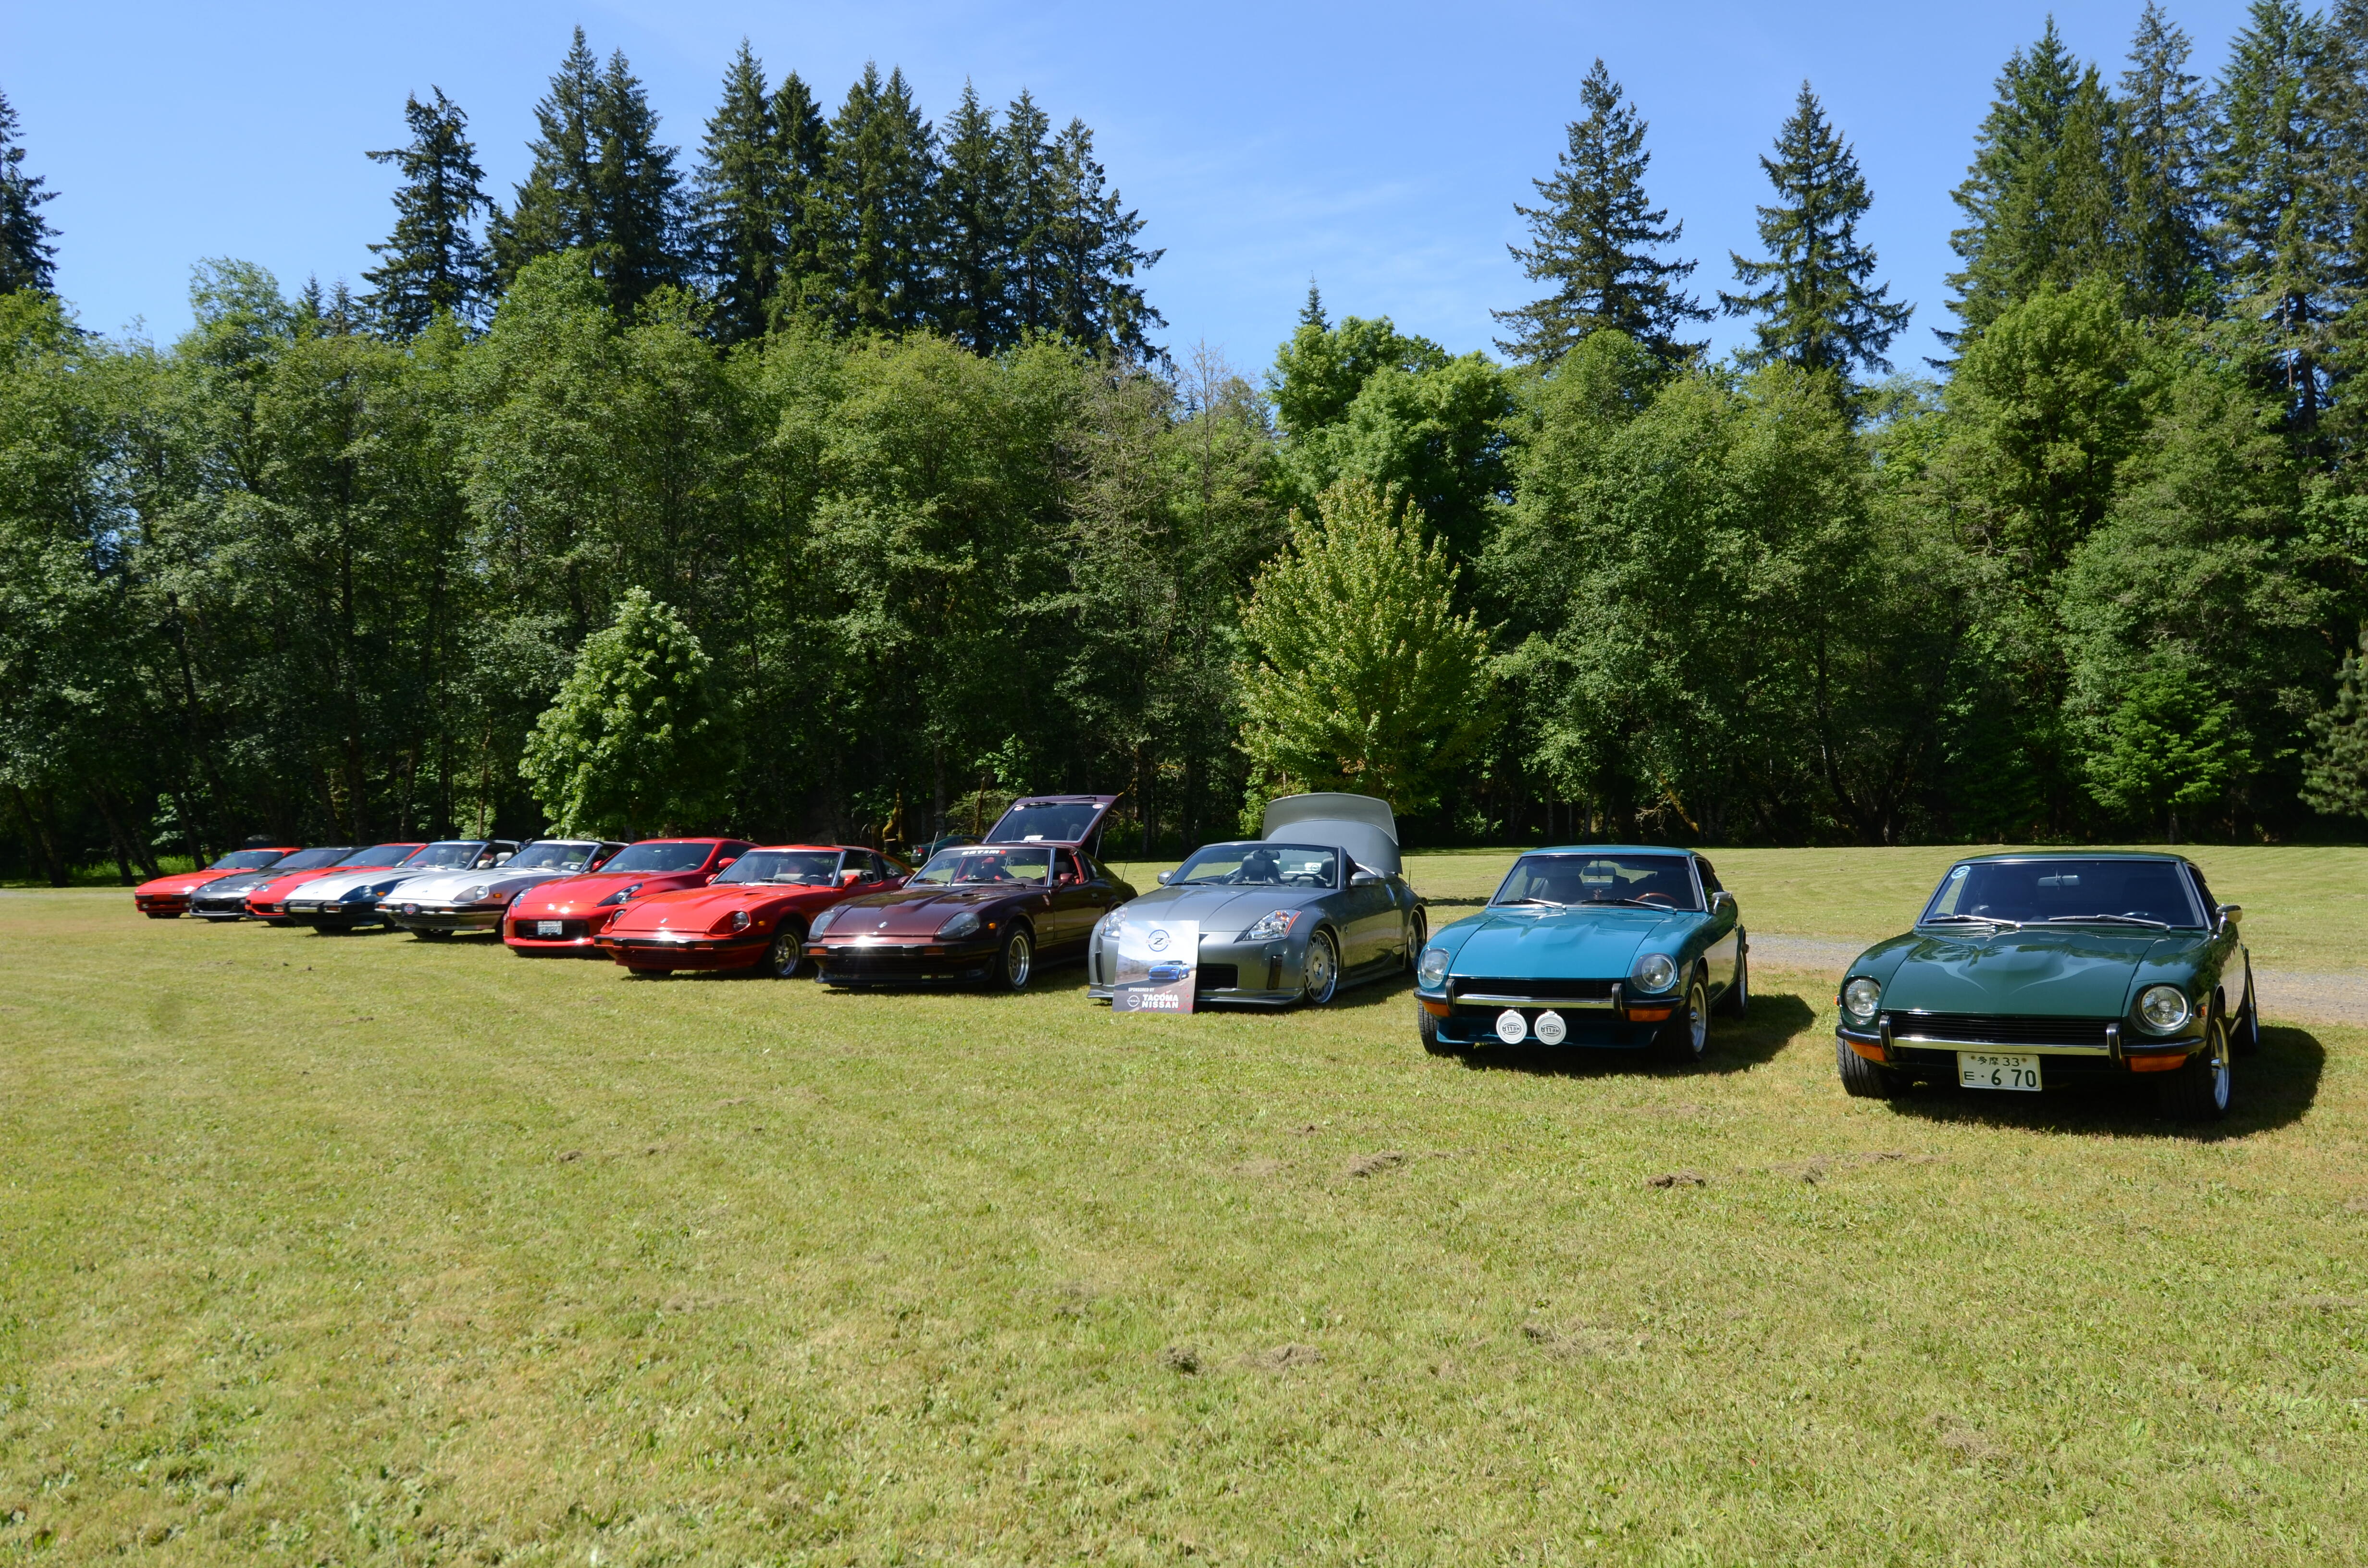


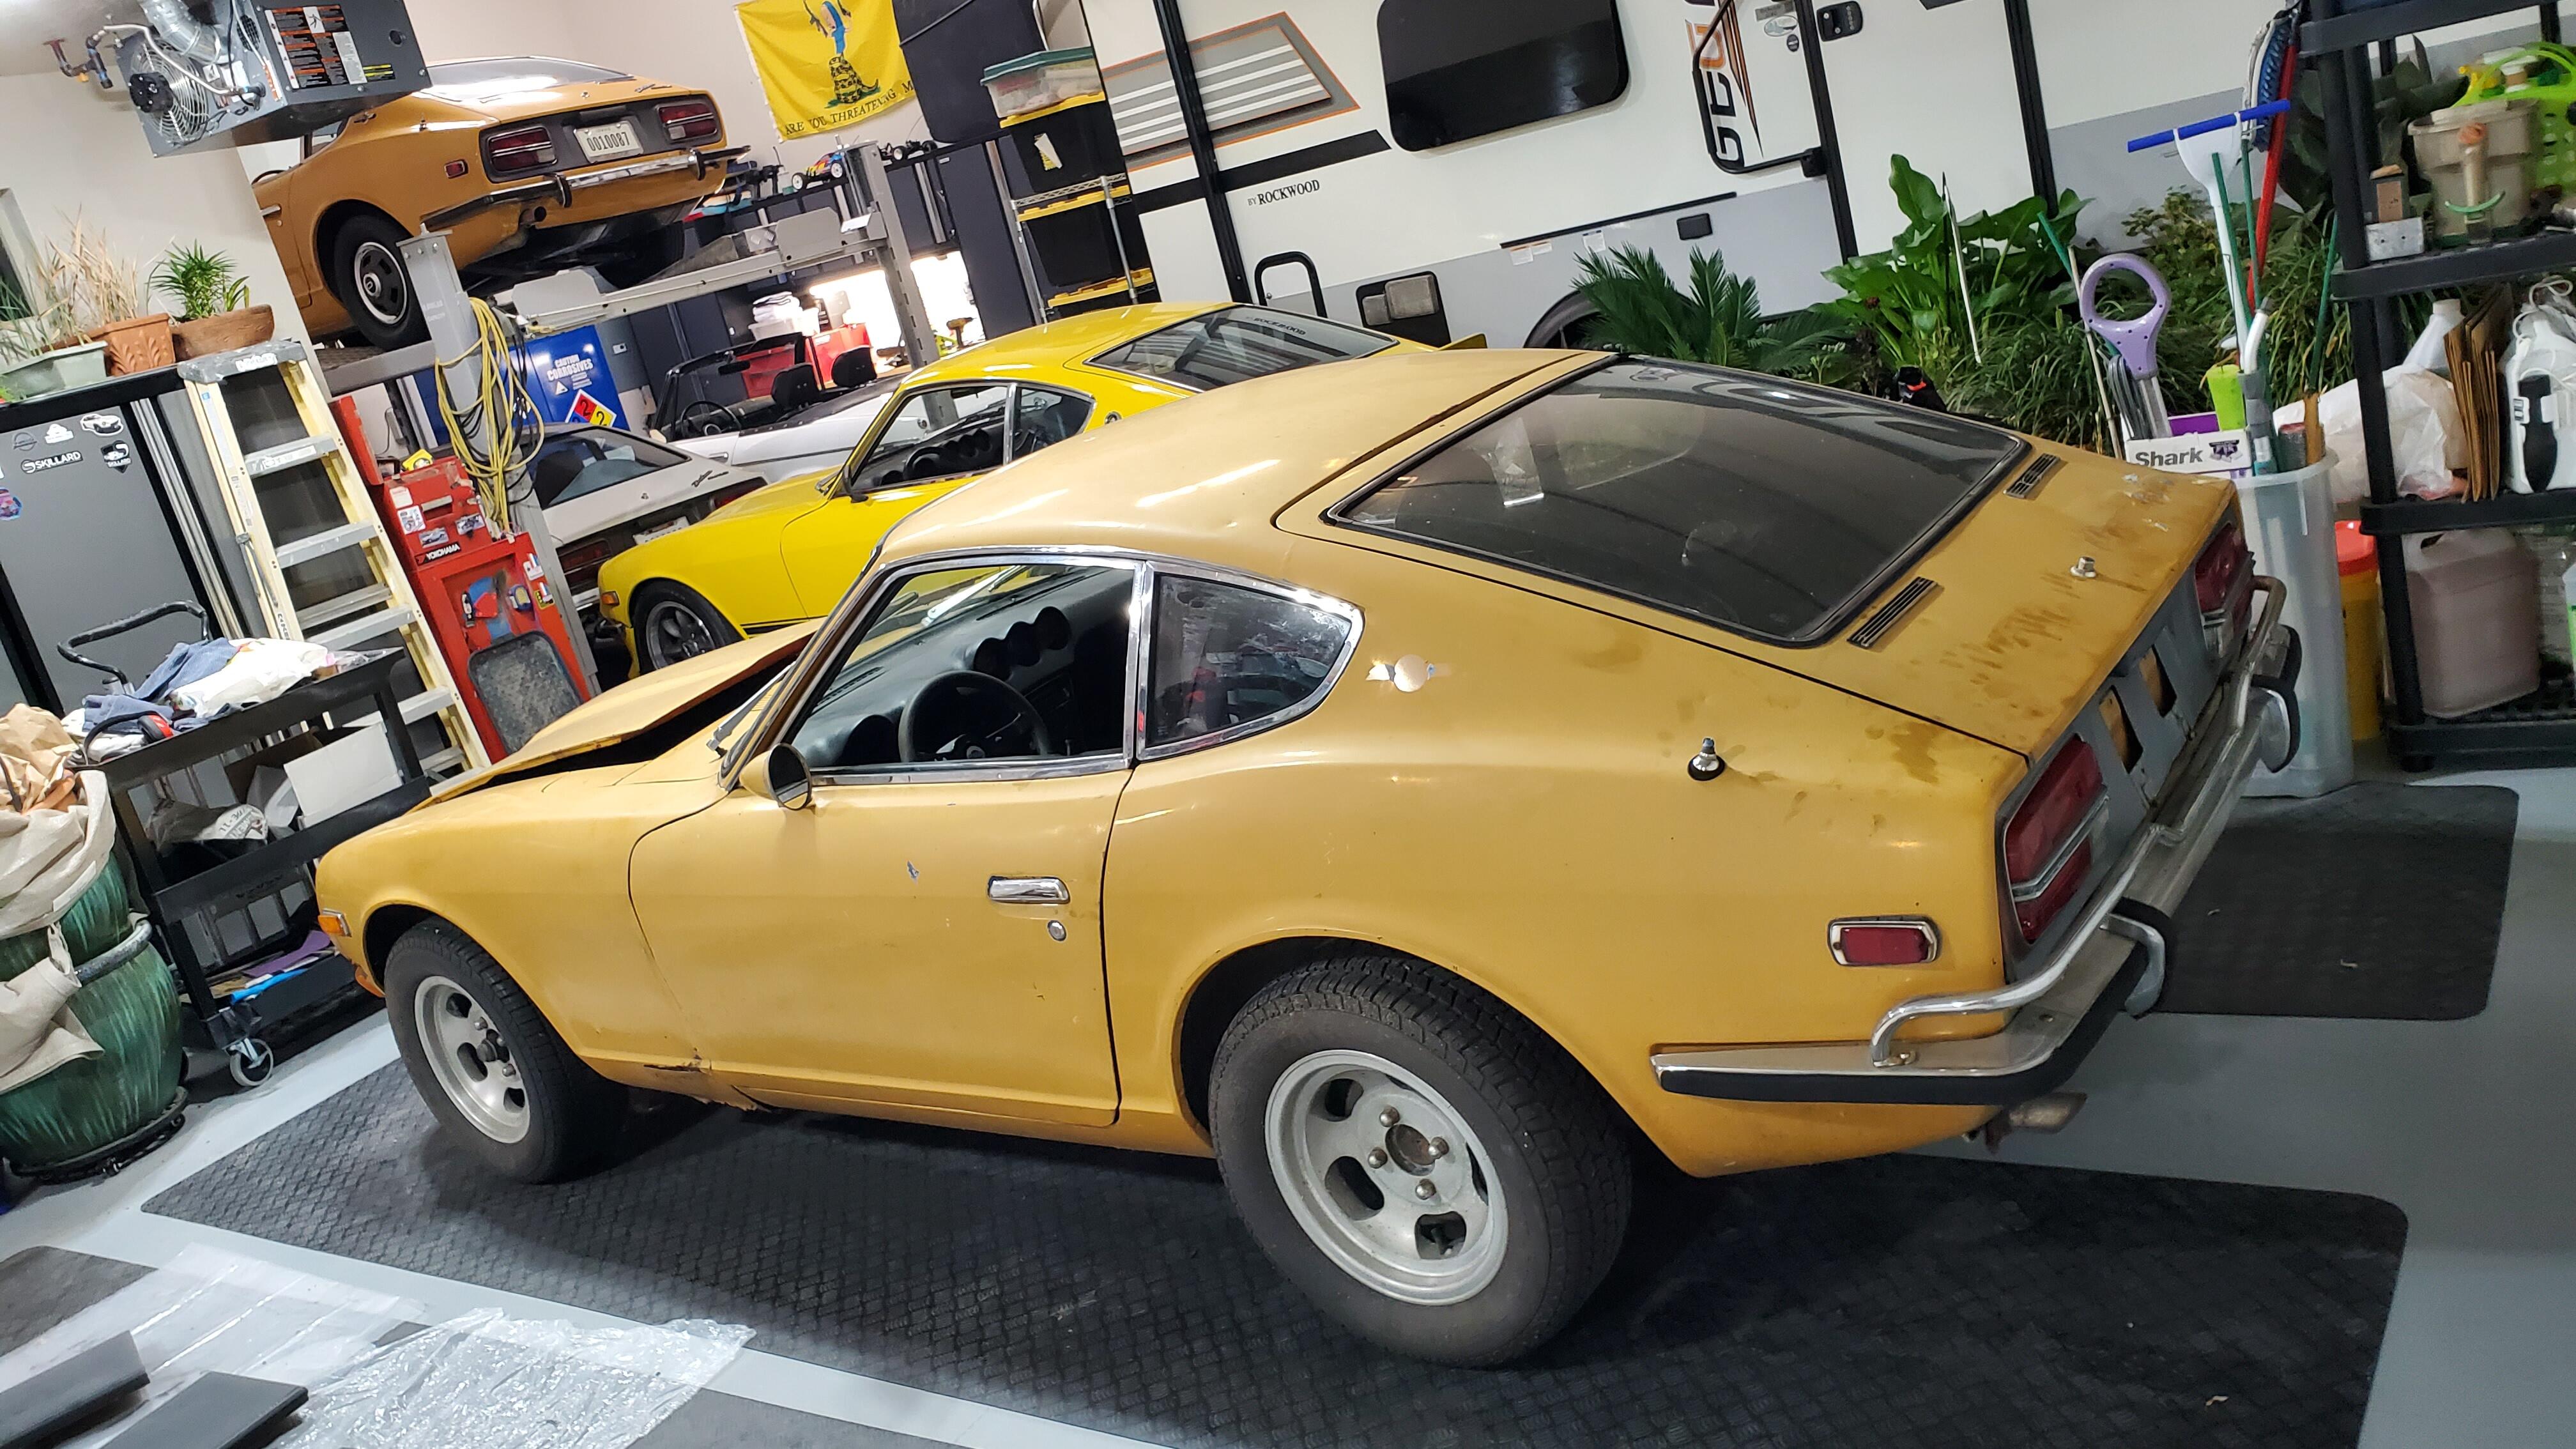
.jpg.7a2f7c357dbc52666ce8378fa42c539c.jpg)
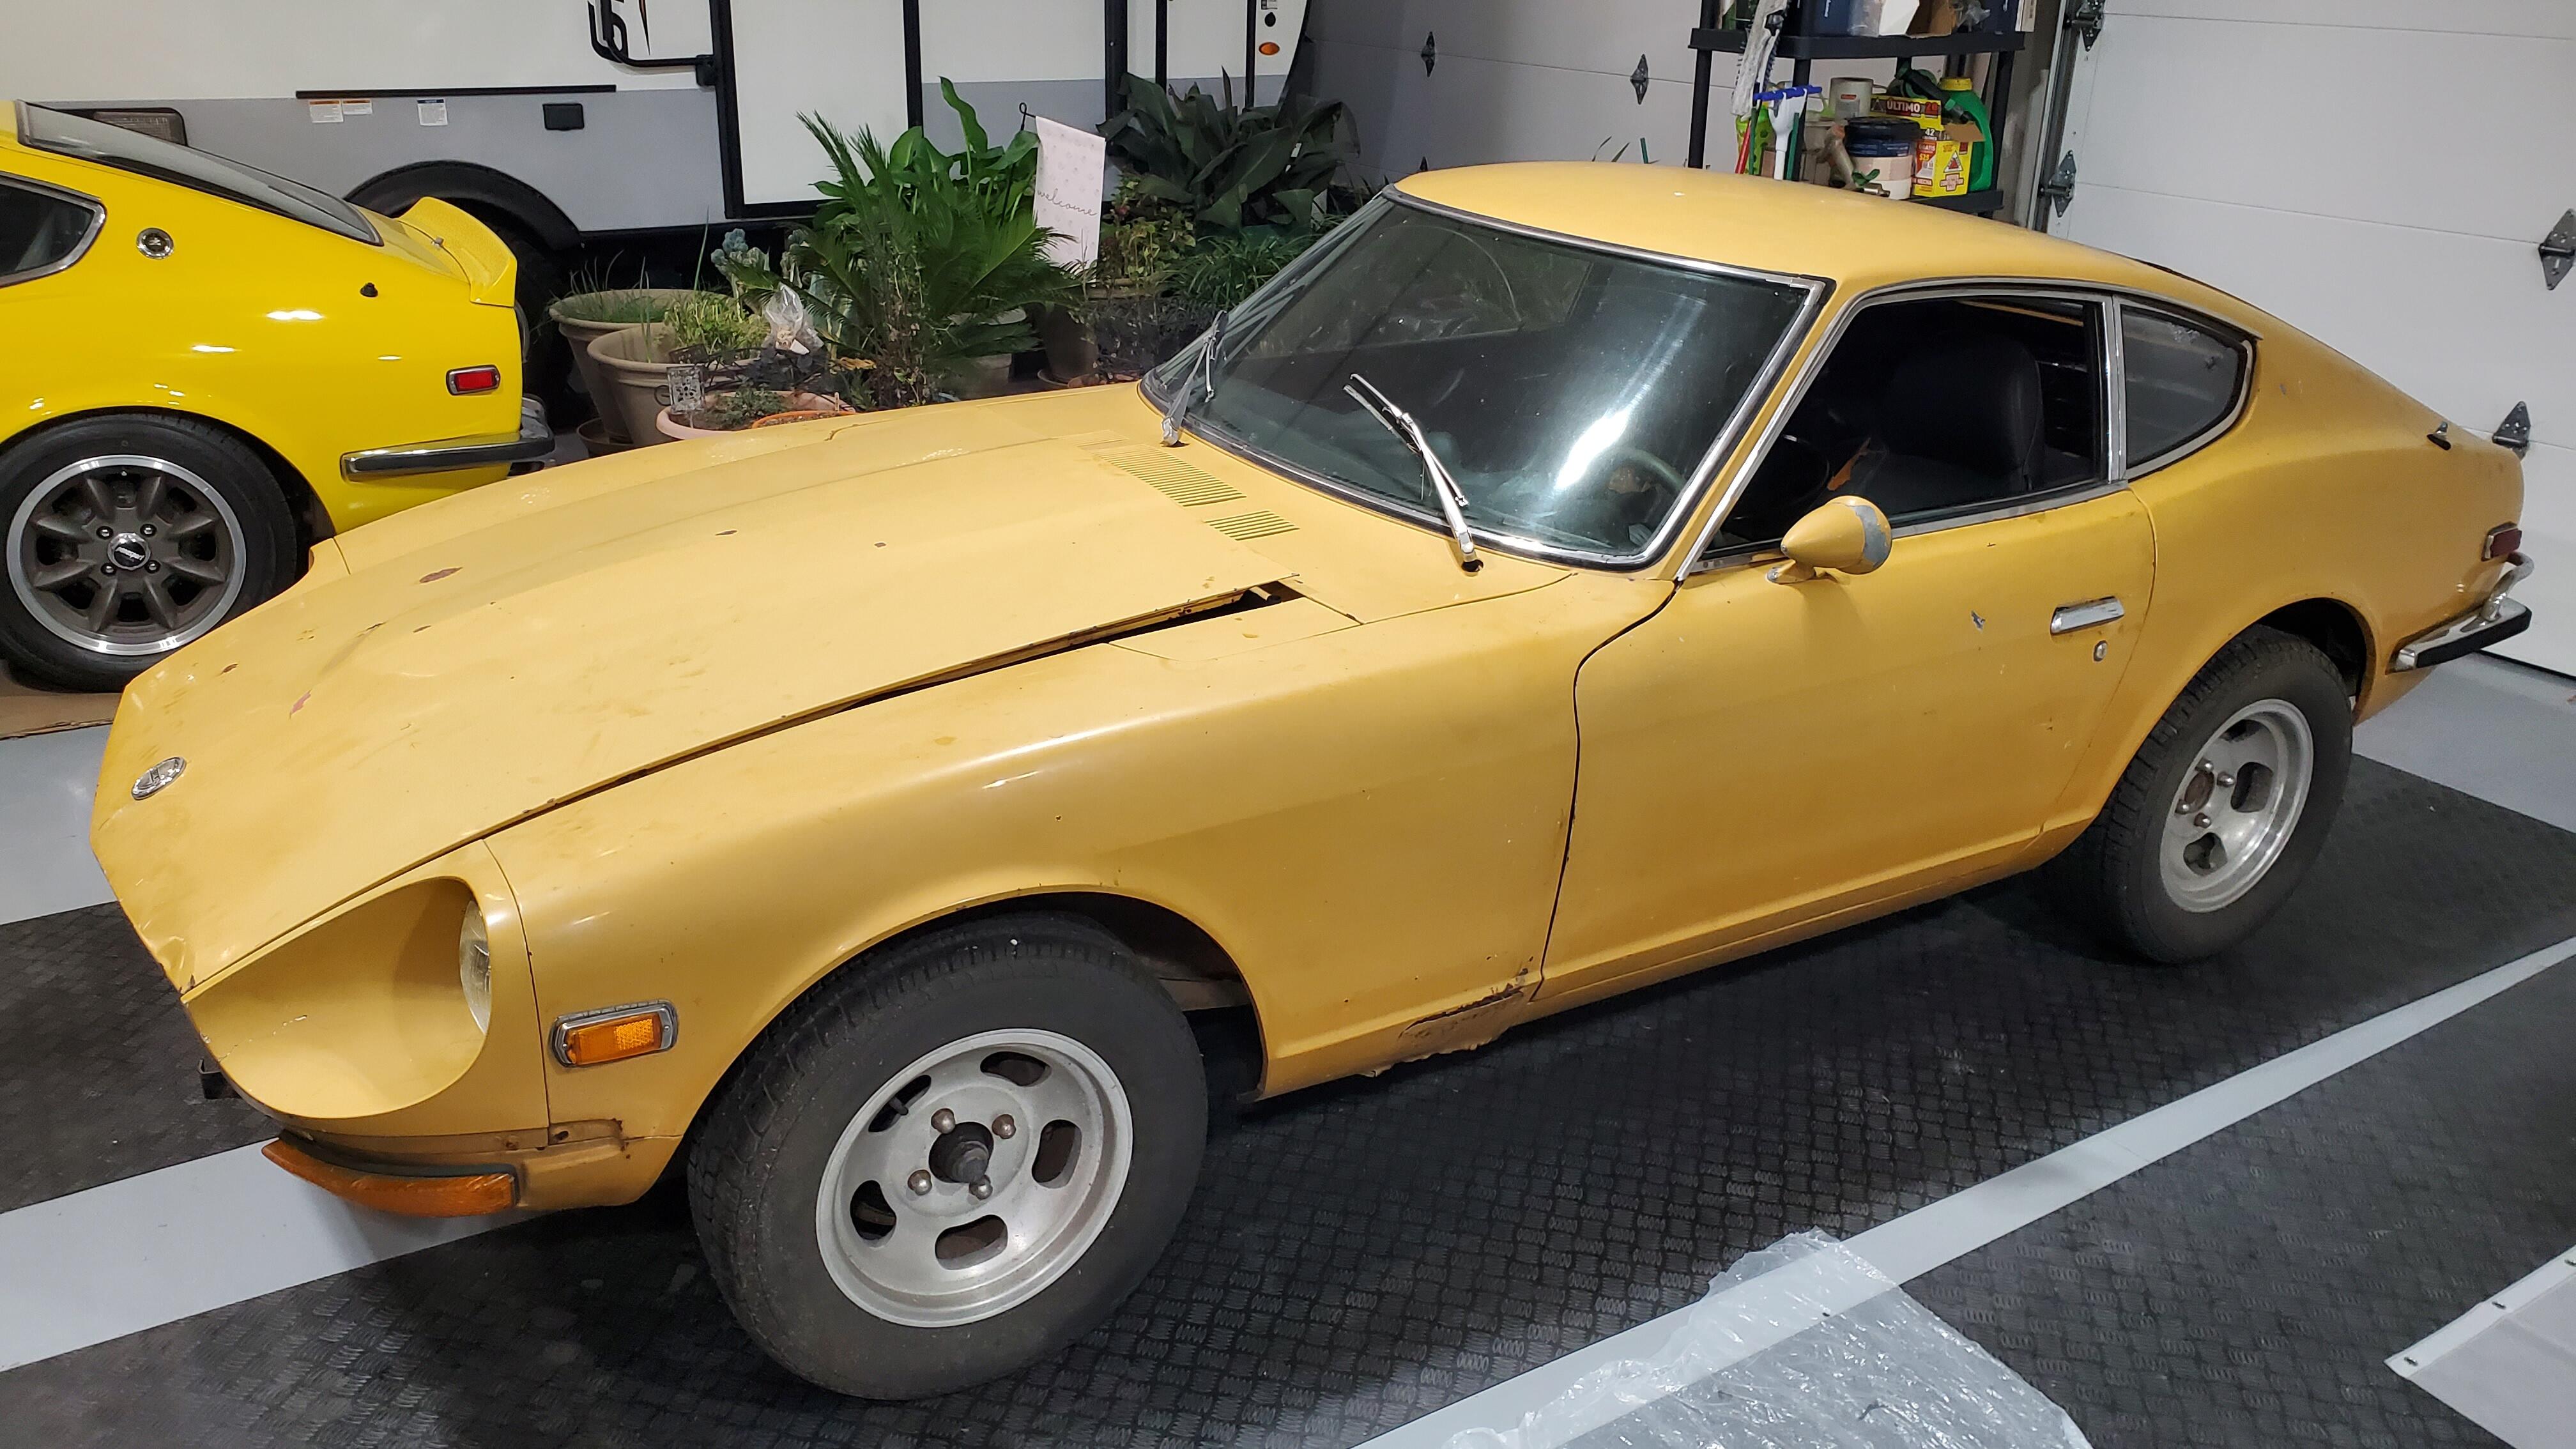
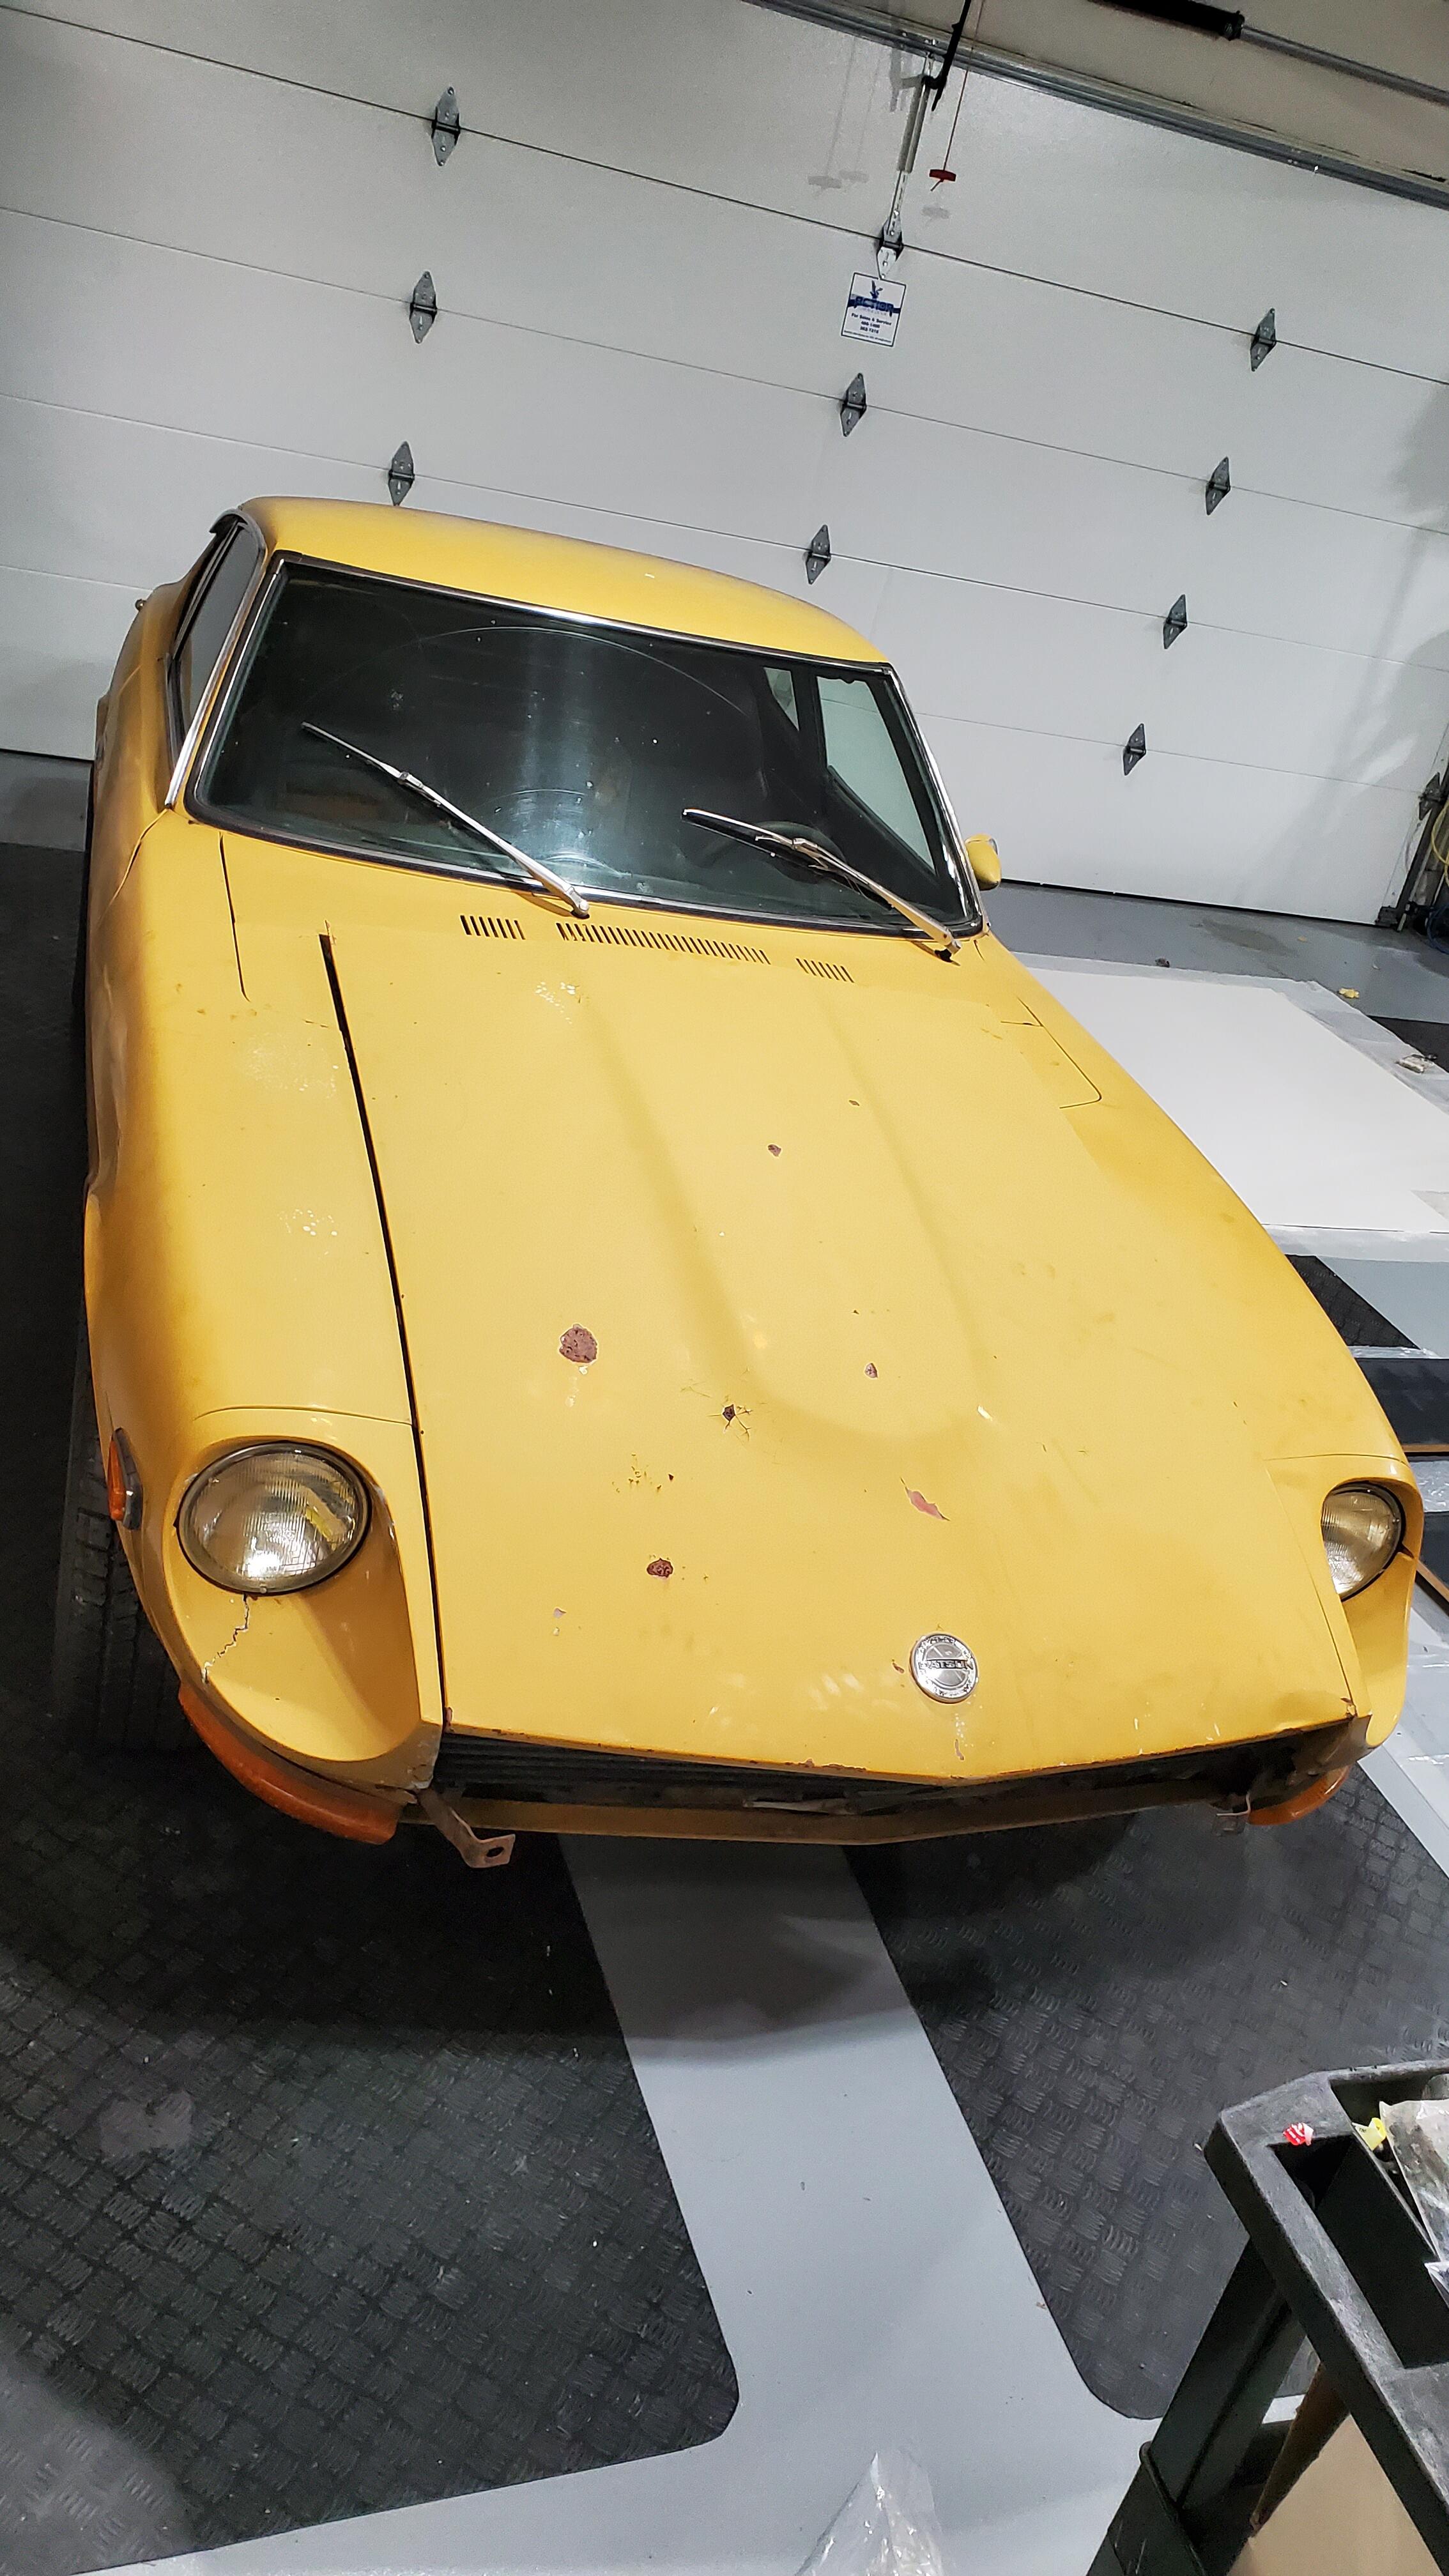

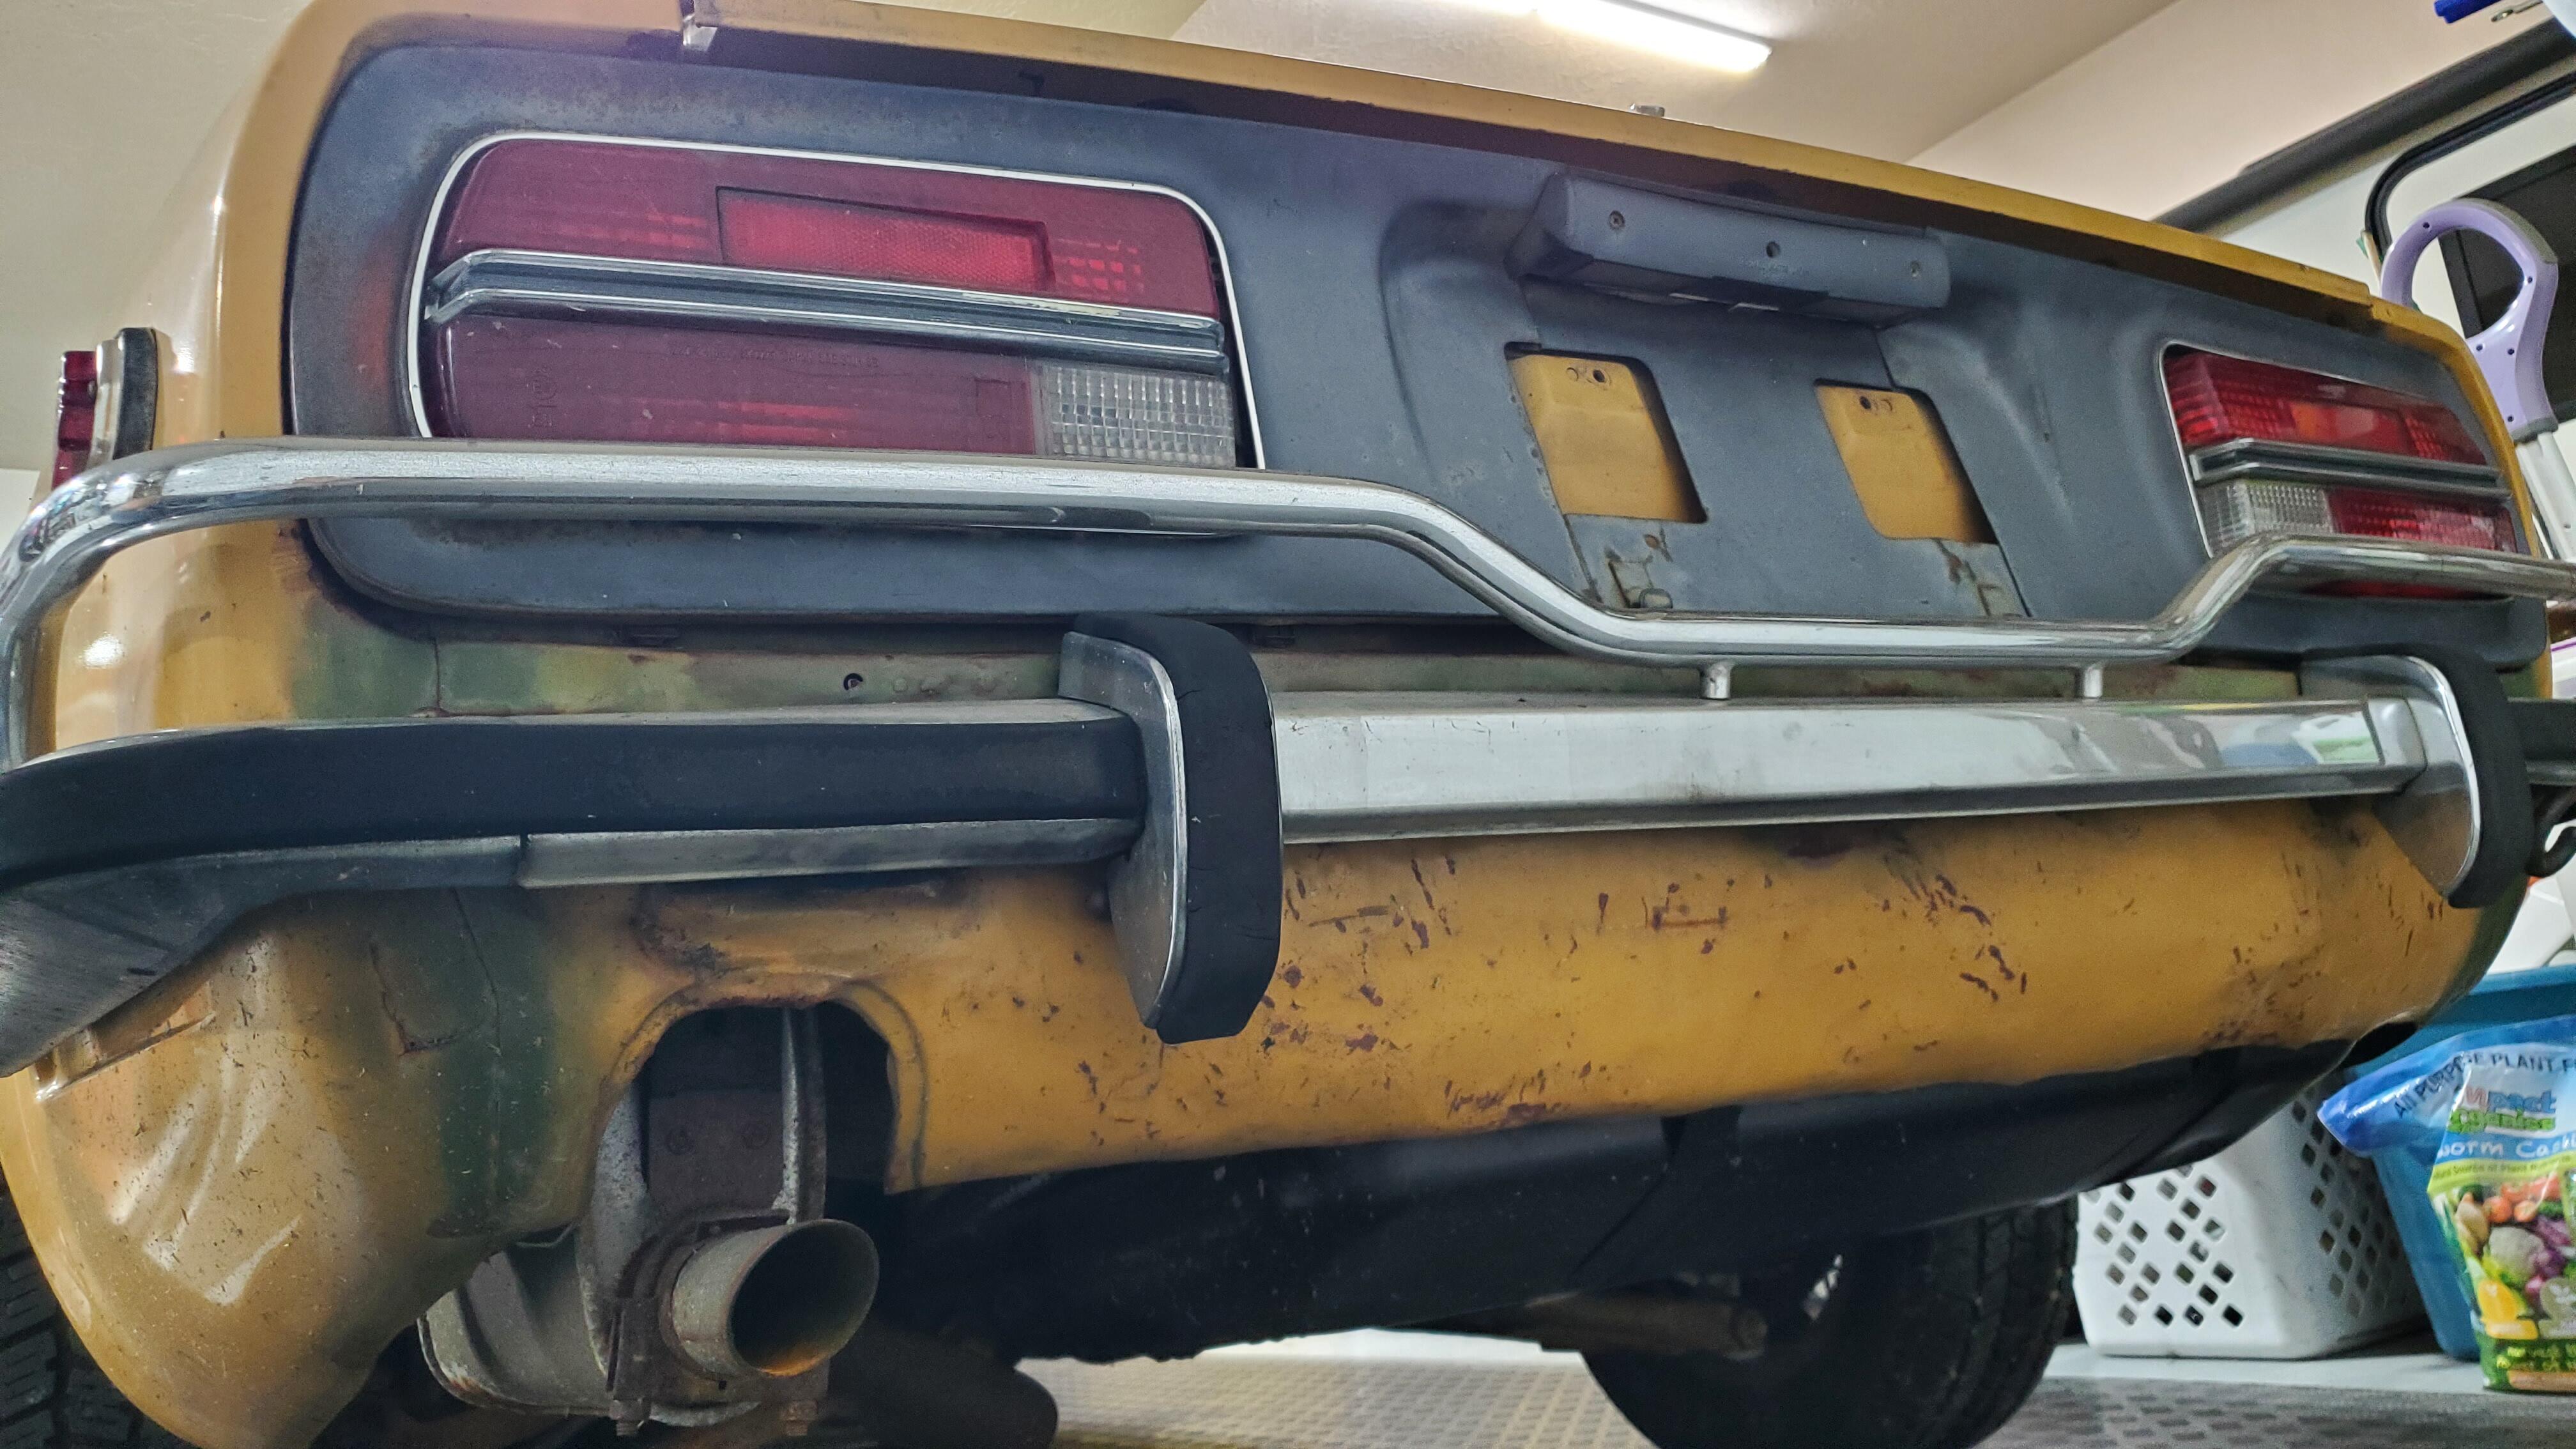
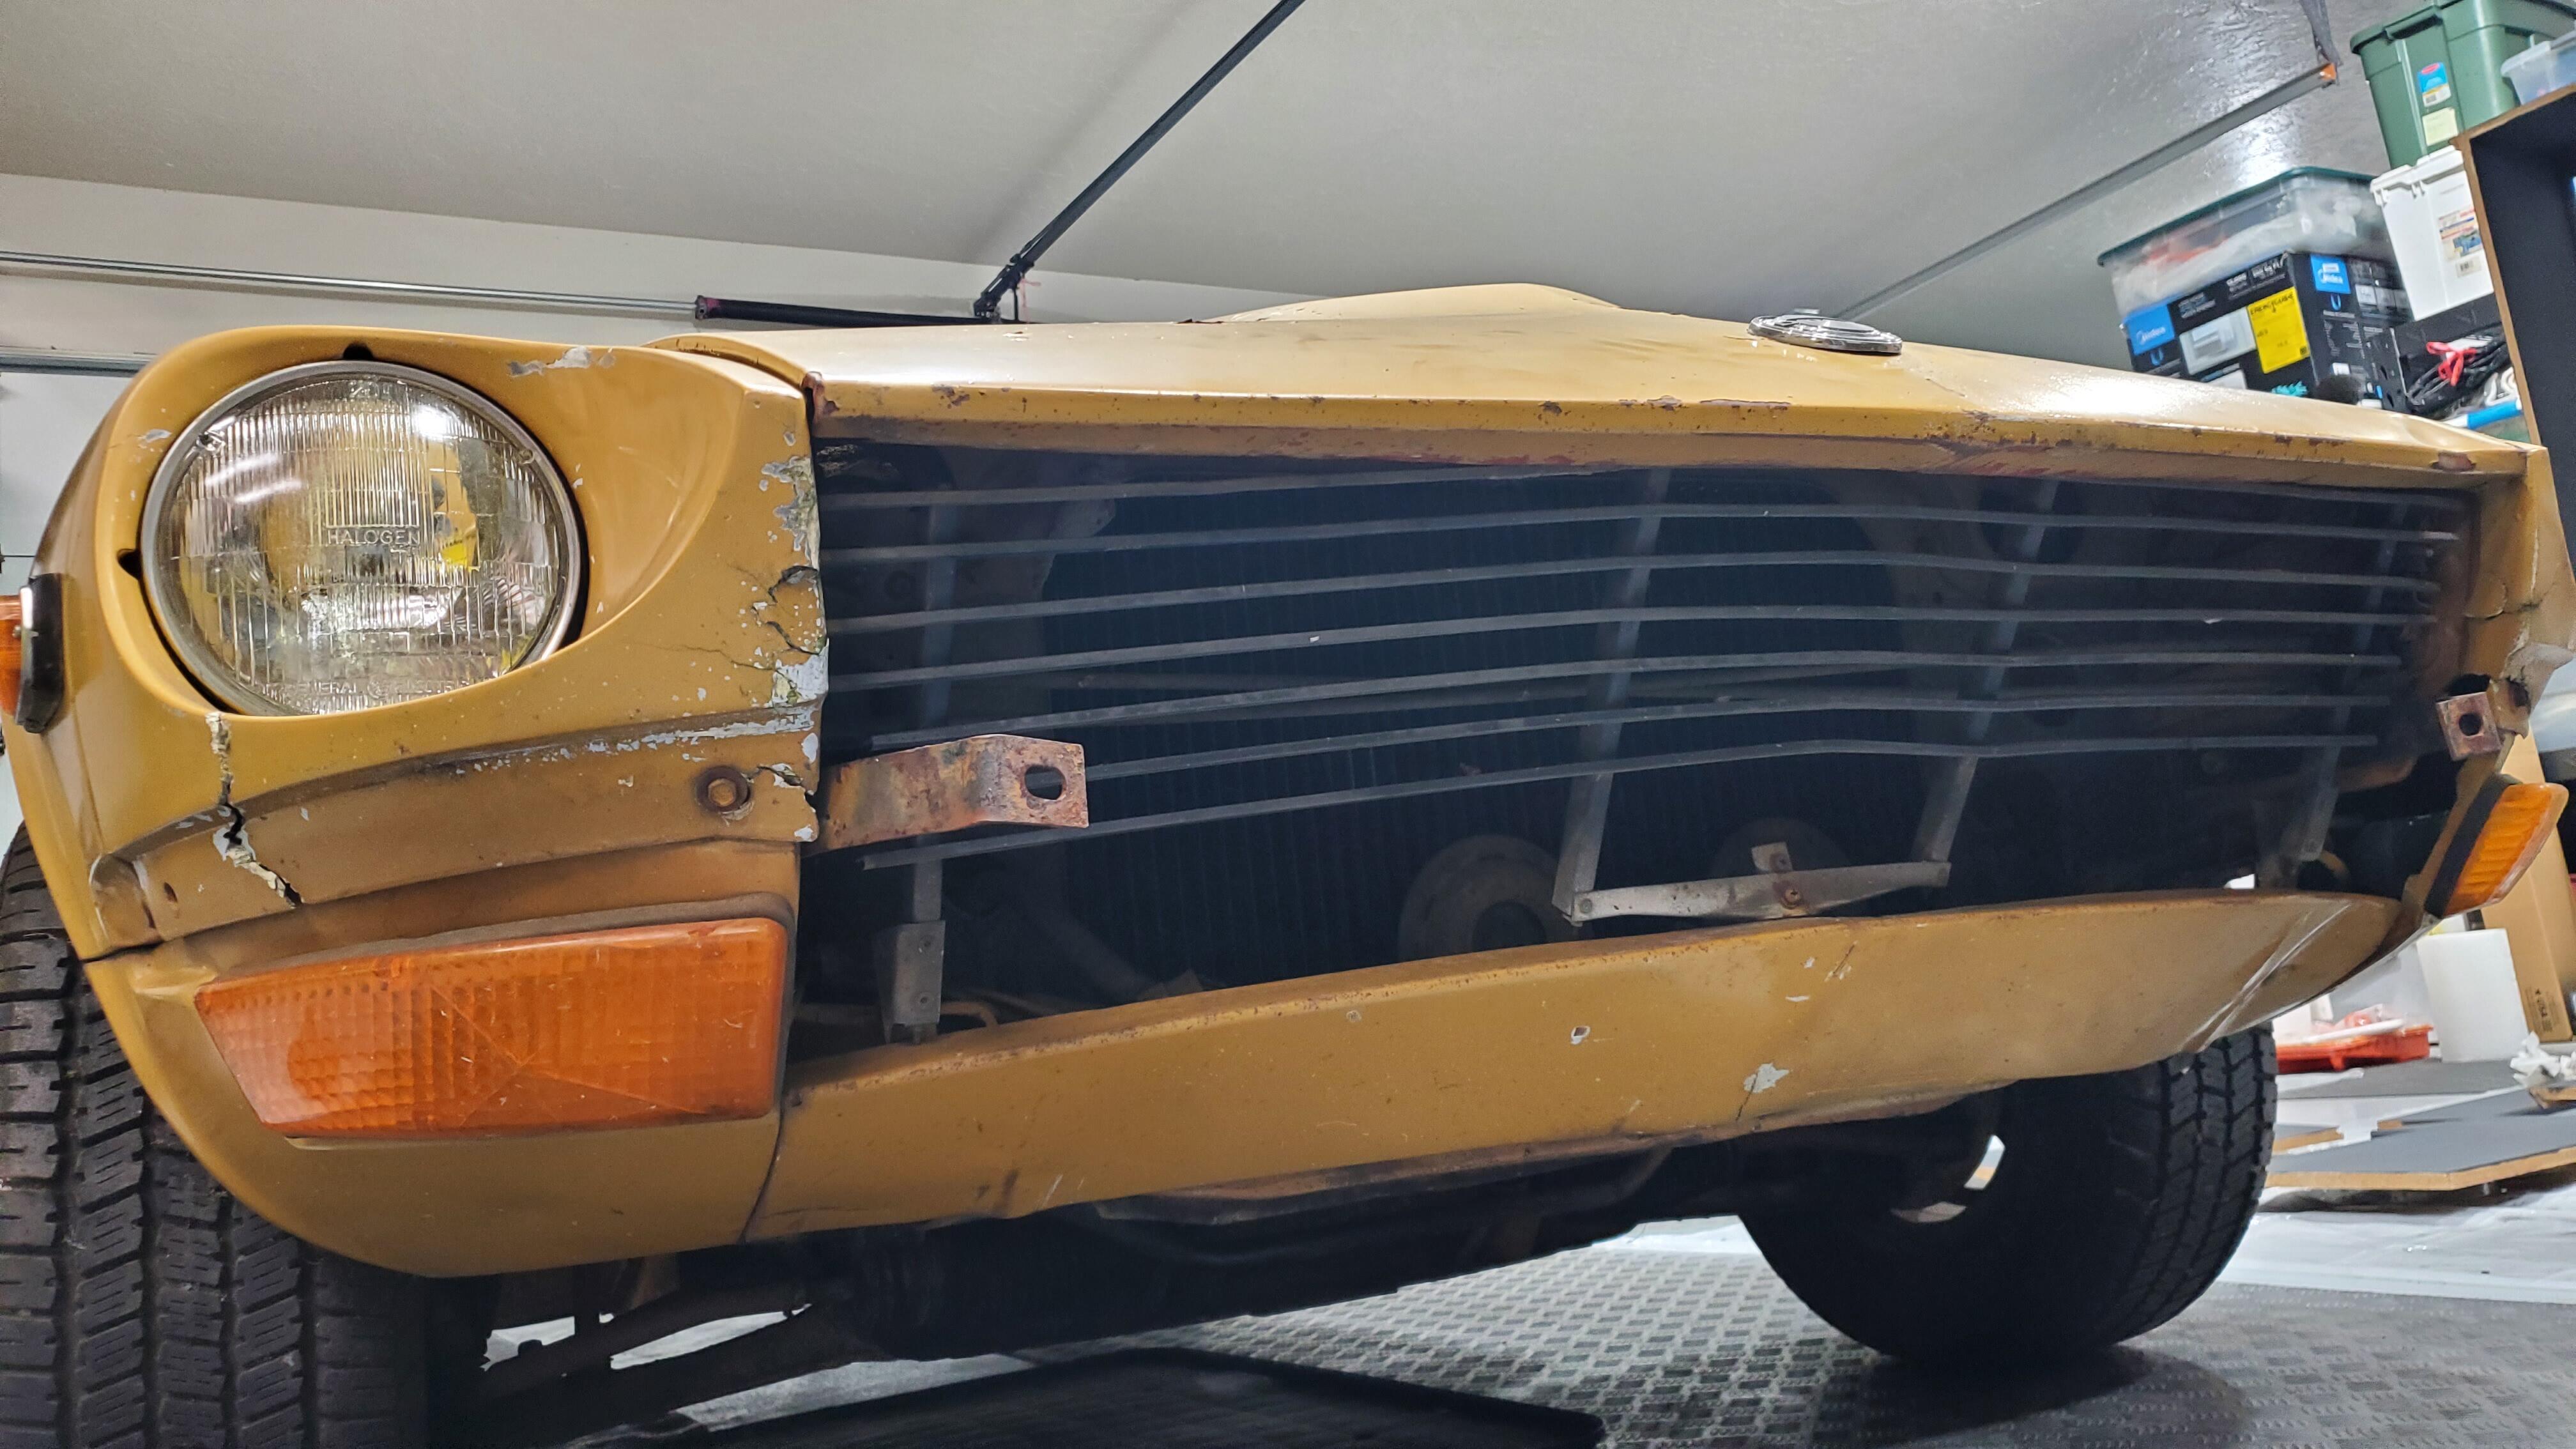
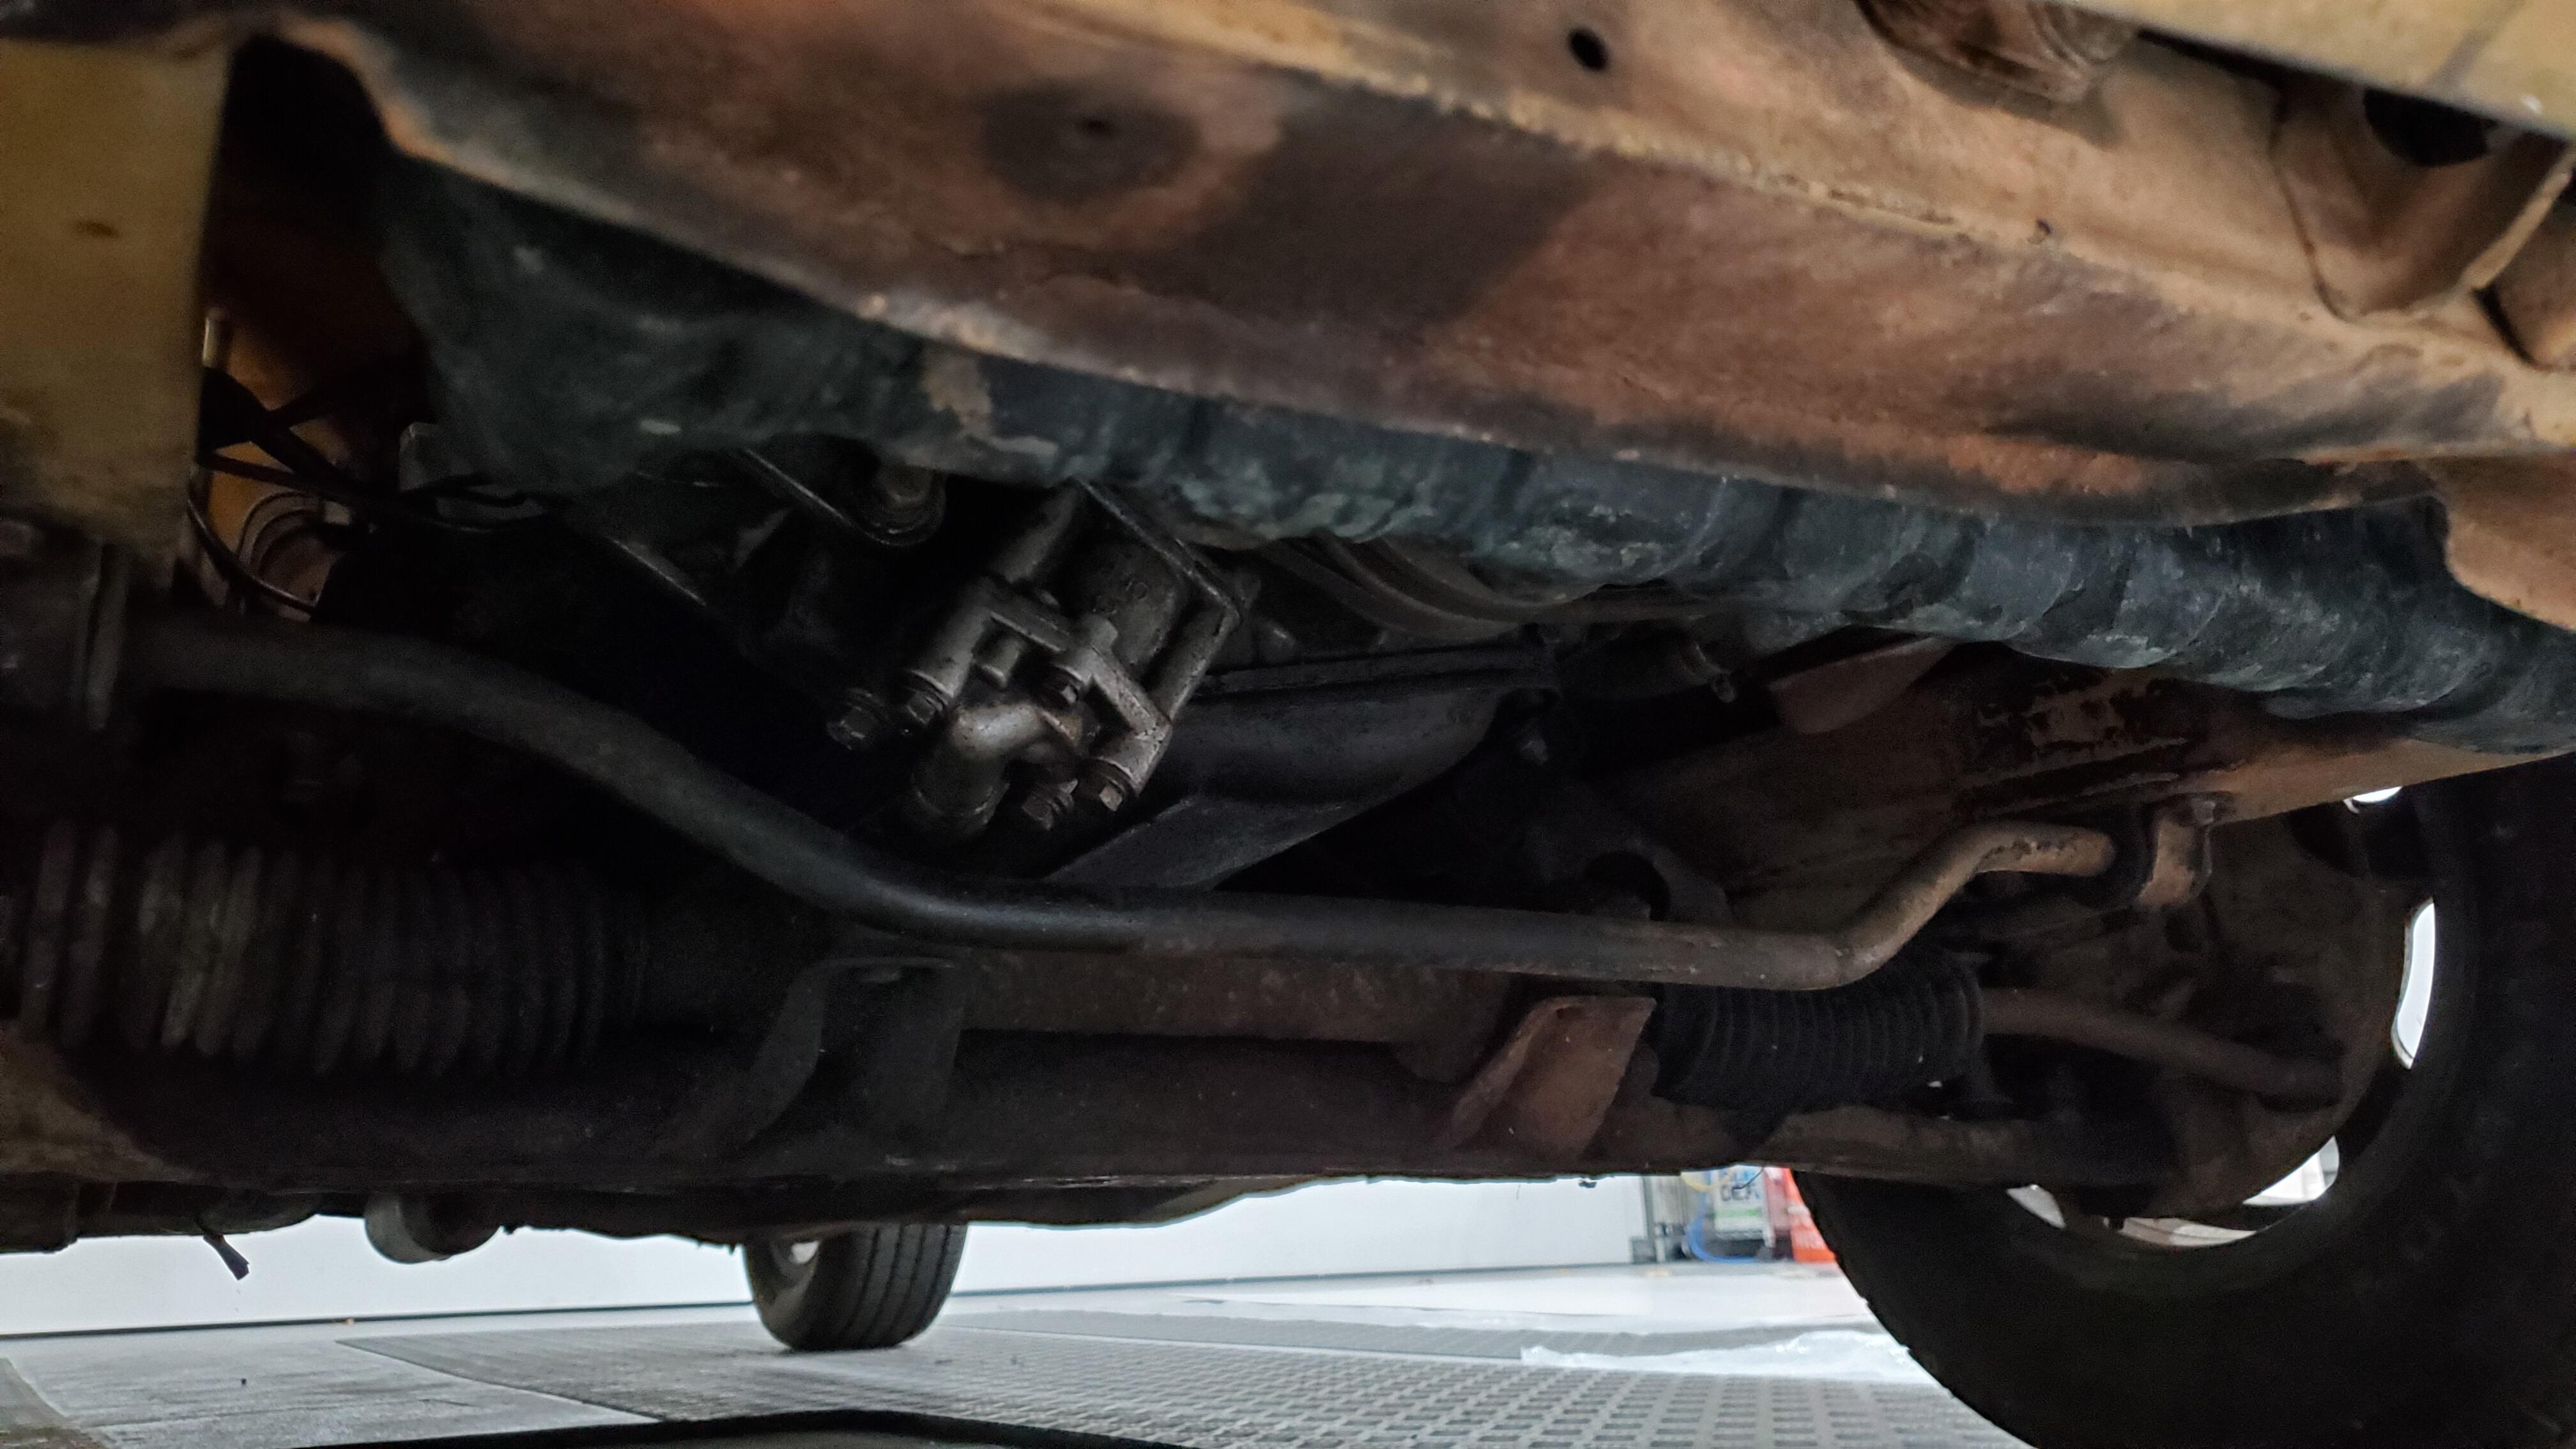
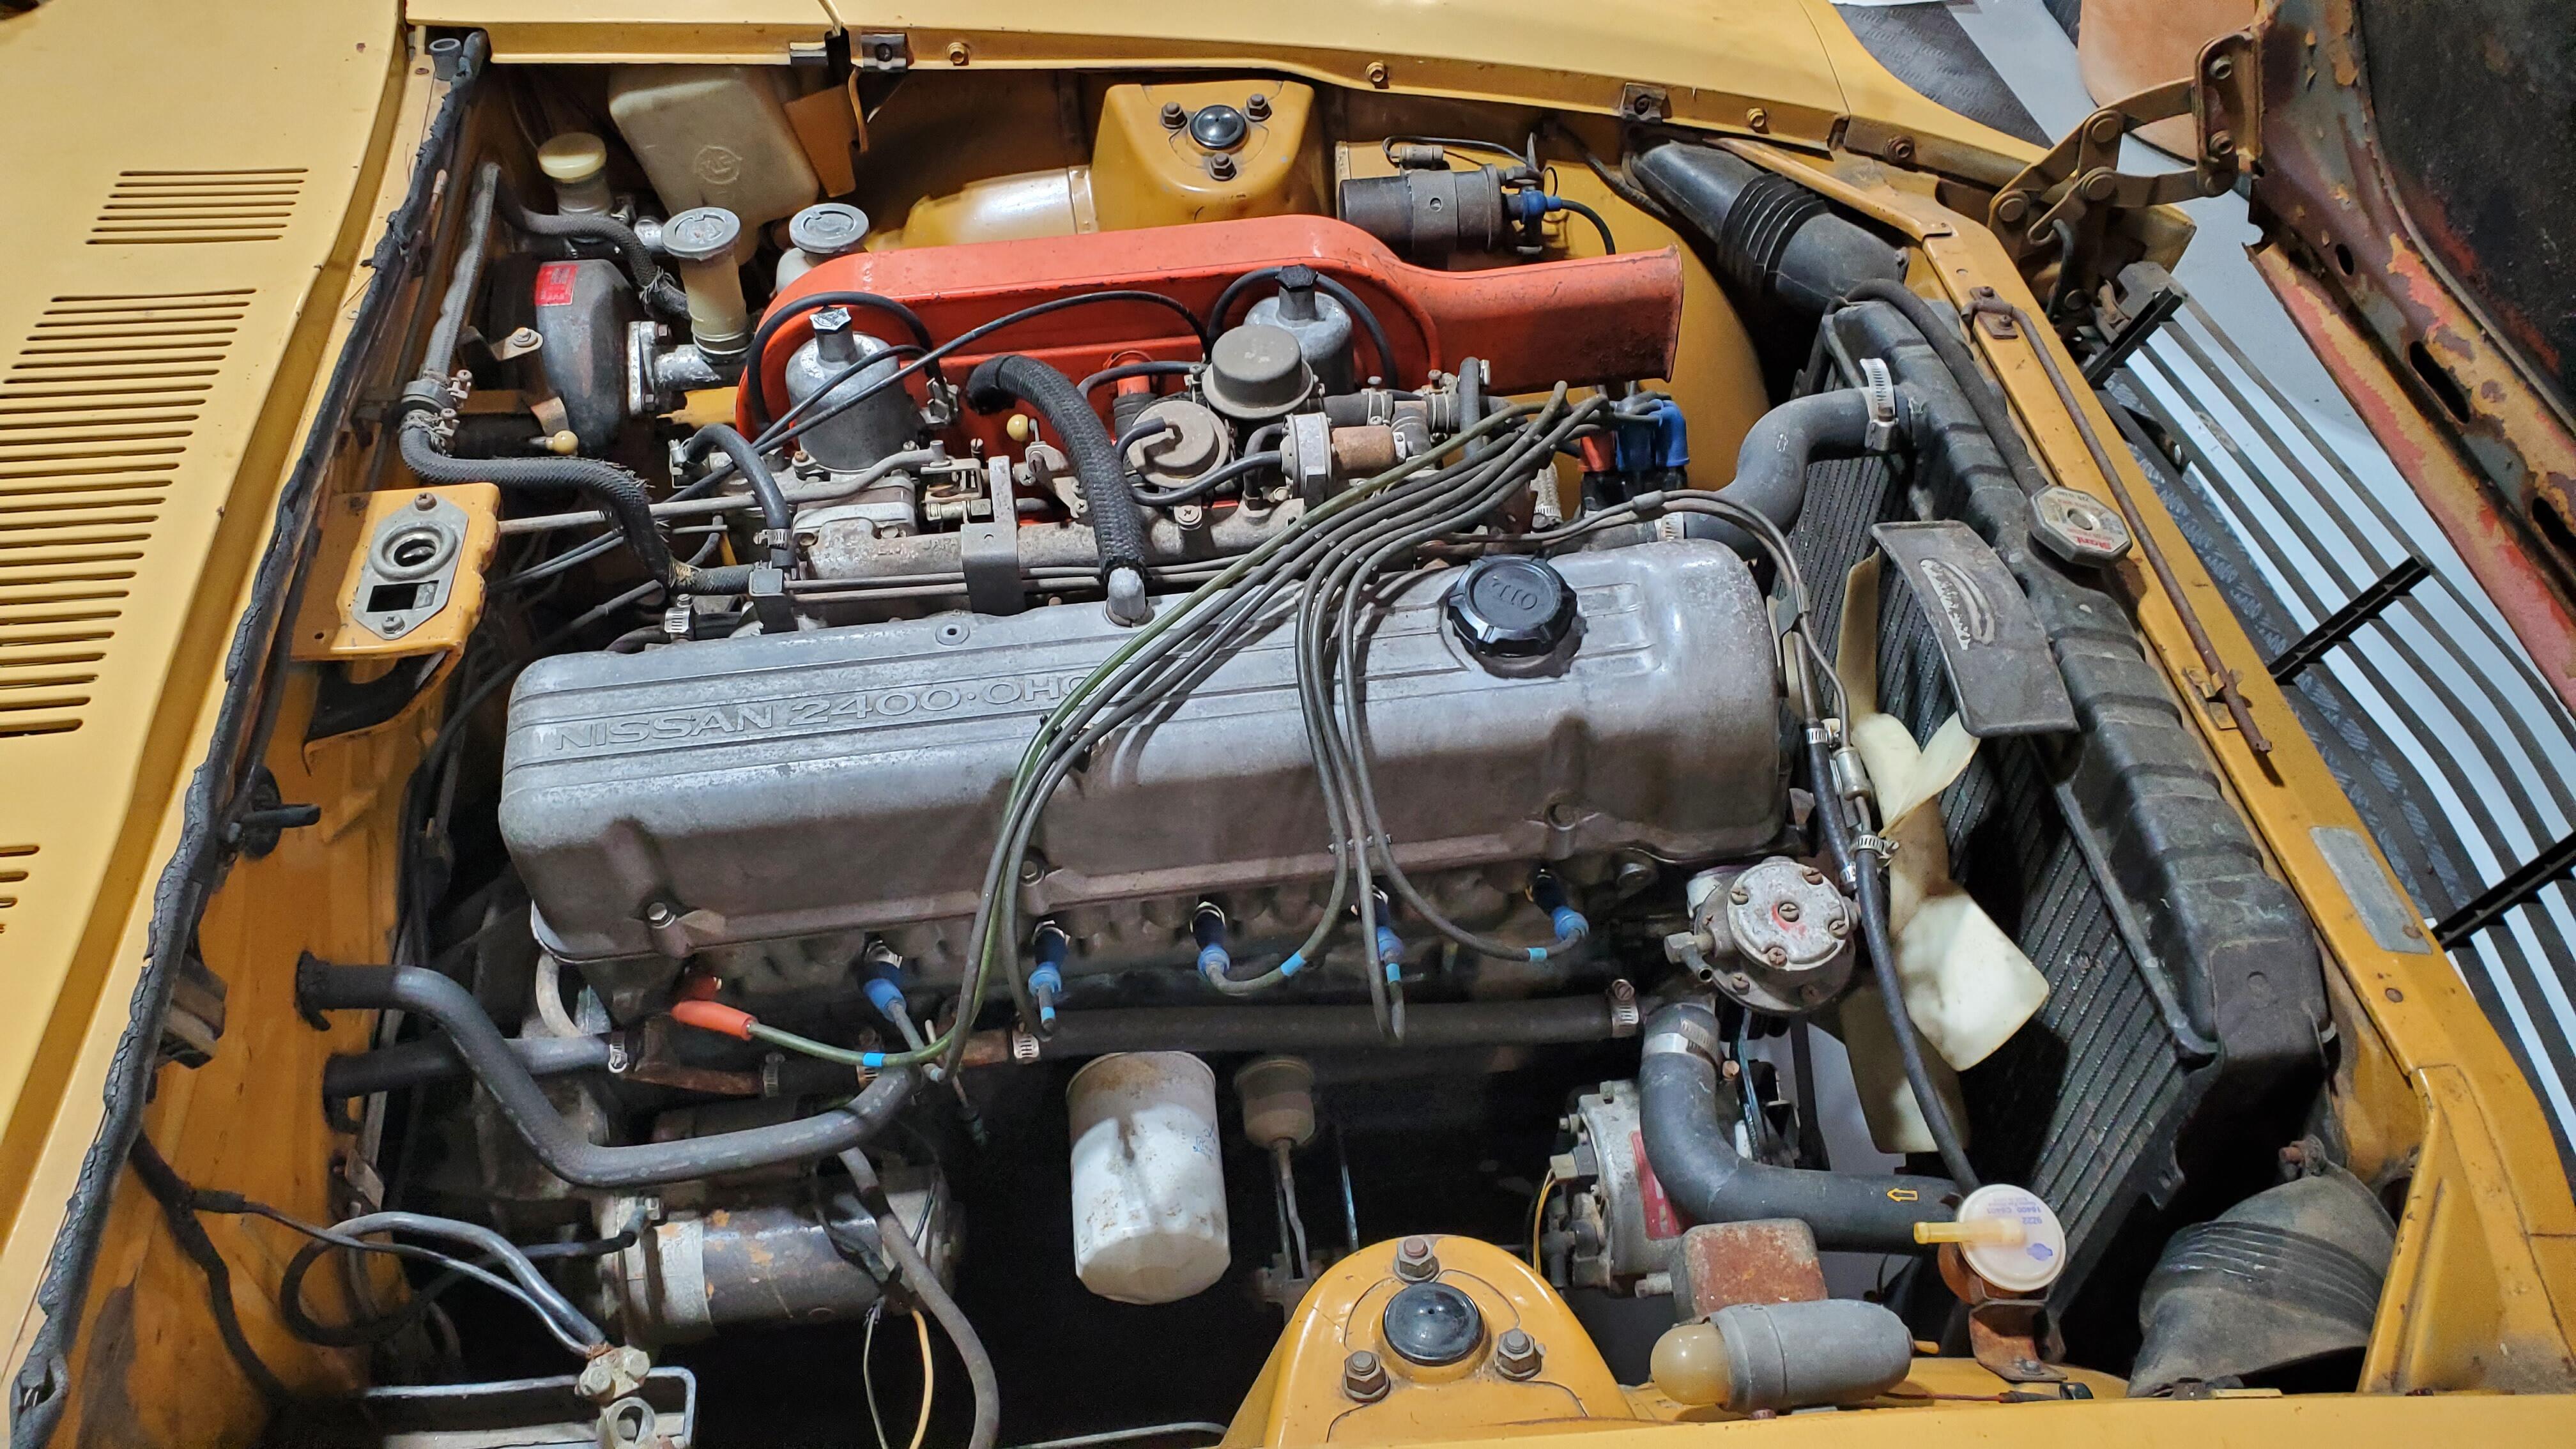
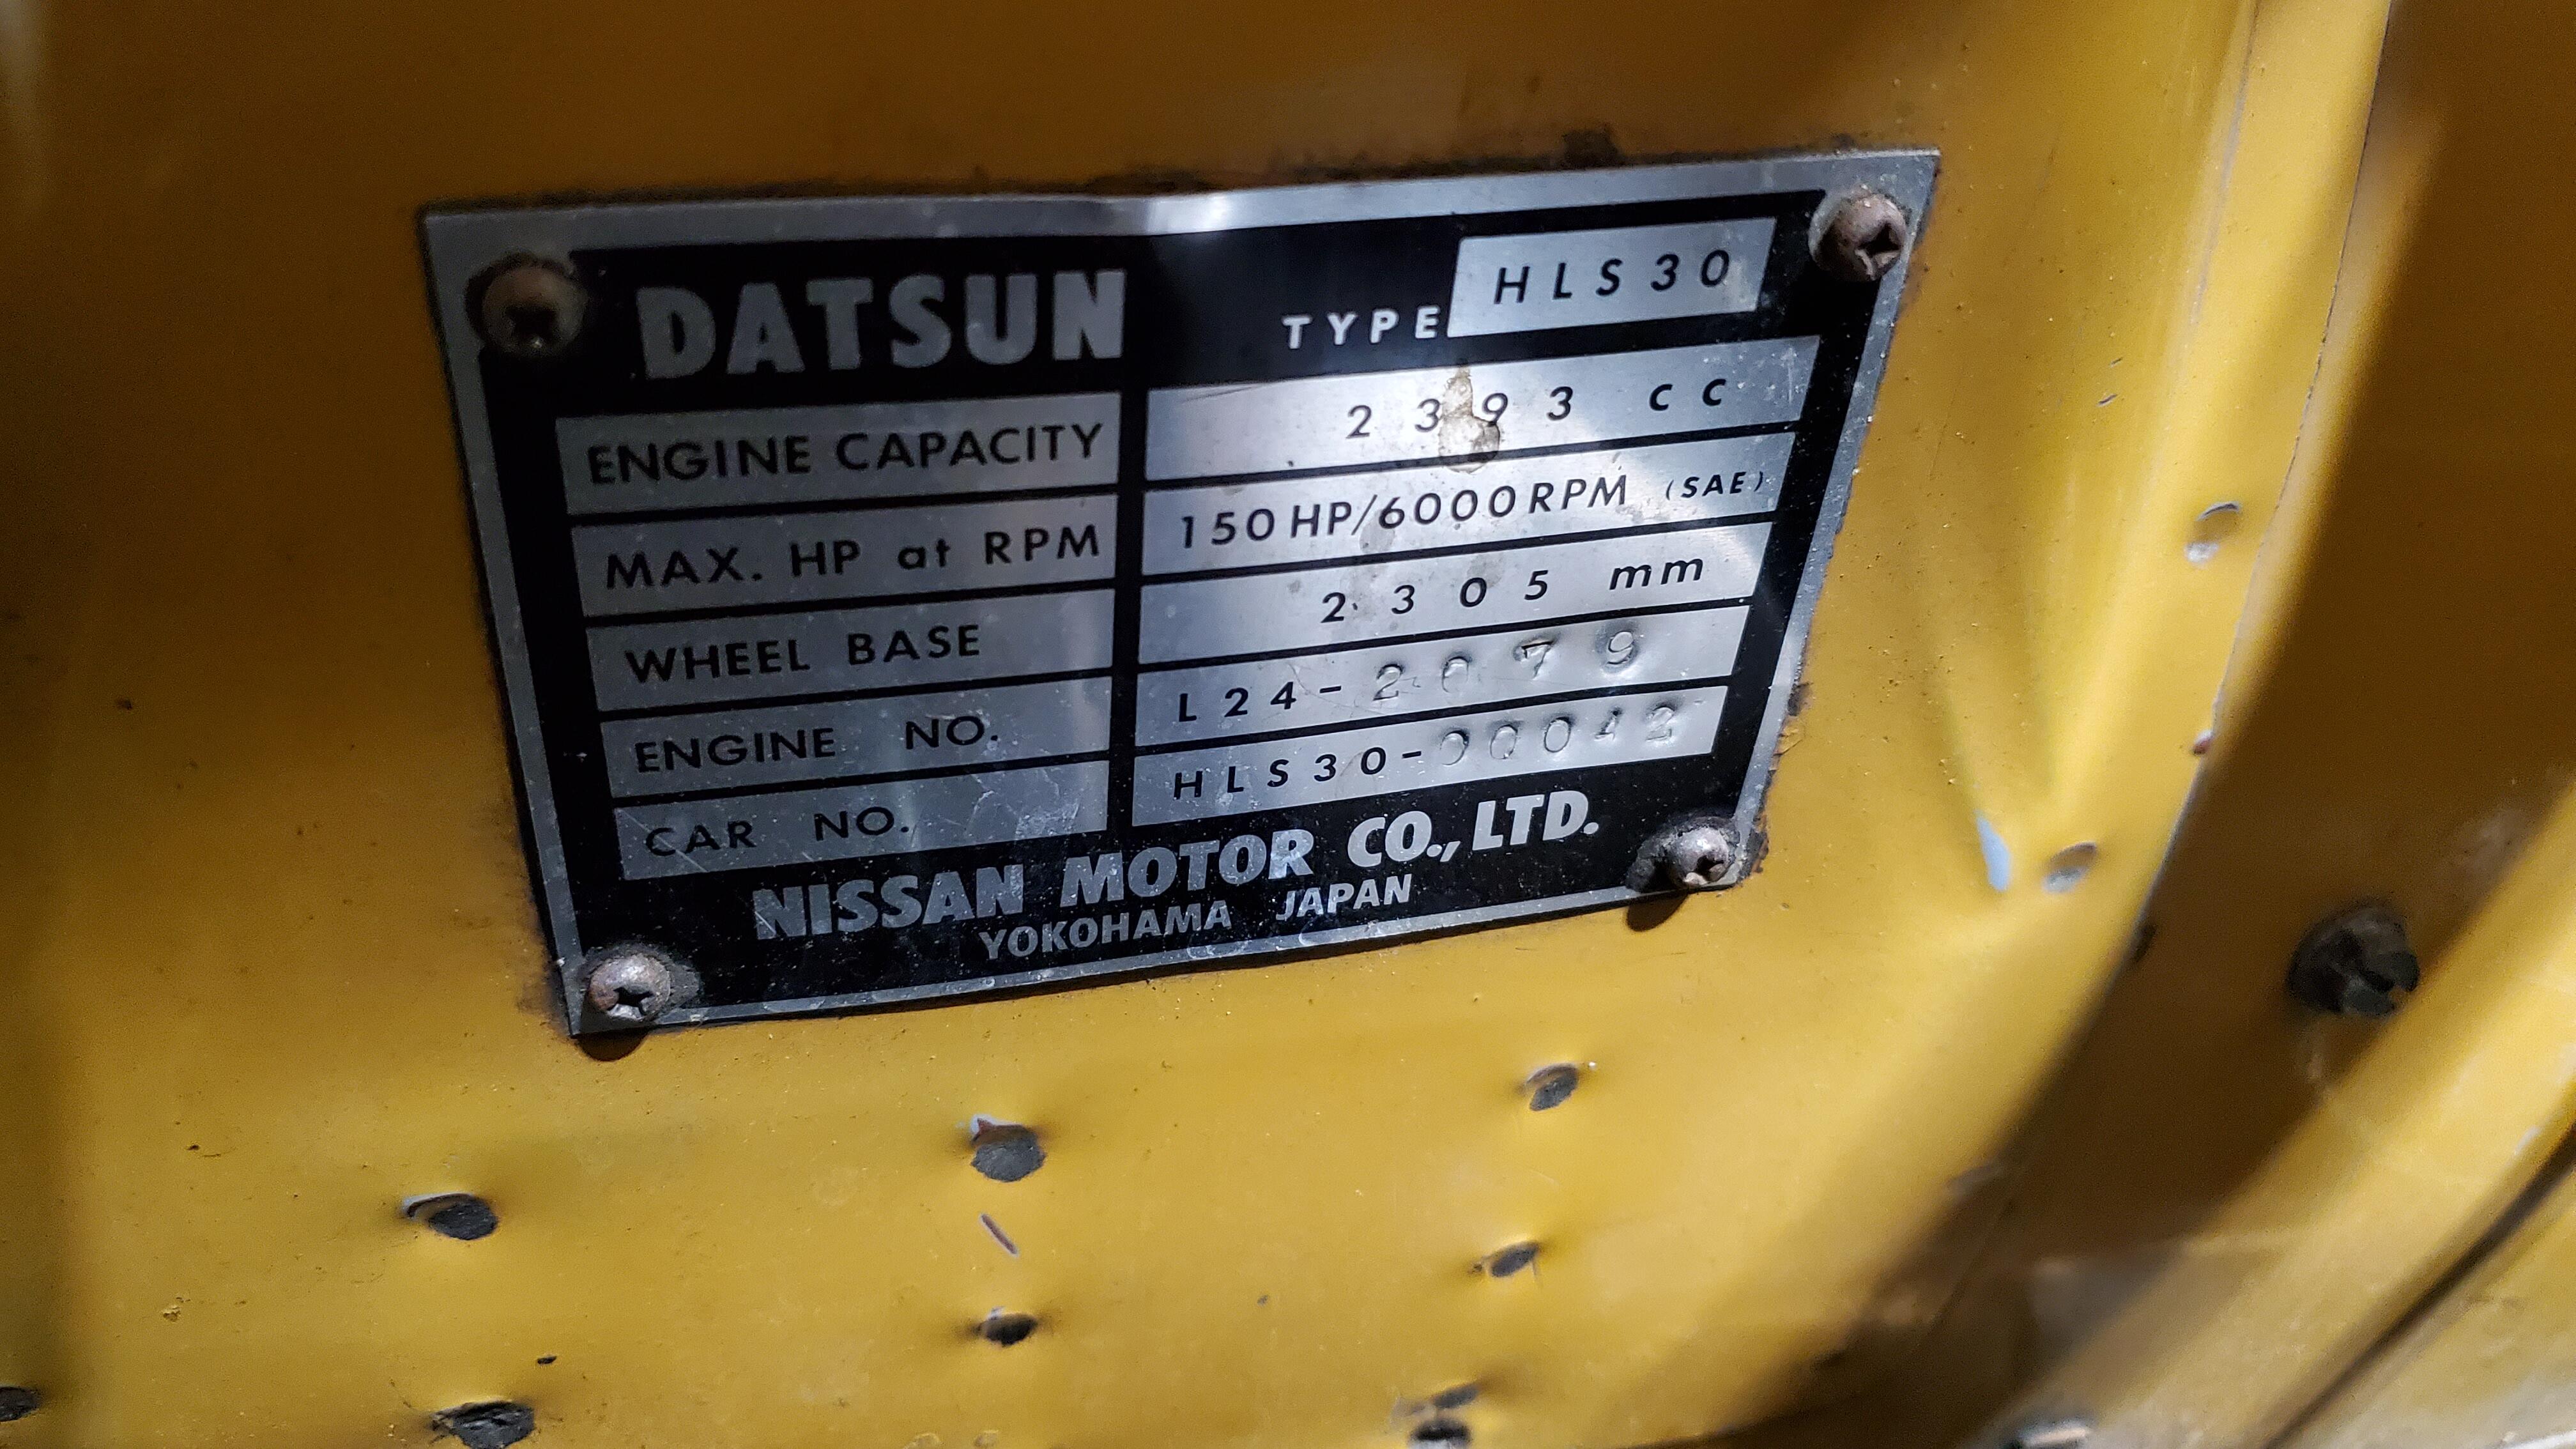
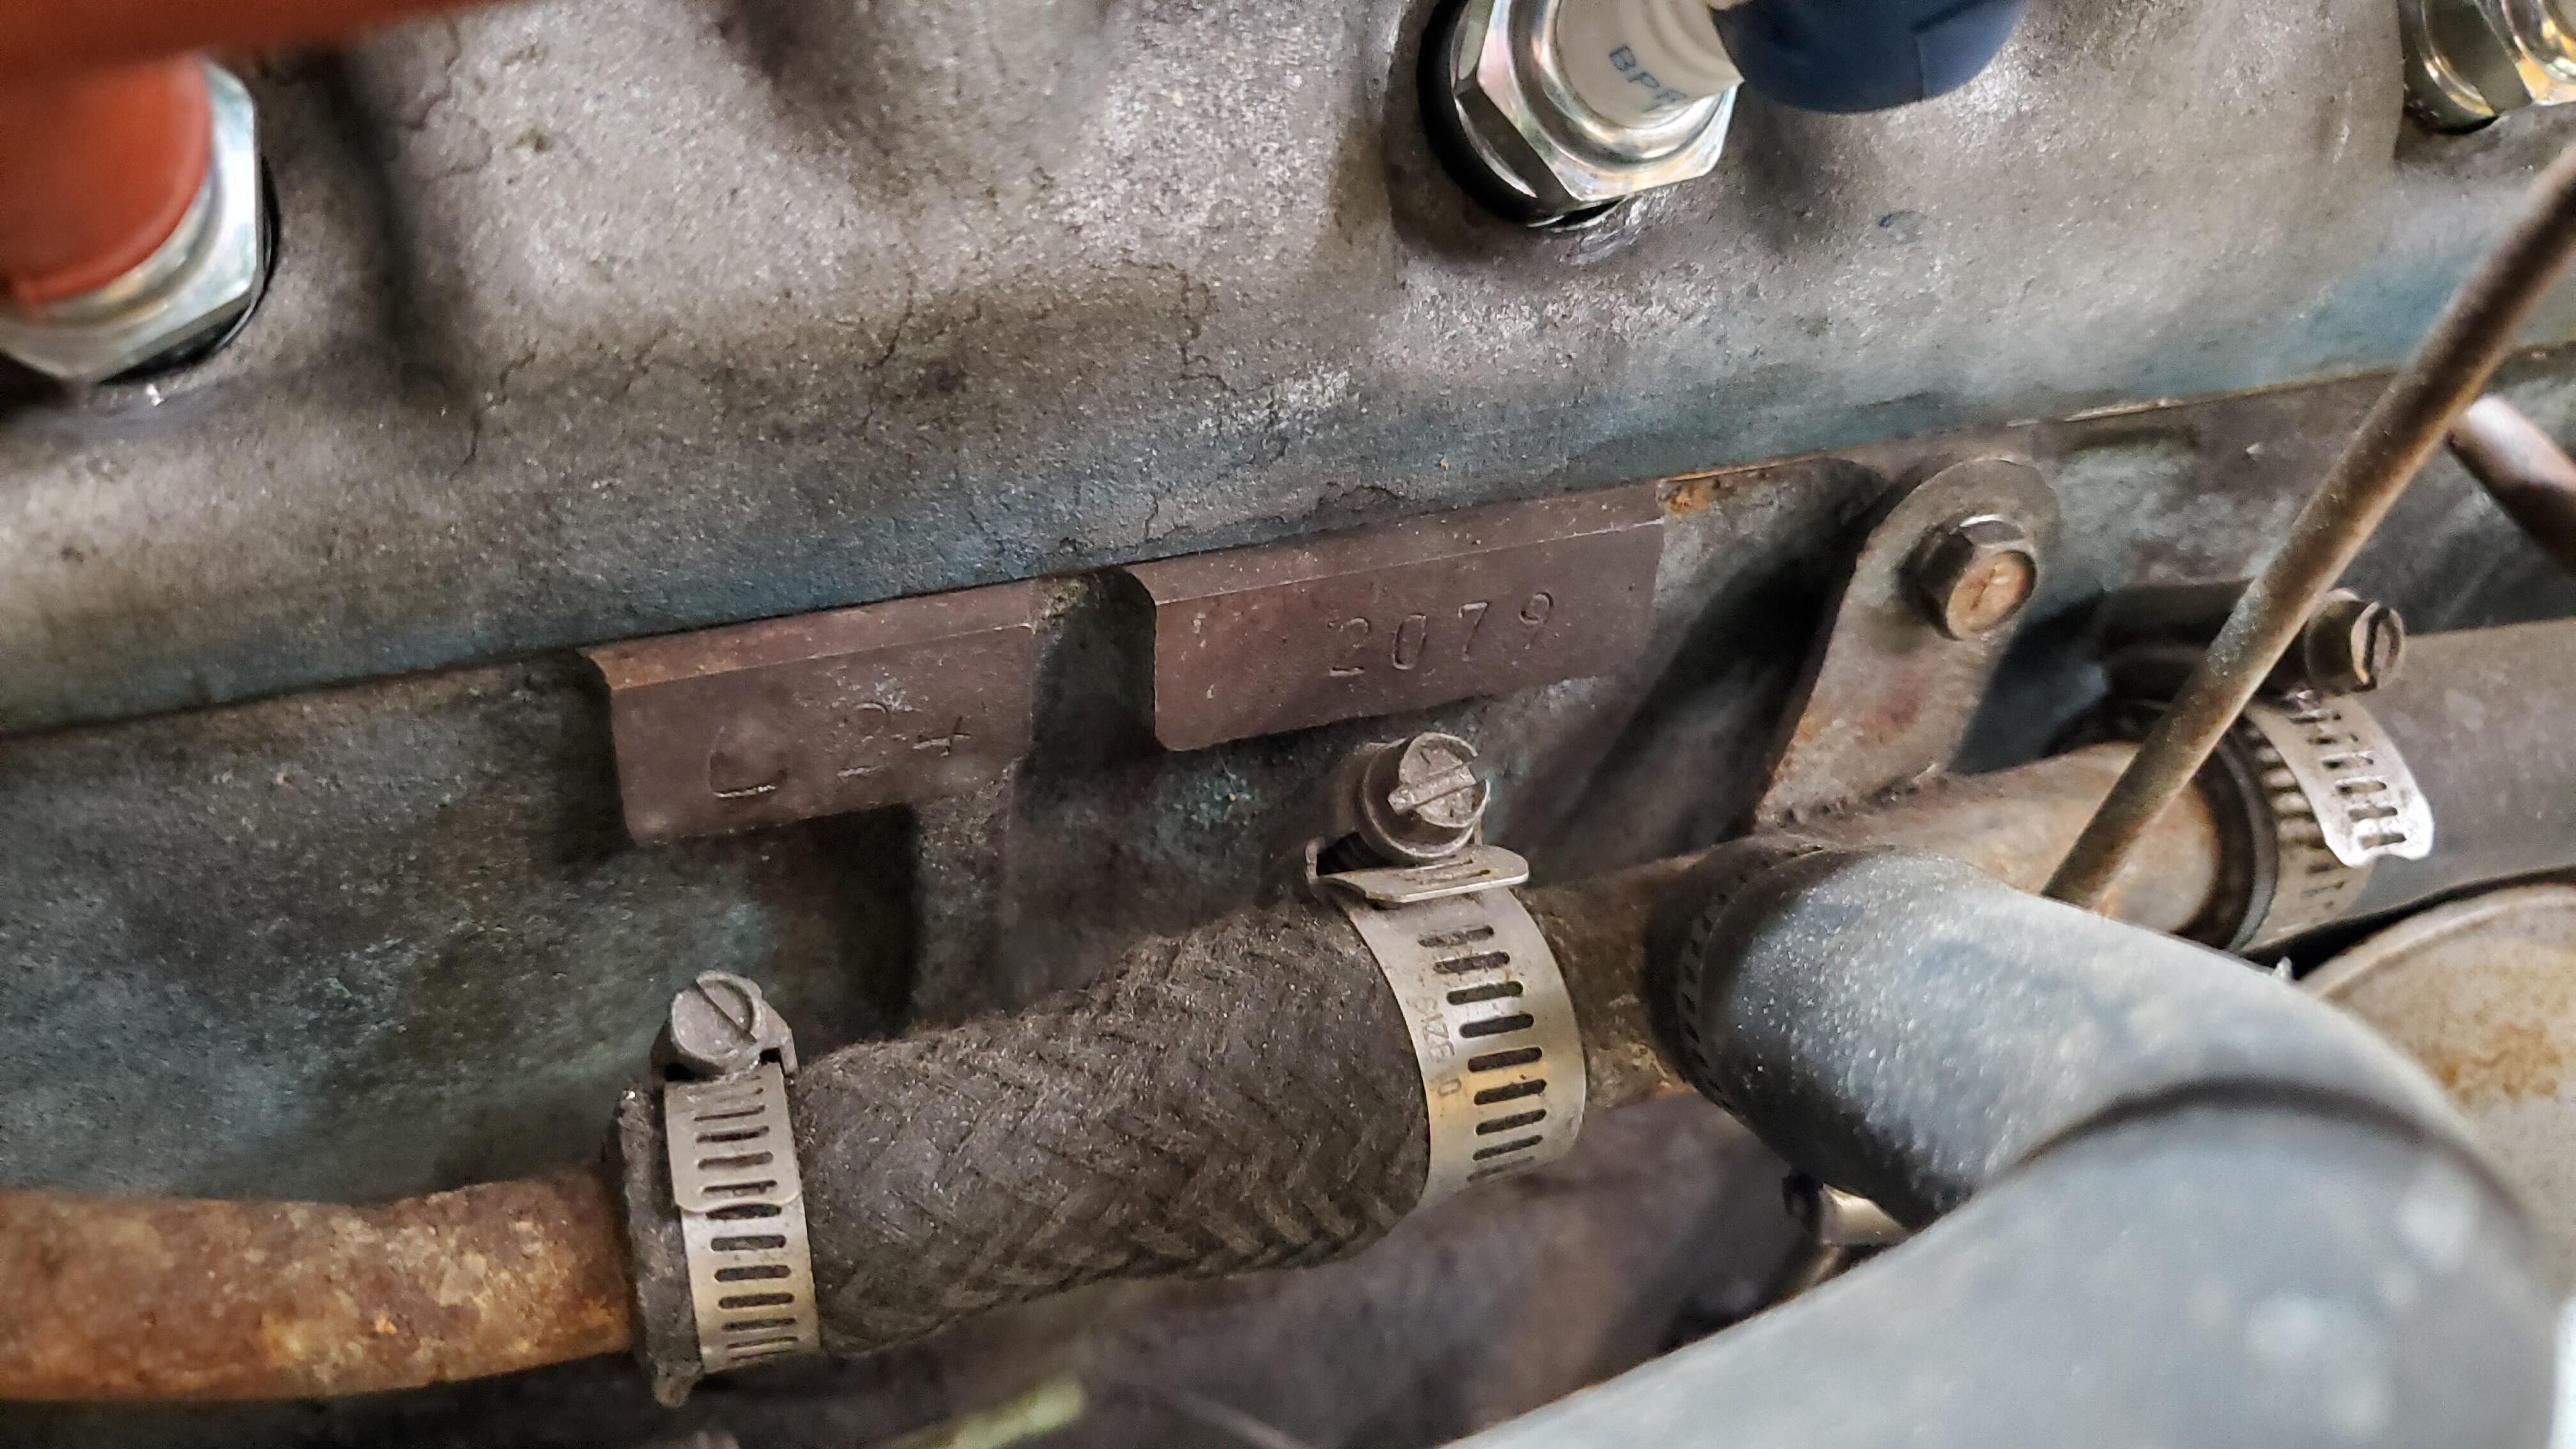
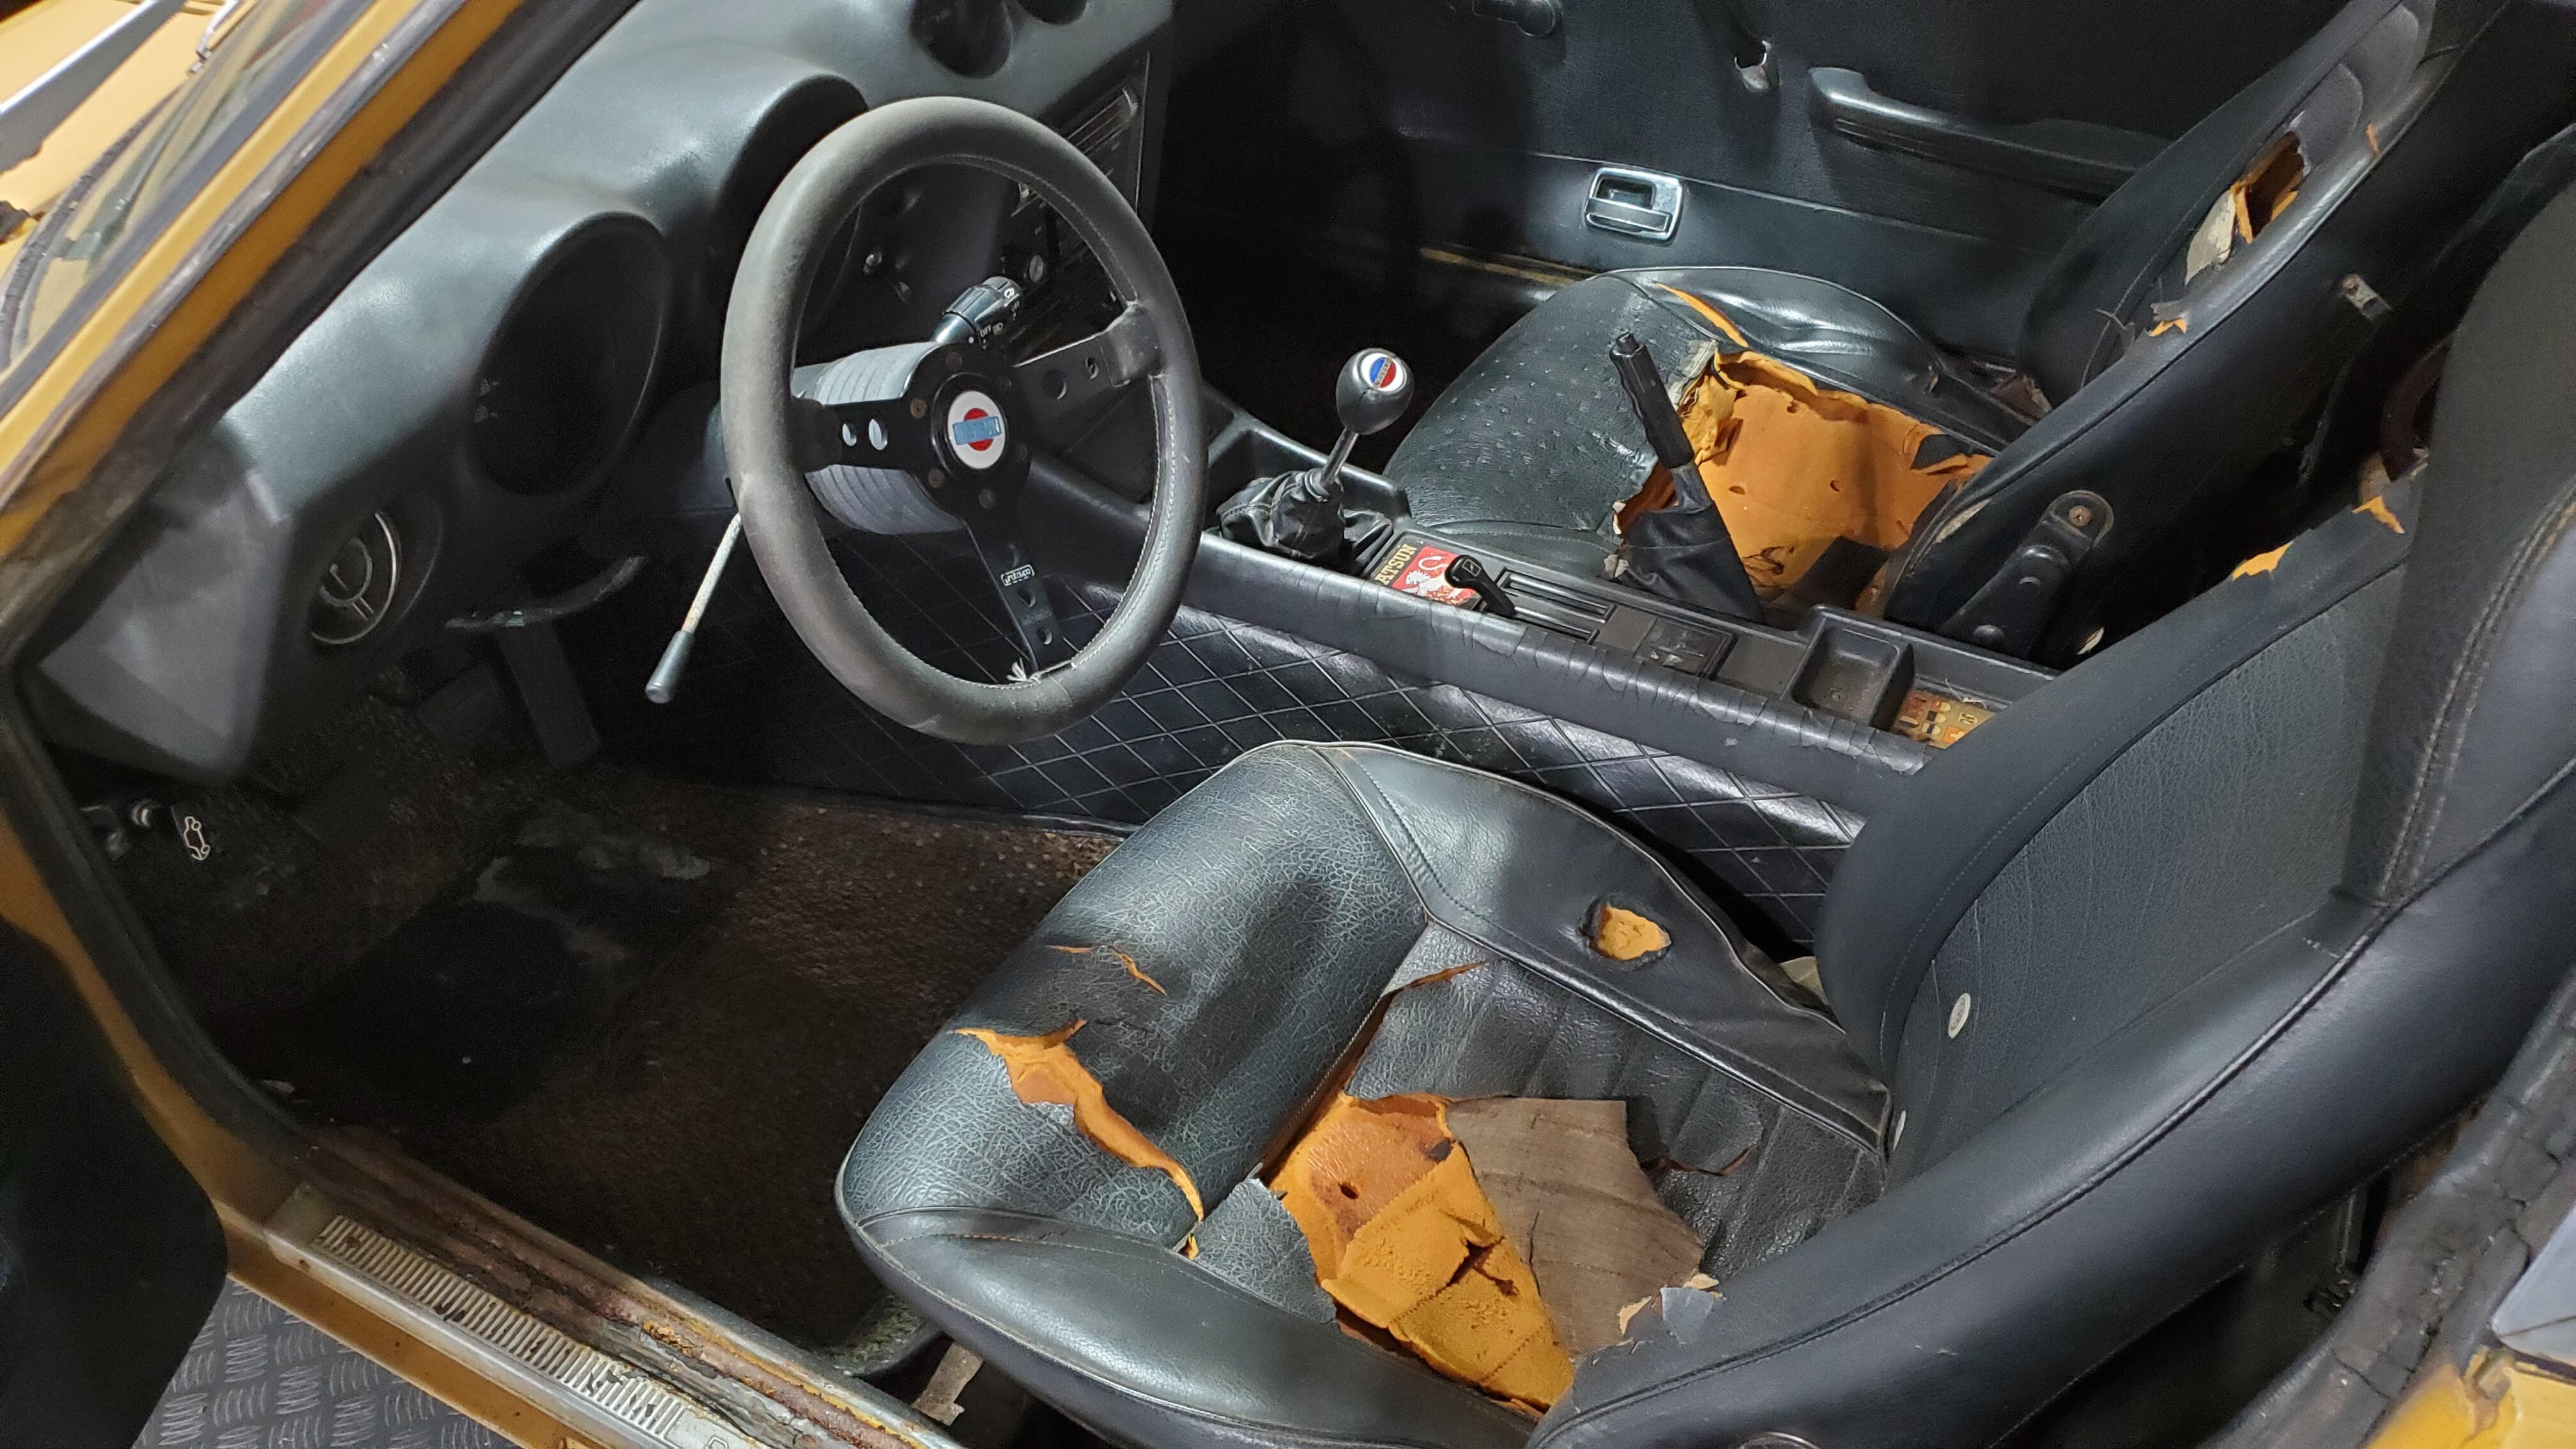
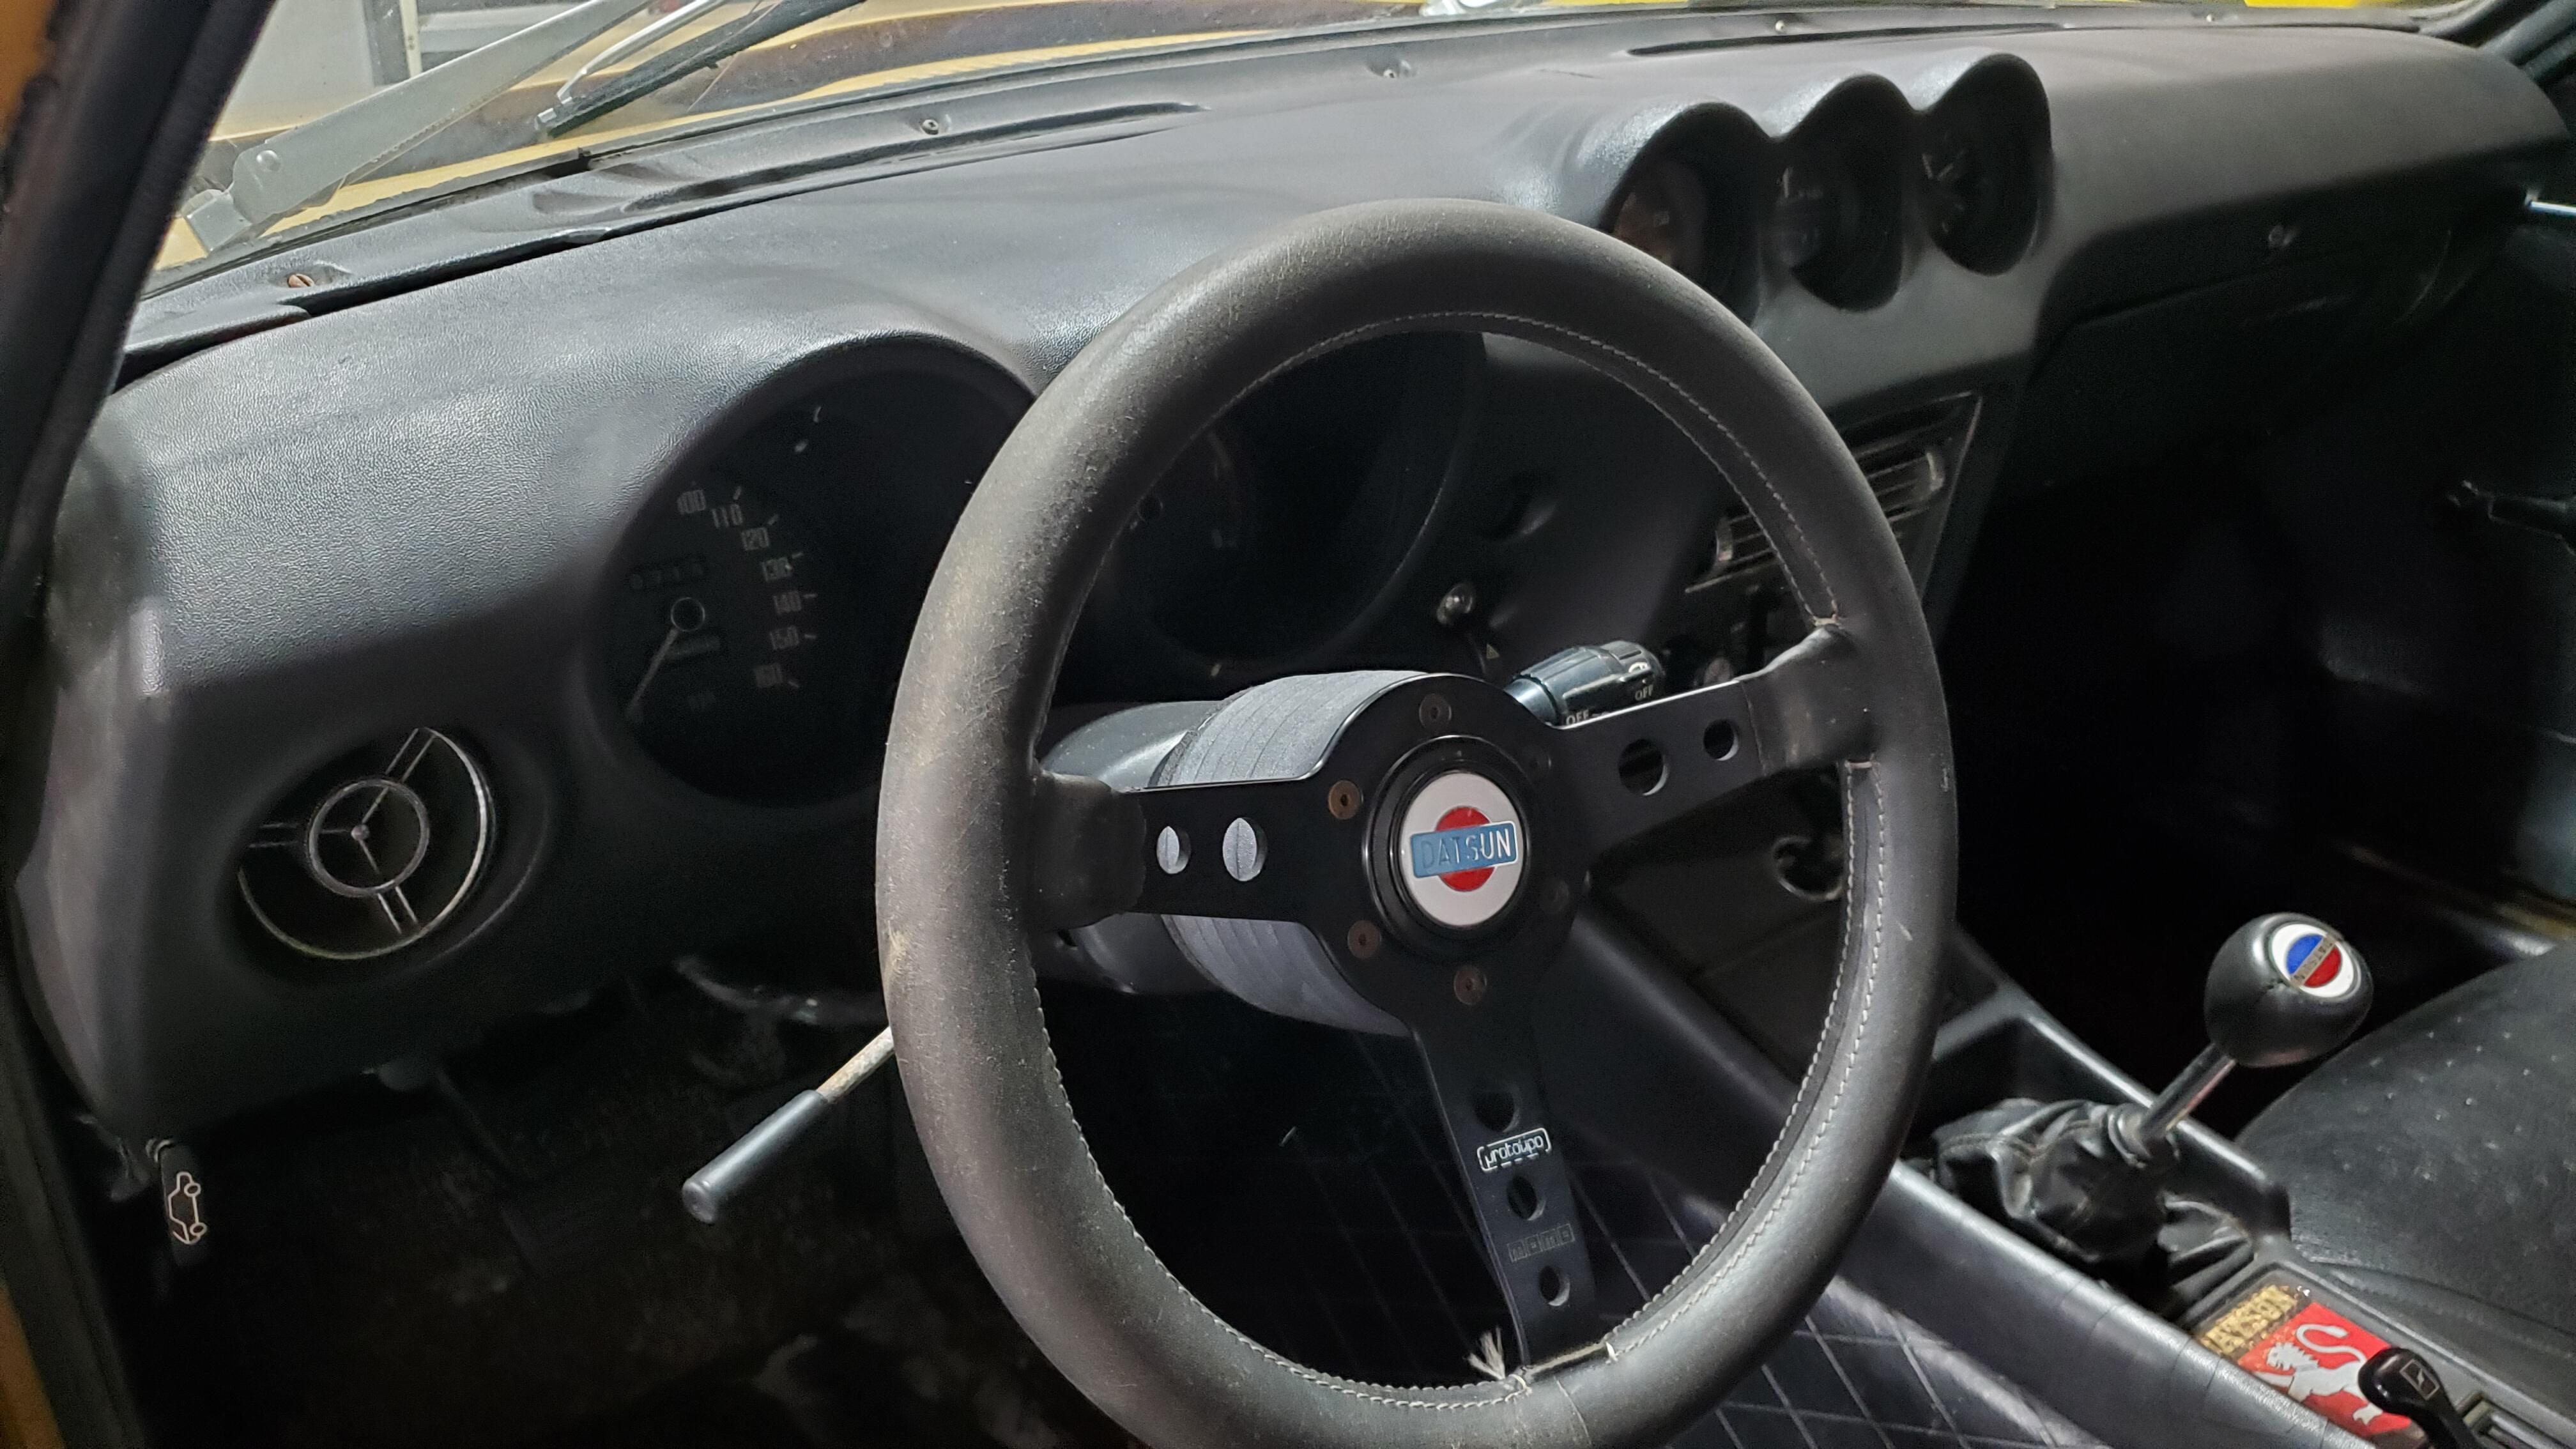
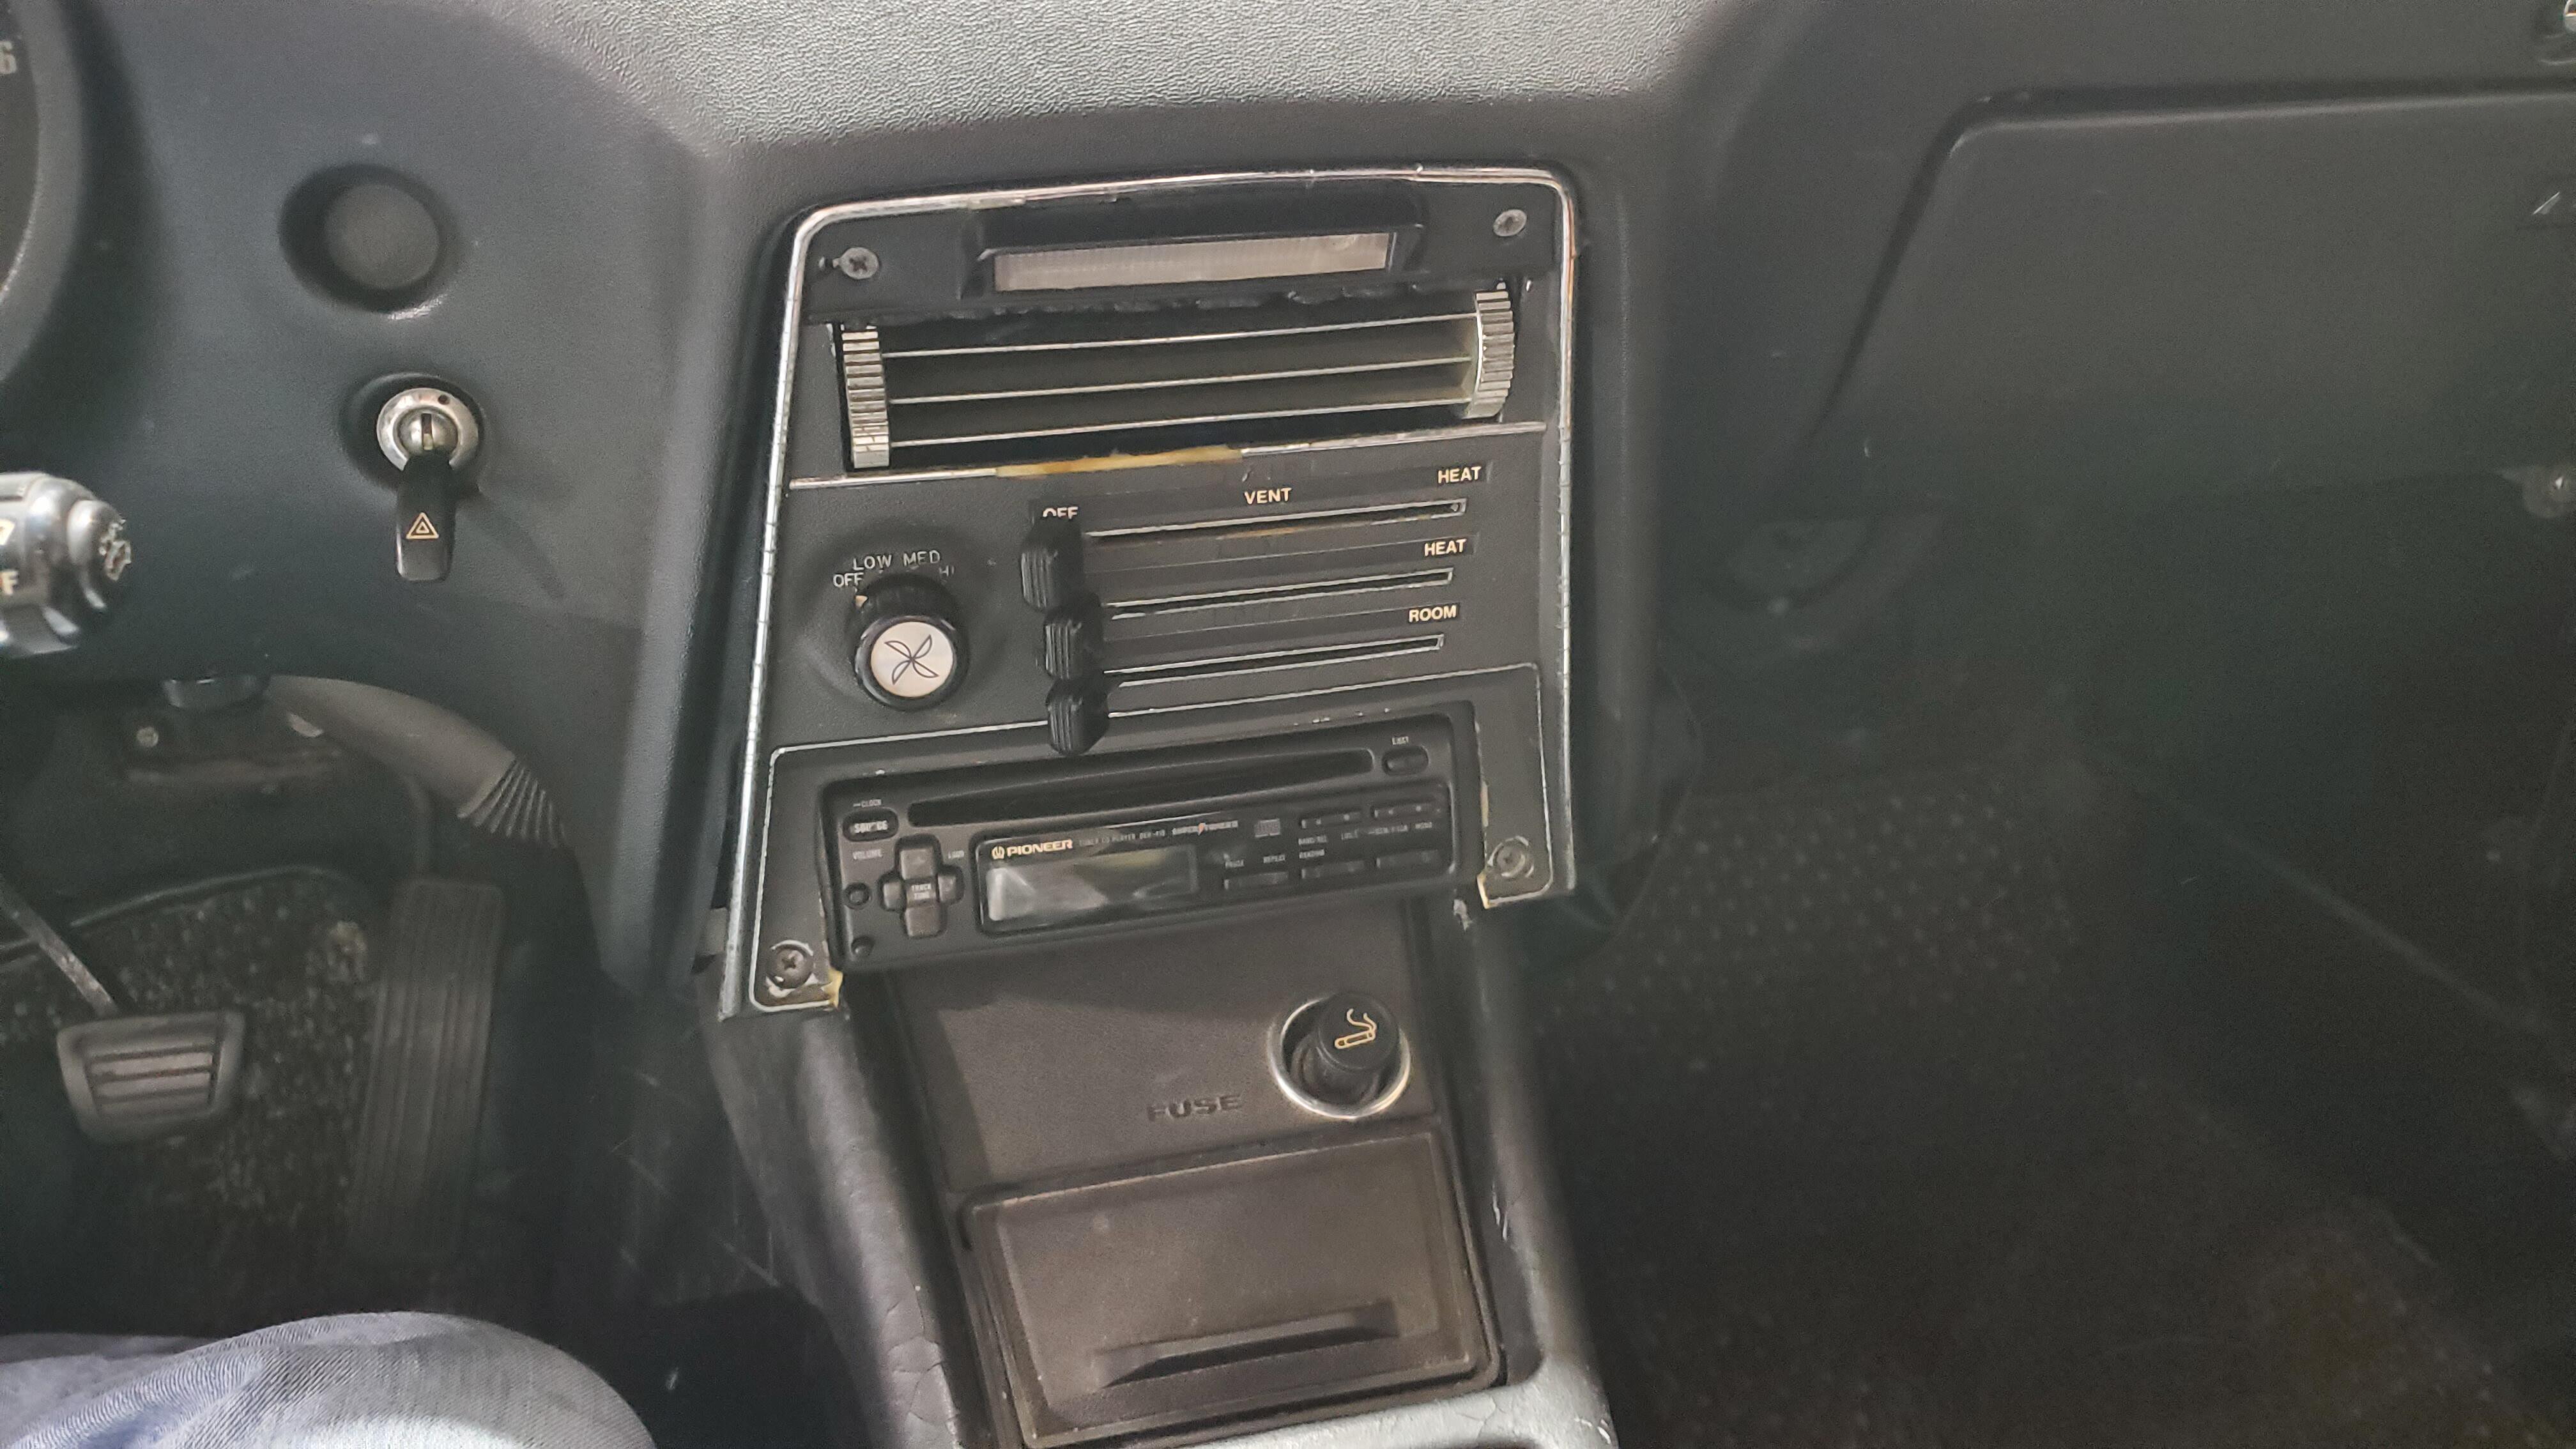
.jpg.25e7254580c386d76ba76d6b61934dd0.jpg)

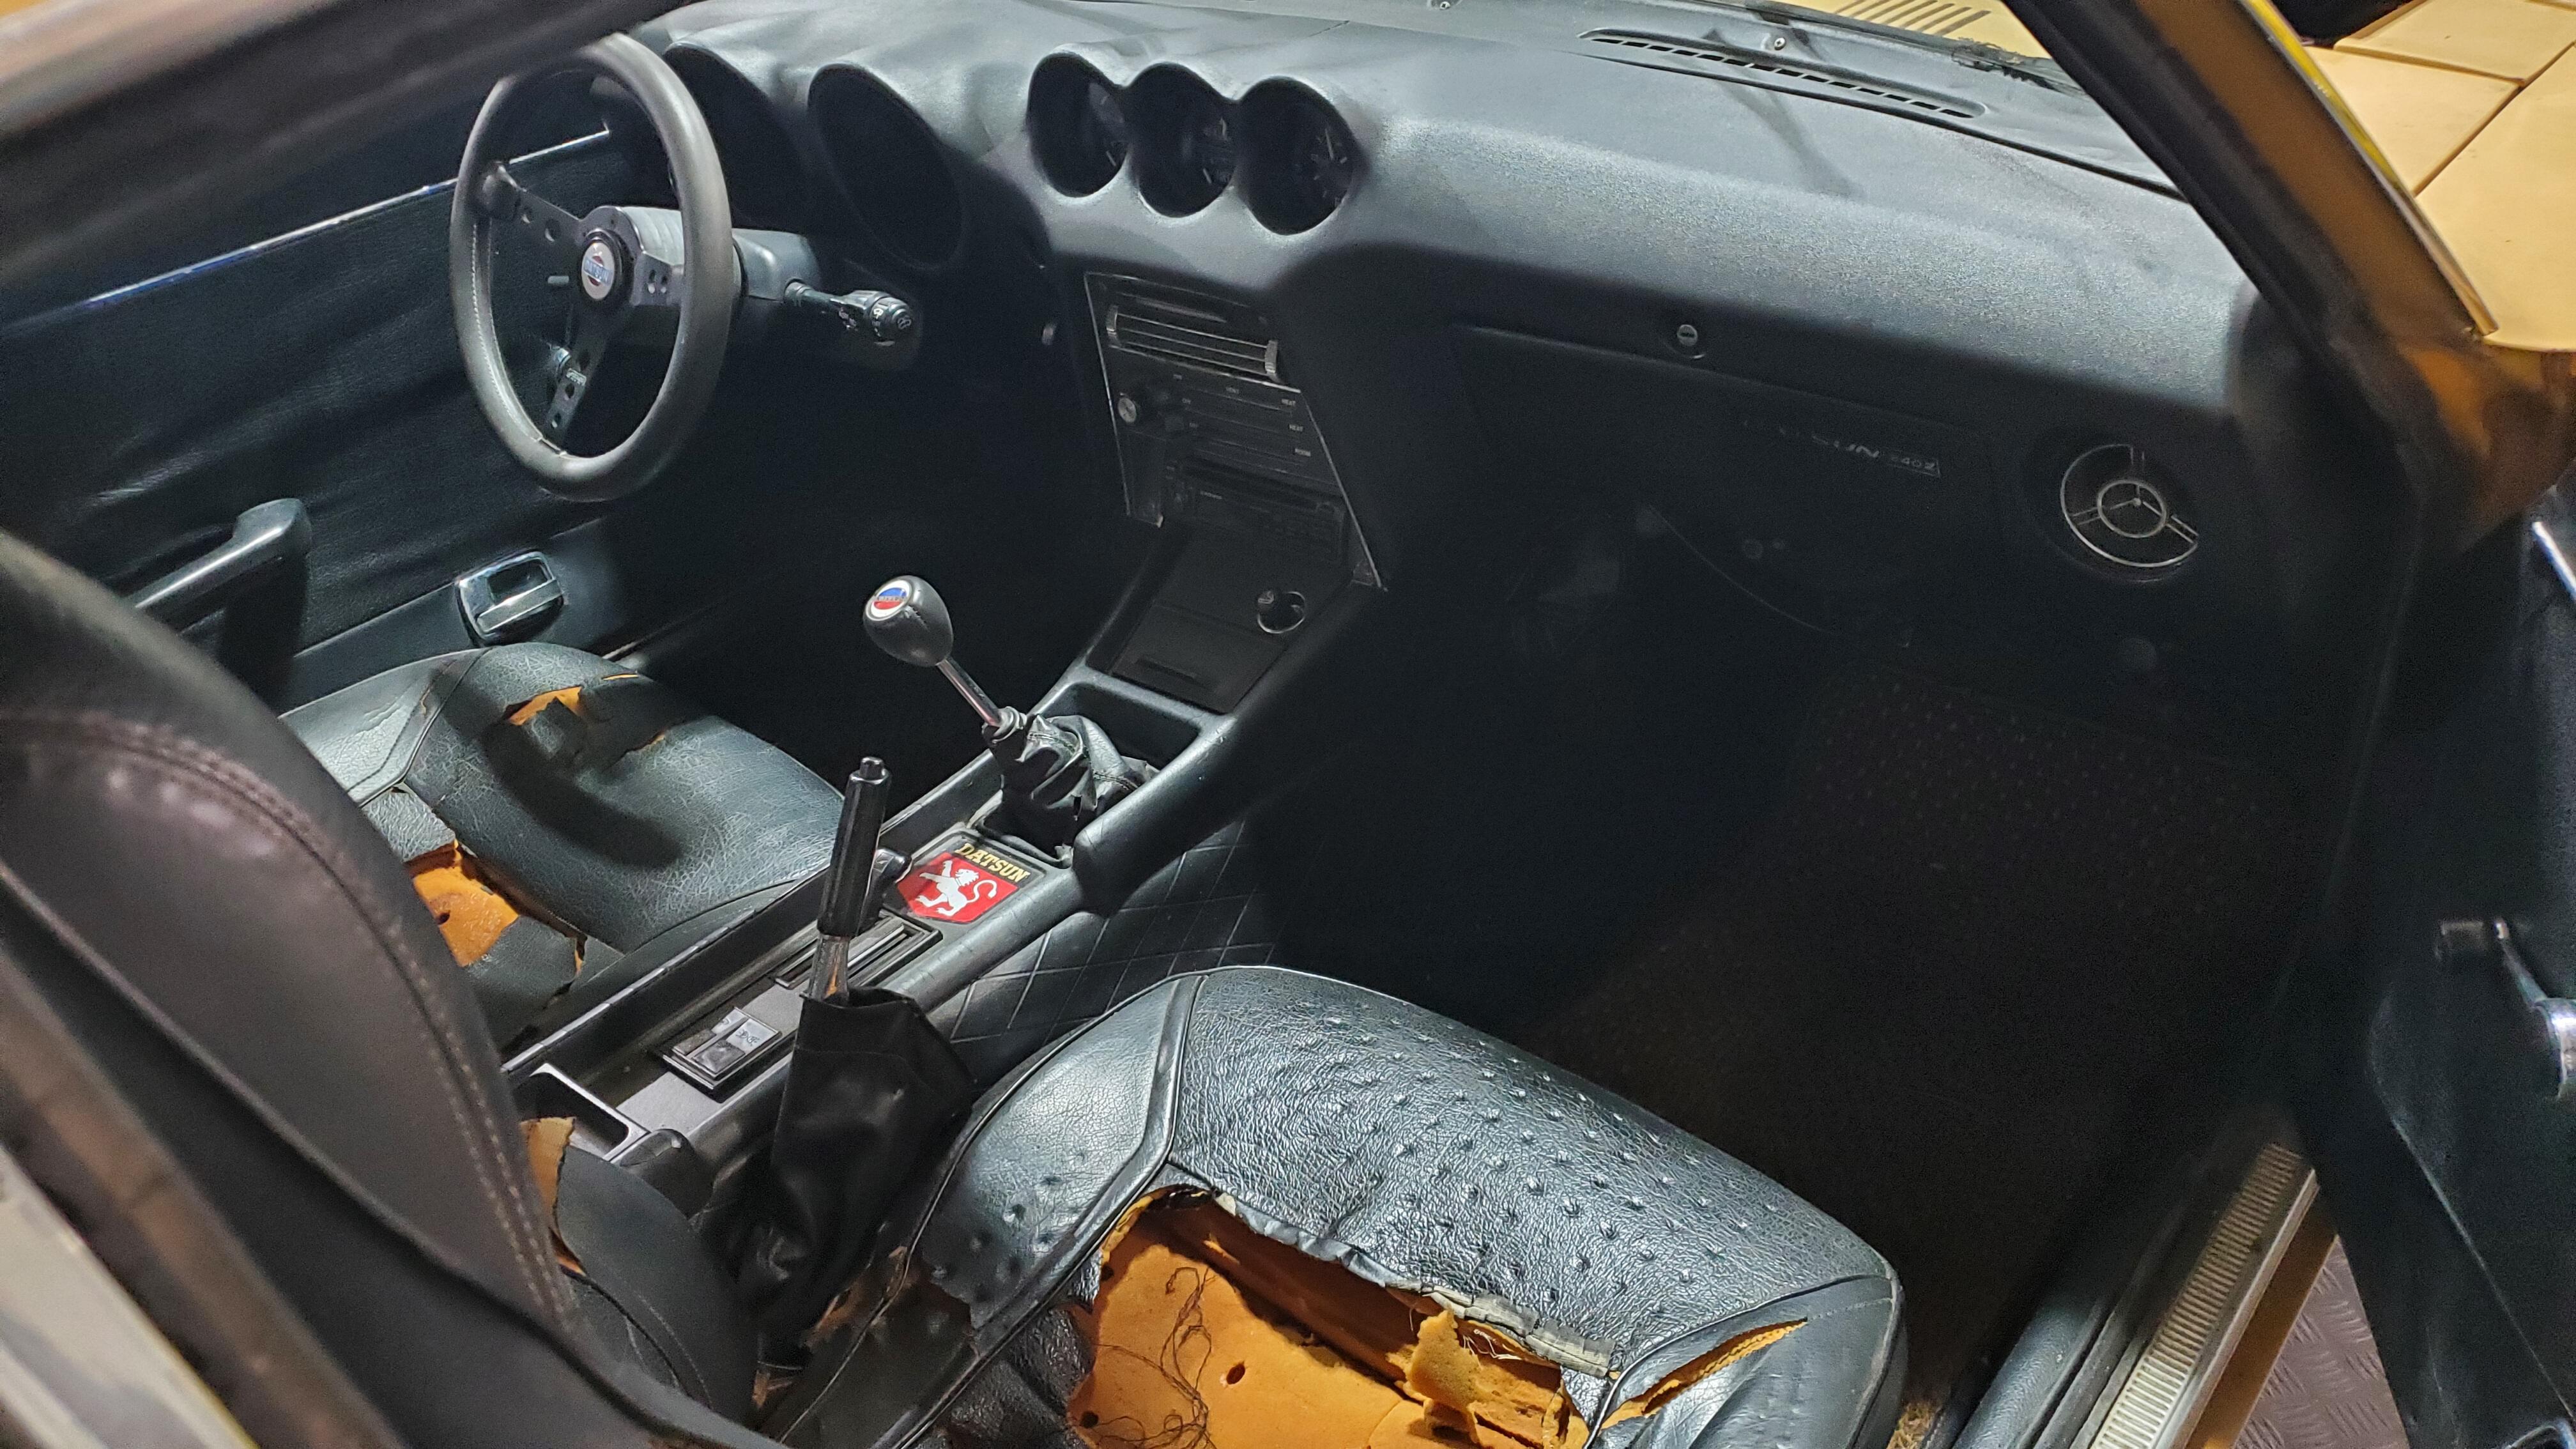
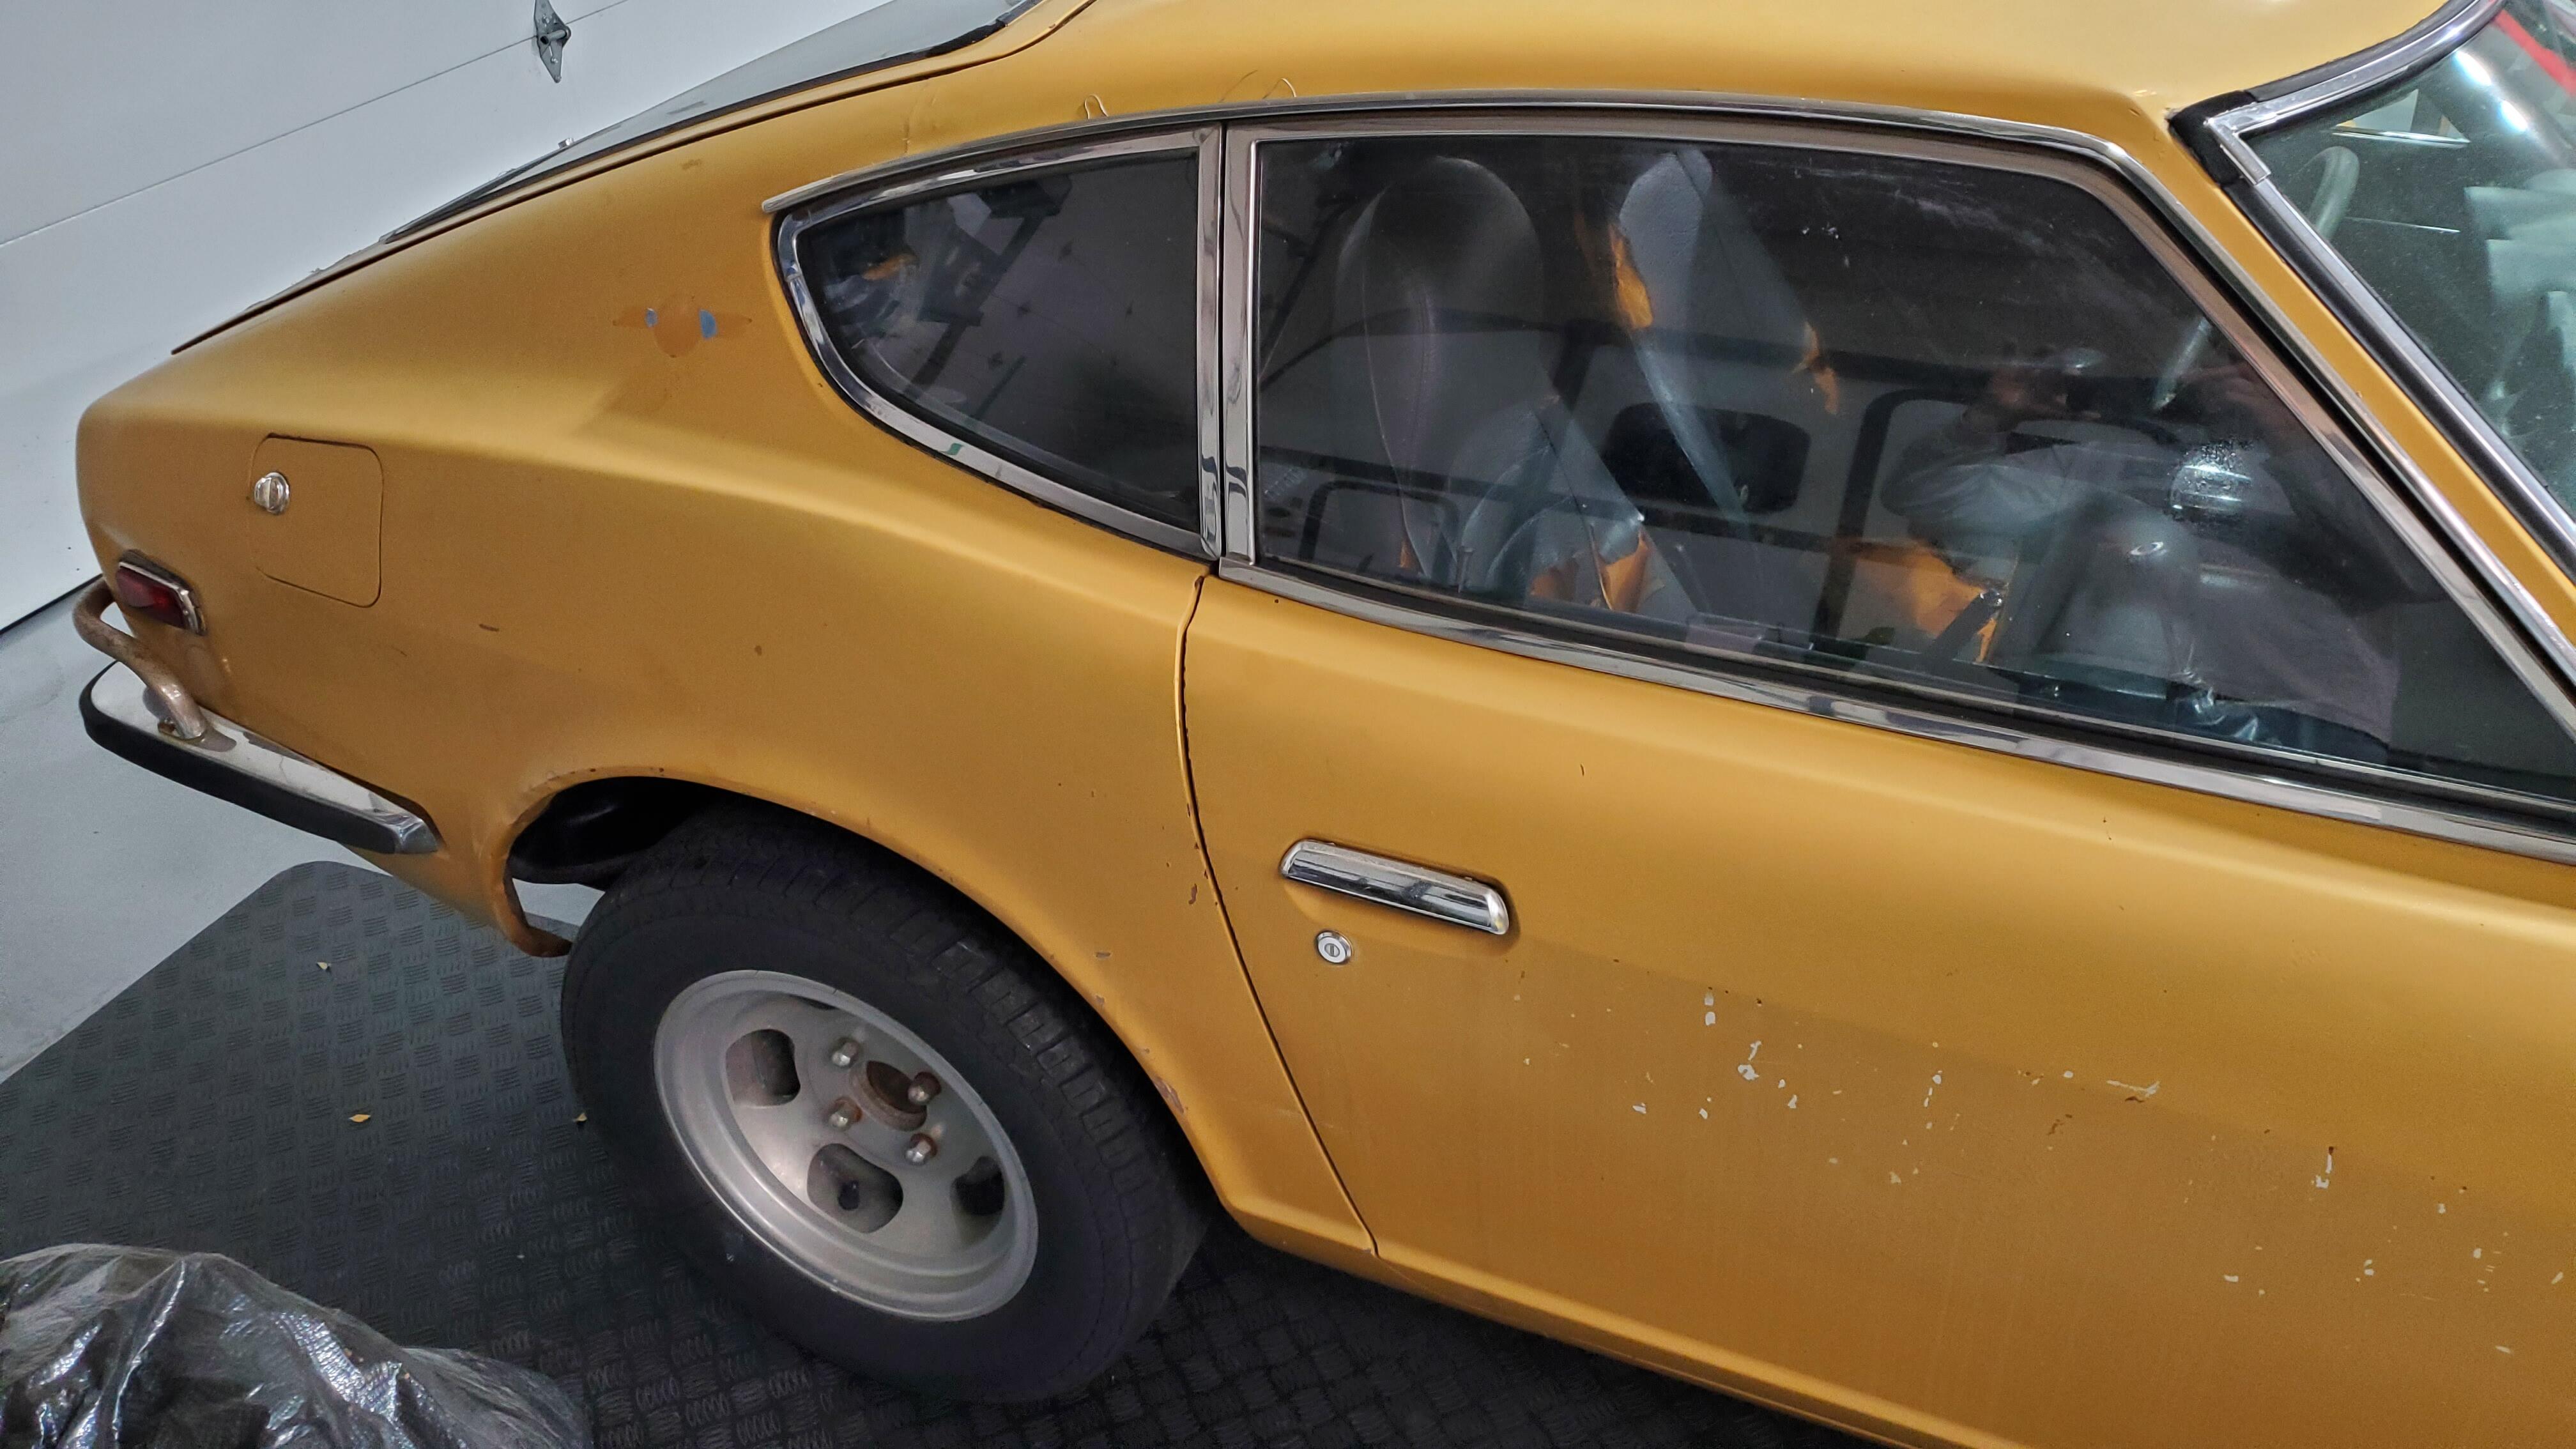


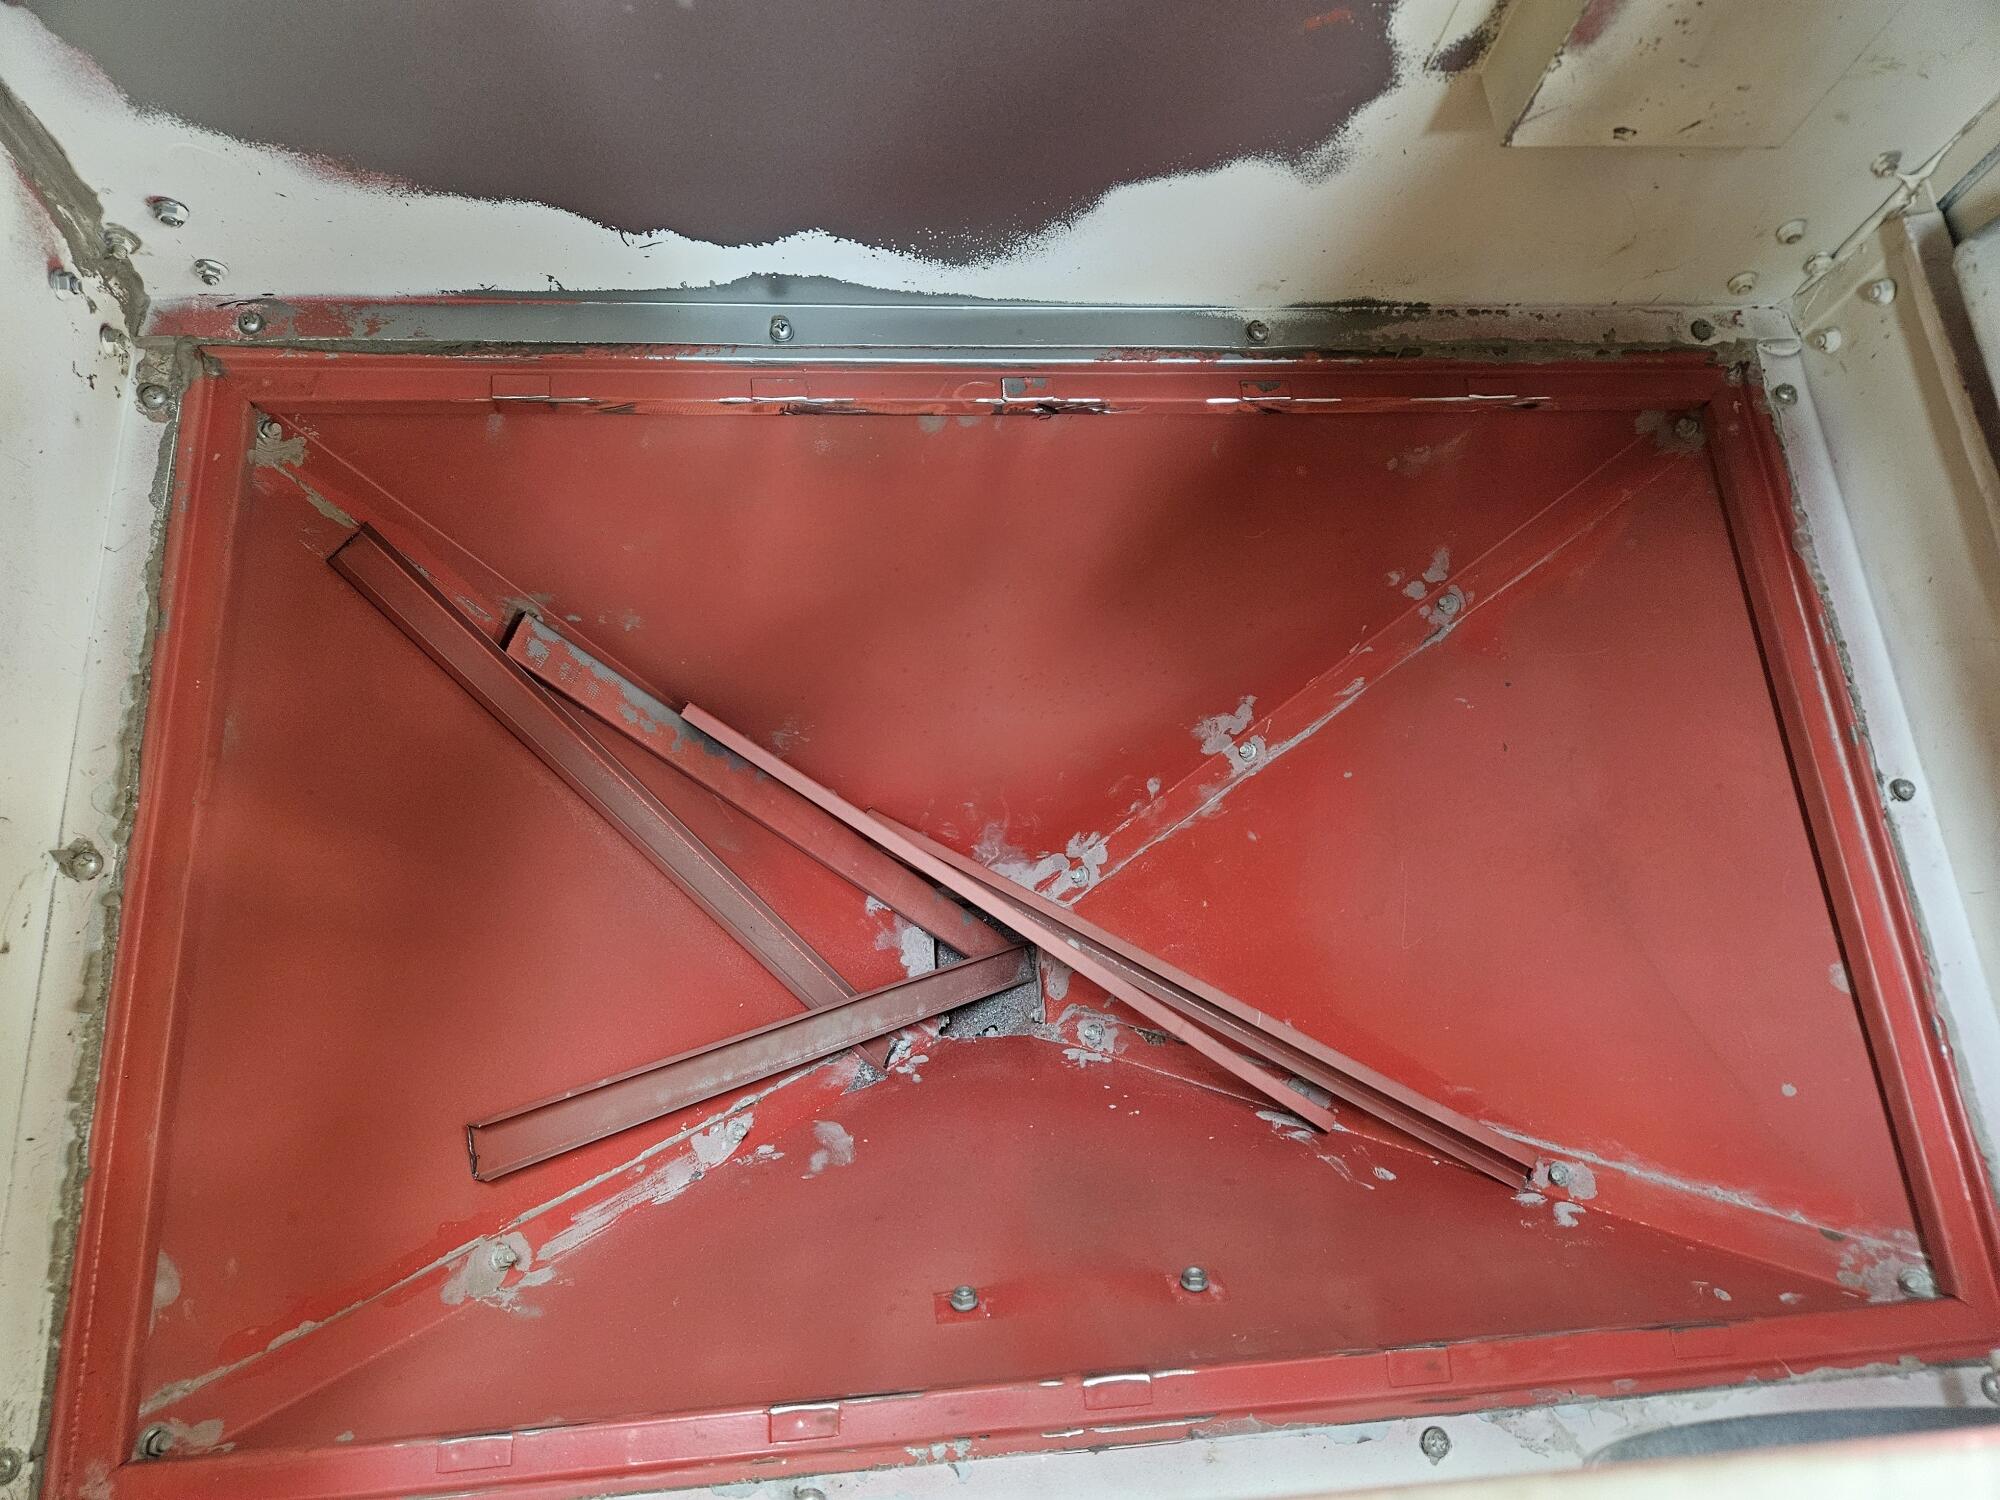
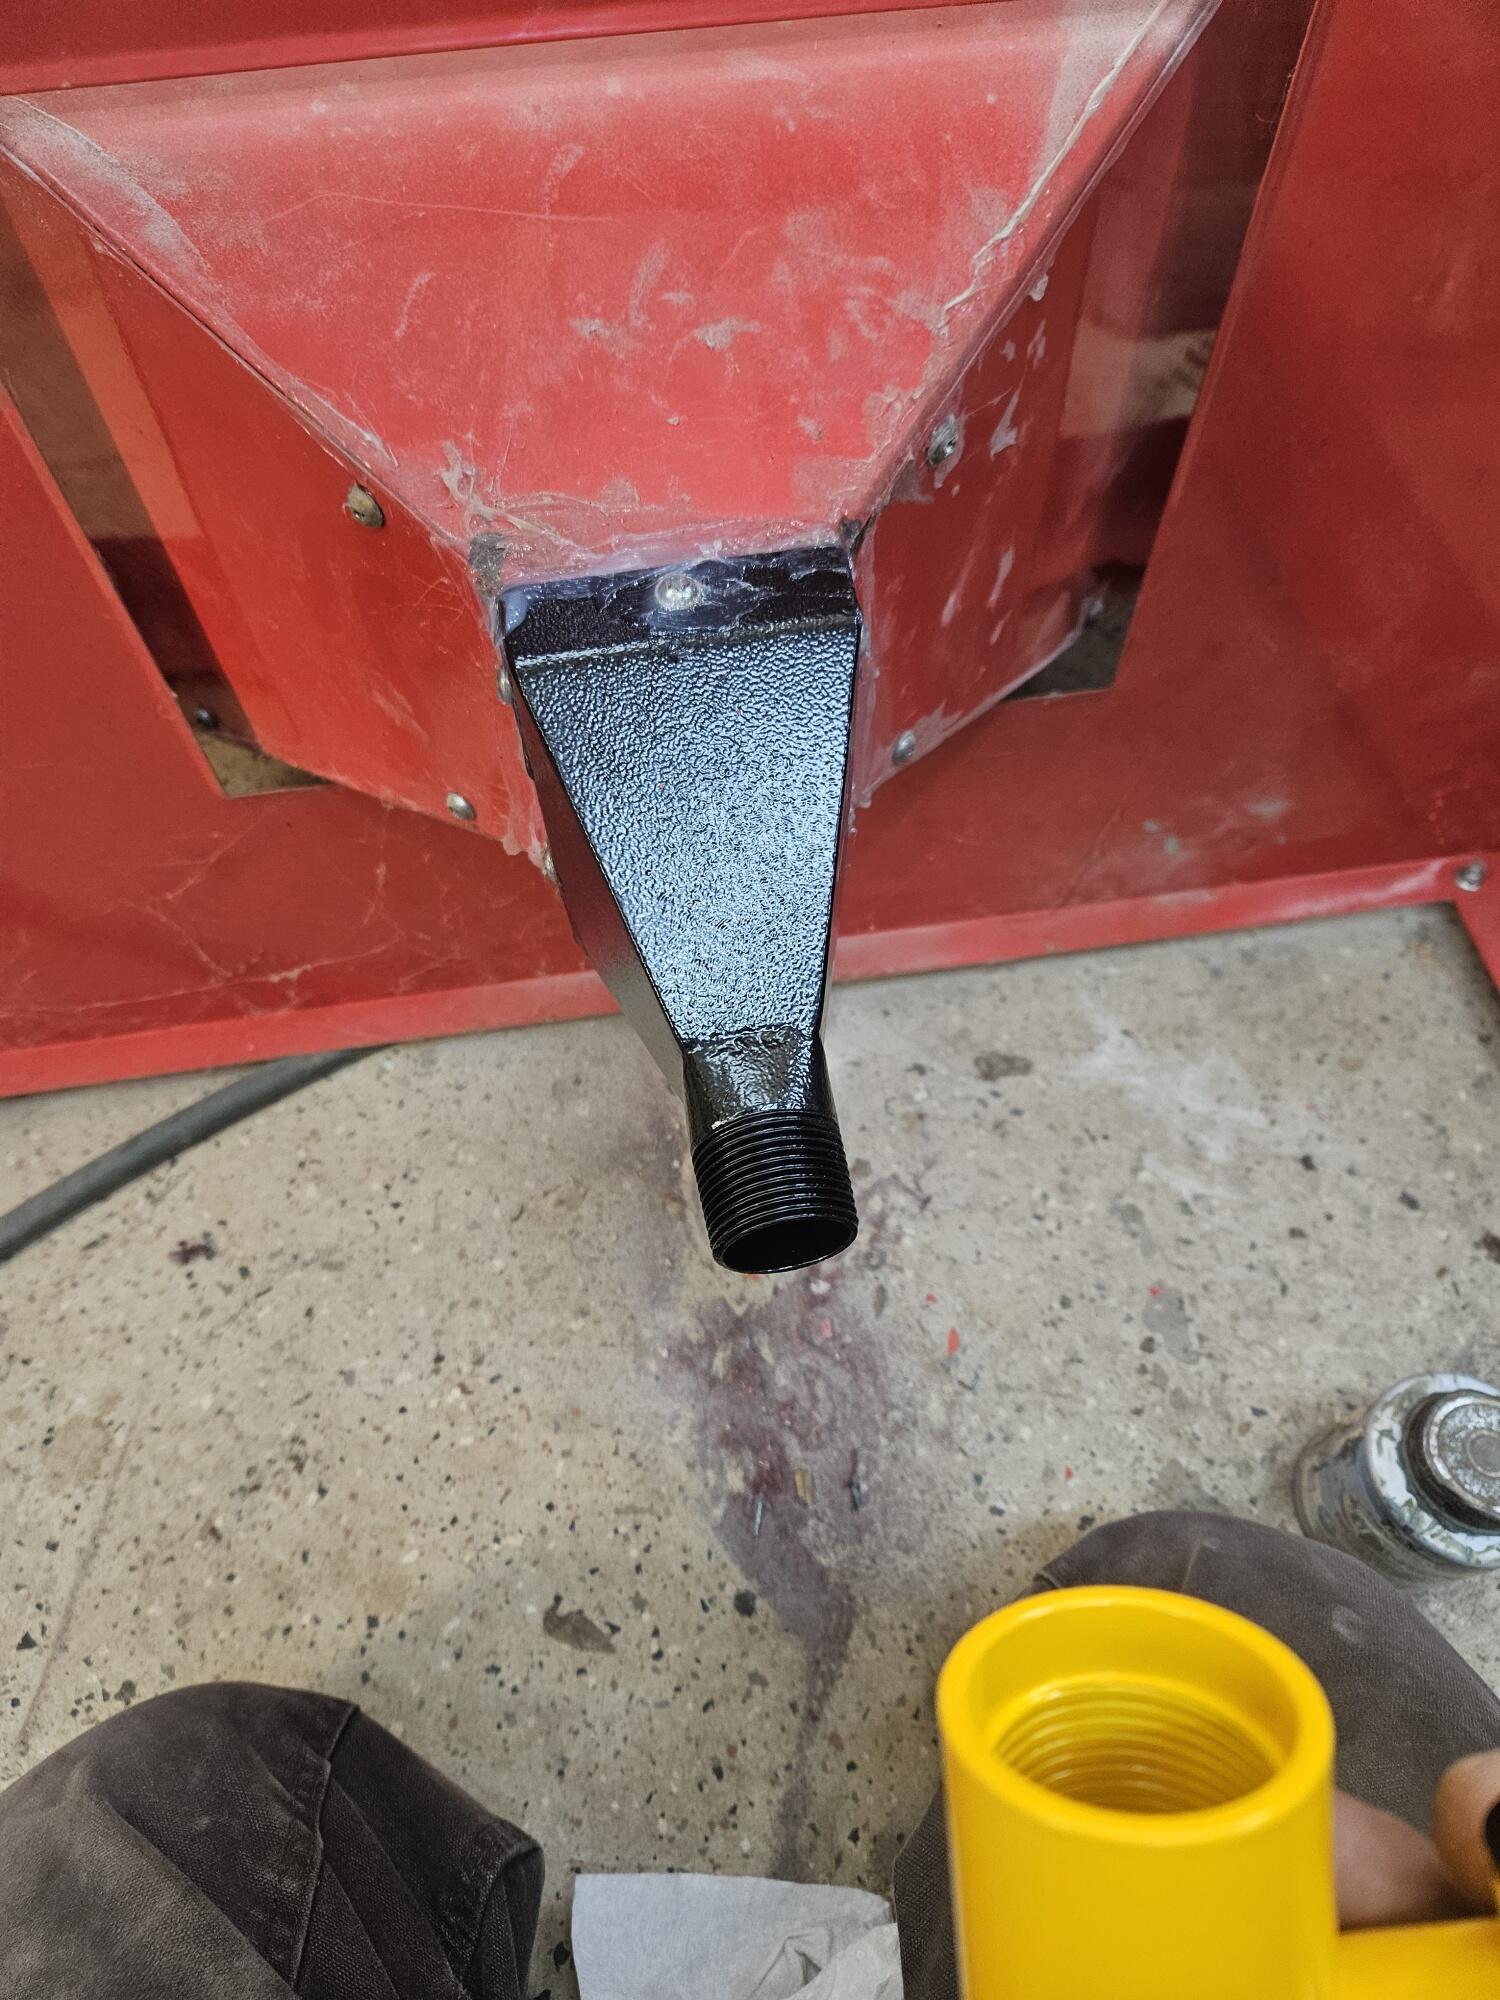
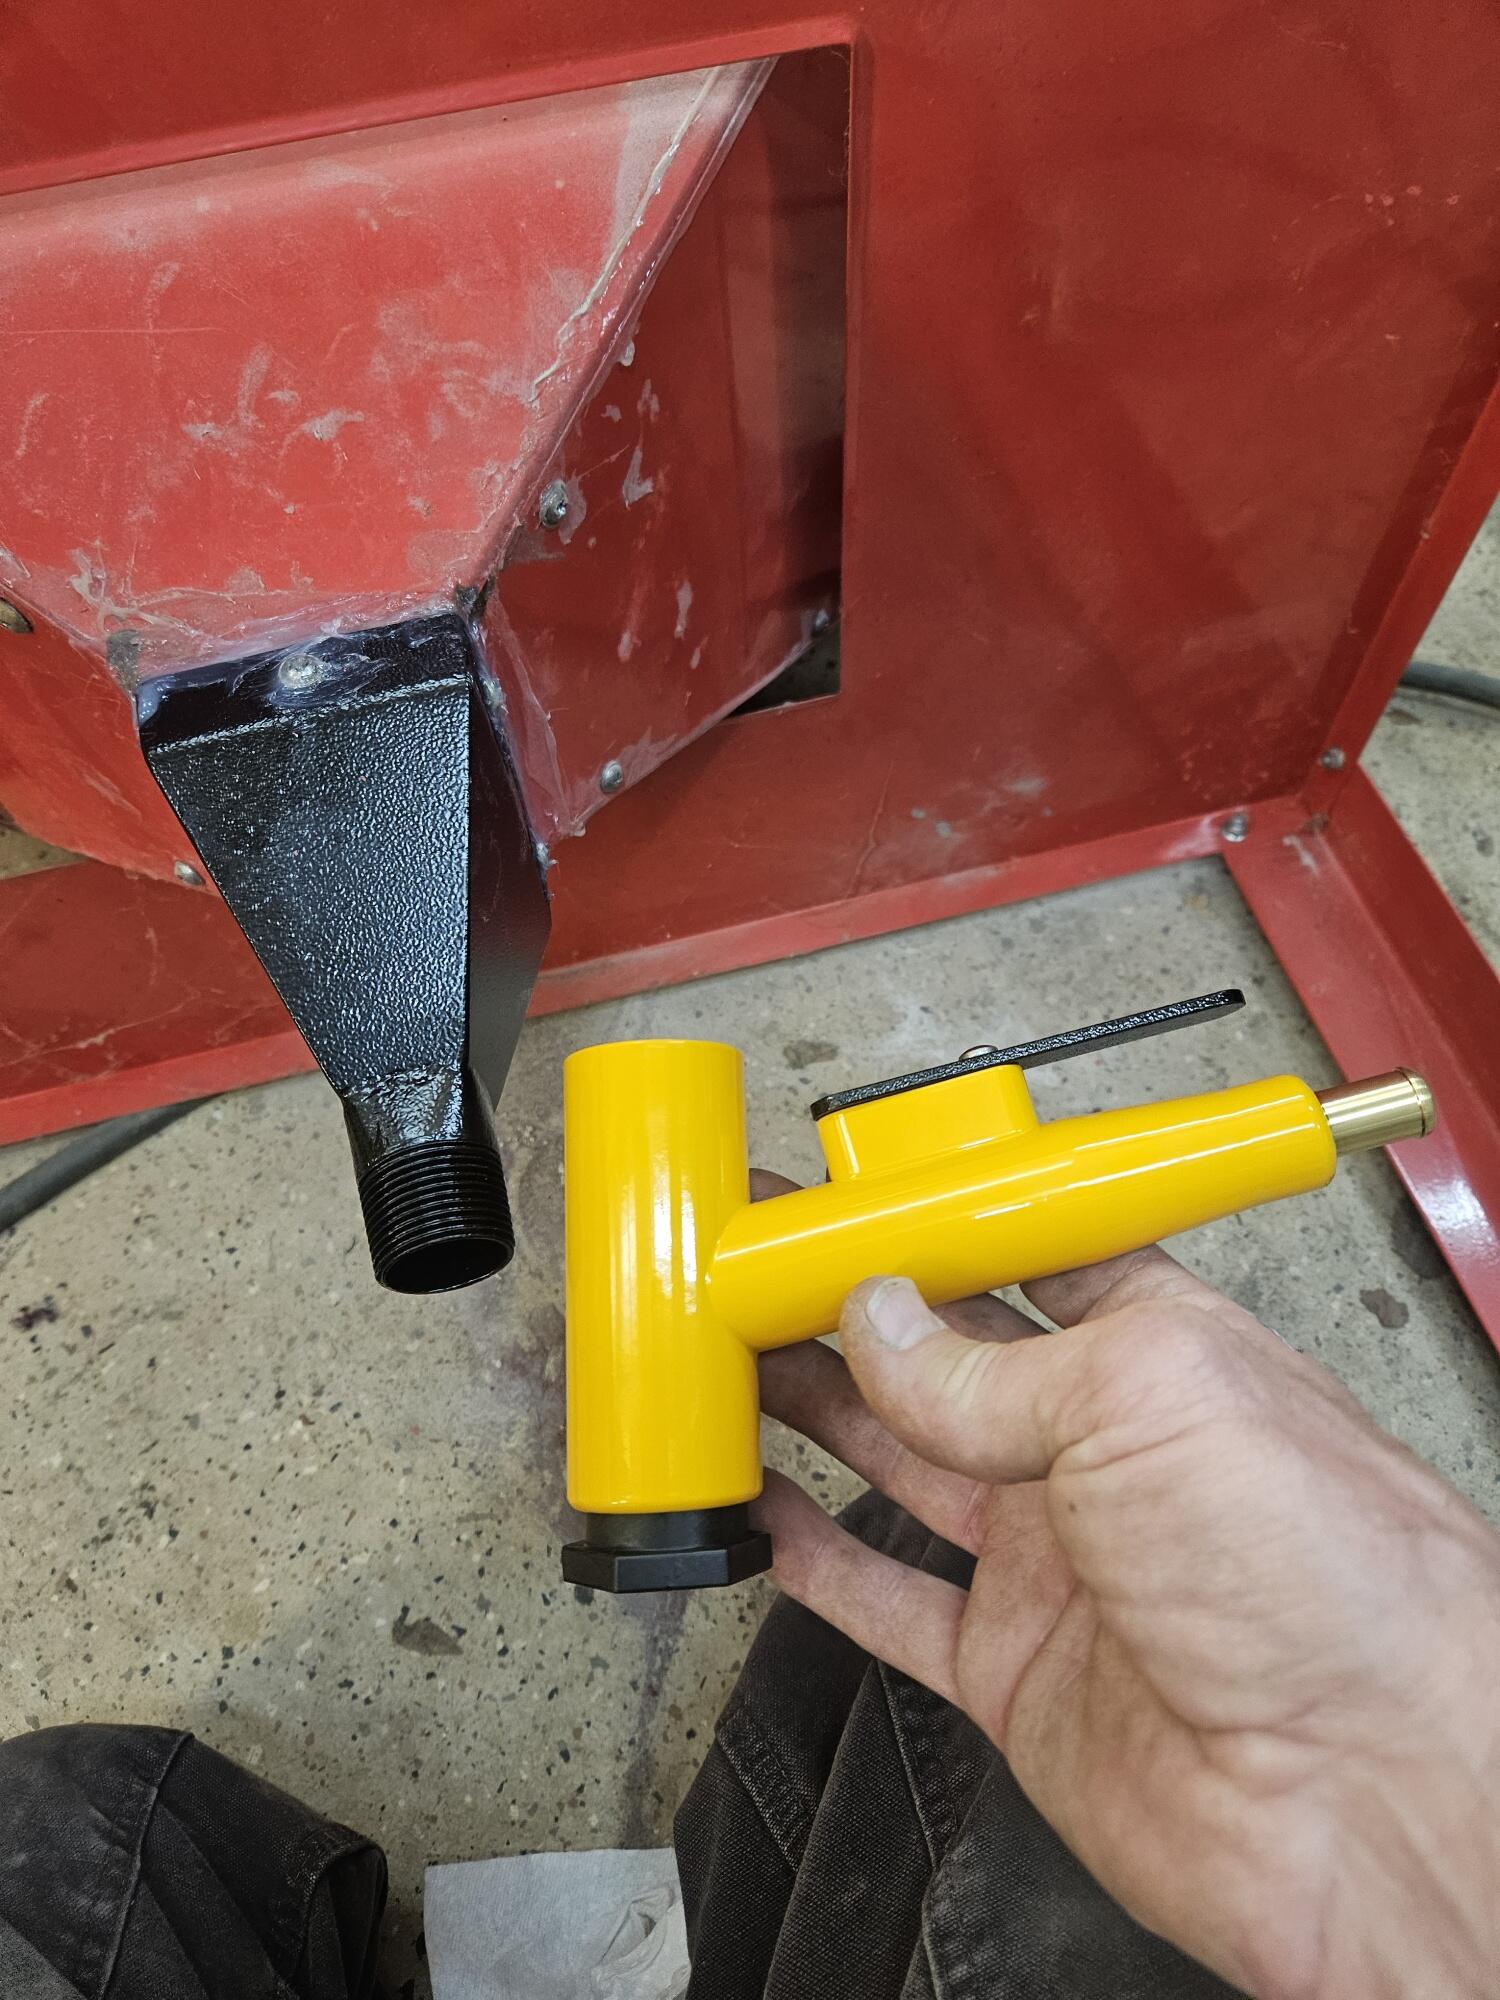


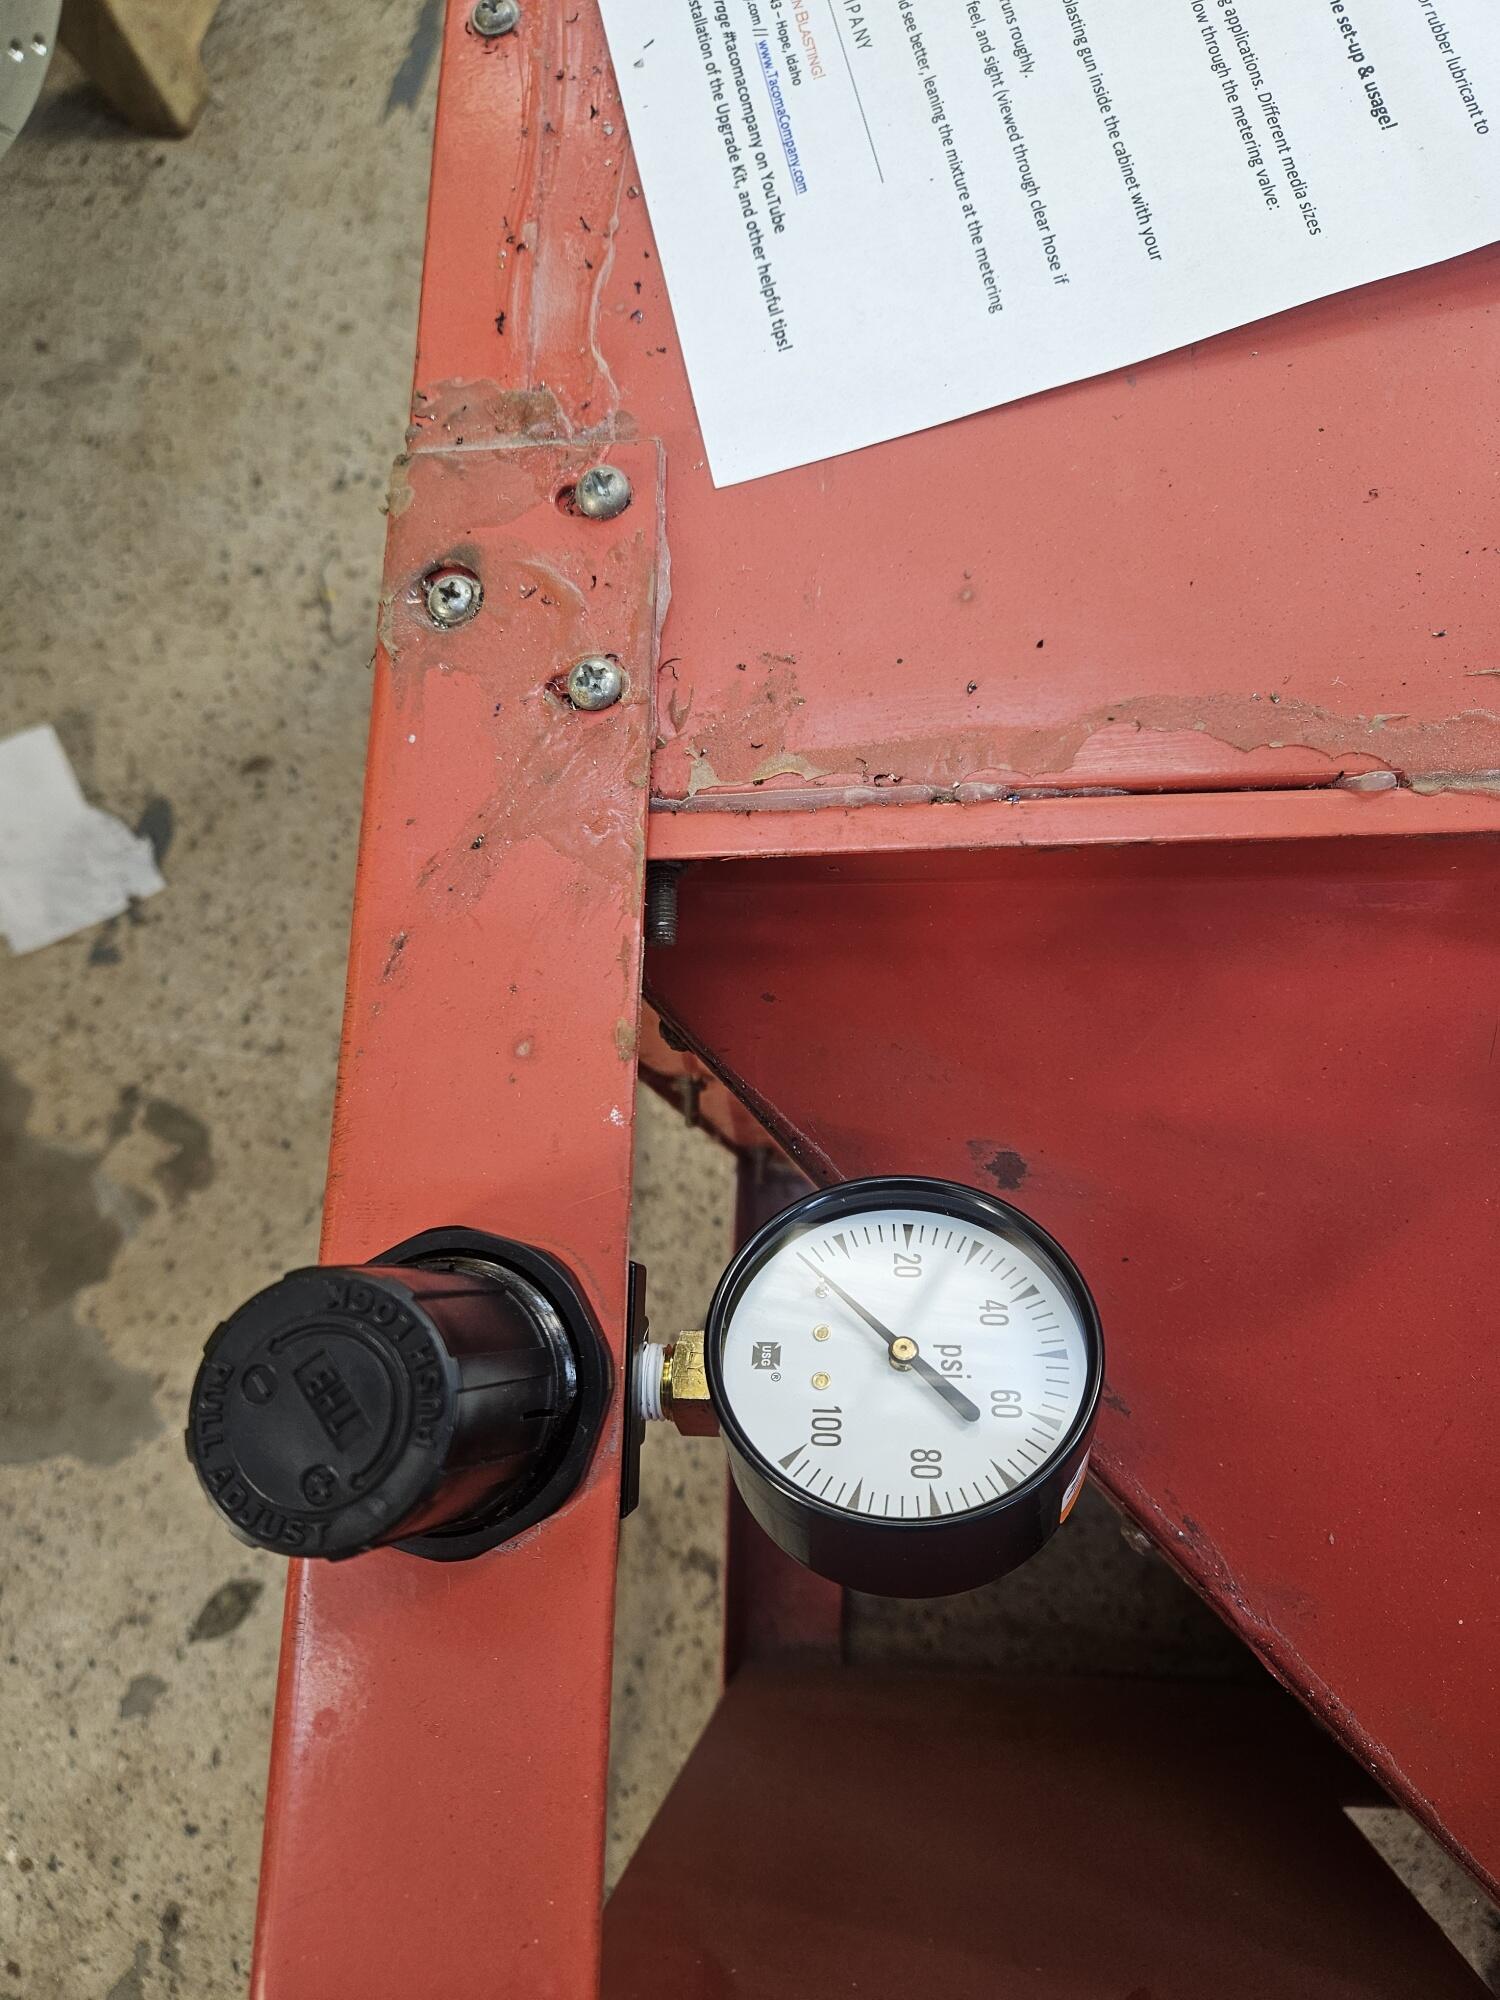


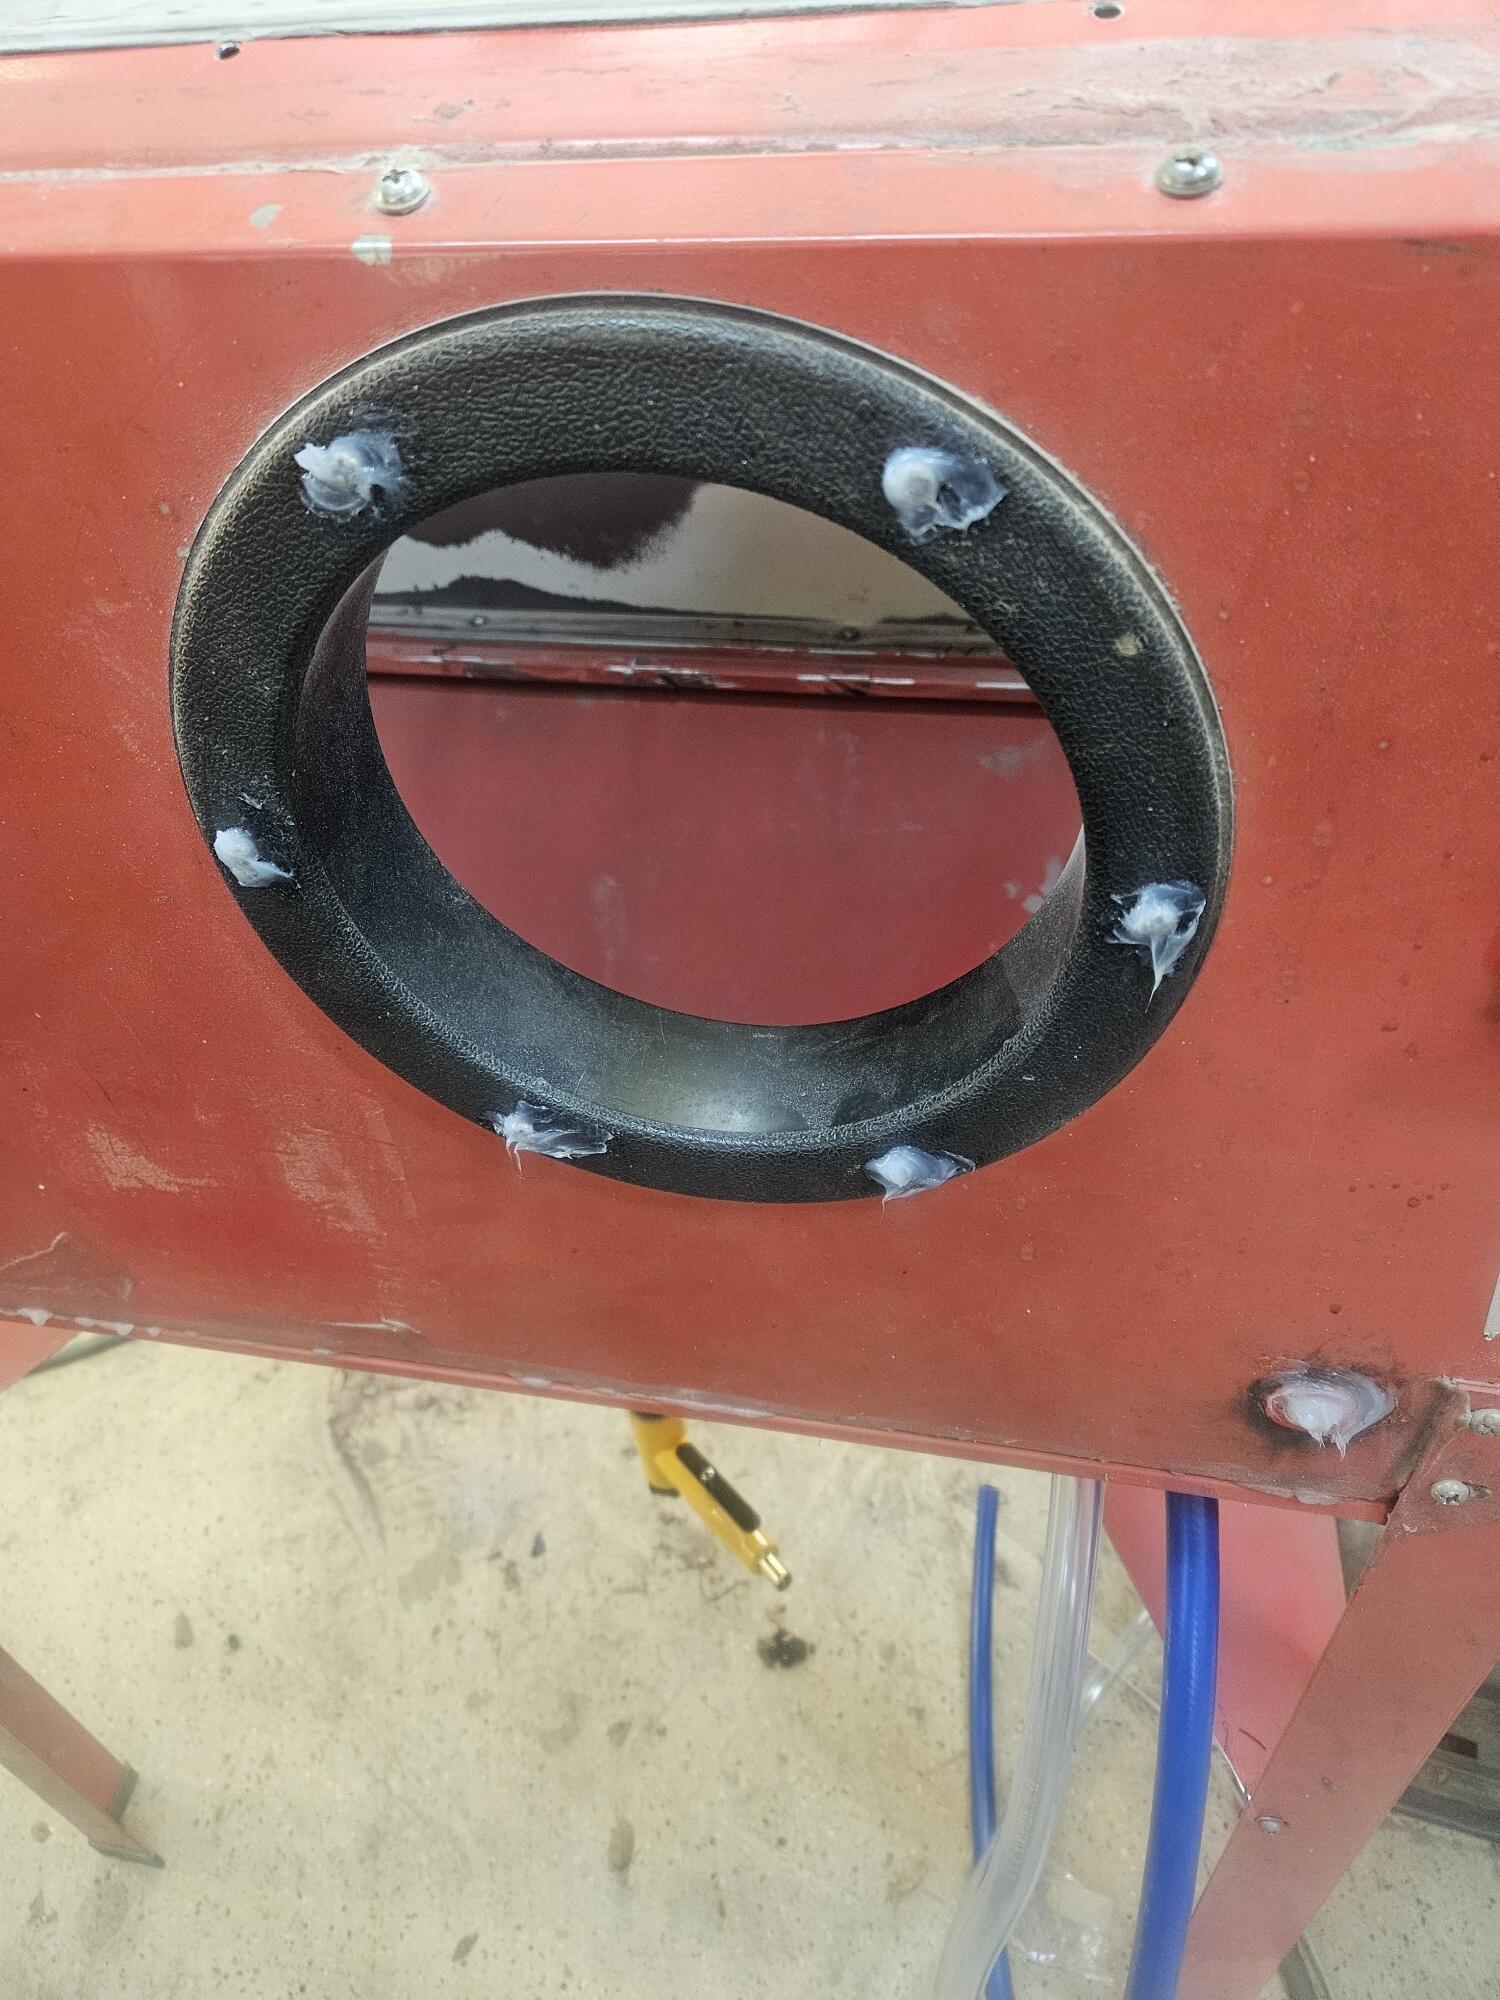

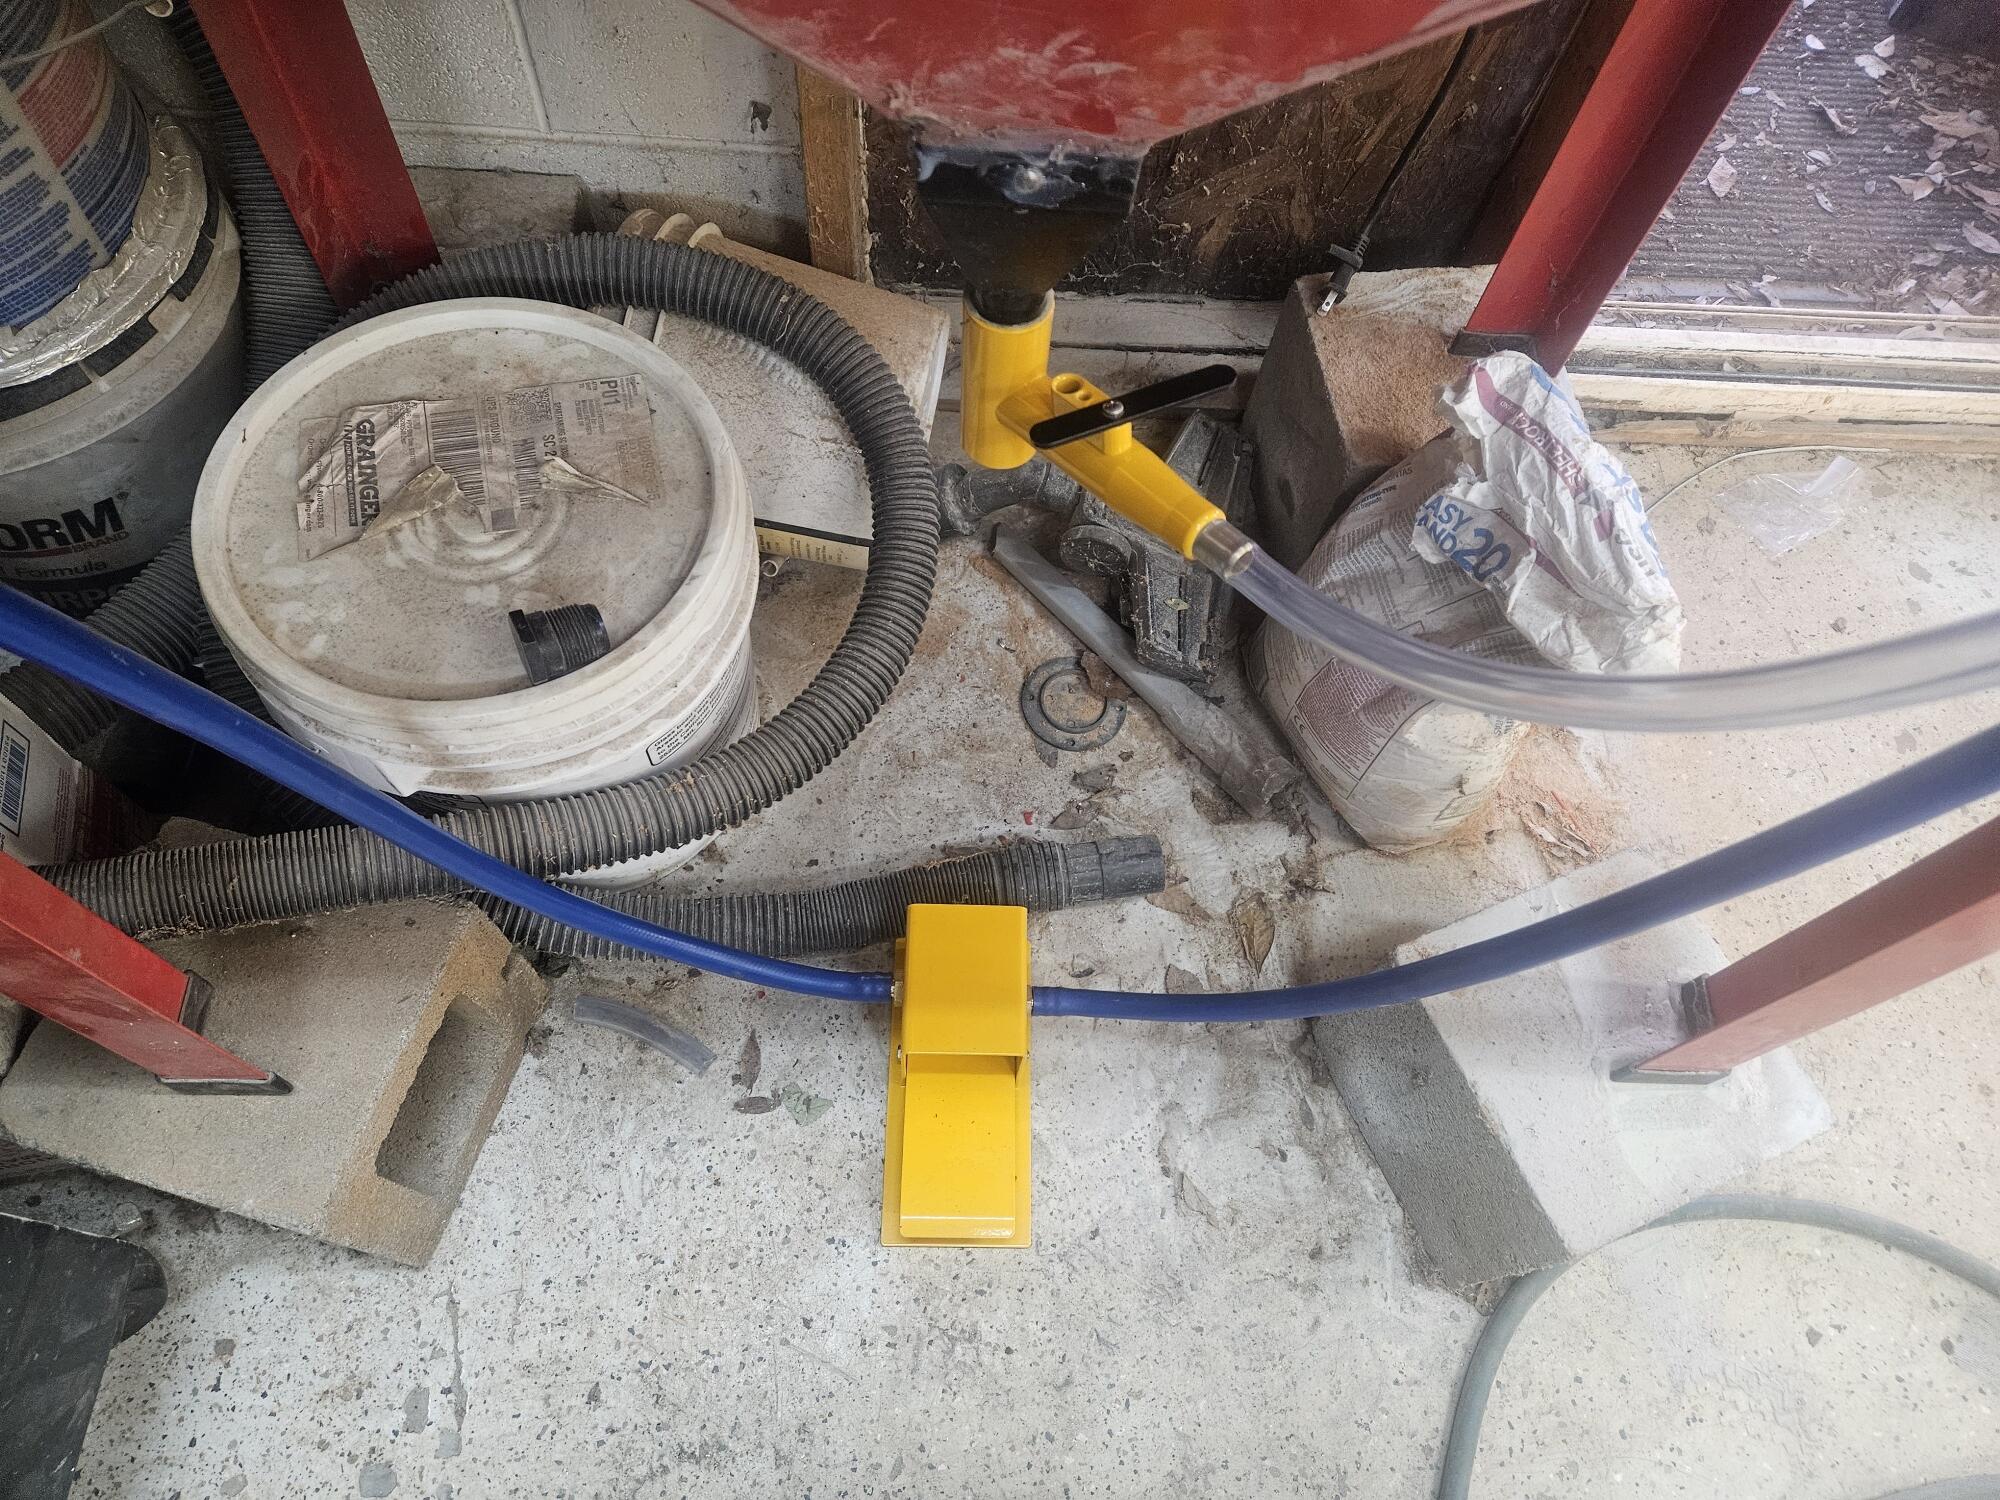
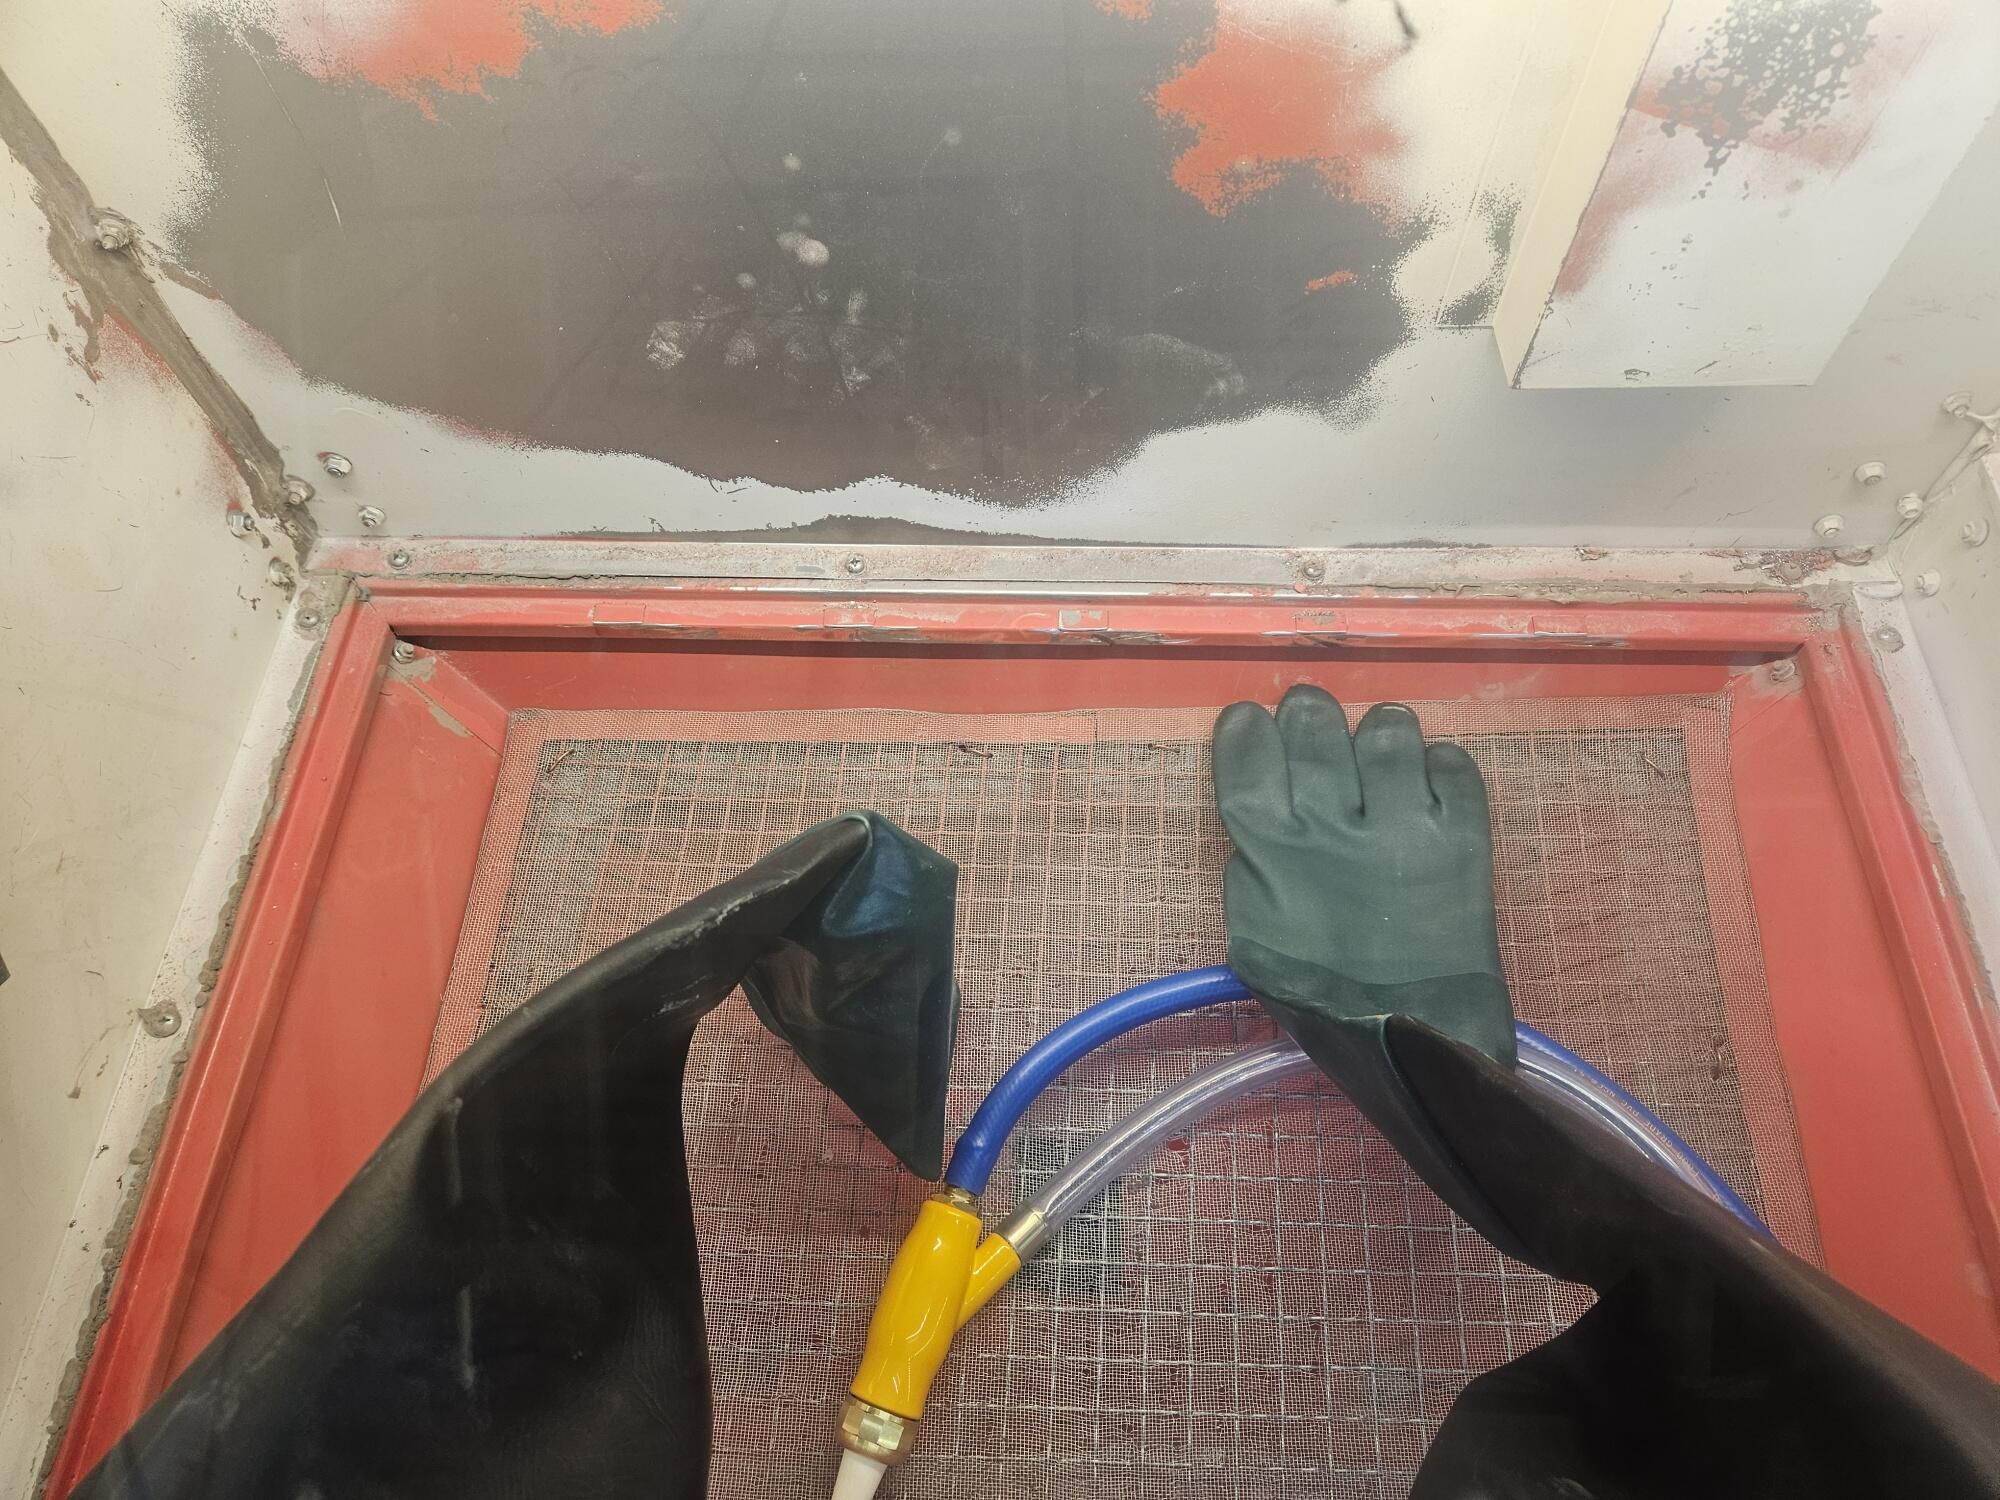
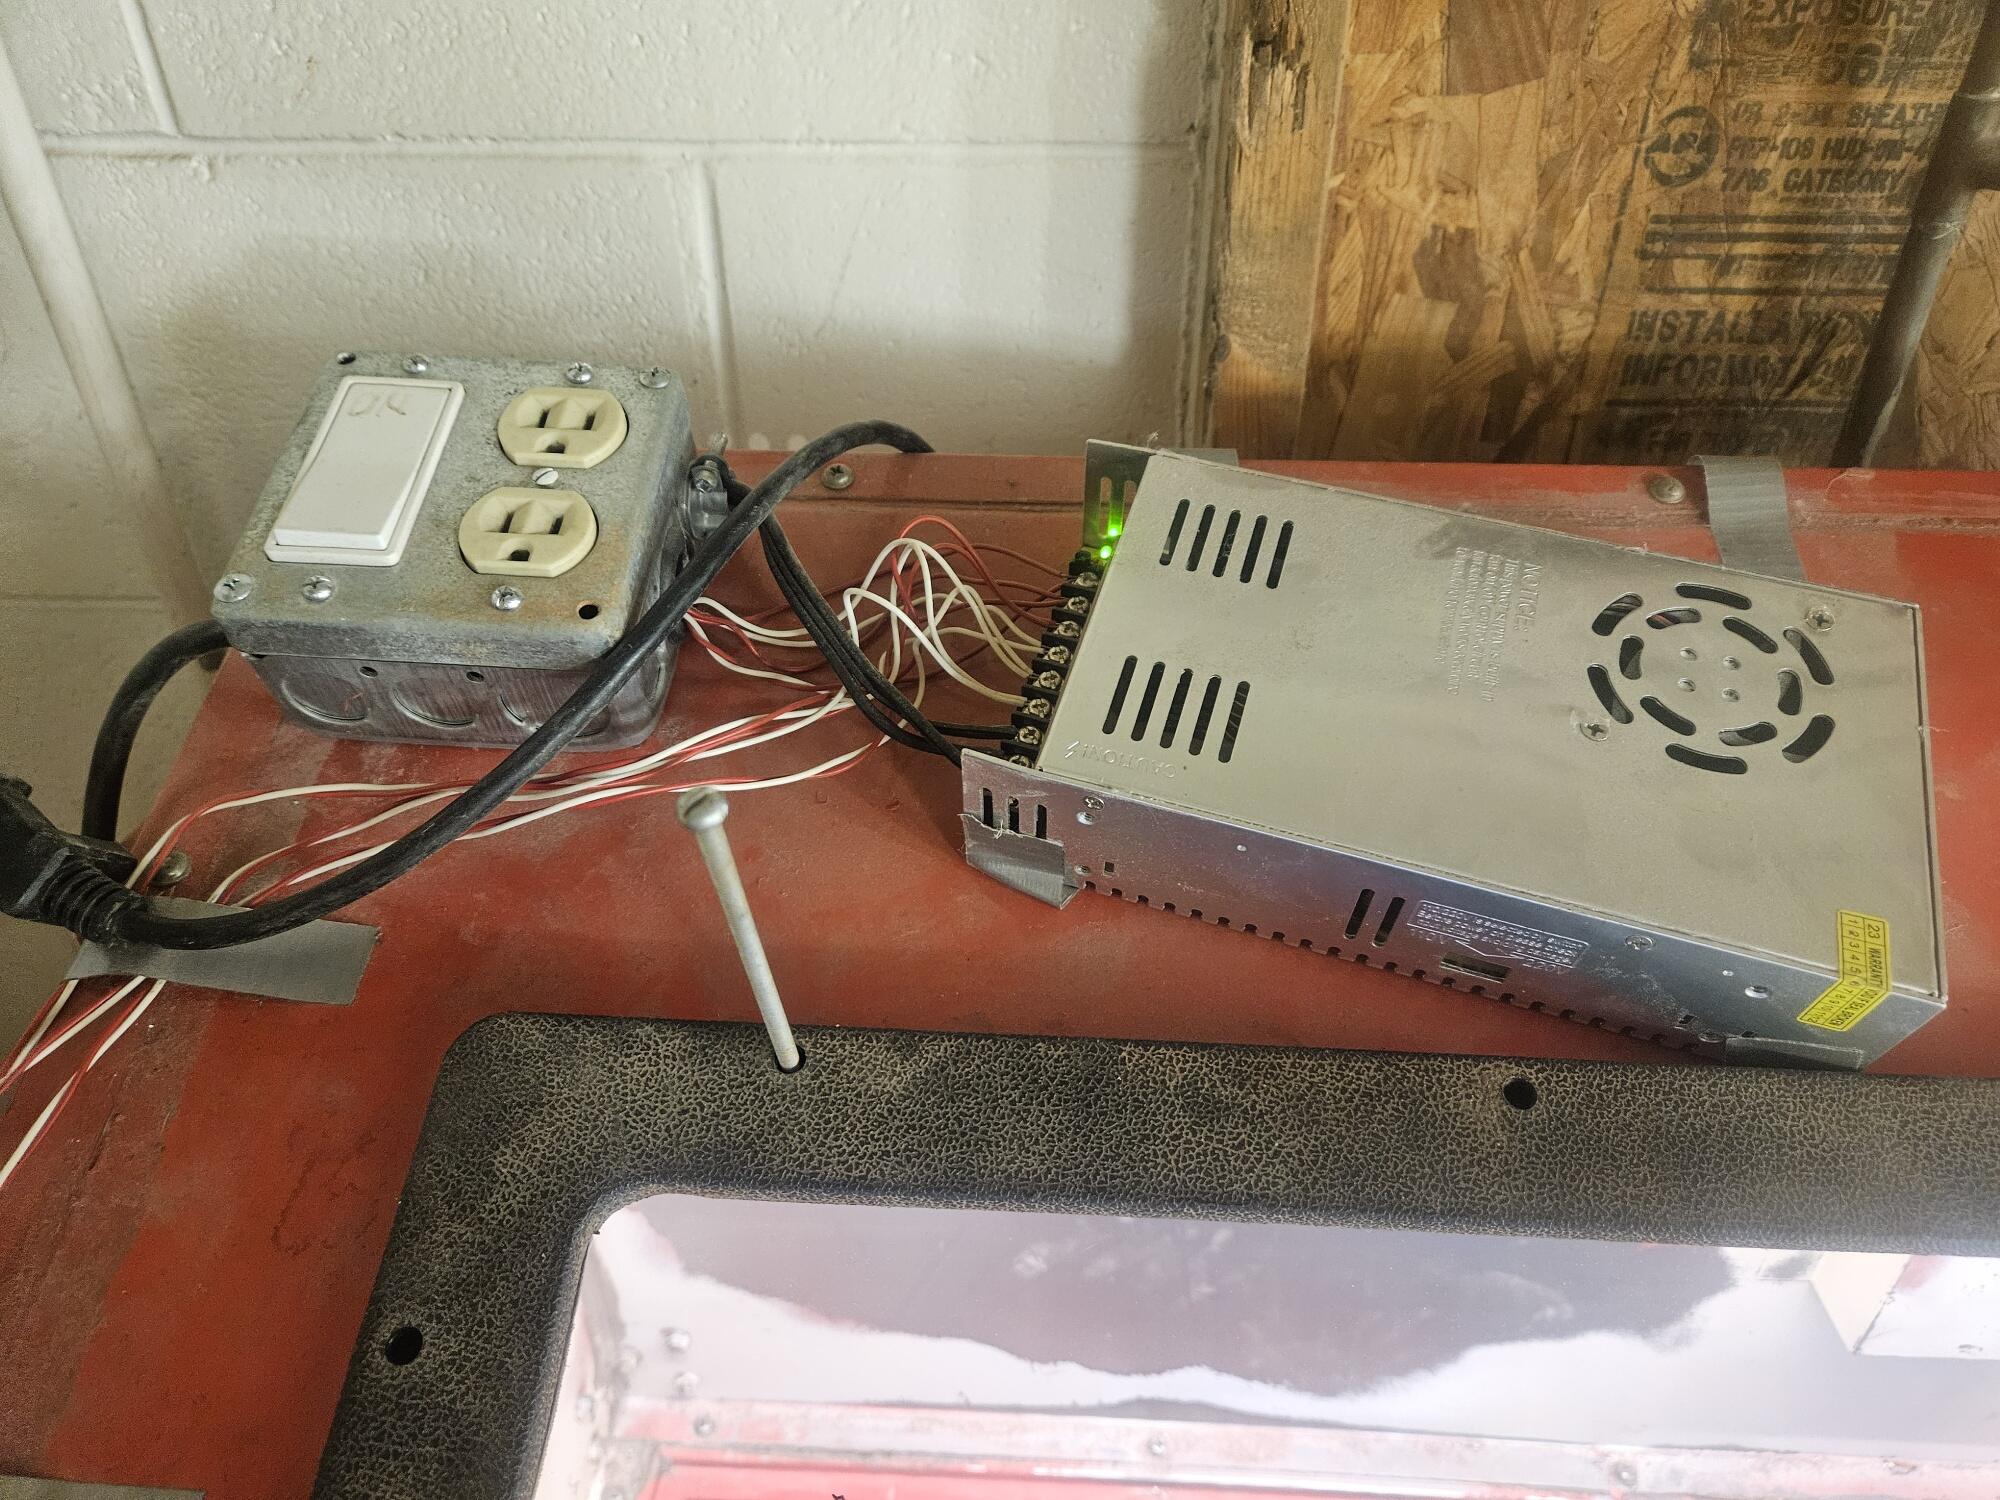
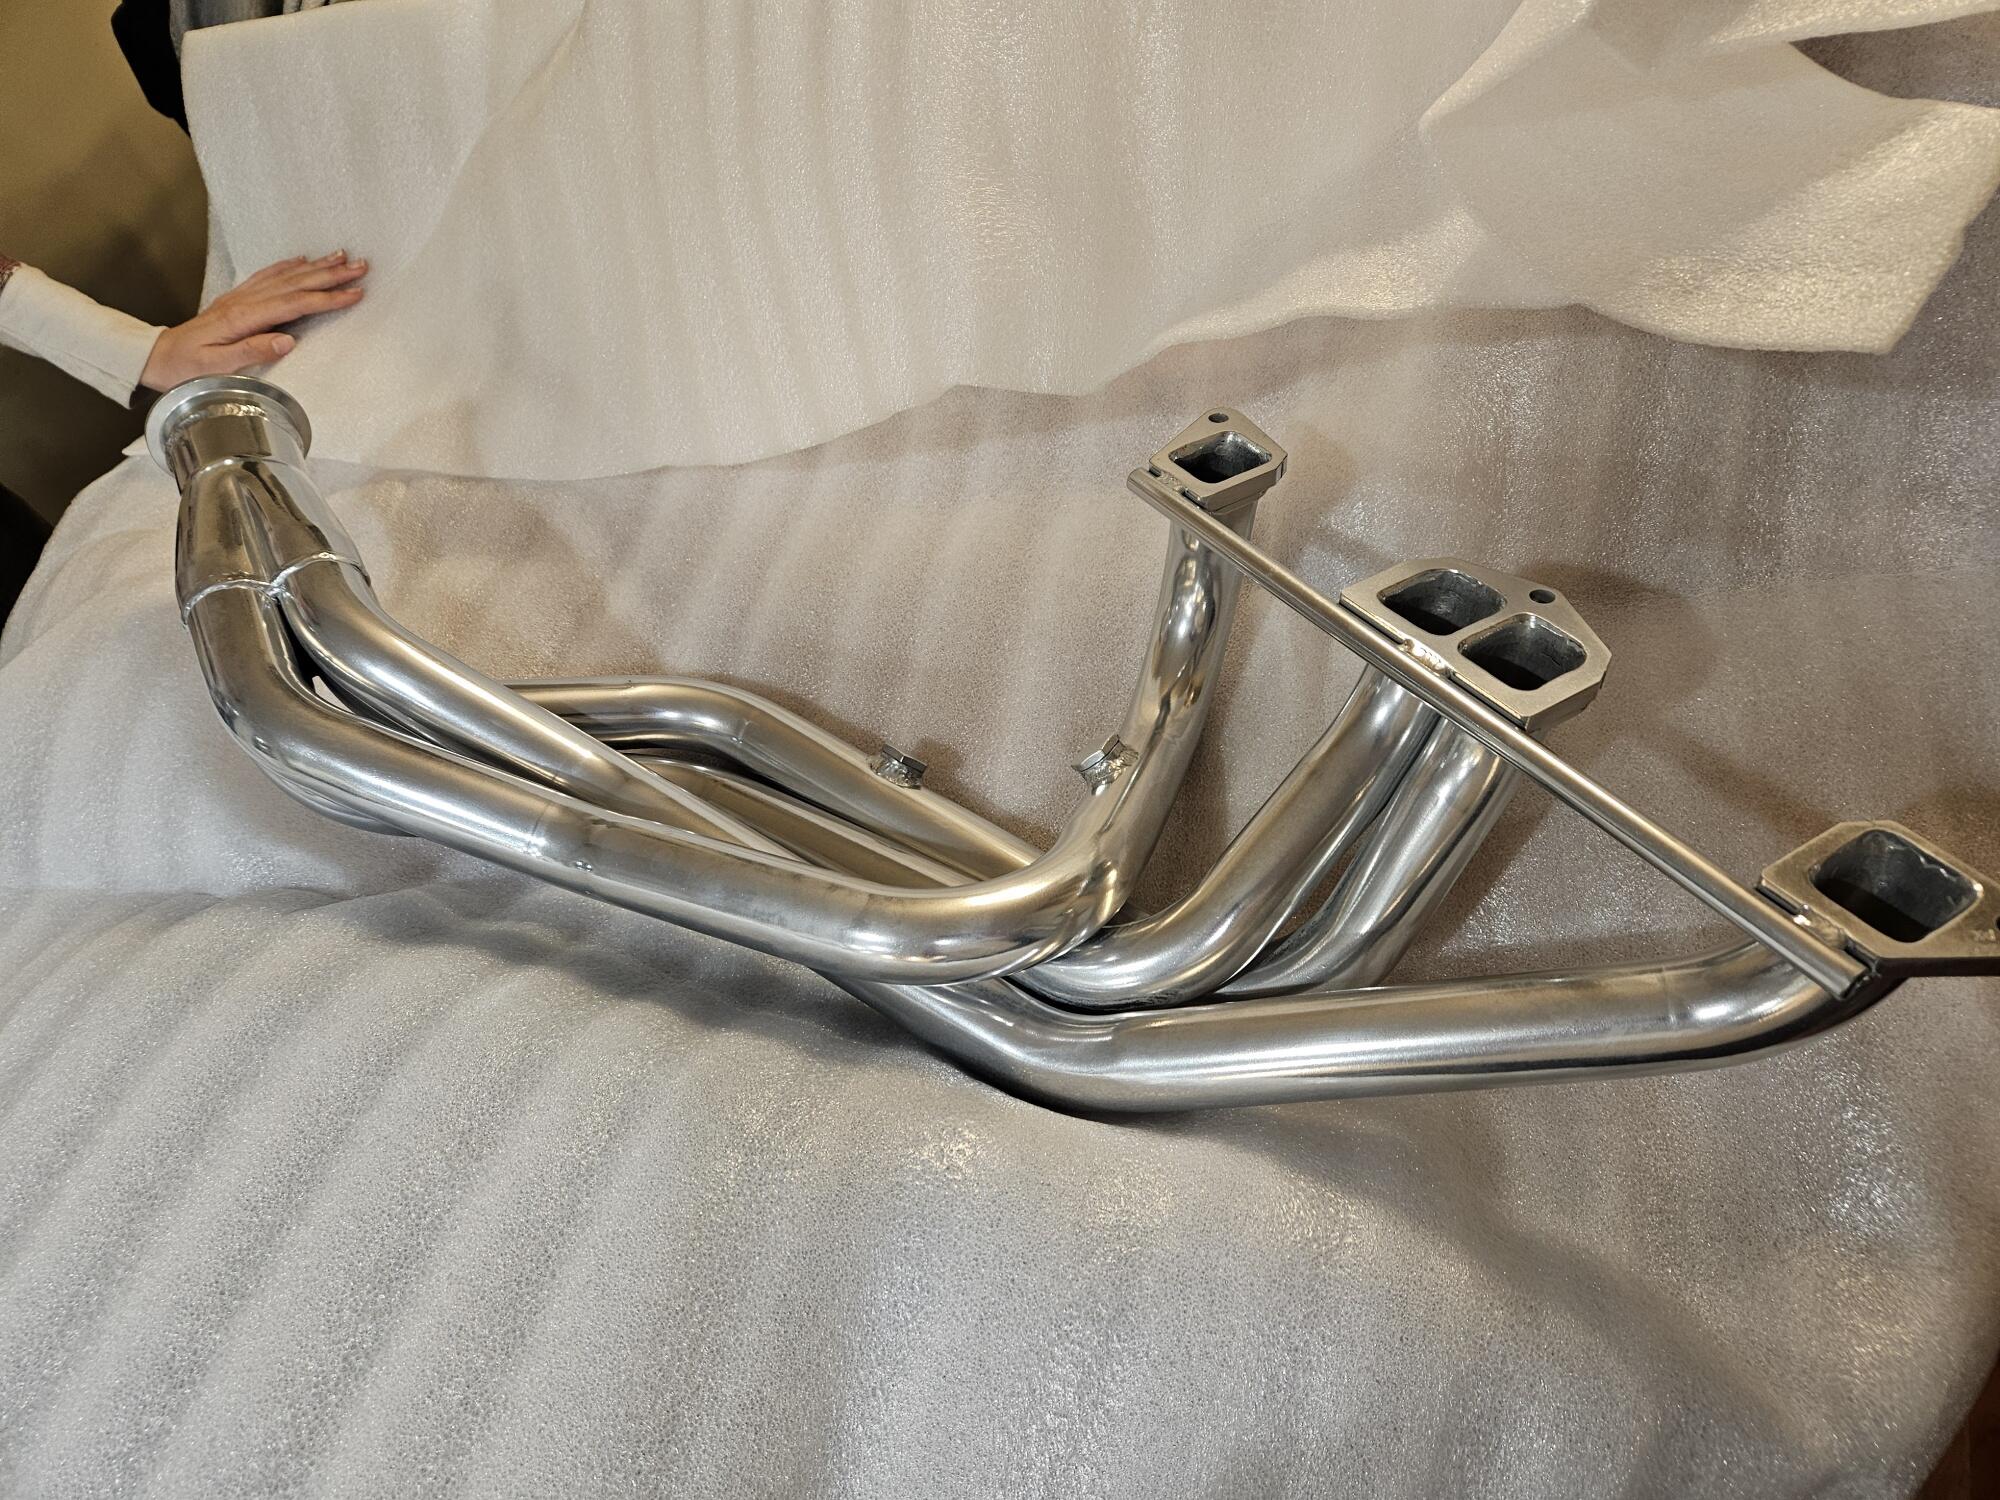
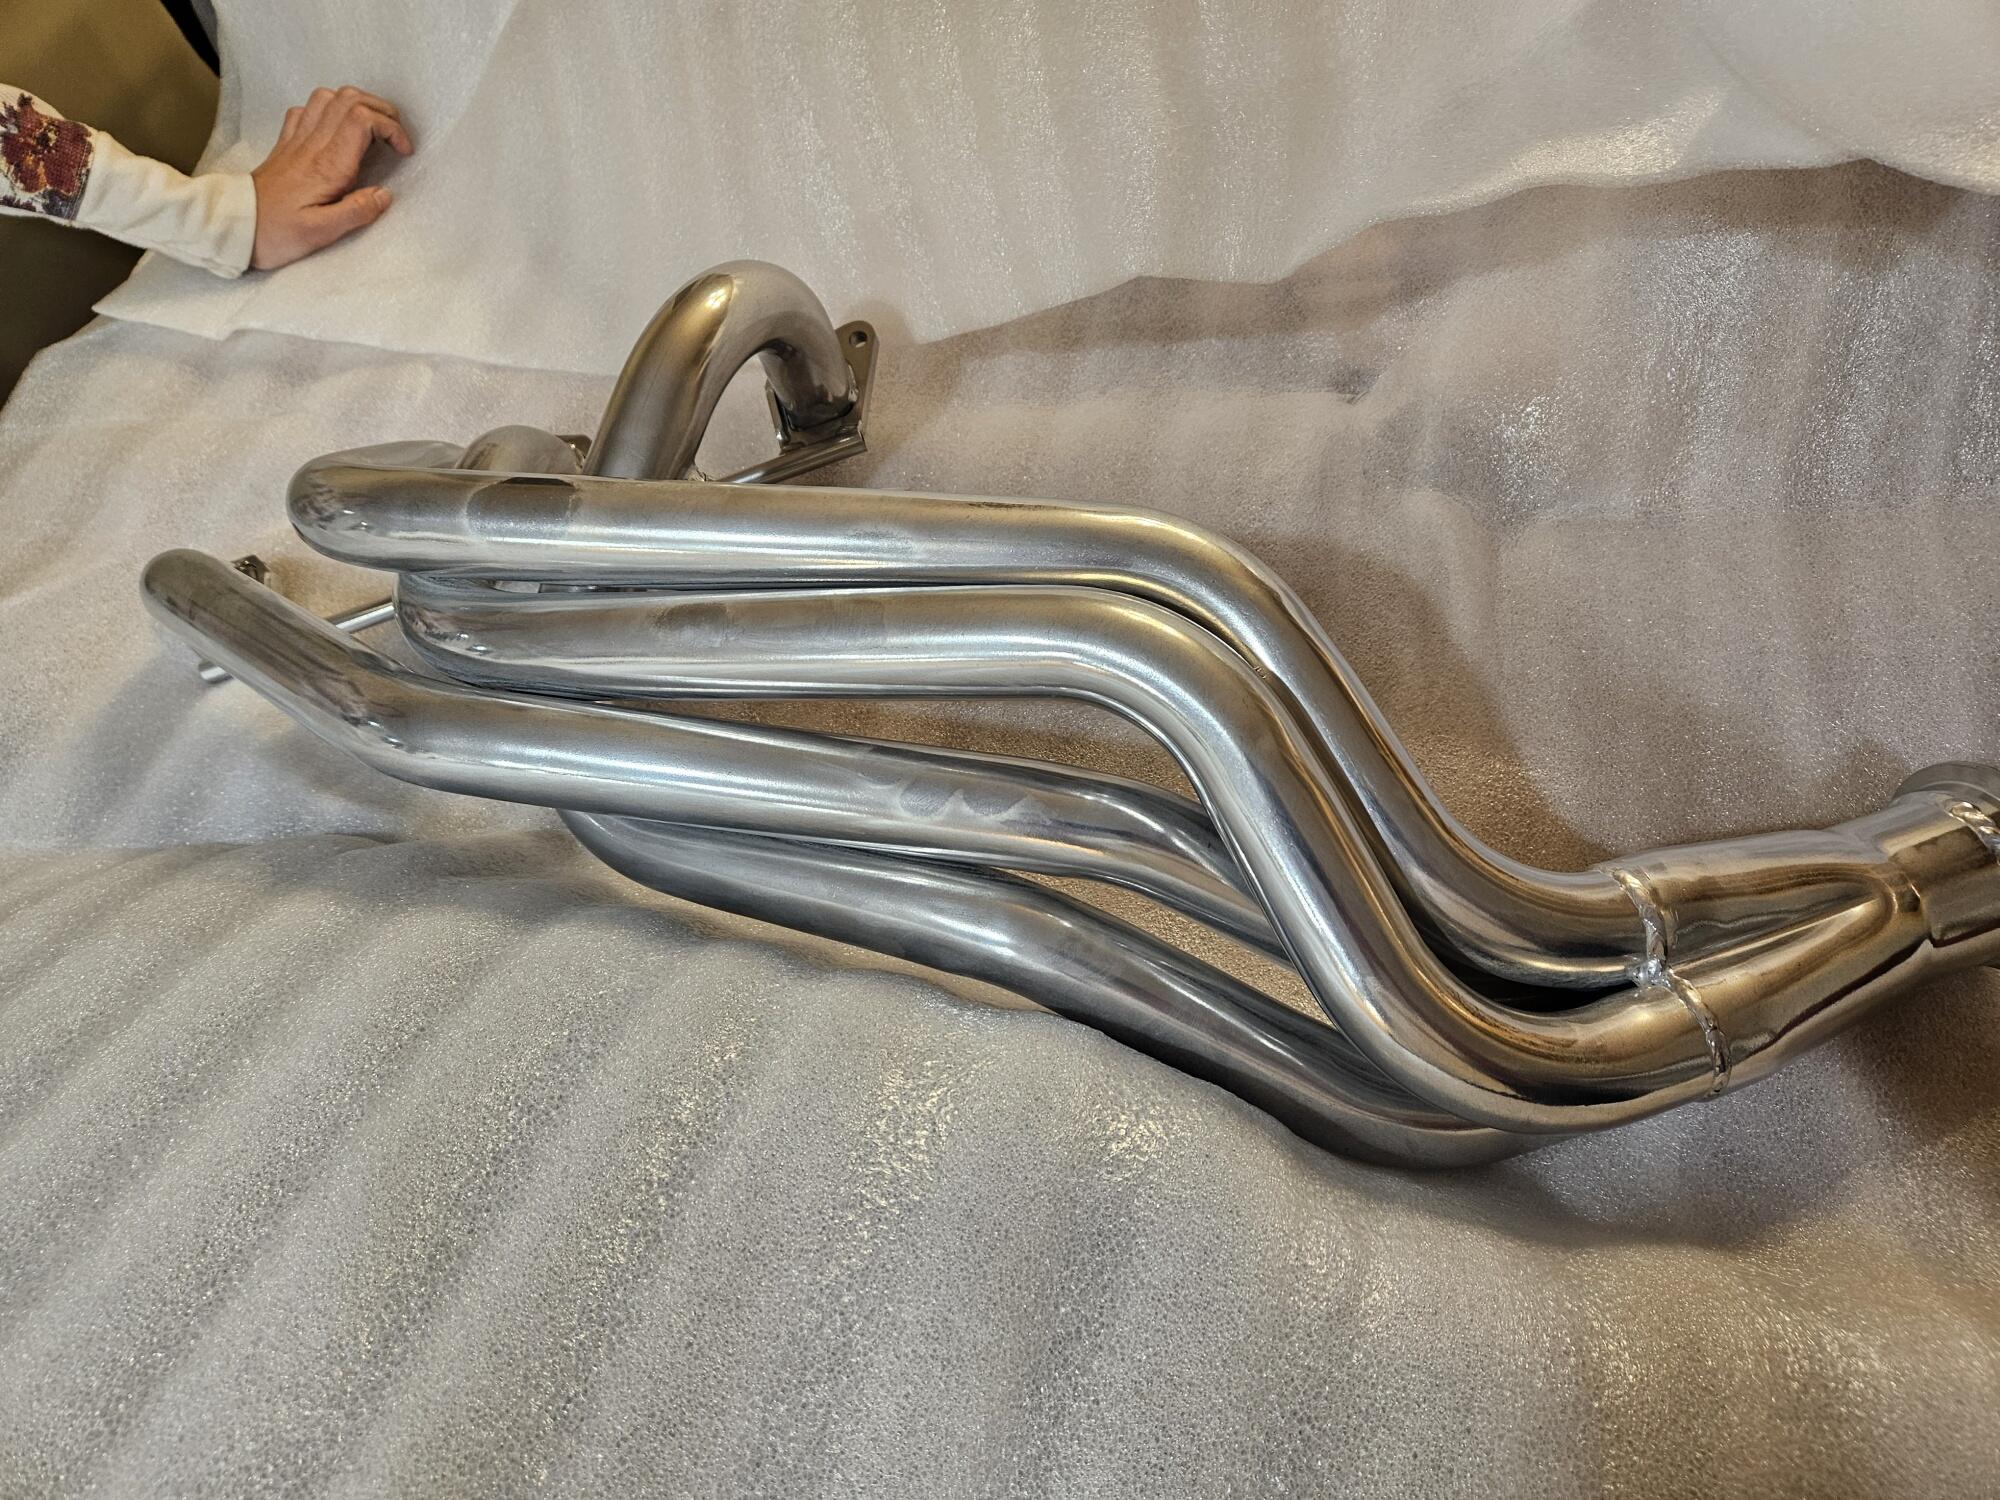
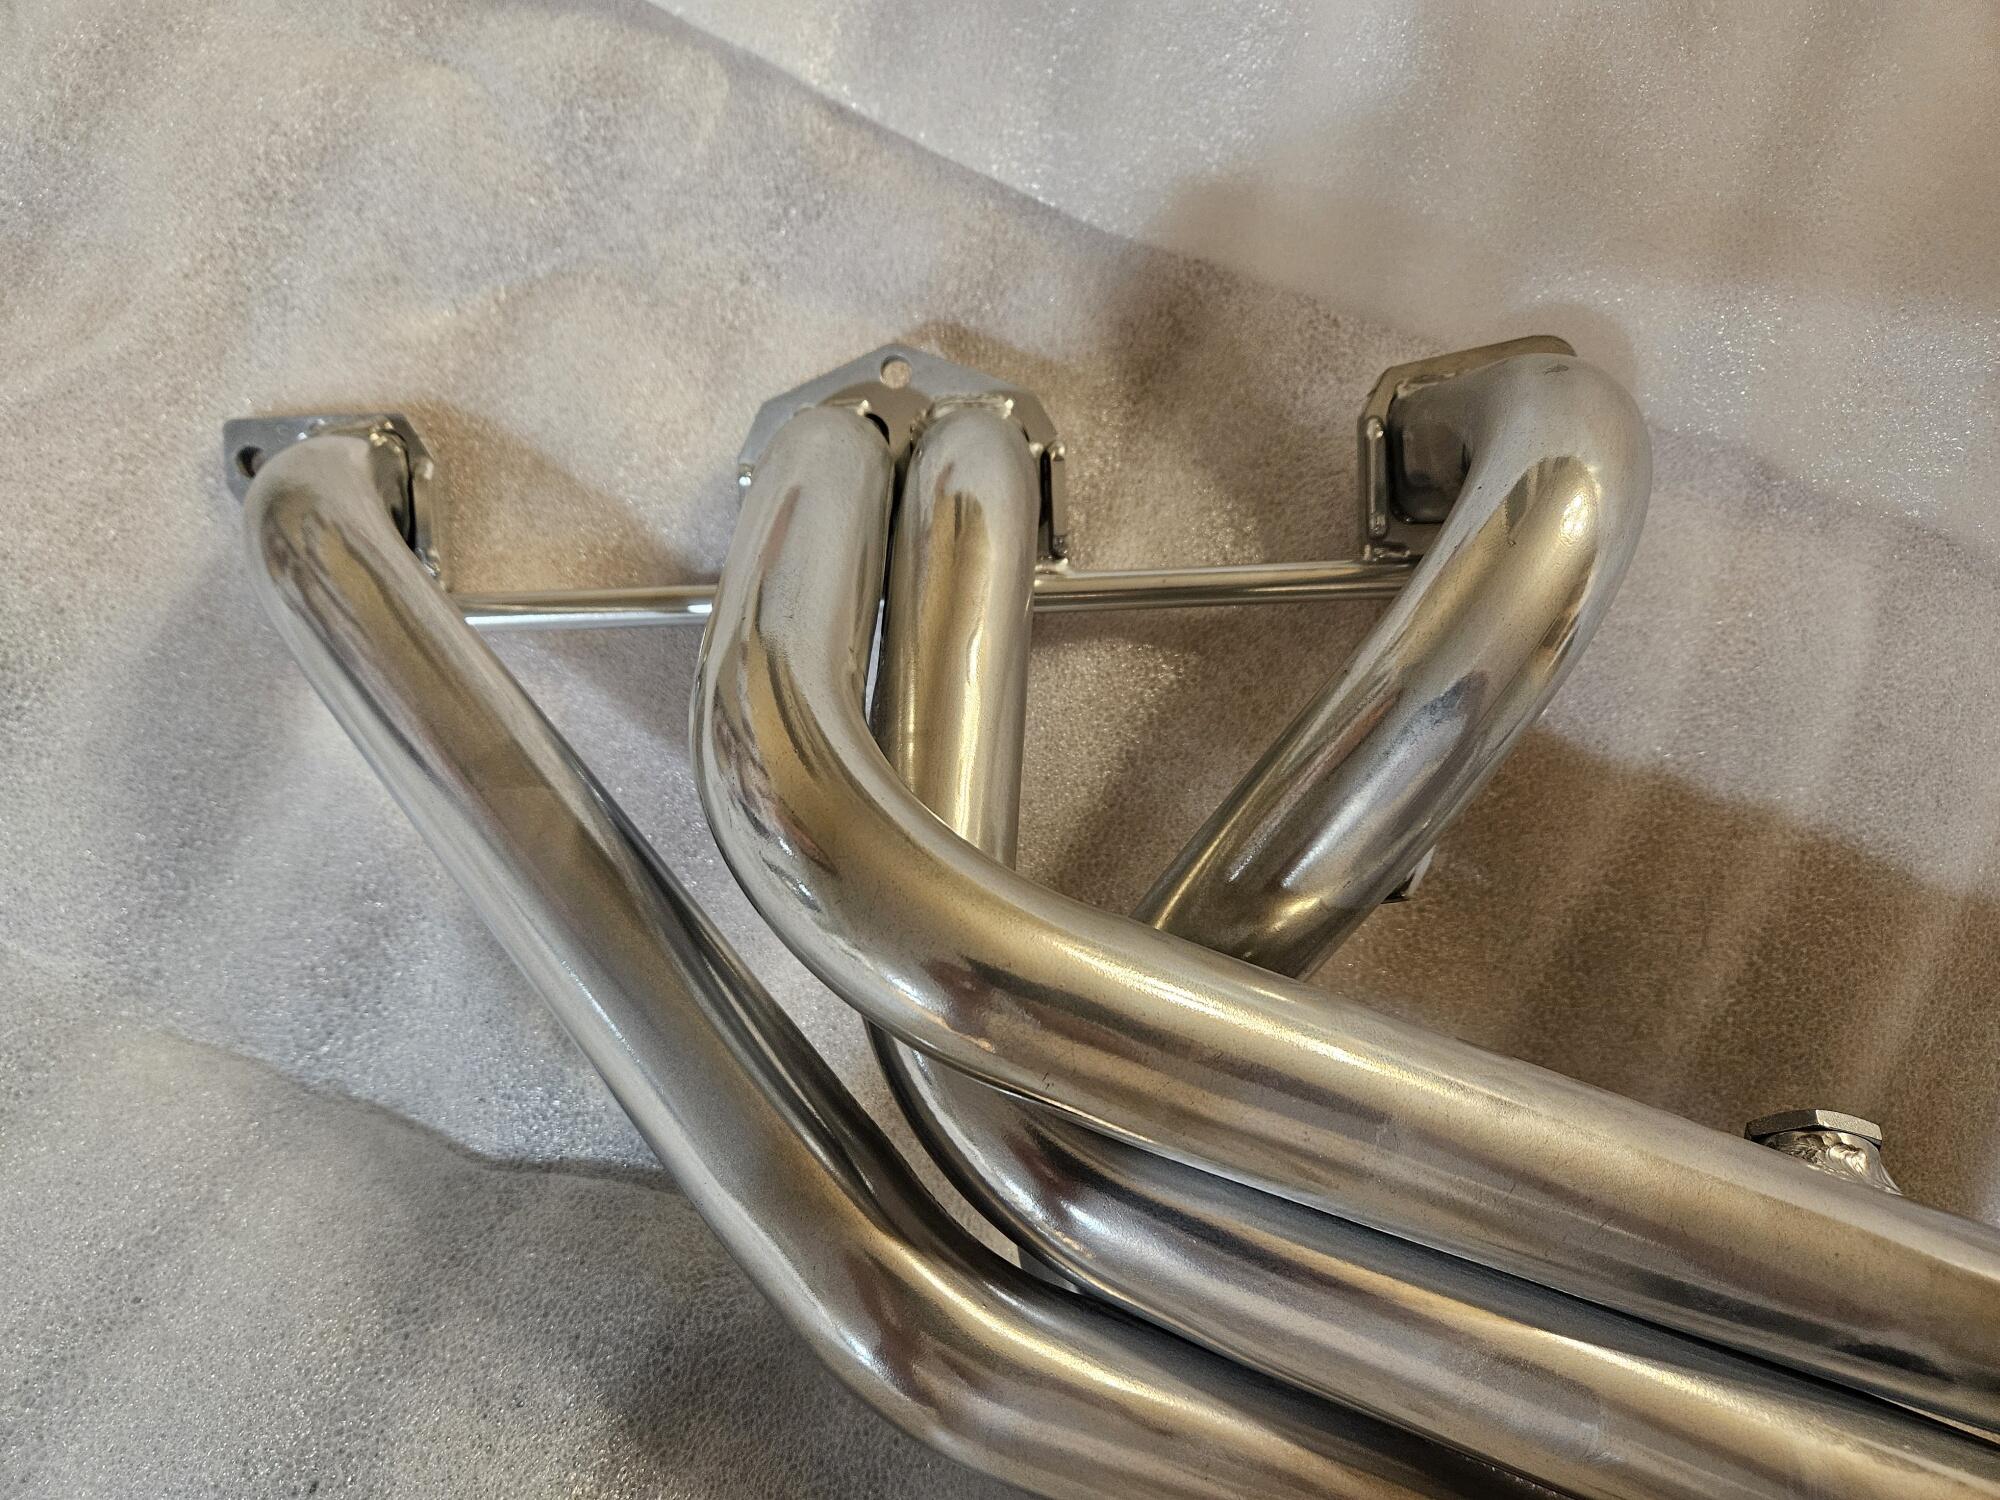

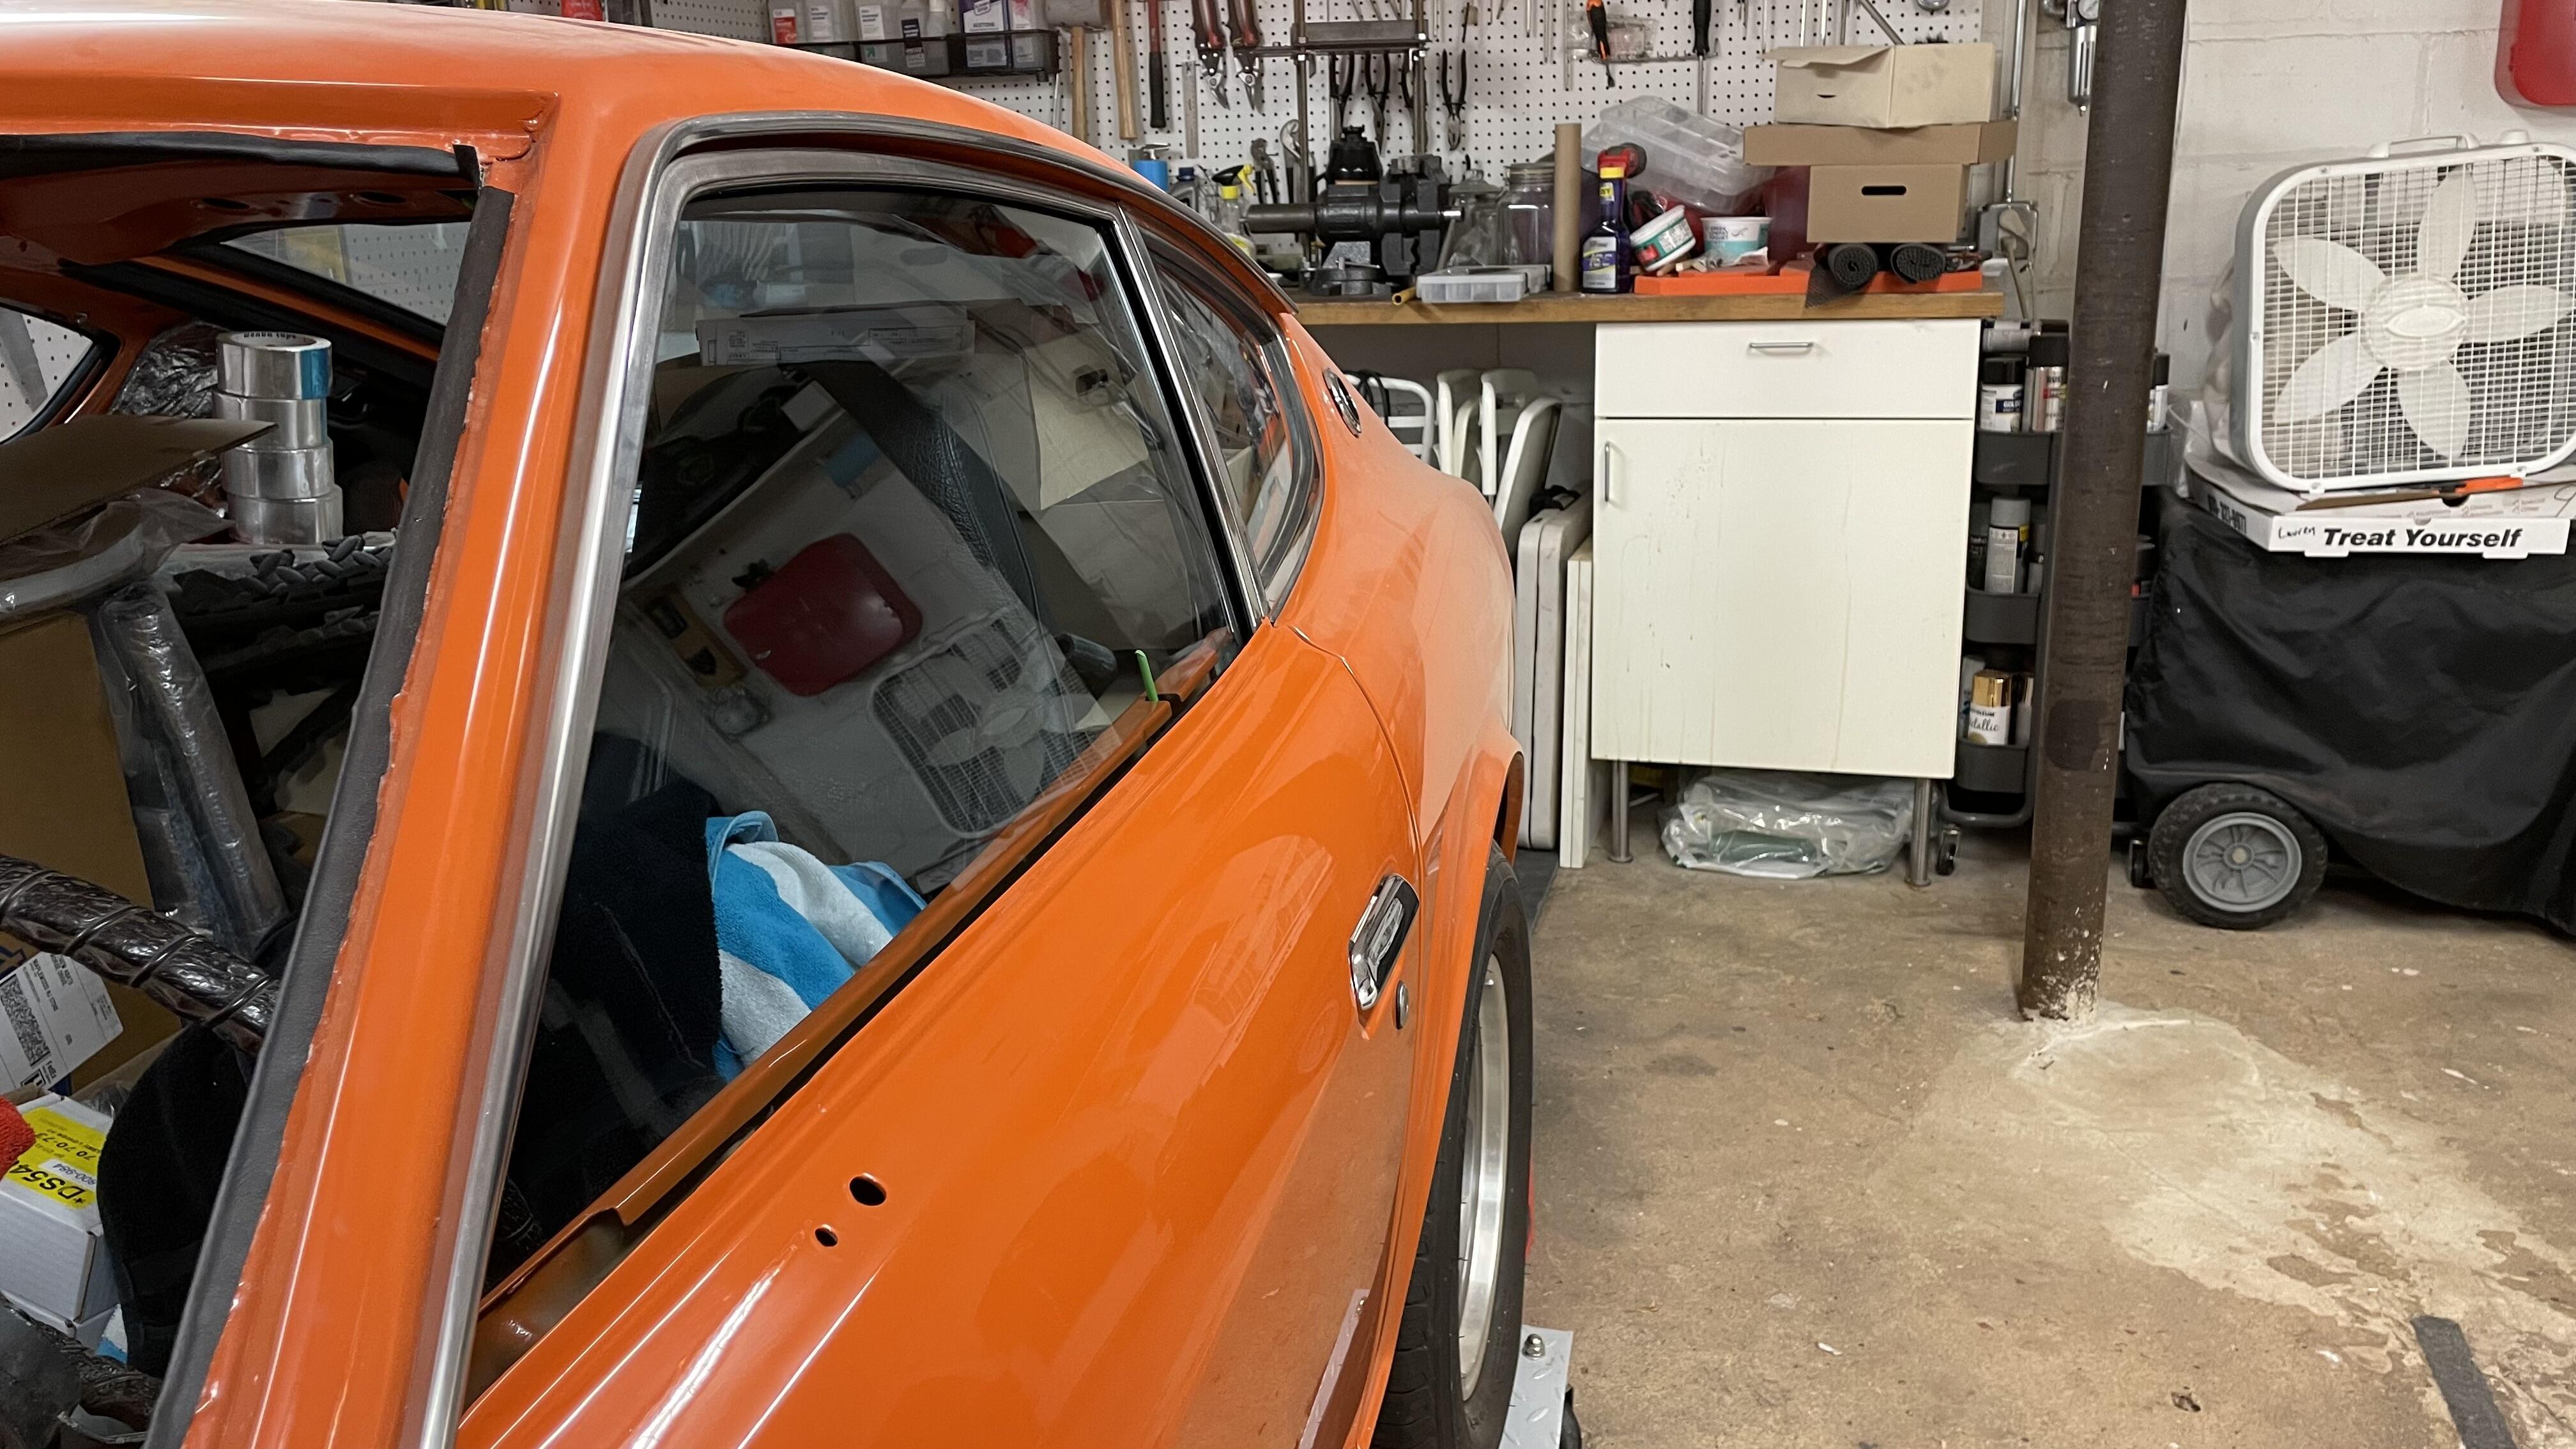


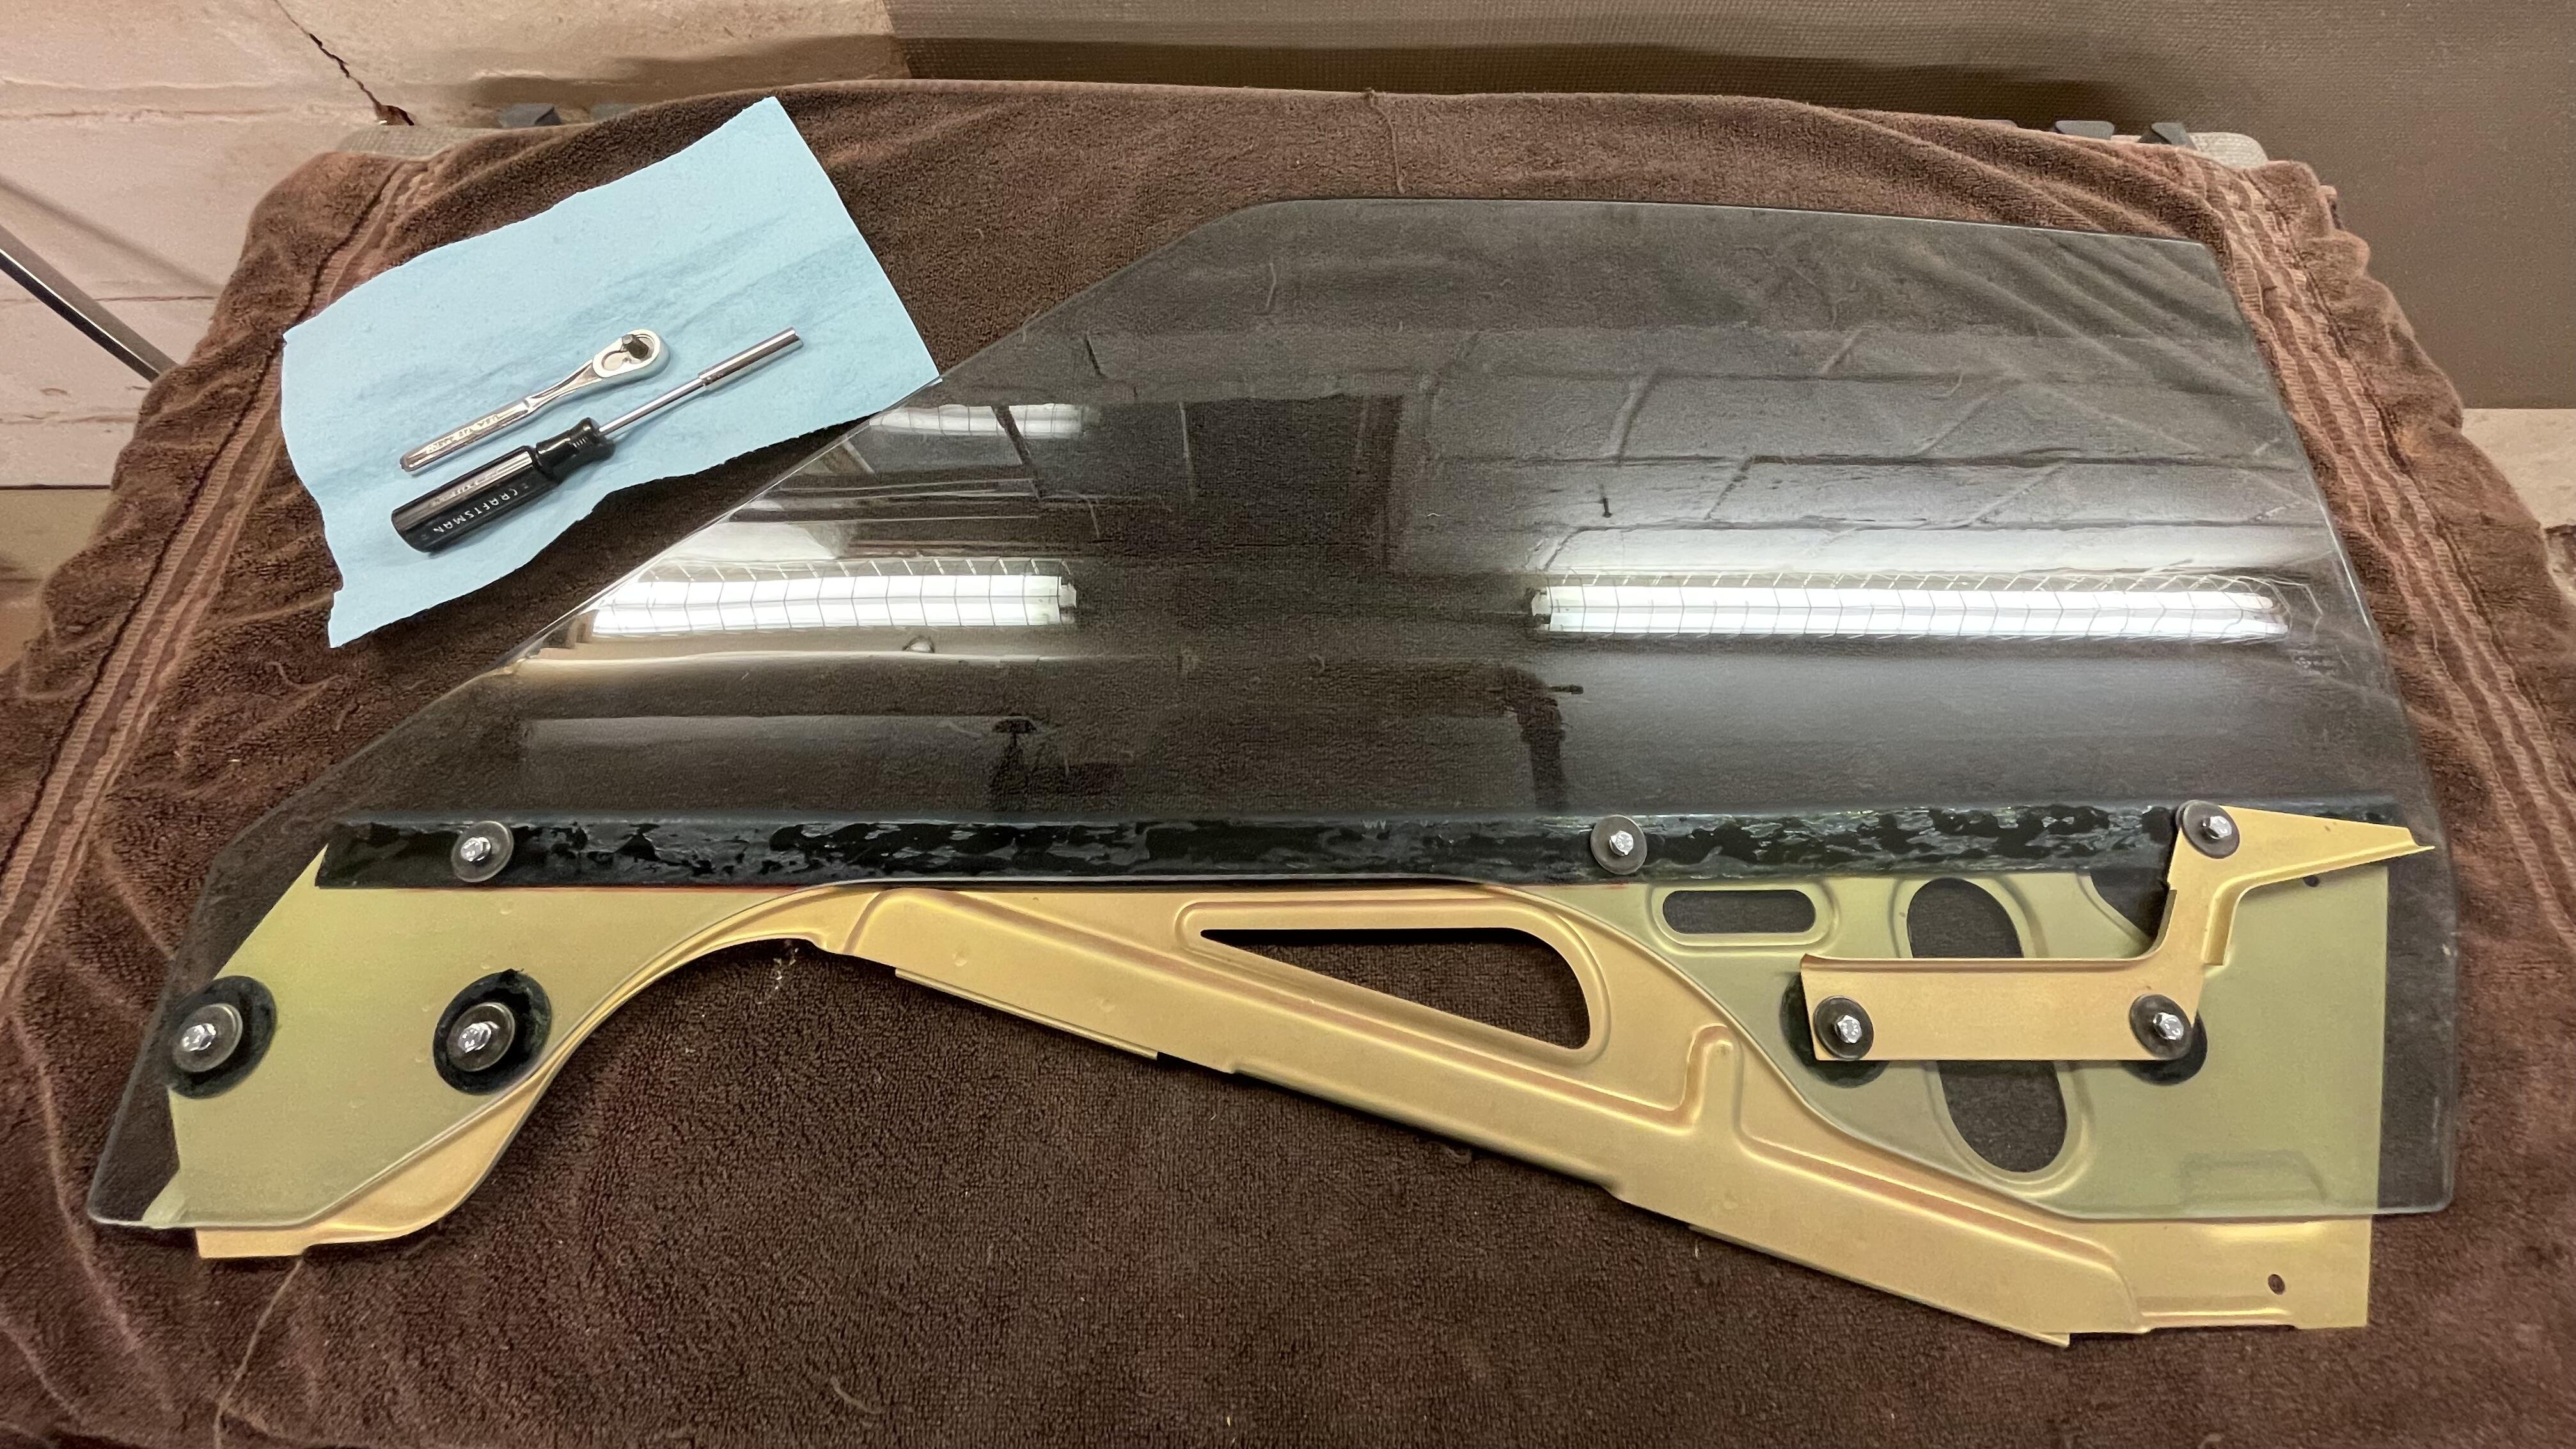
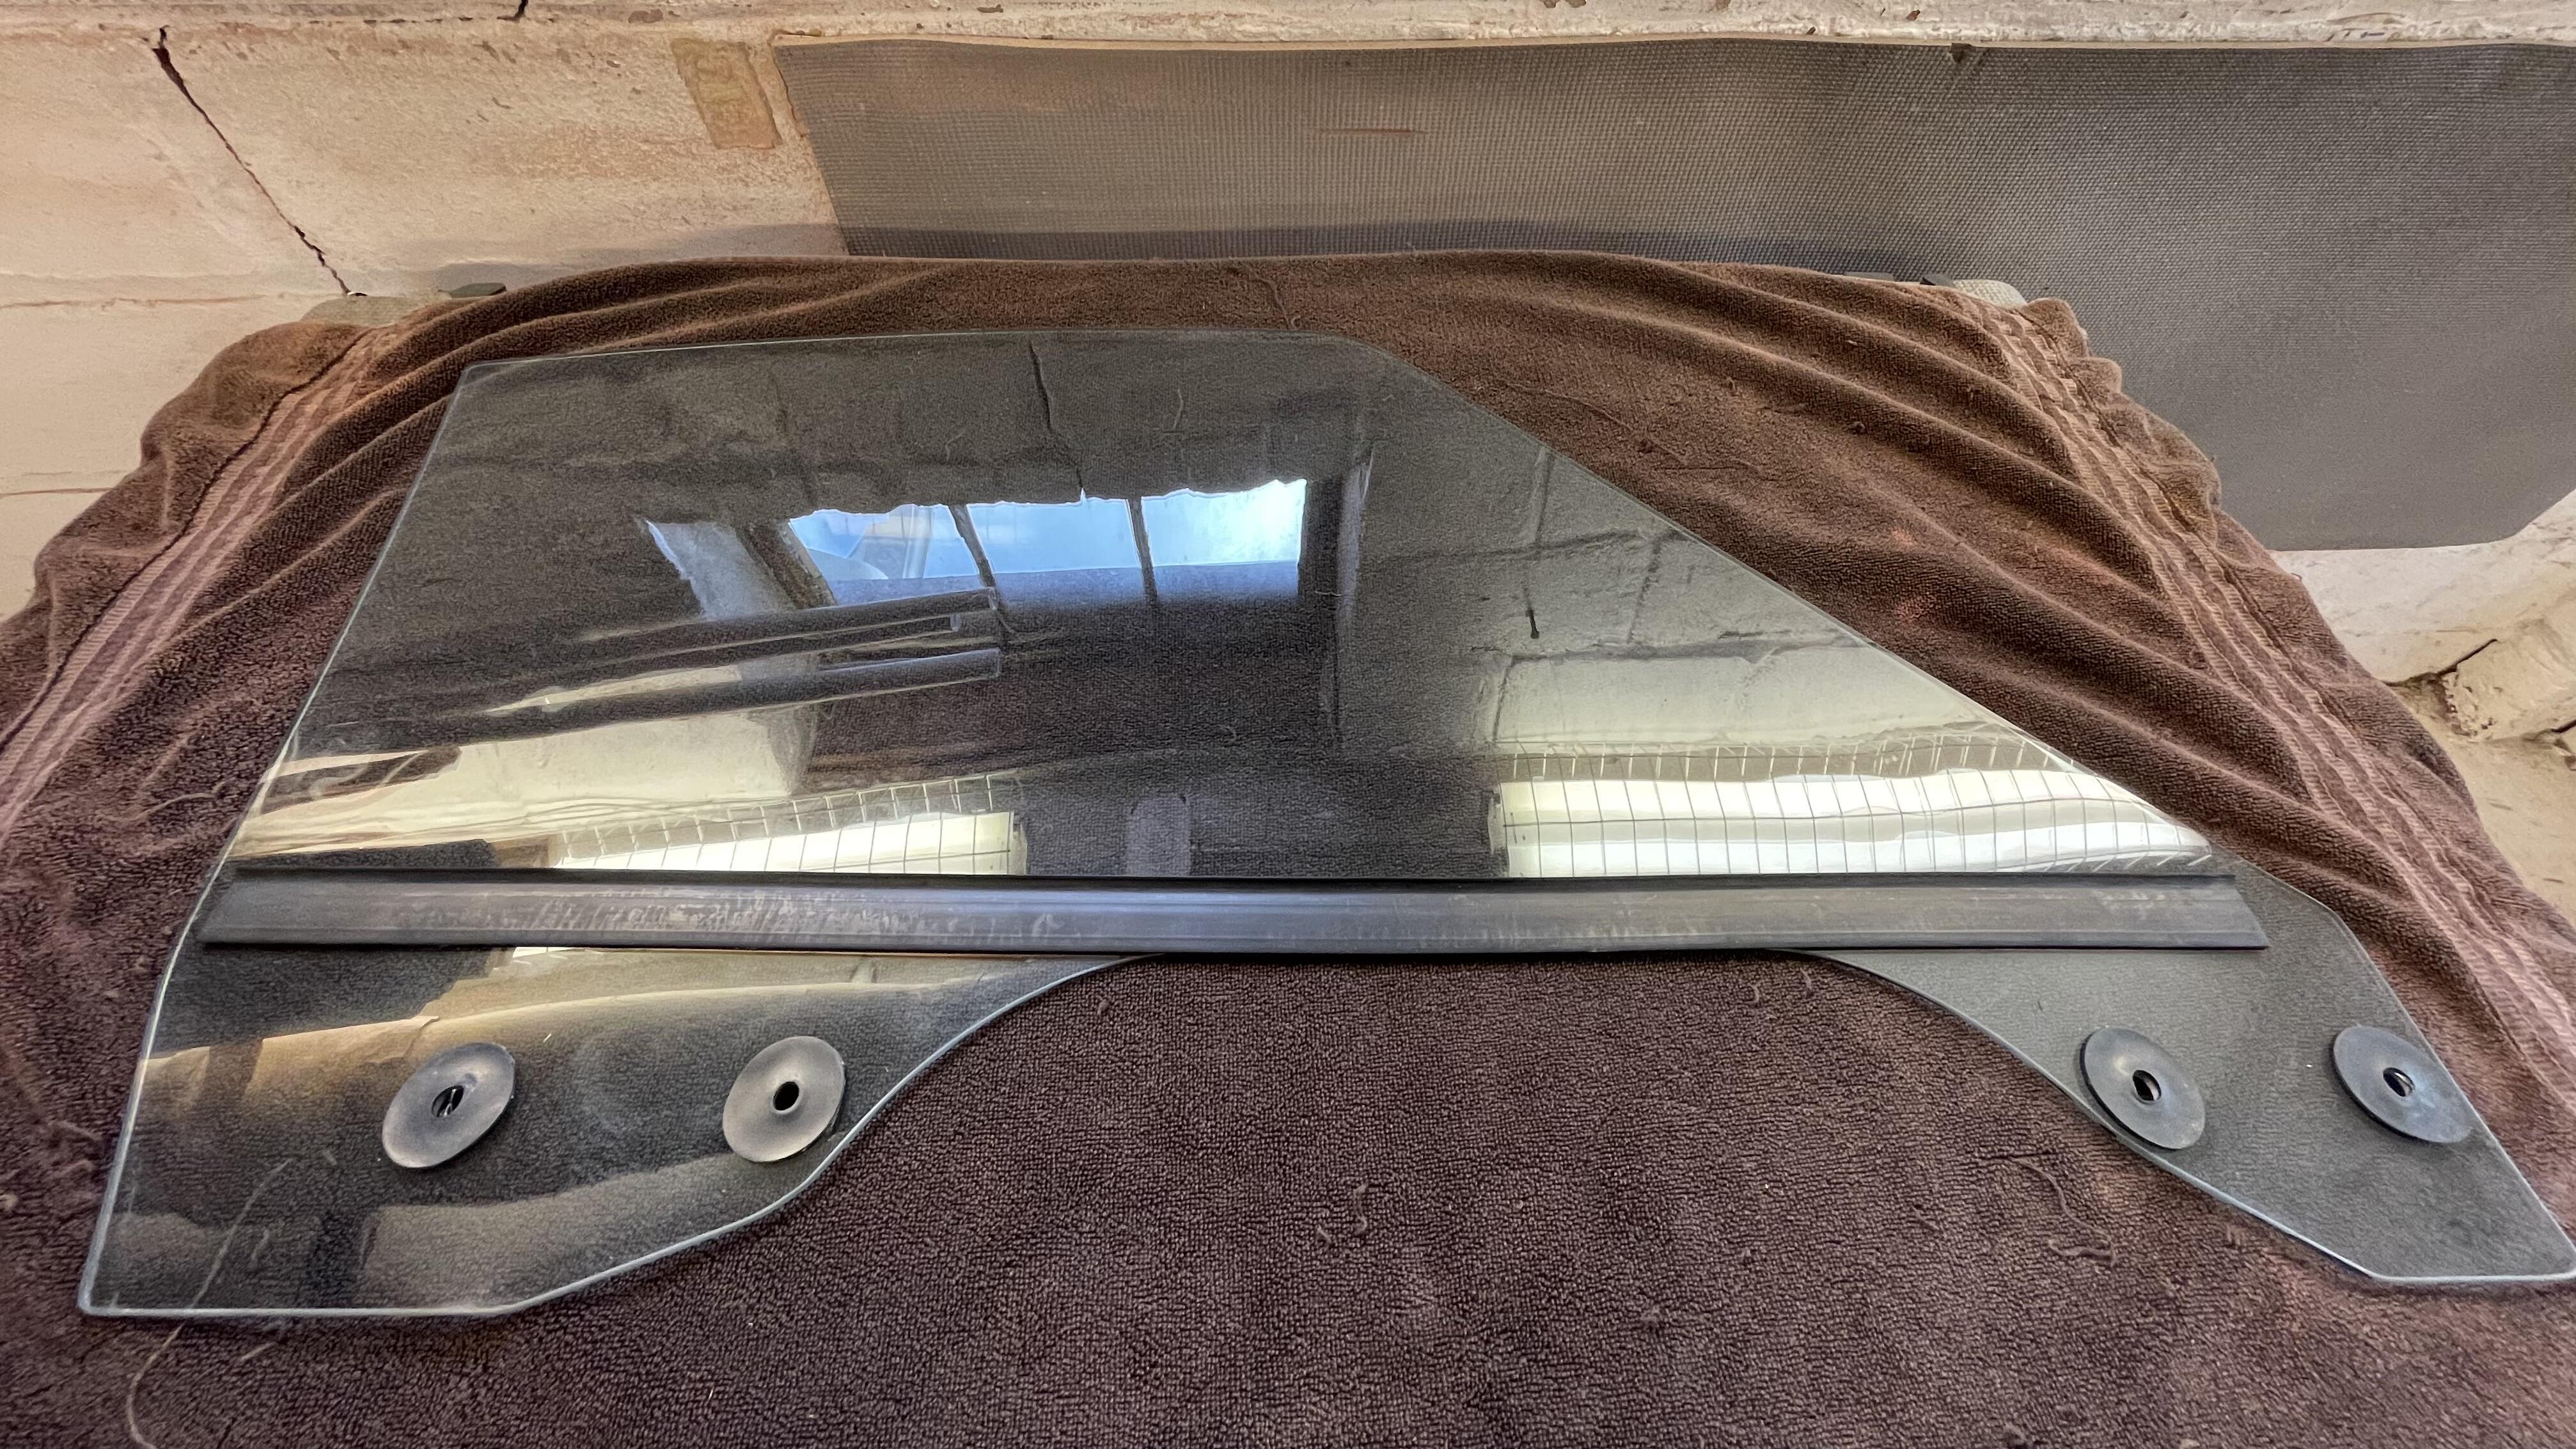


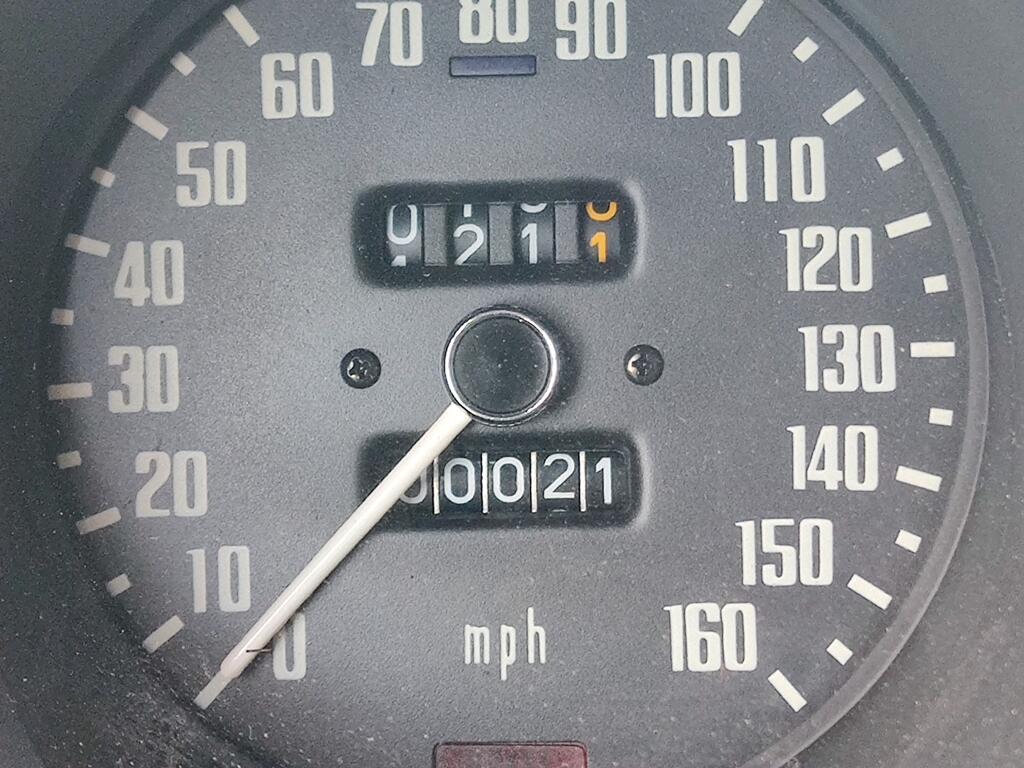

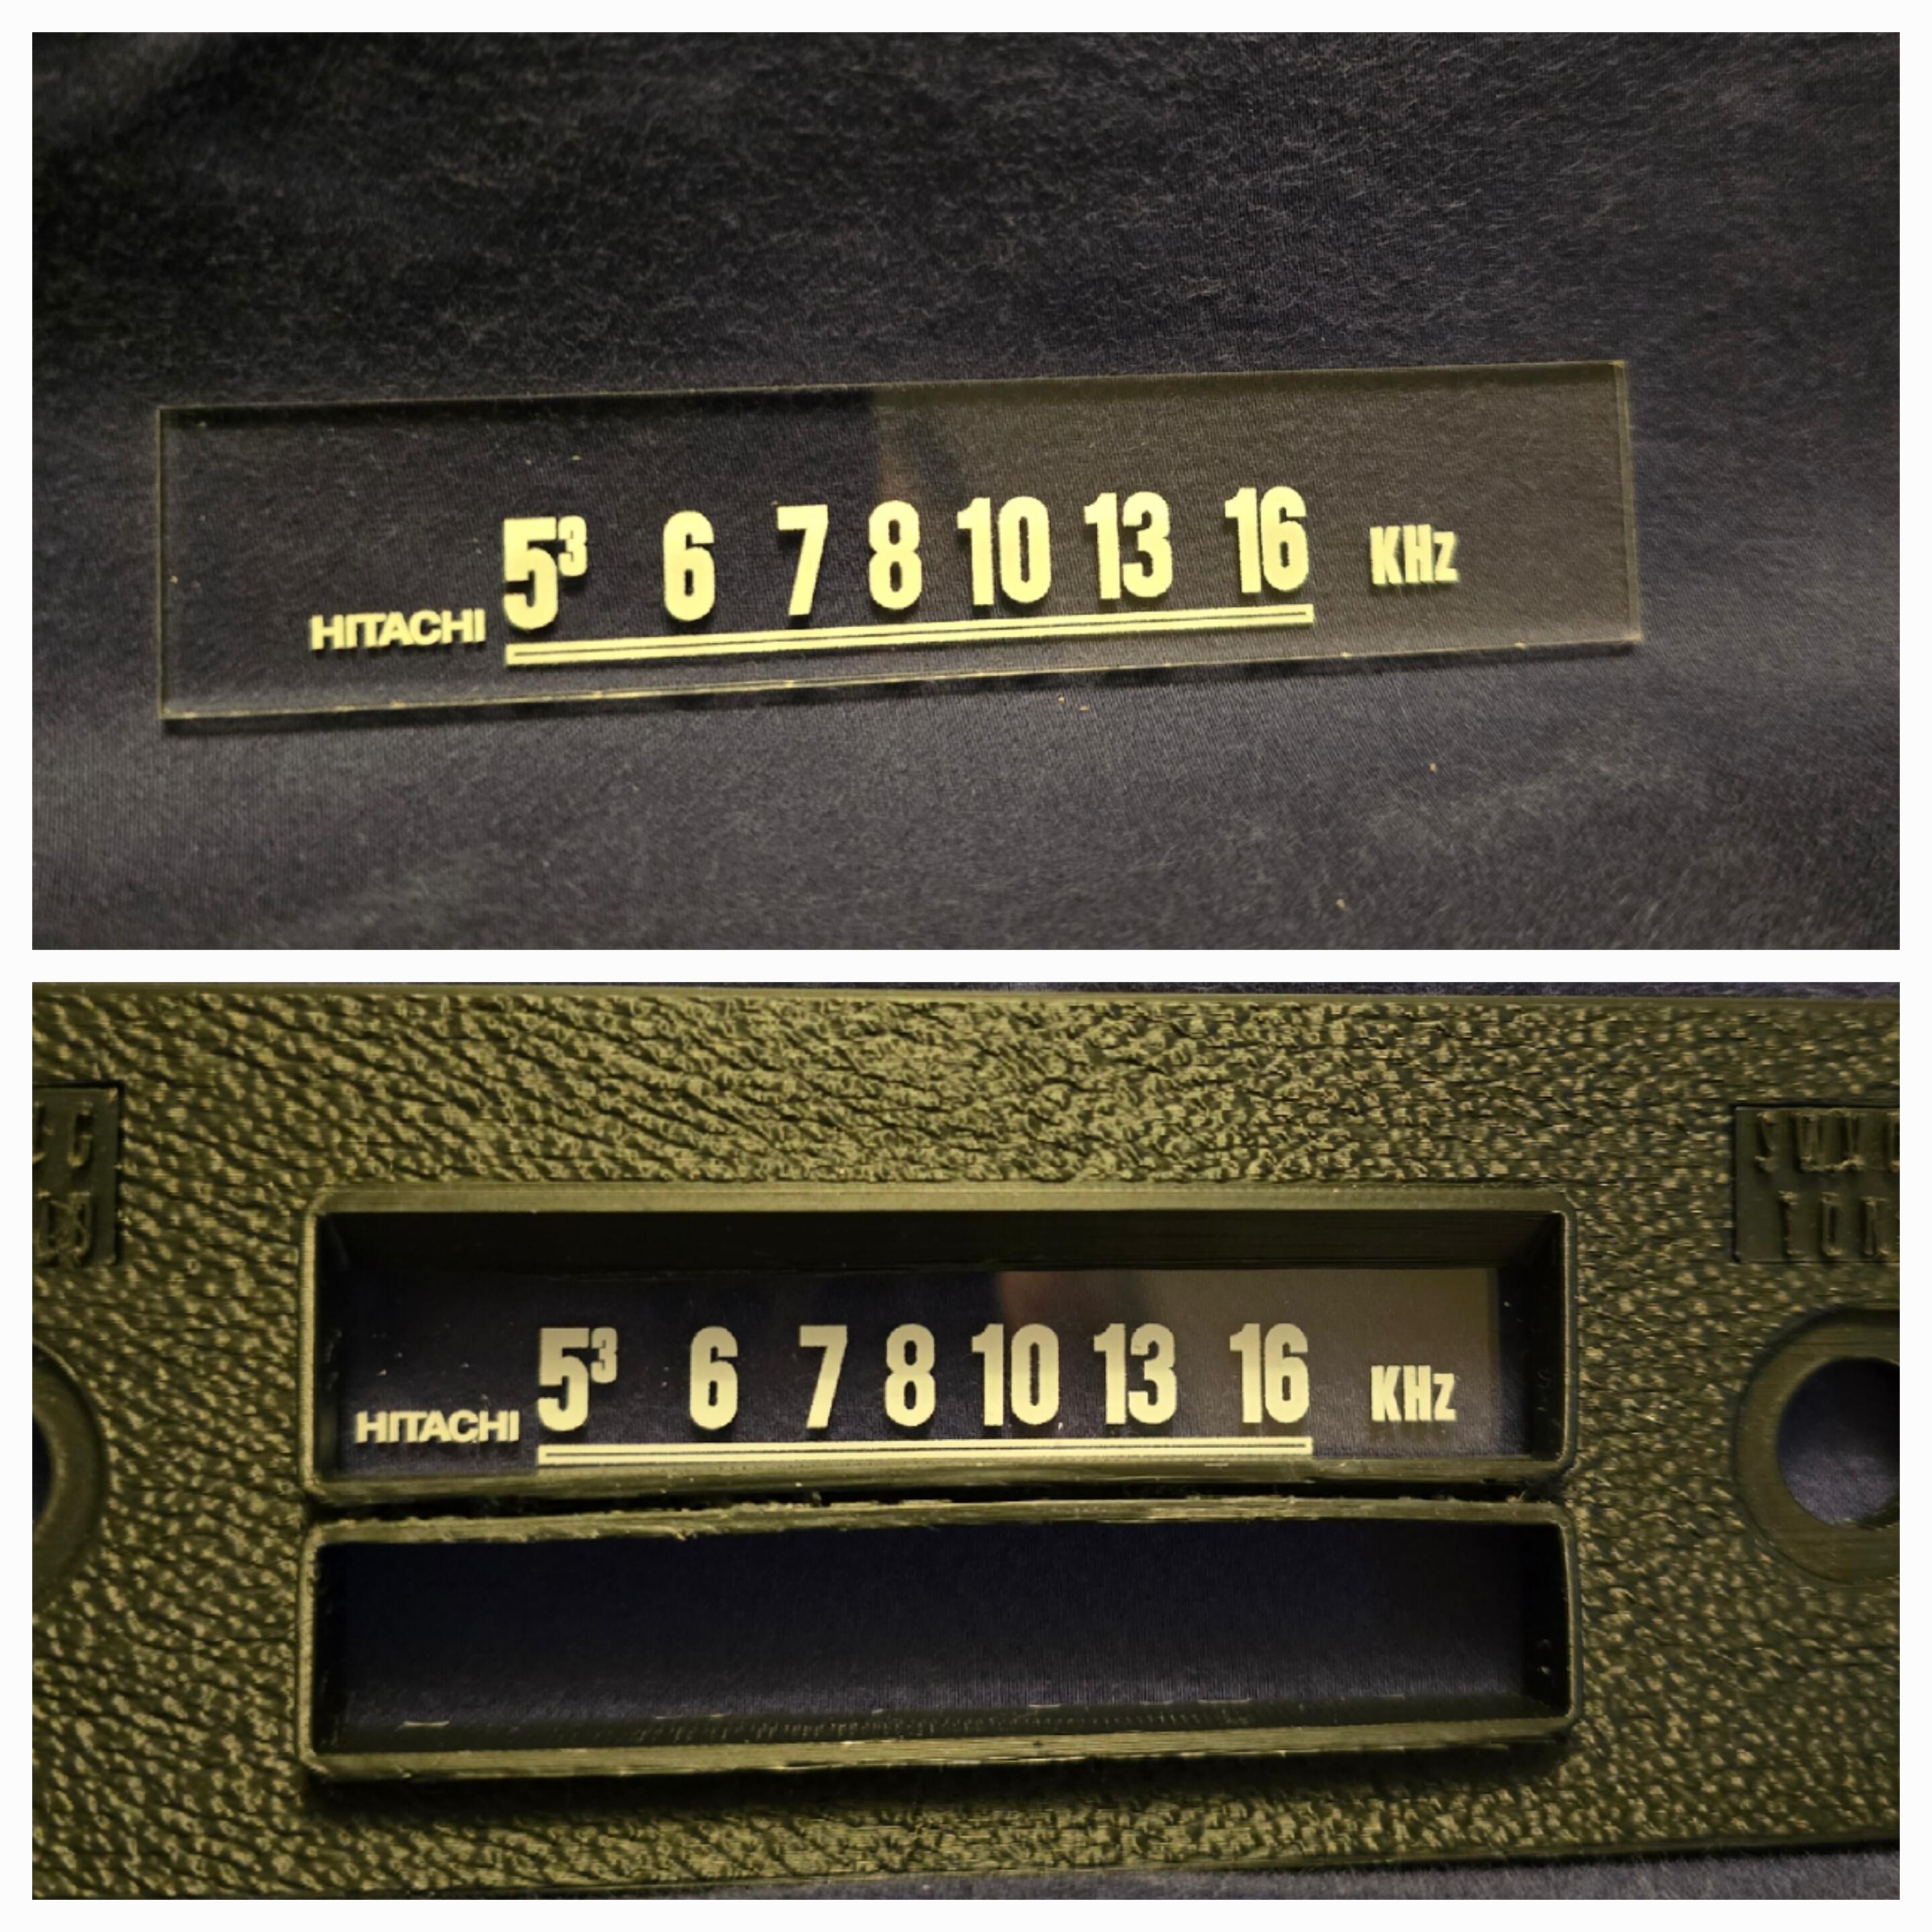


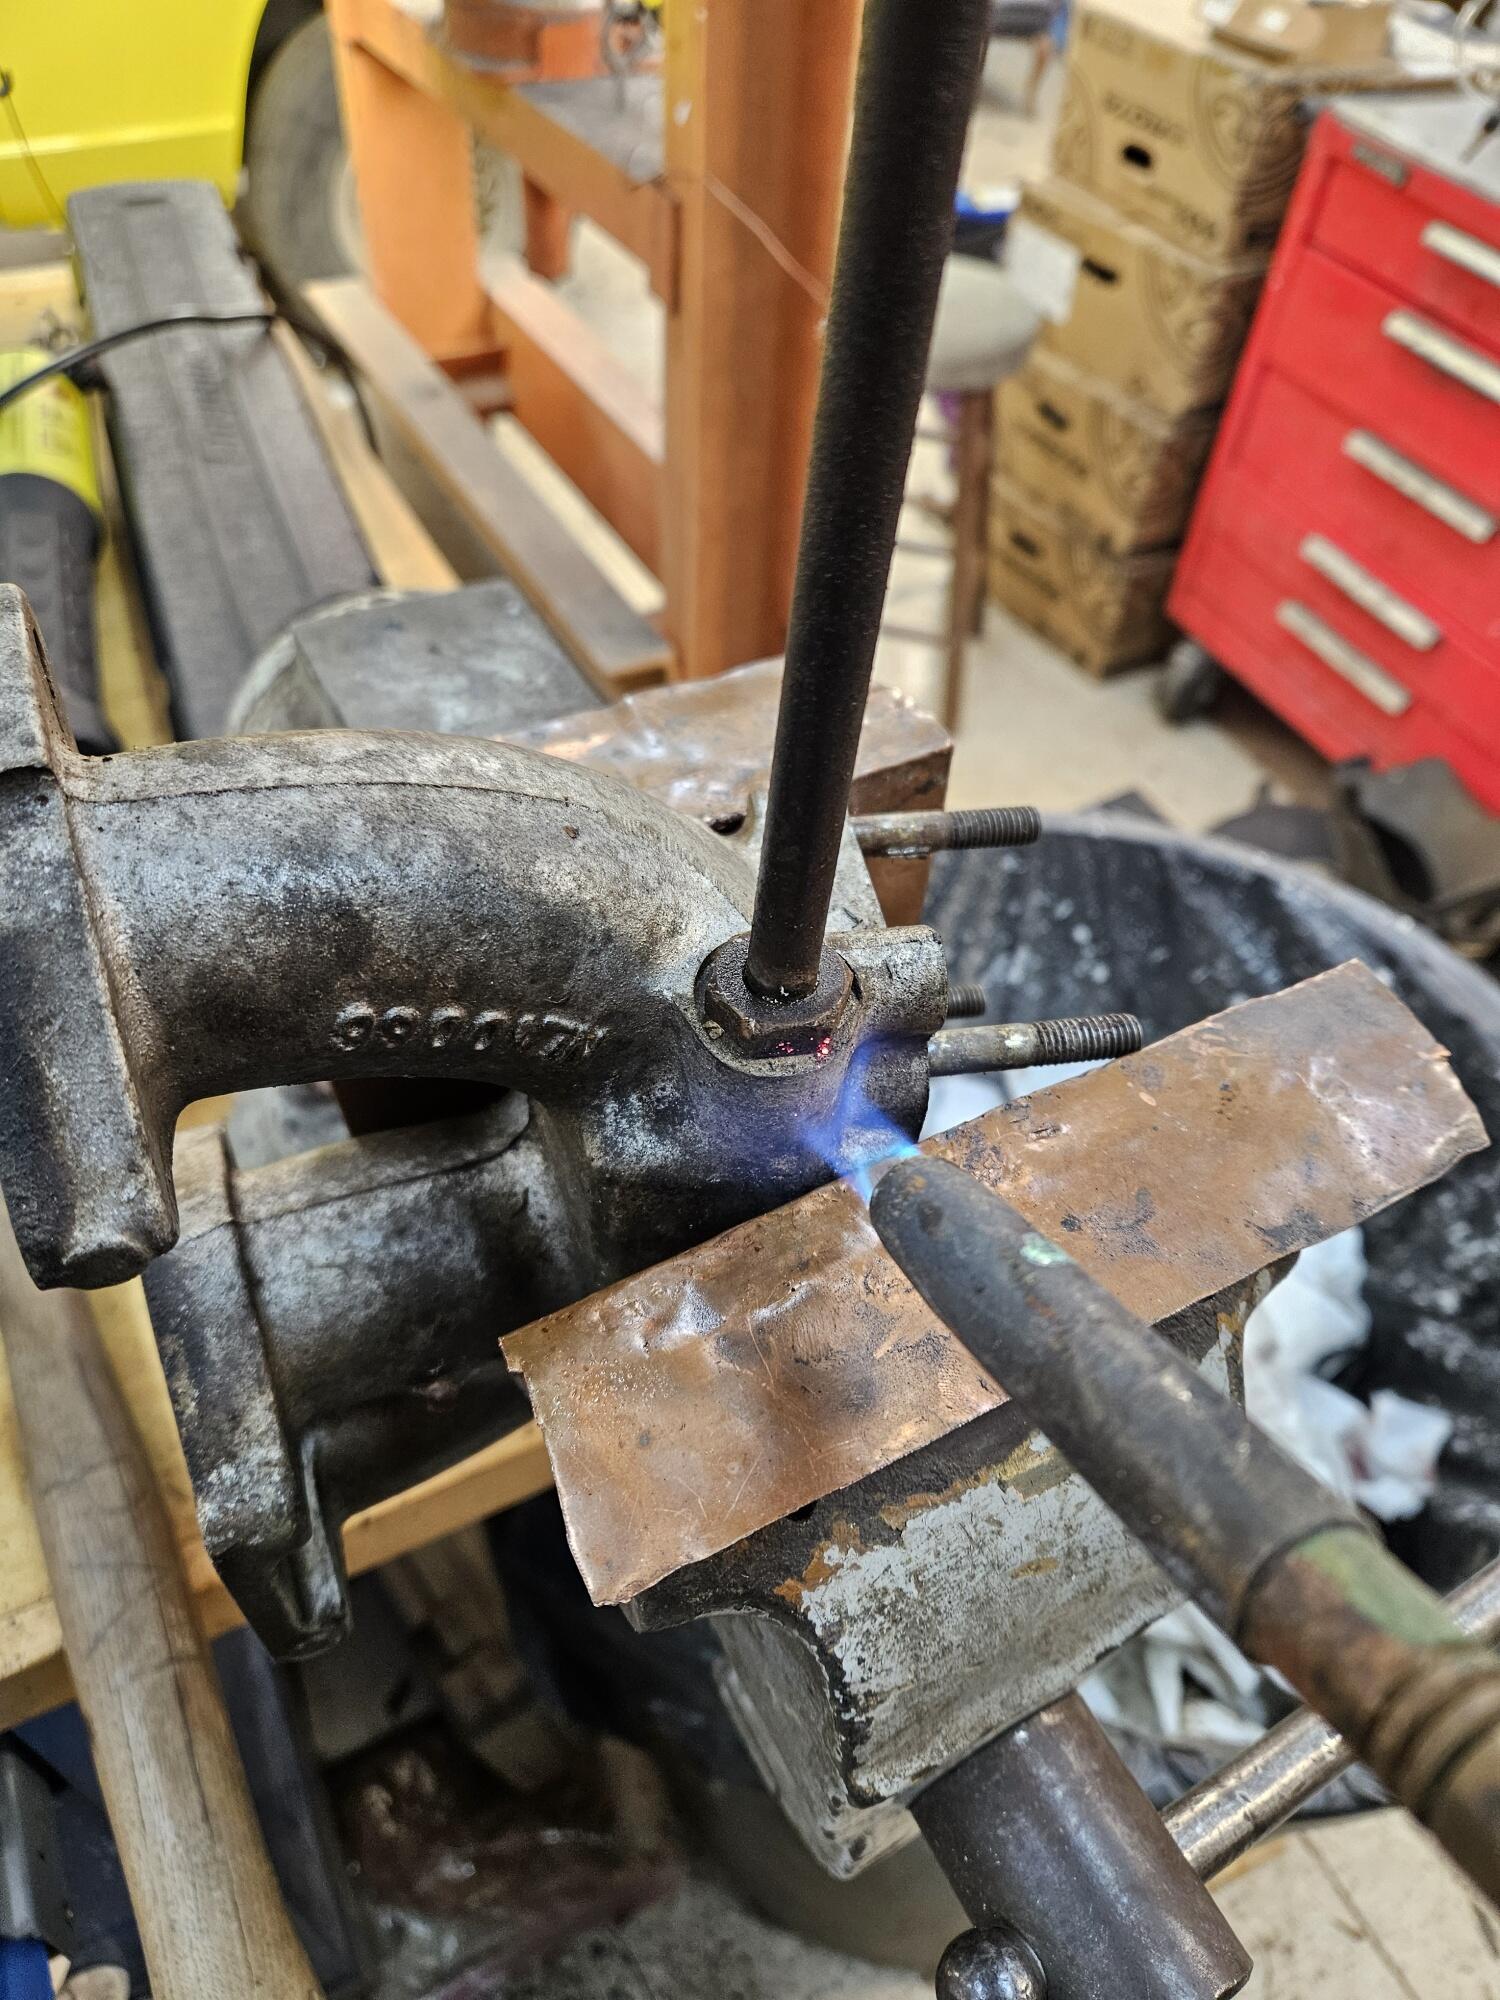
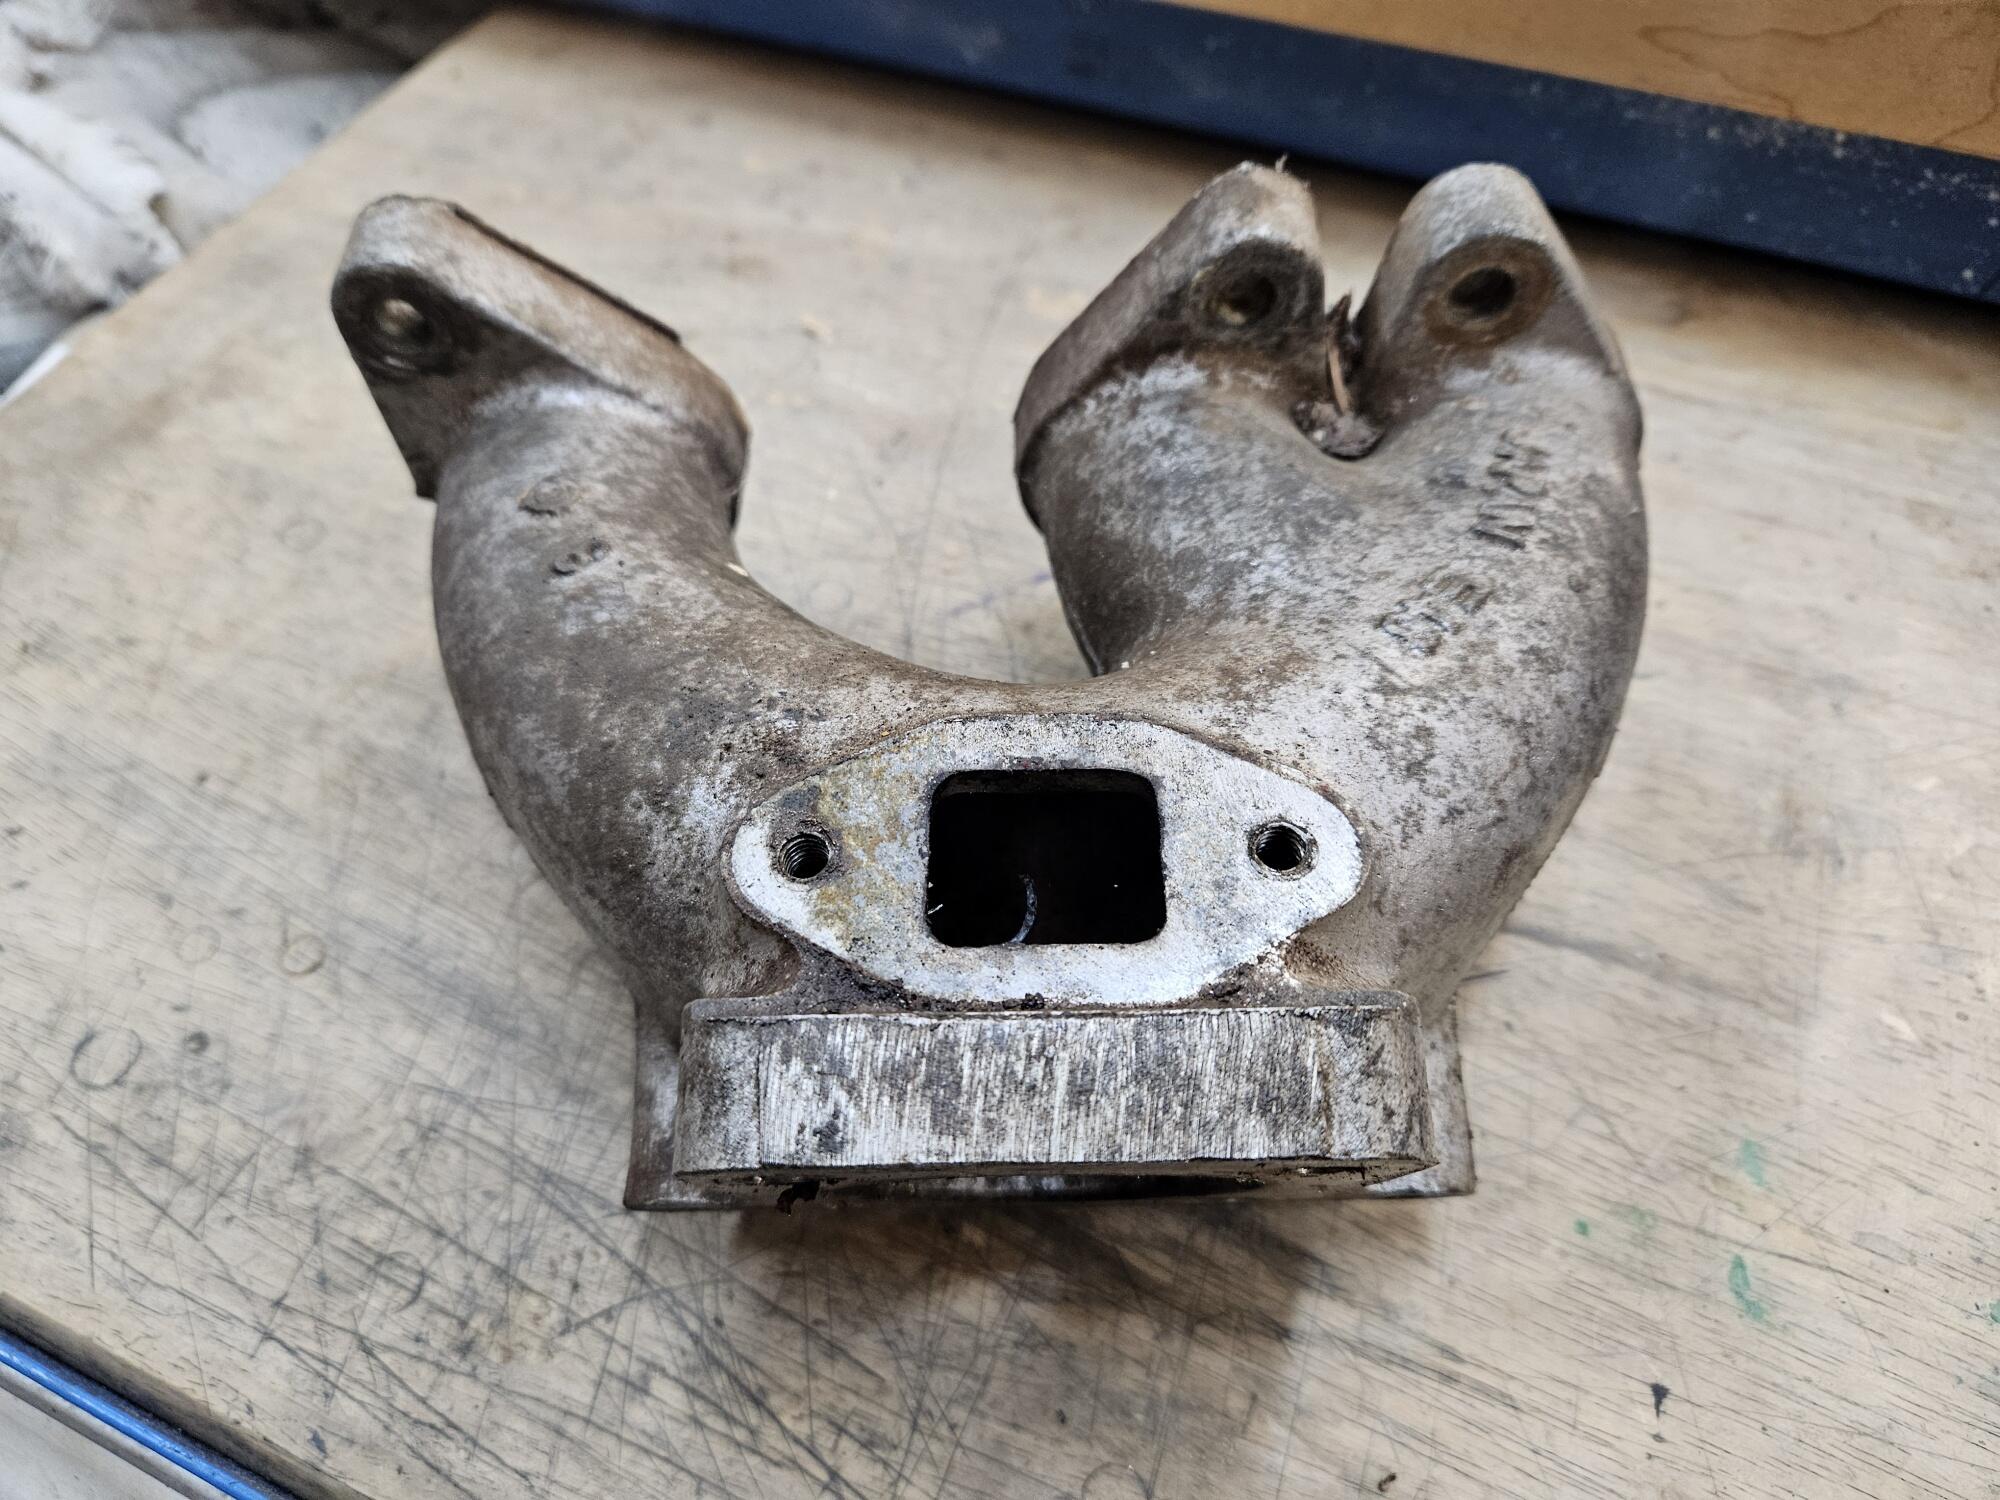
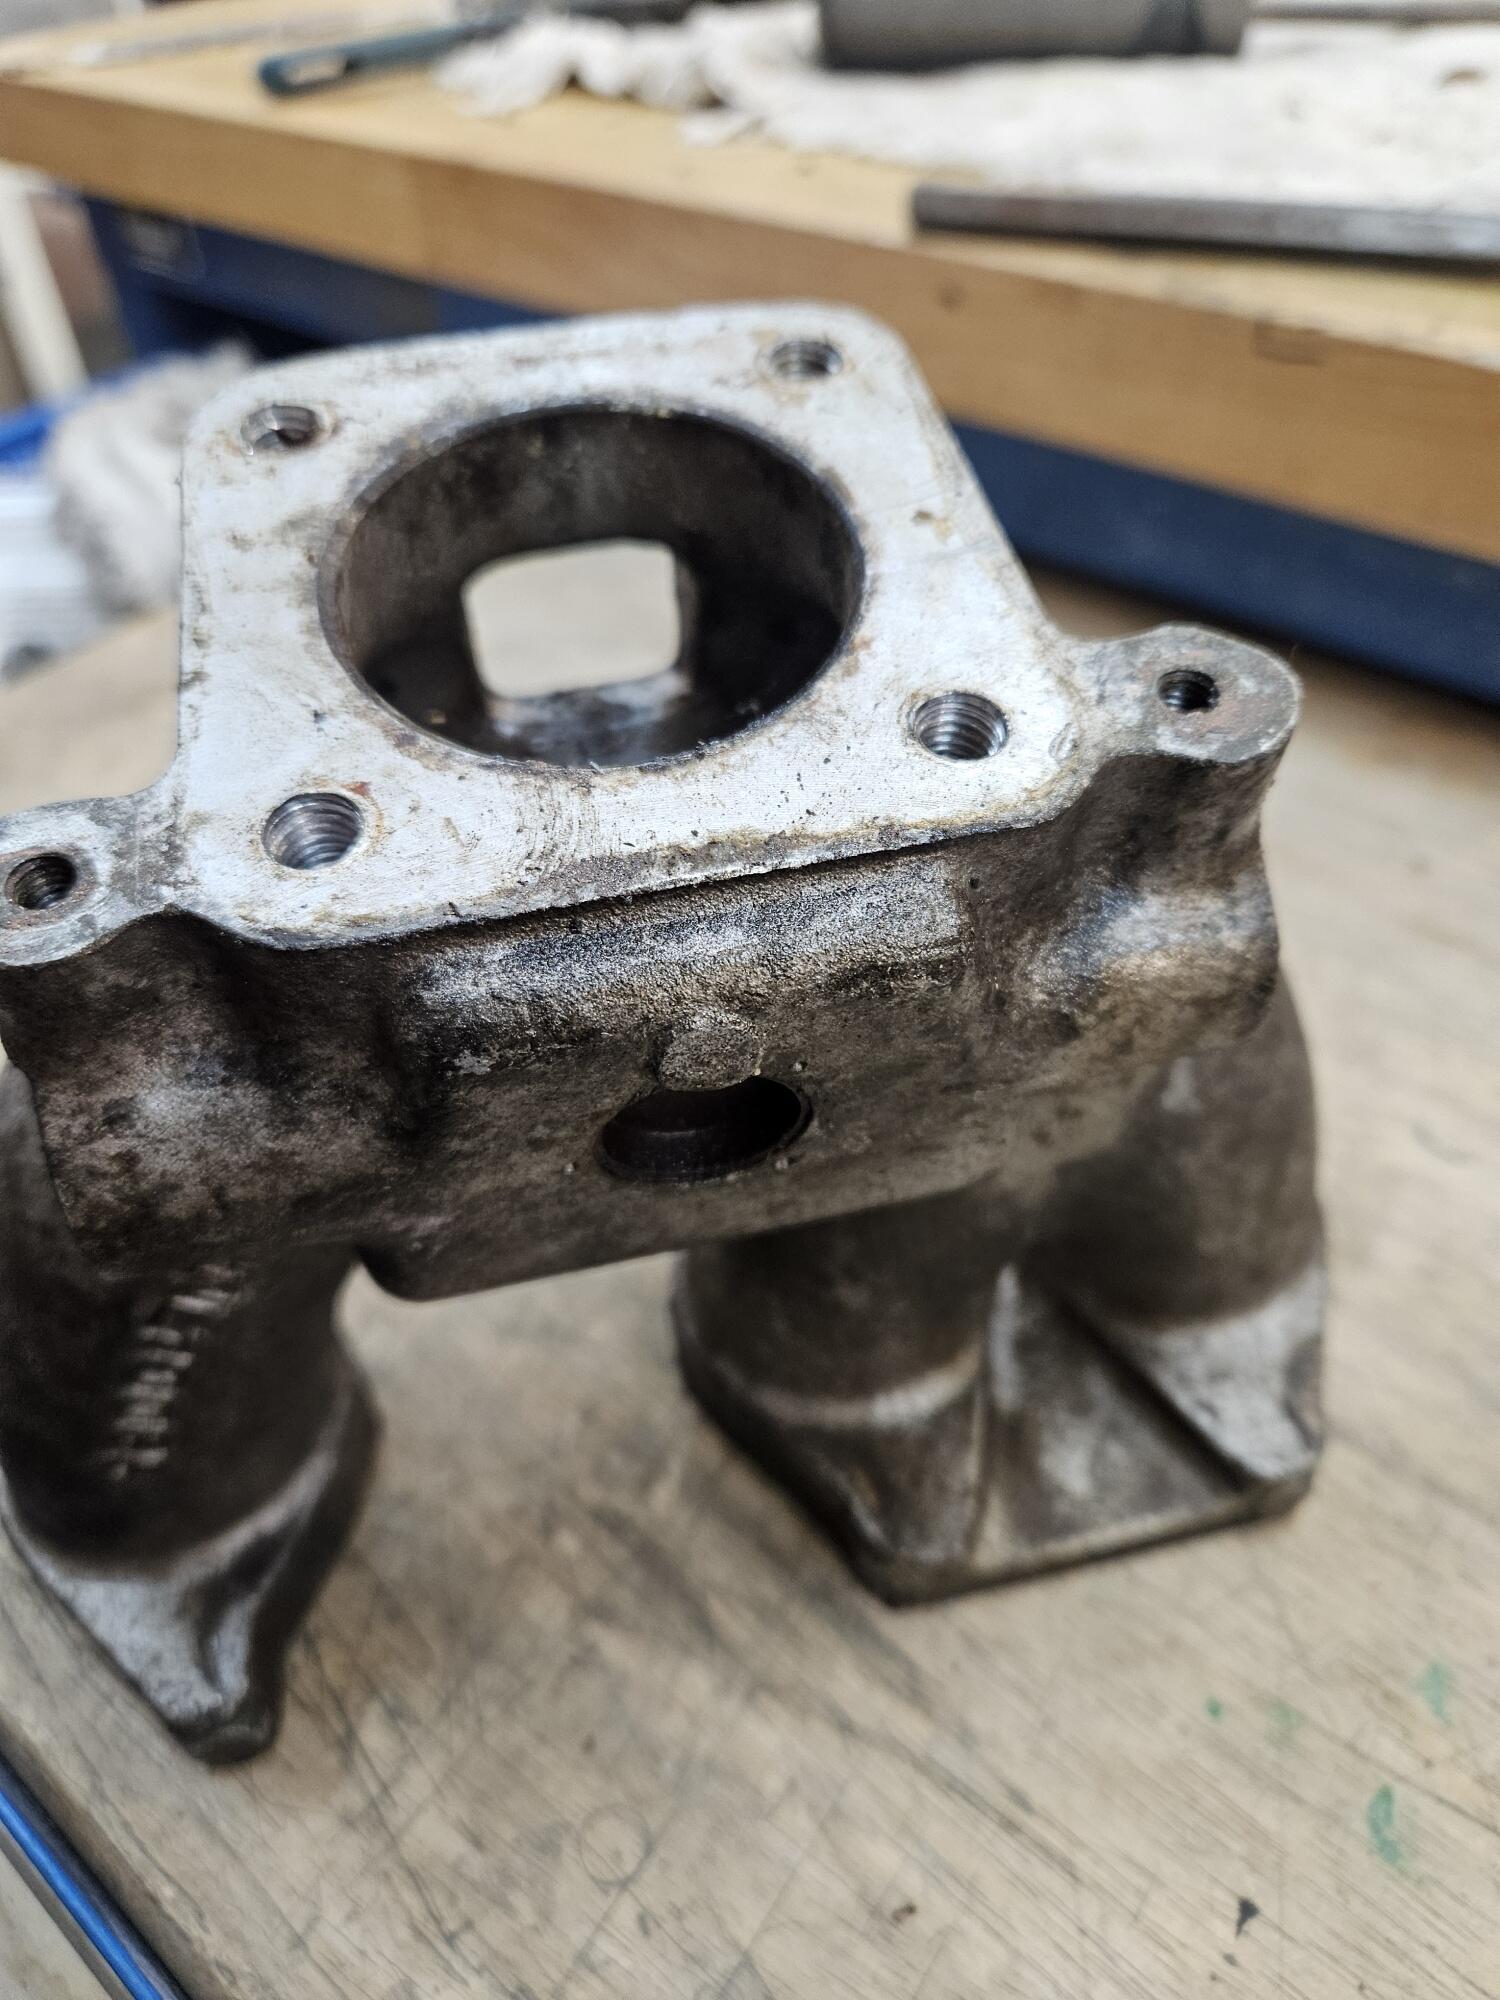

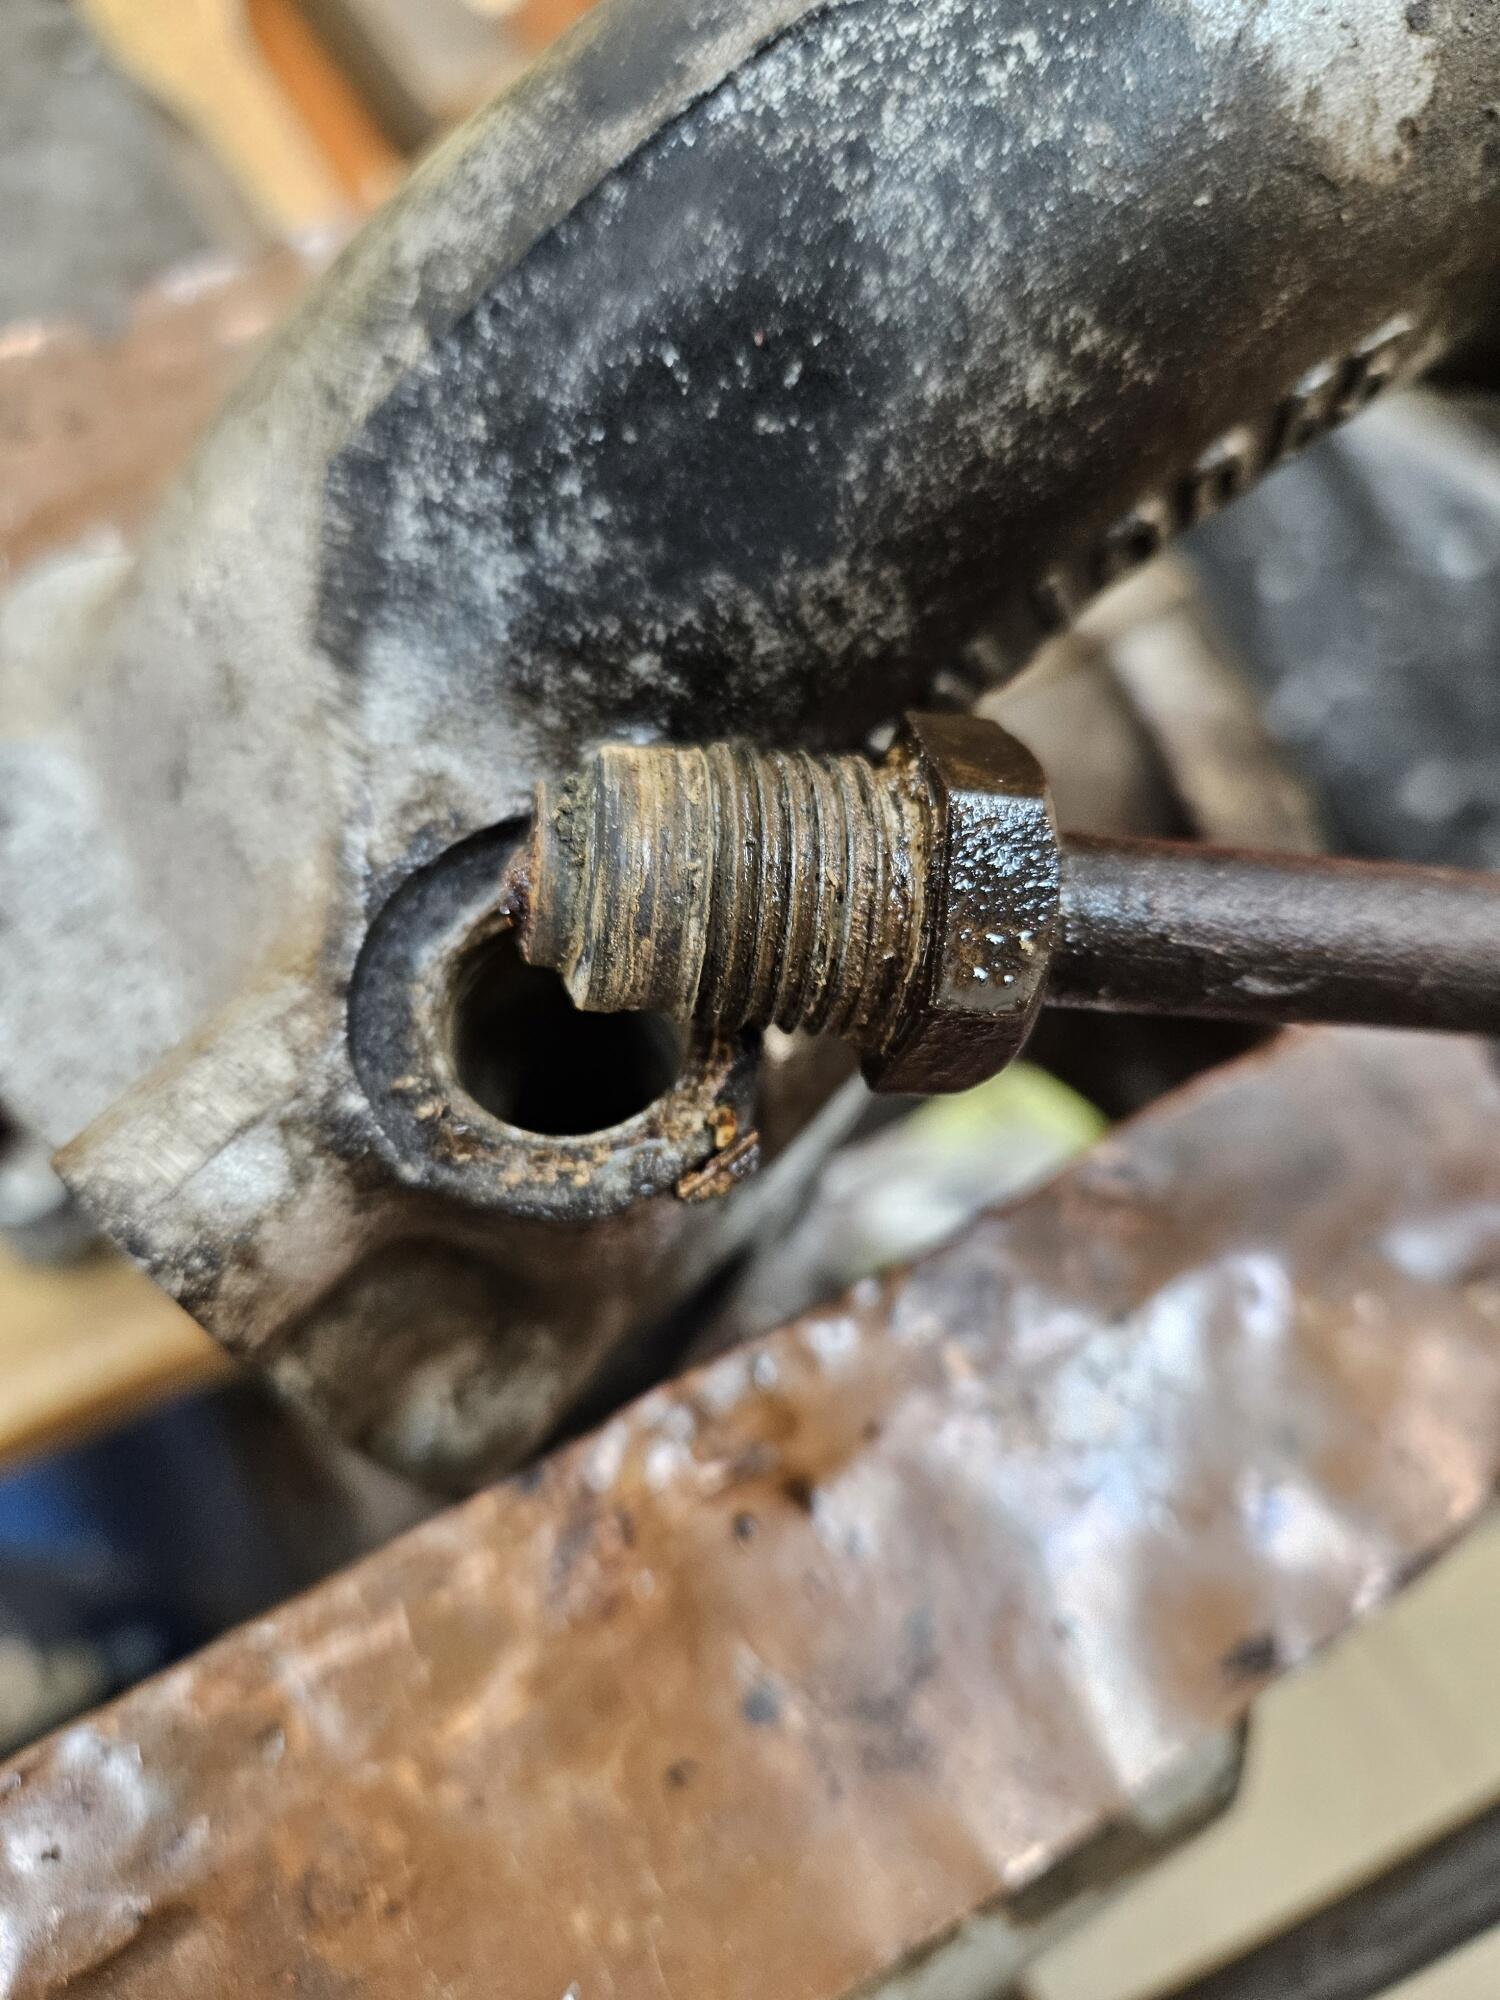
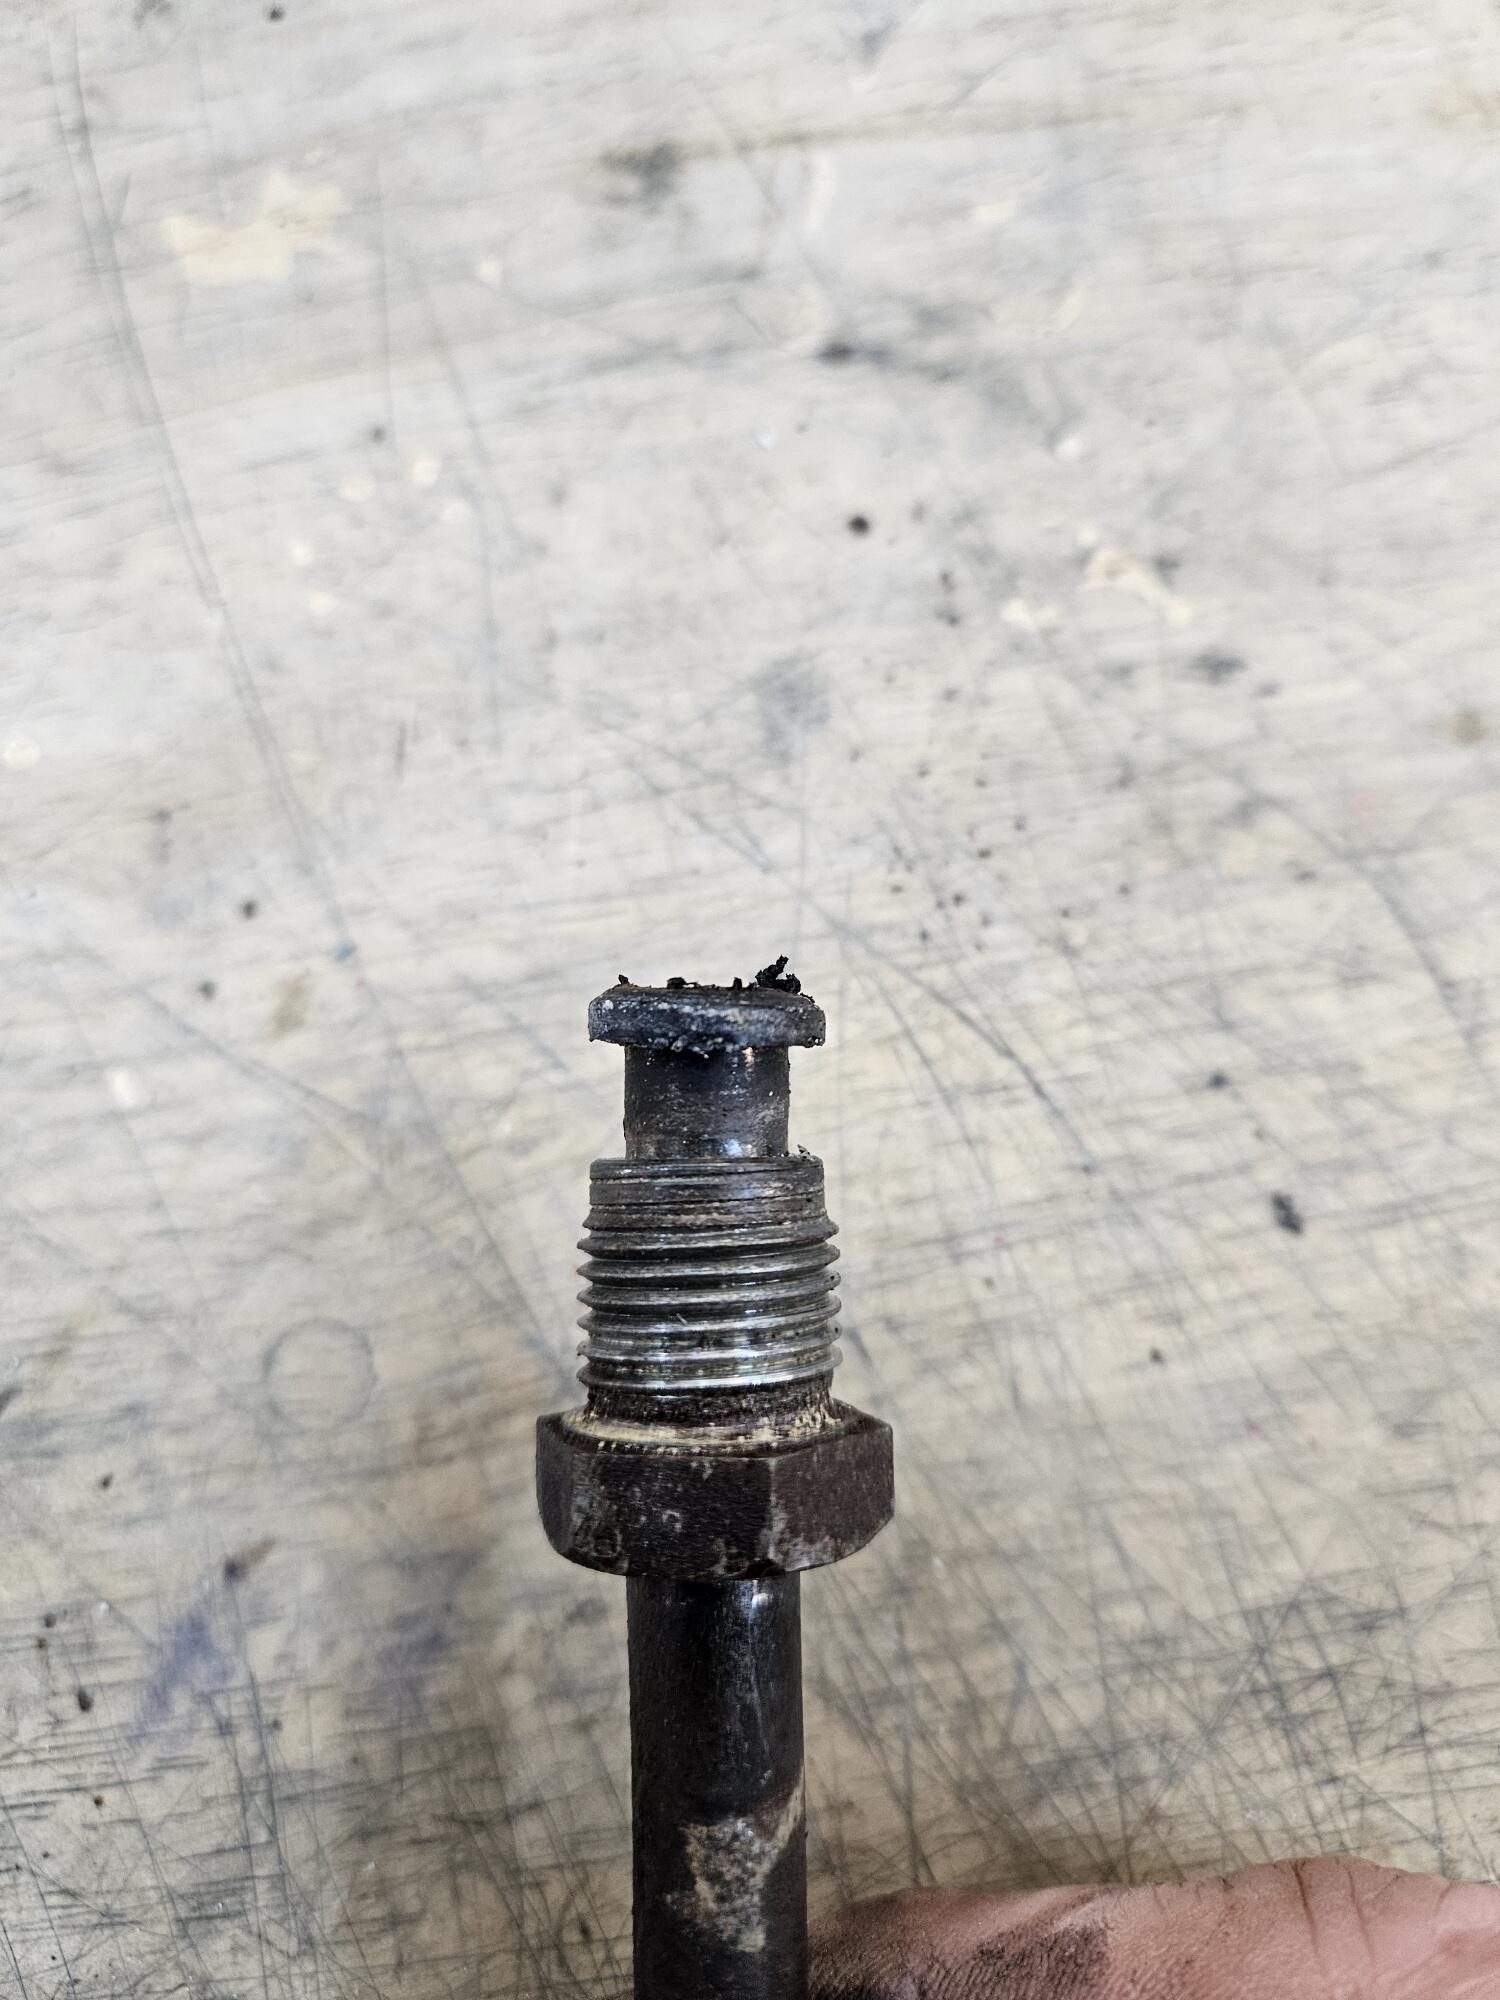

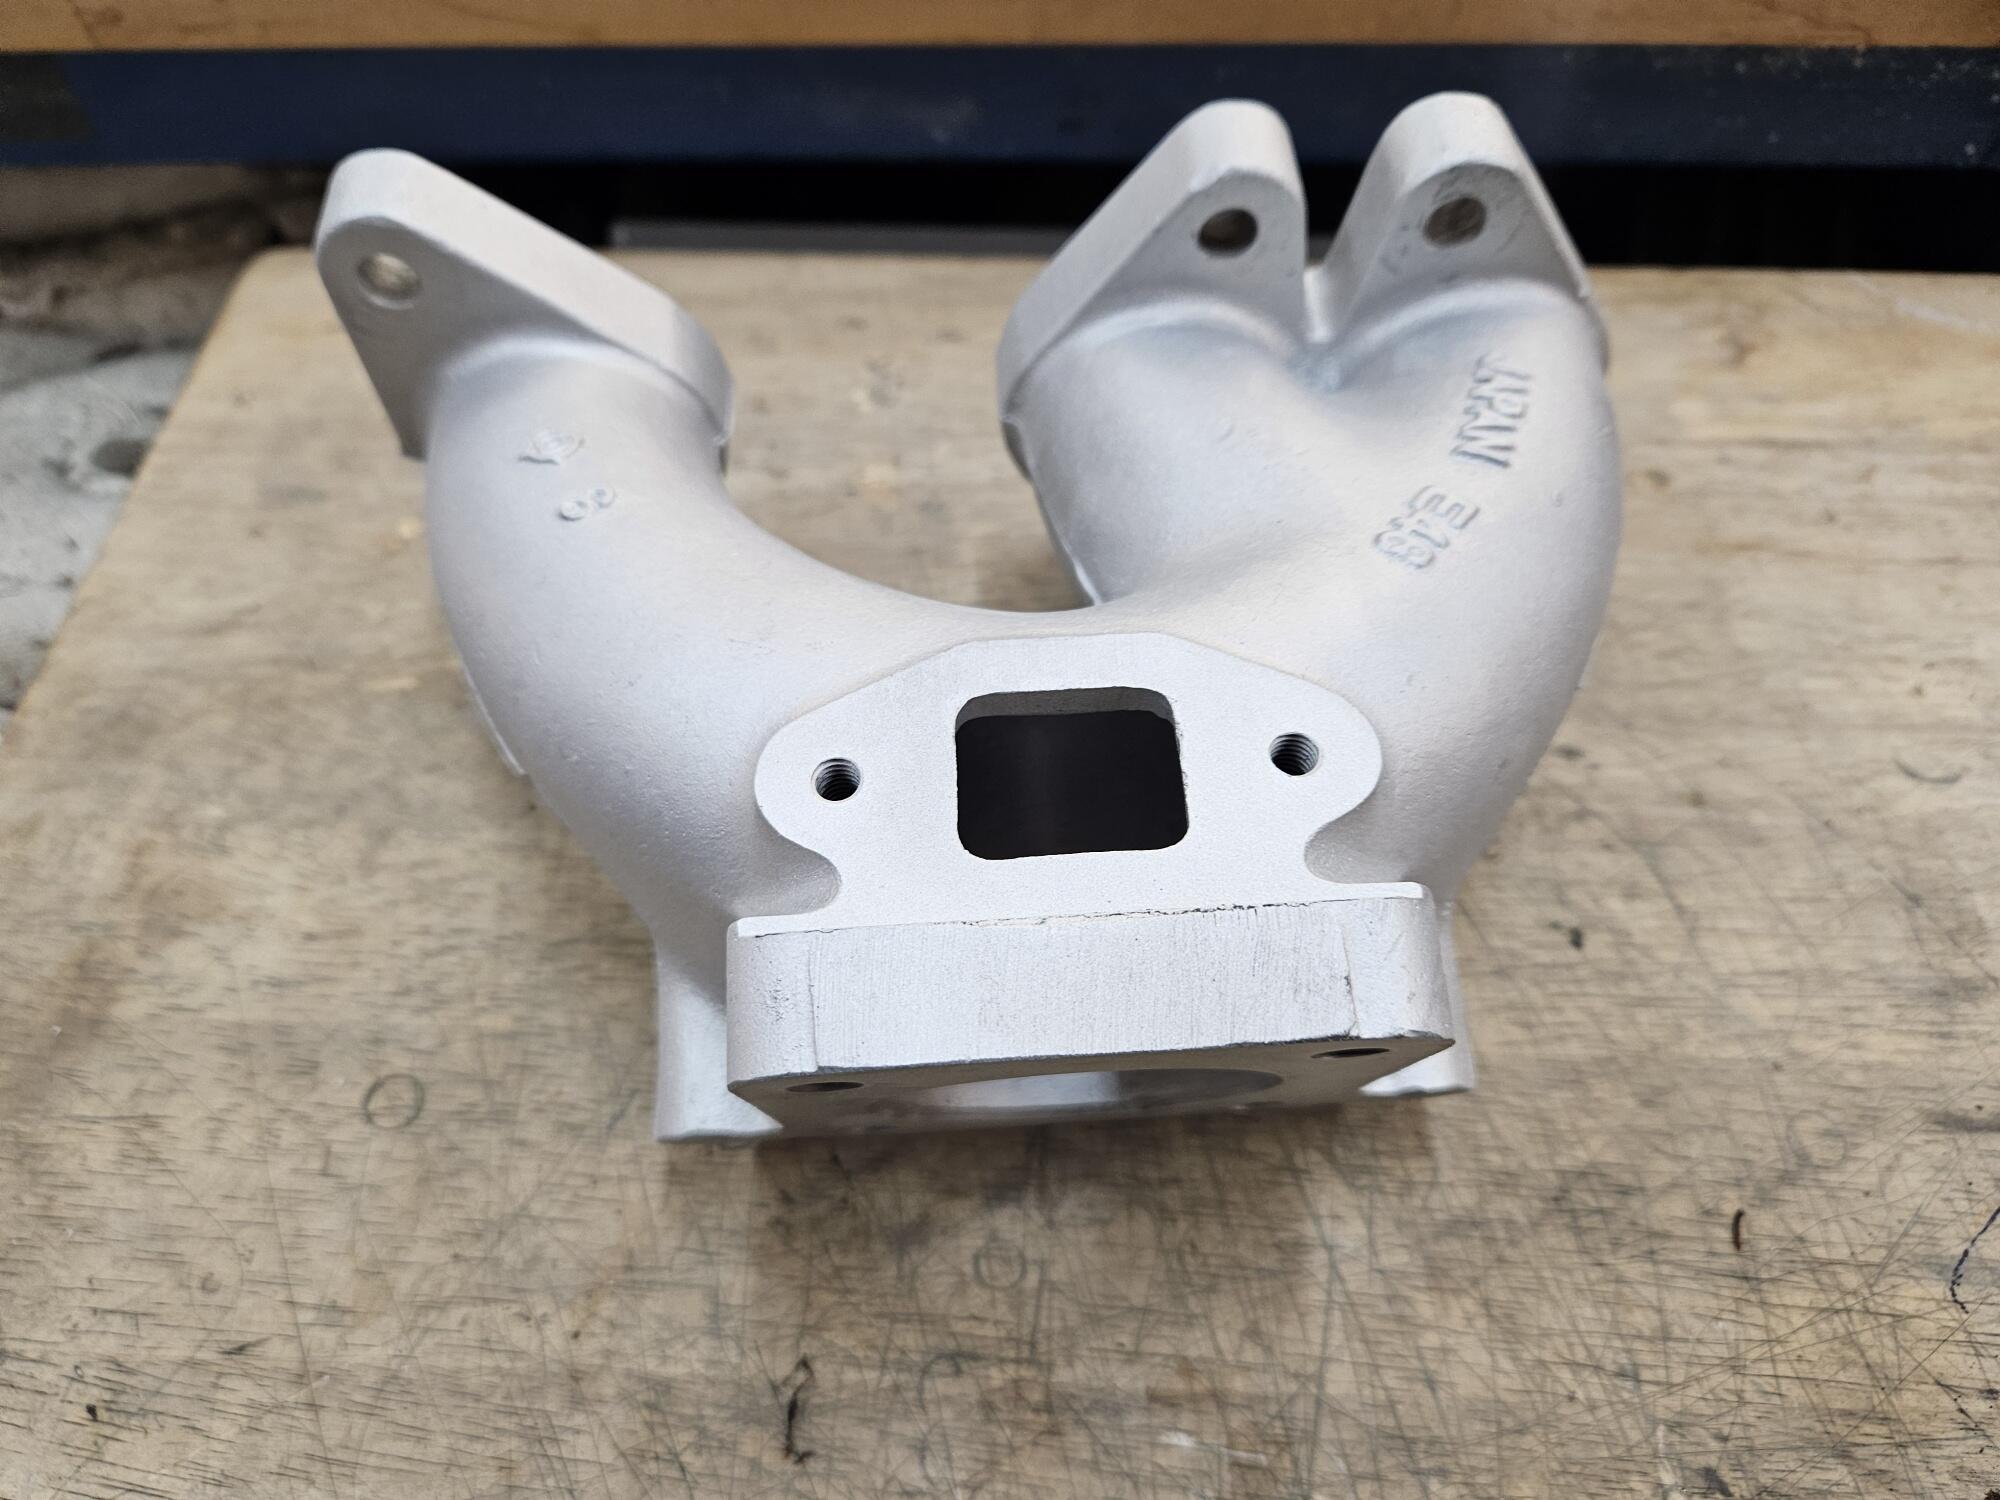


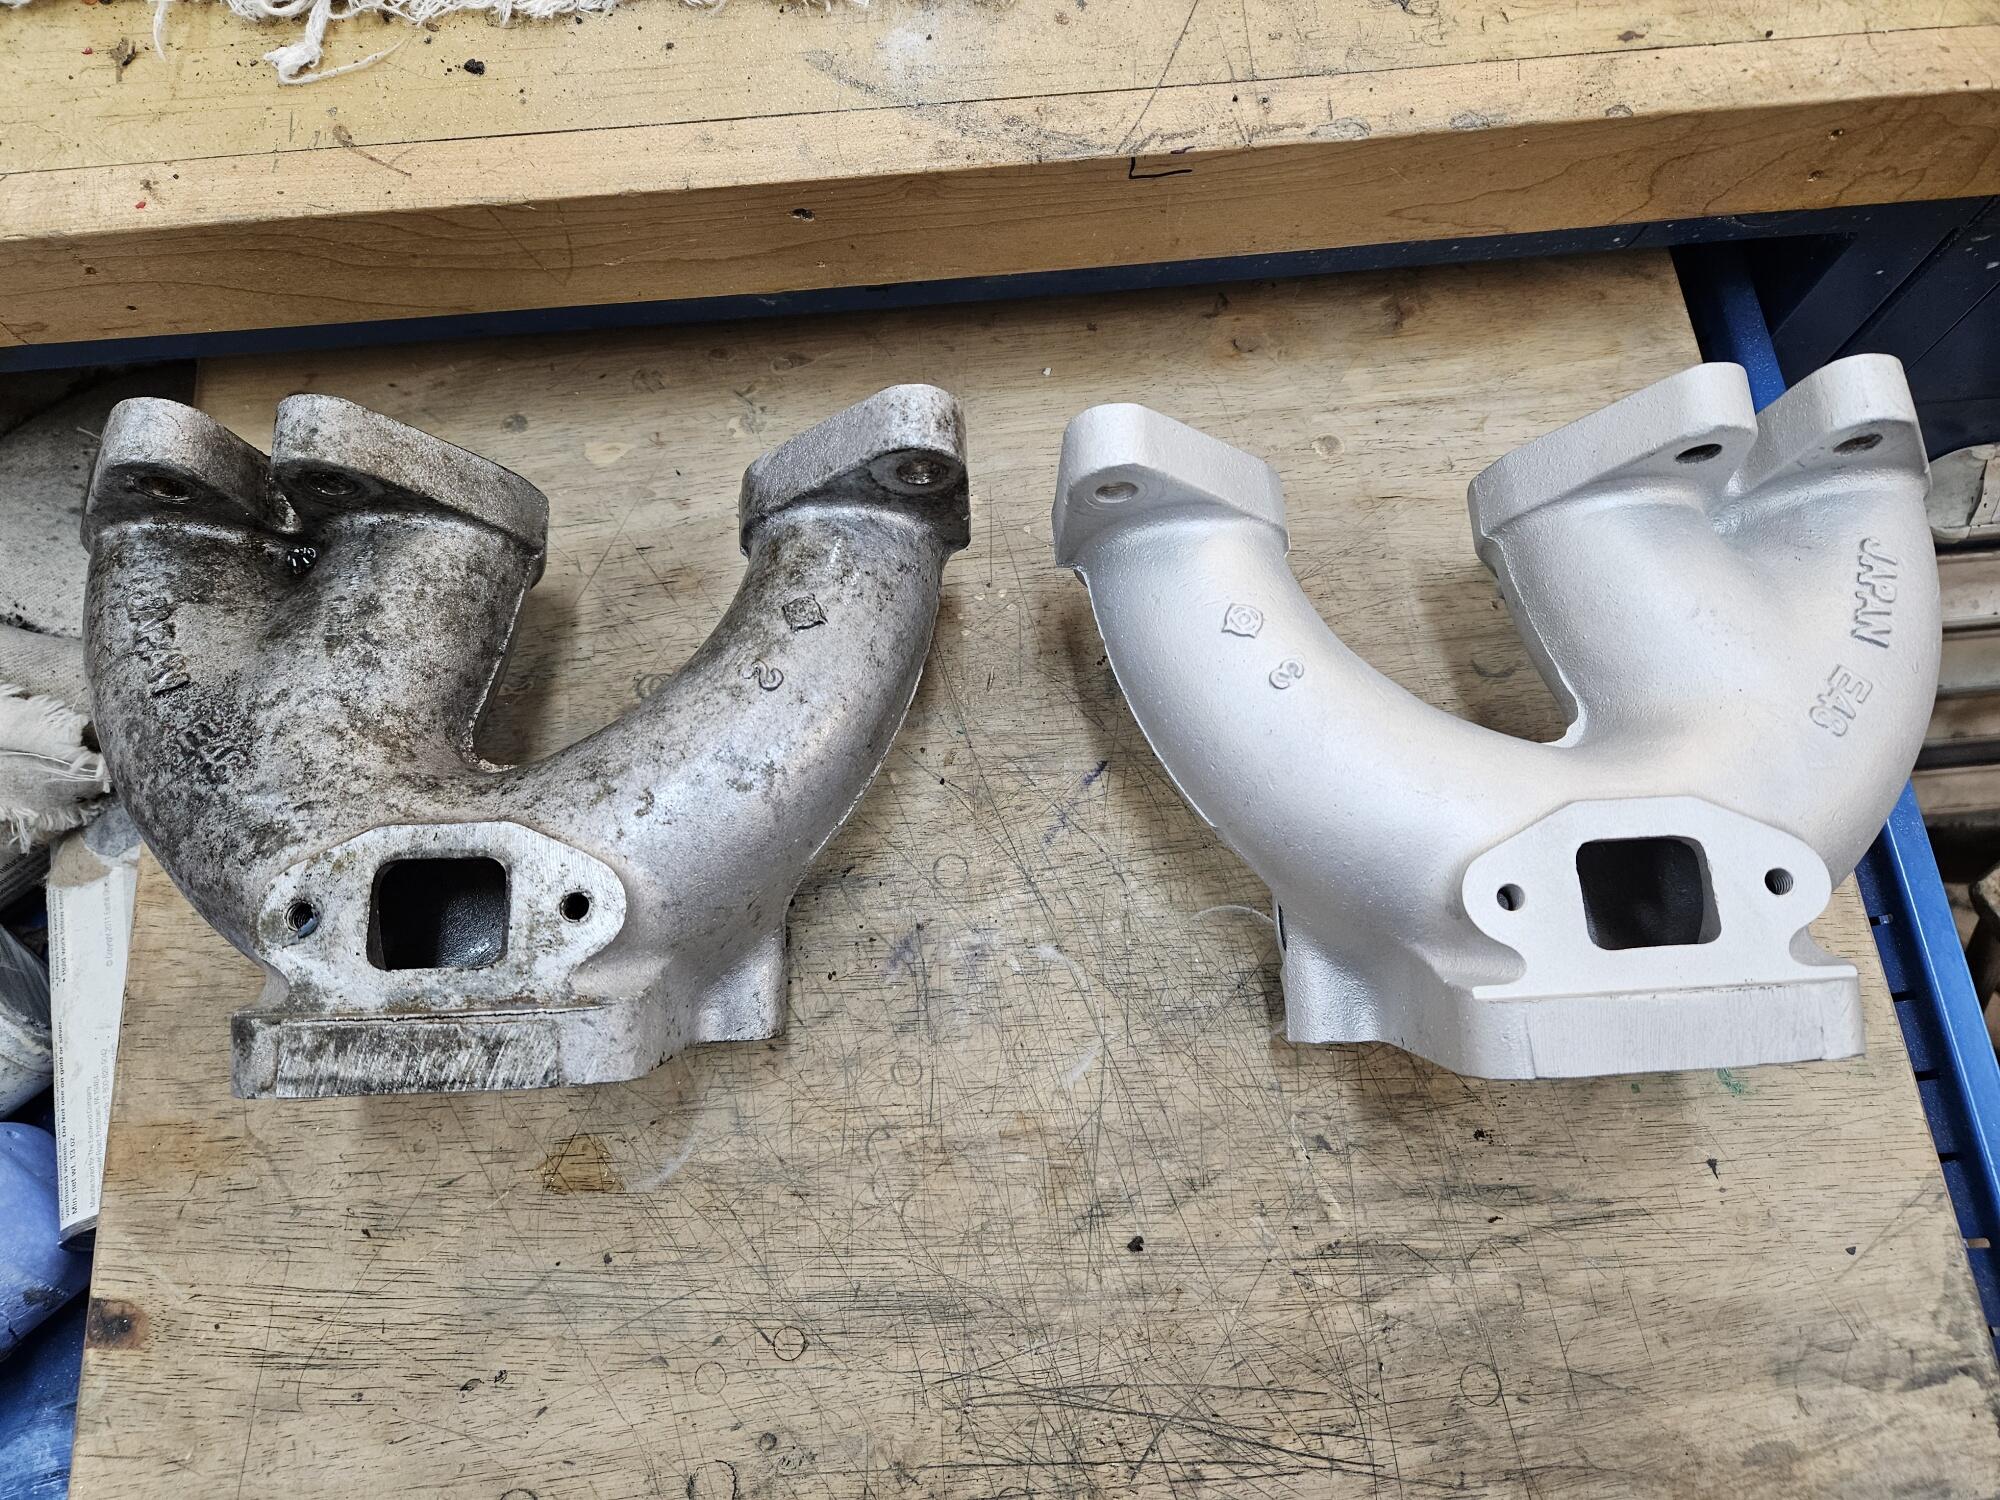

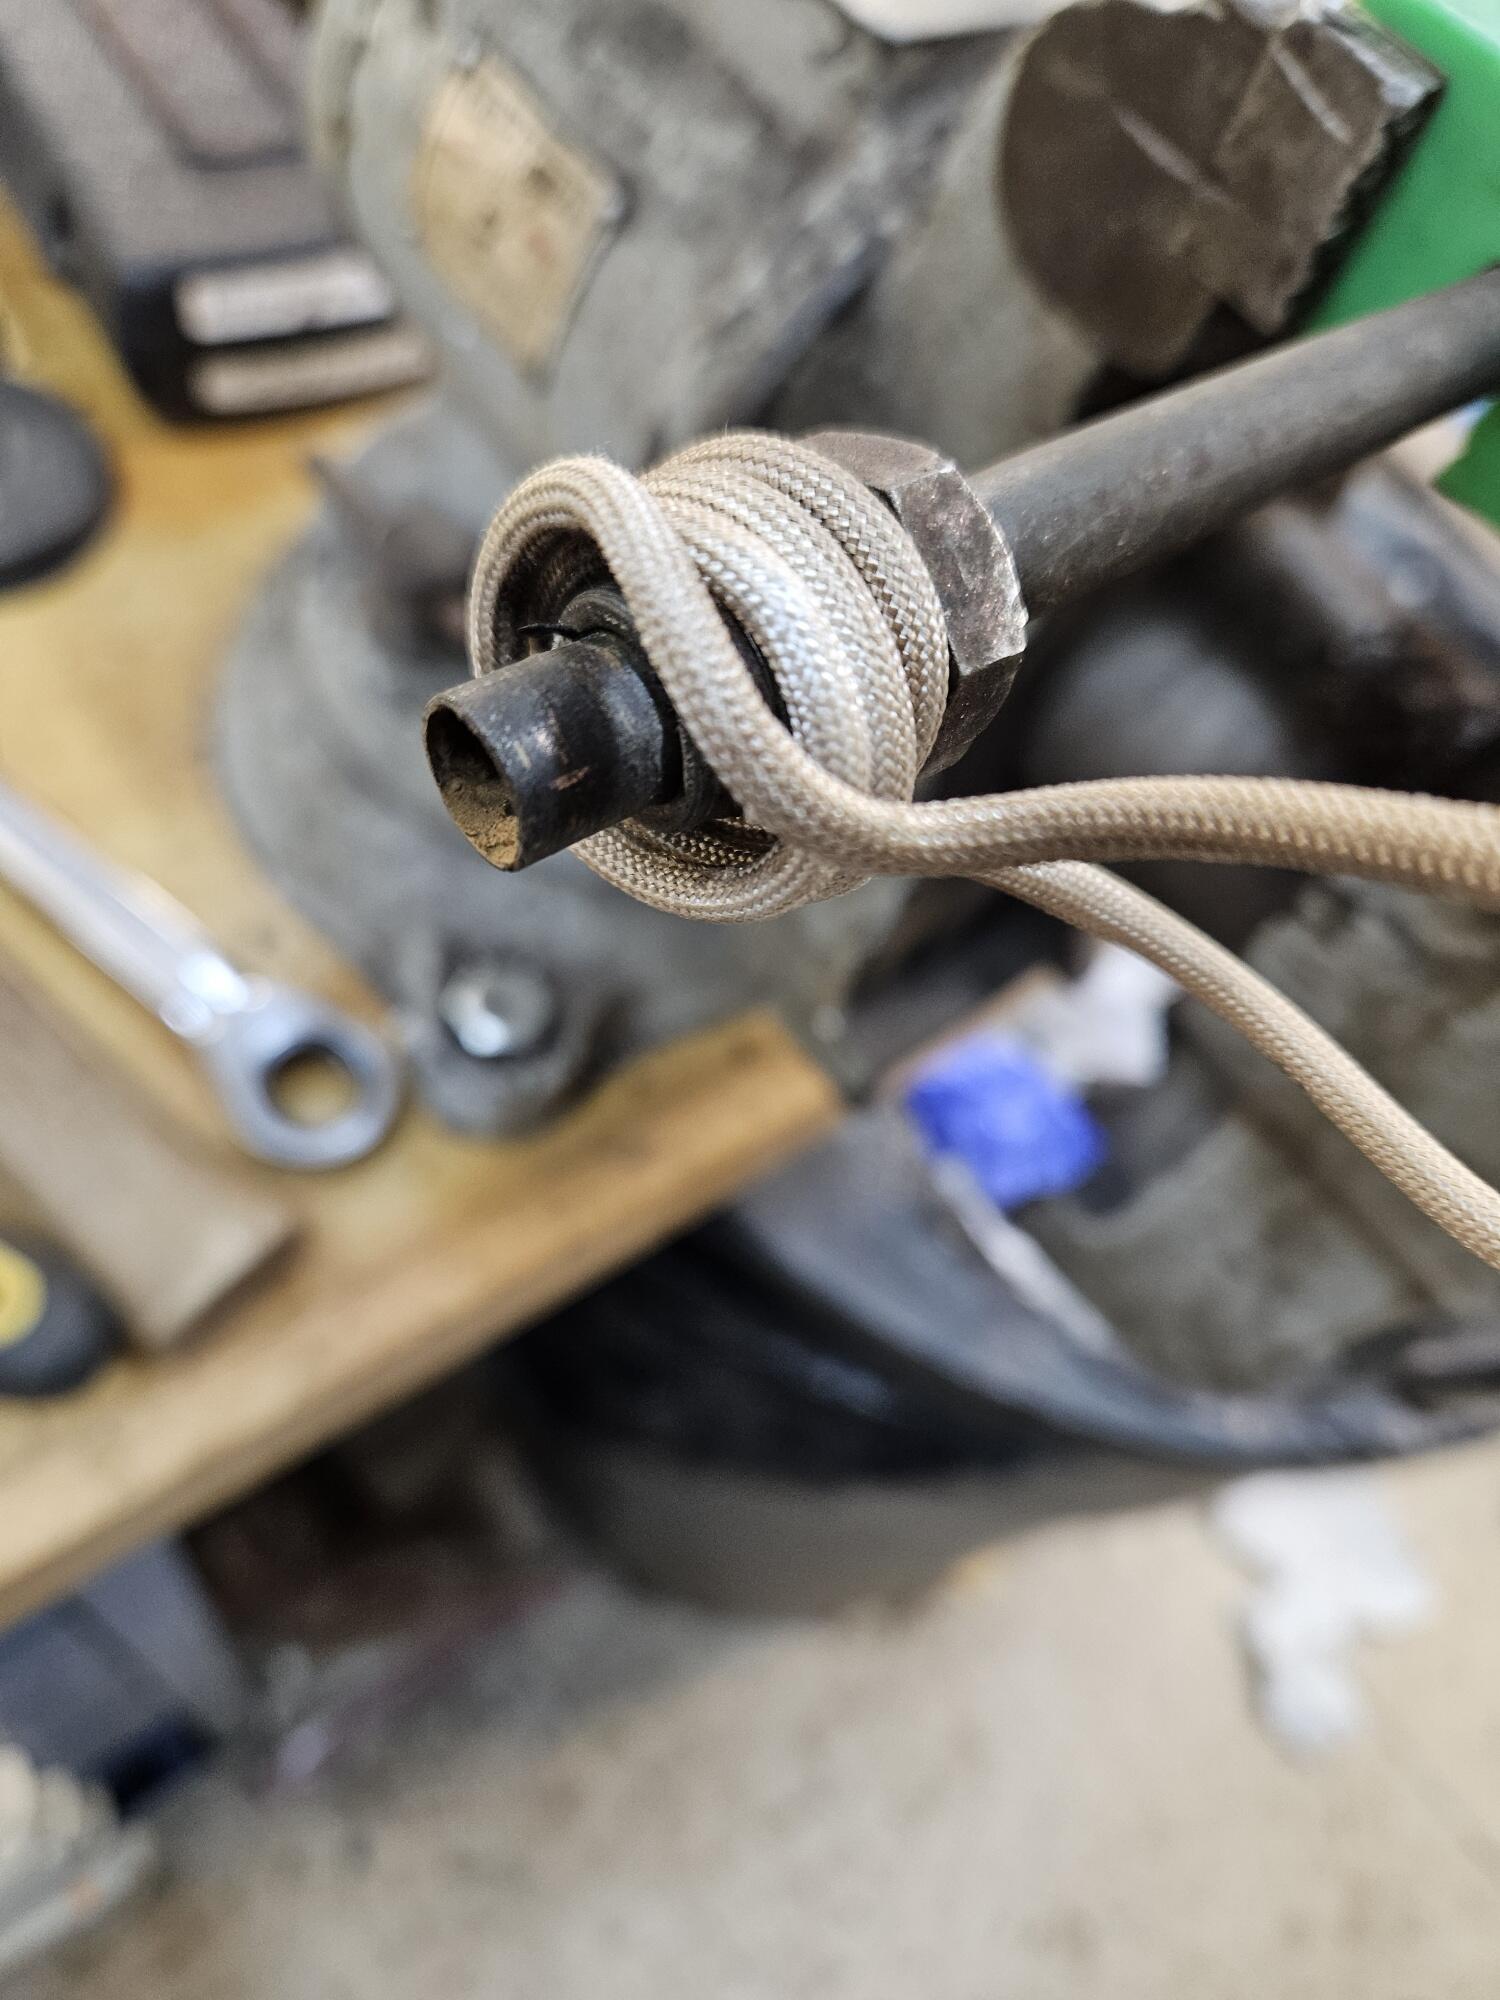


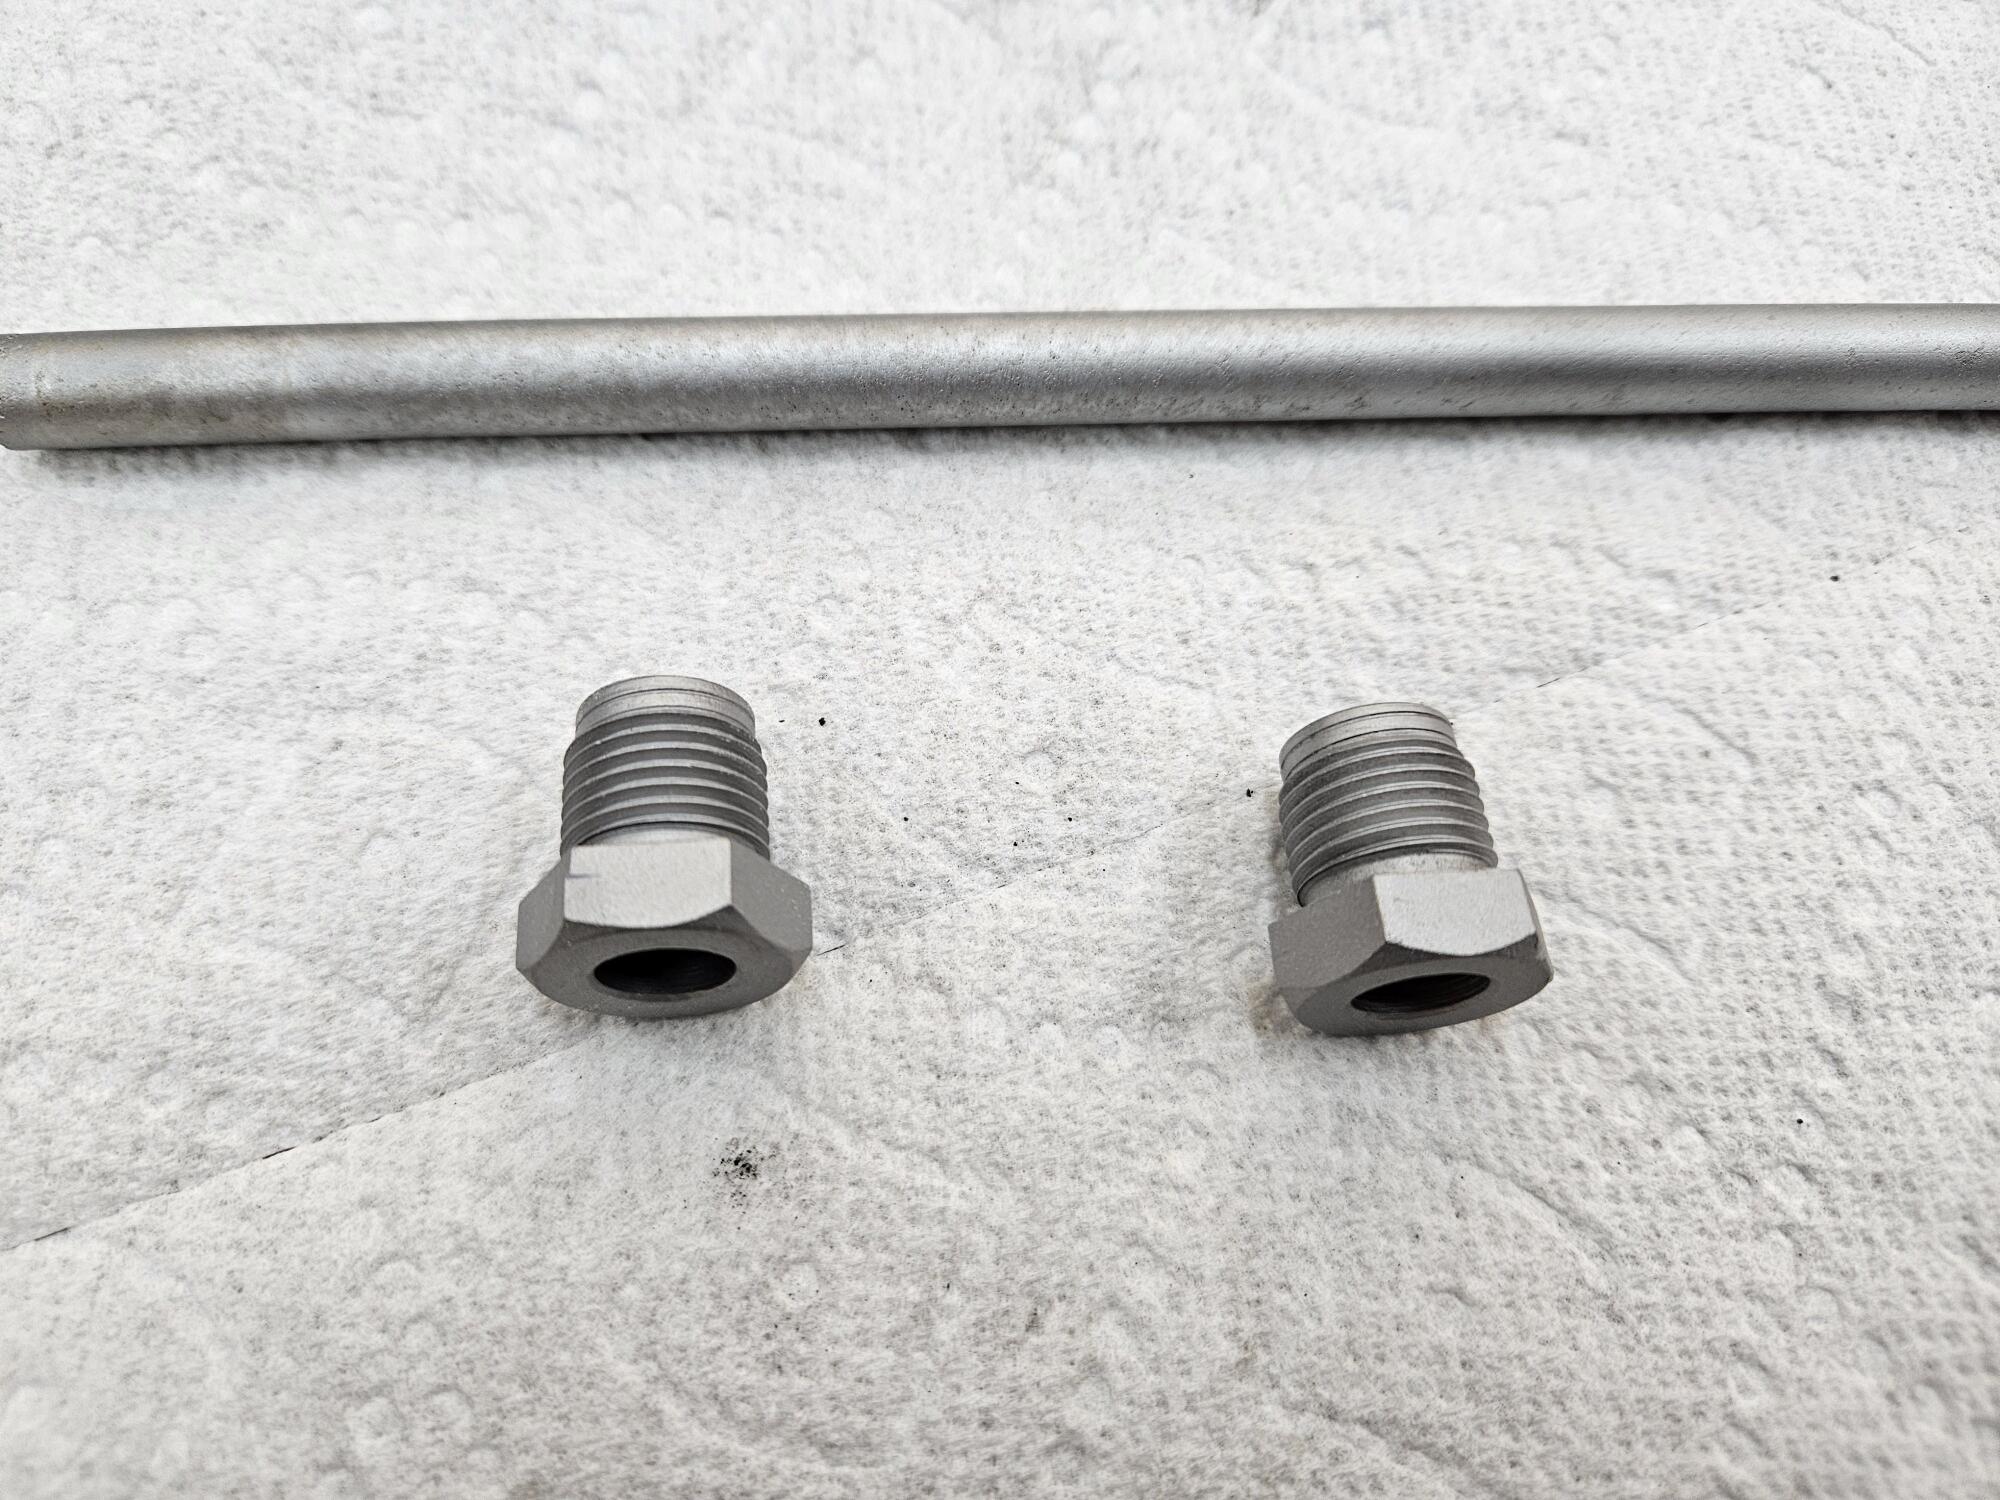
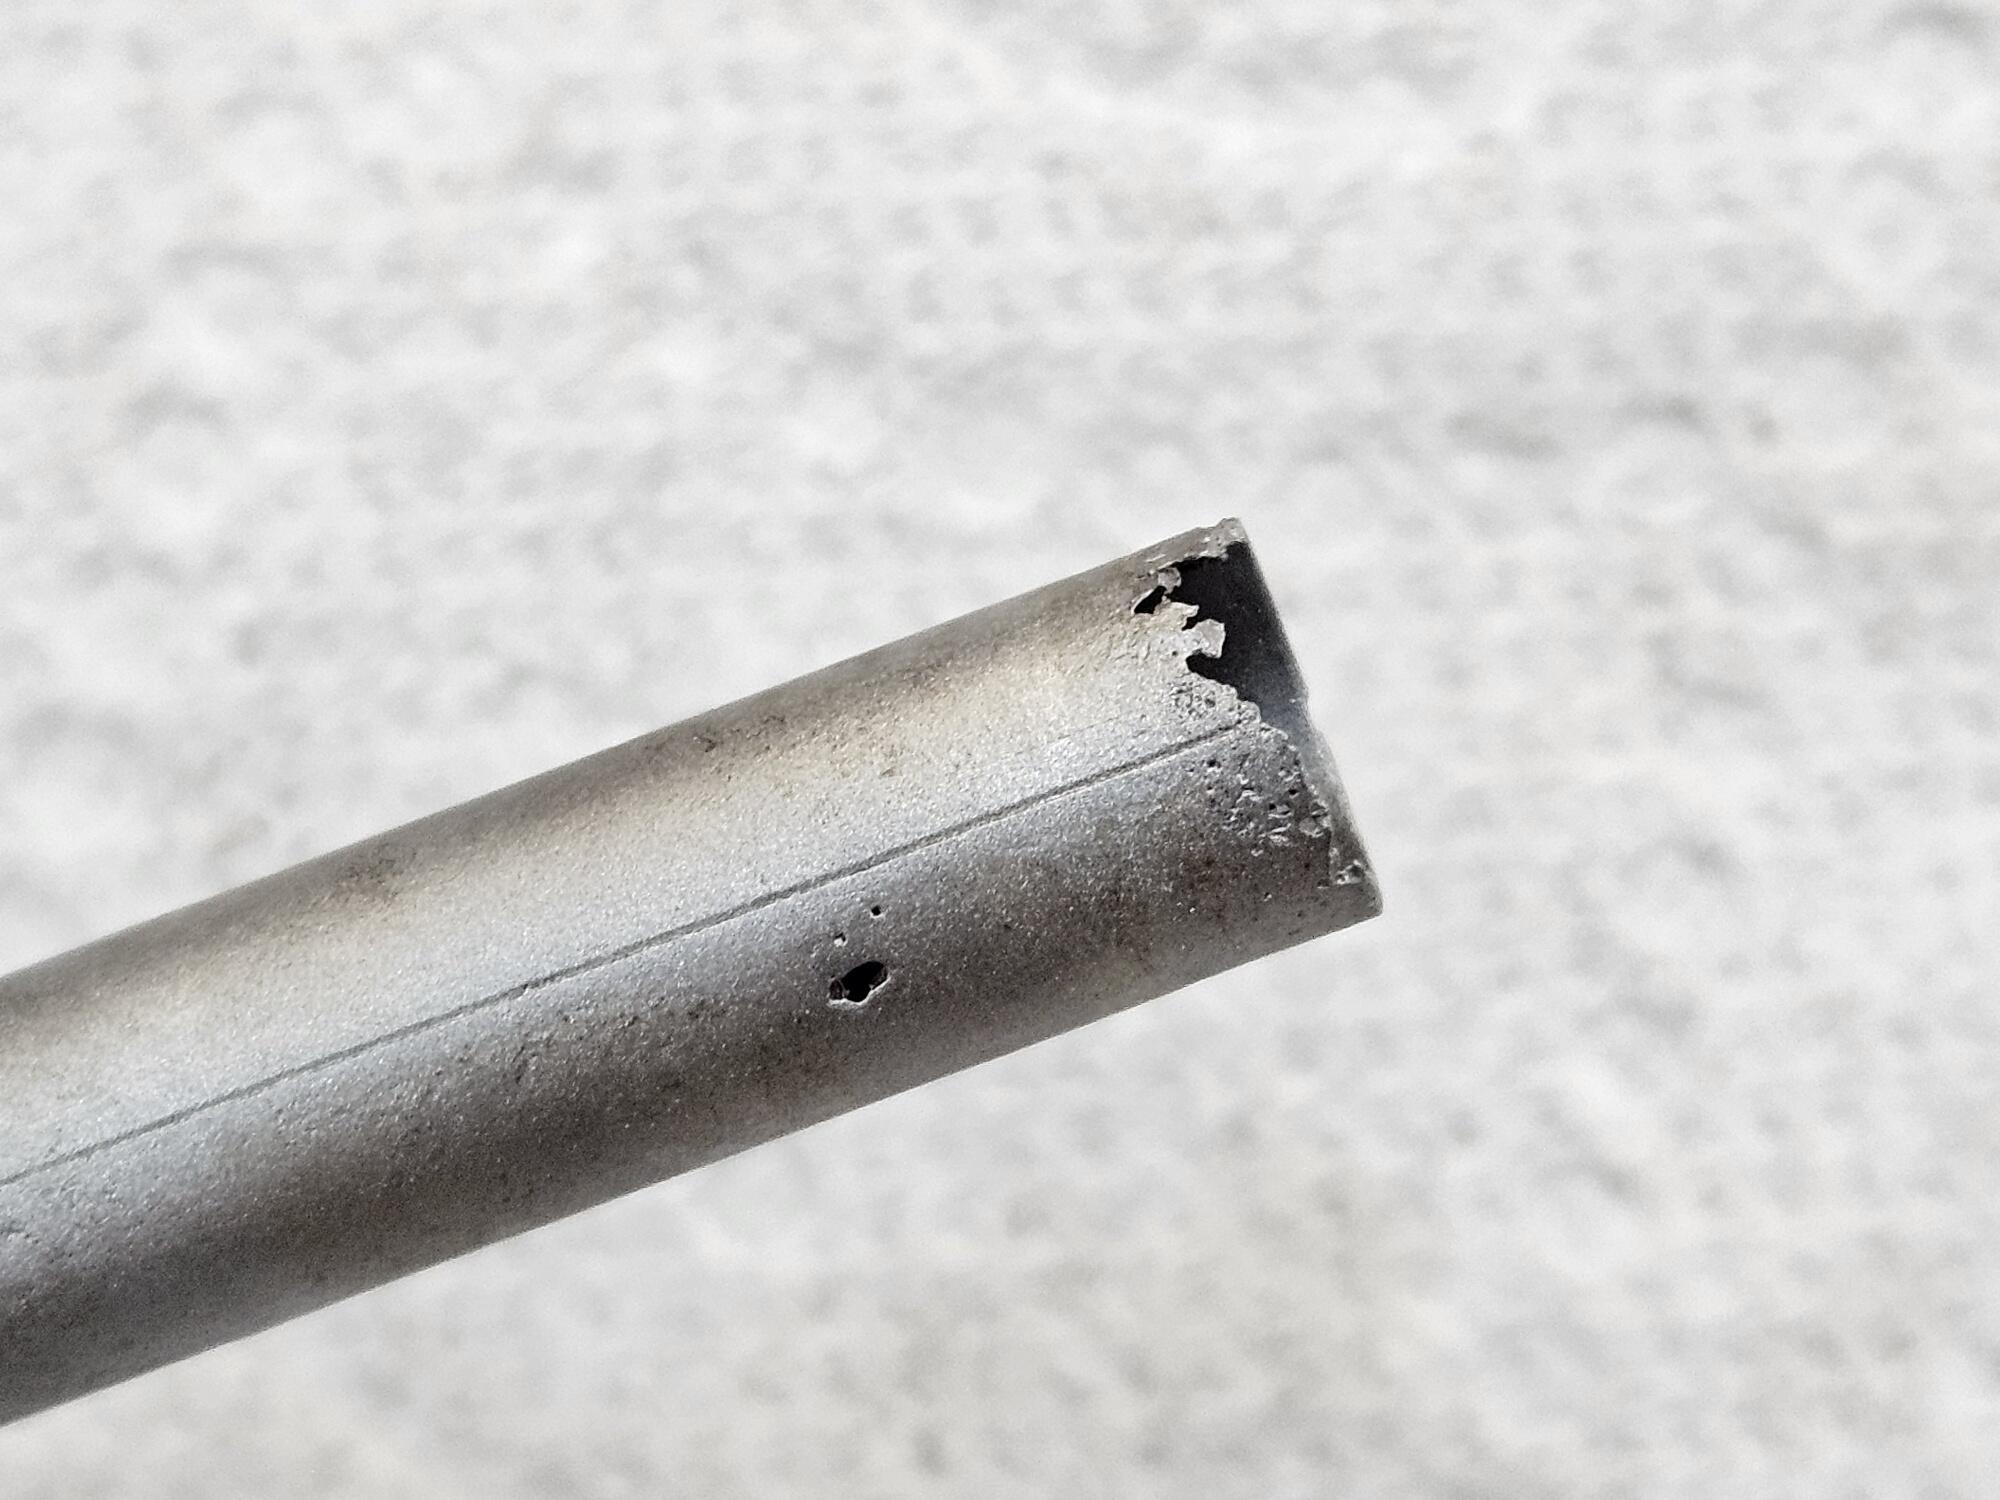
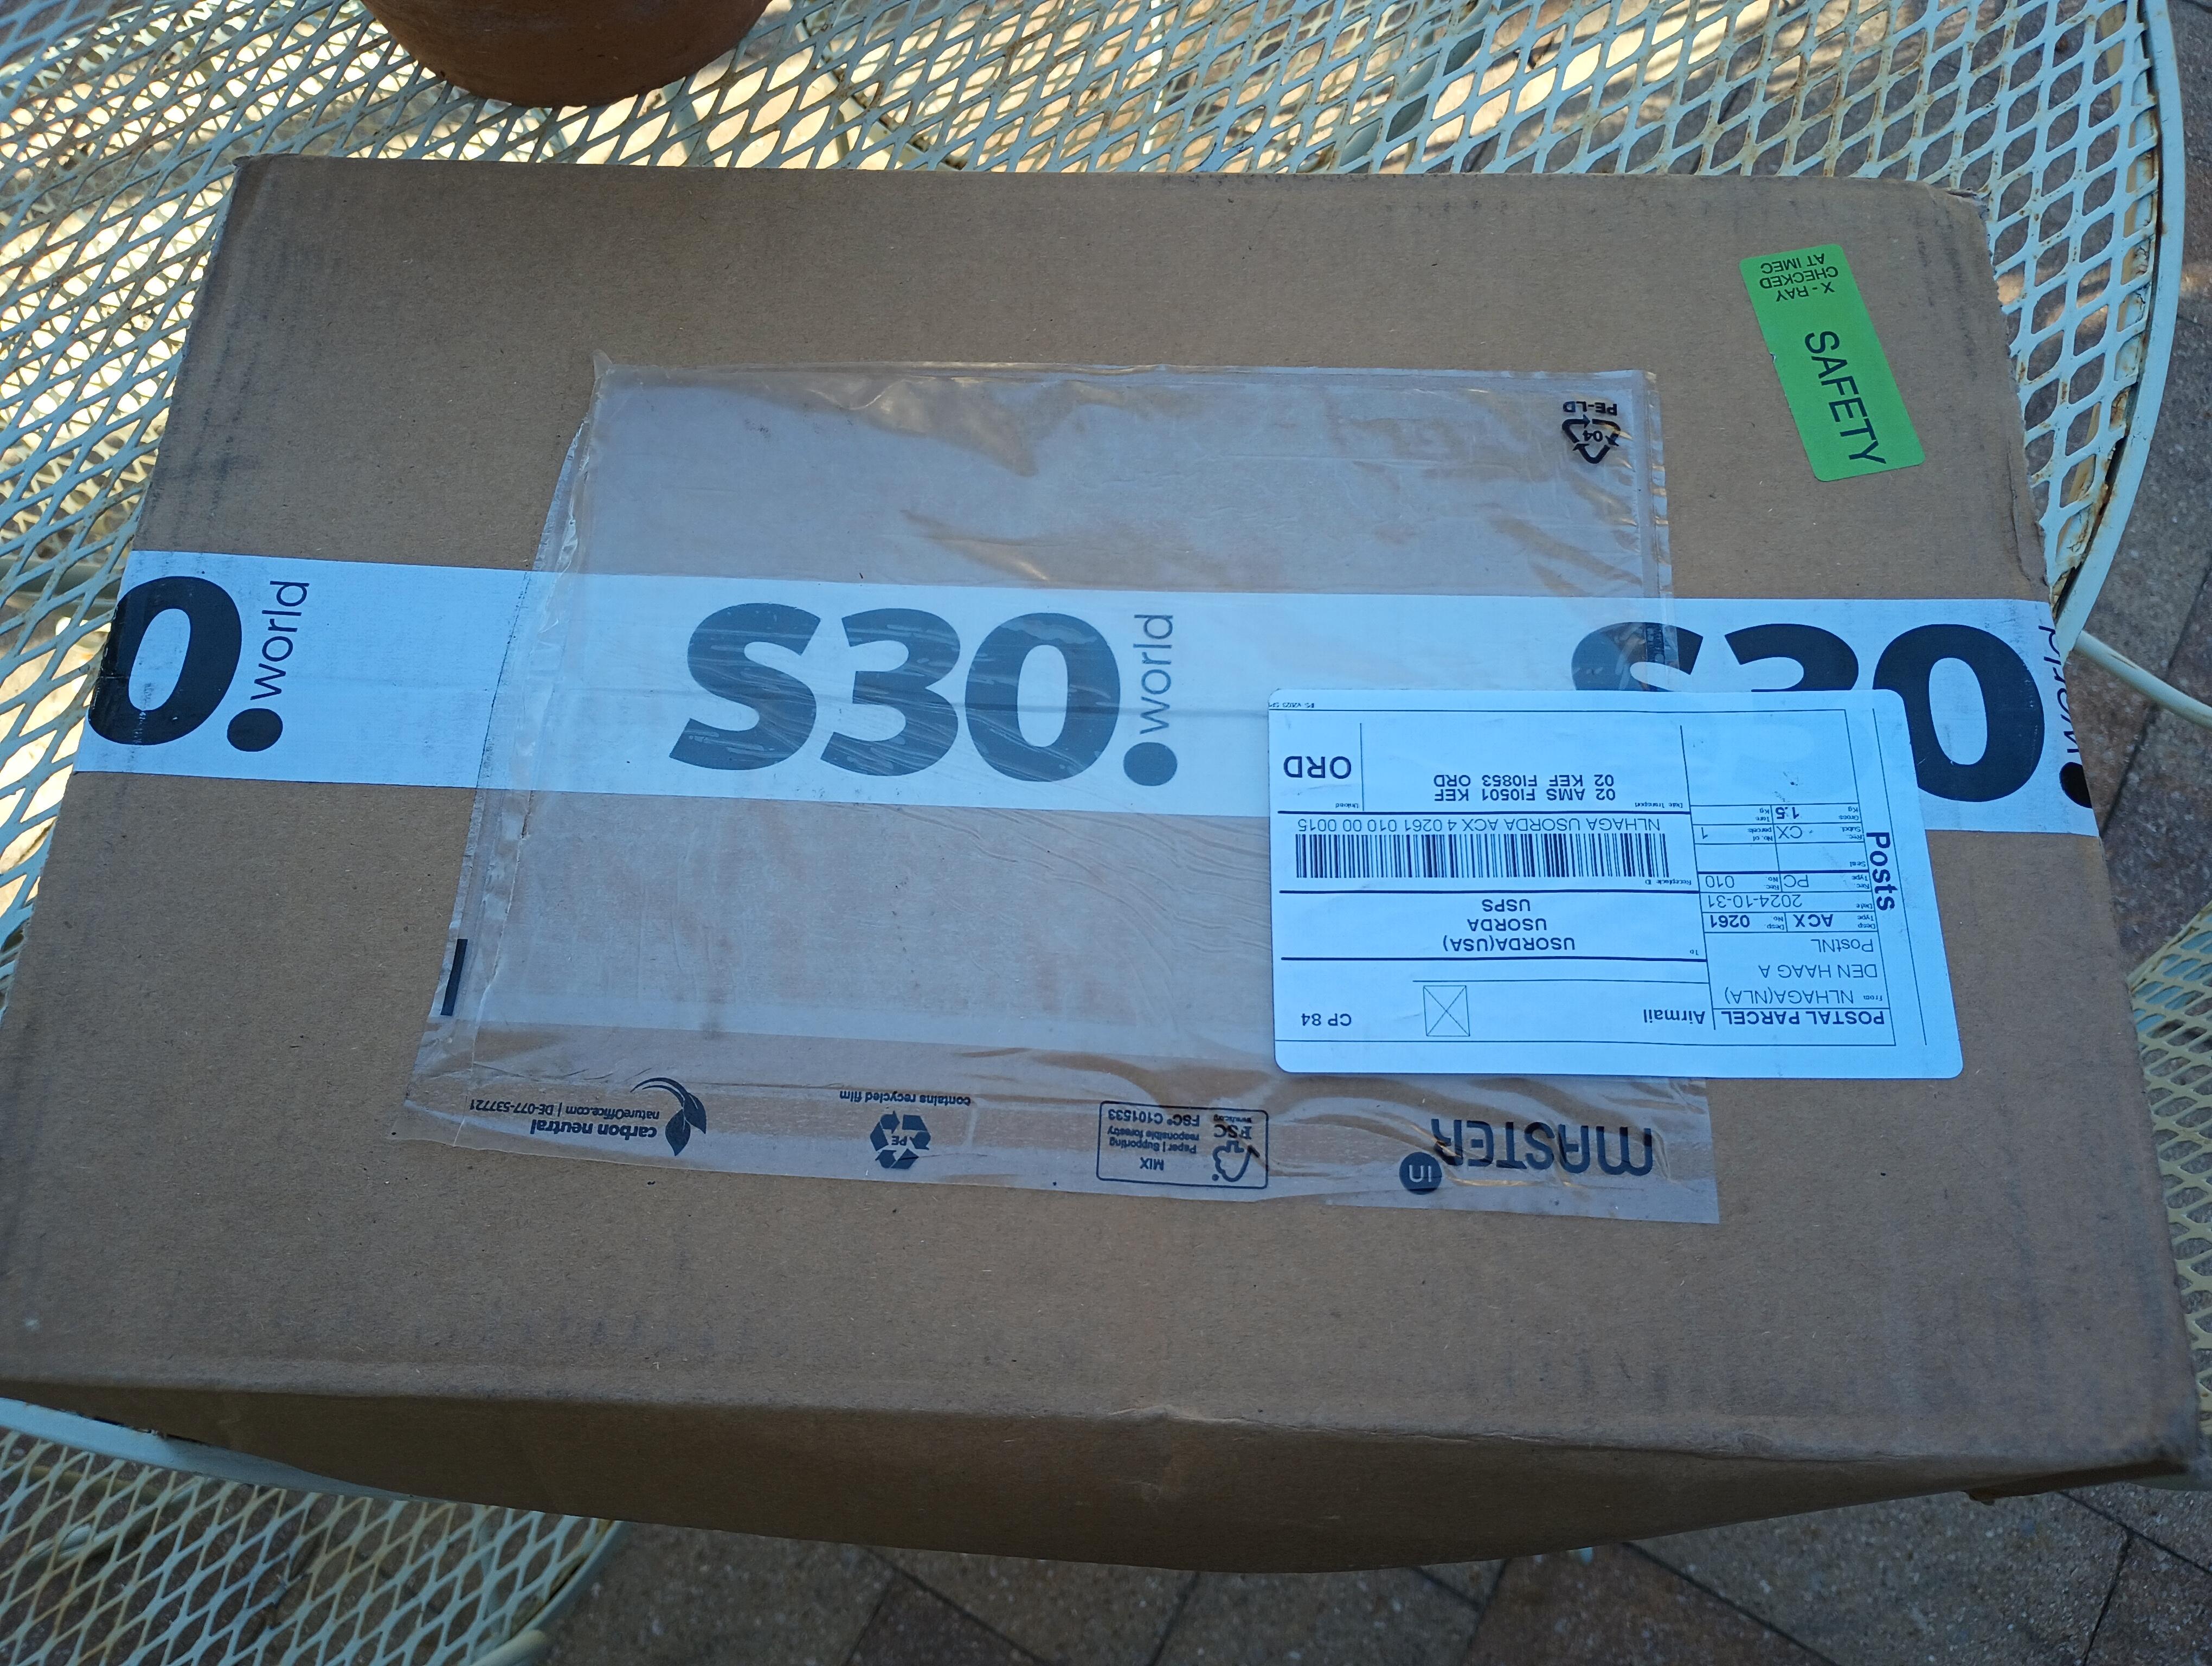
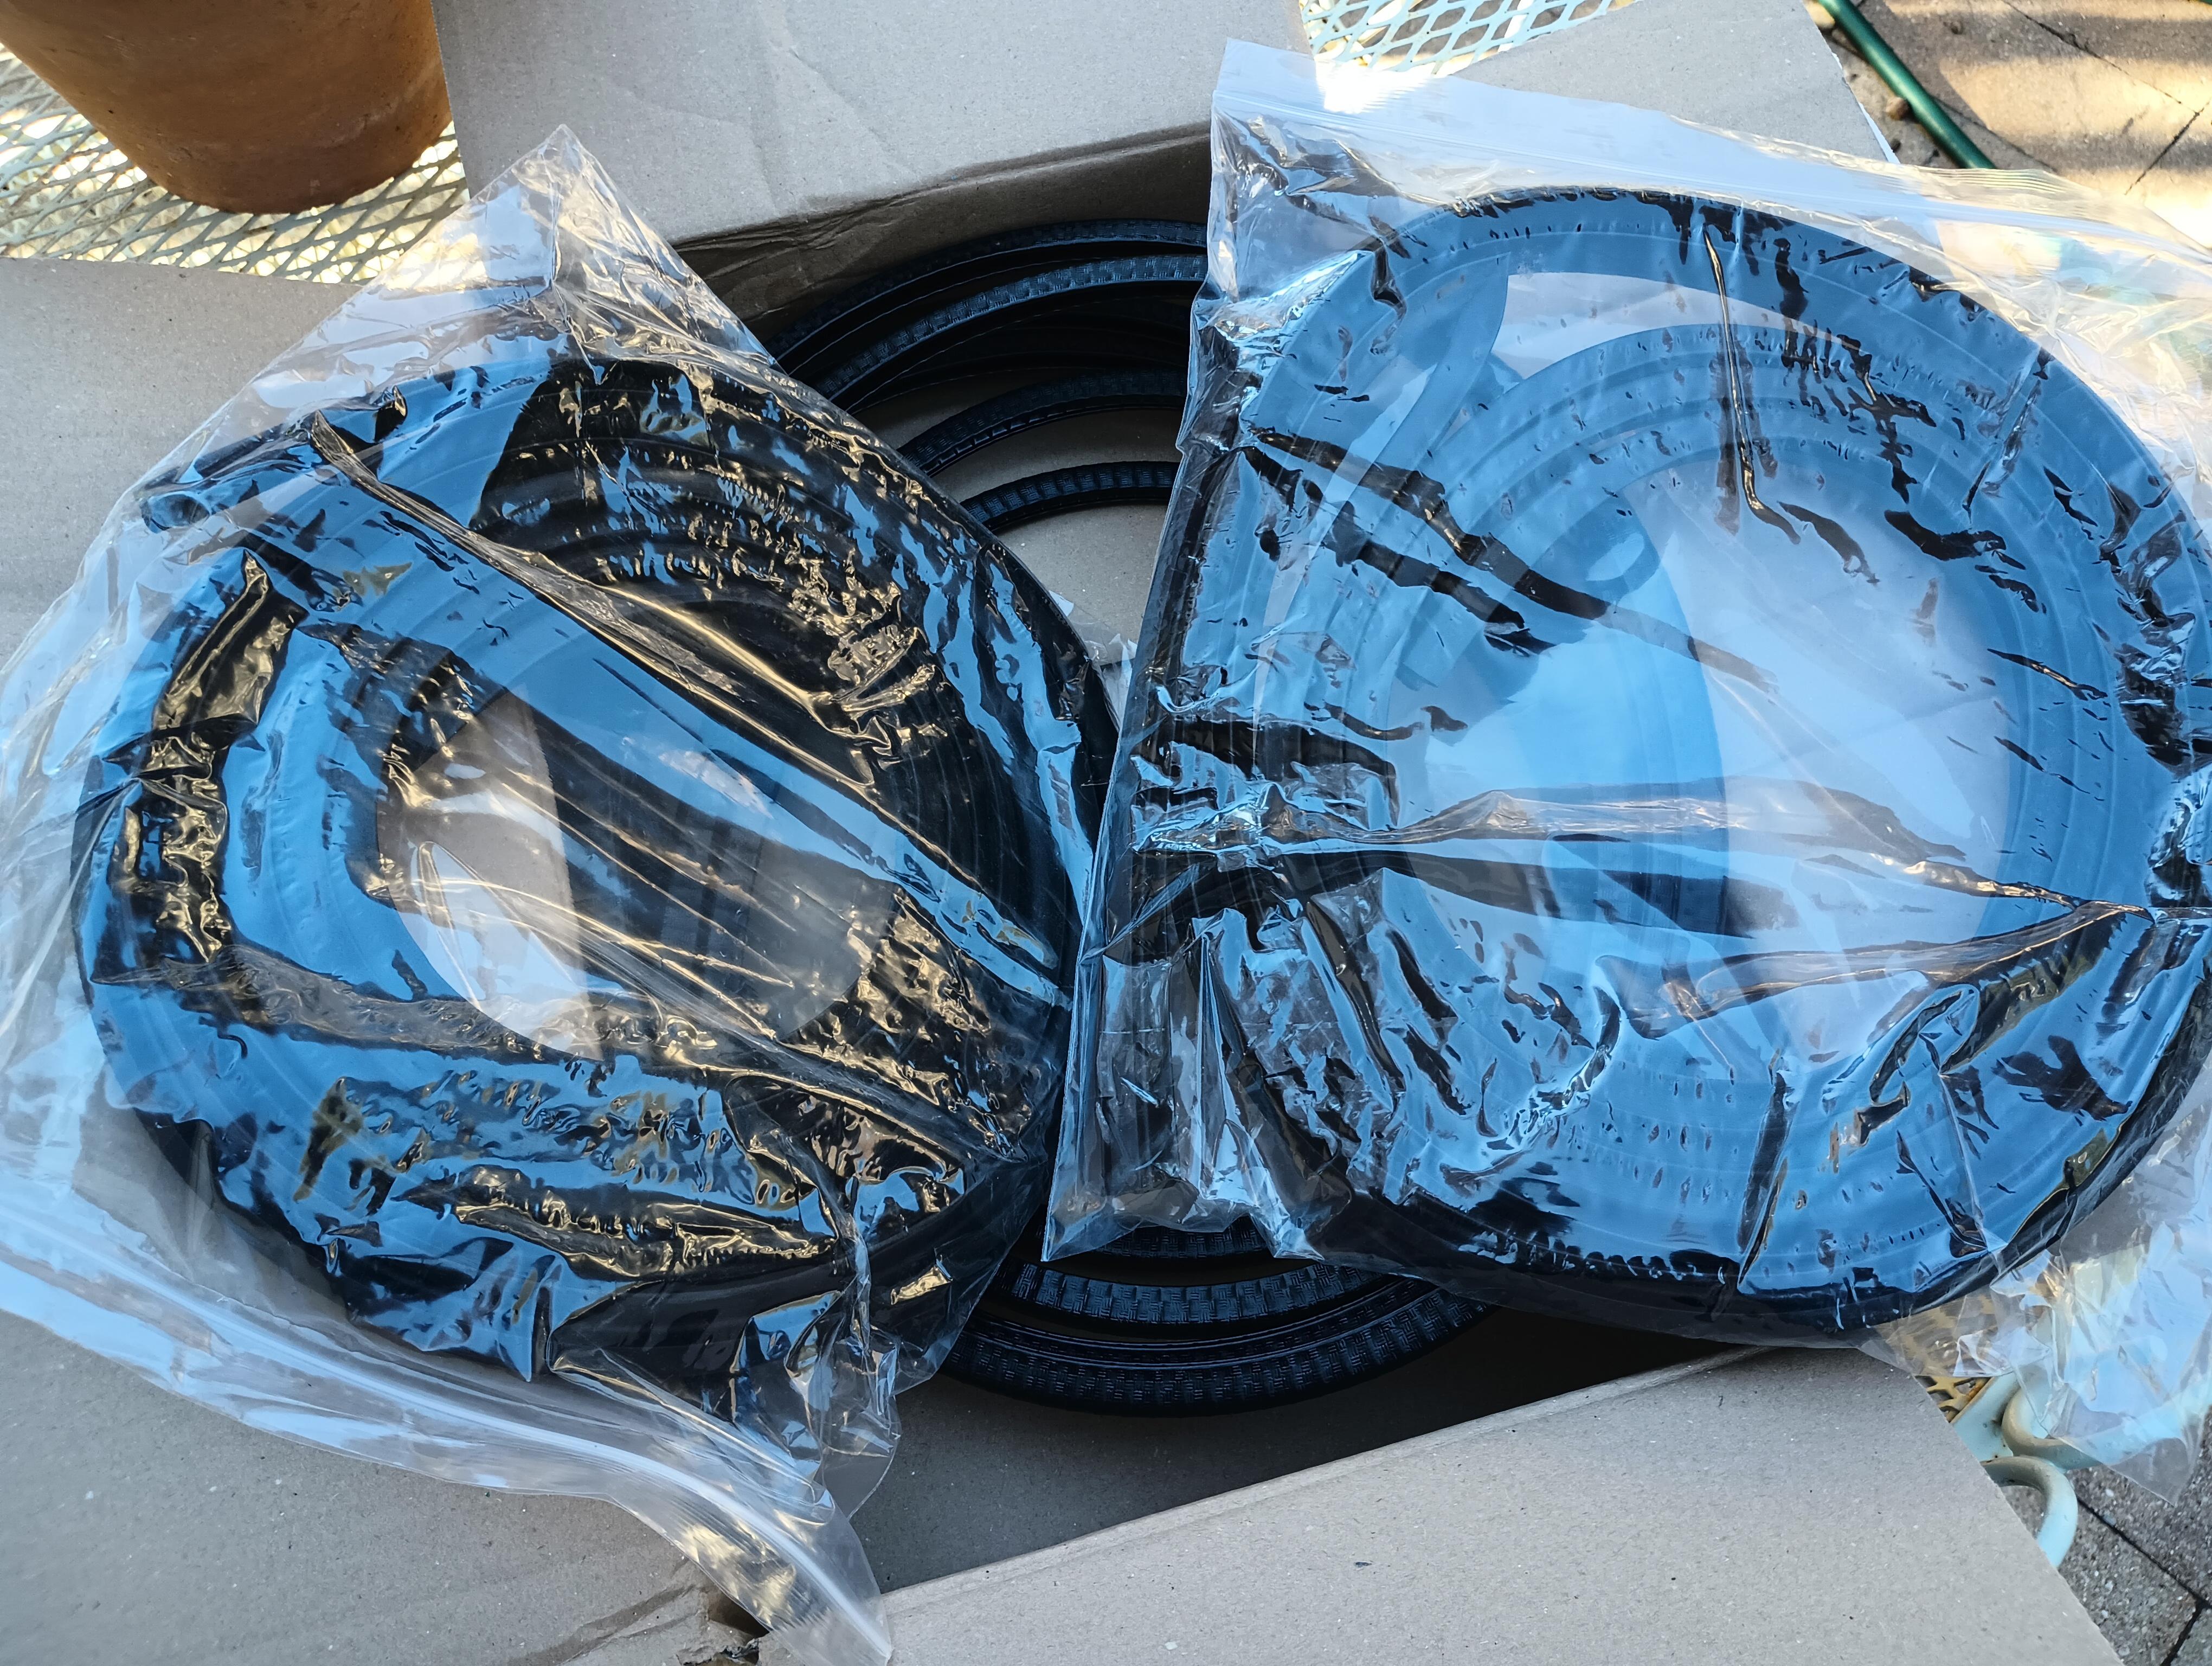
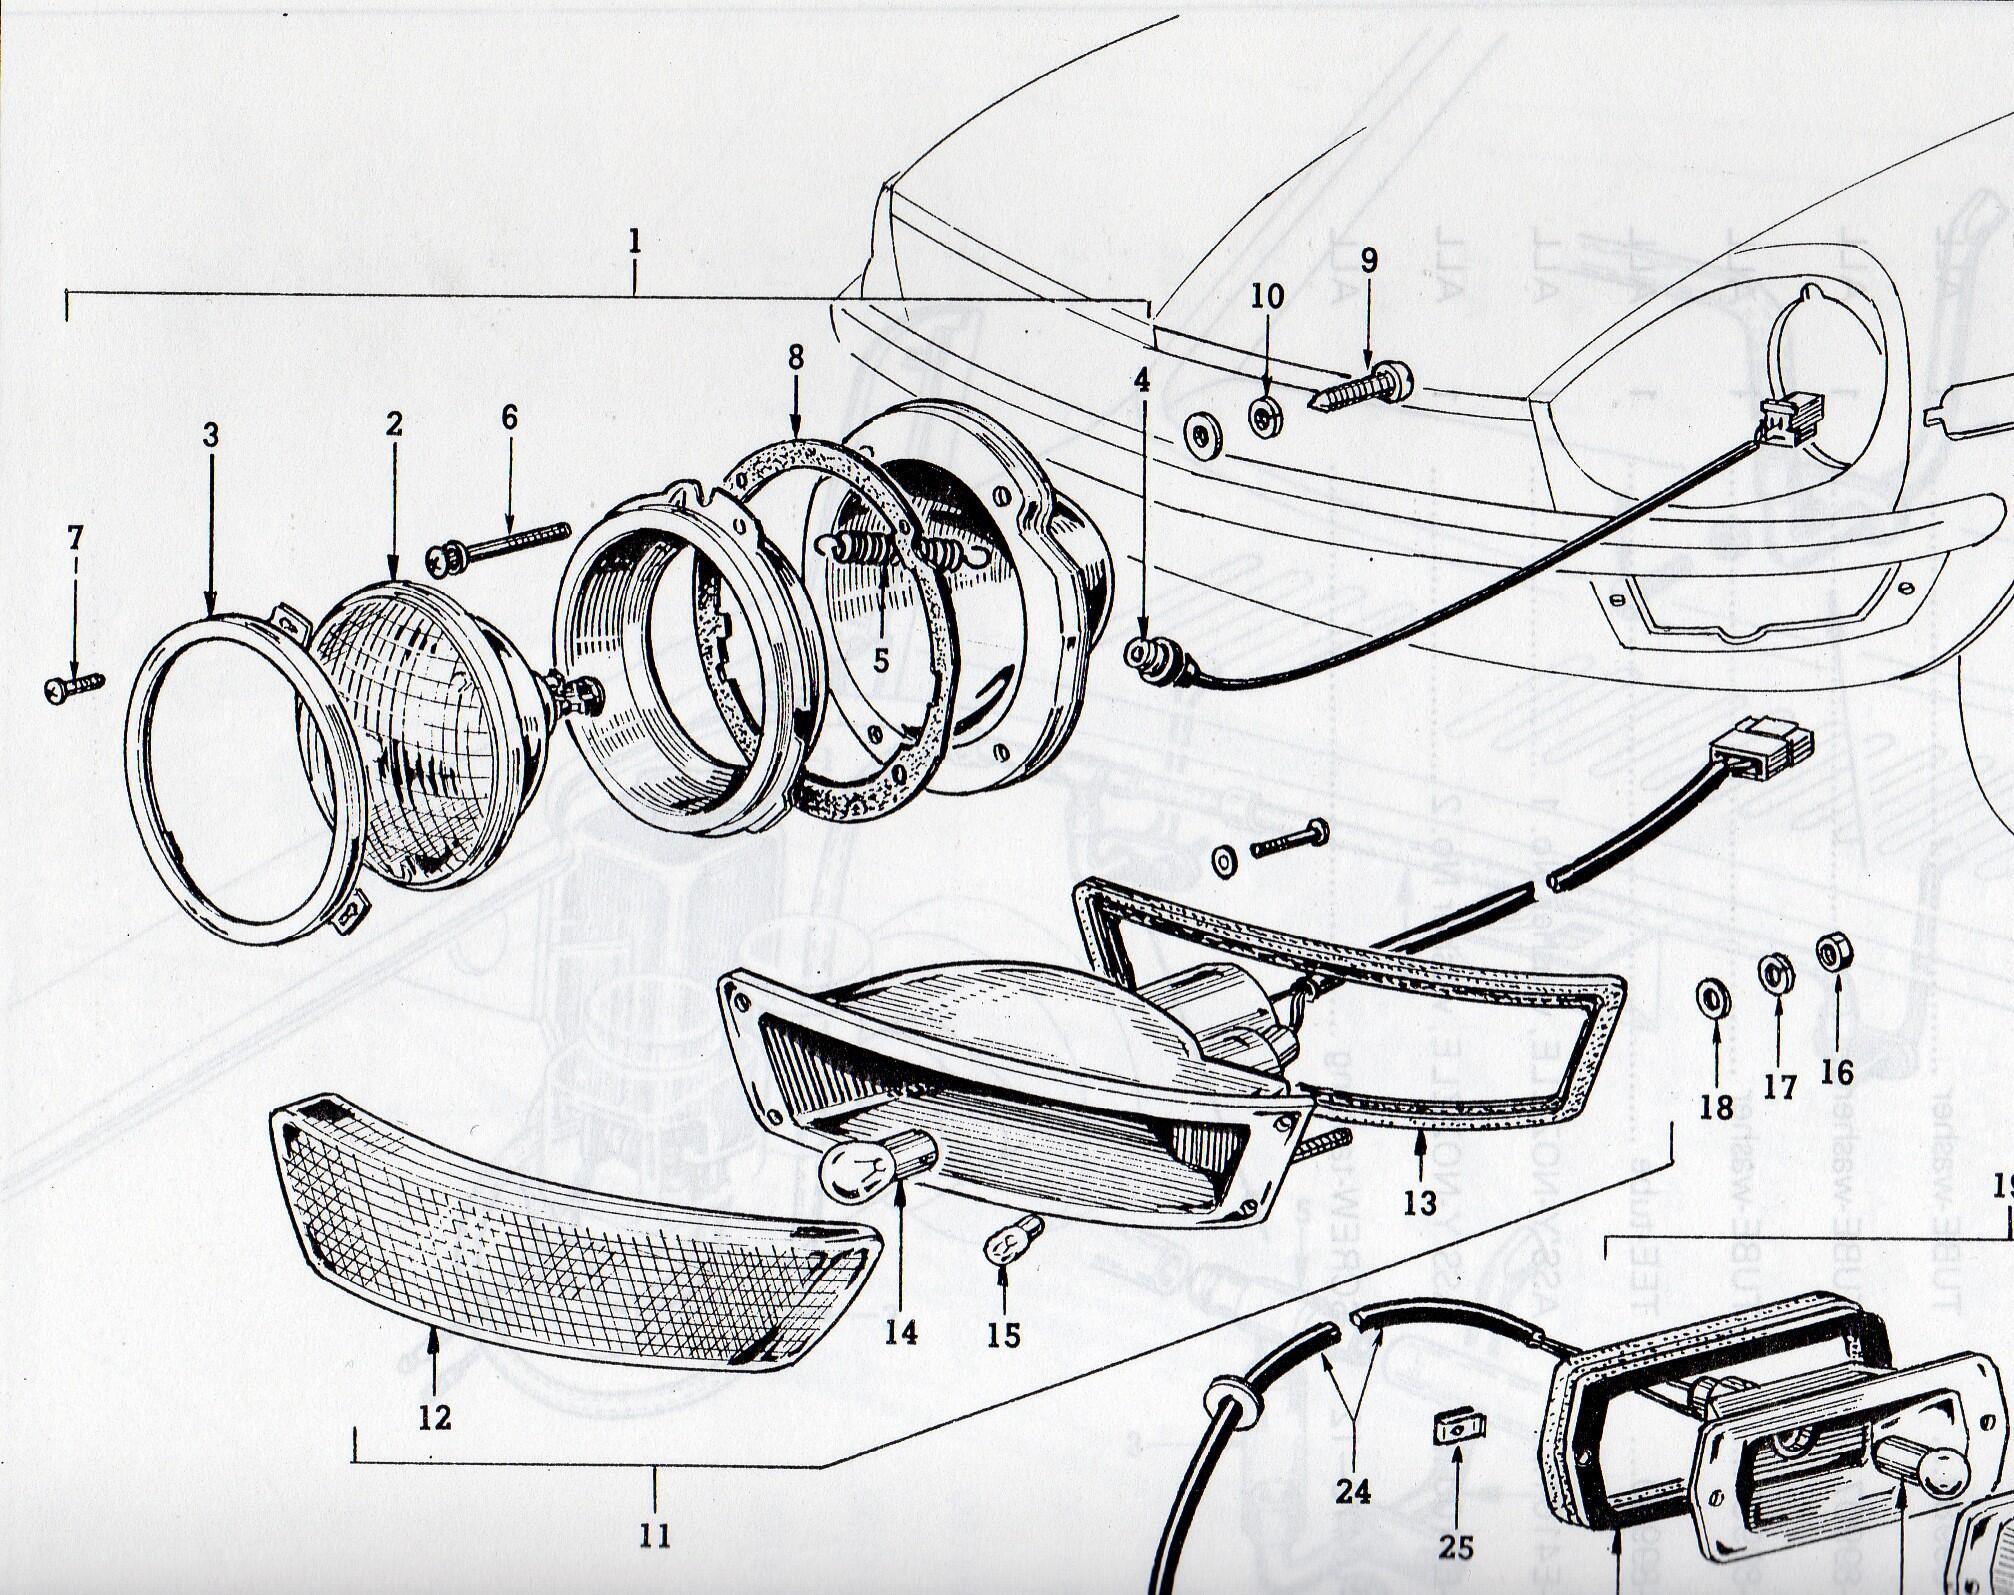

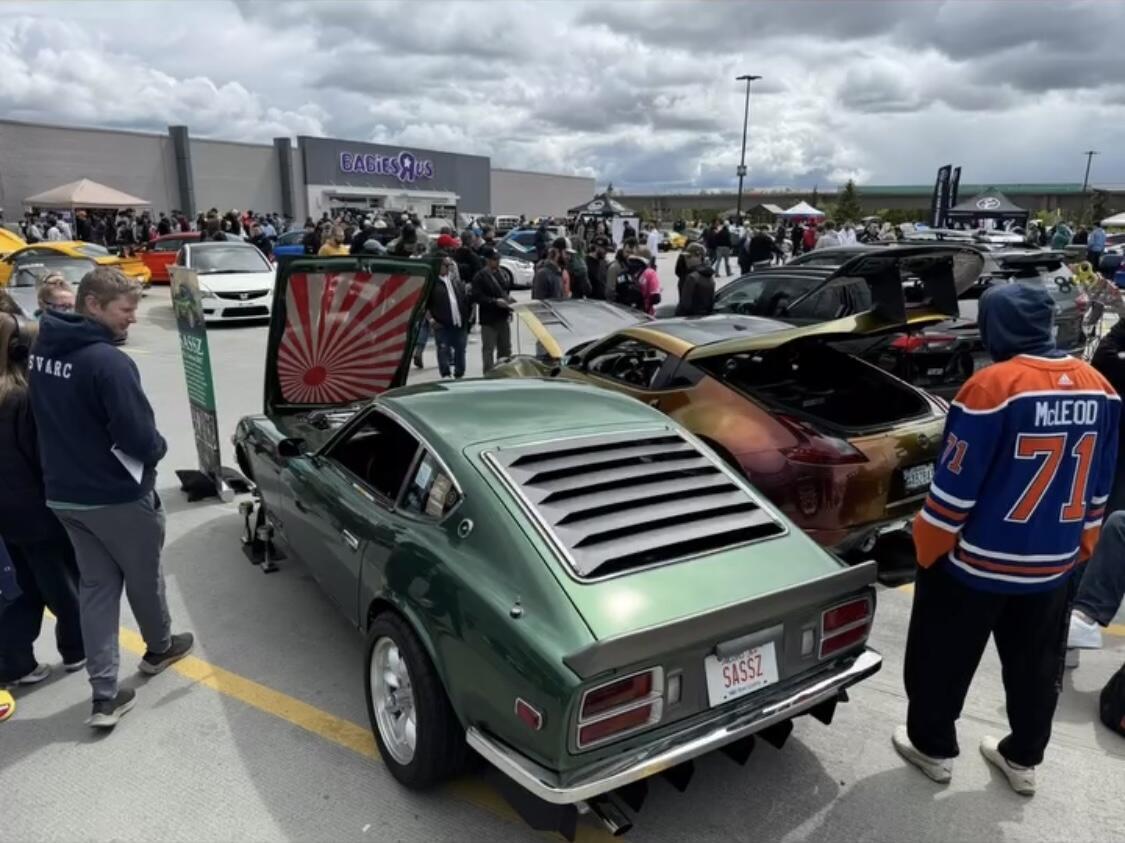


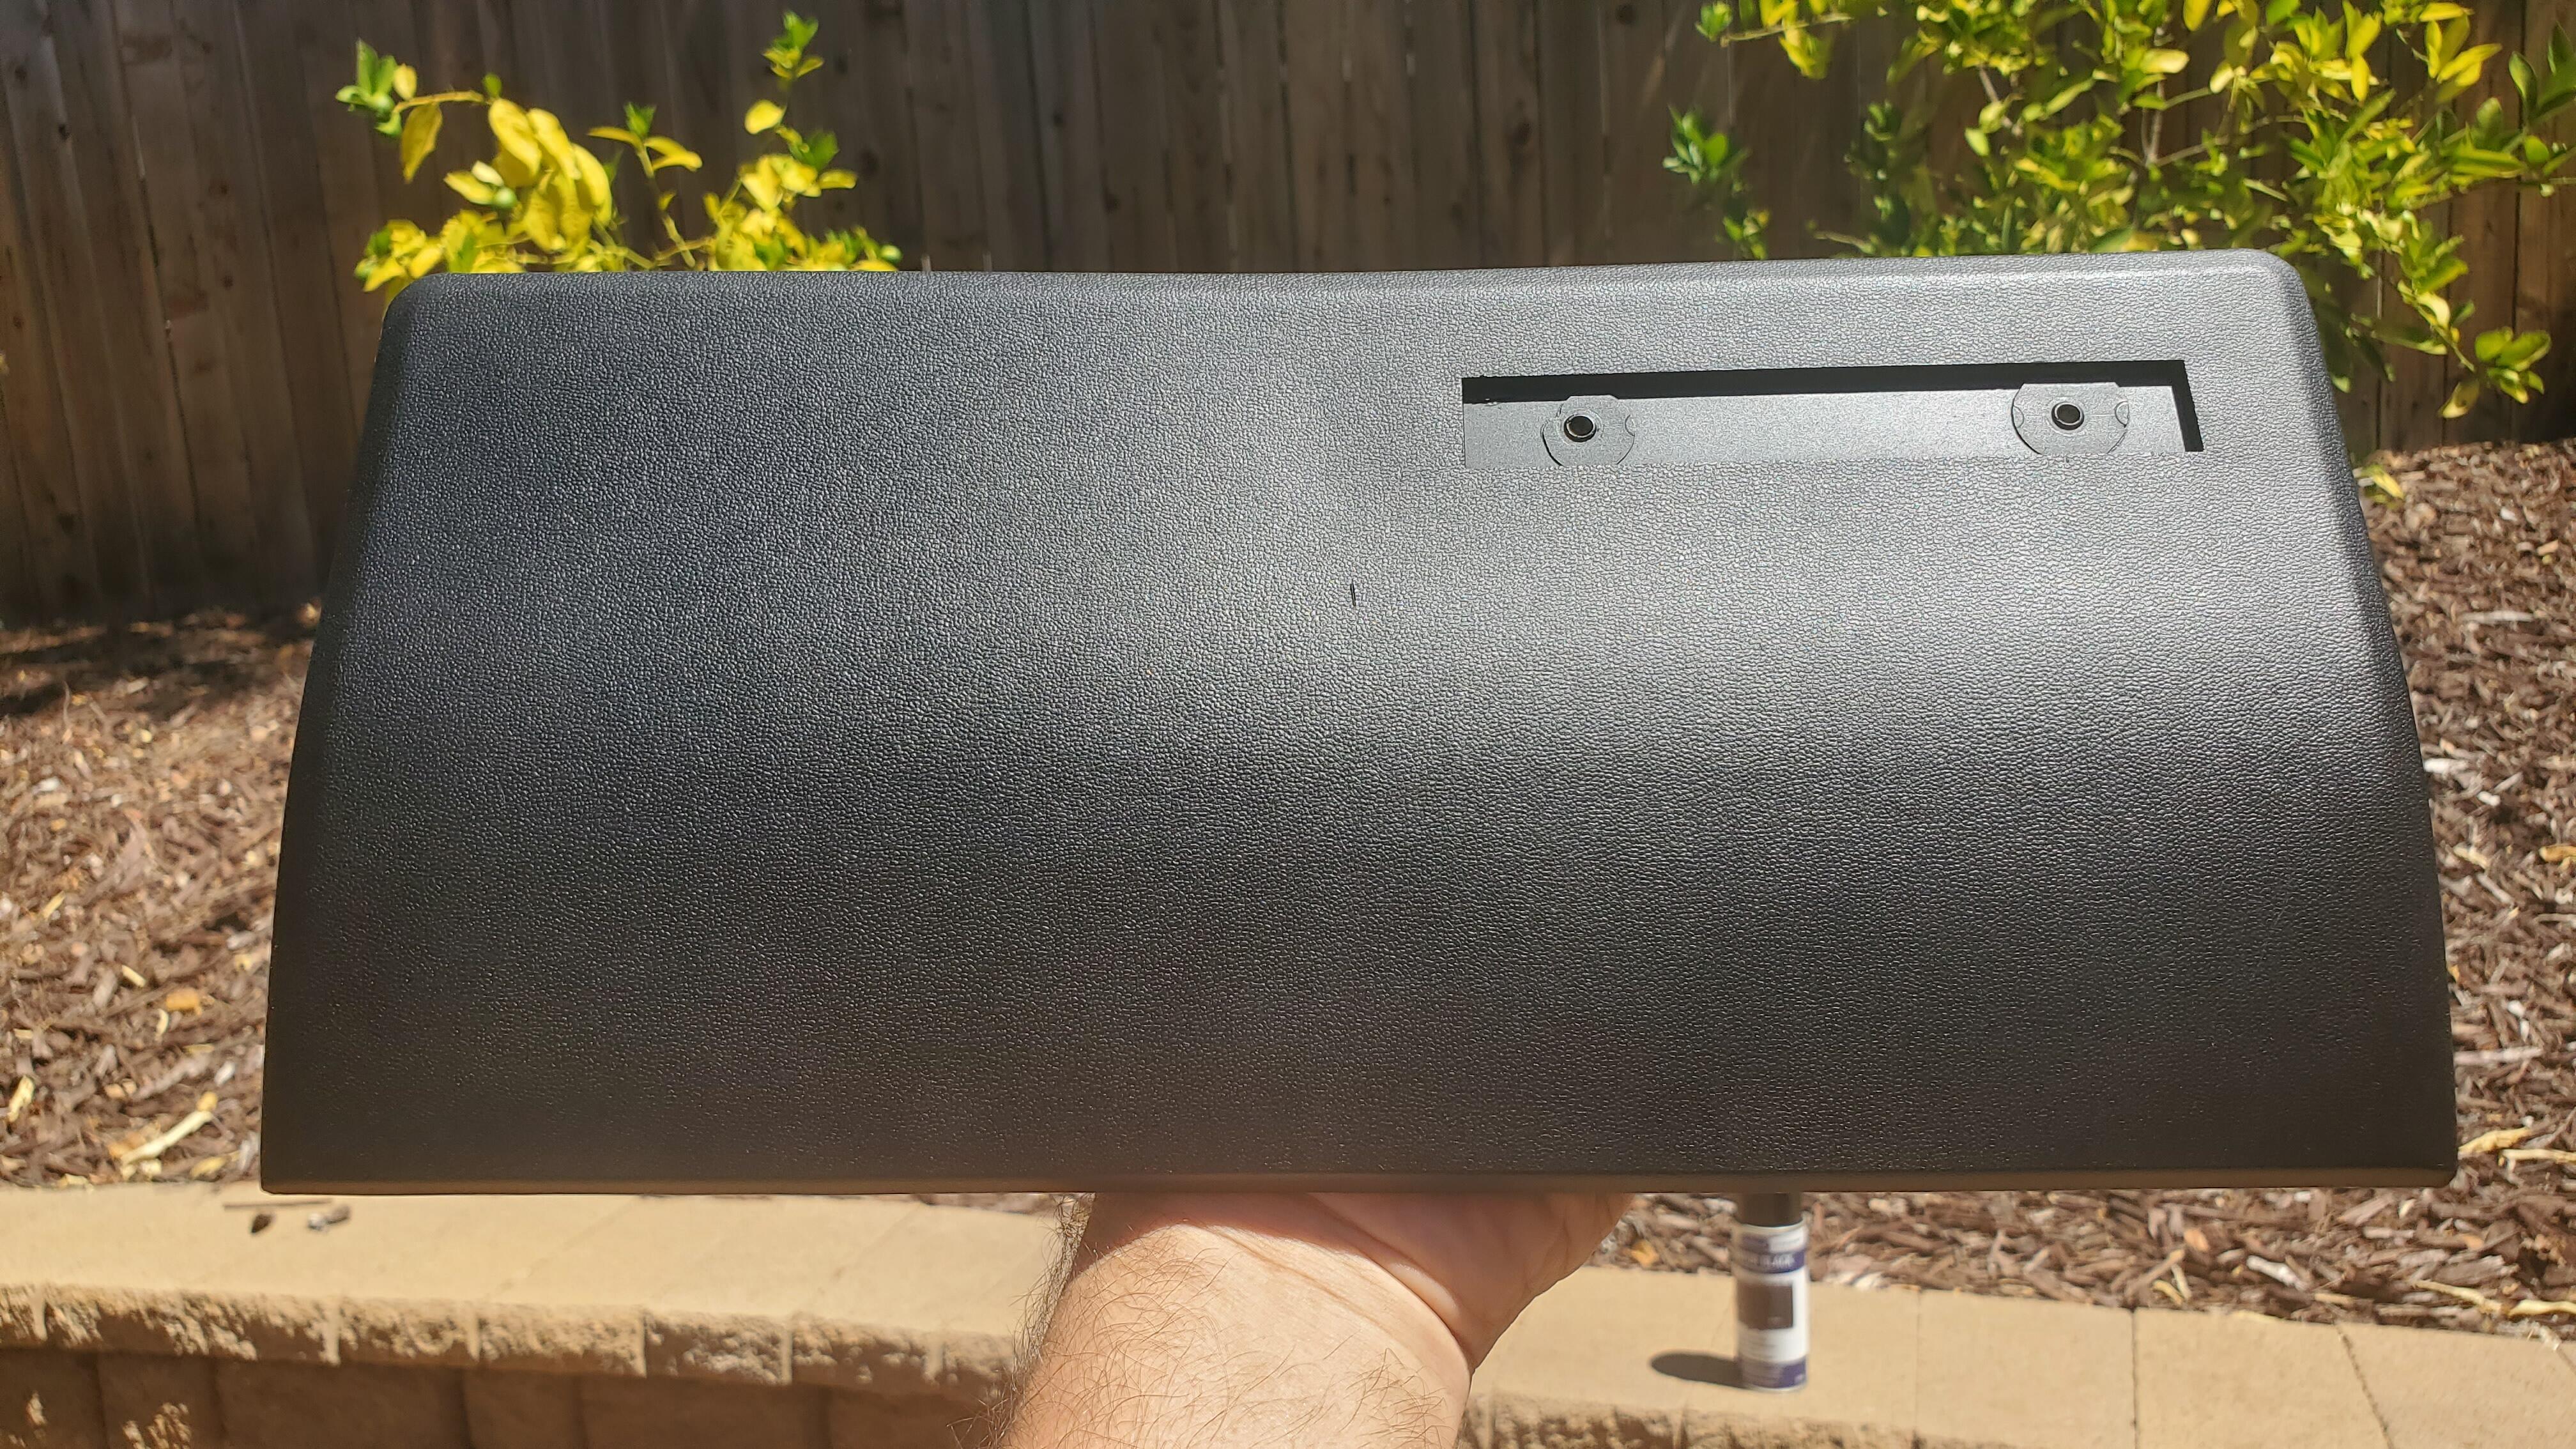
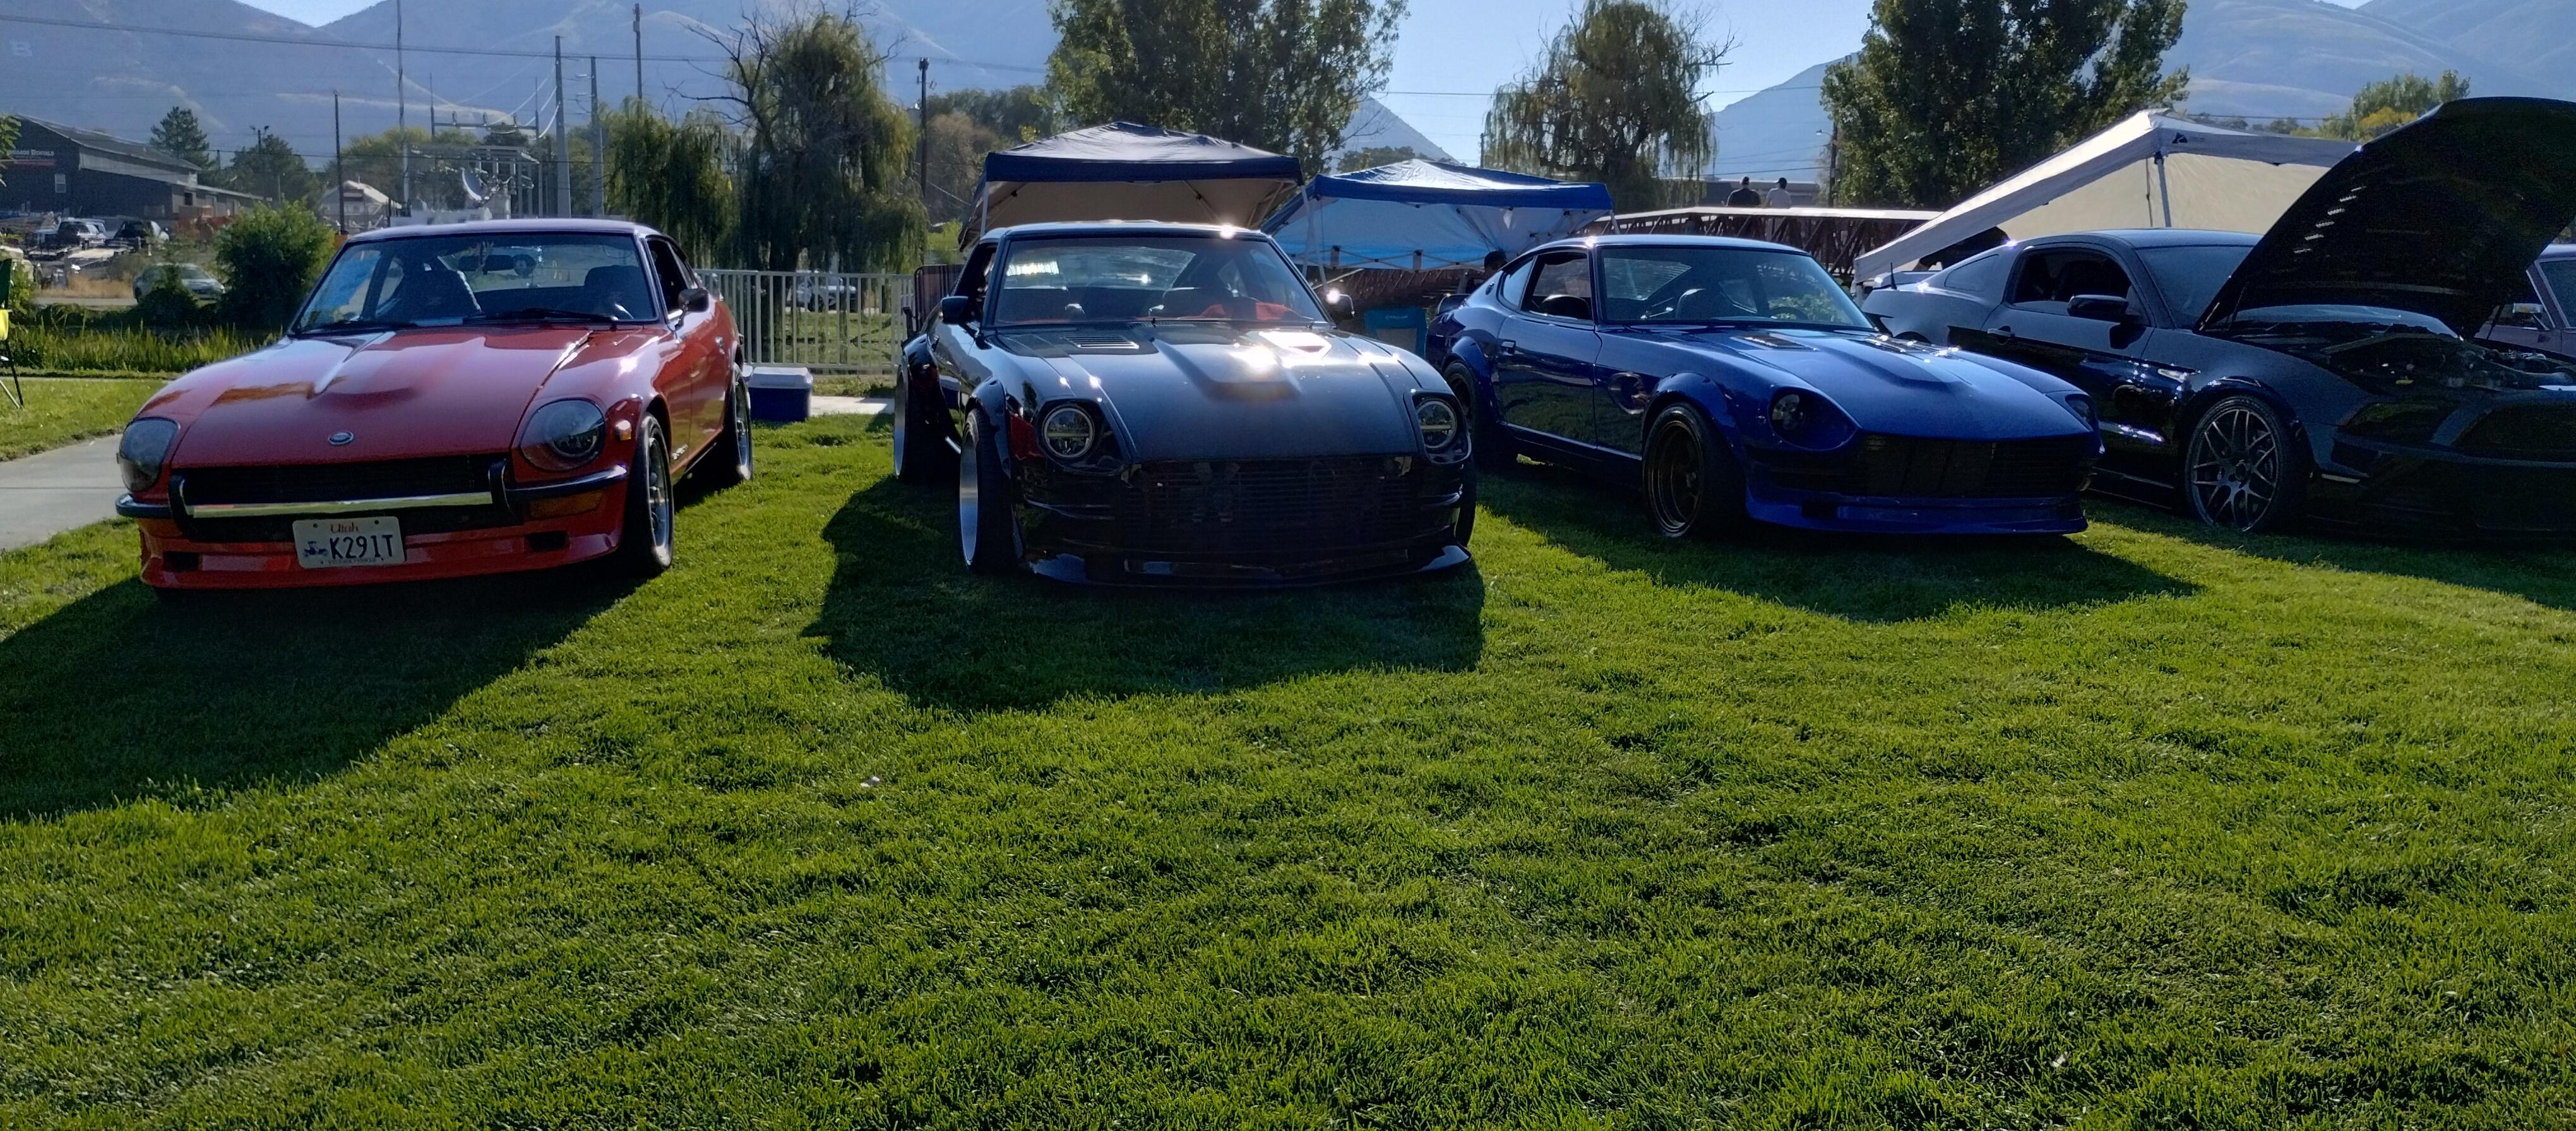
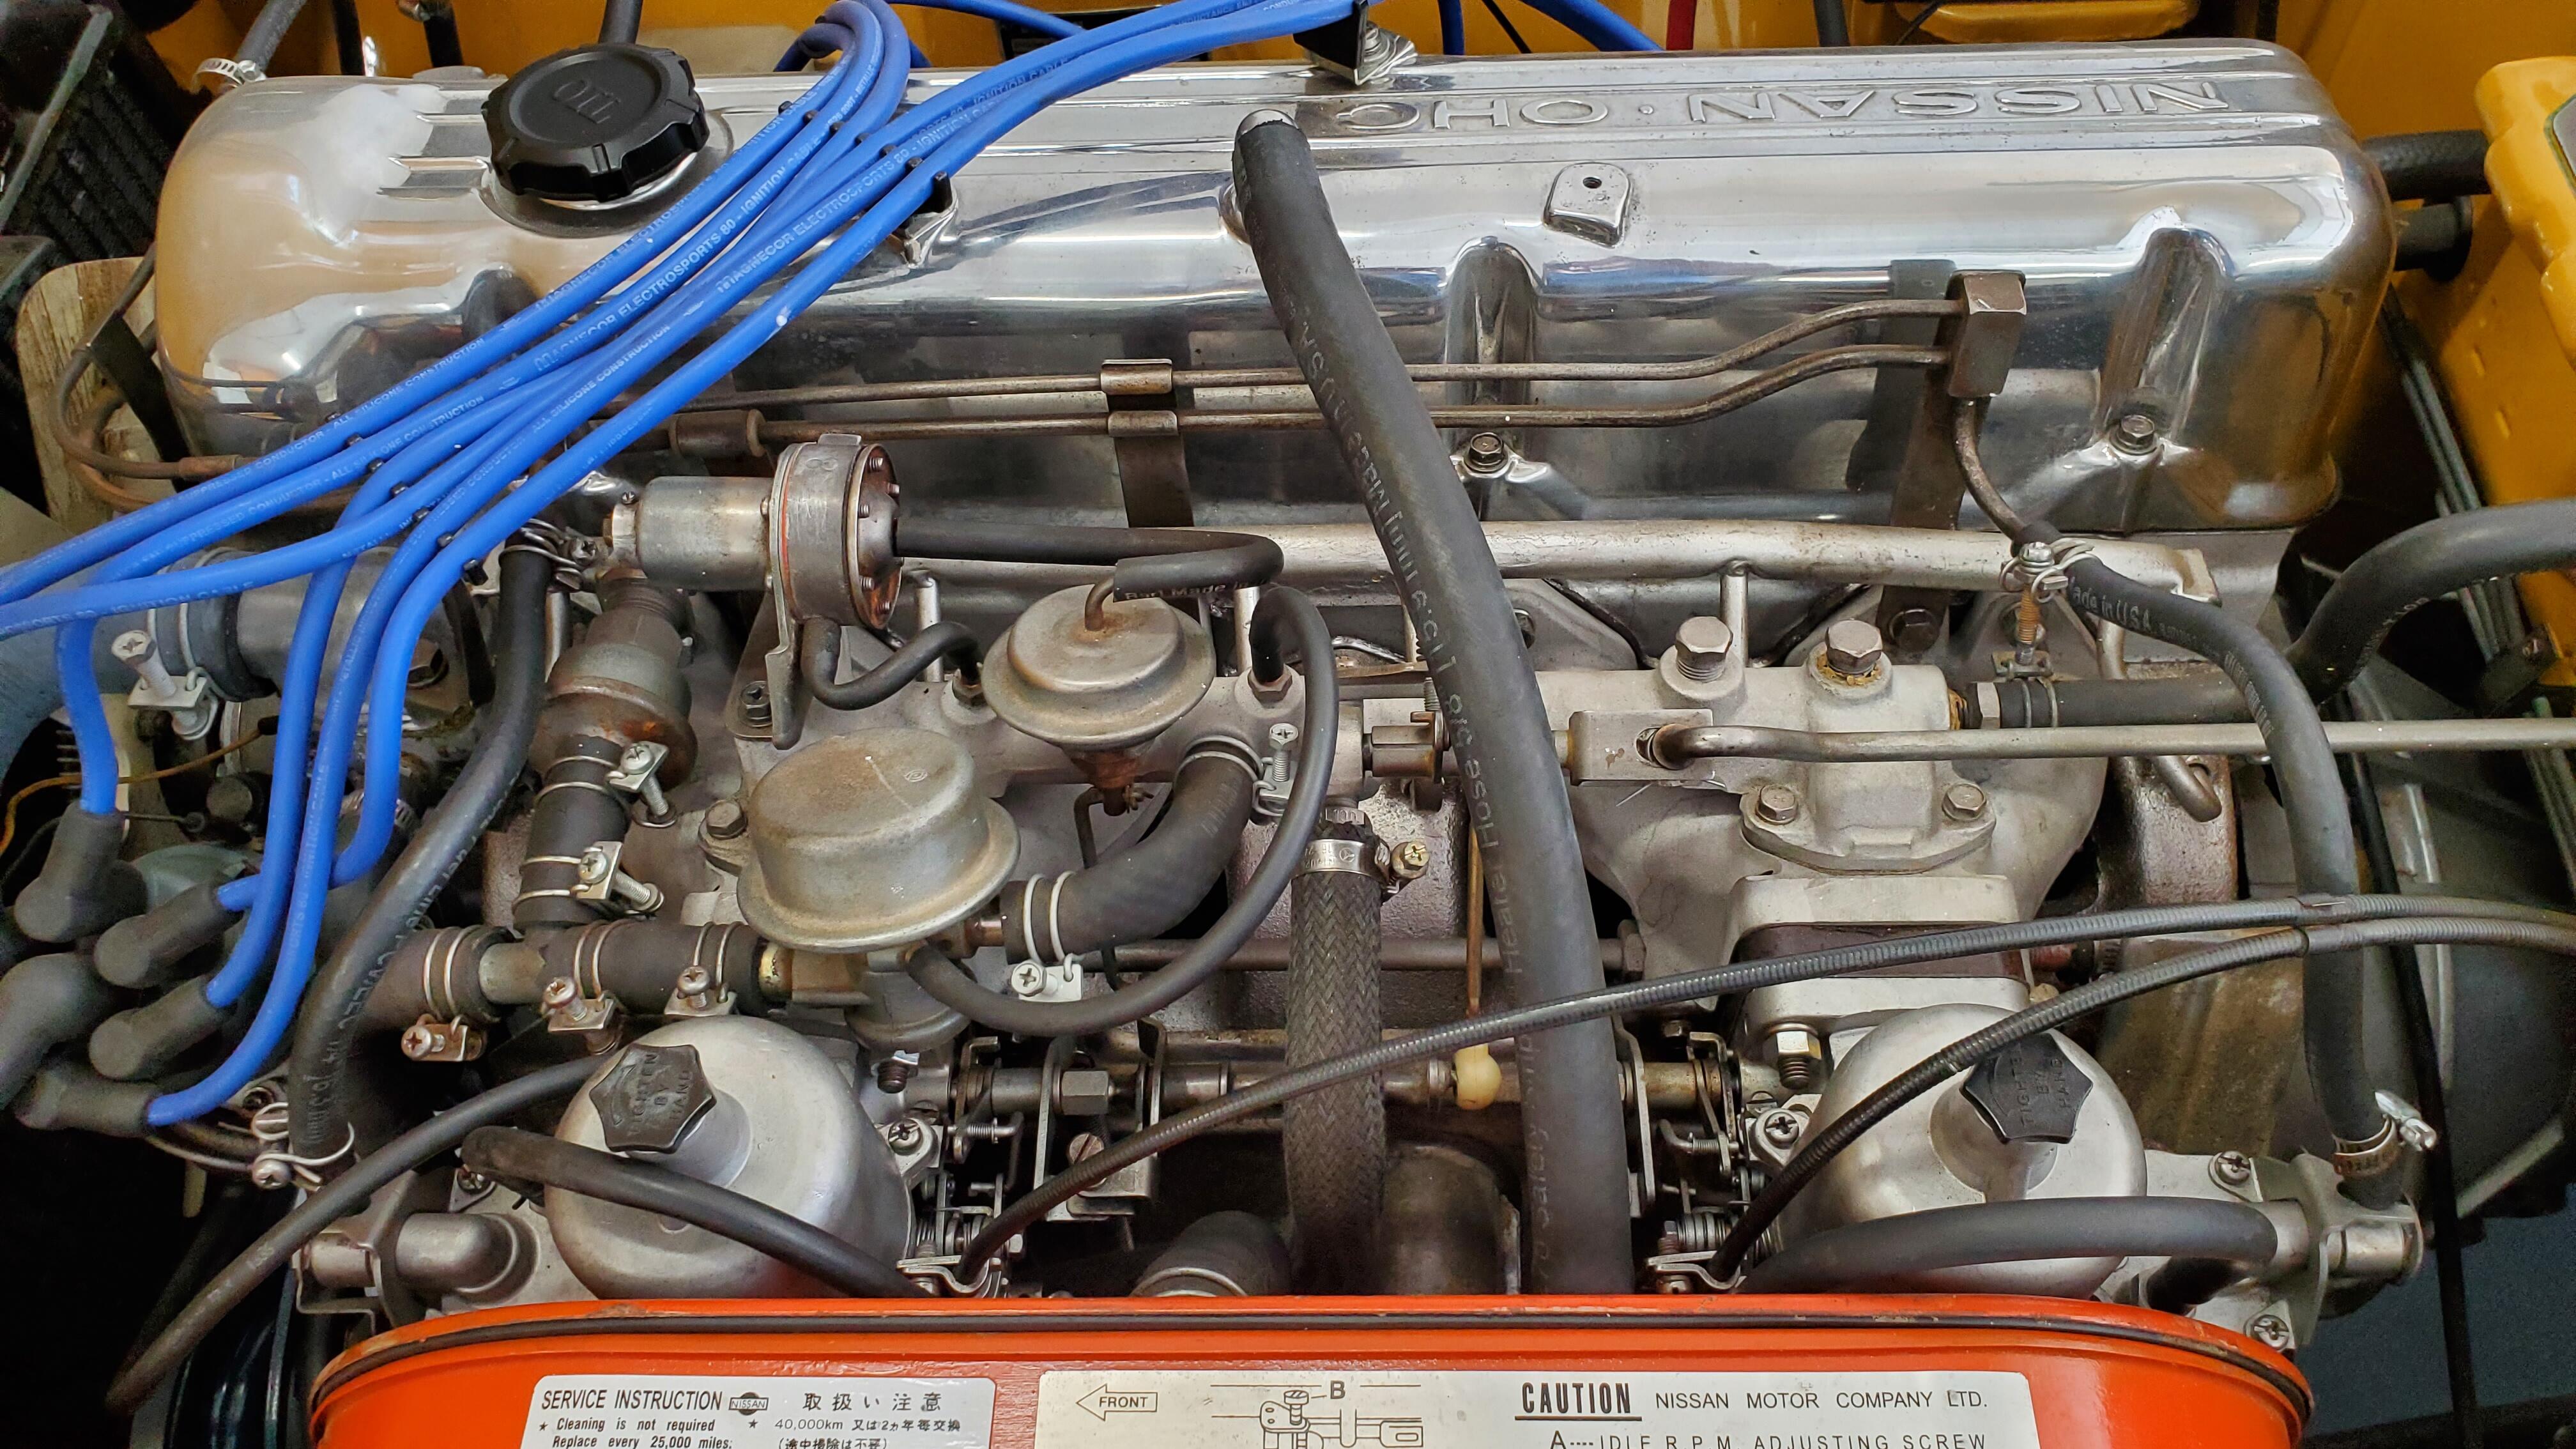

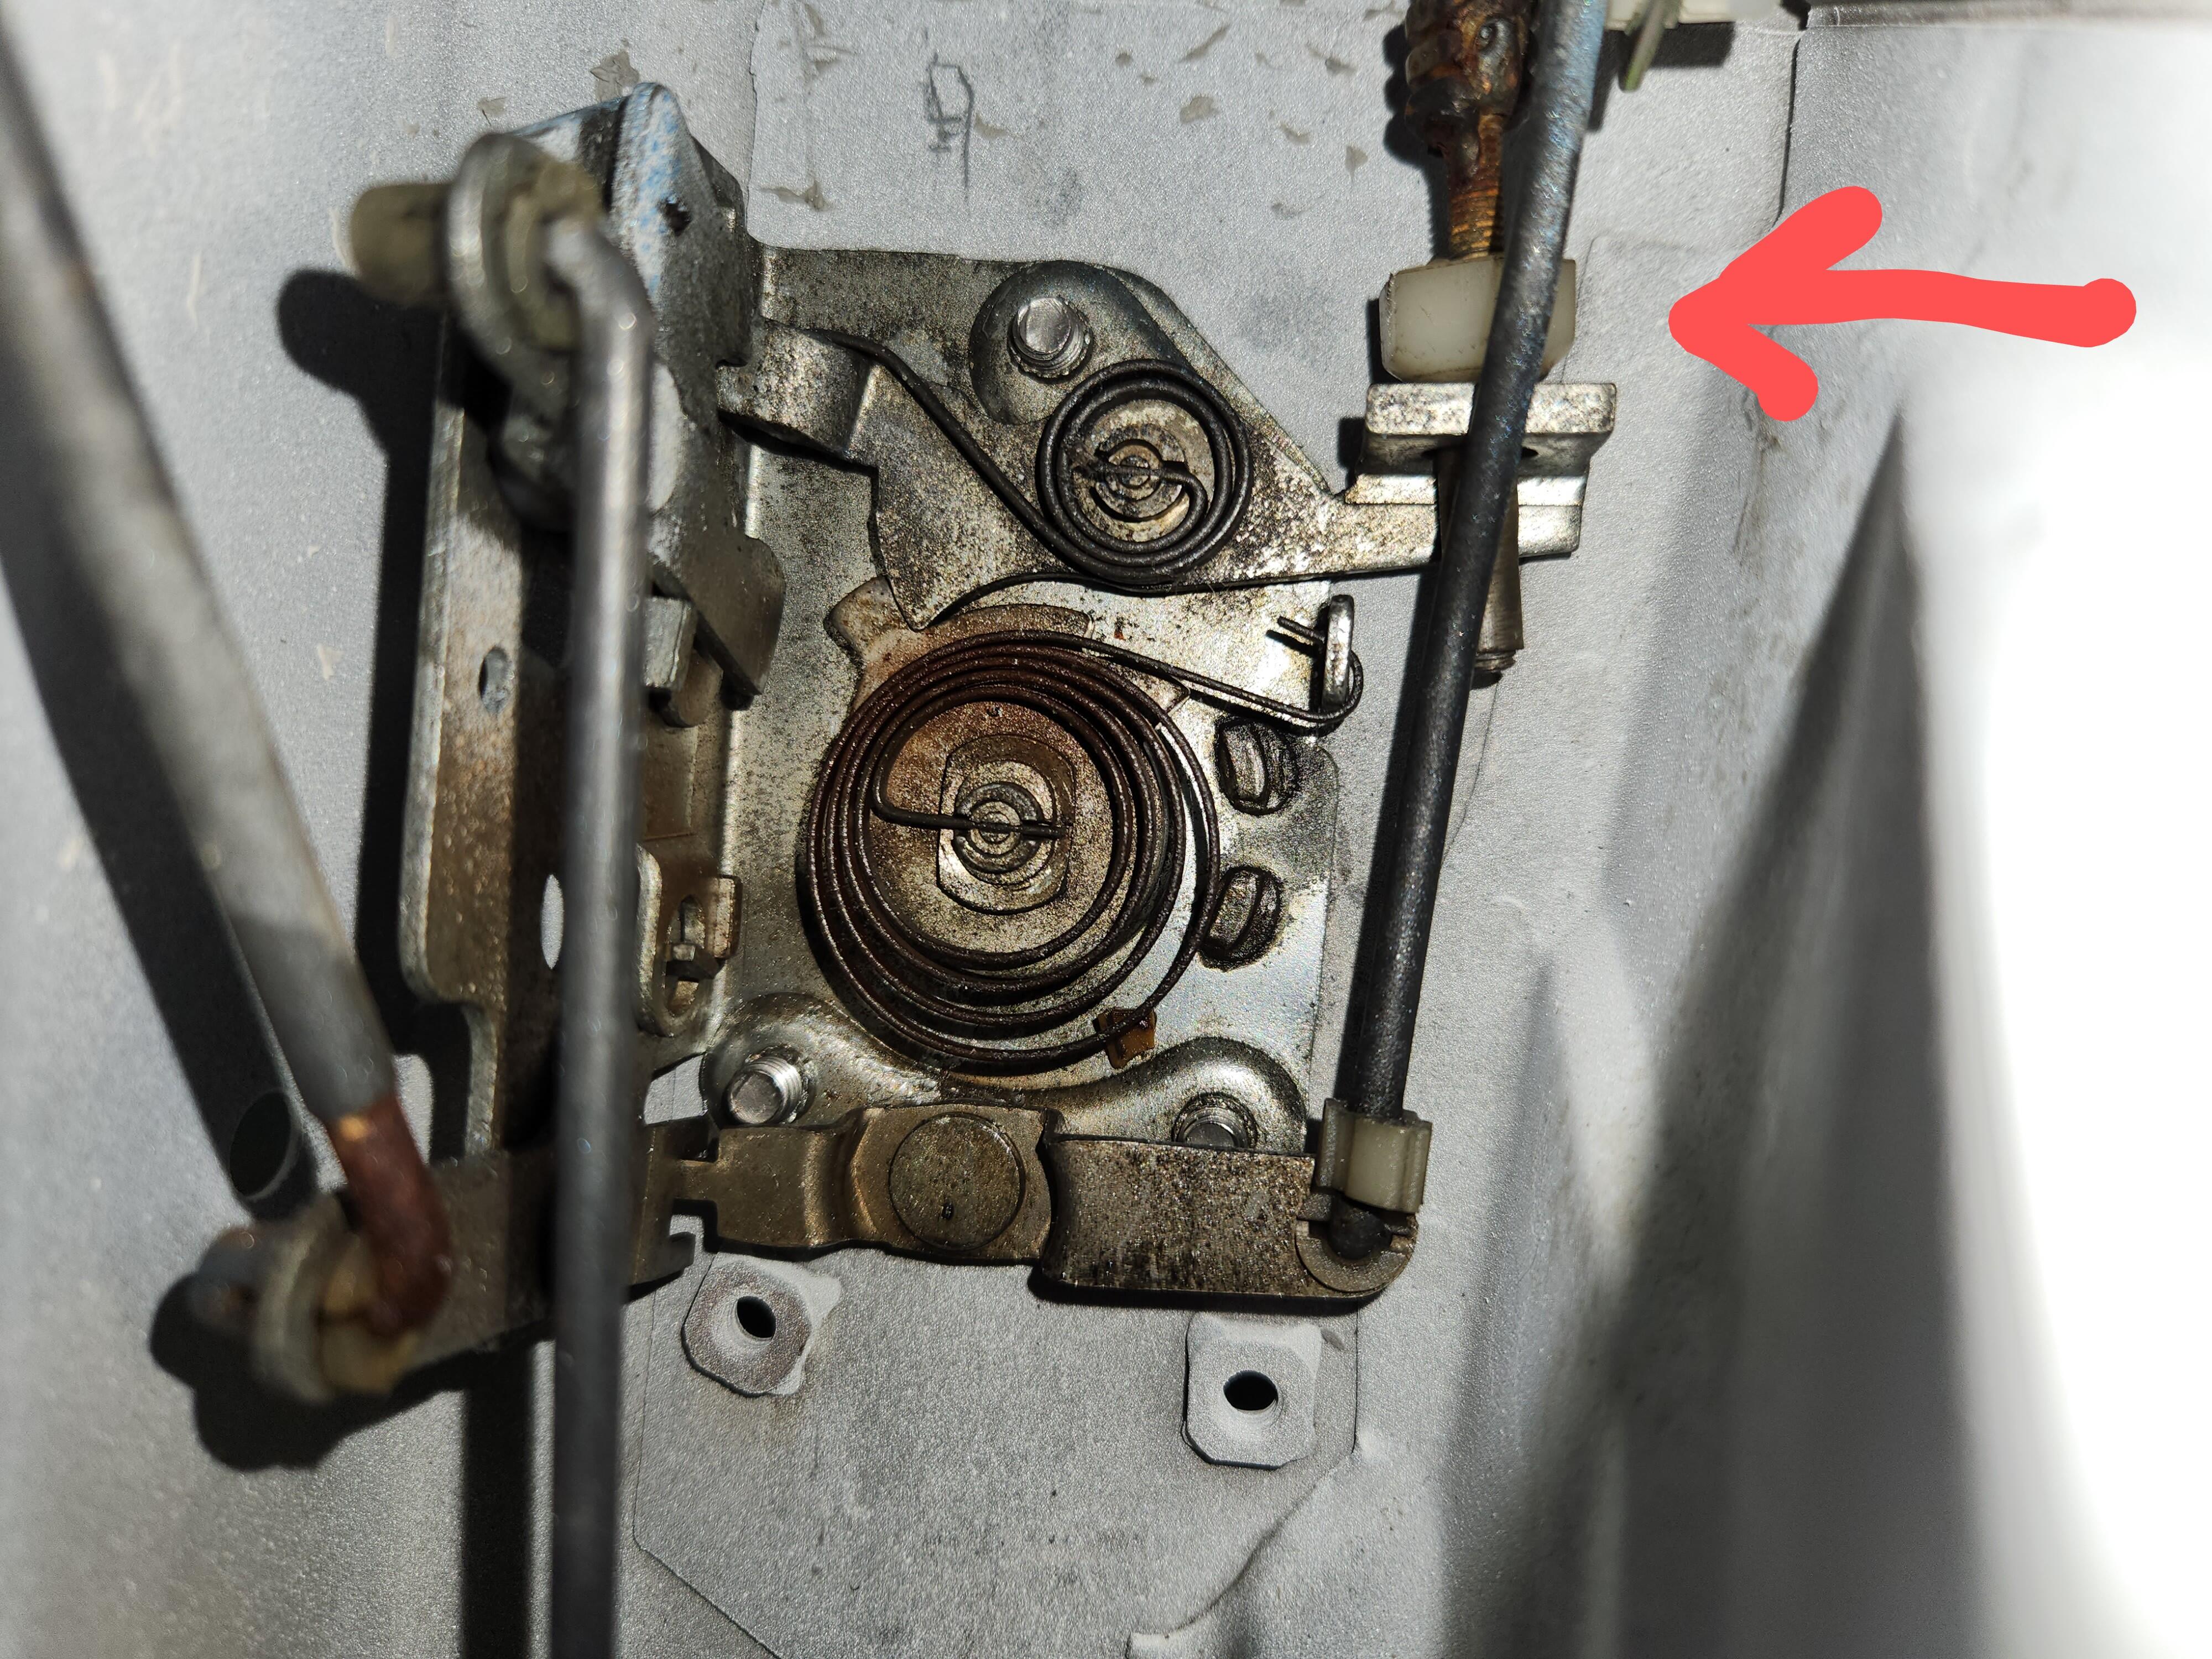
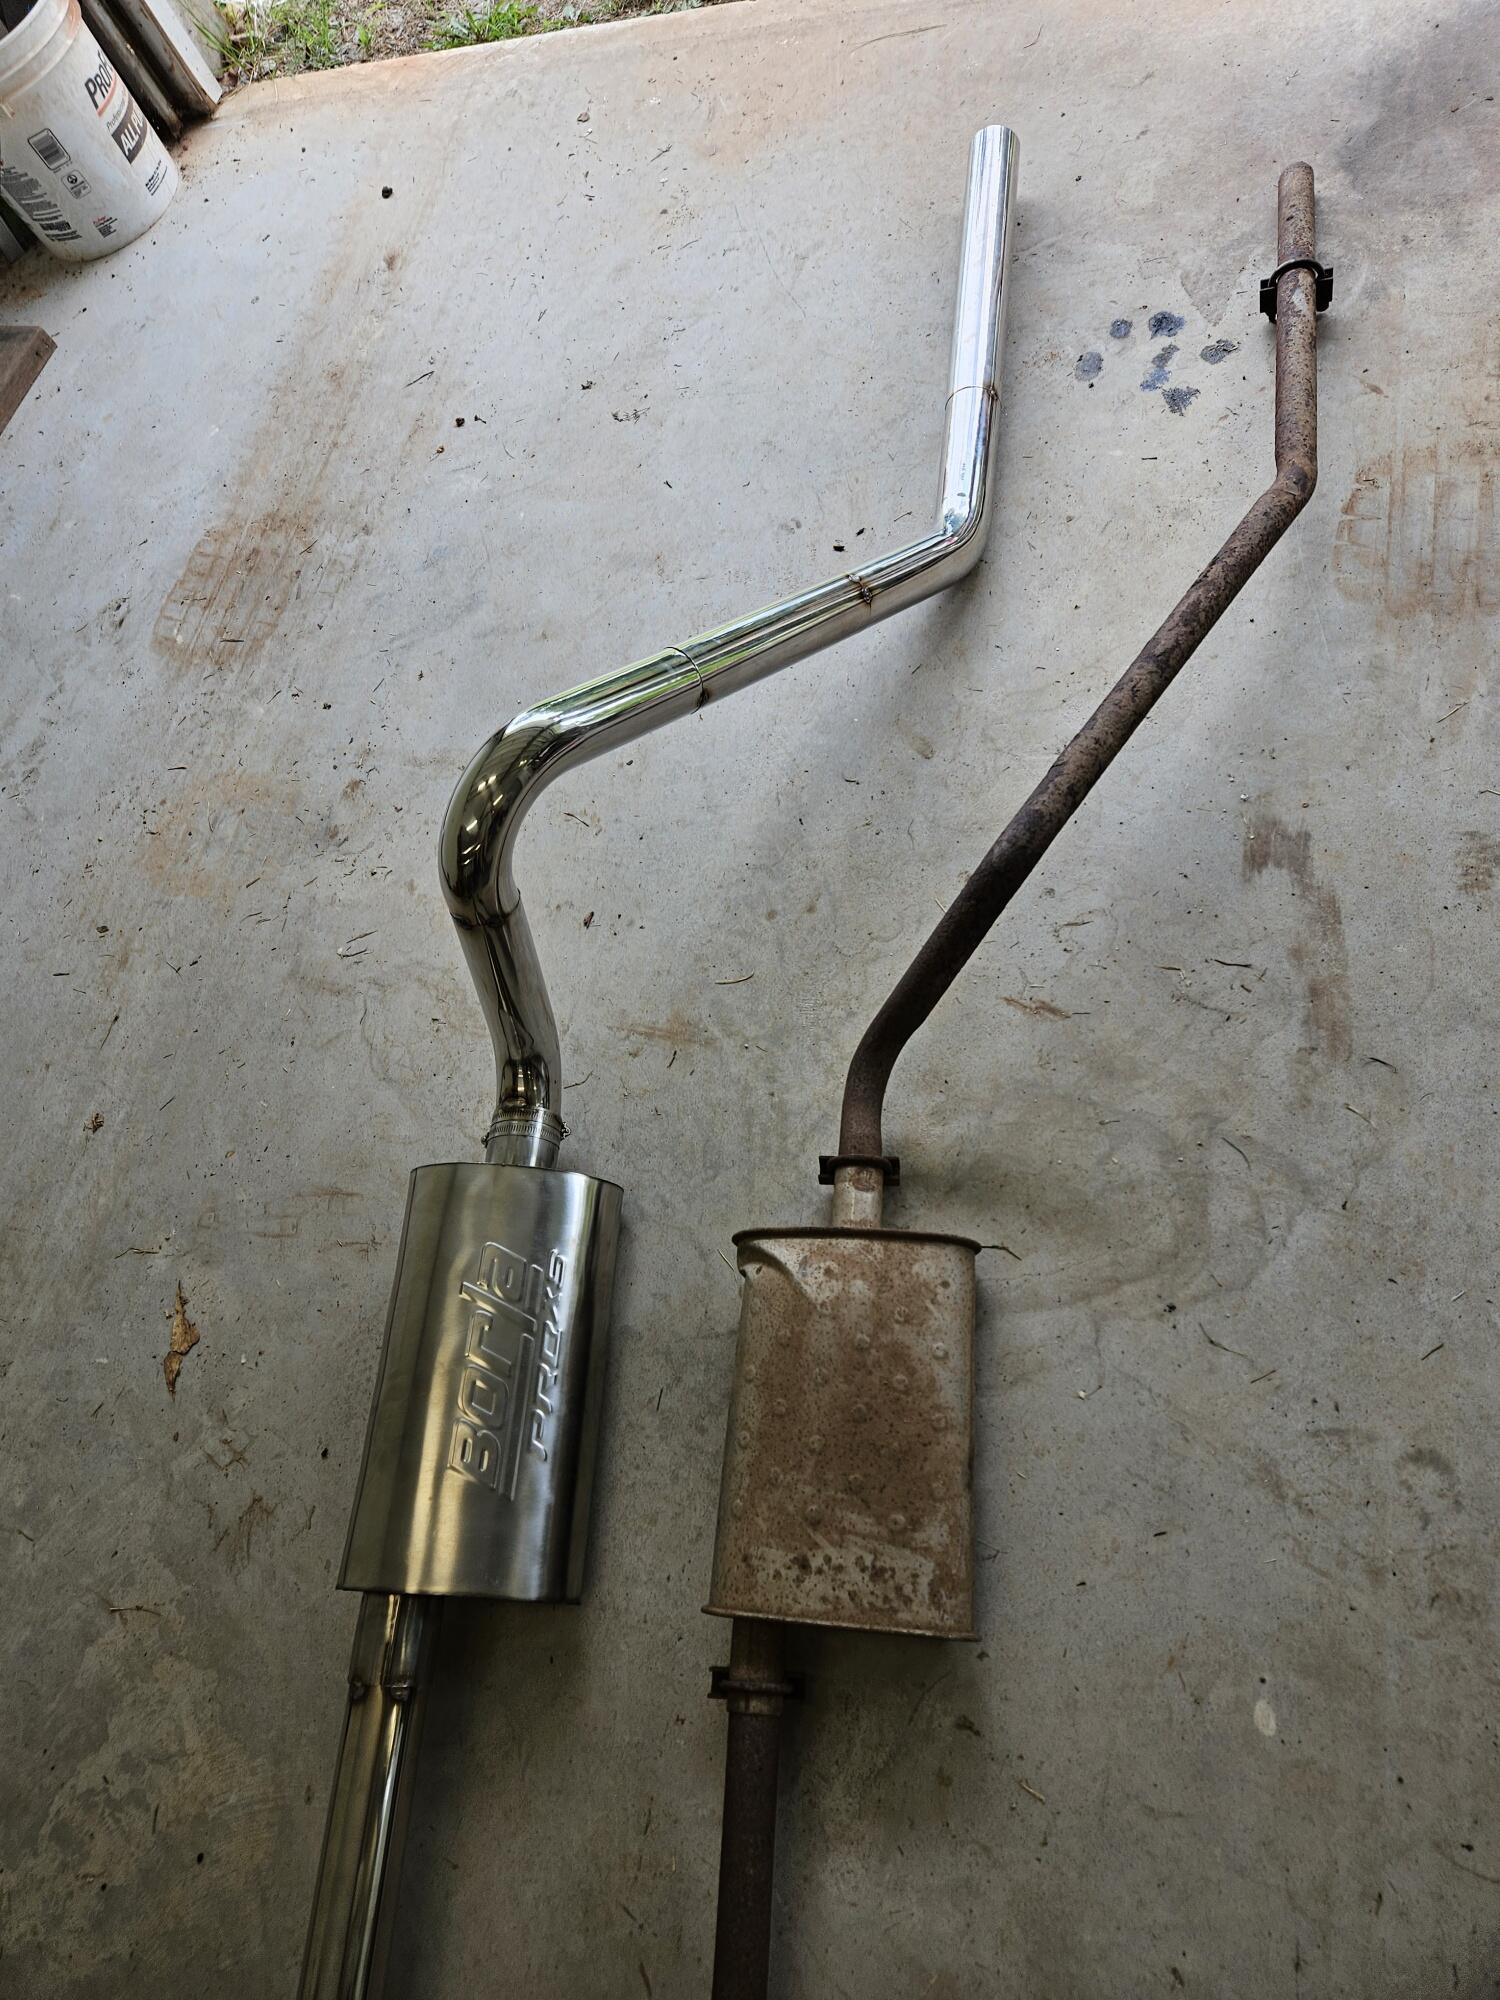

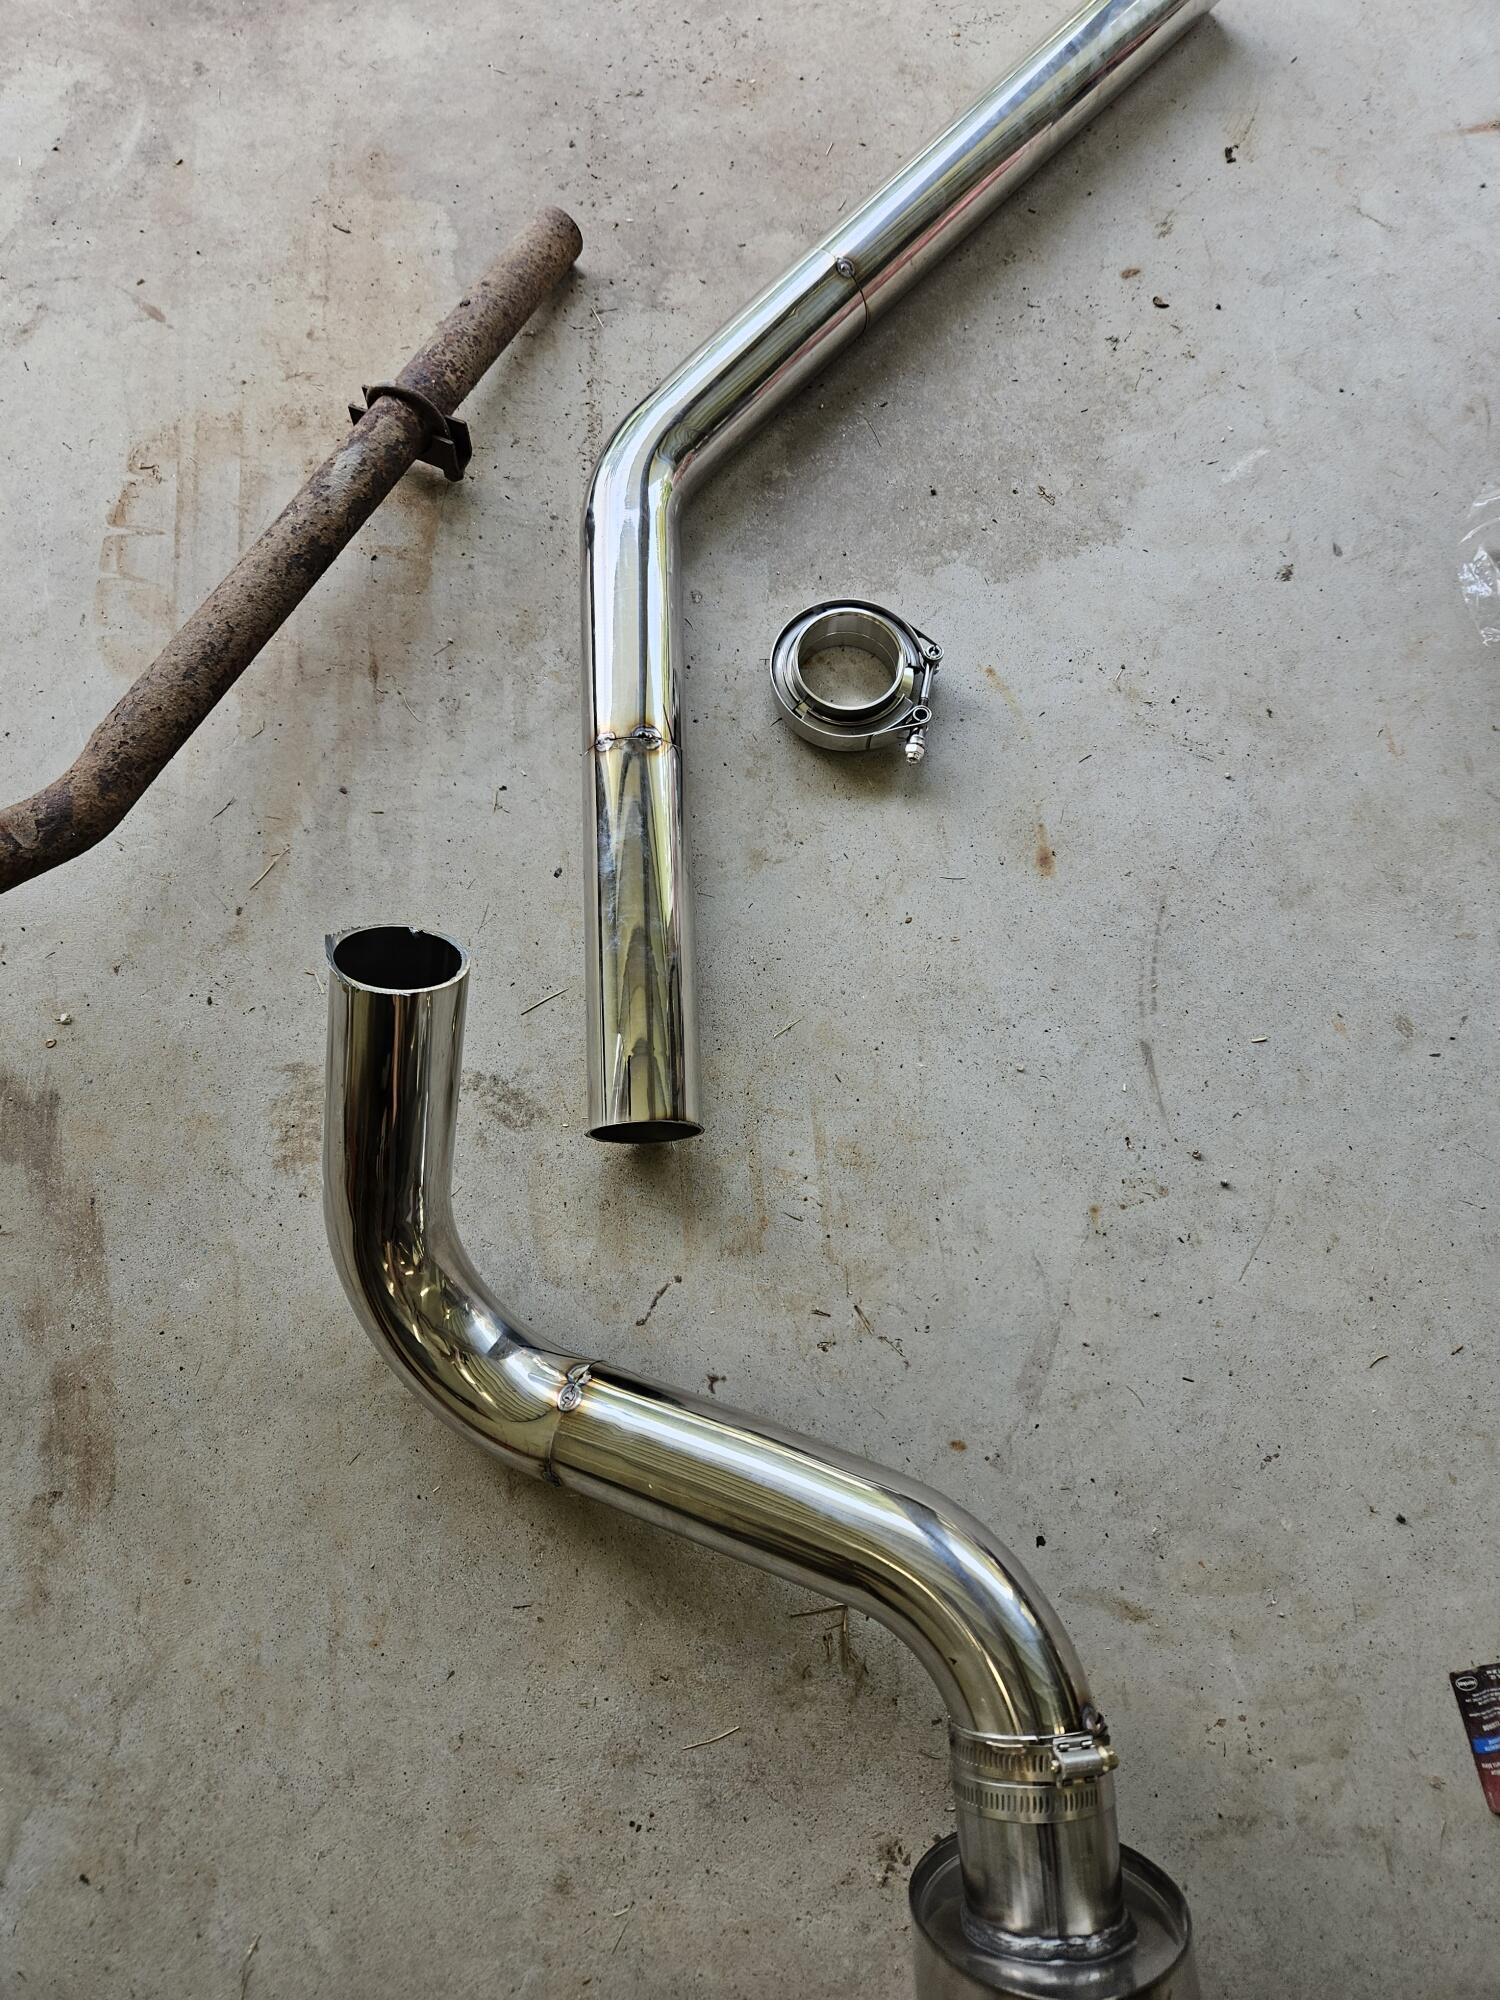
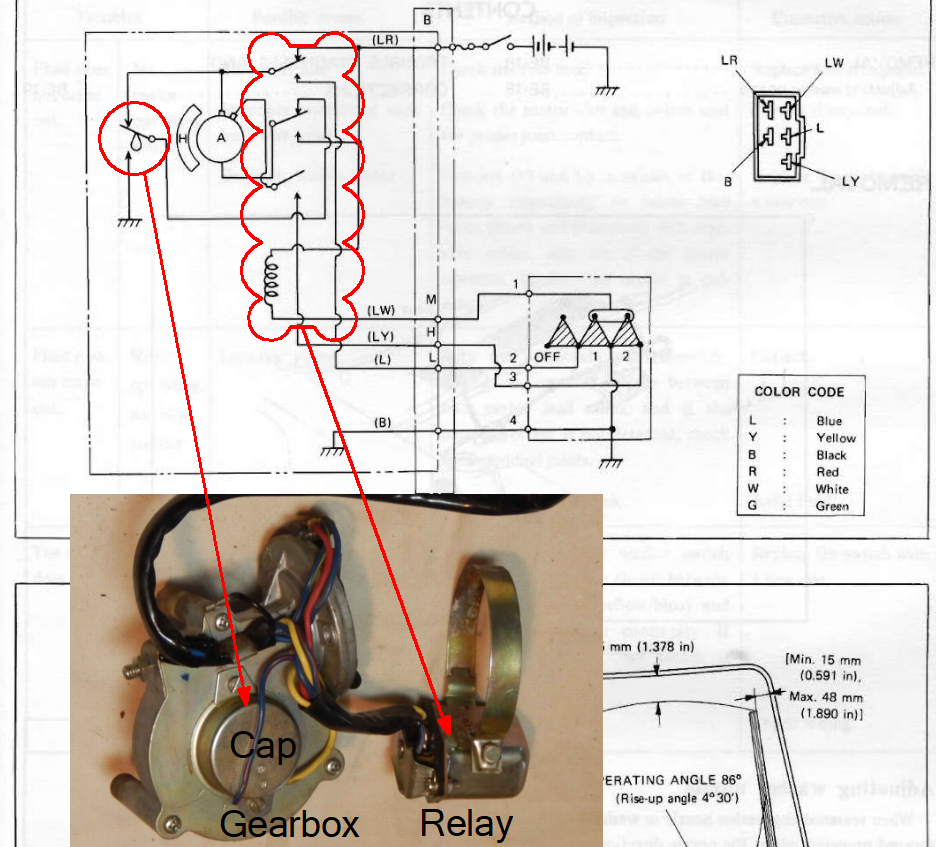

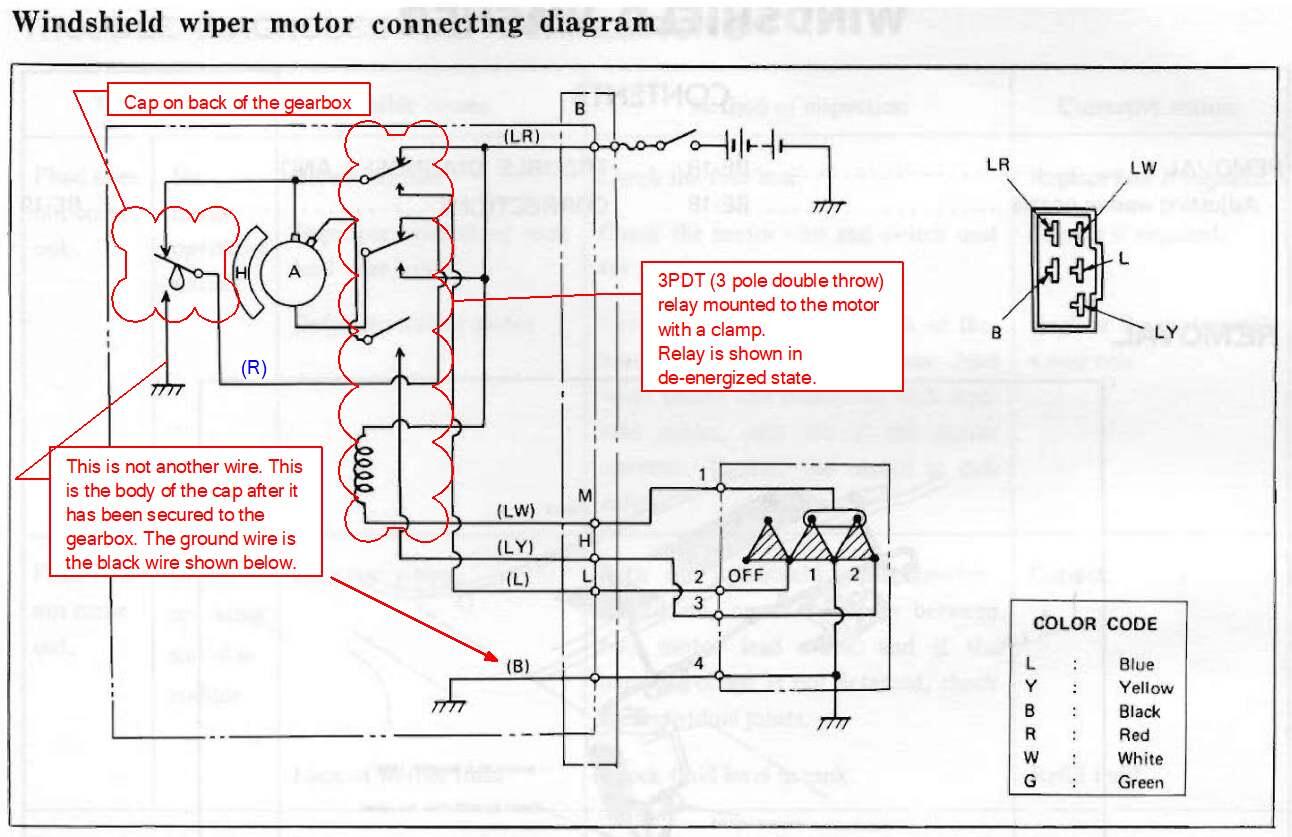


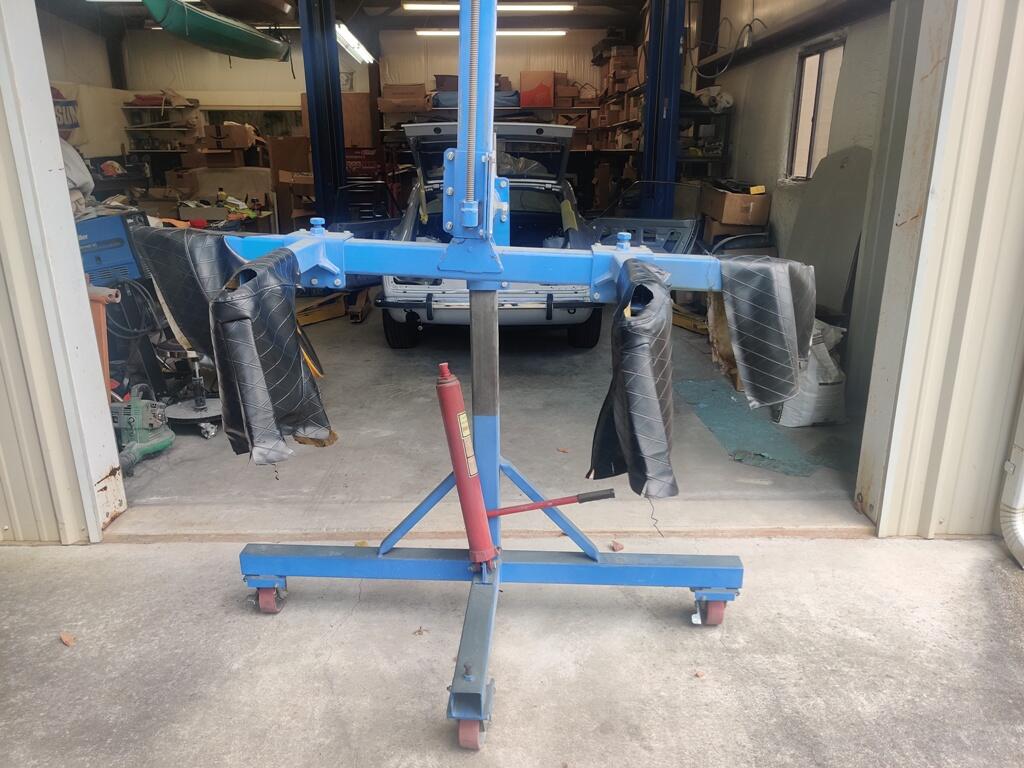
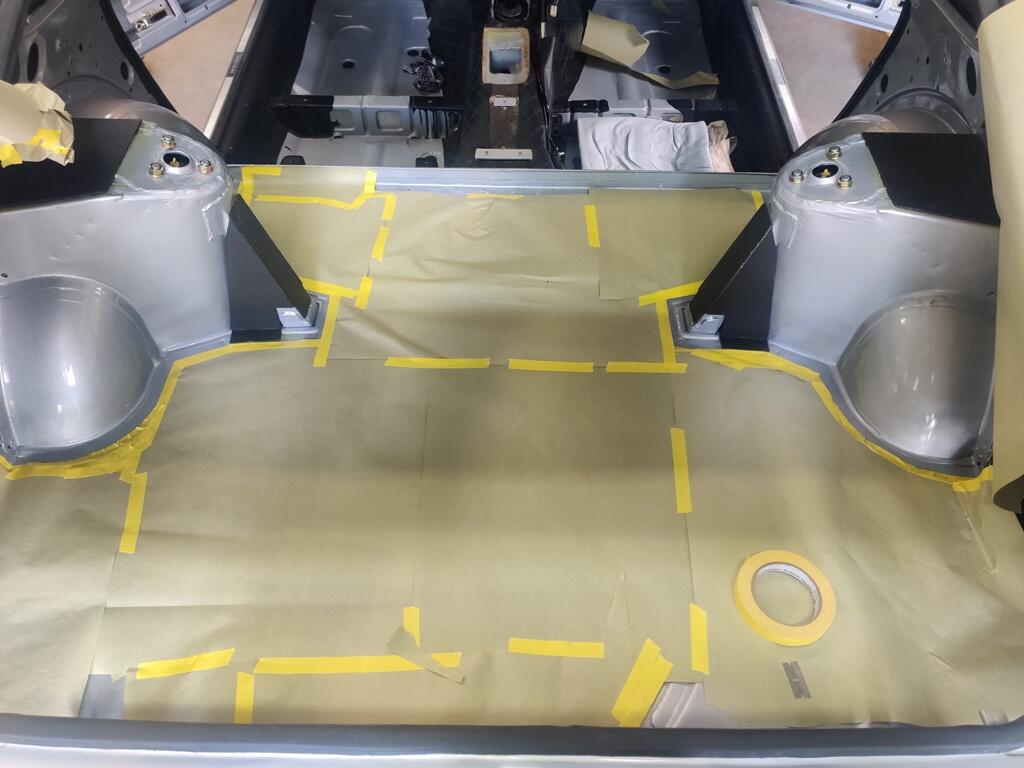
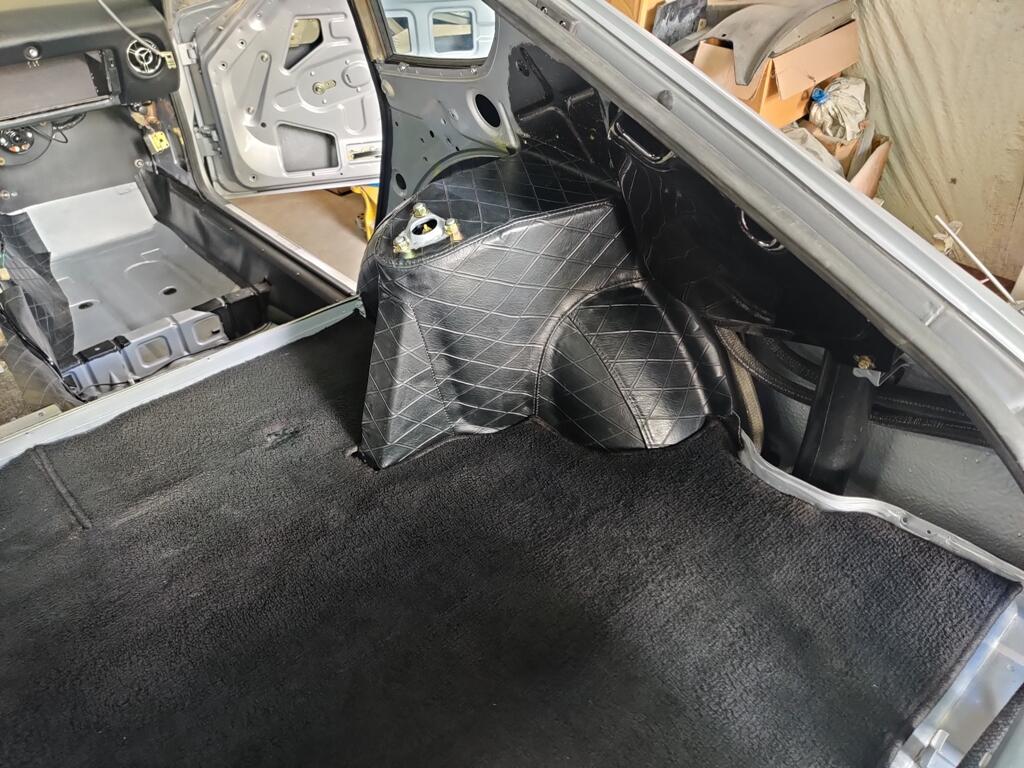
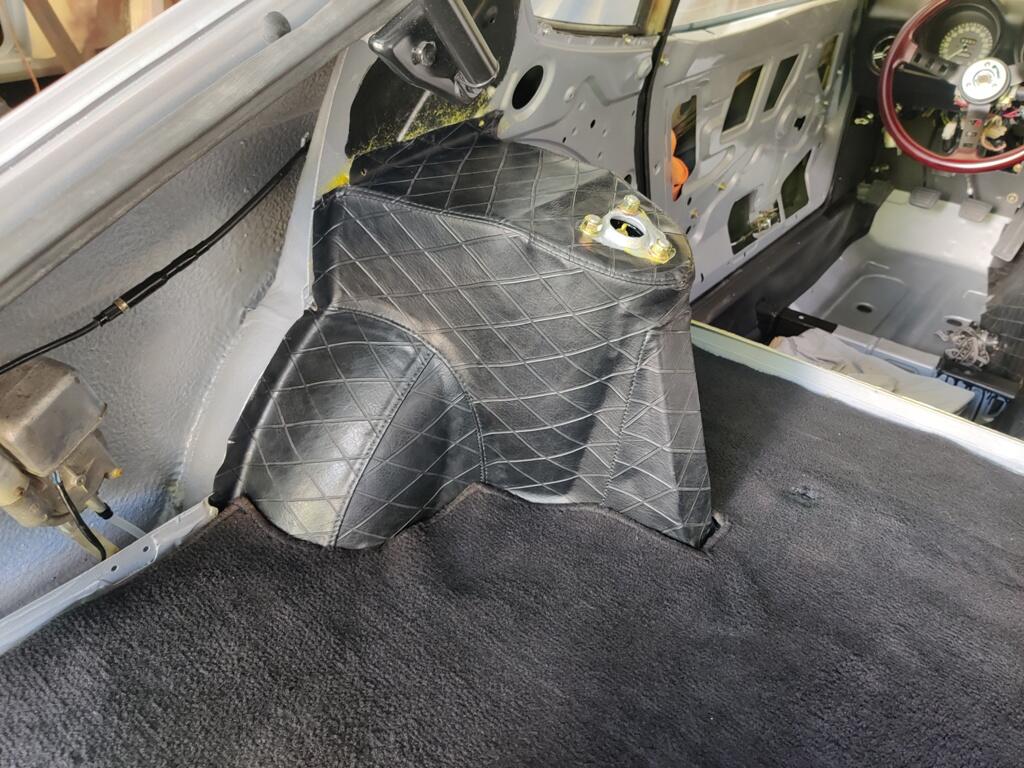

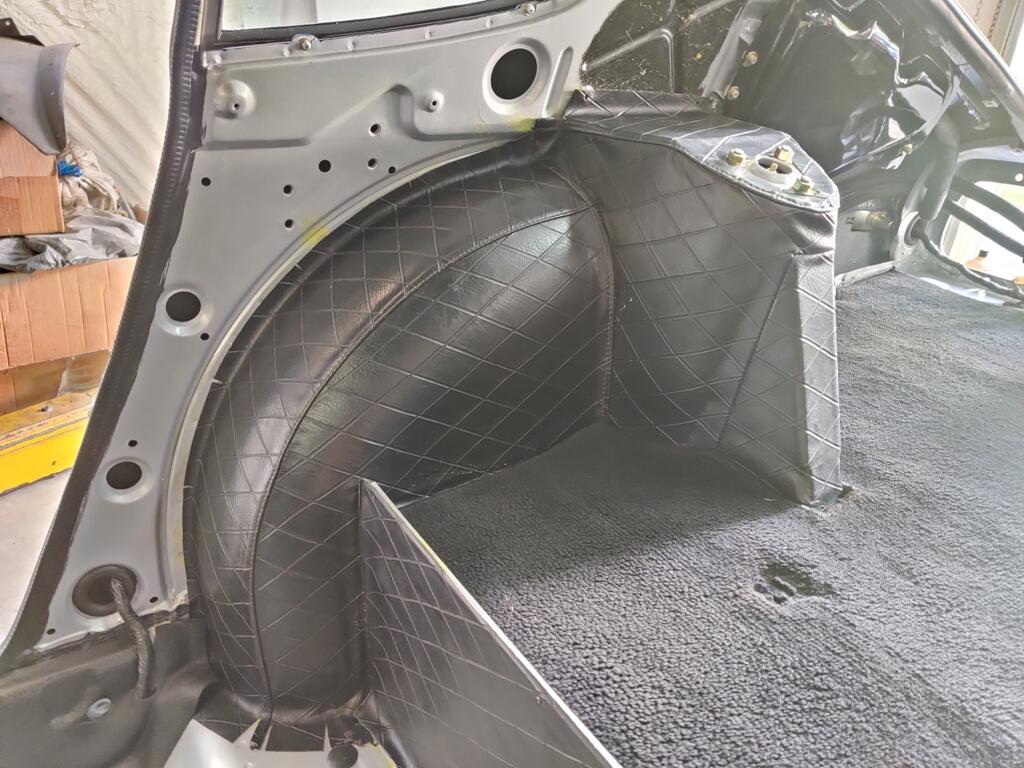
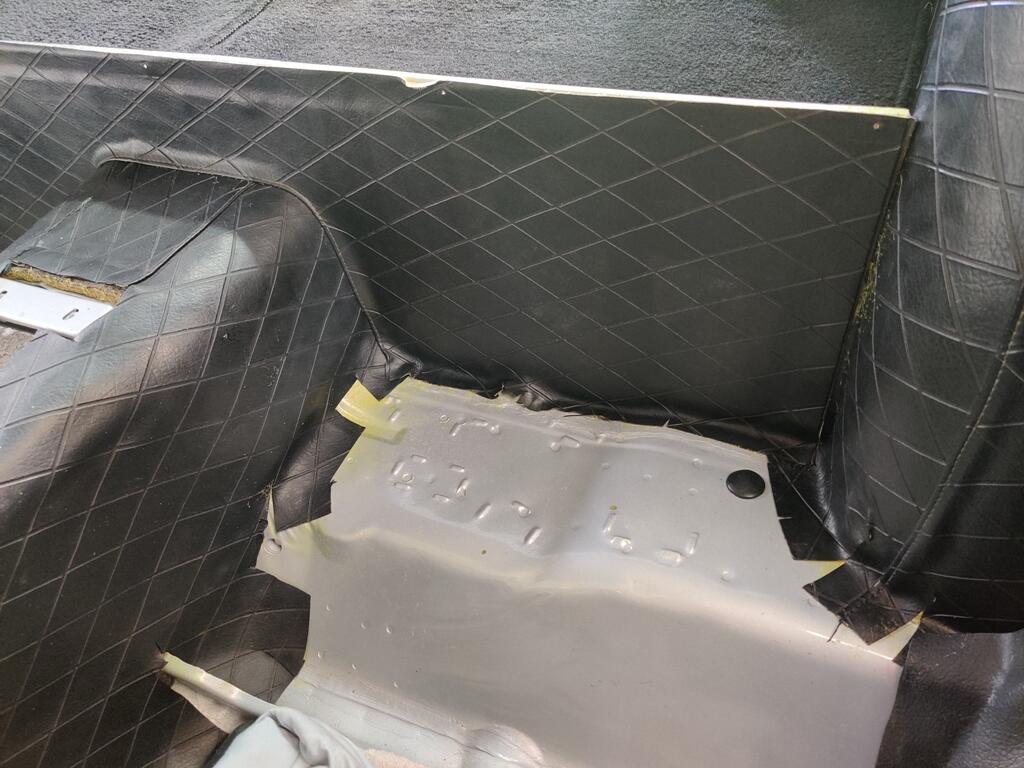

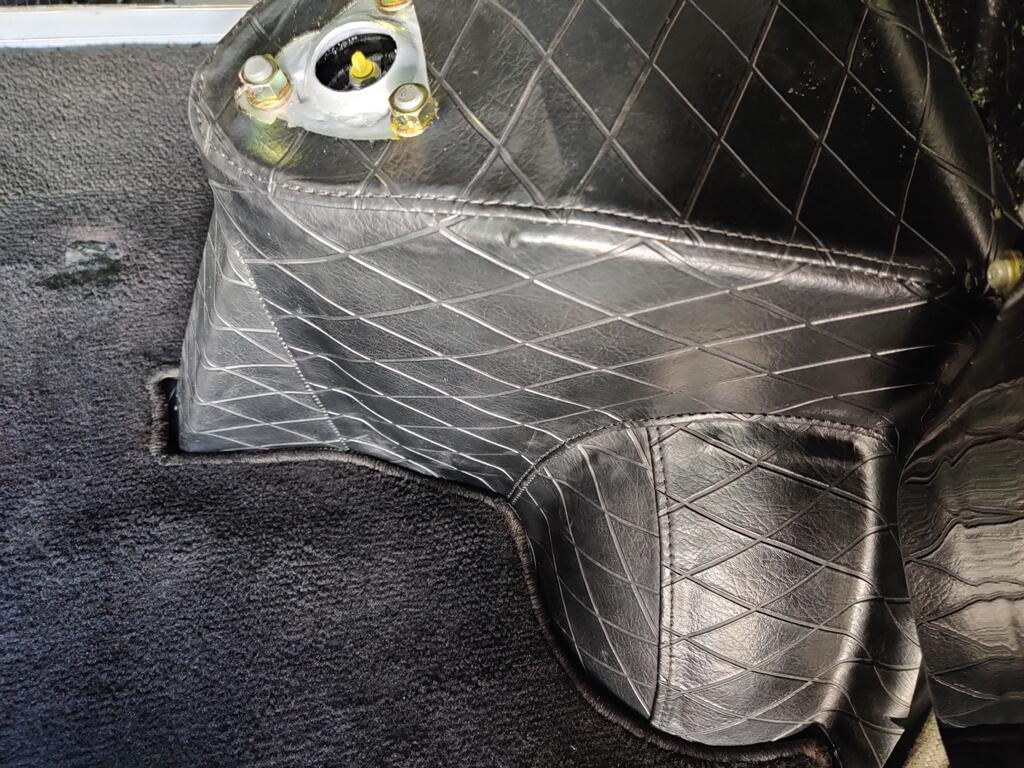
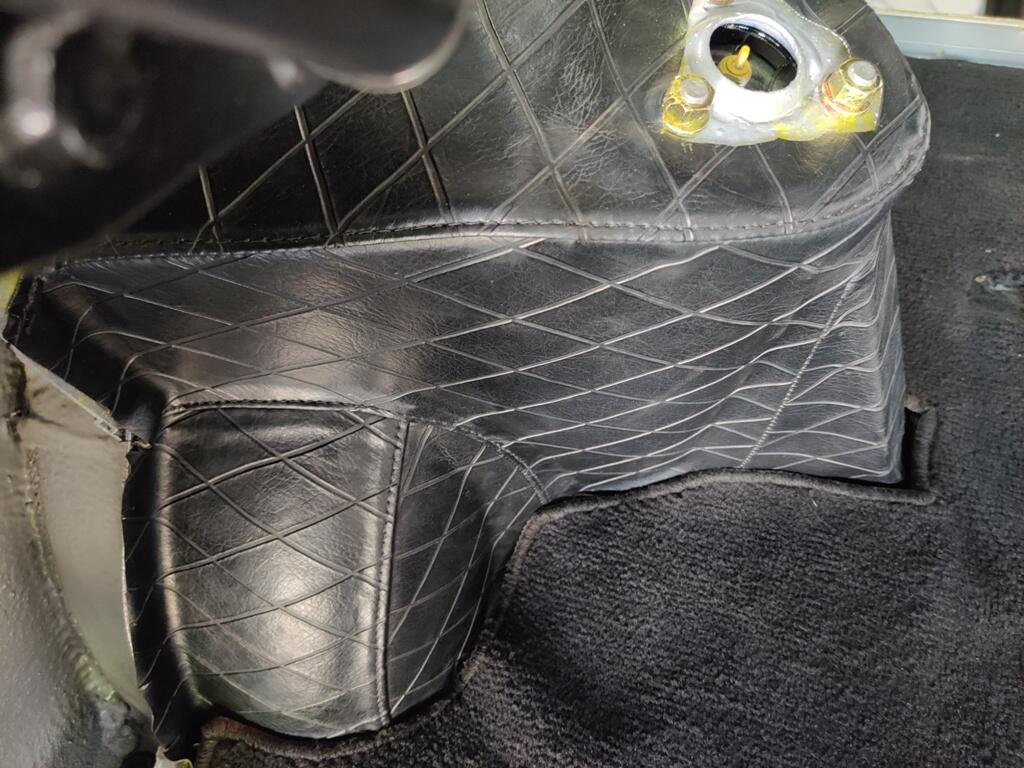
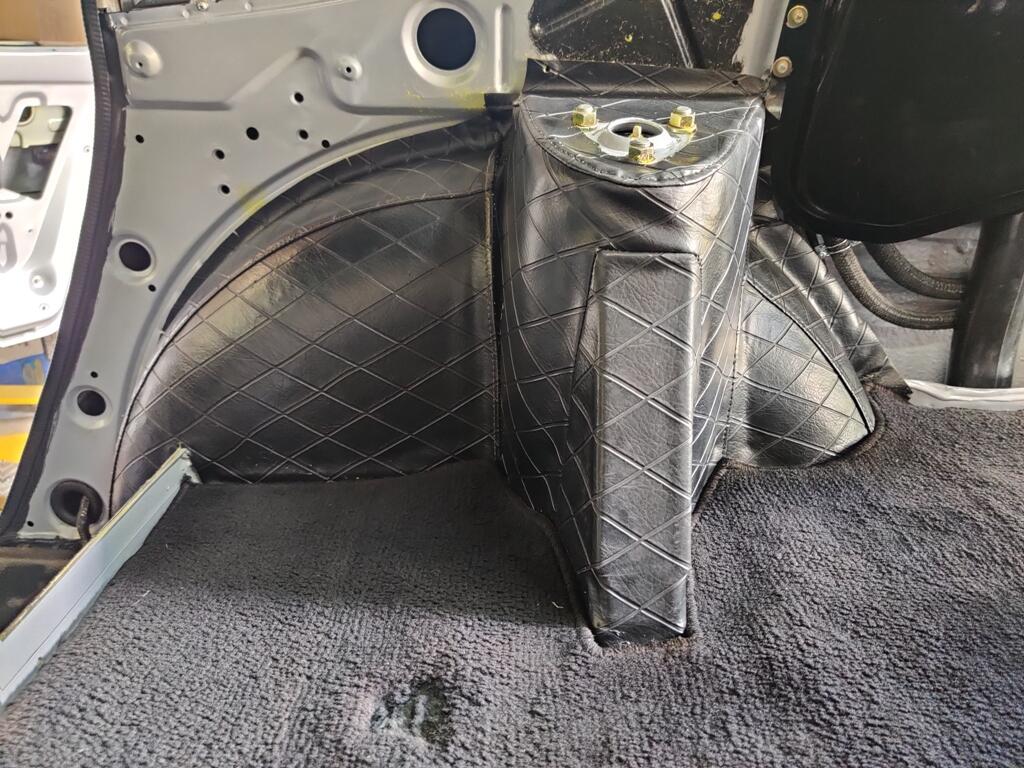

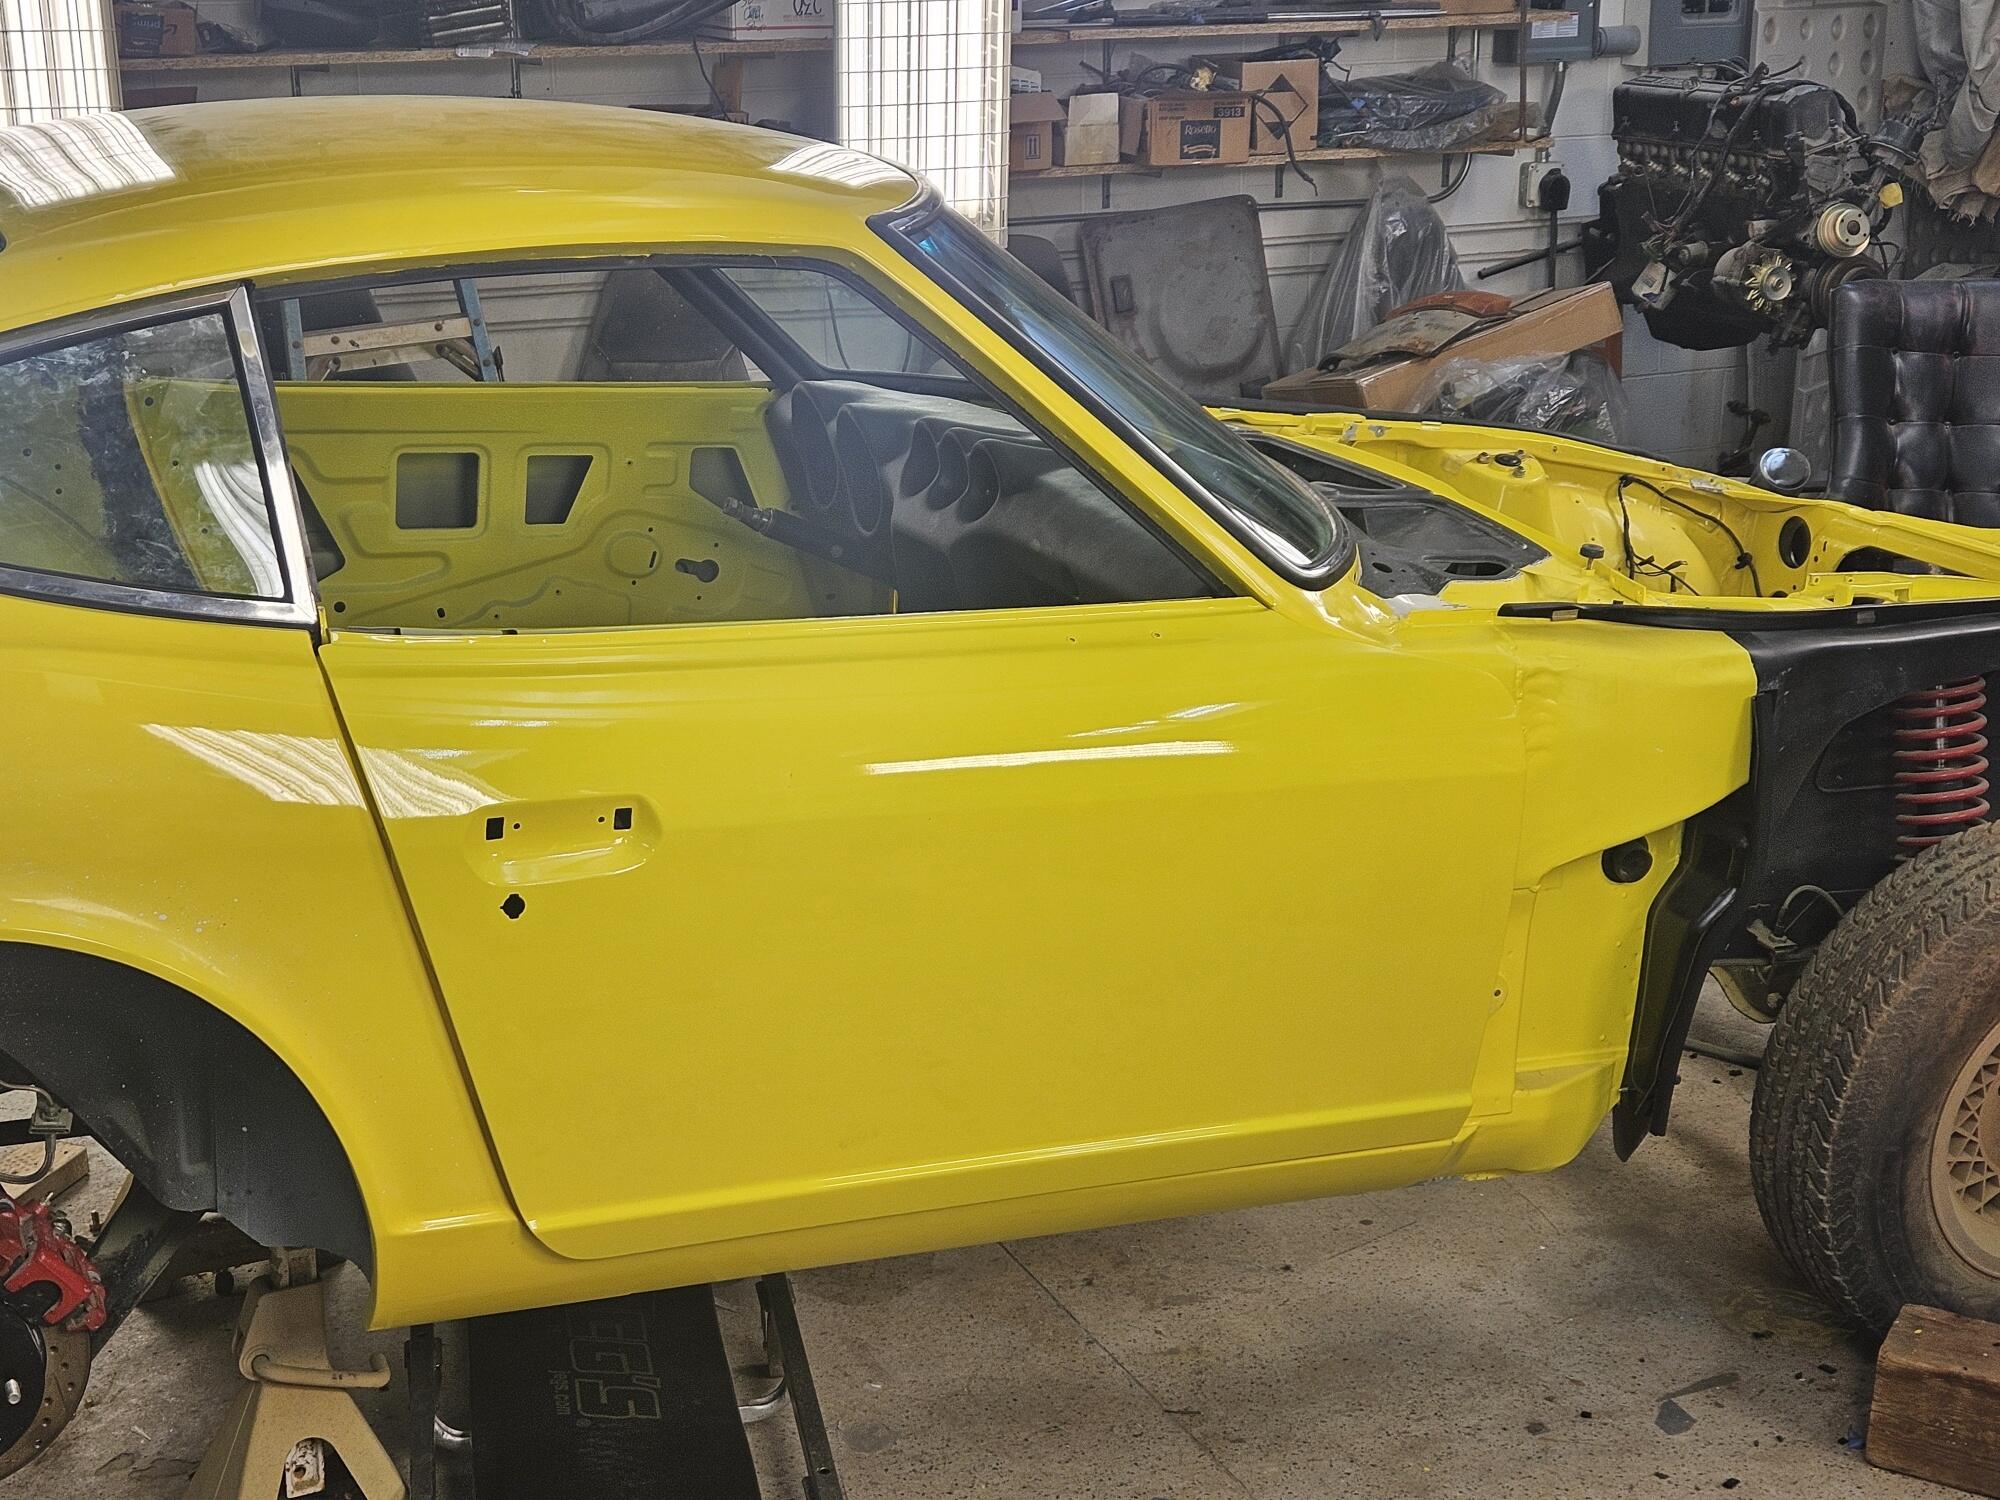

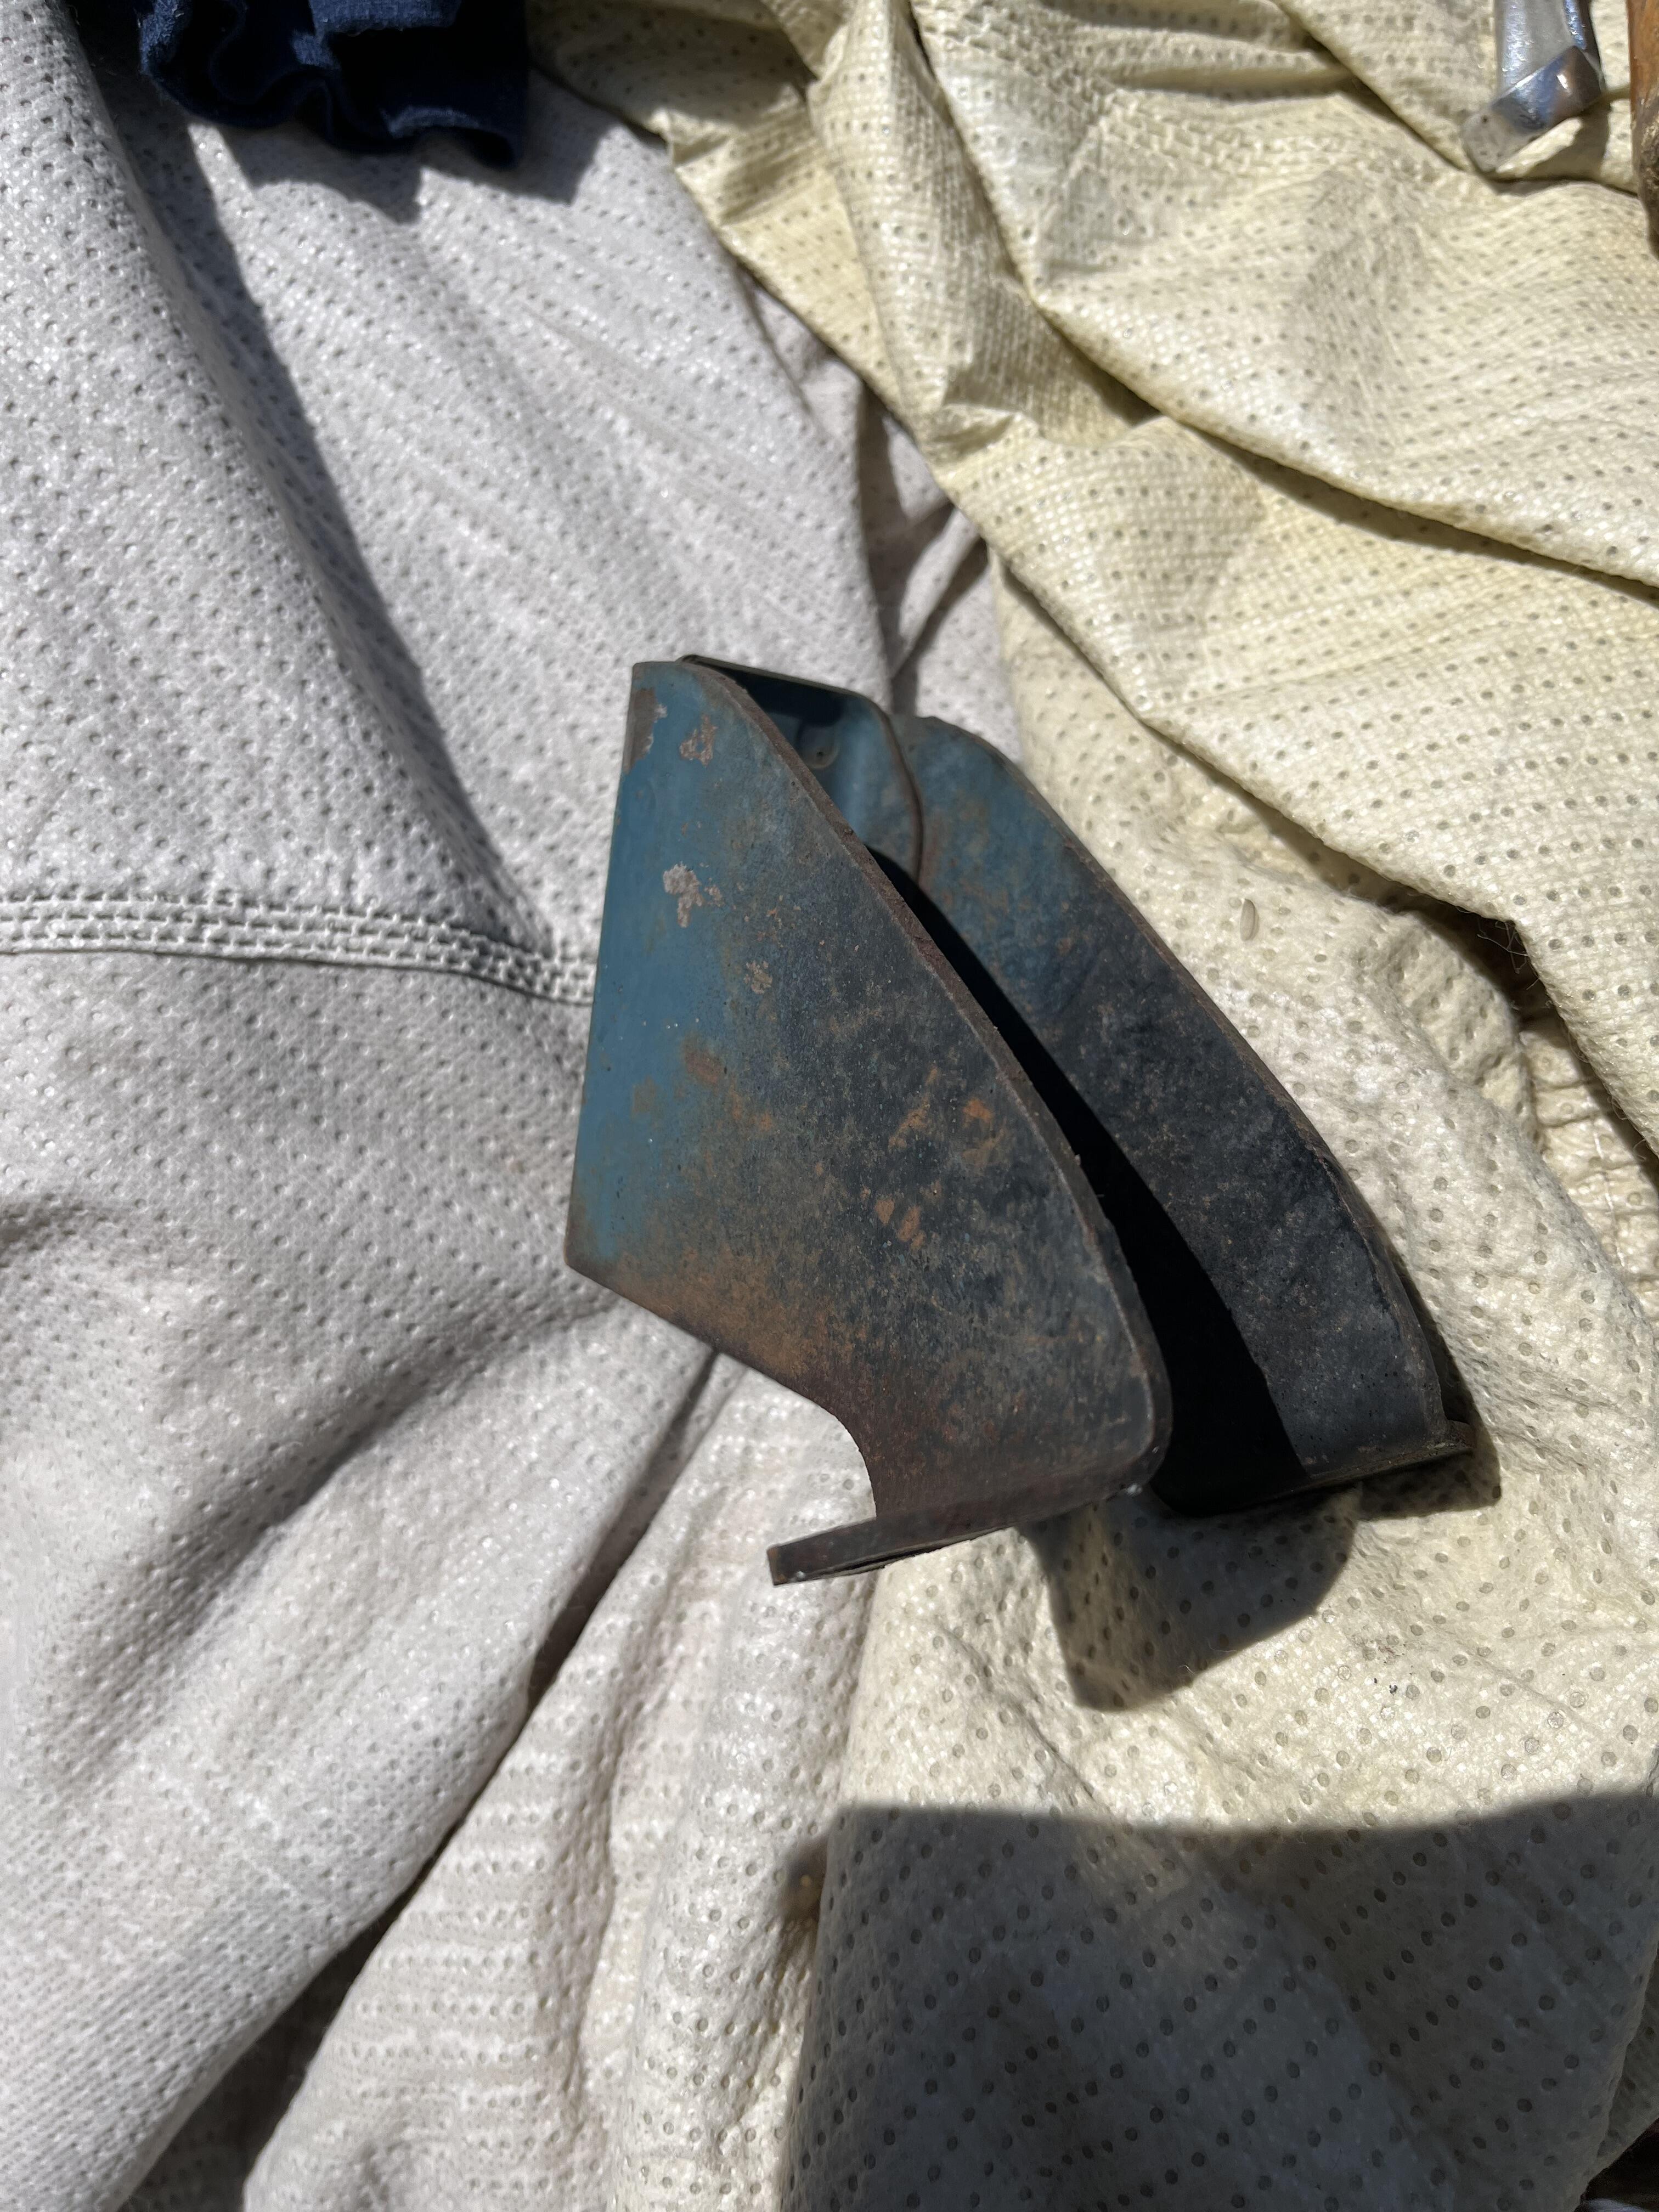
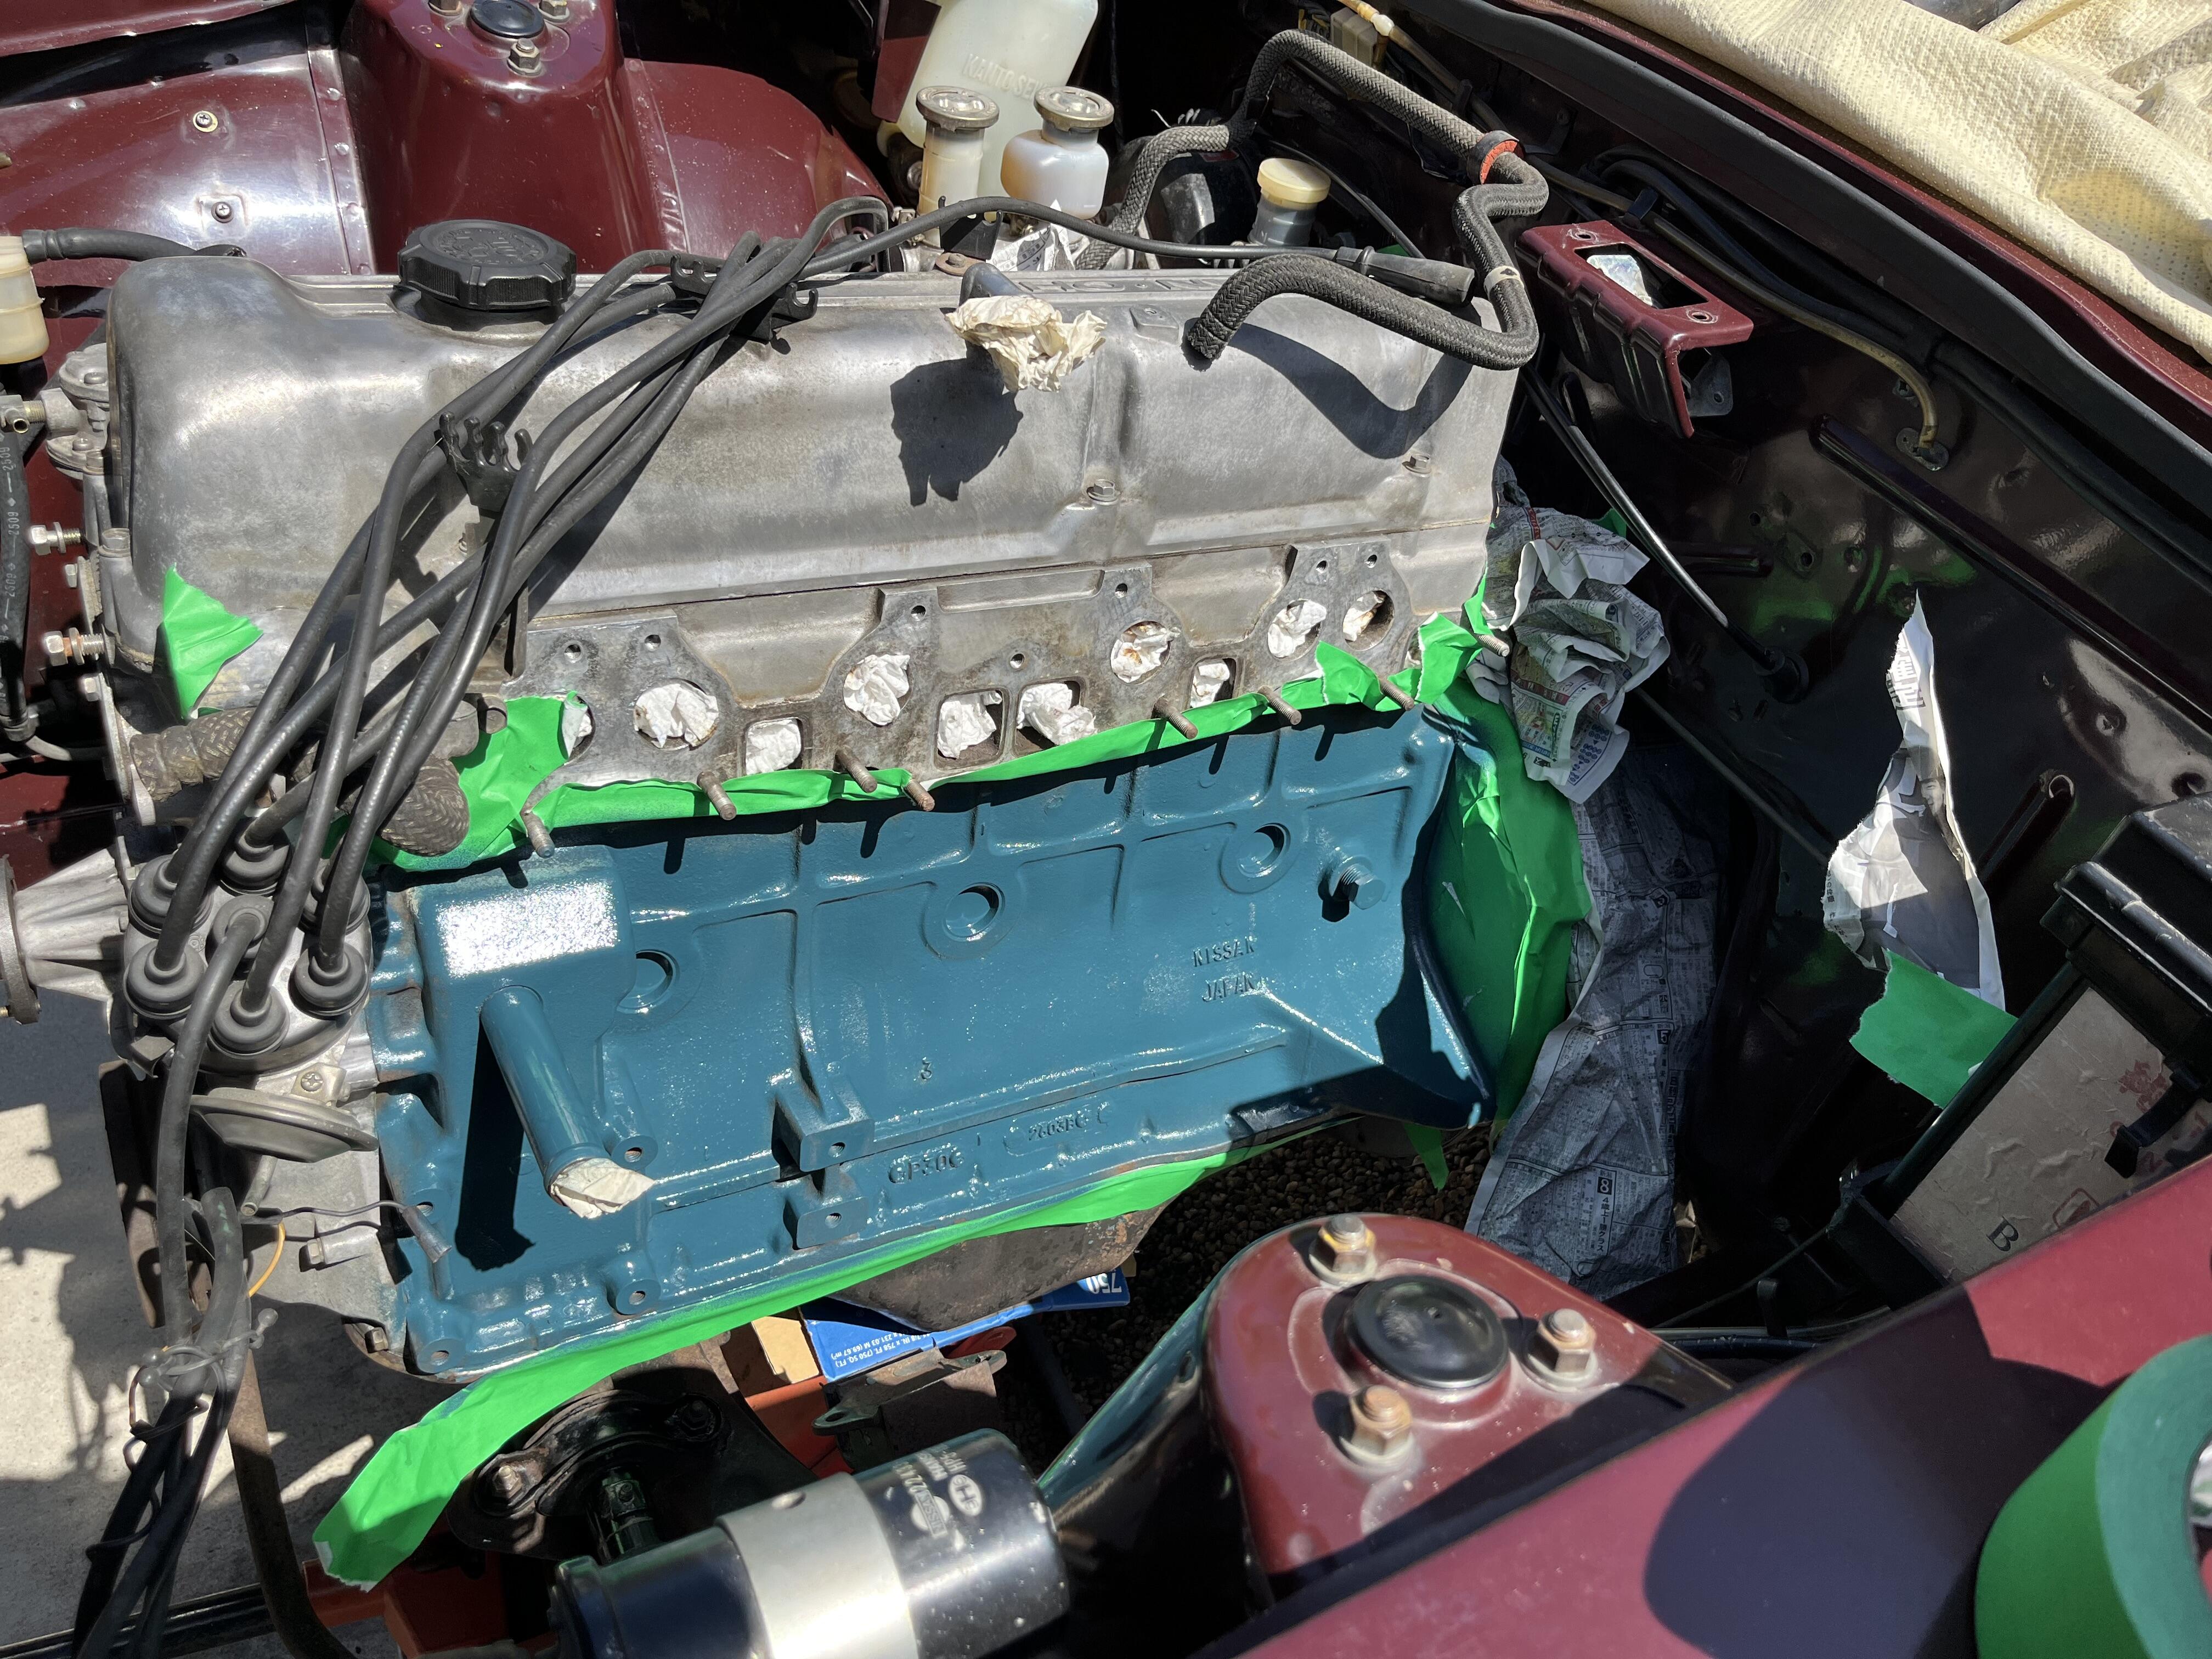
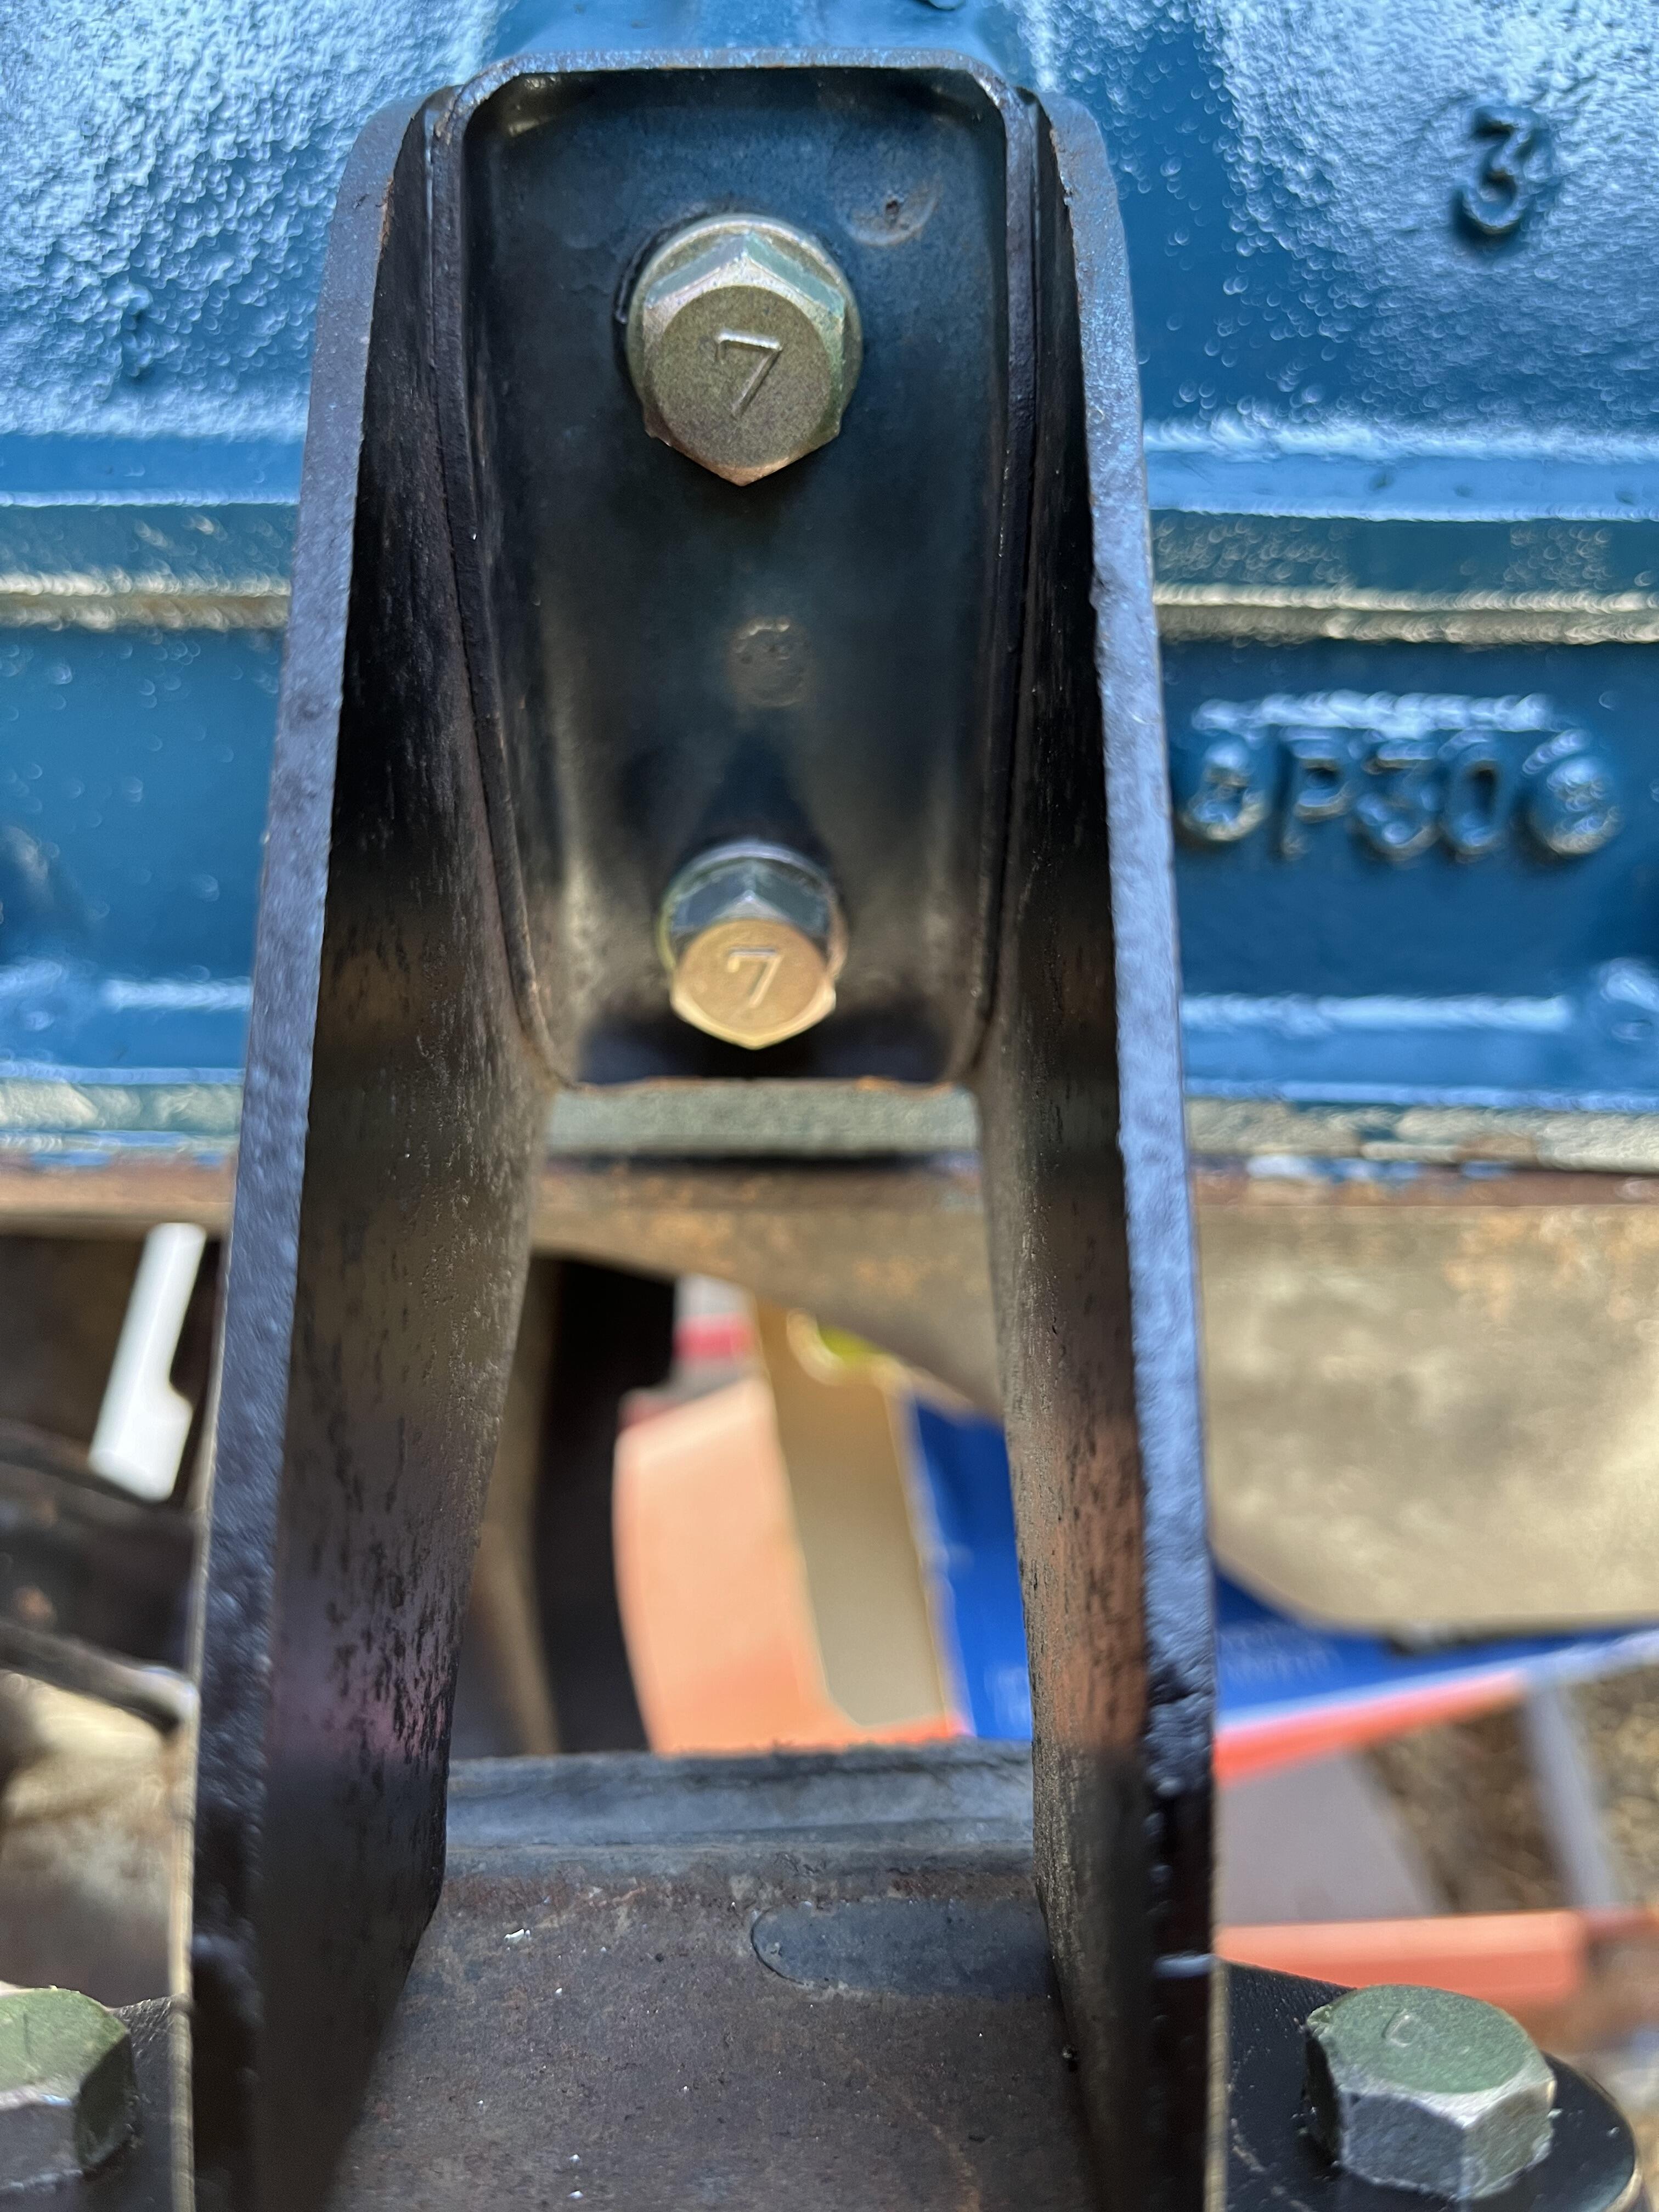
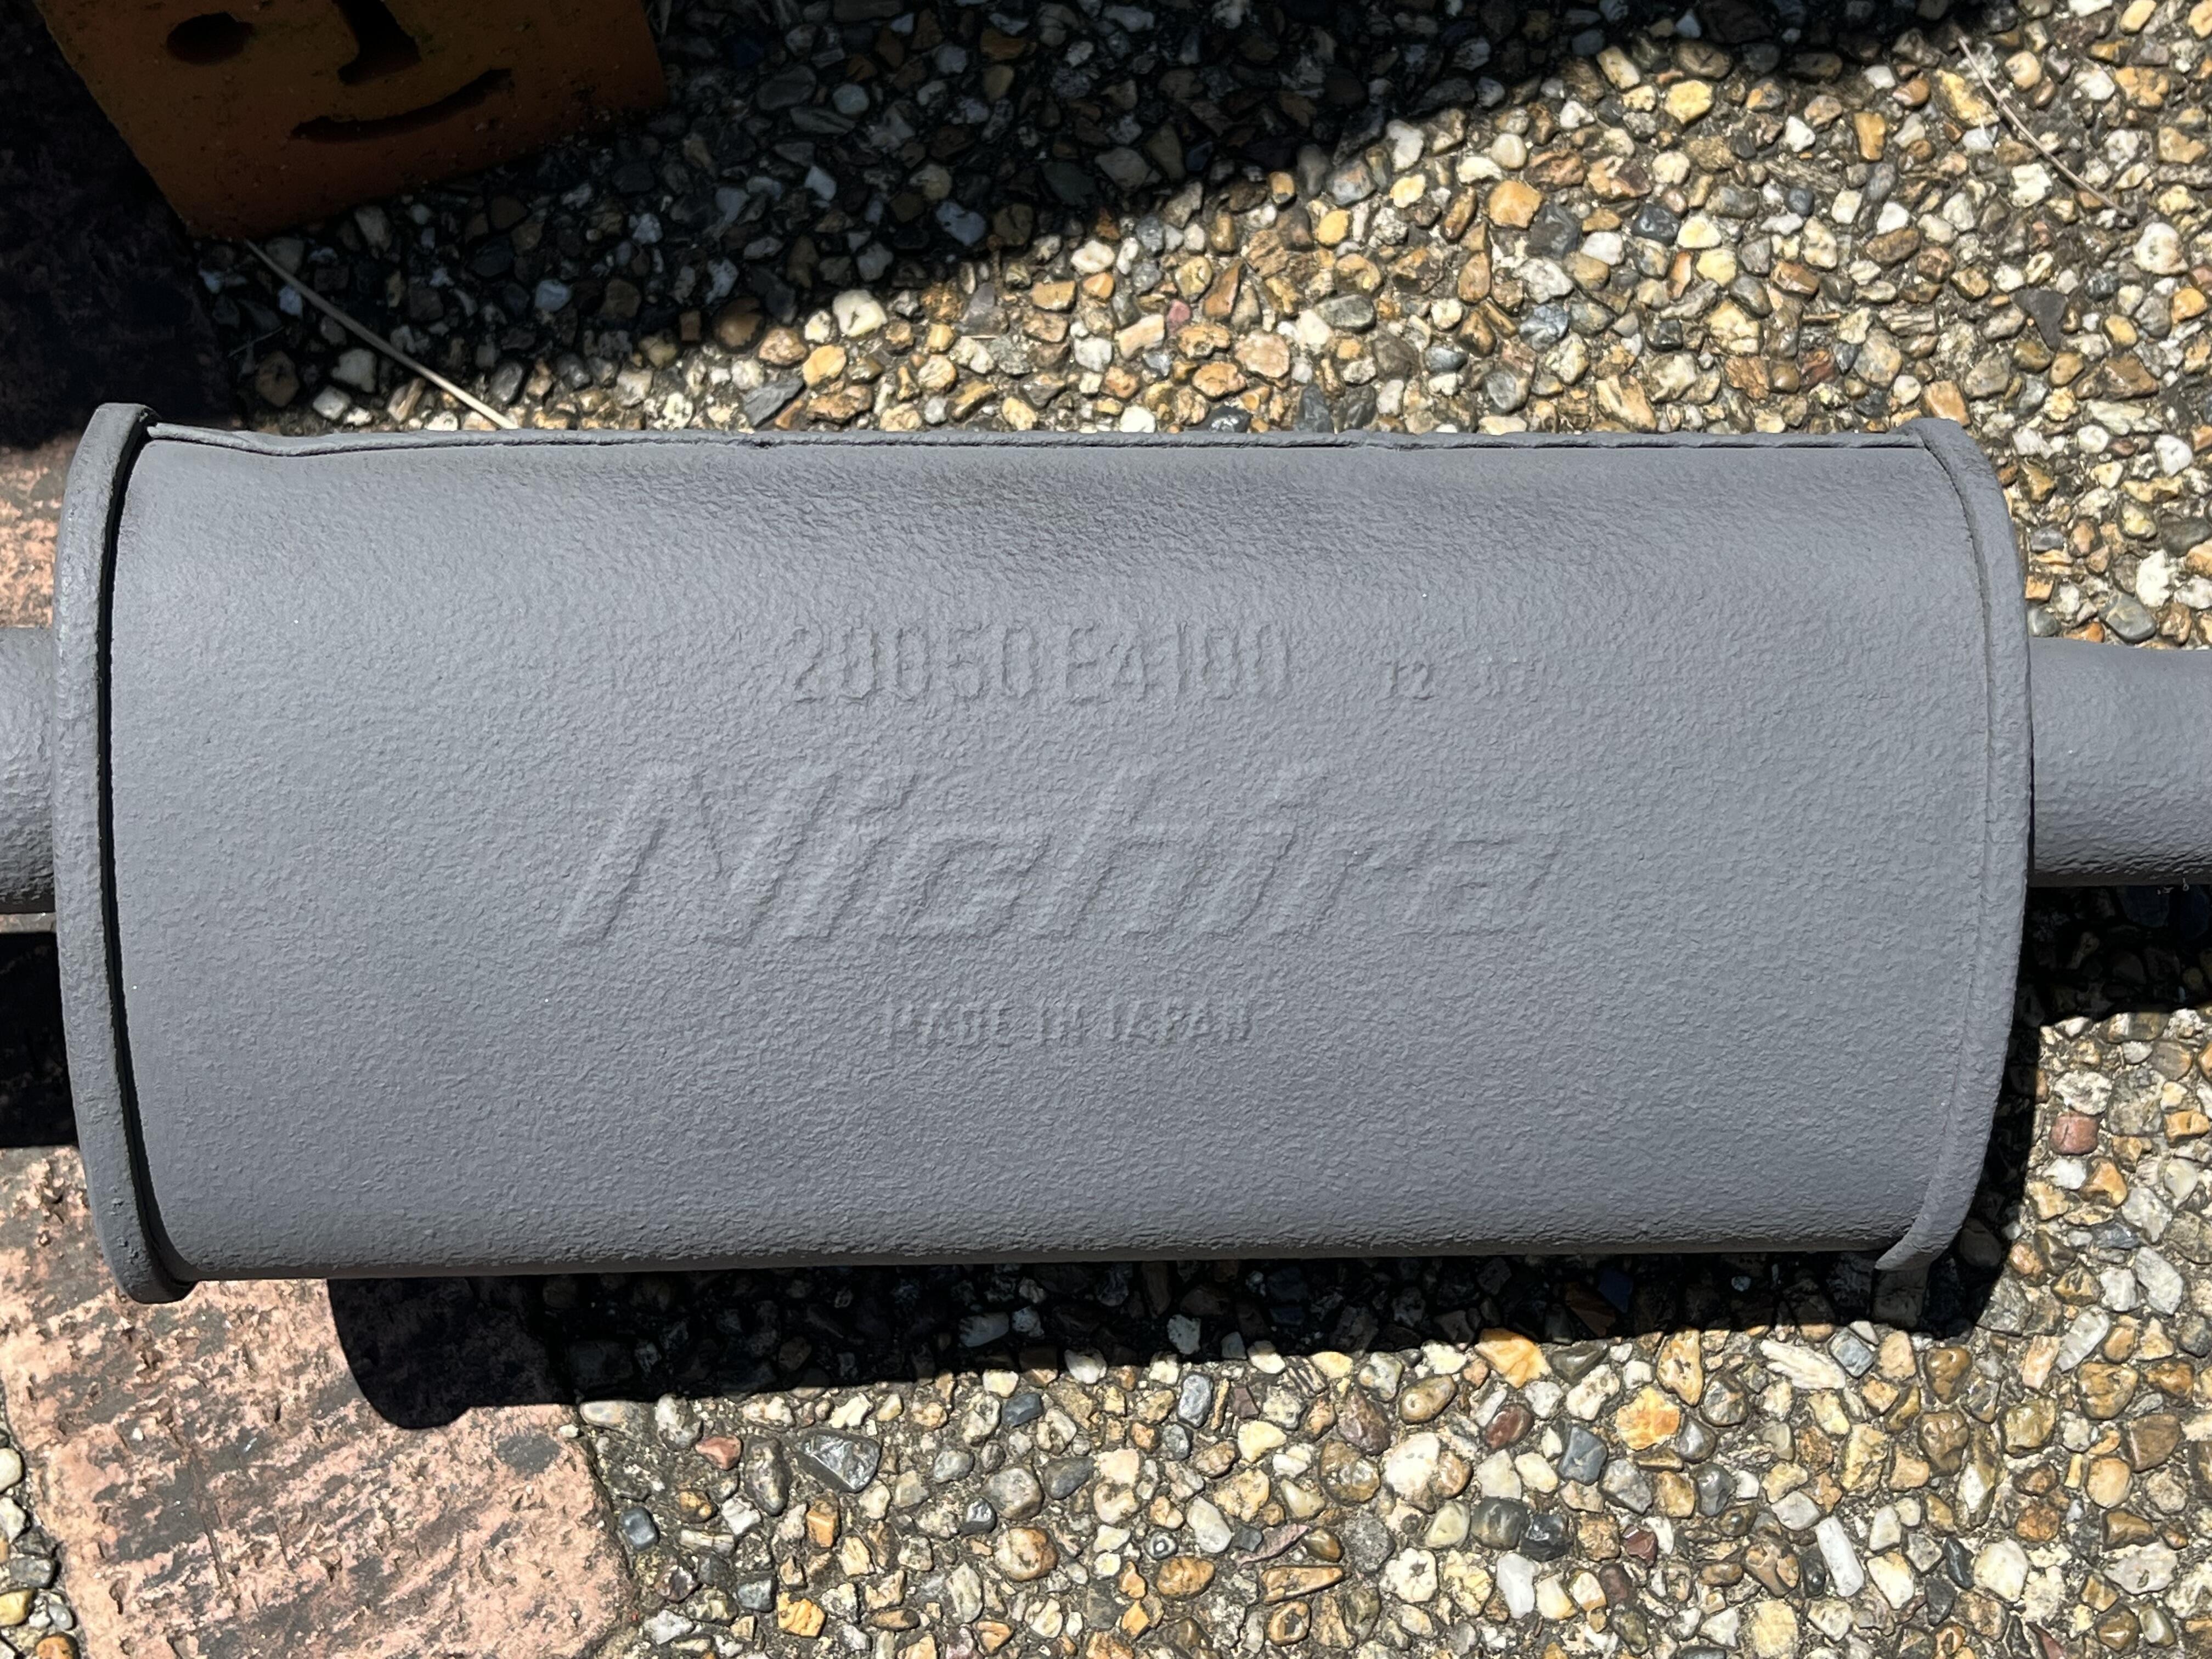
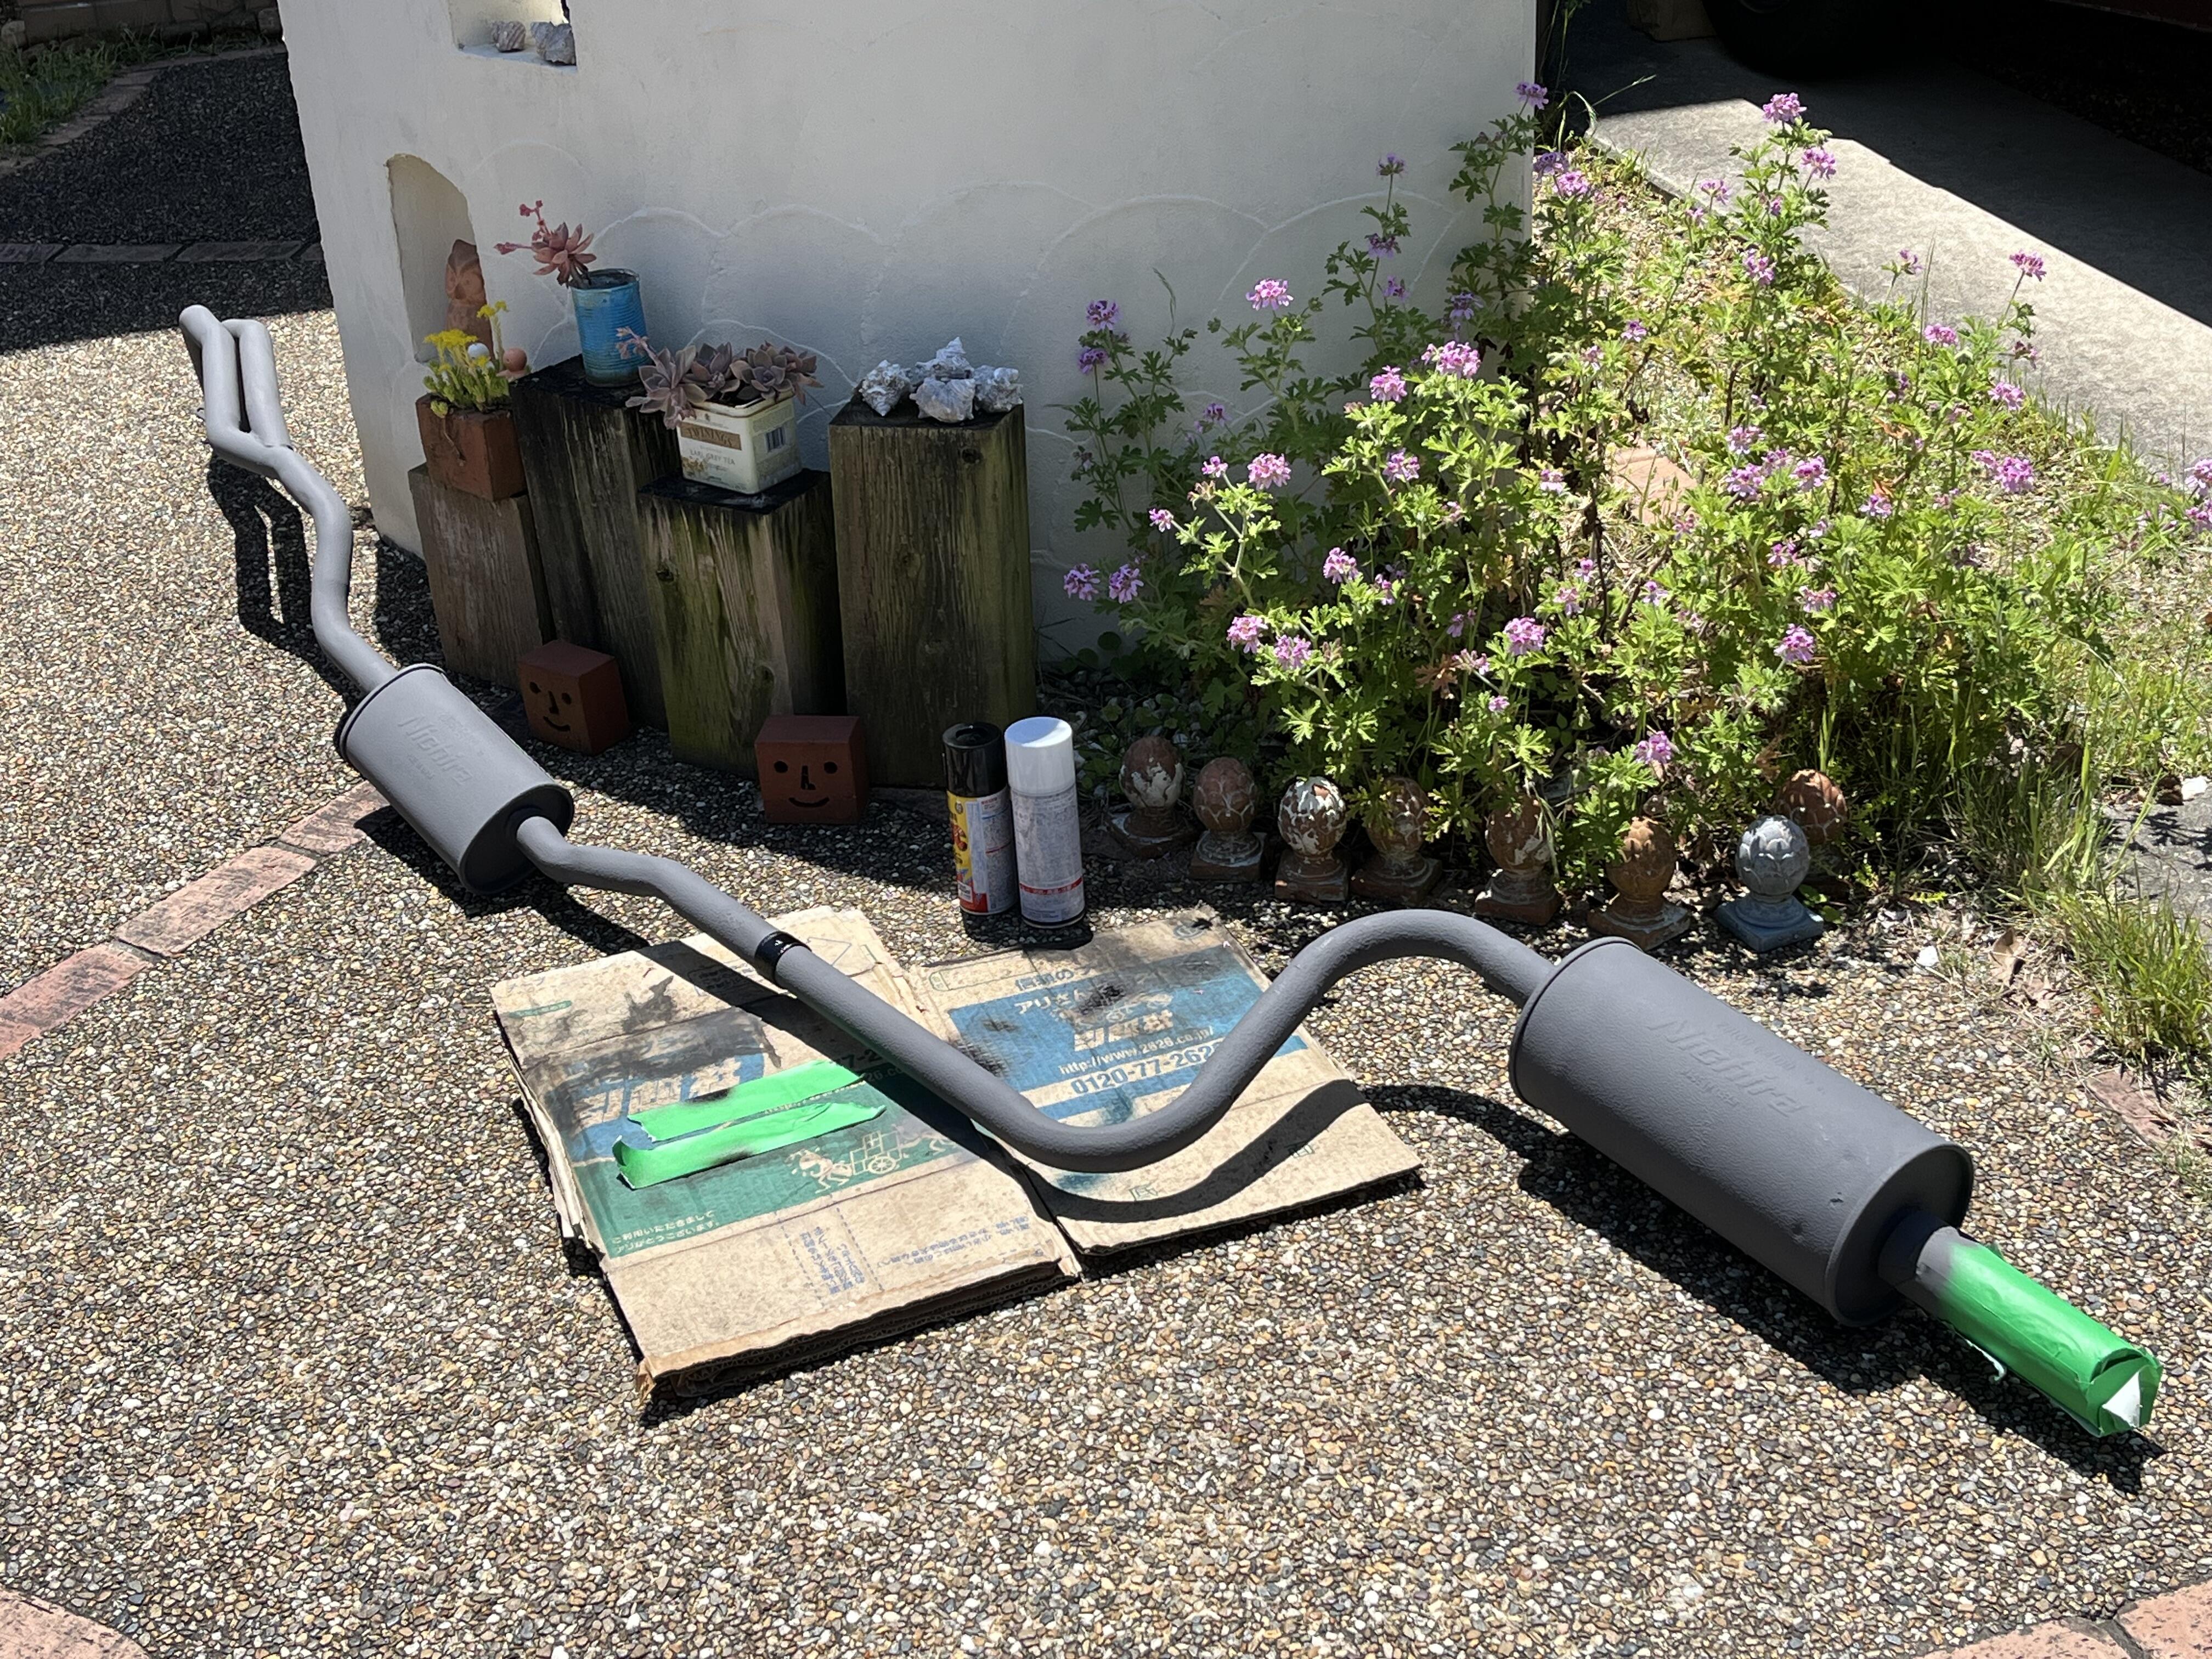
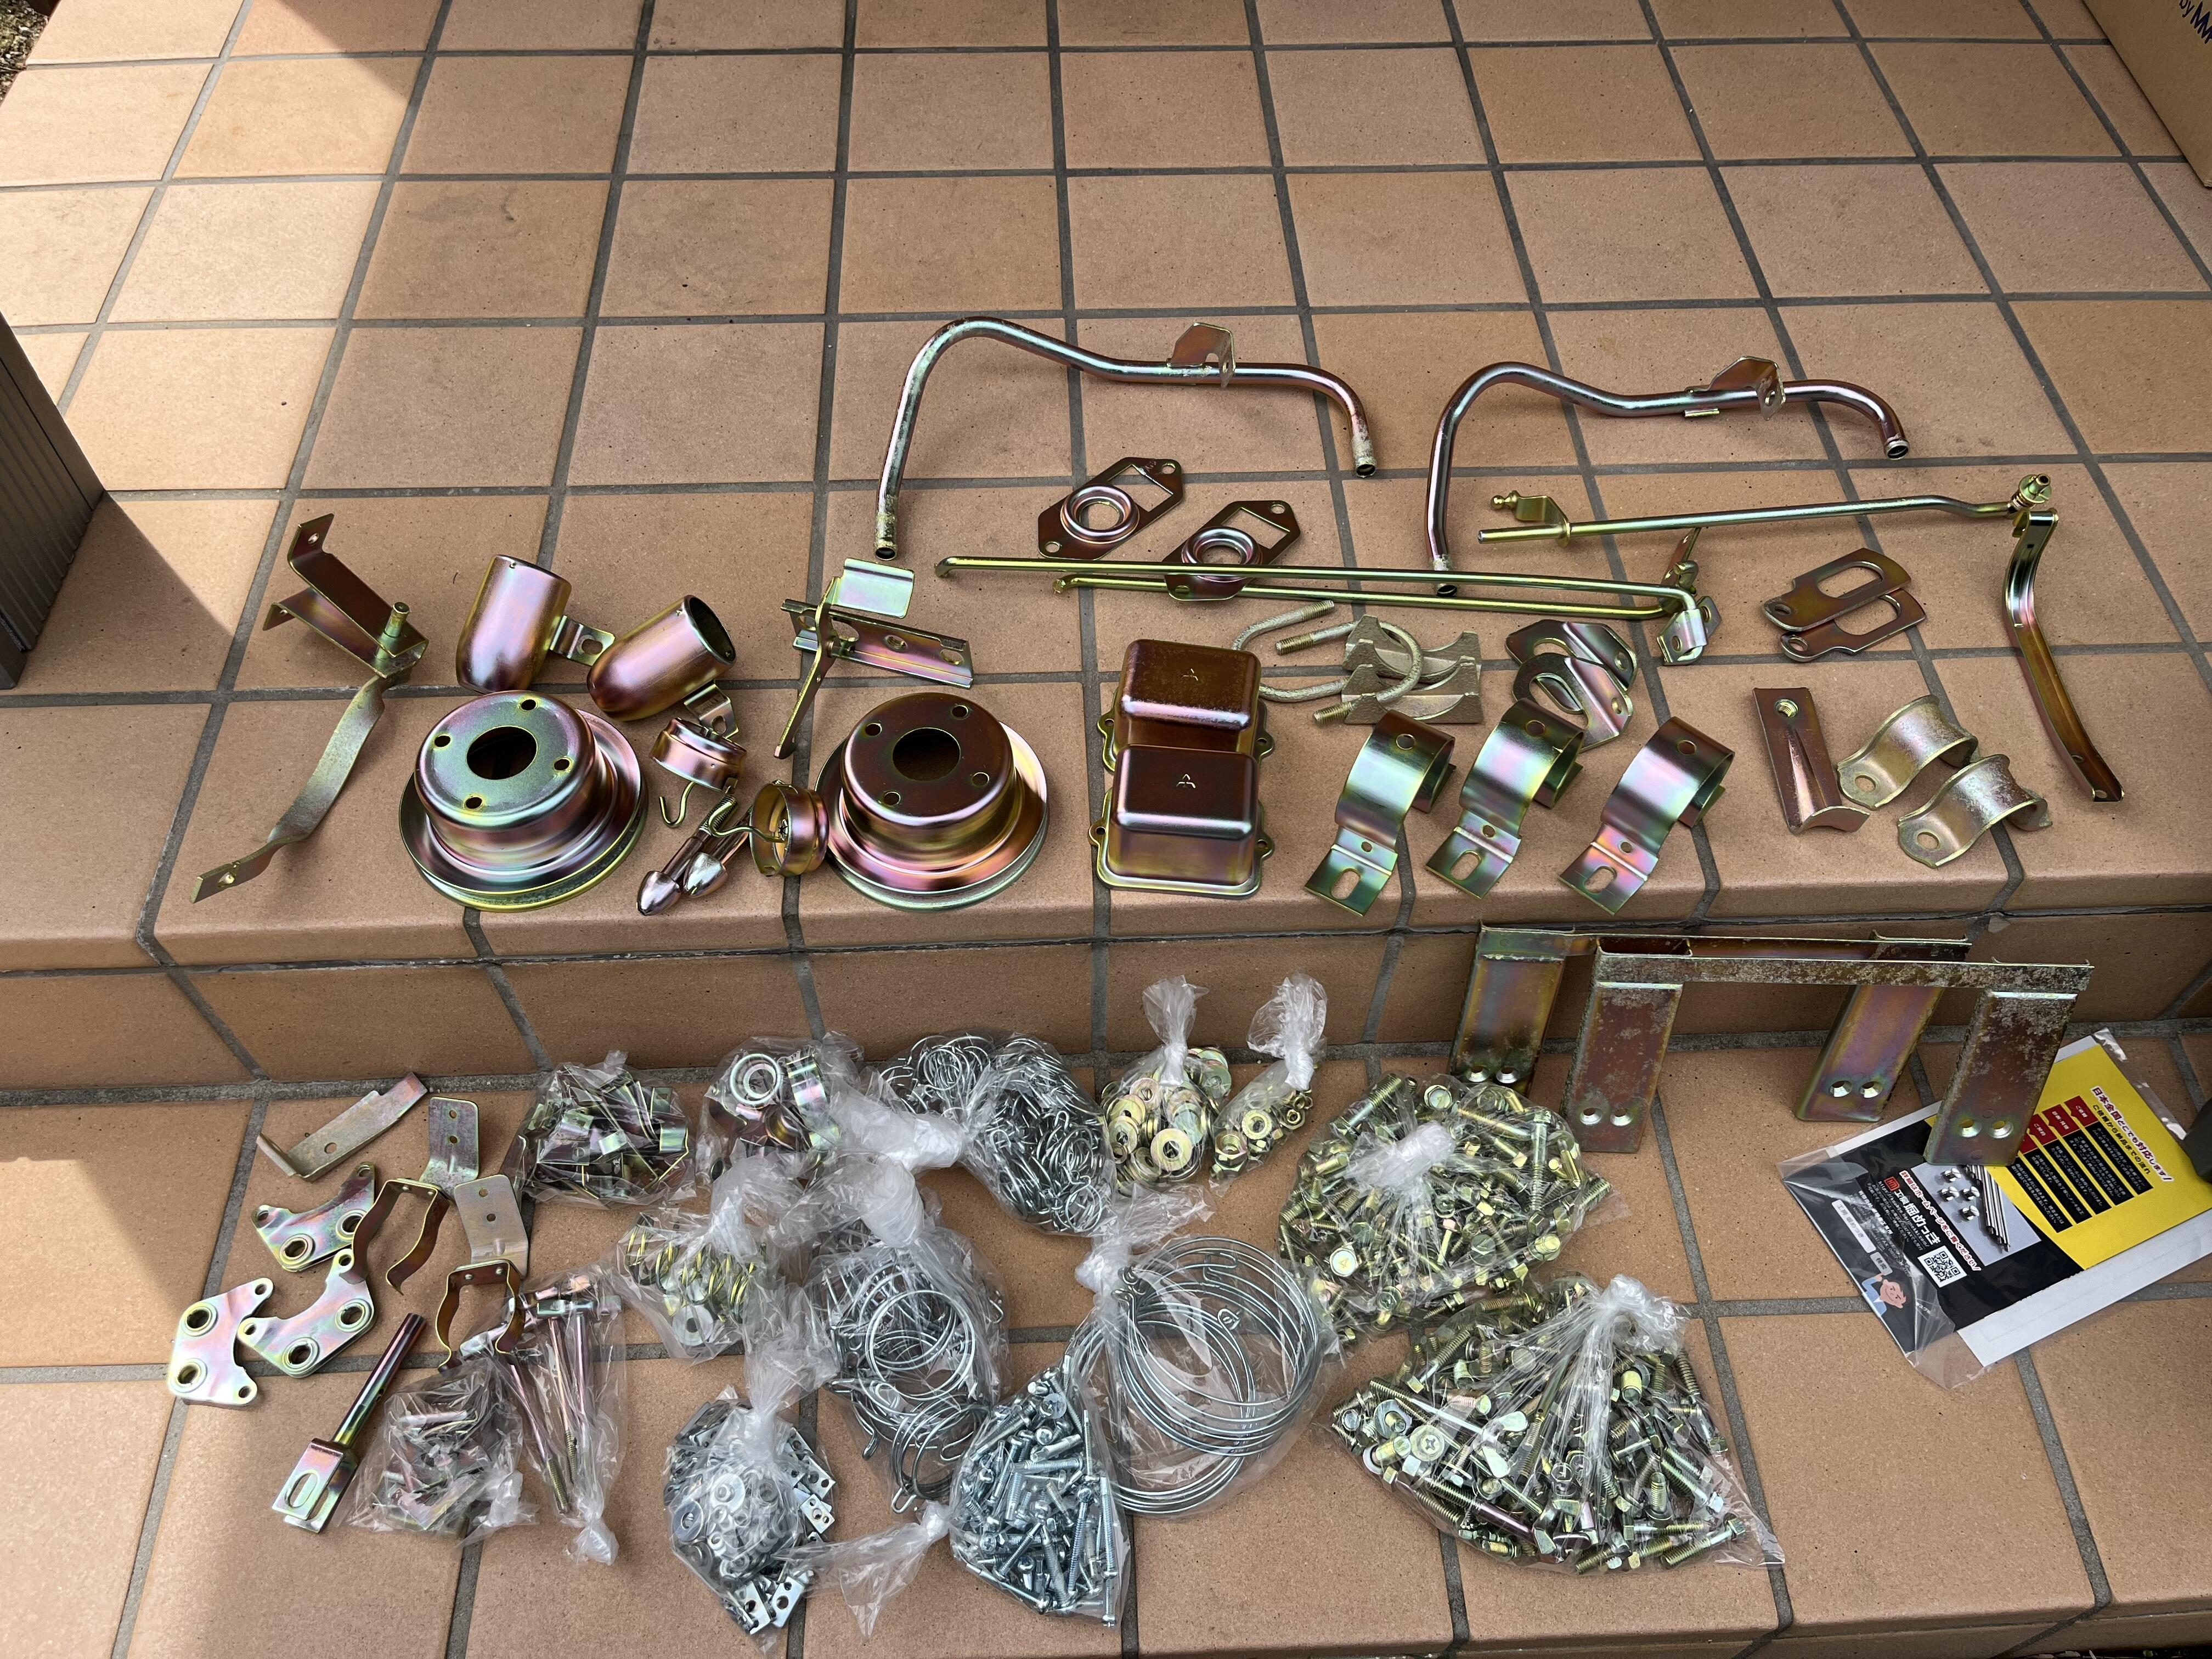
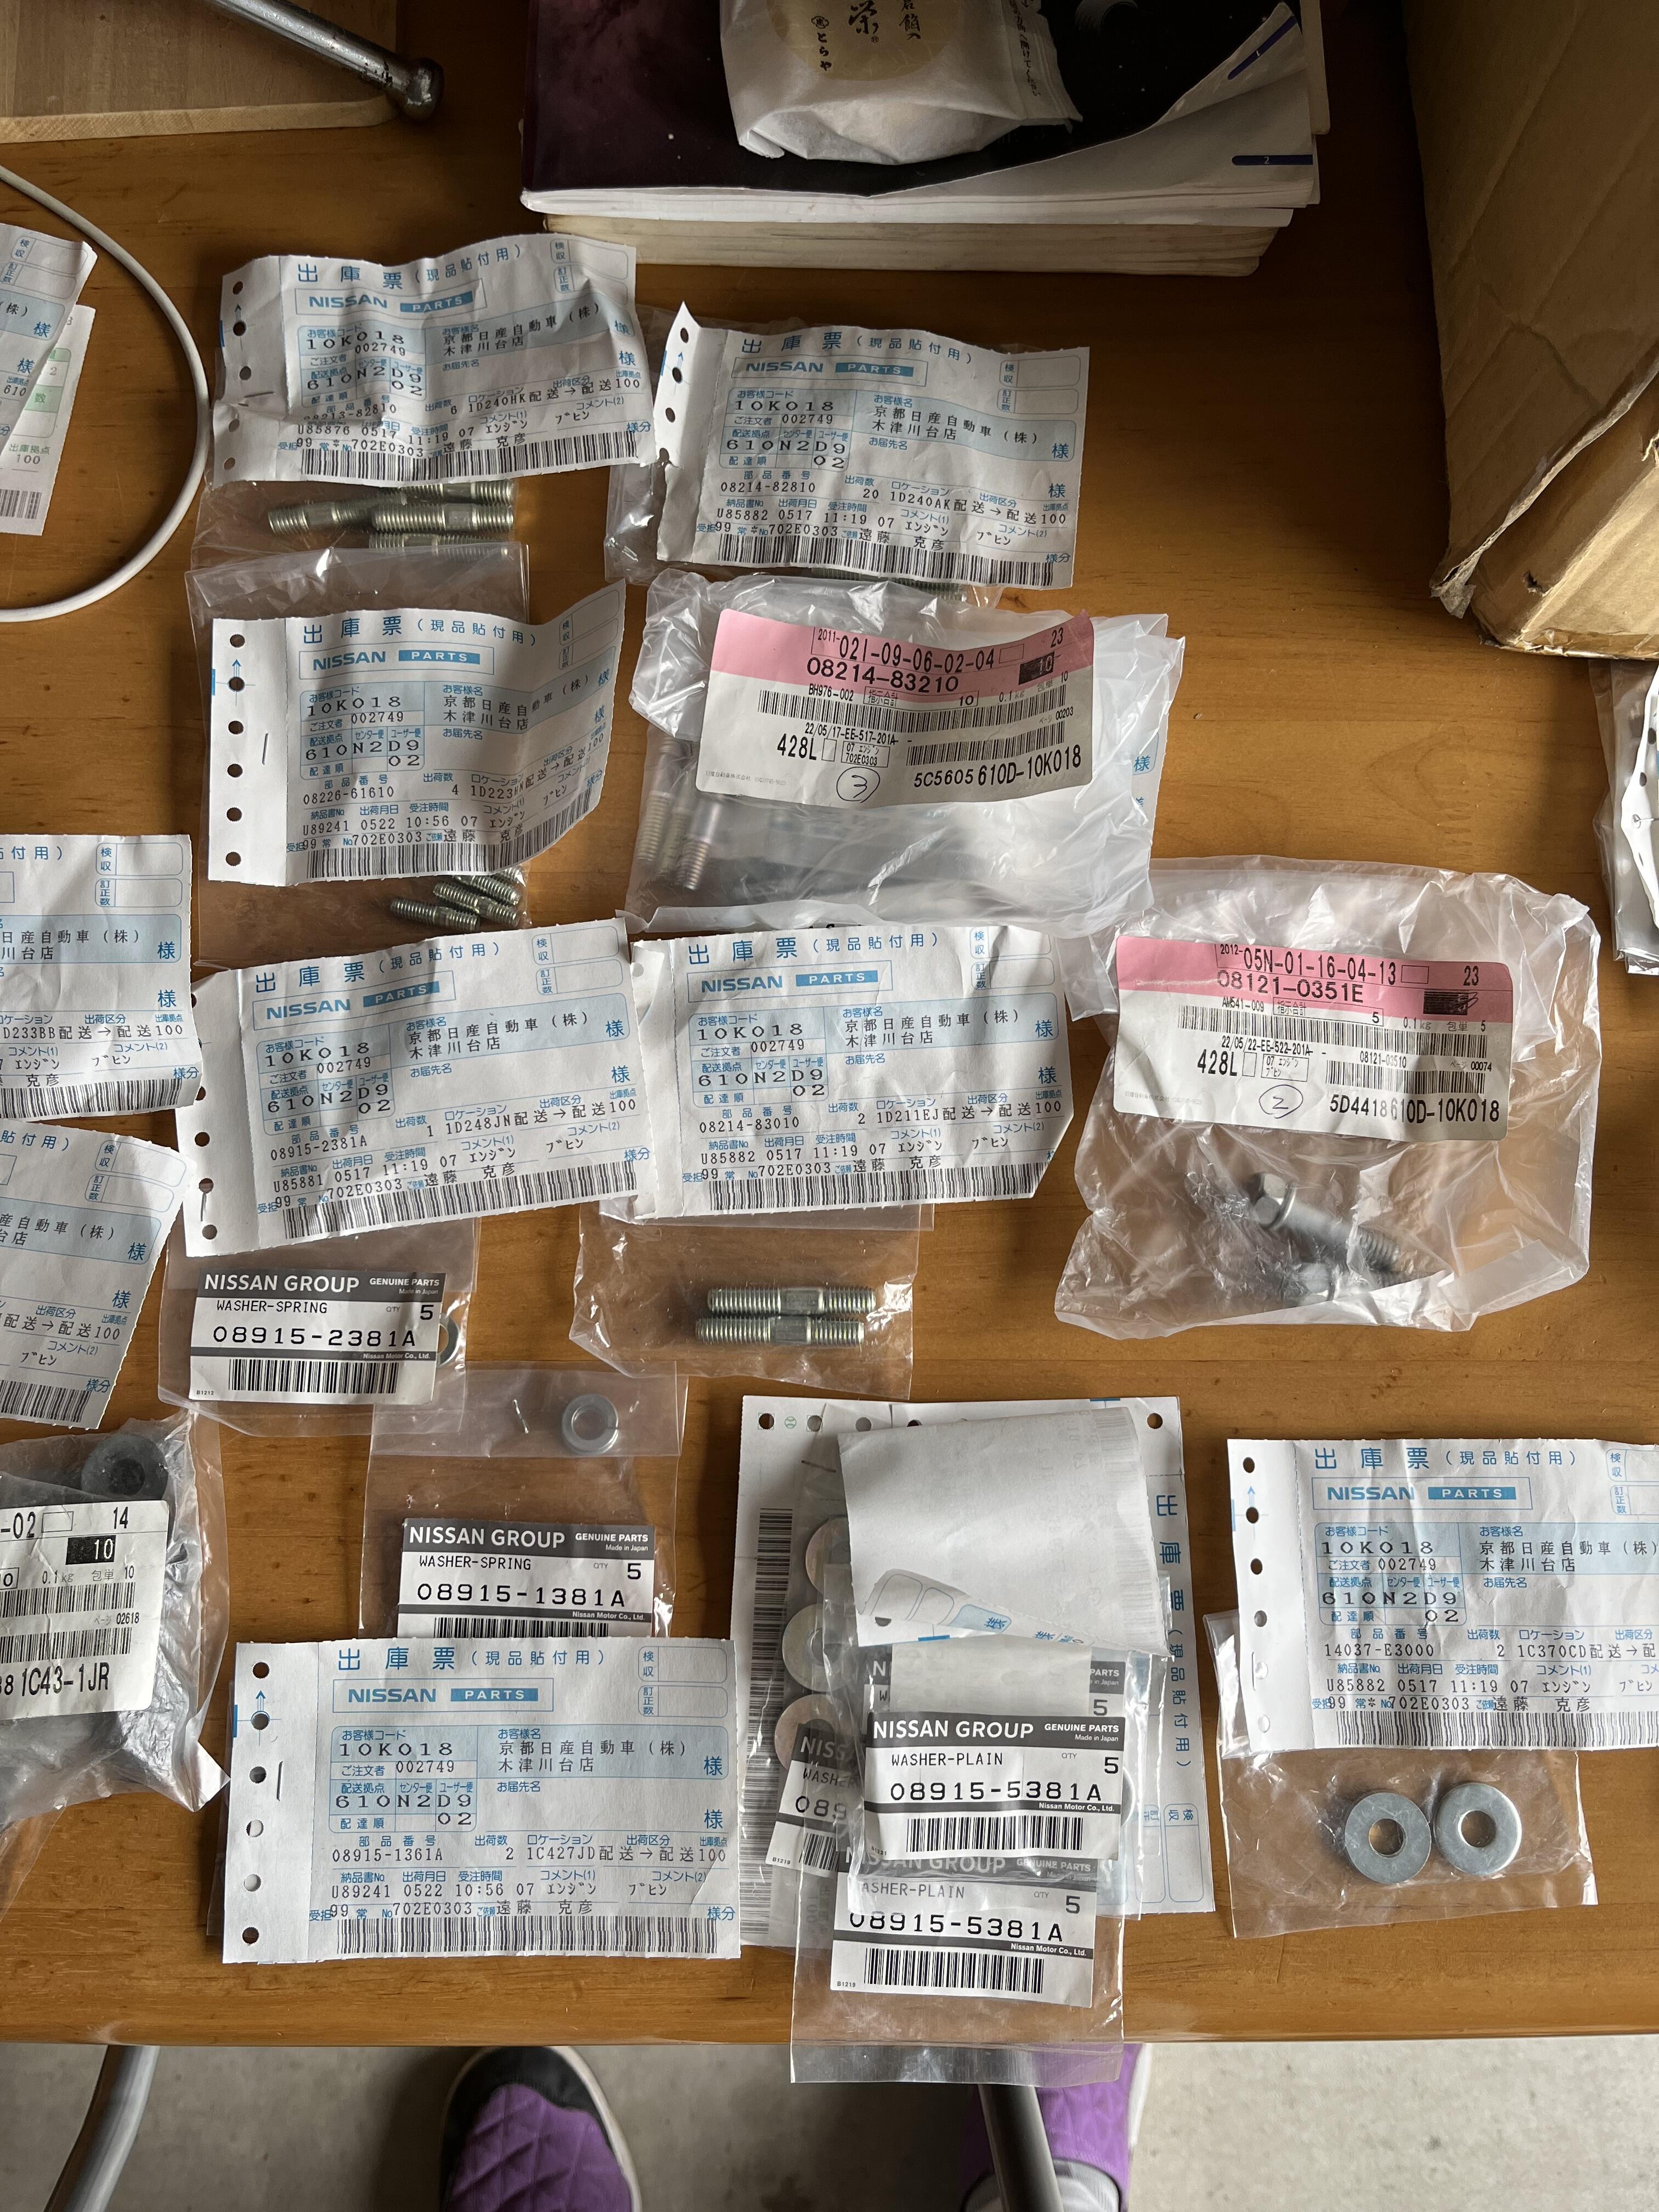


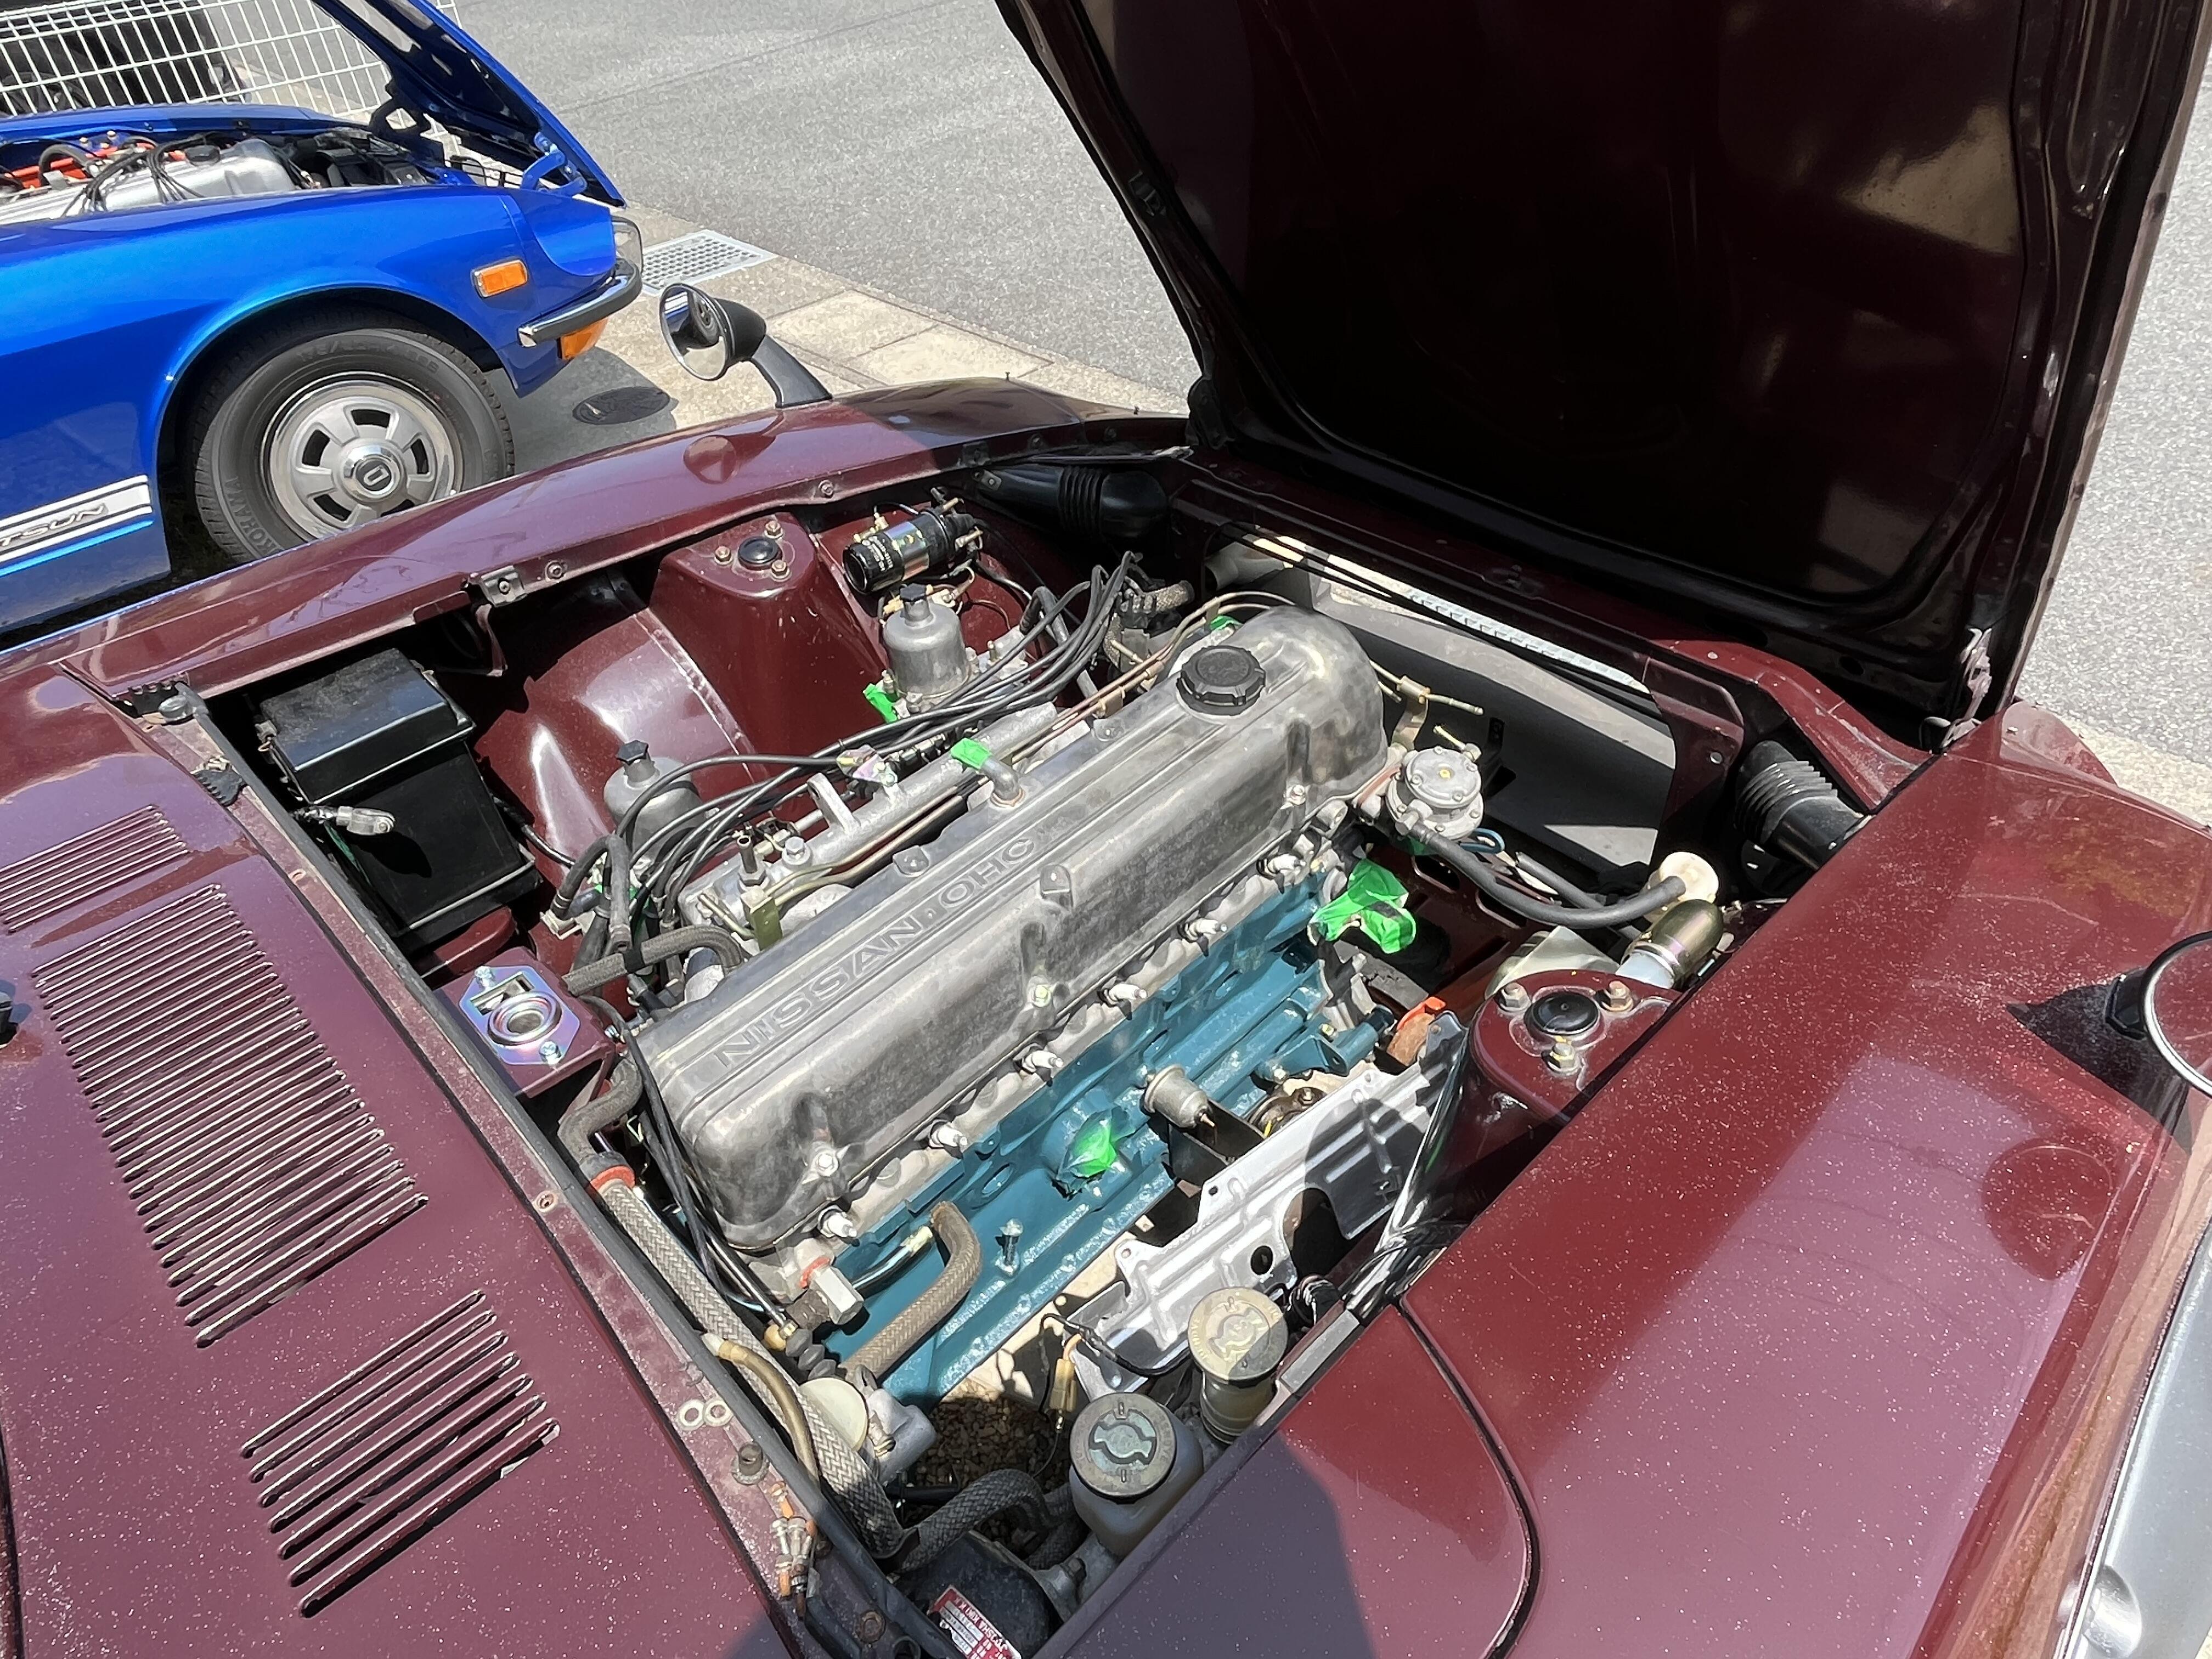
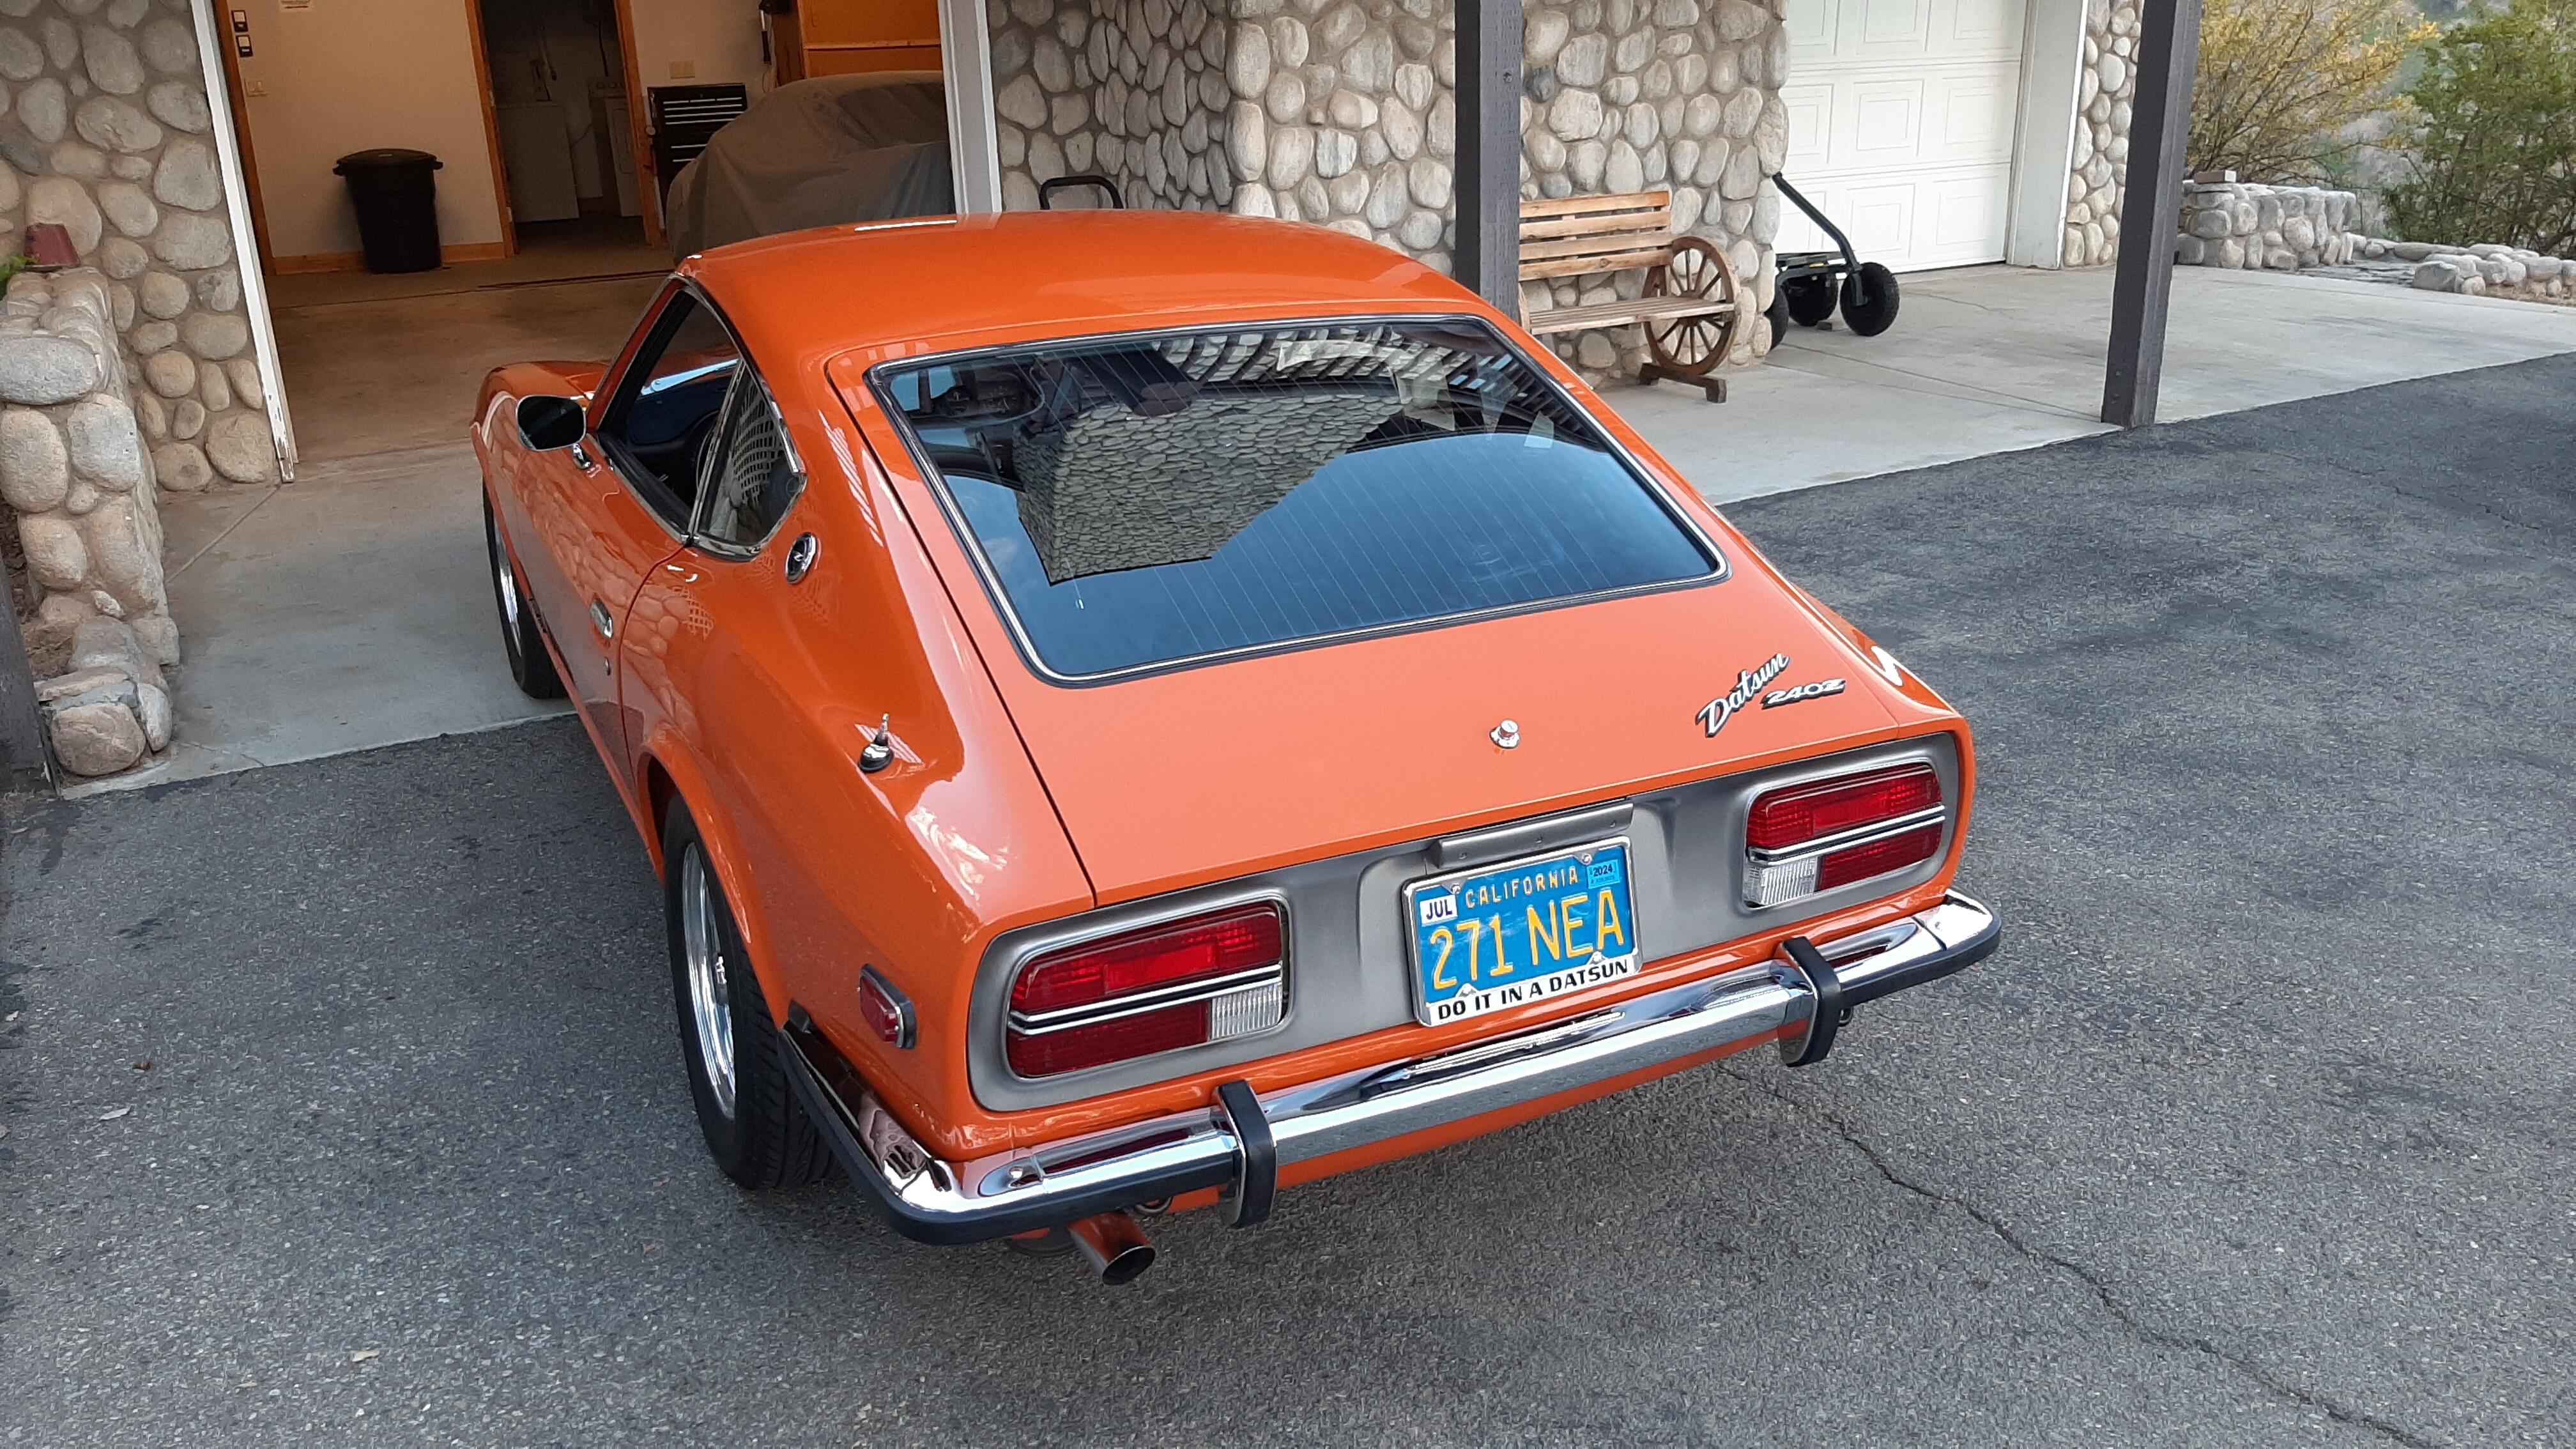

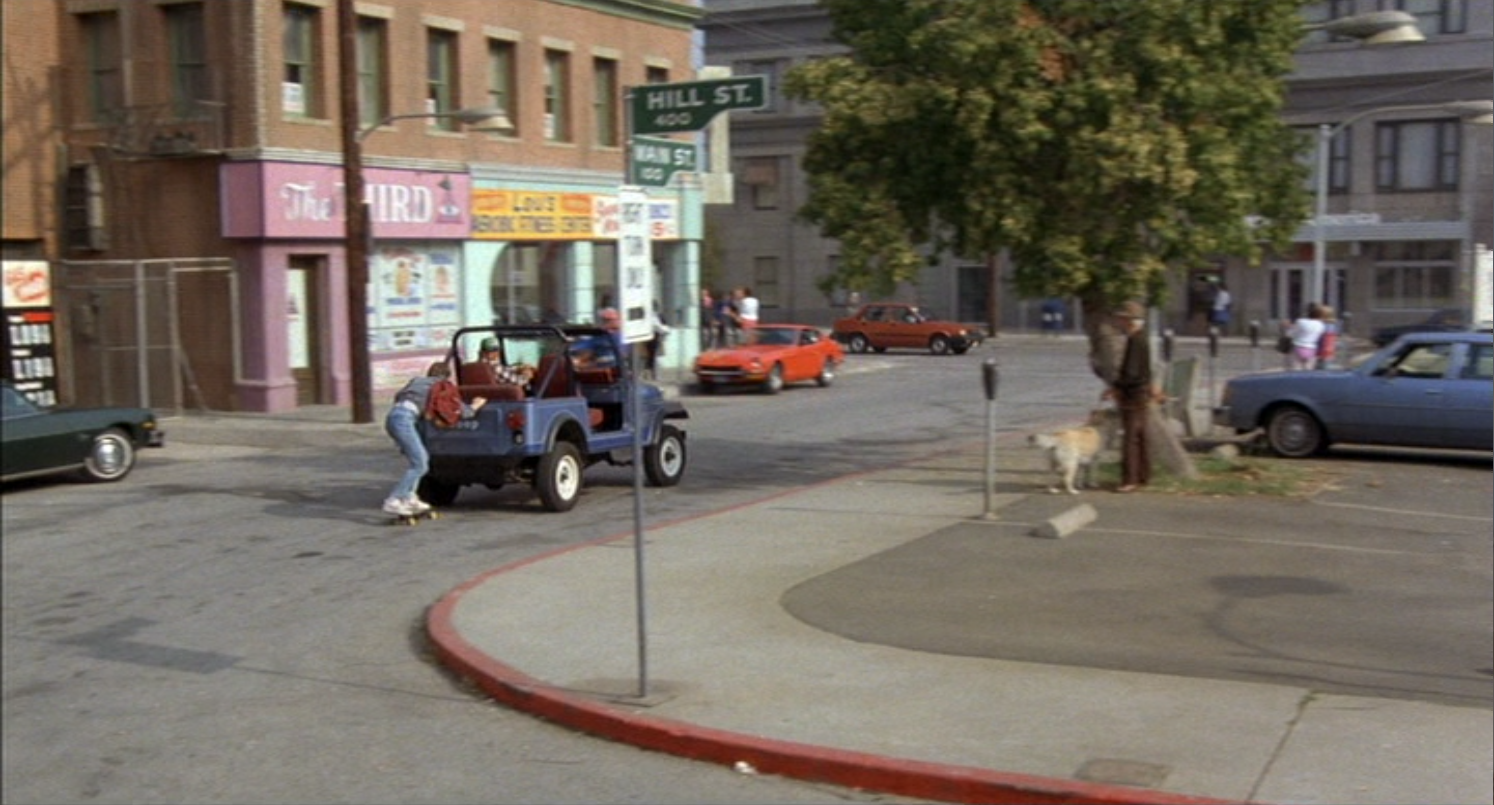
Important Information
By using this site, you agree to our Privacy Policy and Guidelines. We have placed cookies on your device to help make this website better. You can adjust your cookie settings, otherwise we'll assume you're okay to continue.