zcarnut
Free Member
-
Joined
-
Last visited
Everything posted by zcarnut
-
 You do not need to use a valve spring compressor when changing a cam. Rotate the cam so that the lobe is off the follower and using a large screwdriver wedge between the cam (the un-ground surface) and the valve spring retainer. Pull the follower out and repeat eleven more times. It helps if you increase the lash as much as possible beforehand.
 -
Here's a write up I did for our club newsletter a few years ago.
-
Carl, it was Rex Jennet.
-
Contact Roger Schmidt at the Z Barn http://www.zbarn.com/. He has several sets of L24 9mm rods available. In addition to the [late production] 1972 and 1973 240Z’s, the 9mm L24 rods were also used in the four cylinder L16 engines (from 1973 and up) and in the 1977-80 L24E engine used in the Datsun 810. Do not bother trying to find a Maxima L24E engine (1981-84) as Nissan went back to 8mm rod bolts when they changed the crankshaft for the 1st gen Maxima.
-
Hello Steve; I don’t like the bumpers on my 810 either. Those rubber end pieces are kind of ugly and are also NLA if you damage one. I have been looking around for an early Datsun 610 which also had bumpers with chrome ends (like the 200B). Since the 810 (1977-80) evolved from the 610 (1973-76) I was thinking that the 610 bumpers might work on the 810 (with a little fabrication). Problem is that I can’t find any old 610’s where I’m at. Maybe there are still some left in California.
-
Yes, but you have to use “R180" CV axles along with the R180 “CV type†diff. Nissan used CV axles on the very late production R180 differentials. Most 280ZX’s with automatic transmissions had them as well as all the 1981-84 Maxima’s. The R180 CV axles differ from the R200 CV axles in two respects: The R180 CV axles are longer and the splined part that is inserted into the diff is smaller in diameter (and has fewer splines). The CV axles are secured in the diff with a “cir-clip†in the diff mating with a grove in the splined end of the CV shaft (and not a bolt). Hence, you must use a R180 CV axle with a R180 CV differential. These can be identified with a large “K†cast into the top of the diff. You can change over a regular (or U-joint type) R180 diff to accept the CV axles, but this requires disassembly of the differential. This is all well documented on the Hybrid Z forum. Use the search function. http://hybridz.org
-
The early Z car seat belt mounting bolts are SAE thread and not metric thread. This is due to the US DOT standards in effect at that time: Quoted from 571.209 Standard No. 209; Seat belt assemblies: ...Seat belt assemblies designed for installation in motor vehicles equipped with seat belt assembly anchorages that do not require anchorage nuts, plates, or washers, need not have such hardware, but shall have 7/16- 20 UNF-2A or 1/2-13UNC-2A attachment bolts.... You could either use the approved SAE bolt which has been already tested and certified by DOT or you could use your own bolts but you must summit your test data. Generally, it is cheaper and safer to do the former.
-
It does not matter. The early Z cars used "batch firing" which means that all the injectors open and close together at the same time.
-
I swapped out the entire rear suspension crossmember in my 1979 810 with one from a 280ZX. Bolts right up. By doing this you get to replace the rear 810 drum brakes with disc brakes. You also get to use the ZX rear sway bar, something the 810's did not have. Use the ZX rear parking brake cable. The only “jury rigging†required is to add an “extension†between items #6 and item #12 in the picture posted by Stephen. This is needed because the ZX cable (item #16) is not long enough. But this is no big deal to fix. You can use a flat 1" x 1/4" x 8" piece of metal or a piece of an old brake cable (which is what I did) secured with a hardware store cable clamp: I also swapped out the 810 brake proportioning valve with the ZX one to maintain correct front-to-rear braking bias and used the larger diameter ZX master cylinder. If you want to keep it stock then I would give my good friend Roger Schmidt of The Z Barn a call as he has several junker 810's (and he even has my old 810 rear crossmember which had a good working parking brake cable).
-
On an FI car with the stock setup you really do not want to do that. An “open†valve cover vent (breather) allows what is called “false air†to enter the intake manifold via the valve cover, out the block vent, through the PVC tube and finally past the PVC valve and into the manifold. “False air†is air that is not being measured by the AFM (air flow meter) and as a result the mixture will become lean and also the idle speed will increase. Notice that the factory positioned one end of the valve cover breather tube so that is between the AFM and the throttle body. As a result, the air entering the valve cover is being measured and therefore being compensated for. However, if you have the SDS or Megasquirt controller the airflow is calculated with inputs from the MAP sensor, the TPS sensor and the rpm sensor (trigger). As a result any “false air†changes the intake manifold vacuum level which is sensed by the MAP. So, an open valve cover vent will not result in any driveability issues when using one of these aftermarket systems.
-
Note here: I have the [very] early SU's with the metal top damper rods and they do not have any of the oil level "grooves" on them. Go figure!
-
You need to install them using the first method you describe (lifting the choke levers up until the levers just contact the throttle shaft and tighten the cables), otherwise you will not have enough range to open the chokes fully.
-
Their exchange price has gone up to $4 per follower (at least that's what they just charged me). Still a bargin when compared to the dealer cost of $29 a piece.
-
Strange, but there is no listing for a 24013-E8827 nor a 24013-E8828 in my Nissan Parts Price Book (1998 vintage). The most “similar” part numbers to those are a 24013-N3327 and a 24013-N3328, which are 240Z dash harnesses, both listed as being used from 10/72 to 7/73 with the automatic transmission.
-
I have had to use a tap with brake components in the past just to get the threads to start. And all these were new parts. Tap thread size is 10mm x 1.0 which any good auto parts store will have.
-
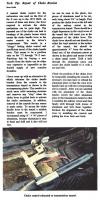
Someone has swapped the original master cylinder with a 15/16 inch diameter 280ZX version. The ZX had disc brakes on both the front and rear, hence the equal sized reservoirs. The ZX master also has the bleeder screws on the right side as pictured and note the wires going to the reservoirs. These come from the brake fluid level sensors which was used on the ZX but not the earlier Z cars. The booster appears to be a 240Z [small] type.
-
Make sure you have the 3/16 inch thick plastic gasket spacers in between the intake manifold and the carbs. Otherwise the heat from the head conducts right into the carb bodies. I had vapor lock problems with my Webers until I installed these spacers. I also made a heat shield to install below the carbs, but I never needed to use it.
-
I was looking at # 313 (yes, it's up for sale) last week and I also noticed the lack of the rear defroster. On the console plate the rear defroster switch is not there and in its place was a rectangular plastic plug. For comparison, on my 2/70 car (# 1841) there is a rear defroster
-
I think you guys are missing the point.... My reason for painting the car in this manner is, in my opinion, the easiest way to achieve the best results. It has nothing to do with trying to be a purist by tying to duplicate the exact factory process. If you paint the panels off the car you eventually have to re-attach them to the uni-body. If the bolts that attach the panel were painted the top color, then you will chip paint off these bolts during the re-assembly process. Adjusting a panel for correct “gaps†generally involves loosening and re-tightening [at least some of] the panel attachment bolts more than once. Touching-up the paint on these bolts is very difficult to do without being noticeable. Car restoration is my hobby and I have painted (or I should say “re-paintedâ€) several cars in the last twenty years, including two Z cars. But in all these instances the body panels were already attached and the engine and drivetrain were already in the vehicle. This will not be the case for my 240Z project. Here I have the opportunity to do a more correct restoration and yes, I am tying to duplicate the factory results which I assume was to be a nice paint job.
-
Although the painting phase of my restoration project is some time away, I am considering painting my 1970 240Z just like the factory did. As part of the restoration I plan to completely remove the existing paint from all the body panels and the uni-body shell. Based on observations of several 240Z’s with original paint, it appears that Nissan painted the cars with the doors, rear hatch, fenders, headlight extensions, hood, inspection panels, valance and the outer valance panels attached to the uni-body. The cowl panel must have been laid in place without its screws during painting so it could be removed later for installation of the wiper components. Of course, when I do this the panels and uni-body will have already been primed with epoxy primer and the back sides of the panels and the bottom of the uni-body will already have a coat of the top color. I am not too concerned with getting overspray on these areas. One thing I haven’t figured out is if the hood springs (or rods) were in place or not when the cars were painted. All the hood springs I have seen are painted black. My guess is the factory painted the hood springs in place with the rest of the car and then painted them black after the body paint had dried and when they were painting the front of the radiator support black. Painting the car in this manner has some advantages, like you can align the doors, fenders and hood correctly before painting. Installing and aligning these parts after they have been painted invites the risk of scratching the new paint. Of course, one down side is the problem of how to install the engine without removing the hood, and the answer is to install from the bottom (again, just like the factory did). I have access to a shop with a floor lift and I think this can be used to lower the 240Z onto the front suspension crossmember which will have the engine bolted to it. I sure I have left out some details, so comments and discussion are welcome!
-
OK. I see. I have the round float covers. So, these are the very early vintage SU carbs! That means I should restore them and sell my unused set of the later NOS "four-bolt" carbs that I bought from the dealer a few years ago!
-
No drain plugs, Arne, but what you mean by the "squared-off" float covers?
-
I should have done some more research. They are original! From the ZTherapy site http://www.ztherapy.com/ <http://www.ztherapy.com/>
-
I was cleaning the dirt off the SU carbs from my 240Z (HLS30-01841 build date 2/70) as I begin the restoration process, and I noticed that the oil filler caps on top of the SU carb domes (where you add oil to the damping chamber) are metal and not the black plastic that every other 240Z I have seen has. The tops of the metal caps are flat and smooth with no writing on them, unlike the plastic ones which have the phrase “tighten by hand†on them. The metal plating is about gone but you can tell they were finished with yellow dichromate. The carbs are the original “4-screw†type and appear to be identical to any other 1970 carbs. I wonder if these caps are indeed original or were they part of some aftermarket re-build kit or maybe they are from another SU carb (even one of the British ones). Anyone have any ideas?
-
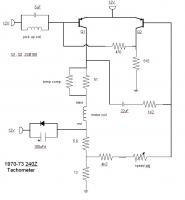
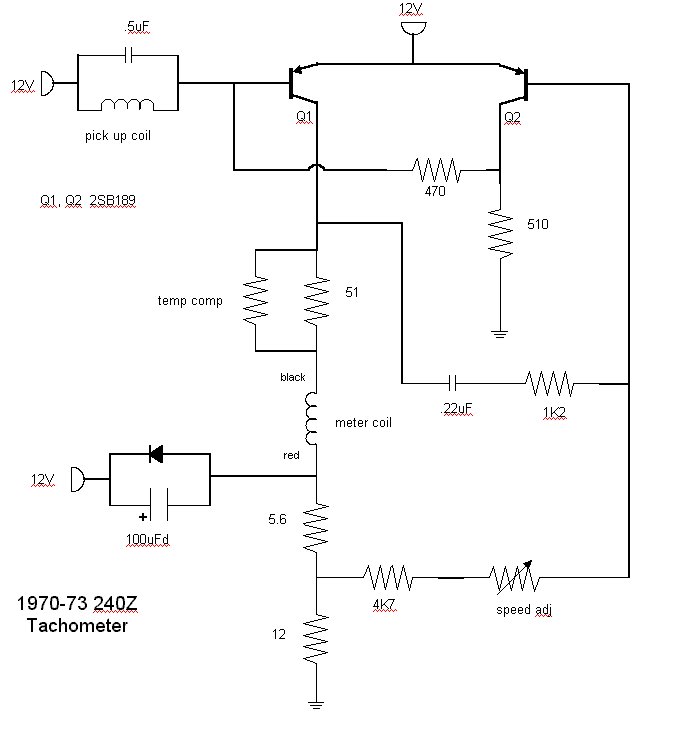
Here's the 240Z tach schematic....