
nbenning
Free Member
-
Joined
-
Last visited
Everything posted by nbenning
-
Thanks for the tip! Finding one of those micro springs will be a challenge .... Lol ... Picked up a used Headlight Assy this last week at a reasonable price. Going to install and I'll report back the results in the next day or two.
-
Quick question ... on the Tail Light sockets that use the dual filament bulb (have two connect points at the base), should these sockets have 3 wire leads going in to them? On my LH Tail Light, the upper far left socket has 3 wires, whereas the upper adjacent socket only has two wires (yet it's a dual filament bulb) ... This has me puzzled ... Thanks!
-
In doing the cleanup on the Headlight and Turn Signal switch, I found a missing spring loaded nub pictured on a previous post and a broken piece as noted from a contributors post. Removed the rocker plates and existing spring/nub knowing I wouldn't have Headlights or Parking lights until I can procure a replacement. Current situation: LH & RH Brake lights are now functional (Original issue!) Reverse Lights Functional Hazard Lights Functional RH Turn Signal Functional LH Turn Signal NOT functional ... Arghhh! More diagnostics time!
-
Ahh ... thanks for the assessment Zs-ondabrain; Do you know where I can purchase another swingarm or the necessary components? Would I need to purchase an arm to strip the pieces for my swingarm assy? Thanks!
-
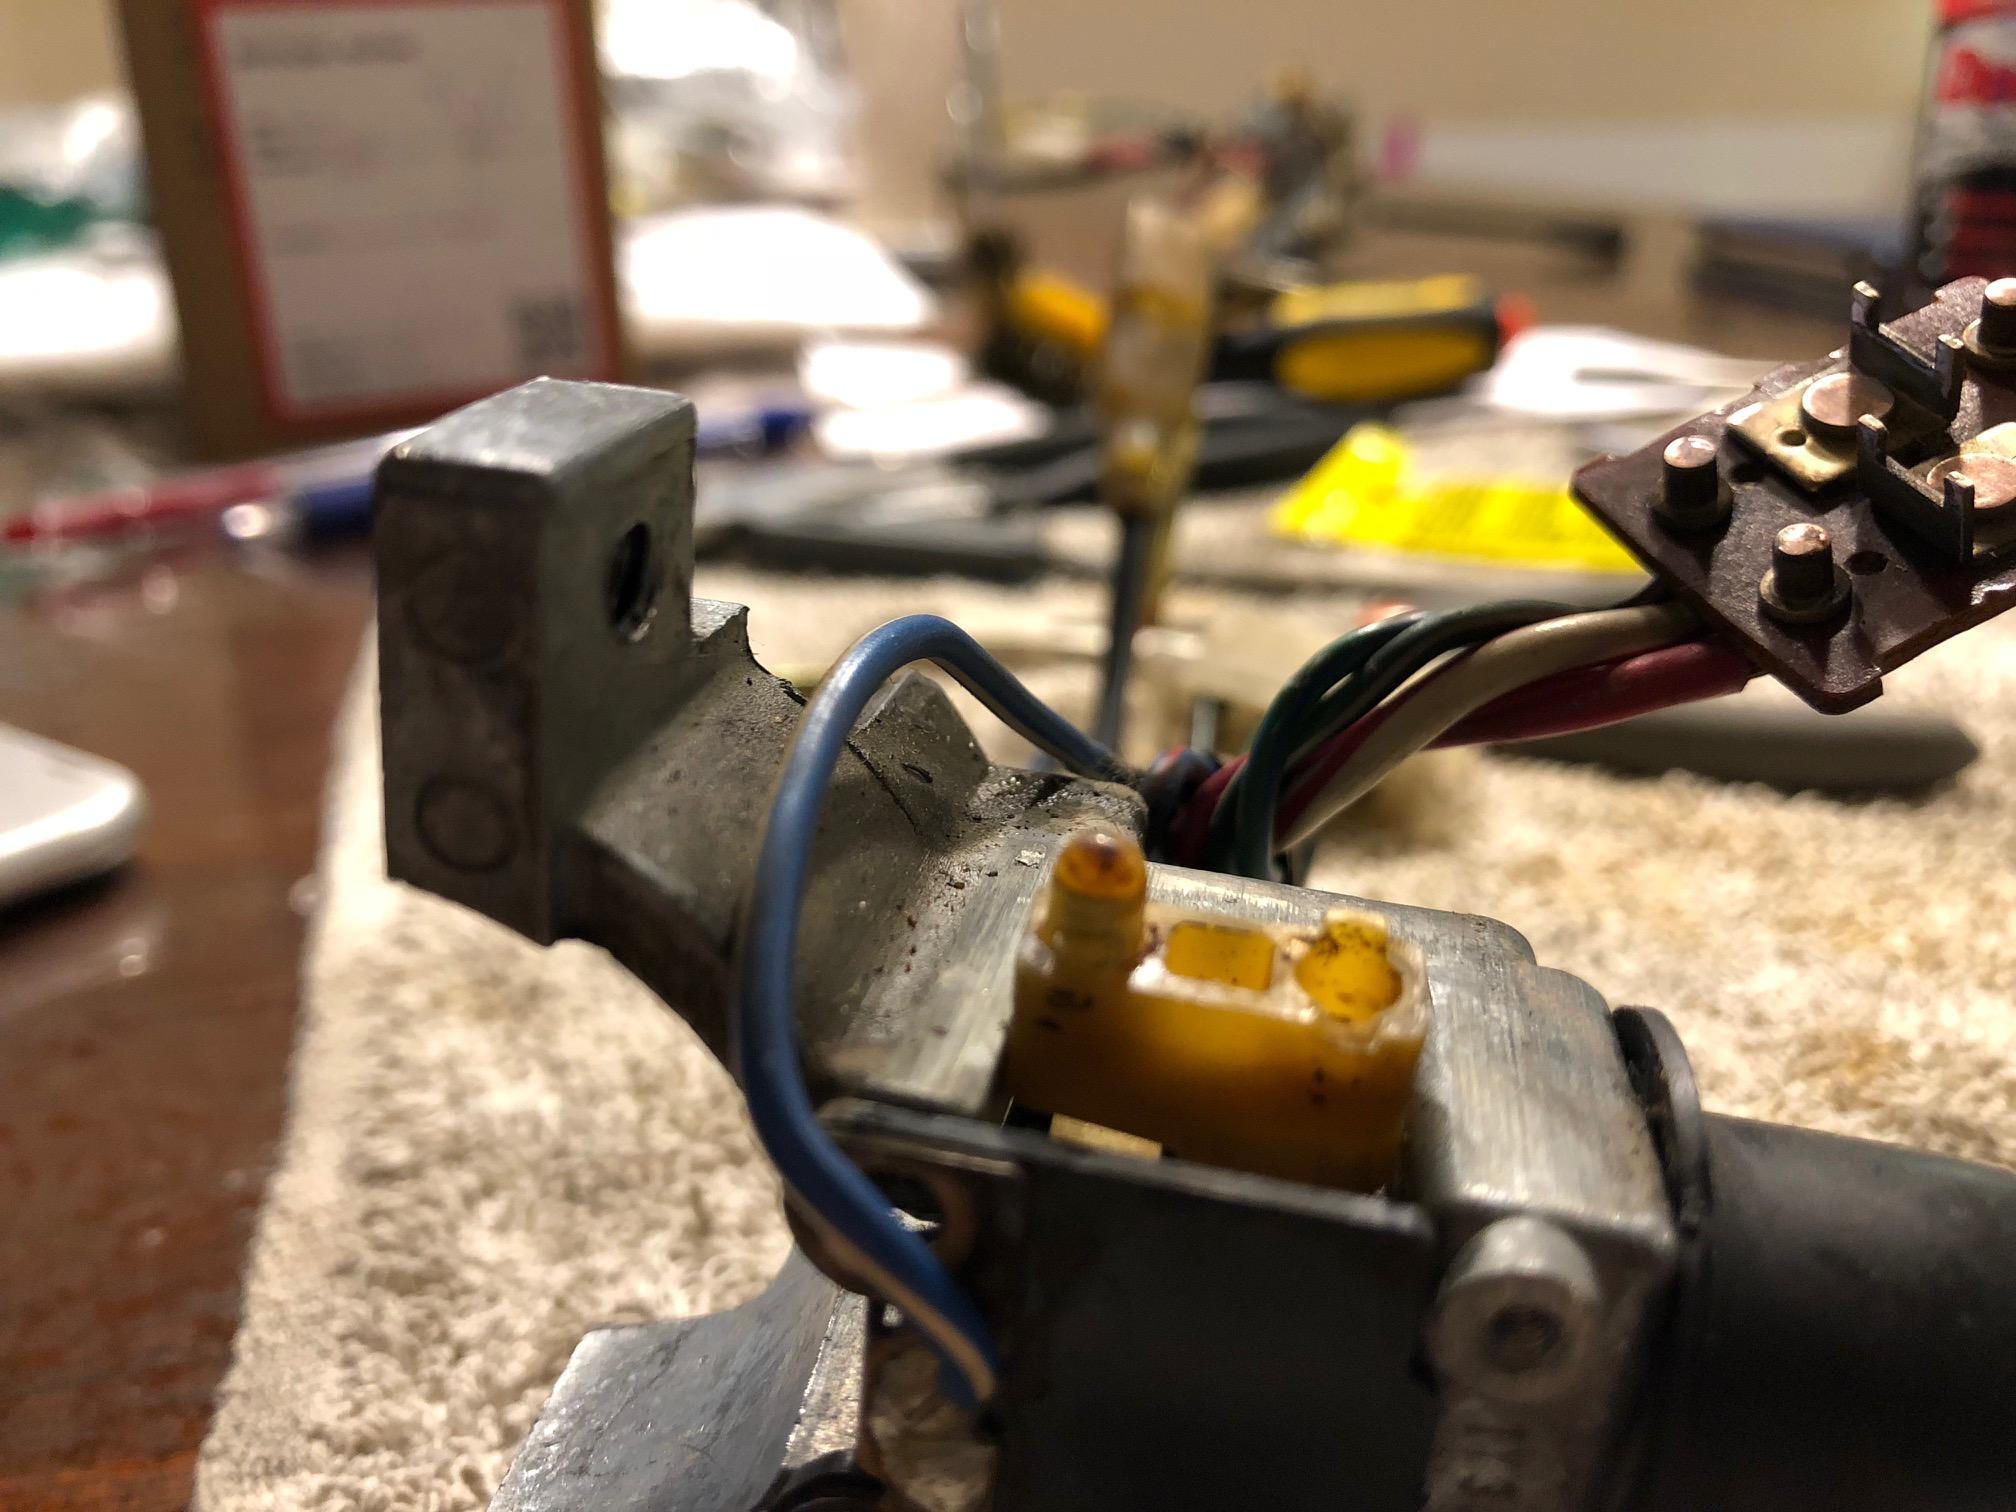
So the the saga continues ... Removed the Head Light switch and assembled the switch housing. On my previous post I mentioned that why was experiencing no difference between the Parking Light position and Head Light position. When I popped off the circuit board, I found out why. As pictured, I'm missing one of the two "spring loaded nubs." So there is a good chance the previous owner wired the headlights in a manner to bypass the parking light condition, thus my switch option is either Off or Headlights On. Any suggestions on how to replace the missing "spring loaded nub?"

-
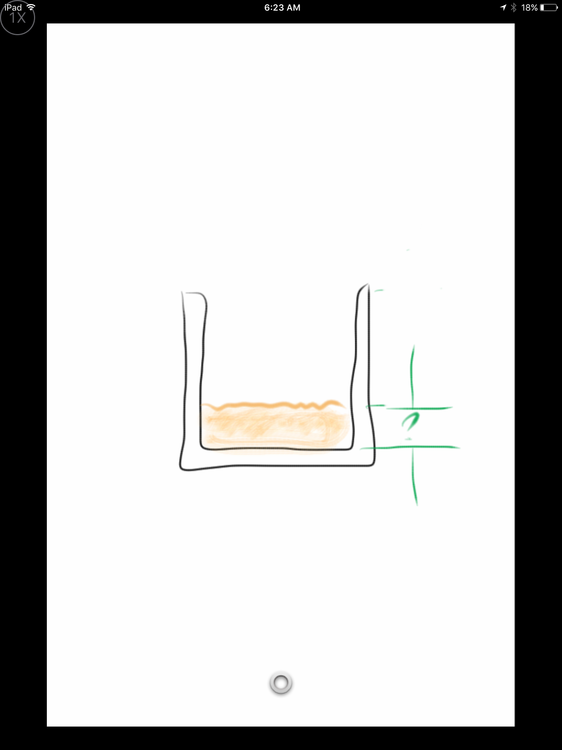
Ok, I spent the evening disassembling and cleaning the T/S switch. I've been following the continuity testing outlined on this website page: https://fiddlingwithzcars.wordpress.com/2012/12/04/turn-signal-repair/ Either it's getting late and I'm losing focus or there are some errors in the continuity call outs. I'm showing that the connections should read something like the attached figure ... Please prove me incorrect! Thanks!
.thumb.png.f72cd29a1b9fd359dcc4033b2ce028d6.png)
-
Thanks again ... I'm glad I don't have a buzzer with the amount of time being under the dash over the last year ? I appreciate the lube suggestions. I've went through a quick continuity test per this posting on-line: https://fiddlingwithzcars.wordpress.com/2012/12/04/turn-signal-repair/ and found a couple anomalies with the LH & RH conditions. Neutral, seemed to check out fine. I'll double check my work this evening, though it's looking like I may have to disassemble the switch housing. Thanks!
-
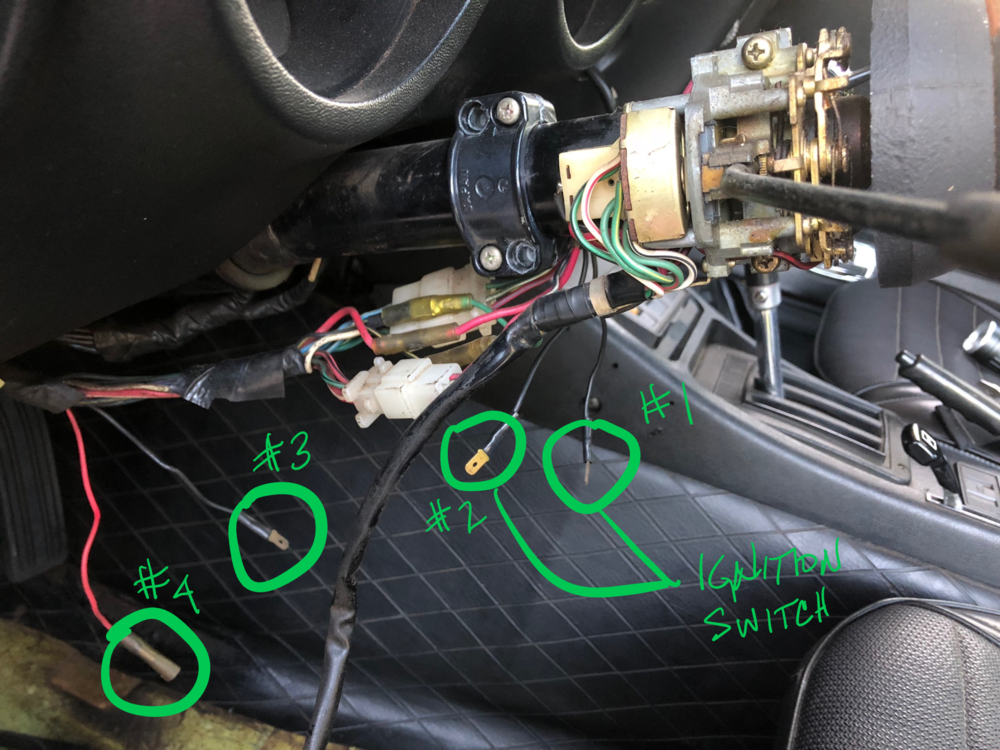
Zs-ondabrain ... Thanks for the reply. #1 So I disassembled the console and pulled the T/S switch assy as well as the Headlight assy this evening. After removing the console assy, I was treated to some unidentified unconnected loose wires. #1 & #2 coming from the ignition switch assy; #3 & #4 coming from the wire harness that goes to the T/S and Headlight assy connectors. Any suggestions on those items? I cleaned up the T/S assy switches and housing using QD CRC Electrical Contact spray. Another issue I had before starting the LH brake light troubleshooting was that my indicator lever would never return to the off position after making a Left or Right turn. After inspecting and cleaning the small spring tabs, I can see why. The springs were seized and after a bit of cleaning they now move freely. http://www.youtube.com/watch?v=LxXZrUZbgkk After using the Electrical Contact spray, on the T/S switch assy, I'm sure the mechanically moving parts will need to be re-lubricated. Any suggestions on a type of non-conductive lubrication spray? #2 I purchased a new electronic flasher from O'Reilly's and replaced the flasher that was in the vehicle a couple months ago. Not sure it was an EF32 ... I'll check tomorrow. #3 I cleaned the headlight combo switch using the Electrical Contact spray noted above. Did not see anything abnormal with the switch assy. I am going to bench test both switch assy's with a continuity tester to see if anything behaves out of ordinary. Thanks in advance for any feedback!
-
Thanks for the reply SteveJ ... So it looks like I have 3 issues to work through. 1. I'll pull the T/S off and see if some electrical contact cleaner will help 2. Not sure what's going on here. With the key in the ON position and engine off, I get no signal flashing. With the key in the On position and engine running, signal flashes - Sounds like another "creative" wiring issue 3. I'll need to address why there is no difference between the first and second position of the headlight switch. I did install the head light upgrade harness (via www.datsun-240z-upgrades.net) I don't believe that upgrade would cause this issue but I'll reach out to Dave and ask. Thanks! Nick
-
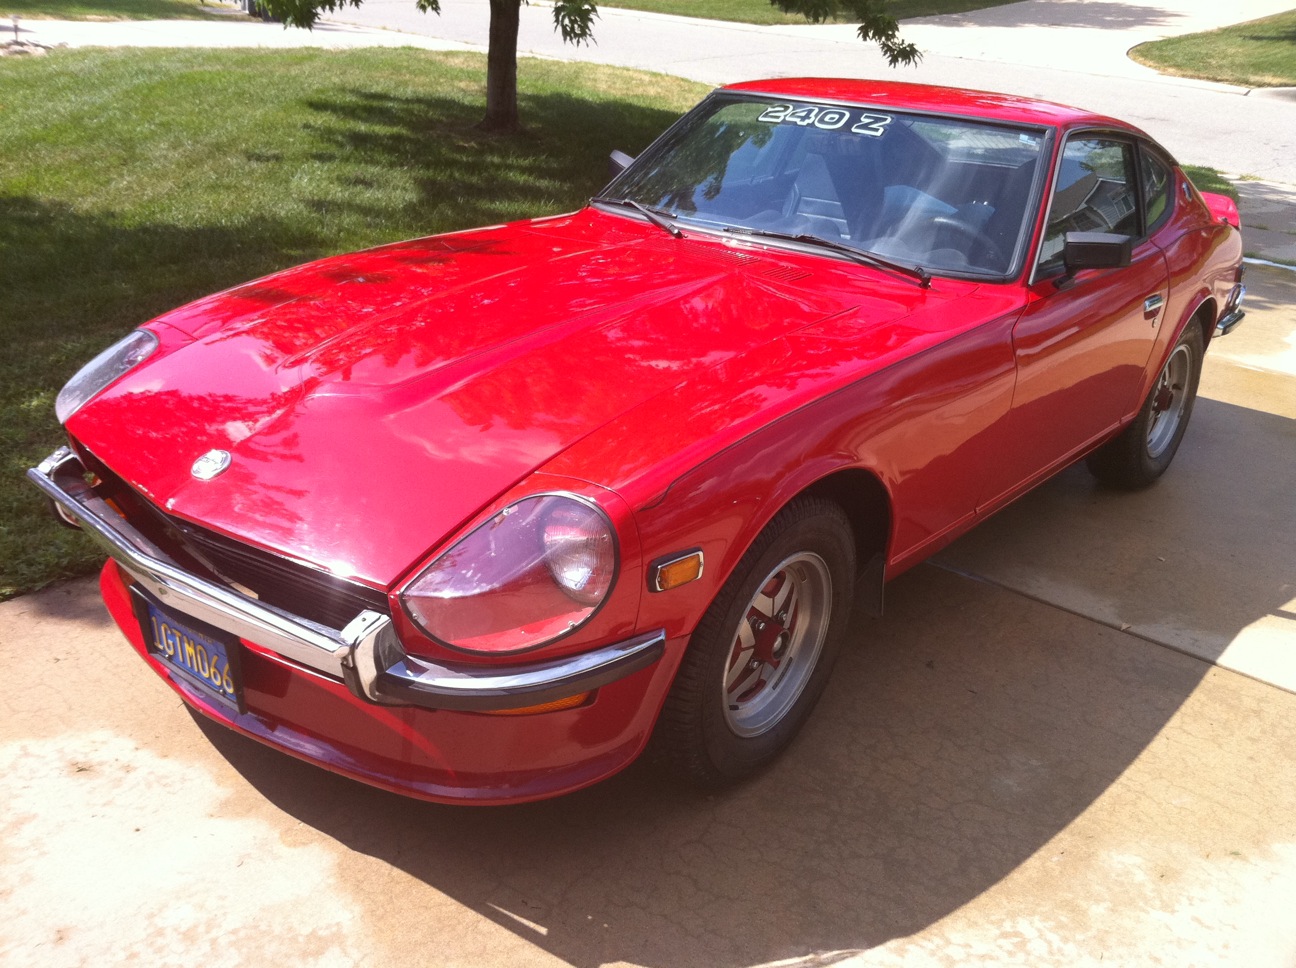
Hey Guys, read through this post and rather create a new post, I thought I'd add to it ... I have a similar, issue but it's the Left Hand Brake lights (upper and lower lights) not functioning. I do have a couple anomalies that I've found during my trouble shooting of the issue: The Turn Signal switch (LH or RH lights) do not function unless the engine is actually started. Is this normal? On the Combo Switch, when I turn the switch to position 1, headlights function, position 2, no difference What is the difference between position's 1 & 2? Hazard Lights - Functional Reverse Lights - Functional Head Lights and Markers - Functional License Plate Lights - Functional Thanks! Nick '72 240z
-
Thanks for the replies ... reached out to zcardepot.com this last week and it is indeed the seal for the hood/cowl. The first pic is the recommended direction. I'll need to trim a couple inches and use some adhesive with a couple clamps as it sets as recommended previously. Cheers!
-
Thanks for the feedback everyone. Yes, the seal is about 4-5 inches too long, so it will be trimmed. I've reached out to zcardepot.com for some clarification and I'll report back when I hear something. Thanks! Nick
-
Hmm ... I agree it doesn’t resemble what was there before, but there wasn’t anything else close in the kit having the shape. I’ll reach out to Zcardepot.com. Anyone have any pics of their seal in this area?
-
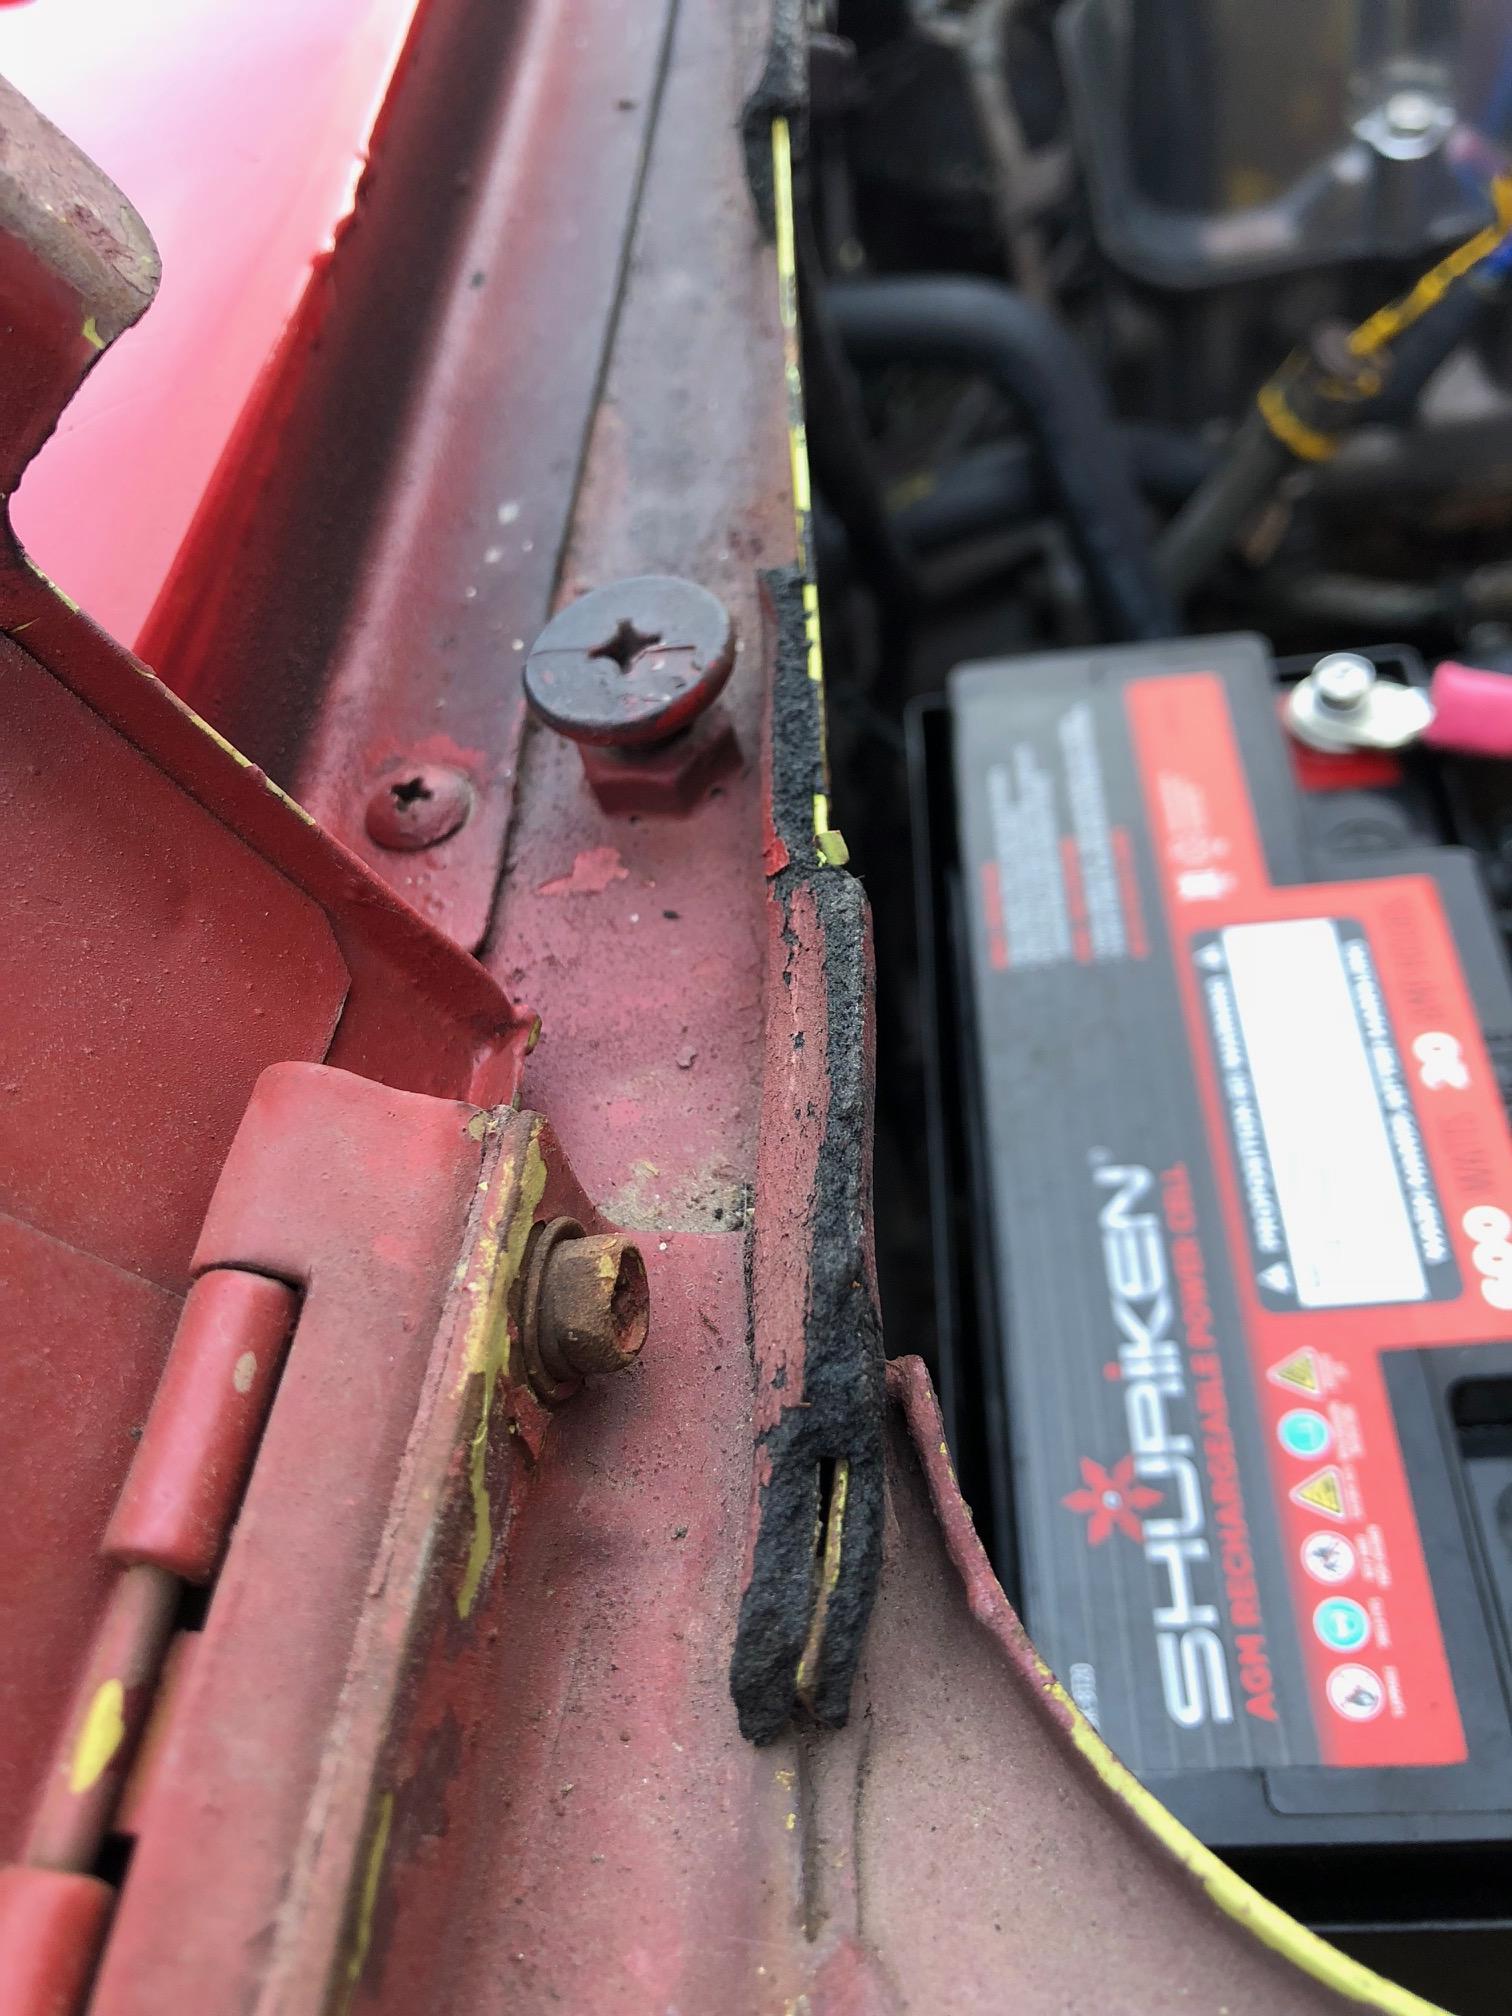
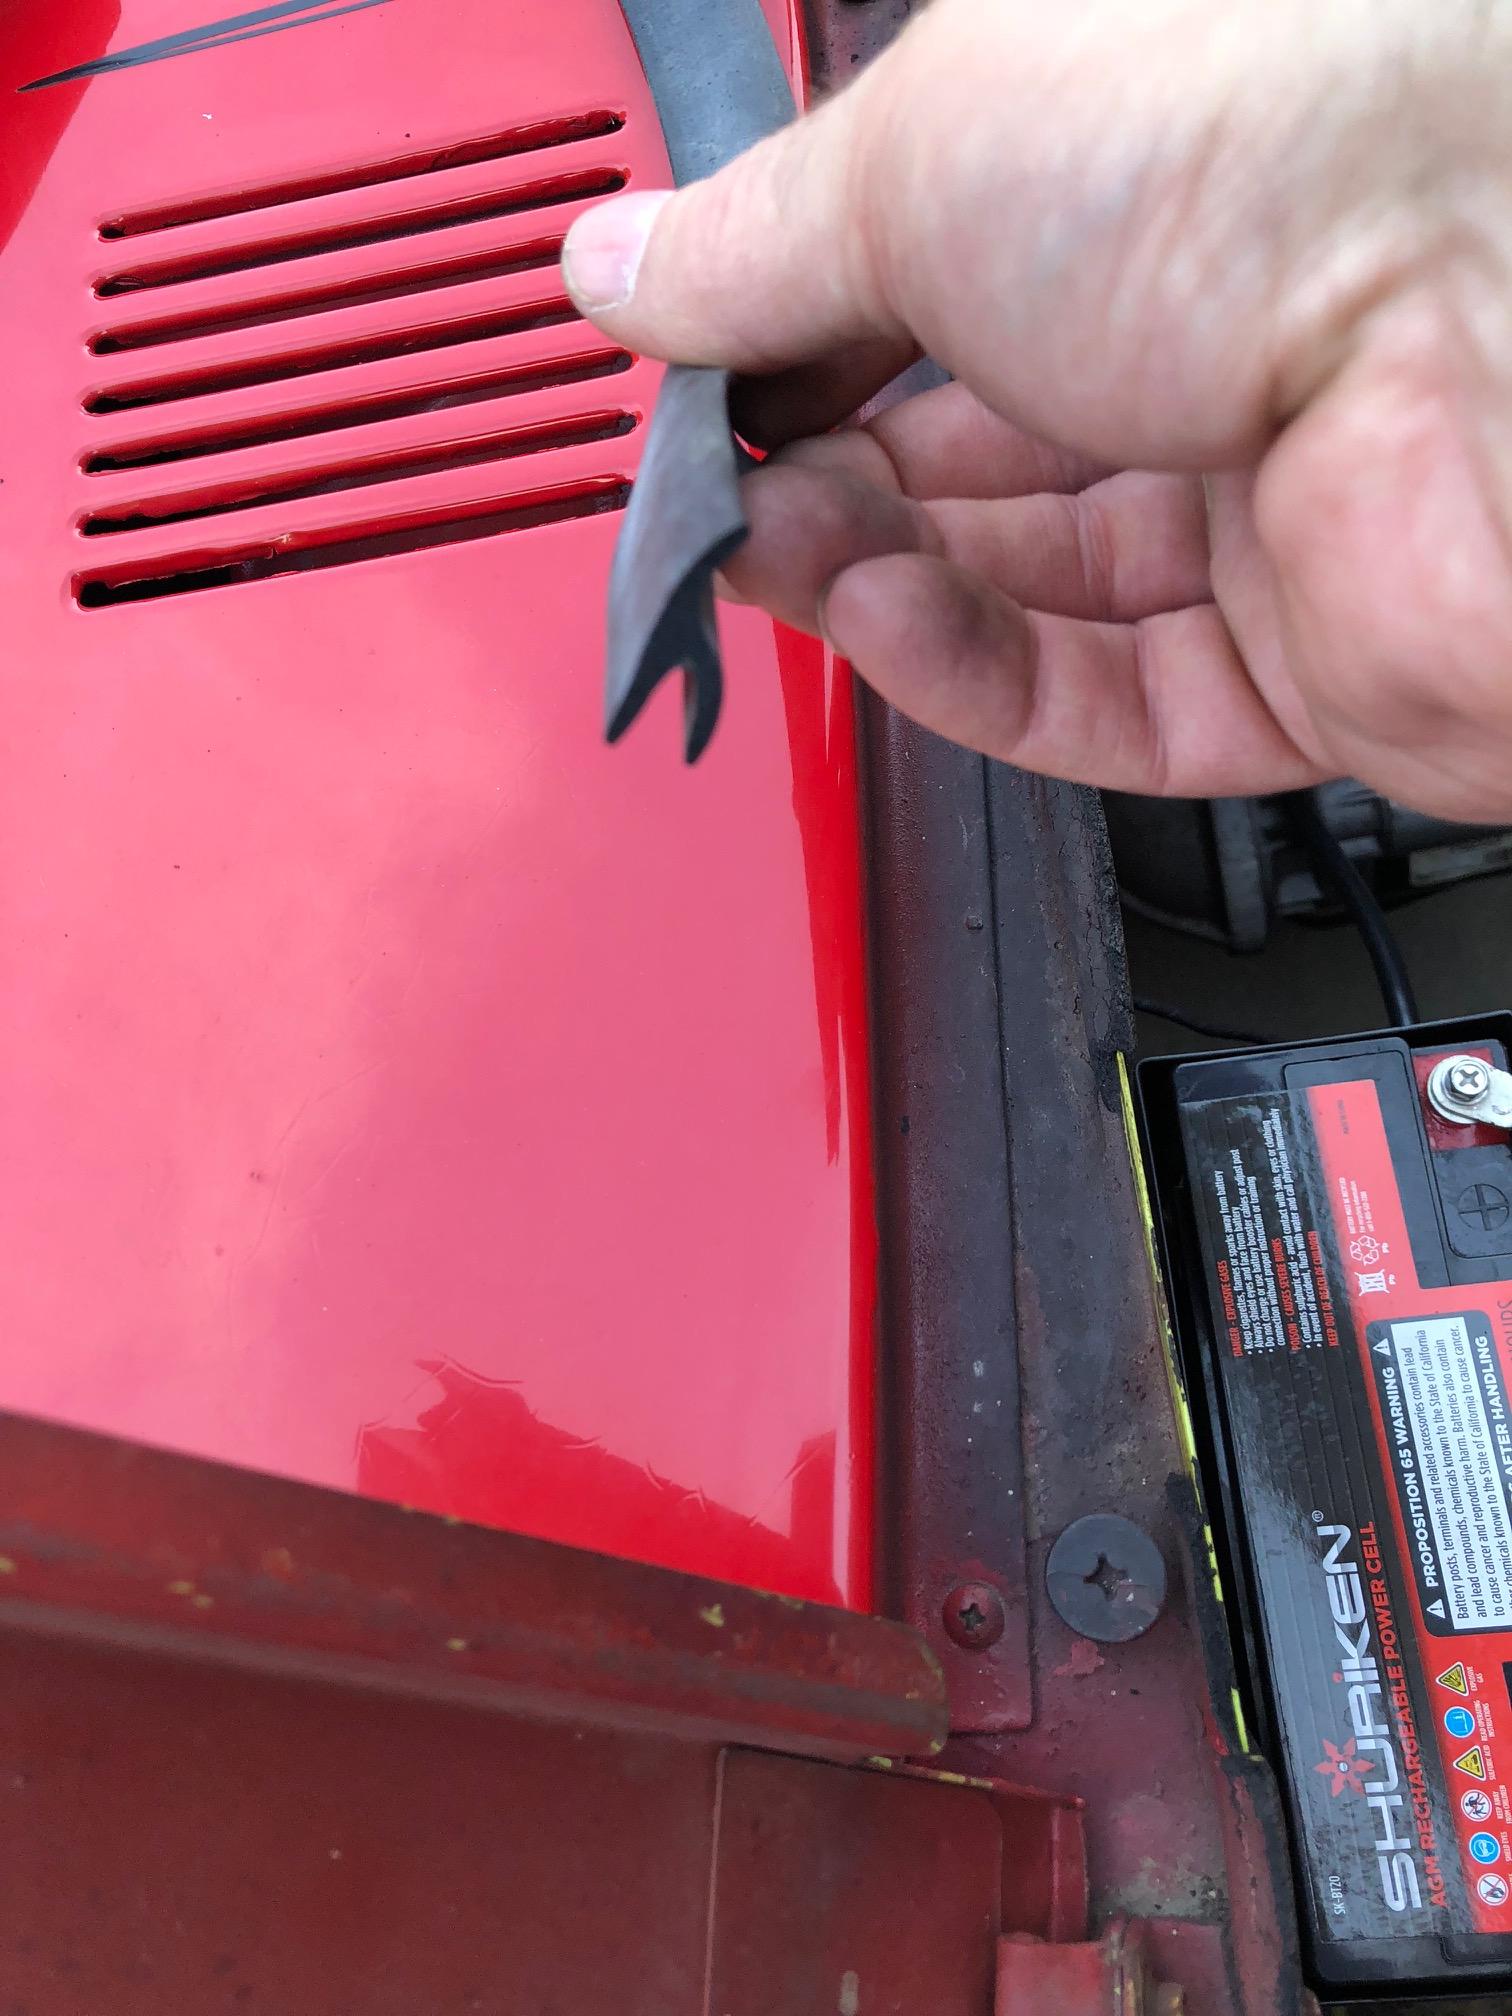
Hello, I purchased a complete weatherstripping rubber seal kit from zcardepot.com. By process of elimination, I believe I've located the Cowl Hood Weatherstrip per the attached pictures. The p/n's on the individual kit pieces don't match zcardepot.com's website p/n's so it hasn't been a very straight forward task ... anyway, my question is, should the seal be positioned in the forward position (fig 3) or aft position (fig 1)? The original seal doesn't have the upper flat rather it was just a "u" shape that was fitted snug to the metal upright angle (fig 2)


-
Where can I find the link to the "Blues tech tips"? Thanks!
-
@ AndyStep12 Where did you pick up your brake booster? I have the exact same symptoms on my '72z that you described. How difficult was it to install? Thanks!
-
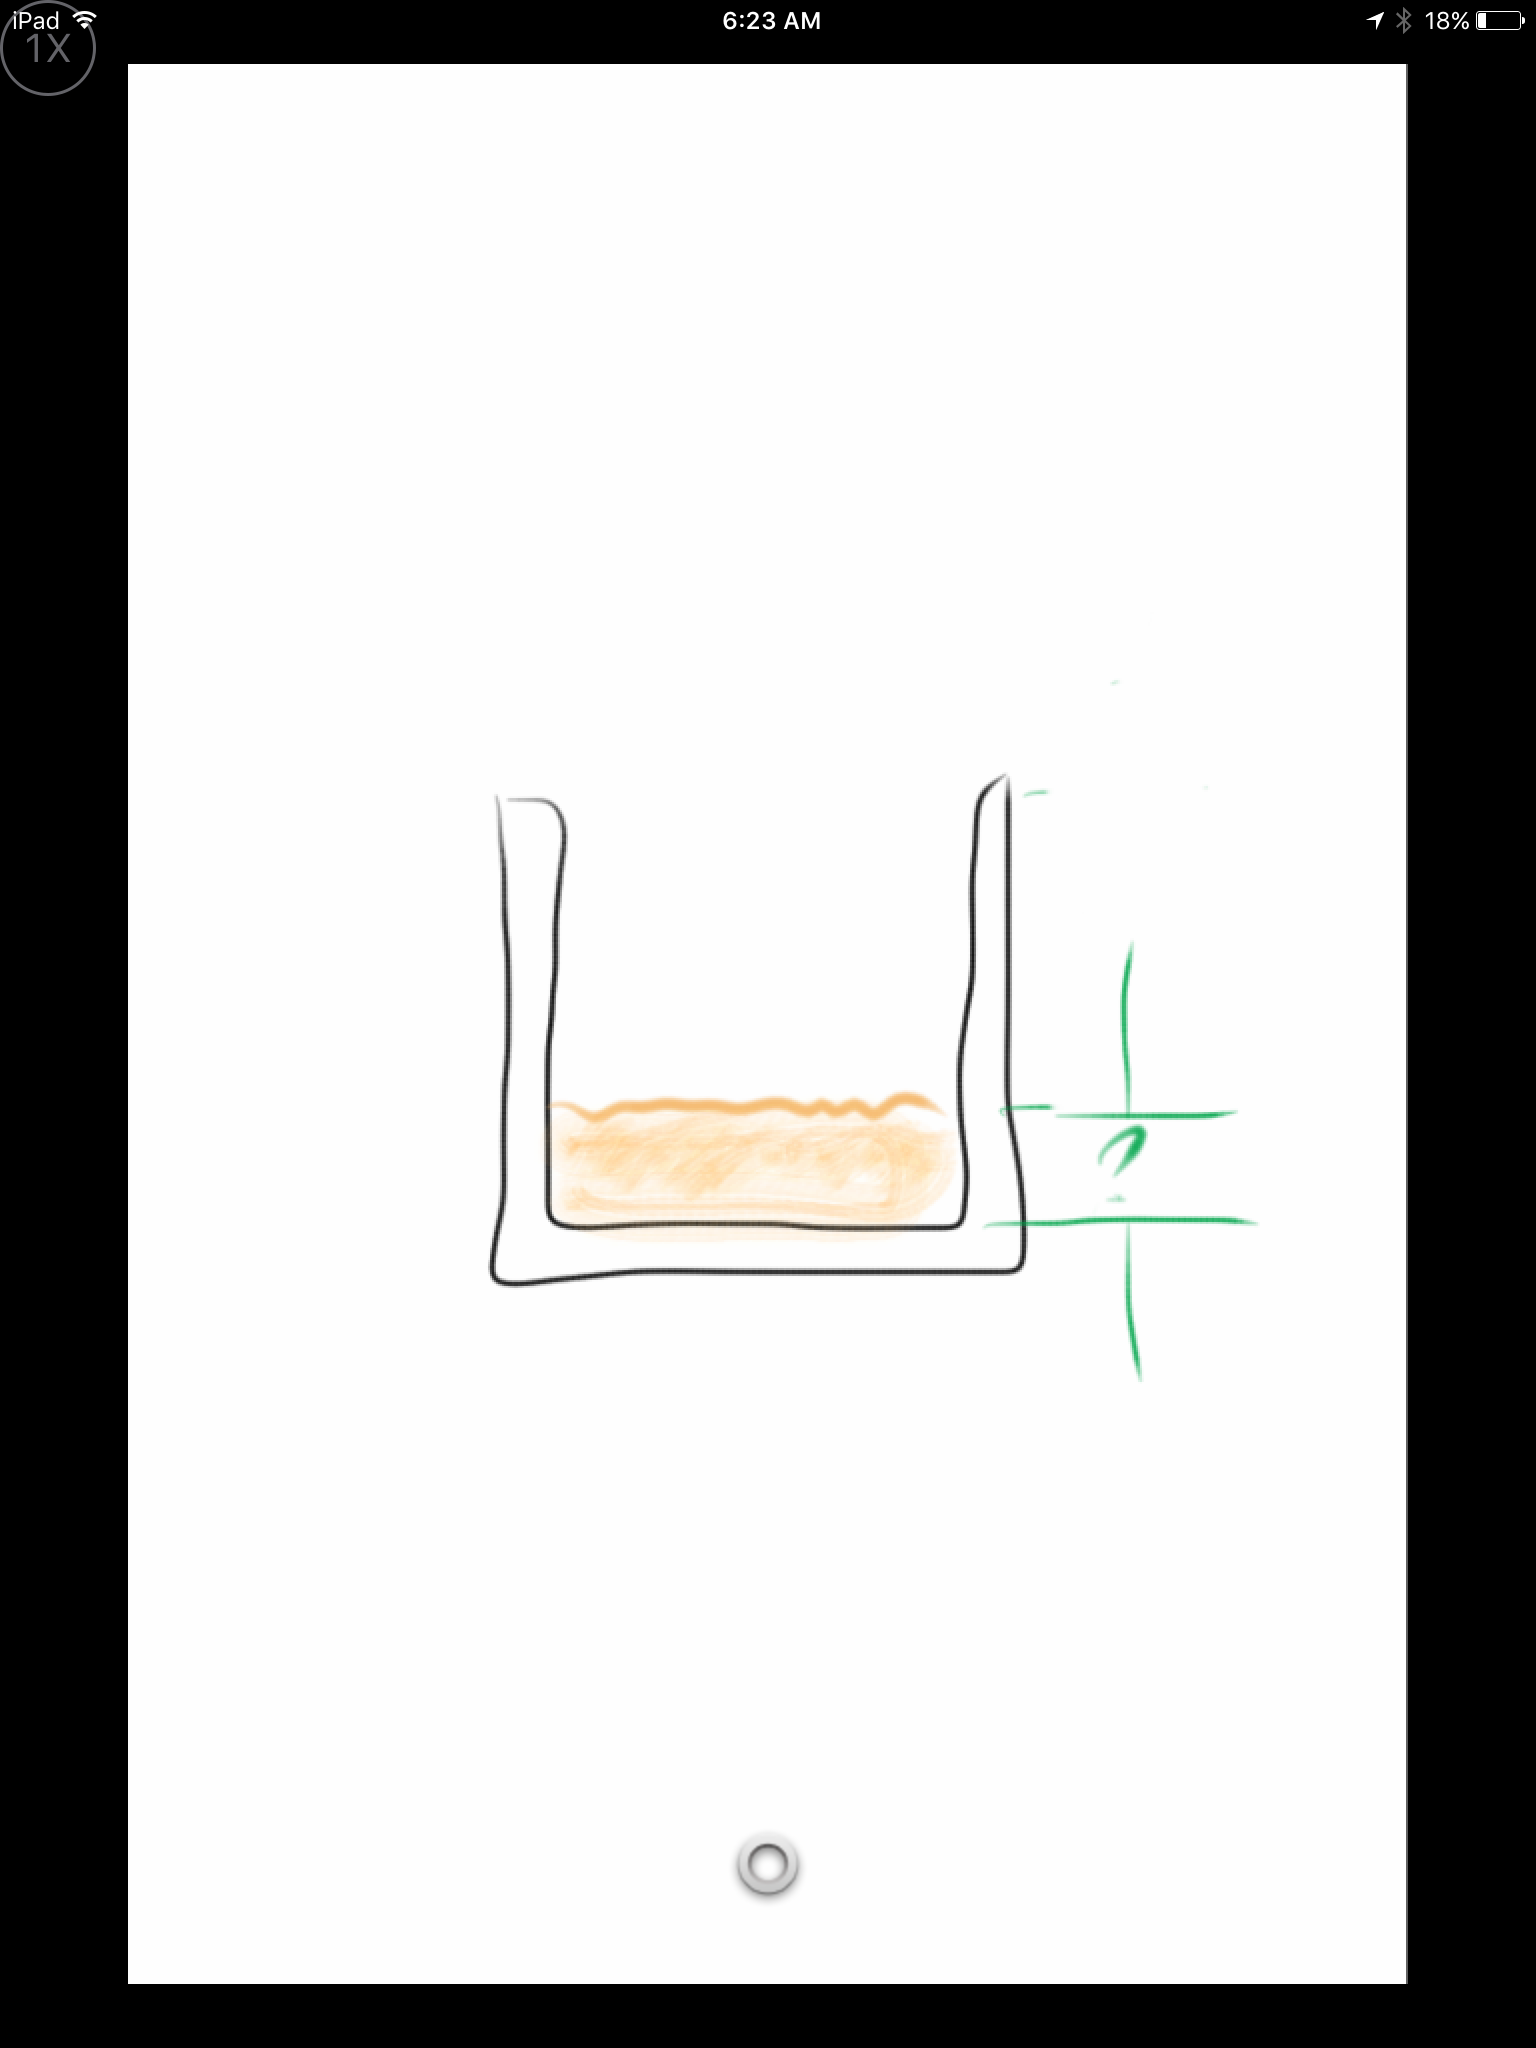
Thanks for the reply and the reference to your Float Bowl experiment. If only we had see-thru bowls on our Carbs! Anyway, to clarify, I am wanting to know what is the fuel level in the bowl after the Float Lid and Float are removed? I can then use a small scale to measure the height from inside the bowl. When I removed my Float Lid and Float, I'm only seeing about a 1/2" of fuel in the bowl. Thanks!
-
Hello ... Thought I'd chime in on the discussion. With regard to eloZada's previous pic of the float bowl with fuel, is that about the amount of fuel that should be in the bowl with the floats calibrated to .55in? Approximately what height of fuel should be observed after removing the float? I know there are numerous discussions regarding the fuel height and ways of checking via clear tubes etc. Thanks!
-
Sun Bleached reservoir? Hmm ... may have to try ... Thanks for the tip!
-
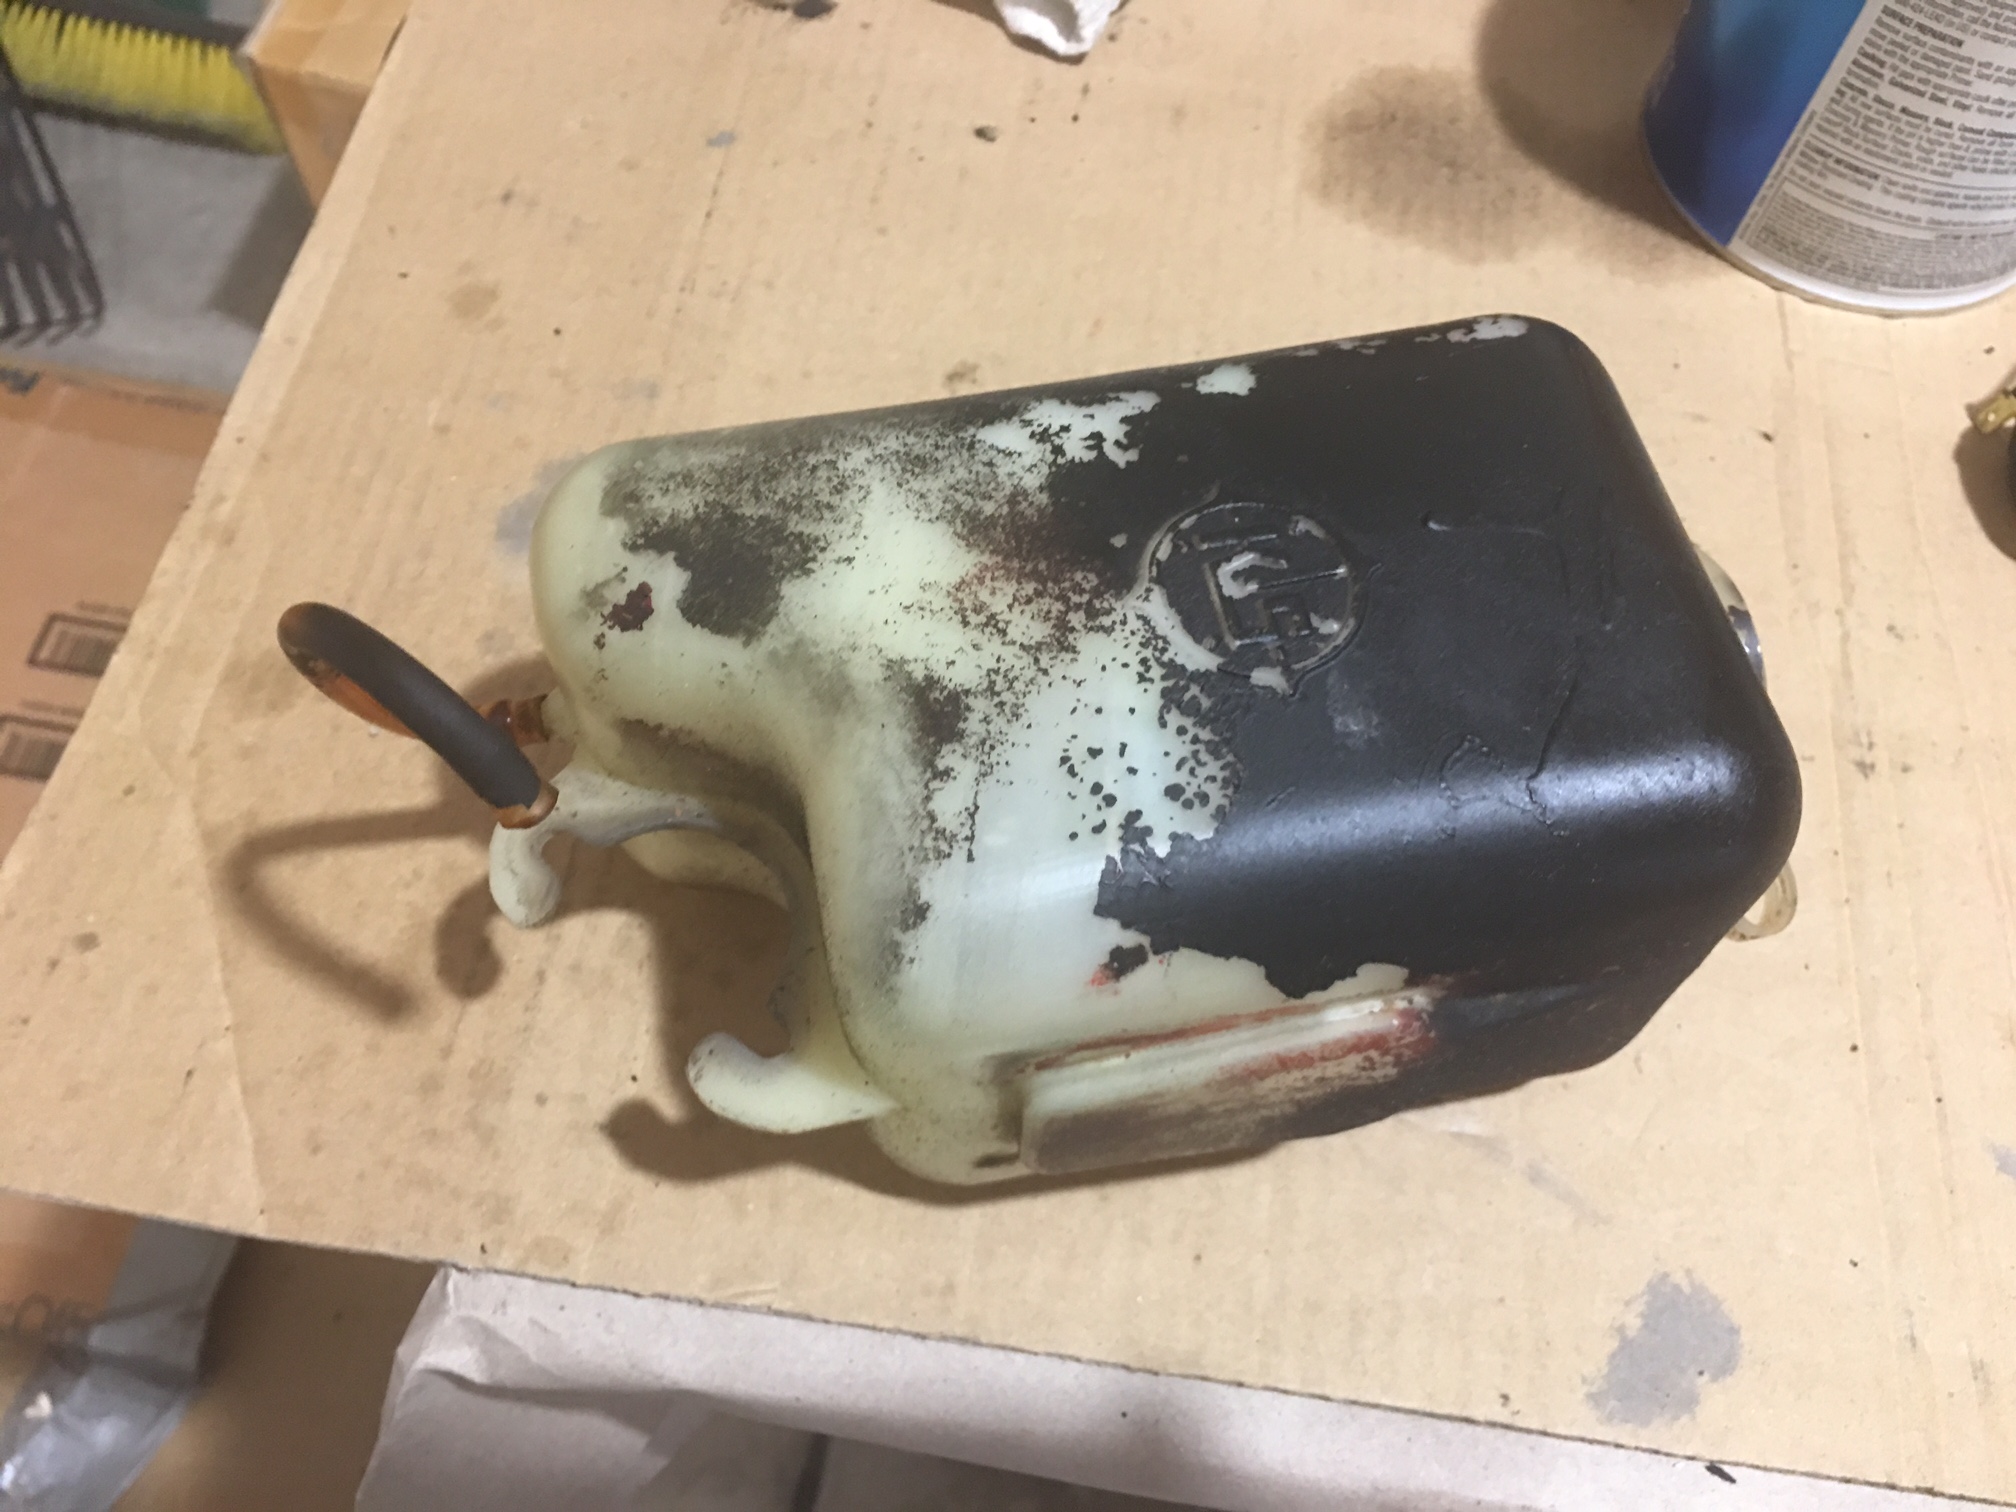
Hey Folks! Thanks for the various suggestions (and comic relief as well) I decided to do try the "Chore Girl" suggestion, though now my attention is to research that soda blasting method for other parts of the vehicle ... A small amount of scratching of the plastic was observed, but overall I'm pleased with the results. Equipped her with a new wiper motor and getting ready to install her tomorrow! Cheers!
.thumb.jpg.58ab5a8d7b6e56381e738e519d7881b6.jpg)
.thumb.jpg.56658a29301ae18f972fd48cf930f830.jpg)
-
Hello! Any suggestions on what to use to clean years of paint over spray on my windshield washer reservoir without damaging the plastic? Thanks! Nick

-
Hello ... Just a quick update regarding the head gasket leak issue. This last week I purchased some ARP thread lubricant as recommended by Chickenman. (FYI, $40 via O'reilly's vs $20 via Amazon ... "no brainer" here) Applied the lubricant to the head bolt threads and base of bolts and performed the three cycle torque sequence, inside to out, three passes (29, 40, 61 ft-lbs) Refilled the radiator (just water for now as recommended by Pop's Z) turned it over for a good 3-4 minutes and no leaks so far! Real test will be when it actually starts ... unfortunately ran out of battery juice and time before getting it fired off and running ... managed to get a few pop's though. Anyway next weekend should be the real test ... but at least some hope before having to make a choice to tear the engine down and removing the head ... I'll keep you posted ... Thanks for the suggestions/feedback! Nick
-
Hello ... Thanks for the feedback. To answer your questions ... Yes, I installed new OEM head bolts purchased from ZCarDepot. I'll take your advice and remove the bolts, apply the ARP lubricant on threads and bolt/washer surface area as well and re-torque in three steps to 61 ft-lbs. When I removed the original 40+ year bolts at the beginning of the project, we sheared a head bolt and to make matters worse, break an "easy out" trying to extract the original bolt. Don't want to go through that mess again! Also, the gasket I used was part of a complete engine gasket set by Stone (Part no. A101-P142H) see attached pic ... Is this one of the gaskets giving other Z owners problems with coolant leaks in to the oil? Thanks, Nick

-
Hello .... Along the same topic of tightening head bolts ... I can use some guidance. I removed my '72 240z head a couple months ago and had it refurbished at a local machine shop. It was re-installed a few weeks later and torqued to 47 ft-lbs using the inside-to-outside alternating bolt grouped method outlined in various service manuals. In the meantime, we finished completing the rest of the engine build over the course of 6-8 weeks. Yesterday, fluids (water, oil, a/t fluid) were put into the engine and the engine was cranked a few times (~ 30 sec). I noticed antifreeze leaking from the head/block separation just a few inches to the left of the oil filter on passenger side. We immediately drained the antifreeze to prevent any water getting into cylinders. Upon research of my engine serial number (#60040) , I found it should have had a final round of torquing to ~61 ft-lbs. We increased the bolt torque, but realized the torque wrench used was not behaving properly and now we are not sure where the bolts really stand. So I've retrieved another torque wrench ... Therefore should I: Loosen and tighten each bolt individually back to a torque of 61 ft-lbs? or Loosen all bolts using the outside-to-inside method and then re-torque them inside-to-outside with the recommended sequence of 29->40->61 ft-lbs? (if I go this second route, I can put a small amount of oil on the head bolt threads, which I neglected to do when putting the head on the first time) and hope this solves my head gasket leak ... Thoughts/recommendations? Thanks, Nick
-
.png.b1ae4b631f098443cfadfbf21d57fd82.png)


.jpg.56dc95fde1d174c6d7881f29a856bcd4.jpg)
.jpg.5e2ed63e43fabb4a39708c0b39a51832.jpg)