zKars
 Subscriber
-
Posts
3,742 -
Joined
-
Last visited
-
Days Won
107
Content Type
Profiles
Knowledge Base
Zcar Wiki
Forums
Gallery
Events
Downloads
Store
Blogs
Collections
Classifieds
Everything posted by zKars
-
Here is my official post demonstrating on video, how to easily remove your drip rail trim with, wait for it, a guaranteed of no damage or bending or warping or anything unpleasant. It is simple, direct, uses common tools and so far has been fool proof for me. Note that this was originally used on a 510’s drip rail trim which is virtually impossible to remove without damage. I have to give credit where due, I googled it and found a guy doing it to a classic Chevy something or other. Looked brutal, but in actuality it is not. You need two tools. A hammer, and a “thing’ with a blunt straight tip, no more than one inch long. Should be at least 1/2 or 3/4” to spread the force. Needs to be at least 12” long or so. If you look at the trim on the car, on the underside, you will see a very thin edge, less than 1/16” wrapped around the bottom of the pinch weld. The technique involves hooking your blunt thing behind that little lip, along its length, 90 degrees to the painted body next to it. Then tapping your thing about 6” down the length of it to drive that little hooked lip off the pinch weld. A video is worth a thousand words
-
I have a “B” type 4 speed (71.5-78) I’m going to part out and recycle. Saving only the front case and input shaft at the moment. I can remove the bushing and send it.
-
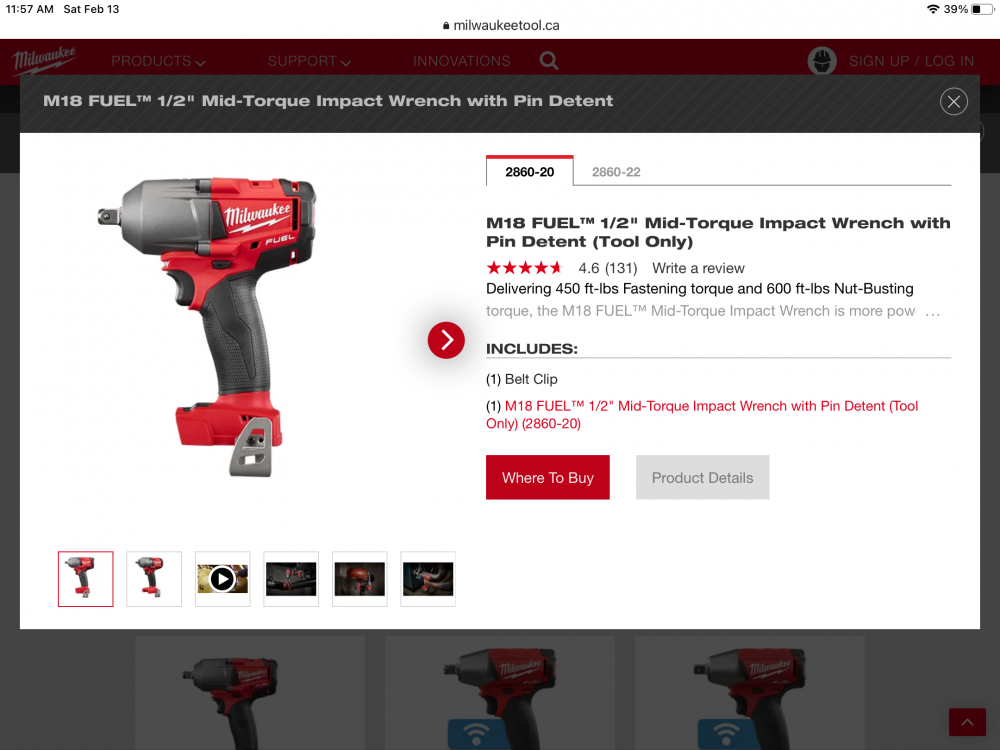
Bought a 1/2 Titanium Ingersol Rand air impact 10-12 years ago. Used it a couple of times, then discovered Milwaukee tools M18 cordless impacts. Haven’t touched it once since. Actually sold it last month And this is the mid-range model. There is a 1000 ft/lb one that’s only a bit bigger. The only air tools I use now is a air hammer that I use to get (most) spindle pins out with.
-
Engine still in the car? Put long handled socket handle with 27mm socket on said nut, and rest arm against left frame rail. Engage starter for 1.46 seconds. Nut will be loose. Air driven impact wrenches need sufficient air volume to reach their potential. 1000 psi doesn’t matter if it just wheezes out of a small 500 foot long hose...
-
Yes thank you, all sorted.
-
I support your decision to replace brake lines due to the possibility of internal corrosion due to moisture, but the fuel lines are less likely to be affected. That said, use the soft copper nickel alloy tubing that is all the rage. I buy it through Amazon from theStopShop (https://www.thestopshop.com/) but they have a web site as well. Best prices I’ve seen. Comes in sizes from 3/16 for brake lines to 3/8 for fuel lines. BTW I’m parting a 75 right now if you want anything smallish, let me know.
-
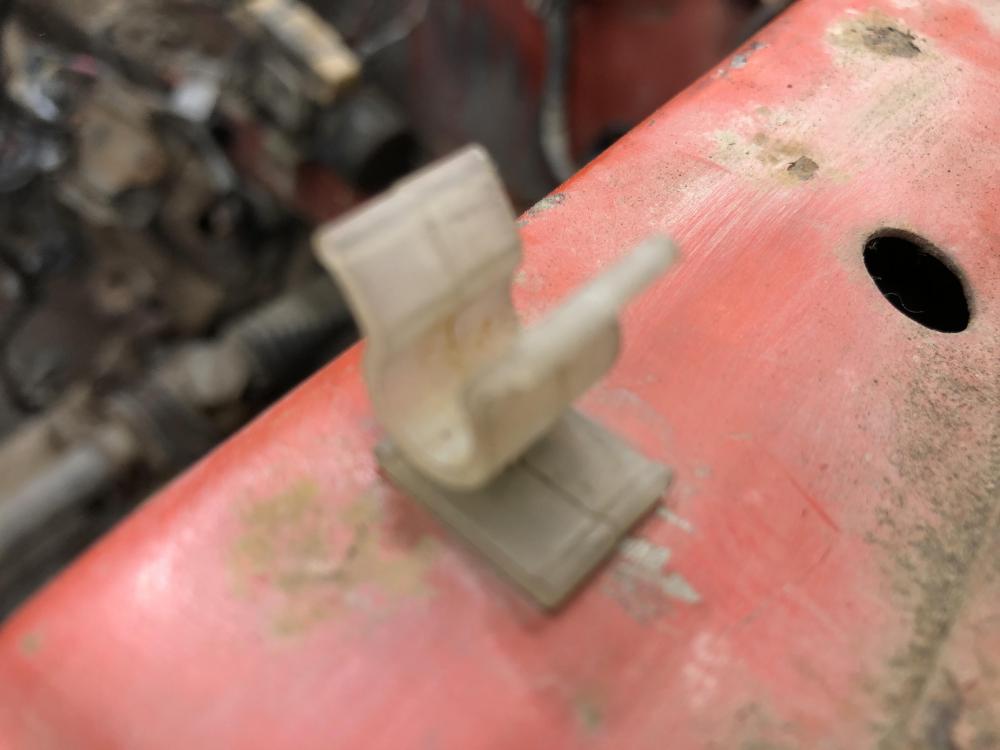
How about this gem? How do I get it off? It’s not brittle but there is no access to the inside of that rad support member.
-
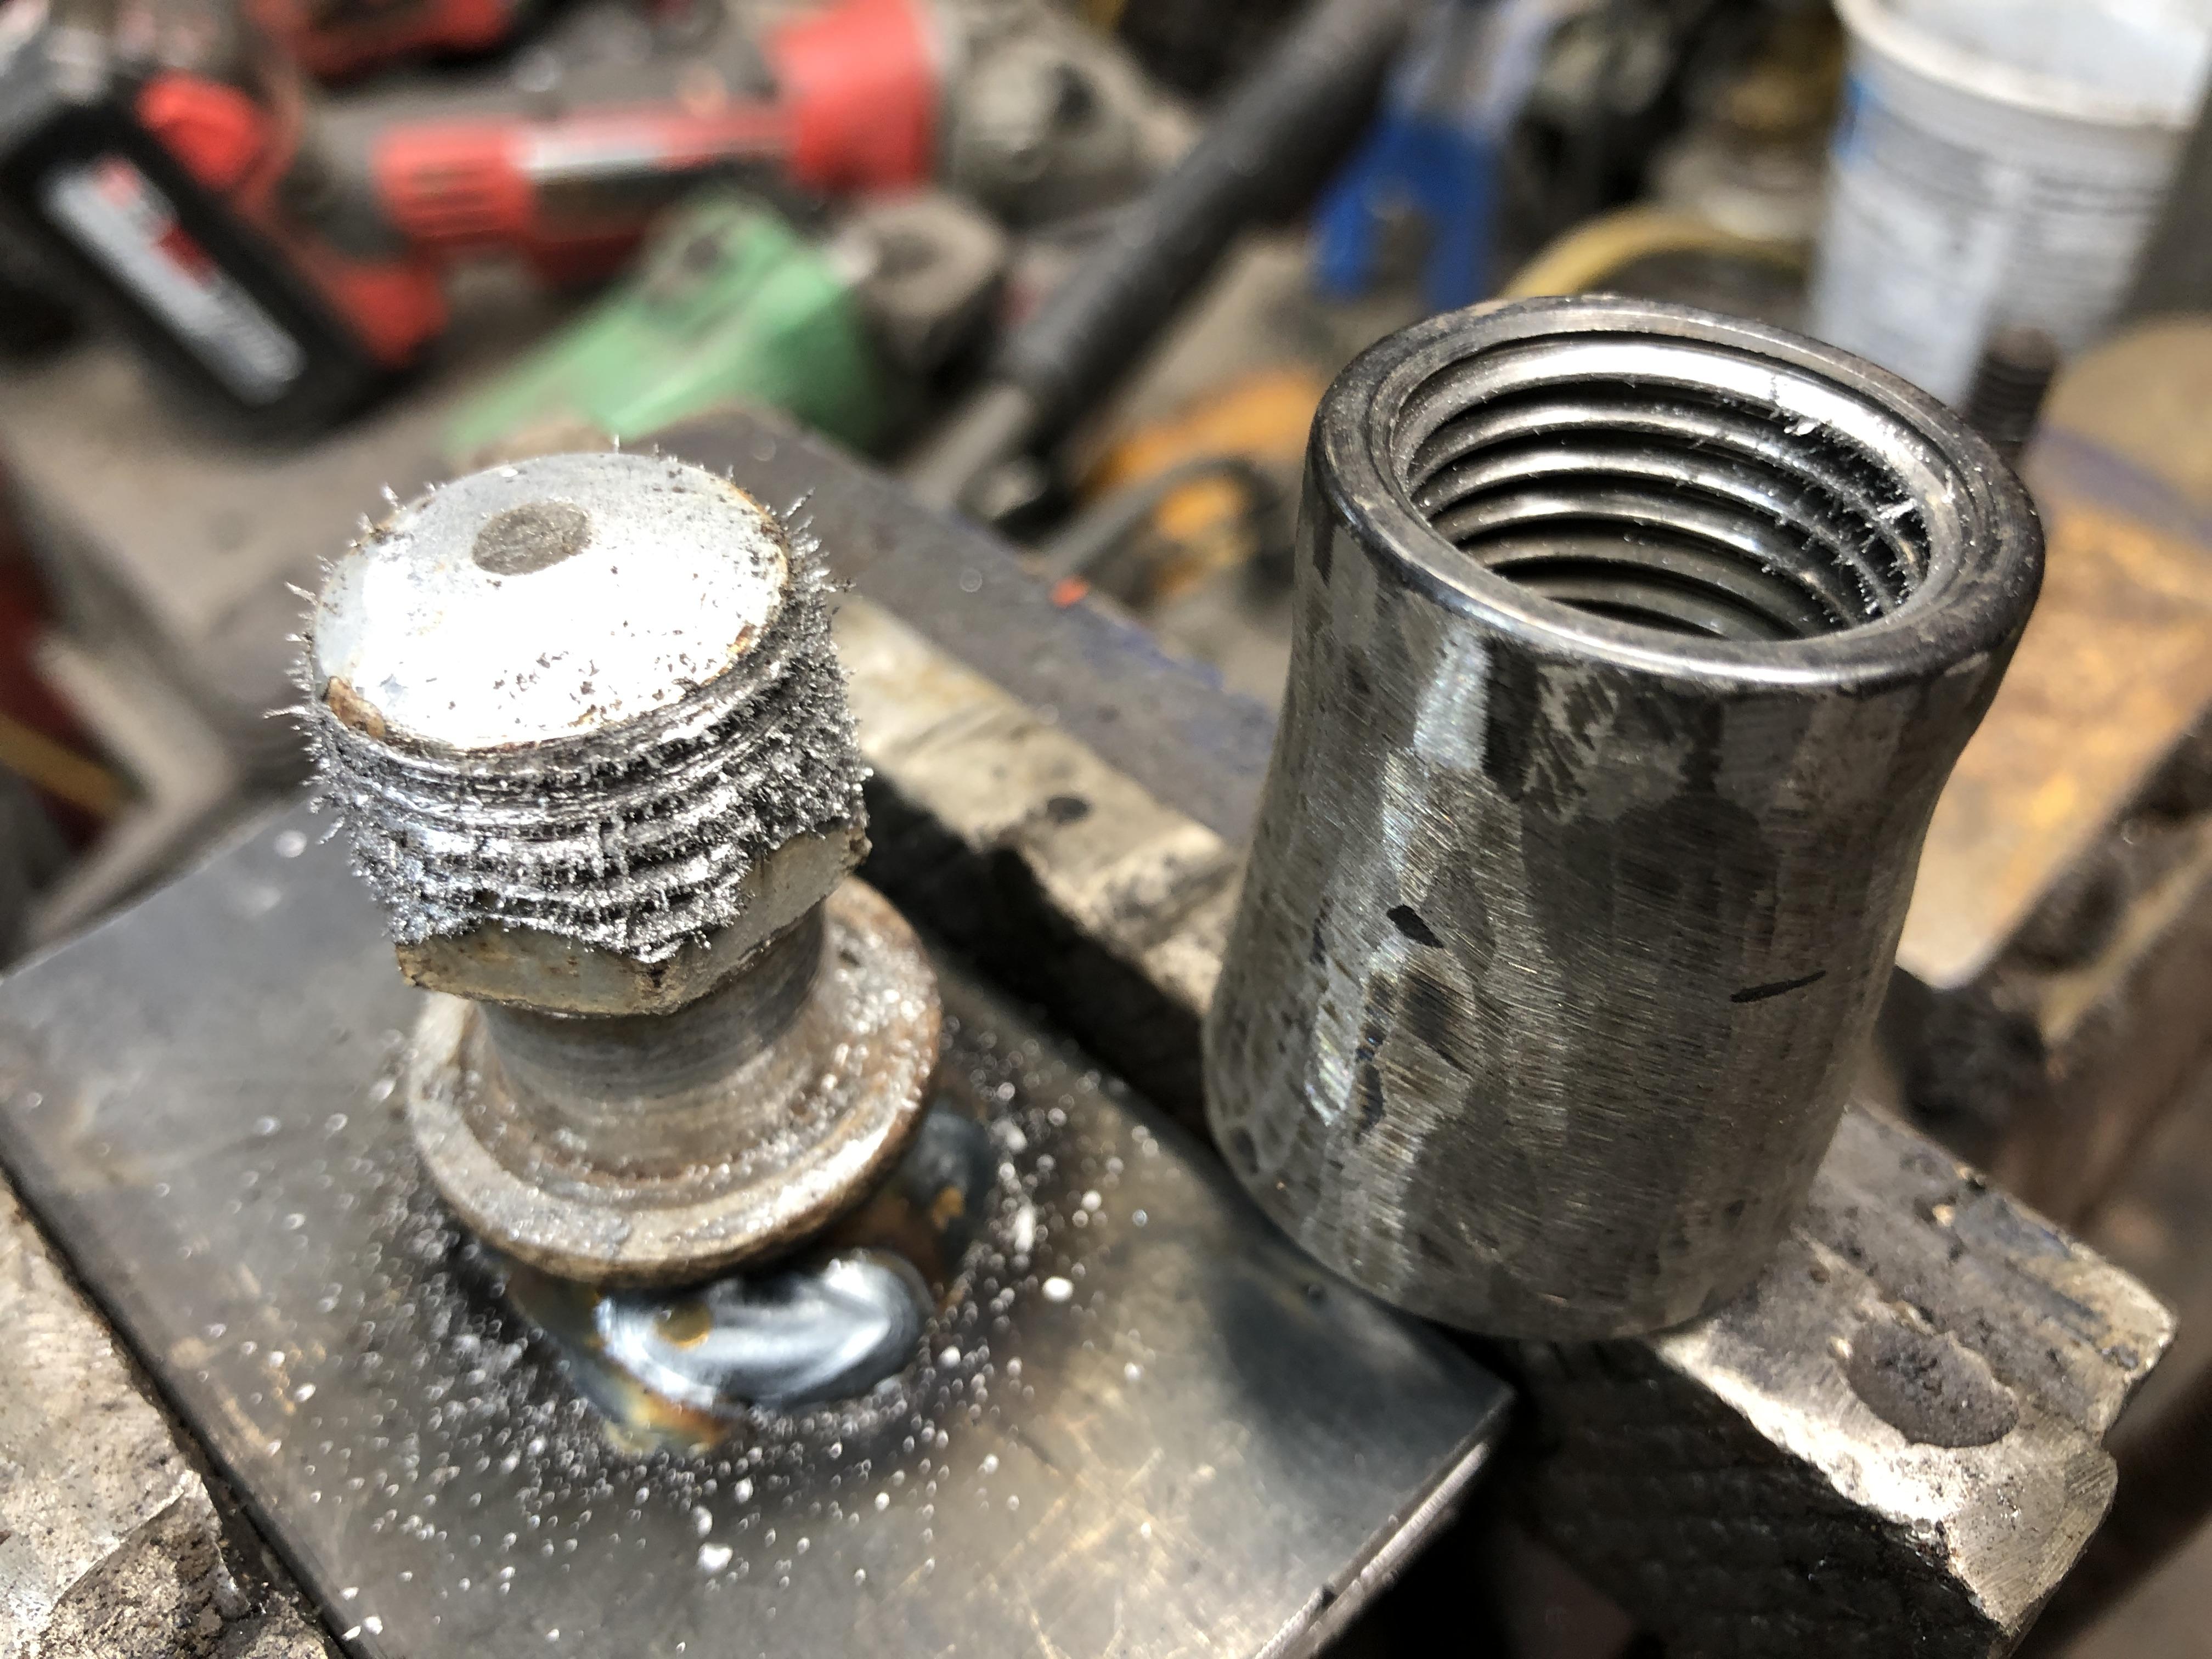
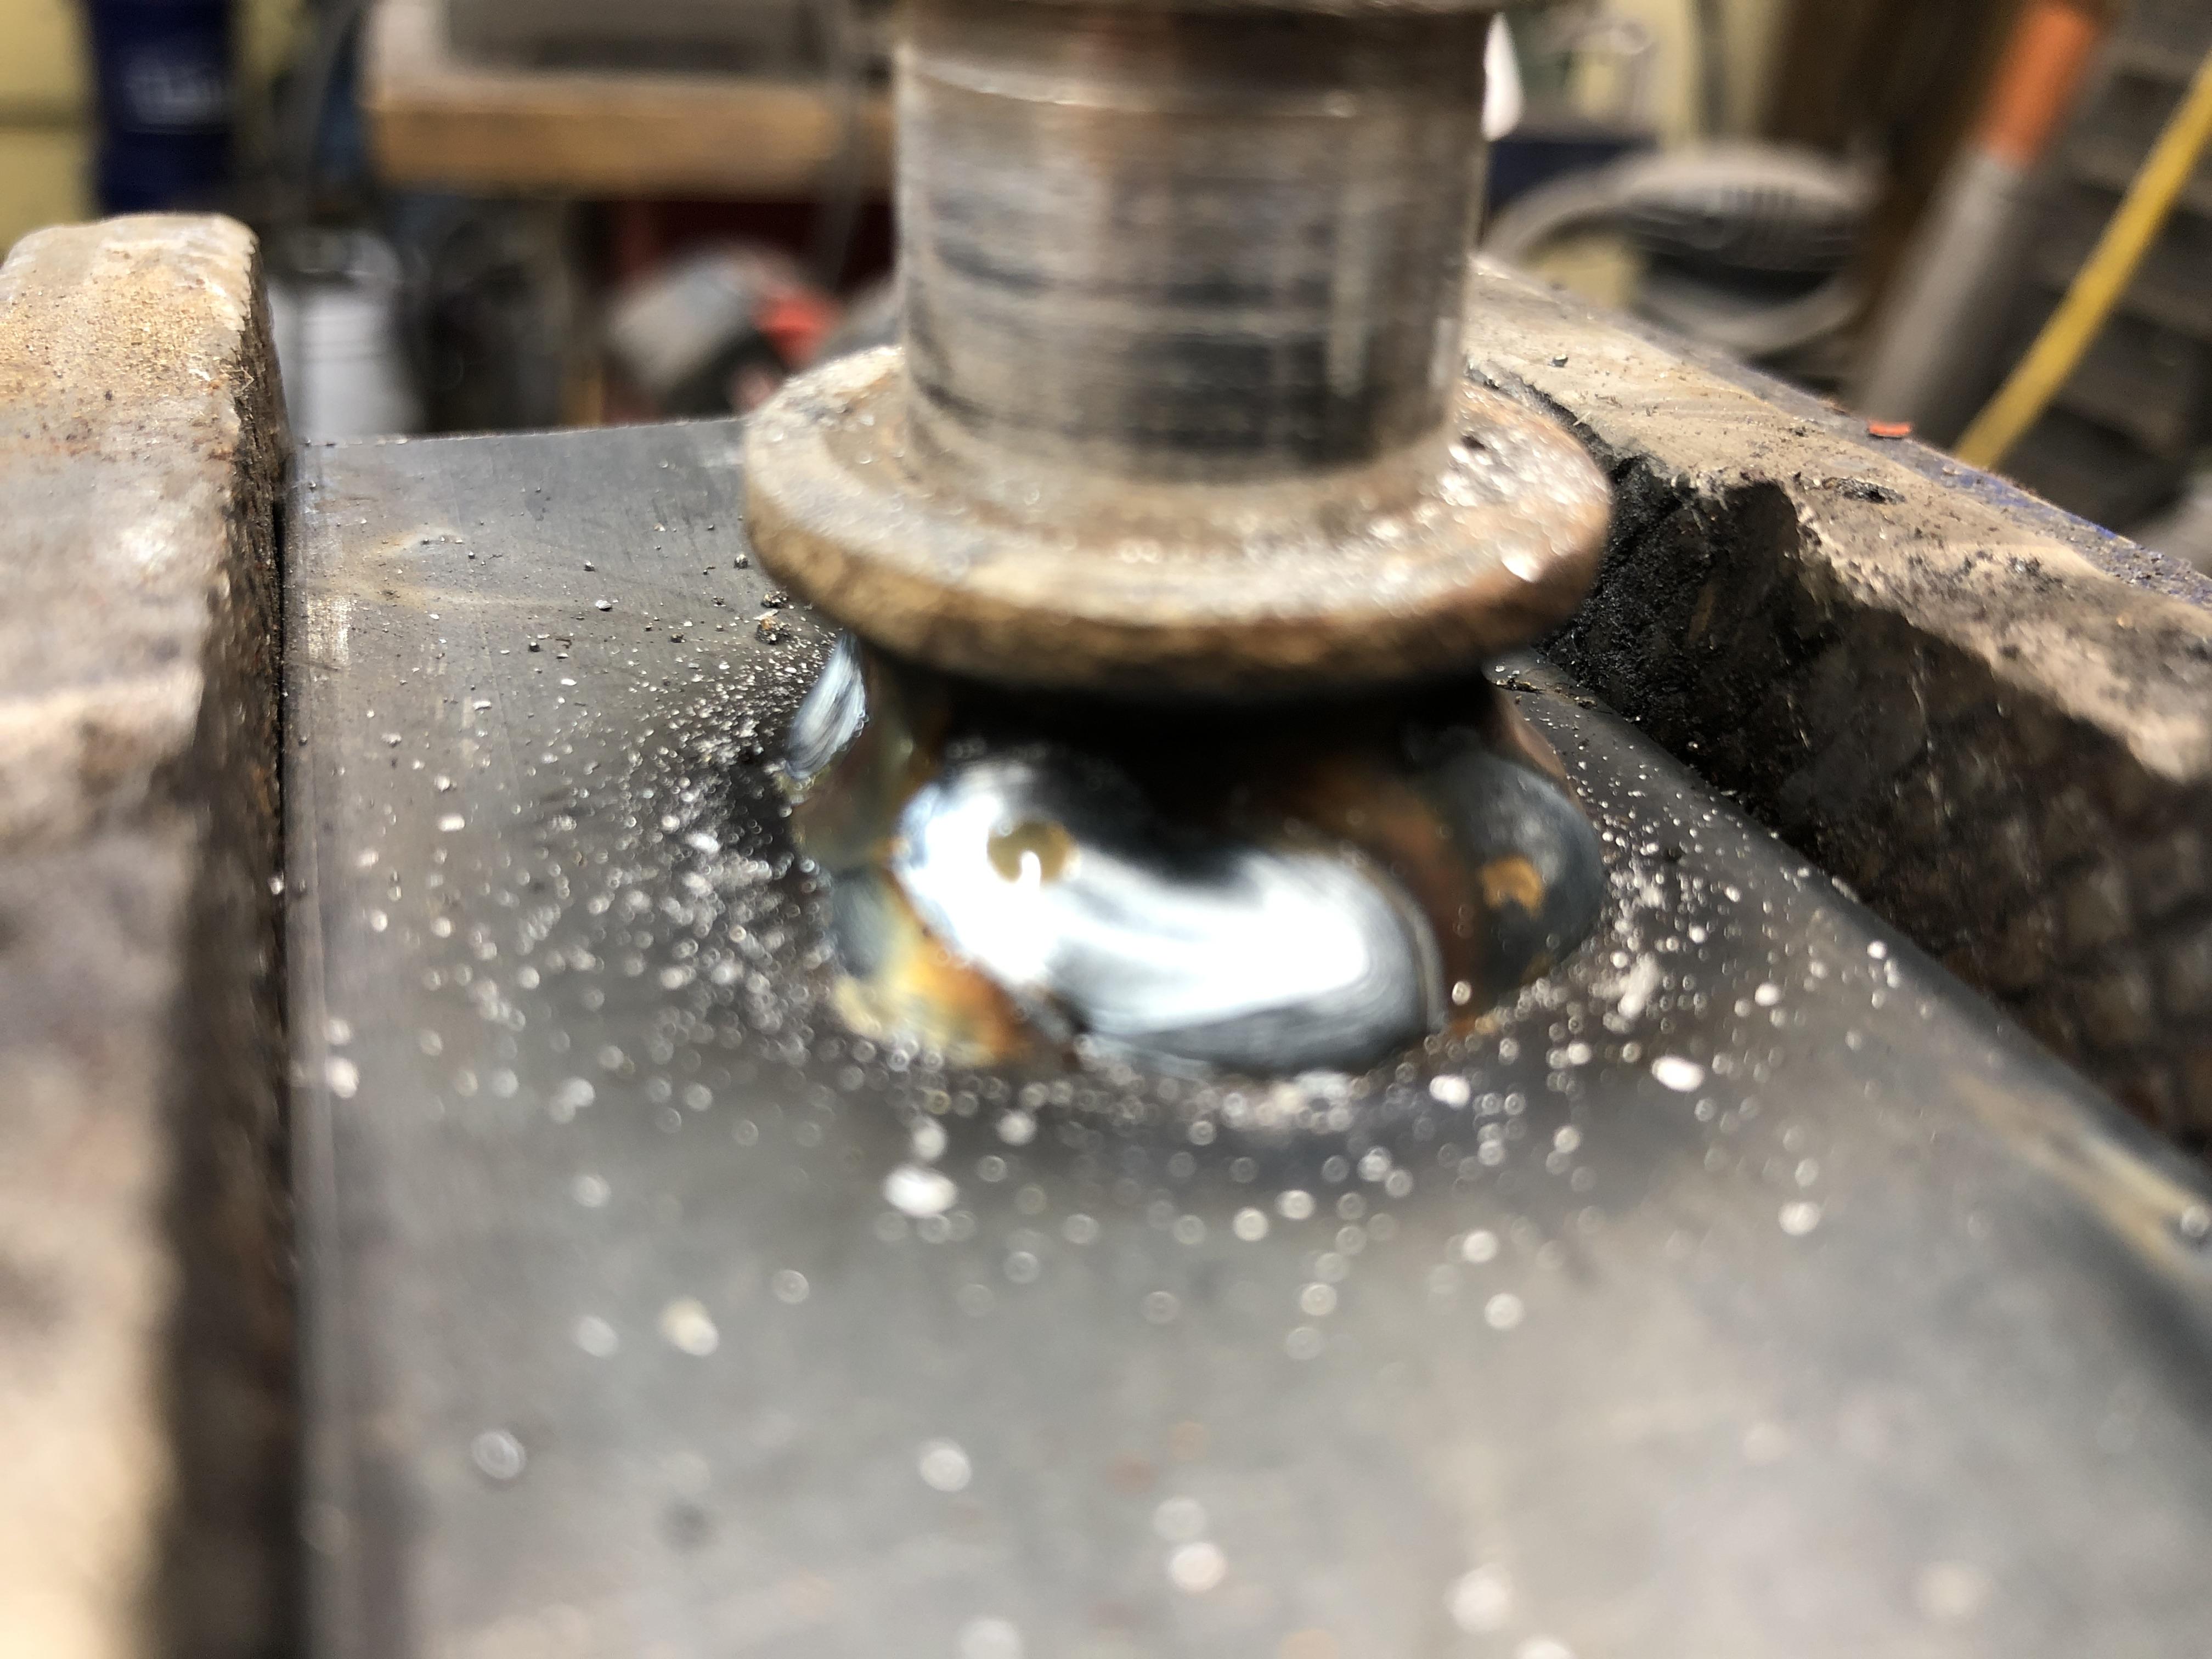
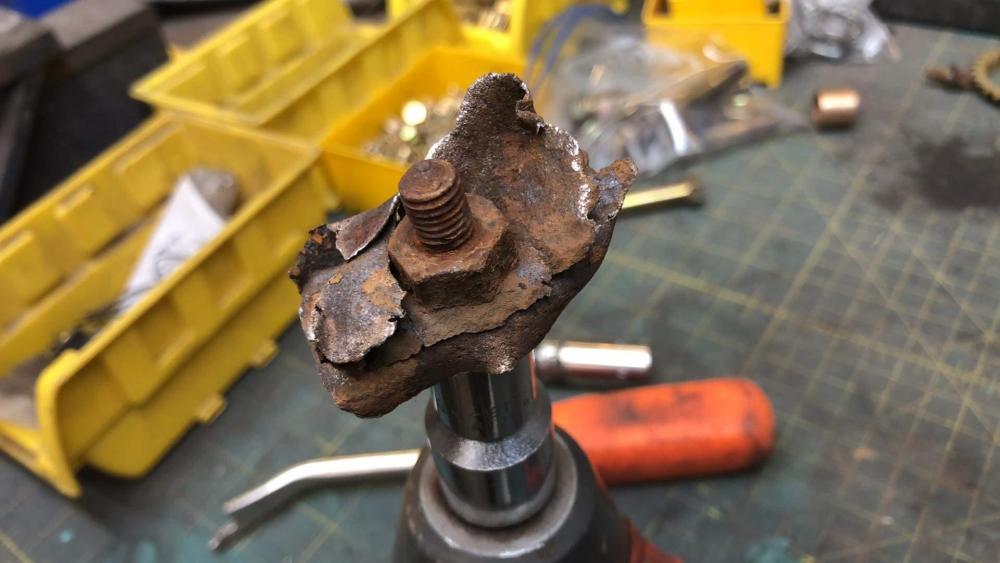
Got lucky again with this car. The rear mag nuts were not happy about coming off AT ALL. I was not using the best impact socket, and it managed to round over the flats on the nut. Yes I have a wonderful cordless Milwaukee M18 impact. I had to go get my left hand thread wheel nut remover to do it. Had to resort to a 4” cheater to get it turning, then finished with the impact. Here it is after removing the extractor. Next pic has an original nut for comparison. Pretty great extractor socket that bit and didn’t break with the 4-500 lbs of cheater pipe torque. It’s been ground down too from a prior job removing wheel locks that wouldn’t come off on a certain Honda. Dang I should have taken a picture of the corrosion about the studs coming through the drum. Very impressive. I am going to have to break the drum to get it off most likely. I’ll try with heat and 5lb persuader for a bit first.... To get the extractor socket off, I had to thread in an old flywheel bolt, then weld that to a plate and put that in the vise. Just tightening the flywheel bolt hex in the vise was not enough. And then a 4 foot cheater bar to get it to start backing off.


-
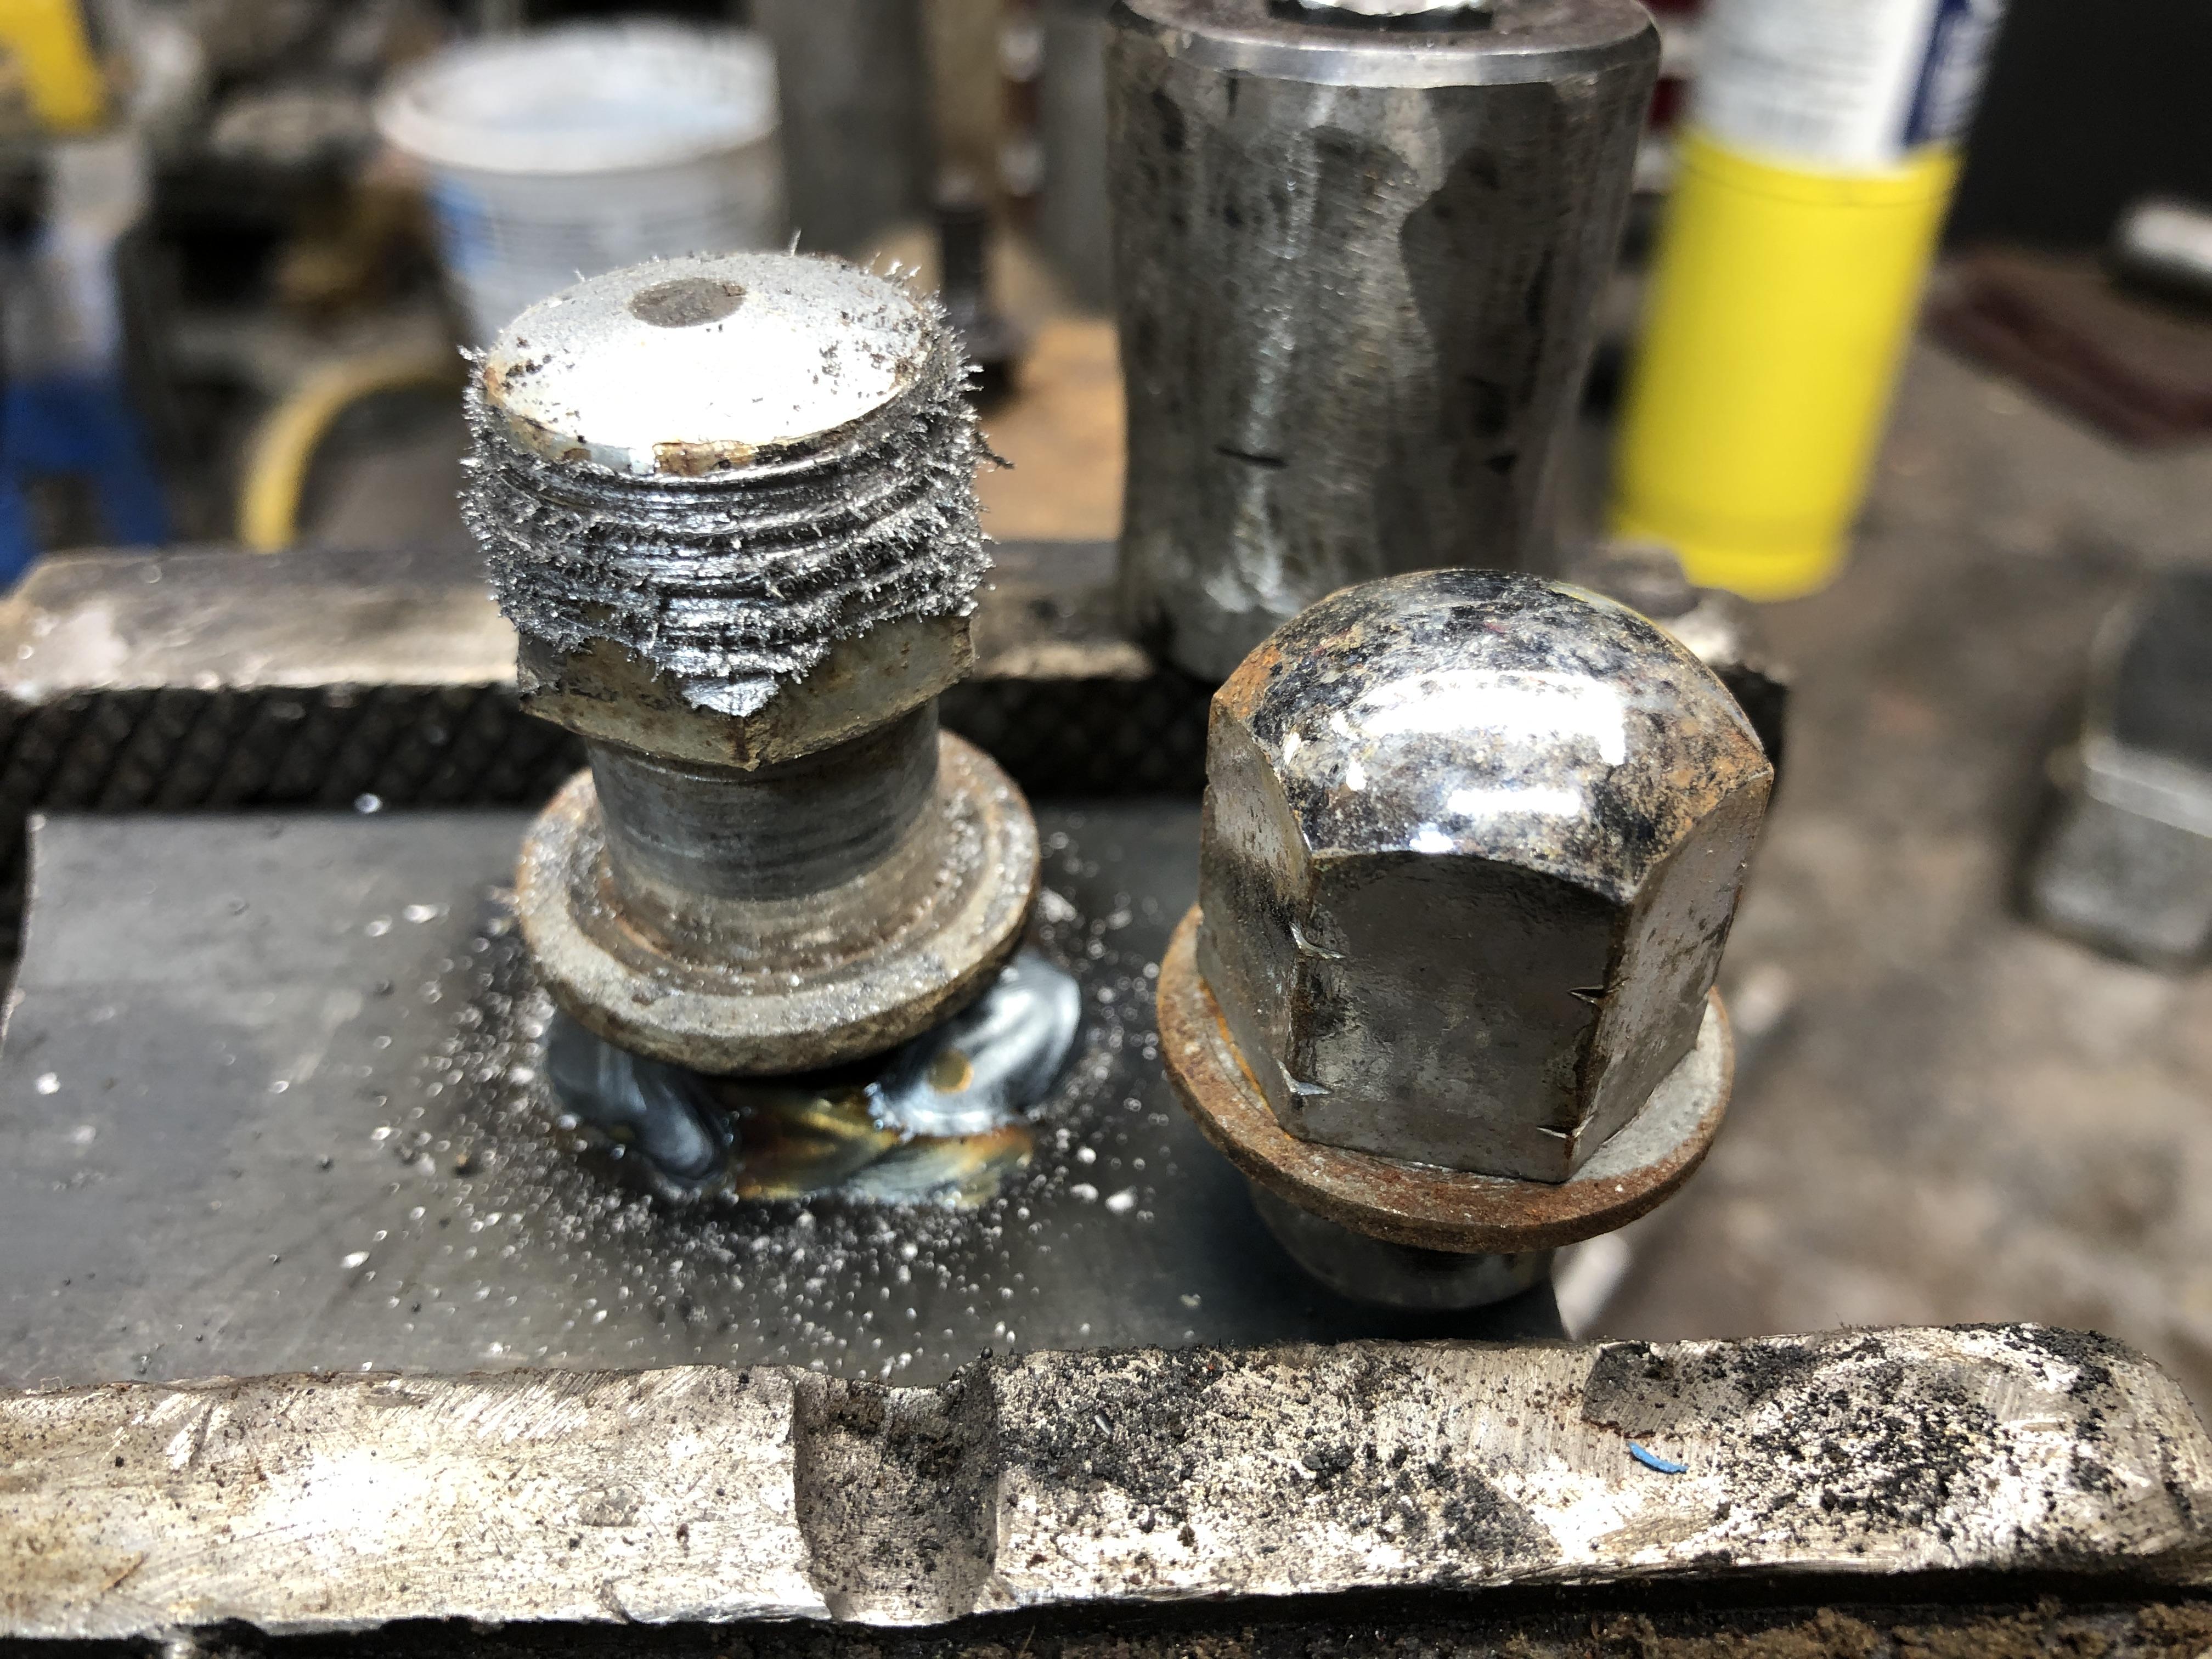
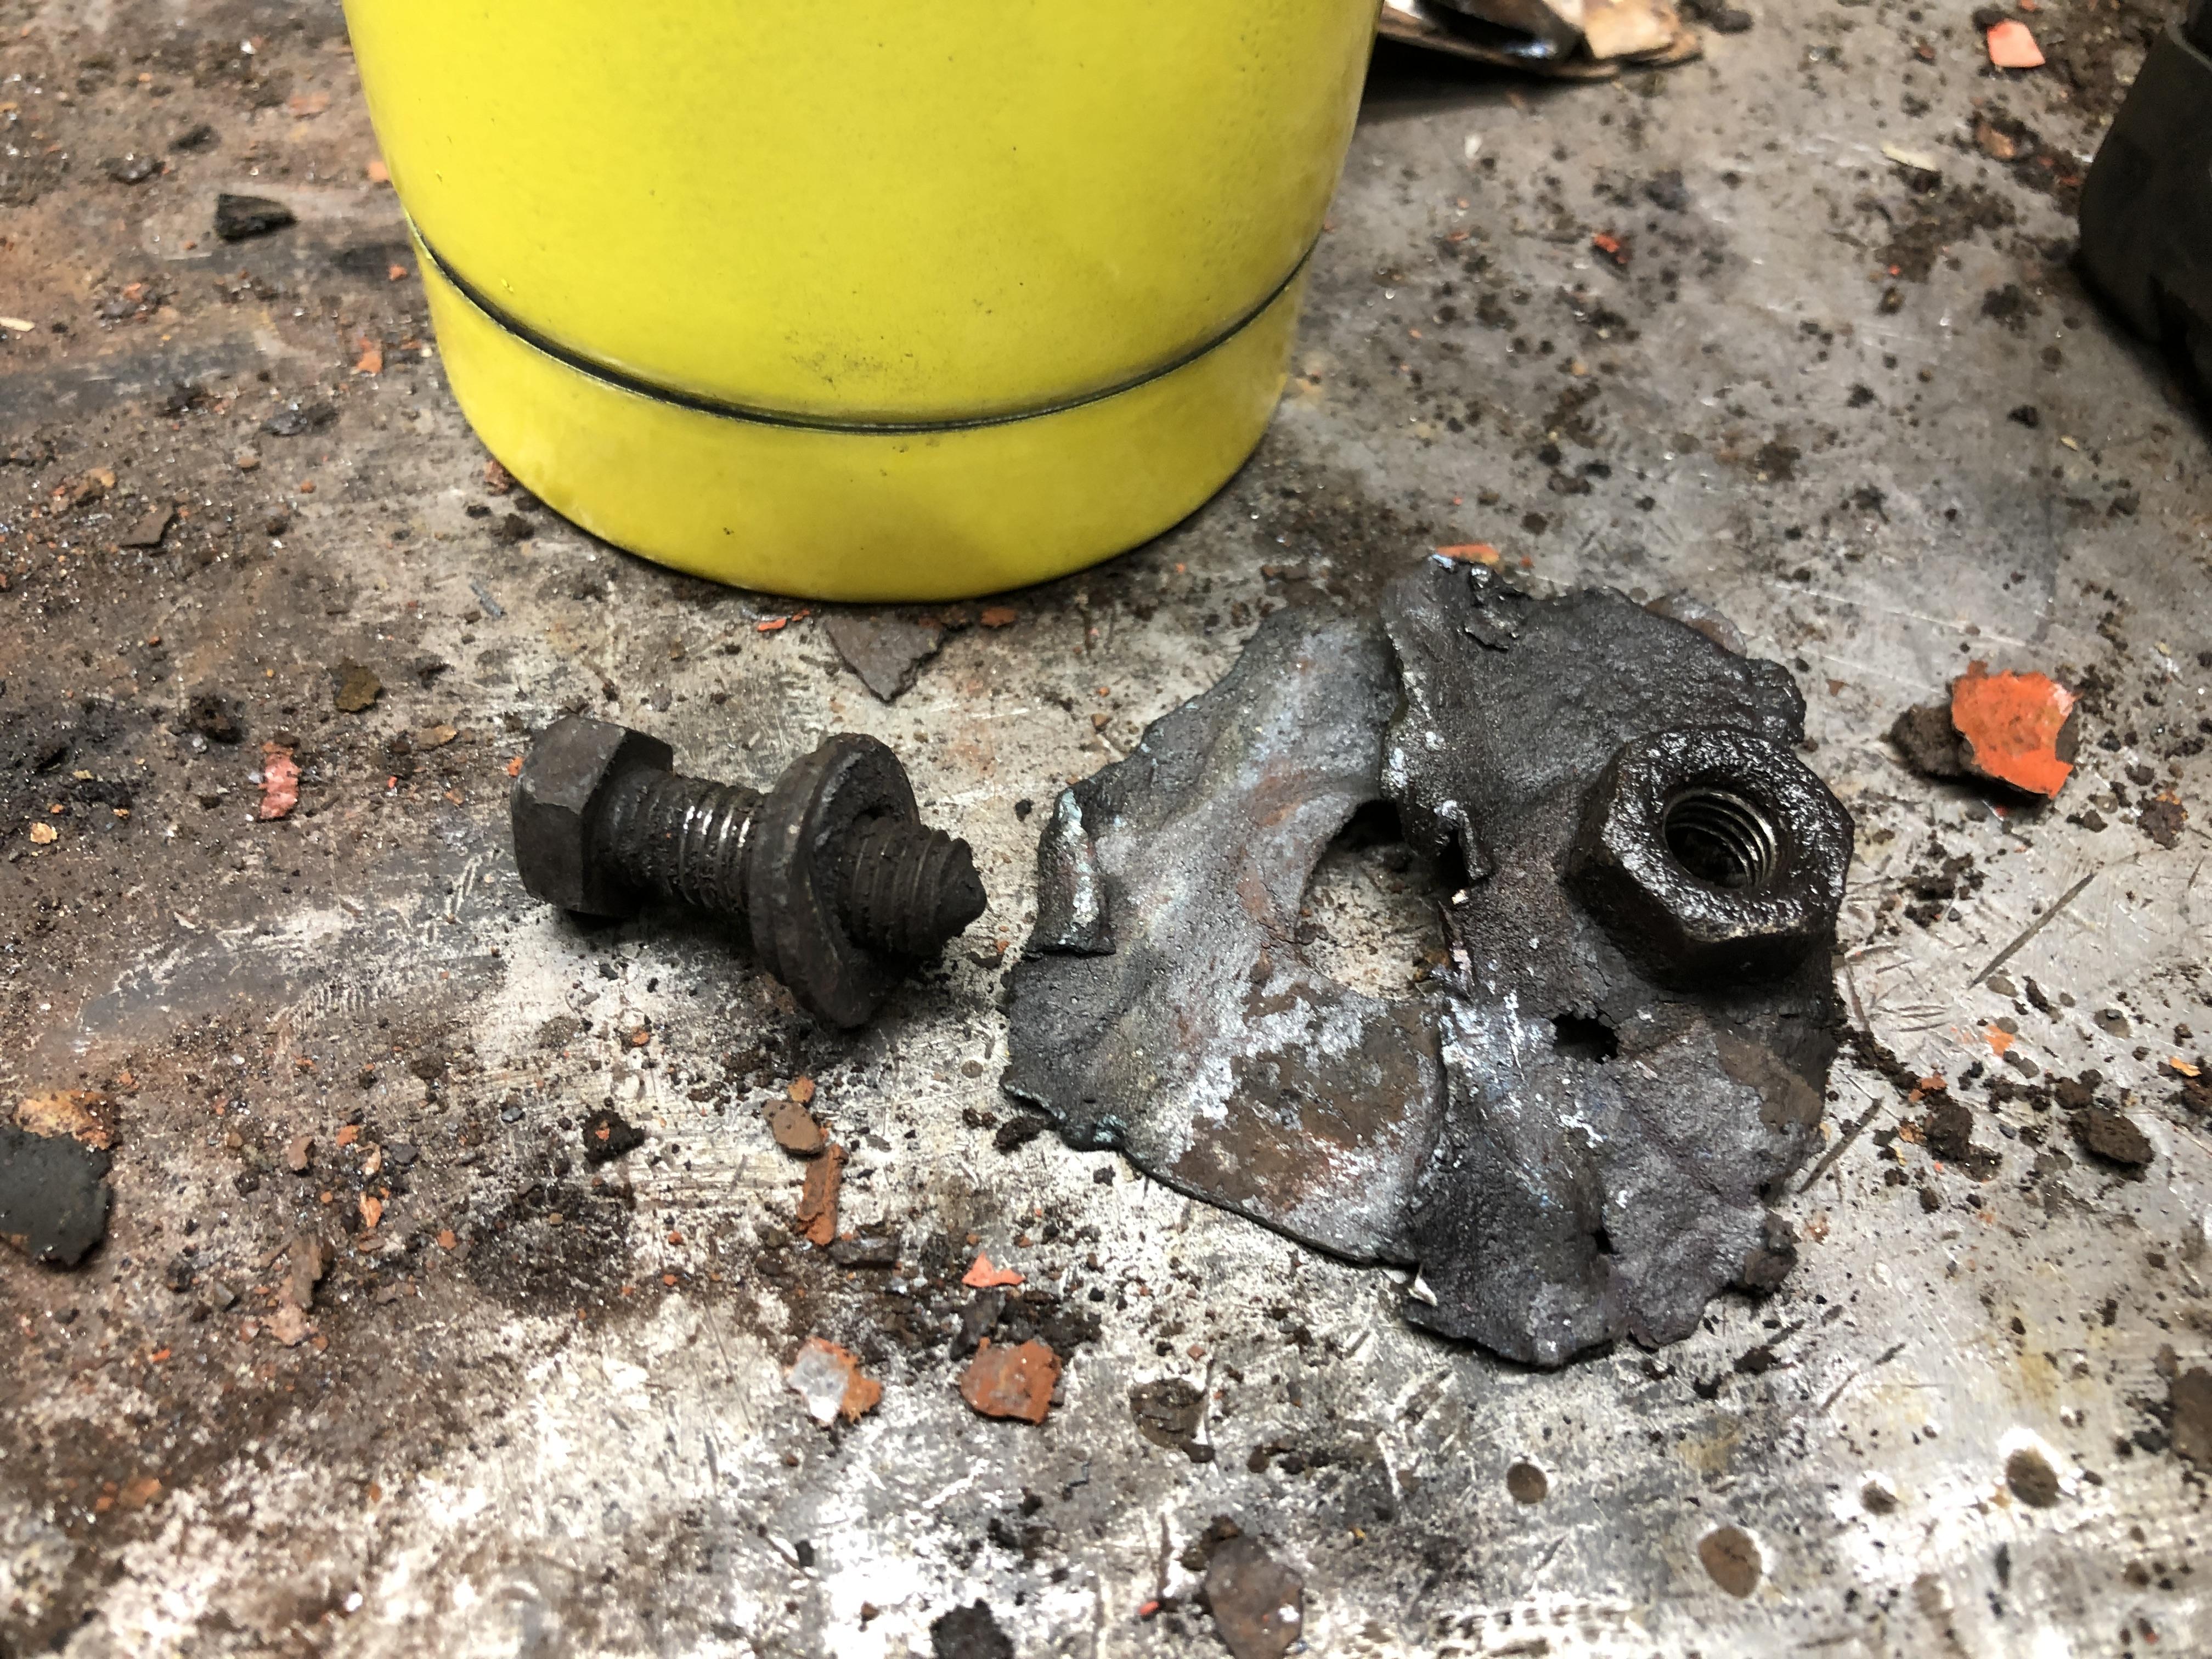
To complete the story. I did “Save” the little pointy headed monster. AND you get to see what the internal welded on nuts look like. Plenty of meat should you find yourself needing to move up a size....

-
Special...

-
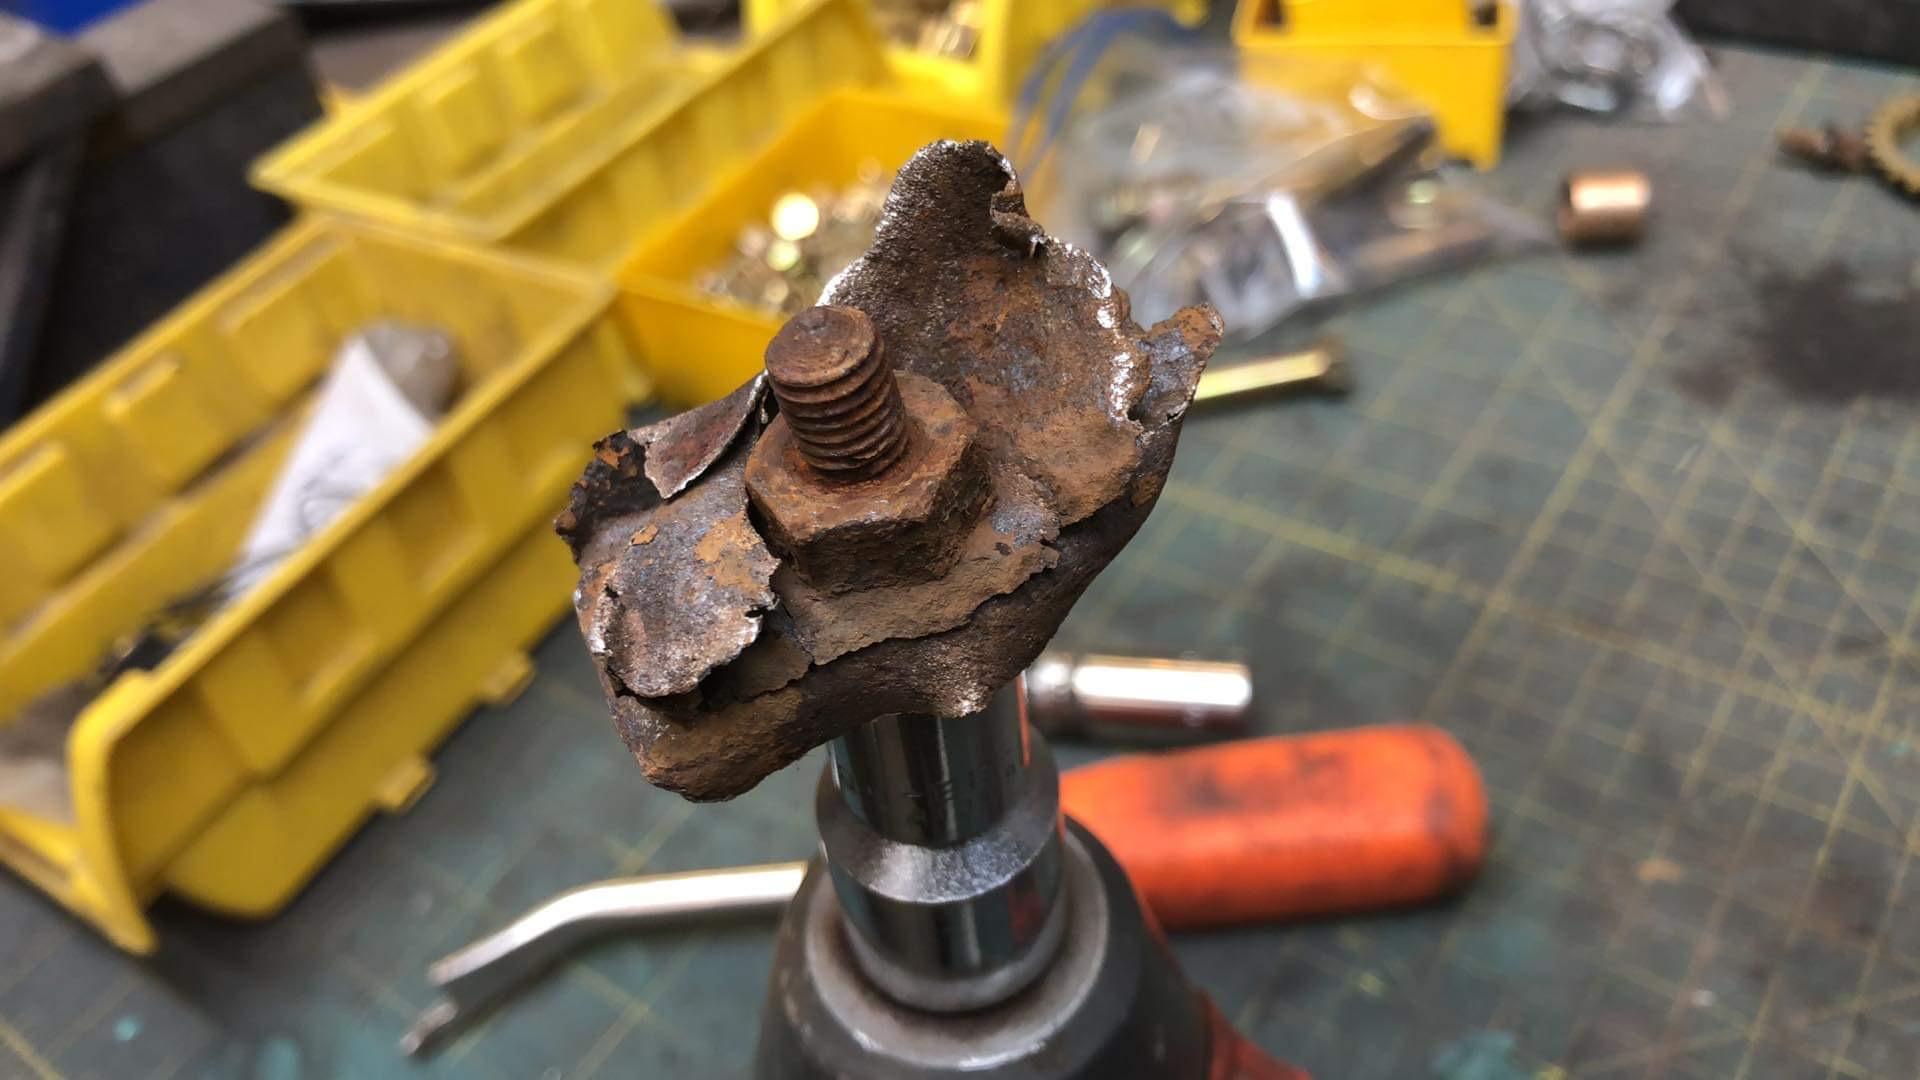
When taking parts off of 50 year old Datsun’s, you may encounter some rusty bolts that need a little attention. Sometimes you just have to give up and break it off, then deal with the drill and tap that results. Perfectly normal. Some of the bolts on my “most likely to break off” list include the M8 pair at the bottom of the fender with the nifty little pointy tips that face upward, threading into an internally welded nut inside the rocker panel. Natural place for water to collect and make those threads just about solid. Well today I had a treat. The 75 280 that I’m parting out had two missing and already out, leaving just two that I had to remove. And surprise surprise, I got one of them out without breaking the bolt!
-
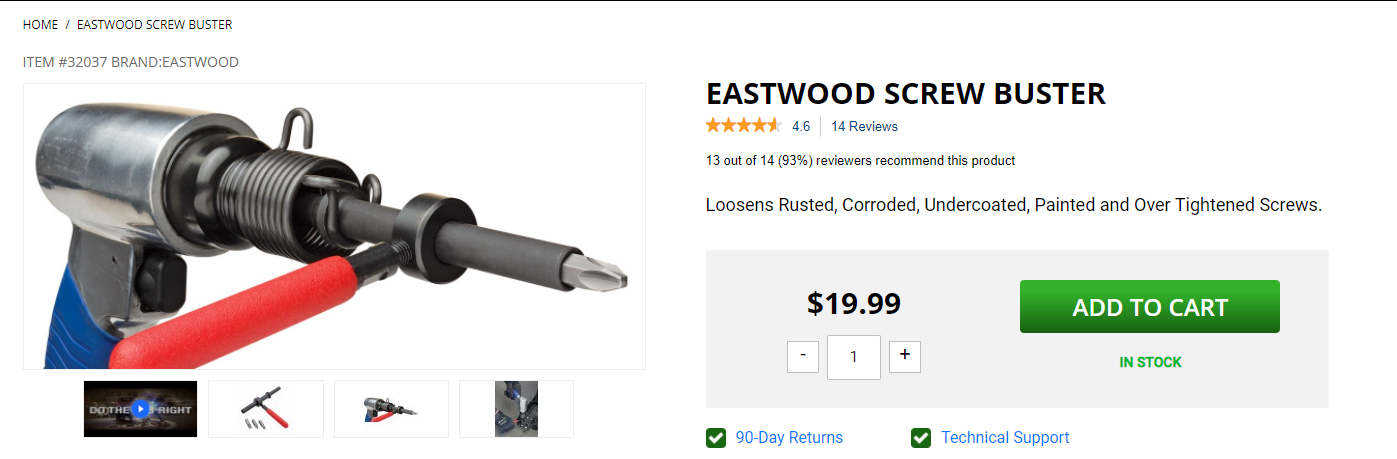
I've been using a Wera #2 philips that has the laser etched tip to grip rusty Datsun screws for years, but these Vessel drivers look even more aggressive. Like I need an excuse to buy another tool..... Looking on Amazon for Vessel also turned up this bad boy, for when the going gets extra tough. Vessel Megadora 980 Impacta P2x100#2 Cross Point Impact Screwdriver and when things get really carried away...


-
Let the finger pointing and rampant speculation begin! Who was first? Who copied who? Too similar not to have been "influenced" by the other, right?
-
Looks the standard set of energy suspension or Prothane bushings to me
-
The standard response is that these is no advantage to using these on the differential or transmission mounts unless you like increased gear noise from those areas brought into the cabin. Suspension bushings are another matter, but for street use, I much much prefer stock control arm and TC rod bushings . Better handling comes at the compromise of harshness, more road noise and steering wheel “sensory input” ie vibration.....
-
Anything this flimsy and transparent I would never use on my suspension or any part of the car. Wait where is that smiley facey thingy....
-
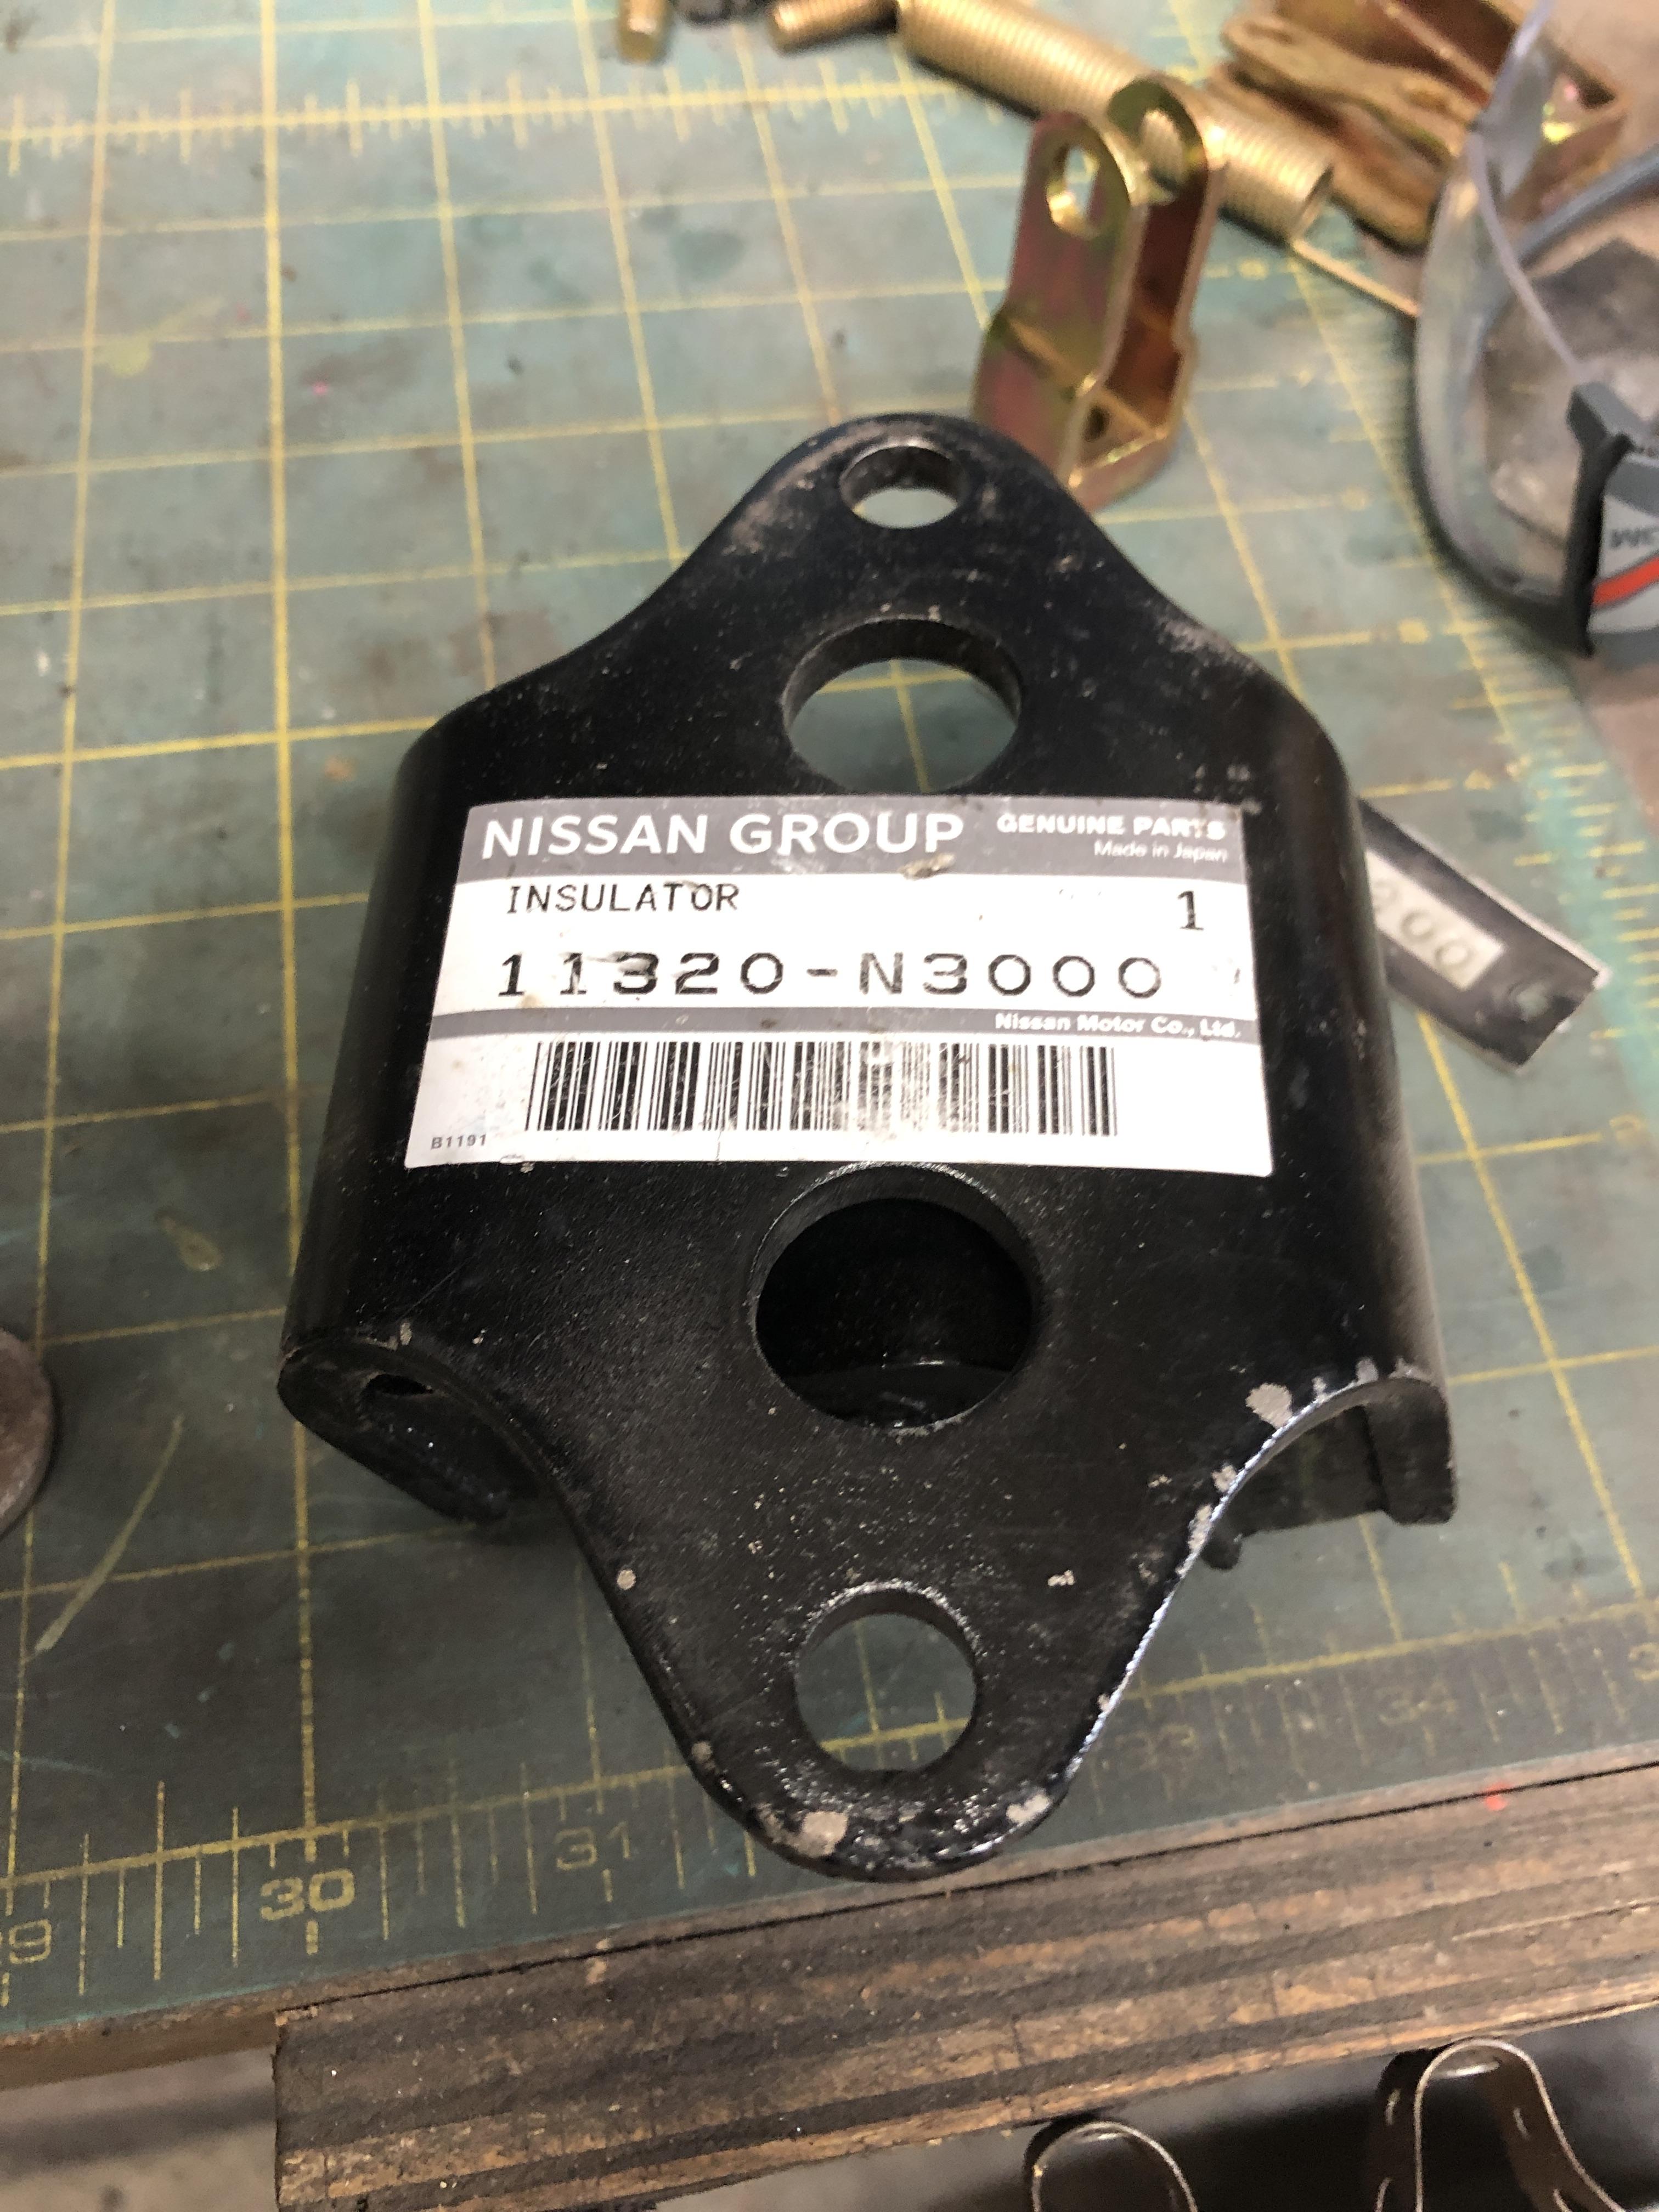
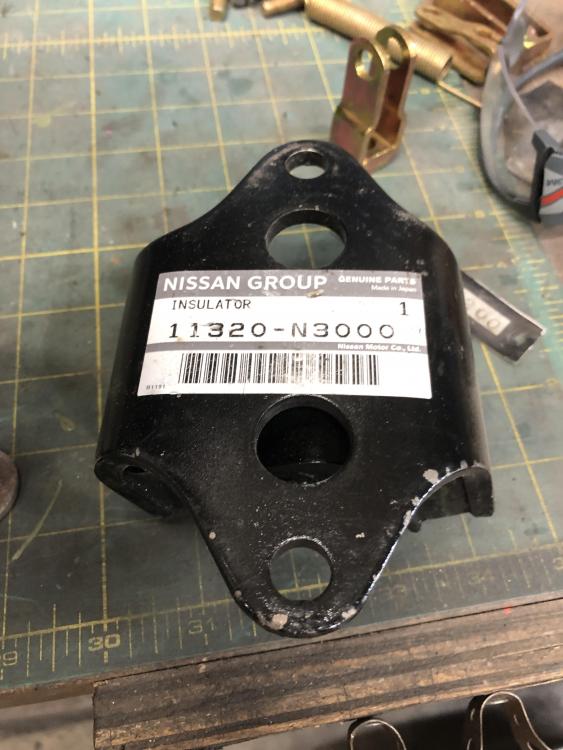
While tinkering with transmission isolators the other day, I noticed a little something that might be helpful that I do not remember seeing before. Often I stare at the transmission isolator as I’m about to put it on and wonder (again) which way around it goes. Which way is front? Well on a genuine Nissan mount, there is a little clue, if you know where to look Do you see it? Now I should go look at a diff isolator and see if the same little arrow is hidden under some dirt and oil I do not see this little clue on another one that I have that is an aftermarket item. Another reason to buy Nissan if you can afford it.

- 1 reply
-
- 1
-

-

wide ratio FS5W71B slipping out of 3rd & 4th
zKars replied to Jeff Berk's topic in Engine & Drivetrain
And this what happens when you leave your transmission upright, out in the rain without a cap on the output end for about 5 years That there is a piece of metal worthy only of your local recycler. How many teeth on the 4th gear, ah, gear? 21 or 22? Look for NIS-16 or NIS-16A https://www.transmissionpartsdistributors.com/fs5w71c-fs5w71e-transmission-input-shaft-kit-22t-31t-fits-86-5-93-nissan-cars-2wd-trucks-nis-16a/ Note it comes with the matching gear for the countershaft cluster. Now I’m worried about the rest of it..... -
The one row fuse box is 68, the other fuse box is 70 I think, I can confirm, P510 for sure. The front markers are 68-69 for sure. Any of this for sale? You knew I’d ask....
-
wide ratio FS5W71B slipping out of 3rd & 4th
zKars replied to Jeff Berk's topic in Engine & Drivetrain
There is nothing holding them together other than bad luck. The synchro must be welded to tapered part of the next gear that it rubs on. Can you turn the front part relative to the back? If not the needle bearing in there must hatched... Get your pry bar out get some persuasion going. Or rig up a slide hammer thingy -
Belmetric has longer M4 screws No they aren’t black, but that’s not hard to accomplish later https://www.belmetric.com/4mm-oval-head-screws-c-10_1489_1267/msoval4x30ss-oval-phillips-stainless-p-7619.html?zenid=pqvq1qf93dsb7jcukh67na7ab6 Also have them in flat head zinc.
-
I’ve had R1R’s on my 510 for a 2-3 years so far. Absolutely love them. Ride, quiet, semi decent wet behavior, and the grip, OMG. (And I don’t OMG very often). On my second set.
-
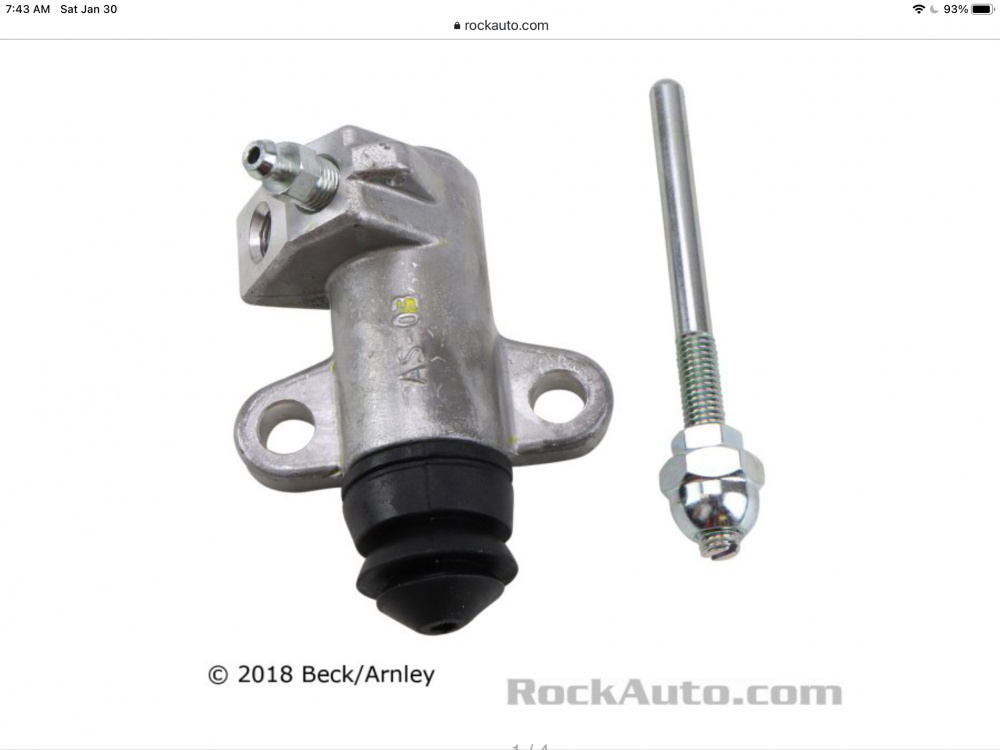
Variable Clutch Cover Height or Thickness Availability
zKars replied to zKars's topic in Engine & Drivetrain
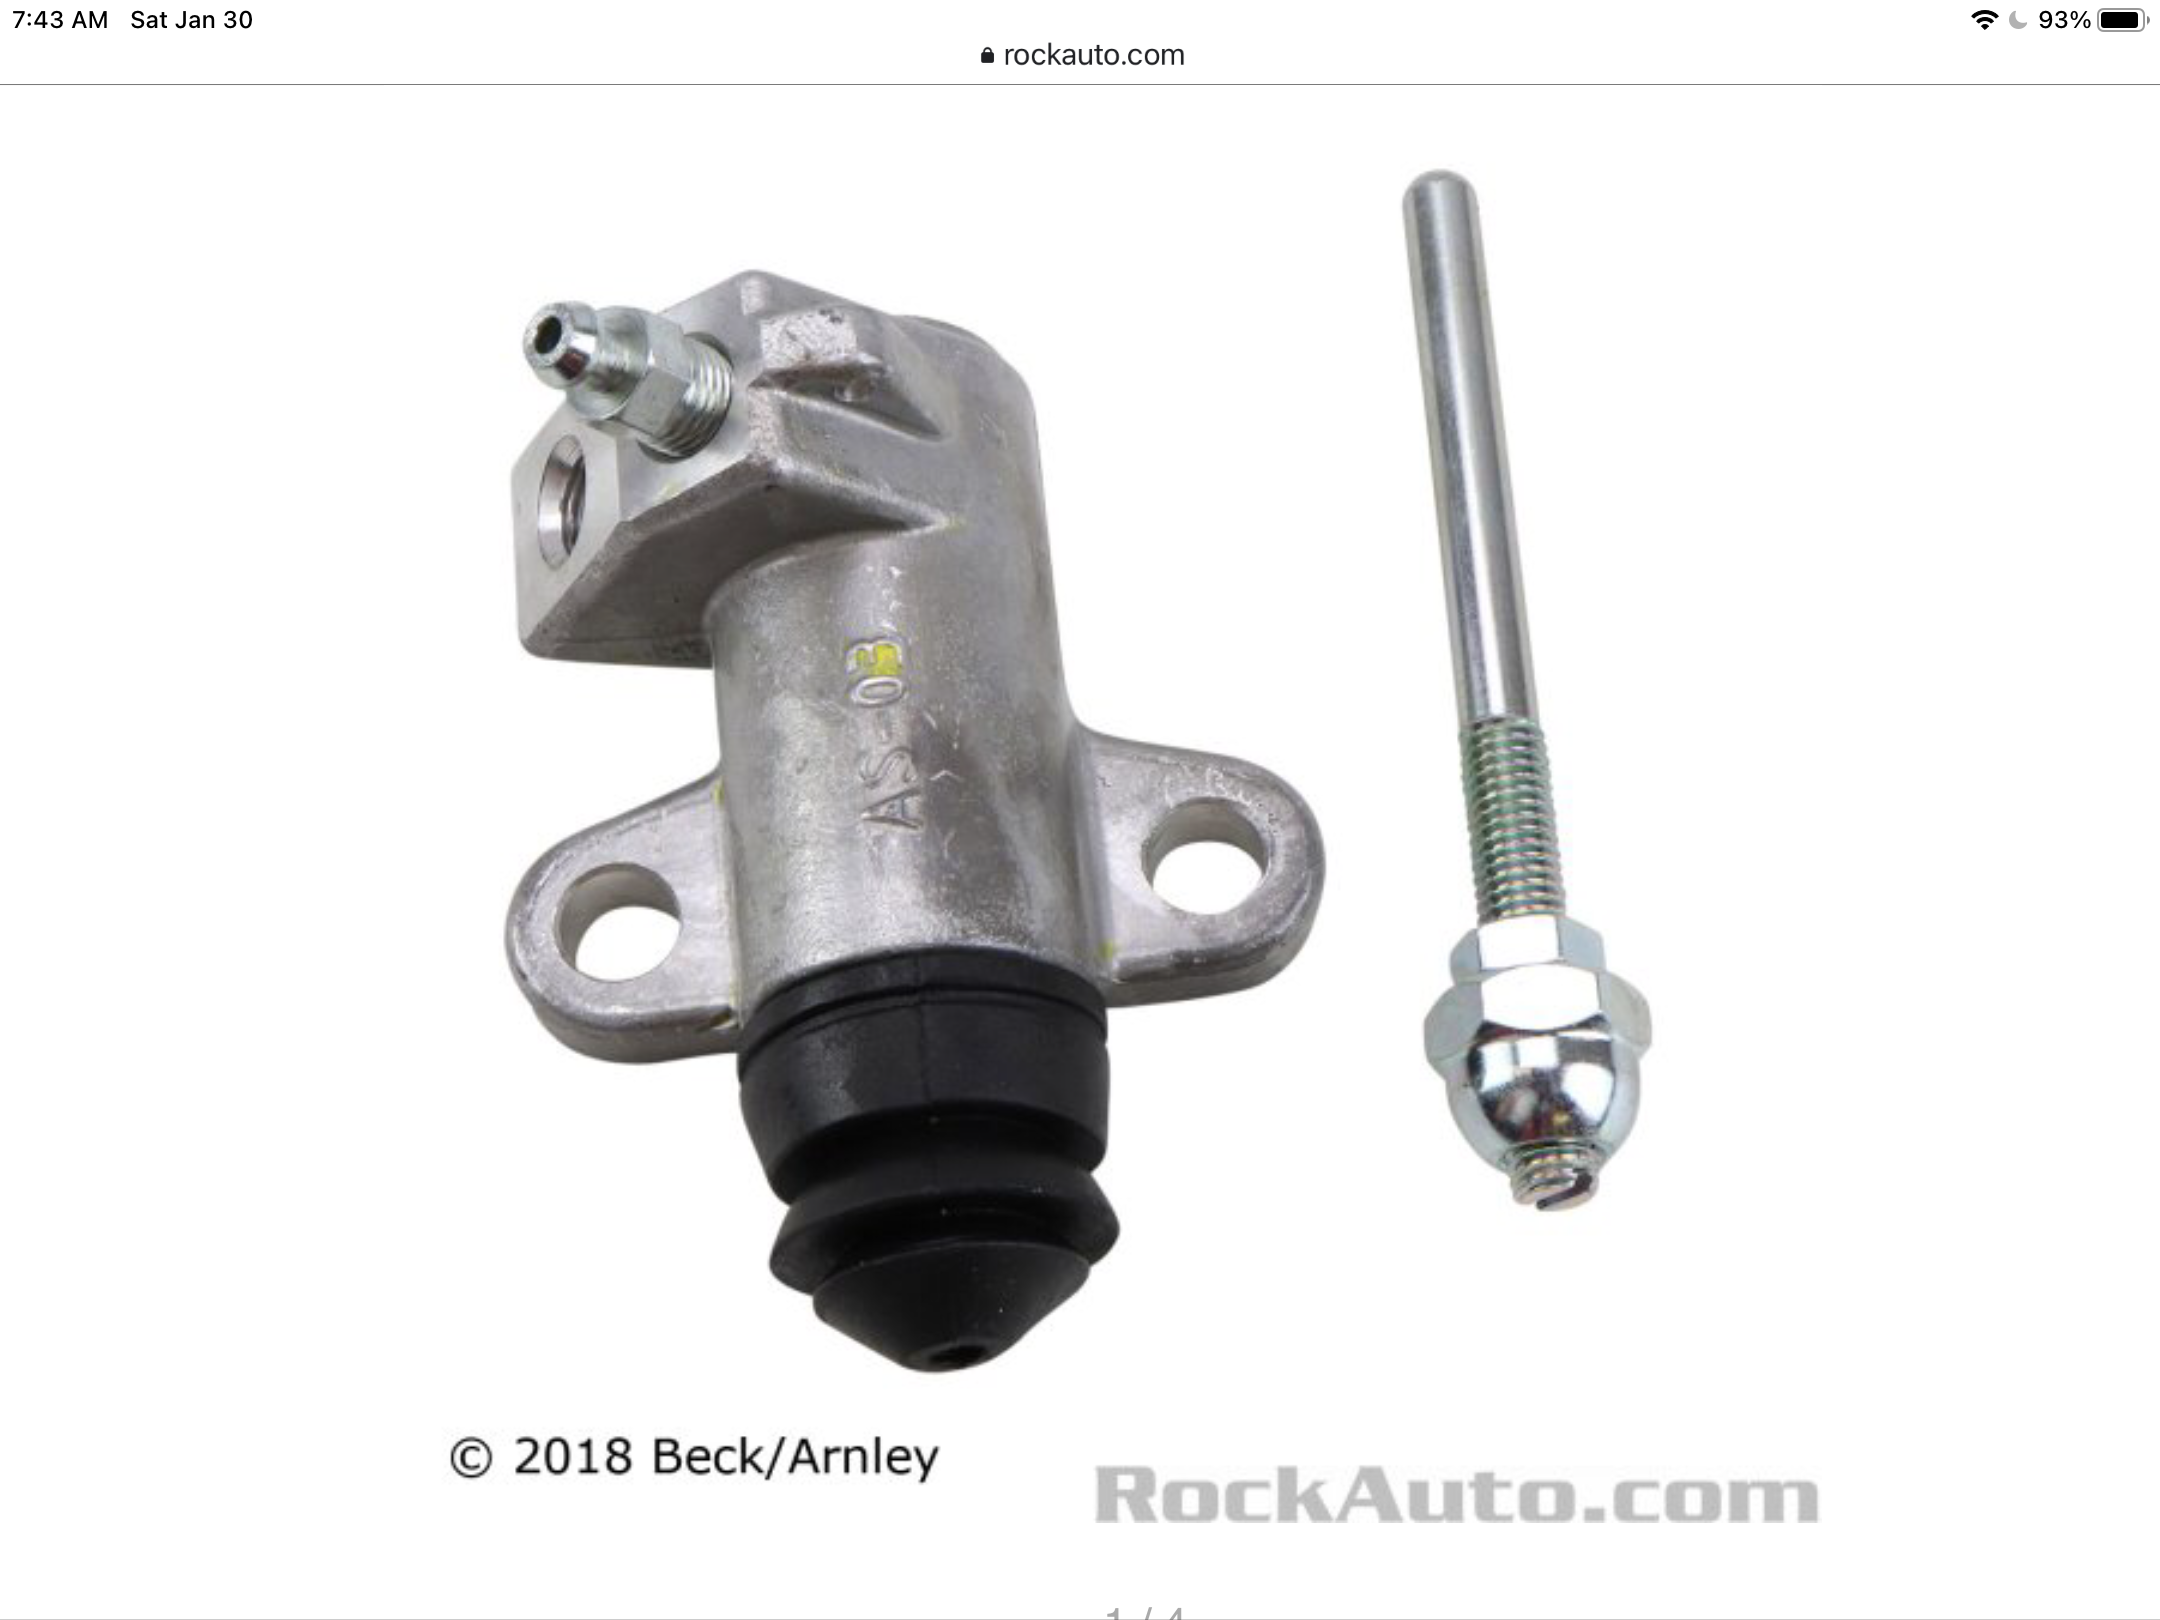
I have to note while we are here. There is also another way to get whatever clutch cover and throw out collar you have to work. There is an adjustable length push rod clutch slave cylinder option and a matching clutch fork with a hole. I’ve found cars with very long collars and very thick clutch covers who’s clutches were working just fine with a very short push rod on the slave courtesy of the adjustable length rod arrangement. The Rule of 92 isn’t as hard and fast a rule as I’ve gone to great lengths to champion. BTW these slaves are spec’ed on the 70 Z’s if you’re looking for one on Rock-Auto. Nothing stopping you from just hack sawing off your fixed length rod as well. Just more of a trial and error thing.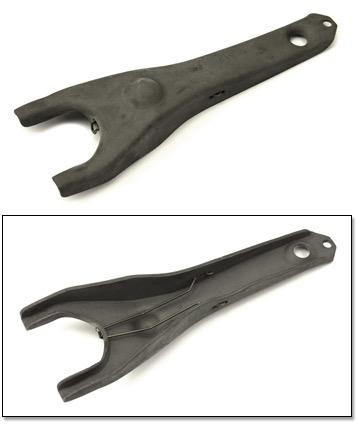

-
Variable Clutch Cover Height or Thickness Availability
zKars replied to zKars's topic in Engine & Drivetrain
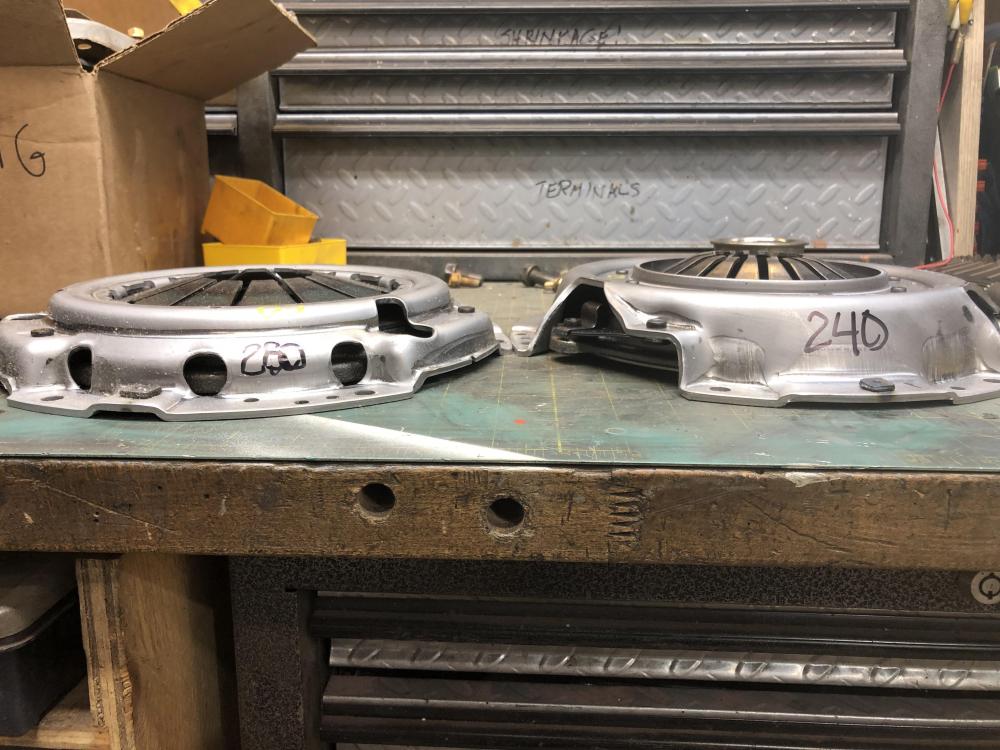
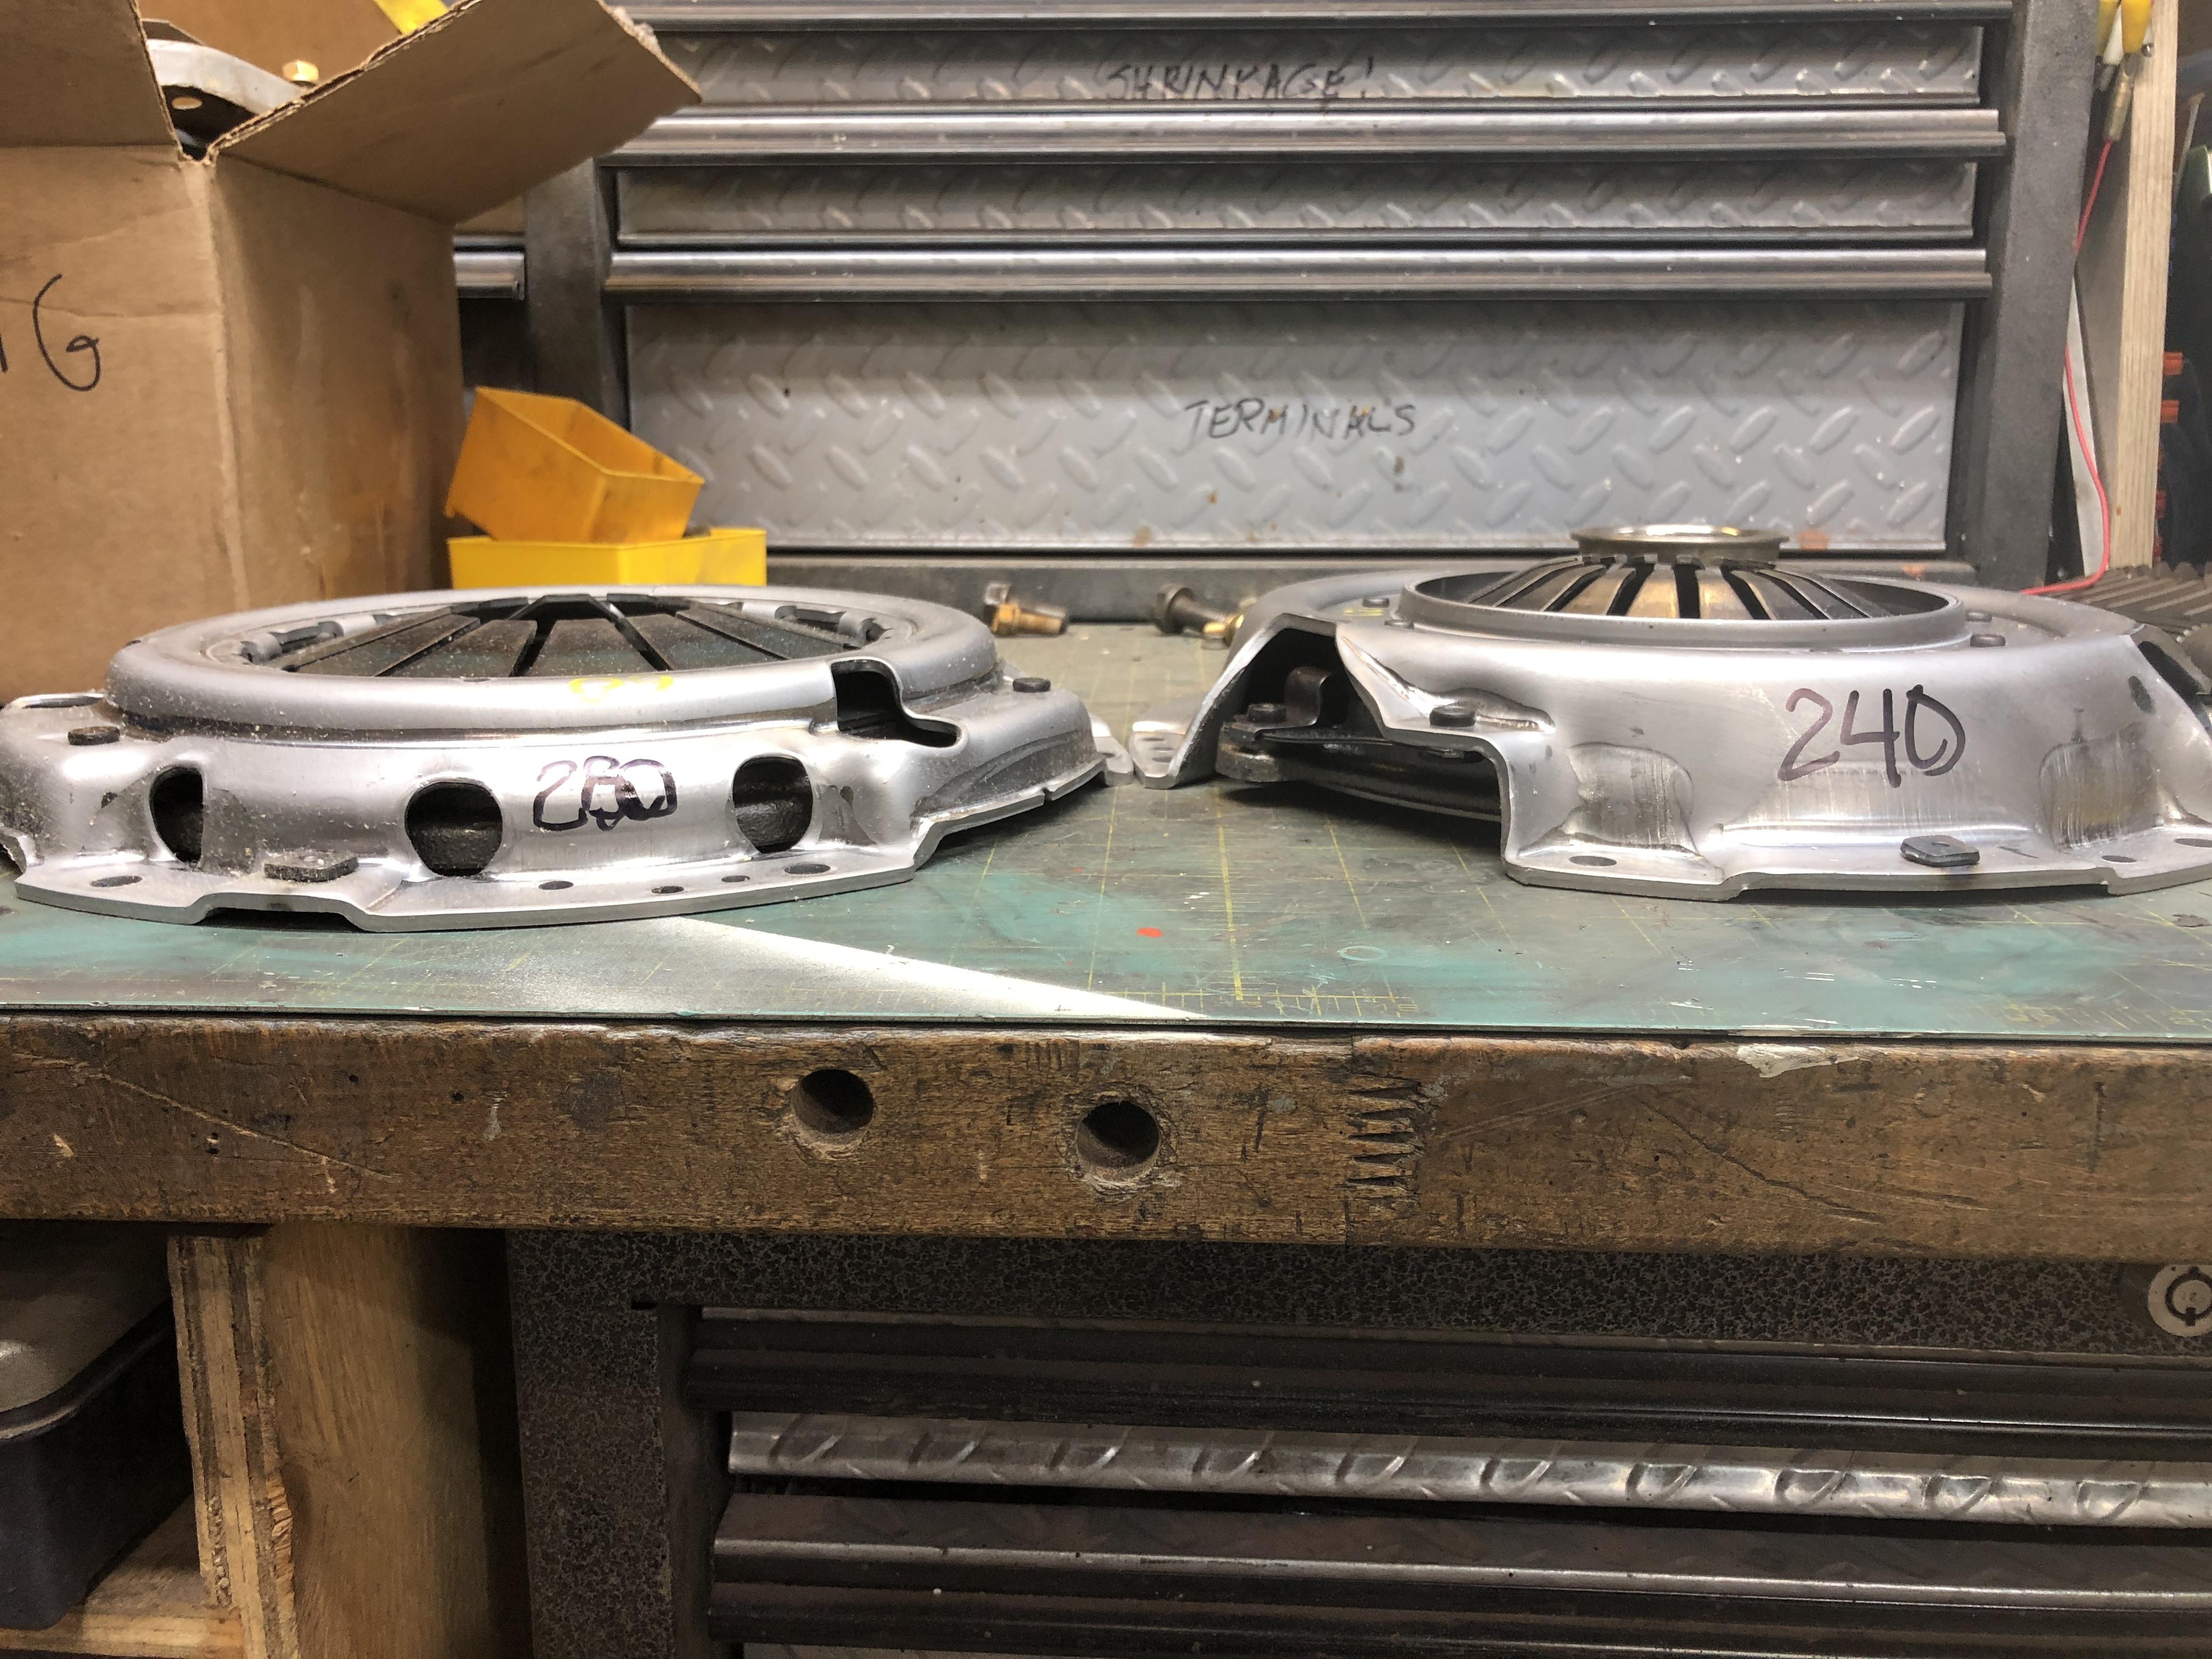
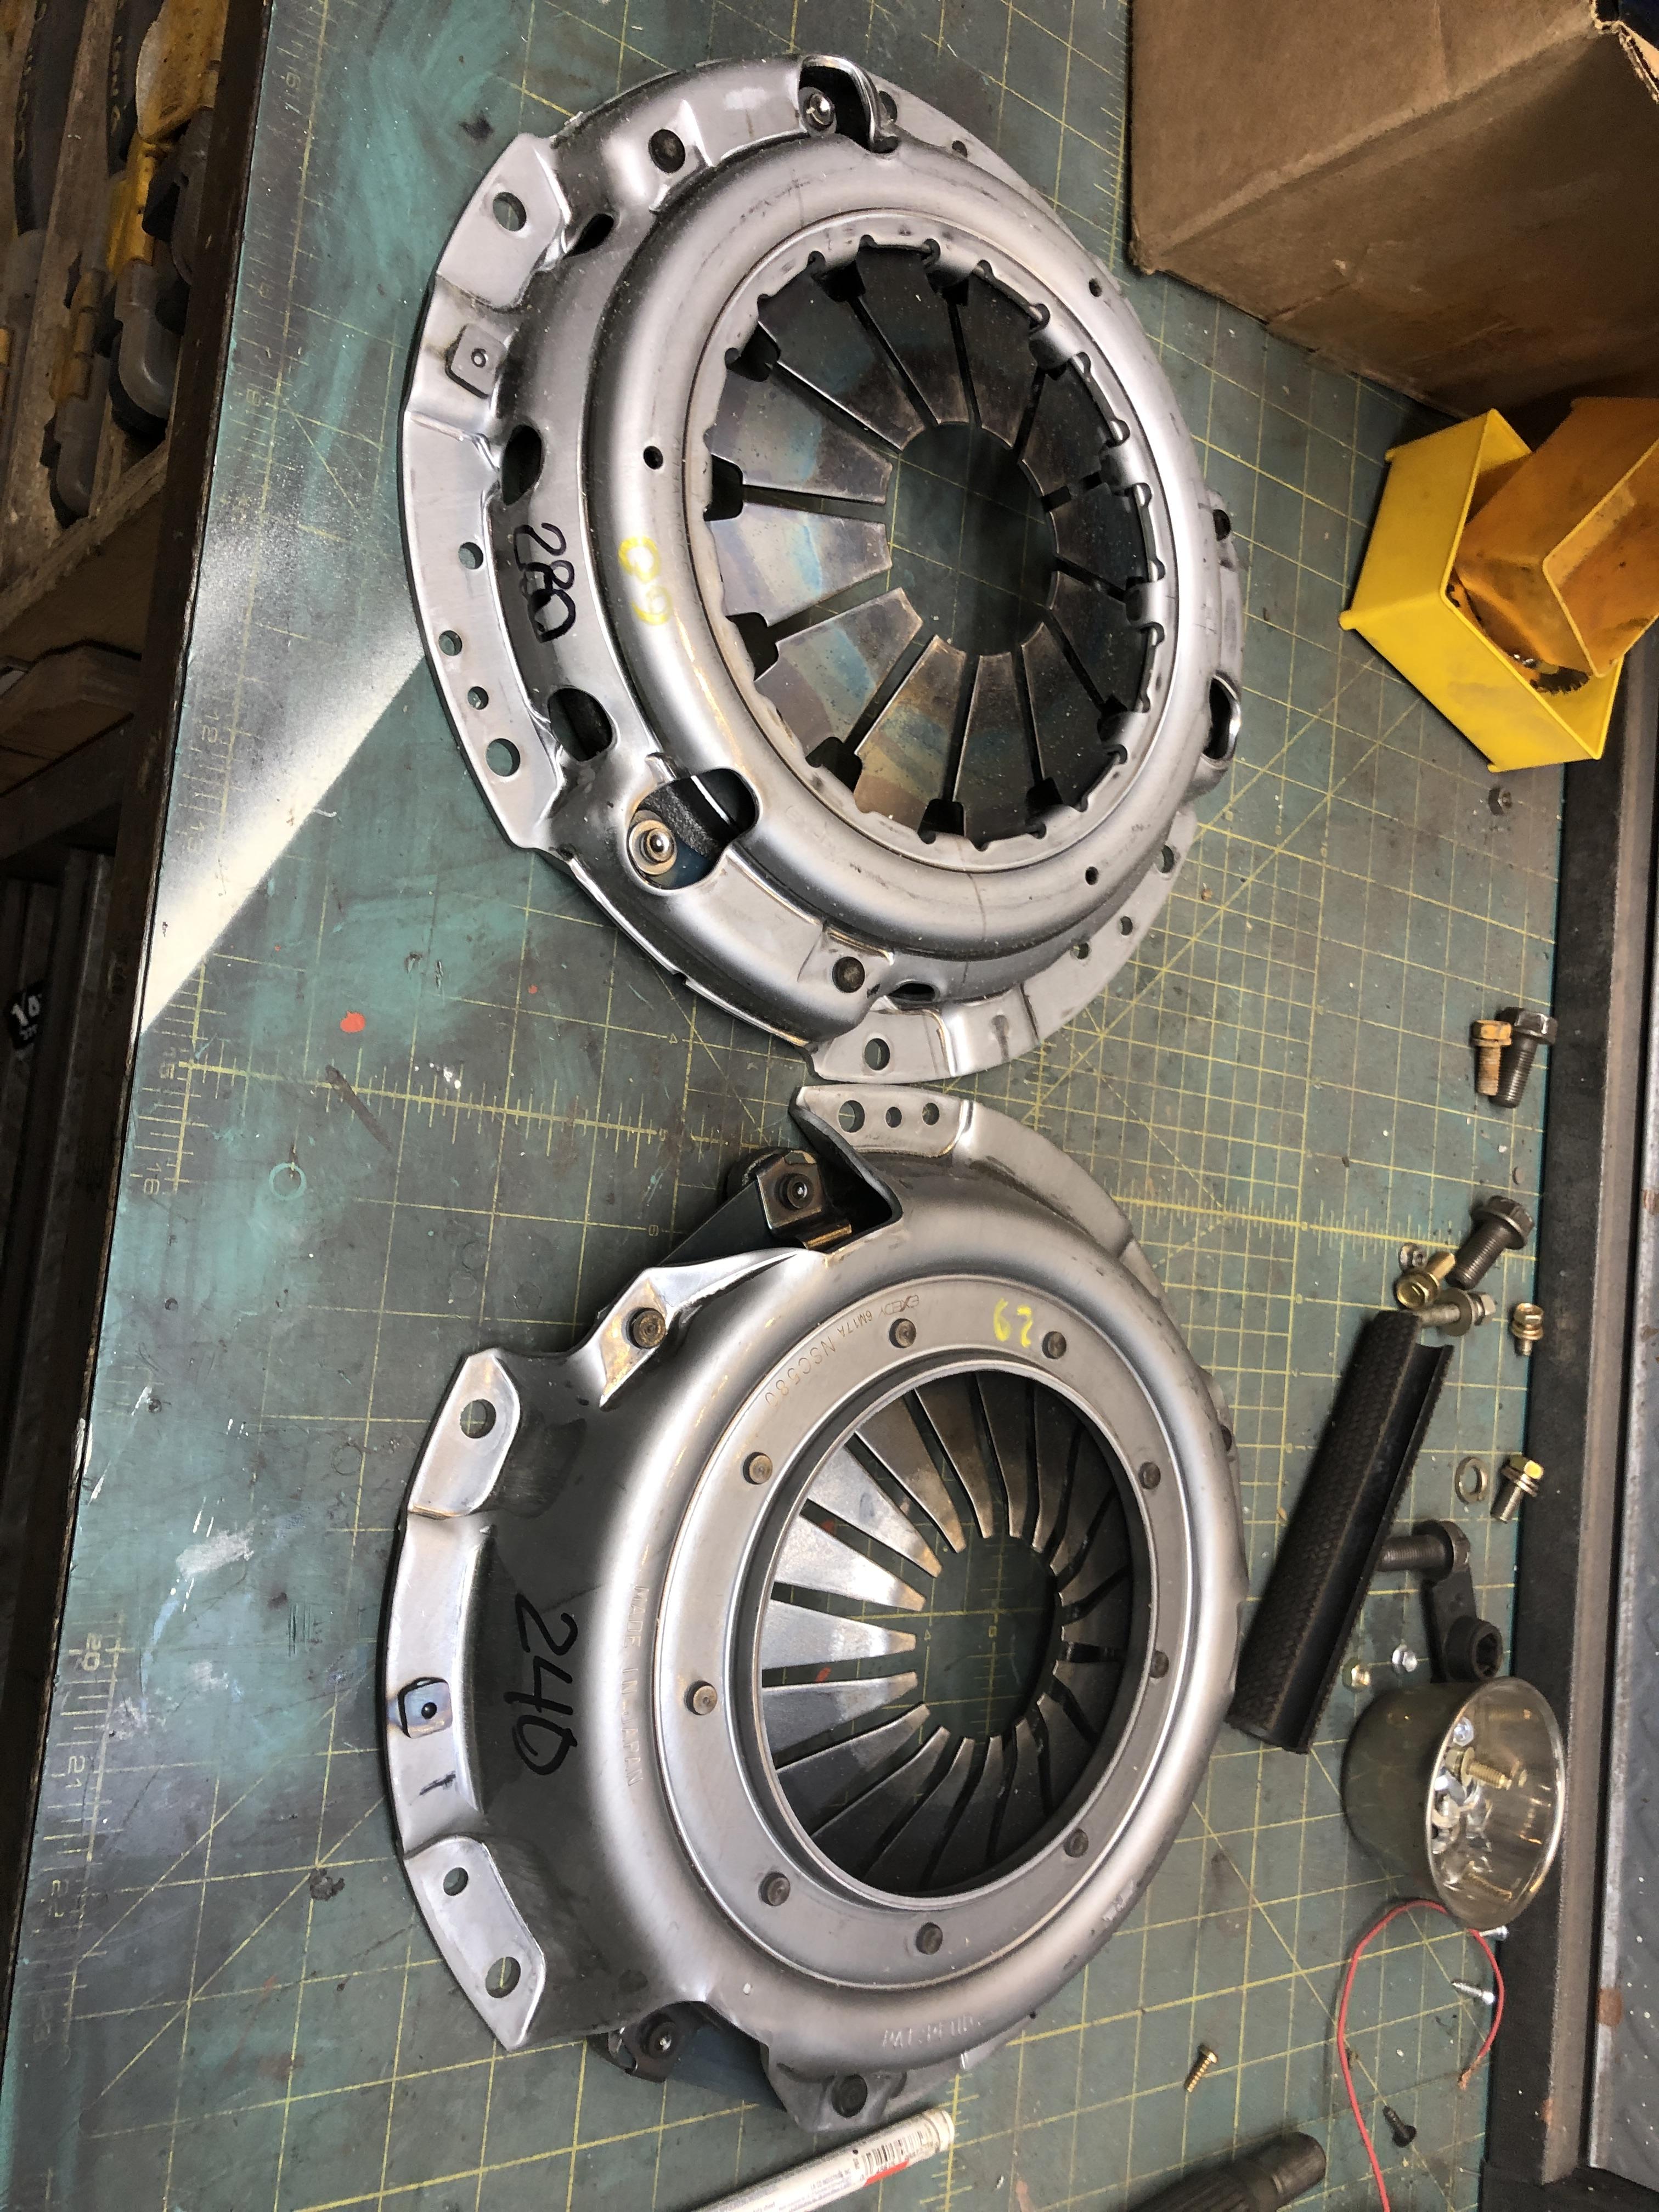
The height of the fingers with the clutch cover bolted to the flywheel (with the disk in place) is what is really needed to properly compare. The free height of the springs may or may not be useful as noted above, the way the fingers move is determined by internal geometry of the moving parts. The fingers on the left cover sure do stick up more than the ones on the right, or so it appears, AND the cover itself appears thinner. -
Variable Clutch Cover Height or Thickness Availability
zKars replied to zKars's topic in Engine & Drivetrain
Here are some pictures of the two covers.