zKars
 Subscriber
-
Posts
3,742 -
Joined
-
Last visited
-
Days Won
107
Content Type
Profiles
Knowledge Base
Zcar Wiki
Forums
Gallery
Events
Downloads
Store
Blogs
Collections
Classifieds
Everything posted by zKars
-
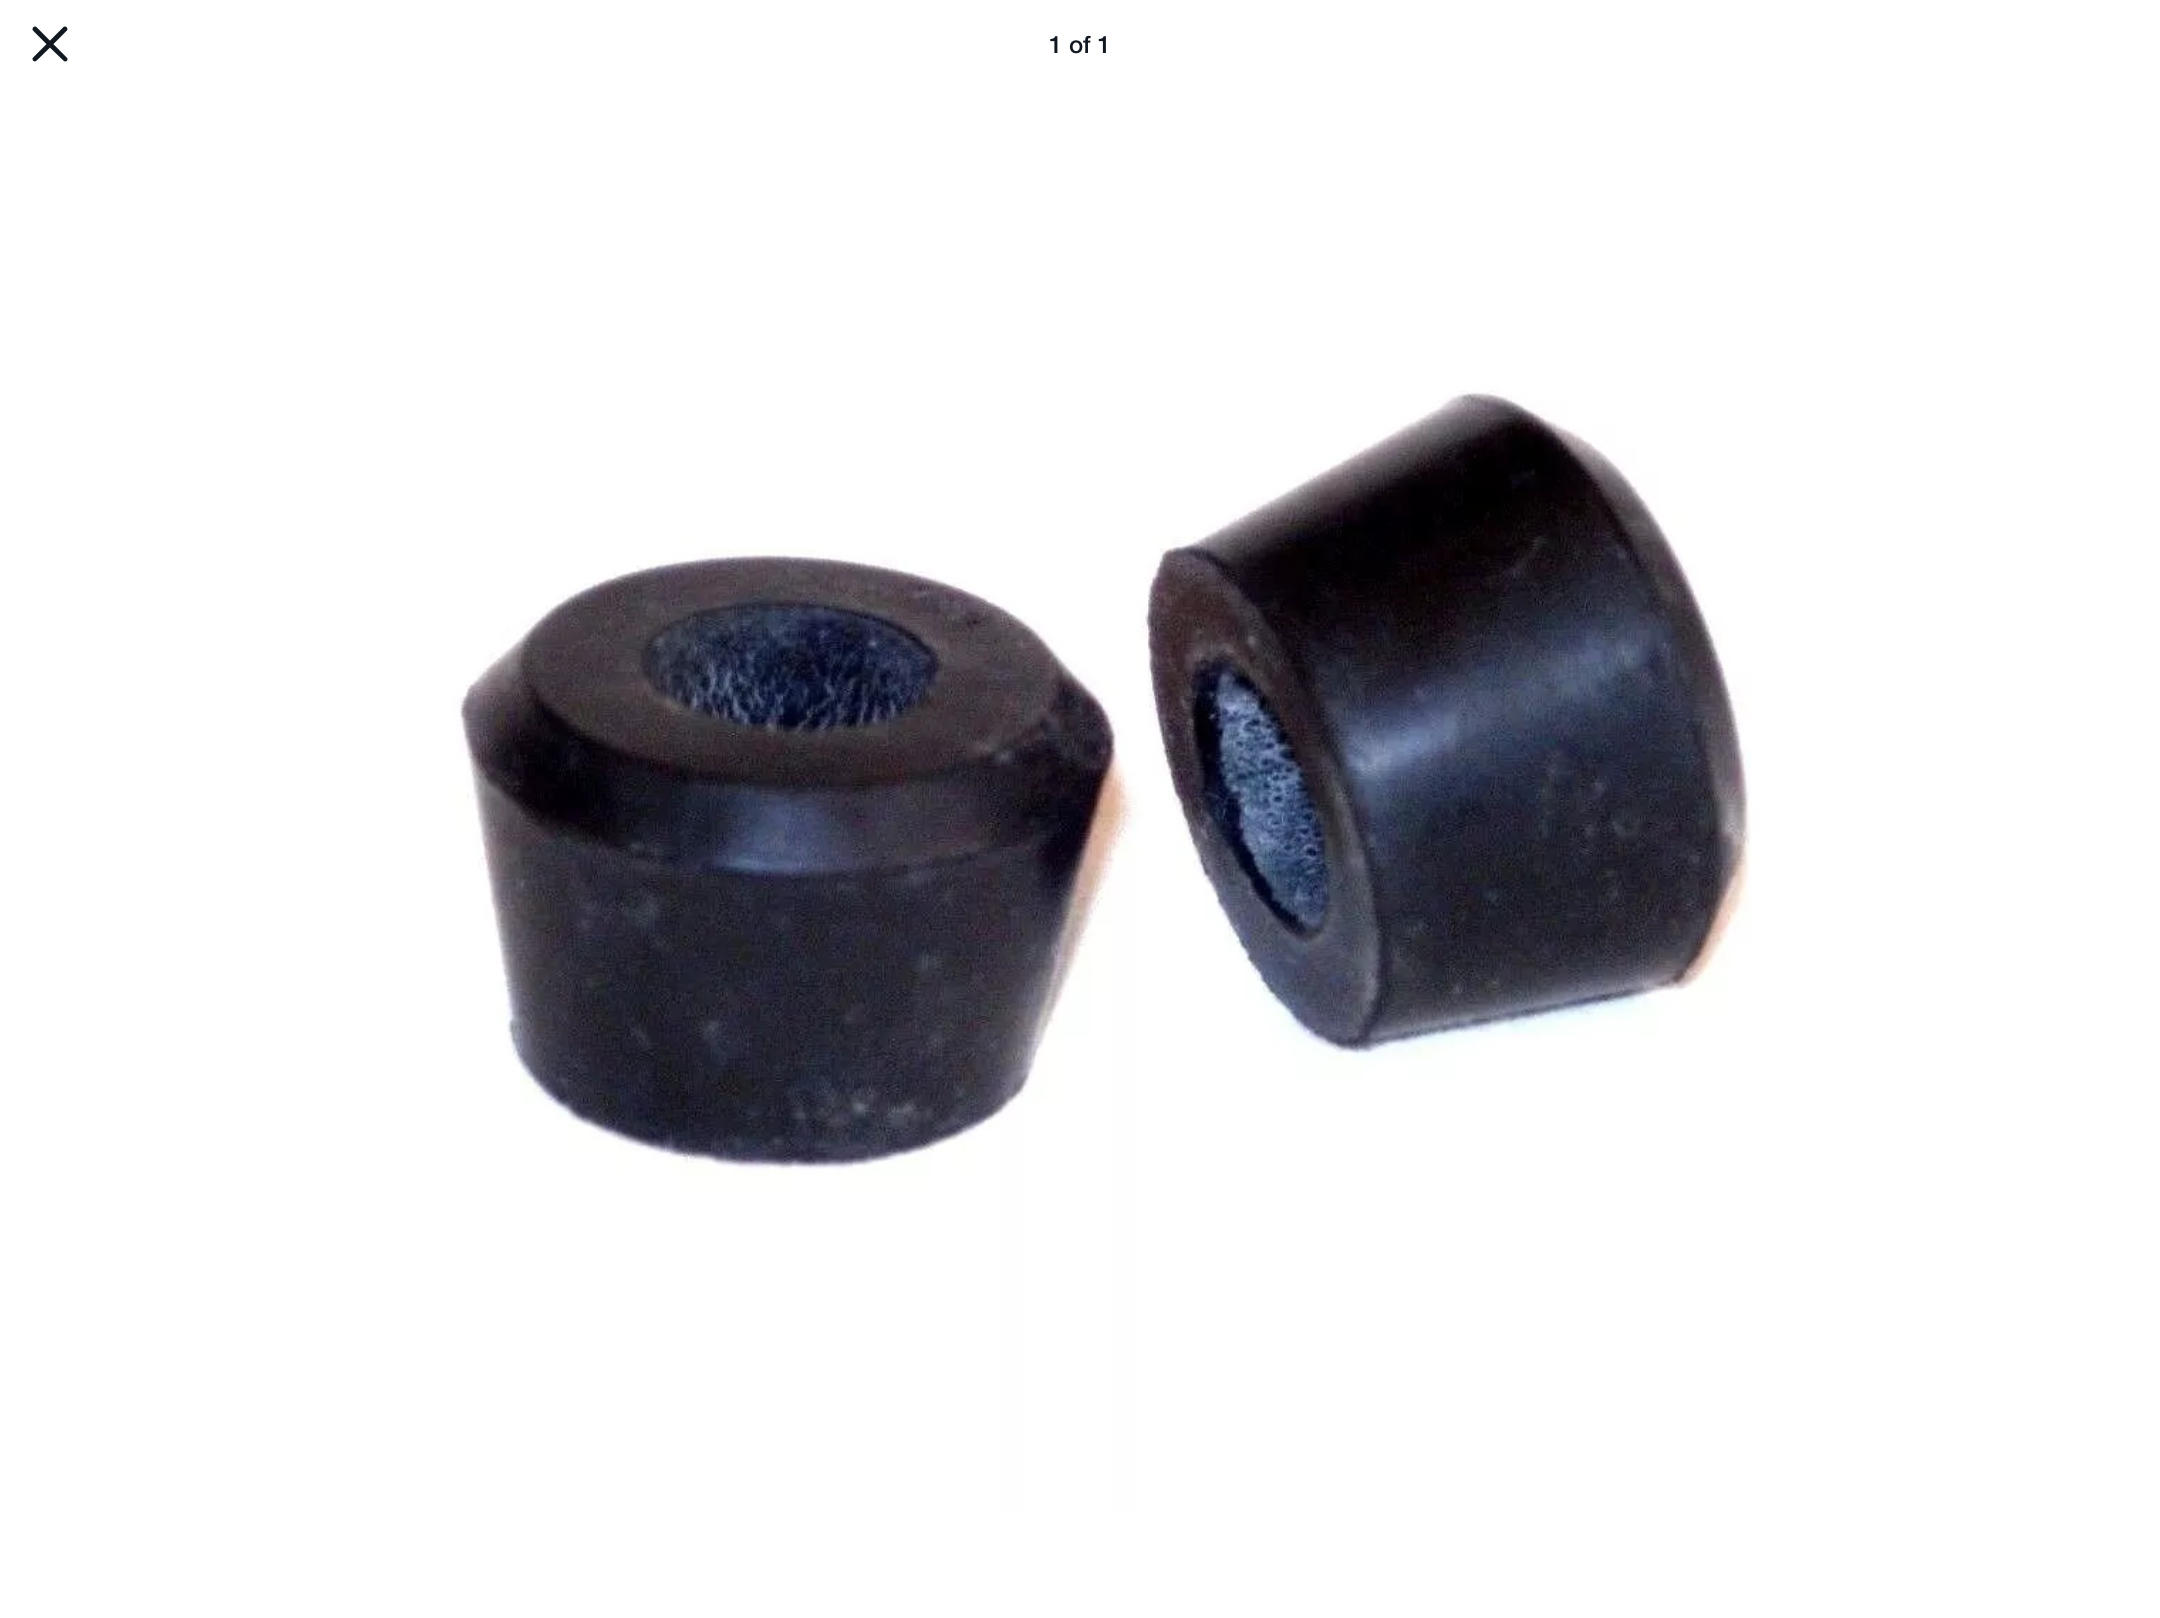
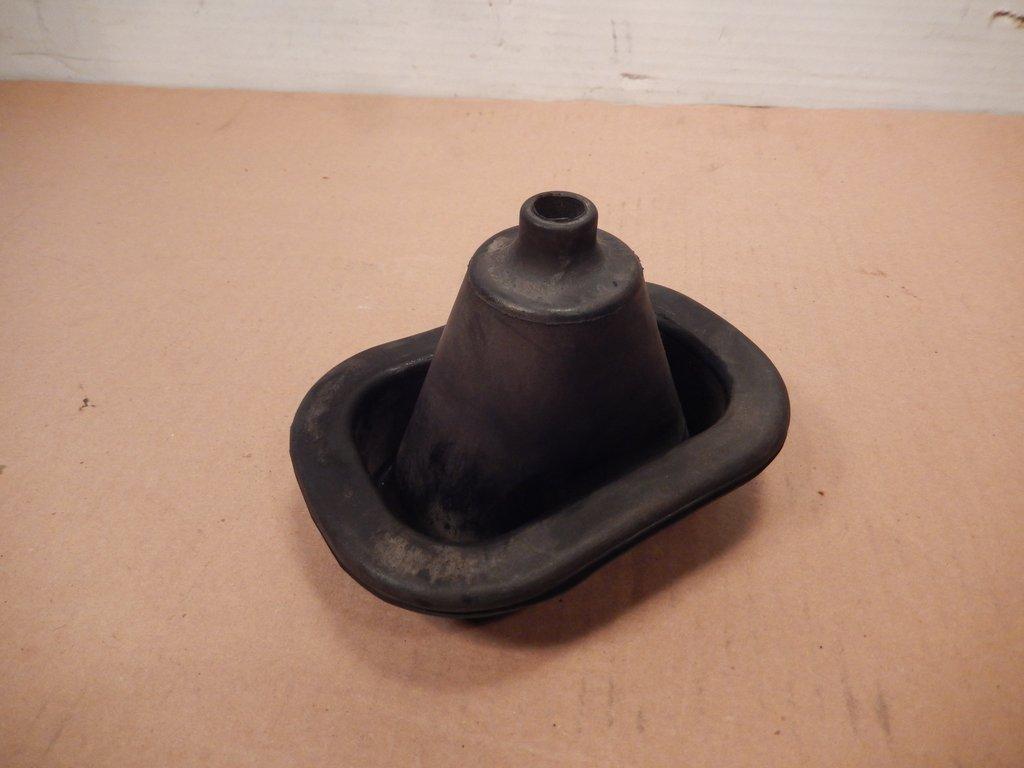
Here are the bushings you need for the “A” type transmission that you have. Search for Datsun 510, there more people supplying them for their “A” type trans that is the same (shifter mount at least) as the early Z trans. Found these on ebay. This is the shift boot you need, that fits the trans tunnel. It has a groove that fits on the trans tunnel cut out.


-
Same check valves. Fuel pressure on a z is controlled by an orifice in the return line of the fuel rail.
-
Looks Peachy! I mean really nice. And; peachie...
-
Welcome and my condolences as well. Interior looks like a 72, has the early bat handled hazard switch. But I’d like to know the story about how it acquired 260/280 tail lights. That bumper and the spacer between the body and bumper on the rear is an early 260 thing. 73’s didn’t have a rear spacer, just on the front. So the question might be, where does the 240 end and the 260 begin?
-
All the problems I have seen in stub axles has been related to worn/spun/bent/ovaled bearing seats. And a few bent axles naturally and I guess a few snapped ones. As long as I can torque it properly and have the axle turn smoothly with some resistance, A micro amount of end play is far from a problem you need to worry about. IMHO When I torque and then the axle spins but has tight spots as you spin it, just disassembling, cleaning seats AGAIN, and re-assembly usually results in a nice consistent rotation. Dem bearing have to seat “just so”
-
Just thinking about things to remember when doing this swap. I’m about to do the same on a 510. Don’t ask... Did you remove the pilot bushing from the crank? The auto doesn’t use it. I’m thinking you did, as I doubt you could get the trans on far enough to bolt it up, but there is a chance....
-
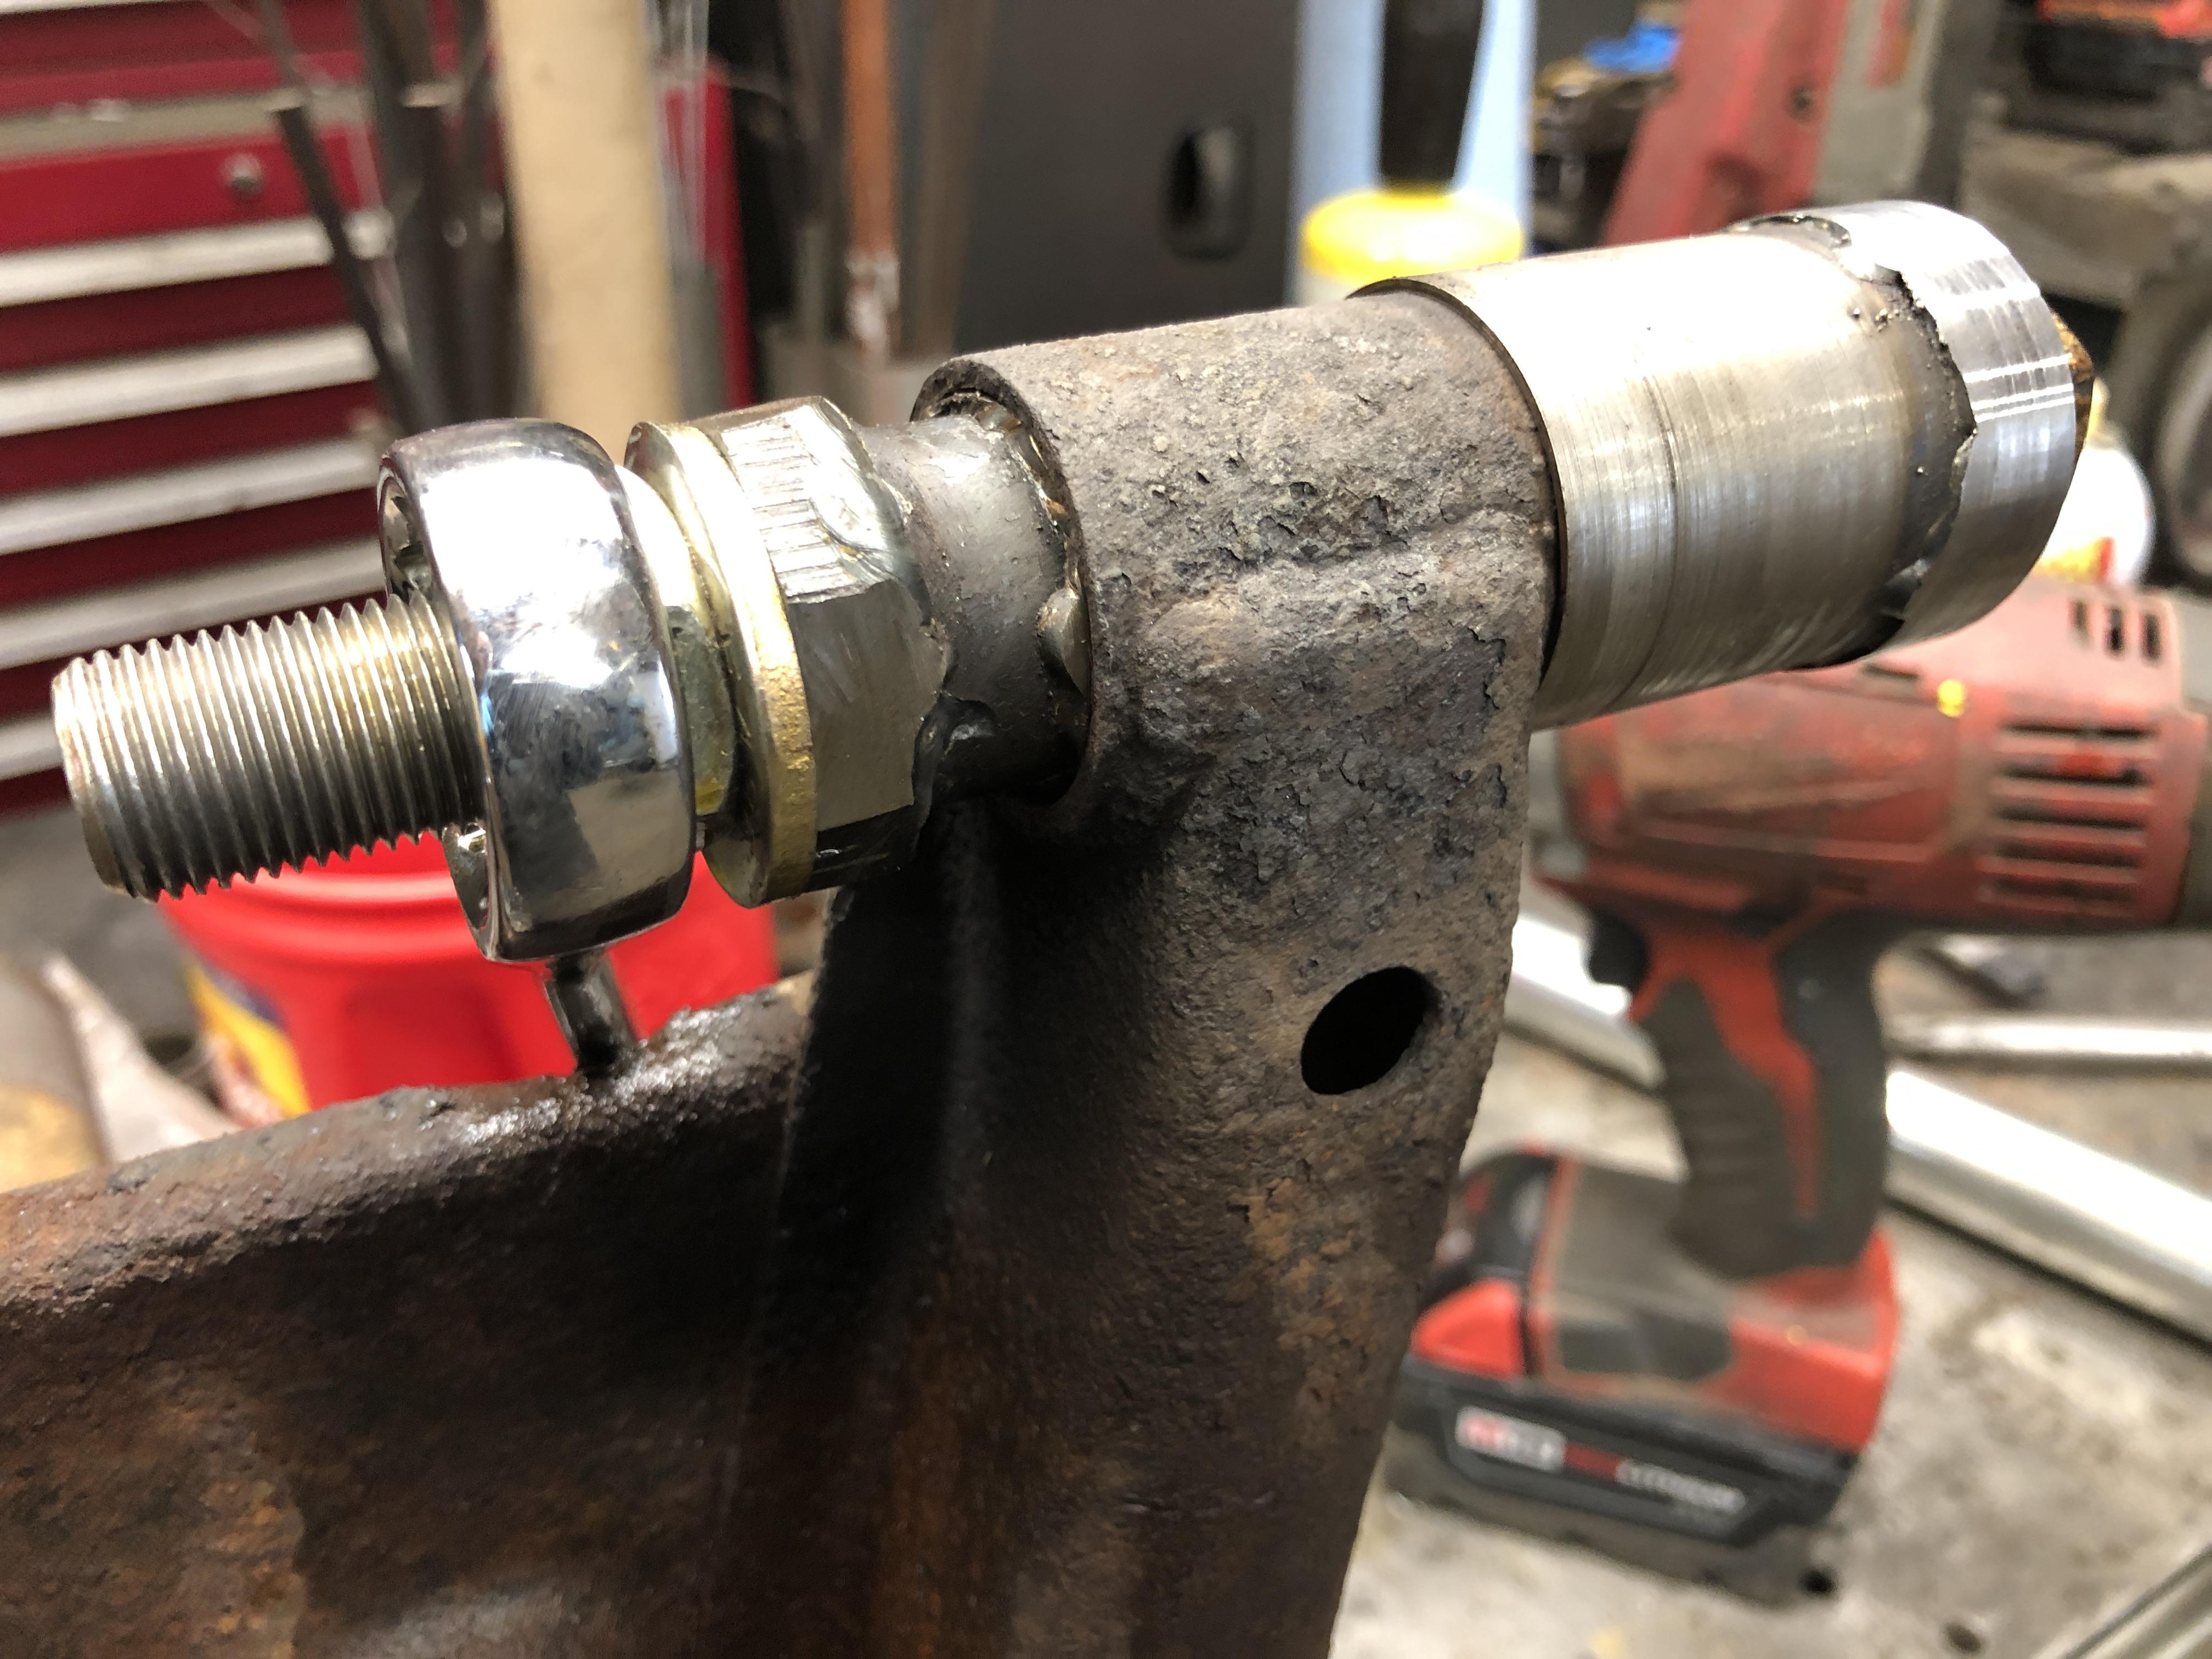
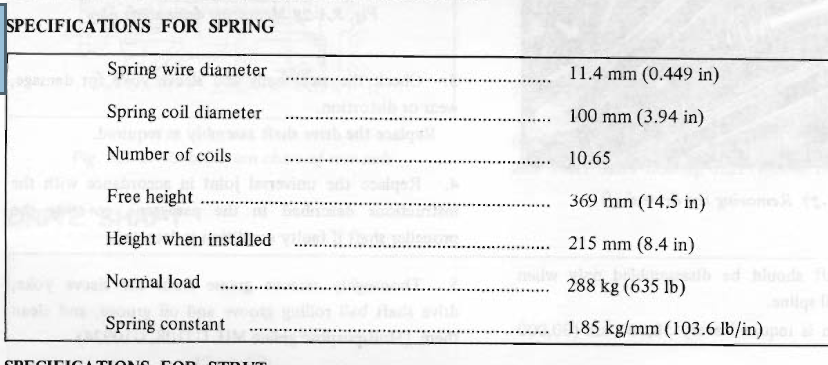
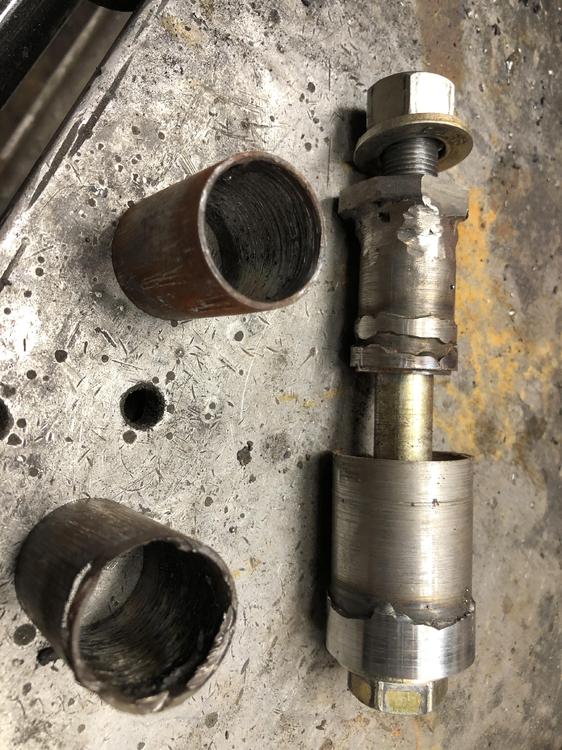
A combination pin puller and bushing press would be a great tool. Fantastic idea. Finding just the right socket is the trick.
-
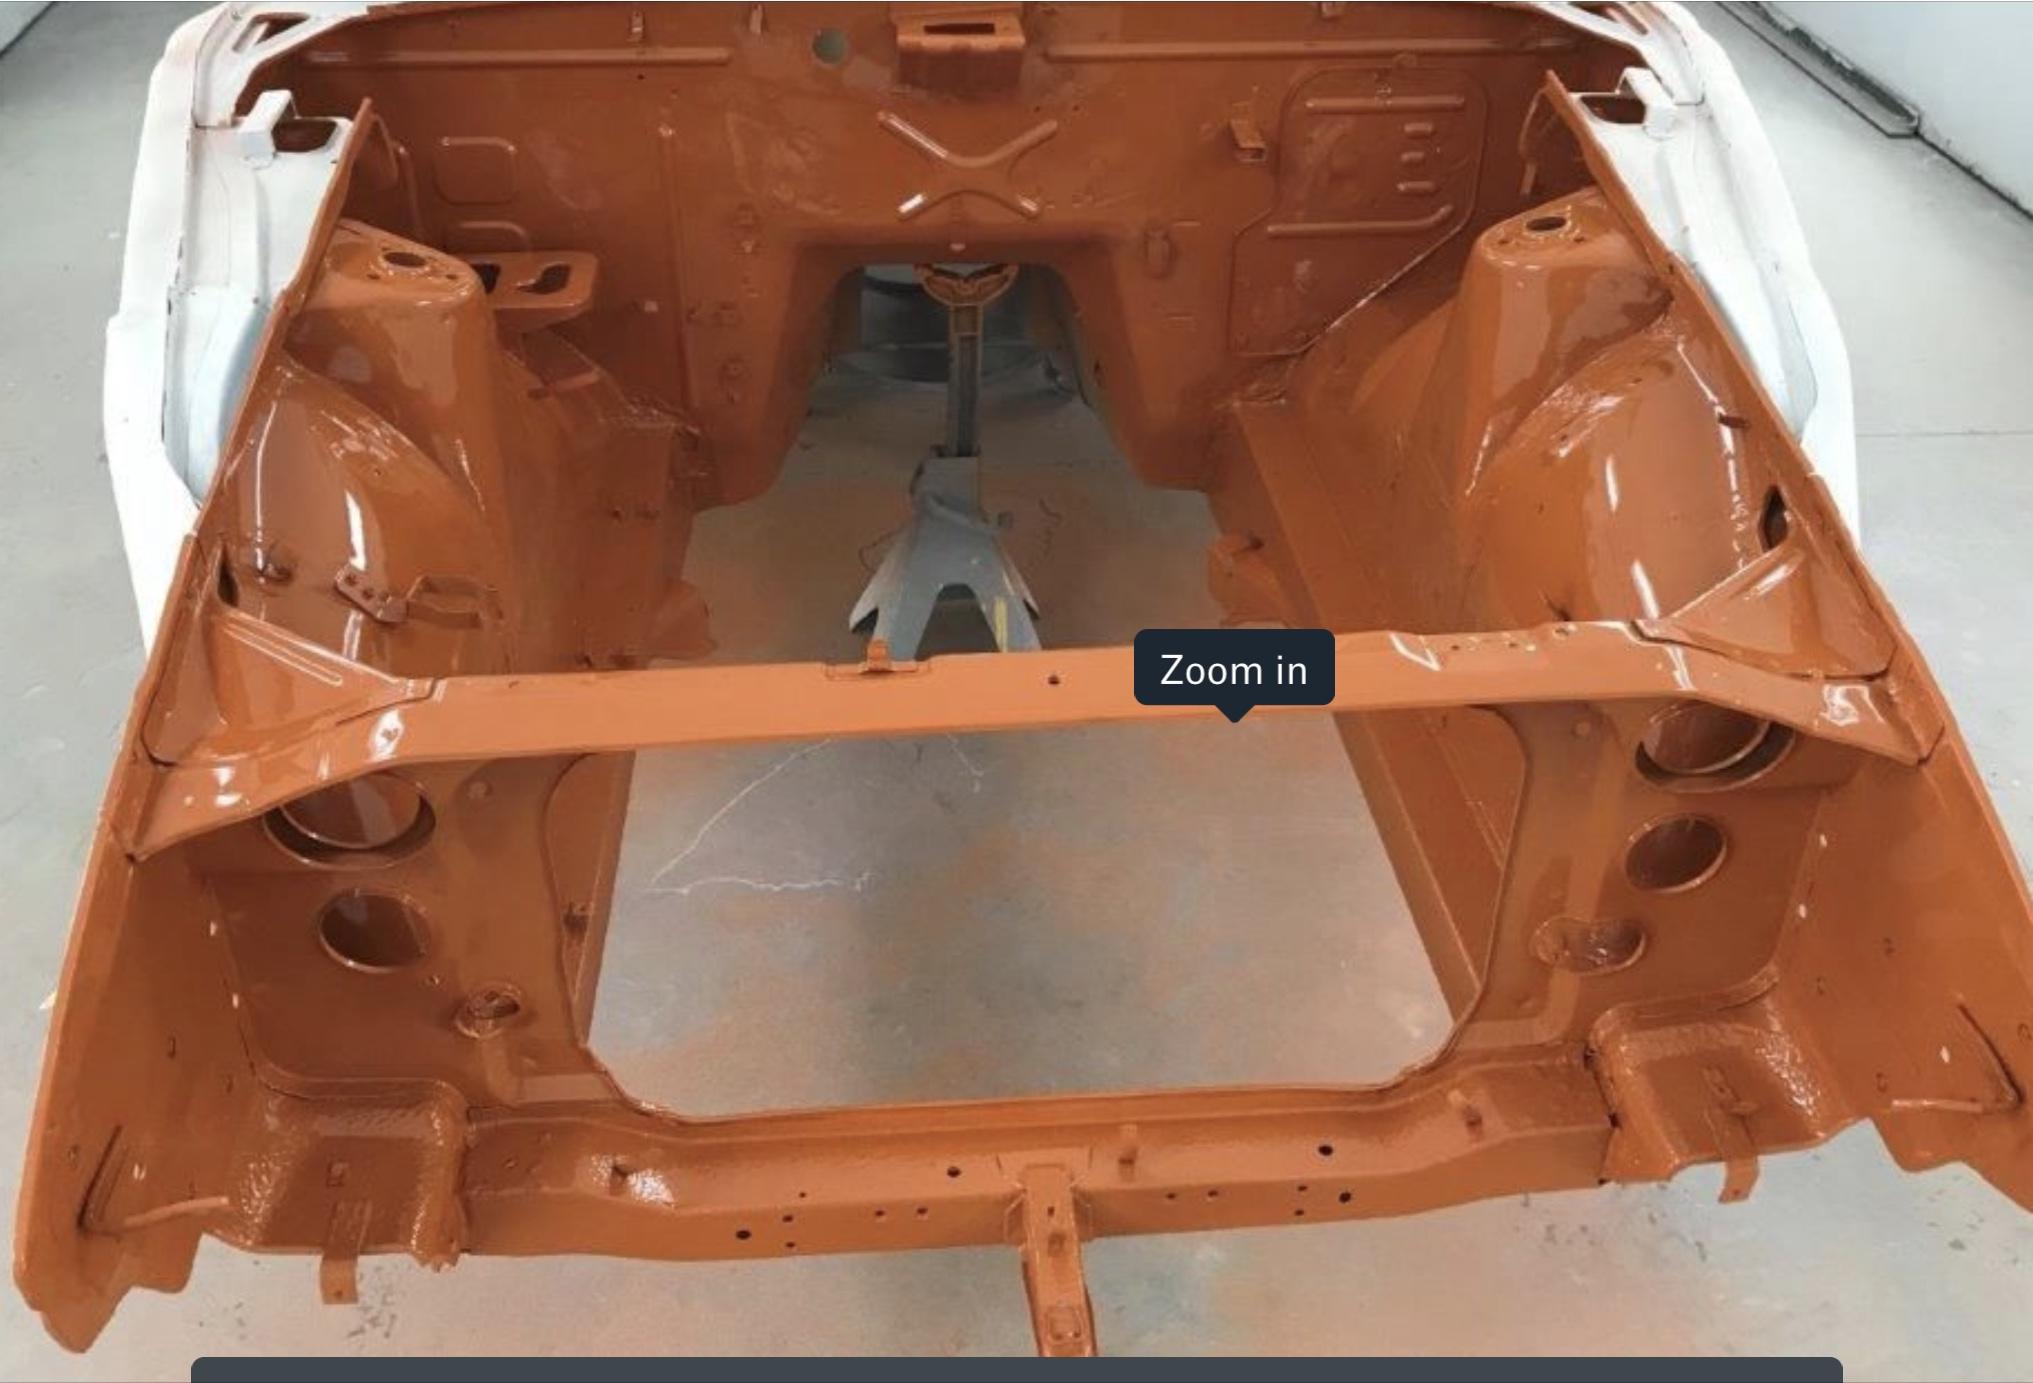
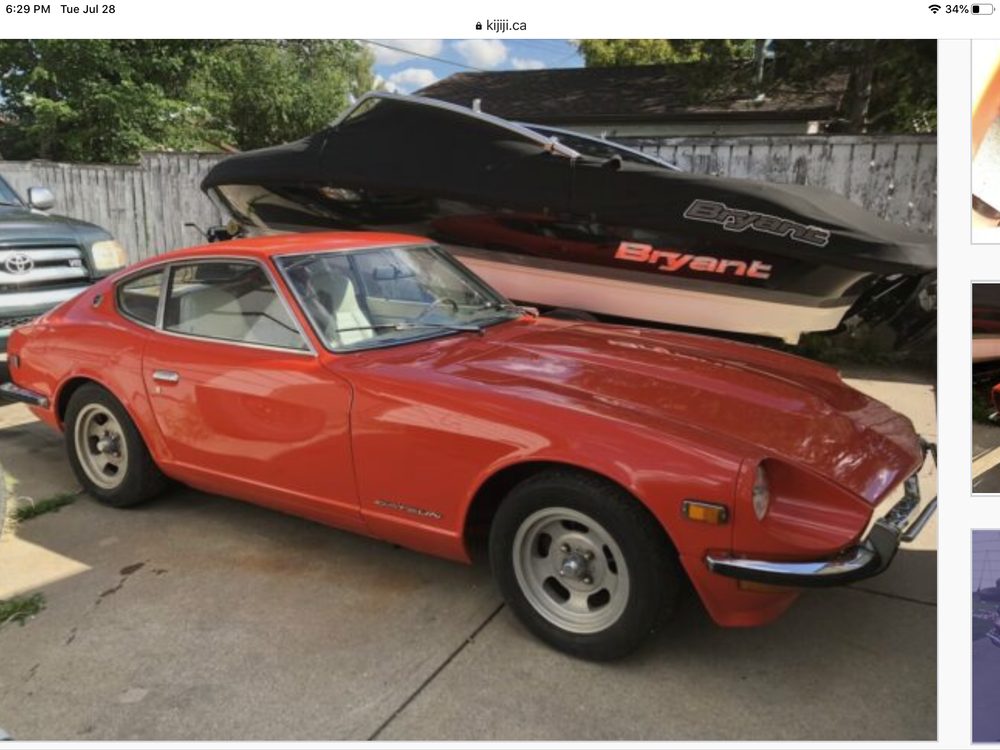
So I went to visit a new customer today to talk about a restoration. Nice little 70, VIN around 2600 or something. He is having the all too common “body Shop hell” problem, and he’s moving from one to the other right now. The old shop partly painted the fenders and the interior, the underside, engine bay. All 918 orange. I went to see it today with him at the new body shop and have the “talk” with the proprietor. You know the one. Anyway.. Heres my problem. I walked into a bay with the door open, bright sunny day, And there was ANOTHER 918 Orange paint job that did not look right to me. It looks distinctly PEACH hued, not really the vibrant orange I’ve come to expect at all. here is an engine bay picture that has the best example of what my mind/eyes see. Peachy, right? Bleaccchhhh! I only have one other real original paint 918 orange on a 1973 in town and that thing is ORANGE. Nothing peachy about it. There is also another one, a 72 for sale on-line locally, with 918. The pictures look exactly Like the 73 I know, and it is ORANGE. Here is a screen grab from kijiji.ca So this dang 70 makes the third such 918 orange car that I’ve seen In the last 10 years with a fresh paint job that is this lousy peachy color that I say is wrong. One of them was painted in the US, the other two here in Alberta Recently. Now this car had repair and paint 20+ years ago, and the owner swears its the same color now, as he had the car painted back then, and he’s ok with it, but I’m trying to get this right. So all you people with 918 orange, would you call it peachy in any way?? Ever see one with the peachy hue and said “that ain’t right” Opinions?

-

Weakness Revealed in the GMB and Spectra Mechanic Fuel pumps
zKars replied to zKars's topic in SU Carb Technical Articles
Not sure what is up with the pictures. I uploaded to the site, they were not on some other service or web site. @Mikecan you have a look and see what might be up? -
Well currently you are out of luck short of going electric. The hot tip at the moment, assuming your diaphragm was the failure, is to put the top half (6 bolts) of your old OEM pump on top of the new Spectra body. This gives you the likely still good OEM check valves and a new diaphragm. About the only other way people are getting by with is using new OEM pumps for 510’s and such, sometimes available on ebay, as donors for the diaphragm and check valves.
-
If the fuel pump you replaced in the last 30 days is a Spectra or GMB brand, then your issue lies there. And https://www.classiczcars.com/discover/content-posted/?&before=1593194073&latest=1590678350
-
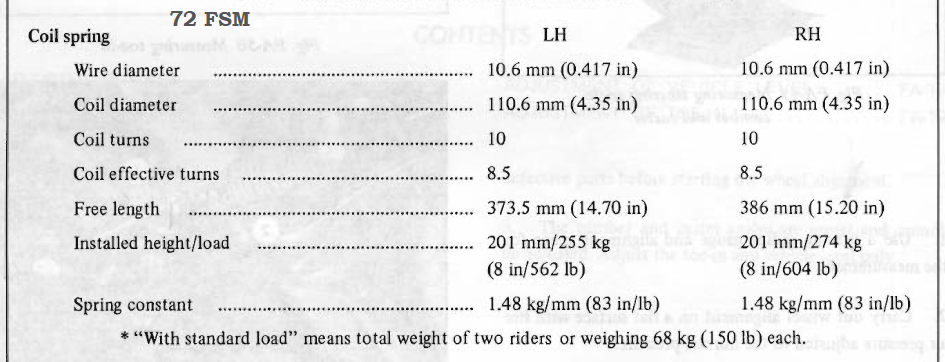
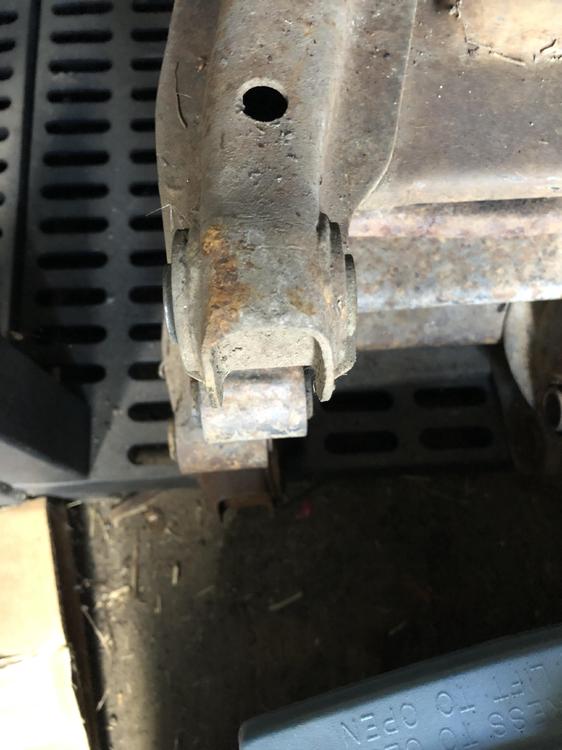
For comparison, here is the front and rear specs for a stock 72 from the 72 FSM My fronts are shorter, 13.75 vs 15.2 (RH), and 13.5 vs 14.7 (LH) and my wire diameter is larger, 0.44 vs 0.417 stock. No there is no sign of being cut. The rears are the same free length, but the wire diameter is slightly larger. 0.46 vs .449 Definitely not stock. They are definitely Nissan, so what are they? Front Rear
-
Saw post this morning on FB from OneSix Industries about a new product I’ll put the text here for those of you wise enough to be staying away from FB.... ‘Datsun A-Series CAS ready for testing. This uses a 24-1 trigger wheel and a high speed ZF Hall Sensor. This will also be available for FJ20 engines, a good alternative to the 35 year old OEM distributors. Finished product will have a hard black anodised cap. Inbox me if you would like to know more!“ Mostly wanted to point out the shift to Hall sensors.....
-
View Advert Spring Sale in July! Nissan 240z Springs. I have a used set of springs for sale. Now who wants old stock springs? Well, I've had these a while and vaguely remember that they were some version of the comp or Euro springs, which is why I kept them. If they are "better than stock", then wonderful, please make me an offer. I'm happy to ship anywhere as long as your paying postage. Front (driver, longer) Overall length, 13.75 inch Diameter 4.375, coil wire OD 0.44 Coil spacing in middle of length, 1.56 Front (shorter) Overall length, 13.5 Diameter 4.375, coil wire OD 0.44 Coil spacing , 1.56 Rear (both) Overall length, 14.75 Diameter 4.45, coil wire OD 0.46 Coil spacing, 1.50 Lengths are absolute longest, from tip to tip of the ends of the coil, measured between squares stood up to touch just the tips at each end. Each has a Nissan part sticker, though all are damaged, and largely un-readable so part numbers are lost. Wouldn't that have been nice.... One sticker on the shorter front spring, has a part number that ends in 06. wonderful...... I found a thread here about Euro springs, and there is one that ends in 06, the LF apparently. Carl lists some PN's and rates. 54010-E4107 240Z Spring/RF (101 lbs/in) 54010-E4106 240Z Spring/LF (101 lbs/in) 55020-E4201 240Z Spring/R (112 lbs/in) I took a picture of each tag, to prove they all have one at least.... There is one front spring with a touch of blue paint more or less where I expect the factory paint marker to be. Not much of a clue. Advertiser zKars Date 07/25/2020 Price $100.00 Category Parts for Sale
-

THIS ADVERT HAS EXPIRED!
- FOR SALE
- USED
I have a used set of springs for sale. Now who wants old stock springs? Well, I've had these a while and vaguely remember that they were some version of the comp or Euro springs, which is why I kept them. If they are "better than stock", then wonderful, please make me an offer. I'm happy to ship anywhere as long as your paying postage. Front (driver, longer) Overall length, 13.75 inch Diameter 4.375, coil wire OD 0.44 Coil spacing in middle of length, 1.56 Front (shorter) Overall length, 13.5 Diameter 4.375, coil wire OD 0.44 Coil spacing , 1.56 Rear (both) Overall length, 14.75 Diameter 4.45, coil wire OD 0.46 Coil spacing, 1.50 Lengths are absolute longest, from tip to tip of the ends of the coil, measured between squares stood up to touch just the tips at each end. Each has a Nissan part sticker, though all are damaged, and largely un-readable so part numbers are lost. Wouldn't that have been nice.... One sticker on the shorter front spring, has a part number that ends in 06. wonderful...... I found a thread here about Euro springs, and there is one that ends in 06, the LF apparently. Carl lists some PN's and rates. 54010-E4107 240Z Spring/RF (101 lbs/in) 54010-E4106 240Z Spring/LF (101 lbs/in) 55020-E4201 240Z Spring/R (112 lbs/in) I took a picture of each tag, to prove they all have one at least.... There is one front spring with a touch of blue paint more or less where I expect the factory paint marker to be. Not much of a clue.$100
-
And the lord said “let there be a HALL EFFECT” and man thence invented the Hall Effect sensor and there was peace, happiness and simple little velocity independent, constant voltage square waves across all the lands.... I saw it and it was good. My apologies to the original author.....
-
Unidentified Mystery Parts! Anyone recognize them?!
zKars replied to Jughead's topic in Body & Paint
Brake pad shims -
Perfect. This one is 24 in the middle. That should settle it. Thanks!
-
About the only issue I have with what has been discussed and suggested, is that the magic 92mm measurement must be made with the pressure plate bolted down to the flywheel with the disk in place. Those finger tips move downward a lot when you bolt the pressure plate down. Now that said, I've been able to make a very short collar work just fine with a clutch fork that has the hole and adjustable length push rod. Just had to make the push rod longer and adjust it out. No monkeying with the ball stud length. So the 92 mm rule applies best for the fixed length rods and forks with no holes, but there is fair bit of error either way that would still work. Pedal clutch rod length works into this too. And is your slave rod the "right" length?
-
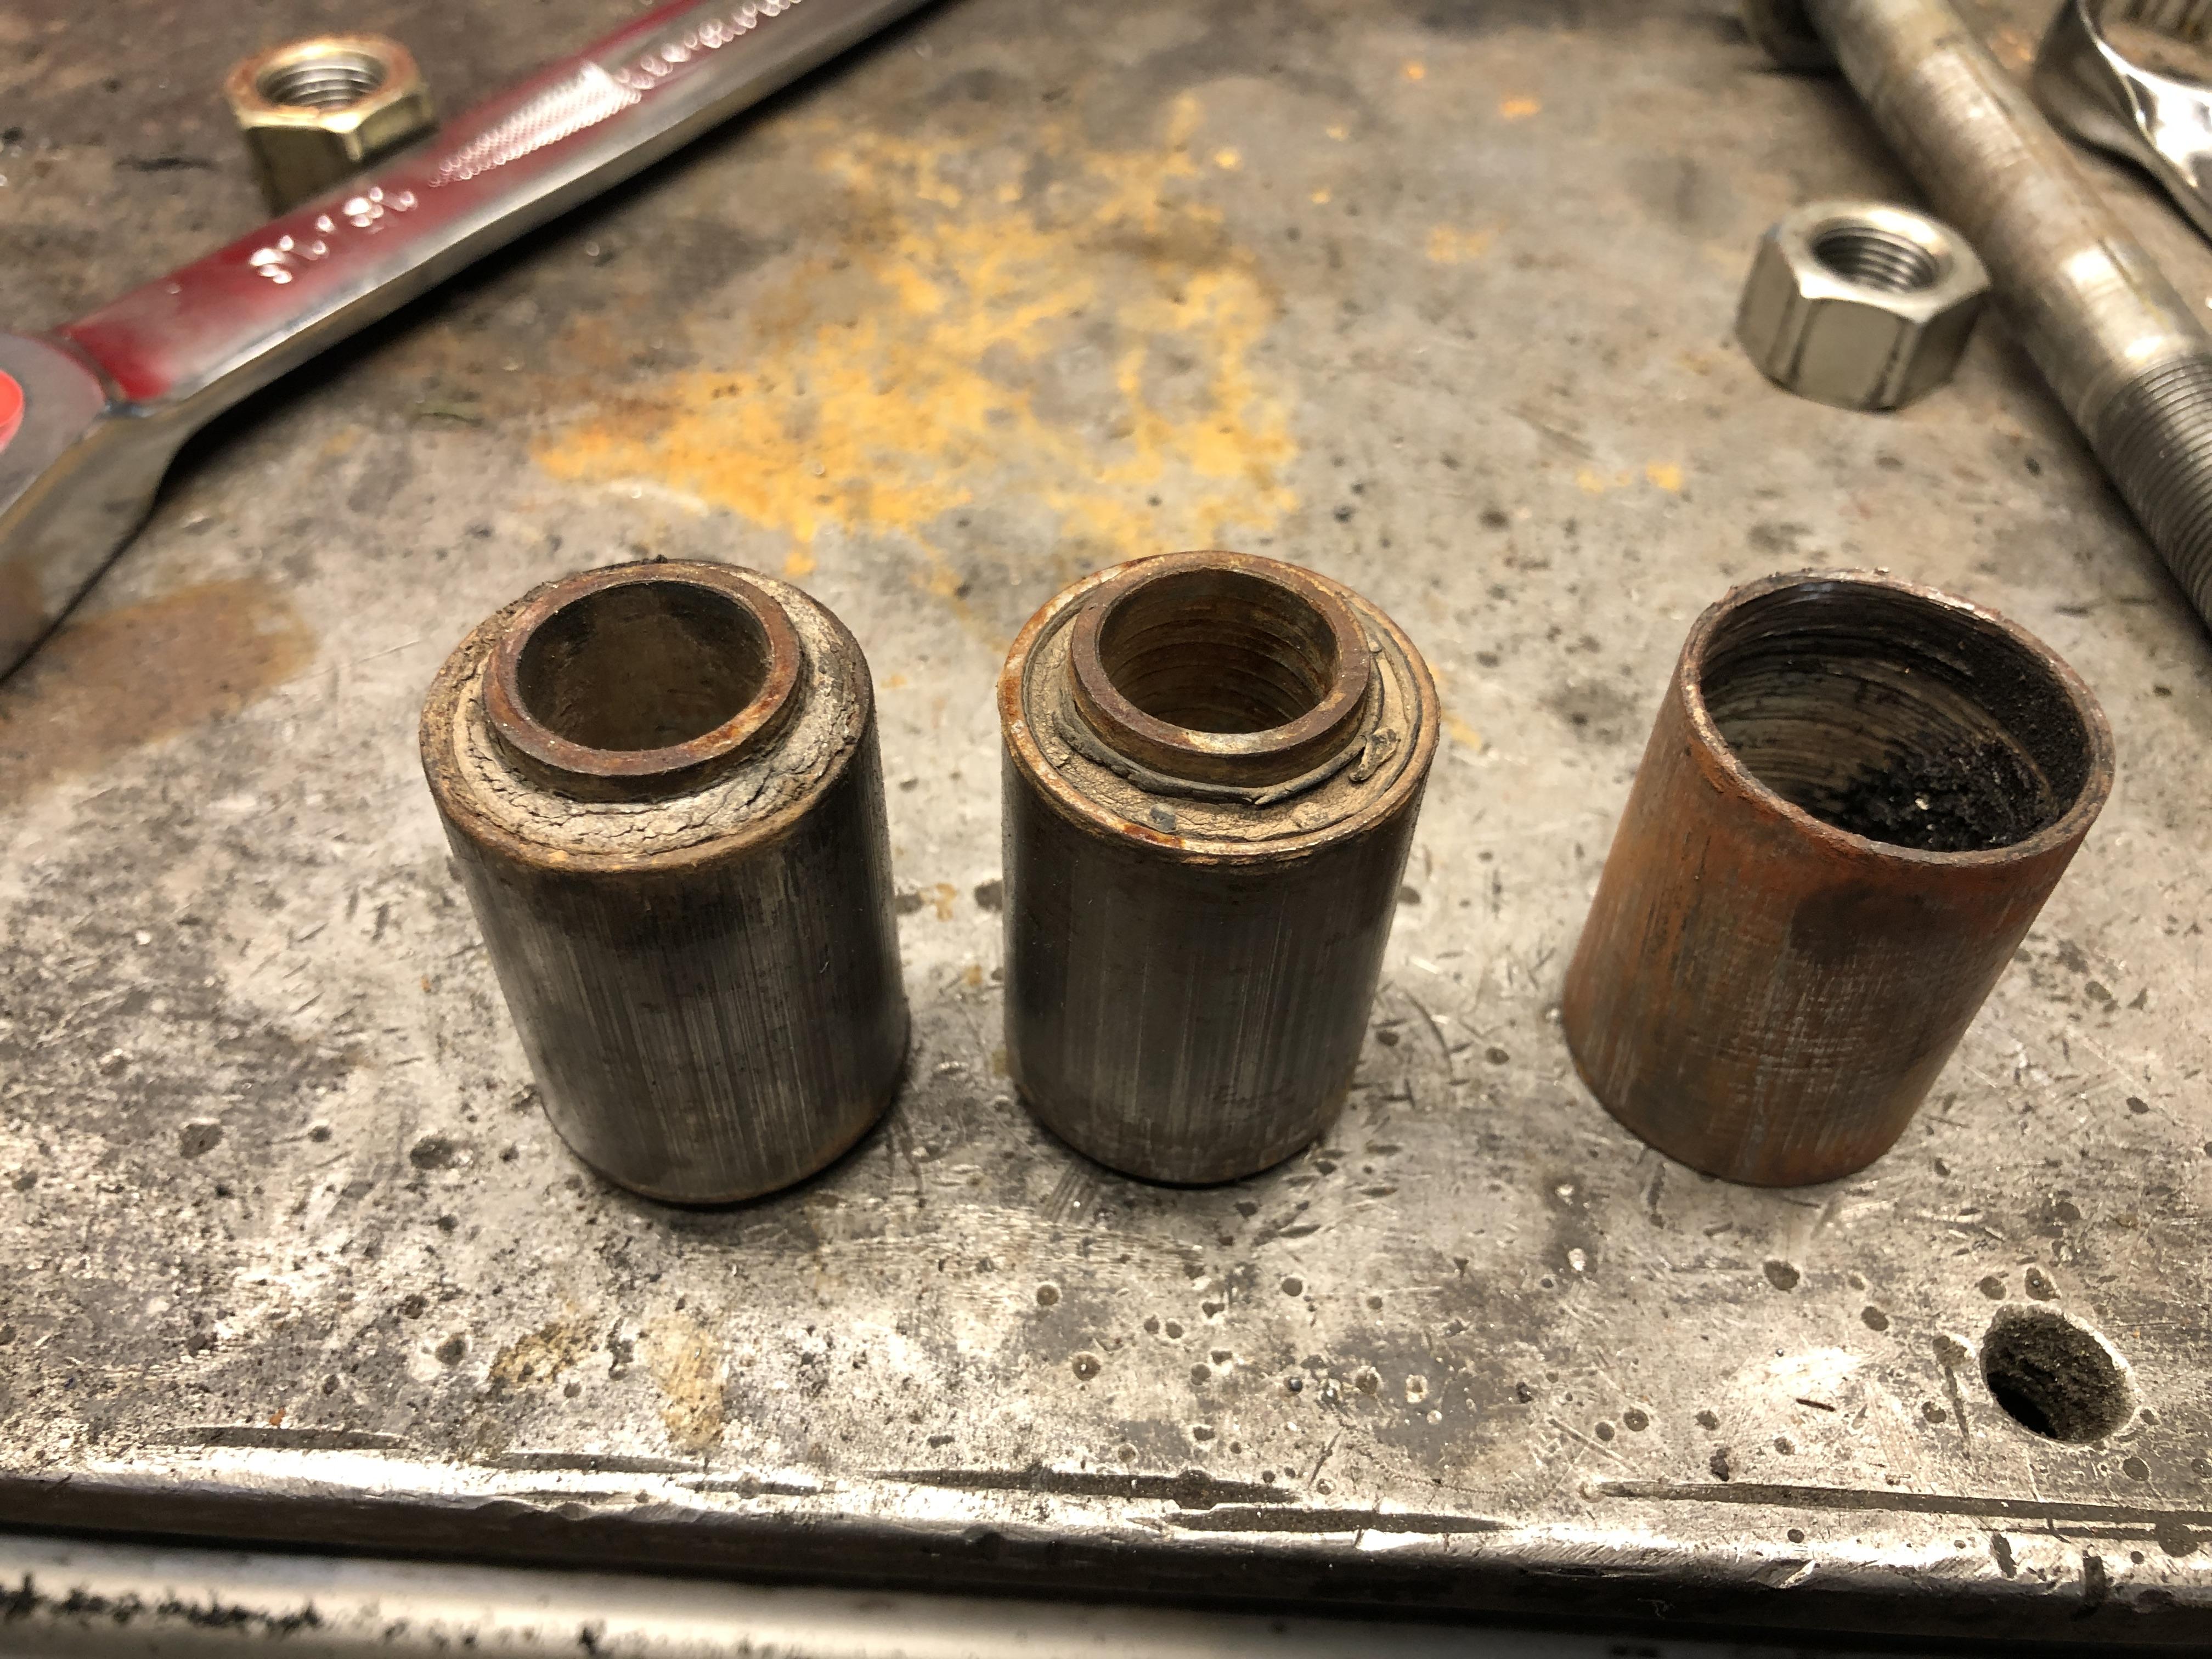
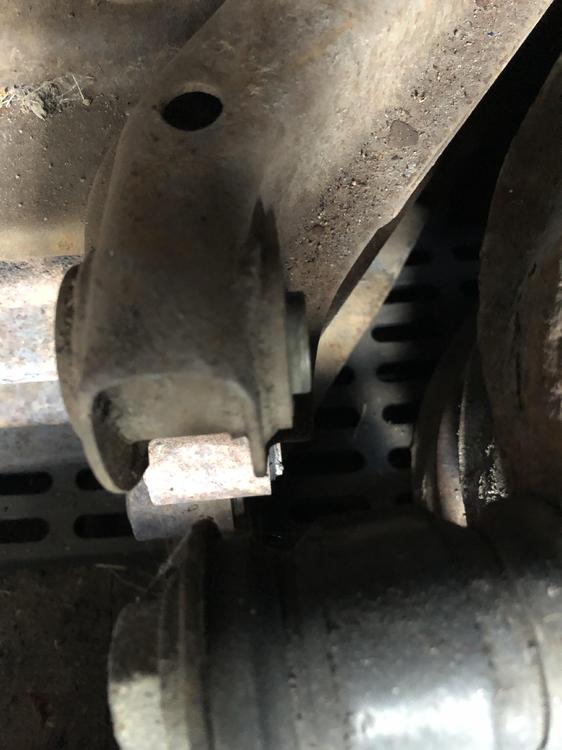
A long time ago on another planet, I got “smart” and decided to weld a short 1” x 0.25 metal bar into the shell, then beat the shell out by bashing on the welded-in bar. It worked pretty well, took a good size hammer to knock them out. The welding heat helped too. It was tickatee boo until I discovered I had bent the ends of the control arms with my “gentle” persuasion.... Now I use a more civilized approach.... I can even press them out whole. When was the last time you saw a stock bushing in one piece fresh out of a control arm with no damage? Same tool presses them back in, using only the smaller die and a couple of washers on the other side. They go in MUCH easier than they come out.

-
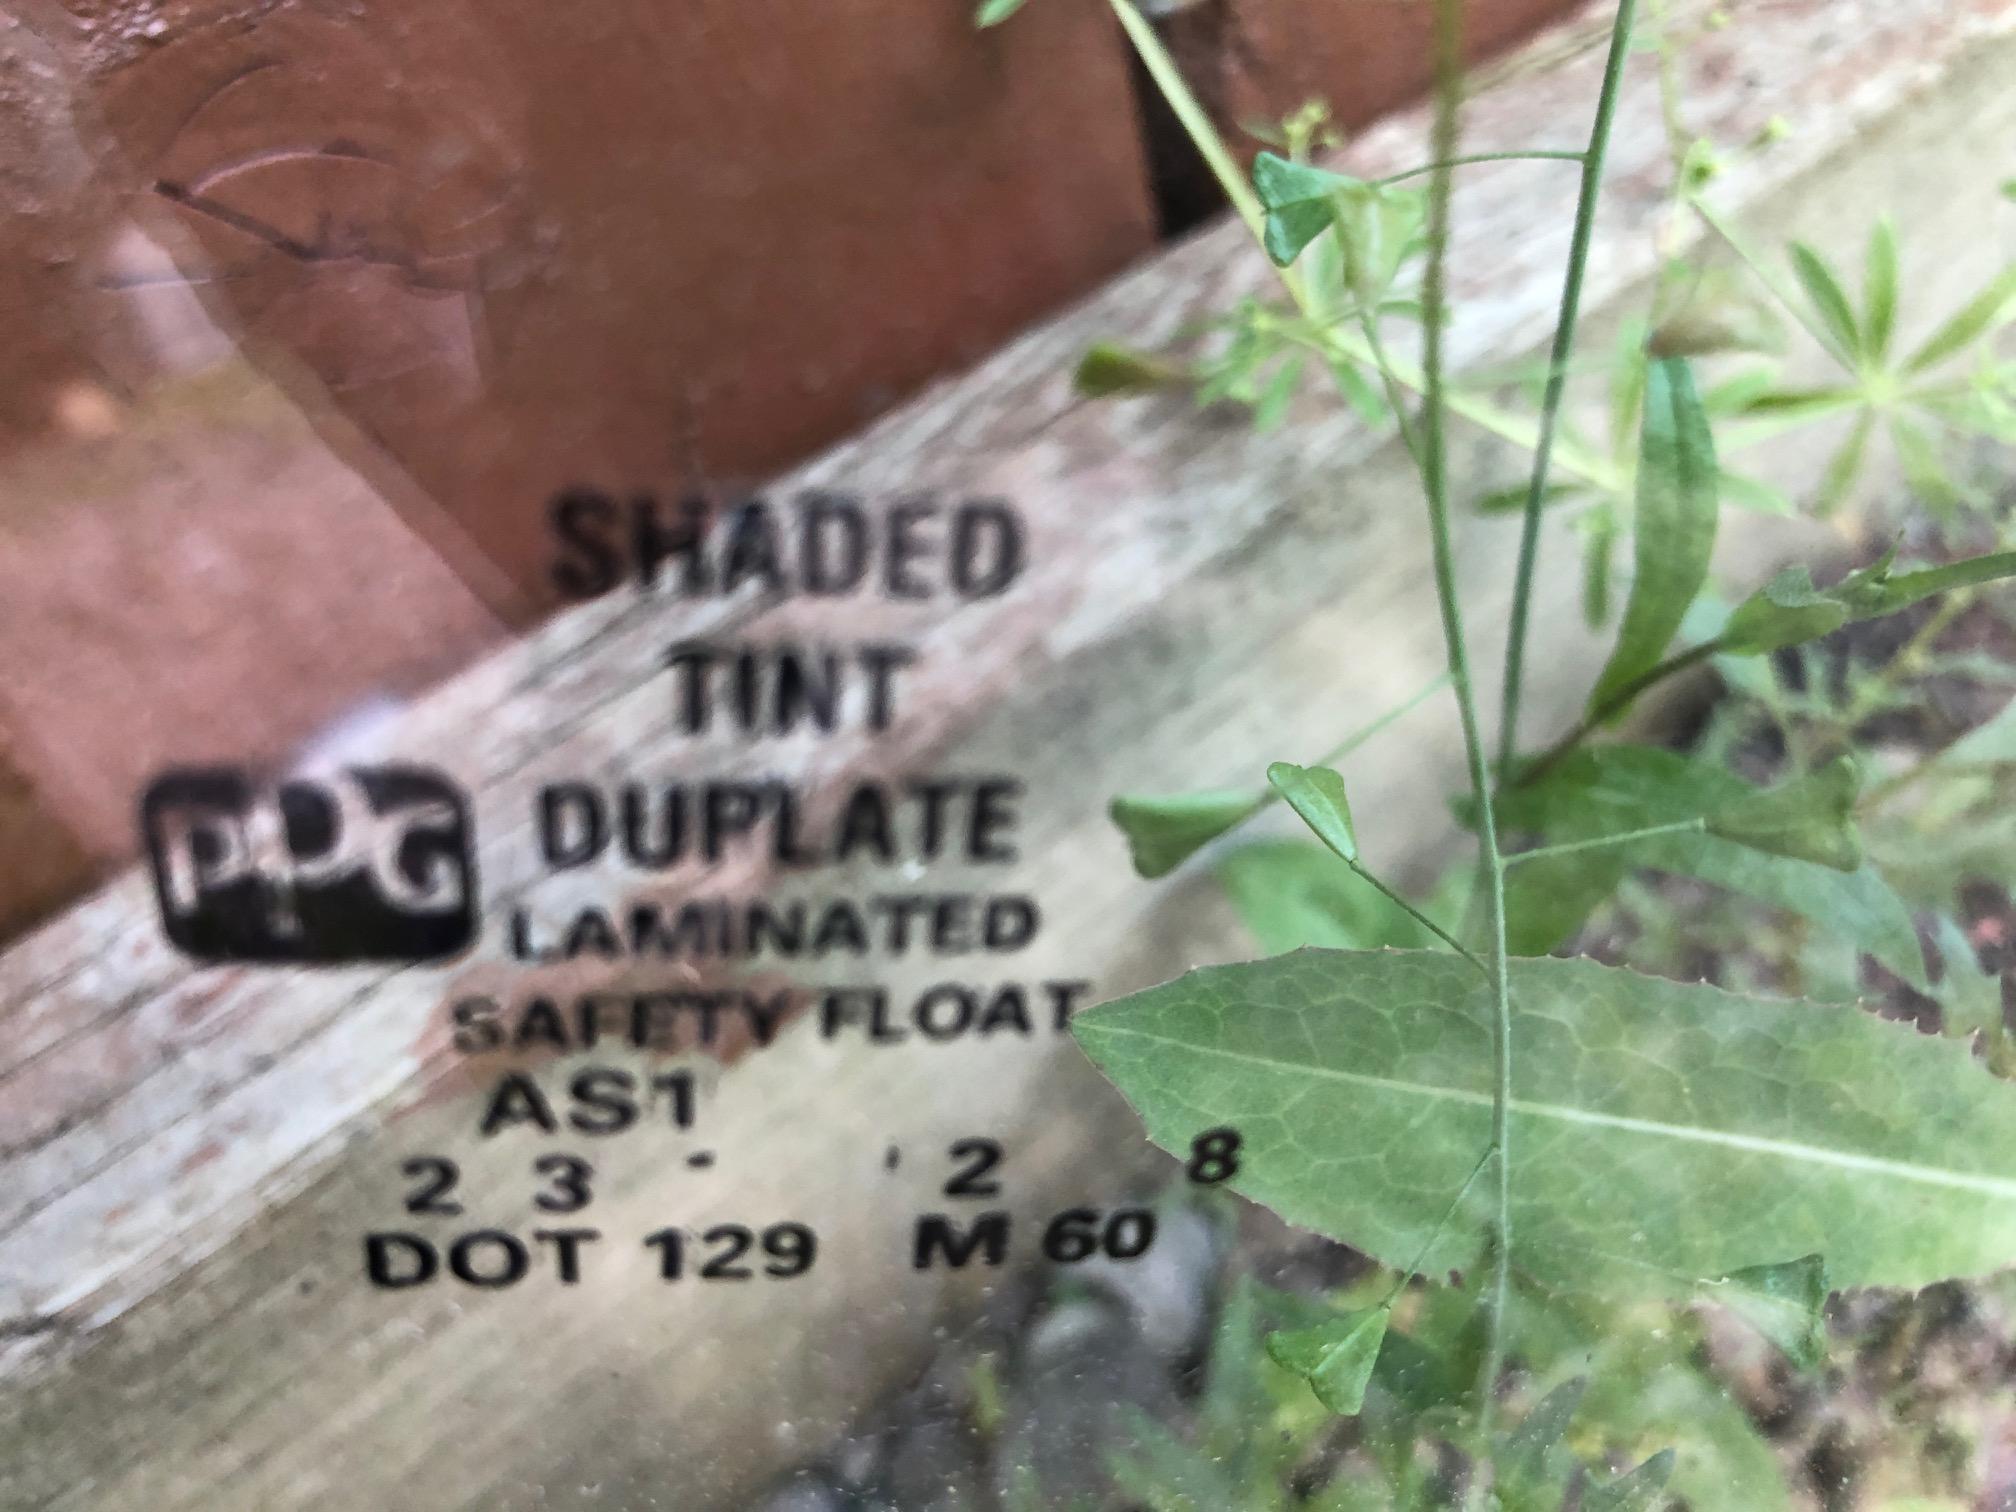
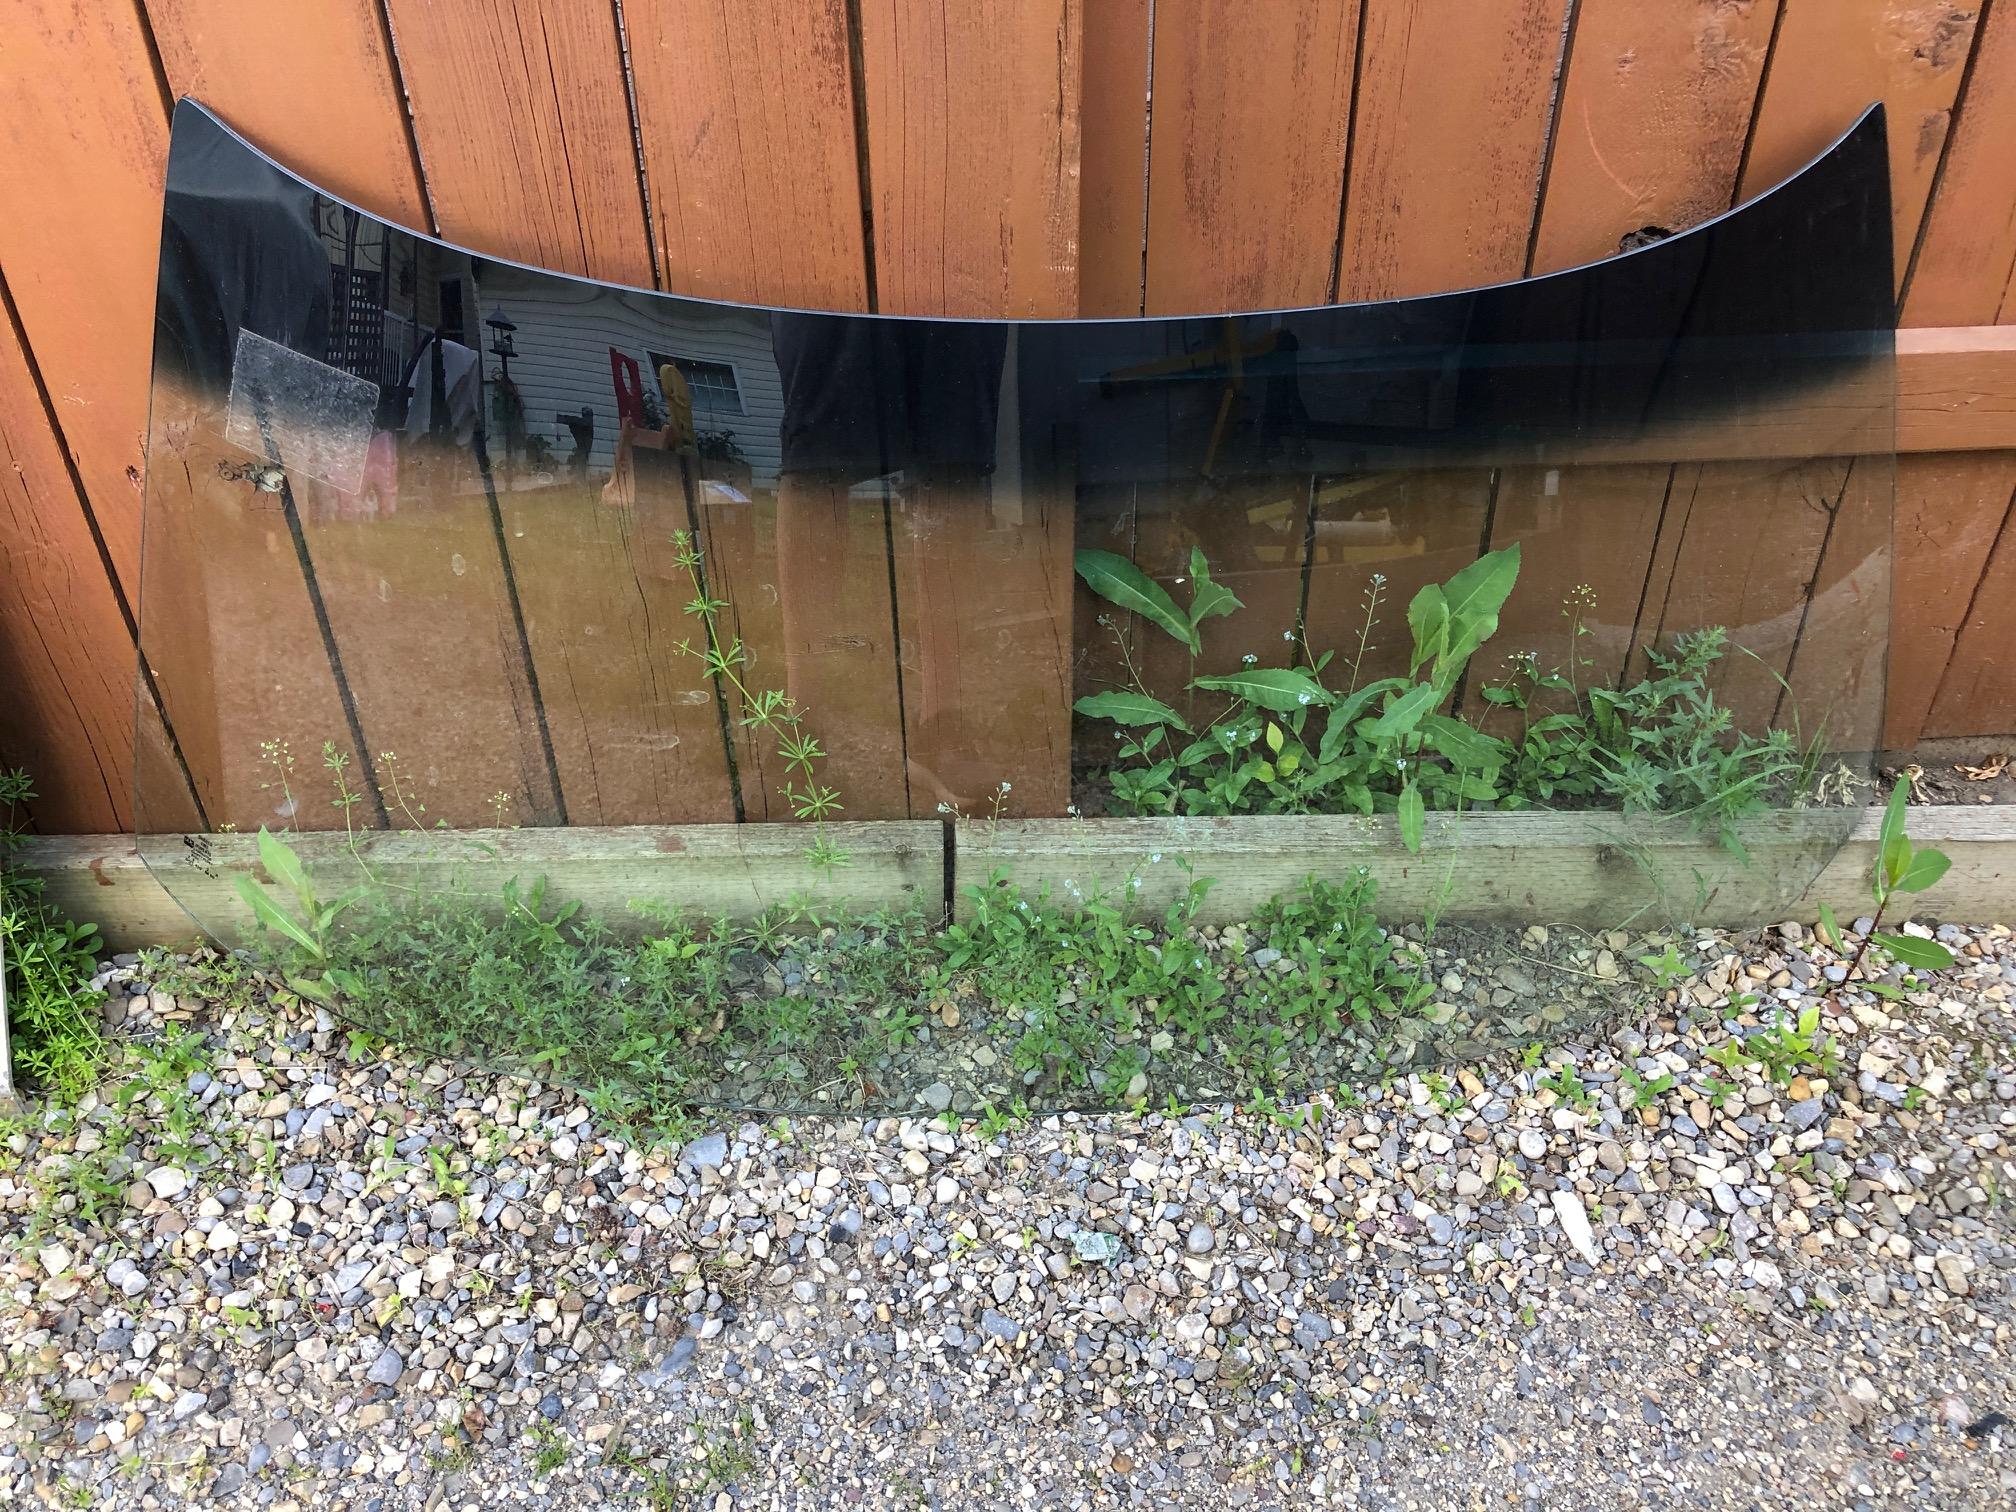
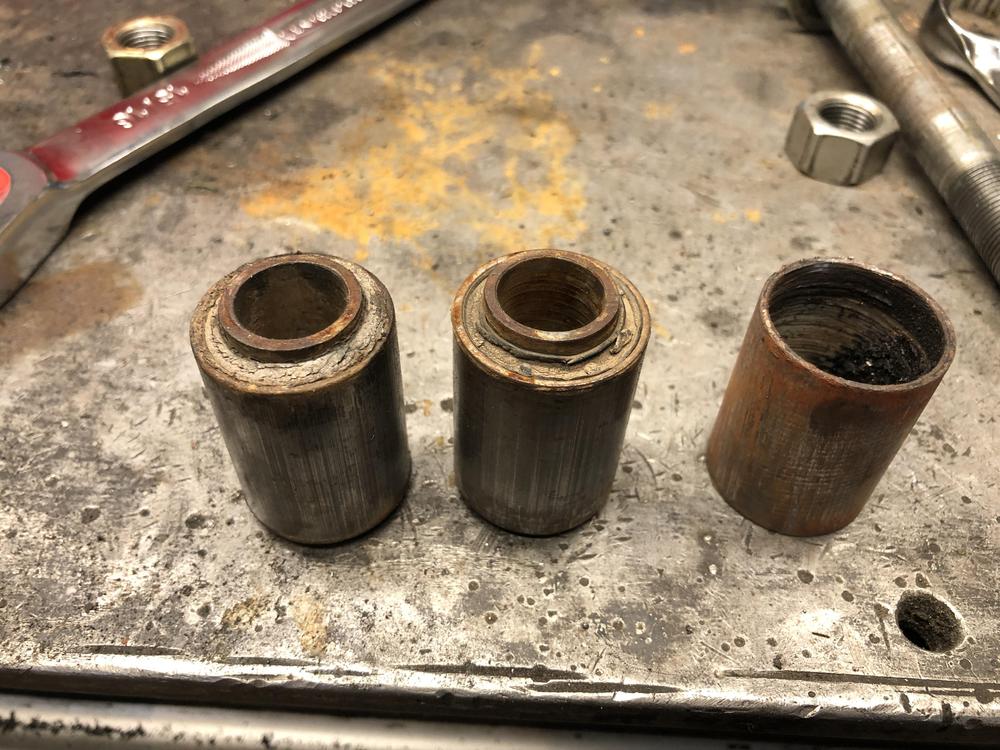
Hoping one of you kind folks has a 280zx, any year (79-83), within reach that can measure a 280 ZX windshield for me. I "Acquired" a new windshield that we thought was S30, but clearly (hahaha) it is not, as the gasket was too short. The shape is right, just not the dimensions. Mostly it's too tall. Thinking it's for ZX then. The labeling in the corner I think is missing some info. The second last line seems to have some dots that may be the remnant of the actual part numbers. See it below. I don't see the usual part numbers I'm expecting. If any of you can measure the length along the top, bottom and sides, I can compare to what I have and see if its close. Thanks Yes, its functioning quite well as a green house...


-
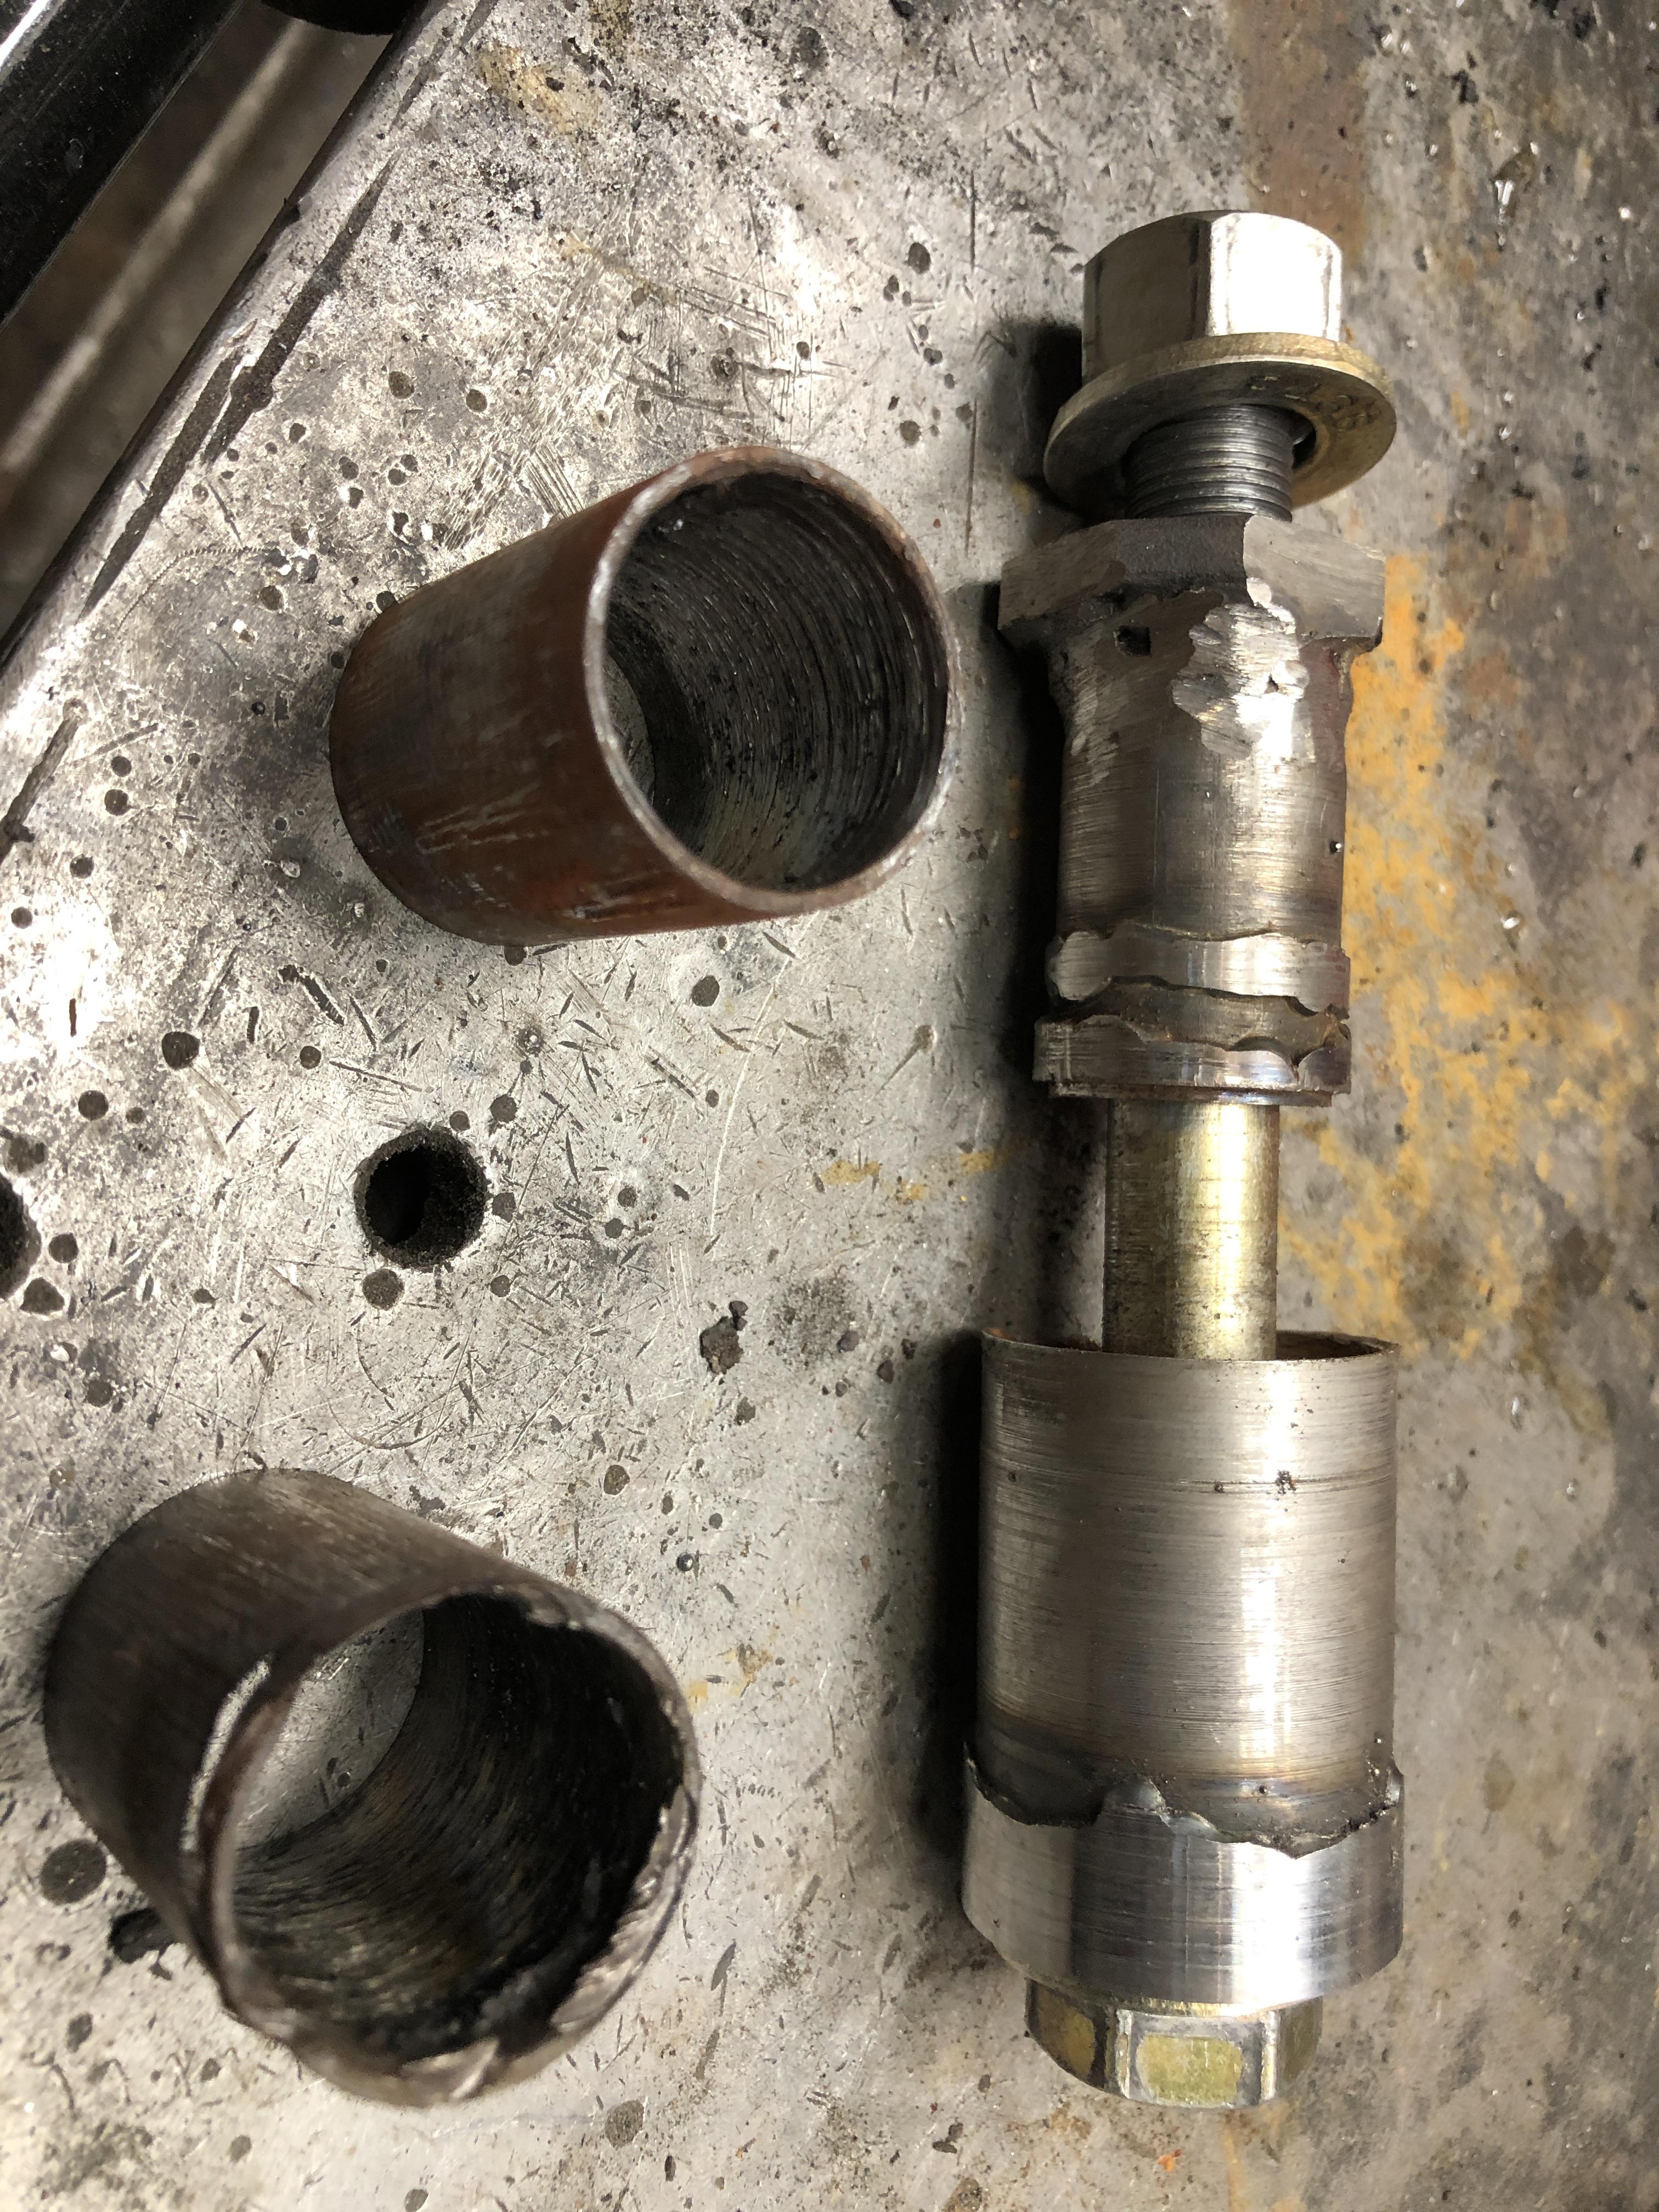
I’m not so concerned about the slightly sloppy fit of a 5/8 bolt as remember the strut and bushing core tubes are torqued together by the bolt/pin and locked solid to one-another. The bushing rubber provides ALL the rotation at this joint. That’s why you torque this together with the car on the ground and driver weight in the seat. You want the rubber at its neutral position most of the time in use. The locking cross pin provides a way to prevent the spindle pin from rotating while torquing (you can do either end independantly without using the other end as a backup) and is a fail safe in case all the nuts fall off. I also just inspected a half dozen old crusty control arms that still have the bushings installed to see where the center bushing tubes have come to roost left/right offset wise after years of use, to see if the initial offset made any difference other than assembly with the strut housing ease. What I found was a bit surprising. The front bushing clearly shows the center tube still offset toward the outside of the control arm, but the rear bushing tubes where all darn close to centered now, maybe just a tad offset to the outside. Not sure if 6 controls arms is a representative sample..... A testament to the dominant direction of travel and forces applied differently? One set of new bushings I have laying around has the offset center tubes. No clue as to vintage. I have a set to install today, I’ll use the advice and experience detailed above. Thank you.
-
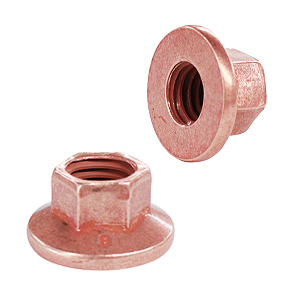
No, they are deformed so that installation causes them to lock on like a stover nut. Adding a lock washer would not be harmful if you would like but it would defeat the purpose of that nice large flange I think.
-
Many of the after market control arms that use 5/8 heim joint ends use a bolt like this. It’s a slightly loose fit in the stock application (stock pin is 16mm), just make sure you use a self locking nut and check it often. With no lock pin, if that nut falls off.....
-
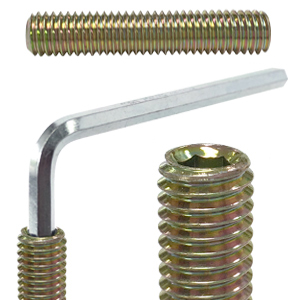
https://www.belmetric.com/hex-with-flange-c-3_51_53/ncf8x10w-copper-flange-nut-wide-flange-p-10435.html?zenid=sahrhmsei24sc6bg2gtlshqhn1 And these babies have 10mm heads! For those tight places around headers and such or at the very least https://www.belmetric.com/jis-small-wrench-c-3_58_2280/nj8x12ylw-jis-nut-yellow-zinc-p-205.html?zenid=sahrhmsei24sc6bg2gtlshqhn1 I also like these studs they have. Easy to insert and remove. https://www.belmetric.com/m8x125-coarse-thread-c-9_71_1840/s8x45fylw-allen-drive-stud-yellow-zinc-p-15201.html?zenid=sahrhmsei24sc6bg2gtlshqhn1