zKars
 Subscriber
-
Joined
-
Last visited
Everything posted by zKars
-
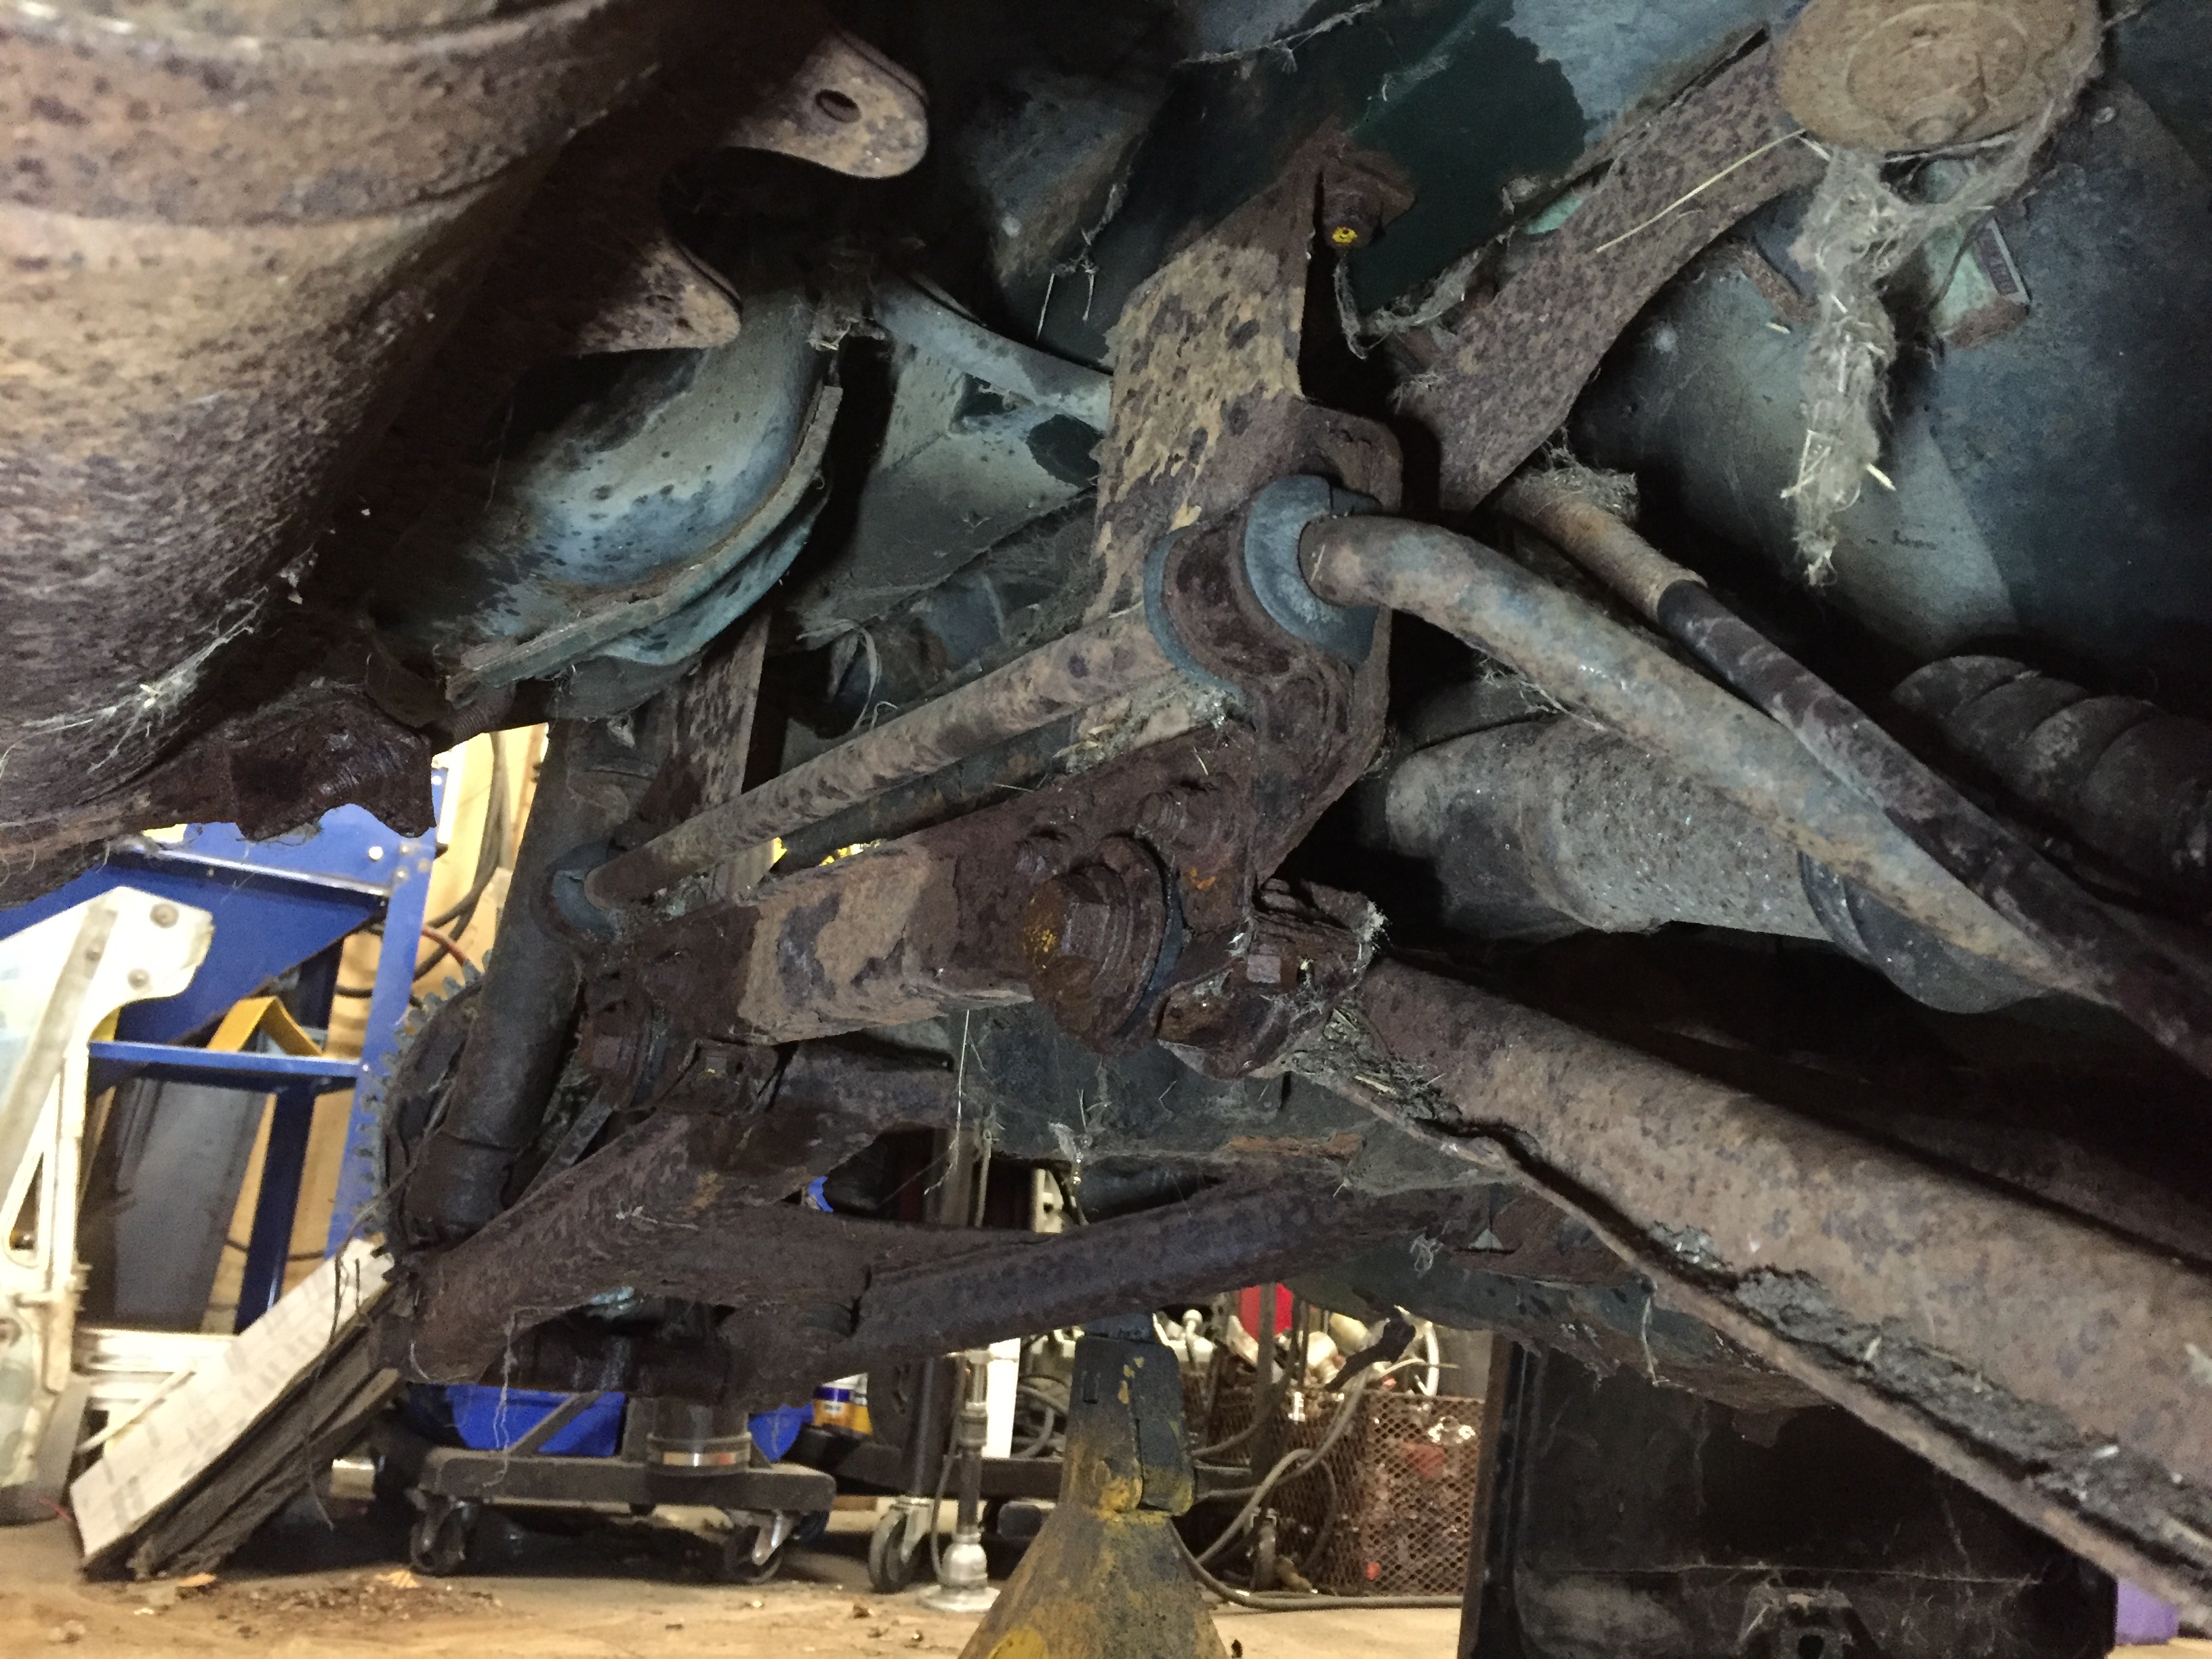
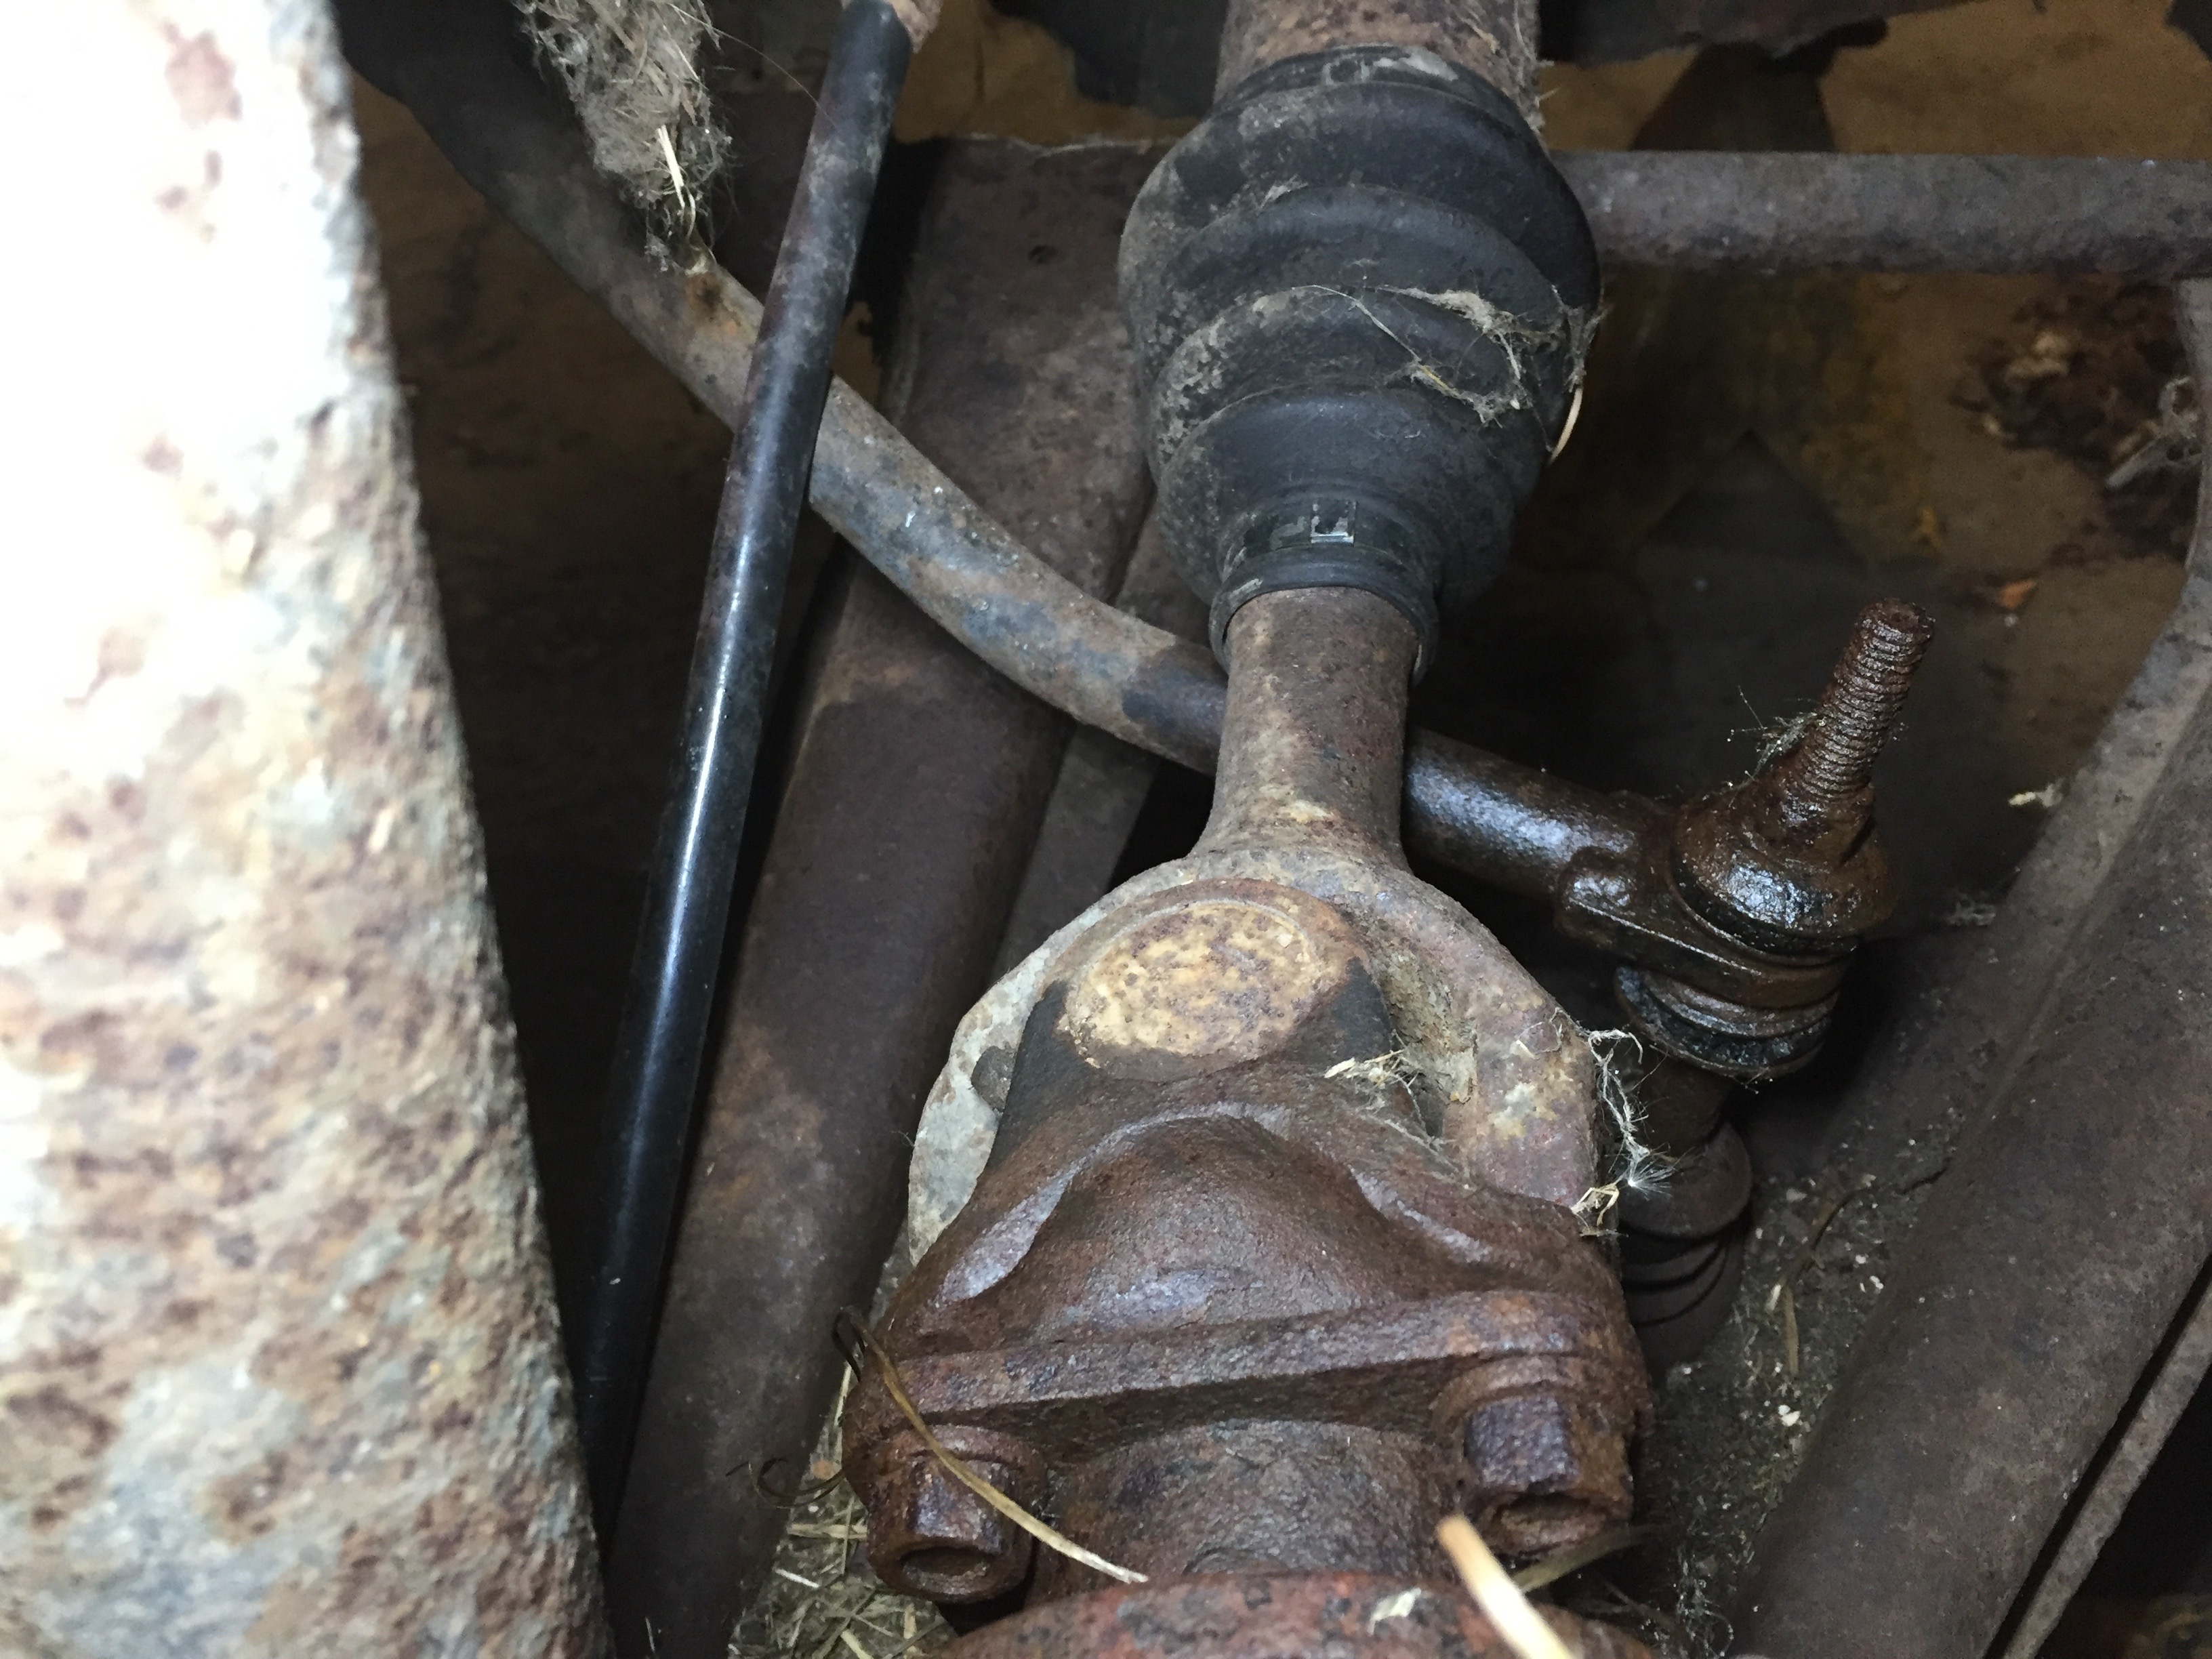
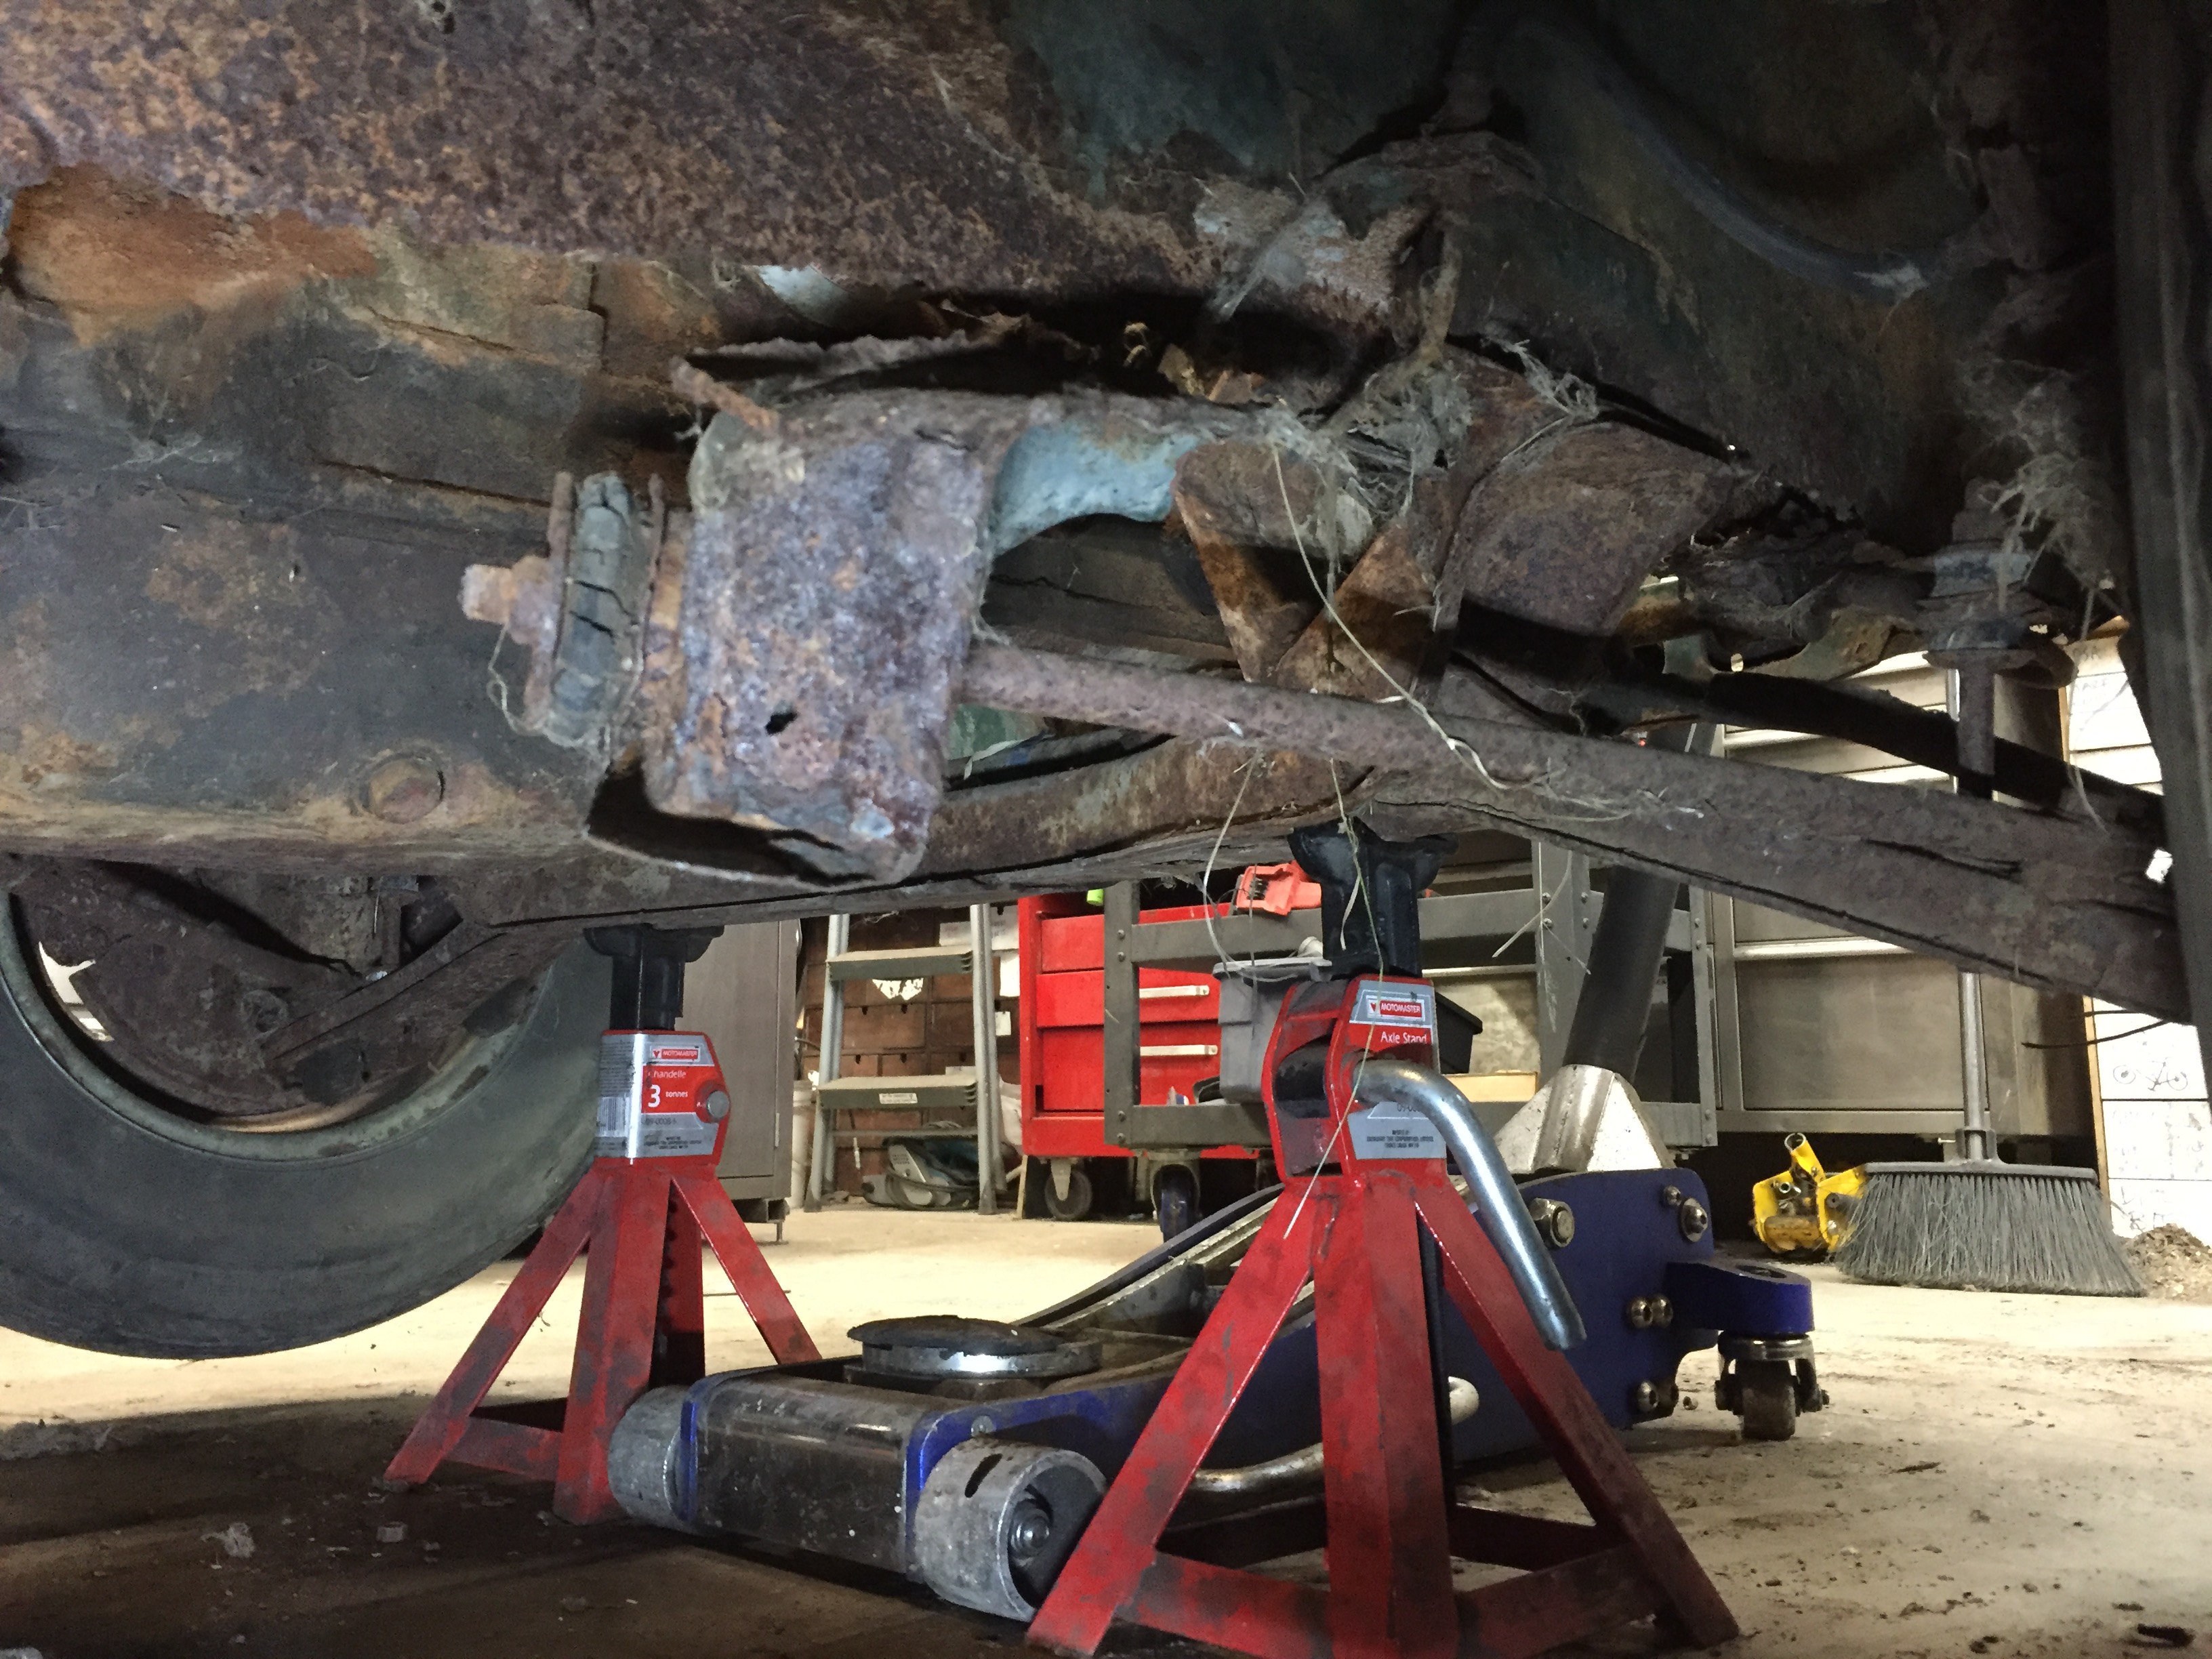
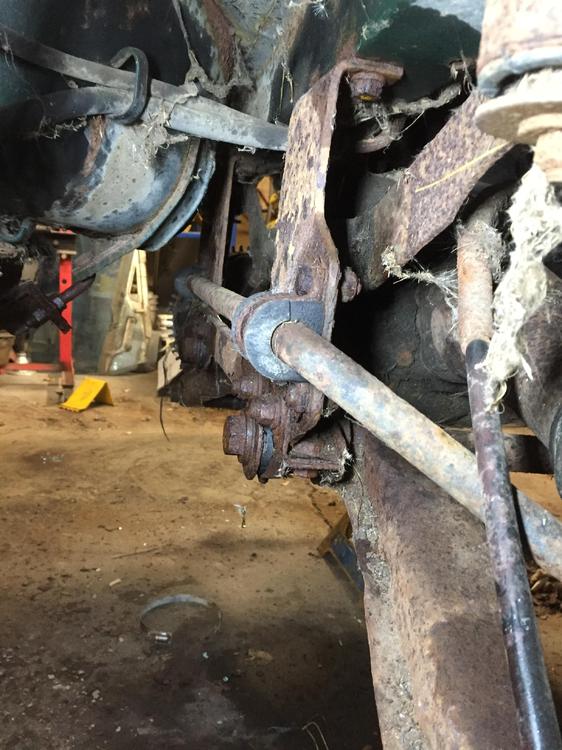
 While we are on the topic of all things "early", I've noticed an interesting feature on the two early HLS30 UA's that I've had my hands on. The topic is a rear sway bar. Correct me if I'm wrong, but I wasn't aware of a factory rear sway bars prior to the 260's. But on both 03798 and 02744 there is a rear sway bar. So what you say, after 40+ years, PO's will add all nature of performance crap, right? Well on 3798, the car had aftermarket front springs and a fatter than stock front sway bar, so I wasn't surprised to find a rear bar on it. Never gave it a second thought. But when I peaked up the butt of 02744, and saw the EXACT same rear bar arrangement I started to wonder. What are the chances of this? Was Nissan Canada adding rear bars? These bars are the style where the bar mounts to the transverse link uprights behind the diff, rather than the stock 260 and later bars that mount ahead of the diff on a frame box member. As you can see, this style requires that you replace the uprights with the wider ones with wings that accept the bar bushing mounts. So my sample of two isn't exactly statistically re-assuring. But what I notice is that all the components have exactly the same age related corrosion and patina. That is, if these bars were added by owners, they were added very soon after purchase. Has anyone else seen this style of rear bar on Z with VIN's around the 1000-5000 mark, especially Canadian spec cars? I just had a thought. When I get the rear suspension out today, I'm going to look at the nuts and bolts that mount those bushings. If they are factory, they will be quite recognizably metric and JIS standard. If they are SAE or metric but hardware store variety, then I have my answer. The style of the bushing cap can also be compared to the front sway bar caps to again compare to factory components.

-
FB as you have experienced, is a very poor place for sharing or getting technical information. Search is terrible, the experience level is poor. Try to find something you saw yesterday. Total crap. There are a few of us experienced guys who are trying to provide some level of real help. What is powerful is the number of people who are on there. If you have something to sell, or need something, you are more likely to find what you need more quickly. Also there a variety of Datsun forums, not just Z's. It is a more inclusive community as there is more and more people with more than one type of Datsun. Another reality we more mature types won't like is that if we want to continue to attract the young, then we have to be able to cater to them in a way they like. And it sure isn't via our beloved Forum.... I have tried to suggest that anything and everything anyone needs for tech help can be found here but have you noticed a huge increase in membership here? I don't think so.
-
I know you're just pulling our leg, but please no more "series" designations. Considering the apparently endless list of ongoing changes throughout the entire S30 line, it is not wise to attempt to draw time lines that correspond to only certain changes. I think just using the break point where the vents moved to the sail panel from the hatch to delineate the "early" and 'late' is quite enough. Series 1A, 1B, 2, 2A, 2B, 2B or not 2B? That is the question...
-
Ok, here we go... Antenna wire through the chassis was a smaller diameter on Z's up to (2744 and 3798 are my samples) than I've seen in later cars Front bumper on 2744 mounts with a single M10 stud on each side, rather than the two on later 240's. The mount brackets are correspondingly different and made of lighter gauge steel than the later ones. 240 Gas tanks on the Canadian UA models have only two vent lines. The floor of the hatch then does not have a steel pass through tube for the left side, just a rubber plub. They also have no evap tank, hard vent line to the front, no "flow guide valve". Which also means the block vent tube does not have the little extra knipple, and the big end of the PVC hose is unique too. And the air cleaner may not have the nipple that attaches to the flow guide valve outlet. Not sure about that one, I don't have the original box on 2744 or 3798. Horn mounts. One 3798, there is a 3 sided retangular bracket welded to the lower rad support that sticks out about 3/4 inch that both horns mount to. On 2744, these brackets are absent and you have the usual (in my experience) two M8 bolts that go directly into the lower rad support through the two horn bracket holes. Never seen these sticking out - brackets before. They are factory. As if there was something behind them that had to get clearance. Factory turbo intercooler? The car was not an automatic. The change of where the rear brake proportion valve is located and all the tubing and tubing support bracket changes that go along with that Gas caps Brake master cylinders. Early had the Front reservoir in the front, with associated changes to the hard lines below. Gas pedal rod in foot well with extra clevis-y thing on top for throttle control cable found on early ones. Different style J-hook on the throttle actuation mechanism. Different bell crank design early to late Hoods. Early one with no holes either side of the latch. Also difference in how hood skin is wrapped around the top corners. Inspection lid catch changes someone else take over, I'm tired....
-
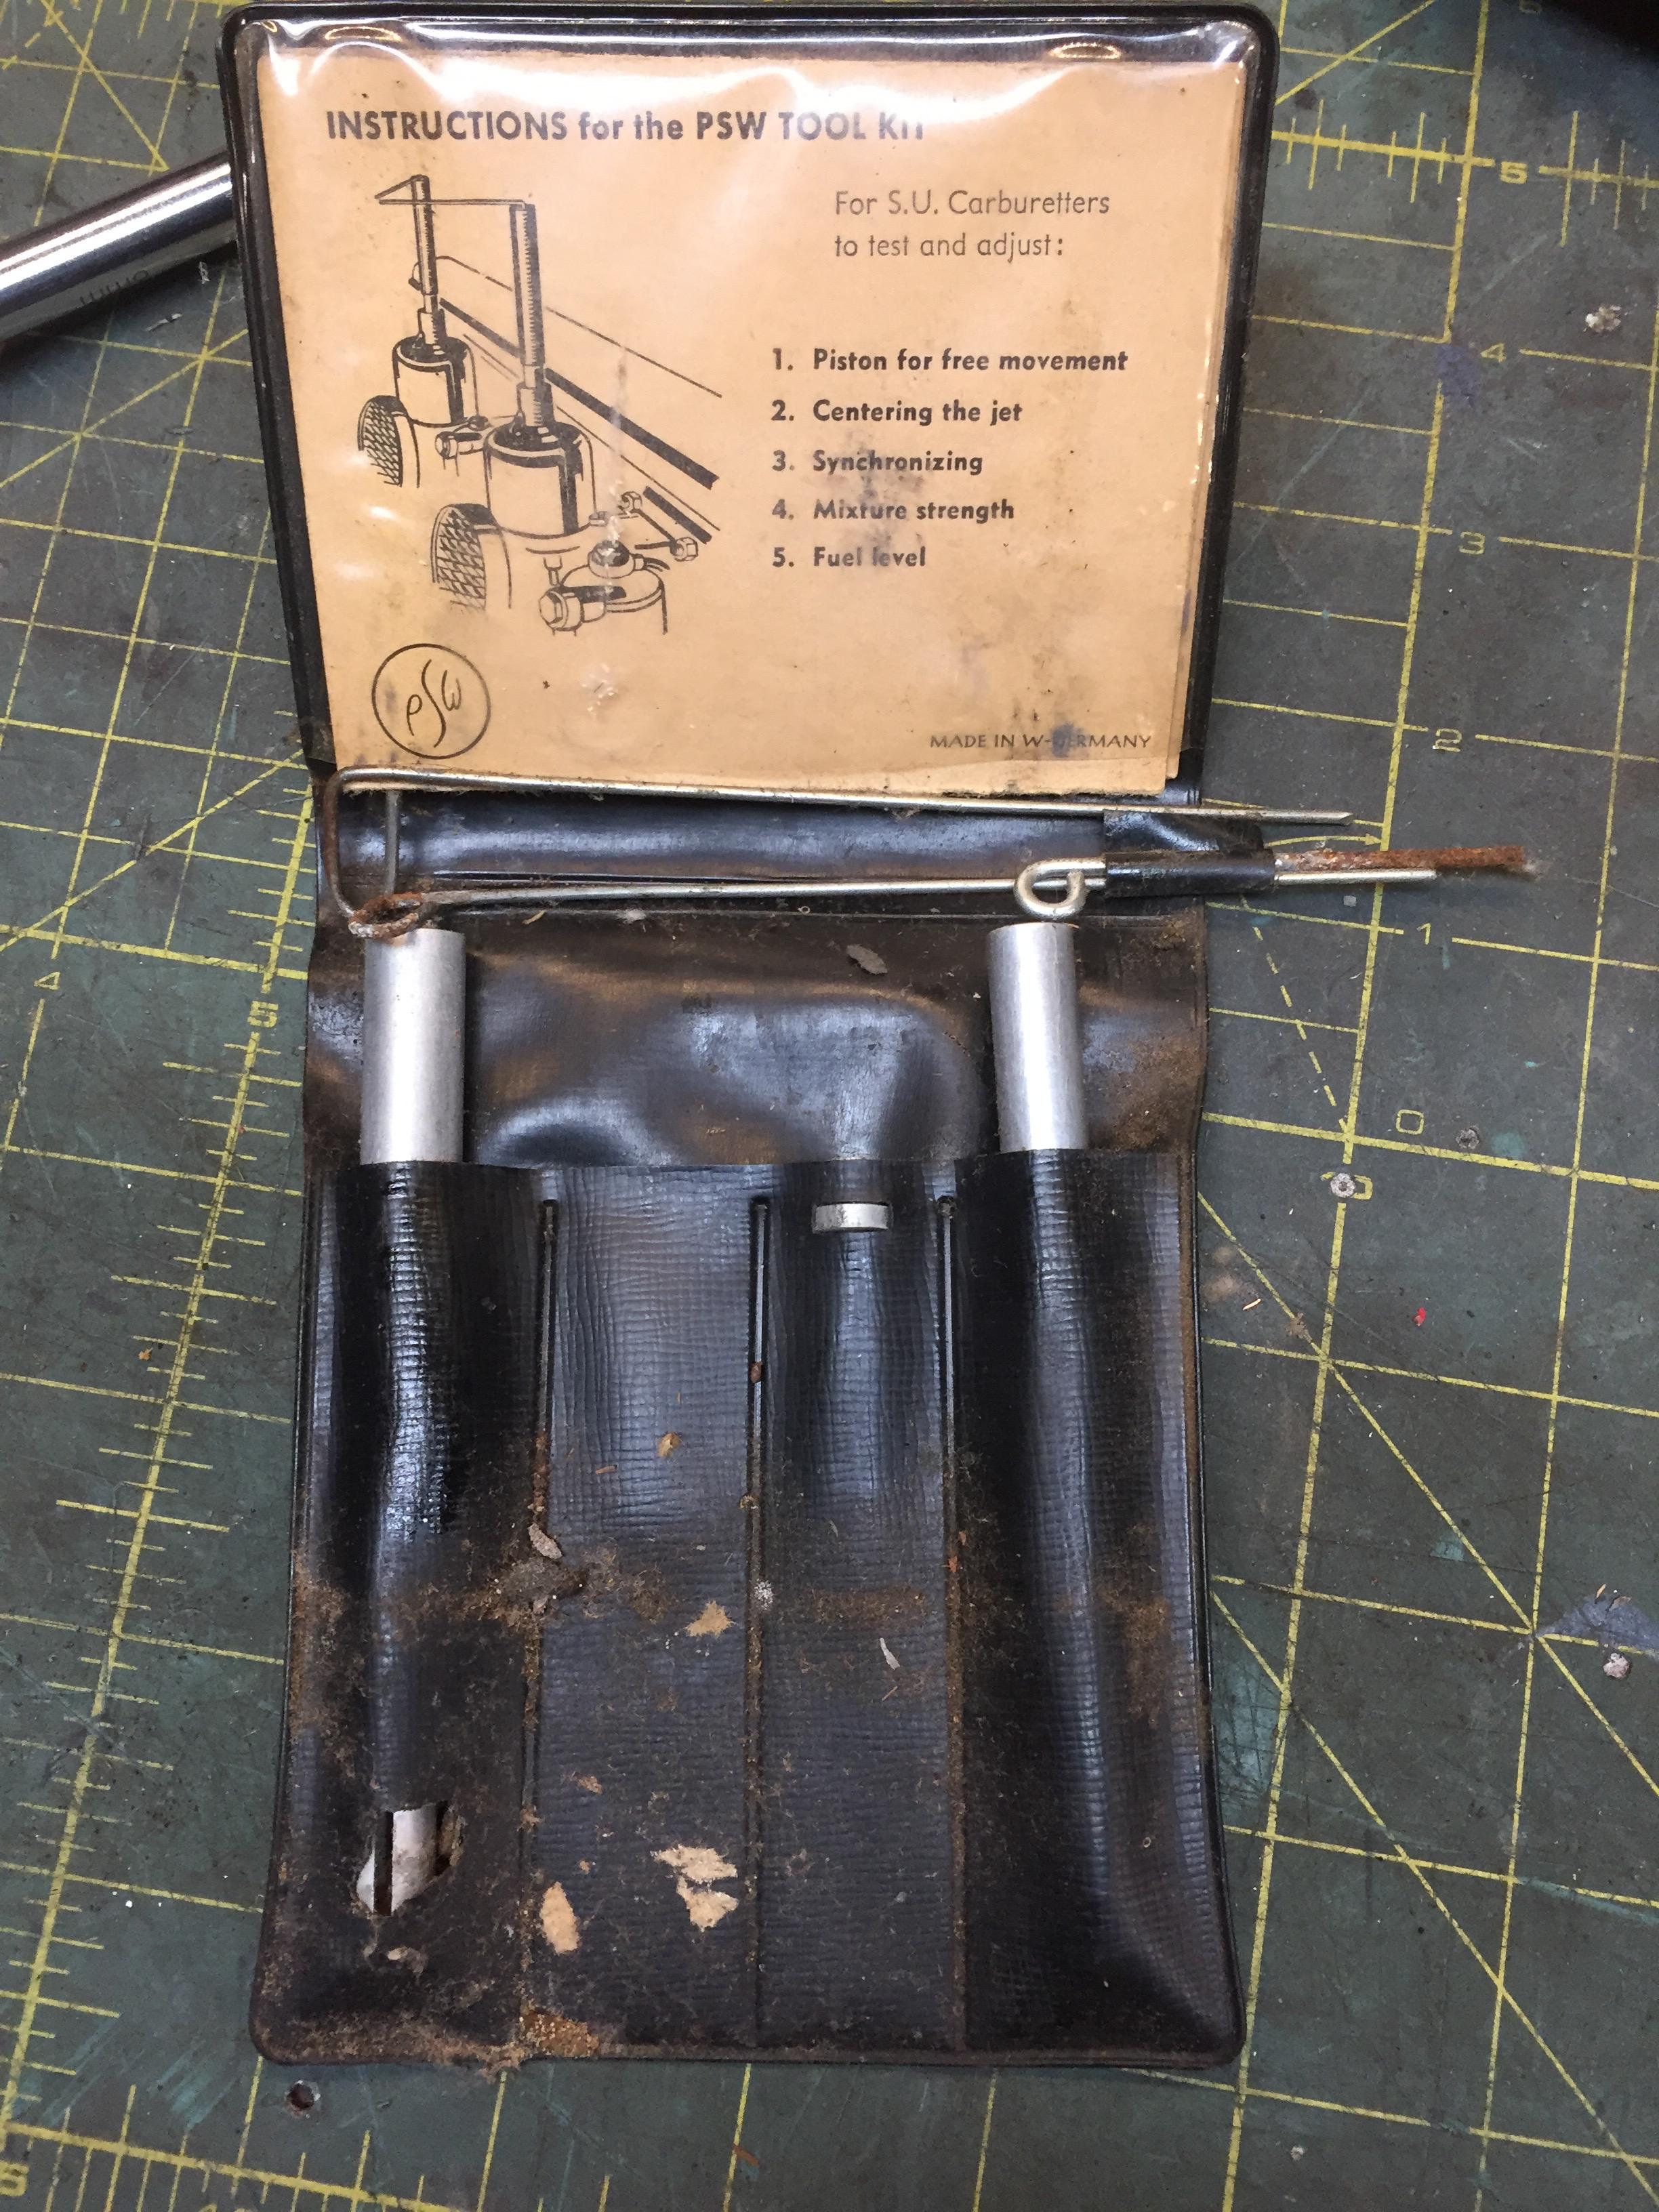
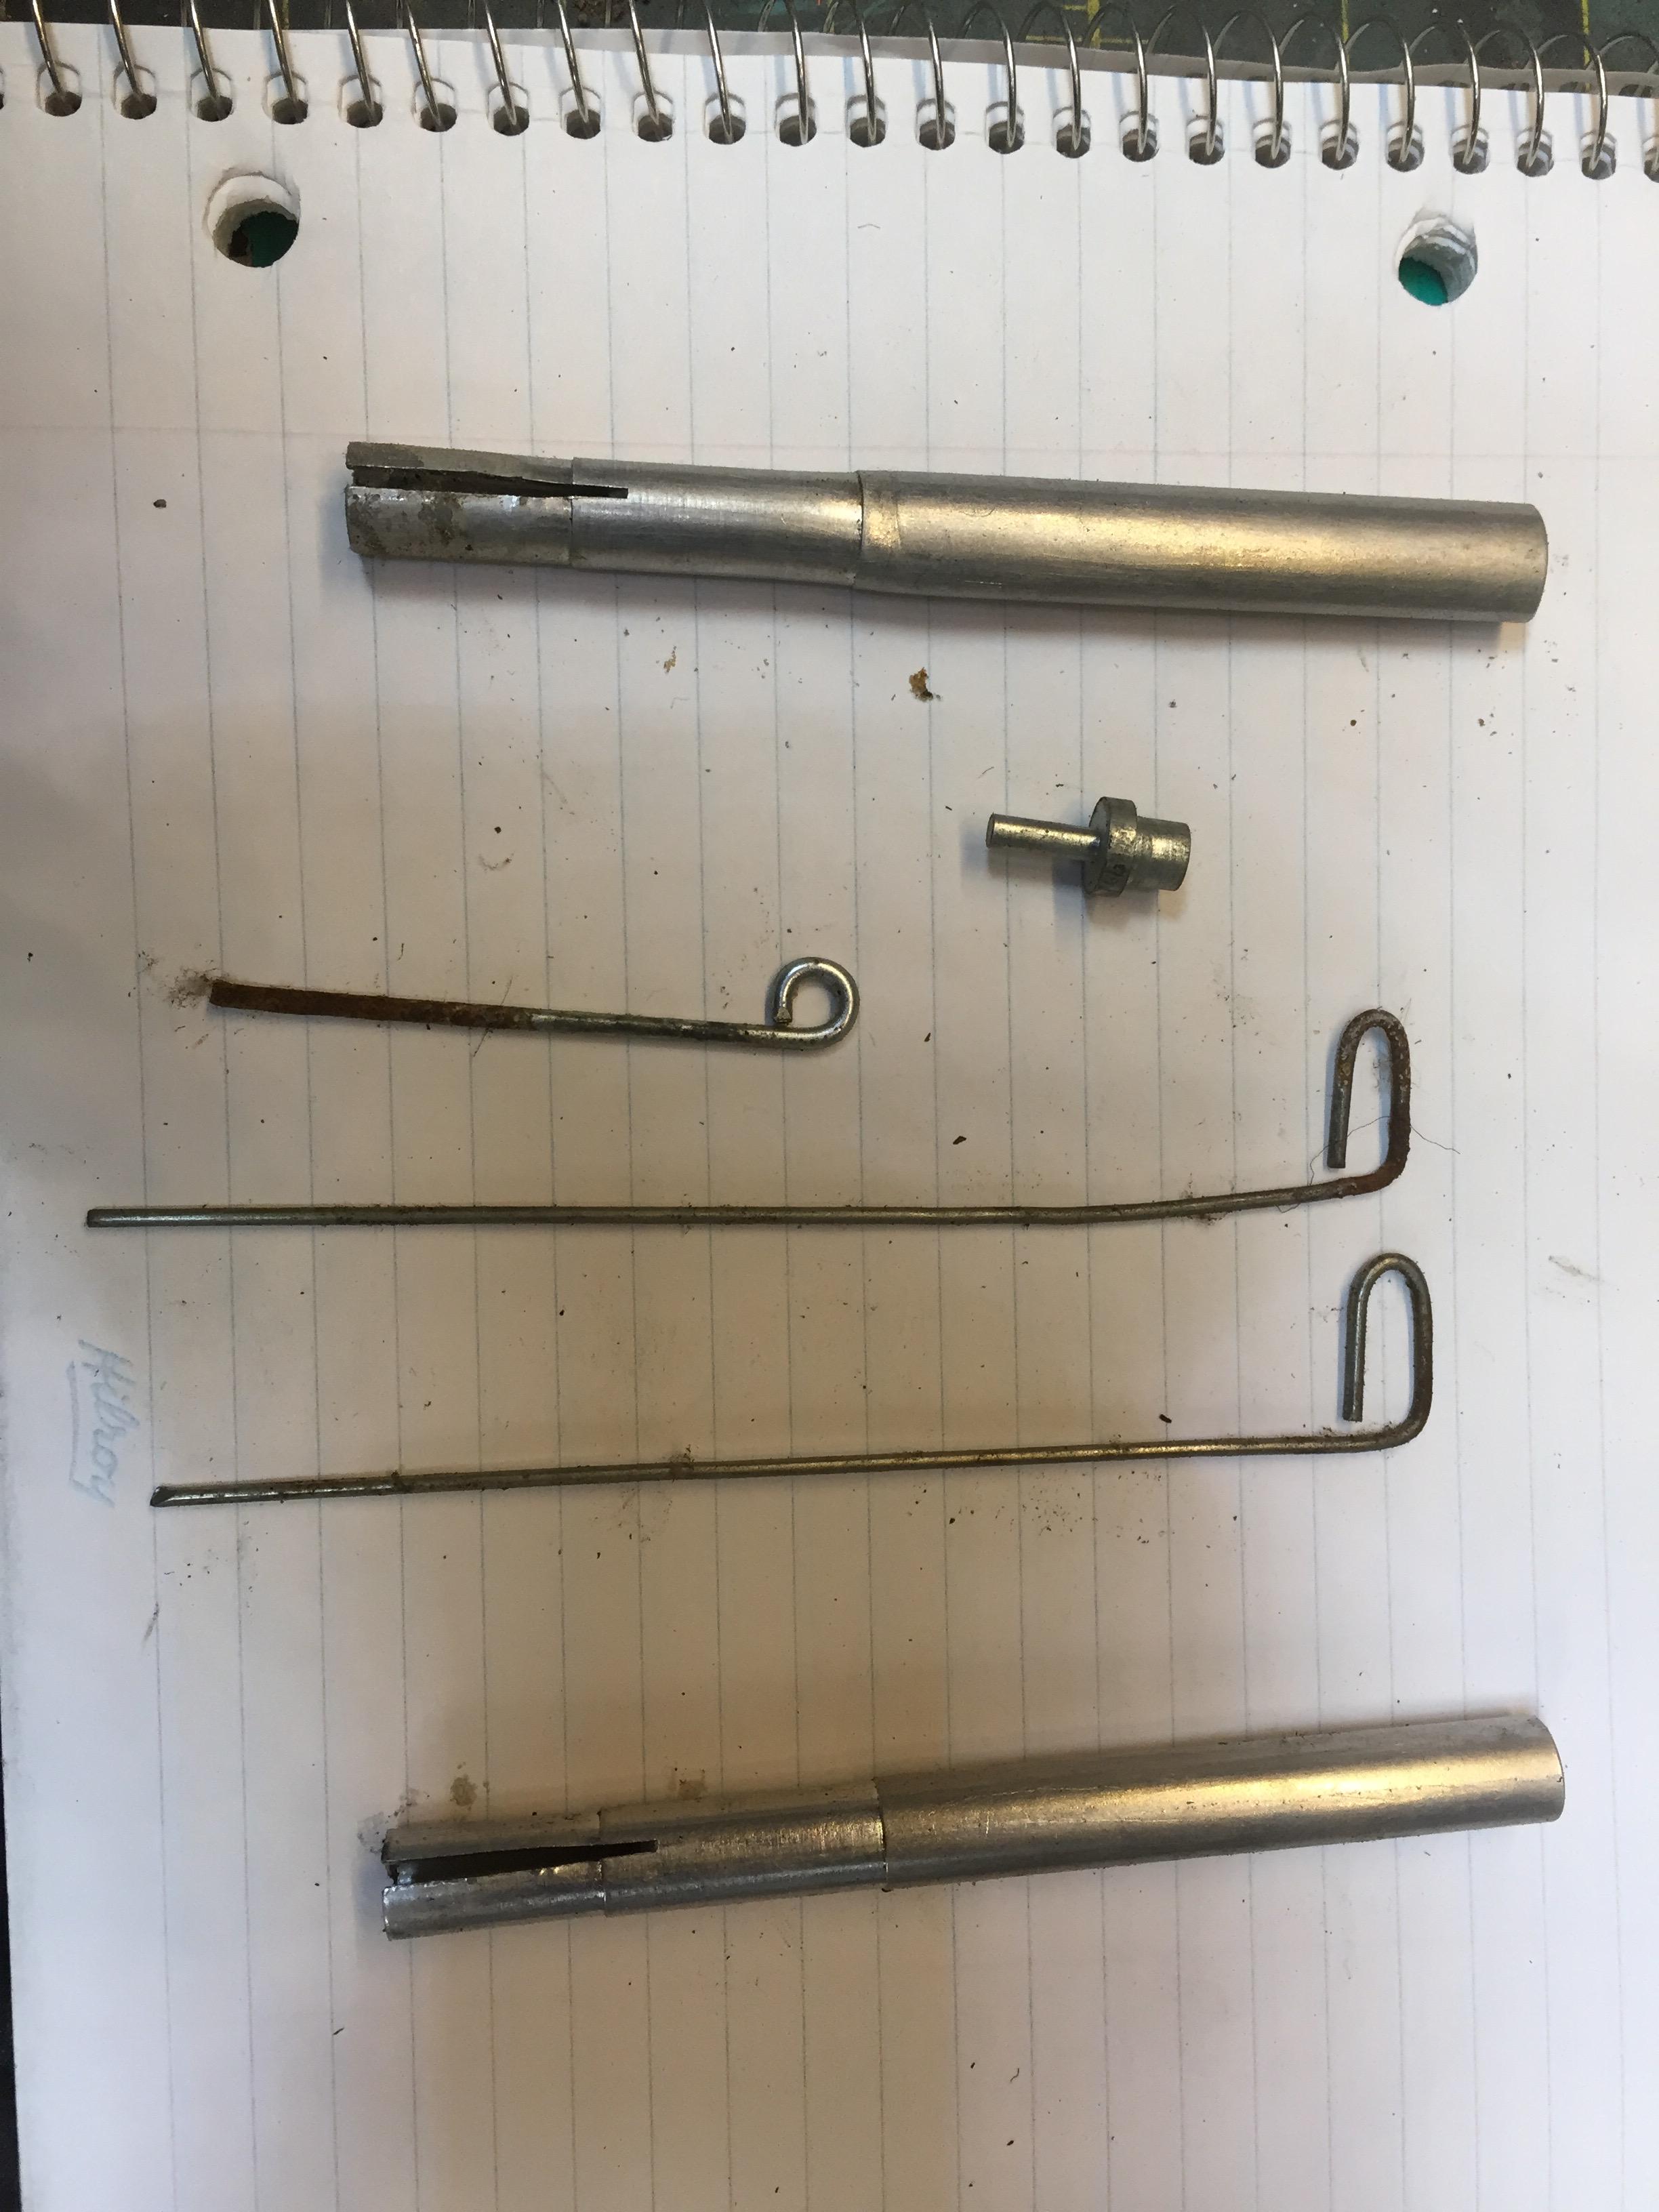
Tuning carbs is the lowest form of witchcraft. Every muggle knows that. The second thing of interest in the glove box is well, two items. First was the last registration form from Alberta, dated 1990. 27 odd years ago. Second is a letter from the Solister General of Alberta dated late 1990 detailing the driving record of the owner. There were four speeding offences in the past 18 months, with a corresponding large number of demerit points. Included in the envelope was a warning letter from 'the man" indication the perp's options and requesting an improved driving attitude. Apparently the selected option was to park the car... We now know what happened over the ensuing quarter century +. Nothing but a slow weight reduction strategy and budget varmit accomodation.
-
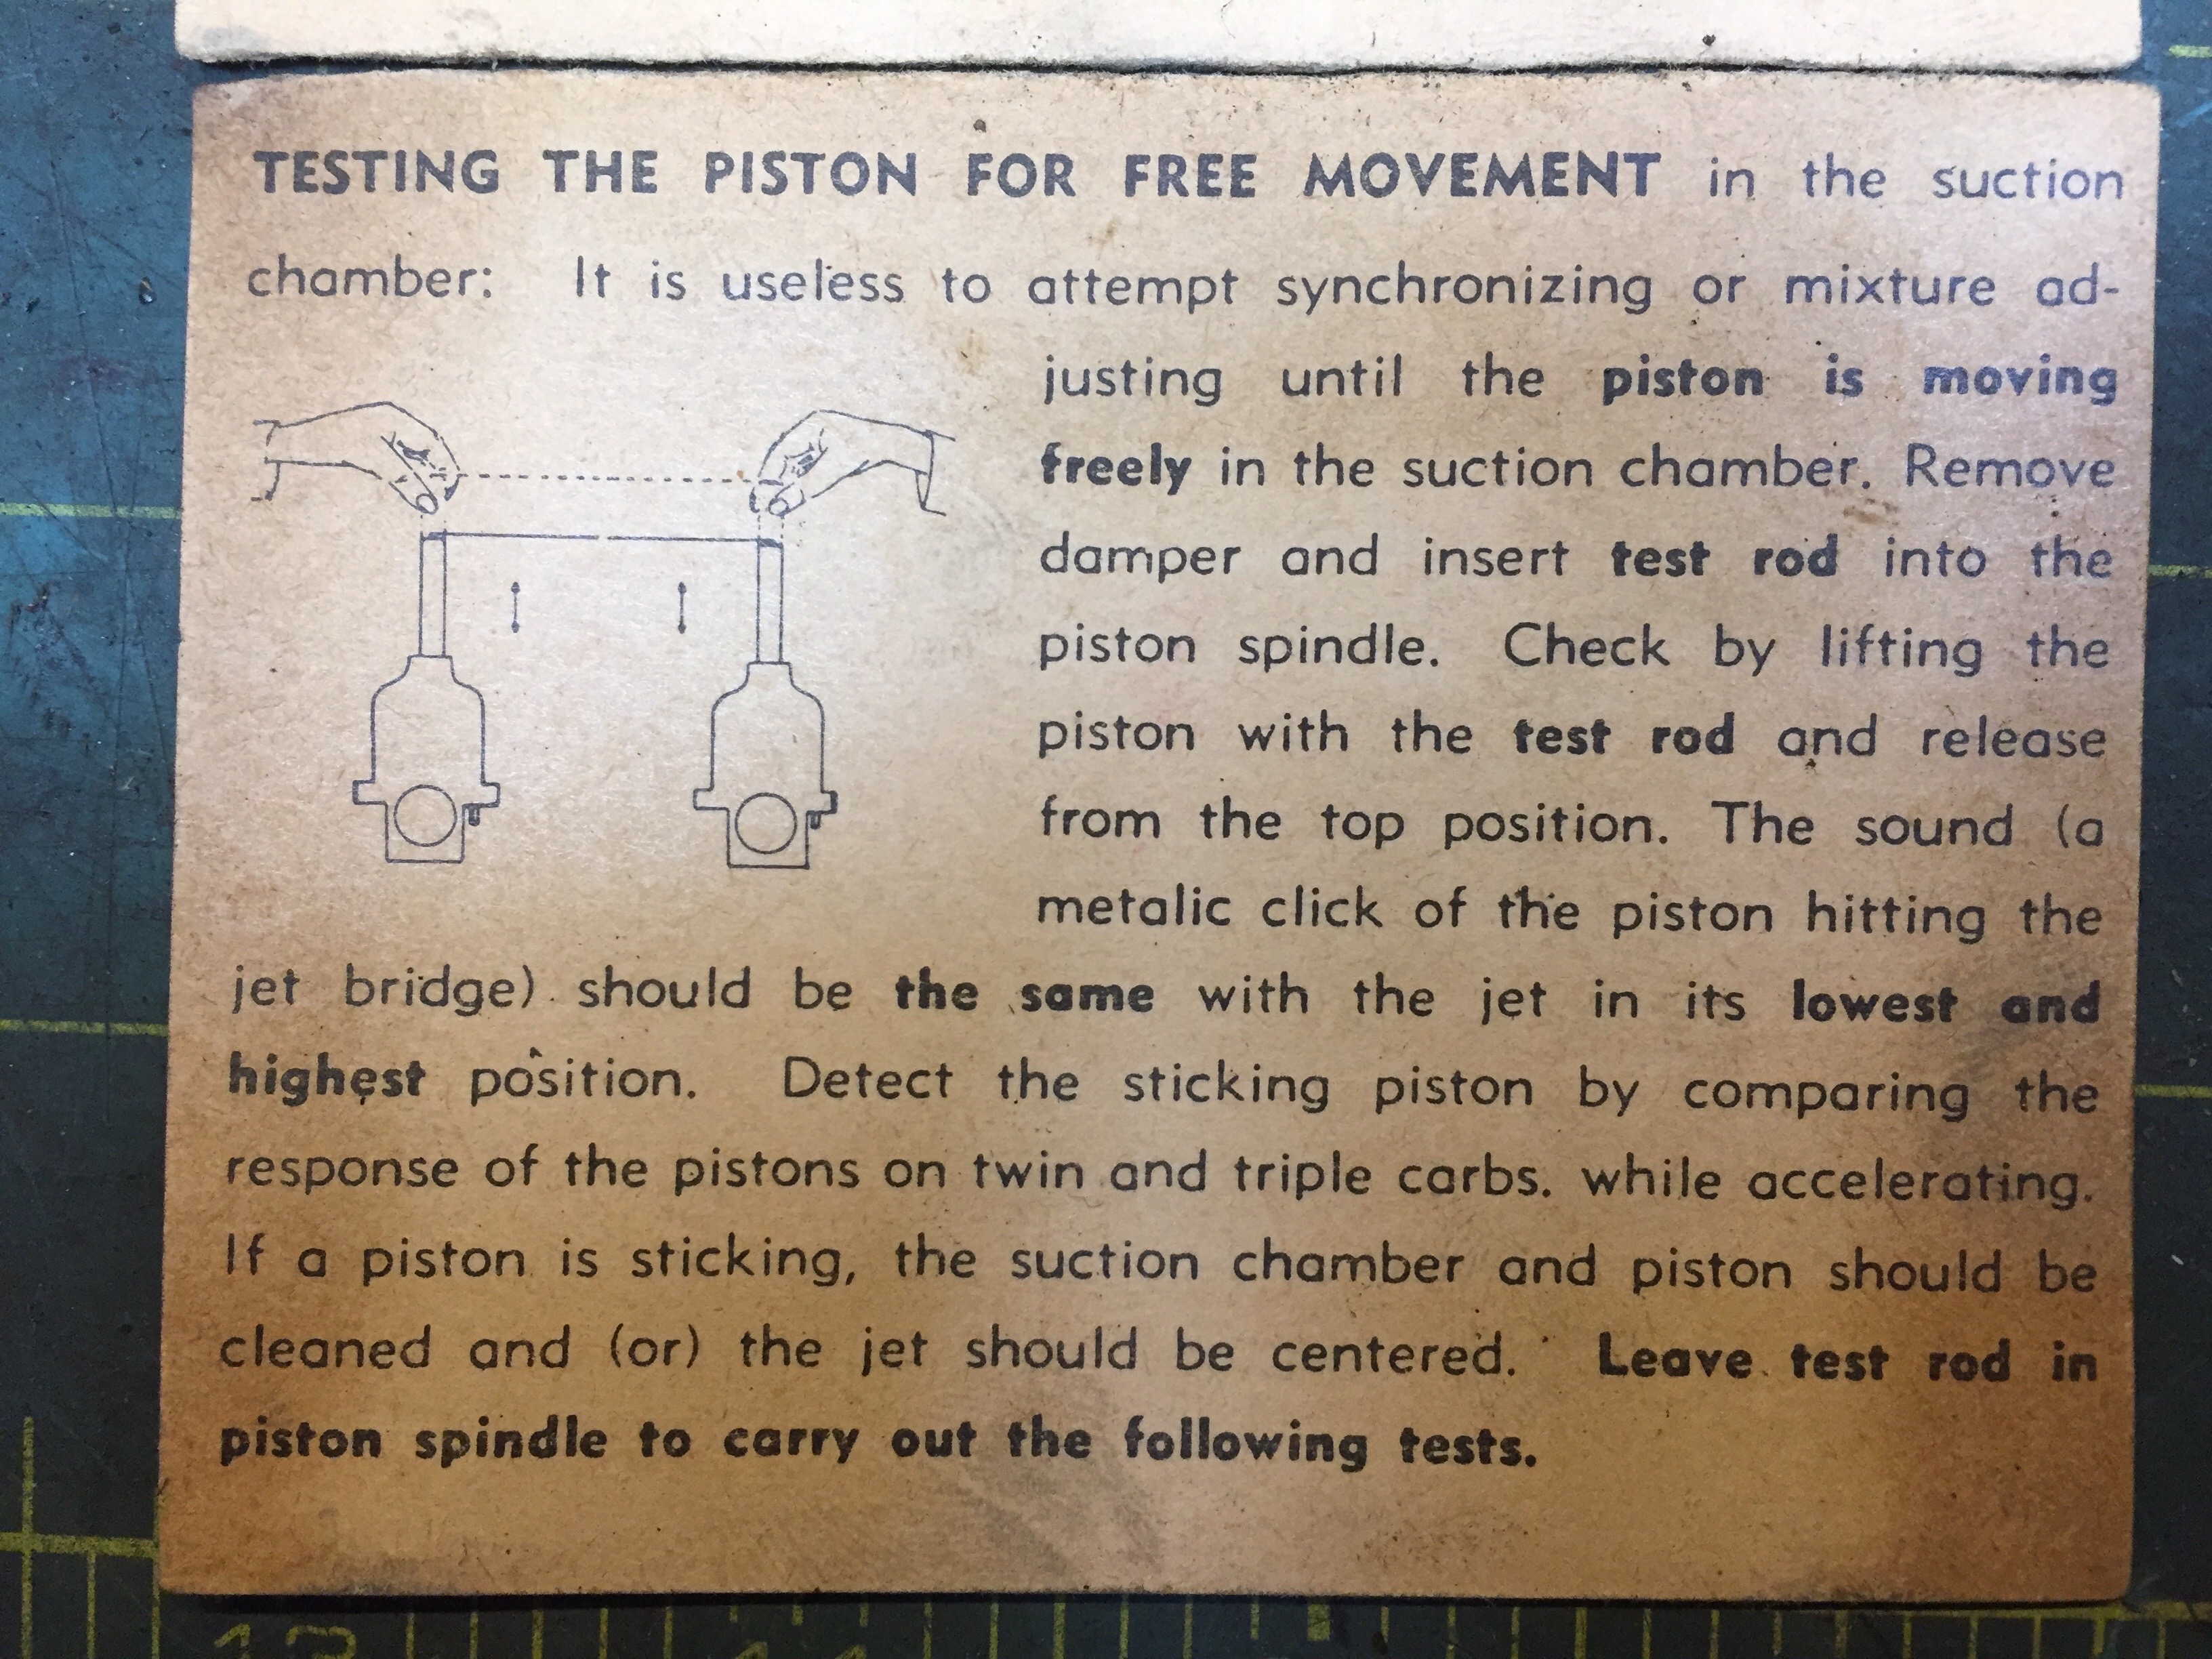
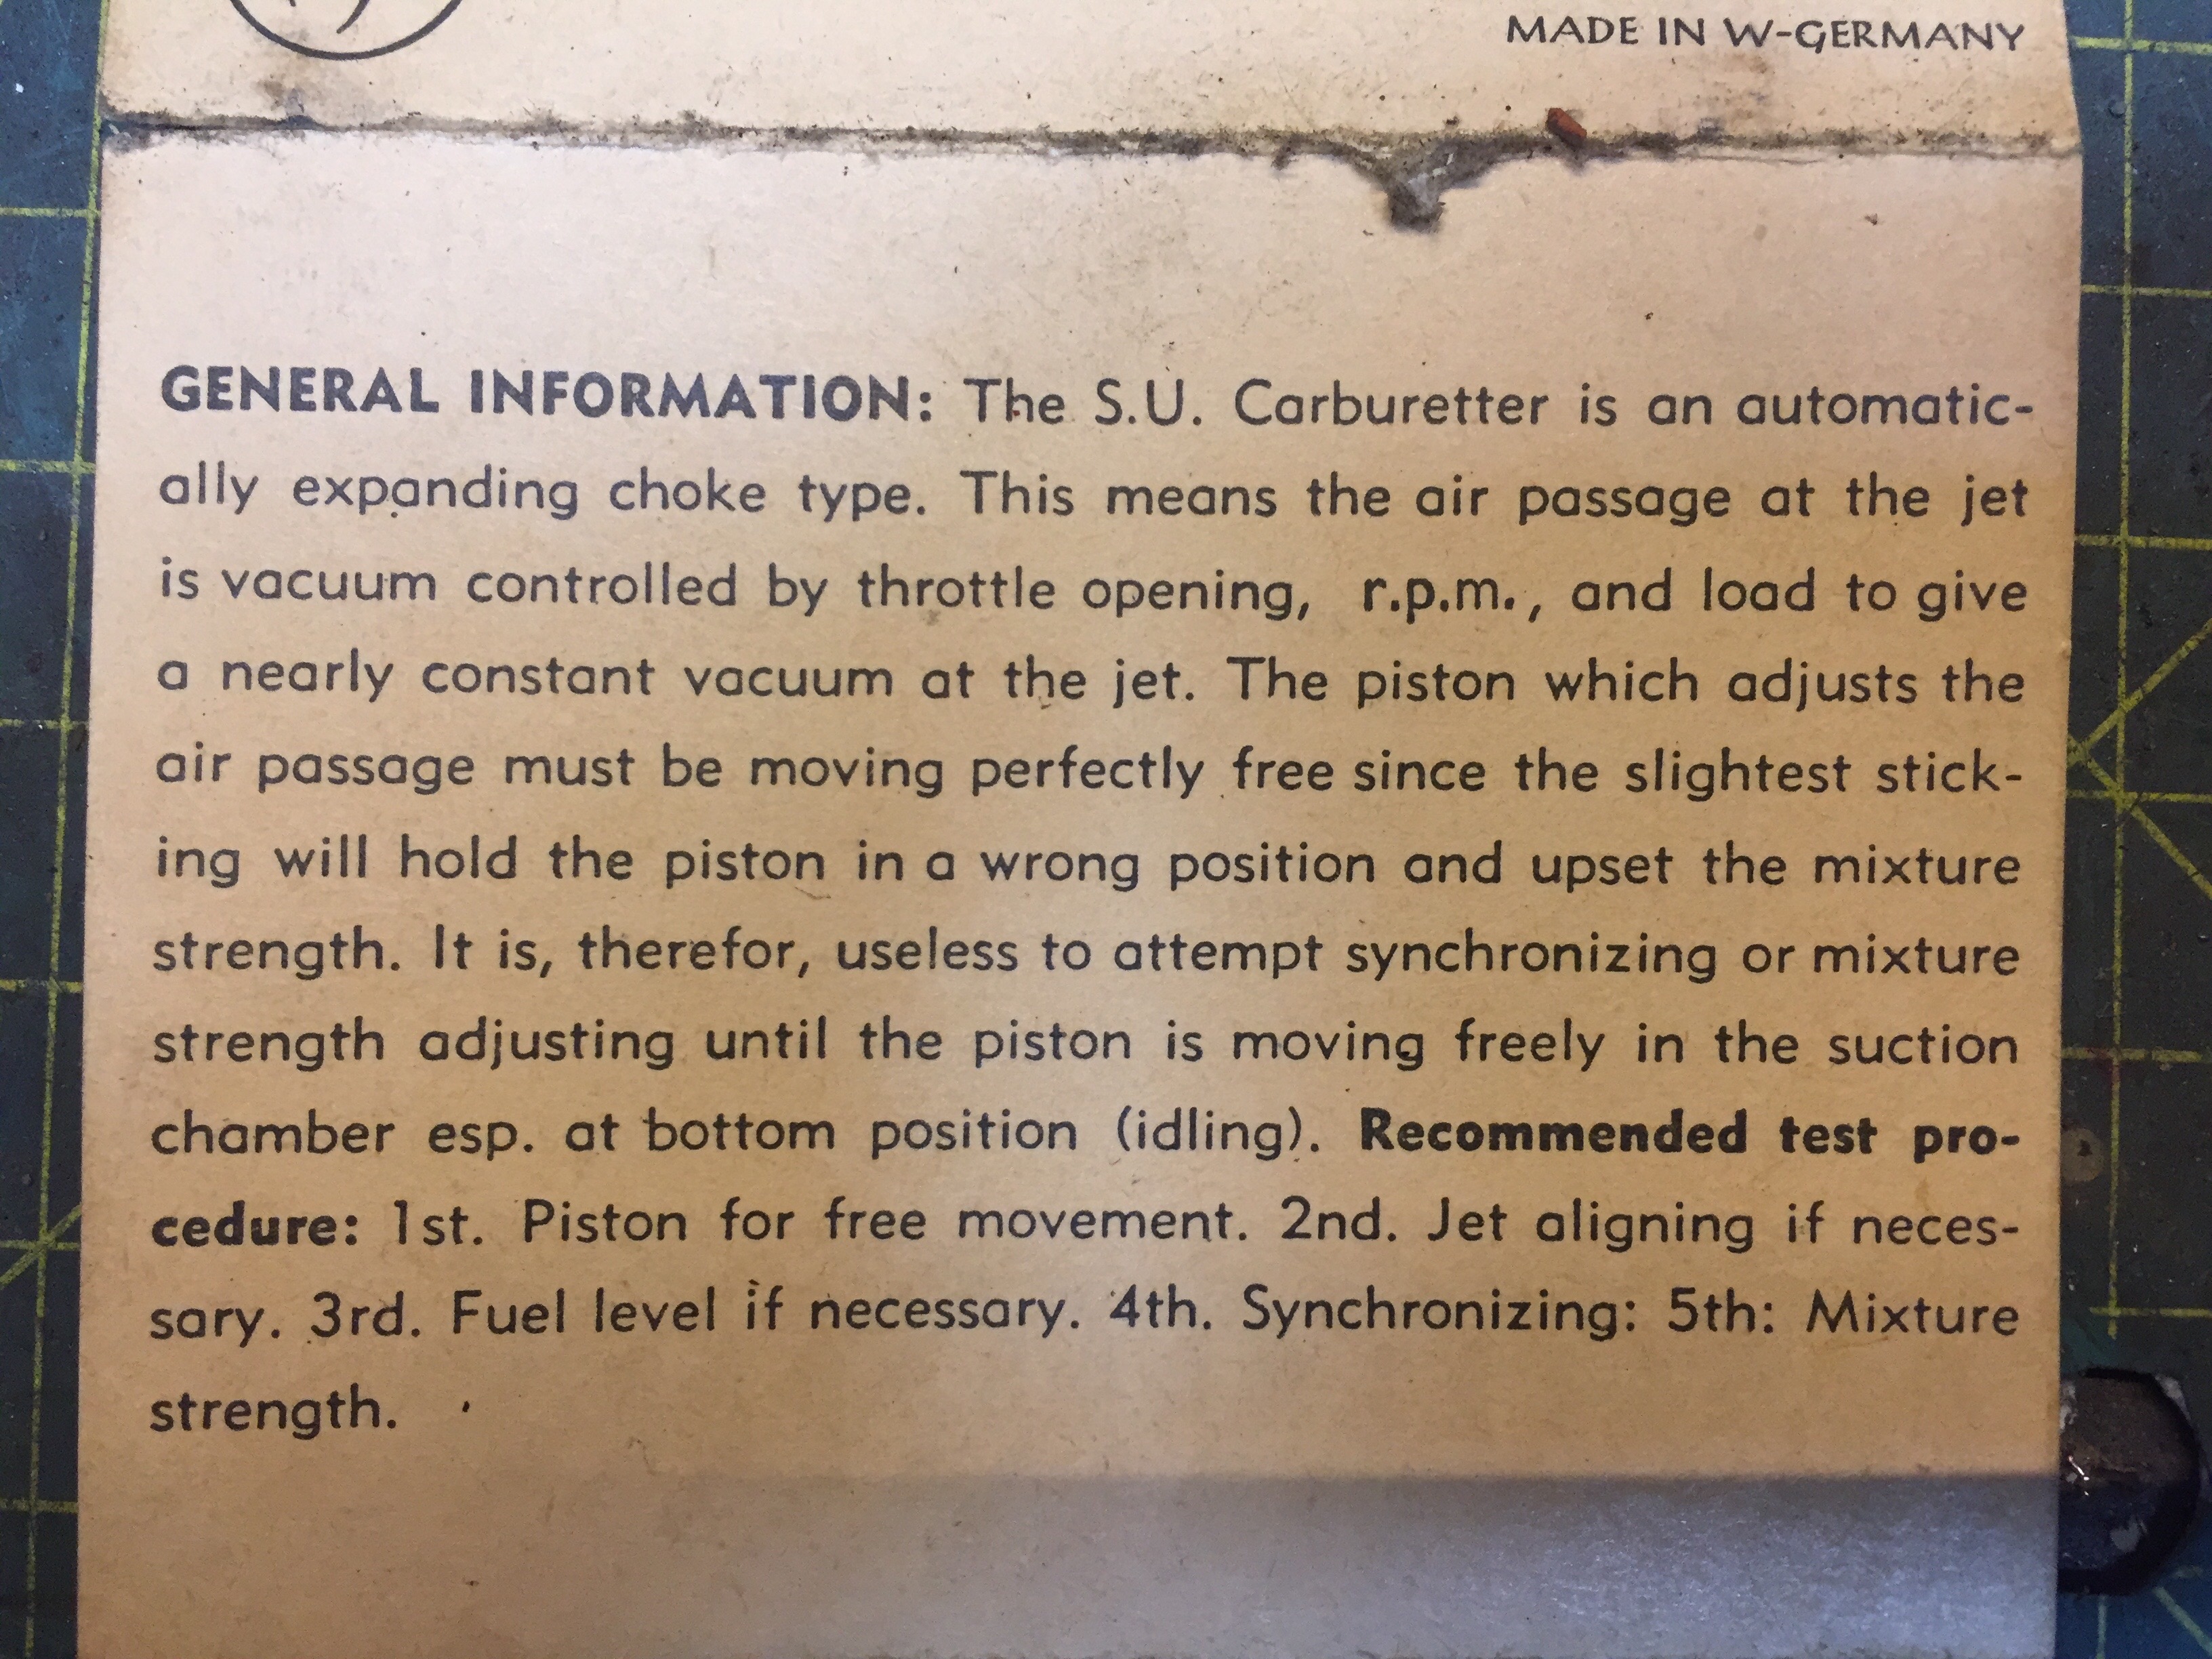
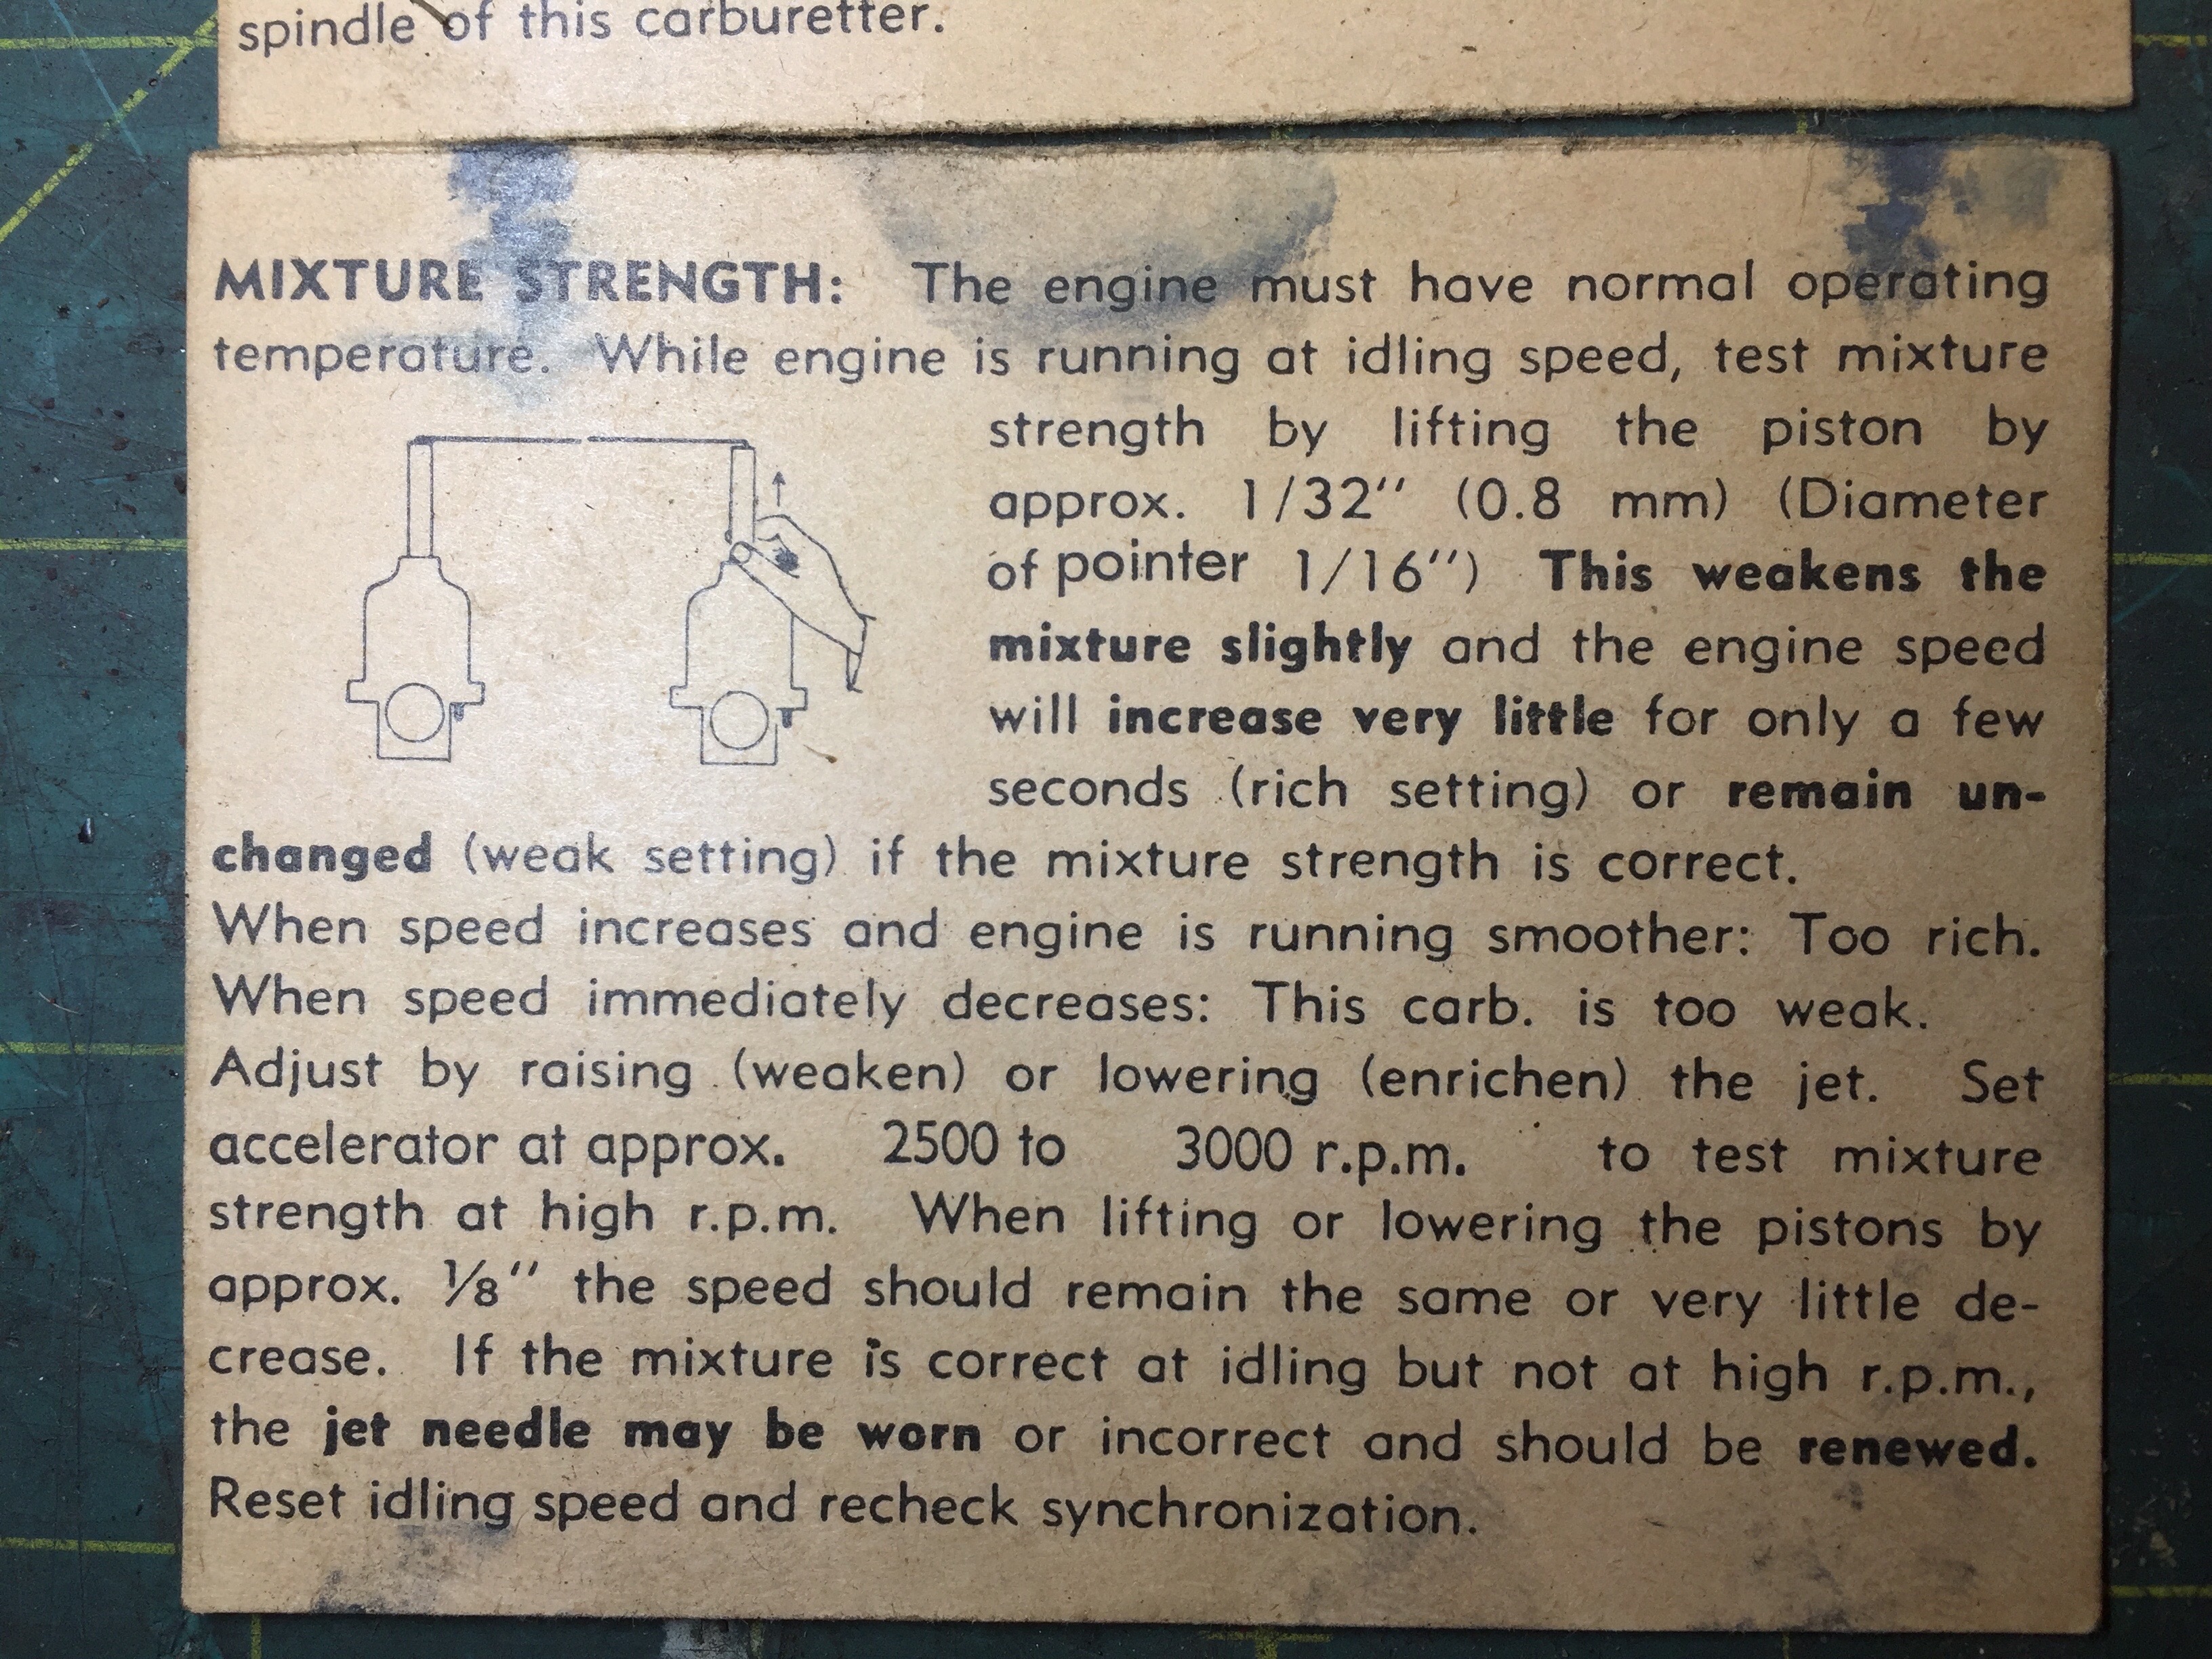
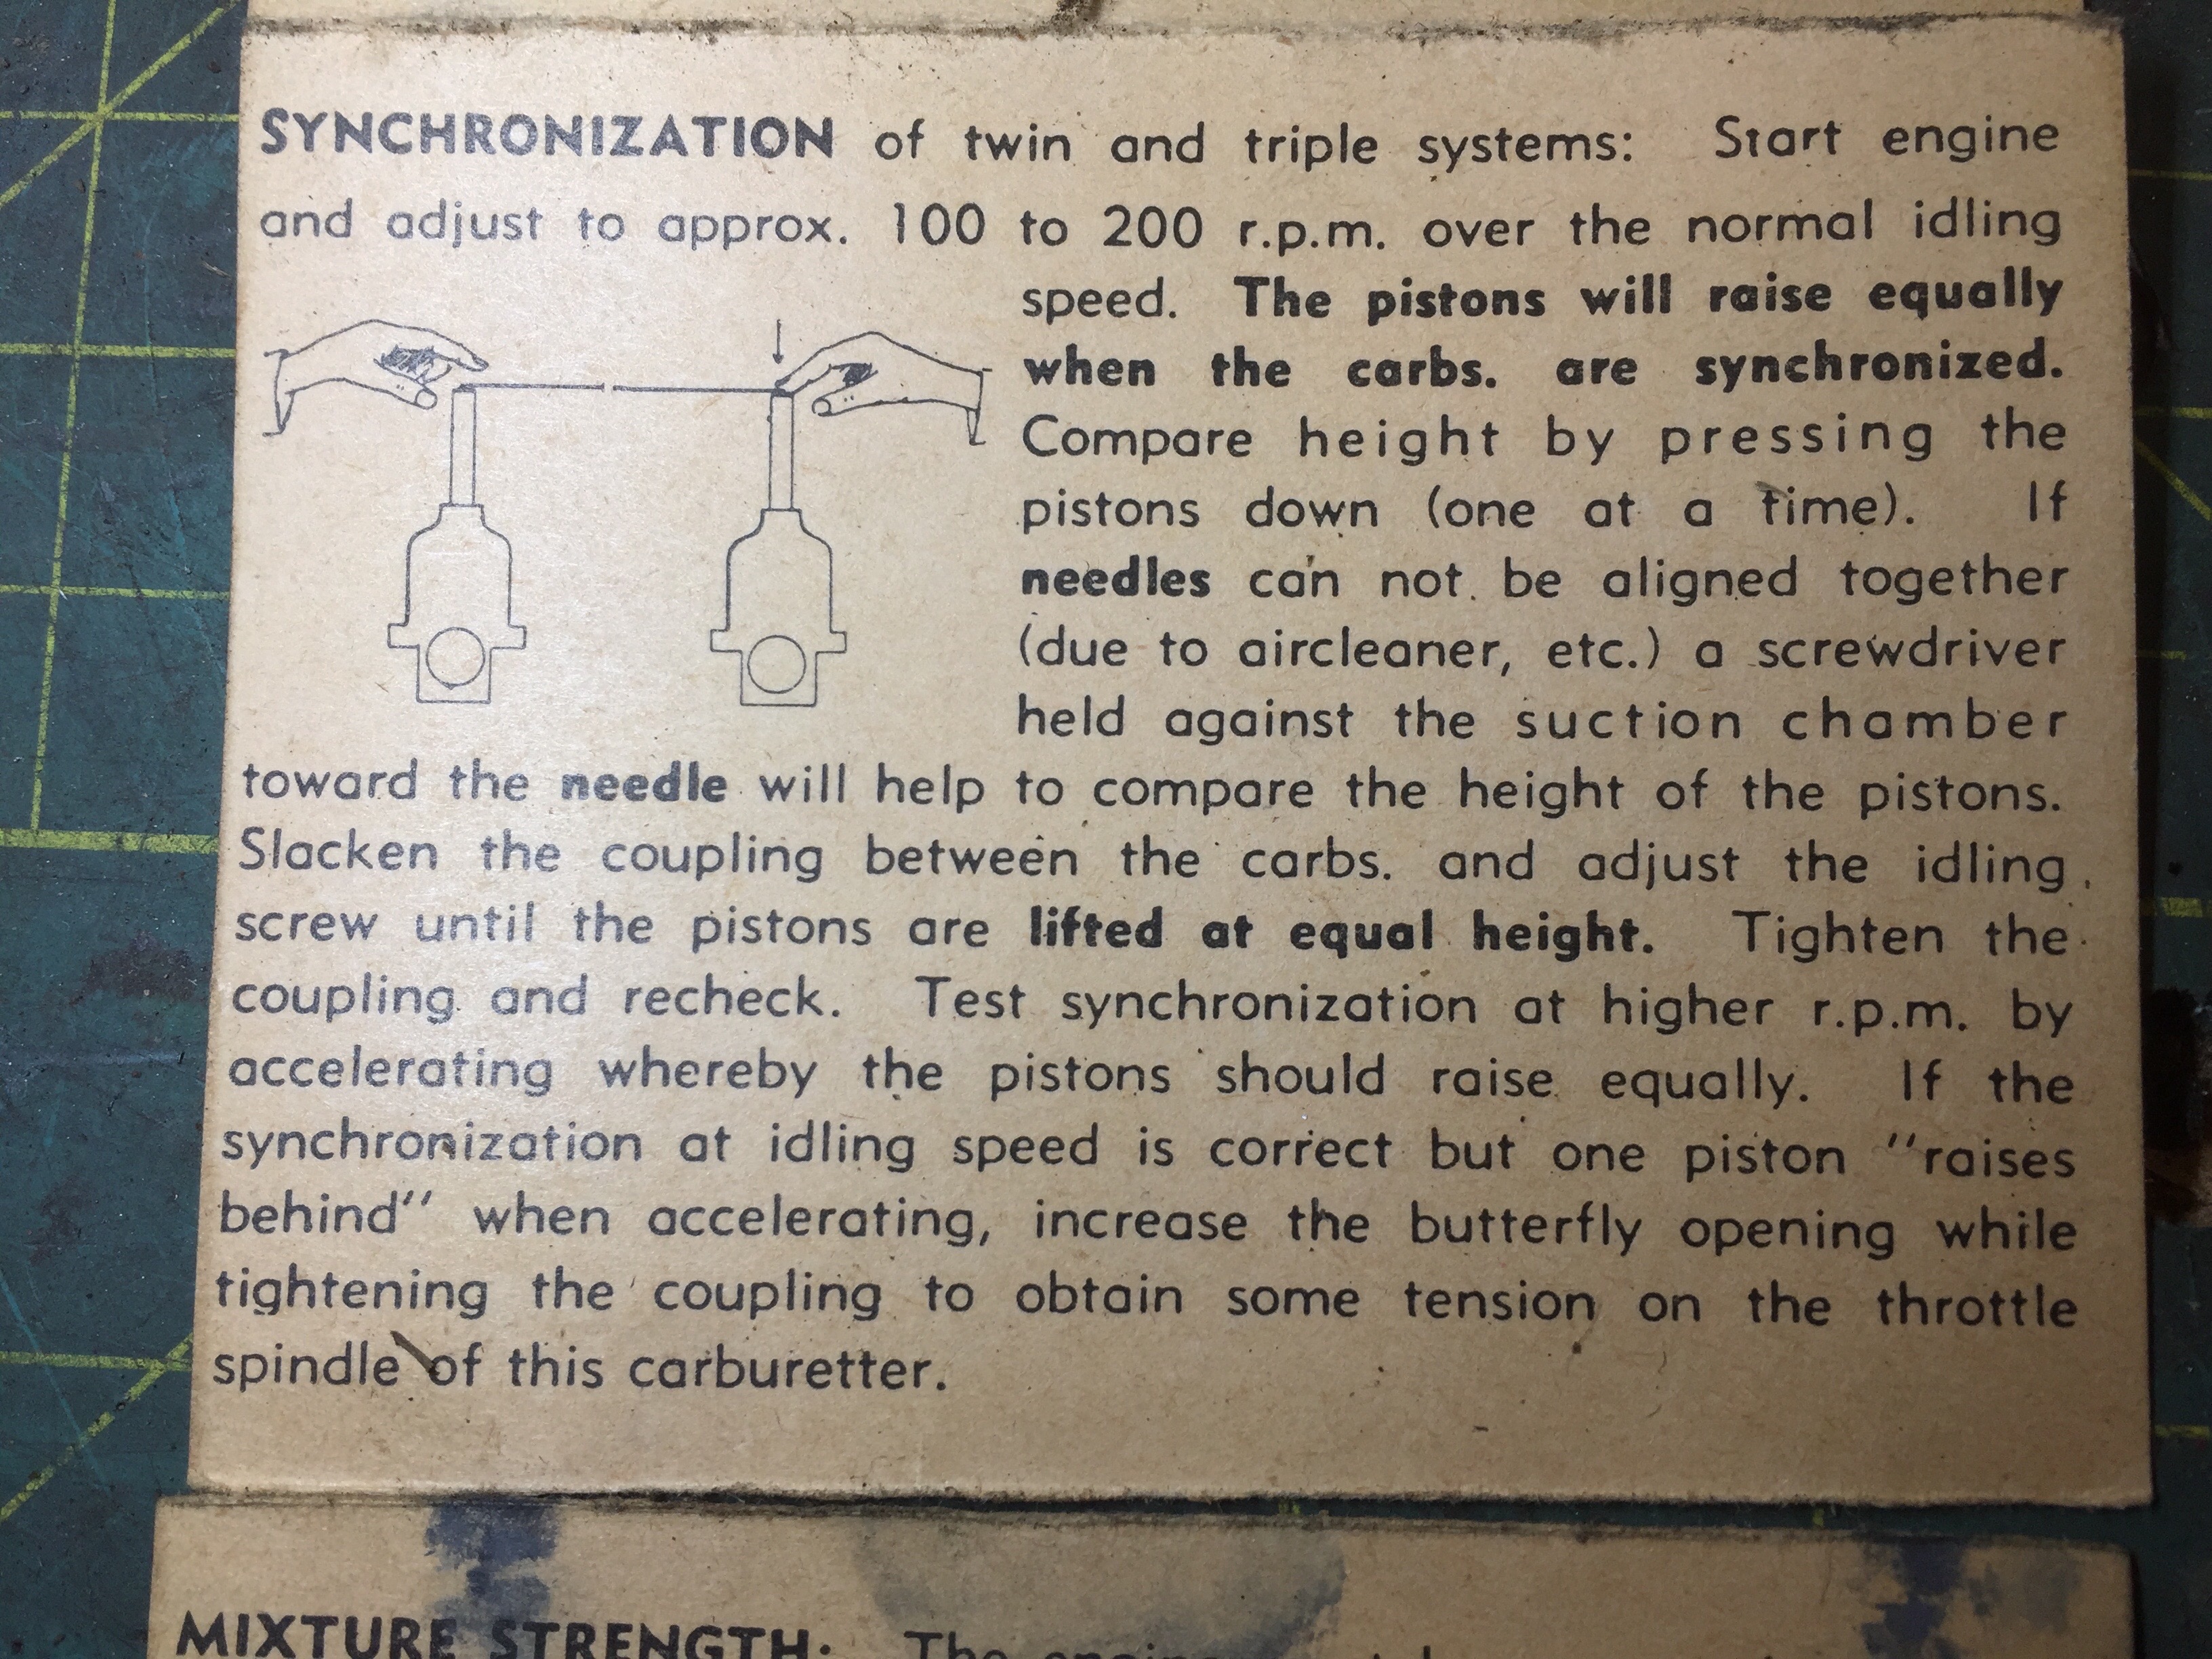
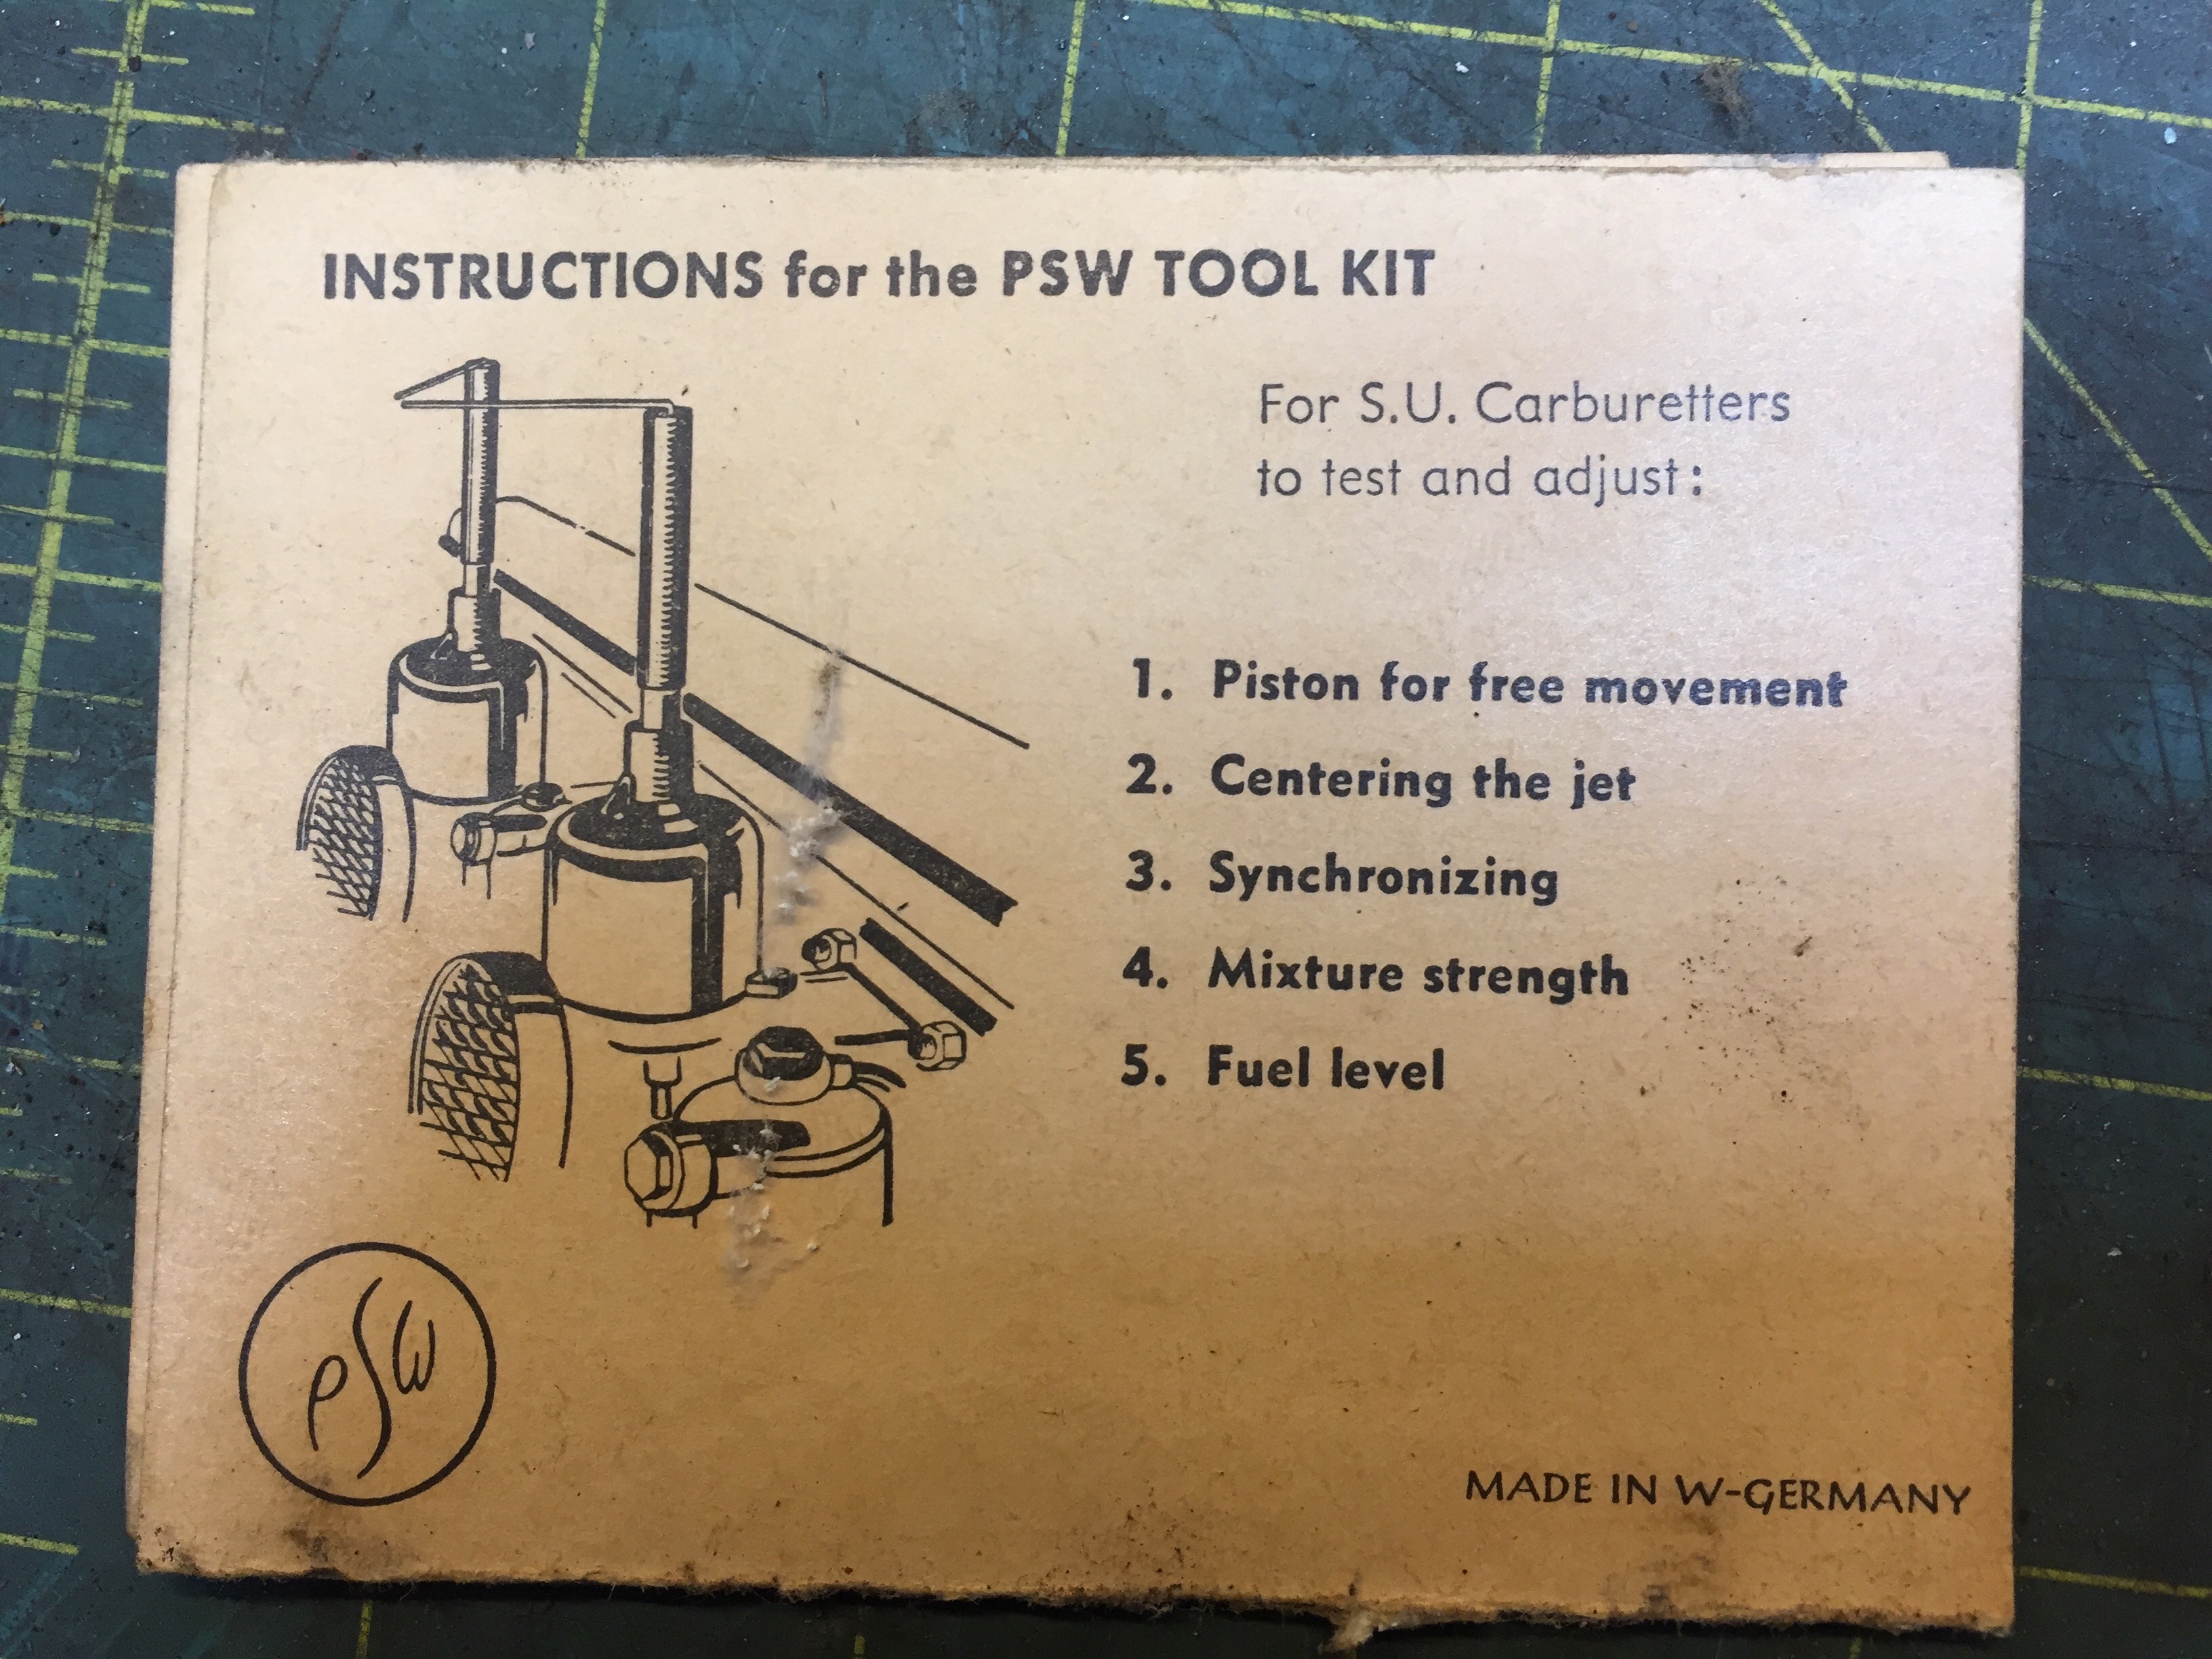
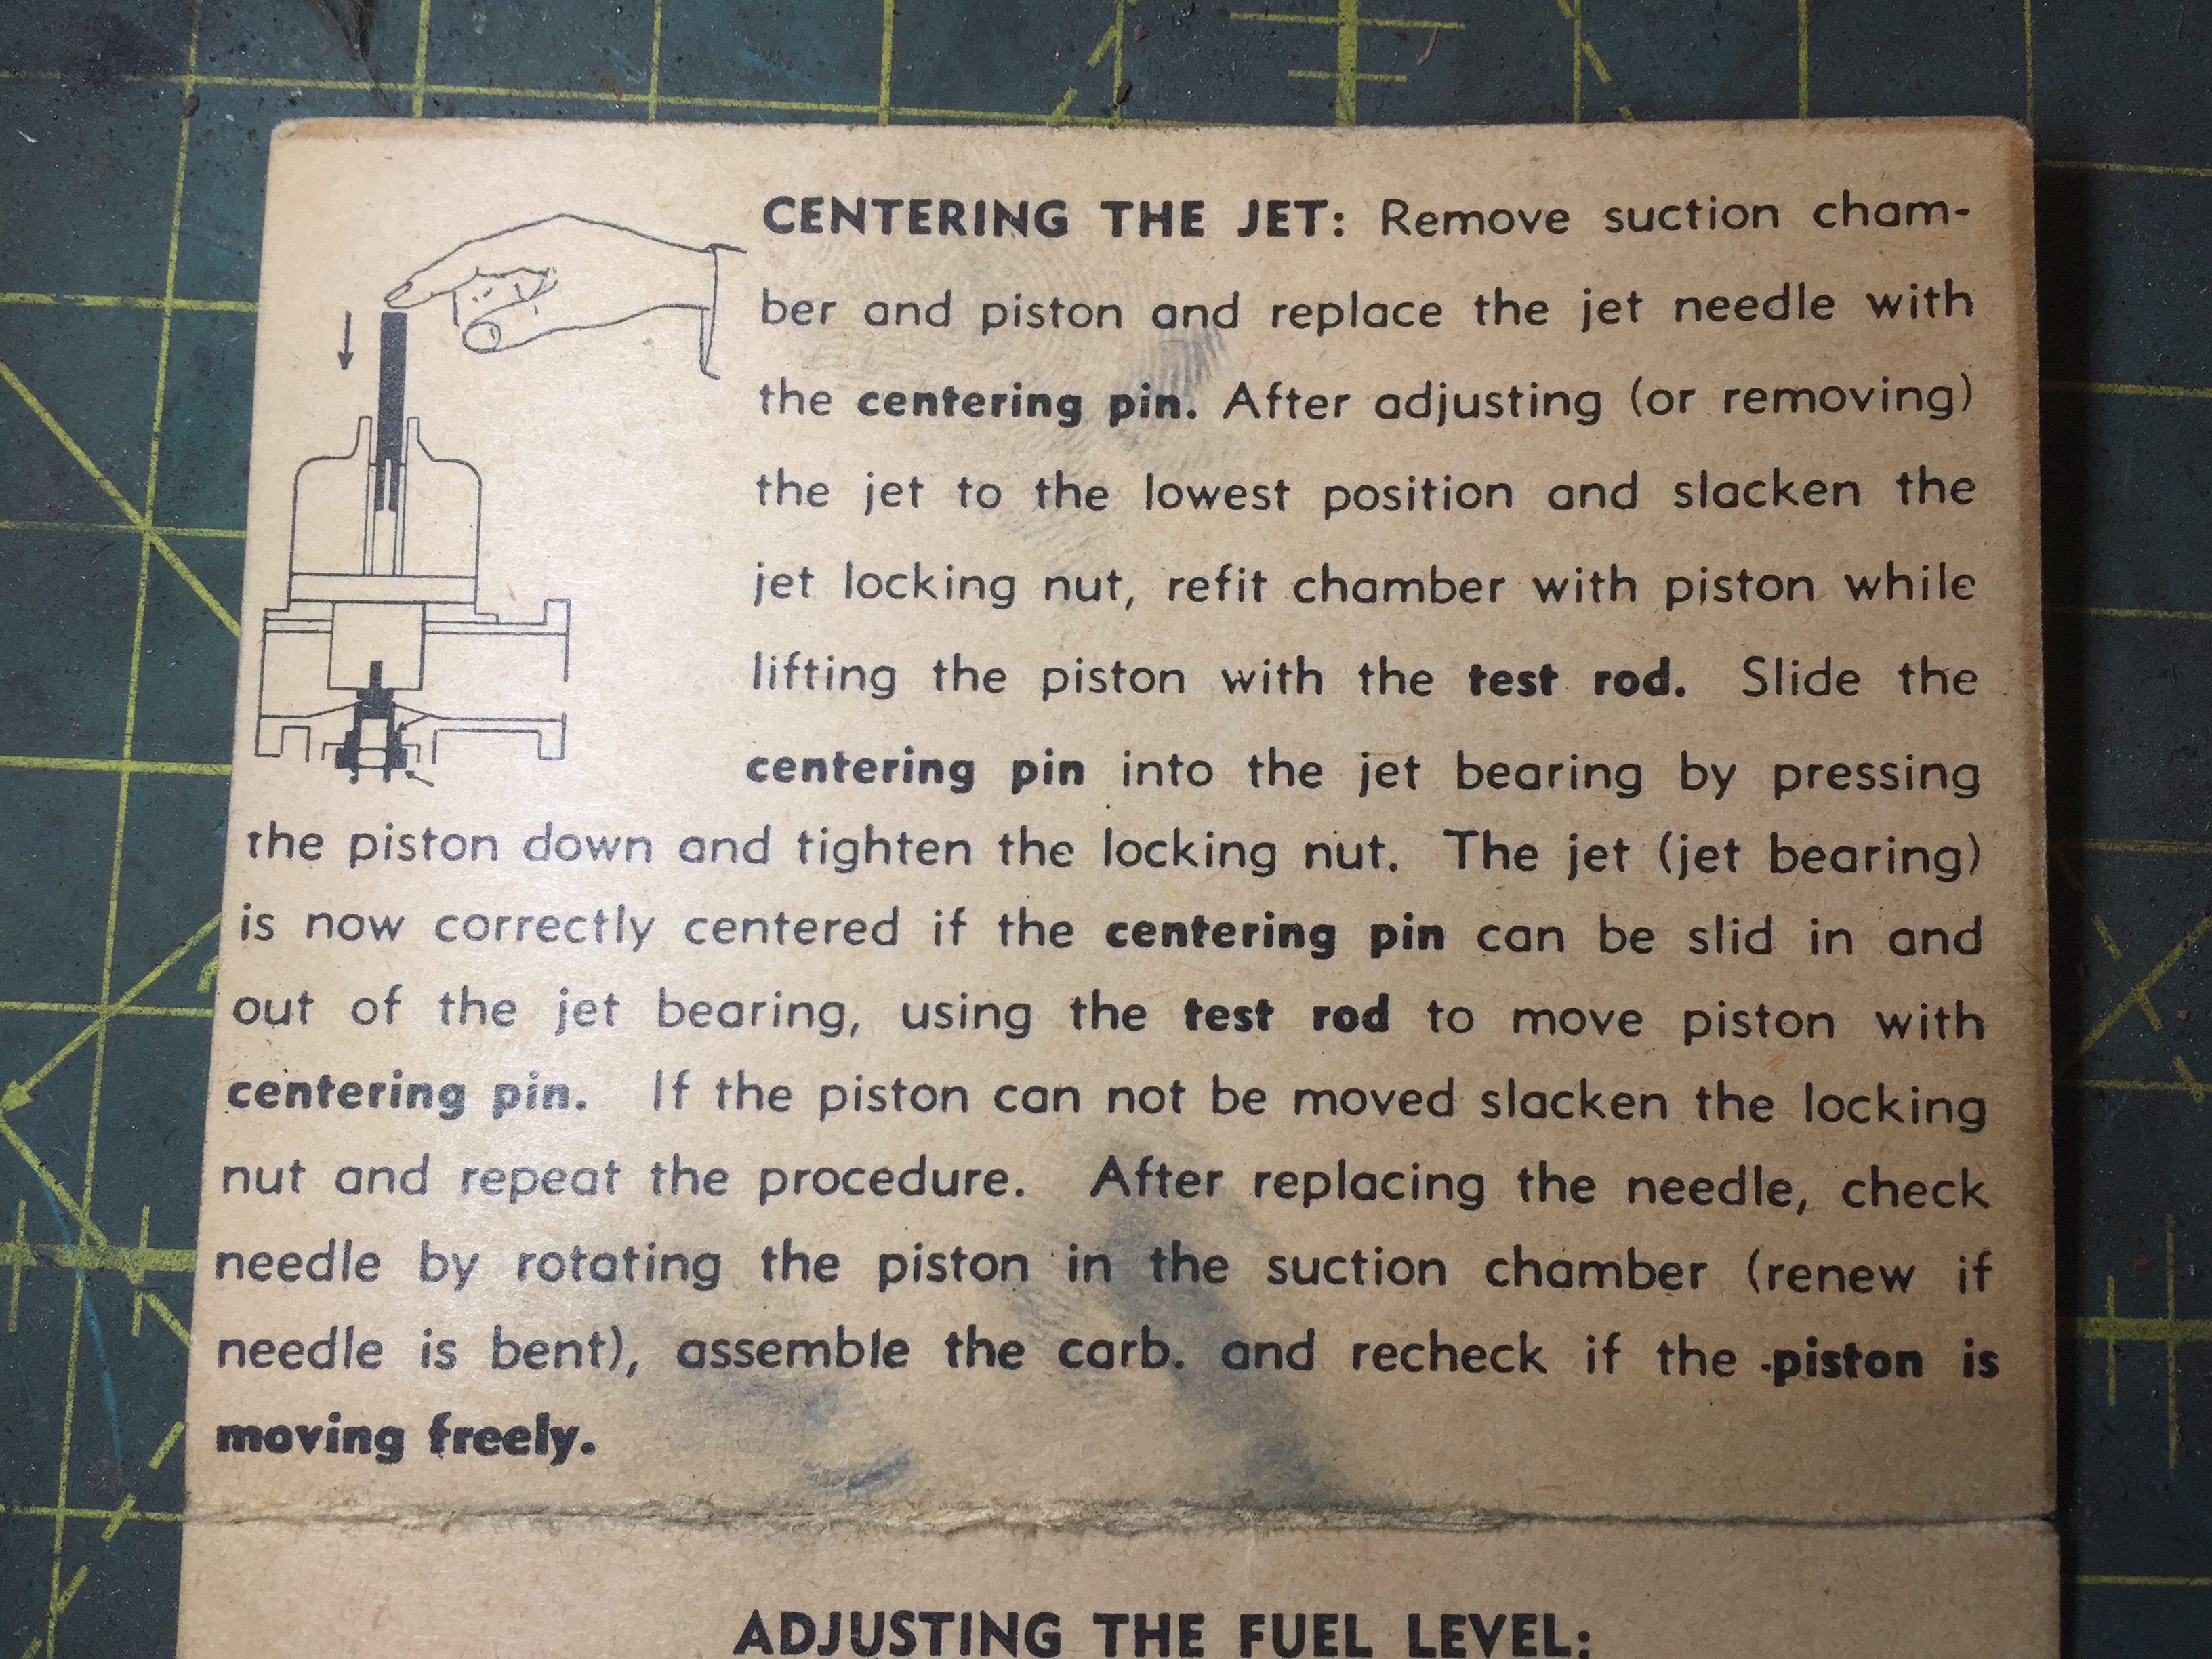
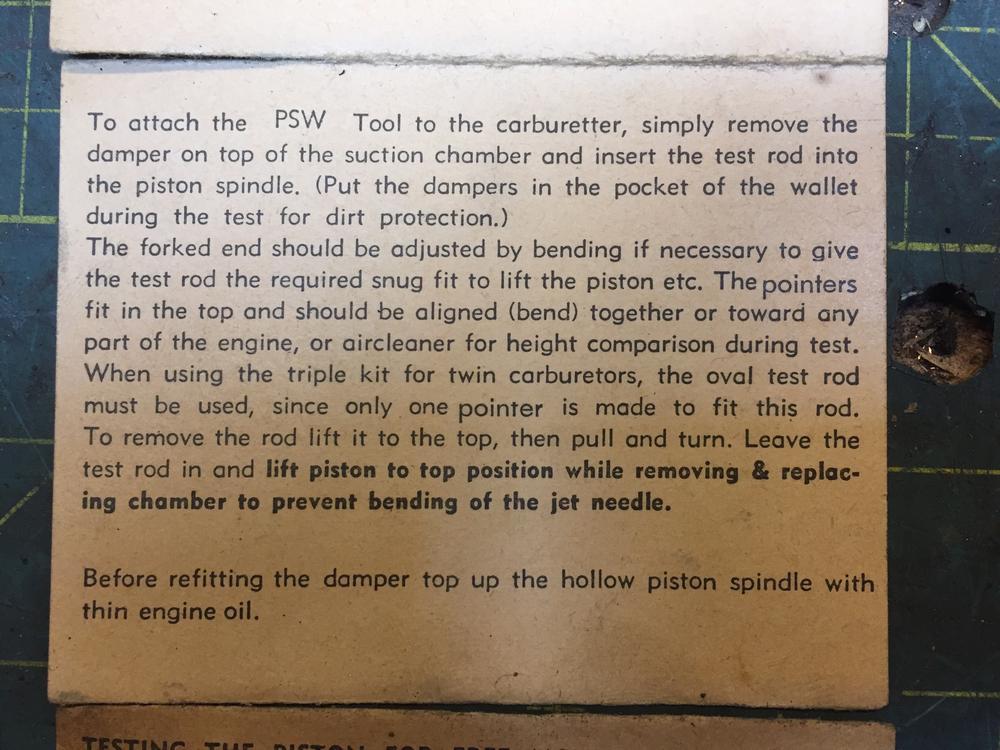
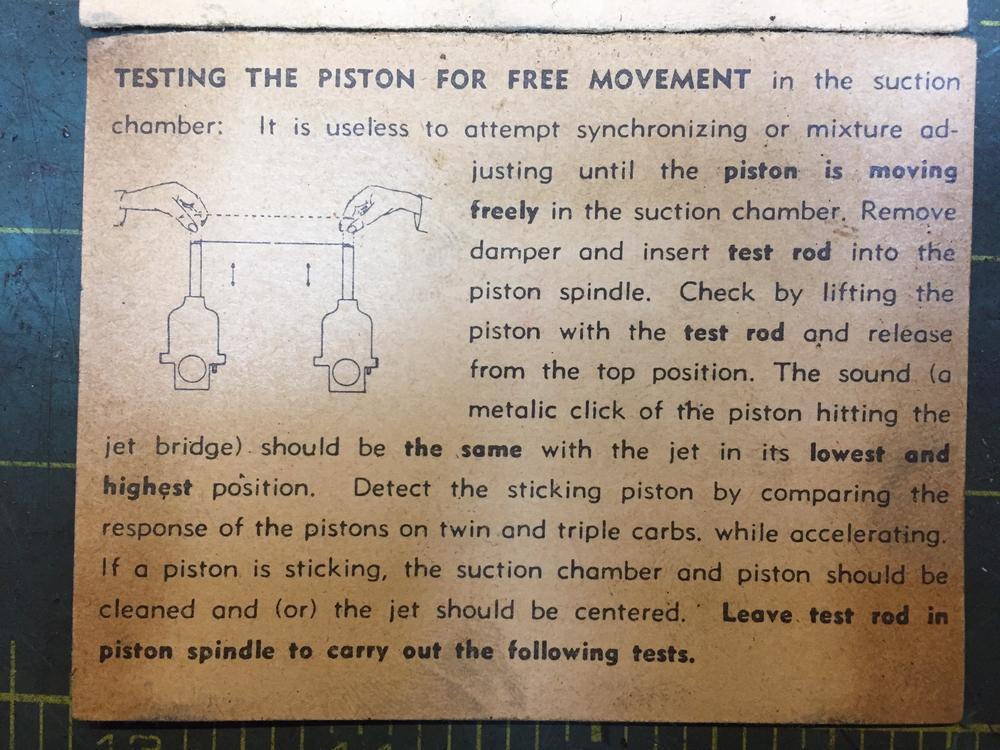
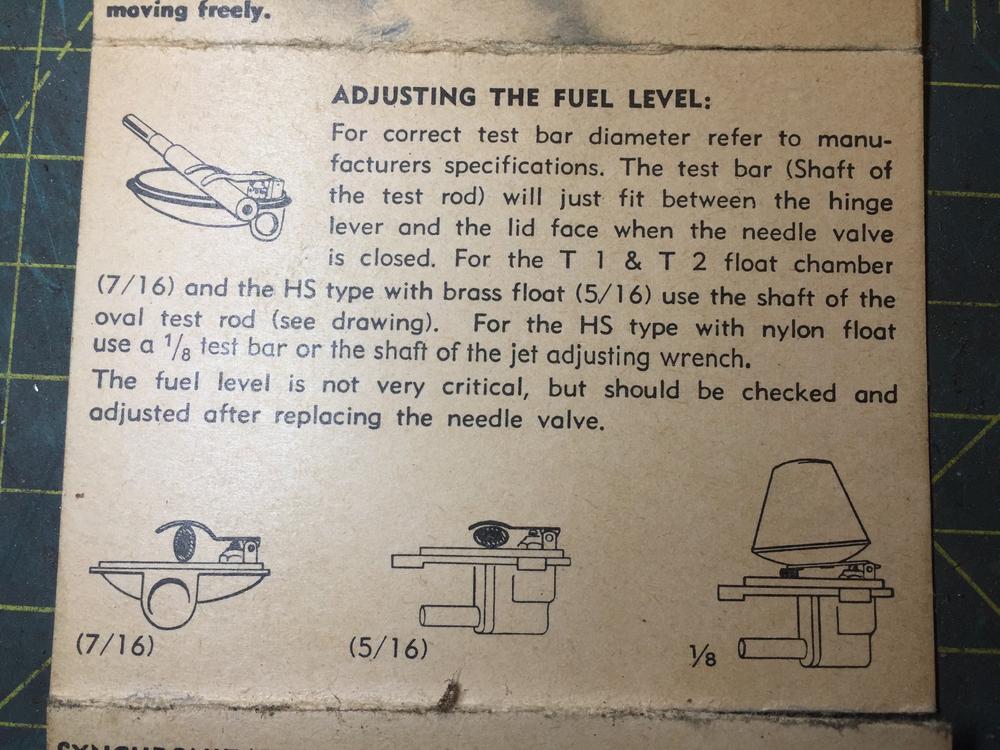
It came with an instruction booklet.


-
Found an interesting item in the glove box. Well two, but first things first. Seems its a tool to assist with SU tuning.


-
-
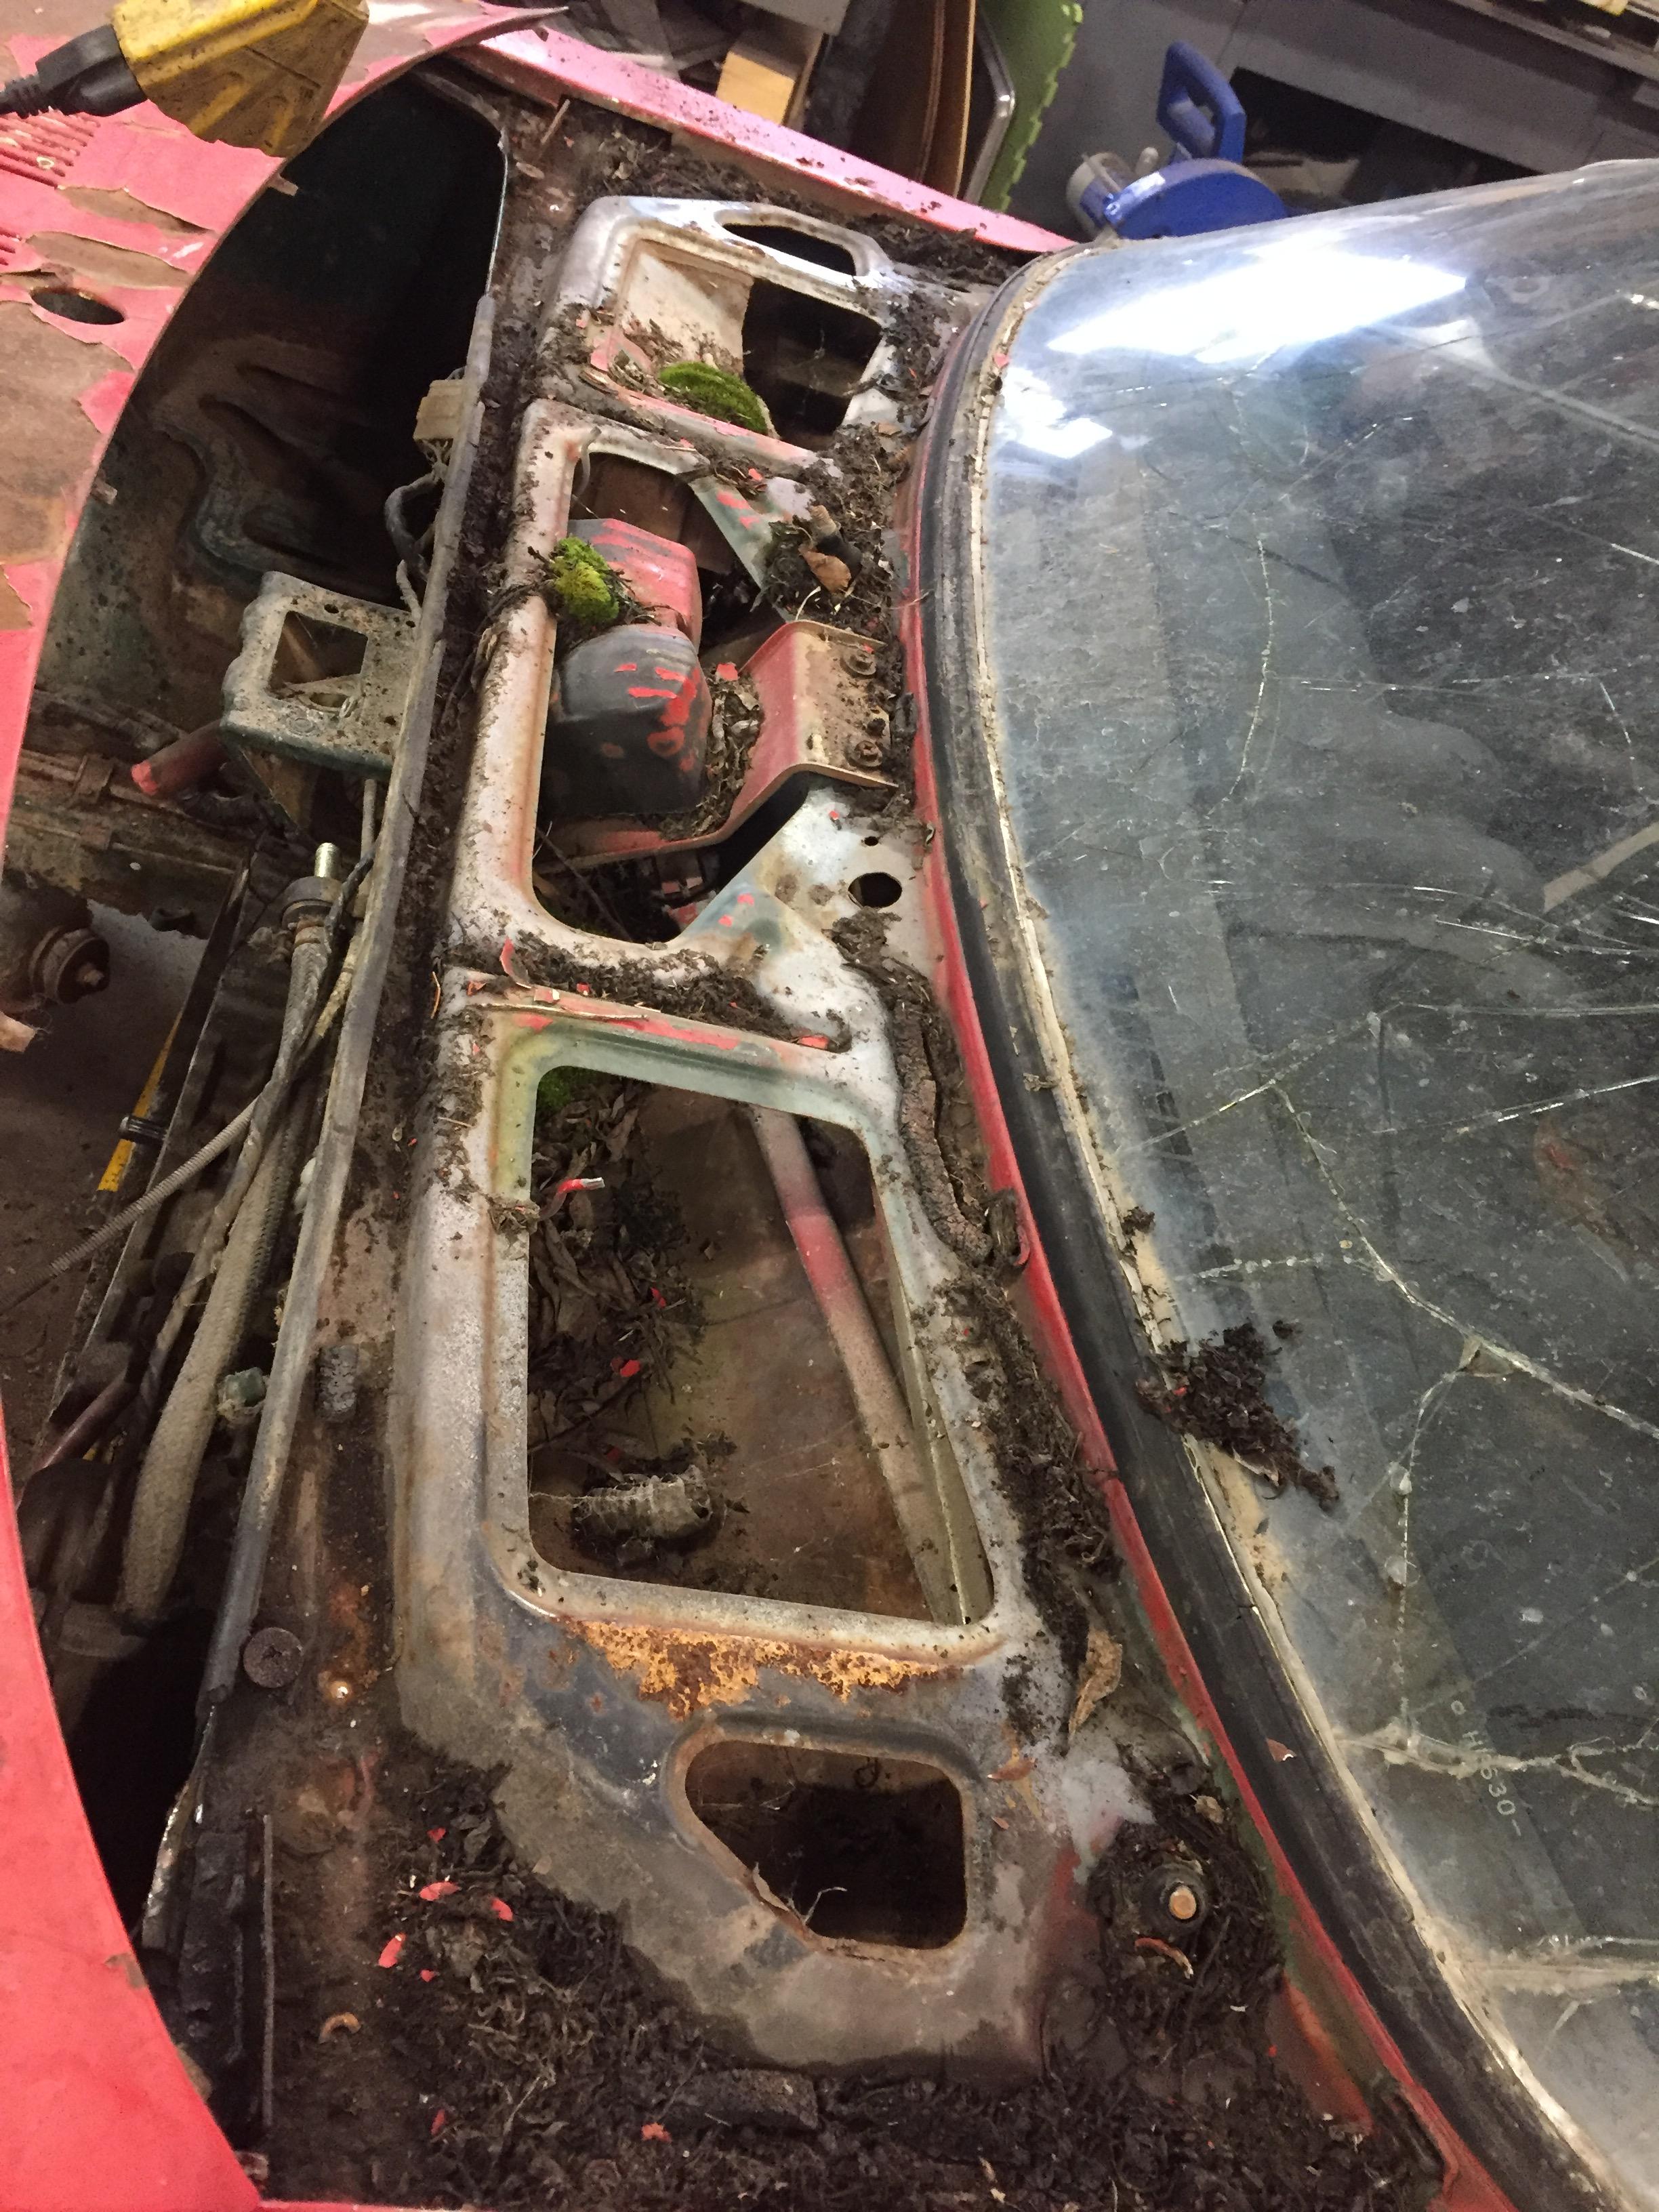
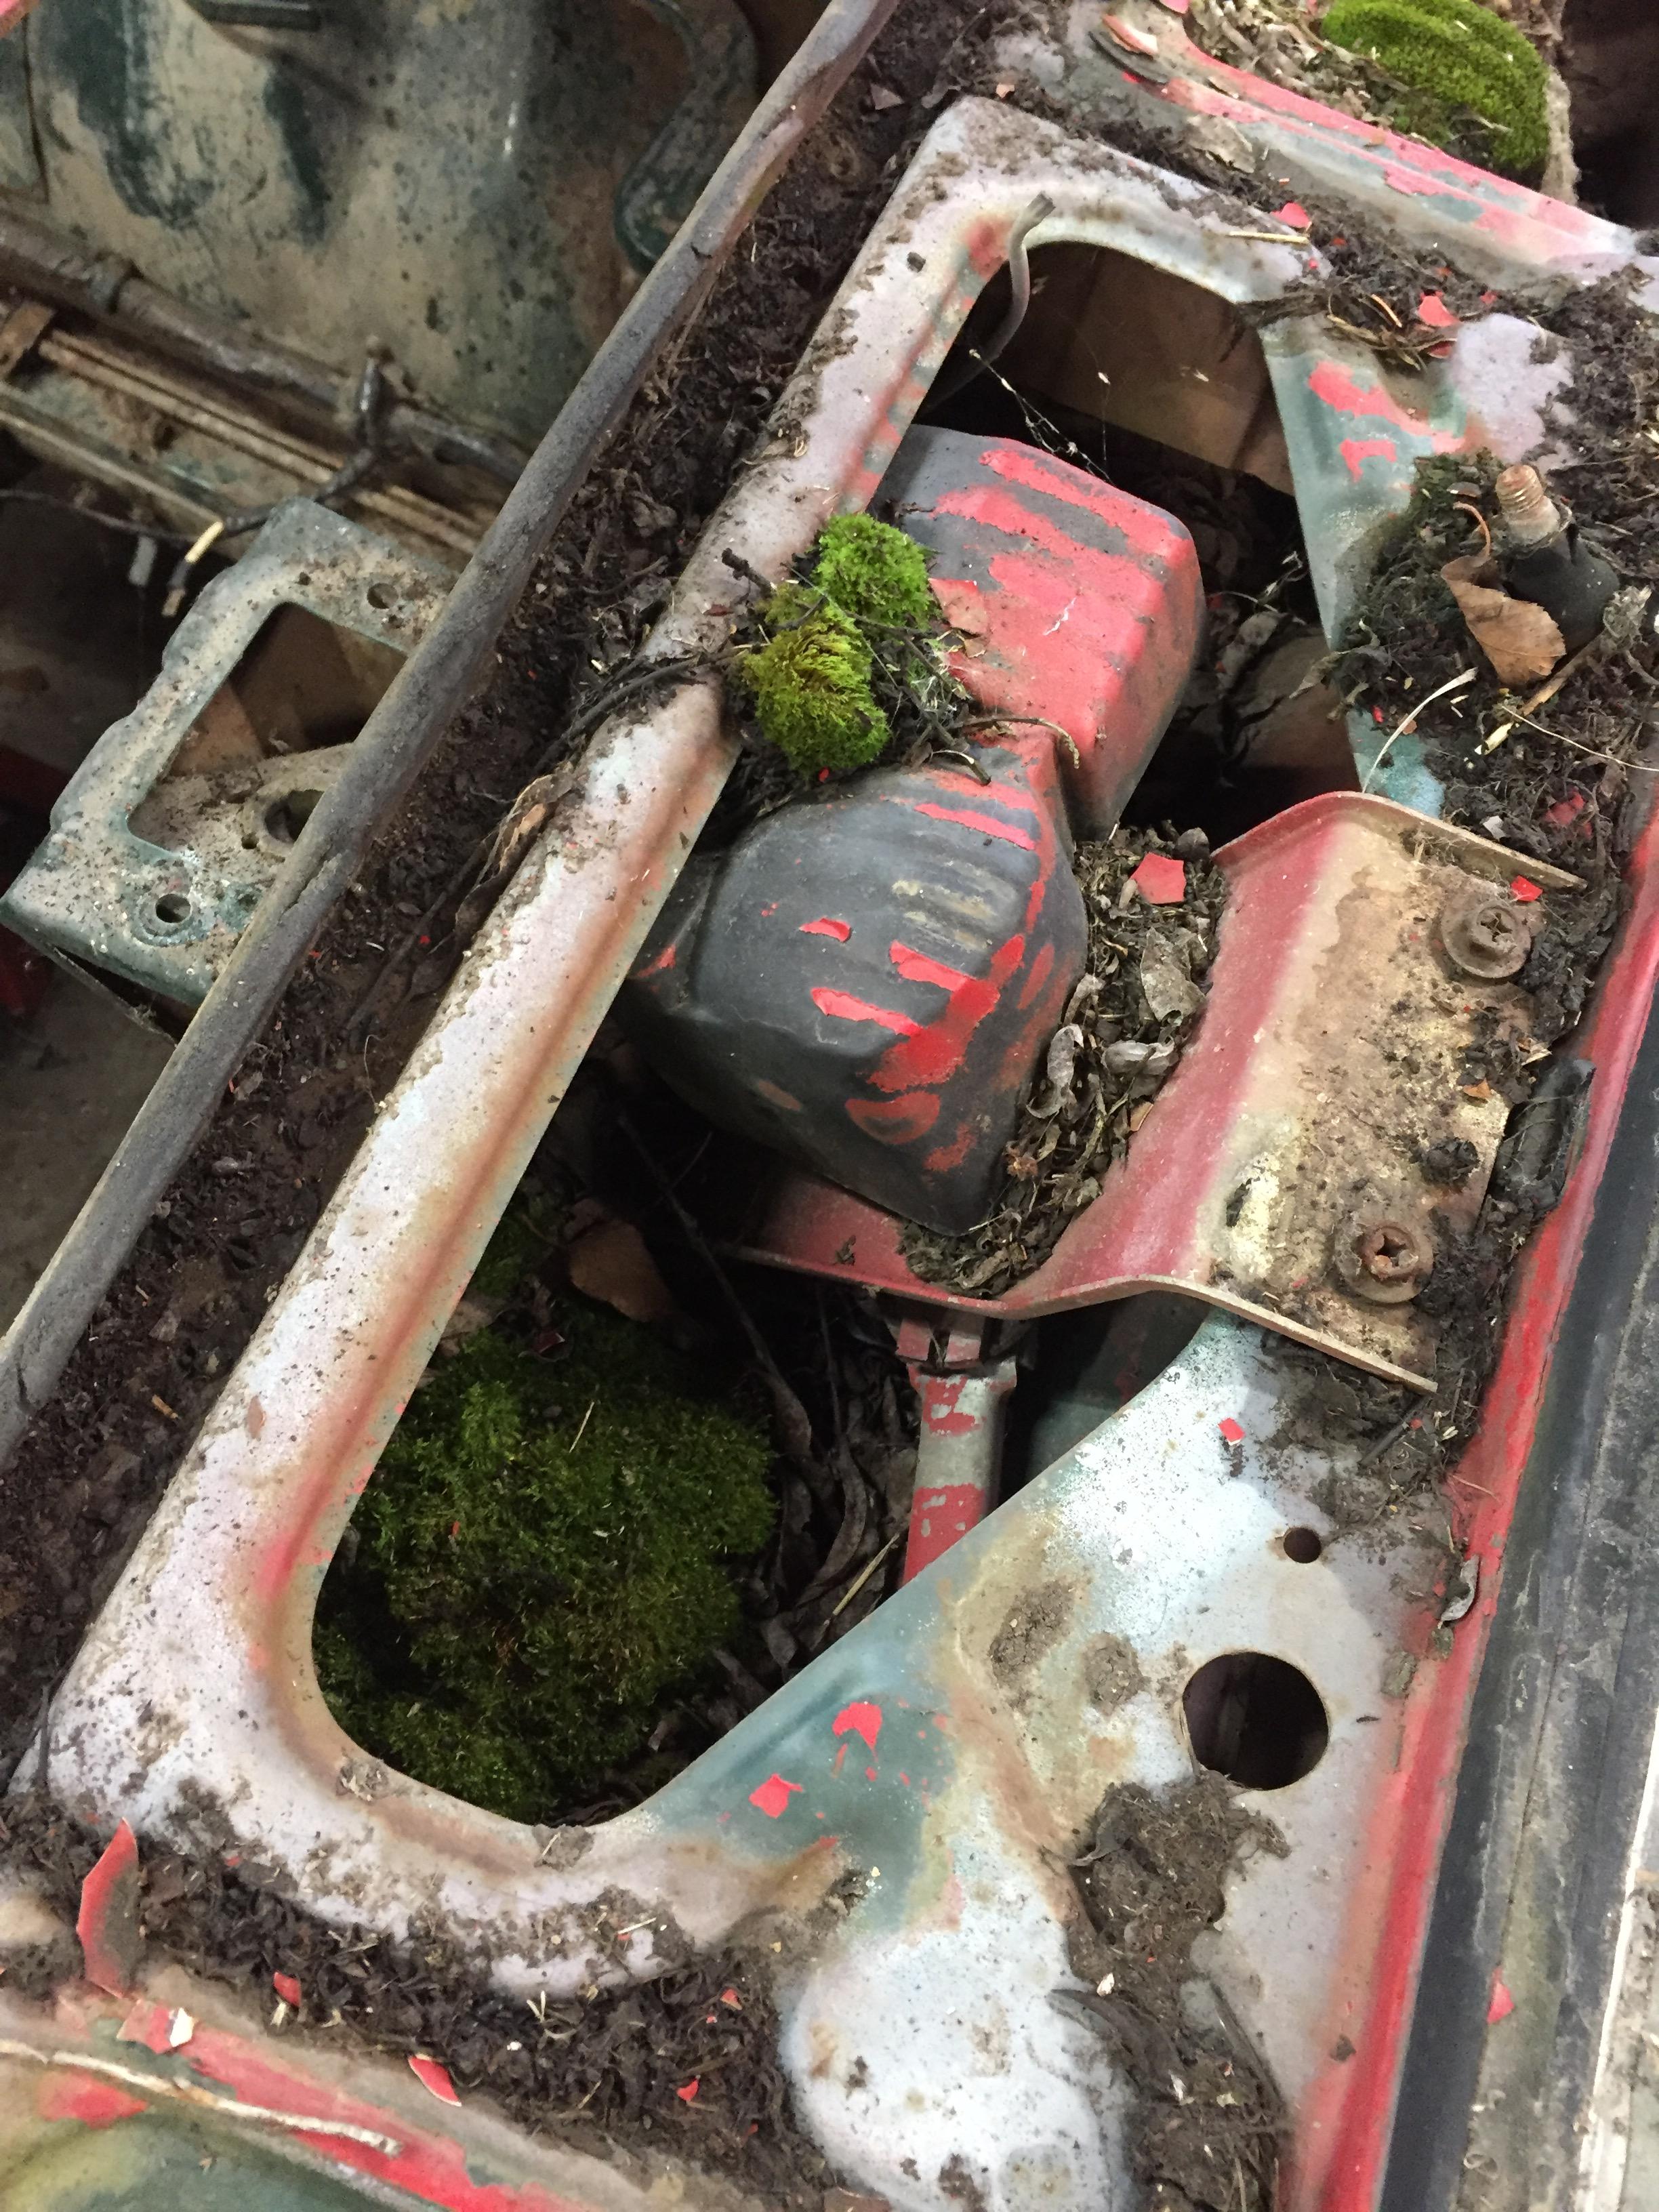
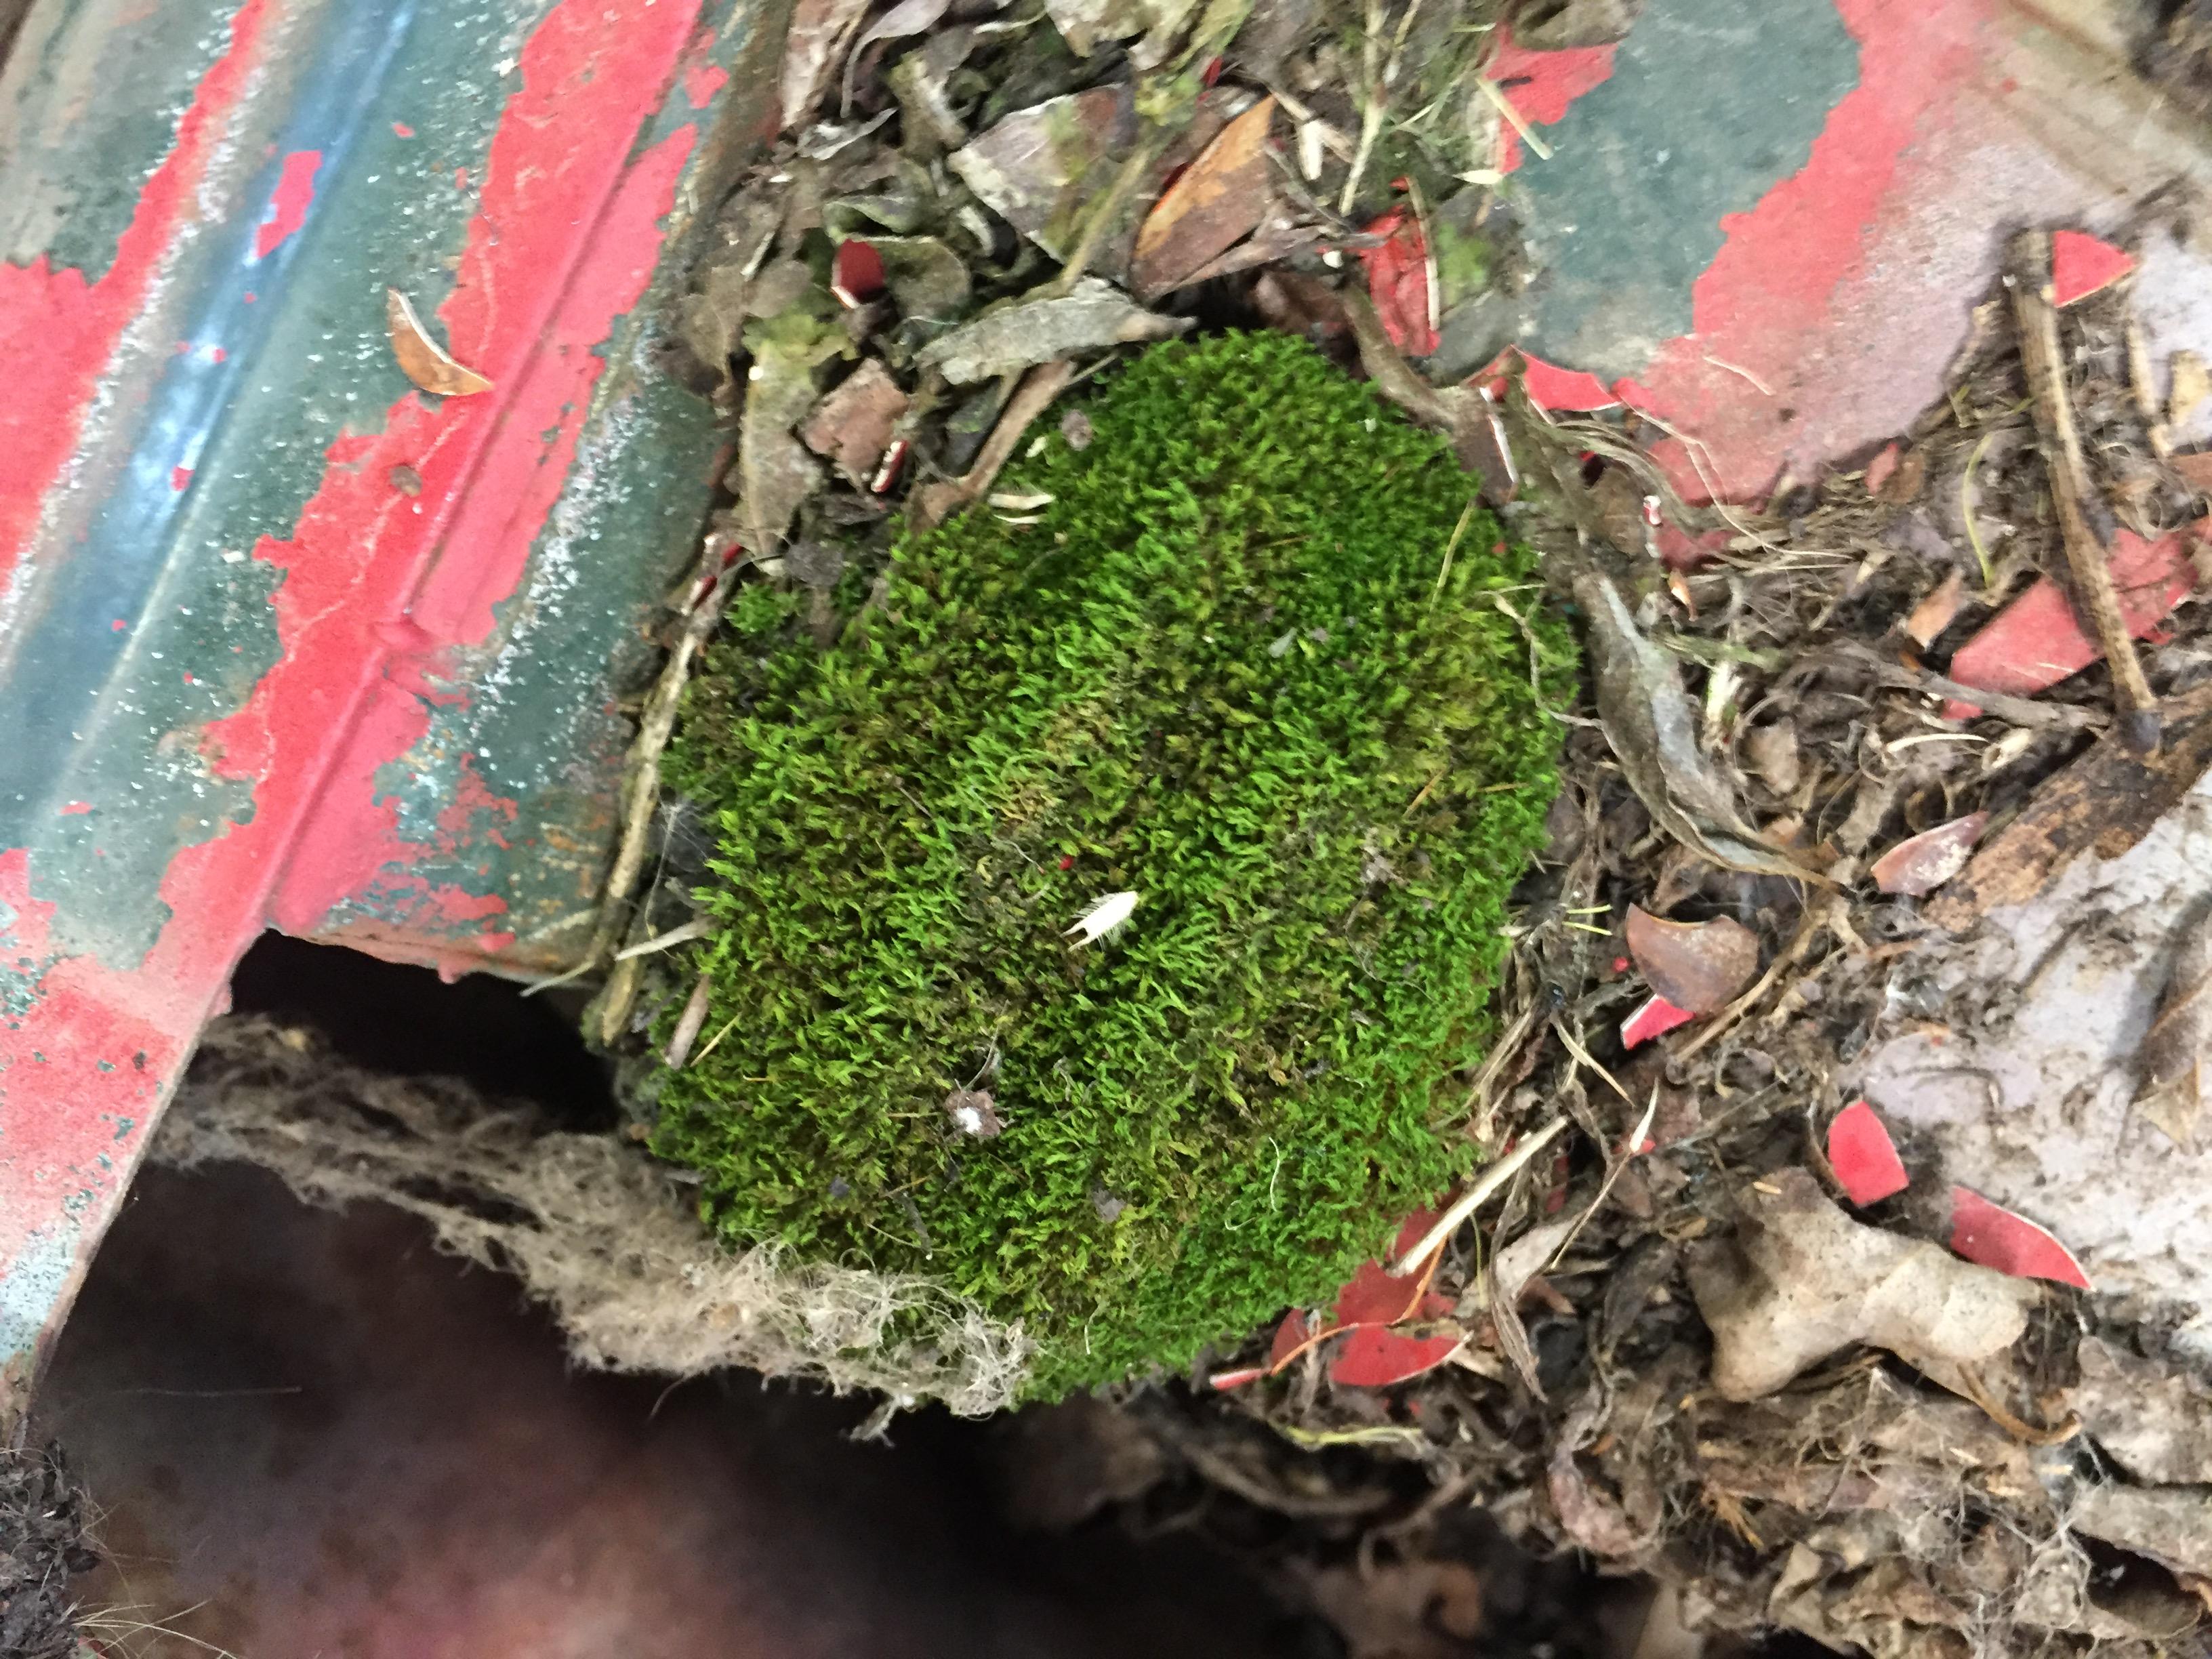
Even in your darkest moments with your hands deep in the cadaver, you can find unexpected beauty and life.


-
That's easy. FIELD TRIP! I got to go to farmers field with a Z buddy and drag its rusty a$$ onto a trailer in the snowy Canada North winter, freezy many unmentionable parts, then have lunch at A&W. A treat I rarely get these days.... sigh.... That and the BOAT LOAD of valuable series 1 parts that it contains for the other S1 car I recently aquired. 'Tis only the body that's worthless... And even then there are several little tid bits that must be kept, like rear tail light trim lower clips, and a pedal box for Auto-manual conversions etc etc etc.... Even a neighbor that makes his living by hauling scrap metal benefits. Circle of life baby, circle of life...
-
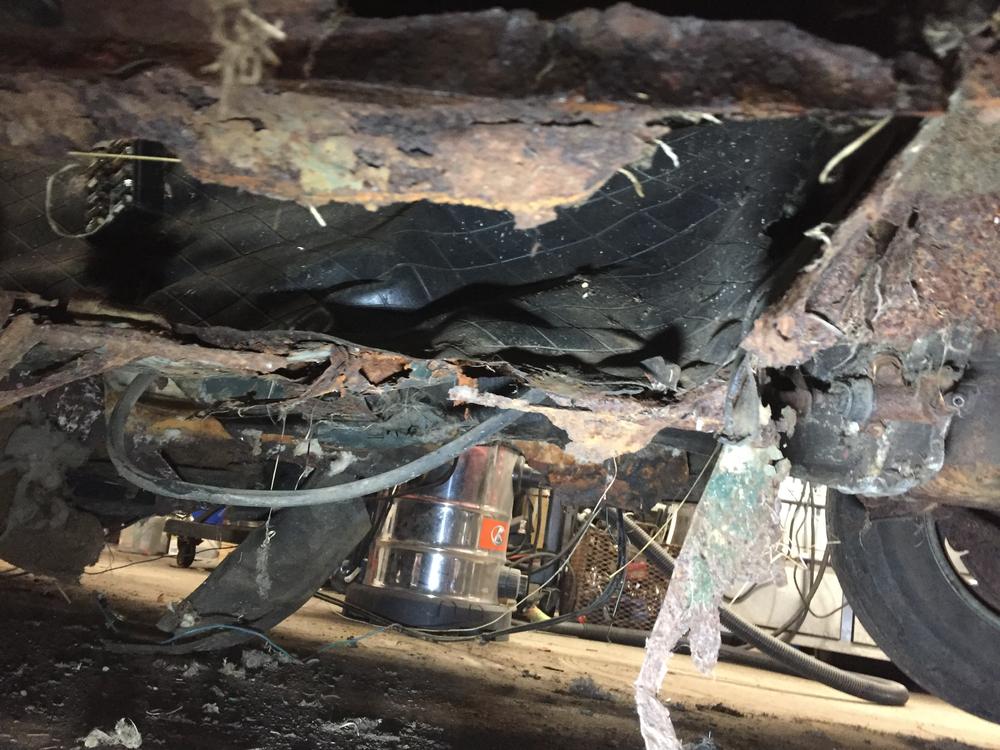
more carnage

-
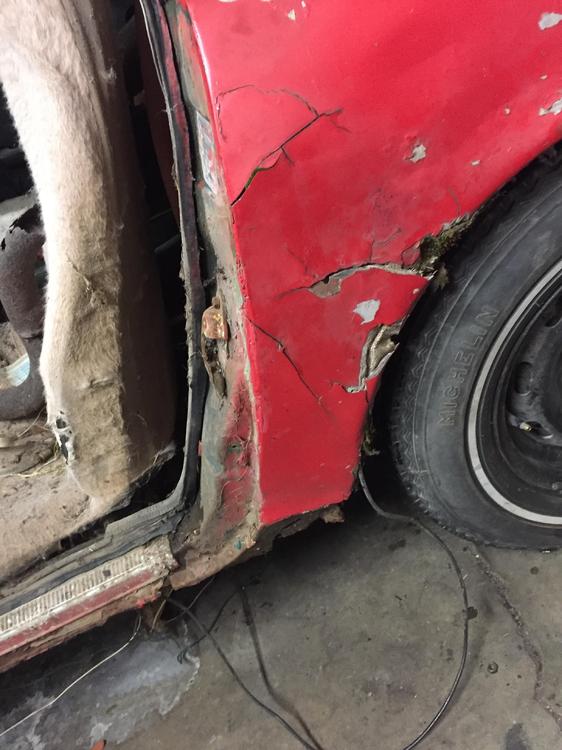
Might not need a Saws-all for this one. Just pretend its a juicy crab leg...
-
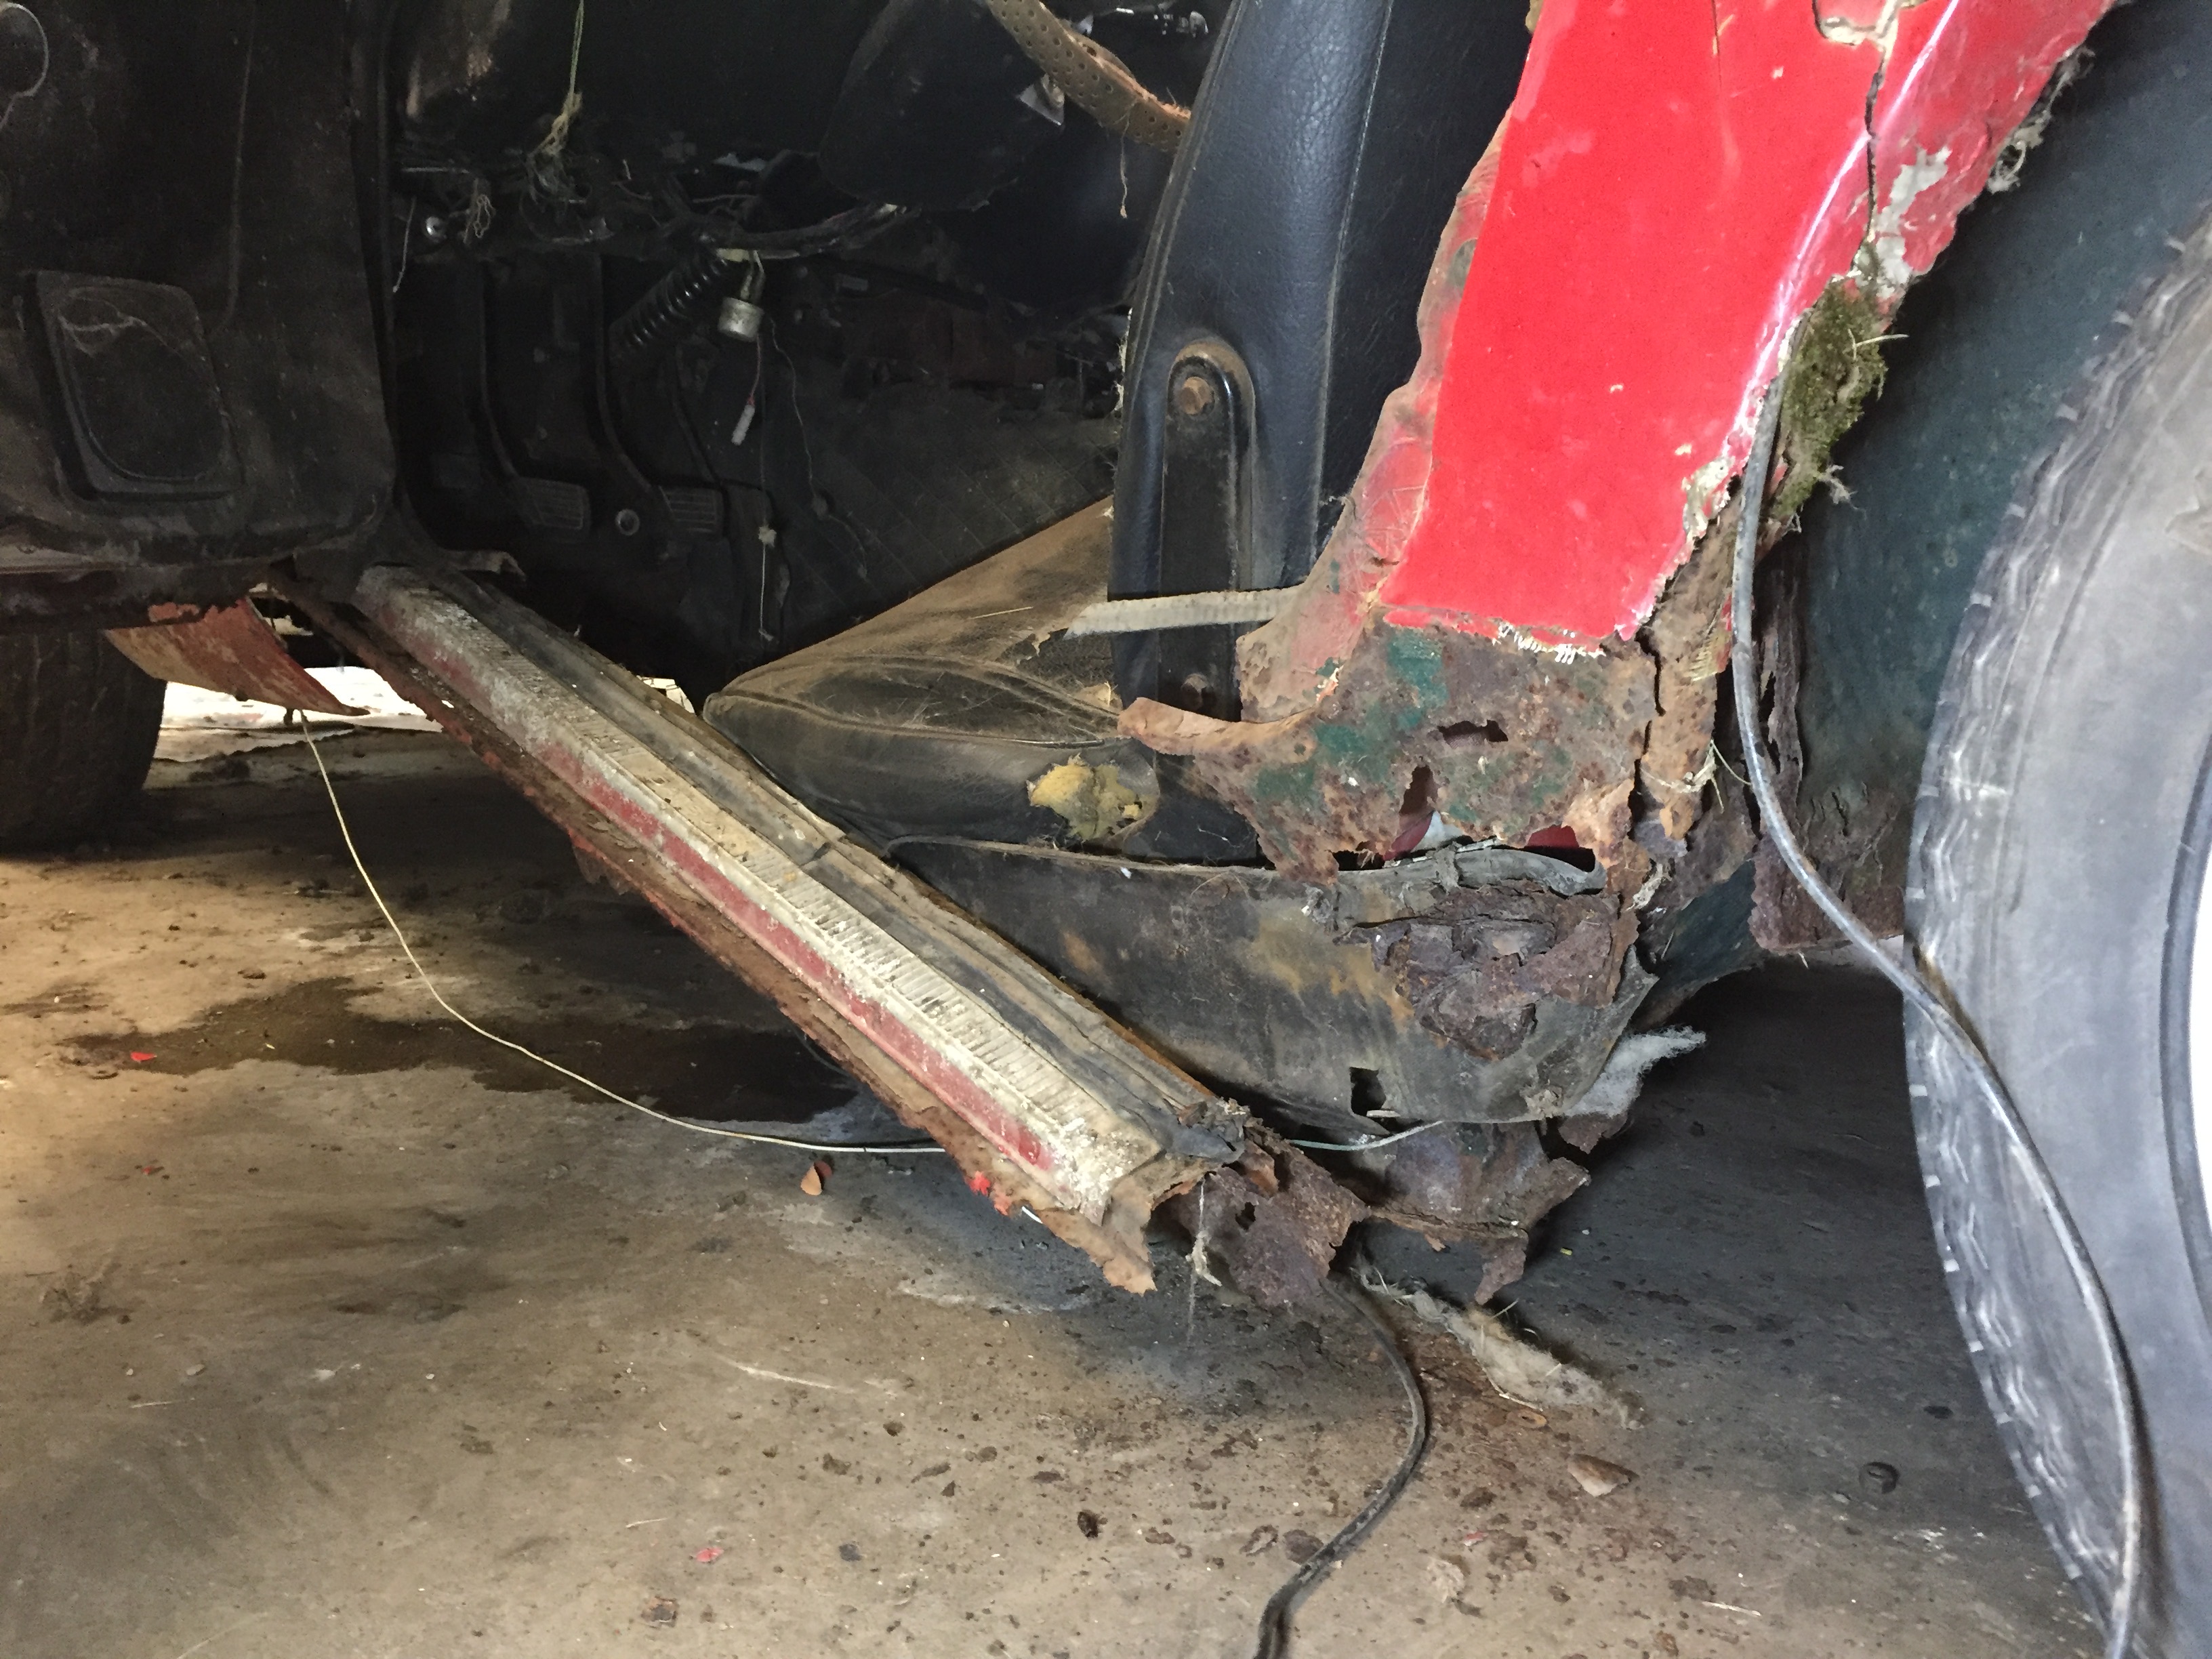
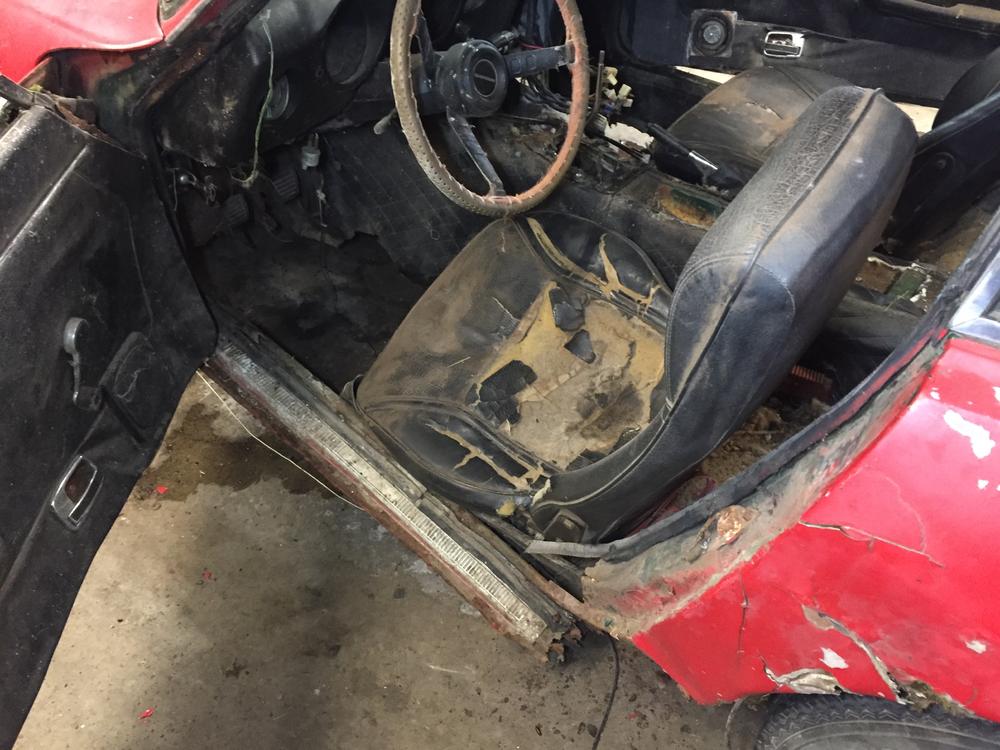
I saddens me to announce the passing of HLS30 (UA) 02744. It joined its other family members that met a similar fate at the rust recycling pile in the sky (actually Lenny's metal recycling center...) this morning at 10:15am I have to admit I was the one that administered the fatal blow, when I foolishly sat in the driver's seat to check the mileage. The extent of the damage can be seen from the accident scene pictures below. I failed to support myself with my feet on the floor (shop floor, not car) while seated. These pctures are the only ones I can bear to show. We should have seen it coming. When trailer towing it home, the straps at each end kept coming loose no matter how much we tightened them at each stop. Maybe the drivers door coming loose and flapping in the wind half way home wasn't just us forgetting to latch it tight... Fortunately I found a signed donor card in the glove box (right behind the mouse nest). It's remaining useful bits will be used to save the life of as many other UA's as possible with 3798 being first in line. It's especially sad as it is (I mean was) full numbers matching. A DNR was not needed. There no way any sane person could bring this one back to life. Donations to the "save a datsun" charity of your choice are requested in lieu of flowers.

-
Congrats on your purchase of rusty bacon. Must be the moon's position with Uranus rising or something, early cars are popping up all ova da' place! First I find 3798, then you dig up 7848. Then the suspiciously light and flexible remains of 2744 followed me home yesterday. It's strickly a parts car (don't even THINK about this body...) but it may have some things you're missing that I don't need for 3798. Keep in touch.
-
These are not shims. If they were in your old axles between the spacer and cap, it was done wrong and you now know the reason your bearings failed. They are noice reduction devices. Really. They stopped being used on the 280's. As long as you have the right spacer that came from the axles, you are good to go. "Most" spacers are stamped "B". The FSM shows you the assembly and length specs of each of the spacers (A, B and C).
-
I've been asked by a parts customer for a hood and driver's door shell for his 72. Anybody in Ontario or east that has something? 9/10 condition required, little to no rust. Small ish dents and crap/no paint are ok. Let me know if you have any leads. Looking in Canuck land first, but if you are in the NE USA, let us know as well. Thanks!
-
So this chapter is now closed for the winter. I finished the mechanical/electrical stuff to make it operational and mostly safe, then put it in storage until next spring. We'll see how I feel about its fate then. Restore, flip, pass on to friends (^). Fun to find all the Canadian UN specific stuff (or lack of stuff) on this one. Hope to find others. I have another 510 project to work on this winter and couple of friends with strip/paint/re-assemble projects and the usual quicky stuff that happens, and that's enough. Keep tuned spring 2018.
-
3798 has no "flow guide valve" or evap line.
-
That will be fine. Unless you get very high temperatures in Seattle this weekend, there is no fuel pressure issues you need to worry about. My favorite stupid boo boo is to leave the lines un capped, then move the car where the angle changes and later have fuel dribble out from gravity feed without noticing it for a while. Pressure buildup is not an issue.
-
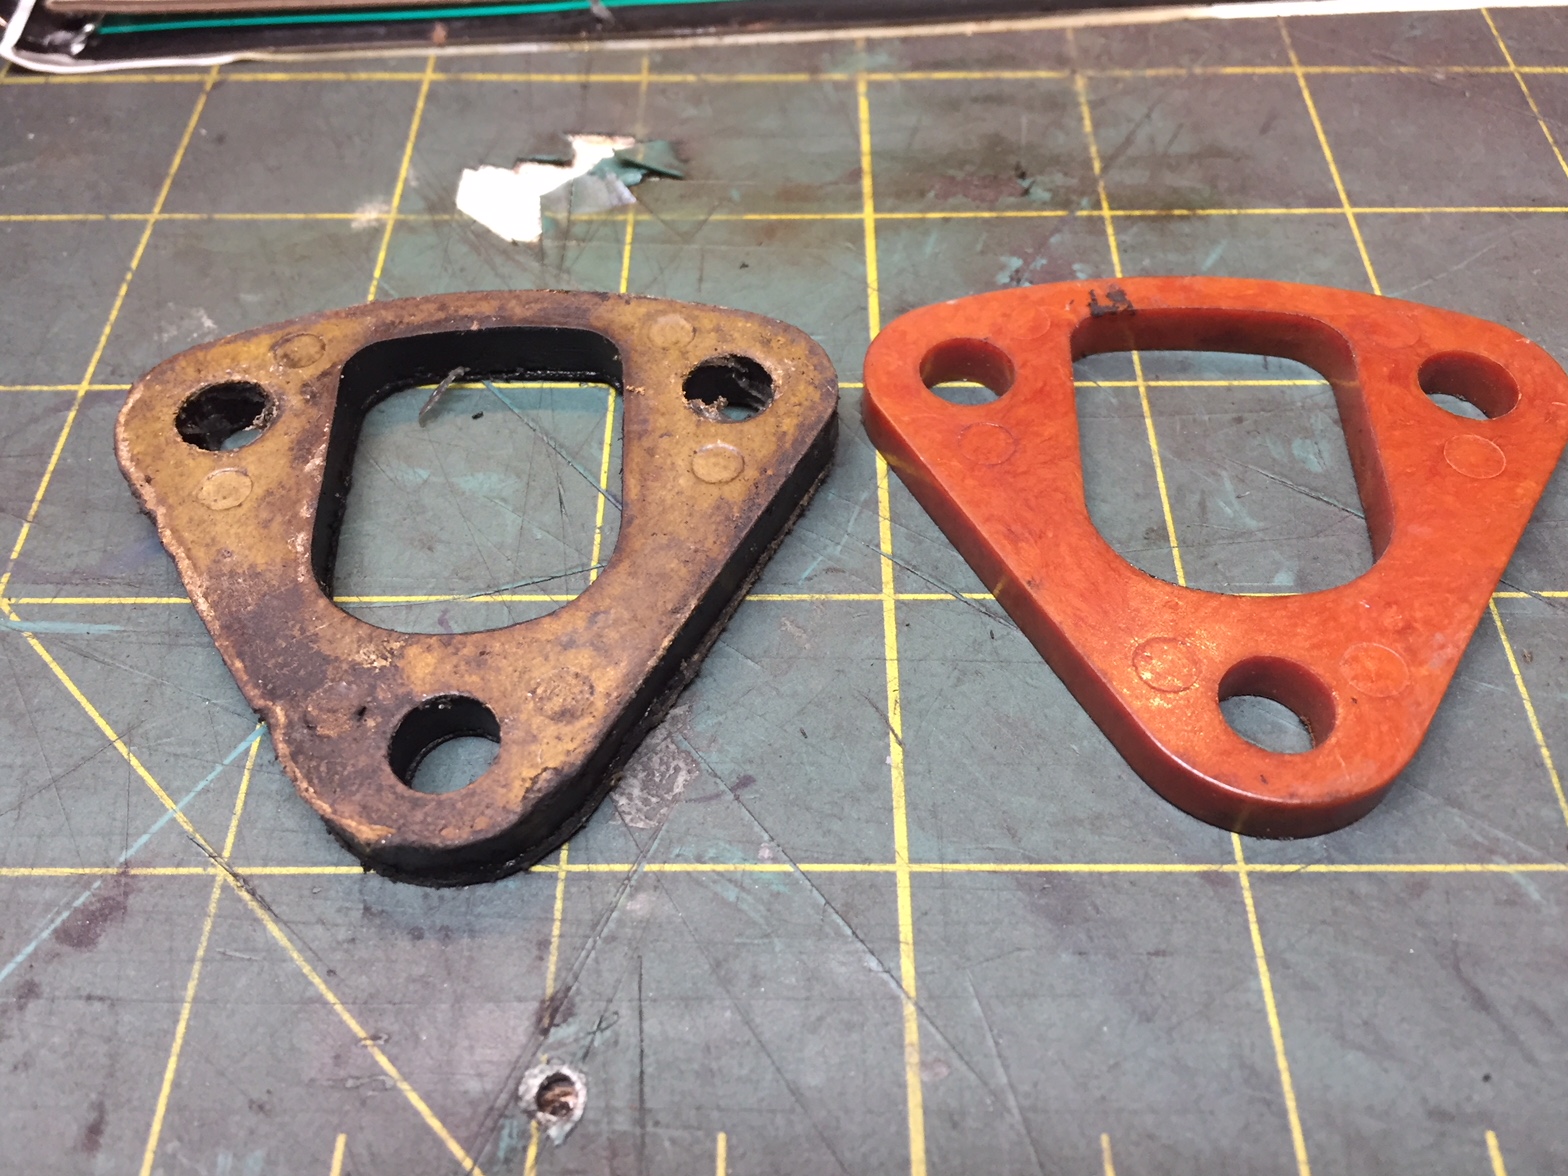
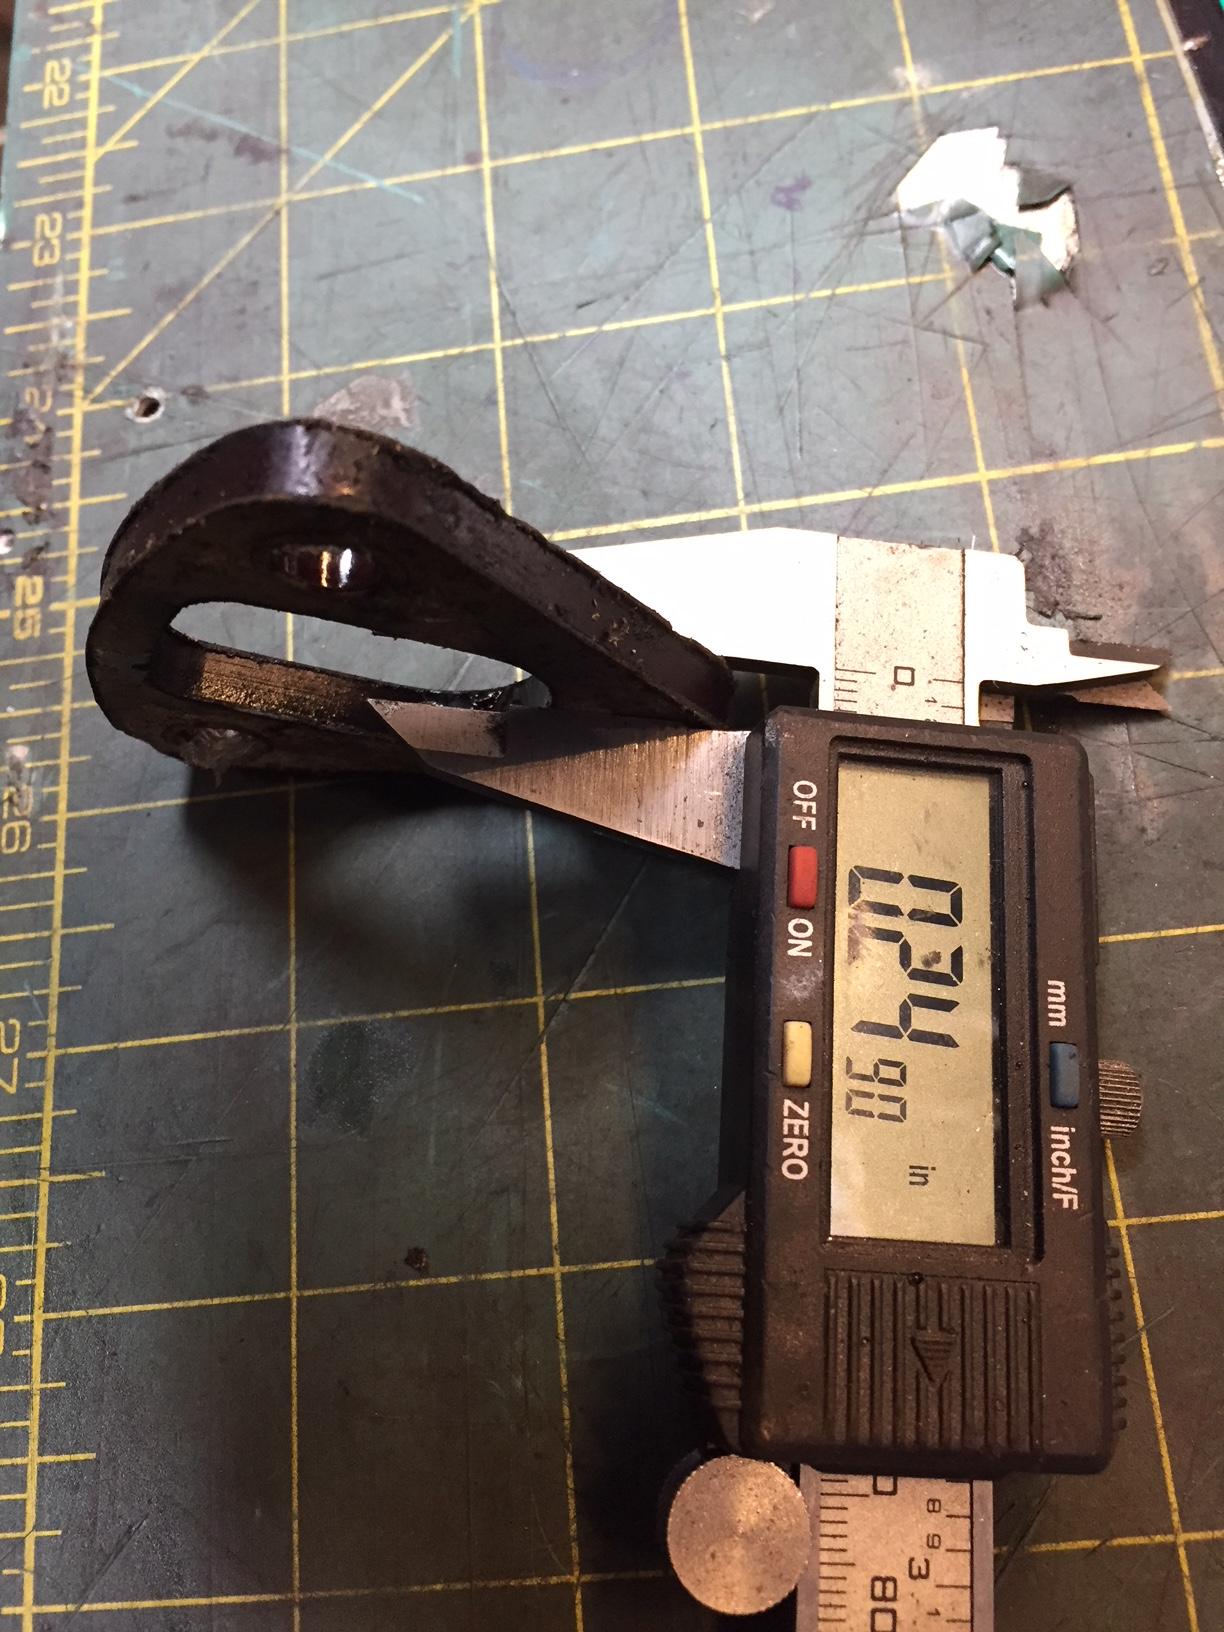
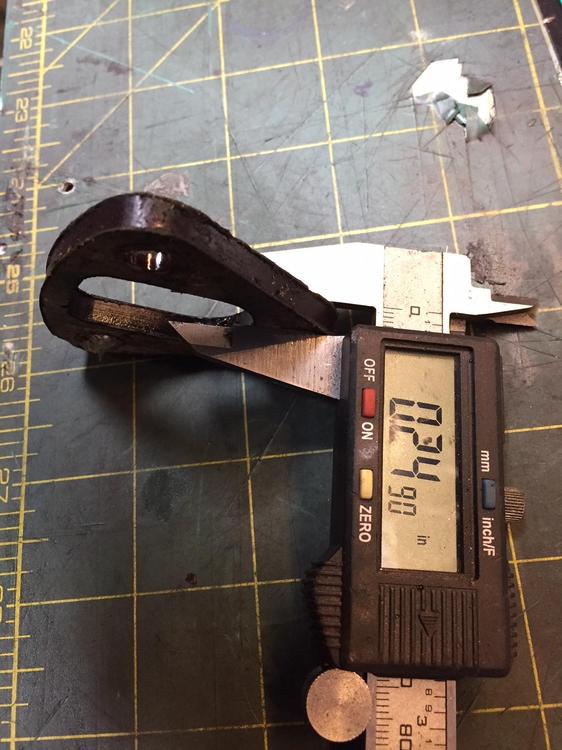
Well with the gaskets one spacer has on both sides, the total width is very close to 0.25 inches. A completely bare and new one I have is 0.222 thick. If you want one, PM me or email to z240@shaw.ca

-
On an auction, online or otherwise, the values vary day to day and buyer to buyer based on non-predictable variables. Individual sales should not be used as bench marks, only as data points on the overall recent history. Statisticians love this stuff, car sellers hate it... I would never put a car on BAT (or Barrett Jackson etc) without a reserve.
-
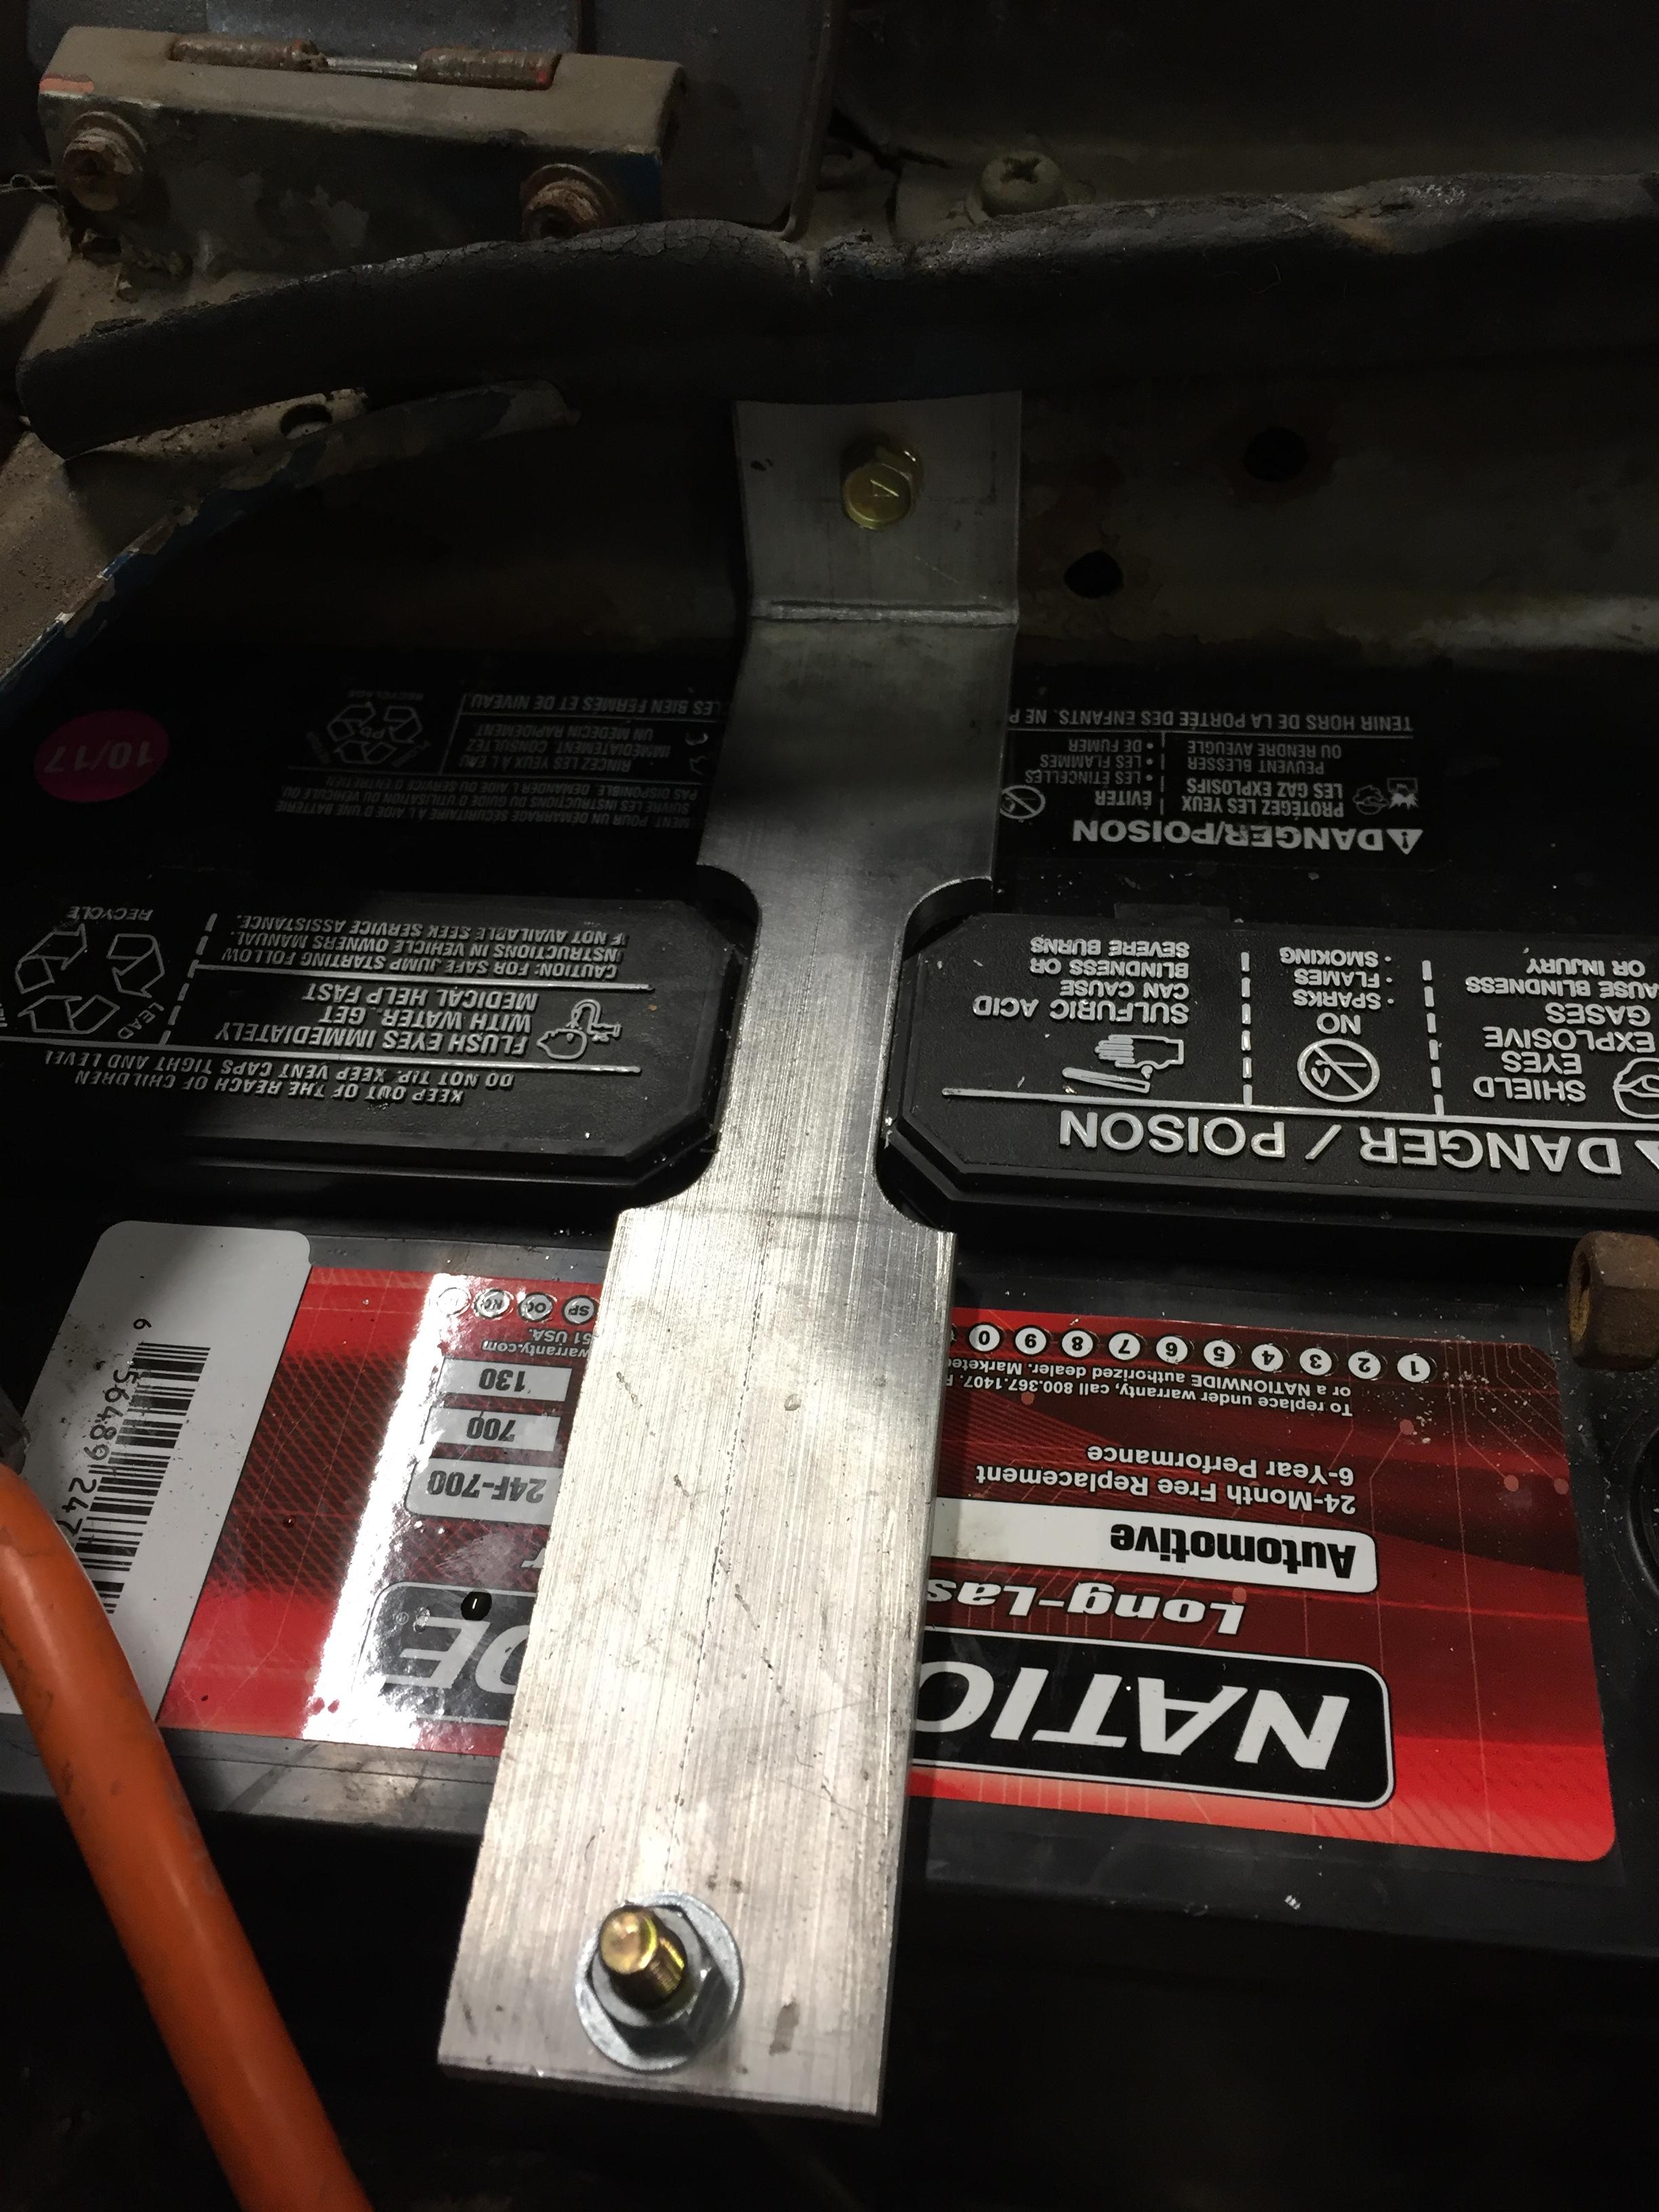
I always specify the 24F code battery, It has the positive post on the "inside" of the engine bay to keep it away from the fender. Yes you may have to adjust the length of your battery cables. Here's my 1/4 thick aluminum, 1.5 wide with 3/4 notch to fit the battery cap thingy battery hold down. No polish or nothing, just strong. Could make it pretty if I felt like it. Right now 3798 doesn't deserve anything pretty.... If you look close at the battery you can see the 24F-700 designation. Hmmm, not so easy to make that 90 bend in 1/4 aluminum without a press break. Just beating on it in a vice is likely going to crack it.

-
You need it for proper spacing of the pump arm. It also serves as a heat insulator. You could make one, I can tell you the exact thickness. I'd send you one, but I'm down to almost none at the moment. Let me look. Gott help a fellow Canuck....
-
SEM makes some wonderful vinyl dyes that let you change your plastic and vinyl color to the original stock color if you feel that's important. Originality only really matters when everything is truely original, not restored in any way.
-
It's true. They are different. Driver weight compensation. Whether you notice a difference on 45+ year old springs, well, your experience my differ from others.