zKars
 Subscriber
-
Posts
3,743 -
Joined
-
Last visited
-
Days Won
107
Content Type
Profiles
Knowledge Base
Zcar Wiki
Forums
Gallery
Events
Downloads
Store
Blogs
Collections
Classifieds
Everything posted by zKars
-
I'll dig one out and get you some pics. $30 bucks? And postage.
-

Another Engine, another mystery. Another day in the life...
zKars replied to zKars's topic in Engine & Drivetrain
Cam looks fine. I did check the lash, some were tight but all were positive. -
If no one else pipes up that is closer, let me know. I can scrounge one up.
-
Another Engine, another mystery. Another day in the life...
zKars replied to zKars's topic in Engine & Drivetrain
So we have a block with 250,000 + km. stock 86 mm pistons, evidence of engine work at some point, rings that don't look the age of the block, poor erratic compression ( that BTW does improve a bit with oil added) only one clearly bad cylinder valve wise, a timing chain with no tensioner, that must have slipped or was put back together without it, that resulted in in-consistent piston smoochin'', The other clues I noticed: -oil pan gasket is not a stock gasket. -chain guides were very worn. Not down to the steel, but grooved and very thin. So fellow detectives? What say you? Not that it matters, she needs a full round of rebuild love. -
Another Engine, another mystery. Another day in the life...
zKars replied to zKars's topic in Engine & Drivetrain
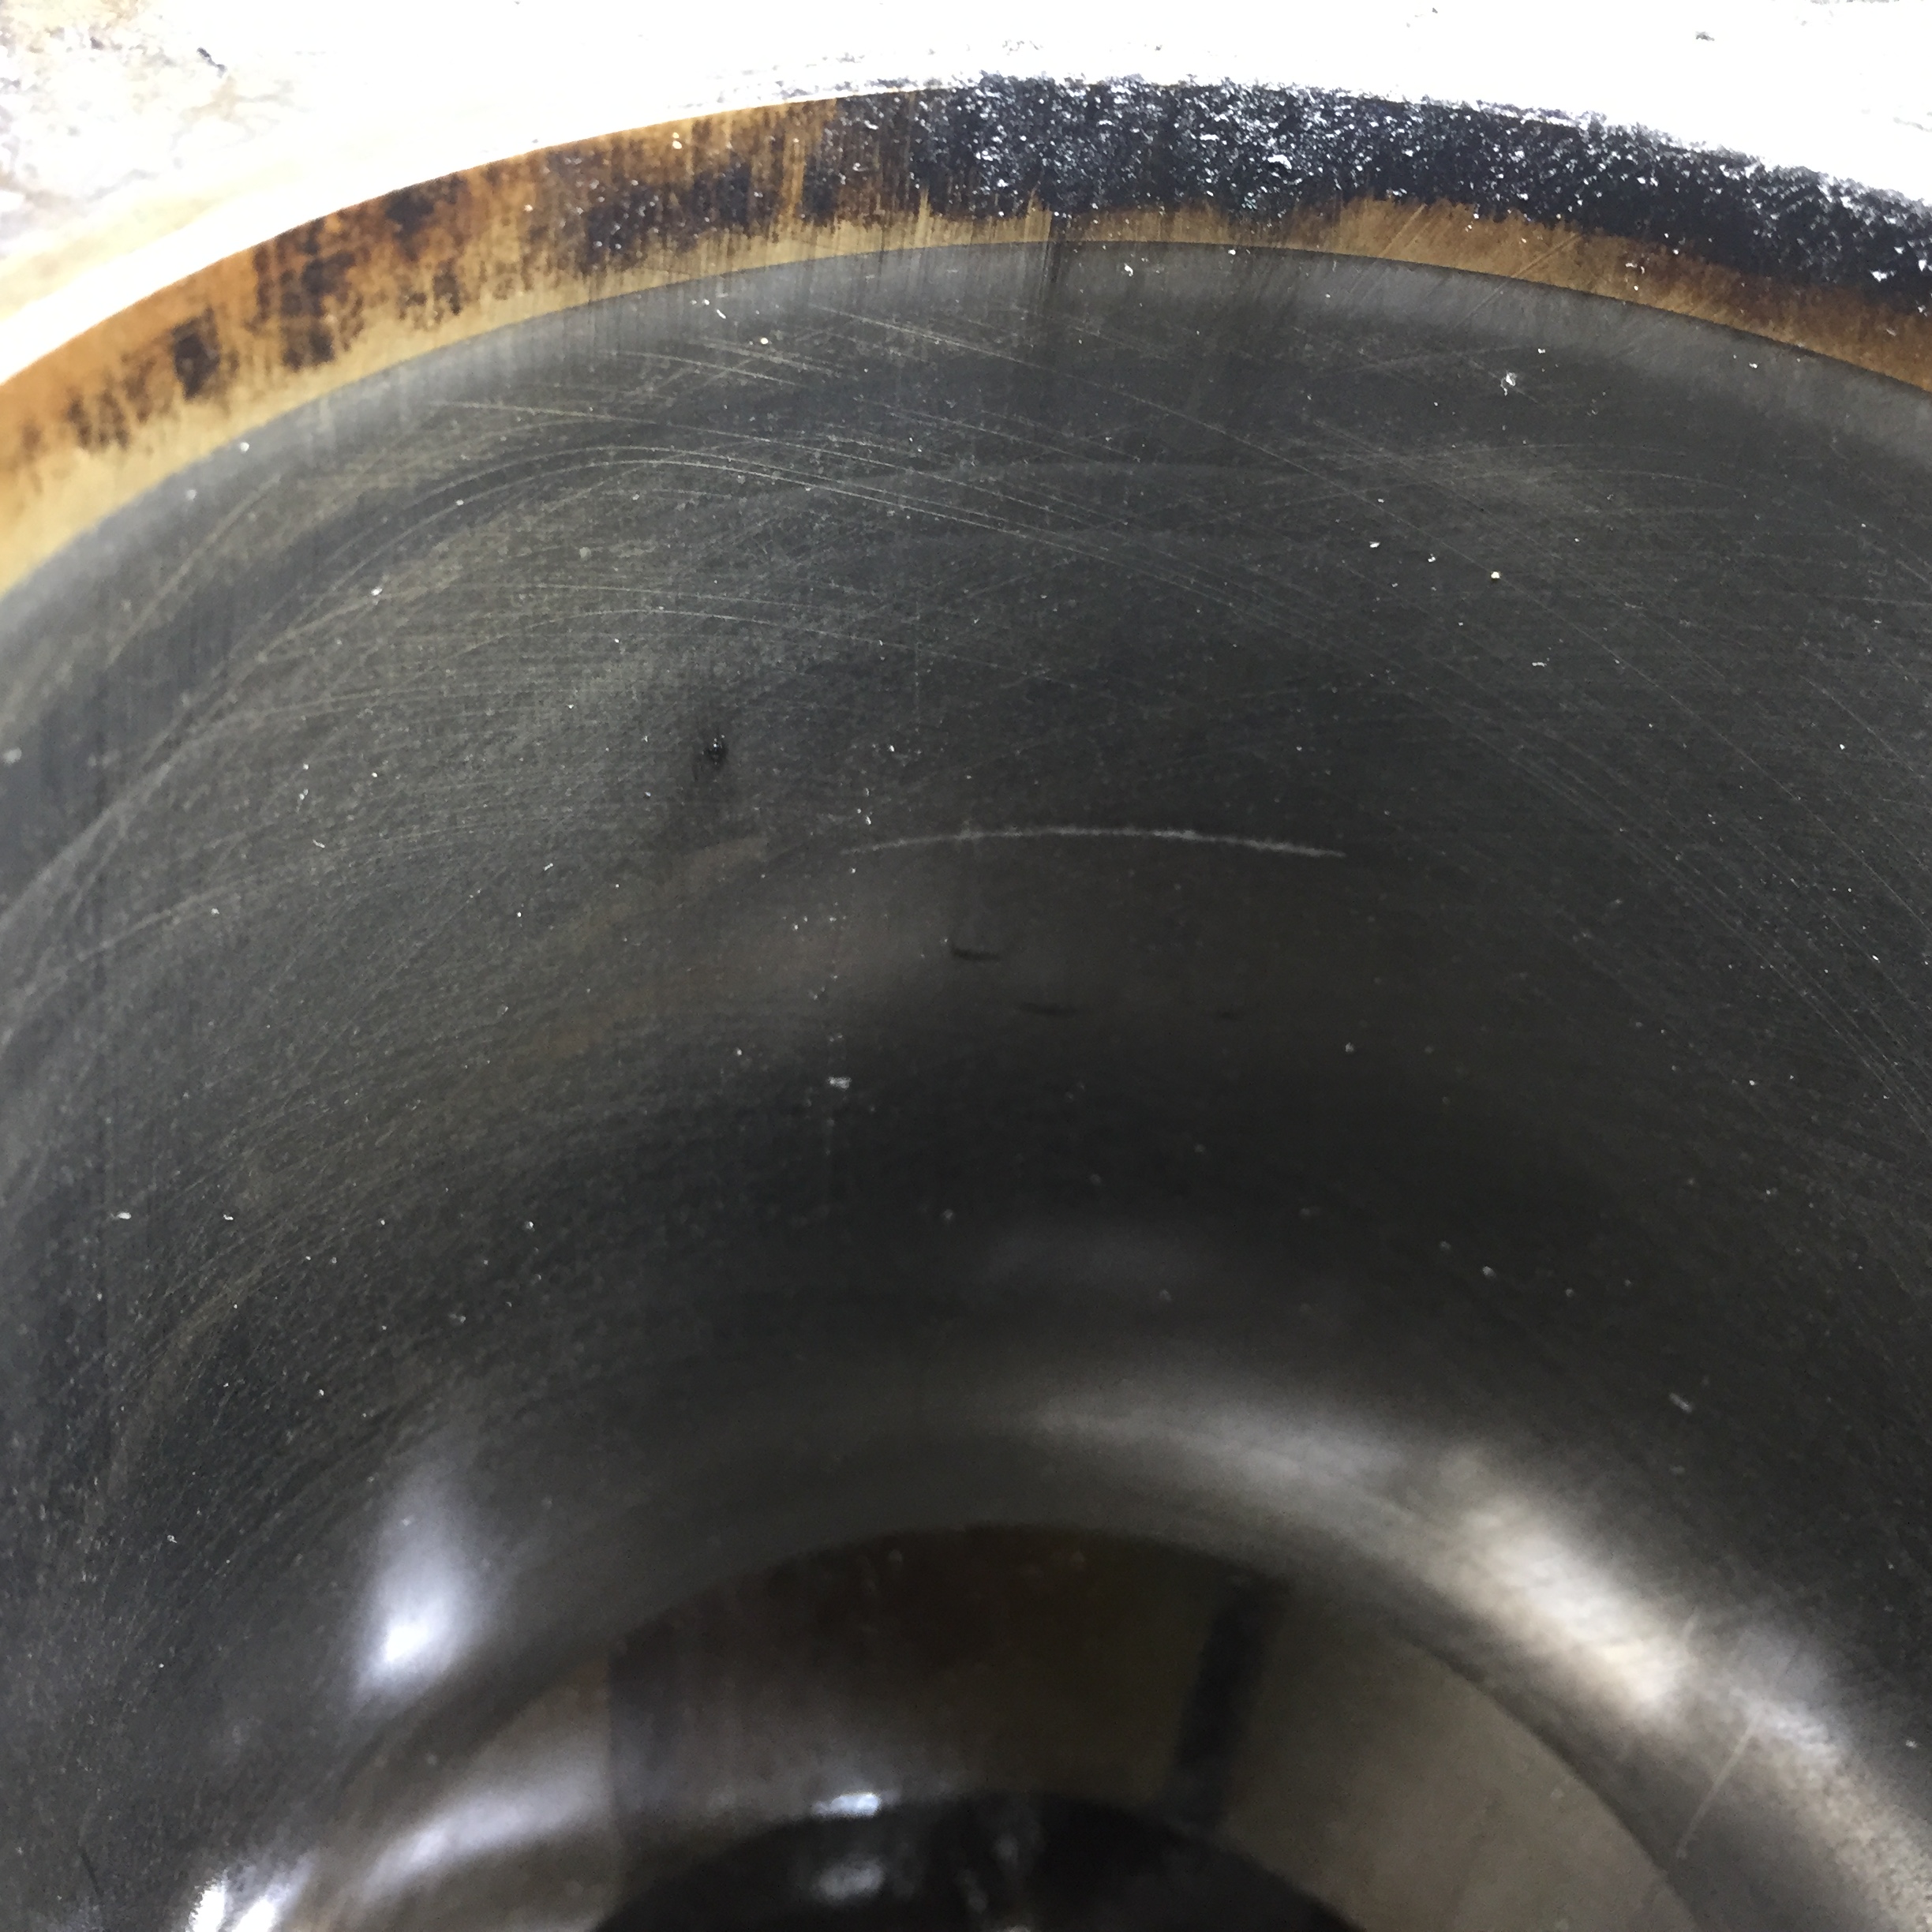
The last remaining mystery to me is the really obvious air leakage into the sump during the leak down test. Just how is that air getting down there? So I see two clues. First the ring end gaps. I popped #1 top ring off and stuffed into the bore, and measured the end gap. 0.020 ish. Hmmm, FSM suggests .010 to .015 is normal, with .040 max,. So .020 sounds ok, maybe a bit wide. With no obvious damage anywhere, about the only thing I see that is not "right" is a really random location of the three end gaps around the pistons. Some have the top ring gaps right next to each other, some are spaced roughly 1/3 of the way around. I likely moved them some while handling, I don't know how much weight to put on this. The walls were all well-oiled, how else does air get past the pistons? Usually I do this test with the motor buttoned up so I never get to hear whatever air escapes past the rings normally in a healthy engine? The leakdown tester was always saying the amount was well into the green/great/good region. I don't think this means too much. The head gasket was great, no issues there. Oil was water-less, water was oil-less. Finally I did a quick bore inspection. Only saw one scratch in #1 that can feel with a finger nail. Everybody else is nice and clean with clear hone marks.
-
Another Engine, another mystery. Another day in the life...
zKars replied to zKars's topic in Engine & Drivetrain
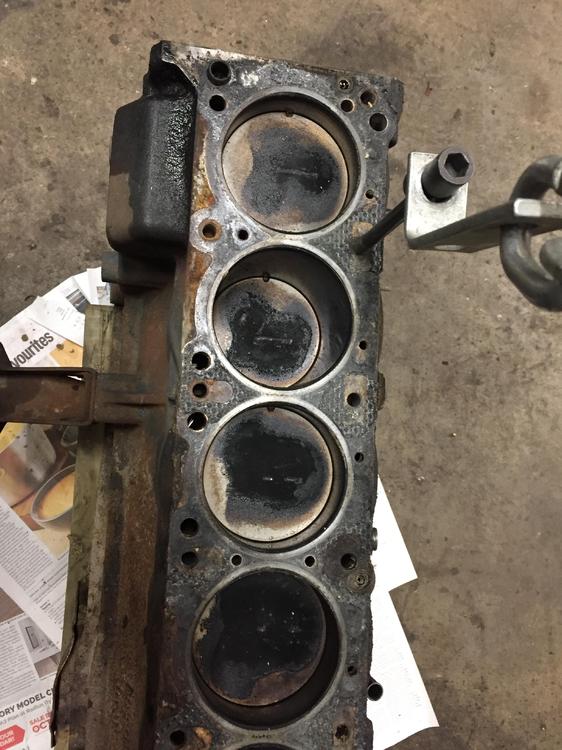
So now that I obvious valve / piston contact in #1, let's check the others. All the others have normal combustion products on top and have to be cleaned with a wire brush (yey! Actual power stroke!), but the two I checked also have the new valve reliefs, though to a much lesser degree. They all had no audible leakage out the intake or exhaust ports during the leak down test (stethoscope used) so they might not be bent, they are just very very good friends with their pistons now.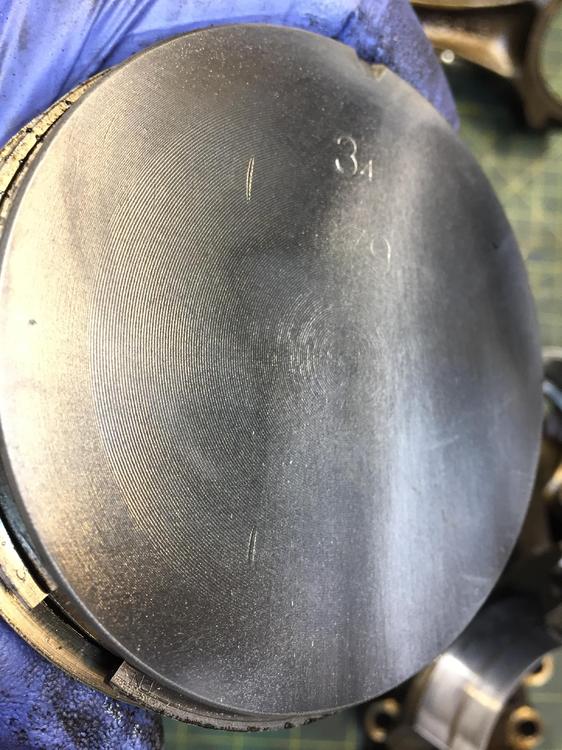
-
Another Engine, another mystery. Another day in the life...
zKars replied to zKars's topic in Engine & Drivetrain
Plans? Well I seem to have P79 head that needs some new valves. Looks like a recycling candidate. Now that nice flat top F54 block with the new piston reliefs, now that has potential! -
Another Engine, another mystery. Another day in the life...
zKars replied to zKars's topic in Engine & Drivetrain
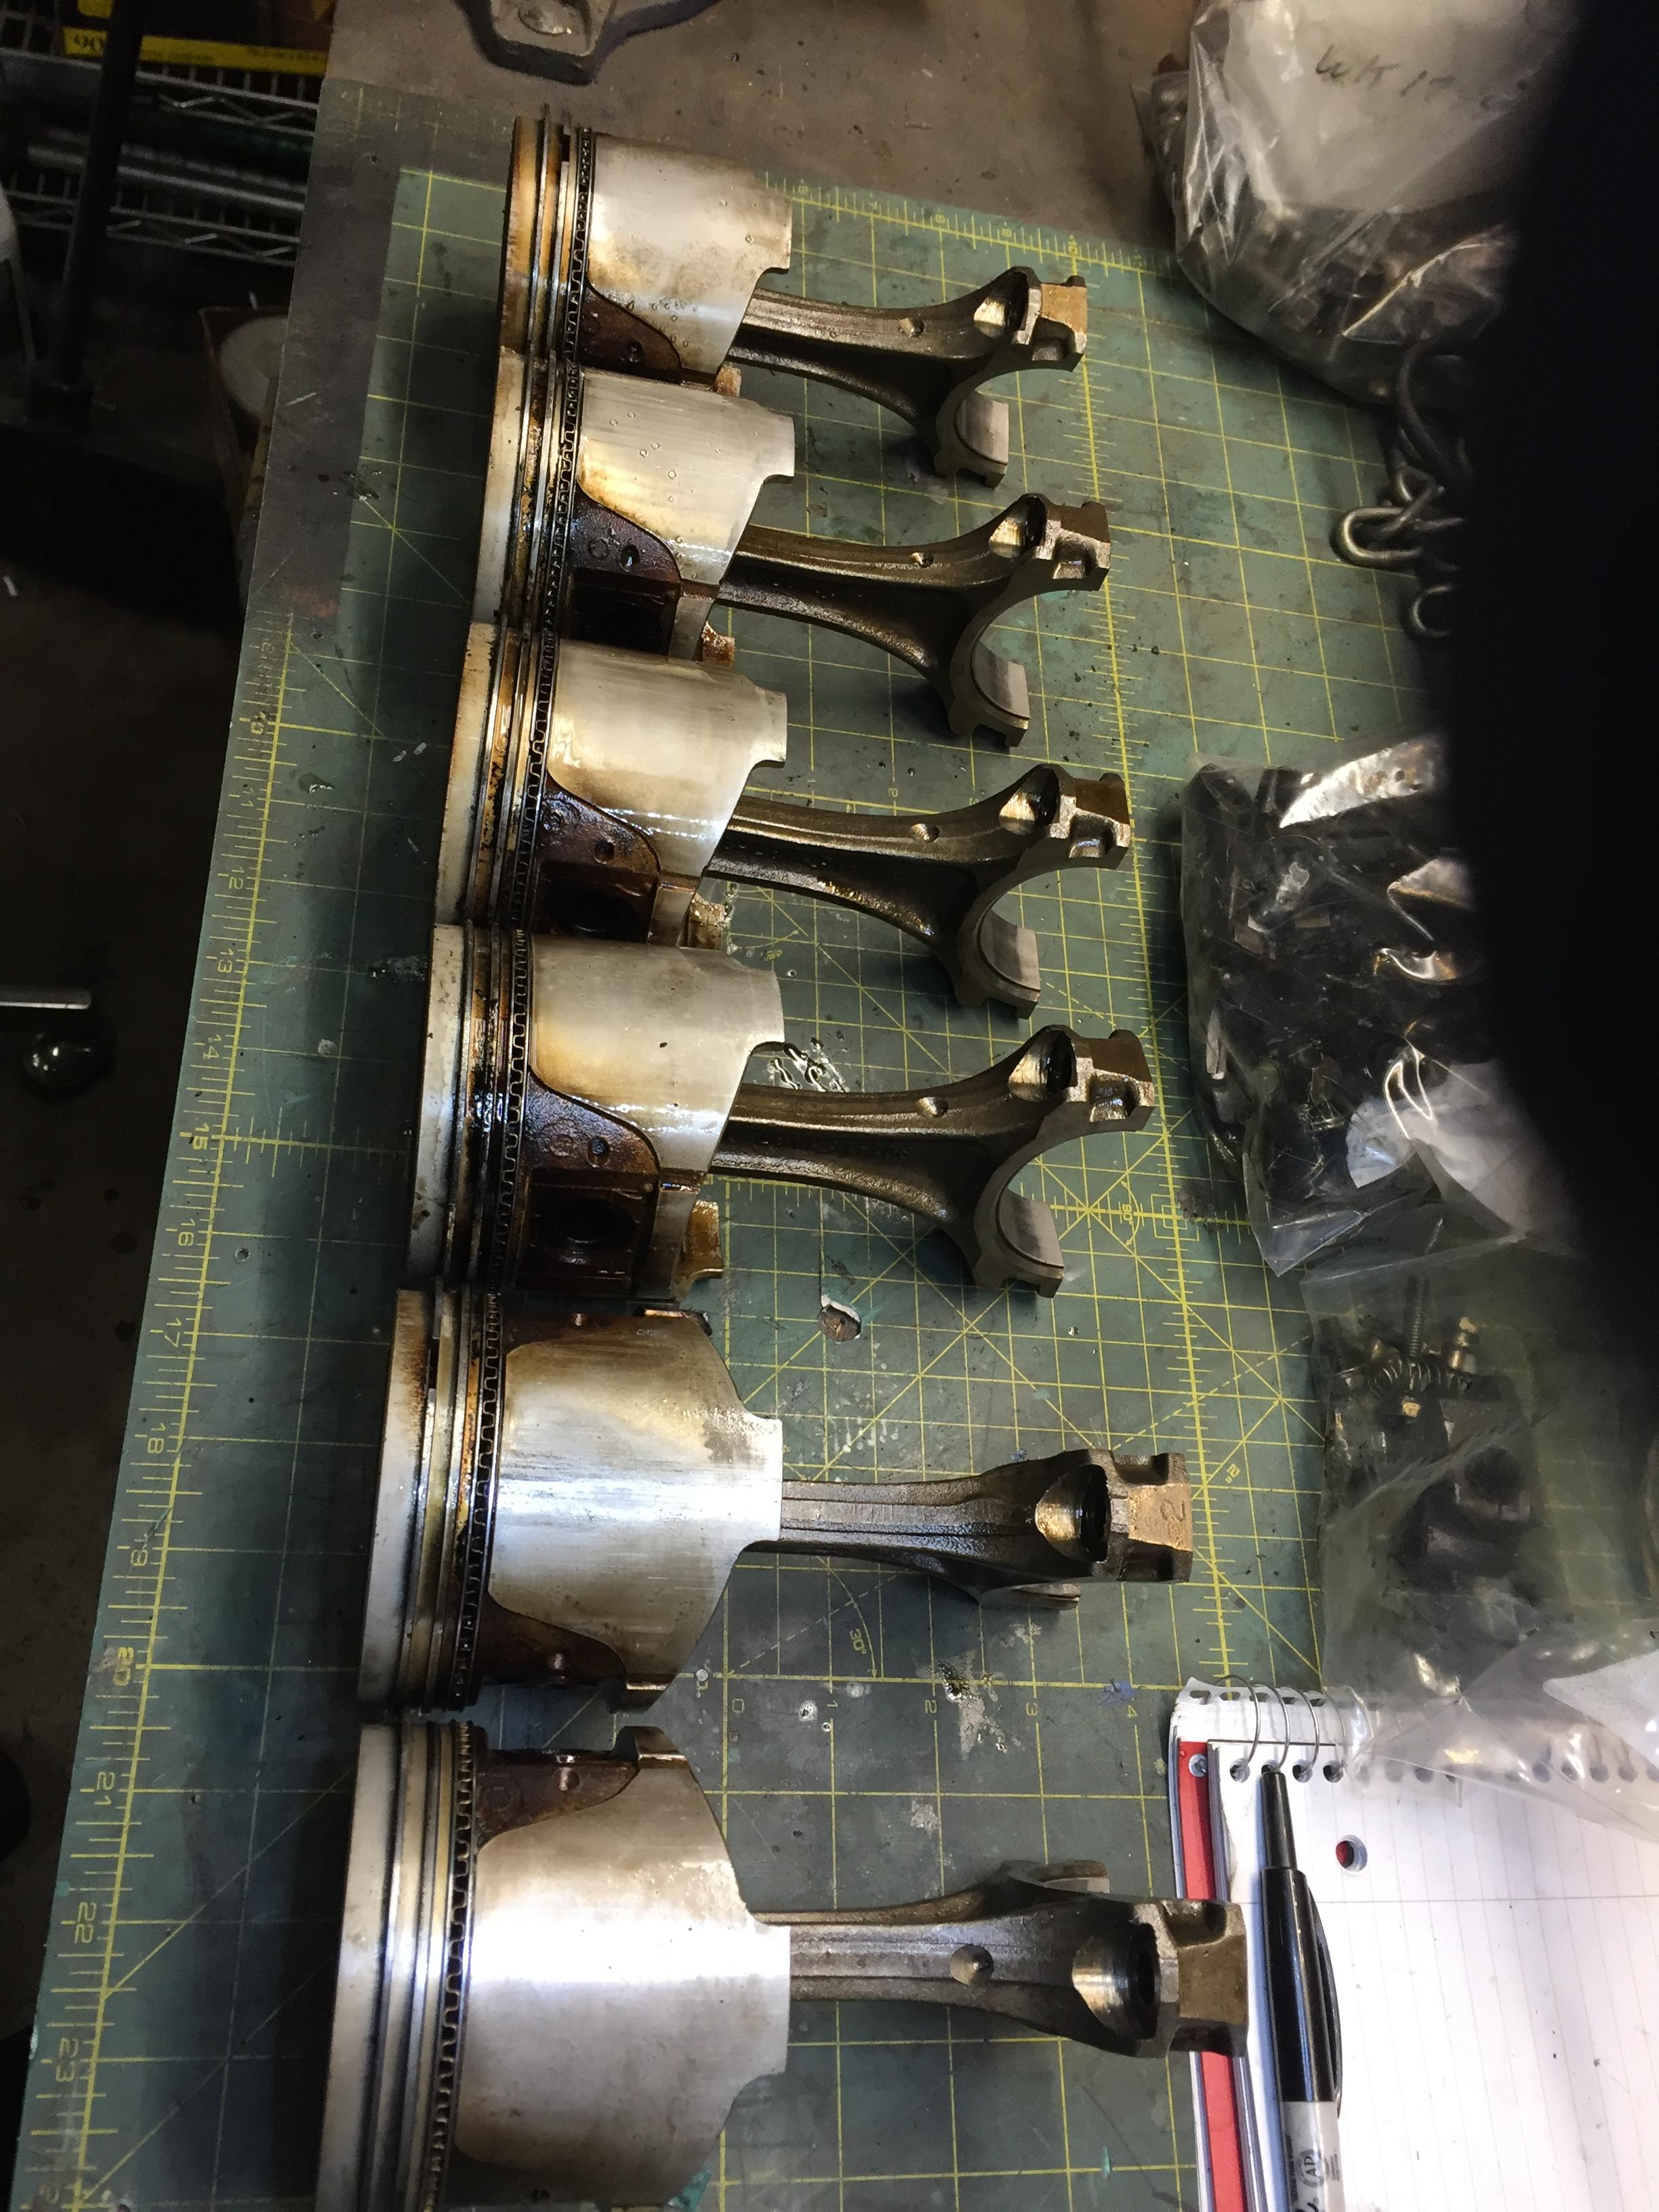
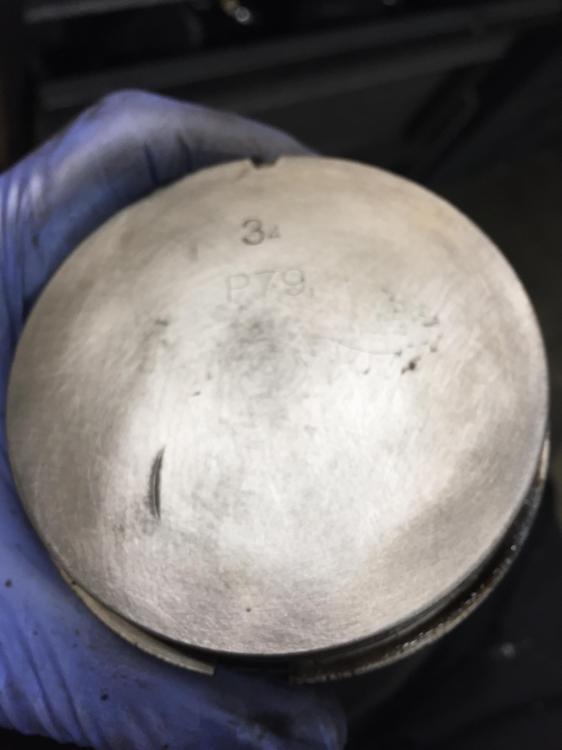
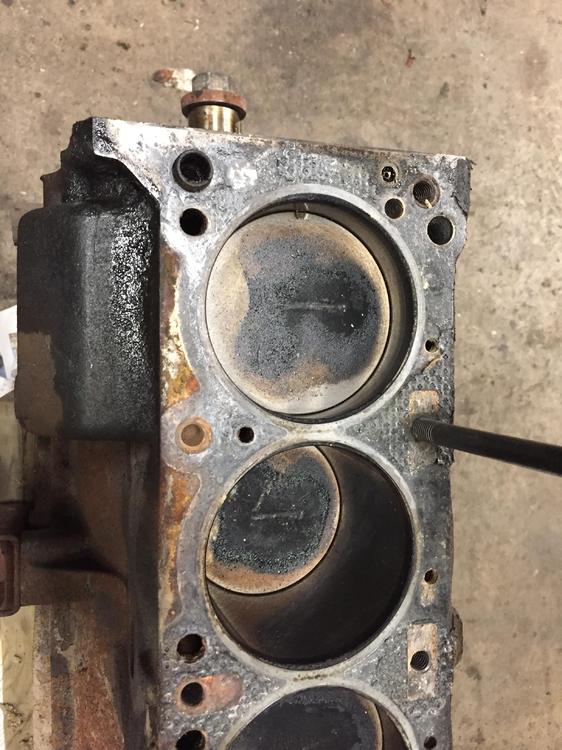
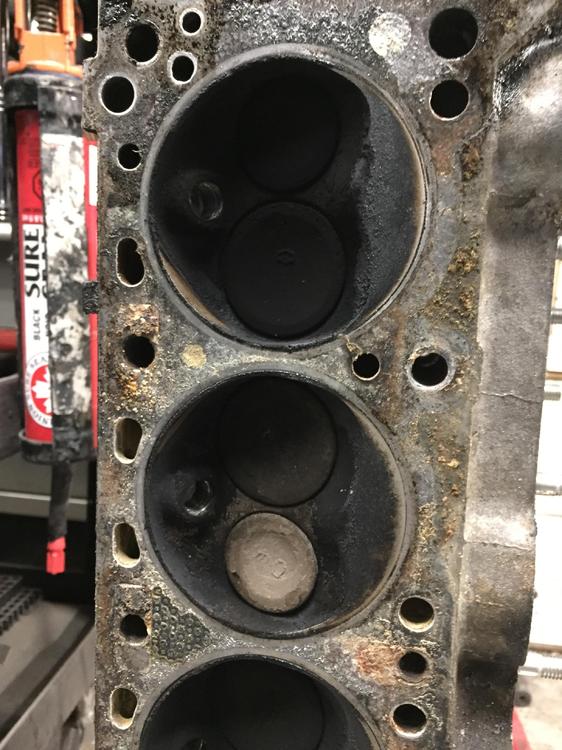
Now on to the pistons themselves. Rings should be dirty, gummy, nasty, worn, something. Ah, no... They look like they have about 10,000 miles on them. Clean, free, no obvious defects. At least not on first inspection. More in a bit. Now with #1 intake valve not sealing, very little in the way of serious combustion was happening there. I was able to clean off the black carbon with a quick solvent wipe. And what should reveal itself to me beadie little eyes? Two little eyebrows divits with the rear (intake) being a bit deeper and longer. I guess we know why that intake valve is not sealing very well. And maybe we understand a bit more about the chain timing accuracy. Me not think it "ideal"
-
Another Engine, another mystery. Another day in the life...
zKars replied to zKars's topic in Engine & Drivetrain
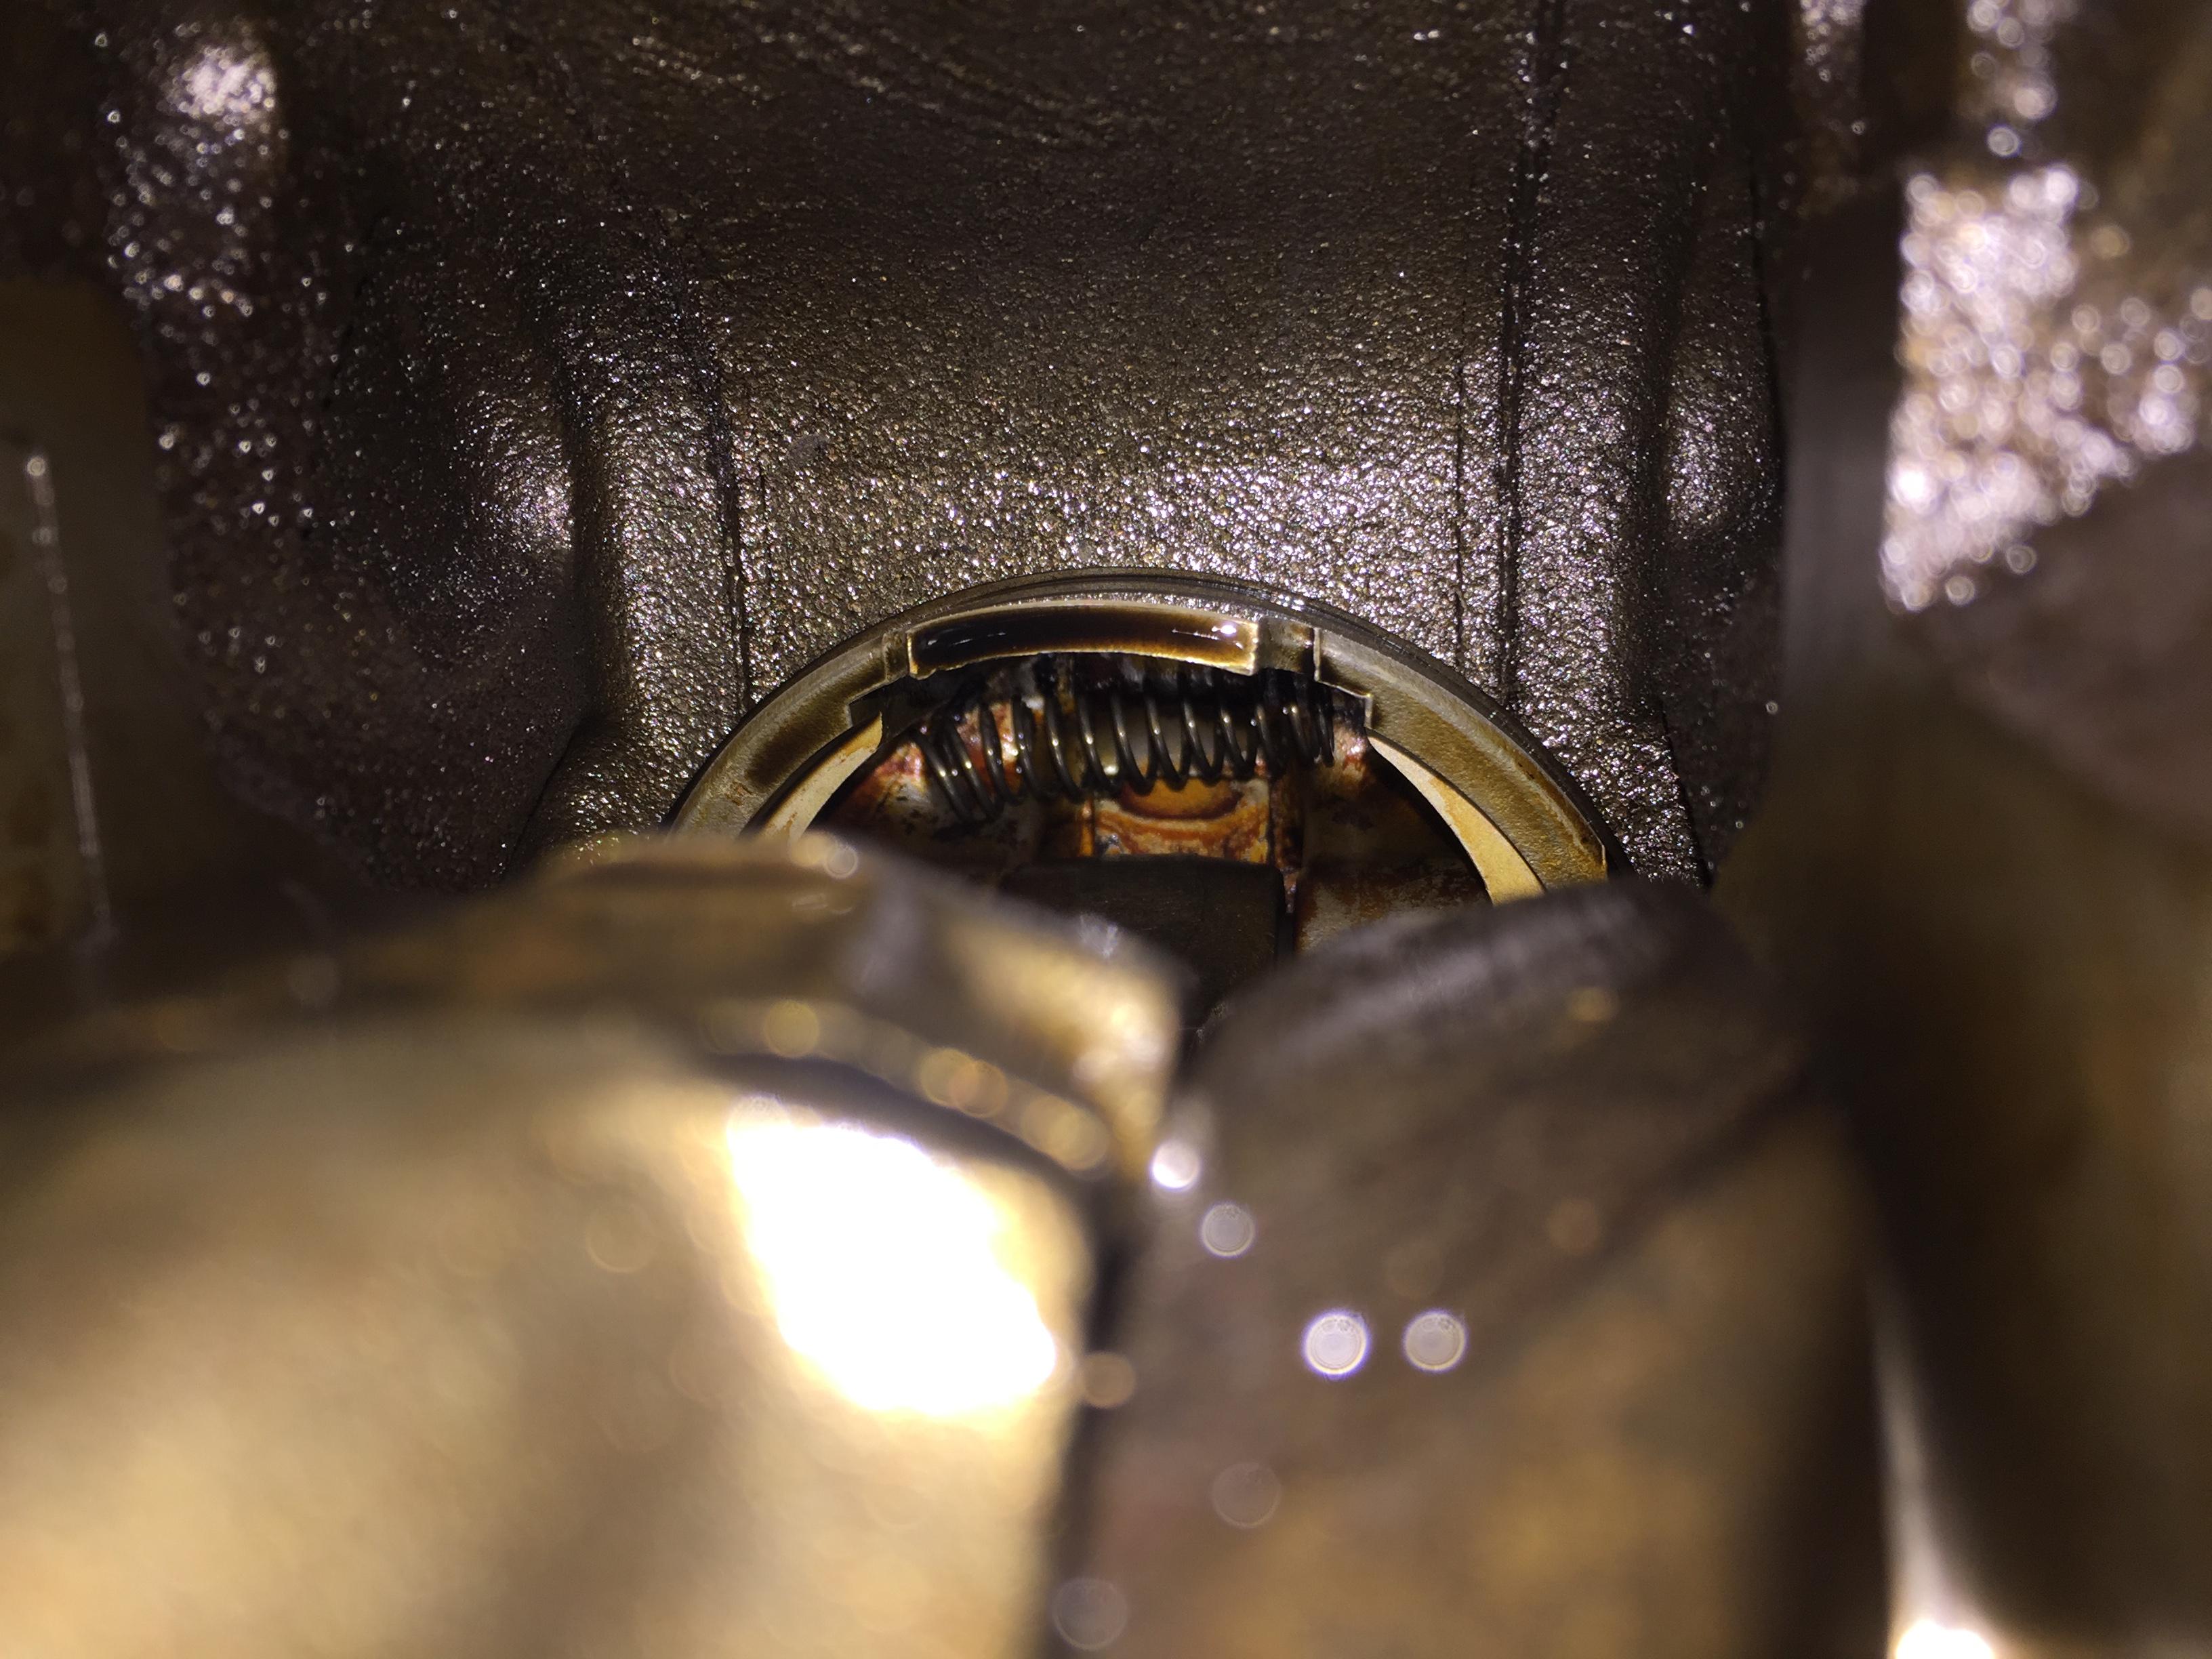
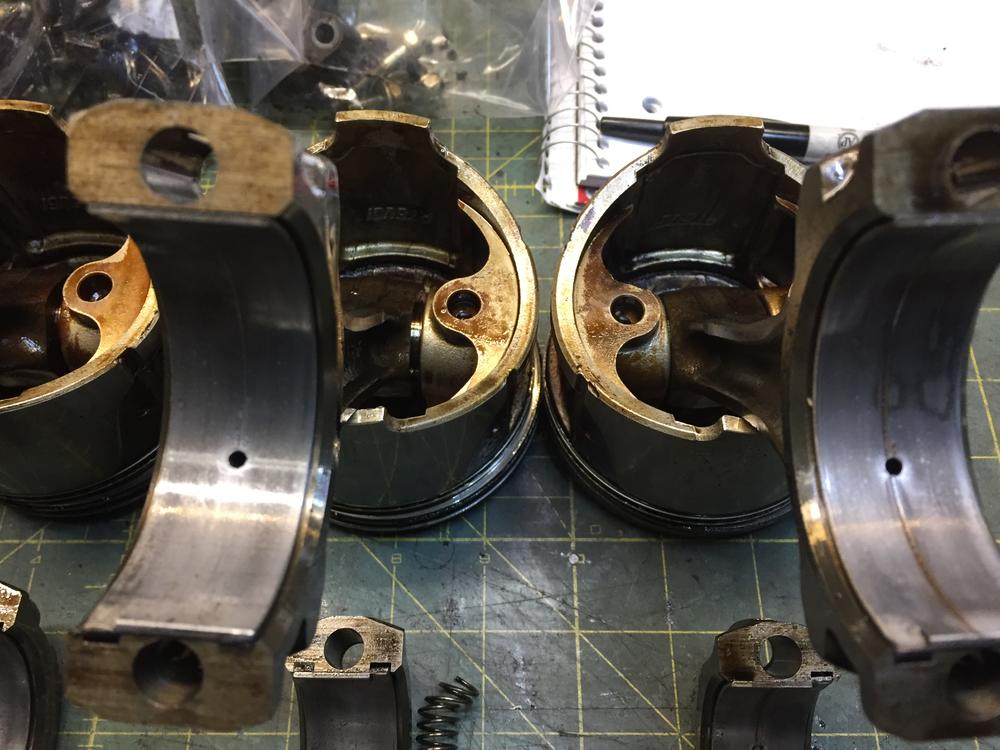
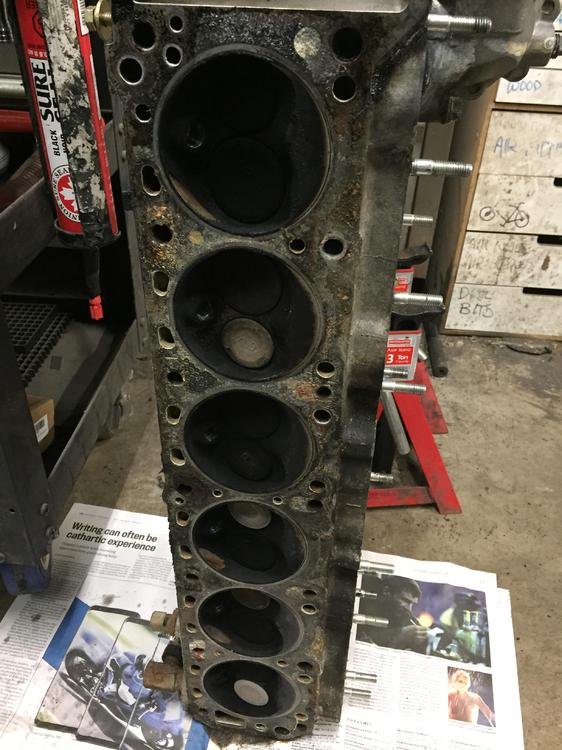
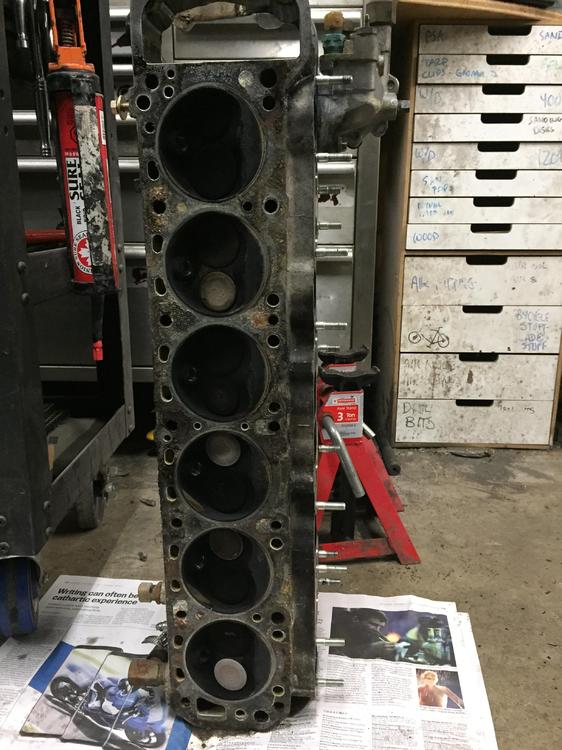
Ok, I couldn't stand it. I tore the b down. Grab your popcorn. First the debris from the tensioner spring migration. Found it! It made friends with #2 piston. No this is not a piston return spring. Must have been a hell of a ride! After taking the pistons out and inspecting the rod bearings, well, there were a few extra oil flow guide grooves... This is #2 and #1 rod bearings. Nice grooves. Some others have embedded bits... Other than defects, the bearings are great. No hint of age or wear through. Other than maybe #1 there...

-
Another Engine, another mystery. Another day in the life...
zKars replied to zKars's topic in Engine & Drivetrain
As to the mystery of the tensioner escape, I have a theory. If someone changed the head, but lost the tensioner in the process by not using a blocker, or just didn't know better and just put it back together anyway, I guess that might explain how it escaped it housing. The broken spring is just what happened later when it got caught in a nasty place. Good thing that tensioner found a snug home in a dark corner, so close to the chance of instananeous and total disaster One thing I regret is not checking the cam timing when I took it apart. With no tensioner, makes you wonder if the chain ever skipped a tooth or two at some point. No indication of valve contact so things didn't get that out of hand. About the only clue to wrong valve timing is the fact that the motor didn't like to exceed 4 or 4.5k RPM. Never had a chance to determine if that lack of fuel or something more sinister... With that loose chain, I would have expected more chain noise, but there was none. Maybe it was the fifteen exhaust leaks that masked the noise. I do now that the block was rebuilt at some point in its life, and likely at a real engine shop. I noticed that the engine builder I use here put something I hadn't seen on a couple of frost plugs. And I see them on two frost plugs on this block as well. I believe them to be a tell-tale to detect either excessive temperature or movement that might indicate a condition that would nullify the warrantee. Removing them is apparently a sin according to their inscription. Any one see these before?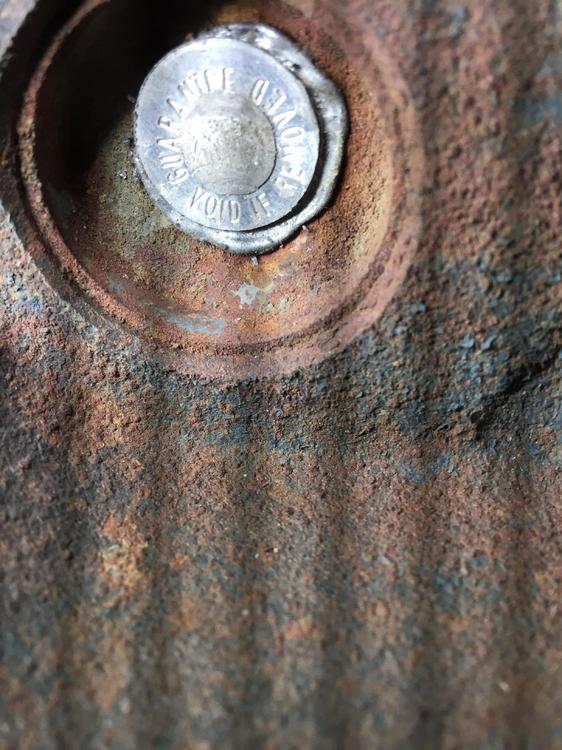
-
Another Engine, another mystery. Another day in the life...
zKars replied to zKars's topic in Engine & Drivetrain
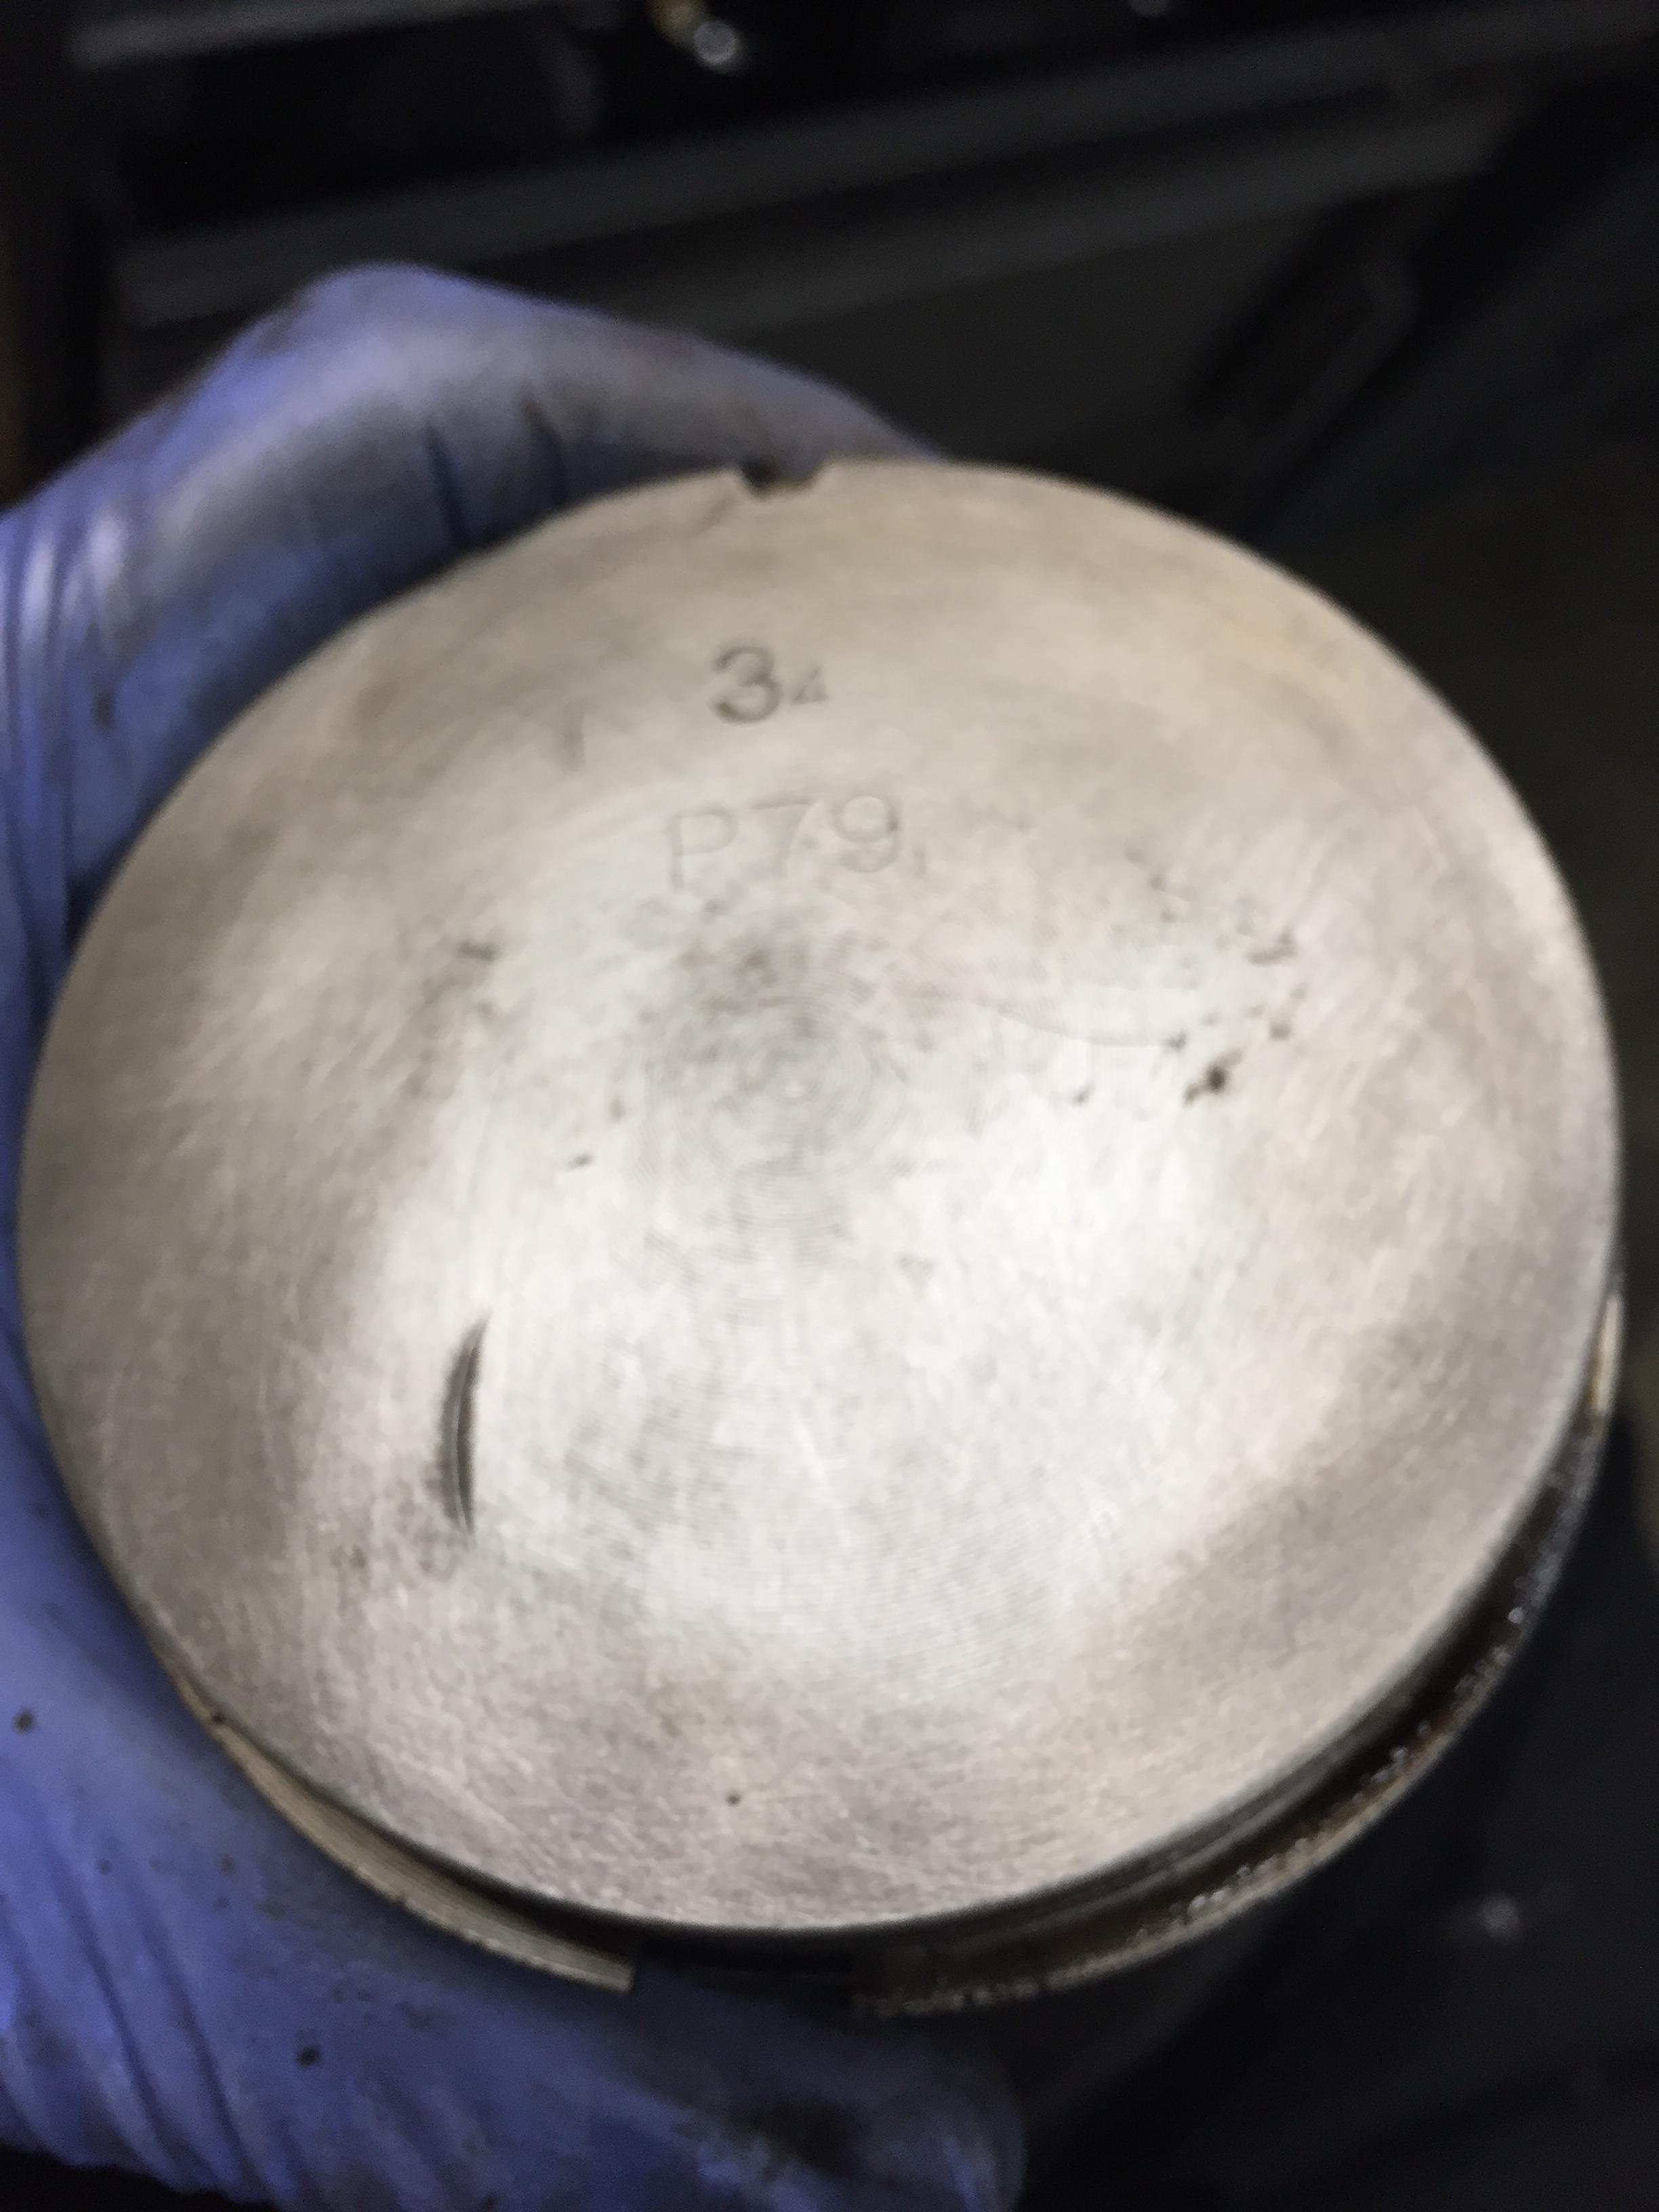
Pictures. Not sure this resolves much. The #1 valves are different than the rest, but all pistons look pretty much the same. Note: the scratch mark across the top of every piston top is a remenant of TDC finder probe, not an interesting artifact. Not sure if I will have a chance to tear down the block this morning before the next Z shows up at my door. I'll try. Both #1 valves are black, while the exhaust valves of all the rest are nice and white. The carbs were running very rich in few hundred km prior to this. Well #3 isn't much better...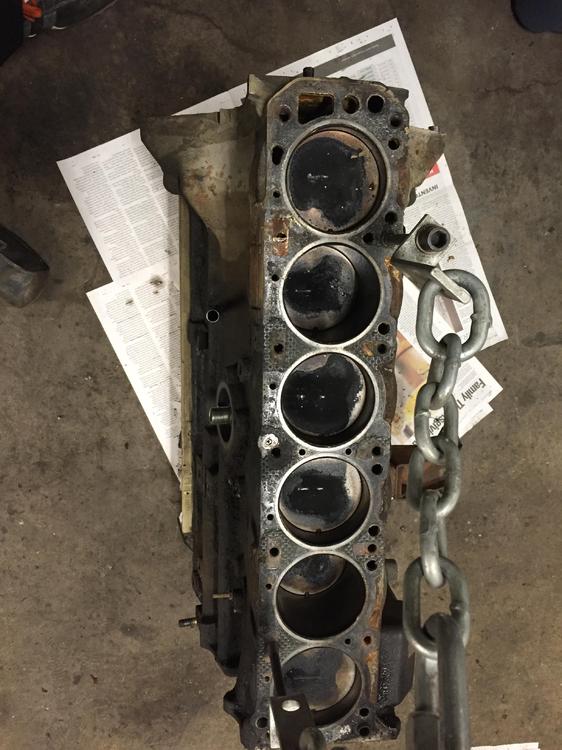
-
Another Engine, another mystery. Another day in the life...
zKars replied to zKars's topic in Engine & Drivetrain
i know, I know, it's all fake news without pics. Coming -
Lucky to get 10 at idle, lift is somewhere north of 1/2", always battling with idle quality, Mik 44''s or brand new SU's. Worth it for the screaming top end, right?
-
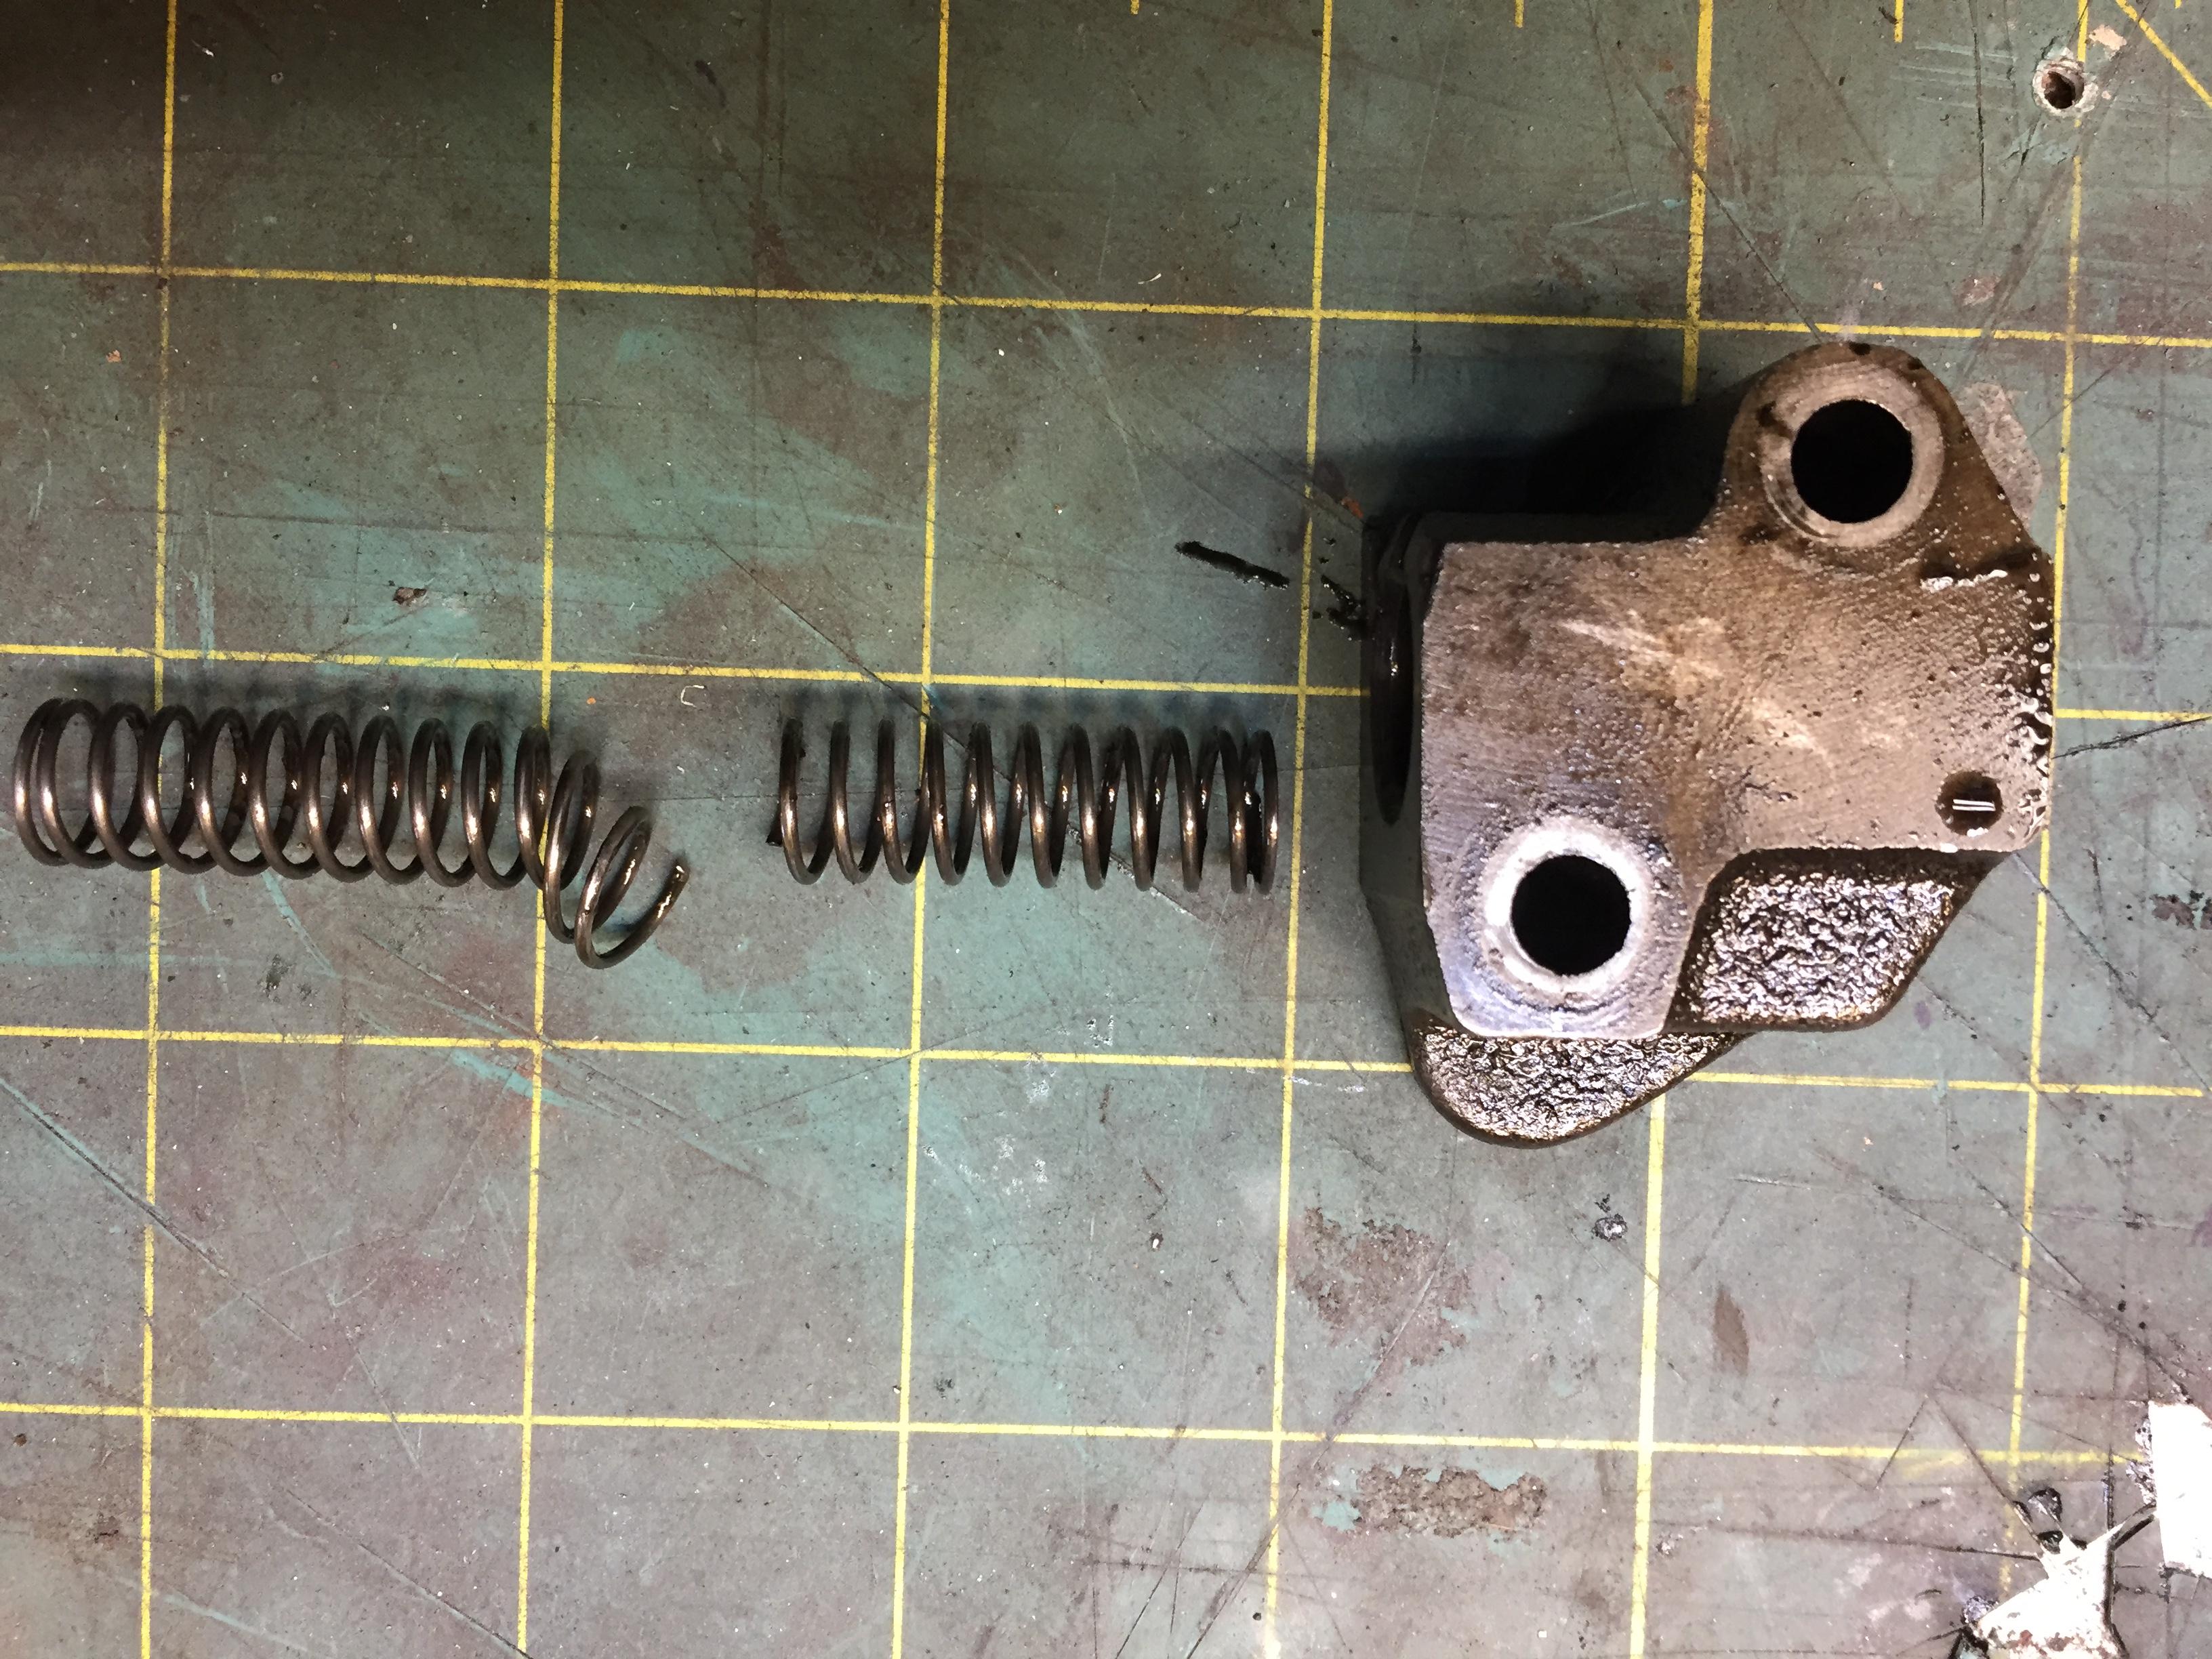
So today I'm tearing down a very worn high mileage F54/P79 ZX motor. It had low compression, and each cylinder was all over the place. 10 lbs, 50 lbs, 80lbs. Runs like crap. Anyway.. I take off the front cover and "clink" on the floor goes the chain tensioner piston. Pick it up and find about 1/2 the spring inside it. This is not good.... The tensioner body is still nicely attached to the block. There is no way the piston can get back in the body, I tried. How did that get out? Well it did. I wonder how much oil comes out of the tensioner, and simultaneously NOT get where its supposed to go. I decided to do a leak down test before I rip the head off just to see if its the valves or rings. Well with pressure on every cylinder I have this nice little draft coming at me. Right from the sump with the front cover off. Anybody wondering how the rings are now? Not me. As a bonus, with air on #1, there is a really really nice draft out of its intake port. Oh goodie..... And for you doubters, yes I did remove all the rocker arms before doing this to be sure they are all as closed as possible. Next we'll take the oil pan off and find that other 1/2 spring. Or its dust.... And check some rings. The bores all look new, the usual no upper ridge and you can still see some cross hatch. Love these blocks.
-
So many of the rusty Z's I've worked on got that way, in my opinion, from issues surrounding the battery tray and all areas below around and behind that that get drastically affected because of it. Exactly how and why this happens can be debated, but having a battery that does NOT exhaust corrosive fluids or gases is the single most important thing you can do to save your car. While this is hardly the only problem area, to me, it represents the single biggest and fastest acting problem area. Secondly, water that gets trapped and is allowed to sit is second worst. Floor mats and underlay MUST receive dry out maintenance as often as practical. Cowl drains should be extended to dump below the fender. The reason I'm going to this length is simple. To me, anything that prevents anyone from driving their Z is a crime. The sight of a dark cloud on the horizon is NOT a reason to not go for a drive. Simple rain in not your enemy, getting that water in a place where it can sit (or wash over your battery) is the problem.
-
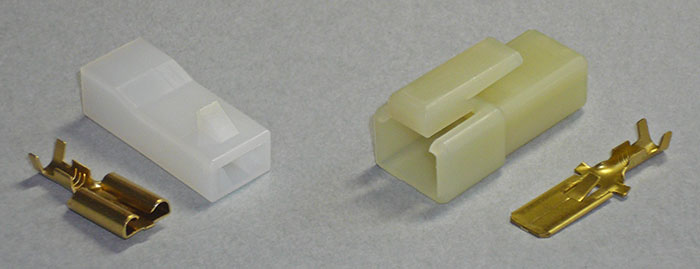
User name FricFrac on hybridz used to sell a complete kit of new Bosch connectors.
-
Paint remover to remove paint. Even DOT3 brake fluid works well. Safe on the skin and leaves it with a silky feeling I find refreshing. Abrasives will scratch plastics. I remember some thread here about treating/bleaching the yellowing. Don't remember what was used, mostly that it was a bit of a process....
-
Even the new racks from carsteering.com http://www.carsteering.com/partview/Nissan/280Z/Manual_Steering_Rack/80~70087_AN.html have only RH threads on both ends. At $270 ish bucks these racks are a pretty good deal. I bought one (how I know both ends are RH) and have inspected it pretty closely. Looks decent. One guy on hybridz installed it and is happy with the result. I bought mine from their ebay store. Came in about 5 days.
-
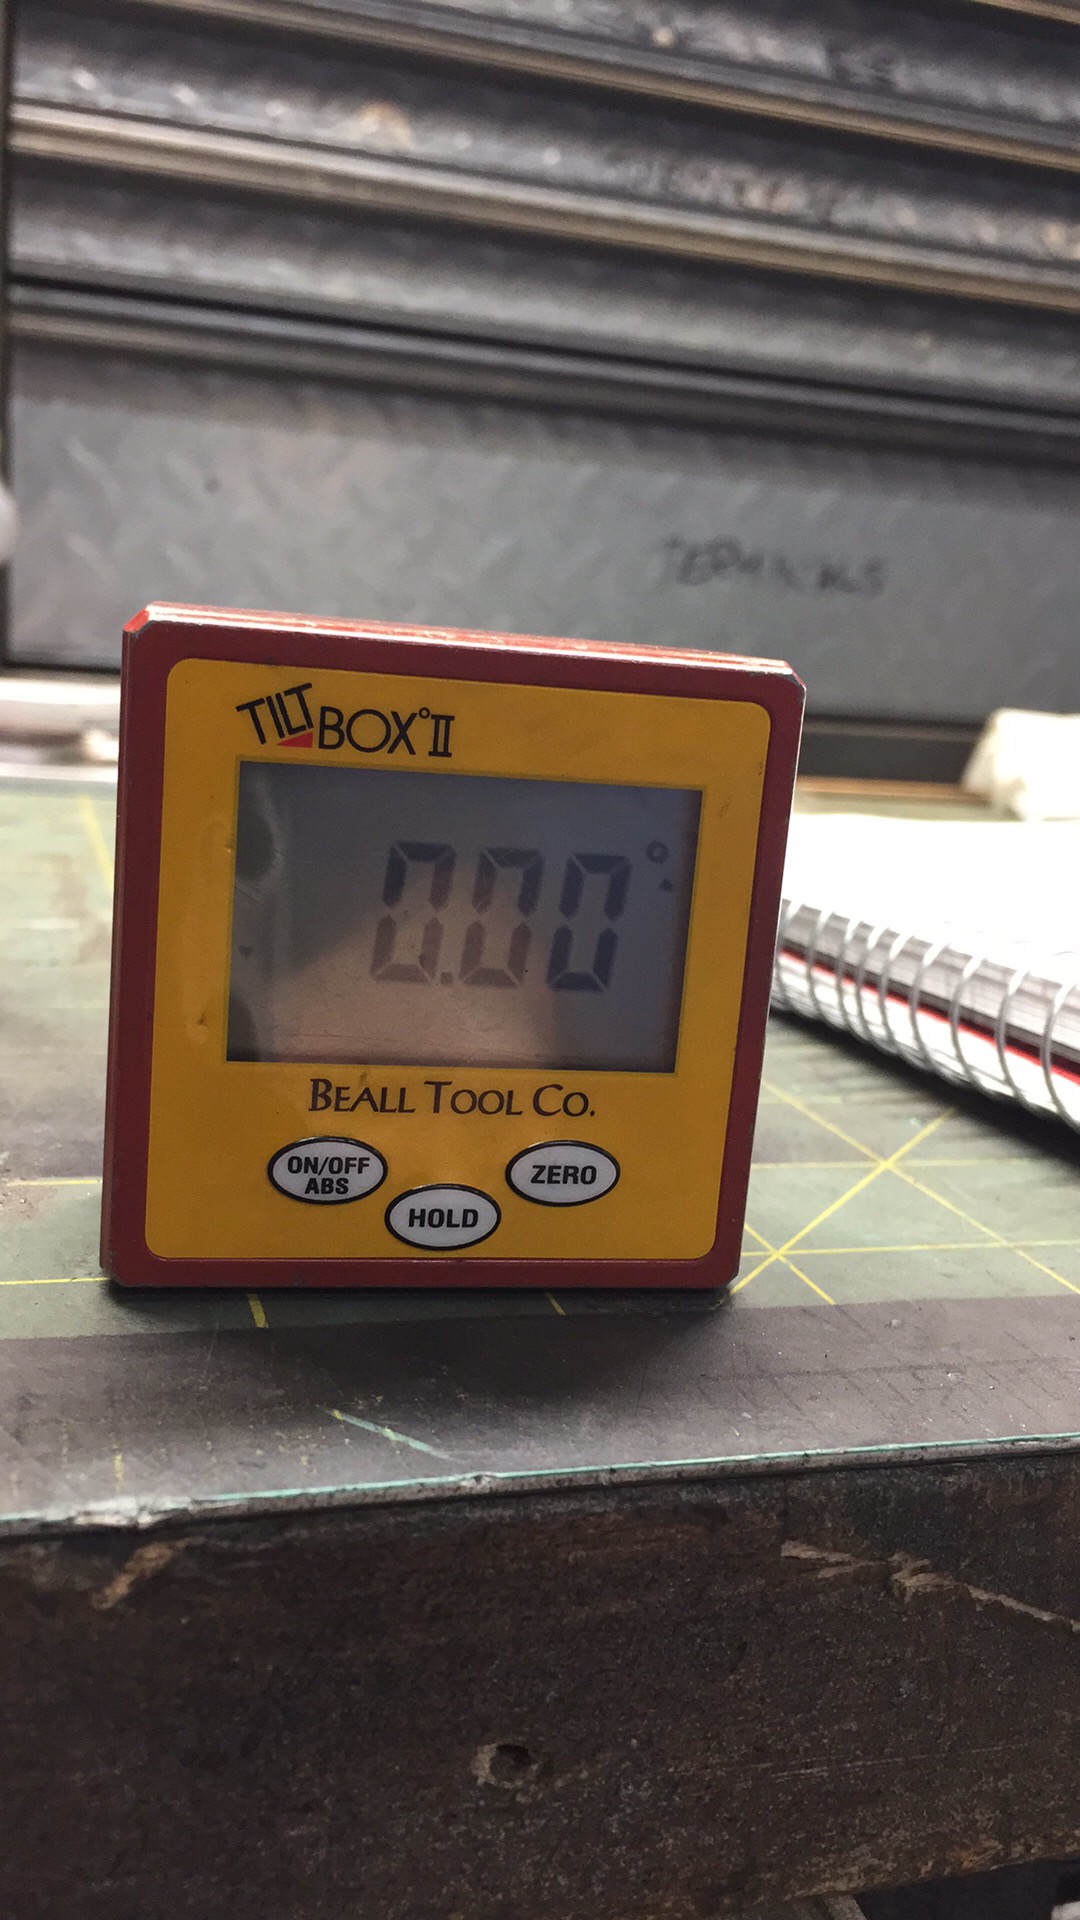
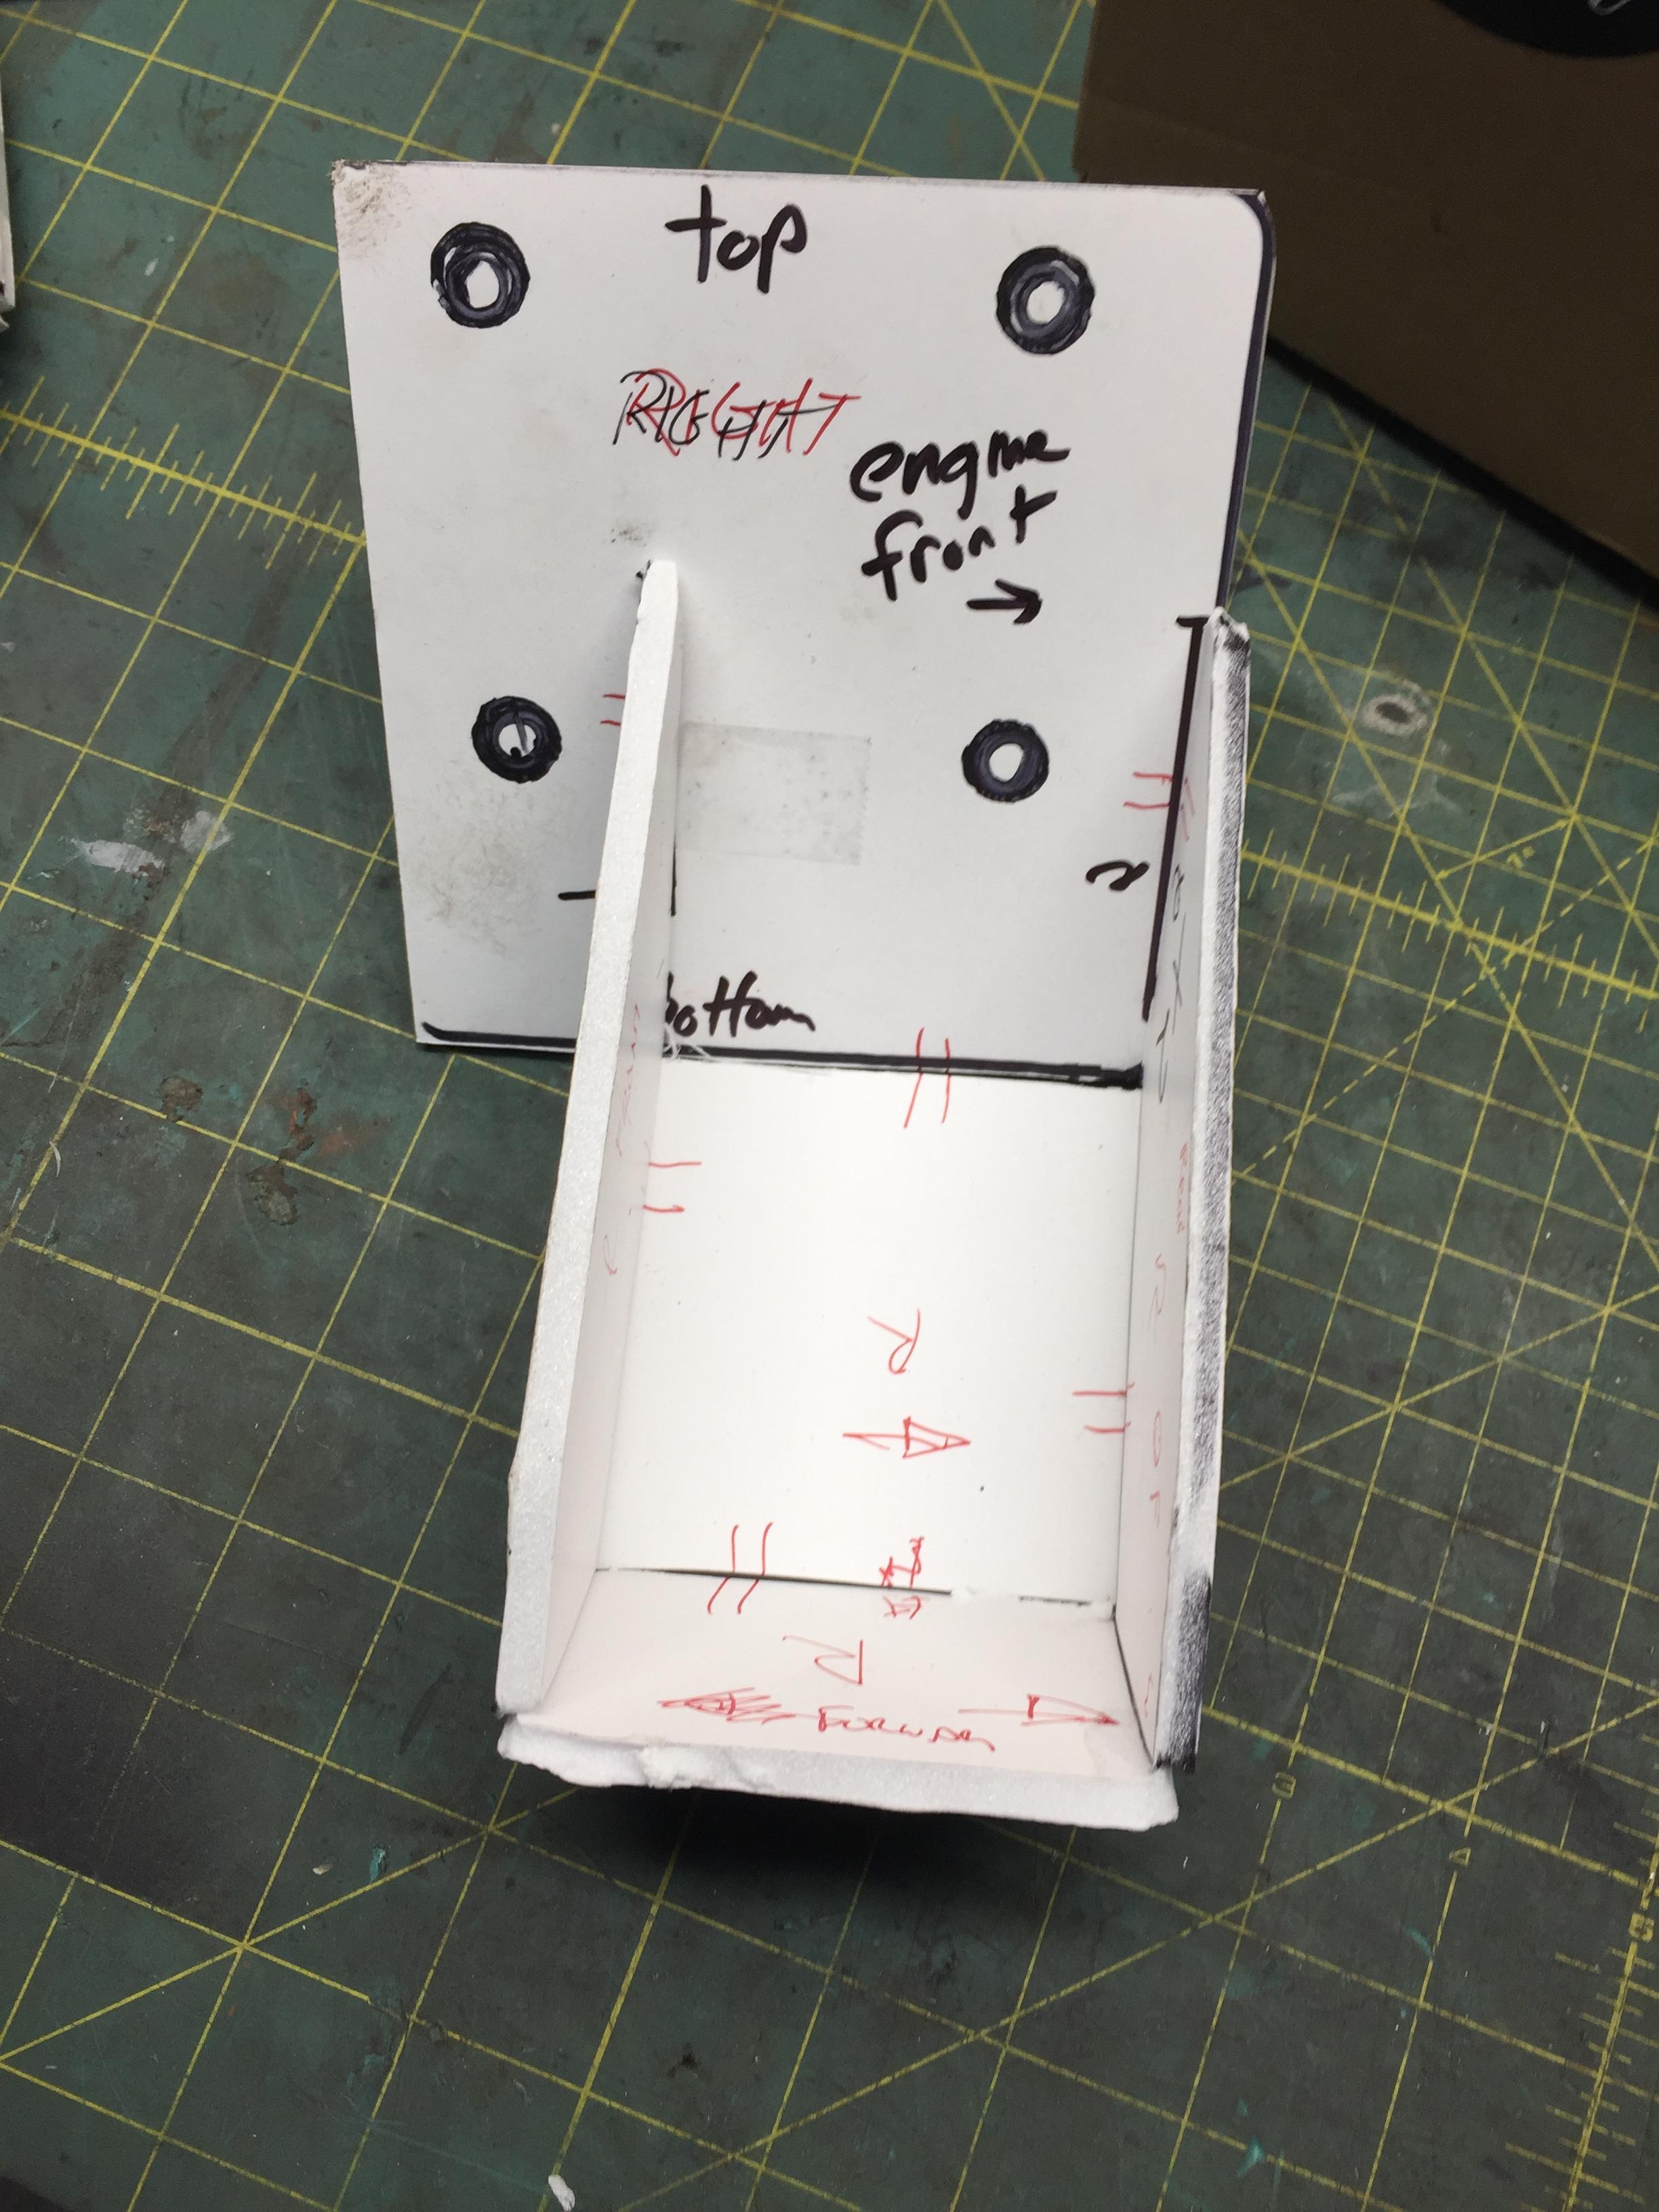
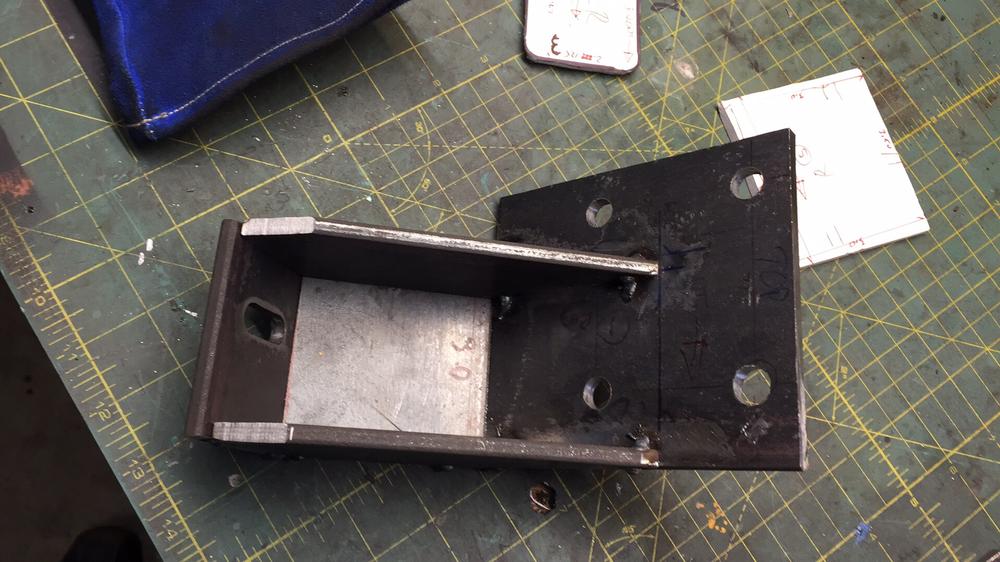
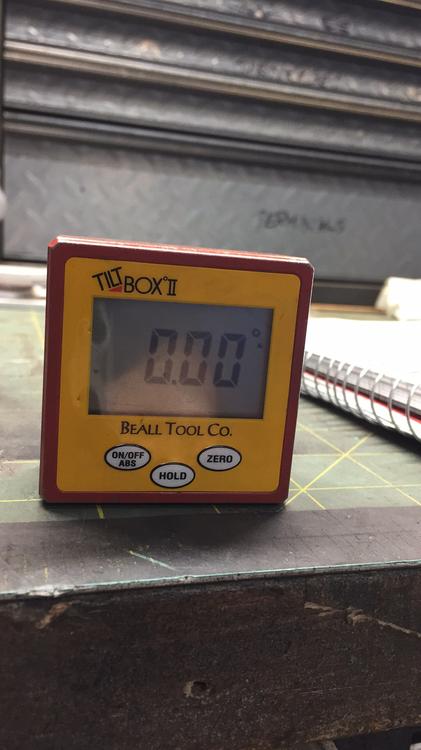
So I have myself in a pickle here. I'm building custom engine mounts for a silly RB25 swap I'm doing for a friend, and I have no way to test if the angles of the fancy new pads on my mounts that sit on the K-member pads are right angle-wise or spread wise before I drop get the engine in. I have great patterns taken from the guy we got the engine from off of the McKinney mounts he has, so I know I'm "close" I find I have NO spare k-members laying around. I know, I'm shocked and dismayed as well. Anyone with a nice little digital angle meter and no engine in their car care to go tell me the angle from horizontal for each of the two engine mount faces on the k-member towers? No rubber isolators/mouts in place please, just the face with the single M10 hole that the isolators bolt through. I have an engine block here with engine mounts attached that tell me the included angle is 90, or darn close, but without knowing the exact engine tilt I can't guess what each K-member pad angle is. I'm guessing that are both exactly 45. Would Nissan make it that easy? Also if you can measure the distance across the two K-member pad between the two single 10mm holes as another data point for me that would be grate, uh, great! I clearly can wait until I get the old L28 out and then measure the guys car myself, but I want these mounts built, welded and coated before he gets here to save time. I'l save the patterns for these mounts and share if anyone wants to save a few $$ on buying custom ones for RB25 swaps as my penance for laziness. Passenger side mount. He made lovely foam board patterns for us to use as a template for making new ones! What a great guy. If you don't have one of these, get one. Fantastic tool for fabricators or drive shaft alignment doers I'm as shocked as you are about how level my bench is.

-
Or http://www.thezstore.com/page/TZS/PROD/25-2063
-
This connector style is one that vintageconnections does not carry that Eastern Beaver does (a Canadian reference if you're wondering...). These are used on the white and white red main power feeds such as the Fusible links and at the inter-harness connectors at the firewall and fusebox. http://www.easternbeaver.com/Main/Elec__Products/Connectors/312_Connectors/312_connectors.html
-
Are you looking for recommendations for a brand, or ideas where the best deal is to buy one? Never mind, I think you need a 260 specific kit. Good luck I think other than Nissan perhaps. But what is unique other than the carbs and head gasket?
-
Late 510's had 4 headlights. It's (they?) are 210's
-
As a proof of concept, simply cleaning and servicing both the wiper linkage and the electrical connections to the wiper motor and primary electrical system, have rendered countless "slow and in supposed desparate need of a Honda motor upgrade" Z's in these parts to perfectly respectibly functioning wipers.
-
A common 3/8 NPT pipe tap also theads nicely into the soft bushing ID. Then I attach a large pair of vise grips to the square end of the tap and hammer on the vise grip to pop them out. I also welded a 3/8 NPT pipe tap to a fitting that attaches to my slide hammer to help persuade out the tough ones.