


zKars
 Subscriber
-
Joined
-
Last visited
Everything posted by zKars
-
 1st! ? Now thats cool! wish I could have been there. Did you make it? Apparently if you took that picture
 -
-
-
-
And I'm back. send me an email to z240@shaw.ca and we'll take it from there. Generally are you after the small flat covers or the later 3D larger covers?


-
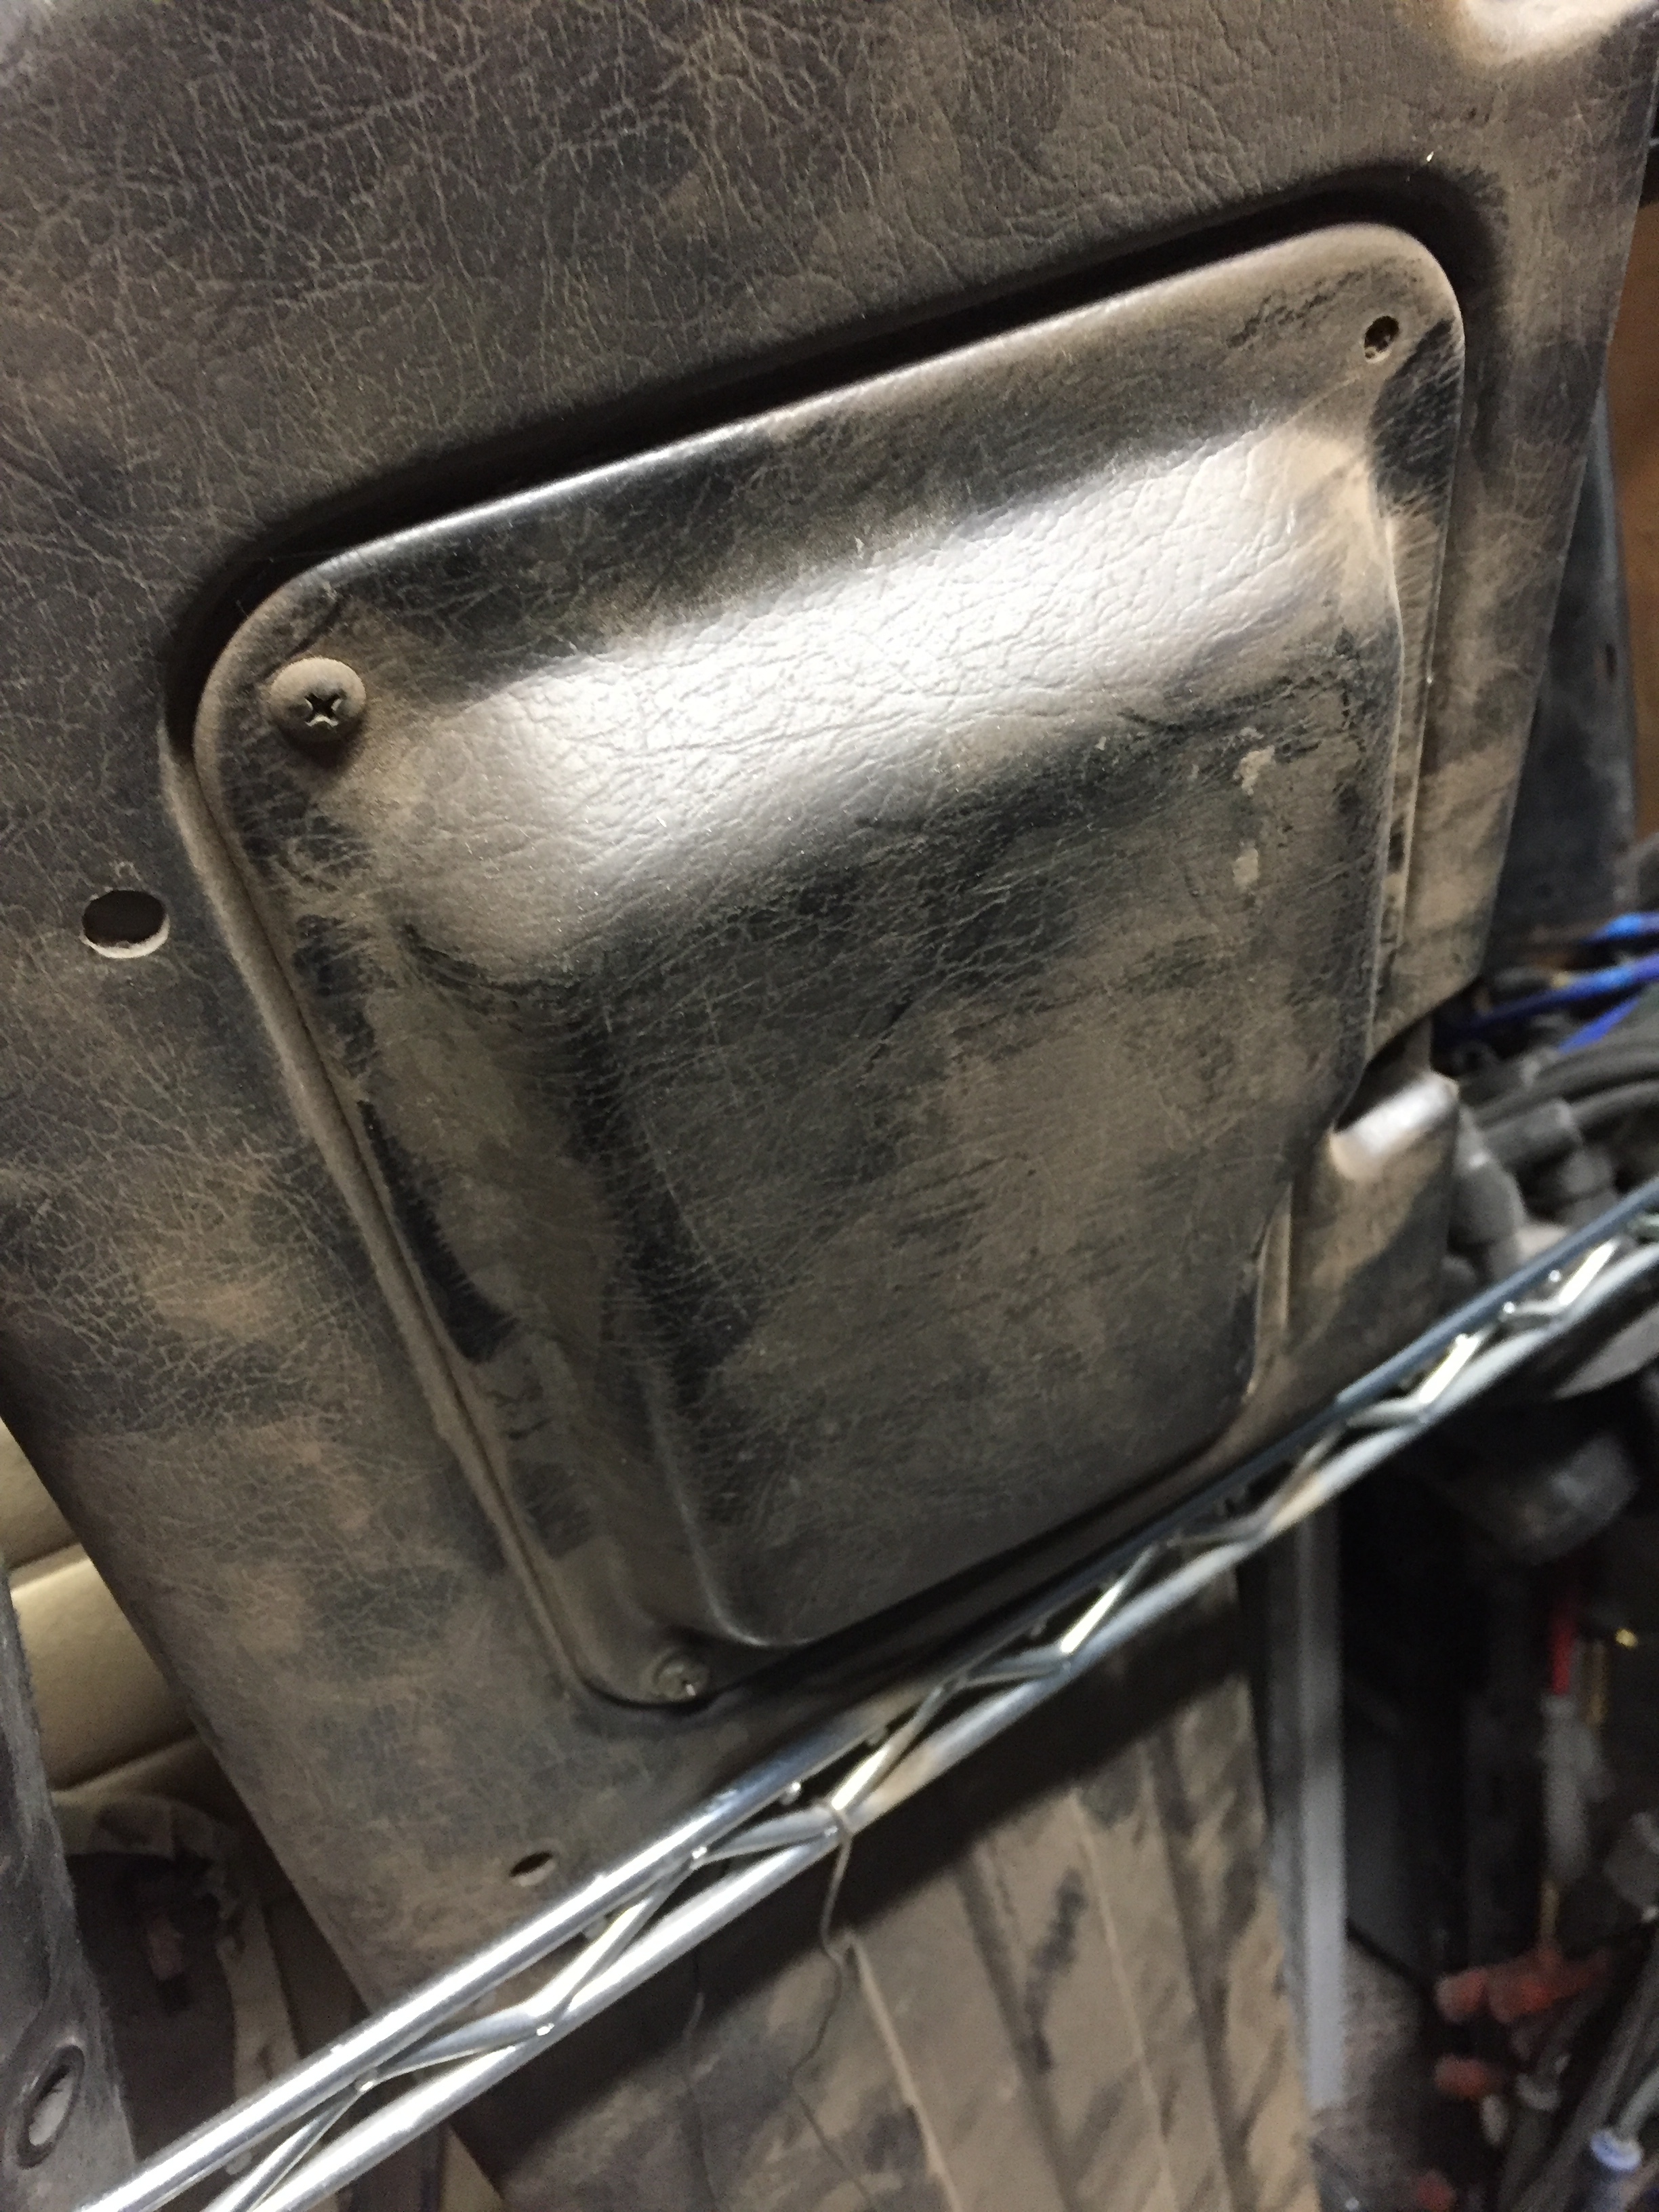
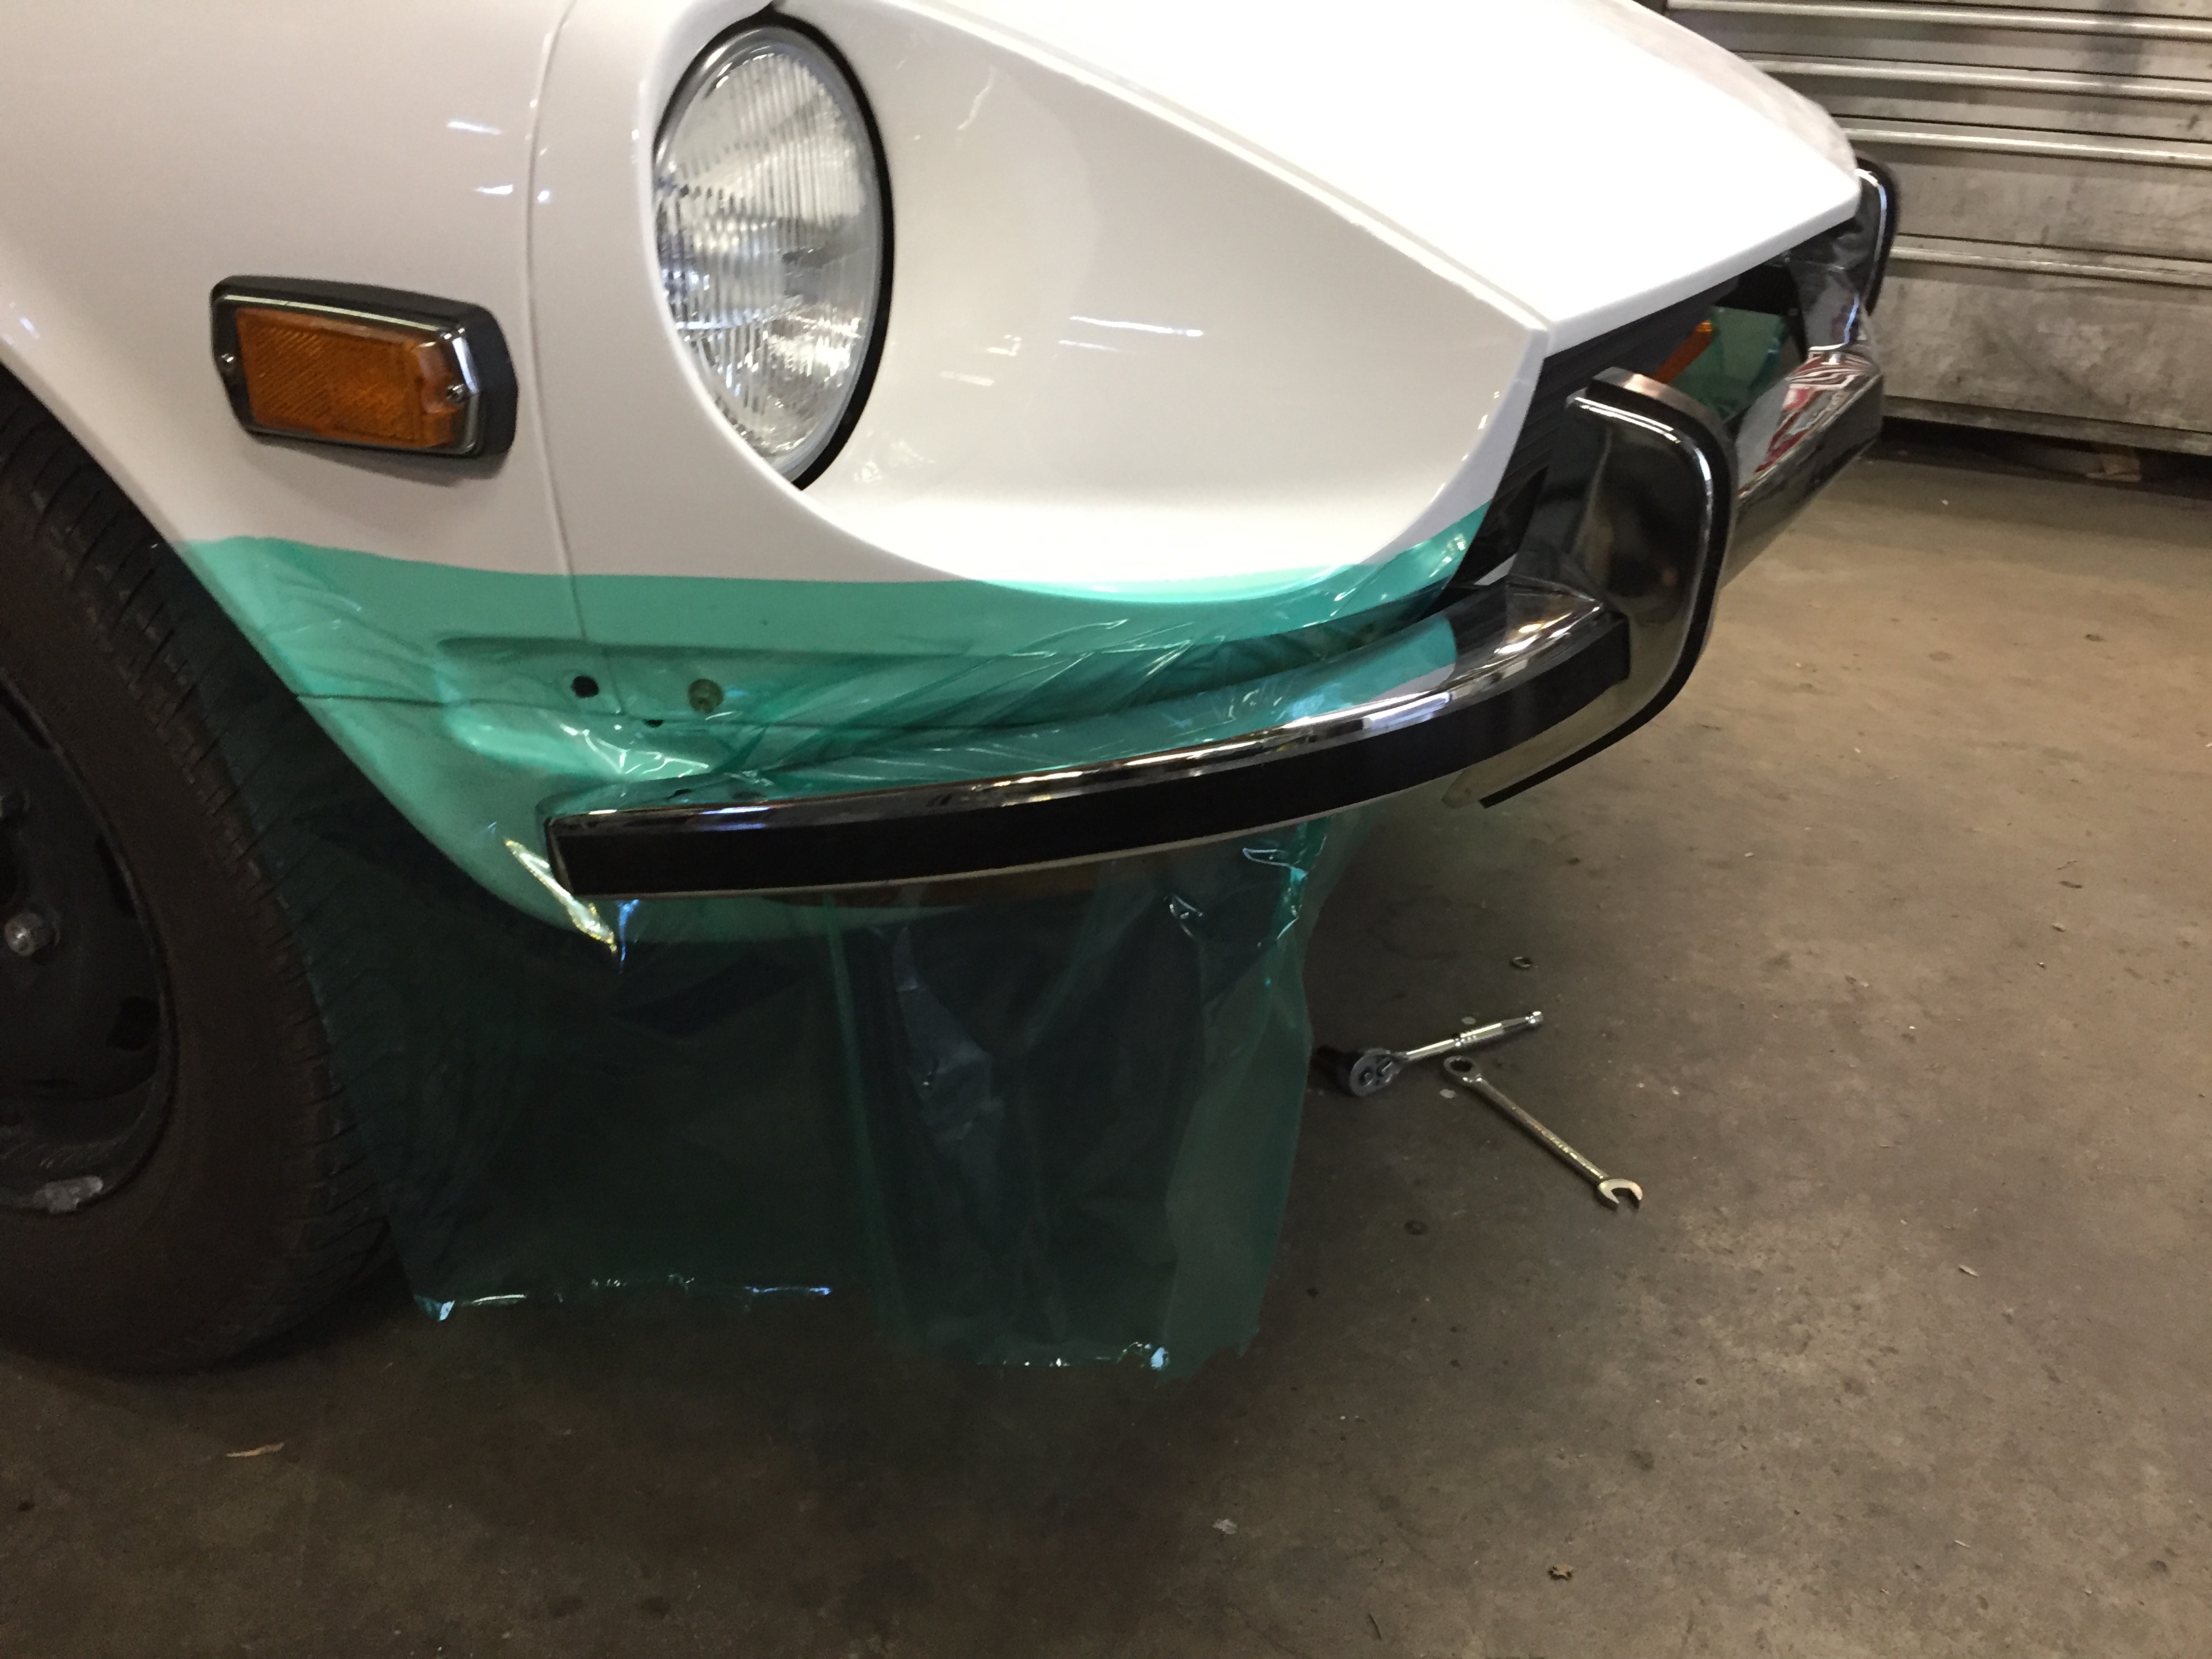
Today found another use for this stuff. I'm putting the bumpers back on after some "improvements" (rubbers, more on that later), and as usual when doing this, I'm concerned about the corners scratching the paint on the fenders as the bumper is placed onto the mounts. I would typically wrap the bumper ends in towels or something or tape sheets to the car. Not today. I just cut a couple of 18 x 24 in pieces of this stuff, (reused the stuff I used on the fender yesterday) stuck it to the car on both sides, and slammed on dah bumper. Then peeled those pieces off and put them on the back to do that one. Check out those rubber strips. They are not stock or repro's. They are however, cheap, lovely and easy to get and apply. Meat for another thread.


-
I can likely scare you up a set. Do you need the screws that attach them? I'm assuming for 71 240.
-
https://www.anplumbing.com/
-
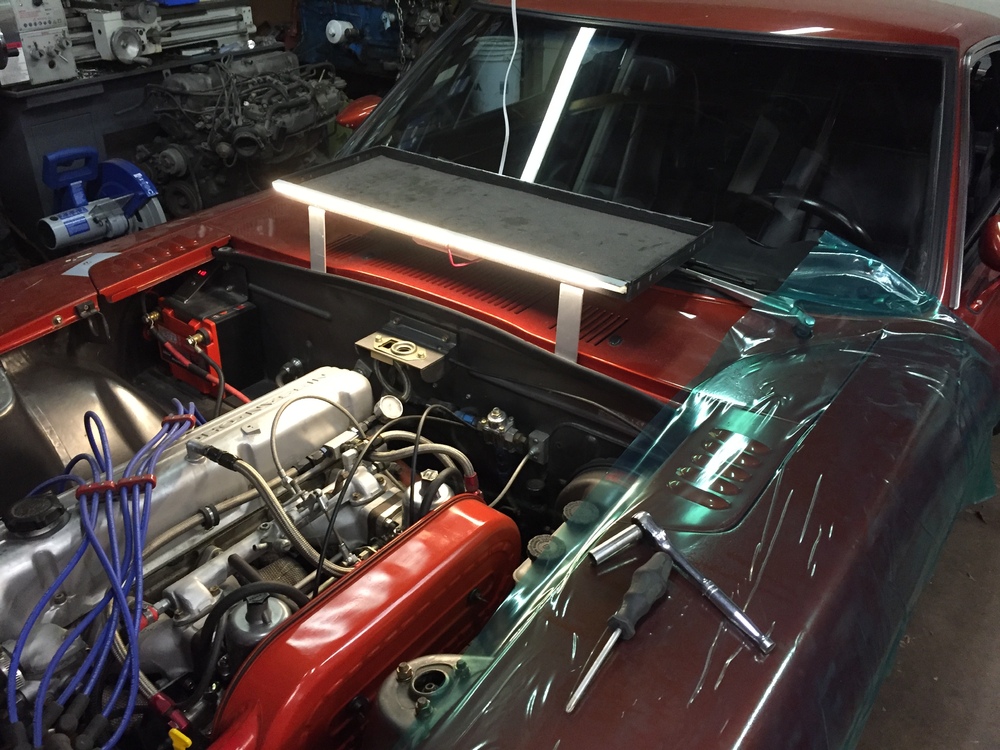
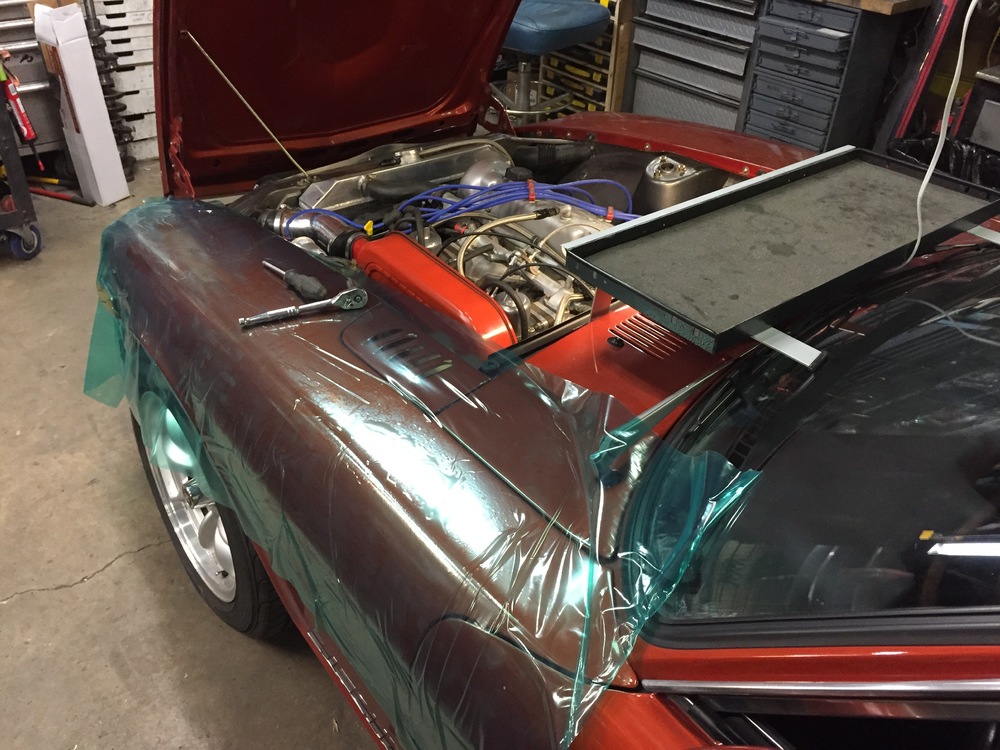
Ok, here is the proof of usefulless. I think I like this stuff. It's tough, has a fairly high friction on the face so tools don't slide off, and it stays in place of course with the great adhesive, but will never have a problem coming off. It seals the surface underneath from all contaminants too. All the sheets, blankets, yogurt mats, etc, that fall off, are never in the right place and that grind muck into the finish are toast around here except for utility use. Now I can leave tools on the fender and cowl like old times instead of the spank tool tray. Well no, I'll keep that, but this reduce the trips to the touch up booth..... I also have to test its resilience to long distance welding and grinding sparks too... Probably burns like gas soaked rags. Have to check that as well...
-
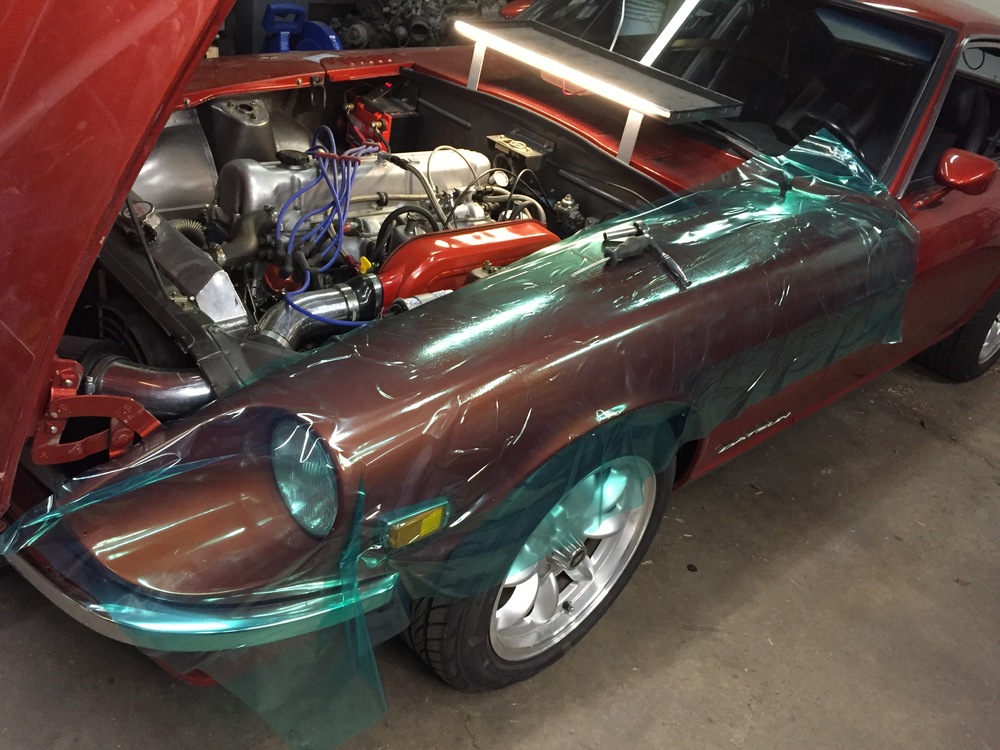
Just received my Amazon order of the protection film. Very interesting stuff. It is 3mil thick, has a nice sticky non-permanent adhesive, and feels really "tough" to the touch. Not at all like kitchen wrap, it has a smooth thick feeling, even though it's only 3mil thick. I stuck it on every surface I could find in the house, smooth and rough alike. Sticks real well and peels right off. Packaging claims its a water based adhesive that washes off easily if any does transfer. Good for 45 days plus or minus. I'm going out to stick it all over a Z fender, drop some tools at it, and see how it holds up.
-
I can help with 2,3 and 4. There is only one hood emblem. Did you mean hatch? PM me.
-
I've received the book mentioned about and read that bit too. First, heat shield added in 73? Every 240 I've ever seen has a heat shield. There are three different ones for heaven's sake. How the heck does turning the wheel have to do with the car quitting due to heat soak????? Is there some super shiny spot on the steering shaft that suddenly aligns and reflects a ton of heat from the exhaust at the carb bodies?????
-
Good idea about the carpet protection film. Got some coming from good old Amazon. We'll see, Also found this stuff.. At least its intended for automotive use. It's only 2mil thick though... https://www.fellers.com/fellers-shopping/cat/clear-overlaminates/sub/thick-overlaminates-paint-protection/set/auto-wrap-shipping-protection-film
-
-
Grumpy right hand turn signals are epidemic. it's one of two things. The first is the contacts in the switch need cleaning, or the tiny roll pin that forms the pivot for the TS arm is either loose or just about to fall out, making the switch hard to move far enough to get the contacts closed. Get creative and make a new pin that's a bit bigger.
-
As mentioned in another thread I've been restoring a 71 for the past few months. One issue that has raised its ugly head is how to project a fresh paint job while assembling the rest of the parts on to the body, especially in a small shop where proximity between the car and whatever you're dragging past it is a constant concern. I was watching one of the various car restoration shows on the speed channel, you know the ones, the ones where they restore a rusty incomplete classic to a new car in 5 days for twelve dollars. Yeah, fictional TV. Anyway, I noticed at one point they had a protective film/cover all over one car protecting fenders doors, roof, everything. It looked like a sticky film with removable adhesive. When I search on-line all I get is ad after ad for the usual 3M paint protective films. The stuff I saw being used seems like such a great way to apply a protective coating. It seals the paint and provides scuff protection. No dust, finger prints, accidental spray of whatever. Anybody care to share what they use to keep their projects protected or have a lead to this elusive temp protective stuff? As you might guess, the 71 is currently back at the body shop right now getting a few touchups....
-
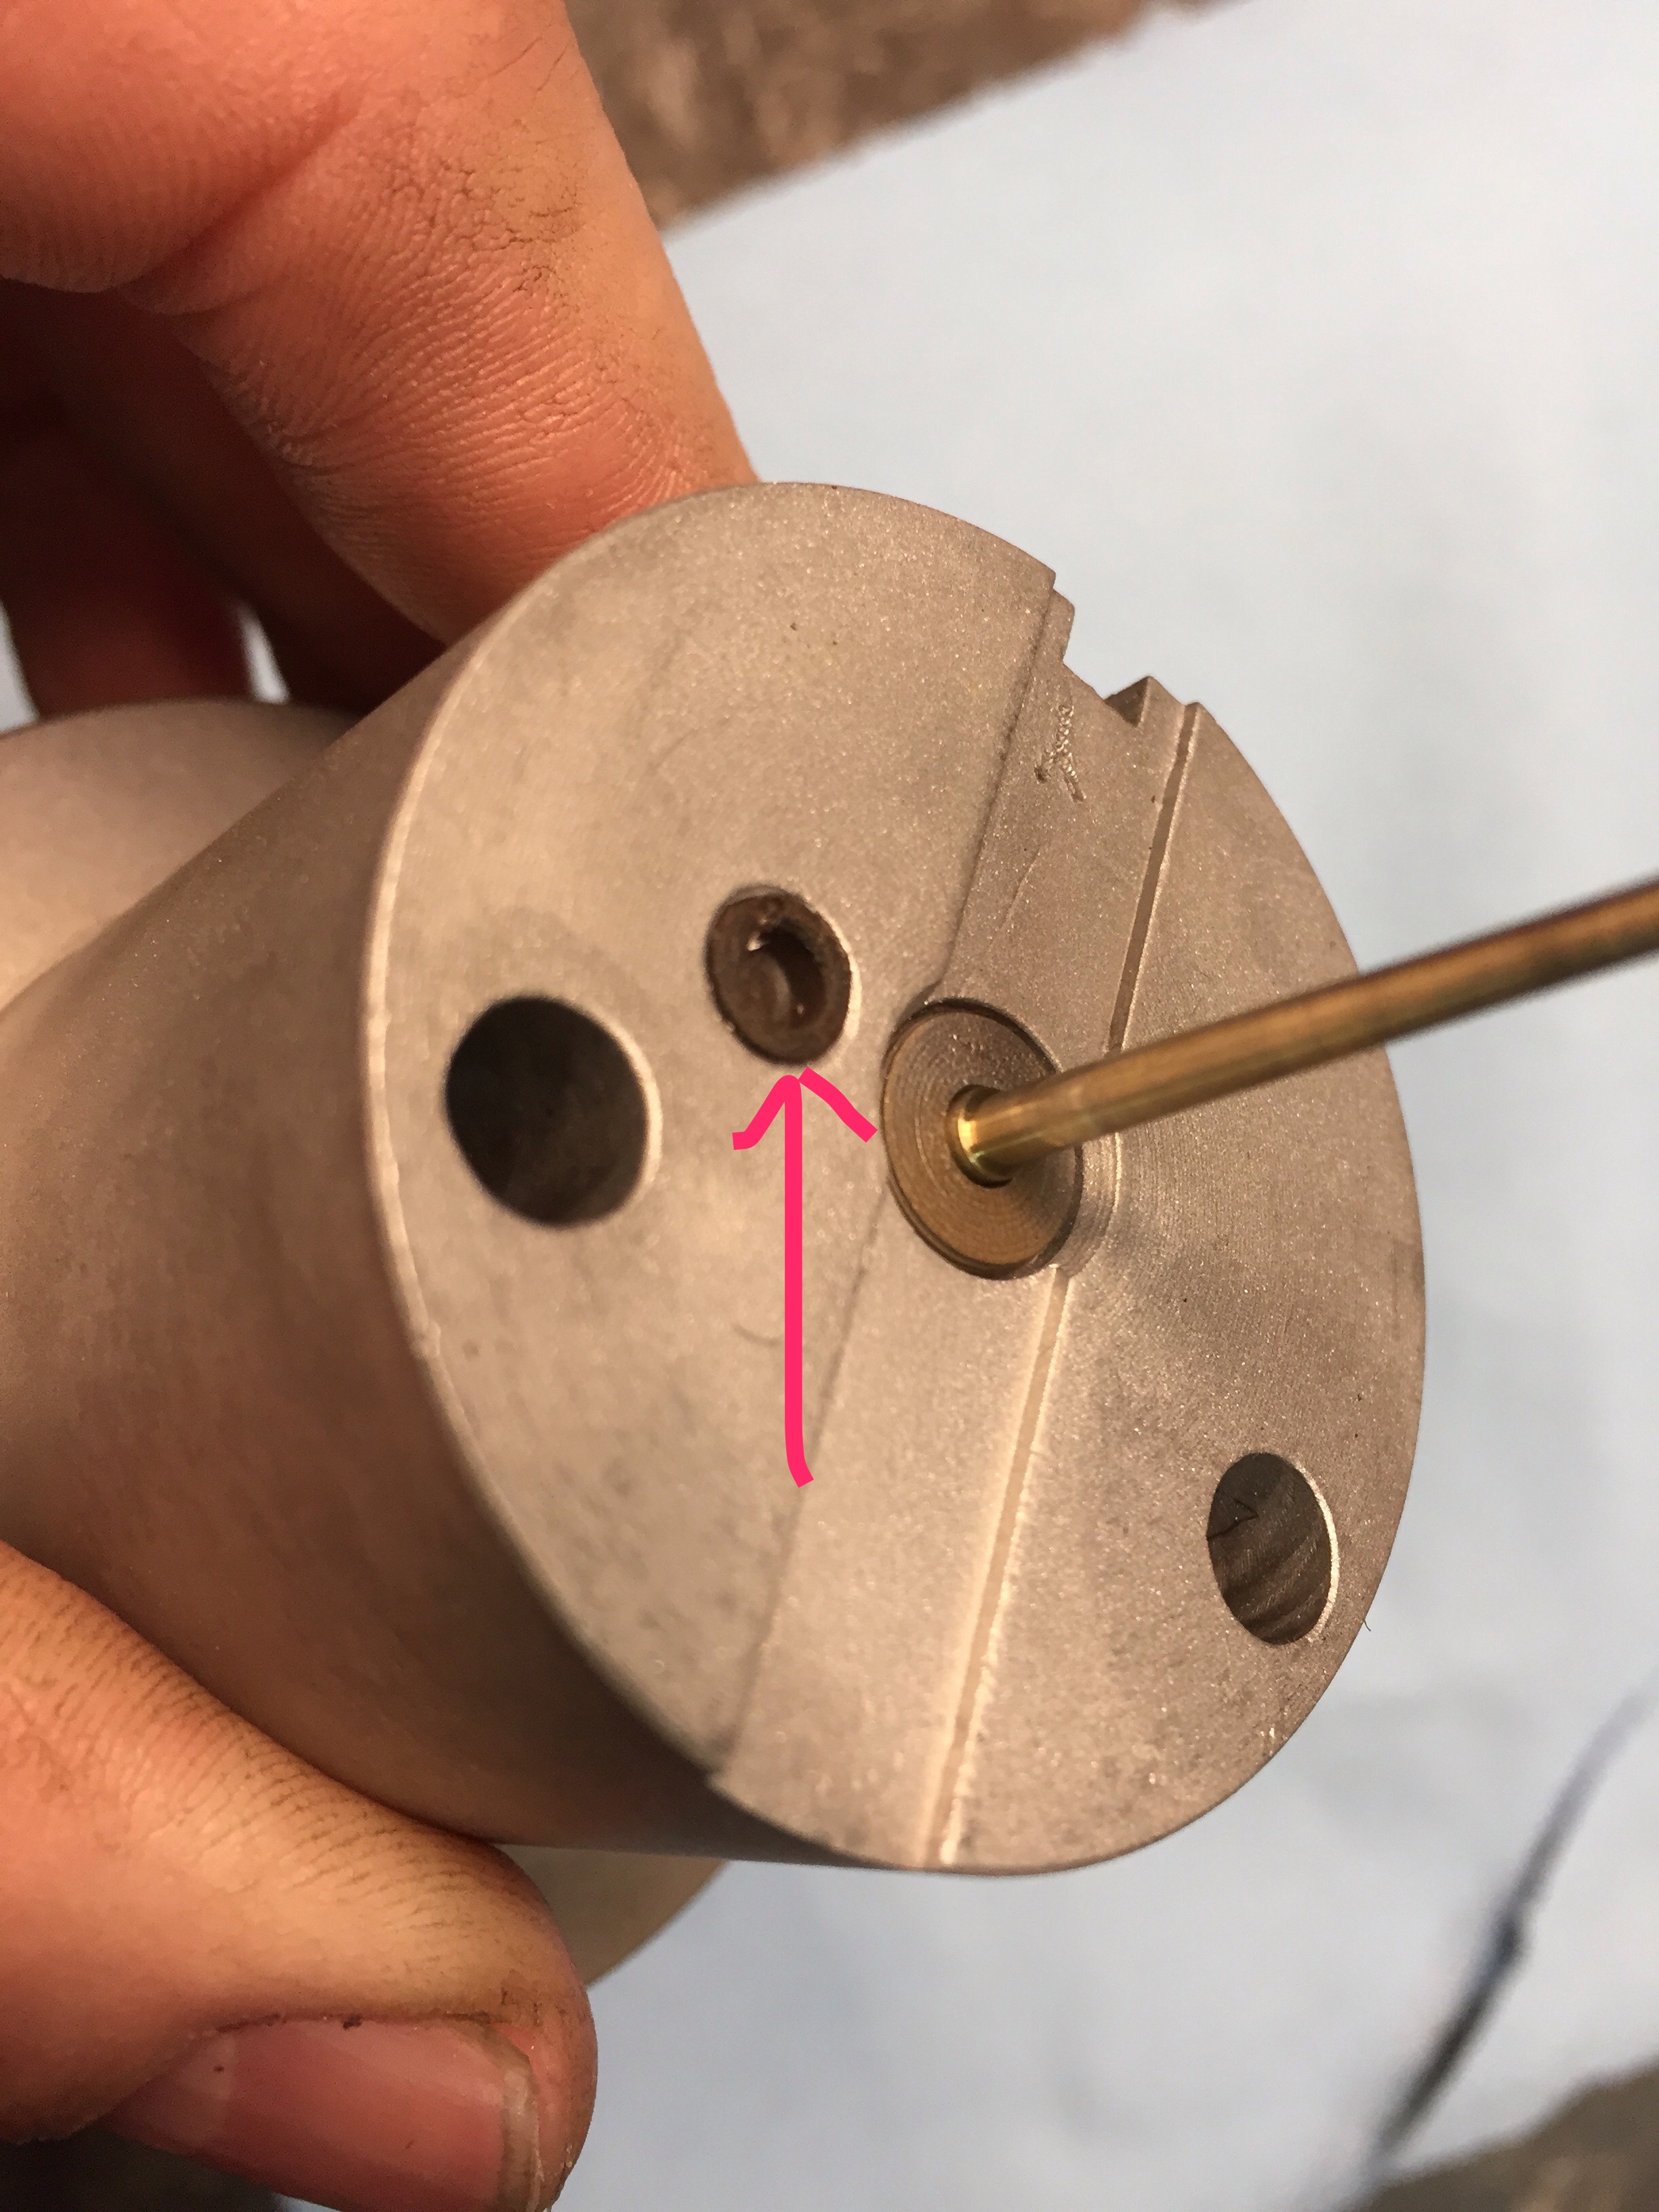
There are two distinct racks that have different width, left side, (drivers around here) rack mounting ear spacing. Generally, 240 are narrow, 280 are wider. Get a 280 bushing and try to cram it into the narrow 240 rack and you're in for a real fight. Get it the other way wrong, and your rack will shift around under steering loads. The shape of the poly bushing is also wrong and needs shaving to fit the shape of the rack like CO indicates. The Energy suspension part numbers for the 240/280 kits are only different in the unique rack bushing included for the matching rack.
-
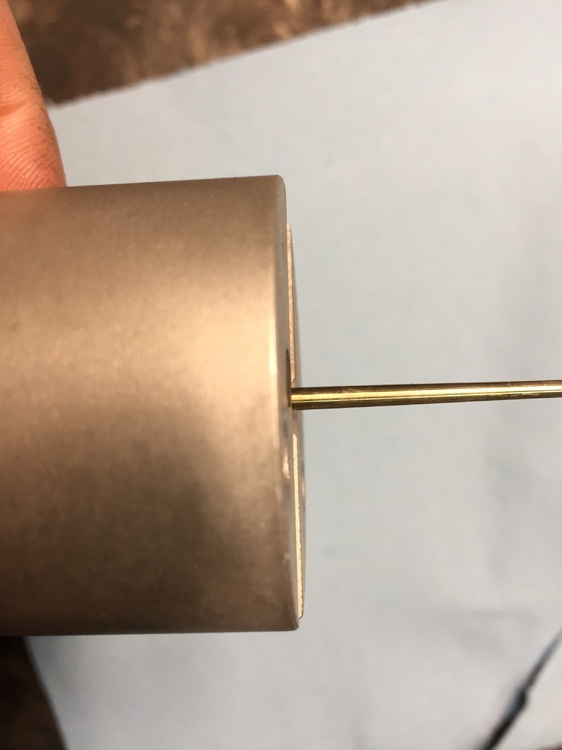
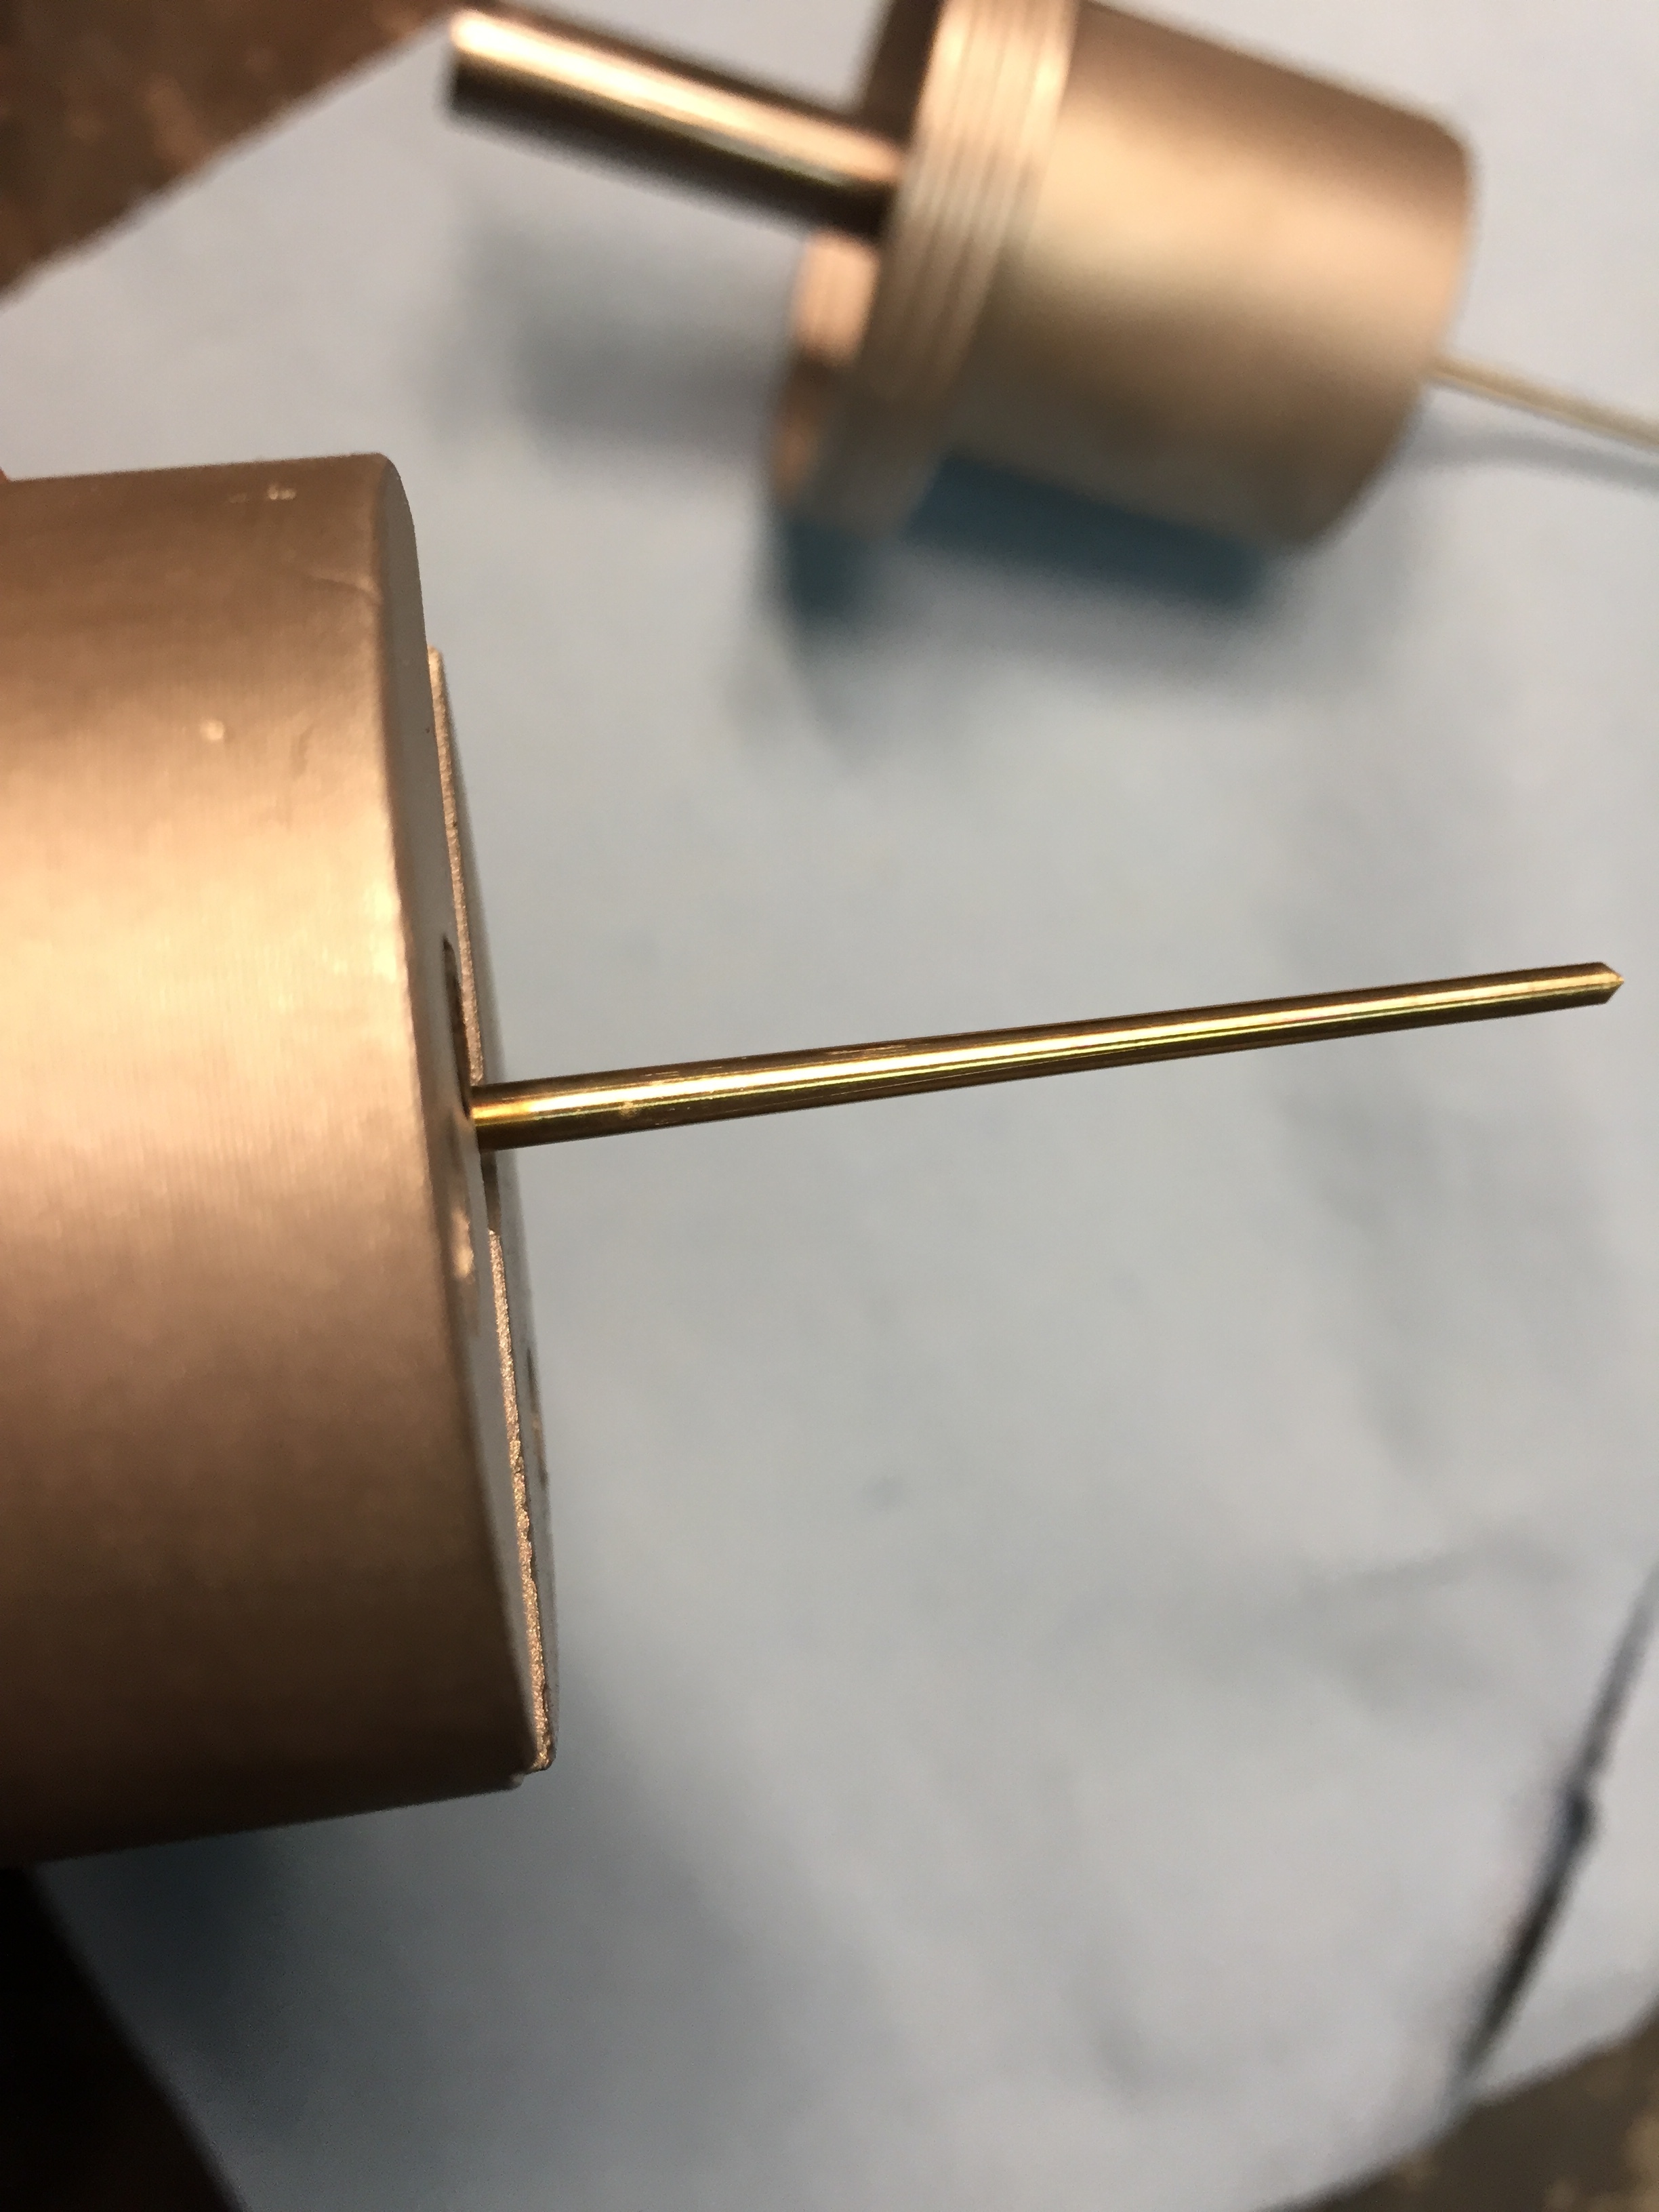
That slot down the center is in fact the key to all this. Thanks CO. The book I was reading, when making reference to this plastic stop, shows a piston without the slot we have in our version of the SU. I have set of SU's (not the ones above) that have this piston style as well, which just served to confuse me more. This style of piston clear depends on that stop to provide at least startup air access. Ours do not have this issue. The plastic stop likely should be flush or just slightly off to do nothing more than provide a soft landing for the piston. Thanks for the clarifications.


-
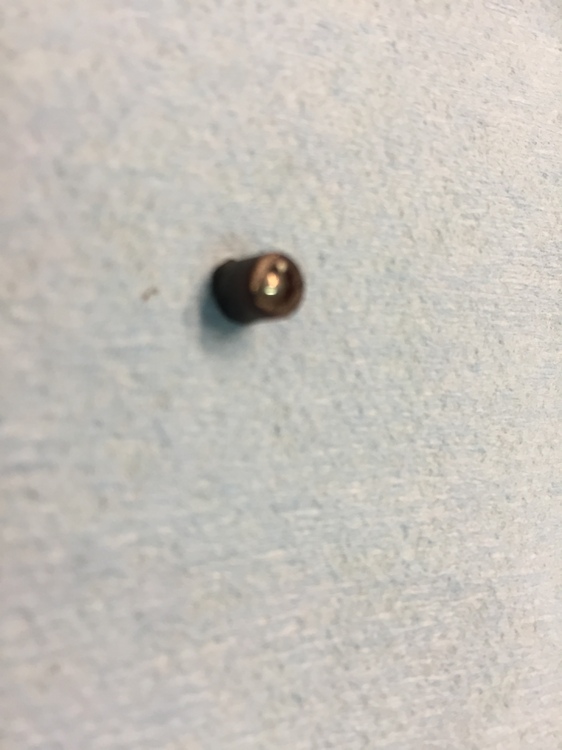
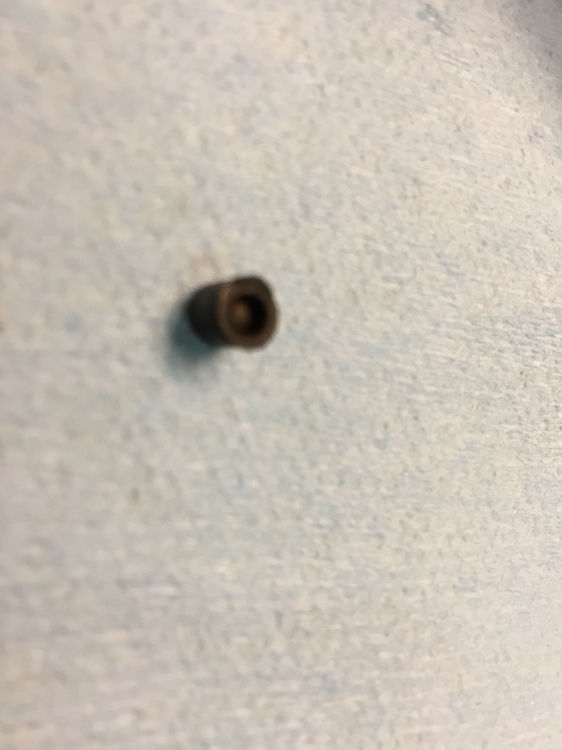
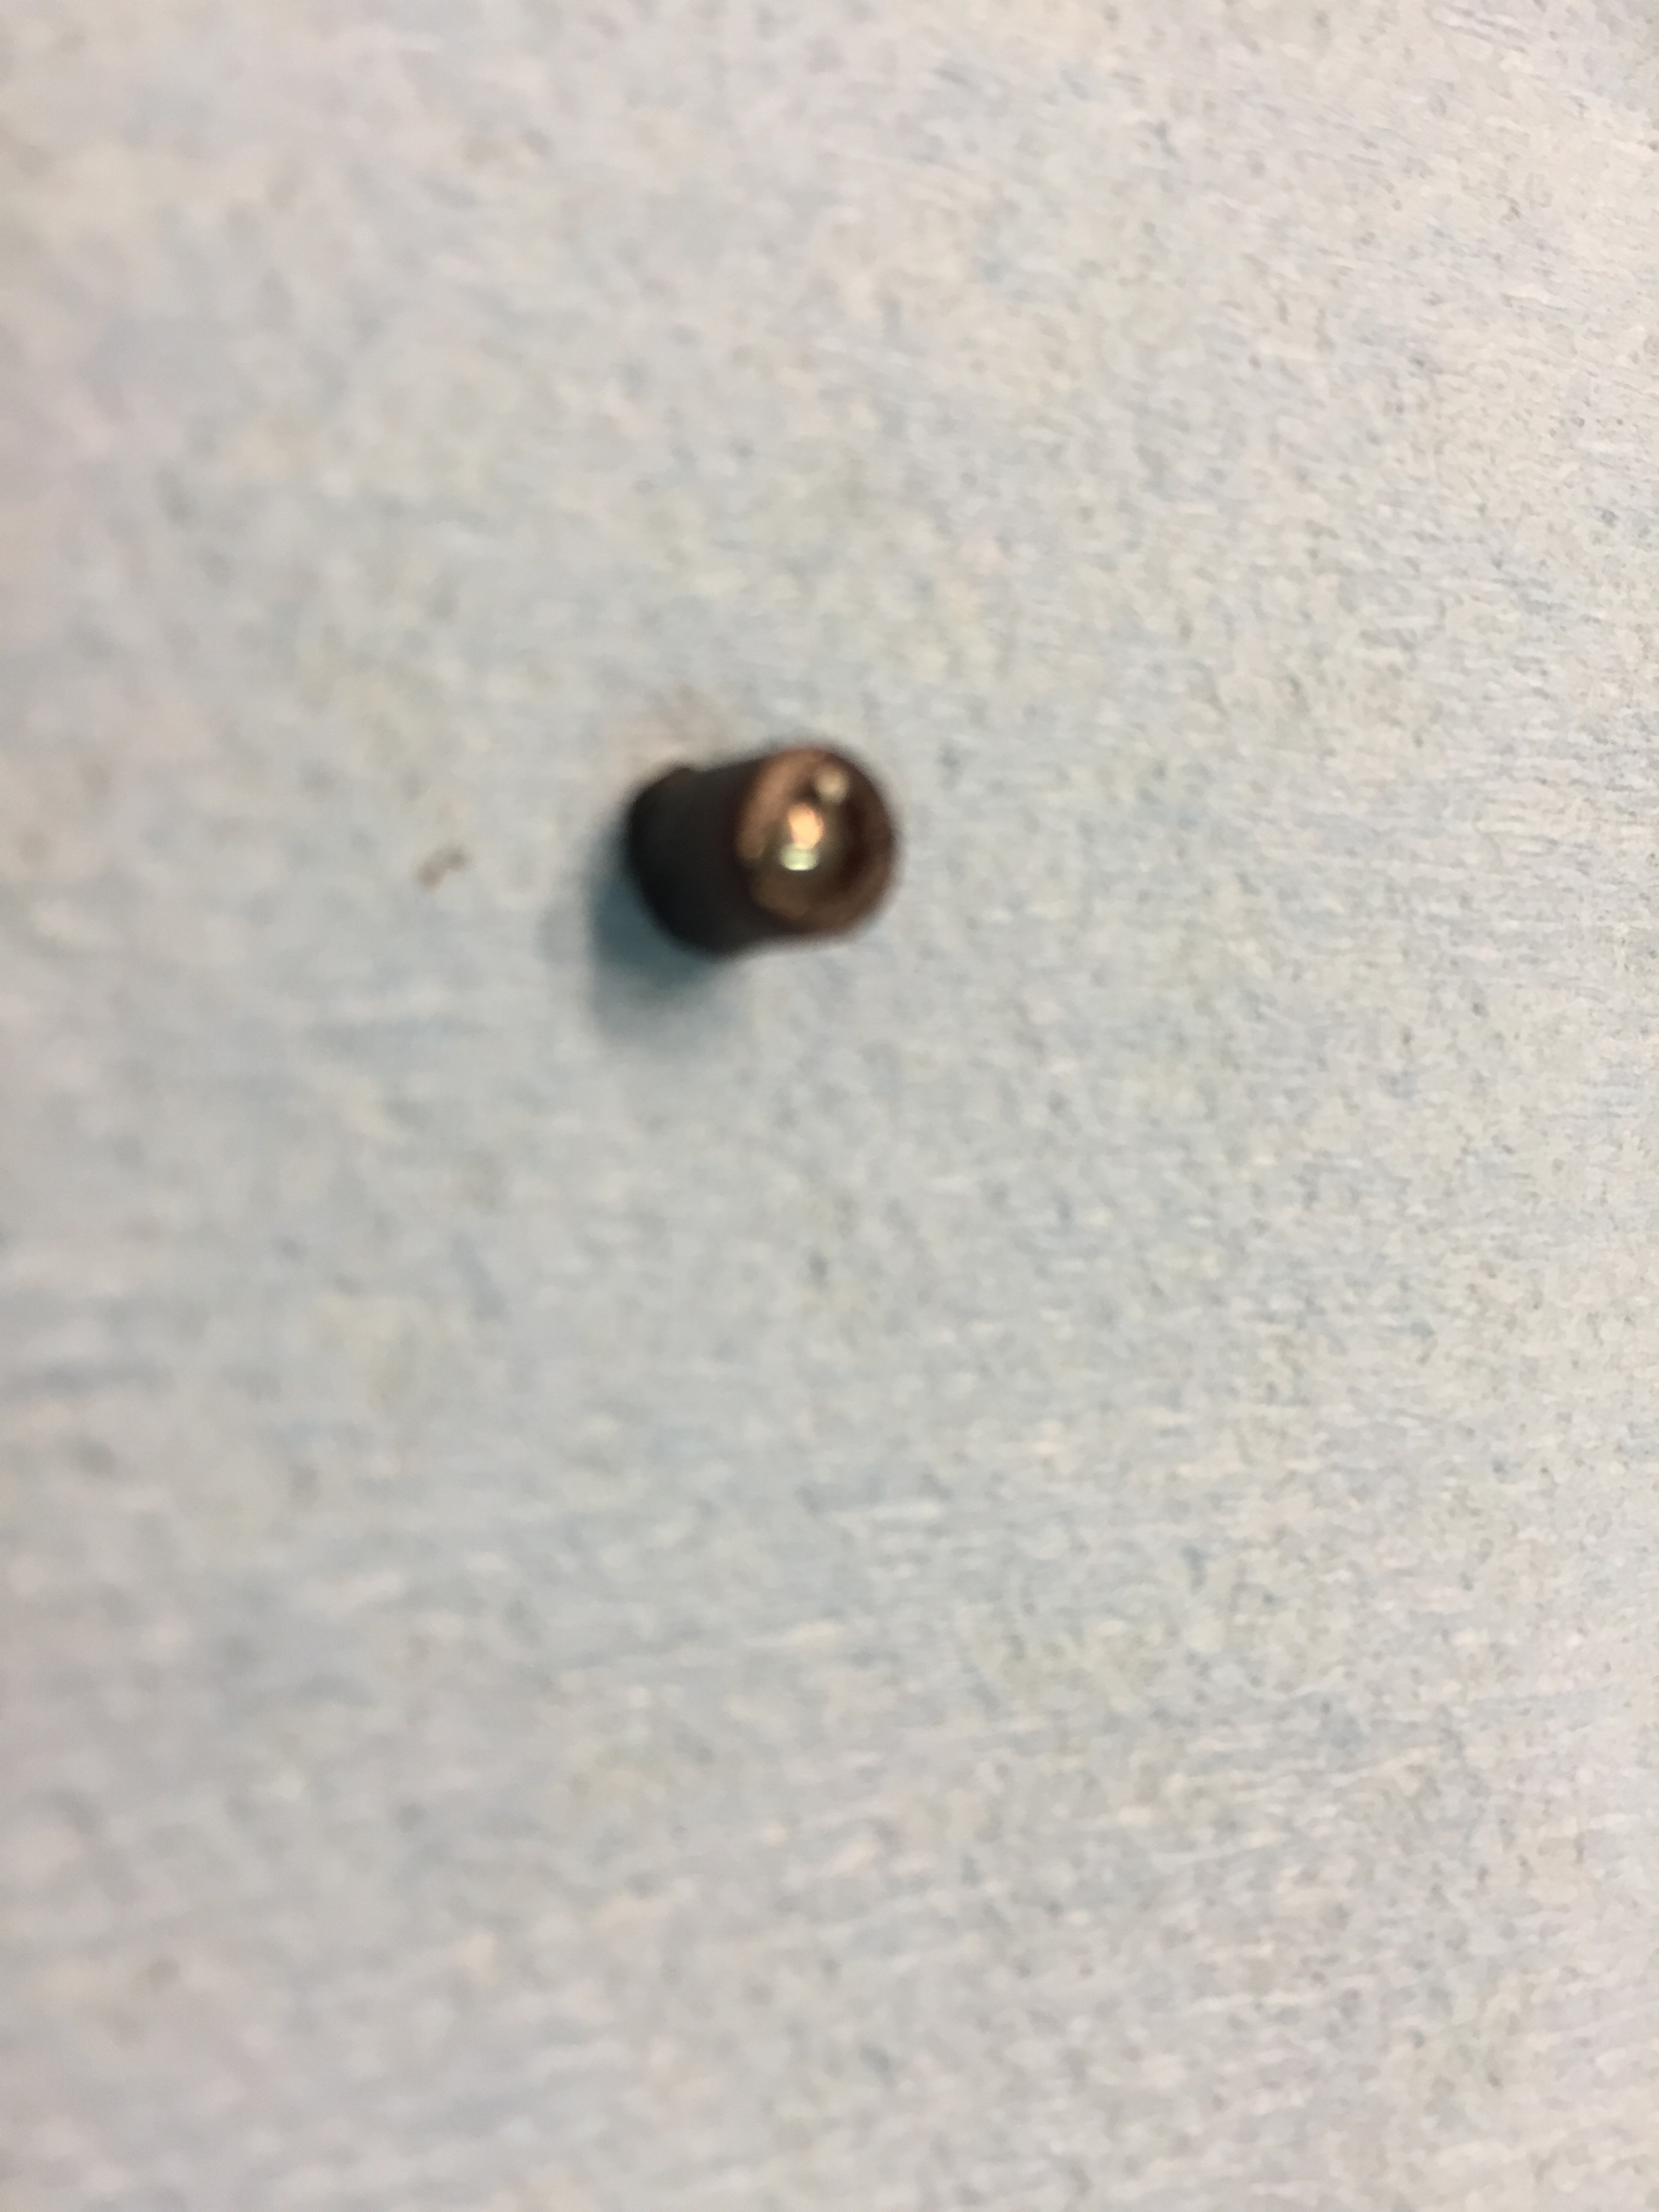
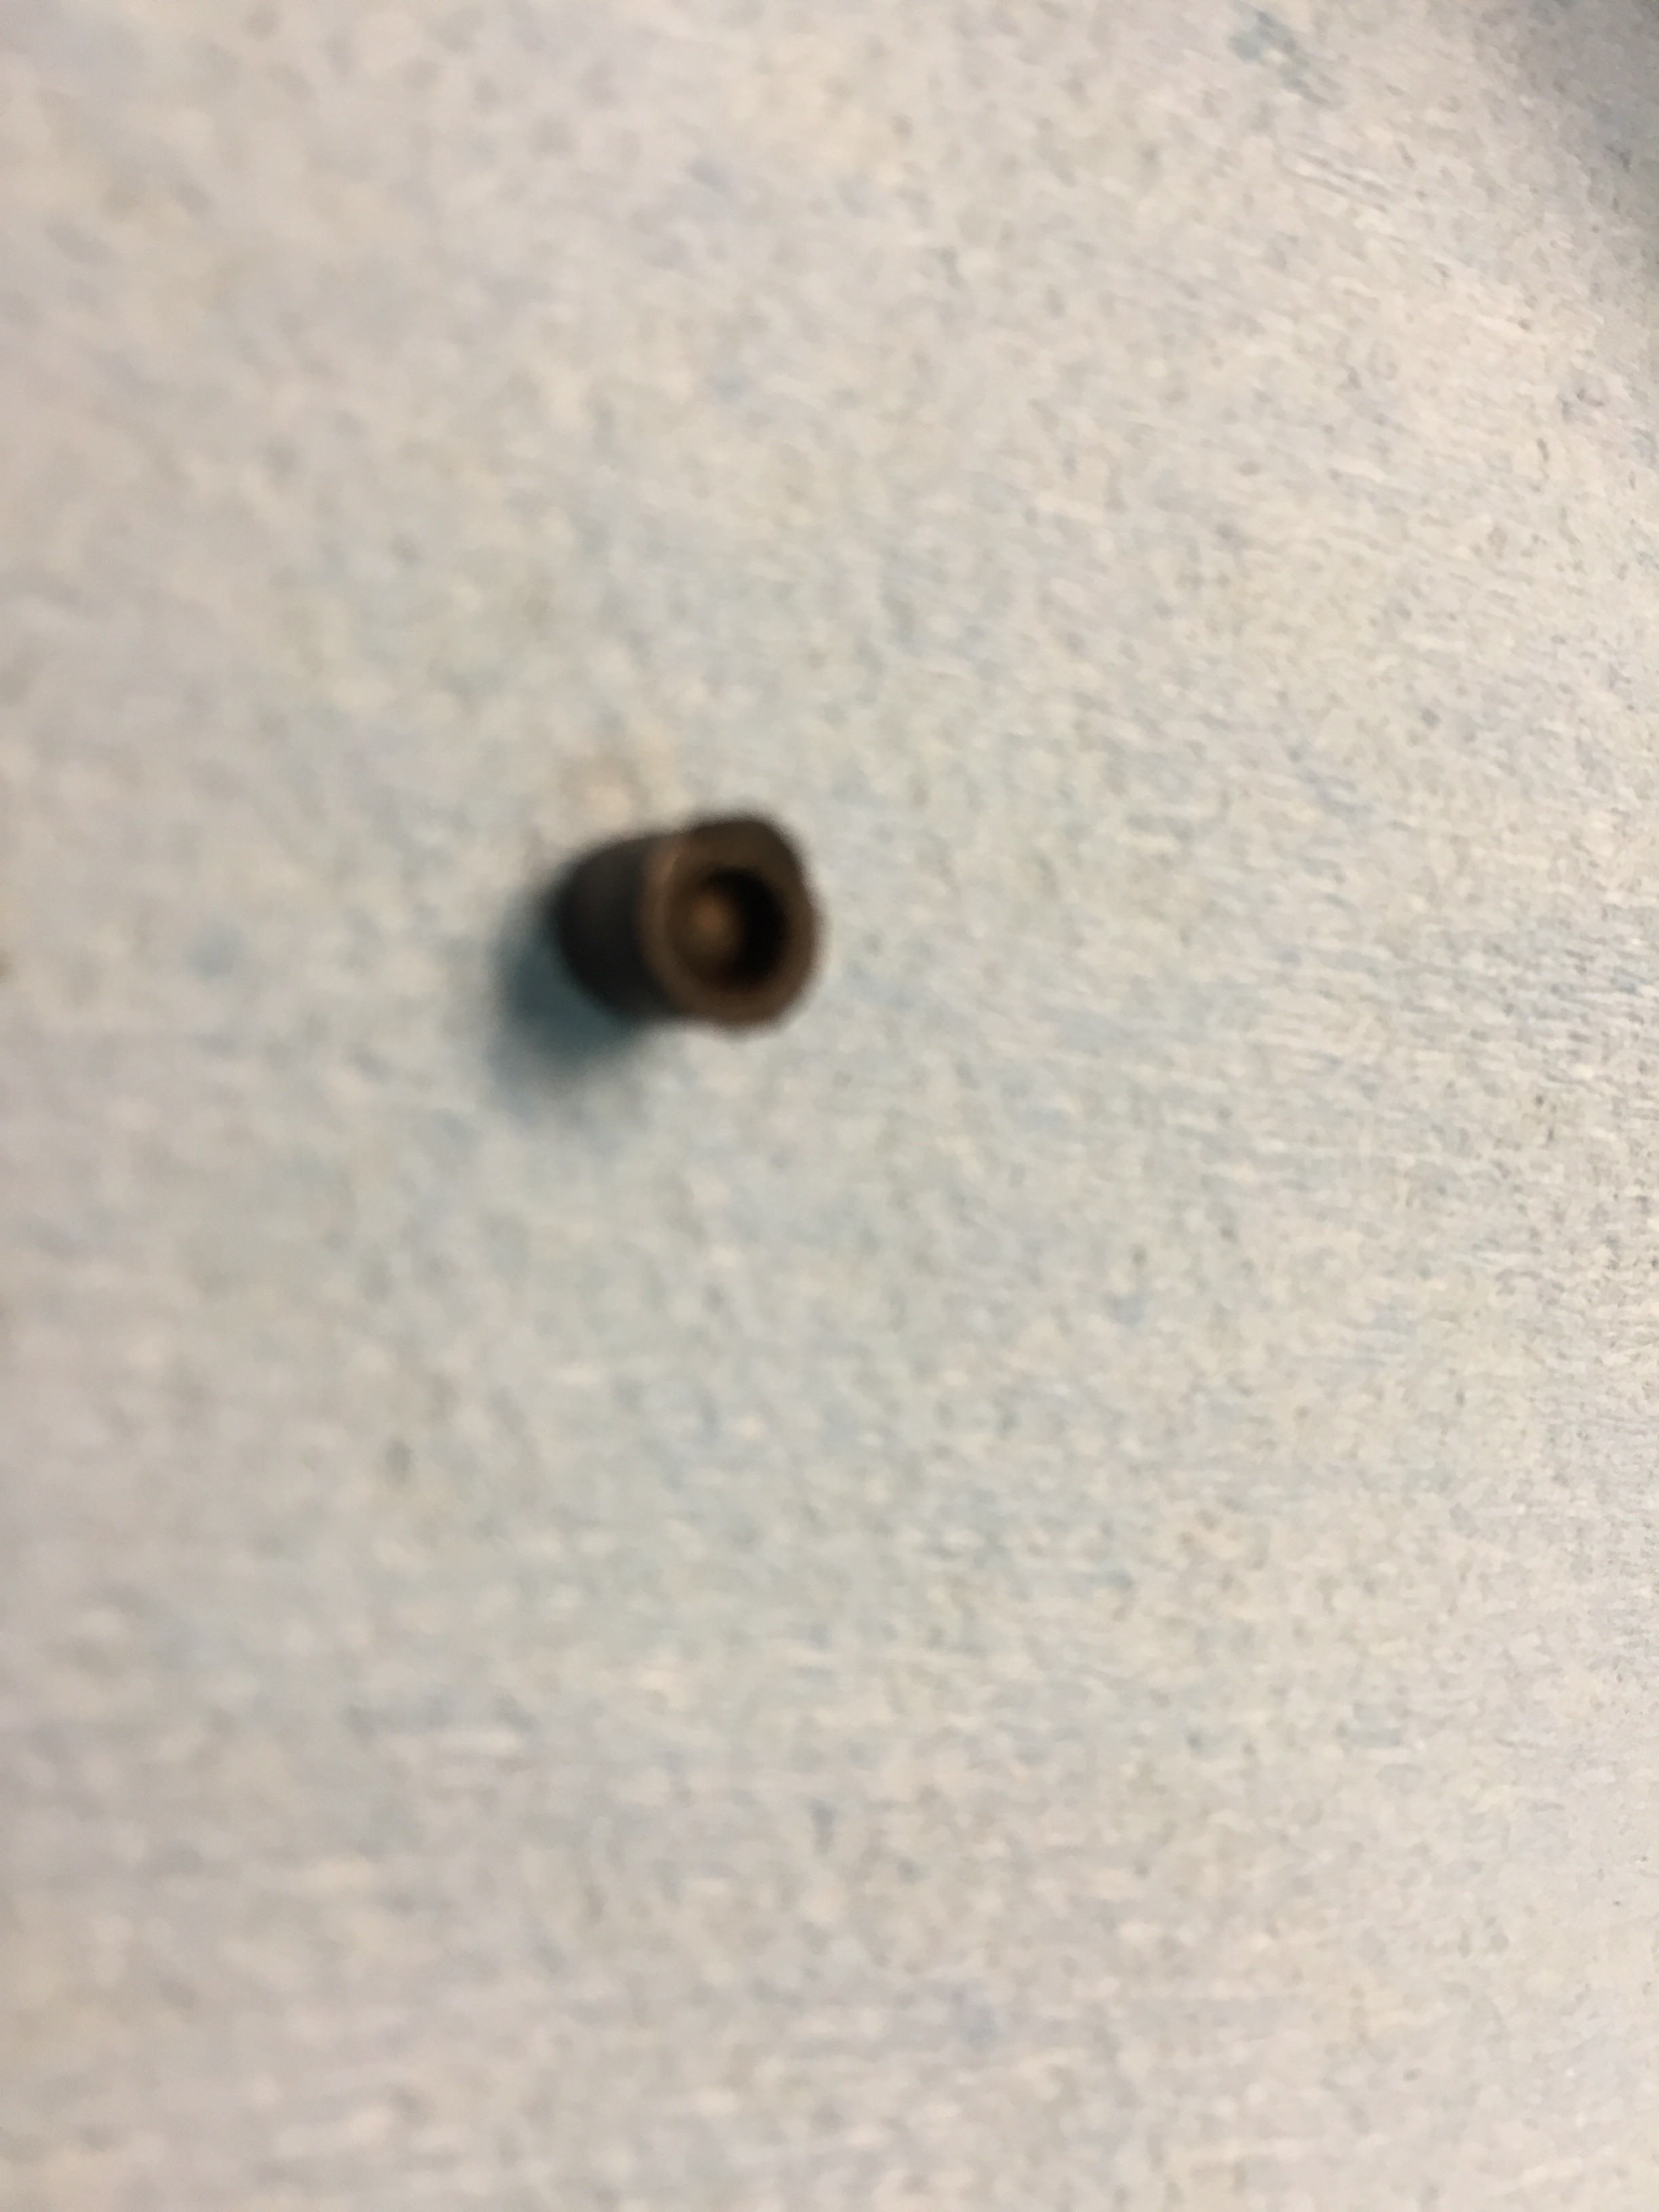
So I had reason to read a book on SU tips and tricks a couple of weeks ago, and came across an interesting tidbit that I need to share. It talked about piston movement and how venturi vacuum makes it move according to load. Great. Then they mention the special case where the piston is all the way down, like at idle, or at startup when the flow rate is so low that the DeltaP over the bridge hasn't gotten high enough so that the pressure diff can't move it yet. The piston has to be held mechanically slightly off the bridge to allow SOME air to get through. How is this accomplished? WIth this apparently long forgotten item on the bottom of every piston. That little round plastic thing is supposed to stick up ~.010 below the piston face to keep it off the bridge. So far I've checked two sets of darn near fresh SU's, and found both to have that little spacer guy mostly flush with the surface on both pistons. I have another car with a fresh set and a couple of local cars with more fresh sets to check yet. Here is it in (crappy) close up. Its a little plastic tube with a ball bearing pressed into it to slightly expand it. It needs to be pressed into the piston, and left proud 0.010 or so. I suppose it gets pressed in a bit everytime the piston drops if its old and doesn't have enough friction to stay put. Here is pictures of how I found them in my Z, looking from a sharp angle you can barely see the black line that just proud of the surface (like .001) I have added a blob of epoxy on top of the button thing on the SU pistons in the 71, then shaved them down to 0.01. This will provide a more stable and lasting bridge spacer. The car starts better, not that it was poor before, and idles at a more stable rate. I'm still in the process to doing this mod to my 73, so I don't have any comment on improvements, but that dang this is not easy to start and idles very poorly. Big cam, crappy vacuum (not that engine vacuum is what actuates the piston), blah blah blah So, I'm not out here saying this will fix all your SU related ills, more like it seems to be a forgotten rebuild setup item that should improve low flow rate operating conditions. @BrucePalmer ? Steve? You out there?


-
-
I just went through an incredibly nasty time with my Black Dragon order. I had placed two orders last Sunday after the feeding frenzy began. On Tuesday I called to combine them into a single order to keep shipping costs down after getting the first shipping quote. We went over the two orders in great detail, and even then there were a few small items that were not available. I was given verbal confirmation on the remaining items. Great. Today I finally received a shipping quote that was way too small. So I called again. I was then told that one of my orders had been CANCELLED !!!!!!!!!!!!!!!!!!!!!!!!!!!!!!!!!! Yes, the one with the bumpers on it. I WISH I COULD SWEAR ON HERE!!!! ARGGGGGGGGGGGGGGGGGGGGGGGGGGGGGGGGGGGGGGGGG! Needless to say, I raised incredible hell, got absolutely no where with the poor girl's manager. All she could say was sorry we are closing, our stock may not be on the shelf, even though the system said it was, blah blah blah. Absolutely no attempt to make any part of my problem right. I cancelled my entire order and told them good luck with the rest of their business. Long story short, if you think you are getting anything from them, be prepared to get very little. I'd call them and get them to re-confirm what they actually have for your order and be prepared to have them send you something in writing if they say they have it. Very very disappointed in the level of customer service. Buyer beware
-
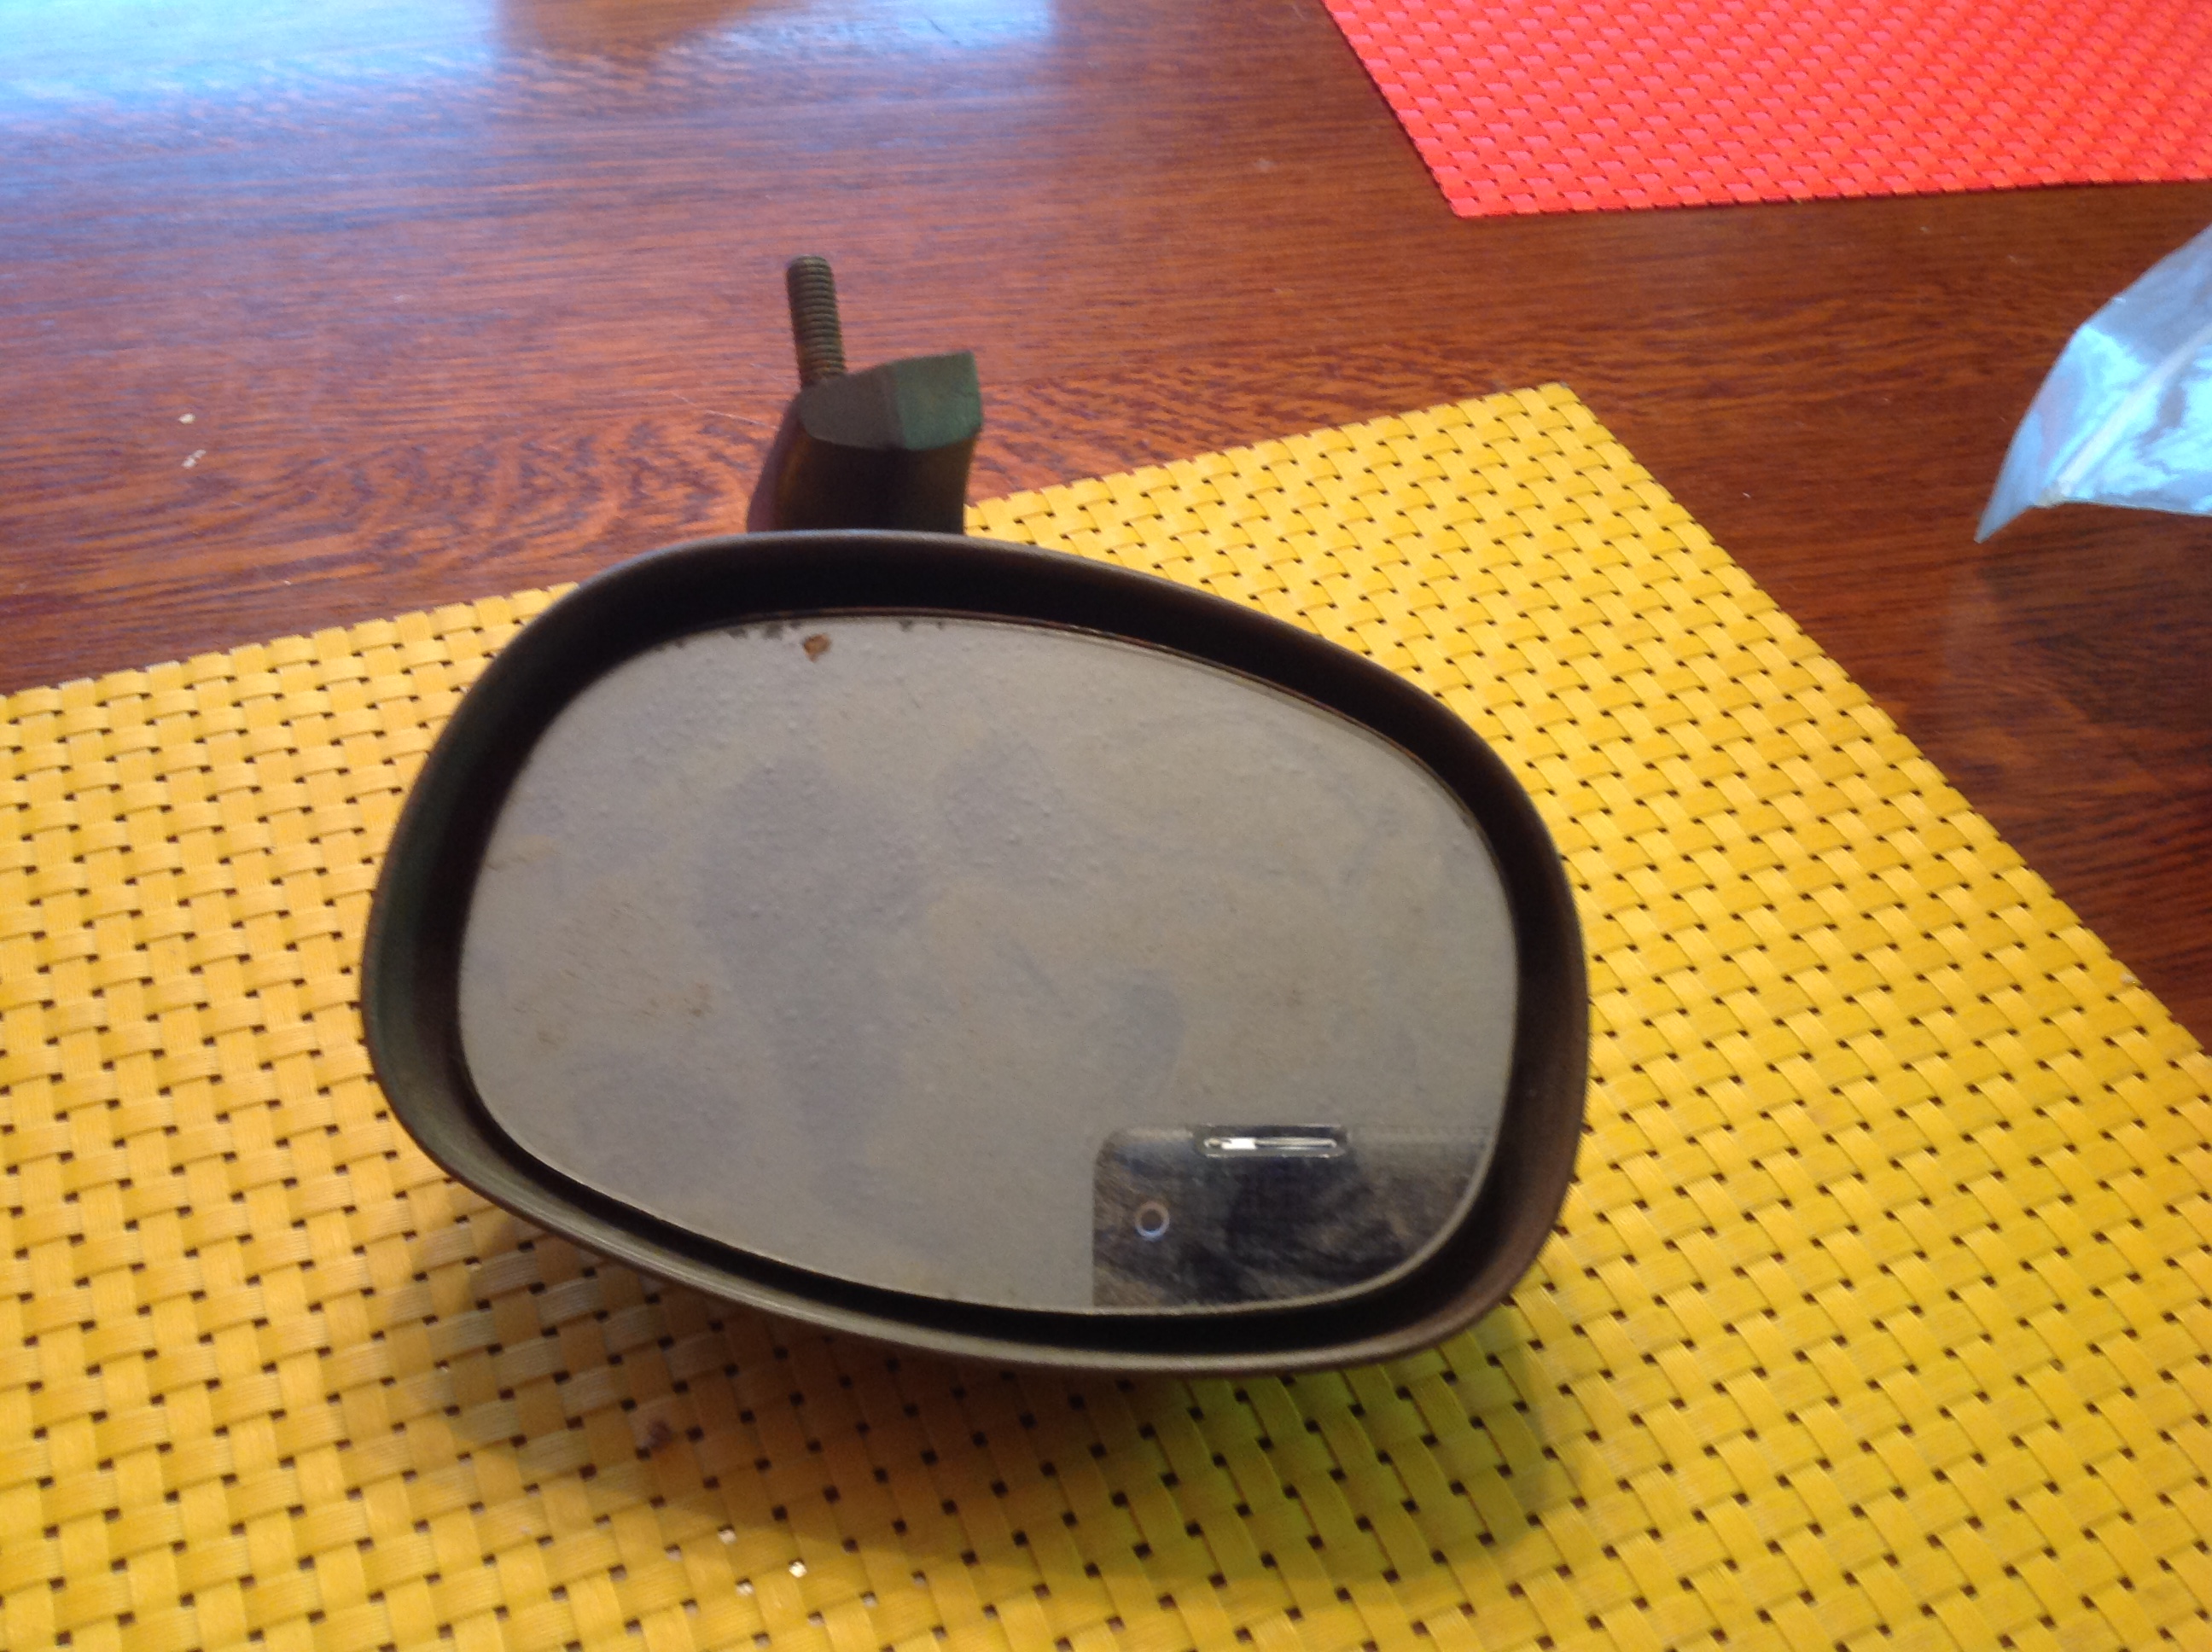
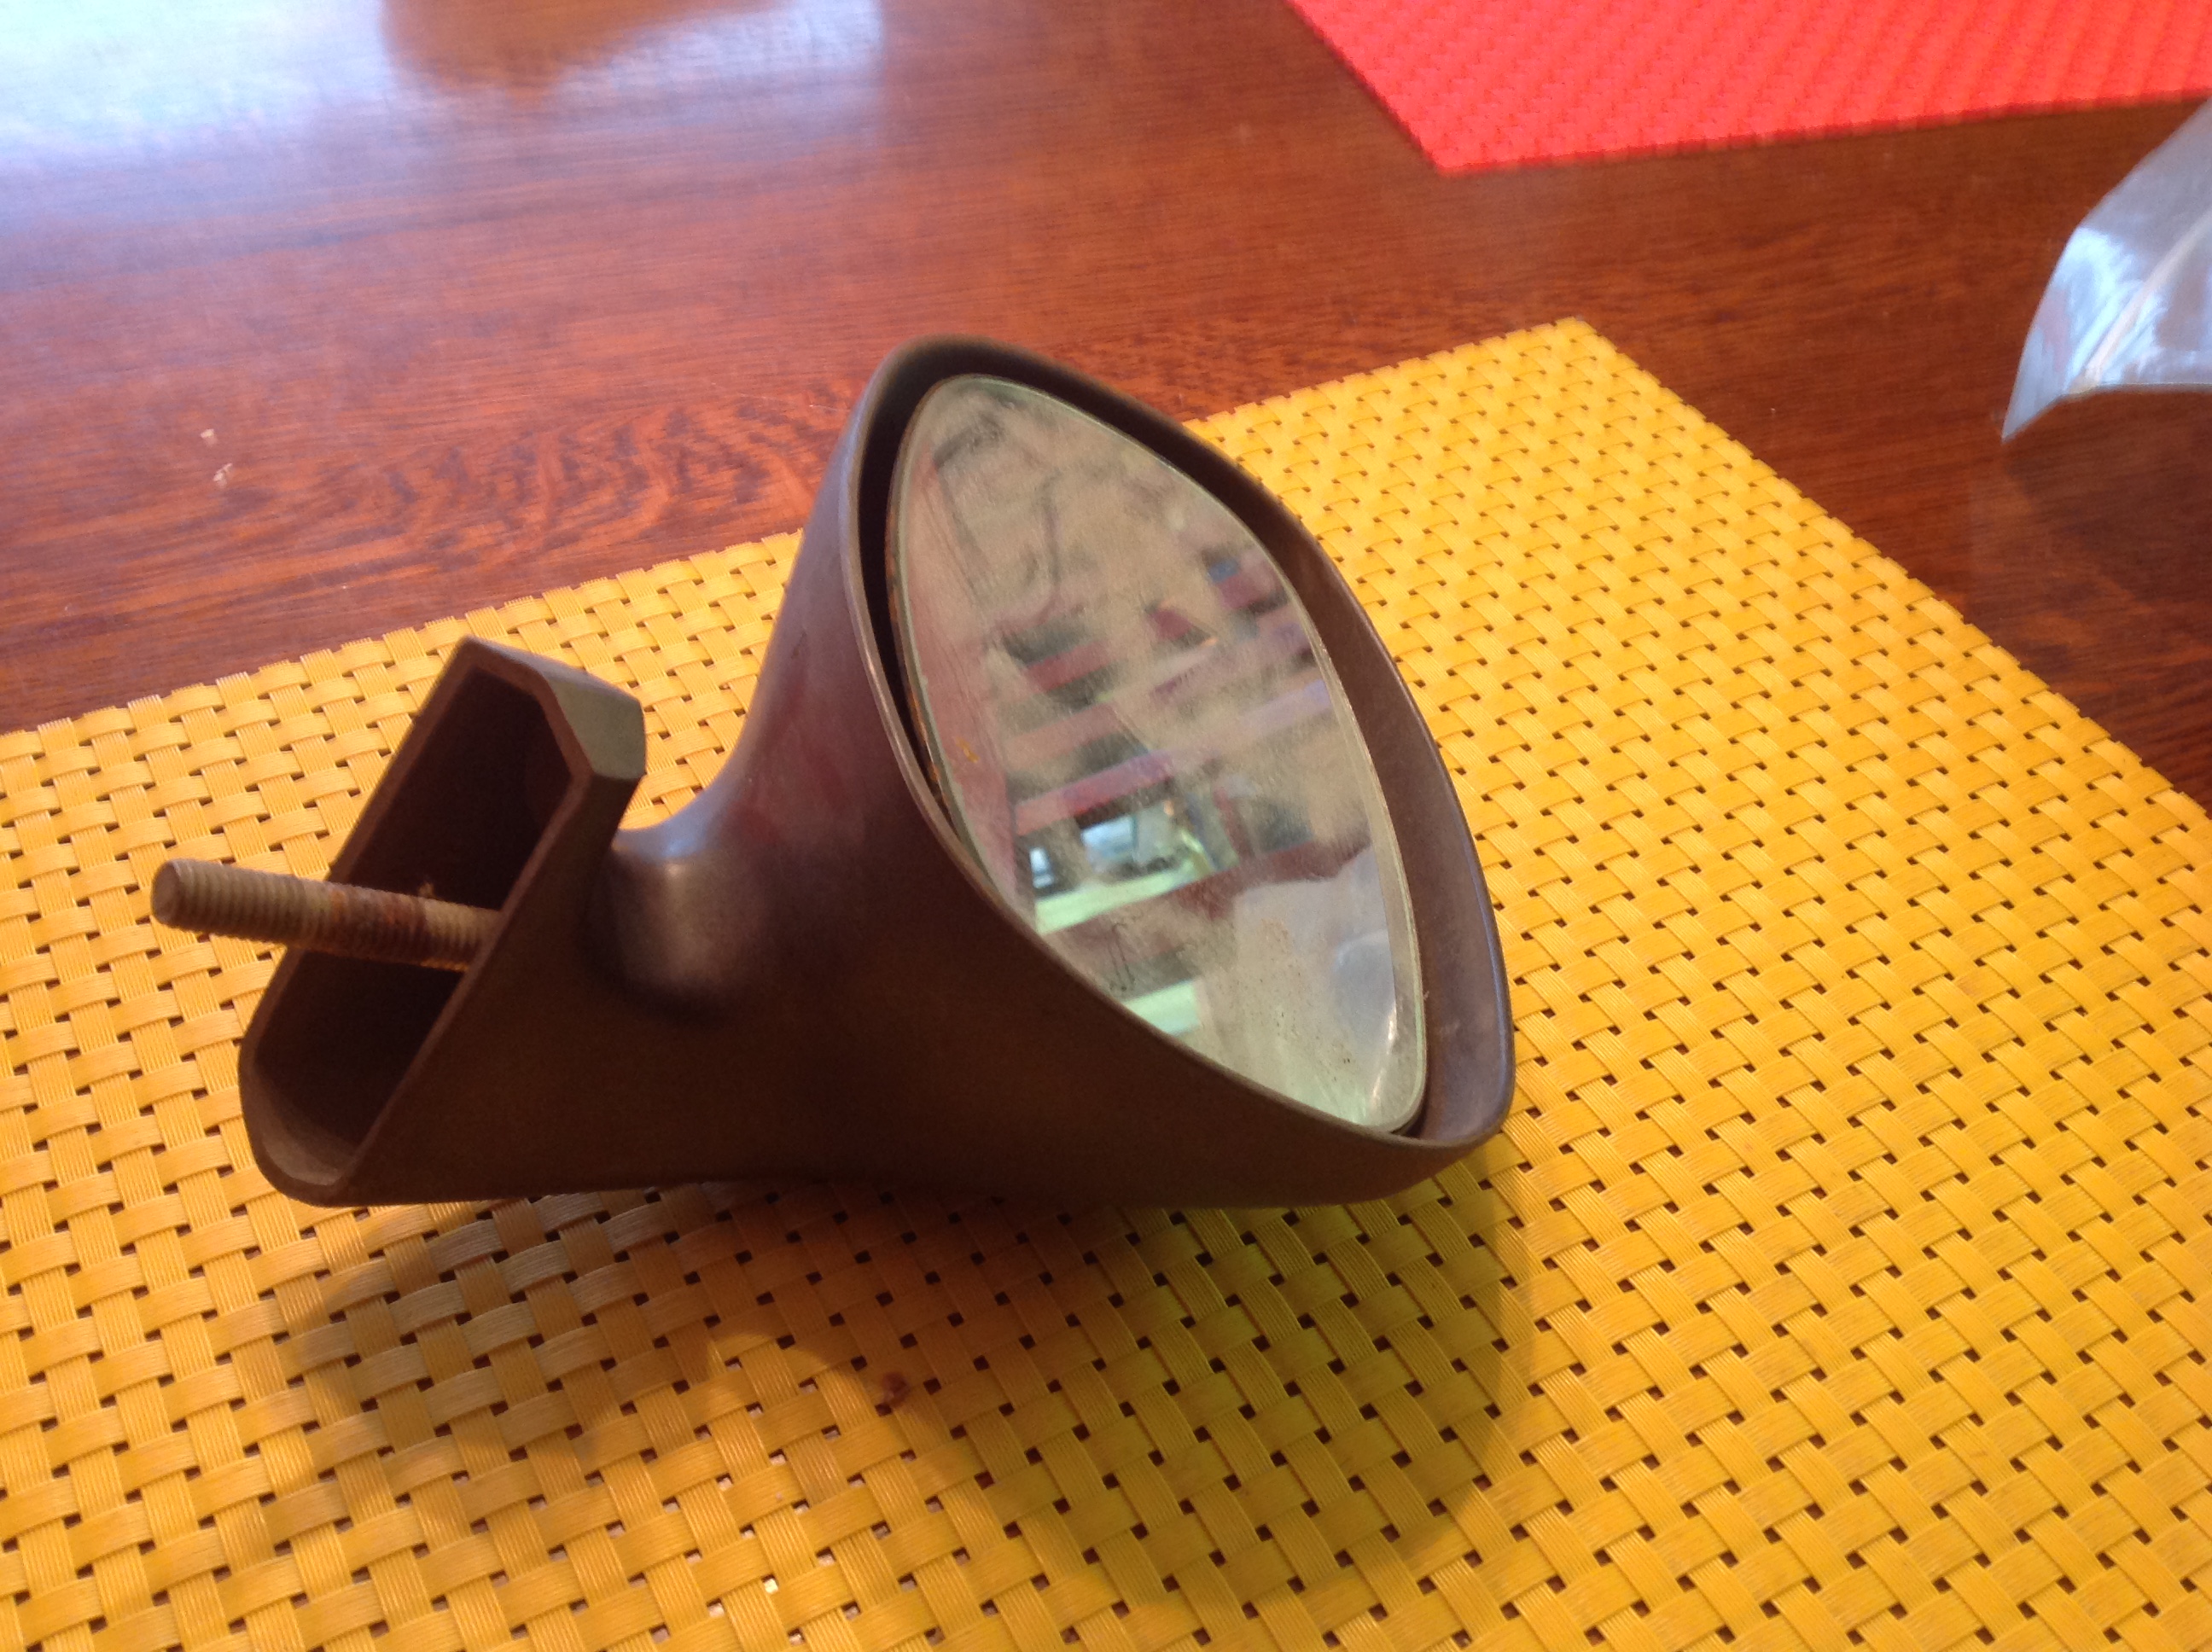
I think this is the same as yours. Seems to be pretty good. Not clean, but not busted! And of course some of you will want to play "what stuff inside Jim's place do we see in the mirror"...


-
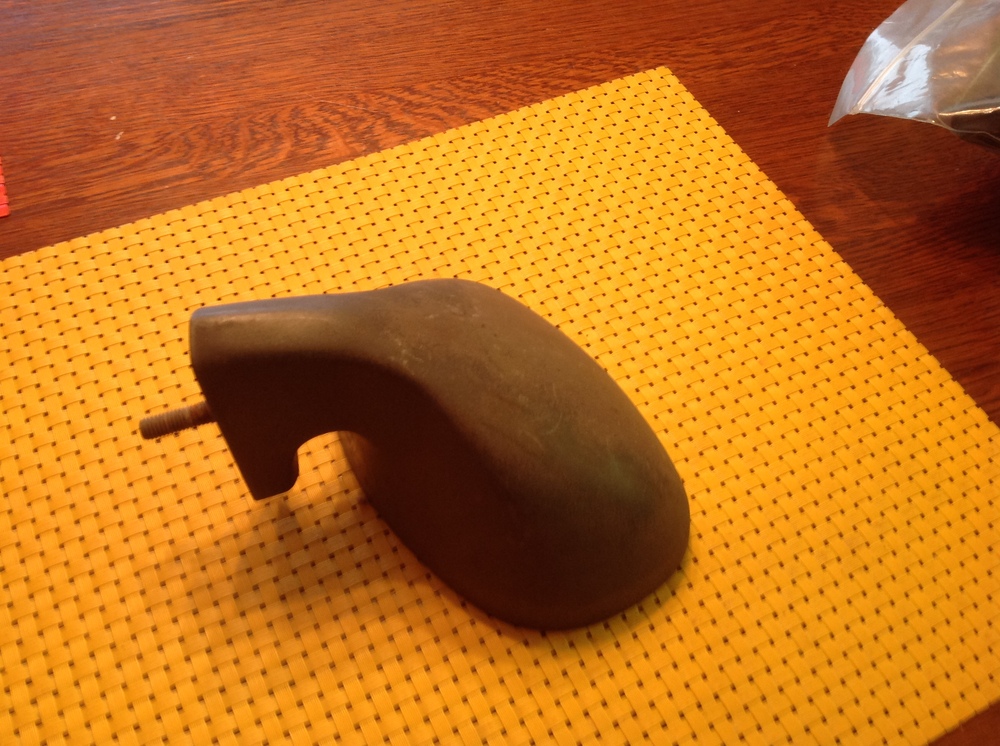
I think I have one. Can you send me a couple of pictures of yours to z240@shaw.ca and I root through the mirror collection and see if I have exactly the same one. Repair wise, I've had good results with same plastic based expoxy's intended for bumper repair. Easy to sand, nice finish.
-
The stock hood bumpers are SAE 1/4-28 thread. Yup it's true. This is just 1/4 NF thread, easy to find nuts to match. Seems Nissan had the same hard time finding these in Metric back then and relented to an SAE piece from who know where. MSA's replacement uses a M6x1.0 bolt with a flat head at least, closer. You can tap the welded nut to M6x1 and thread it in (its a tad loose), using a matching nut underneath to lock it in place.
-


Important Information
By using this site, you agree to our Privacy Policy and Guidelines. We have placed cookies on your device to help make this website better. You can adjust your cookie settings, otherwise we'll assume you're okay to continue.