zKars
 Subscriber
-
Posts
3,742 -
Joined
-
Last visited
-
Days Won
107
Content Type
Profiles
Knowledge Base
Zcar Wiki
Forums
Gallery
Events
Downloads
Store
Blogs
Collections
Classifieds
Everything posted by zKars
-
If you must use “bondo” on bare steel (don’t! Prime it first, epoxy primer is good), use the short strand fiberglass filler rather than regular light weight filler. It soaks up WAY less moisture from the air than standard bondo. Standard bondo on bare steel is the fastest way to get that steel rusty and have that bondo go byebye.
-

Camshaft Oil Spray Bar Redesign and Rebuild
zKars replied to Captain Obvious's topic in Engine & Drivetrain
A BSPT male to NPT female adapter is pretty easy to find. I know McMasterCarr has them, and even Autometer has that part as well. https://www.autometer.com/1-8-npt-to-1-8-bspt-pressure.html?gad=1&gclid=CjwKCAjwo9unBhBTEiwAipC113yoh0IxbFAi4AbHjmRRP0yeHW3MdROua1aBNLXI9UrOlpXXf4pvgxoCdDAQAvD_BwE&gclsrc=aw.ds Even Amazon.ca has them next day delivery. Hunt for Autometer 2269 -
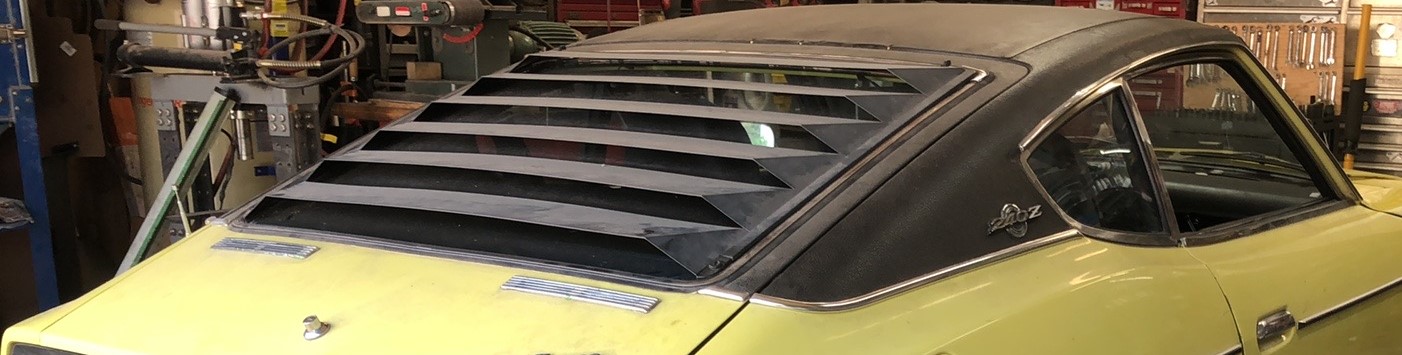
I hope it’s “real” as well. It’s in pretty good shape, bit of lifting at the front top where is meets the windshield weatherstrip, glued that back down. Couple of splits at the back edge at the hatch gap, will have to investigate vinyl repair techniques. No signs of delamination anywhere, that sucker is stuck down good. I especially love the contact glue overspray that was all over the side of the hatch on both sides. It came off pretty cleanly with some modern contact cement remover. Not what I would have expected from a factory installation though. Maybe a sloppy dealer installing a factory supplied kit? Who knows. Poor thing has had a repaint sometime in its past, there are little yellow strips at the edges of the vinyl where it comes down the A pillar where masking tape was not quite covering it. That will come off too.
-
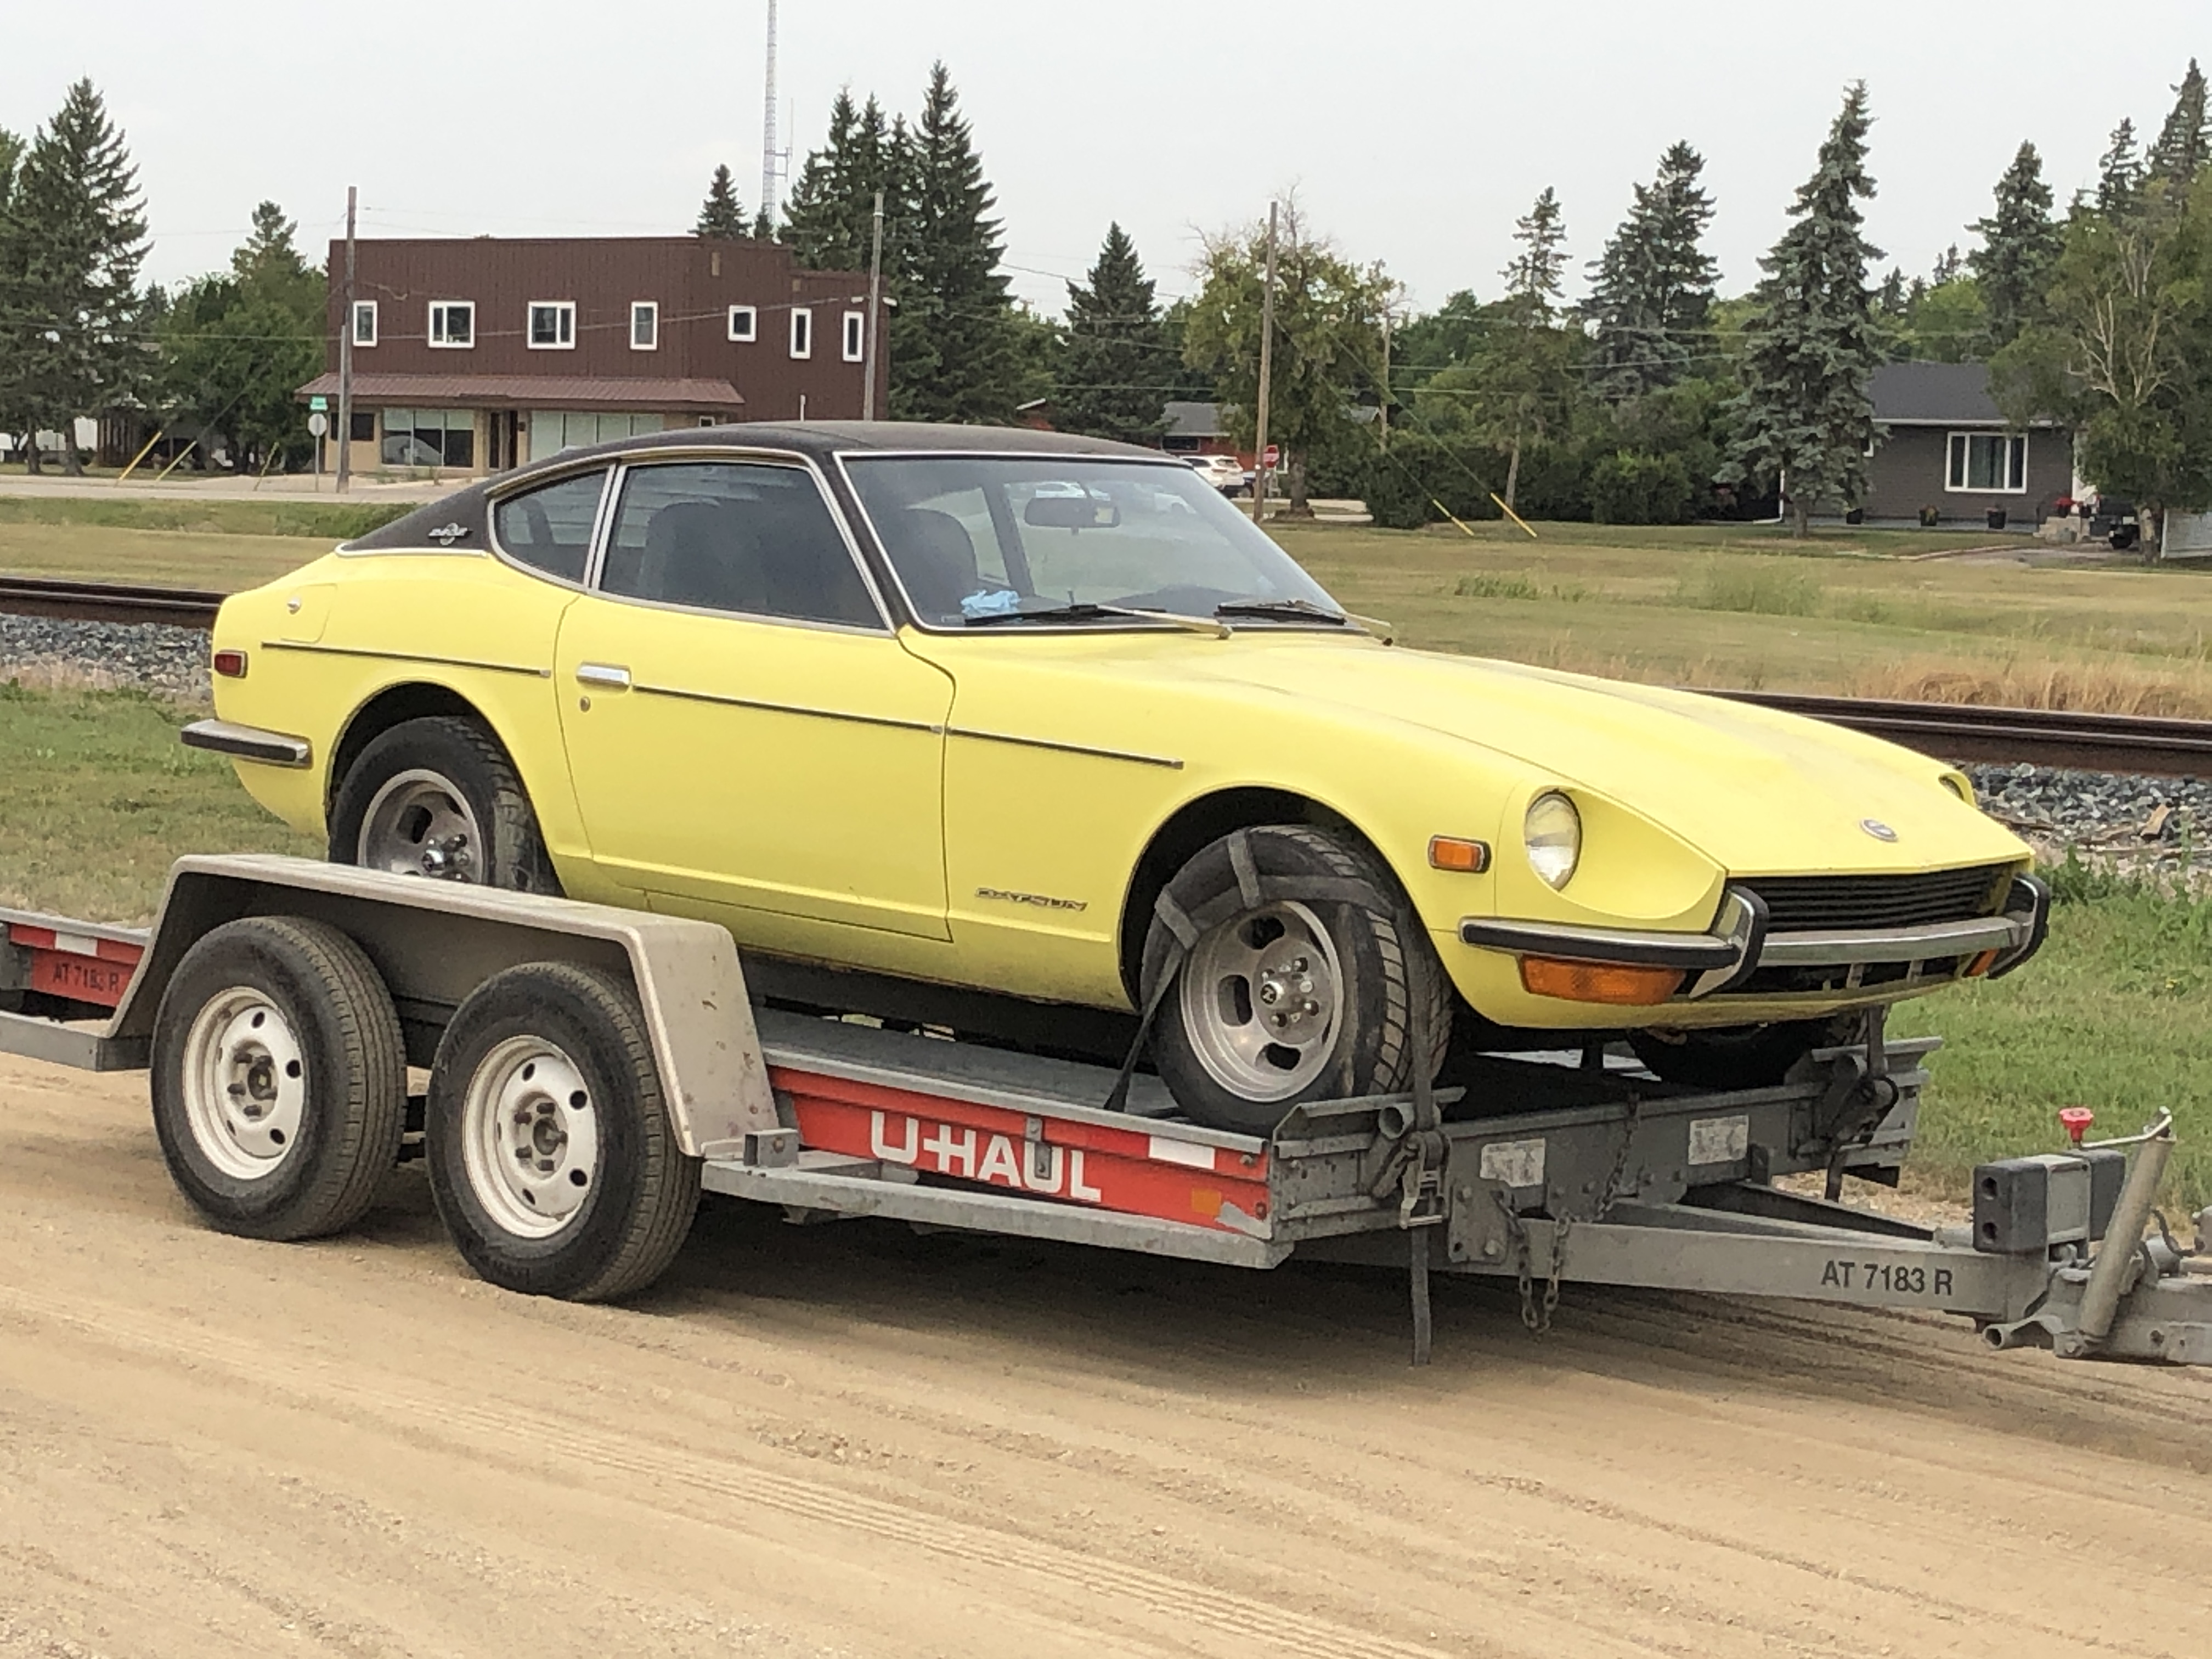
Love to dredge up old topics, but I think I have one of these "factory leather tops" on a Z I'm restoring (maybe more like refreshing). 1/71 build date. it is most definitely not leather. Were they ever really leather? Factory or applied later after purchase? Love the fat chrome trim strip at the base on the 1/4 panel and hatch.

-
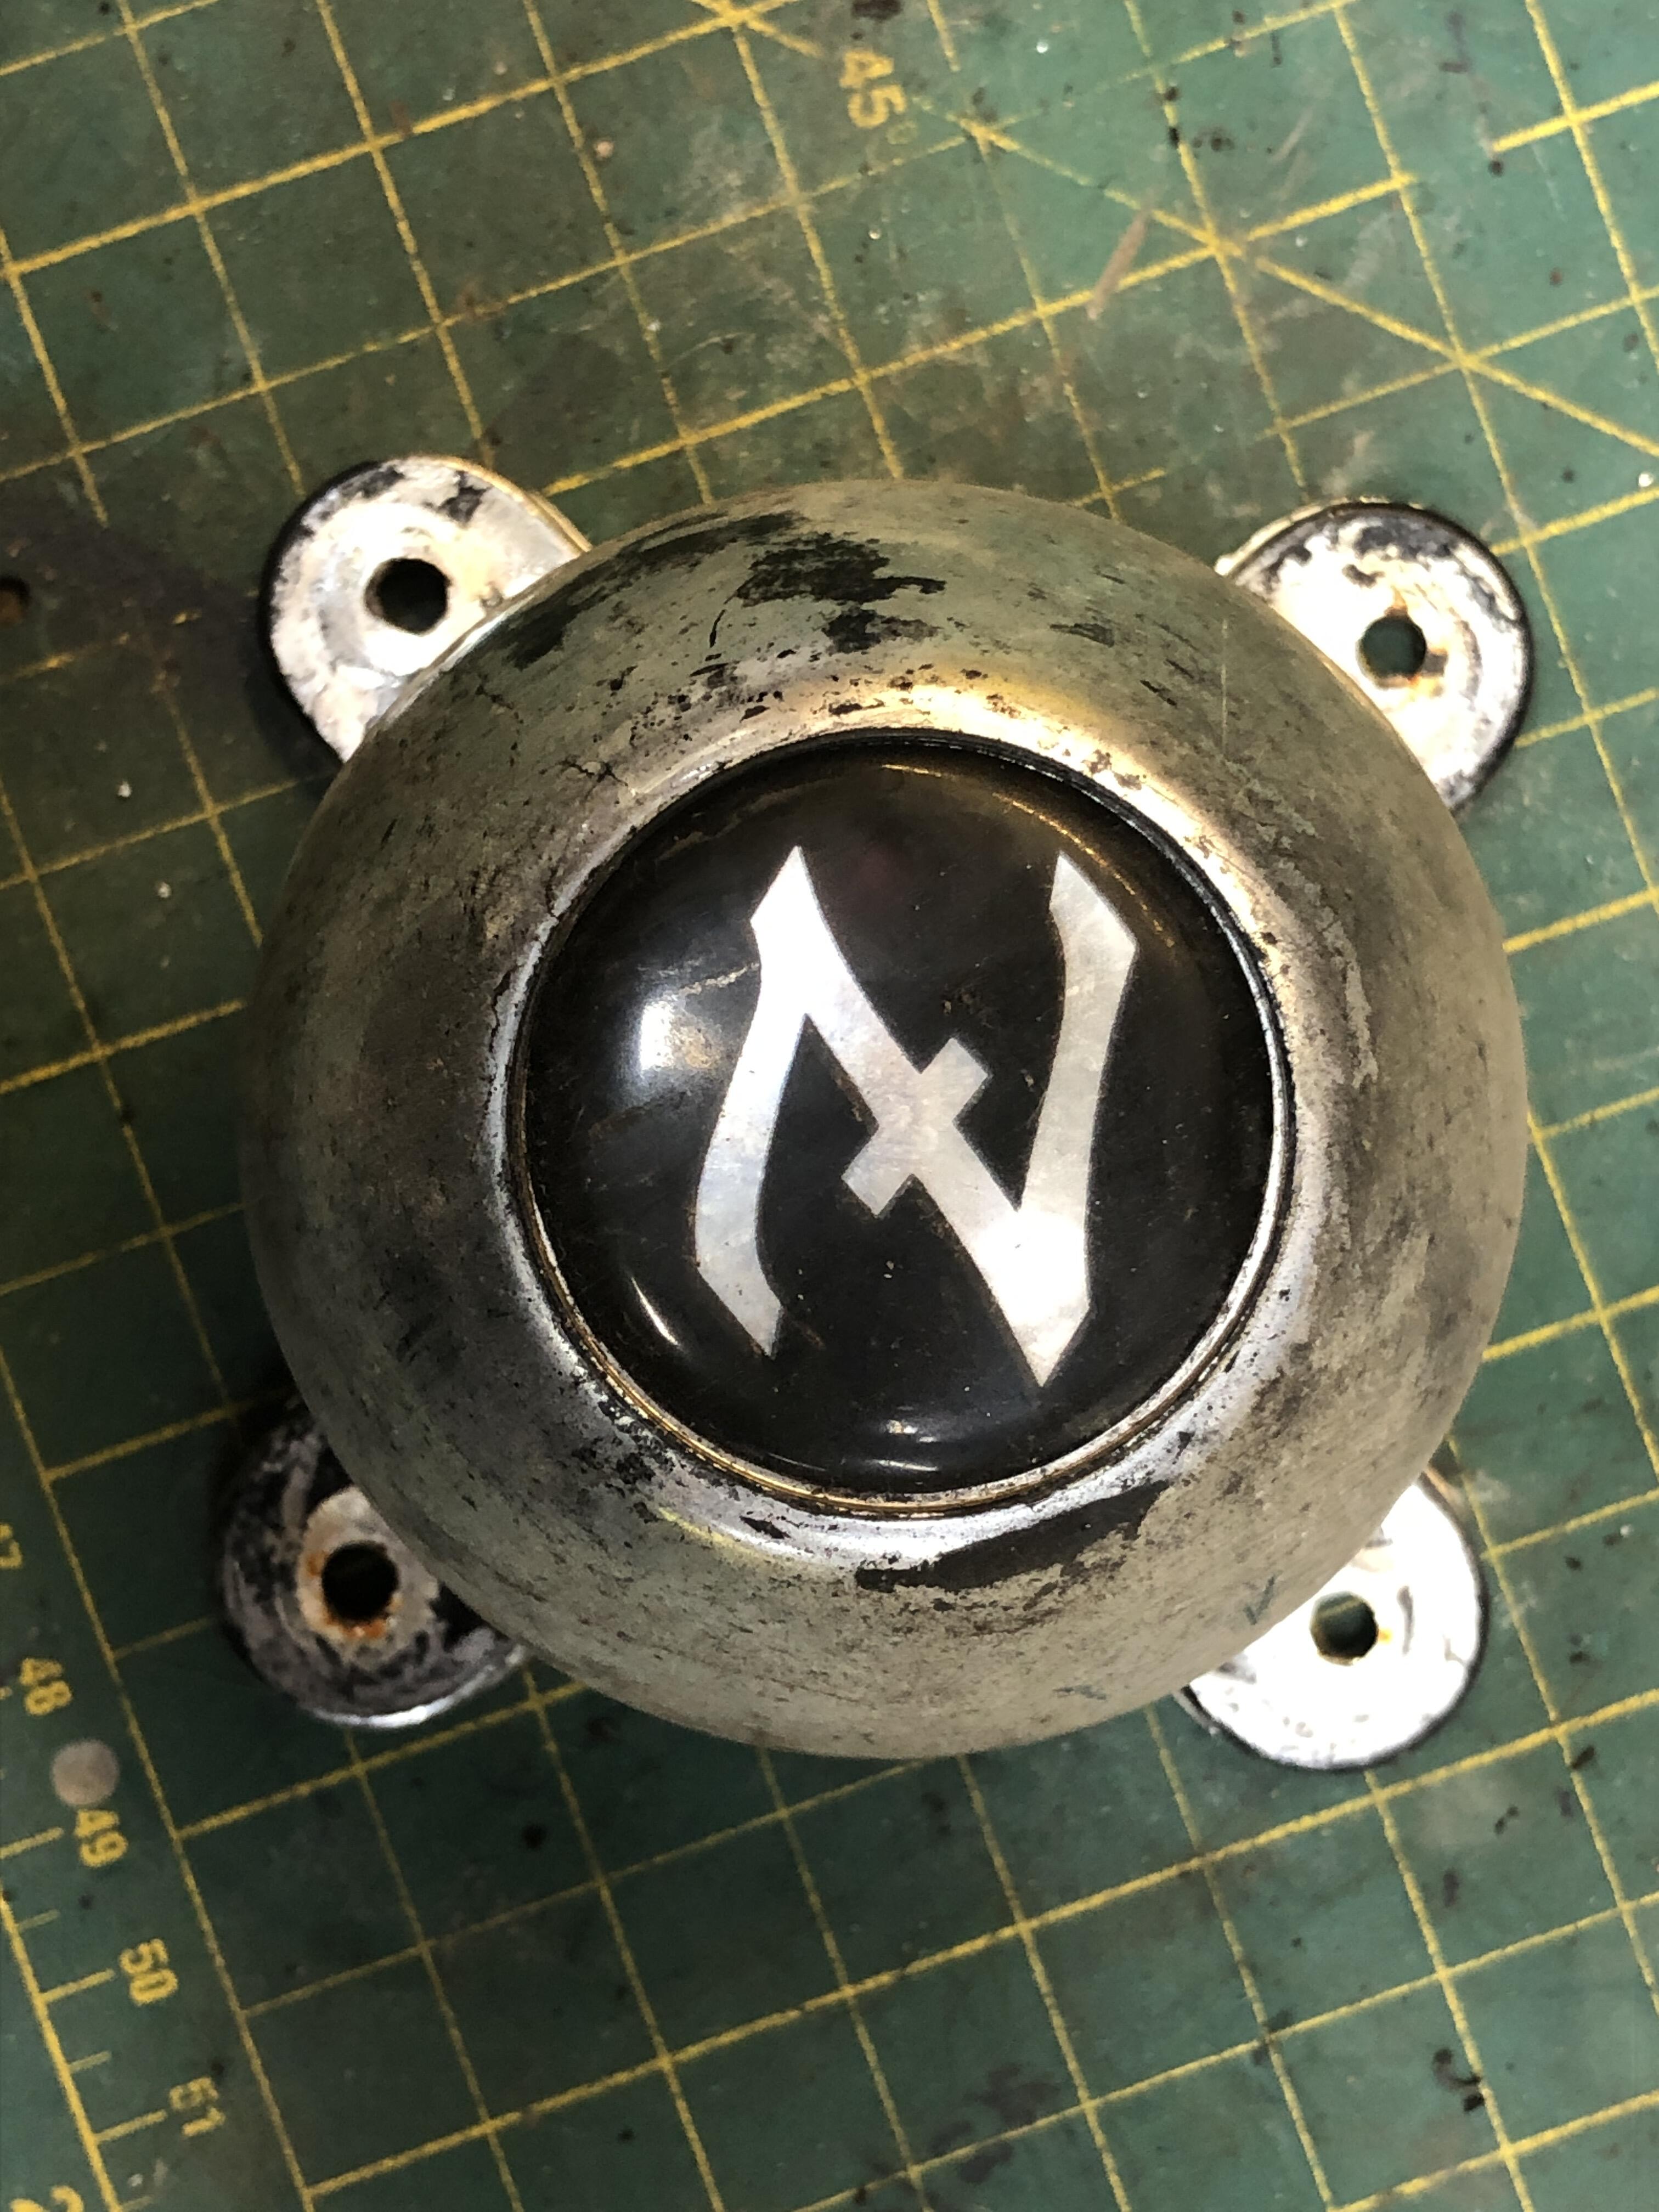
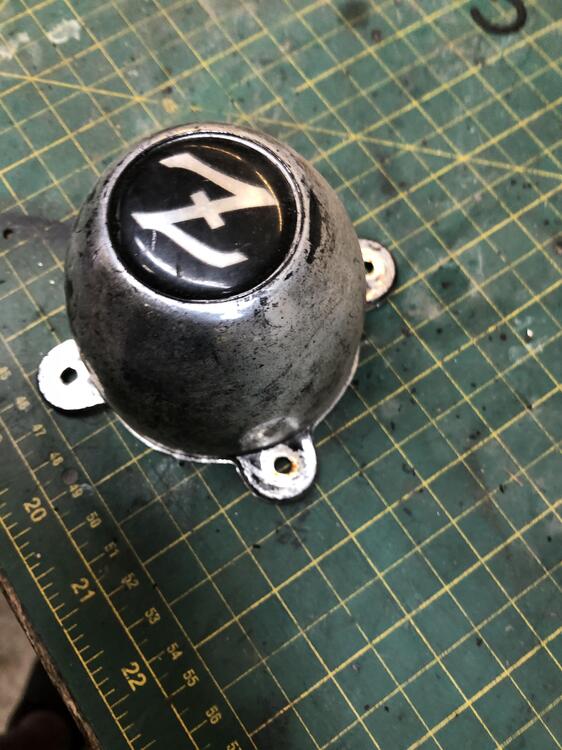
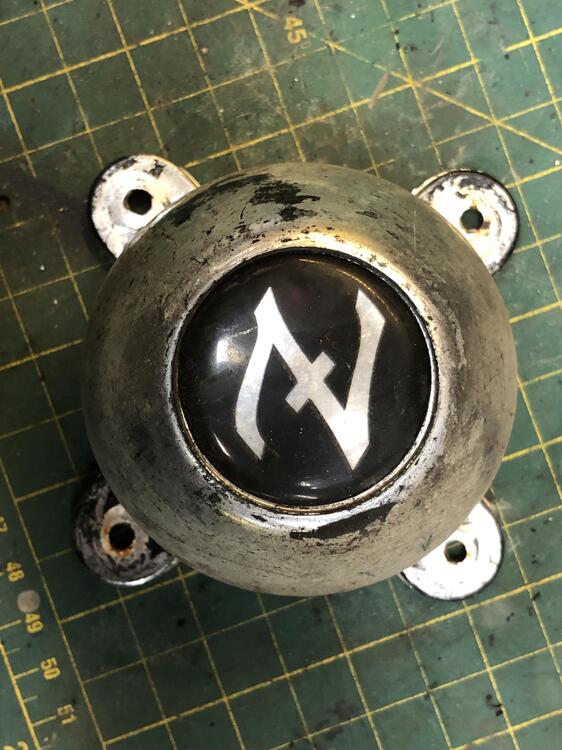
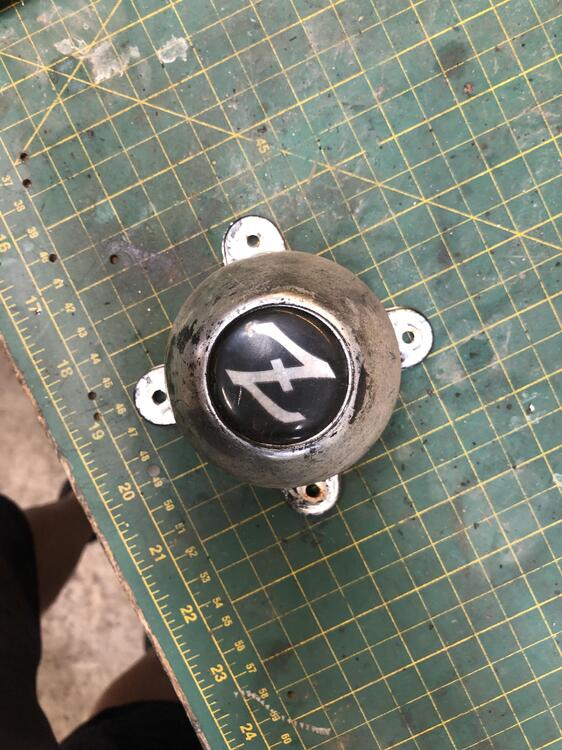
I forgot to include the hole spacing in my post, so although they are perfect visually, they are 2.5” spacing and I need 3-5/8”. And then I had a thought while typing the above. I wonder if they are measuring the “spacing” between each adjacent pair of holes, rather than the “bolt circle” diameter approach that I was using. So I rushed out and measured my cap, and sure enough, adjacent holes are 2.5” !!! So these likely work! Thank you!
-
I really suspect this is not a new topic, but I’m looking for new ones of these. I know they won’t come with the fancy Z stickers. We have a solution for that. Any leads? I’ve been searching and searching to no avail.
-
Steering U-Joint Compilation Thread - Sourcing and Part numbers
zKars replied to zKars's topic in Suspension & Steering
Now for the later PITA ujoints, 15 x 39 ujoint for staked yokes. A thread where these were discussed with a part number https://www.driveshaftparts.com/index.php?route=product/product&product_id=1100 Part Number: UJ1540SD They indicate they are out of stock as of today. They indicate a length of 1.535 which converts to just under 39mm, even though the part number suggests they are 40mm (1540SD) I have a pair of these in my hand, confirm part number and fitment.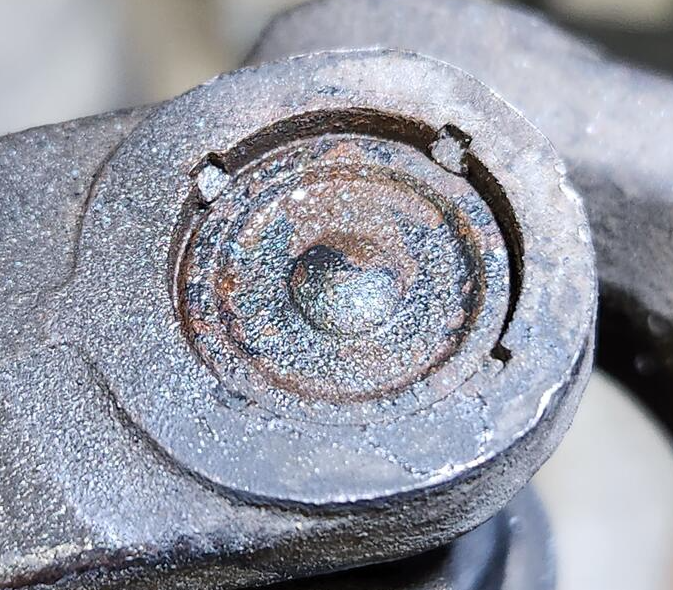
-
Steering U-Joint Compilation Thread - Sourcing and Part numbers
zKars replied to zKars's topic in Suspension & Steering
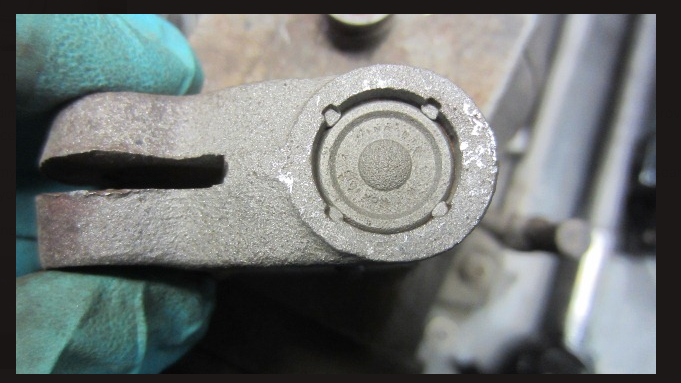
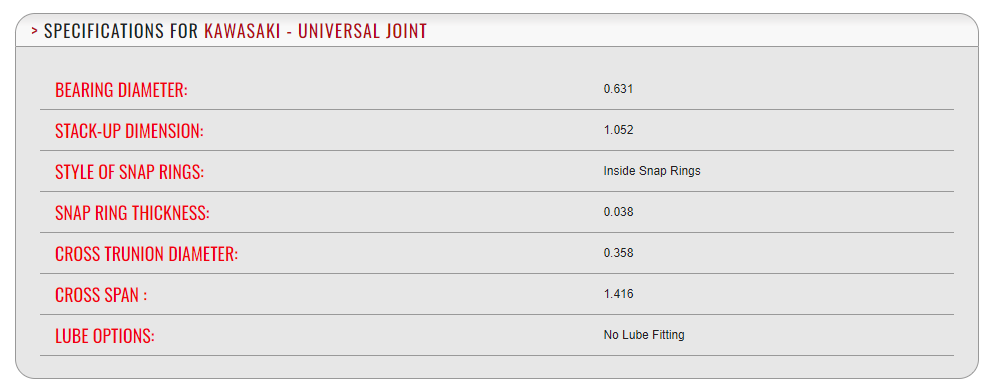
First the early 16mm x 40mm style with C clips Previously I could find them using the ATV700 part number. These come from this specific Kawasaki ATV Kawasaki Bayou 300 front driveshaft u-joint set 1989 - 2004 Kawasaki OEM part number : 49050-1055 Once I knew this I was able to google that part number and found plenty of suppliers BTW, this is all confirmed through a local Kawasaki ATV store here in Calgary. He can get them for $37.99 CAD each. Ebay has them too. As does Amazon.ca, $46 each, 4 day delivery They mention the model # of the ATV, KLF300C They also mention it fits "Mule 2510 4x4 1993 - 1999" Ebay mentions there manufacturer is East Lake Axle and their part number is U201.02 And the really cool thing? All these U-joints have zerks..... And some specs from http://motormasterpowersports.com/index.php/product/detail/sku/ATV700 On the generic ATV700 part
-
I have been searching for u-joints for the steering shafts again, and my usual suppliers seem to having stock issues. I searched around in the threads for old links and sources and found a bit of a mess so after finding out tons of additional information about part numbers and such, I thought I would leave a single thread with as much information as I can I'll divide this into the two sizes of u-joints. The 16x40mm early un-staked type with the snap rings, the later 15x39mm ones that you have to deal with the stake and un-stake. Won't get into how-to in this thread, just sizes part numbers and companies etc
-
Interesting. Text and pictures from another thread I responded to. Site bug I suspect.
-
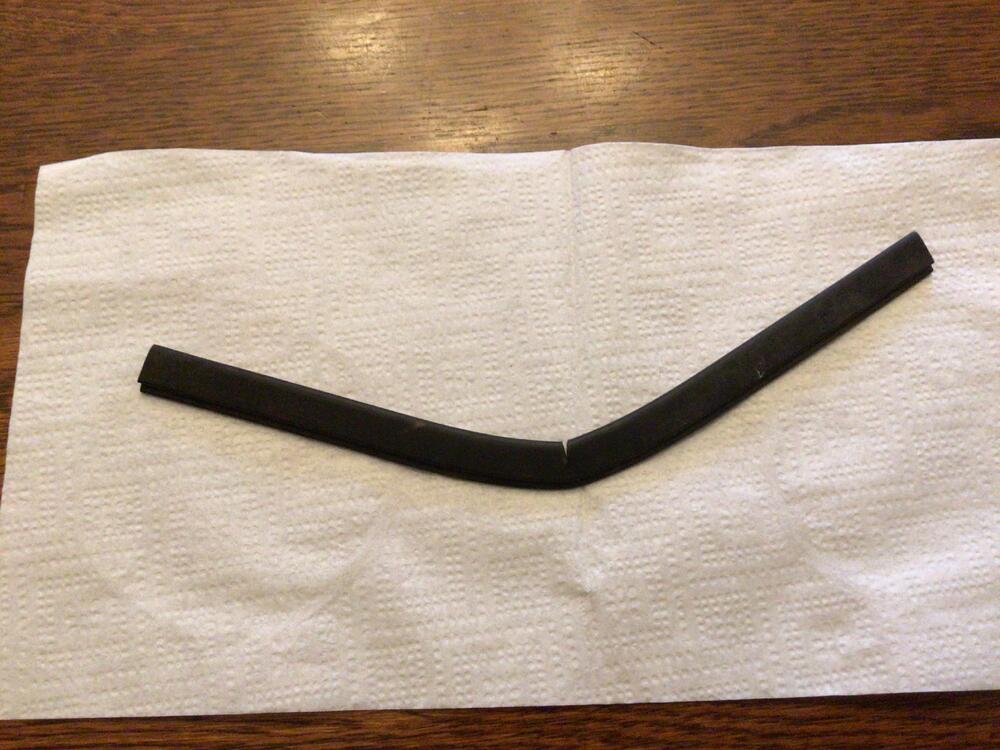
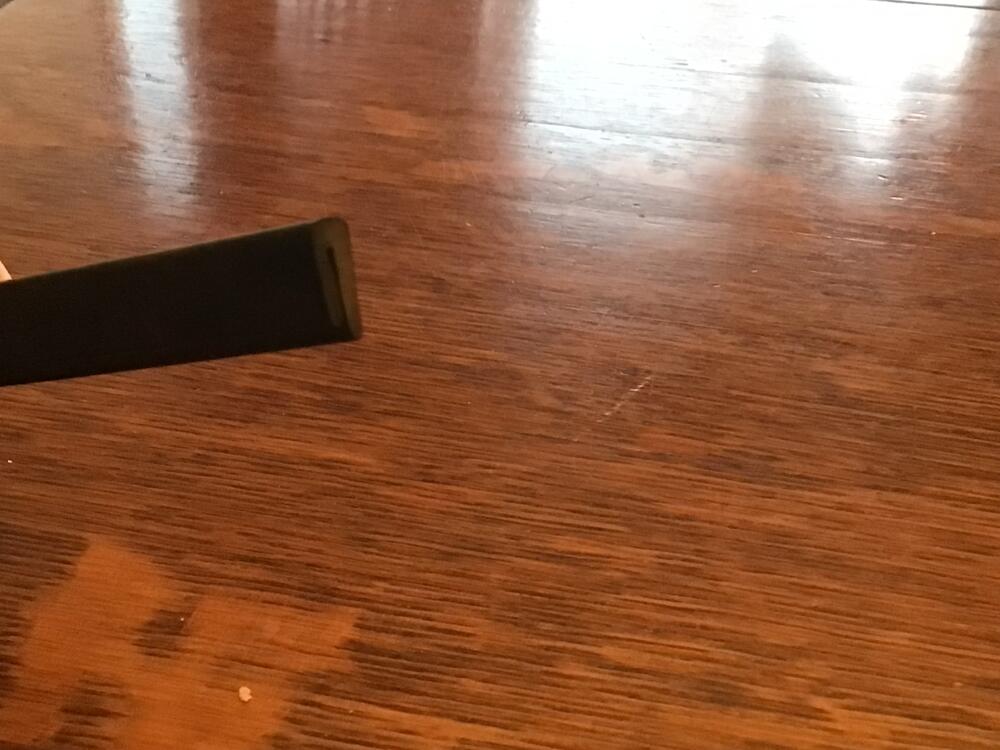
9 inches long, 1/2” wide, slit is for 1/32 sheet metal. Strangely the width of one side is slightly narrower than the other. Not likely going to find replacement material with that, but no one will notice. They take a little wedge out of the center to help it conform to the corner
-
Cost analysis, The CIBIE housings where $78 each, the bulbs a hun, so for $200 bucks I got pretty decent (and easy to install) lighting. Not bad.
-
Who doesn't love a little butter on their Z after all!
-
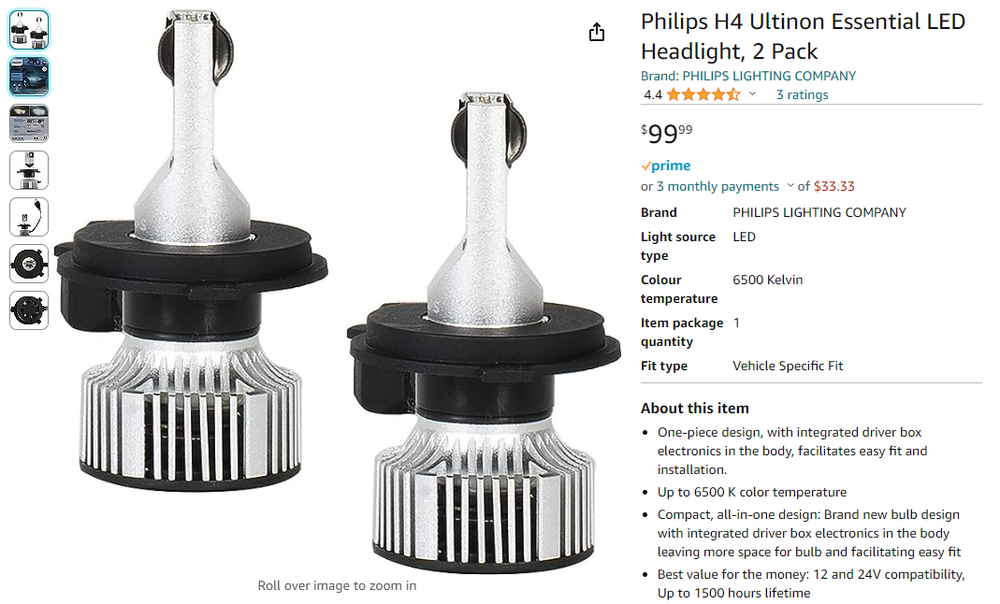
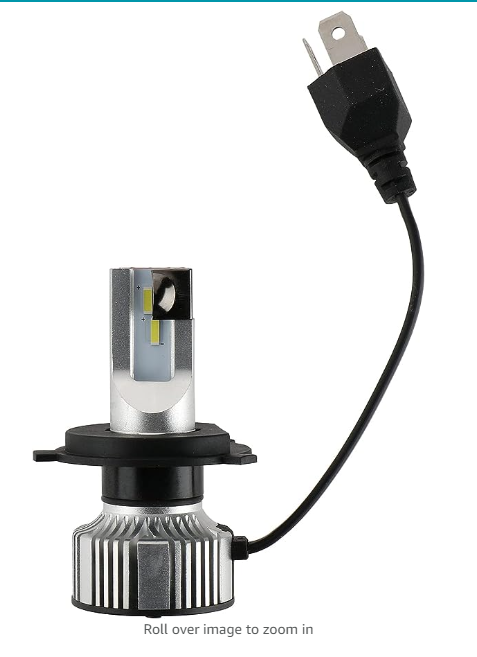
So doing this all again on a bit of a budget 71 Z that I'm restoring (Dapper don't fit the $$ profile), I decided to hunt down a better LED bulb solution, and maybe I have it. Philips has a nice LED H4 that has a small fan and NO driver box. Here is my Amazon screen. Two bulbs for $!00 CAD, about $12.85 USD..... It fits in the headlight can without a struggle, and although I've only played in the daylight shining against my tool box, the patterns look pretty decent. Will report better results shortly.
-
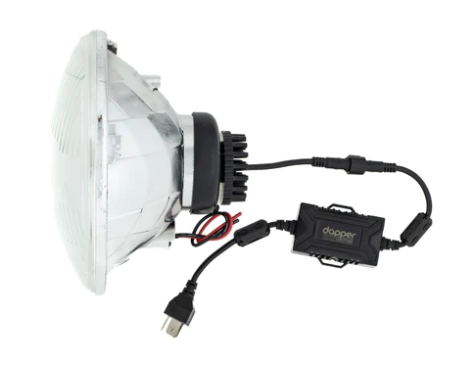
So it has been very common for me to "upgrade" Z head lights using CIBIE H4 housings, and then stuff in either H4 halogen bulbs, or more recently, LED H4 bulbs. Save the ol' headlight switch contacts with lower current LED bulbs and maybe you don't need to add a relay harness I say. All good. Lord, but there are SO many options for LED H4 bulbs out there. Which ones to choose? There are tons of prebuilt fancy one piece LED 7" round headlights out there (thank you to the millions of classic Jeep owners), but most of them are far too modern looking for any Z restoration I'm doing. I want a classic looking lens, then jazz the innards. There is a basic issue with stuffing an LED H4 in a housing designed for Halogen H4 bulbs, primarily with the exact positions for the light elements once in the housing. This can have a major impact on your beam pattern. Very easy to get this wrong. I have fallen in love with Dapper's solution, (https://www.dapperlighting.com/collections/1970-1973-datsun-240z/products/oe7) where they supply a matched housing (made inhouse apparently) with an LED bulb that lines things up perfectly. I have the 575 version in both of my 510's (anyone want one?) and love the pattern perfection and light output. But. $$$$$$$ Have put them in a Z too, but there is a caveat. There is a driver box attached to their bulbs, and that thing does NOT fit inside a S30 headlight can. I had to (cough cough) "make room" with a ball peen hammer..... Many of the aftermarket H4 LED bulbs I see on Amazon for example, ALSO have a driver box and sometimes a rather large fan attached. Buyer beware of the need to do a li;' shapin' as they say.
-
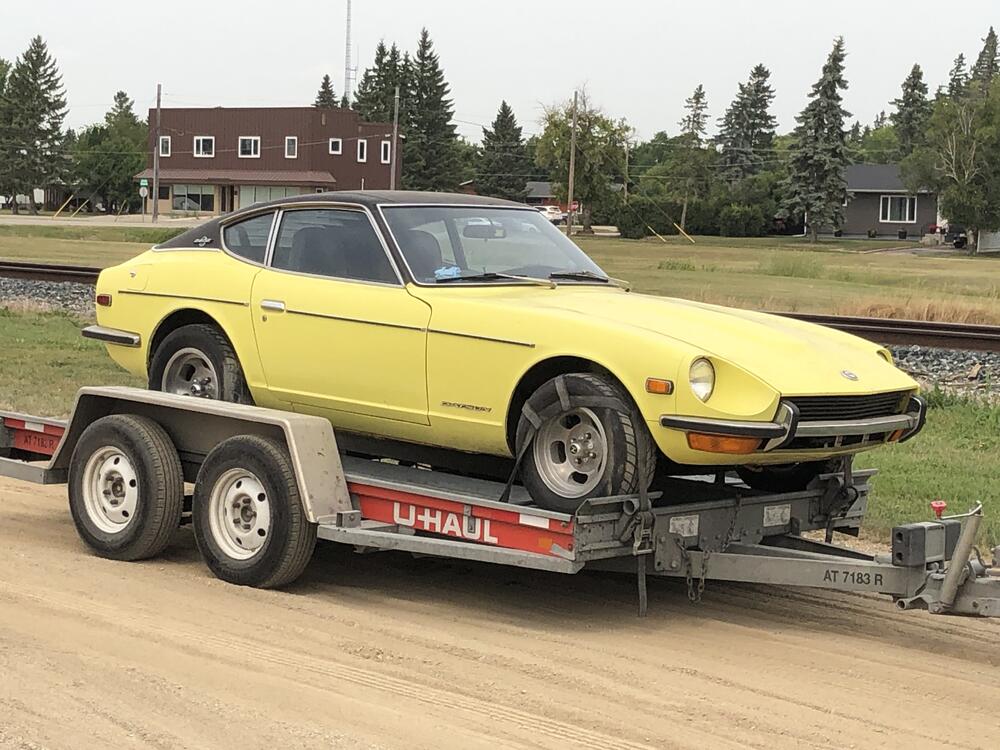
Yes but your paint, decals, carpet, bunk, rubber and wiring will be just fine. Love the label.
-
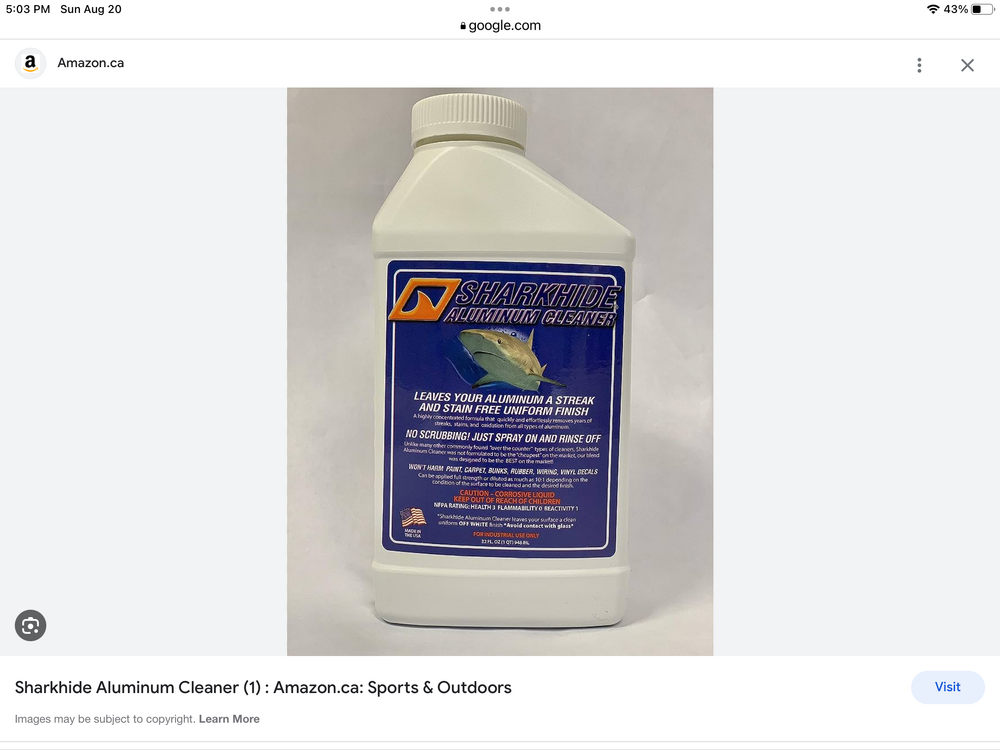
Yes the cleaner. I should show a picture of the bottle.
-
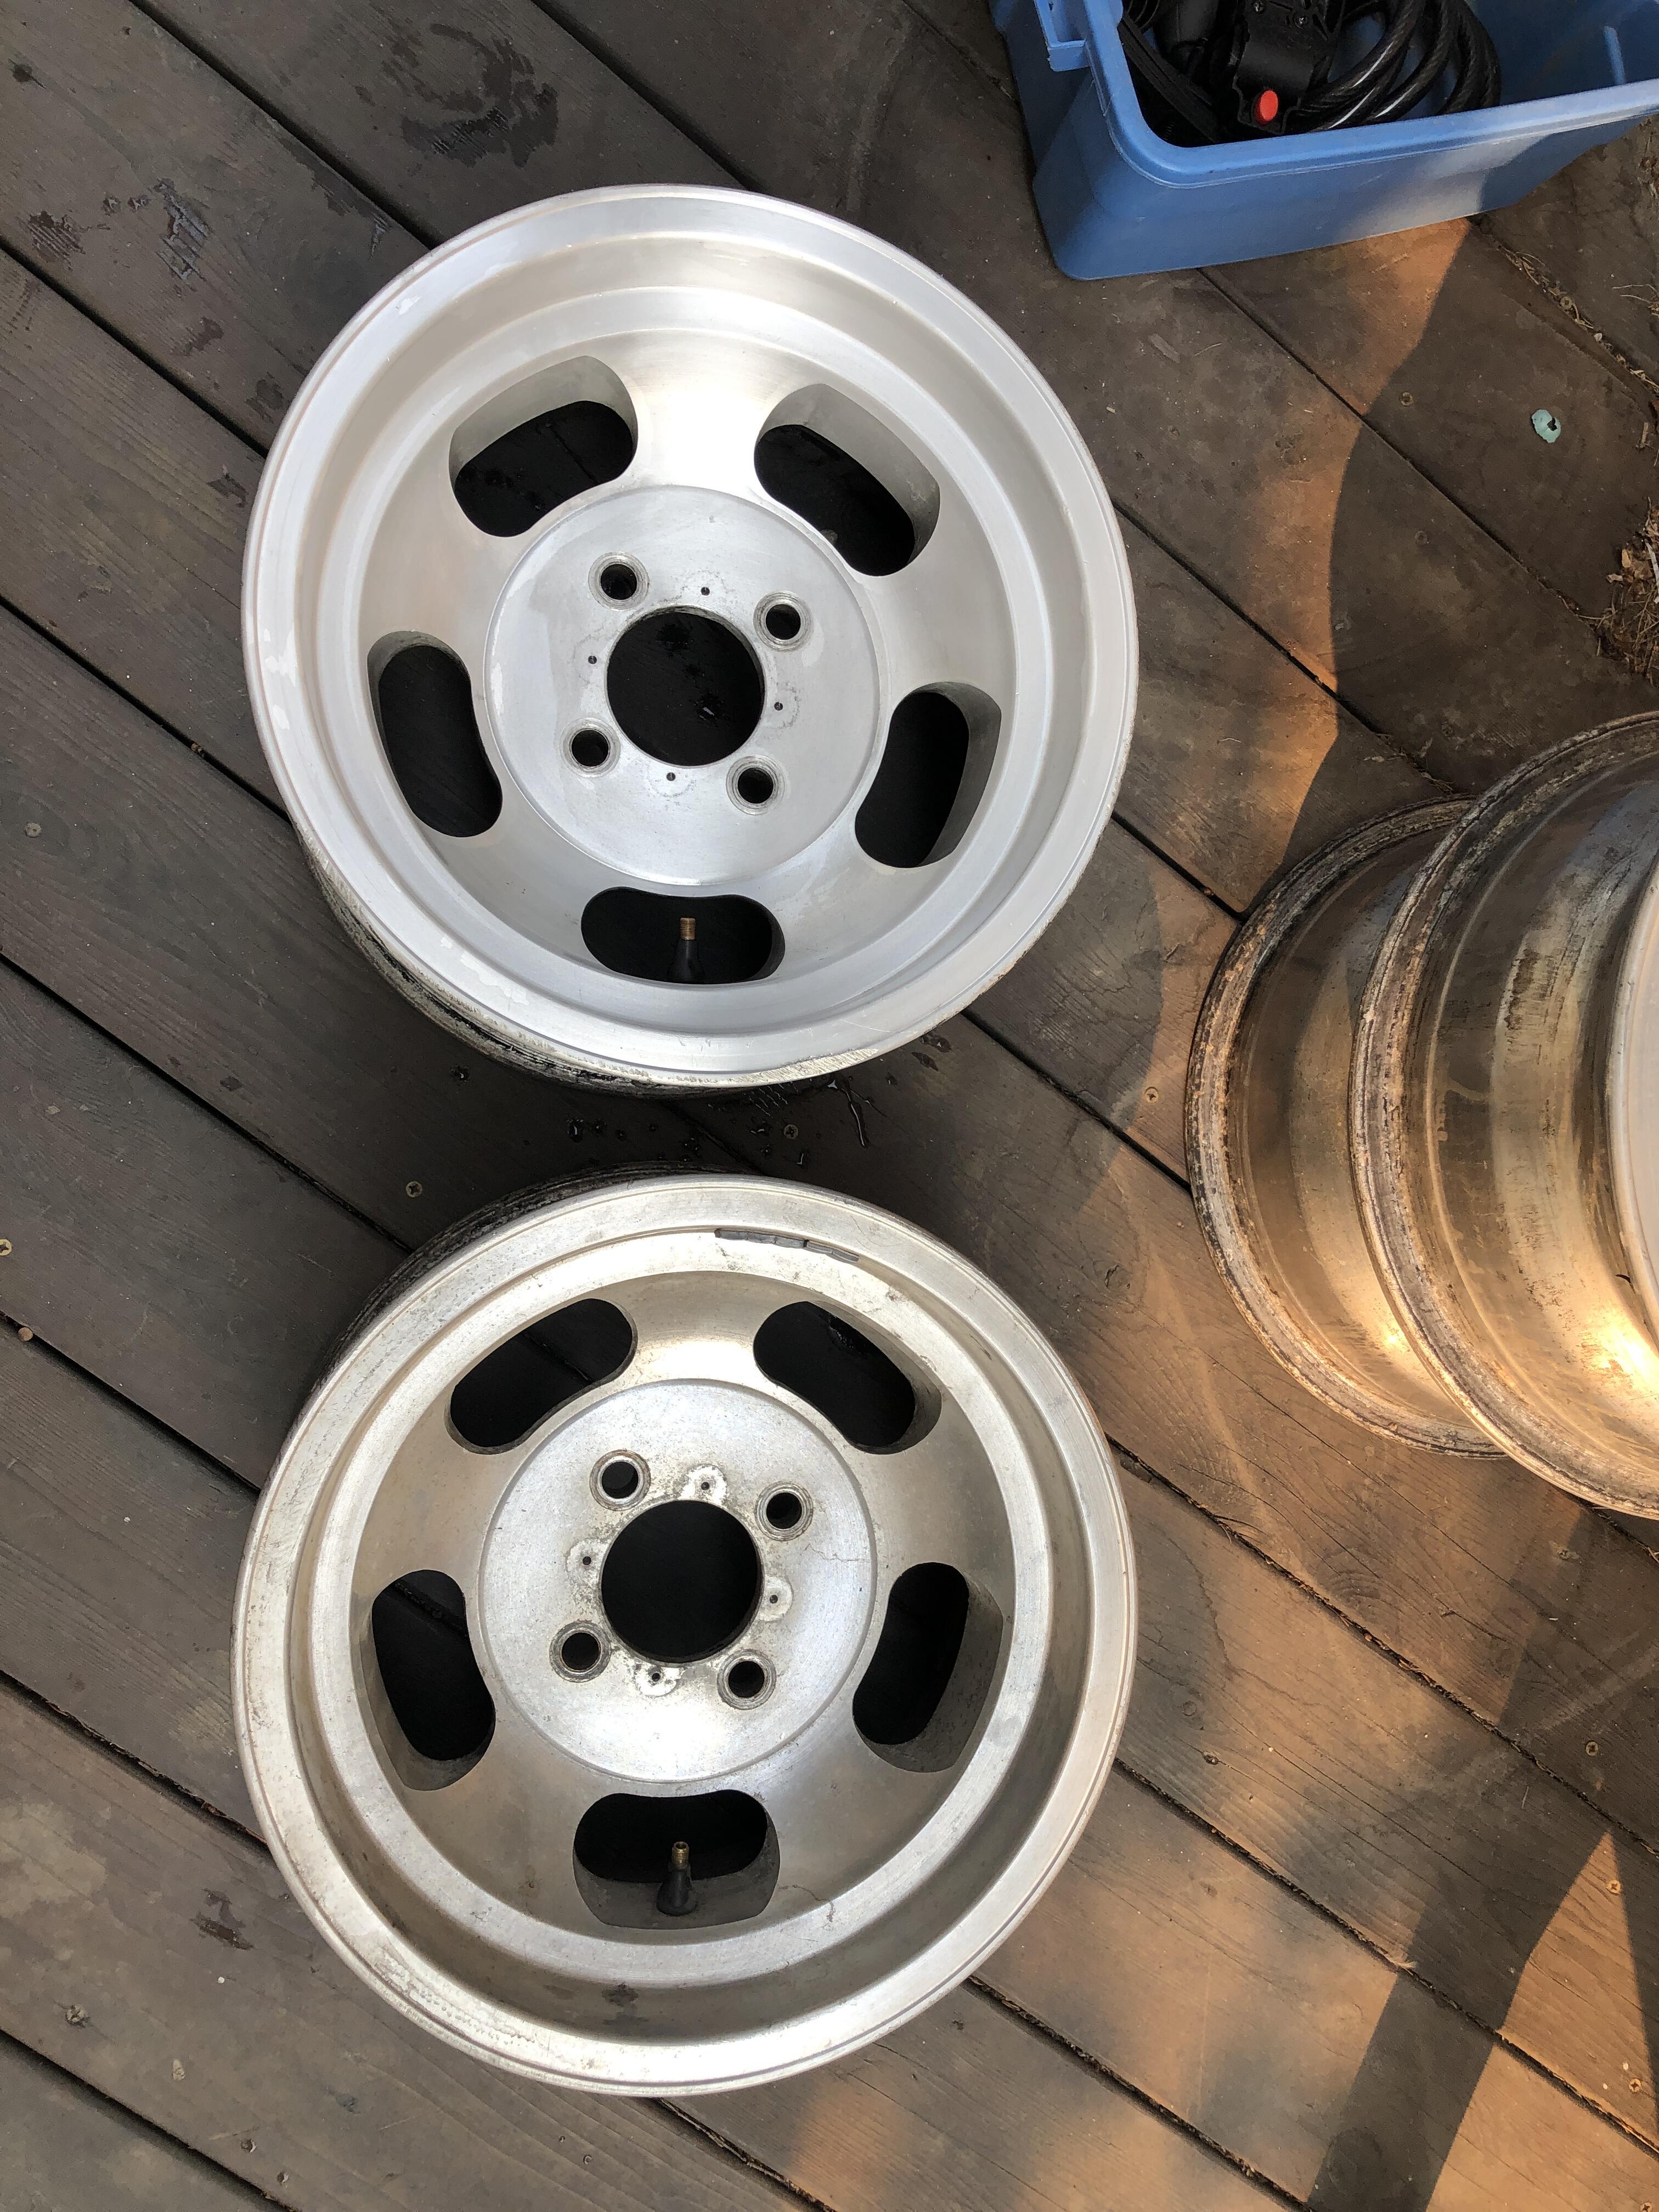
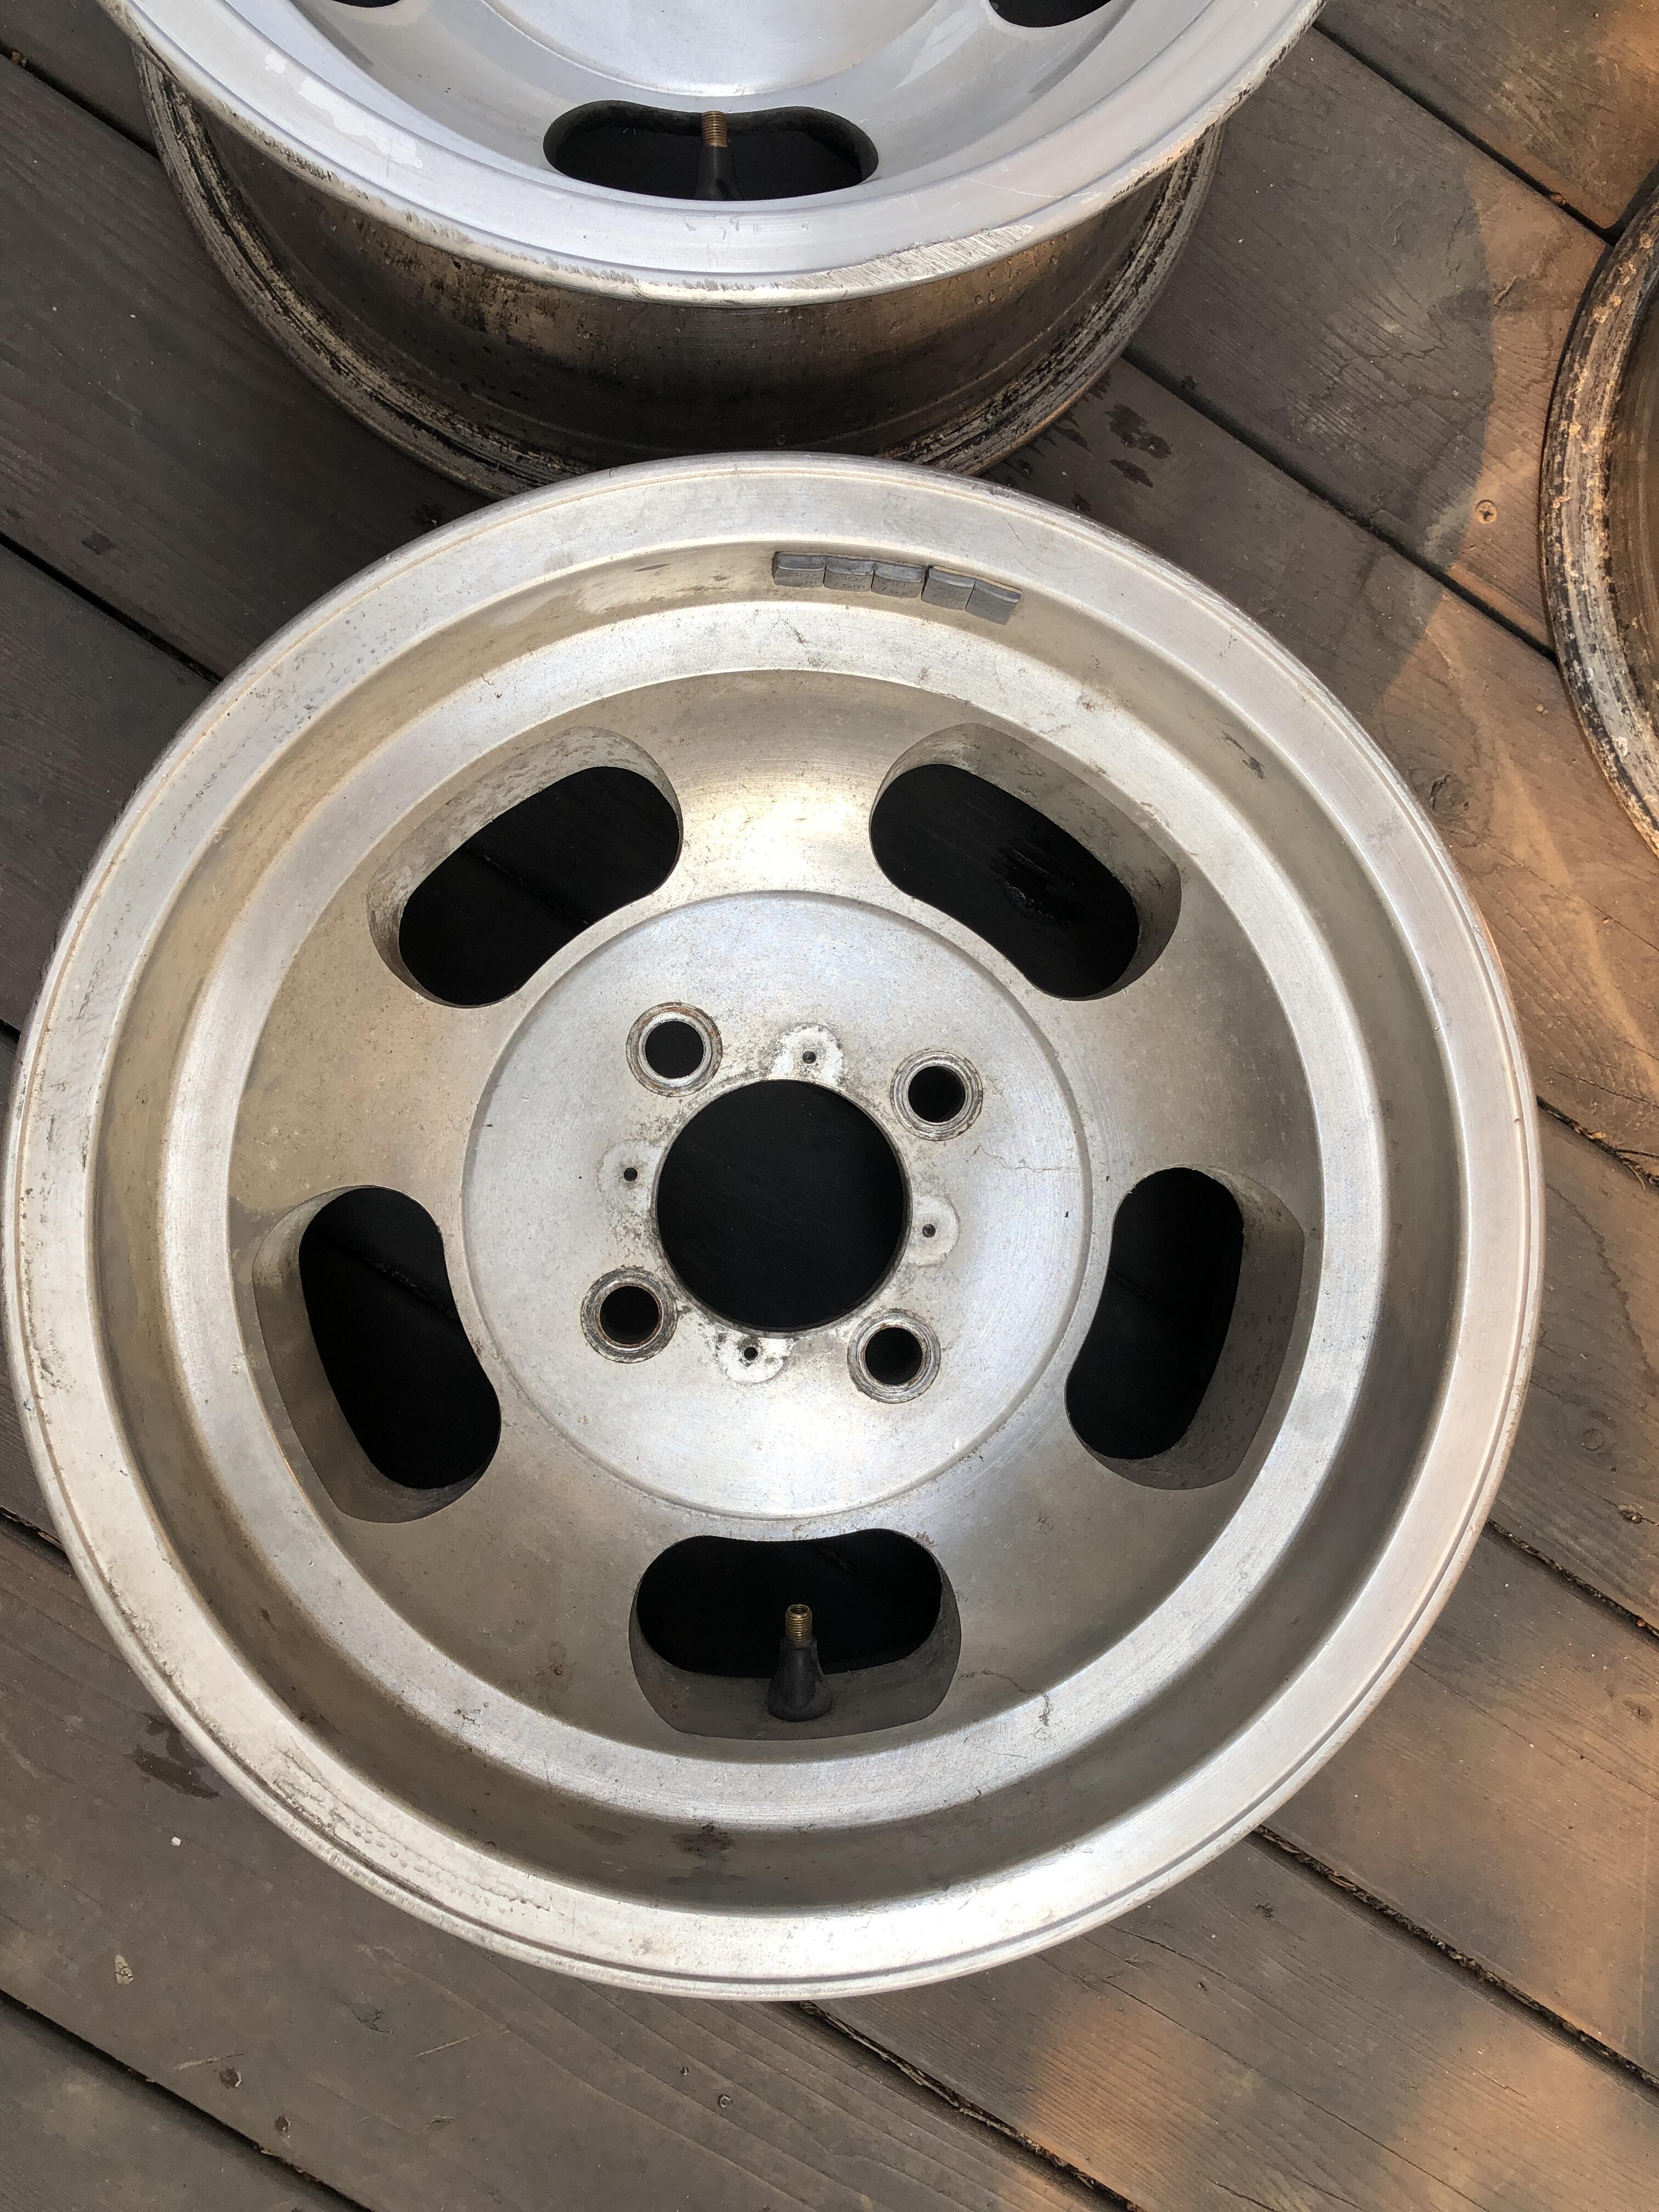
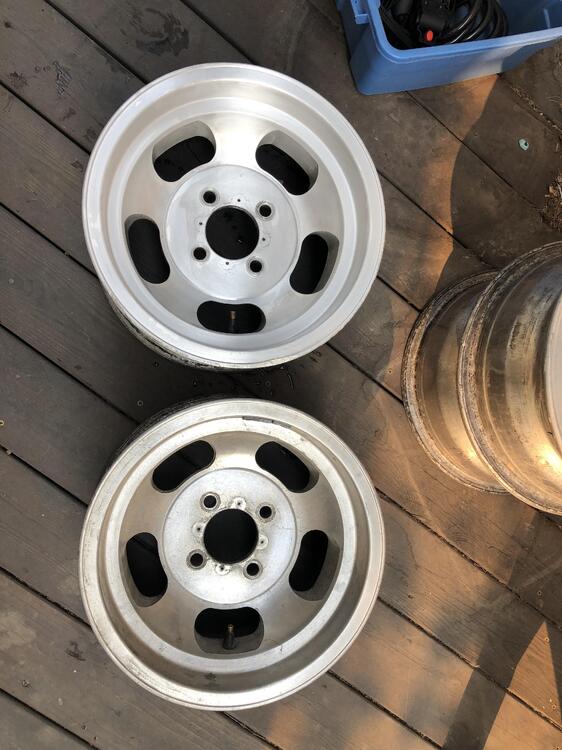
I bought a product called SHARKHIDE several years ago with the intent to clean many aluminum Datsun things like wheels and valve covers. Finally got around to trying it today. THIS SHEITE IS DA’ BOMB! I have a set of lovely original D-slot mags on a 71 that I’m restoring, and this stuff took them from grim to perfect in the fastest easiest way I’ve ever imagined. This stuff is seriously bad for you, the instructions have scared me away from even trying it until today, but damn, it does what it says it will do. Just ragged it on, scrubbed the grime with same gray scotchbrite scrub pads then rinsed it off. 15 min per wheel tops. Obviously you have to the clear coat off first, not sure these ever had any. At the time I bought it, 10 years I think, it was only available thru boating companies, no retailer would ship it, so I picked up a bottle in Salmon Arm BC on the way back to Calgary on vacation that year. Now I see it on Amazon of course. I’d buy it from sharkhidestore.com, it’s $29.95 a quoart vs $97 on amazon, big surprise. If you want serious power, this stuff is what you want. Just be dang careful with it.


-
Weber's have an accel pump jet that sprays fuel in the bore when you push the pedal. Little jet that sticks down in the bore from the top. You can get reversed weber choke mechanisms as well. I mean "inverted". One example https://www.mecatechnic.com/en-GB/choke-mechanism-for-weber-dcoe-and-idf-inverted_UC40223.htm
-
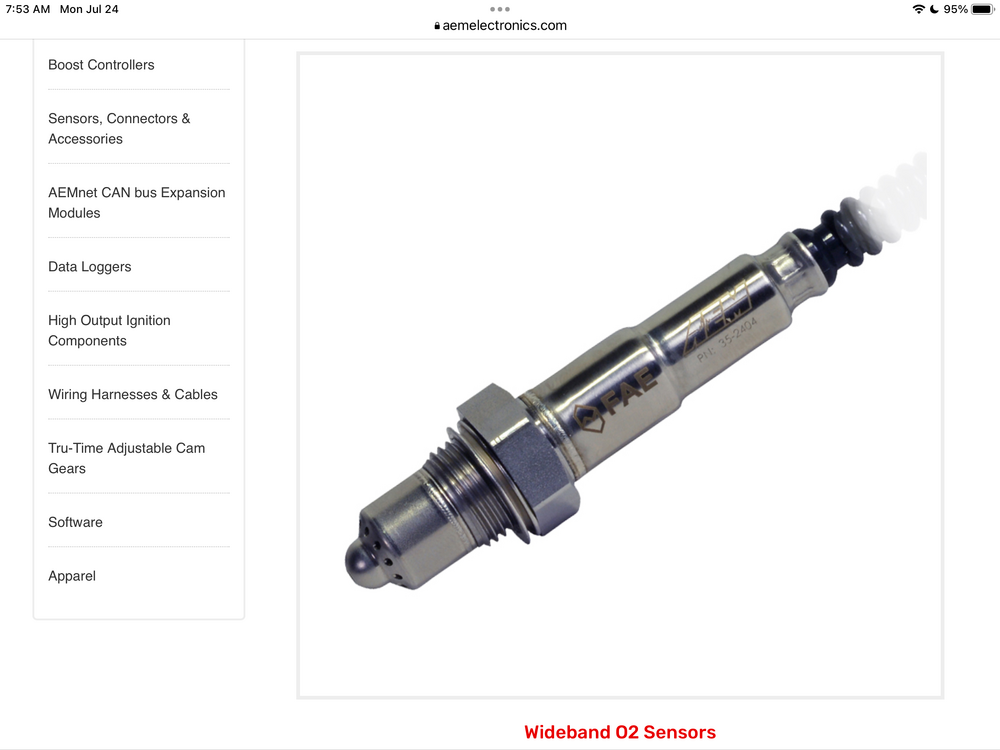
I agree. Time to find a better alternative. Even their pictures on the amazon page that show various shots of the equipment, shows one with the Bosch sensor, and one with the fake. During one of my discussions with AEM, they said “whatever is shown on our website is exactly what you get” and they had inconsistent pictures then as well. Just looking today they show a clearly non-bosch sensor FAE brand, and bosch depending on where you look. To be fair, I purchased their 30-0319 X series controller for use in my latest EFI project and it came with a Bosch sensor, and has been working great all summer. It’s the one that just has the little controller box inline, no gauge, and you use it’s CAN bus (or analog) output to feed into your ECU for AFR data. I have also purchased stand alone Bosch sensors from Amazon and gotten the real thing at a decent price. This is typically what I buy to replace the shitty AEM sensor.
-
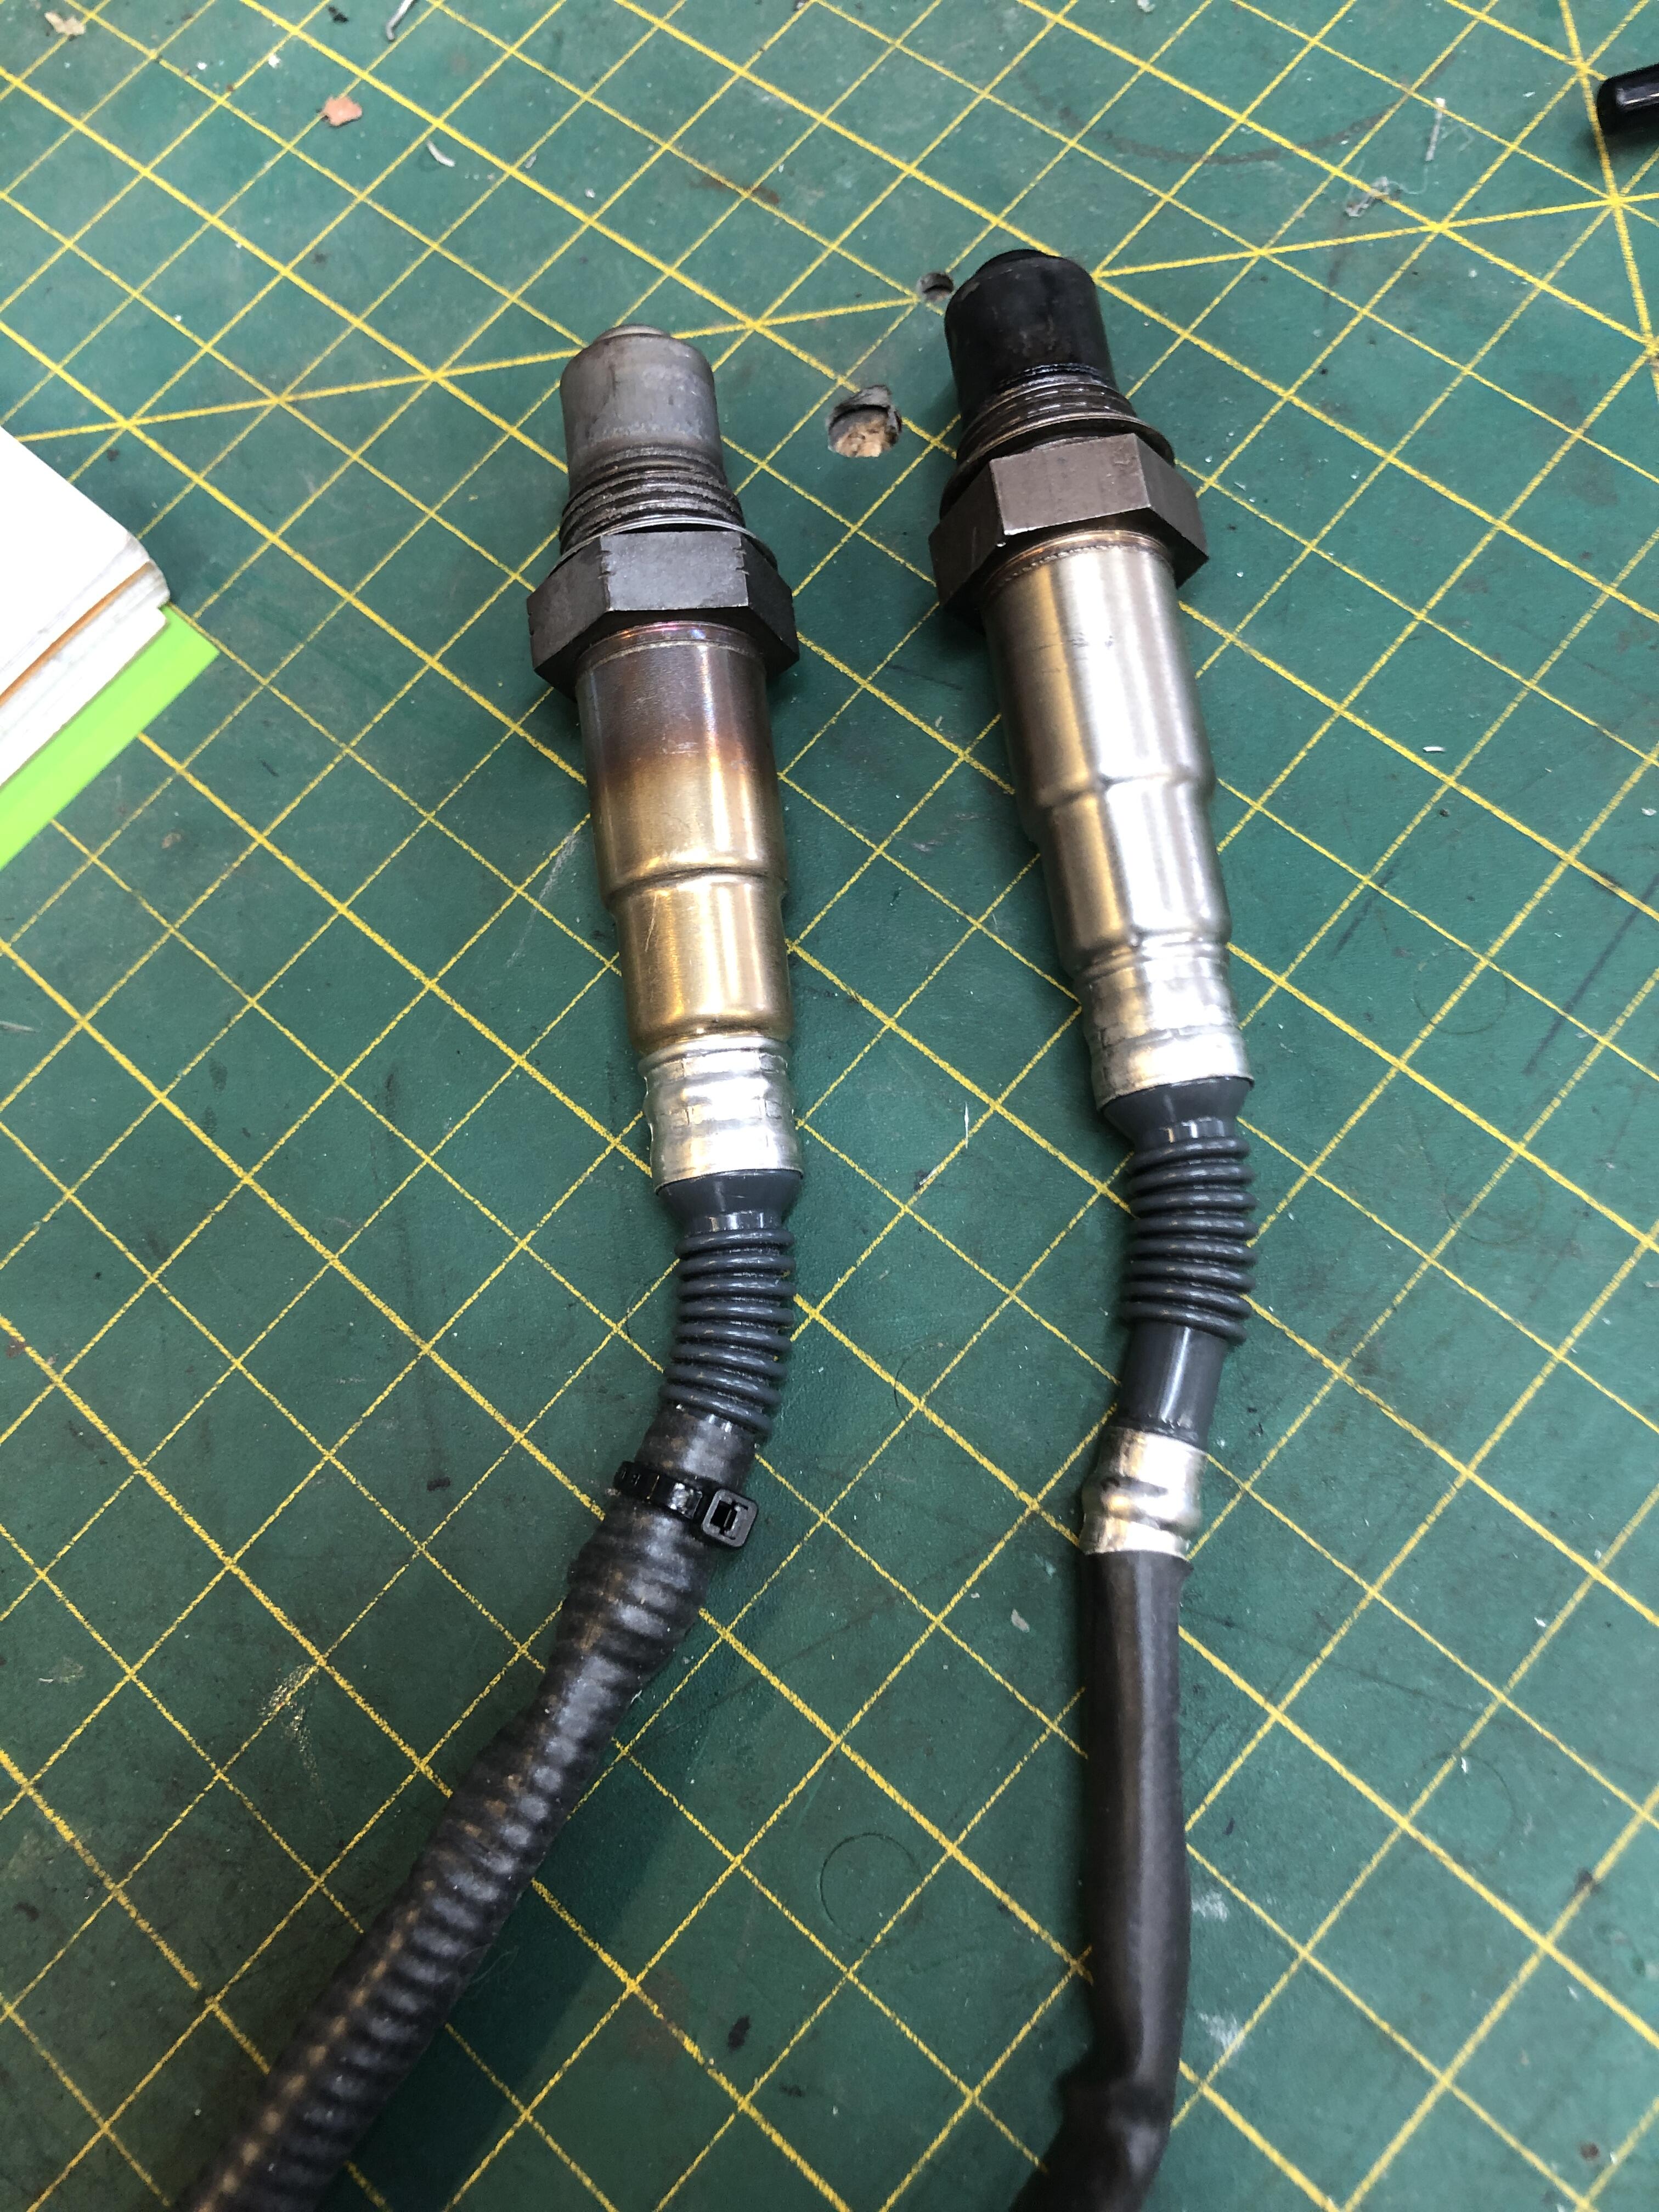
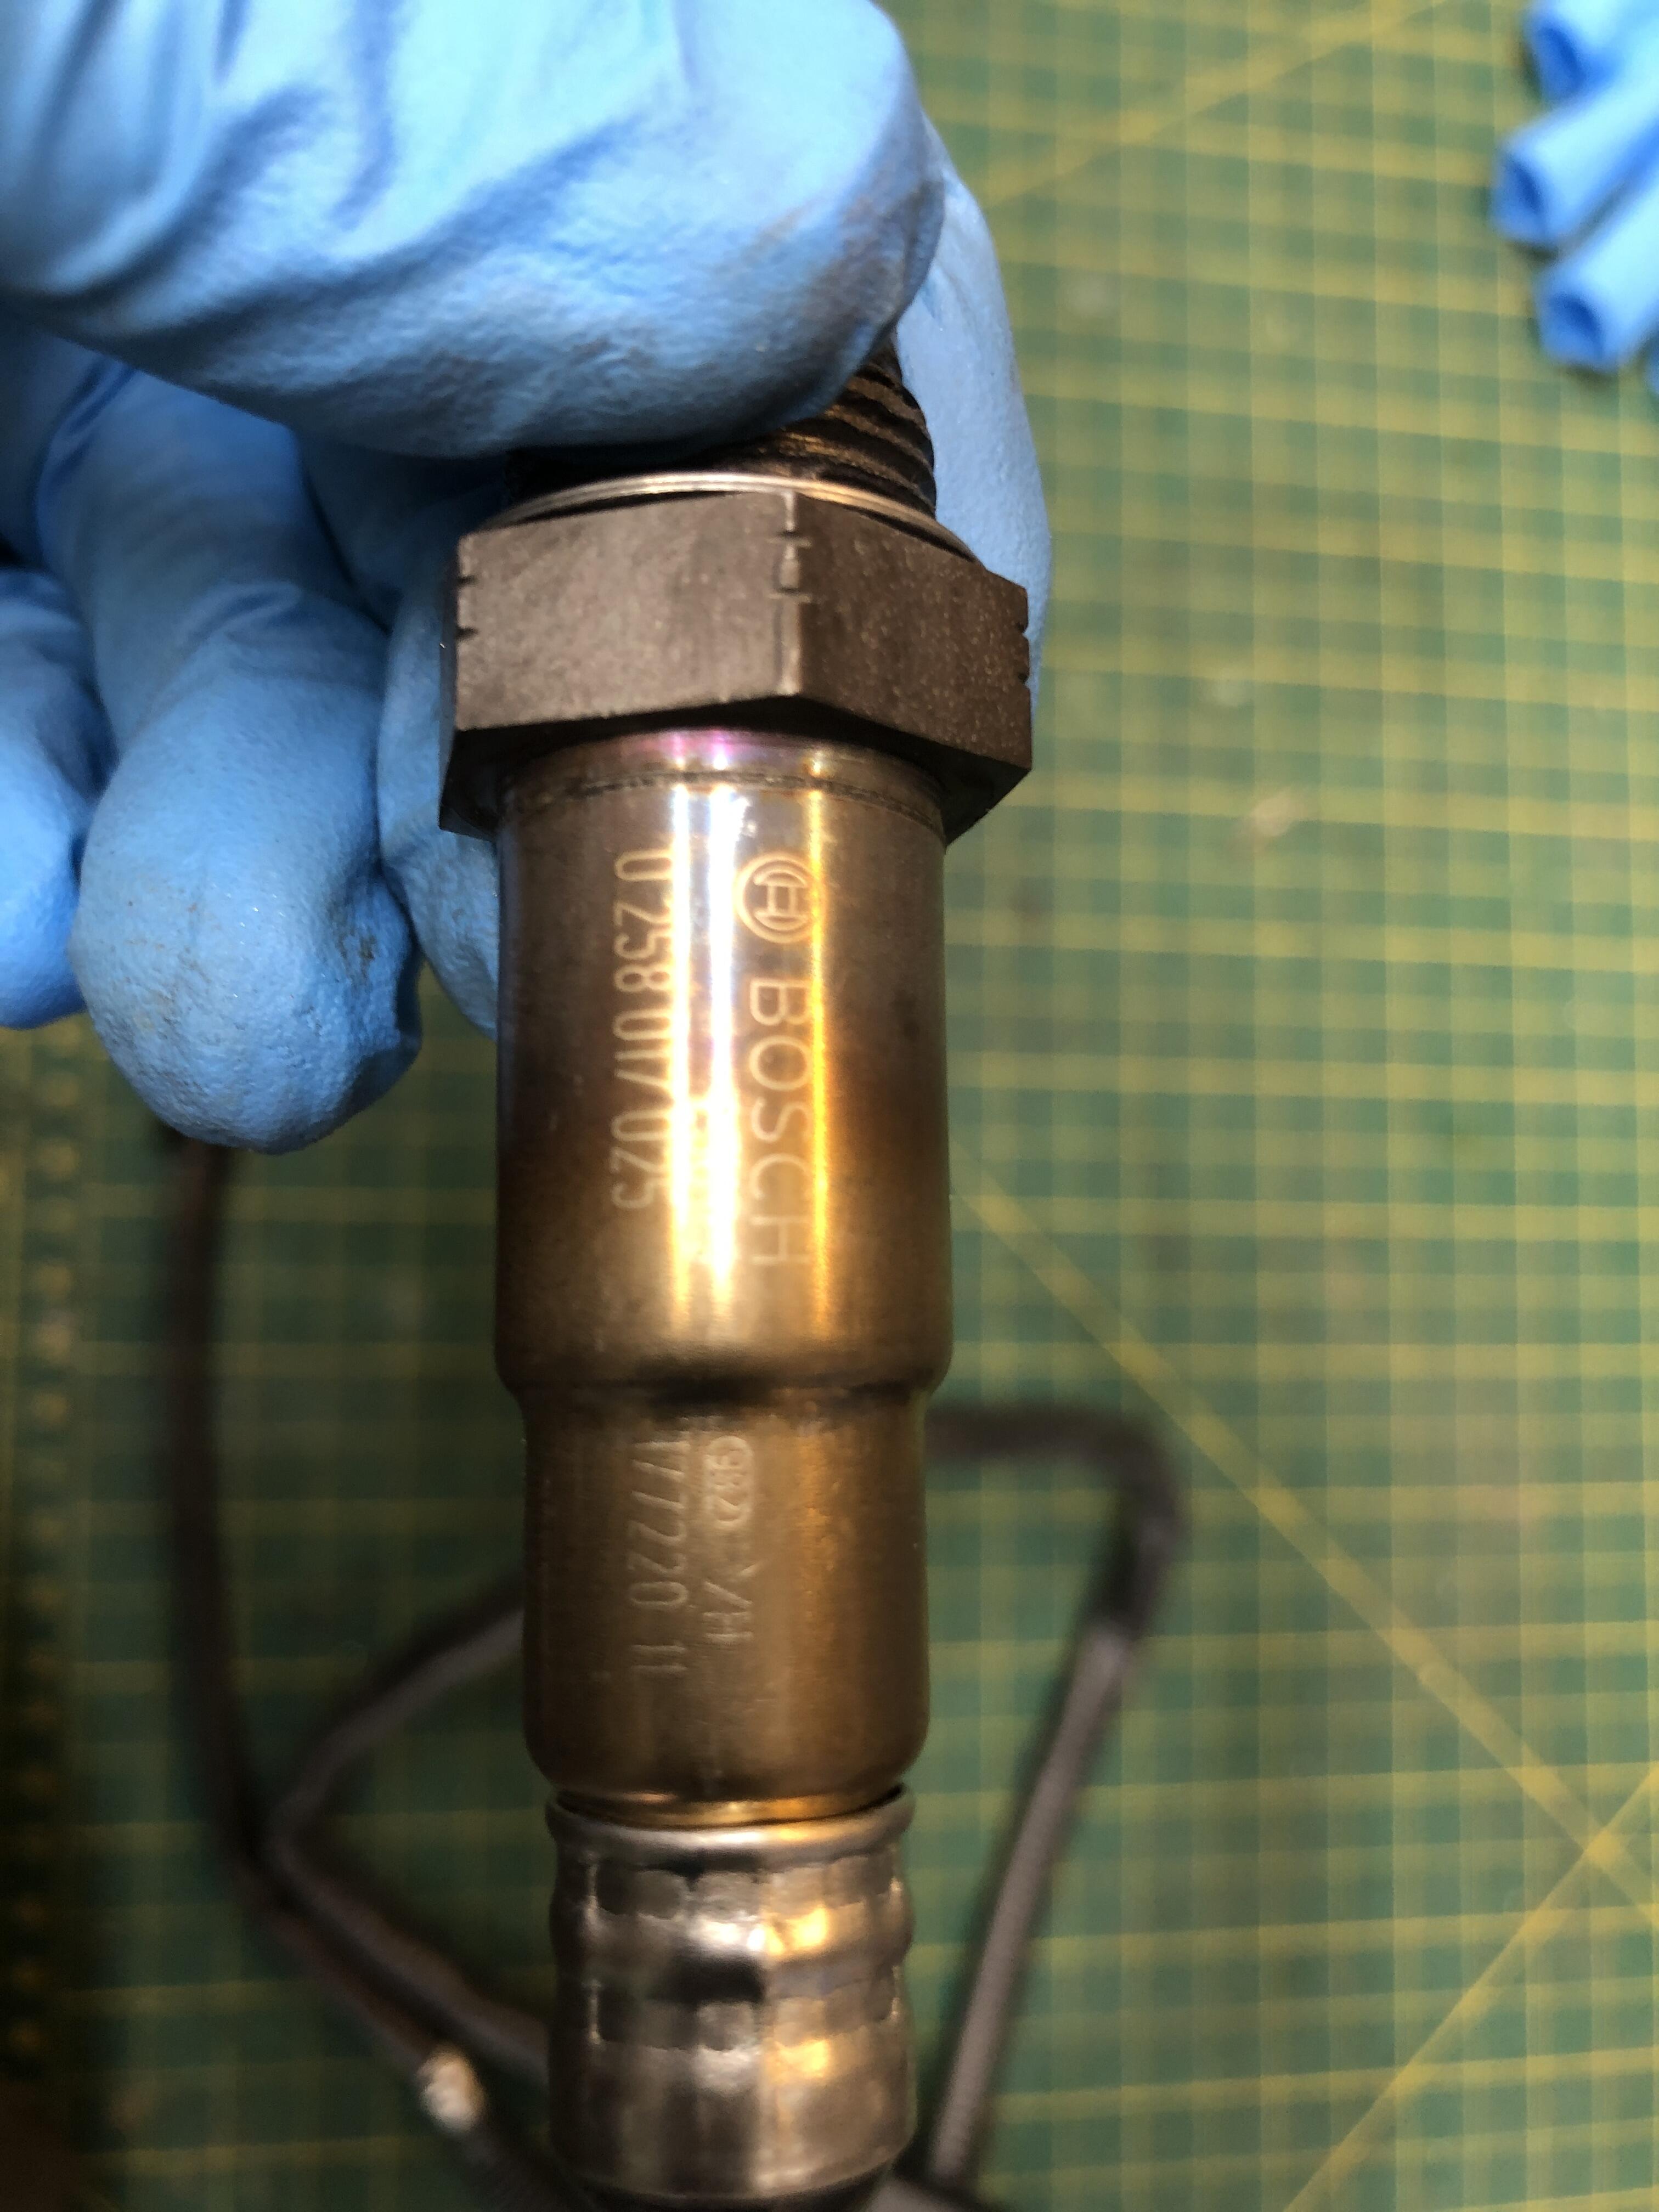
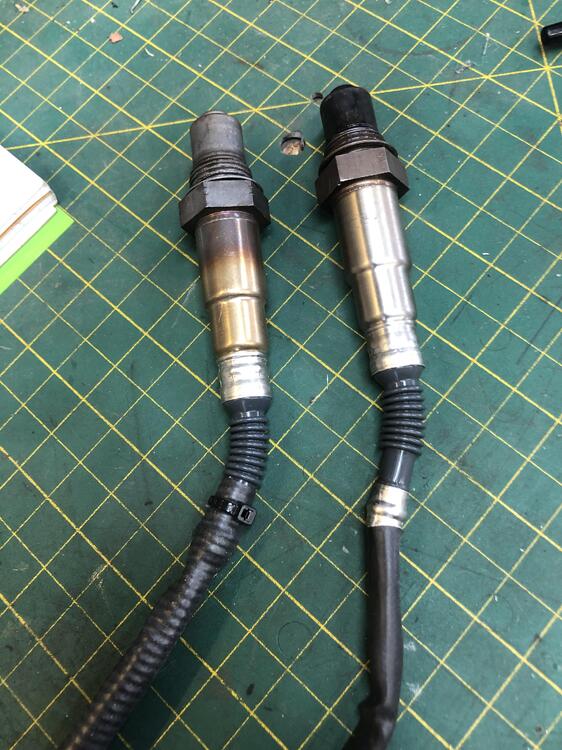
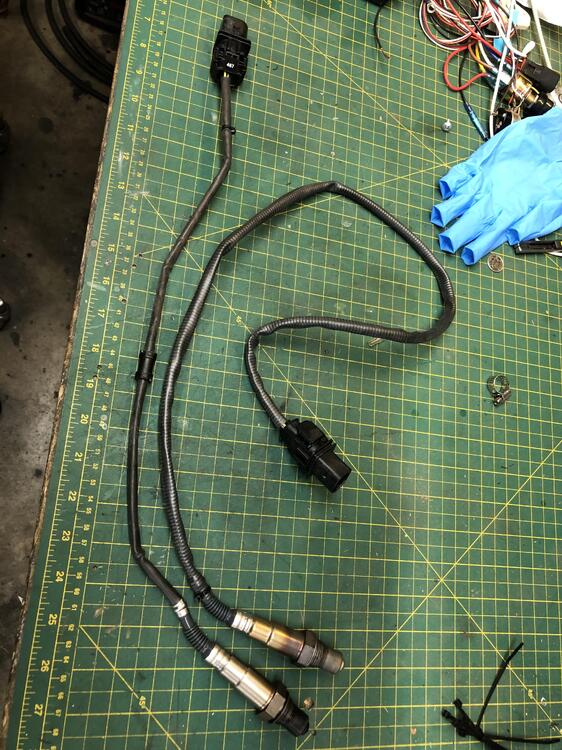
So lets show the real vs fakes. Here are the two business ends. Bosch on the left, fake on the right. The Bosch sensor has that graduated heat coloring, a zip tii holding the sheath material over the accordion boot. The fake is shiny polished. And has no markings. The Bosch sensor has the markings you'd expect Lastly the wiring length of Bosch sensor is much longer.

-
I have been bitten several times now (you'd think I'd learn...) by oxygen sensors that fail in the first few hours of life. I typically buy the AEM 30-4110 kit from Amazon, good price, shows up quick, blah blah. After a few rapid sensor failures, and me telling AEM, and them quickly sending new sensors under warrantee, and me going and buying "real" (more real??) Bosch sensors, I now have some details to report so you can determine if you get similar "bad" sensors.
-
Lean times, and not just because of high prices and low wages.
zKars replied to zKars's topic in SU Carb Technical Articles
There. See? It was the loose dizzy cap. Guess it went wonky (sorry for the technical term) above 4k. I knew if I asked you guys would help me solve it! Even if only in spirit..... So what did we learn today? -Misfires can cause a lean condition as read on the AFR gauge, just like the reverse. -Change a bunch of stuff and get the same result? You are changing the wrong stuff. -Tunnel vision is blinding.