


zKars
 Subscriber
-
Joined
-
Last visited
Everything posted by zKars
-
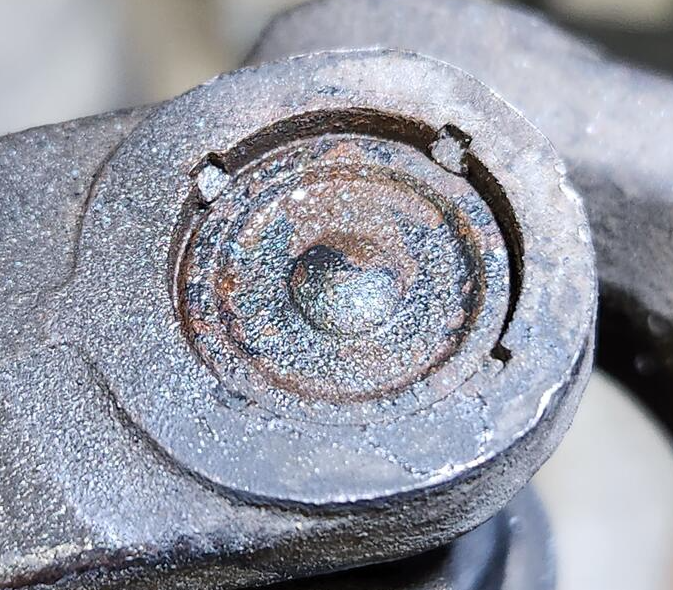
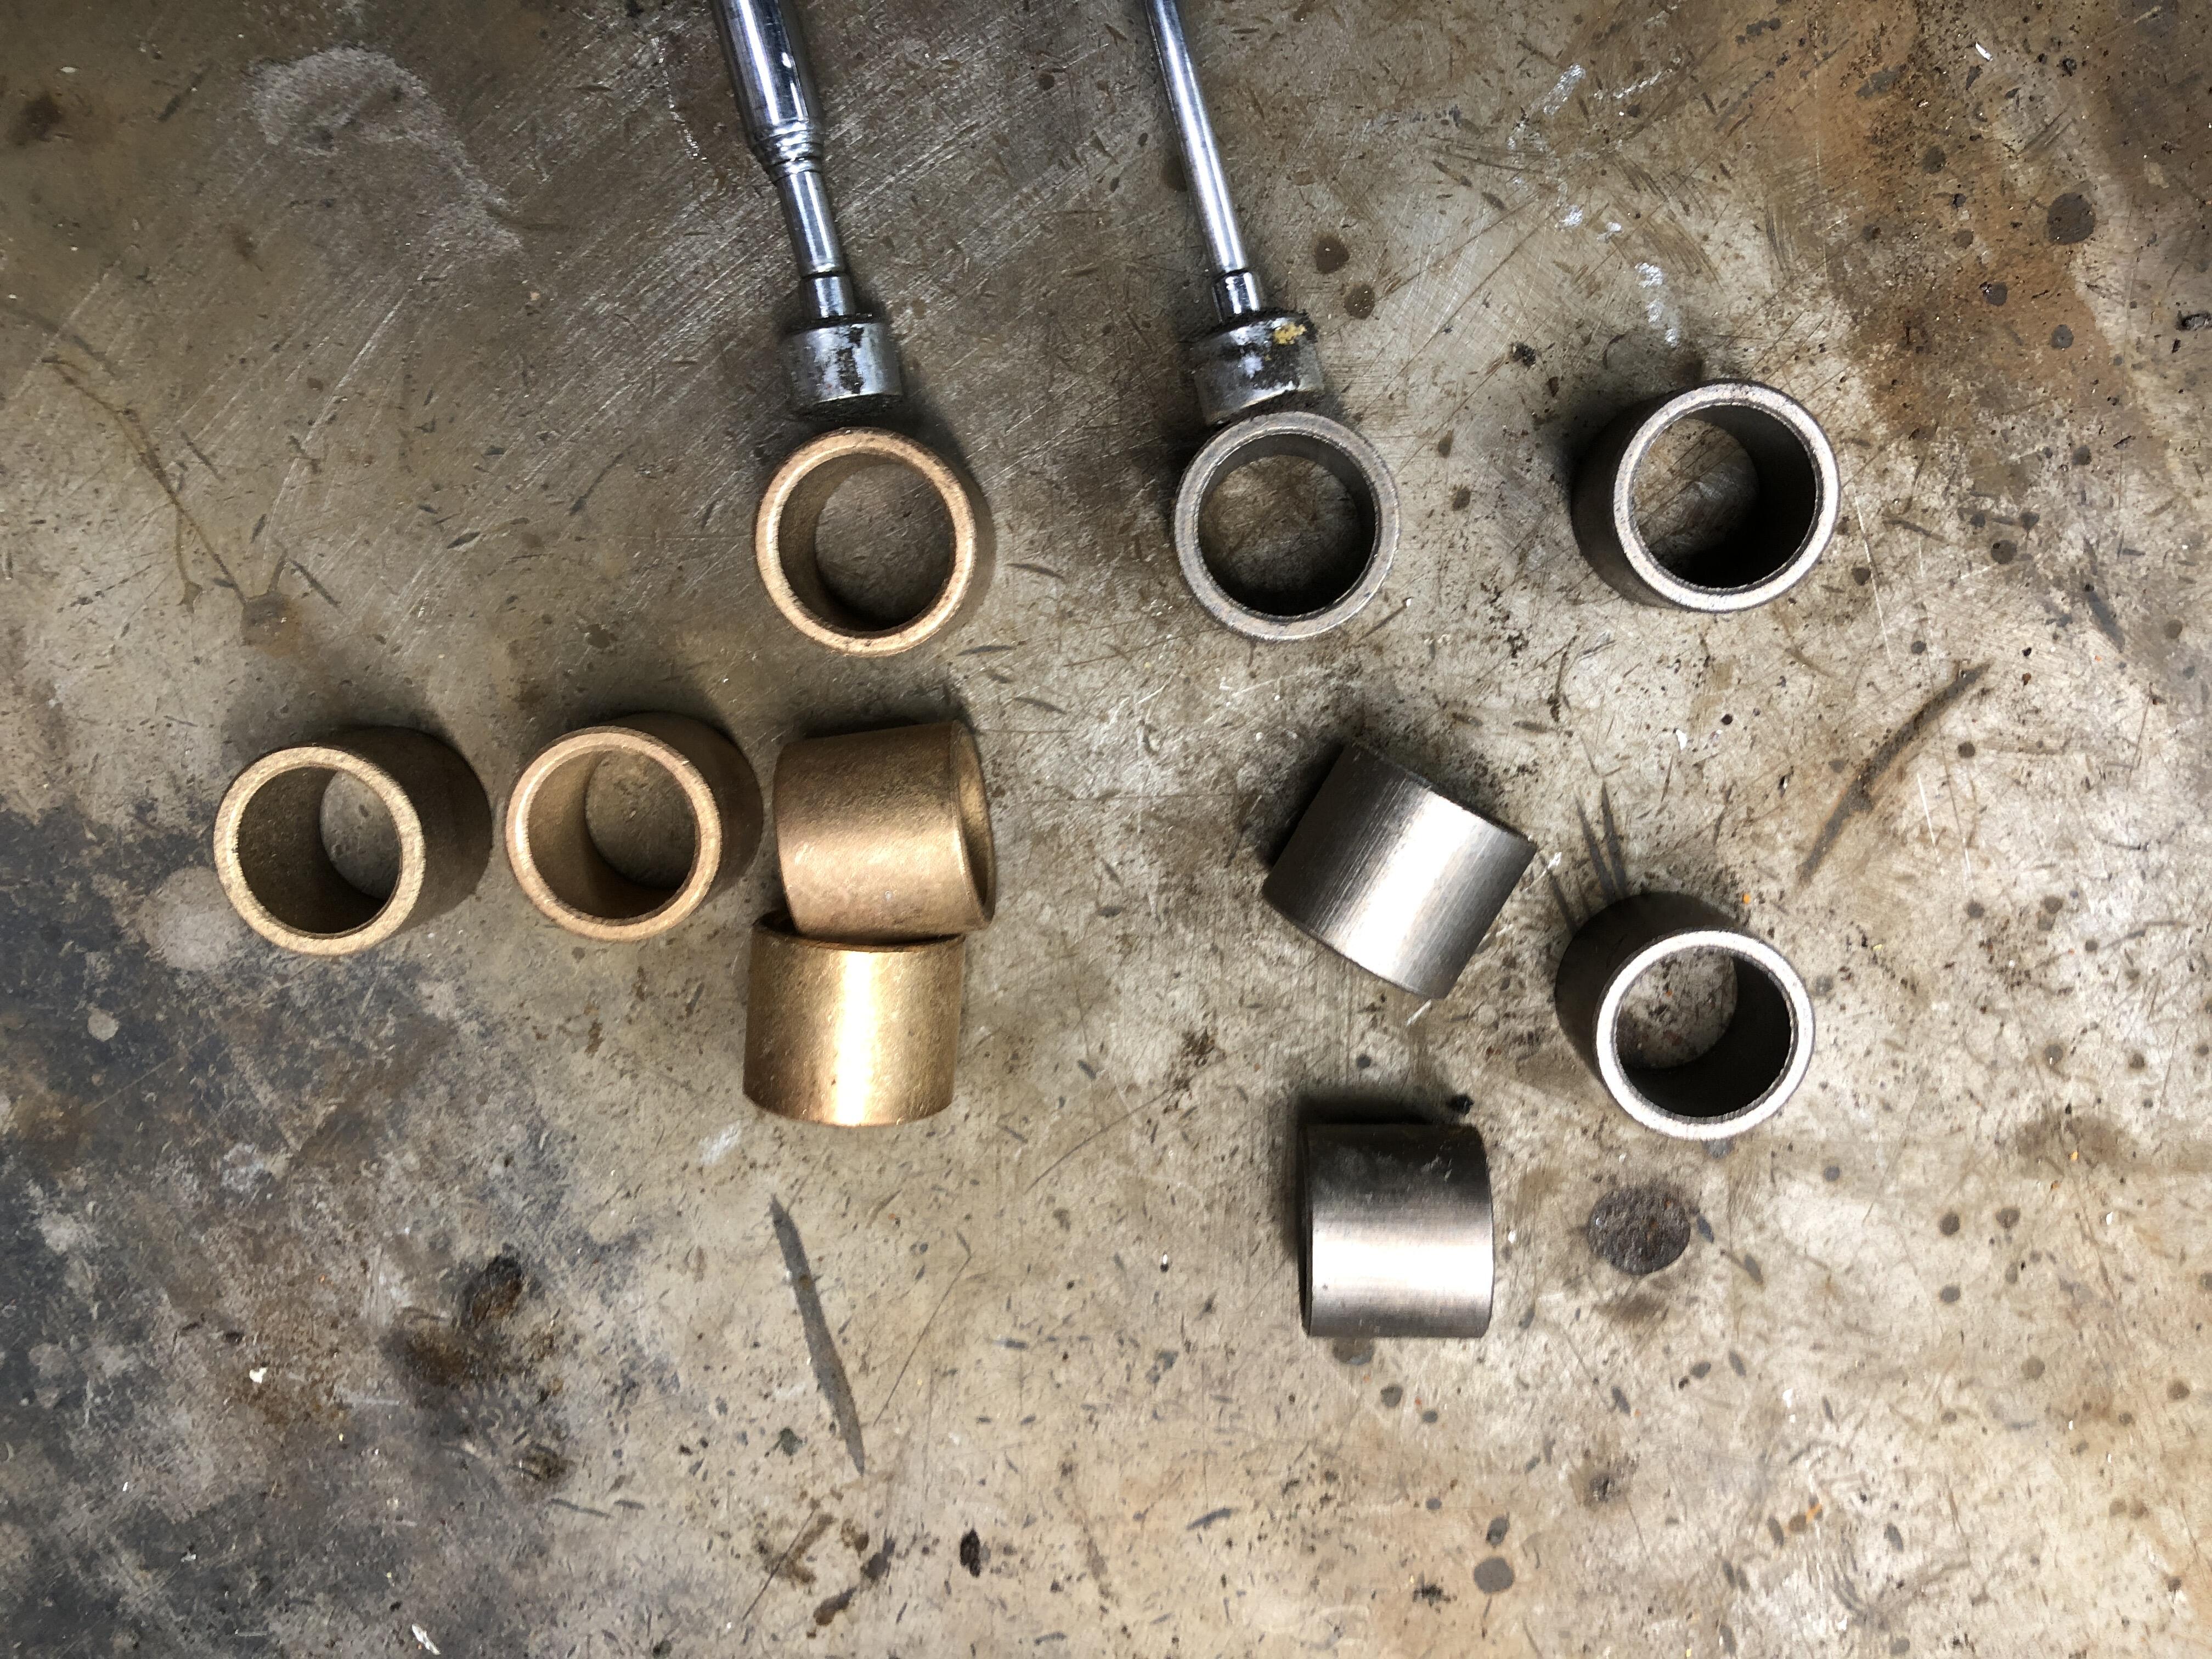
 So today I pulled out all my spare bushings again to compare dimensions. Generally they were all the “same”, nice loose fit on the trans shaft, not enough to make any play, just slip right on. BUT the one thing that is VERY different is the material the bushings are made of. Half were bronze, half were steel! I had one Timkin in a box and it was steel (see magnet firmly attached to the silver ones in pics below). The others were (I believe) from Exedy clutch kits. So regarding greasing or not, clearly to me at least, the steel ones would benefit from some grease. The bronze ones don’t “need” it but it won’t hurt. Going to keep doing the 4mm deep insert, which places it at the bottom of the chamfer. Even made an aluminum tool to beat it in without any fear of damage.
-
After an exhaustive search for K&N E-2910 air filters, I contacted K&N directly. They are NLA as of earlier this year. Where you-all getting your stock air filters from? Nissan likely still has stock ones, but anyone finding aftermarket anywhere?
-
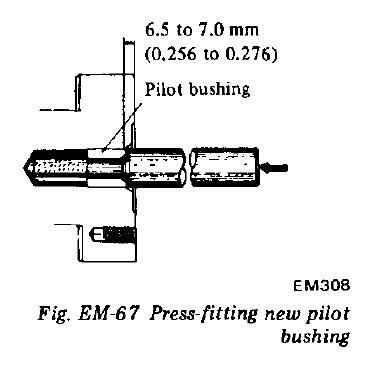
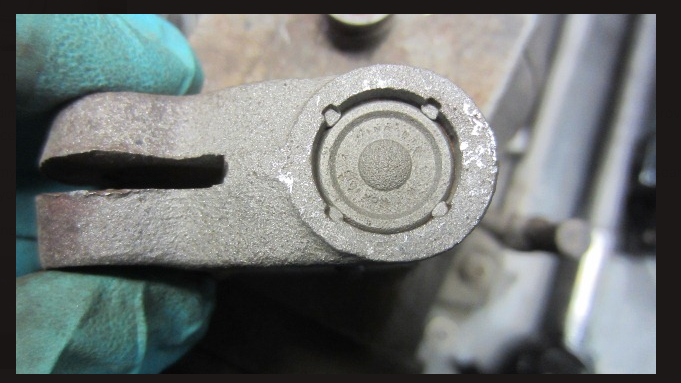
I agree. Can’t see how grease would hurt. A Little. Last question, how to install? I don’t want to pound on the face of it and deform it to reduce the ID. No way I want the shaft tip bound up in the mess I make installing it. I have a bunch of real trans input shafts that i use for clutch alignment tools (HATE the plastic ones, WAY to sloppy). Seems like a natural for installing the bushings, but the ID Change is a chamfer not a nice square shoulder so that might spread the end making it too loose or hard to install all the way. Some are tighter than others. I seem to need to make a nice driver tool with a double step. One to touch the face of the bushing, and the other 4mm (6.5-7??) back and large enough to stop the insertion at exactly the right depth against the crank face. Or just whack it with a punch……
-
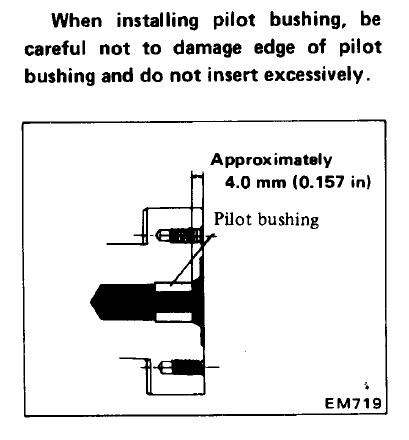
Question 2. Bushing installation depth. I usually to put them in until they were just even with the chamfer that is just below the surface of the crank face, may 2-3 mm in. I used to leave them flush, then when you put the trans back on, it would push it in to the exact depth it needs. Because of these questions and remarks in the FB posts i actually looked at the FSM about this for the first time, and found conflicting information. The 76 FSM say 6.5-7 mm inside the face, the the 82 ZX FSM says 4mm inside the face. Quite a difference. I don’t believe the cranks are any different. I sure don’t want it too deep and risk a really sloppy and barely engaged trans shaft tip. Recipe for noise and vibration I would think. I’m not happy with setting it shallow and letting the shaft push it in, as it might leave the chamfer on the larger diameter behind the tip of the shaft still in contact with the face of the bushing. Again source for noise. I suppose it might wear off quickly anyway. What is your SOP on this?
-
So. Seen a thread a few weeks ago on one of the face book groups about the proper way to install the pilot bushing in the back of the crank. Actually I think it was about some trans noise the OP was trying to track down, then someone said it might be your pilot bushing, then others chimed in about that and it went on to how to install one. Then does and don’ts. You know how those discussions go. Well a couple of questions have arisen from some of the comments I read, so I thought I’d ask this collective mind about them and see what you’re experience is. Question 1. Some/several said you MUST grease the trans input shaft tip where it goes into the pilot bushing. Many of them are very experienced old timers with plenty of practical experience. I never have, looking at the pilot bushings I have handled (plenty) they look like an oilite type bronze metal which typically does not require lube of any kind. The FSM for 76 in fact says DO NOT oil. The 82 ZX FSM mentions nothing one way or the other. The fit is also quite loose, i once tried every new bushing I had once (like 10) and they were all quite a loose fit, some worse than others, but NONE were anywhere near snug where you had to push it one by hand with some force.
-
No. Reproductions. I have some used complete windows and some of these pieces from others I’ve stripped but am away for the next 10 days.
-
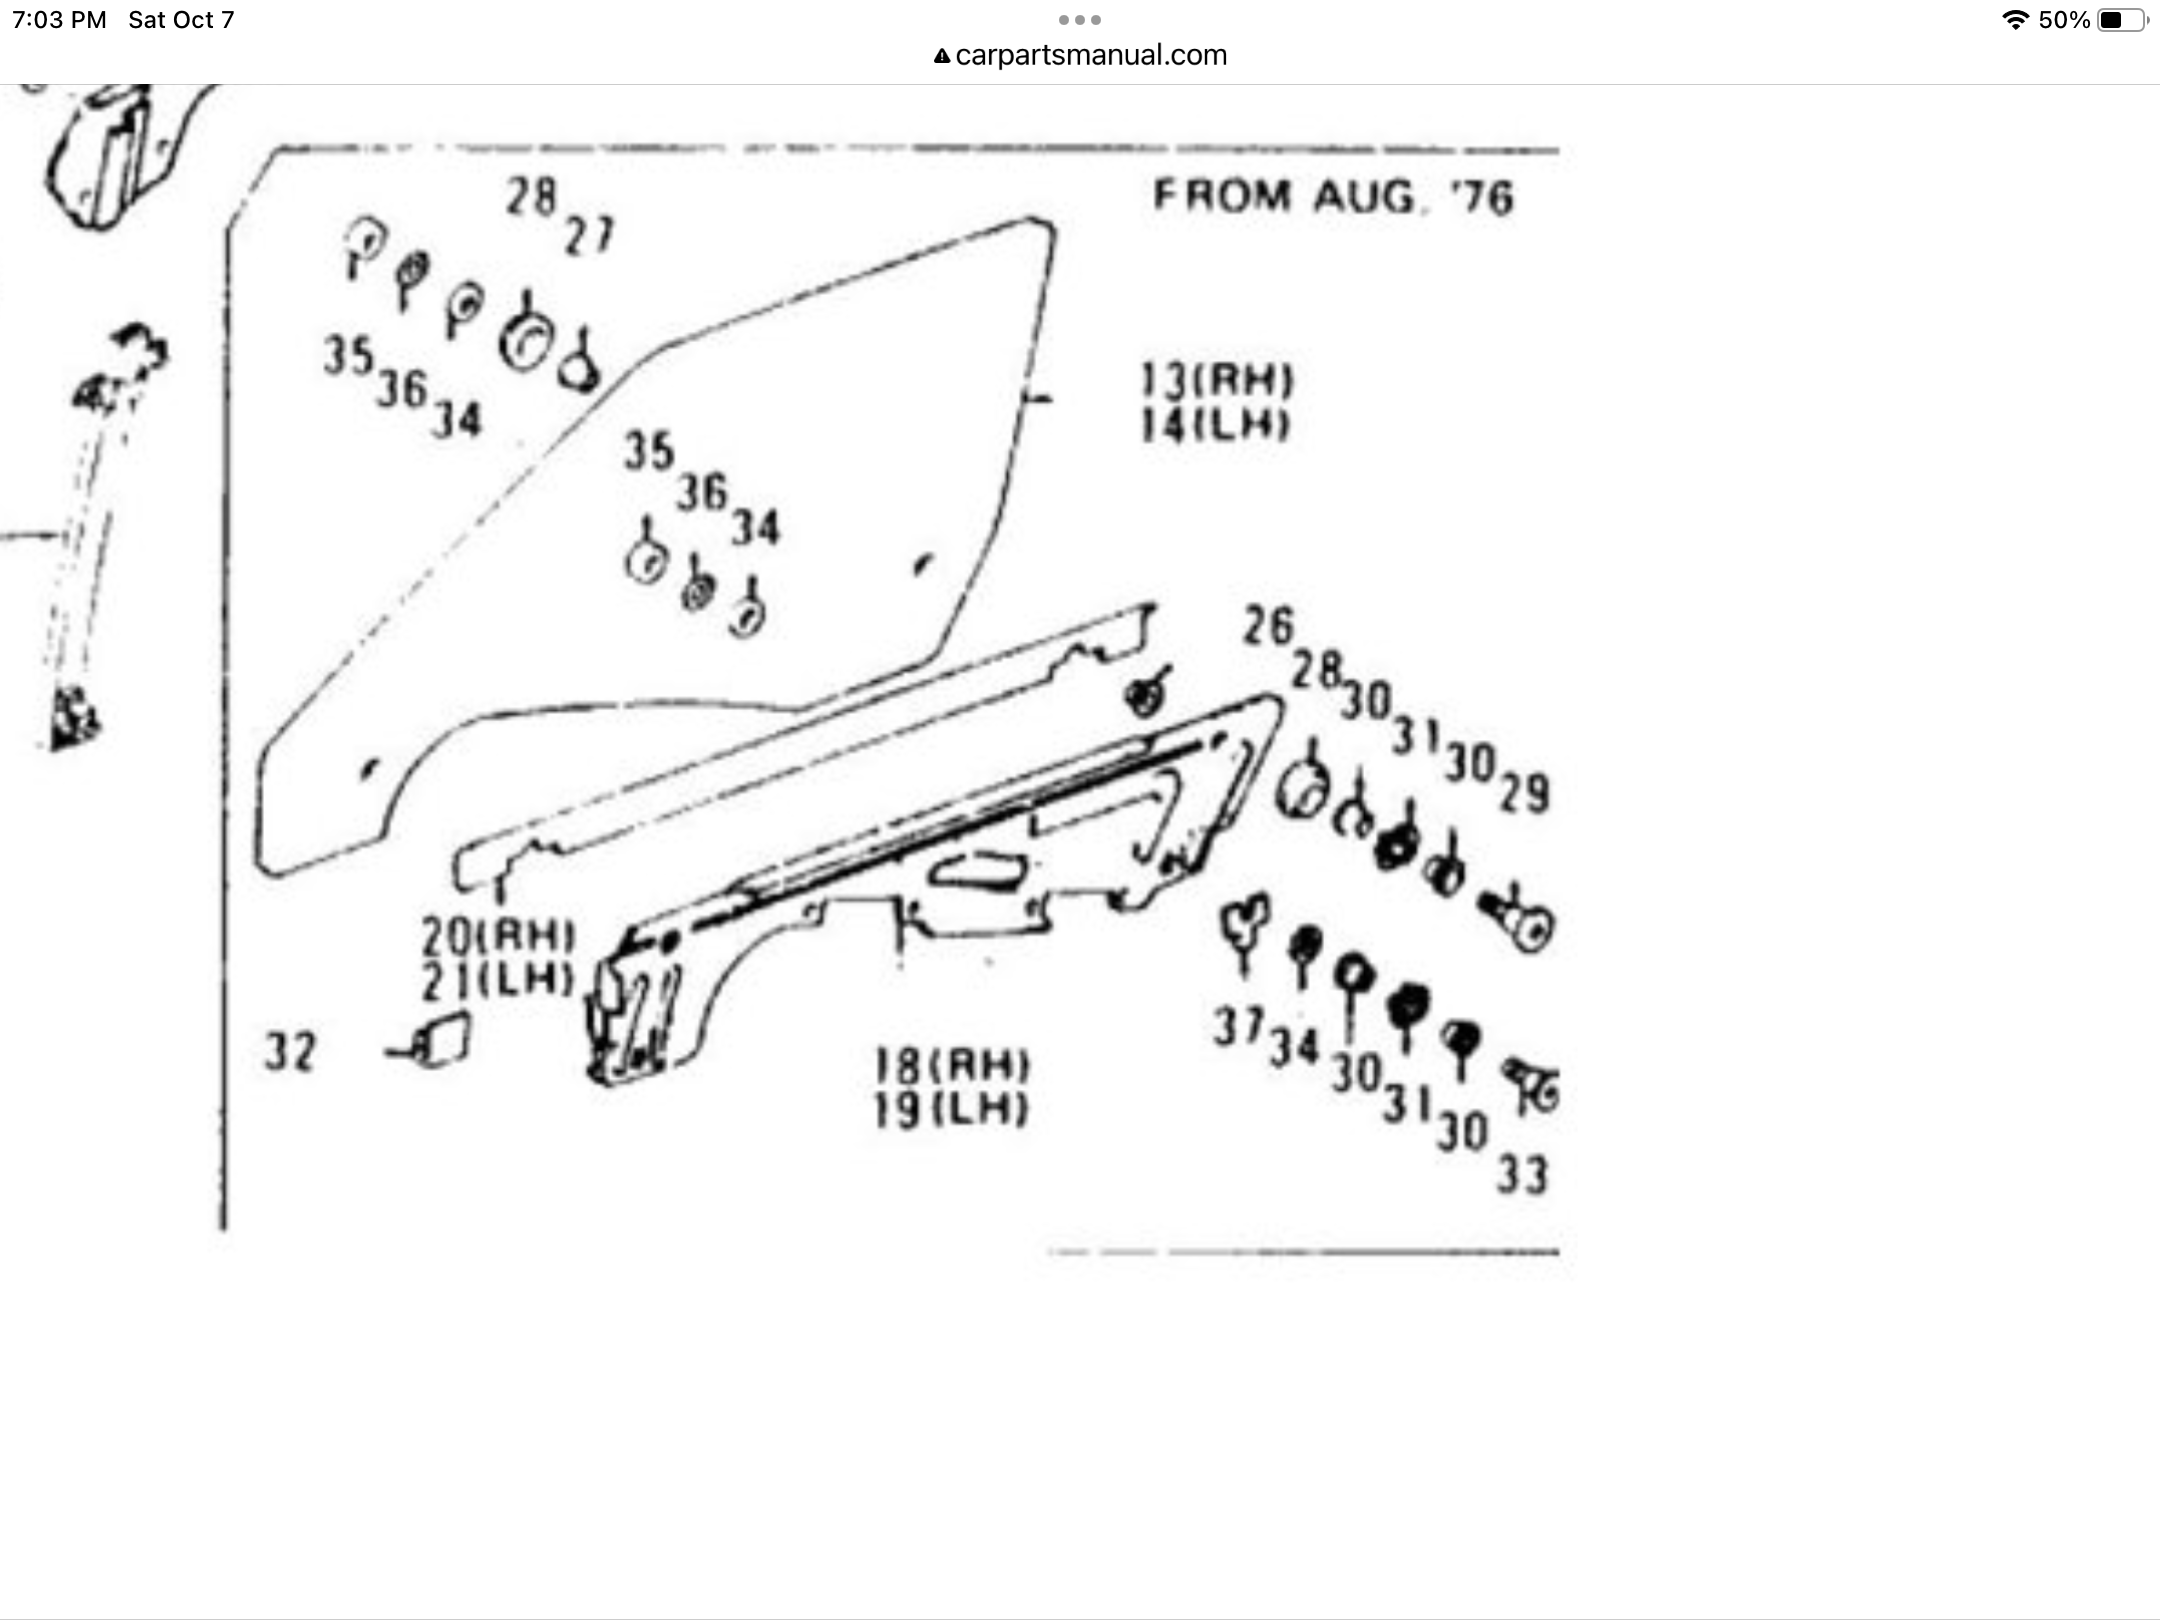
The microfiche also has a blow up of 77-78 door window track guide thingy’s. https://www.carpartsmanual.com/datsun/Z-1969-1978/body-260z-280z/2-seater/door-panel-glass-hinge

-
I thought of another mis-fire problem and the solution. Like Mark, it was related to the plugs. I used, and still use, NGK BPR6ES plugs. The issue I routinely run into with them, is that the end of the plug where wire snaps on, is threaded on to the plug, and is often loose. Several years ago (2015), a random issue with mis-fire throughout the range dogged me for a year or better, and when I finally discovered that one of the end caps was loose on a couple of plugs. Tightened them up, and the mis-fire went away. The BPR6ES-11 plugs that also spec'ed for 280's with EFI, don't have the threaded end cap. I described this WAY back in 2015. The thread lionk is below if you want to see pics. EDIT EDIT : just doing a bit of a good search. NGK plugs BPR6ES #7131 have the threaded caps, #4008 have solid caps! Jim, stop buying #7131 BPR6ES plugs you old idiot! BTW, Don’t order the Denso #4008 plugs by mistake. They are NOT the same….. Just saying…..
-
We had a case here recently with high RPM misfires that turned out to be a poor fitting distributor cap that must have been moving around at higher vibration levels at high RPM’s. You could wiggle it with your hand, wouldn’t seat square and tight. Replaced it with a new cap and viola as they say, revs to the moon with no mis-fire. Ignition systems rely on a in-spec gaps and fitment, any “Extra” energy lost with a too large gap (or inconsistent gap) and resulting spark, results in a weak plug spark and mis fire.
-
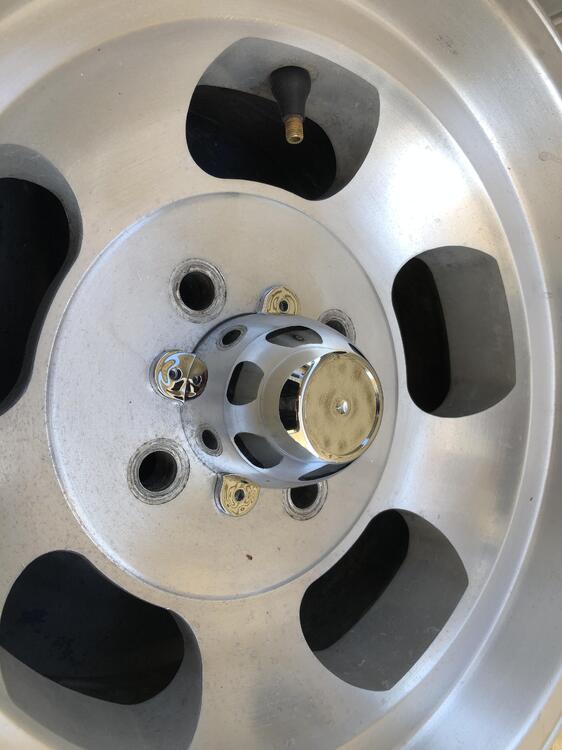
To finish up this topic, the caps suggested above have arrived, and they are a perfect fit. The chrome is perfect, they even come with the four little screws! Now to transplant the old stickers. Or get new ones. Now the decision has to be made about how to protect the amazing bare metal finish on these wheels. Polish, clear powder coat, clear acrylic paint?


-
There is a gentleman named Sal Ceja on several of the FB Datsun groups that sells shims for our diffs. He may also be able to supply technical help.
-
If you must use “bondo” on bare steel (don’t! Prime it first, epoxy primer is good), use the short strand fiberglass filler rather than regular light weight filler. It soaks up WAY less moisture from the air than standard bondo. Standard bondo on bare steel is the fastest way to get that steel rusty and have that bondo go byebye.
-
A BSPT male to NPT female adapter is pretty easy to find. I know McMasterCarr has them, and even Autometer has that part as well. https://www.autometer.com/1-8-npt-to-1-8-bspt-pressure.html?gad=1&gclid=CjwKCAjwo9unBhBTEiwAipC113yoh0IxbFAi4AbHjmRRP0yeHW3MdROua1aBNLXI9UrOlpXXf4pvgxoCdDAQAvD_BwE&gclsrc=aw.ds Even Amazon.ca has them next day delivery. Hunt for Autometer 2269
-
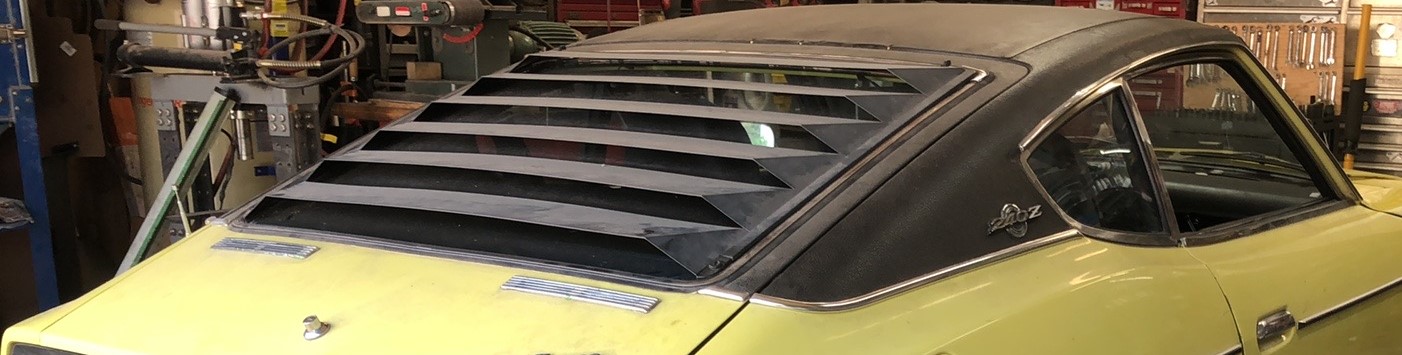
I hope it’s “real” as well. It’s in pretty good shape, bit of lifting at the front top where is meets the windshield weatherstrip, glued that back down. Couple of splits at the back edge at the hatch gap, will have to investigate vinyl repair techniques. No signs of delamination anywhere, that sucker is stuck down good. I especially love the contact glue overspray that was all over the side of the hatch on both sides. It came off pretty cleanly with some modern contact cement remover. Not what I would have expected from a factory installation though. Maybe a sloppy dealer installing a factory supplied kit? Who knows. Poor thing has had a repaint sometime in its past, there are little yellow strips at the edges of the vinyl where it comes down the A pillar where masking tape was not quite covering it. That will come off too.
-
Love to dredge up old topics, but I think I have one of these "factory leather tops" on a Z I'm restoring (maybe more like refreshing). 1/71 build date. it is most definitely not leather. Were they ever really leather? Factory or applied later after purchase? Love the fat chrome trim strip at the base on the 1/4 panel and hatch.

-
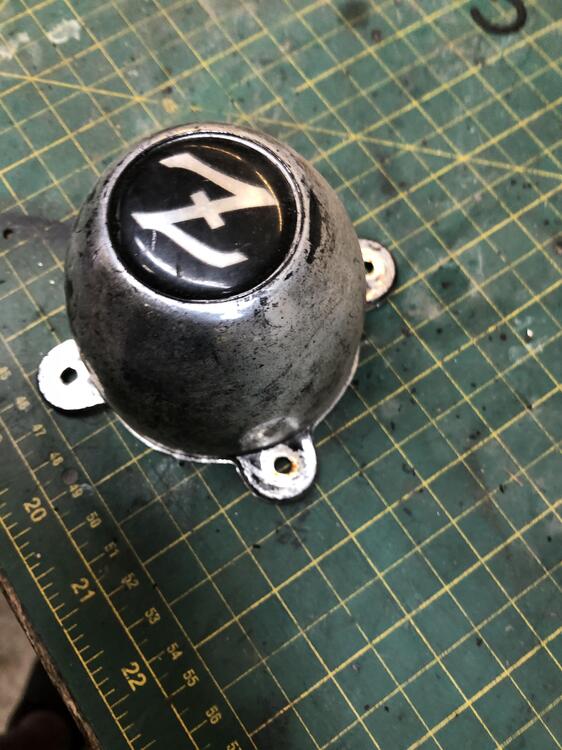
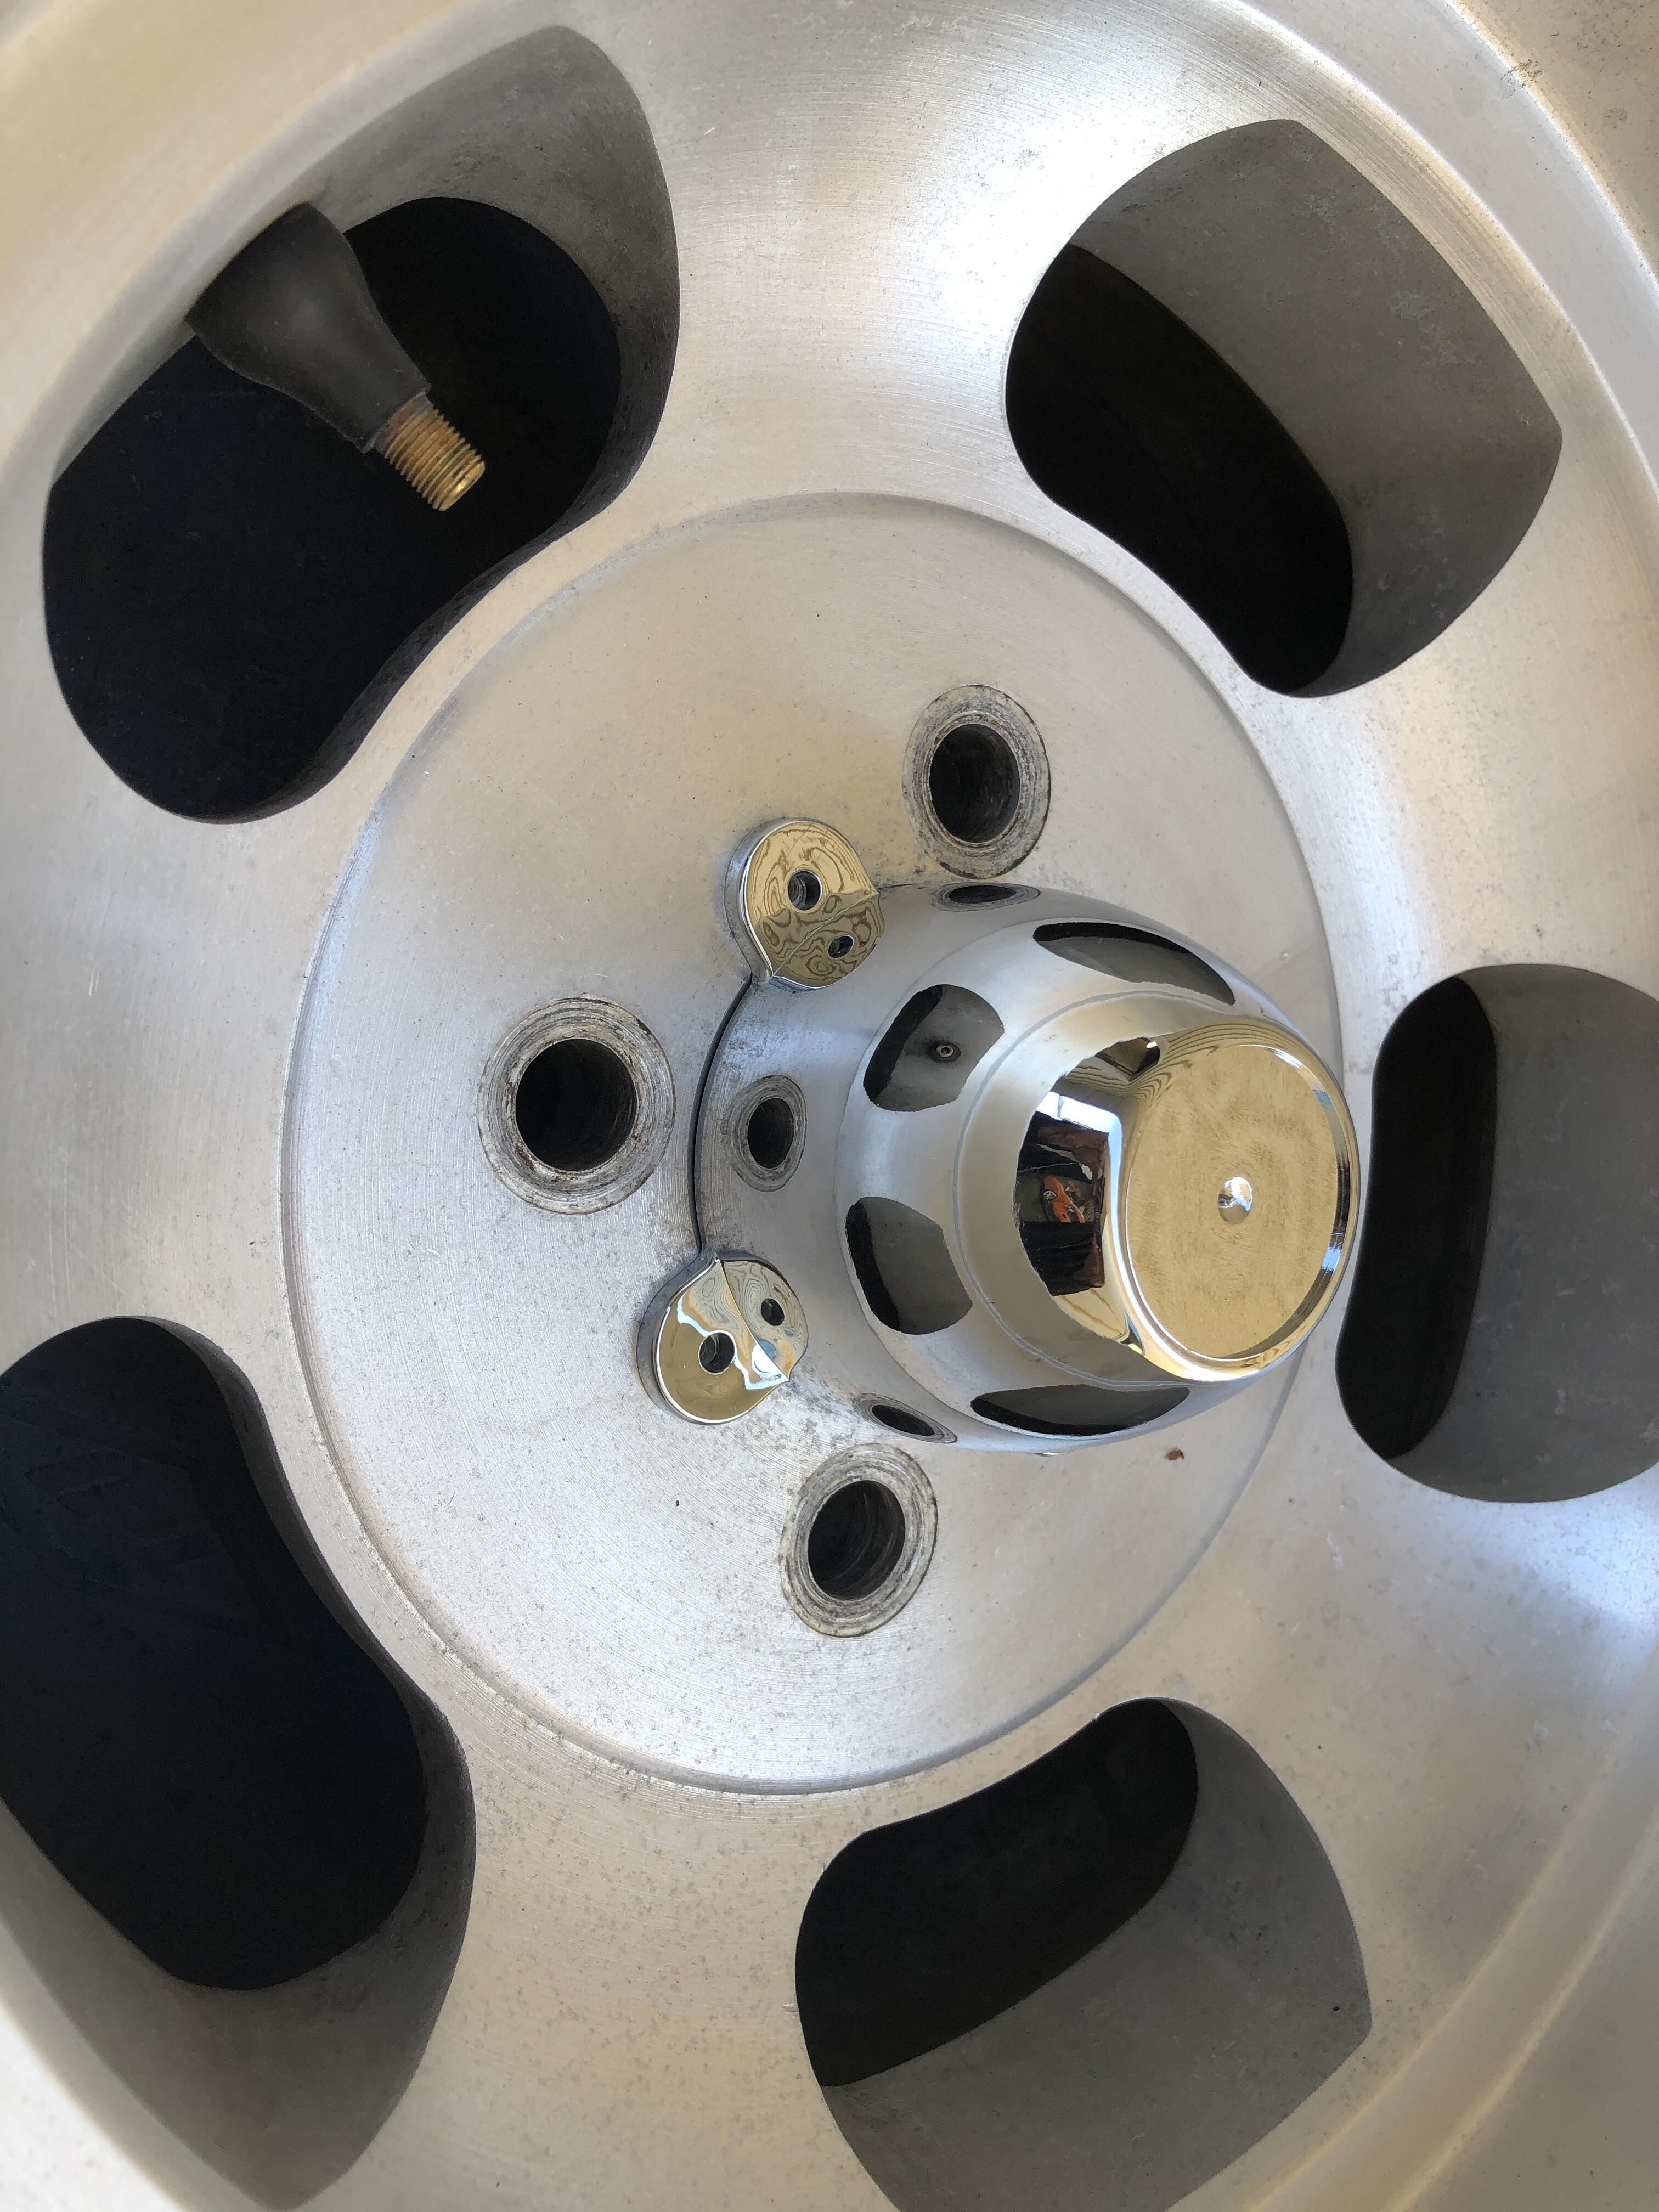
I forgot to include the hole spacing in my post, so although they are perfect visually, they are 2.5” spacing and I need 3-5/8”. And then I had a thought while typing the above. I wonder if they are measuring the “spacing” between each adjacent pair of holes, rather than the “bolt circle” diameter approach that I was using. So I rushed out and measured my cap, and sure enough, adjacent holes are 2.5” !!! So these likely work! Thank you!
-
I really suspect this is not a new topic, but I’m looking for new ones of these. I know they won’t come with the fancy Z stickers. We have a solution for that. Any leads? I’ve been searching and searching to no avail.
-
Now for the later PITA ujoints, 15 x 39 ujoint for staked yokes. A thread where these were discussed with a part number https://www.driveshaftparts.com/index.php?route=product/product&product_id=1100 Part Number: UJ1540SD They indicate they are out of stock as of today. They indicate a length of 1.535 which converts to just under 39mm, even though the part number suggests they are 40mm (1540SD) I have a pair of these in my hand, confirm part number and fitment.
-
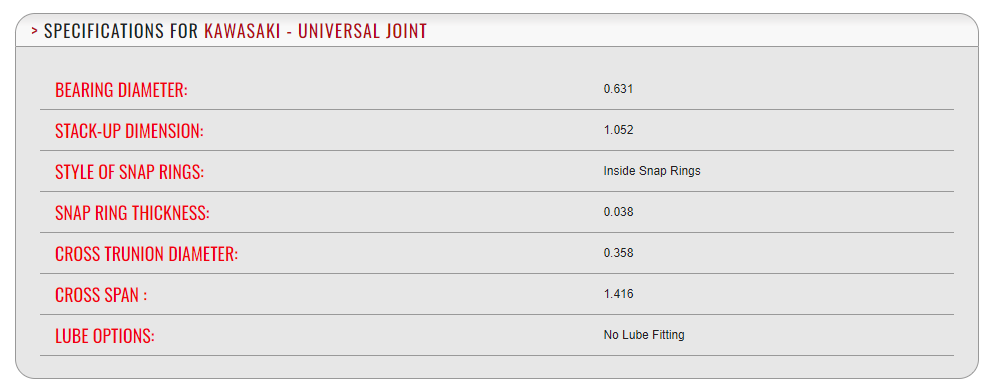
First the early 16mm x 40mm style with C clips Previously I could find them using the ATV700 part number. These come from this specific Kawasaki ATV Kawasaki Bayou 300 front driveshaft u-joint set 1989 - 2004 Kawasaki OEM part number : 49050-1055 Once I knew this I was able to google that part number and found plenty of suppliers BTW, this is all confirmed through a local Kawasaki ATV store here in Calgary. He can get them for $37.99 CAD each. Ebay has them too. As does Amazon.ca, $46 each, 4 day delivery They mention the model # of the ATV, KLF300C They also mention it fits "Mule 2510 4x4 1993 - 1999" Ebay mentions there manufacturer is East Lake Axle and their part number is U201.02 And the really cool thing? All these U-joints have zerks..... And some specs from http://motormasterpowersports.com/index.php/product/detail/sku/ATV700 On the generic ATV700 part

-
I have been searching for u-joints for the steering shafts again, and my usual suppliers seem to having stock issues. I searched around in the threads for old links and sources and found a bit of a mess so after finding out tons of additional information about part numbers and such, I thought I would leave a single thread with as much information as I can I'll divide this into the two sizes of u-joints. The 16x40mm early un-staked type with the snap rings, the later 15x39mm ones that you have to deal with the stake and un-stake. Won't get into how-to in this thread, just sizes part numbers and companies etc
-
Interesting. Text and pictures from another thread I responded to. Site bug I suspect.
-
9 inches long, 1/2” wide, slit is for 1/32 sheet metal. Strangely the width of one side is slightly narrower than the other. Not likely going to find replacement material with that, but no one will notice. They take a little wedge out of the center to help it conform to the corner
 Cost analysis, The CIBIE housings where $78 each, the bulbs a hun, so for $200 bucks I got pretty decent (and easy to install) lighting. Not bad.
Who doesn't love a little butter on their Z after all!
Cost analysis, The CIBIE housings where $78 each, the bulbs a hun, so for $200 bucks I got pretty decent (and easy to install) lighting. Not bad.
Who doesn't love a little butter on their Z after all!


Important Information
By using this site, you agree to our Privacy Policy and Guidelines. We have placed cookies on your device to help make this website better. You can adjust your cookie settings, otherwise we'll assume you're okay to continue.