zKars
 Subscriber
-
Joined
-
Last visited
Everything posted by zKars
-
 Market conditions vary all over the continent. Let the googling begin! Round here, $5K gets you a perfect one. $3K gets you a good starting point. Double or triple that for S30 (70-73). Spend time hunting. Look for a shell that's rust free, make the mechanical stuff your project. Good luck.
 -
Welcome. The answer to your question is simple. Buy a better one. Nothing more expensive and time consuming to do than bodywork and rust repair. There are PLENTY of ZX's out there waiting for someone to love them. Let yours go to a better place, completing the cycle of life. Iron Ore -> Iron -> Steel -> Datsun -> Rust -> Iron oxide -> back to the earth.... That said, there is only two reasons you would restore the one you have. Either you have an emotional attachment to it, (and a money tree in the back yard), or you do your own work so labor is free. And you have a money tree in the back yard. Oh yeah, and tons of free time. Did I mention the need for a money tree?
-
Thanks Leon, glad to know he made it and won a distance award. Bad lighting or not, that thing is gorgeous. Effort rewarded!
-
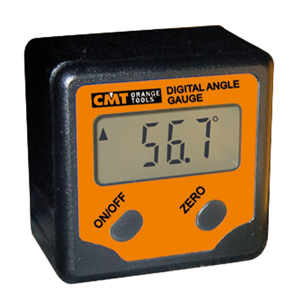
Here is another great angle measuring tool. Its small enough that it may fit above a Z drive shaft, and even better, because of its small size and square box shape, you can put it on the bottom of the shaft. There seem to be many varieties of this gauge available now. Because the car is likely not parked on a level surface,or when up on jack stands or a hoist. The angles you read may not be actual drive shaft/Trans or Dshaft/Diff angles. Measure the engine/trans angle by measuring the angle at the valve cover. Then measure the driveshaft angle and subtract the two. keep up/downhill straight. The diff is more problematic. No flat top or bottom to use as a reference. Have to take the drive shaft off and and measure the flange face angle, then subtract 90. Use the same dshaft angle minus diff angle thing to get that angle. The trick is to get them both (trans/shaft and shaft/diff) the same, and both between 1 and 3 degrees. You need some angle to make the u-joint move all the bearings and stay lubed, but not more than 3 deg to minimize vibration. Also the trans centerline and diff center lines must be parallel. This is pretty hard wired if you're using the stock mounts, but worn engine and or trans mounts will contribute their own error.

-
Loved to have been there. Will go one day. Its nice to remember and appreciate that there are many more lovely Japanese tin cans out there than just Z's. Did you see a crazy Canadian from Saskatoon there with a dark green '75 280? He was having trouble on the road between here and there, and haven't heard from him since. Hopefully no news is good news.
-
Pretty darn nice! I'm encouraged to see your results using the Duplicolor products. Did you have problem finding it in stock locally? I believe you mentioned having to wait for some of it to arrive. Who did you order it from? I'm considering attempting some self-painting this winter on the next project. Your results are leading me to believe a "decent" DIY job is in fact possible.
-
"Better" is a term that everyone defines differently. I think you will have better luck finding other engine options that are popular for Z cars on this site. HybridZ That group is dedicated to making Z cars "better" than stock. Good luck with your improvements.
-
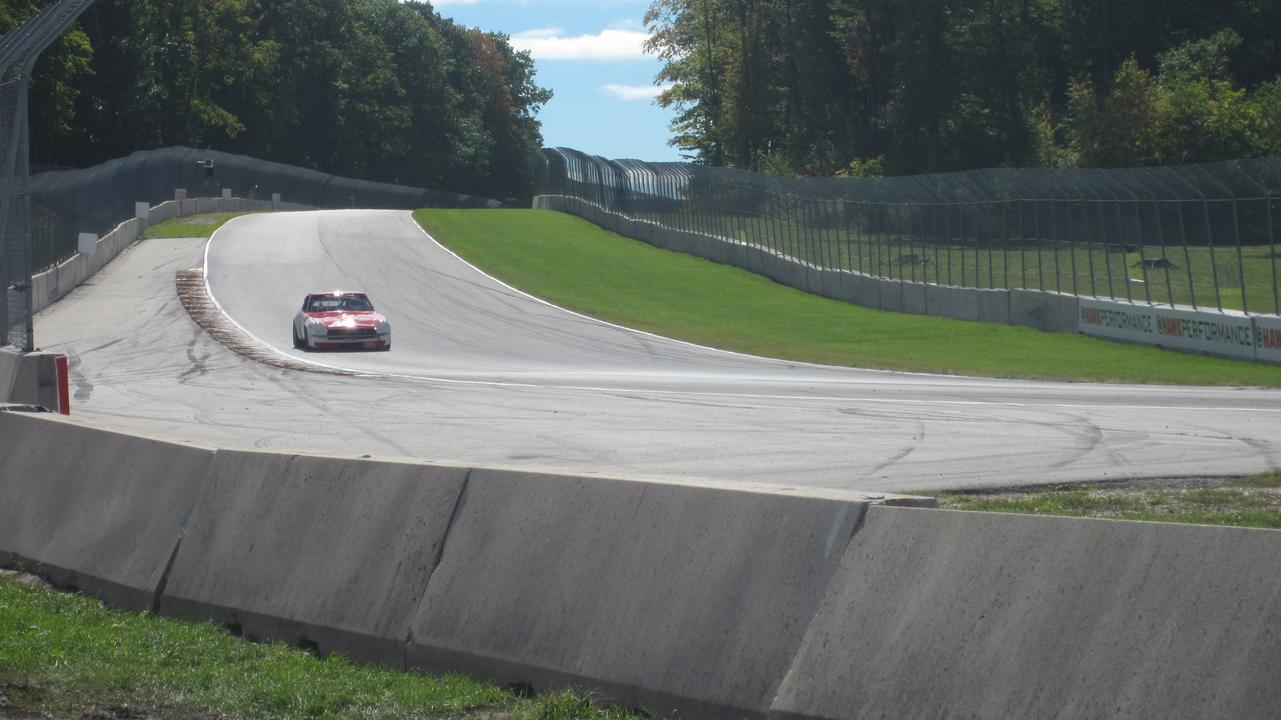
I uploaded a video of John passing by during the race on the home stretch. John Morton with #46 at SCCA 50 Run offs Sept 2013 - YouTube
-
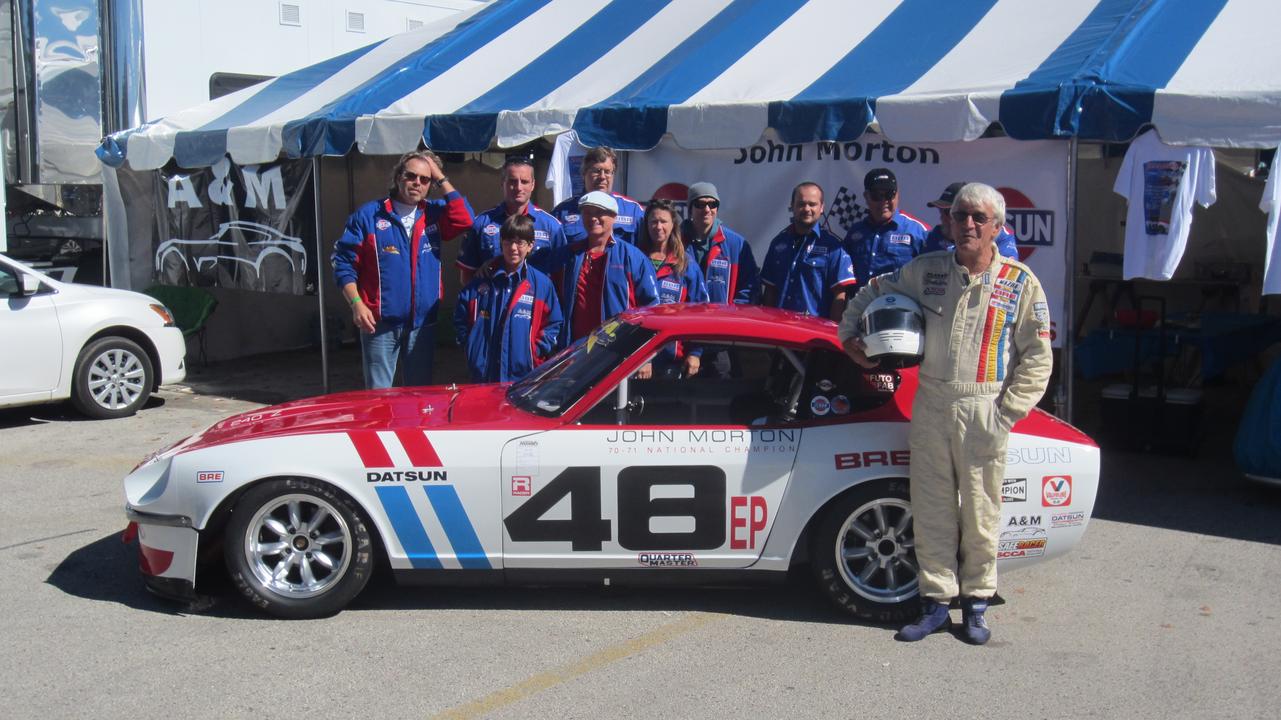
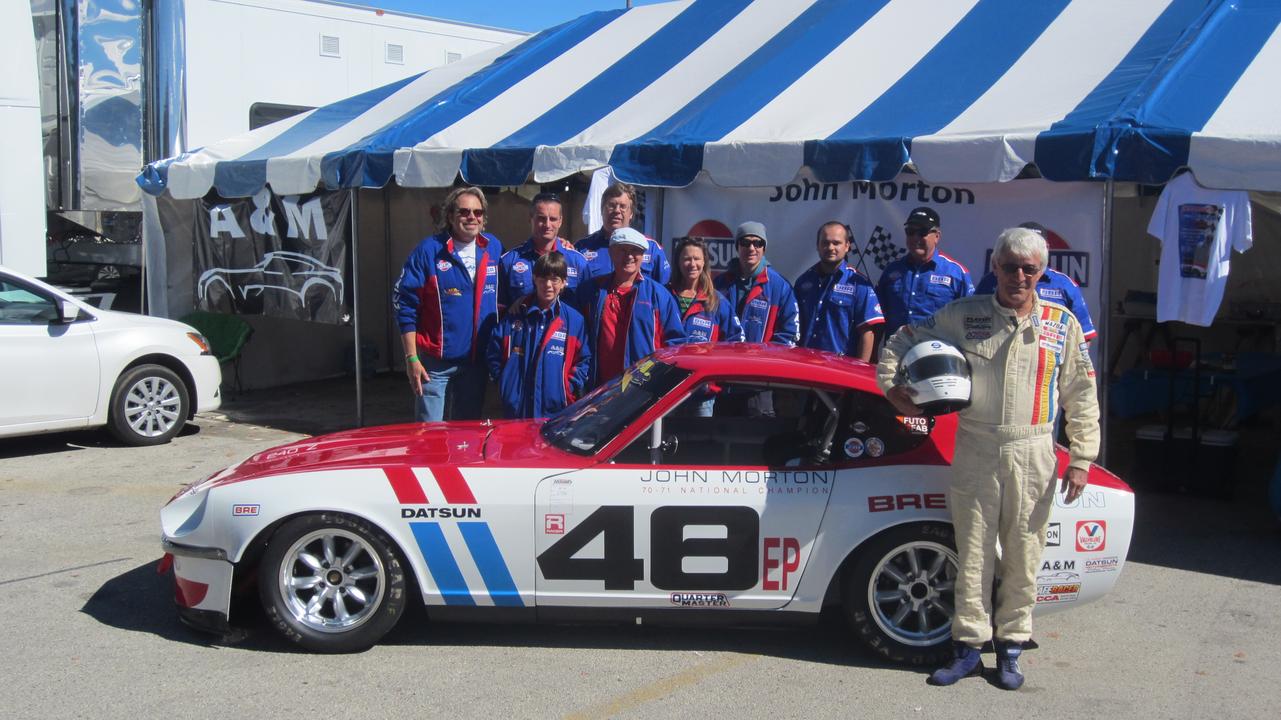
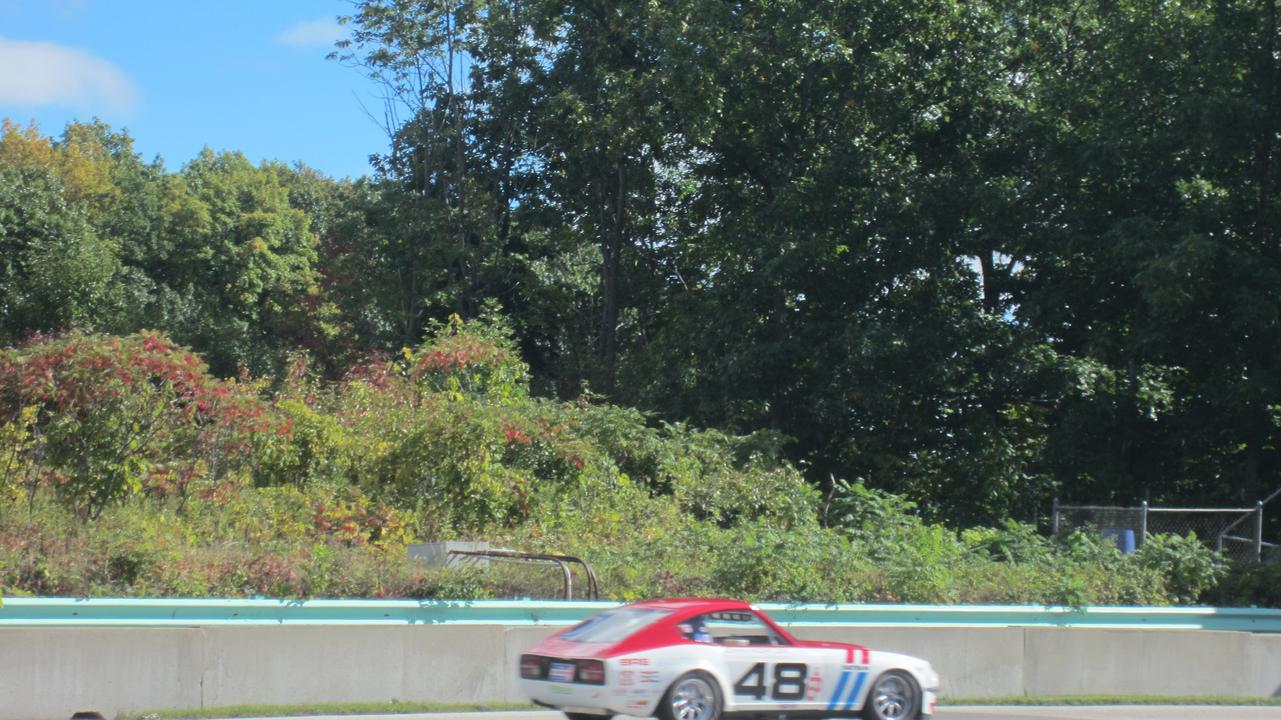
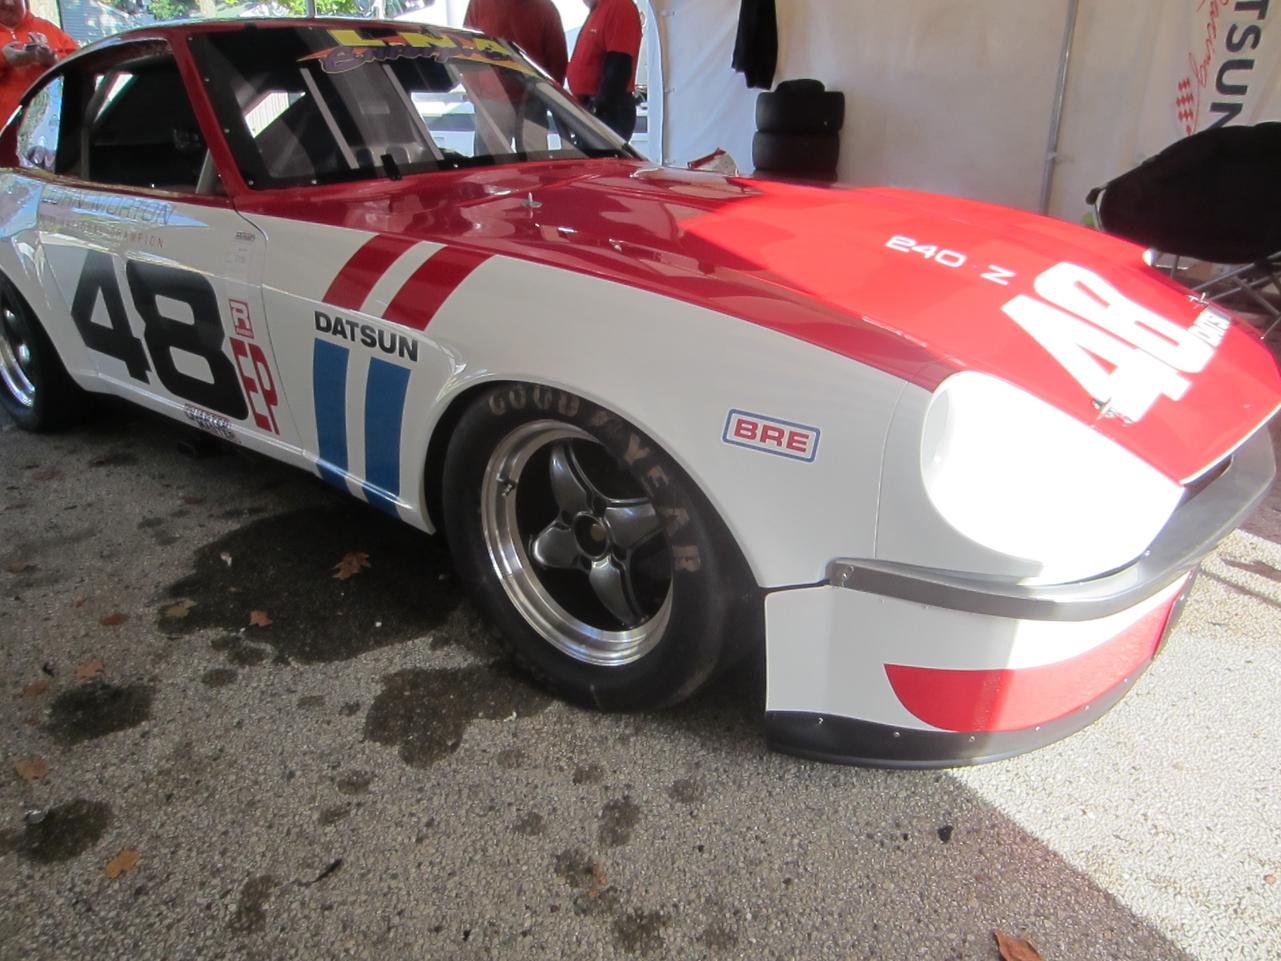
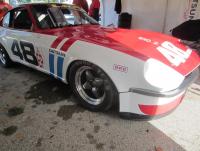
Not technically an old racing photo, but its full of old racers... Last weekend at Road America SCCA run-offs with John Morton and the Bonk Brothers replica.

-
This is my favorite reference: http://www.roadranger.com/ecm/idcplg?IdcService=GET_FILE&dID=287236 The other trick I like is putting a laser pointer into the end of the transmisson so that you know EXACTLY where it points on the plane of the diff flange. Or visa versa. Of course the trick is building a "thing" that slips on the trans splines and supports the laser point in its center... Let google be your friend.
-
It was an electrical short somewhere. Car quit dead in a heart beat. Fusible links blew, and the starter circuit is weak. He has hard wired the coil and he's on the way again. He's traveling via Vegas, I15 all the way. Last i heard he was going alright. I'll let everyone know if I hear more about his location. Thanks.
-
I have a buddy Canadian stuck on his way to JCCS in LA with a dead 75 280. Is there anyone able to provide local support? Call or txt Ken one 306 three four one 42 33 if you can help him out. He's a long way from home with electrical problems and he may need some Z specific help. Appreciate anything you do for him. Thanks!
-
When Greg was initially on the podium humbly accepting 2nd place (again), I couldn't believe the grace with which he accepted that fate. Total class act. Sam his builder was with me and was steaming about the bumping and clearly wanted to protest. Didn't hear until later that the decision had gone Greg's way. Very very glad it turned out as it should have been. Congrats again Greg!
-
Greg did an outstanding job. The lead changed hands several times between he and Matt. There is some controversy how ever as Matt did a fair bit of bump and grind and got ahead of Greg on the last lap via a bit of contact. There was talk of a challenge at the end. Matt won a couple of additional awards based on the win here so a successful challenge might be quite a blow... It still makes me proud to know that Greg and that dang 260 can run with these "modern" fellas and do that well. Like we need convincing! Way to go Greg!! John did the best he could coming in 10th with a largely un-tested and un-shook-out Z. Got faster every lap, and claims it could be much faster with some work. We are happy he and the car came back unscathed. There is always next year!!!


-
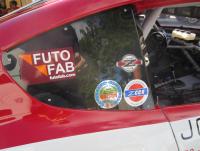
The white poster on the hatch glass is all the names that appear on the hatch stickers. Each of the contributors present will sign the poster for John. There is a Go-Pro in the car that will record the race from that vantage point. The race is being recorded by the media, so there should be video at some point. I'll record what I can from the stands, and any pre-race stuff I grab in the paddock. Also check racer.com for some more coverage. SCCA - Racer.com There are links at the end of the article about John with some links to SCCA live coverage.
-
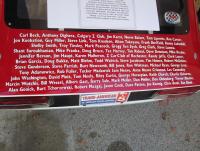
Spent the day at Road America with the Bonk team and John Morton. I'm still floating around, haven't come back to earth yet. I've added a few teaser pictures of the car, and John. I'll upload more tomorrow when the race is done and the dust has settled. The effort that went into constructing this car in the time available is nothing short of awe inspiring. Sam Neave and the Bonk team deserve our gratitude for a job well done. Also thanks from the Bonks to all the financial contributors, each named on the hatch of the car. You all made a difference.

-
I'll try to keep some feed back coming and hopefully I'll get some pictures to post. We will be at the track all weekend. Going to be a blast.
-
Wow. That's a must-hear. Great stuff.
-
Exedy is the OEM supplier. Good stuff. For casual street use, just about any of them are fine. Don't buy the cheapest... Just saying. And HI! Just realized you're a newbie. Welcome to the site. Ton's of information in the archives including clutch reviews and news.
-
I saw a movie once with an airplane in it that had a Z in its name!
-
Right Tomo, can't hardly wait to get there and see the goings on. You coming? What ever happens, it will all be part of history soon enough, and the stuff of endless discussions and stories for years to come. Anybody else planning on going for the weekend or just for this one race on Sunday? See you-all there. Seems like Wisconson has a few good driving roads.
-
Sorry to hear this, it is a royal pain. I'de be very suspicious of the crank surface. A speedy seal is a good thing as Steve indicates. No reason for that seal to leak unless something is chewing it up.
-
Great news about the packing. Maybe there was a fly on the wall listening to the above "comments"...
-
Glad to hear we're more help than hinderance. Blue with the fuse and noise reduction coil in-line is +12 power to turn it on, Red/blue is dash light illumination, remaining grey and grey/Black(?) are speaker - and + respectively. Radio gets ground through its metal chassis.
-
No cups in those holes. If these same clips worked before in the old panels, then the thickness of the backing on the new ones must be quite a bit more than before, preventing them from seating all the way. Bang them harder....