zKars
 Subscriber
-
Posts
3,742 -
Joined
-
Last visited
-
Days Won
107
Content Type
Profiles
Knowledge Base
Zcar Wiki
Forums
Gallery
Events
Downloads
Store
Blogs
Collections
Classifieds
Everything posted by zKars
-
Yes, if you give her a fish, she might indeed go away. For more than a weekend. Oh, sorry, you mean the OTHER opposite way, if YOU gave Her a fishing pole, then.... uh,... no, sorry, same result....
- 25 replies
-
- 1
-

-
- clutch fluid
- fluid specs
- (and 2 more)
-
"Give a man a fish, and he eats for a day. Give a man a fishing pole and his wife will never see him again on weekends...."
- 25 replies
-
- 1
-
-
- clutch fluid
- fluid specs
- (and 2 more)
-
the bottom nylon bushings are all the same. There is a thread about a door hinge bushing that can be used in place of the plastic stockers. Maybe its on Blue's tech tips... Yup, http://atlanticz.ca/zclub/techtips/shifterbushing/index.html
-
Thanks for keeping the focus on this. Its coming together, please help make it a success if you can.
-

mechanical throttle linkage, what's the problem ?
zKars replied to bartsscooterservice's topic in Open Discussions
The common fix involves reducing the included angle of the two bell crank arms from ~90deg to ~50deg or so. There is a thread on here somewhere about this. Just cut the mounting tube in half, rotate and re-weld. Change length of the upper rod end to match. You could also convert to cable throttle, the best solution in my mind. Depends on whether original look or vastly improved functionality is your goal. -
Don't make fun of it! Hasn't it had a hard enough life already? Imagine how it feels spending all that time in oklahoma? I'm sure there's room for an nice L6 in there somewhere...
-
Skewed front frame rails on my Z (in enginebay) =( Swap or straighten?
zKars replied to Tomzern's topic in Body & Paint
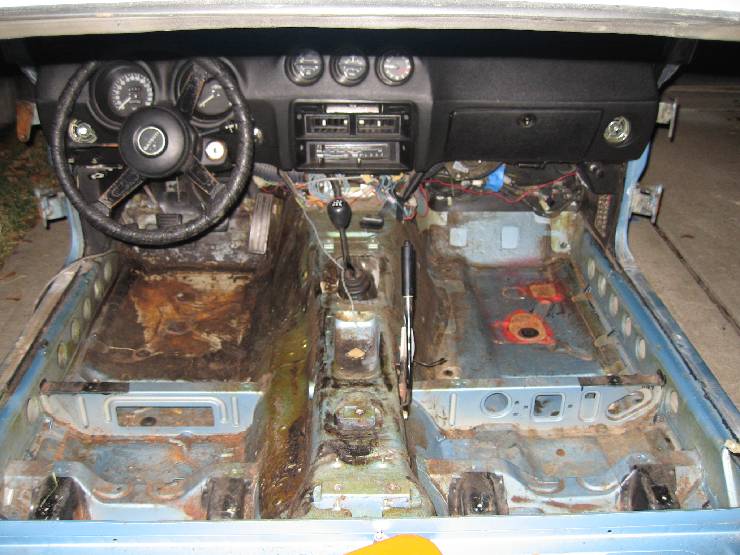
Here is a great picture of the front floor areas and why you need to remove the tar mat for inspection. Passenger side has the tar mat still in place, Looks lovely. Drivers side with mat removed. shows all the nasty rust underneath. Any arguments now? Thanks and credits to user 280z1975 from thread http://www.classiczcars.com/forums/help-me/20051-floor-pans-tar-removal-question-other-stuff.html In thread he has an album on his website of more pictures of the total removal and what he found underneath.
-
Skewed front frame rails on my Z (in enginebay) =( Swap or straighten?
zKars replied to Tomzern's topic in Body & Paint
Ok, me first. This link, Kelly W's Z Restoration gives the most complete and clear pictures I've ever seen of what the Z uni-body structure looks like, both with rust problems, and after extensive restoration Ideally, I'de like to have some of these pictures in this forum on this thread, not referenced via the link to Carl's server page, but it's likely stable for a while, right Carl? Would you mind if I took select pictures from that set to post here? So here is the reference. If you ever wondered what is supposed to look like in that corner, or that frame rail, here it is. -
Skewed front frame rails on my Z (in enginebay) =( Swap or straighten?
zKars replied to Tomzern's topic in Body & Paint
Tom-Anders I am very sorry to see this situation you are in. This damage must be dealt with before the car is driven. The solutions to this are not simple or in-expensive I'm afraid. Blue's links to the frame restoration accurately indicate what you are likely going to have to deal with. This entire situation repeats itself daily it seems. I really wish there was some sort of way to guide potential Z buyers, any old car buyer really, in determining the TRUE rust and structure condition there cars are before they purchase them. So, toward that end, and in no way being disrespectful to your situation, let us all learn from it at least, by pointing out some obvious things that should have been caught before the car left North America. 1. That damn thick tar undercoating that seems to be on so many of these, and years of collected dirt grease, leaves, rat sheet, and, ALL of the sound deadening tar mat sheets from the inside of the floor pans MUST be removed from all critical areas to properly inspect the rust and structural condition. What looks smooth and undisturbed when covered with this stuff CANNOT be evaluated for compentency without its total (95%) removal. Those famous words I've heard so often just GRATE on my brain when I hear them. "I picked up the carpets and didn't see any rust! Looked great!!!" Then you start chipping off the tar sheets in the foot well and your hammer goes straight thru to clean air underneath. AARRRGGGG... 2. The first picture that shows the brake line going under the frame rail. Look at that. Carefully. That's green FIBERGLASS patching over that frame rail. Do I have to mention that this just SCREAMS that a hole in a structural member was filled with that crap, and not even in a way that's smooth and hidden. There is no fibreglass repair on a structural member that is adequate. Lessons: 1. There is no such thing as too many pictures. Get the car on a hoist and have the seller photograph EVERYTHING. If you are there, LOOK at everything with an mind set of "does that look right"? 2. Get schooled in what it SHOULD look like down there. You can't spot problems unless you know what its supposed to look like. Are the frame rails supposed to be straight? (yes). Do the two frame rails run parallel? (yes) Are there any places where they change size (yes, they neck down near the rad support). Are dents in the bottom of the frame rails under the floor normal? (yes and no.... depends on magnitude) 3. What specific areas MUST I look before all others for rust issues. 4. Remove undercoating and floor pan sound deadening tar mat from all areas noted in 3. Even if its hard to do, even if the seller protests. If you can't walk away. 5. Any rust showing on the outside hides 10 times more on the inside, miminum. 6. Doing Body work and rust repair is 100 times more expensive, time consuming and frustrating (via endless project delays and funding headaches) than the cumlative effort to hunt down a better chassis to start with. I didn't fill in the answers to most of thoise questions, because, EVERYBODY, your assignment is to FILL this thread with pictures and stories of YOUR experiences with buying Z's that "looked practically rust free" but turned into nightmares once the cancer and resulting structural damage within was revealed. We need to build a single thread that we can point everyone to when they ask the never ending question "what should I look for when buying a Z?" Come on, contribute!! -
The first set are 15x6 "swaztika's" from an 82 or 83 ZX turbo. The second set are the commonly found "D-slot" alloy mags (14 x 6 ?) on 195/75 -14's, put on by dealers to boost profits. Several manufacturers are possible, look at the back to see if there are markings. In restored condition, both are sought after and do indeed seem to be ~$200 ish a set. Cost of professional restoration of these to this price level is typically more than $200, unless you spend many hours doing it by hand yourself. Put them up on the classifieds and start with $200 then drop the price every few days until you find out what they are worth. Its called market research.
-
Steve is correct, 78 had no ballast and no provision to actually use it "no ballast in crank, but ballast when run" configuration, but thats ok. It just means you won't get the little boost in spark energy while starting. First question to ask, did you get a new mallory or other type of coil? If you have the stock coil, then don't worry about the ballast resistor. Its not designed to run with one. If you do have a new coil, and its instructions specifically call for a ballast resistor, just put the ballast resistor in series with the wire that goes to the + side of the coil. Said another way, connect the wire that now goes to the + side if the coil to the ballast resistor (either terminal) and make a new wire that connects the other ballast resistor terminal to the + side of the coil.
-
From unfortunate death to rebirth...2+2 content here!
zKars replied to Jay_Z's topic in Introductions and Rides
Whatever you're drinkin' Blue, pour it down the drain. Now..... -
Take the upper rad hose off and check for split in the hose and make sure the clamp is tight....
-
car died on way home. suspect fuel pump, need help
zKars replied to Wingsuit's topic in Carburetor Central
wingsuit: Congrats on the inspection (near) pass! Driving time coming real soon! No in-tank pump on any S30. All 240 had mechanical pump on the engines, some had addition electric pumps back by the tank. THat can next to yours is filter. The fuel pump quit for sure. Most likely problem is the +12 power to it has been lost. Blown fuse, bad connection most likely. Plugging wouldn't burn the pump up quickly. The red wire attached to it runs somewhere, likely to the ignitions switch of something that gets power when the key is in the ON position. Just trace the wire back and see where it goes, then it might be obvious why its not connected anymore (like loose or blown fuse in-line). First test, turn the key to the On position and test for +12v at the red wire on pump. There is no exposed wire at the pump, so trace it back where it goes until you can get a bare end to test. Or expose a tiny bit of the copper on the wire near the pump, or slice into with a razor blade to touch the core wires and touch you probe to the blade. Check the black ground wire too. It has to be connect to car metal somewhere or the - side of the battery. If you can't figure out what went wrong, just re-wire that red wire to a new spot. Find a fuse position that gets +12 when you turn the key on, and temporarily connect the red pump wire to the fuse connector by tucking a bare end under a fuse. Make this VERY temporary, it will get you running. Make sure you put that wire under the terminal closest to the CENTER of the fuse box or you may risk blowing that fuse with the extra pump current. Worst case, just connect it straight to the battery +12. Having the pump up front like that is a poor idea in general. Pumps are good pushers, not all are good suckers. The inlets tend to need to be below the bottom of the tank. That particular pump is a decent sucker, but it belongs in the back with the tank. Later! Good luck. Call to chat if you need to! -
Dang. Another part for the 3D printer gang....
-
Fiche has that these are only on 280. N4400 from 11/75 only, then N4600 from 08/77, ie 78 only. I've only ever seen them on a single '78 280. nissanparts.cc has a listing for 66882-N4600 $1.97 each. NissanParts.cc - Your #1 Source for OEM Parts and Accessories They are a Nissan dealer in Tecoma Washington that does on-line parts sales. I used to buy a few things from them a couple of years ago, quite good to deal with, I'de definitely start with Courtesy Nissan first though.
-
The restriction is a temp valve on the back of the intake manifold (SU 240) feb by the pipe that goes around the back of the head. It closes when the temp gets high enough. Its just to warm up the intake, not to continuously heat it once the car is up to temp. Its a bypass on the thermostat as well when cold. Everyone should read the hybridz thread about cooling these engines and what might happen when you loose important things like manifold bypass and other "un-necessary" stuff..
-
Welcome to Tabco has the listing
-
Ok, I give up. Nearly took the hot knife to it this weekend. That sorry, abused, incomplete, mass of sadness and has to go to a better place. Blue/Ross, 147 is all yours. At least you get first dibs on her. Anyone else interested, let me know! I'll just console myself in knowing I saved it from the hands of its past oppressors and gave it at least a chance at glory. Next....
-
The challenge is to save the oil pan gasket from getting ripped when you remove the front cover, AND when you put it back on. To help with the removal, start with a thin thin razor knife blade and get between the cover and oil pan gasket with a few passes to separate them. Take the 4 oil pan bolts out first that go into the front cover from the bottom to give you maximum space in there. Once you are replacing the cover, smooth and chamfer the two top edges and two bottom edges of the front cover (the outside inch or so) slightly so that it doesn't tear into either head or pan gasket as you slide it back together. Just put an extra small dab of sealant on those four edges to ensure a seal. Start with the bottom first, put it over the oil pan gasket 1/8" then start the top under the head. Use a bit of oil on the head gasket and oil pan gasket to make the cover slide and not grab. Go slow when replacing it, and watch what's happening. Good luck.
-
To temporarily block the heater core, just plug both engine hoses. This is the same as having the heater core turned off, so its safe. The common mistake is to connect (short circuit) the engine hose connections. This reduces head cooling, effectively making the hose the easiest way for the coolant to get from the back of the head to the rad, rather than making it go thru the head, ie removing heat! Its ok to do for a short period, like in an emergency on the road, but don't leave it like that. The heater valve is a restriction even when its wide open, so having the heater valve open is NOT the same as connecting the head connections with a hose.
-
Check two things. 1. The hazard switch itself. Take it apart and check the internal contacts for corrosion. Your lucky, yours is in the console and easy to get to. 2. There are a few connectors that are under the dash on the passenger side foot well, actually at the firewall, near the hear core. There are two or three in a bundle there. Pull the connectors apart and look at the pins inside. I've run into several of these things that have gotten wet from leaking heater cores that have turned the pins in those connectors to green meanies... 3. And of course the turn signal switch itself in steering column could need cleaning as well. Get the wiring diagram and do some tracing and see what is common with the problem. Good luck!
-
Another unsecured battery accident. You're lucky its not all up in smoke. Those things are heavy, bungee cords don't cut it. 78's have another pair of fusible links for the fuel injection on the battery side of the relay bracket right beside the battery. The fuel injection and fuel pump relays are under that bracket as well. Here's hoping all those fusible links did their job...
-
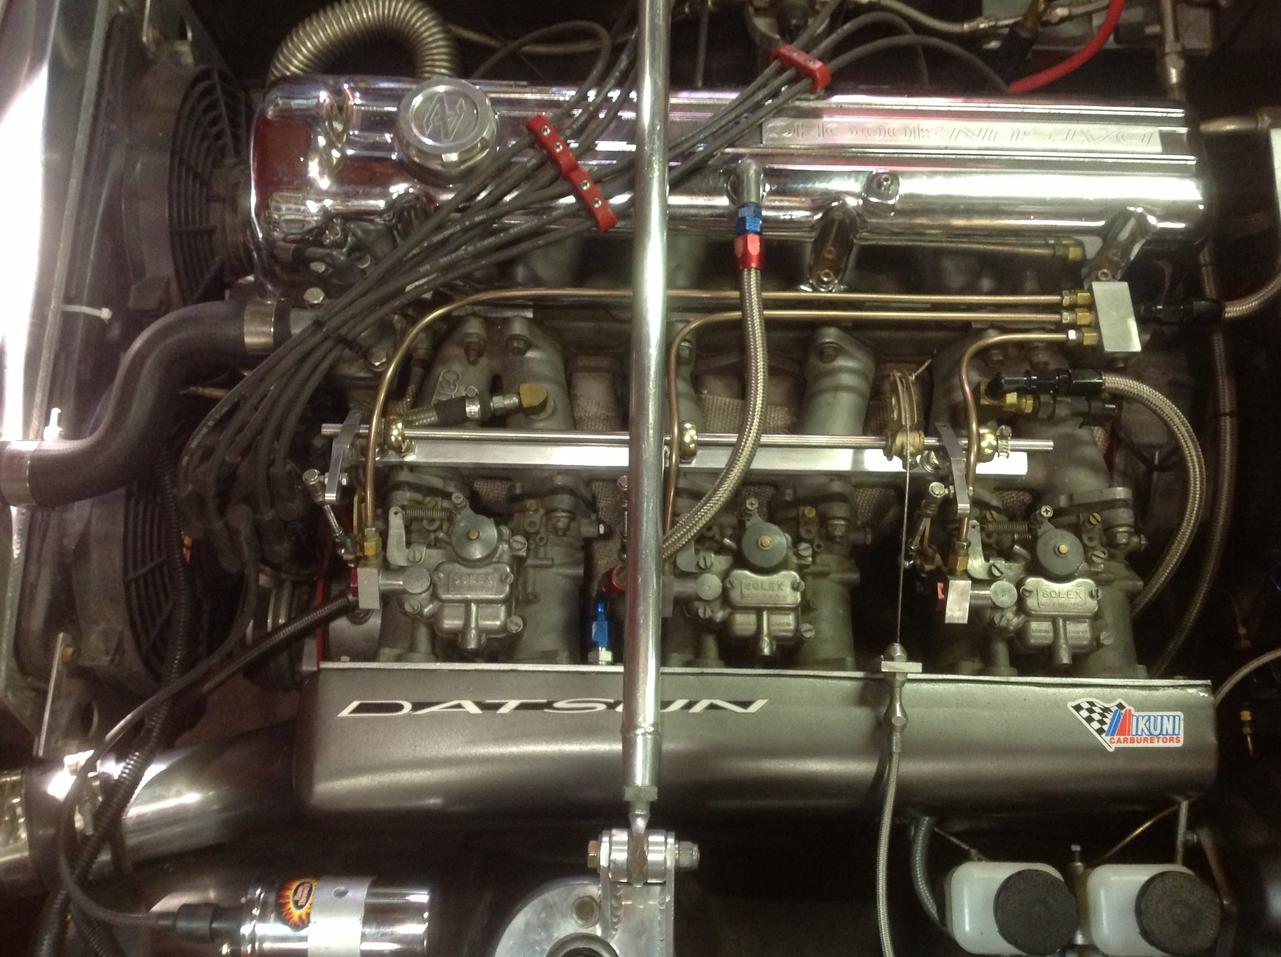
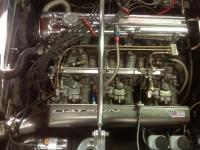
I'm going to be the devils advocate here. Why don't all the SU carb guys in the hotter climates complaining of similiar symptoms? Should be real common to all "float bowl" users.... I have this issue too with my Mikuni 44's The time it takes to get it to start is directly propotional to length of time it sits. Mechanical pump or electric. 24 hours, no wait time at all. 48 hours, maybe 15 sec of cranking, 7 days, maybe 40 seconds of cranking. I have a check valve too. How can something this pretty be so tempermental? Maybe that answers my own question....
-
I'm sure its possible. With just the right tools, the right light, with an extra pair of hands, with the spring still around the plunger shaft, with the right patience.... with enough beer... It's a balance between your, sorry, 'his', fear of the unknown and having a whole day and more patience than I have, to try to get that tensioner back where it belongs and the chain back on... Dawg7, since you're friend is so anxious to learn and do, I say take this as an opportunity for learning about what's under the front cover and how to properly mechanically time a L engine. enjoy!