zKars
 Subscriber
-
Joined
-
Last visited
Everything posted by zKars
-
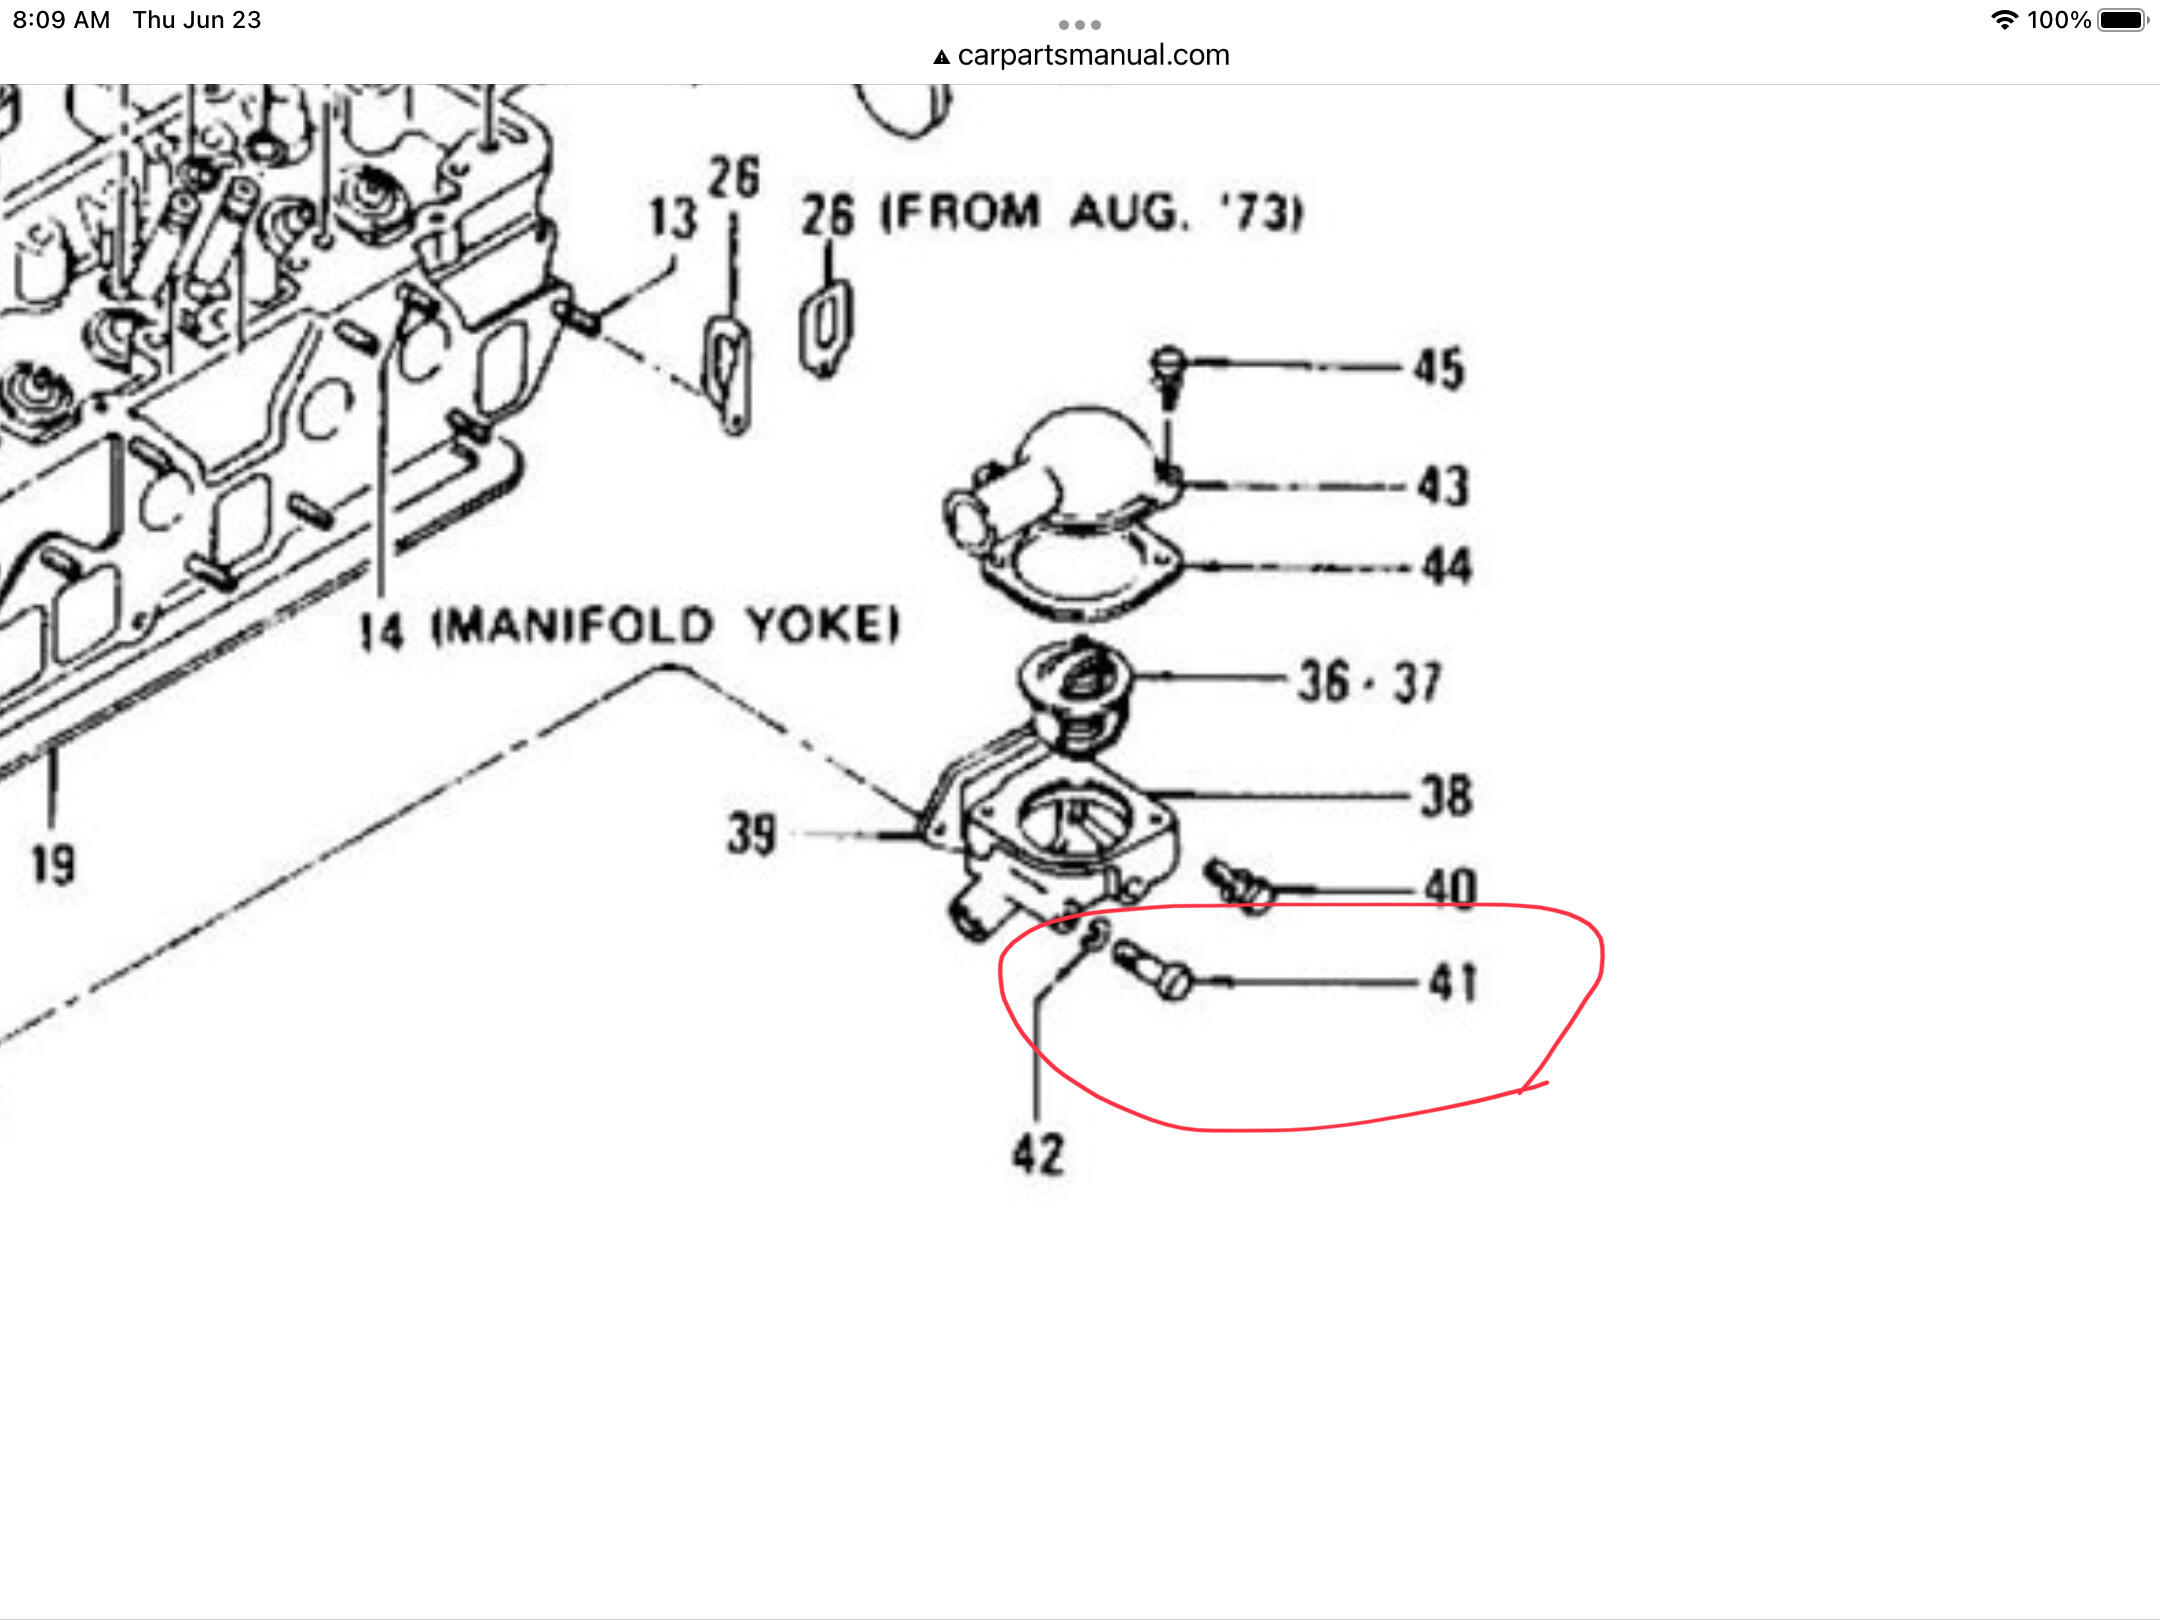
 Remember to be extra careful when selecting the longer of the two thermostat housing to head bolts! It penetrates the head and can come in contact with the timing chain guide. More than one unfortunate soul has broken the guide in the process. (Cough cough) The right length is under 70 mm IIRC, something like 63mm? The fiche part number is not a 08xxx that gives you the bolt spec as least not in the fiche I have : 11063-21001 #41 in this fiche, #38 in the fiche shown above.
-
-
We discussed the “missing dizzy spring” on a thread here some time ago. Long story short, it is by design, the spring is not missing. Concentrate on the sticking advance issue. I’m willing to bet one of your choke nozzles is stuck down even if the cable is trying to push it up. Give both a good finger shove upward under each carb. Secondly check fuel deliverability. Pressure and volume.
-
A wonderful and admirable project. My thoughts. ditch the ammeter, voltmeter only. No need to have lots of high current wire running around with no purpose. and go aftermarket gauges without doubt. Don’t forget the AFR gauge as well. Vendors make 3d printed adapters for speedhut gauges for S30’s. Join the world of Deutsch connectors and/or weatherpack. Relatively small investments and easy to crimp and make waterproof connections. Like the brake line world, once you invest in the tooling (good pair of crimpers), all wiring issues become simple to handle rather than a pain in the, well you know. Since you still need to interface to OEM components, vintageconnections.com has many of the stock pins and connector shells you need.
-
I believe this may be that which you seek. PM me to discuss discussion of asset transferancing. Yes I’ve been drinking again.

-
I think the holes in the thing are slightly offset so you can't get the bolts back in if you put it in wrong as well

-
Leon Cutajar in Australia sells kits with all the parts and does rebuilds if you send him your hinges. https://www.facebook.com/marketplace/item/651063596012440/
-
One more possibility. I chased a bad vibration for over a year until, almost as a last resort, i checked the spacers I was using on the front wheels. They were only 3/8 or a 1/4 thick, but they were SO BADLY MADE (cheap cast pot metal) that their thickness varied SO much that the wheel had enough run out to cause the vibration. Bought some 1/4 aluminum flat plate, drilled the damn holes myself and TOTALLY solved the steering wheel vibration. Bent or out of round rims can also cause the run out too. Just jack the car up at each wheel, rig up a pencil or something to “just touch” the rim near the edge and rotate the tire and watch the clearance to the pencil tip as the tire goes around. Should be dang near no variation, maybe 0.05 at most. A runout gauge is the best thing to use of course but just as a check you can almost hold your finger there and check.
-
https://www.thezstore.com/page/TZS/PROD/classic21j/24-5556
-
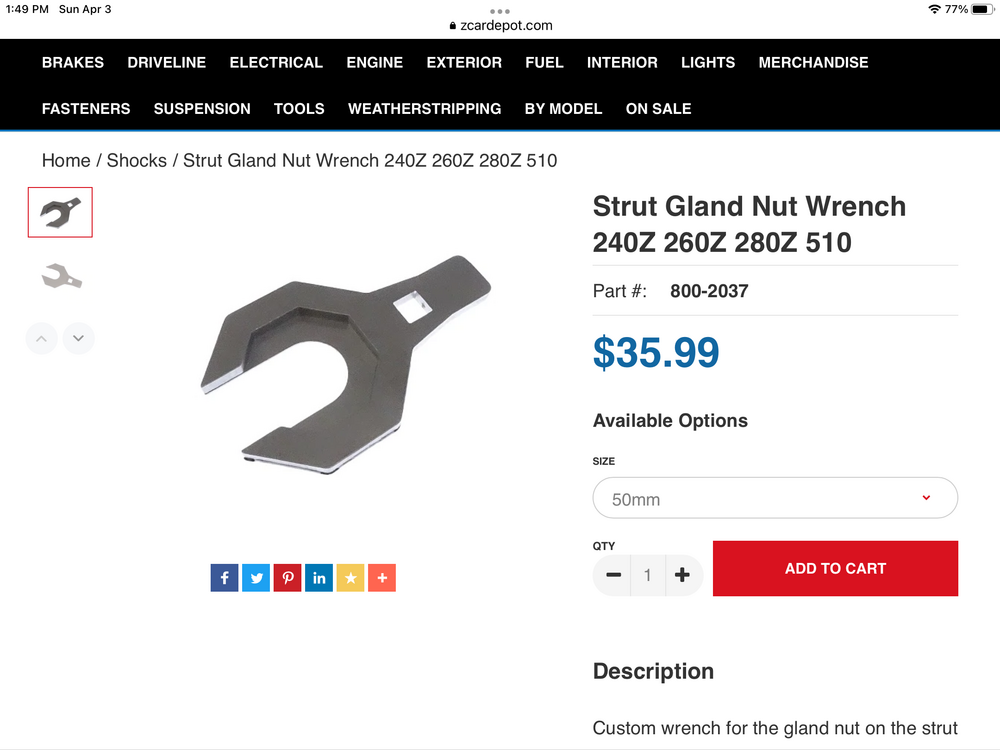
This thing works surprising well https://zcardepot.com/collections/shocks/products/strut-gland-nut-wrench-240z-260z-280z
-
You can, but I’ve never used anything but anti-seize on the threads and never ever seen an oil leak there.
-
The only one (other than the few on the front cover), that is open to the inside of the engine is the front long thermostat housing bolt. Racking my brain, but can’t think of any others. Must include the usual warning about that one thermostat housing bolt, make sure it does not protrude and come against the chain guide that is right there.
-
The rubber bit doesn’t sit in the slit like a grommet would, it is just a disk on the handle side to, as mentioned, sound dampen the action when you use the handle. I think it was actually felt-like or something.
-
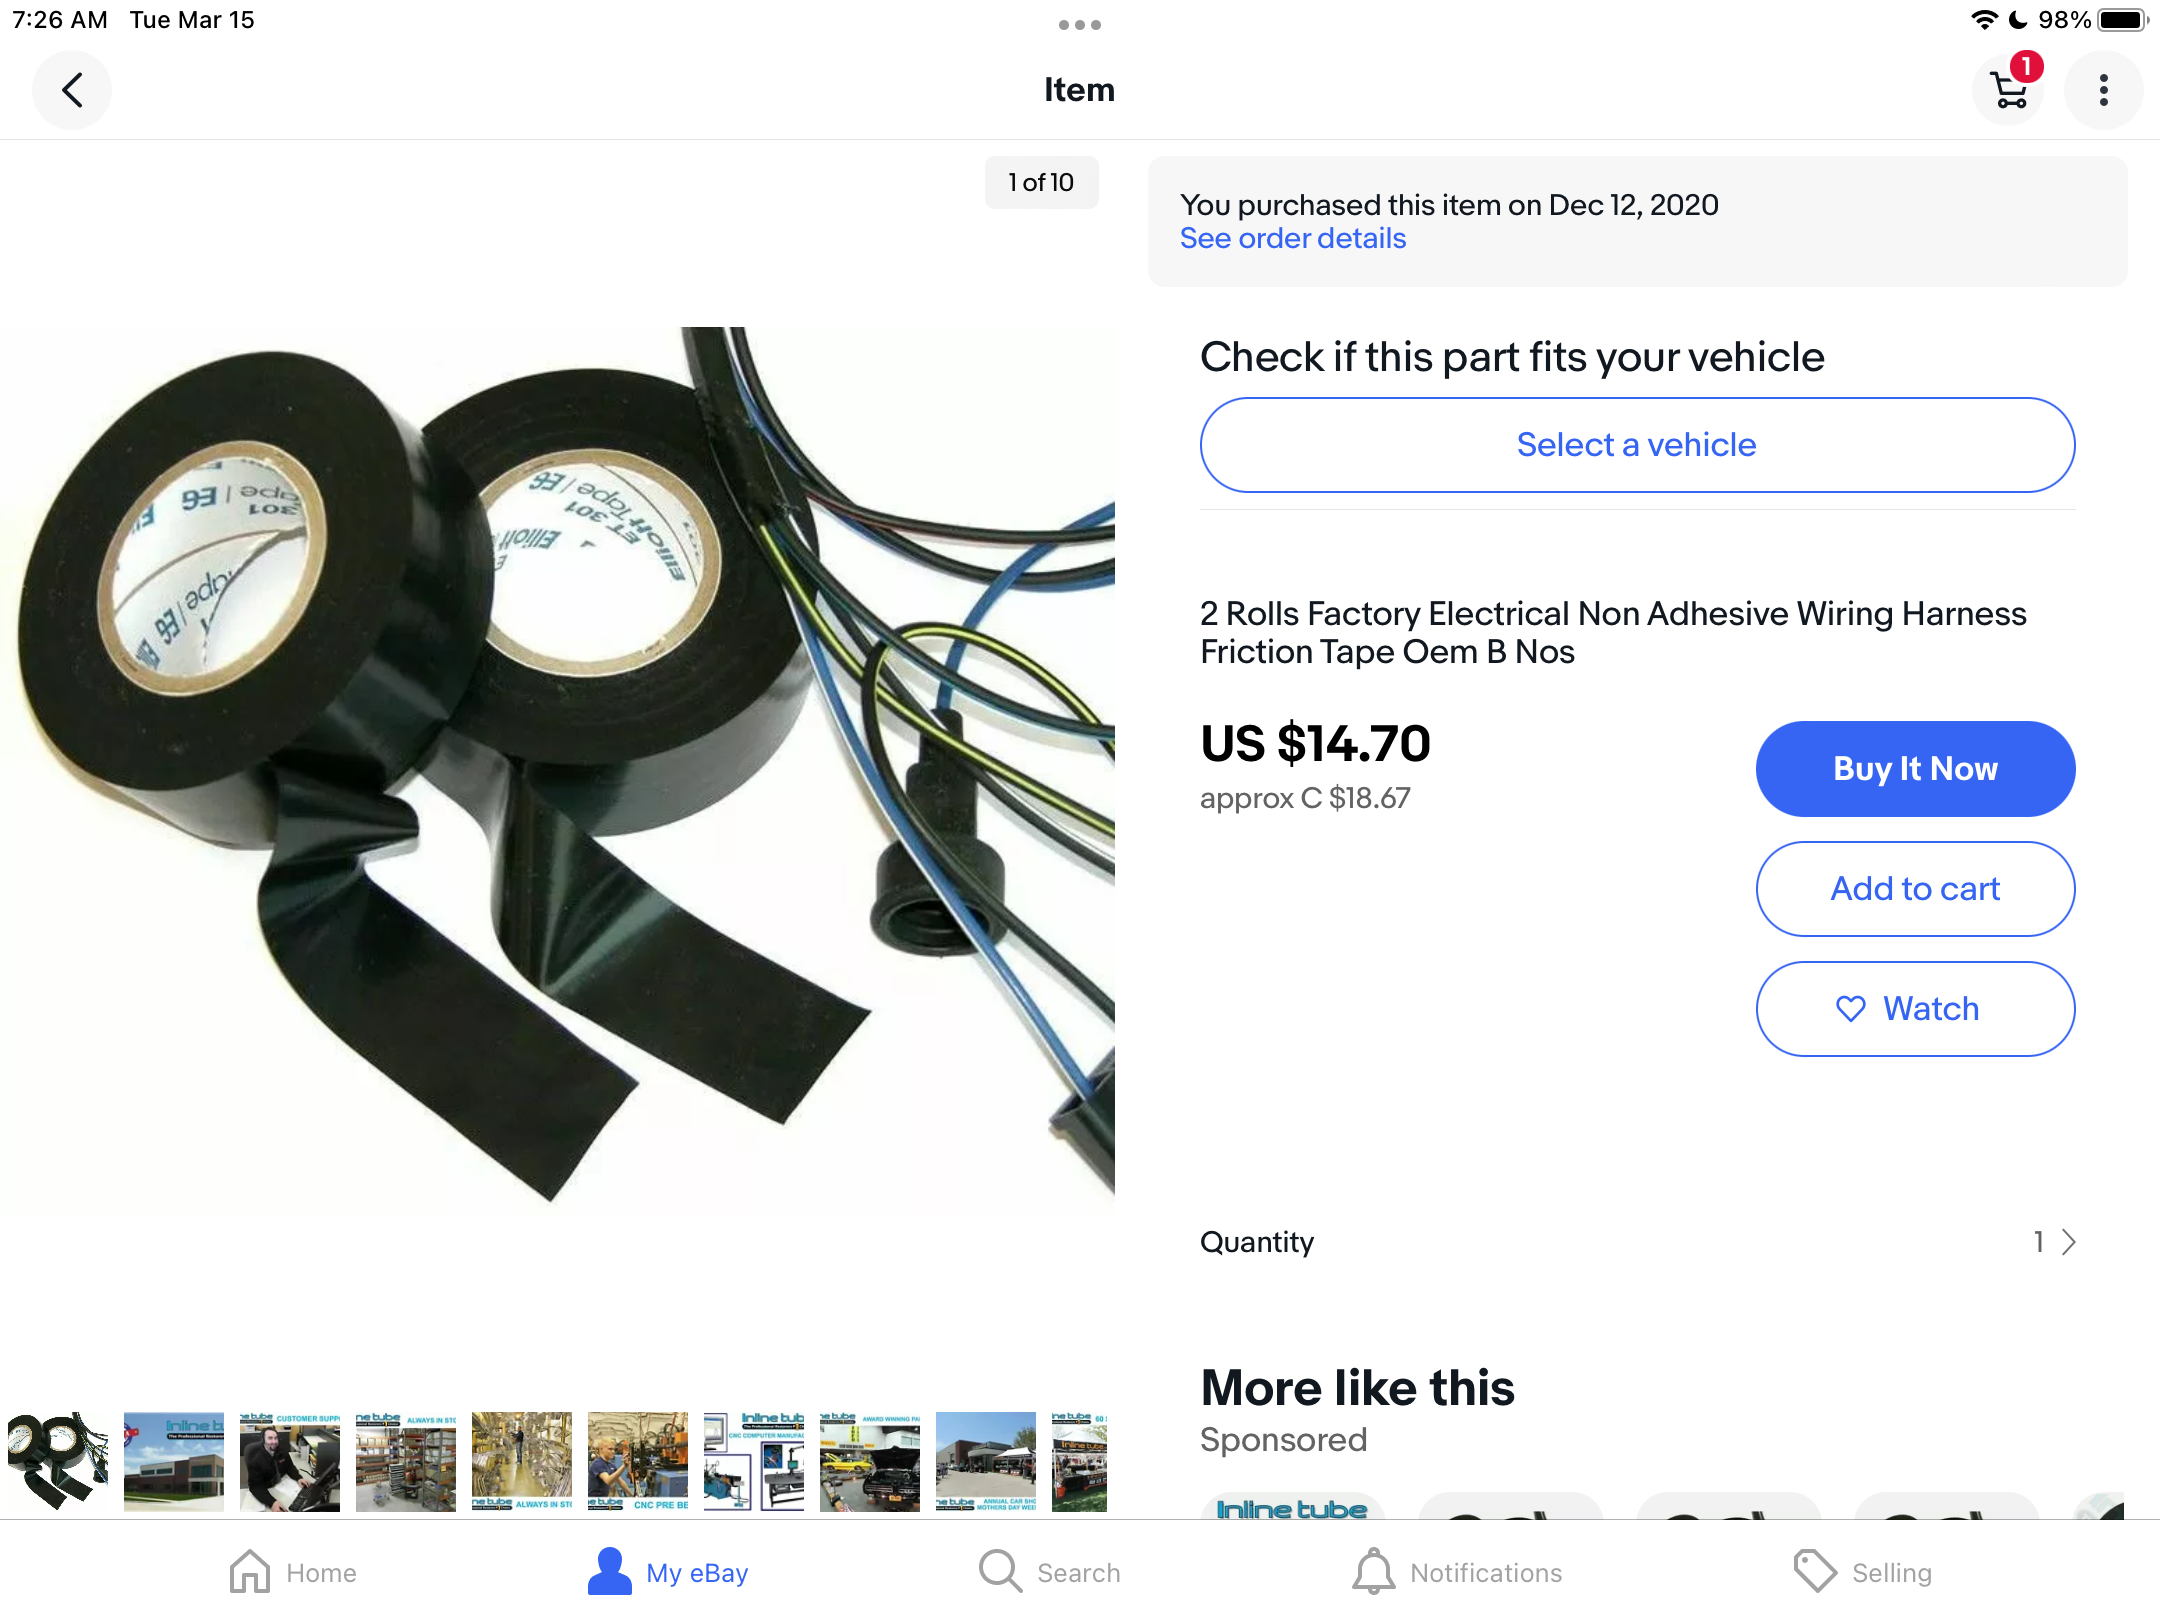
My favorite stuff is this. https://www.ebay.ca/itm/190823047174 It looks and feels like the stock harness tape. No sticky adhesive on the back.

-
-
Push and turn me thinks, or the whole black panel pops out THEN you can get to the hex nut behind
-
There’s that ‘thou shalt not covet wife and good’s’ thing, but I’m hoping it doesn’t cover car parts, cuz I have a real covet worked up over here! Great find! Congrats
-
Thank you for the kind offer but I was referring the missing cardboard strip that has been torn off of the lid of the box on the later model. Unless you have spare box lid……

-
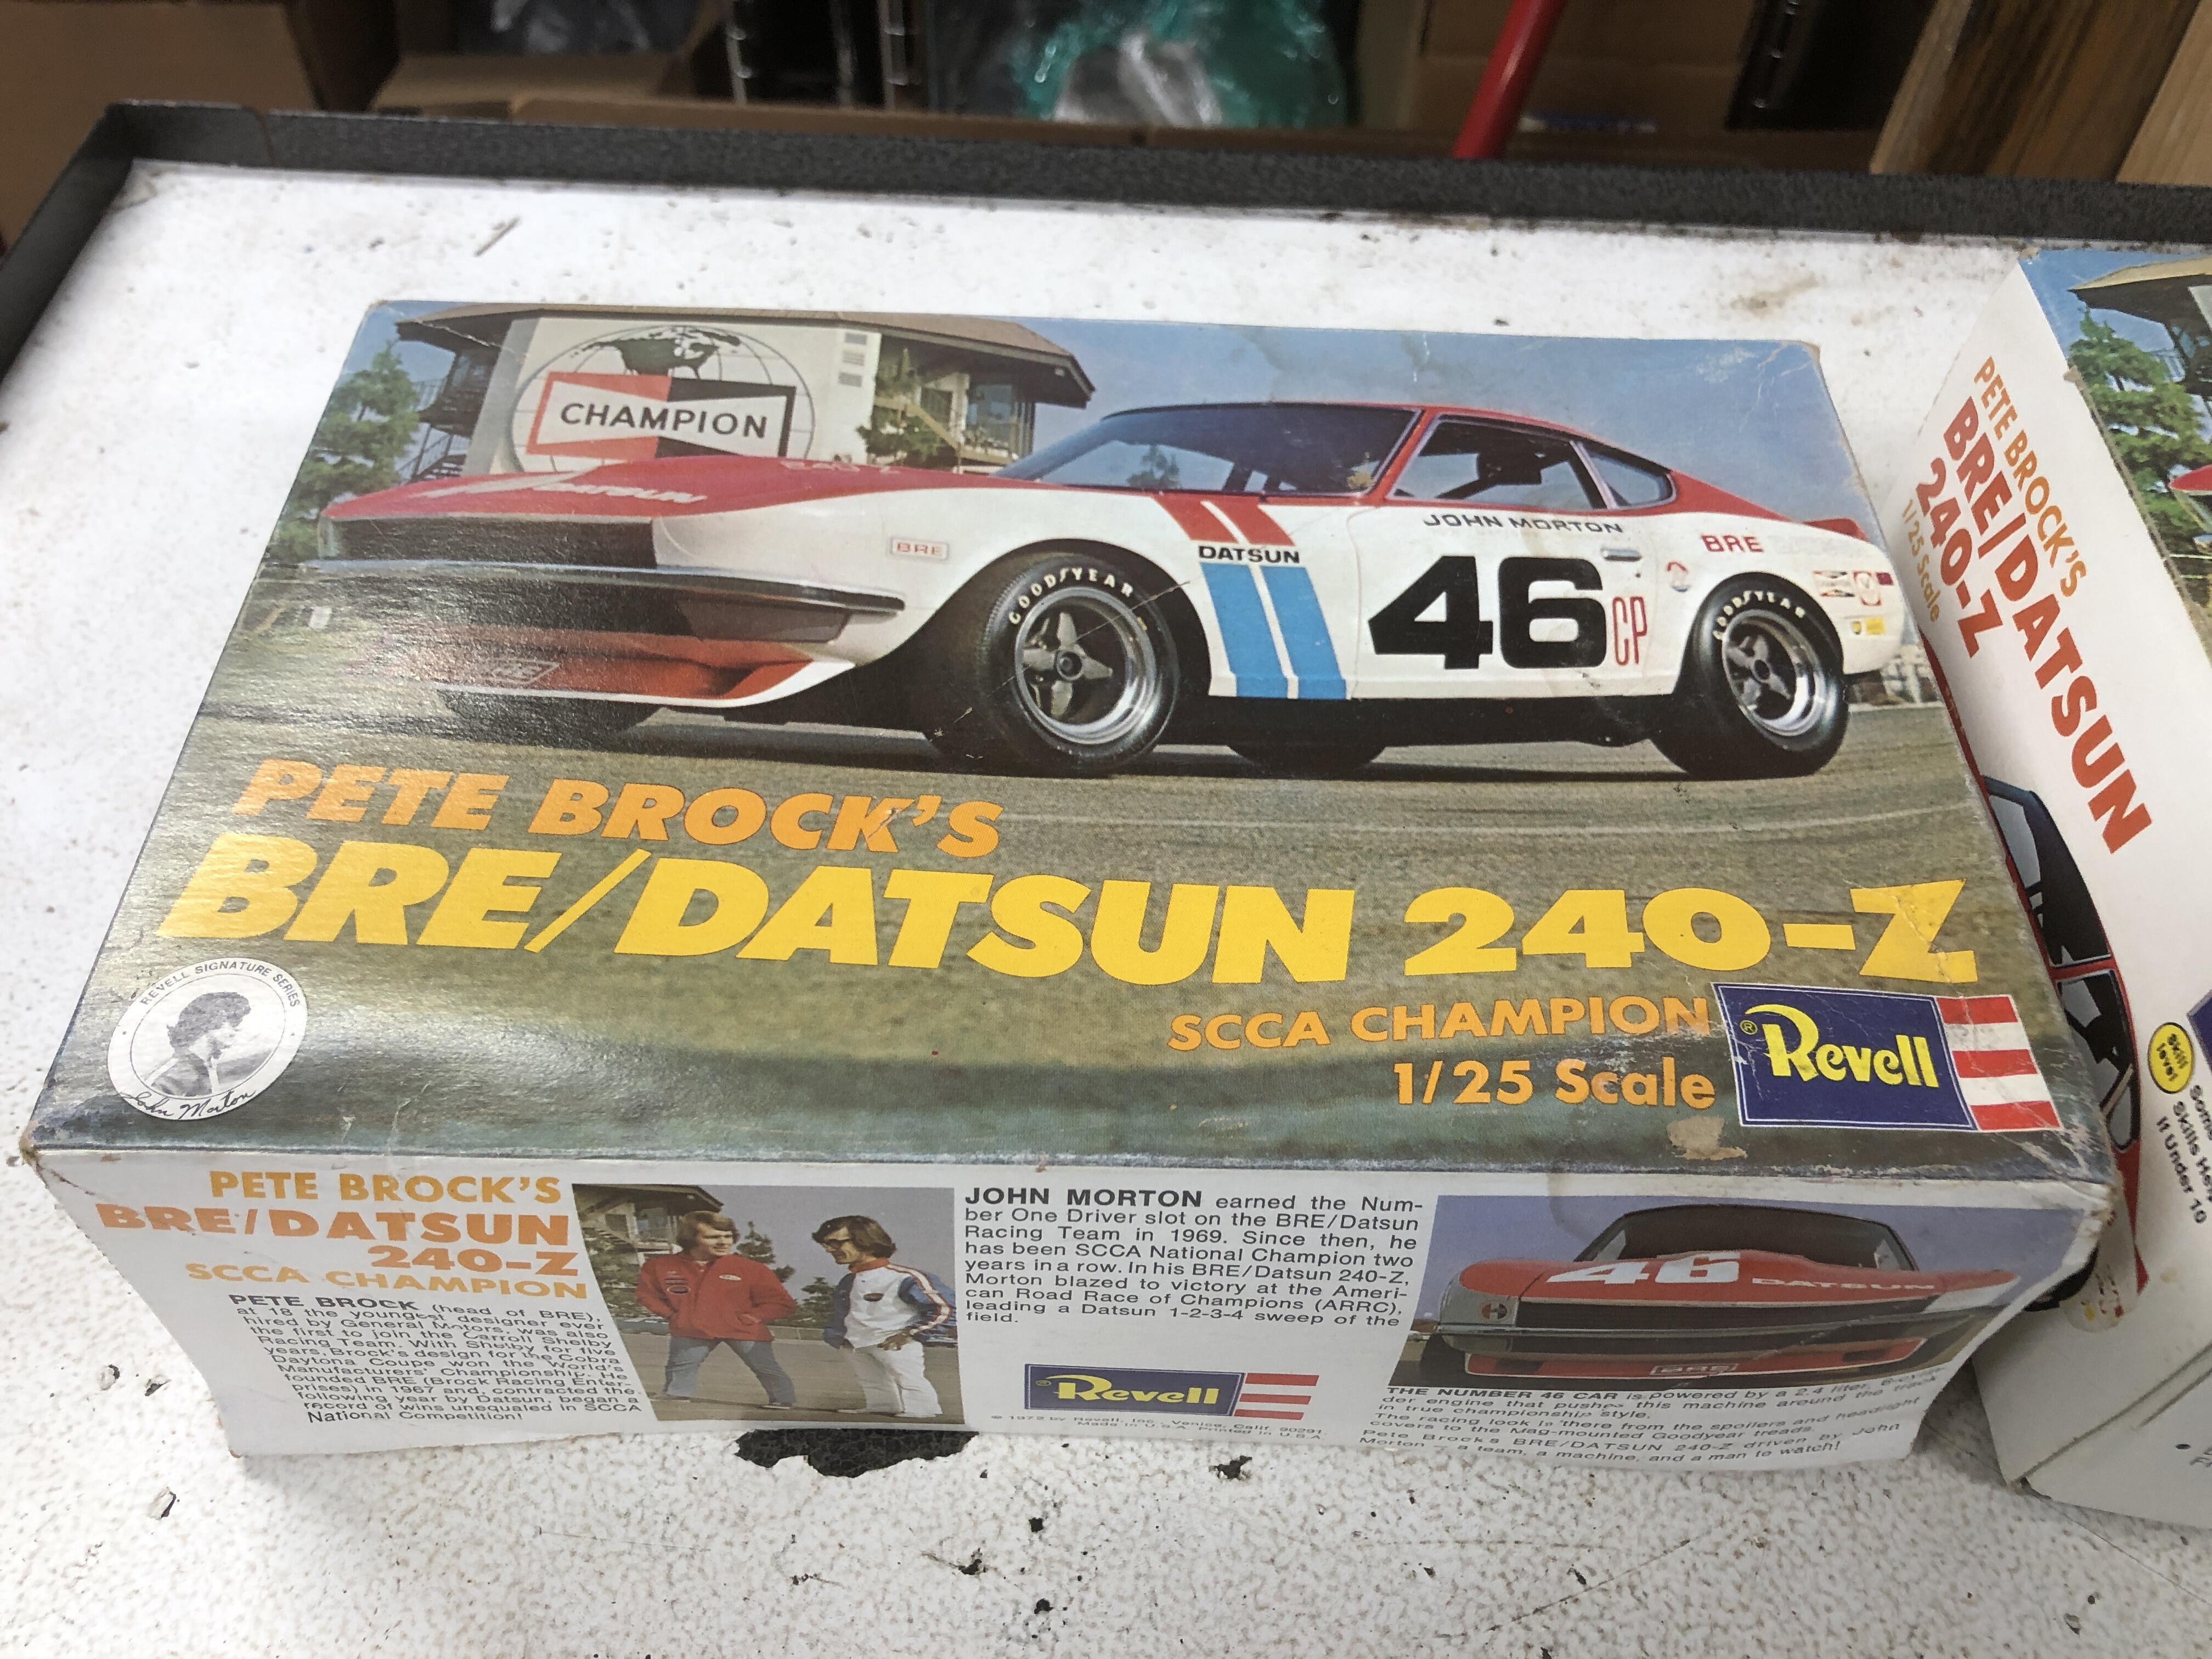
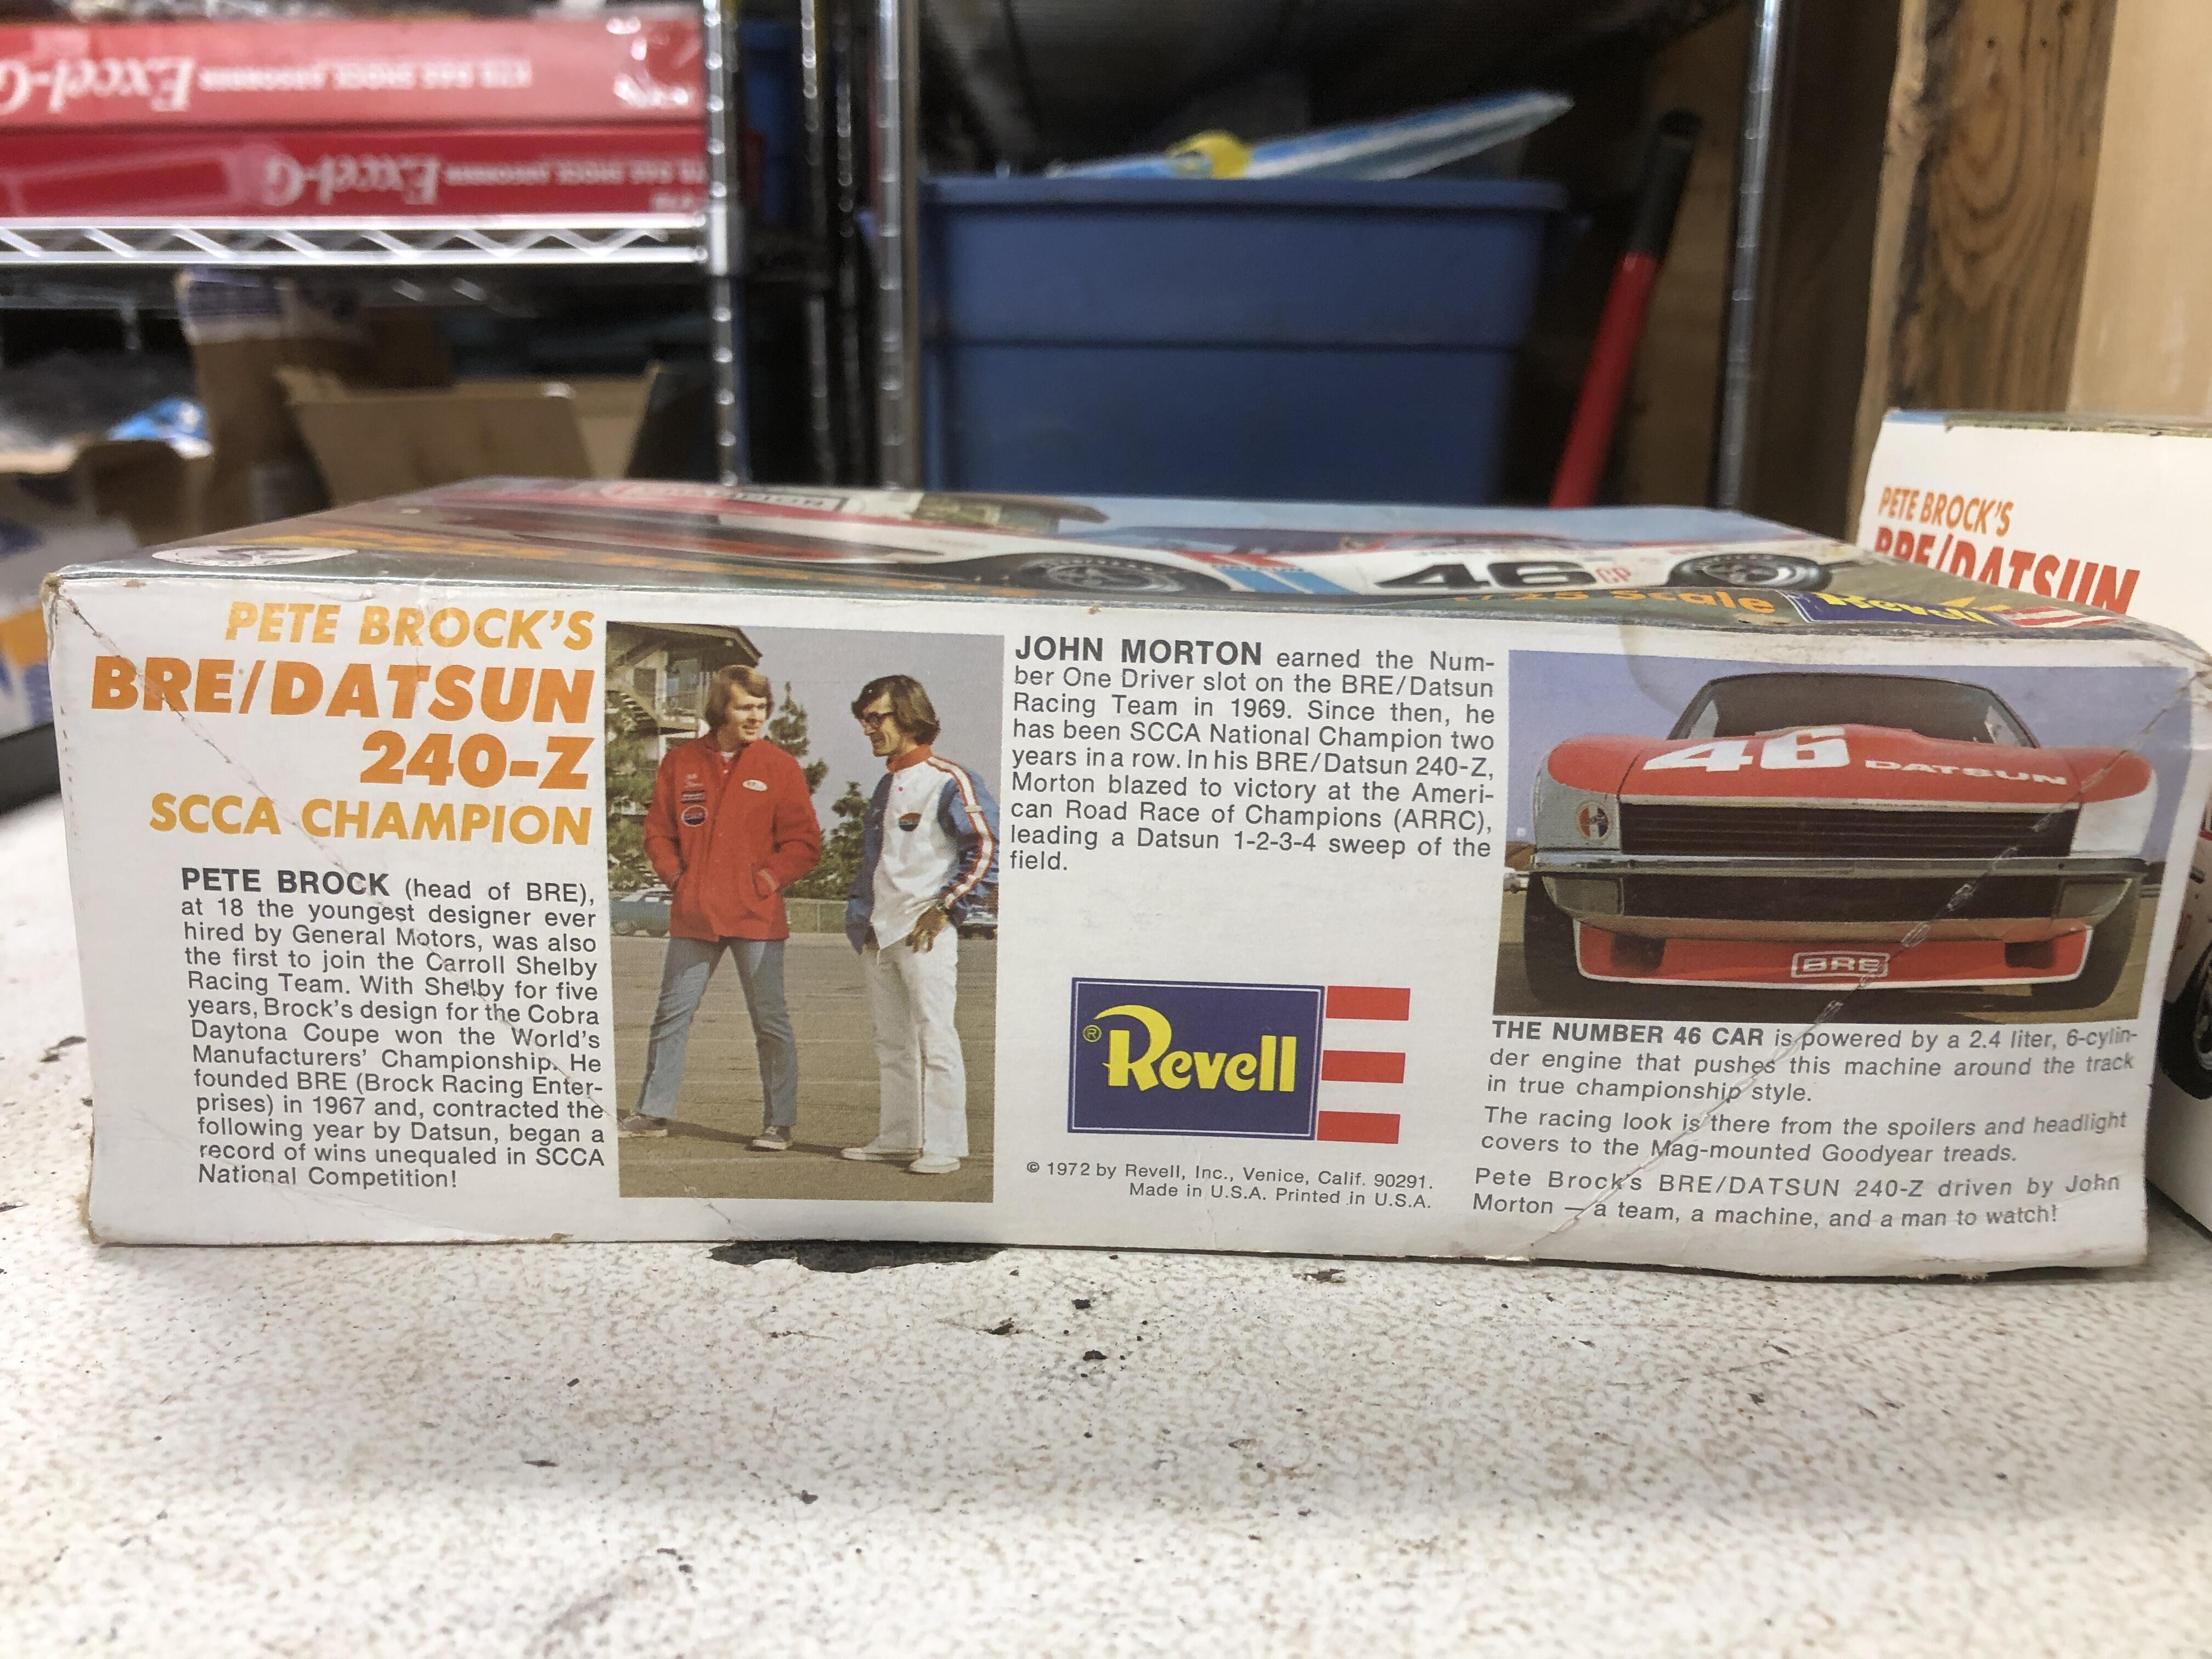
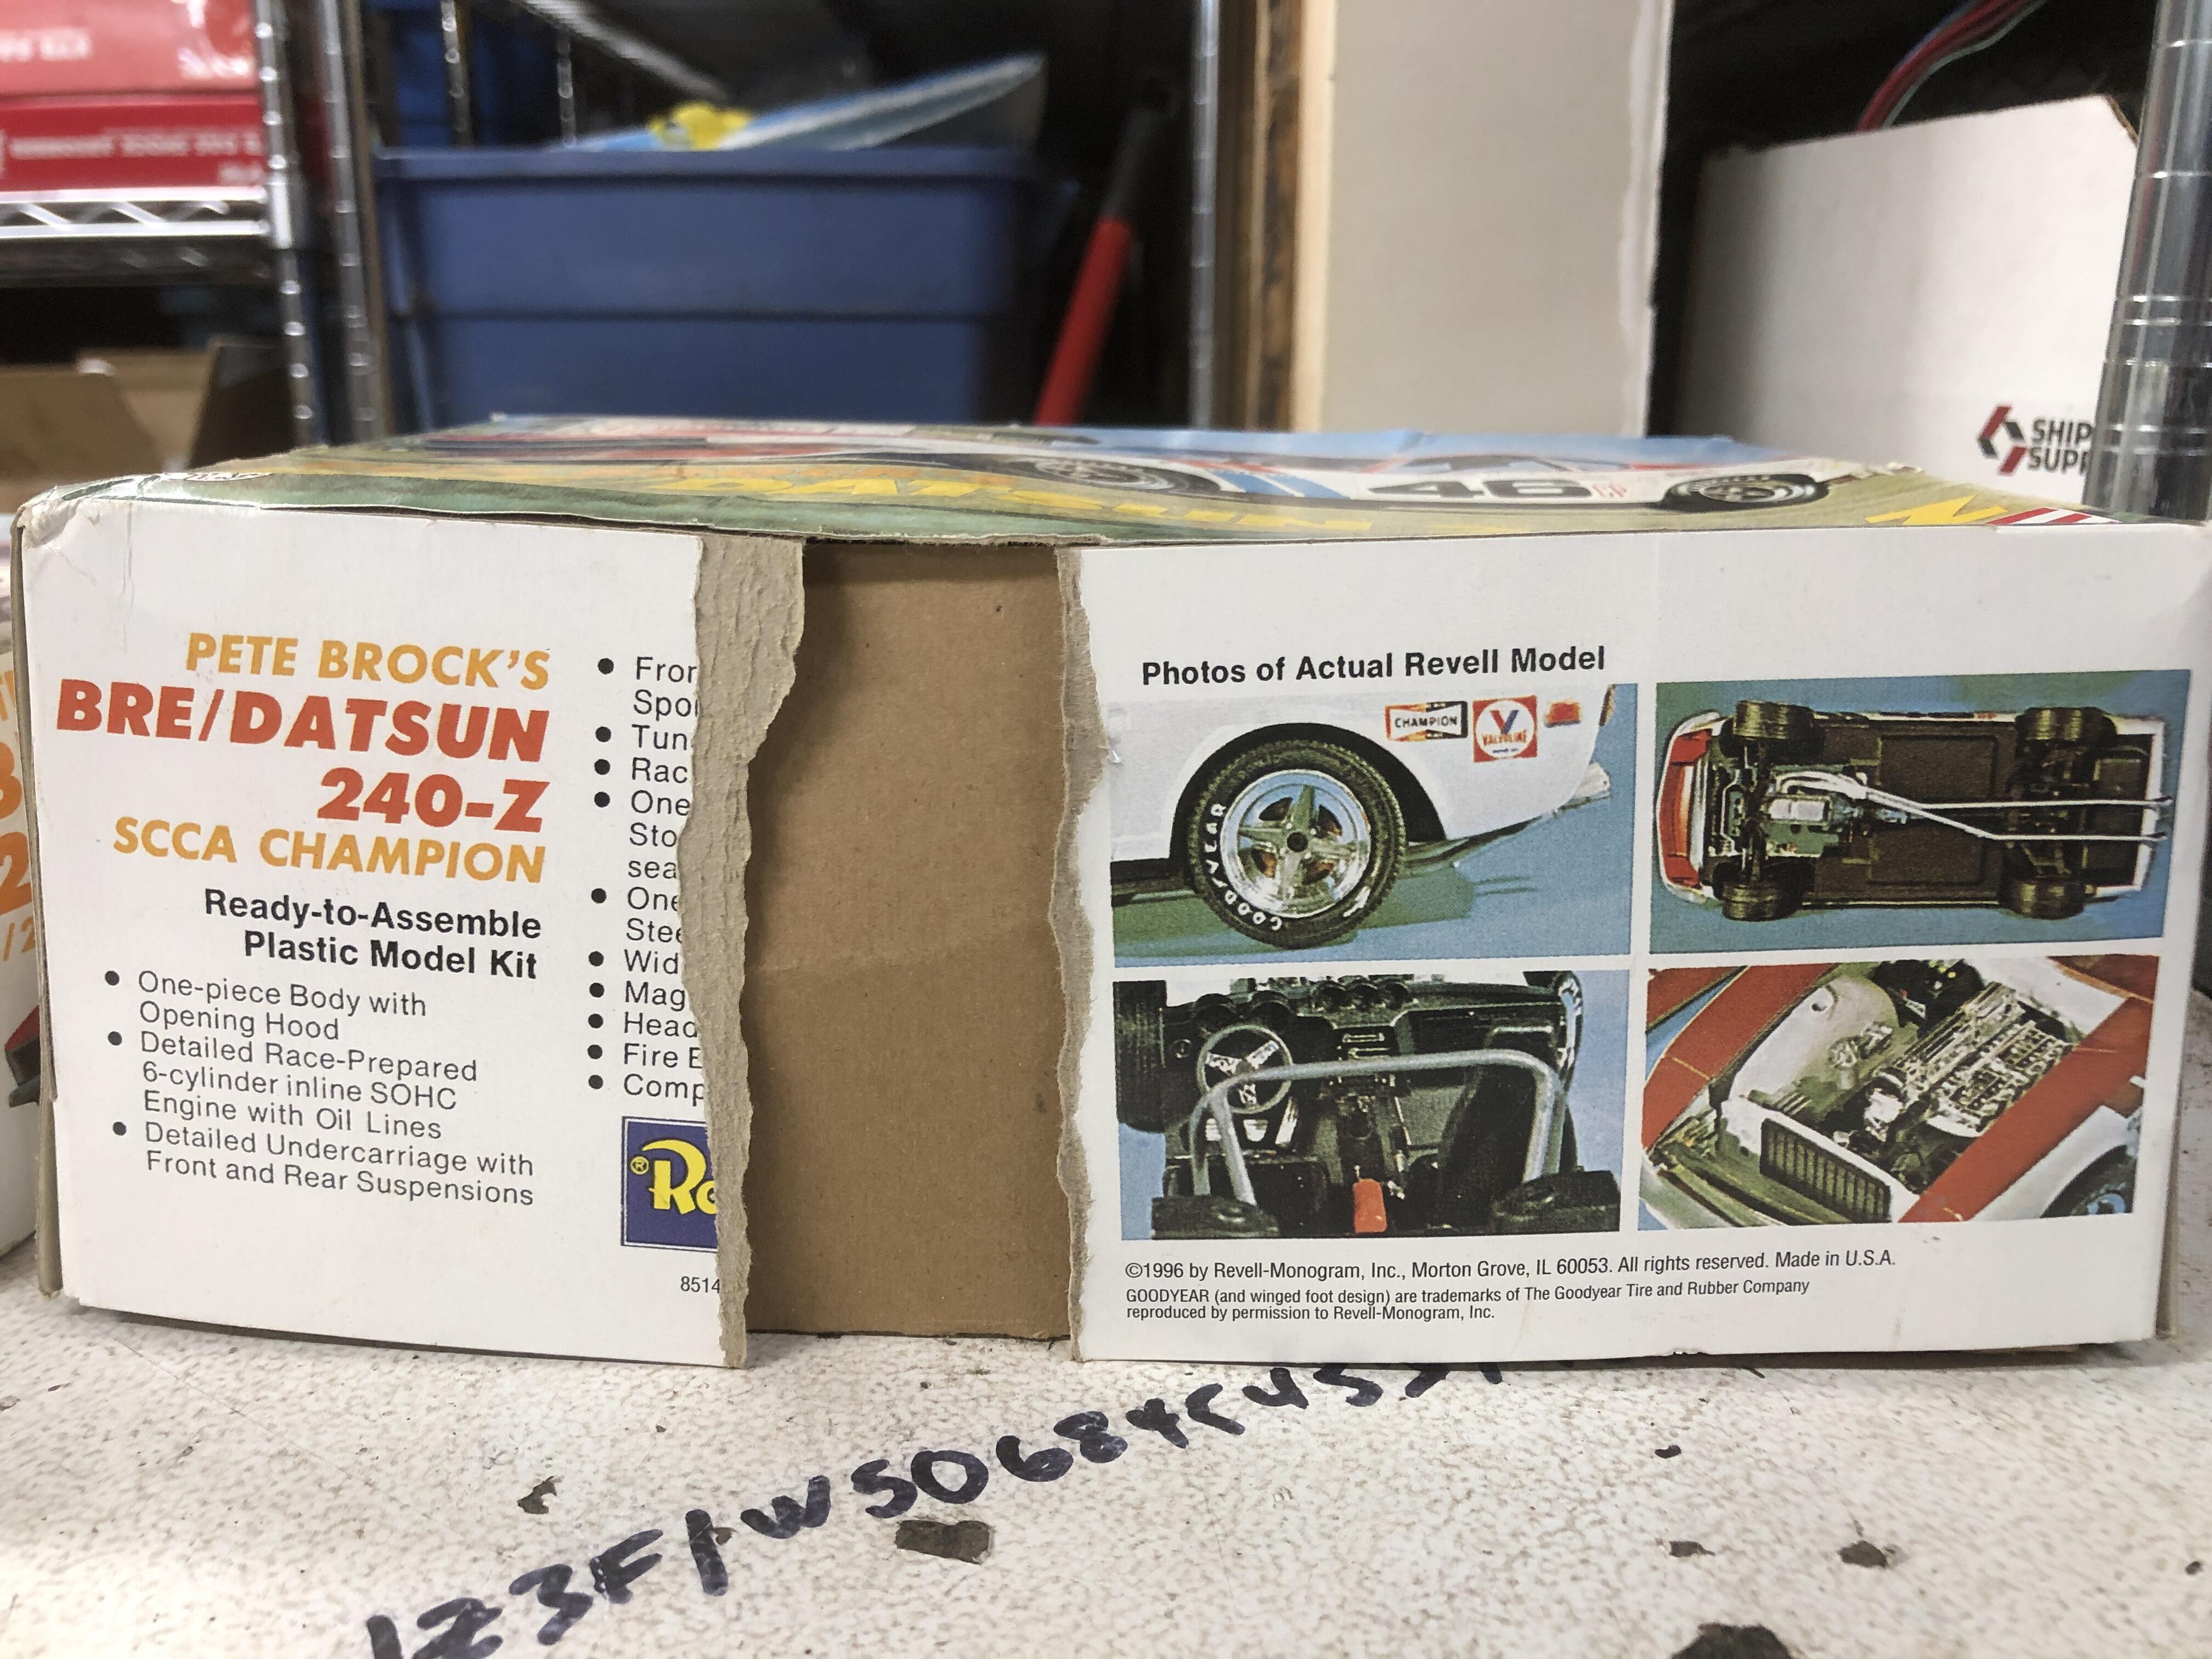
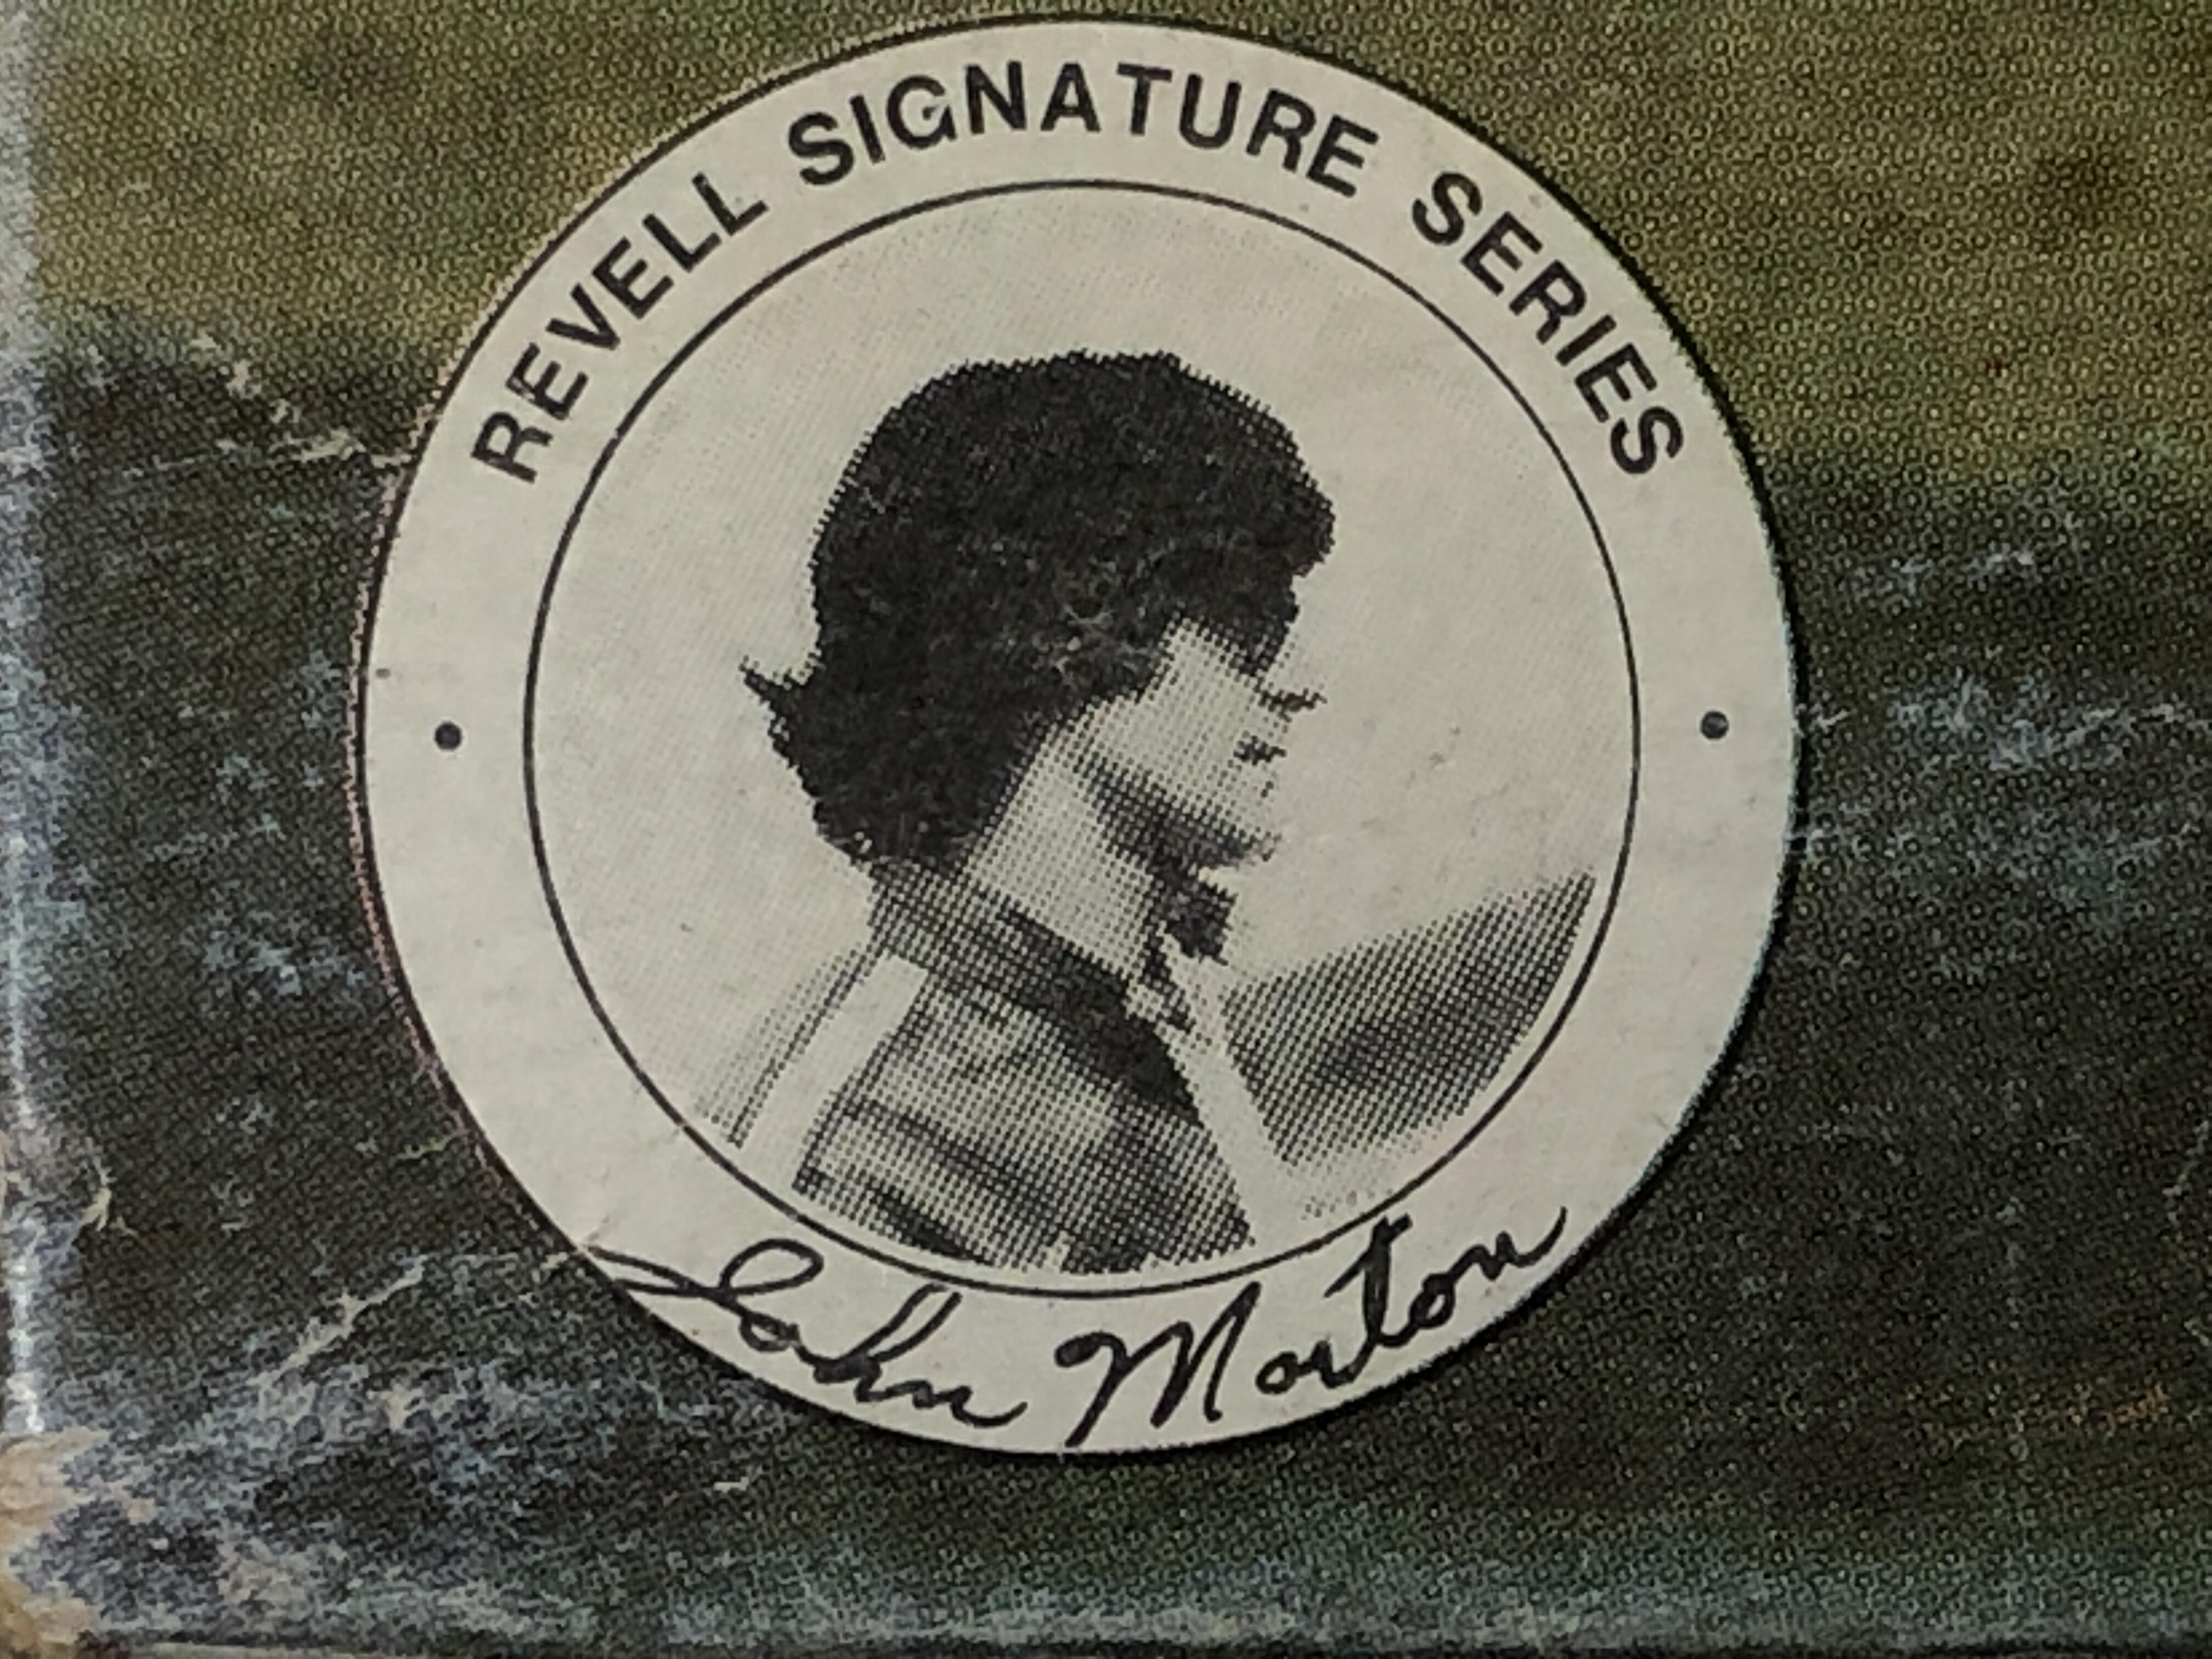
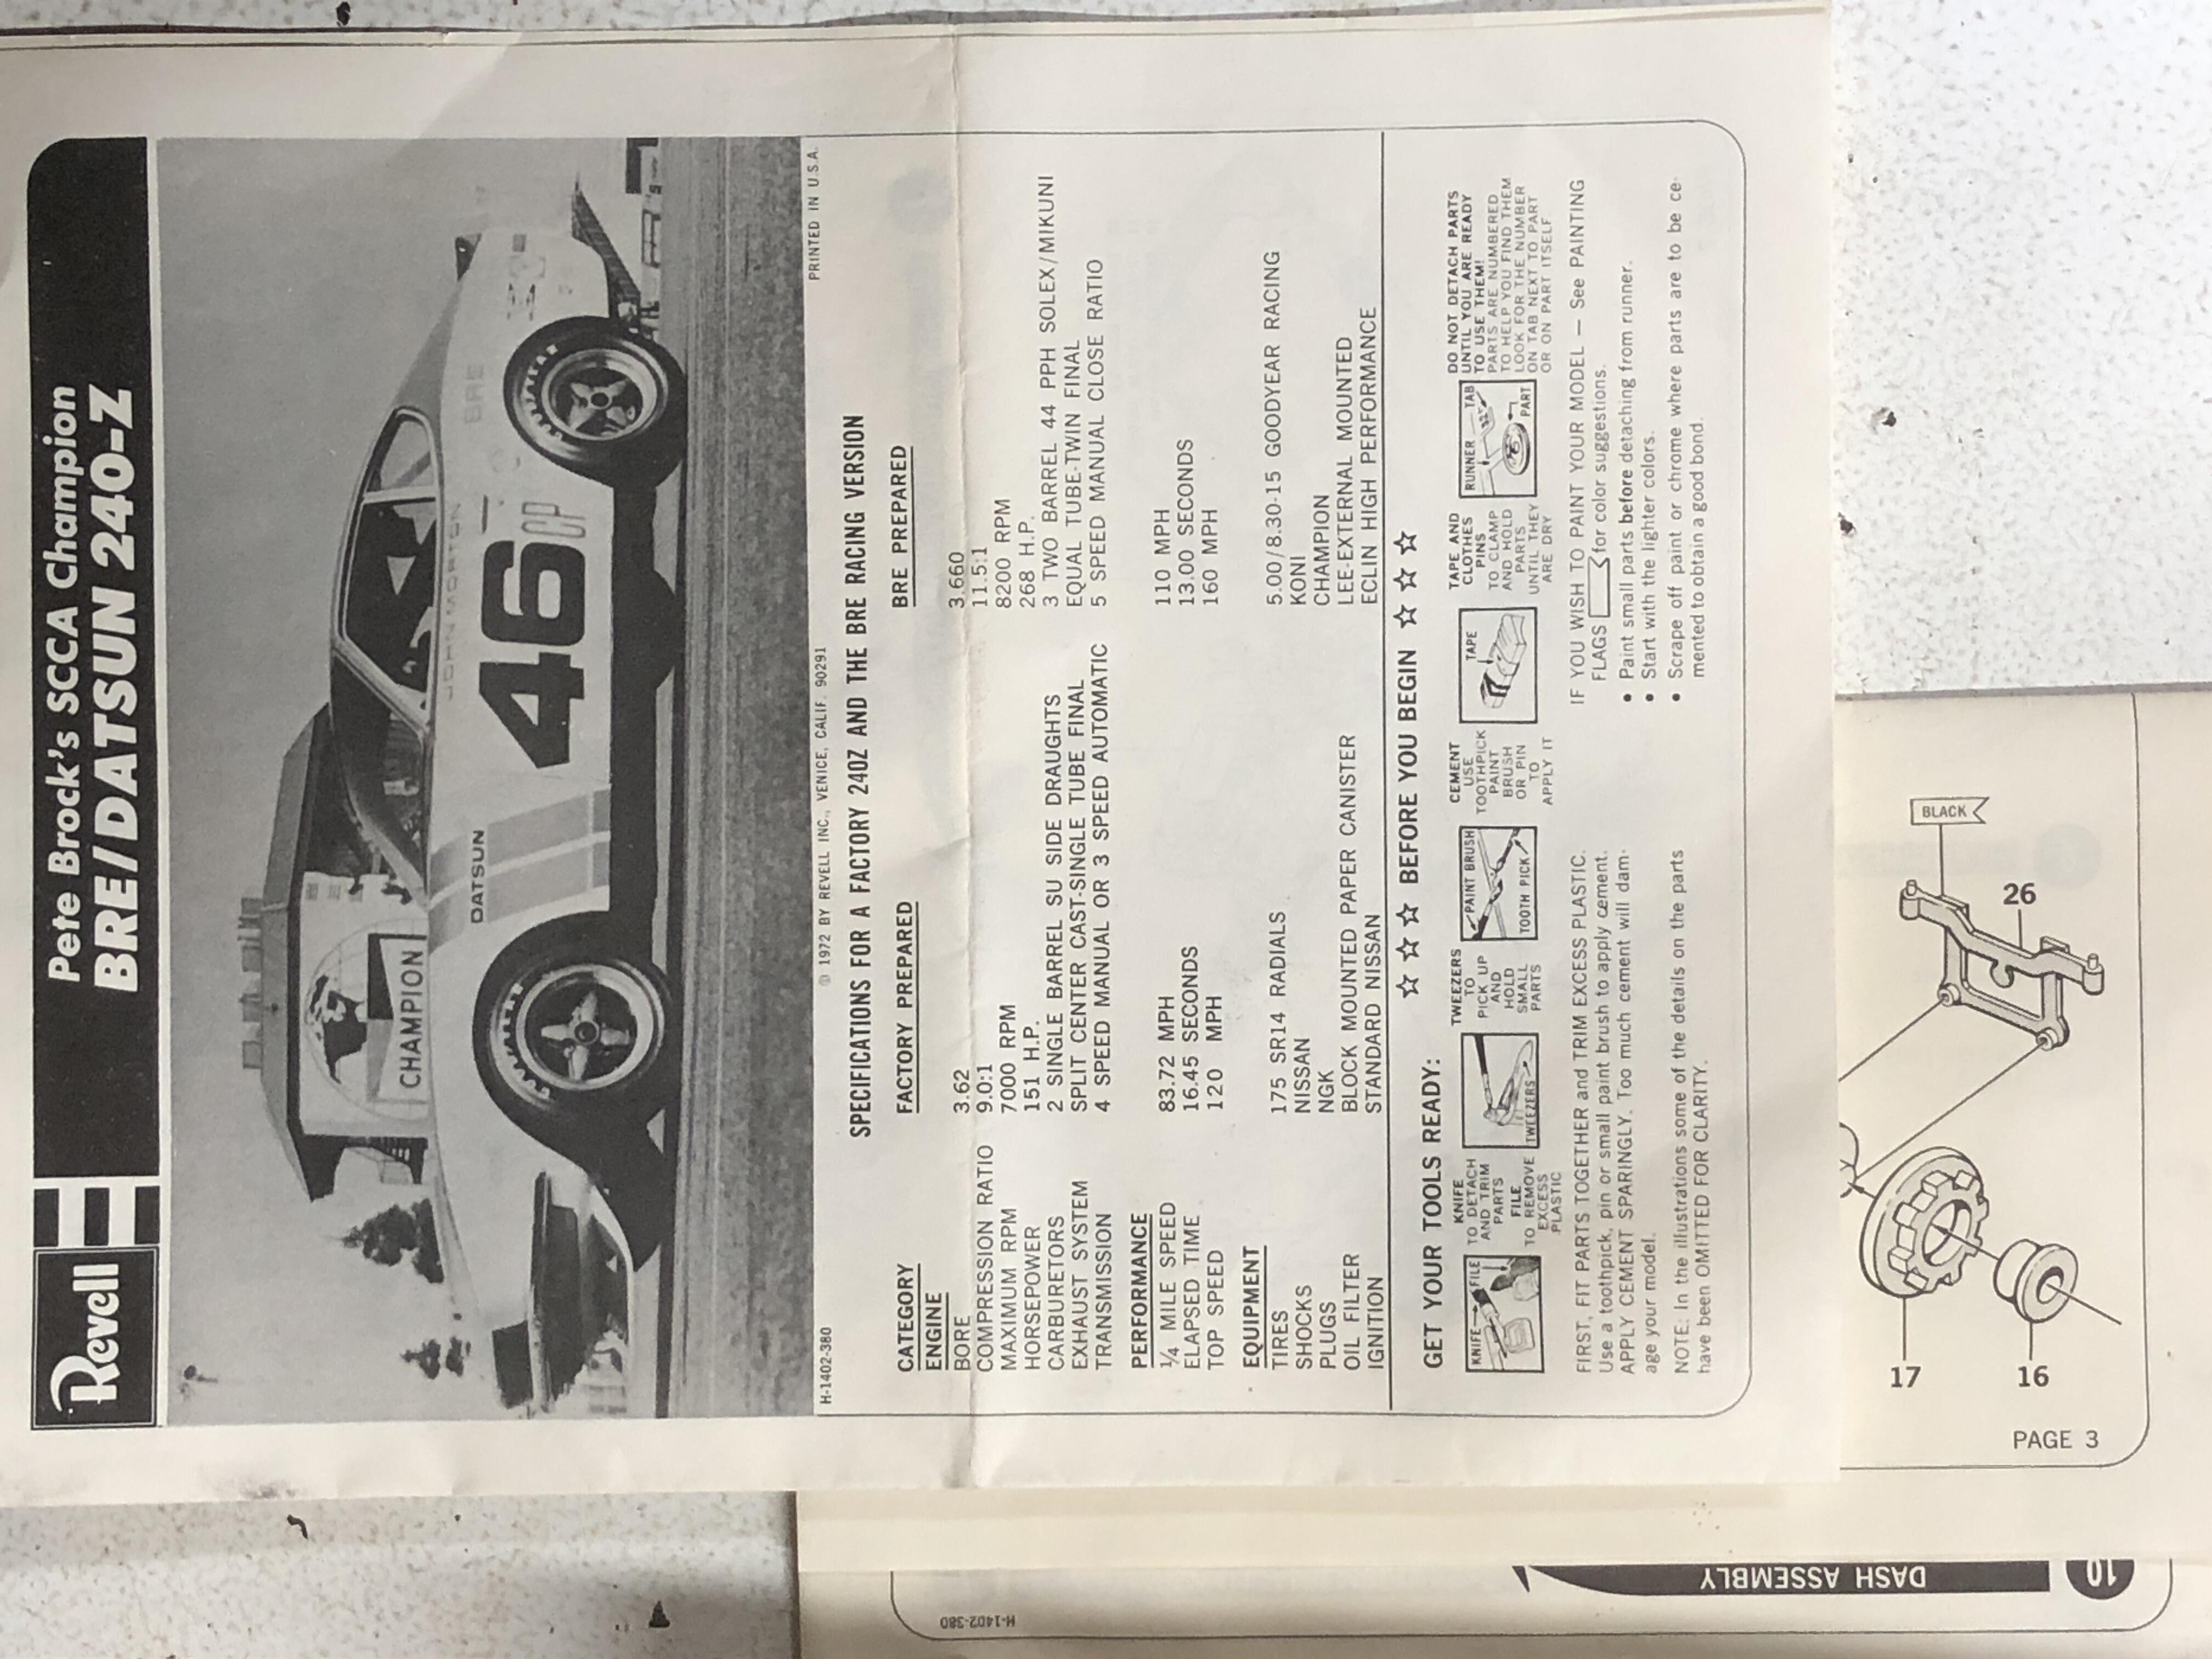
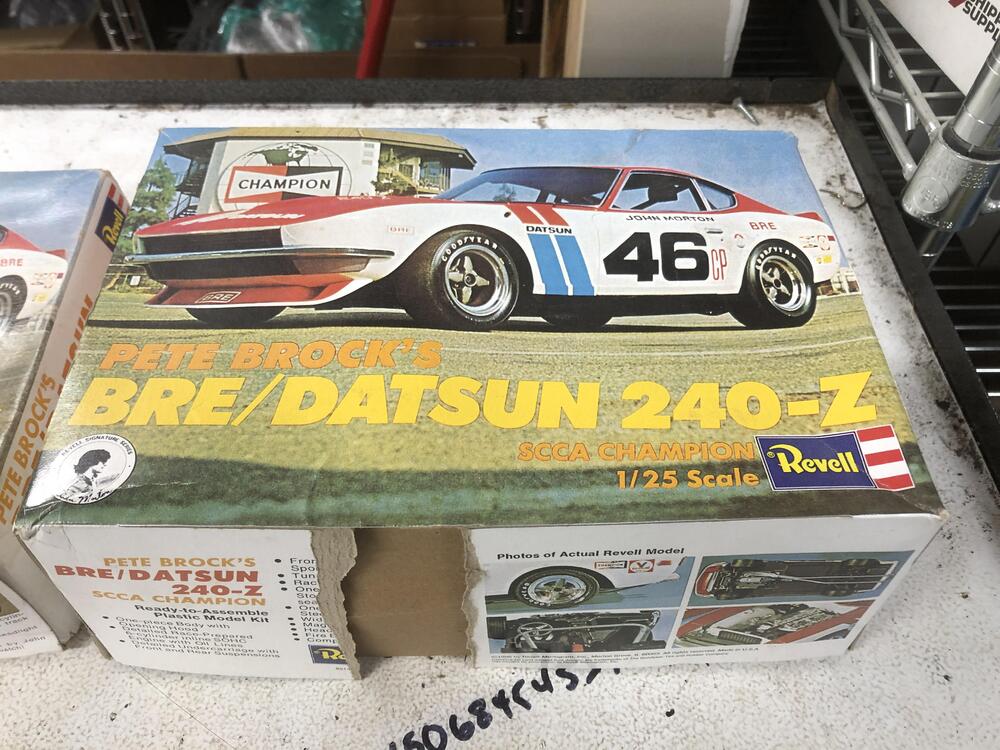
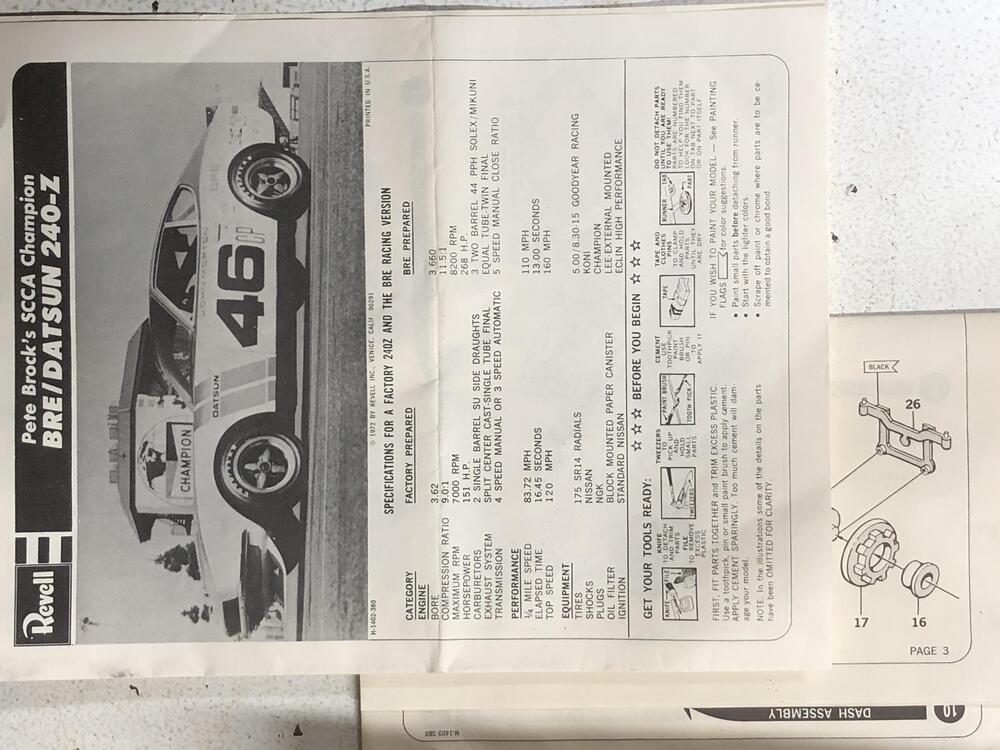
Wouldn’t consider myself a model citizen, but I have an early Revell 240Z Peter Brock “46” 1/25 kit that I purchased from a guy off facebook a couple of years ago, and today found another for sale locally on Kijiji. Definitely a later version. Model #’s are H-1402 (early) and H-1422 (larger, later) The early box is shorter and has a different image on one side than on the later taller box. The image of Pete and John is only on the early box. Not the most flattering pose for John. Ha! Later taller box is also missing a strip. Dang it. At least the model parts are all there and un-assembled. My early version is partly assembled and several of the pieces are off of the frame. Previous owner started assembly. Haven’t search the inter webs for the part numbers to see how old they are, but pretty sure they would be 70’s. Now that I’ve searched a bit, the instruction sheet indicates 1972. Might part with the later one with the damaged box. Let me know if you’re interested This stamp is on the later taller box, definitely an inferior copy of a copy or such. This is on the earlier box. Much crisper.


-
oh yeah! Still have plenty of those kicking around. Use them all the time.
-
And here we are again with more evidence that there is something new to learn every single day. Thanks for the great detective work.
-
Thank you!
-
Fabulous! Love it when upgrade stuff bolts in. Can you post up the part number of the pigtail you found? Thank you!
-
The stock cups where indeed welded to the overall mount. you don’t want to trying to line up any more parts than you have to when installing these. The actual cases of broken TC rods with poly is extremely low, and I bet of those, it was caused by pitted or less than perfect TC rods that were compromised to start with. Inspect the TC very closely, especially right at the step where the washer sits. ANY pitting means get new(er) rods. I personally put rubber on the front, and poly on the rear, or just stick with fresh rubber on both sides. Impact harshness when going over bumps is reduced with rubber on the compression side of the mount. If you are racing and trying to maintain a set of fixed alignment specs then get a set of adjustable length solid mount TC rods from any of the half dozen suppliers of these parts. (Techo Toy etc).
-
Nope, nothing intended to be taken apart with these. Sand blast them best you can then powder coat as is. Any place that doesn’t get much PC isn’t visible anyway. Well they “can” be taken apart with grinding and re-engineered with replaceable fasteners, depends on the level of quality you are trying to achieve I guess