zKars
Supporting Member
-
Joined
-
Last visited
Everything posted by zKars
-
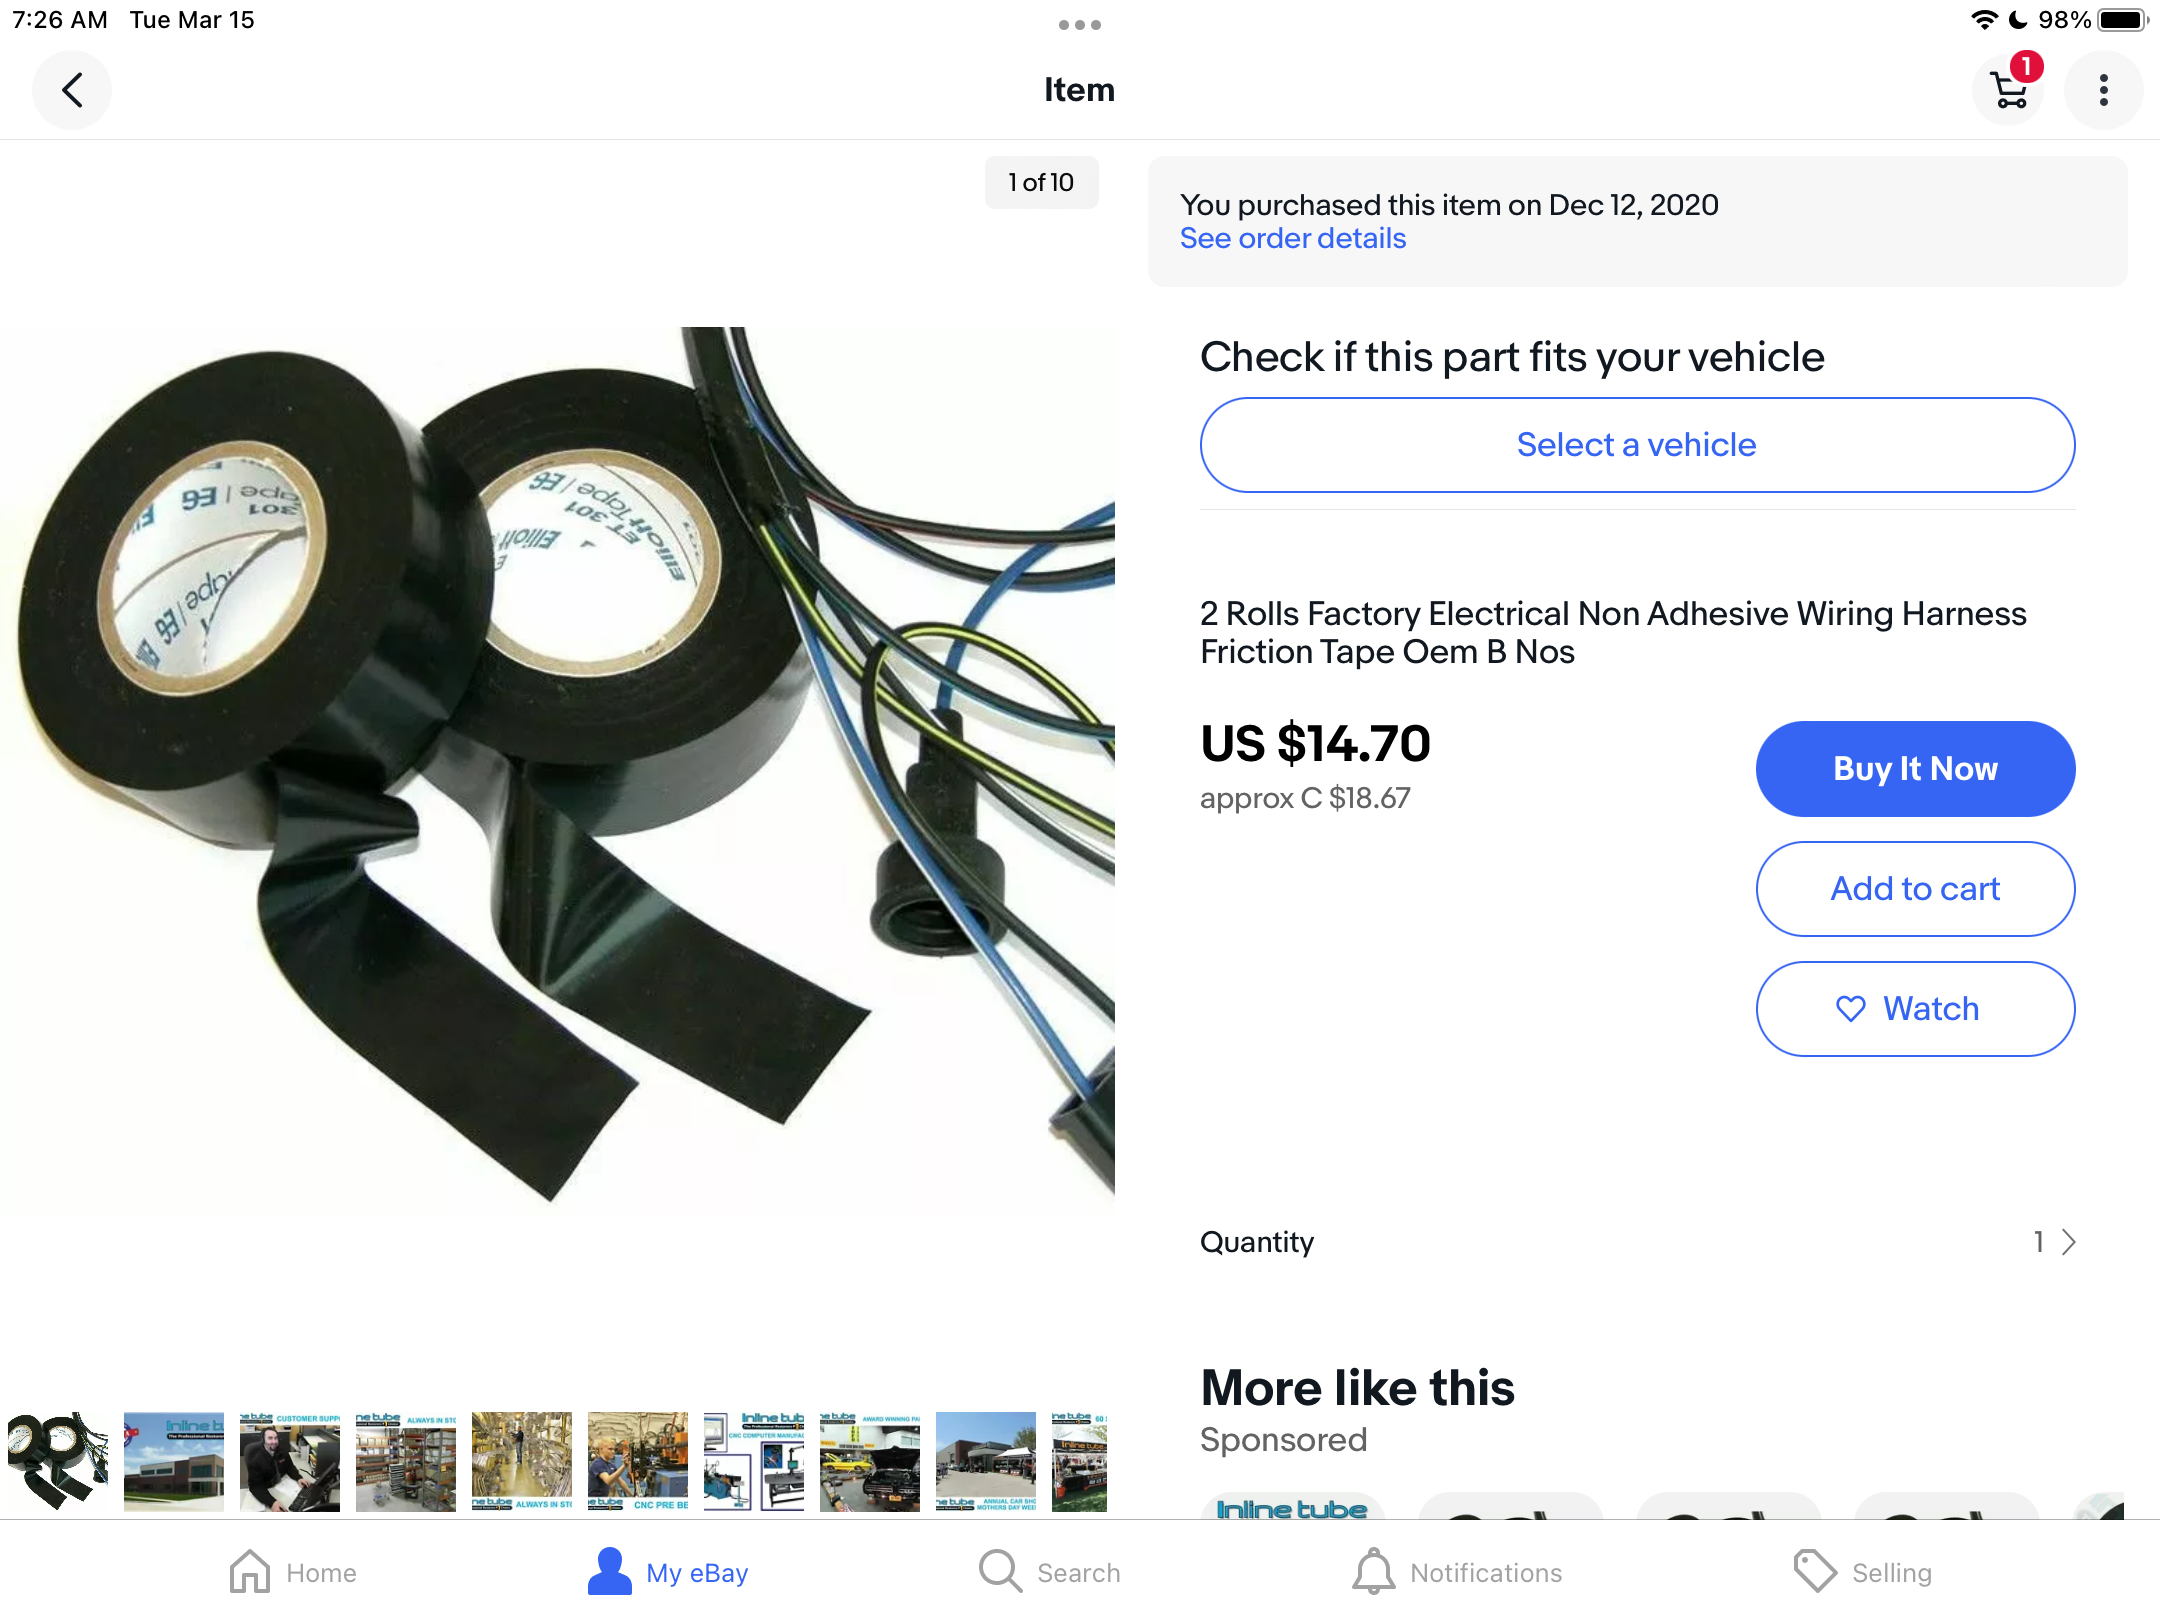
My favorite stuff is this. https://www.ebay.ca/itm/190823047174 It looks and feels like the stock harness tape. No sticky adhesive on the back.

-
-
Push and turn me thinks, or the whole black panel pops out THEN you can get to the hex nut behind
-
There’s that ‘thou shalt not covet wife and good’s’ thing, but I’m hoping it doesn’t cover car parts, cuz I have a real covet worked up over here! Great find! Congrats
-
Thank you for the kind offer but I was referring the missing cardboard strip that has been torn off of the lid of the box on the later model. Unless you have spare box lid……

-
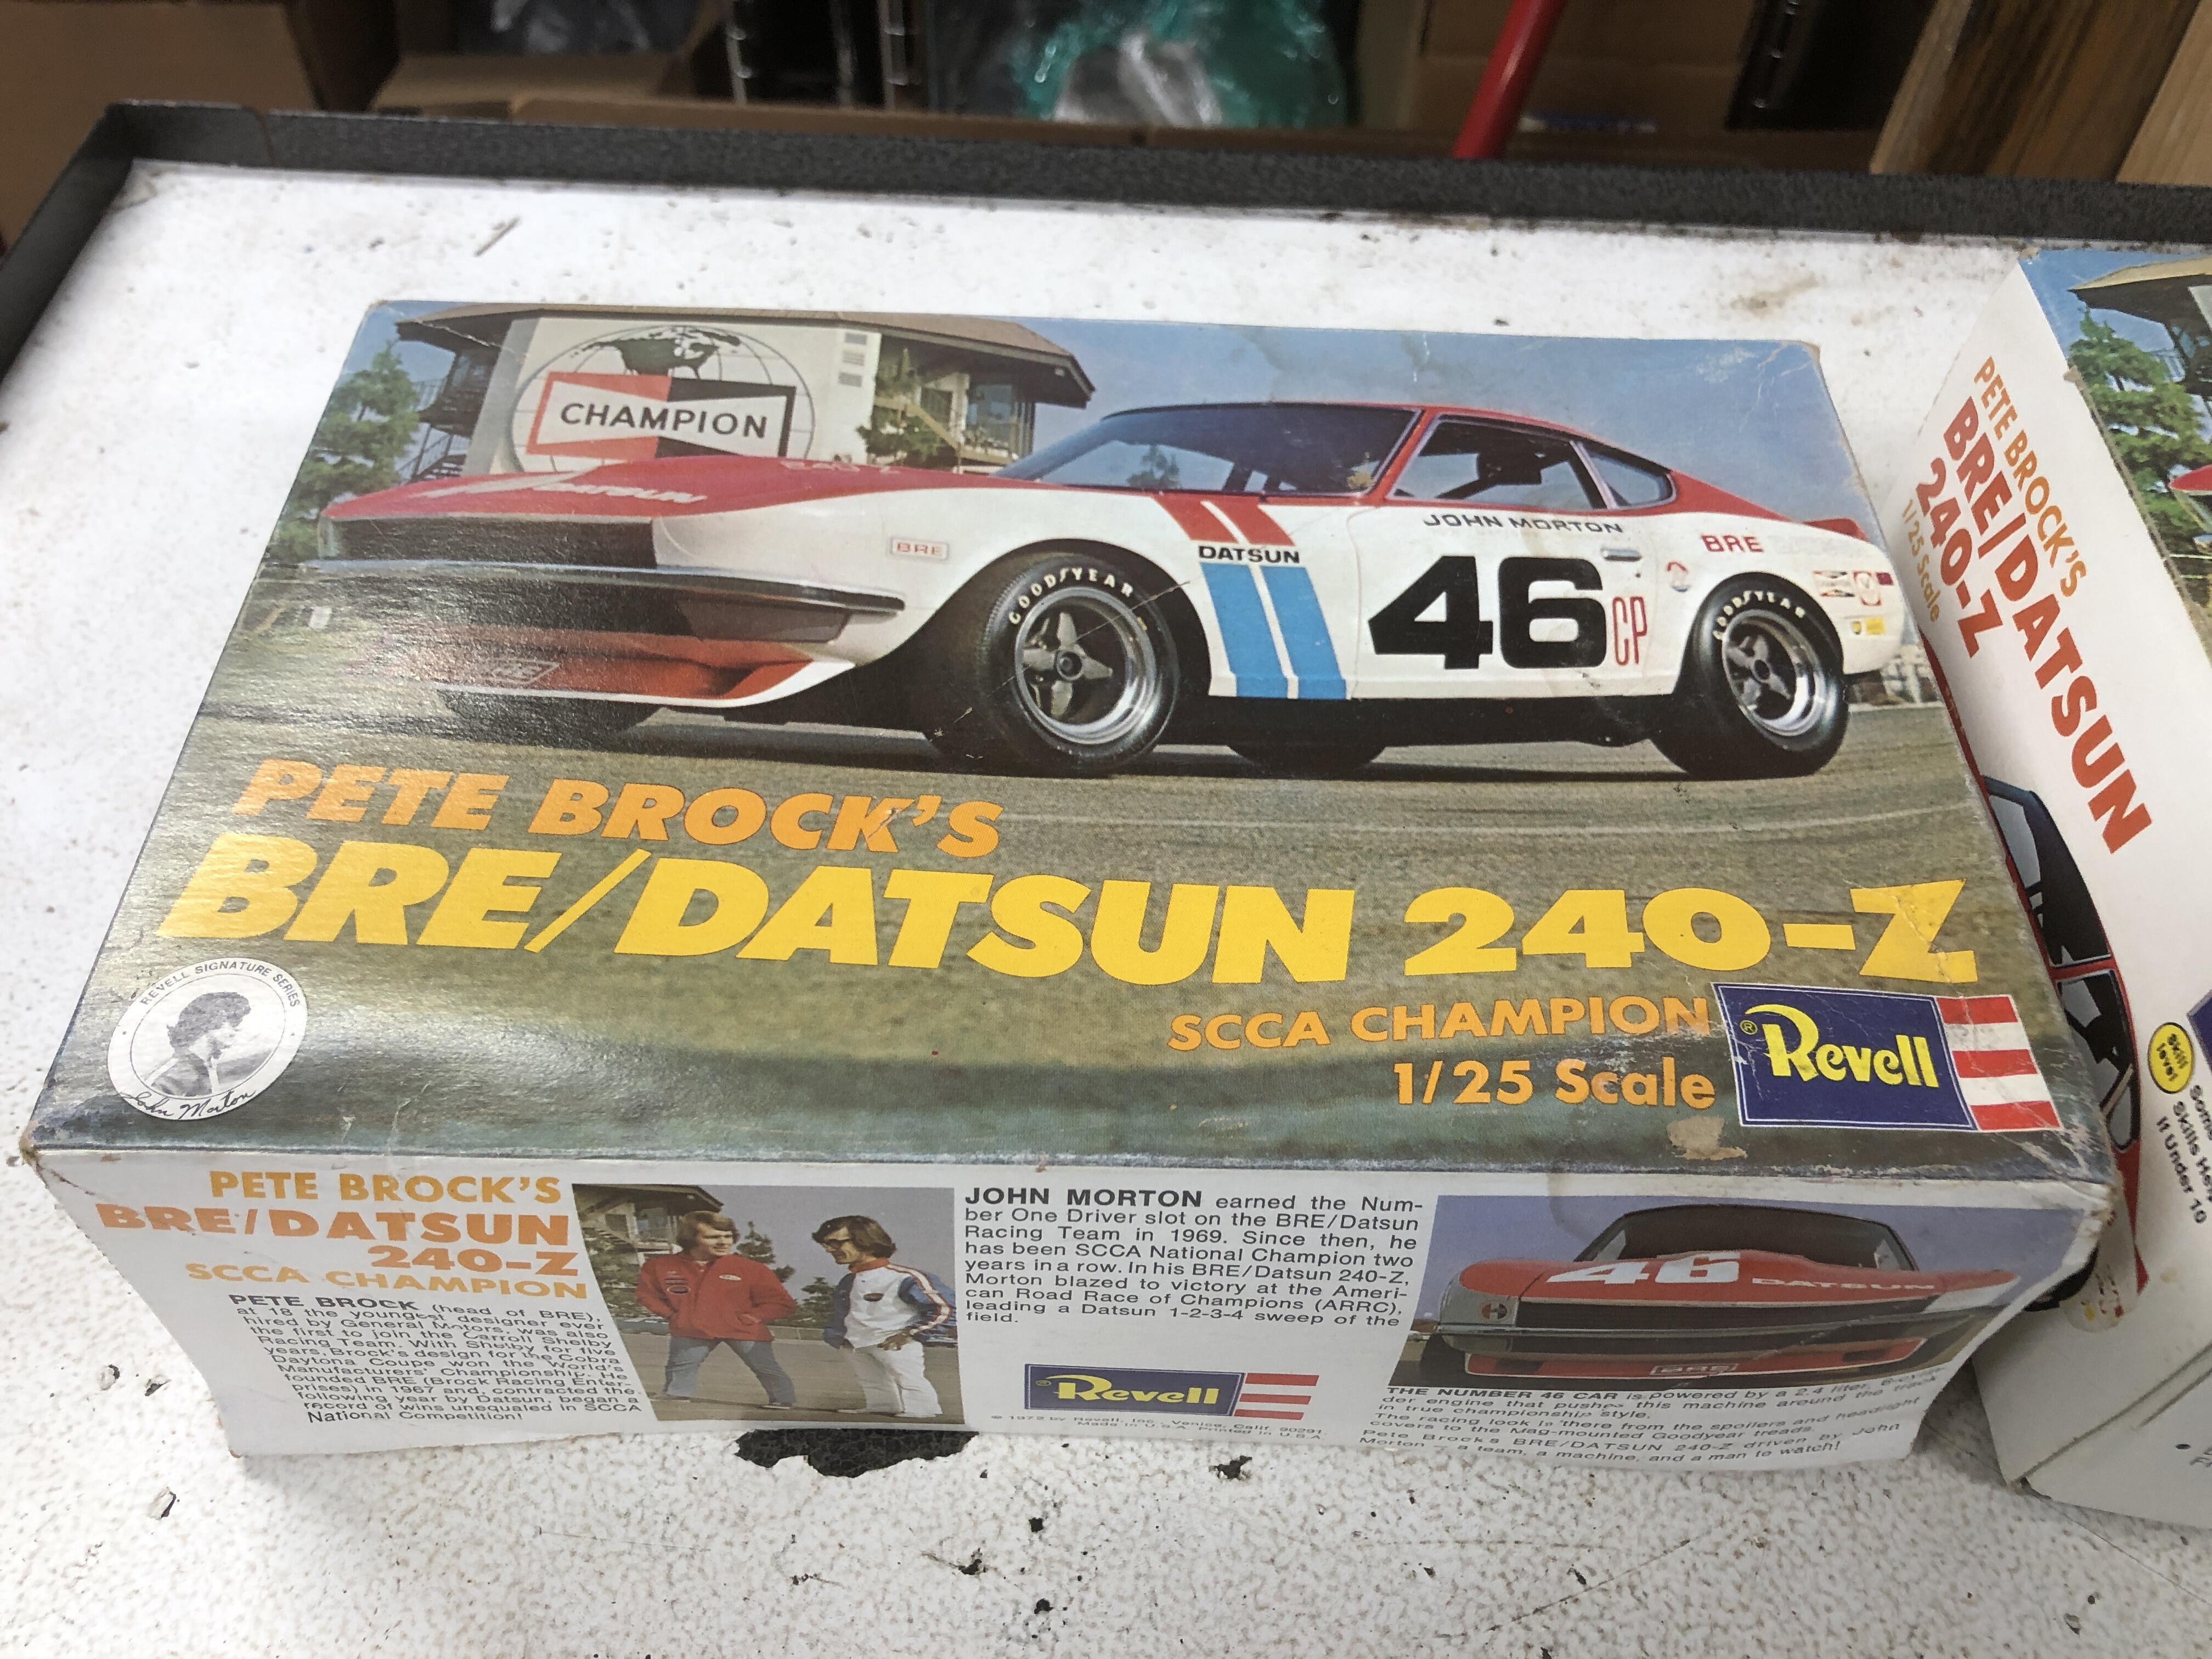
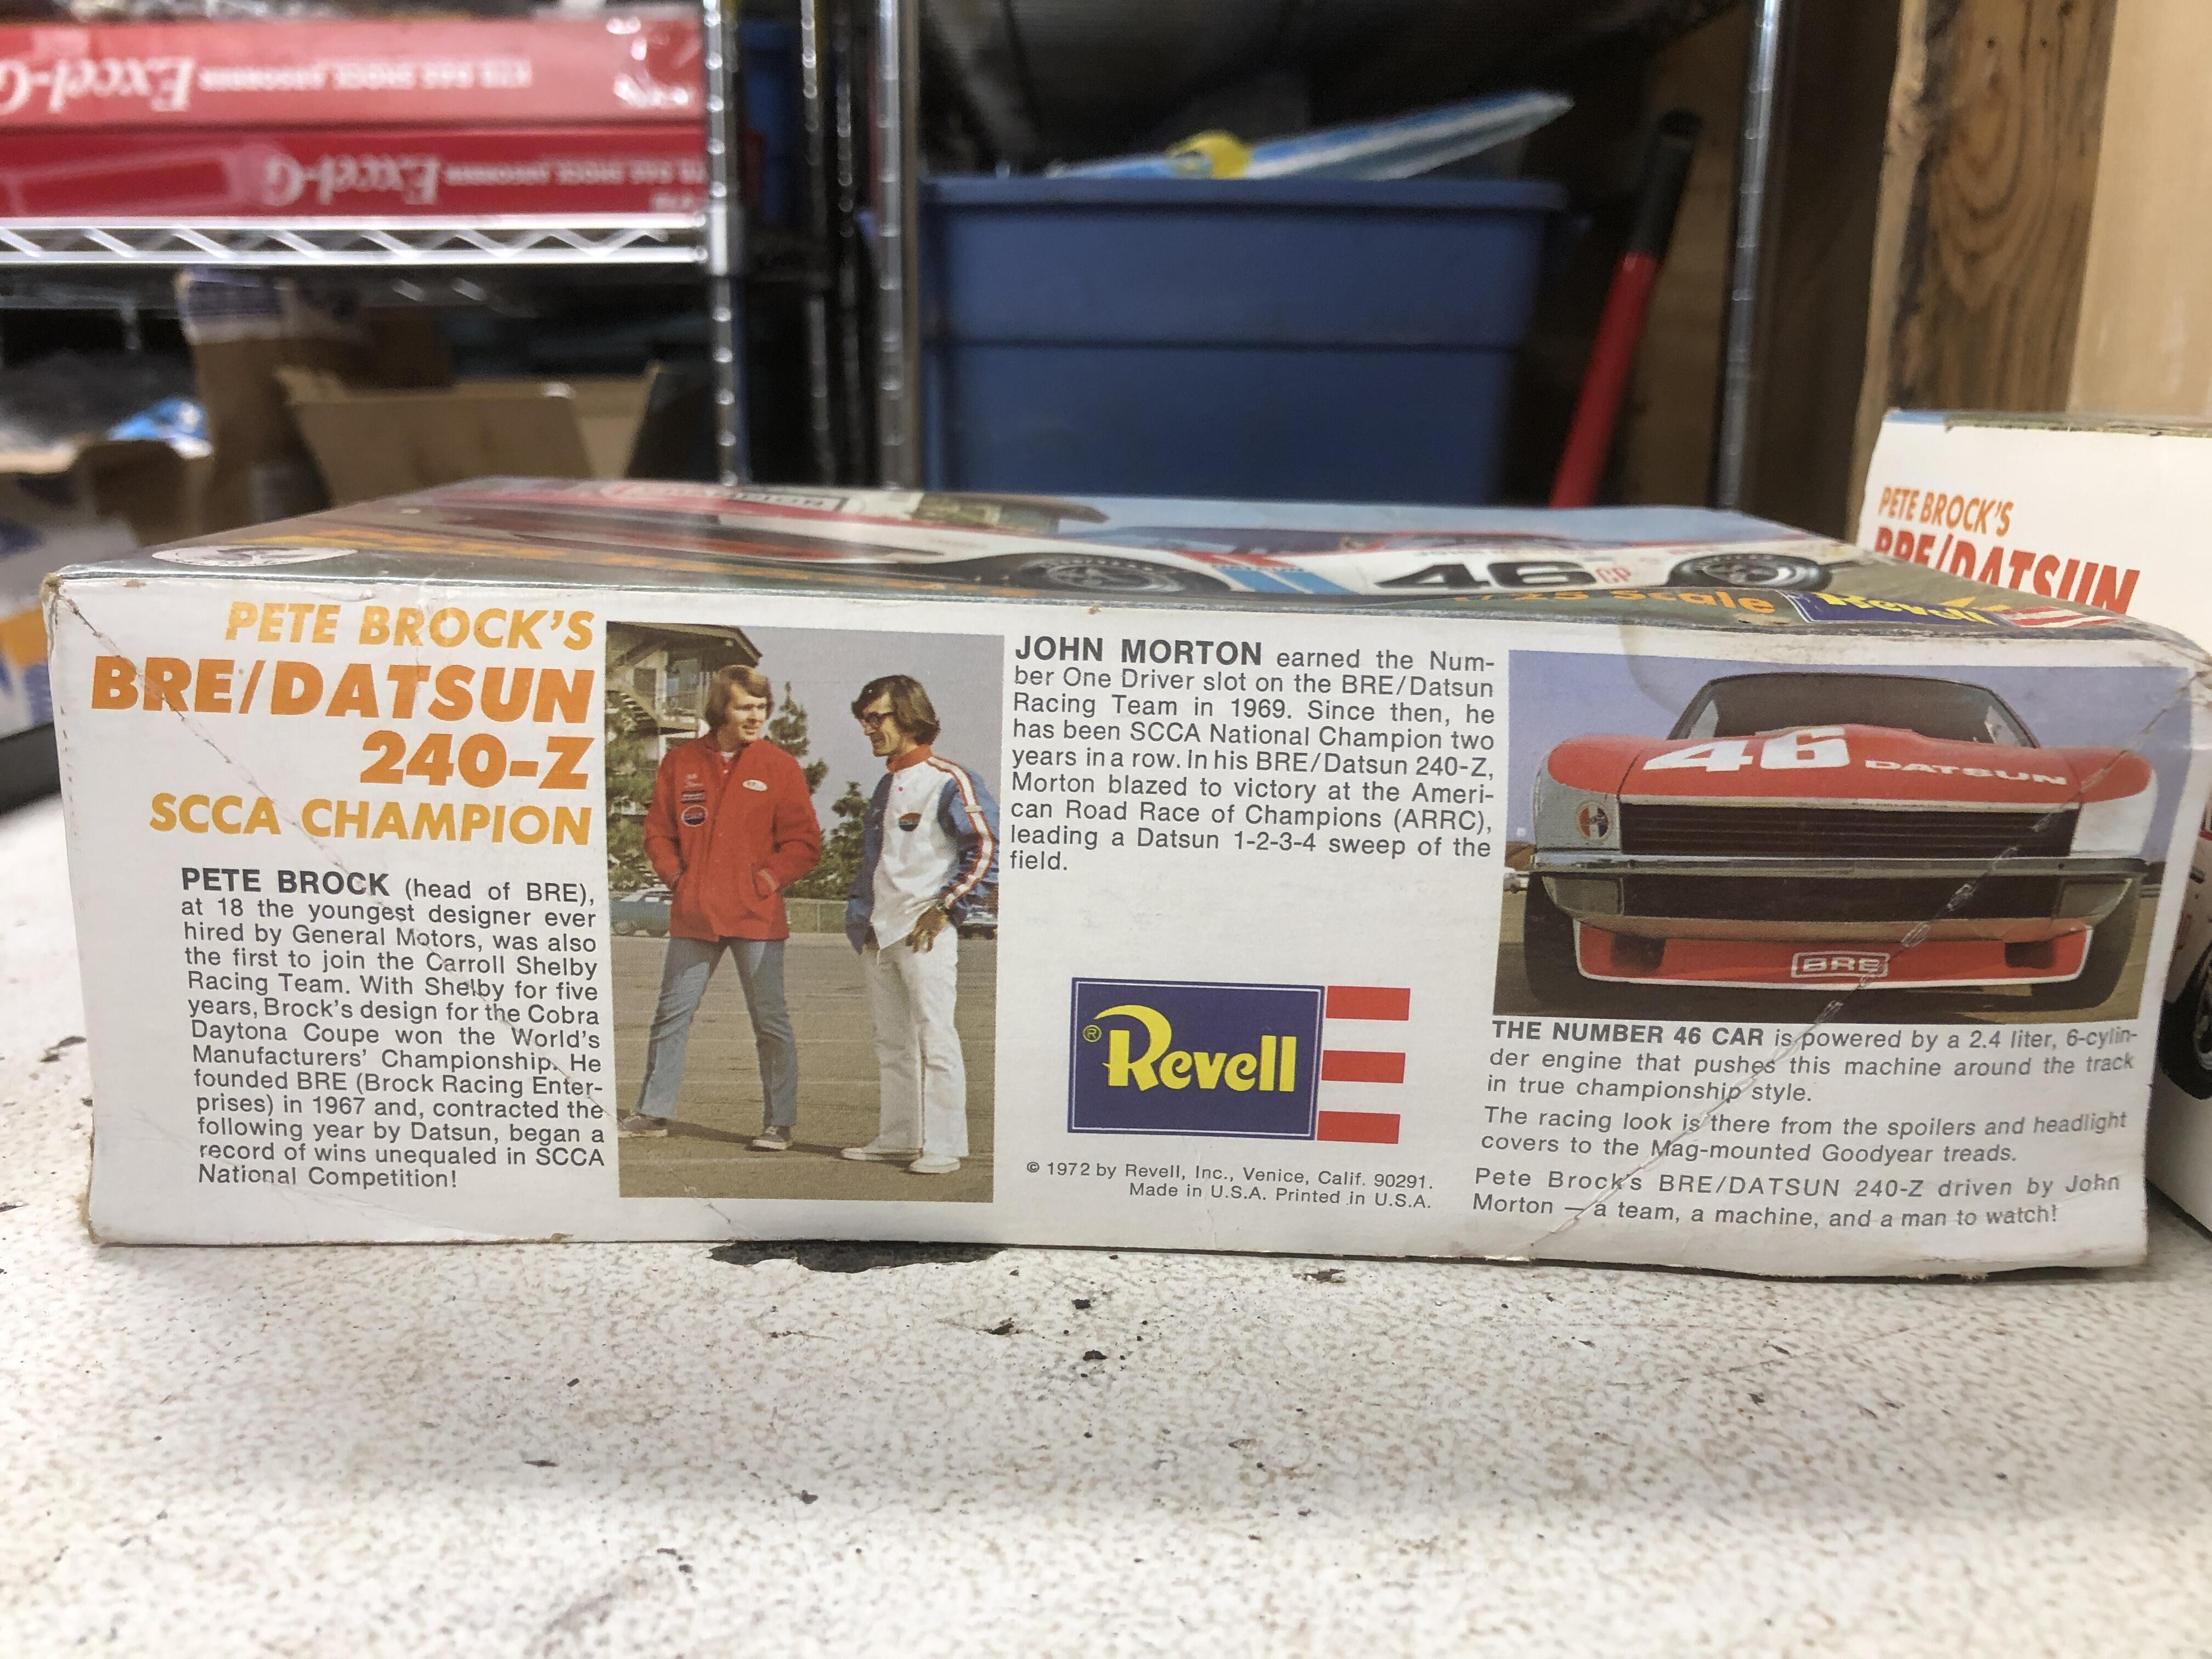
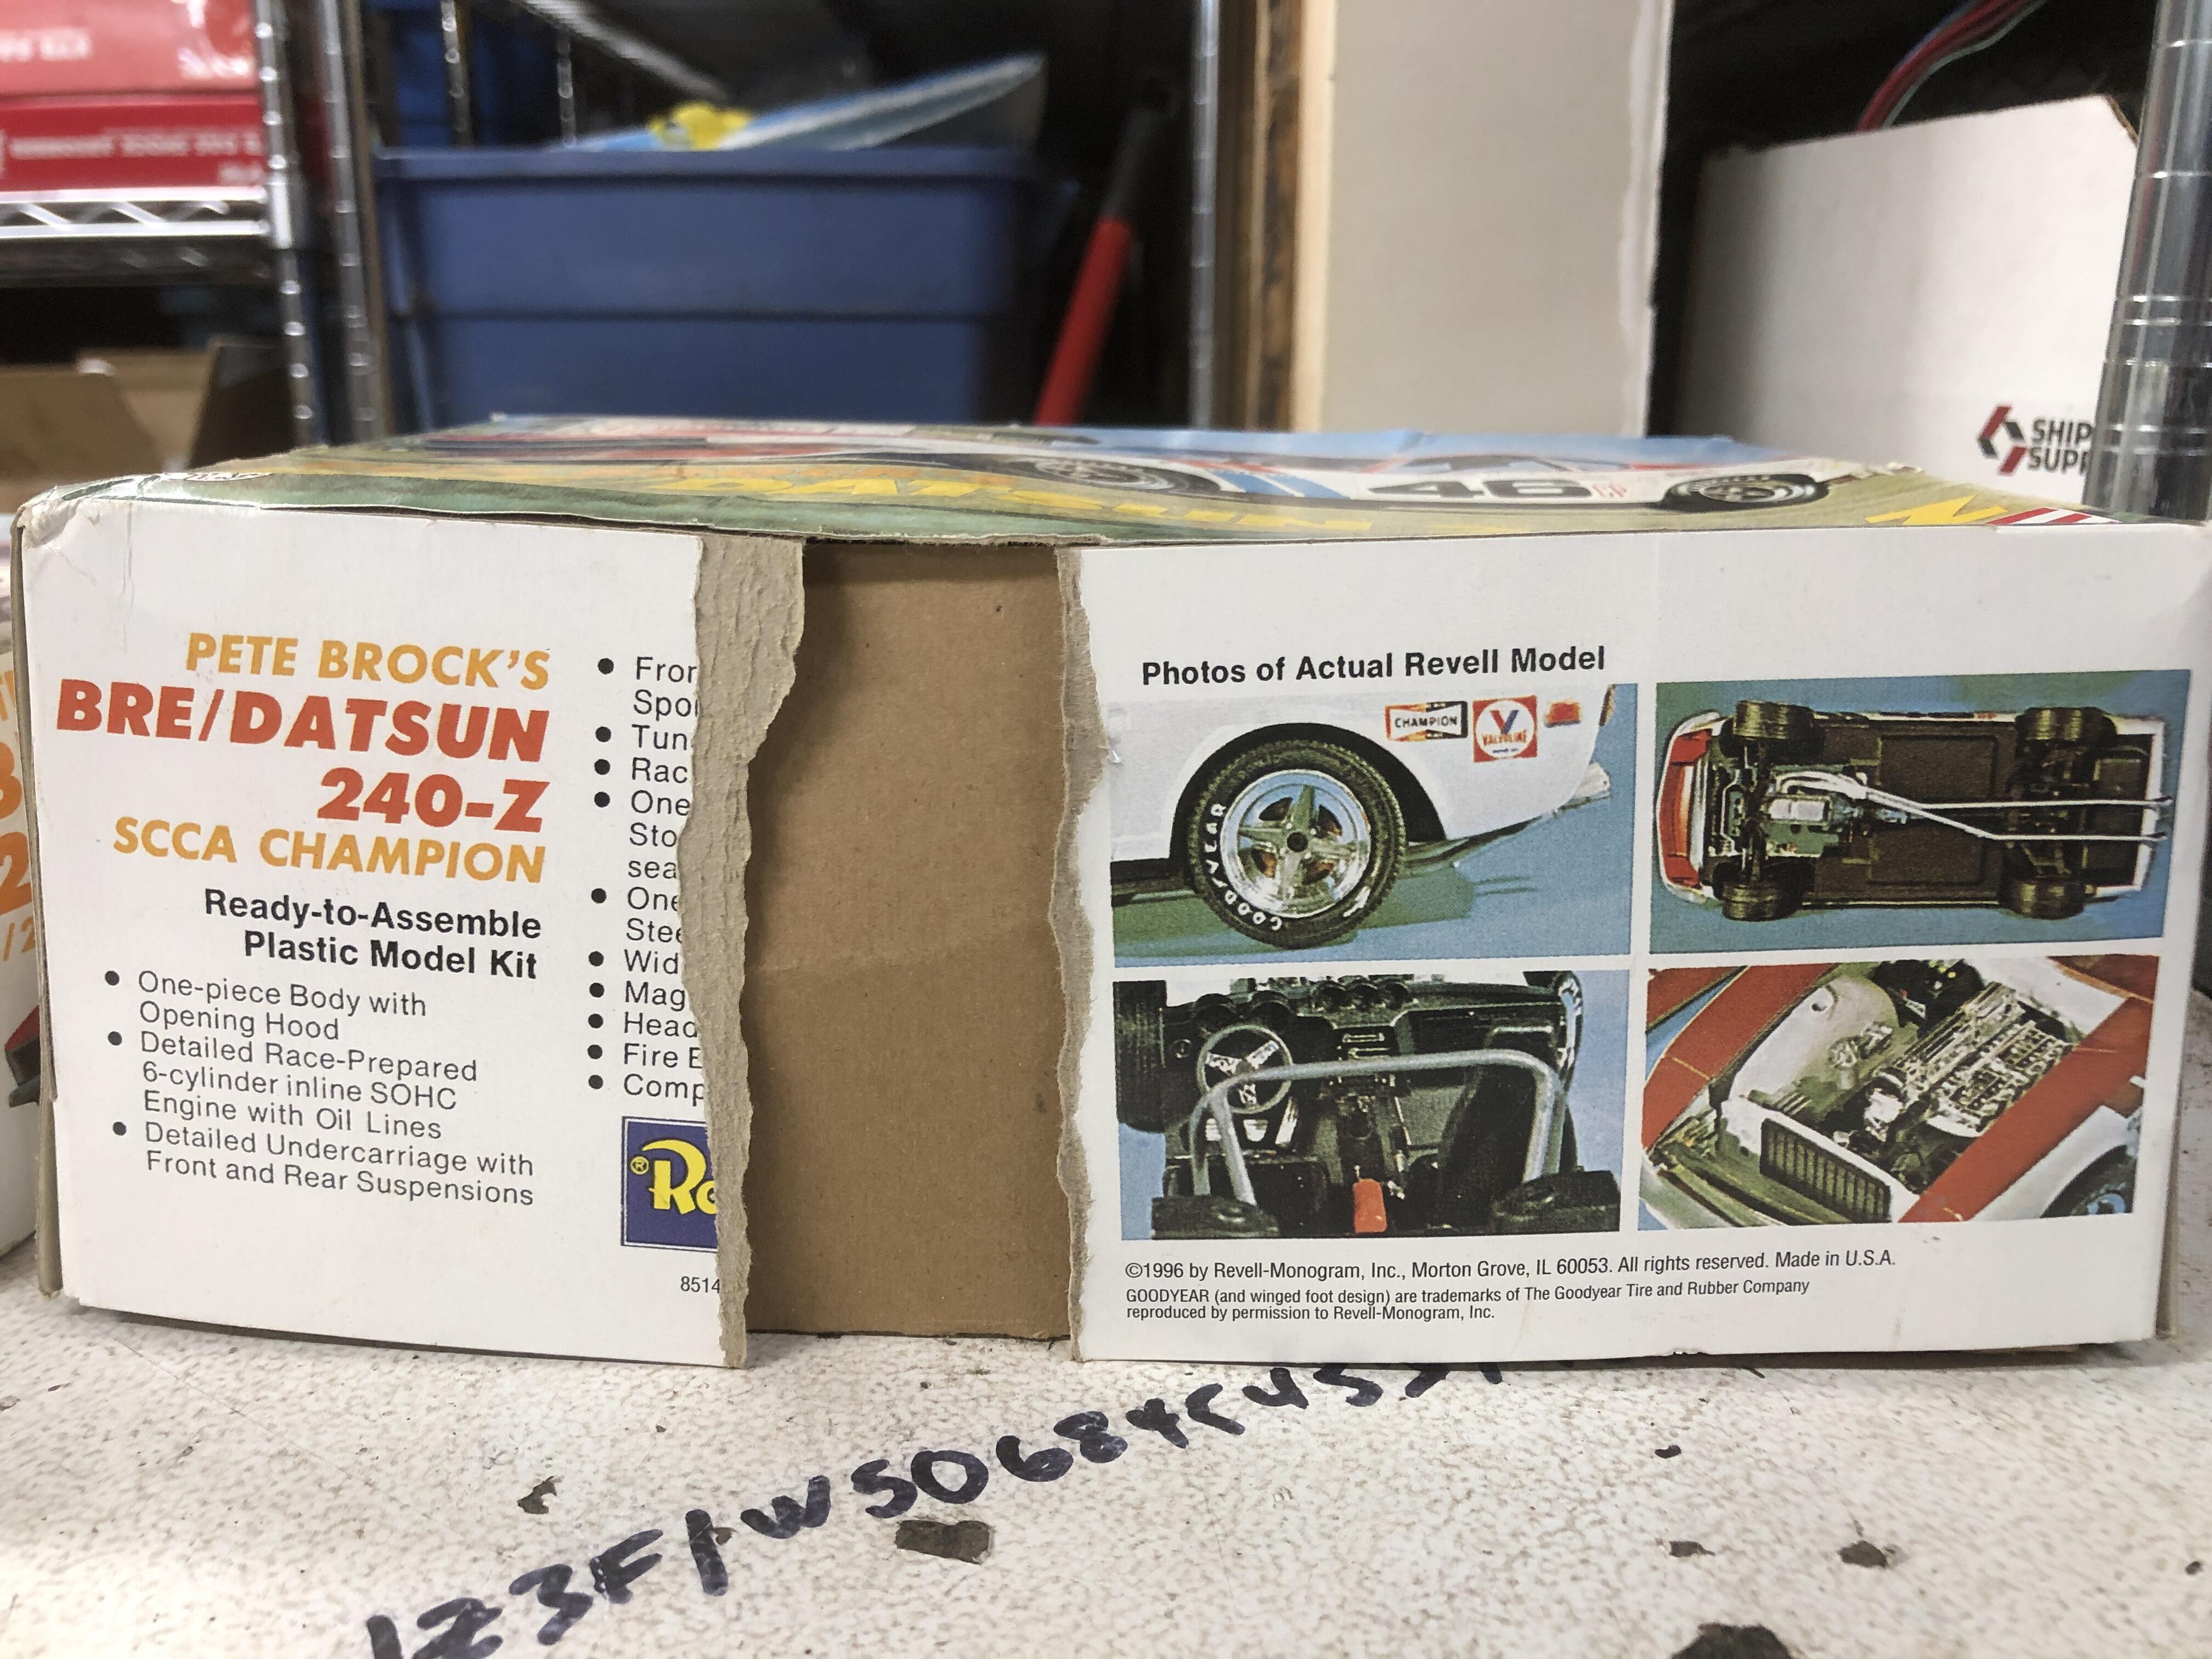
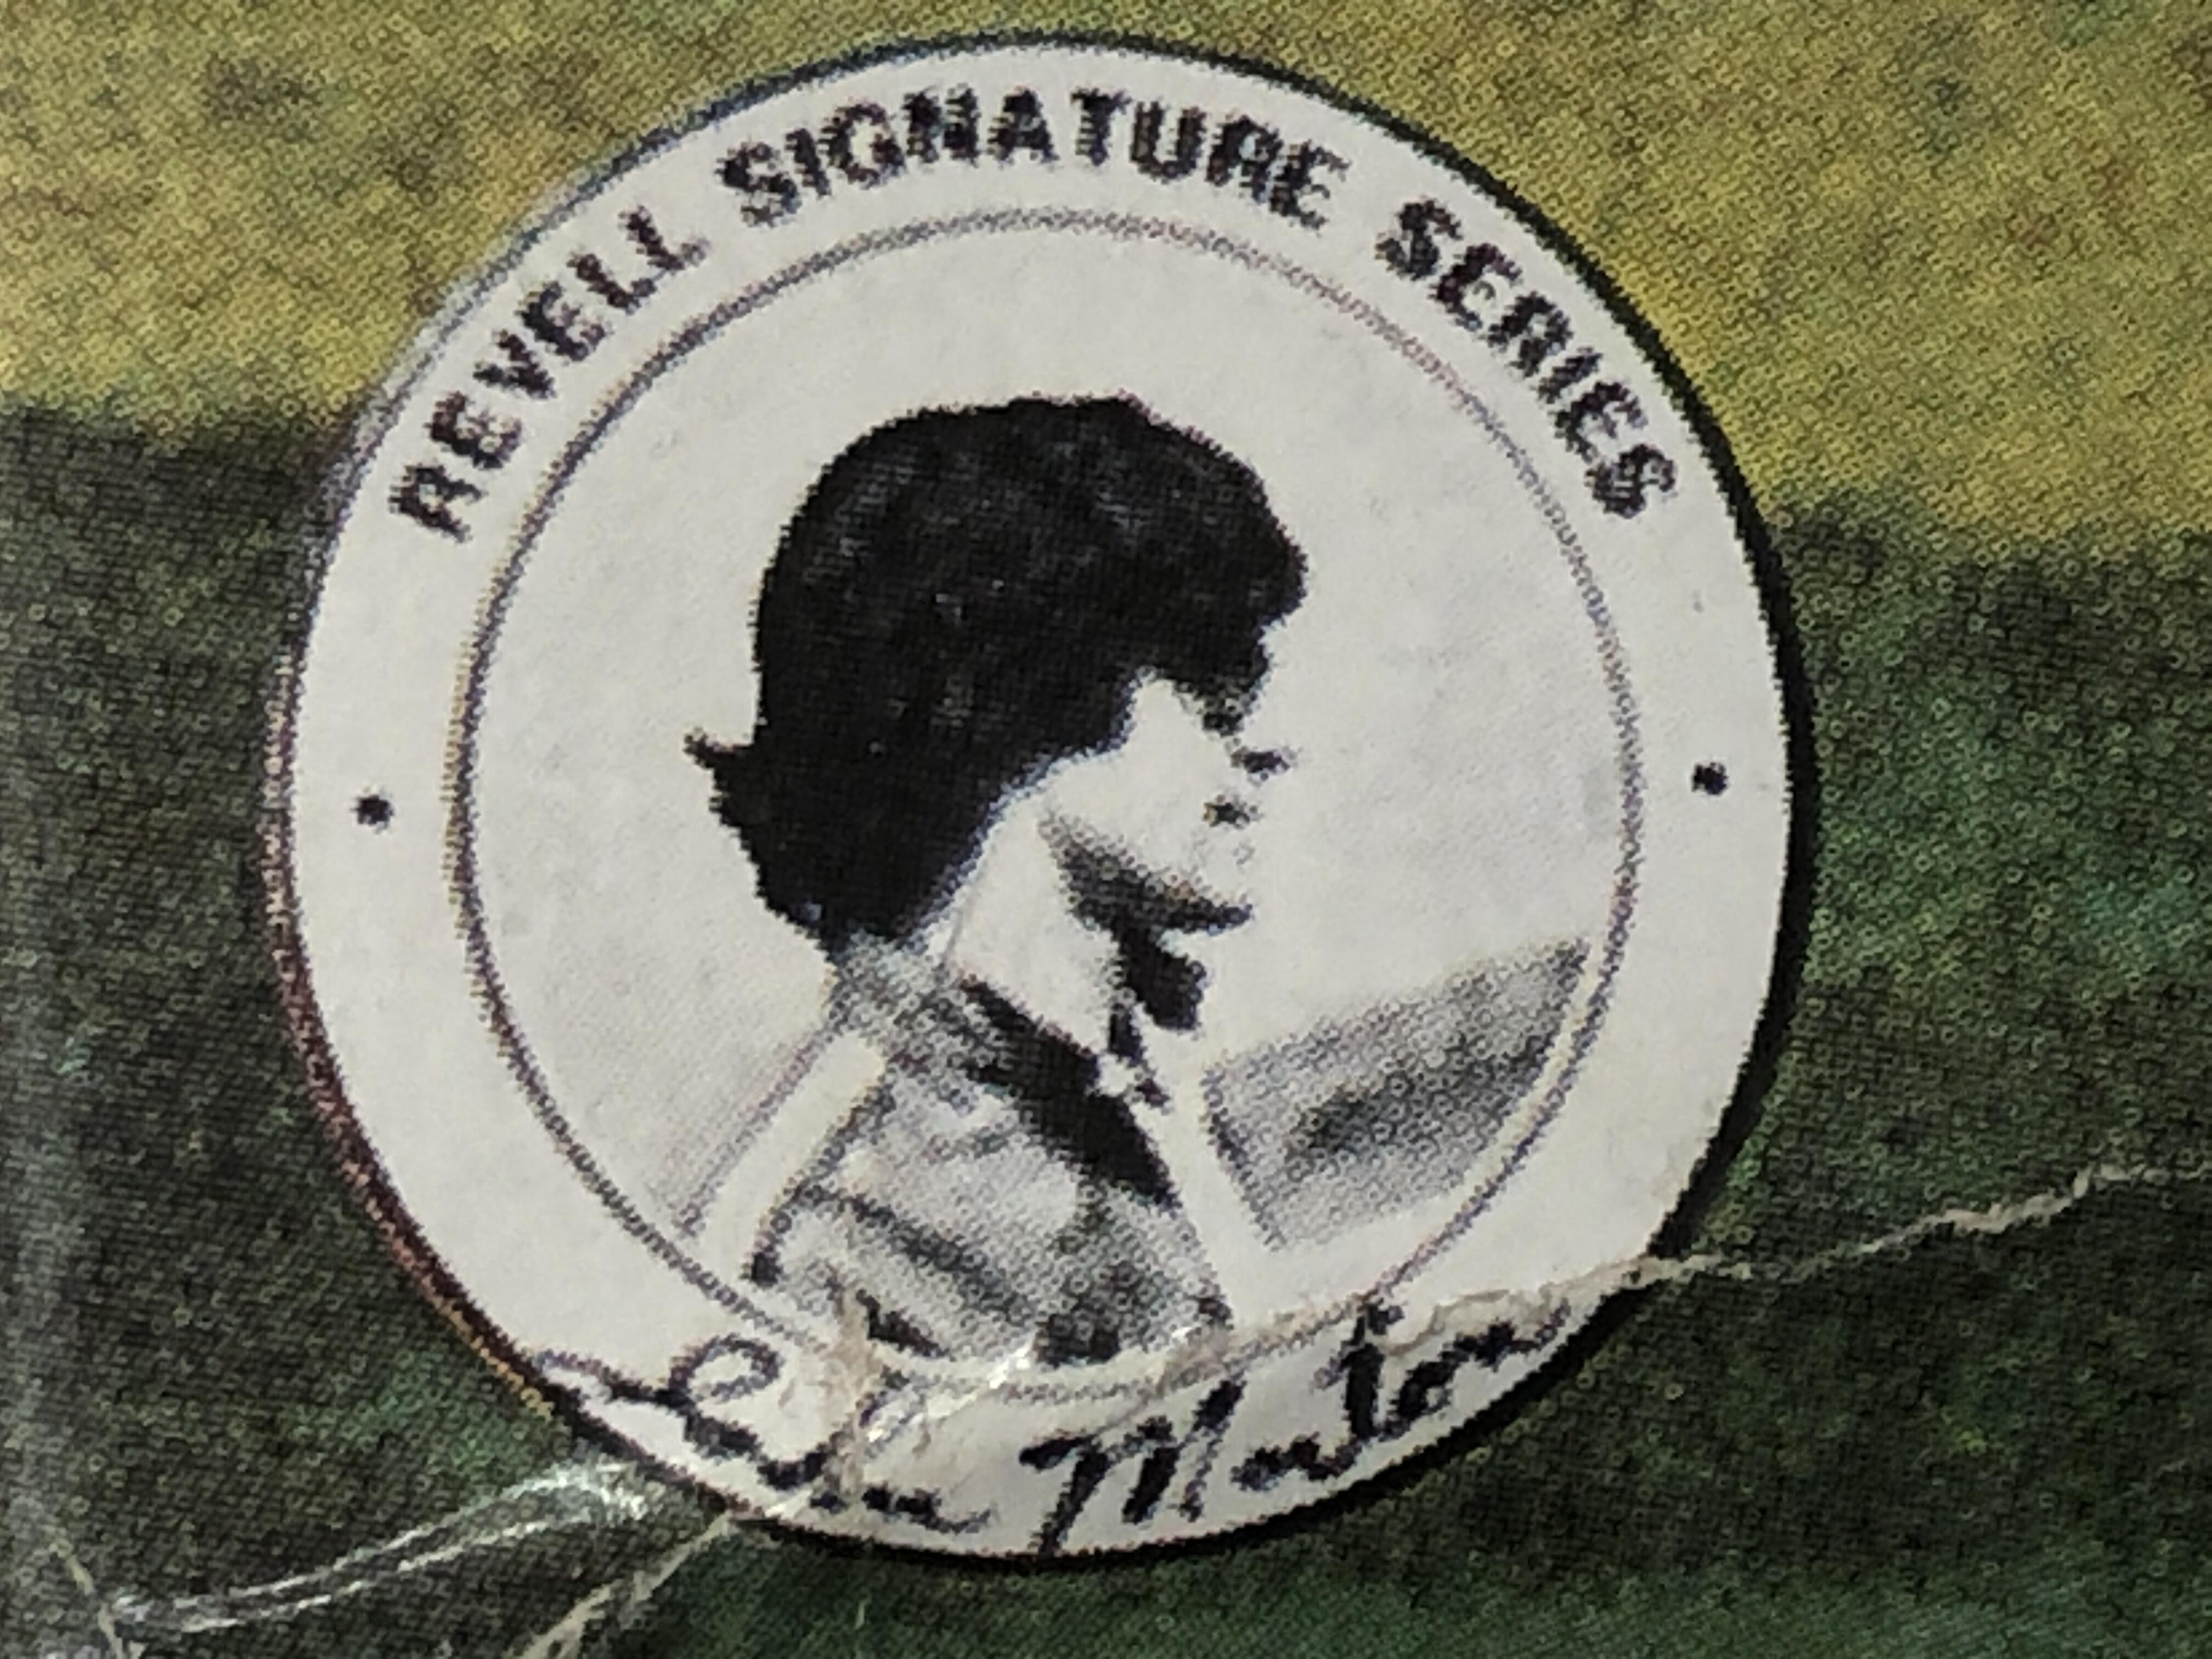
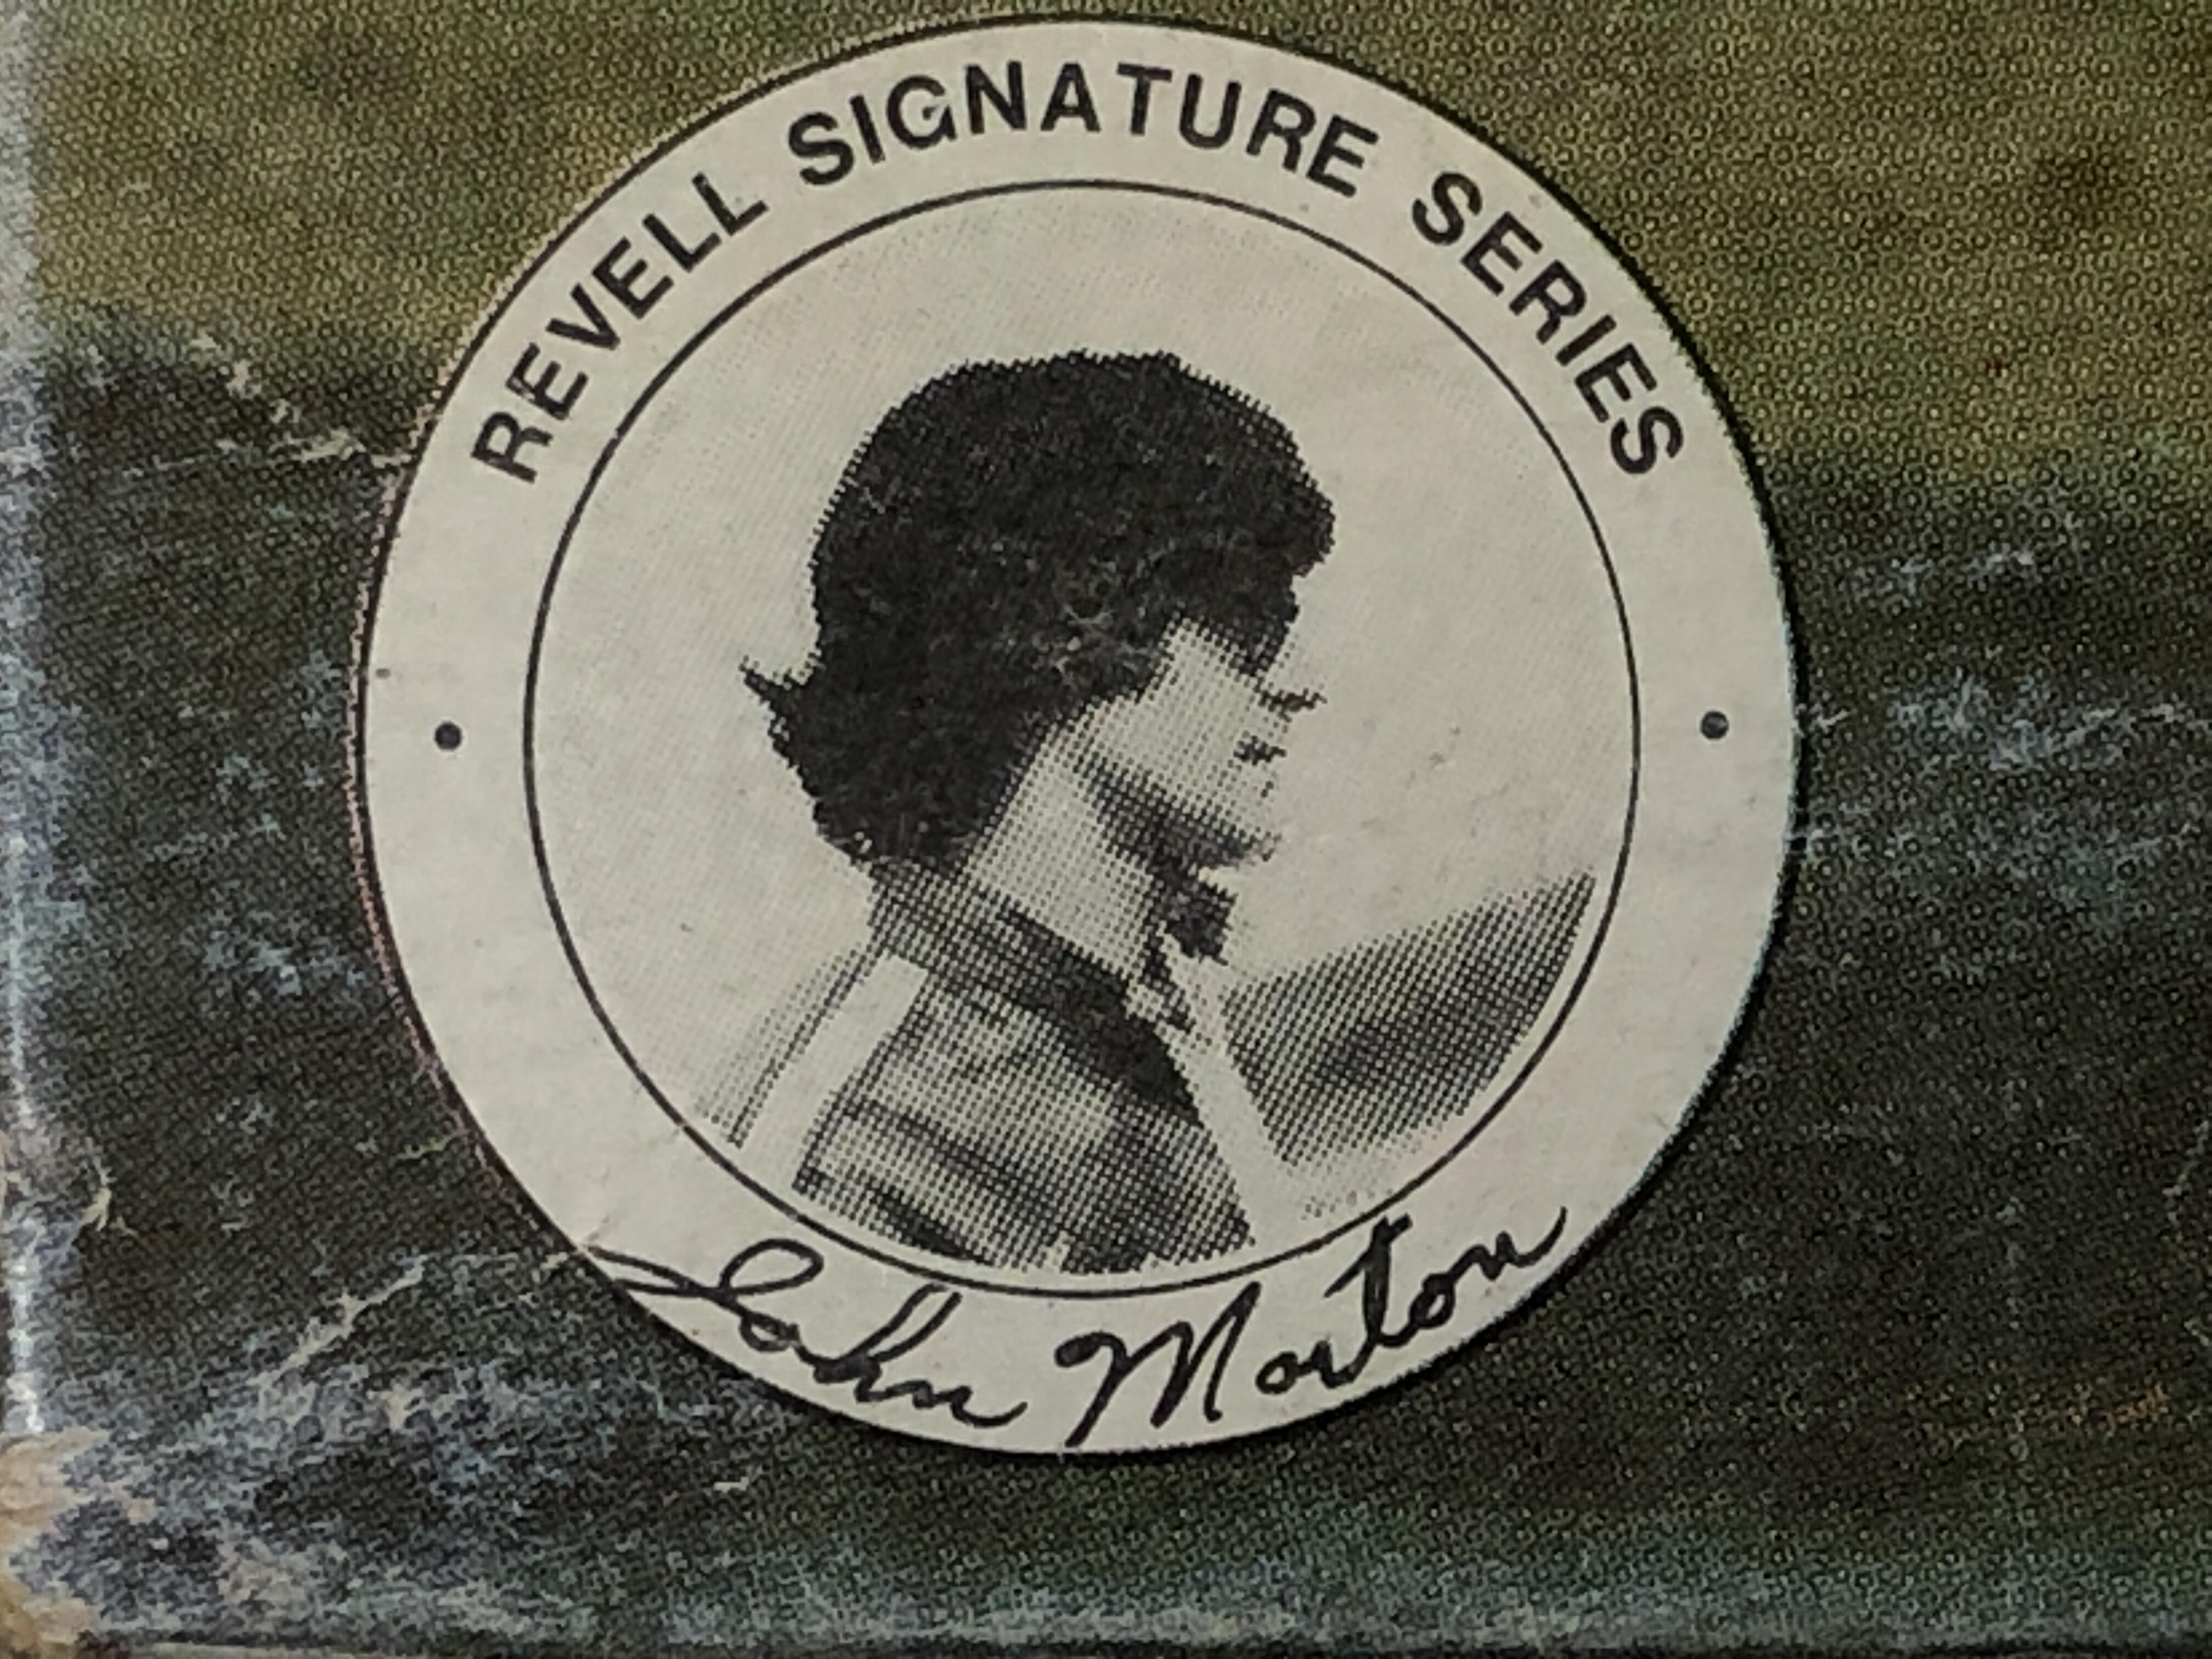
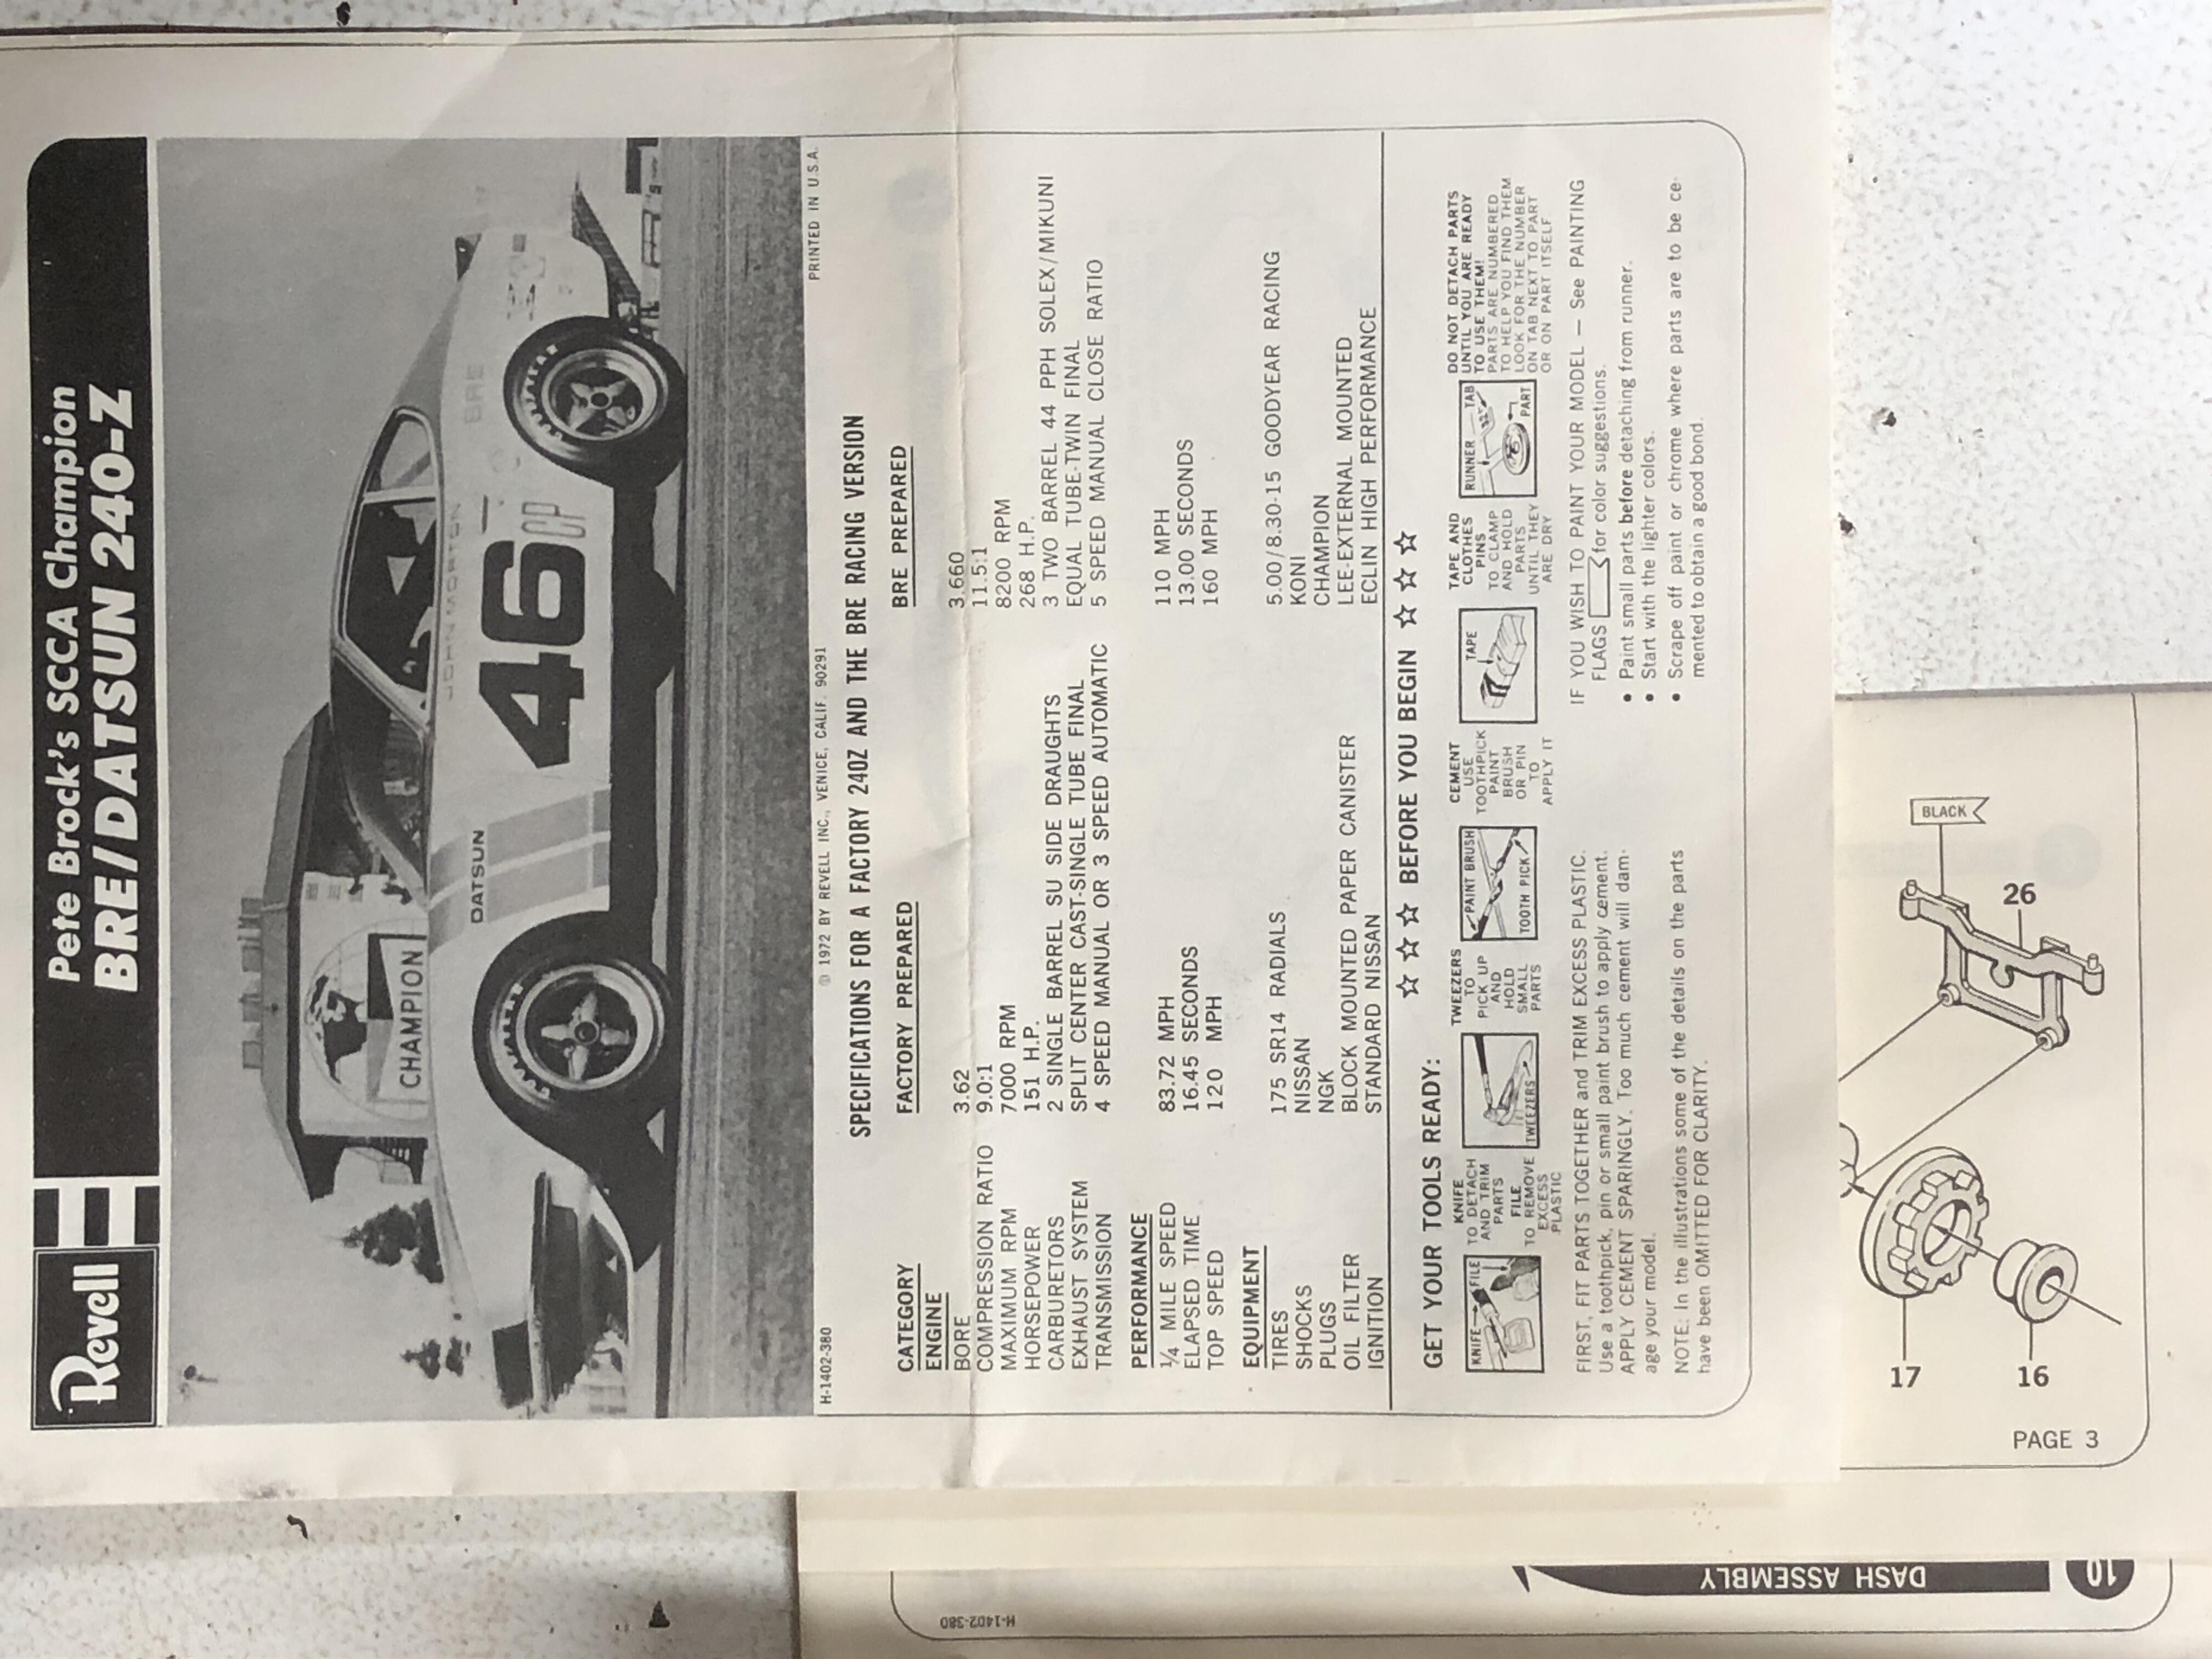
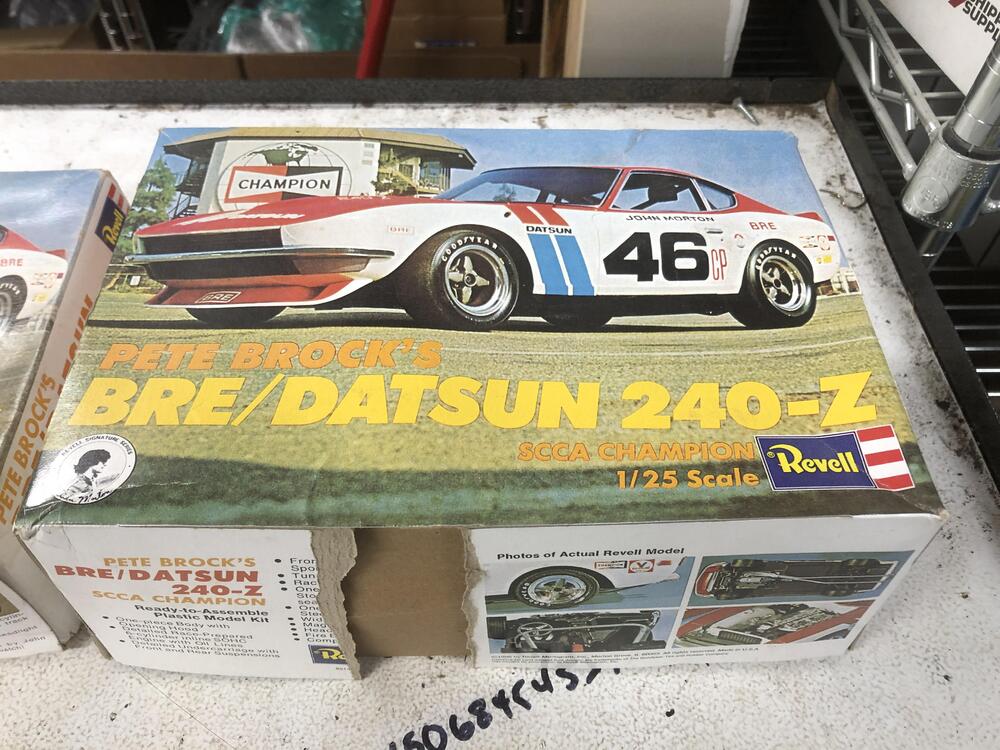
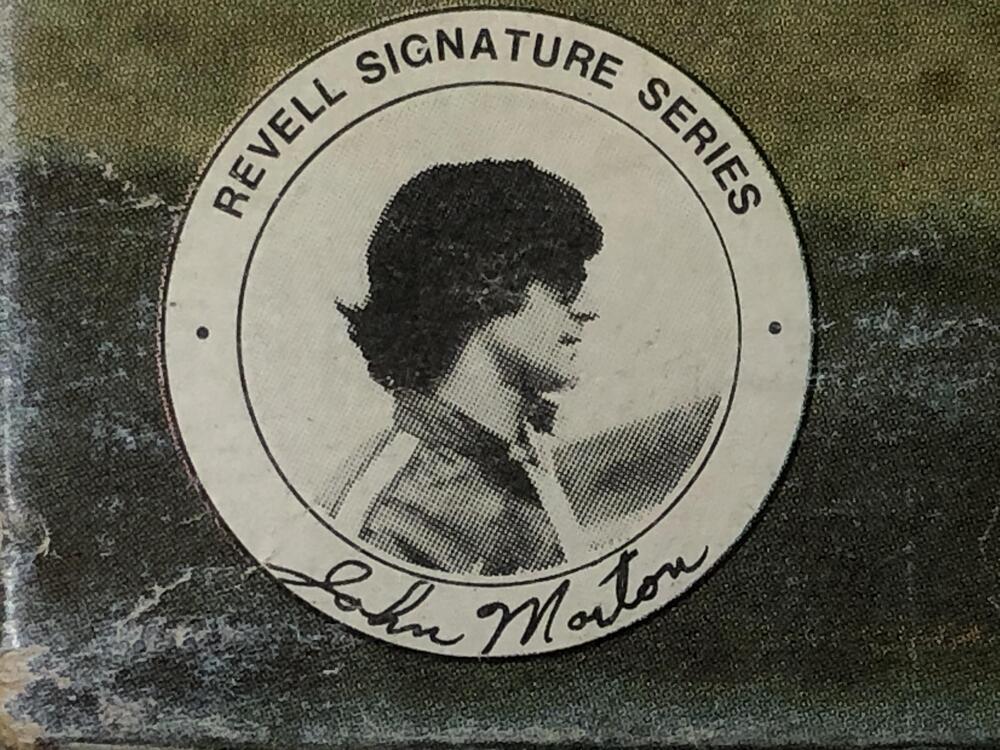
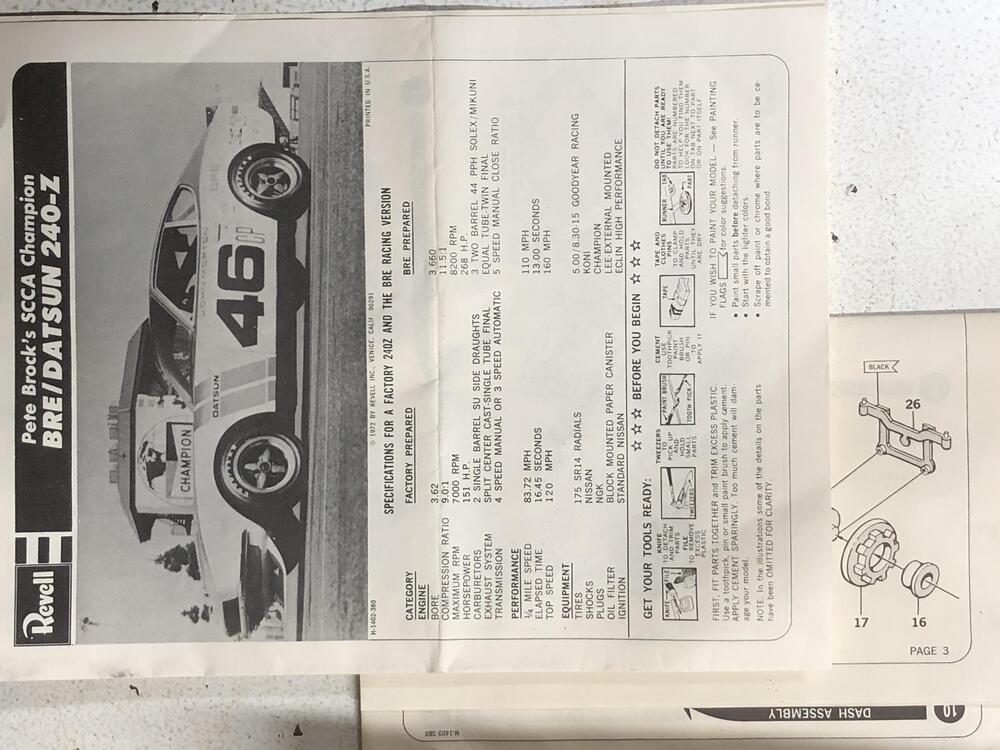
Wouldn’t consider myself a model citizen, but I have an early Revell 240Z Peter Brock “46” 1/25 kit that I purchased from a guy off facebook a couple of years ago, and today found another for sale locally on Kijiji. Definitely a later version. Model #’s are H-1402 (early) and H-1422 (larger, later) The early box is shorter and has a different image on one side than on the later taller box. The image of Pete and John is only on the early box. Not the most flattering pose for John. Ha! Later taller box is also missing a strip. Dang it. At least the model parts are all there and un-assembled. My early version is partly assembled and several of the pieces are off of the frame. Previous owner started assembly. Haven’t search the inter webs for the part numbers to see how old they are, but pretty sure they would be 70’s. Now that I’ve searched a bit, the instruction sheet indicates 1972. Might part with the later one with the damaged box. Let me know if you’re interested This stamp is on the later taller box, definitely an inferior copy of a copy or such. This is on the earlier box. Much crisper.


-
oh yeah! Still have plenty of those kicking around. Use them all the time.
-
And here we are again with more evidence that there is something new to learn every single day. Thanks for the great detective work.
-
Thank you!
-
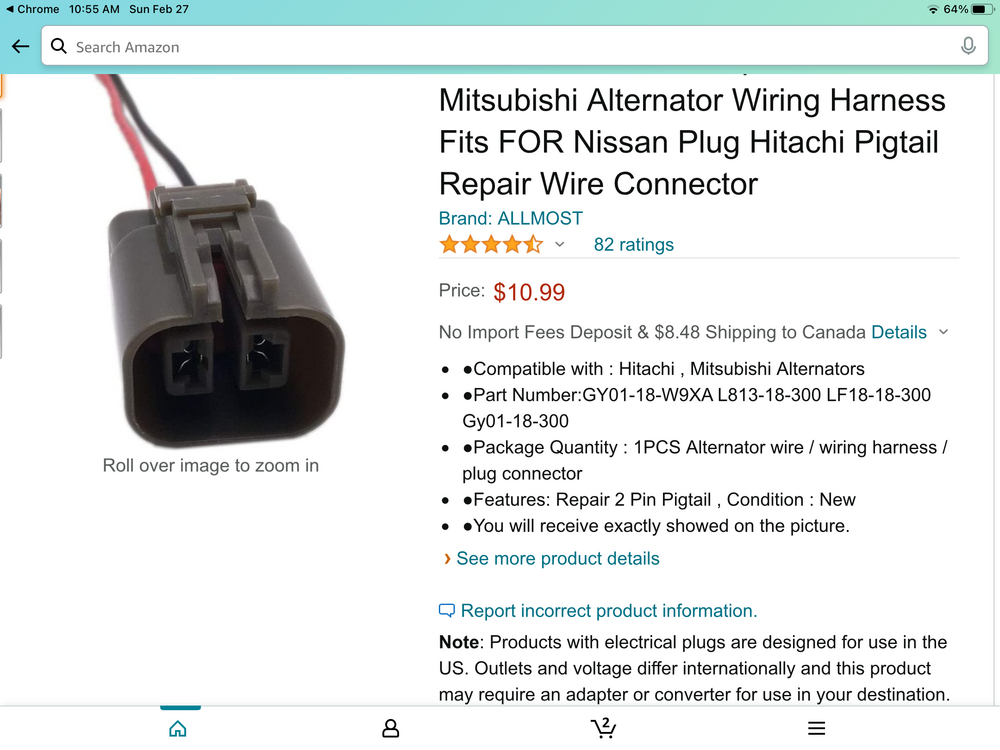
Fabulous! Love it when upgrade stuff bolts in. Can you post up the part number of the pigtail you found? Thank you!
-
The stock cups where indeed welded to the overall mount. you don’t want to trying to line up any more parts than you have to when installing these. The actual cases of broken TC rods with poly is extremely low, and I bet of those, it was caused by pitted or less than perfect TC rods that were compromised to start with. Inspect the TC very closely, especially right at the step where the washer sits. ANY pitting means get new(er) rods. I personally put rubber on the front, and poly on the rear, or just stick with fresh rubber on both sides. Impact harshness when going over bumps is reduced with rubber on the compression side of the mount. If you are racing and trying to maintain a set of fixed alignment specs then get a set of adjustable length solid mount TC rods from any of the half dozen suppliers of these parts. (Techo Toy etc).
-
Nope, nothing intended to be taken apart with these. Sand blast them best you can then powder coat as is. Any place that doesn’t get much PC isn’t visible anyway. Well they “can” be taken apart with grinding and re-engineered with replaceable fasteners, depends on the level of quality you are trying to achieve I guess
-
Lest we forget...
-
10mm outside diameter. Seem them on the couple of 69 510’s I’ve worked on recently as well doing the same duty.


-
sometimes its hard to see when the stamped numbers are full of "nasty". Just count the teeth if you can't find it.
-
The holes are likely a weight saving feature. Or a way to tease you. You look in there and realize there is space to squirrel things away, but you realize can’t get there from here…. Someone was a hero when they suggested using that space for tools and doing away with the behind seat storage.
-
The bumper mounts got bigger, the doors got bigger intrusion bars, the hazard switch and HCP’s grew illumination, the gathering storm of safety and emissions requirements was just gathering steam.
-
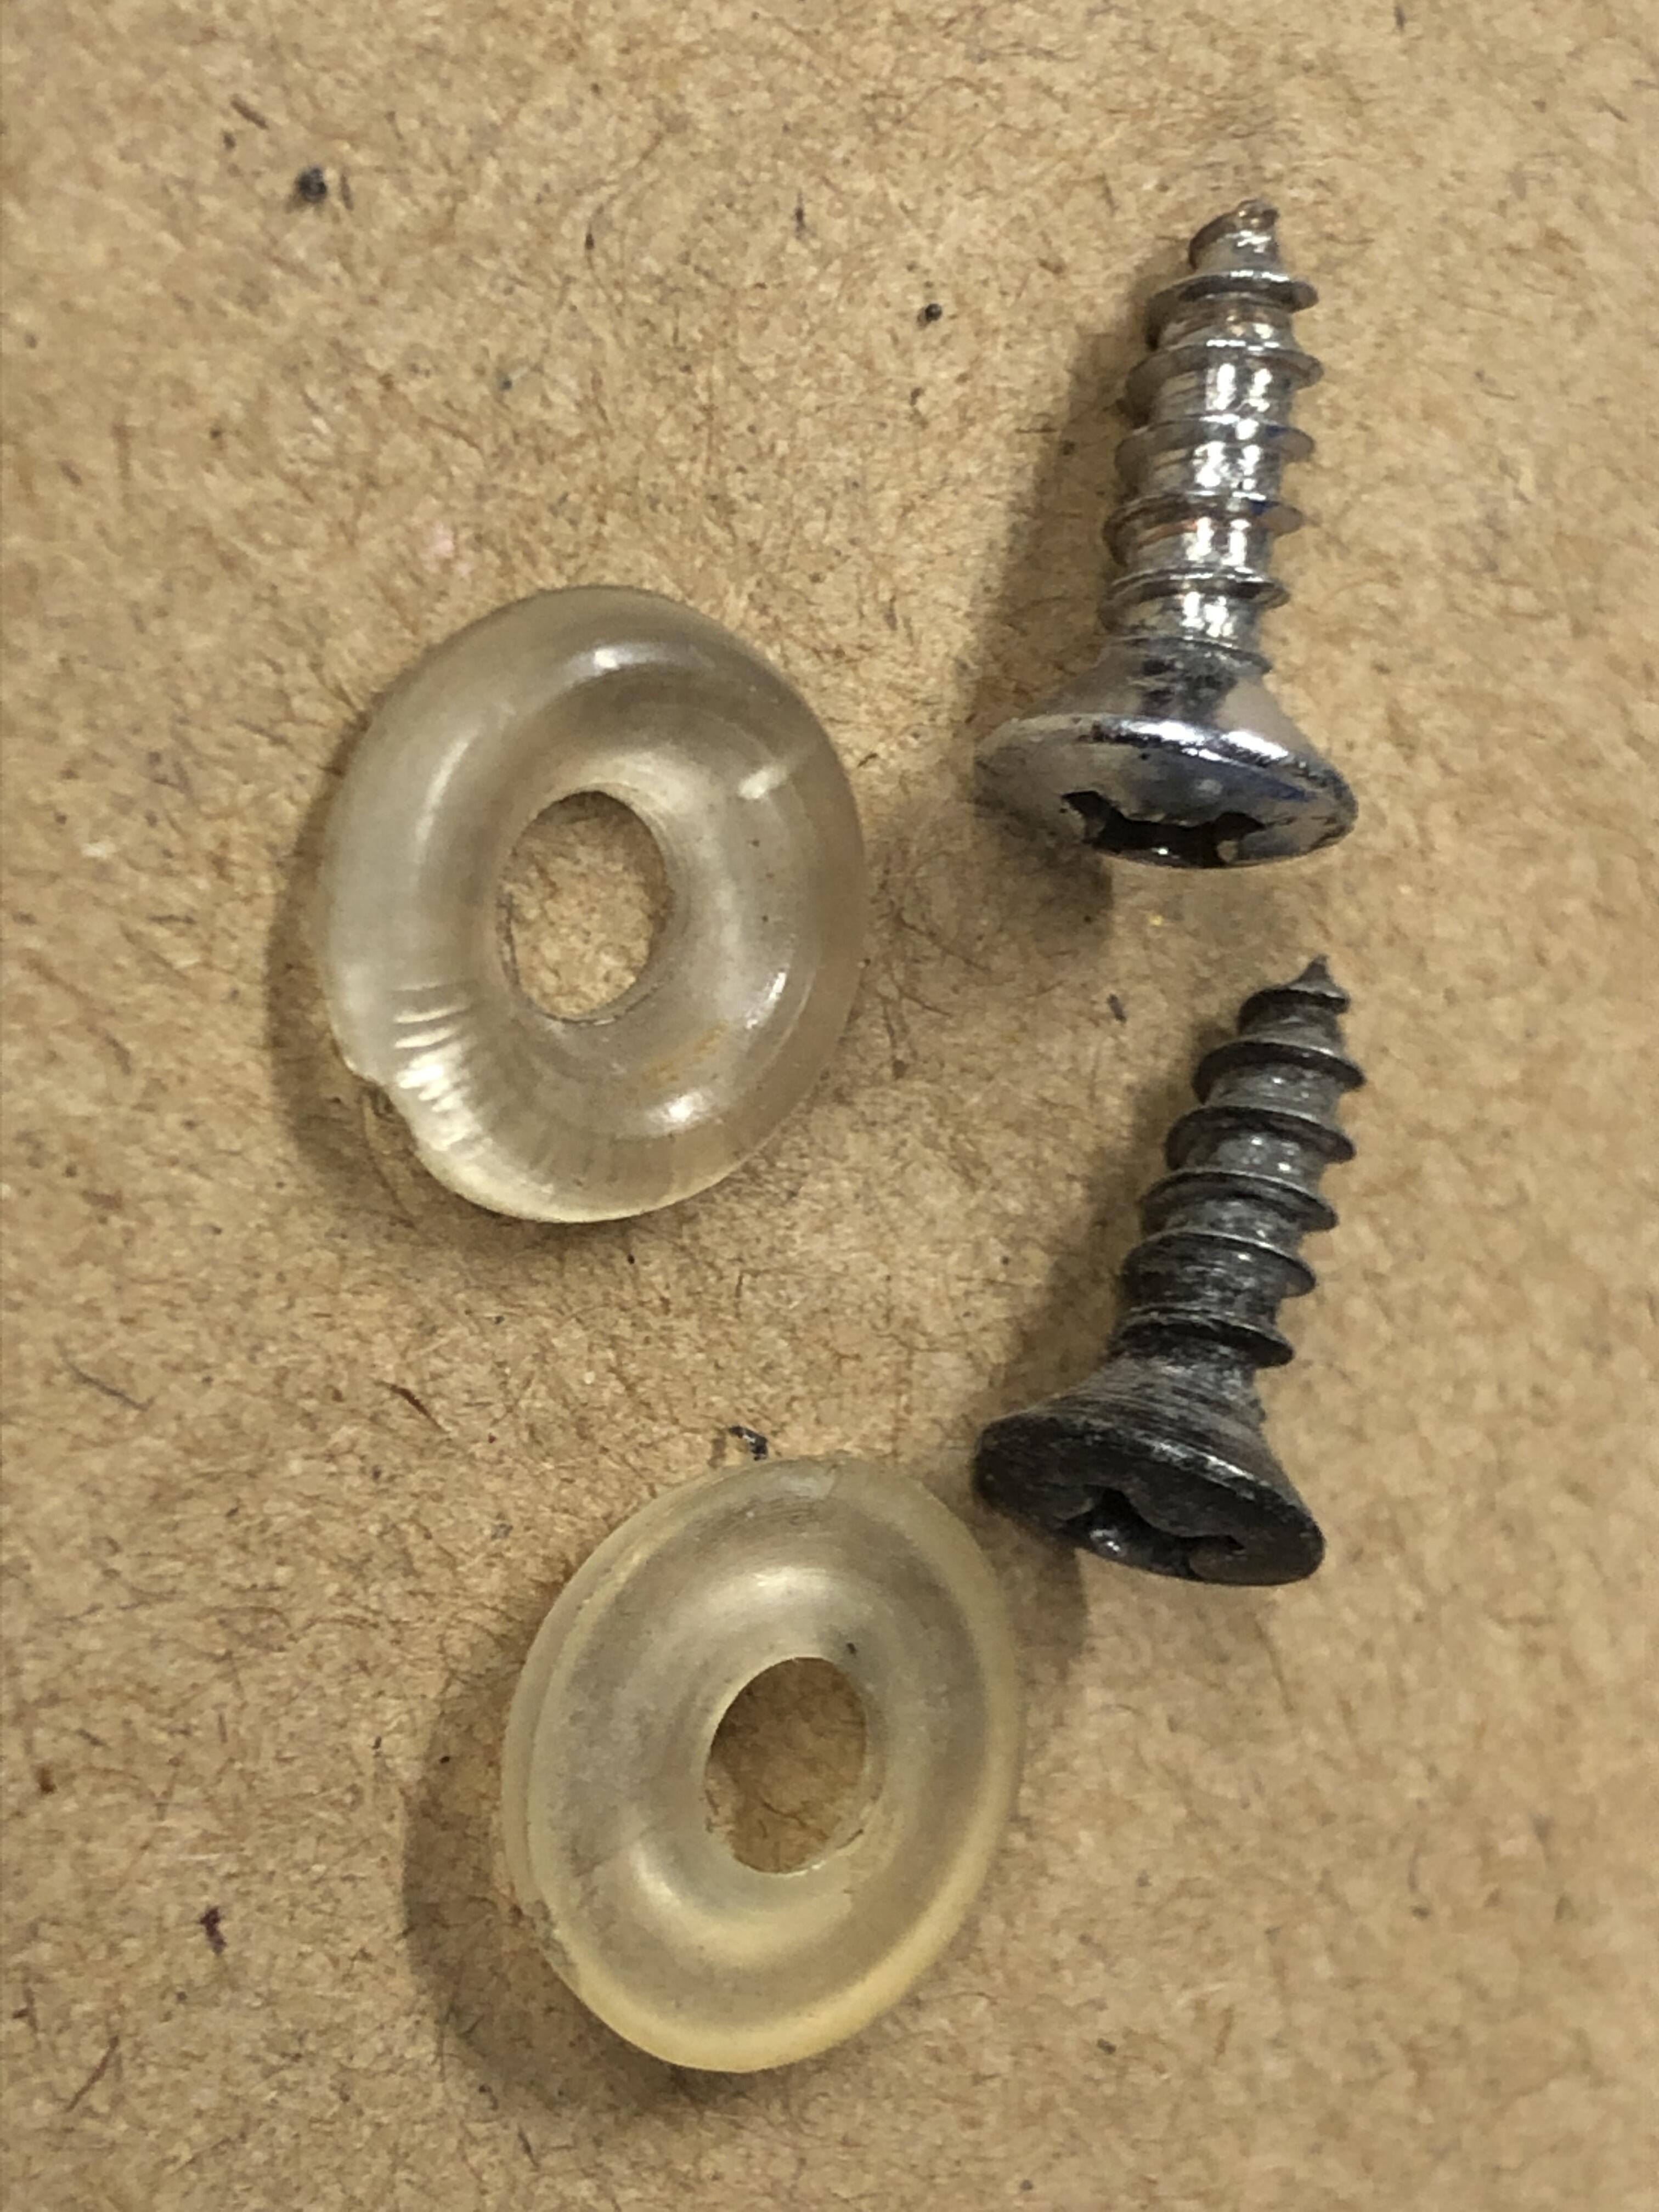
You’re missing the internal safety bar that is normally inside that door. It is attached with three bolts through those holes on this end.
-
Well, I stand corrected. And thinking about it after having driven this trans for many miles, first is not as low as I thought. Thanks for setting that straight
-
Something about “Thou shalt not covet thy neighbor’s Datsun….” comes to mind, but… I’m coveting like crazy here. Nice find indeed!
-
These late 77-78 latches are different than the earlier ones, but the single most powerful thing I done that often changes a door that won’t latch into one that latches easily is to lubricate the mechanism. It HAS to rotate freely or it will have trouble getting to the “2nd stage” latched all the way position.
-
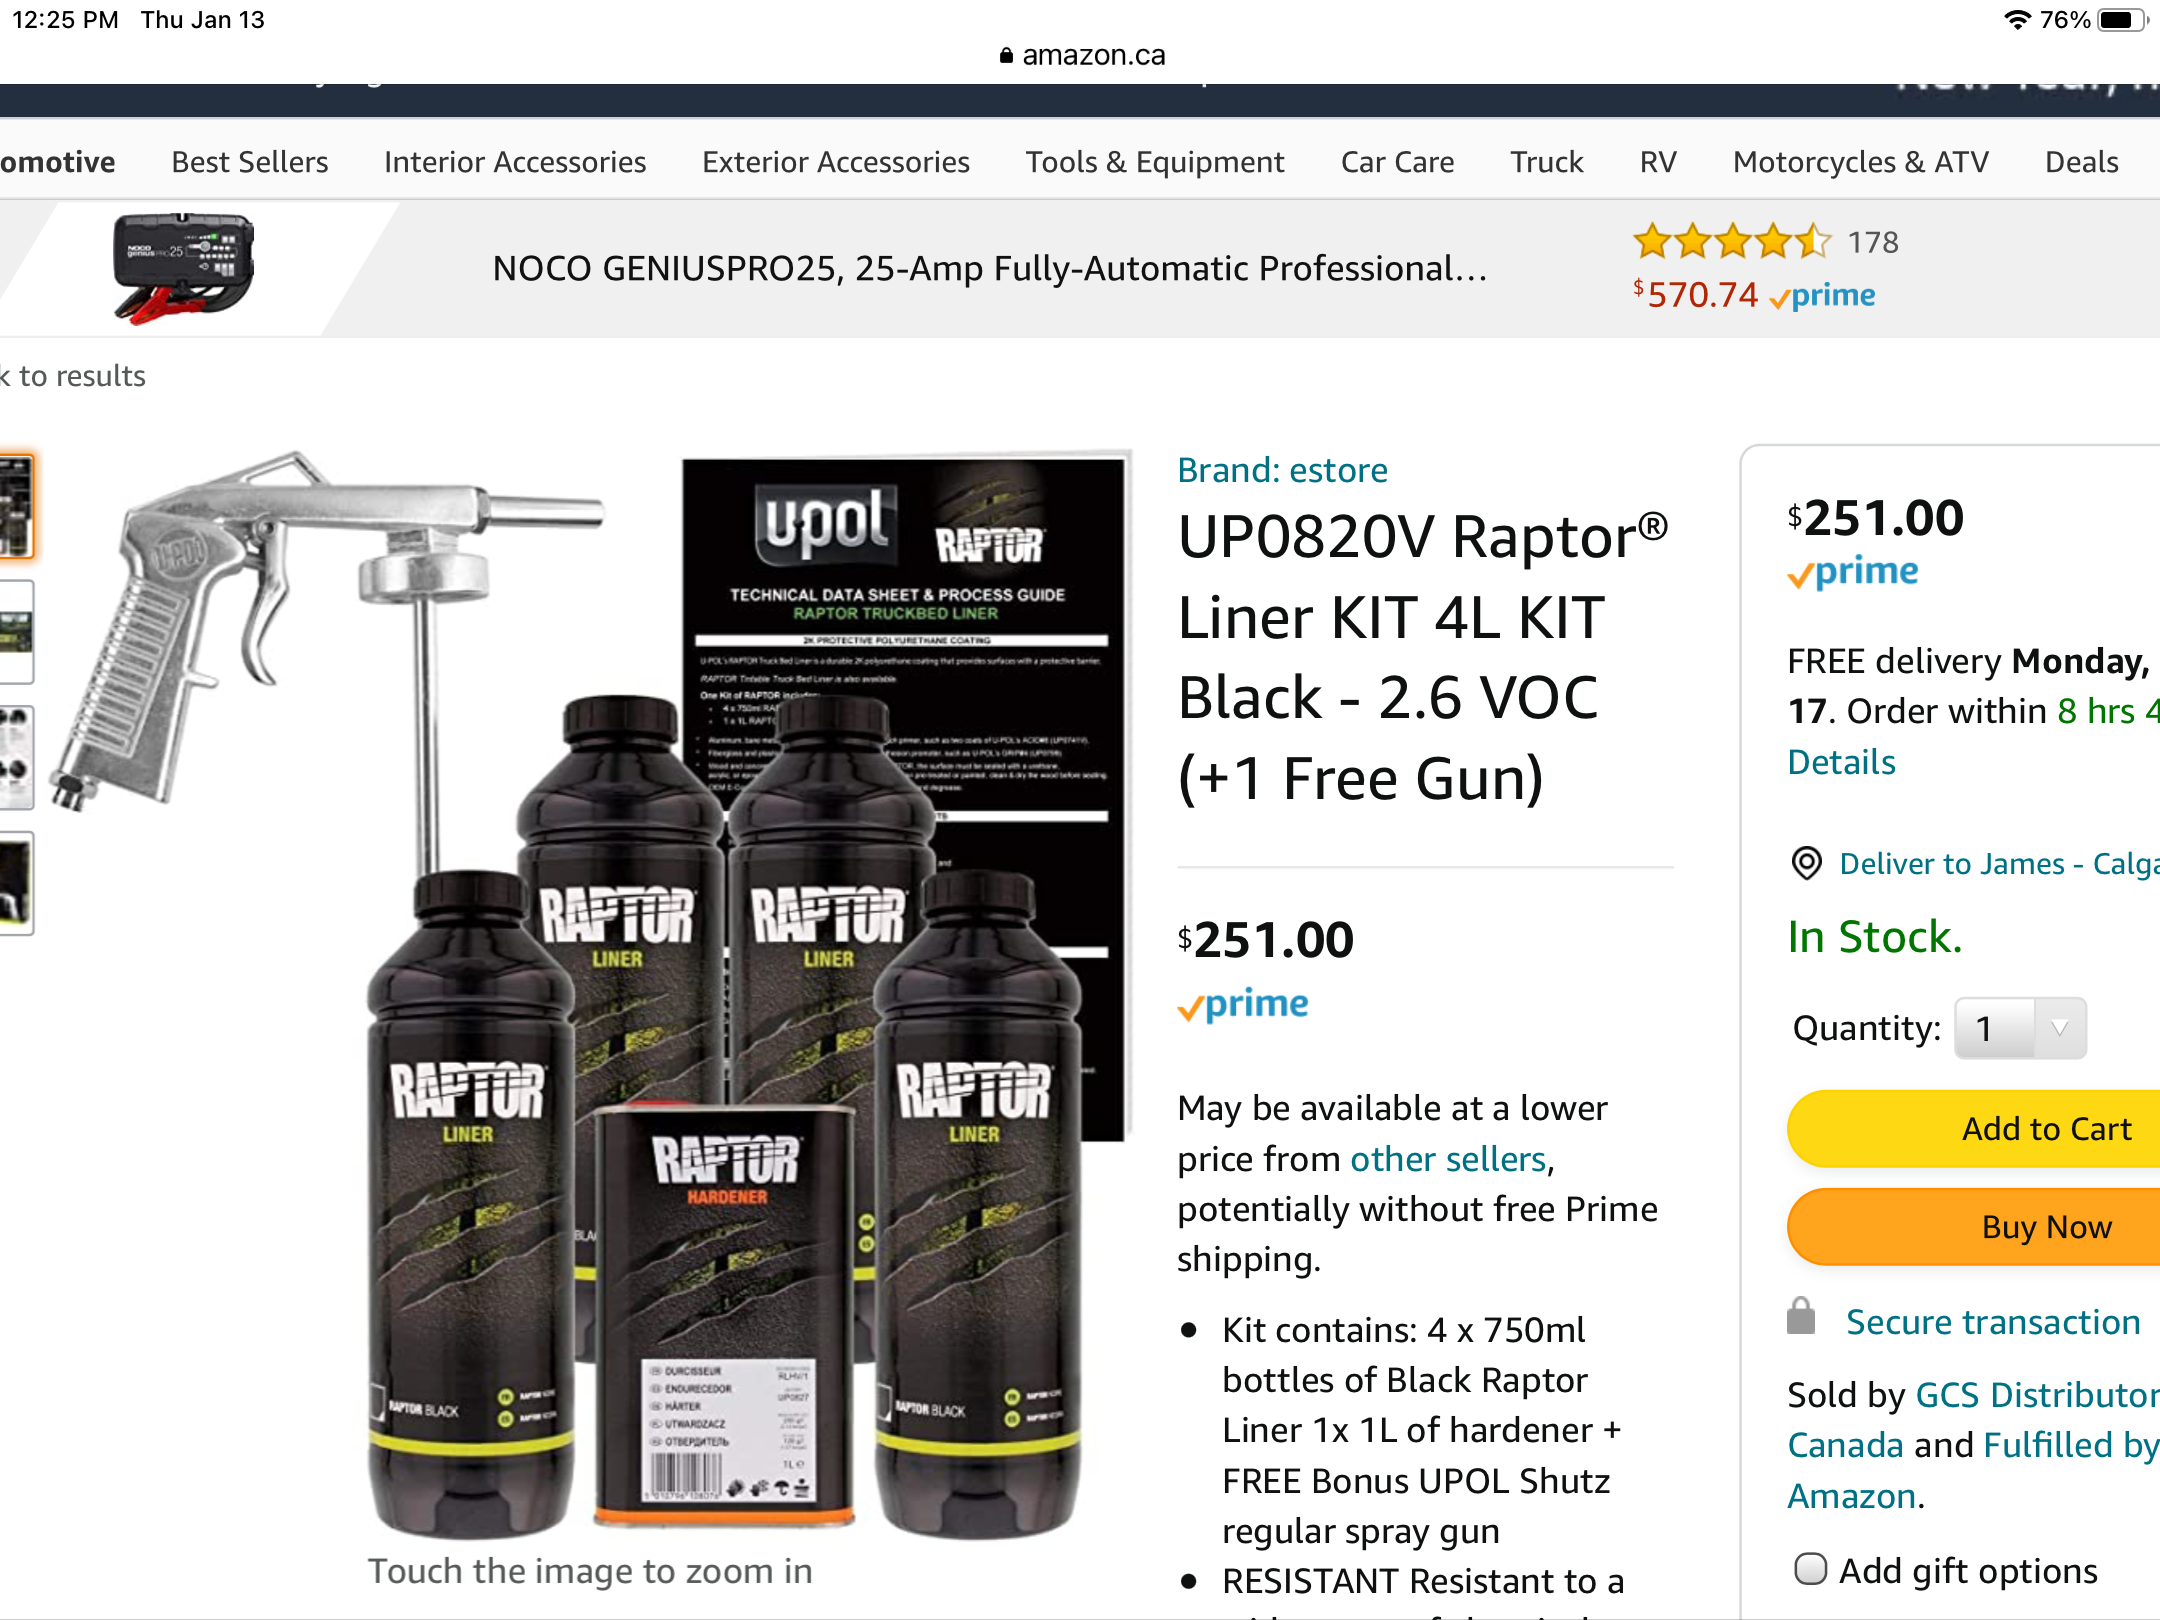
About the only thing I’m putting on the bottom of my Datsun’s now is a pro quality 2-part “truck bed liner” like Raptor. It has proven itself on the bottom of several heavily driven cars in my sphere of influence…. As with anything you apply to your bottom, proper prep and attention to detail are the key to staying stuck for a long long time. My first experience with this stuff in the bed of my various ford 1/2 tons, and with all the scrap metal and datsun junk I have abused those boxes with the ONLY damage I have ever done to the coating is with a single small chip that I caused with an sharp engine block corner crashing into the deck one day when “putting” (more like tossing…) it back there. With the current truck we are 7 years in and the coating looks new, other than not being shiny and black anymore.

-
Yes this is always an option. I haven’t measured it, but the total adjustment in the two slots on the dizzy base seem to be about the rotation distance between the 6 towers. The only issue is assigning wire lengths that “fit” well with your new dizzy ‘TDC” position for each plug.
-
Datsun stud pattern is 4 x 114.3mm. What bolt pattern are the wheels you’re looking at? +25mm wheels will require spacers to clear the tire away from the strut, maybe 15mm (5/8) is enough spacer.
-
I can beat totalZ and ebay pricing. Send me PM and we’ll discuss