zKars
 Subscriber
-
Posts
3,742 -
Joined
-
Last visited
-
Days Won
107
Content Type
Profiles
Knowledge Base
Zcar Wiki
Forums
Gallery
Events
Downloads
Store
Blogs
Collections
Classifieds
Everything posted by zKars
-
Great topic, great read, lots of stuff I am happy to learn about. Thanks fellow Canucks. “En Grand VItesse Avec La Datsun 240-Z” Magnifique!

-
I have a couple dozen of these, somehow they all migrated to my basement making them hard to find for the rest of you. Sorry about that. In the USA, I'm betting Sal Ceja has plenty and all plated purdy. He lurks on FB in S30 Life or similar.
-
I’ve always seen the same color on the grill no matter where I look so I assume the grills were painted everywhere in the same gray. Never seen any hint of old plating on those long bolts.
-
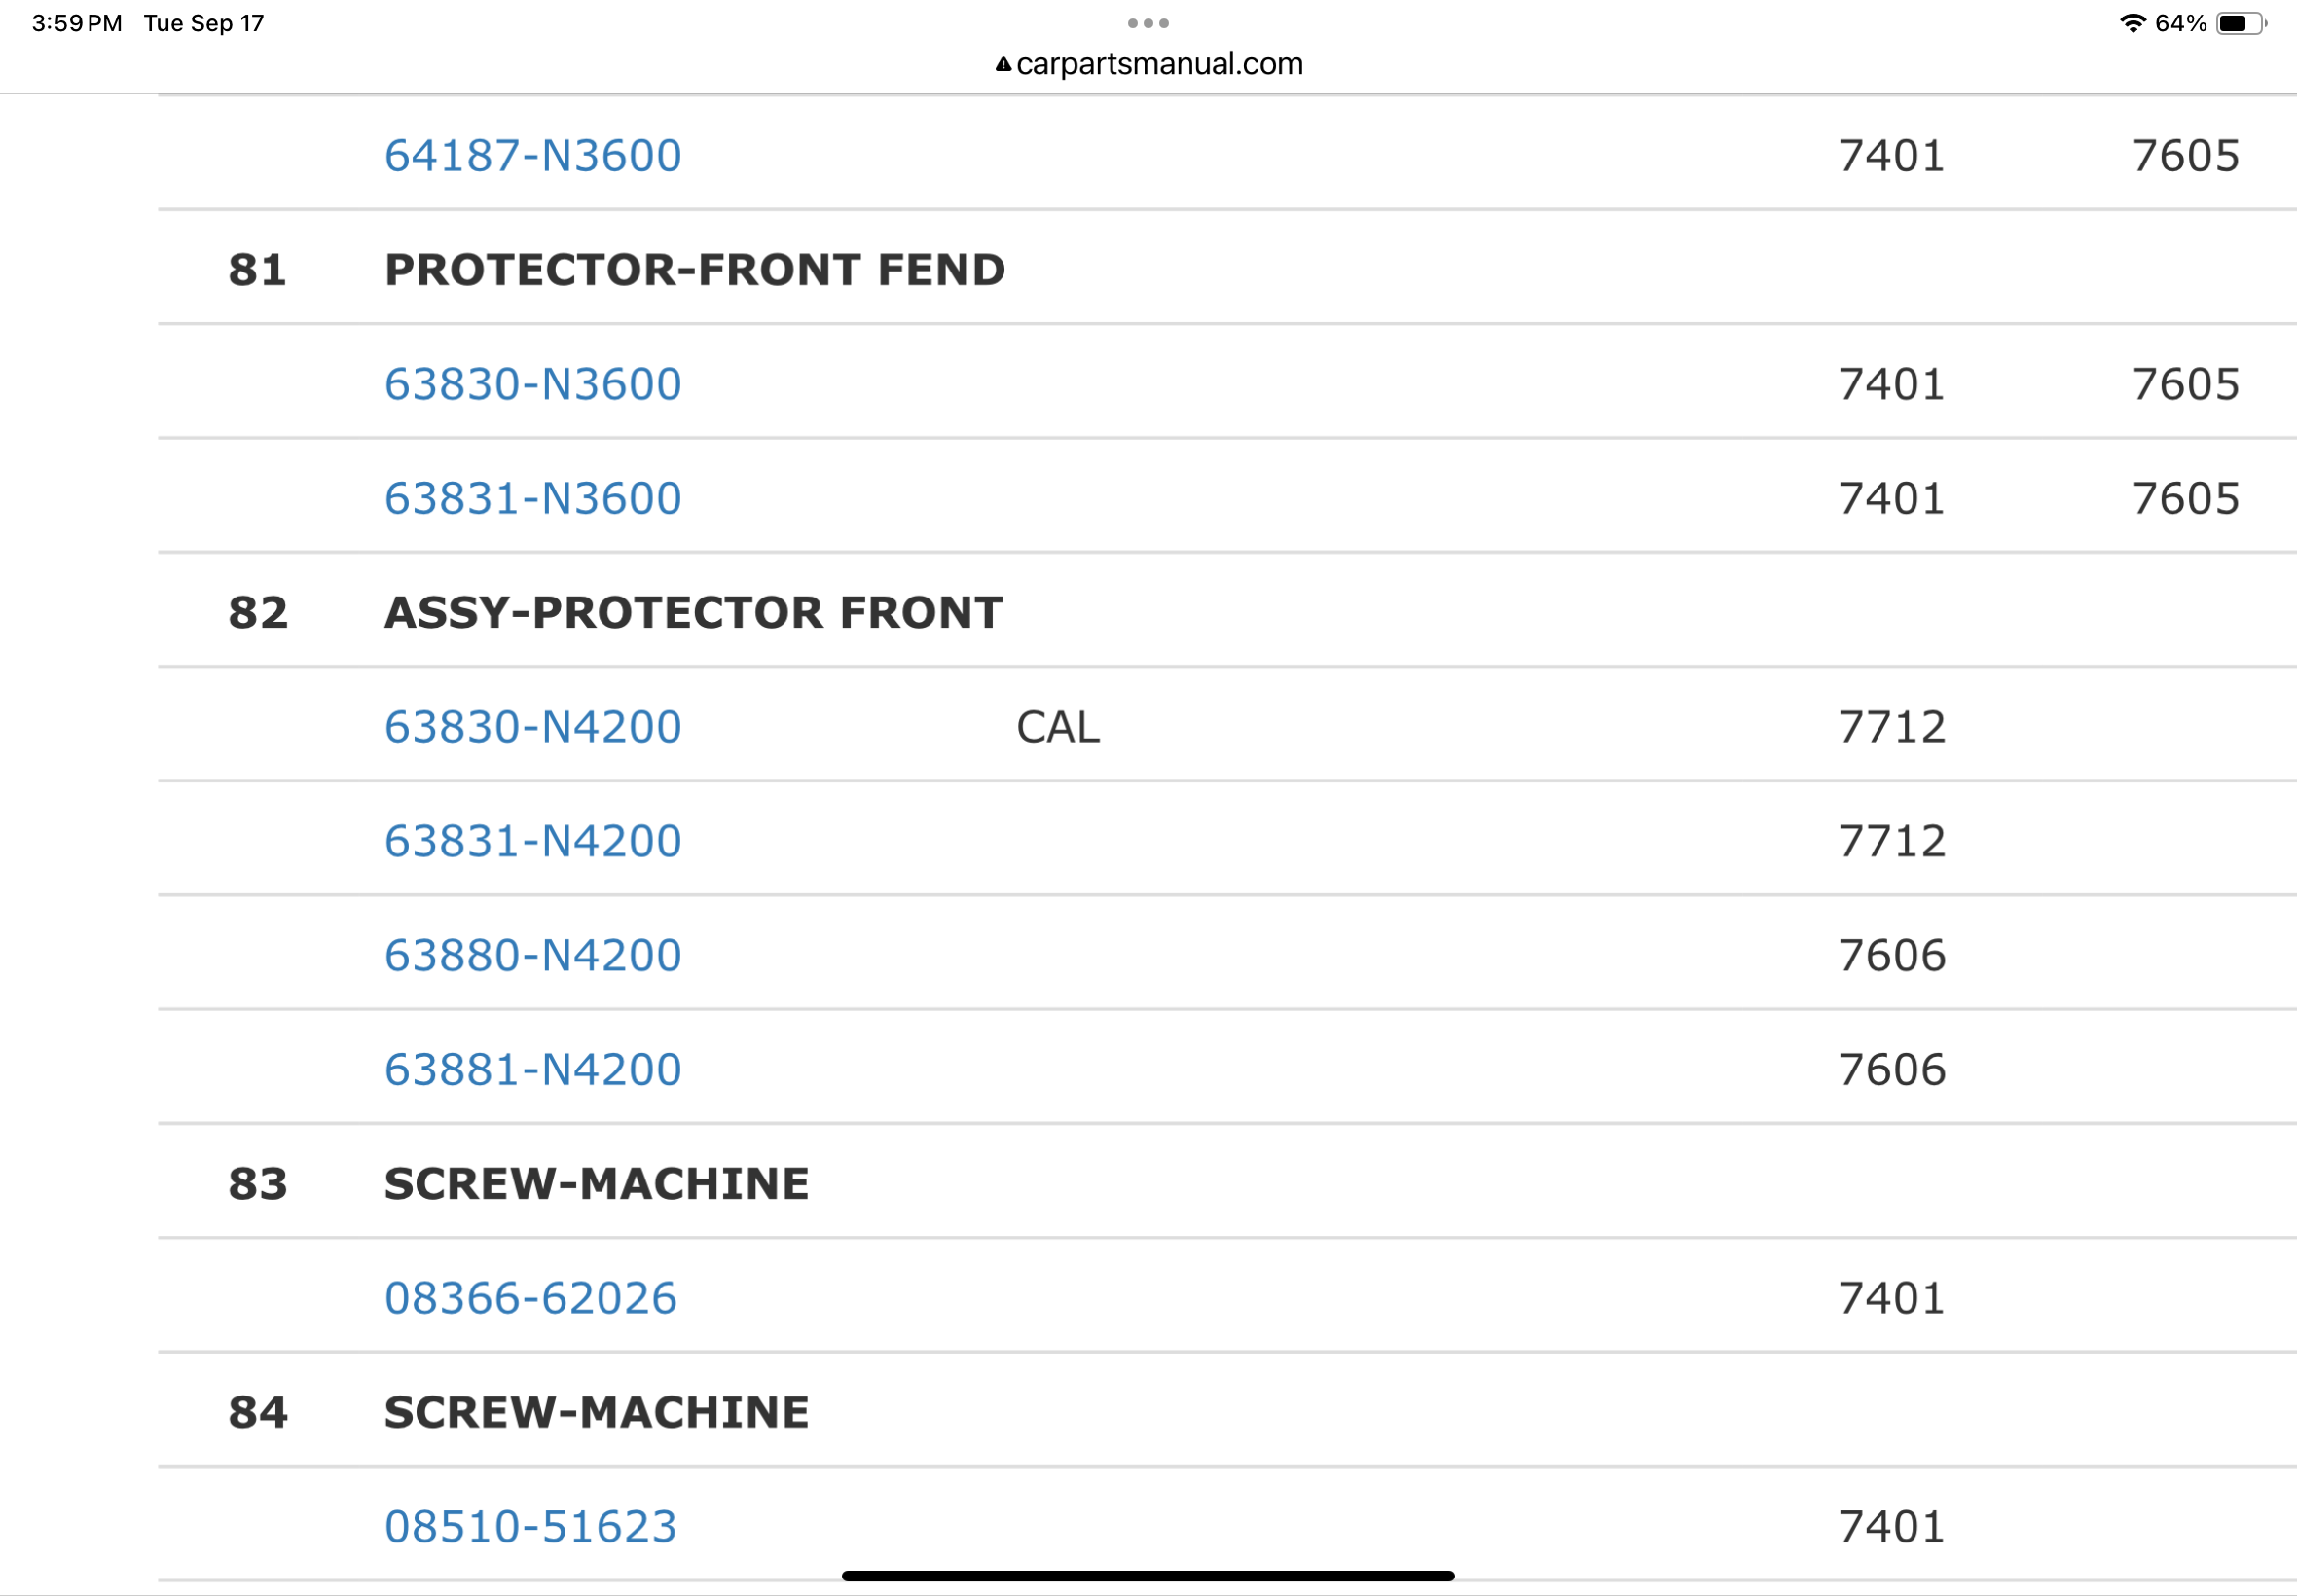
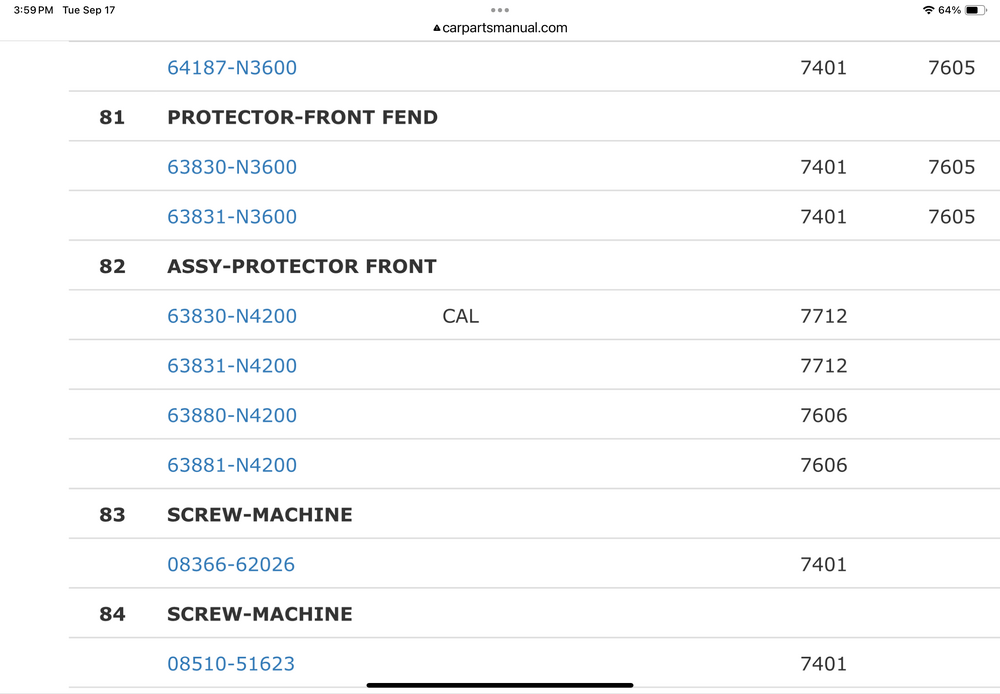
Fiche details about liner parts
-
Somewhere in the 260/280 range, they added entire front wheel well liners in plastic. I imagine they install where you indicated. There are two versions. Not aware there were any such thing on 240’s (all North American references)
-
Those are not related to the lock or door mechanism. As noted they are meant to accept a screw for something. Look a bit small for the M6 bolts the license plate bolts need. The bent arm on the back of the lock cylinder shown “used” to have a little rubber sleeve on the necked down area. Bit of noise abatement. Not needed, you could put a short bit of very small heat shrink on there if you like.
-
Can you post a picture of the thing you are looking for from the other side please. I can rummage through the horde…
-
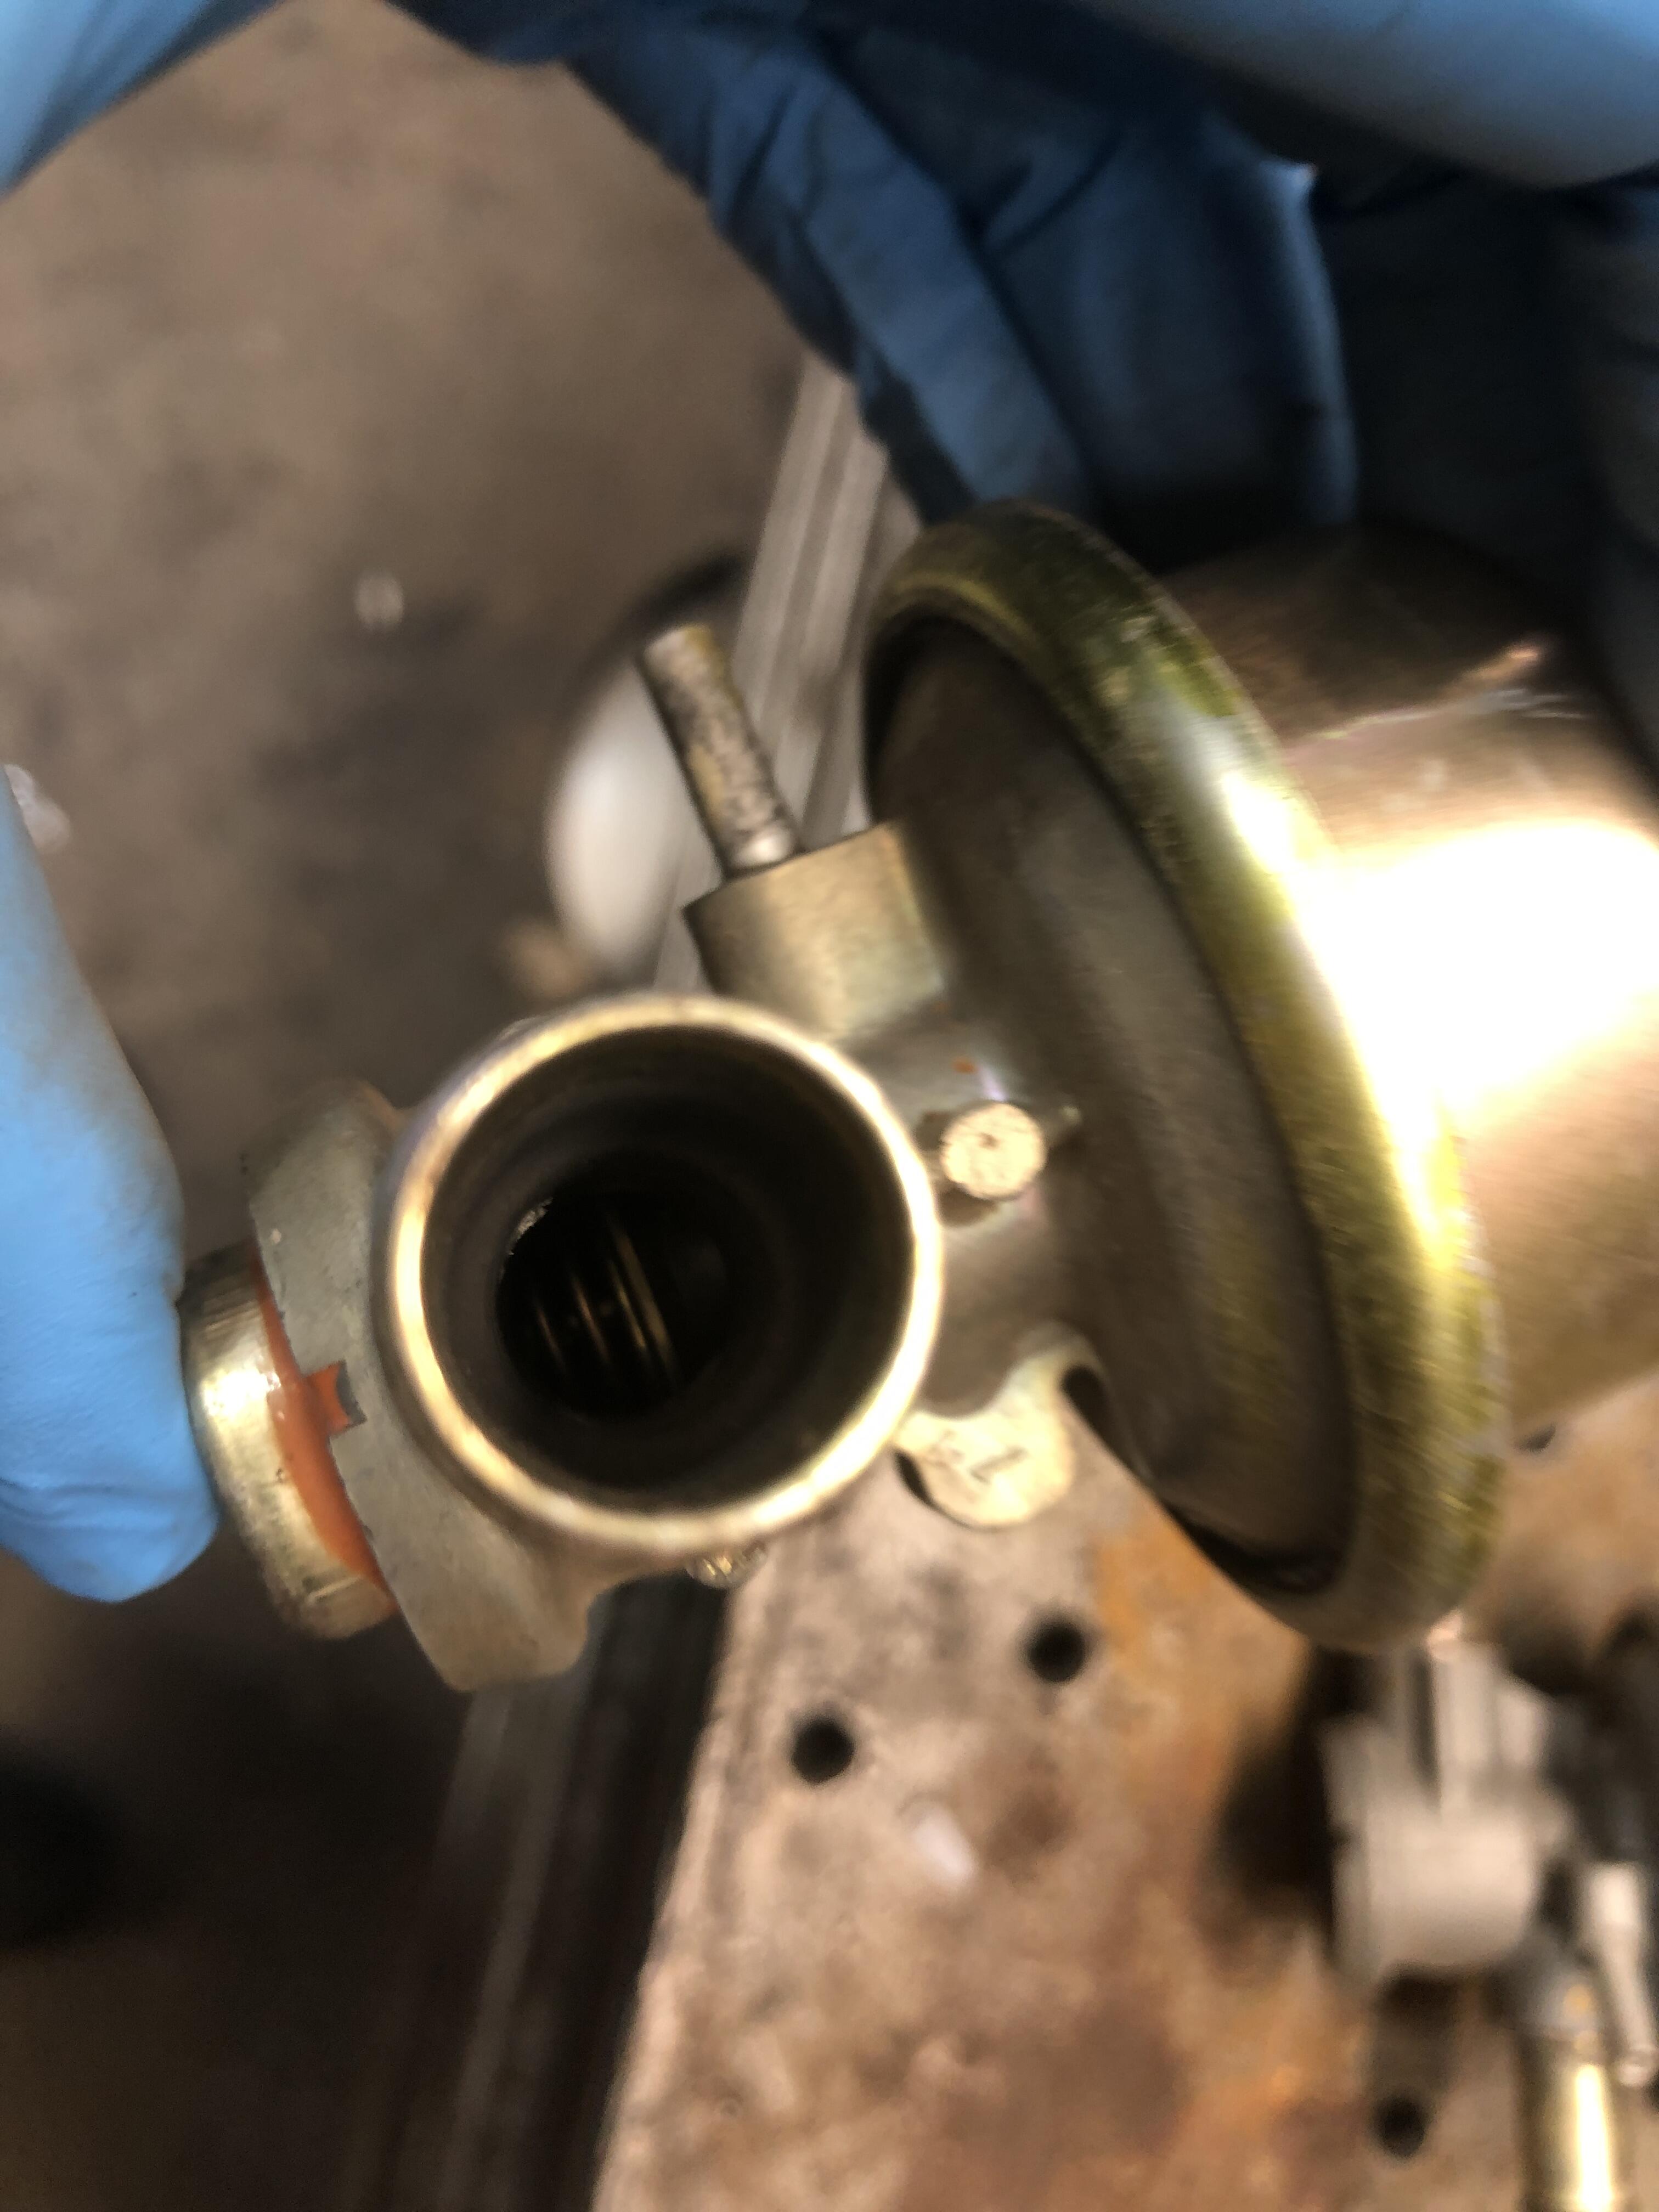
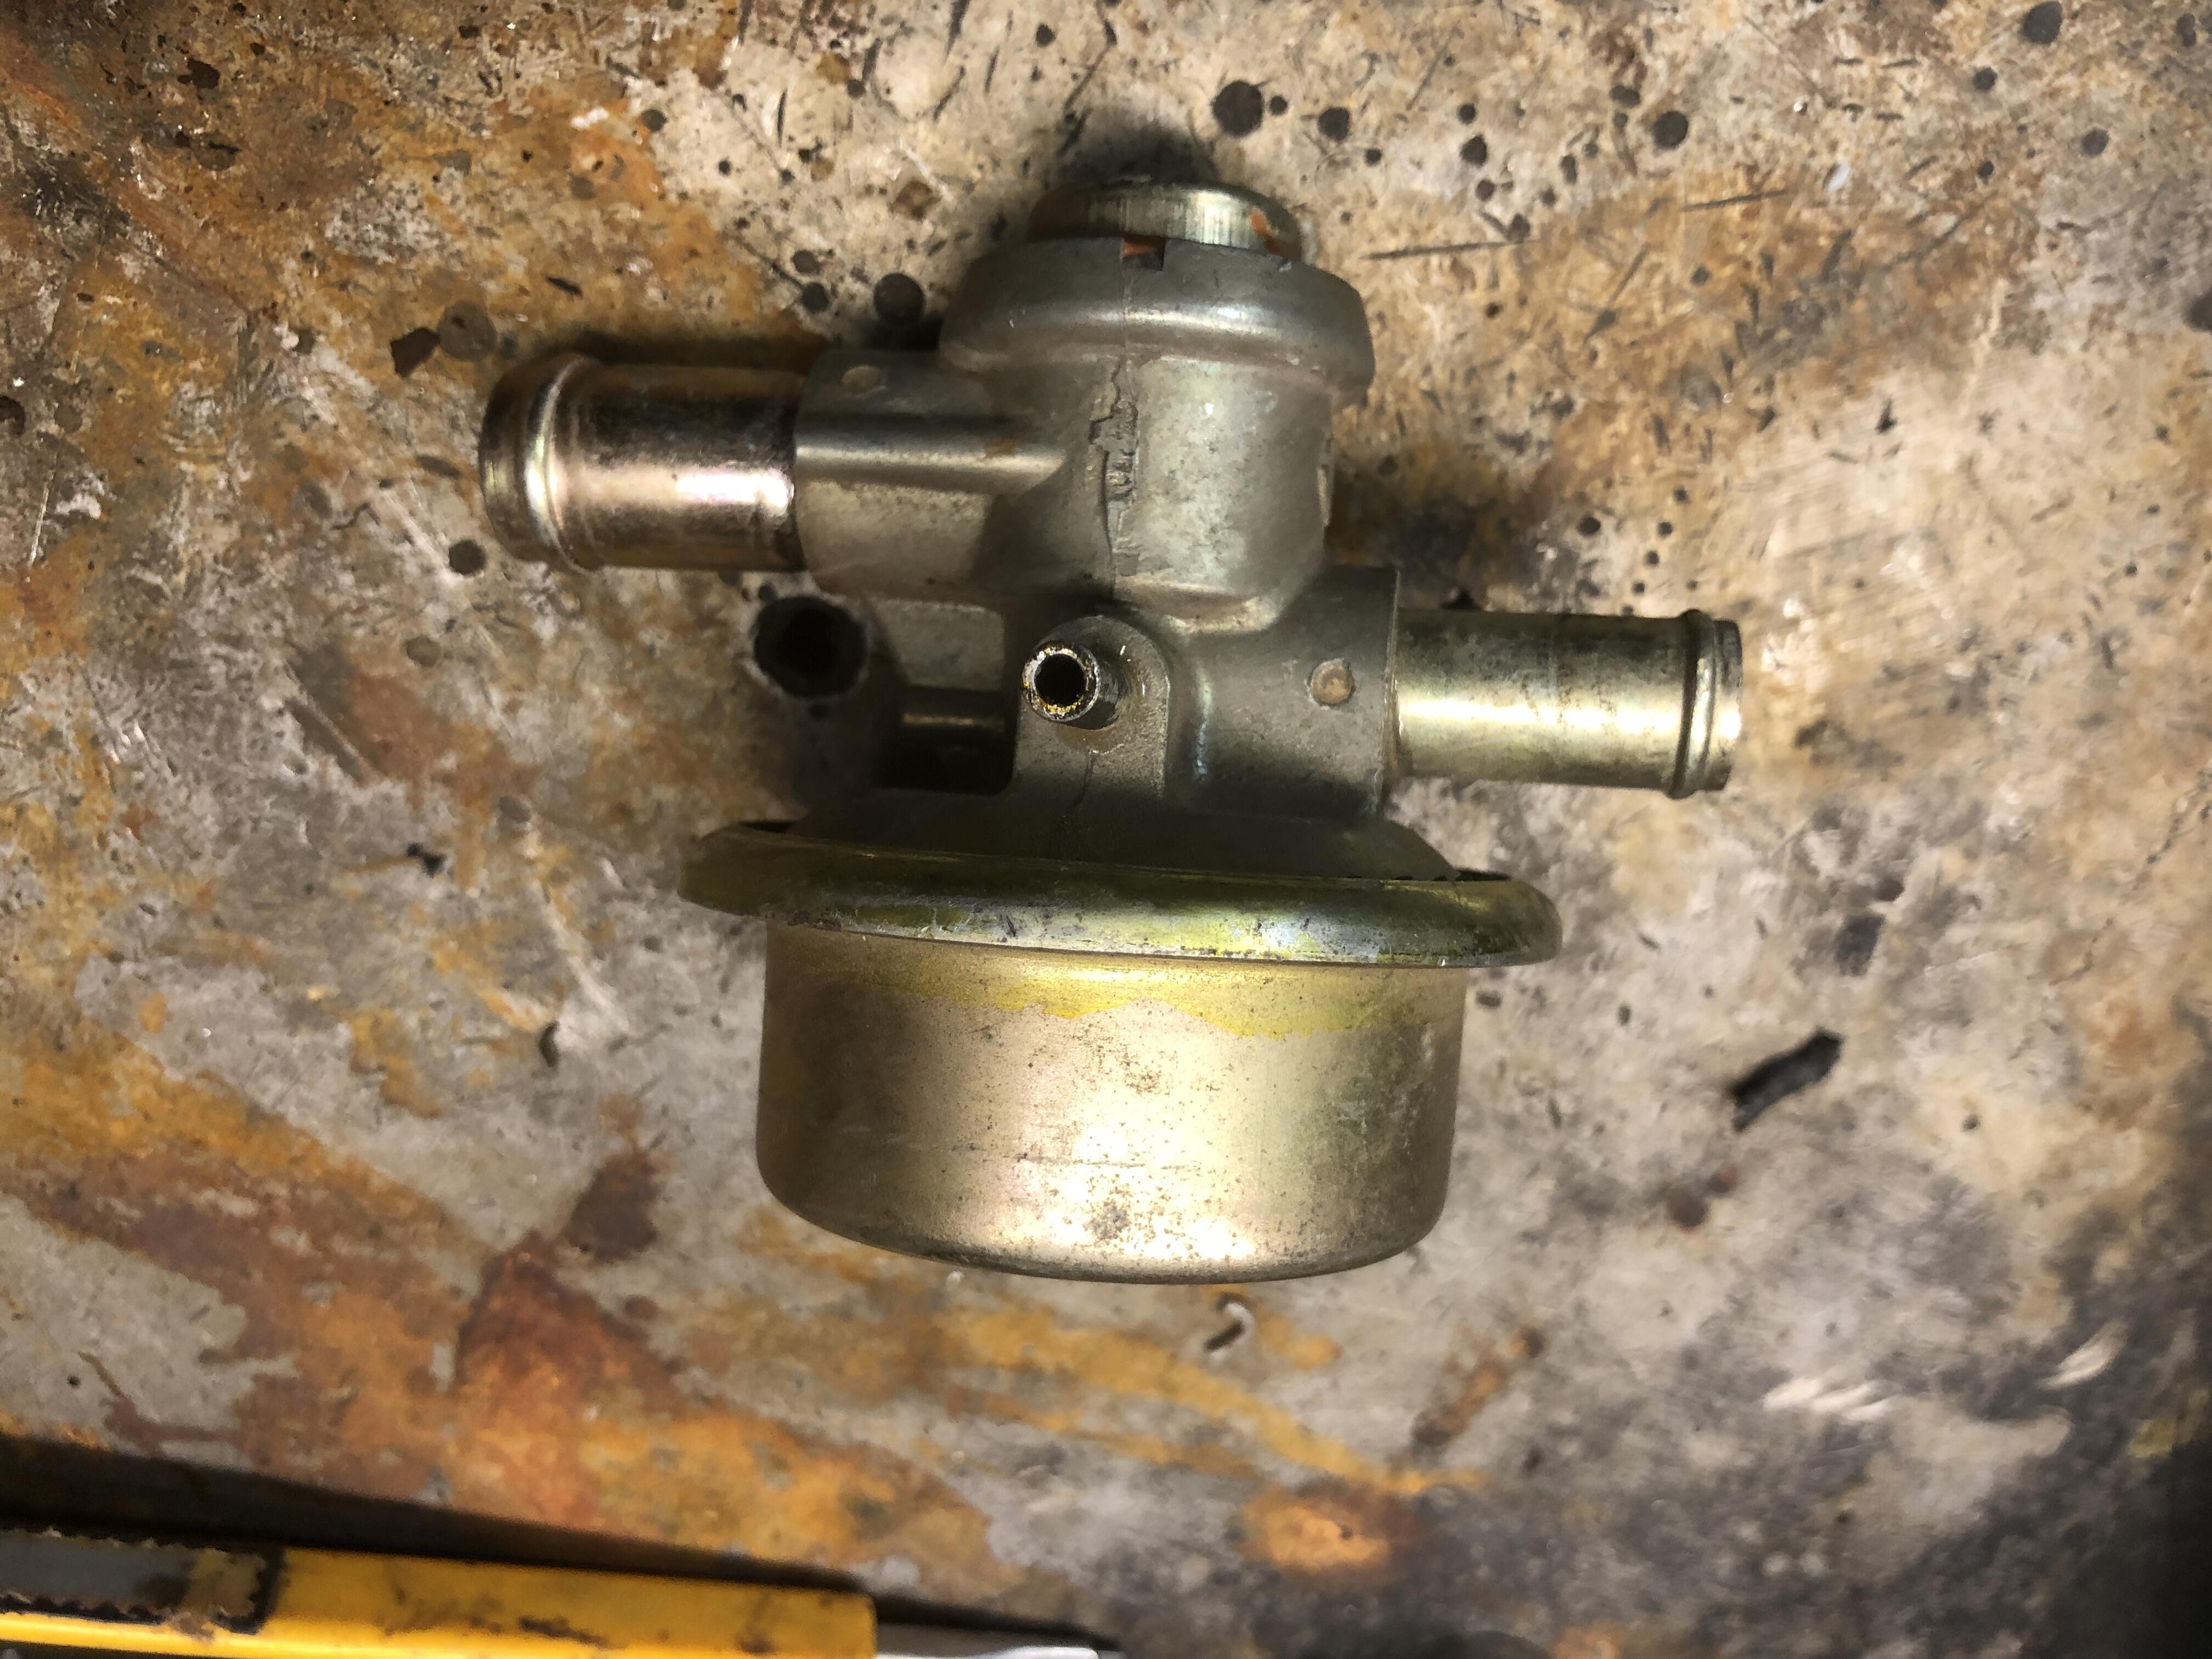
Well, “Velly Intellesting”…. The back of the two plugs is usually a 71-72 location for the vacuum fitting out to the brake booster. Only the early balance tubes had that fitting going out the end horizontally like yours. What I see is a bit strange. The hose fitting in the back of your balance tube with the hose that I assume goes to your brake booster, looks suspiciously like a PCV valve….. Can you take the hose off and show a pic with the whole hose going over to the booster? You have the PCV in the regular place in the center of the balance tube where it belongs. I cannot figure out what the other plug is meant for quickly. Couldn’t see any picture on Google with it used. Your balance tube is NOT the later 73-74 style for sure
-
Nice! Feels to good to solve some problems and make progress
-
Lube the liveing daylights out of it, especially the outside bit that comes in contact with the striker. Operate by hand until it works like butter. Alignment wise, the C shaped opening into the striker where the door latch has to fit through as you close it is fairly close tolerance, as long as it go more or less straight into the striker you have that part right. It’s the in-out alignment that determines how your door fit flush wise. Will have to weather strip on to complete that alignment. And then if your door hinge pins are sloppy the door might have to be lifted a bit to get into the latch cleanly.
-
Parts of the fancy electric fuel pump cut off sensor wiring and relay sub harness specific to the 73. There is a thread on here somewhere that explains it all. Basically they wanted to turn the pump off in case the engine quit, so had to sense that, via alternator voltage and oil pressure?
-
Coincidently, working on a different throttle cable arrangement but with the same Lokar cable. Here is my solution to hold the fitting on the cable end. An M4 grub screw through the thick hex part of the fittingl This bites the sleeve below. You also need a way to bond the sleeve to the braided cable sheath. I found this one slipped down the cable! I use some UV cure resin.

-
Of the two, only one works. And it looks pretty much new. It's here if you need it.


-
I have a couple. Will test what shape they are in.
-
Absolutely. And parts are NLA to rebuild. I would not hesitate to buy one of the excellent reproduction racks from technotoytuning. Looks 100% stock and they are new new new. They were on sale just a while ago, $495USD I believe.
-
Ok, 14 years ago is making me feel older than I am. Thanks for digging that back up. I have forsaken the Kia strips for a McMaster Carr near equivalent. I buy this stuff by the 100ft rolls and have installed plenty on local cars for several years with happy customers. https://www.mcmaster.com/catalog/130/3984/1120A822 Latest idea (So far untested…) is to replace the front vertical section of that strip with one with a smaller bulb. This might help the initial tightness and a bit thick WS that makes the doors hard to close for a while. The binding we all hate is from the front vertical area of the door. I can confirm this from observation. Apparently the OEM seals were thinner in this area.
-
Maybe these are a bit more economical shall we say if you are not concerned about originality in this application https://belmetric.com/m5-5-pan-phillips-tapping-steel-zinc-plated-din-7981-c/?sku=MSM5.5X16 I’m not positive if these are the exact correct size (they have many other sizes), and you have to provide a flat washer, but they will serve the purpose.
-
Fried random ground wires are often caused by bad ground connections to the frame and battery. Current will find a path if you don’t have a low resistance path where you intend. Imagine starter level current that can’t use the battery cable but uses that ground wire instead. ZZZZZZZ Start with the fat black negative battery cable inspection and cleanup (both ends) and the body ground between the battery and the firewall. Then the engine harness ground screw on the frame across from the starter. Then the ground connection on the back of the alternator.
-
Other than fitting through the tunnel and letting you get to each gear without hitting the hole or console, you have to use one of the shorter tipped shifters or you won’t be able to get 5th gear with that transmission. Many have been caught with this issue. You “think” it moves into 5th when you’re on the floor testing it, but once under power, you find out “NOPE”
-
Update on the wonder U-joint tool. Today I went to use it to do a Z driveshaft u-joint for the first time and much to my dismay, it is too big! By this I mean the U shape receiver area that you place over the end of the yoke (where the cups sit) slips right past the yoke. Barely. Useless… Dang. Unless you have a welder I just ran a couple of beads along the lip to make it smaller, and it worked just fine. Now I haven’t tried it on the half shafts to see if I made it too small now, if I did, I suppose I’ll have to get another 10105. Oh well

-
I keep forgetting about this run every year. It’s so close to home (relatively) it would make a great spring excursion. Maybe next year. Thanks for the great pictures and sharing them with us.
-

A Review of Modern Technology Upgrades for Classics
zKars replied to zKars's topic in Parts Swapping
Interesting. I initially found it on some aftermarket automotive parts website, then looked at TanksInc directly where it was cheaper. And now you found a cheaper one yet. Both devices are identical with different labels. Techno versions is the cheapest for sure -
Dang, have to acquire more fans, must keep ahead…… Seriously I have seen quite a variety of fans and noticed that some have reversed curvature of the blades compared to others. Same puller blade angle, but blade is cupped the other way. Aerodynamic/airflow modeling advances apparently … Also I believe that the mounting face of the plastic fans is not in the center of the hub, make sure da fan is on da right way….
-
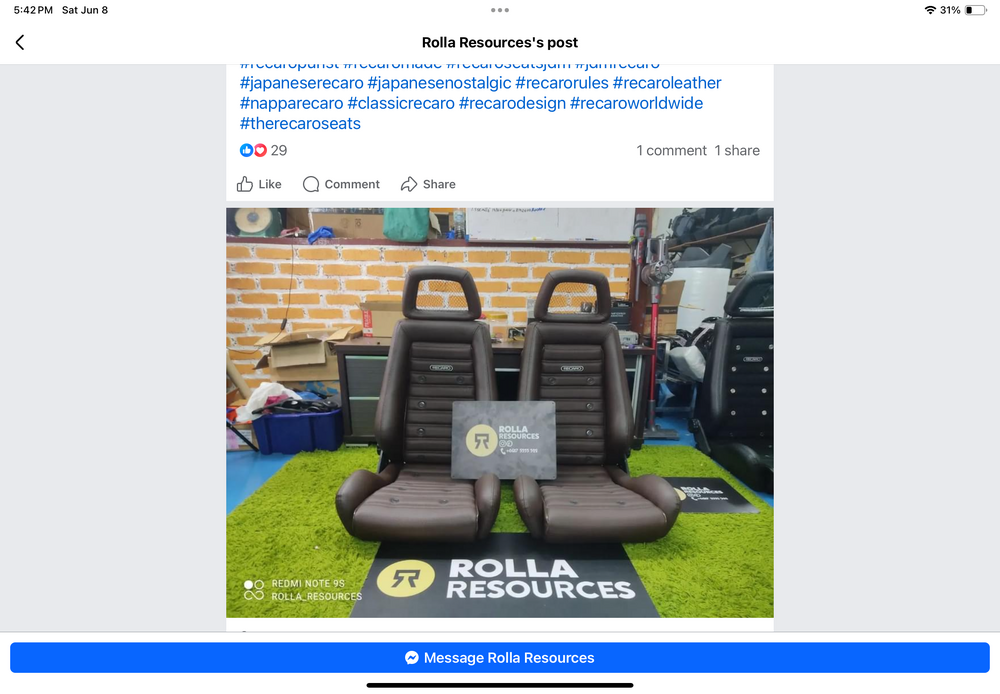
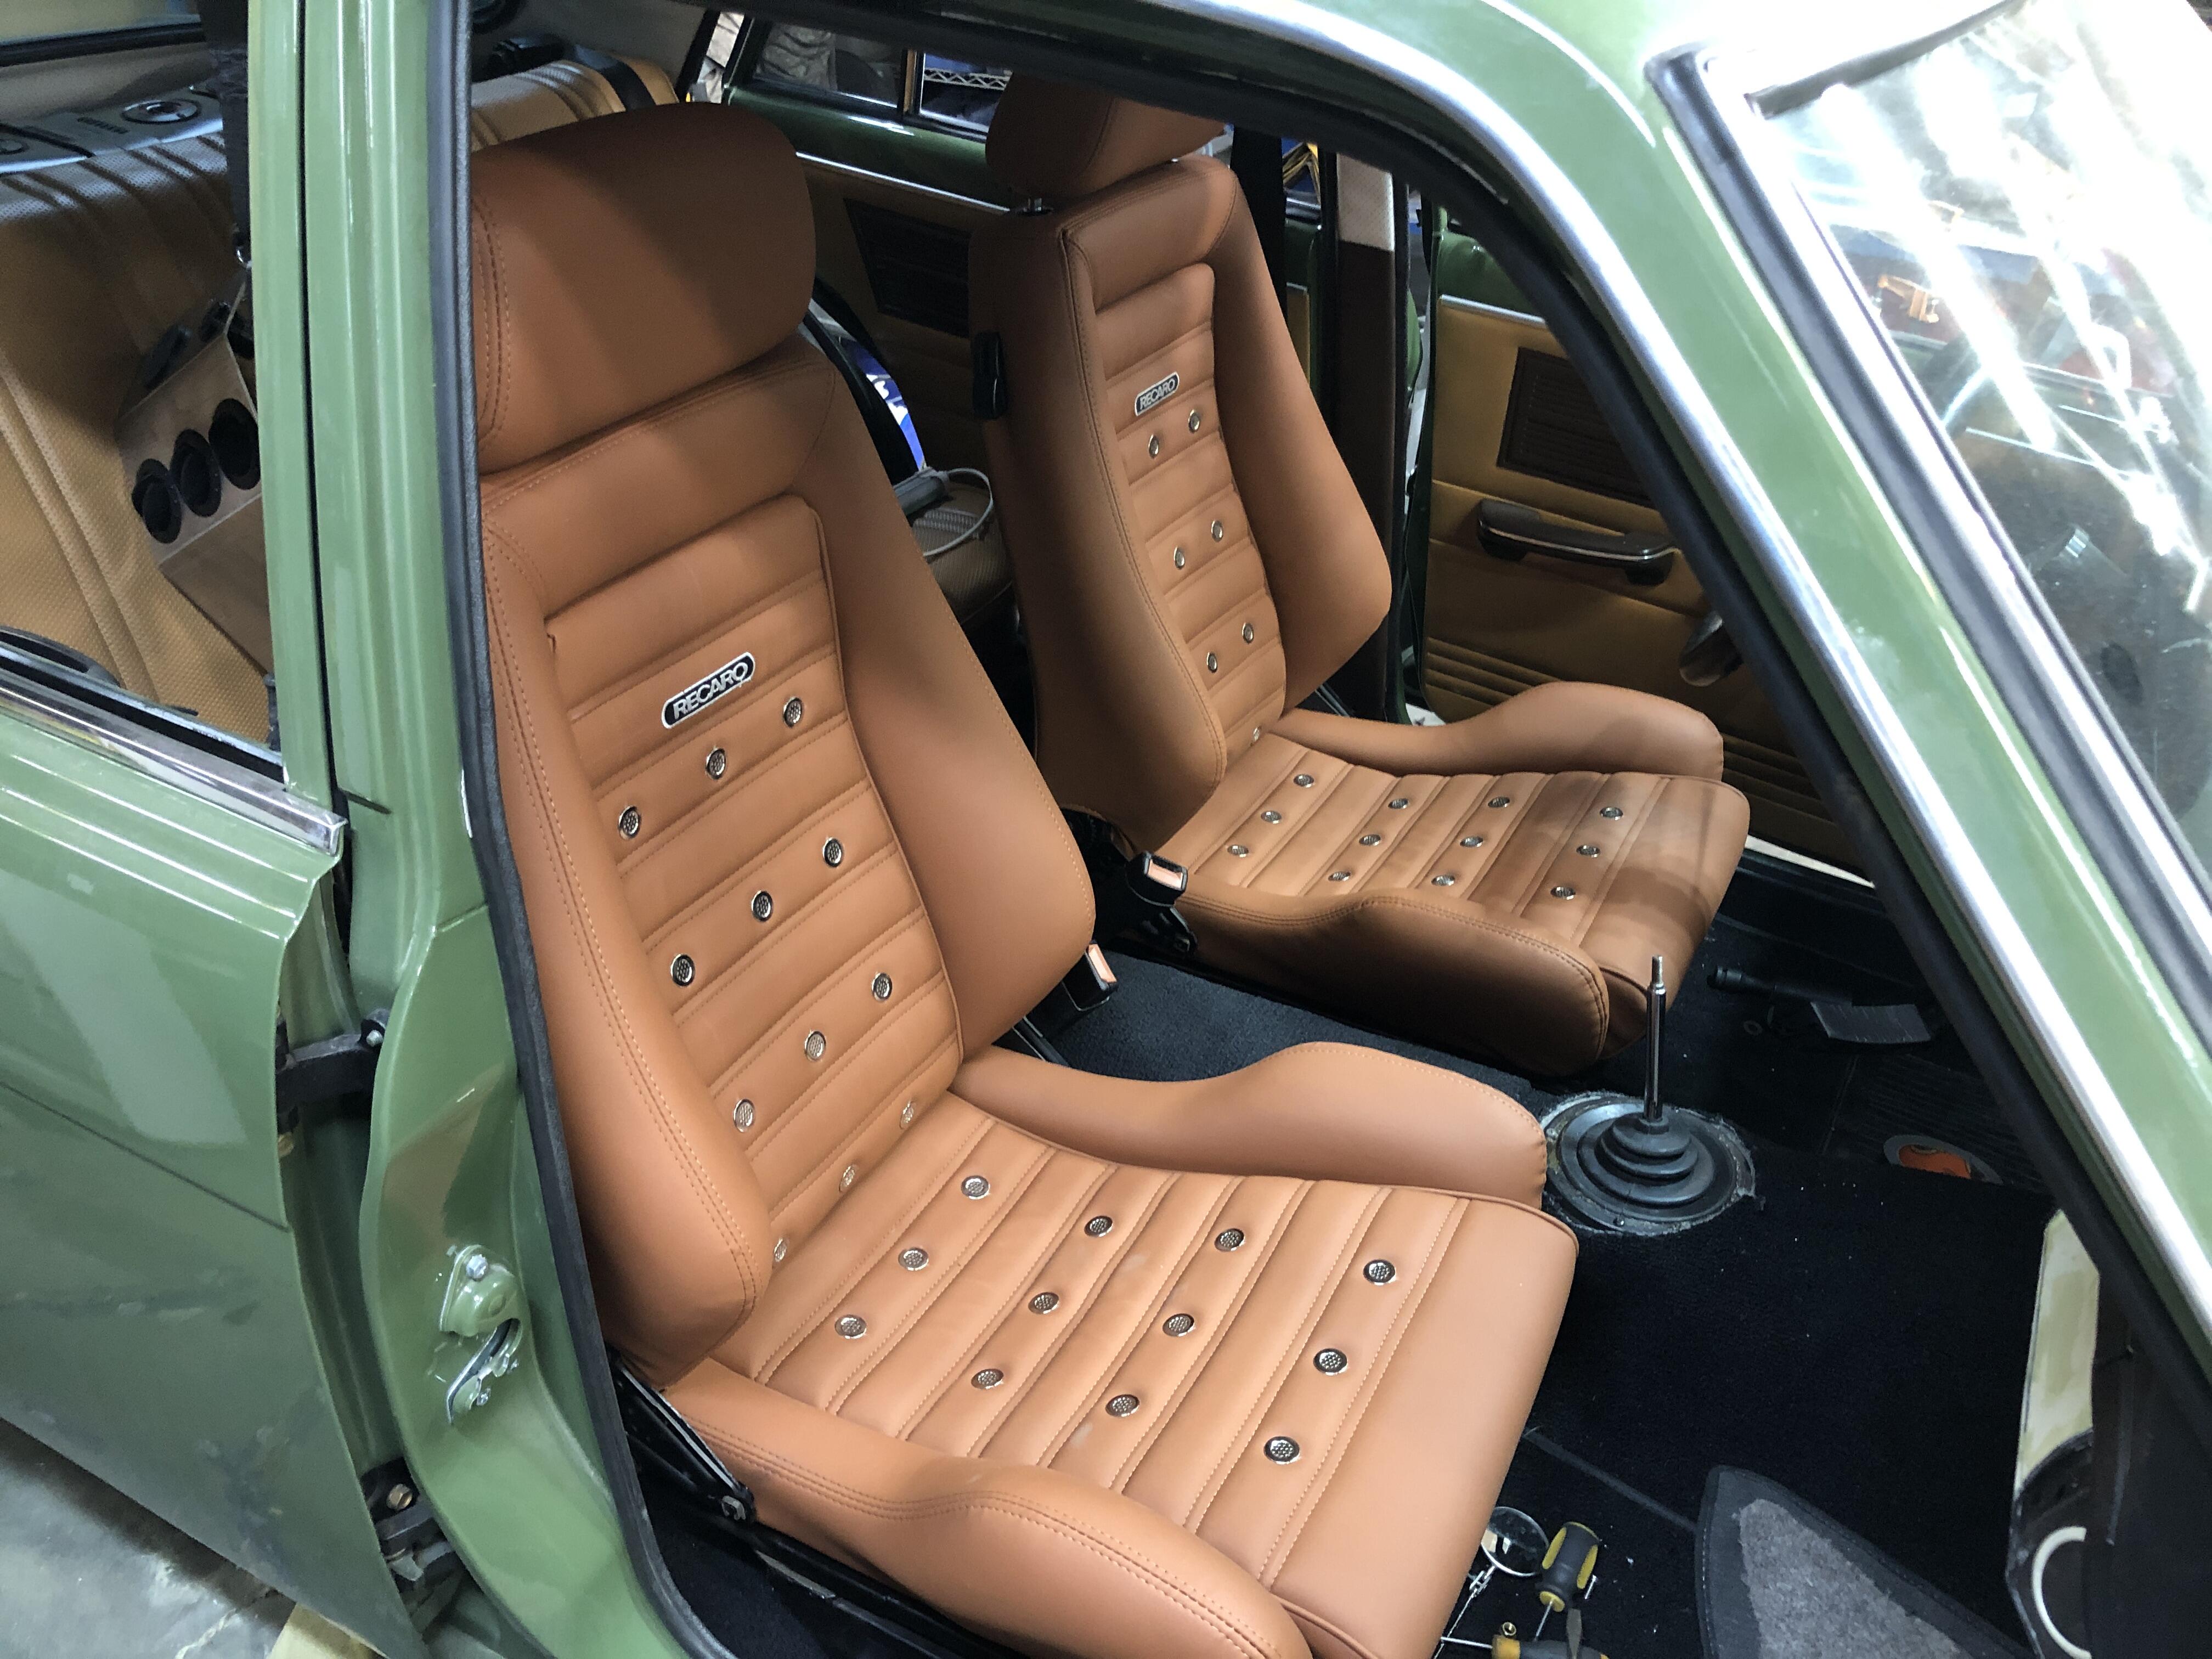
Here is a full shot of my seats. Thin flat bottoms. Simple four bolt mounting. Light and comfy Beware of statements on their site about “Leather”. They mean “Really really great quality synthetic leather”, but not leather…..

-
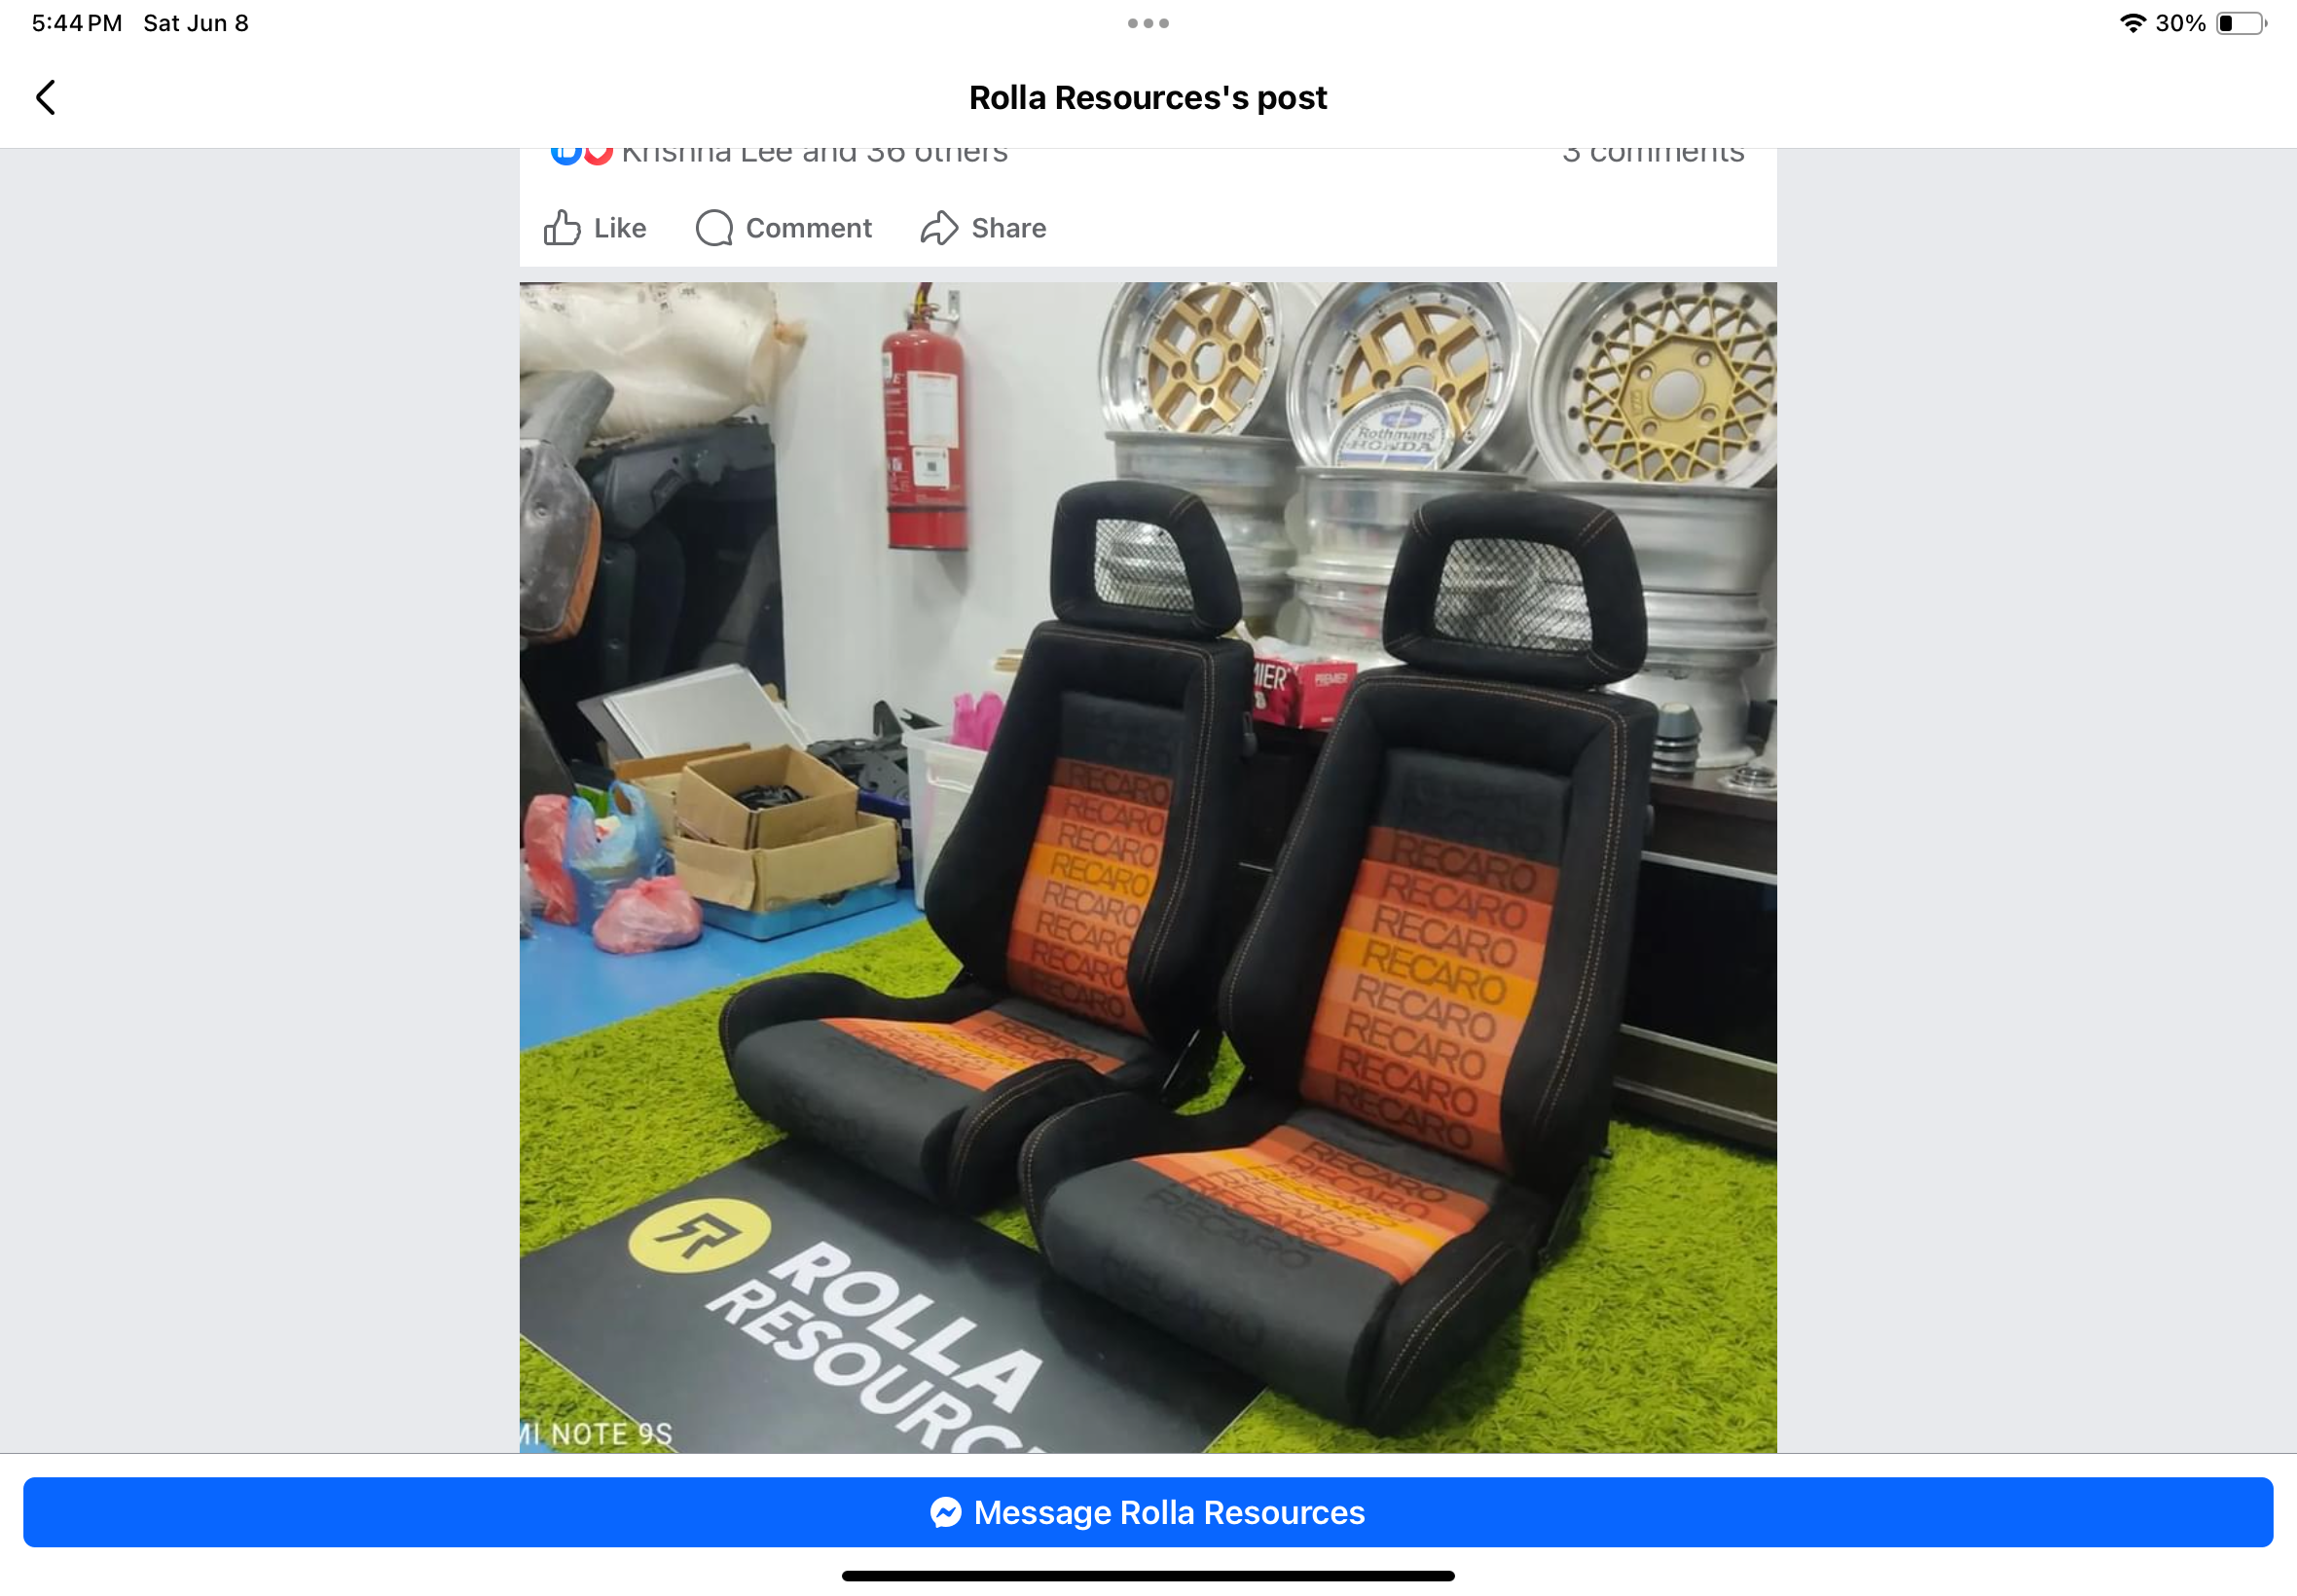
Here is a screen shot of the first post they just put up. Nice headrests.