zKars
 Subscriber
-
Joined
-
Last visited
Everything posted by zKars
-
 I also made my own. It’s called $1.00’s worth of rubber hose. There is nothing wrong with the OEM design except the strap is too loose or gets stretched with time and allows the diff to lift too far tearing the rubber in the isolator. Just add a rubber spacer to remove the slop. Yes I should zip tie the hose in place so it doesn’t work it’s way out. So $1.50
-
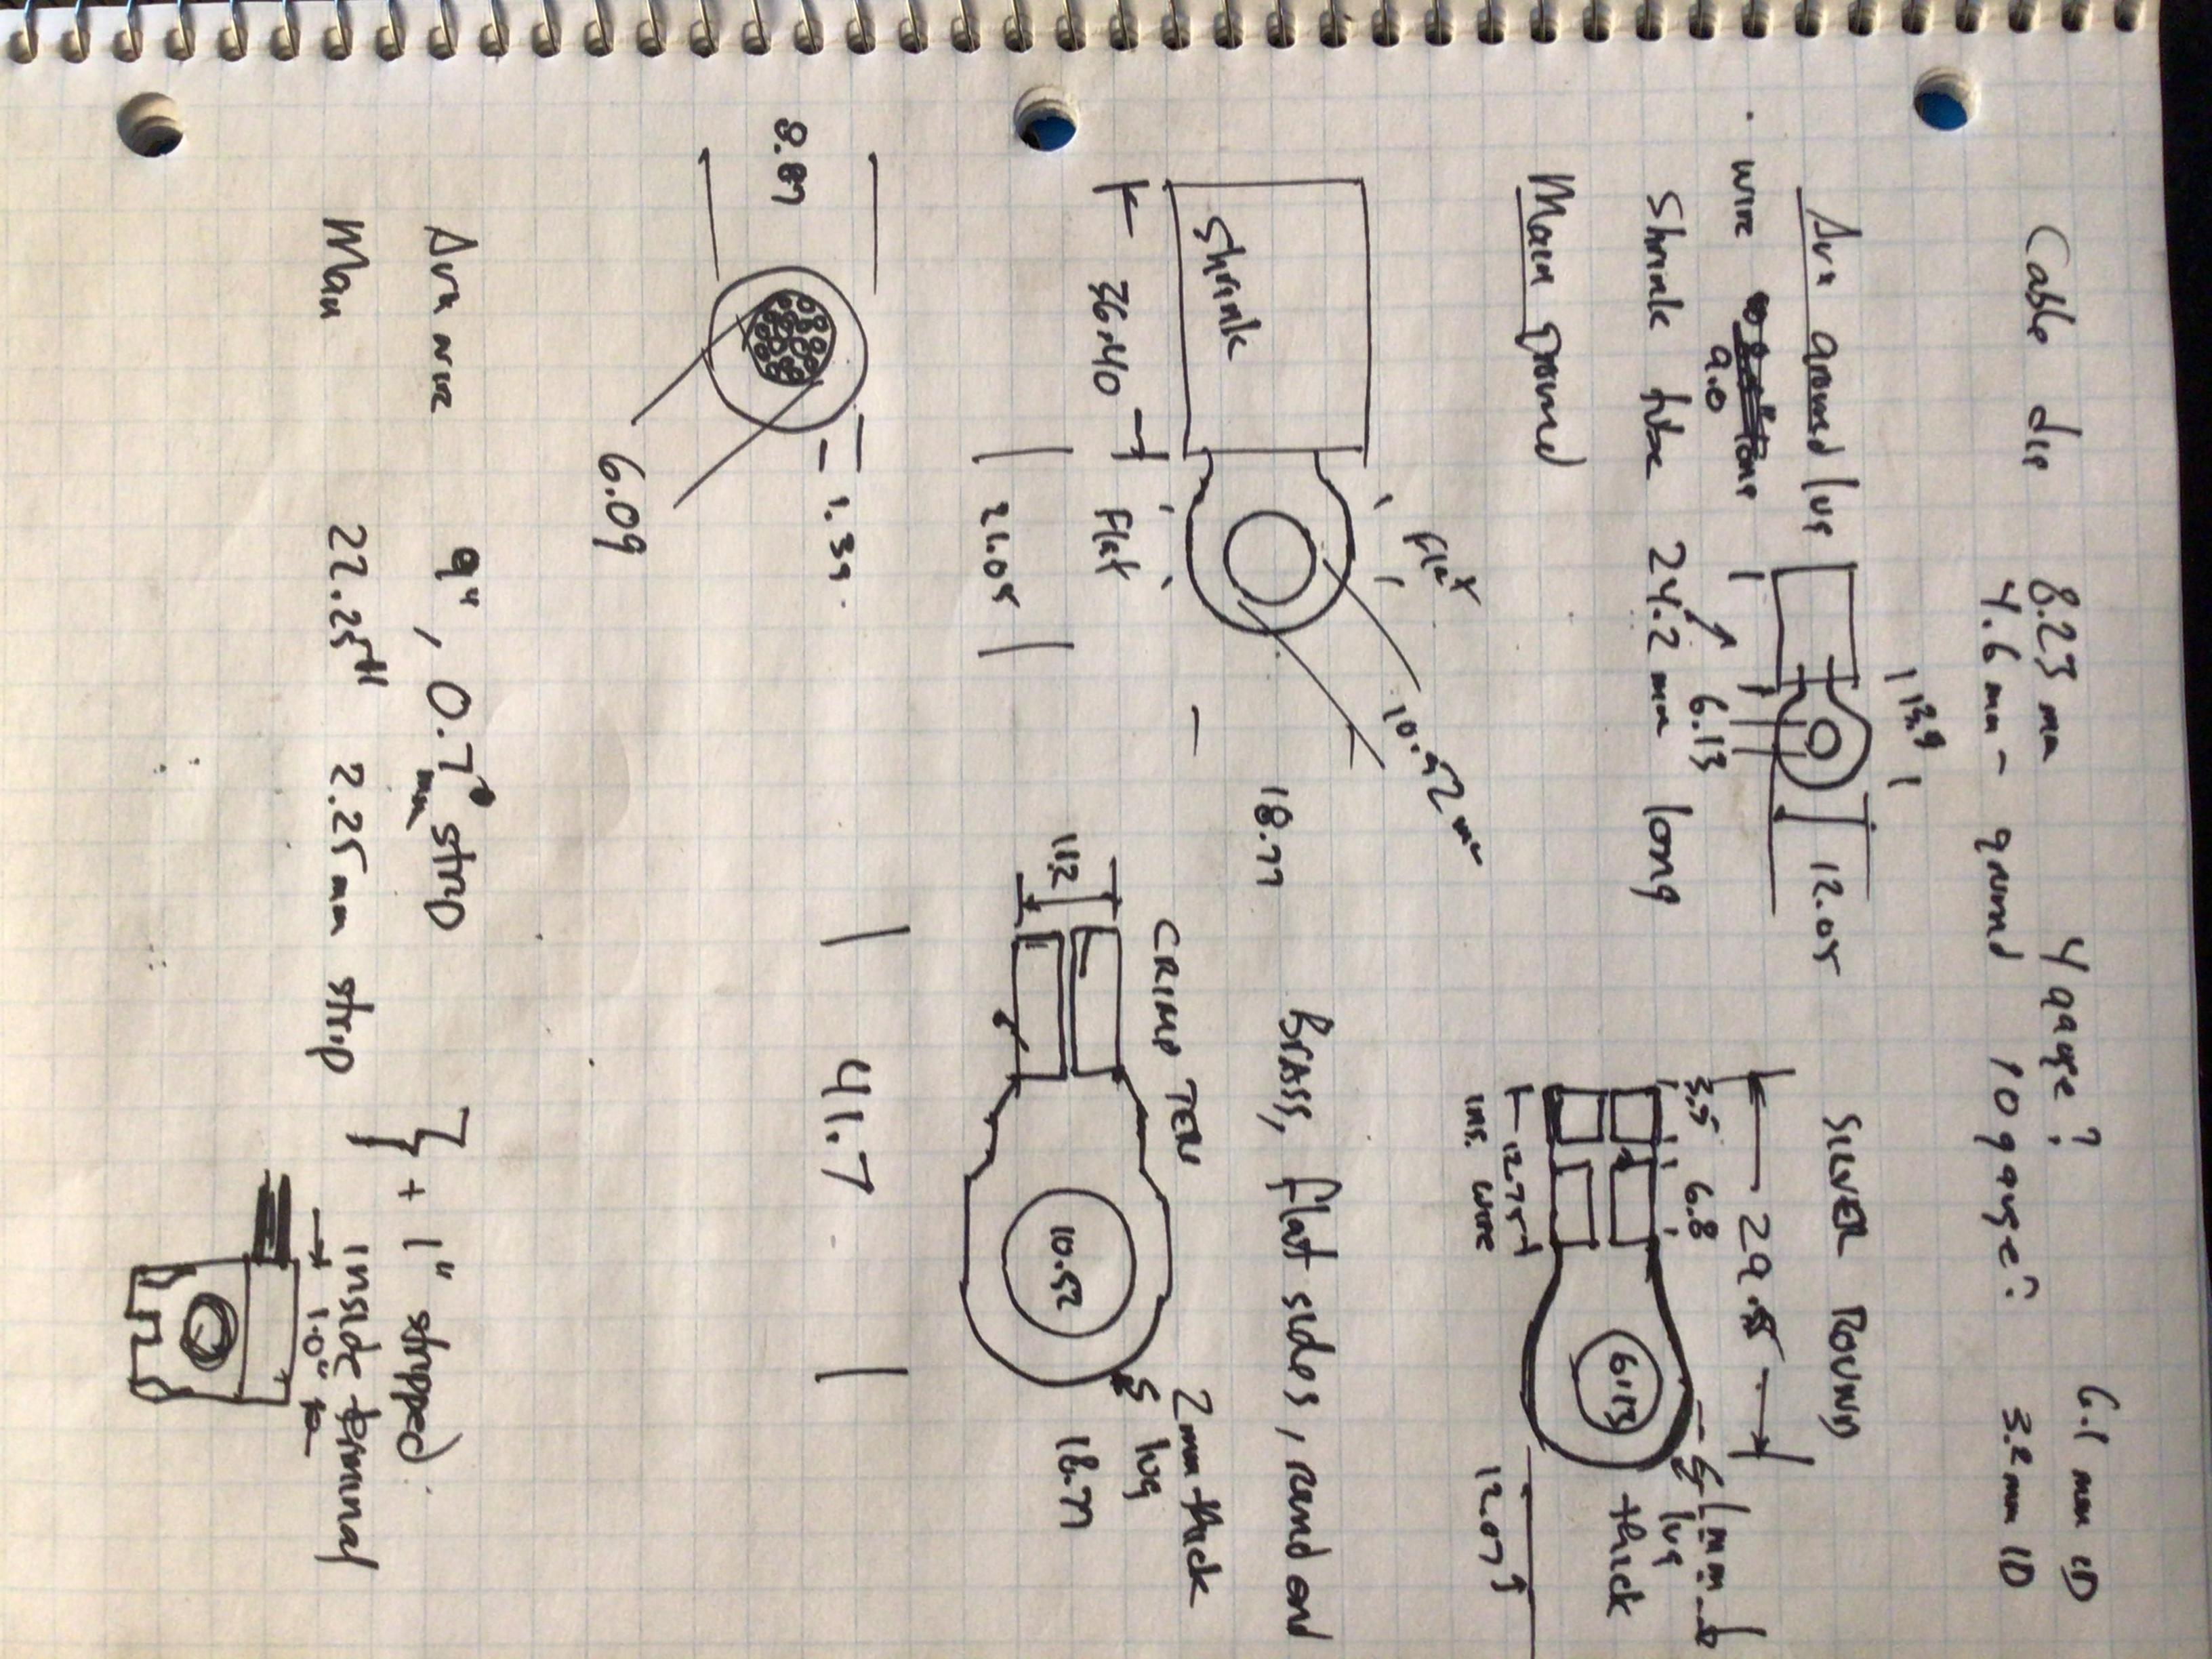
I really don’t want to get in the reproduction parts business, at least not yet. I do want to produce “reasonable” items that come close to the originals at first glance at a reasonable price for my own projects. I will include my rough notes and doodles of the detail measurements of my negative cable. Sorry for the not-perfectly readable scribbles. No I’m not a doctor.

-
Given the price, I’m kinda thinking they may be OEM cables. The Fiche does show different cables starting 72-07. Going to have to call them to get details if you want to see the difference I can imagine nothing location or lug size, or grounding difference. Might be a “better” battery terminal end upgrade or style or something
-
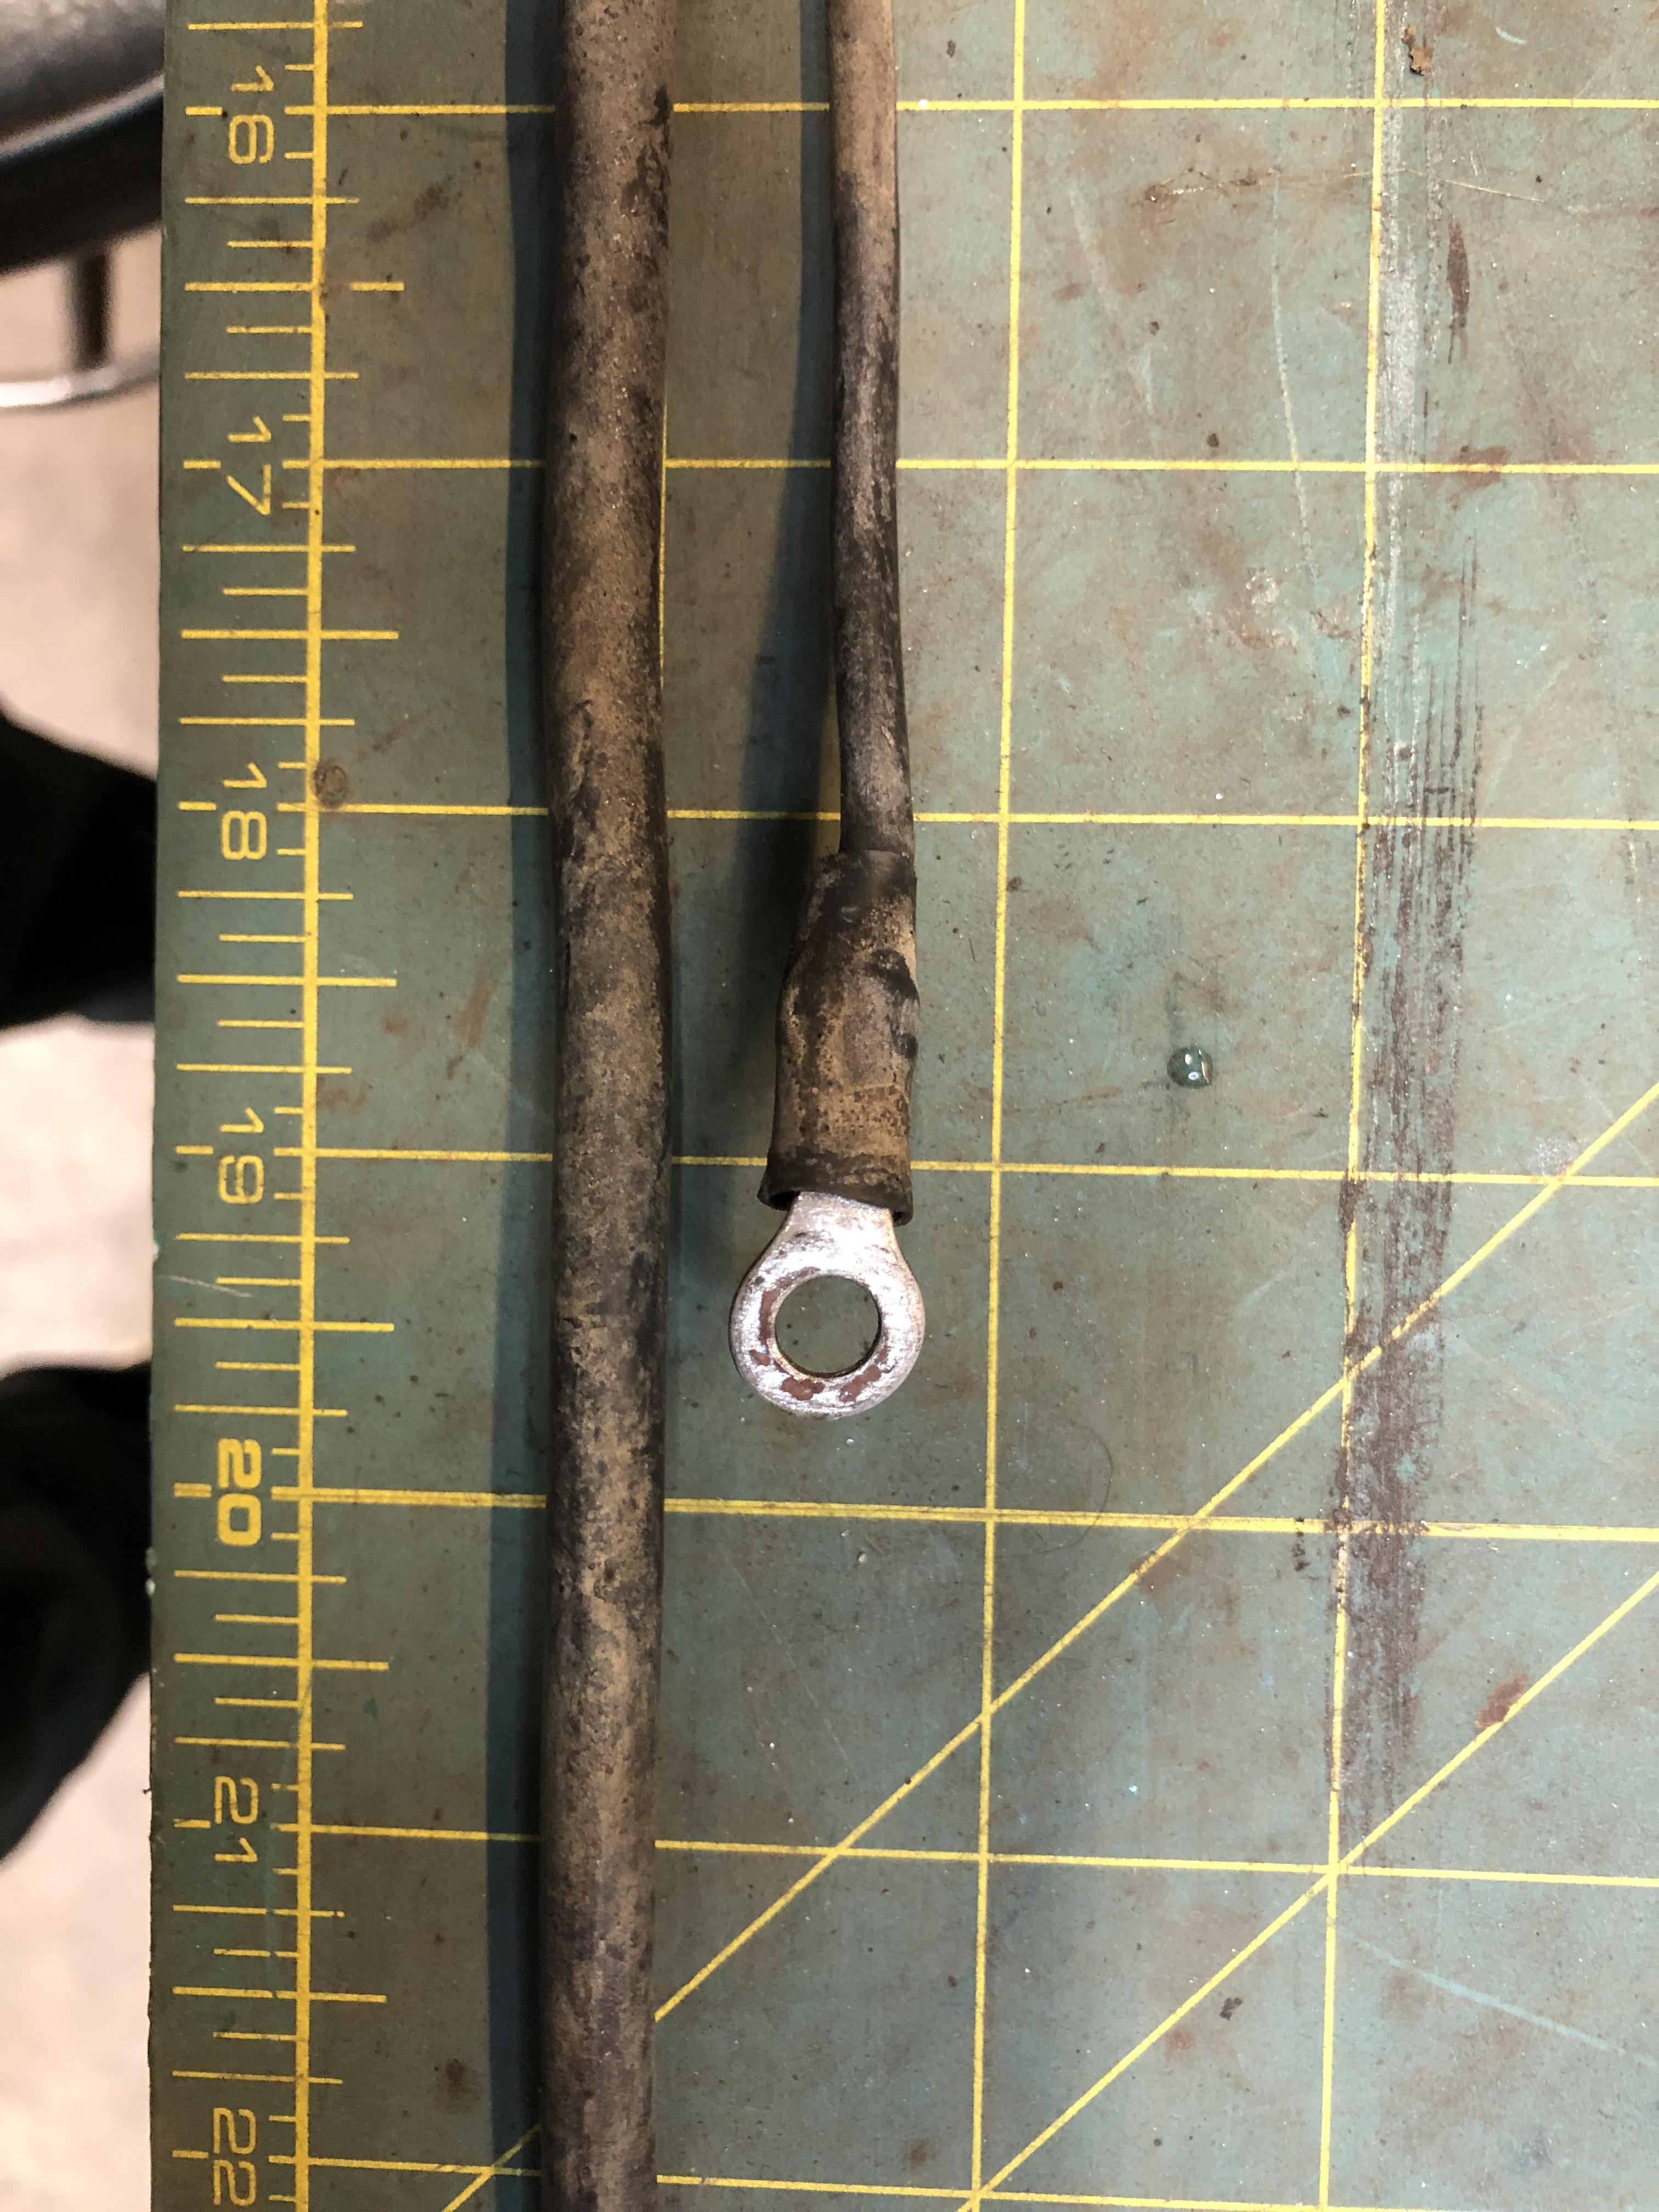
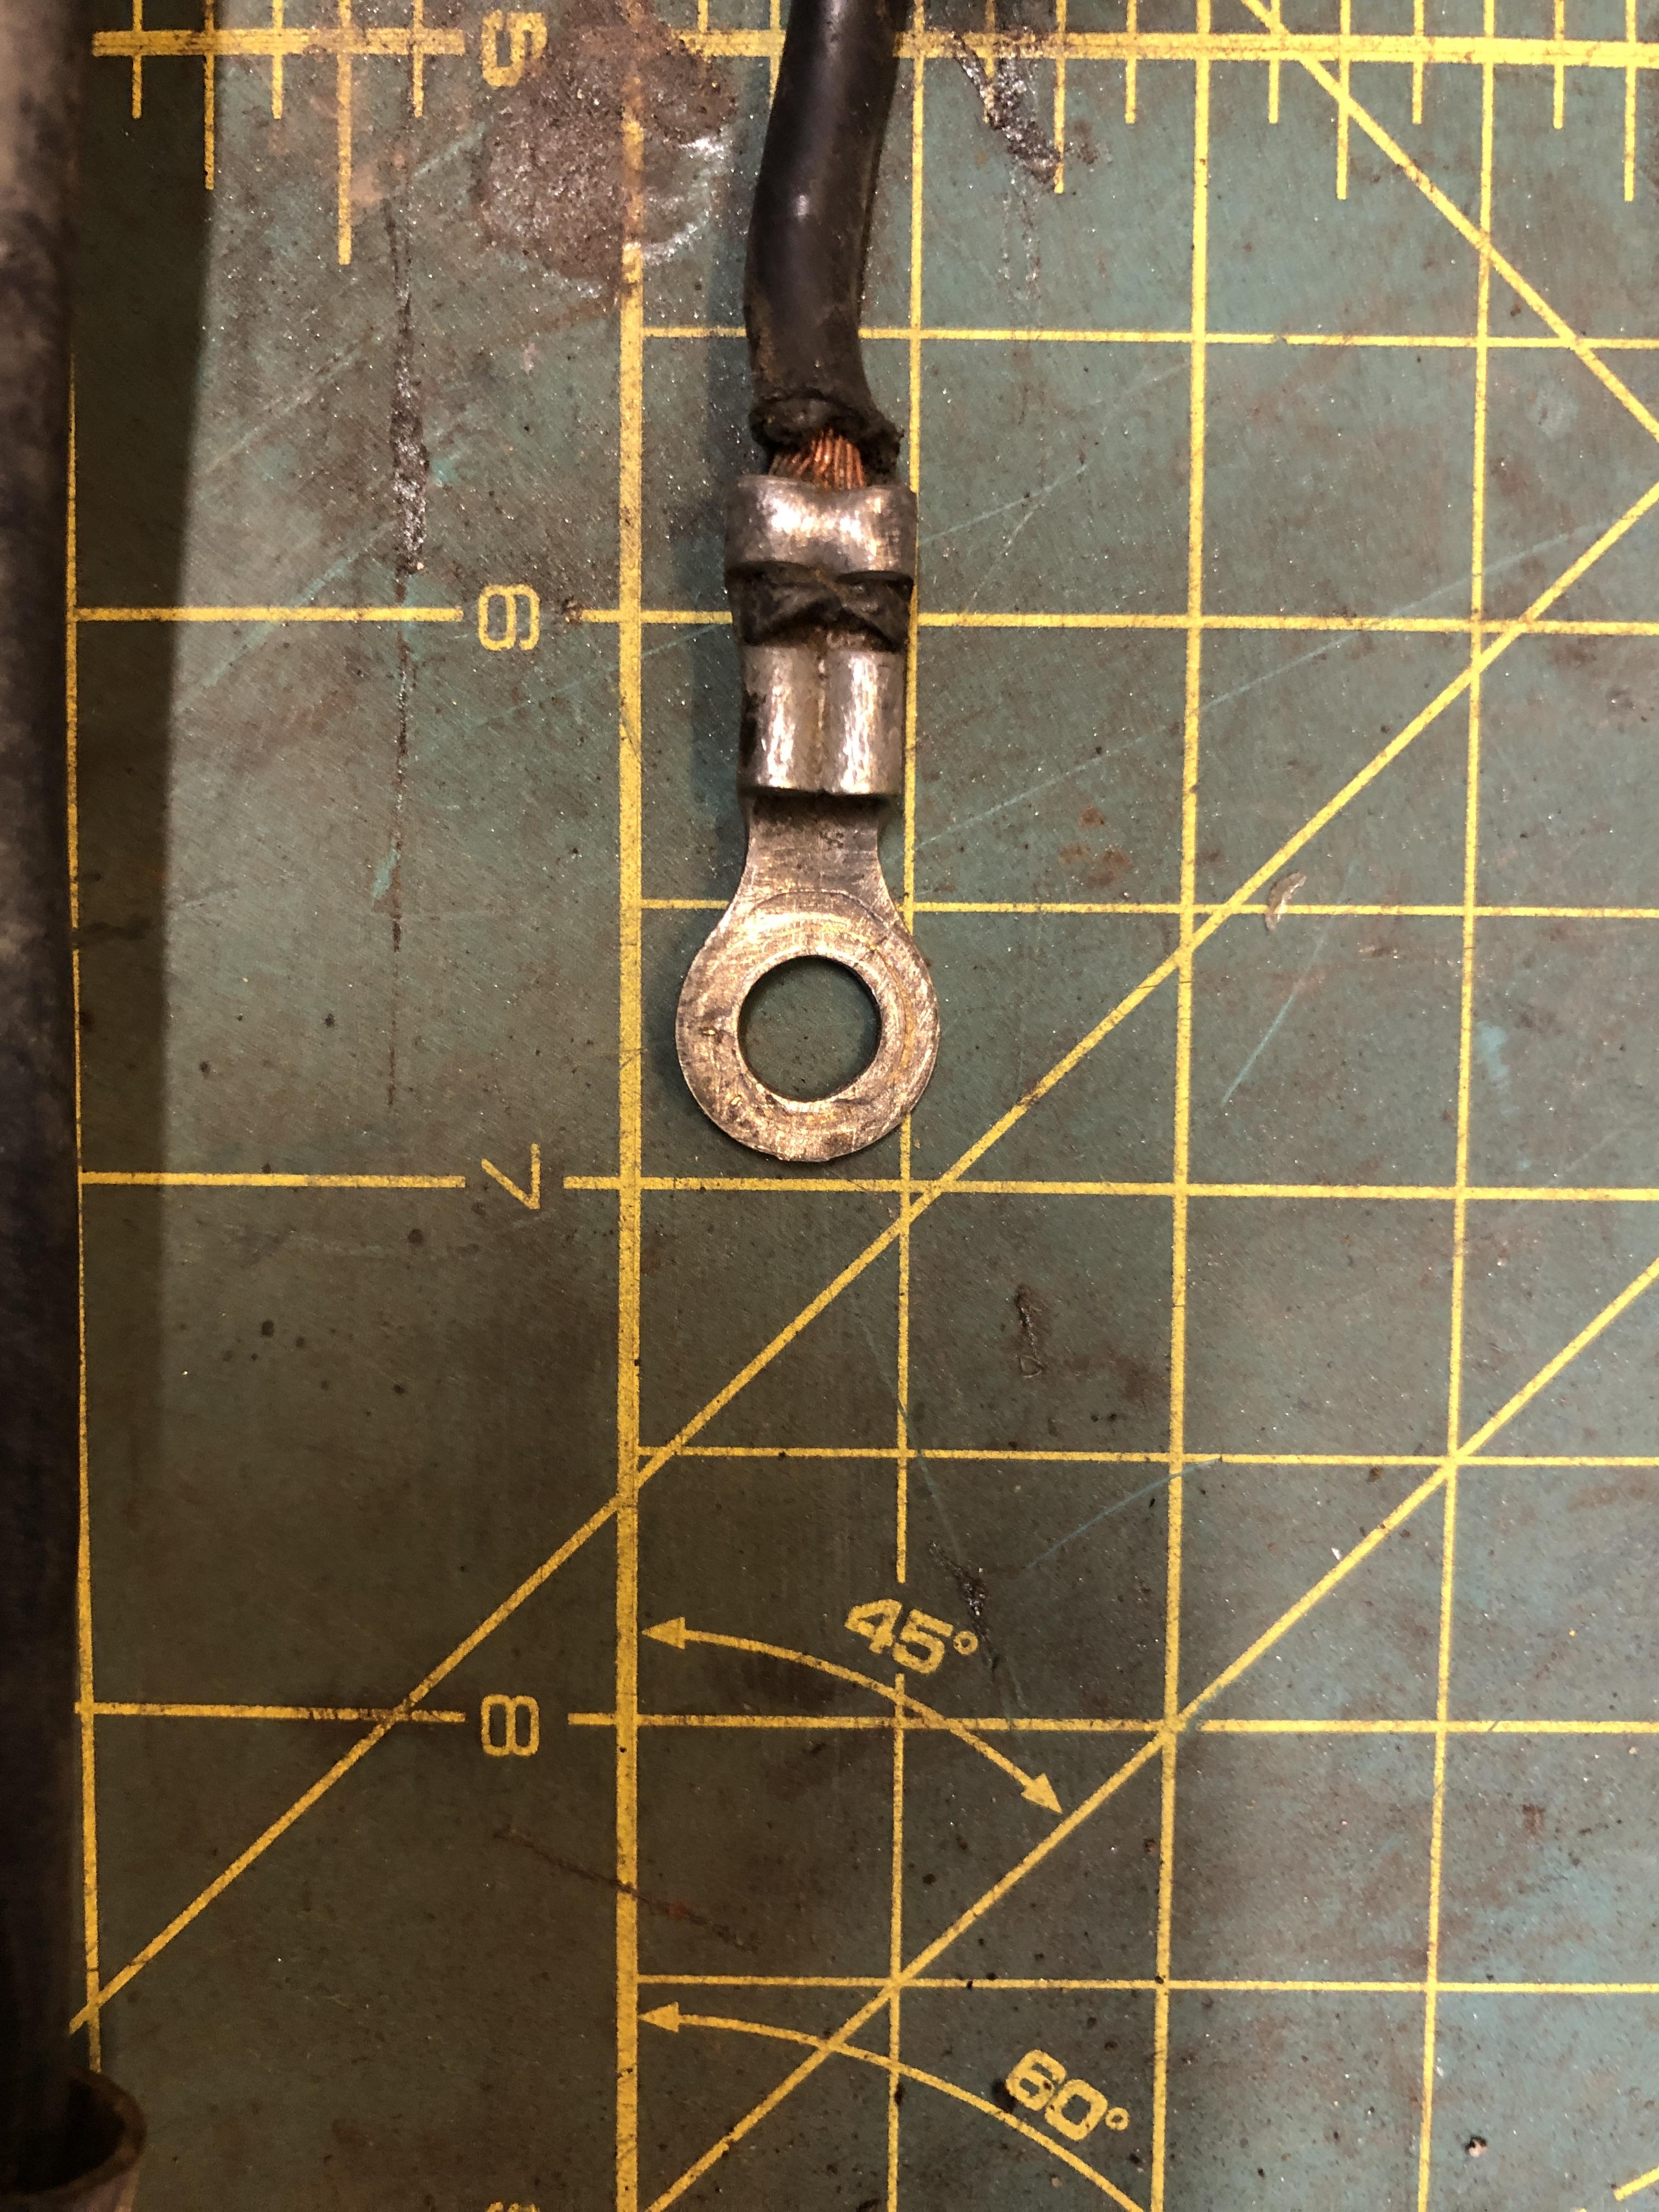
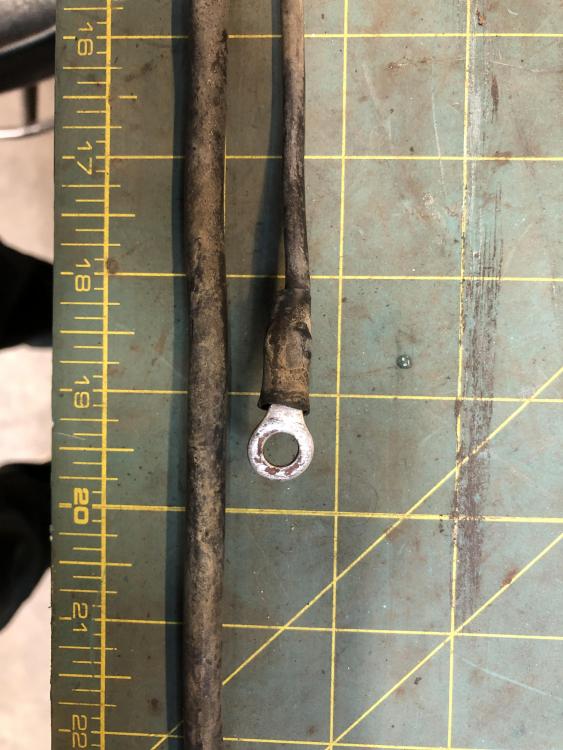
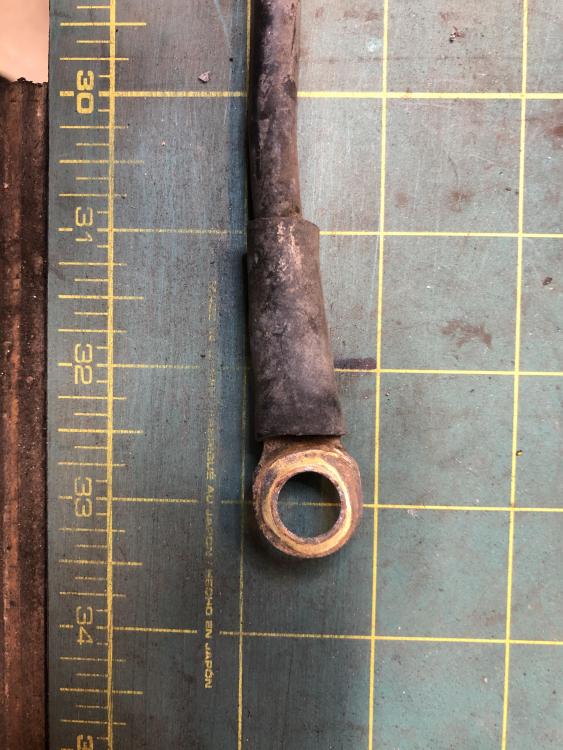
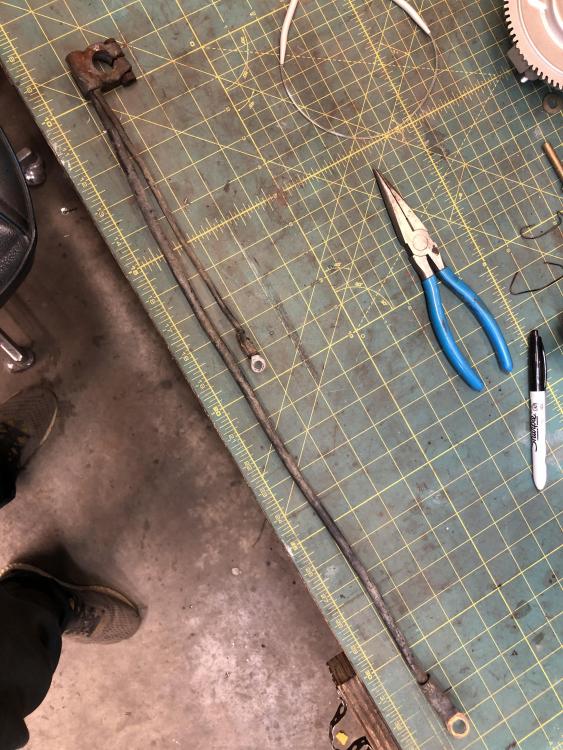
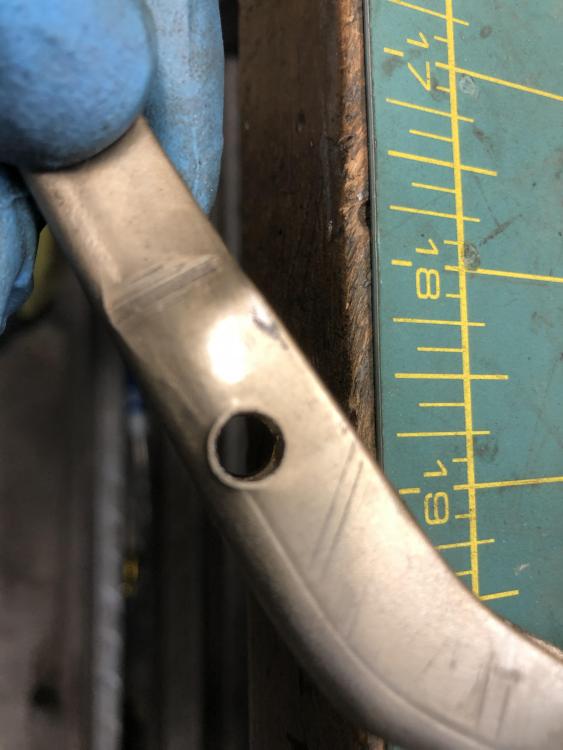
I realized I have one good original negative cable on the new to me 71 I just picked up. Now “we” need one of those original blobs to use to make reproduction blobs.... I’ve taken detailed measurements of the cable, lugs, wires etc. Finding the very heavy lugs that Nissan used is going to be a challenge in todays cheap crap marketplace. The big cable lug is a brass or copper monster made with 2mm thick metal and has a lovely crimped connection done with a serious tool.


-
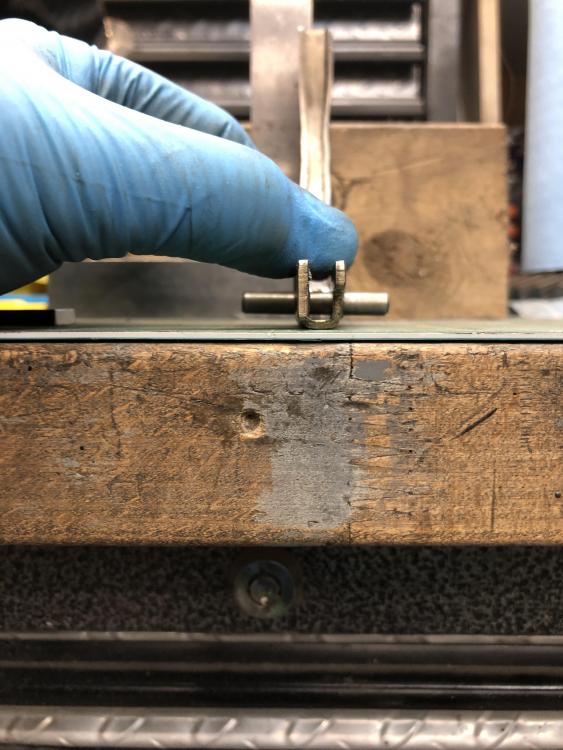
Great ingenuity. Many of the Datsun family hood latches are very similar. There are hood latches, out there, you didn’t look in the right place. I have a few 240/260/280 hood latches that are replated real purdy that I’d part with, but it seems you have your solution right there. Nice work
-
Nothing like more options. https://www.aircraftspruce.ca/catalog/pnpages/15-04818.php?gclid=CjwKCAiA17P9BRB2EiwAMvwNyGDVuhht0dypa-XwCNqz7pVIJ_WSV9hDGVqKnMOl-WcpRjx2K9uCiRoCFJUQAvD_BwE Gotta trust an air craft supplier would sell hose that is fuel worthy. Been studying fuel tubing. Seems Viton tubing is getting the nod. One description. https://www.new-line.com/hose/tubing/viton-tubing/viton-rubber-tubing

-
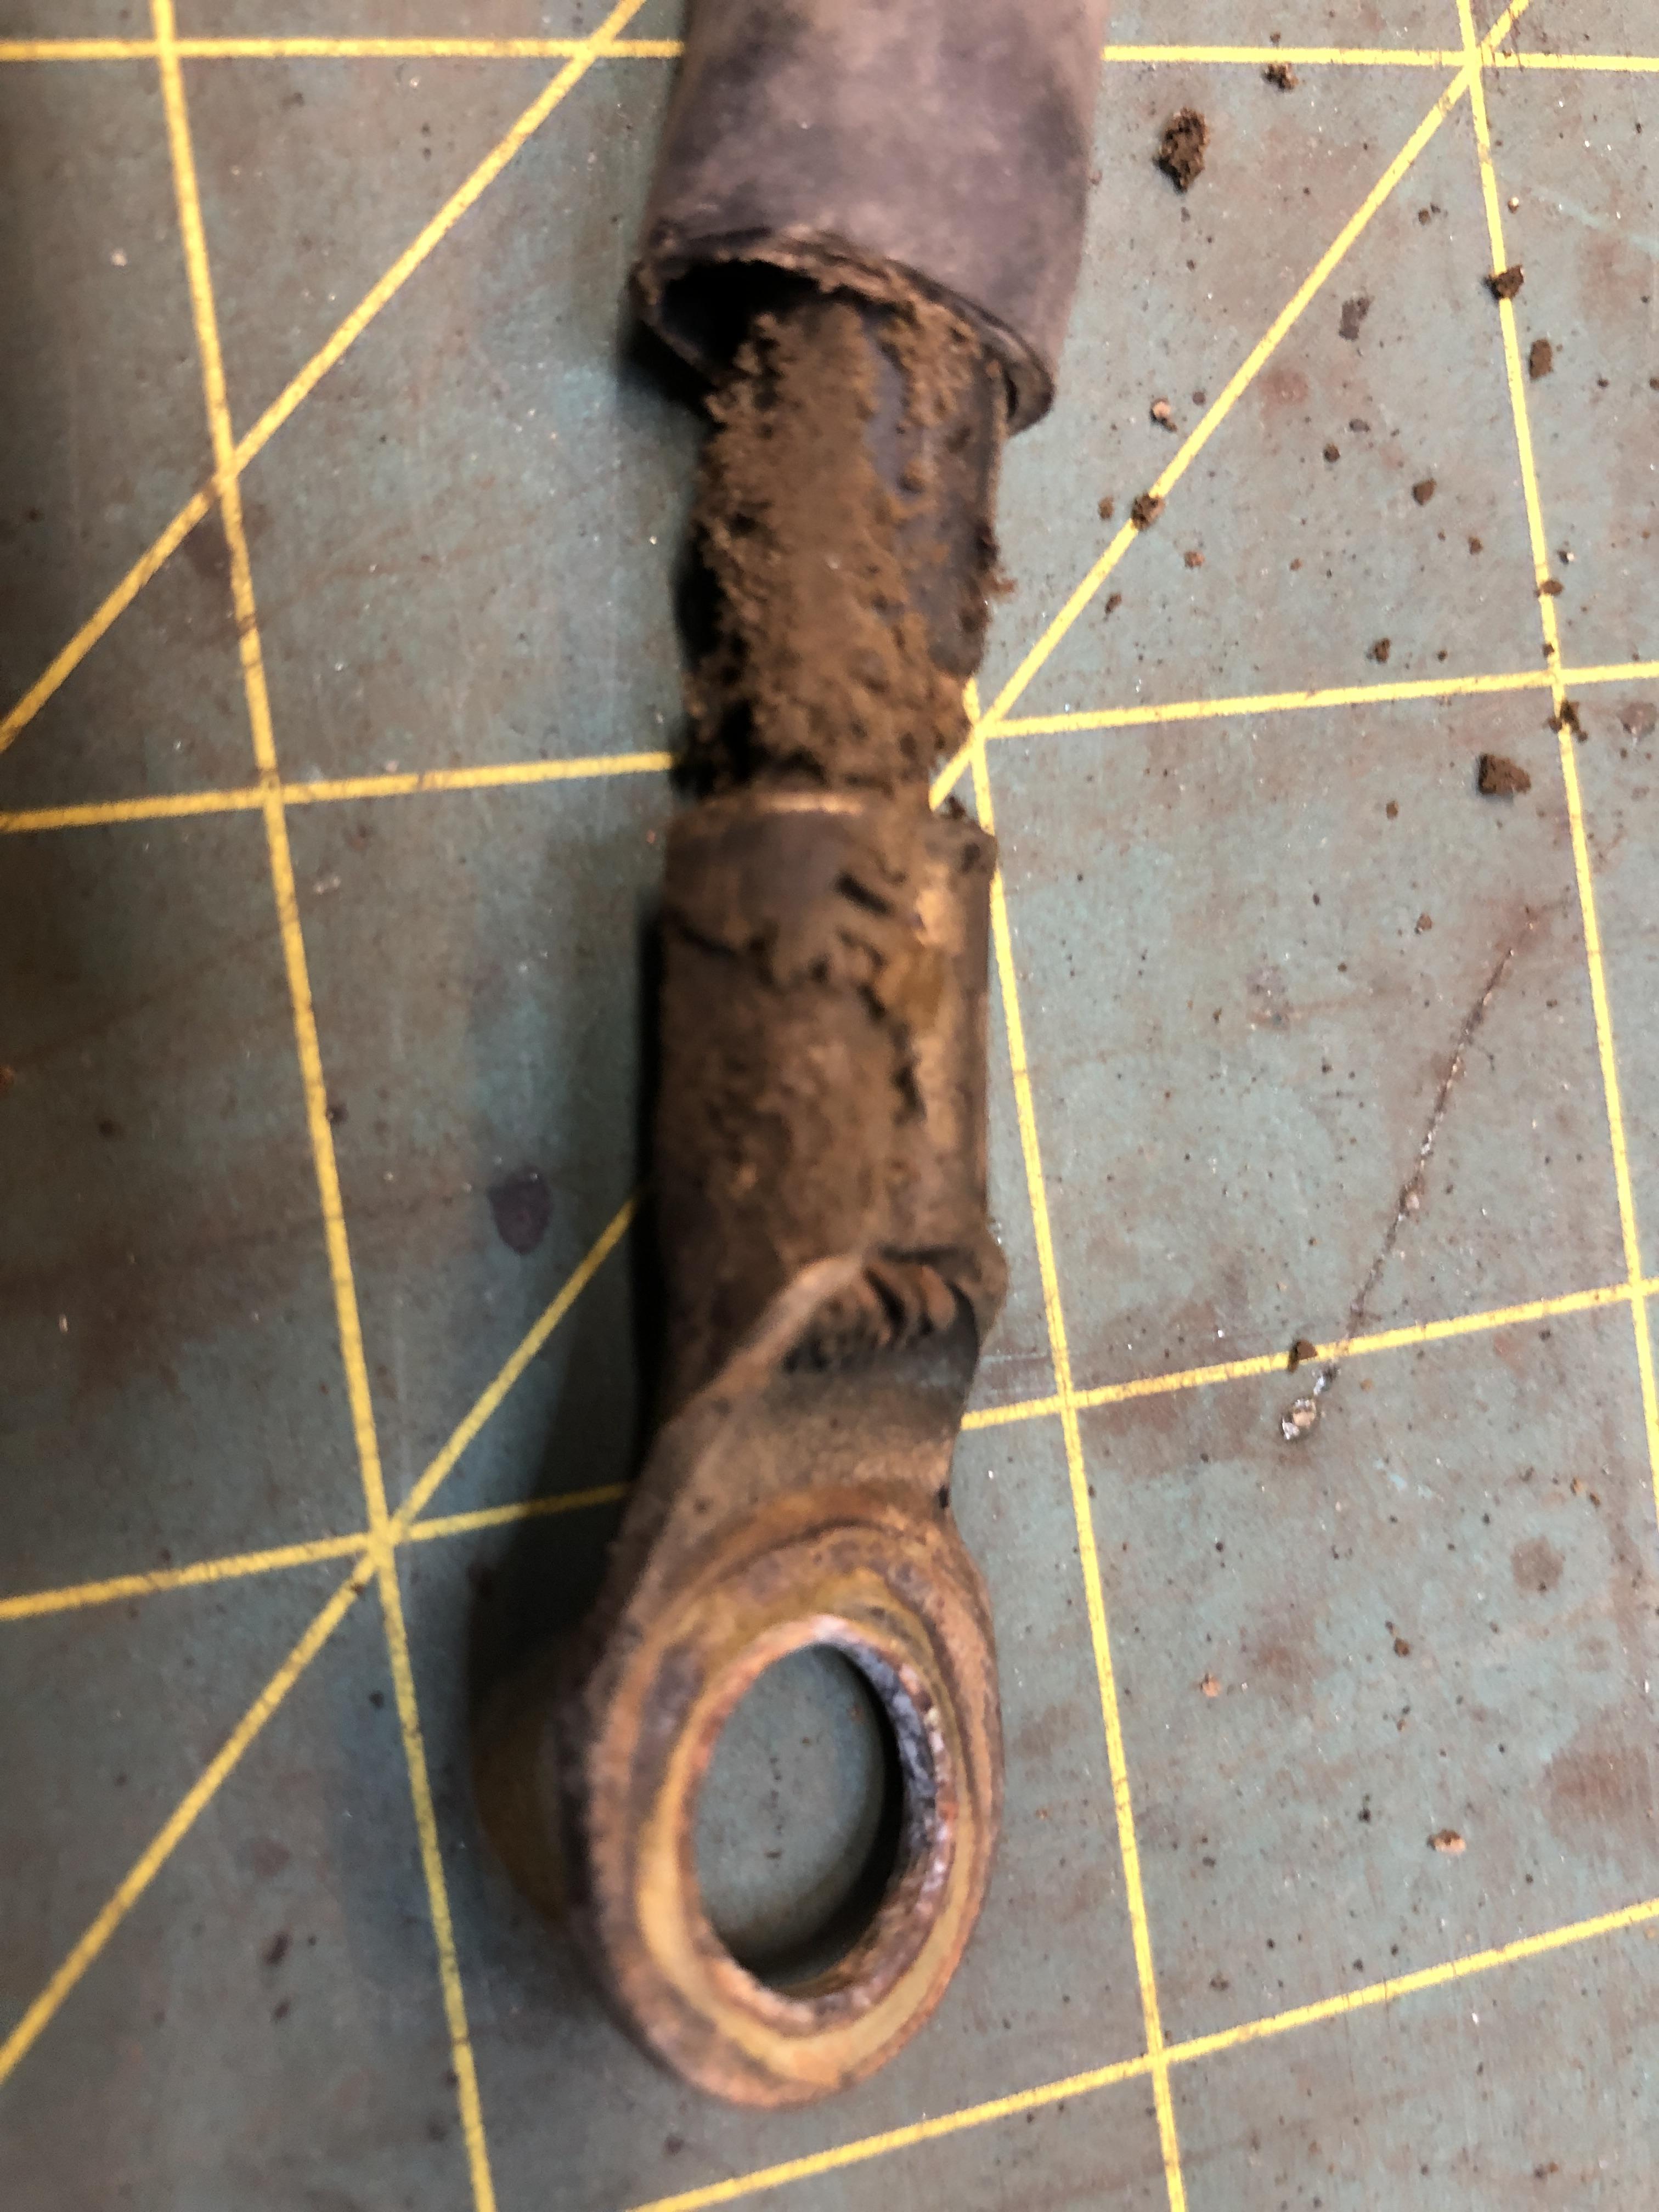
Finally dawned on me what that black blob is on the positive cable. It a rubber cover for the terminal. Now I have find some that fit the terminals I bought to do this right(er).
-
That site has the positive one as well.
-
Some info and pictures here.
-
I’ve seen kinks and I’ve seen hoses that are so stiff they impede choke motion. OEM stuff is amazing, the 40 year since last started last Z I’ve been playing with, still had soft hoses I’ve been using the silicon tubing that RC hobby stores sell for the nitrous fuel they use in RC car and airplane engines. Comes in different colors too! Pink is nice. No doubt Z Therapy has some input on this Wait I’m Canadian, COLOURS.
-
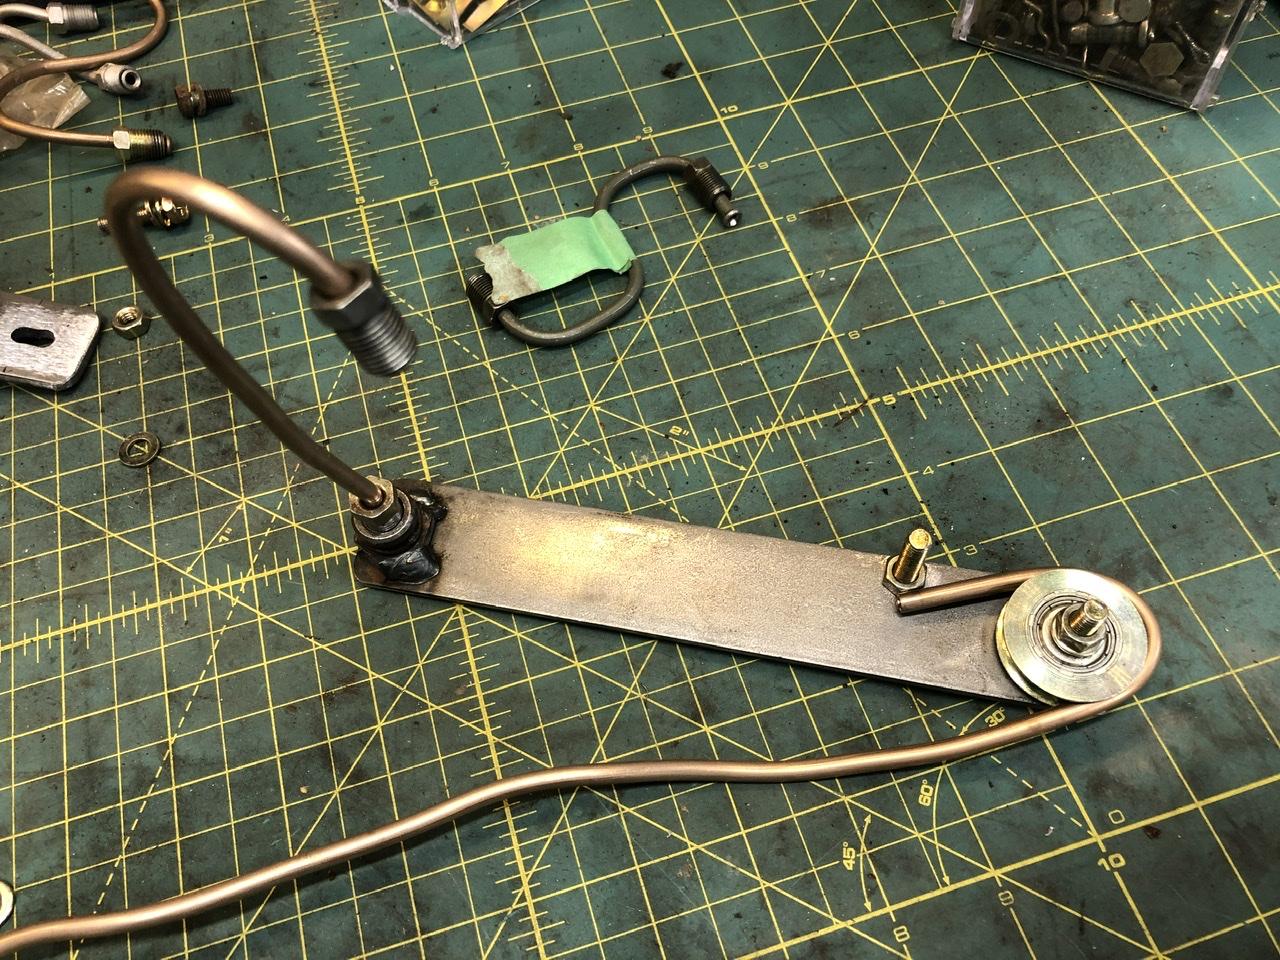
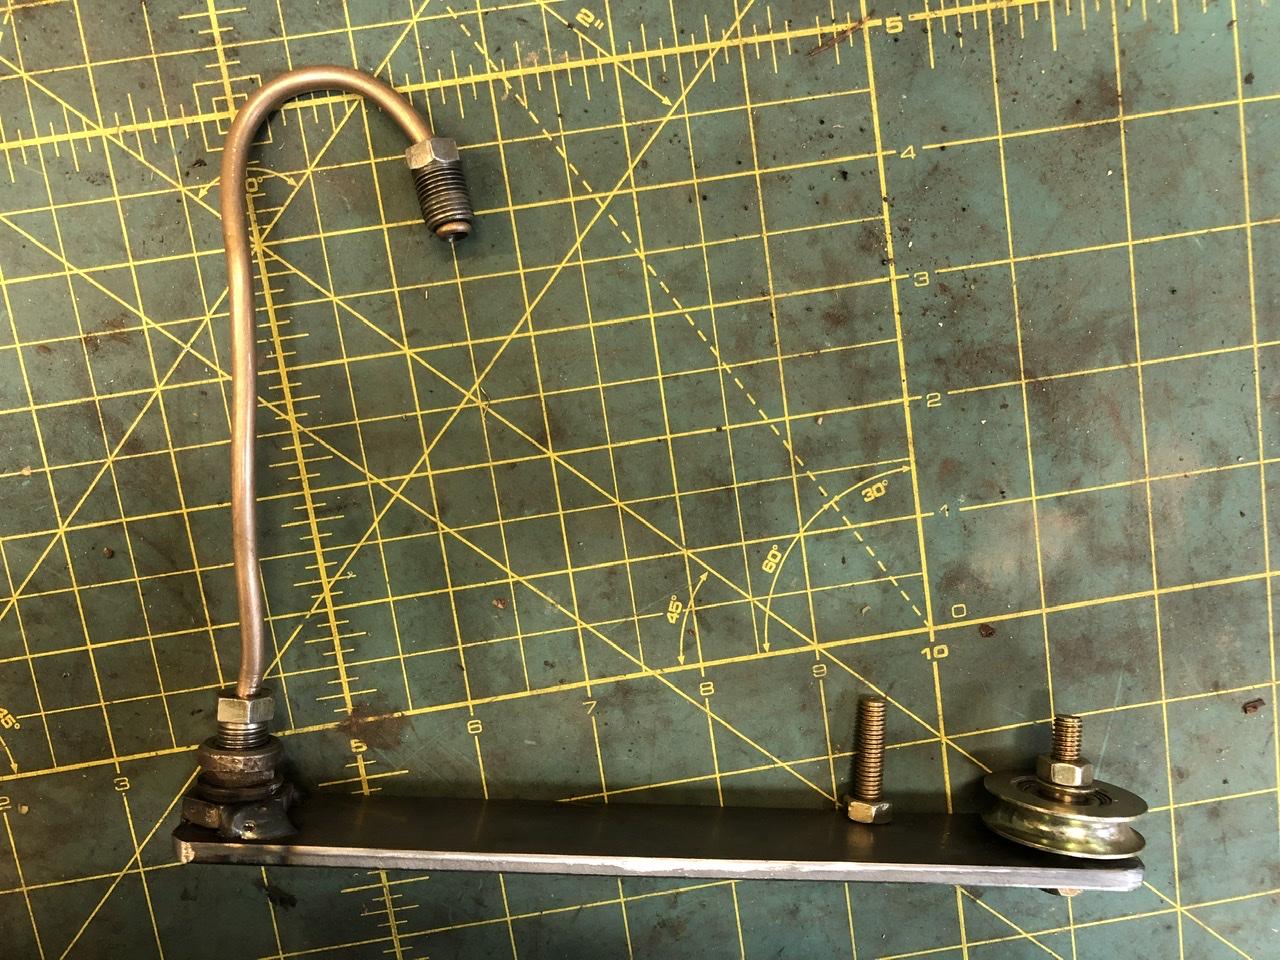
Yes there is a 1.25 diameter roller thing at the other end to help you form tubing as well if and when that comes in handy. That wheel is a screen door bottom guide roller. It has a 1/4” groove, bit bigger than the 3/16 tubing, but works just fine.

-
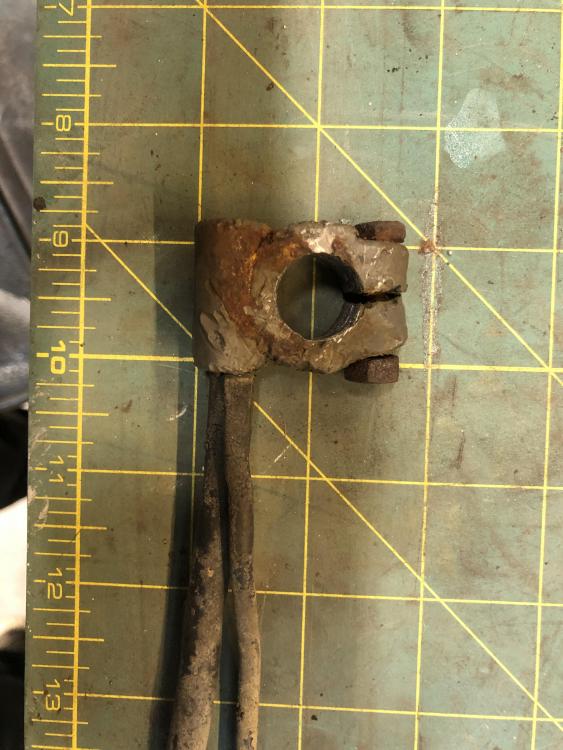
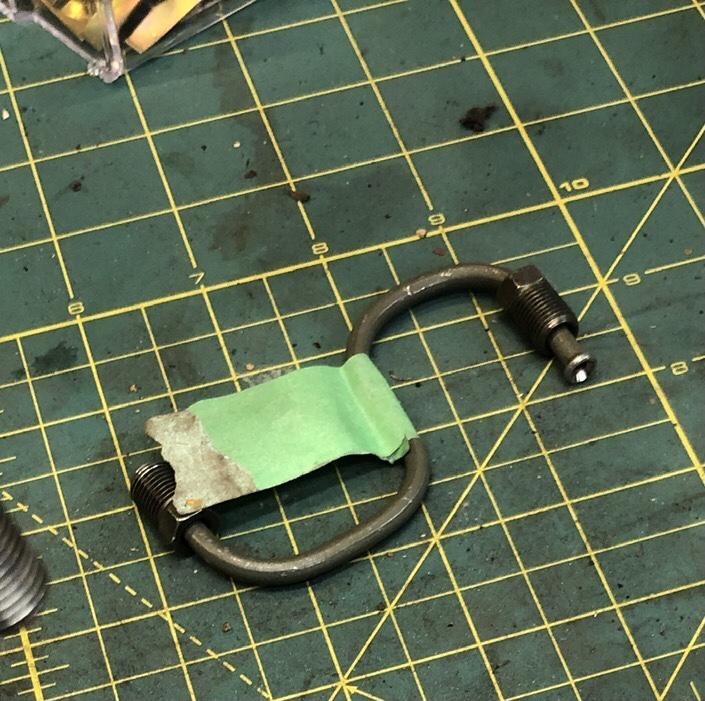
Just stare at that little beauty for a minute. The brake line threaded into that little remnant of an old brake line welded to the bar is the secret weapon. I already use the CuNi tubing and have for years. It is very soft and forms nicely in my powerful hands. However, there is one bend type that is always challenging and of course occurs frequently. A tight curve near the end of the tube. Bending the end of the tube requires more force as the leverage is reduced with shorter length. Don’t believe me, make a 180 in the middle of a 12 long piece, then make it again at the end. My finger tips cringe at the thought of it. Dang, if only there was a way to safely, easily grab the end of the tube in a vise grip or something without screwing up the threads or crushing the tubing and giving me an extension handle to increase leverage. BINGO! Thread the tube nut into an old female brake fitting welded to the end of a scrap. Consider that little devil tight S curve on the stock front caliper. TWO tight 180 bends near BOTH ends! Impossible to make it nice and pretty and kink free! Not any more. I made a bunch. Need any? All of these were created on the car on real stock calipers and strut tube mounted hose ends, so they fit perfectly. They are R and L sided. They took literally 5 minutes each to bend and fit. Yes, they are not the exact same shape as the stock ones, sorry. Those bends are ridiculous.

-
Cool tool of the day for November 8th. Been making brake lines again on the latest project, and finally made that little tool that makes some of the tighter bends really easy.


-
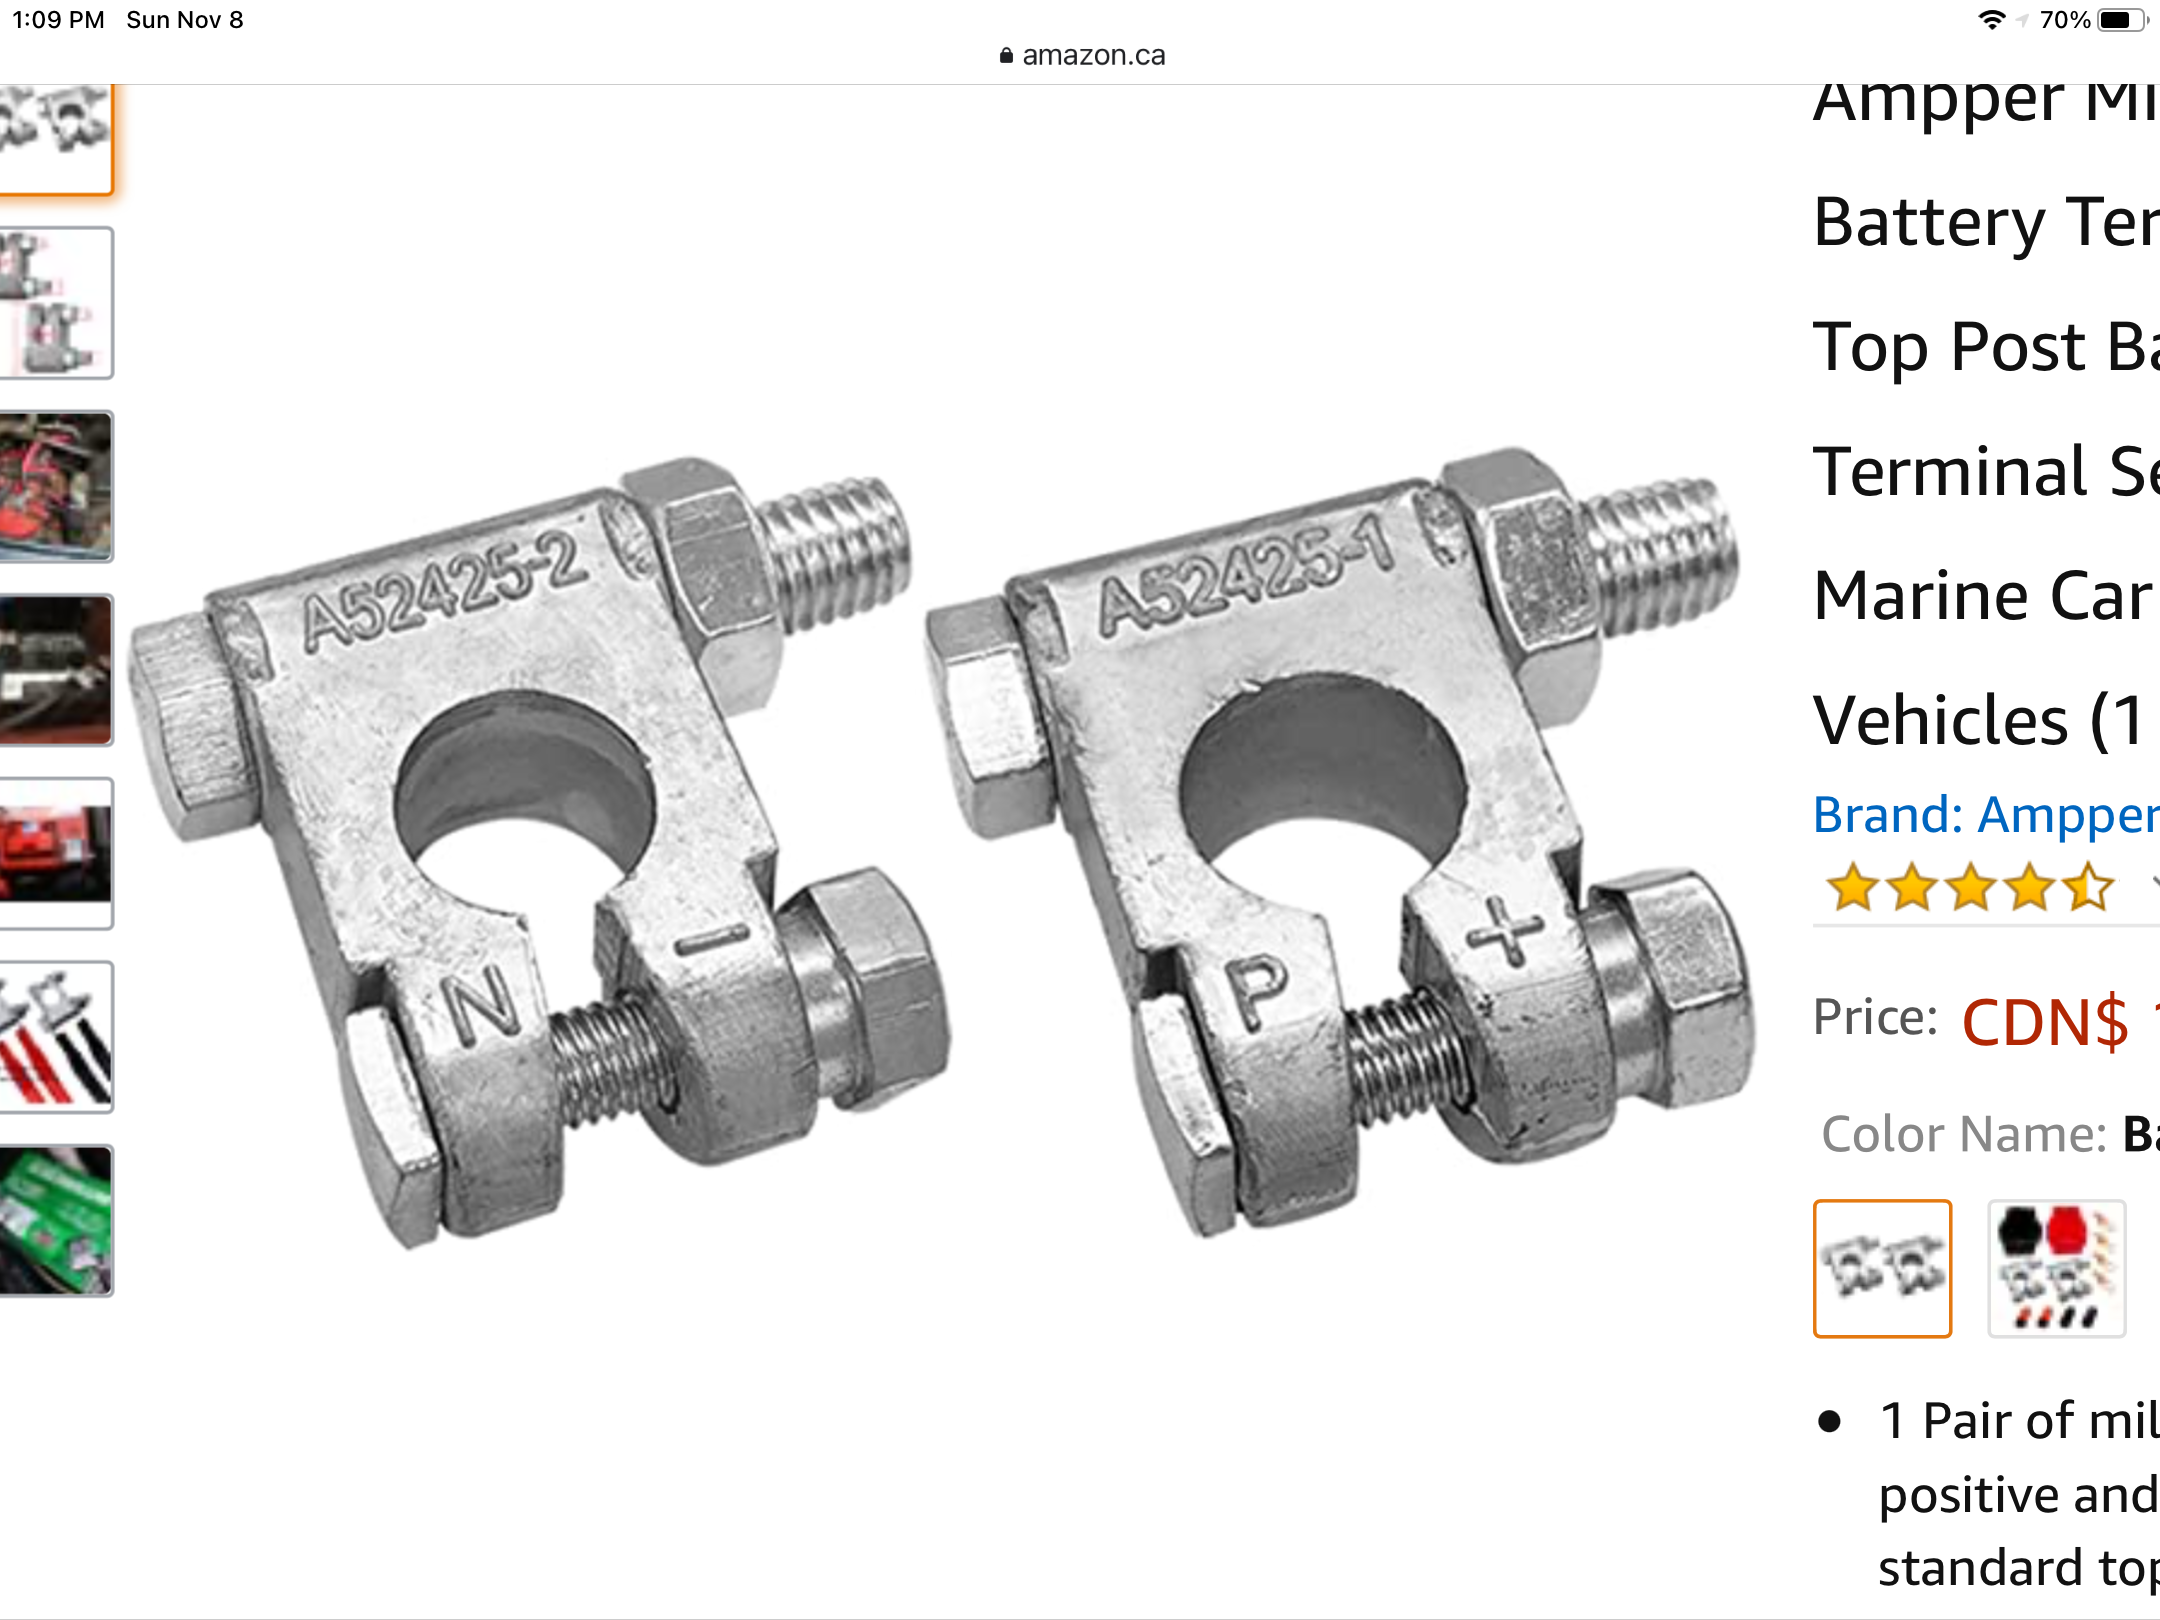
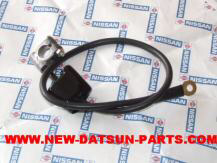
I’m digging that engine bay. Share with us your source of battery terminal/cables please. Quite tough to find that style already made up, or are you putting your own cables into empty lead terminals. Closest I found were these. I suppose one could solder cable ends into the hole where that boilt passes through?

-
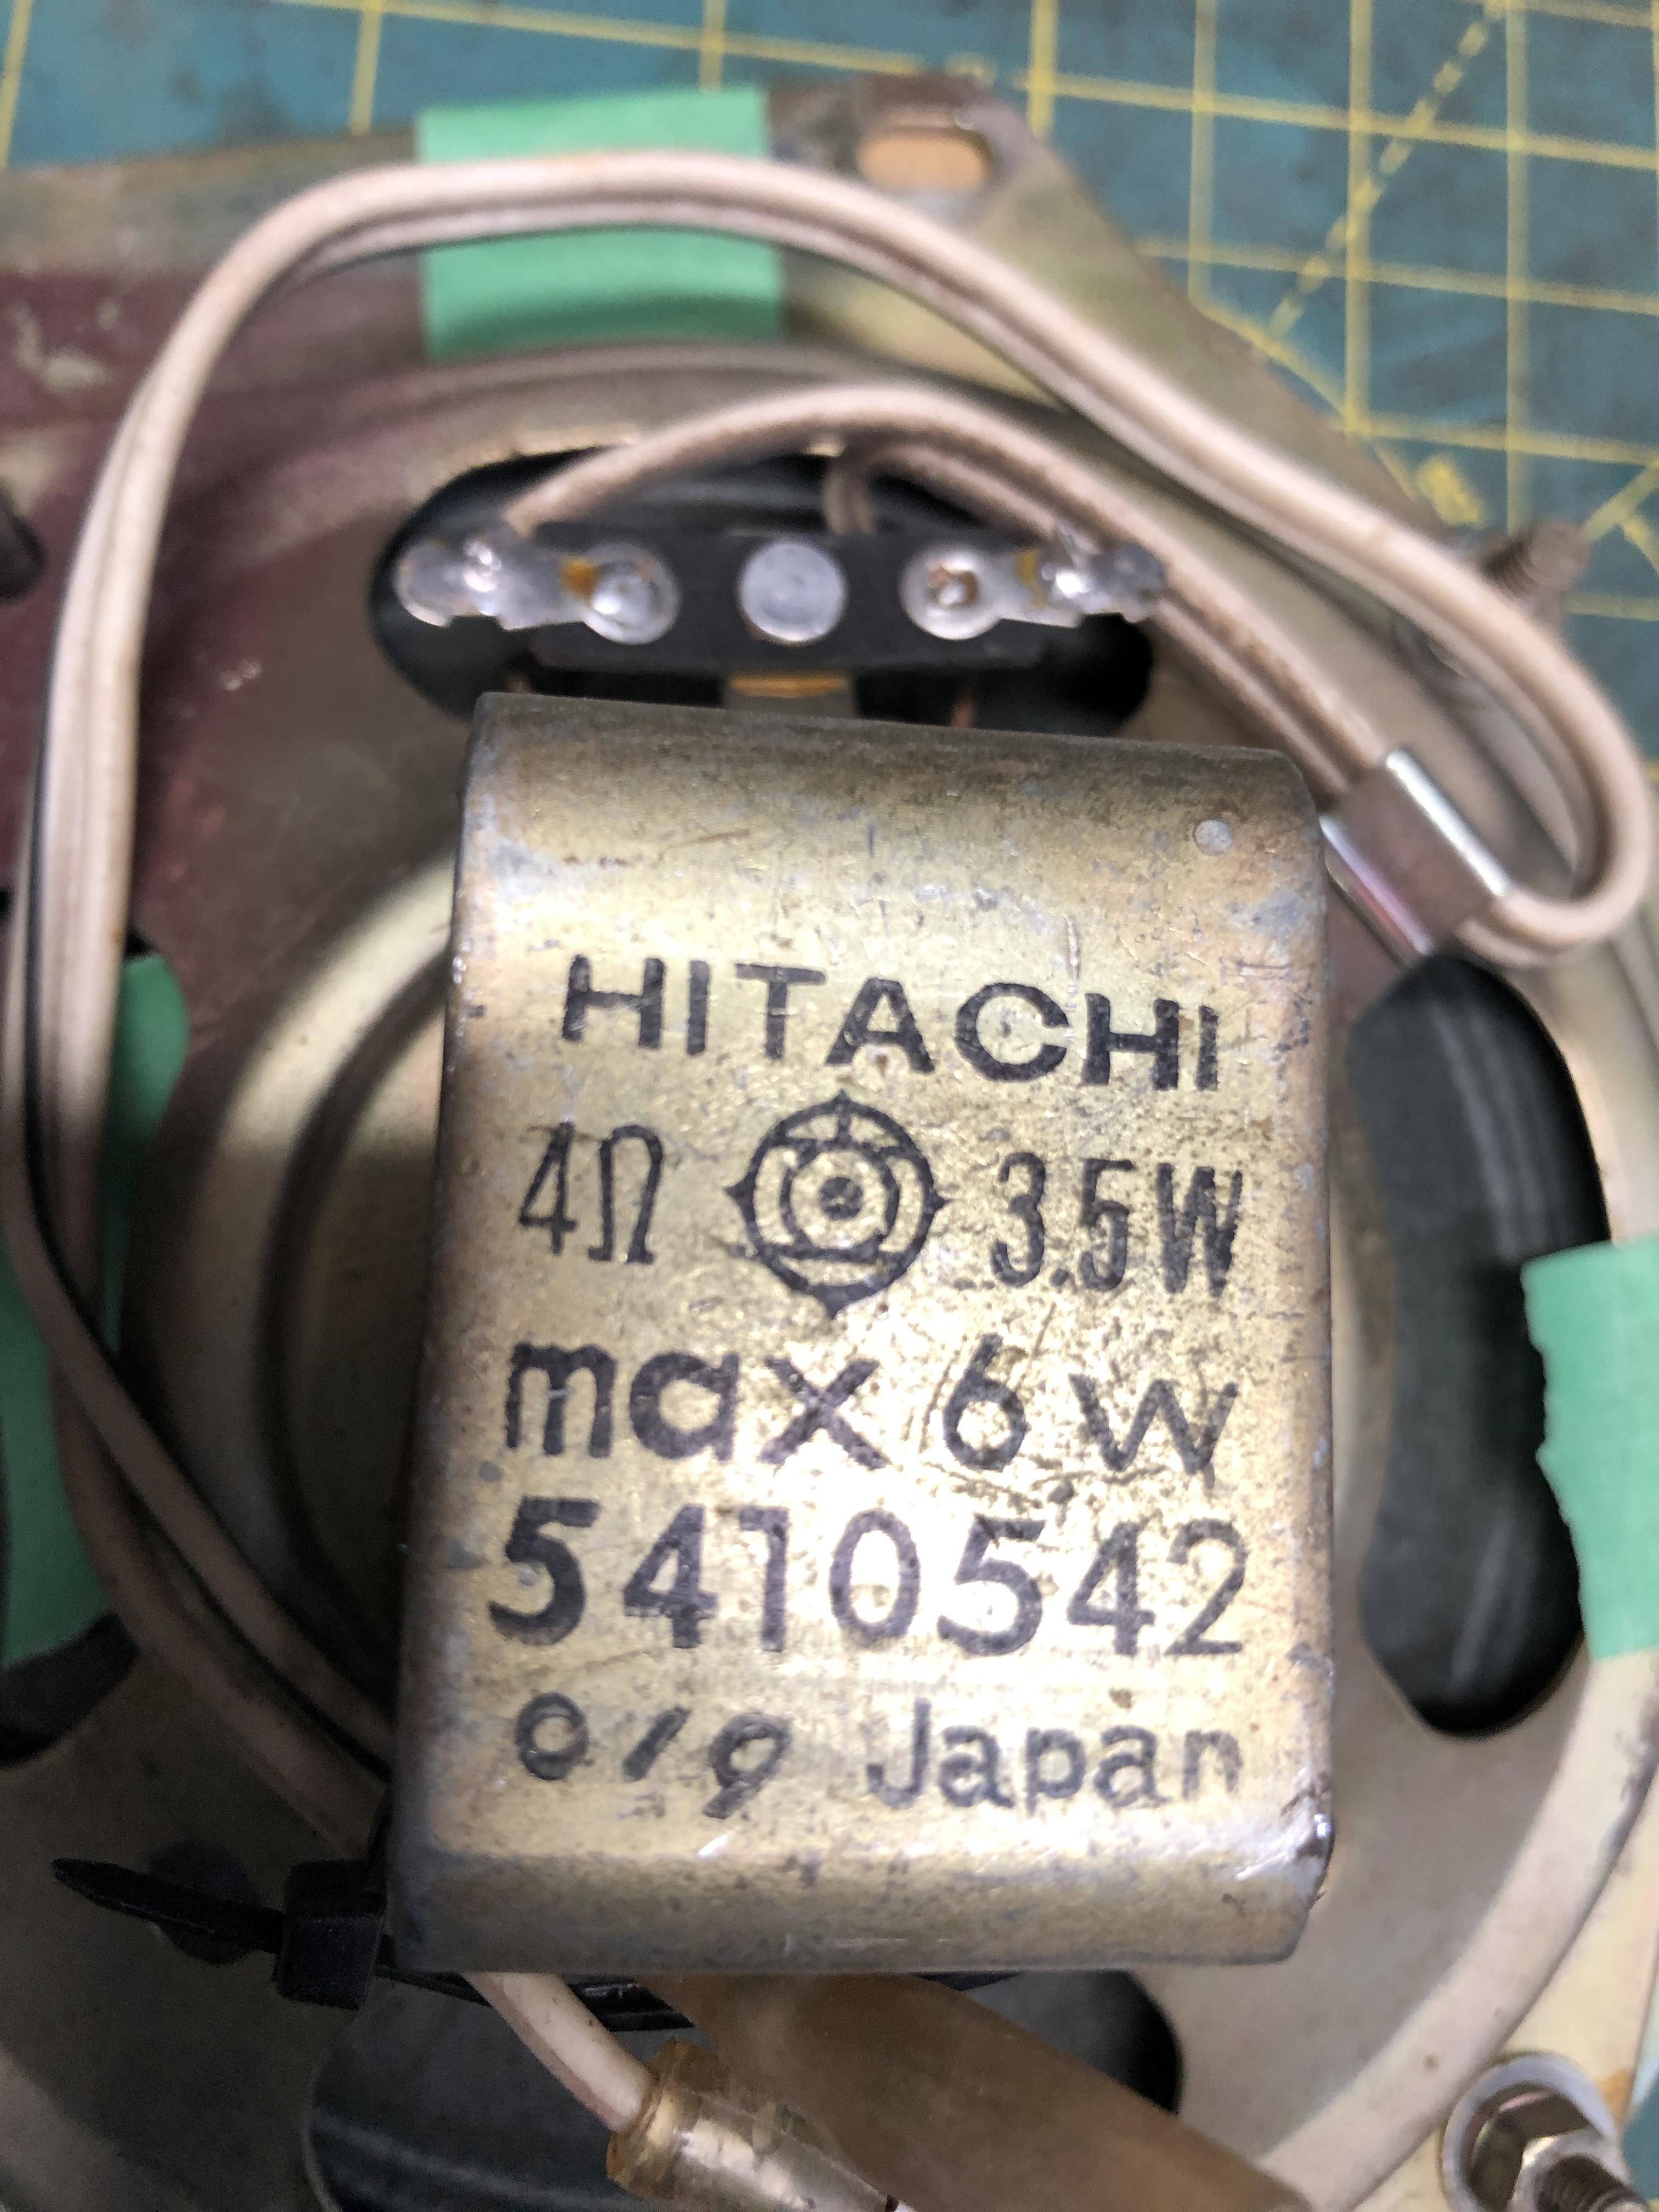
Some visual reference for speaker specs.


-
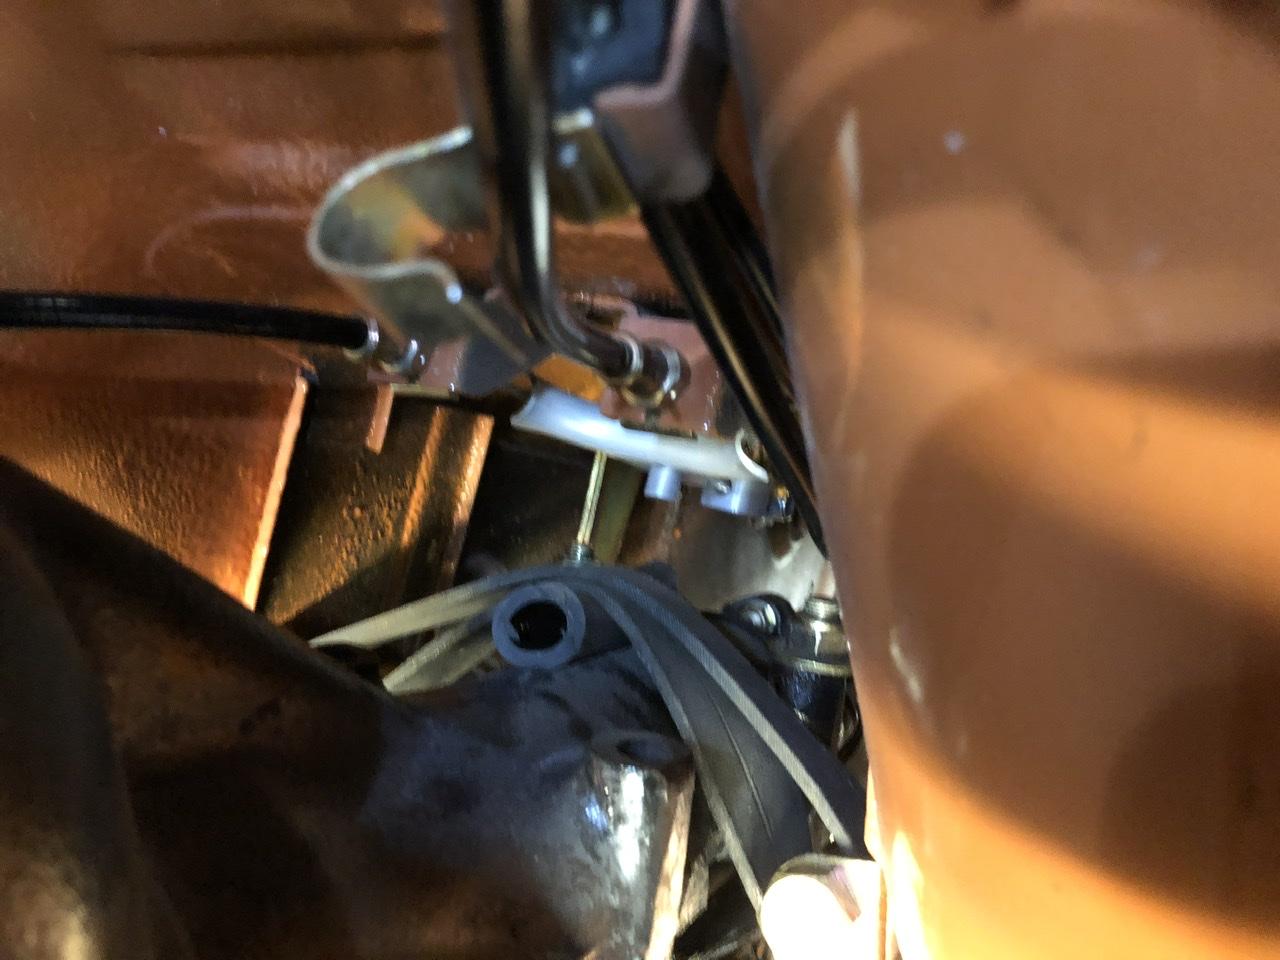
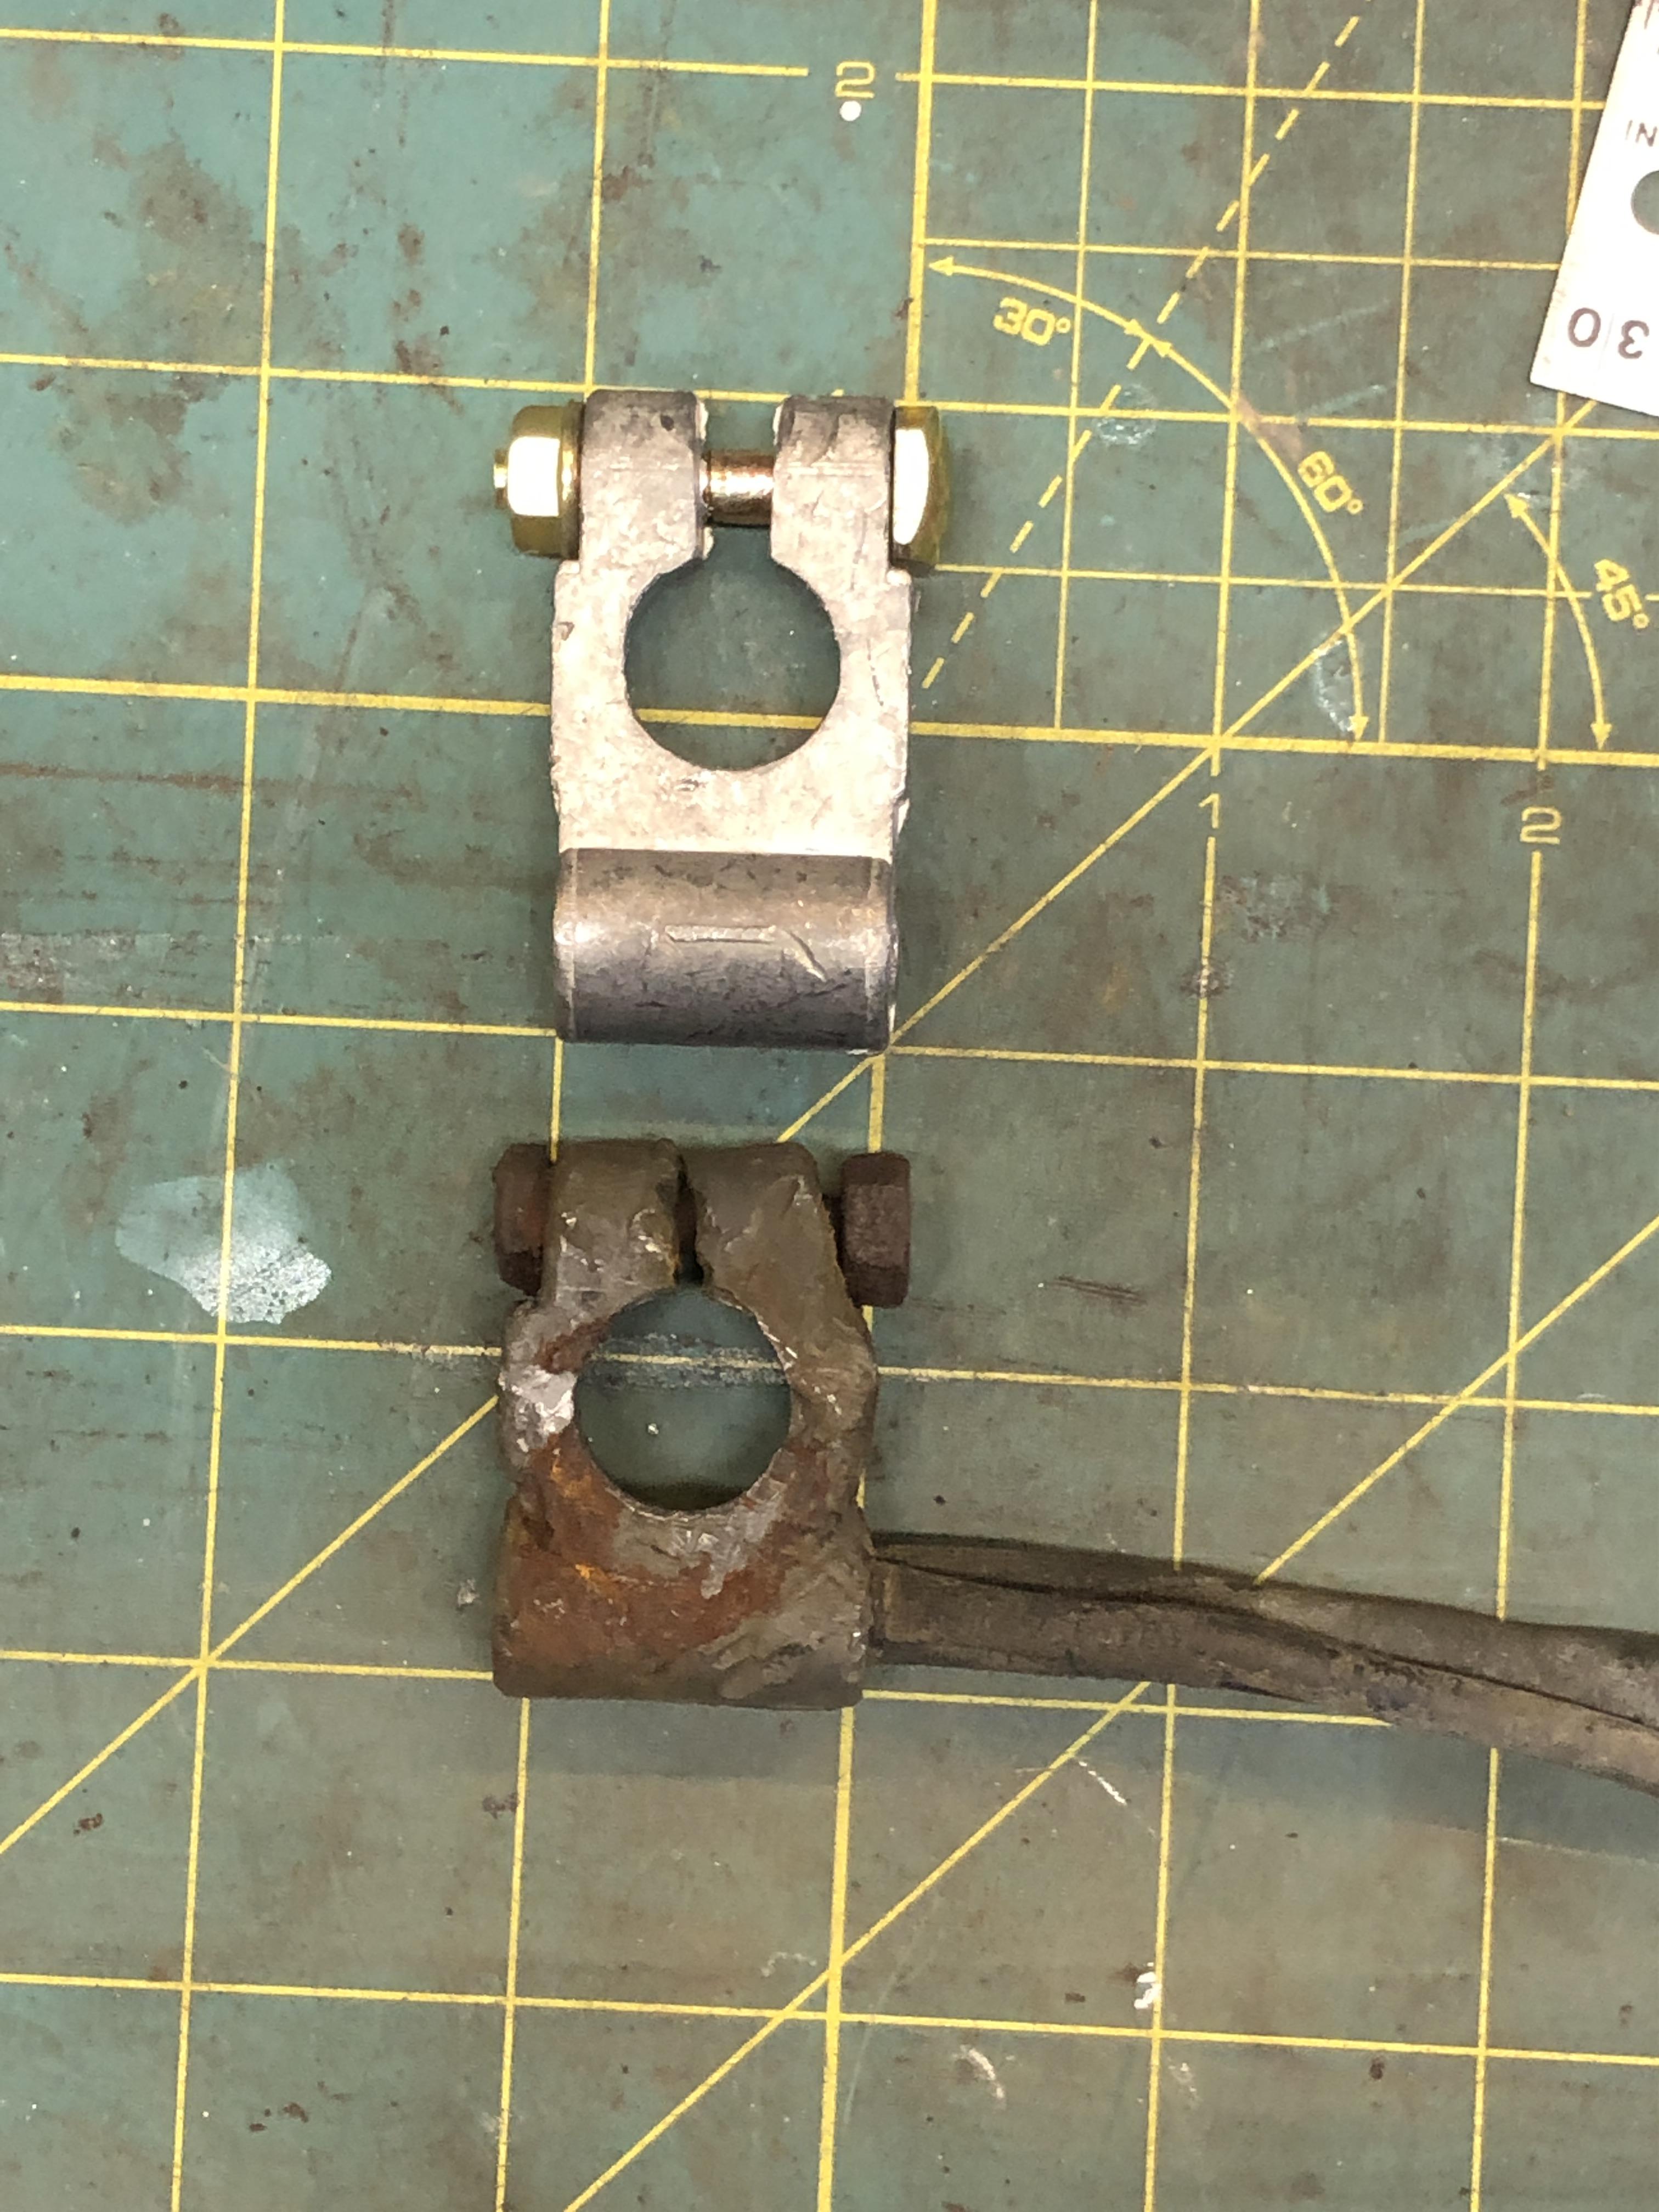
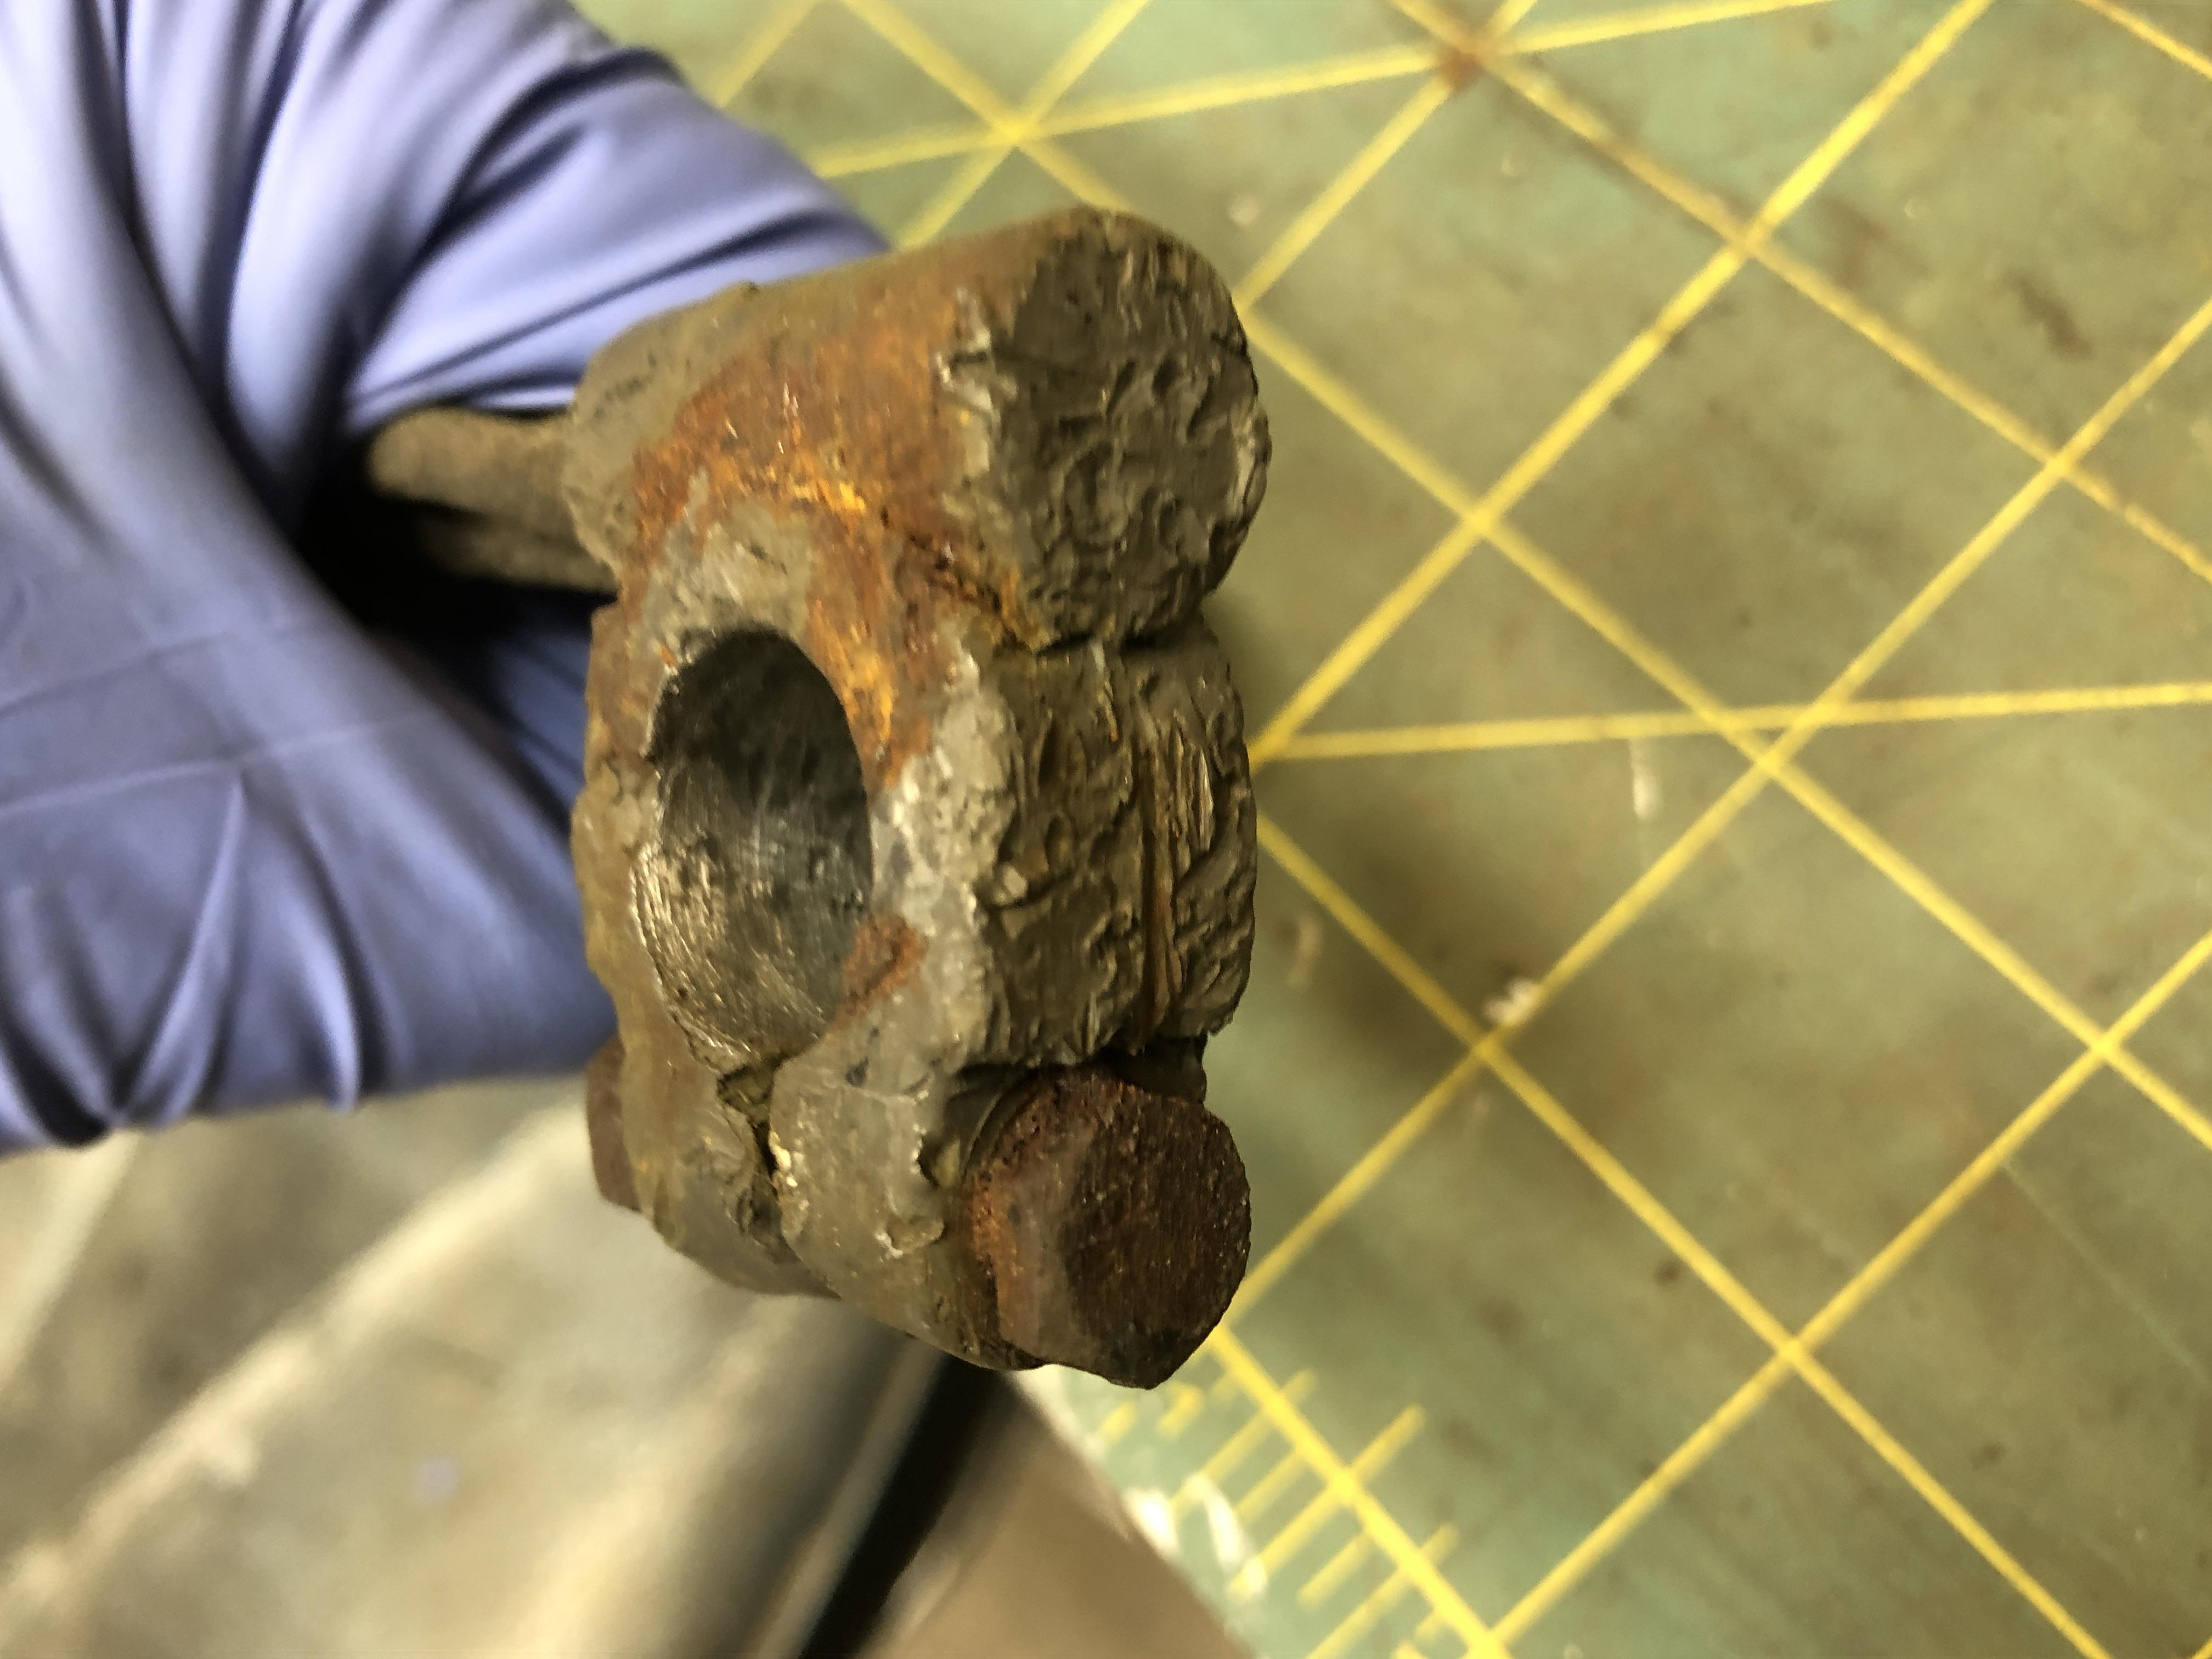
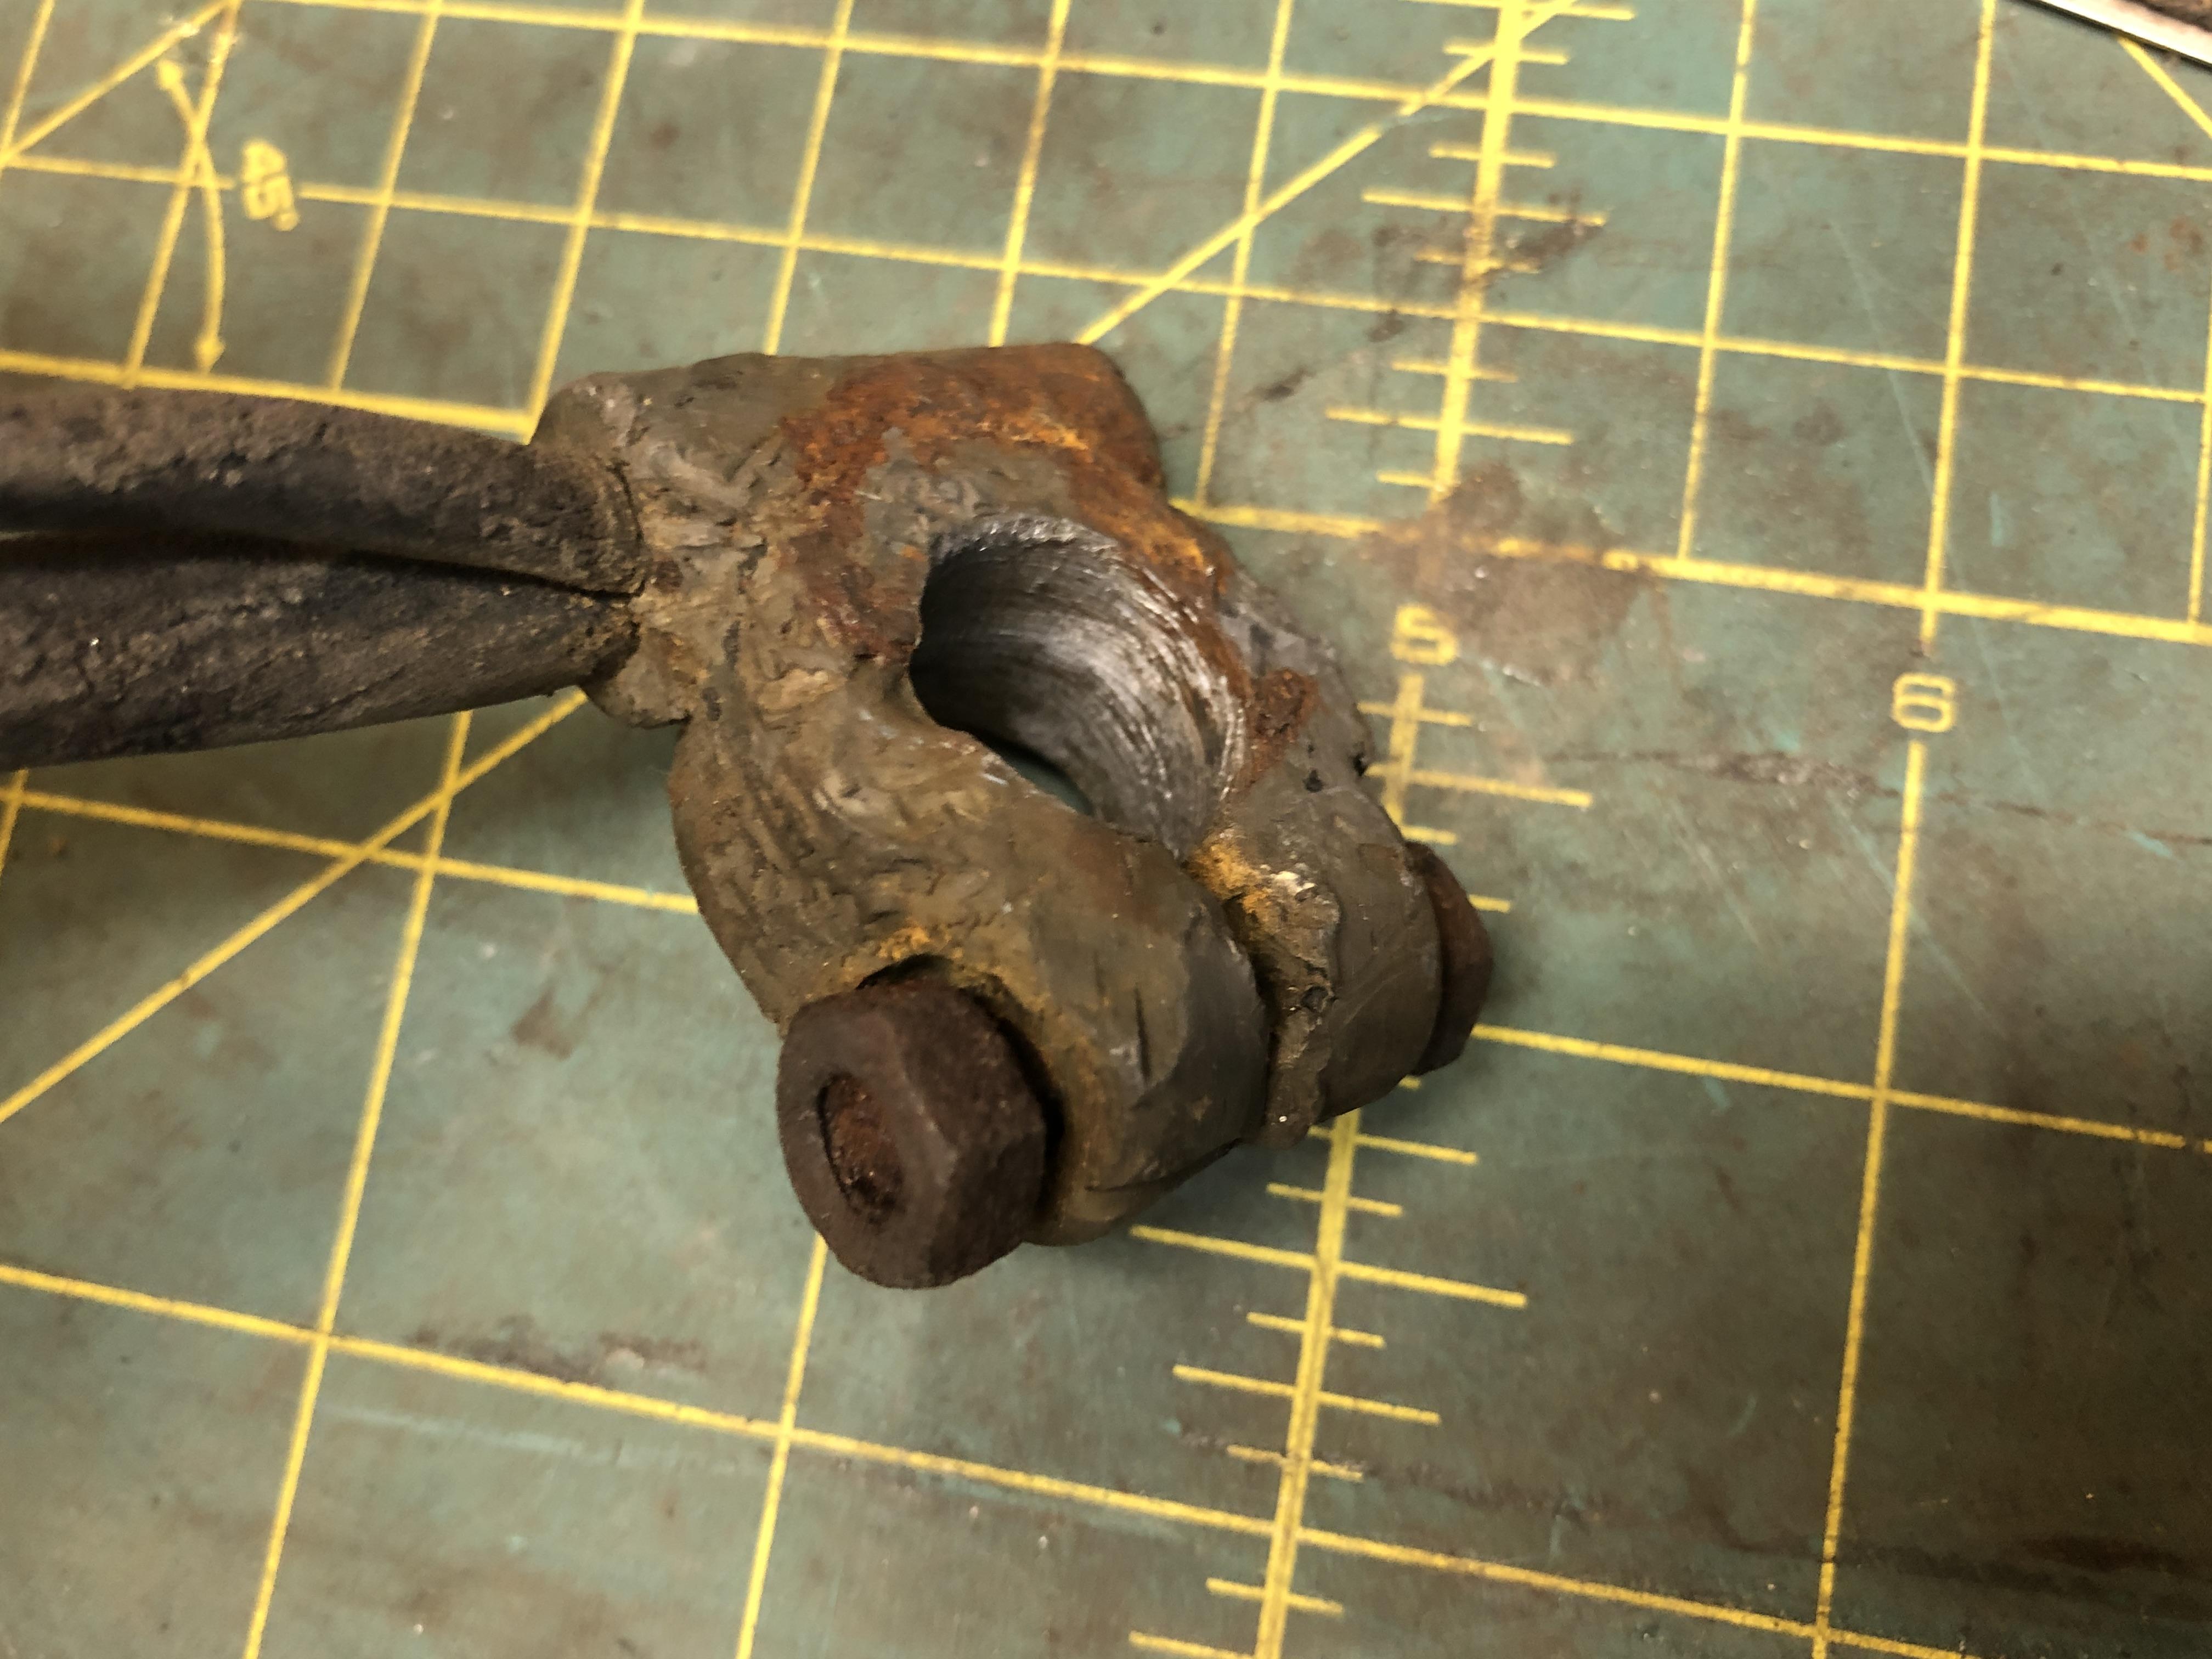
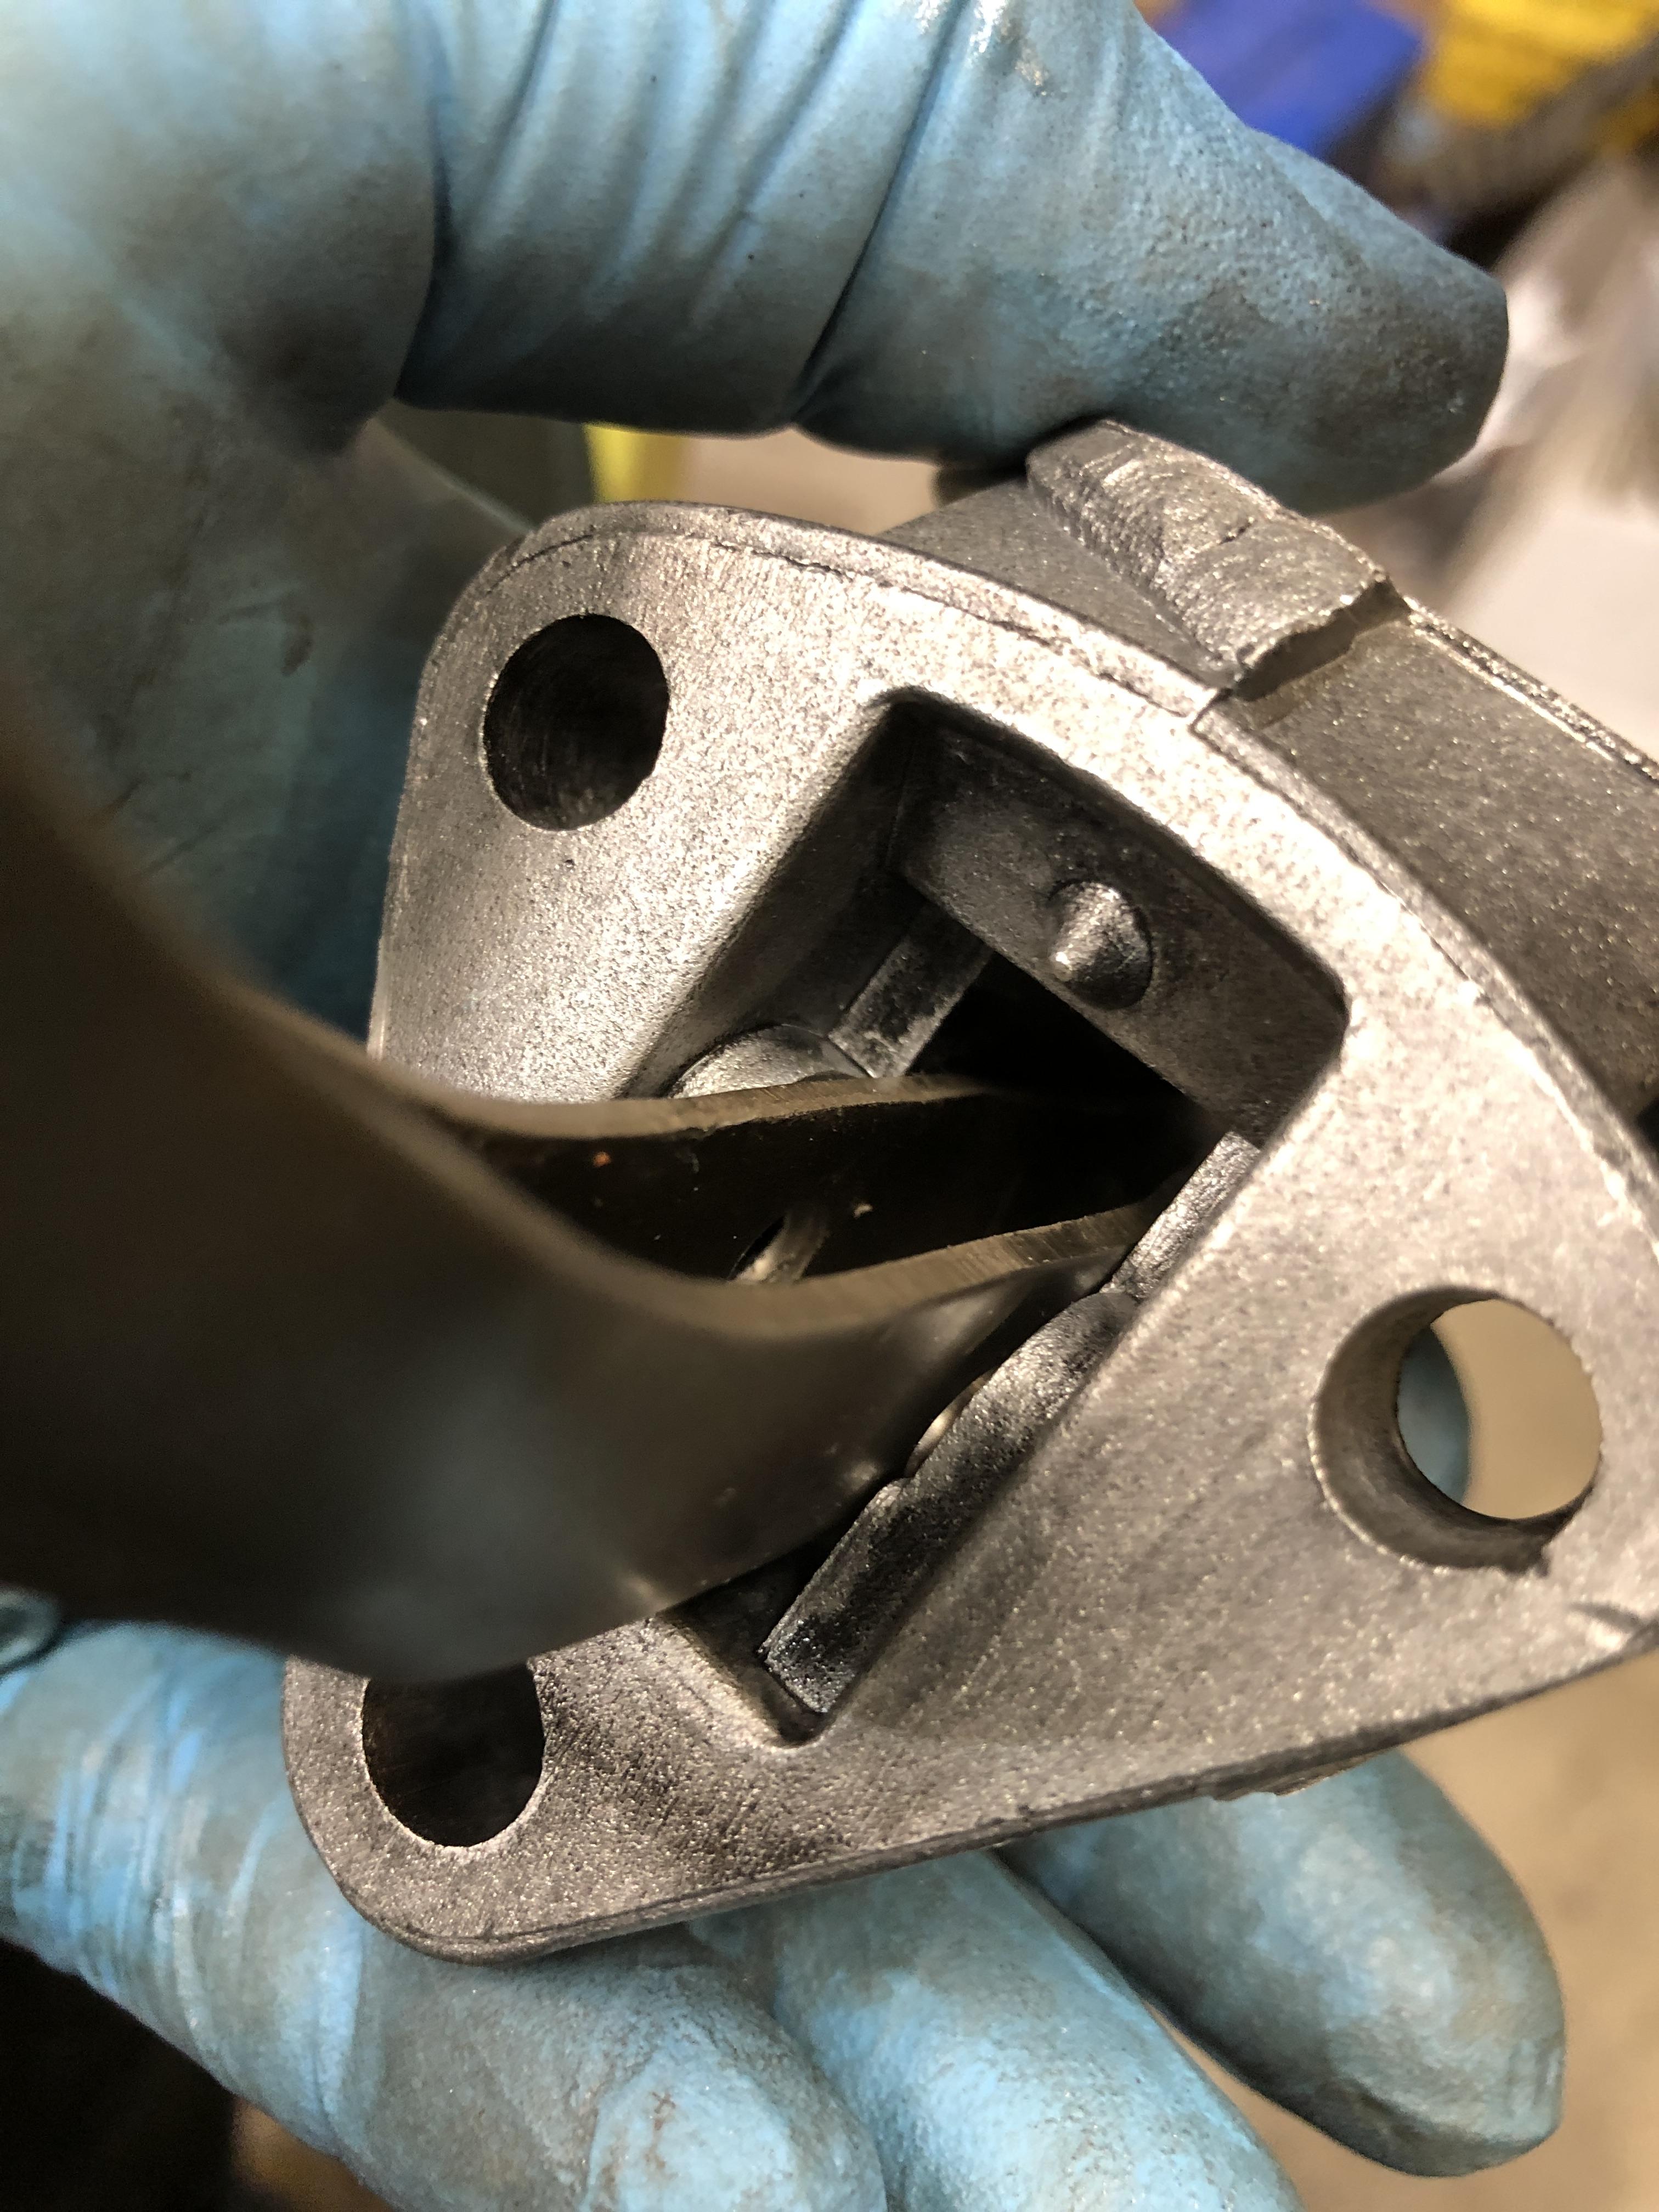
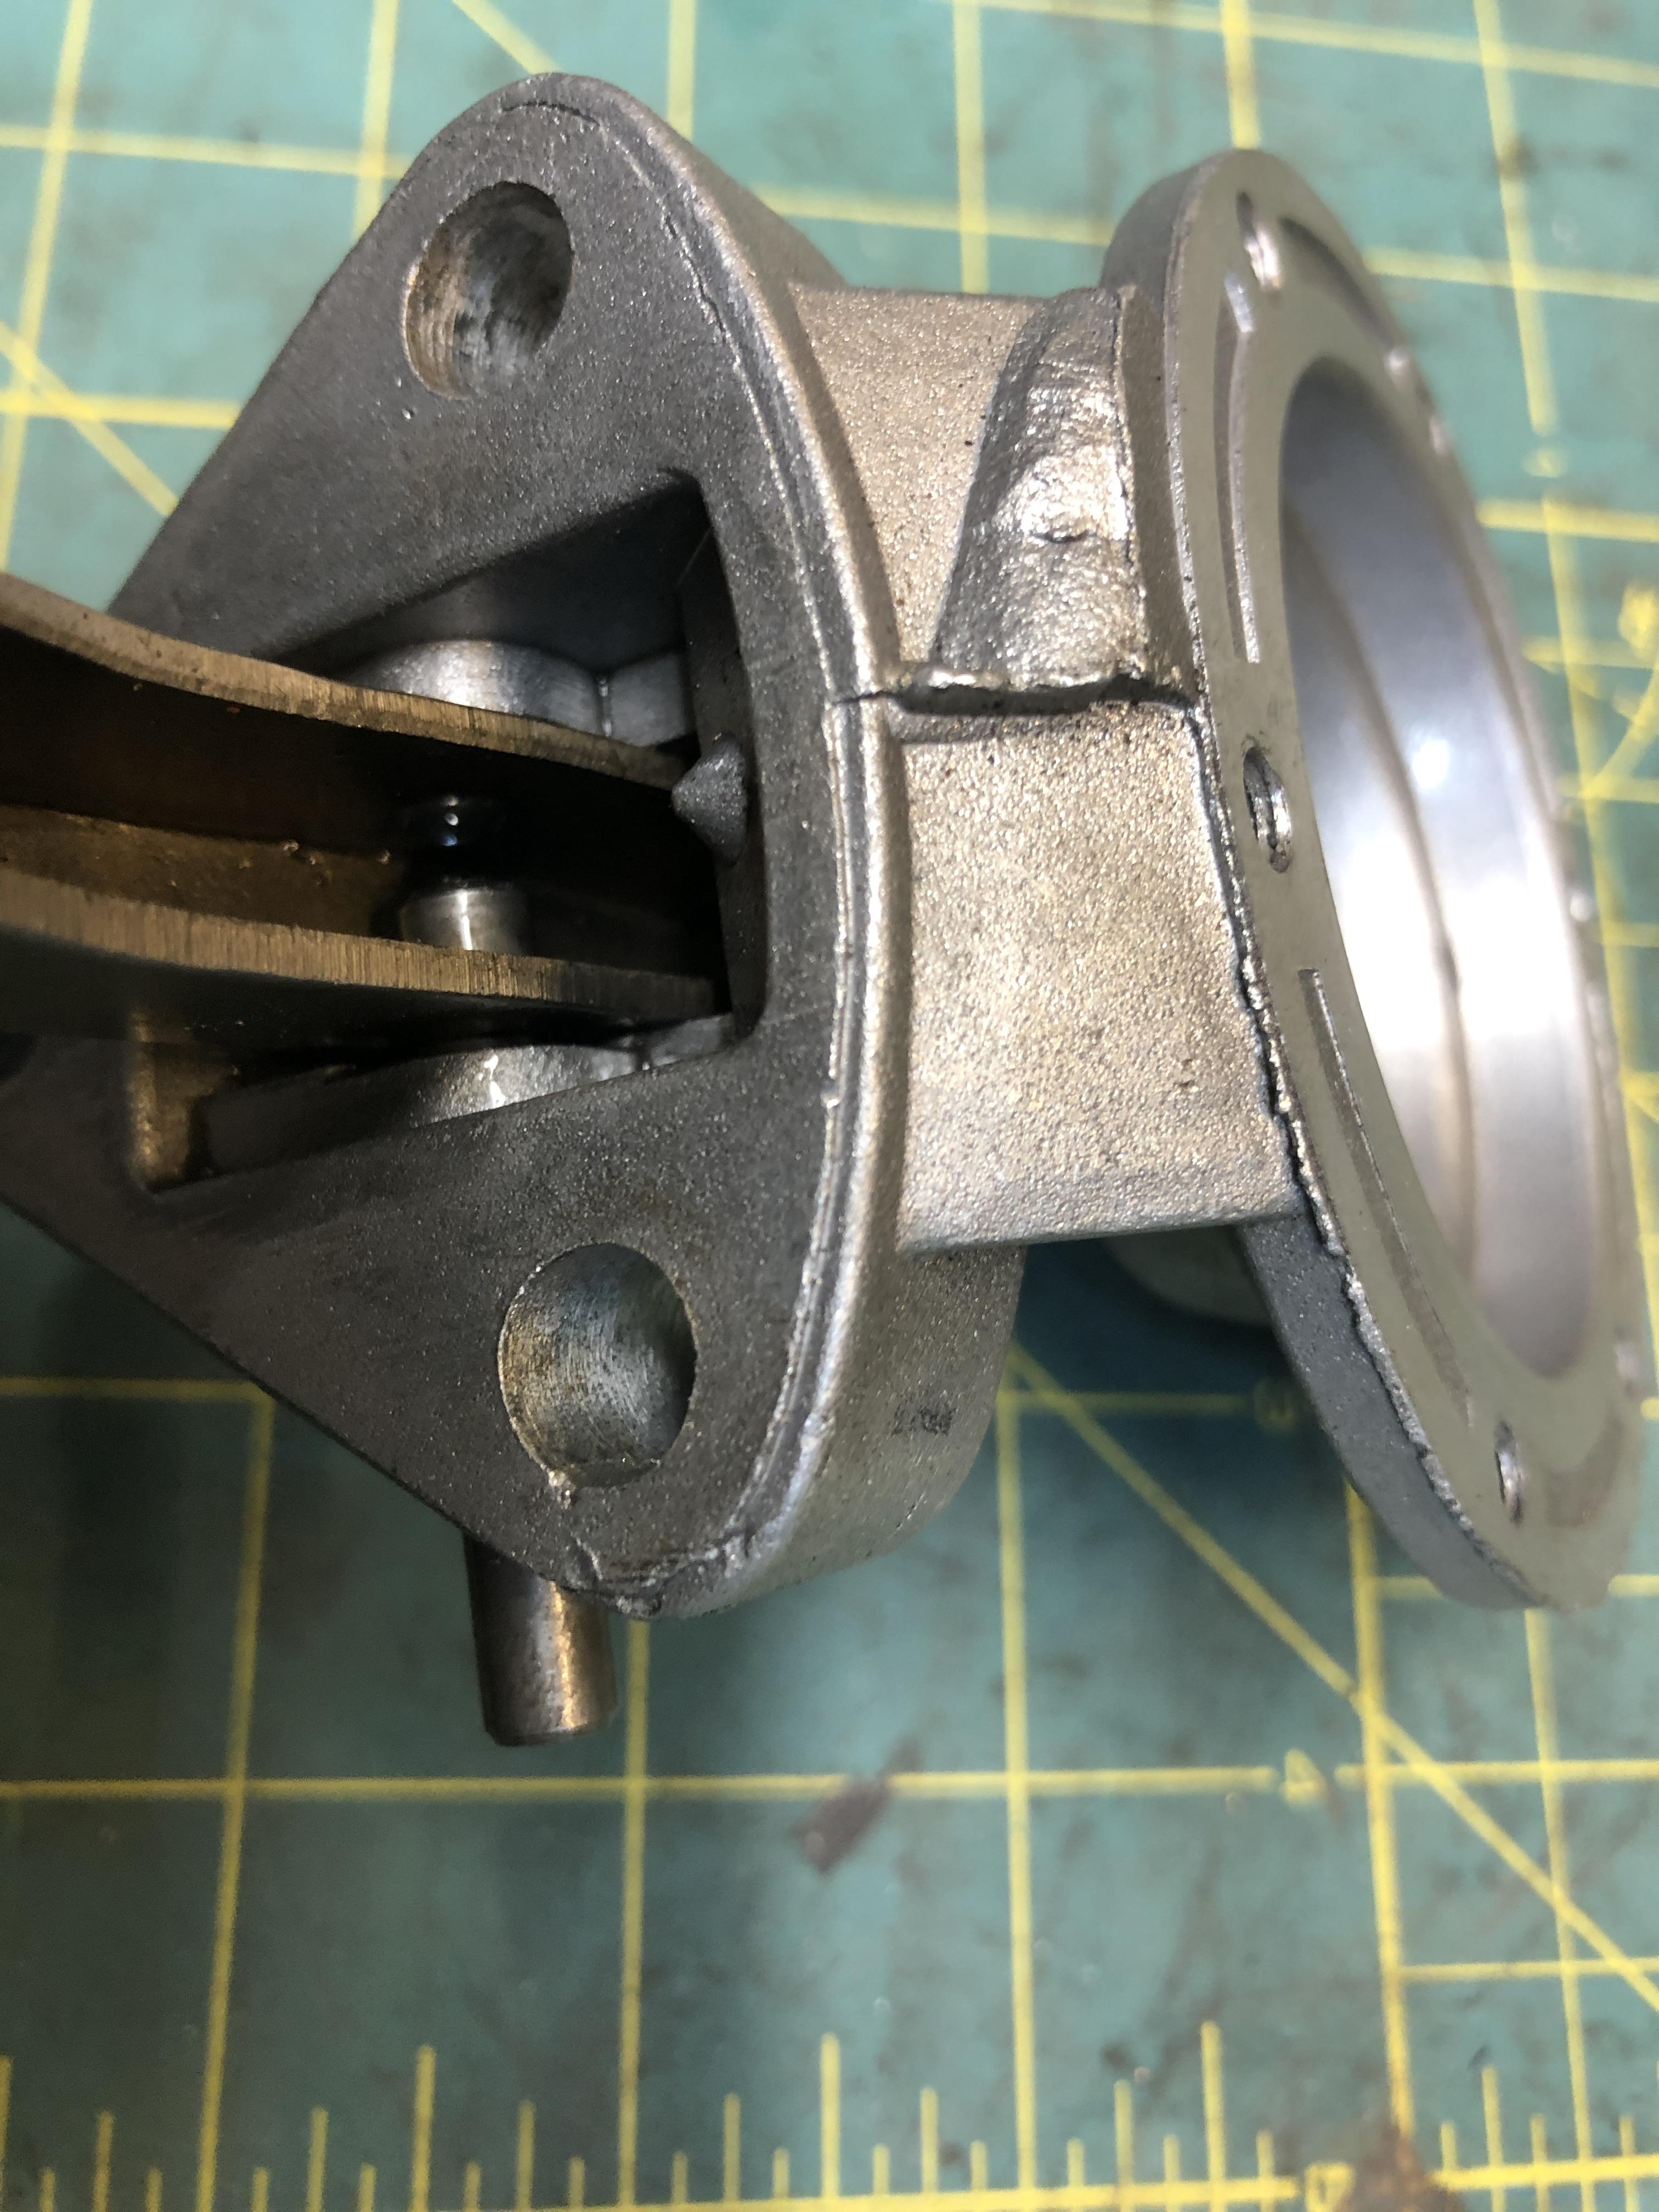
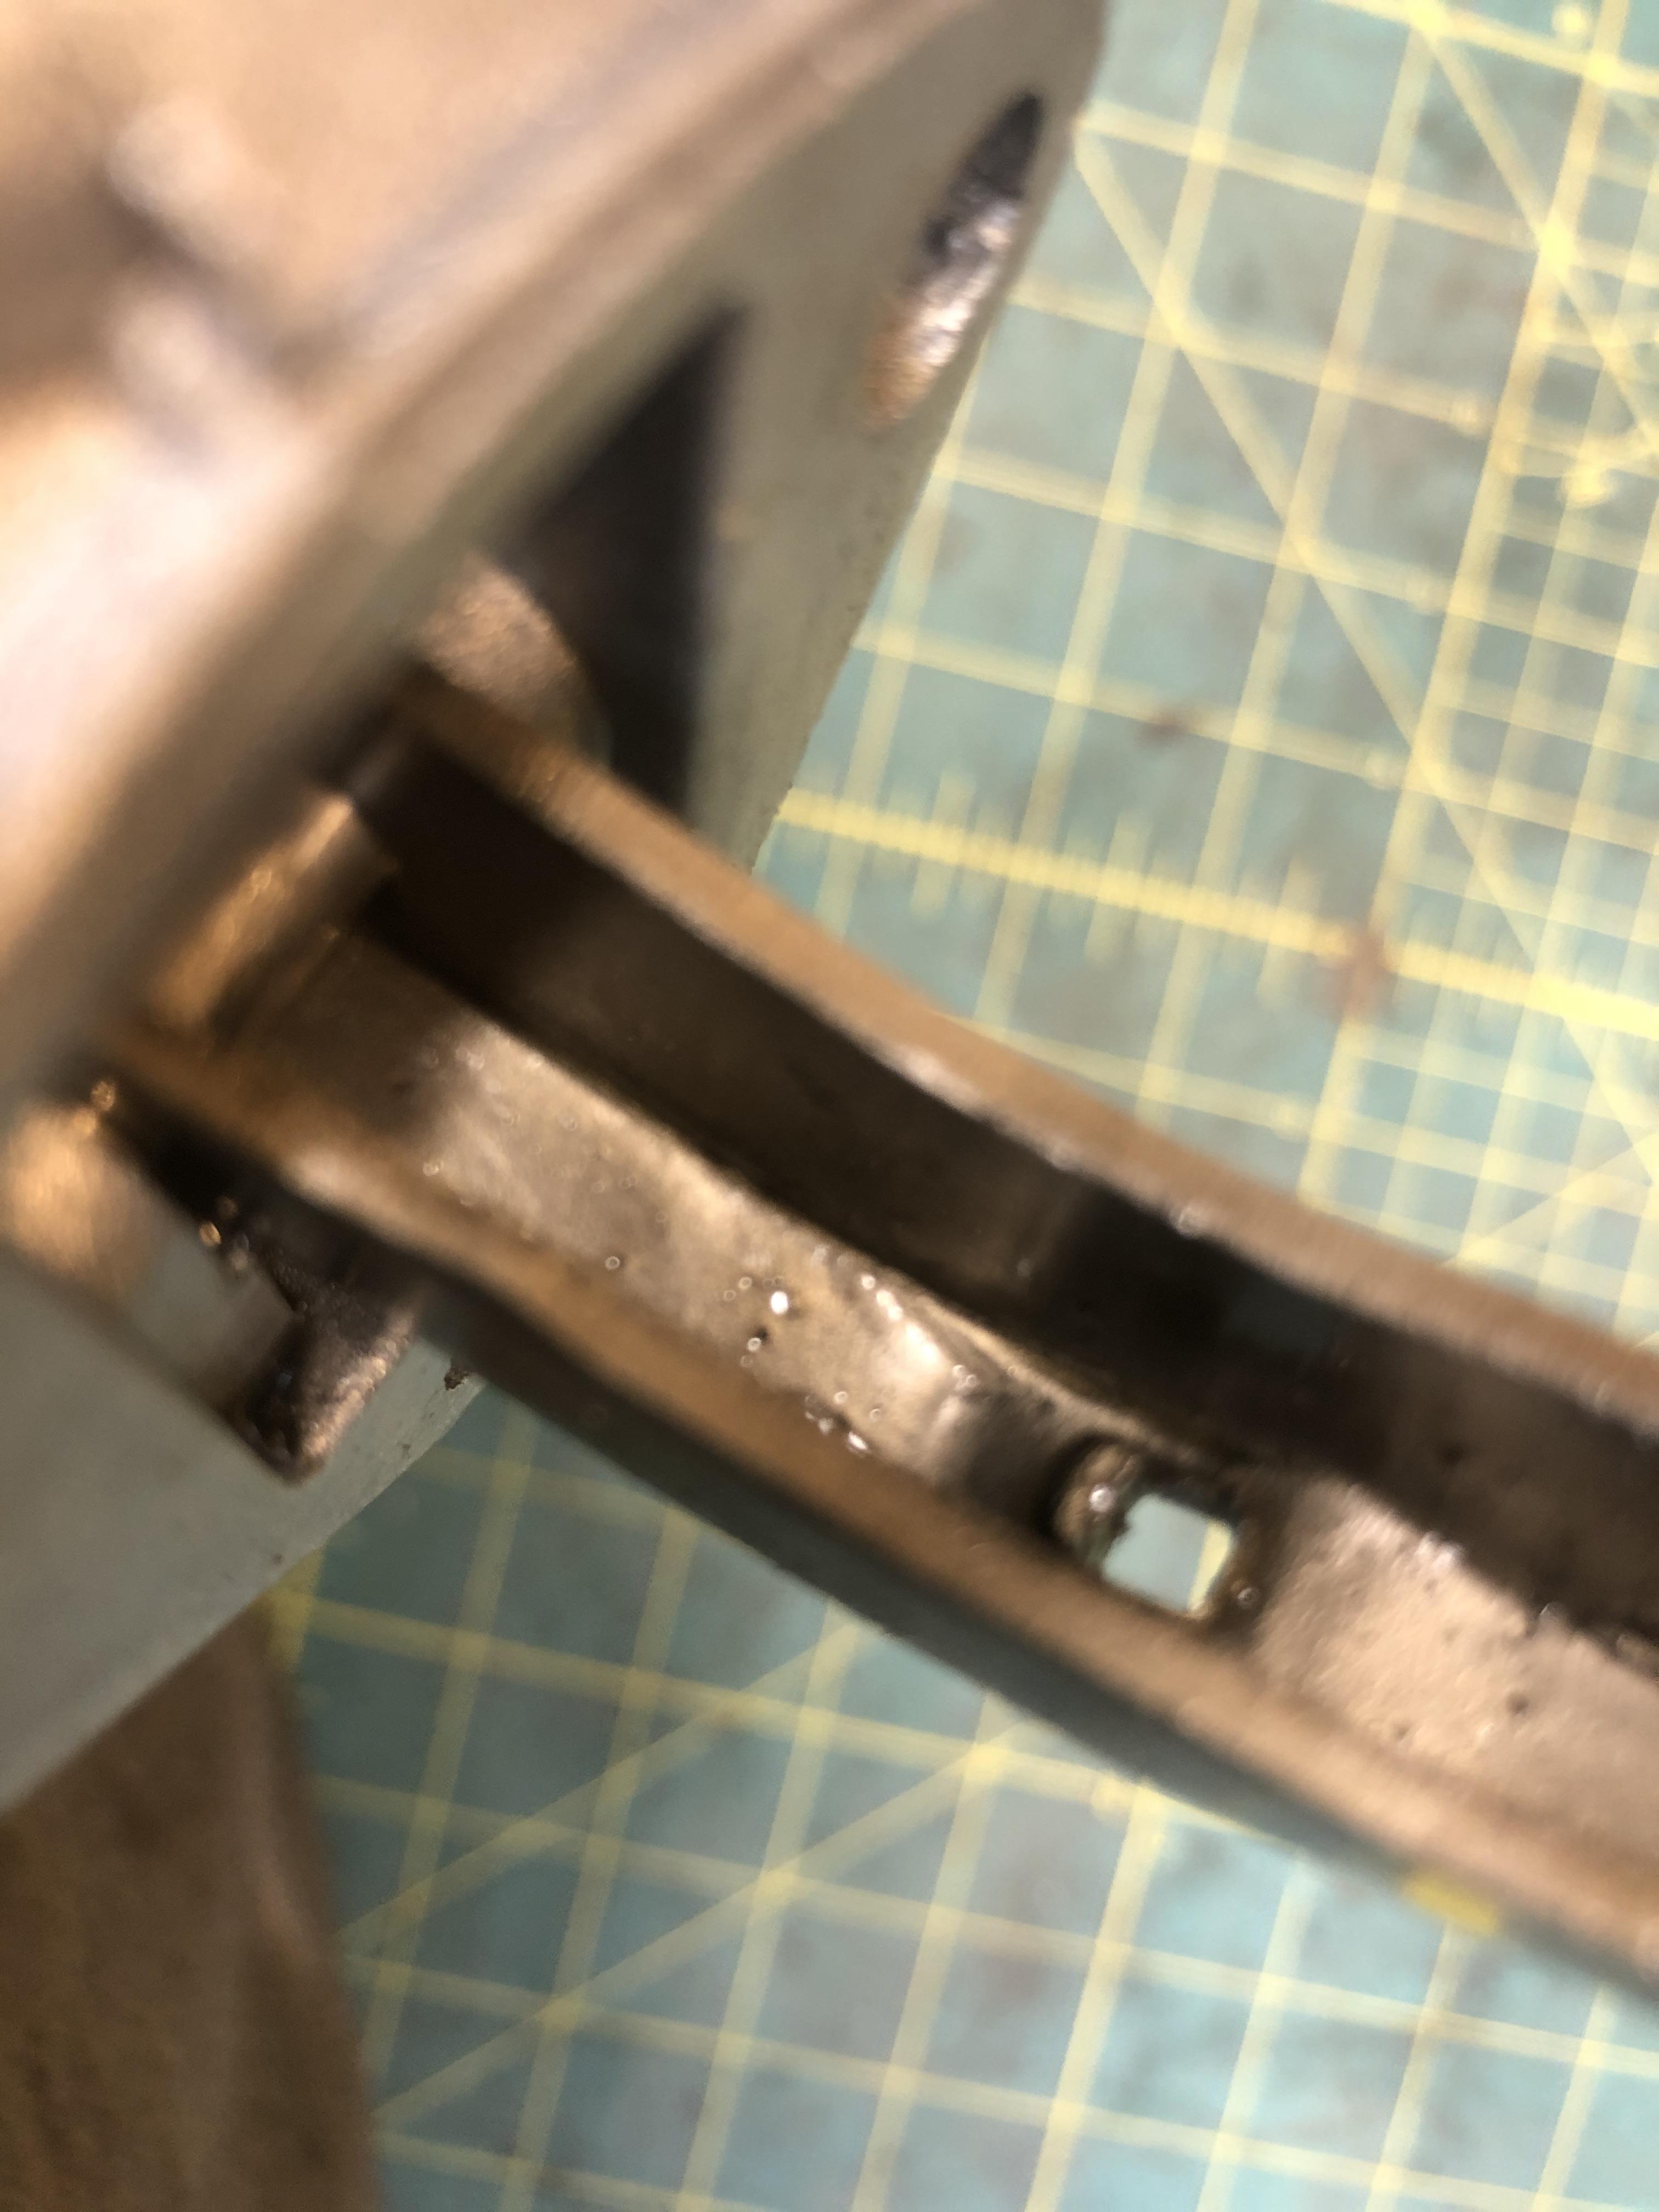
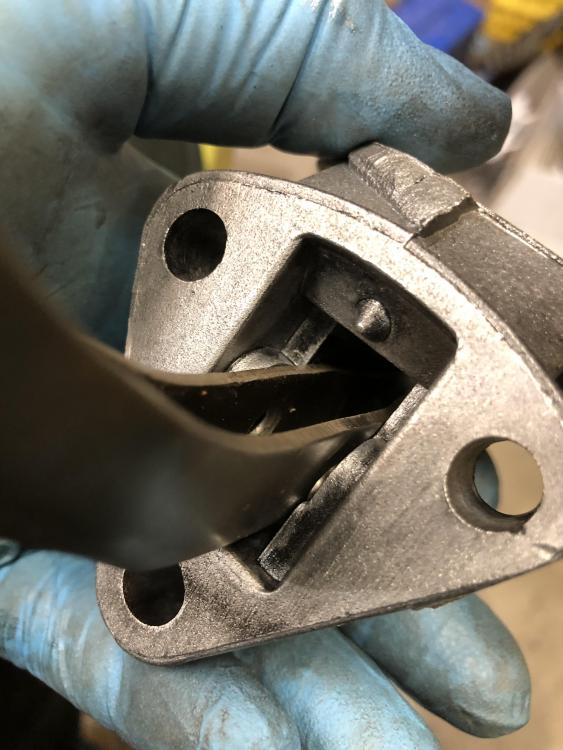
Bigger hammer. Actually hammer and punch, from the front to rear, to dislodge the end straight backwards back through the hole it is sitting in. They are just rusted together. I’m working on this very task, except the “put it together with fresh parts” instead of the opposite that you’re doing. If you want a picture I can show you details.
-
The gap is to pass the bare little cable once you’ve pushed the main metal body back through the big hole. Whack the end until it dislodges from the bracket, moving to the left in your picture.
-
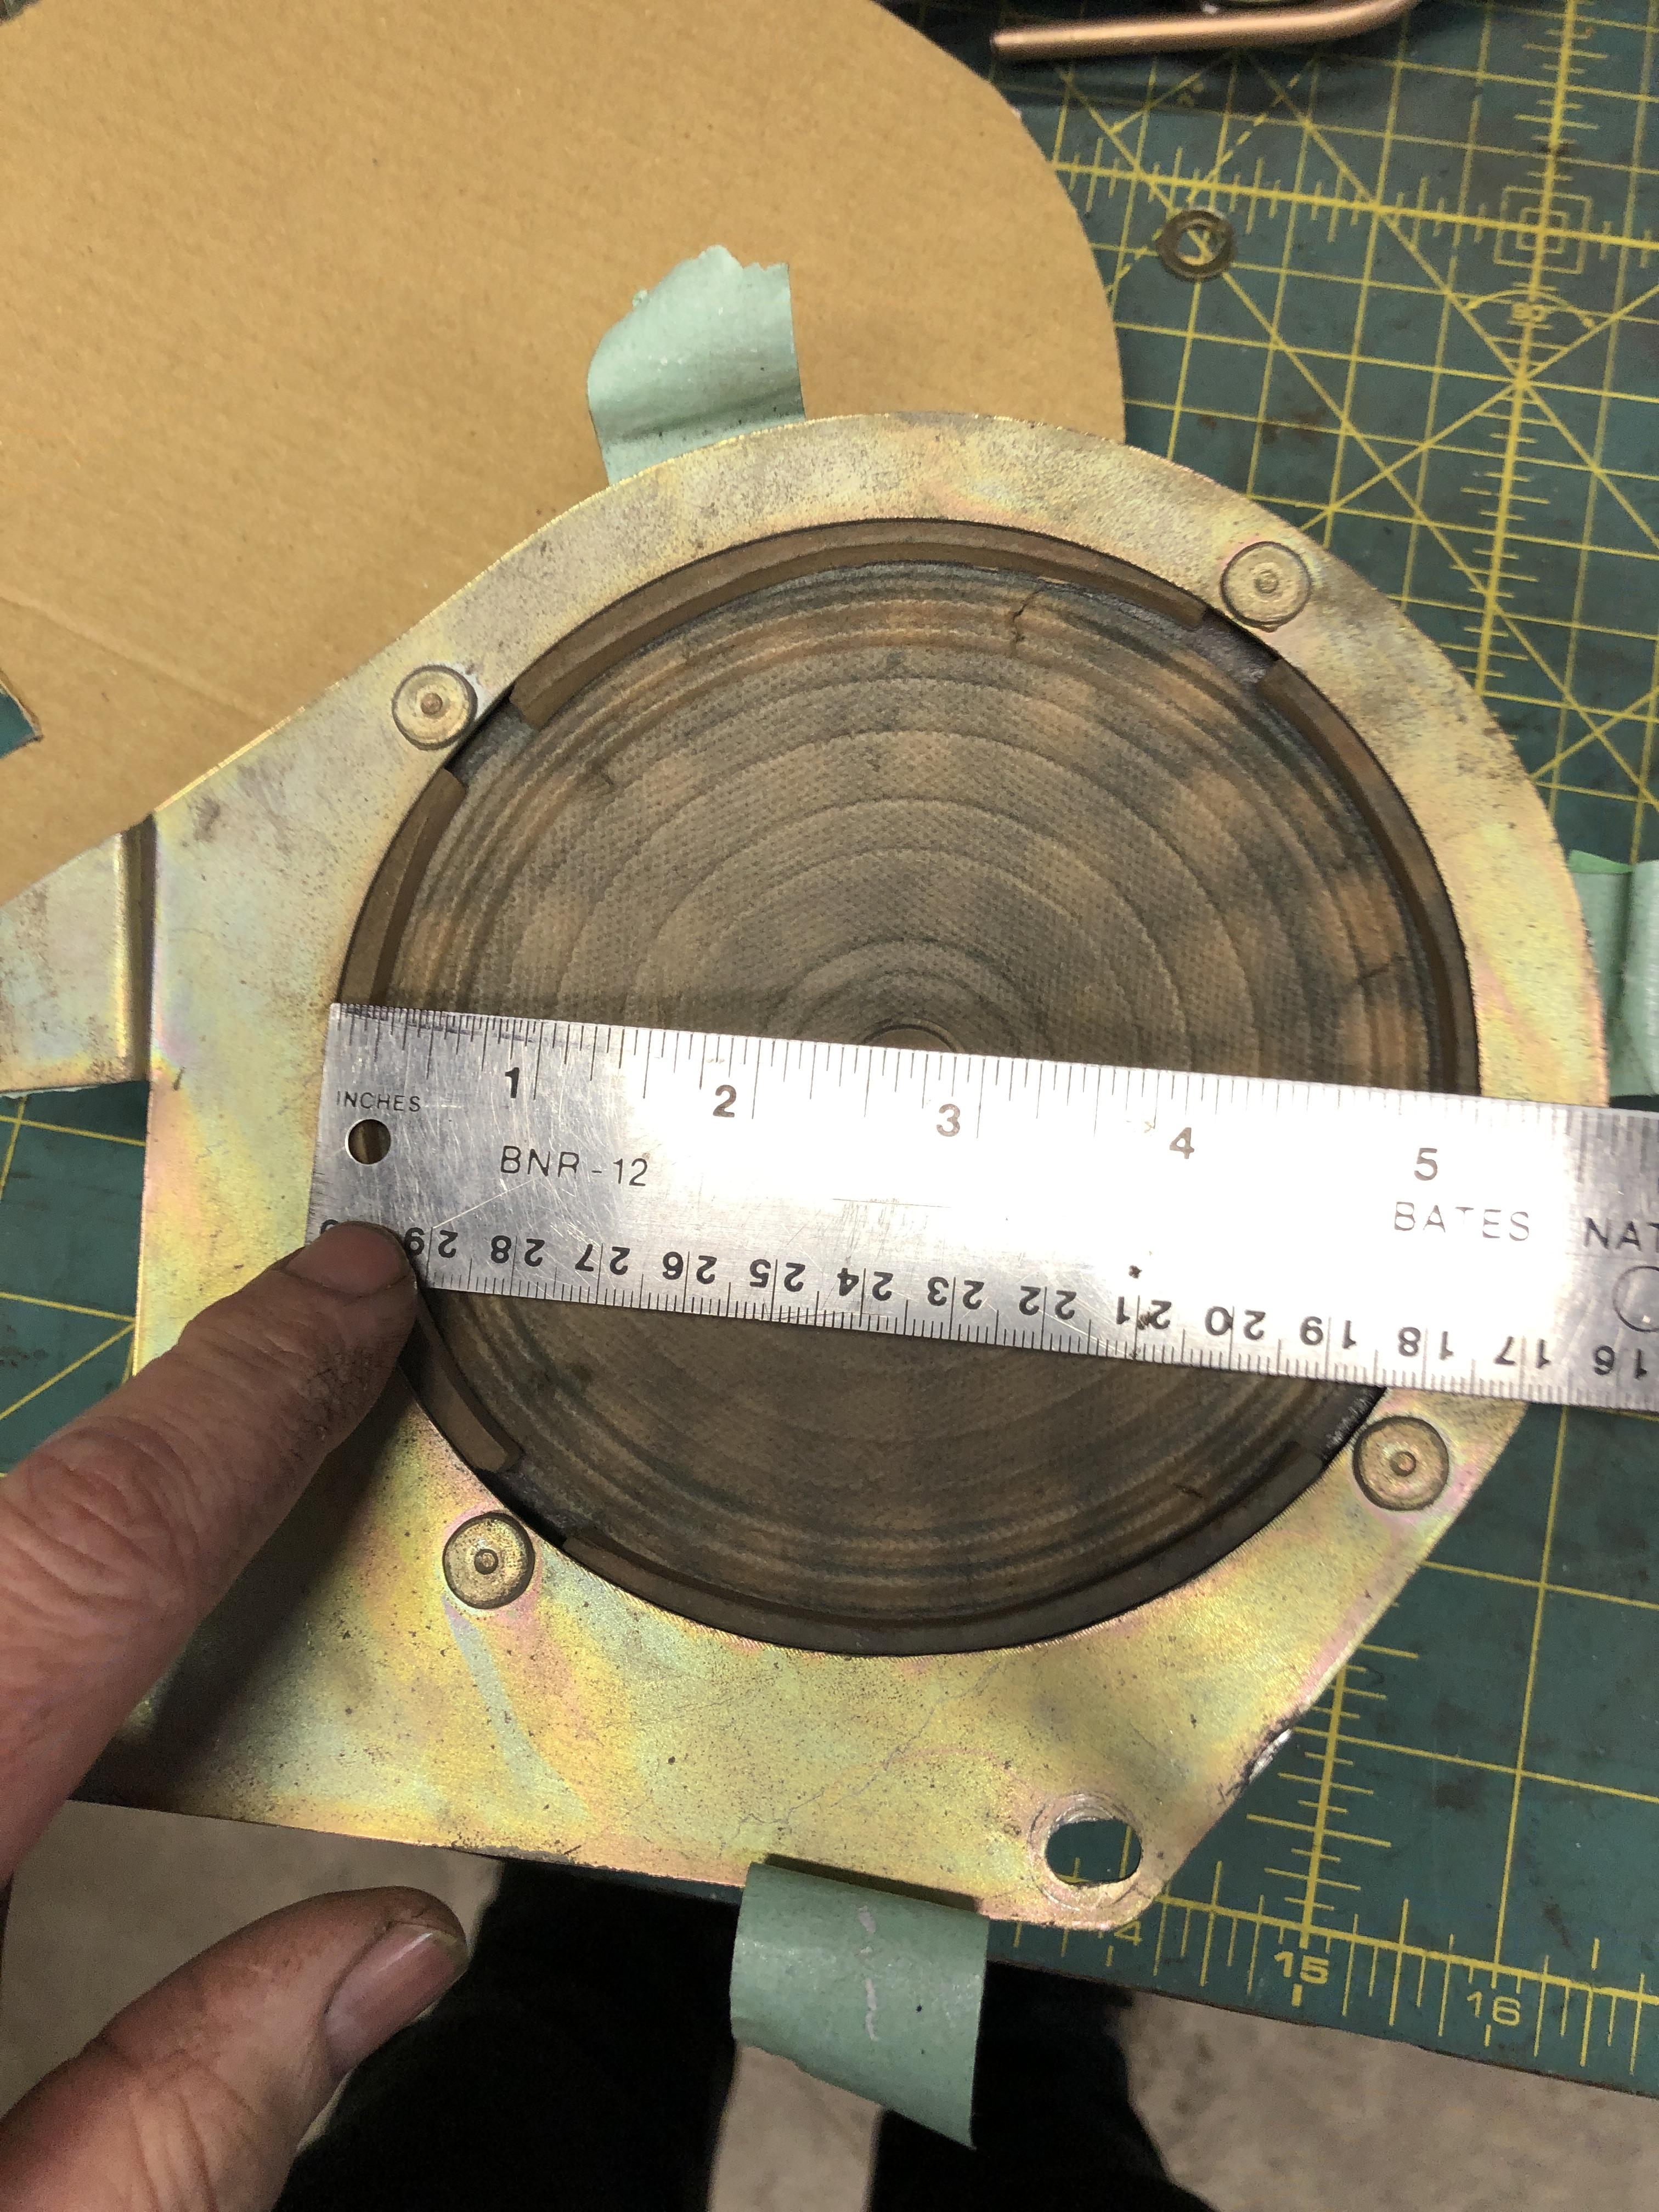
No. The length of the rod and shape of the end of it are different. The oil seal is completely different as well. Pity. If you were brave enough or clever enough, you might be able to grind off the rivet in the center and steal the diaphragm. Just have to figure out some way to re-rivet on to the old stem. Bit tough I think.
-
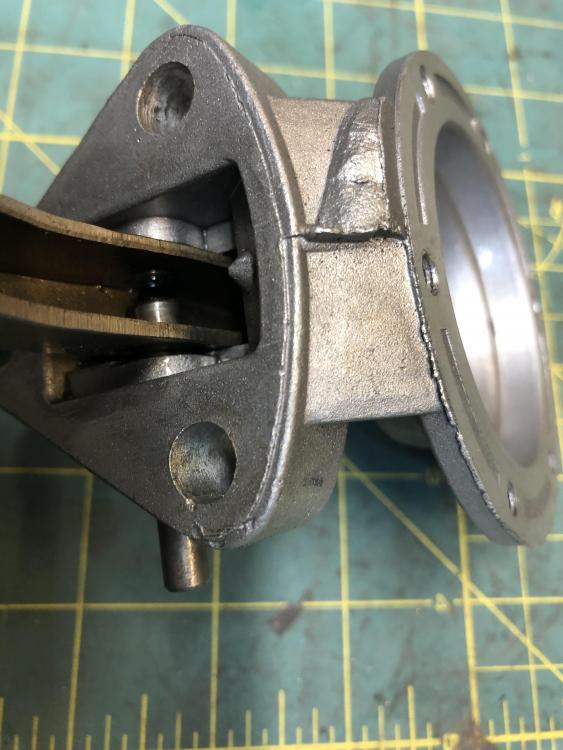
Well, learning is SUCH a complicated business, Trial, error, more trial, more error. So, it turns out that the U shaped arms are not changing shape and growing wider magically. It is the outer aluminum cast case that is changing shape, ie getting narrower, causing the arm to rub and stick. And it twas “I” that was causing the squeeze. In my vise. I was holding it as you see in a couple of pics above, very gently squeezing the case just enough to hold it. Well, the wall thickness of the sides of that GMB case is SO THIN that I was actually distorting the case inward, not just momentarily reducing the clearance when its in the vise. When it failed, and I brought it in to diagnose, I put it in the vise, THEN noticed the arm was binding. No surprise now. I then assumed that was the issue and the above couple of posts resulted. Note that I cannot cause the same distortion and tight arm motion when clamping an OEM pump body. Much thicker stuff. Big surprise. Thus we are back to square one. I have reassembled this pump with all its original parts and it sucks and blows just marvelously. It is not clear again what caused it to quit after my initial 30 minutes of use. Now I’m down to the diaphragm plunger getting mis-aligned in the arm hook, or the spring having fallen out of position causing poor return action. Hard to believe at cranking RPM’s that that would be an issue. Not check valves, I had the OEM cap with their check valves in place during the on-car failure. Has to be something mechanical. The search continues. Another lesson in forensics.
-
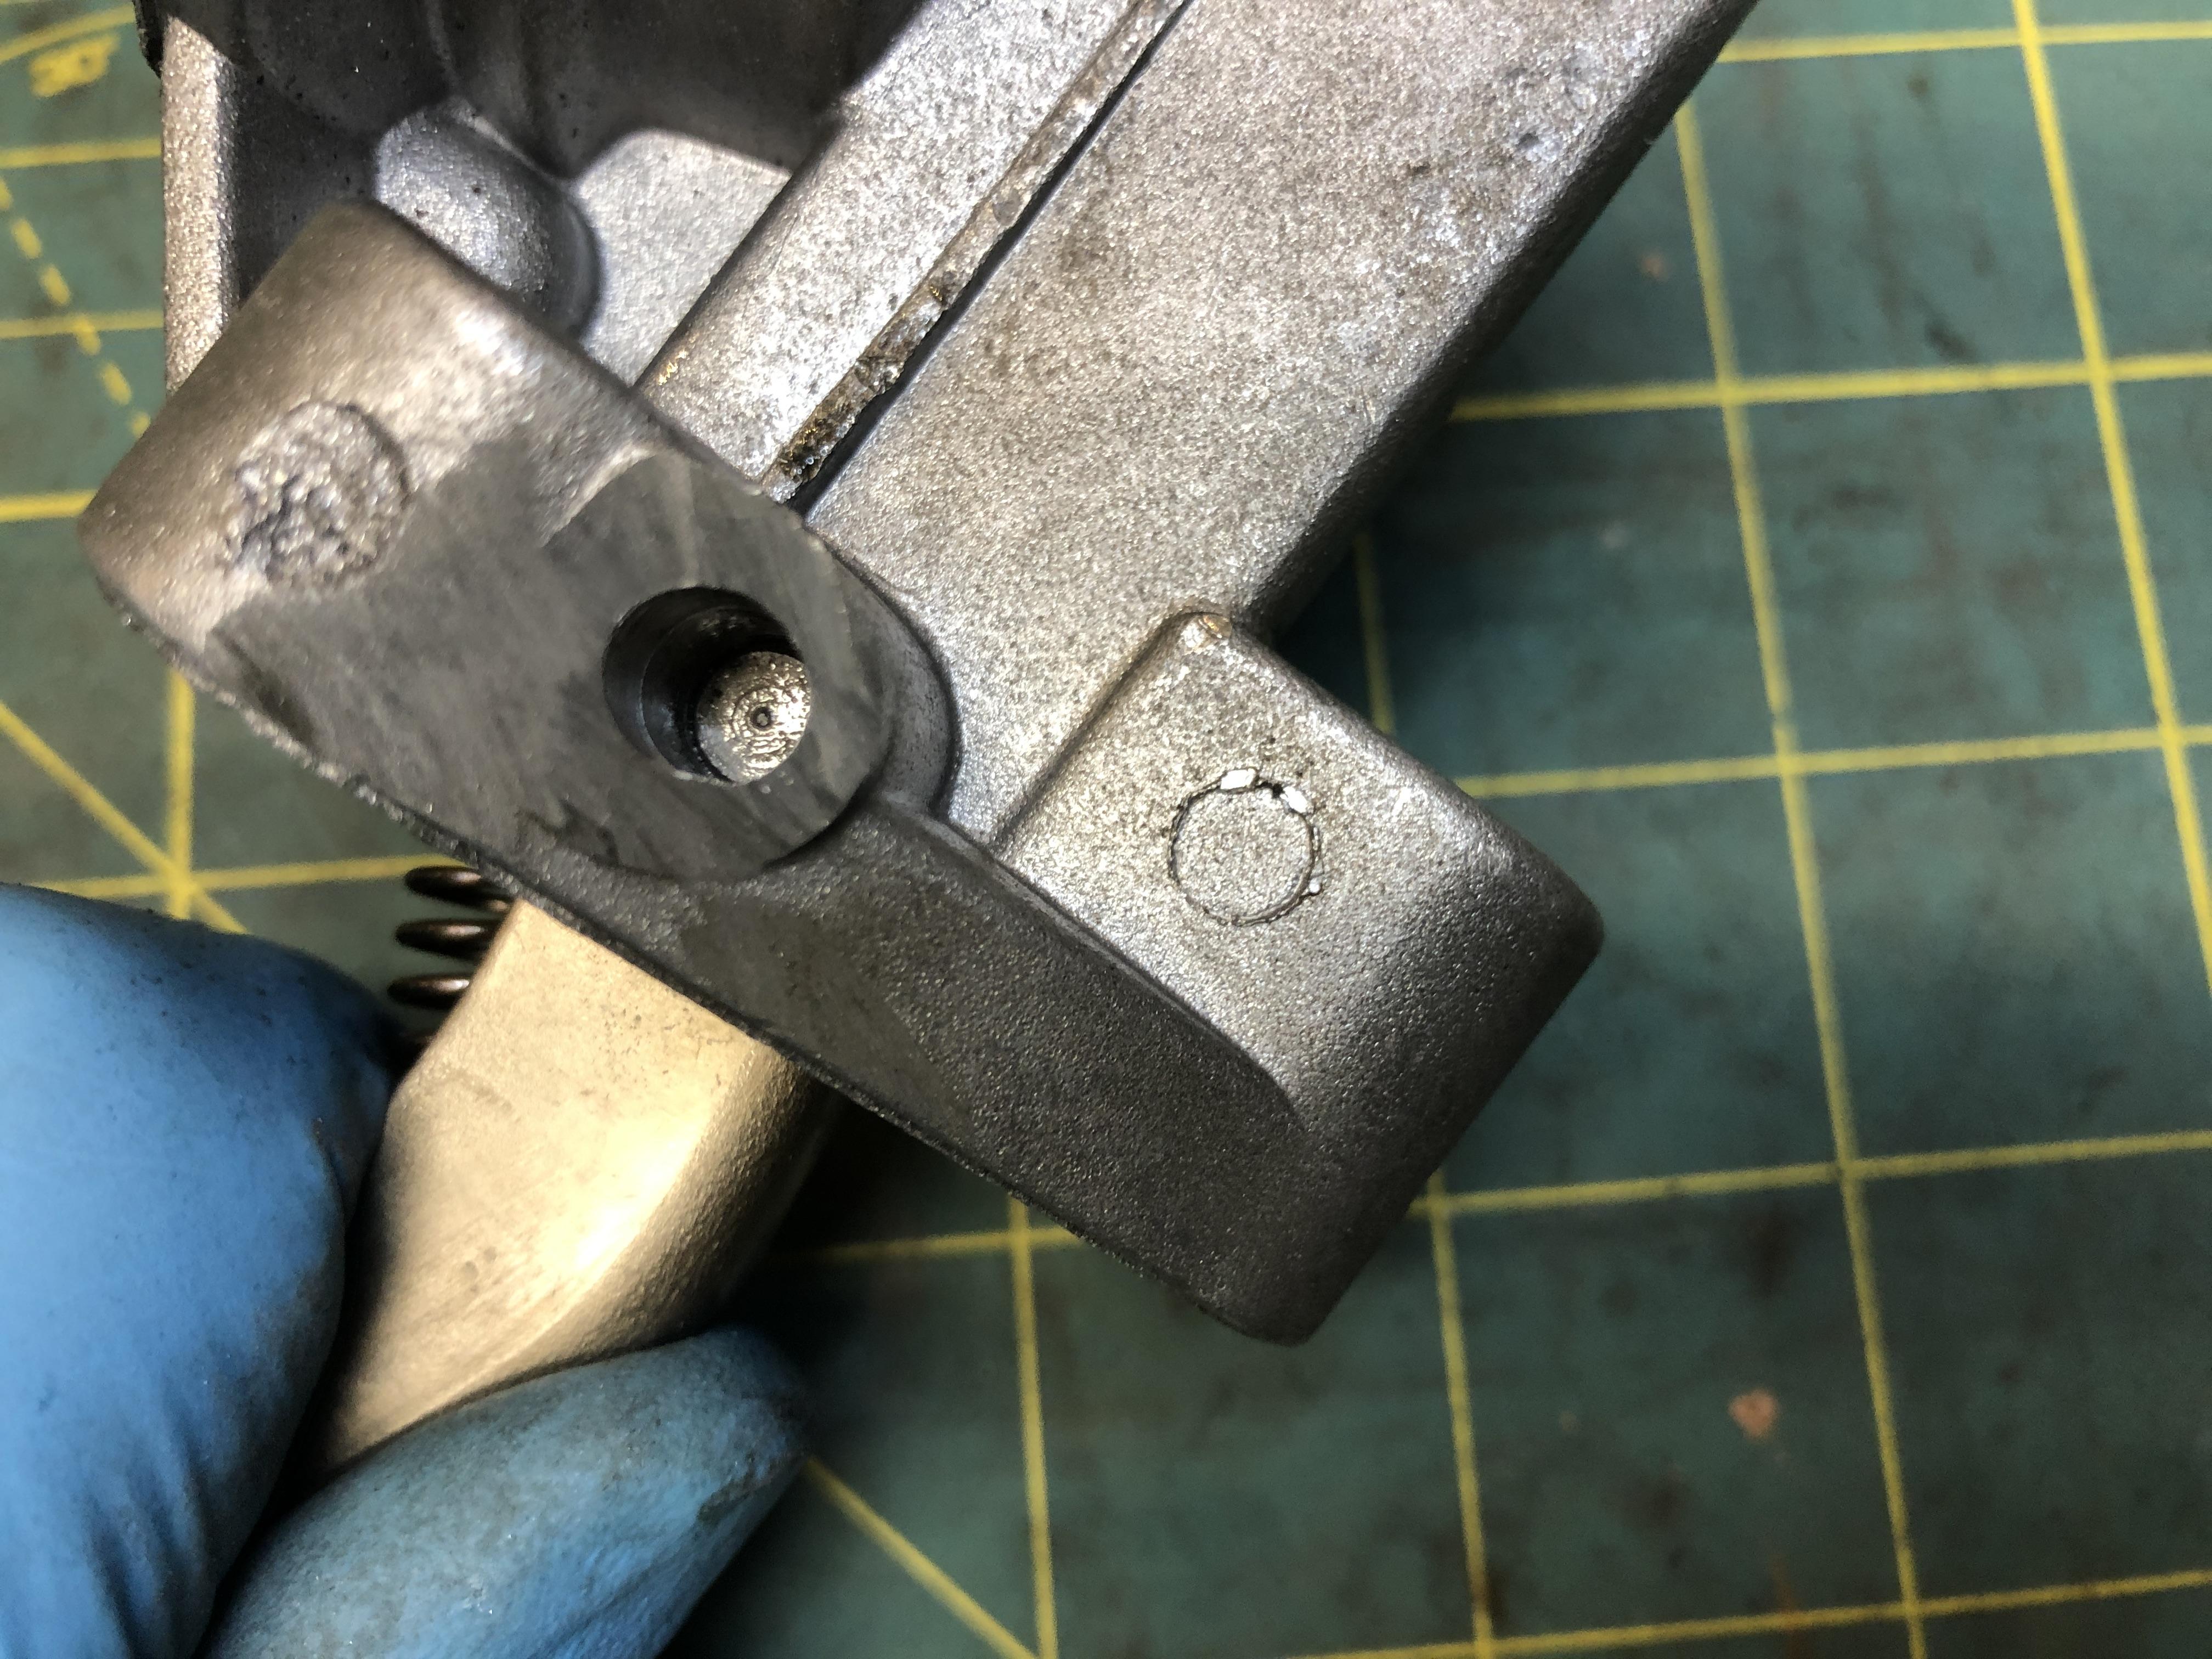
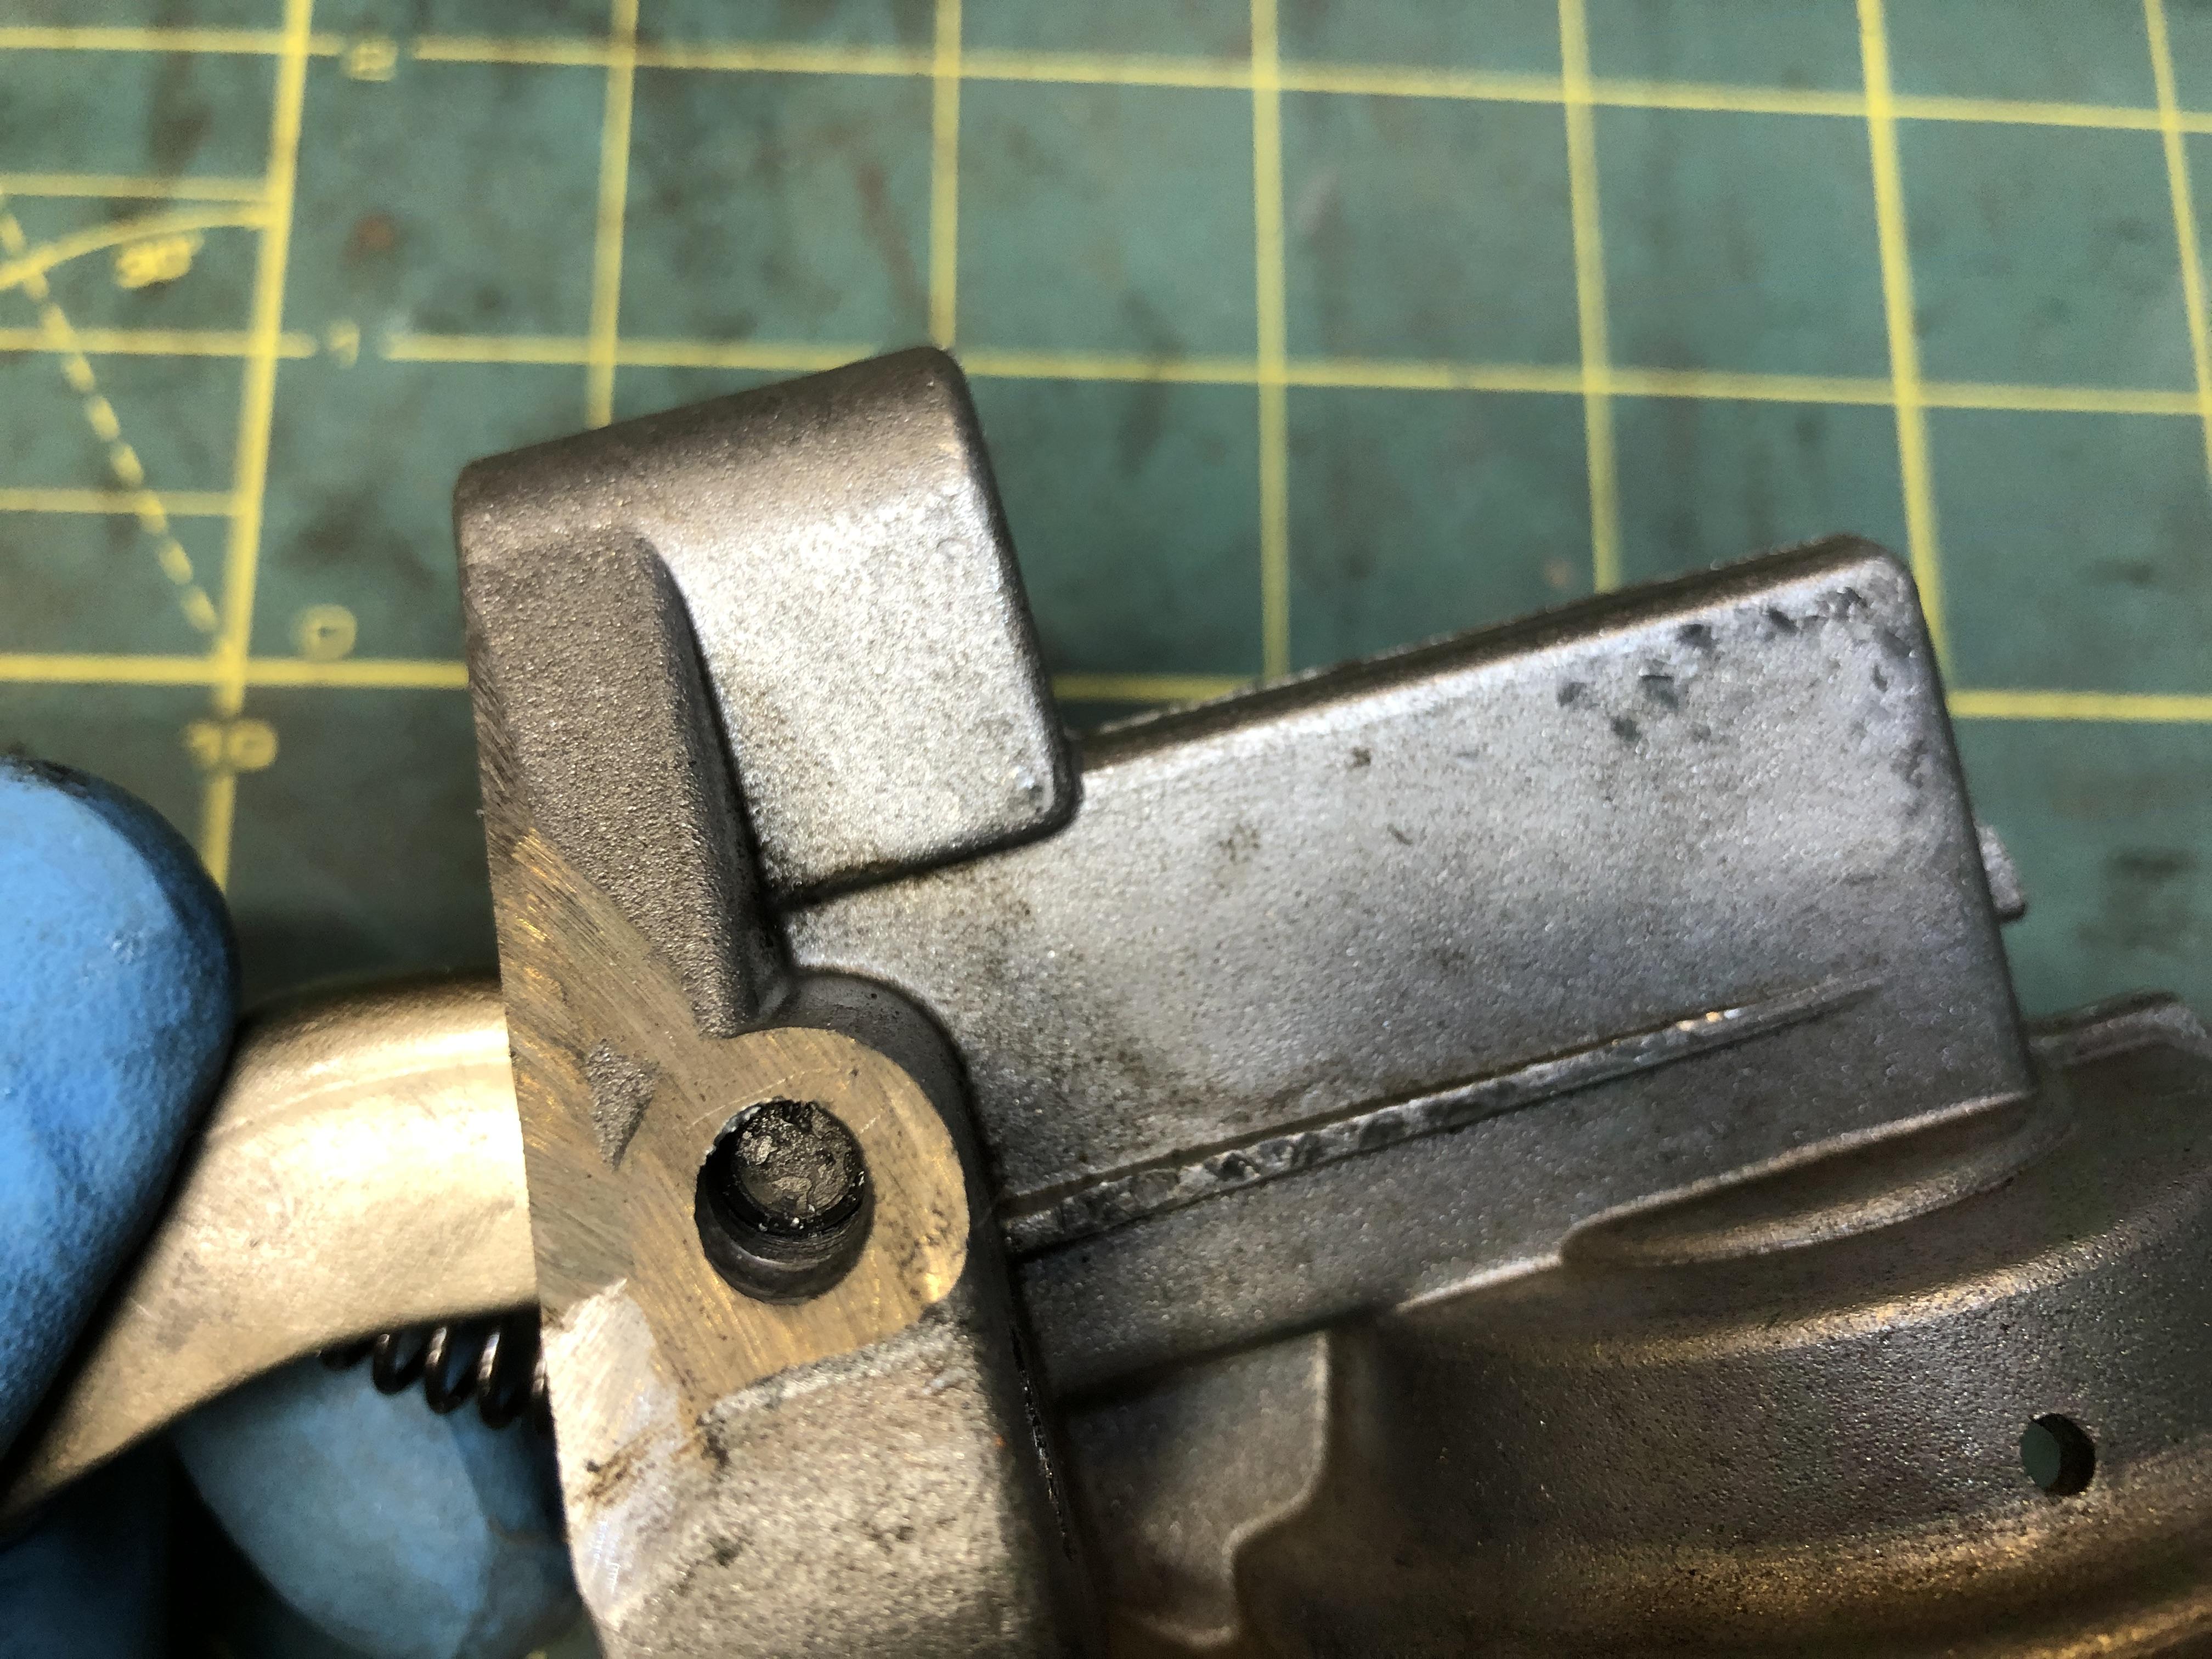
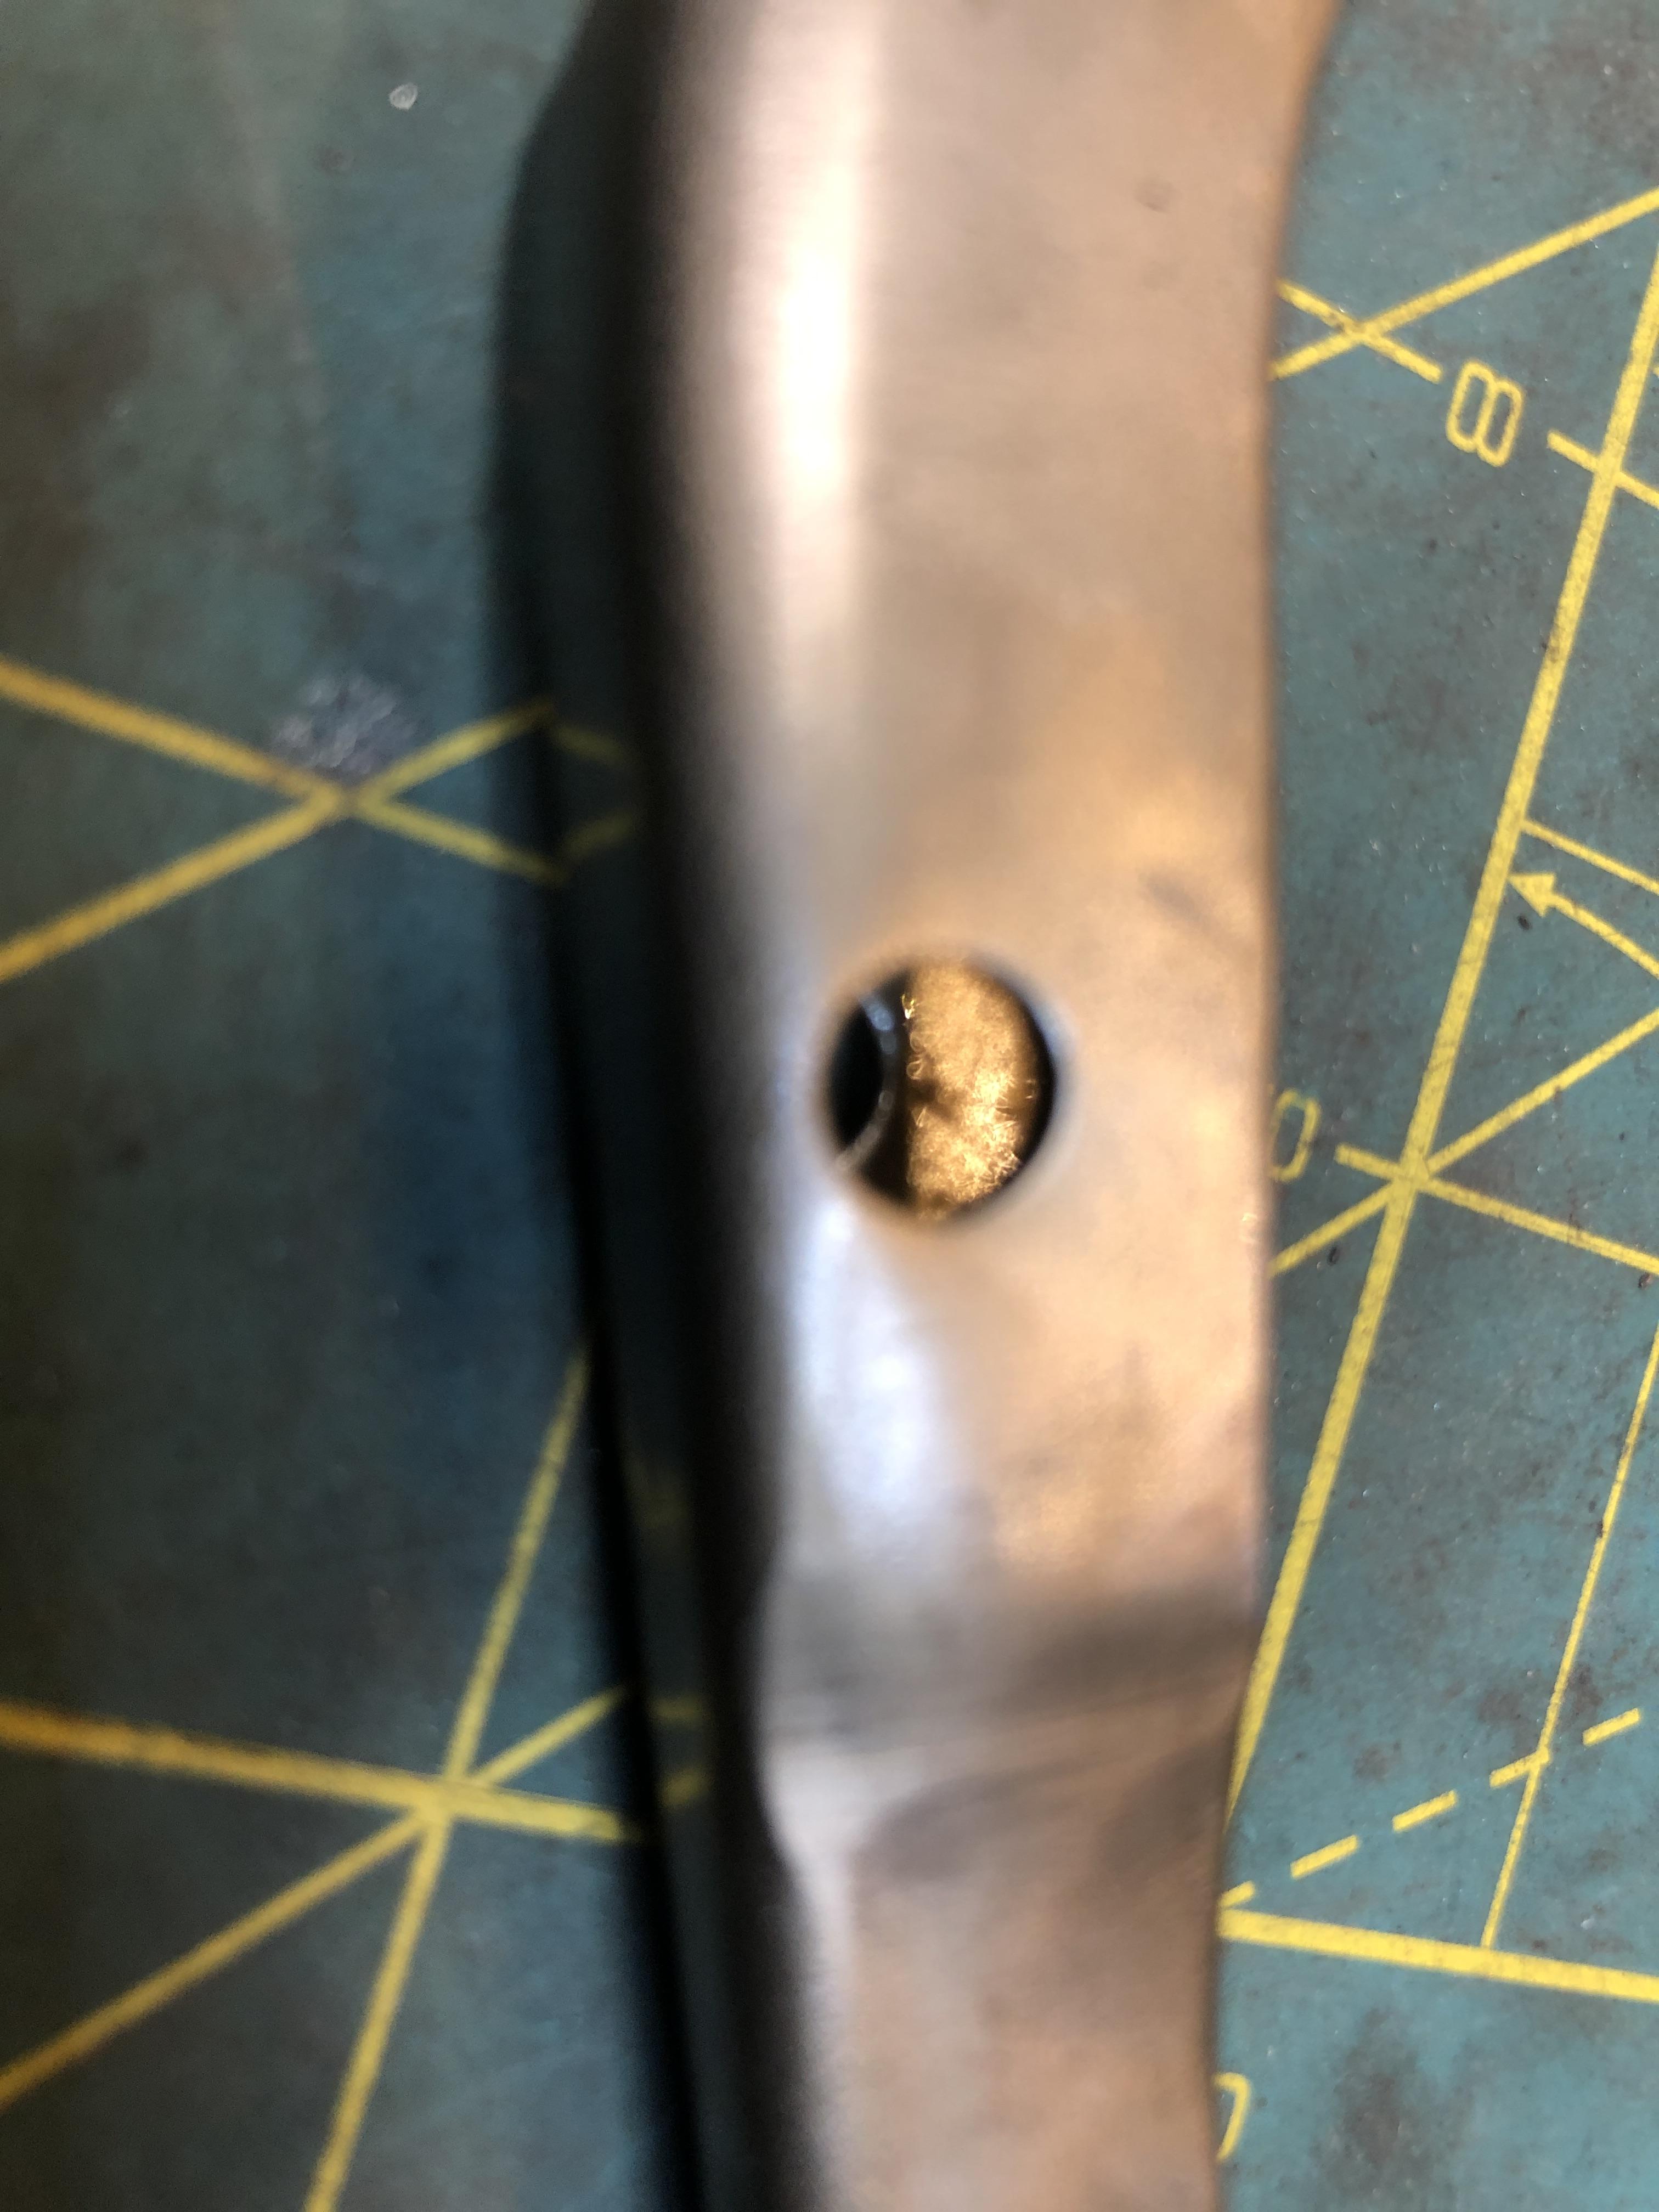
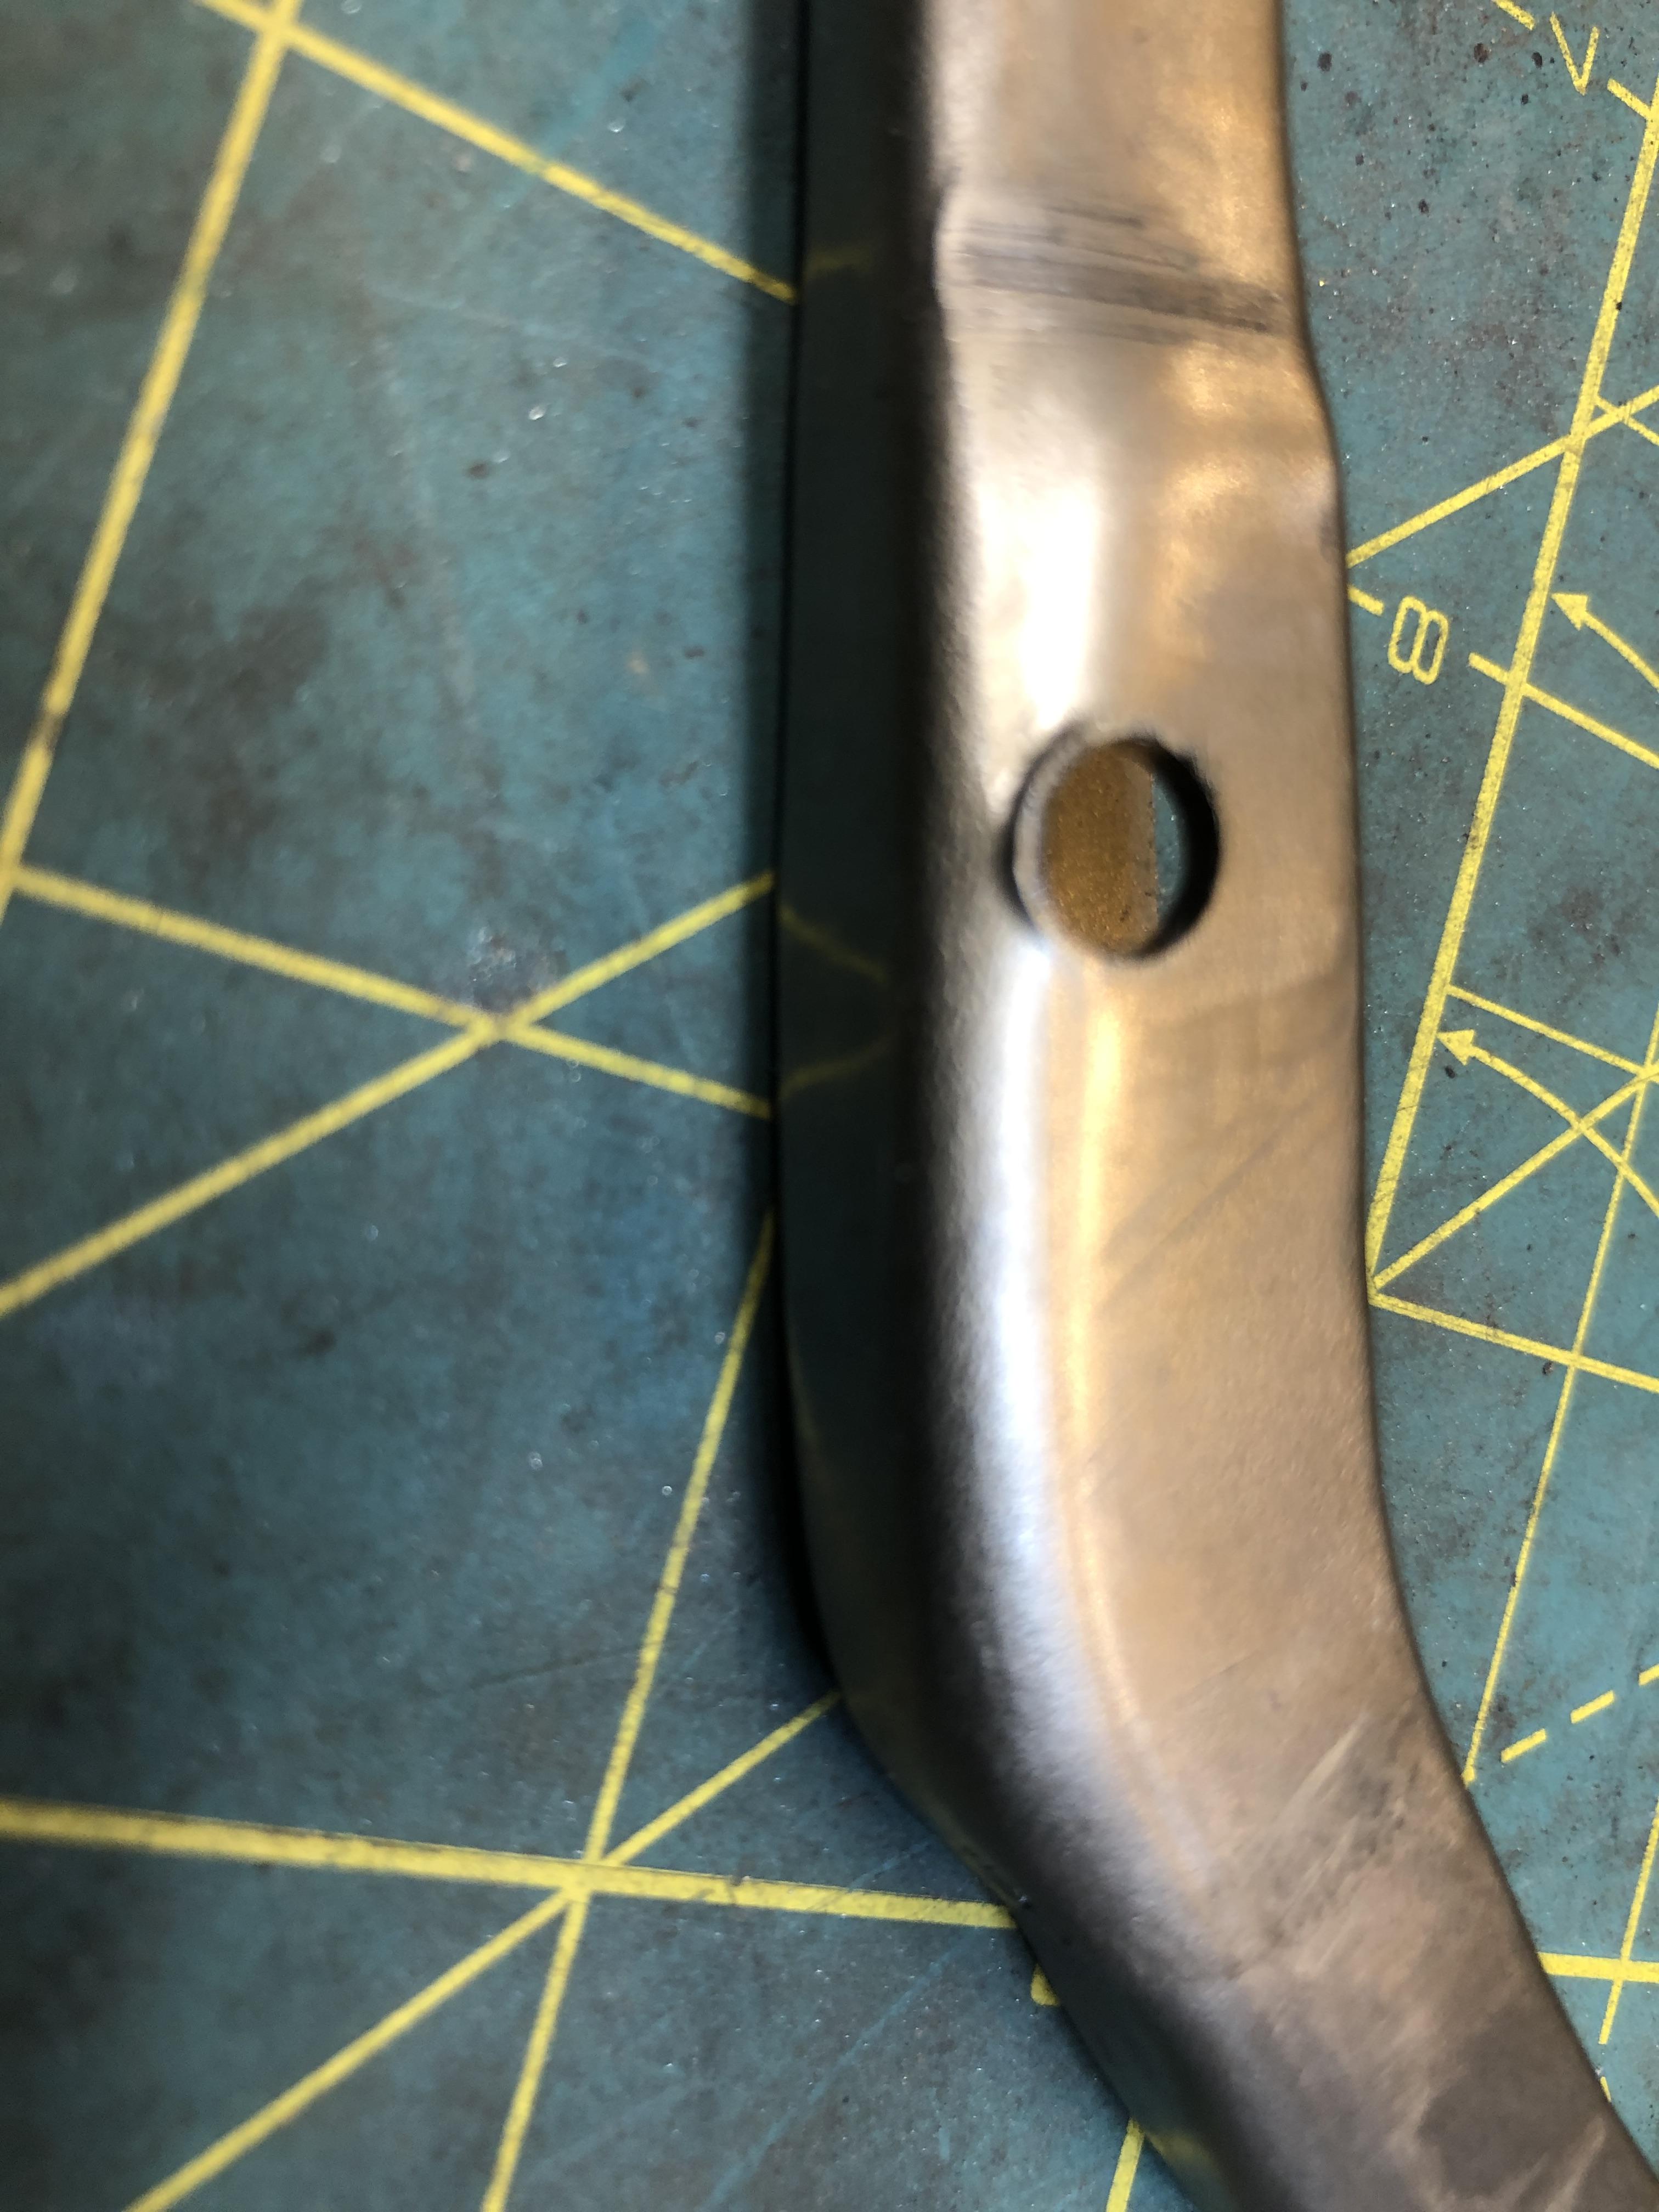
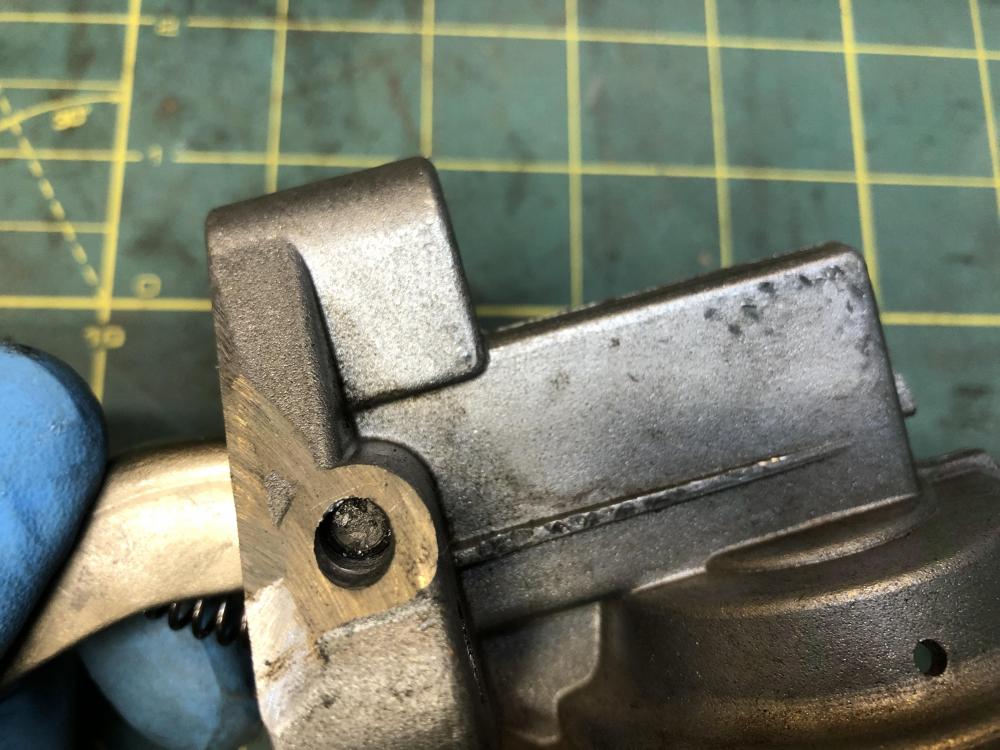
More to add. I have taken apart the GMB pump to see why the arm became sticky. I also inspected the other new GMB pumps I have and they are both free moving of course. Further, if I remove the spring, the diaphragm spring action is sufficient to return the arm after each stroke. Now clearly you need enough spring force to ensure the arm returns when the engine is running at 7000 RPM. Point is, if the spring falls off its perch, the pump may still “work” at the lower end of the RPM range. So my spring off its perch isn’t the main failure So what happened is that the arm rubs the inside body of the pump near the pin, causing enough friction to make it sticky. I hacked off the housing where the sealing balls are located to get the balls out. Zip zip gone. Then the pin through the arm just fell out. Loose. The arm came out with a tiny tug. The pin is just placed through two holes in the arm, and sits and rotates in the body of the pump. No bushings. Steel pin rotating in aluminum body. Oil is the only thing keeping it from wearing quickly. Now to the issue. The U shape of the arm is simply a bit wide and is rubbing the body, just above and into the body near the pin. I went to put the arm back in and put the pin through it to start seeing what’s going on, but I couldn’t quite push the arm in far enough to get the pin started, then saw that it was rubbing the body. I can easily push a bit, put the pin back through and have the same stiff rotating arm that hangs up. In one picture below you can see the shiny spot where it rubs the AL body on the front side. Now the mystery is that it was loose to start with. How did that fairly thick, pressed into a U shape, arm “expand a little” and “become tight” with a bit of use? I do not have an answer for that yet. I can see in the other two pumps that there is room on either side, not much, but clearly enough. The U shaped arm is not particularly symmetrical and the hole through it is different on one side, as the sides are not perfectly parallel. When I put the pin through and attempt to hold the arm “vertical” relative to a square, the pin is not sitting quite straight through it. So I thought it was going to be a dragging pin in the body that was causing the friction due to oil not getting in there,, but nope, the arm expanded like a noddle when it got wet with oil I guess. Maybe it “Relaxed” from its obviously press formed shape when it got hot? I’m reaching here..... metallurgists out there? I do know that if I just take a BFH to that arm and make it the “right” width again (or grind a bit off, or widen the inside of the body a bit), that I will have a wonderfully performing pump. Until the pin works it way out of the body..... Anyone have any 6mm ball bearings I can put back in there? Oh dang, I’ve ground off the place where it sits. Thread it and put a very short bolt in? Silicon? Bit of epoxy? Shiny spot above the hole. Bit of black Sharpy above that where I applied some to the body to see where the arm touches. You call that square?


-
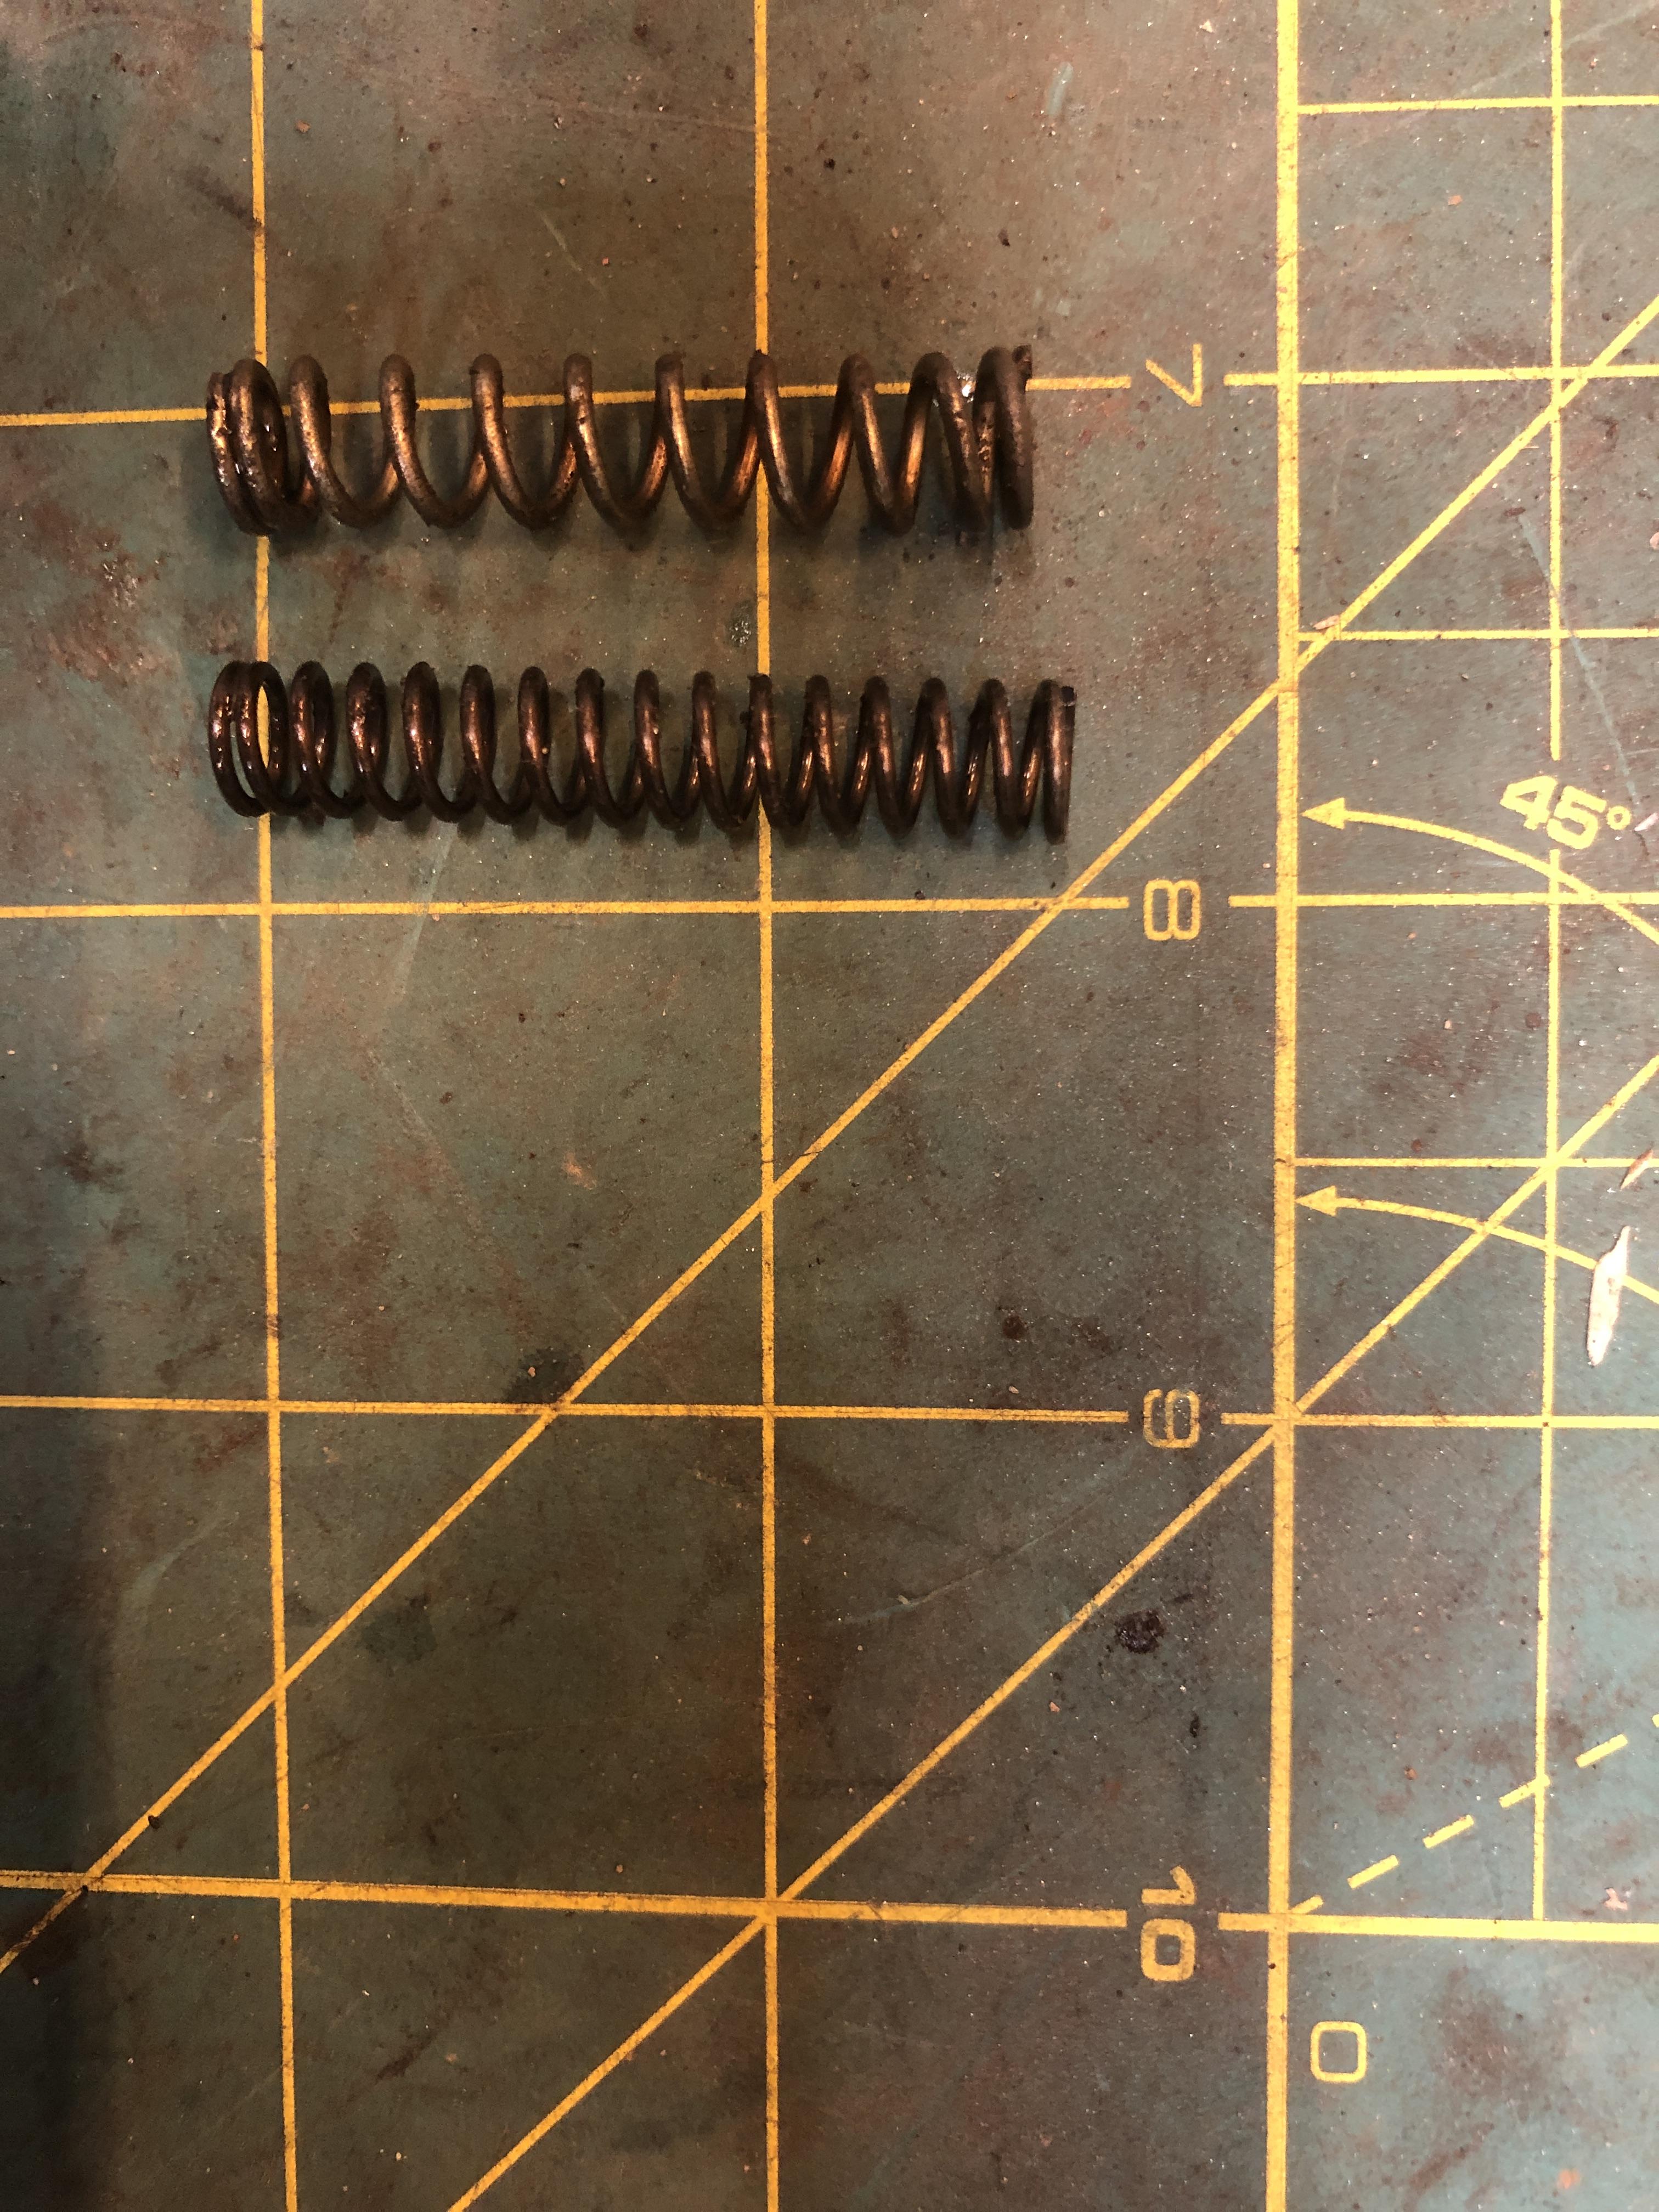
I have addition news on the topic. This week I had reason to replace a stock pump on a very old and neglected 71 that i was trying to resurrect. I was just doing a quick job to try to get it running, so I grabbed one the new GMB’s I had laying around that i was previously investigating, Anyway, took them both apart, and slapped the top of the old Nikki (look fine) on the bottom of the new GMB and stuck it on the car. My prior guess about the GMB check valves being bad made me do that. It sucked fuel and I got the car started (another thread about Doing it for the first time in 40 years).... That was Tuesday afternoon/evening. Maybe ran the car for 30 minutes on and off. This morning I cleaned the carbs more and tried to start the car again. Guess what. No sucky, no pumpy. You have GOT to be kidding me. So long story short. The failure mode on this pump is no mystery. The pivot point on the mechanical arm seized up preventing the arm from being able to oscillate. It didn’t seize up solid, you can move it easily, but it was stiff for lack of a better term. The spring is not strong enough to push it back when it is in the up position. I have video of me moving the arm and having it stick/stay in the min and max position. The spring, when compared to an OEM spring is about 1/3 the compressive strength. This is a rough feel test, but it is MUCH weaker. I also found the spring laying loose in the arm, dislodged from its end points. It might be weak enough that it falls out after a bit of use, and the pump stops working as the arm has no ability to return to the “out” position. No amount of lube sprayed at the pivot point changed the friction one iota. The friction is smooth, is just much too high to allow the pump to operate what that wimp of a spring. I did put the stronger OEM spring in for a test, it was not strong enough to return it. An OEM pump arm is totally loose, nearly floppy on the pivot point. I have yet to check two other new GMB pumps I have to check if the rotation friction at the pivot is less or the same. I did initially put the pump in the vise and manually actuate it when I swamped the tops, and it felt normal and returned itself with the spring pressure. I’m also thinking that you are also actuating the diaphragm, stretching it up and down, as the arm moves which provides some additional spring pressure to the system. Is this enough to overcome the friction I have in this pump? No. Clearly without the spring in place, in this pump, it cannot and does not operate with the diaphragm spring effect alone. It worked initially, then quickly failed. 59DCDAF7-8D95-4CBB-BB6F-CDF83CDCDBBA.MOV OEM top, GMB bottom Little tab at the end holding spring The other spring perch is just a little bump. In its defense, the OEM pump uses more or less the same way to capture the spring. There is a geometric difference, as with the GMB spring, when you actuate the arm, the spring just BENDS as much as compresses. The OEM pump does more or less the same thing, just less bend, more compression. This contributes to the willingness to dislodge I believe.


-
Final chapter for now. Had to clean the carbs more thoroughly than I initially hoped. The jet tubes were not moving on their own, so couldn’t set richness or chokes. It was massively lean, would bog terribly just blipping the throttle, so I took them off last night and cleaned them up. One jet tube had to be pin punched with a ball peen hammer to move it. No damage, after cleaning and lubing, they now work just fine. I drove it quite nicely into its parking spot in my yard under its own power. Clutch felt perfectly fine. Would have loved to take it around the block and get it in second, but with no brakes, no way. The master has a layer of probably the stickiest black goo in the reservoirs I have ever seen. Will have to soak for ever. It has the nice early “Front in the front” master, would like to keep it. The clutch slave soft line was plugged with crud. Couldn’t bleed the clutch initially, so I suspect the rest of the brake system needs more cleaning and work than I’m prepared to do this round. I have “peachy” to get ready by Christmas and there’s a storm-a-comin’ this weekend that will snow in the fleet for the winter. Thanks to Jitensha (Kevin) for helping with the car rodeo today and doing a great job of wheel chock placing when needed.
-
Clutch master and slave are new. Wouldn’t push fluid to the slave. Turns out the soft line was plugged with crud. Fixed that, and now the clutch works. Can technically make it move under its own power. SU’s need to be dismantled and cleaned, the jet tubes are frozen and it’s tough to get the mix rich enough. Runs but way too lean. Will take care of that this evening. It has to move into my yard for winter. Don’t feel like pushing it uphill, so it will get itself there, even if I use the starter motor to do it.
-
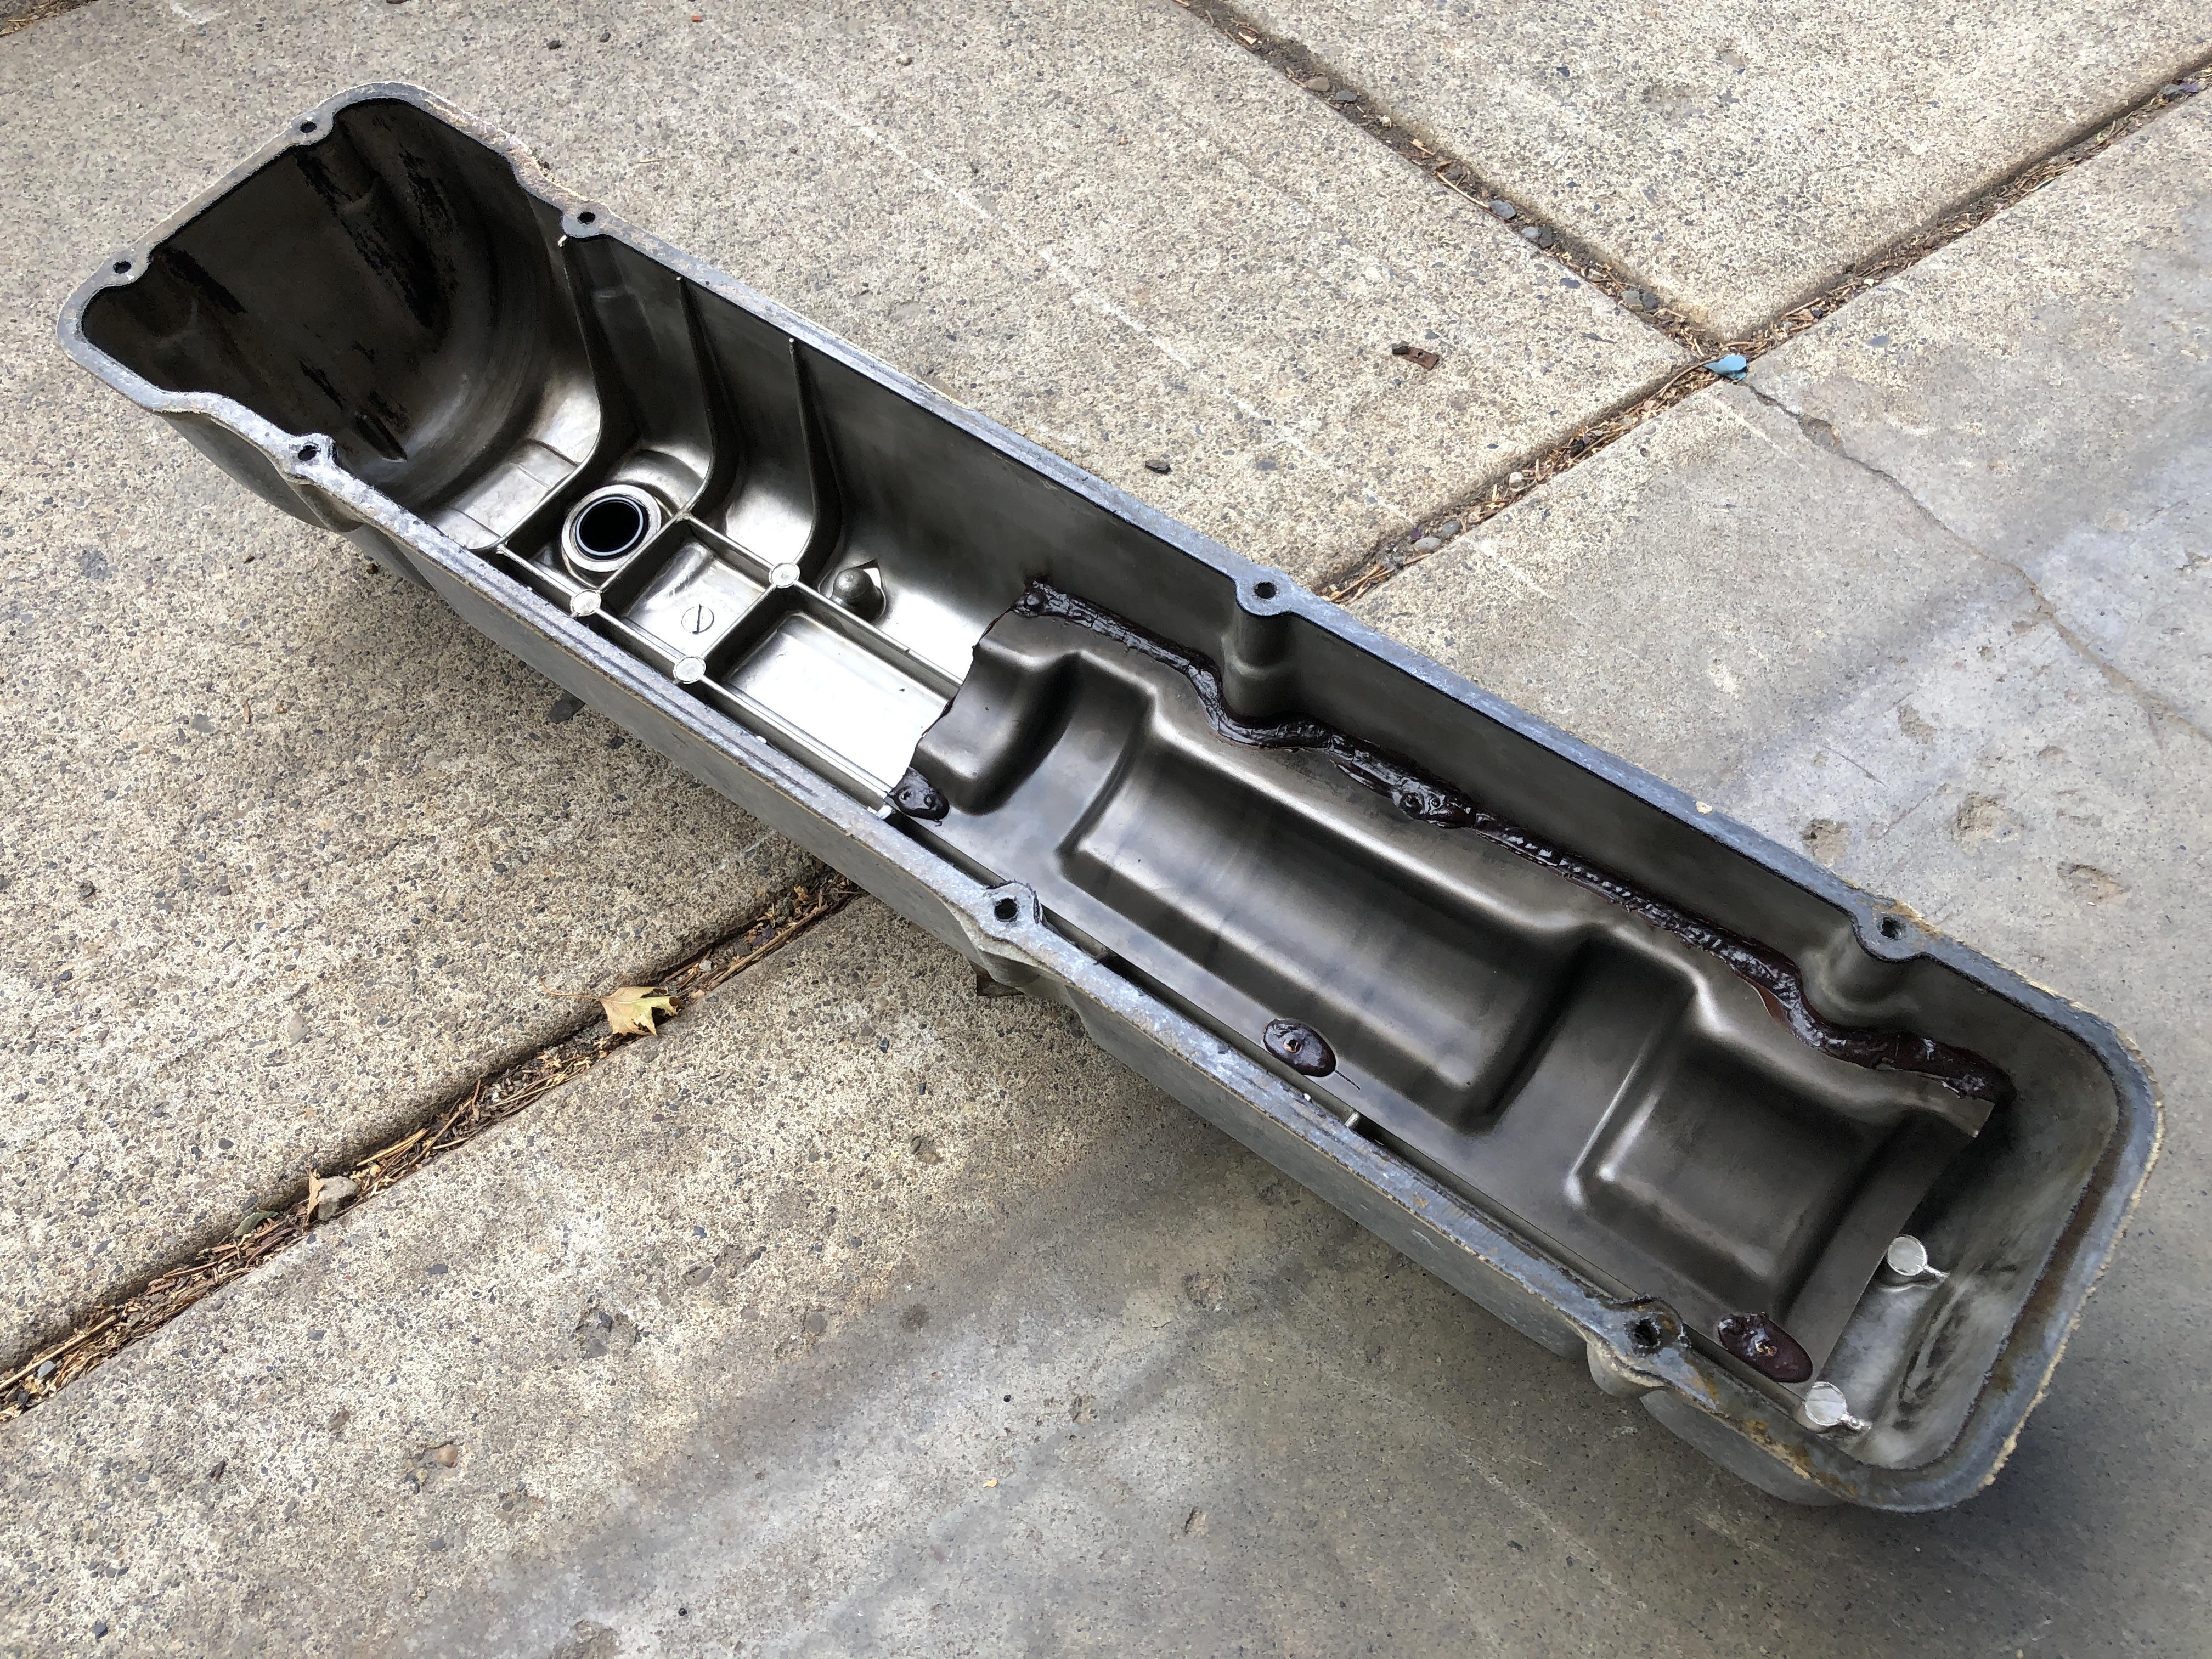
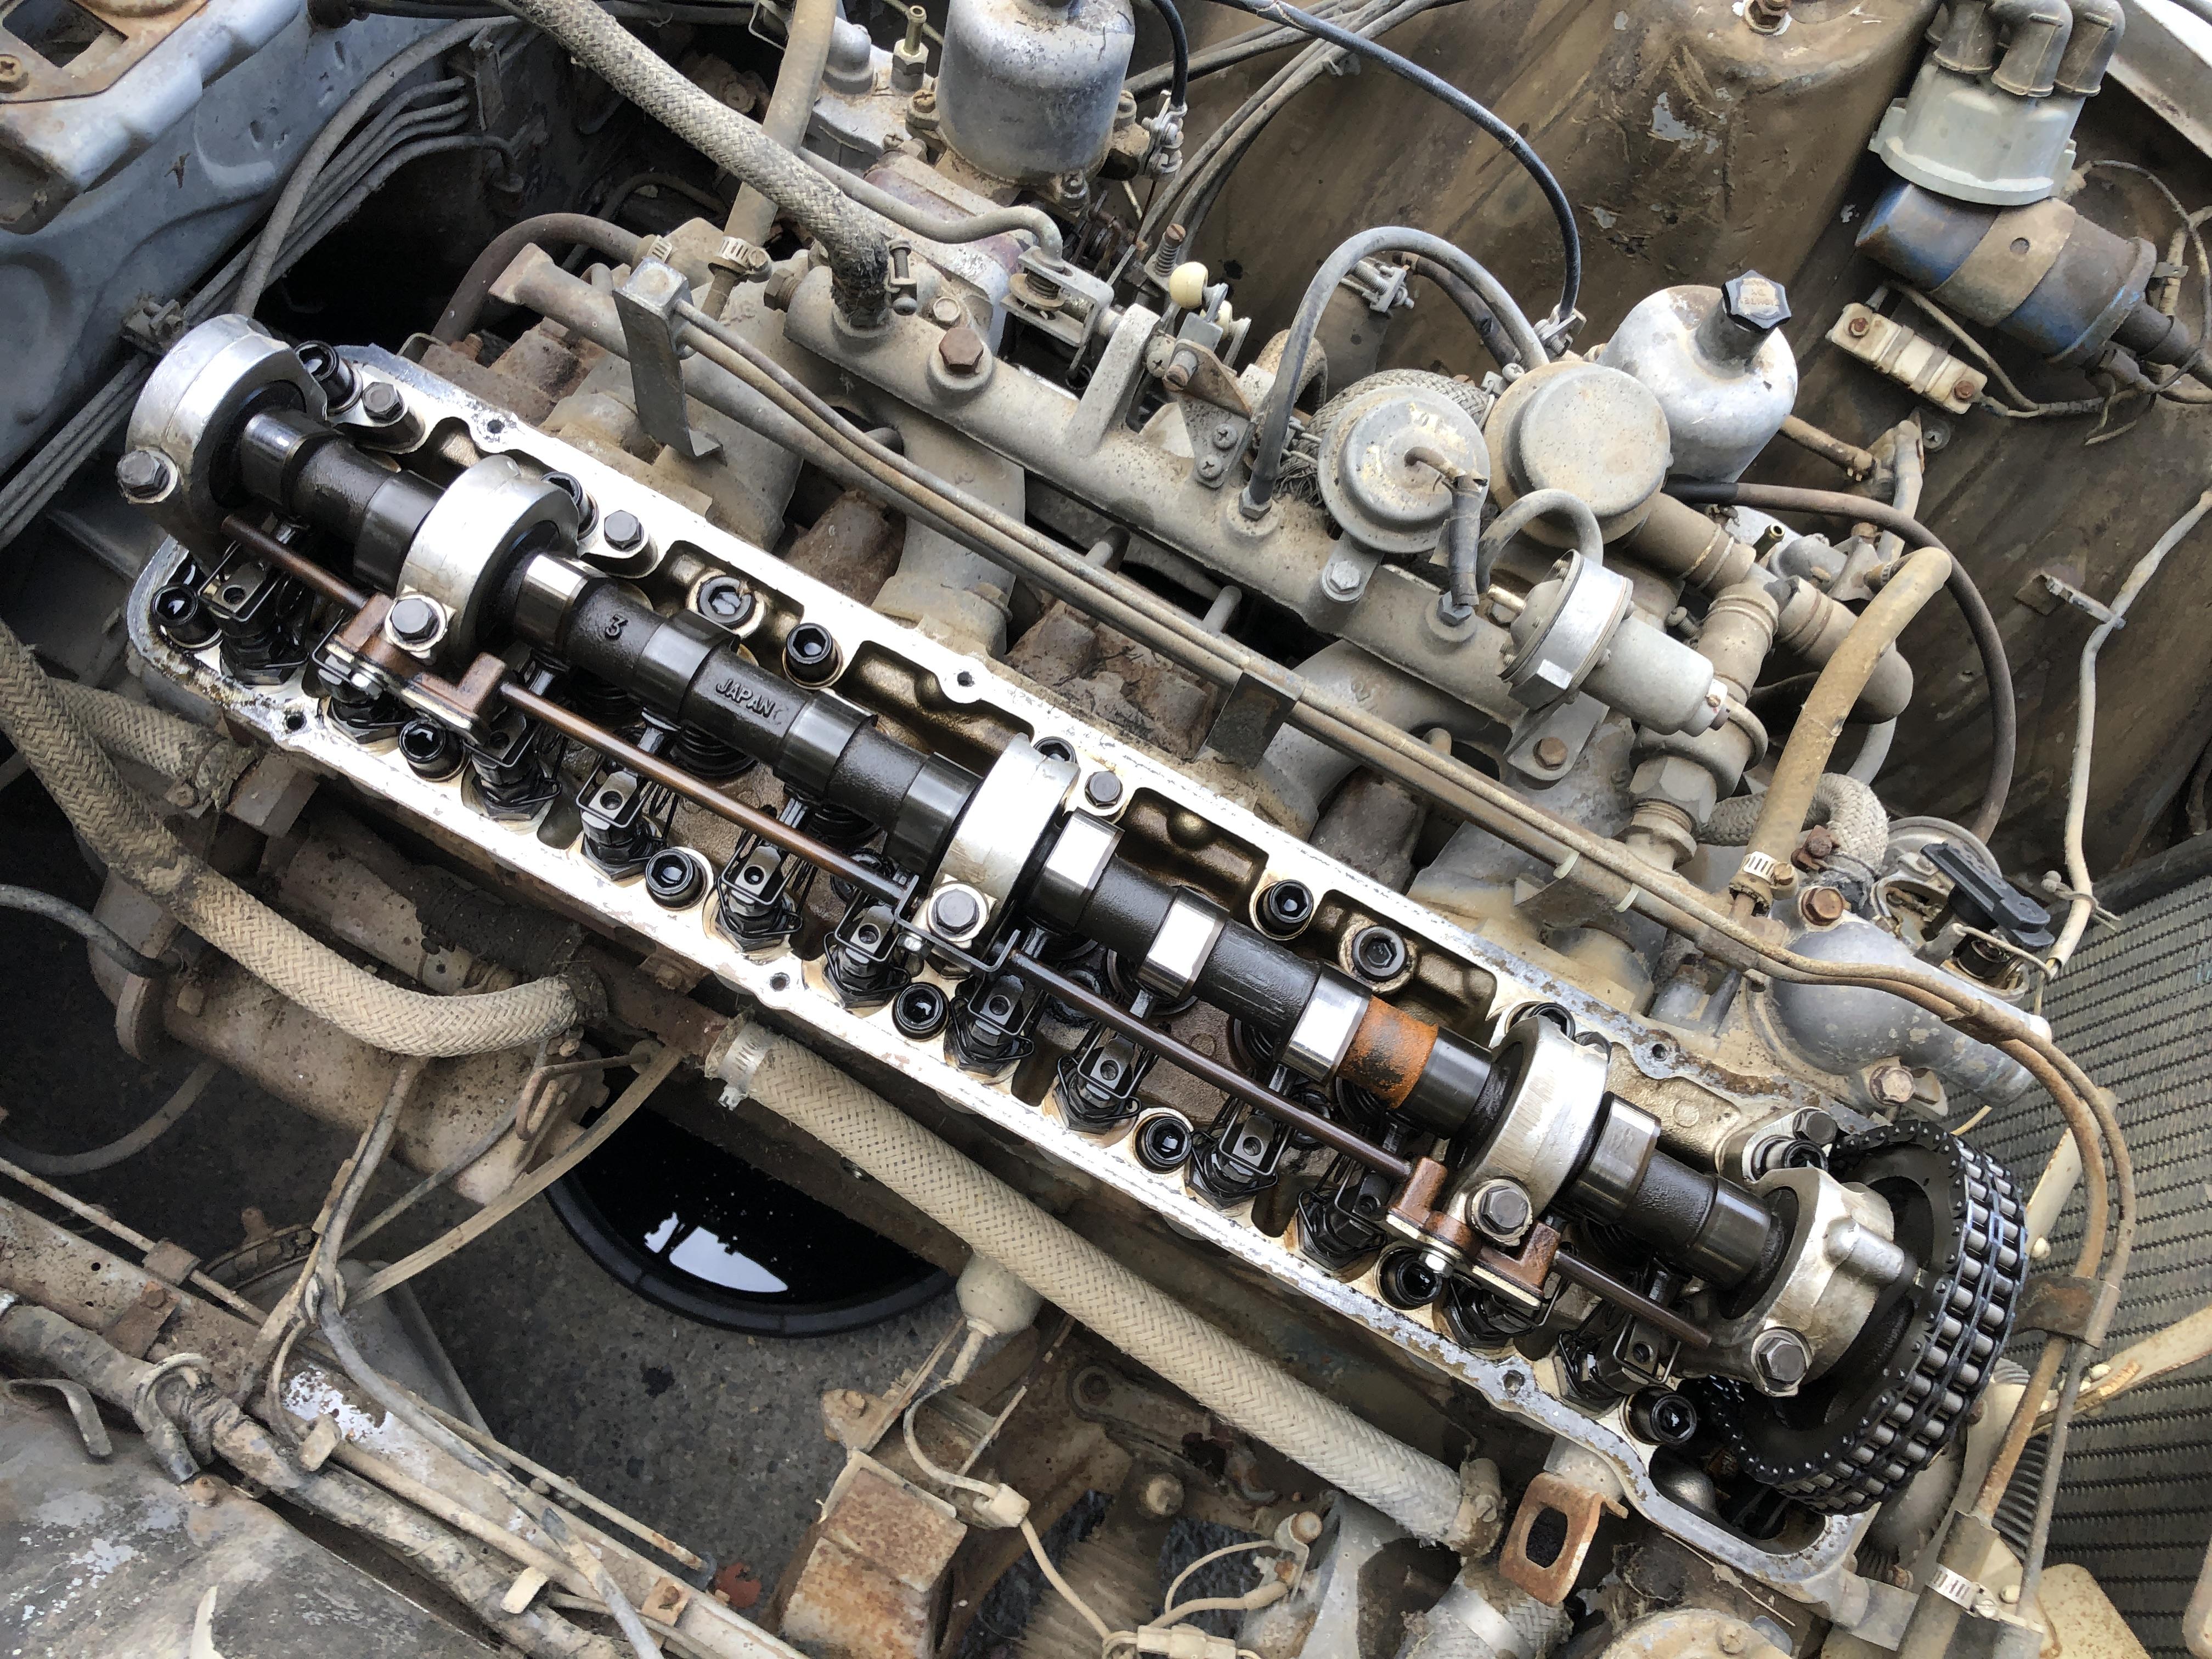
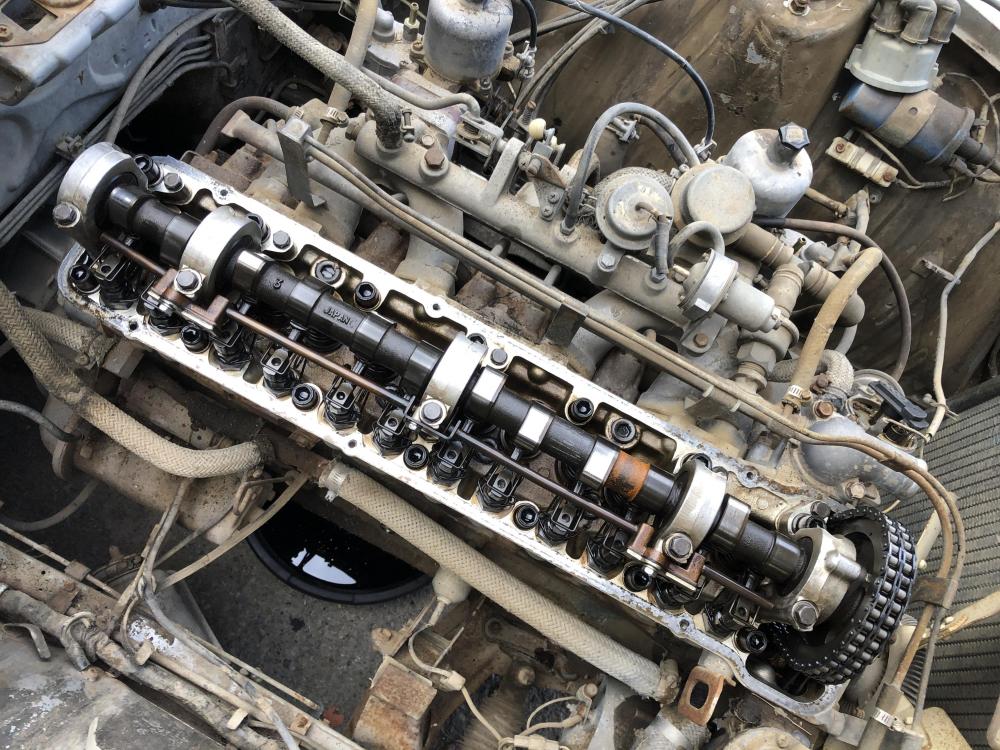
Here is how nice the engine looks inside. Runs without a puff of anything white or blue out the tail pipe. Heater valve leaks. Good thing there are holes in the floor to let it out on the ground.
-
I cannot claim to be its first owner, just the second. It just arrived in my care last week. Apparently the rear brakes failed in 81, then never got fixed. Now if I can change the clutch hydraulics, I might take it for a spin. Who needs brakes anyway