


zKars
 Subscriber
-
Joined
-
Last visited
Everything posted by zKars
-
 All great ideas. One more tip from me. How to get the rope/twine/monofiliment/floss into the pinchweld channel in the weatherstrip. I use 3/16 line, so I grabbed a 6-8 inch long 1/4" ID piece of tubing (brass from a hobby store is what I used I think) and thread the rope through it, leave about 12" inches sticking out. You can then insert the tip of the tube with the 12" bit of line into the rubber channel (leave the end of rope sticking out, it's the end you will start pulling on) and draw it around the weatherstrip perimeter keeping the tip inside the channel. Start center bottom or top, your choice. The rope will magically be deposited inside the channel. Should take about 20 seconds and feels SO good when you do it! Since lube is a hot topic, you could lube the rope before you insert it and get the channel lubed at the same time! Here is a picture of the commercial tool I found online to give you the visual.
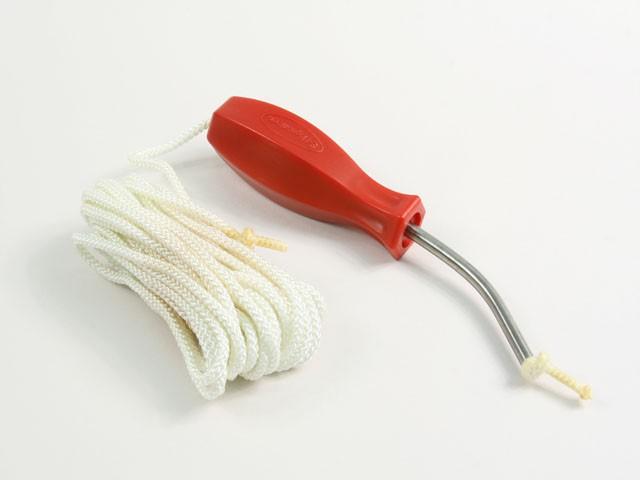
-
The only thing the cord needs to be is 1. Strong enough not to break, and 2. thick enough so that when you wrap it around your hand to pull in tight spots it doesn't cut your hand in half. Leather gloves are your friend. Do little circles in the corners to get the gasket seated. Also the thinner it is, the more likely it will be to tear the rubber if you pull it wrong. 3/16-1/4" rope is a good balance, and I will try that wet trick next time. Genius! HB olfa knife blade flat against the glass to remove outer rubber flange works every time to remove the old gasket and get the glass out. Never broken one. Old gaskets can be rock hard, so it takes a bit of pressure and repeated passes, so wear leather gloves and eye protection for when the blade breaks. Got lots of tricks for putting it in, just a bit hard to explain. Most important is to get the gasket on the glass 100% all around before you put it in on the car, so that it sits down into the window opening as far as possible all around before you start roping yanking. It should look like it's almost all the way in and down all around. If you can't get it seated well to start with, it will rise maddeningly at the top especially and make it impossible to get the gasket on the pinch weld. If you do it right, your helper really only needs to keep the top center held down as you do the rope thing around the bottom and sides. Last trick is using a flat plastic tool to help you seat the gasket all the way over the pinch weld as you go along. This one is my favorite. When you push it between the glass and gasket (inside, 90 deg to the gasket)) and pull toward you , it forces the "U" of the gasket fully over the pinch weld. If you're not over the pinch weld fully at the bottom, the glass gets offset toward the top too much, making the top very hard to get it started and seated up there. Once you get to the top, using the tool also helps you get the gasket over the pinch weld and finally all seated in place. Anyway, hope this helps. The first couple I did were a bear, now I can do it myself if I get in and out of the car about 1000 times to whack the glass as I go along to keep the top in place. A big sand bag is also handy to help hold the top center down and in place if you're alone.

-
Go on, be brave, grab a philips screw driver, and remove those four flat headed screws holding on the trim cover. Never know what you might find inside.... Then let me know if you need any of those screws cuz you're gonna lose one at least....
-
Greetings fellow member of the Jim club. Me thinks the material used is very similar to the bargain basement style exhaust hanger parts I see at the local auto parts emporium. Now I think the original parts come with and installed on (ie threaded through), a new OEM cable, which makes it a bit tricky to apply "new" ones should you be able to fabricate or buy some. I may have a slightly used cable with these items still attached for reference.
-
The closest replacements I've found are from midwestcontrolproducts.com. They have 8mm ball socket ends, but they have M5 threads rather than M4 on the originals. This has lead me to using M5 threaded rod and making complete new throttle rods. They even have several styles of ball ends that lock on to the ball studs. I do have a little stock of both stock rods and ball ends as well as many of the midwest ball ends that I use for throttle cable and other linkage building projects if you want to get some from me. https://midwestcontrol.com/shop/DMCBH-5?search=Ball joint M5
-
View Advert Tokico 5020R Springs. Set of 4 I have technically two sets of 5020R rear Tokico springs for sale. Four individual springs. Fairly sure they are 240Z rear replacements, but do a bit of searching and make sure. Tokico spring info is a bit scarce now, these are discontinued I believe. Asking $160 for the set of four, $40 each. Shipping additional. Advertiser zKars Date 06/22/2019 Price $160.00 Category Parts for Sale
-
If you want a bit of a hardy-har-har to take the edge off of the day, check out this comic strip. https://www.gocomics.com/that-is-priceless Something a little different, but it certainly tickles my funny bone just the right way. Perhaps some of you will also appreciate this style. A bit of a sampler, as they say...

-
-
Perhaps my storage bin(s) full of dash ducting hose might finally find a purpose in life. Let me know if you can't find suitable replacements, BTW, vintage air has some pretty nice duct hose you buy. I know they have 2" at least.
-
Great idea to reproduce these. Note that the only difference in the upper and lower washers is the ID of the hole in the middle, as the pin it thicker at the top than at the threaded ended. It's fun to visualize how and when those knubs touch and resists the movement of the M-bar as it flexes with diff movement. In the neutral position, the knubs don't touch the bushing eye, but as the bar flexes, the knubs touch and help resist that twisting motion. When the eye bushings wear out, these knubs become primary support for the bar and quickly wear.
-
The Ireland trip even generated a few ideas about my future plans for parts storage and inventory. This is the "long room" in the Trinity College library. Plainly the concept of "heaviest on the bottom, lightest on top" as seen in the ordering strategy on the shelves, also applies to car parts. Sorry having trouble with this new .HEIC files that my iphone is magically using now.... Anybody else fighting with this crap? I can't just choose files from the "Click to choose files" button anymore. Apple strikes again. I used a resize app to grab one and saved it, which saved it as a jpg, but this is not fun.

-
Didn't see or generate any black spots. No surprise they exist.
-
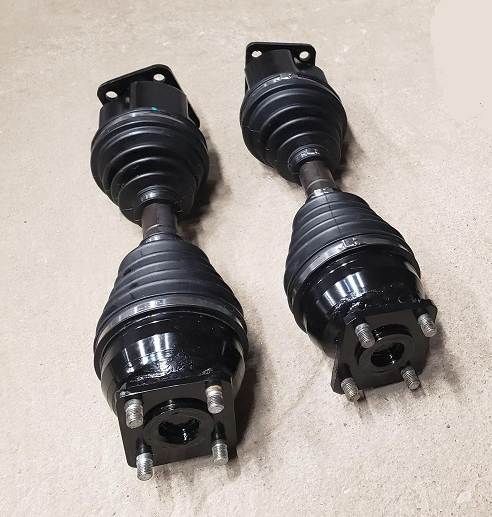
on the axle price, say $300? $900 new but given the recent bad press I can seem to give them away. on the datsunrestomod axles, I bought the version that have the snapin Subby stubs that are part of their CV axles. No need for another $350-500 for the adapters needed for the futofab cv's
-
Never experienced anything in Canada even close to what I find here. Hard to explain. Just know it's VERY fun.
-
I have a set on my 510. Work perfect. I have the STI diff stub version. I'll let my old Futofab axles go for cheap. Hate them.
https://datsunrestomods.com/collections/all just saying maybe its time to abandon the porch Cv adapter w/lock wire and sloppy spline stuff...
 View Advert Wanted: 5 speed striking rod Hey gang Ive had a transmission rebuilder ask me for a striking rod for rhe FS5 trans. Any body have one or any leads? Advertiser zKars Date 06/08/2019 Price $1,233,456.00 Category Parts Wanted Year 0 Model Z or ZX
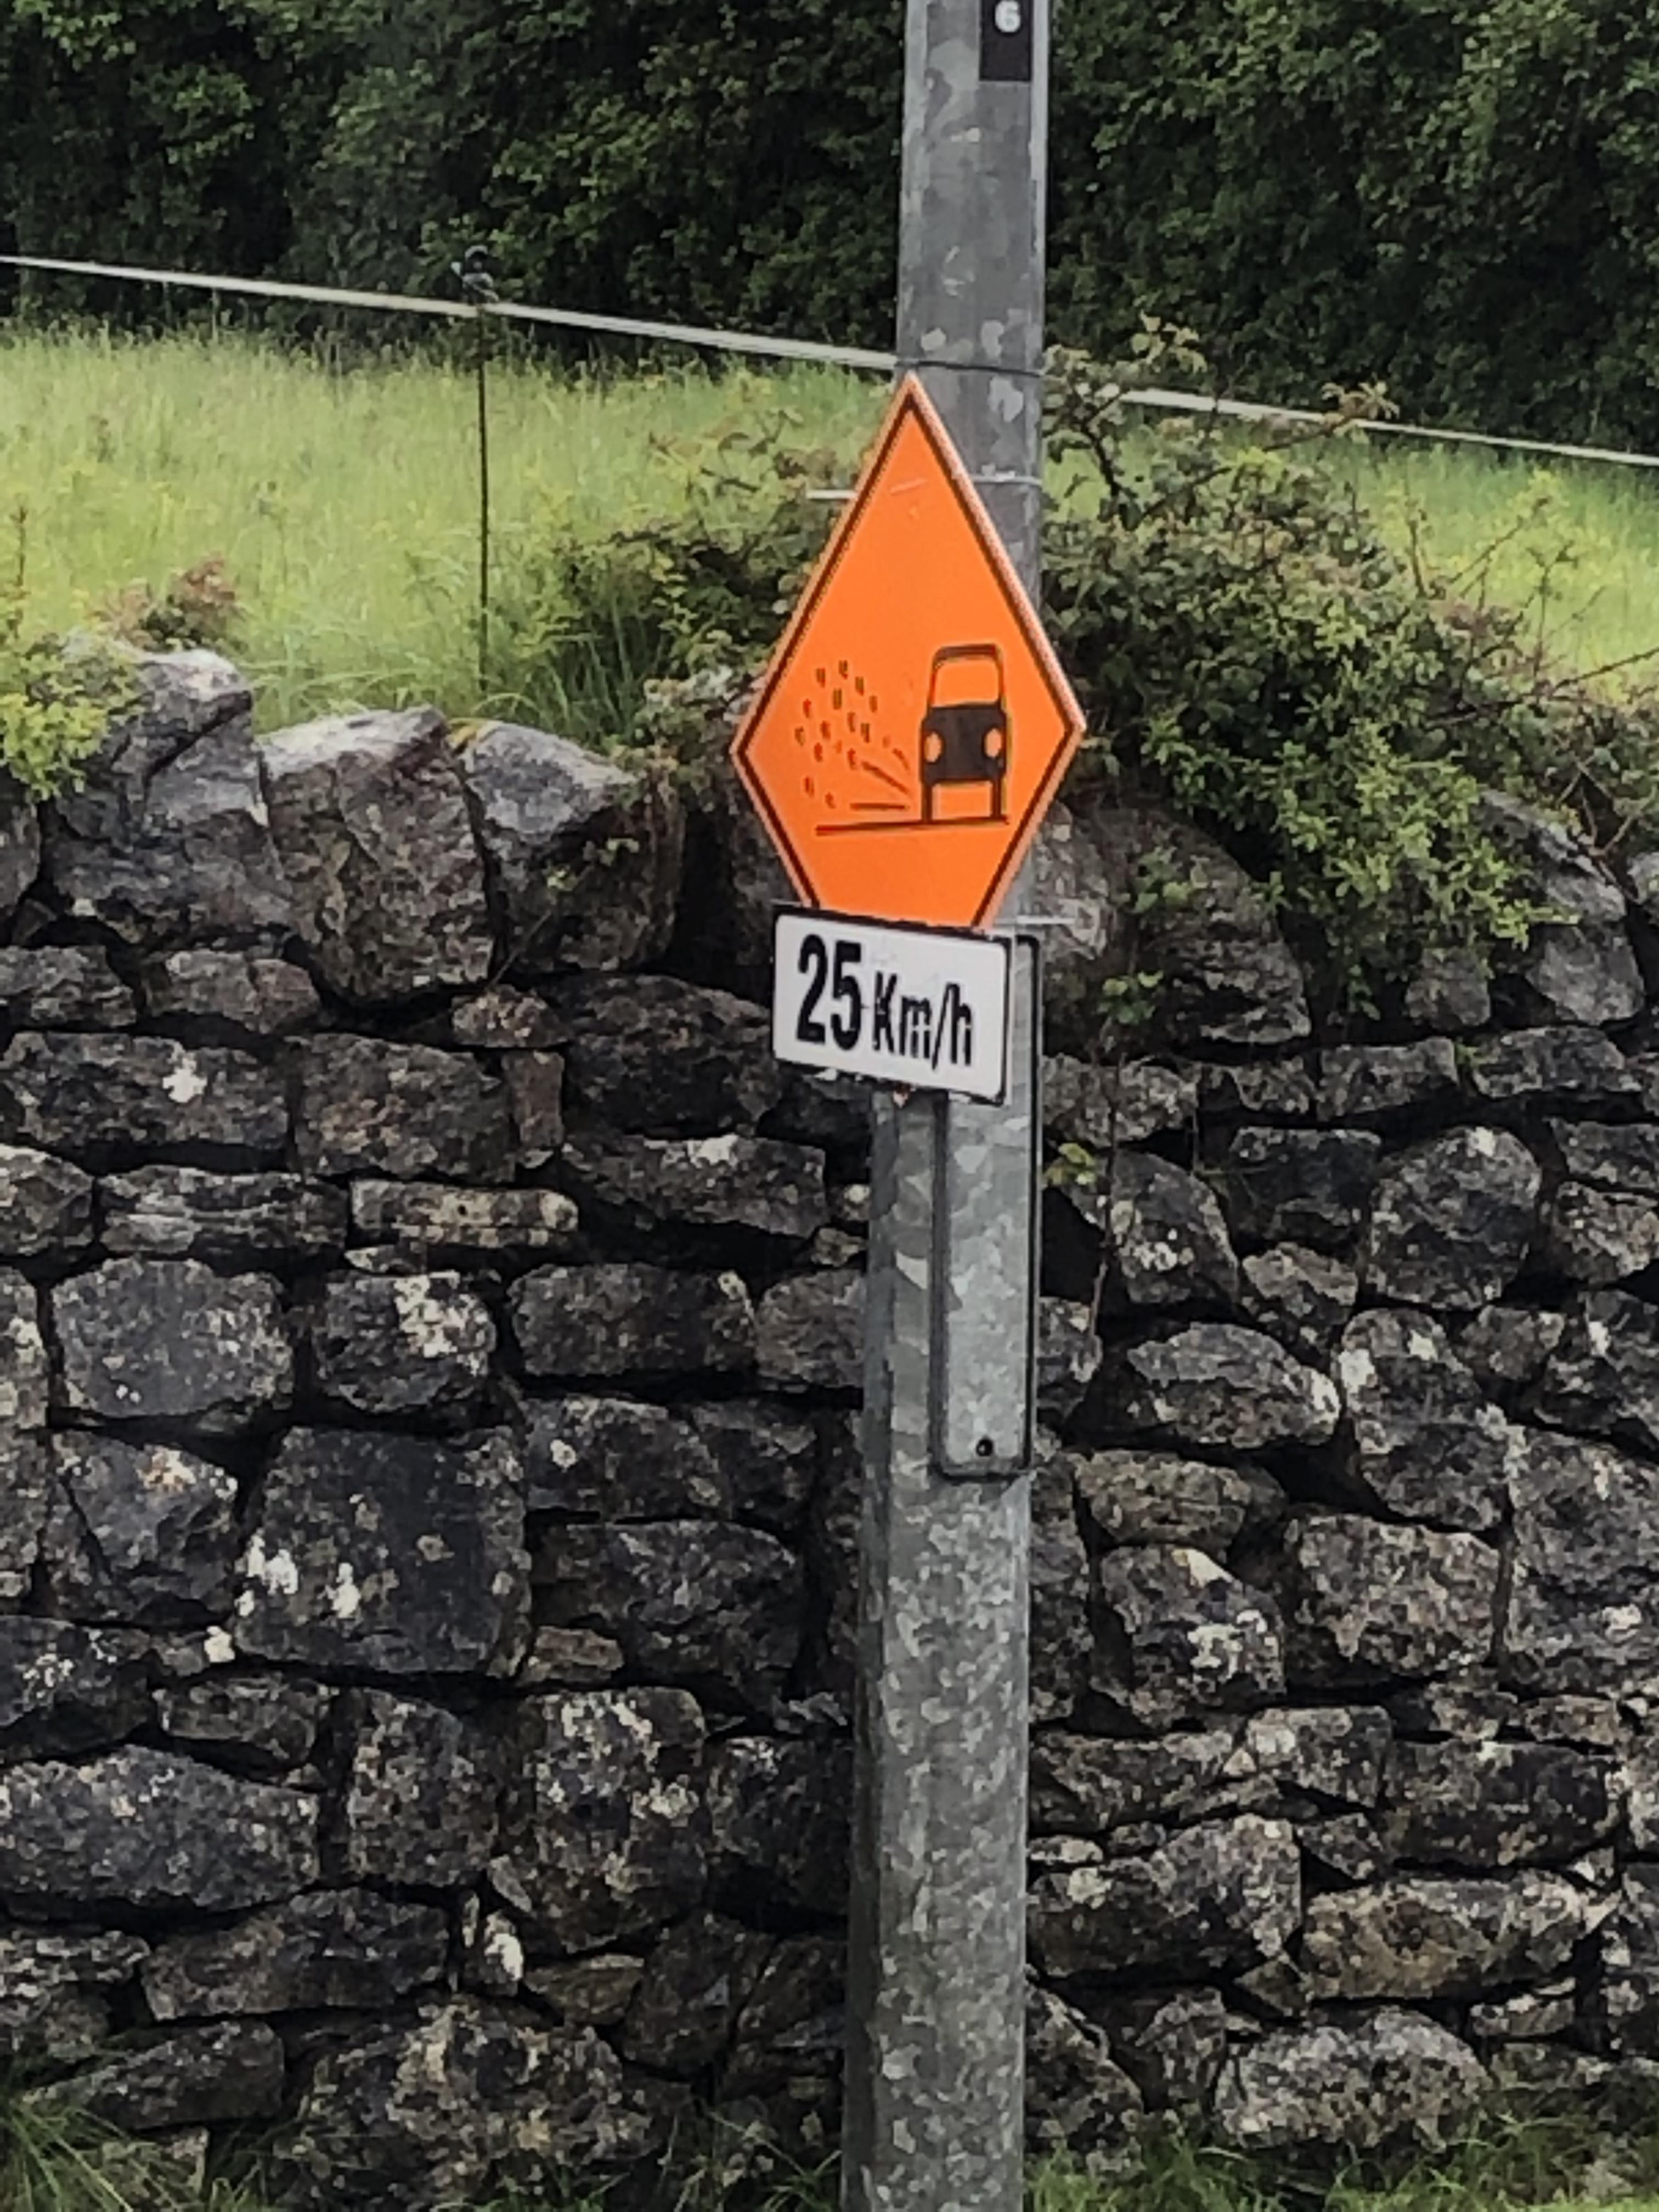
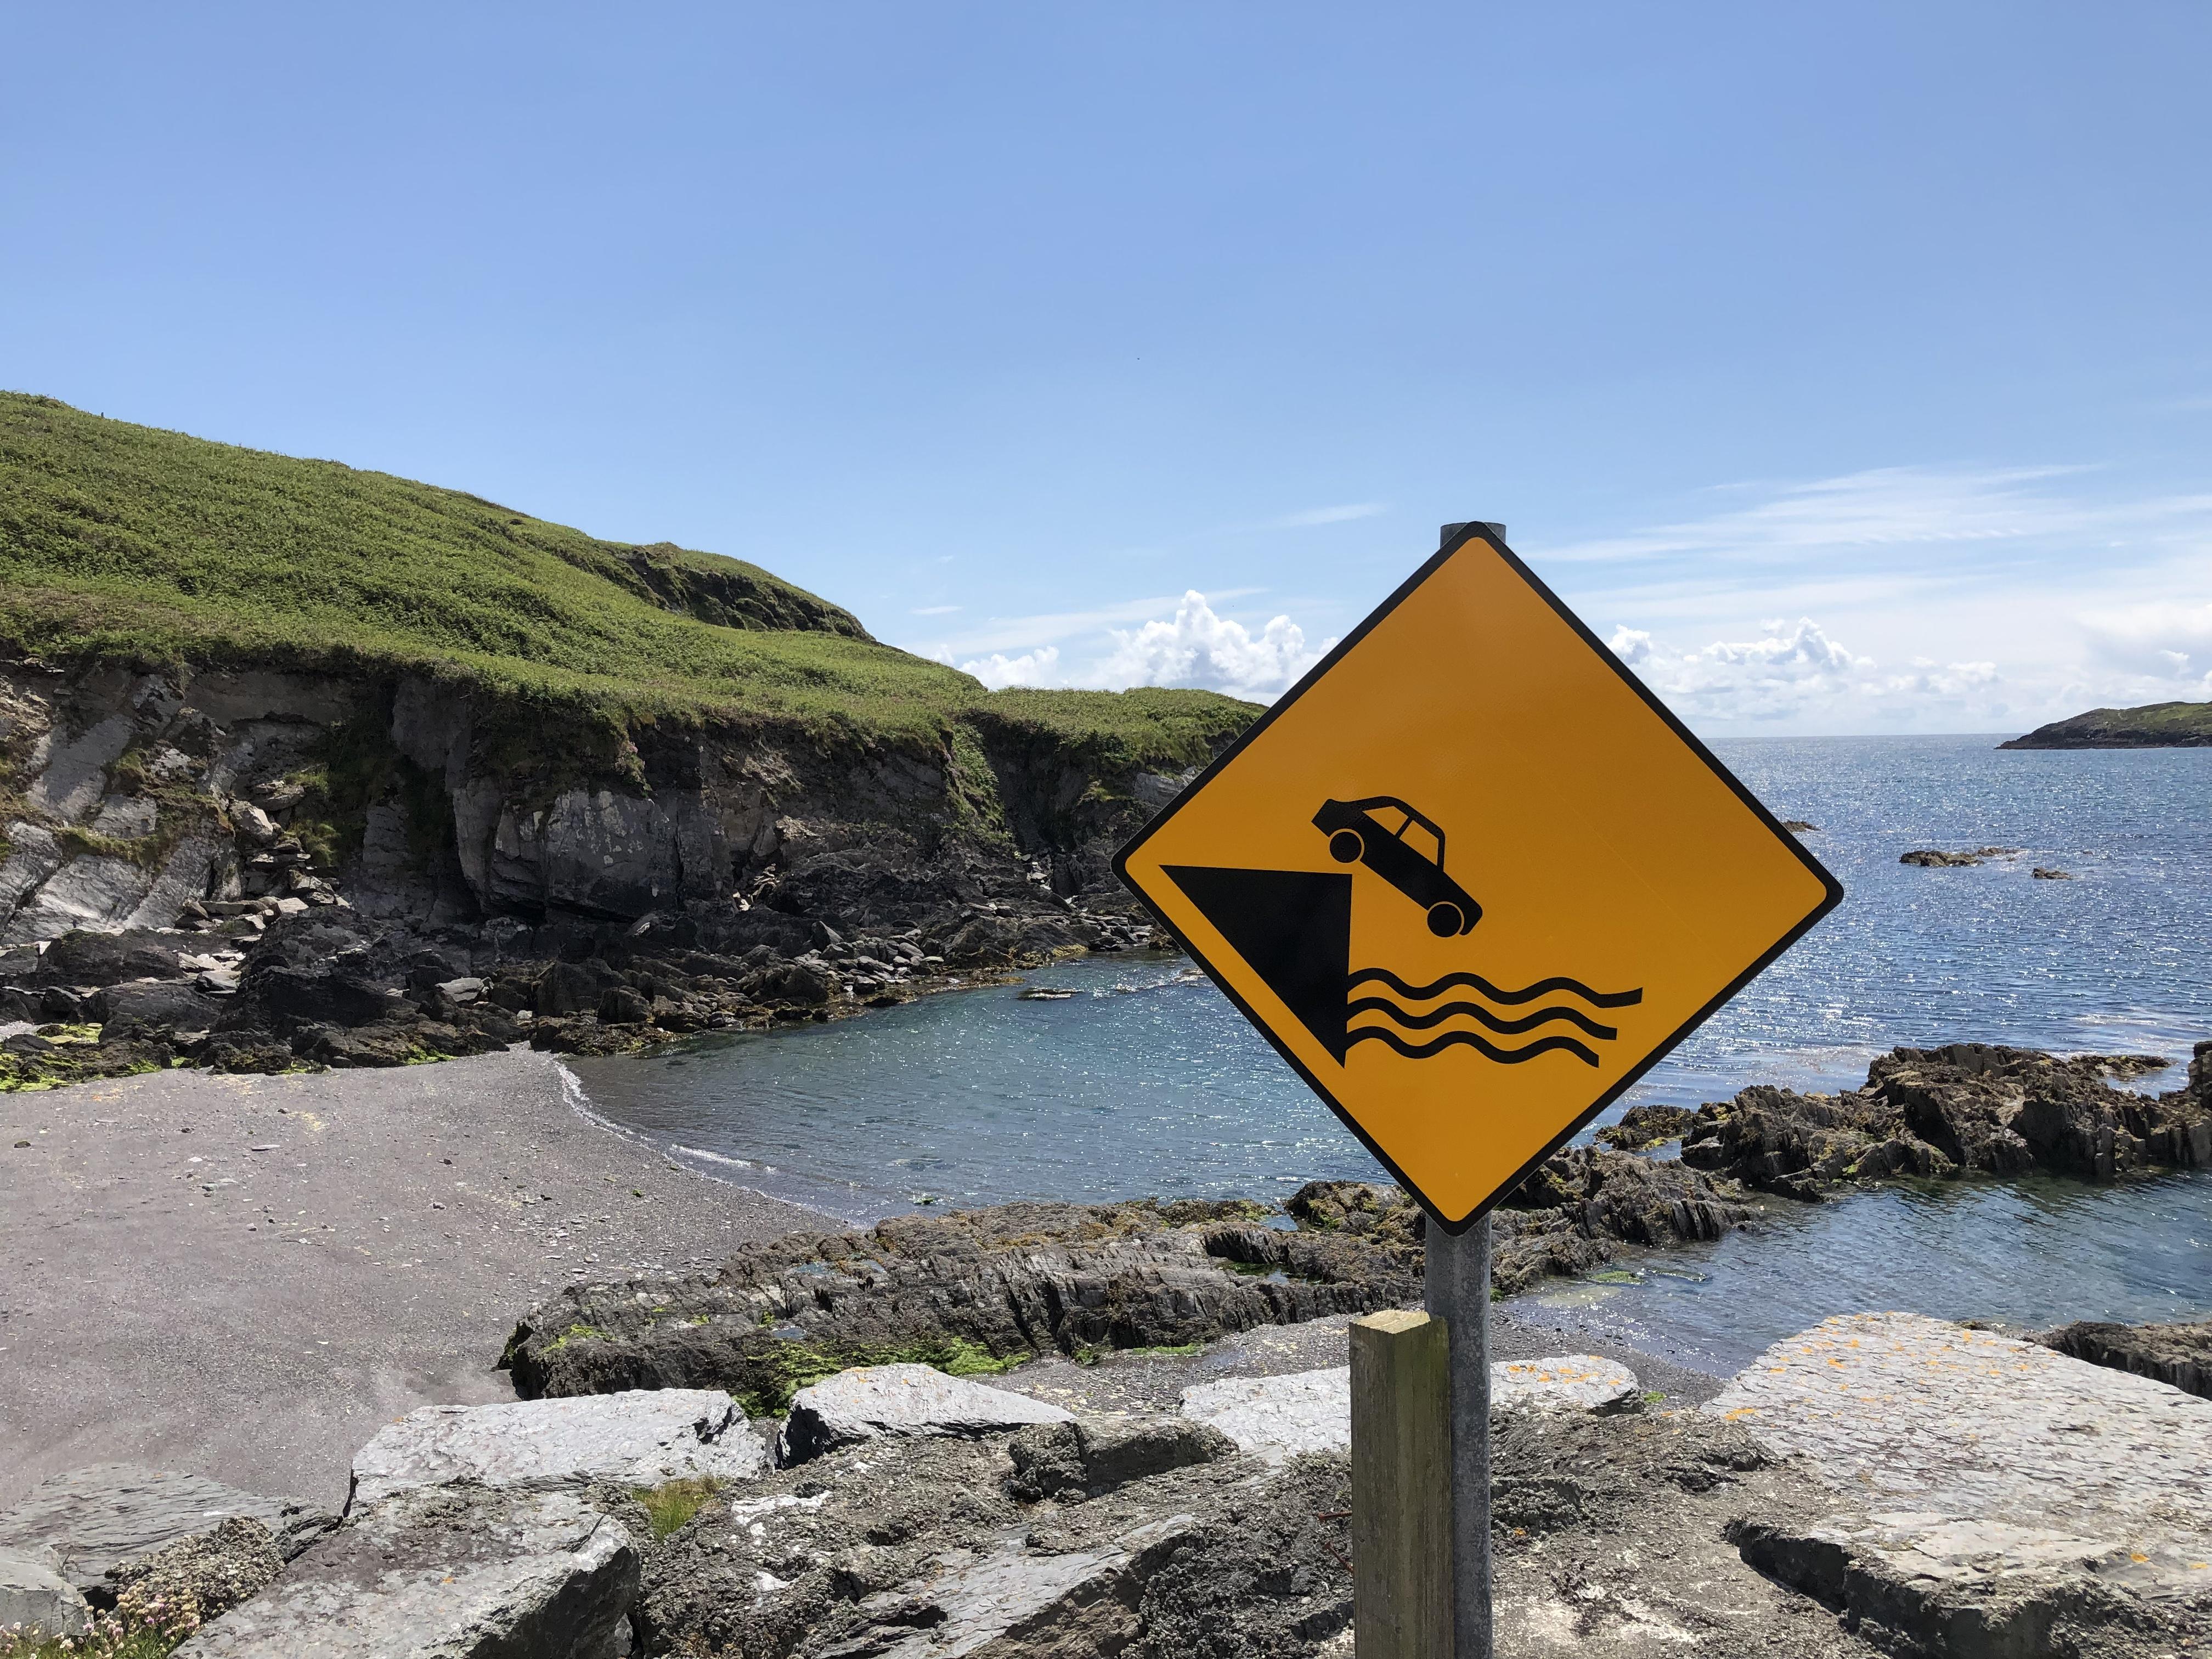
NO straight roads. All perfect pavement. Could never drive every road. Too many, every one is tight narrow twisty, bounded by rock or bush RIGHT there at your mirrors and rims. Lots of on-coming traffic, including trucks, makes for continuous butt clinching, challenge filled driving. Glorious! Only downside is the passenger's constant screaming and pleading for mercy.
Ireland; Roads. Incredible. Go. PS. Buy life insurance first... oh yeah, The scenery's ok too.
View Advert Wanted: 5 speed striking rod Hey gang Ive had a transmission rebuilder ask me for a striking rod for rhe FS5 trans. Any body have one or any leads? Advertiser zKars Date 06/08/2019 Price $1,233,456.00 Category Parts Wanted Year 0 Model Z or ZX
NO straight roads. All perfect pavement. Could never drive every road. Too many, every one is tight narrow twisty, bounded by rock or bush RIGHT there at your mirrors and rims. Lots of on-coming traffic, including trucks, makes for continuous butt clinching, challenge filled driving. Glorious! Only downside is the passenger's constant screaming and pleading for mercy.
Ireland; Roads. Incredible. Go. PS. Buy life insurance first... oh yeah, The scenery's ok too. Sorry to hear of this unfortunate situation and the engine damage. While you'll never know if the cap failure or timing contributed to the engine failure, it will always leave the lingering doubt about the product, even without the customer 'service' contribution. I too had the center electrode fail in my 123 dizzy cap that left me stranded in a far away place. I wasn't smart enough to carry a spare, as I thought the new one would last longer than 2000 km. Silly me. I carry a lot of spares, before and after that event, but rarely have had to use any of them, but experiences like this make the practice necessary.
Tanks Inc and Holley sell great in-tank pump solutions. There are others, do a bit of searching. I like one of the Holley setups as it comes with their Hydromat product that acts like the world's best fuel sponge in the bottom of the tank. Look up the Holley 12-130
Ah, that makes more sense. A total of 3. Still I marvel at how moving the nozzle less than a full station makes much of an effect, yet it clearly does. Seems to me the flowrate of fuel from the nozzle may be a more complex function of the total needle profile that is immersed in the nozzle than simply the difference between the needle OD/nozzle ID area at the top of the nozzle.
This is very helpful information. Thanks for posting it. I was reading the above post about the case where Mark had to add 3 turns to compensate for an elevation change to get back into drivable state. I had to richen it up about one turn to go from Whistler BC down to sea level in Squamish on one trip. Geez 3 turns seems like a lot I said.... So just as a point of reference in this subject matter, let's connect the number of turns required to move one station on a needle. The threads on the nozzle height adjuster are 1.0mm pitch I believe, so moving 1/8 inch, the distance between needle stations requires just a bit more than 3 complete turns. Makes me wonder how I get significant changes to AFR when tweeking the knob just 1/2 a turn or so during garage tuning sessions .... Crossing a threshold from one to the next? Maybe this stuff isn't so simple..
Sorry to hear of this unfortunate situation and the engine damage. While you'll never know if the cap failure or timing contributed to the engine failure, it will always leave the lingering doubt about the product, even without the customer 'service' contribution. I too had the center electrode fail in my 123 dizzy cap that left me stranded in a far away place. I wasn't smart enough to carry a spare, as I thought the new one would last longer than 2000 km. Silly me. I carry a lot of spares, before and after that event, but rarely have had to use any of them, but experiences like this make the practice necessary.
Tanks Inc and Holley sell great in-tank pump solutions. There are others, do a bit of searching. I like one of the Holley setups as it comes with their Hydromat product that acts like the world's best fuel sponge in the bottom of the tank. Look up the Holley 12-130
Ah, that makes more sense. A total of 3. Still I marvel at how moving the nozzle less than a full station makes much of an effect, yet it clearly does. Seems to me the flowrate of fuel from the nozzle may be a more complex function of the total needle profile that is immersed in the nozzle than simply the difference between the needle OD/nozzle ID area at the top of the nozzle.
This is very helpful information. Thanks for posting it. I was reading the above post about the case where Mark had to add 3 turns to compensate for an elevation change to get back into drivable state. I had to richen it up about one turn to go from Whistler BC down to sea level in Squamish on one trip. Geez 3 turns seems like a lot I said.... So just as a point of reference in this subject matter, let's connect the number of turns required to move one station on a needle. The threads on the nozzle height adjuster are 1.0mm pitch I believe, so moving 1/8 inch, the distance between needle stations requires just a bit more than 3 complete turns. Makes me wonder how I get significant changes to AFR when tweeking the knob just 1/2 a turn or so during garage tuning sessions .... Crossing a threshold from one to the next? Maybe this stuff isn't so simple..


Important Information
By using this site, you agree to our Privacy Policy and Guidelines. We have placed cookies on your device to help make this website better. You can adjust your cookie settings, otherwise we'll assume you're okay to continue.