zKars
Supporting Member
-
Joined
-
Last visited
Everything posted by zKars
-
Let me know if you need one.
-
-
I see one missing M6 nut and flat washer on a short stud sticking out (first pic), but everything is as it should be. That's all you're missing.
-
-
-
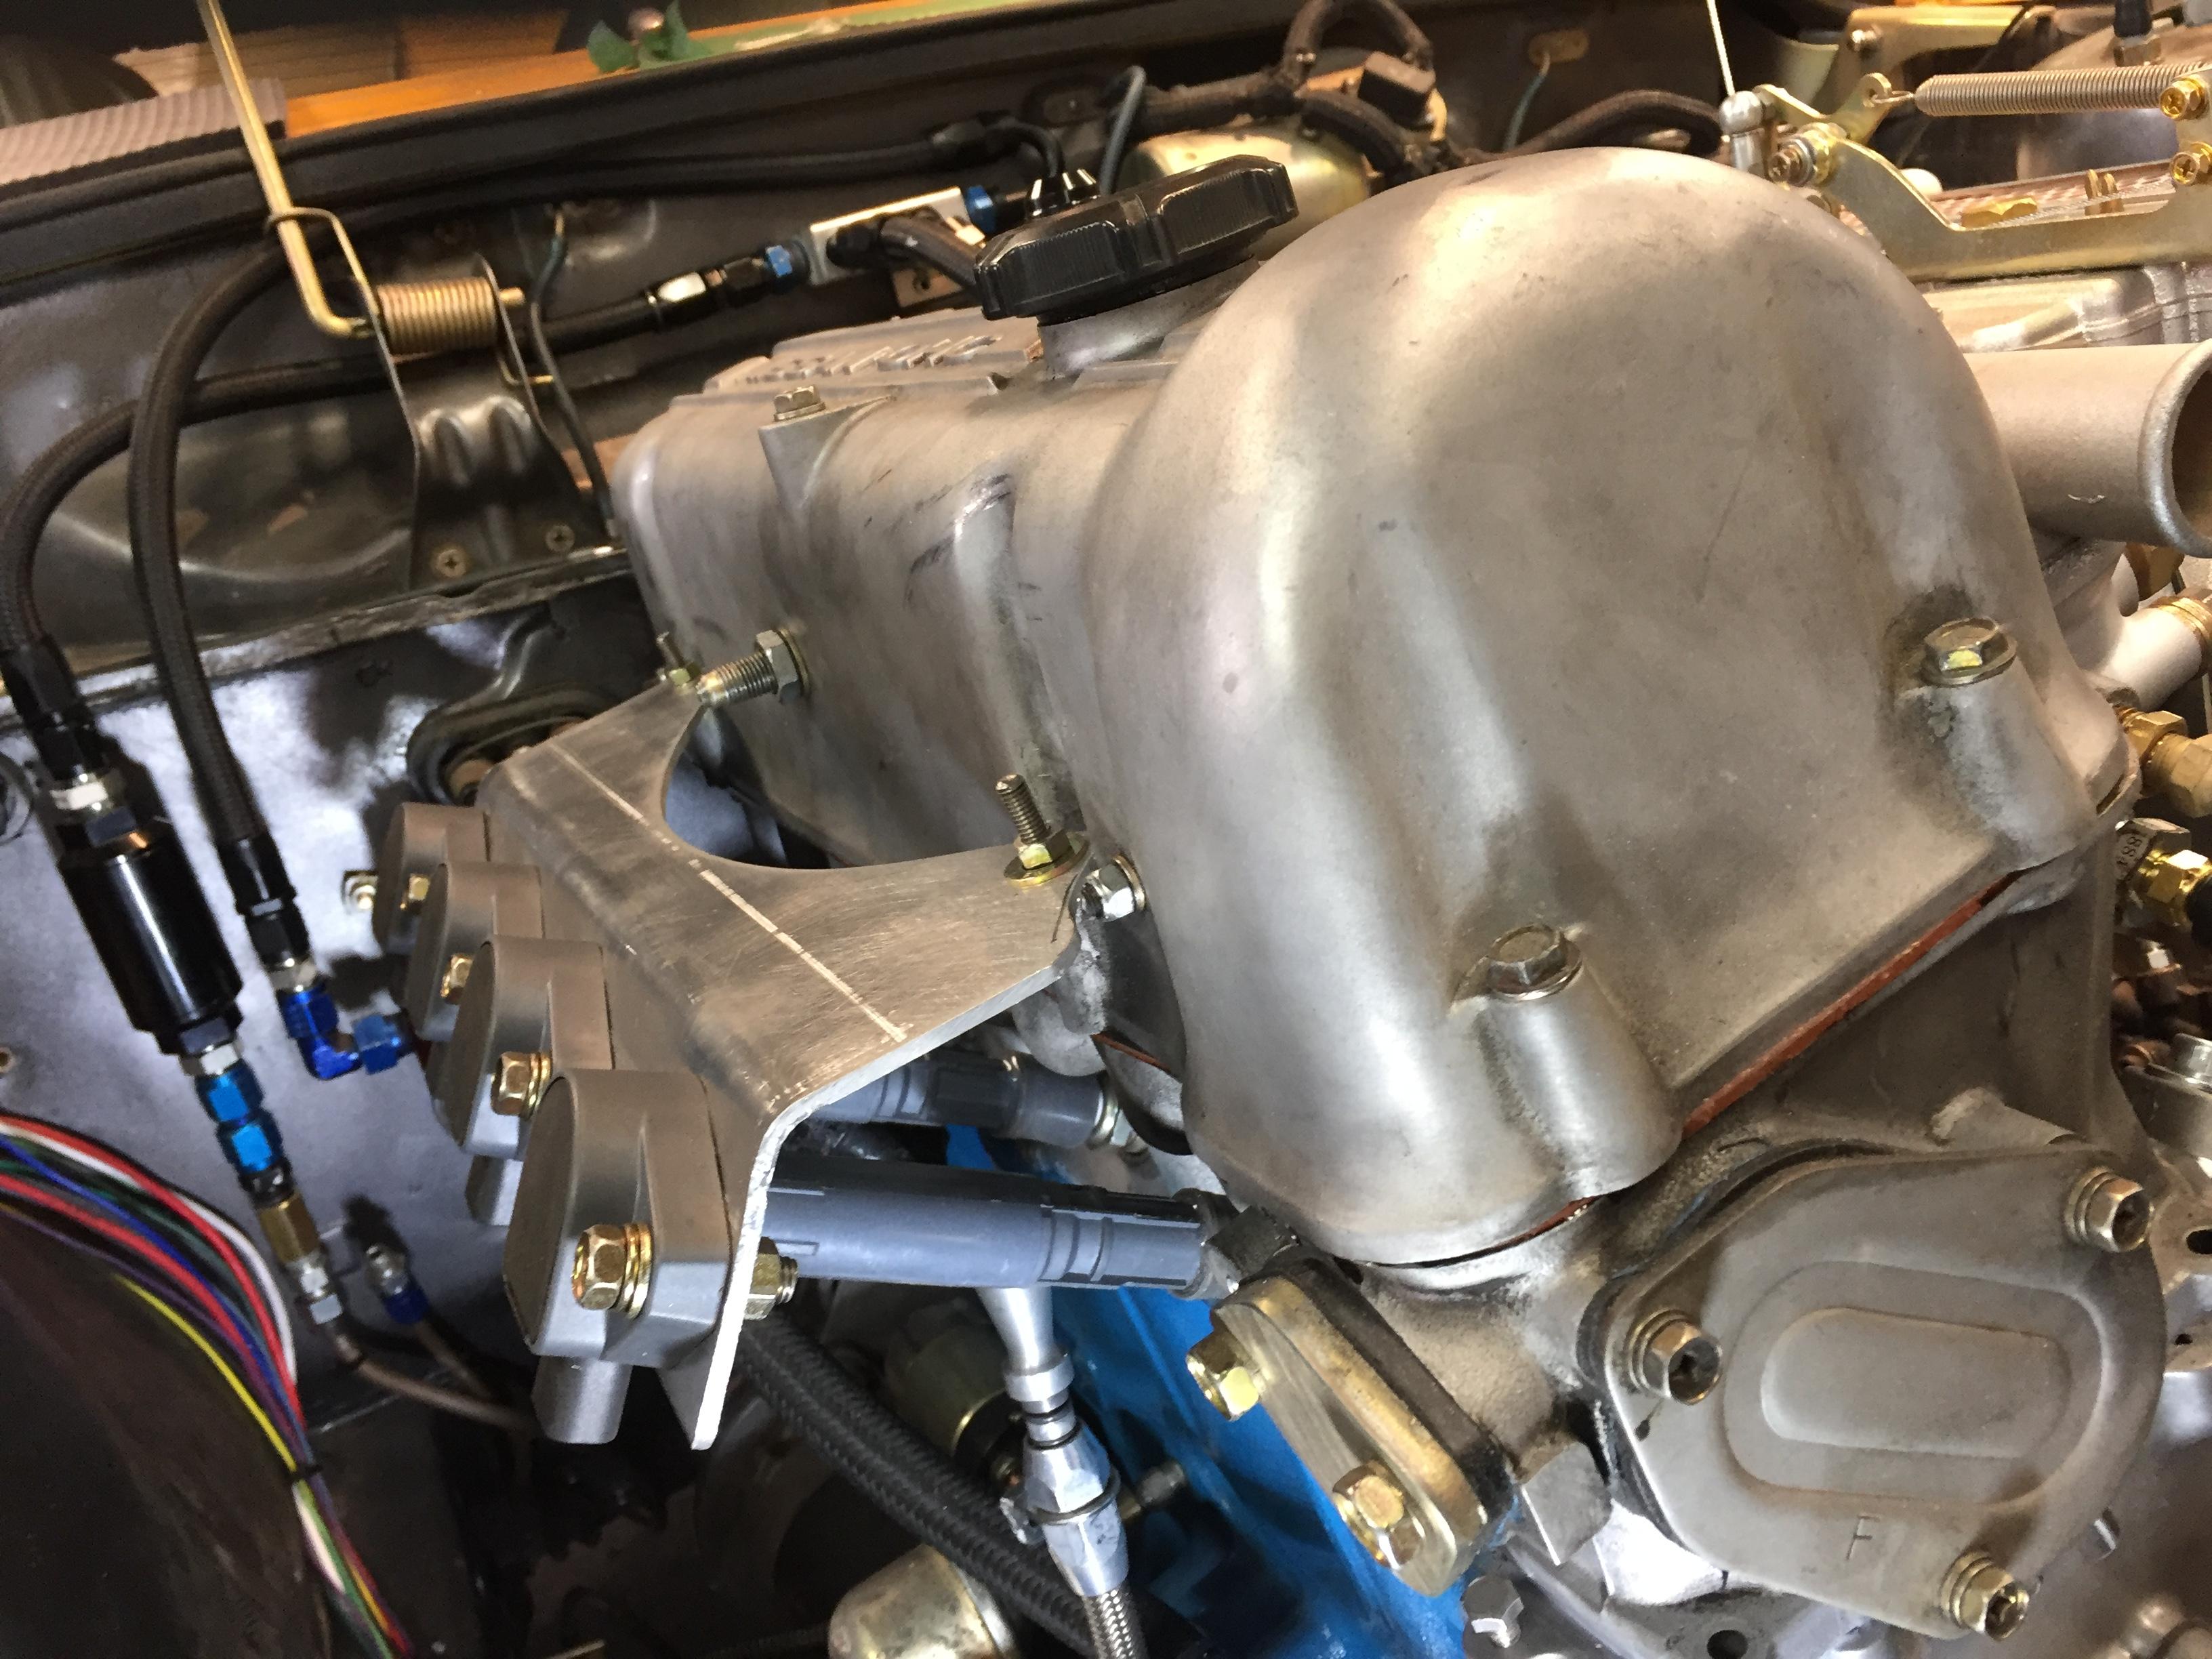
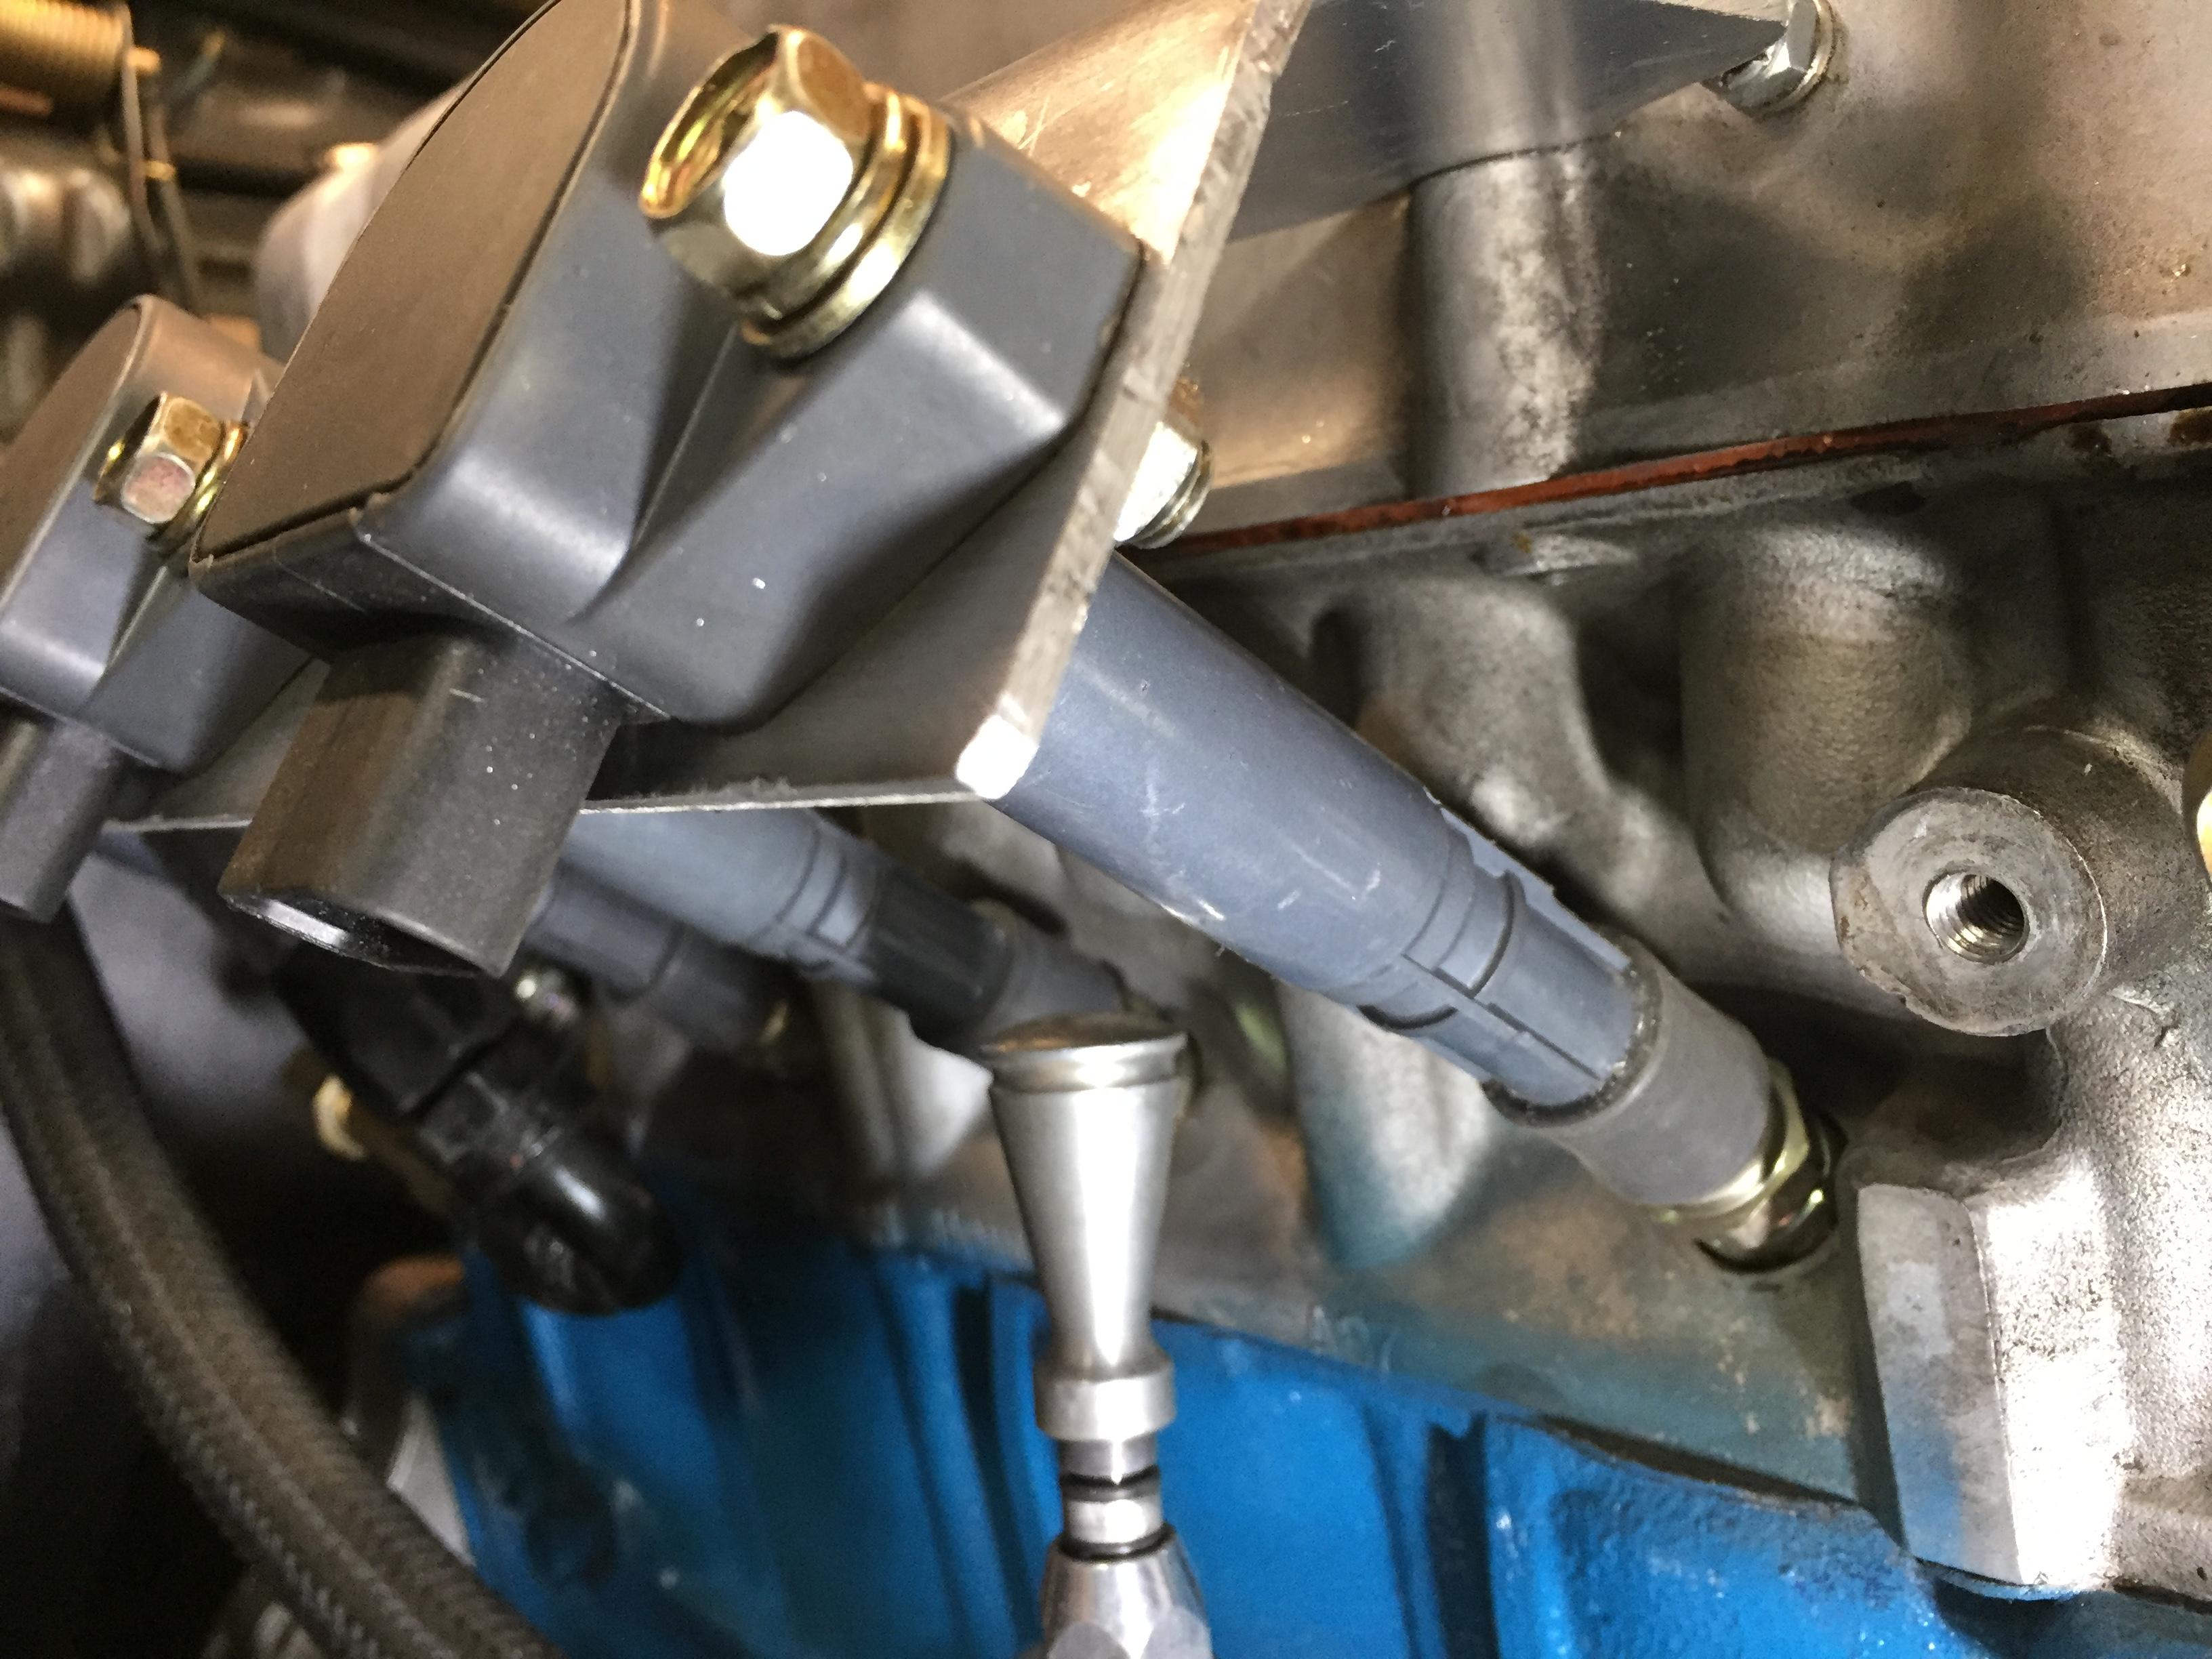
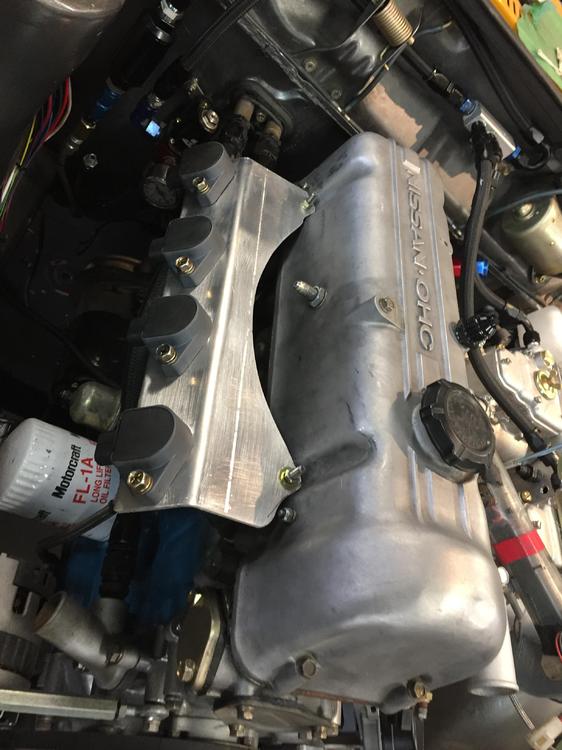
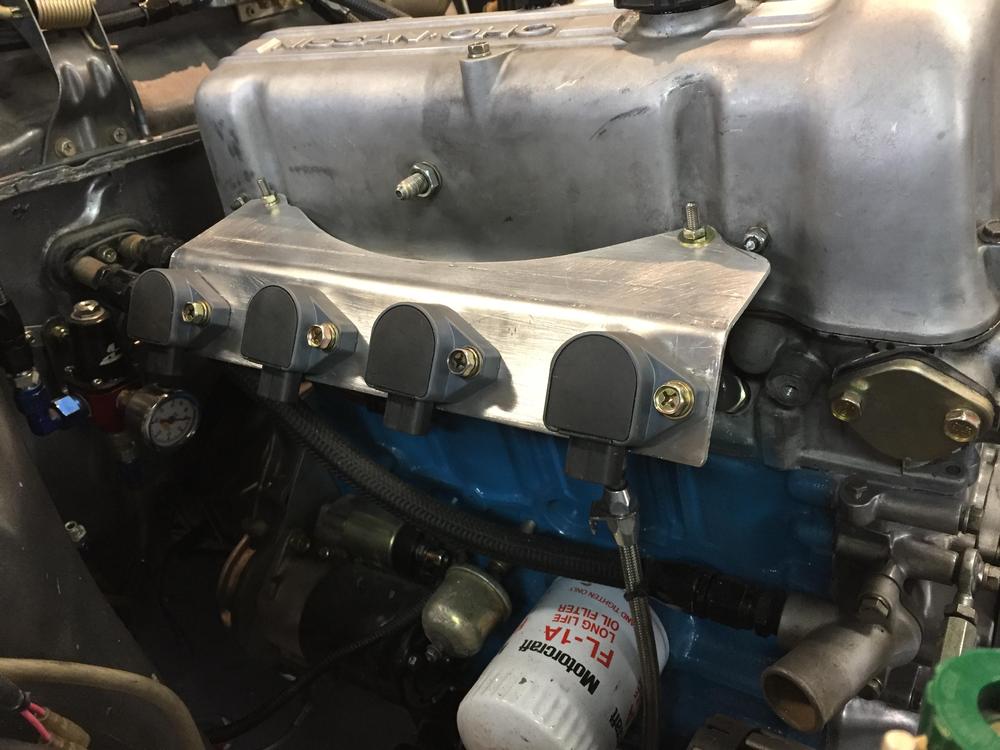
Thanks to Mark's and ConverTT for the original idea, I too am doing an EFI conversion to 510. I just completed my proto type bracket for the COP's and want to share a couple of hard won (trial and error) dimensions that may help ConverTT with his fabrication I made a simple bracket with a single bend in 1/8" aluminum plate. It is 14 x 5.5 inches wide, with the bend at 3.25", with an included bend angle of 126.6 deg. I drilled 1.5" holes for the COP base, and 11/32 holes for the mounting bolts (M8). I had to drill out the holes in each COP to 5/16 (or 8mm) as they would not quite pass a regular M8 bolt. On an L4, the plugs are not evenly spaced all along. 1-2 is 4", 2-3 is 3.625", and then 3-4 is again 4". Interesting that these measurements are not metric. They are 4", not 100mm. The center of COP 1.5" hole to it's 5/16 mounting hole is 1.25". I shaped the tabs that fit over the two valve cover bolts to fit the shape of the cove in the valve cover of course. The two holes are 3/8" from the edge. Some shapely-ness has been added to the bracket to make it both pretty and functional. More to follow. Powder coating when complete. I replaced the two valve cover bolts with studs to minimize the wear on the threads in the head with the many test fit cycles. When you tighten down the mounting bolts for each COP, it pulls the coil boot tightly down over the plug to the fully seated position. The bracket does not move in any way. It is very sturdy as is. I was tempted to make the bracket in two pieces so that you undo a couple of bolts along the seam and the two valve cover bolts to get the valve cover off for service, rather than having to undo all the COP's and wiring as well. We'll see how I feel the next few times I do a valve adjusts. I got very lucky as my press break can take a max of 14" wide stock, and that turned out to be exactly the width of the aluminum plate. Horse shoes for sure. Ah one more detail. You would think that base of the COP that sits flat on the plate would be, well, flat. Nope. The mounting tab that sticks out to the side that has the 8mm hole has a slight upward angle, may 2 degrees. A person with OCD would make a wedge shaped washer to go in there...


-
I had a great experience with my SU's with the stroker motor. Nearly equal performance in the low/mid range as the Mikuni 44's I had previously, excellent mileage, easy starting etc. AFR's with N47 needles on cruise at 15'ish, 12-13 at WOT
-
Glad to help. Speed shops that sell weld in O2 bungs will also have plugs. Some of the bungs I've bought actually came with the plug.
-
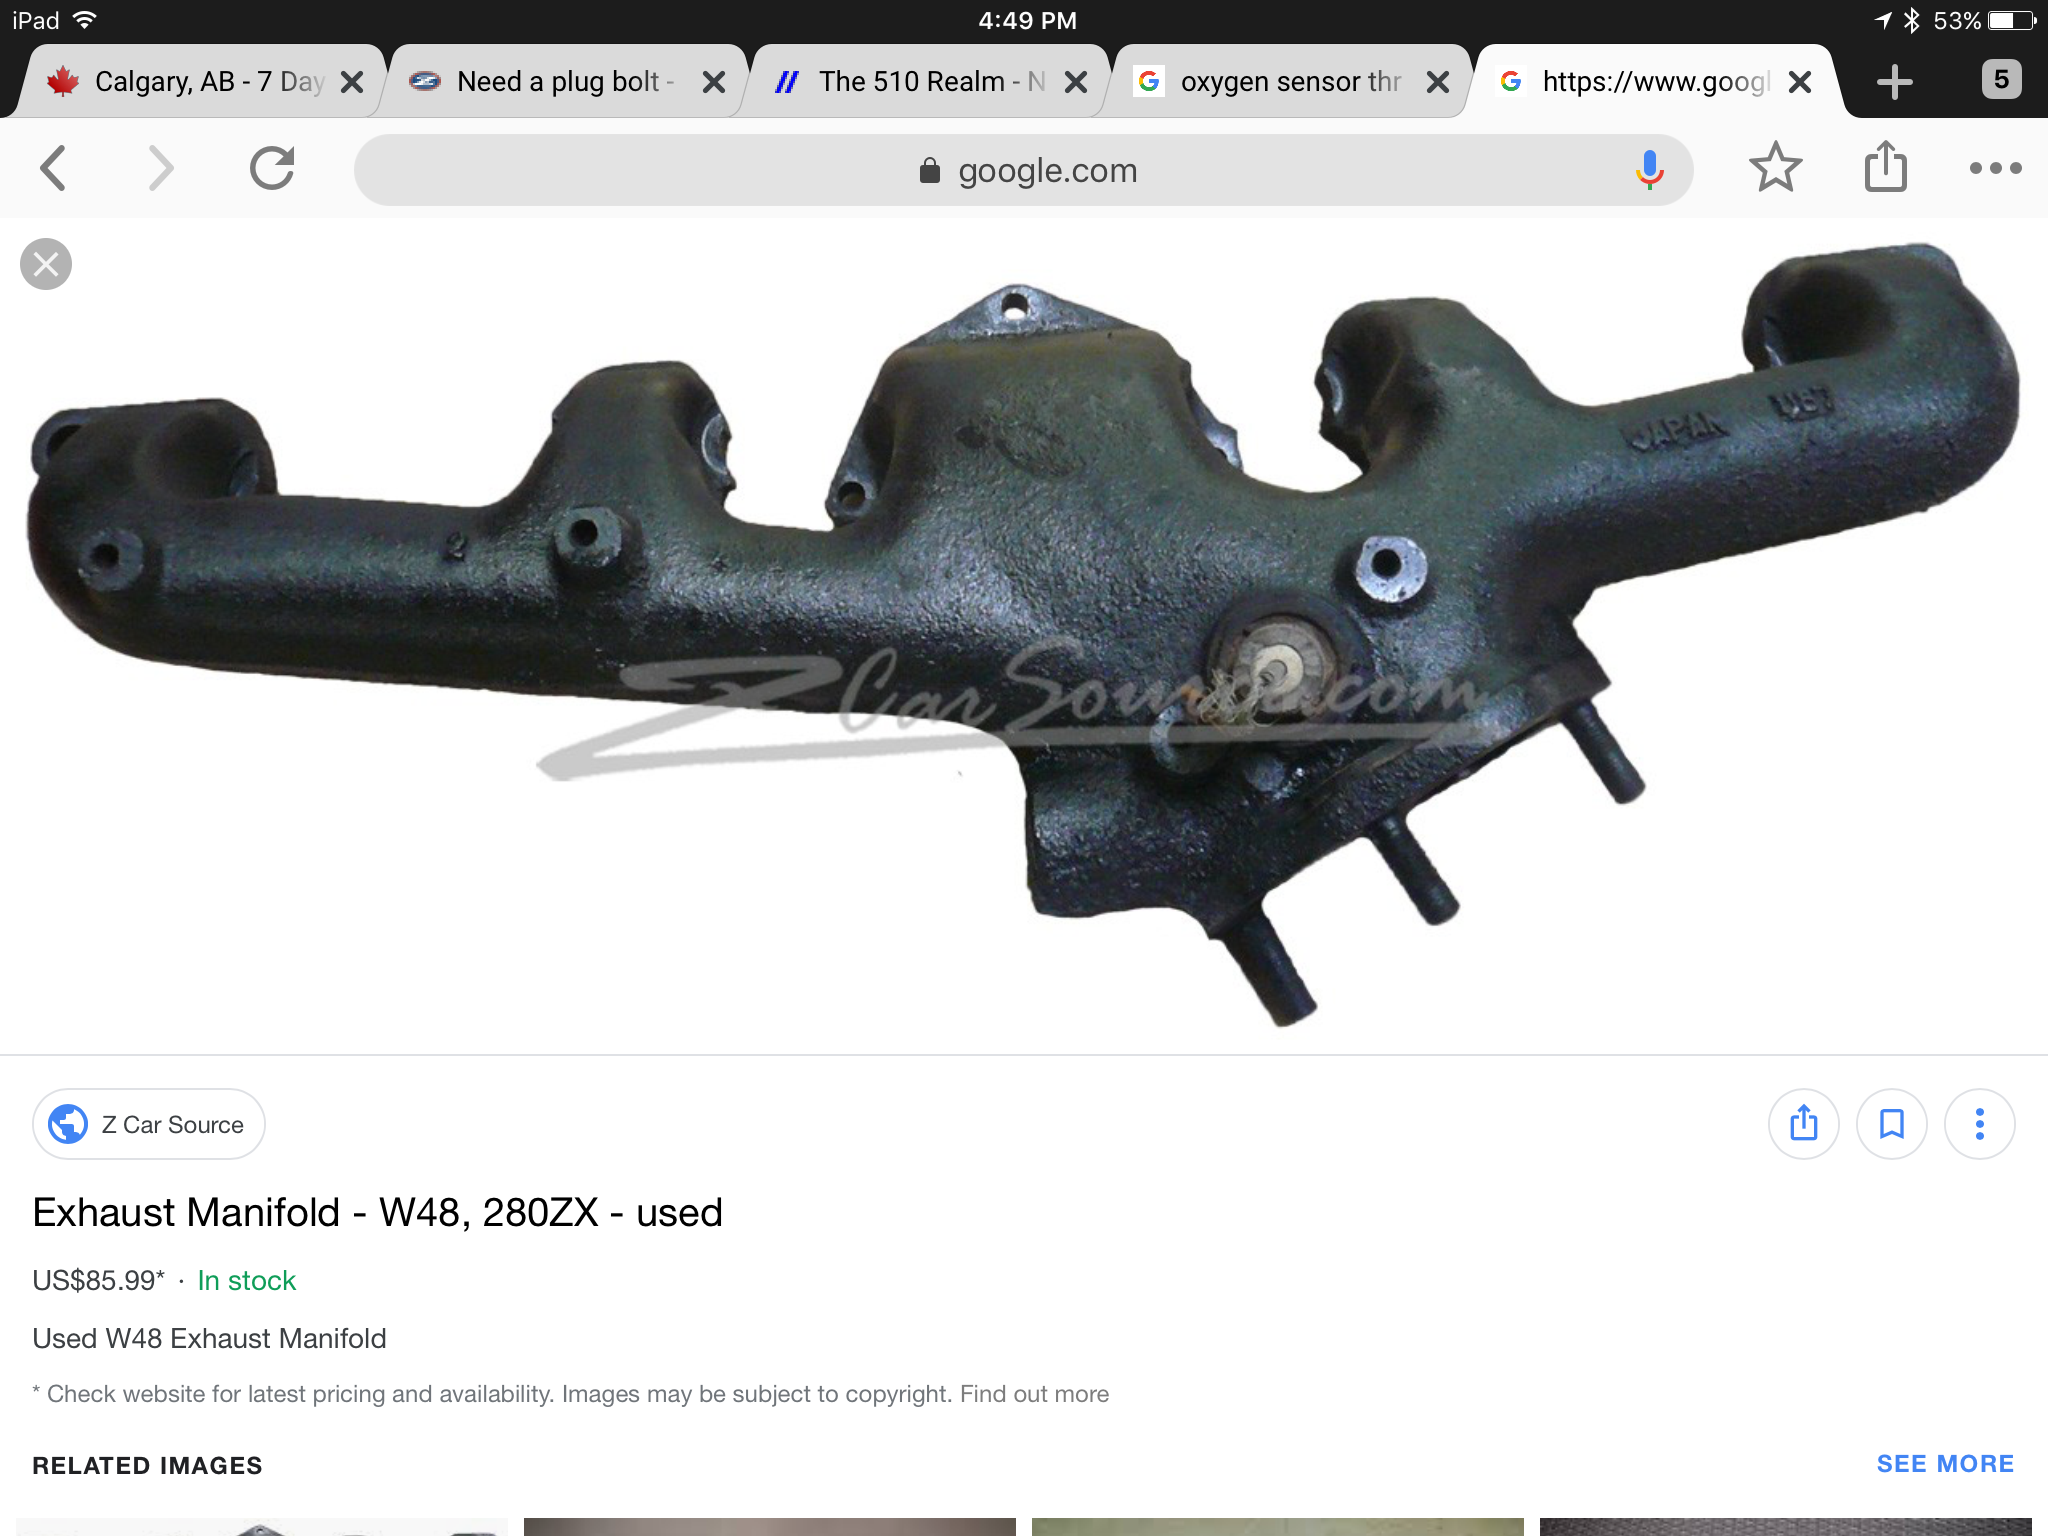
Is that not the narrow band O2 sensor location from a ZX manifold? Never seen an early manifold with a need for either an EGR fitting or O2 sensor that would explain that hole. Unless it was a later user added "feature" Anyway if its O2 bung thread, its M18x 1.5. https://www.google.com/search?q=280zx+exhaust+manifold&rlz=1C9BKJA_enCA668CA668&oq=280zx+exhaust+manifold&aqs=chrome..69i57j0l3.6099j1j7&hl=en-US&sourceid=chrome-mobile&ie=UTF-8#imgrc=wbMsjPBtTsxSnM:

-
Please indicate in what axis you feel play on the right. in and out, up and down? The copper washer has no effect on how the bearings sit in their seats or the compression of the distance piece. It does affect where the inner stub half sits when its all tight, in an in/out sense, ie spaces it out a bit, which might differ how it fits with the seal or interferes on the sides if the dust flange is bent or something. Bottom line, that dang washer has nothing to do with bearing fit, preload, rotation torque, or anything important. If you have entire axle play, the bearings are not seated or the inner stub is not touching or compressing the two bearings against the distance piece properly, and about the only way that washer can affect this is if is jamming on the shaft and some force you appliying is bending the washer and not applying compression to bearing inner race. You didn't enlarge that washer hole and put it between the distance piece and a bearing did you?
-
I'm going to use one in my 510 build this time around, I'll take it apart to clean it and let you know what I find. No doubt someone on amazon and or ebay has activated charcoal for sale.
-
So like magic, I get an email from eastwood just now announcing "Free shipping to Canada" for orders over $99 Clearly they felt they had to do something given the policy change.
-
-
The ground is in the fuel sender/fuel pump harness that goes through the hatch floor just beside the right rear tail light. It attaches to bolt that goes into the side of the frame rail above the tank. Totally inaccessible without removing the tank. If you think that lug is corroded, you are right. Just splice into the black wire above where it goes down below the hatch floor and make a new ground connection near the tail light. Sheet metal screw about 3 inches long should go right into the gas tank if you aim it right
-
Have to dig it up, but I bought a new (not reman) rack with inner tie rods from an outfit on ebay couple of years back. It was ~$275 USD back then. Why hunt for $200 parts? Oh yes, their ebay name is carsteering https://www.ebay.ca/usr/carsteering?_trksid=p2057872.m2749.l2754 Or https://www.jegs.com/i/Rare+Parts/202/RP26575/10002/-1
-
Just cuz I'm in the mood to stir up trouble, I have an observation about this diff getting moved to solve a rear end vibration or u-joint wear issue. The 510 IRS has it's half shafts in the supposed "bad" position with the wheel hubs behind the diff flanges by just about the same amount as the early Z's had. Ie, half shafts not 90 to diff. Nothing was ever done or said about vibration problems or u-joints prematurely wearing out in 510s (and later 610s). Me thinks there is more to the Z issue than has been revealed. I smell a Gosher style cover up.... Back to regular programming....
-
Fresh lock washers (and correct torque) are your best moves to keep that clutch on there. Lock tite is overkill in this application. Won't hurt a thing if you use it.
-
-
-
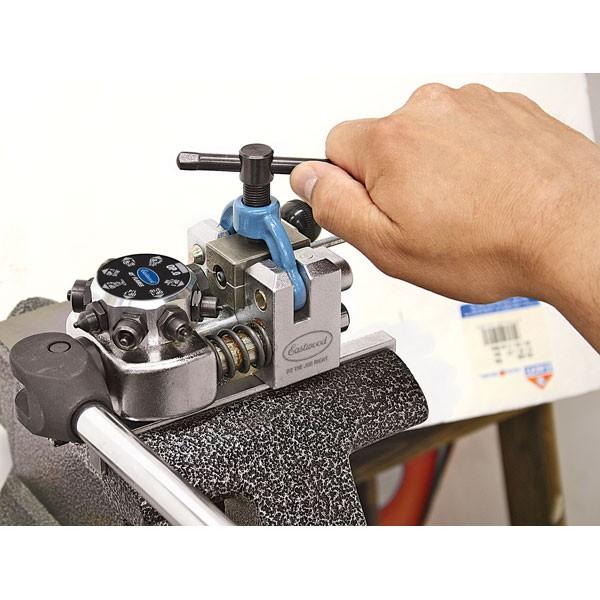
So I've been busy okay? But yesterday I finally got the eastwood tool out and have to report I like it more than the FedHill tool. Makes the same high quality flares, but it has features which makes it easier to use too. The clamp release is faster and easier to use, and the unique feature that helps you "zero" the tube position at the beginning of the operation is so slick. There is a flat face on the turret that you use to push the tubing flush with the die block, rather than the Fedhill tool that makes you either visually line it up, or use some other flat 'thing' to manually set the start position. It even breaks down for storage more easily. Pretty slick system. All this said, my Fedhill tool is pretty slick compared to most of the other tools out there. It's still available. While I'm here, I have to mention the tool I use when I have to make on-the-car flares. The picture of it below gives you the idea. It's well made, makes good flares. Eastwood has one, I bought mine from Ebay. Now if someone would come up with a system that reminds me to put the nut on the tubing, THEN make the flare...


-
Are you sure you have the right release bearing sleeve length? Do you have an adjustable length clutch arm rod? Ie arm with the hole in it that the slave rod pokes through?
-
The clutch may not be releasing completely if its hard to shift in all gears.
-
I have a few of those. z240@shaw.ca and we'll get some on the way.
-
Still waiting for someone to do the six SU setup. Using the 38mm SSS carbs should be big enough. Then I'll be impressed.
-
McMasterCarr.com has a poop load of springs. I've used an inner valve spring on my 4 door, it's close, but actually not stiff enough.