zKars
 Subscriber
-
Posts
3,743 -
Joined
-
Last visited
-
Days Won
107
Content Type
Profiles
Knowledge Base
Zcar Wiki
Forums
Gallery
Events
Downloads
Store
Blogs
Collections
Classifieds
Everything posted by zKars
-
There is commercial source for these, and it has been discussed here a year or so ago. Sorry can't find it at the moment, just to give you hope that you may be able to find them.
-
Glad it arrived in good shape. I did replace the connector shell, the old one was pretty grungy as can be see seen in the picture above. Just couldn't ship it that way. No more of these here!
-
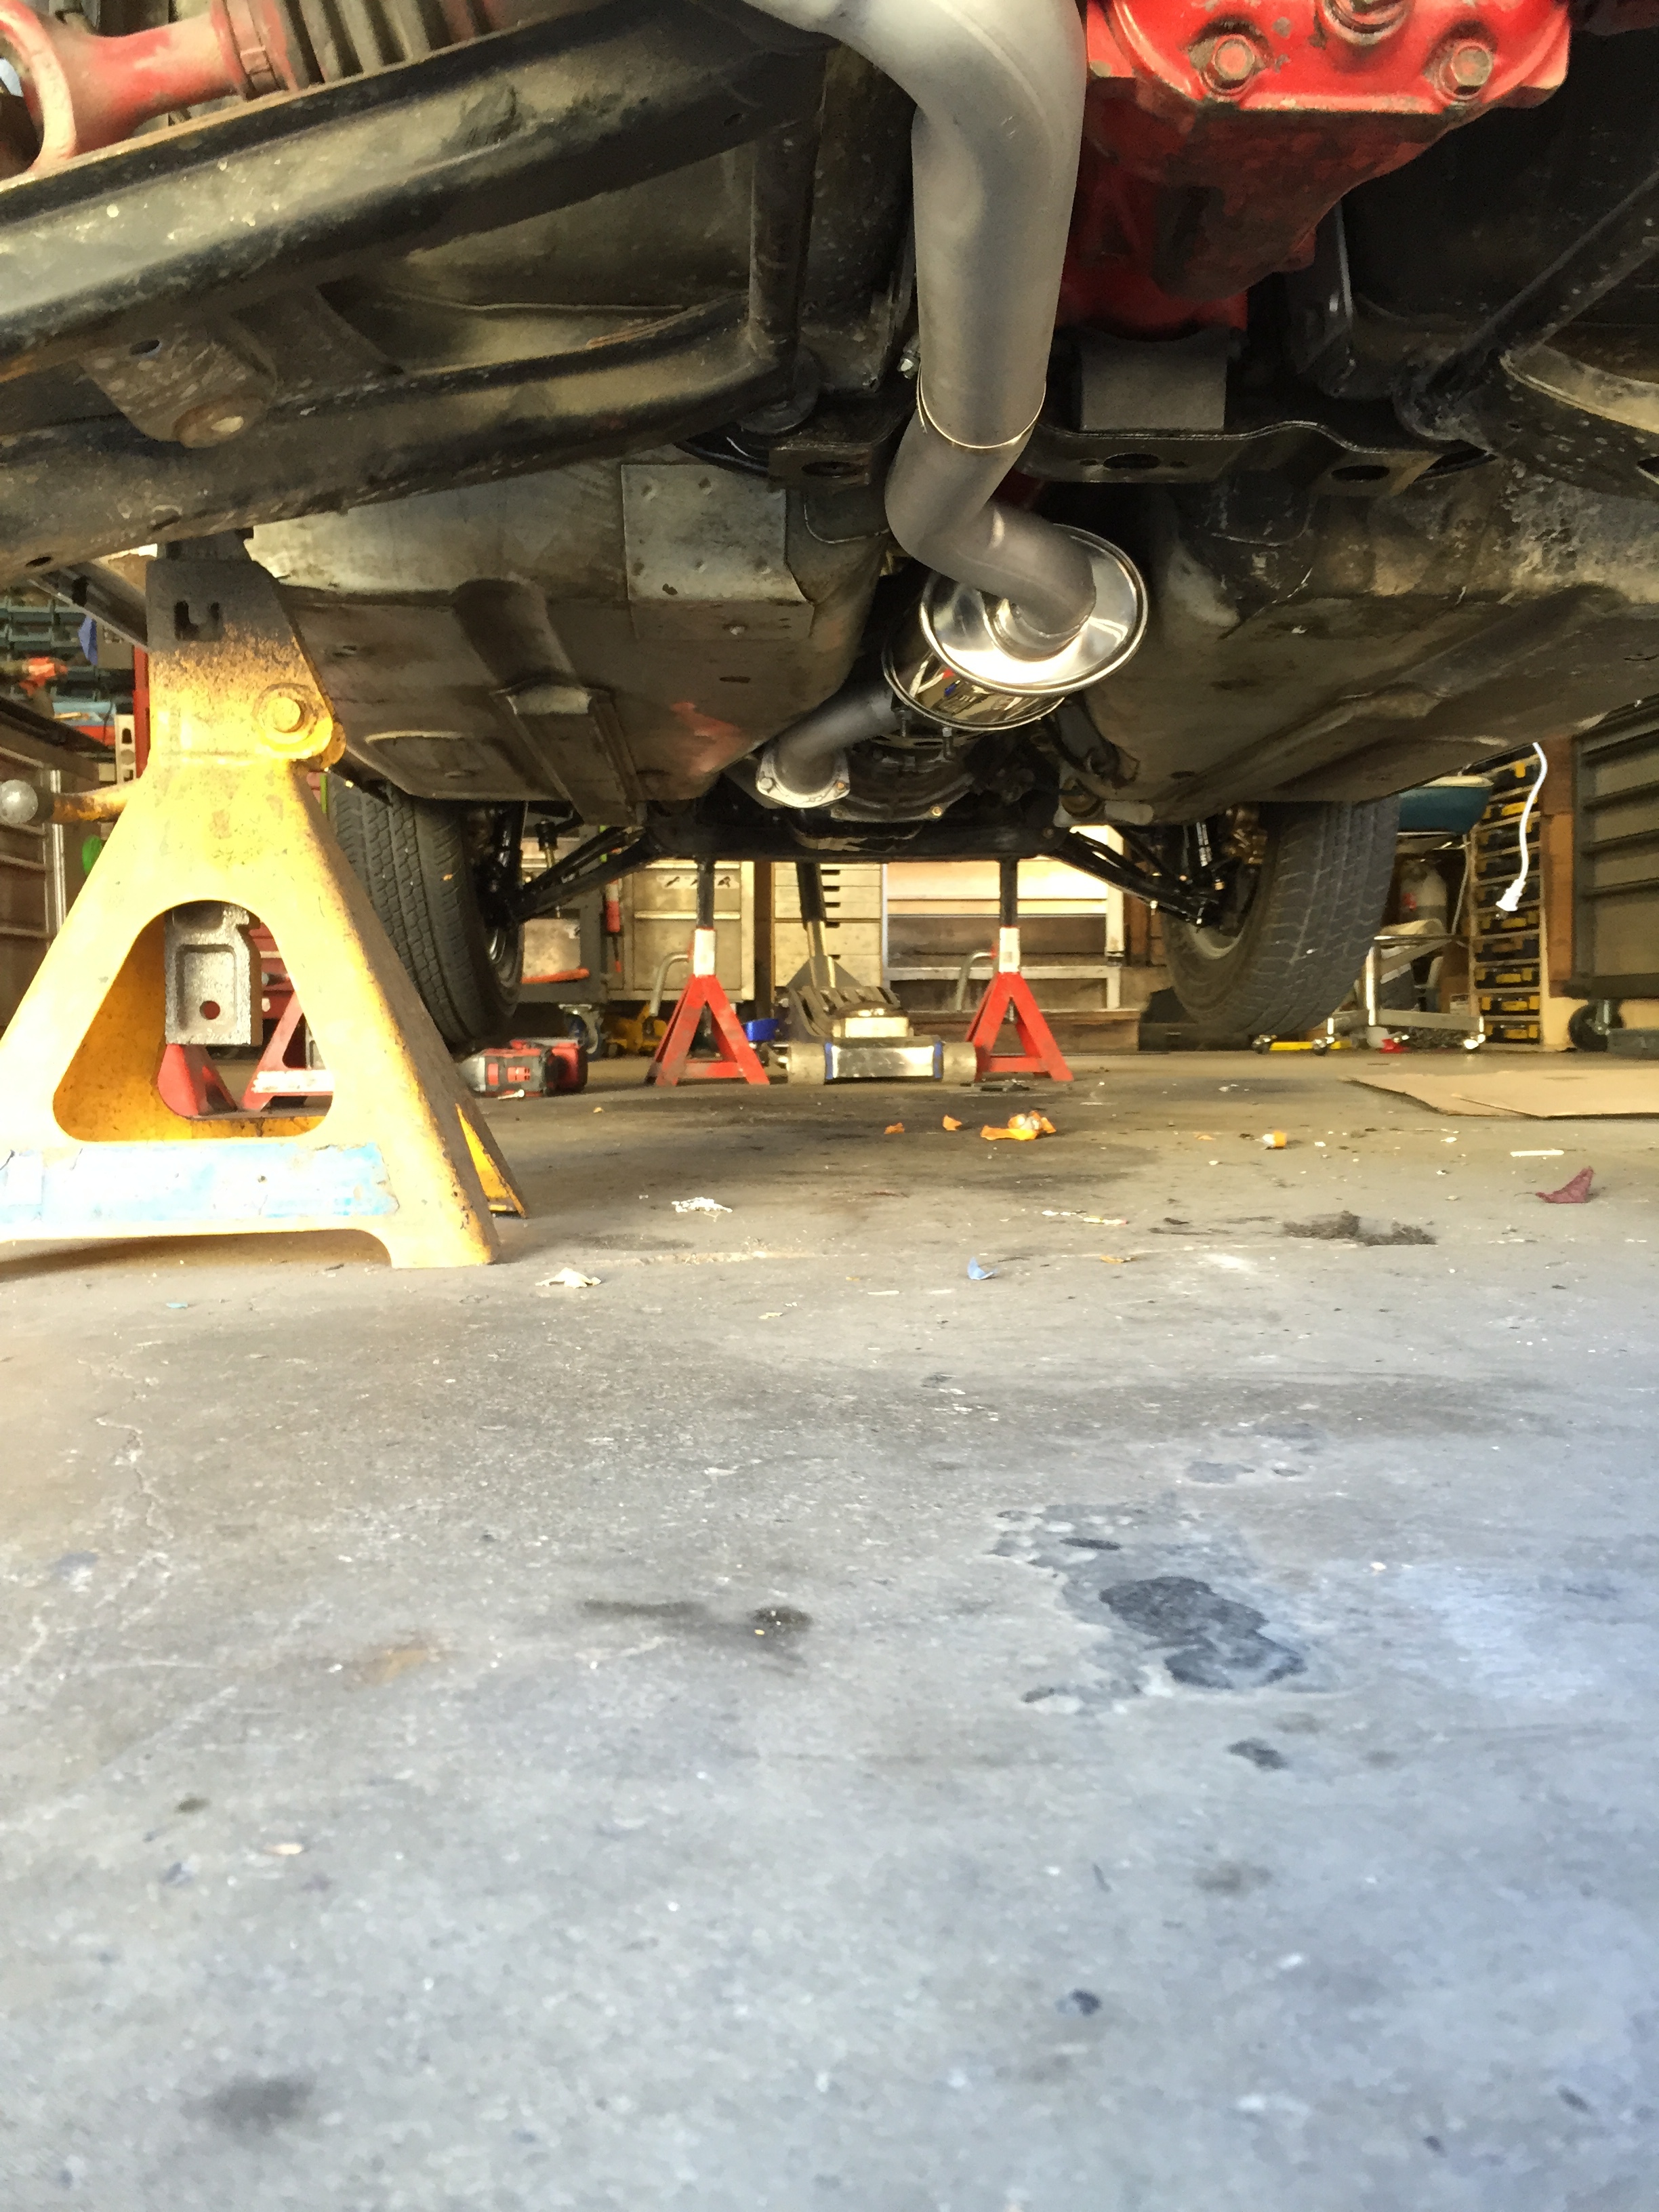
They are both flow through. The resonator is 2.25 and the muff 2.5. No buyers yet. Going to a car show tomorrow out in Radium BC so the 73 still thinks I like it, then will get to proper advertising next week.
-
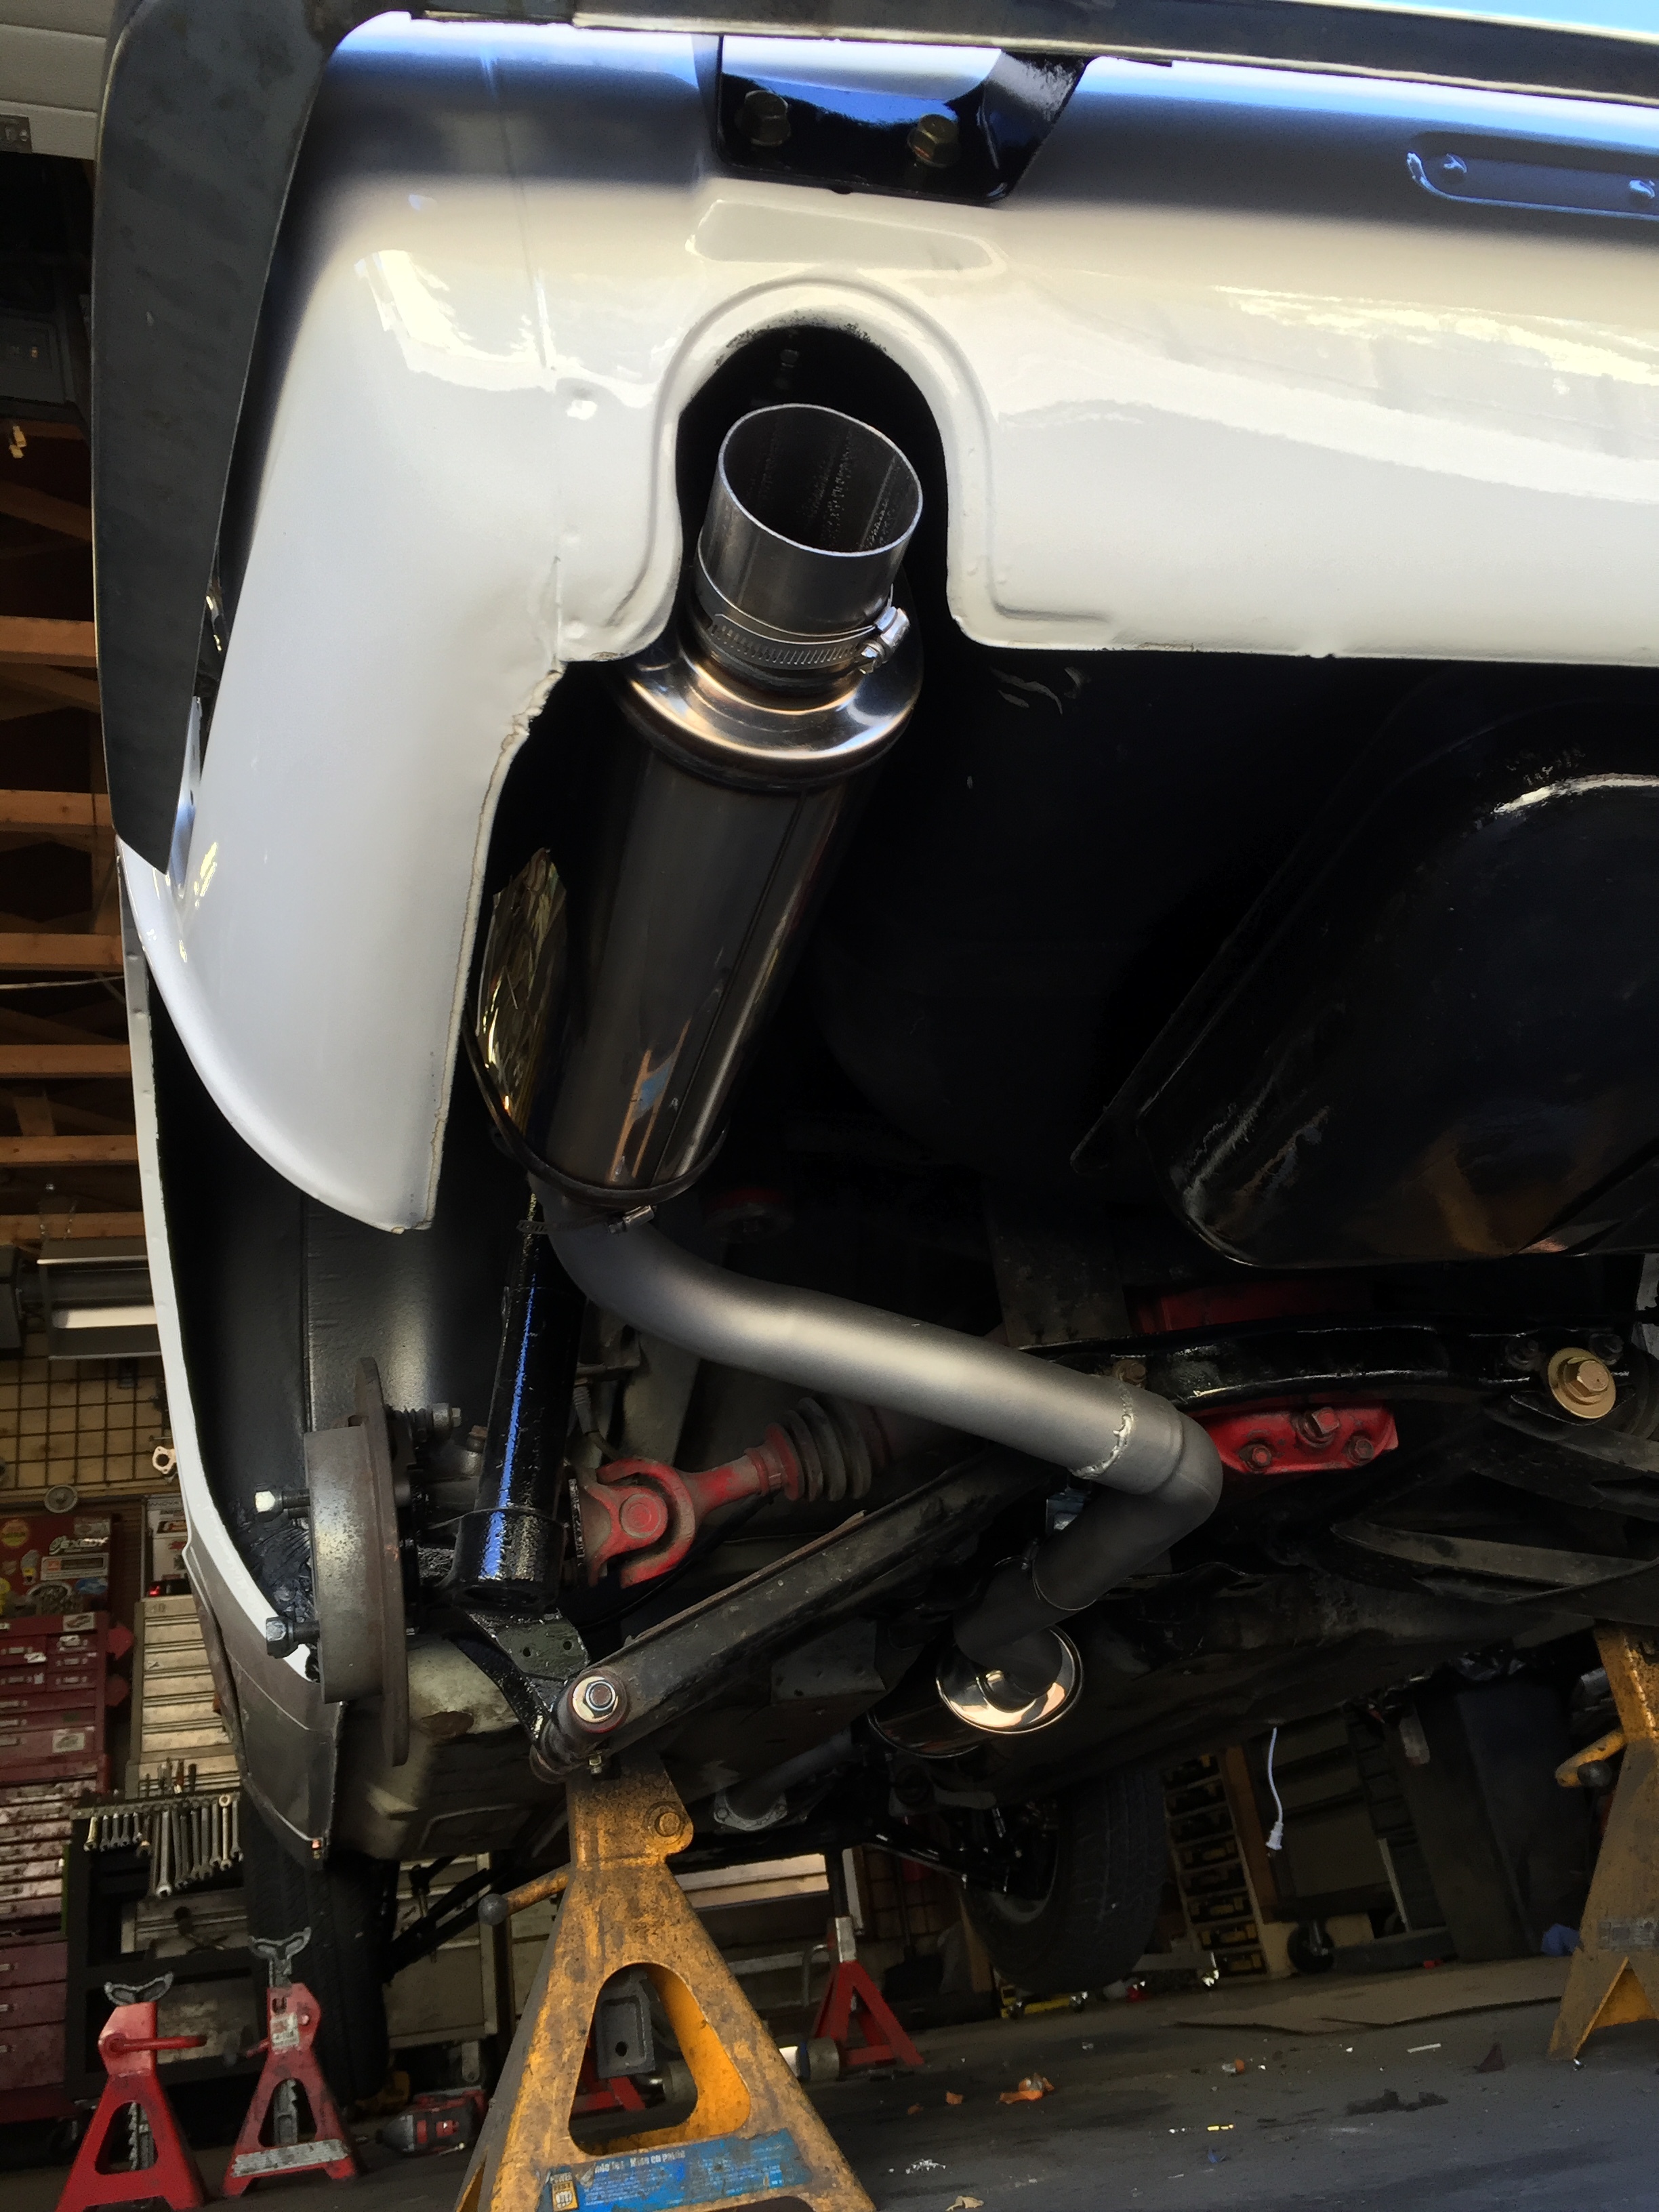
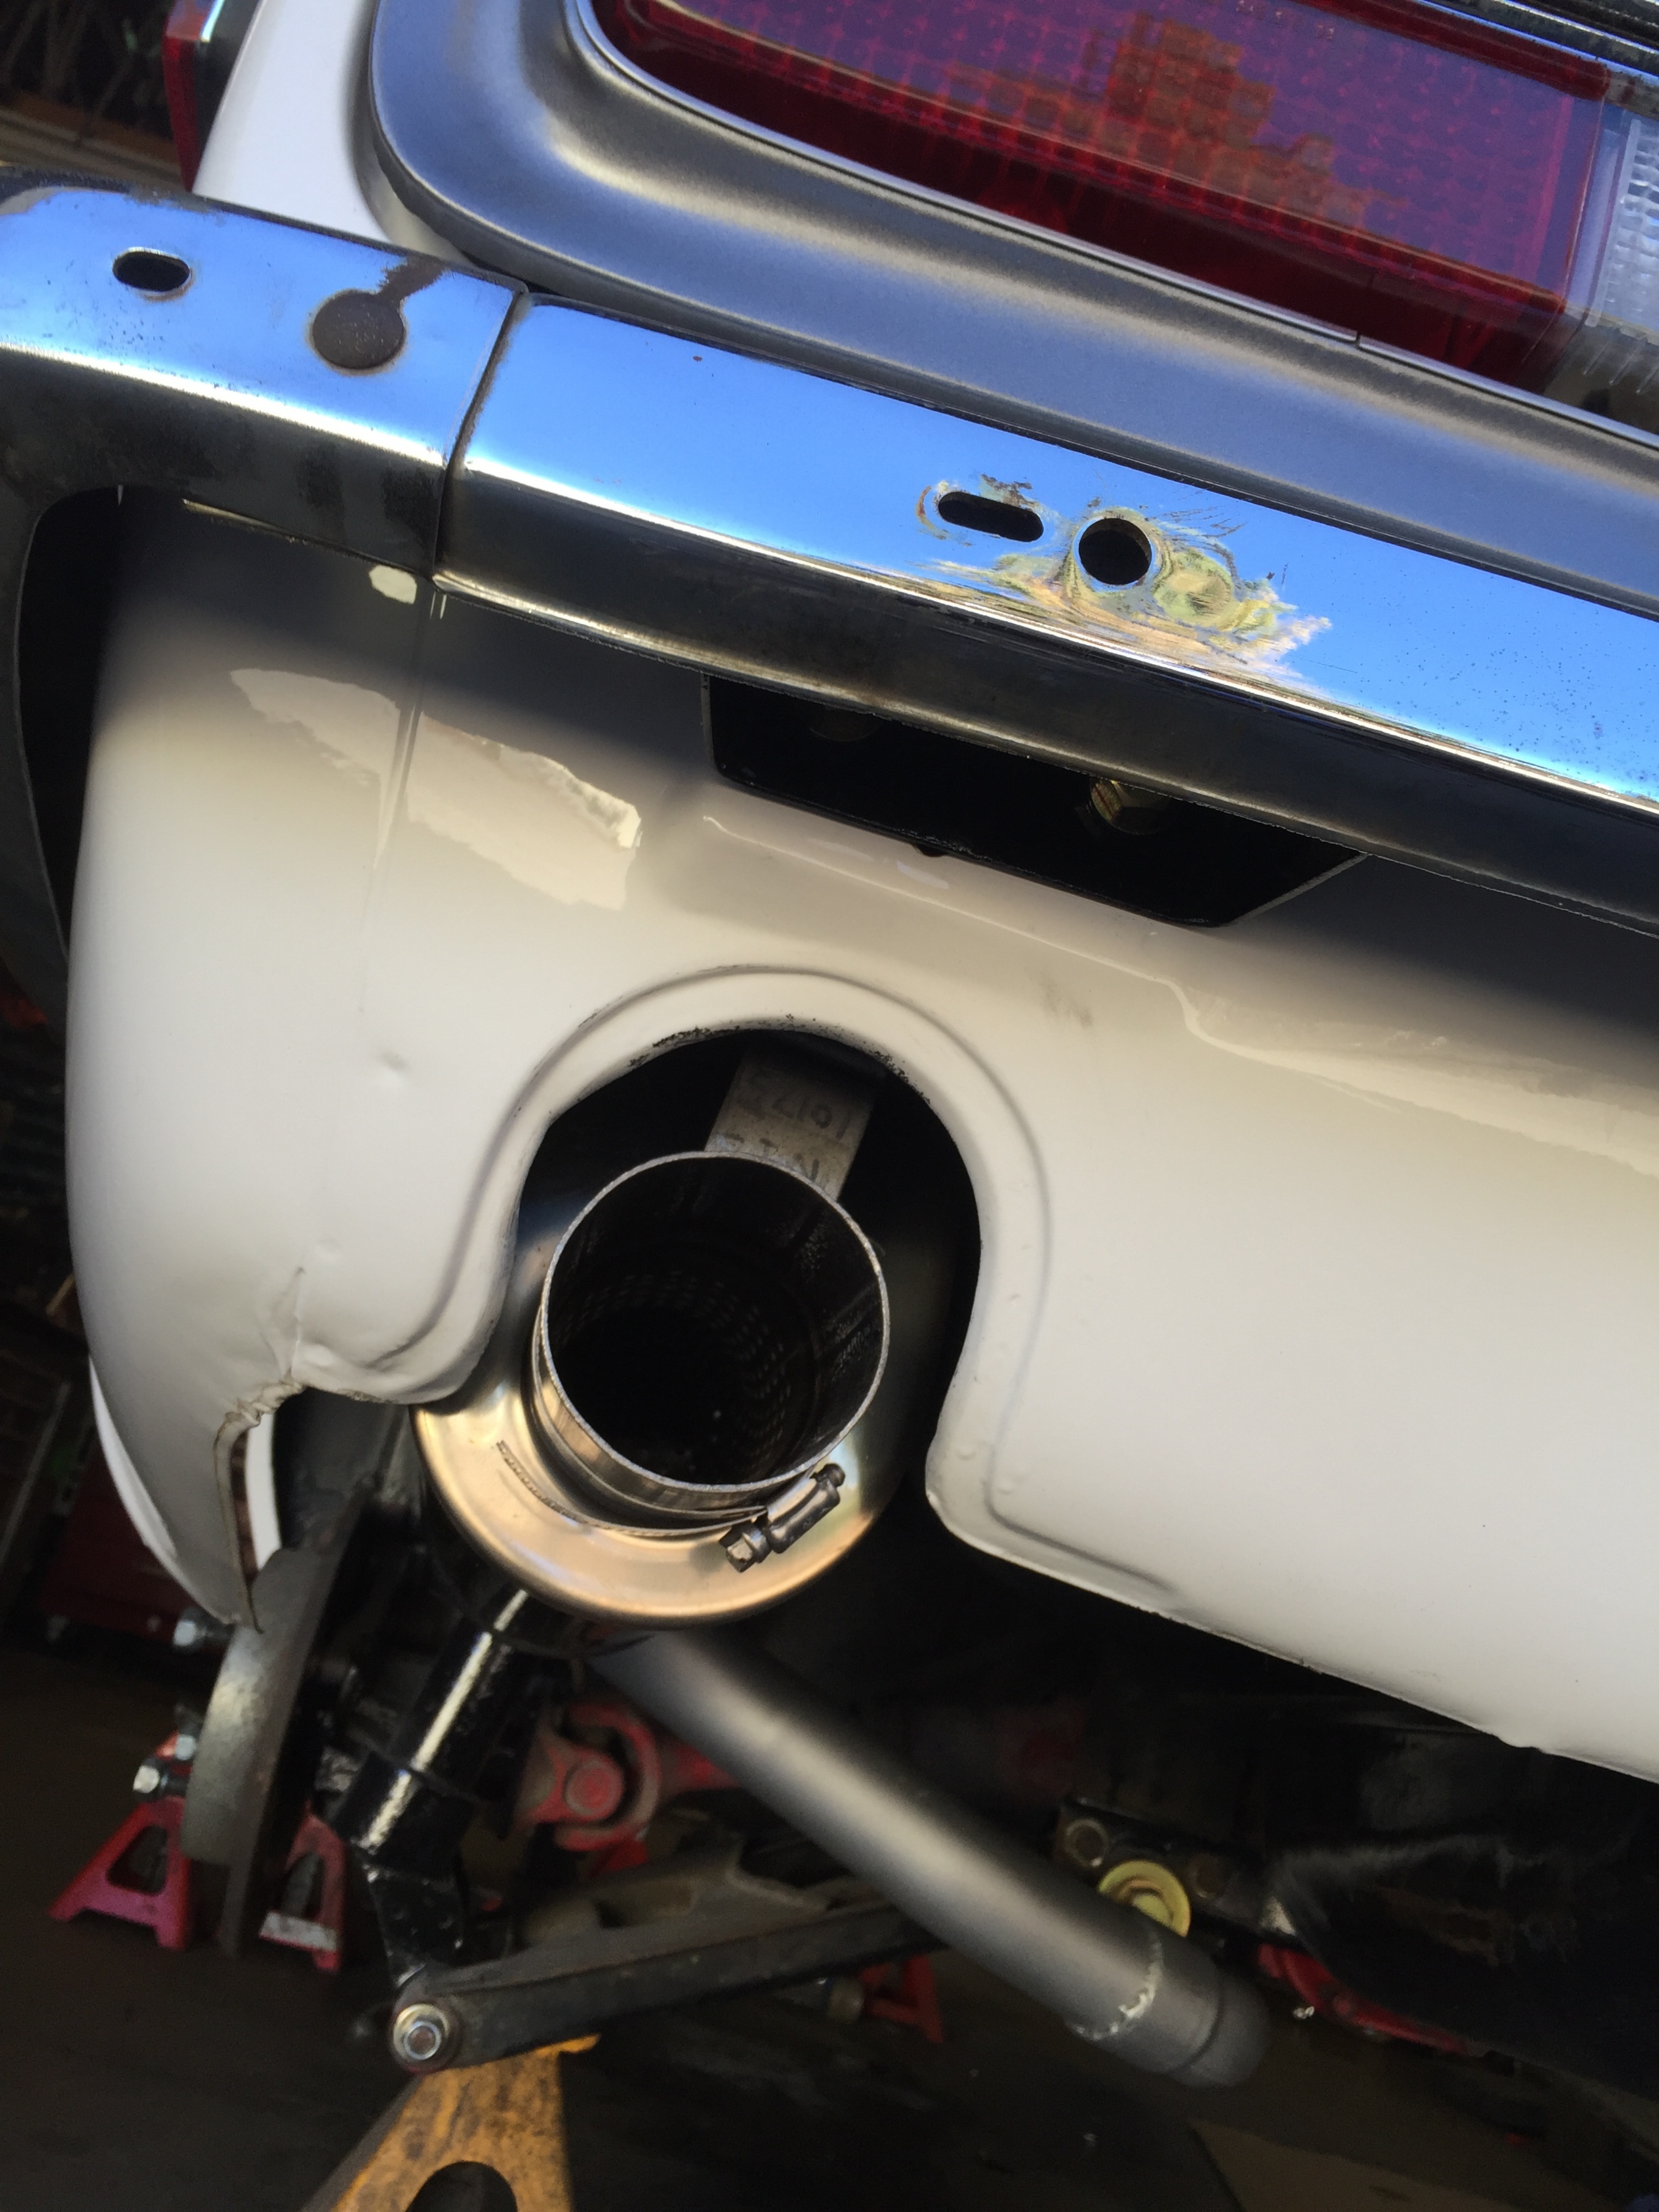
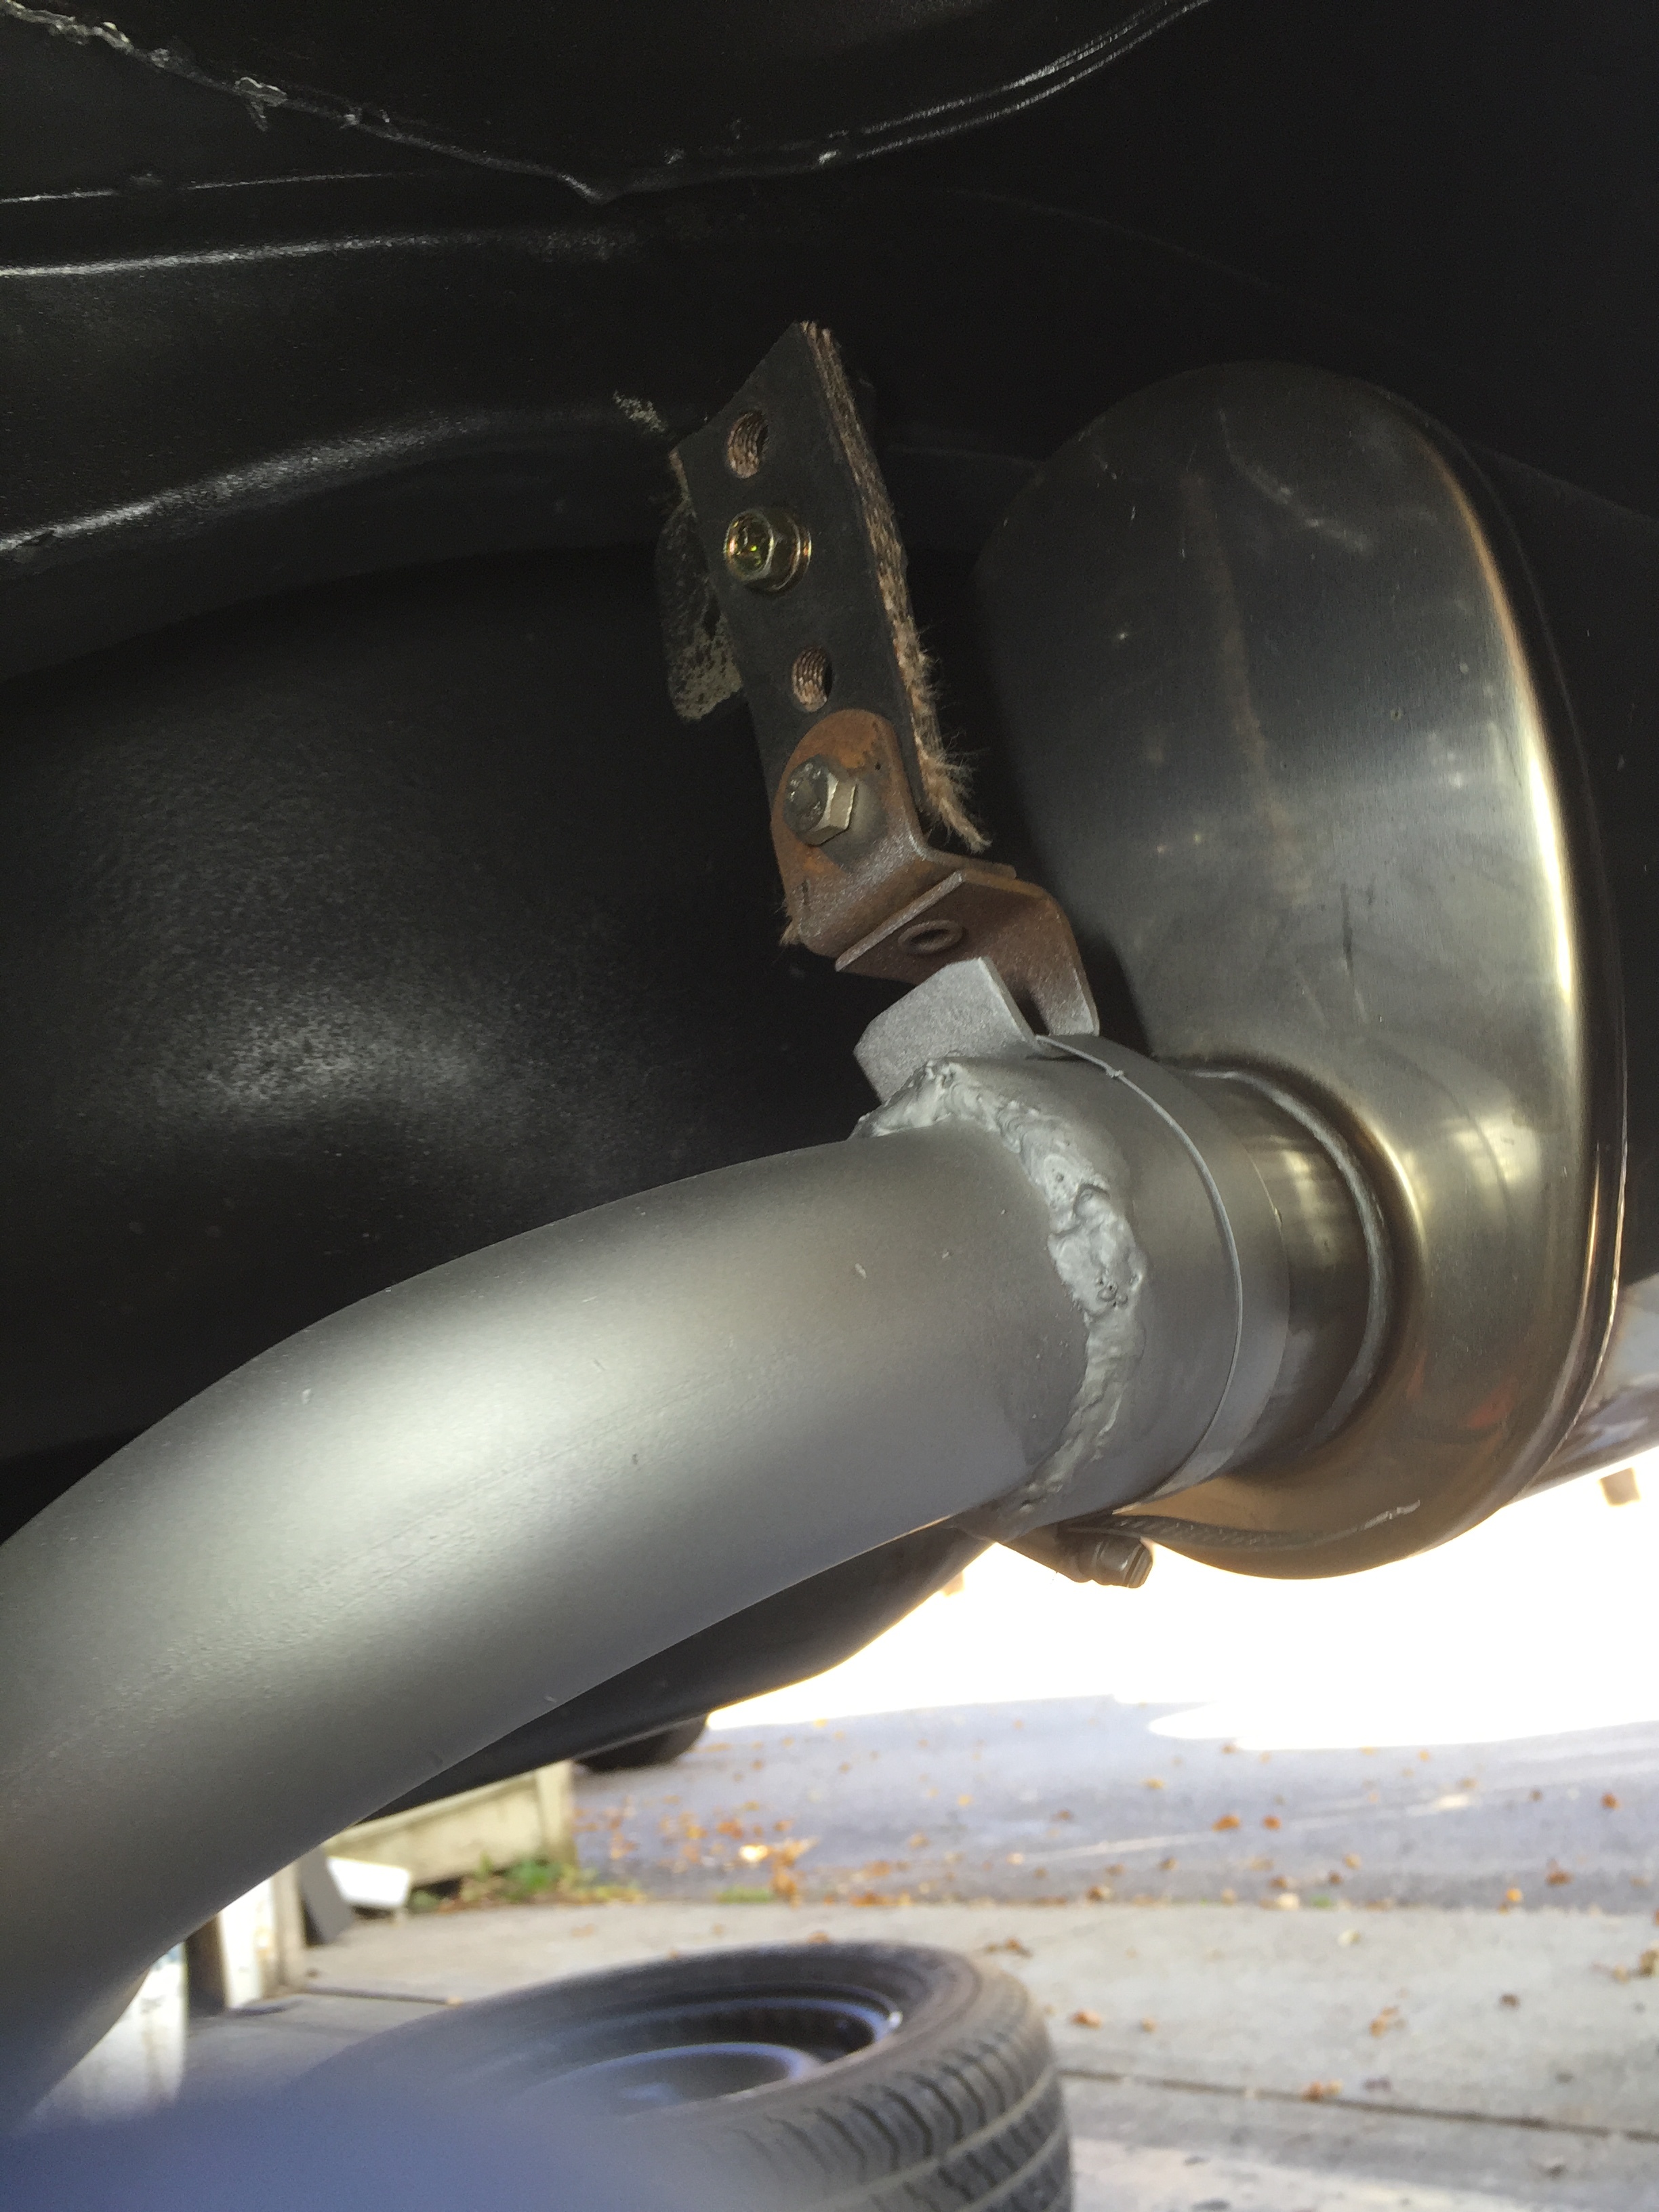
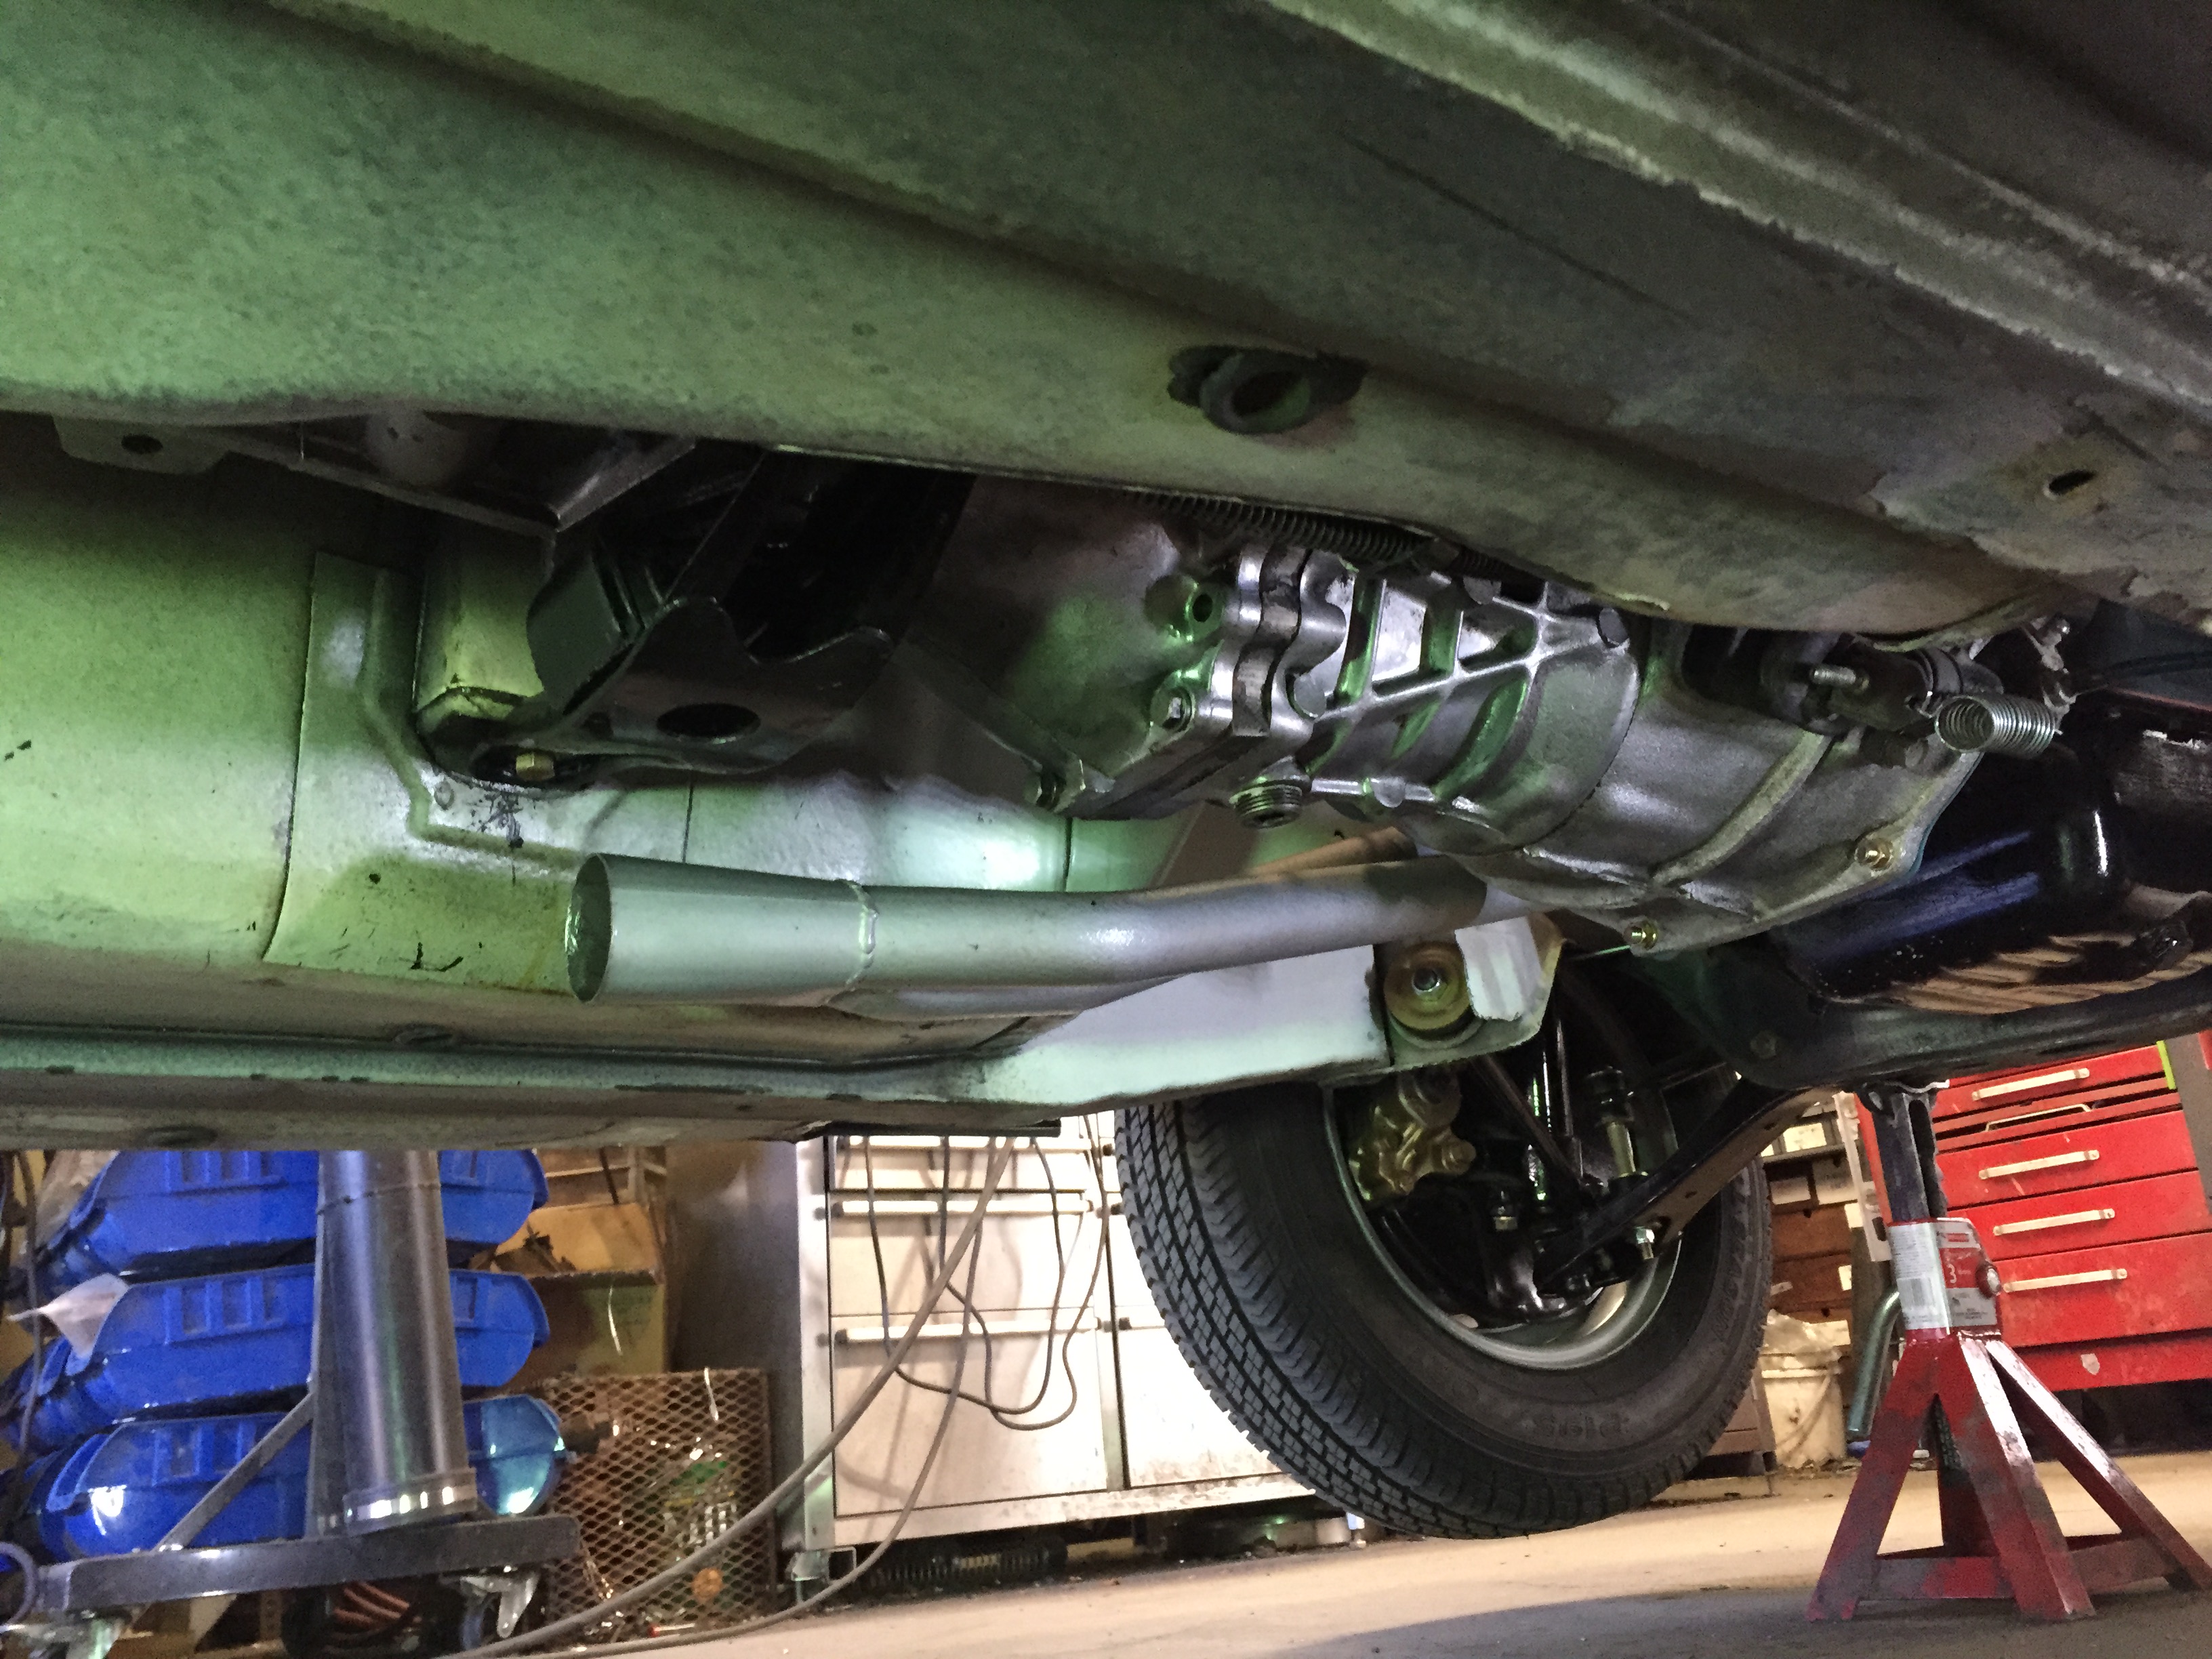
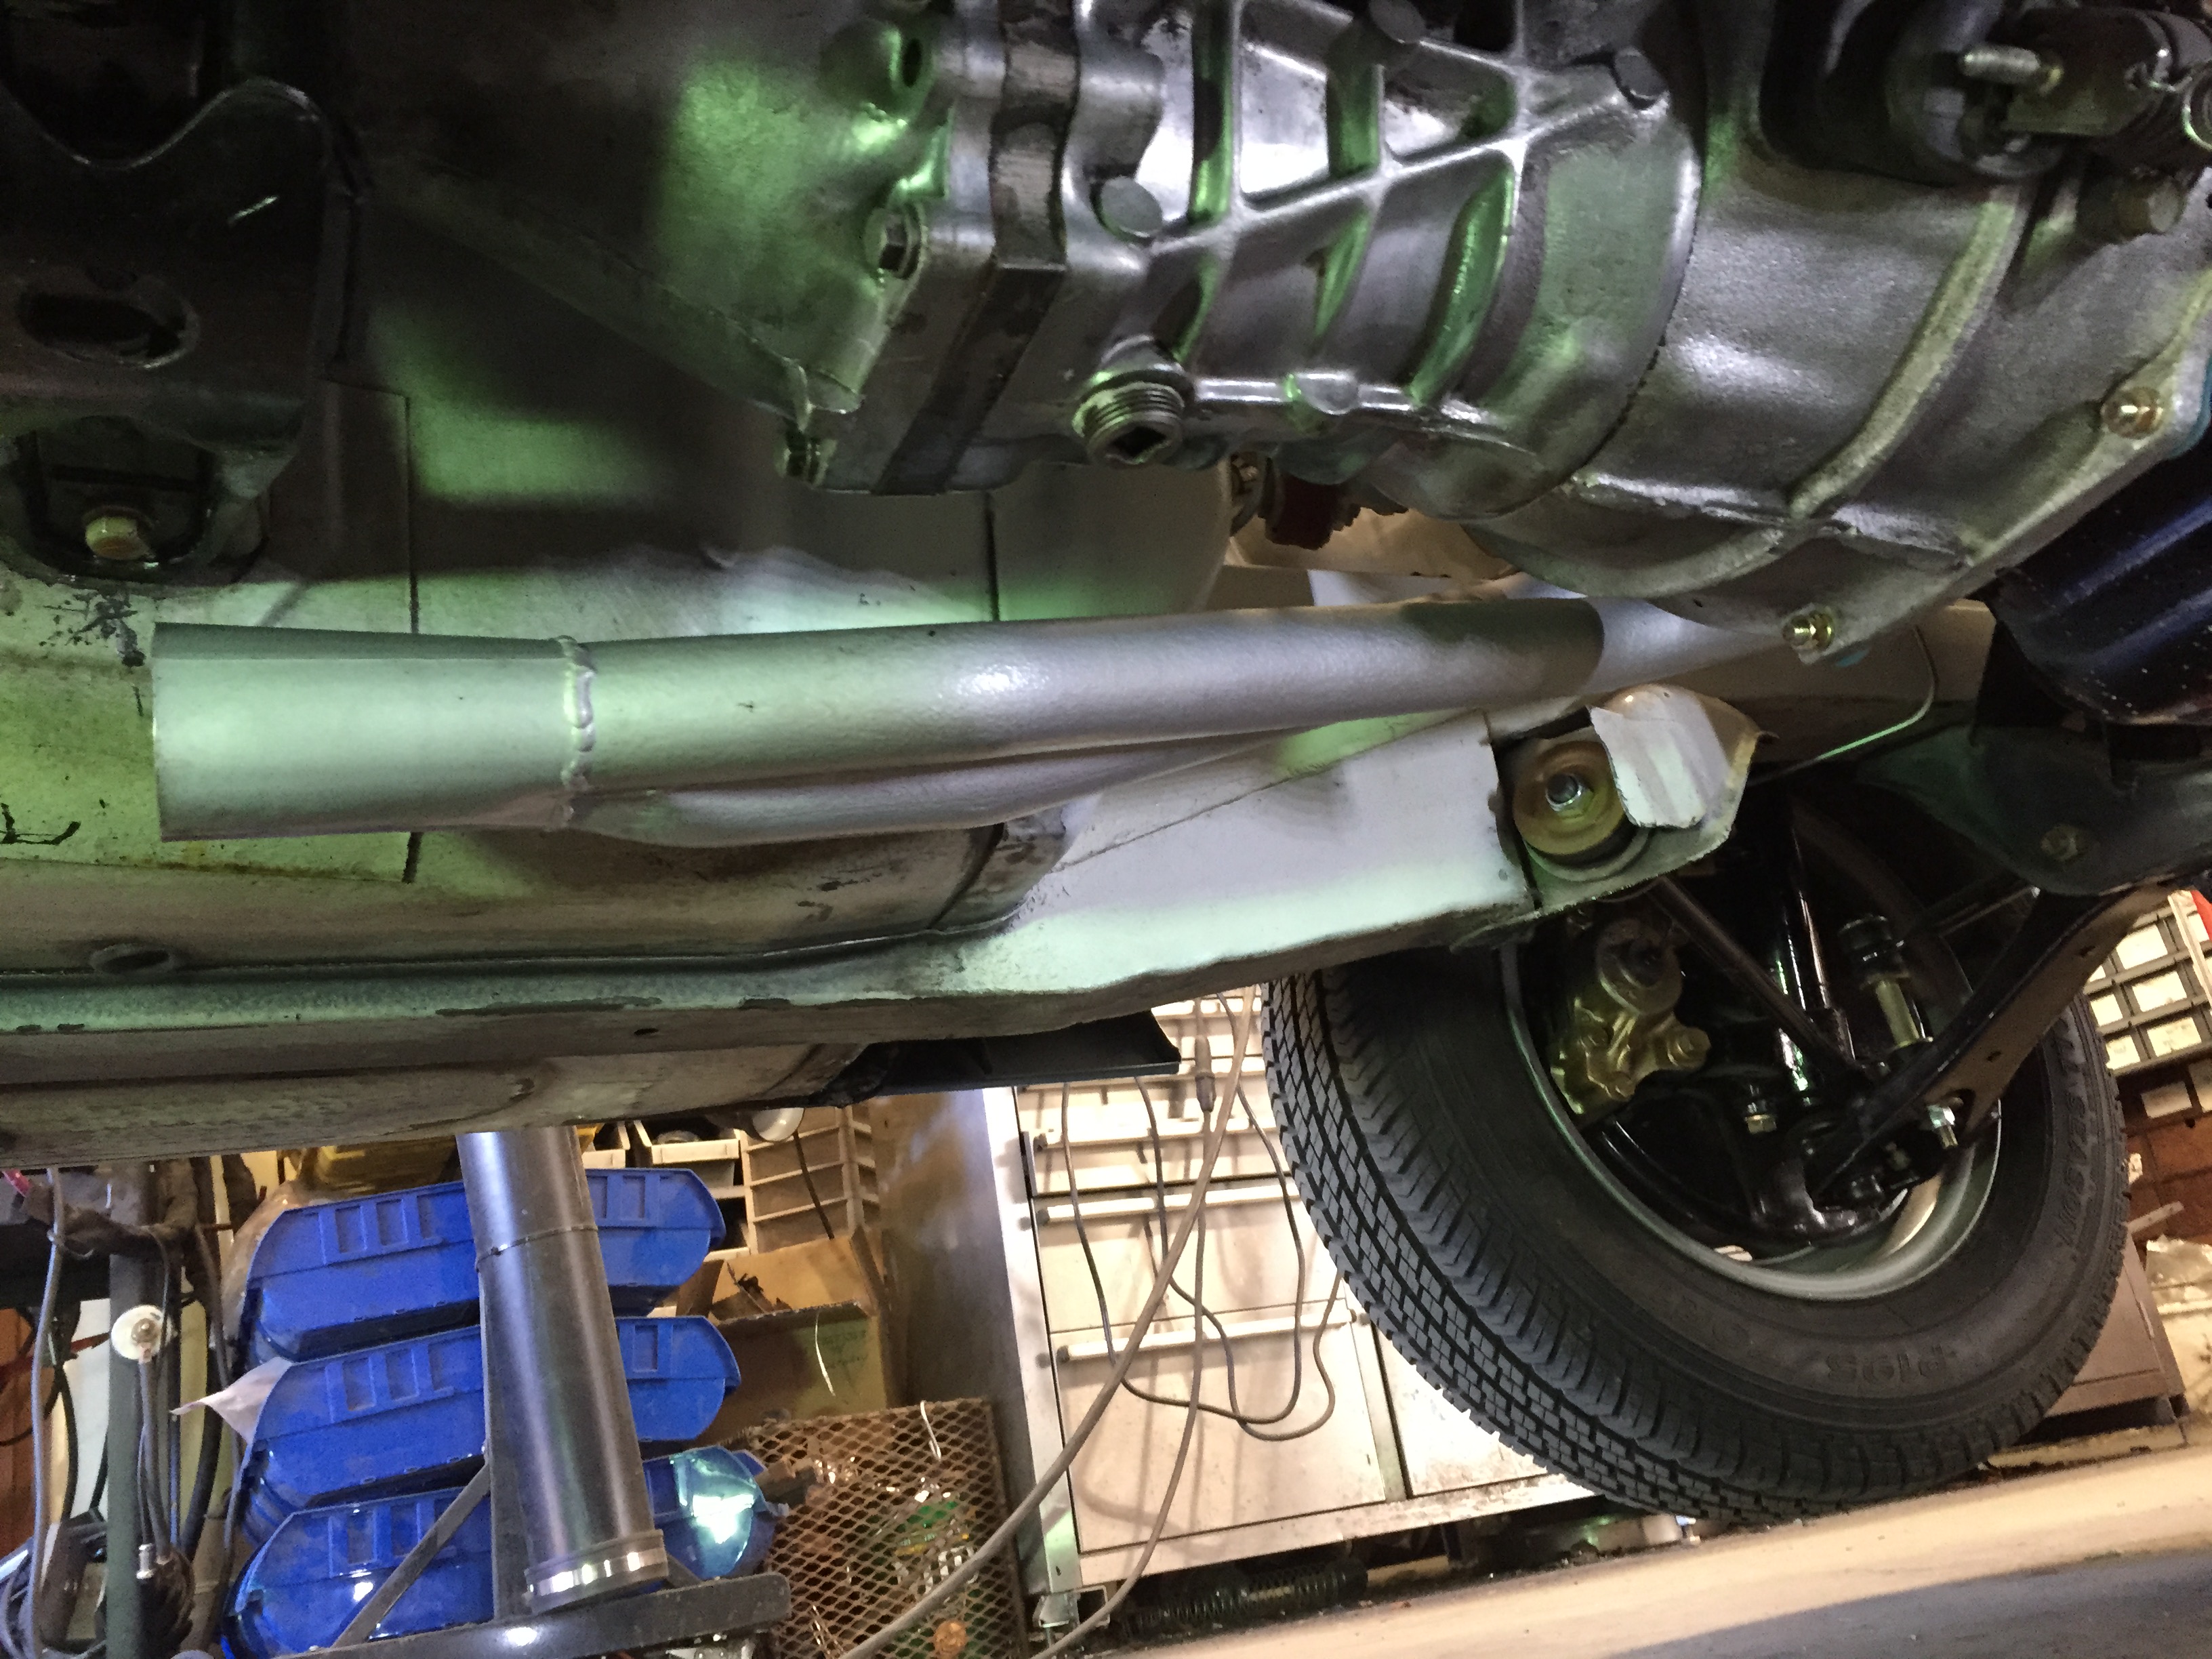
Muffler work is complete. Main muffler is a stainless Magnaflow 14211 and the resonator is a Vibrant 1140 "Ultra Quiet" The fitment of the muffler is fantastic. It is standing upright and looks totally tucked from the rear. Both inlet and outlet are offset to the same side. The resonator is about as wide as it can be. Wish it came in double offset, the in and out pipes would not have to be as curved. Just have to find a nice tip. The sound is fantastic. Quiet'ish at idle and cruise but has a good sound under power, but not loud or obnoxious. I see more cleaning I need to do... sigh....


-

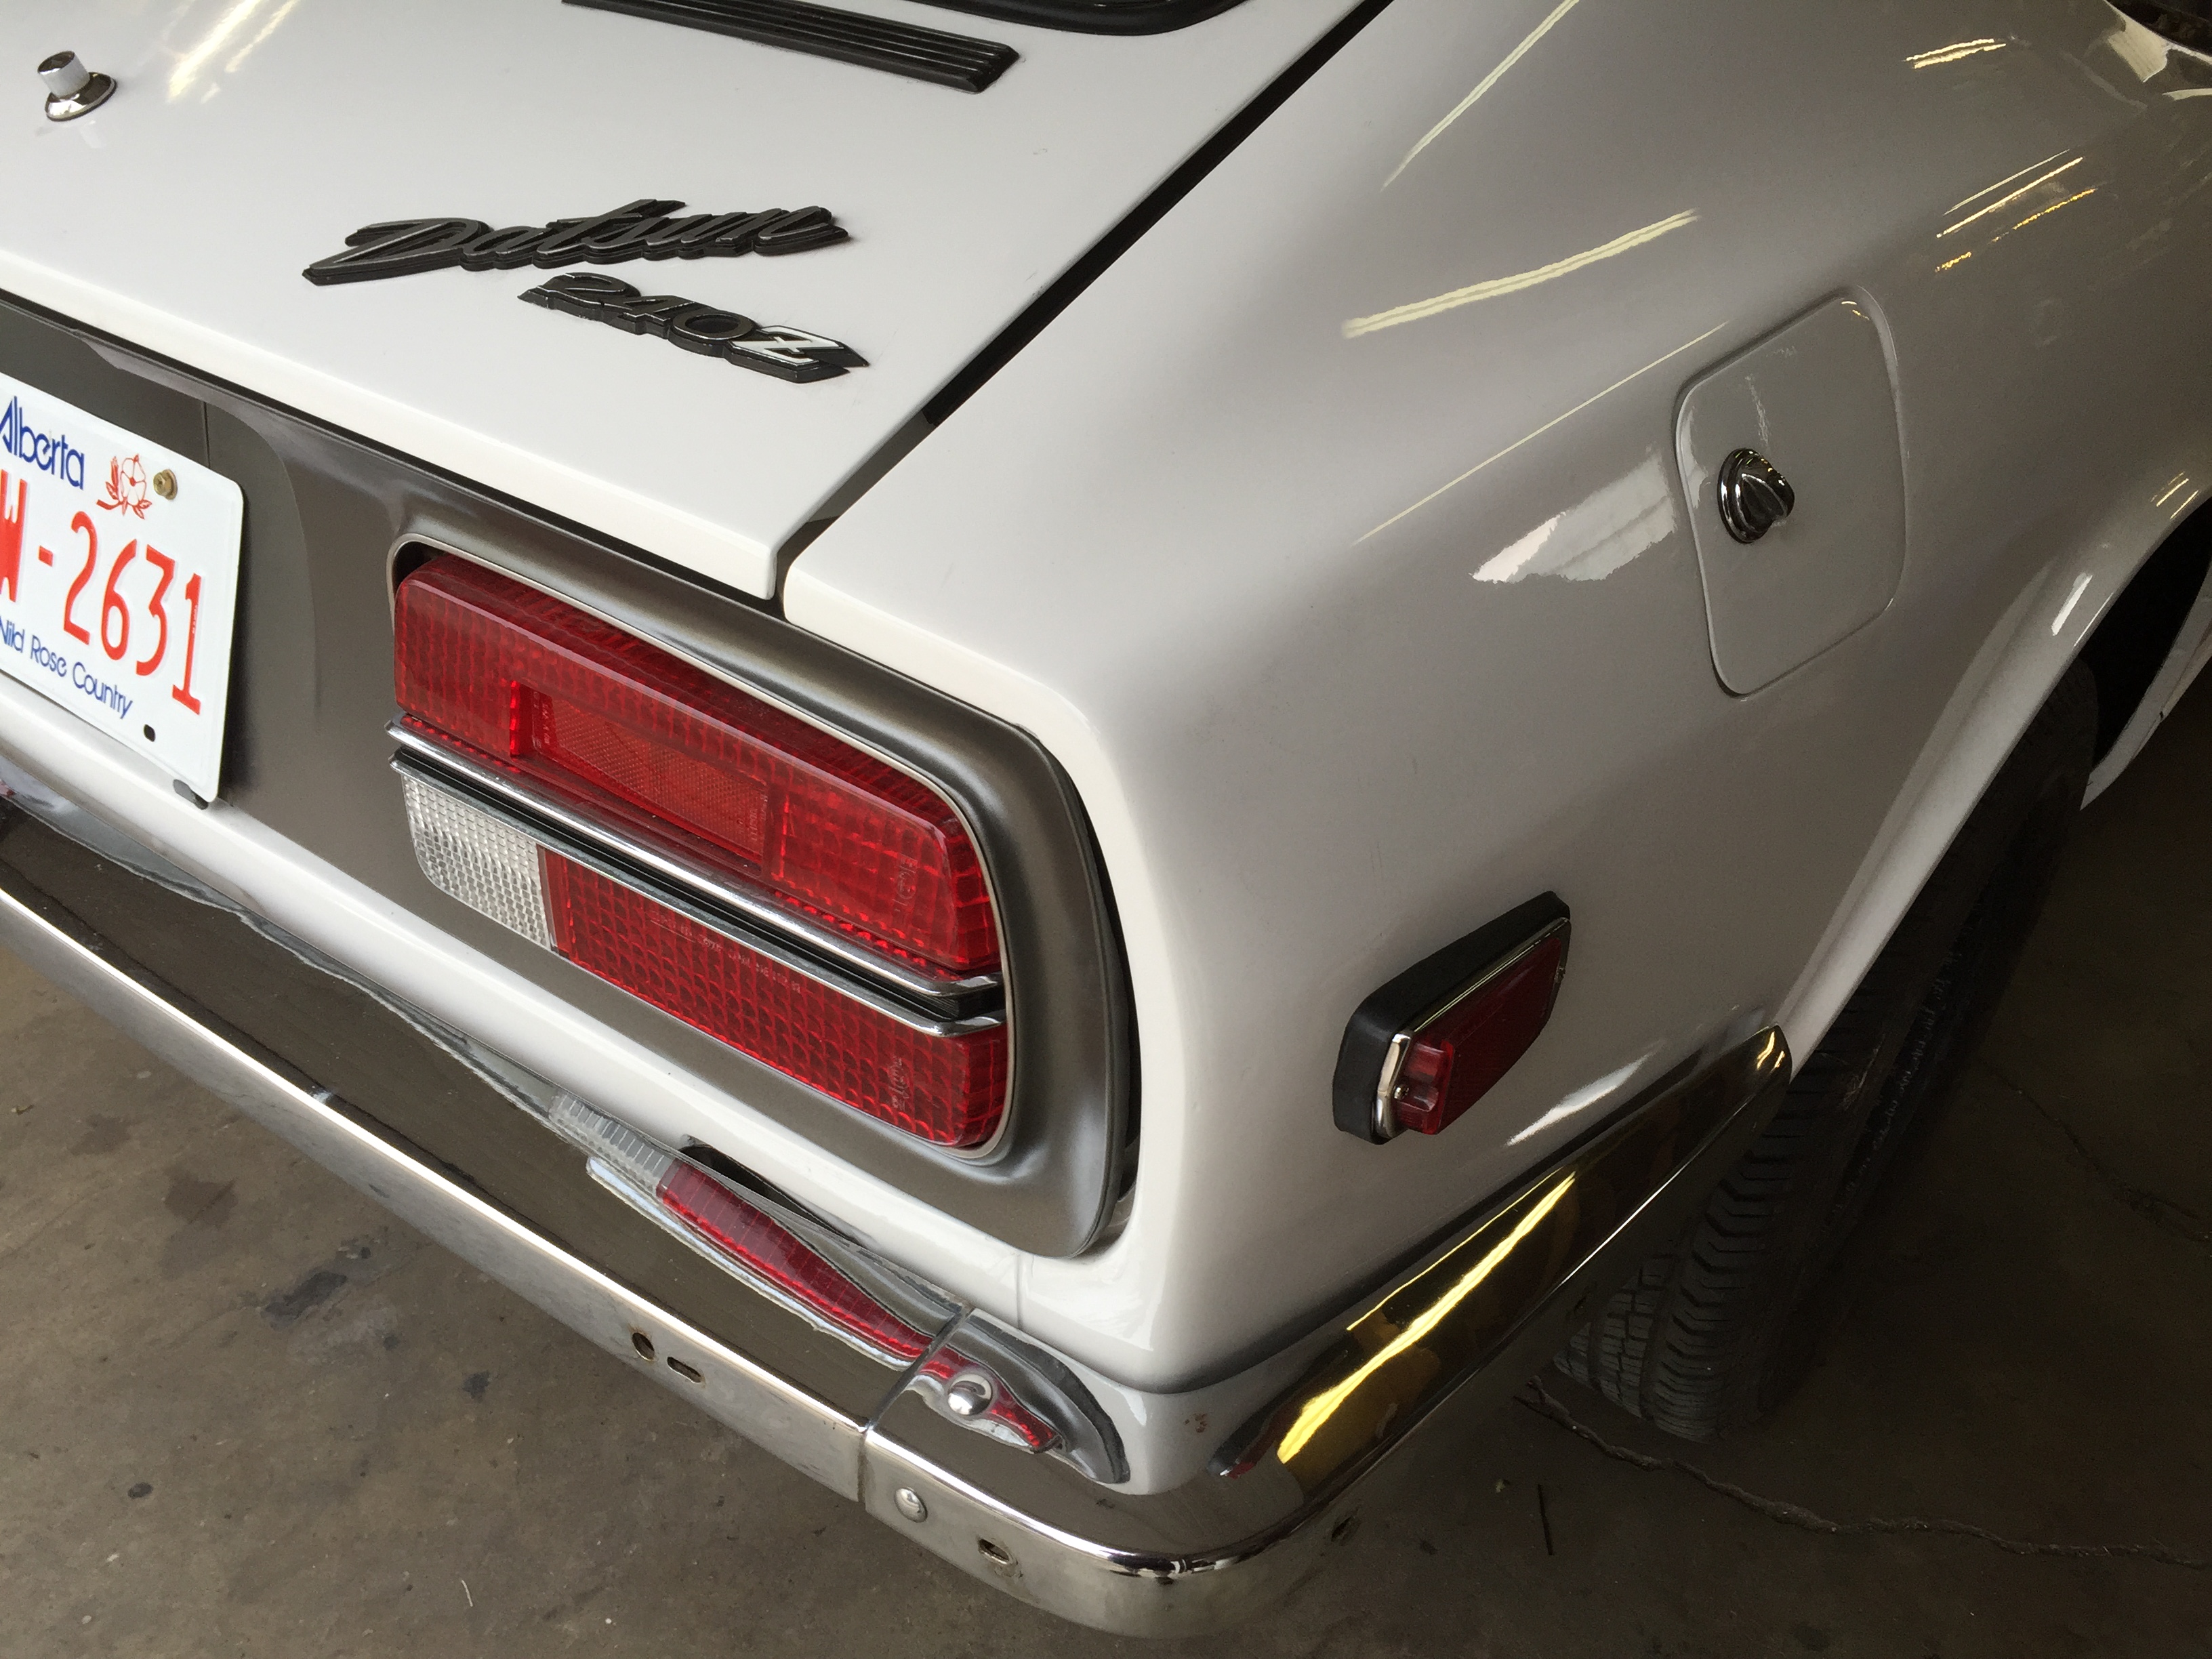
RH AND LH Rear fenders not aligned with doors on my 72 240z
zKars replied to Johnny wick's topic in Body & Paint
Remove the weatherstrip from that door and close the door and hold it in position so that as much as the door is aligned with the front and rear fender, then see if it fits differently/better. This will give you an un-biased indication if the door fits the opening or if the weatherstrip is in fact holding it away. The fit overall is pretty good, I would not be suing the shop just yet. You can tap the pinch weld where the weatherstrip sits and bend it back into the car a bit to adjust how close the weatherstrio comes to the door. Also after a few months the weatherstrip will compress and the door will likely fit better. You cna then tap the pinchweld back into alignment. This is normal body fitment work. They didn't do anything "wrong". -
And it went for its inaugrial 'toodle" around the block this evening. Other than the lack of muffler, it was un-eventful. No police summoned from mad neighbors, it goes, stops, turns, lights work. Midas, here we come in the morning. Good thing its only 1.5 miles away.
-
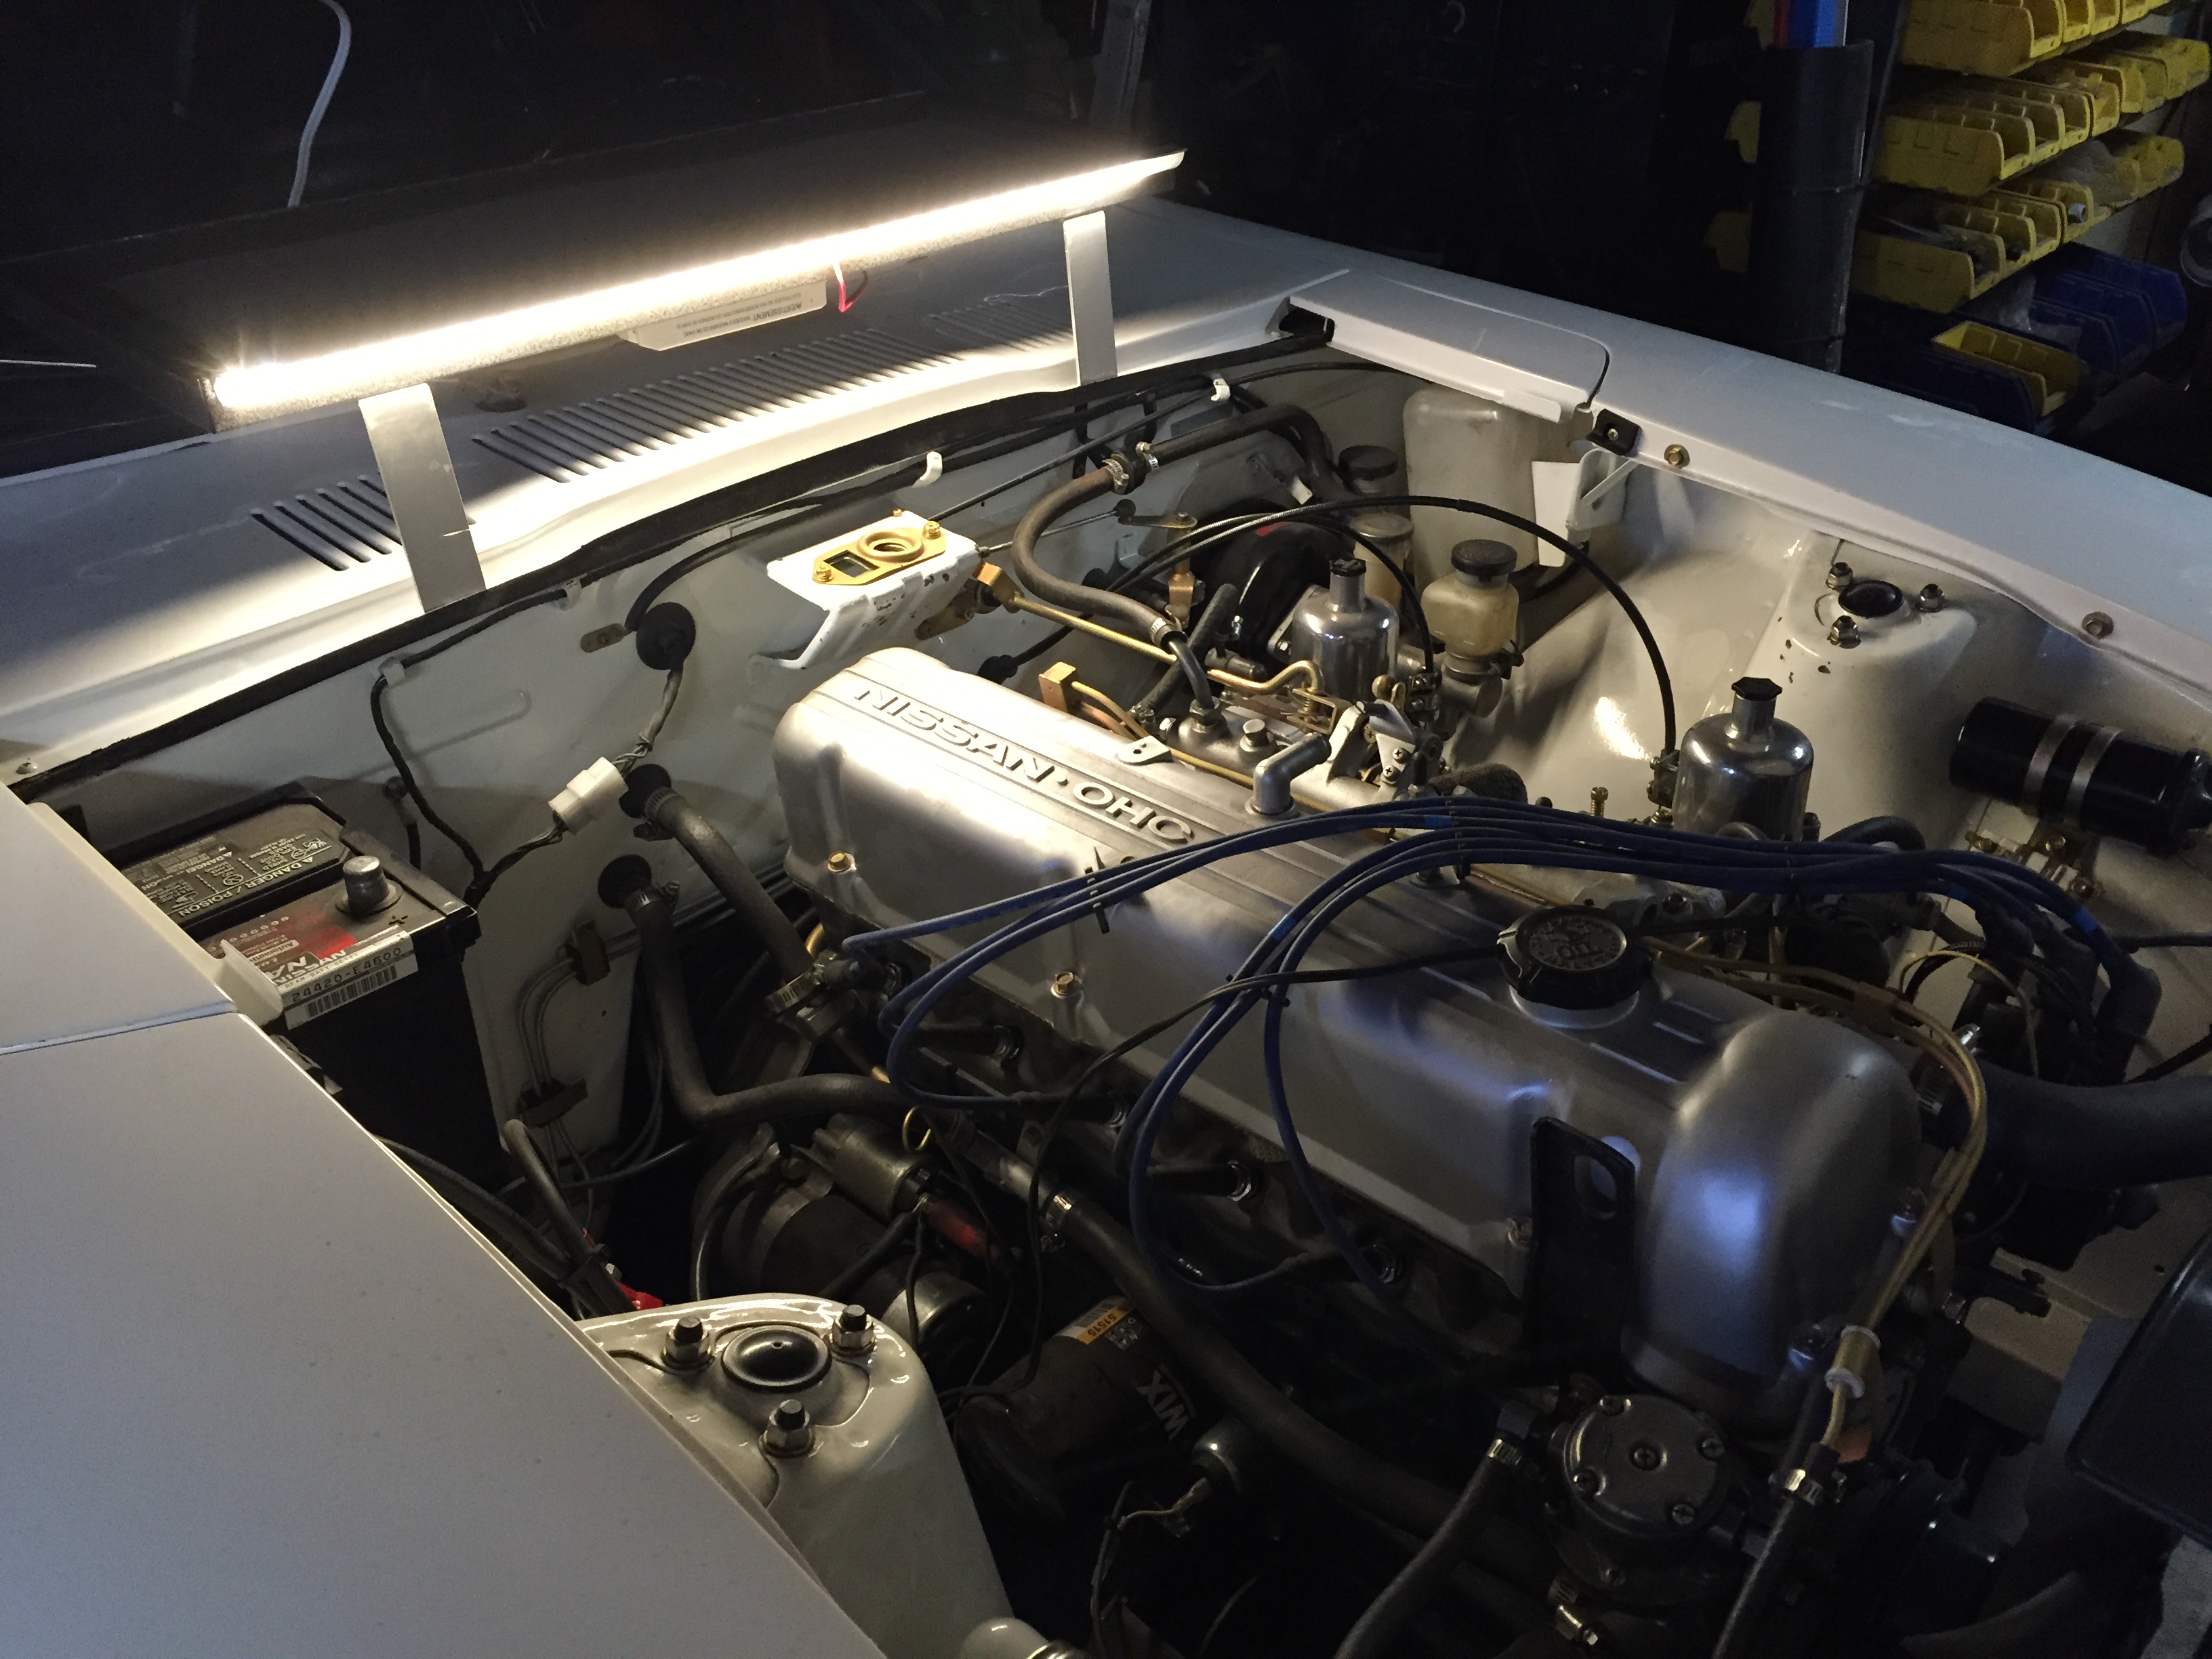
You'd think I'd have done this by now, but I finally did the initial 20 min engine break in. Shall we just say...

-
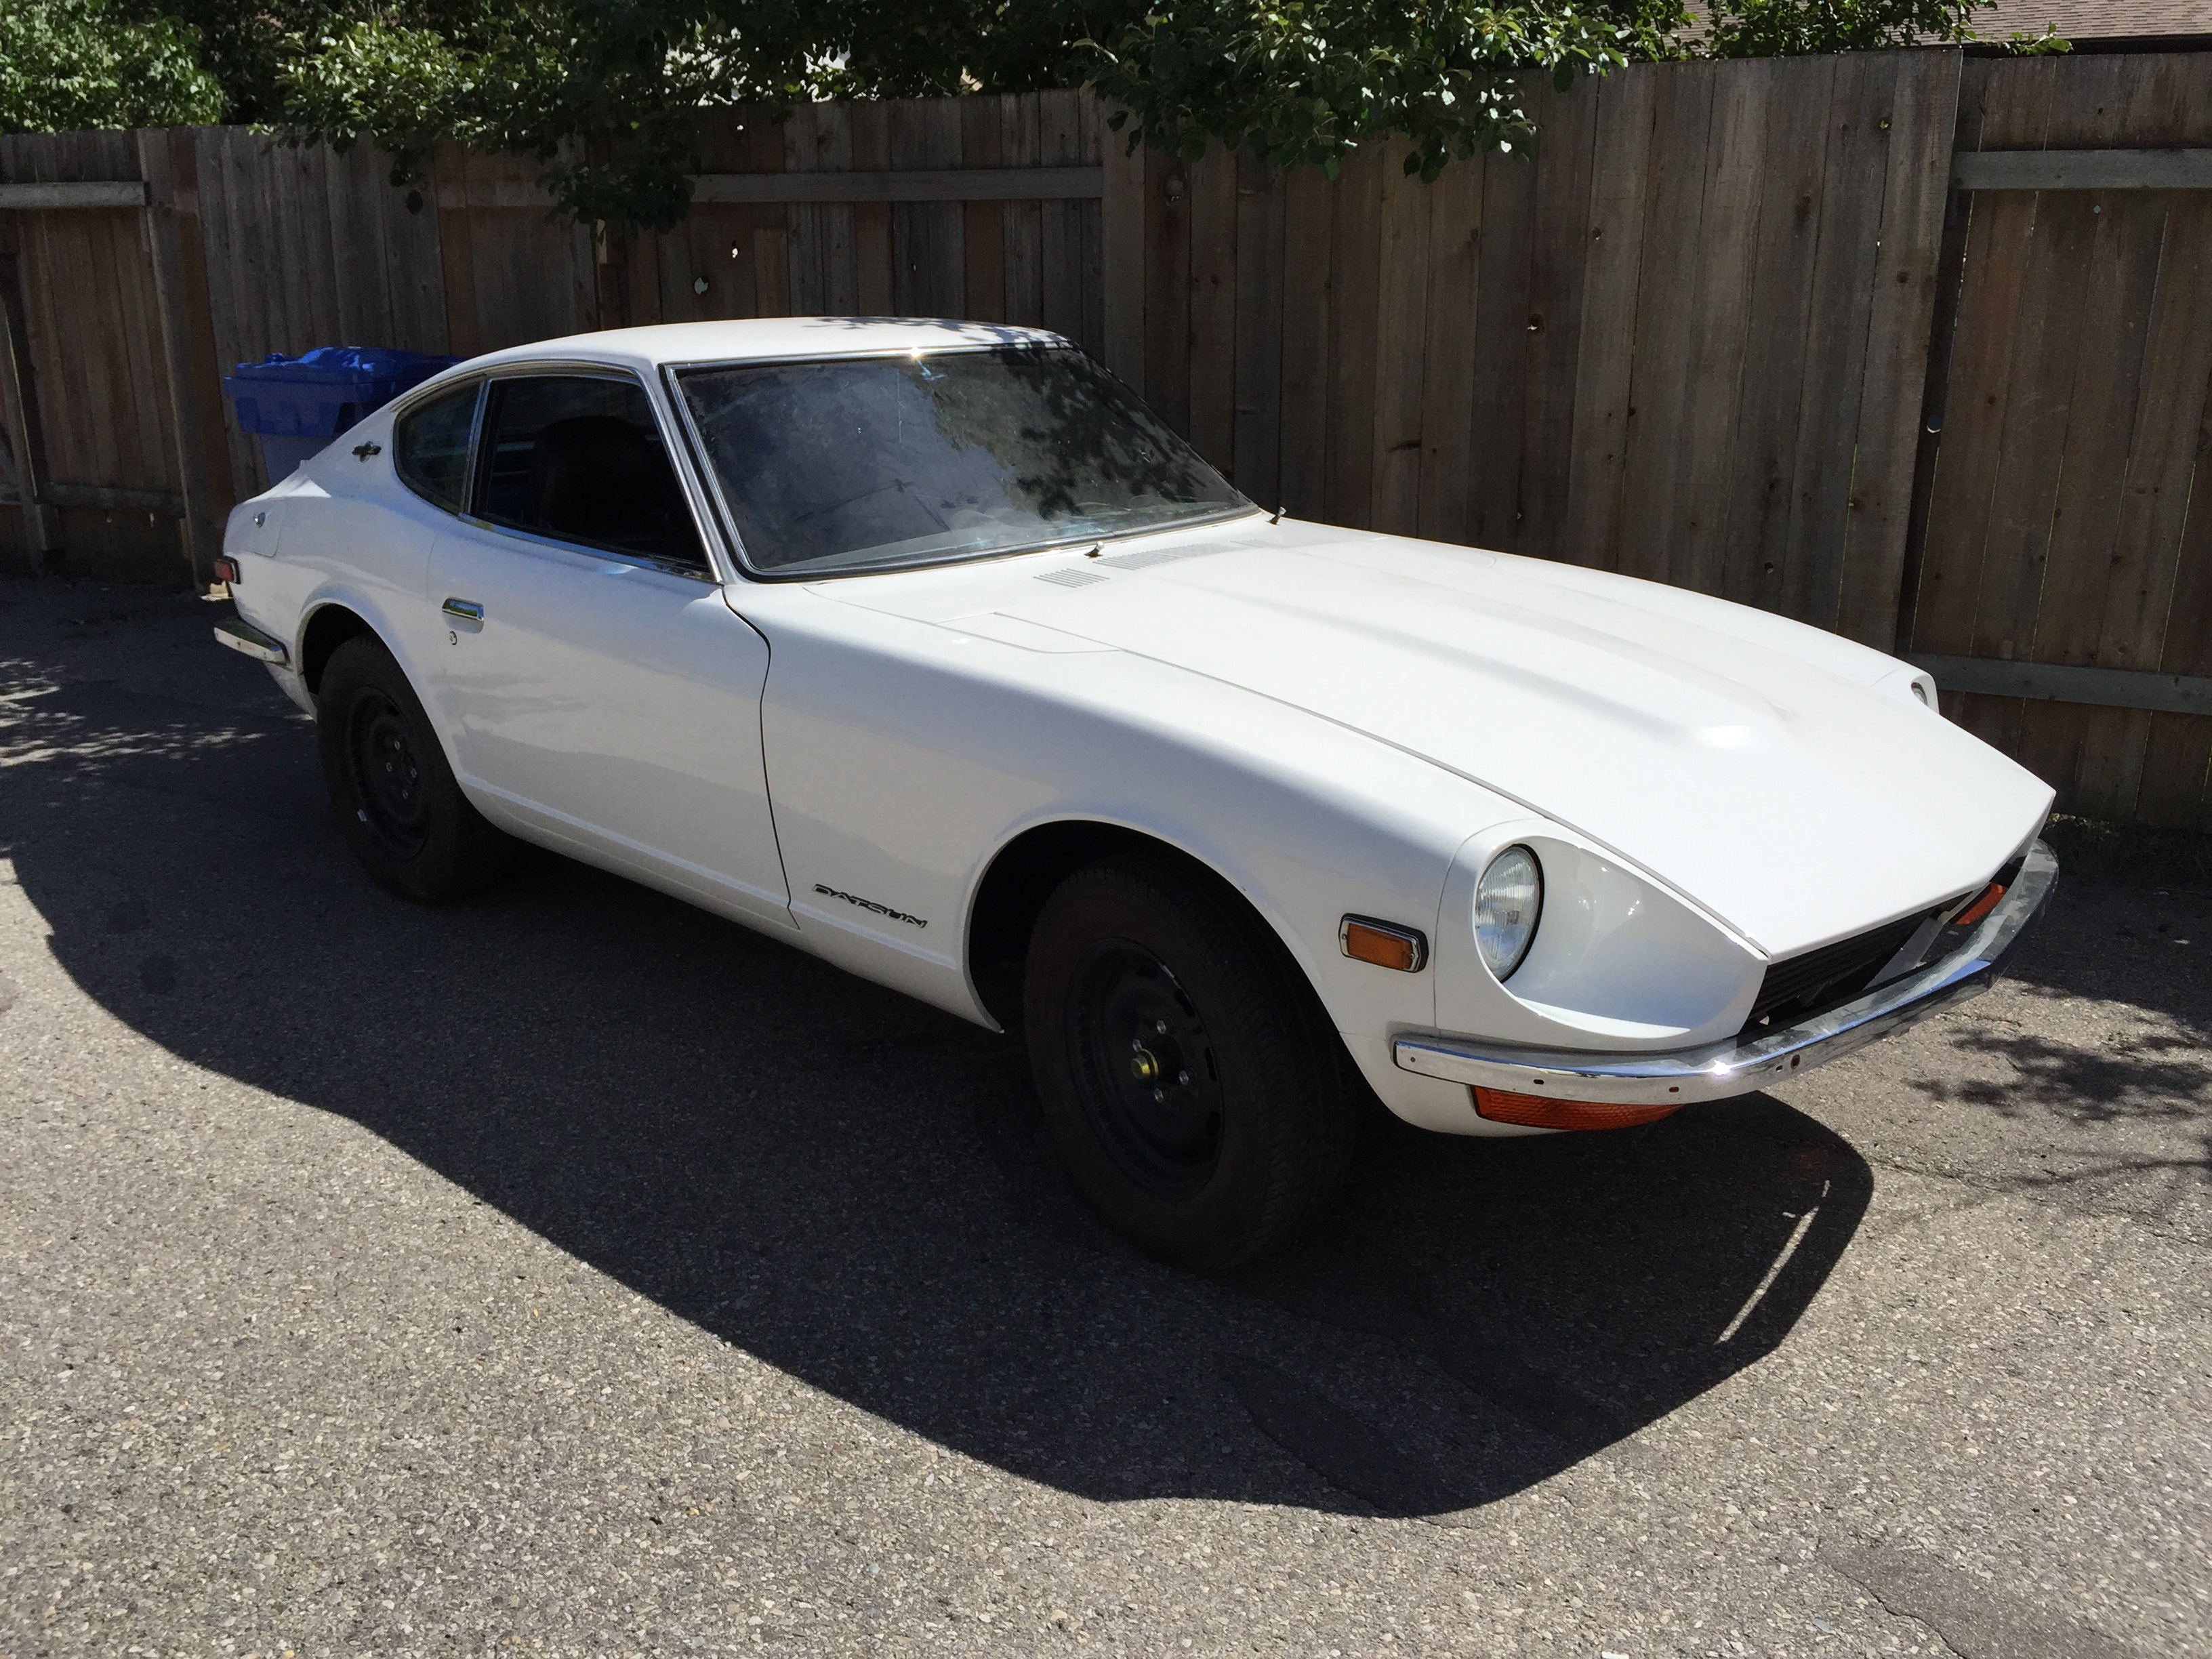
Single stage white paint. I didn't paint it, would have to ask the painter for details. It's more about the underlying body work and priming and sanding than about the top coat.
-
Another value point submitted by a friend: A 73 @ $37,000 asking! http://www.hemmings.com/classifieds/dealer/datsun/240z/1534203.html Apparently 73's are the hot tip at the moment...
-
Done! Payment received. Thanks.
-
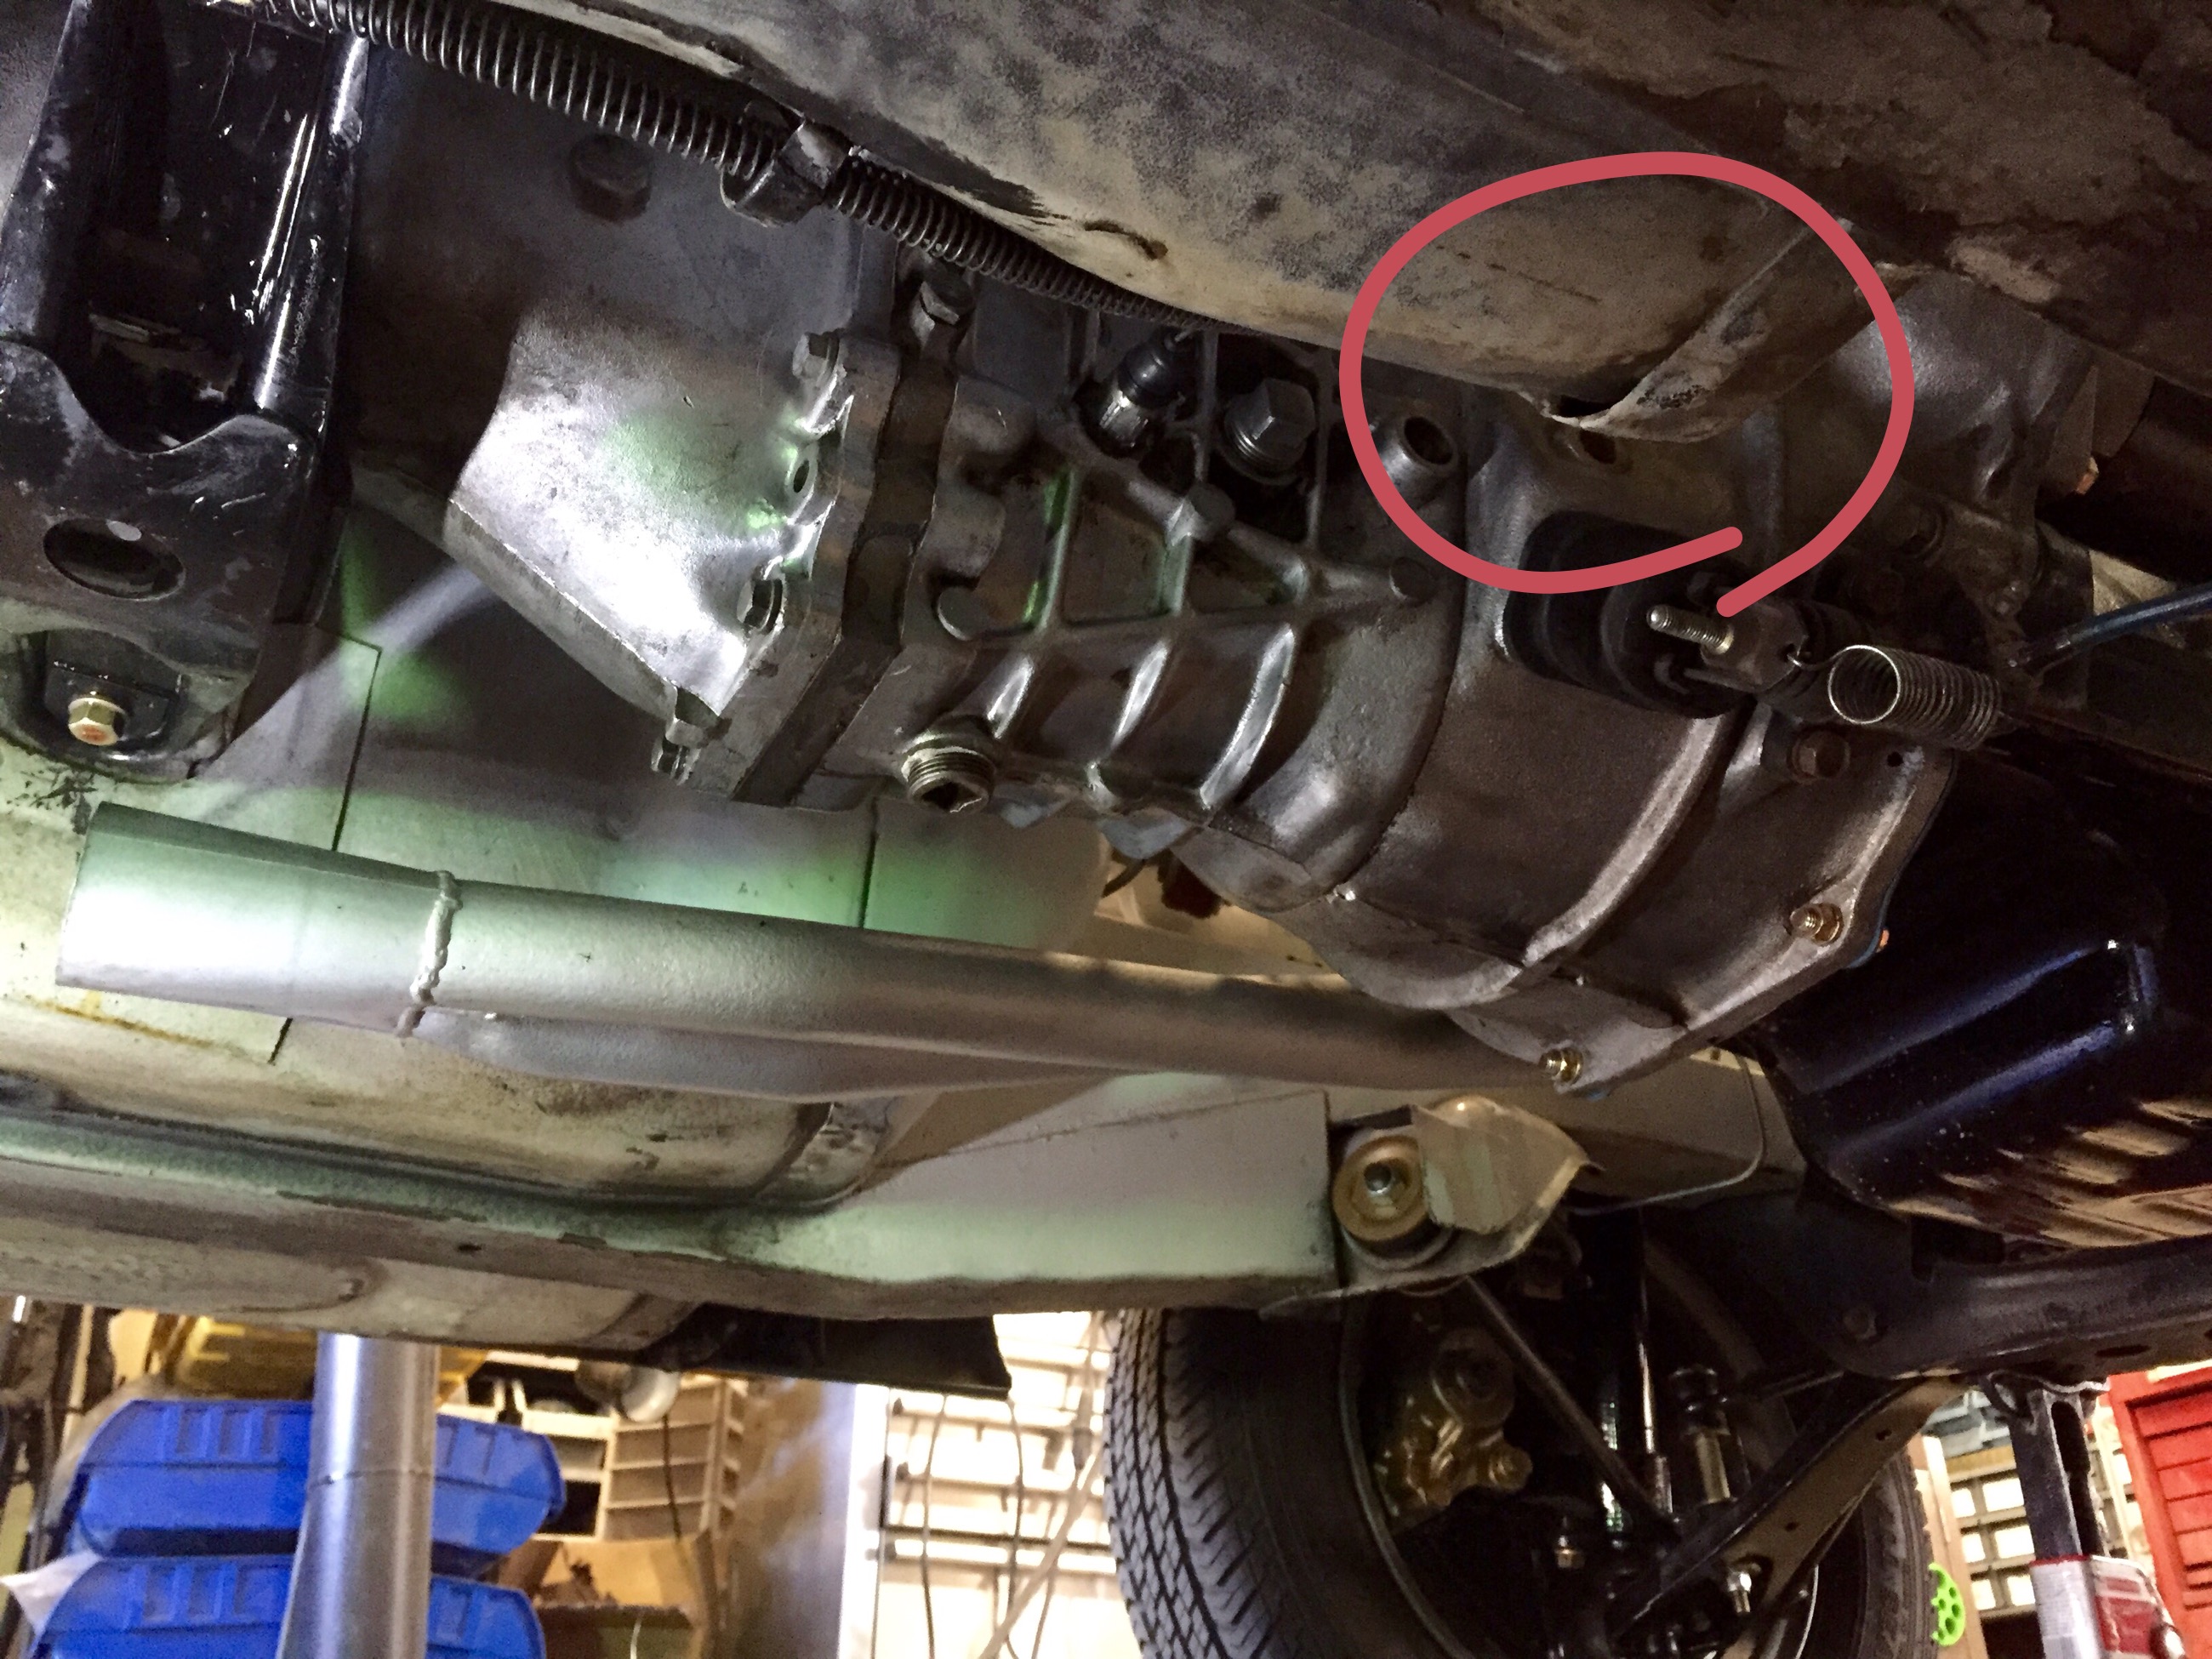
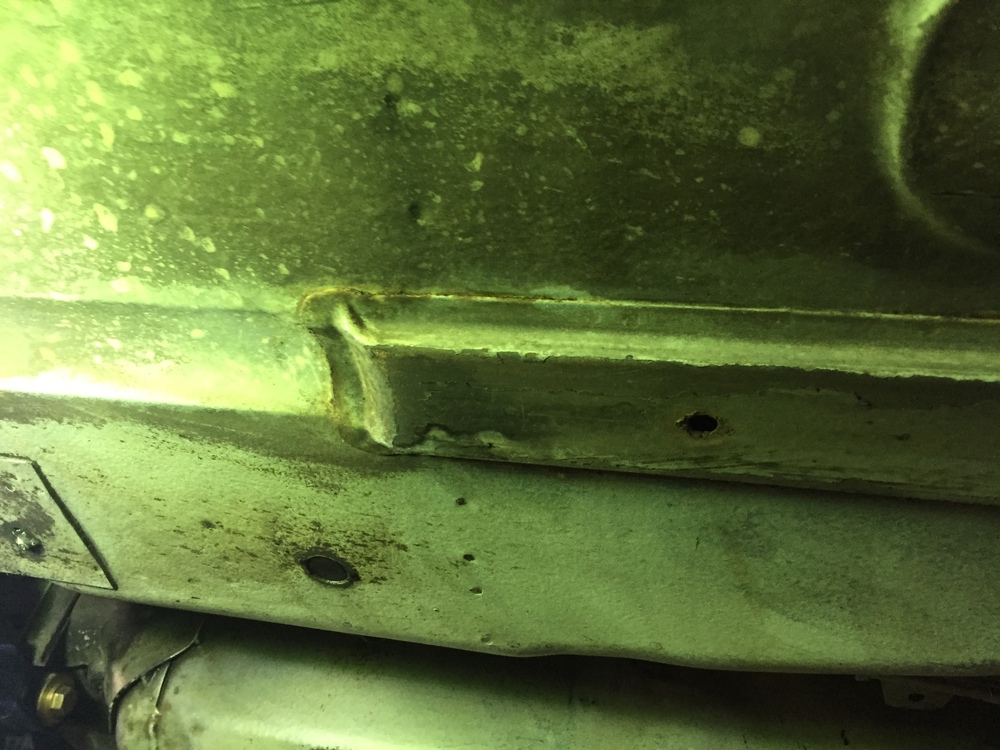
Looking at these pictures there is something I need to take care of and it may be something you all need to consider. Check out the gap in this seam where the firewall curves under and meets the floor pan! I've seen this on other Z's but never one this wide. Can you spot the same thing on the other side? I'm going to hammer that shut and get the seam sealer out. And you wonder why these thing rot away....

-
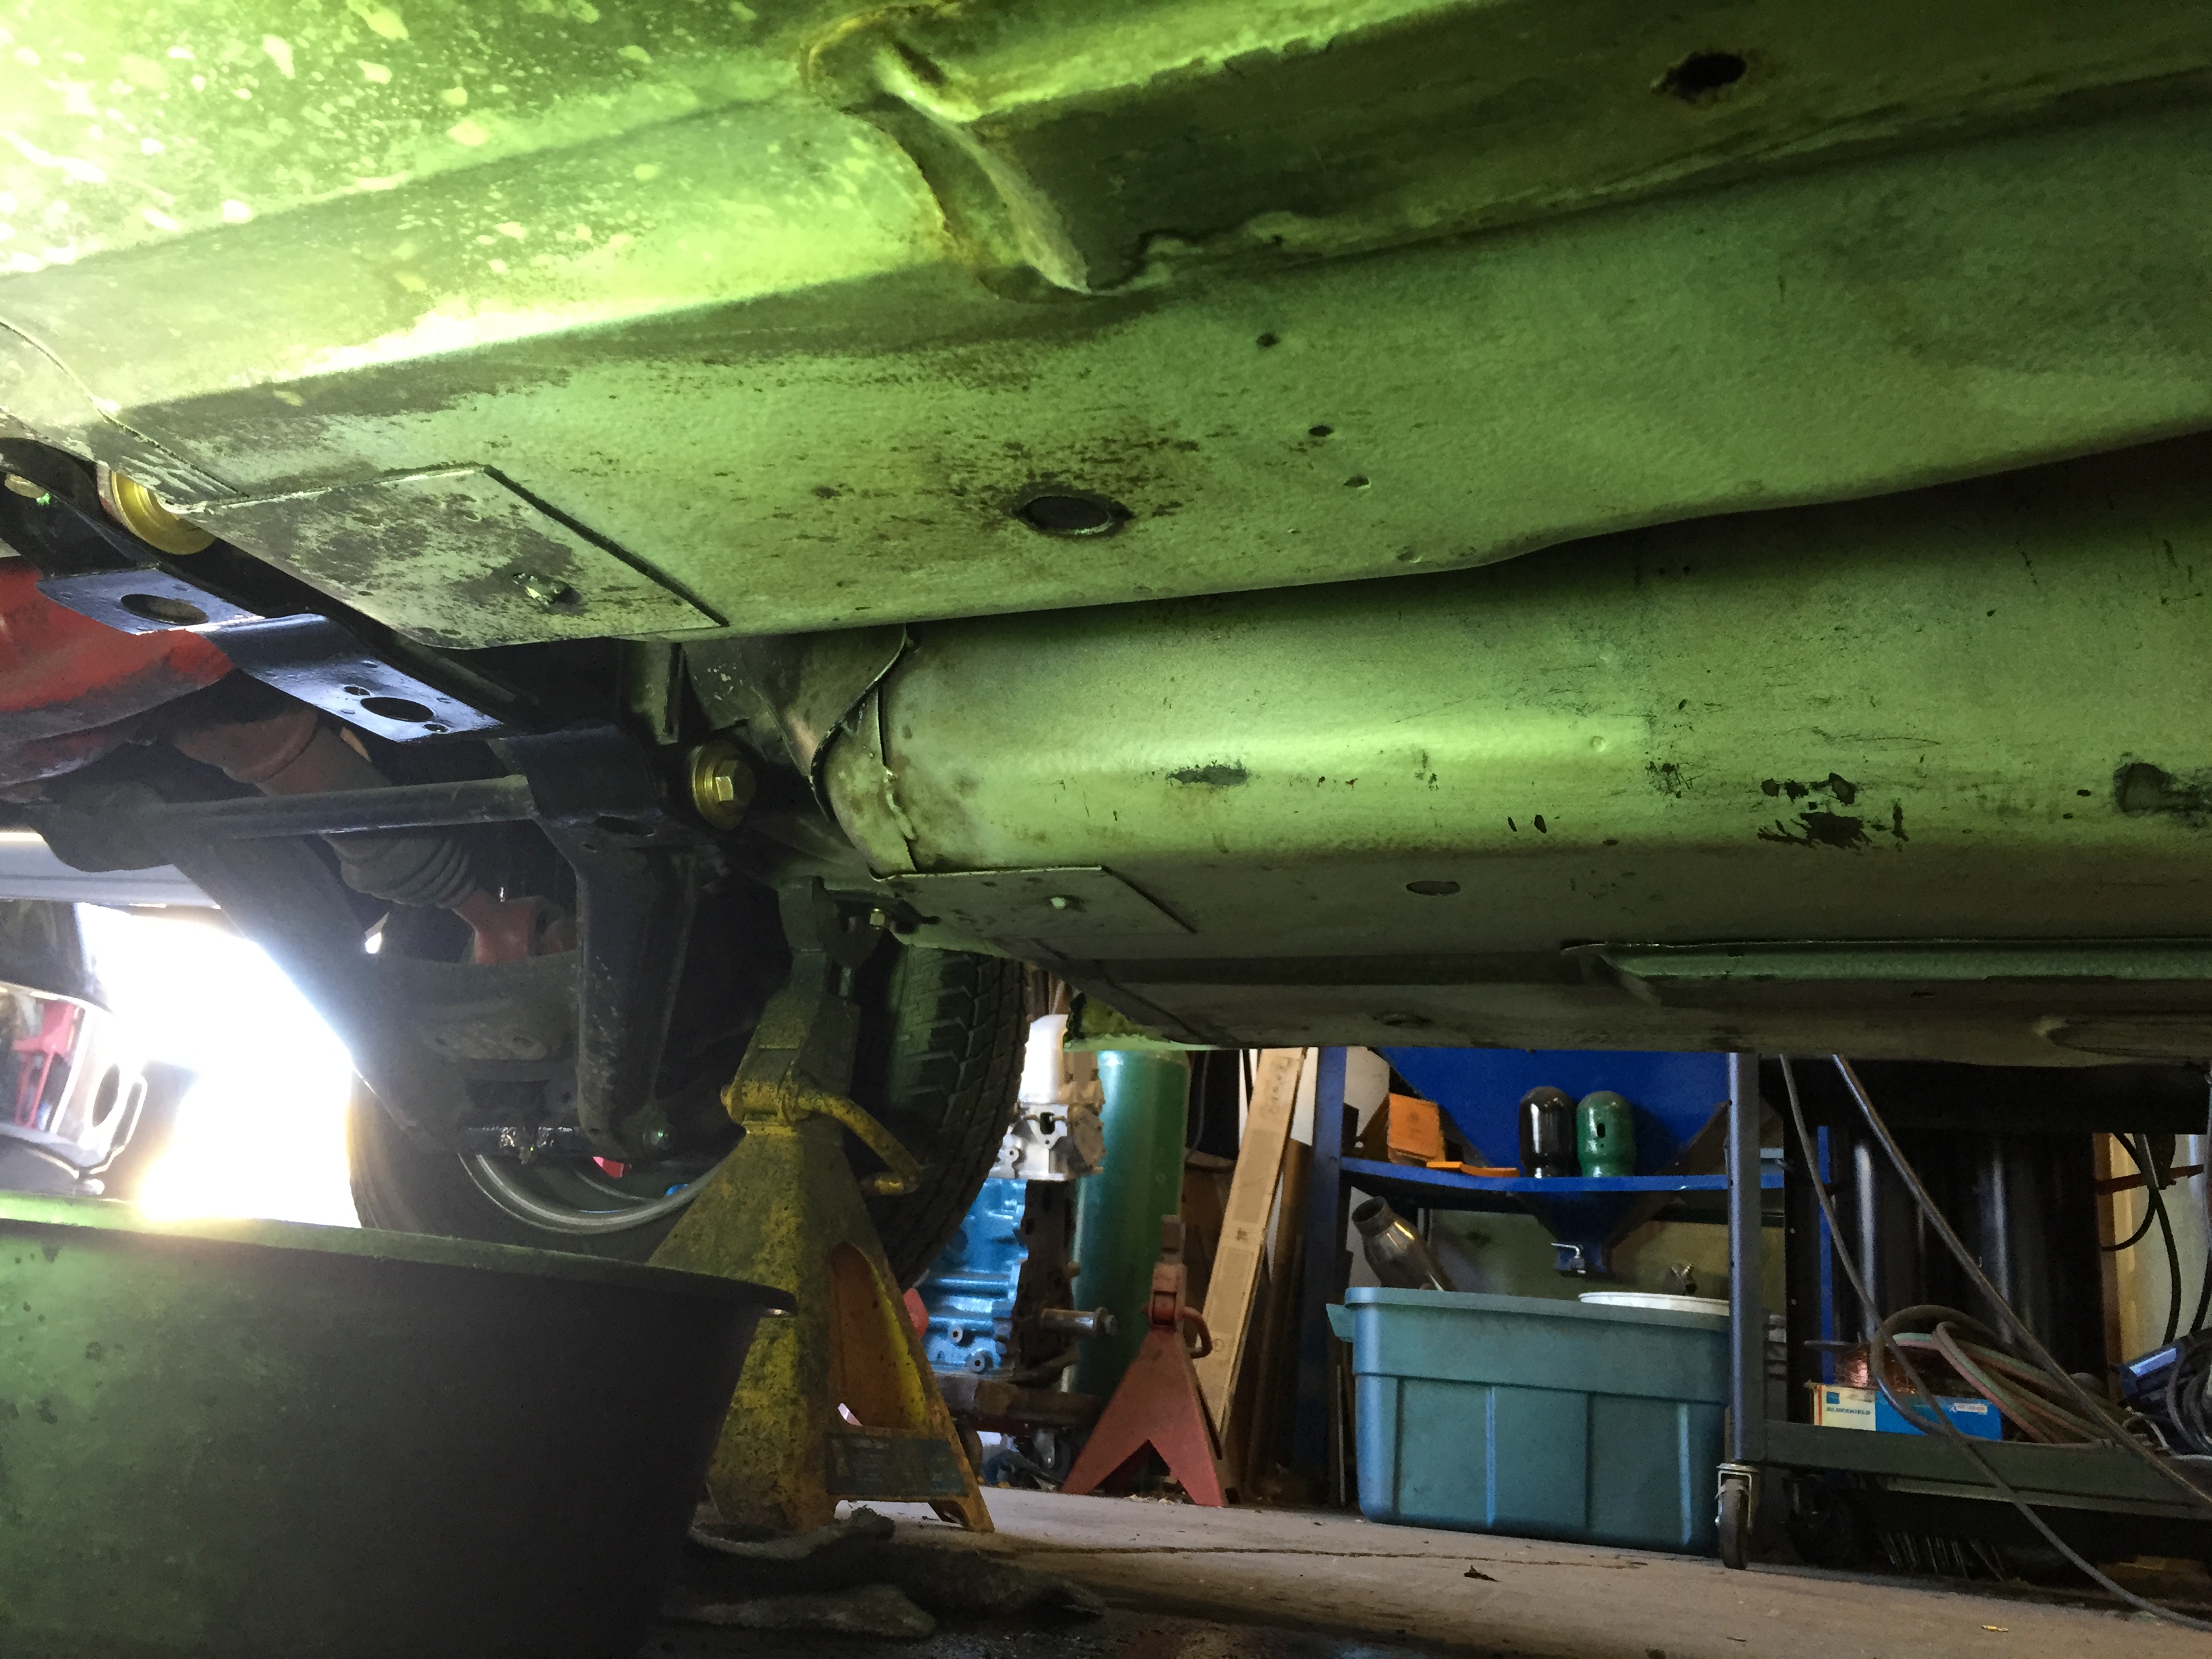
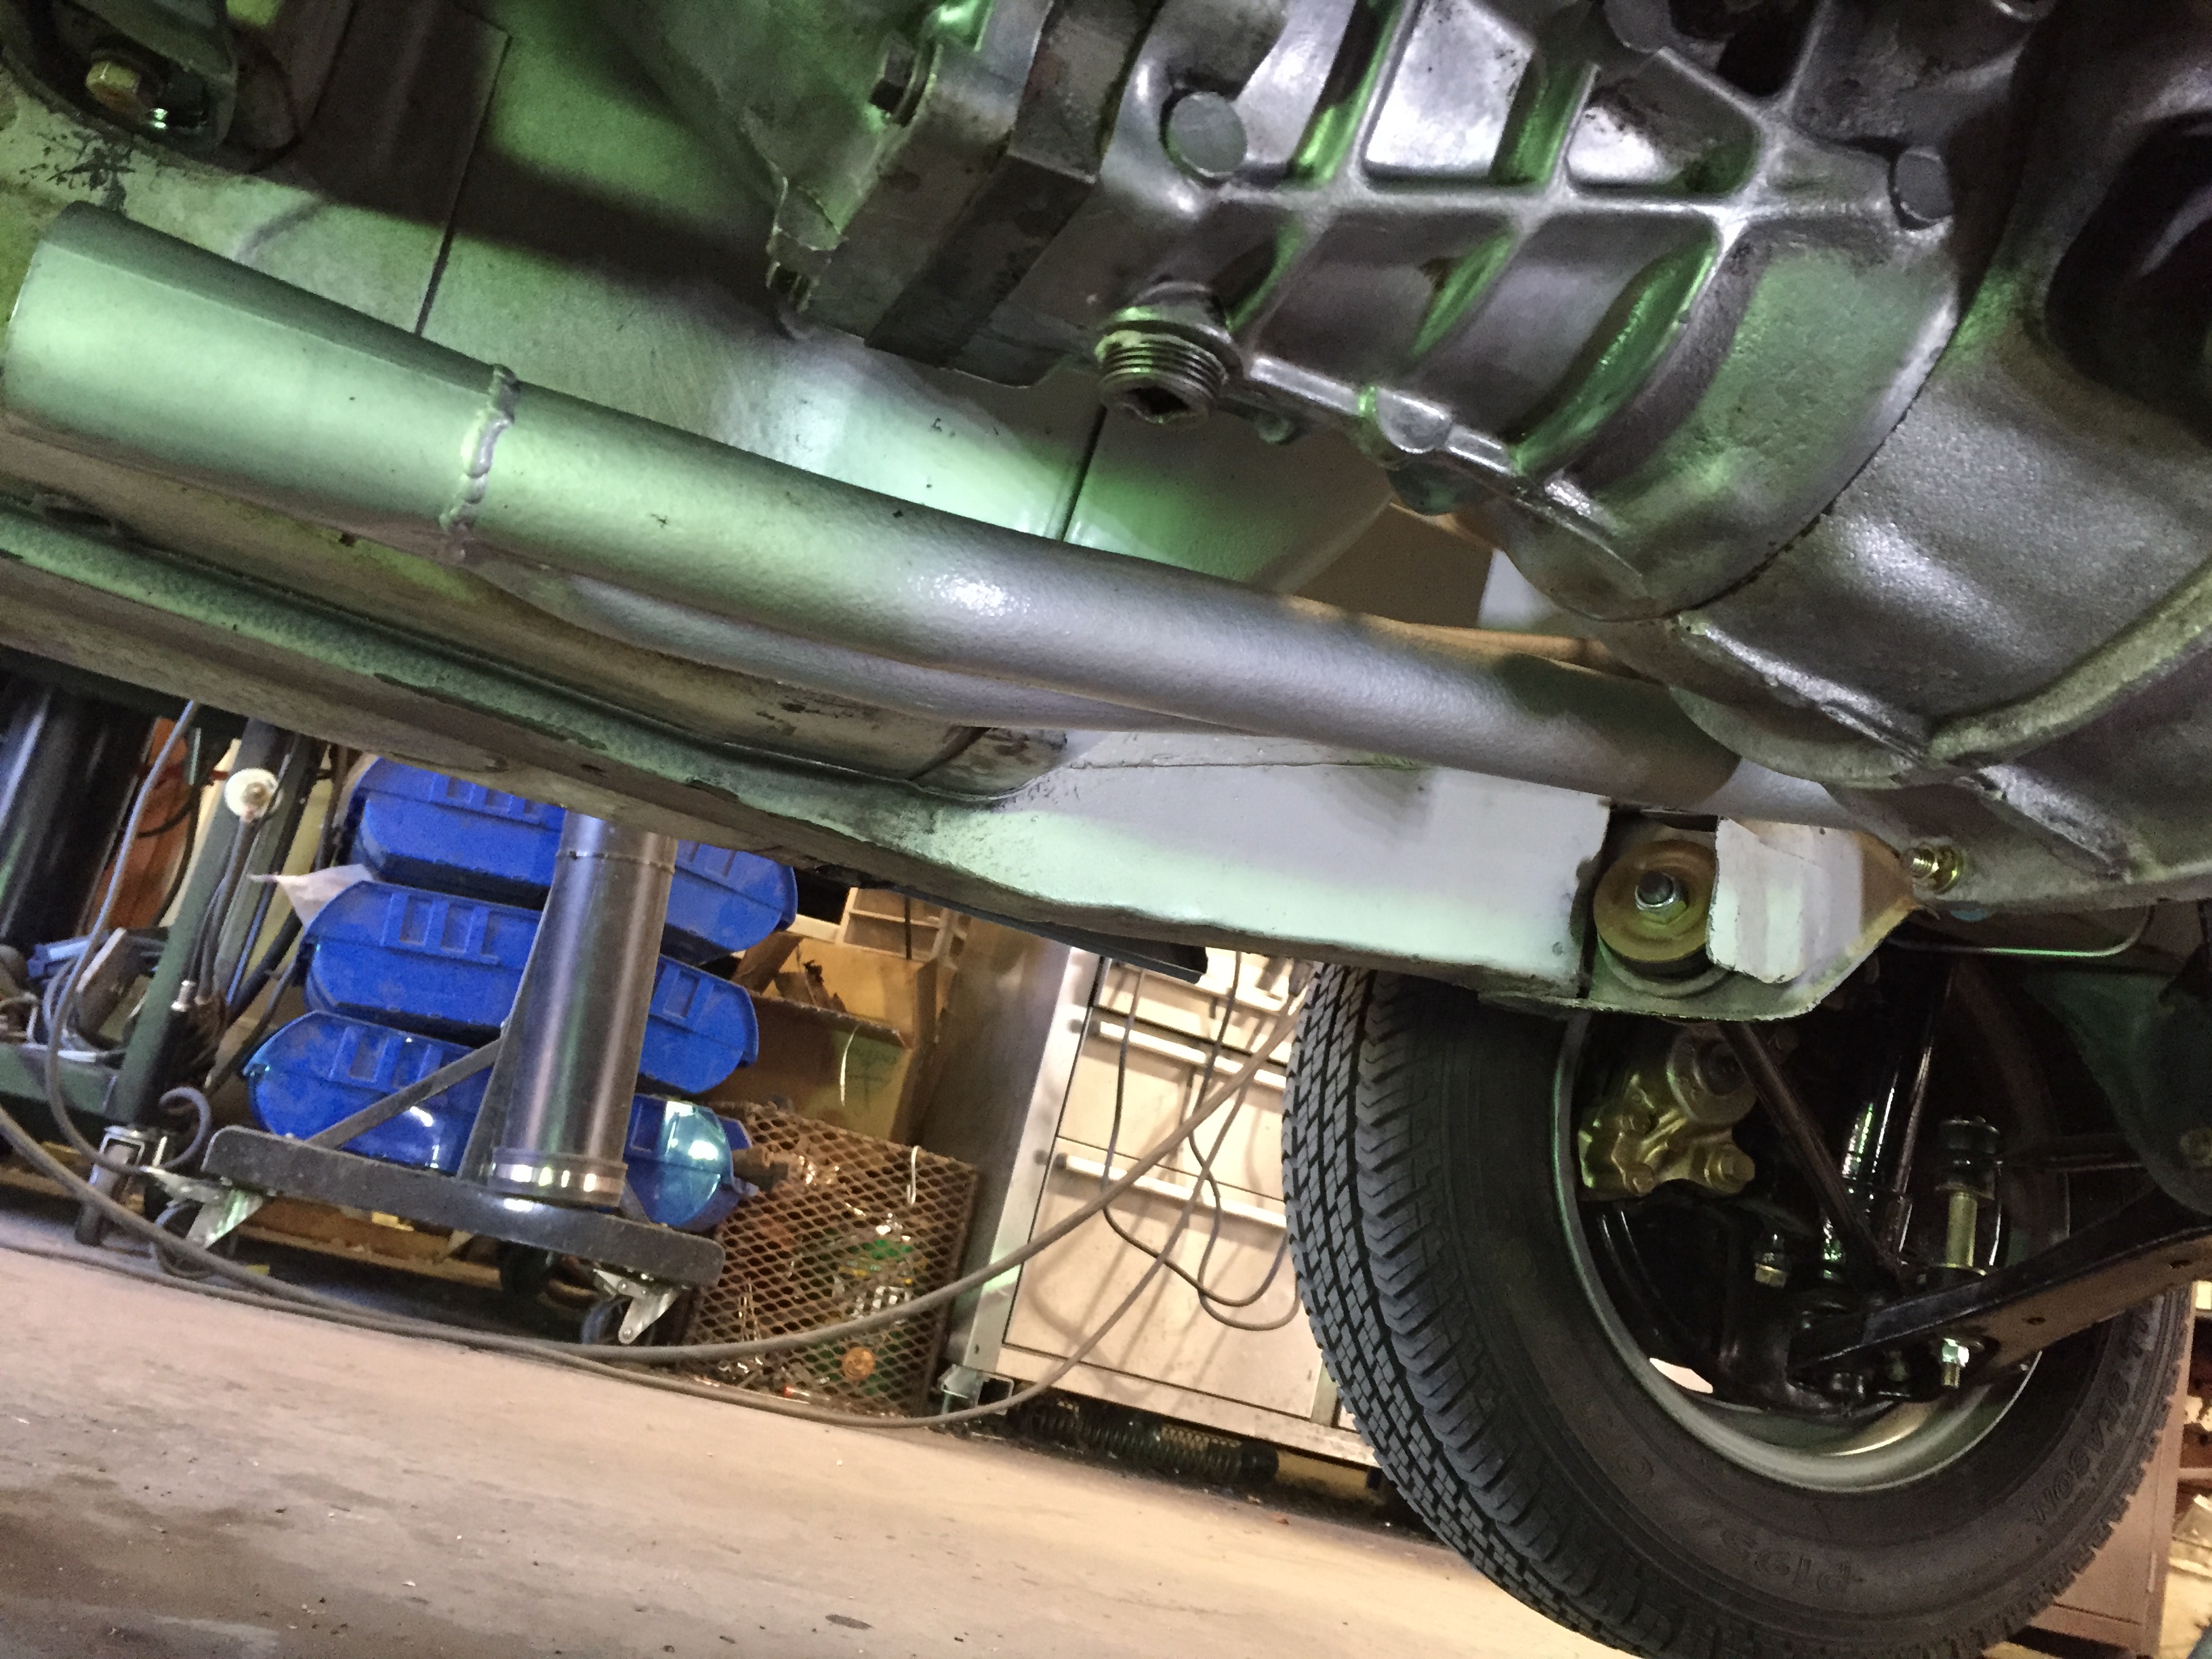
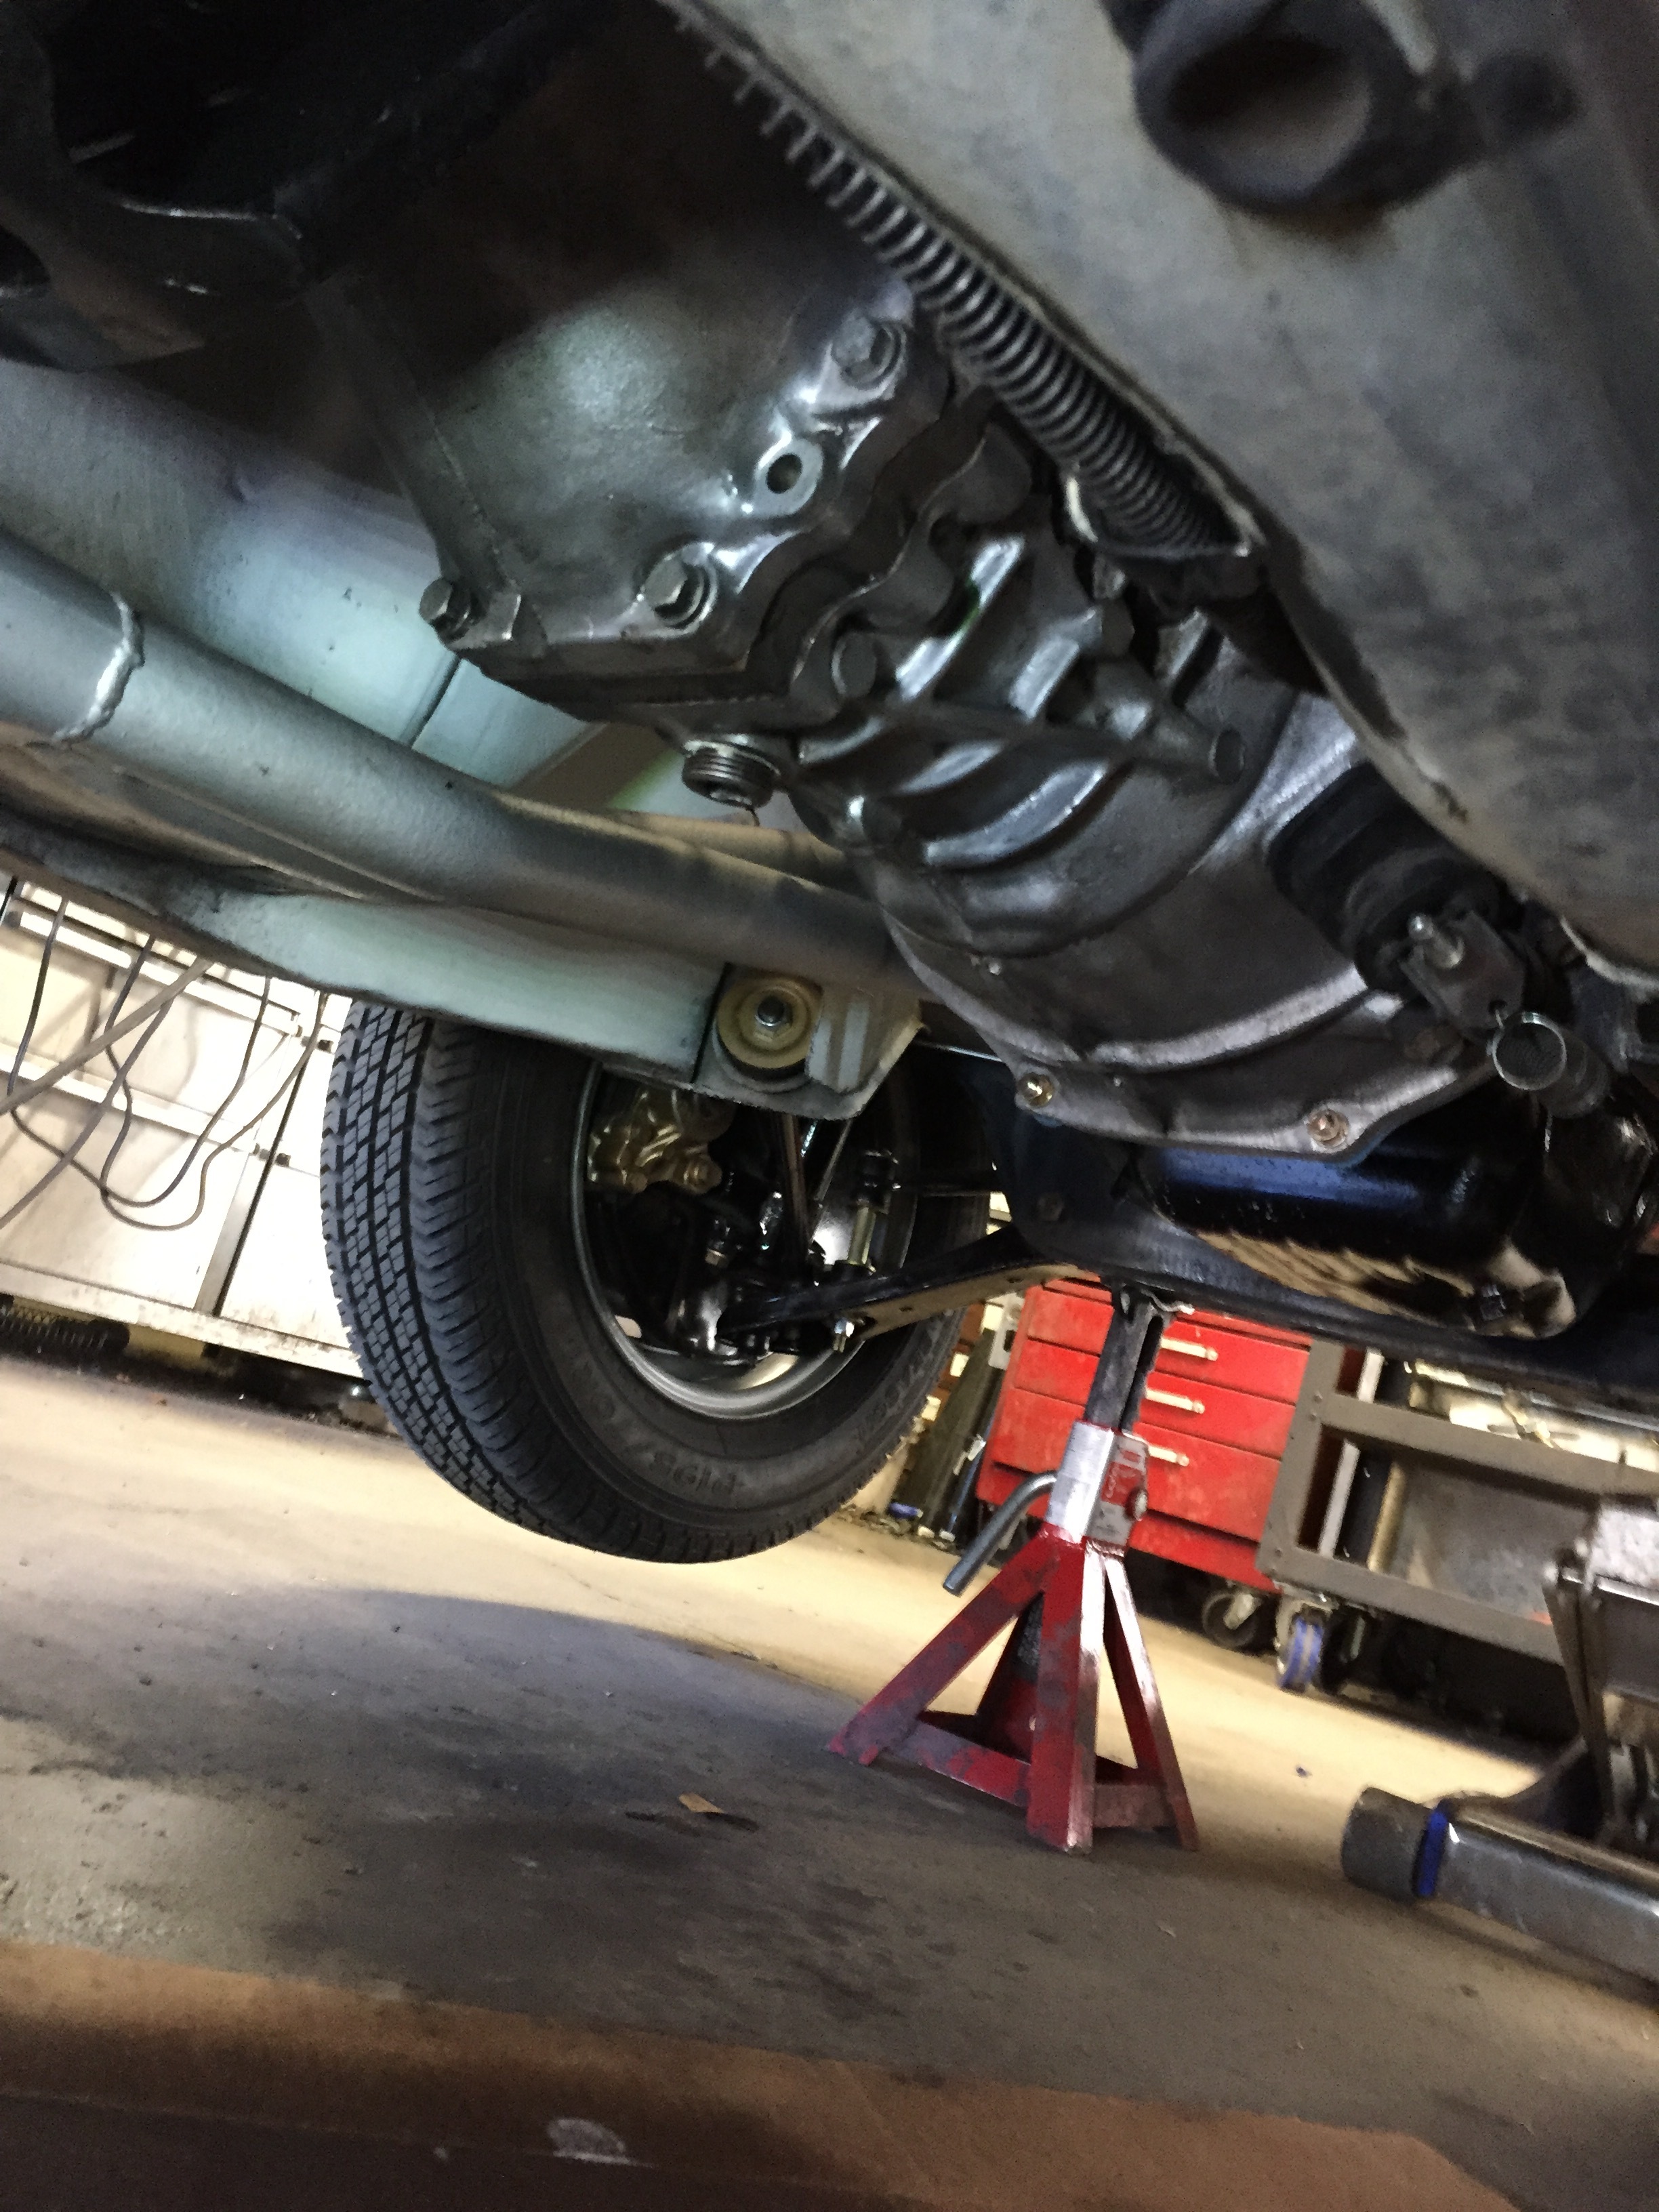
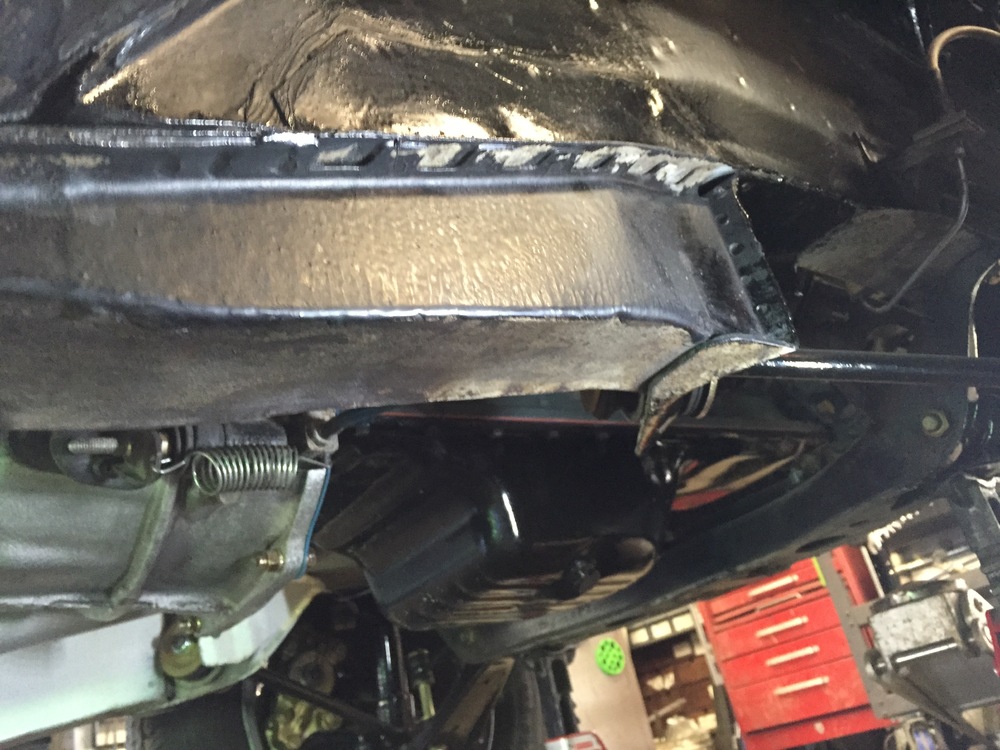
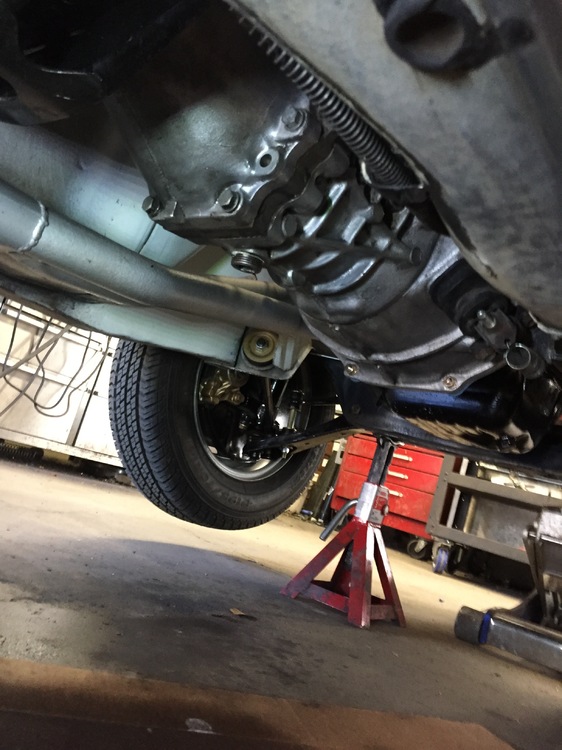
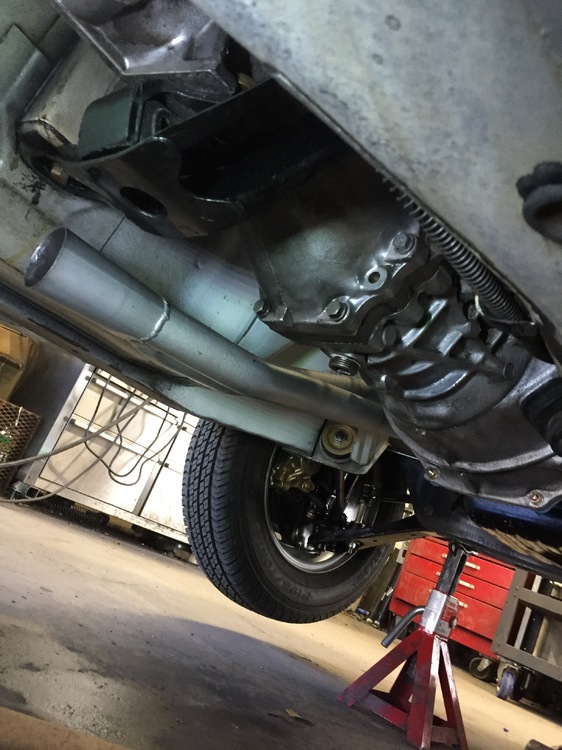
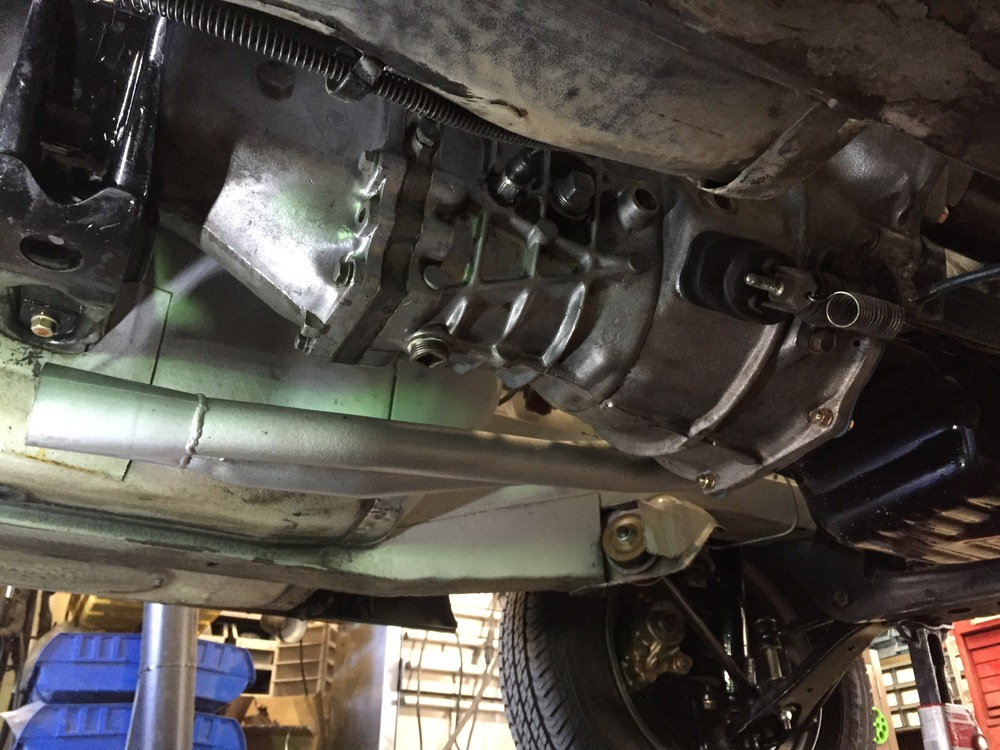
So I have the beast up on jack stands working on the exhaust, and thought I'd post a couple of pics so you see the incredible un-touched un-rusty ness of this thing. Please ignore the green coloration in some pictures. its the "filter" I have on the halogen light. I know I have a bit more scrubbing to do, but I wanted to show the never un-coated (or very very perfectly removed undercoating at some point) underside. I've stripped and coated everything from the firewall forward and rear suspension area back, but left the middle alone to prove the starting point quality. Nothing to hide here. The front of the frame rail/TC rod pocket is in the coated area here, as is the area above that where the re-inforcing/doubler plate is located. The messy stuff is painted seam sealer around the plate, not coated rust flakes! Really! Honest! Crappy shadows..... I think I'll leave the exhaust wide open like that.... End of the frame rail. Flat, clean, un-scathed.


-
Yeah I saw the Eastwood hot lamp system. How the heck to control temperature properly or is it that forgiving? I think I'll buy another matching cheap toaster oven, chop the ends off of both and "merge" them. Just imagine the roll of duct tape around and around the seam.. Think Red Green.
-
Ah yes, another of the eternal list of decisions. Go with a "used" set of DATSUN sill plates lovingly (and slowly) restored, or use a fresh set without? Or spend $$ on someone's NOS set... Trade someone four sets of used for one NOS? At least I can offer the buyer either option. I need a longer powder coating oven.....

-
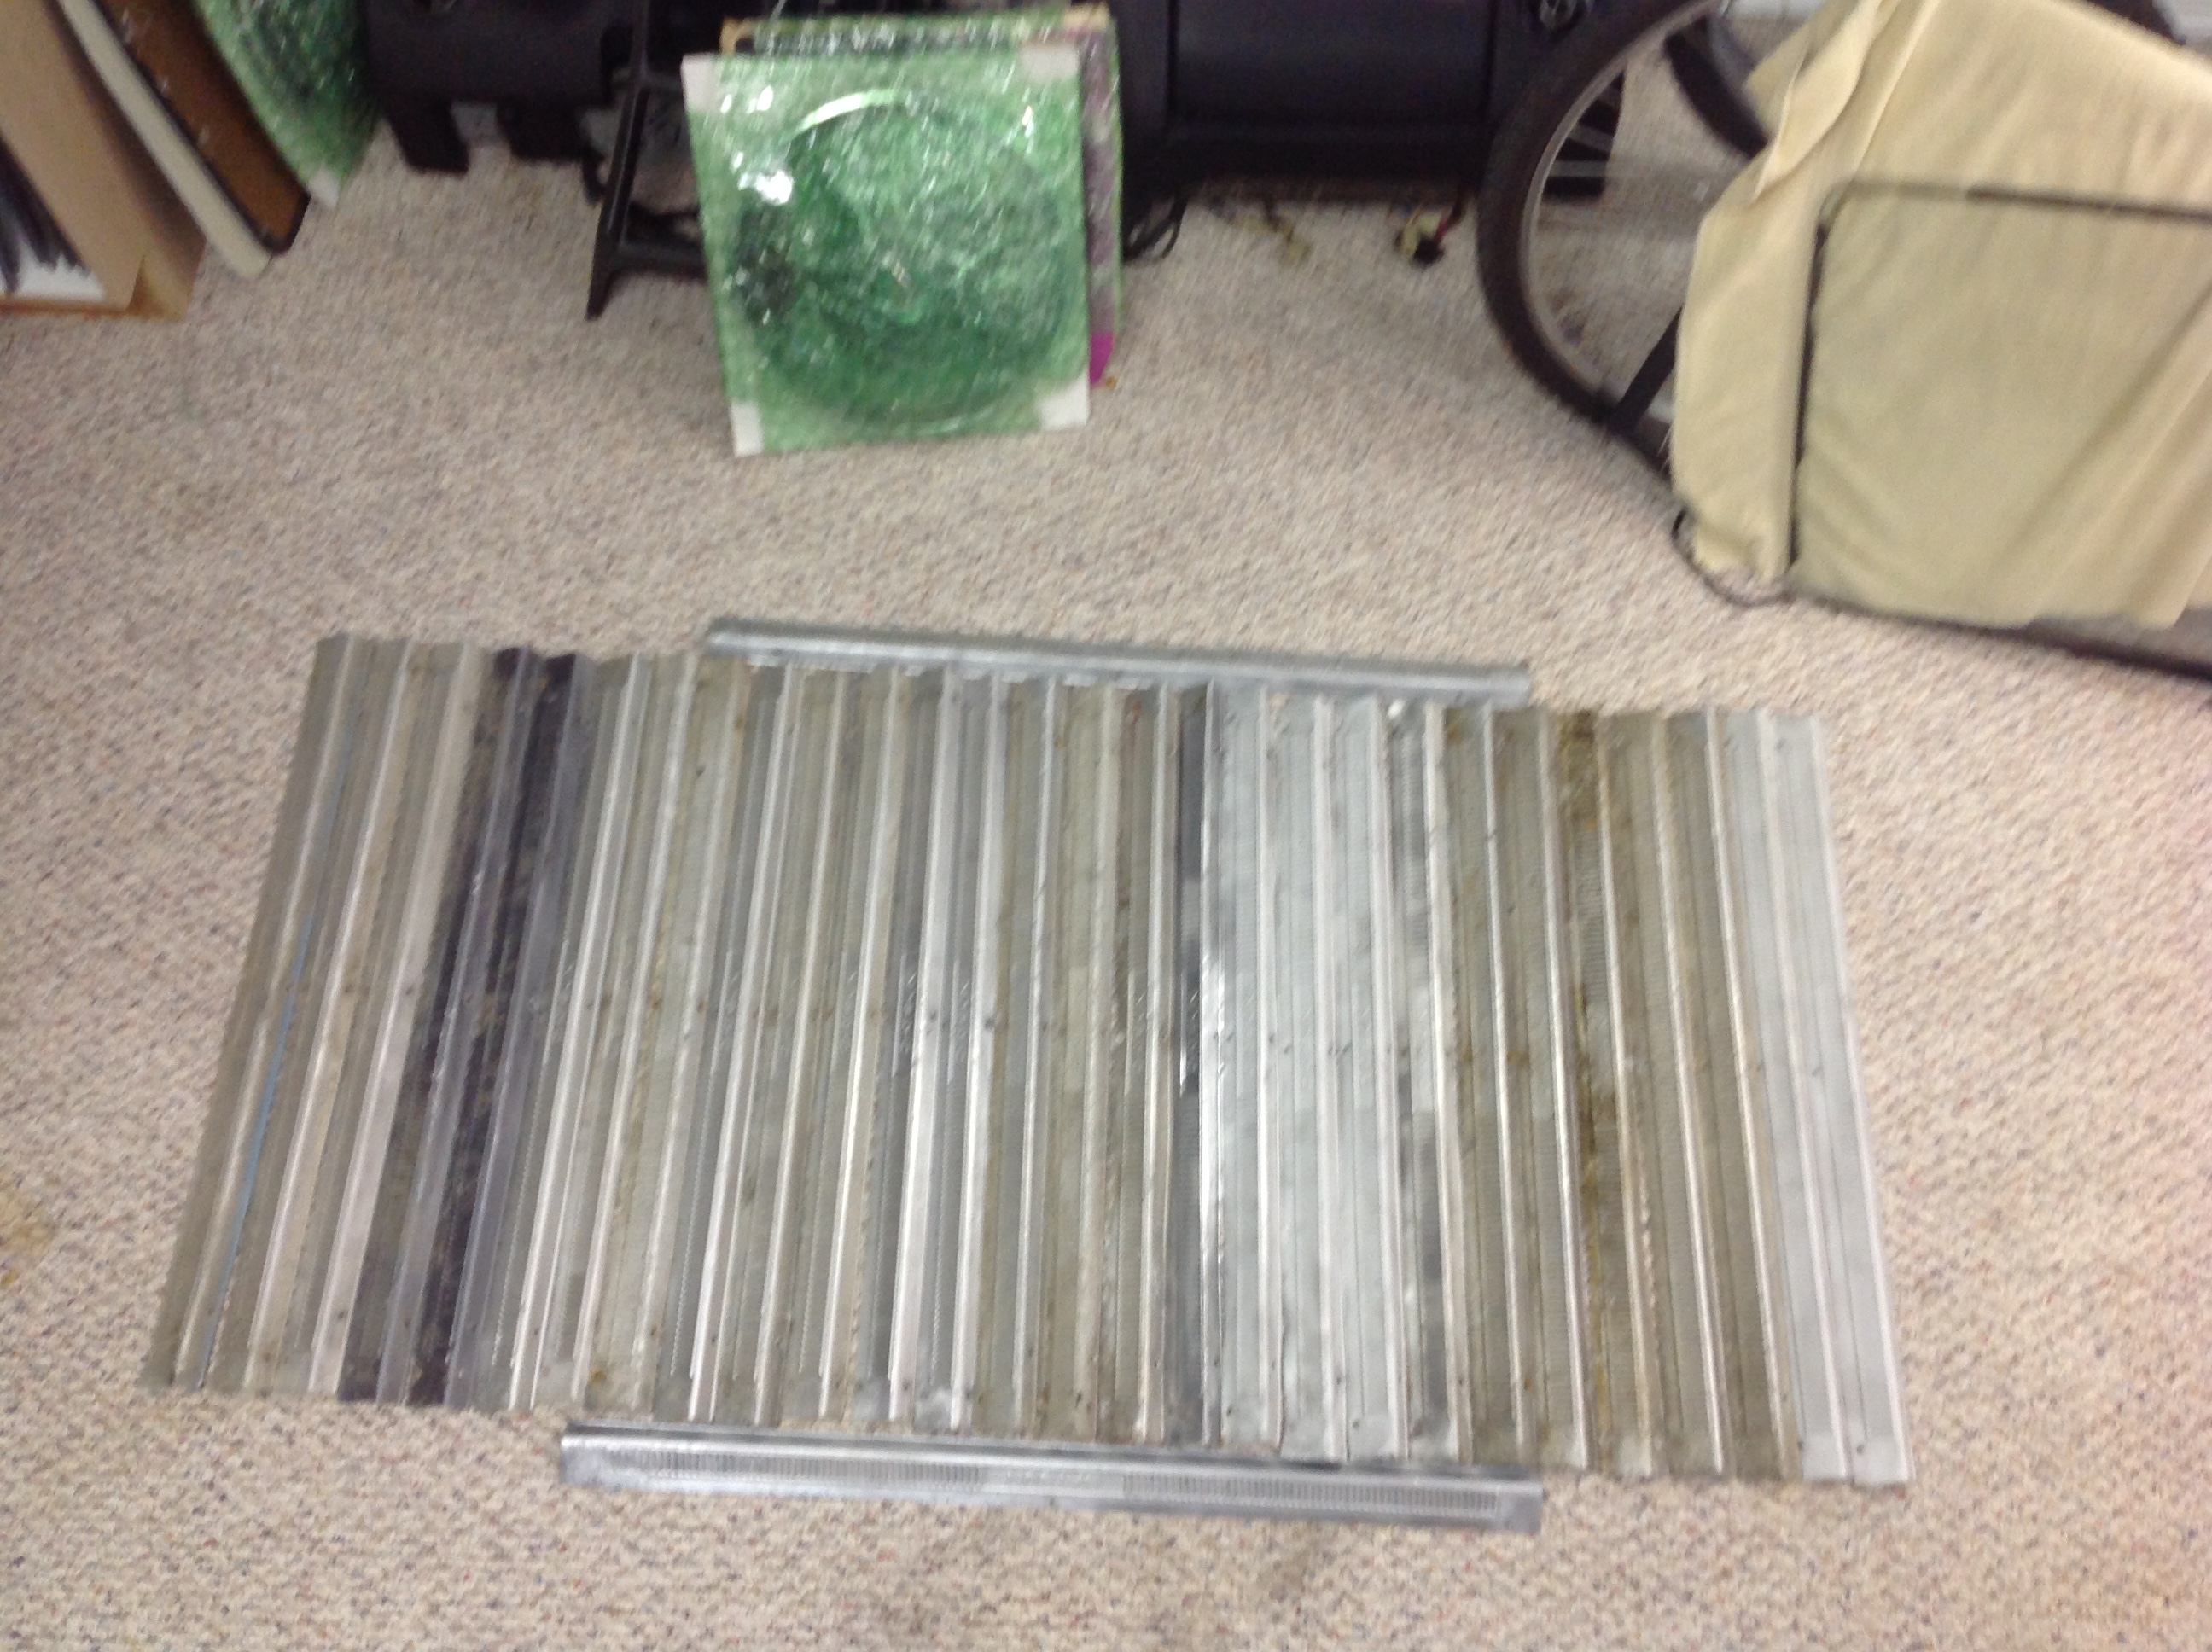
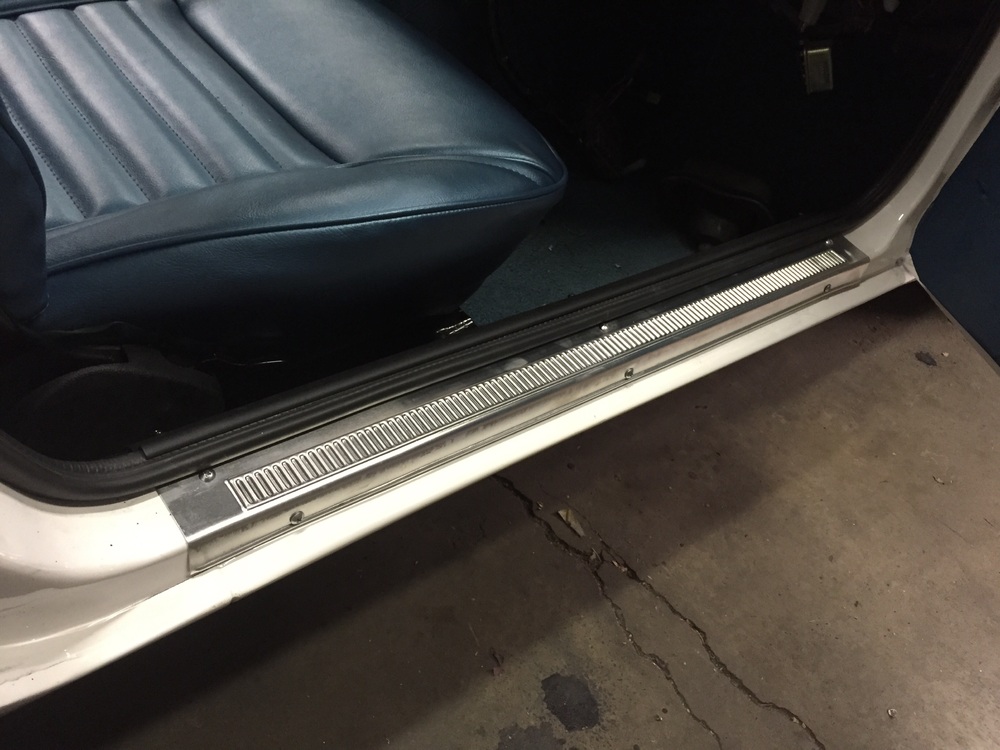
Let's see what you can spot in the threshold strip shine.
-
There. I'm black and blue and so is the car.


-
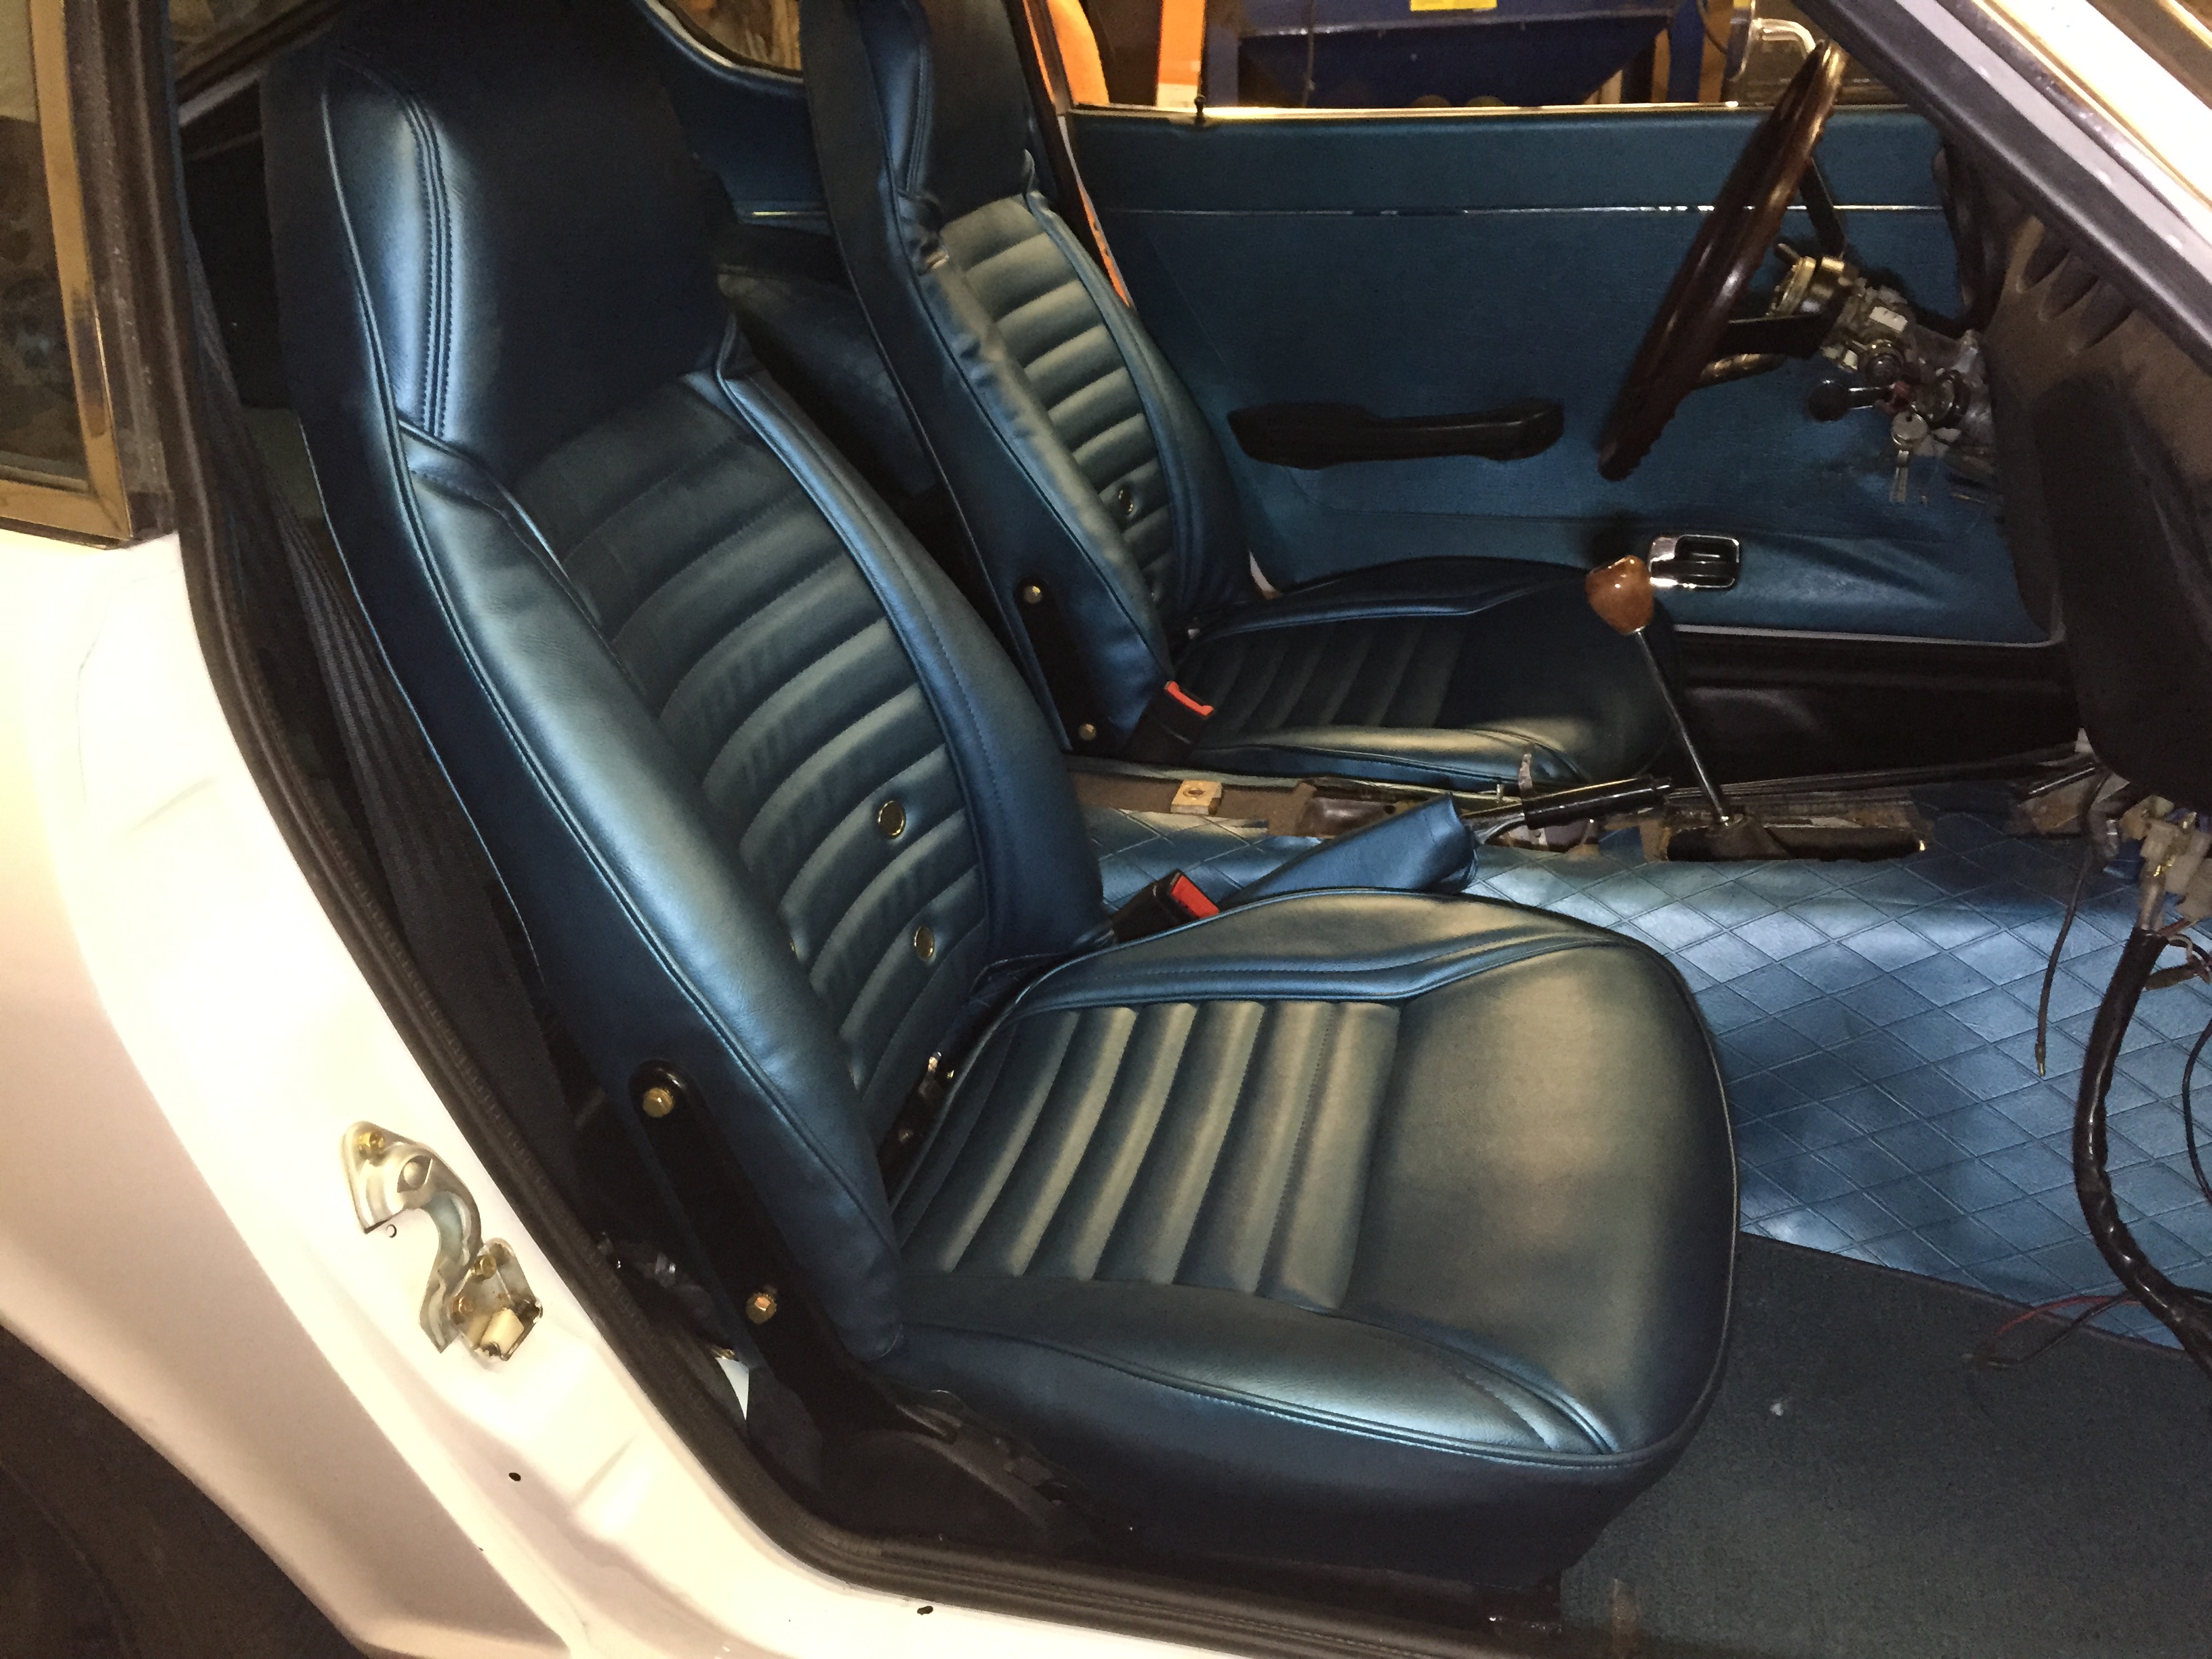
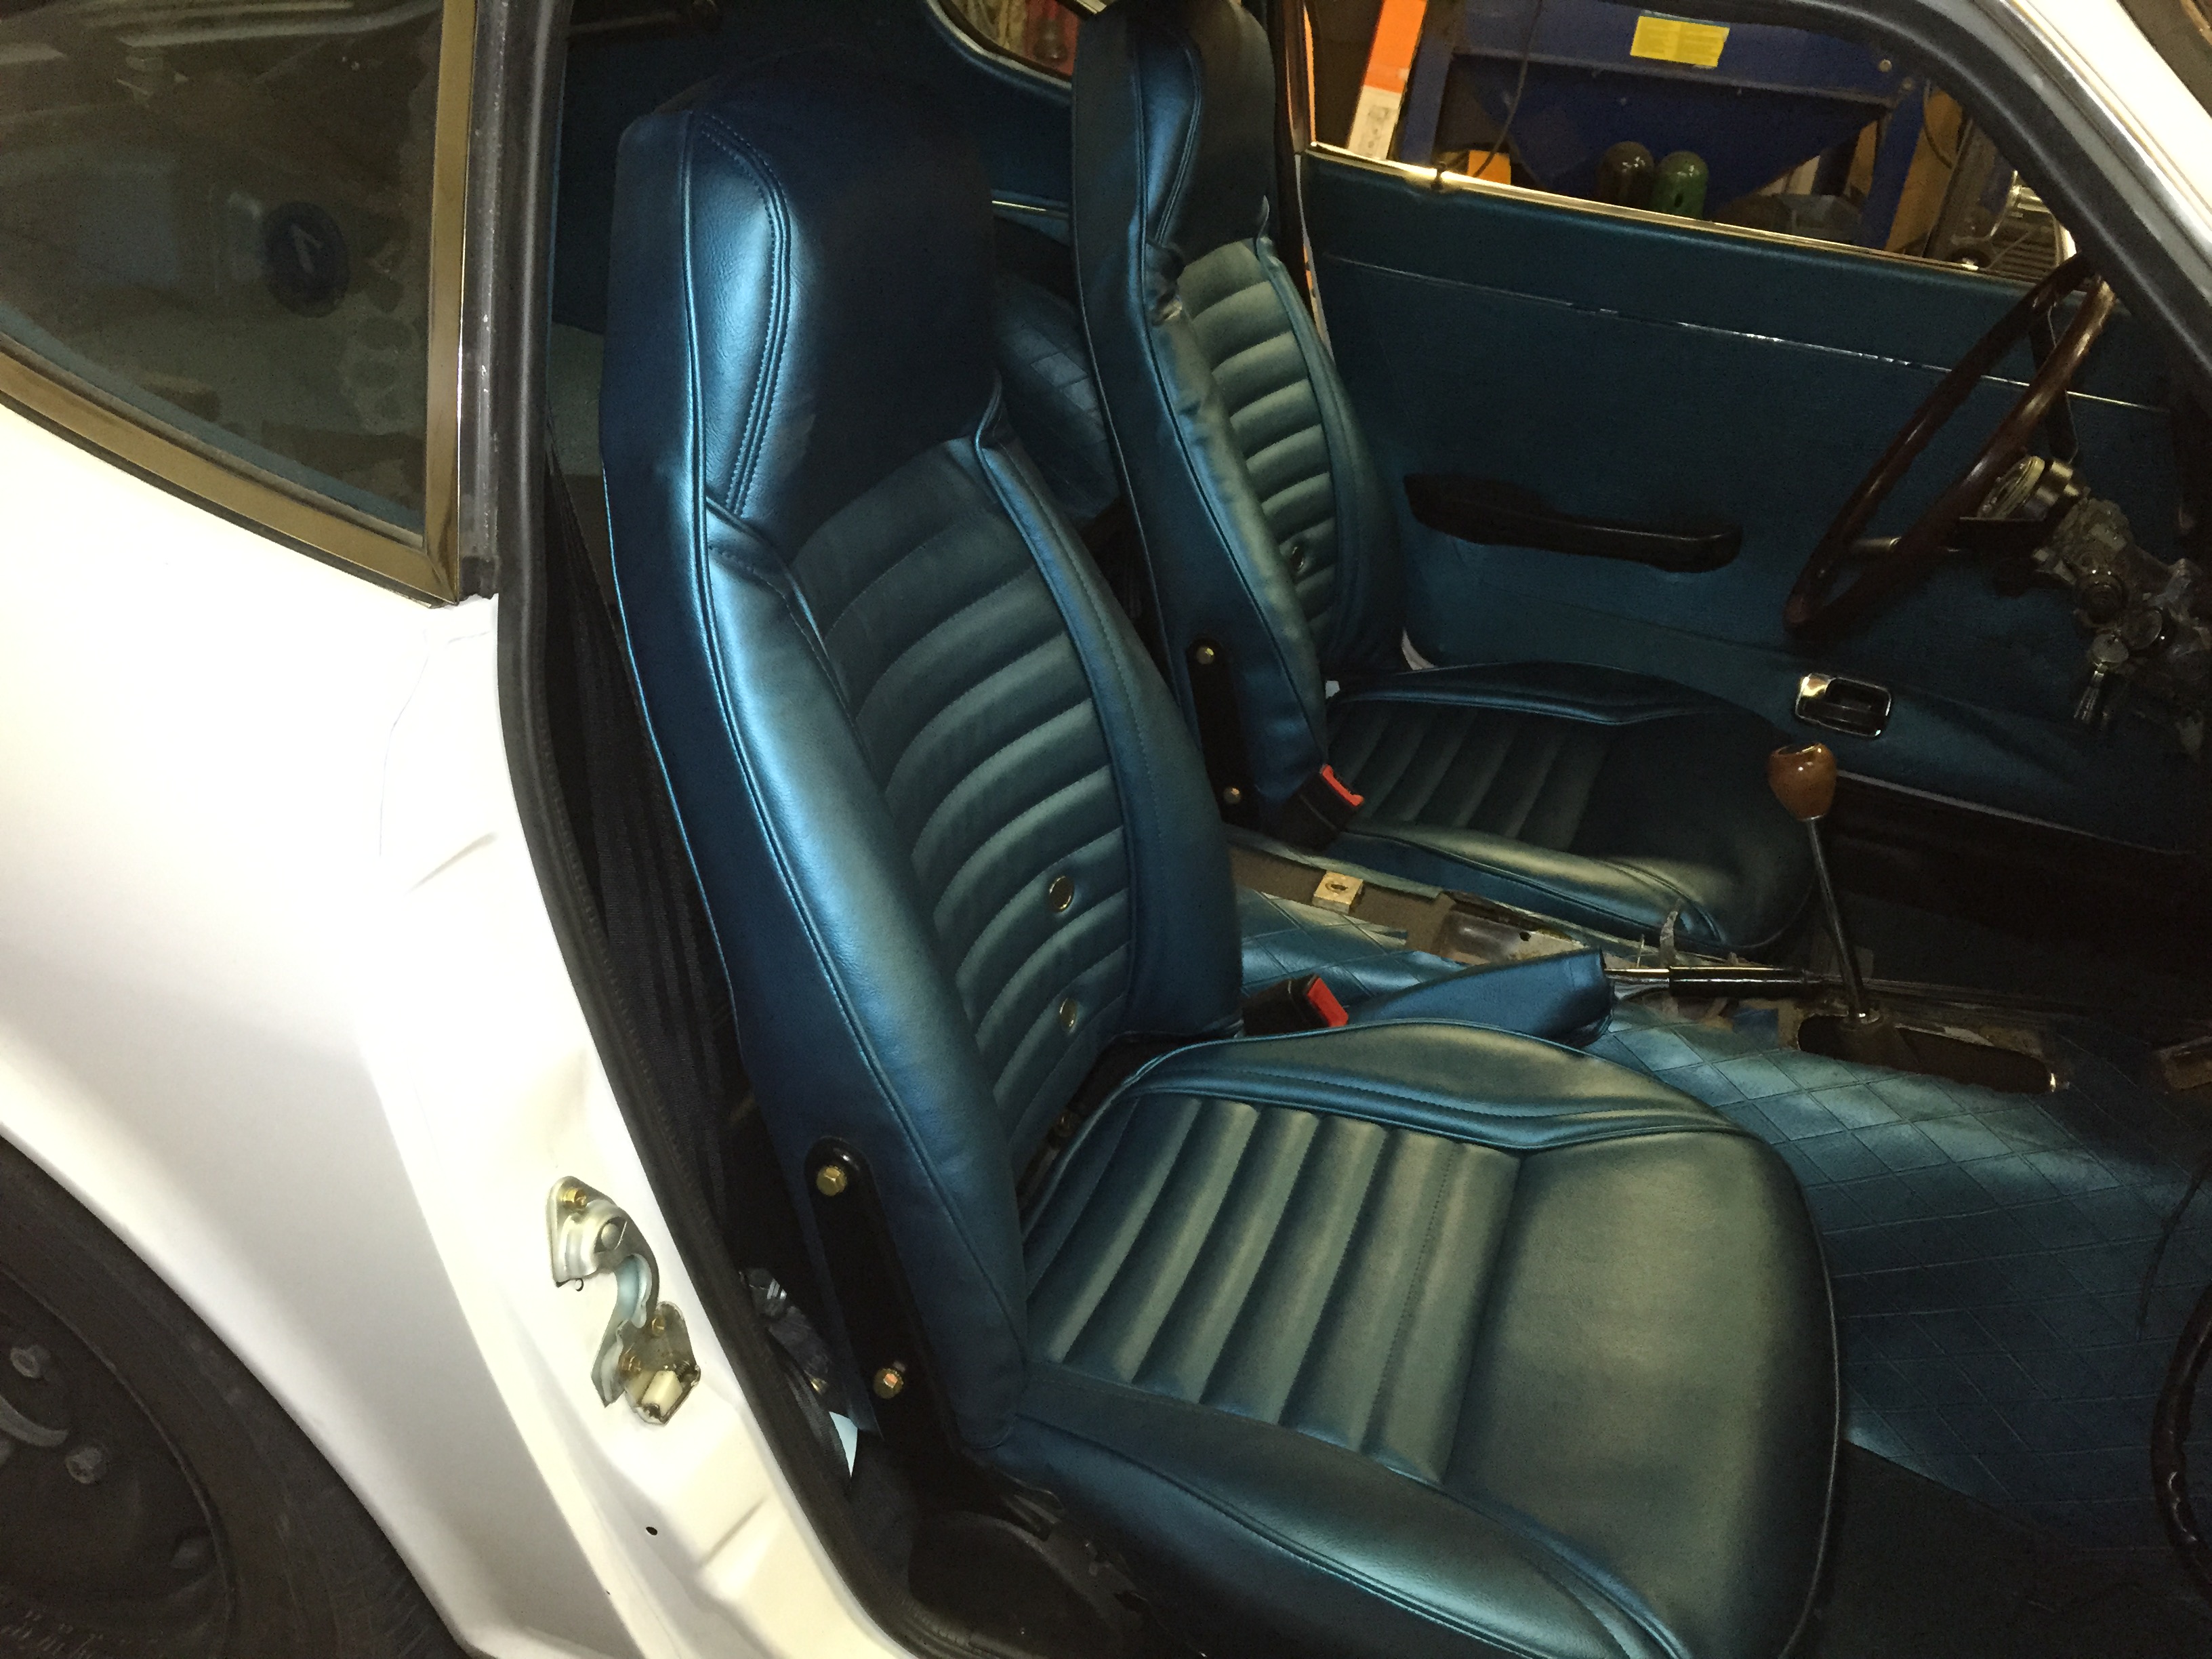
I bought the seat covers from MSA. The interior panels are all original re-dyed, except the tail light panel and one quarter window cover. Just finished wrestling the seat covers on the drivers seat. Now all four pieces are done. May I again thank all the upholsterers out there for their service. And the inventor of the zip tie. Without those things to pull the back rest upholstry ends together, and a heat gun to soften that thick vinyl, I'd be a basket case. Will have them back in the car soon and pictures coming this aft. P.S. I'll also have a like new set of black seat covers just laying around if anyone would like them... I am NOT installing them for you.
-
It goes round and round. Nothing special, its an asian "value priced" thing from Busy Bee tools here in Calgary. Wouldn't buy another one. Does the little things I need around here.
-
Okay you bunch of crows, focus on the pretty white thing in the middle of the shop, not the shiny stuff all around. Weeeee, you're welcome to drop in anytime. Love to show you around.
-
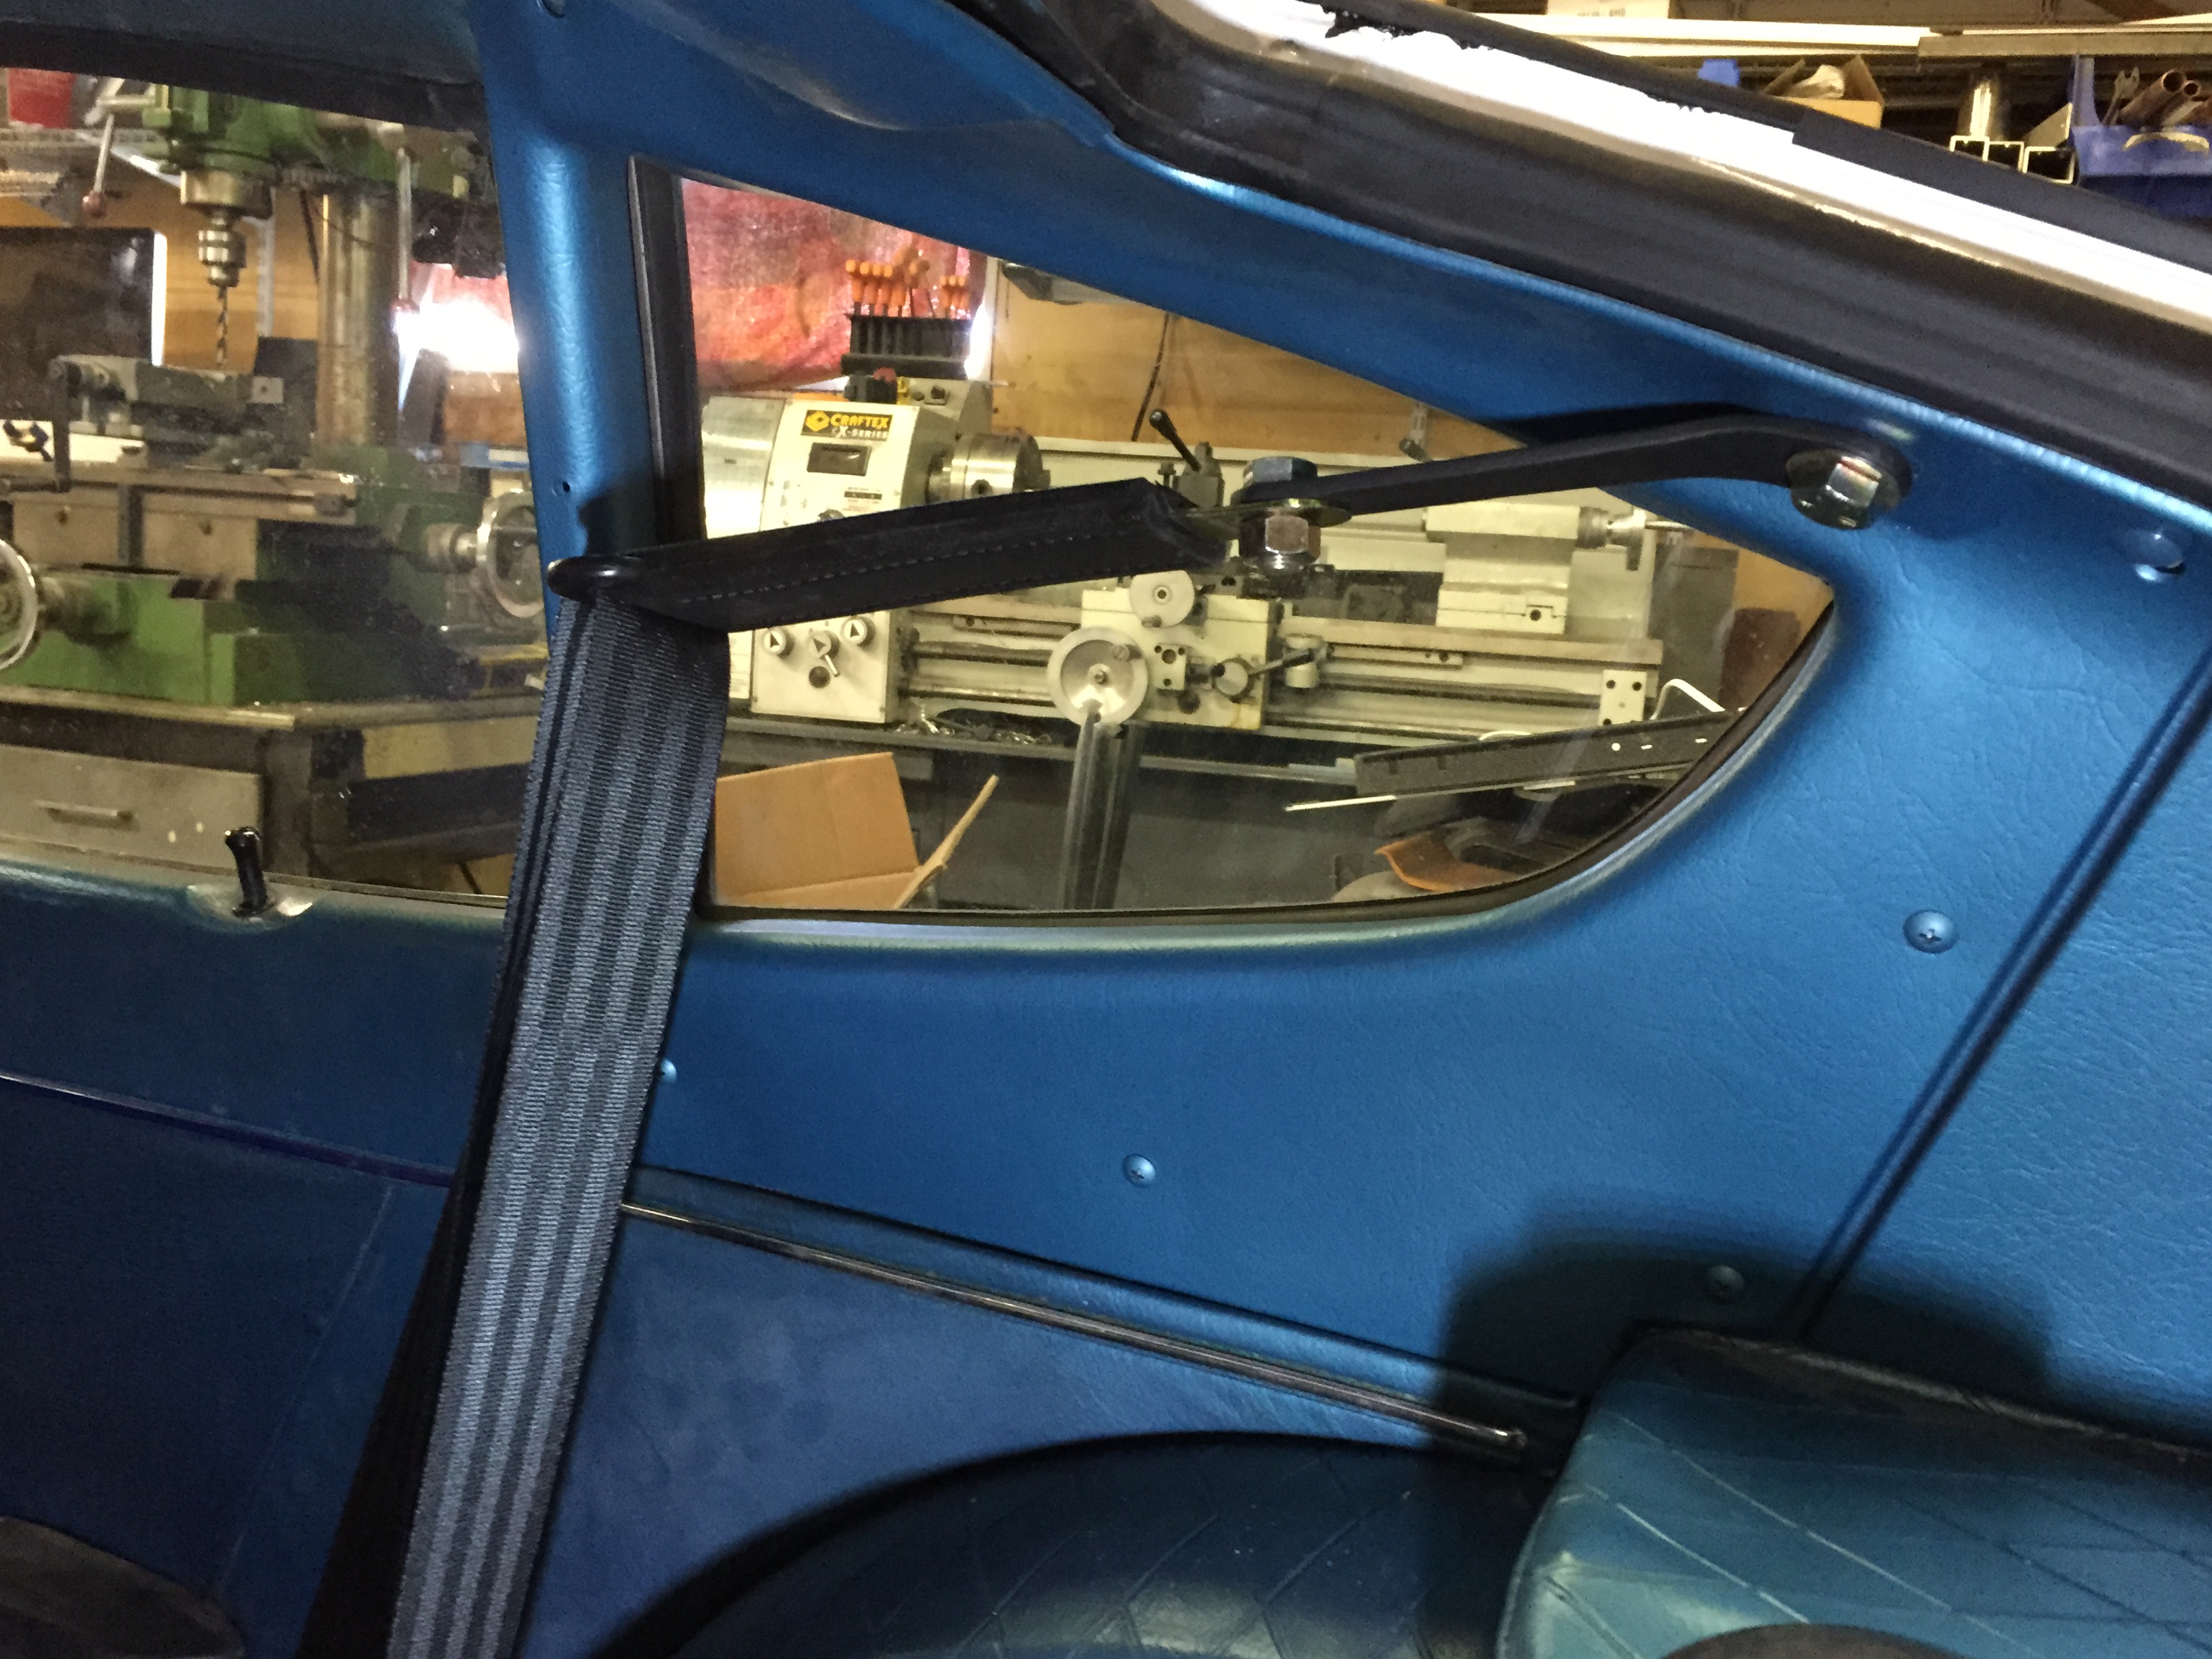
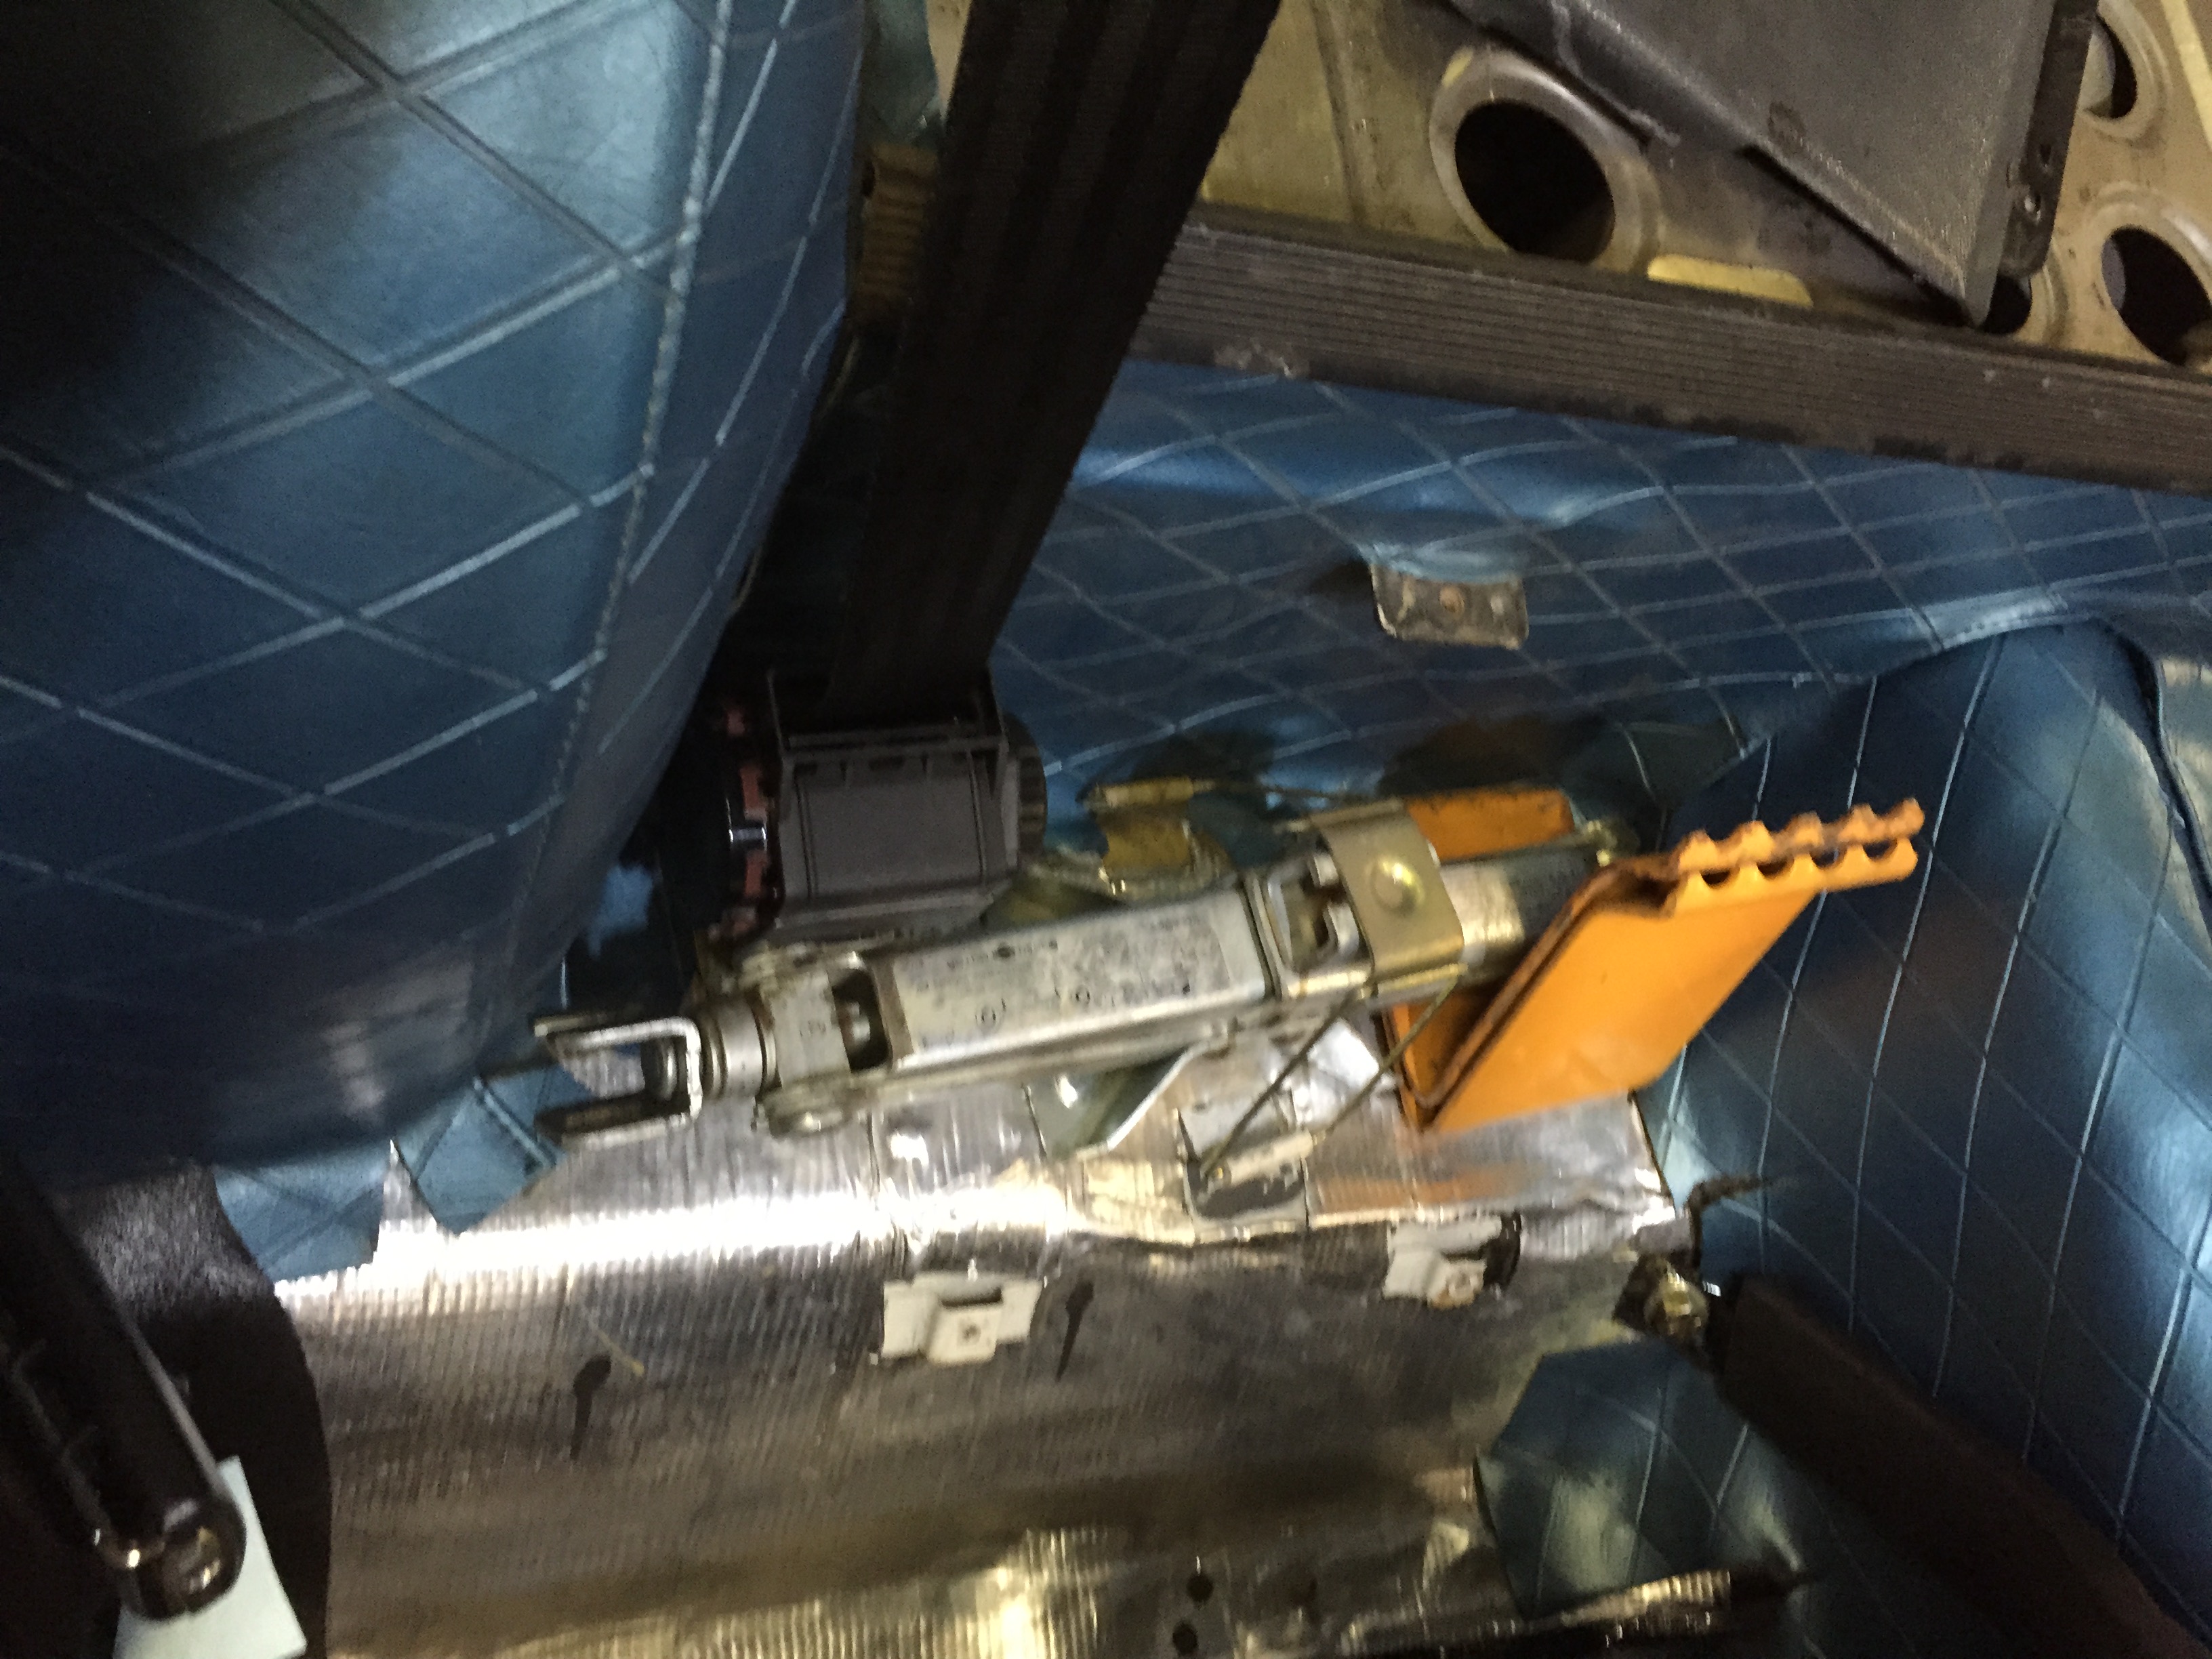
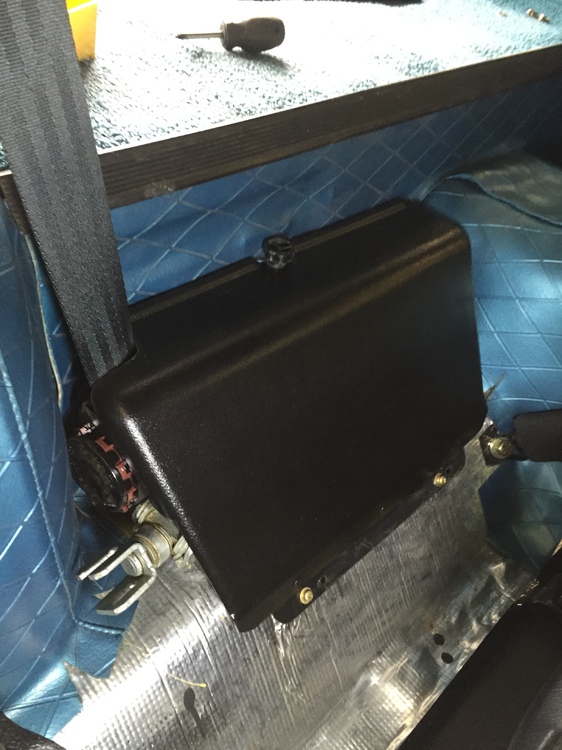
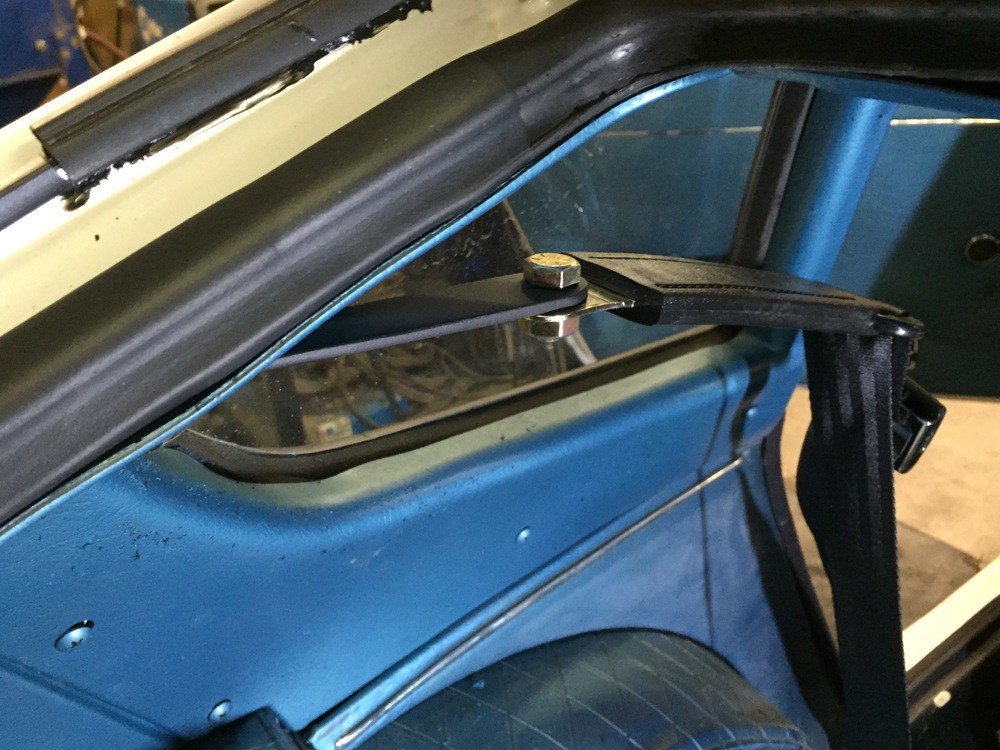
Some other blue interior pics. These were taken around my most recent new modern seat belt upgrade and how to do it properly in a series 1, oops I mean early Z with plastic behind the seat tool covers. It deserves it's own thread. Here the retractor reel fits right in the corner and still has room for the jack and wheel chocks. yes you have take a corner out of the cover to let the belt come thru. This is the shoulder belt extension that puts the pivot point loop just behind the drivers shoulder and puts the down going belt going straight down into the reel as its supposed to.


-
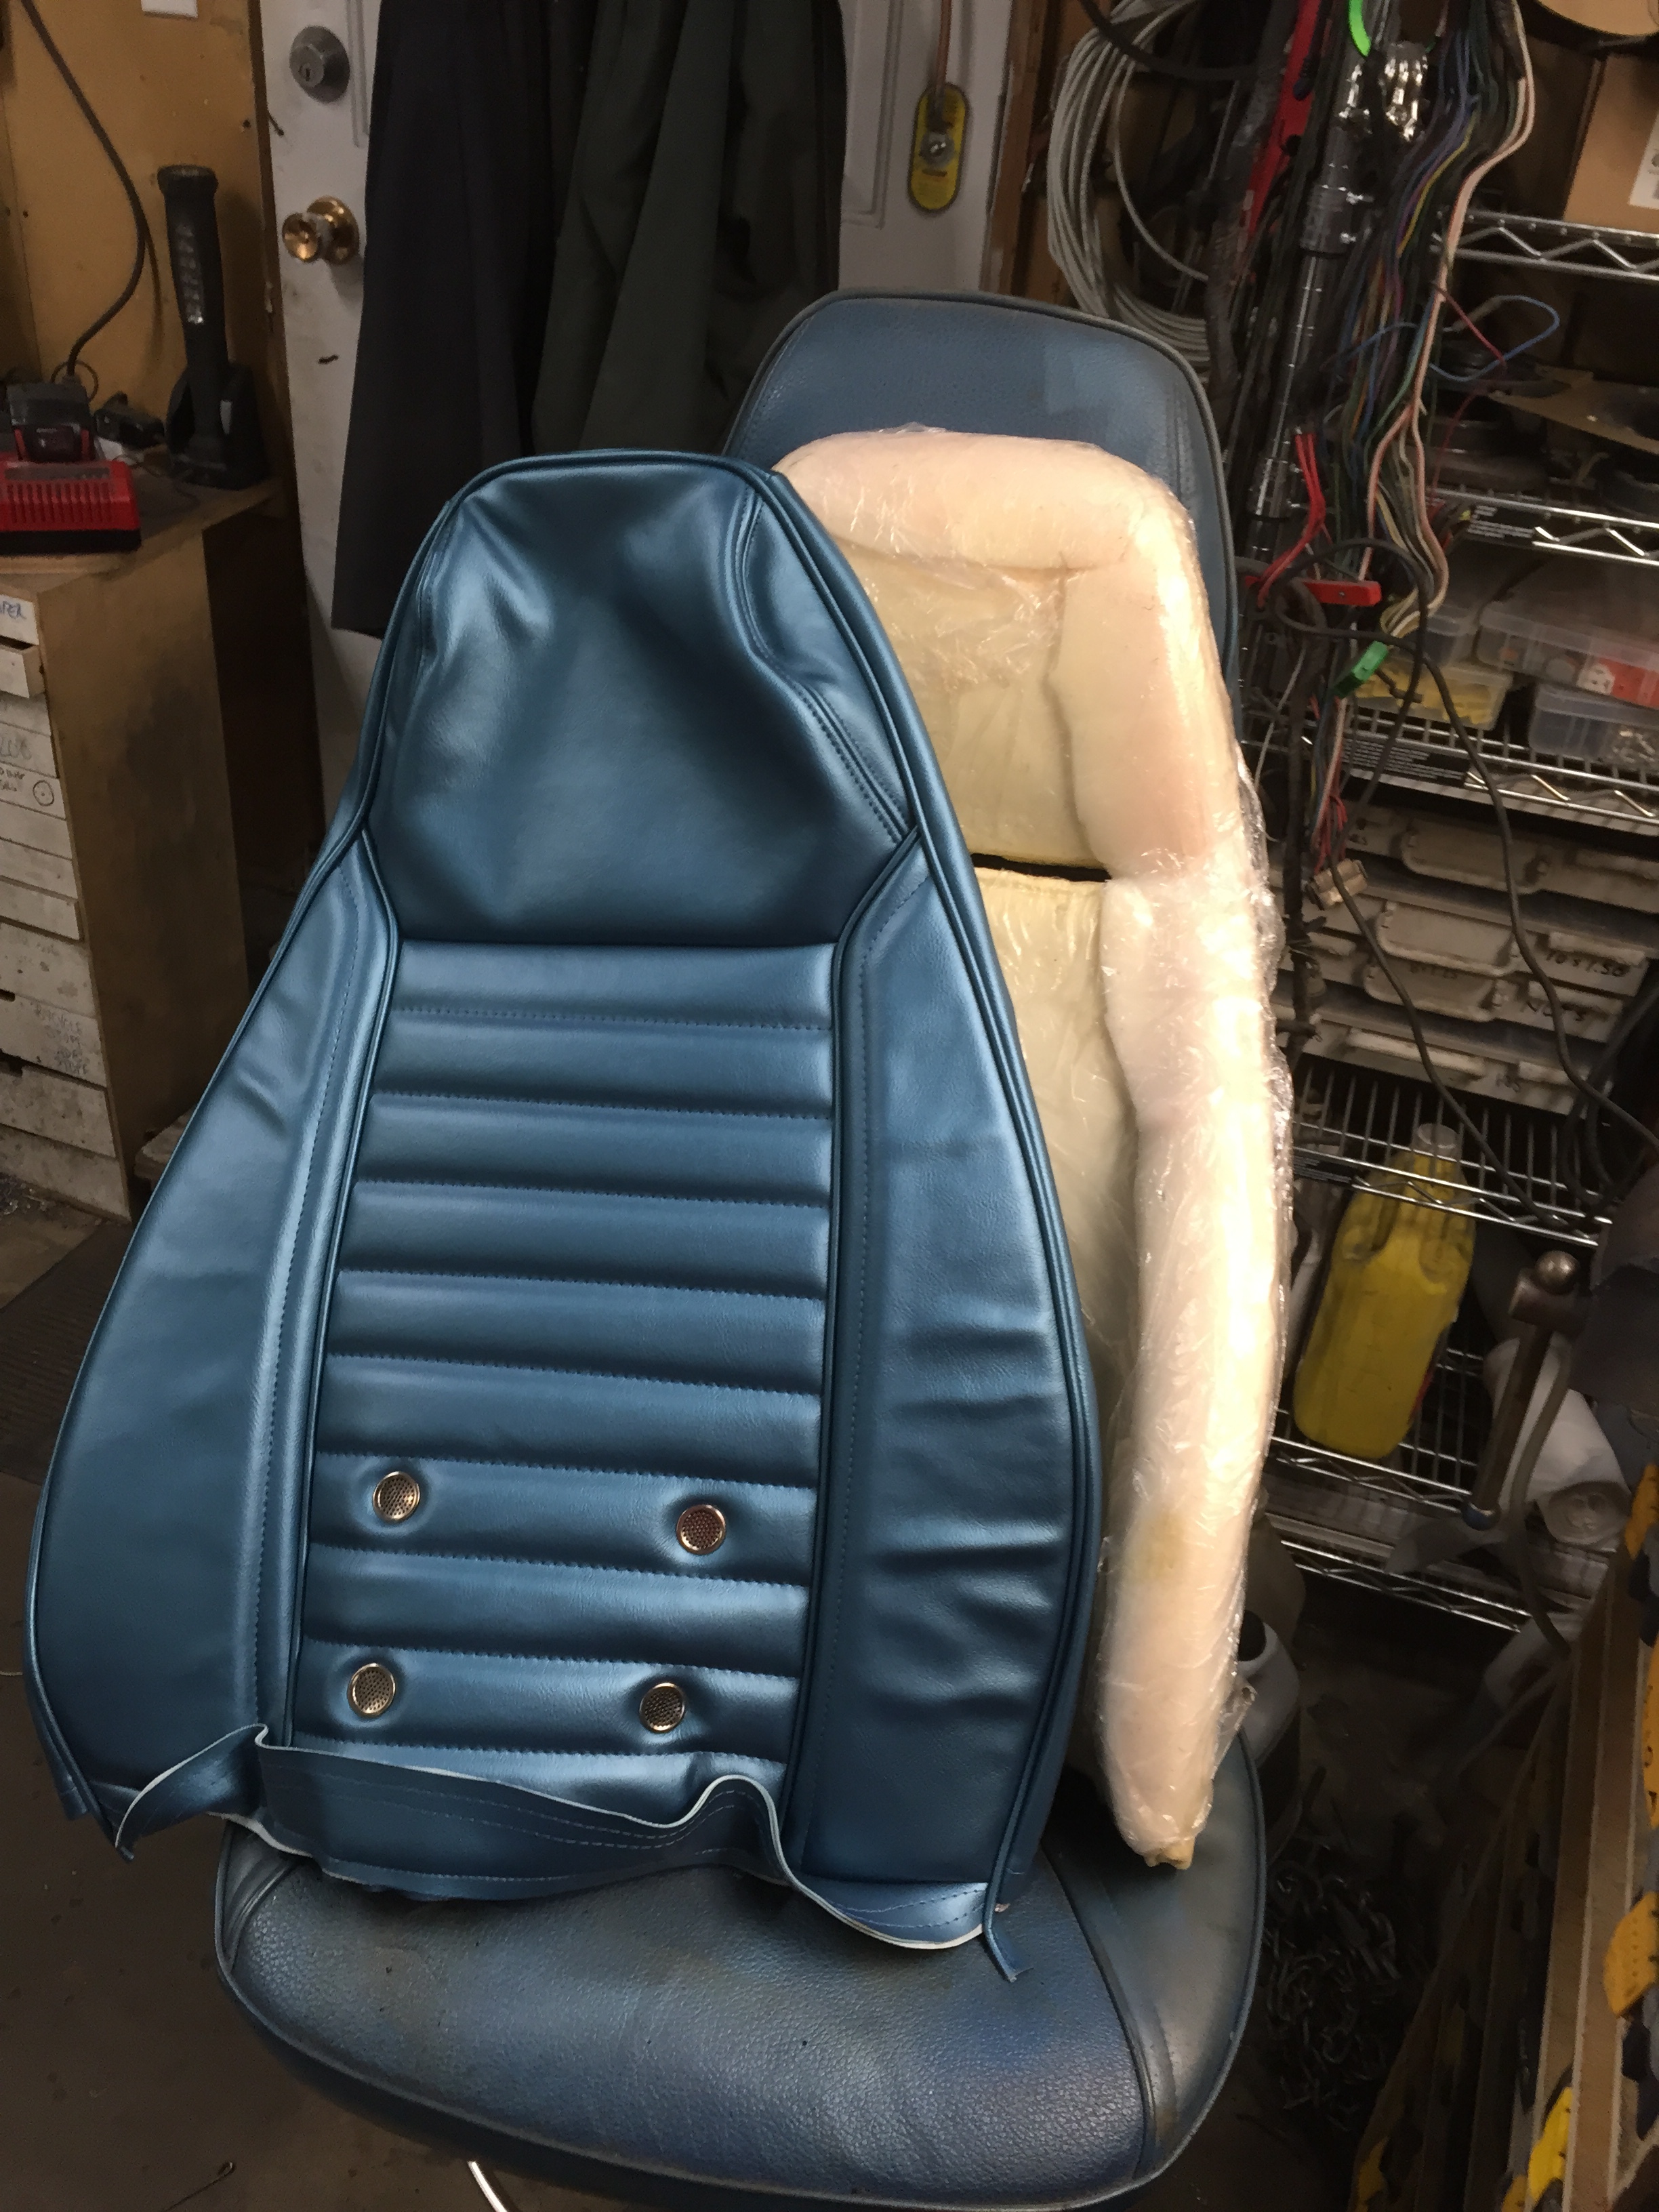
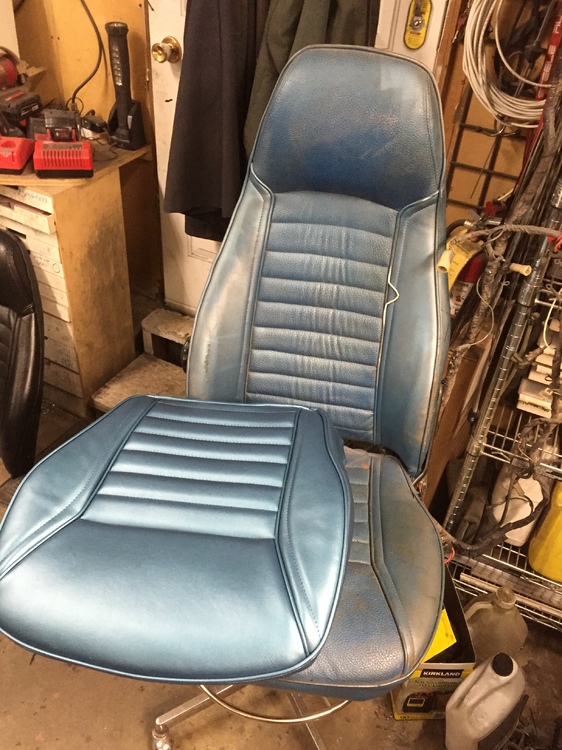
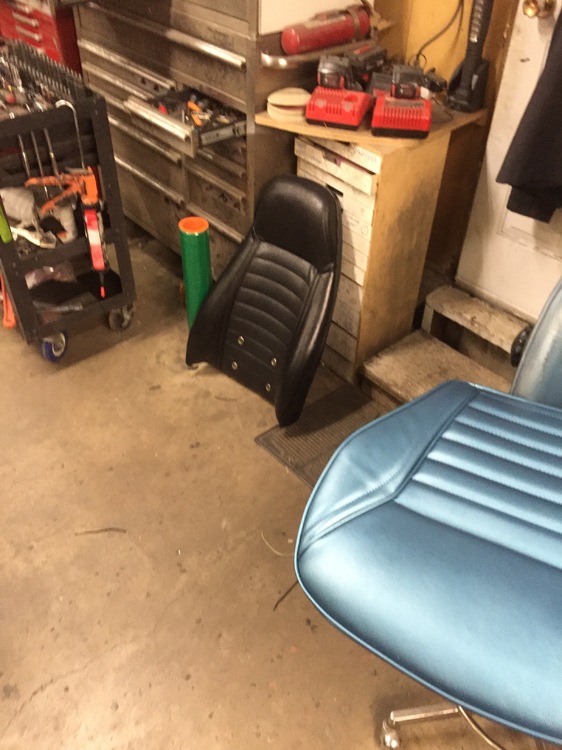
Now about the blue interior and some pictures. Truth is I'm just putting the new blue seat covers on the seats. The rest of the blue interior parts are in place, but with the black seats, no matter how new and pretty, it just kinda spoils it. I have a whole new respect for upholstry people after struggling on the first seat cover. Second one will be easier. Skin about to go on the foam. Note I'm working on the original blue seat that now functions as a shop seat and workbench. Very handy for unholstry work too! The black seat back waiting to be stripped, and new base with blue. Comparing old and new Old and new. The new material is much thicker stock than the old. Nice and stiff in the cold out in the shop today. The seats I'm using were recently totally rebuilt with new foam and springs. Everything is shiny clean and new now


-
A friend just sent me this link from Bring a Trailer. http://bringatrailer.com/listing/1973-datsun-240z-14/ And another high is set for a 240Z sale. $27,750 !!!! And its only a measly 73! (though a very nice one.) $25k for a fresh series 1 is looking pretty cheap. Just saying
-
Blue pictures coming tomorrow. Not pictures of Blue though.
-
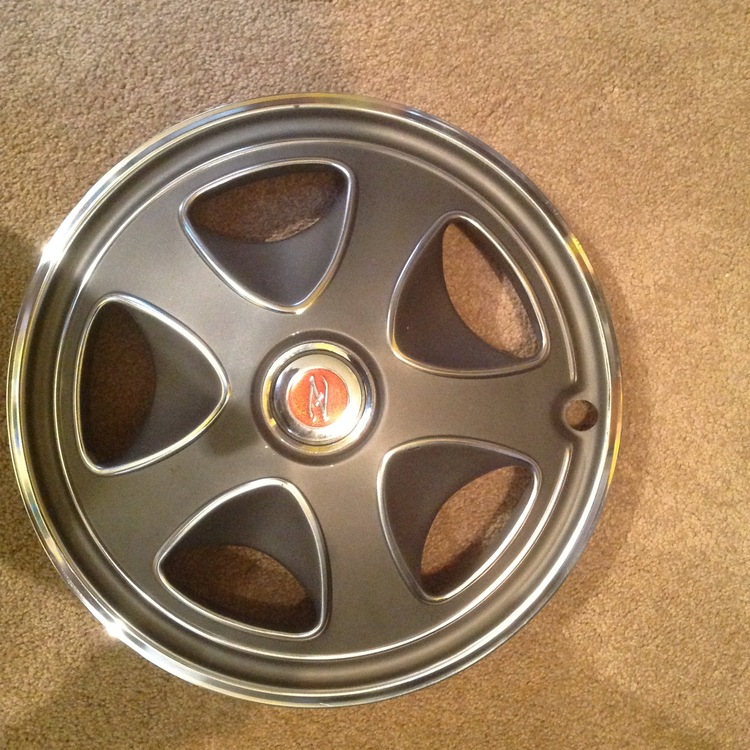
Four nearly perfect "Z" hub caps to go on the nearly perfect 14x5 stock rims. I know, I know.... Don't start. I have 4 14x6 aluminum slot mags you can have if this is too "Wrong"
-
Comes with its own "Cowl mounted LED lit tool tray" if one of "you" buy it!