


Rainman
Free Member
-
Joined
-
Last visited
Everything posted by Rainman
-
 Included below are the instructions for proper adjustment of the clutch slave cylinder and the clutch pedal with figures included... Hope this helps! Clutch adjustment (early 240Z models): 1. Detach the return spring from the clutch slave cylinder. 2. Loosen the locknut on the pushrod and then turn the adjusting nut until any movement in the withdrawal lever is just removed. 3. Back off the adjusting nut 1.5 turns and then tighten the locknut and reconnect the return spring. 4. When this adjustment is correctly carried out, a clearance between the face of the release bearing and the fingers of the diaphragm spring will be provided of 0.79 inches and a free movement at the clutch pedal of 0.39 to 0.59 inches. Clutch pedal adjustment (240Z Models): 1. Set the upper surface of the pedal pad 8.0 inches from the metal surface of the "toe board". Do this by adjusting the length of the master cylinder pushrod. The free movement at the pedal should be between 0.39 and 0.59 inches, otherwise adjust the slave cylinder pushrod as described in the previous section.
 -
Ownership of the lot will be public record in the county recorder's office. I'd take the address of the lot in and they should be able to supply the owner's info since the surrounding businesses are of no help. Best of luck!! Tom
-
Nice!! If you wander through Medford on the way, shoot me a PM if you're not in a hurry and want to drink some coffee or something. Tom
-
The 4 speed in my 260Z was leaking like mad when I woke the car up from an 11 year nap, so I had it rebuilt while it was out of the car to have the seals replaced. I got all the brass and bearings including synchros at the Nissan dealer for a very reasonable price, around $200 if memory serves. I took the tranny and the box of parts to a reputable import shop and they rebuilt it for around $200.. I'm sure you're local Nissan parts department could get the same parts for the same $$. Just a thought... Tom
-
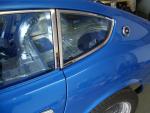
That little "reddish" convertible sitting next to the cinderblock wall is a Sunbeam Alpine or Tiger. My Dad restored a Tiger and it's a quick little beastie. There are only about 500 of those left in the US... Just curious what engine it has in it, maybe if you're over there again you could check it out? That car is likely worth some money to the right person, as are all those Z cars as one of the previous posts mentioned (the rust belt).
-
Sounds like you need to adjust the clutch pedal and slave cylinder. Let me know and I'll post the instructions for an early 240Z if it'll help. You can find it in the FSM I'm sure but my input will come from a Haynes manual... Tom.
-
I took my ignition switch to a locksmith with a new key cut from the code found inside my glovebox and they were able to rebuild the lock in the ignition switch using the new key. Cost about $40. Works great now...
-
My header has returned from Jet-Hot Coatings in Tempe, after two and a half weeks. It looks really nice!! Here is a picture of it.... Header: $200 Jet-Hot Sterling coating: $300 Knowing it won't rust away in a few years: Priceless The installation went a lot quicker than the removal of the old exhaust manifold. Of course I had several weeks to prepare everything as I noted in my previous post. Got a couple new studs and a new set of exhaust nuts at the Nissan dealer. After touching up all the threads on the old studs, everything went together nice and easily. Here's a pic of the header in place on the engine.. The intake manifold and Weber carbs are in the next pic. It looks pretty decent in the pics and in person as well as long as you don't get any closer than about 20 feet! I took the car in to an exhaust shop yesterday afternoon and I'm told it should be done by the end of the day. I'm really looking forward to getting the car back and hearing how the new exhaust sounds. Hope you enjoyed reading my exhaust oddysey. Let me know if you have any questions, I'll be happy to help.
-
FWIW... I sent a header in to Jet-Hot coatings just a couple weeks ago, it should be back any day now with any luck. It's a metal/ceramic coating process that is pricey but it sure looks good and is guaranteed. Check out their website: http://www.jet-hot.com/ Customer service is excellent and turn around time was quick.. only about a week between when they got the part and when they shipped it back out to me. It cost me about $300 to have a 6-into-2 header coated with the sterling finish coating. They will coat anything you send them including intake manifolds, etc. I was going to send along a collector for the header and they would have charged me $15 per foot of tubing. Ultimately I decided not to do that right now. The good thing is they will accept those nasty rusted headers and prep them up right for the coating, they don't have to be new. Mine weren't new but they weren't nasty rusty either. Are you talking about coating your entire exhaust system? That would be sweet and you'd likely never need to replace it either. Costly though.. Whew!! Hope this helps... Tom.
-
-
-
My '74 260Z has some noticeable exhaust leaks that I've been ignoring since I woke it up from an 11 year nap in 2006. Well, I finally decided to roll my sleeves up and see what kind of damage I could really do to the system.... My wife was off work for spring break a couple weeks ago so that's when I decided to start this project. Being able to use the car she drives to get to work as necessary was the deciding factor. I put the car up on jack stands and removed the single (the other two were broken off in the past) nut holding the exhaust pipe onto the stock manifold. My intent was drill out the broken off studs and replace them, reinstall the exhaust system and that would be the end of it. Not so easy... As I'm drilling out the broken off studs, I notice the underside of the heat shield between the intake and exhaust manifolds and it sure is black and sooty. That doesn't seem right.. better take it off and see what's going on behind it.... There I find the big crack in the exhaust manifold... Oh NOooooo!! Picture to be added later... Obviously this won't do.... Luckily I have a 6-into-2 header that I bought from a friend. Been meaning to send it in to Jet-Hot for a nice Sterling Coating, just needed to get the money together. No time like the present I guess... A quick meeting with the boss (my wife, Steph) about the finances and I get a reluctant thumbs up after much begging and pleading! Hey, I'll take it however I can get it!! So here's the plan: I'll send the header away for coating after I've removed the intake and exhaust manifolds. That way I have a chance to fit it as my car sits pretty low. A good thing too, I needed to have it shortened a bit to allow for improved clearance. Whew!! The biggest pain in the rear of the manifold removal was draining the coolant from the system as it is plumbed all through the intake manifold for emissions. Or it used to be that is!! I've removed all that hardware and have since plugged all those 'no longer necessary' holes with pipe fittings. Most of the exhaust nuts were easily removed, no studs were broken off in the process!! The most aft stud was previously broken off and was easily removed with the help of a left handed drill bit, screw extractor, some candle wax and copious amounts of heat. I also removed the most forward stud as it is rumored to be near breaking off if it hasn't already. I cleaned up the mating surfaces on the head with a dremel tool and a polishing attachment I found at the hardware store. It resembled a really tough pencil eraser head... anyway.. Any old gasket material was handily removed and it looks real good to boot! I touched up the threads on the remaining studs with an 8mm x 1.25 die. Did the same to the threaded holes in the head with a 8mm x 1.25 tap. Took a wire wheel to the exhaust manifold and balance tube. They actually look pretty sharp now! I think I'll even take some time to tidy up the engine compartment some while I have so much room on both sides of the engine now. If the weather warms up this week as it is forecast then I'll do it. I also cleaned up the valve cover while it's so easily accessible. The header should ship today according to Jet Hot so I'm hoping to have it back by the end of the week. Then it's off to the exhaust shop to graft the new header into the existing rusted mess of an exhaust system. Should I drive it to the shop with open headers?? :eek: Oh and don't worry, I'll get some pictures included in the next update! Well, that's about all I have to add for now. Watch for updates and some pics in the next couple days... Until then, take care and thanks for reading!
-
-
It's been a while but since I started this project but I thought an update was in order.... I just got my 260Z to run for the first time tonight! It's not a paperweight anymore. It ended up being so much more work than I originally planned but it's all finally come together. Here's the whole story... I replaced all of the brake components except for the brake pedal and the hard lines. Even put in a set of Toyota 4 piston calipers. New master cylinder and vacuum booster, braided stainless lines, wheel cylinders, all of it new. Pulled the tranny and had all the brass and bushings replaced, new centerforce clutch, new throwout bearing and collar, new master and slave cylinders. Resurfaced the flywheel, installed a new input shaft bushing. Cleaned up the differential and put a new rear cover gasket in it and refilled with fresh gear oil. All the fuel and vent lines have been replaced, the tank boiled out and coated, new filler neck rubber too. Rebuilt my Weber DGV's, installed remanufactured distributor, new coil, new plugs and wires. The radiator was boiled out. Installed new Kokico's all the way around too. Mechanically the car is like new. Still have a few little things to work out, windsheild wipers don't work. Lights only work on high beam. Should be fun chasing the little bugs out of it for a few months now. I sure appreciate all the input offered and thanks so much for all the encouragement. Will see how she handles a longer drive tomorrow!
-
Just dropped mine off to be powder coated. Will post pics once I get it back.
-
Thanks for sharing your project Mike, it sure looks nice! The pics have been very enjoyable. Next time up in the northern end of the state, I'll stop in to see the guys at Ztherapy some time as well. Sounds like a great group of people. Stop in and say hi if you find yourself going through Medford! Tom.
-
Thanks a bunch for the update Mike, I was certain you hadn't forgotten about it! It's fun to keep up with your progress since the situation surrounding our cars is so similar. Glad to hear that your engine isn't sticking any more! Just keep pressing on and we'll both get there eventually! I hope the recovery from your buddy's wedding is speedy as well. Be sure and give me shout should you end up down south in Medford. Will catch up with you one of these days...
-
Thanks for the coolant suggestion Gary, I think I will fill the system only with water as you say until I know for sure it's all set and ready to go. Might as well pull the T-stat while I'm at just to make sure the potential trouble spots are checked out. I appreciate you offering up the manifold with the blocked tubes. I intend to find a set of headers for it eventually so I will pass on your most generous offer. Thanks anyway though!! So that's what a strap wrench is! Thanks Mike, and I hope your Z is coming out alright as you continue to knock the cobwebs out of it. I'm making decent progress on mine. I pulled the dual Webers out of it and got one cleaned up tonight. The difference between the two is striking. I still need to clean up the second and order a set of rebuild kits this week. The rubber diaphrams just don't like to sit around for 11 years I guess. At least they were dry though!!
-
Replacing all your cooling lines and fitting sounds like a great idea, Arne! The piping coming off my thermostat housing is pretty gunky, with no shortage of the whitish/yellowish corrosion from years of sitting there. I think I'm just going to replace the worst of the hoses right now since my car won't be road worthy for a while even if it happens to start right up once I try it for the first time. Do you think I should replace the thermostat while I'm in there? I'll still need to go through the brakes and clutch hydraulic systems. I took the cap off the clutch cylinder today and the fluid wasn't liquid anymore, it was about the consistency of petroleum jelly. Very interesting. It's a good thing I'm not in a hurry! I made some pretty good progress today. I got all of the fuel lines out of the engine compartment and am ready to go buy the replacements. The ATF is soaking in the cylinders, I'll leave it a while longer as I don't have a big enough socket to get on the nut in the crank pulley. I'll bet you know what size it is...25mm, 27mm?? the biggest I have is a 22mm. Would it be better if I didn't try to rotate the crank using that nut? Let me know what you think! Mr. Beck mentioned a strap wrench, though I'm not sure I've ever seen one of them. I removed the old smog pump and all the plumbing that goes with it. I'll need to find a cap for the area where the hose connected to the "rail" with lines distributing some of the pumped air into each leg of the exhaust manifold (sorry, not familiar w/the terminology!). I found your reply about the intake cooling subsystem interesting. I'm hesitant to pull all that off the engine right now as only a little heat shield isolates the intake from the exhaust manifold. The coolant runs through every single piece of the intake manifold, even the Weber adapters. Those adapters were the gunky pieces that I mentioned earlier, everything else seemed pretty clean but I still intend to run some clean water through it before I replace the coolant. Let me know what you think about the method of turning the crank... and if anyone else has any input, please don't be shy! I'll be watching your online diary while I'm on the road later this week Arne, so best of luck w/ your engine swap! Have a great week and I'll catch you later! Tom.
-
Hey Mike, How's your progress? I've been watching your thread as you work through your Z's partially rotating engine. My 260Z is in a similar state and I have been working through Mr. Beck's awakening list as well. My thread is "Hello from Oregon" (I live down south in Medford). Hang in there and don't give up! I'll be watching for your updates and hoping for the best for you! Take care and enjoy the weekend. Tom.
-
I just got my fuel tank back from the radiator shop but I'm not very pleased with the work they did so it may have to go back for a second dip.. Bummer! Best to have it done right while it's out of the car the first time though. I decided to take the Weber carbs off the car and have them looked over by a fellow that knows them well. Will also rotate the engine by hand this weekend after the ATF treatment mentioned in the "waking the sleeping beast" thread. I've also drained the radiator this week and need to replace some tubing in that system before I flush and refill it. The coolant looks fairly clean with the exception of the stuff that came out of the intake manifold area, it was pretty yucky. Anyway, I should be ready to go once the fuel tank gets corrected and reinstalled. I'll keep everyone posted on my progress next week.
-
Thanks for all the great pics Astrohog and best of luck with your refresh! I'm just starting to work on my early '74 260Z so I'll be right there with you. Have fun!
-
Thanks so much for the welcome Pir0San, theianmonster and Jim! It'll be fun to share my project with everyone and get the kind of help that I've seen already on this and other threads. Thanks for the link Carl, but I was all over your post in the "waking the beast" thread. I've already printed out your suggestions and they are on my toolbox as we speak! Mike and I have much in common! I read every entry at Arne's website until late in the evening last night and very much enjoyed the time and effort you put into keeping the site current. I will have some electrical issues to iron out as well. My 260 was having some intermittent issues with the driver side headlight before it quit running completely (no spark). I removed my fuel tank last night and will have it boiled and painted this week. Once that's done, I intend to replace all the fuel and vent lines in the back and under the hood. I have already bought the ATF, it will go into the cylinders upon completion of this post and I hope to manually move the crankshaft pulley next weekend. I'll keep you posted with my progress!!
-
Thanks Arne! I'm learning plenty already. Seems there is another newbie like me up in Portland that just got a Z for free (lucky dog!!) and there have been some great posts on his thread that also apply to my car. I'll certainly keep you posted on my progress!
-
Hello All, I'm new to this group though I've owned my early '74 260Z for 13 years. Am just beginning the big project of refurbishing this car as it hasn't ran for the last 11 of those years. The body is straight with the exception of a few dents and has no rust. All the systems need to be reworked and the engine needs to be rebuilt (I presume). It always ran great and never leaked or burned a bit of oil. If you've ever had an engine that sat for so long and have any input, please let me know your thoughts!! Anyway, I'm certain I'll have my hands full this winter but I'm going to need a second car by next spring and I know my good 'ole Z car is up for that. I look forward to hearing from you and learning about your Z car! Until then, take care and thanks for reading! Tom.