Jump to content

Rainman

Free Member
  • Joined

  • Last visited

Blog Entries posted by Rainman

  1. Rainman

    The paint Odyssey begins!

    It has been a long time since I've done anything to my '74 260Z. I woke it up from an eleven year nap in 2006, did some exhaust work in 2008 and just enjoyed driving it for just over two years. It has needed new paint ever since I bought it in 1993 and now it's gonna get it in spades. I have access to a rotisserie thanks to some very generous and helpful Southern Oregon Z club members here in Medford, so I'm going to strip it down to the bare bones, turn it upside down and make the underside pretty as well. I've got more work to do today but it should be "in the air" by the end of the day.
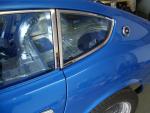
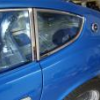
    I started the project on November 21st.. here is a picture of the car at the beginning...

    I was fortunate to have the assistance of one very good friend from Lithia Nissan and my Brother-in-law, Steve helping out on the first day. We made good progress but there are a ton of parts on a Z Car!! See the damage at the end of the first day...


    And all the parts...

    You can see these pics and more on my photobucket account...
    http://s286.photobucket.com/home/Rainman6801/index
    Thanks for reading!!
  2. Rainman

    The Header Returns.. Pics included!

    My header has returned from Jet-Hot Coatings in Tempe, after two and a half weeks. It looks really nice!! Here is a picture of it....

    Header: $200
    Jet-Hot Sterling coating: $300
    Knowing it won't rust away in a few years: Priceless
    The installation went a lot quicker than the removal of the old exhaust manifold. Of course I had several weeks to prepare everything as I noted in my previous post. Got a couple new studs and a new set of exhaust nuts at the Nissan dealer. After touching up all the threads on the old studs, everything went together nice and easily. Here's a pic of the header in place on the engine..

    The intake manifold and Weber carbs are in the next pic. It looks pretty decent in the pics and in person as well as long as you don't get any closer than about 20 feet!

    I took the car in to an exhaust shop yesterday afternoon and I'm told it should be done by the end of the day. I'm really looking forward to getting the car back and hearing how the new exhaust sounds.
    Hope you enjoyed reading my exhaust oddysey. Let me know if you have any questions, I'll be happy to help.
  3. Rainman

    The Exhaust Odyssey begins...

    My '74 260Z has some noticeable exhaust leaks that I've been ignoring since I woke it up from an 11 year nap in 2006. Well, I finally decided to roll my sleeves up and see what kind of damage I could really do to the system....
    My wife was off work for spring break a couple weeks ago so that's when I decided to start this project. Being able to use the car she drives to get to work as necessary was the deciding factor.
    I put the car up on jack stands and removed the single (the other two were broken off in the past) nut holding the exhaust pipe onto the stock manifold. My intent was drill out the broken off studs and replace them, reinstall the exhaust system and that would be the end of it. Not so easy...
    As I'm drilling out the broken off studs, I notice the underside of the heat shield between the intake and exhaust manifolds and it sure is black and sooty. That doesn't seem right.. better take it off and see what's going on behind it.... There I find the big crack in the exhaust manifold... Oh NOooooo!! Picture to be added later...
    Obviously this won't do.... Luckily I have a 6-into-2 header that I bought from a friend. Been meaning to send it in to Jet-Hot for a nice Sterling Coating, just needed to get the money together. No time like the present I guess... A quick meeting with the boss (my wife, Steph) about the finances and I get a reluctant thumbs up after much begging and pleading! Hey, I'll take it however I can get it!!
    So here's the plan: I'll send the header away for coating after I've removed the intake and exhaust manifolds. That way I have a chance to fit it as my car sits pretty low. A good thing too, I needed to have it shortened a bit to allow for improved clearance. Whew!!
    The biggest pain in the rear of the manifold removal was draining the coolant from the system as it is plumbed all through the intake manifold for emissions. Or it used to be that is!! I've removed all that hardware and have since plugged all those 'no longer necessary' holes with pipe fittings. Most of the exhaust nuts were easily removed, no studs were broken off in the process!! The most aft stud was previously broken off and was easily removed with the help of a left handed drill bit, screw extractor, some candle wax and copious amounts of heat. I also removed the most forward stud as it is rumored to be near breaking off if it hasn't already.
    I cleaned up the mating surfaces on the head with a dremel tool and a polishing attachment I found at the hardware store. It resembled a really tough pencil eraser head... anyway.. Any old gasket material was handily removed and it looks real good to boot! I touched up the threads on the remaining studs with an 8mm x 1.25 die. Did the same to the threaded holes in the head with a 8mm x 1.25 tap.
    Took a wire wheel to the exhaust manifold and balance tube. They actually look pretty sharp now! I think I'll even take some time to tidy up the engine compartment some while I have so much room on both sides of the engine now. If the weather warms up this week as it is forecast then I'll do it. I also cleaned up the valve cover while it's so easily accessible.
    The header should ship today according to Jet Hot so I'm hoping to have it back by the end of the week. Then it's off to the exhaust shop to graft the new header into the existing rusted mess of an exhaust system. Should I drive it to the shop with open headers?? :eek: Oh and don't worry, I'll get some pictures included in the next update!
    Well, that's about all I have to add for now. Watch for updates and some pics in the next couple days... Until then, take care and thanks for reading!

Important Information

By using this site, you agree to our Privacy Policy and Guidelines. We have placed cookies on your device to help make this website better. You can adjust your cookie settings, otherwise we'll assume you're okay to continue.