JimmyZ
Free Member
-
Joined
-
Last visited
Everything posted by JimmyZ
-

 I stripped the car with Aircraft Remover and began cutting out rust affected areas. It was 16-17 years since I last stripped the car this way. There was very little rust under the paint. My patching skills have improved so I decided to redo my earlier patches and reclean.
 -
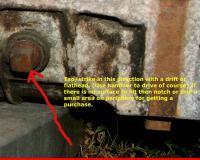
Whining or whirring indicates poor tolerances between the gears and comes with age. Screeching however is NOT good. If coming from the tranny it would indicate a possible locked or skating bearing. Tearing down and changing bearings in these trannys is fairly straightforward. Hope the bearing is only chewing itself and not spinning in the bore that it rides in. IF you have shavings/crunchies running through things all of the ball bearings need to be changed regardless. The bottom countershaft bearing swims in crud and is the weakest link when debris is present. Hope to God the needle bearings that the gears ride on haven't done any skating. I once opened up a dry tranny and found the gears had heated up to a point that they turned blue. Most of the bearings had popped out of their races and the shafts were cocked so that things wouldn't turn. On the bright side you can find used trannys for $100-$200. I'm assuming vise grips can't cut it for this one. As a last resort you can heat the tranny case with a torch which will make it turn easily. Ally will expand a thou or two at 300-400 deg while steel remains almost unchanged. Before torching try whacking the head of the plug hard as this can also loosen things up and also possiblt improve the gripping surface/head. (Hit straight on) I once heard of a crazy guy who took apart cars with a hammer. His principle was to tap the edges of fasteners with the hammer to turn them. You might be able to tap the edges using a screwdriver as your contact point. Heat the case with a propane torch then tap using a screwdriver driven by a hammer. Try the hammer tap trick w/o heating first. One other option is to use a cutoff tool to notch a slot for a flathead screwdriver or piece of plate to nest in. Having a bolt welded to the plug would be the last resort. As soon as the weld cooled the case would be hot/expanded then the bolt could be turned.
-
I sat in one and didn't like anything about it. To me there really isn't a soul to the car. Every 240 I've met has a presence that can be felt. I know this sounds whacky but it is the best explanation I have. It is an OK car but shouldn't have "Z" as part of it's name. They should have never come out with a convertible Z. It kind of reminds me of Metallica's old music vs new. There is no justification for commercialized crap for the masses unless you are greedy and want to make $$. A true spartan sports car is all that is needed if one truly wants the Z as part of the name.
-
Bummer. I just tried Nissan and Datsun. It's possible your local paint jobber may have some old books laying around. We are just lucky to have such a broad year range available on the net. Sry Jim
-
My Z has taken all of those cars in stock condition. The 944 owners used to get pissed that they were being upstaged by a tired old Datsun.
-
Yeah I'm thinking this is one of those things like the time I rebuilt both the Z's front calipers. After putting them on the car I couldn't get them to bleed. I had switched them and the bleeders were on the bottom! Switched them back and not so amazingly they bled fine. This has to be something really obvious. Fork backwards, forgot that the "little adjuster thingy" on the slave cylinder was not installed, reversed T/O bearing collar, etc... At least I hope it's something that simple.
-
The ball stud is fixed and unadjustable. The fork and it's relationship to the slave cyl/pressure plate are all that matters. A picture would really help. Are you using the same type/size clutch components as what came out of the car? I know that there is a difference between the early and late model pressure plates. I own a 240z and use a 280z pressure plate. Can't remember what changes I had to make when I switched but the 240 PP was higher/taller than the 280Z pressure plate.
-
Can you send a picture?
-
Just going through other possibilities... Don't get alarmed. Inside the bellhousing there is a ball/stud which the clutch fork attaches to. (midspan) Was/IS the fork engaged on the ball stud. Can you move the fork by hand? It should only move in a linear fashion not side to side. It might be possible that the fork is loose/off the stud and needs to be snapped onto the ball. Does the end of the fork line up with the slave cylinder as it should is what I'm asking. The following suggestions are really long shots. (Stupid) Are you sure that the throwout bearing/collar was facing the right way? Is the fork attached to the collar? You should be able to shine a light up in there and verify It has been a long time since mine was apart. Just going on memory. Send us a picture if U can.
-
I second a7dz's remark about sifting. I use a screen (house screen) to sift. Use DRY sand. Make sure the sand you are buying is absolutely dry or the thing will clog. When/if it does clog close the air valve and open/cycle the sand feed valve a few times. Doing this may clog the tip so it might be easier to take off the nut/ceramic tip when flushing. I only have to open my sand valve 1/4-1/8 (very little) to get a good flow during use. Don't turn it off at the end that you hold. Instead turn off the sand flow then air flow. This way you line stays clean. Don't store sand in the tank as it will absorb water. Use only enough sand for the job at hand and fill to half capacity so that water from air supply doesn't affect your sand. Don't rely on the water separator that came with the pot alone. Harbor Freight sells a blue water separator that is a canister type with regulator included. (It's about $35) This works great. http://www.harborfreight.com/cpi/ctaf/displayitem.taf?Itemnumber=1118 When your air supply at the sandblaster gets below 65-70 it's not as efficient and the sand feed can vary. Try and use it at 80-120.
-
Thanks Mike. Someday the interior of my Z will be that clean. Thanks again, Jim
-
I'd like to see pics... (Please) Prefferably a couple of closer shots of the vinyl pattern/grain. Thanks, Jim
-
Inner fenders can be stripped by Aircraft remover. You'll want to remove the rest of the paint with sandpaper. Find any rust and sandblast then Ospho the entire stripped area. After 24hrs under dry conditions you can sand or scotchbrite the "crust" off the Ospho then prime and paint. This method works quickly and does the job well. Look into Body Shutz for respraying your IFW (wheel side) The reason you shouldn't topcoat (clear/colorcoat) large areas using a small compressor is that you need to keep the paint wet. Spraying a pattern, waiting for the compressor to catch up then spraying the half overlap pattern is not ideal. Jim
-
Hmmm... I have a 240Z but could swear that the 280Z driveshaft unbolts back at the differential yoke. There are four small nuts/bolts which hold the driveshaft to the front of the diff. Make sure that you use red loctite on these bolts and the pressure plate bolts when reassembling. IF you can, keep the driveshaft or a spare driveshaft yoke plugged into the back of the tranny while removing/installing. You'll need to drain the tranny fuild otherwise. If you don't you'll finish the job with your back and hair soaked in smelly 90W. (Ask me how I know these things.) Jim
-
If you are going to be sandblasting a 2HP compressor is slow torture. You'll get 10 seconds of sandblasting time for every minute or two of waiting for the compressor to catch up. If you are relying on the compressor to run an impact wrench sporadically then a 2HP is fine. For years I got by with a 5HP compressor but this should be considered a minimum if you really need to stand on it. If you are painting then a larger tank (pref vertical tank 60gal) is needed. Modern spray guns (HVLP) need a 6-7HP compressor for anything more than cutting in door jambs. Small tanked machines tend to have more moisture present in the air making them undesireable for painting. You can make a small compressor work for small paint jobs though. Finish work requires a real machine though. Get a real compressor if you can. By "real" I mean one with the motor separate from the compressor. The oiless models have inferior output and durability usually. Hope this helps Jim
-
Here's a link which might help. http://warbuddies.homestead.com/RestoHelp.html Jim
-
Check out Harbor Freight's pressure pot sandblasters. I got one from Enco for $80 a few years ago. Harbor freight has the same model. I also lucked out and got a 7HP 60 Gal vertical compressor on sale for $350.00! (Harbor Freight has great sales every now and then) The 7HP can keep up with the pot but I usually double up with my 5HP compressor. The size sandblasting pot that you will get at a rental yard will usually be too large for what we need. If you really need to sandblast on a budget you can always use a siphon sandblaster and a small compressor. You can even constuct your own siphon sandblaster for $10.00 if you are in a bind. (If you like I'll dig mine up for a few pictures) Invest in some Aircraft remover and Ospho before beginning. Strip the paint and do a little pretreat of rusted areas with Ospho. Stripping paint, body filler or seam sealer greatly increases your sandblasting time so strip these using other methods to speed things up. In Florida I get sand for $2.00 a 50lb bag and use a screen to recycle used sand a few times. If using a small pressure pot screeing new sand is a must because it can easily clog the ceramic nozzle. There are always a few stray chunks of debris in bagged sand. My2c Jim

-
Thanks Mike. Where did you get yours from? New covers are going on the seats. My foam is too far gone. In your opinion how close are the repros to the originals? Does the vinyl have identical patterns and is the foam firmer/softer or mishaped in any areas? Not that I have a lot of choices here. Just curious though. Thanks, Jim
-
Just curious if anyone has used the seat foam from Classic Datsun. Opinions, hardships, likes etc... If so has anyone used the foams in a series1 240Z? http://www.classicdatsun.com/ Thanks, Jim
-
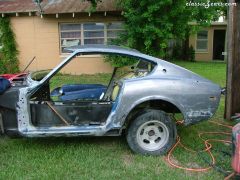
The real question is whether you have the tools, aptitude, space, understanding wife/girlfreind, etc.. Of course it can be done. I had to wait several years before I had all the items above in a row before tearing my Z apart. The wait is worth it though. My body shell wasn't quite as bad but many people urged me to start with a better shell. I chose not to. Challenges like this are a great way to test what you're made of. You'd be surprised at what you can accomplish on a car by taking on a 3'x3' section at a time. Jim Here's a link that might help http://warbuddies.homestead.com/RestoHelp.html
-
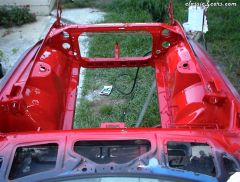 With the frame rail, floor pans and firewall fixed I was glad to get to this point.
 -
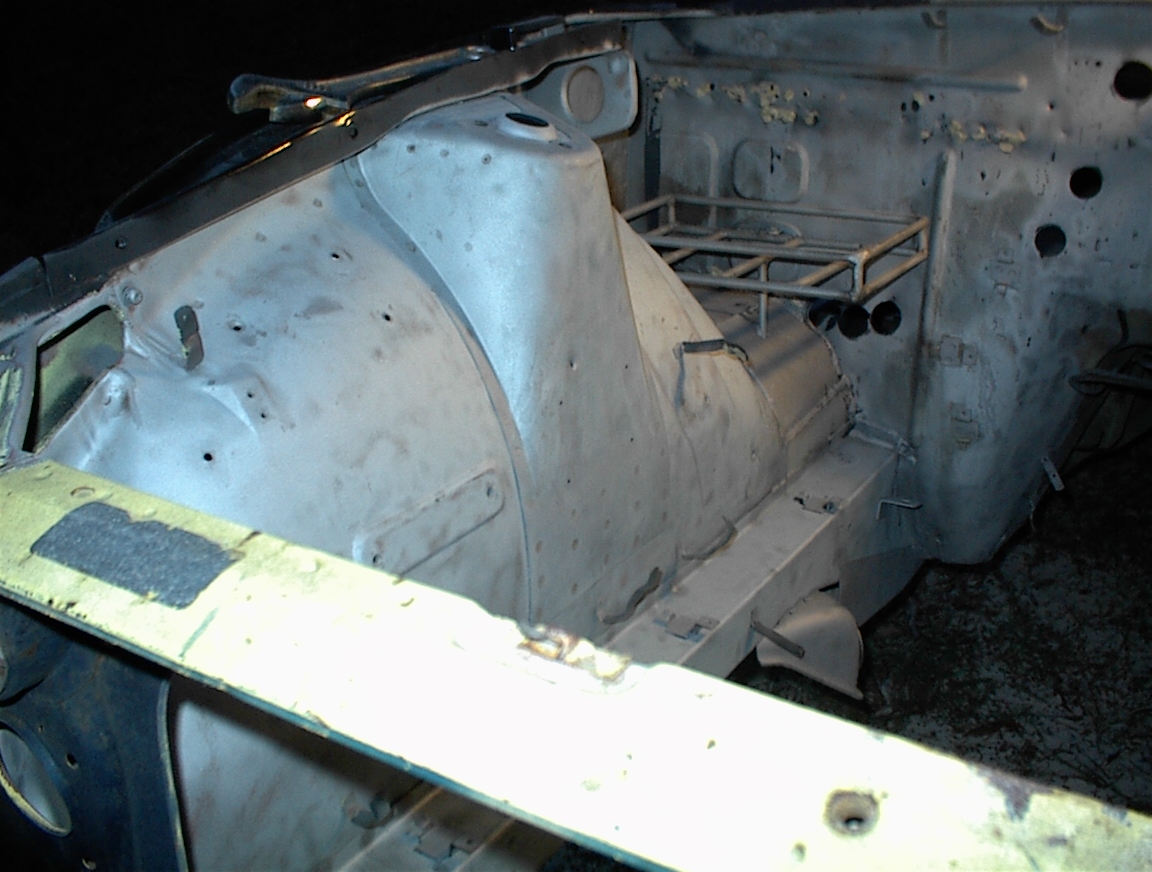
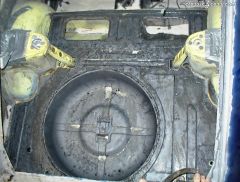 The new tire well is in and the entire area has been sandblasted and Ospho applied.
 -
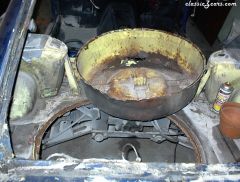 This thing was too far gone. I spied a better one in a junkyard car.
 -
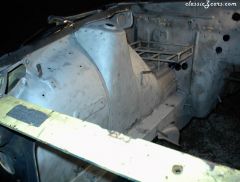 With new frame rail installed/battery tray fabbed I sandblasted entire front end.
 -
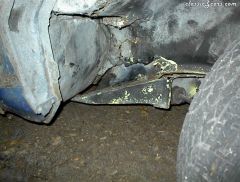 Battery acid ate through firewall, inner fenderwell and frame rail.