JimmyZ
-
Posts
822 -
Joined
-
Last visited
-
Days Won
1
Content Type
Profiles
Knowledge Base
Zcar Wiki
Forums
Gallery
Events
Downloads
Store
Blogs
Collections
Classifieds
Everything posted by JimmyZ
-
A chemical treatment of the tank will buy you some time but the rust will be back. You should consider having the tank opened up and sandblasted inside. The depth of the rust pockets on my '71 Z's tank warranted this and I imagine most Z's would be the same. (Especially if the rust is becoming an issue with the fuel system.) The KBS system says that it's impervious to alchohol. Interesting How does one remove KBS if the need should arise later down the road???
-
Be very careful if you are doing any work on your tank. Tanks can explode and kill or maim. This is one thing that might not give you a second chance if you screw up. This is why having a shop do it is much better. Do a search on this topic and you'll see it's been discussed many times. Here's a page I made for a do it yourself approach.... http://warbuddies.homestead.com/gastank.html The Renu franchises are expensive but nice. Member "Diseazd" told me of a fellow who cleans the insides out and then galvanizes the interior. This would be the BEST by far. 2c Jim
-
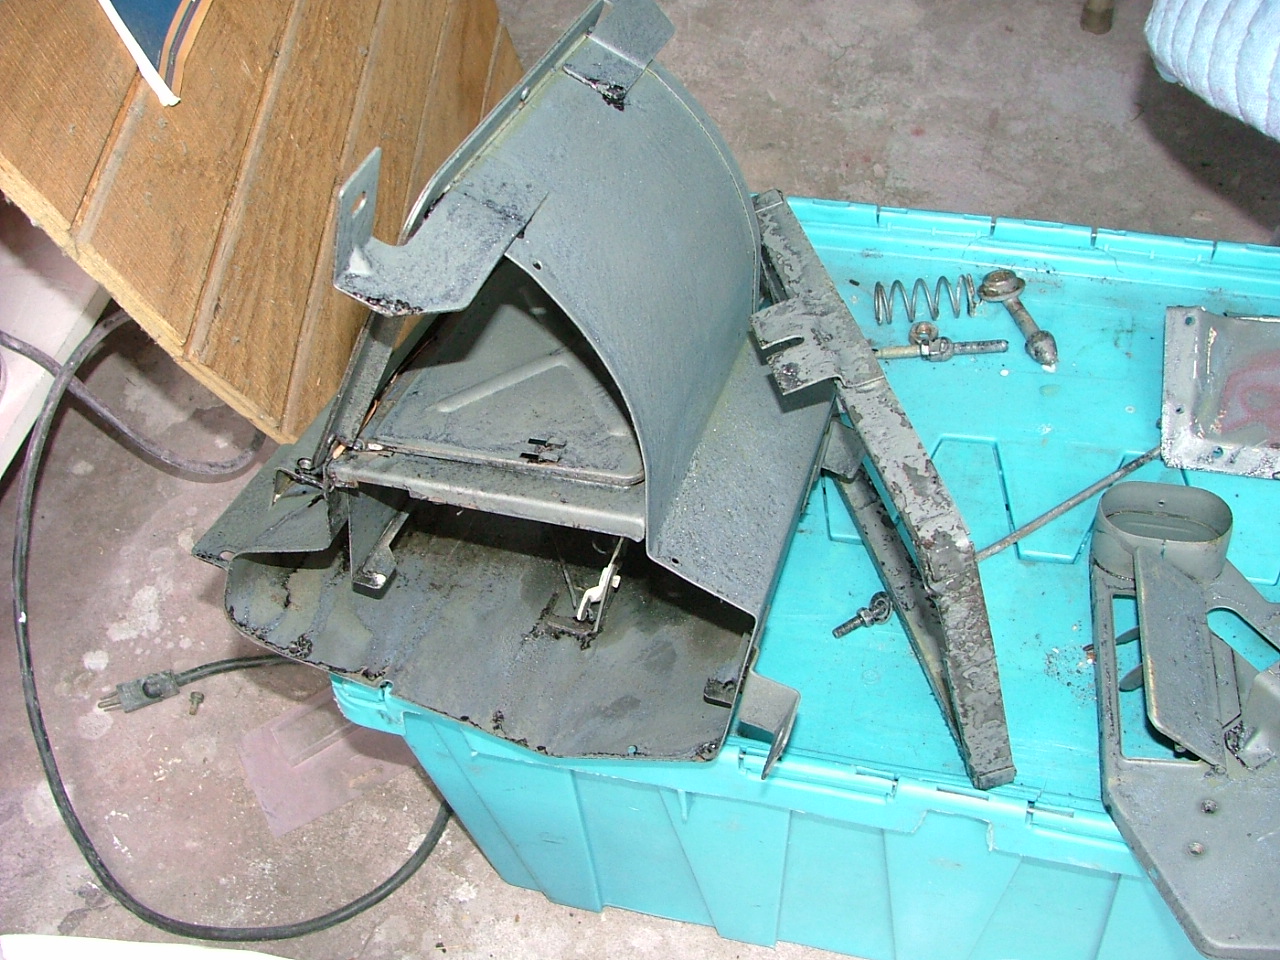
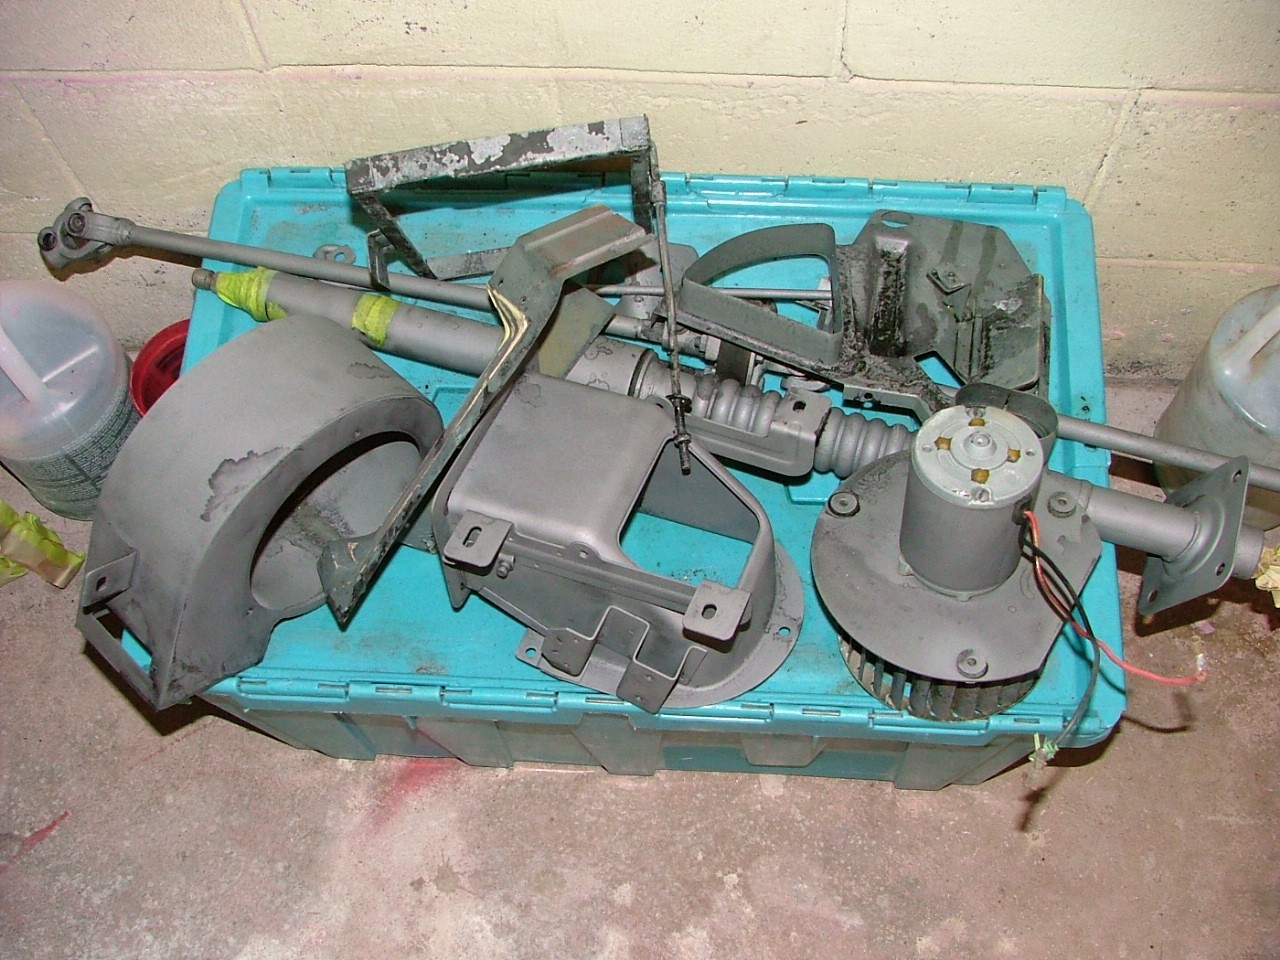
Here's some pics of sandblasted '71 240Z under dash parts. Black stuff is crusted ospho.


-
The internal linkage perhaps?? There is a bar inside the heater box which goes from the cable on the outside. Are both heater doors open on "heat"? The heater box full of leaves theory is looking better all the time.
-
Trying a hotter thermostat won't hurt during the cold months. I use a 3 row radiator and 180 degree T-stat in Florida year 'round with no probs. (It's somewhere around 180 IIRC) If it's not too cold outside you could try removing both lines to the heater and flushing in both directions. (On engine side of firewall of course) The door you mentioned on the blower box is a recirculation or fresh air option. In frigid temps you can guess which will work better. It's also possible that some leaves etc have gone though your system and are blocking the heater core's air flow a bit. You might be able to remove the blower box/plastic connector and carefully shop vac any offending objects from the top of the core without having to remove it. 2c Jim
-
My best advice would be to seek advice from your local paint jobber and the person who will be applying the topcoat. Here's a page I made for this sort of thing...http://warbuddies.homestead.com/restohelp.html In short apply some epoxy primer after the metal has been chemically treated to nix rust. The POR undercoat is unecessary and will not give you any gains in longevity over a properly applied series of primers. (as mentioned in the link above) You DO want to avoid having too much overall paint thickness. (Primer -> topcoat total thickness) I'm not a giant fan of POR. POR's paint film is just shy of indestructable and it's very simple for the average Joe to apply. This would seem to make using it a no-brainer. The question then is why aren't more people/body shops using it? POR has done an excellent job of advertising and sells itself as being a one time fix all. To me, POR could be used on underbody work as you have done. A more "normal" approach such as using primer/topcoat and body shutz would be better in the end. Of course you could coat the POR with shutz for a near meteor impact proof undercoating. Shutz helps cut down road noise which is nicer than hearing every single pebble you hit. 2c Jim
-
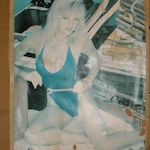
Got mine with my Black Dragon order. I'm like HEY!! I know who that is!!! Nice pic of the Z too. Congrats Carl! You got the first month/first place in my book. That Austin Healey in "March" was also very nice. Jim
-
I agree with Kenz earlier post. Make sure the points are in good shape and adjusted. Check the plugs too. Having the points off just a bit or pitted will cost a few extra revolutions when cranking. It should take a few extra cranks/seconds to get it started but it shouldn't be an ordeal. Could this possibly have something to do with the crap gas our Z's are being force fed. Perhaps the ethanol in the equation is to blame. BTW I live in Central Florida. It rarely gets cold. (20-30F at worst) When it does my Z starts in about two -three seconds but runs a little rough for 30sec to 1 minute. After about 5 minutes it's completely limbered up. I use a 180 degree thermostat. FWIW 2c Jim
-
-
It wouldn't hurt to run it some more and see what happens. The "white chunks" will be seen when the oil is cold. As the oil warms it turns to clear water. I'd run it some more and see if it overheats or misbehaves some more... Just to be sure. Years ago my mom's ski boat w/ Chevy 350 had a condition which filled the crankcase with water. ( Actually meant "added" not "filled") The oil was a frothy mess of milkshake looking stuff. It's amazing the engine didn't seize. We changed the oil while still hot and remedied the water's path into the engine. (water via bad exhaust cooling gasket) Years later it's still doing fine. Just don't turn mad rpms with it while testing it. The real question is are you absolutely sure that it's oil in the radiator? Could it just be some remnants of Bars leaks or chunks of rust swimming in there? If it really is oil then is it as simple as a blown head gasket or is it a cracked head or block. More than likely it's just a head gasket. Wouldn't hurt to have the head zyglowed while it's off. Cya, Jim
-
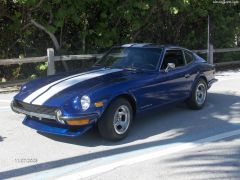 Looks GREAT! That's the color scheme I wanted when mine had blue paint. Never did get around to the stripe(s) though. Sweet!!!
 -
Pull the plugs and check them. You are looking for signs of a blown head gasket or fouling on them. Did you do the tests I mentioned above?? If they are covered in fluffy black deposits it's rich fuel. Black slick deposits oil fouling. (Rings, valve seals/guides) White crusty deposits = water I had a friend who had a bad ECU. (The prob went away after the ECU was replaced.. Odd) I asked him to check the plugs and he said he "just" replaced them and that they were fine. When I went to check them they were completely fouled from a rich fuel condition. Check your oil too. If you have a blown head gasket you might find water or milky deposits on the dipstick. The coolant will have oil floating in the surface. (Look in radiator when it's cool) It's also possible for a head gasket failure to not mix the fluids. In such cases it just fills a cylinder with whatever it allows to pass by. When the engine dies or will not start connect a timing light to a plug wire and see if it's actually firing. Checking ignition on 280Z's requires a little care. I've been told that doing the usual "lay the bare plug on a valve cover" approach may damage the ECU. This is just hearsay but perhaps Sblake can chime in. Using a timing light is foolproof though.
-
I agree with Sblake. Check the thermostat first. Take the radiatior cap off (With engine cold) and run the engine. After a couple minutes the water in the radiator should start to circulate at a good speed. This indicates that the thermostat has opened. The water will be warming up but should not be boiling or extremely turbulent. If the water is boiling, bubbling or shooting out of the open radiator then you have a blown head gasket. A blown head gasket will cause the water to heat very rapidly and can cause some extreme pressures in the system. On modern cars the plastic tanks on the radiators have been known to crack or explode under these pressures. It would be funny if it werent so expensive. Our Z's have brass tanks and might develop cracks at the leaded joints. Don't know much about 280Z FI and Blake is the expert. IIRC the water temp has some bearing on fuel mixture. It's also possible that you have a lean fuel mixture. (for whatever reason) For those ten minutes that it's running is the engine making decent/normal power? If the engine seems a little weak then you're probably lean. Check the condition of the plugs if you suspect it's lean. There are lots of pics/descriptions on the 'net as to what lean plugs look like. Don't run it long if it's overheating. Just take it for a quick spin and see what kind of power it's making. 2c Jim
-
Good to see that you have the original ballast (white ceramic) and wiring. It would be best to order a new distributor anyway. Black Dragon has one on sale for $109.95 Part # 70-701-R You just need some points, proper coil and a condenser after that. I made a post about some excellent/premium points I found at CarQuest. (If you want to search) It seems that NAPA can also get them. There is a difference between the premium and regular points. Jim
-
The points ignition is very basic. It really depends on how much of your distributor's hardware is still in there. Take a pic of your coil area and of the distributor with the cap and rotor removed. They may have taken the points backing plate out and substituted a proprietary part,. (Prob not tho) You may not even have a stock cam in there. It mau have been replaced by the aftermarket sending unit. You will also need a ballast resistor and a coil which is made for points ignition. You can use other coils but the entire setup is designed to be matched for long life on your points. The points and condeneser have to handle the switching and asking them to run a beefier coil will upset the balance that the designers intended. Hopefully you still have your harness wires for the ballast and coil. There is also a small harness that runs one wire to the distributor and one to the water temp sending unit. (Two wire harness) On my 2/71 240 The coil "+" terminal has a single black w/ white stripe wire. The "-" terminal has a solid black wire. The ballast resistor has a Black w/ white on the firewall end and a green w/ white stripe on the opposite end. If you can't find the aforementioned wires try working your way back on the harness. (Towards radiator) Be sure that your distributor shaft has no/minimal play in it. Points won't work well in a sloppy distributor. Do a search on this site for this issue. Also do a search for tachometer wiring on early Z's. There were two different tachs. (To my knowlege) Here's a link to a page I made for 240Z ignition... http://warbuddies.homestead.com/240Zignition.html Hopefully this will be a good start for you.
-
1974 is probably different. Unplug the two GY's at the brake light switch and run a jumper between them. If this doesn't turn on the brake lights then jostle the brake light fuse a bit. (Twist/shift it to break through any corrosion) You may not need to replace the BL switch. I'm sure you did it right but is the switch adjusted right?? Try a mulimeter on the leads of the BL switch. (Check for continuity when the pedal is depressed) You should have voltage at one of your GY wires at the switch. Swapping GY's won't have any effect since it's a simple switch. There are some other wires with plugs in the vicinity which could have been plugged in. That's why I mentioned it.
-
God we should really try to have some betting allowed on the site. I'm sitting here thinking about it while comparing pics. It does look like everything is good on the column as Dave said. (Just looked at mine) Ok Ok Ok Check the wires down at the brake light switch. The two green wires with the yellow stripes plug into the brake light switch. It might be possible that some other wires were mistakenly plugged in. The brake light switch has two GY wires on it.
-
I agree with E. You changed something alright. I noticed that you changed the light switch. Although you can't screw up on the big plug it's possible to screw up and misplug the individual wires on the steering column. Try unplugging some of those individual wires one at a time and observe whether your brake lights out. (Go out with the lights on that is) I've managed to plug the wrong ones in the past. This is probably your problem. It may also be that you have a switch from a year of Z which doesn't jive with your earlier model. I'm sure you've tried disconnecting the brake light switch already. (Just to see if the switch is misadjusted) If it were misadjusted the brake lights would stay on of course. IF I'm reading this right then all six of your rear 1157 bulbs are coming on when the light switch is turned to "on".????? This isn't a simple matter of someone swapping your bulbs in their sockets to have fun with you. Let us know what it is. Now that I took a little more time to read your post I'm betting on the wiring in the column or an incompatible switch. Jim
-
Very strange. You havent done any switching of the wires on the steering column?? That would be my first thought. The bulbs are 1157's for arent they??? For fun try the hazards and turn signal light to see if they are wired right.
-

Umm... no one seems to know how to fix this...
JimmyZ replied to 240zDailyDriver's topic in Help Me !!
Sounds like a fuel related issue assuming that it runs smoothly. IF it's not running smoothly at 4Krpm + then check the ignition first. Do a search on this site regarding checking play in your distributor shaft. It's possible that it's causing your woes. Grab a timing light and hook it up to any plug wire and do your little rev experiment while watching the flashes. If the timing light starts flashing erratically above 4.5K then you know it's an ignition problem. Start by checking the condition of the plugs then replace the points and condenser and see if that helps. If replacing the plugs points and condenser doesnt get it then the replace the cap/rotor and finally the coil last. Plug wires should not be touching anything metal. It might also be possible that you have some loose or bad plug wires. If the timing light's flashing shows no problems then start by changing the fuel filter and checking that the float bowls are clean and the needles are clean and working properly. Also check that the SU pistons are clean and able to move freely. Check the cleanliness/condition of your plugs. I've had little experience with this but sometimes an engine that's been overheated will have it's pistons swell. In some cases you can't run it for more than a minute or two before it shuts down. I knew one guy who "fixed" his swollen pistons by revving the crap out of it the moment it started.(6K rpm+) Amazing he didnt snap something but it worked. 2c jim -
Welcome to the club and congrats on getting the Z! The best course of action would be to ship the tank off to one of the Renu franchises. If you get a used tank then chances are that it will eventually have troubles. There are also lots of discussions of gas tank restoration in the archives. A search of "gas tank" would yield a few hours of good reading. FWIW The 280Z has a screen on the pickup tube which will get clogged if you try to clean/repair/seal the tank at home. Here's a page I made for my 240's gas tank resto... http://warbuddies.homestead.com/gastank.html NOTE 240Z tanks have no filter screen. Be VERY careful when handling your tank or raw fuel. This is not to be taken lightly. An accident could end or severely change your life. 2c Jim
-
Since you're changing the cam the answer is YES. You will need to remove the intake and exhaust manifolds. Removing valves on a bench is easy... Easier when you don't have to wrestle with the manifolds and head. I've always preffered yanking the engine and replacing all of the gaskets and seals. It's actually easier this way. If you should break a bolt/stud and need to drill it or weld a temp head on it having the thing outside the car is easier. There's also a chance that simply swapping the head will leave you with a minor oil leak. When you remove/replace the front cover the pan gasket may get damaged. When the front cover is off you might also have debris fall in the front end of the oil pan. To me it's a good idea to replace all of the studs for the manifolds with new ones. (At least the exhaust) The exh studs get a little brittle with age. This assumes that you're removing the manifolds. You could feasibly leave the intake and exhaust manifolds on the head if your'e just swapping a gasket. (Which you are not) Just avoid getting any crap on your new head gasket. (Things that may fall off of manifolds) There's a chance that you'll break a head bolt. The way the arrangement is penetrating lubricant has no way of reaching the head bolt's threads. Since they are high tensile bolts they are hardened and can't be drilled with regular drill bits. A carbide drill in a milling machine might do the trick. A trip to a shop with an EDM would probably be in order. (Electrical discharge machining = zap the bolt away) I had enough of the bolt protruding to weld a nut to the broken bolt. The heat from welding also aids in freeing the fastener. It's only $100 to replace the timing chain set. I'd do it on any engine that had seen lots of miles. The timing chain setup is very reliable but I don't want to find out how far it can be pushed. 2c Jim
-
You can take off the towers. Just make sure that they are marked. My towers have letter stamps on them but you could even use a nail/hammer to make a series of small dots. Just search the various Z boards and you'll see it's very common to remove the cam towers. Search for details about getting them back on and aligned right. The cam slides right out. Make sure that you keep the valves in order also. I got a bunch of dixie cups for mine. Water isn't an issue as you can blow the oil passages clean with compressed air. I bead blasted my head which removed everything undesireable. Laquer thinner cleans well but doesn't remove chemical deposits. If you don't have a compressor you could just shell out a few bucks for a head shop to clean it. They can also inspect the head for a small fee. Well worth it. Jim
-
 Congratulations!! Nice getaway car too.
 -
Thanks. :)