


JimmyZ
Free Member
-
Joined
-
Last visited
Everything posted by JimmyZ
-
 Arne, What do you think about Cooper tires? If I remember right you used to be in tires?? Just curious, Jim
 -
Do you have a speed shop in the area? Ask them where the best place is for headwork. (Be sure to mention your budget) Years ago I made the mistake of taking my head to an average production rebuild shop. I specified a three angle grind and got a standard valve job. They said they replaced some guides when all they actually did was knurl them. In the end they padded their bill and I could have paid a little more to have it done right. Do some reading in various Z rebuild texts and tear down/put the head together yourself. This way you can inspect their work. It's surprisingly easy. Wear saftey goggles when compressing springs to avoid flying keepers, etc in the eye. Look into shops with a Serdi machine. This machine easily makes matched machined surfaces. (Rather than a guy operating a Sioux handheld grinder) A relative of mine that did heads for years said that some people like to give a light going over with a stone grinder after the Serdi to take the burr off which is left by the carbide bit being removed. Here's a link to a cheap dial indicator w/ base. http://www.use-enco.com/CGI/INPDFF?PMPAGE=336&PARTPG=INLMK3&PMITEM=628-3040 (measuring valve wobble) You can make a cheap valve spring compressor which bolts to your bench. Using a little ingenuity you could even make one without welding. http://www.classiczcars.com/forums/showthread.php?t=24524&highlight=valve+spring+compressor Enco has other cheapie measuring instruments for such a task. Head work can be very expensive. I think you'll be surprised when you see how things add up. 2c Jim
-
Perhaps the faceplate is rubbing the needle or button. Try taking it apart and moving the needle by hand. If the hand doesn't stick it's something electrical in the tach. Look at the circuit board. I seem to remember a resistor going bad in a tach I had years ago. (240Z tach) The resistor was visibly baked. I could have replaced it since the colors were discernable but swapped the tach instead. Sblake's route is much easier.
-
Thanks. I had a feeling it was something like that. The Z looks a lot cleaner/sportier that way. IMO
-
Drop dead gorgeous Filipe! Wow! I hope they have LoJack where you live. Glad you're finally getting to enjoy it.
-
Diseazd probably has his sprocket happily on by now... and torqued right. Certainly hope so. A cam sprocket bolt is not a heavily loaded fastener. There is no taper to be engaged and the assembly relies on indexing from the keyway. How can there be any substanitial tensile loads on this fastener? In my mind the only reason they made the thing so large was to allow someone to apply enough torque to turn the engine from the cam without breaking the fastener. (If for God knows what reason the need should arise) The issue then is getting enough preload on the bolt to keep it from loosening. Overtightening a fastener severely limits the # of cycles it can face before failure. The only way there could be such a divergence in torque figures from one book to another (FSM vs Frank H) is if there was a different material or diameter of the fastener being used. One might argue the extra torque could be used to sandwich the sprocket better and make life for the key a little easier. You could also argue that minute load reversals on the sprocket could loosen the fastener. (Not happening with red loctite) This still ignores the fact that you might be exceeding the elastic limit of the fastener. This makes it something worth a little less than a skipping stone. The female threads in the cam whether it be G4000, 8620 etc are a non issue with the engaged length of the cam bolt. If they were a sloppy (class 1) fit then that might be another story. Jim
-
Absolutley! I agree. The post was meant in the context of the cam bolt problem. A moron might torque a cast oil pan/cork gasket to the bolt's max torque... An ugly surprise when the aluminum cracks. At 1.5xdia engagement and up the female threads don't matter for aluminum. (it becomes a minor concern) With enough engagement concern shifts more towards getting good preload on the male thread. Although a cam is casehardened and the female threads are "soft" the length of engagement takes care of worries for the female thd. I'm not an engineer but have read Charles Taylor's book and others. http://mitpress.mit.edu/catalog/item/default.asp?ttype=2&tid=6993 He has a great breakdown of material selection and fastener design/use in Ch.9. My intent was to merely offer "D" with a means of researching some reasonable torque values. (put his mind at ease) 2c Jim
-
http://buy1.snapon.com/catalog/item.asp?P65=&tool=&item_ID=11057&group_ID=1412&store=snapon-store&dir=catalog LOLLOLLOL ...If you really want to find the noise. Just kidding. I recently replaced my stock diff mount with the Ron Tyler type mount. (Had to make it) http://alteredz.com/drivelinemods.htm#Differential_Front_Mount Like it says the measurements are different for an early Z so I just went with the basic idea. I think the holes for mounting were spaced at 1.811" on my 2/71. Had to fab the mount on the car. Used some throwaway Dixie Chopper lawnmower blades for the 1/4"x 3" stock. Total cost $15 with GM mount! The Tyler mount is the BEST thing I ever did for my rear end. It's pretty quiet too. I get a little noise from the old ring/pinion but there is "0" clunk. (Noise supression is pretty good) I've heard stories of new stock diff mounts tearing up days after install. (Rough driving) In your case I might try taking your halfshafts to a driveline shop and have them look at them. It's probably them or some slop in your diff. (As mentioned above) Distant third/fourth place is your new mount and the diff/mustache bar bolts being loose. You'll get it stomped out eventually. Jim
-
You can always look up the required torque for that diameter of fastener. The degree of hardness and thread pitch of a fastener also affects torque req's. The engaged length of the threads is great enough to not worry about the female threads. There are torque calculators online but you need to know the tensile strength of the fastener to get a good answer. In this case the lower answer (around 40 ft/lbs) is right if it's a "soft" bolt. It might be as high as 80 ft/lbs for a high grade bolt of this sort. This is an approximation since I don't know the diameter/thread pitch etc... Here's a link to a good calculator... http://www.futek.com/boltcalc.aspx For Standard http://www.futek.com/boltcalc.aspx?mode=metric For metric bolts This application isn't that critical. (As opposed to a con-rod/main cap) Just use some red loctite after a good cleaning with some acetone or other loctite friendly cleaner. Carrol Smith's Nut's Bolts Fasteners and Plumbing Handbook is the best! If you're doing anything critical like building a race engine or suspension this book is a must read. 2c Jim
-
The rear bumper is completely flat. No overiders. Is that something stock for japanese Z´s? Sweet car! Jim
-
You're welcome and Yep... That's the condenser. As they get older they change. (At least that's what I'm told) An old condenser can cause the points to arc/pit faster. Best to replace both points and condenser at the same time. More than likely what happened was that the points slipped a bit and the gap was too close causing them to arc and pit faster. It's a bit anal but a dwell meter is a good tool to check your points with. A coil with the ballast resistor wired backwards will have the full 12V going to it while the car is running. Check that the voltage to the coil is around 6V when the car is running. It's easy to switch the leads which are both black. Make sure that the car is at the manufacturer's specified rpm when checking the dwell angle. (600 rpm in Haynes manual) For the meantime it wouldn't hurt to check your gap every now and then. Here's a cheap dwellmeter from sears... http://www.sears.com/shc/s/p_10153_12605_00902165000P?vName=Automotive&cName=Tools&Equipment&sName=Automotive%20Testing%20Equipment&psid=FROOGLE01&sid=IDx20070921x00003a Glad it's running better. Jim
-
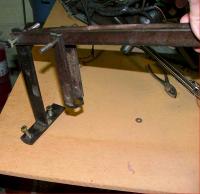
Valve spring compressor and some Dyechem to check lash pads. I think that's all that's needed. (Cam lube too) FWIW/ You can make a valve spring compressor pretty cheap. It's another story when you are removing the valves instead of compressing them. It's much easier and faster to make/use a bench tool. The inner springs make things a little complicated when trying to get the collets out/in. (If you try and compress by gripping the springs) Here's a pic of one I made for less than $5. http://www.classiczcars.com/forums/attachment.php?attachmentid=15935&d=1168302531
-
Here's a cheap timing light. http://www.harborfreight.com/cpi/ctaf/displayitem.taf?Itemnumber=3343 Otherwise $25-$50 ought to get one from Autozone etc.. The following is for a "normal" timing light that has an inductive pickup and a 12V connection. You can spot a missing/fouled plug by simply running the engine and connecting the inductive pickup to each wire. (All 6 and then the coil wire) This is using the timing light as a diagnostic tool rather than a tool for setting timing. Make sure the pickup is firmly closed or you may get an intermittent flash. You can check all the wires without turning off the car. Be careful when working near the fan and belt(s)! What you are looking for is a miss or "hiccup" in the strobe. This will indicate that there wasn't current passing for one reason or another. The inductive pickup senses a peak of the magnetic flux which comes from the collapse of the field in your coil. (each time a plug is fired) If the car is "missing" but the wire(s) still show good spark with the T-Light then it's a fuel issue. Normally you connect the timing light to the #1 wire and shoot the crank pulley while turning the distributor to adjust timing. It sounds like you may need to check the condition of your points faces. A regap sounds good too. In a pinch you can use a piece of cereal box cardboard to set the gap. A dwell meter and replacement of both points and condenser at the same time is the way to get long life out of a set of points. Proper tensioning and fastening of the points is important too. It's easy for points to slip a little if the hardware is on wrong. Here's an ignition page I started but haven't finished yet. It's more for troubleshooting points systems that don't run but there are pictures. Look at the spark picture and compare. http://warbuddies.homestead.com/240Zignition.html
-
I painted my radiator tanks using basecoat/clearcoat. Although it's not the stock look it's very glossy and really sets off the "new engine bay" look. Didn't touch the fins with anything. PPG's Omni base/clear is pretty cheap.
-
After doing what was mentioned above here's another thought should it continue to give trouble. You can kill an electric pump by running it dry. Find a way to check the fuel pressure while it's running. Consult a HAynes manual or do a search on the site to find out where to hook up a guage and what pressures it should be running at. It could be a $180 lesson. (Hopefully not) Is the electric pump noisier than normal? Listen for it when you turn the ignition on but haven't cranked yet. Sblake is good with 280's. Perhaps he will chime in.
-
 Very nice!!!!!
 -
You can get the '72 booster from Autozone etc. Might as well get a '72 master cylinder and swap the lines while you're at it. (Front and reverse circuit on the '72 MC are different. Keep your original MC and booster for historical preservation and a spare. Dont' give your '71 booster or master C as a core. The original (pre 8/71)MC "should" fit the '72 booster. I'd do a search on this site for it though. Getting a brand new master cylinder is a better idea than a rebuilt one. Be sure to ask when buying if it's new or rebuilt. Might as well replace it for safety. The stock brakes aren't the greatest compared to modern systems that you might be used to. The master vac has a small diameter so it doesn't help as much with braking. This results in more pressure needed at the pedal. You could just but a master vac from Black Dragon and let them keep the core charge of $35. (might be more expensive than your local parts dealer/might not.
-
He meant the rotor. He was trying to describe the cap and rotor. OR Perhaps he was trying to describe the condenser. The other "cap" he was mentioning (inside) might have been a hint at an internal resistor type rotor. The early Z doesn't have such a rotor. No noise suppresion. Sometimes a rotor with an internal resistor can go bad. Sometimes there are dimensional differences in cap and rotors if you mix and match different aftermarket brands w/ factory. I think we should wait for some feedback from the original poster. (If it ever comes) He might have fixed it and doesn't care to share. Love it when they do that. Cya, Jim
-
It really depends on what you want for your car. Do you want it to have the "original" component setup that it came with. People swap brake boosters and MCs from different vehicles all the time. Check out HybridZ for such things. The jist of this site is more in the restoration end of the spectrum. If your Z was made before 8/71 the master cylinder and brake booster are different. You can still get rebuild kits for the early booster through Black Dragon. The usual culprit is the pushrod (and it's seal) which contacts the master cylinder. (Not the end which goes inside the cabin) Once the pushrod gets rusted or pitted the seal which acts on it wears and leaks vacuum. Simply rebuilding it will buy some time but on mine I fabricated a pushrod on a metal lathe. Surface finish is important on sealing surfaces such as this. Look up "Ra" finish for seals on google. Chicago Rawhide, a seal company has some good literature too. You can use a '72 master cylinder on an early 240 but need to switch the lines as front and rear circuits are reversed on the 72's. It is still possible to buy the early MC new but it's not cheap. Check for leaks on all four corners. If it pulls then you've probably got a stuck caliper. Rebuilding calipers is easy. Leaky calipers or cylinders will screw up the pad/shoes ability to do their job of course. Replace them after fixing any leaks. Use the search feature on the site as this sort of thing has been gone over quite a bit. 2c Jim
-
What Mr Camo said plus.... Check for excessive runout/play in the distributor shaft. This could cause some erratic motion in the points. A dwell meter could also be used to see if your points gap jumping all over the place. (From excessive runout) A timing light will tell you if a plug or coil wire isn't firing/grounding. Try using the TL on plug wires and coil wire. If it flashes erratically then you have a fouled plug or some other ignition issue. At least this will help rule out fuel issues. Wiggle the plug on your ignition switch a little. Sometimes the switch goes bad and can intermittently fail. (The TL would show this as missed firing also. ) 2c Jim
-
Cool that it finally came to an end. At least you didn't have to pop a cap in the towtruck driver for even thinking of towing your baby off.
-
You can do a plug weld with your MIG to recreate the spot welds. An air cut off tool makes an excellent tool to do the fine grinding to make the plug welds flush. That's how I did mine. Use some weldable primer in the immediate vicinity of the weld. 2c Jim
-
I agree geezer. We are lucky to have people making parts. We just need more. To me, a full quarter panel is most important. Snagging one off a JY Z or patching with some half QP isn't good enough for me. One of my friends has a '70 which was tatooed in the rear and may not be put back on the road again for lack of rear panels. I imagine they had several jigs with various rolling wheels for making bends in the QP's. (Nissan) The crisp shapes you describe could only be made by a multi step process using jigs built specifically for the panel. (In my limited knowlege of sheet metal forming) A full QP jig would have to be sectional or have partial duplicates for secondary forming operations. I'd be game for taking a swing at making one if I knew a little more of what was involved. Perhaps I could just take it to the lake and do some explosive forming. (fishing w/ M-80) I'd also be willing to make a built up mold out of 1/4" plate if I knew someone with a press suitable for stamping a QP. As for the inner fenderwells one might be able to use a forklift and some heavy concrete molds to form those simple shapes? A donor fenderwell could be coated with form release. The design would probably need some tweaking to take springback into account. Musings of Jim's demented mind...
-
Oops. I actually meant the tooling for making the quarter panels etc. I'm very curious what materials they use and if the molds for are sectional. For instance, The quarter panel molds for our cars can't possibly made in a single action. I'd imagine they are made in several steps. This is something I'd like to see on the "How it's made" show. It would also be nice if the creation of such tooling were in the abilities of those of us into machining and casting. I can't imagine something such as the QP arch can be formed by stamping. One would think it would be a rolled part. It's good to know that the panels aren't terribly thin like the stuff used on modern throwaway asian cars. Jim
-
A shop vac is great for removing sand. Trying to blow all of the sand out moves it around to areas you have done. One area to watch for is the internal space right above the bumper. The door posts and window pillars never seem to be completely sand free. You may want to fashion a shop vac attachment out of a long length of 1/2-3/4" tubing. You can fish this up and around as well as use it for blowing out. See if the blaster can blow things out as best he can with his 90cfm rig. (If he's using a commercial compressor) I'm sure he will but it would save a little time in cleanup. You'll probably spend a day or two doing the suck and blow thing before you have most of the sand out. (God that sounded awful!) Good luck! Jim
