2377kN
Member
-
Joined
Everything posted by 2377kN
-
 I got front and rear sun shades from here... https://www.heatshieldstore.com/car-window-shades/1975-nissan-280z-coupe The front fit perfectly, but my car is a 2+2 so I had to trim about an inch and a half from the top of the rear sun shade. Been a couple years now and no complaints.
 -
Thanks everyone. Just learned a new term too: splined.
-
I'm getting ready to replace my clutch master and slave cylinders. I'll be doing this solo and am wondering about the clutch master mounting bolts and nuts. Do I need to secure the bolt inside near the clutch pedal so when I loosen the mounting bolts on the clutch master they don't just spin? Maybe I'm overthinking this. Thanks
-
I had Power Brake Exchange rebuild my brake booster last May. I checked my receipt and it was 120 plus 15 for shipping. It was less than a week turn-a-round. Came back great. Take measurements of how far out the pushrod protrudes. I did not to that and had to adjust it by trial and error.
-
I too wanted to have my antenna work with the original switch, and replaced my antenna about two years ago with a MQ-1 semi-automatic unit. I followed the work found here: http://jarvas240z.blogspot.com/2015/05/amfm-antenna-upgrade.html So far it's been great, no complaints
-
Got an update to my LED Dash Light Upgrades. About a month ago, the brake warning light began to act funny. It started off by glowing really dimly even when it was not supposed to be illuminated. Then it would flicker brighter when hitting bumps in the road. I checked all the connections, and looked for the relay under the passenger seat. I could not find the relay, but everything fine otherwise. I decided to pull the bulb and check it out. Turns out the bulb was faulty. When hooked up to a good battery the bulb would flicker when shaken. The other red LED bulbs I still had are way too bright so I put a stock tungsten bulb back in for now. The rest of the LED interior bulbs have worked great.
-
Zclocks, you might try calling z expert in Venice Beach a call and see who they use. When they did the suspension work on my car the alignment was farmed out. I tried finding the alignment results print out see who they used but I can not seem to find it.
-
Update: Got the brake booster back from the Power Brake Exchange SoCal Location. Cost was 120 for the rebuild and 15 for shipping. Last weekend I got it back in the car and then replaced the Master Cylinder. Ended up getting one from Courtesy Nissan in TX. Definitely more expensive than the ones from Rock Auto. Also got a clutch master and slave to replace in a couple of weeks. Installed speed bleeders, they are a nice upgrade. Ran into only one snag. I removed the drivers seat to have easier access to put the brake pedal clevis and pin back. When putting the seat back one of the blots snapped off. Was just past finger tight at that point. Weird. Was able to drill into it and back it out pretty easily. Replaced all the seat bolts. Made sure not to drop the reaction disc. But I think I need to adjust the pushrod about 3mm out. I never noticed til now after paying attention how different the brake pedal feels in different cars. In my household there is the 280z 2+2 (10” booster), a 2005 Jeep Wrangler Unlimited, and a 2018 Hyundai Tucson. The 280z has the heaviest feel, the Hyundai the lightest. Going to go though the rest of the braking system next. Rotors, Calipers, Drums, Wheel Cylinders, and Hoses. Keeping everything stock. There’s plenty of stopping power for my cruising.
-
Got the booster out over the weekend and sent it off to be rebuilt. I hope to have it back by Memorial Day Weekend. The master cylinder was not leaking any fluid, but I don't trust it anymore. Going to replace it. Also ordered new master and slave clutch cylinders. Gonna head to the DIY garage in Baldwin Hills, CA to do that in a couple weeks. Thanks everyone for the info, I'll update when the job is complete.
-
@german240, I've never had a chance to check out a 240z interior, so I can't say if the braketeer it will work in one.
-
Thanks for the info everyone. I called up Booster Dewey Exchange and Power Brake exchange. Dewey has all the parts for a rebuild but the diaphragm. So going to my booster to the Power Brake Exchange SoCal location. Sprayed some Kroil on the bolts and did a deeper inspection. Going to get a new Brake Master Cylinder. Looks like the only choices are Cardone, Beck/Arnley, or Centric. Any reason to pick one over the others? This doesn't seem like too hard of a job so I will probably head to the closed down toys-r-us parking lot that's not very far and do the job there. Replaced my fuel pump there a couple years back and had no problems. Worst case scenario I have AAA.
-
Ok then, I'll source a master cylinder as well and have a local shop do the install. My brake booster looks beat and old, probably original. Master cylinder looks way to shiny to be original. Thanks for the info Patcon.
-
On the way to work this morning my brake booster failed, so drove back home and parked it. It's a '75 2+2, so it's the larger 10.5" brake booster. I will most likely either send mine out to boosterdeweyexchange.com or pick one up from Motorsports Auto. Any reason to pick one over the other? Is it possible to remove/replace the brake booster with out affecting/introducing air to the brake lines? The FSM is vague and searching online for a couple hours didn't give a clear answer. I do not have access to anywhere close by I can bleed brakes, so will have to farm out the work if that’s the case.
-
I got my Kia motor from RockAuto and installed it last fall. Used a metal nibler to make it fit. Got it all hooked up with the factory connector and turned it on. The new motor made some noise but didn't make much difference in air flow. Did some testing and determined it was spinning the wrong direction. Swapped the pins in the connector and tried it again. Tons of air blowing after that. If anyone does the upgrade and doesn't notice a difference try swapping the pos / neg that feed the motor.
-
I finally got around to addressing my lack of a faster idle at start, which has been the case since I acquired the car. After reading through this thread I removed my AAR to see what’s what. At about 70 degrees there was barely a sliver of a crescent shape to let air through. Hooked it up to a battery to see what happens, and nothing. No change in the shape of the crescent. Put it back in the car and ordered the 300ZX AAR part number 22660-45P00 from Courtesy at a cost of 100.66. Price has gone up. Put the new one in the car and upon startup my car now idles around 1200rpm. Success! P.S. my car is an April ’75 build date 280z California Emissions car.
-
I say go for it! Bring tools and check fluids/belts before leaving. Get a AAA premiere membership, and if something goes wrong you could get towed up to 200miles. I purchased and drove my '75 from Auburn to LA back in 2007. I didn't trust the car 100% to make it up over the Grapevine so I went by way of the 58 to the 14. It's longer by a good amount but not as steep. Something to consider.
-
I just checked my receipt. Was 155 plus shipping. I first brought it to North Hollywood Speedometer & Clock Co to see if they could diagnose and repair. They could not but they could rebuild with modern components that would require a re-wire. I then looked and ebay and other stores. Did some more looking and found Speedometer Plus. Wasn't much more for a rebuild I trust vs gambling on something else. I mailed it to them on a Monday and it was back to me by Friday the same week. It's been great ever since.
-
-
I had similar symptoms and ended up sending it to Speedometer Plus in Los Angeles. Was repaired and has been rock solid since.
-
I had to do a double take when I read about the oil pressure light, or lack thereof. Page 94 is a fun read with passing times.
-
 I scanned in my 1975 280z Owner's Manual. The binding was falling apart so I pulled the pages apart from each other, made the scans, and assembled in InDesign. Pages 67-70 are missing though from the emissions section. This is a better quality scan the the other '75 manual I found on the net.Free
 -
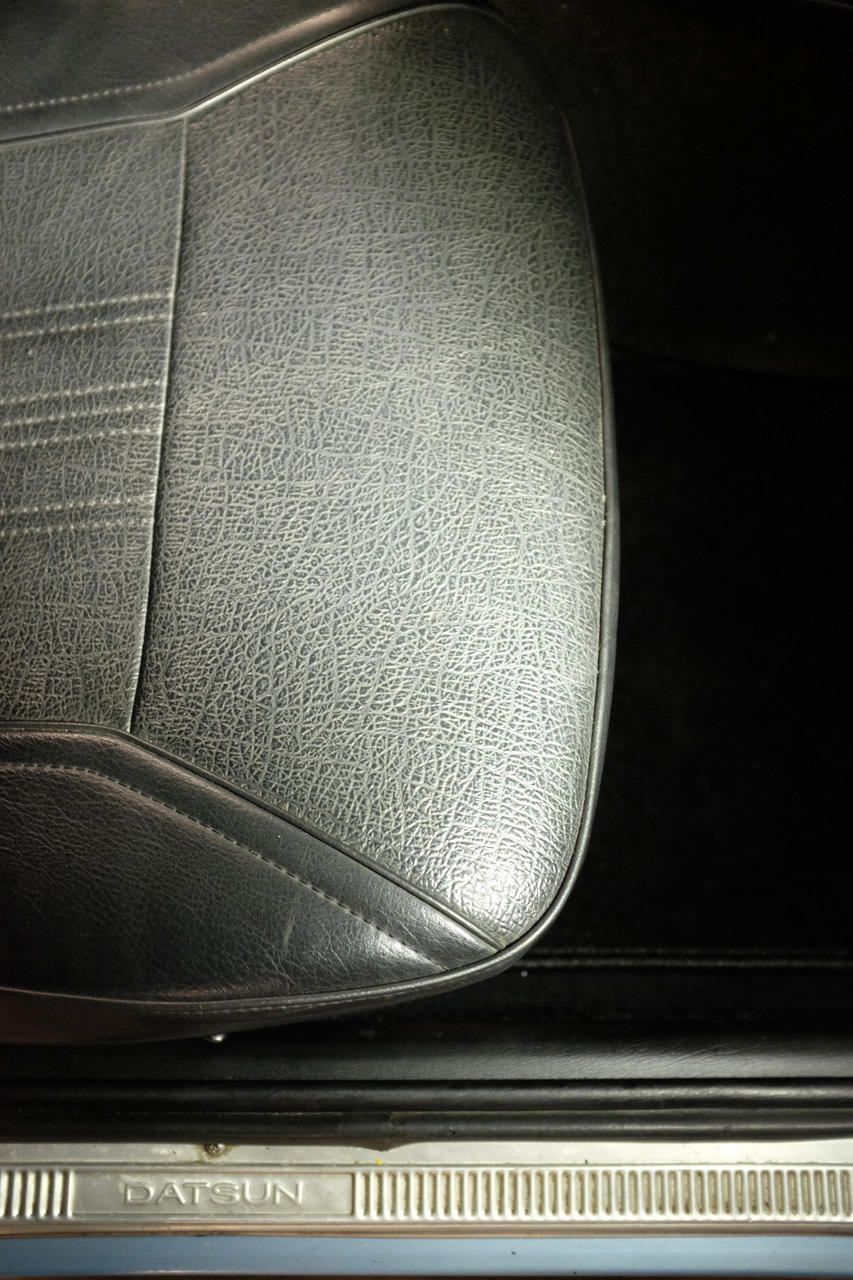
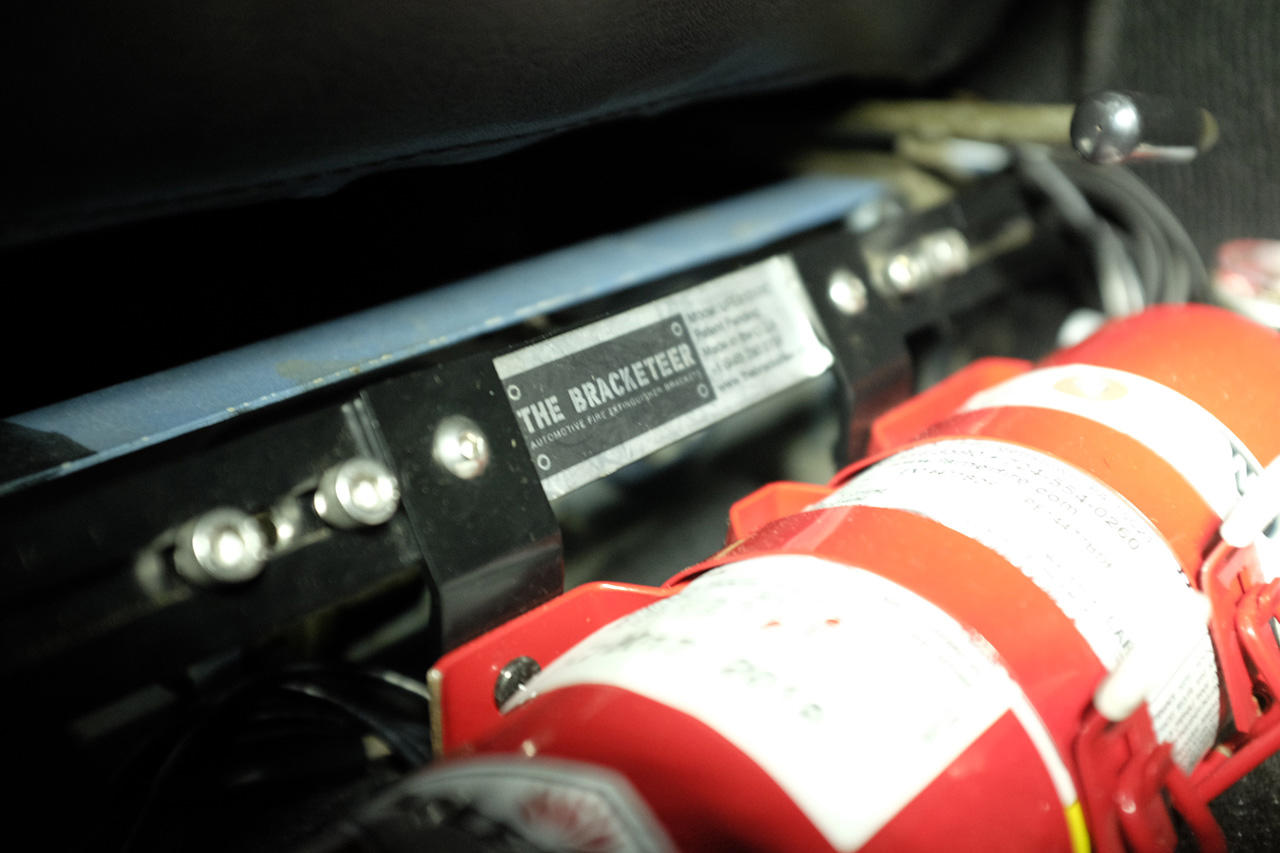
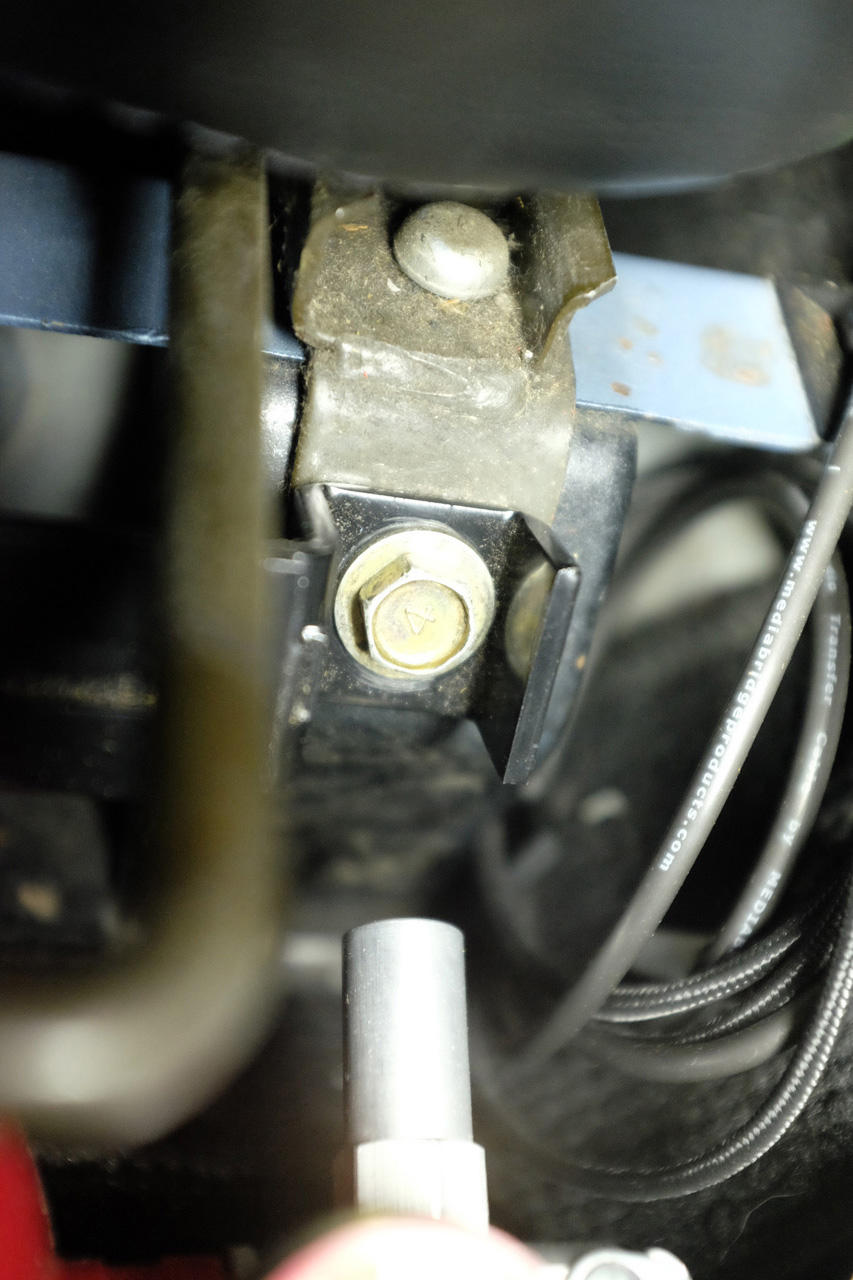
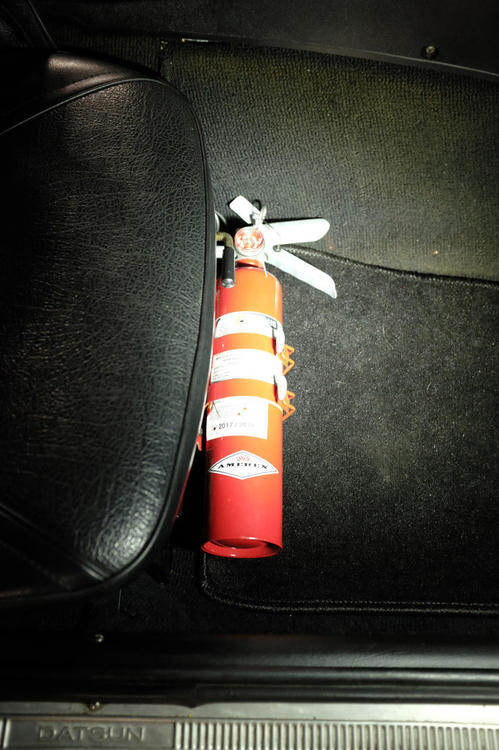
To mount my fire extinguisher I bought something called the Bracketeer. http://www.thebracketeer.com/ I mounted it in front of the passenger seat. It bolts to the factory seat mount bolts. The clearance is nice. It does not hinder the movement of the seat.

-
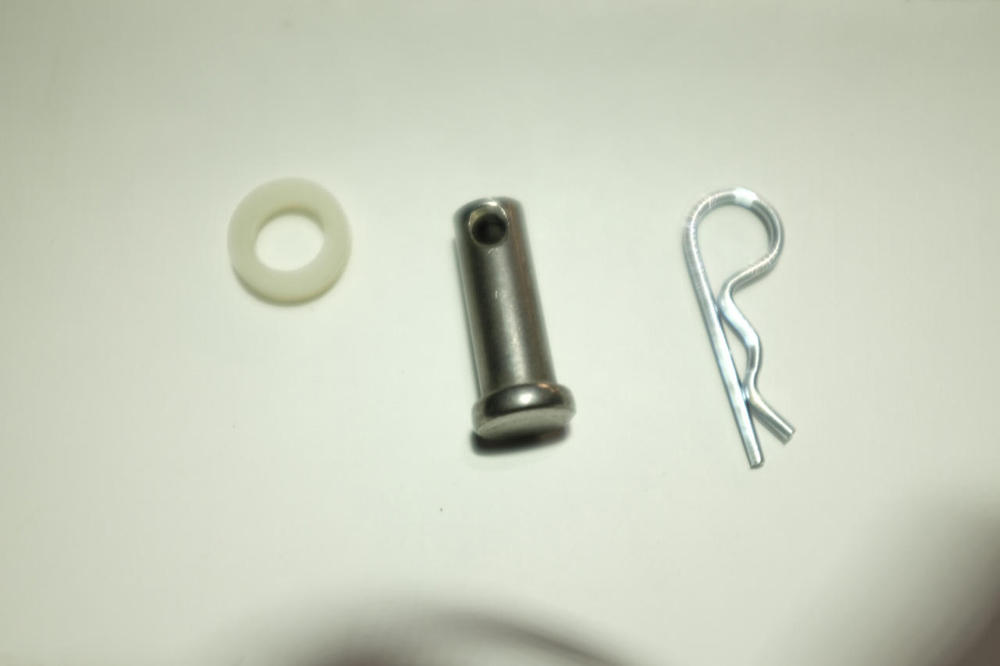
Thanks everyone for the info. For me, welding the hole and re-drilling was not an option. I ended up re-drilling the whole with a 3/8" drill bit and sanded down the clevis and the pedal where they make contact. Got a 3/8" clevis pin from McMaster-Carr (Part Number 98306A915.) Re-assembled and lubed everything. Feels real nice now. When it wears out I'll look into using a bearing. The replacement clevis pin was slightly longer than stock, so used a nylon washer.

-
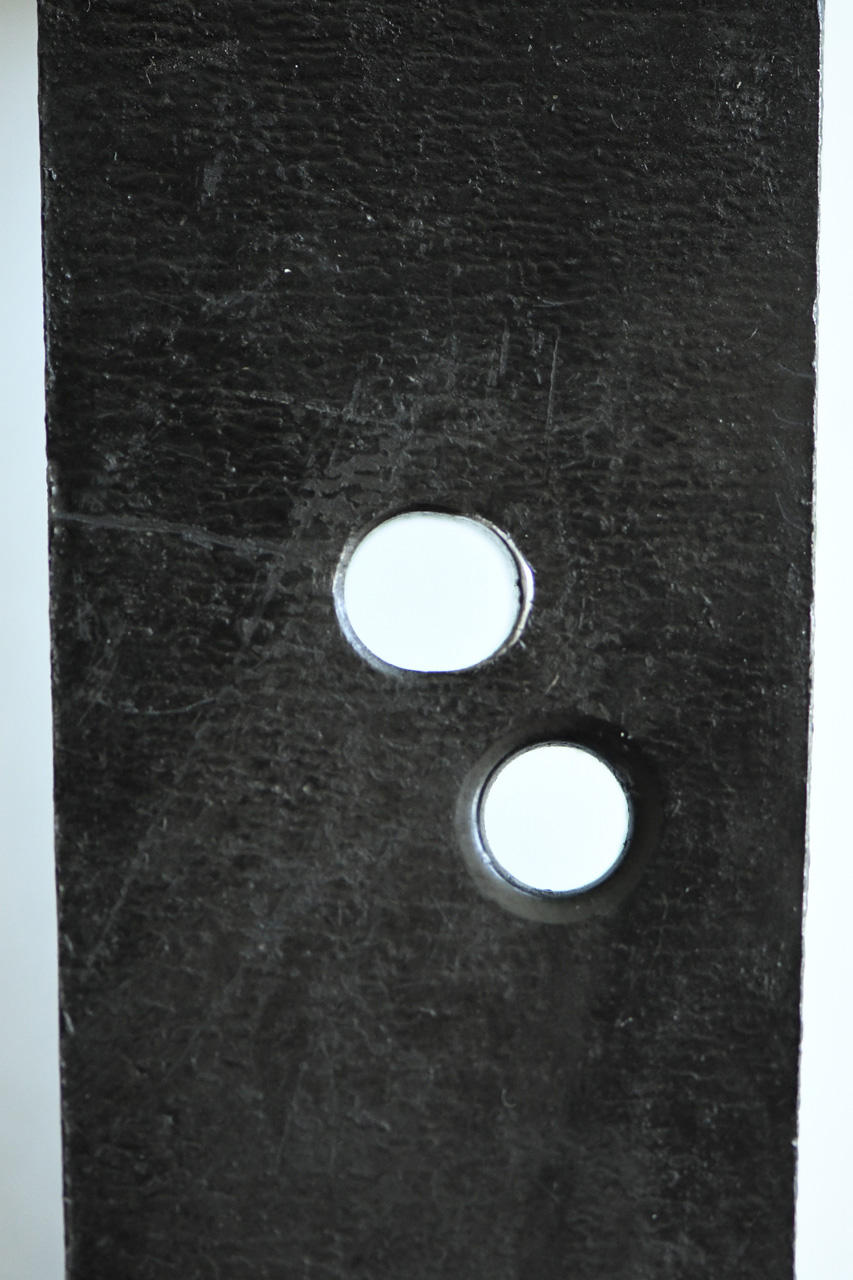
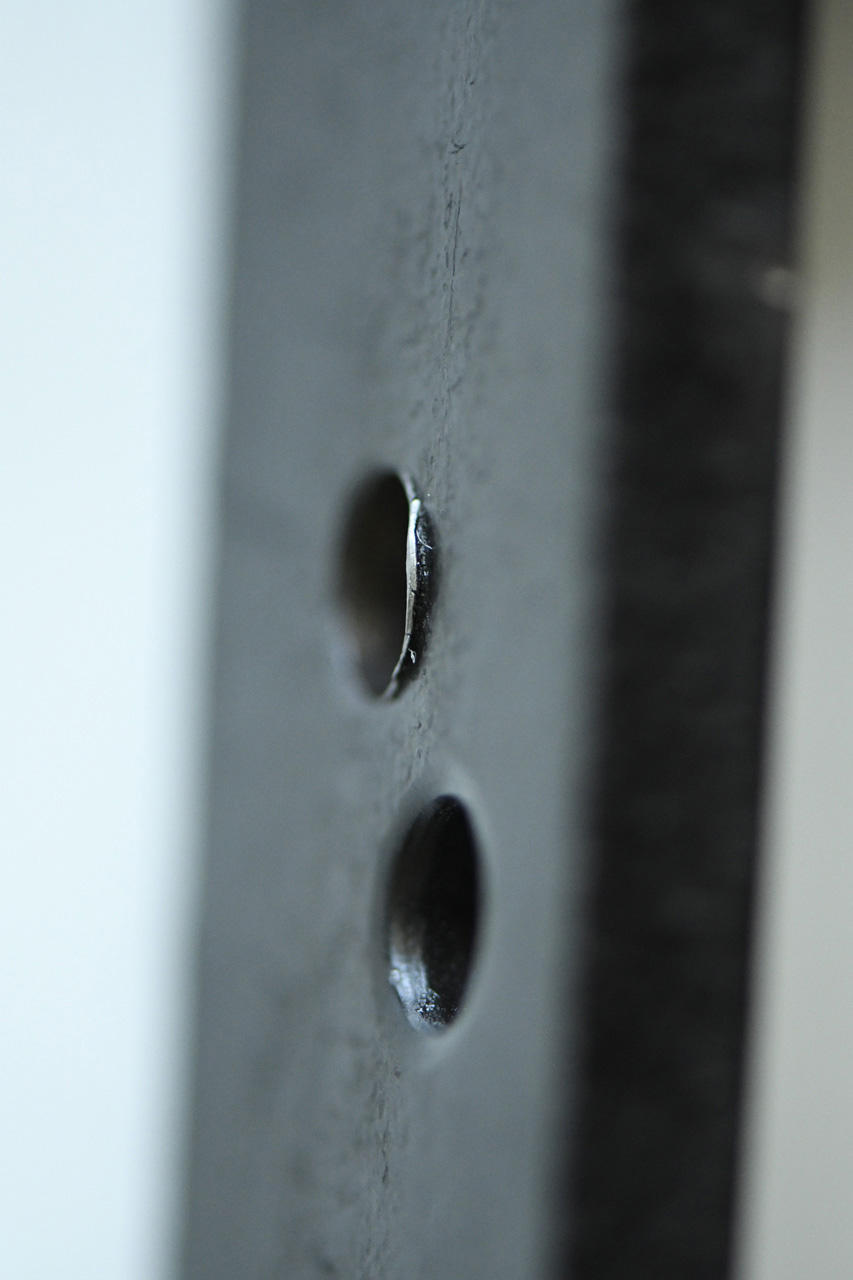
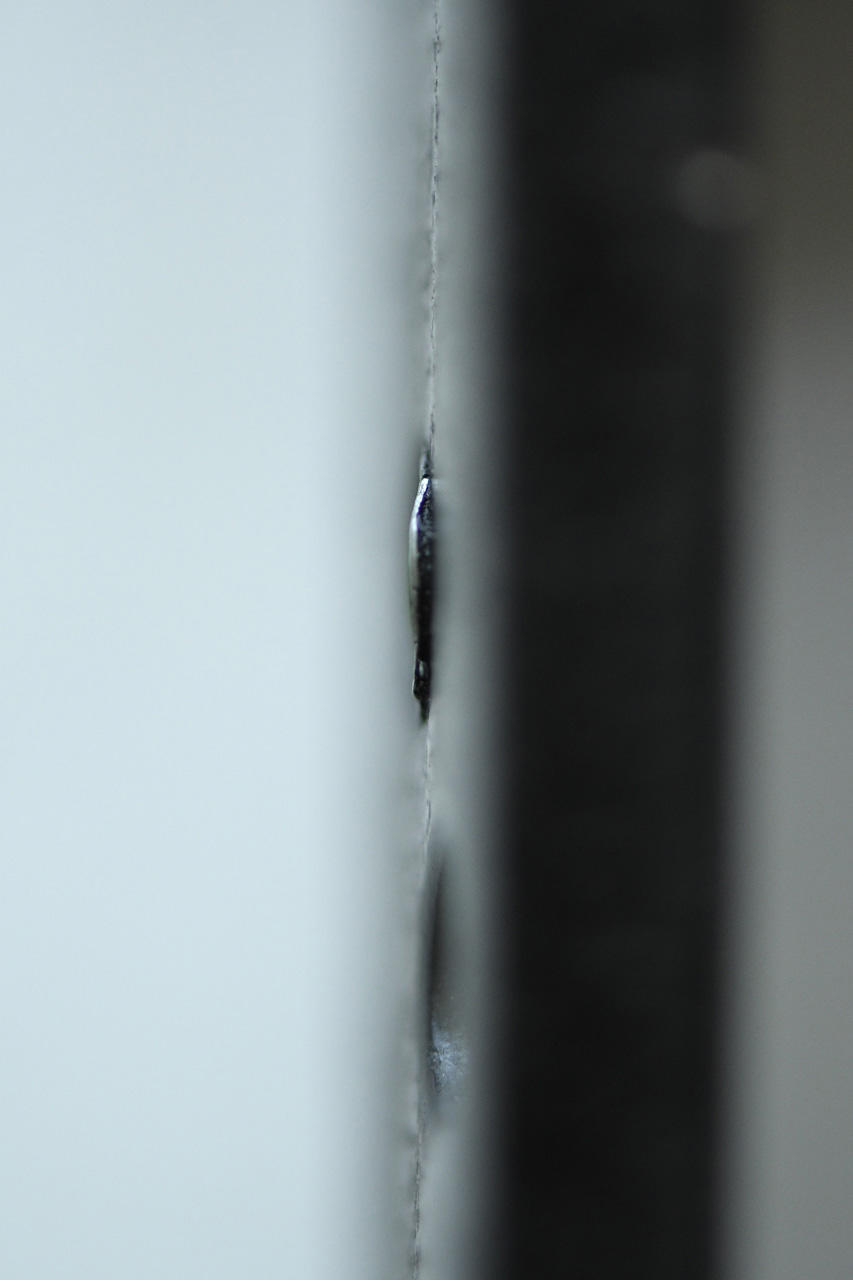
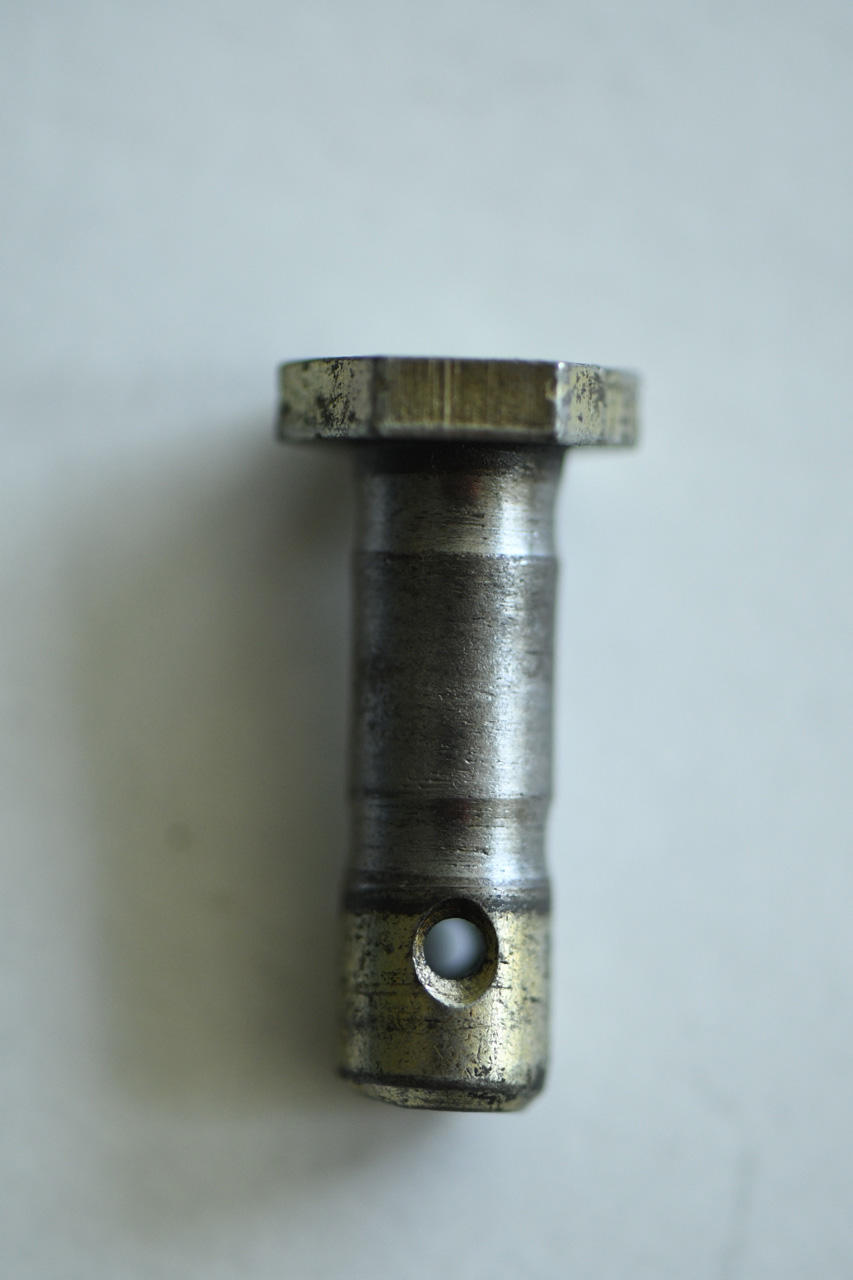
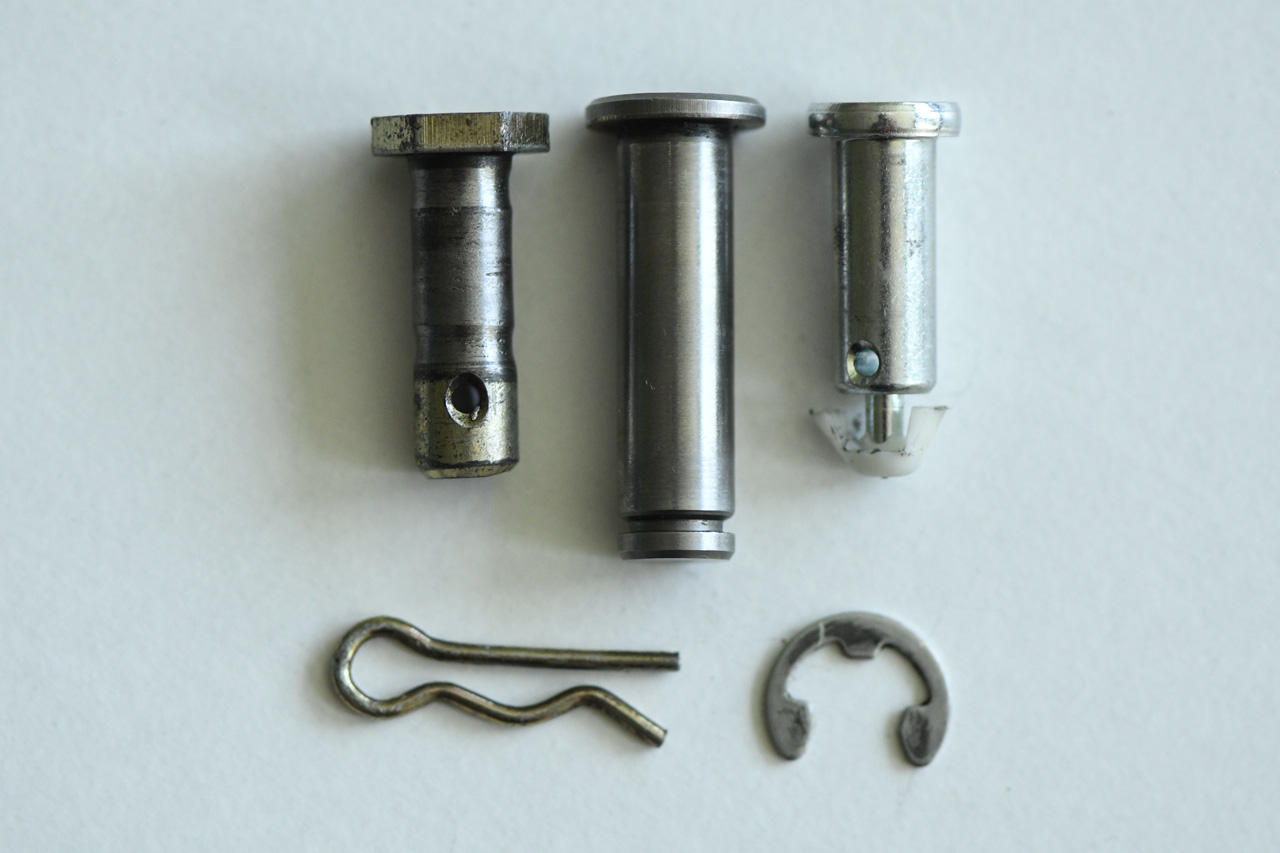
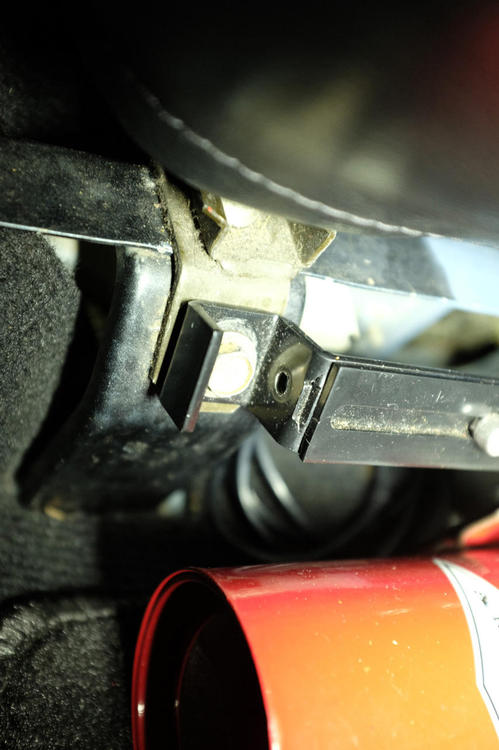
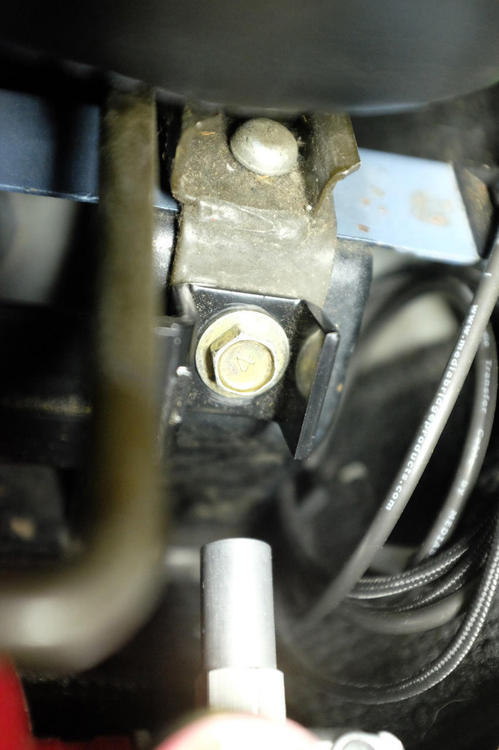
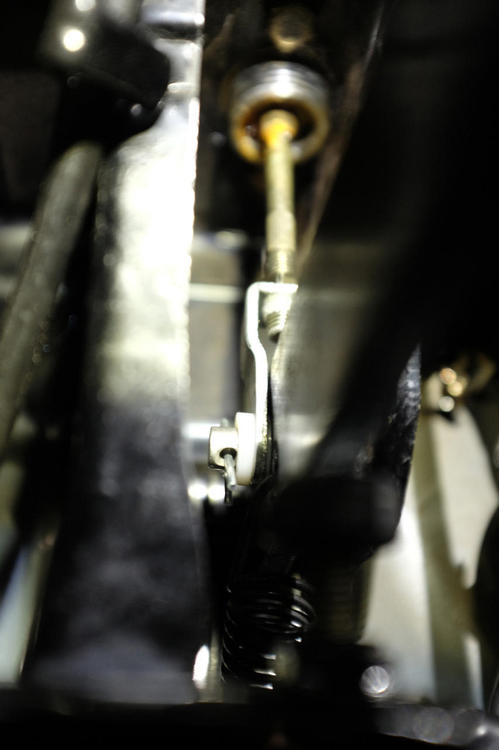
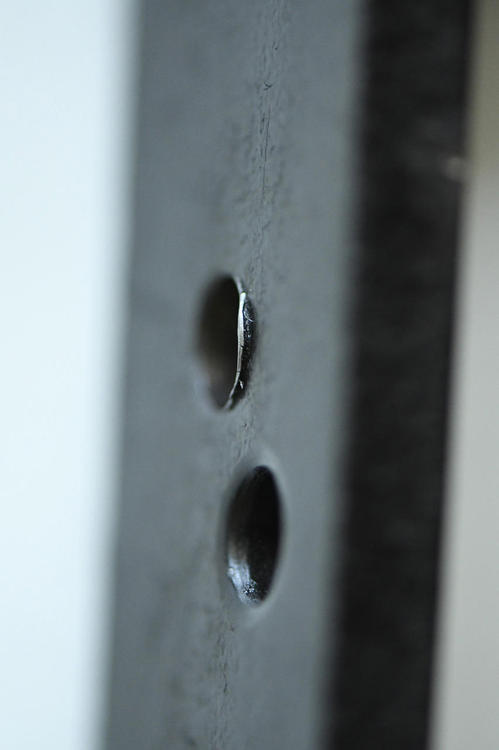
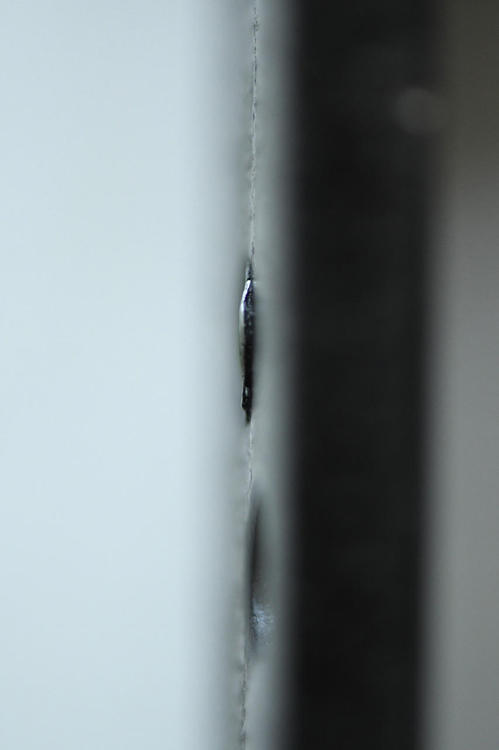
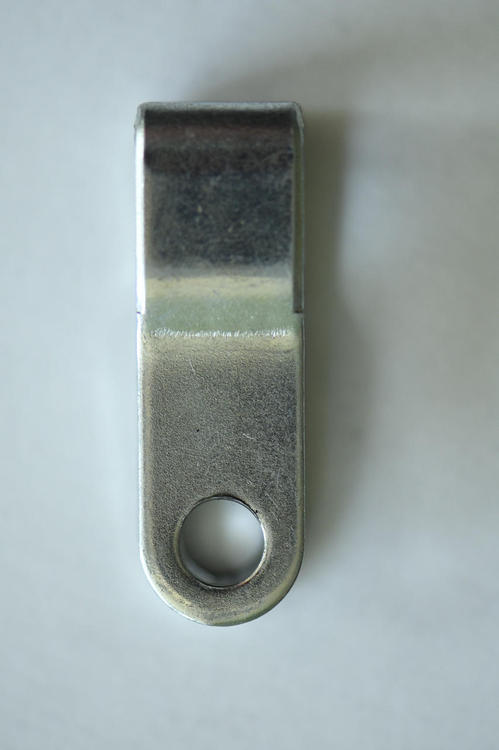
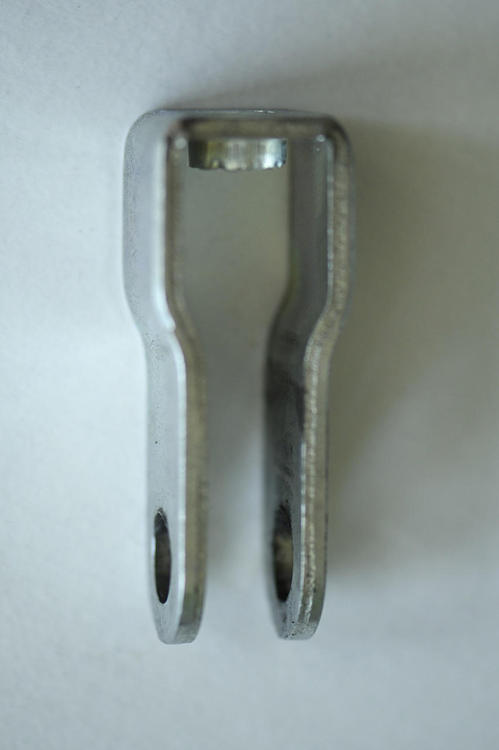
Squeaky Clutch Pedal and Clevis Pin: TLDR: Can anyone think of any problems by drilling out the oblong clevis pin wholes on both the pedal and clevis and replacing the clevis pin with a slightly larger shifter pin? A couple weeks ago I got around to addressing my squeaky clutch pedal. I contorted myself under the dash and lubed everything up pretty well. The squeak was gone, but now there is a pop feeling in the pedal travel. Cue some research and it’s the clevis pin. Got a replacement in the mail and swapped it in. Removing the seat made it tolerable. Put the seat back in and gave it a go. The pop feeling is still there. Time to remove the pedal and see what’s what. After getting the pedal out It’s easy to see the problem. The whole has worn larger, and metal flared up a bit in the oblong side of the whole on both the pedal and the clevis. It’s the flared up metal that grinds together to make the pop feel. Here’s some macro shots of it. The plan is to drill out the wholes and replace the clevis pin with an extra shifter pin I have and use a couple washers to keep it from moving back and forth.


-
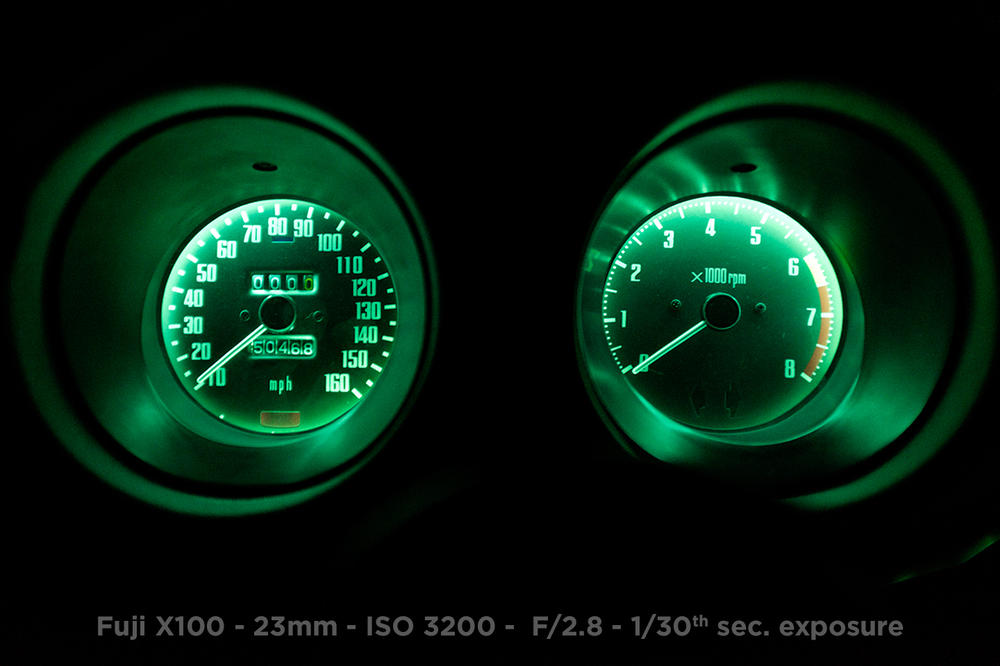
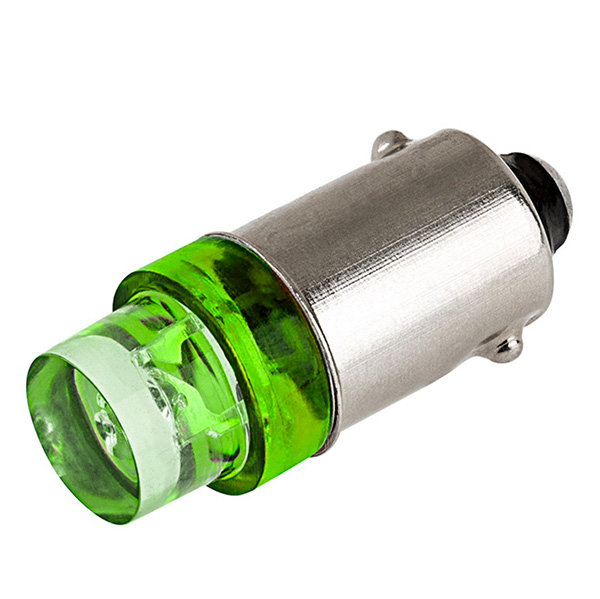
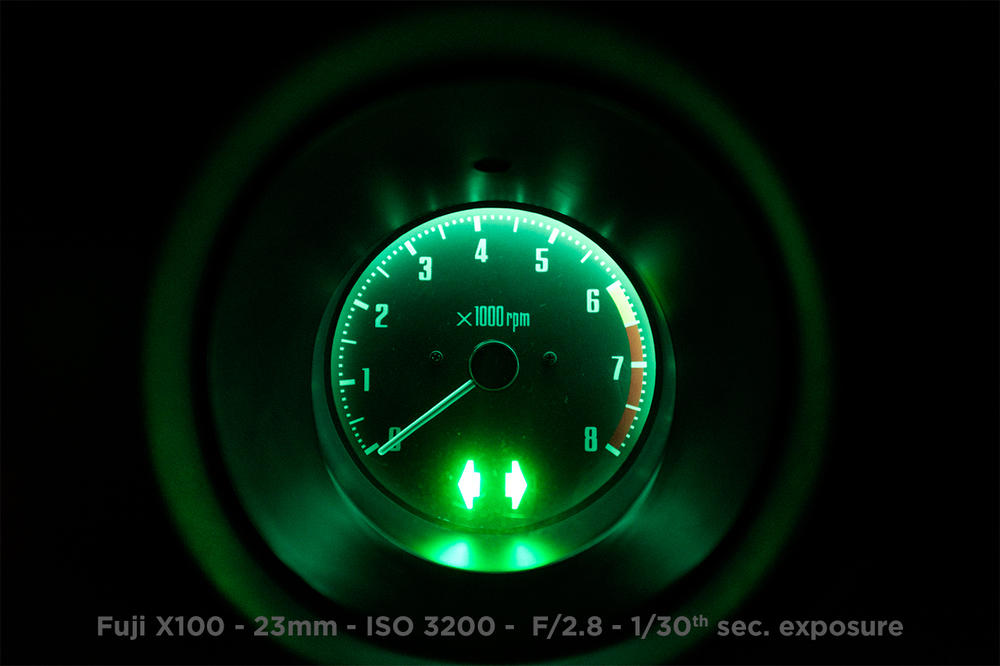
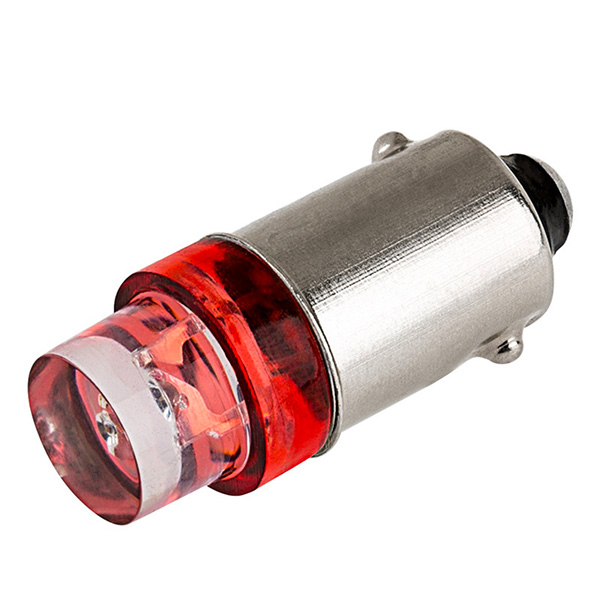
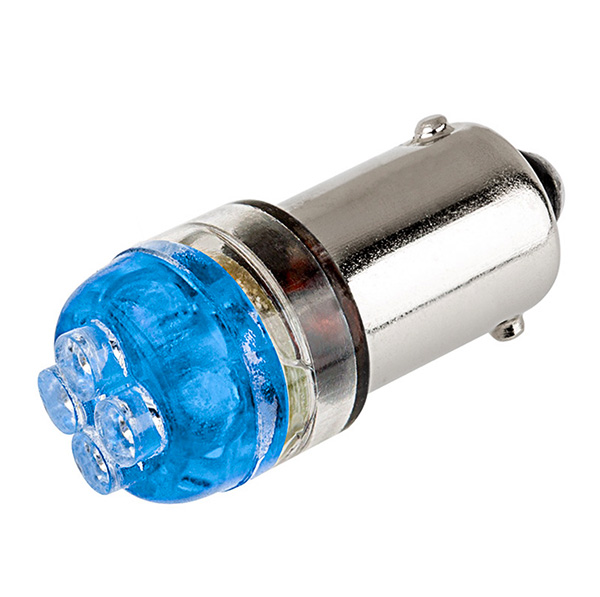
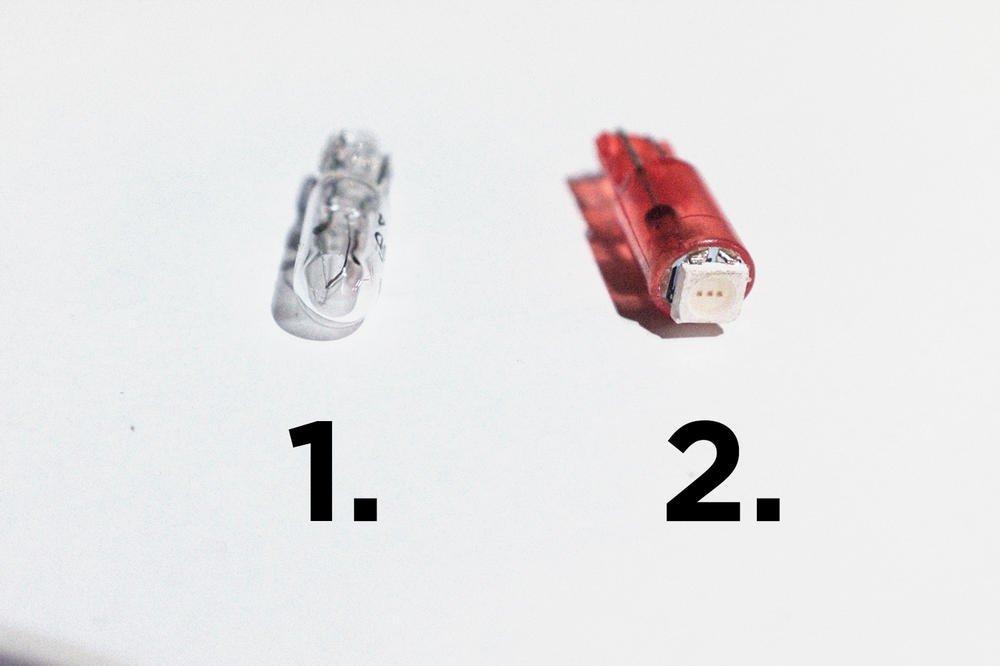
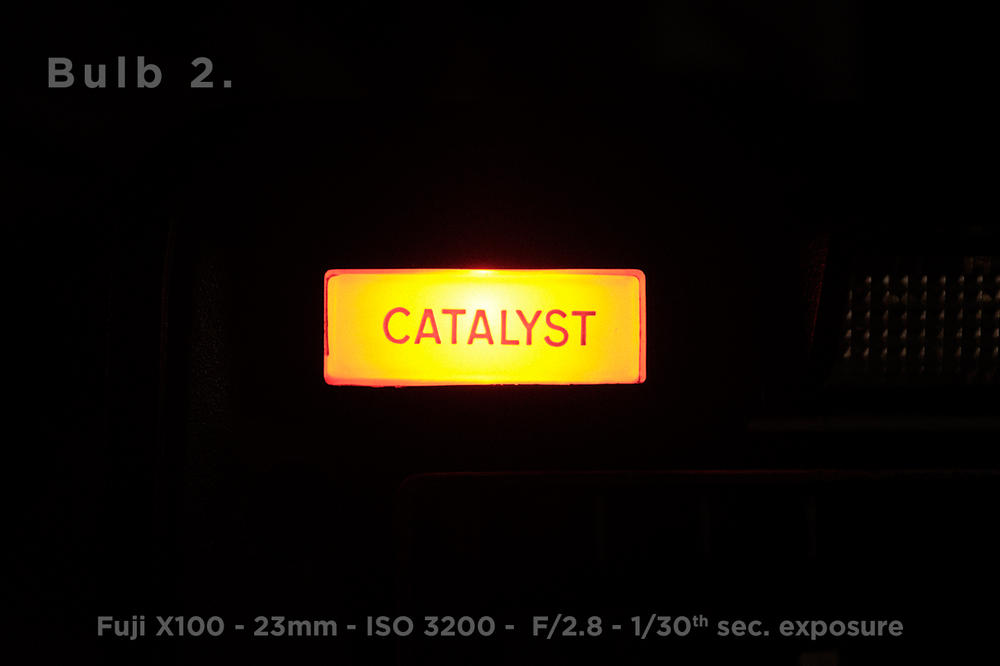
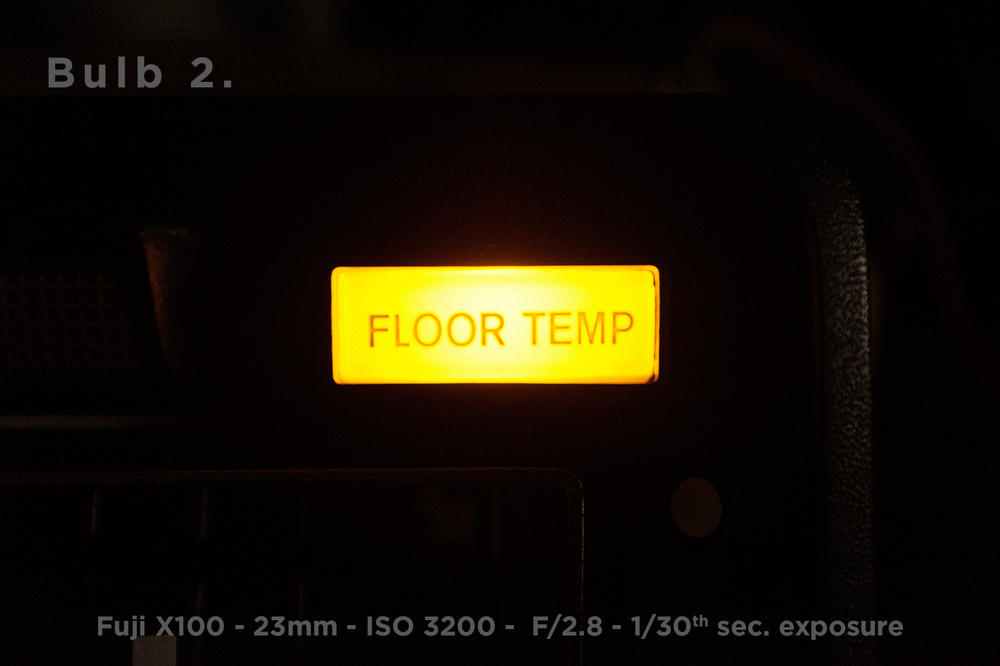
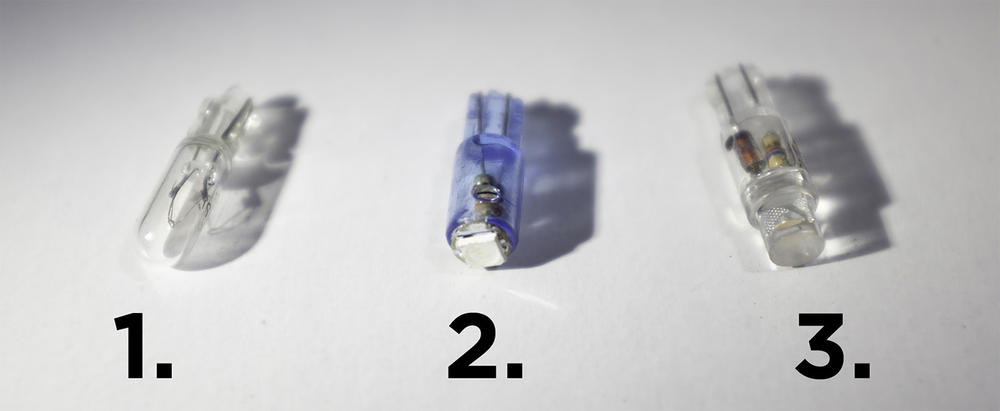
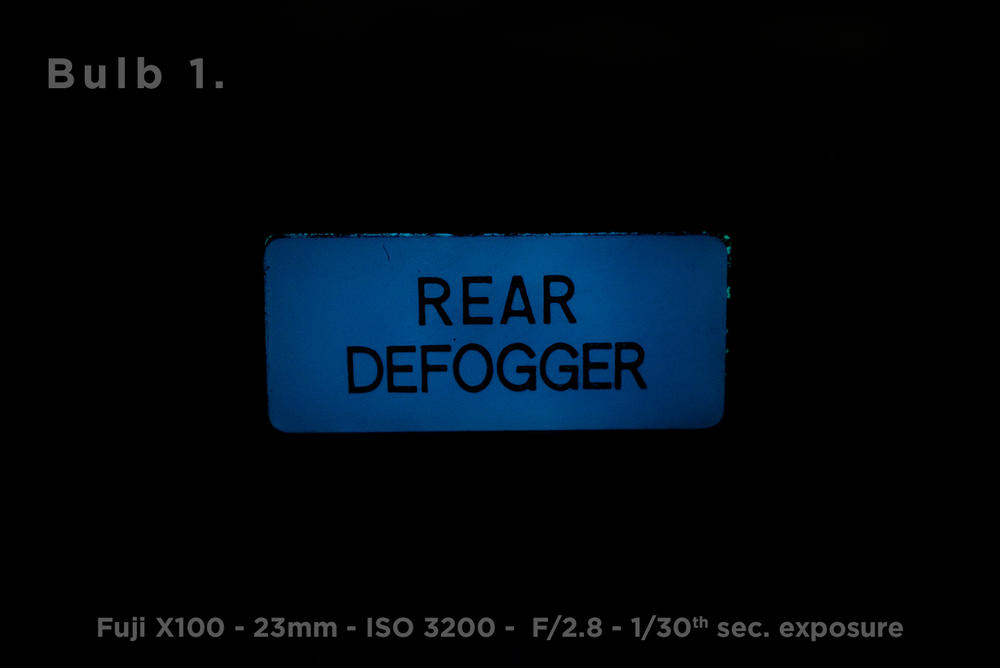
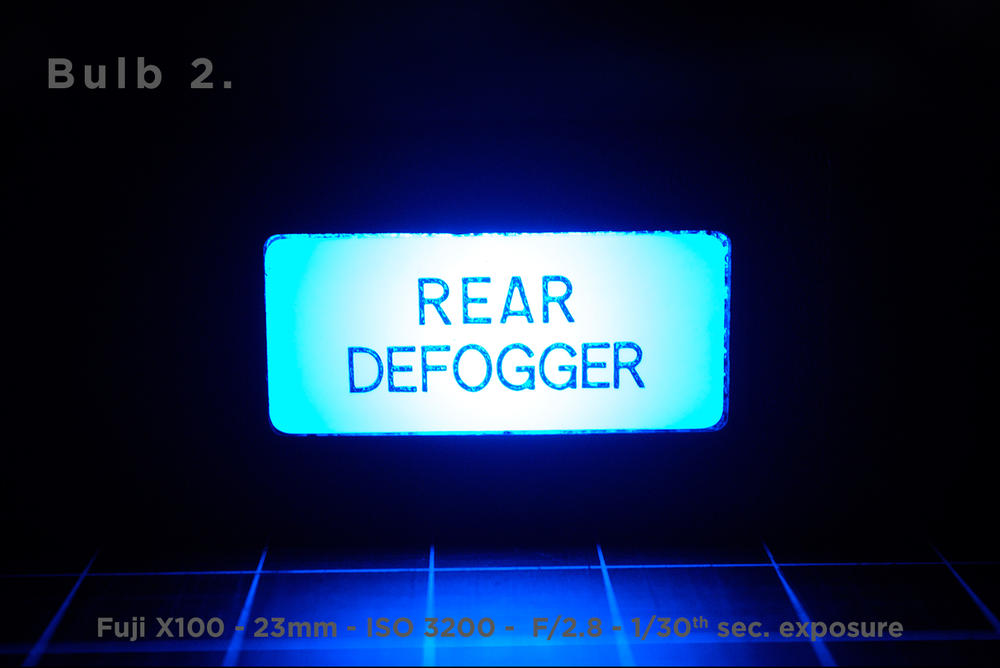
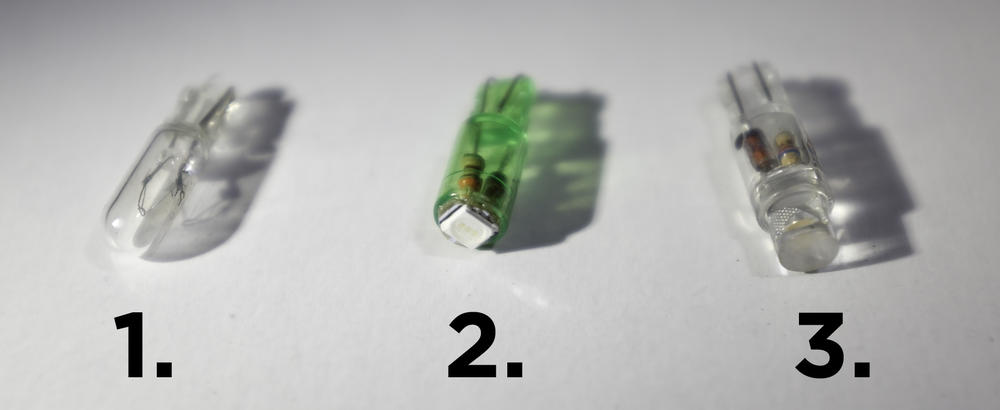
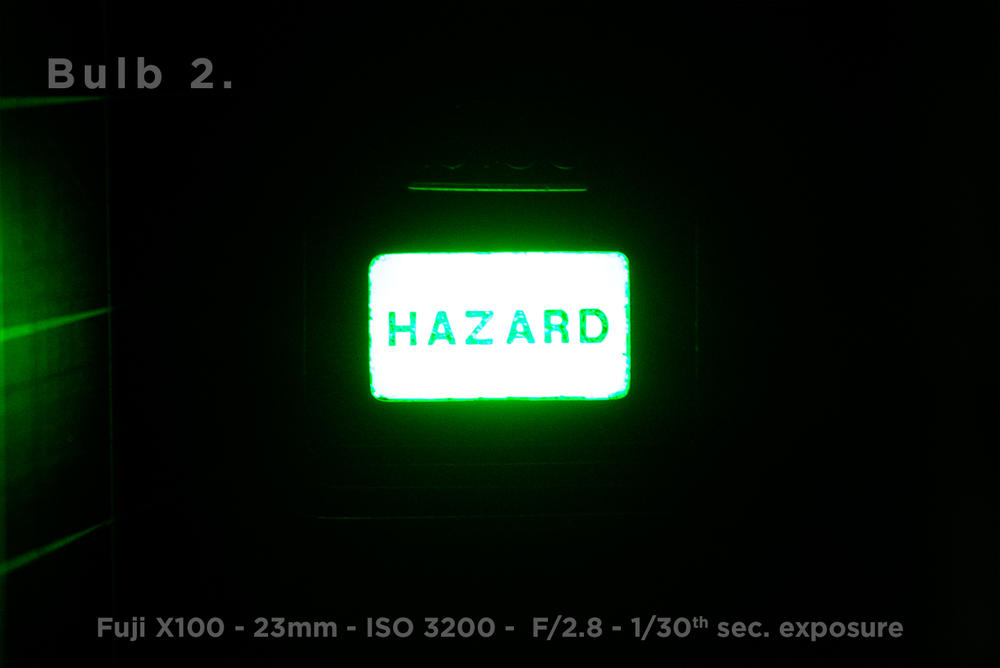
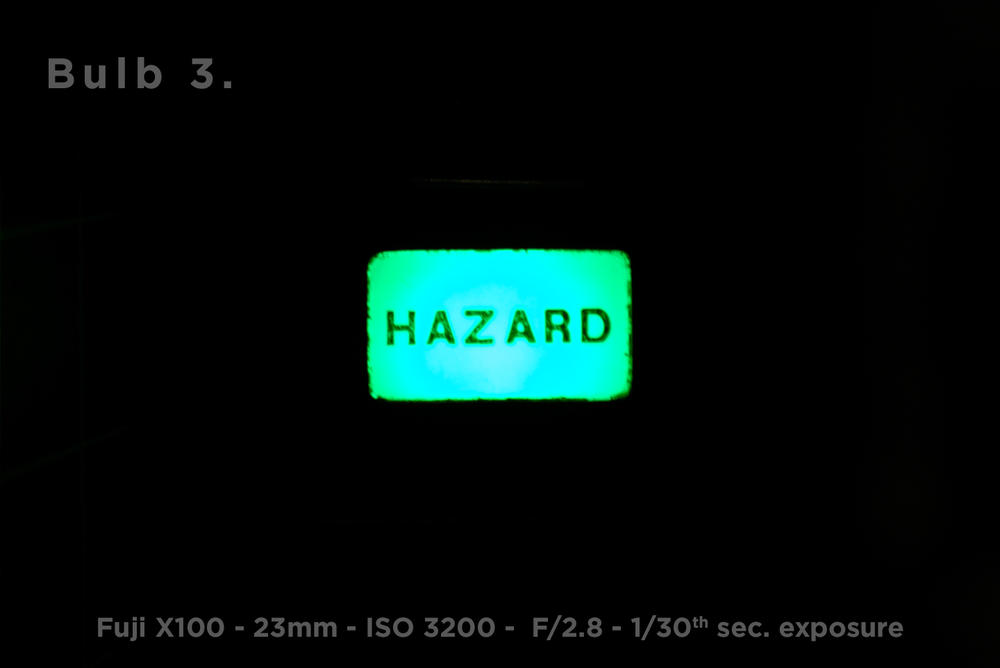
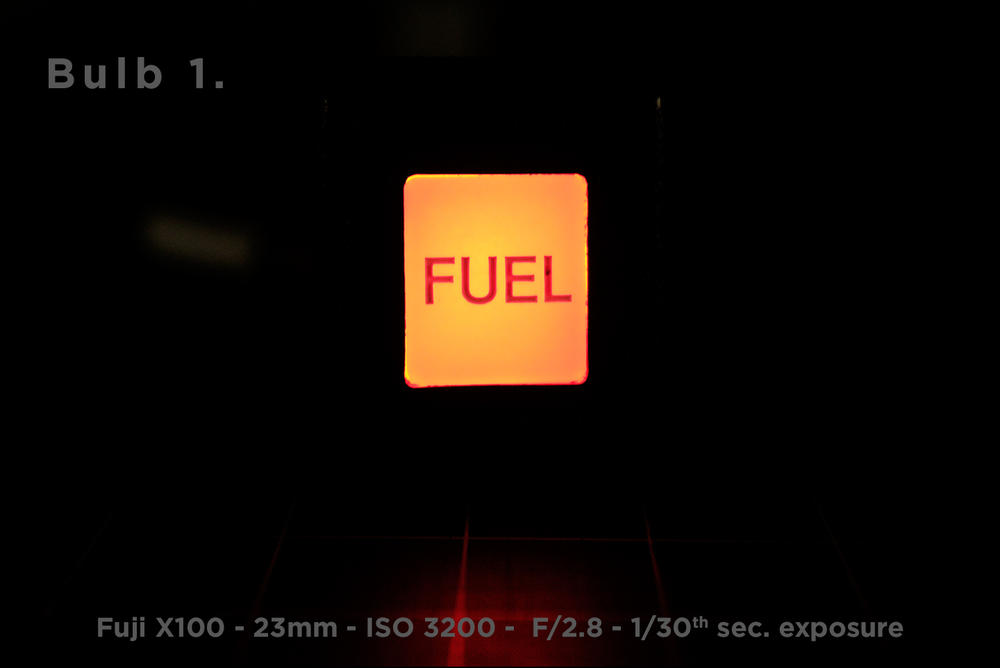
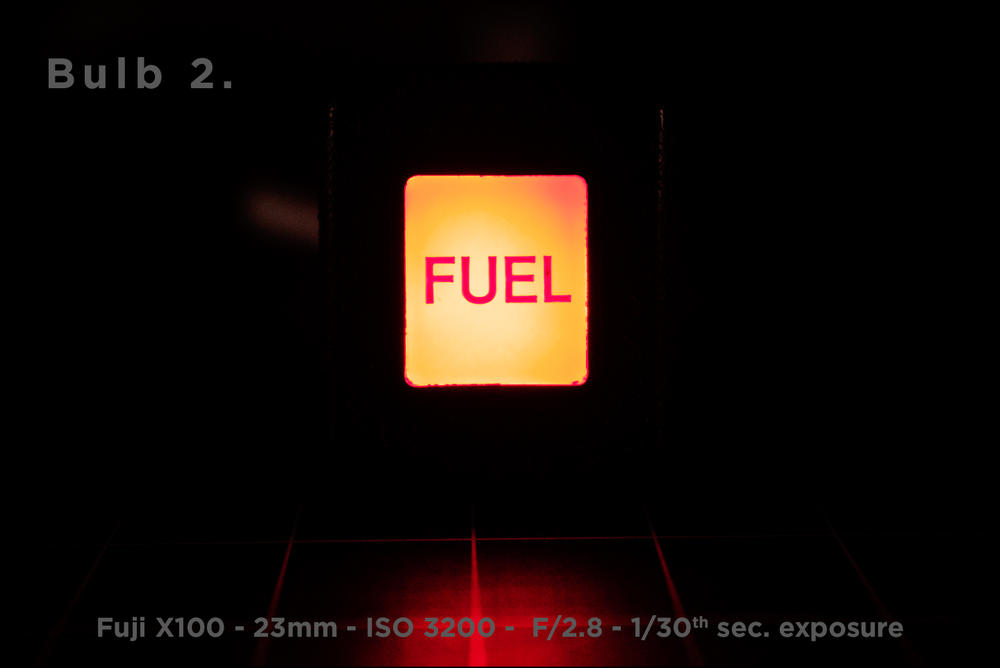
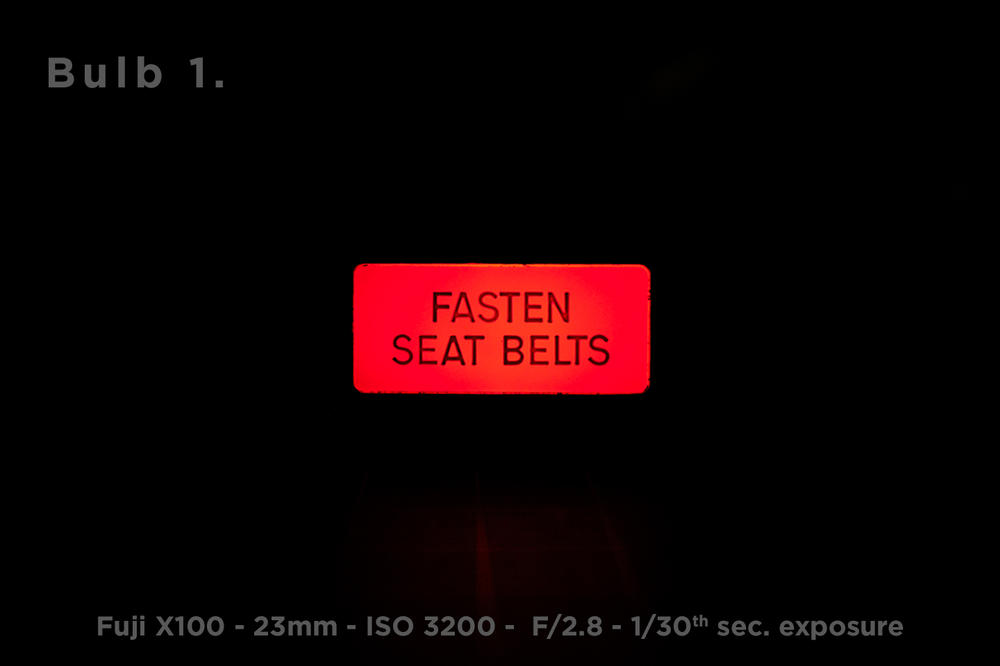
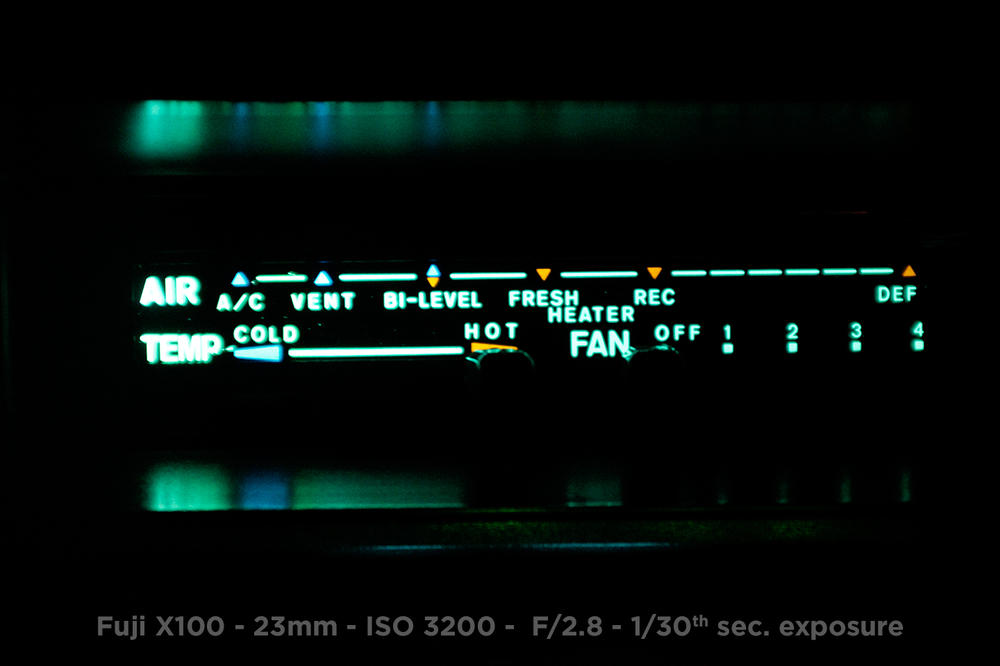
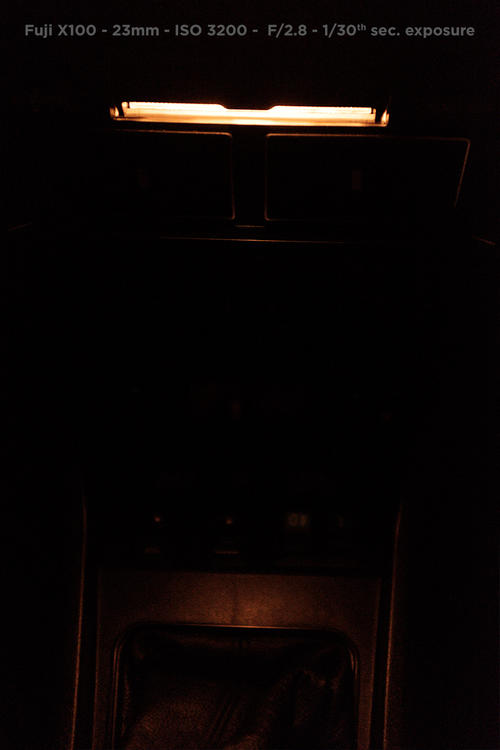
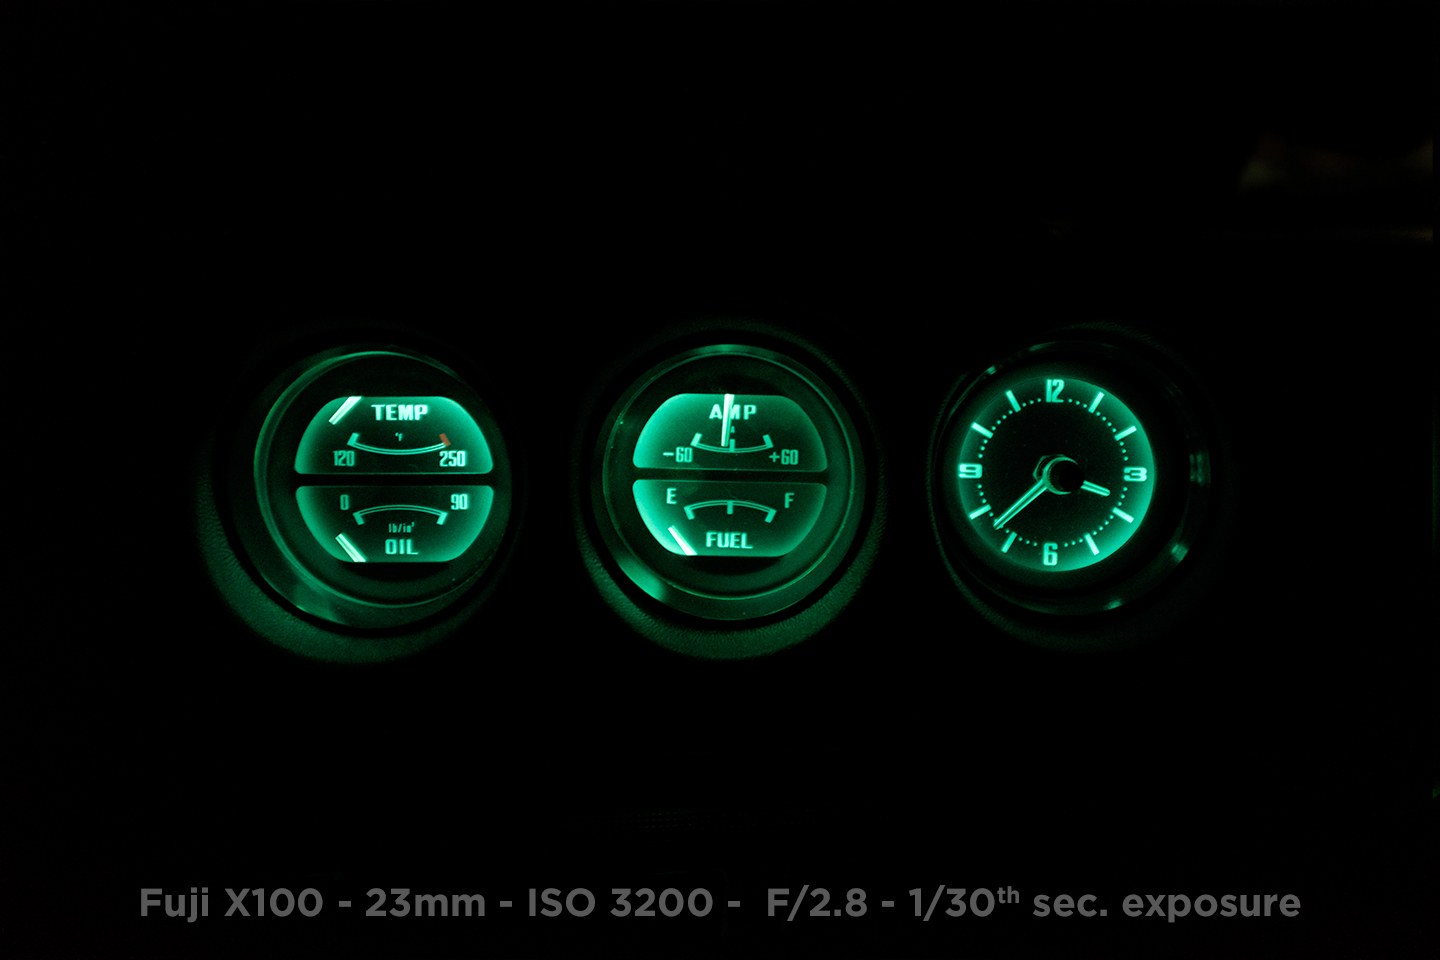
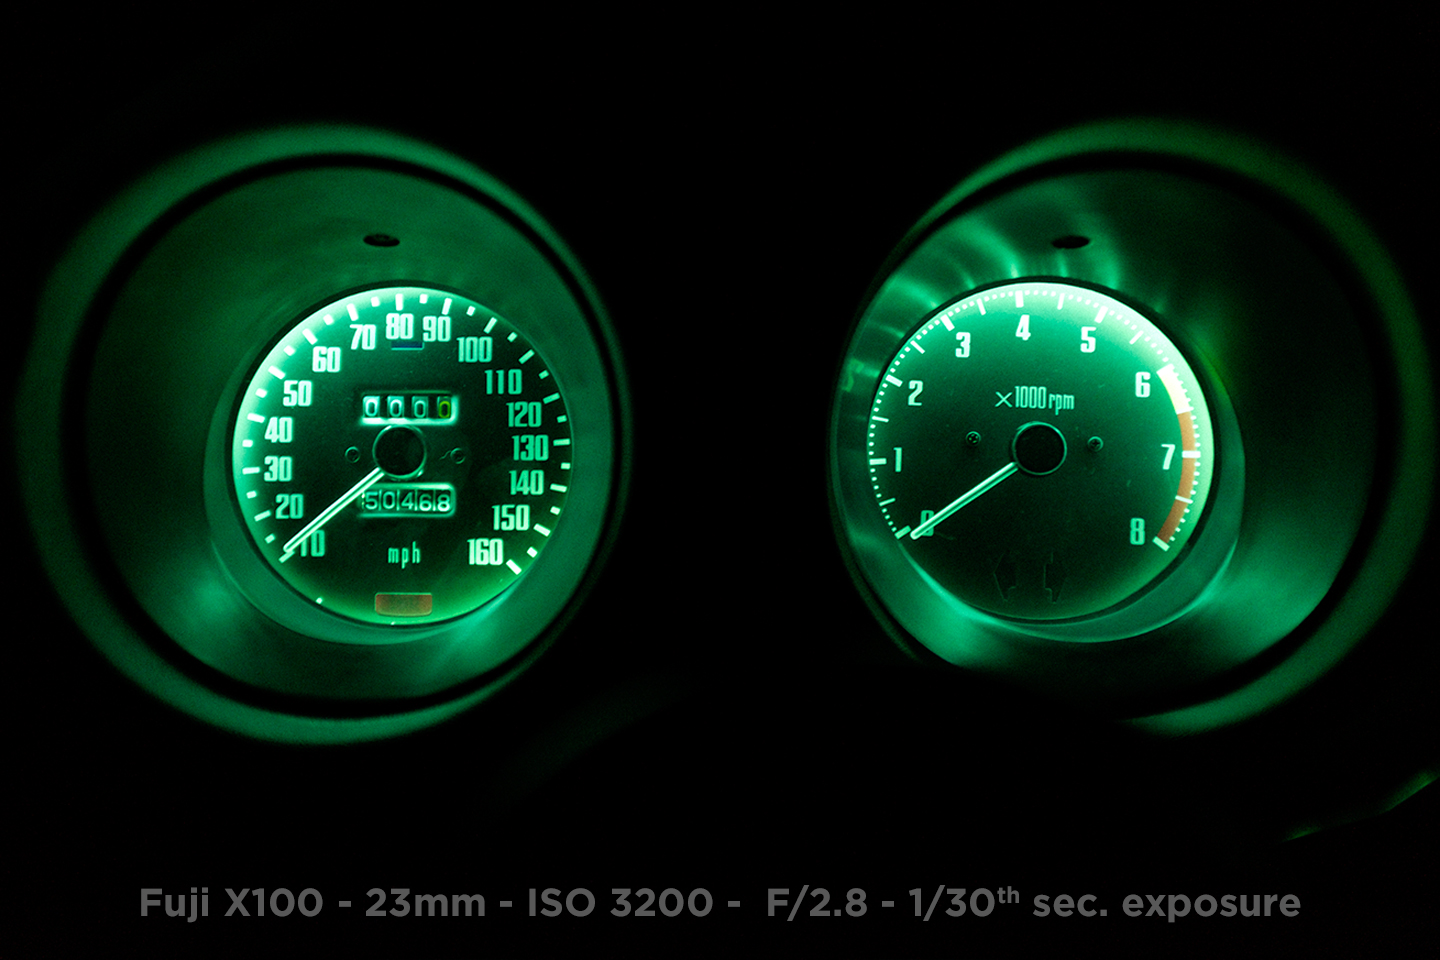
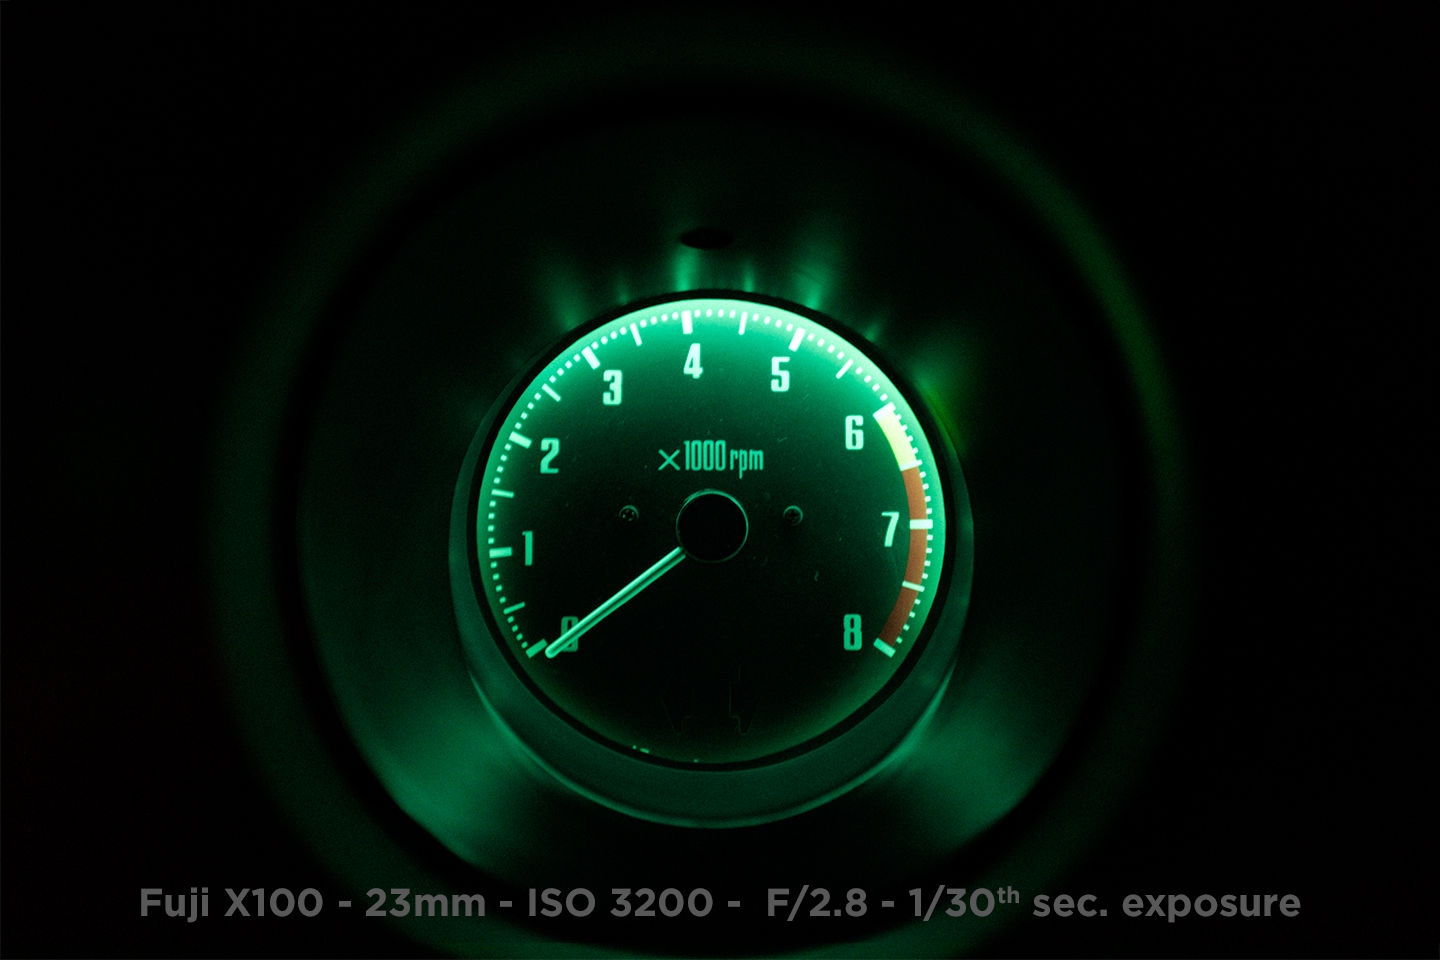
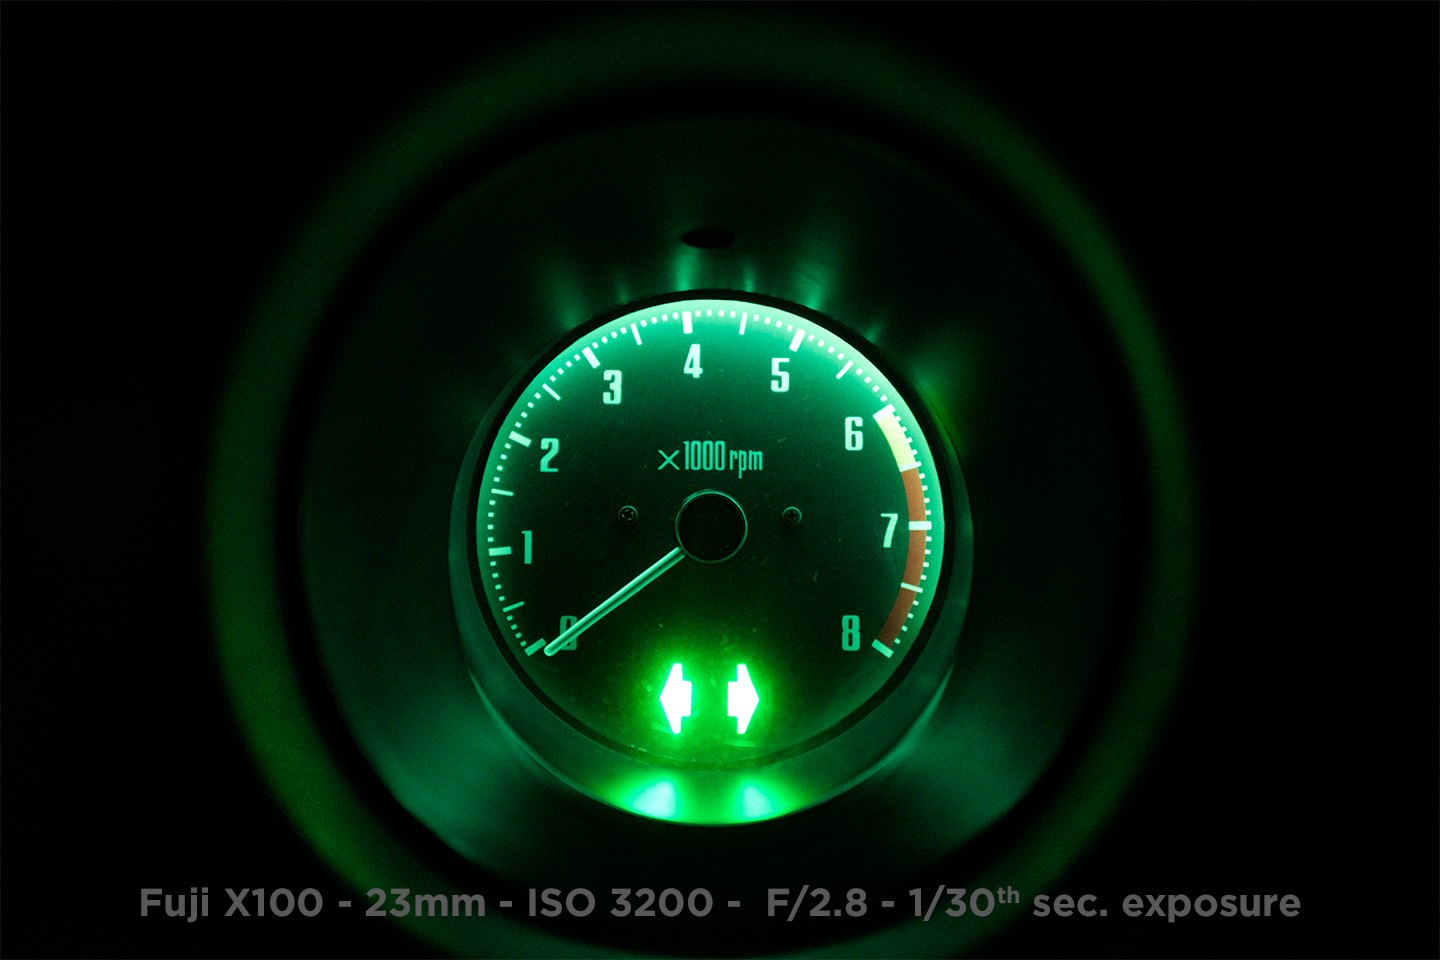
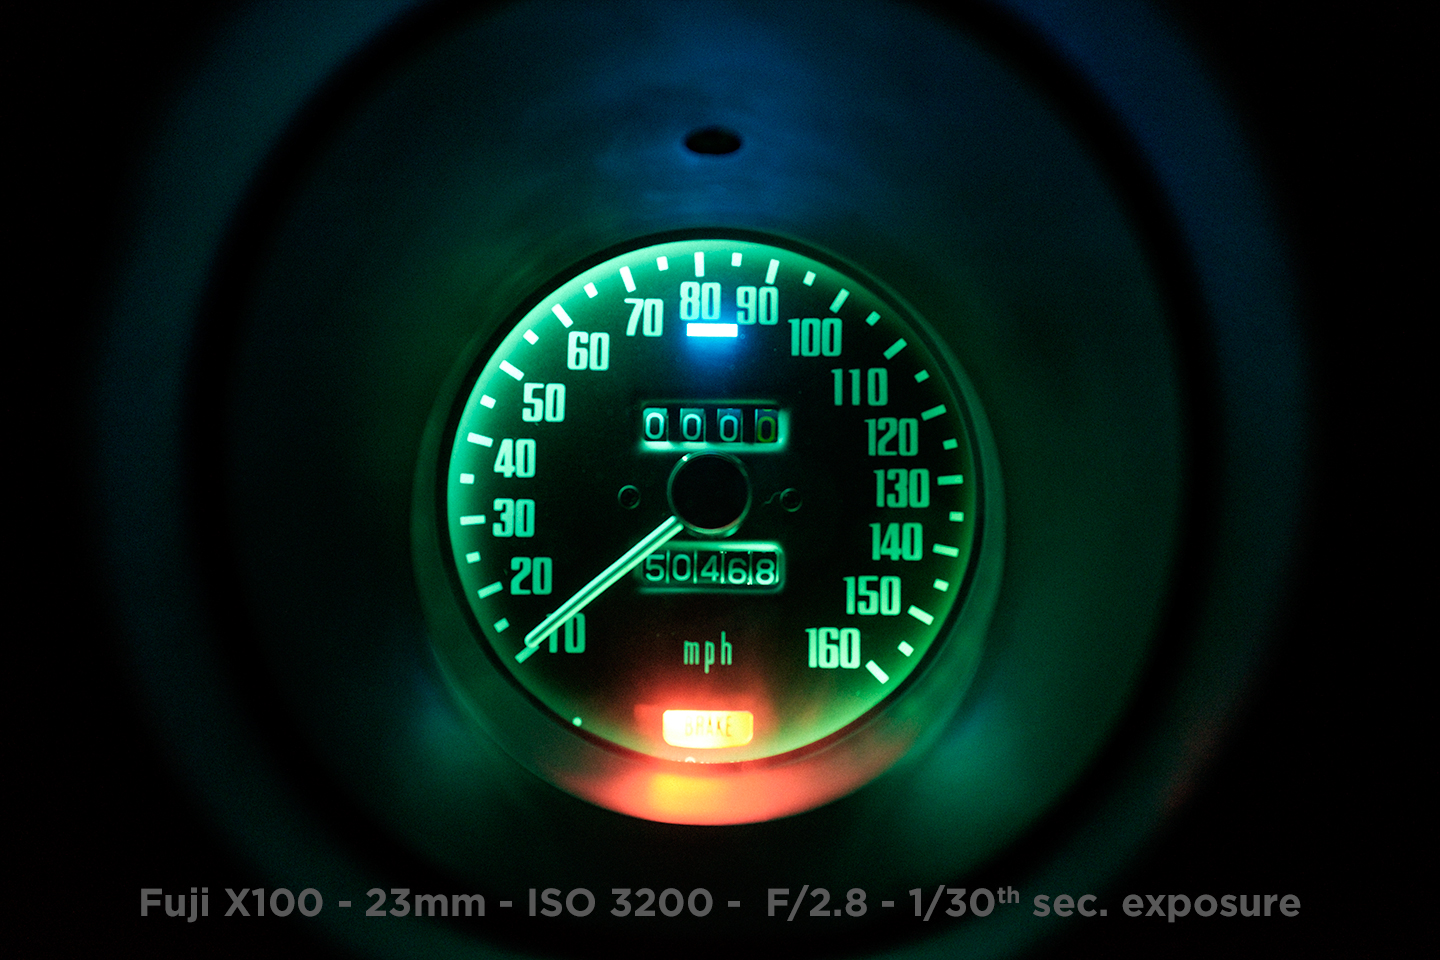
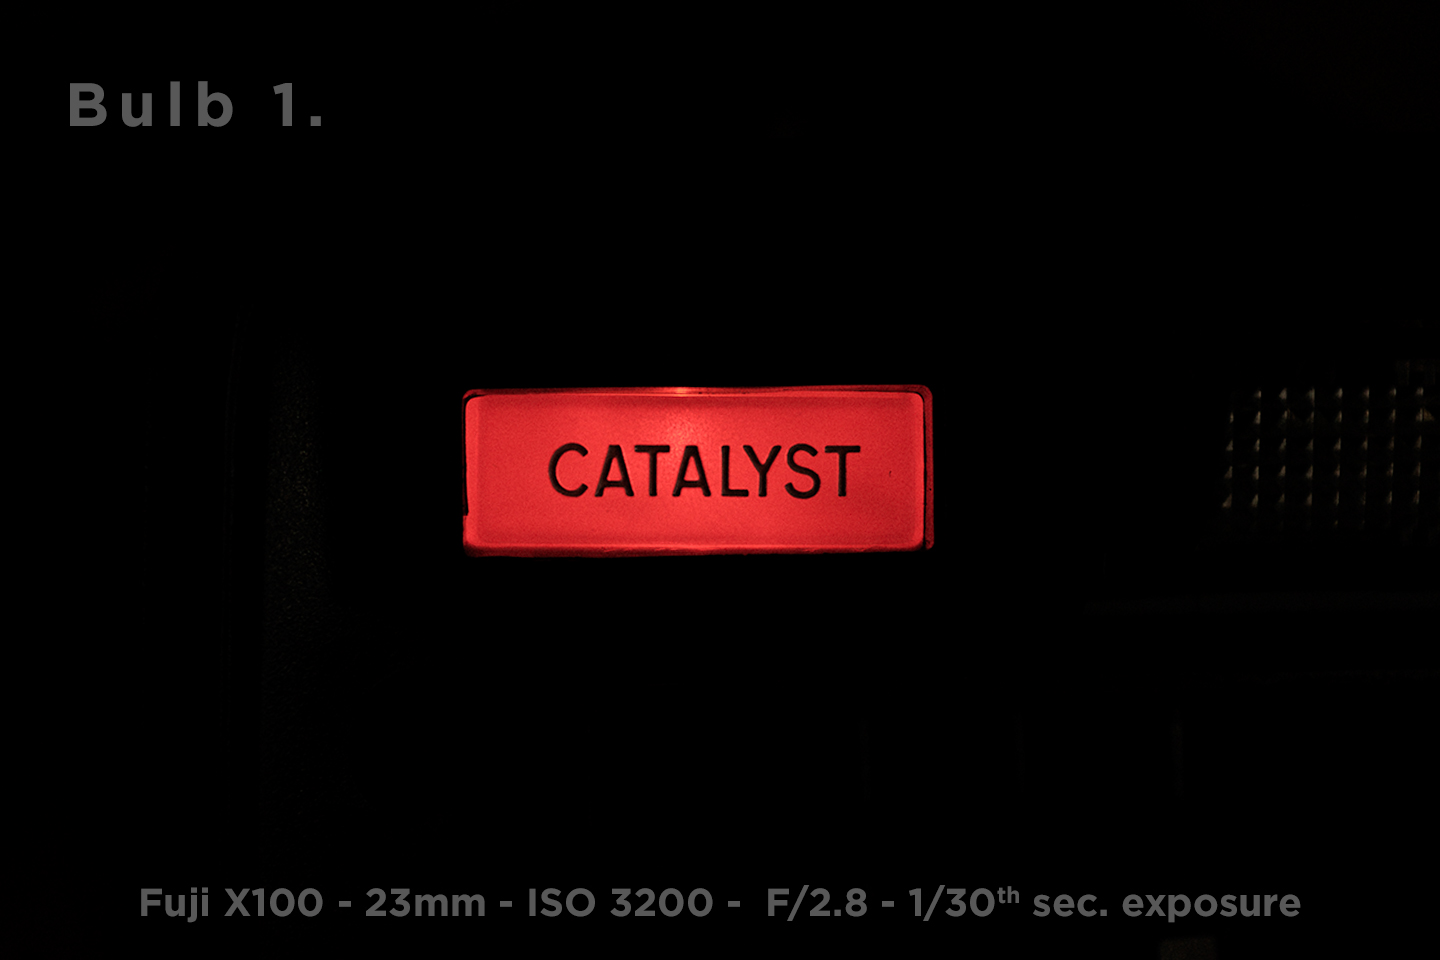
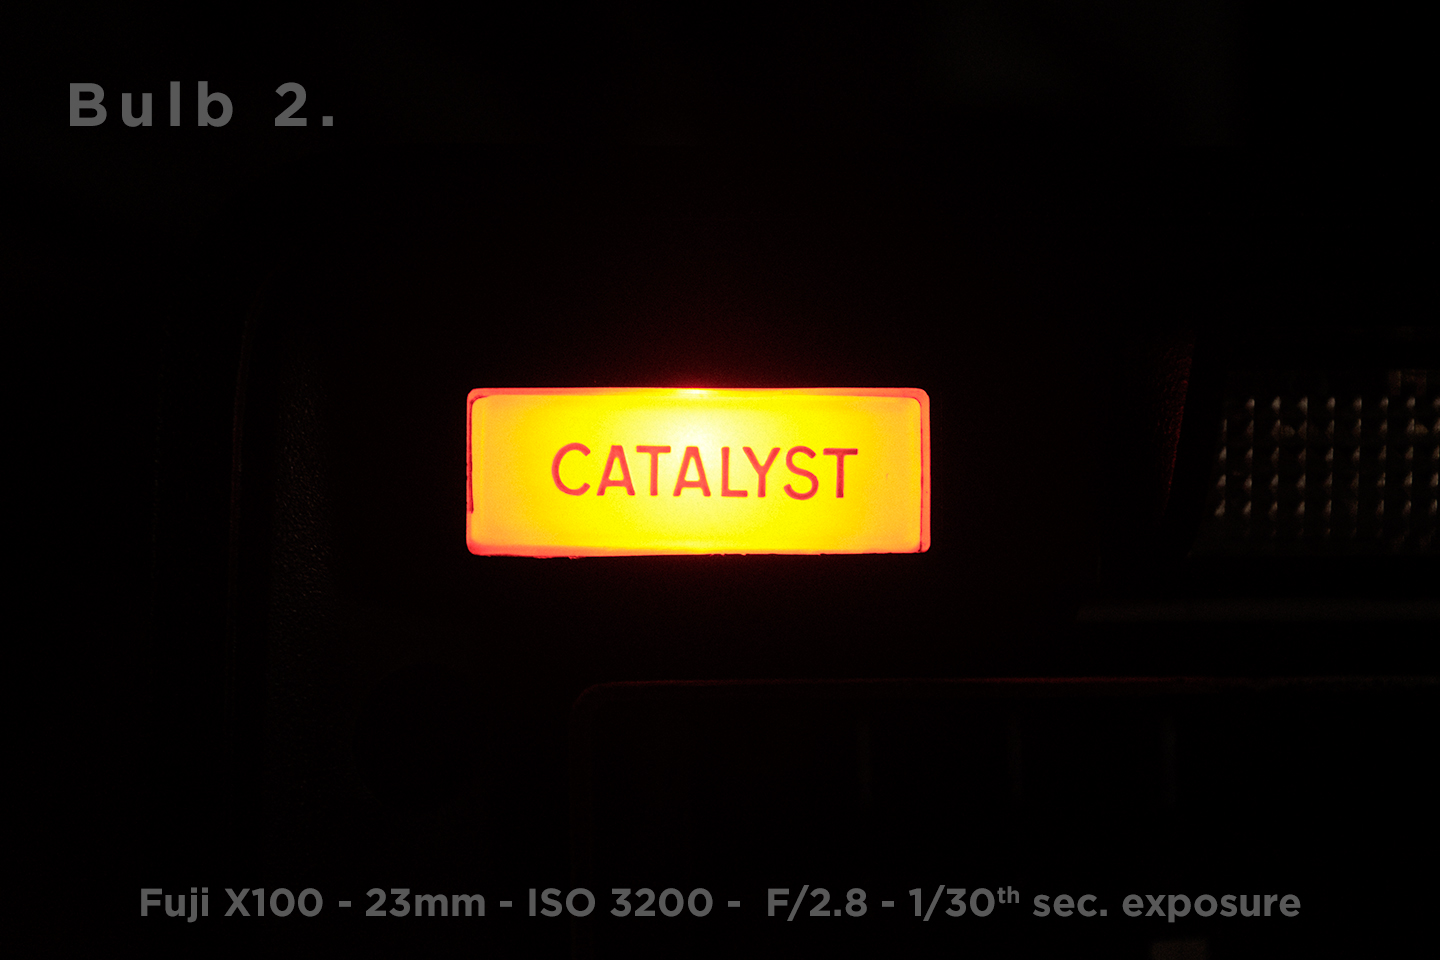
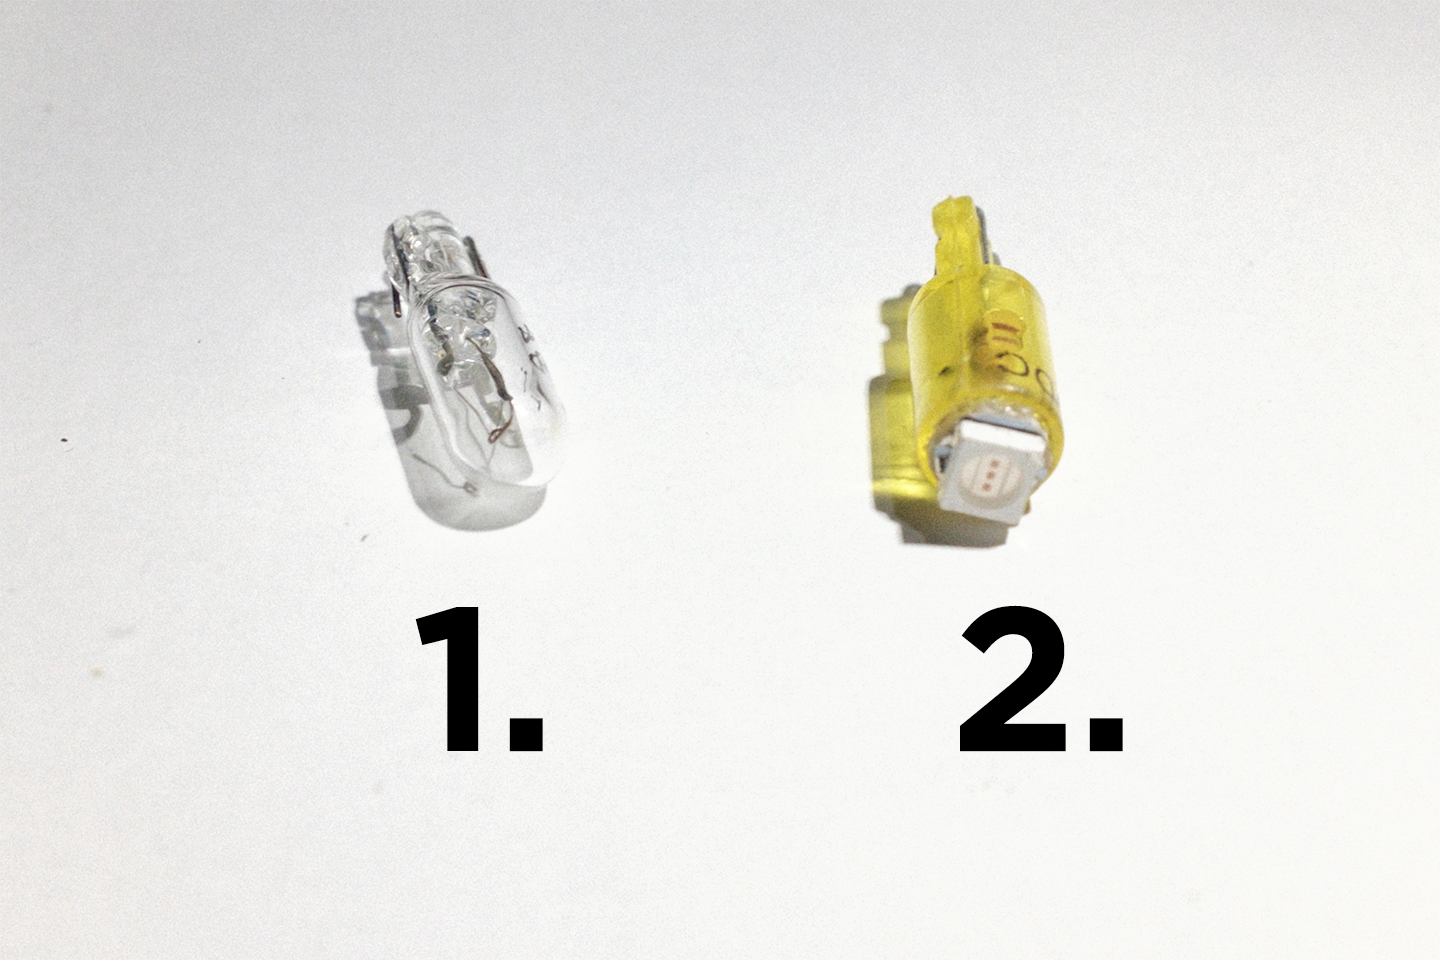
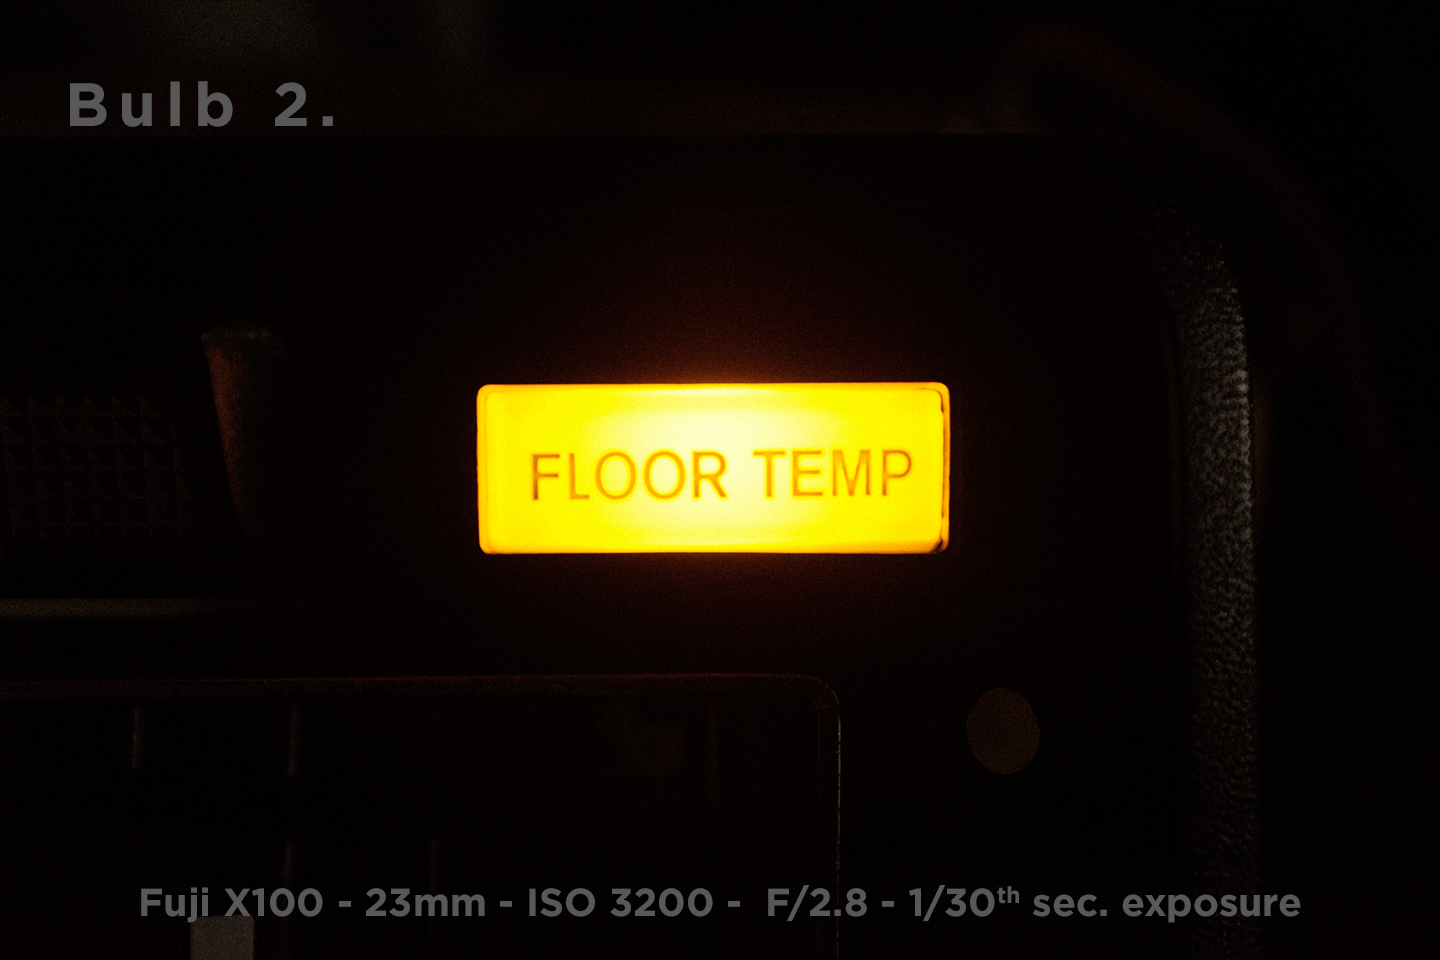
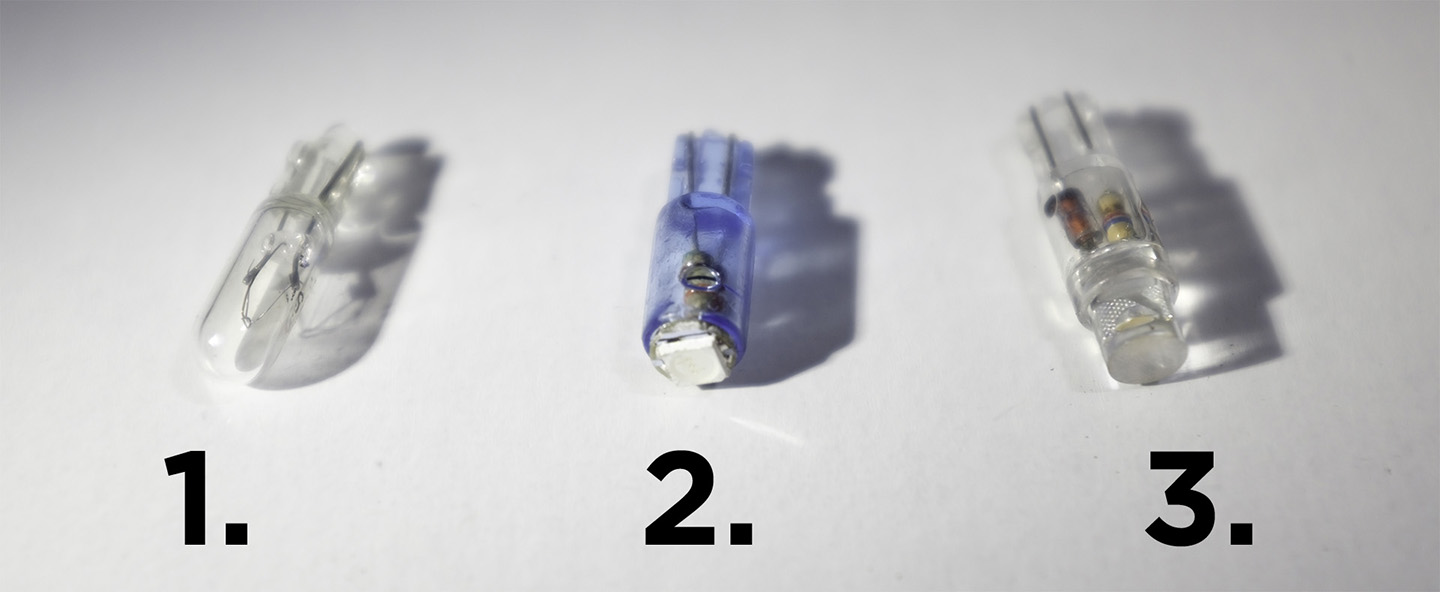
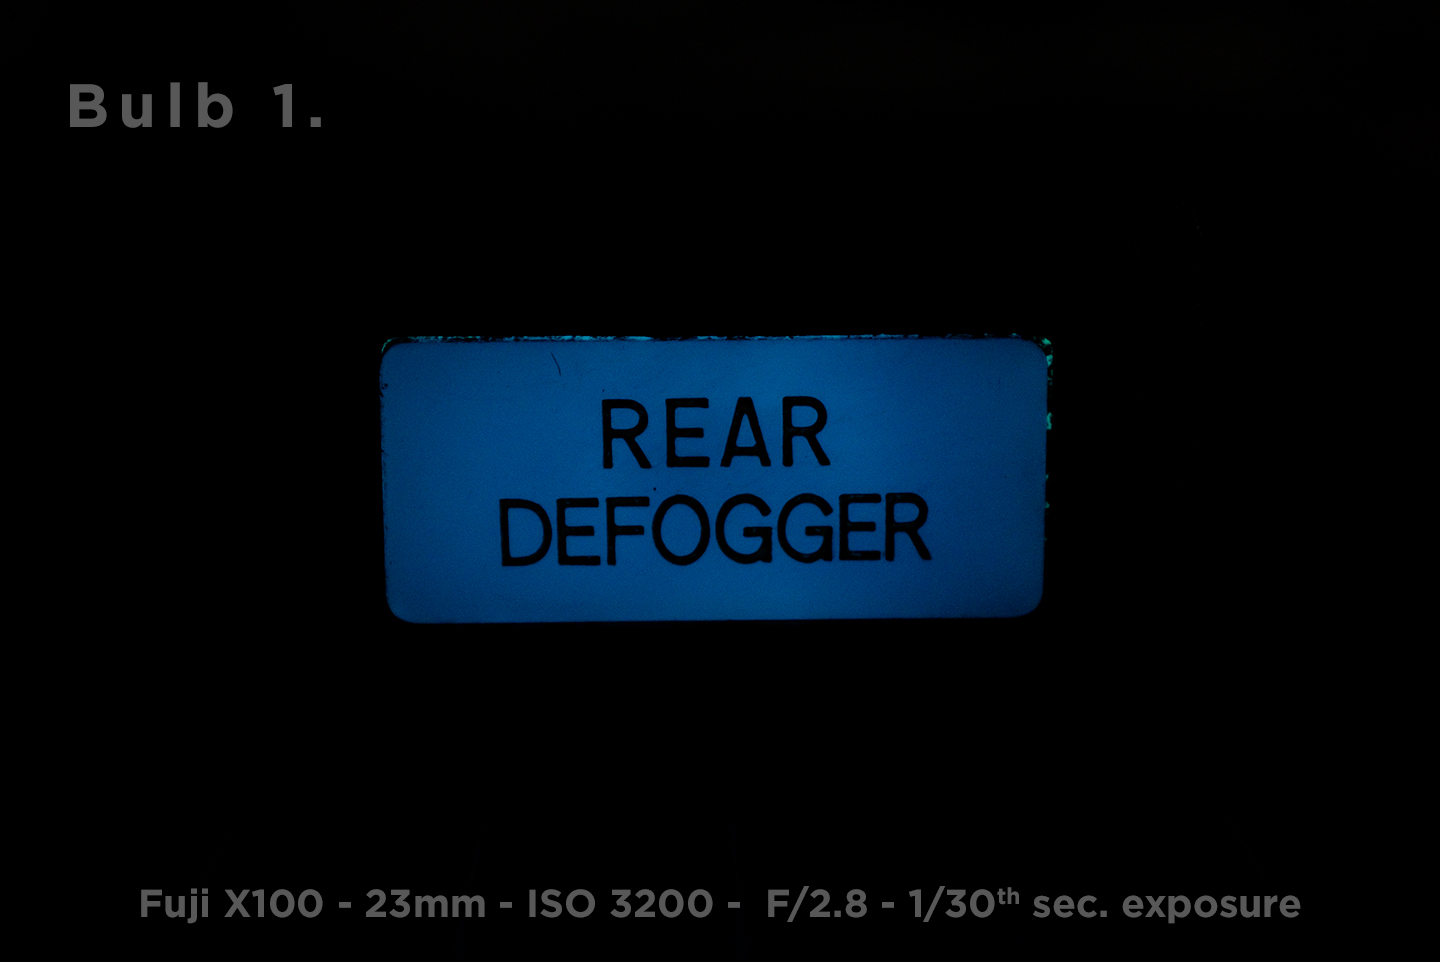
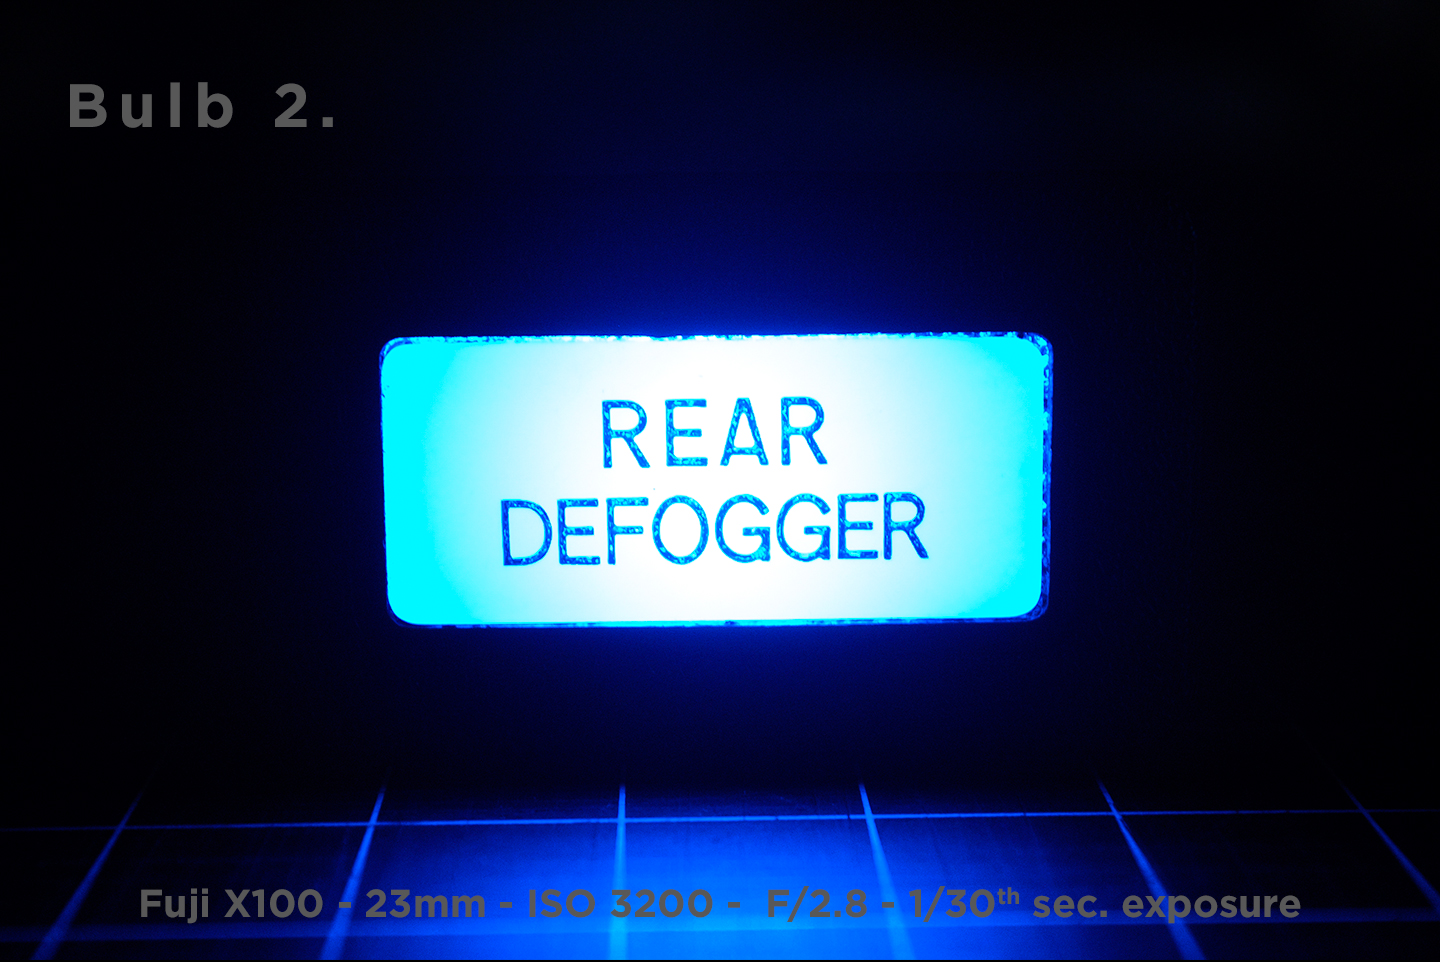
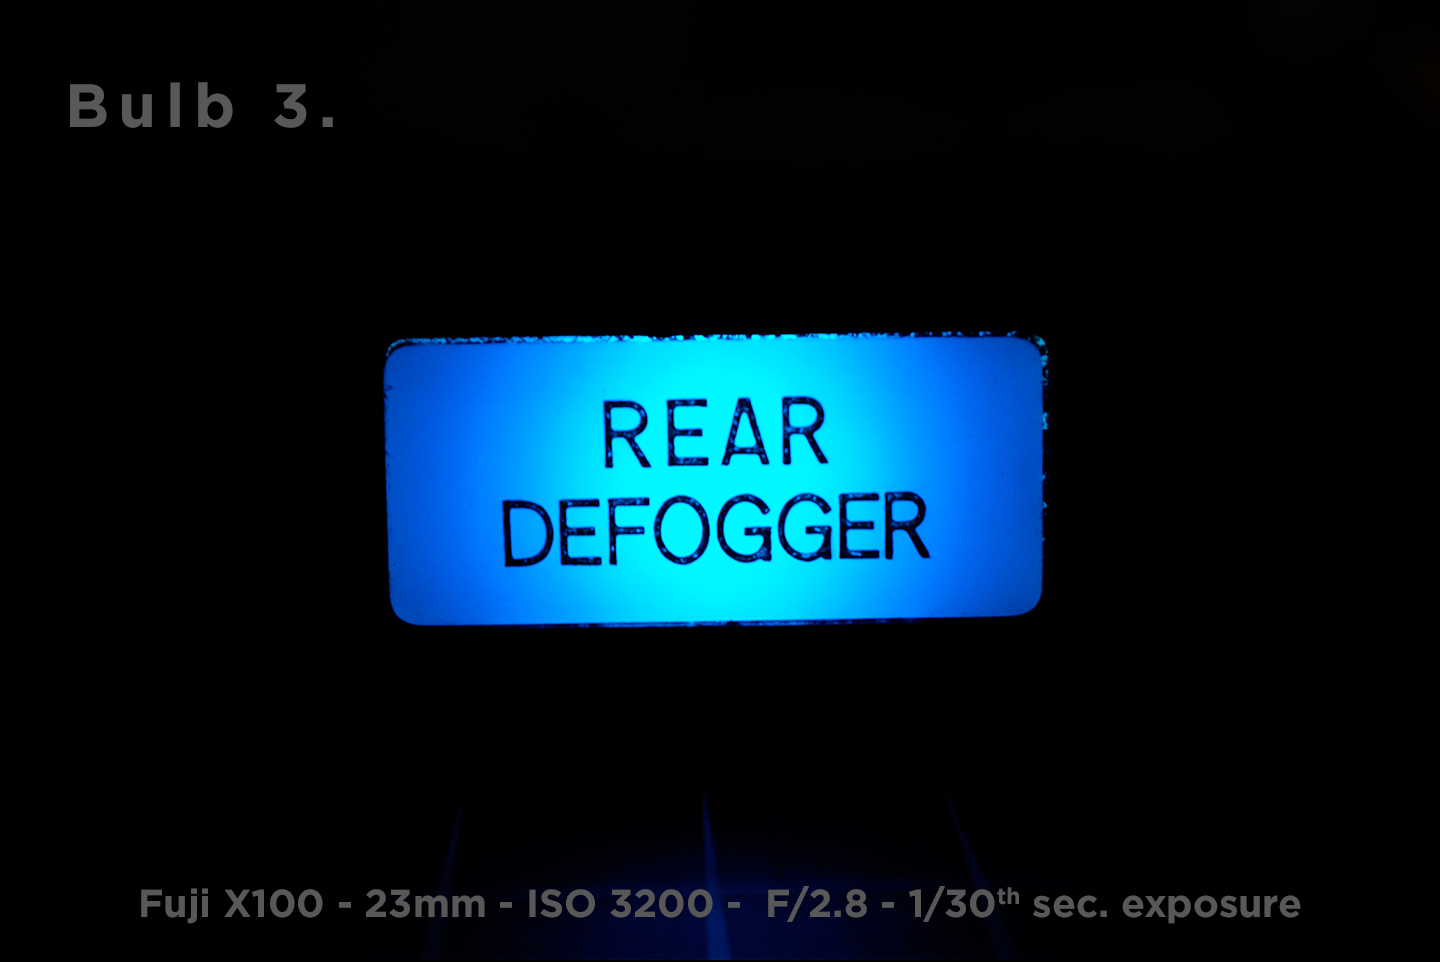
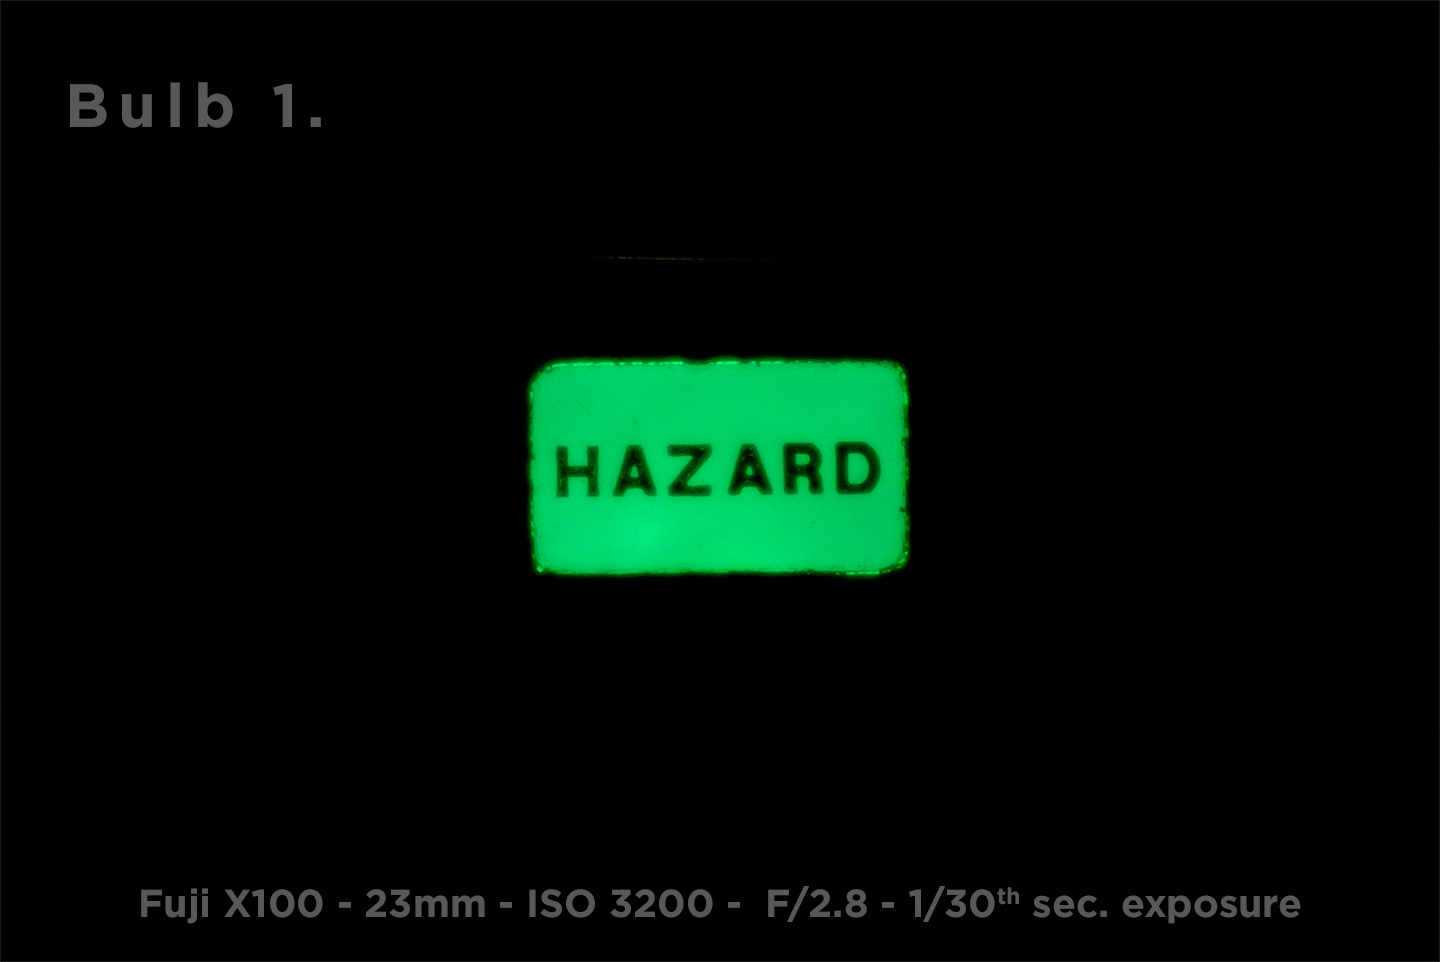
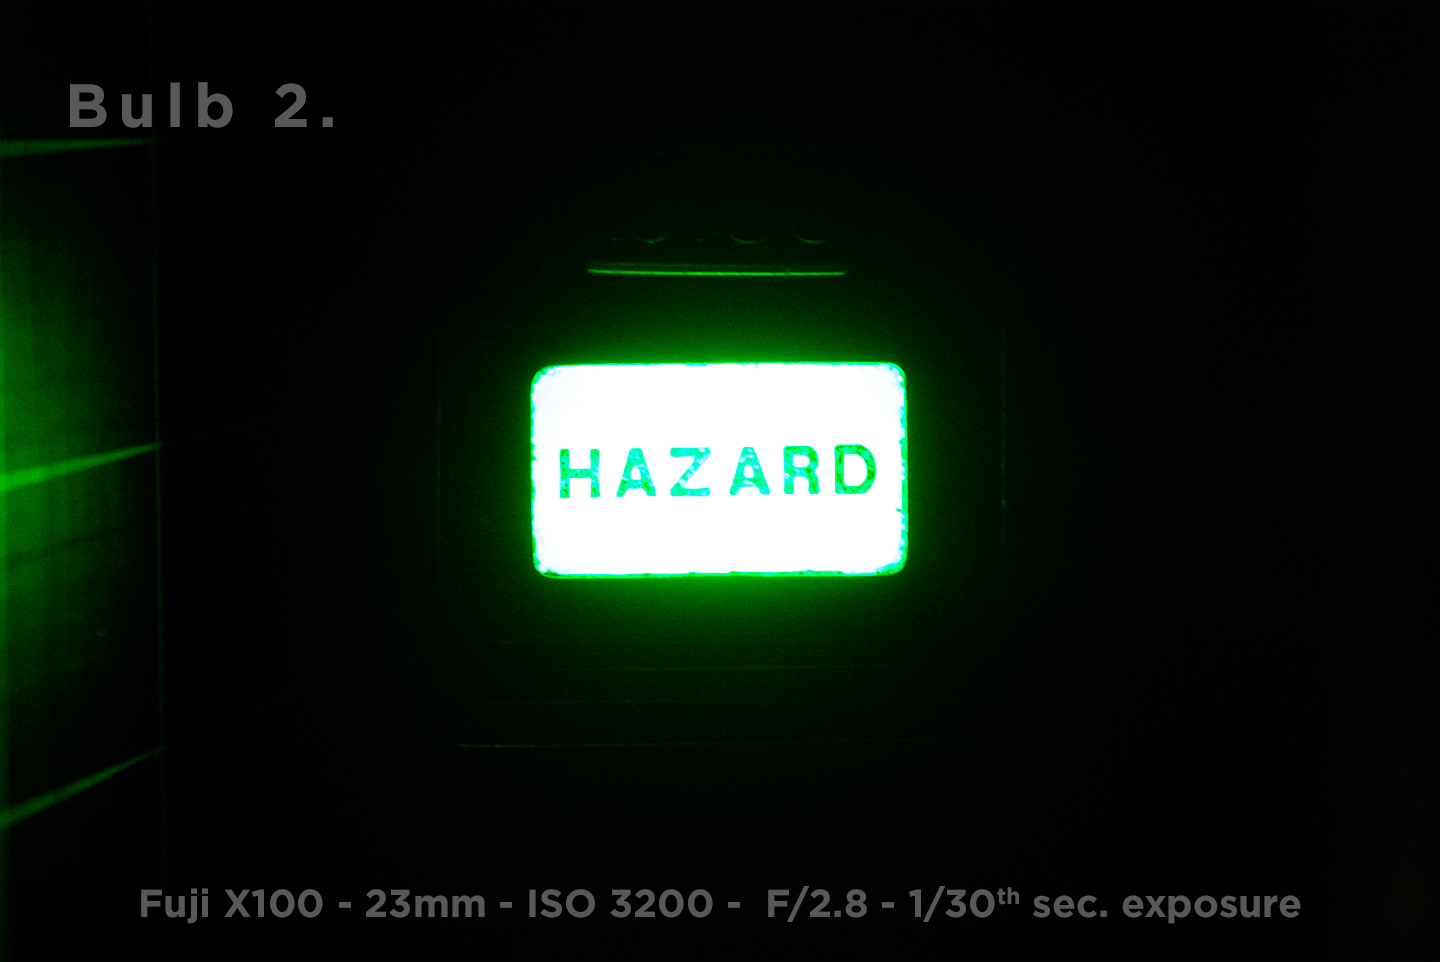
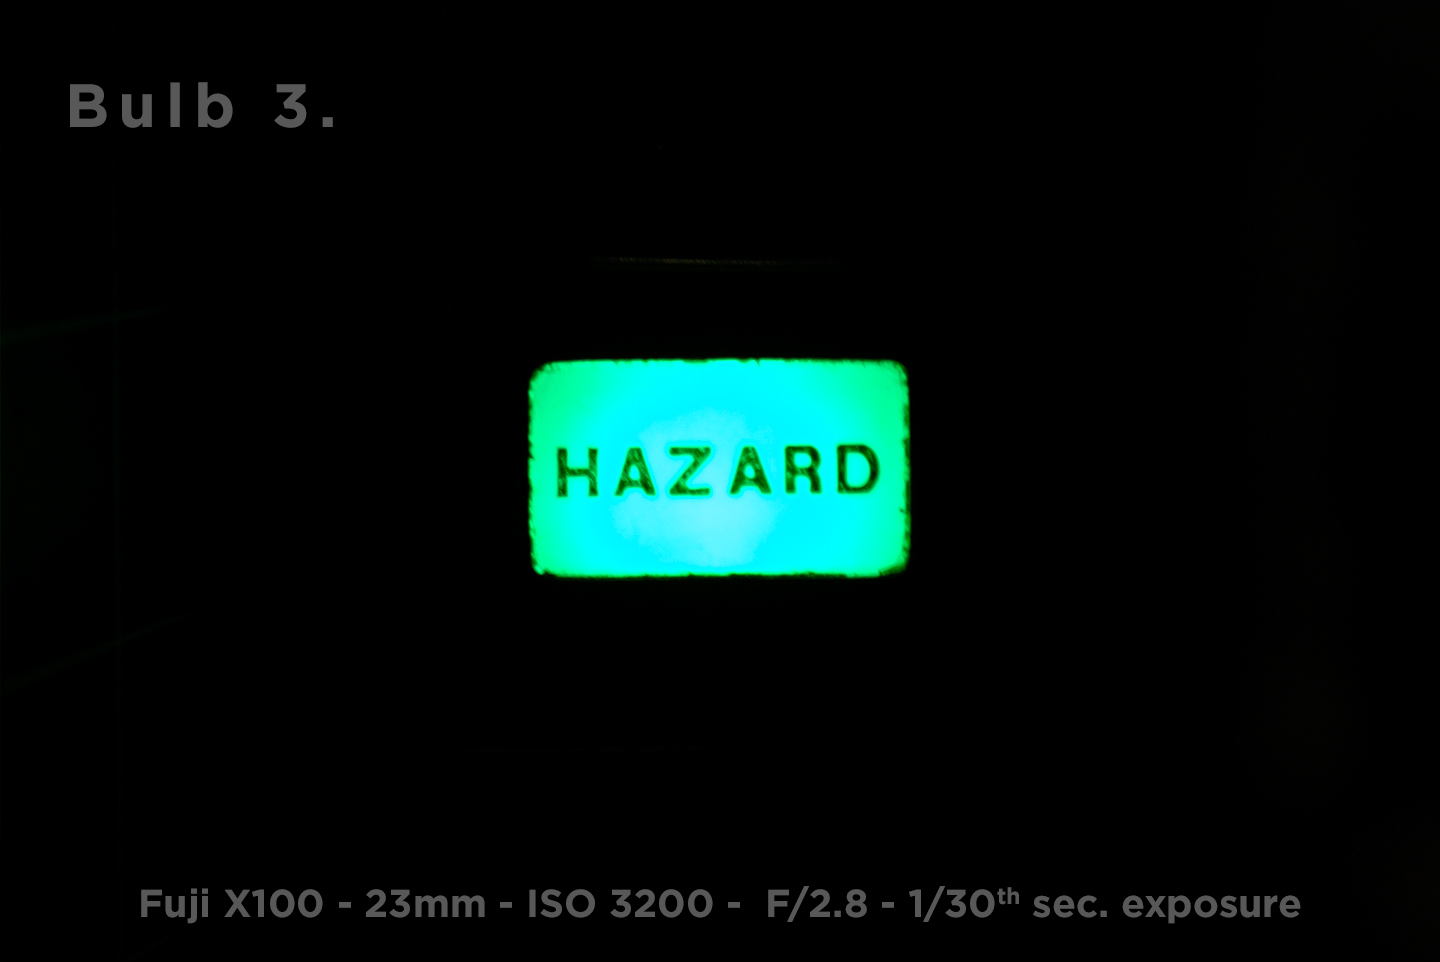
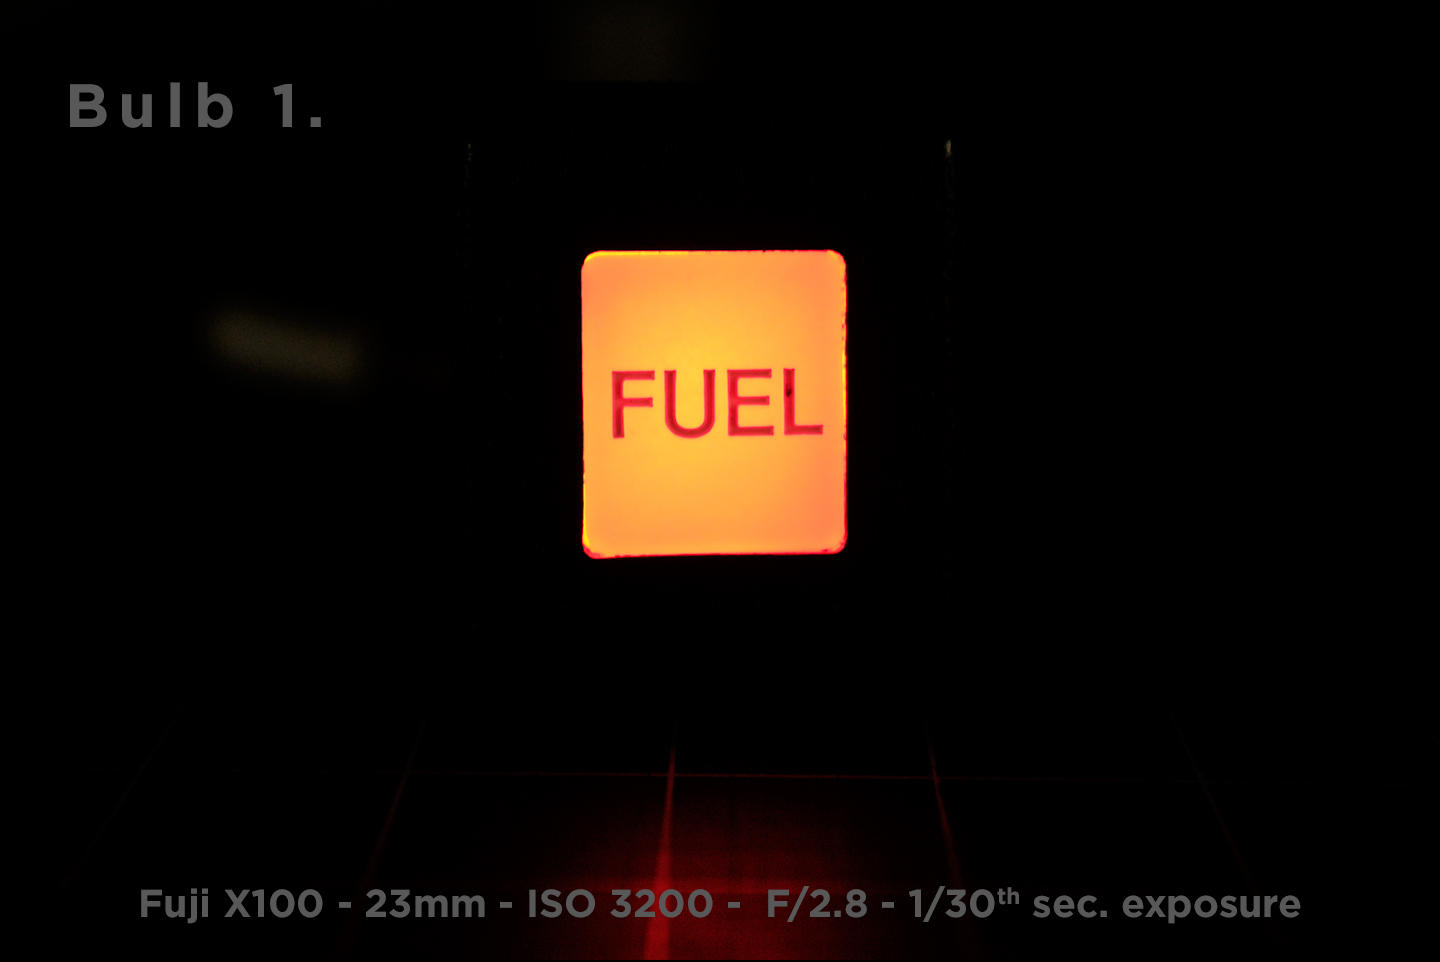
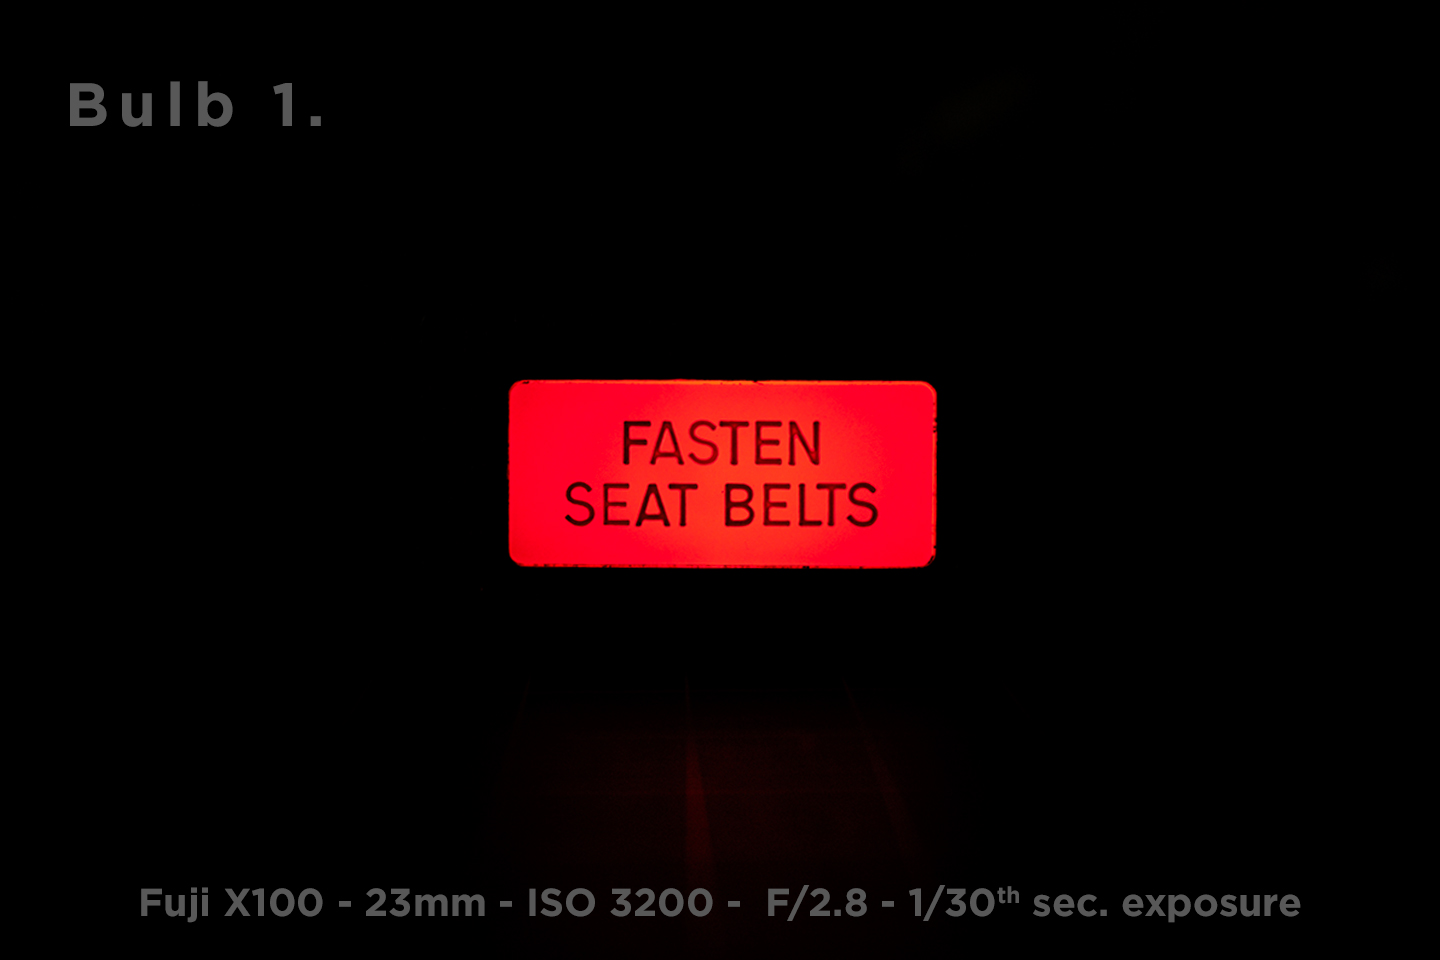
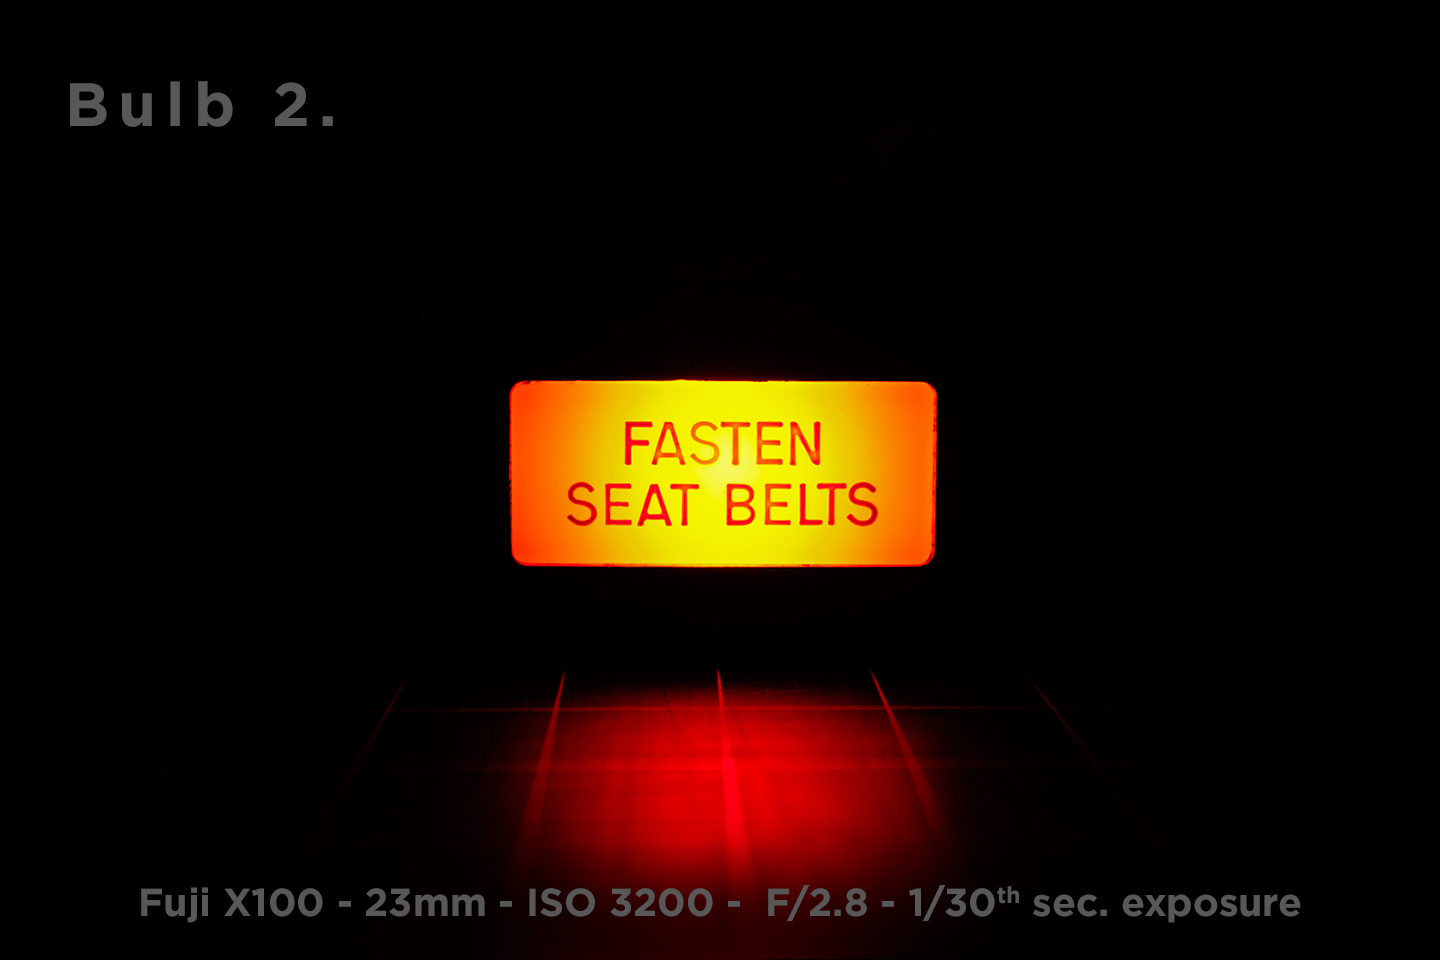
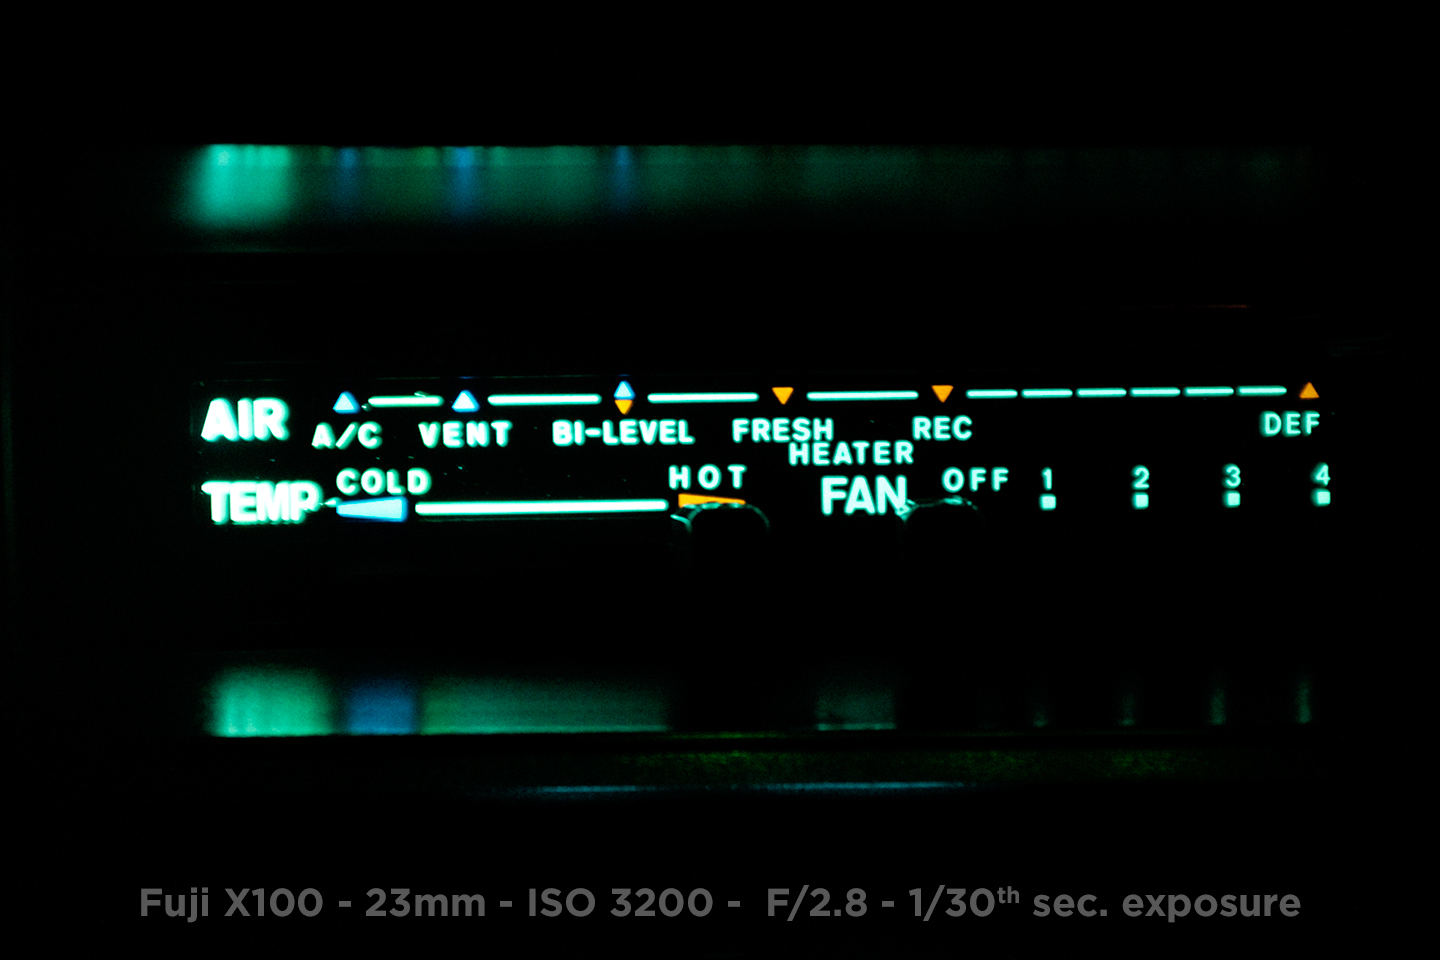
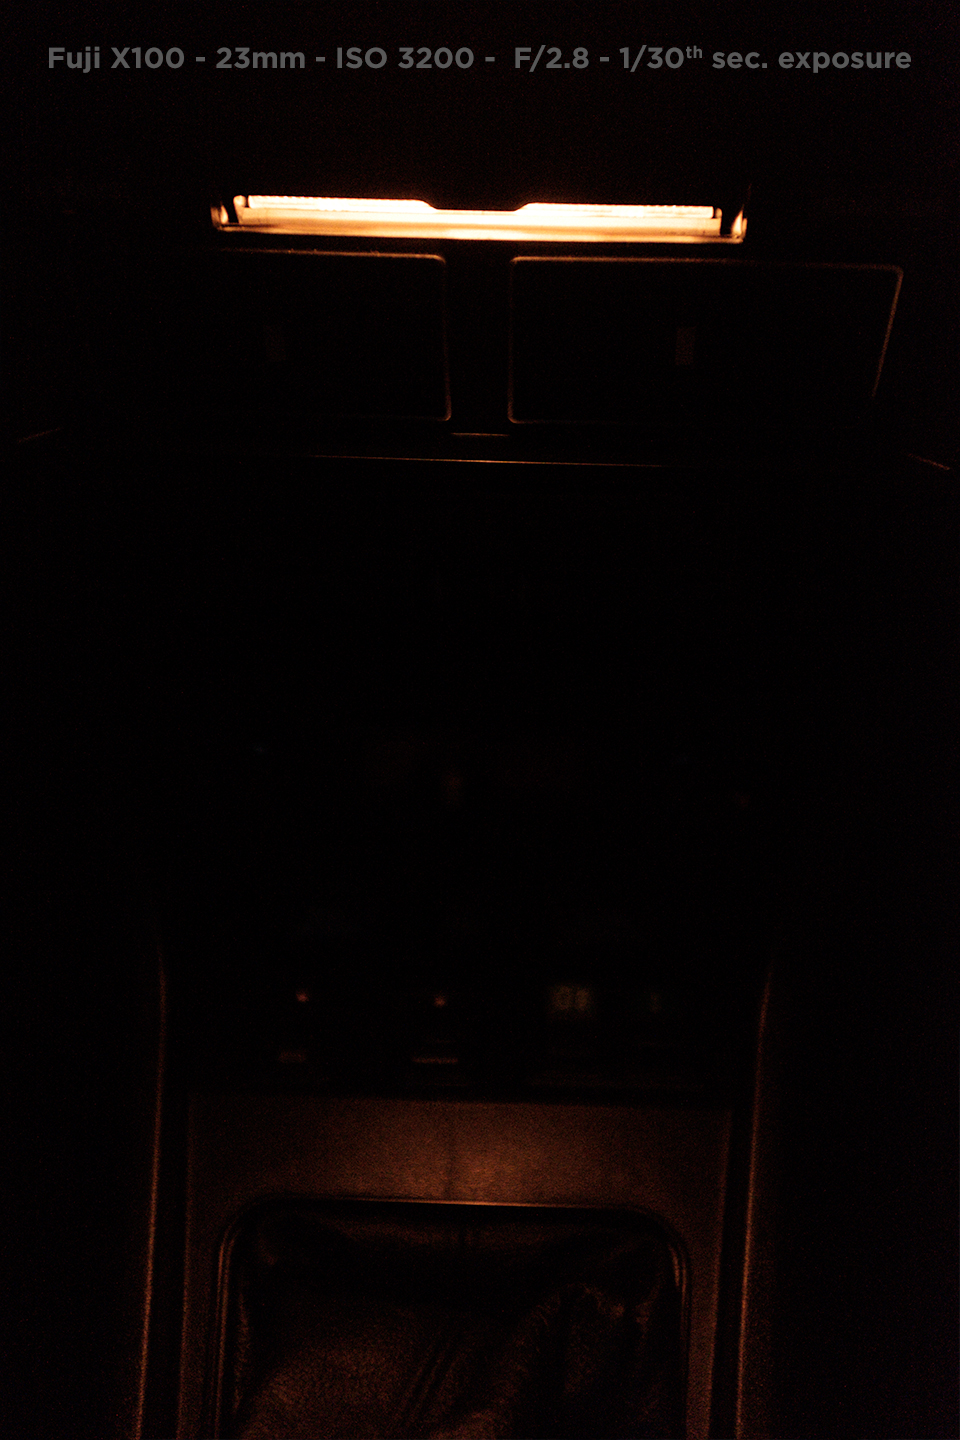
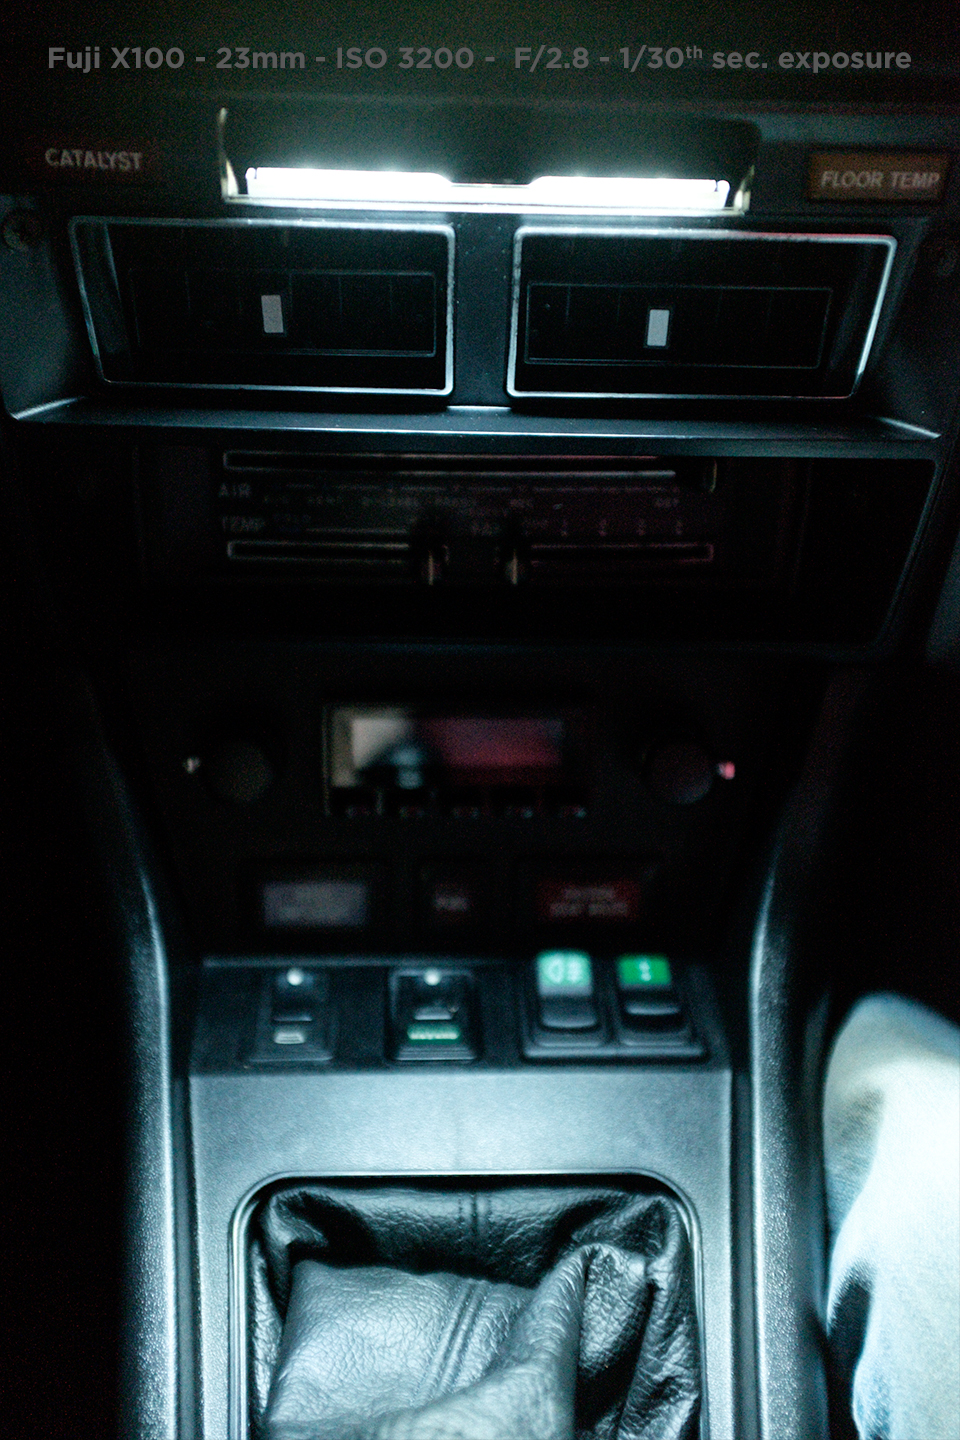
Got some more pics of my gauges and other lights inside the cabin. Again, all the following pictures have been shot in manual exposure mode with a white balance set at 5000K. Here’s a pic of the three small gauges with bulb number 6 from my previous post. Here’s a pic of the speedo and tach. I also put LED bulbs in the turn signal indicators, high beam indicator, and brake warning light in the gauges. I tried a couple different bulbs but forgot to take before and after pictures. These are what I used. For the turn signals I got green bulbs from superbrightleds.com. https://www.superbrightleds.com/moreinfo/ba9s-ba7s/ba9s-led-bulb-1-led-ba9s-retrofit-car/3/#/attributes/15 Green. 90°. 4 Lumens. BA9s These bulbs are perfect. Obviously brighter than the stock tungsten bulb, but not overpowering. Got a red bulb of the same variety for the brake warning light and the fuel warning light. Again, brighter then stock but not too much. For the high beam indicator I went with a different style bulb then the turn signal lights and brake light. https://www.superbrightleds.com/moreinfo/ba9s-ba7s/ba9s-led-bulb-4-led-ba9s-retrofit-car-classic-car-bulbs/6/ Here’s a pic of the speedo with brake light and high beam indicator lit up. Since my car is a 1975 California car, it has a floor temp warning light and catalyst warning light. Here’s a pic of the bulbs tested for the catalyst warning light. Bulb 1. - Stock tungsten 74 Mini Wedge Bulb. Bulb 2. - Red LED 74 Mini Wedge Bulb. https://www.superbrightleds.com/moreinfo/miniature-wedge-base/74-led-bulb-1-smd-led-miniature-wedge-retrofit-car/227/ The stock bulb is really dim. The LED is much brighter. Even though it does not show in the pic, it is nice and red when seen in person. Here’s a pic of the bulbs tested for the floor temp warning light. Bulb 1. - Stock tungsten 74 Mini Wedge Bulb. Bulb 2. - Amber LED 74 Mini Wedge Bulb. https://www.superbrightleds.com/moreinfo/miniature-wedge-base/74-led-bulb-1-smd-led-miniature-wedge-retrofit-car/227/ The stock bulb is really dim. The LED is much brighter. Here’s a pic of the bulbs tested for the rear defogger light. Bulb 1. - Stock tungsten 74 Mini Wedge Bulb. Bulb 2. - Blue LED 74 Mini Wedge Bulb. https://www.superbrightleds.com/moreinfo/miniature-wedge-base/74-led-bulb-1-smd-led-miniature-wedge-retrofit-car/227/ Bulb 3. - Warm 3000k LED 74 Mini Wedge Bulb. https://www.superbrightleds.com/moreinfo/instrument-cluster-gauge/74-led-bulb-1-led-miniature-wedge-retrofit-car/226/ The Stock Bulb is really dim. Bulb number 2 is way too bright for a bulb that will stay on and not a warning light. Bulb 3 is perfect. Brighter than stock, but not overpowering. To the naked eye its really similar to the look of the stock bulb, just brighter. 3000k is really close to the 2800K color temp. of tungsten bulbs. Here’s a pic of the bulbs tested for the hazard light switch. Bulb 1. - Stock tungsten 74 Mini Wedge Bulb. Bulb 2. - Green LED 74 Mini Wedge Bulb. https://www.superbrightleds.com/moreinfo/miniature-wedge-base/74-led-bulb-1-smd-led-miniature-wedge-retrofit-car/227/ Bulb 3. - Warm 3000k LED 74 Mini Wedge Bulb. https://www.superbrightleds.com/moreinfo/instrument-cluster-gauge/74-led-bulb-1-led-miniature-wedge-retrofit-car/226/ The stock bulb is really dim. Bulb number 2 is way too bright for a bulb that will stay on and not a warning light. Bulb 3 is perfect. Brighter than stock, but not overpowering. To the naked eye its really similar to the look of the stock bulb, just brighter. 3000k is really close to the 2800K color temp. of tungsten bulbs. The fuel warning light is a standard BA9s tungsten bulb. Here’s a pic. I replaced the stock tungsten bulb with the same one used in the brake warning light inside the speedo. https://www.superbrightleds.com/moreinfo/ba9s-ba7s/ba9s-led-bulb-1-led-ba9s-retrofit-car/3/#/attributes/15 It’s brighter than stock but not excessively so. Here’s a pic of the bulbs tested for the fasten seat belts warning light. Bulb 1. - Stock tungsten 74 Mini Wedge Bulb. Bulb 2. - Red LED 74 Mini Wedge Bulb. https://www.superbrightleds.com/moreinfo/miniature-wedge-base/74-led-bulb-1-smd-led-miniature-wedge-retrofit-car/227/ The stock bulb is pretty dim. The LED is much brighter. Even though it does not show in the pic, it is nice and red when seen in person. The cigarette lighter socket and the HVAC controls both use 194 Wedge bulbs. I don’t have a pic of the cigarette lighter socket but I do have one of the HVAC controls replaced with an LED. This is the bulb used. https://www.superbrightleds.com/moreinfo/boat-miniature-wedge-bulbs/194-led-boat-and-rv-light-bulb-6-smd-led-tower-miniature-wedge-retrofit-106-lumens/2489/4112/ The map light was also replaced with LED’s. When I had my combo switches re-built a couple years ago I sprung for the map light LED from Dave at www.datsun-240z-upgrades.net. Here’s a pic of the stock bulb. Here’s a pic of the LED bulb from datsun-240z-upgrades.net. It’s way brighter and the map light is actually very useful now. The only interior bulbs not replaced with LED's in my car are the dome light and the glove box light. I swapped an LED in the glove box light but it did not work. The polarity needs to be reversed and I didn't get around to it yet. Here's my bulb count so far for a '75 2+2. Speedometer: (2) BA9s bulbs for illumination (1) BA9s for High Beam Indicator (1) BA9s for Brake Light Indicator/Warning Tachometer: (2) BA9s bulbs for illumination (2) BA9s for Turn Signal/Hazard Flashing Indicators Temp/Oil Gauge: (1) BA9s Clock: (1) BA9s Amp/Fuel Gauge: (1) BA9s Catalyst Light: (1) 74 Mini Wedge Floor Temp: (1) 74 Mini Wedge Rear Defogger: (1) 74 Mini Wedge Fuel: (1) BA9s Fasten Seat Belts: (1) 74 Mini Wedge Hazard Switch: (1) 74 Mini Wedge Cigarette Lighter Socket: (1) 194 Wedge HVAC Controls: (1) 194 Wedge Glove Box: (1) BA9s Map Light: (1) Might be 194 Wedge, not sure on size, replaced with LED from datsun-240z-upgrades.net