59ghia
Member
-
Joined
-
Last visited
Everything posted by 59ghia
-
 proxlamus Shot me a pic, if you would. Thanks, Dave
 -
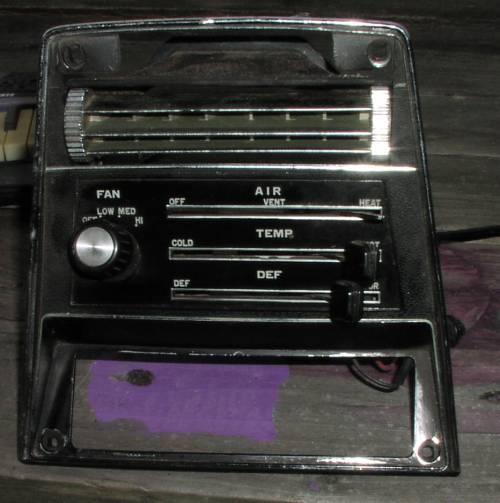
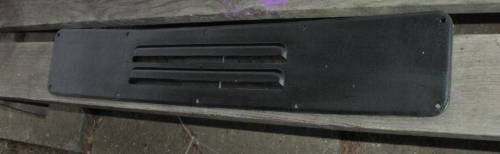
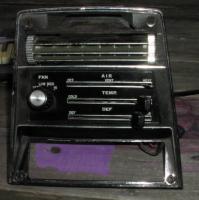
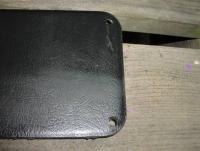
The heater panel has 2 areas were the chrome has lifted, but is still attached, the drivers tool door has a crack about an 1 1/2 long from the screw mount area, on top
-
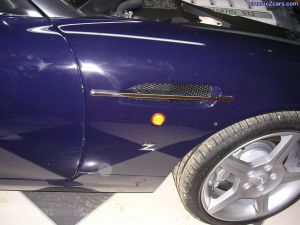
Gus, Here are some pics, I hope! Dave


-
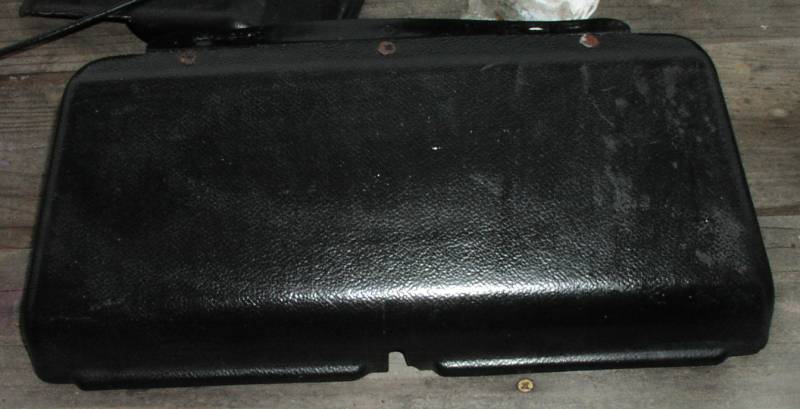
Bill, Center console was not in car Zdreamer I think I have the heater control stuff, and the tool doors I'll post pic's tomorrow
-
I hear ya! I'm just getting kinda desperate for a bumper! Oh well, patience is a virtue
-
Ok, But how about putting a '73 bumper on a '72 ? Get rid of the big overiders, and the bumper is basically the same, except the attachment method (bumper side) Dave
-
Hi Vicky A "roller cam" ussually means the lifter has a small "wheel" riding on the cam lobe. Flat tappet or lifter is just that, a flat area riding on the cam, this causes more resistance. Our Z's are flat tapet or rocker arm/lash pad. This area is where the term "swipe pattern" comes from, small matched grooves "swipes" happen at this high resistance point. You never want to move rockers for this reason, those "groves" are like a finger print, each cam lobe makes their own on its tappet. Now you can get roller lifters also, there again is a small steel wheel that rests on top of the valve stem (you need a lash pad when you run these) This equals even less valve train resistance. Hope it helps, Dave
-
Hello fellow Zers I've got an opportunity to pick up a clean late '72 early'73 bumper. Although they look the same except for the larger overiders, the mounting point inside the bumper is different. The early bumpers have the studs permanently mounted to the bumper itself, were the late 72, June or July has the mounting bracket studs mounted thru the overiders on an adaptor. Has any one tried to mount these late '72-73 bumpers to an earlier car? I'm getting close to desperate to find a clean early bumper, and thinking I may need to do some mods to get this to work. Thanks in advance, Dave
-
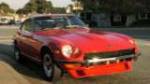
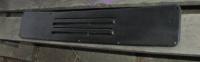
Hello fellow Z'er's Well the Z's in the shop getting painted, Montery historics are coming way to soon, and I need a front bumper, bad. I have a 71 parts car with a few leftovers, antique clocks (another subject). I did see athread with folks lookin for an early, with vents, interior hatch panel its in good shape. Try me I have lots of "stuff" Dave
-
Put me on the list! I've been to this event just about every year, and in my opinion its a "can't miss"! Dave
-
Was this a 2+2 thing ?
-
I'll take earthquakes over those things any day! Glad to hear you came out un-scathed. Dave
-
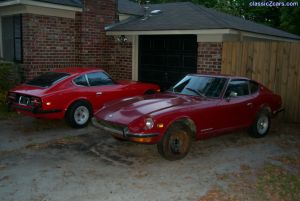 Looks like she cleaned up well!
 -
 With a v-12 to boot!
 -
They ask the question "what can brown do for you?" Well...........
-
I believe, as in the brake lines, the hose part is held in place by a clip, and only the hard line should turn. after removing the hard line there should be a slip-fit clip, remove that, then push the rubber hose up and out. You should notice some indents where the hose/ metal part slides into... Good luck, Dave
-
Also check the retainer springs, kinda looks like a cloths pin spring. I've had one pop off and sound like a mis-adjusted valve. Good luck, Dave
-
1955, same year, Porsche 550 Spyder (lil Bastard) My favorite car. Gonna Build a Beck replica one of these years!
-
Check this place out, http://www.lightlens.com/coloredbulbs.htm
-
My daughter has a yamaha flute, and my Ford Taurus SHO has the wonderful Yamaha built V-6. Dual overhead cams, 3.0 litre, 4 valve per cylinder 220 hp. An absolutly fantastic engine! Thanks for the informative thread. I've seen a couple of the 2000's, one at the montery historics, the guy had it running, sounded sweeeeet! Dave
-
I just pulled one from pic-a-part in hayward last weekend, 1/2 price day, $71.00. Ya gotta pull it yourself. Ask them for a drain pan, drain it first and check condition of oil, look for chunks of metal etc. Good luck, Dave P.S. keep in mind the one out of the 77 is not the close ratio box...the one i pulled was a 81.
-
Gavin, Actually the intake is the larger of the two, from what I understand, the volume in is larger then the volume out, since some is lost in the combustion process. I read that or heard it somewhere.... Dave
-
Did you end up with a savaged title? If so keep those pics you have in case you ever want to sell your car. Looks good! Dave
-
If dis-assembly, cleaning and oiling doesn't work you may have to clean the little motor that drives the clock. You really need to be careful, but this is what i had to do. There are four very small wires that act like "brushes" on a very small 3 segment "commutator" This "commutator" gets dirty and needs to be cleaned (I used an eraser tip) This job is a real PITA but was the only way to get my clock working (one year now). The real difficult part is getting the "brushes" back arount the "commutator" Through the outside I slid a paperclip or somthing like that between the "brushes" enough to open up those very thin wires "brushes" to re-assemble. You may need to clean those wires where they touch the commutator with some real fine sandpaper , 1000 grit or so. Again be real careful if you try this as those wires are thin! Good luck, Dave
-
Been there done that too!!! My fuse looked ok, but the cap seperated , and alittle brown suff was coming out between the left cap and glass. My fuse box was starting to melt on that left side lug. I half arsed repaired that lug and haven't blown a fuse since. You can also "rebuild" your light switch. Do a search, there's a thread around here somewhere were I described how I did it. Good luck, Dave