geezer
Free Member
-
Joined
-
Last visited
Everything posted by geezer
-
Yes, my insert is split. I think more are, than are not. If you get a limited run of inserts made from a suitable metal and consider selling them, put me on the list for one. I'll even send you my split original to use for a dimensional example if you like. I've even been considering having a shift map button done in aluminum by a local machinist and painting it up. It wouldn't fool anyone but might look nice just the same.
-
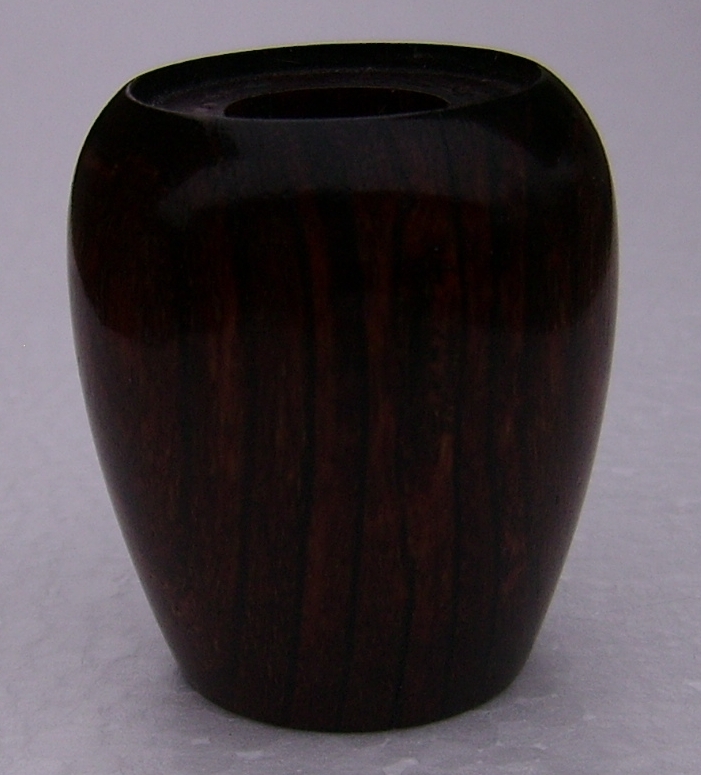
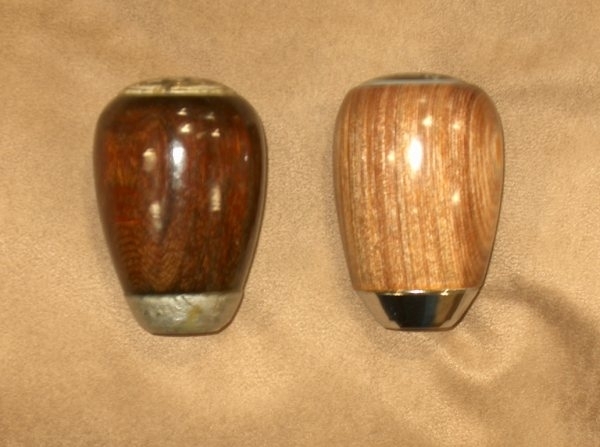
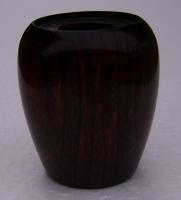
It appears to be the original natural wood color but being the 4th owner, anything could be possible and I noticed someone did paint the base with aluminum color paint. I did spin it and removed the scratches starting with 220 grit and progressed to 800 and then a gloss polish. The wood is the same color throughout. Even the hole where the glue remnants were cut away it revealed the same color wood. My best guess, thats the way it was originally. I've seen a few variances in the coloring of these knobs. I believe it is just the nature of wood.
-
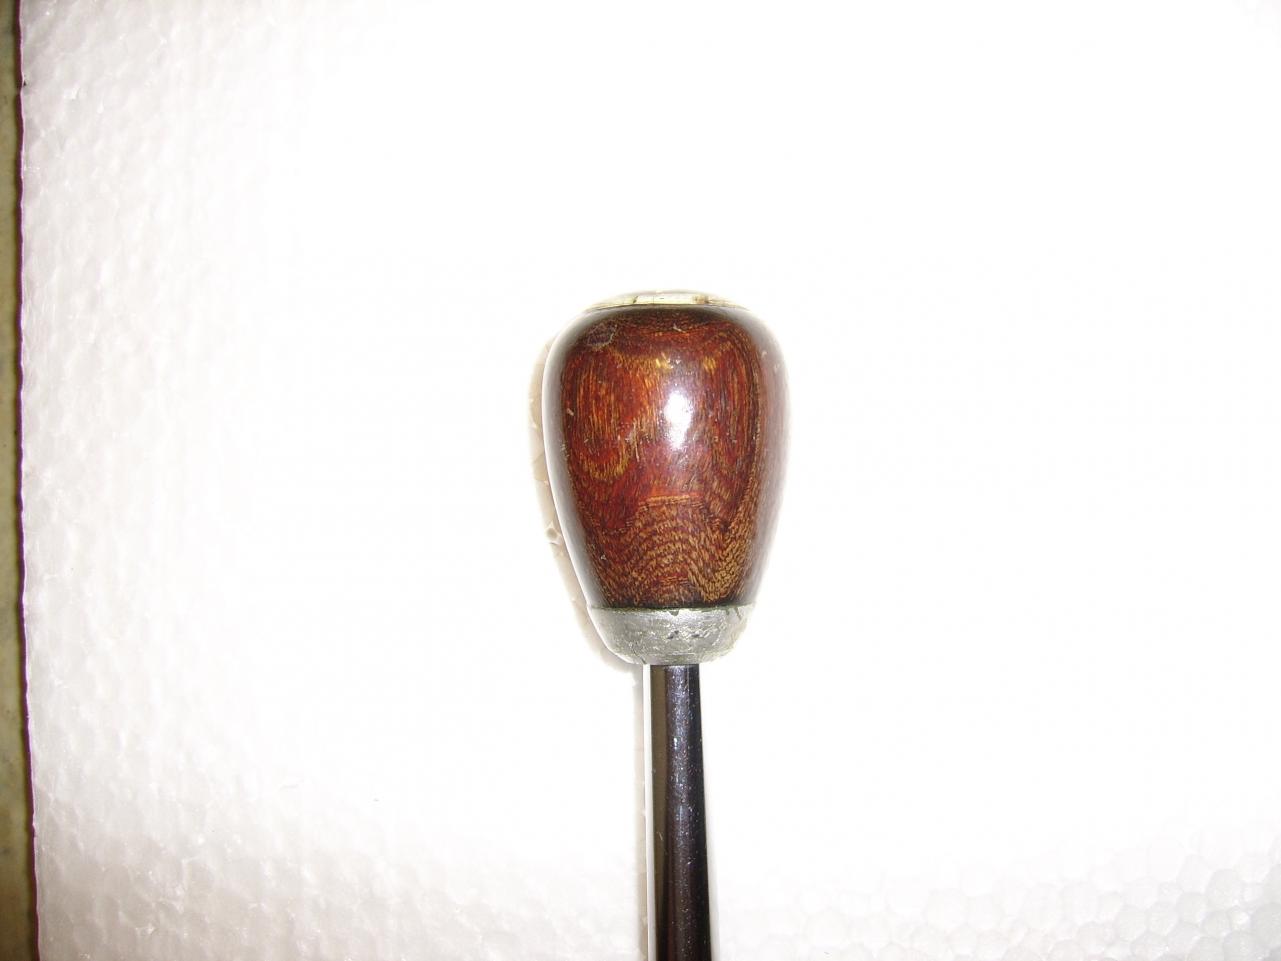
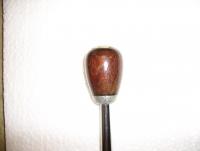
Looks great! The coloring of the wood and perhaps even the type of wood probably varies quite a bit so I don't think you could make a mistake with your coloring choice. Whatever you like is good. Mine is a pretty close match to my steering wheel. The light colored knob is an OEM replacement that I turned down. It is still a bit taller and not the same as an original but a definite improvement over what they are selling. The darker one is the knob that I believe was original to my 240Z. After disassembling it, I lightly turned it to remove a few scratches and then buffed it up. There is no stain or finish of any kind on it. That is the natural color of the wood. It has a just enough, nice gloss to it. I am curious to know what kind of wood it is. Yeah, a source for map buttons would be nice. Thats the tough part to find.

-
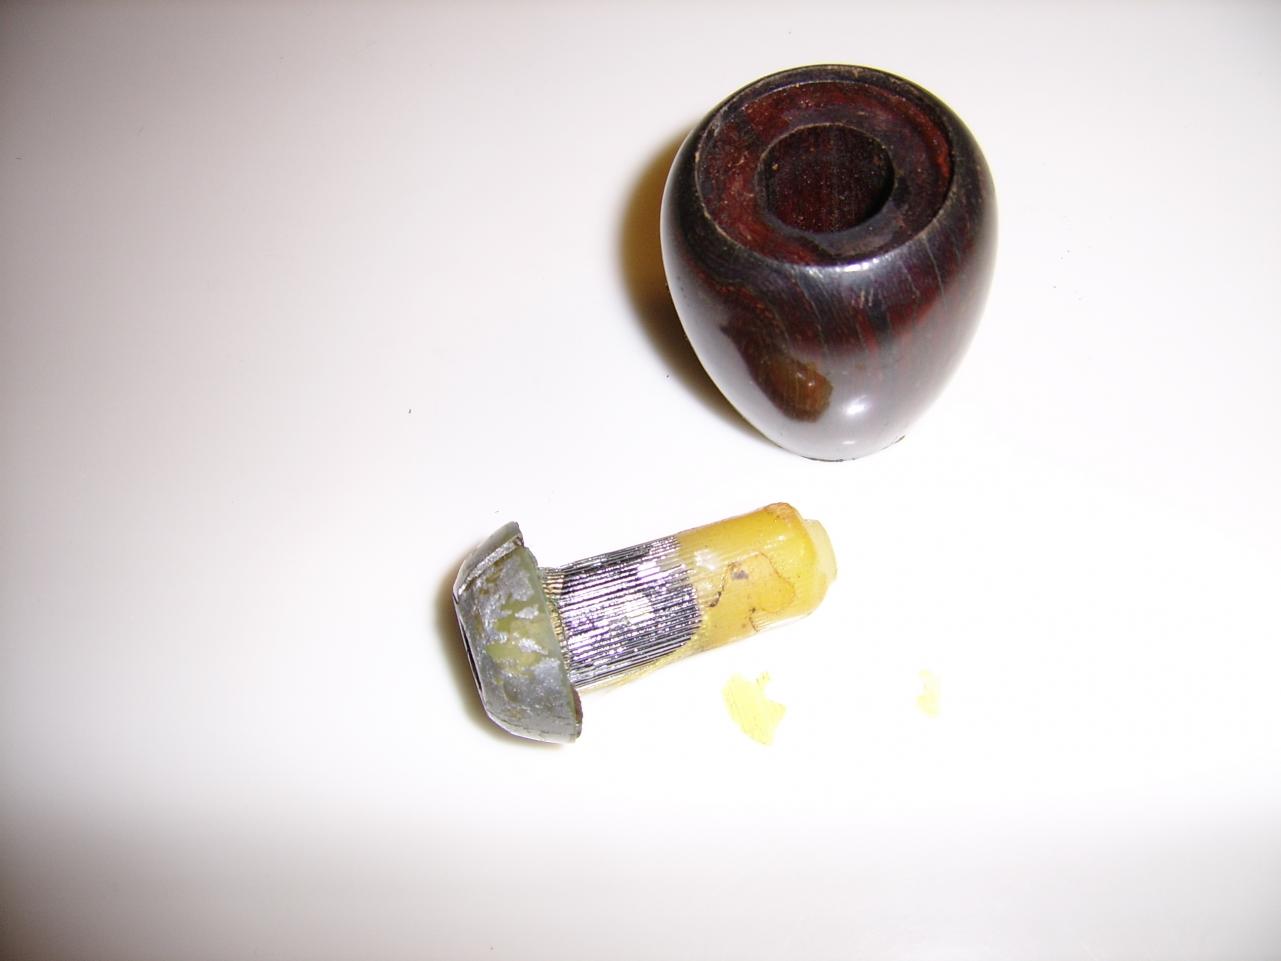
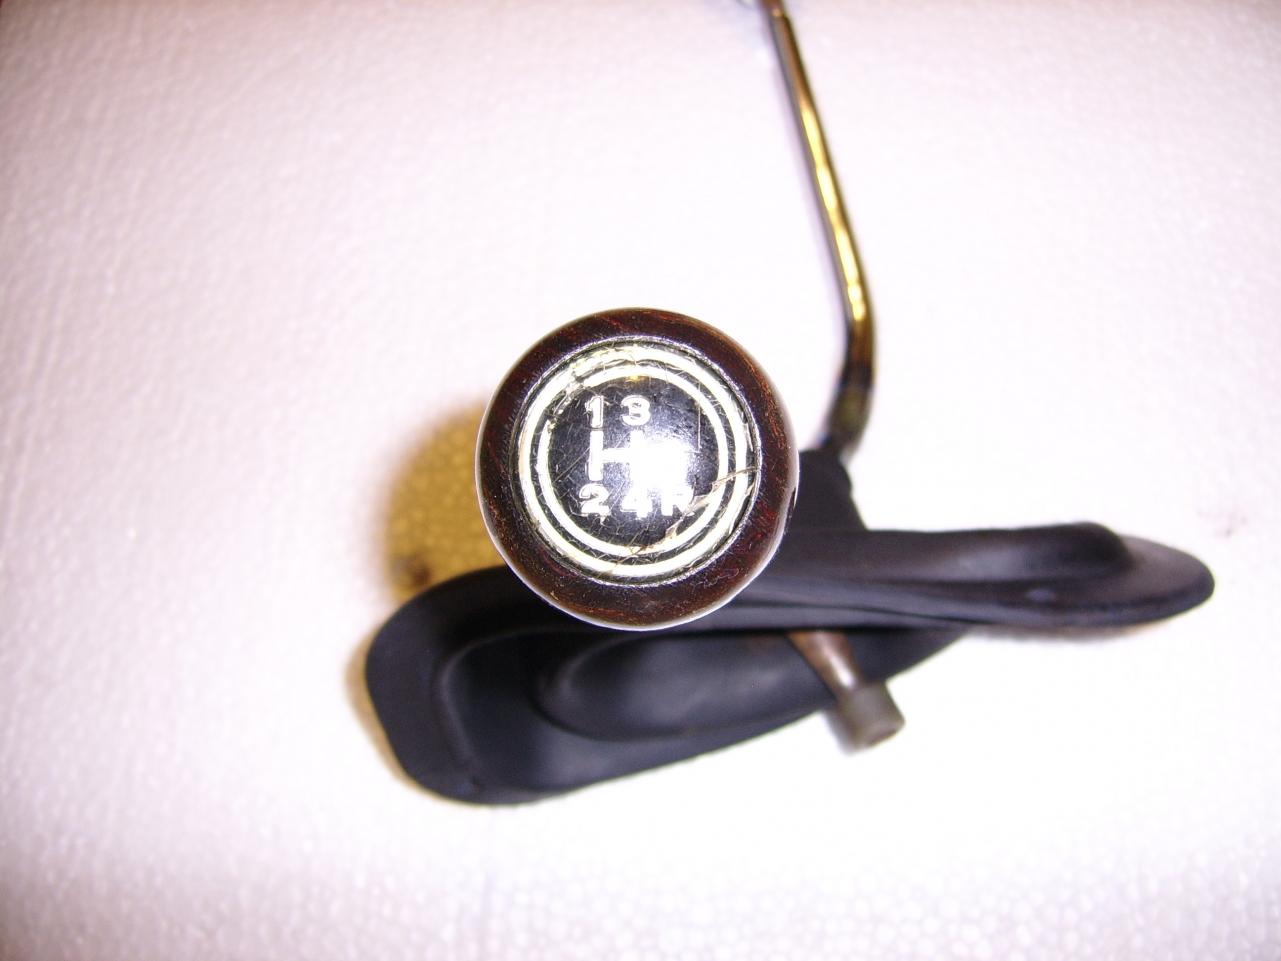
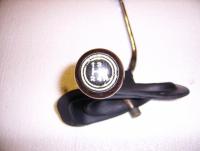
Great work Captain Obvious! olzed - I found that most wooden knobs regardless of wood species will be turned from a blank that is comprised of two laminated booked pieces. If you study a knob you may be able to find the butt joint. Some times they are tough to detect. There are several reasons to make them this way, including economics as well as a way to prevent splitting of a single block. On another note, does anyone subscribe to the thought that alternate shift knob suppliers were used when our cars were built? Just something I've been wondering about after seeing so many examples posted of the lighter colored wood. I had always thought the knob that was on my '70 was an original but it seems to be an entirely different type of wood. Everything else was the same such as the mounting plug and the shift map button and it has exacting dimensions of the others, but the wood is different. Does anyone else have one that looks like this. There is no finish or stain of any kind on it and it is a very hard darker wood with a different grain, that polishes beautifully. I also am looking for a new shift map button and base plug for this one. I like it better than my new OEM replacement knob that I turned down. Nothing feels as good in the hand as one shaped like the originals to me. I'll get a pic up of what I thought was my original shift knob when I figure out how to post a pic.
-
Some are stainless, some are not but I have forgotten which is which. I had my non-stainless set rechromed. I have heard of the stainless variety splitting which was caused by over tightening the fasteners or ill fitting components. They are sometimes difficult to fit correctly and really are not that well made. Photos can be decieving and the gaskets may have been left out of the pics. I would ask the seller more questions if interested.
-
Just this past week we were devising a plan to do this. The trick would be to make it both functional with ease of operation and also as invisible as possible. I wouldn't like to change the outward appearance at all. We tossed around the idea of using Chrysler minivan quarter glass actuators. With todays epoxies it would not even be necessary to drill a hole in the glass. An invisible hinge on the leading edge and water tight seal around the perimeter would complete the package. The only thing that would stop me from attempting this is the likelyhood of exhaust gases entering the cabin.
-
Now that its off, it would be a good time to study the mechanism and learn how the shoes can be backed off without resorting to extreme force. Would be good to know for the next time.
-
This is how I do it also. If you don't get that pawl out of the way you will never get the shoes to back off. After getting the shoes backed off and you find the drum is still frozen, mix up a 50/50 solution of acetone and automatic trans, fluid. Apply generously by any means you can. This solution has the ability to actually wick up hill, get in behind the drum and will penetrate better than any other product I've used. The acetone evaporates quickly so use it up till gone after mixing or seal it in a jar. Now if all else fails, use the large 3 arm puller and you will get the drum off without damaging it. I never fail to get them off without damage since using these methods.
-
This one seems to appeal to kids and men, not so much with the women, so I think it would qualify as "bachelor chow". I call them "west coast choppers" fried baloney sandwiches. Before separating the baloney slices, make cuts about an inch in at 12 o'clock, 3 o'clock, 6 o'clock & 9 o'clock, through the whole stack (to save time). Then when frying the individual slices in the pan they won't distort and bubble up in the middle. When cooked the slices resemble Maltese crosses. I like my sandwiches toasted, buttered, lots of ketchup. A big hit on Poker night too. Serve with chips, wash down with beer.
-
Anytime Jeff. I've been really preoccupied as of late but will be glad to help if I can. Just let me know what you need. My dizzy and E12-80 module are known to be working well.
-
Congrats Daniel! I was watching your auction with interest and am pleased that there is such interest in these clocks. To me they are a unique trinket when displayed in our HLS30s that if nothing else are worthy of conversation. It wouldn't surprize me to see more of them listed in the near future.
-
No problem, you can have one of the Martys pick it up or if you want meet me next week when I'm over. Just not sure of the day or time yet. I'll PM you. Edit: Yes, I've seen a few instances where Nissan refers to the vapor tanks as reserve tanks.
-
They were available here about a month ago when a friend bought a set. Not sure what he paid for them but I could ask.
-
I don't see anything that will prevent you using the tank from your Dad's but the sending unit will most likely need to be matched up because of the different possible tank capacities. This page taken from the "Outline Specifications" manual, which explains the transition years of '74, '74.5 & '75 may help in some small way to differentiate the year/model usage of your tanks. Just curious, how important is it to have a working fuel gauge? Can the team determine closely enough, how far you can go on a tank and do the math on pit stops?
-
It could be difficult to adjust your spool tension with the wire on the spool messed up like that. I looked at my Miller, although different, it also uses a washer, spring and nut to adjust the required tension. The nut is the nylock variety to help in preventing loosening & I guess tightening too. Was there something interferring with the knob when the door closed? Edit: I vaguely remember that because I use the large rolls of wire I had change out a piece that was provided when I bought the welder. Try looking in the manual for info on that. If you don't have a manual for that machine, you should be able to download one on the net. Good luck!
-
Ask your friend if he could coat the inside as well.
-
I'm not familiar with that brand of welder but they all use the same principal in order to keep the correct tension on the spool. You may have put it back together in the wrong sequence or are missing a component. If all else fails could you not double nut it to prevent it from tightenng too much?
-
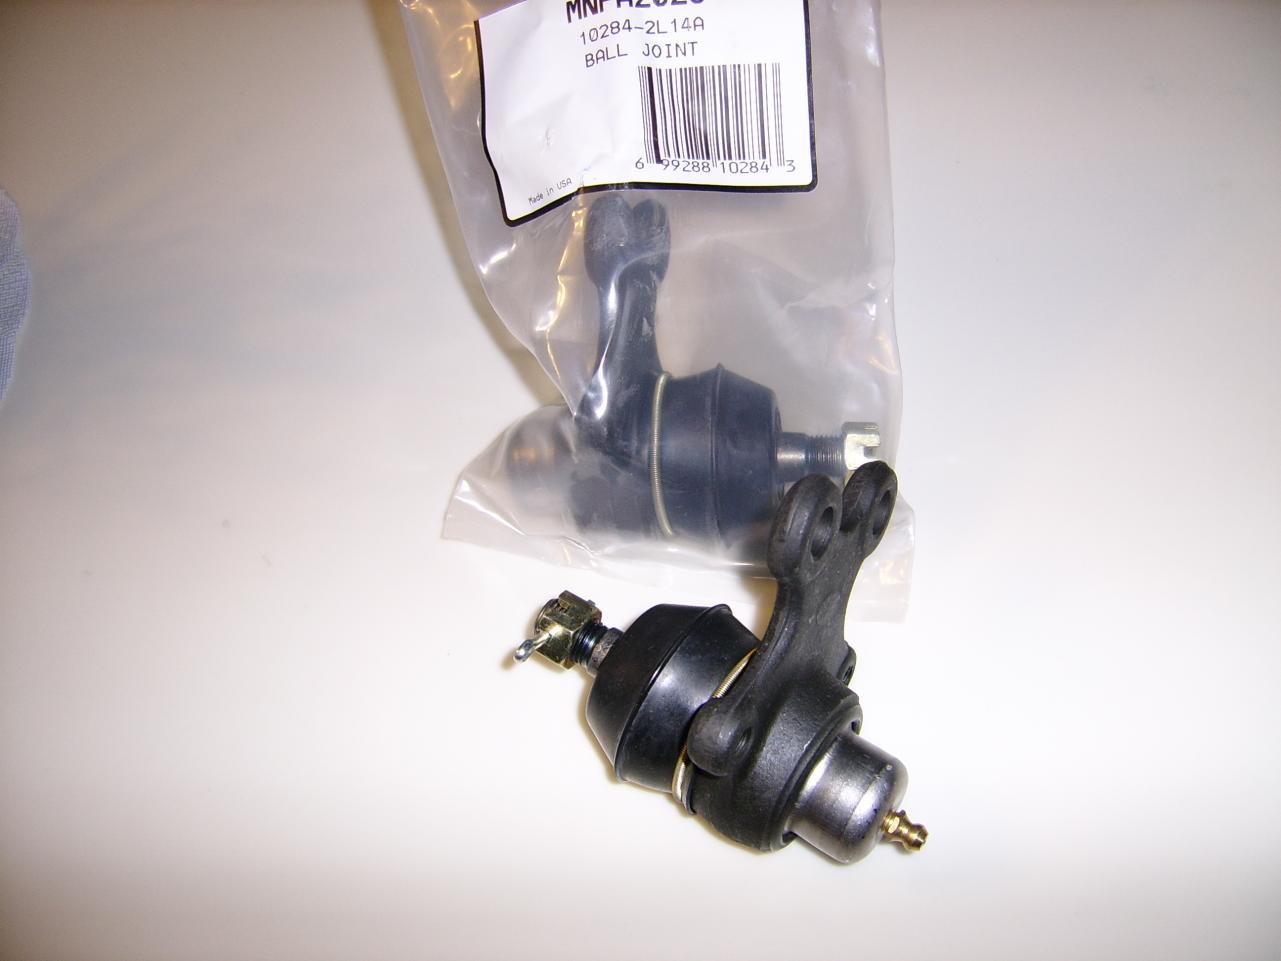
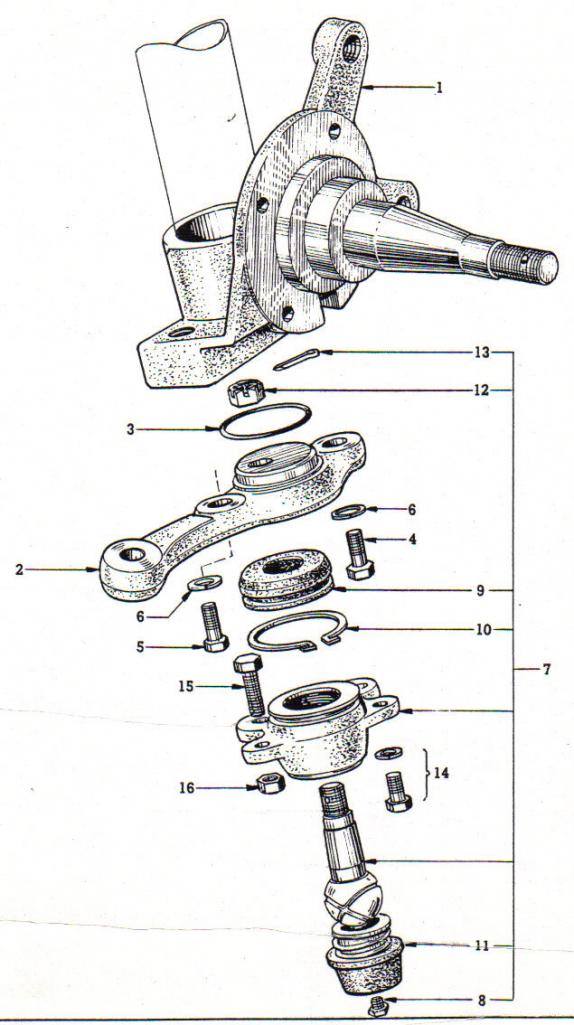
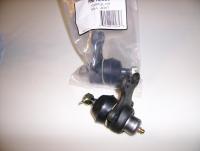
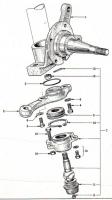
Yes #9 is the dust cover. The dust covers come already on the ball joints when you buy them. Depending on your budget you can buy new balljoints from the Nissan parts counter or from a dozen other aftermarket parts supply houses. I would expect the OEM part to be the highest priced and also the one with the longest life expectancy but most of us opt for one from an alternate supplier.
-
The only rubber in that area would be the "O" ring that is on the steering knuckle arm (#3) and the dust boot John pointed out (9) in this illustration.
-
Well, I might be becoming more simple minded in my old age, but I don't have anything against some light hearted entertainment in its place and I'll admit to a few smiles & chuckles while reading this thread. Lifes too short to sweat the small stuff. I doubt the integrity of this site will be compromised or the Z content will be contaminated. After all, none of us want to go to the Gulag and who wouldn't want another comrade?
-
If you scroll to the bottom of this page you will see a thread by Galaxybj who used nylon rope stuffed into #1 & #6 spark plug holes to help lift the head off when the crank was turned.
-
So far, I have only held mine in place without mounting them but don't foresee any problems when its time to mount them on the car. They are absolutely flawless, straight & concentric. I was very impressed with the quality after hearing the stories of tricky fitment early on. For me it was cheaper to buy these than have my originals rechromed. I sold my originals and recouped some cash, not giving it a second thought.
-
They sure are sweet aren't they. I couldn't find a single flaw in mine. My friend liked them so much he also bought a set. Just a tip for anyone else buying a set who doesn't want the rubber installed. They will send the rubber if you ask for it, even if you specified that you don't want holes drilled in the bumpers. That's what my buddy did so he could use the rubber on one of his other Zs. If anyone does this, I'd be interested in the rubber.
-
Thanks for your insight Ron, and heres to your continued success working with these clocks.
-
Since the early and later types are visually identical, without opening the case, I was hoping to learn the significance of these numbers and learning if the "type" could be determined from them. Was the one numbered 2032 an early type? Edit: I'm guessing since you refer to it as a serial number it would have to be an early type.