MidLifeCrisiz
Free Member
-
Joined
-
Last visited
Everything posted by MidLifeCrisiz
-
 There is a fabric "loop/hem" sewn to the bottom side of the seat upholstery that goes through a slit in the foam and a wire runs through the hem and then connects to this wire you describe with the hooks on each end. There are 2 small o-rings of turned wire to hold the 2 wires together (shows well in Arne's picture). The one wire is on the bottom side of the webbing, the other can't be seen in photo as it is tucked in the slit of the foam. It's purpose I believe is to help pull the center of the upholstery down to contour it and keep it from puckering up when no one is sitting on it. I personally found it very hard to re-install the 2 o-rings to connect wire to wire with new non-compressed seat cushion. I ended up using 2 heavy zip ties to connect the 2 wires and tossed the o-rings. Allowed me to pull them tight and give the seats a nice professional looking contour.
 -
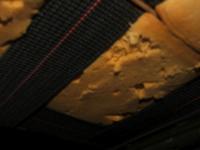
I bought my webbing on line from Albany Foam and Supply. They were a quick ship and you can purchase by the foot. 2" Elastibelt 650 It is black with a red stripe. Worked very well with the pop-rivet gun after I figured out you need to punch a starter hole. Looks just like what Arne's photo shows, my photo is not as nice as my seat was already installed when i took it. Here is the link to Albany Foam: http://www.ausinc.net/ausinc/17.pdf The webbing is listed 3/4 the way down the left side of page. Rubber, Elastic 0701006 2" ElasBelt 650 Webbing cut $.39 ft. 164 ft. roll price 41.00 roll For a picture of what you are getting go here, but the price is better at Albany: http://upholsterysuppliesandfoam.com/xcart/home.php?cat=263&js=n I don't remember how much I used/ordered, however I believe there are some previous posts in the archives that addressed this.
-
I re-did my seats this past summer. I think the gap is due to the new vinyl being stretched so tight. As it wears it may relax and fill the gap. I'm with previous post...it allows for a little ventilation as the the vinyl doesn't breathe.

-
Mally002, where did you find the factory originals...are there anymore? Can you give me the lead?
-
Maybe this one will make some of you feel better as well!

-
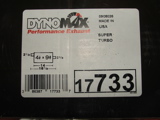
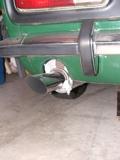
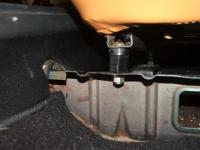
Don't know if this will help but I just put a Dynomax Super Turbo 17733 2 1/2" inlet on my car about a month ago. Purchased at Advance Auto Parts for $47.77. After searching the Dynomax website and talking with techs at the store felt there was NO issue with mounting "backward"...inlet in center outlet offset as previous post stated. Car sounds awesome, nice rumble without obnoxious noise. You can definitely here it coming without getting a negative reaction from the neighbors. I would highly recommend and I don't think it is very visible unless you duck under and take photos like I attached. I added a chrome tip to extend beyond bumper. I still get exhaust smell into the car with windows down, but have not done all the tips on new seals, checking for holes, gaps, etc...nice winter project for Wisconsin. One comment, the first few days of running brought up what smelled like a very hot candle wax odor, probably the fiberglass matting breaking in??? :nervous::smoke:It went away after the first couple of days of running. I posted a few pictures of the different angles. Hopefully this helps everyone. Steve

-
I read yesterday (http://online.wsj.com/article/SB121807669397319543.html?mod=djemITP) Chrysler is in negotiation with Nissan to have cars built for them. They stated that the chasis and engines would be the same but the cars would be designed differently. Maybe with the Chrysler design team...Viper blood and the Charger, and new Challenger retro designs they would be interested in the retro 240Z. Since Nissan can't get the new designs right... Anyone know anyone at Chrysler to send the drawings to??
-
UPDATE - I was able to get to access the leaking vent hose loosen the hose clamp and slide it off the tank. Pulled the rear inside tail light panel and interior quarter panel open and removed the other end from the evaporation tank without dropping the gas tank! Slid the old hose up and out from the top. Replaced by reversing the process. I bought an extra 6" of hose...glad i did as it would have been impossible to slide the hose through the metal frame of the car right next to where it connects to the top of the tank with the tank in place. I was able to re-route around the frame member and it is still tucked up and out of harms way. I wasn't able to purchase braided line, but it is fuel line so should be good to go. If I need to chase additional lines in the future due to leaks, etc...I'll drop the tank and re-route this vent line as it came from the factory. I'm very grateful for the advice and putting me up to the challenge.
-
Got it. I understand there is only one Houdini...even though he did come from Wisconsin. Thanks.
-
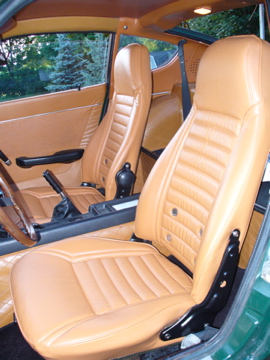
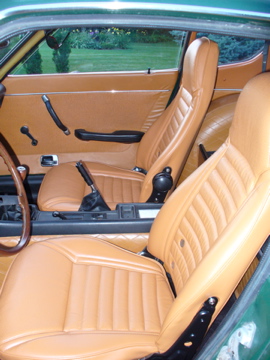
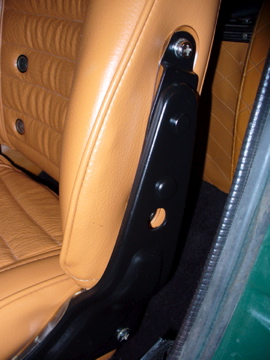
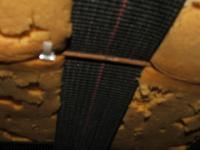
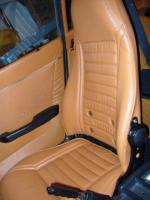
Poindexter, On the base of my seats there spacers that can be removed to lower the seats. As I am only 5' 9" so I have the spacers in to keep the seats at maximum height. From the back edge of the drivers seat to the headliner the measurement is 33 1/2" with spacers in. If you removed the spacers it would drop the seat by about 1" or extend the height the same amount. The drivers seat, which I measured for the picture, has brand new foam that has 115 miles of "butt time" on it. So it will only go down from here. I also attached a photo showing the webbing underneath you can just see the end of the white zip tie that was trimmed off. I described this in the earlier post as a great method for synching up the pucker in the seat. The photos is from the passenger side where I re-used the old foam, but I did the same thing on the drivers side.


-
Hey 26th-Z, Wisconsin is unbeatable at this time of the year. High 70's low 80's with low humidity. Plenty of fresh water lakes to boat, swim, fish. Can't beat it. I live in Manitowoc. Those Packers...don't know about the Favre situation...he may just end up down in your neck of the woods with the Bucs. Anyway back to the problem at hand. I don't understand why I need to drop the tank to fix this vent hose. IF I can access the fitting at the top of the tank and get the clamp off, can't I fish a new line in to replace it? What am I missing? Or does it look easier than it really is. You guys have experienced it so guess it "is what it is". Someone mentioned on another thread relating to smell/fumes that they had just blocked up some of their gas tank vents permanently. Is this a viable option. I just am not excited about dropping the tank. Too many other things I would rather work on right now. Maybe down the road someday, but preferably would like to put my time in on other things. Maybe I'm dreaming and this can't be quick fix?
-
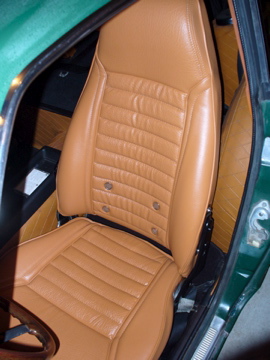
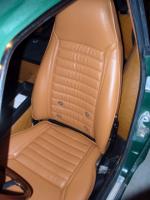
Finally completed my Butterscotch seats so thought I would chime in on this older post. I'm glad I stuck with the original seats even though it was big headache to even find butterscotch. I think I got the last set of covers on the planet. Seems no one is offering anymore. I put new foam in the entire drivers seat and new webbing on both seats. They are very comfortable and the first question I got when someone saw them was, "who did your leather seats?" They look great and keep the original classic look I wanted. Be prepared for sore hands and fingers. Stretching the vinyl for a good fit requires a nice hot sunny day to let the vinyl bake a little to make it pliable and stretchable. A little tip that I should have photographed. The seat covers have a fabric sleeve on the inside that allows you to pull in the center of the bottom seat and the same on the back rest just below the headrest to the frame. This keeps the seat from puckering when not being sat on. Two metal rods (coat hanger like) one through the upholstery sleeve and one through the webbing/back rest metal frame are to be attached using two rings. These are virtually impossible to try and re-attach like the original setup from the factory. I used heavy duty zip ties and was able to pull the two rods together and tighten up the vinyl to the frame. they will never be seen as the upholstery covers them or they are out of view under the seat. It was a great way to pull the pucker out and just snipped off the excess zip tie. By the way...mally002, I'm jealous of how great your car looks. I hope to be there by next summer.


-
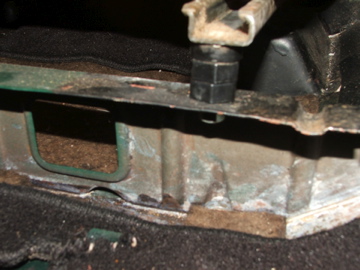
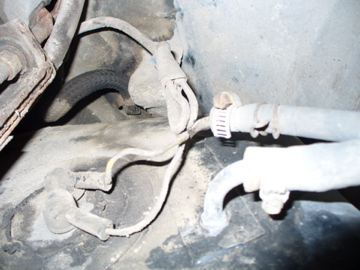
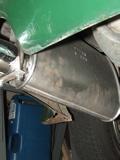
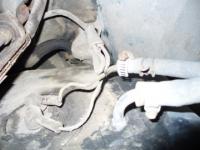
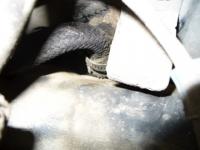
OK got the car slightly elevated and stuck the camera up and under. Based on feel for moisture (gas) and photos it is pretty obvious that the braided line directly above the gas level gauge on the passenger side is the culprit. This braided line runs up toward and next to the filler neck. Seems that I could get up and disconnect on the tank end...where does it go after it heads over by the filler neck? Is this the same line that ends up in the filler neck that you can see when you open the gas cap or goes to an evaporation tank? Has anyone replaced this line without dropping the tank? beandip... your comments about the evaporation tank...where is it located? Is it above the hatch deck in the quarter panel so I can access by removing the interior plastic or do I get access from underneath the car? Don't want to pull the interior apart just to investigate. This leaking braided line goes up and toward the passenger side as you described, but seems I could replace without dropping the tank. I can access the hose clamp connection on the tank without dropping it. Does anyone believe this isn't my issue? You can see from the pics that the line is wet where it connects to the top of the tank. I assume that this line isn't supposed to be porous but rather braided for flexibility...correct? bigoak...Thanks for the help and the idea about using the camera. Learning something new every day...better than a day in the office! thanks Steve
-
BigOak, Good idea tomorrow I'll try and snap a picture of the top of the tank. The leaking did NOT seem to come from one side but rather directly out of the top center as it was running down and around all four sides of the tank. As opposed to where you showed in the photos on your old thread where you showed rust or corrosion on the connection seam on the tank between the top and bottom half of the clam shell...that is definitely not where my leak was occurring. It was running down off the top of the tank. I haven't had any fuel smell issues with the car and it sits in the same 3 car garage with my everyday boring to drive vehicles and the kid's bikes. I think I would have smelled it if I have a missing vent hose, never had it sitting with this much gas...maybe only a 1/2 tank but maybe we'll see more with pixs. Mike, NO Wisconsin gas even with our huge taxes is not $8/gallon. I believe the premium I pumped was $4.19/gallon down about $.40 in the past week that is why I pumped that much to begin with. I started thread by writing that I had spilled a 1/2 gallon and decided there was no way that much was spilled. Didn't adjust the math when I changed the amount to 1/4 gallon.:stupid: Anyway...more to come with pixs. Thanks for the start.
-
Daydreaming a little last night while pumping gas and filled my '71 right up and into the filler neck. Haven't had the car that long and guess never pumped that much gas in before, usually just pumped $20 worth or something. I have it running well and looking good so I pumped approx. 11 gallons last night. Stopped it just short of overflowing the filler neck by the gas cap. I then realized I had fuel pouring out over the top of the tank itself as though there is some type of vent on the top of the actual tank? :eek:The tank leaked itself down to a point that no additional dripping occurred, I dried everything off and let it evaporate for 30 minutes before starting the car. Probably let what seemed to be a 1/4 of a gallon of gas spill onto the pavement at the station. There goes $2. :disappoin There seems to be no leak in the tank itself as it is holding on Full and no additional drips on the cardboard I put under in the garage last night. Drove it home 15 miles from the station and I can see fuel right up to the bottom of the filler neck with a flashlight beam. My question...do I need to investigate a leak right at the connection point of the filler pipe and the tank or is there some type of vent in the top center of the tank to handle this type of overfill situation? The gas seemed to be coming from the top center of the tank and running around all four edges as opposed to right from the neck area on that side of the car. The concrete was very level where I was filling up. It is obviously almost impossible to get your arm up and feel the top of the tank without lifting the car. Any help would be appreciated. Thanks Steve
-
I dyed my '71's carpet with 2 packs of rit dye. Carpet is black, had faded to a brownish gray color. Hot boiling water in a wheel barrow (about 7 gallons of water) dipped and then soaked for a day. I hung them to dry for at least a week in the sun. This was in the middle of last summer, they look great and I've had no leaching or wearing to this point. I think it was worth the effort for the little time and money it took and they look great. If they start to wear, I'll look at new replacement, but for now why not try it. Less than $5 and an hour of time. Glad to hear about the shoe polish on the luggage straps, i need to give that a try. Thanks Steve
-
OK...I'll bite...what's the "rope trick"? I suppose I should have searched before asking though... However, it's not getting the old one out that is the issue as it looks like Charlotte's Web, just would like to find a non-tinted one. I'm going to follow upon some of the leads you've shared. thanks again to everyone chiming in. Steve
-
Thanks Tony this is very helpful. Glad to hear that it can be done as long as you are patient and careful. Now I just need to find a replacement... Steve
-
This is great info guys. Has anyone had any experience installing a used windshield out of a 280z or something newer than a 240z? Is this worth it...or should I just go new with the built in tint, since the glass guys in my area say the only thing available is tint. Thanks, Steve
-
Thanks for the help guys and the advice on installing a new gasket. Anyone know where the best price/quality gasket I can buy?
-
I have a May '71 240z with a very cracked windshield. I have searched and haven't found anything on the site for help. What Z year windshields work on an early '71? Can I replace with a 280Z, i have to believe these would be easier to come by used...especially in Wisconsin where the pickins are slim on early Z's. I can buy a new one local but it contains the tint strip on the top...want to stay stock if possible. Any help would be appreciated. Thanks MidLifeCrisiZ
-
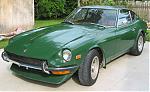
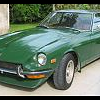
Hey your car's older sister is jealous...guess younger siblings always get more attention Mine's a 5-'71 Green with butterscotch...HL30-24574 still in need of the make-over!
-
thanks for the heads up You're right...looks close...however I believe the interior portion of the seats are actually cloth/velour. The angled shot into the drivers side looks like brush marks on the fabric. They did a nice job on the seats though. Looks good with the rest of the butterscotch...if you like butterscotch:laugh: thanks again
-
Nice looking car. I love the wheels as well. Just curious though...Ontario plates in one photo and Florida plates in the other two photos:surprised Different time periods on the photos?
-
Bryan, I'll take another look at my old seats to cut a sample swatch, however they are so faded that I'm not sure I have any part that is really good. On an extremely positive note a package arrived over the weekend with a new set of butterscotch seat covers. Seems Z-man @ Zspecialties came through for me afterall...maybe the last set available anywhere??? They look great! I'll take some photos when I get them installed and post for all to see. Steve:classic: