Everything posted by Nissanman
-
ZG nose bonnet hinge...need help. Thanks
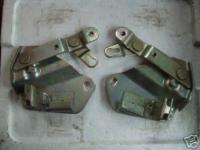
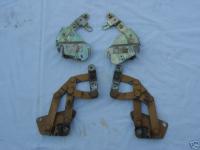
First pic. from above site. $275 a set. I may be wrong but I'm reasonably sure you can convert the stock hood hinge to perform just like these. I did this conversion years ago but they are not yet fitted to the car so I can't verify that they work as intended. However, if you would like to see some pics. of what I came up with, I'll get some tomorrow. My motives were clear, $275 a set:tapemouth:tapemouth:tapemouth The second pic. shows the pair, side by side. I edited that pic. printed it at 1:1 scale, then rearranged the stock hinge to pivot in the same places:classic: Third pic. is the two types compared. Get rid of the intermediate linkage and VIOLA!
-
Rust is killing my z
It is all repairable, it is just that it will take time and effort to dissect the panels and weld in fresh metal. That area by the radius rod is notorious for doing that. Nissan welded in a doubler plate in the wheel well and the moisture collects behind it. Rear sill patches are available. Rust inside a door may mean a replacement door, but it might also be just surface rust. You will need to remove the door trim and have a good look see to determine the extent of the damage. I use a pointed scriber to test the integrity of suspicious areas. Door frames are easily repaired, not so with the skin. Thin sheet, due to corrosion, is a beach to weld to, you have to cut back to decent metal to do the repair which of course makes the hole bigger:disappoin.
-
Brake Booster Hose - Engine Side
Perhaps it is the hose that connects from the booster to the non-return valve and not from the valve to the engine:rolleyes:
-
Brake caliper question?
Just looking at that item, all that appears to be missing is a set of pads. You are better off buying pads of your choice anyway, preferably high quality. Also, it would be ideal to replace both callipers at the same time. Why not use yours as cores for a pair of re-manufactured ones? Too important to do by 1/2 measures:finger:
-
Rust is killing my z
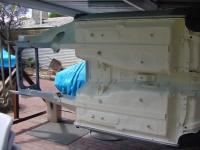
Enter soapbox mode: - "It is only metal and metal can be repaired." Only YOU can decide whether YOU want to do it/get it done and keep the car. Even chassis rails are just folded sections of sheet. Is it an economical proposition or should you cut your losses:rolleyes: Post some pics. and open it up for discussion:ermm: Both of the under floor chassis rails were replaced on this body, as well as sections of the floor pan. As mentioned a PL510 is also ~36 years old minimum so Terry the Tinworm has had plenty of time to get established:(
-
Found a Rust Hole...Can I weld a patch
Typical rustout for a uni-body, not unique to Nissans:rolleyes:. There are two panels in that strut tower area that coincide at a very shallow angle. The inner panel stops about 60-70mm from the chassis rail. Moisture can enter where the cutout for the strut tower occurs, in the wheel well. It will then creep down the cavity and game over. I repaired mine by cutting the engine bay side hole a different size to the wheel arch size hole. That allowed me to patch the small hole first then do the large hole. It is necessary to repair both panels. This is an important structural area for the front suspension. Welding in fresh metal is the only solution. Once done, make sure the seams are well treated with a sealer and the metal is corrosion proofed to prevent a recurrence.
-
phosphoric acid?
After you let the product do its' thing, you wash it off with clean water. This cleans the surface but more importantly, neutralizes the remaining acid. The surface then can be a dull gray to a light yellow/straw in colour. Wipe it immediately with a swag of paper towels to mop up excess moisture. Then wipe it again with more towels but this time, spray the surface liberally with methylated spirits. A hand held pump pack is great for this, one you can vary the nozzle from a spray to a stream. The metho. will displace any remaining moisture from seams, cracks, nooks and your actual cranny as well. You can then use de-humidified compressed air to ensure the panel is super dry. Concentrate on the seams etc. to blow out any trapped fluid. The panel is then ready for wiping down with "Silicon Off" or "Prepsol", to make it primer ready:)
-
Wanted Dead MR30 ECU
Hi Nigel, I spoke to him about it Sunday night, he seems to think it was binned, sorry:cry:
-
cam tower
Nissan, in their FSMs, are very strong in their wording re cam tower removal. Essentially they advise line boring the towers if they are ever disturbed. However, in the real world where heads are welded, machined, ported, heated, pressure tested and whatever, the towers are usually the first thing to be removed. The thing to do when re fitting them is to : - 1 put them back in the same order they were originally, 2 use head saver shims if the head thickness has been reduced too much by re-facing, 3 tighten them gradually whilst at the same time spinning the cam that will be in the engine when it is assembled. The last point is certainly not line boring but it will ensure that the towers will be suitably aligned for the relevant cam shaft. If the towers are torqued to the recommended value and the cam still spins when whizzed by hand, what more can you do?? As for the recalcitrant tower, I don't think there is any set screw or other reason why it shouldn't just slide off. Try moving it to both the front and rear, there might be a burr on the tower preventing it from moving one direction or another. Worst case, leave it on the cam and re-mount it to the head when required! The tip of a screw driver:ermm::ermm: Methinks there was an [vain] attempt, by the dreaded Previous Owner, to lever the cam chain tensioner back together:finger::finger:
-
Z432 Throttle linkage
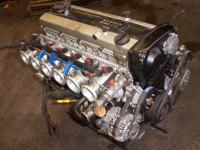
What, like the first pic? I think this is set up for a cable. I think cable operation would be a better method personally:devious: Or the second and third pics? You can just see the throttle linkage at the far left.
-
Wanted Dead MR30 ECU
Might have one in the shed. I'll have wee look tomorrow and see if I can find it. It was a worker. It actually belongs to my son but I'm sure he would be willing to part with it, his MR30 is looooong gone:cry:
-
brakes
I think what he is inferring, is that the e-brake test, which only uses the rears, will or rather should, take longer to stop the car. That, of course, is providing the front brakes are doing something:nervous::nervous::nervous: Where you go from there though:ermm:
-
Brake booster/master cylndr FLANGE(spacer) question
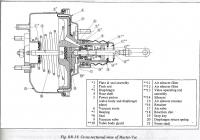
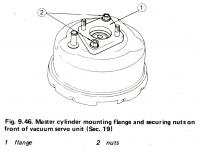
Patrick, I really don't think that the M/C to spacer and spacer to booster surfaces are anything near airtight. The booster should have a diaphragm in it that has atmosphere on one side, the pedal shaft side, and manifold vacuum on the other side, the M/C side. There is a seal that goes around the shaft, P/N#1 in the attachment, which seals the vacuum chamber from the atmosphere. There is no mention of any seal either side of the spacer, so unless anyone else has a different opinion.....
-
Tricks to get the windshield trim back in
You'll need a special tool to spread the rubber slightly as you feed the stainless trim into it. From memory it looks a bit like a 2 pronged fork but is plastic with a handle. It is "U" shaped and goes over the strip as it is laid on the weatherstrip. You then pull it towards you, it spreads the rubber and you press the trim into the groove before the tool passes and the rubber springs back. I saw it done years ago but what they use now is anybodies guess:ermm: You could try asking the installer if you could borrow one or at least view what they use:nervous:.
-
Fuse Relay Question
...or even Nissan themselves. Nissan was/is notorious, and a right pain it is, for using some real whacko relay configurations which are unique and incompatible with any generic auto relay. Once you know what the Nissan relay pinouts are, then it is possible to convert the wiring to a conventional relay...or two:ermm:
-
Modifying a Brake booster to fit M/C for 240Z
There is supposed to be a 10mm flange between the Booster can and the Master Cylinder. It converts the horizontal studs on the booster to vertical studs to mount the M/C. According to the Haynes Manual, the booster pushrod is adjustable in length. If you doing all that and there is still a 10mm gap, all is pear shaped:finger:
-
73 240z coil diagram needed.
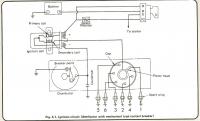
Here you go. If you want colours, well, that will be extra:cheeky: The VR may have a rubber pad behind it for vibration isolation but by the same token it should be earthed/grounded somewhere too. I think that is achieved through the wiring to the alternator.
-
Bolt on horsepower
My son and I spent an afternoon browsing through the Summit Racing cattledog years ago. We worked out that if we fitted all the power generating and fuel saving items they had for sale, to a given engine, we would have the most powerful engine on the planet with zero fuel requirement. Is there something wrong with that theory? :stupid::stupid:
-
Moving the plug wires on the coil??
Like he ^^^^^ said:ermm: One of the dead giveaways of a non Nissan aware mechanics work on an L series engine is an out of phase distributor drive and a re-programmed distributor cap to "correct" the situation:finger: Yes, after you have got yourself adjusted to the situation, pull the pump and try again:tapemouth
-
Rebuilding the engine
Maybe blowby but perhaps the reverse! Blowby is into the crankcase, I'm thinking sucking oil vapor from the crankcase. I was always taught that doing up a head and not doing rings was a wee bit iffy:nervous: The extra load of the combustion chamber being as fresh as, can strain the rings and cause an oil burner. Anyhoo, like the man said, what do the spark plugs look like, sooty or oily? Sooty=rich, oily=well, oily:ermm:
-
Rear glass dimensions
1973 240Z rear hatch glass: - 95cm x 71cm.
-
Source for Wire Clamps
I wouldn't mind betting that you can get them from Nissan. My Skyline had wire type clamps on the water hoses from factory so I reckon Nissan still fit them to some new models. Have a look under the hood of a current model and see if they have the size you are seeking :classic: Then of course there is always your local Boneyard. The carb. clamps are available from some of the Roadster vendors like here
-
Alcohol or paint thinner?
Click me, click me:nervous:
-
Gas tank tubes
You could try inserting some small diameter stiff wire through the pipe. That should dislodge anything trapped inside the tube. A dose of carburetor cleaner and a squirt of compressed air would help too. Trouble is, the blockage, may very well end up inside the tank, ready for a re-run. As for the loose pipes, sounds like they need to be re-soldered. Use an electric soldering iron which will have no naked flame. Build the solder up in a mound where the pipe exits the tank to improve the mechanical strength. I personally don't like the idea of using JB Weld for that, just my opinion. After you have finished the repairs, give the tank a good rock and roll with a small amount of solvent or de-greaser to wash out any sludge.
-
But Mom...it followed me home... honest!!!
Great little car:classic: I hope you enjoy driving the DNA source of the 240Z. ...and keep it that way:finger: Unless you are VERY careful, the factory jack will put an after market dent in the door of the car when you use it:tapemouth:tapemouth.


