Everything posted by GreenZZZ
-
Biz trip to Tokyo
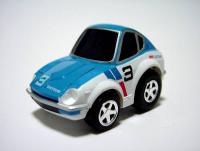
Going to Japan for the first time on a biz trip. What are must does for Z-geeks to do while in Japan. Logistically I won't be able to leave Tokyo unfortunately, not enough time this go around. I can think of a few things. Hitchhike around downtown and hope Kats-san is driving around offering lifts in his 432Z (remember to get in on the left as pushing Kats out of the driver's seat might be considered rude....) Try to find a Z parts supply and stuff the suitcase worth goodies that are best bought in Japan Start an import business of these freaky little items
-
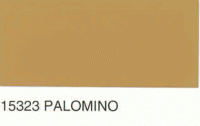
Butterscotch dye or paint?
I was googling this yesterday. These SEM vinyl paints look interesting, but probably not close enough...
-
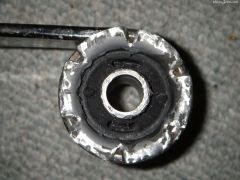
New Mustache Bar Bushing
-
POR-20 on stock manifold
Sometimes the info on this site is way over my head, I mean really, what was that first part again? Drawers? Wha??? Hopefully it will be like any other year... Pappy - "If you ain't winning, your losing" Drinking Buddy - "Shake-n-bake that manifold!" 'Lil GreenZZZ - "Daddy, you made that grace your bitch!"
-
Cleaned up the gas tank and removed the evaporation tank
Looks fantastic! Why remove the evap tank? Just curious...
-
[2011] What did you do to/with your S30 today?
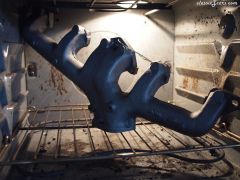
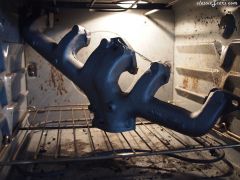
POR-20 basted on exhaust manifold at 350 for 15 minutes... :cheeky: Curing the paint at 350 degrees
-
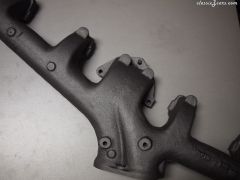
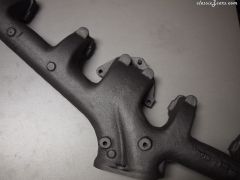
POR-20 on stock manifold
I blasted, painted, cured my exhaust manifold using POR-20 high temp paint. This paint takes a while to stir after you open the can. Its thick unlike POR-15 which is thin like water. The color is so similar to the sandblasted manifold it is kind of tough to find painted/unpainted parts of the metal, the color is that good. Waited till the wife left the house this AM and cooked the paint to cure it for 350 degrees for 15 minutes. Should have taken the plastic coated coat hanger off the manifold prior to cooking :stupid: No biggie, I ran the oven clean cycle to cover up the evidence and reported the housework good deed! Seems like a pretty decent surface. Curing the paint at 350 degrees Final surface
-
POR-20 on stock exhaust manifold
-
POR-20 on stock exhaust manifold
-
POR-20 on stock exhaust manifold
POR-20 applied on stock exhaust manifold. Do this when the wife isn't around and make sure she doesn't read CZCars. Note to self, remove plastic coated hanger next time before putting into oven!
-
POR-20 on stock exhaust manifold
POR-20 applied on stock exhaust manifold. Do this when the wife isn't around and make sure she doesn't read CZCars. Note to self, remove plastic coated hanger next time before putting into oven!
-
Spindle pin removal tool survey
If you don't run new brake fluid into your system every two years, your wheel cylinders get pitted out... Unless you live in very low humidity. On the topic of the survey, I've killed one of the thrust bearings and broken the puller rod while it was loaned out. Pulled about 7 pairs of pins.
- Stock mustache bar bushing flare
-
Understanding a Weber Side Draft Carburetor Through a Fictional Supposition.
Interesting to compare/contrast the Weber design to the SU design with a machined tapered needle to vary the orifice. Both approaches have their merits.
-
Oem bushings for moustache bar .
Like Steve says, get the microfilm and order the parts (local dealer, zcar.com, courtesyparts.com, FactoryNissanParts.com, etc...) My car only has urethane on the transmission bushings, inner rear control arms and sway bars. You'll need to swap out the 240Z part number for the 280Z lower differential stopper bushing.
-
Stock mustache bar bushing flare
Mike, your tool bevel looks flat photo here and Kevin's tool has a rounded bevel so I don't think they were made by the same machinist. Both work. Main thing is to get the lip started in the right direction, which they both clearly do. The finish on the rounded beveled tool looks about the same Nissan factory.
-
Spindle pin removal tool survey
I don't think I've ever seen ones that clean except mine which were drenched in VersaChem 13 thread lubricant when they were installed in the early 90's. Think yours have been replaced at some point.
-
Oem bushings for moustache bar .
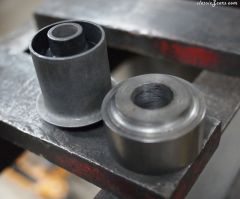
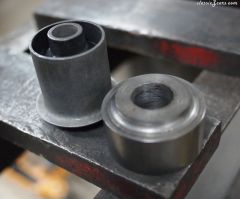
Kevin LeBlanc at the Austin Z-Clinic had this tool made up. We're kicking around the idea of making up a batch of them. It would have been nice to have two of them, one for each side as the socket side which was already flared ends up not as clean as the flared side we did, but still a huge improvement over my hack saw job above... Control arm pin pullers and this little flare tool are almost required for stock Z rear end work.
-
Oem bushings for moustache bar .
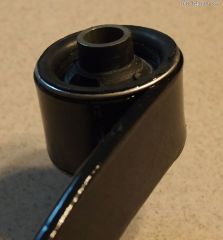
Cross posting, just finishing my redo of my bushings. Worked out great... Mustache Bar bushing flare tool Tool top, socket on the bottom Looks good!
- Stock mustache bar bushing flare
-
Custom press tool for Mustache Bar Bushing install
Kevin Leblanc at Austin Z-Clinic had a mustache bar bushing tool made, works great. Looks just like it was done in Japan. Other side was a bit distorted from the socket though
-
Custom press tool for Mustache Bar Bushing install
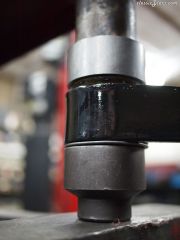
This is about 1/2 way through the press tool lipping the bushing colar over (top). Using a big socket on the bottom.
-
Custom press tool for Mustache Bar Bushing install
Kevin Leblanc at Austin Z-Clinic had a mustache bar bushing tool made on the right. Stock bushing on the left
-
Custom press tool for Mustache Bar Bushing install
Kevin Leblanc at Austin Z-Clinic had a mustache bar bushing tool made on the right. Stock bushing on the left
-
Driveline vibration
You got a nice test lab setup with your car to try all 8 combinations, but eventually one of the C clips in the U Joints will bend.


