Diseazd
Free Member
-
Joined
-
Last visited
Everything posted by Diseazd
-
 Thanks Mitchell.......If you're ever in Richmond, please look me up. Guy
 -
I don't either Arne.....I just remember when I bid on a nice Texas Z a couple years ago, he mentioned that he had used the 280Z one piece seal with good results. I was wondering if anyone had tried the Nissan 280 seals( he said he had bought them from Nissan)? Guy
-
Yes.....and the work is beautiful!
-
Gary.....When I get Carlos to do my head work, I provide all the parts......He charges $450.00 for the head ( includes cleaning the head, installing new hardened seats, new guides, valve job and surfacing the head ). Re the block.......He'll hot tank the block, bore to your specs, hone the cylinders and install brass freeze plugs (brass freeze plugs included) for $200.00. For an extra $50.00, he'll paint the block original Datsun blue. He will obviously charge shipping and handling charges if not hand delivered. Guy
-
I've heard that the Nissan 280Z (one piece seals) work great in the early cars........anyone tried those?
-
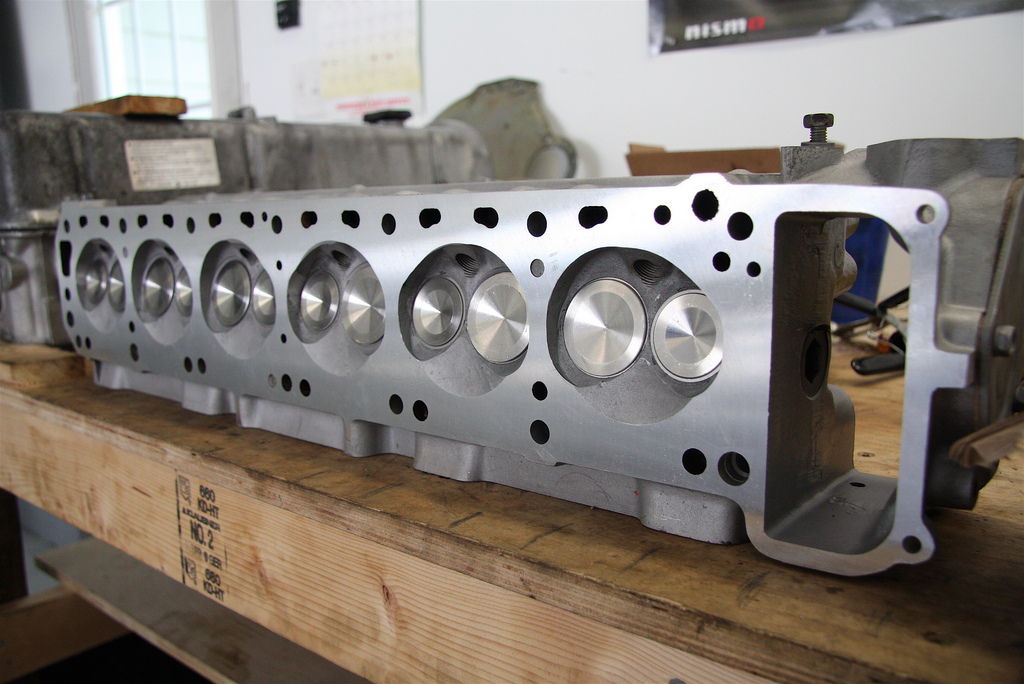
FYI.......An example of Carlos' work at Citizen's Machine Shop.......An E31 with hardened seats, bronze valve guides and L28 exhaust valves. The block is an L24 bored .040 over. He's a real perfectionist.

-
Mike.....Same thing happened to me a couple weeks ago. The culprit from what I can figure out is hard runs before the thermostat has opened. In other words if you get on it before the engine has fully warmed up and allowed the thermostat to open, the water pump is building maximum pressure. If the thermostat is open, your radiator cap can release the pressure......Make sense? Guy
-
The first 3 pics above are of the L24 coming out........the rest are of the L28 going in. Yes it is the same engine as in the rest of the pics, The engine runs great.....I'll post final dyno results sometime in the next few weeks. Guy
-
Match the bearing collar to the clutch........240z collar to 240z clutch........280z collar to 280z clutch etc.
-
http://www.geocities.com/inlinestroker/index.htm Read through this site.....It'll give you a number of useful tips. Punch marks are on top side of the rings. Instructions should be included with your ring set. If you are uncomfortable installing the rings, most machine shops will install a set of rings for $10.00 to $15.00.
-
If the holes don't line up pretty close, I'd get a set of Clevite rod bearings from NAPA or factory rod bearings from Nissan. If the oil expander and rails are installed properly, compressing the rings won't upset the butting of the expander. I've never used those rings before........some seem to be easier to install the oil rings. Perfect Circle are great as well as stock Nissan.......Hastings oil rings are a pain to install (so much so that I tossed a set).
-
Be very careful not to drag the edge of the screwdriver across the inside of the tranny housing, or it'll never seal again! That surface needs no gouges. One more thing you can try is to drill a couple self tapping screws into the rubber frame of the seal and pull with a couple pair of vise-grips. It ain't pretty but it works. Guy
-
The directions that came with my MC reads as follows: 1) Clamp MC securely by mounting flange to bench vise. 2) Remove and discard factory installed protective plugs from the outlet ports and place a catch container under the MC. 3) Fill the reservoirs with new brake fluid. When the fluid begins to drip from the outlet ports, securely install threaded plugs. This provides lubrication to the piston seals before bleeding. 4) Using a bleeding tool or other suitable bleeding tool, begin slowly depressing the MC piston using 3/4 to 1" strokes. Wait 15 seconds between strokes to avoid aeration of fluid. Continue this procedure until the piston can't be depressed more than 1/8" and no air bubbles are visible in the fluid reservoir. 5) Remove the MC from the vise and install in vehicle, leaving the plugs installed. 6) Remove one plug at a time and connect the steel brake lines from the vehicle to the MC. 7) The wheel cylinders and calipers must now be bled to remove any remaining air in the system. I would think layers of towels are always a prudent idea. Good Luck!
-
Nice avatar Frank..........Couldn't figure out who the new guy was!:bulb:
-
Mark 11:25 on the inside of the distributor mount on the timing cover with a magic marker......get your wife to sit up top and tell you when the tang lines up. My wife's an expert!
-
Installing rubber seals is on the list that only professionals should attempt.....the longer I work on Z's the longer that list grows!
-
Thanks OZ.....Don't use that Nismo aftermarket bolt though (at least with the stock damper).....If you look closely you'll see a drop down on the washer....It prevents everything from locking up up front(in the L series motors with stock damper). If you use one(in an L series motor with stock damper) mill the drop down completely off. Hope you're doing great. I still want to build that L28 with the L24 crank,rods and E31. Maybe soon. Regards Guy
-
<a href="http://www.flickr.com/photos/14049800@N00/4608025106/" title="IMG_8417 by RVAE34, on Flickr"><img src="http://farm5.static.flickr.com/4020/4608025106_708409f017_b.jpg" width="1024" height="684" alt="IMG_8417" /></a> <a href="http://www.flickr.com/photos/14049800@N00/4608025450/" title="IMG_8418 by RVAE34, on Flickr"><img src="http://farm5.static.flickr.com/4030/4608025450_f81e28fcca_b.jpg" width="1024" height="684" alt="IMG_8418" /></a> <a href="http://www.flickr.com/photos/14049800@N00/4608025780/" title="IMG_8420 by RVAE34, on Flickr"><img src="http://farm2.static.flickr.com/1333/4608025780_b4768dfcd0_b.jpg" width="1024" height="684" alt="IMG_8420" /></a> <a href="http://www.flickr.com/photos/14049800@N00/4607416805/" title="IMG_8422 by RVAE34, on Flickr"><img src="http://farm5.static.flickr.com/4052/4607416805_cb89d2075d_b.jpg" width="1024" height="684" alt="IMG_8422" /></a> <a href="http://www.flickr.com/photos/14049800@N00/4607417185/" title="IMG_8421 by RVAE34, on Flickr"><img src="http://farm2.static.flickr.com/1005/4607417185_81bdd342e0_b.jpg" width="1024" height="684" alt="IMG_8421" /></a> <a href="http://www.flickr.com/photos/14049800@N00/4607417769/" title="IMG_8423 by RVAE34, on Flickr"><img src="http://farm2.static.flickr.com/1261/4607417769_0d96060eca_b.jpg" width="1024" height="684" alt="IMG_8423" /></a> Chuck is moving again.....Paint soon!
-
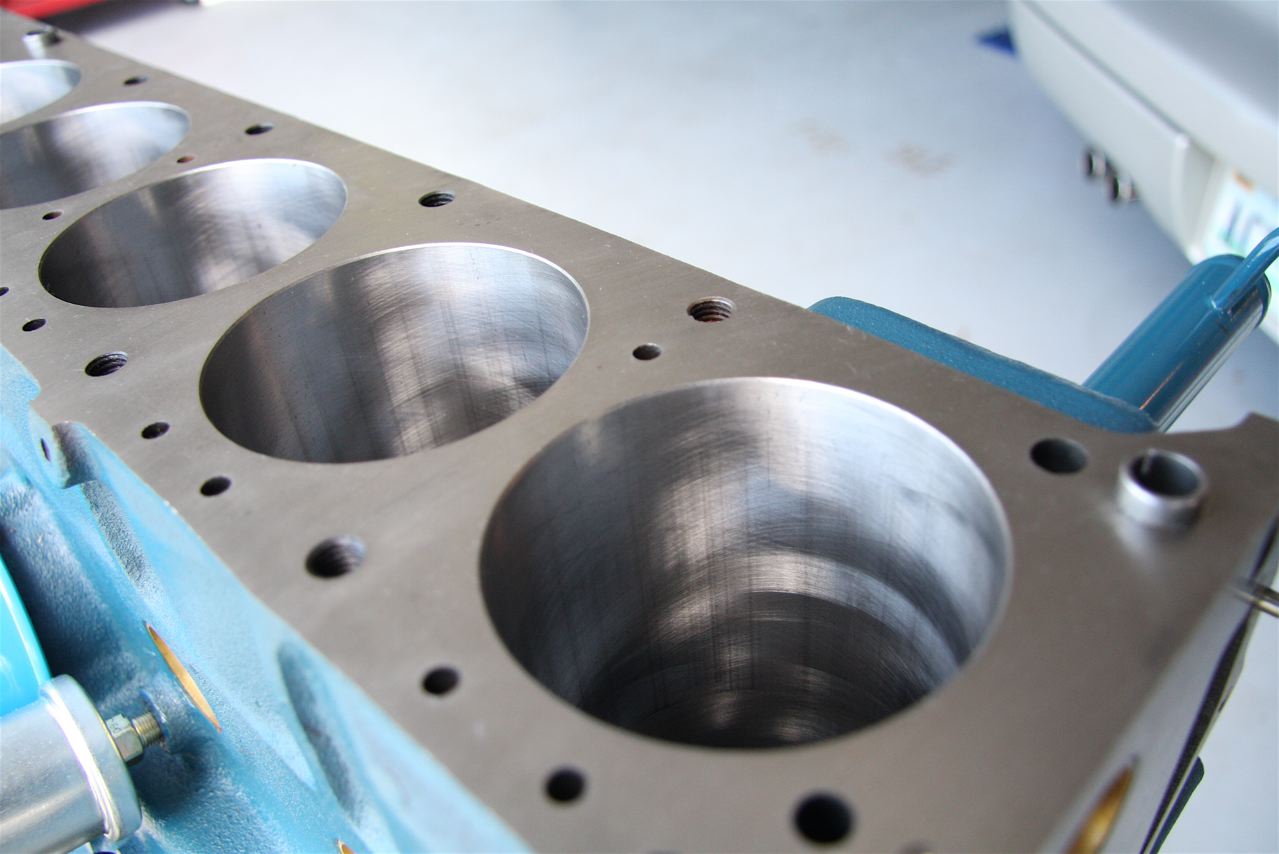
<a href="http://www.flickr.com/photos/14049800@N00/4592994467/" title="IMG_8144 by RVAE34, on Flickr"><img src="http://farm2.static.flickr.com/1148/4592994467_624ef696bc_b.jpg" width="1024" height="684" alt="IMG_8144" /></a> <a href="http://www.flickr.com/photos/14049800@N00/4592993839/" title="IMG_8143 by RVAE34, on Flickr"><img src="http://farm4.static.flickr.com/3382/4592993839_5b45a09114_b.jpg" width="1024" height="684" alt="IMG_8143" /></a> Block was perfect all along.....now the pistons are too.
-
<a href="http://www.flickr.com/photos/14049800@N00/4608028862/" title="IMG_8438 by RVAE34, on Flickr"><img src="http://farm5.static.flickr.com/4037/4608028862_30d55756d7_b.jpg" width="1024" height="684" alt="IMG_8438" /></a> The pistons were cut .030".....Deck height is now "0".....cost....$80.00.
-
The early 280 dampers are honed in about 3/8 of an inch so you can feel the key engage before torqueing down the crank bolt (a big improvement over the 240 dampers). If the key isn't centered in the damper it can cause big problems. They are still available from Nissan ($180).
-
Super.....you're good to go!
-
My machine shop said they just did an engine exactly like mine (73 pistons in L24 block). Evidently 73 pistons need to be milled .030 inch for 0 deck height. They can mill the pistons with rods attached. I'm going to have them mill .025 inch for a positive .005 inch deck height ( most experts I've talked to including Dave Rebello say .035 to .038 inch clearance is minimum), so you could actually have plus .015 inch and still be OK.( gasket is .050 inch when torqued). As far as material available to mill......the valve fly-cuts are a lot more than .030, so that shouldn't be a problem. Looks like I'll be zipping it up shortly.....I'll update when I get the pistons back from the shop.
-
Green should be perfect.
-
When I build my engines (and I've built a lot of them), I take the crank to a machine shop..... get it checked for straightness and make sure it mics to standard....I also have them polished. If the crank checks out, I install Clevite standard bearings and just bolt her up. I've never had a problem. Datsun engines don't wear unless really abused. In 20 or so engines, I've never turned a crank or rod journal and you usually can't feel any wear on the cam lobes or at the top ridge of the cylinder. It's always prudent to check things though.....let us know what your clearances are and if you have other questions as you go forth! Good Luck.....Guy