BackDoorz
Free Member
-
Joined
-
Last visited
Everything posted by BackDoorz
-
 Update ... After working on my brakes for awhile, I am back on the road again using Ethanol-free gas. So far I have had no "hot-start" issues. After saying that, it has been cold here in NC (more so than usual). I have not driven my car as much since it has turned cold (maybe burned 2 tanks?). I guess the real test will be this summer. I will try to update again. Meanwhile ... "Happy Motoring".
 -
Update on my current brake problem. I took the front and rear brake lines coming from the bottom of the master cylinder out and insert two plugs. This was to determine if my master cylinder was bad. I had both reservoirs full of brake fluid. I started up the car and pressed on the brake pedal and the pedal moved just about a 1/2 inch. The pedal held firm and did not leak down. I re-installed the brake lines and started the car and the brake pedal went to the floor. Now, was this a good test for checking out the master cylinder? If so, shouldn't I be seeing a leak some where? That is taking into account all the other things that I have done that is mentioned in my original post.
-
Car is a 1976 280z with automatic transmission. I am the original owner. Been having brake issues off and on for about 2 years now. I will not go into all the details, but started out with wheel cylinder problems on the rear drums. My current problem is no brakes. Pedal goes to the floor. The times that I have tested the car in the neighborhood, the brakes will stop the car, but are bottomed out leaving me no reserve at all. The following have been replaced or repaired in the past 2 years: - Both rear wheel cylinders. (These are not leaking.) - Both front calipers and pads. (These are not leaking and the bleeders are positioned to the top.) - Master Vac (The check valve is operating correctly and reaction disk is properly installed. The internal adjustable plunger has been adjusted correctly for the master cylinder. It holds a good vacuum.) - Master Cylinder (I am on the third one. All were properly bench bled. Thought this was the problem, that’s the reason for three.) - Proportioning valve has been cleaned. - Brake warning light switch has been cleaned. - Rear drum brakes are new and have been adjusted correctly. I have bled the brakes many, many times using several methods. A vacuum pump, a Motive Products Brake Power Bleeder, and the good ‘ol way, with my wife inside the car working the brake pedal. There are NO leaks anywhere in the brake system. When I bleed the brakes, I see NO bubbles at all and I bleed almost a pint of brake fluid through to each wheel. No brake lines are crimped. Any suggestions, thoughts, or ideas will be greatly appreciated. Brake hoses have been replaced with stainless steel braided. Answer to madkaw: I did your procedure that you did on your mustang early on. Answer to Zed Head: The brakes will pump up just a bit, but not like they should. Answer to Darrel: The push rod has been adjust correctly. I made my adjustments till I could tell that it was pushing in on the master cylinder when I re-bolted it. After that I gradually adjusted the push rod back in. Also the brake pedal moves only about a 1/2 inch or less before it engages the pushrod.
-
booster.bmpI have a 1976 280z, automatic. I need the piece that connects the master vac to the brake pedal. I believe a 1973 - 1978 may work. Anyone have one laying around they might want to sell?
-
Vapor Lock, Heat Soak, VooDoo, whatever you wanna call it ... ________________________________________ I have read a lot about "heat soak" and "vapor lock" for quite a while now. I was always under the impression that those two "quirks" were not likely to happen on FI type engines. If you do a "Google" on the subject, you will find a vast number of folks that say it can't happen. After saying all that I will add my spin. I have a 1976 280Z, automatic, A/C, with ~155,000 miles. I am the original owner. The car is all original under the hood. This car was my daily ride for about 10 years (1976-1986). I live in N.C. where it gets 90 to 100 degrees for most of the summer. From the first day I started driving this car, till I parked it, I never experienced any type of "heat soak" or "vapor lock". I could go anywhere, park, come back out in 15-20 minutes, and she would start right up with no problems. For about 6 years (1986-1992) this car was parked in my garage. I did not drive it. I decided to start driving it again. I did some work getting her "road ready". I started to drive this car on a limited basis, still experiencing no "heat soak" or "vapor lock". After about 4-5 years I noticed that on rare occasions the car would seem to, what I thought, flood for just a brief time after about 15-20 minutes with the engine off. As the years have gone by, I can tell that this problem has gotten progressively worse. Now it is like this everytime it is parked for 15-20 minutes. I have changed several items in hope of correcting this problem. New fuel pump, new FPR, fuel injectors cleaned and tested, cleaned all electrical contacts, new AFM, cooler thermostat, new fuel filters (G3 & under hood), complete tuneup (including adj. valves), checked for air leaks, etc., etc., etc. I installed a switch underneath my dash to allow me to just run the fuel pump before I tried to start the engine, hoping to pump cooler gas around the fuel rail. I have seen very little improvement if any. My conclusion about this problem ... gasoline. The gasoline that I was putting in this car in the 70's and 80's in nothing like the gasoline that I'm using today. Each area of the country seems to have their own blend for summer and winter. I intend to try and burn ethanol free gasoline for awhile and see how that works. I also plan to take the fuel rail off and wrap it and the fuel injectors in some type of heat wrap. My thinking here is maybe insulating the fuel system from the heat as much as I can.
-
I haven’t seen anything like this in the forums and it maybe another way that everyone is doing this. Anyway, thought I would add my way. I recently installed a Brake Booster on my 1976 280Z. When it came time to bolt up the master cylinder to the brake booster, I knew that I was going to have to make an adjustment on the push rod that goes into the master cylinder from the brake booster. If you have ever done this job, it's sort of guessing game on just how much you should turn the push rod in or out. After looking at the whole setup for awhile, I think I have come up with a way that will get you pretty close. - Insert a small screwdriver into plunger opening of master cylinder until it stops. MCPlungerMeasure1.bmp - Make a small red mark on the screwdriver at the end of the master cylinder that goes into the brake booster. MCPlungerMeasure2.bmp - Take the screwdriver and lay it next to the master cylinder. - Line up the red mark even with the end of the master cylinder and make a blue mark on the screwdirver next to the face of the flange (where the bolts go through) that goes next to the spacer on the brake booster. MCPlungerMeasure3.bmp - The distance between the end of the screwdriver (tip) and blue mark is how much the rod from the brake booster can go before it starts to move the master cylinder plunger. - Take the screwdriver and place the tip to the diamond shape spacer on the brake booster. Compare the distance of the rod from the brake booster against the distance from the tip of the screwdriver and the blue mark and adjust push rod accordingly. MCPlungerMeasure4.bmp Notes: The master cylinder actually sticks into the brake booster up to the flange. That is the reason for measuring from the end of the master cylinder to the plunger. Red & blue markings are my own choice, any markings will do. Any straight object will work for marking, I used a small screwdriver. Make sure that push rod is pushed back as far as it can go into brake booster.
-
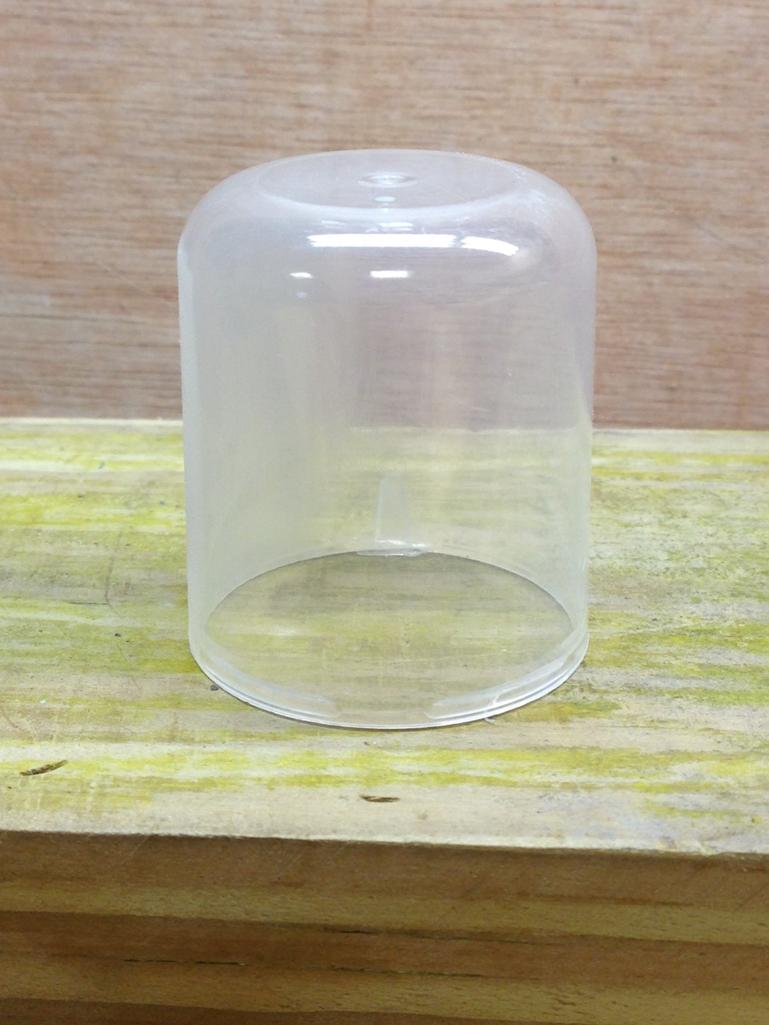
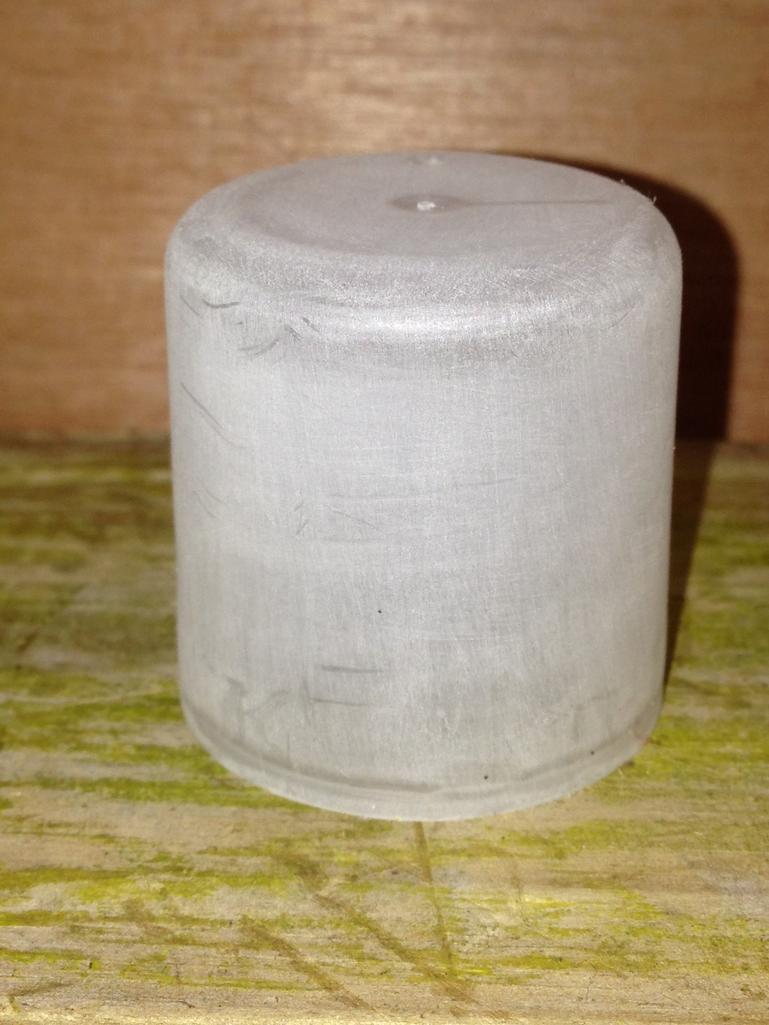
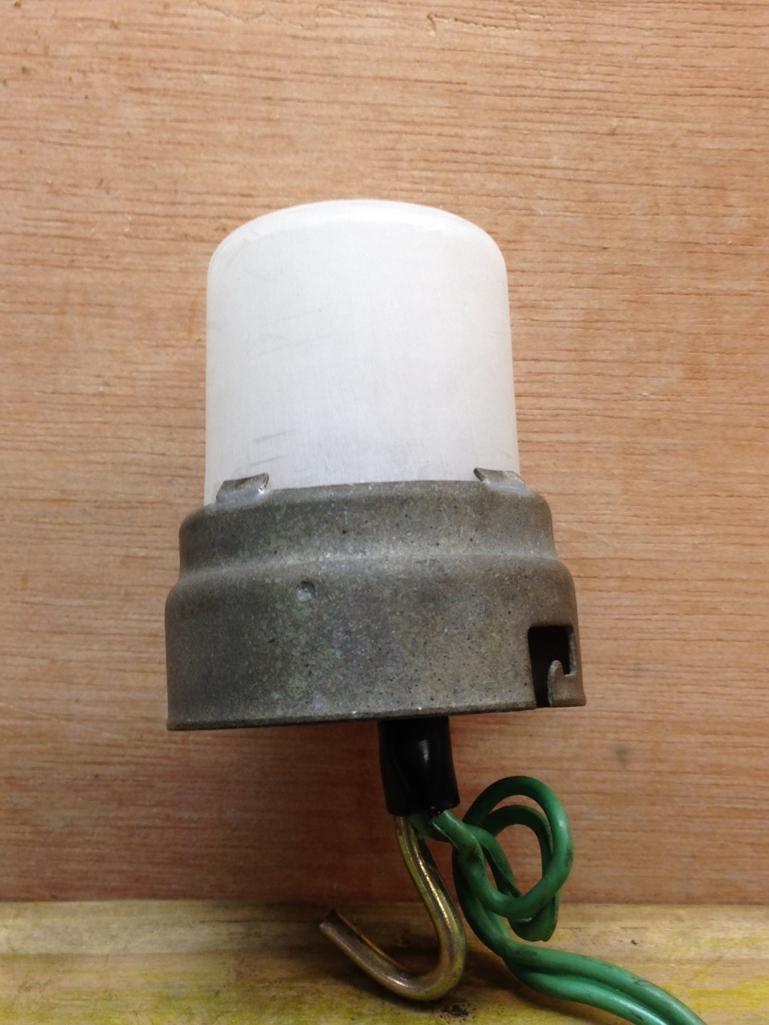
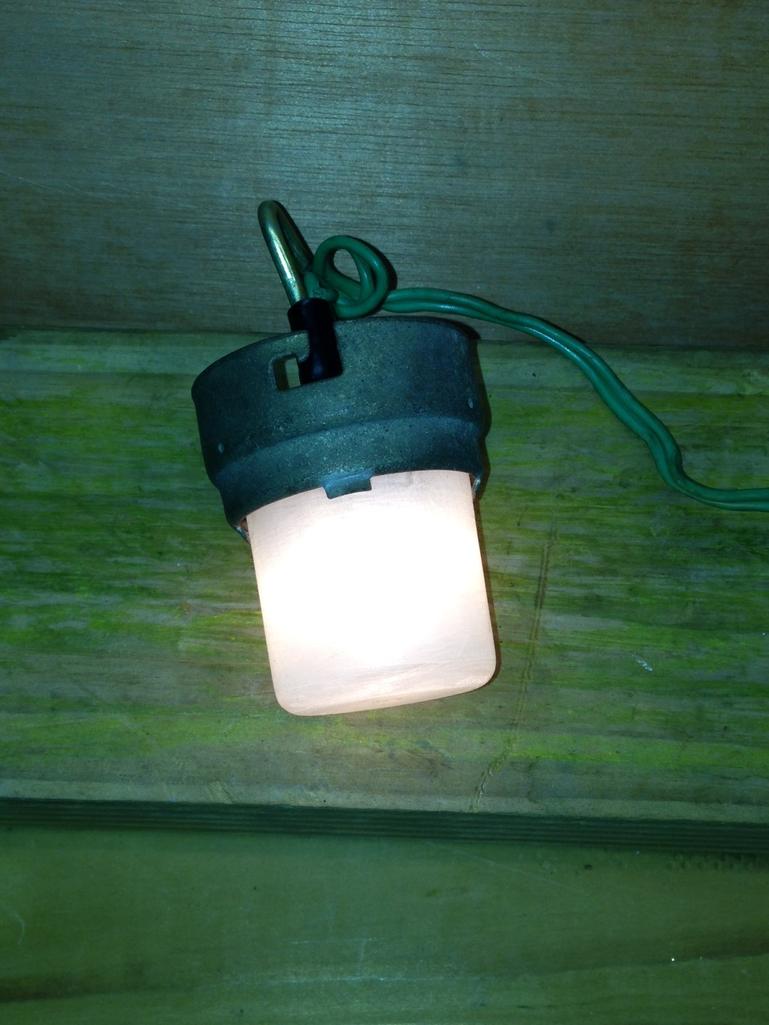
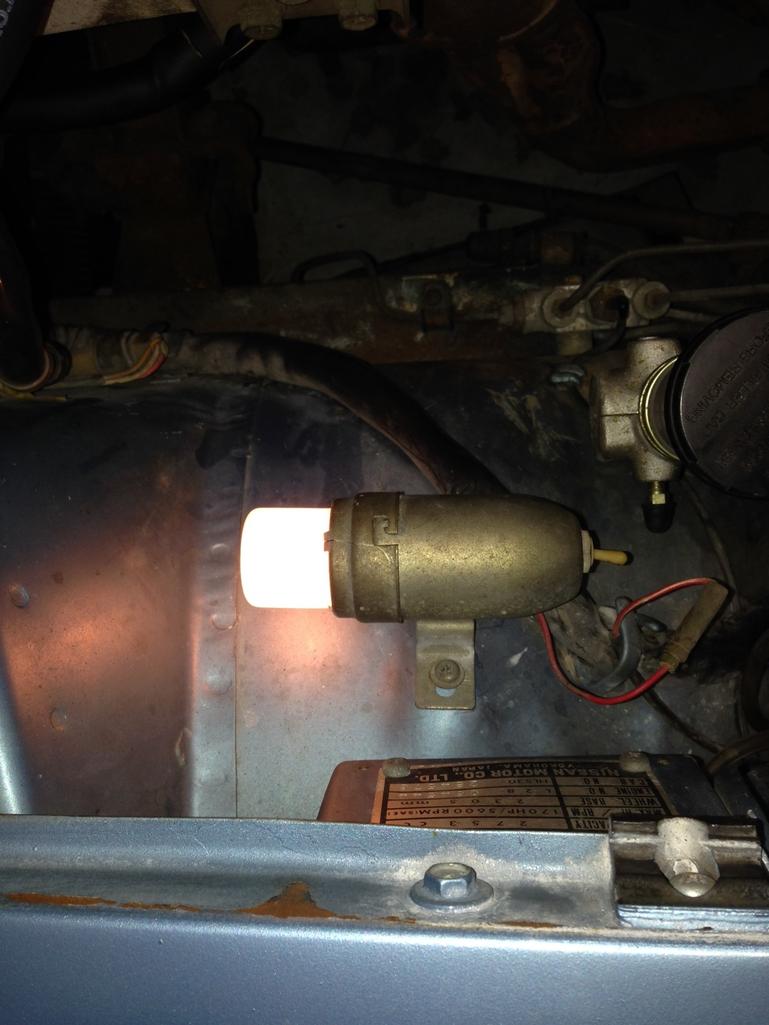
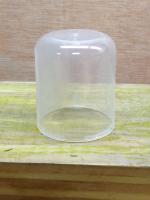
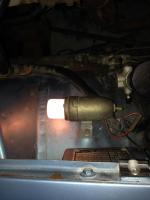
Thought I would share this. I was looking for a lens cover to replace the one that disintegrated on my under hood inspection light. Could not find just the lens, but could find the whole light itself. Not wanting to spend that much money, I thought I might be able to come up with something else. I looked in several drug stores and found several plastic caps on various types of hair products, body sprays, and etc. I found a cap from a Neutrogena Body Mist spray can that was the same diameter as the light. If you notice on the light itself, there are four tabs that help hold the lens cover in. There is also a rubber gasket/washer inside. I bent the four tabs out so as to allow the plastic cap to go in. The fit was good. The plastic cap was too clear for me. So I used some 400 grit sand paper and “scuffed†up the plastic cap so as to make it look frosted. This gave me the look I wanted. I put everything together and bent the tabs back in to hold the new lens cover in place. This may not be "original", but it works for me. I have attached some pictures.


-
I'd like to add something here. I see where a lot of people are asking about fuel injectors. Which ones to use, new or remanufactured, and so forth. The following information maybe known, but here it is anyway. The link comes the Reuters website. It is a stock listing for Standard Motor Products. Under "Full Description", paragraph identified as "Engine Management Segment". As you can see Standard Motor Products makes several different brands. Are they all made to the same specs? That's a good question. Standard Motor Products Inc (SMP) Company Profile | Reuters.com
-
Would like to add my experience with replacing the OEM bushings in the mustache bar. Mike was kind enough to loan me his bushing tool and it worked great. I acheived the flare that I wanted with the bushing tool. I also used the "drive" end of a 2 1/2 inch socket to continue the flare down more. Once I did this, I used the other end of the 2 1/2 inch socket and continued to flatten the bushing all the way down. I am very pleased with the results. All of this was done using a 20 ton press. Ride is great and rear end noise is 100x better than with the urethane. Thanx Mike.
-
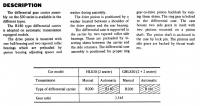
The following is from the 1975 Factory Service Manual, under Propeller Shaft & Differential Carrier, page PD-3, under Description … “The differential gear carrier assembly has a hypoid type drive pinion and ring gear set with a gear ratio of 3.545 for all models.†The following is from the 1975 Factory Service Manual, under Propeller Shaft & Differential Carrier, page PD-3, under Description … “The differential gear carrier assembly has a hypoid type drive pinion and ring gear set with a gear ratio of 3.545 for all models.†The following is from the 1977 Factory Service Manual, under Propeller Shaft & Differential Carrier, page PD-3, under Description … These are the only Factory Service Manuals I have checked. I would think the same information would be in all of them. So, do you believe what’s in the Factory Service Manual and the gear ratio information from the IZCC website (Transmission and Rear End Gear Ratios) ??? Gear Ratios 240Z 70-73 MT (3.364) (R180) 240Z 70-73 MT 5spd. (3.900) (R180) - non US 240Z 71-73 Auto (3.545) (R180) 260Z 74 MT (3.364) (R180) 260Z 74 Auto (3.545) (R180) 280Z 75-76 (3.545) (R200) 280Z 77-78 MT (3.545) (R200) 280Z 77-78 Auto (3.545) (R180)
-
1976 280z Automatic About 18 months ago, I replaced all the rubber suspension bushings with urethane bushings underneath my car. This included the mustache bar bushings. Since that time I have had a lot of rear end whine, which I did not have before. I have read several comments from people that have had the same experience going from rubber to urethane. Thus, I have decided to go back to rubber on my mustache bar. I am having trouble remembering the exact setup that was used for the rubber bushings. I know there was the rubber bushing that goes in the end of the mustache bar. Does it go in a certain way? I also can't remember how the serrated/alagator bushings were arranged. Was there two on top and two on the bottom of the bushing, with the serrated/alagator side next to each other and the flat side to the nut/washer and bushing? Or was there one on top and one on the bottom of the bushing with the serrated/alagator side next to the bushing? I have a FSM, but it really doesn't detail the bushing that well. AtlanticZ has one or two pics that help some. Black Dragon really confuses me. It shows the break down real well, but it shows two washers (serrated/alagator???) that are grey in color, not black like the other parts. It looks like that these might be required, but don't really know. Maybe they are required and they don't carry them. I thank all in advance for any help.
-
I have a 1976 280z w/ automatic transmission. I am the original owner. Recently my brakes got very hard. I could hardly stop the car. I drove home, parked the car over night. The next day I started the car up and the brakes went to the floor. I tried to pump them up and they still went to the floor. From my experiences and reading on the internet, hard brake problems are related to the brake master vac. Brakes going to the floor are related to the brake master cylinder. I removed the brake master cylinder and after inspection, thought I saw some brake fluid inside where the brake master vac plunger goes. Based on conversations with a mechanic friend and the price difference between a new brake master cylinder and a new brake master vac, I decided to install a new brake master cylinder. I installed the new bench bled brake master cylinder, bled the brakes according to the FSM, and the brakes went to the floor when the pedal was pressed. I then removed my brake master vac, had it rebuilt, reinstalled it, re bled the brakes, and the brakes still went to the floor. There are no leaks anywhere on the brake system. There has been no brake work done on the car for the last 3 years. The one way vacuum valve is working correctly. I know there are adjustments on the brake master vac plunger (the end that goes into the brake master cylinder) and the end that hooks to the brake pedal. The plunger end looks to be adjust correctly according to the FSM. The end that hooks up to the brake pedal has very little adjustment left and has never been adjusted. Any thoughts???
-
These moldings WERE NOT factory installed. I bought my 1976 280Z new and there were no moldings on the car. Later on, after a few "dings" I had some installed by a body shop.
-
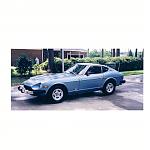
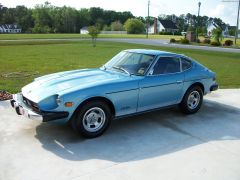 1976 Datsun 280z ... original car ... original owner