rturbo 930
Community Member
-
Joined
-
Last visited
Everything posted by rturbo 930
-
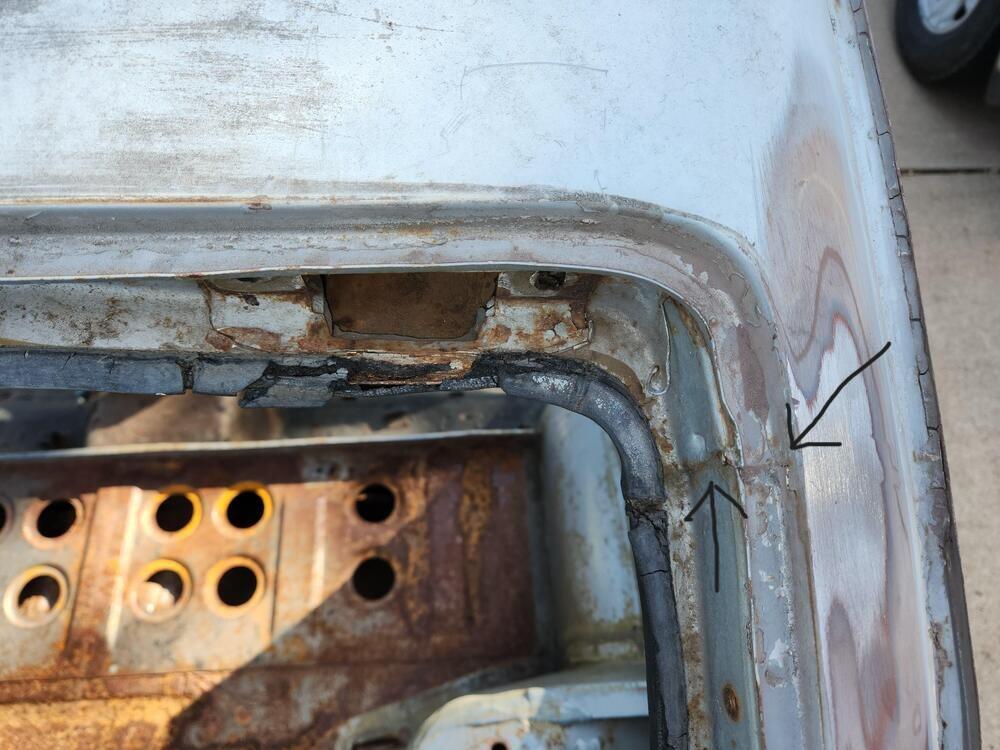
This is where the roof overlaps the quarter panel. If I remember right, the roof skin has a flange at the back, so you'll likely want to cut a little below that joint. I've been trying to find pictures on google to refresh my memory on how it goes together, but not finding much.
-
Yup, front fitment is way off, totally sunken in the fender. Rear isn't bad. The bumpers look bad, and the front fender arch looks silly with how much it was moved up. Having the door and rocker combined ruins the proportions of the door since it is now much more square. Hopefully the actual rocker is still there underneath since it's a major structural component of the car. I really don't see the point of having done all this. It doesn't look good, and as mentioned, there isn't even a need for such wide tires with a stock L28. As far as handling goes, I suspect there's a limit to how much rubber is really needed to have fun with throwing the car around, and I'd say he has way more than he needs. Also, If I was doing a build like this with custom wheels, my choice would definitely not be five slot mags. It's surprising he couldn't think of anything better than that, which makes me think he's just not very familiar with these cars, or Japanese cars in general. I have to agree with grannyknot that this guy is a bodyman who thinks he is a designer, but is not. This is not an improvement on the original design. I've seen the results from people who can rework a classic design and have it come out looking better than the original, and this is not it.
-
Since it's a one off with no plans to sell, I suspect it may just be a passion project of some Nissan employees. Who knows. It does seem a bit odd and out of nowhere. Pretty cool regardless.
-
I'm not sure that makes sense. Would it even be legal for any kind of competitive racing? In that regard, it has the same problem as the OS Giken and Datsunworks DOHC heads.
-
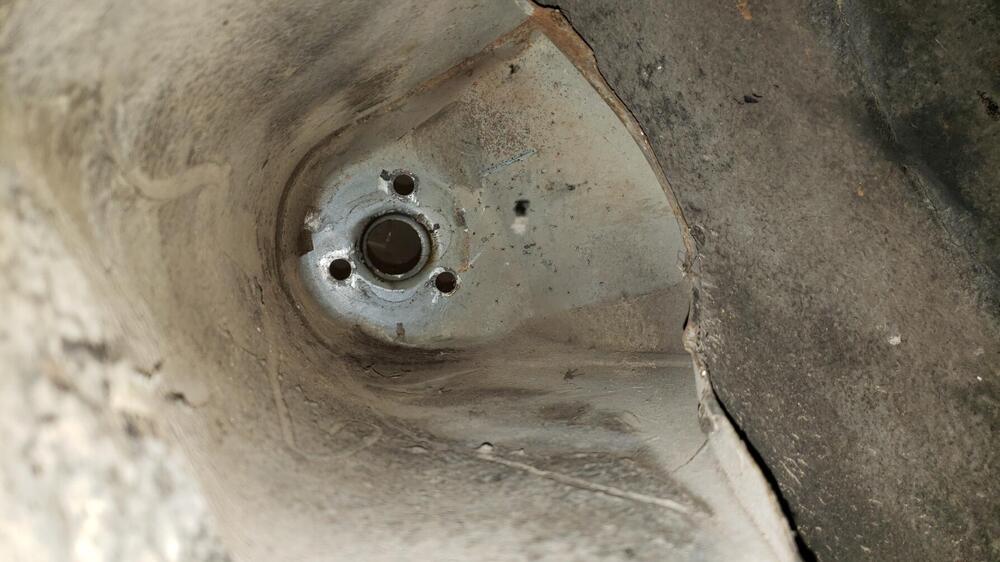
I measured the tail light panel holes to be about 5.5 to 5.8mm, and the corresponding holes in the hatch slam panel on the car appear to be 4.5mm on both my 280Z and 240Z.
-
I can't remember what the smaller bolt hole is for. I might be wrong but I think there's a bracket that the plastic cover attaches to, it might be for that.
-
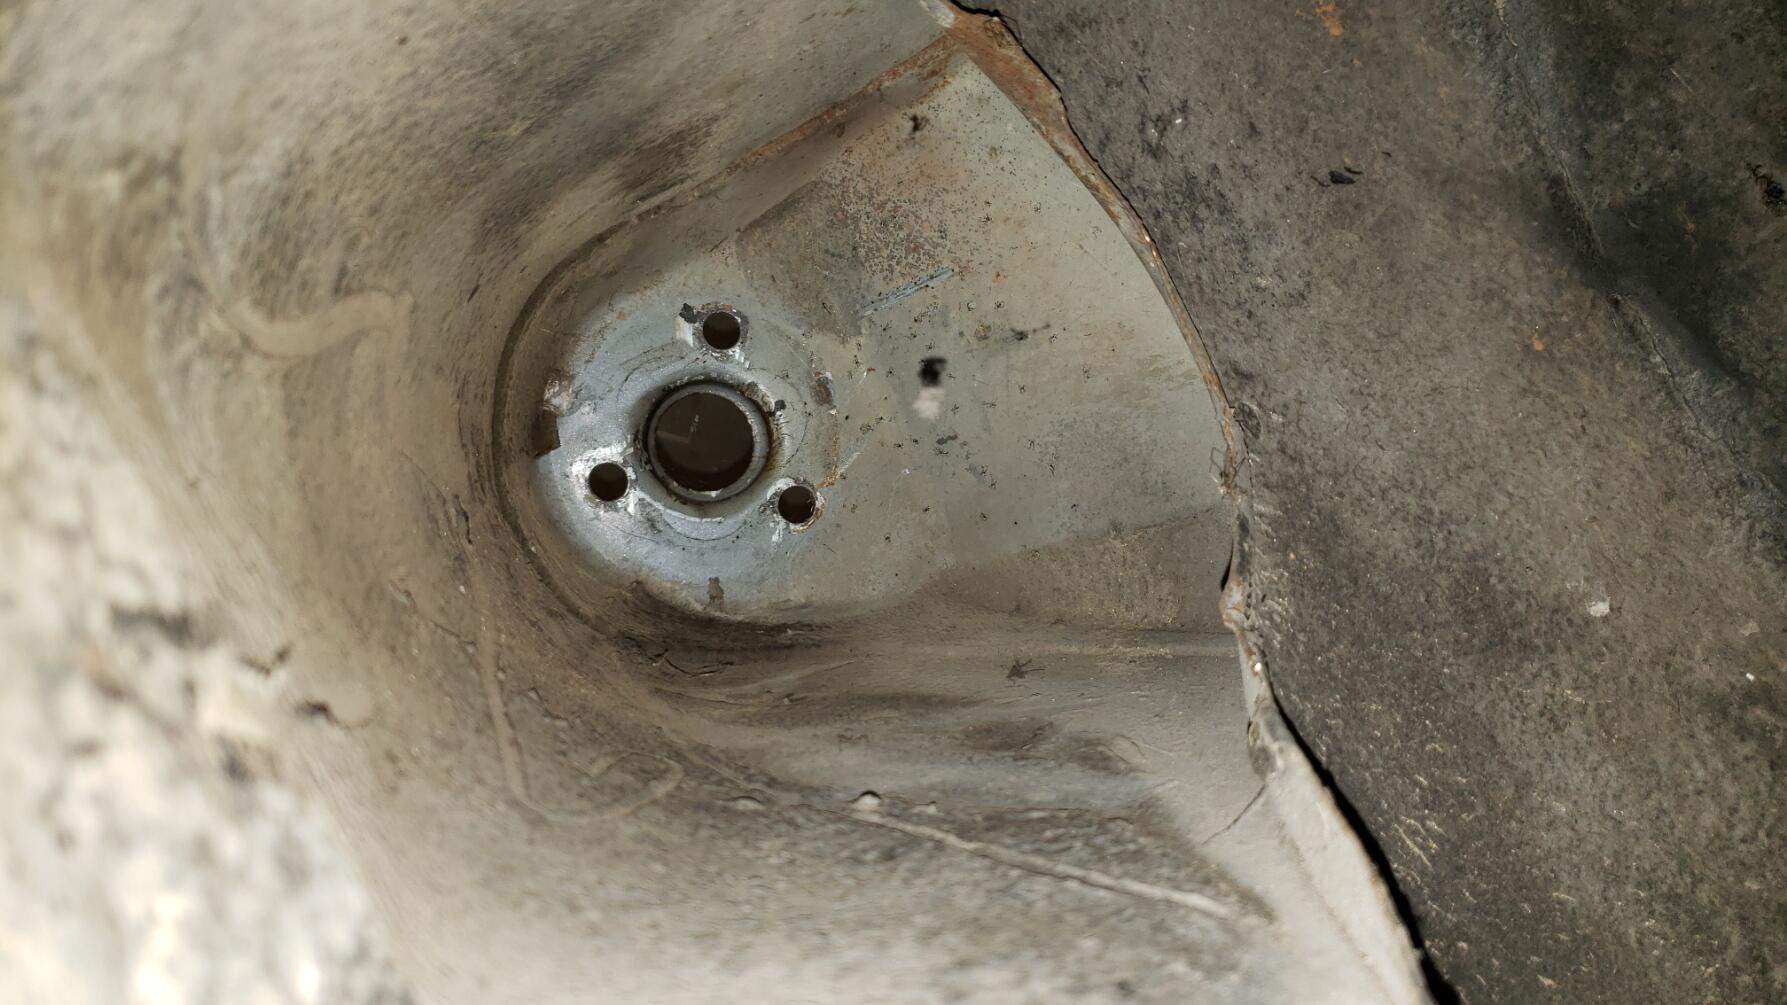
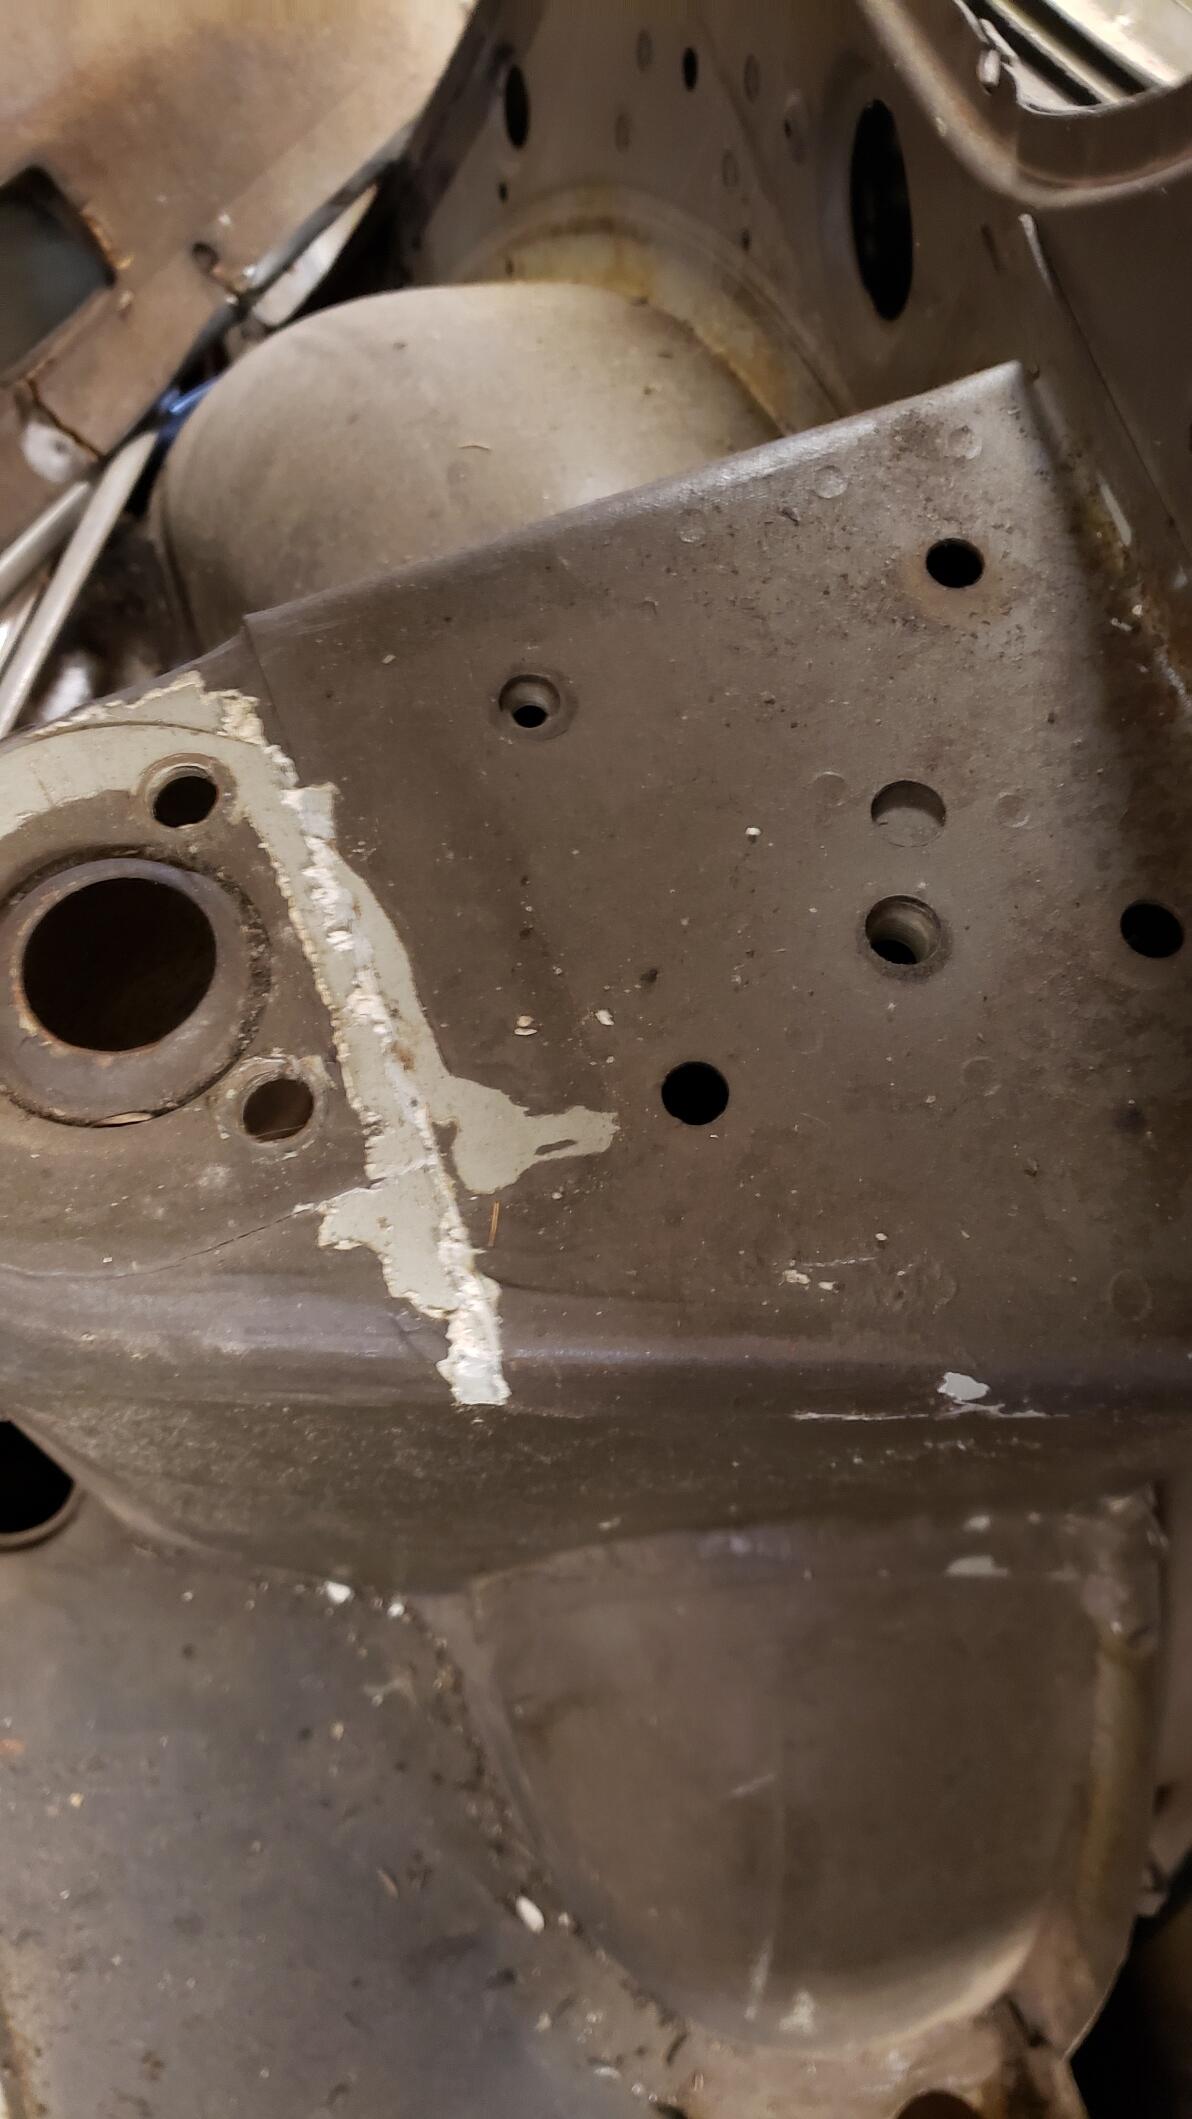
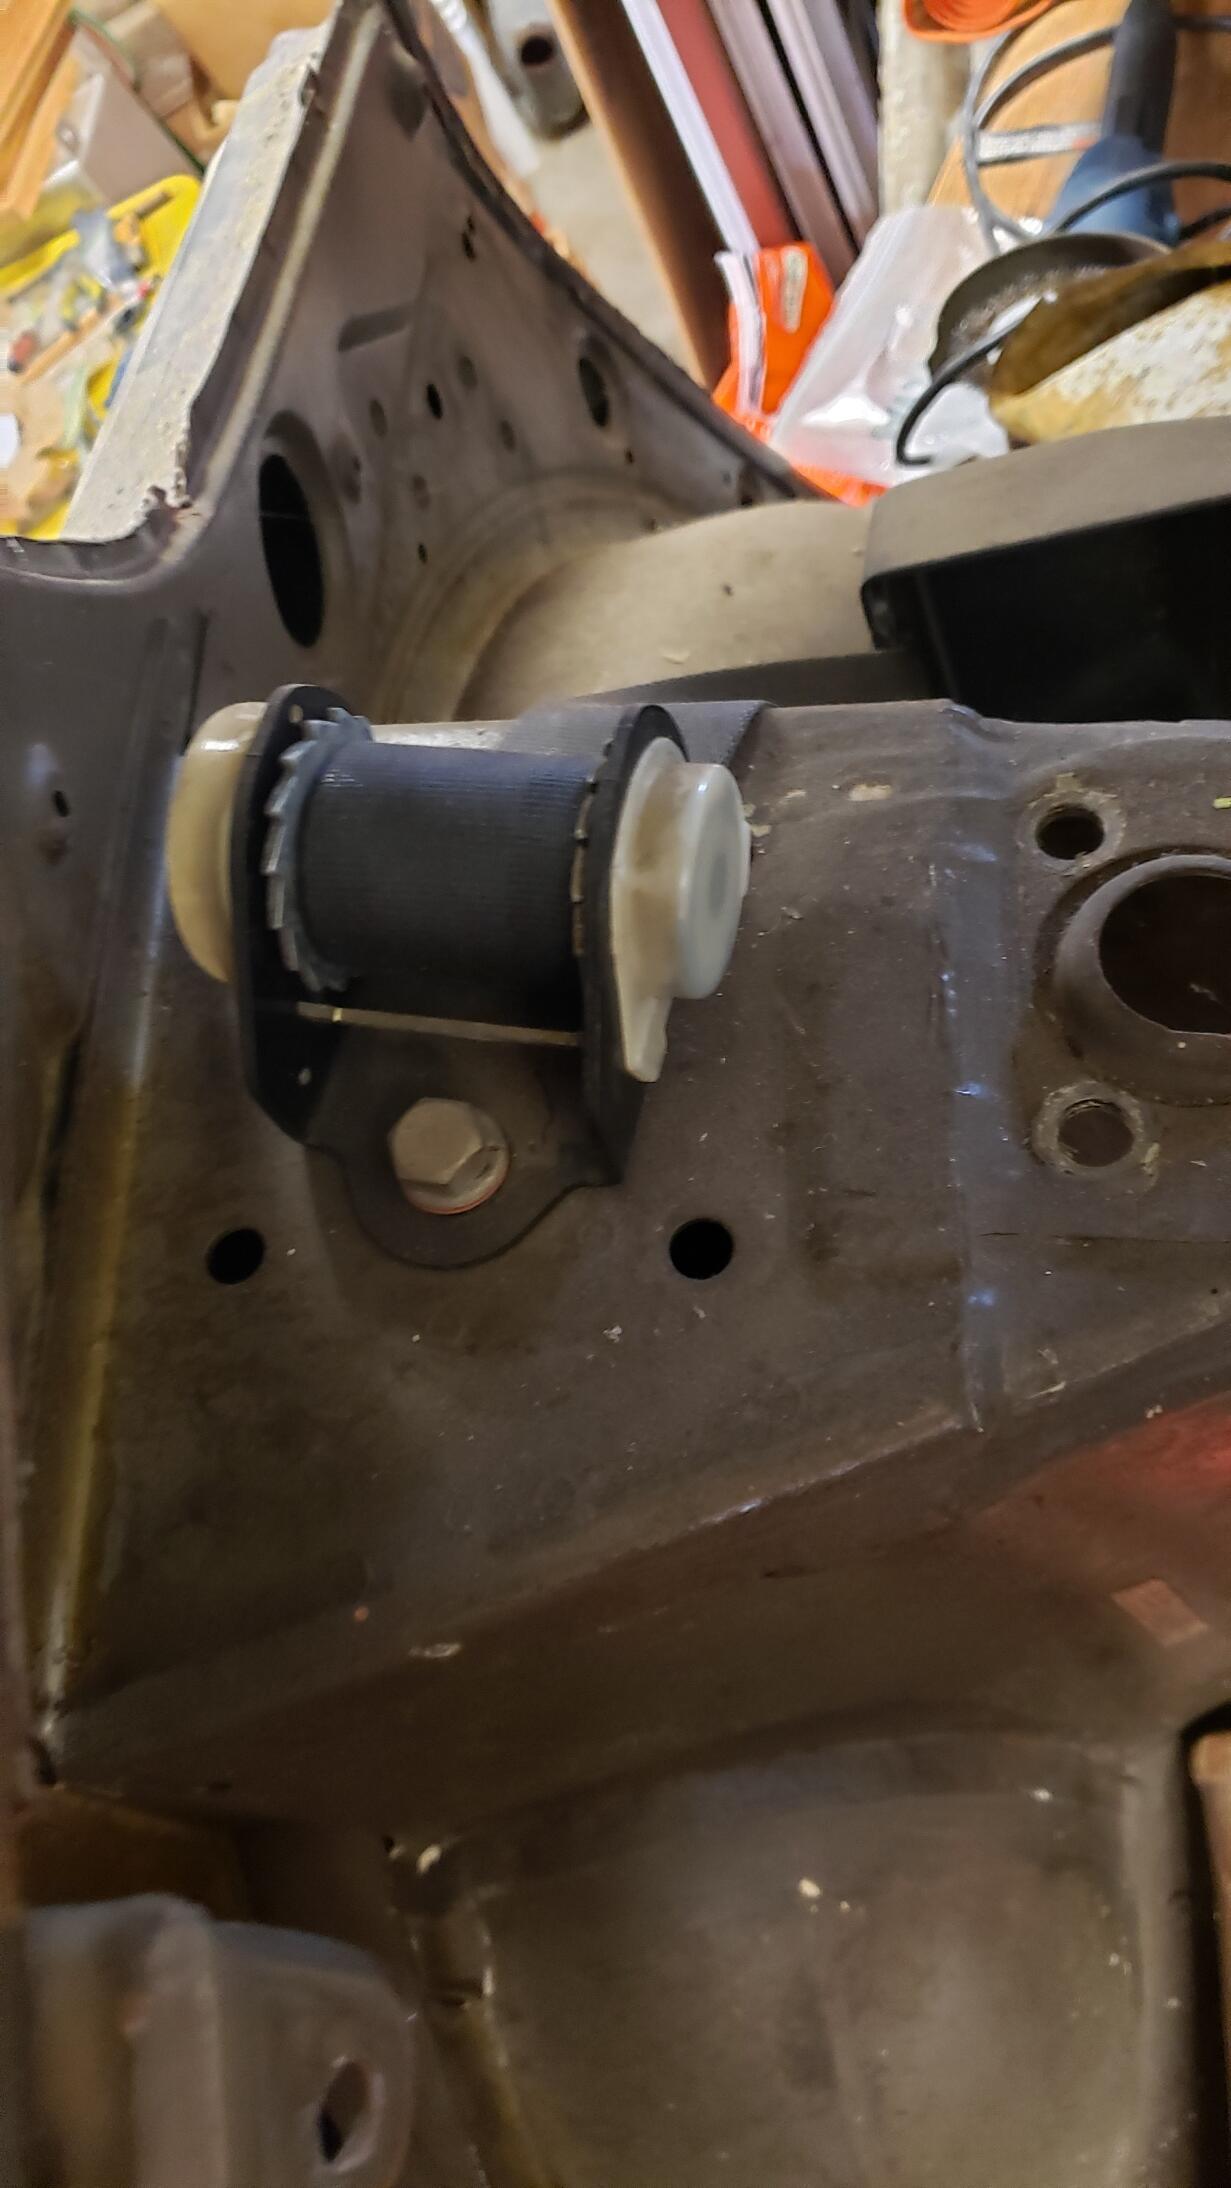
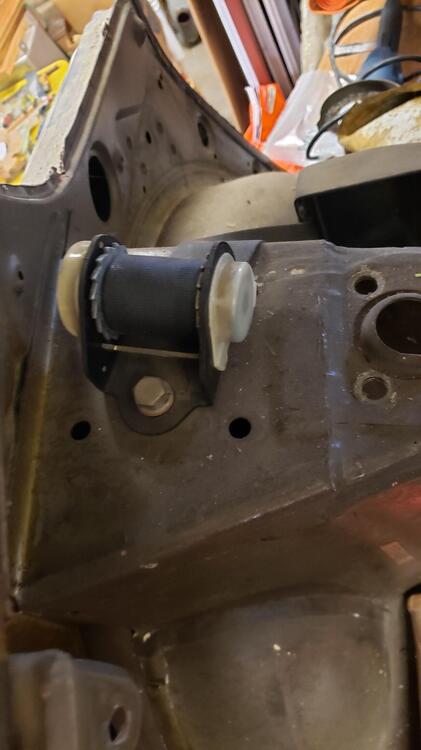
Okay, apologies for the delay, busy time of year. Hopefully these photos give you an idea of how it's put together. Since your 75 doesn't have the strut tower mounted belts, I suspect you don't have the plate like the later cars, and it's probably just a bit of cardboard on top to help support the vinyl covering like the 240Zs have.

-
I'm not sure why you think it's accessible then. The cavity is closed by the wheel well on the bottom and the seat belt mount plate on top. If your '75 already has the top plates installed but without tapped and threaded plate that the seat belt mounts to, then you're probably best off drilling out the spot welds to remove the top piece, weld on your threaded mount, and reattach the top plate. I can take photos of my car if needed, it's a '76, and everything is exposed and easy to see right now.
-
You don't access the underside. There's a plate that's drilled and tapped that is welded to the underside of the plate that the inertial reel bolts to. In the above photo of a 240Z, you're looking at where the strut tops mount, not where the seatbelt reels mount.
-
If the rails have no damage, then I see no point in replacing them. I think you can probably get away with just replacing the strip of metal where the rail meets the floor, which should be an easy enough patch to make and shape with basic tools. Areas of surface rust or minor pitting can be treated with naval jelly or similar. It's a much smaller job than total replacement of floors and rails, would save you a good bit of money, and would also serve as a good learning experience. Also, it's a good place to learn being the floor since it's not visible. But, as Hussein says below, you need to know exactly how much rust damage there is before you can begin. Detailed, well lit photos would be helpful, and we don't know yet if the damage goes beyond just the front floor section.
-
I don't see a reason to buy floors, and I don't know what condition your frame rails are in, I haven't really seen a clear shot of them where I know what I'm looking at. Your driver's floor looks like it has rust through only where it joins the frame rail, and some surface rust around the drain holes. Is there something I'm not seeing? I'm just hesitant to suggest that you go ahead and completely cut out your floors since that's a pretty significant job. I also just don't see the point of a whole floor if a patch is all that is needed. Total replacement only makes sense IMO when it's less work than doing a bunch patches. Do your frame rails still have the flanges on them where the floors are rusted? Are they rotted through on the bottom? Are they badly dented? I just went back and read your initial post again. Sounds like you're not going to be the one doing the work. If so I think the question of what you should buy should be left to the person doing the work. Also sounds like you're having trouble finding someone to do the work, so I'll throw this out there. Tim at https://industrygarage.com/. He's a Z guy and his work can be seen at the Street Bandito youtube channel. They're in the same building as his father's body shop in Baltimore where he used to work, and I know he does some customer work. Not sure if he'd be interested in your project, but worth a shot if you're having trouble finding someone.
-
They are not the same. The rails won't fit. The toe board might fit on the driver's side with some work, not sure about the passenger side, the floor steps down on one side of the rail. Your car being a 2+2 will only complicate matters, although if you're only doing the front footwell area it may not be a problem. You will need to find the appropriate 280Z equivalent parts, or learn how to shape metal. I would also consider patching instead of replacing, from the photos the full extent of the damage doesn't seem to be revealed, it may or may not warrant full replacement. Get all the tar off the floor before making that call.
-
My understanding is that removing the exhaust liners ruins the flow of the head. Without them the exhaust ports are too big and/or the wrong shape for ideal flow characteristics.
-
I'd try removing the fuzzy covers before going out and buying replacement visors. Wouldn't be surprised if the original material is underneath.
-
I don't think you're understanding or clearly reading his post, because he did not say that the wood composite (which is probably the most accurate way to describe it) is inferior to solid wood. He is saying the opposite of that, that a traditional wood rimmed steering wheel would be inferior to the wood composite wheel in the Z. I don't understand the problem here. To say that something is made of wood means something very specific, which is that something has been made using pieces of solid wood, carved out of a whole tree. This is not that. It is wood that has been reduced to wood fibers, and then put back together again with some kind of binding agent. To say that it is made of wood, in the exact same way that a chair is made of wood, with no meaningful distinction is simply not accurate. I think zKars summed it up nicely on the previous page. Made with wood, but not made of wood. And held together with a resin or something, in the same way fiberglass or carbon fiber is, which IMO would make it a wood composite. Still mostly wood, but not quite wood.
-
What dutchzcarguy said. The strength comes from the shape of the piece, not the thickness. I don't know what thickness the guy in the video is using but I've seen people use really thick box tube, like 1/8", and in that case you're just adding weight. If you want to improve chassis stiffness, make or buy a piece that connects the front subframe to the rear. Even if you make the floor rails super strong, there's still a bunch of other places the car flexes in anyway. I just browsed the video, he didn't even connect the floor rails to the rear subframe, so there isn't even any added stiffness lol. He cut the bottom off the old rails so I don't think he's created any kind of water/rust trap as he might've if he just put them straight over top of the old ones. I'm guessing he just wanted a cheap replacement. If he's going to all that effort, I don't know why he didn't just have some steel in the correct thickness bent up, and then do the rest of his fab work.
-
I have a Tabco rocker and I'm not impressed with it. I bought it years ago, and I intend to replace it with a KF equivalent. Now that KF is around I'm not sure there's any reason at all to buy Tabco parts. I have a few and I don't think any of them are quality.
-
Looks like the Ignore Thread feature is gone too. Must've been some kind of reset overnight.
-
I'm skeptical that the Z Car Source rack is actually new as claimed. The one in the photo looks like a used rack that's been painted, and it looks like it had some surface rust on it that was cleaned up because the finish isn't perfectly smooth. Also, I am not aware of any reproduction rack of any kind other than the T3 rack, which is why they went to the effort of creating a new rack to begin with, because there wasn't one available before. Maybe the ZCS rack has new rack and pinion in an old housing? I'm surprised this is the first I'm hearing about it since getting an actually new/rebuilt rack and not just a repainted or resealed used unit has been a problem for years now.
-
-
Simple front and rear strut bars are not going to turn the flexible Z chassis into a stiff car. I would suggest you log onto HybridZ and search for what people have done with chassis reinforcement, and what is suitable for a street car, as that subject has been covered many times there with lots of discussion. How do you intend to use the car and what do you expect from it? You're in Germany so I would think the car will have to stay fairly stock. Here is the late John Coffey's list of reinforcements for a street car: 1. Seam Weld (every sheet metal seam overlap.) 2. Bad Dog Subframe Connectors 3. Weld-In Roll Bar. 4. Welded In Rear STB. 5. Triangulated Front STB. 6. Radiator Core Support Reinforcement. 7. Transverse Link Bracing Reinforcement. 8. RT Diff Mount. 9. Tubular Seat Mounts. 10. Box Upper Frame Horns to Firewall/Cowl. 11. Reinforce Pedal Box/Brake MC Mount. 12. Reinforce Front ARB Mount. 13. Reinforce Front Strut Tower to Frame Rail Junction. Doing all of that would be a lot of effort, I'd probably look into numbers 2, 4, 5, 8, 10, and 12. The reinforcements you posted would serve the purpose of number 10.
-
With the value of 2+2s being relatively low, and the cost and effort of welding in a new floor plan and frame rail (if it does in fact need the whole floor vs just a patch), I think I would probably sell it as is and let the new owner do the repairs. I also suspect the car has more rust than just this area pictured, that rust hole has been brewing for a while.
-
It'll be 15 years here for me too at the end of the month, although for most of that time I was more active on HybridZ. Started coming on here more a few years ago.
-
I'm not sure why they don't make it more clear or offer them as a set, but yes, you order a set of front and rear frame rails, weld them together, and install in the car. I'm sure there's a thread on HybridZ that shows how they go in, they were a pretty popular item.
-
Subframe connectors are the first thing that comes to mind for me. Available here: https://baddogparts.com/ Might want to browse Hybridz.org if you're looking to modify and do some chassis work as that site is geared more to that sort of thing. A full roll cage is off the table if you want to street drive the car though, unless you want to wear a helmet every time you drive it.